Chorizo Stuffed Bell Peppers

These Chorizo Stuffed Bell Peppers are packed with southwest flavor, perfectly portioned for meal prep, and freezer-friendly!

The post Chorizo Stuffed Bell Peppers appeared first on Budget Bytes.

We’re in love with stuffed bell peppers here at the Budget Bytes kitchen, so I decided to make a new variation just so I could have an excuse to eat stuffed bell peppers again. These Chorizo Stuffed Bell Peppers are full of super flavorful Mexican chorizo, hearty rice, and a rich sauce, then topped with melty mozzarella cheese. They’re SO filling, perfectly portioned for meal prep or freezer cooking, and quite flexible if you want to change up the ingredients to make them even more budget-friendly! Put this one one your to-cook list because I know you’re going to love them!

Overhead view of chorizo stuffed bell peppers in a baking dish on a yellow background.

Ingredients for Chorizo Stuffed Bell Peppers

These stuffed bell peppers are packed with flavorful herbs and spices and a rich tomato-y sauce so that every bite is deee-licious. Here are the ingredients for chorizo stuffed bell peppers:

  • Bell Peppers: You’ll need three bell peppers to make six servings for this recipe. We used a mix of colors to make it more festive, but you can use any color pepper that fits your budget.
  • Mexican Chorizo: Mexican chorizo is a fresh (not cured) sausage that is packed with spices. You can usually either buy this loose or in links. If you buy them in links, simply squeeze the meat out of the casing into the skillet. I like Johnsonville brand, but many larger grocery stores also make their own generic version.
  • Garlic & Onion: A little fresh onion and garlic add flavor and texture to the bell pepper stuffing.
  • Rice: Long grain white rice bulks up this meal to make it filling while keeping the cost low. We cook the rice right in the pot with the chorizo, spices, and broth for maximum flavor.
  • Chicken Broth: The rice is cooked in chicken broth to ensure that every bite is super flavorful. We use Better Than Bouillon to make our broth because it’s budget-friendly and has great flavor.
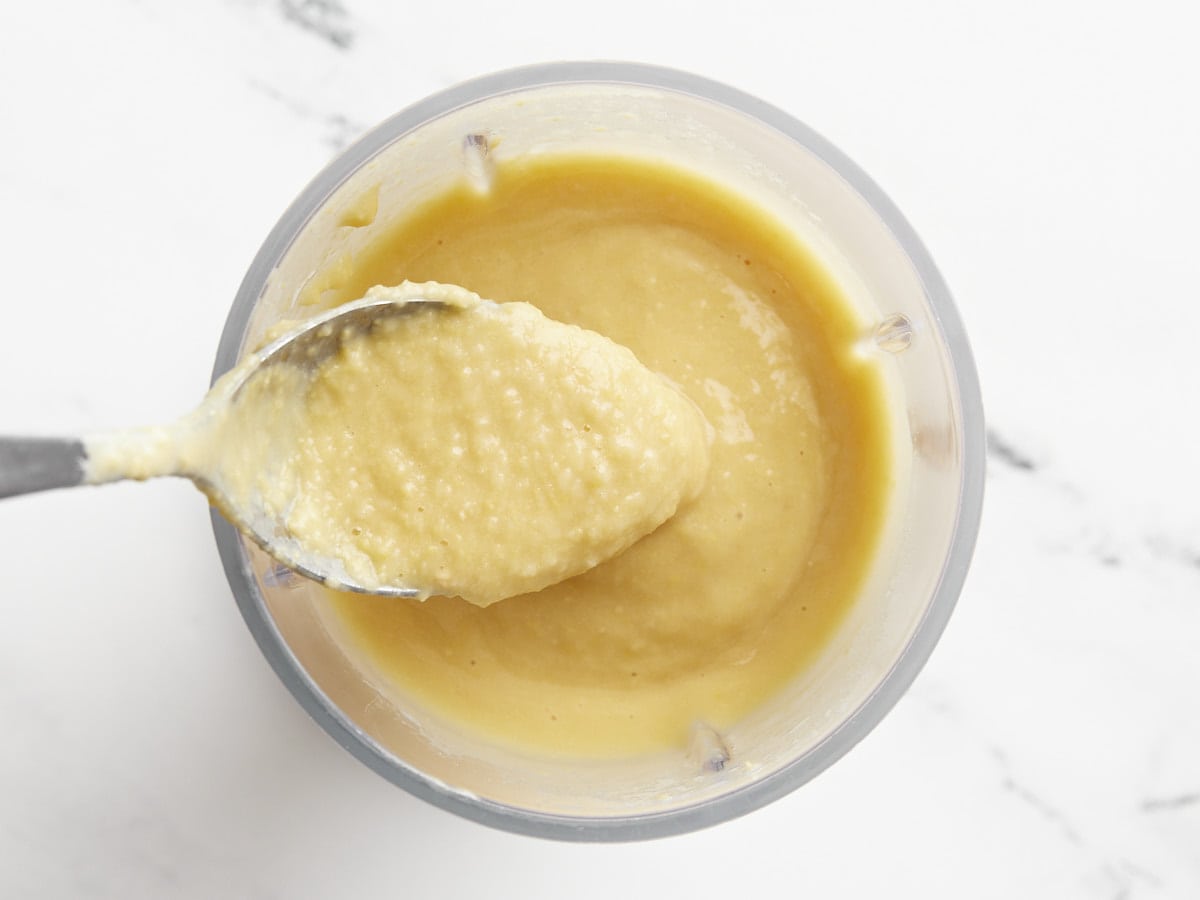
  • Tomato Paste: Tomato paste is added to the broth to help create an enchilada sauce-like flavor in the rice mixture.
  • Diced Green Chiles: Green chiles add even more flavor, color, and texture to the filling. If you prefer a milder stuffed pepper, you can leave out the green chiles or look for a mild green chile.
  • Spices: We packed this bell pepper stuffing with even more spices including chili powder, cumin, garlic powder, cayenne pepper, and salt.
  • Mozzarella: The stuffed bell peppers are topped with mozzarella cheese for a rich finish, but you can substitute with a different type of cheese if preferred, like Monterey jack, pepper jack, cheddar, or a Mexican blend.
  • Green Onion: A few sliced green onions sprinkled over top of the stuffed bell peppers add a fresh finish, but are entirely optional!

What Else Can I Add?

This recipe is pretty flexible, so if you want to change it up or make it more budget-friendly, here are some other ingredients you can add:

  • Beans: Try swapping half of the chorizo with a can of black beans or pinto beans for more fiber and less cost.
  • Diced Tomatoes: If you want more color and texture in your bell pepper filling, try adding a drained can of petite diced tomatoes, or diced tomatoes with chiles (Rotel).
  • Sweet Potato: Chorizo and sweet potato are a perfect flavor pair. Replace half of the chorizo with one small finely diced sweet potato for a spicy-sweet flavor profile (add it with the rice so it can simmer and soften with the rice).

Mexican Chorizo vs. Spanish Chorizo

It’s really important to use the correct type of chorizo for this recipe. You’ll need Mexican chorizo, which is a fresh (uncooked & uncured) sausage. You’ll find Mexican chorizo in the fresh meat department, usually near bratwurst and other fresh sausages. Spanish chorizo is a cured, sliceable sausage that you’ll usually find near cheese, pepperoni, or other charcuterie-type foods.

What to Serve with Chorizo Stuffed Bell Peppers

These southwest-inspired peppers are really filling on their own, but if you want to serve something on the side they pair really well with Cumin Lime Roasted Sweet Potatoes, Cowboy Caviar, Sweet Potato Cornbread, or Warm Corn and Avocado Salad.

How To Store Leftovers

I love making stuffed bell peppers for meal prep, so this is how I store and reheat them. The cooked bell peppers can be stored in the refrigerator for 4-5 days. I like to reheat them quickly in the microwave (about 2 minutes each).

Or, once chilled in the refrigerator, you can transfer them to the freezer. I suggest packaging them individually in a freezer-safe, air-tight container, so you can reheat one at a time as needed. Frozen stuffed bell peppers can be thawed in the refrigerator overnight and then reheated the next day in the microwave, or thawed straight from the freezer in the microwave using the defrost function, then heated through on full power.

Side view of a fork lifting some stuffing out of the bell pepper with the cheese pulling.
Overhead view of chorizo stuffed bell peppers in a round baking dish.
Print

Chorizo Stuffed Bell Peppers

These Chorizo Stuffed Bell Peppers are packed with southwest flavor, perfectly portioned for meal prep, and freezer-friendly!
Course Dinner, Main Course
Cuisine Amercian, Mexican
Total Cost $12.91 recipe / $2.15 serving
Prep Time 5 minutes
Cook Time 1 hour
Total Time 1 hour 5 minutes
Servings 6
Calories 380kcal

Ingredients

  • 3 bell peppers $4.07
  • 1 lb. Mexican chorizo $4.99
  • 1 yellow onion $0.37
  • 2 cloves garlic $0.16
  • 1 4oz. can diced green chiles $0.99
  • 2 Tbsp tomato paste $0.20
  • 2 tsp chili powder $0.20
  • 1/2 tsp cumin $0.05
  • 1/2 tsp garlic powder $0.05
  • 1/4 tsp cayenne pepper $0.02
  • 1/4 tsp salt $0.02
  • 1/2 cup long grain white rice (uncooked) $0.13
  • 1 cup chicken broth $0.19
  • 1 cup shredded mozzarella $1.25

Instructions

  • Preheat the oven to 350ºF. Cut each bell pepper in half so there is a top and bottom portion, then remove the seeds and ribs. You can either carefully cut the stem out of the center of the top half, or eat around it later. Place the halved bell peppers in a baking dish, cut sides up. Par-bake in the preheated oven for 15 minutes.
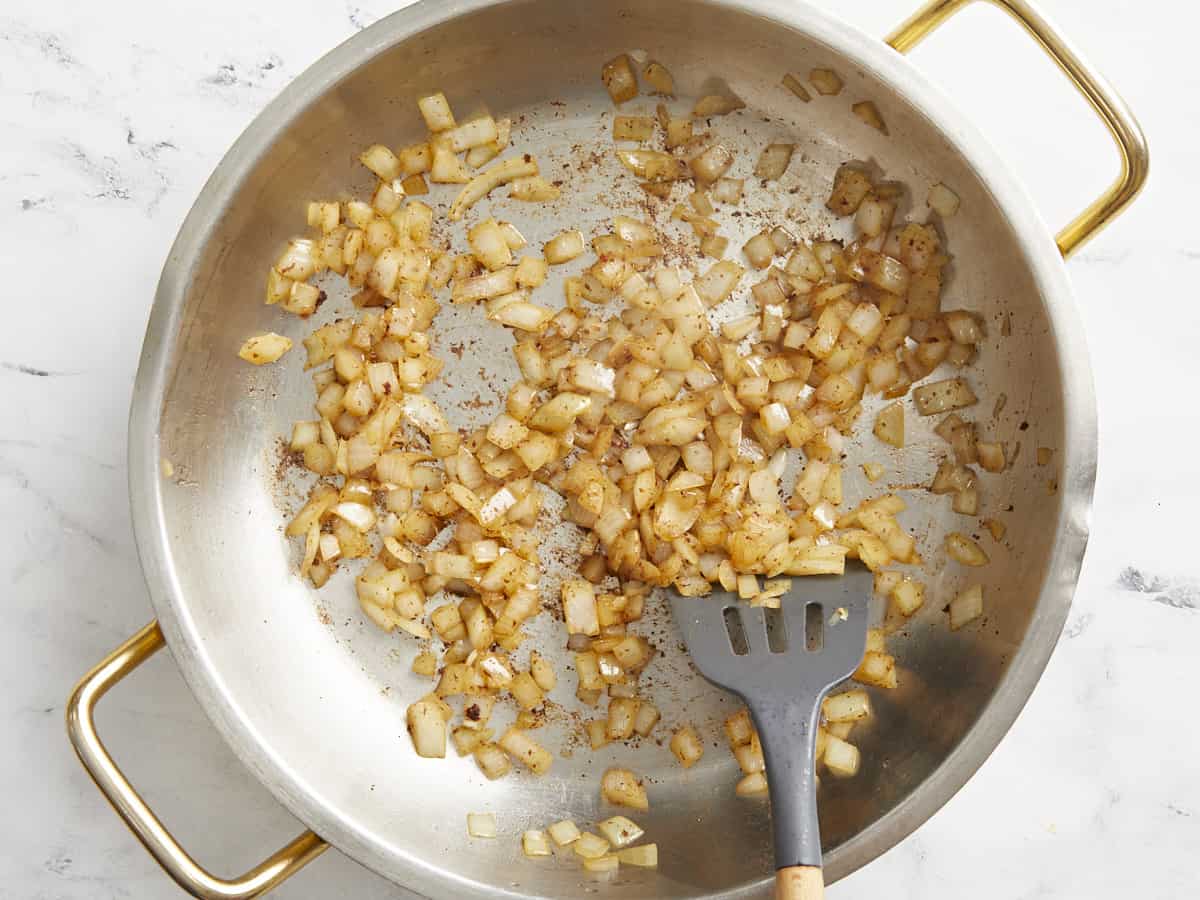
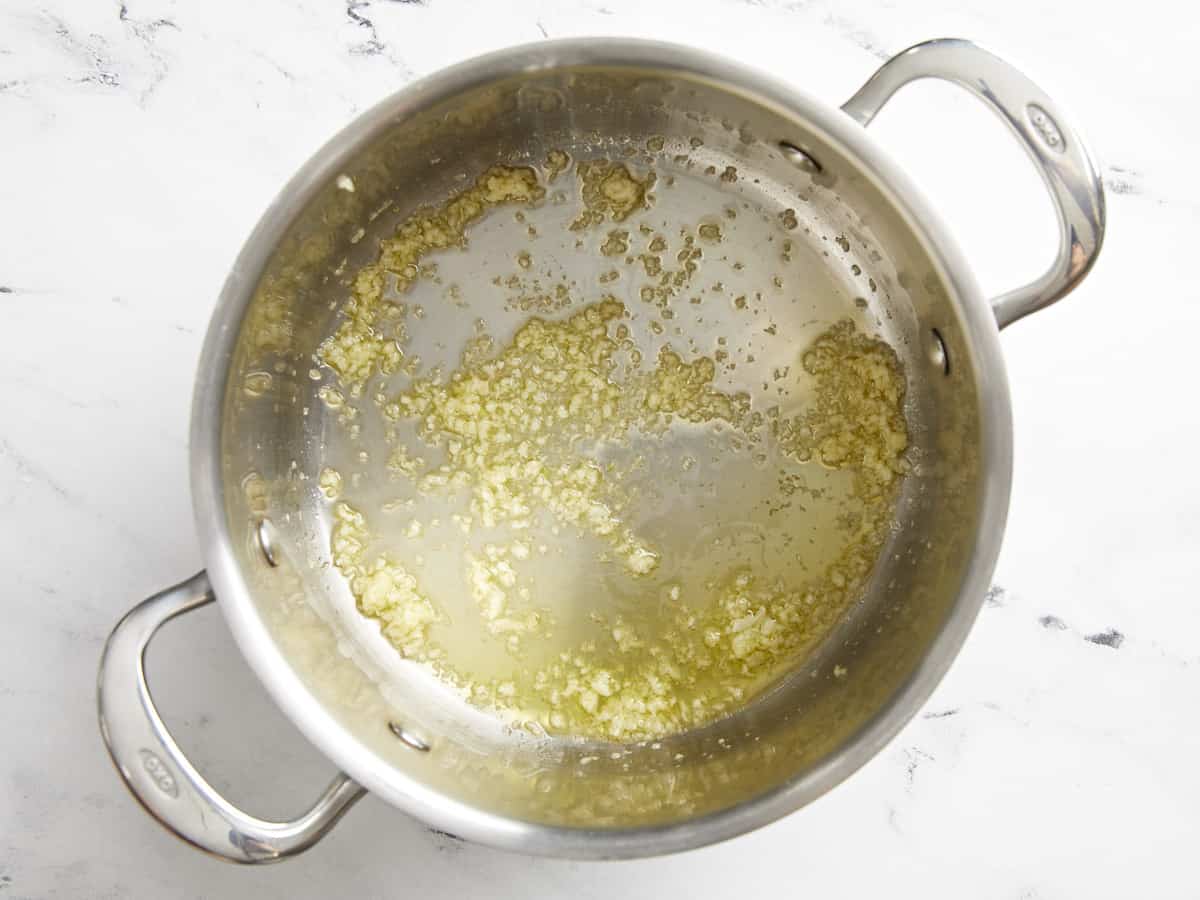
  • Add the chorizo to a large deep skillet and cook over medium heat until browned. While the chorizo is cooking, dice the onion and mince the garlic. Add the onion and garlic to the chorizo and continue to cook until the onions are softened.
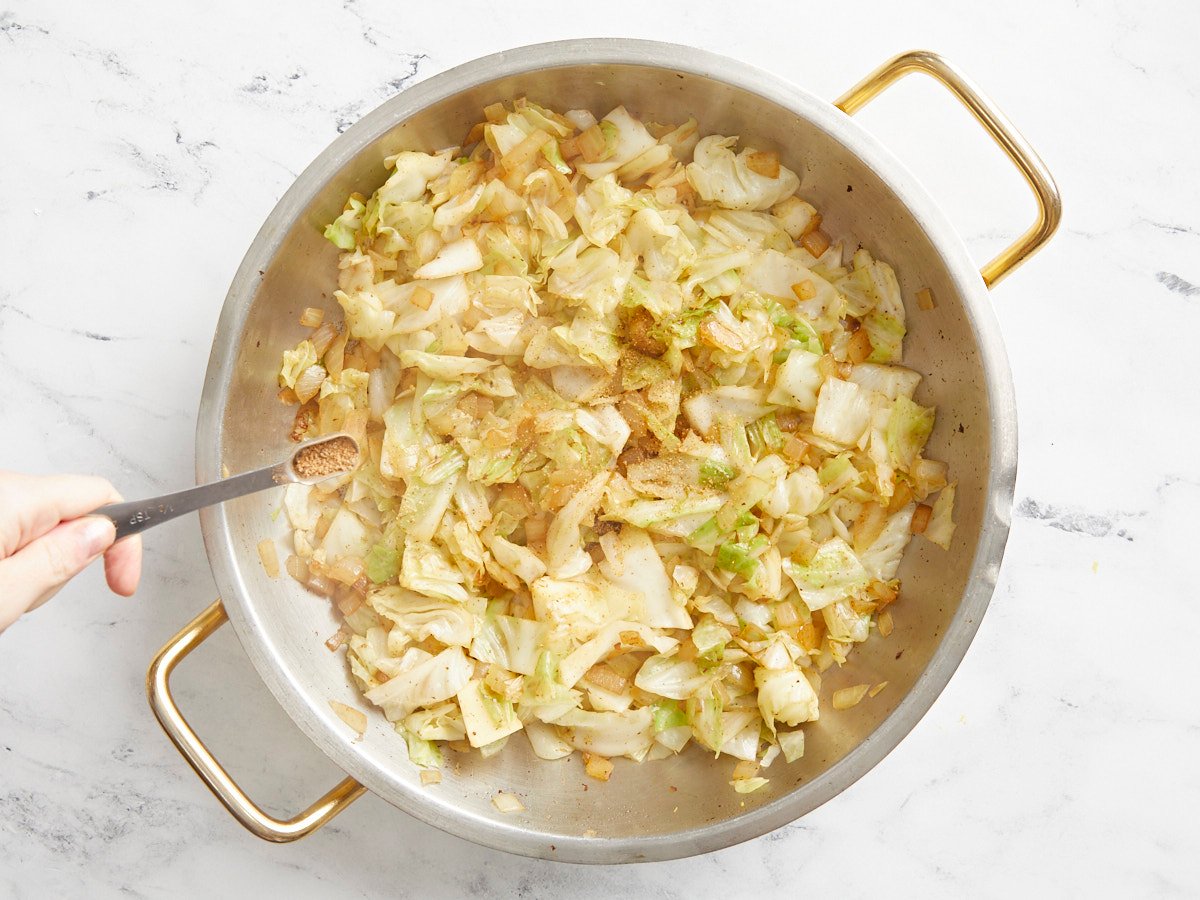
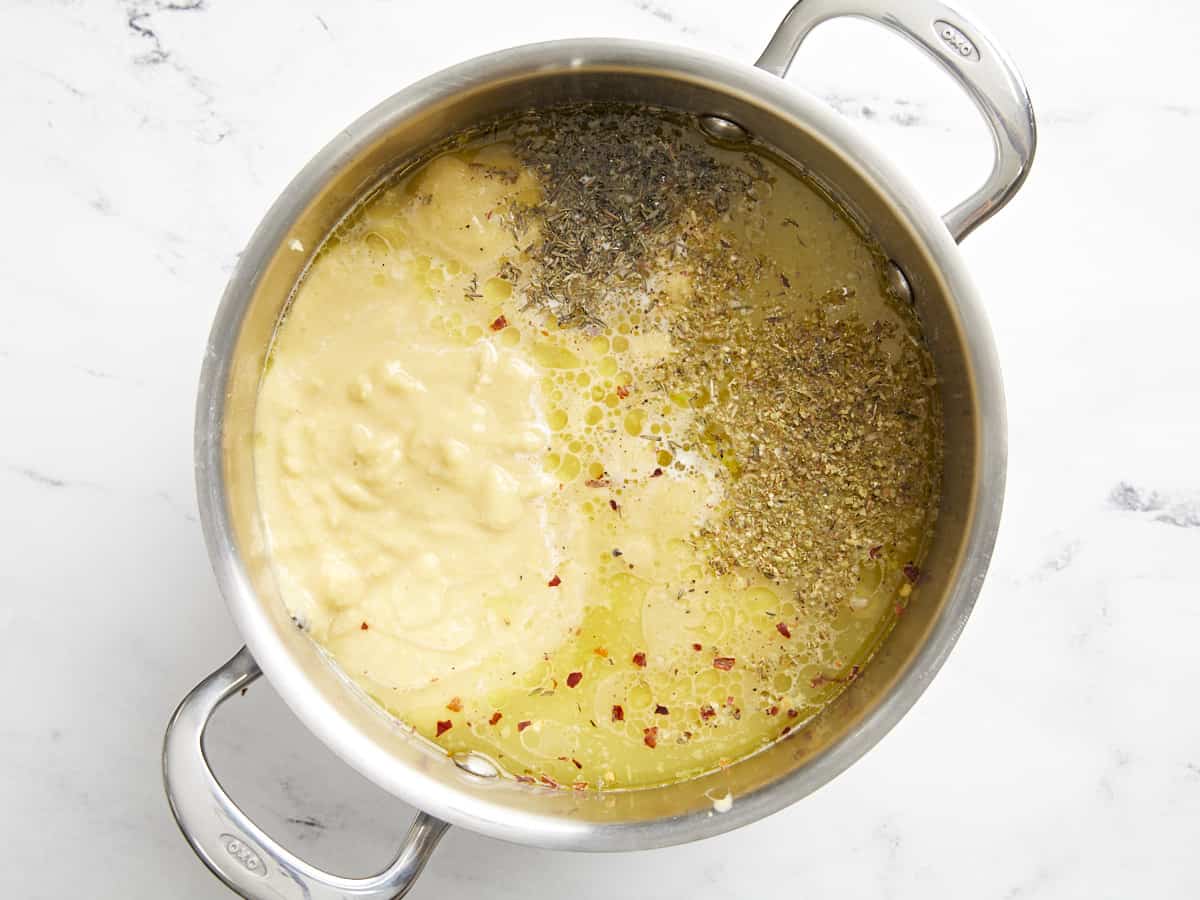
  • Add the diced green chiles, tomato paste, chili powder, cumin, garlic powder, cayenne pepper, and salt to the skillet and stir until combined.
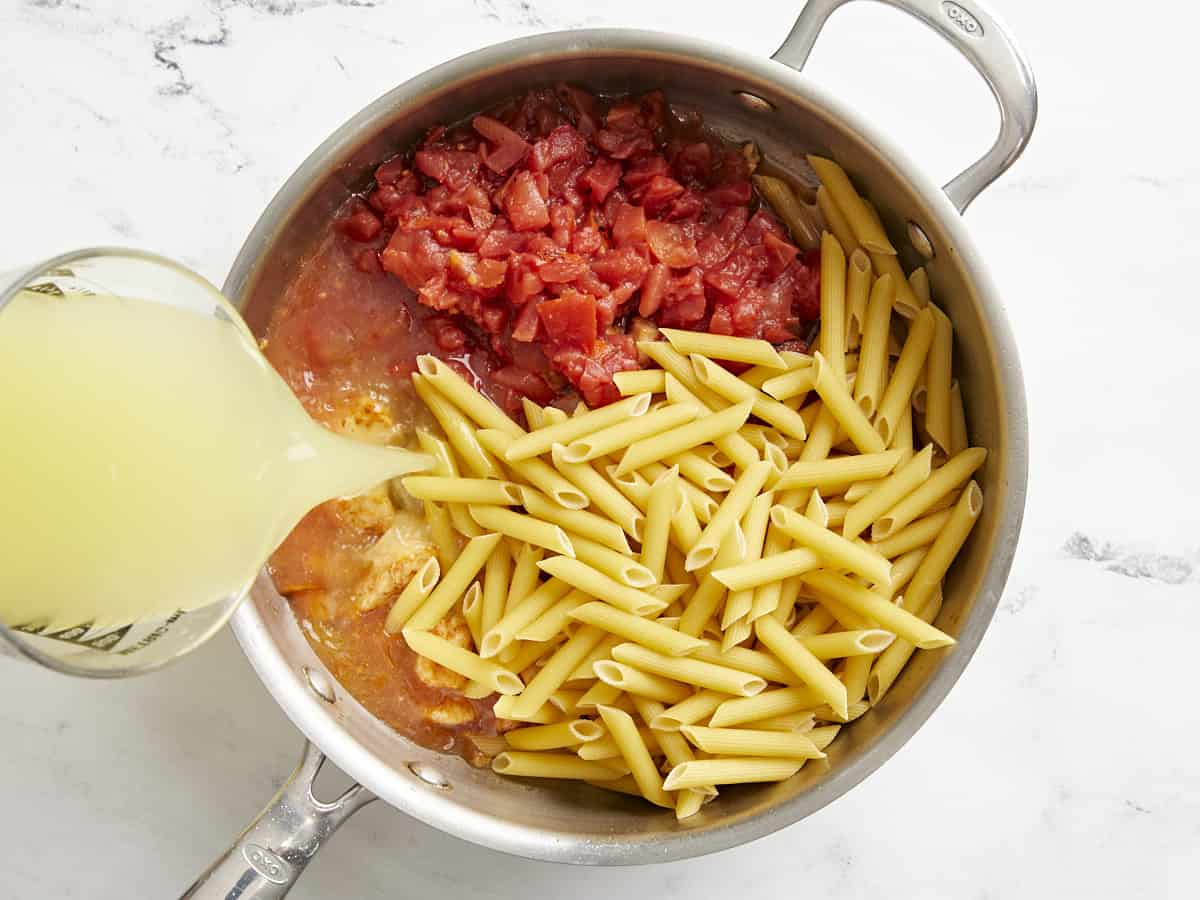
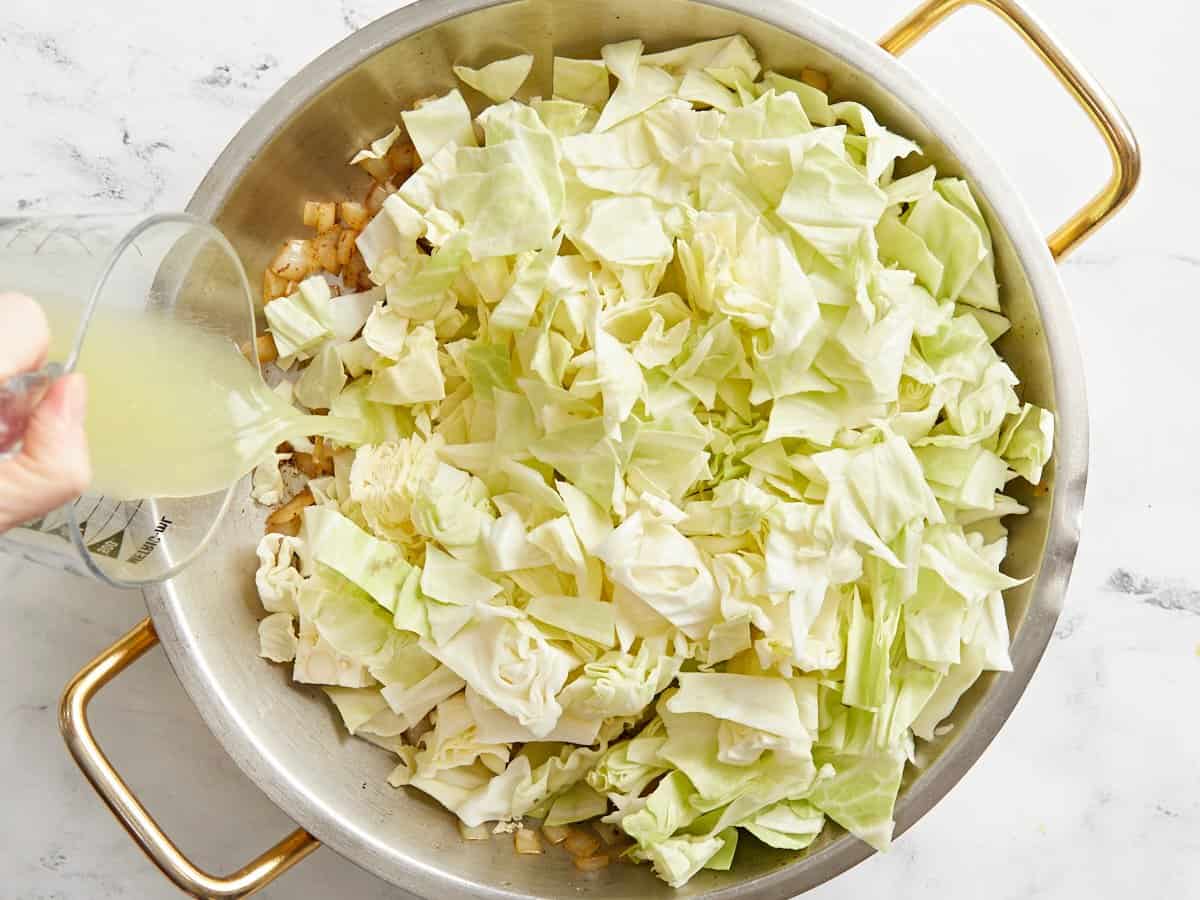
  • Add the uncooked rice and chicken broth to the skillet and stir until combined again. Place a lid on the skillet, turn the heat up to medium-high, and allow the broth to come up to a boil.
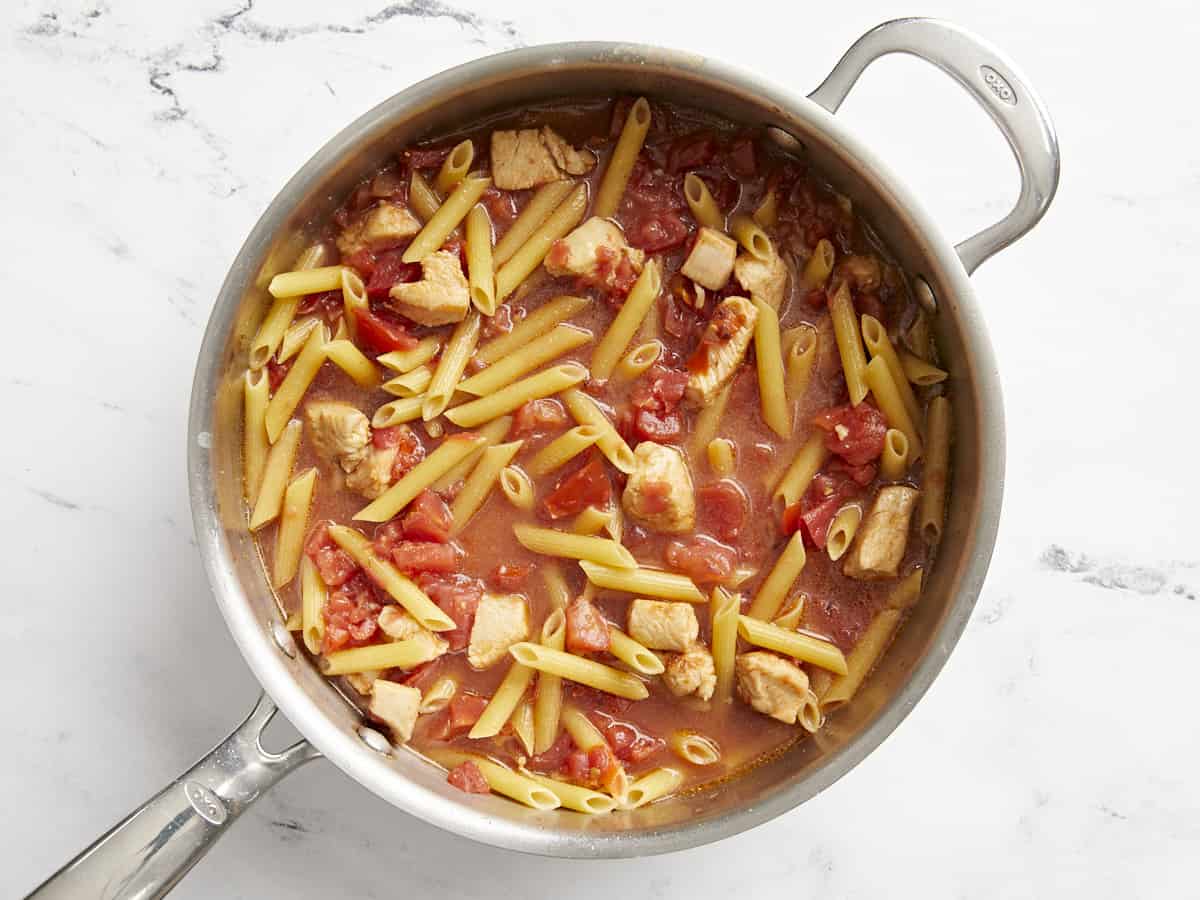
  • As soon as the broth begins to boil, turn the heat down to low and let the rice simmer over, low without lifting the lid or stirring, for 20 minutes. After 20 minutes, turn off the heat and let it rest for five more minutes.
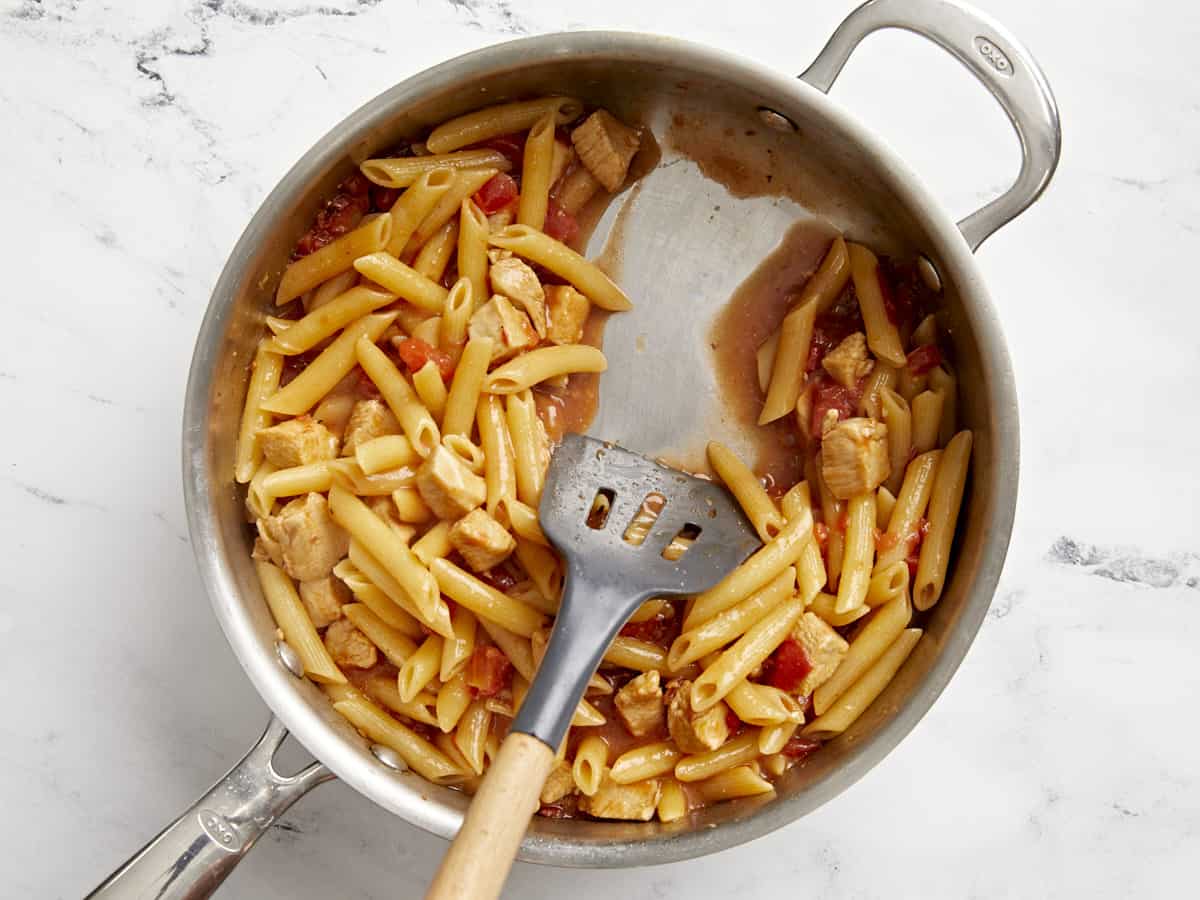
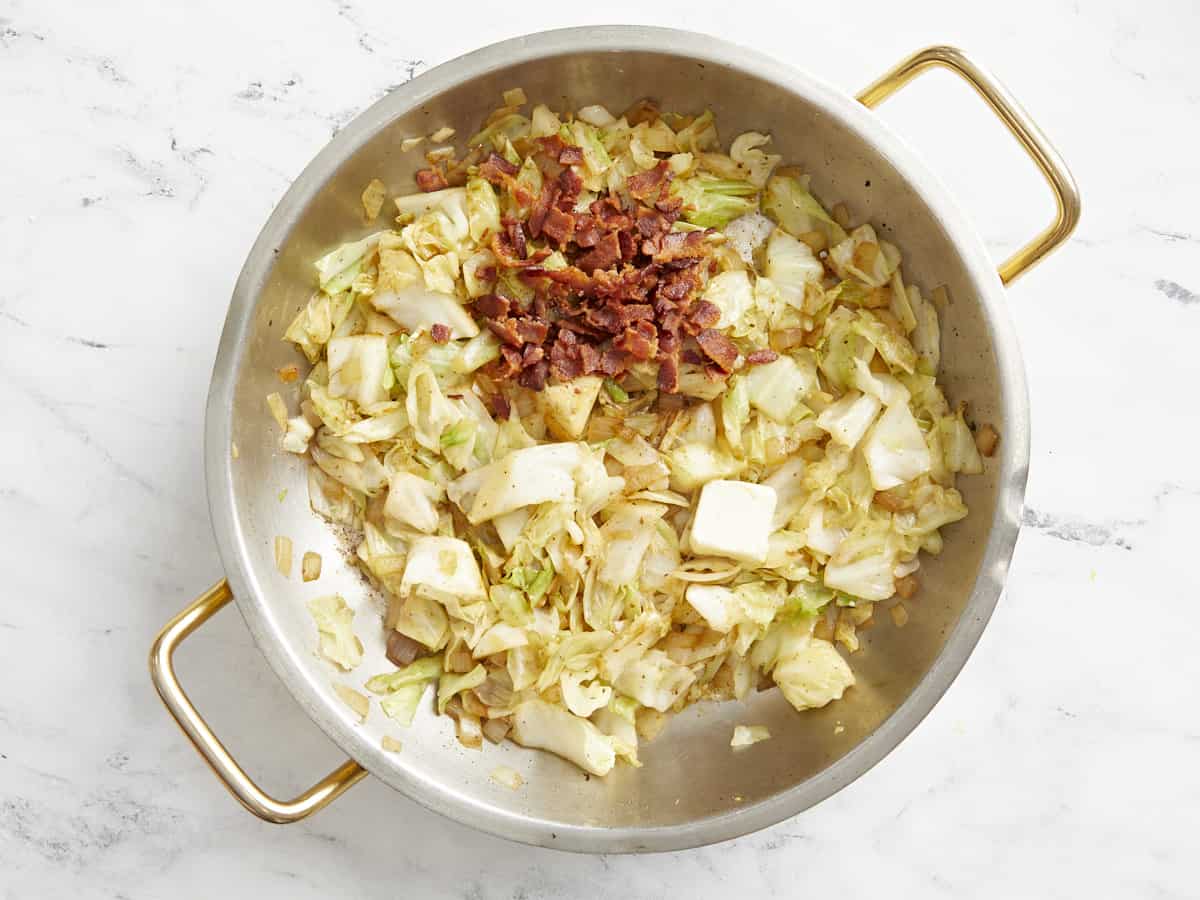
  • Finally, remove the lid and gently stir the rice and chorizo mixture. All of the broth should be absorbed and the rice tender.
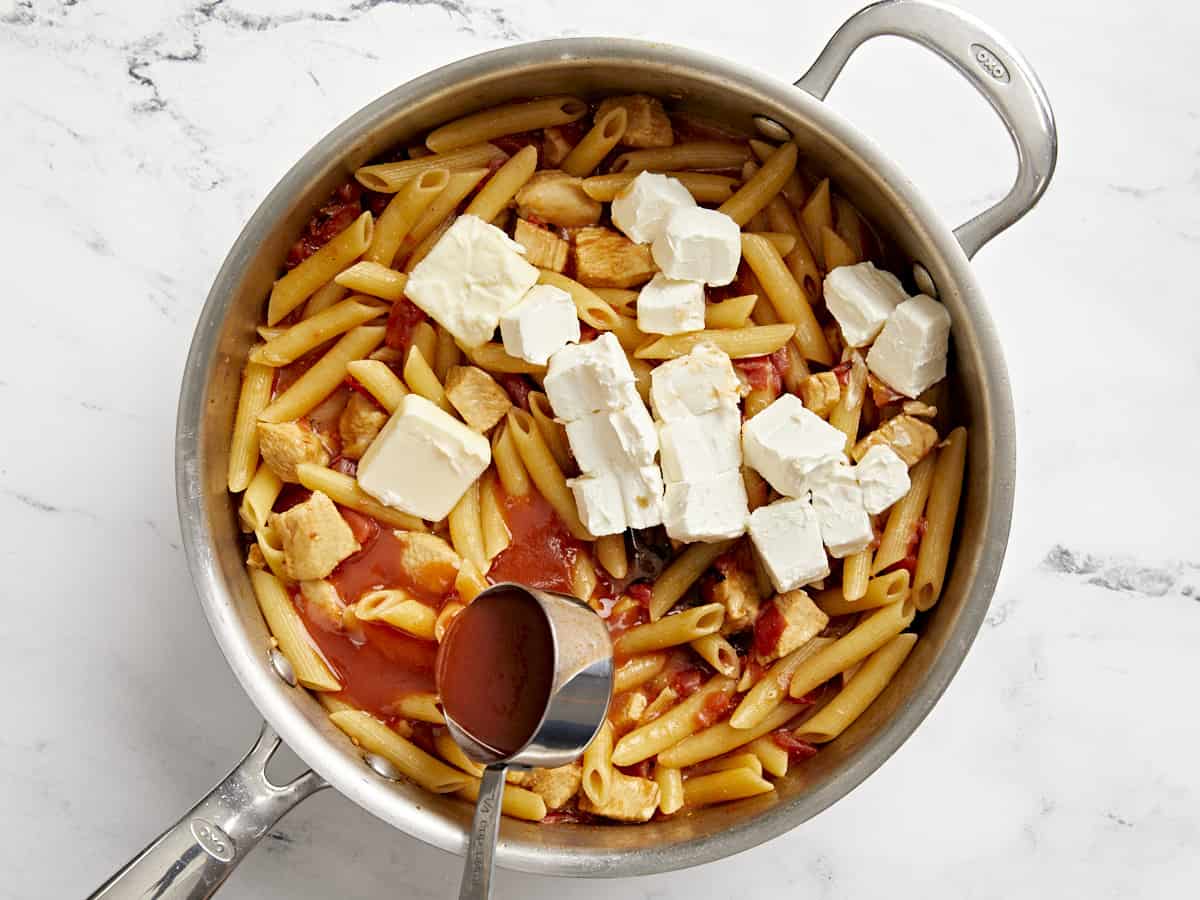
  • Divide the rice and chorizo mixture between the six bell pepper halves, then top with shredded cheese. Cover the baking dish and return it to the 350ºF oven and bake for 20 minutes more. Finally, top with sliced green onions and serve!

See how we calculate recipe costs here.

Nutrition

Serving: 1pepper | Calories: 380kcal | Carbohydrates: 24g | Protein: 18g | Fat: 24g | Sodium: 1032mg | Fiber: 3g
Overhead view of two stuffed bell peppers on a plate with a fork digging into one.

How to Make Chorizo Stuffed Bell Peppers – Step by Step Photos

Prepped bell peppers in a baking dish.

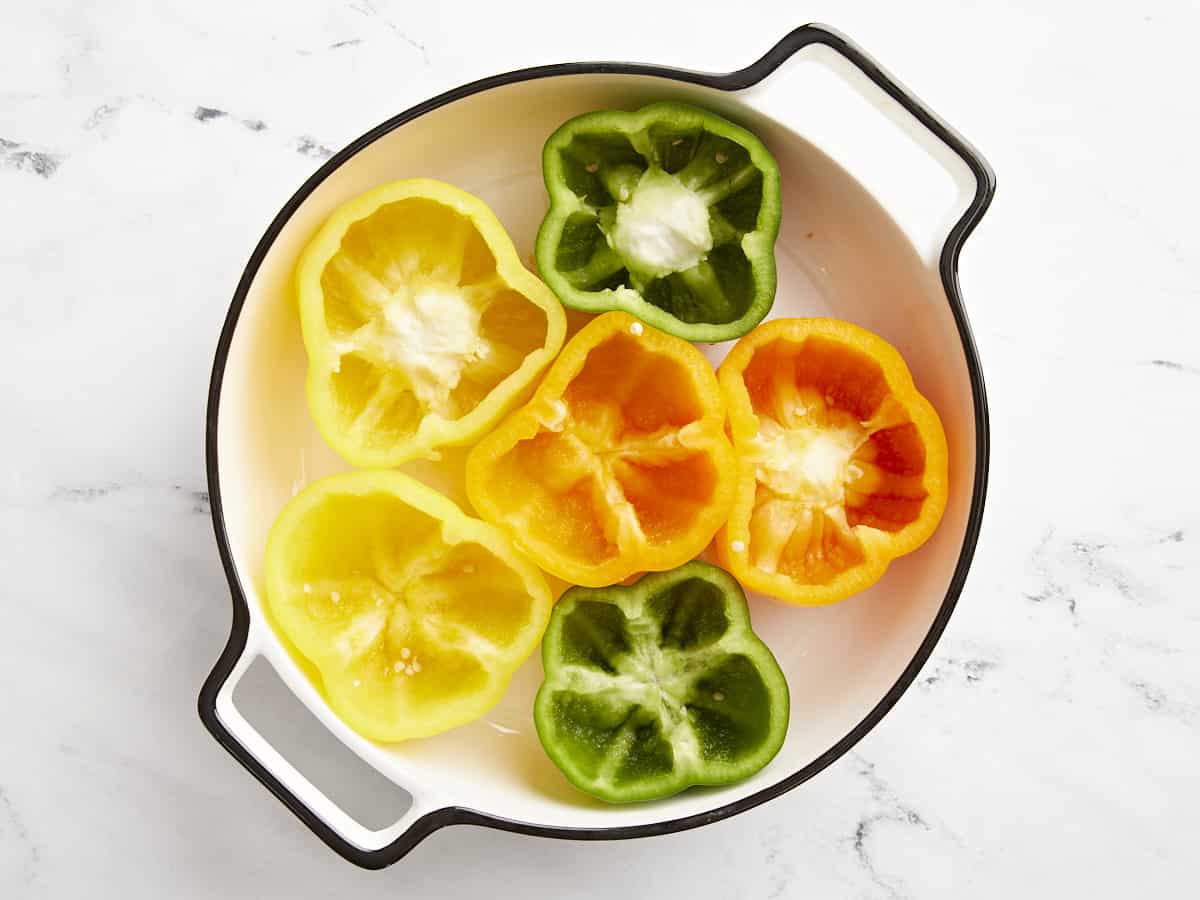
Begin by preheating the oven to 350ºF. Cut three bell peppers in half to create a top and bottom piece for each pepper. Scoop out the seeds and ribs. You can either cut out the stem from the top half of the peppers, or eat around them later. Place the halved peppers in a baking dish and par-bake them for 15 minutes in the fully preheated 350ºF oven.

Cooked chorizo and onion in a skillet.

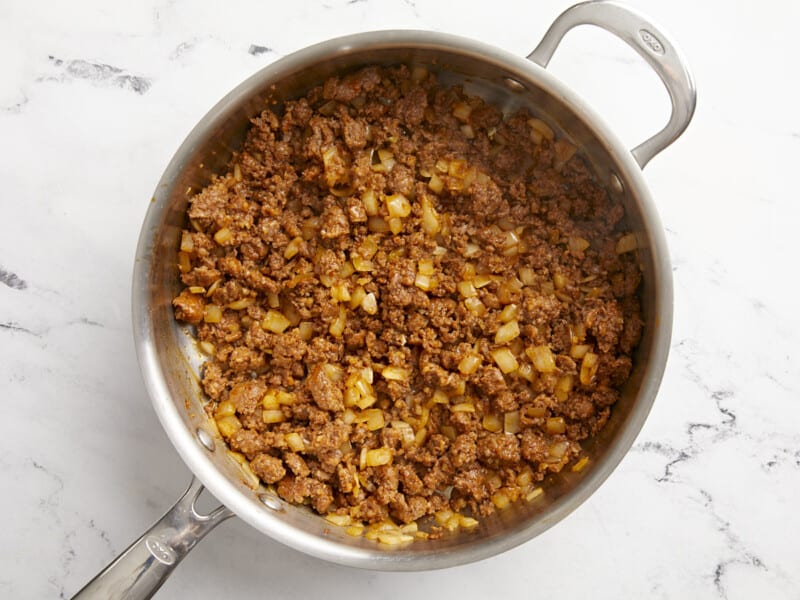
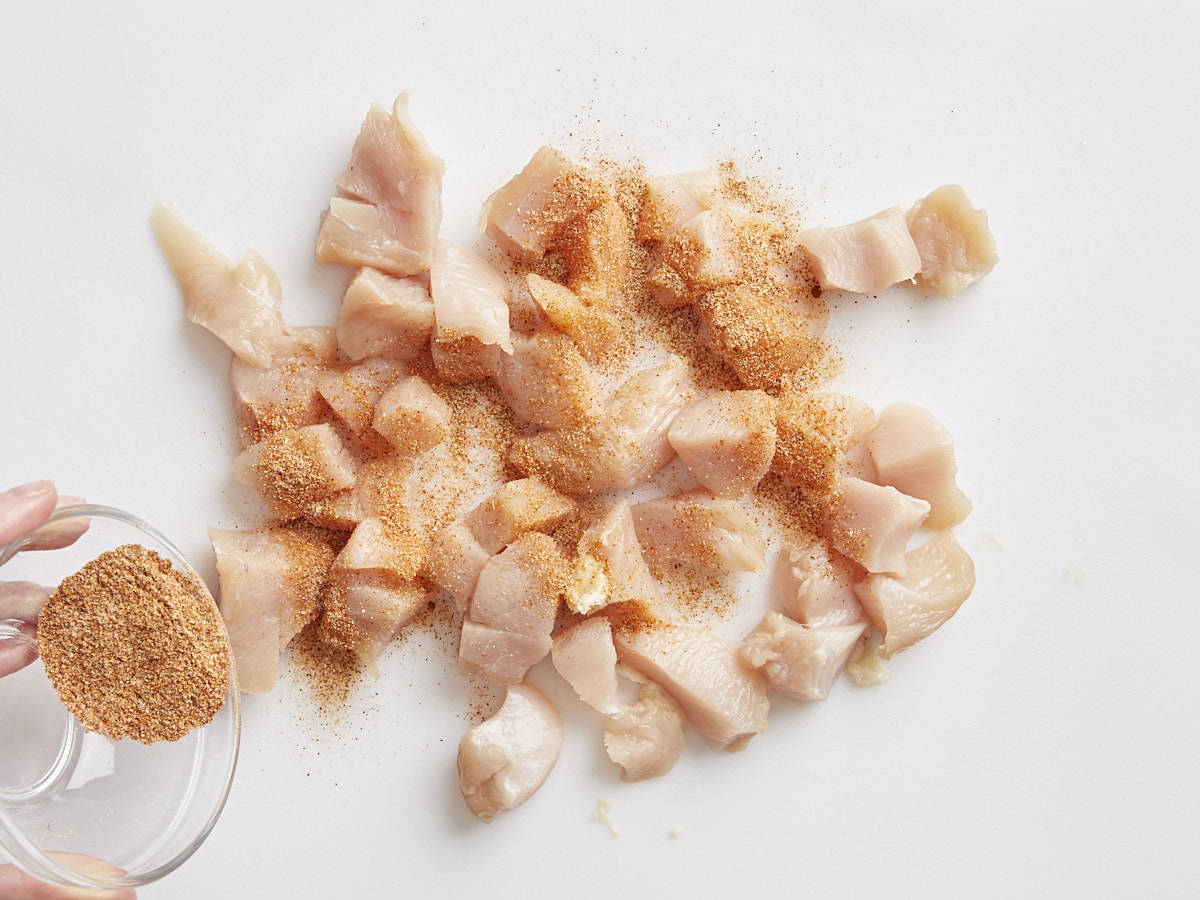
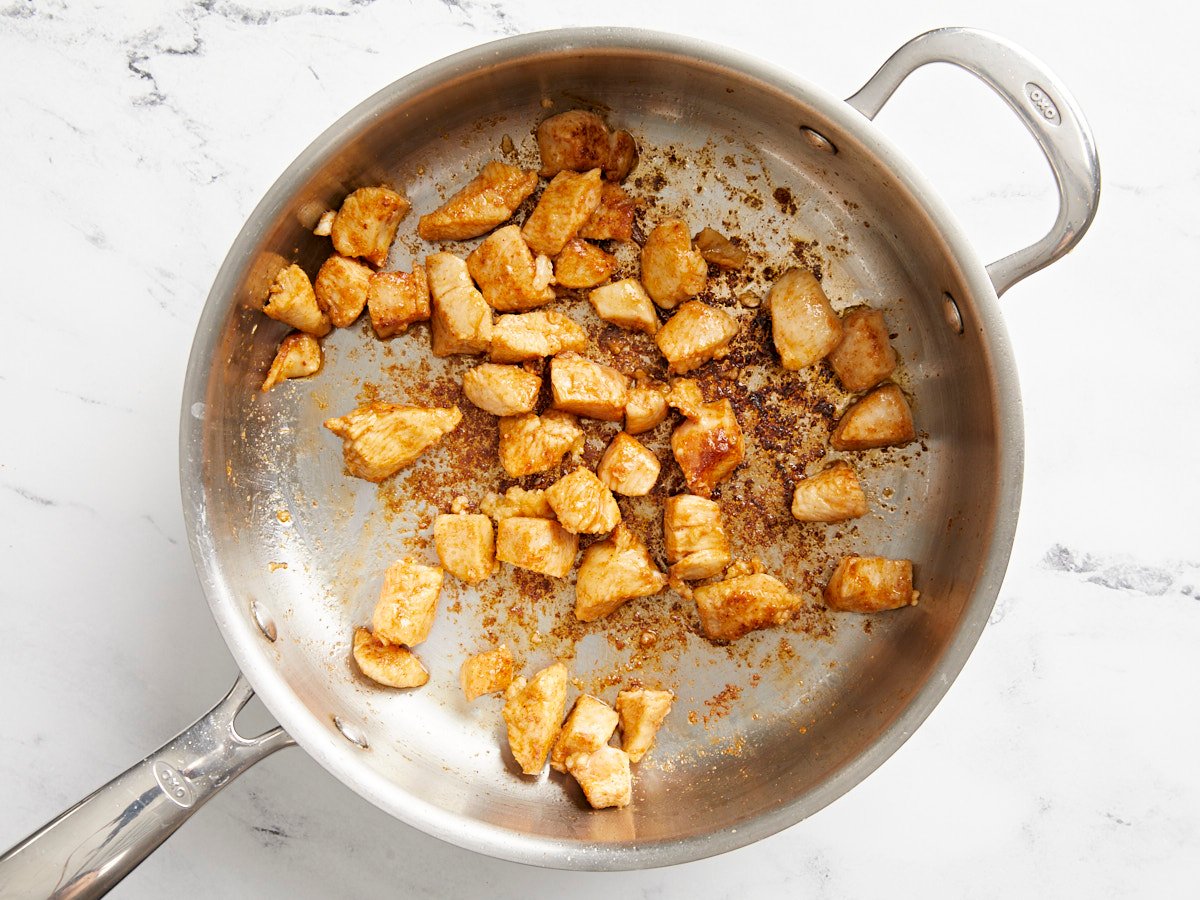
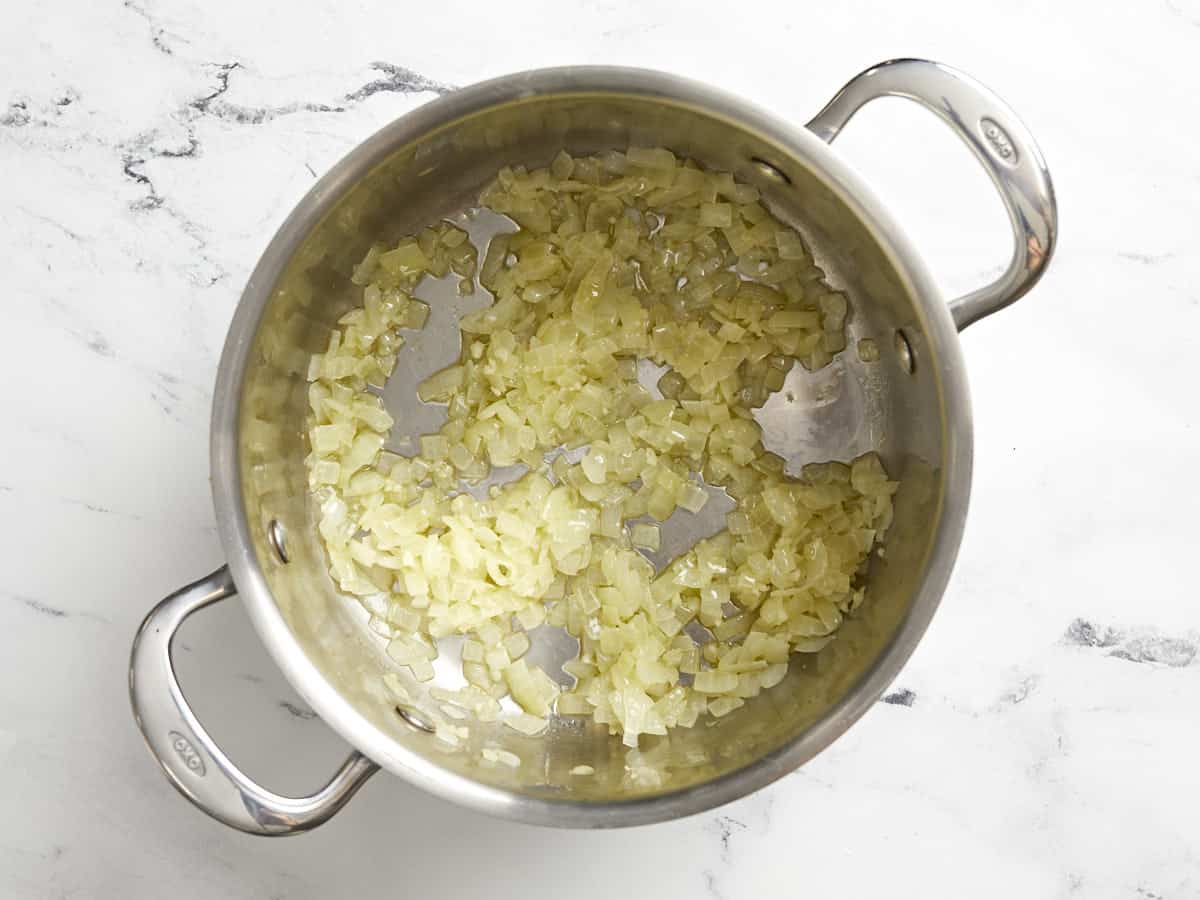
Meanwhile, cook 1 lb. of Mexican chorizo in a large deep skillet over medium heat until browned. The chorizo has plenty of fat, so you likely won’t need to add any additional to the skillet. Dice one yellow onion and mince 2 cloves of garlic. Add the onion and garlic to the skillet with the chorizo, and continue to cook until the onions are softened.

Green chiles, tomato paste, and spices added to the skillet.

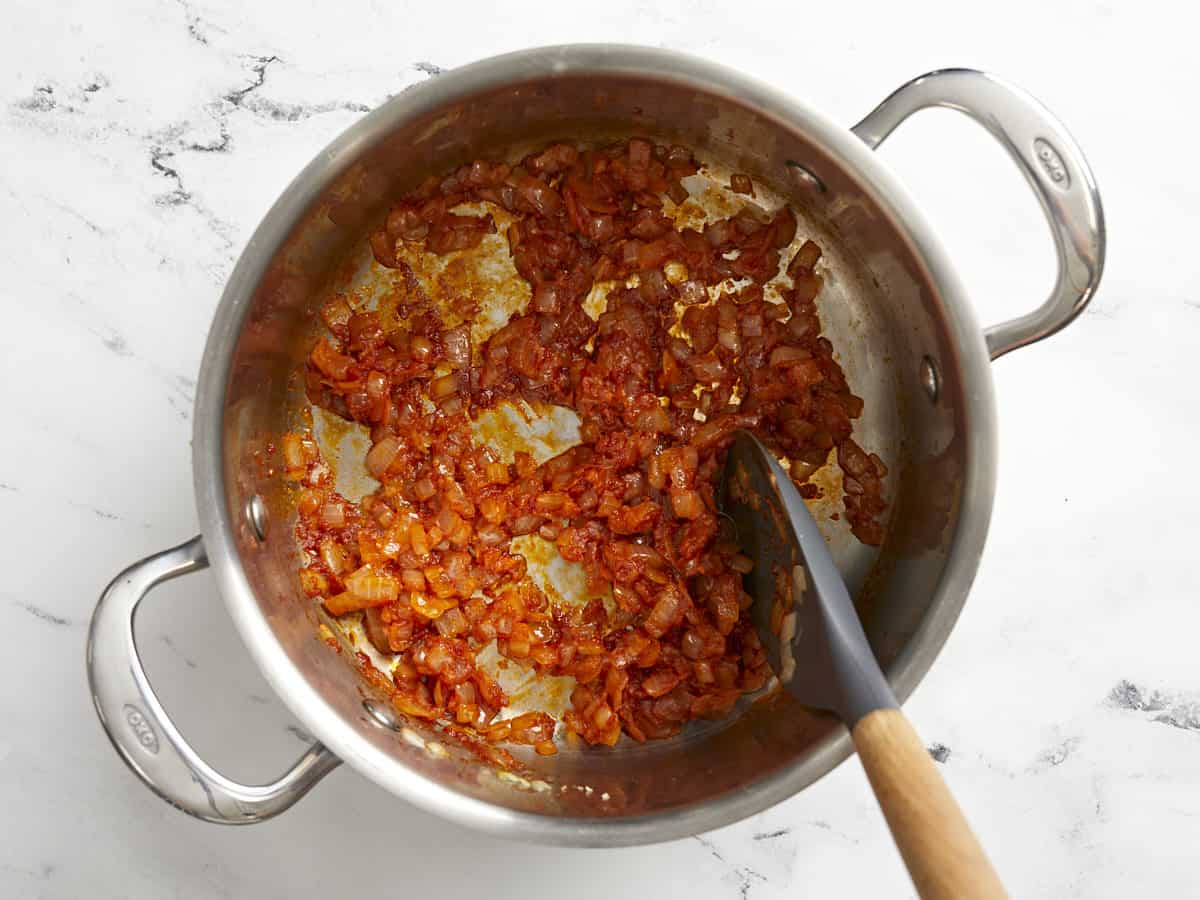
Add one 4oz. can of diced green chiles, 2 Tbsp tomato paste, 2 tsp chili powder, ½ tsp cumin, ½ tsp garlic powder, ¼ tsp cayenne pepper, and ¼ tsp salt to the meat and onions. Stir to combine.

Rice added to the skillet, broth being poured in the side.

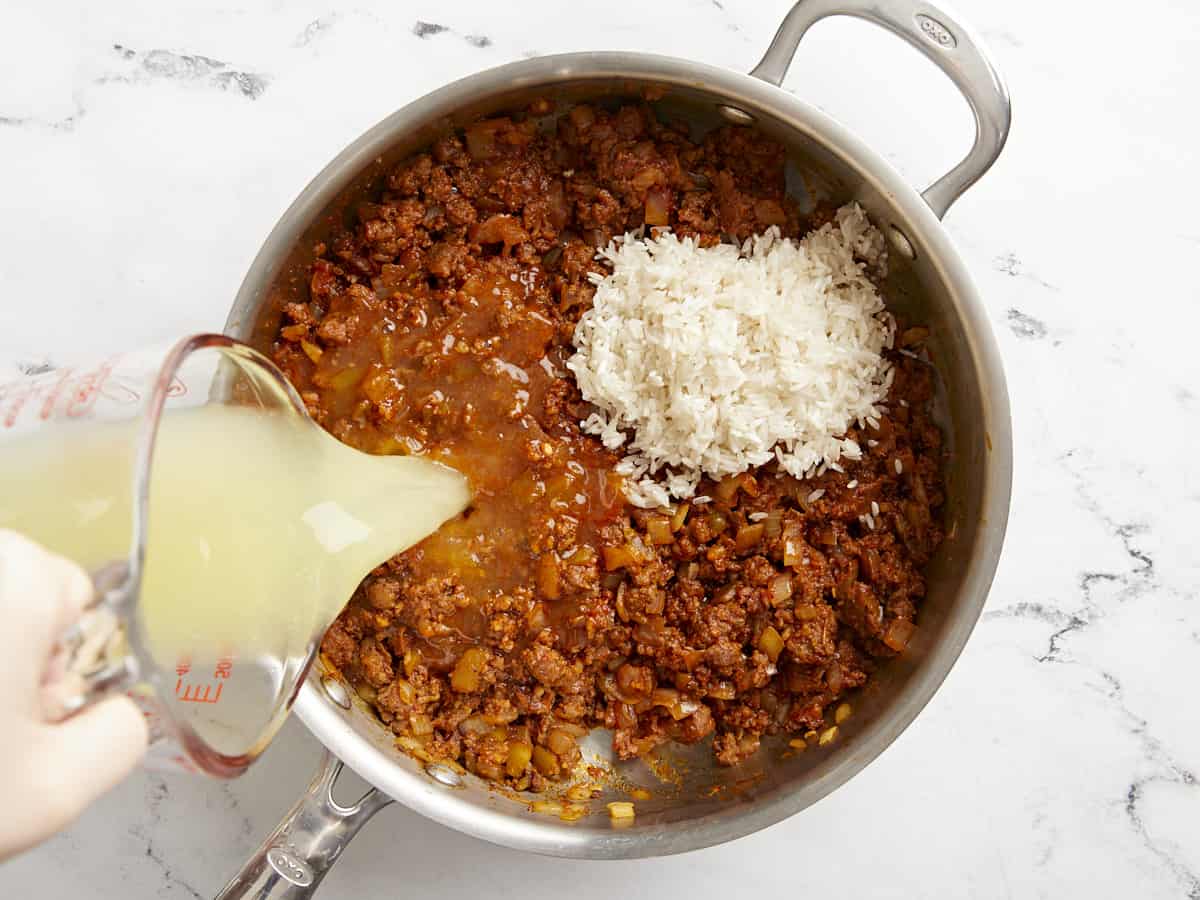
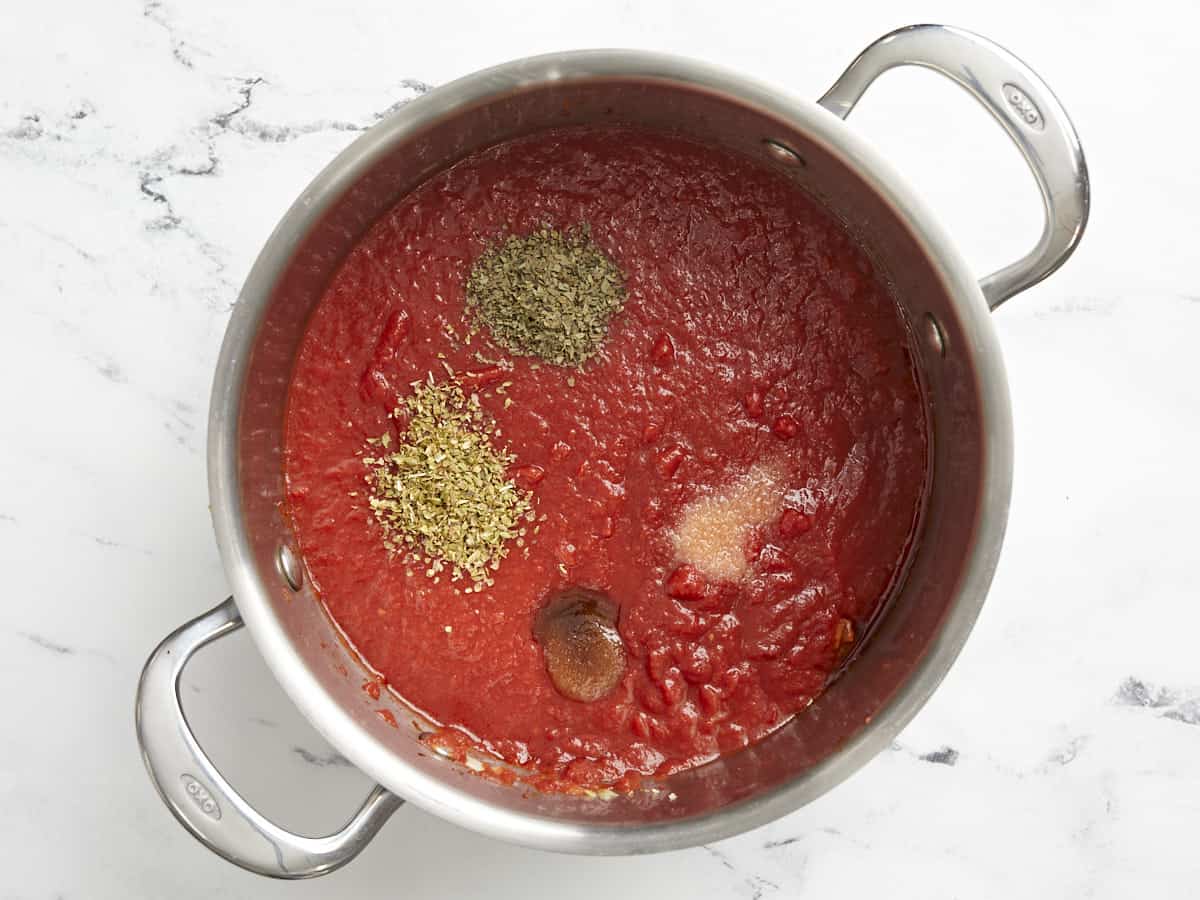
Add ½ cup of uncooked long grain white rice and 1 cup of chicken broth to the skillet. Stir well to combine, then place a lid on top, and turn the heat up to medium-high. When the broth reaches a full boil, turn the heat down to low and allow it to continue to simmer over low (without removing the lid or stirring) for 20 minutes. After 20 minutes, turn the heat off and let it rest for 5 more minutes.

Cooked chorizo and rice in the skillet being scooped to the side with a spoon.

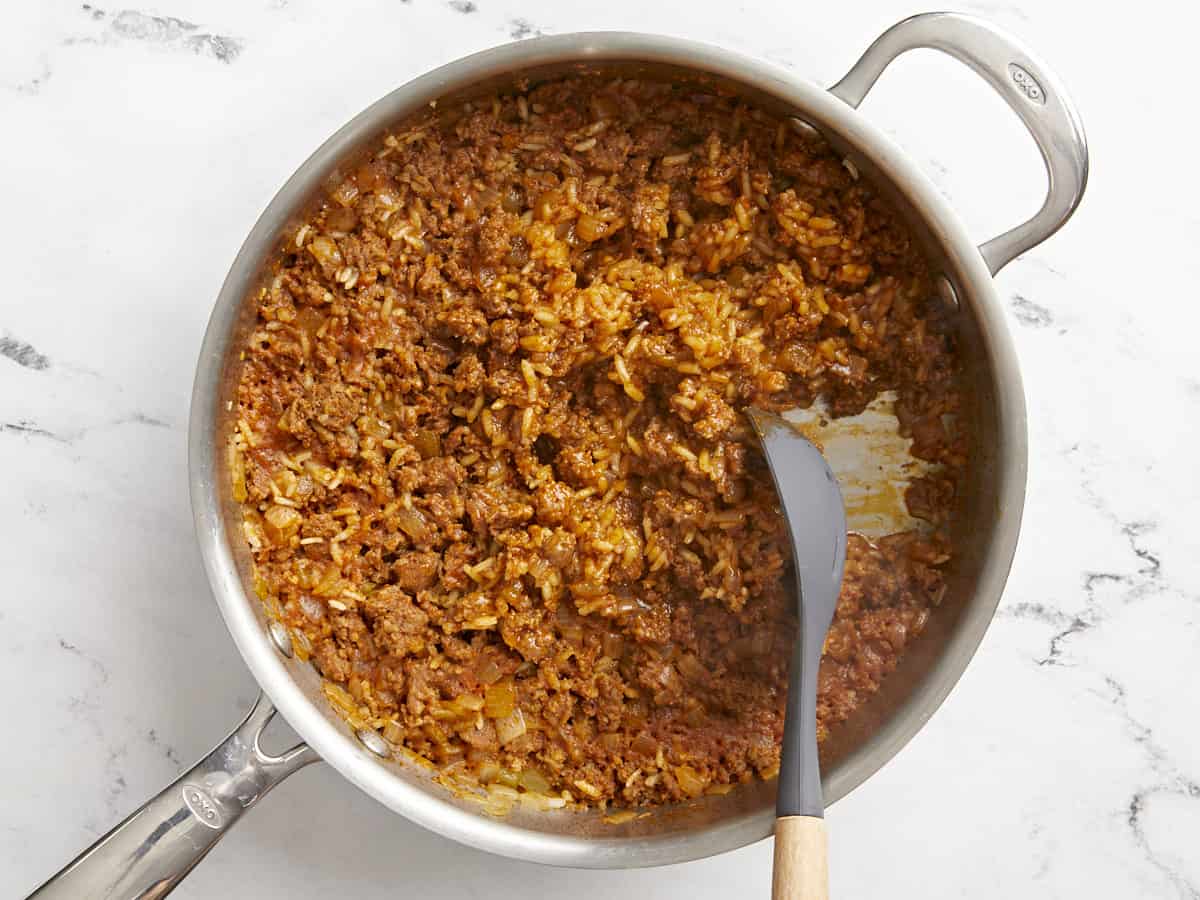
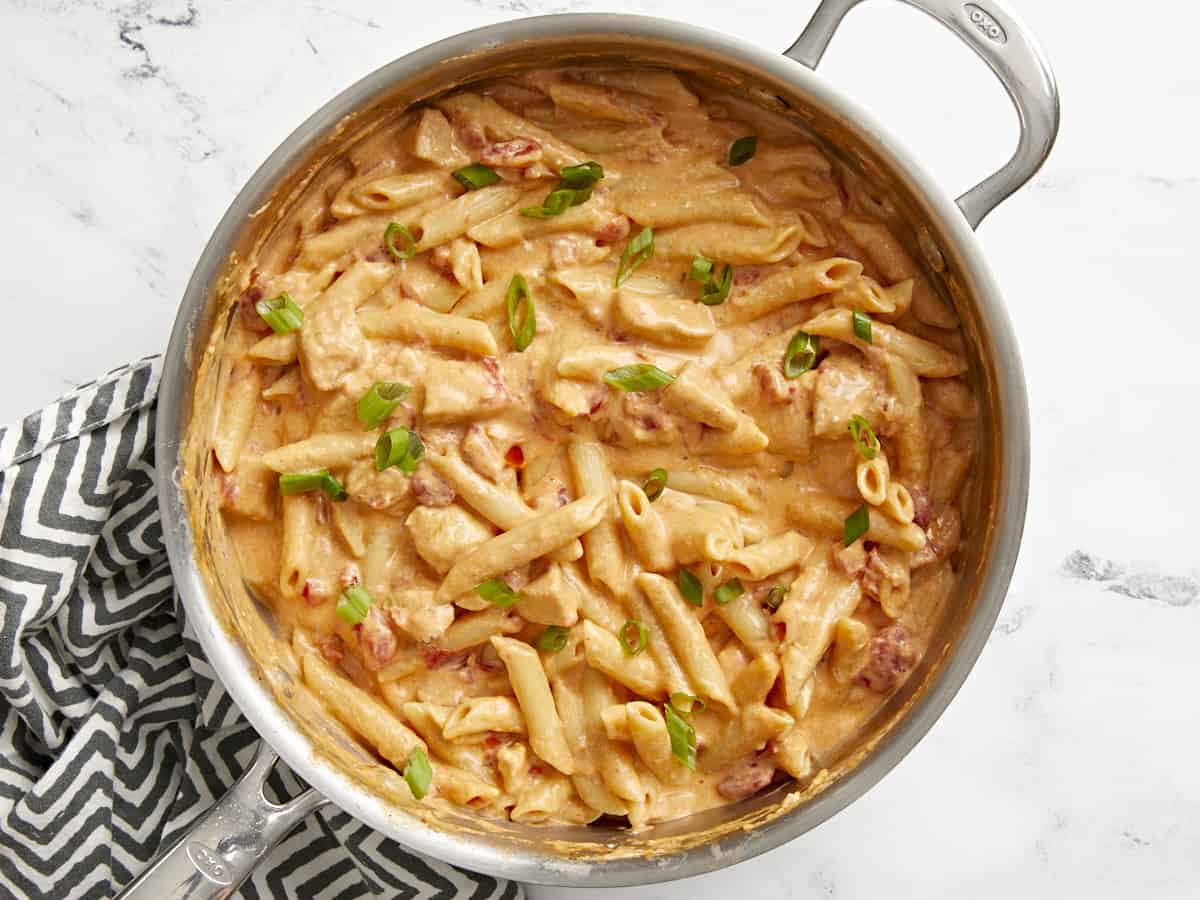
After simmering for 20 minutes the broth should be absorbed and the rice should be tender. Gently stir the rice and chorizo mixture with a spoon.

Filled bell peppers in a baking dish being topped with shredded cheese.

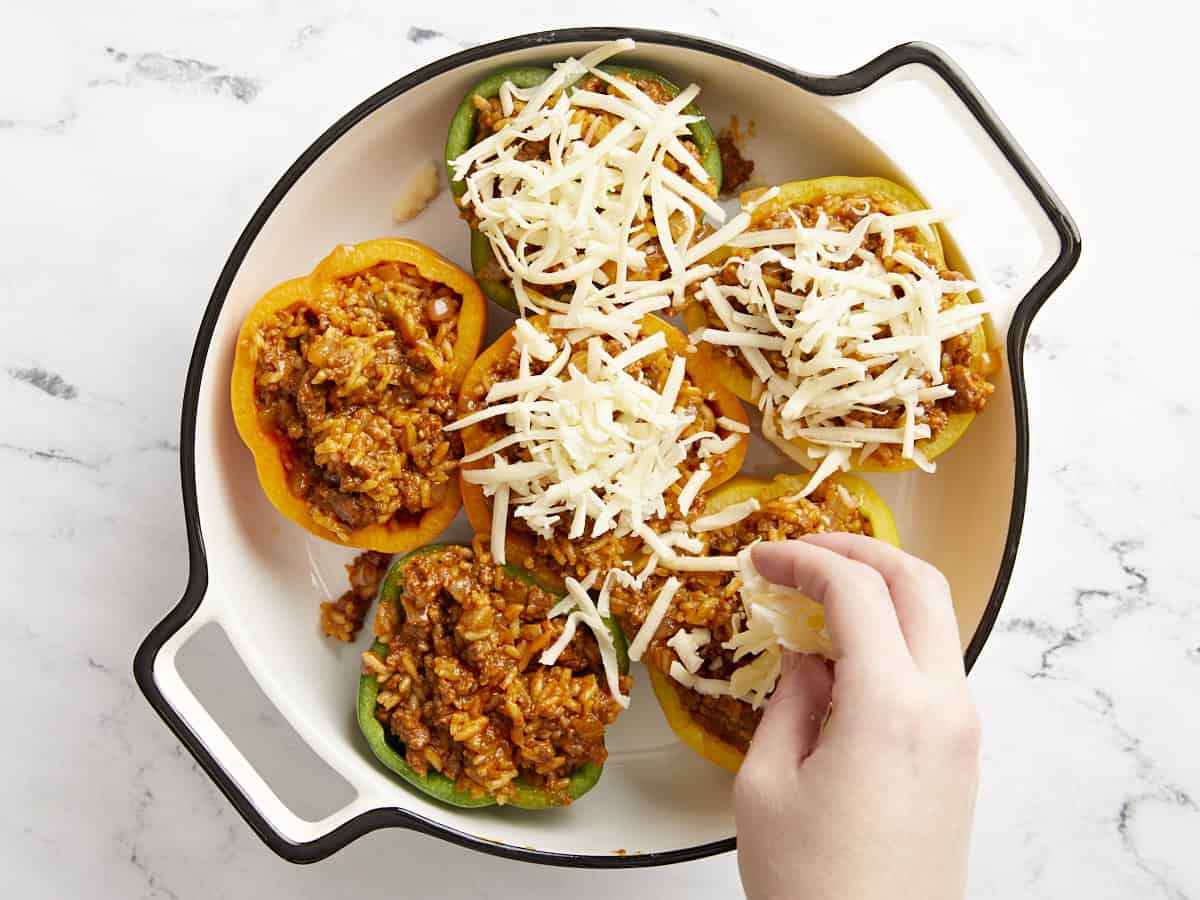
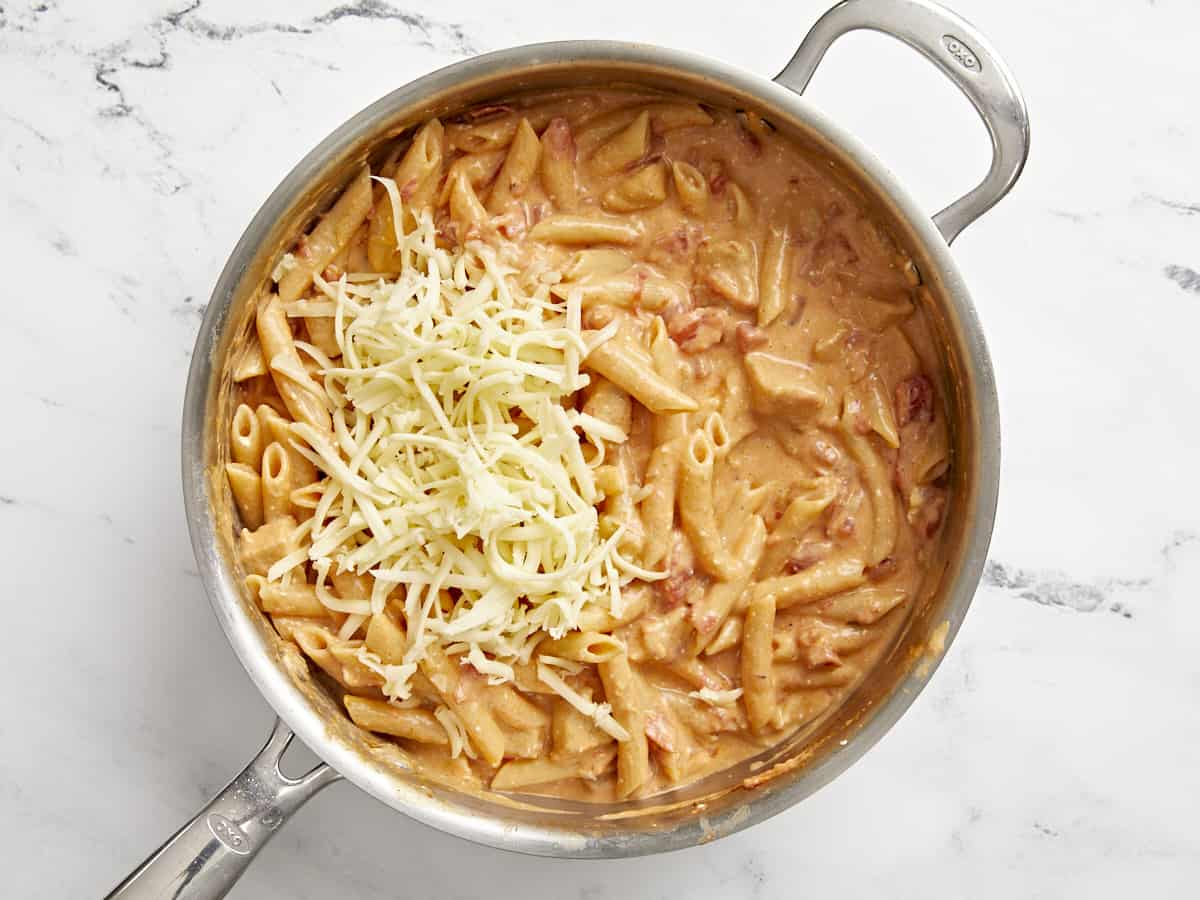
Divide the rice and chorizo mixture between the six par-baked bell pepper halves, then top with shredded mozzarella cheese (about 1 cup). Cover the dish and bake in the 350ºF oven for 20 minutes.

Finished stuffed bell peppers topped with sliced green onion.

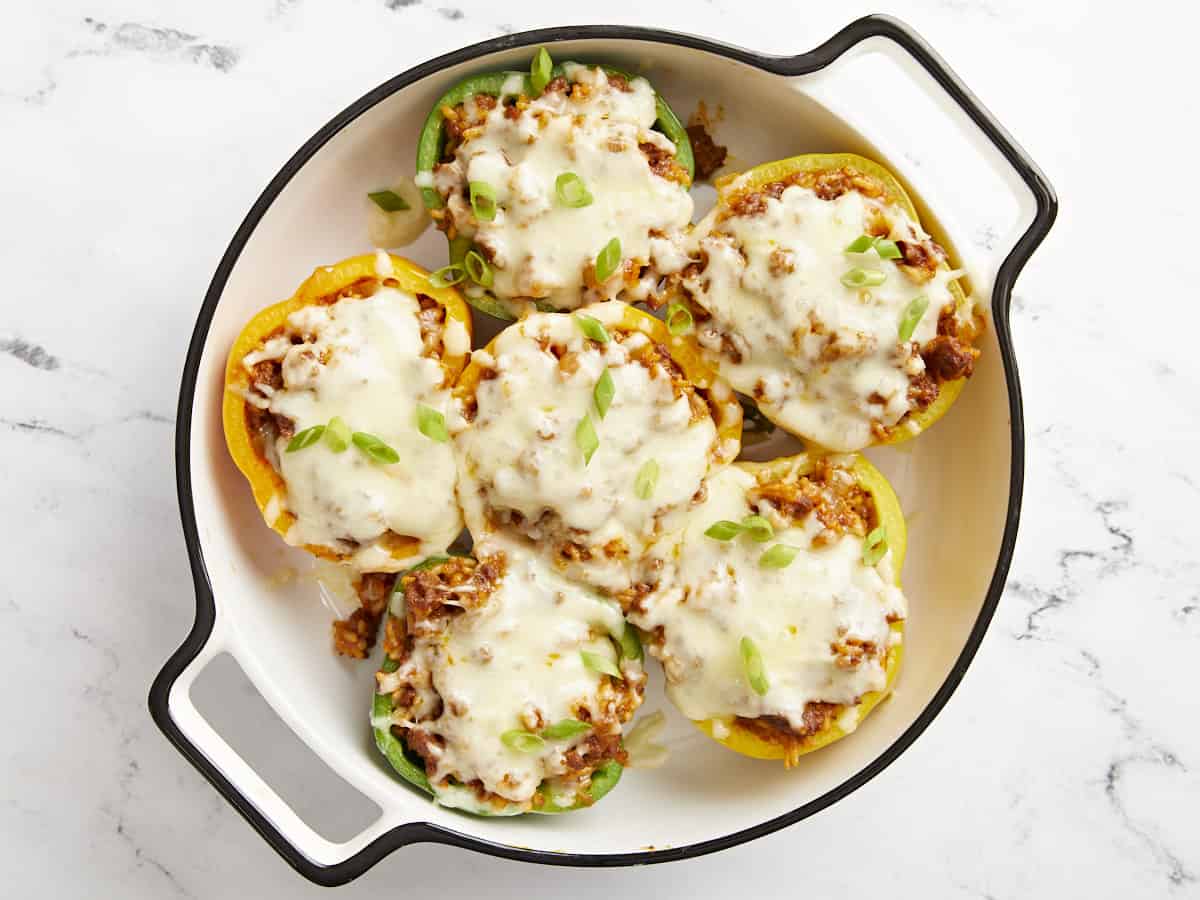
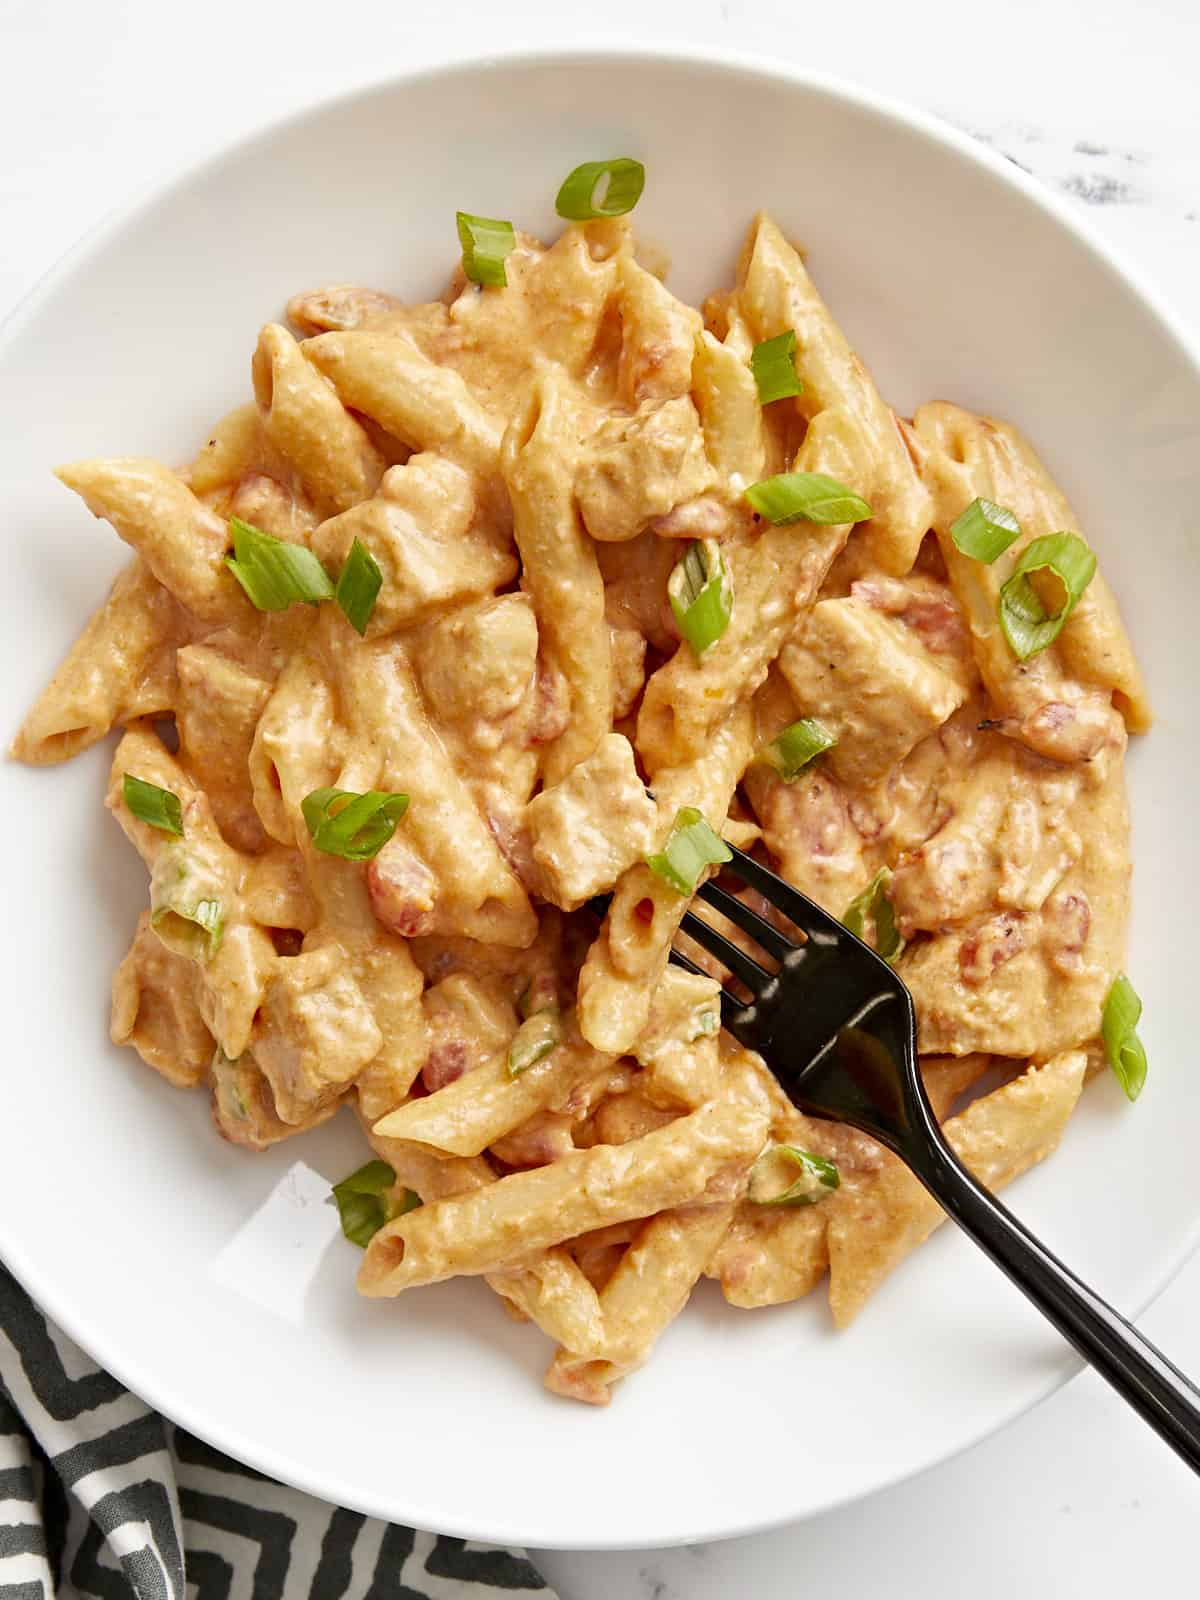
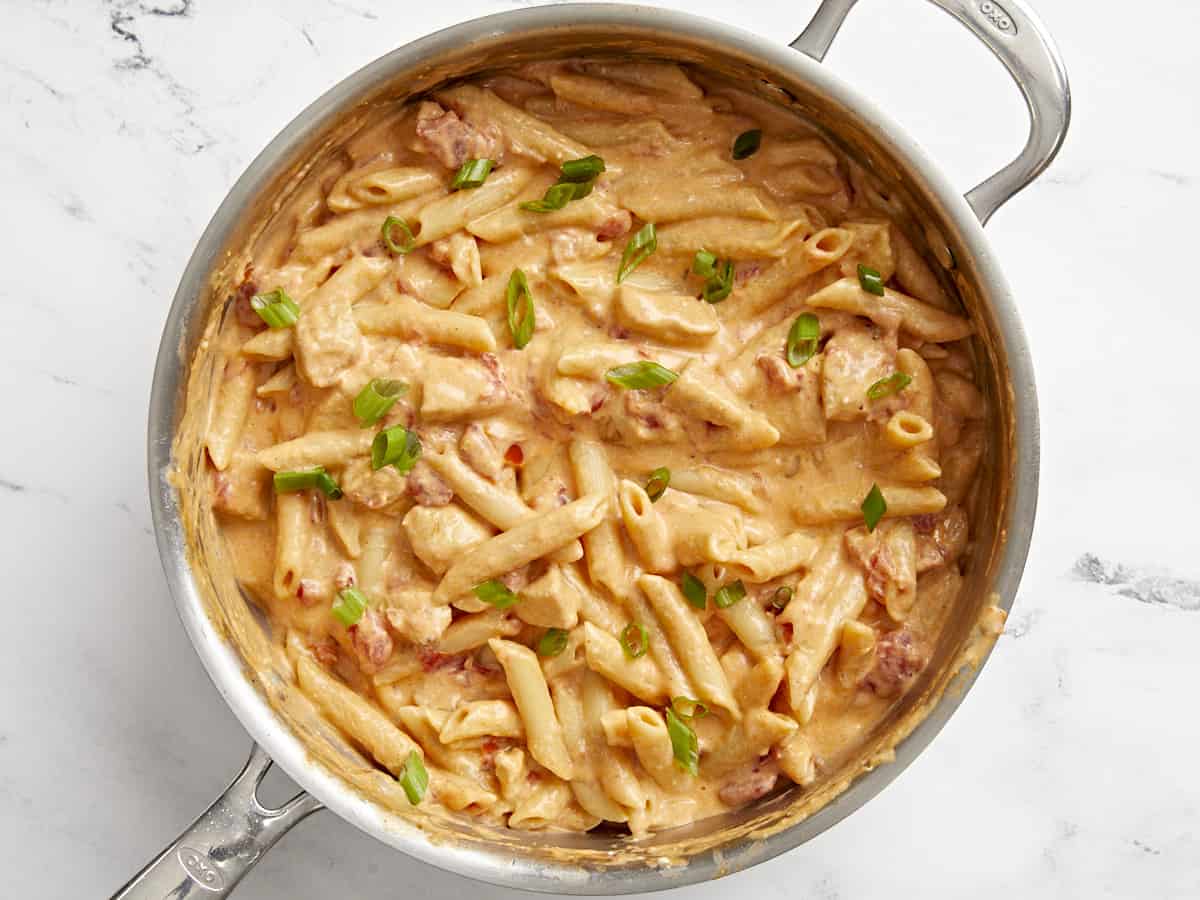
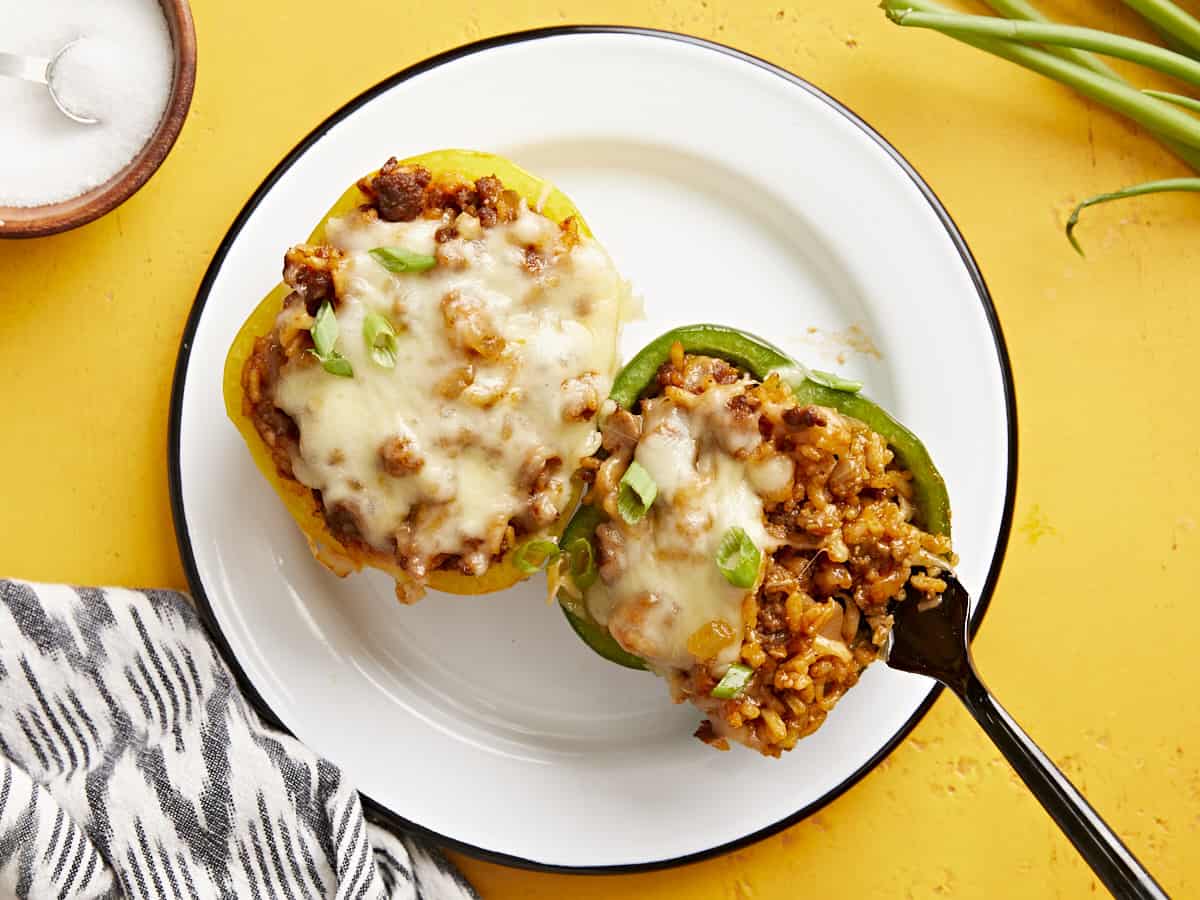
Top the chorizo stuffed bell peppers with sliced green onions and serve!

Close up side view of a fork lifting some of the filling out of a stuffed bell pepper.

Enjoy the cheesy chorizo-y goodness!!

The post Chorizo Stuffed Bell Peppers appeared first on Budget Bytes.

Buffalo Chicken Pasta

This Buffalo Chicken Pasta recipe is the perfect combination of creamy, tangy, and spicy flavors. It’s a must-try for spicy food lovers.

The post Buffalo Chicken Pasta appeared first on Budget Bytes.

One thing I’ve learned over the years is that most dips can also double as an amazing pasta sauce, and this Buffalo Chicken Pasta is a great example. I took all of the creamy, tangy, spicy goodness of buffalo chicken dip and made it into a deliciously cheesy one-pot pasta. So gather around all of my spicy food friends, you’re going to want to make this easy, creamy, and addictive Buffalo Chicken Pasta ASAP!

Close up overhead view of a bowl full of buffalo chicken pasta with a fork.

Ingredients for Buffalo Chicken Pasta

This cheesy buffalo chicken pasta starts with all of the same ingredients as buffalo chicken dip, then we add a few more to make it a little saucier and give the dish just a touch more flavor and texture. Here’s what you’ll need to make buffalo chicken pasta:

  • Chicken Breast: We use one boneless, skinless chicken breast for this recipe and stretch it across four servings to keep things budget-friendly. You can use diced boneless, skinless chicken thighs for an even less expensive option. Or, you can add leftover chopped or shredded cooked rotisserie chicken to the pasta at the end. If using pre-cooked rotisserie chicken, just add the remaining spices to the sauce.
  • Seasoning: We seasoned the chicken breast with garlic powder, onion powder, cayenne pepper, and salt for extra flavor.
  • Butter: Butter balances the heat and acidity of the hot sauce and helps give this dish that classic buffalo sauce flavor.
  • Chicken Broth: In true one-pot pasta style, the pasta is cooked in chicken broth for maximum flavor.
  • Pasta: We used a classic penne pasta for this dish, but you could also use bowtie, rotini, or any short pasta shape.
  • Cheese: A combination of cream cheese and Monterey jack cheese keeps the sauce extra creamy and smooth without the need for a flour and butter roux.
  • Hot Sauce: Franks Red Hot Sauce is the classic sauce used for any “Buffalo” flavored dish, but any vinegar-based cayenne hot sauce will also be delicious.
  • Worcestershire sauce: Worcestershire adds just the right of umami and sweetness to the buffalo sauce, preventing it from having a flat flavor.
  • Petite Diced Tomatoes: To give this pasta more texture and flavor, we added a can of petite diced tomatoes.
  • Green Onion: We topped this pasta with sliced green onion for a little dose of savory freshness at the end.

What Else Can I Add?

If you have a little extra wiggle room in your budget, you can add even more goodies to this buffalo chicken pasta to make it ✨extra✨. Try topping the pasta with crumbled blue cheese, or stirring in some bacon crumbles. If you love a crunchy topping, try crushing some butter crackers or tortilla chips and sprinkling them on top of the pasta just before serving. And while it is totally unconventional, I think some small broccoli florets would be awesome in this, kind of like broccoli mac and cheese!

What to Serve with Buffalo Chicken Pasta

This buffalo chicken pasta is pretty rich, so you’re going to want something light and refreshing to serve on the side. You can opt for a super Simple Side Salad, a classic Caesar Salad, or maybe a simple Cucumber Tomato Salad. Or just go with the theme and serve up some carrot and celery sticks with blue cheese dressing for dipping!

Tips for Making One Pot Pasta

One-pot pasta can be tricky for some because the pasta is cooked in a much smaller amount of liquid than traditional pasta cooking methods. Here are a few tips to make sure your one-pot pasta cooks evenly and to the right texture:

  • Use heavy, thick-bottomed cookware to help the ingredients heat evenly.
  • Use a burner that is close in diameter to the bottom of your pot to ensure even heating.
  • The broth does not need to fully cover the pasta for it to cook, so resist the urge to add more water or broth in the beginning. Steam will help the pasta above the water line to cook, and the pasta will be stirred to ensure it all has contact with the liquid.
  • Make sure the liquid is simmering the whole time the pasta is cooking. If the heat is too low, or the liquid is only simmering in the center of the pot, the pasta will cook unevenly and get gummy.
  • Stir the pot occasionally to prevent sticking and help everything cook evenly.
  • Use your judgment. If the pasta looks close to being cooked through, but there is too much liquid left in the skillet, let it finish simmering with the lid off. If the liquid is gone but your pasta is still not tender, add a splash of more water or broth and continue to simmer until tender.
Overhead view of a pan full of buffalo chicken pasta with a striped napkin on the side.
Overhead view of a bowl full of buffalo chicken pasta.
Print

Buffalo Chicken Pasta

This Buffalo Chicken Pasta recipe is the perfect combination of creamy, tangy, and spicy flavors. It's a must-try for spicy food lovers.
Course Dinner
Cuisine American
Total Cost $8.13 recipe / $2.03 serving
Prep Time 5 minutes
Cook Time 25 minutes
Total Time 30 minutes
Servings 4
Calories 545kcal

Ingredients

  • 1 boneless, skinless chicken breast (about ⅔ lb.) $3.33
  • 1/2 tsp garlic powder $0.05
  • 1/2 tsp onion powder $0.05
  • 1/2 tsp cayenne pepper $0.05
  • 1/4 tsp salt $0.02
  • 1 Tbsp cooking oil $0.04
  • 2 Tbsp butter $0.26
  • 8 oz. penne pasta $0.67
  • 1 15oz. can petite diced tomatoes $1.00
  • 1.5 cups chicken broth $0.28
  • 4 oz. cream cheese $1.10
  • 1/4 cup hot sauce $0.52
  • 1/2 tsp Worcestershire sauce $0.02
  • 1/2 cup shredded Monterey jack cheese $0.58
  • 2 green onions, sliced (optional) $0.16

Instructions

  • Cut the chicken into ½-¾ inch pieces. Combine the garlic powder, onion powder, cayenne pepper, and salt, then sprinkle it over the chicken pieces. Toss the chicken in the spices until everything is well coated.
  • Heat the cooking oil in a large deep skillet over medium-high heat until very hot. Once hot, add the chicken and allow tge chicken to brown on all sides. The chicken does not need to be cooked through at this point.
  • Add the uncooked pasta, canned diced tomatoes (with the liquid), and the chicken broth to the skillet with the chicken. Stir to dissolve all of the browned bits off the bottom of the skillet.
  • Place a lid on the pot and allow the broth to come up to a strong simmer. The broth will not fully cover the pasta, but that is okay. Once the broth is simmering, briefly stir the pasta, replace the lid, then turn the heat down to medium-low.
  • Allow the pasta to simmer in the broth for 10-12 minutes or until the pasta is tender and most of the liquid has been absorbed, stirring once or twice throughout, and always replacing the lid after stirring.
  • Once the pasta is tender and only a small amount of thickened liquid remains in the skillet, cut the cream cheese into chunks and add it to the past along with the butter, hot sauce, and Worcestershire sauce. Stir and cook over medium-low heat until the cream cheese has fully melted into the pasta.
  • Add the shredded Monterey jack cheese and stir until melted into the sauce. Top with sliced green onions, then serve hot.

See how we calculate recipe costs here.

Nutrition

Serving: 1.5cups | Calories: 545kcal | Carbohydrates: 46g | Protein: 30g | Fat: 26g | Sodium: 1193mg | Fiber: 2g

How to Make Buffalo Chicken Pasta – Step by Step Photos

diced chicken breast with seasoning being sprinkled on top.

Dice one boneless, skinless chicken breast (about ⅔ lb.) into small ½-¾ inch pieces. Combine ½ tsp garlic powder, 1/2 tsp onion powder, ½ tsp cayenne pepper, and ¼ tsp salt, then sprinkle it over the chicken. Toss the chicken until it is evenly coated in spices.

Browned chicken pieces in a skillet.

Heat 1 Tbsp of cooking oil in a large deep skillet over medium-high until very hot. Once hot, add the chicken and allow it to brown on all sides. The chicken does not need to cook through here, just let it brown on the outside.

Tomatoes, pasta, and broth added to the skillet.

Add 8 oz of uncooked pasta, one 15oz. can of petite diced tomatoes (with the liquid), and 1.5 cups of chicken broth to the skillet with the chicken.

Uncooked pasta in the skillet with the chicken and tomatoes.

Stir everything well, making sure to dissolve all the browned bits off the bottom of the skillet. The broth will not fully cover the pasta, but that’s okay. Do not add extra liquid at this point.

Cooked pasta in the skillet, a spatula pulling the pasta to the side to show the thickened sauce.

Place a lid on the pot and allow the broth to come up to a strong simmer. Once simmering, give the pasta a quick stir to loosen it from the bottom, replace the lid, then turn the heat down to medium-low. Let the pasta simmer over medium-low for 10-12 minutes, or until the pasta is tender and only a small amount of saucy liquid remains.

Cream cheese, hot sauce, butter, and Worcestershire added to the skillet.

Once the pasta is tender and most of the liquid is absorbed, it’s time to make the buffalo sauce. Add 4oz. of cream cheese (cut into chunks), 2 Tbsp butter, ¼ cup hot sauce, and ½ tsp Worcestershire sauce. Continue to stir and cook over medium-low until the cream cheese is fully melted into the sauce.

Shredded cheese added to the skillet.

Add ½ cup of shredded Monterey Jack cheese to the skillet and stir until it has melted into the sauce.

buffalo chicken pasta topped with sliced green onions.

Top the buffalo chicken pasta with sliced green onions and serve hot!

Overhead view of a bowl full of buffalo chicken pasta.

The post Buffalo Chicken Pasta appeared first on Budget Bytes.

Orange Julius

This perfect Orange Julius recipe is refreshing, easy-to-make, and packed with creamy citrus flavor for a quick summer treat or healthy snack.

The post Orange Julius appeared first on Budget Bytes.

I know it’s still spring, but the days are getting warmer, the sun is starting to shine, and I am ready for summer and all of its cold, fruity drinks. And let me tell you, this Orange Julius is going to be the drink of the summer for me. It only takes a few minutes to whip up this super easy Orange Julius recipe and is the perfect cold and creamy treat to make me feel like I’m vacationing somewhere in the tropics (a girl’s gotta dream). Not to mention, there are so many ways you can vary this Orange Julius recipe to make it more dessert-like, more healthy like a breakfast smoothie, or even turn it into an afternoon cocktail, so I’m truly going to be sipping this one all. summer. long. Don’t miss my variation suggestions below!

overhead view of two glasses full of orange juilius with straws and orange slices.

What is An Orange Julius?

Orange Julius is a refreshing and creamy orange drink made with orange juice, milk, sugar, vanilla, and egg whites which create a super frothy texture. The drink was invented by Julius Freed at his Los Angeles juice stand in 1926 and has been a summertime favorite ever since. The drink grew in popularity over the years and was even deemed the official drink of the 1964 World’s Fair Exposition. In the decades since it has become a staple in shopping malls and on Dairy Queen’s menu. Today’s it’s usually made without egg white, but it’s still just as dreamy and creamy as ever. And the best part? You don’t have to shell out $6 per Julius at an ice cream stand because these deliciously creamy citrus drinks are so easy to make at home!

Ingredients for Orange Julius

You’ll only need four simple ingredients to make a homemade Orange Julius (plus ice). Here’s what you’ll need for this recipe:

  • Frozen Orange Juice Concentrate: This is the secret ingredient for making a super citrusy Orange Julius without it getting too watery. The orange juice concentrate adds a ton of sweet-tart orange flavor while allowing the smoothie to stay thick and frothy.
  • Milk: Whole milk is added to balance the acidity in the orange juice and give the Orange Julius its characteristic creamy flavor. While you can use a lower fat milk, it will affect the creaminess of the drink. Whole milk is recommended.
  • Sugar: A little bit of sugar helps balance the acidity and bitterness in the orange juice concentrate so the Julius has a deliciously sweet and smooth finish.
  • Vanilla: Vanilla adds to the creamy flavor profile and gives the drink an orange creamsicle-like flavor.
  • Ice: Ice makes the Orange Julius super cold and helps create a deliciously thick and frothy texture. You can increase or decrease the ice to make the smoothie your desired texture.

Can You Make Orange Julius with Orange Juice?

The recipe below uses frozen orange juice concentrate to deliver a really strong orange flavor while keeping the smoothie thick and rich. You can substitute about 2 cups of fresh orange juice in place of the orange juice concentrate, but it will make the Julius much less thick and the flavor will not be as bold. For the richest, boldest flavor, definitely buy orange juice concentrate. The remainder of the can can be easily stored in your freezer for your next Orange Julius, so it’s worth purchasing!

Orange Julius Variations

I love a simple classic Orange Julius, but there are so many fun ways you can change the recipe to make it your own. Here are some other ingredients you can add to an Orange Julius for variety:

  • Fruity Flavors: Try adding banana, mango, or pineapple for a tropical twist, or strawberries for a summery flavor.
  • Vegan Orange Julius: Make it vegan by replacing the whole milk with canned light coconut milk (not the kind in a carton that is intended as a milk substitute).
  • Protein Julius: Turn it into a protein smoothie by adding vanilla Greek yogurt or your favorite vanilla protein powder.
  • Green Julius: Add a handful or two of baby spinach to make a creamy, citrusy, green smoothie.
  • Boozy Orange Julius: Add vodka or rum to make a fun “adult” Orange Julius.
Side view of two glasses full of Orange Julius with striped straws and orange slices.
Overhead view of two glasses of orange julius with straws and orange slices.
Print

Orange Julius

This perfect Orange Julius recipe is refreshing, easy to-make, and packed with creamy citrus flavor for a quick summer treat or healthy snack.
Course Beverage, Breakfast, Dessert
Cuisine American
Total Cost $1.87 recipe / $0.94 serving
Prep Time 5 minutes
Total Time 5 minutes
Servings 2 (12oz. each)
Calories 253kcal

Equipment

Ingredients

  • 1/2 cup frozen orange juice concentrate $1.16
  • 1 cup whole milk $0.20
  • 1 tsp vanilla extract $0.45
  • 3 Tbsp granulated sugar $0.06
  • 1 cup ice $0.00

Instructions

  • Place all of the ingredients in a blender and blend until smooth and frothy.
  • If your Orange Julius is not thick enough, add more ice. If the Julius is too thick, add a little water or milk and blend again until you reach the desired consistency. Serve immediately and enjoy!

See how we calculate recipe costs here.

Nutrition

Serving: 12oz | Calories: 253kcal | Carbohydrates: 49g | Protein: 6g | Fat: 4g | Sodium: 58mg | Fiber: 1g

How to Make An Orange Julius – Step by Step Photos

Ingredients being added to a blender.

Add ½ cup frozen orange juice concentrate, 1 cup whole milk, 1 tsp vanilla extract, 3 Tbsp granulated sugar, and 1 cup ice to a blender.

Blended Orange Julius in a blender from above.

Blend everything together until it is smooth and frothy. Adjust the consistency of your Orange Julius by adding more ice to make it thicker or adding a little water or milk to thin it out.

Orange Julius being poured from the blender into a glass.

Pour the homemade Orange Julius into a large glass and enjoy immediately!

Side view of an Orange Julius in a glass with a striped straw and orange slices.

The post Orange Julius appeared first on Budget Bytes.

Fried Cabbage

This fried cabbage recipe is a super easy side dish that goes with just about any meal. It’s flavorful, budget-friendly comfort food at its best!

The post Fried Cabbage appeared first on Budget Bytes.

Fried cabbage is an incredibly underrated side dish, IMHO. It’s cheap, you only need a handful of simple ingredients, and it goes with everything. Plus, cabbage is one of my favorite budget ingredients because it’s so filling and nutritious, and you really don’t need a lot to make it taste great. This Fried Cabbage recipe is as easy as it gets and it’s so good that I find myself making it over and over. It’s one of those recipes where I actually look forward to eating the leftovers!

Overhead view of fried cabbage in a skillet.

Fried cabbage is a classic Southern side dish that you’re likely to find at BBQ joints and soul food kitchens across the Southern United States. It’s simply chopped cabbage that has been fried in bacon grease until golden brown and delicious. Seriously, words can not describe how amazing this melt-in-your-mouth cabbage is.

Ingredients for Fried Cabbage

It doesn’t take a lot to make fried cabbage taste incredible. Here are the few simple ingredients you’ll need to make this fried cabbage recipe:

  • Cabbage: This is the bulk of the recipe. It’s inexpensive, filling, and has tons of fiber (yay)! Look for cabbage that has a nice green color and isn’t very heavy for its size. Dense, compact cabbage can be underripe, have a tough texture, and lack flavor.
  • Bacon: Bacon adds flavor, salt, and fat to the cabbage, making it extra finger-licking good. See below for suggestions if you prefer a vegetarian fried cabbage or can’t eat pork.
  • Onion: Adding an onion to the fried cabbage brings both savory and sweet flavors to the table. The onion caramelizes a bit in the skillet bringing a slight natural sweetness.
  • Chicken Broth: Liquid helps steam and soften the cabbage, which can otherwise be quite tough. Using chicken broth instead of plain water ensures maximum flavor. You can substitute with other broth flavors, if preferred.
  • Seasoning Salt: I like to season my fried cabbage with an all-in-one seasoning salt, like Lawry’s or Tony Chacherie’s. We used Tony’s because I love the slightly spicy kick, but Lawry’s is equally as delicious.
  • Butter: A little bit of butter melted into the cabbage at the end gives the fried cabbage a deliciously rich finish.

Vegetarian Fried Cabbage

The bacon and chicken broth bring a large portion of the flavor to this dish, but you do have options if you’d like to make a vegetarian fried cabbage recipe. Simply swap out the chicken broth for vegetable broth or a vegetarian “chicken” flavored broth to start. To replace the smoky flavor and fatty mouthfeel of the bacon, I suggest either adding more butter or a tablespoon of coconut oil and some smoked paprika. You may also want to increase the seasoning salt to replace the salt from the bacon.

What to Serve with Fried Cabbage

Fried cabbage is the perfect side dish for any Southern-style dinner. Try pairing it with Pulled Pork, BBQ chicken, pork chops, potato salad, black-eyed peas, cornbread, or ham.

How to Store Leftovers

Fried cabbage is quite delicious as a leftover and you don’t need to take any special measures when refrigerating it. Simply place it in a food storage container and refrigerate for up to five days. To reheat the fried cabbage you can either microwave until hot or place it back into a non-stick skillet and sauté over medium heat until heated through. I do not suggest freezing fried cabbage as it will likely get very mushy upon thawing.

Overhead view of fried cabbage in a bowl.
Close up overhead view of fried cabbage in a skillet.
Print

Fried Cabbage

This fried cabbage recipe is a super easy side dish that goes with just about any meal. It's flavorful, budget-friendly comfort food at its best!
Course Dinner, Side Dish
Cuisine American
Total Cost $3.39 recipe / $0.85 serving
Prep Time 10 minutes
Cook Time 20 minutes
Total Time 30 minutes
Servings 4 (about 1 cup each)
Calories 184kcal

Ingredients

  • 4 oz. bacon $1.33
  • 1/2 head green cabbage (about 1.25 lbs or 6 cups chopped) $0.99
  • 1 yellow onion $0.37
  • 1/4 cup chicken broth $0.52
  • 1/2 tsp seasoning salt $0.05
  • 1 Tbsp butter $0.13

Instructions

  • Add the bacon to a very large skillet and cook over medium heat until the bacon is brown and crispy. Remove the bacon from the skillet and drain the excess bacon fat, leaving about 2 Tbsp in the skillet (reserve the drained fat for later).
  • While the bacon is cooking, finely dice the onion and chop the cabbage into 1-inch pieces.
  • After removing the bacon from the skillet, add the diced onion and continue to sauté over medium heat until the onions become soft and translucent (about 5 minutes). The moisture from the onions will begin to dissolve the browned bacon bits from the bottom of the skillet.
  • Once the onions are soft, add the chopped cabbage and chicken broth. Continue to let the cabbage cook over medium, stirring occasionally, until it has softened, most of the liquid has evaporated, and the edges begin to brown. If the skillet dries up before the cabbage is soft, add 2 Tbsp of water and continue to sauté until softened.
  • Once the cabbage is soft and the liquid has evaporated, add the butter to the skillet and stir until it has melted and coated the cabbage. Turn the heat off and add the seasoning salt, starting with ¼ tsp, then adding more to taste.
  • Finally, crumble the cooked bacon and stir it back into the cabbage. Give the cabbage a taste and adjust to your liking. Garnish with some freshly cracked pepper, serve, and enjoy!

See how we calculate recipe costs here.

Nutrition

Serving: 1cup | Calories: 184kcal | Carbohydrates: 10g | Protein: 5g | Fat: 14g | Sodium: 577mg | Fiber: 3g
Close up side view of fried cabbage in the skillet.

How to Make Fried Cabbage – Step by Step Photos

Cooked bacon in a large skillet.

Cook 4oz. of bacon in a very large skillet over medium heat until well browned and crispy. While the bacon is cooking, finely dice one yellow onion and chop ½ head of cabbage into 1-inch pieces (about 6 cups once chopped).

Sautéed onion in the bacon fat.

Once the bacon is cooked, remove it from the skillet and drain most of the bacon fat leaving about 2 Tbsp in the skillet (reserve the drained bacon fat for later). Add the diced onion and continue to sauté over medium heat until the onions are soft and translucent. The moisture from the onions should dissolve the browned bacon bits from the bottom of the skillet.

Chopped cabbage added to the skillet, broth being poured into the side.

Add the chopped cabbage and chicken broth to the skillet. Let the cabbage cook over medium heat, stirring occasionally, allowing it to wilt down. If the skillet becomes too dry before the cabbage has softened, reduce the heat and add a couple of tablespoons of water.

Wilted cabbage in the skillet, seasoning being sprinkled over top.

Continue cooking the cabbage until it has softened, most of the liquid in the skillet has evaporated, and the edges of the cabbage begin to brown. Once the cabbage is soft, add 1 Tbsp butter and stir until it has melted and coated the cabbage. Turn the heat off and season with the seasoning salt, starting with ¼ tsp and adding more to taste (we used about ½ tsp).

Crumbled bacon added to the cabbage.

Finally, crumble the cooked bacon and stir it into the cabbage.

Finished fried cabbage in the skillet.

Taste the cabbage and adjust to your liking. You can garnish with chopped parsley, if desired, and freshly cracked pepper.

Close up overhead view of fried cabbage in a bowl.

The post Fried Cabbage appeared first on Budget Bytes.

Easy Marinara Sauce

This easy homemade marinara sauce recipe only uses a few simple ingredients to create a rich and bold flavor, perfect for pasta and more!

The post Easy Marinara Sauce appeared first on Budget Bytes.

I know it’s super easy just to open up a jar of store-bought marinara sauce and pour it over your pasta, and sometimes that’s all the energy we have (no shame), but hear me out. This easy marinara sauce recipe is surprisingly simple, super inexpensive, and you get to control the ingredients (great for those watching their sugar or sodium intake). Plus, homemade marinara sauce is very freezer-friendly, so you can make a double batch now and save the other half for the nights when you have no energy. It heats through in minutes and you’re good to go with zero effort!

Overhead view of a pot full of homemade marinara sauce with a wooden spoon in the center.

What is Marinara Sauce?

Marinara sauce is a simple tomato-based pasta sauce. It’s characterized by its simple list of ingredients, which leads to an uncomplicated and bright tomato flavor. The texture of marinara sauce is usually very uniform without large chunks, which allows it to coat pasta evenly. Marinara sauce is most often used as a sauce for pasta, but it can also be used in many other dishes or as a dipping sauce.

Ingredients for Marinara Sauce

Marinara sauce in its most simple form is just puréed tomatoes (or passata) and a small amount of herbs and spices. I’ve added a couple more ingredients here to satisfy my American palate, but the recipe remains very simple. Here’s what you’ll need to make this marinara sauce recipe:

  • Onion: The natural sugars in onion add a touch of sweetness to the sauce, which helps balance the acidity of the tomatoes.
  • Garlic: Garlic pairs so well with tomato sauce that I just had to add some to round out the savory flavors. That being said, you can skip it for a more traditional marinara sauce flavor.
  • Olive Oil: Olive oil helps the onion sauté without burning and it adds some body to the sauce.
  • Crush Tomatoes: A large can of crushed tomatoes provides bulk to this sauce with a fairly smooth texture. If you can not get crushed tomatoes where you live, passata will also work.
  • Tomato Paste: A little bit of tomato paste added to the sauce helps thicken it up and intensifies the tomato flavor.
  • Herbs: Dried basil and oregano round out the flavor of this sauce and give it a subtle herbal finish.
  • Brown Sugar: Adding sugar is a short cut with tomato sauce that helps balance the acidity without having to simmer the sauce for a long period of time. You can skip the brown sugar, but I love the balance it brings to the flavor.
  • Salt: Salt is arguably the most important ingredient in any dish as it helps our tongue distinguish between different flavors. If your sauce is not properly salted, you will not be able to taste its full flavor.

What Kind of Tomatoes to Use for Marinara Sauce

This recipe is written using canned crushed tomatoes, which offer both convenience and a low price. While you most definitely can make marinara sauce using fresh tomatoes, that would require several more steps and a reformulation of the recipe to account for the extra water and flavor differences.

When choosing the canned crushed tomatoes for this recipe, keep in mind that there can be quite a drastic flavor difference between brands. If budget is your main concern, this recipe makes a great sauce even when using generic-brand canned tomatoes. But, if you want to get a bit fancier, you can opt for a premium or imported brand, or even buy whole canned San Marzano tomatoes and purée them yourself. Even when you opt for a more expensive canned tomato, this recipe is still very easy and budget-friendly, making it a great option for special occasions like date night in!

How to Use Marinara Sauce

We all know that marinara sauce is great on pasta, but you can use it for other recipes, as well! Here are some other ways to use this easy homemade marinara sauce:

  • Use it on pizza for a lighter tomato flavor. It’s particularly great on Margherita pizzas.
  • Use it as a dipping sauce for homemade focaccia or breadsticks.
  • Combine it with other sauces like pesto or alfredo sauce to make a new pasta or dipping sauce.
  • Add it to sandwiches, like Meatball Subs.
  • Use it as a base for soup by adding more seasoning, broth, and other items like pasta, meatballs, or vegetables.

How to Store And Reheat

As mentioned, this marinara sauce recipe freezes beautifully. After cooking the marinara sauce, transfer it to the refrigerator until completely chilled. The sauce will stay good in the refrigerator for 4-5 days, or you can transfer it to the freezer for longer storage. Just make sure the sauce is in a freezer-safe container, label and date it, and then freeze for up to three months. To reheat, simply transfer the frozen sauce to a saucepot and heat over medium-low, stirring often, until heated through.

A fork twirling into a pile of pasta covered in marinara sauce.
Overhead view of finished marinara sauce in the pot surrounded by pasta and herbs.
Print

Easy Marinara Sauce

This easy homemade marinara sauce recipe only uses a few simple ingredients to create a rich and bold flavor, perfect for pasta and more!
Course Dinner, Main Course
Cuisine American, Italian
Total Cost $3.11 recipe / $0.39 serving
Prep Time 5 minutes
Cook Time 40 minutes
Total Time 45 minutes
Servings 8 (½ cup each)
Calories 73kcal

Ingredients

  • 1 small yellow onion $0.37
  • 2 cloves garlic $0.16
  • 2 Tbsp olive oil $0.32
  • 2 Tbsp tomato paste $0.20
  • 1 28oz. can crushed tomatoes $1.89
  • 1/2 tsp dried basil $0.05
  • 1/2 tsp dried oregano $0.05
  • 1 tsp brown sugar (optional) $0.02
  • 1 tsp salt (or to taste) $0.05

Instructions

  • Dice the onion and mince the garlic. Add the onion, garlic, and olive oil to a sauce pot and sauté over medium heat until the onions are soft and translucent (about 5 minutes).
  • Add the tomato paste and continue to stir and cook for 3-5 minutes more, or until the tomato paste takes on a slightly darker color. This caramelizes the sugars in the tomato paste to give it a slightly sweeter and less acidic flavor.
  • Add the crushed tomatoes, basil, oregano, brown sugar, and salt to the pot. Stir to combine and dissolve any tomato paste from the bottom of the pot.
  • Allow the sauce to come to a gentle simmer, then reduce the heat to medium-low, partially cover the pot, and allow the sauce to simmer for about 30 minutes, stirring occasionally.
  • After simmering for 30 minutes, taste the sauce and adjust the salt, sugar, or other seasonings to your liking. If the sauce is too acidic for your liking, you can let it simmer longer (about one hour) or add more sugar. Serve hot or refrigerate until ready to eat.

See how we calculate recipe costs here.

Nutrition

Serving: 0.5cup | Calories: 73kcal | Carbohydrates: 10g | Protein: 2g | Fat: 4g | Sodium: 454mg | Fiber: 2g
Close up side view of marinara sauce being stirred in the pot with a wooden spoon.

How to Make Marinara Sauce – Step by Step Photos

Sautéed onion and garlic in a saucepot.

Dice one yellow onion and mince two cloves of garlic. Add the onion, garlic, and 2 Tbsp olive oil to a sauce pot and sauté over medium heat until the onions are soft and translucent (about 5 minutes).

Tomato paste stirred into the onions and garlic in the saucepot.

Add 2 Tbsp of tomato paste to the pot and continue to stir and cook for 3-5 minutes more, or until the tomato paste takes on a slightly darker color. This caramelizes the sugars in the tomato paste, adding a natural sweetness.

Crushed tomatoes, sugar, and herbs added to the pot.

Finally, add one 28oz. can of crushed tomatoes, ½ tsp dried basil, ½ tsp dried oregano, 1 tsp brown sugar, and 1 tsp salt. Stir to combine and dissolve any tomato paste from the bottom of the pot. Allow the sauce to come to a gentle simmer.

Marinara sauce being stirred in the pot.

Once simmering, turn the heat down to medium-low, partially cover the pot, and let the sauce simmer for about 30 minutes, stirring occasionally. Leaving a lid on the pot but slightly ajar can help prevent splatter.

Overhead view of finished marinara sauce in the pot surrounded by pasta and herbs.

After simmering for 30 minutes, give the marinara sauce a taste and adjust the salt or other herbs to your liking. If it’s still too acidic for your taste, you can either simmer it longer (around 1 hour total), or add more sugar.

Marinara sauce being spooned over a plate of pasta.

Serve the homemade marinara sauce over pasta, use it for a dipping sauce, or freeze it for later!

The post Easy Marinara Sauce appeared first on Budget Bytes.

Creamy Mushroom Soup

This deliciously rich and creamy Mushroom soup is quick, easy, and perfect for cold winter nights or to pack in a thermos for an easy lunch!

The post Creamy Mushroom Soup appeared first on Budget Bytes.

I’m all about the creamy soups during the cold winter months, and this incredibly creamy Mushroom Soup is one of the best. This mushroom soup recipe is so easy to make and is as cozy as it gets. You’ll want to serve this soup with some crusty bread or crackers to soak up every drop of that savory creamy broth because it is just to die for. And the best part? Because this mushroom soup is so simple and uncomplicated, it’s also very inexpensive, even when the cost of mushrooms is on the higher side!

Side view of a bowl of creamy mushroom soup with a spoon lifting some out of the bowl.

Ingredients for Mushroom Soup

I love this Creamy Mushroom Soup for its simplicity. It’s just sautéed mushrooms, a creamy broth, and a few simple seasonings. Here’s what you’ll need to make this mushroom soup:

  • Mushrooms: I highly suggest using baby bella mushrooms for this soup because they have a nice deep color and rich flavor. White button mushrooms will not add as much color or flavor to the soup. You could also chop up some larger portobello mushroom caps to use in place of the Baby Bellas.
  • Olive Oil: Olive oil is used to sauté the mushrooms so they get a nice deep brown color, which adds both flavor and color to the soup.
  • Garlic: Garlic adds depth to the flavor and Pairs just perfectly with the flavor of the mushrooms.
  • Butter: Butter adds richness to the soup and combines with the flour to create a roux, which thickens the broth.
  • Flour: All-purpose flour combines with the butter to create a roux, which thickens the broth. Without the flour, the broth will be very thin.
  • Vegetable Broth: Vegetable broth is the base for this soup and it provides complexity to the flavor, as well as a nice brown color. You can use mushroom broth instead if you have it.
  • Heavy Cream: Heavy cream adds a deliciously rich and creamy flavor to the soup.
  • Seasonings: This mushroom soup is seasoned simply with salt, pepper, thyme, and soy sauce. The soy sauce adds a wonderfully earthy umami flavor that enhances the mushrooms.

What Else Can I Add?

If you want to put your own spin on this mushroom soup recipe, here are a few other ingredients you can add:

  • Paprika: Add sweet paprika to make it closer to a Hungarian Mushroom Soup.
  • Onion: If you want even more savory vegetable flavor, sauté a finely diced onion with the mushrooms.
  • Sour Cream: To make the soup even richer and to add a slight tang, stir a few dollops of sour cream into the broth at the end.
  • Homemade Croutons: Top your soup with homemade croutons for a delicious garlicky crunch!

Make it Vegan

It’s very easy to convert this recipe to a vegan mushroom soup. Simply use coconut oil in place of the butter to make the roux, and then use full-fat coconut milk in place of the heavy cream. Coconut milk tastes really good in savory recipes like this and actually pairs very well with mushrooms! Check out our Vegan Creamy Mushroom Ramen for another example of these flavors together.

What to Serve with mushroom Soup

The broth in this soup is extremely rich and creamy and you’re going to want to sop up every drop, so I highly suggest serving it with some crusty bread like our No-Knead Bread, Focaccia Rolls, or Soda Bread. Or, if you don’t want to make homemade bread, at least make sure you have some crackers on hand!

I’d also suggest adding some vegetables on the side to lighten things up, and I’d go for a wintery roasted vegetable like Roasted Brussels Sprouts or our Roasted Cauliflower Salad.

How to Make Mushroom Soup Taste Better

Using really good, full-flavored broth is key to making mushroom soup taste its best. We suggest using Better Than Bouillon to make the broth used in this soup because it has tons of flavor, is budget-friendly, and reduces waste compared to boxed and canned broths. We used their vegetable-flavored bouillon, but you could certainly use their mushroom flavor if you have it.

Overhead view of a bowl of creamy mushroom soup with a spoon in the center.
Side view of a bowl of creamy mushroom soup with a spoon lifting some out of the bowl.
Print

Creamy Mushroom Soup

This deliciously rich and creamy Mushroom soup is quick, easy, and perfect for cold winter nights or to pack in a thermos for an easy lunch!
Course Dinner, Lunch, Soup
Cuisine American
Total Cost $6.82 recipe / $1.71 serving
Prep Time 5 minutes
Cook Time 30 minutes
Total Time 35 minutes
Servings 4 (1 cup each)
Calories 299kcal

Ingredients

  • 1 lb. baby bella mushrooms $4.59
  • 3 cloves garlic, minced $0.24
  • 1 Tbsp olive oil $0.16
  • 1 pinch salt & pepper $0.05
  • 4 Tbsp butter $0.47
  • 1/4 cup all-purpose flour $0.04
  • 3 cups vegetable broth $0.51
  • 1 tsp soy sauce $0.02
  • 1/8 tsp dried thyme $0.02
  • 1/2 cup heavy cream $0.75

Instructions

  • Wash the mushrooms to remove any dirt or debris. Slice the mushrooms and mince the garlic.
  • Add the olive oil, mushrooms, and a pinch of salt and pepper to a soup pot. Sauté the mushrooms over medium heat until they have released all of their moisture, all the liquid has evaporated from the bottom of the pot, and the mushrooms become very dark brown. Add the minced garlic and continue to sauté for one minute more.
  • Add the butter and flour to the pot. Stir and cook for about two minutes more, or until the butter coats the bottom of the pot and turns deep golden brown.
  • Once the flour mixture is a bit browned, add the vegetable broth, soy sauce, and thyme. Stir to dissolve all of the flour from the bottom of the pot. Allow the liquid to come up to a simmer, at which point the flour will slightly thicken the broth.
  • Finally, stir the cream into the soup. Give the soup a taste and adjust the salt or pepper to your liking. Serve with crusty bread and enjoy!

See how we calculate recipe costs here.

Nutrition

Serving: 1Serving | Calories: 299kcal | Carbohydrates: 15g | Protein: 5g | Fat: 26g | Sodium: 904mg | Fiber: 1g
Overhead view of a ladle full of creamy mushroom soup held over the soup pot.

How to Make Creamy Mushroom Soup – Step by Step Photos

Sliced mushrooms on a cutting board.

Begin by rinsing and slicing one pound of baby Bella mushrooms.

Sautéed mushrooms in a soup pot.

Add the mushrooms to a soup pot with 1 Tbsp olive oil and a pinch of salt and pepper. Sauté the mushrooms over medium heat until they release all of their water, the water evaporates, and the mushrooms begin to brown. Add three cloves of minced garlic and sauté for about one minute more.

Flour and butter added to the soup pot with the mushrooms.

Add 3 Tbsp of salted butter and 4 Tbsp all-purpose flour to the pot. Continue to stir and cook over medium heat, allowing the butter to melt and create a paste with the flour that coats the mushrooms.

Browned roux showing on the bottom of the pot under the mushrooms.

The butter and flour will begin to coat the bottom of the pot. When it becomes medium brown, it’s time to add the liquid to the pot.

Vegetable broth being poured into the soup pot.

Add three cups of vegetable broth, ⅛ tsp thyme, and 1 tsp soy sauce to the soup pot and stir to dissolve all of the browned bits off the bottom of the pot. Allow the broth to come up to a boil, at which point it will thicken slightly from the flour and butter roux.

Heavy cream being poured into the soup.

Once the soup has reached a boil, turn the heat down to medium-low and add ½ cup heavy cream. Allow the soup to heat through and begin to simmer gently.

Finished soup being stirred.

Taste the soup and adjust the salt or other seasonings if desired. The soup may need additional salt depending on the salt content of the broth used. We used Better Than Bouillon, which tends to be on the salty side, so we did not need any additional salt.

Overhead view of two bowls of mushroom soup garnished with parsley.

Serve the creamy mushroom soup with your favorite crusty bread and enjoy!

The post Creamy Mushroom Soup appeared first on Budget Bytes.

Apple Cranberry Baked Oatmeal

This Cranberry Apple Baked Oatmeal recipe is an easy, warm, and comforting breakfast that is perfect for fall and winter meal prep.

The post Apple Cranberry Baked Oatmeal appeared first on Budget Bytes.

I have an intense love for cranberries, but you can usually only find them in the supermarket for a few months out of the year. So this year, I bought a couple extra bags and tossed them in the freezer so I could enjoy them for months after the season had ended. Well, that day is today and I used some of my cranberry stash to make this delicious Apple Cranberry Baked Oatmeal. And if you didn’t happen to stash any cranberries last fall, you can sometimes find them in the freezer section year-round. Baked oatmeal is one of my favorite breakfast meal preps because it’s SO easy to make and the leftovers are great. Plus, it’s freezer-friendly!

Close up overhead view of a casserole dish full of cranberry apple baked oatmeal and a wooden spoon scooping some out.

What is Baked Oatmeal?

Baked oatmeal is a lot like bread pudding, but instead of chunks of hearty bread baked into the custard, it’s rolled oats. The end result is a soft, moist, scoopable oatmeal that is not at all gloopy like those instant oatmeal packets. It’s filling, rich, slightly sweet, and one of my absolute favorite ways to enjoy oats.

Ingredients for Apple Cranberry Baked Oatmeal

Baked oatmeal recipes are super simple by nature, and this apple cranberry version is no exception. Here’s all you’ll need to make this baked oatmeal recipe:

  • Applesauce: Unsweetened applesauce keeps the baked oatmeal soft and moist, adds a delicious apple flavor, and provides some natural sweetness to the baked oatmeal so you don’t have to add as much sugar.
  • Eggs: Eggs combine with the milk to create the custard that helps the baked oatmeal bake firm up into a scoopable texture instead of the thick porridge-like texture that you get with stovetop cooked oats.
  • Brown Sugar: A little extra sugar helps balance the tart flavor of the cranberries and makes the baked oats just sweet enough that you feel like you’re having a treat.
  • Vanilla: Vanilla extract helps the oats taste extra rich.
  • Cinnamon: A touch of cinnamon gives the baked oatmeal a warm and cozy flavor.
  • Salt: Salt helps all of the individual flavors of the oatmeal pop.
  • Baking Powder: A small amount of baking powder gives the baked oatmeal loft so it’s not quite so dense.
  • Milk: Milk softens the oats and combines with the egg to create a rich custard.
  • Cranberries: Cranberries give the baked oatmeal a deliciously sweet-tart flavor and gorgeous pink color. We used cranberries that had been previously frozen, but you can use fresh as well.
  • Old-Fashioned Rolled Oats: Oats are the main ingredient, the star of the show. Make sure to get old-fashioned rolled oats instead of quick oats because they have a lot more texture and will keep your baked oatmeal from being too mushy.

Is It Breakfast or Dessert?

Baked oatmeal can be served as either breakfast or dessert! It’s only slightly sweet, so it’s still a balanced breakfast, but it’s delicious enough that I’d happily eat it as a dessert or sweet treat. If you want to make it even more dessert-like, try topping it with a simple streusel before baking. Just combine ¼ cup flour, 2 Tbsp brown sugar, 2 Tbsp white sugar, and 3 Tbsp softened butter until it forms a crumbly mixture that resembles wet sand. Sprinkle that over the baked oatmeal before baking and it turns this baked oatmeal into a decadent dessert!

How to Serve Baked Oatmeal

People always ask if baked oatmeal is supposed to be served hot or cold, and the answer is that it can be enjoyed either way! I love it when it’s still warm out of the oven and topped off with a splash of cold milk. But when I’m eating the leftovers for meal prep, sometimes I eat it cold and sometimes I warm it in the microwave. It’s totally up to you!

Whether you enjoy it hot or cold, I love to add a little milk or half and half to my bowl, or even a scoop of Greek yogurt for extra protein. If you have any walnuts on hand, they would also make a great topper for this Apple Cranberry Baked Oatmeal flavor. Or, if you want it a little sweeter, try topping it with some maple syrup!

How to Store The Leftovers

To store the leftovers of your baked oatmeal for meal prep, divide it into single portions and place them into air-tight food storage containers. They can be refrigerated for up to five days. Or, once cooled in the refrigerator, you can transfer them to the freezer for longer storage (about 3 months). To reheat frozen baked oatmeal either let it thaw in the refrigerator overnight and then microwave until hot, or reheat straight from the freezer using the microwave’s defrost function.

Overhead view of cranberry apple baked oatmeal in a bowl with a golden spoon.
Baked oatmeal being scooped out of the casserole dish with a wooden spoon.
Print

Apple Cranberry Baked Oatmeal

This Apple Cranberry Baked Oatmeal recipe is an easy, warm, and comforting breakfast that is perfect for fall and winter meal prep.
Course Breakfast, Dessert
Cuisine American
Total Cost $3.51 recipe / $0.59 serving
Prep Time 15 minutes
Cook Time 45 minutes
Total Time 1 hour
Servings 6
Calories 220kcal

Ingredients

  • 1 1/2 cups unsweetened apple sauce $0.95
  • 2 large eggs $0.28
  • 1/4 cup brown sugar $0.14
  • 1/2 tsp vanilla extract $0.30
  • 1/2 tsp cinnamon $0.05
  • 1/2 tsp salt $0.02
  • 3/4 tsp baking powder $0.04
  • 1 cup milk* $0.48
  • 1 cup cranberries (frozen or fresh) $0.67
  • 2 cups old-fashioned rolled oats $0.58

Instructions

  • Preheat the oven to 375ºF. Add the apple sauce, eggs, brown sugar, vanilla, cinnamon, salt, and baking powder to a large bowl and whisk together until smooth. Add the milk and whisk until smooth again.
  • Slice the cranberries in half (no need to thaw if frozen) and add them to the bowl of wet ingredients along with the rolled oats. Stir until everything is evenly combined.
  • Pour the oat mixture into a 2-quart casserole dish. Bake the oatmeal in the preheated 375ºF oven for 45 minutes, or until the surface is a light golden brown and it is no longer sticky in the center. Serve hot or refrigerate until ready to eat.

See how we calculate recipe costs here.

Nutrition

Serving: 1Serving | Calories: 220kcal | Carbohydrates: 39g | Protein: 7g | Fat: 5g | Sodium: 292mg | Fiber: 4g
Overhead view of cranberry apple baked oatmeal in the casserole dish, freshly baked.

How to Make Cranberry Apple Baked Oatmeal – Step by Step Photos

Wet ingredients for the baked oatmeal in a bowl.

Preheat the oven to 375ºF. In a large bowl, whisk together 1.5 cups of unsweetened applesauce, 2 large eggs, ¼ cup brown sugar, ½ teaspoon vanilla, ½ teaspoon cinnamon, ½ teaspoon salt, and ¾ teaspoon baking powder.

Milk pouring into the side of the bowl with the applesauce mixture.

Once the previous ingredients are evenly combined, add 1 cup of milk and whisk again until evenly combined.

Sliced cranberries and dry oats added to the bowl.

Slice one cup of cranberries in half (if frozen, no need to thaw) and add them to the bowl along with 2 cups of old-fashioned rolled oats. Stir the cranberries and oats into the milk mixture.

Baked oatmeal mixture in the casserole dish before being baked.

Pour the oat mixture into a 9×9-inch (or 2-quart) casserole dish.

Baked oatmeal in the casserole dish after coming out of the oven.

Bake the oatmeal for 45 minutes or until it’s golden brown on top and the center is no longer wet.

Baked oatmeal being scooped out of the casserole dish with a wooden spoon.

Serve the apple cranberry baked oatmeal warm or divide into single portions and refrigerate until ready to eat!

Milk being poured over a bowl of cranberry apple baked oatmeal.

I like to enjoy my Apple Cranberry Baked Oatmeal with cold milk poured over top! 🤤

The post Apple Cranberry Baked Oatmeal appeared first on Budget Bytes.

Lemony Chickpea Soup

This Lemony Chickpea Soup recipe is simple, budget-friendly, and delicious. It’s the perfect comforting low-effort meal for busy nights.

The post Lemony Chickpea Soup appeared first on Budget Bytes.

Quick and easy soups made with canned beans have become my favorite go-to easy meal when I’m too tired to cook and too broke to eat out. I’ve made several variations of this soup over the years, including the viral Rosemary Garlic White Bean Soup, but this week I made a Mediterranean-inspired Lemony Chickpea Soup. It’s fast, easy, has bright flavors, and pairs perfectly with some crusty bread for a simple no-fuss meal.

Overhead view of three bowls of lemony chickpea soup garnished with a lemon slice.

This incredibly simple Lemony Chickpea soup combines puréed chickpeas, broth, and some seasoning to create a perfectly comforting and flavorful bowl of soup. And since most of these ingredients are shelf-stable, this is a pantry meal you can make any time with no planning head.

Ingredients for Lemony Chickpea Soup

Here’s all you’ll need to make this deliciously easy chickpea soup:

  • Garlic: A hefty dose of garlic gives this soup a deep savory flavor and perfectly balances the bright lemon.
  • Olive Oil: Olive oil is used to sauté the garlic and give the soup a little bit of richness in the mouthfeel.
  • Chickpeas: This recipe uses canned chickpeas to make the entire preparation fast and easy. If you prefer to use chickpeas cooked from dry, you’ll need about 4-5 cups of cooked chickpeas.
  • Chicken Broth: Broth adds a lot of savory depth to the soup as well as the salt needed to make each flavor pop.
  • Lemon: A splash of lemon juice brightens up the flavors in the soup, provides a nice contrast to the savory garlic flavor, and gives the soup a fresh Mediterranean flavor.
  • Seasoning: The seasoning profile for the soup is fairly simple with just a little bit of thyme, oregano, red pepper, and black pepper. Keeping the seasoning light gives the soup a bright and fresh flavor.

What to Serve with Lemony Chickpea Soup

This chickpea soup is just begging for some crusty bread for dipping, so I highly suggest making a loaf of our easy no-knead bread or focaccia rolls. Or, if you need something a little faster, homemade garlic bread would also be amazing with this soup. And, if you want some veggies on the side, a simple side salad would be awesome, or you could go with something a little heftier, like tortellini salad.

Tips for Smooth Chickpea Soup

Canned chickpeas can often be a bit on the firm side, so to make sure your chickpea soup is extra smooth you may need to pre-boil the chickpeas, but it depends largely on the brand of chickpeas. Some canned chickpeas are quite soft, while others are very firm or borderline undercooked.

If your chickpeas are very firm, simply empty the can and liquid into a small saucepot and simmer them for about 10 minutes. Let the chickpeas cool before transferring to the blender to purée.

Overhead view of a pot full of lemony chickpea soup with garlic bread on the side.
Overhead view of a bowl of lemony chickpea soup with a spoon in the middle.
Print

Lemony Chickpea Soup

This Lemony Chickpea Soup recipe is simple, budget-friendly, and delicious. It's the perfect comforting low-effort meal for busy nights.
Course Dinner, Lunch, Soup
Cuisine American, Mediterranean
Total Cost $4.52 recipe $1.13 serving
Prep Time 5 minutes
Cook Time 18 minutes
Total Time 23 minutes
Servings 4 (1.25 cups each)
Calories 375kcal

Ingredients

  • 3 15oz. cans chickpeas, divided $2.67
  • 4 cloves garlic $0.32
  • 2 Tbsp olive oil $0.32
  • 2 cups chicken broth $0.26
  • 1/2 tsp dried thyme $0.05
  • 1/2 tsp dried oregano $0.05
  • 1 pinch crushed red pepper $0.02
  • 1 lemon $0.79
  • 1/4 tsp salt (or to taste) $0.02
  • 1/4 tsp Freshly cracked black pepper $0.02

Instructions

  • Add 2 of the cans of chickpeas to a blender with the liquid in the can and purée until smooth.* Drain the third can of chickpeas and set aside.
  • Mince the garlic and add it to a saucepot with the olive oil. Sauté the garlic over medium heat for about one minute, or just until the garlic becomes very fragrant.
  • Add the puréed chickpeas, drained chickpeas, chicken broth, thyme, oregano, red pepper, salt, and pepper to the soup pot with the garlic. Stir to combine.
  • Allow the soup to come up to a simmer, then simmer for 10 minutes, stirring occasionally.
  • While the soup simmers, zest and juice half of the lemon (you'll need about 2 Tbsp juice and ½ tsp zest). Slice the remaining lemon for garnish.
  • After the soup has simmered, add 2 Tbsp juice and a pinch of lemon zest, then stir to combine.
  • Taste the soup and adjust the salt, lemon juice, pepper, or other herbs to your liking. The amount of salt needed to properly flavor the soup will depend on the salt content of your broth, so make sure to salt to taste at the end.
  • Garnish the soup with the remaining lemon slices and zest, a drizzle of olive oil, and more pepper if desired, then serve with crusty bread and enjoy!

See how we calculate recipe costs here.

Notes

*Some brands of canned chickpeas are quite firm. To make the soup really smooth you may need to pre-simmer the beans for about 10 minutes to make them softer before blending. 

Nutrition

Serving: 1.25cup | Calories: 375kcal | Carbohydrates: 48g | Protein: 18g | Fat: 14g | Sodium: 1527mg | Fiber: 15g
Overhead view of three bowls of lemony chickpea soup garnished with slices of lemon.

How to Make Lemony Chickpea Soup – Step by Step Photos

Blended chickpeas in a blender with a spoon.

Add two 15oz. cans of chickpeas to a blender, with the liquid in the can, and purée until smooth. If the brand of chickpeas you’re using are extra firm, you may want to simmer the chickpeas in the liquid for about 10 minutes before blending to soften them more. Let the simmered chickpeas cool slightly before blending, as blending hot liquids can be dangerous.

Minced garlic in a soup pot with olive oil.

Mince four cloves of garlic (or more, if you’d like!) and add them to a saucepot with 2 Tbsp olive oil. Sauté the minced garlic over medium heat for about one minute, or just until the garlic becomes very fragrant.

Beans, broth, and herbs in the soup pot.

Add the puréed beans, one can of drained chickpeas, 2 cups of chicken broth, ½ tsp dried thyme, ½ tsp dried oregano, 1 pinch of crushed red pepper, ¼ tsp salt, and ¼ tsp pepper to the pot. Stir to combine and bring the soup up to a simmer over medium heat.

Zested and juiced lemon.

Let the soup simmer for about 10 minutes, stirring occasionally. Meanwhile, zest and juice half of a lemon (you’ll need 2 Tbsp juice and about ½ tsp zest). Slice the other half of the lemon to use as a garnish.

Lemon juice being added to the soup.

After the soup has simmered for about 10 minutes, add 2 Tbsp lemon juice to the soup along with a pinch of lemon zest.

Finished soup being stirred in the pot.

Taste the soup and adjust the salt, lemon juice, zest, or other herbs to your liking. The amount of salt needed will depend on the salt content of the broth used and it can really help the flavors pop, so make sure to salt to taste at the end.

A ladle full of lemony chickpea soup held close to the camera over the pot of soup.

Garnish the soup with the remaining slices of lemon and lemon zest, extra pepper, and a drizzle of olive oil. We also had some parsley in the fridge, so we added some of that for color.

Overhead view of a bowl of lemony chickpea soup with a spoon in the middle.

The post Lemony Chickpea Soup appeared first on Budget Bytes.

Homemade Banana Bread

This homemade Banana Bread recipe is super rich, moist, and melt-in-your-mouth delicious. It’s the perfect Saturday morning treat!

The post Homemade Banana Bread appeared first on Budget Bytes.

One day a friend was telling me about how she used to be so in love with the Starbucks banana bread and all I could think about was how the price for one slice is probably more than it costs to make a whole loaf, so I had to working on a dupe. It took about eight tries, but I finally made a homemade banana bread recipe that is super rich, moist, and totally melt-in-your-mouth delicious. And the best part? It ended up costing about $0.38 per slice. 😱 Take that, ‘bucks! Anyway, this banana bread was so good that I’ve been dreaming about it ever since. 🤤 So now the question is, is it wrong to make banana bread every single weekend??

Front view of a sliced loaf of banana bread on a wooden cutting board.

There are so many different recipes for banana bread out there and they create loaves that vary quite a bit in color, size, shape, texture, and of course flavor. My goal for this homemade banana bread recipe was to create a loaf that was super soft and moist, had a really good pronounced banana flavor, the loaf had to rise to a nice doamed shape (not be a flat brick), and did not get too over-browned. It took a combination of ingredients and techniques, but we finally got the perfect loaf of banana bread.

Ingredients for Banana Bread

Here’s what you’ll need to make this incredibly moist and delicious banana bread:

  • Bananas: You must use very ripe bananas for banana bread. Like, half brown ripe. This will ensure they provide enough sweetness, moisture, and banana flavor to the bread. Underripe bananas will give you a dry, bland loaf.
  • Butter & Oil: I used a combination of butter and oil for this banana bread. Butter gives the bread a ton of rich flavor, while oil keeps the loaf super moist after it cools in a way that butter can not. It’s a one-two flavor-texture punch!
  • Eggs: Eggs help give the loaf strength, so it doesn’t crumble, and they also help leaven the loaf so that it bakes up nice and fluffy.
  • Sugar: Using a combination of brown and white sugar again maximizes the flavor and texture. Brown sugar adds a deep flavor and helps moisten the loaf, while white sugar sweetens without making the batter too heavy.
  • Flour: All-purpose flour provides strength and body to the banana bread.
  • Baking Soda: Baking soda helps leaven the loaf so it rises into a pretty doamed loaf shape.
  • Vanilla: A touch of vanilla extract adds richness to the flavor.
  • Spices: We add just a little bit of cinnamon, nutmeg, and salt to the batter to add complexity to the flavor without overpowering the banana. They’re supporting roles, not the main character.
  • Walnuts: Walnuts are optional, but I love the contrast in flavor and texture they add to the bread. You can also substitute in chocolate chips if that’s your jam!

How to Store Banana Bread

I could eat this whole loaf of banana bread within a few days by myself no problem, but if you’re not a champion eater like myself, here’s how to store the leftovers. Make sure the bread is completely cooled after baking, then cut it into thick slices. The sliced bread can be stored in the refrigerator in an air-tight container for 4-5 days, or it can be frozen for longer storage.

To freeze the banana bread, place sheets of parchment paper between the slices to prevent them from sticking, then place them in a gallon-sized freezer bag. Individual slices can be taken out and thawed at room temperature or briefly microwaved to warm through.

Tips for the Best Banana Bread

I made a LOT of loaves during the development of this recipe, so here are some tips that I found will help you get the absolute best banana bread ever:

  • Make sure your bananas are VERY ripe. The sugar content of bananas increases as they ripen, so the more ripe your bananas are the sweeter the bread and the more pronounced the banana flavor will be.
  • Don’t overmix the batter. Stirring the bread batter too much or too vigorously will create a rubbery texture in the banana bread. Fold the wet and dry ingredients together just until evenly combined.
  • Preheat the oven. This is a non-negotiable when baking. The sudden exposure to high heat (rather than a slow increase of a non-preheated oven) is what helps the loaf rise properly.

How to Make Banana Muffins

This banana bread recipe also bakes up really well as muffins. To make banana muffins simply prepare the batter as listed in the recipe below but divide the batter between 12 wells in a standard-size muffin tin. Bake the banana muffins in a preheated 350ºF oven for about 30 minutes, or until the muffins have risen all the way in the center, they’ve browned nicely, and a toothpick inserted into the center of the muffins comes out clean (crumbs but no wet batter).

Overhead view of a slice of banana bread with butter spread on it.
Print

Homemade Banana Bread

This homemade Banana Bread recipe is super rich, moist, and melt-in-your-mouth delicious. It's the perfect Saturday morning treat!
Course Breakfast, Dessert
Cuisine American
Total Cost $4.57 recipe / $0.38 slice
Prep Time 15 minutes
Cook Time 1 hour
Total Time 1 hour 15 minutes
Servings 12 slices
Calories 288kcal

Ingredients

  • 4 Tbsp salted butter, room-temperature $0.54
  • 1/4 cup cooking oil $0.16
  • 1/2 cup granulated sugar $0.18
  • 1/2 cup brown sugar $0.26
  • 1.5 cups mashed ripe bananas (about 3-4 bananas) $0.84
  • 2 large eggs $0.29
  • 1 tsp vanilla extract $0.60
  • 2 cups all-purpose flour $0.40
  • 1 tsp baking soda $0.04
  • 1/2 tsp salt $0.02
  • 1/4 tsp ground nutmeg $0.02
  • 1/4 tsp cinnamon $0.02
  • 1/2 cup chopped walnuts (optional) $1.20

Instructions

  • Preheat the oven to 350ºF. Add the room-temperature butter, cooking oil, granulated sugar, and brown sugar to a mixing bowl. Use a hand mixer or stand mixer to beat the ingredients together until they become light and creamy.
  • Mash the bananas well, then add them to the mixing bowl with the butter and sugar, along with the eggs and vanilla extract. Use the mixter again to beat the ingredients together until smooth.
  • In a separate mixing bowl, stir together the flour, baking soda, salt, nutmeg, and cinnamon until well combined.
  • Pour the flour mixture into the bowl of wet ingredients and fold them together just until combined. Do not overmix.
  • Add the chopped walnuts to the bowl and gently fold to combine again.
  • Grease an 8.5"x4.5" loaf pan with butter or oil, then add the batter and smooth it out evenly into the pan.
  • Bake the banana bread in the preheated 350ºF oven until it's deeply golden brown on top, has a crack down the center, and a toothpick inserted into the middle comes out clean (crumbs are okay, but wet batter is not).
  • Allow the loaf to cool for about 5 minutes in the pan, then gently remove it from the pan and allow it to finish cooling on a wire rack. Once cooled, slice, serve, and enjoy!

Banana Muffins Instructions

  • Prepare the batter as listed above, then divide it between 12 wells of a standard-size muffin tin.
  • Bake the banana muffins for 30 minutes in the preheated 350ºF oven or until they have risen all the way in the center, have browned nicely, and a toothpick inserted into the center comes out clean (crumbs are okay, but no wet batter).

See how we calculate recipe costs here.

Nutrition

Serving: 1slice | Calories: 288kcal | Carbohydrates: 40g | Protein: 4g | Fat: 13g | Sodium: 233mg | Fiber: 2g
Overhead view of a sliced loaf of banana bread.

How to Make Banana Bread – Step by Step Photos

Butter, oil, and sugar added to a mixing bowl.

Preheat the oven to 350ºF. Add 4 Tbsp of room-temperature salted butter, ¼ cup cooking oil, ½ cup white sugar, and ½ cup brown sugar to a mixing bowl.

Creamed butter and sugars in the mixing bowl.

Use a hand mixer or stand mixer to cream the butter, sugars, and oil together until it looks light and creamy.

Mashed bananas in a measuring cup with a fork.

Mash 3-4 bananas, or until you have 1.5 cups of mashed banana.

Banana, eggs, and vanilla added to the butter and sugar mixture.

Add the mashed banana, two large eggs, and 1 tsp vanilla extract to the bowl with the creamed butter and sugar. Use the mixer to mix the ingredients together until smooth.

Dry ingredients being poured into the bowl of wet ingredients.

In a separate bowl, stir together 2 cups of all-purpospe flour, 1 teaspoon baking soda, ½ teaspoon salt, ¼ tsp nutmeg, and ¼ tsp cinnamon until well combined. Pour the flour mixture into the bowl with the wet ingredients and then fold them together just until they form a wet batter. Do not overmix.

Chopped walnuts being folded into the banana bread batter.

Add ½ cup of chopped walnuts to the batter and fold briefly to combine.

Banana bread batter being smoothed into a bread pan.

Grease a standard 8.5″x4.5″ bread pan. Pour the batter into the pan and then spread it out evenly.

Baked banana bread in the bread pan.

Bake the bread for 60 minutes, or until golden brown on top, cracked in the middle, and a toothpick inserted into the center comes out clean. Allow the bread to cool for about 5 minutes in the pan, then gently remove it from the pan and allow it to finish cooling on a wire rack.

Stacked slices of banana bread on a plate.

Once cooled, slice the banana bread and enjoy!

Butter being smeared onto a slice of banana bread.

The post Homemade Banana Bread appeared first on Budget Bytes.

Creamy Polenta

This creamy polenta has a rich flavor, creamy texture, and deep corn flavor. It’s the perfect base for stews, saucy beans, and braised meats.

The post Creamy Polenta appeared first on Budget Bytes.

I’ve lived in the south most of my life and we eat grits all the time, so I thought I knew what polenta was all about. But let me just tell you, this Creamy Polenta is on a whole other level. from the instant grits I was used to. While both grits and polenta are made with cornmeal, this Creamy Polenta has a rich texture, deep corn flavor, and super creamy consistency. I think Marsha’s exact words when we tested it in the studio were, “I think I’m in love…” Same, girl, same. I’m going to be making this polenta to serve with every stew, saucy bean dish, or braised meat from here on out.

Overhead view of a bowl of polenta with a pat of butter on top.

What is Polenta?

Polenta is a cornmeal mush made by boiling cornmeal until it’s tender. It can be served like a porridge or chilled until firm, sliced, and pan-fried for a crispier texture. While similar to grits, another type of cornmeal mush, polenta and grits are made with different varieties of corn. Polenta is made with flint corn, which has a more dense and chewy texture that holds up better to boiling than dent corn, which is used for grits. Grits are generally more finely milled, except stone ground grits, which are closer in texture to polenta. I find that polenta has a much better mouthfeel (less gloopy) and a stronger corn flavor. It’s absolutely delicious!

Ingredients for Creamy Polenta

To make this polenta recipe extra creamy and delicious, we go a little further than simply boiling the cornmeal in water. Here’s what you’ll need to make the dreamiest, creamiest homemade polenta:

  • Polenta: You’ll need uncooked polenta for this recipe, which comes in a bag and looks like coarse ground or stone ground cornmeal. Depending on the store, you may either find this with dry grains, with Italian ingredients like pasta, or in the specialty or health food ingredients. One popular brand that you’re likely to find in most major U.S. grocery chains is Bob’s Redmill. If you have a store with bulk bins or have an Italian grocery nearby, you can probably find it priced for much less than chain grocery stores!
  • Chicken Broth: Instead of boiling the polenta in plain water, we cooked the polenta in chicken broth which gives it tons of savory flavor. Make sure you use a full-flavor broth to give the polenta the best flavor. We use Better Than Bouillon to make our broth.
  • Butter: A healthy dose of butter makes the polenta super creamy and delicious.
  • Parmesan: Parmesan is stirred into the cooked polenta and gives it a slightly cheesy flavor and tons of savory umami.

How to Serve Polenta

Polenta is often served as the starchy base for a meal, similar to how rice is served as the bed for saucy dishes and stir-fries. Polenta pairs extremely well with stews, braised meats, saucy bean dishes, and roasted vegetables. It’s the perfect cozy companion to all of your warm winter meals. Try it with our Chicken Cacciatore, or Slow Cooker Beef Stew!

How to Store Leftovers

Leftover cooked polenta can be stored in the refrigerator for about four days. But, as with most starches, polenta will firm up when chilled. The best way to make use of chilled cooked polenta is to slice it and then pan-fry it into crispy cakes. These crispy polenta pieces are perfect for dipping in your favorite sauce, or serving as a side with dinner. If you prefer to serve the chilled polenta as a porridge, you’ll need to add more liquid (broth, water, or milk) and heat gently while stirring until it loosens up.

Overhead view of polenta in a pot with butter being stirred.
Close up of polenta in a bowl with a spoon dug into the side.
Print

Creamy Polenta

This creamy polenta has a rich flavor, creamy texture, and deep corn flavor. It's the perfect base for stews, saucy beans, and braised meats.
Course Dinner, Side Dish
Cuisine Italian
Total Cost $2.32 recipe / $0.58 serving
Prep Time 5 minutes
Cook Time 10 minutes
Total Time 15 minutes
Servings 4 (1.25 cups each)
Calories 288kcal

Ingredients

  • 4 cups chicken broth $0.42
  • 1 cup uncooked polenta $1.06
  • 4 Tbsp salted butter $0.44
  • 1/4 cup grated Parmesan $0.40

Instructions

  • Add the chicken broth to a pot and bring it to a boil over medium-high heat.
  • Once the broth is boiling, whisk in the polenta. Turn the heat down to medium-low and let the polenta simmer, stirring often, for about five minutes or until it has thickened.
  • Turn the heat off and add the butter and Parmesan. Stir the butter and Parmesan into the polenta until fully melted. Taste the polenta and adjust the salt or butter as desired. Serve immediately.

See how we calculate recipe costs here.

Nutrition

Serving: 1cup | Calories: 288kcal | Carbohydrates: 33g | Protein: 7g | Fat: 14g | Sodium: 1072mg | Fiber: 1g
Close up of polenta in a bowl with a spoon dug into the side.

How to Make Polenta – Step by Step Photos

A measuring cup full of uncooked polenta.

You’ll need one cup of uncooked polenta for this recipe. It should look like this, coarsely ground cornmeal.

Chicken broth being poured into a saucepot.

Add four cups of good chicken broth to a sauce pot and bring it to a boil over medium-high heat.

Polenta being whisked into the broth.

Once the broth is boiling, turn the heat down to medium-low and whisk in the polenta. Let the polenta simmer over medium-low, whisking often, for about five minutes or until it has thickened.

Butter and Parmesan added to the polenta.

Remove the polenta from the heat, add 4 tablespoons of salted butter and ¼ cup of grated Parmesan, and stir until they have fully melted in.

Finished creamy polenta being stirred with a whisk.

The polenta should now be super thick and creamy. Give the polenta a taste and adjust the salt if needed. Our chicken broth had plenty of salt, so no more was needed, but it will definitely depend on the type of broth used.

Finished creamy polenta in a bowl ready to be served.

Serve the creamy polenta immediately while it is still warm and soft. You can add some freshly cracked pepper on top and a little extra butter or Parmesan, if desired.

The post Creamy Polenta appeared first on Budget Bytes.