Today’s the Day! My book Snacking Cakes is officially out in the world. I think you all are going to love this book full of easy, one bowl cakes that can all be baked in an 8×8 or 9-inch round pan!
…
Today’s the Day! My book Snacking Cakes is officially out in the world. I think you all are going to love this book full of easy, one bowl cakes that can all be baked in an 8x8 or 9-inch round pan!
There are 50 base recipes with TONS of variations with suggestions to mix and match the toppings. I tried to hit every possible cake craving in these pages, and there is lots of room for you to experiment on your own too!
Simple Sesame
Minty Chocolate Malt
You can sub in your favorite fruit or nuts, add some chocolate chips, and add a bit of whole grain flour too if that’s your jam (it’s definitely my jam). I hope you find inspiration and joy in these recipes!
One of my very favorite chocolate makers in NYC, Raaka Chocolate, is launching a new line of baking chocolate today! They are starting with two delicious varieties, Oat Milk 58% cacao that I used in this chocolate mousse tart and Maple Dark 75% cacao. They will launch two more varieties in the coming weeks, and they have cacao powder and cacao nibs too! I got a sneak peek of all four varieties and I have enjoyed baking with (and just plain eating) these little chocolate discs so much.
This decadent Chocolate Mousse Tart with Browned Butter Oat Crust is definitely fit for a special occasion, but isn’t too tricky to put together. The crust is the easy-peasy pat in the pan variety and the mousse is just as good on its own as it is in this buttery, crisp, toasty crust. You could even just make the chocolate mousse and skip the crust all together, but don’t skip the billowy whipped cream!
Raaka Chocolate is unroasted which highlights all of the natural fruitiness of cacao so it’s flavor profile might be a little different than your everyday chocolate, and it is so, so tasty. They are also a company that values the community of growers, producers, and makers whose livelihoods depend on cacao and chocolate and are very transparent about their sourcing practices. You can read all about it on their website. Let me know if you try it!
Oat Milk Chocolate Mousse Tart with Browned Butter Oat Crust
Makes one 9-inch tart
This decadent chocolate tart is more than the sum of its parts. The toasty-oaty crust provides a perfect base for rich and decadent chocolate mousse made with Raaka’s sublimely delicious Oat Milk chocolate. The mousse is delicious on its own for gluten free folks too.
Browned Butter Oat Crust
1/2 cup (115g) unsalted butter
2/3 cup (60g) rolled oats
1 cup (130g) all purpose flour
1/3 cup (35g) confectioner’s sugar
1/2 teaspoon kosher salt
Water, as needed
Oat Milk Chocolate Mousse
2 tablespoons granulated sugar
2 tablespoons strong coffee or coffee liqueur
3 large egg yolks
Pinch salt
4 ounces Raaka Oat Milk Chocolate finely chopped, plus a little more to garnish
1 1/4 cups heavy cream, divided
Heat your oven to 375ºF and lightly grease a 9-inch removable bottom tart pan.
Brown the butter: Melt the butter in a small saucepan set over medium heat. Make sure to use a pan with a light colored interior so you can see the milk solids change color. Continue to cook the butter, stirring occasionally, scraping the milk solids off of the bottom and sides of the pan as necessary. After a few minutes the milk solids should turn golden brown and smell toasty. Transfer the toasty browned butter to a heat safe container and let it cool slightly.
Add the oats to the bowl of a food processor and pulse a few times until the oats are broken up a bit. Add the flour, confectioners sugar, and salt and pulse about 10 times or until the mixture looks like coarse sand. Drizzle the butter into the mixture and pulse until combined. The mixture should hold together easily when you squeeze it in your hands. If it seems very dry, add water 1 teaspoon at a time until it holds together.
Pour the mixture into the prepared tart pan and press it evenly into the bottom and sides of the pan. Use the bottom of a measuring cup to make the crust smooth and even. Bake the crust until it is golden brown, 20-25 minutes. Set it on a rack to cool completely.
When the shell is cool, make the mousse.
Whisk 3/4 cup of the heavy cream to soft peaks and store in the refrigerator while you make the rest of the mousse.
Set a heatsafe bowl over a pan of simmering water to make a double boiler. Add the sugar, coffee, egg yolks, and a pinch of salt to the bowl and whisk the mixture until it is very hot to the touch (about 160ºF), pale yellow and doubled in volume.
Add the chopped chocolate and whisk until smooth. Off of the heat, add a heaping spoonful of the whipped cream and whisk it into the chocolate mixture to lighten it a bit. Add the rest of the whipped cream and gently fold to combine. Pour the mousse into the cooled shell, smooth the top, and refrigerate until firm, about one hour. Just before serving whip the remaining 1/2 cup cream to soft peaks dollop it over the mousse. Grate a bit more chocolate over the top and serve.
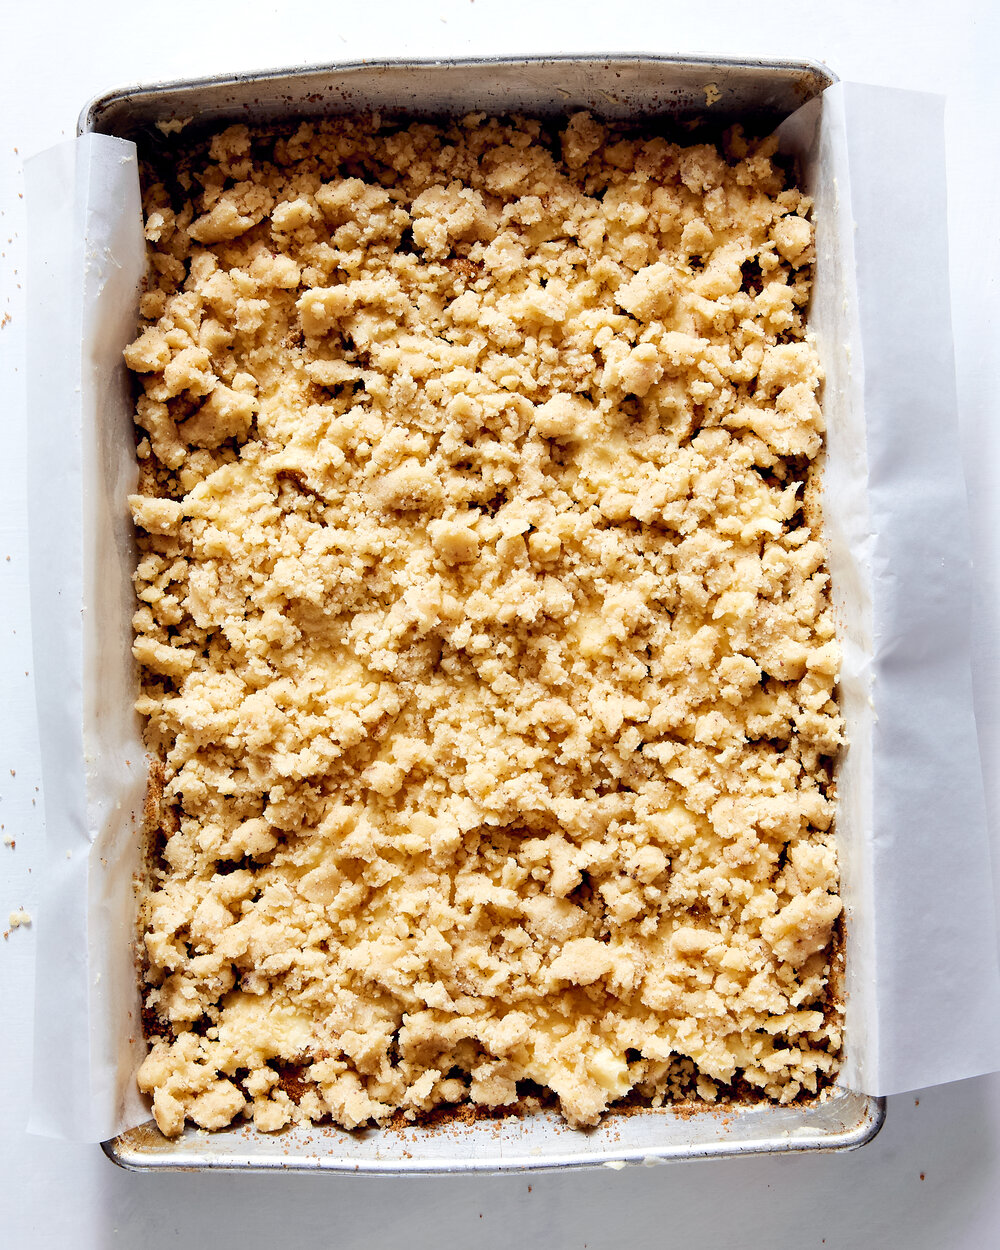
This recipe for “Coffee” Coffee Cake is from Edd Kimber’s wonderful new book One Tin Bakes which features 70 recipes that you can make in a 9x13 pan. It’s such a smart idea and Edd truly covered every possible type of bake in this book. There are so many incredible recipes that it was tough to pick just one, but this cake has everything - toasty crispy streusel, coffee and cinnamon filling, and a moist tender sour cream cake. It comes together pretty quickly too, which is my favorite kind of bake.
This is the sort of cake that I can’t stop eating all day, in fact, I ate it for two meals the day I made it! It’s so homey and comforting with just enough coffee and spice to make me keep coming back for more, and the toasty, nutty brown butter in the streusel is an A+ move!
Edd very kindly gave measurements in imperial and metrics, but do yourself a favor and just use a scale it’s so much easier, especially for this type of book that was written in metrics and converted. I hope you all pick up a copy of this book from your favorite Indie Bookstore, they need us more than ever - check out IndieBound.com and Bookshop.org for your local shopping options.
125g (4 ½ oz/1 stick + 1 tablespoon) unsalted butter, plus extra for greasing
160g (5 ¾ oz/1 ¼ cups) plain (all purpose) flour
115g (4oz/ ½ cup + 1 heaped tablespoon) caster (superfine) sugar
½ teaspoon fine sea salt
For the Espresso Swirl
100g (3.oz/⅓ cup + 2 tablespoons) light brown sugar
3 teaspoons instant espresso powder
2 teaspoons ground cinnamon
For the Sour Cream Cake
175g (6oz/1 ½ sticks + 1 teaspoon) unsalted butter, at room temperature
300g (10 ½oz/1 ½ cups) caster (superfine) sugar
315g (11oz/2 ½ cups) plain (all-purpose) flour
1 tablespoon baking powder
1 teaspoon fine sea salt
1 teaspoon vanilla extract
3 large eggs
180ml (6 ¼ fl oz/ ¾ cup) sour cream
Preheat the oven to 180°C (350°F), Gas Mark 4. Lightly grease the baking tin and line with a piece of parchment paper that overhangs the two long sides of the tin and secure in place with metal clips.
Start by making the streusel as it needs to chill a little before baking. Mix the flour, sugar and salt together in a bowl. Melt the butter in a small saucepan over a medium heat, stirring frequently. The butter will melt, sizzle and splatter and then start to foam. As it foams, little golden brown flecks will start to appear. Before these flecks burn, remove the pan from the heat and pour the butter over the dry ingredients, using a fork to stir until it all clumps together. You’re looking for a mix of fine crumbs and big chunks. Pop the bowl into the freezer.
Next, make the espresso swirl. Mix together the sugar, espresso powder and cinnamon in a small bowl and set aside.
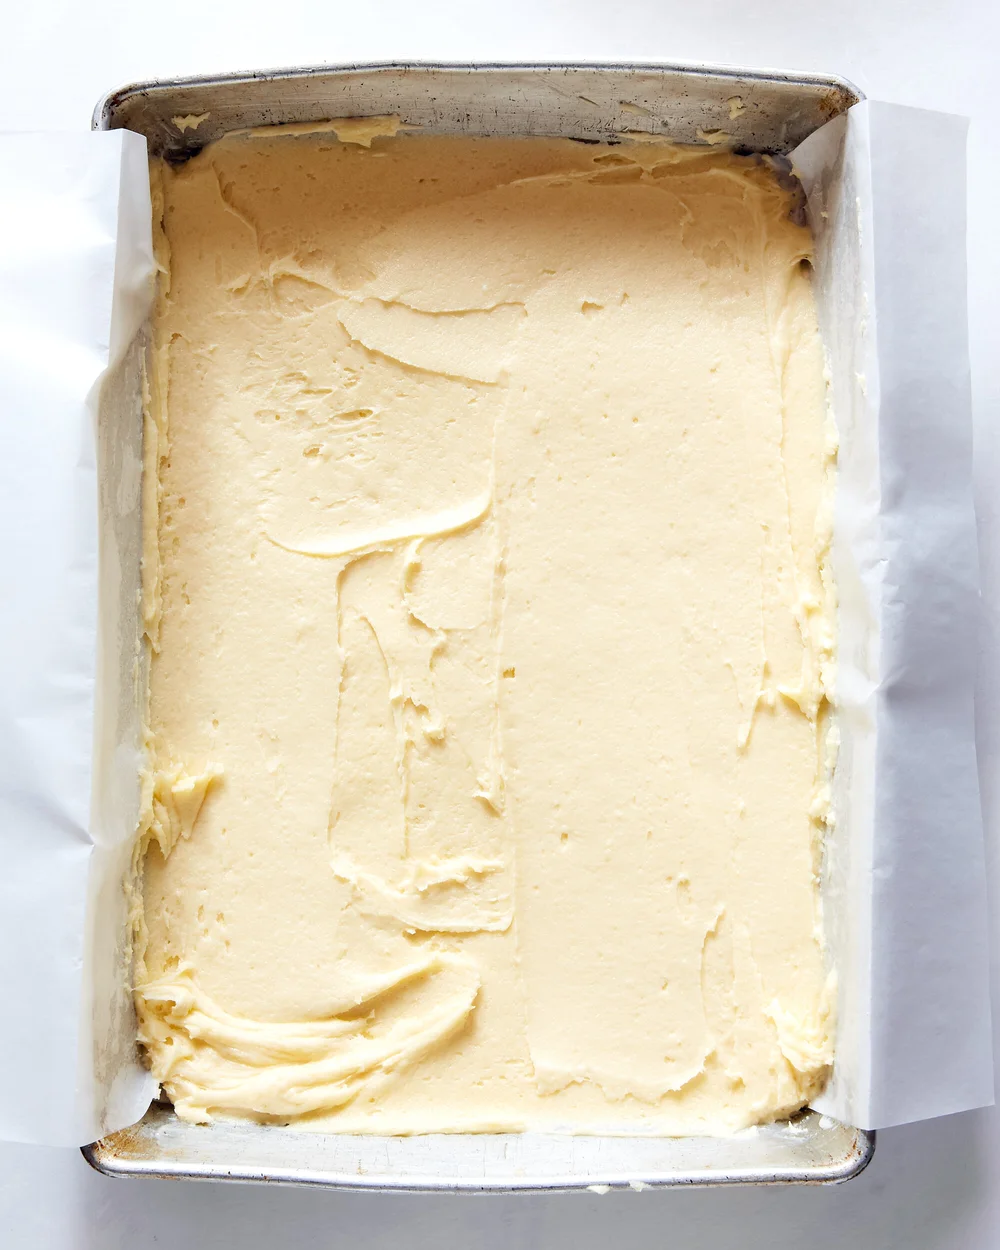
For the cake, place the butter and sugar into the bowl of an electric stand mixer fitted with the paddle attachment and mix on medium speed for 5 minutes, or until light and fluffy.
Meanwhile, mix together the flour, baking powder and salt in a separate bowl. Add the vanilla to the butter mixture and mix briefly to combine. Add the eggs, one at a time, beating until fully combined before adding another. Add the flour mixture in three batches, alternating with the sour cream, starting and finishing with the flour.
Spoon two-thirds of the cake batter into the prepared tin spreading into an even layer. Sprinkle over the espresso swirl then dot small spoonfuls of the remaining batter all over the top, covering as much of the swirl mixture as possible before gently spreading so that all of the swirl mixture is covered. Sprinkle over the streusel in an even layer.
Bake for 45–50 minutes or until a skewer inserted into the middle of the cake comes out clean. Leave to cool in the tin for about 15–20 minutes, before using the parchment paper to gently lift it out on to a wire rack to cool completely. Once cool, cut into portions and serve.
Hi! Hello there! How are you? I hope you are holding up ok.
I have been keeping a secret, and I’ve been nervous to share this news with you because wow the world feels upside-down right now, but I guess now is as good of a time as any to tell you: I WROTE AND PHOTOGRAPHED A NEW BOOK! It’s called SNACKING CAKES and it will be published by Clarkson Potter this October if all goes according to plan.
Phew.
Snacking Cakes is full of one-bowl cake recipes that you can make with minimal ingredients, some simple tools (no electric mixers necessary!), and an 8x8 (or 9-inch round!) pan. There are 50 recipes, but they all sneakily have flavor and pan variations making the true count of recipes much higher than that. It’s got it all from bright citrusy cakes to rich chocolatey ones, and everything in between. There is truly something for everyone and they are the kind of cakes you can make any day of the week. That beauty on the cover is a Cocoa Yogurt Cake that comes together so quickly, and lasts for days on the counter. You can top it with a glaze too, but only if you feel like it. This one is vanilla bean, but there are lots and lots to choose from.
I know I haven’t checked in here in a long while and the truth is I took the summer off of blogging to work on some photography projects, and teach at my beloved Melisses. Then, the minute those projects were wrapping up I found myself writing this VERY FUN book full of TRULY EASY, very SNACKABLE CAKE recipes for any occasion…like moving into a new apartment or a low key birthday or making it through work on a Monday. I kinda wish I could just send it to all of you right now because I know you are all baking at home a lot more than usual and I’d love to share these recipes with you. Alas, that isn’t the way that book publishing works.
I’ll be back soon with more info, but if you’d like to and can swing a preorder (please do, this is such a weird time to be publishing a book!) there’s a link over in the sidebar. Take care of yourselves and others out there.
Allegra and I had such a wonderful response to our Summer workshop this year that we added a second set of dates - August 25-28!!
I’m so excited to announce that I will returning to Greece to be the guest chef for a Cooking Workshop and Retreat with Allegra Pomilio at Mèlisses in Andros, Greece August 25-28 2019. During this short and sweet retreat we will cook communal meals, relax by the pool, and discover some of Andros' most beautiful beaches.
There are a few different styles of rooms available at a few different price points and registration is open now! Click through to learn more about this beautiful place, our workshop, and to reserve your spot. Allegra can answer all of your questions about the house. See you in Greece!
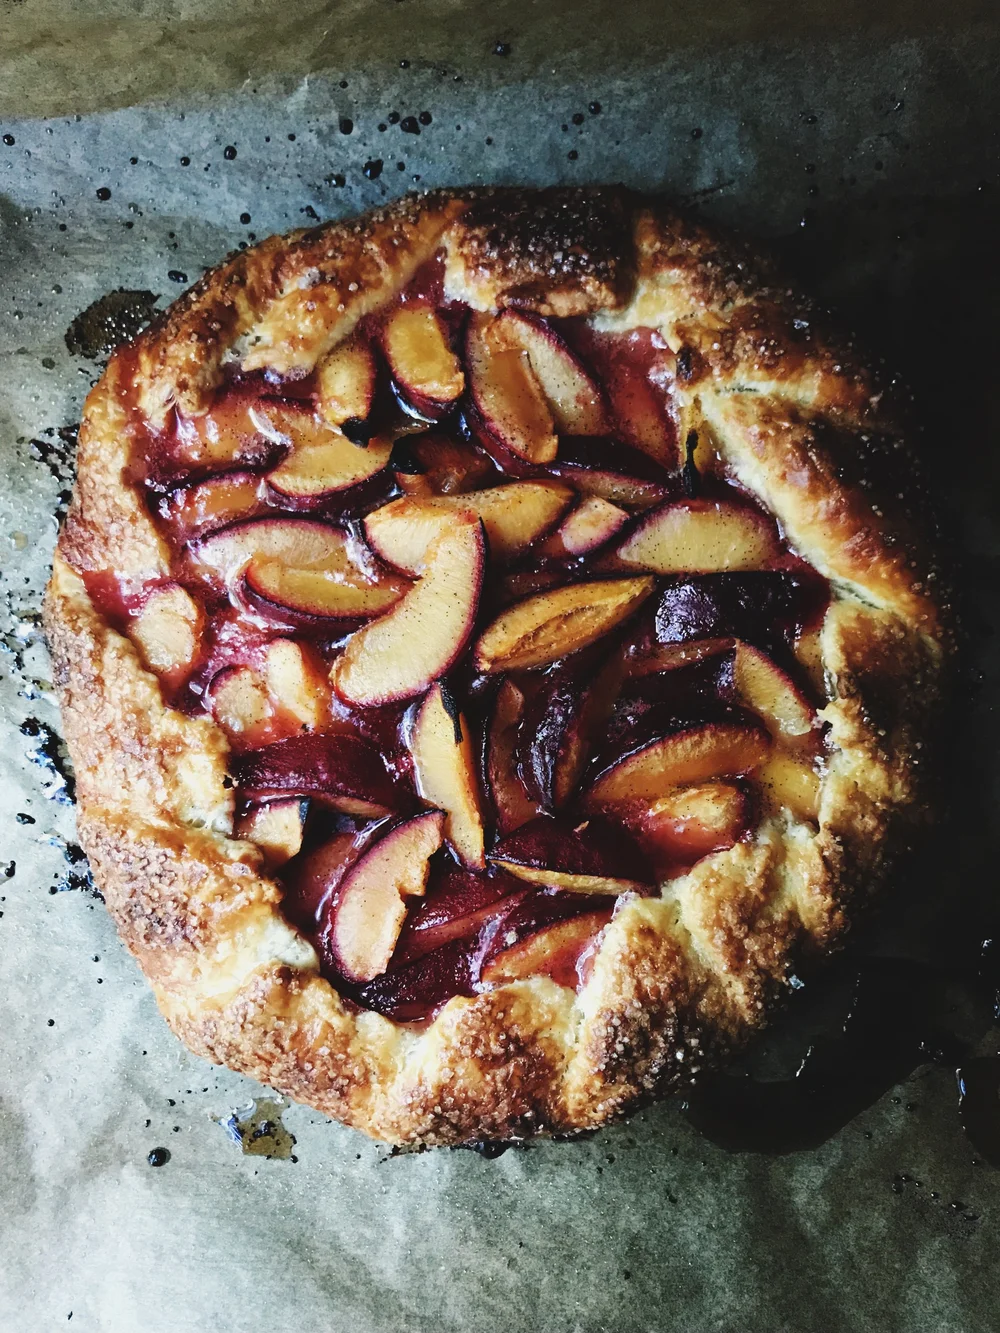
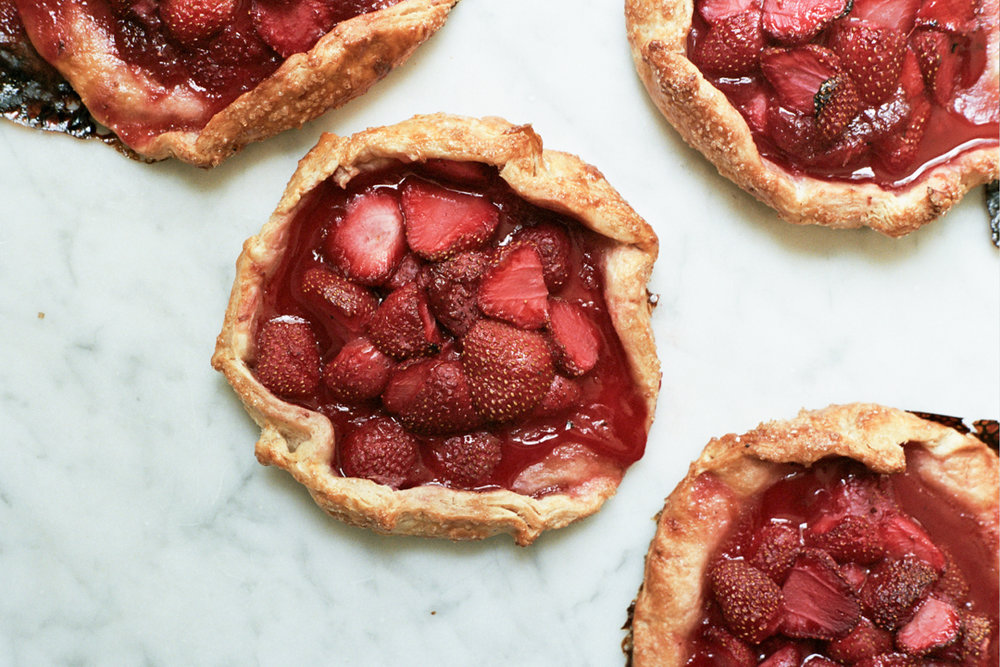
Hello! This post is a little refresh of my very favorite recipe - Galettes! If you follow me on instagram you know that I am a galette evangelist. I think galettes are the very best and most fun dessert because they are so easy to make and adaptable, but my recipe was a little bit hidden in the archives so I am pulling it out into the spotlight with this easy to find post. You can use just about any fruit you like or a combination of fruits, and feel free to adjust the sugar to taste. Be free! Don’t worry about it too much! Have fun!
If you bake a galette make sure to tag me and #summerofgalettes on instagram and feel free to message me with any questions. I love seeing what you bake!
All Butter Pie Crust
All pie crust is made from the same basic ingredients: flour, fat, water, and salt. I am partial to an all-butter crust because I think it tastes the best. The key to flaky pie crust is to keep the ingredients nice and cold— especially the butter and water—and to work quickly and intentionally. I like to mix pie crust with my hands rather than a food processor or pastry blender because I can control the exact size and shape of the butter pieces for the flakiest results. Add a few teaspoons of sugar if you prefer a sweetened crust.
Ingredients
2 2⁄3 cups (340g) all purpose flour
1 teaspoon kosher salt
1 cup plus 2 tablespoons (255g) very cold unsalted butter
1 tablespoon apple cider vinegar
8-10 tablespoons (120ml) ice water
Whisk the flour and salt together in a large bowl, cut the butter into 1⁄2-inch cubes, and add the apple cider vinegar to the ice water.
Working quickly, add the butter to the flour and toss to coat. Then use your fingers or the palms of your hands to press each cube of butter into a flat sheet. Keep tossing the butter in the flour as you go to ensure that each butter piece is coated with flour. The idea is to create flat, thin shards of butter that range from about the size of a dime to about the size of a quarter. If at any time the butter seems warm or soft, briefly refrigerate the bowl.
Sprinkle about 6 tablespoons of the icy cold vinegar-water mixture over the flour mixture. Use a gentle hand or wooden spoon to stir the water into the flour until just combined. If the dough seems dry, add more cold water a couple of teaspoons at a time. You have added enough water when you can pick up a handful of the dough and easily squeeze it together without it falling apart.
Press the dough together, then split it in half. Form each half into a disk, and wrap each disk in plastic wrap. Chill the dough for at least 2 hours before using, but preferably overnight. Keeps for up to three months in the freezer wrapped in a double layer of plastic wrap and a layer of foil. Thaw in the refrigerator before using.
VARIATIONS: For a rye variation, substitute 11⁄3 cups (175g) rye flour for an equal amount of the all purpose flour. For a spelt variation, substitute 11⁄3 cups (175g) spelt flour for an equal amount of the all purpose flour. You also may need a bit more water to bind the dough for these variations.
Any Fruit Galette
Yield: One 8-inch galette
You can use this formula with just about any seasonal fruit. For apples, pears, and stone fruit peel if desired then slice into 1/4-1/3-inch slices. Apricots (my fave!) can be gently torn in half or cut into quarters. Slice strawberries in halves or quarters if they are large. Rhubarb can be sliced into thin batons or 1/2-inch chunks. Feel free to experiment with combining your favorite fruits. I love stone fruit and berries together in the summer. Also, the apricot jam can be replaced with any jam or marmalade you like that will compliment the fruit you are using.
1 disc pie crust
3/4 pound (340g) fresh fruit
1/4 cup apricot jam
1/4 cup (50g) granulated sugar, to taste
2 tablespoons flour
1/2 teaspoon lemon zest
seeds of one vanilla bean (optional)
pinch salt
1 egg, for egg wash
turbinado sugar and flaky salt for sprinkling
Arrange a rack in the oven in the lower third and preheat oven to 425ºF. Line a baking sheet with parchment paper.
Combine the sugar vanilla bean seeds, lemon zest, flour and salt in a bowl. Add the fruit to a large bowl and sprinkle the sugar mixture over the top, but don’t stir quite yet.
On a lightly floured surface roll the dough into a rough circle between 1/8-1/4-inch thick and transfer it to a parchment lined baking sheet. Gently stir the fruit mixture until well combined.
Spread the jam onto the center of the dough, then pour the fruit into the center of the galette. Press gently to compact the fruit into an even layer. Fold the edges of the dough up and over the fruit and press the folds gently to seal. Refrigerate the formed galettes until the dough is very firm.
Brush the galette with egg wash, sprinkle with turbinado sugar and flaky salt if desired and bake until deep golden brown and bubbling, 45-55 minutes. Serve warm with vanilla ice cream.
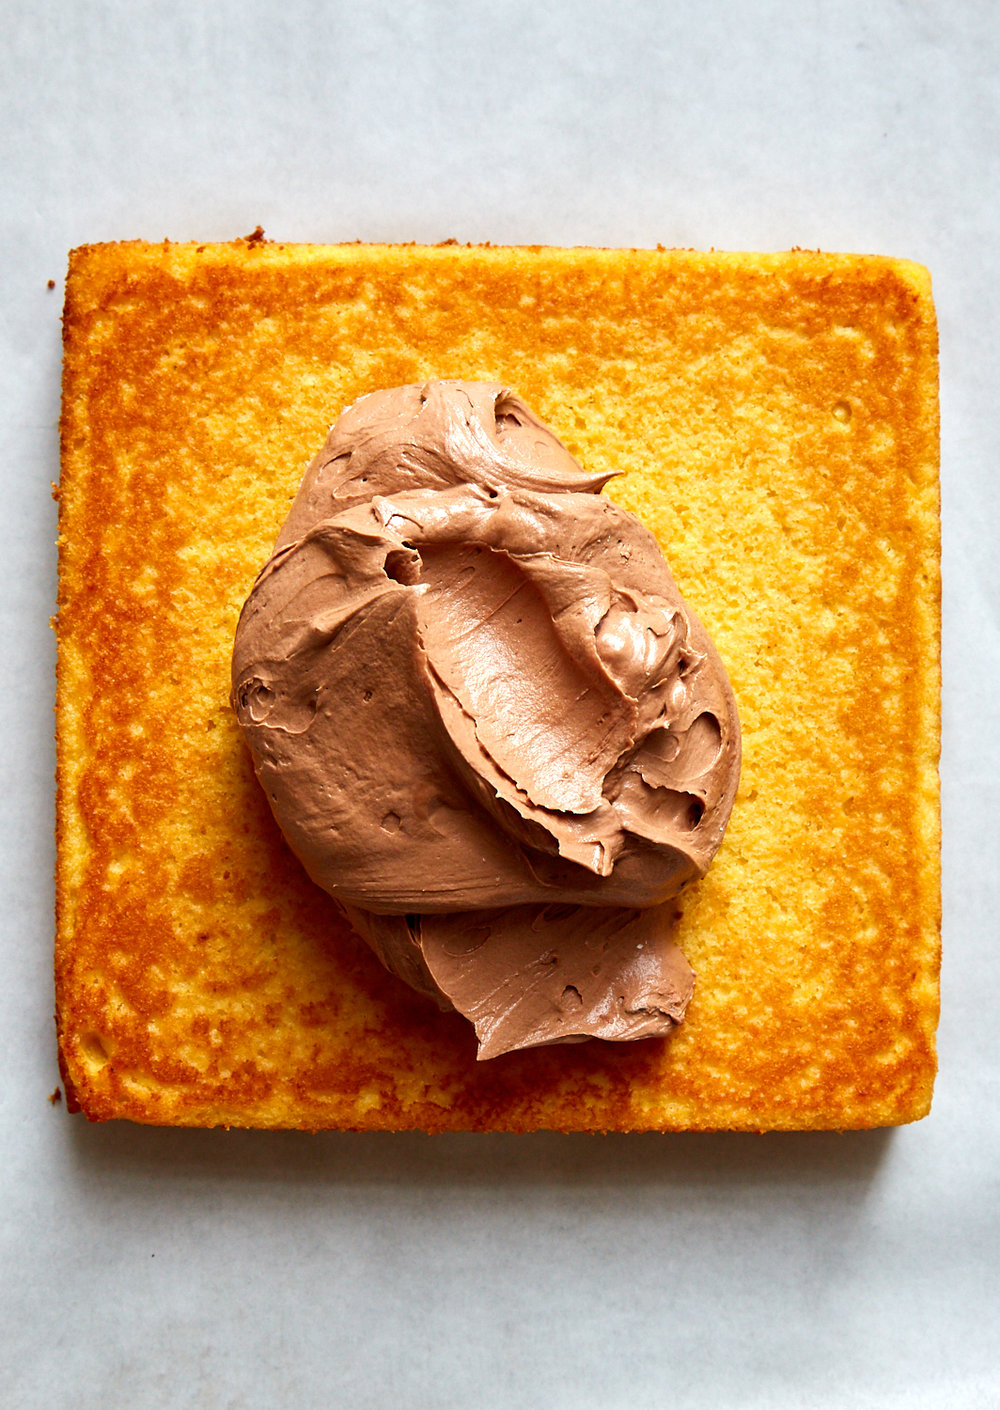
It’s birthday season in Apartment 2 (we lost the B in our move, years ago) and you all know I love a bigolbirthdaycake. I have to admit that I have been a chocolate cake/vanilla frosting devotee for many years but after trying this yellow cake recipe my preference just may be flipping upside down. It is straight from King Arthur so you can head on over to their site to check it out.
The method for mixing the cake is a little unusual, but it gives this cake a really nice crumb and moist texture. I find yellow/white cakes can be kind of bland and dry, but not this one! Make sure to use high quality cocoa powder in the frosting, it makes a huge difference.
We are still in a bit of an in between produce season, but the weather is warming up and the sun is out so I am craving fresh fruit desserts like it’s my job. I guess it kind of is my job…I love to make desserts like this pavlova because it is fairly low lift and aside from a low, slow bake in the oven for the meringue (which you can make the day before if it’s not too humid where you live) everything comes together in a few minutes.
The tart crushed raspberries provide some nice sauciness here and contrast well with sweet strawberries and the crisp, pillowy meringue. Make sure to use the best strawberries you can find for this dessert, and adjust the sugar to your personal tastes. In NYC we get some really nice organic berries from California but they are $$ so you may just want to bookmark this until they are in season locally where you live. The mini mint leaves are also totally optional, but they do add a nice freshness and beautiful pop of contrasting color.
Crushed Raspberry and Strawberry Pavlova
Crisp and chewy meringue, pillowy whipped cream, and sweet-tart berries are combined to make this super springy, and fairly simple dessert. Assemble just before serving for the best textural experience as the meringue will weep and melt as it sits.
Meringue
4 large egg whites
1 cup (200g) superfine sugar
1 1/2 teaspoons cornstarch
1/4 teaspoon salt
1/8 teaspoon cream of tartar
1 teaspoon vanilla extract
1 teaspoon white vinegar
Berries
1 pound of the best strawberries you can find
1/2 cup fresh raspberries
2 teaspoons sugar
1/2 vanilla bean, seeds scraped
pinch salt
To Serve
1 cup (240ml) heavy cream
1 tablespoon sugar
mint leaves
To make the meringue: Preheat the oven to 250ºF (130ºC/Gas Mark 1/2). Trace an 8-inch (20cm) circle onto a piece of parchment paper and flip it upside down on a baking sheet.
Stir the cornstarch and sugar together in a small bowl. In the bowl of a stand mixer fitted with the whisk attachment or with a handheld electric mixer in a large bowl, beat the egg whites, salt, and cream of tartar on high speed until soft peaks form. With the mixer running, slowly add the sugar mixture about one tablespoon at a time until you have added all of the sugar and the egg whites are stiff and glossy about 7 minutes. Add the vanilla extract and vinegar and mix for 30 more seconds.
Dollop the meringue onto the prepared baking sheet and use an offset spatula to spread it evenly to the edges of the traced circle. Make a shallow indent in the center of the meringue which will hold all of the delicious toppings. Bake the meringue for 1-1 1/2 hours or until the outside looks dry and slightly creamy in color. Turn off the oven and prop the door ajar with a wooden spoon. Let the meringue cool completely in the oven. It should feel firm and crackly when you press it, but will be soft and marshmallowy in the center. When cooled, you should be able to gently peel it off of the parchment paper and place it on a serving platter or cake stand.
To make the topping: Slice the strawberries in half if they are small, quarters if they are large. Combine the raspberries, sugar, vanilla bean seeds and a pinch of salt in a large bowl and crush the berries with a fork. Gently stir in the strawberries and let the fruit macerate for a few minutes. Taste and add a bit more sugar if desired, keeping in mind that the meringue will be quite sweet.
Whip the cream and sugar together to soft peaks. Top the cooled meringue with the whipped heavy cream, followed by the berries. Sprinkle mint leaves over the top and serve immediately.
I am hard at work queuing up some new recipes and blog posts for you all, but I wanted to pop in and tell you about a little class I am teaching next month at Ovenly’s new studio in Brooklyn.
It will be a small class all about galettes! Each student will make a batch of dough and galette to take home, and I’ll be sharing all of my top tips for pie and galette success!
I’m not teaching much this year, and there are just 5 spots left so grab one while you can.
Sign up and details can be found HERE. Feel free to contact me through the contact form on the blog if you have any questions. Happy Baking!
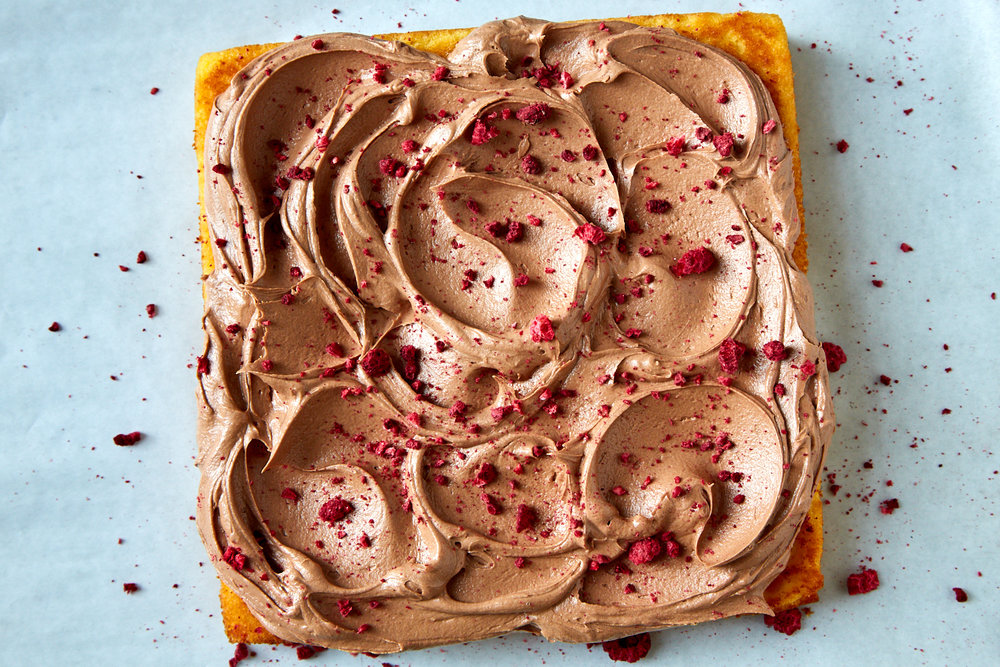
I love a cake that you can stir together in one bowl, and this passionfruit cake fits the bill. It is packed with passionfruit flavor and is mouth-puckering tart, but the *ahem generous* swoops of chocolate frosting balance it quite nicely. You could also add an additional 1/4 cup (50g) sugar for a sweeter cake, but I’m a fan of the contrast. If you aren’t a huge frosting fan you may want to hold a little back when you are topping the cake. The cake is also delicious - tart, floral, and tropical - on its own. If you’d prefer to skip the frosting all together, make a little bit of glaze made from passionfruit and confectioners sugar and drizzle it over the top instead.
Would you believe that I have misplaced my sprinkles? I’m not sure how it happened, but after my Christmas cookie bonanza I managed to hide ALL OF MY SPRINKLES from myself and I didn’t discover it until I went their normal storage spot to grab some to sprinkle this beaut. In the end it was a blessing because I crushed up a handful of dehydrated raspberries for decor instead and they added a nice tart punch to the topping.
p.s. I use a spoon, instead of an offset spatula, to get these deep swoops and swirls.
One Bowl Passion Fruit Cake with Fluffy Chocolate Frosting
I used Goya brand passionfruit puree for this cake which I can find easily at most of the supermarkets in my area. Its also very inexpensive and runs about 3 bucks for 7 ounces. You can certainly make your own puree or use a higher end brand, but I’m here to tell you that the inexpensive stuff works just fine. Choose your own adventure. Although, if you can find fresh passionfruit, a few of the seeds and pulp sprinkled over the top would make a beautiful, crunchy garnish. This cake tastes best the day that it is baked, but holds up for a couple of days at room temperature. If you use dehydrated fruit as a garnish it will soften as it sits.
1/2 cup (115 grams) unsalted butter, at room temperature
1 tablespoons milk, plus more if necessary
1/2 teaspoon vanilla extract
fat pinch of salt
Heat oven to 350ºF and butter and flour or spray an 8x8 inch baking pan with non-stick spray.
In a large bowl, whisk the sugar, passionfruit puree, sour cream, melted butter, eggs, vanilla extract, and salt until combined and smooth.
Combine the flour and baking powder in a fine mesh sieve and sift it into the large bowl. Whisk the batter until smooth and pour into the prepared pan. Slide the pan into the oven and bake until a cake tester inserted into the center comes out clean 20-25 minutes.
Cool the cake in the pan on a rack.
While the cake is cooling make the frosting.
Add all of the frosting ingredients to a large bowl and beat until smooth and fluffy, add a bit more milk if necessary. Alternately, Deb makes the frosting in a food processor.
Spread the frosting evenly over the cooled cake and decorate with a shit-ton of sprinkles. Enjoy immediately! This cake keeps is best the day it’s baked, but will keep for a couple of days, covered at room temperature. The dehydrated raspberries will soften over time.