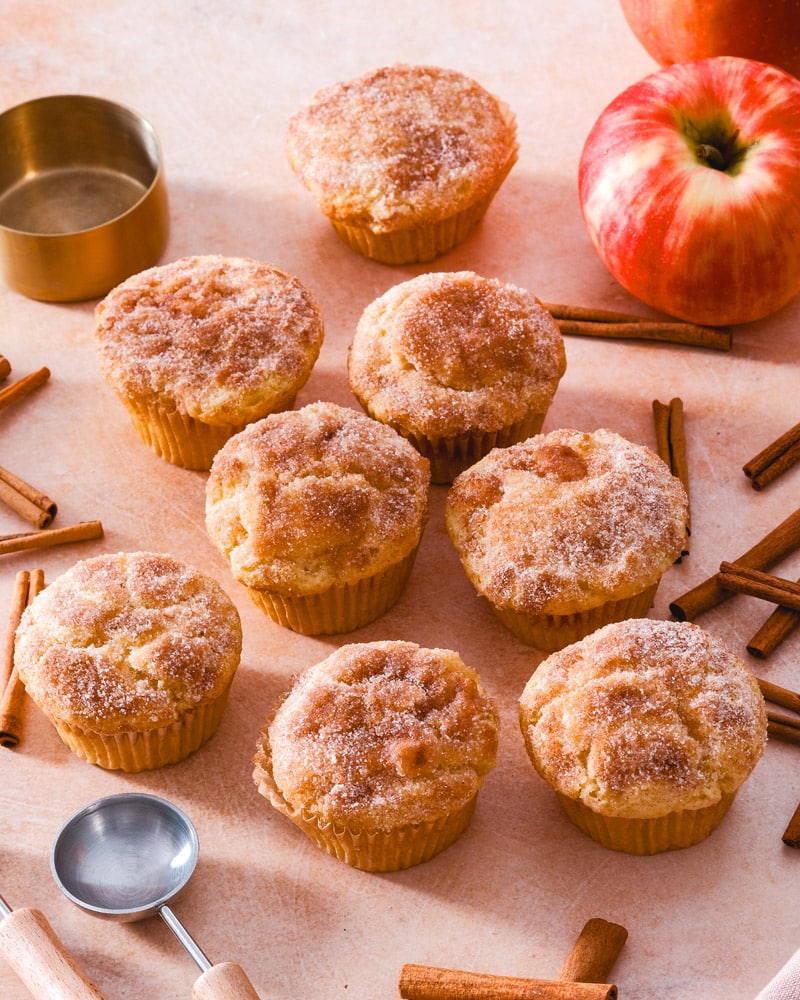
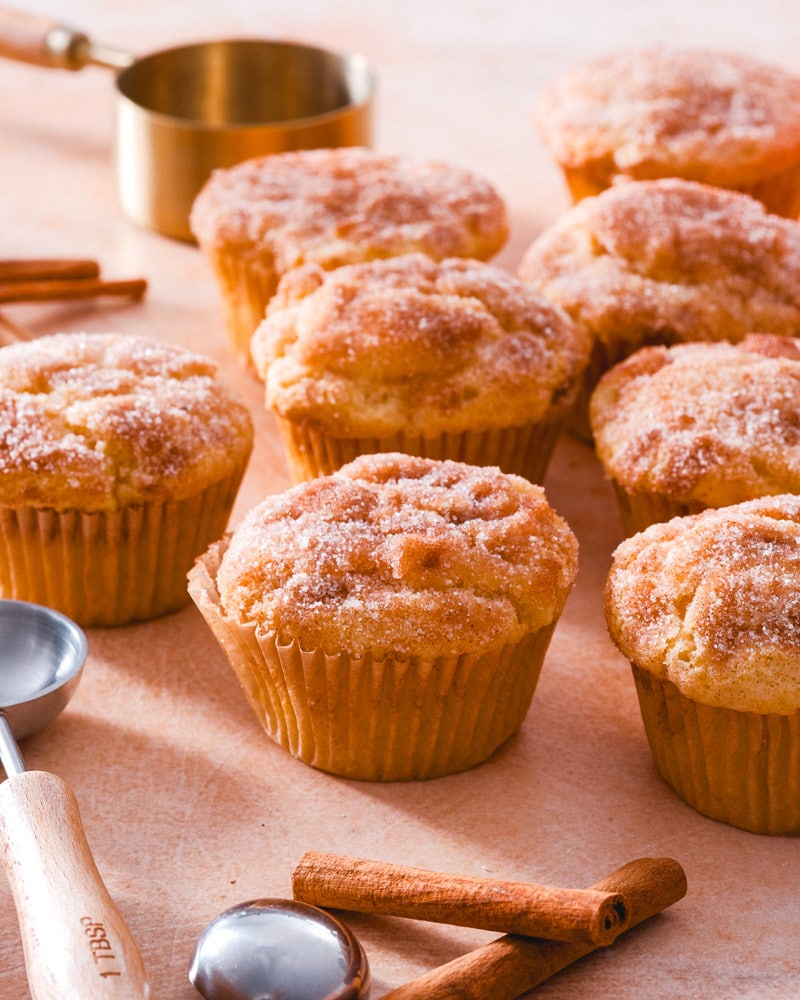
This apple cinnamon muffins recipe is so fluffy and moist, with a crunchy cinnamon sugar topping. A total family favorite!

Here’s a muffin recipe that’s the best cozy baking project: apple cinnamon muffins! These are so delicious everyone will beg for the recipe. Each one has a fluffy, tender crumb, with just the right amount of sweet tart bursts of apples. The best part? Sprinkling with cinnamon sugar before and after baking makes a crunchy, warm spiced topping. You won’t believe how tasty these are!
Ingredients in apple cinnamon muffins
Apples and cinnamon are the best combination, like in oatmeal or apple crisp. So why not translate that into muffin form? These little cakes taste like you picked them up at a local bakery. They’re tall, delicately sweet, and have the best crunchy cinnamon sugar topping. Here are the ingredients you’ll need:
- All-purpose flour
- Granulated sugar
- Baking powder, baking soda, and salt
- Buttermilk
- Butter
- Neutral oil
- Eggs
- Vanilla
- Cinnamon
Best types of apples for baking
The best type of apples for baking? Bake with a firm, crisp tart apple. Crisp tart apples hold up well texture-wise, and their tangy tartness accents the sweetness of baked goods. Here are some of the best apples for baking and cooking. You can use other types too, but the flavor of these types have the best flavor:
- Pink Lady
- Jonathon or Jonagold
- Granny Smith
- Fuji
The keys to apple cinnamon muffins
These apple cinnamon muffins are so full of flavor, you’ll make them a fall baking staple! (They are in our house.) There are a few keys to the flavor and achieving an even bake. Here’s what to keep in mind:
- Use real buttermilk (no substitutes!). Buttermilk is crucial to making a fluffy muffin with a tender crumb. We’ve tried all sorts of muffin recipes and buttermilk is truly the best! Don’t be tempted to use even a buttermilk substitute here! It’s got to be the real thing.
- For an even bake, fill every other cup in two 12-cup muffin tins. Here’s a key to even baking for muffins: fill every other cup in a tin! This helps them to have beautiful domed tops and an even bake. It’s not required, but helpful for perfect muffins.
- Baking at 375°F makes a taller muffin. Many muffin recipes bake at 350°F, but a slightly hotter oven makes a taller and fluffier muffin. This recipe also has a large amount of leavener (baking powder and baking soda) for a good rise.

Storage info
Apple cinnamon muffins taste best the day of baking, but they save well too! You’ll want to keep them refrigerated because of the crunchy topping and the moisture in the apples, which can make them soggy if stored at room temperature. Here’s what to know:
- Refrigerator: Store refrigerated for up to 1 week! Let them stand at room temperature for a few minutes before eating.
- Freeze: Freeze in a sealable container and store up to 3 months.
More apple recipes
Love baking with apples! When it’s the season, we love baking them up into muffins, breads, cookies, and crisps. Here are a few more apple recipes:
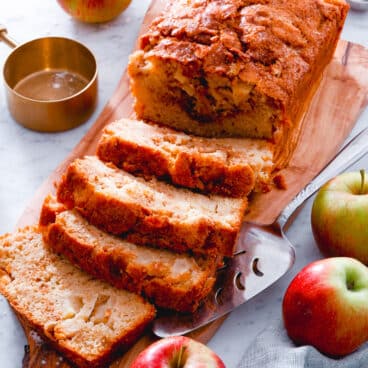
- Try this tasty Apple Bread, a similar recipe but in bread form
- Mix up cozy Apple Cinnamon Oatmeal
- Make Apple Crisp, Apple Crumble, Apple Dumplings or Baked Apples
- Opt for Crisp Apple Salad


This apple cinnamon muffins recipe is…
Vegetarian. For vegan, go to Vegan Apple Muffins.
Print
Apple Cinnamon Muffins
-
 Prep Time: 30 minutes
 -
Cook Time: 20 minutes
-
Total Time: 50 minutes
-
 Yield: 12
Description
This apple cinnamon muffins recipe is so fluffy and moist, with a crunchy cinnamon sugar topping. A total family favorite!
Ingredients
For the muffins
- 1 ½ cups apples, peeled and diced
- 2 cups [280 g] all purpose flour
- 2 teaspoons baking powder
- ¼ teaspoon baking soda
- ¾ teaspoon kosher salt
- 1 cup granulated sugar
- ¾ cup buttermilk*
- 5 tablespoons melted unsalted butter
- ⅓ cup neutral oil (grapeseed, canola, or vegetable oil)
- 2 eggs
- 1 teaspoon vanilla extract
For the topping
- ¼ cup granulated sugar
- 1 teaspoon cinnamon
- 1 ½ tablespoons melted butter
Instructions
- Preheat the oven to 375°F.
- Peel and chop the apples and set them aside. Place muffin wrappers in every other muffin cup of two 12-cup muffin tins.**
- In a large bowl, whisk the flour, baking powder, baking soda, and salt. Make a well in the center. In a medium bowl, whisk the granulated sugar, buttermilk, melted butter, neutral oil, eggs, and vanilla extract.
- In a mix bowl, mix the sugar and cinnamon for the topping.
- Pour the wet ingredients from the batter into the well in the dry ingredients. Mix gently until just combined and there are no longer streaks of flour.
- Add the apples and fold it in with a spatula, taking care not to overwork the batter. (If desired, you can store the batter up to 24 hours before baking.)
- Scoop the batter into the muffin papers using a dough scoop: it should fill to the top of the muffin papers. Sprinkle the tops with the cinnamon sugar, using half of the cinnamon sugar mixture.
- Bake until the tops are golden and set and a toothpick in the center comes out with a few crumbs, about 20 to 26 minutes total (rotate the pans halfway through baking). Allow to cool for 5 minutes.
- Brush the top of each muffin with melted butter, place the remaining cinnamon sugar on a plate, and dip each muffin into the plate to coat the top. Transfer to a baking rack to fully cool (about 30 minutes to 1 hour). The muffins are best eaten the day they are made, but they store very well in an airtight container in the refrigerator and last up to 1 week.
Notes
*Buttermilk is the magic ingredient which makes the most consistent texture and rise! Don’t be tempted to leave it out or use a buttermilk substitute. It’s worth it (we promise).
**Baking in every other muffin cup makes for a more consistent bake. If all you have is a 12-cup muffin tin, you can use that too.
 Category: Muffin
 Method: Baked
 Cuisine: Baked
- Diet: Vegetarian
Keywords: Apple cinnamon muffins, apple cinnamon muffin, cinnamon apple muffin