Split Pea Soup

This cozy Split Pea Soup will fill you up and warm you through on those cold winter days. Super satisfying and oh so delicious!

The post Split Pea Soup appeared first on Budget Bytes.

The cold weather has finally creeped into my neck of the woods and all I’ve been craving lately is a big, warm bowl of soup! Lucky for me this easy Split Pea Soup recipe hits the spot! It has lots of veggies and the added ham gives it sooo much flavor! It’s thick, filling, and like most soup recipes it makes a big batch. Perfect to freeze any leftovers for later! Trust me, I’ll definitely be keeping this soup in rotation this season!
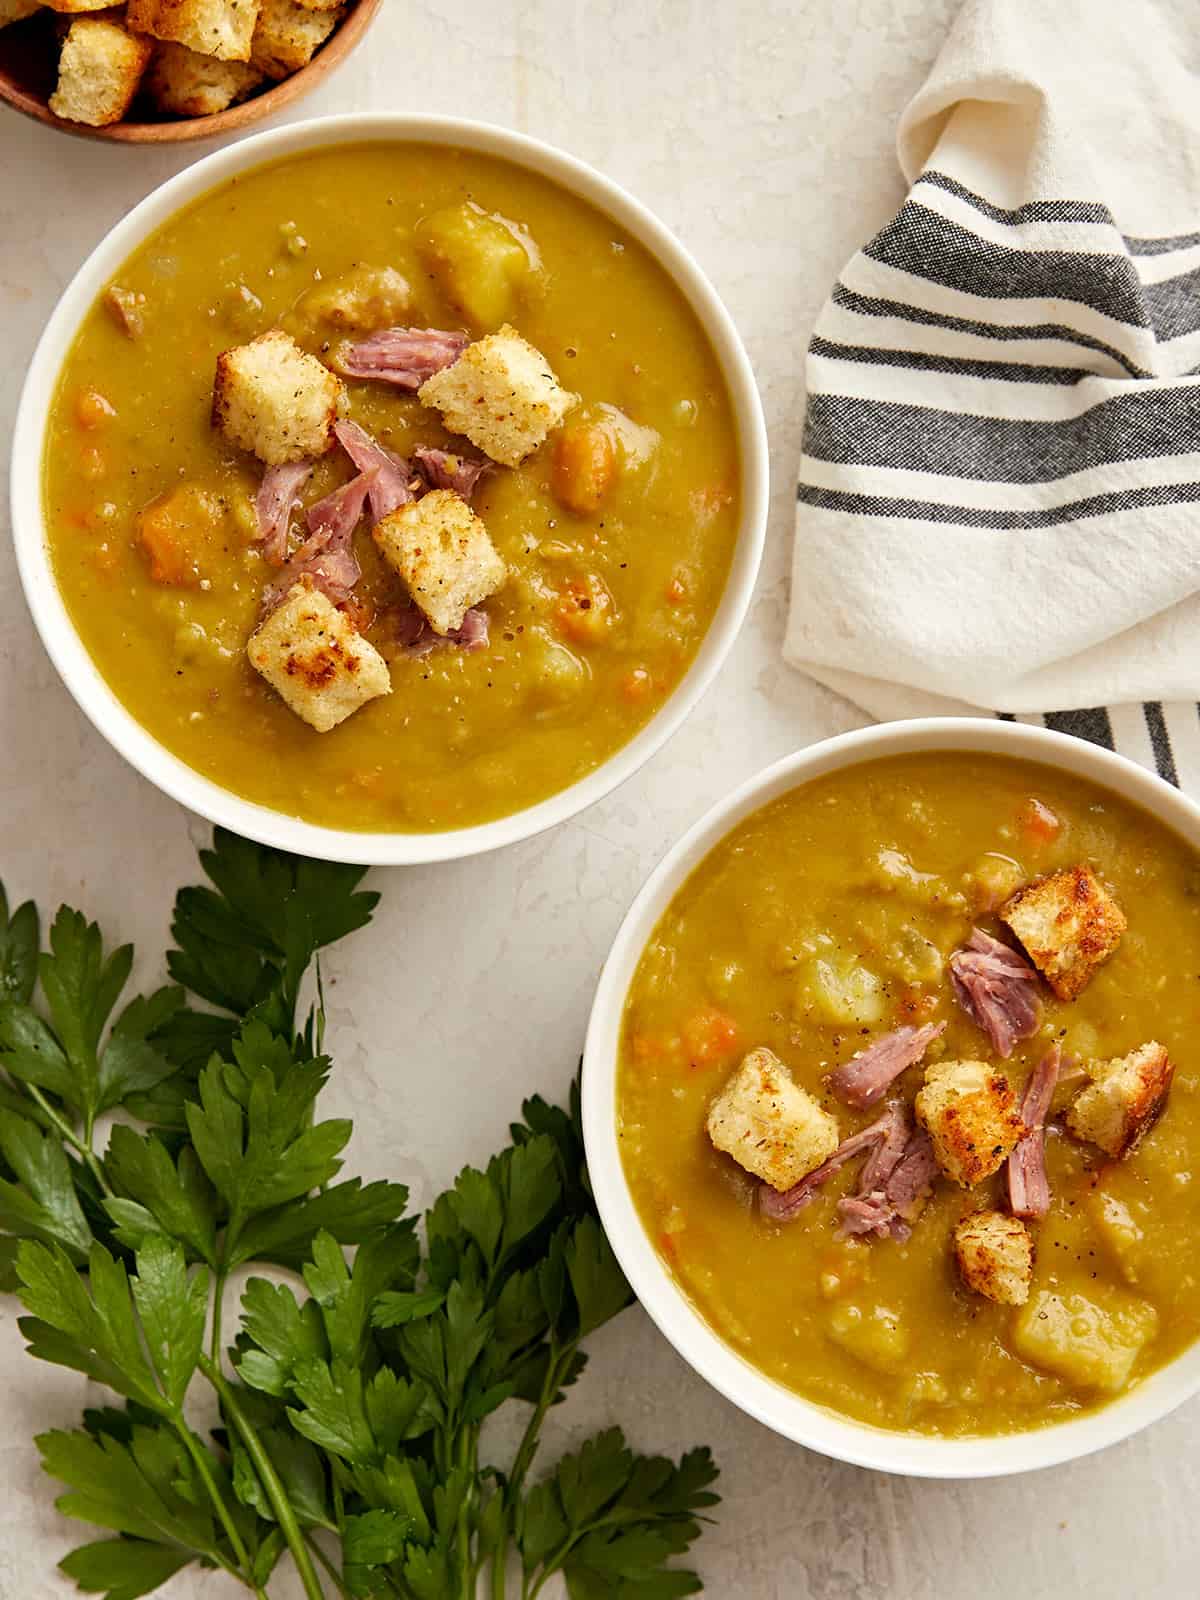
Overhead view of two bowls of split pea soup with parsley and a napkin on the side.

What Are Split Peas?

Split peas are just like they sound, peas that have been dried and split in half. They’re part of the legume family and are often found in both green and yellow varieties. Both can be used to make this easy, comforting split pea soup. We’ll be using green split peas for this recipe. You can find split peas in the dry bean aisle, next to bags of other types of dry beans.

Ingredients for Split Pea Soup

You won’t need much to make this thick and chunky split pea soup recipe. Here’s a quick rundown of the ingredients you’ll need:

  • Split Peas  – Split peas are the star of the show for this simple soup recipe. We’re using dry, uncooked green split peas.
  • Aromatics – Onion, celery, carrots, and garlic provide a wonderful flavor base for the soup.
  • Ham Hock – The ham hock provides lots of smoky, salty flavor to the soup. It also gives you a little bit of meat to enjoy with every other bite :)
  • Bay Leaf – Adds an extra subtle layer of flavor and depth to the soup.
  • Chicken Broth – Make sure you use a good quality chicken broth as a lot of the soup flavor will come from the broth. We use Better than Bouillon to make our broth. It’s economical and has great flavor!
  • Russet Potato – To make this an even more filling and hearty soup, we added one diced russet potato. It also helps to thicken the soup.
  • Salt and Pepper – You’ll be surprised how much salt and flavor comes from the ham hock and chicken broth. So taste the soup towards the end, then add any salt and freshly cracked black pepper to taste.

Do Split Peas Need To Be Soaked Before Cooking?

Nope! That’s what makes this soup so simple to make. Split peas cook quickly without any pre-soaking, and because they’re already split open, they break down well to thicken soups. I like to give the split peas just a quick rinse when I take them out of the package, but other than that you can add the peas directly to your pot (without soaking) with the rest of your ingredients.

How To Store Split Pea Soup

Split pea soup stores very well in the fridge or freezer. You can store any leftovers in an airtight container in the refrigerator for up to 5 days. If you don’t think you can eat all 6 servings in about 5 days, then freeze the rest in freezer-safe containers for up to 3 months.

Side view of two bowls of split pea soup with homemade croutons on top.

Pictured with Homemade Croutons on top!

Overhead view of a single bowl of split pea soup with one hand holding the bowl and another hand spooning some of the soup out.
Print

Split Pea Soup

This cozy Split Pea Soup will fill you up and warm you through on those cold winter days. Super satisfying and oh so delicious!
Course Dinner, Lunch
Cuisine American
Total Cost $9.51 recipe / $1.58 serving
Prep Time 10 minutes
Cook Time 1 hour 30 minutes
Total Time 1 hour 40 minutes
Servings 6 (1 1/3 cups each)
Calories 458kcal

Equipment

Ingredients

  • 2 Tbsp olive oil $0.24
  • 1 yellow onion, diced $0.32
  • 3 stalks of celery, diced $0.75
  • 3 carrots, diced $0.46
  • 2 cloves garlic, minced $0.16
  • 1 smoked ham hock $3.65
  • 1 lb split peas $1.69
  • 6 cups chicken broth 1.02
  • 1 bay leaf $0.10
  • 1 russet potato, peeled & diced $1.12

Instructions

  • Heat a large pot or dutch oven over medium-high heat. Add the olive oil, diced onion, diced celery, and diced carrots. Saute for about 4 minutes or until vegetables have softened. Stir in the minced garlic and saute for an additional 30 seconds.
  • Add the split peas, ham hock, bay leaf, and chicken broth to the pot and gently stir.
  • Add a lid and bring the pot to a gentle boil. Once boiling, reduce the heat to medium-low and simmer for 1 hour. Give the soup a stir periodically and flip the ham hock over once or twice, while the soup is simmering, so that it gets even exposure to the hot liquid.
  • After 1 hour the peas should have completely broken down almost to a mush. If they are still retaining their shape, continue to simmer for 10 more minutes.
  • Next remove the ham hock from the pot and set it aside to cool. Add the diced potato to the soup and stir to combine. Continue to simmer for about 12 more minutes or until potatoes are tender.
  • While the potatoes are simmering, and once the ham hock is cool enough to handle, remove the meat from the bone and shred into small pieces.
  • Add the ham meat back to the pot with the soup and gently stir to combine.
  • Feel free to season the soup with salt and freshly cracked black pepper to taste. Enjoy with crackers, homemade croutons, or crusty bread!

See how we calculate recipe costs here.

Nutrition

Serving: 1serving | Calories: 458kcal | Carbohydrates: 59g | Protein: 29g | Fat: 13g | Sodium: 994mg | Fiber: 21g

More Split Pea Soup Variations

Overhead view of a single bowl of split pea soup with one hand holding the bowl and another hand spooning some of the soup out.

How To Make Split Pea Soup – Step By Step Photos
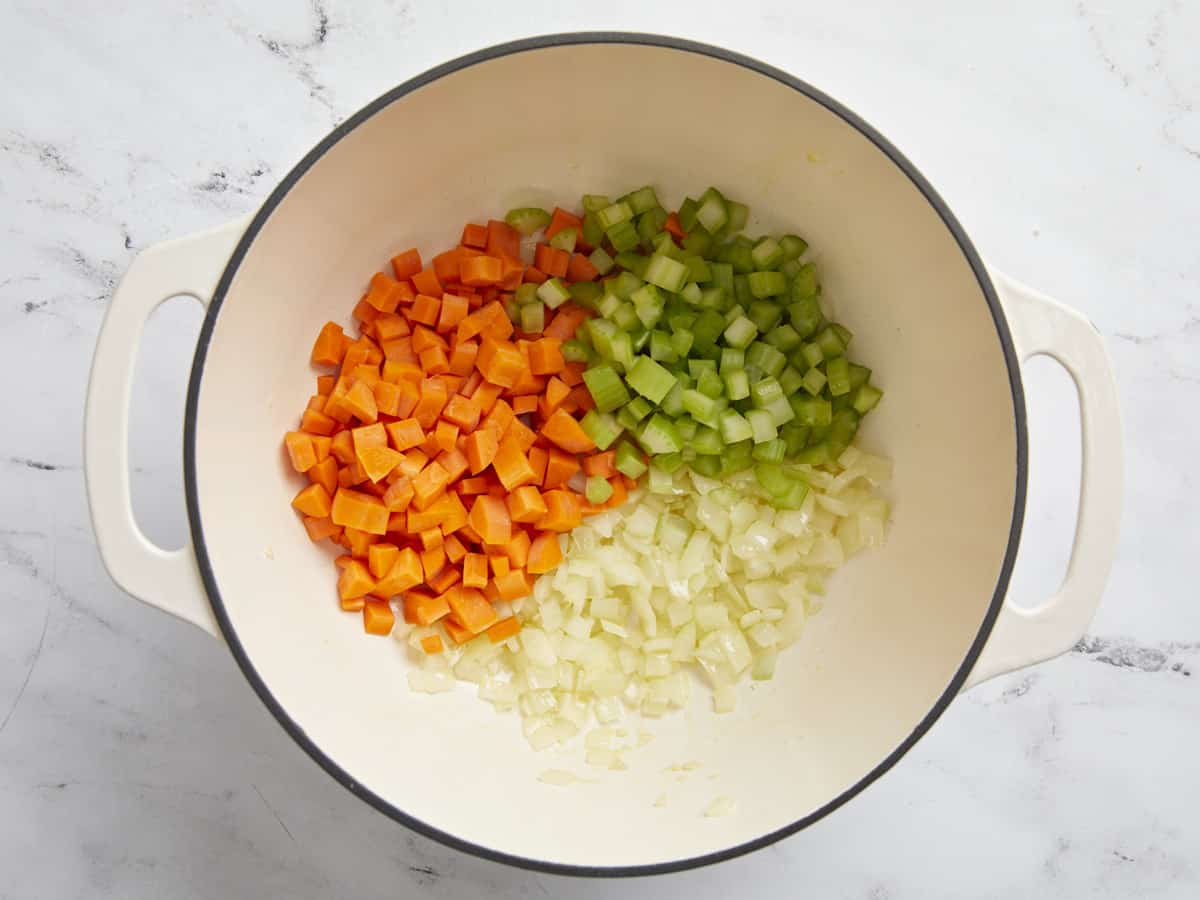
Overhead view of diced onion, diced carrots, and diced celery in a dutch oven pot.

Heat a large pot or dutch oven over medium-high heat. Add 2 Tbsp olive oil, one diced yellow onion, three diced celery stalks, and three diced carrots. Sauté for about 4 minutes or until vegetables have softened. Stir in two minced garlic cloves and sauté for an additional 30 seconds.
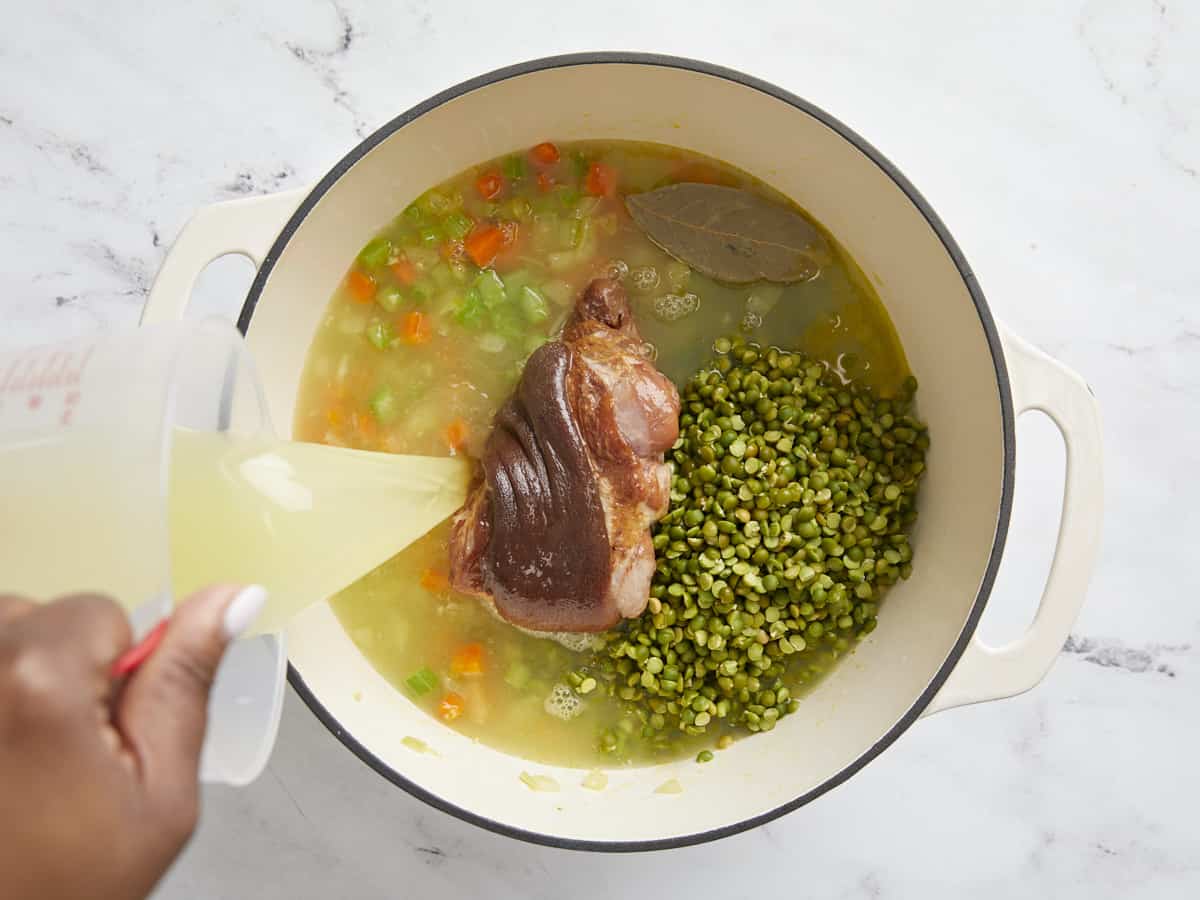
Split peas, ham hock, bay leaf, and chicken broth added to the pot.

Add one pound of split peas, one ham hock, one bay leaf, and 6 cups of chicken broth to the pot and gently stir.
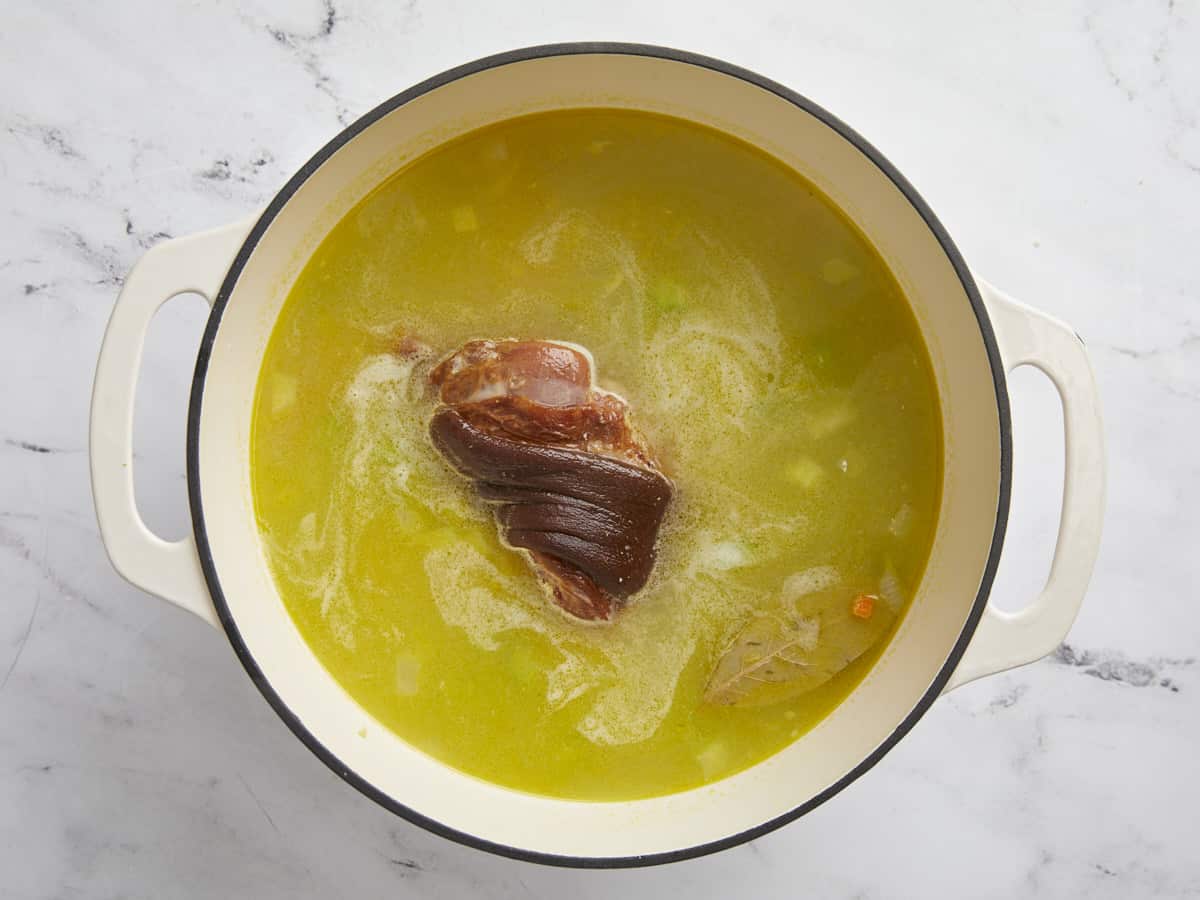
Overhead picture of the soup before it's cooked.

Add a lid and bring the pot to a gentle boil. Once boiling, reduce the heat to medium-low and simmer for 1 hour. Give the soup a stir periodically and flip the ham hock over once or twice, while the soup is simmering, so that it gets even exposure to the hot liquid.
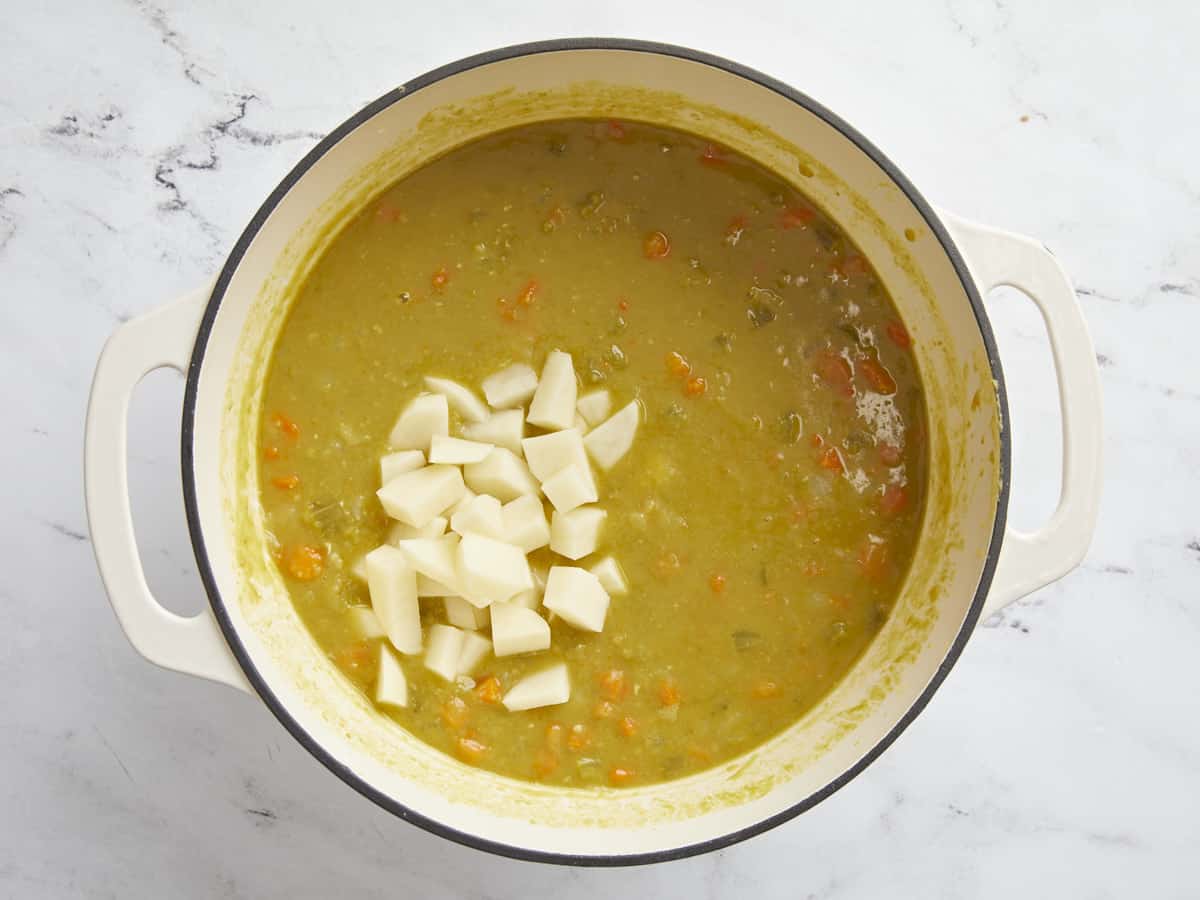
Overhead picture of soup pot with diced potatoes being added and ham hock being removed.

After 1 hour the peas should have completely broken down almost to a mush. If they are still retaining their shape, continue to simmer for 10 more minutes. Next remove the ham hock from the pot and set it aside to cool. Add the diced potato to the soup and stir to combine. Continue to simmer for about 12 more minutes or until potatoes are tender.
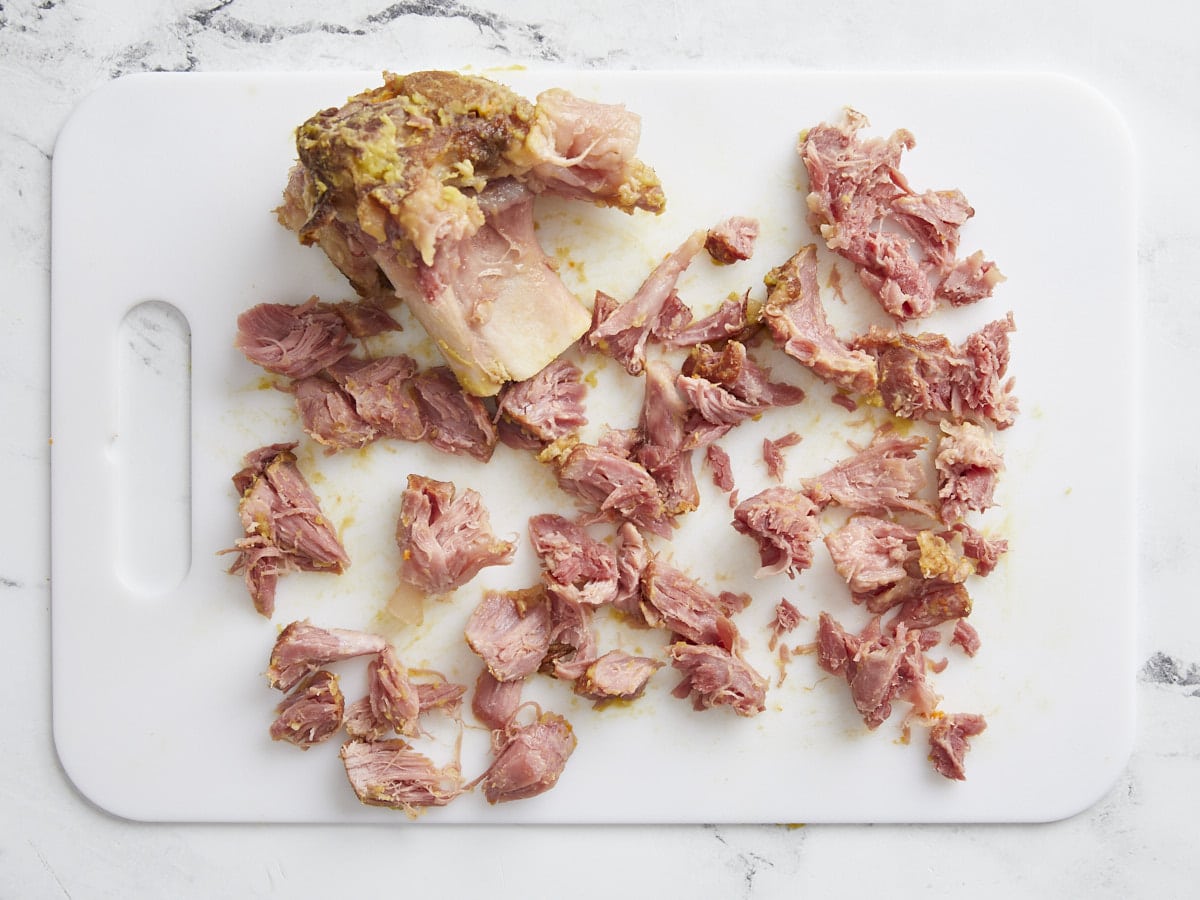
Ham hock being pulled off the bone on a cutting board.

While the potatoes are simmering, and once the ham hock is cool enough to handle, remove the meat from the bone and shred into small pieces.
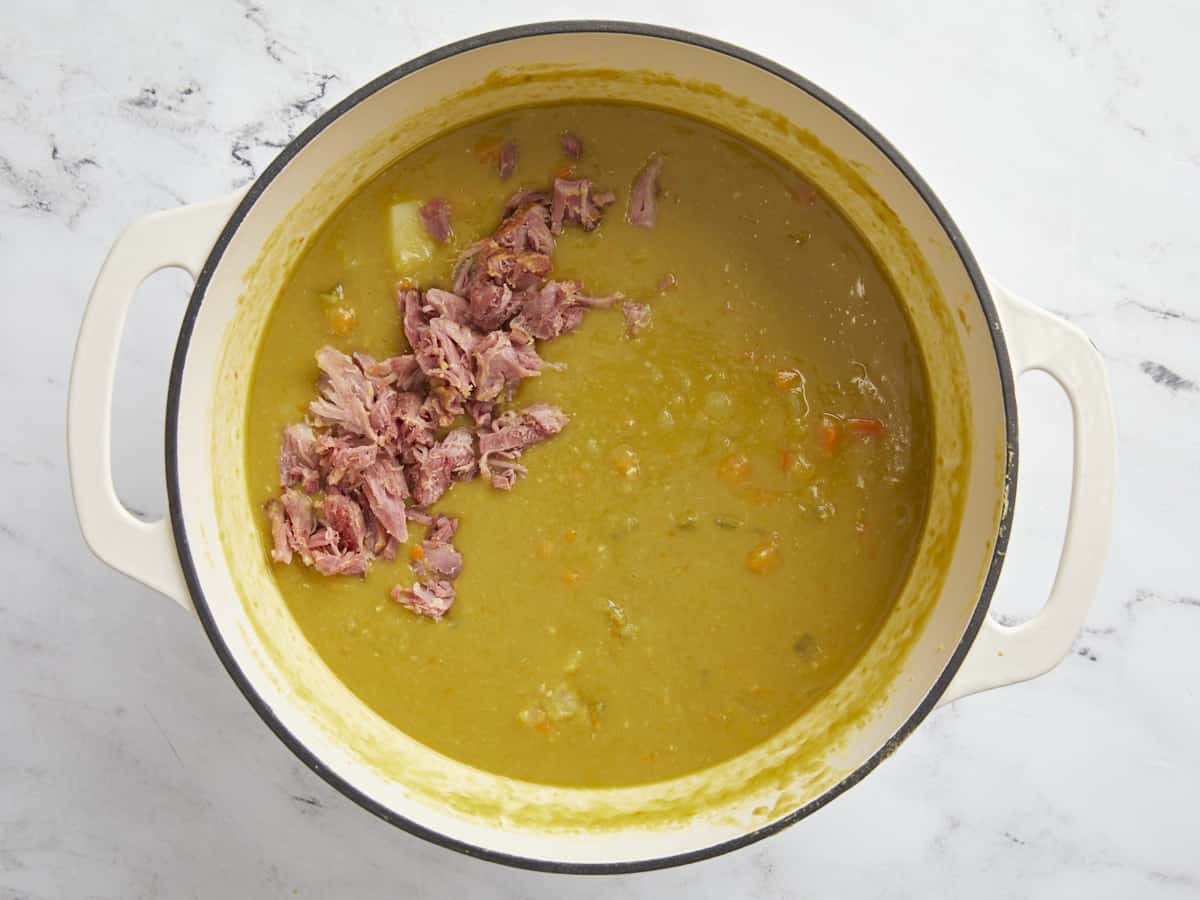
Add ham hock meat back to the soup pot.

Add the ham meat back to the pot with the soup and gently stir to combine.
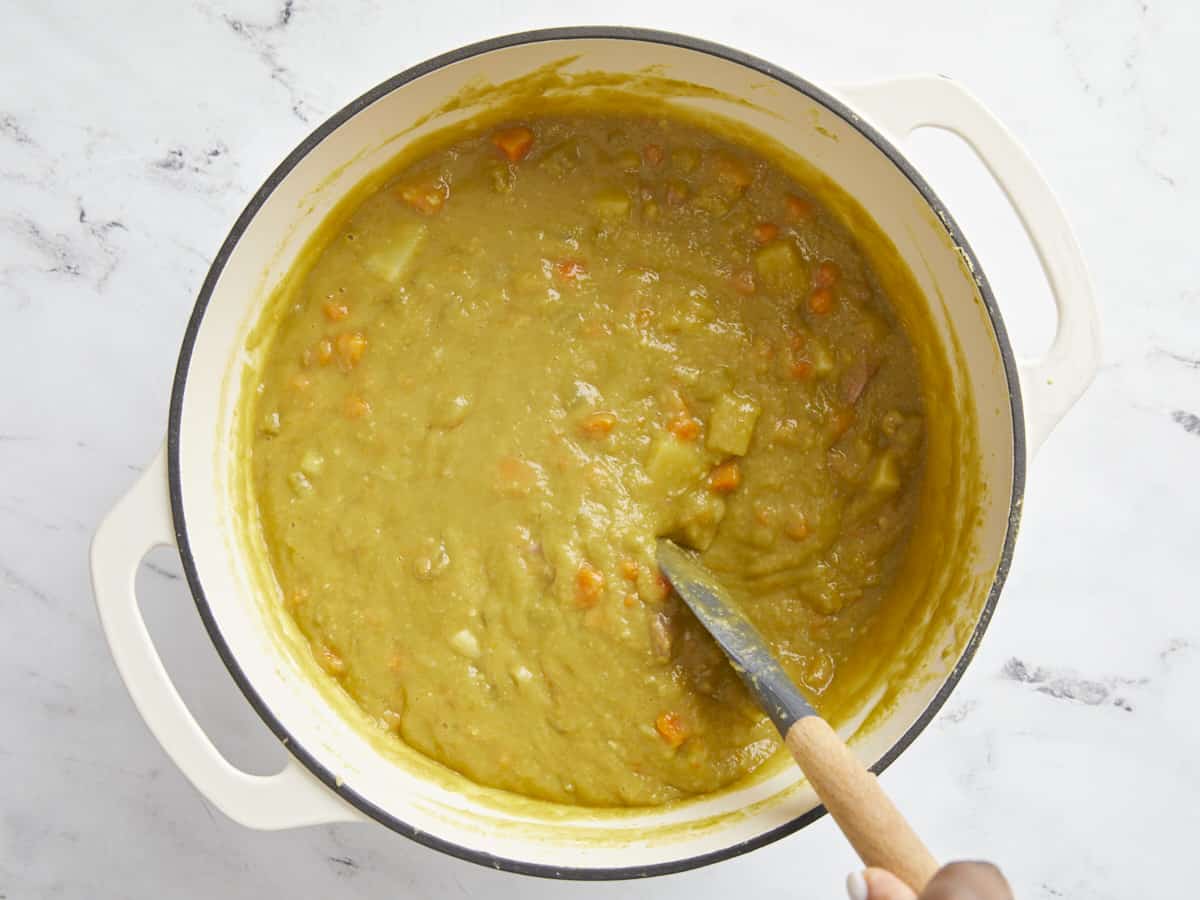
Overhead view of finished split pea soup with ham.

Season the soup with salt and freshly cracked black pepper to taste.
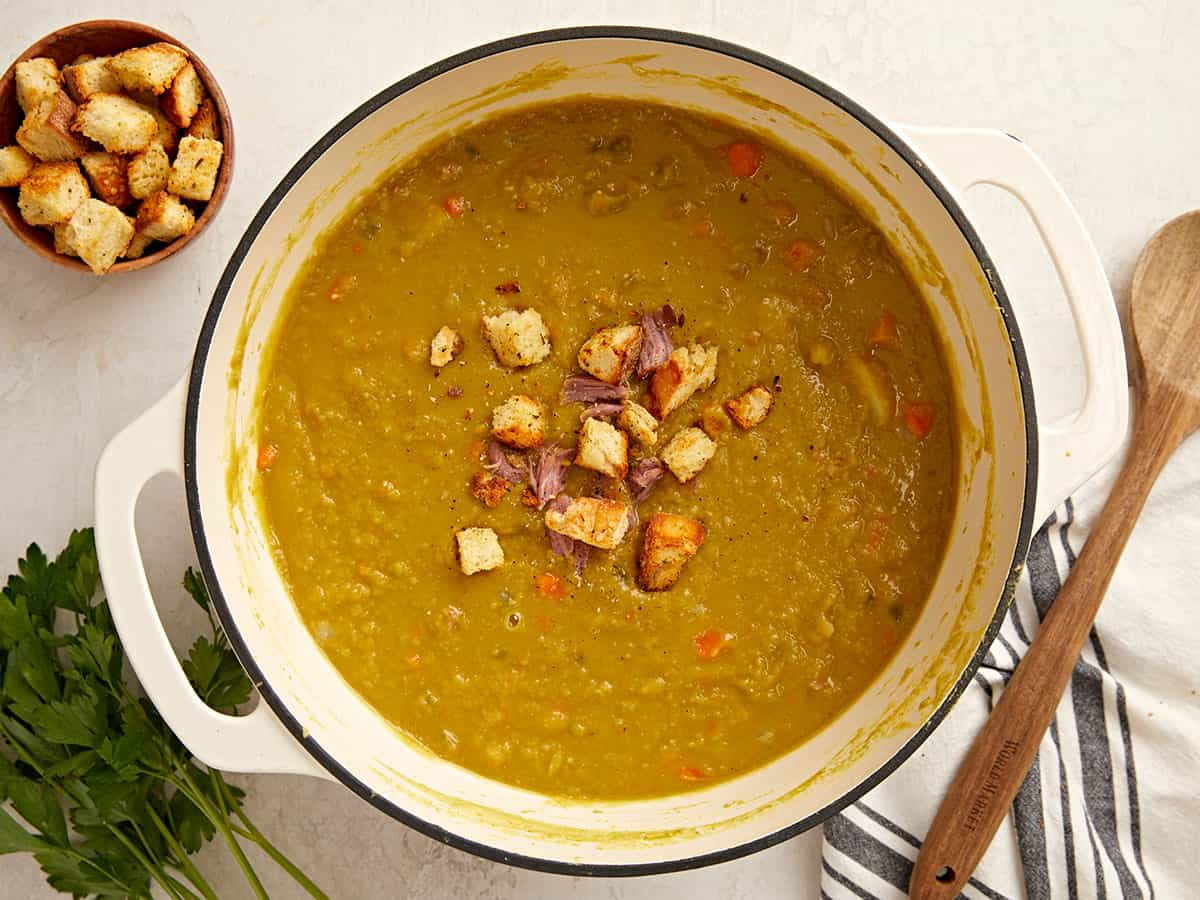
Overhead view of a dutch oven pot full of split pea soup with homemade croutons on top.

Time to enjoy a warm, satisfying bowl of Split Pea Soup with some homemade croutons, crackers, or crusty bread! Yum!

The post Split Pea Soup appeared first on Budget Bytes.

Turkey Chili

This flavorful turkey chili features ground turkey, colorful beans and vegetables, and plenty of herbs and spices to keep you full and happy!

The post Turkey Chili appeared first on Budget Bytes.

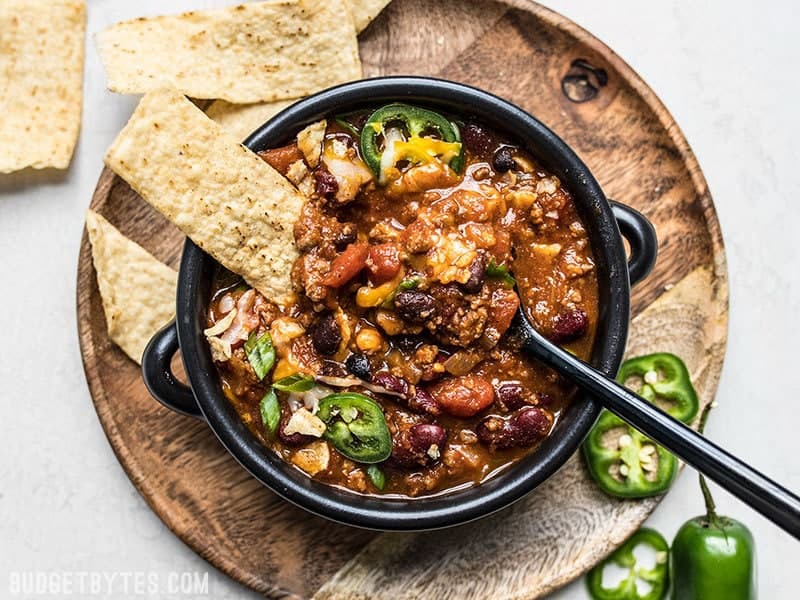
I make chili at least every other week during the fall and winter months, so naturally I’ve come up with quite a few variations of our classic chili recipe over the years. This Turkey Chili is a little bit lighter and is chock full of colorful vegetables. It’s the perfect chili recipe for the transition season when the leaves are just starting to fall but the air is still a little on the warm side. ;)

Overhead view of a pot full of turkey chili with ingredients on the sides.

What’s in Turkey Chili?

Turkey chili starts with a similar base as a classic chili recipe: ground meat cooked in a rich and flavorful tomato-based sauce, and seasoned with tons of warm spices. Because ground turkey has a lighter flavor, we went with a lighter, zestier flavor profile and added a ton of colorful vegetables and beans.

Ingredients for Turkey Chili

Here’s what you’ll need to make turkey chili:

  • Ground Turkey: Opt for dark meat turkey or ground turkey with at least a little fat. Extra-lean ground turkey breast can get a little dry and tough when simmered in chili.
  • Onion and Garlic: Every good chili starts with onion and garlic to create a deeply savory flavor base! I went with four cloves of garlic for this recipe, but feel free to measure with your heart. ;)
  • Poblano Pepper & Corn: A diced poblano pepper and some frozen corn kernels add a lot of flavor and color to this chili, making it extra festive. Poblanos can be spicy, though, so if you need a mild heat, skip the pepper or substitute with a green bell pepper.
  • Beans: A combination of kidney beans, black beans, and pinto beans adds even more color, texture, and flavor to this chili. The beans are very flexible, so if you only want black beans or kidney beans, you can certainly substitute them to fit your needs.
  • Tomatoes: Diced tomatoes add texture to our chili while tomato paste helps thicken the sauce and adds a really rich tomatoey flavor.
  • Herbs & Spices: The secret to the sauce! We use our homemade chili seasoning, which is a mix of chili powder, cumin, oregano, garlic powder, onion powder, salt, and pepper, to season our turkey chili.

Make it Vegetarian

This turkey chili is super easy to make vegetarian. Simply swap the ground turkey with an extra can of beans (kidney, black beans, or even pinto beans), or your favorite meat substitute, like soy crumbles.

Slow Cooker Instructions

Chili is a great slow cooker recipe. To make this turkey chili in your slow cooker, first brown the ground turkey in a skillet, then add it to the slow cooker with all of the other ingredients (reduce the water to 1 cup). Cook the chili on high for 3 hours or low for 6 hours.

How to Store Leftovers

After cooking the turkey chili, divide it into single-serving containers and store in the refrigerator for 4-5 days. Once chilled in the refrigerator, you can transfer some to the freezer for longer storage (about 3 months).

To reheat the chili, either microwave on high, stirring occasionally, until heated through. Or add to a sauce pot and cook over medium-low, stirring often, until heated through.

What to Serve with Turkey Chili

Chili and cornbread were made for each other, so try pairing this turkey chili with our Jalapeño Cheddar Cornbread or Sweet Potato Cornbread. And don’t forget the toppings for your chili! Try adding a sprinkle of cheddar cheese, sliced green onions, or cilantro. Or maybe a dollop of sour cream, some corn chips, or pickled jalapeños.

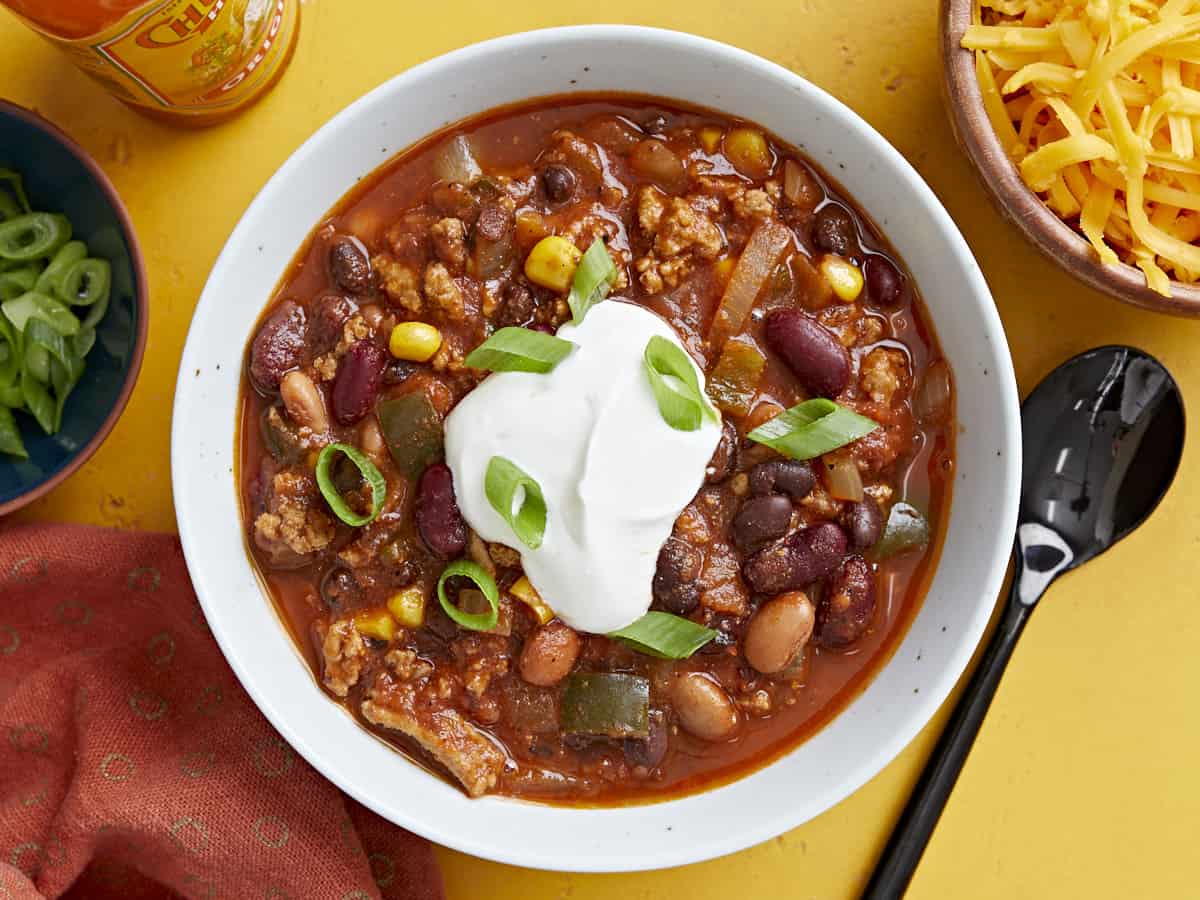
Overhead view of a bowl full of chili with toppings and a spoon dipping into the center.
Overhead view of a bowl full of chili with toppings.
Print

Turkey Chili

This flavorful turkey chili features ground turkey, colorful beans and vegetables, and plenty of herbs and spices to keep you full and happy!
Course Dinner, Lunch, Main Course
Cuisine American
Total Cost $11.55 recipe / $1.93 serving
Prep Time 10 minutes
Cook Time 40 minutes
Total Time 50 minutes
Servings 6 (1.3 cups each)
Calories 331kcal

Equipment

Ingredients

Instructions

  • Add the olive oil and ground turkey to a large pot and cook over medium heat until the turkey is cooked through. Break the ground turkey up into pieces as it cooks.
  • While the turkey is cooking, dice the onion and poblano pepper, and mince the garlic. Add the onion, poblano, and garlic to the pot and continue to sauté for a few minutes more, or until the onions are soft and translucent.
  • Add the canned beans (drained), frozen corn (no need to thaw), diced tomatoes (with juices), tomato paste, chili powder, cumin, oregano, onion powder, garlic powder, salt, pepper, and water. Stir to combine.
  • Place a lid on the pot and allow the chili to come up to a simmer. Once simmering, reduce the heat to medium-low and continue to simmer for 30 minutes (or longer, if preferred), stirring occasionally. After 30 minutes, taste and adjust the seasoning to your liking, then serve.

See how we calculate recipe costs here.

Nutrition

Serving: 1.3cups | Calories: 331kcal | Carbohydrates: 41g | Protein: 29g | Fat: 7g | Sodium: 1138mg | Fiber: 13g
Overhead view of a pot of turkey chili.

How to Make Turkey Chili

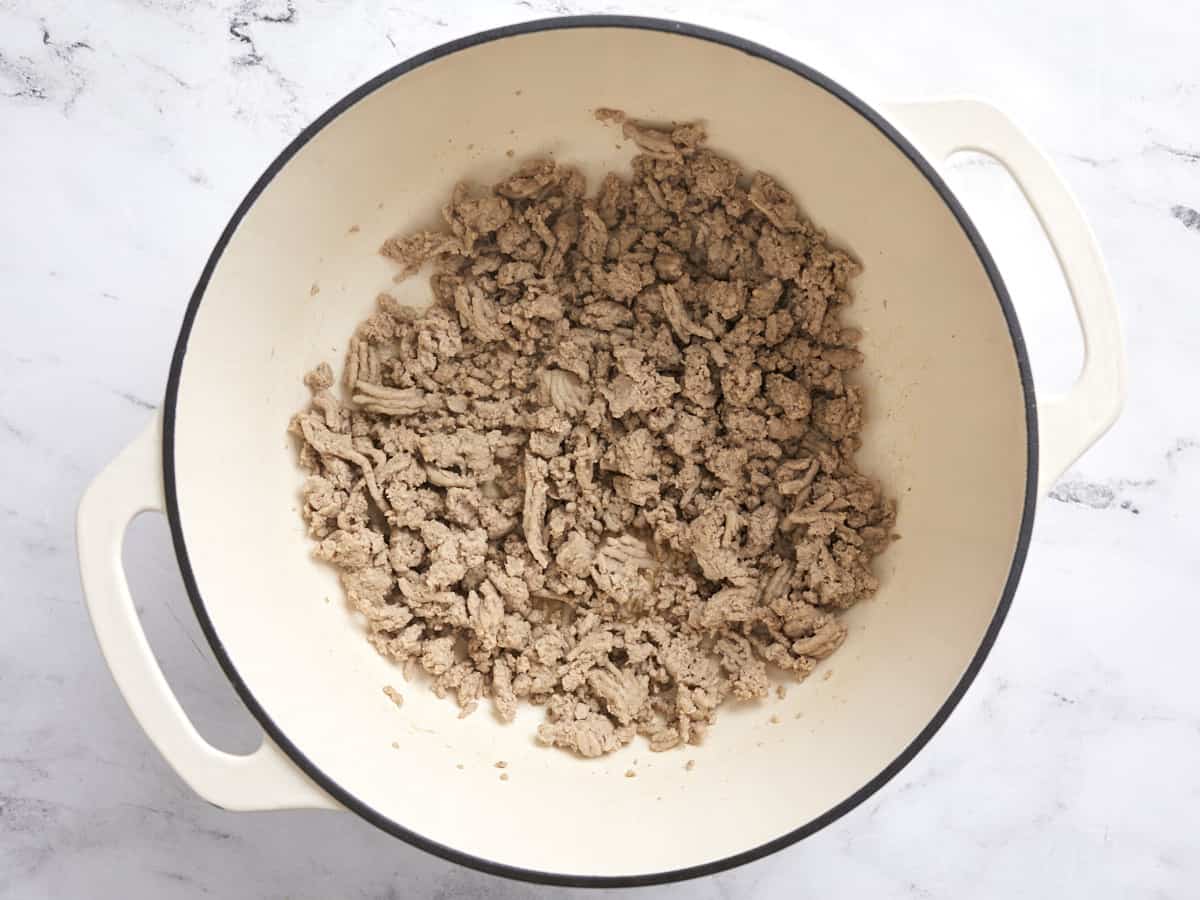
Browned turkey in a large pot.

Add 2 Tbsp olive oil and one pound of ground turkey to a large pot. Cook over medium heat until the ground turkey is cooked through.

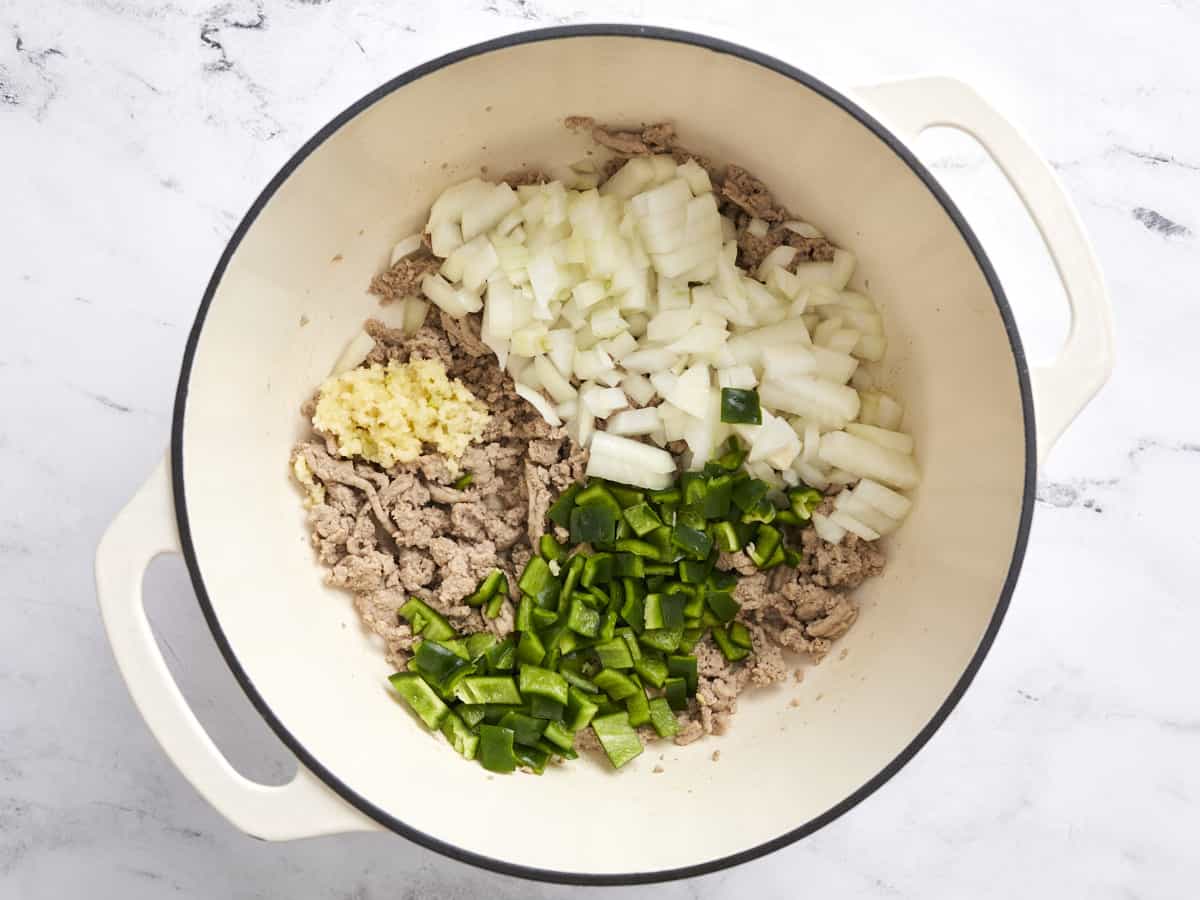
Onion, poblano pepper, and garlic added to the pot.

While the turkey is browning, mince four cloves of garlic, dice one yellow onion, and dice one poblano pepper. Add the garlic, onion, and pepper to the pot and continue to cook and stir over medium heat until the onions have softened.

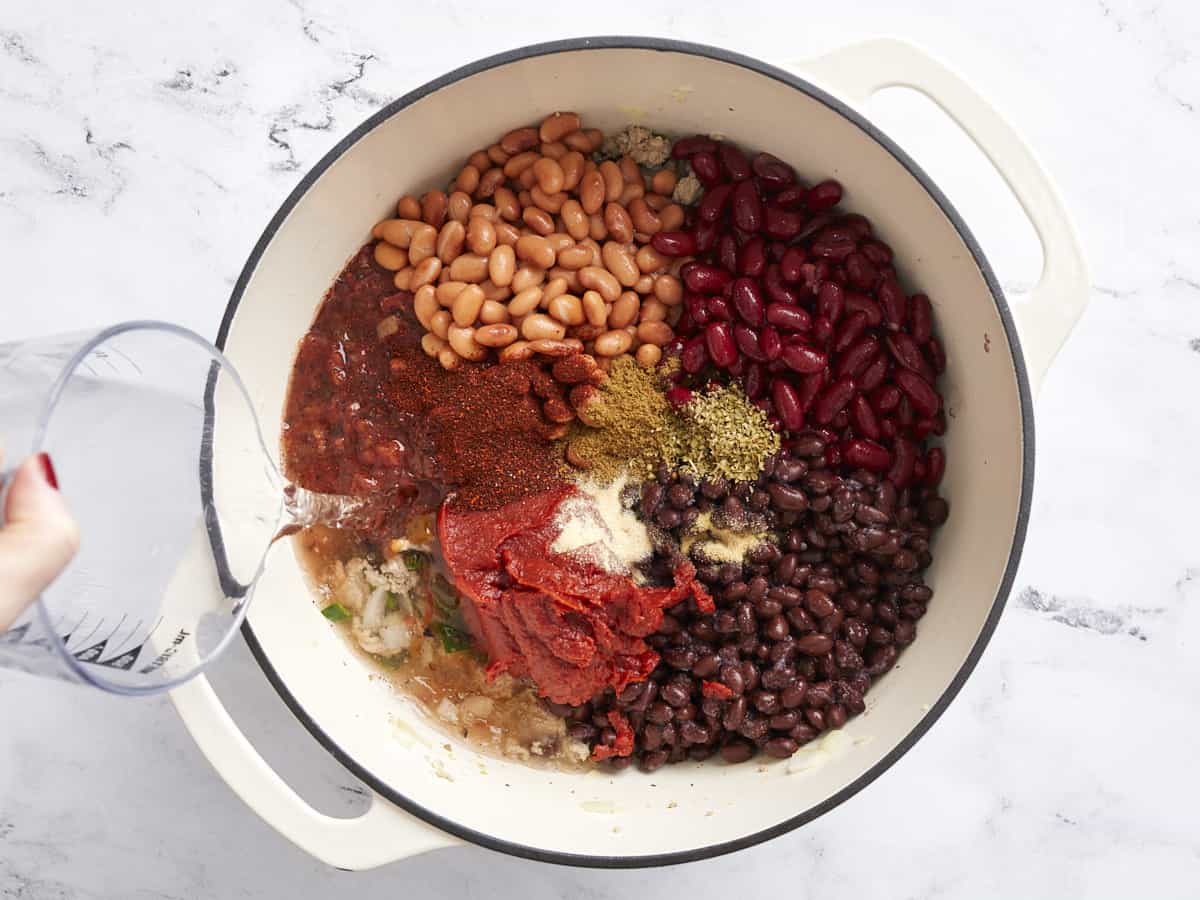
Beans, tomatoes, and spices added to the pot, water being poured in the side.

Next, add one 15oz. can of kidney beans (drained), one 15oz. can of black beans (drained), one 15oz. can of pinto beans (drained), one 15oz. can of fire-roasted diced tomatoes (with juices), one 6oz. can of tomato paste, 1 cup frozen corn kernels, 1 Tbsp chili powder, 1 tsp cumin, ½ tsp dried oregano, ¼ tsp garlic powder, ½ tsp onion powder, ¾ tsp salt, ¼ tsp pepper, and 2 cups water to the pot.

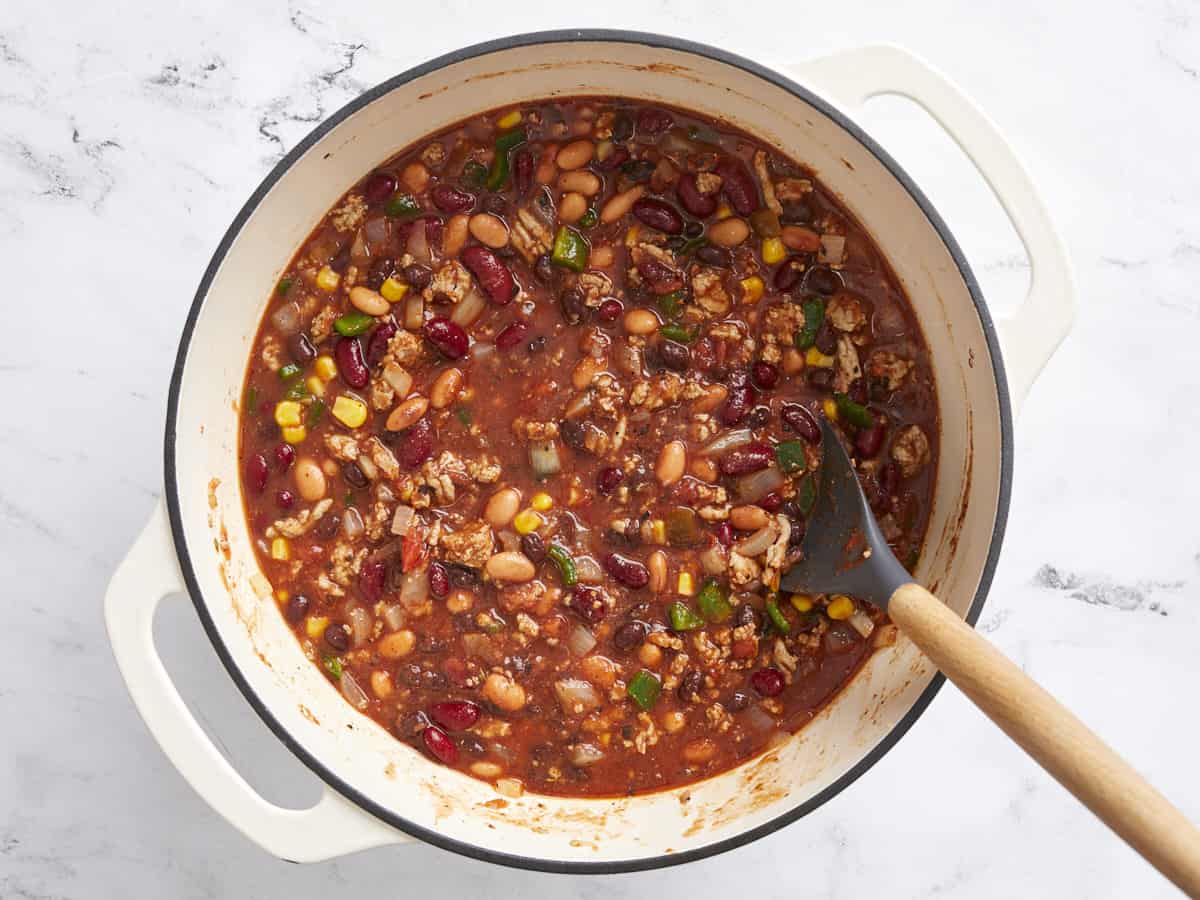
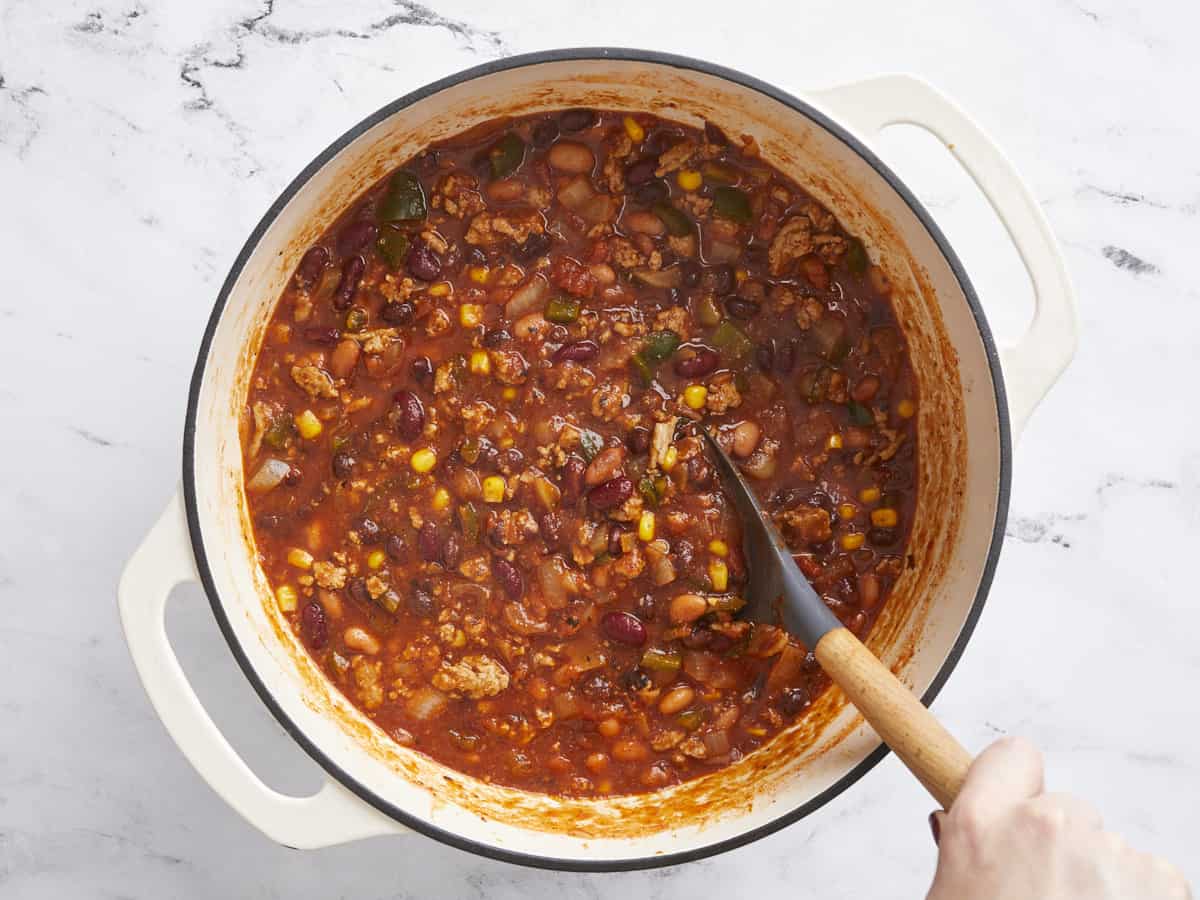
Stirred chili before simmering.

Stir everything to combine, then place a lid on the pot and allow it to come up to a simmer.

Simmered chili in the pot being stirred.

Once simmering, reduce the heat to medium-low and let it simmer for 30 minutes. Give it a taste, adjust the seasoning to your liking, and serve!

Overhead view of a bowl full of chili with toppings.

And don’t forget to pile it high with your favorite chili toppings!

The post Turkey Chili appeared first on Budget Bytes.

Black Bean Chili

This easy and comforting black bean chili is rich, full of warm chili spices, and fast enough to pull together on a busy weeknight.

The post Black Bean Chili appeared first on Budget Bytes.

Chili is seriously one of my favorite parts of the fall-winter season. It’s super easy to make, the leftovers are amazing, and it’s incredibly cozy and hearty. It’s basically all I want to eat from September to March. 😅 Our classic chili recipe is great, but I also love this simple black bean chili because it has a slightly lighter, brighter flavor, and I just have a soft spot for black beans. Gimme all the black beans all of the time! So if you’re looking for something to meal prep for the week or just something to keep you warm as the air outside gets colder, give this black bean chili a try!

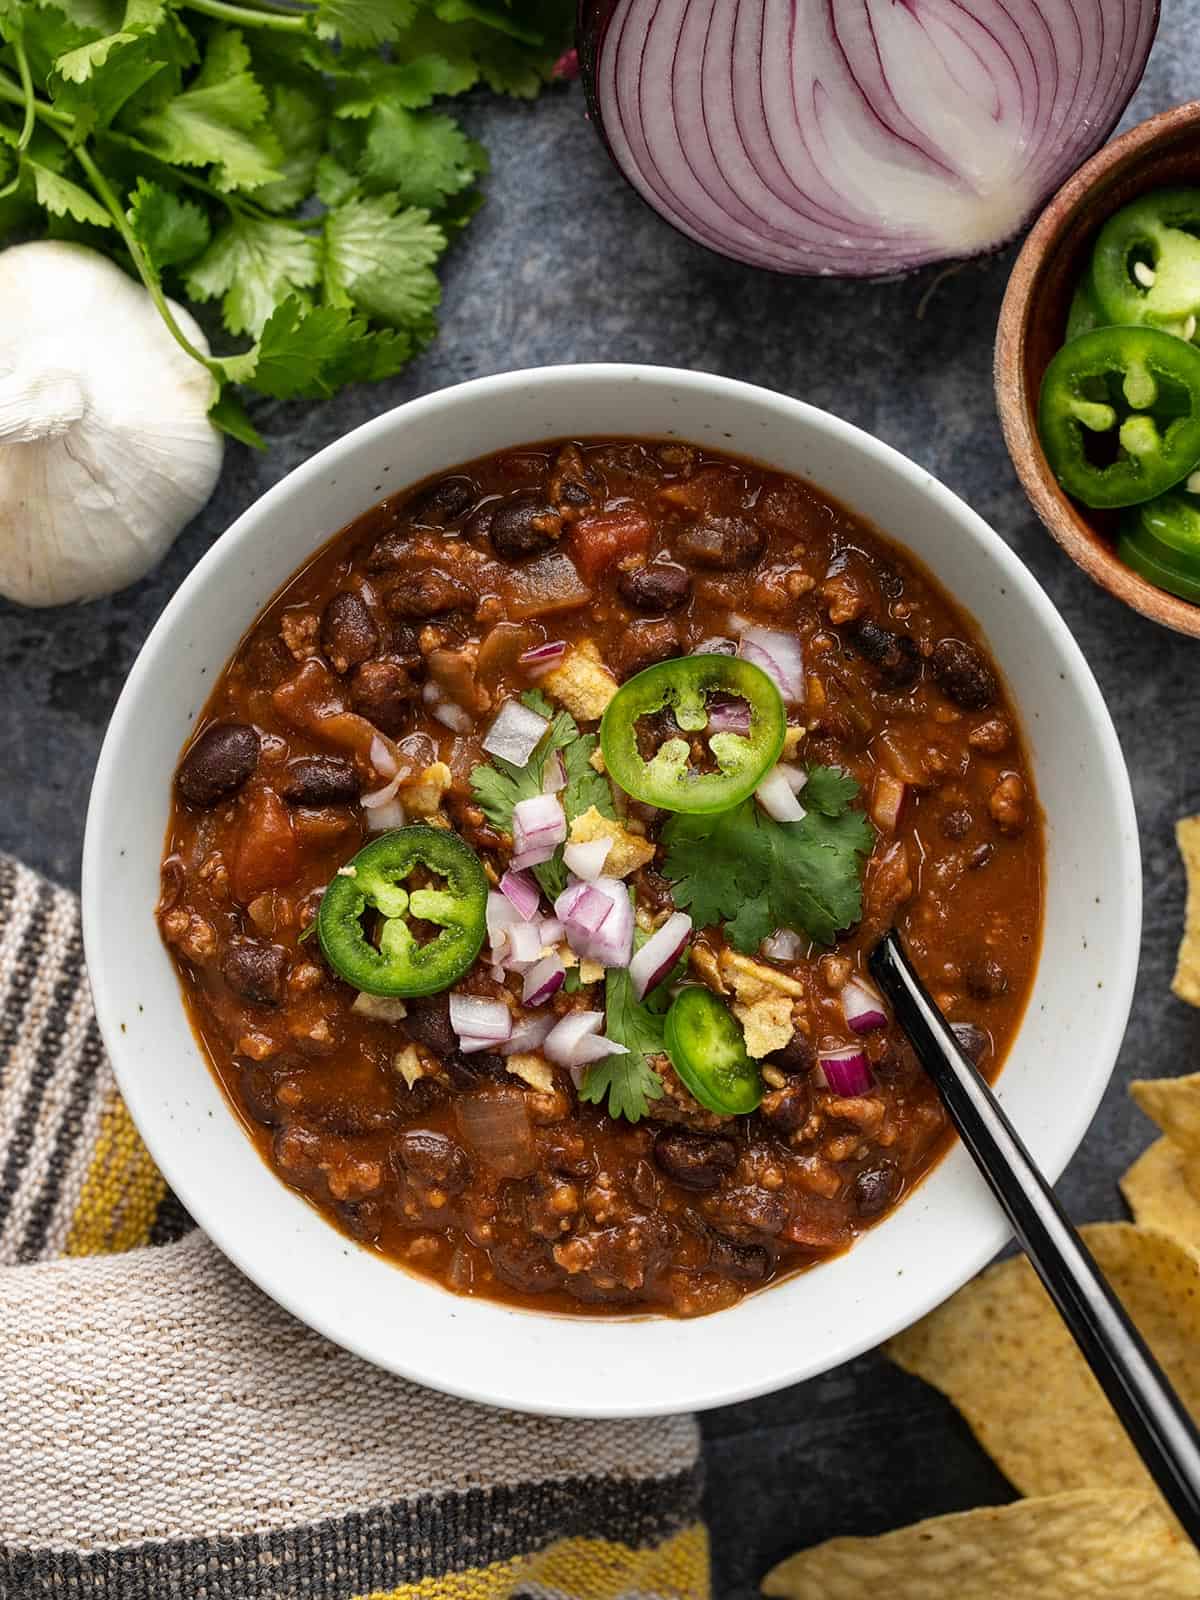
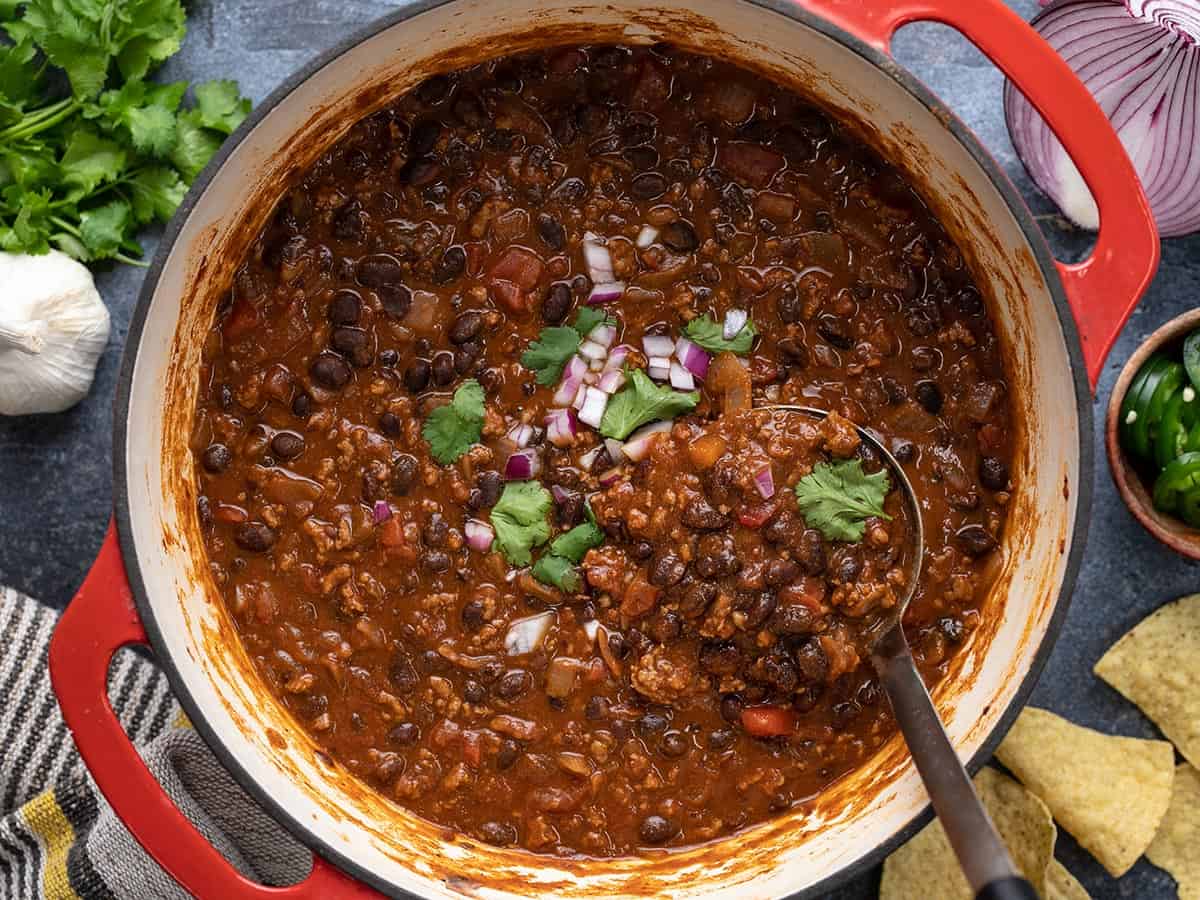
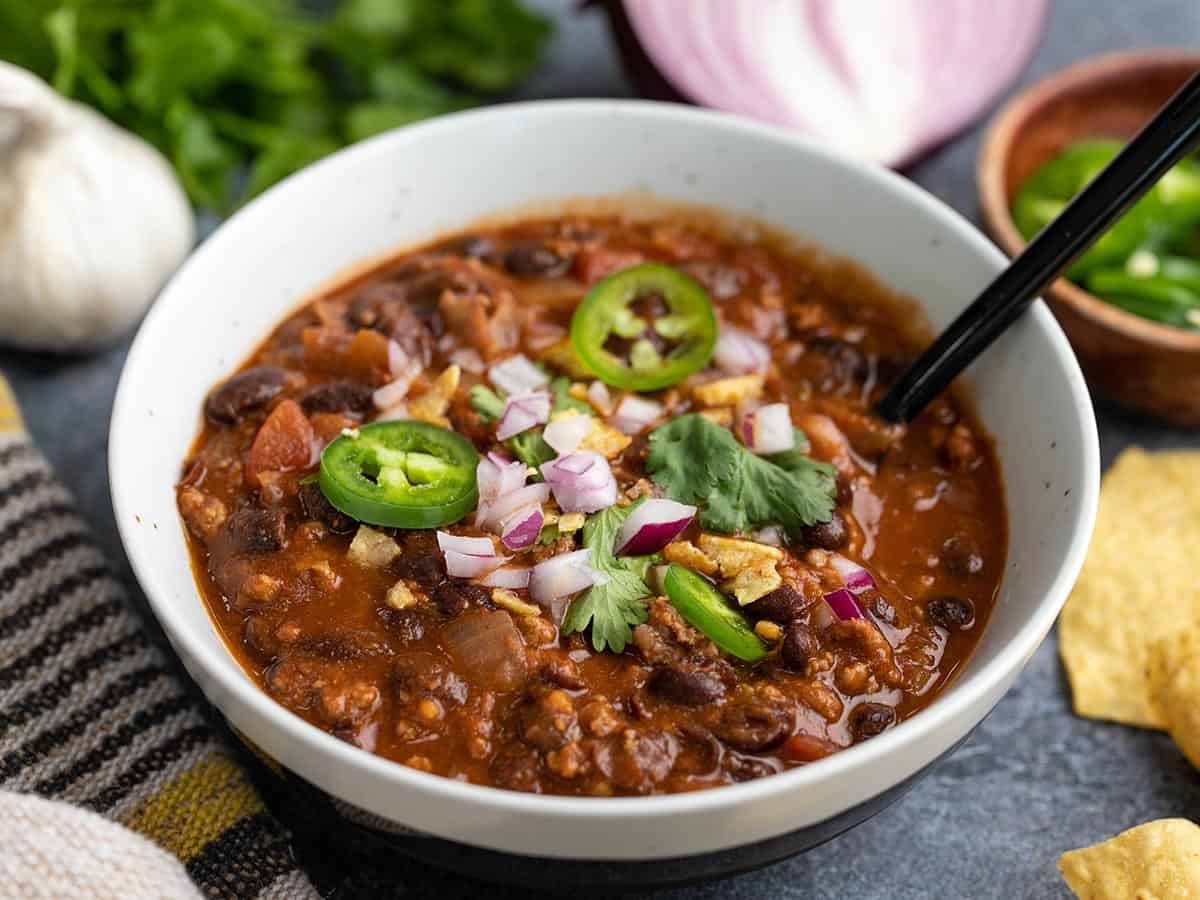
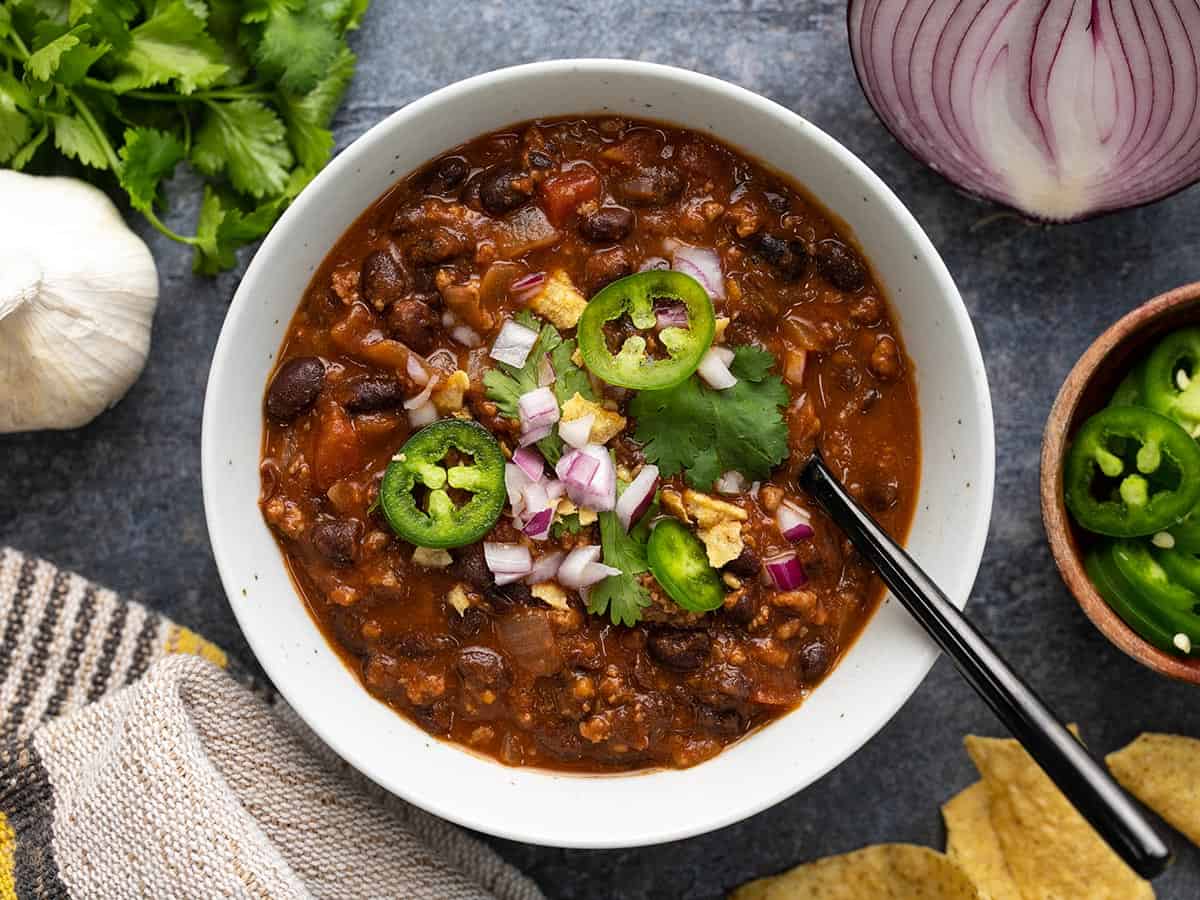
Overhead view of a bowl full of black bean chili with toppings.

What’s in Black Bean Chili

Rather than just substituting all black beans in my classic chili recipe, I also changed the flavor profile of this chili slightly. I used tangy diced tomatoes with green chiles, which gives the chili a nice brightness. I paired that with a little more cumin than usual for a slightly earthy base, and then added some smoked paprika because that smoky flavor pairs really well with the black beans. I also wanted the black beans to be the star of this show, so I actually used half the amount of ground meat as my classic chili, which helps keep it very budget-friendly as well!

Ingredients for Black Bean Chili

Here’s what you’ll need to make this delicious and hearty pot of black bean chili:

  • Onion and Garlic: Any pot of chili is going to start with plenty of onion and garlic to get those savory base flavors in place!
  • Ground Beef: I used only a half pound of ground beef for this recipe, but you can increase it to one pound if you prefer a more meaty chili. You can also substitute with ground turkey if preferred.
  • Tomatoes: I used a combination of diced tomatoes with green chiles and tomato paste for this chili. The diced tomatoes add texture and a zingy flavor (thanks to the green chiles) and the tomato paste adds richness and helps thicken the chili.
  • Herbs and spices: The spice mix for this chili starts with a hefty dose of chili powder, then we add some extra cumin for earthiness, a little smoked paprika, oregano, salt, and pepper. Feel free to add a little cayenne if you like your chili spicy!

Toppings for Chili

One of the reasons I love chili the most is all of the fun toppings you can add to your bowl. It’s a great opportunity to use up leftovers in your fridge or pantry, and it can just add tons of flavor, color, and texture to the meal! Here are some of my favorite toppings for black bean chili:

  • Fresh or pickled jalapeños
  • Diced red onion
  • Avocado
  • Sliced green onion
  • Cilantro
  • Crushed tortilla chips
  • Sour cream
  • Cheddar cheese
  • Fresh lime juice
  • Diced avocado
  • Pico de gallo
Overhead view of a pot full of black bean chili.

Serve with a side of Jalapeño Cheddar Cornbread!

Overhead view of a bowl full of black bean chili with toppings.
Print

Black Bean Chili

This easy and comforting black bean chili is rich, full of warm chili spices, and fast enough to pull together on a busy weeknight. 
Course Dinner, Lunch, Main Course
Cuisine American
Total Cost $9.19 recipe / $1.53 serving
Prep Time 10 minutes
Cook Time 20 minutes
Total Time 30 minutes
Servings 6 (about 1.3 cups each)
Calories 358kcal

Ingredients

Instructions

  • Dice the onion and mince the garlic. Add the onion and garlic to a large pot with the olive oil and cook over medium heat just until the onions are softened (2-3 minutes).
  • Add the ground beef to the pot and continue to sauté until the beef is cooked through (5-7 minutes).
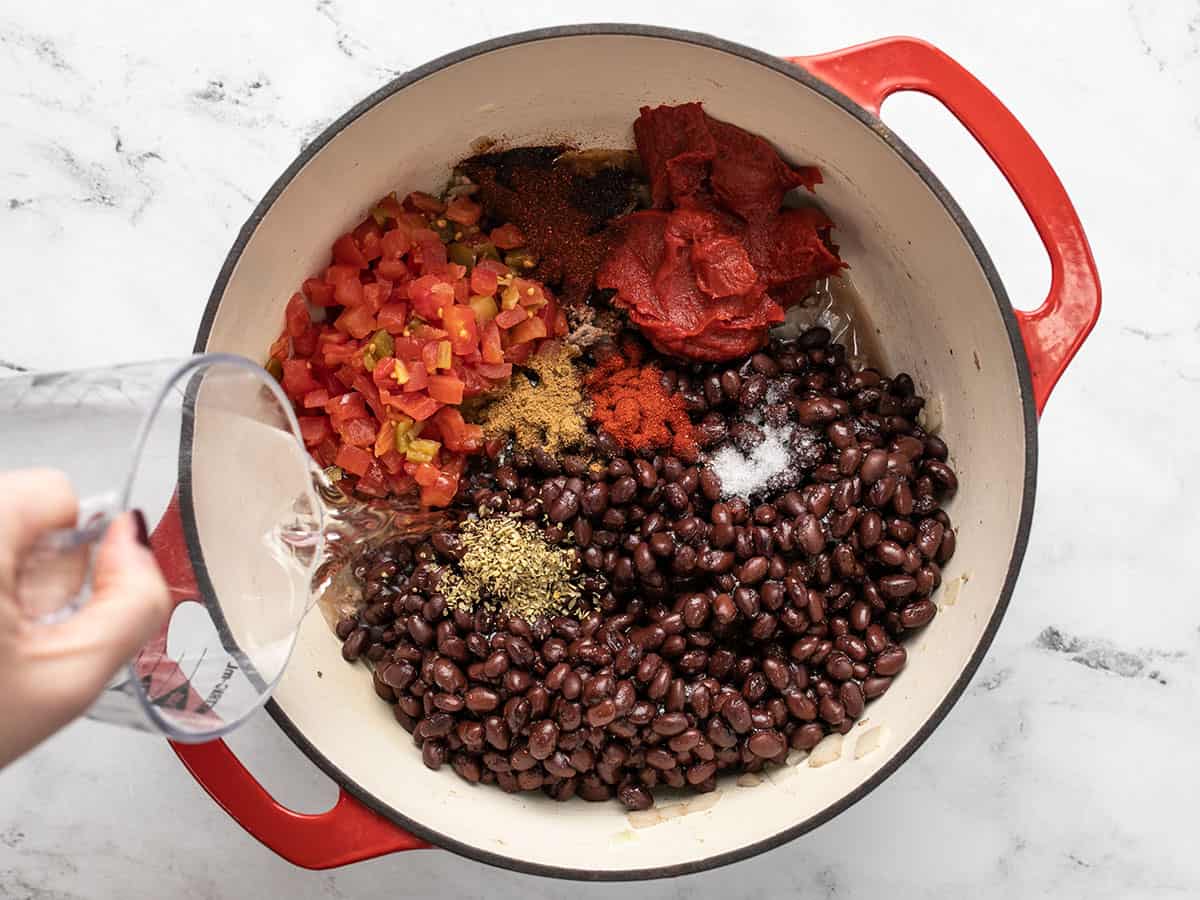
  • Add the drained black beans, diced tomatoes (with juices), tomato paste, chili powder, cumin, smoked paprika, and oregano. Stir everything to combine.
  • Place a lid on the chili and allow it to come up to a simmer. Let the chili simmer for about 15 minutes, stirring occasionally, to let the flavors blend and help the liquid thicken slightly.
  • Taste the chili and add salt as needed (this will depend on the salt content of your canned goods. I added about ½ tsp). Serve with your favorite chili toppings and enjoy!

See how we calculate recipe costs here.

Notes

*If you want a mild chili, you can use plain diced tomatoes instead of diced tomatoes with green chiles.

Nutrition

Serving: 1Cup | Calories: 358kcal | Carbohydrates: 46g | Protein: 22g | Fat: 11g | Sodium: 1292mg | Fiber: 17g
Side view of a bowl full of black bean chili with a spoon in the center.

How to Make Black Bean Chili – Step by Step Photos

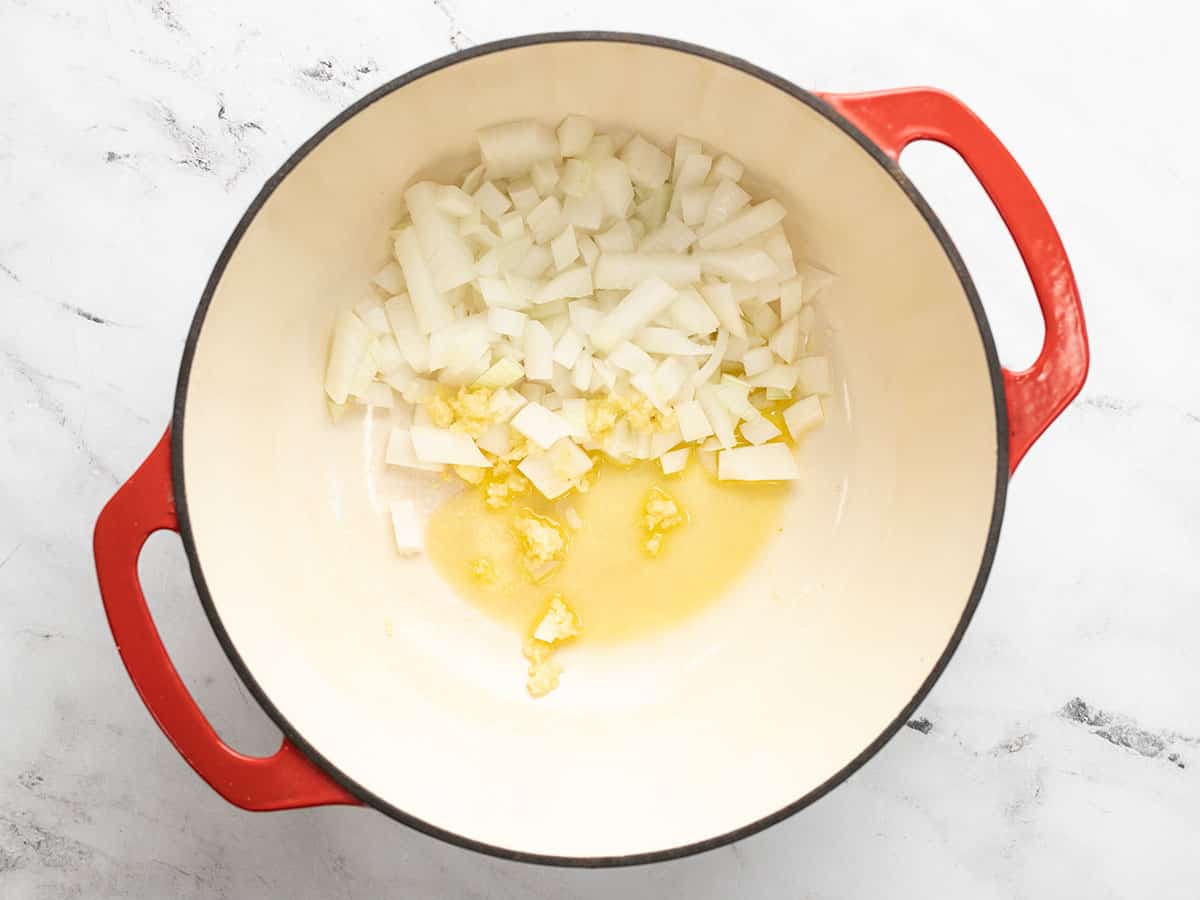
Onions, garlic, and oil in a soup pot.

Begin by dicing one yellow onion and mincing four cloves of garlic. Sauté the onions and garlic with 1 Tbsp olive oil in a large pot over medium-low heat until softened (2-3 minutes).

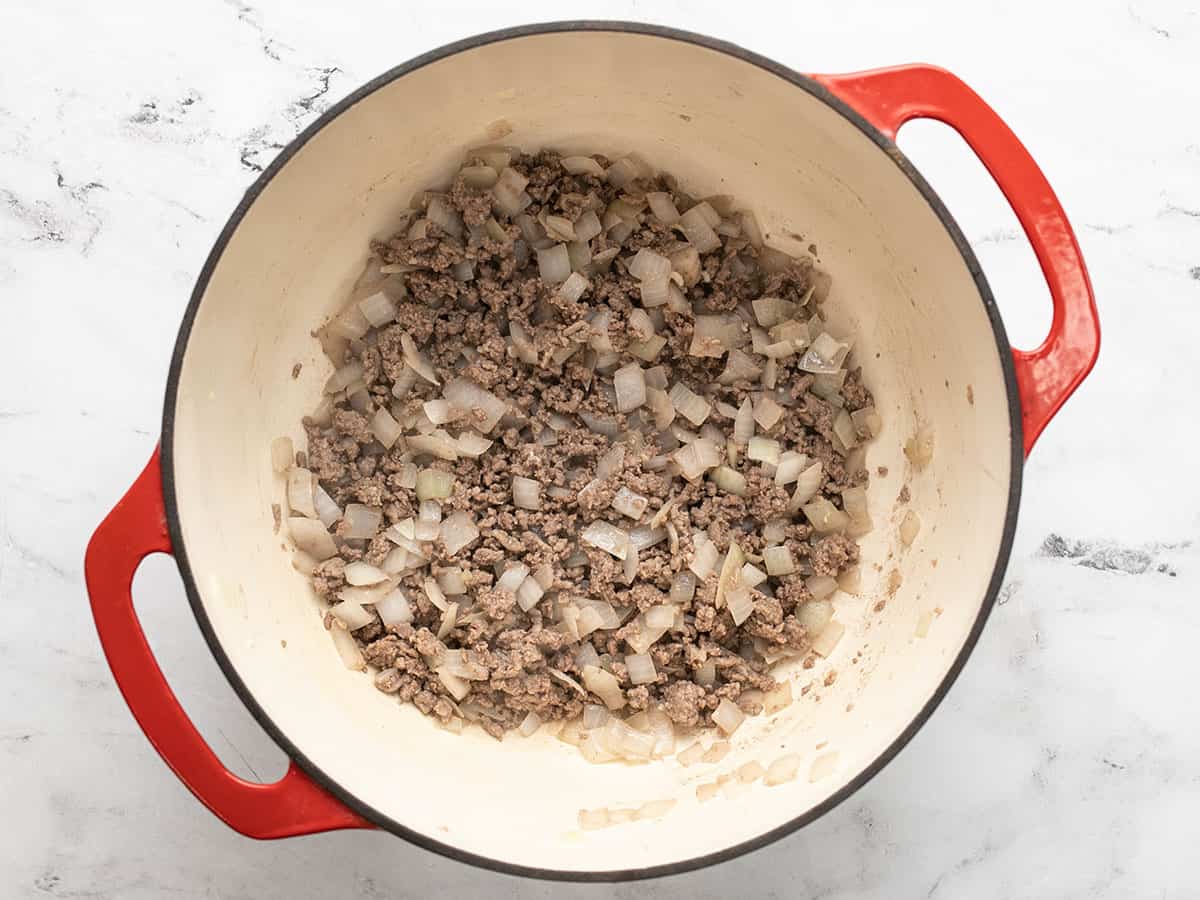
Browned beef in the pot with garlic and onions.

Add ½ pound ground beef (or turkey) and continue to sauté until the meat is cooked through.

Tomatoes, spices, and water added to the soup pot.

Add three 15oz. cans of black beans (drained), one 10oz. can of diced tomatoes with green chiles (with the juices), one 6oz. can of tomato paste, 1 Tbsp chili powder, 1 tsp ground cumin, ½ tsp smoked paprika, ½ tsp oregano, ½ tsp salt, and 2 cups of water.

Chili ingredients in the pot, stirred, but not simmered.

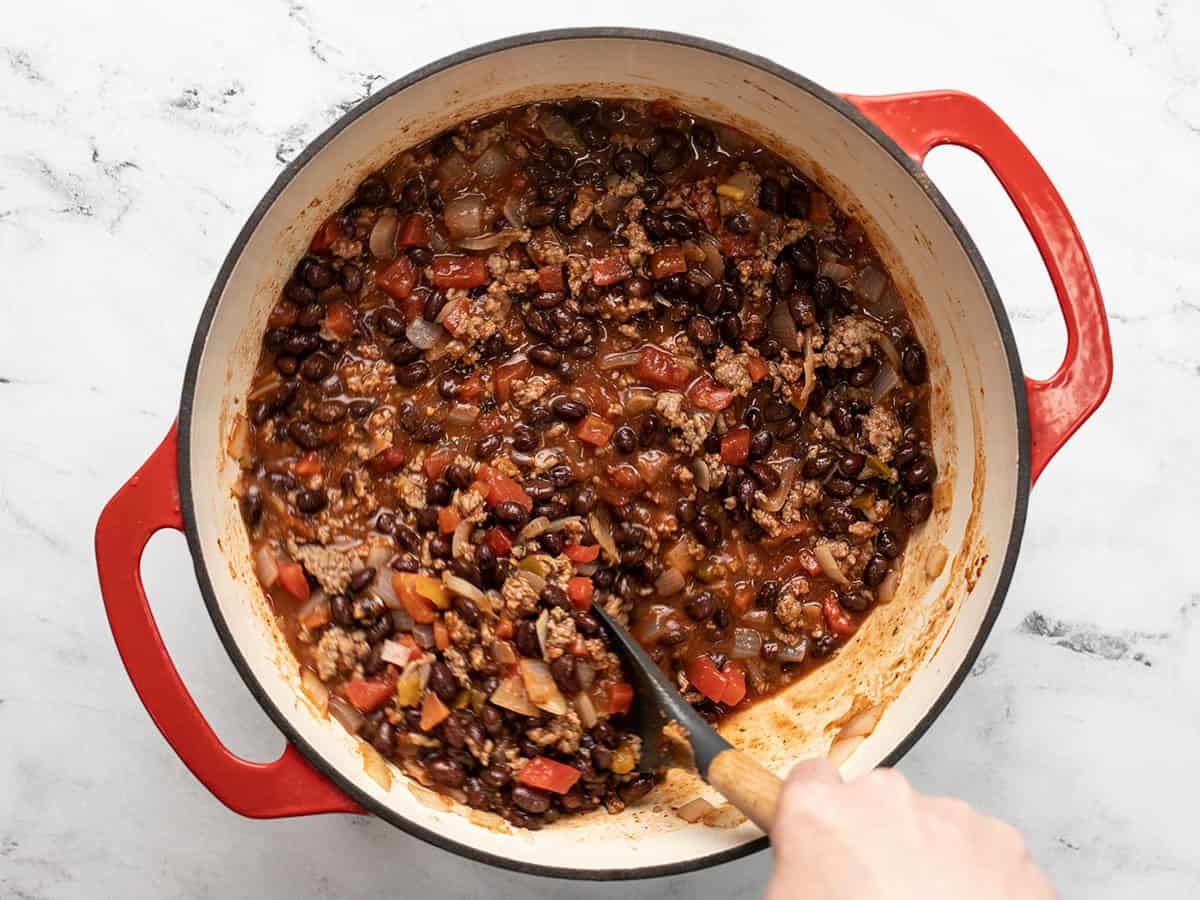
Stir all of the ingredients together until evenly combined. Turn the heat up to medium-high, place a lid on the pot, and allow the chili to come up to a boil. Once it comes up to a boil, give the chili a stir, replace the lid, and reduce the heat to medium-low.

Simmered chili in the pot being stirred.

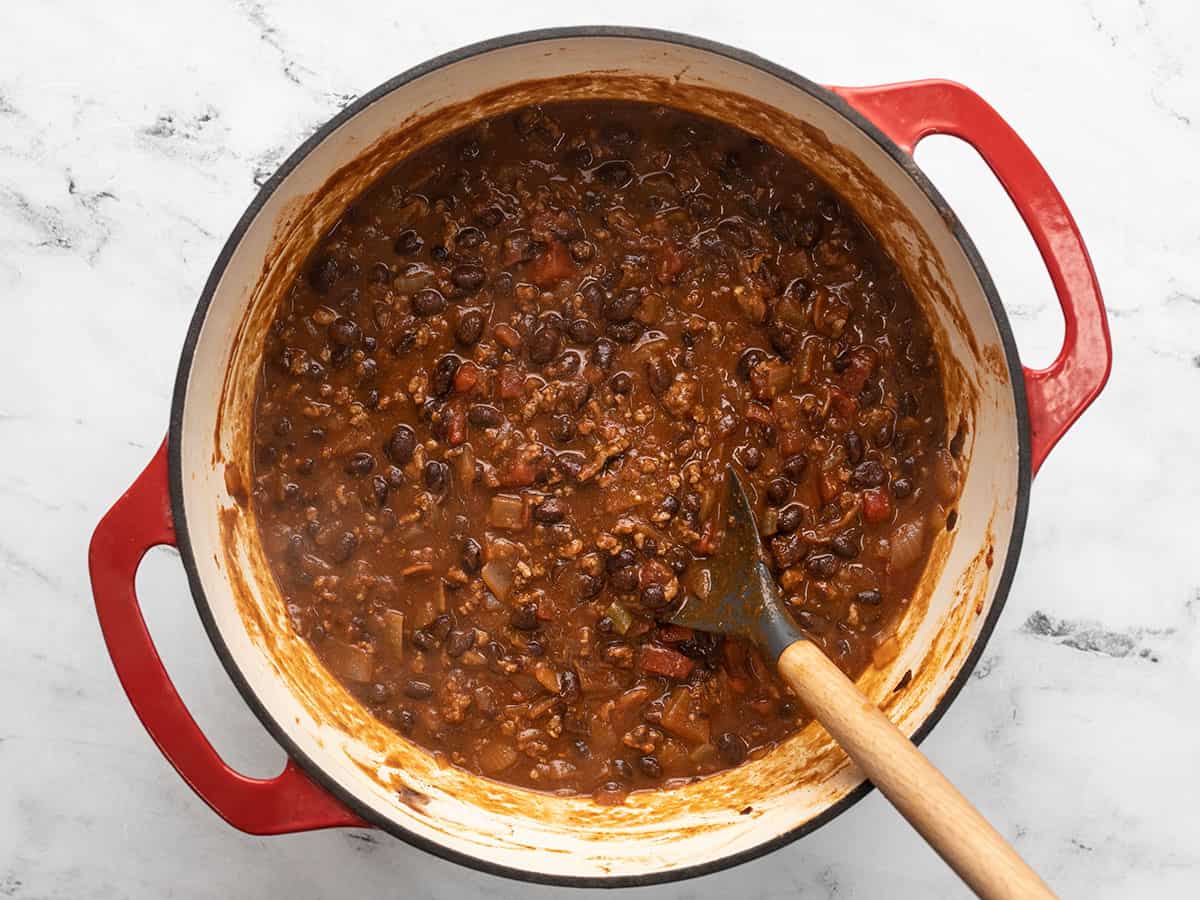
Let the chili simmer over medium-low heat for about fifteen minutes, which will help blend the flavors and thicken the sauce. Give it a taste and add salt if needed. I added about ½ tsp. And that’s it! You’re DONE making dinner! 

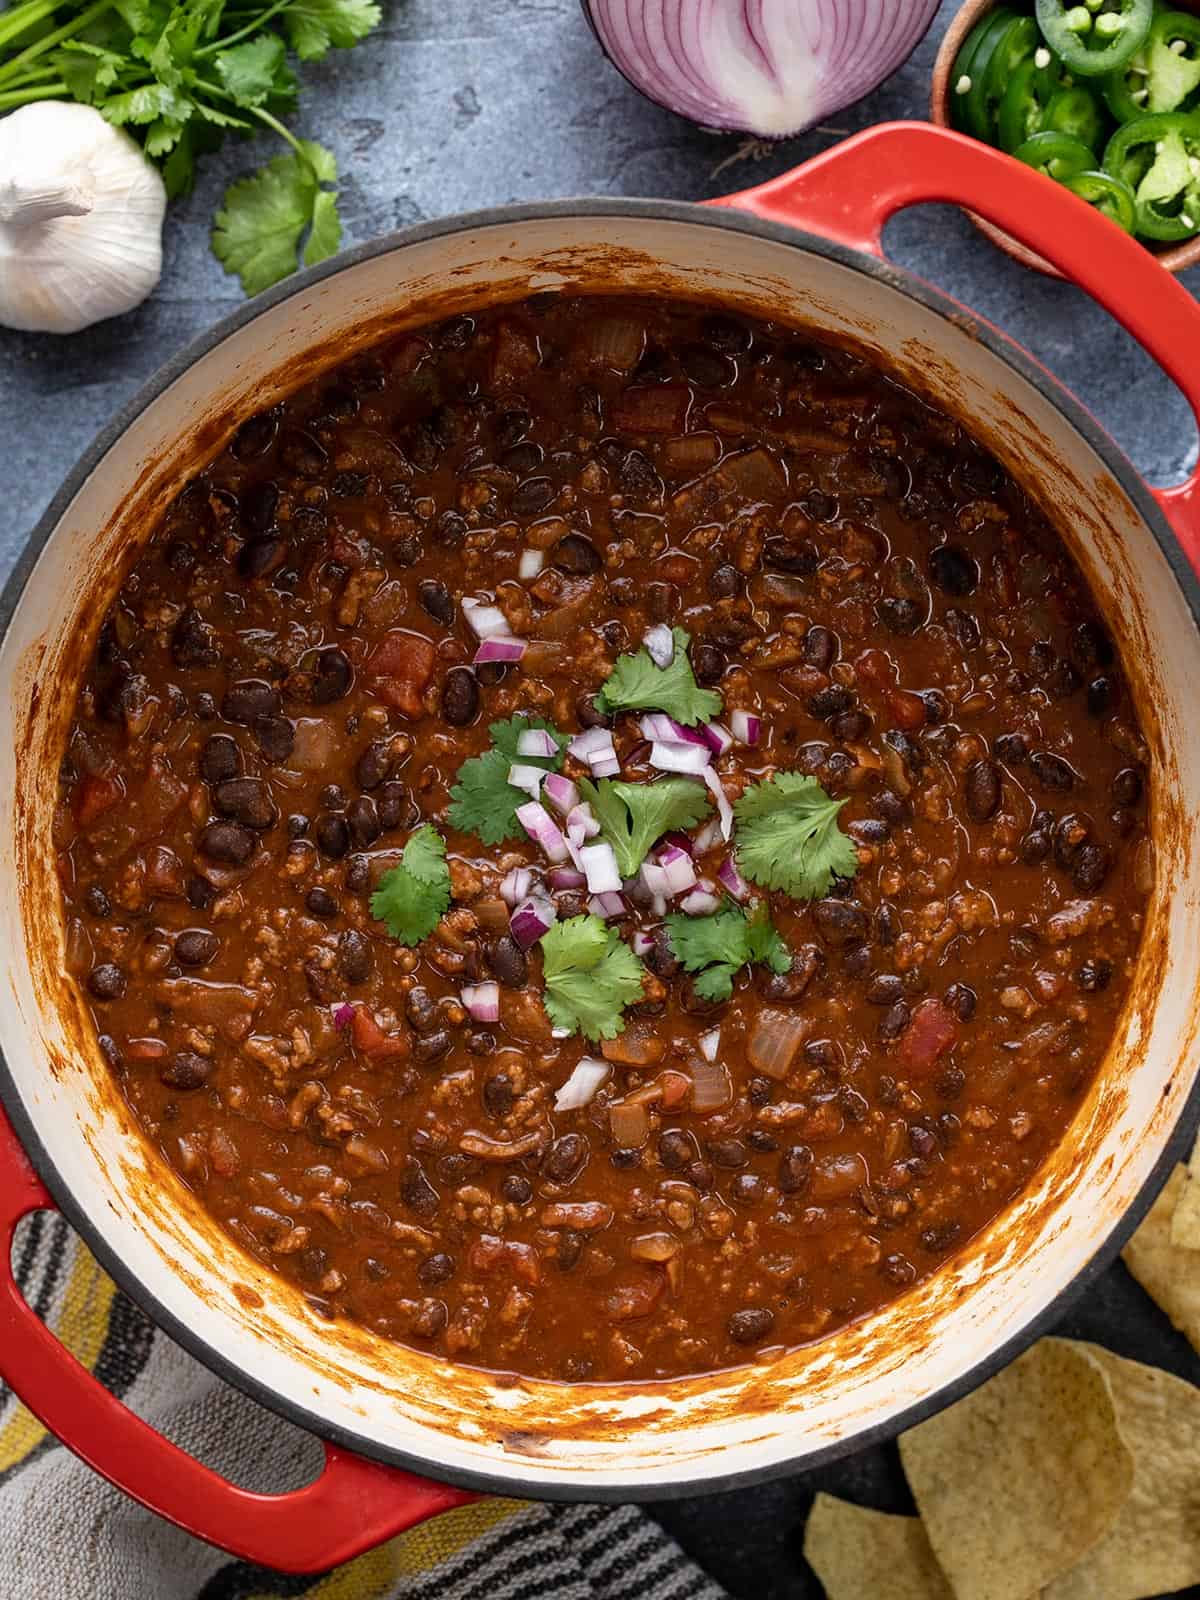
Overhead view of a pot full of black bean chili with toppings in the center of the pot.

Add your favorite toppings and go to town! Or divide it up into single-serving portions and refrigerate for really easy ready-to-heat meals for the rest of the week.

Overhead view of a bowl full of black bean chili with toppings.

The post Black Bean Chili appeared first on Budget Bytes.

Cheap And Easy Bean Recipes

20 Easy Bean Recipes that are budget-friendly and delicious including black bean recipes, pinto bean recipes, cannellini bean recipes, and kidney bean recipes.

The post Cheap And Easy Bean Recipes appeared first on Budget Bytes.

Let’s get into some of our favorite cheap and easy bean recipes! We love beans over here at Budget Bytes because they’re inexpensive, shelf-stable, incredibly versatile, and full of fiber and other nutrients. They adapt well to different spices and flavors, creating the perfect foundation for lots of delicious bean recipes! Beans can also easily help bulk up a recipe while keeping the cost low. So whether you love black beans, pinto beans, cannellini beans, kidney beans, or a combination of ALL the beans, we’ve rounded up several easy bean recipes we’re sure you’re going to love!

Collage of six easy bean recipes with title text in the center.

Black Bean Recipes

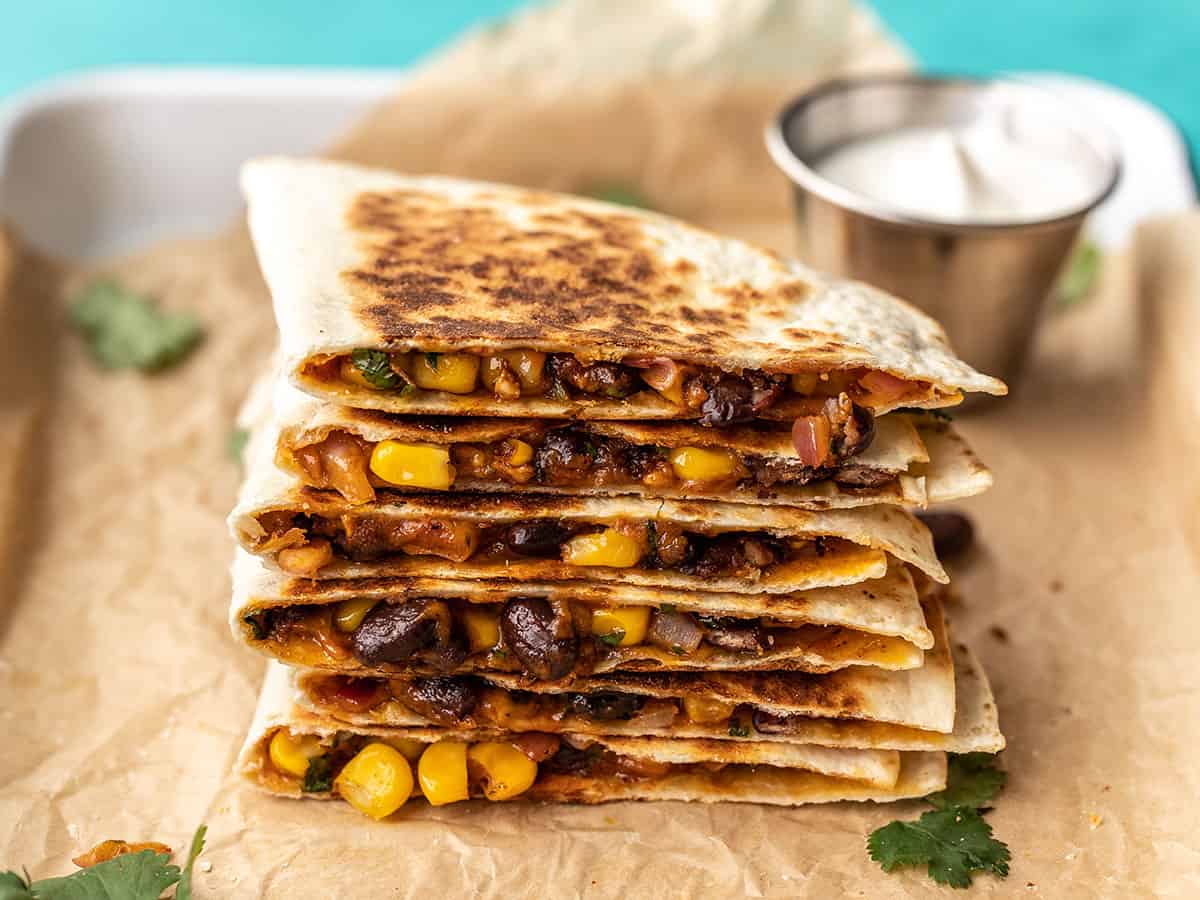
Black Bean Quesadillas

Hearty Black Bean Quesadillas

A stack of black bean quesadillas on a serving tray
These Hearty Black Bean Quesadillas are an easy vegetarian snack or light meal that are filling, flavorful, and freezer-friendly!
4.89 from 219 votes
$6.61 recipe / $0.66 each Get the Recipe

Prepare to fall head over heels for these hearty and super delicious Black Bean Quesadillas! This is one of those vegetarian black bean recipes that meat-eaters will also love. Promise! ;)

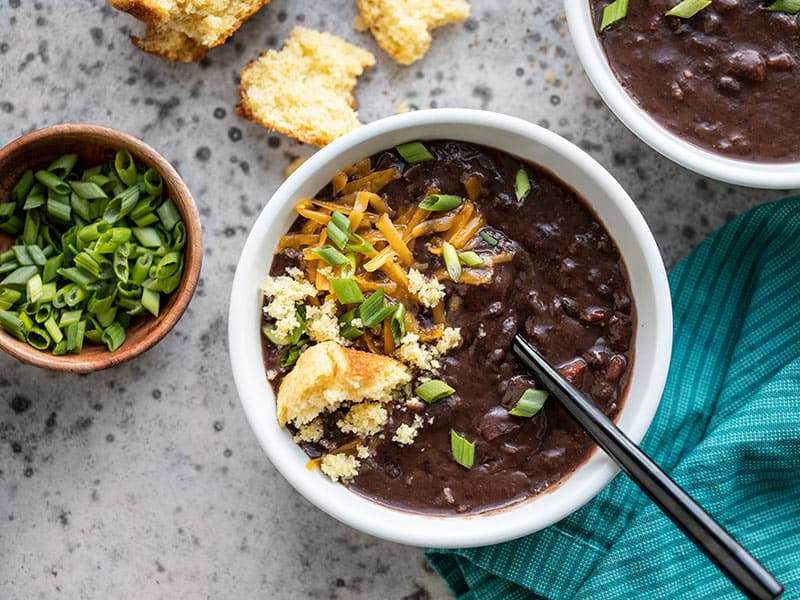
Smoky Black Bean Soup

30-Minute Smoky Black Bean Soup

Two bowls of Smoky Black Bean Soup with various toppings, next to a bowl of sliced green onion and a crumbled corn muffin.
This super fast and easy Smoky Black Bean Soup is rich, filling, flavorful, and waiting to be piled high with fun toppings! An easy vegan weeknight dinner.
4.97 from 30 votes
$4.24 recipe / $1.06 serving Get the Recipe

Who else loves soup season?! This quick and easy Smoky Black Bean Soup is made with canned black beans, veggies, spices, and tons of flavor!

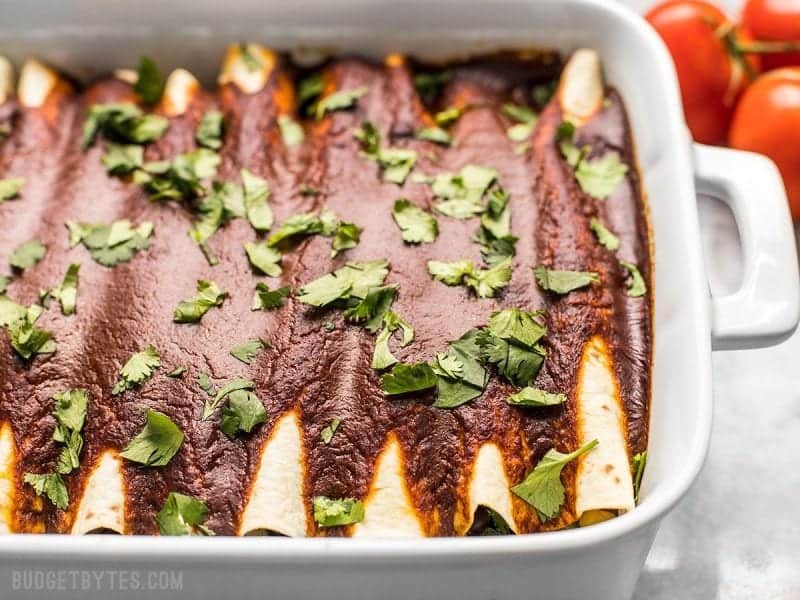
Black Bean And Avocado Enchiladas

Black Bean and Avocado Enchiladas

These hearty vegan Black Bean and Avocado Enchiladas are stuffed with fresh ingredients and drenched in a homemade sauce for big flavor in every bite. BudgetBytes.com
These hearty vegan Black Bean and Avocado Enchiladas are stuffed with fresh ingredients and drenched in a homemade sauce for big flavor in every bite. 
4.91 from 118 votes
$7.23 recipe / $1.45 serving Get the Recipe

If you’re looking for a super delicious black bean dinner recipe, look no further. Our popular Black Bean and Avocado Enchiladas are filled with a simple black bean and veggie mixture, then covered with a rich homemade enchilada sauce! Yum!!

Black Bean Burgers

Homemade Black Bean Burgers

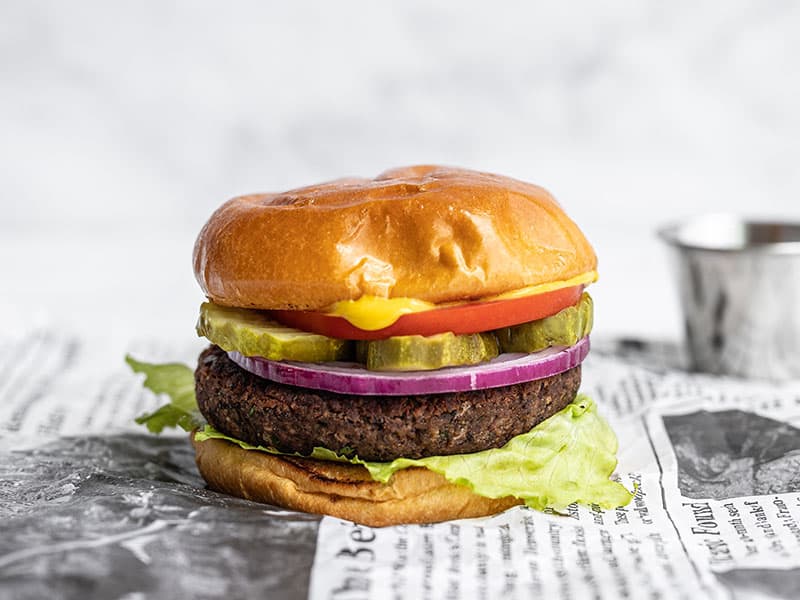
Side view of a single black bean burger on a bun, fully dressed, sitting on newsprint
Black beans, cumin, sriracha, garlic, and fresh red onion make these homemade black bean burgers a flavorful and filling vegetarian meal.
4.88 from 41 votes
$2.57 recipe / $0.43 serving Get the Recipe

Ditch those expensive restaurant veggie burgers and make these Homemade Black Bean Burgers for dinner this week. Top with your favorite toppings and if you have leftovers, just freeze the rest for another day!

Cowboy Caviar

Cowboy Caviar

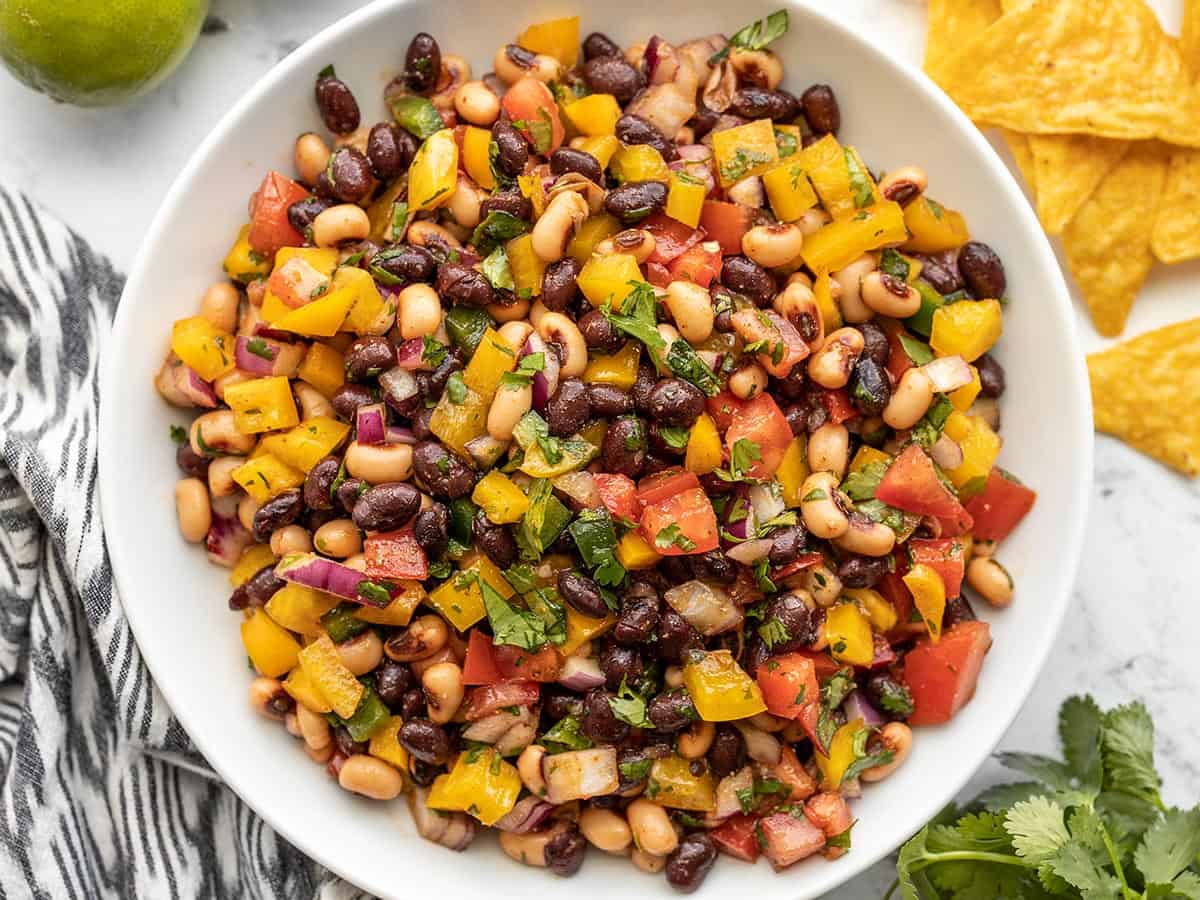
Close up overhead view of cowboy caviar in a bowl with chips on the side.
Cowboy Caviar is a deliciously fresh bean salad with a colorful mix of beans and vegetables, plus a zesty lime dressing.
4.87 from 53 votes
$5.30 recipe / $0.53 serving Get the Recipe

Make room for this super fresh, colorful and delicious bean salad! Cowboy Caviar is a cross between a bean salad and salsa and it’s perfect served with chips, on top of salads, inside a burrito bowl, or as a simple side dish.

And if you love black beans, be sure to try out more of our favorite Black Bean Recipes!

Pinto Bean Recipes

Cheesy Pinto Beans

Cheesy Pinto Beans

Overhead view of a bowl of cheesy pinto beans over rice.
Cheesy Pinto Beans are a quick and satisfying meal made with simple pantry staple ingredients, like canned beans.
4.90 from 47 votes
$2.96 recipe / $0.74 serving Get the Recipe

Though this may seem like a simple recipe, you’ll be surprised just how much flavor is packed into these Cheesy Pinto Beans! Serve with a bowl of rice and you instantly have an easy, satisfying meal.

Creamy White Chicken Chili

Creamy White Chicken Chili

Overhead view of a bowl of creamy white chicken chili with toppings and a spoon.
This creamy White Chicken Chili is easy and extra cozy for those cold fall and winter nights. The leftovers are great, too!
4.96 from 21 votes
$12.81 recipe / $1.60 serving Get the Recipe

Creamy White Chicken Chili is a thick and rich chicken and bean stew that’s made with tender chicken, beans, veggies, and a medley of southwest-inspired spices. Easy enough for any weeknight dinner meal.

Pinto Bean Soup

Pinto Bean Soup

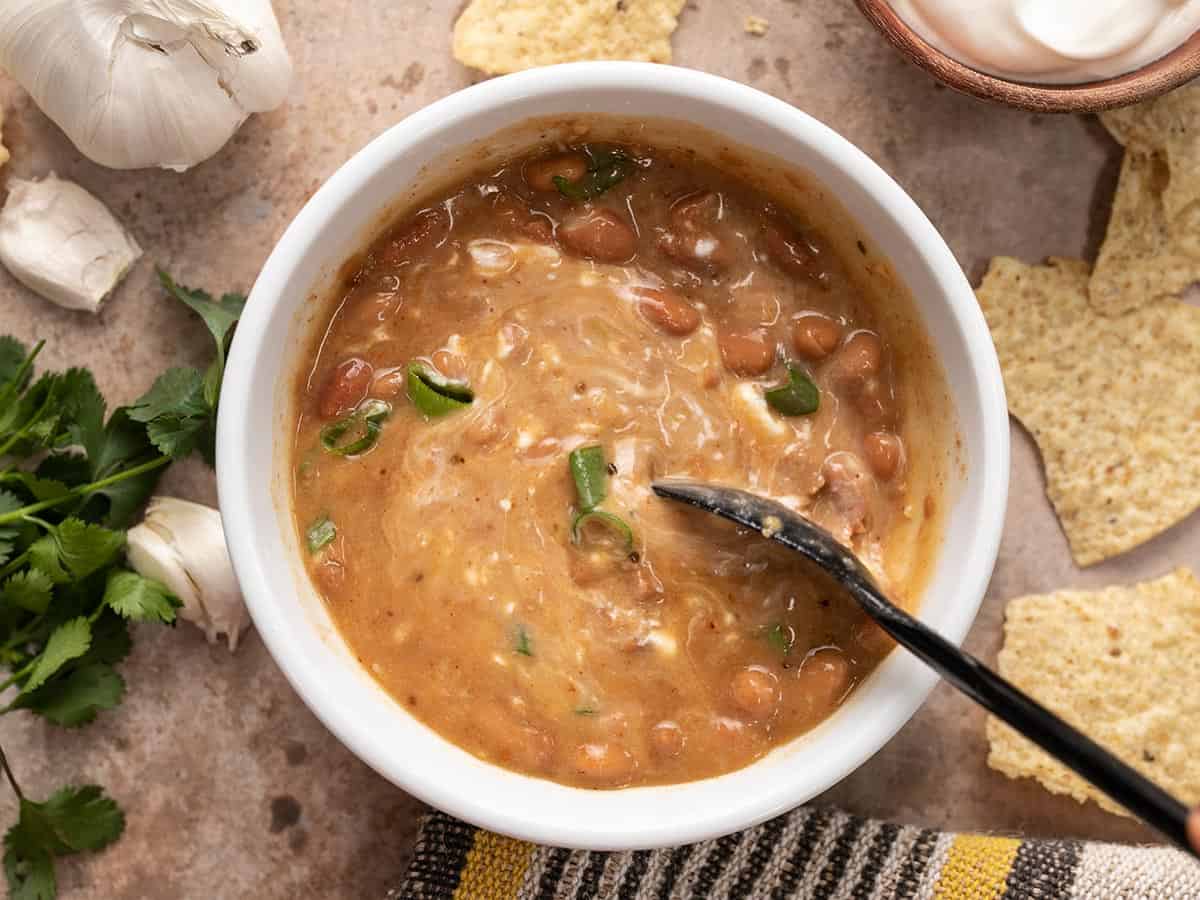
Close up overhead view of three bowls of pinto bean soup.
This easy Pinto Bean Soup is a simple and filling meal for when money is tight but you still want something flavorful and comforting.
$3.51 recipe / $0.88 serving Get the Recipe

If you love easy, cozy, soup recipes then I know you’ll love this super simple Pinto Bean Soup. When I first tried it, I was literally blown away by how delicious it was and yet incredibly easy to make!

BBQ Bean Sliders

BBQ Bean Sliders

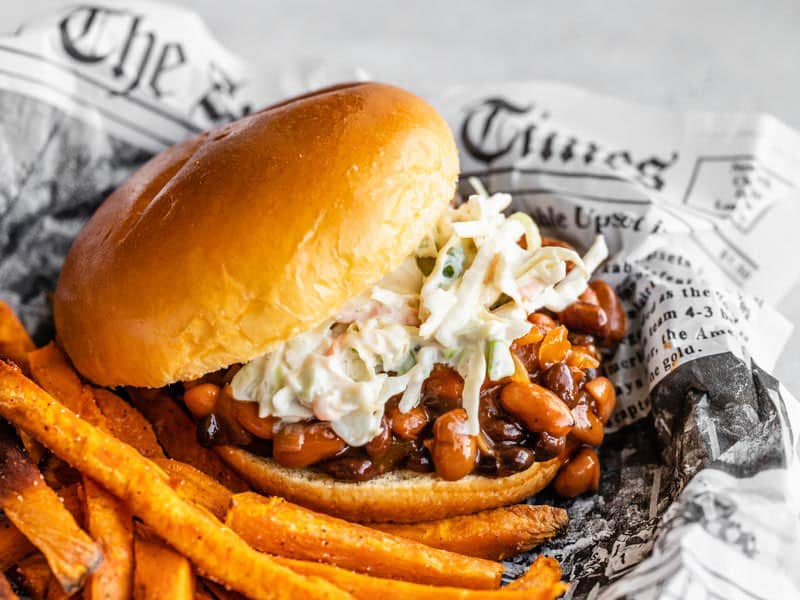
Side view of a BBQ Bean Slider on a plate with some sweet potato fries
These BBQ Bean Sliders topped with a homemade creamy coleslaw are a quick dinner fix when you're craving BBQ and don't have time for slow cooking meat!
4.85 from 32 votes
$5.85 recipe / $1.46 serving Get the Recipe

These BBQ Bean Sliders are great to cook when you are craving BBQ and you don’t have the time or money to slow cook an entire pork shoulder. Just add cooked beans and spices, your favorite BBQ sauce, and our homemade creamy coleslaw, and you’ve got a quick & easy BBQ bean sandwich!

Taco Soup

Taco Soup

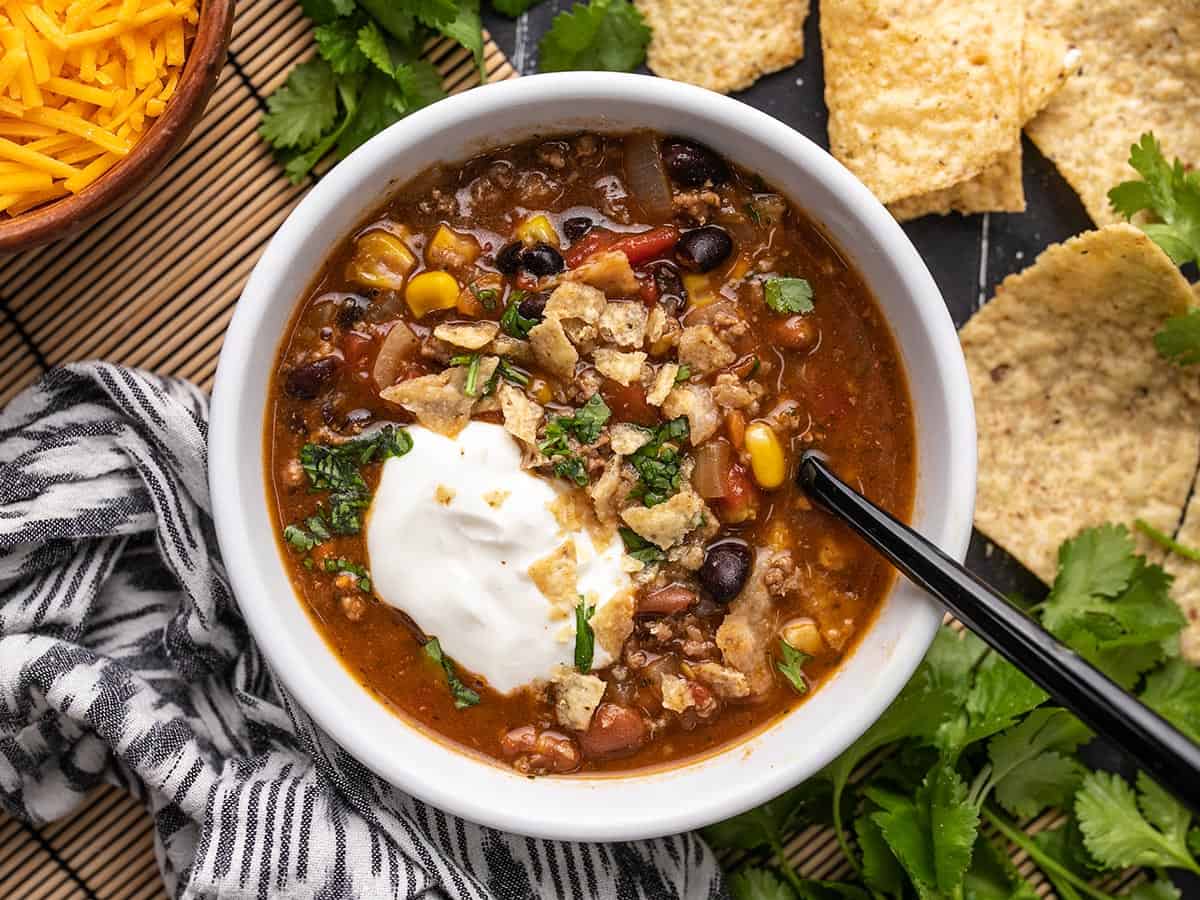
One bowl of taco soup with toppings.
Taco soup is an easy and hearty soup with all the flavor of your favorite tacos in a warm and delicious bowl of soup.
5 from 5 votes
$11.84 recipe / $1.97 serving Get the Recipe

Let’s talk about this fun, hearty, and super flavorful, Taco Soup! It’s made with seasoned ground beef, lots of beans, veggies, and a generously spiced tomato broth. It’s the perfect way to get your taco fix in a big bowl of soup with ALL the toppings!

Cannellini Bean Recipes

Easy Rosemary Garlic White Bean Soup

Easy Rosemary Garlic White Bean Soup

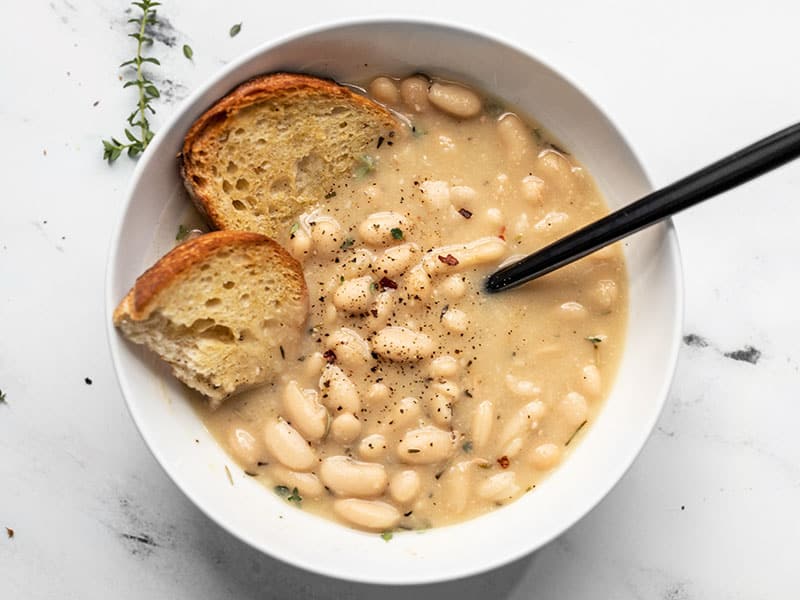
A bowl of Rosemary Garlic White Bean Soup with two pieces of toasted bread and a black spoon in the middle.
This incredibly easy Rosemary Garlic White Bean Soup takes only eight simple ingredients to deliver a bowl full of rich, bold flavor.
4.80 from 131 votes
$2.49 recipe / $0.62 serving Get the Recipe

This creamy and cozy Rosemary Garlic White Bean Soup comes together with just eight simple ingredients and it’s perfect with some homemade croutons on top or a piece of crusty bread for dipping!

Parmesan Beans

Parmesan Beans

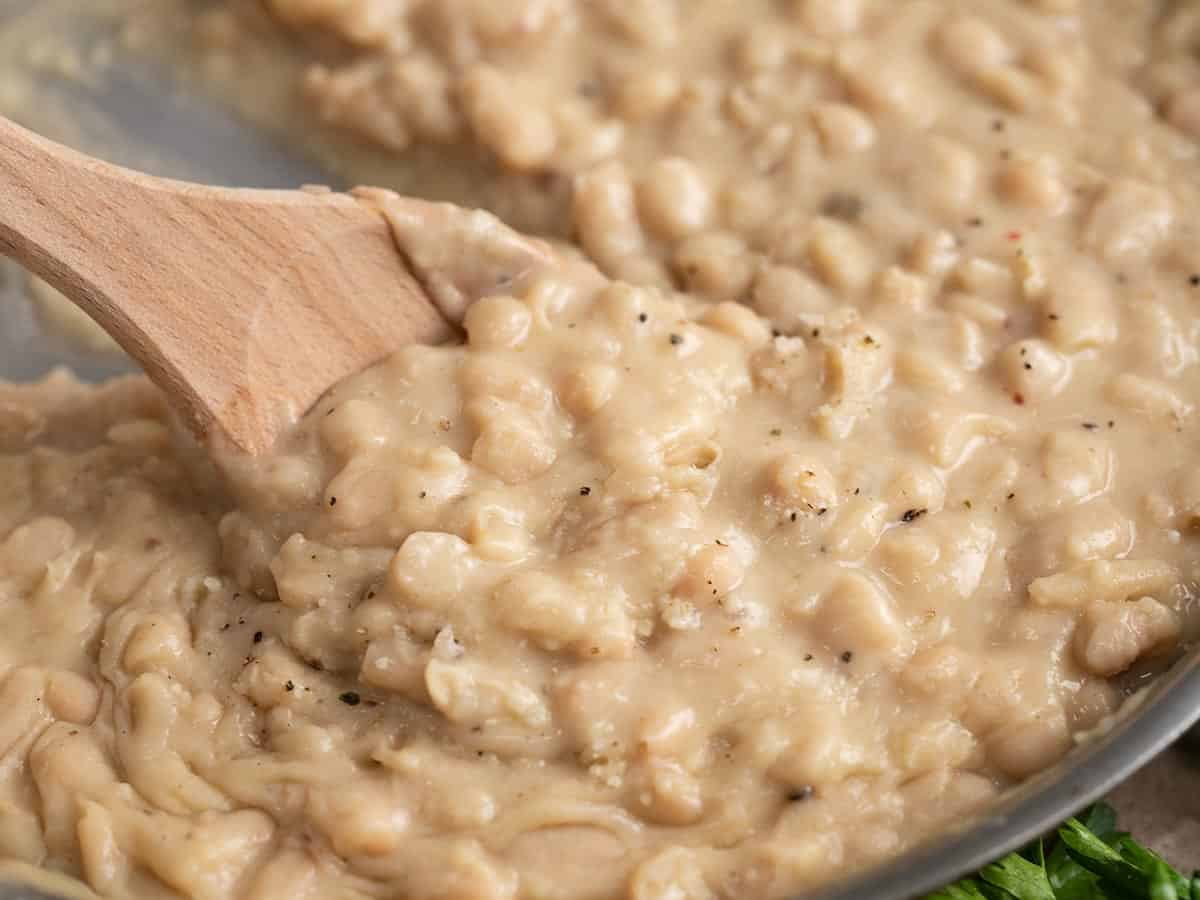
Close up side view of a wooden spoon stirring Parmesan Beans.
Parmesan and freshly cracked pepper give these canned cannelini beans new life! These Parmesan beans are an easy and delicious side dish.
5 from 5 votes
$2.97 recipe / $0.74 serving Get the Recipe

These Parmesan Beans are easy, delicious, and you only need seven simple ingredients! It’s a simple side dish that only takes about twenty minutes to make!

Smoky White Bean Shakshuka

Smoky White Bean Shakshuka

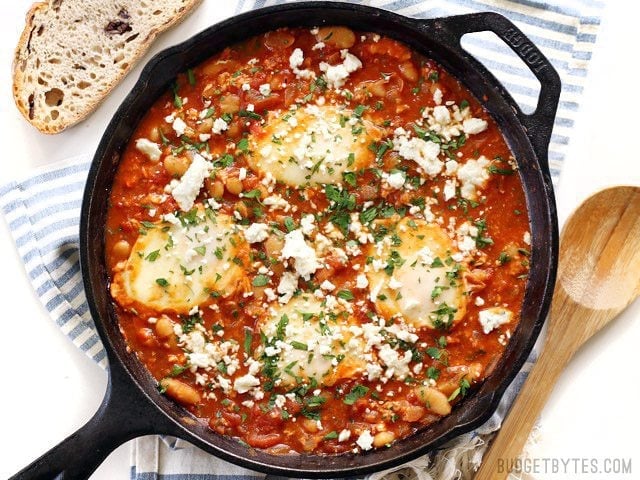
Smoky White Bean Shakshuka makes the BEST breakfast for dinner! BudgetBytes.com
Eggs poached in a rich and smoky tomato sauce speckled with white beans, this Smoky White Bean Shakshuka is a filling and inexpensive breakfast or dinner! BudgetBytes.com
4.86 from 67 votes
$6.49 recipe / $1.62 serving Get the Recipe

This Smoky White Bean Shakshuka is the ultimate breakfast-for-dinner recipe! It’s made up of poached eggs, cannellini beans, fresh herbs, and feta simmered in a rich and flavorful tomato sauce.

Creamy White Bean And Spinach Quesadillas

Creamy White Bean and Spinach Quesadillas

Close up of a plate full of creamy white bean and spinach quesadillas with a dish of red salsa
Crispy on the outside, creamy on the inside, these insanely delicious Creamy White Bean and Spinach Quesadillas make an awesomely fast weeknight dinner. 
4.94 from 90 votes
$3.99 recipe / $1.00 per quesadilla Get the Recipe

Switch up dinner tonight with these Creamy White Bean and Spinach Quesadillas! They’re crispy on the outside, rich in flavor and can be made in just 20 minutes.

White Beans With Mushrooms And Marinara

White Beans with Mushrooms and Marinara

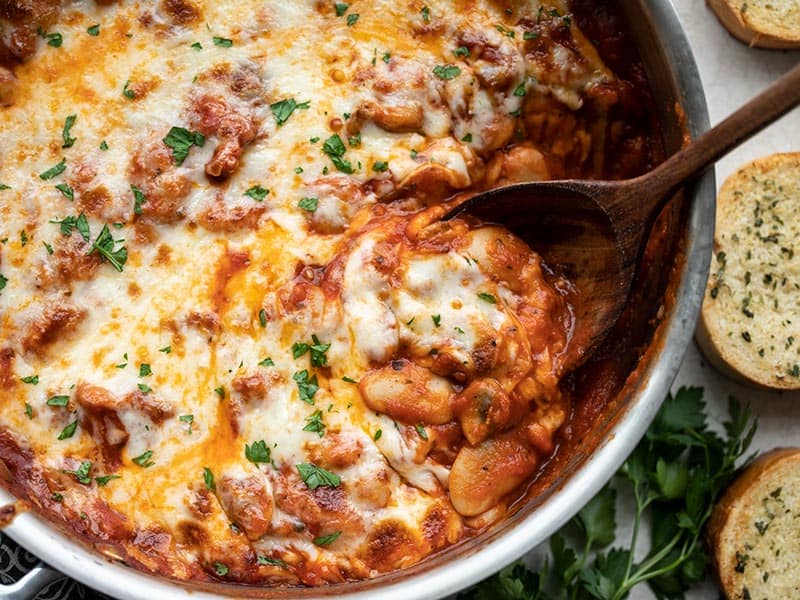
Close up view of a spoon scooping some white beans with mushrooms and marinara, garlic bread on the side.
White beans make a fiber-filled swap for gnocchi in this cheesy, indulgent skillet full of white beans, mushrooms, and marinara.
4.96 from 48 votes
$6.54 recipe / $1.64 serving Get the Recipe

White Beans with Mushrooms and Marinara is an easy one-skillet meal that uses a few simple pantry and produce ingredients and comes together in under 30 minutes!

Kidney Bean Recipes

Louisiana Style Red Beans And Rice

Louisiana Style Red Beans and Rice with Sausage

A bowl full of red beans and rice with sausage, a spoon in the center of the bowl
Classic Louisiana style red beans and rice are a naturally budget friendly meal that will give you leftovers for days! Freezer friendly!
4.51 from 122 votes
$9.75 recipe / $1.63 serving Get the Recipe

These Louisiana Style Red Beans and Rice are rich, flavorful, budget-friendly, has a TON of fiber and protein, and will have your house smelling amazing!

Classic Three Bean Salad

Classic Three Bean Salad

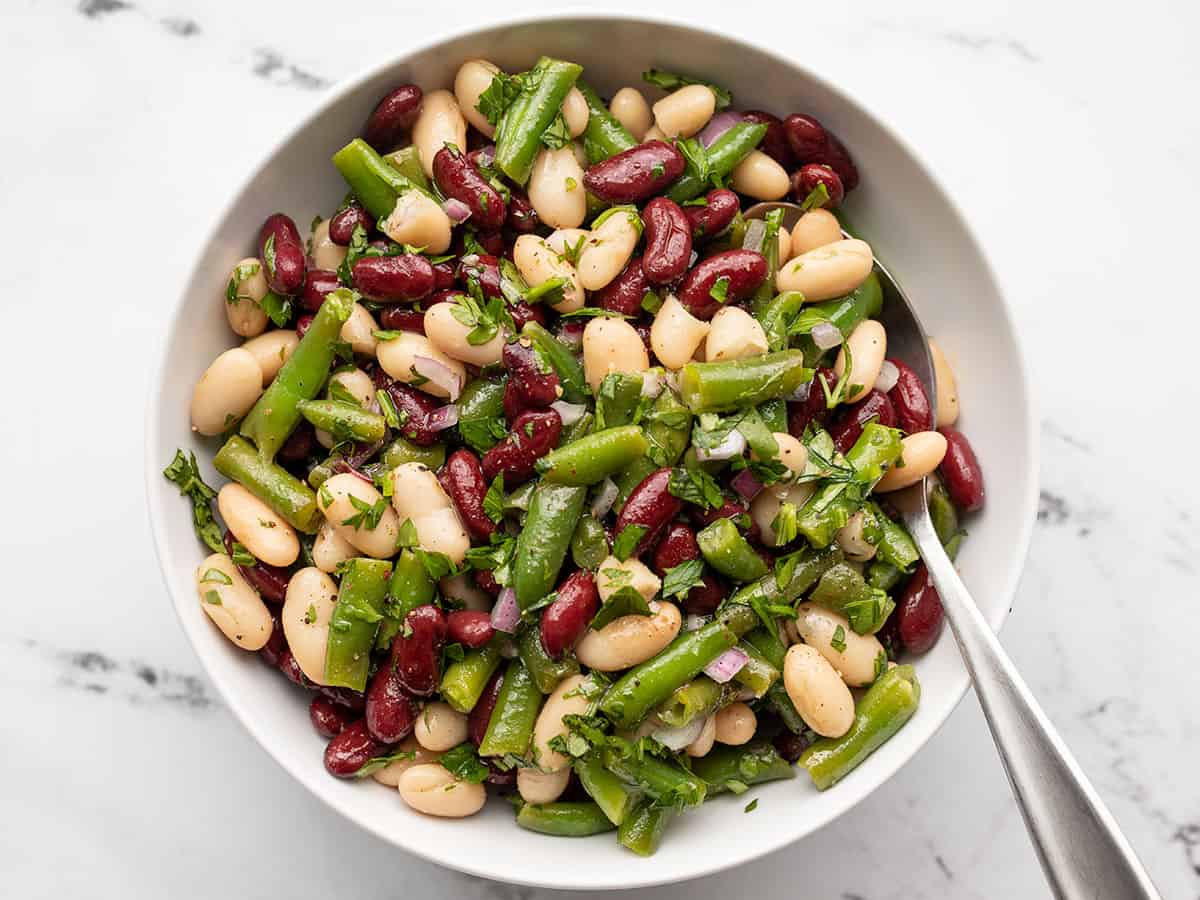
Overhead view of a bowl of three bean salad
Simple ingredients come together in this Classic Three Bean Salad to make a simple summer side dish, perfect for BBQs and potlucks!
4.67 from 12 votes
$2.79 recipe / $0.56 serving Get the Recipe

We’re saving you time and money with this simple Classic Three Bean Salad! It has minimal ingredients, a tangy-sweet dressing, and it’s the perfect side dish for get-togethers or busy weeknight meals.

Classic Homemade Chili

Homemade Chili Recipe

Basic Chili in a bowl being eaten
This is the BEST homemade chili recipe. It's super easy and delicious, plus there are plenty of ways to customize it and make it your own.
4.89 from 140 votes
$9.28 recipe / $1.55 serving Get the Recipe

If there’s one bean recipe to keep in your back pocket, it’s definitely a good Classic Homemade Chili recipe! This chili recipe is a budget bytes reader-favorite and can be customized in a number of ways to make it your very own.

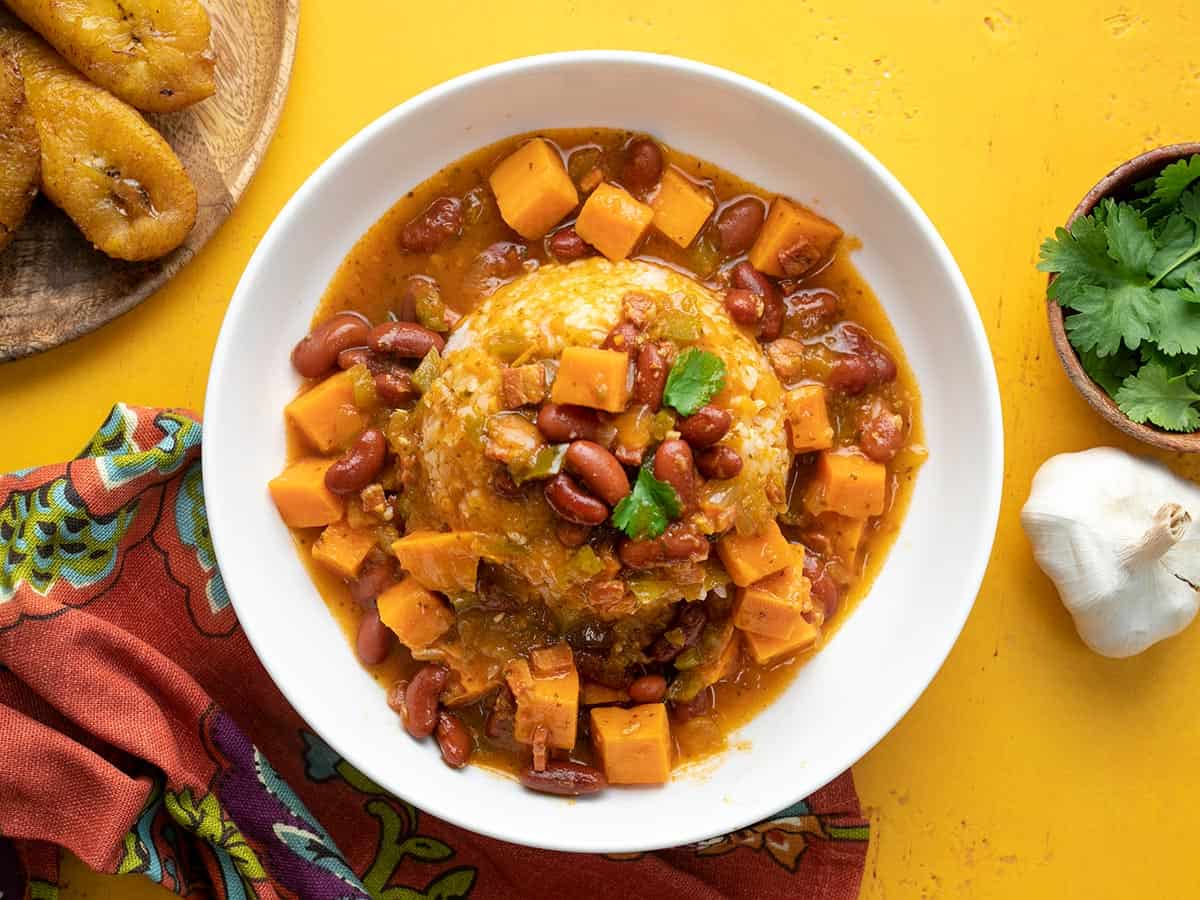
Puerto Rican Rice And Beans

Puerto Rican Style Red Beans and Rice

Overhead shot of a white bowl of red beans and rice.
Puerto Rican Rice and Beans is a dish with bold flavors, it's easy to prepare, and it's budget-friendly! Make it a meal with a side of ripe yellow plantain slices, or serve it as a sidekick to any protein.
4.67 from 12 votes
$8.24 recipe / $0.69 serving Get the Recipe

Puerto Rican Style Red Beans and Rice can be a meal on its own with a side of ripe yellow plantain slices or you can serve it as a sidekick to any protein.

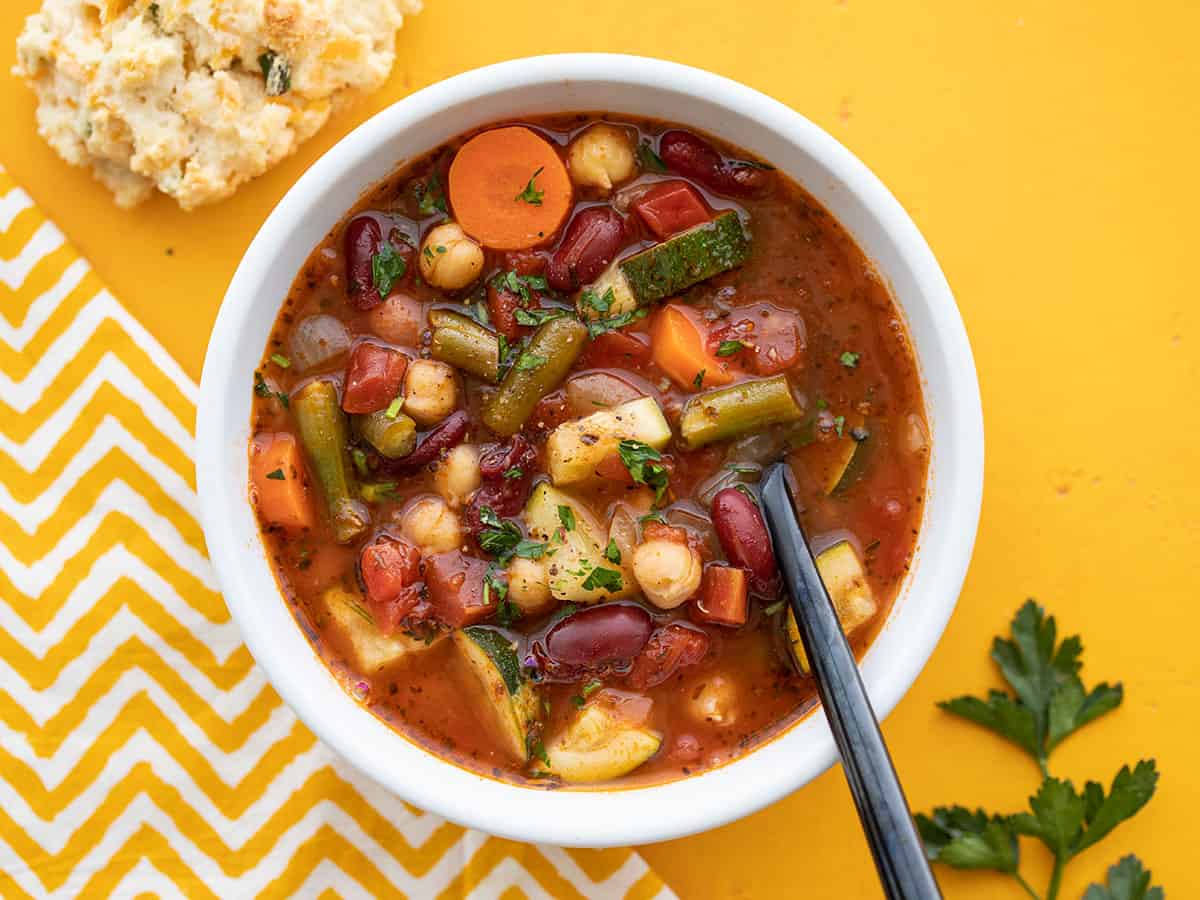
Easy Minestrone Soup

Easy Minestrone Soup

Overhead view of a bowl of vegetarian minestrone with a spoon in the middle
This easy Vegetarian Minestrone Soup is hearty, chock full of vegetables, budget friendly, meal prep ready, and super flexible! 
4.85 from 26 votes
$5.96 recipe / $0.99 serving Get the Recipe

This Easy Minestrone Soup is warm, comforting, budget-friendly and great for meal prep! Wanna add pasta…go for it! Or just keep it simple by adding some extra beans for an even more hearty flavor.

The post Cheap And Easy Bean Recipes appeared first on Budget Bytes.

Coconut Curry Chickpeas

Coconut Curry Chickpeas are flavorful and filling easy weeknight dinner packed with chickpeas, kale, and a flavorful creamy curry sauce!

The post Coconut Curry Chickpeas appeared first on Budget Bytes.

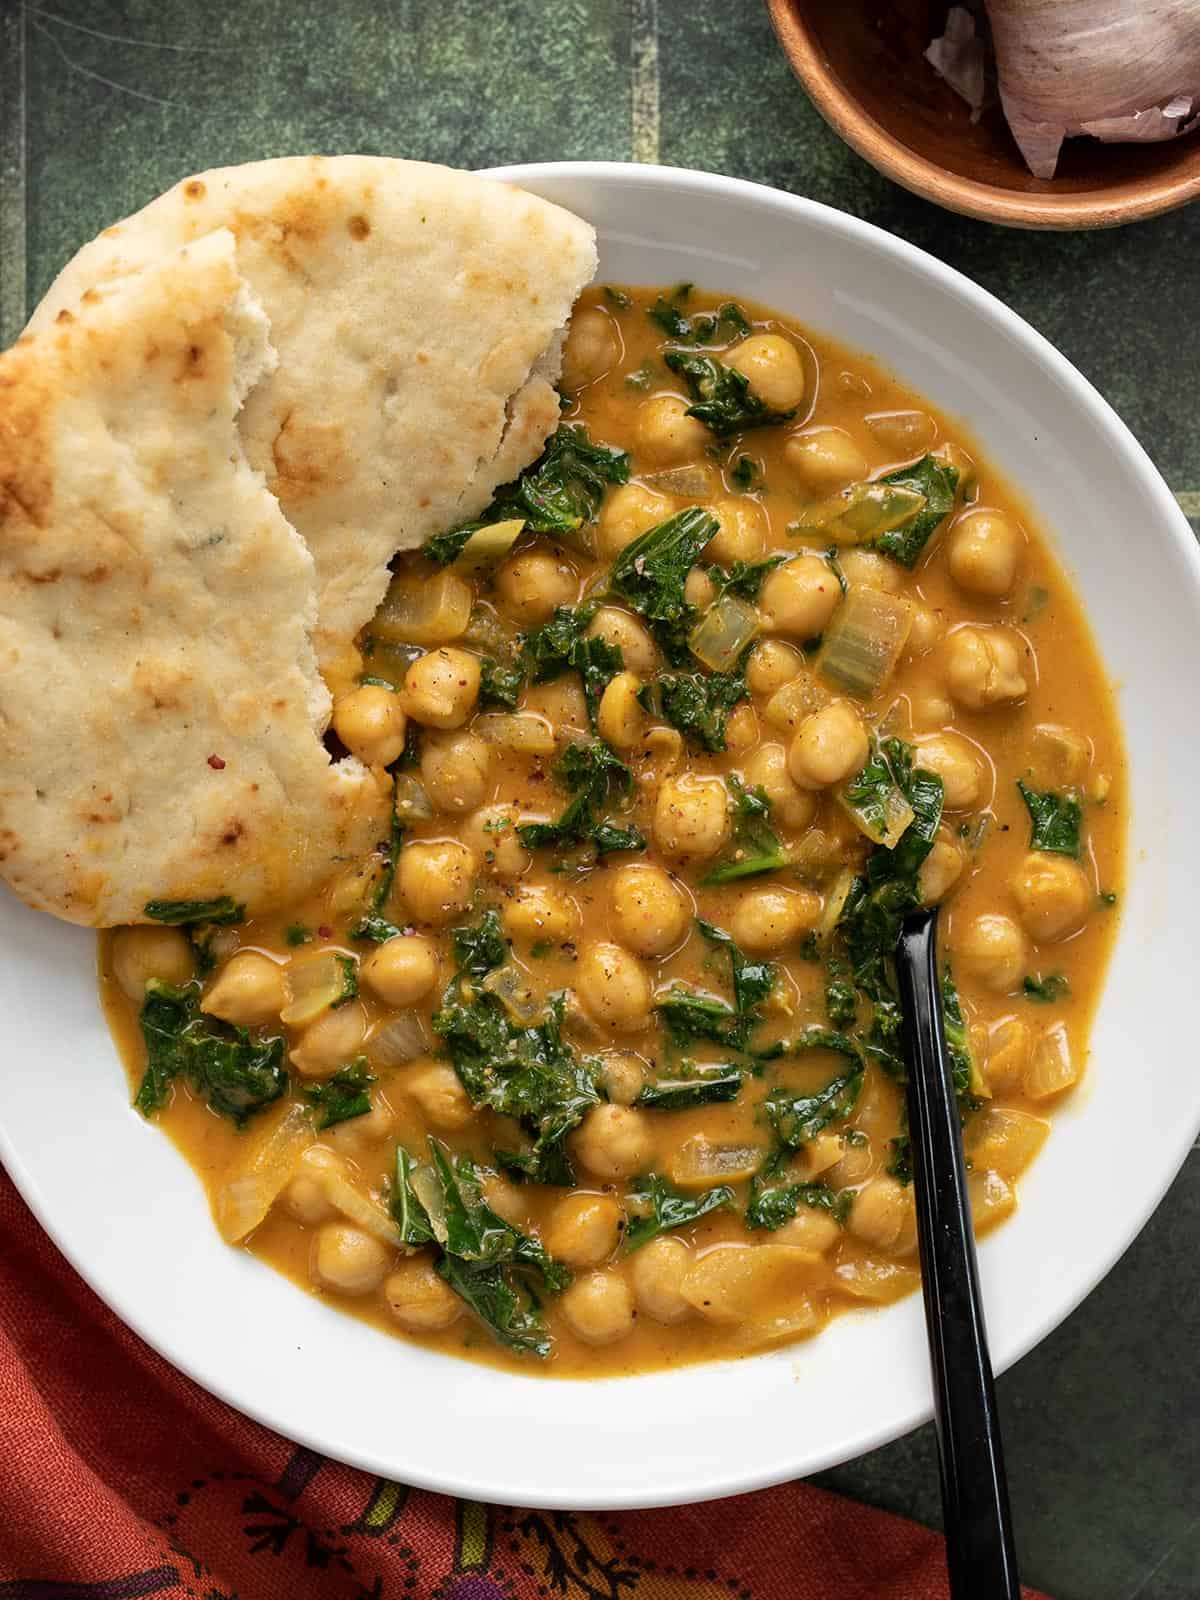
Quick curries are my favorite kind of weeknight dinner because they’re incredibly flavorful, require very little effort, and the leftovers are even better the next day. Plus, that creamy curry sauce makes everything taste good, so you can pack them with all sorts of nutrient-dense goodies, like chickpeas and kale. So basically, what I’m trying to say is, you need to make these Coconut Curry Chickpeas ASAP!

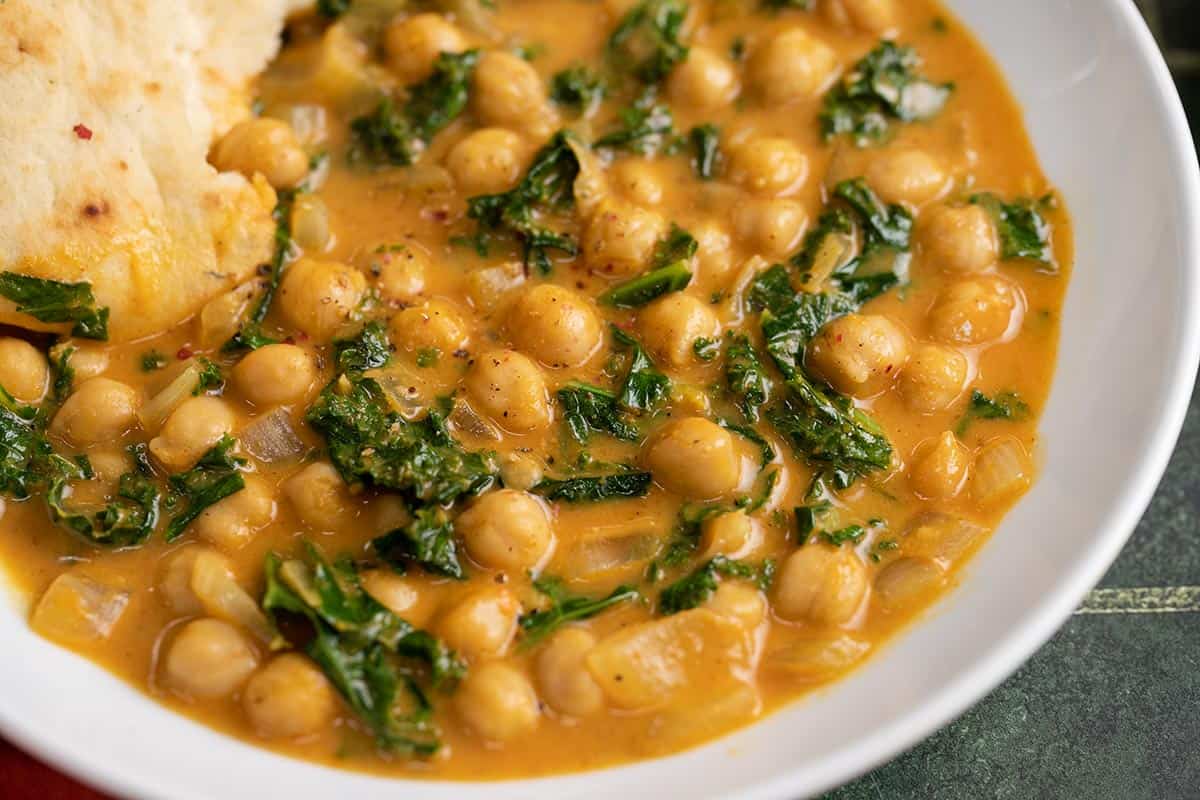
Close up overhead view of a bowl full of coconut curry chickpeas with naan bread on the side.

What’s in Coconut Curry Chickpeas

You’ll only need a handful of ingredients to make this warm and hearty dish, most of which you can keep on hand for last-minute dinners. Here are the ingredients you’ll need to make coconut curry chickpeas:

  • Aromatics: onion, garlic, and ginger create a powerful flavor base for this dish.
  • Spices: Curry powder and cumin. If you want a hot curry, you can always add a bit of cayenne pepper, too!
  • Tomato sauce: a little bit of tomato sauce adds just the right amount of acidity to the dish to balance the creamy coconut.
  • Coconut milk: full-fat coconut milk gives the curry sauce a ton of body and provides a creamy base to balance the potent flavors of the spices and aromatics.
  • Chickpeas: Inexpensive chickpeas fill out this dish, providing tons of belly-filling power and good-for-you fiber.
  • Kale: kale adds a little more variety in texture, color, and flavor to this dish. If you’re not into kale, you can substitute with fresh spinach.

What Kind of Curry Powder to Use

Curry powders can vary quite a bit in flavor from brand to brand, so make sure you experiment to find one that you enjoy. I’ve never met a curry powder that I didn’t like, so I don’t have one particular brand to suggest, but you definitely want to make sure it’s fresh! Old spices that have been sitting in your pantry a while begin to lose flavor and become dull and bland with time.

You also have the option to use either hot or mild curry powder. If you enjoy spicy foods you can use a hot curry powder, OR simply add some crushed red pepper or cayenne pepper to the dish when adding the curry powder and cumin.

How to Serve Coconut Curry Chickpeas

This warm and saucy dish is great over rice, or crusty bread or naan for dipping. You definitely want some sort of starchy goodness to soak up all of that sauce! You can also experiment with topping your chickpeas with fresh cilantro or even a squeeze of lime. Something light and refreshing, like Creamy Cucumber Salad, would also pair nicely with these curry chickpeas.

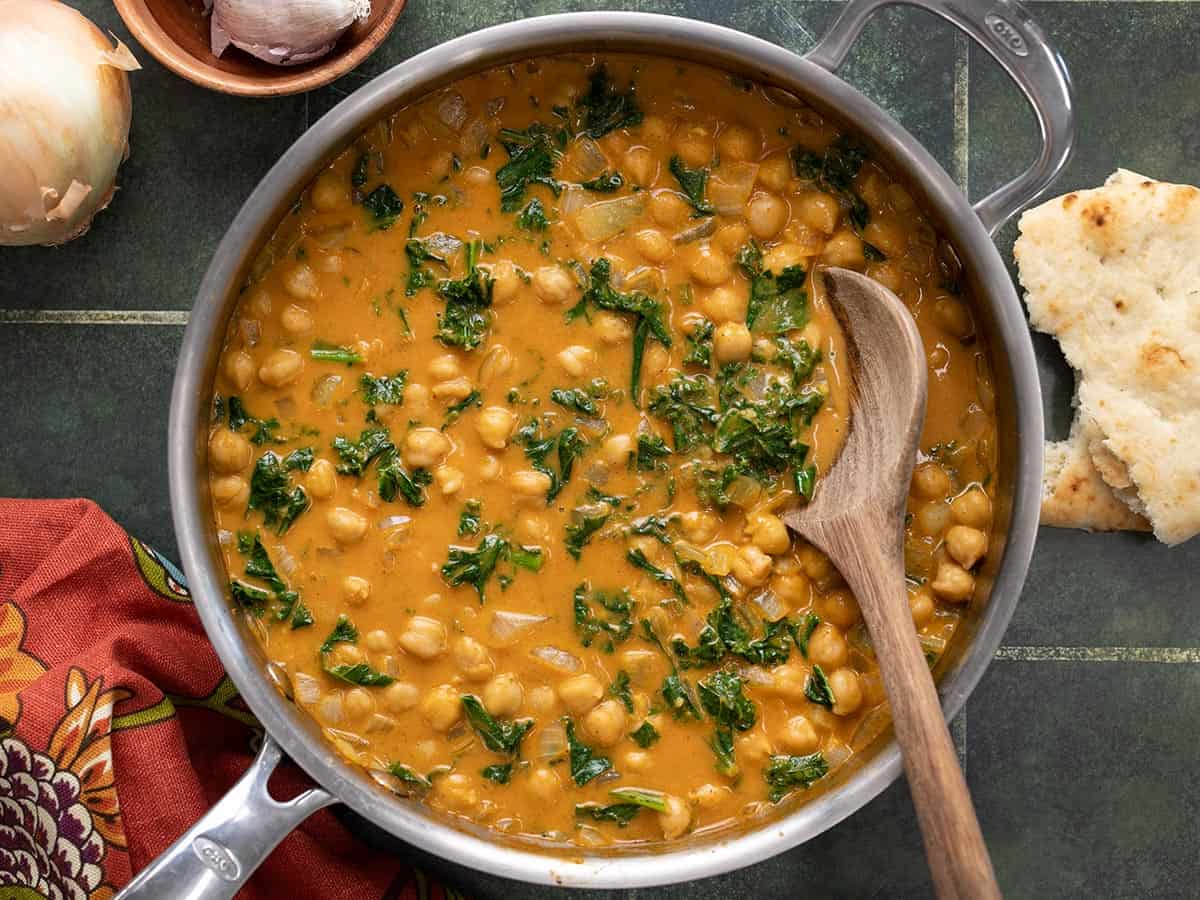
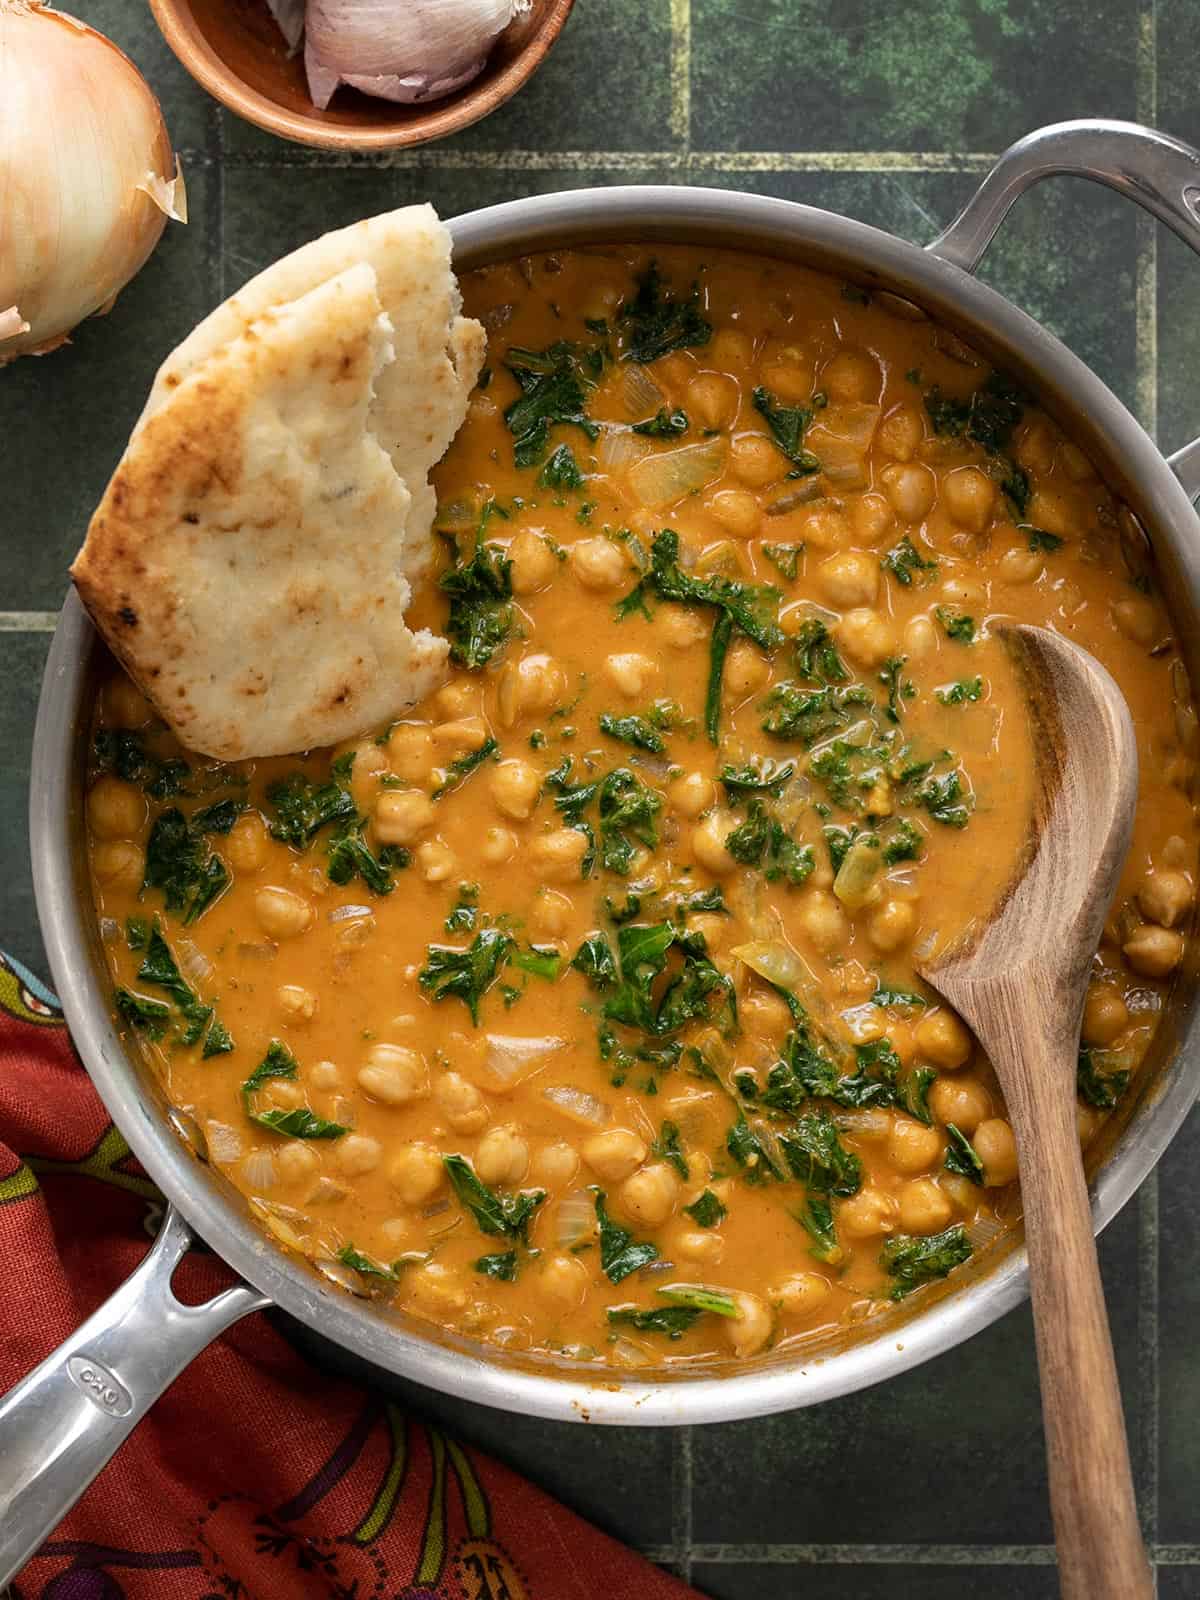
Overhead view of a skillet full of coconut curry chickpeas with a wooden spoon.
Overhead view of a bowl full of coconut curry chickpeas with a piece of naan.
Print

Coconut Curry Chickpeas

Coconut Curry Chickpeas are flavorful and filling easy weeknight dinner packed with chickpeas, kale, and a flavorful creamy curry sauce!
Course Dinner, Main Course
Cuisine Indian
Total Cost $7.44 recipe / $1.86 serving
Prep Time 10 minutes
Cook Time 25 minutes
Total Time 35 minutes
Servings 4 1.5 cups each
Calories 615kcal

Ingredients

  • 1 yellow onion $0.38
  • 2 cloves garlic $0.16
  • 1 tsp grated fresh ginger $0.10
  • 1.5 Tbsp curry powder $0.45
  • 1 tsp cumin $0.10
  • 2 15oz. cans chickpeas, drained $1.58
  • 1 8oz. can tomato sauce $0.50
  • 1 13.5oz. can full-fat coconut milk $2.99
  • 4 oz. chopped kale (about 3 cups) $0.75

Instructions

  • Dice the onion, mince the garlic, and grate the ginger. Add the onion, garlic, and ginger to a large deep skillet along with the olive oil. Sauté the aromatics over medium-low heat for about five minutes, or until the onions are soft and translucent.
  • Add the curry powder and cumin to the skillet and continue to stir and cook for about one minute more to toast the spices.
  • Drain the chickpeas, then add them to the skillet along with the tomato sauce and coconut milk. Stir everything to combine.
  • Turn the heat up to medium-high to bring the sauce up to a simmer. Once simmering, turn the heat back down to medium-low and allow the curry to continue to simmer for 15 minutes, stirring occasionally.
  • Add the kale and stir it into the sauce. Continue to cook and stir until the kale has wilted to your desired tenderness (I cook for about 5 minutes more). Finally, taste the curry and add salt to taste (about ½ tsp). Serve hot with rice or bread for dipping!

See how we calculate recipe costs here.

Nutrition

Serving: 1.5cups | Calories: 615kcal | Carbohydrates: 73g | Protein: 23g | Fat: 29g | Sodium: 316mg | Fiber: 22g
Close up side view of a bowl full of coconut curry chickpeas.

How to Make Coconut Curry Chickpeas – Step by Step Photos

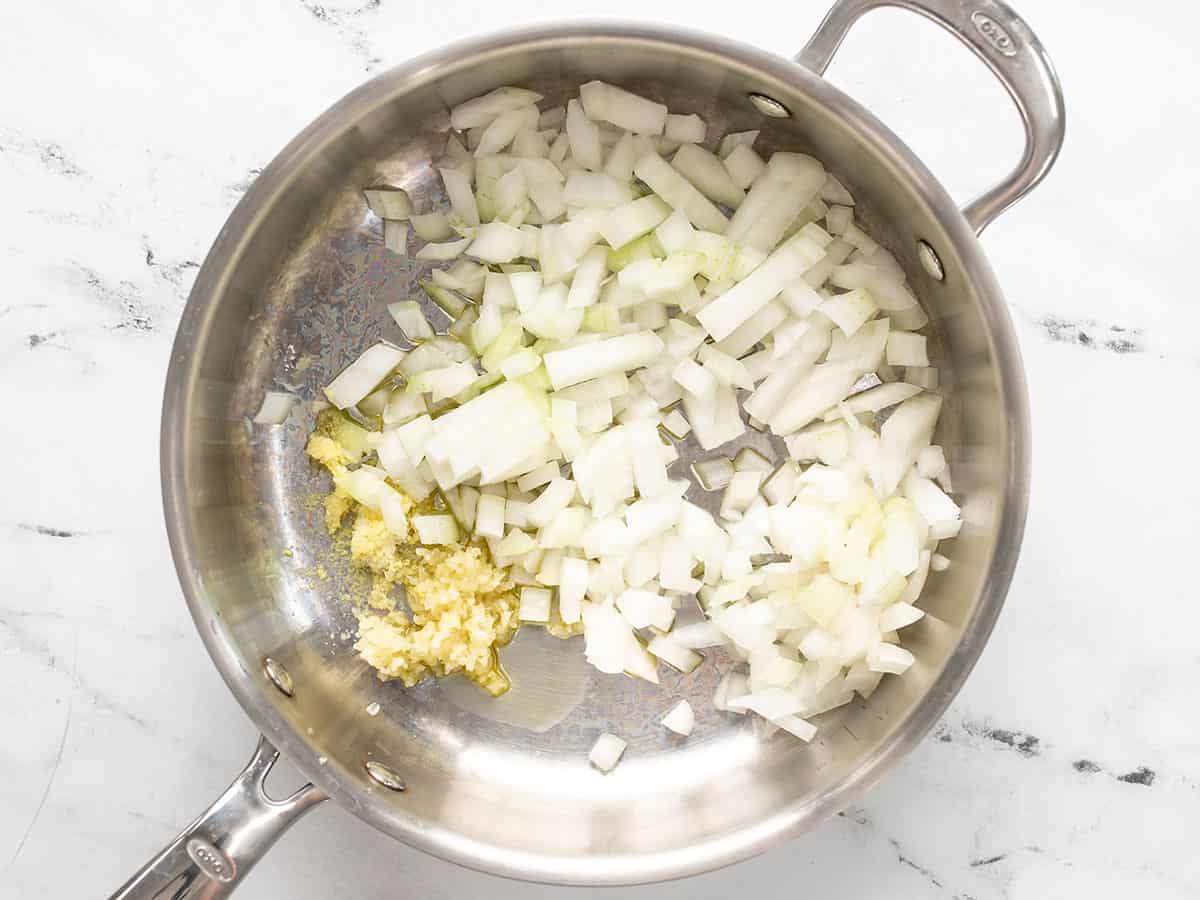
Diced onion, minced garlic, and grated ginger in a deep skillet.

Dice one yellow onion, mince two cloves of garlic, and grate about one teaspoon of fresh ginger. Add the onion, garlic, and ginger to a deep skillet along with 2 Tbsp olive oil. Sauté the aromatics over medium-low heat for about five minutes, or until the onion is soft and translucent.

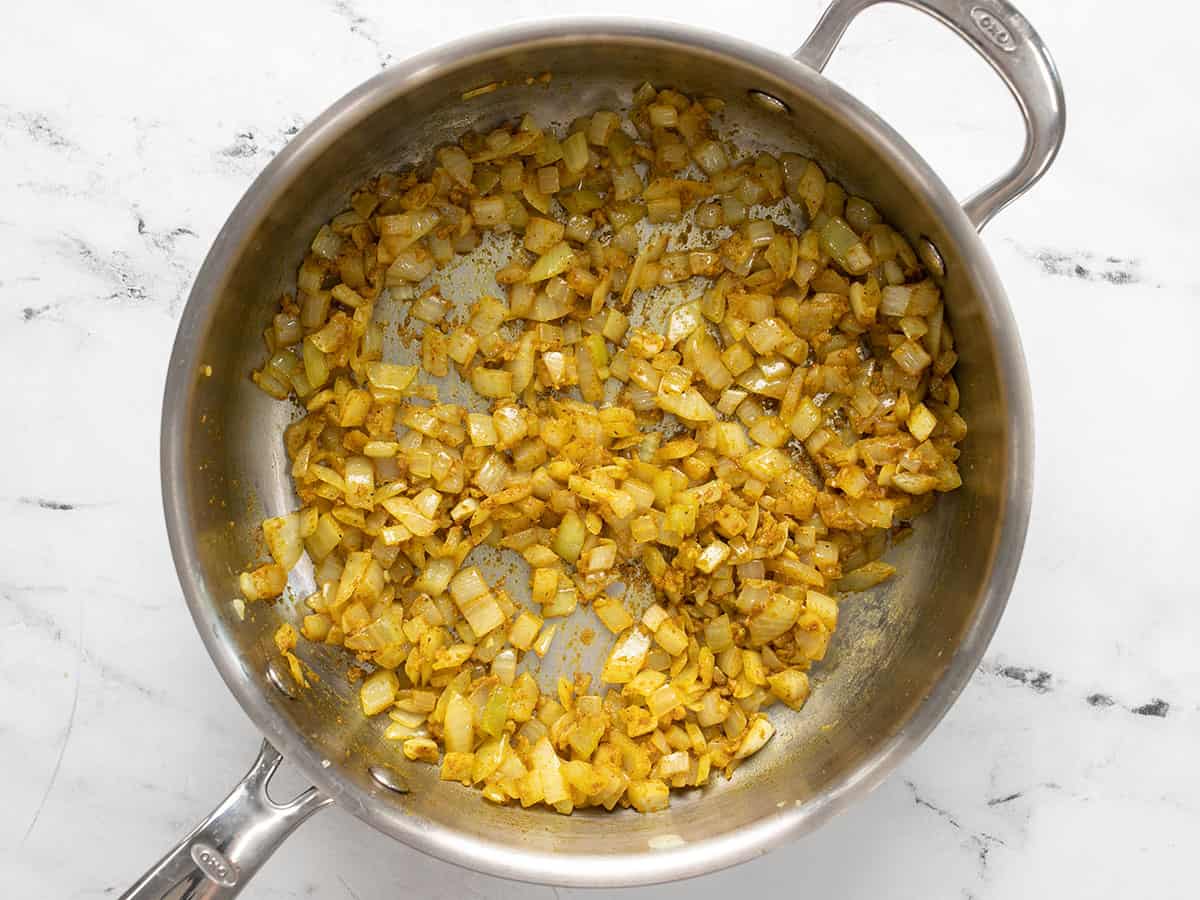
Spices added to the skillet with onions, garlic, and ginger.

Add 1.5 Tbsp curry powder and 1 tsp cumin to the skillet. Continue to stir and cook for about one minute more to toast the spices.

Chickpeas, tomato sauce, and coconut milk added to the skillet.

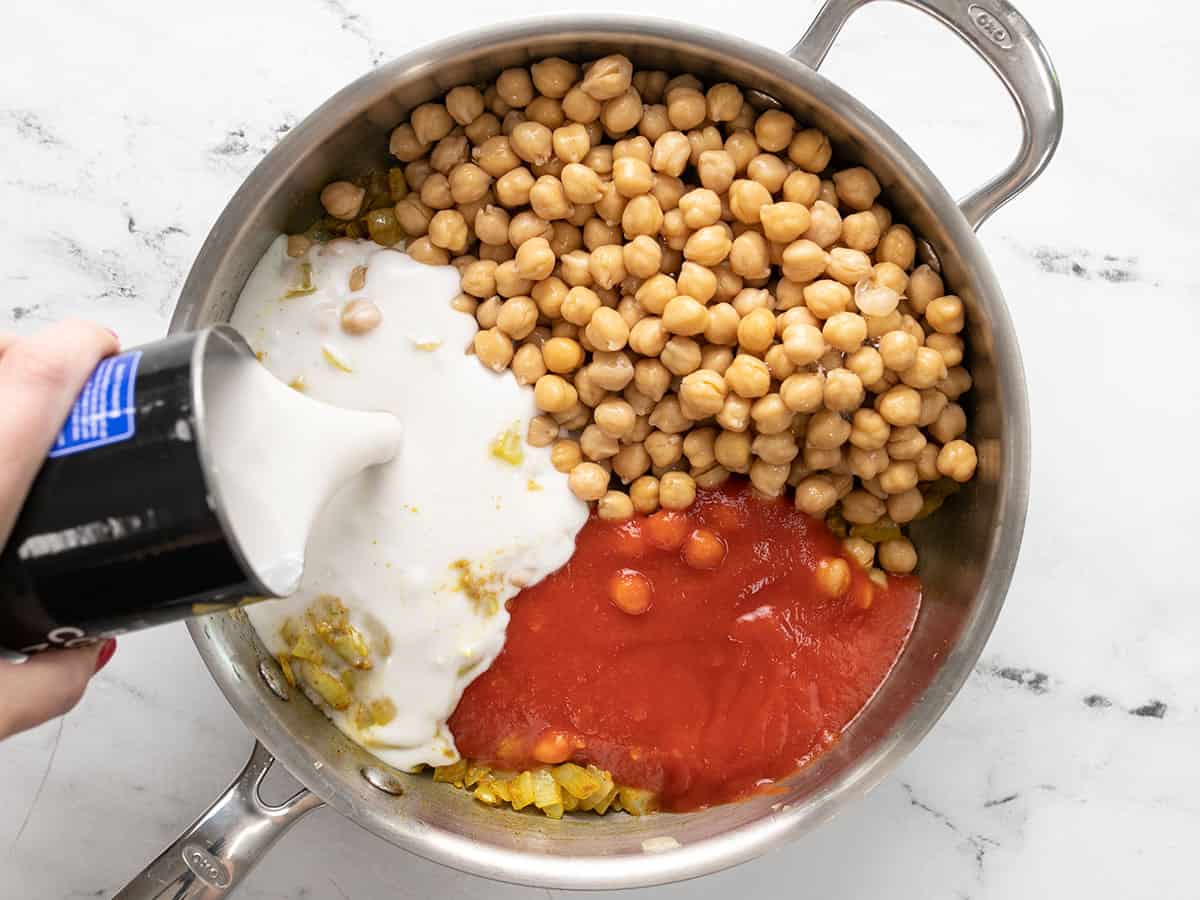
Drain two cans of chickpeas, then add them to the skillet along with 8 oz. tomato sauce and a 13.5 oz. can of coconut milk (full fat).

Simmered chickpeas in curry sauce.

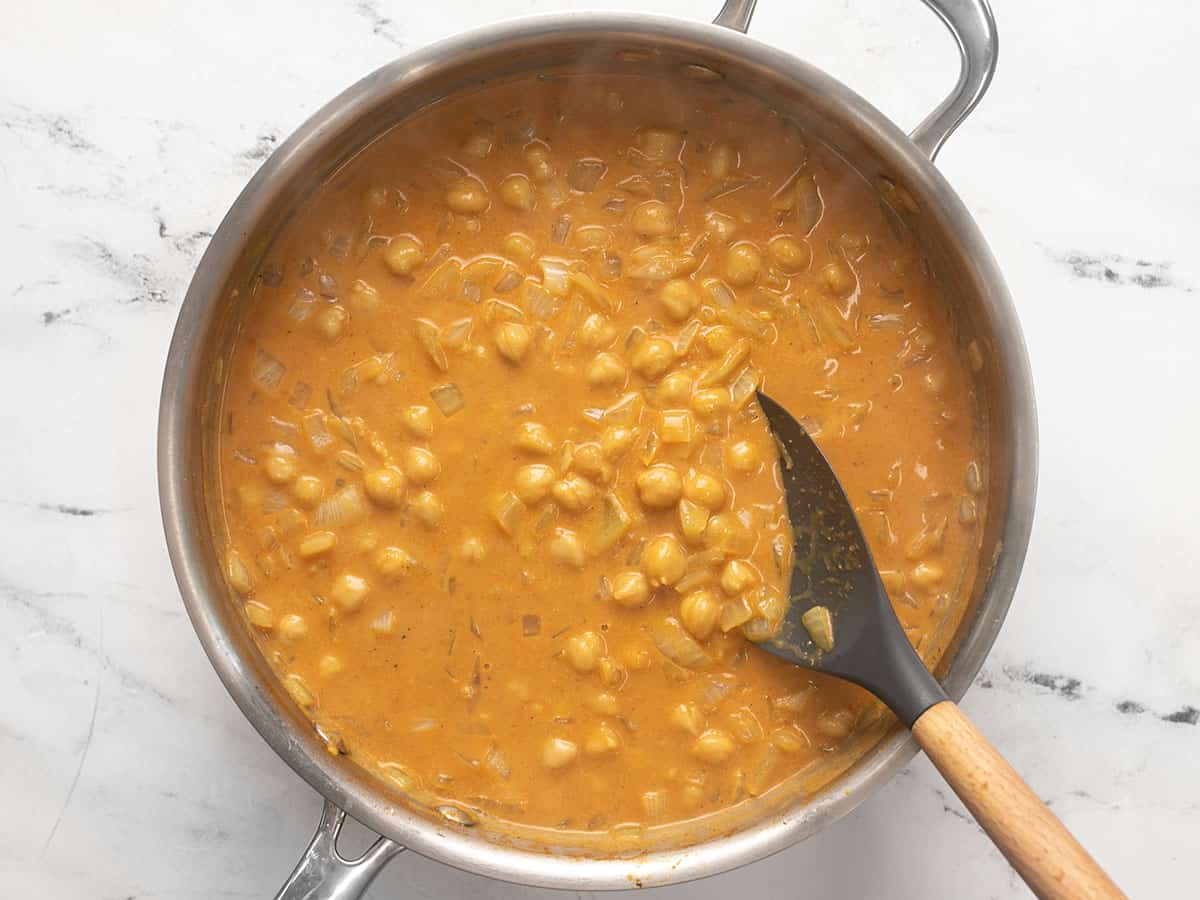
Stir until everything is evenly combined, turn the heat up to medium-high, and allow the sauce to come up to a simmer. Once simmering, turn the heat down to medium-low and let it continue to simmer for 15 minutes, stirring occasionally.

Fresh kale added to the skillet.

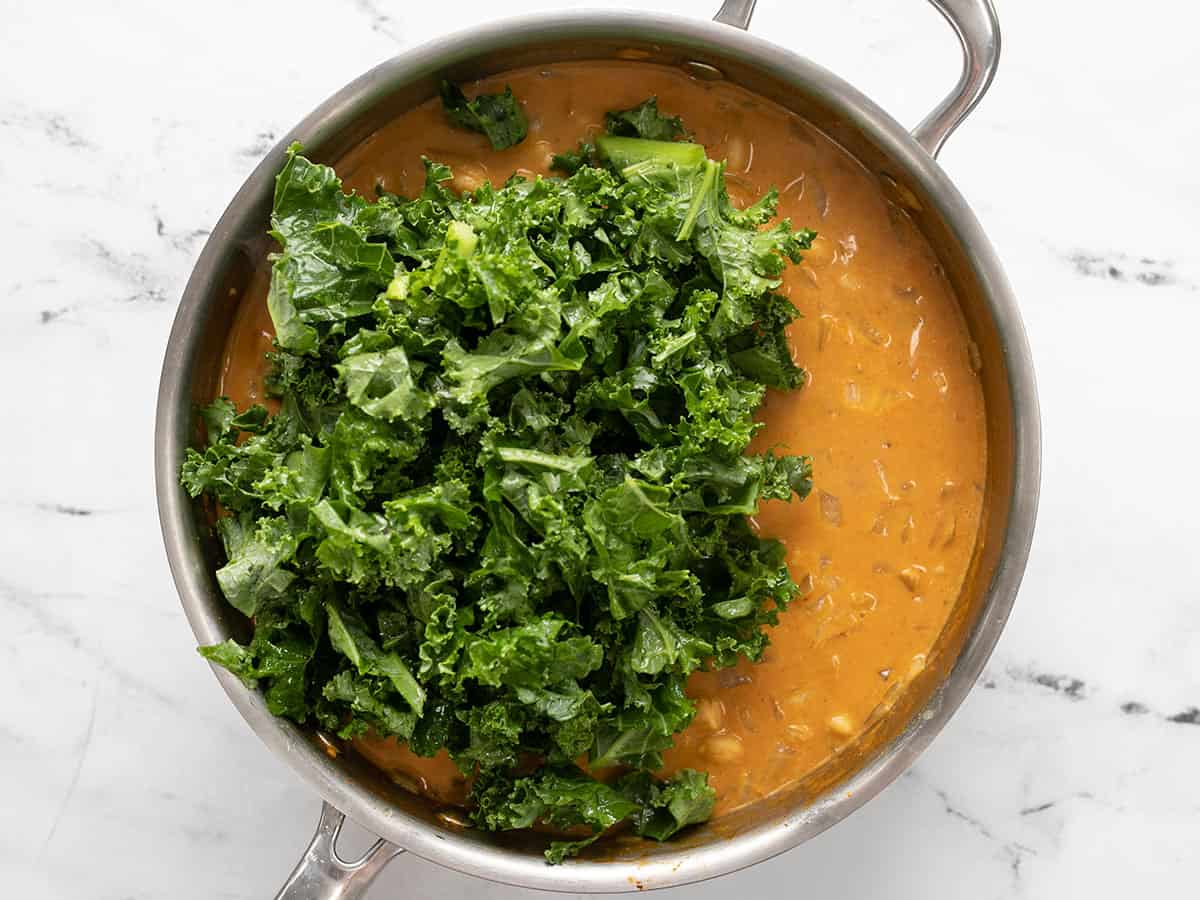
Add 4 oz. (about three cups) of fresh chopped kale to the skillet. I buy the pre-chopped bagged kale to make this easier.

Finished coconut curry chickpeas with wilted kale.

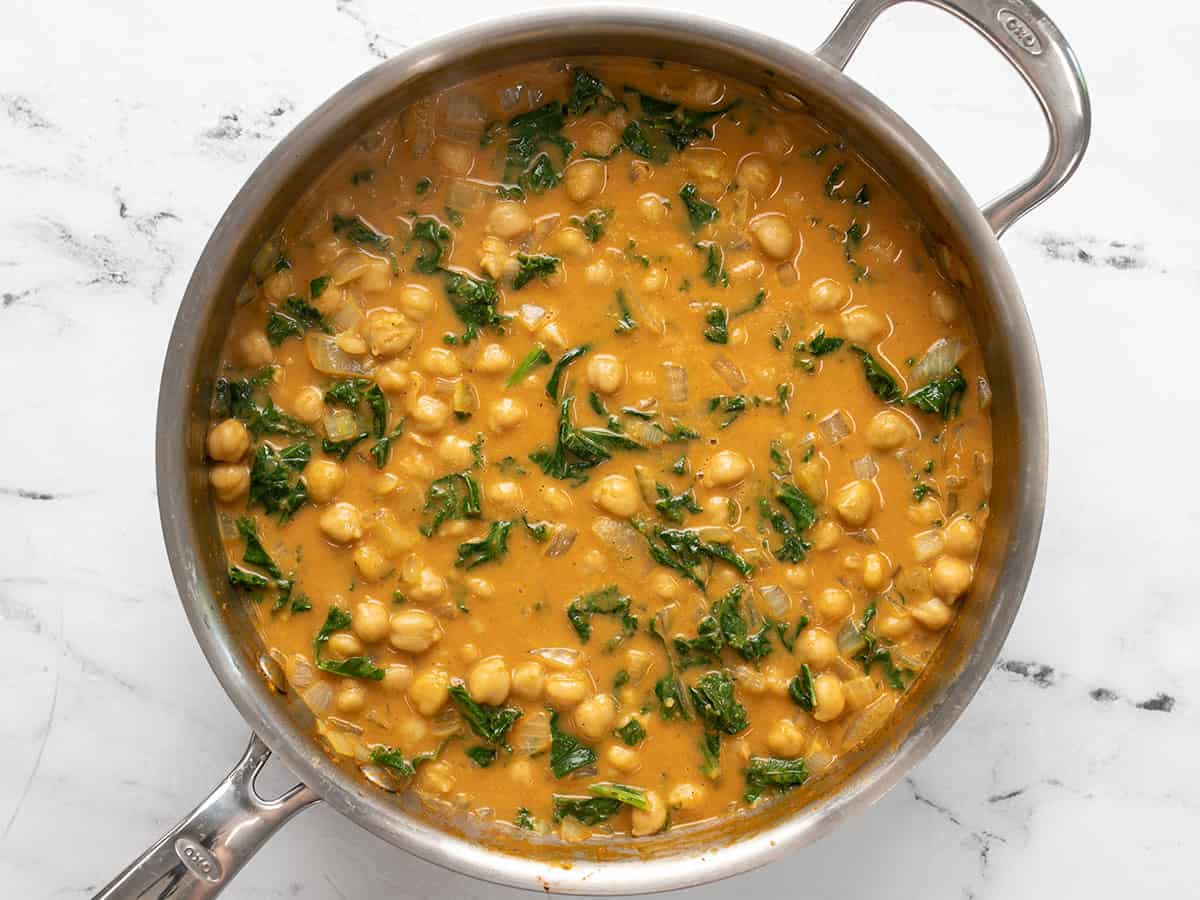
Continue to cook and stir until the kale has wilted to your desired tenderness. I enjoy the kale with a bit more texture, so I only simmer for a few minutes more. Taste the curry and add salt to taste to help the flavors pop (about ½ tsp).

Finished skillet full of coconut curry chickpeas with naan and a wooden spoon.

The post Coconut Curry Chickpeas appeared first on Budget Bytes.

Parmesan Beans

Parmesan and freshly cracked pepper give these canned cannelini beans new life! These Parmesan beans are an easy and delicious side dish.

The post Parmesan Beans appeared first on Budget Bytes.

I will literally (read: figuratively) eat anything that is Parmesan and black pepper flavor. There’s something about that combo that is so insanely satisfying to my palate. But I guess that’s why Cacio e Pepe is such a classic. And since I love turning a humble can of beans into something delicious, I decided to give a couple of cans of cannellini beans the Parmesan-pepper treatment. The end result is kind of like refried beans, but using a different bean and with a different flavor profile! Easy and delish!

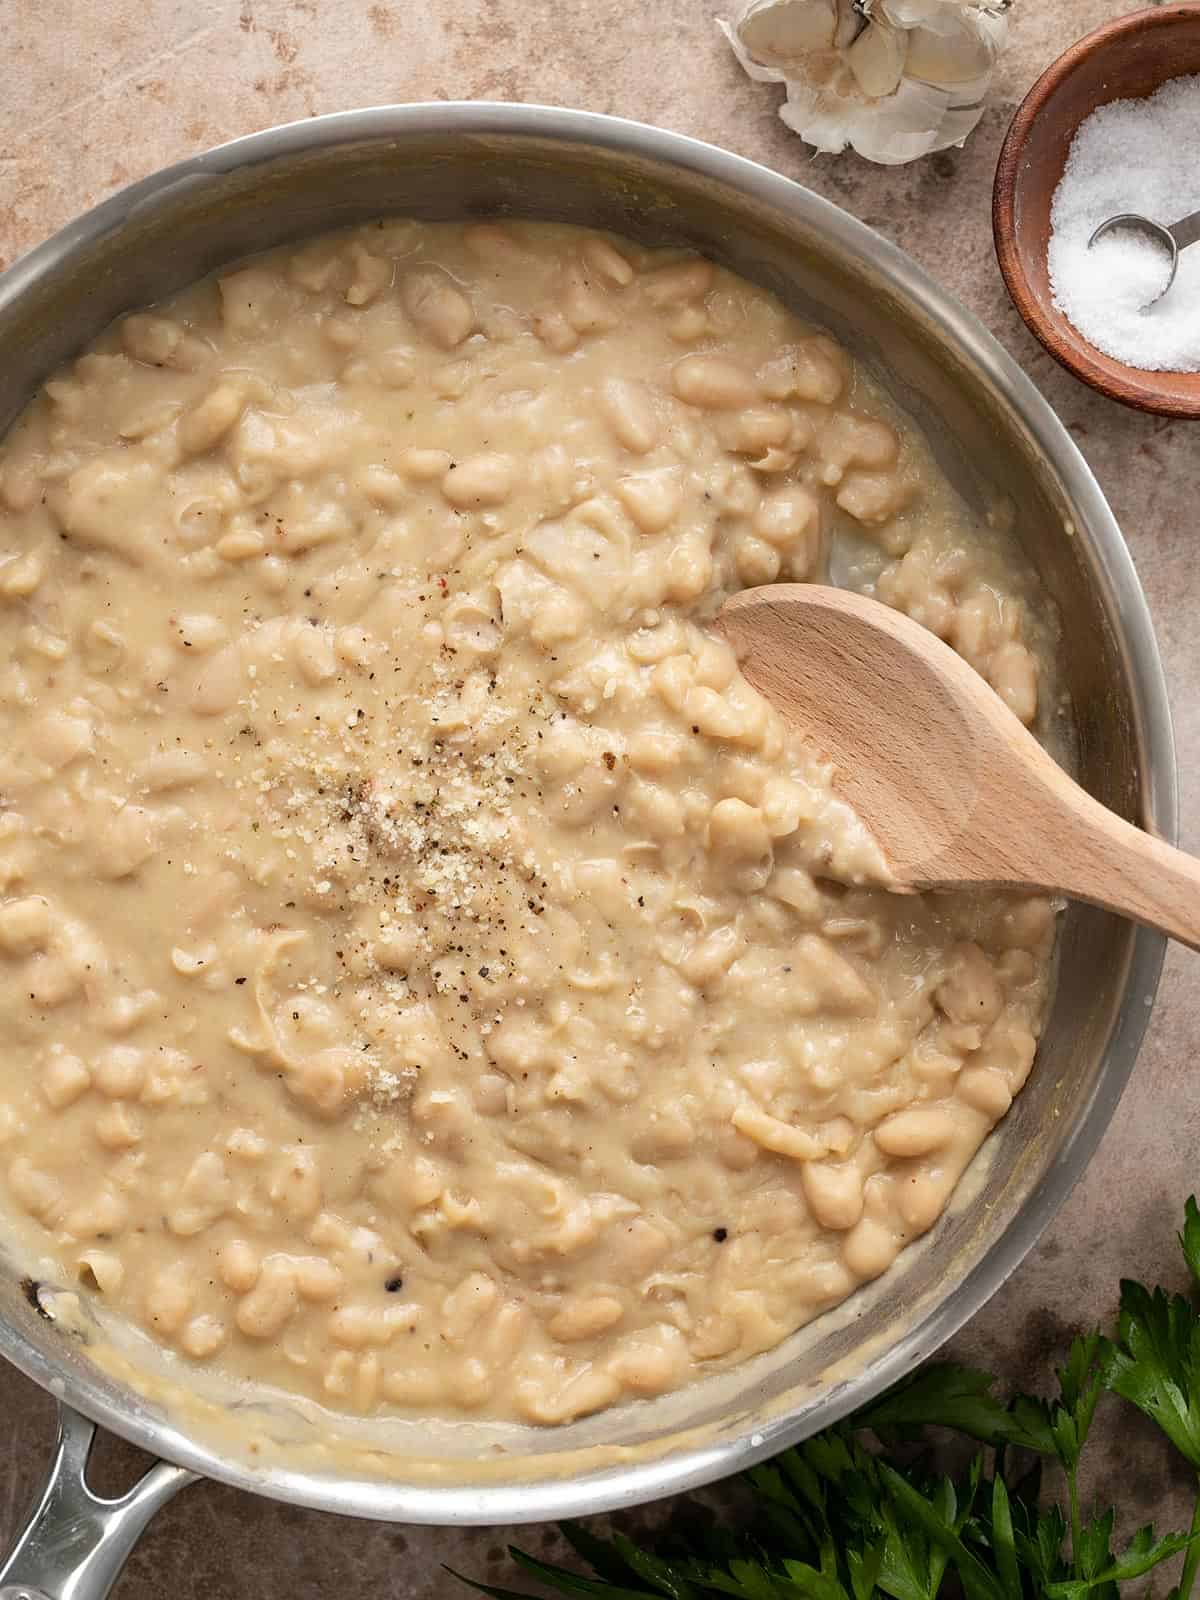
Overhead view of a skillet full of Parmesan beans with a wooden spoon.

What’s in Parmesan Beans?

This super simple side dish only has seven simple ingredients and only takes about twenty minutes to make! And since I usually have ALL of these ingredients on hand, Parmesan beans are going to be my new go-to side dish. Here are the ingredients you’ll need to make Parmesan Beans:

  • Cannellini Beans: I like Cannellini beans for this recipe because they have a soft and creamy texture, but also retain enough shape so that you’re not left with complete mush. Their flavor is also mild enough to not overpower the Parmesan.
  • Garlic: A little sautéed fresh garlic gives this recipe a nice deep base flavor. Plus, all good recipes start with sautéed garlic, ammiright?
  • Olive Oil: The oil is used to both sautée the garlic AND give the beans a little more body and richness. You need a little fat in there to smooth it all out.
  • Chicken Broth: Simmering the beans in a little bit of broth adds more flavor and helps create that saucy texture.
  • Parmesan & Pepper: The two main flavor players! I can never get enough of Parmesan and pepper together. I’ve listed amounts below, but really, just measure with your heart. ❤️

Can I Use a Different Bean?

Cannelini beans really are the best choice for this dish because of their flavor, texture, and size, but you could probably get away with Great Northern Beans or navy beans. Both of these varieties also have a mild and creamy flavor and texture, but they are smaller in size. Navy beans also tend to break down faster, which may result in a mushier texture.

What to Serve with Parmesan Beans

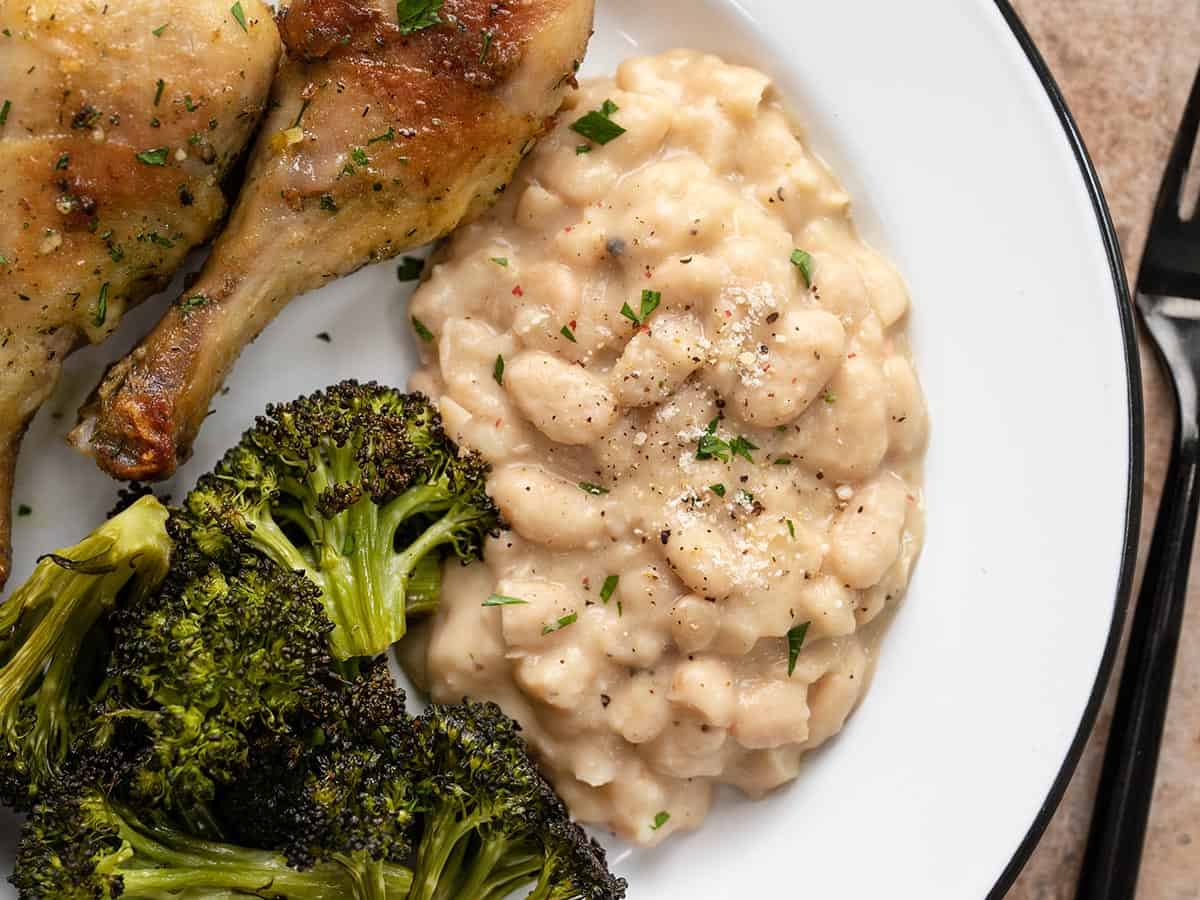
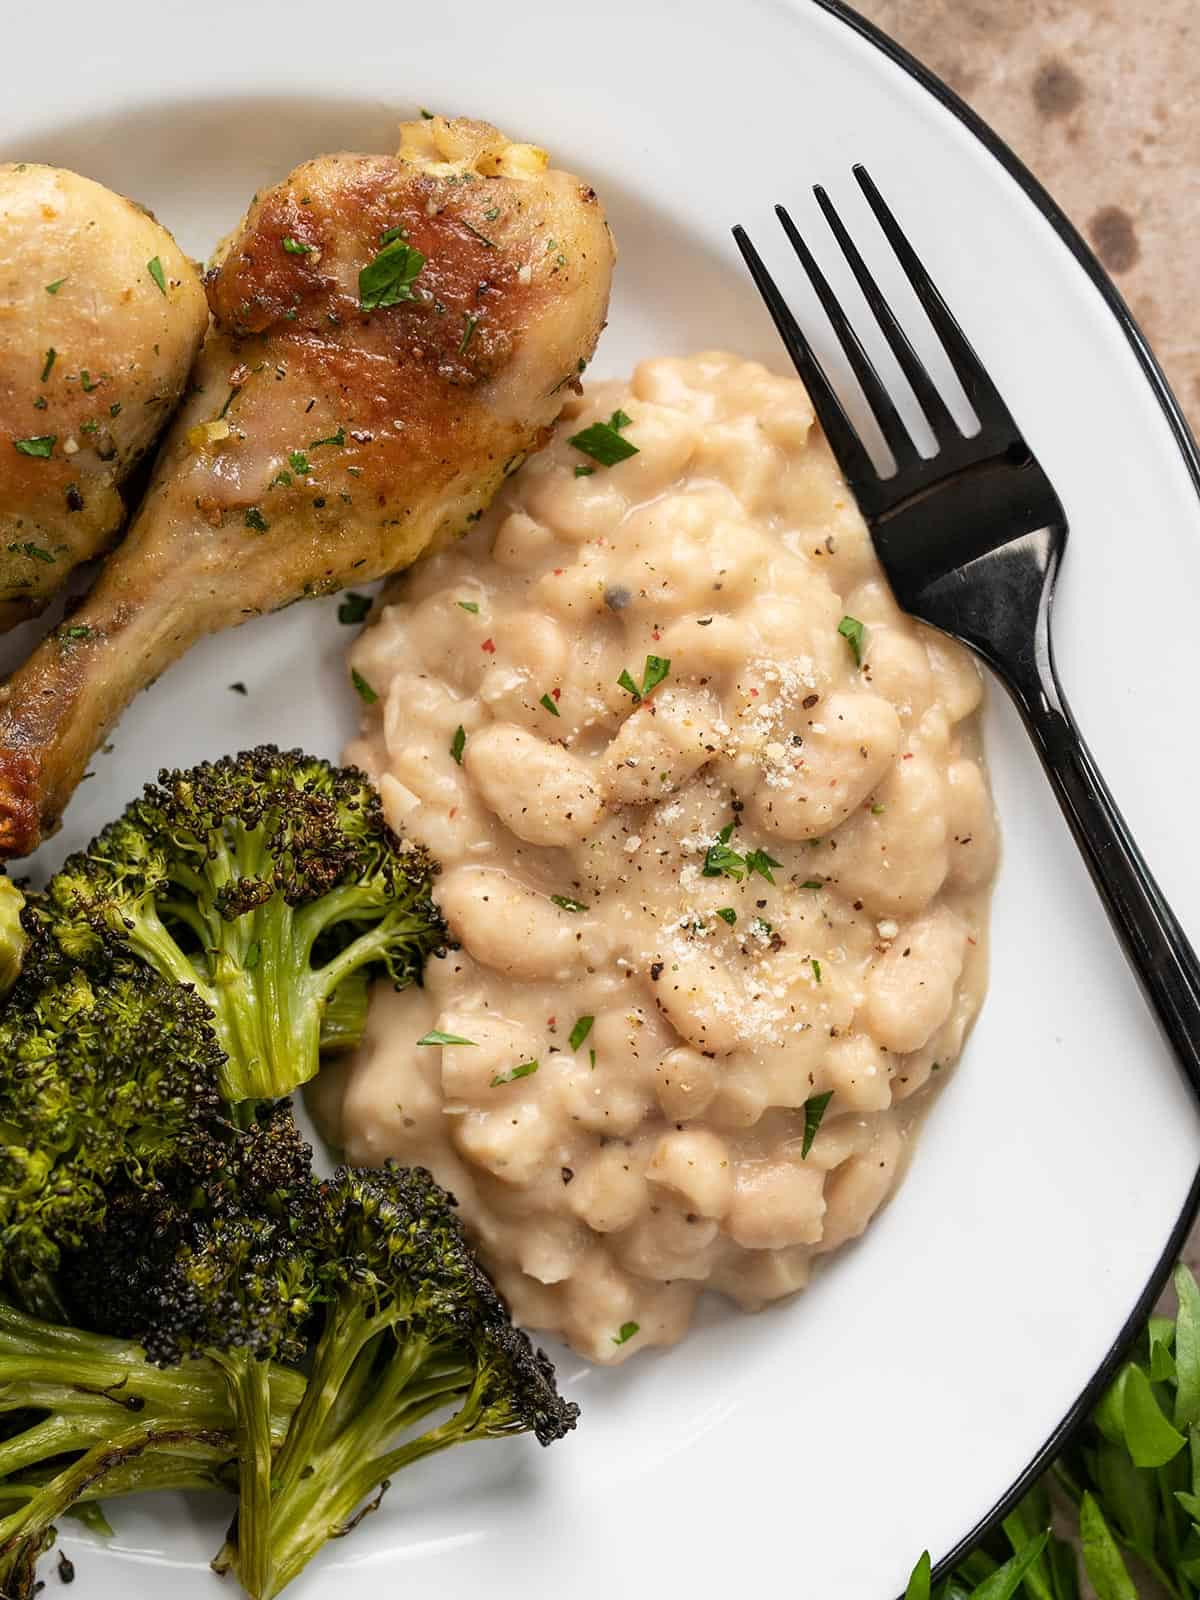
Parmesan beans are such a neutral side dish that they’ll go with so many different meals. Today I served them with some baked chicken drumsticks and roasted broccoli, but they’d also go great with: Tomato Basil Chicken, Creamy Pesto Chicken, or Lemon Pepper Chicken.

Overhead view of Parmesan Beans on a plate with chicken and broccoli.
Close up side view of a wooden spoon stirring Parmesan Beans.
Print

Parmesan Beans

Parmesan and freshly cracked pepper give these canned cannelini beans new life! These Parmesan beans are an easy and delicious side dish.
Course Dinner, Side Dish
Cuisine American
Total Cost $2.97 recipe / $0.74 serving
Prep Time 5 minutes
Cook Time 15 minutes
Total Time 20 minutes
Servings 4 ½ cup each
Calories 259kcal

Ingredients

Instructions

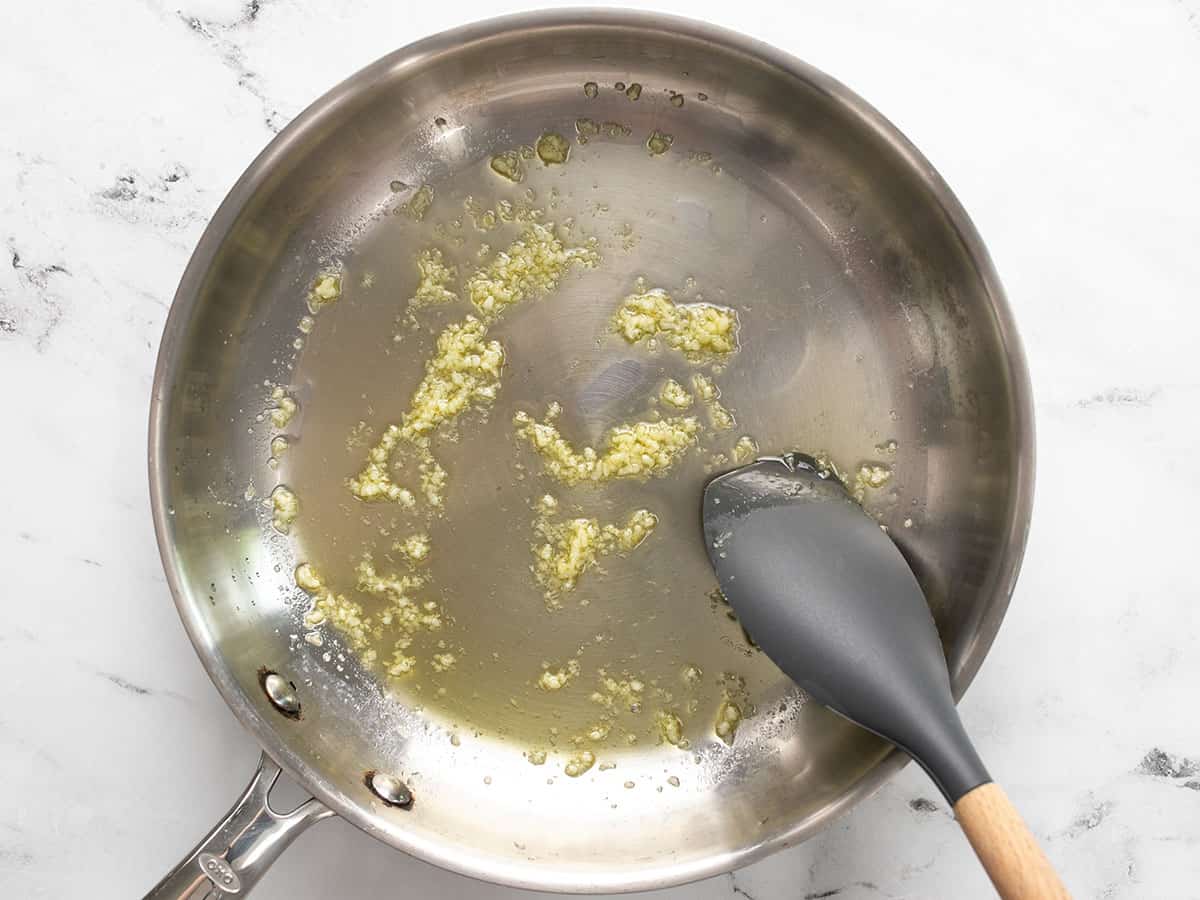
  • Mince the garlic and add it to a large skillet with the olive oil. Sauté the garlic over medium heat for about one minute.
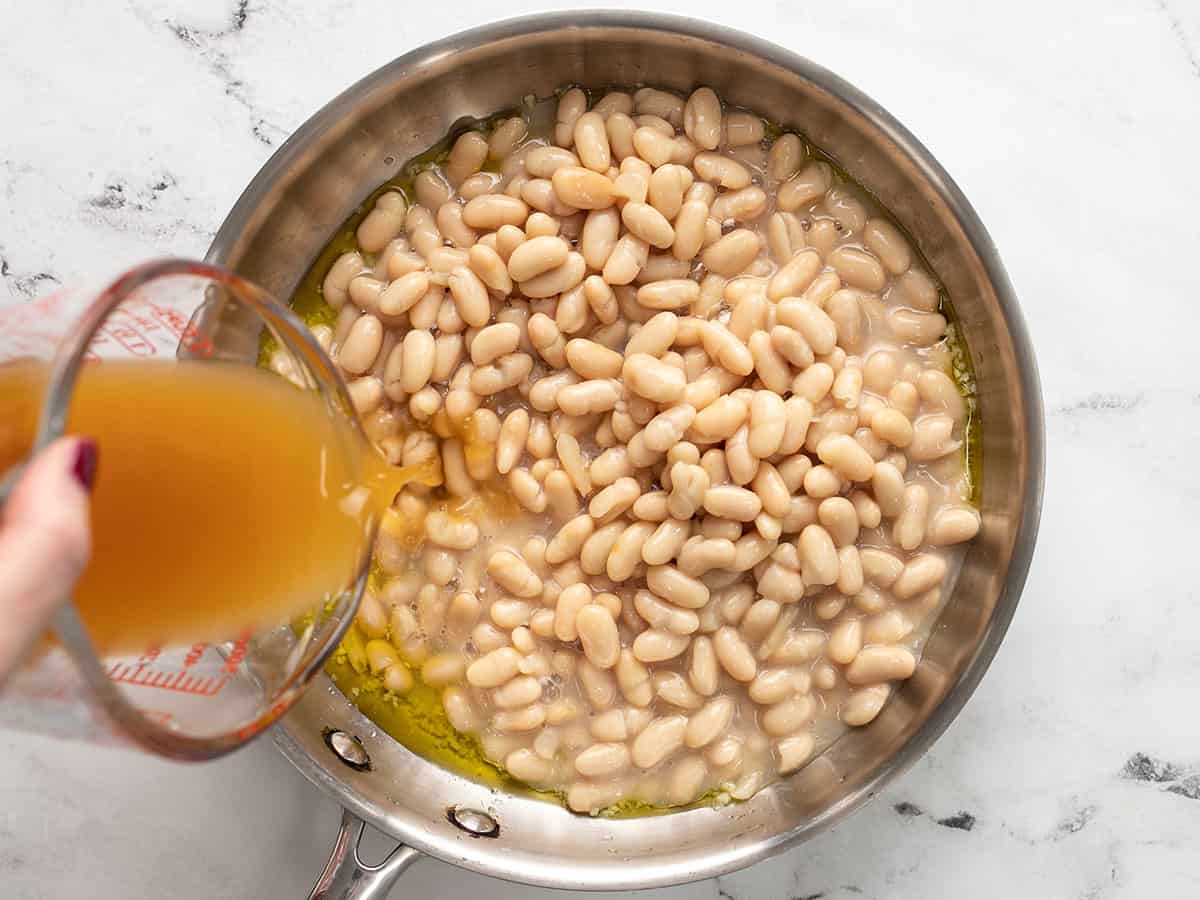
  • Drain, but do not rinse, the Cannellini beans. Add the beans and broth to the skillet with the garlic. Stir to combine.
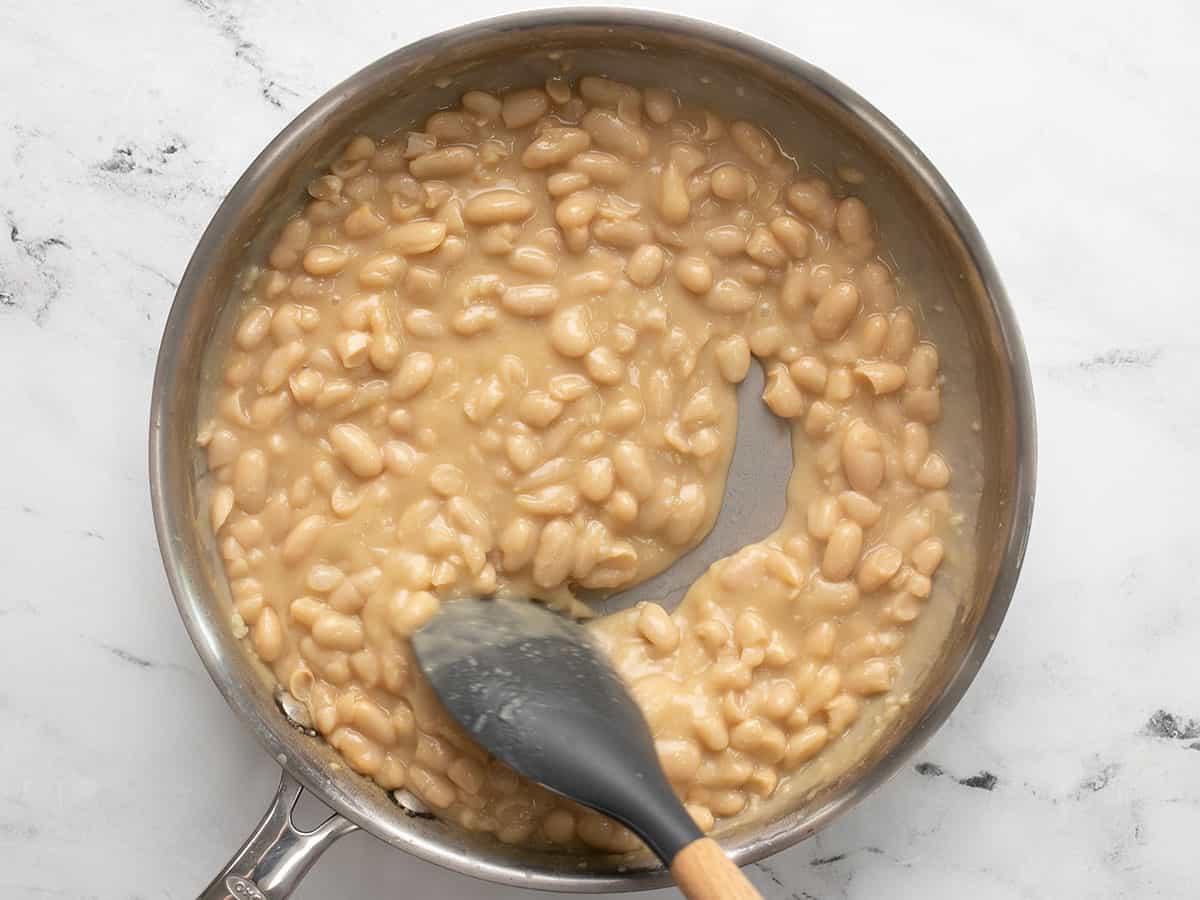
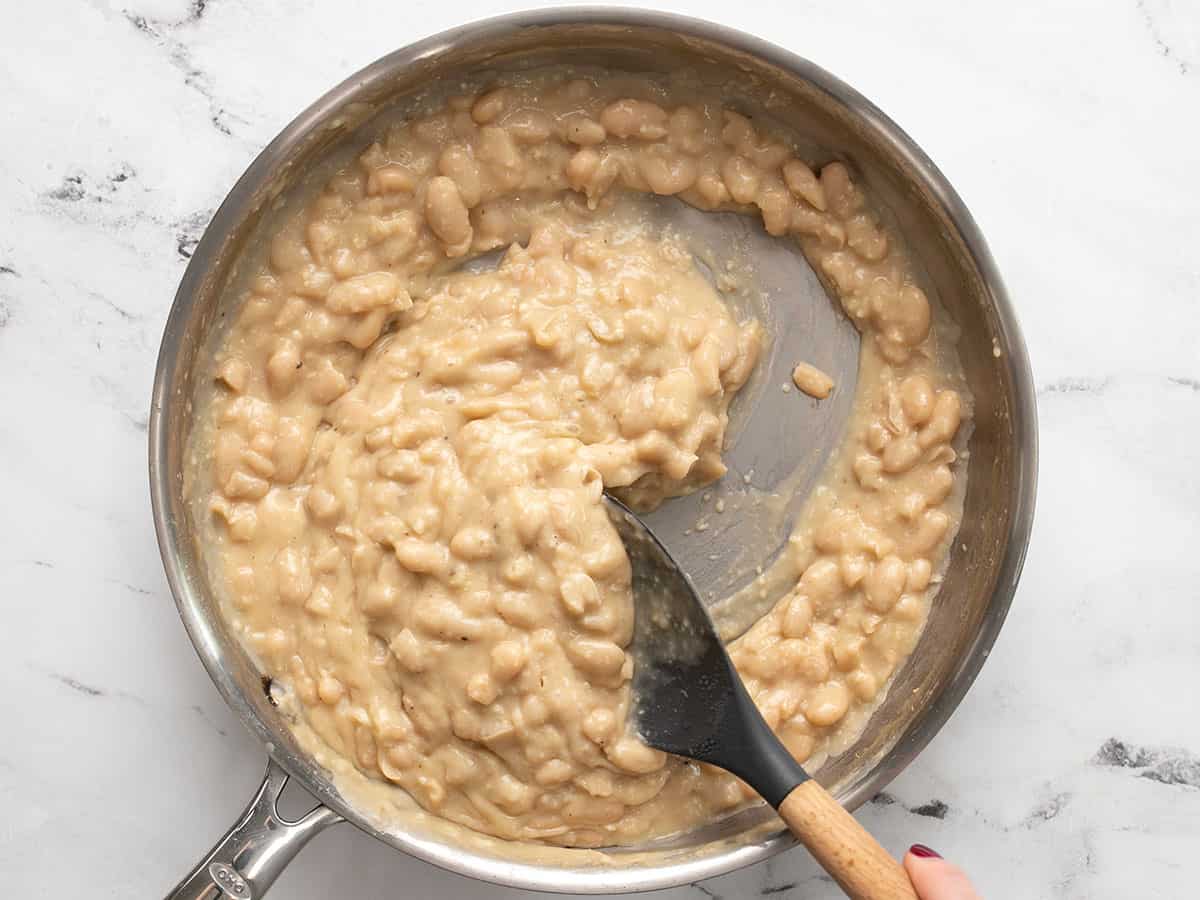
  • Allow the beans to come up to a simmer. Simmer the beans, stirring occasionally, for about 10 minutes, or until they've thickened slightly. The spoon should leave a trail in the beans as you stir.
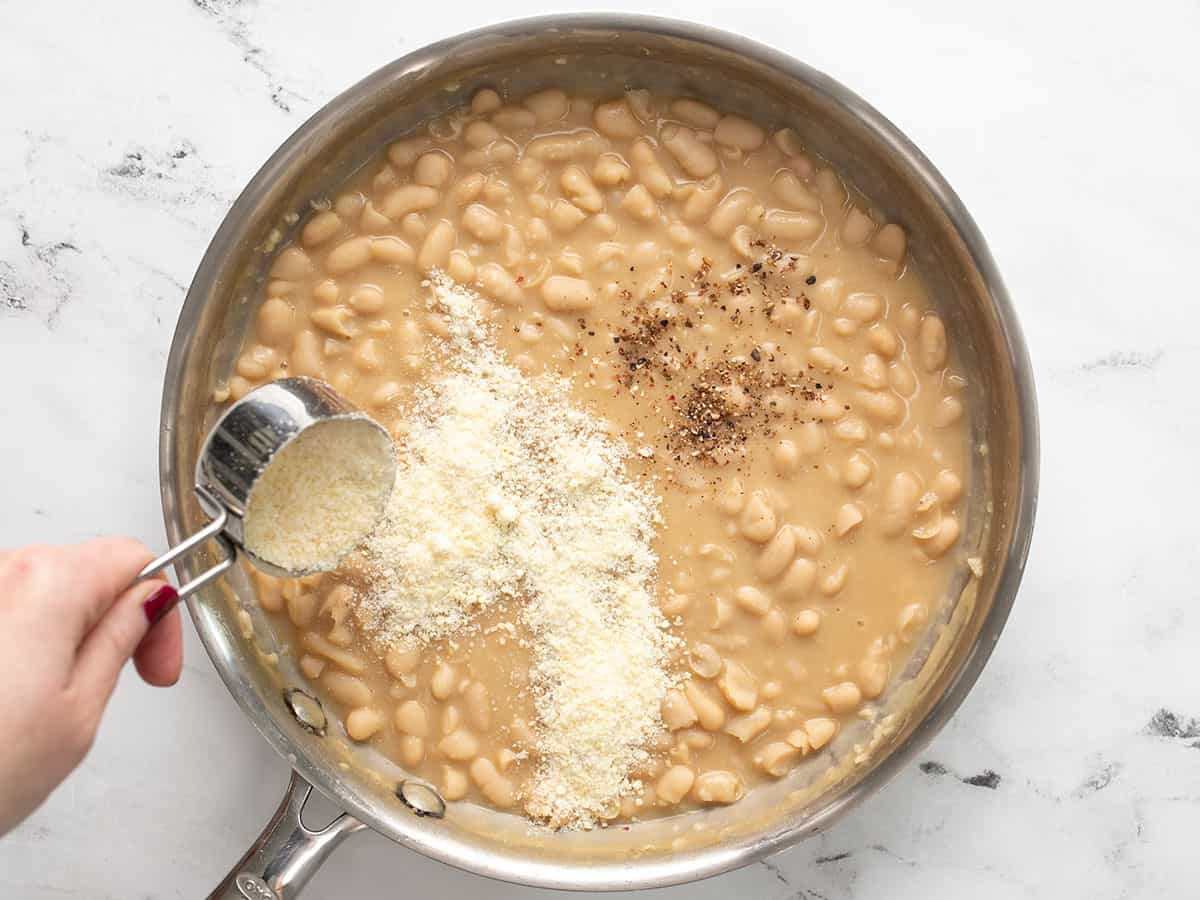
  • Add the Parmesan and pepper to the beans. Stir to combine. Taste the beans and adjust the Parmesan, pepper, or add salt if needed. Serve hot!

See how we calculate recipe costs here.

Nutrition

Serving: 0.5cup | Calories: 259kcal | Carbohydrates: 35g | Protein: 15g | Fat: 9g | Sodium: 736mg | Fiber: 11g
Close up side view of a wooden spoon stirring Parmesan Beans.

How to Make Parmesan – Step by Step Photos

Sautéed garlic in a skillet with olive oil.

Mince two cloves of garlic and add them to a large skillet with two tablespoons of olive oil. Sauté the garlic over medium heat for about one minute.

Bean added to the skillet, broth being poured in the side.

Drain but don’t rinse two 15oz. cans of Cannellini beans. Add them to the skillet along with ½ cup vegetable or chicken broth. Stir to combine.

Simmered beans in the skillet being stirred with a spoon.

Allow the beans to come up to a simmer. Simmer the beans, stirring occasionally, for about 10 minutes, or until they become thick and saucy. There should be a trail left by the spoon when stirred.

Pepper and Parmesan being added to the skillet.

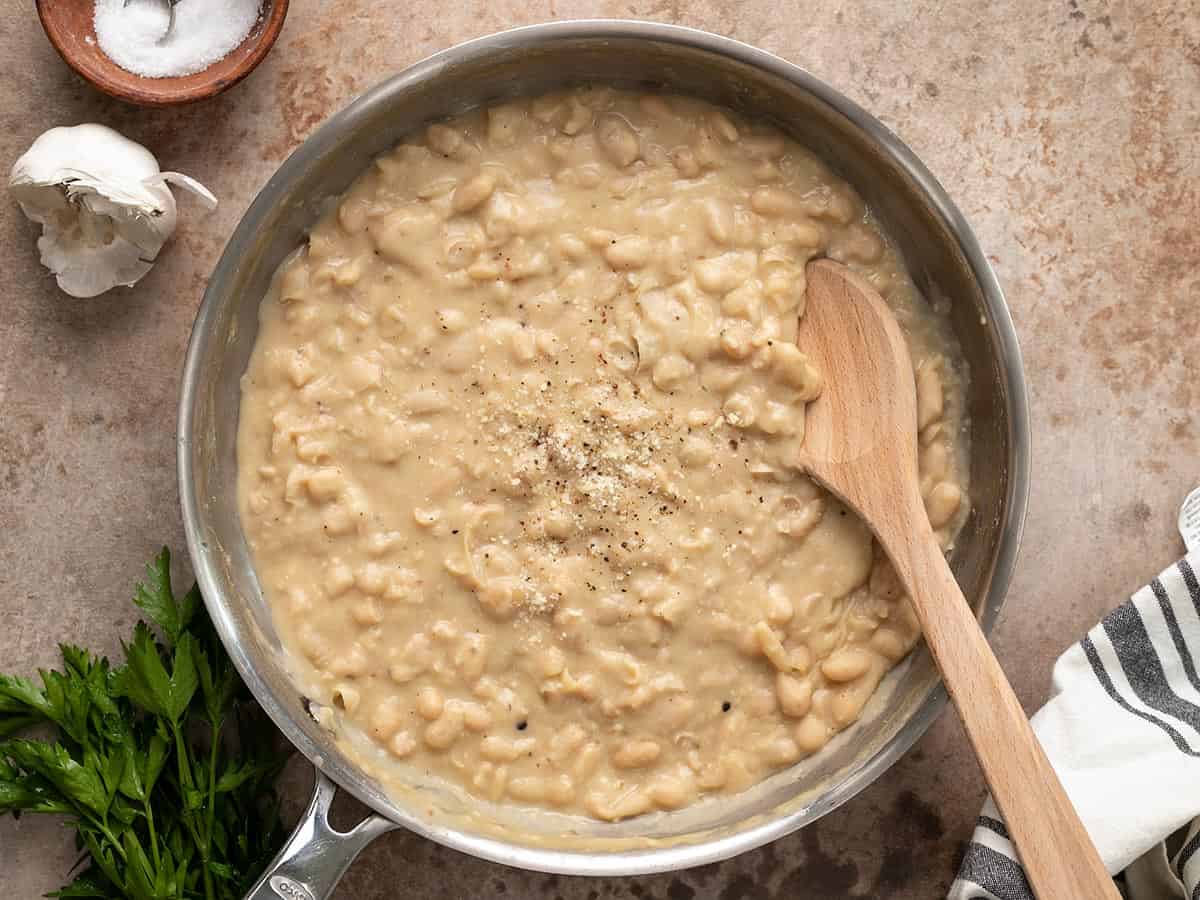
Add ¼ tsp freshly cracked pepper and ⅓ cup Parmesan (grated or shredded) to the beans. Stir until the Parmesan has melted into the beans.

Thickened beans being stirred with a spoon.

The Parmesan will help thicken the beans considerably. Give the beans a taste and adjust the Parmesan, pepper, or add salt if needed.

Finished beans in the skillet with a wooden spoon.

Serve the beans immediately, while still hot. The beans will thicken and solidify when cooled.

Overhead view of Parmesan beans on a plate with chicken and broccoli.

The post Parmesan Beans appeared first on Budget Bytes.

Pinto Bean Soup

This easy Pinto Bean Soup is a simple and filling meal for when money is tight but you still want something flavorful and comforting.

The post Pinto Bean Soup appeared first on Budget Bytes.

I’m a soup all-year-round type of gal and when that soup is made with just a few inexpensive ingredients and takes less than 30 minutes to make you know it’s going in my regular rotation. This super simple Pinto Bean Soup is a southwest version of our viral Rosemary Garlic White Bean Soup, and it’s every bit as easy and delicious. Plus, you can go wild with the toppings to make it more fun!

Close up overhead view of three bowls of pinto bean soup with sour cream and green onions.

What’s in Pinto Bean Soup?

This incredibly simple soup only needs eight simple ingredients, most of which are pantry staples. Here’s what you’ll need to make pinto bean soup:

  • Garlic and Olive Oil: The soup starts by sautéing minced garlic in oil to create a deep savory base flavor.
  • Canned Pinto Beans: The bulk of the pinto bean soup is, surprise-surprise, pinto beans! We use a combination of whole beans and puréed beans to create both a creamy texture and something to sink your teeth into.
  • Spices: We used a simple mix of chili powder, cumin, oregano, and cayenne pepper to season this soup, but you could get creative and use your own seasoning blend if you prefer!
  • Vegetable broth: Vegetable broth adds volume, flavor, and salt to this soup. We use Better Than Bouillon to make our vegetable broth, which is very flavorful and contains a decent amount of salt. If you’re using a less flavorful broth your soup won’t be quite as scrumptious. If you’re using a low-sodium broth you may find that you need to add a little salt to your soup at the end to help make the flavors pop.

Is This Soup Spicy?

This soup can be made spicy OR mild. If the chili powder you use is spicy, your soup will be spicy. I used McCormmick’s chili powder, which is very mild, so I also added a pinch of cayenne pepper to the soup. It’s not enough cayenne to really make it hot, it just adds a little dimension. If you prefer a spicy soup you can use a spicy chili powder or add more cayenne.

What Else Can I add?

Soups like this are fun because they’re a blank slate for making your own creation. Here are some other fun ingredients that you could add to your soup:

  • Jalapeños (dice and sauté with garlic)
  • Canned diced green chiles (either leave diced or purée with the beans)
  • Fire roasted diced tomatoes (either leave diced or purée with the beans)
  • Onion (sauté with the garlic)
  • Corn kernels
  • Sliced or diced carrots
  • Tajín

Toppings for Pinto Bean Soup

Much like chili, this soup is great with all sorts of fun toppings! So scan your fridge and pantry and add some more flavor, color, and texture to your bowl. Here are some topping ideas for this pinto bean soup:

  • Tortilla chips
  • Sour cream
  • Shredded cheese
  • Fresh jalapeños
  • Cotija
  • Cilantro
  • Green onion
  • Avocado
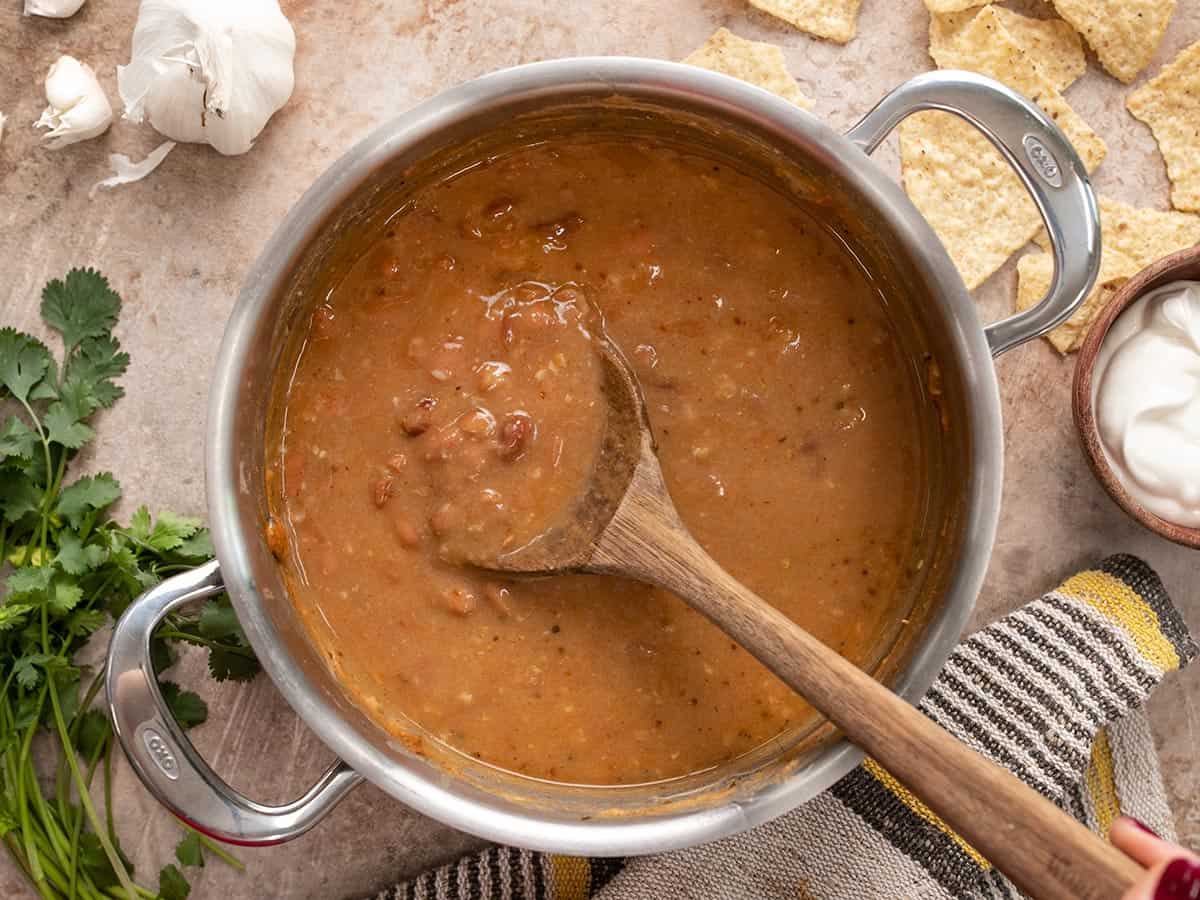
Overhead view of a pot full of pinto bean soup with a wooden spoon.
Close up overhead view of three bowls of pinto bean soup.
Print

Pinto Bean Soup

This easy Pinto Bean Soup is a simple and filling meal for when money is tight but you still want something flavorful and comforting.
Course Dinner, Lunch
Cuisine American, Southwest
Total Cost $3.51 recipe / $0.88 serving
Prep Time 5 minutes
Cook Time 20 minutes
Total Time 25 minutes
Servings 4 1.25 cups each
Calories 335kcal

Ingredients

  • 3 15oz. cans pinto beans, divided $2.37
  • 4 cloves garlic $0.35
  • 2 Tbsp olive oil $0.32
  • 1/2 tsp chili powder $0.05
  • 1/4 tsp cumin $0.02
  • 1/4 tsp dried oregano $0.02
  • 1/8 tsp cayenne pepper $0.01
  • 2 cups vegetable broth* $0.37

Instructions

  • Pour 1 can of the pinto beans (with the liquid from the can) into a blender and purée until smooth. Set the puréed beans aside.
  • Mince the garlic and add it to a soup pot with the olive oil. Sauté over medium heat for about one minute.
  • Add the chili powder, cumin, oregano, and cayenne pepper to the pot and continue to sauté with the garlic for one minute more.
  • Drain the remaining 2 cans of pinto beans, then add them to the pot, along with the puréed beans and vegetable broth. Stir to combine.
  • Turn the heat up to medium-high and bring the soup up to a boil. Once boiling, reduce the heat slightly and let the soup simmer (without a lid) for 15 minutes. The soup will thicken slightly and the flavors will deepen as it simmers.
  • After simmering for 15 minutes, the beans should be extra soft. Use the back of a large cooking spoon to smash more of the beans and thicken the soup further.
  • Taste the soup and adjust the salt or seasonings to your liking. Serve hot with your favorite toppings!

See how we calculate recipe costs here.

Notes

*We use Better Than Bouillion to make our broth, which has a deep flavor and contains a decent amount of sodium. If you’re using a less flavorful broth, your soup will be less flavorful and you may want to increase the spices. If using a lower sodium broth, you may want to add some salt at the end to help the flavors pop.

Nutrition

Serving: 1.25cups | Calories: 335kcal | Carbohydrates: 51g | Protein: 15g | Fat: 9g | Sodium: 1330mg | Fiber: 15g
Side view of a bowl of pinto bean soup with sour cream and a spoon lifting the soup.

How to Make Pinto Bean Soup – Step by Step Photos

Puréed pinto beans in a blender.

Pour one 15oz. can of pinto beans (with the liquid from the can) into a blender and purée until smooth (you may still see some small pieces of skin, that’s okay).

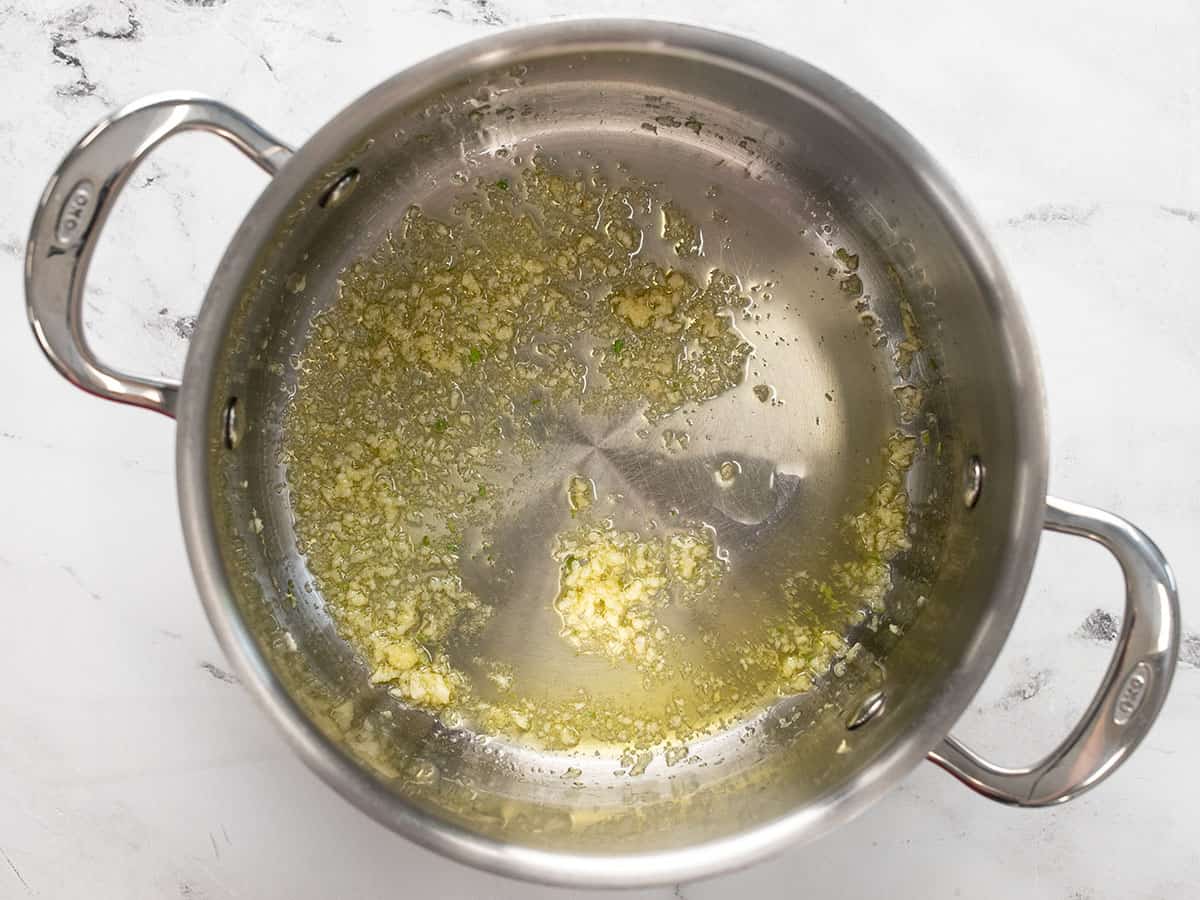
Oil and garlic in a soup pot.

Mince four cloves of garlic and add them to a soup pot with 2 Tbsp olive oil. Sauté the garlic over medium heat for about one minute or just until the garlic becomes really fragrant (don’t let it burn).

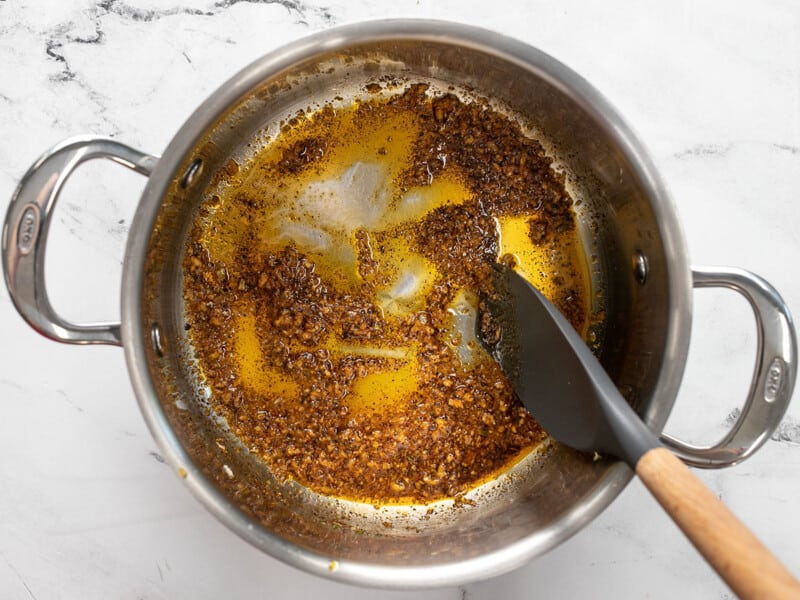
Spices being sautéed with the garlic and oil.

Add ½ tsp chili powder, ¼ tsp cumin, ¼ tsp oregano, and ⅛ tsp cayenne pepper to the pot. Sauté with the garlic for about one minute more.

Whole beans in the pot and puréed beans being poured in.

Drain the remaining two 15oz. cans of pinto beans. Add the drained whole beans and the puréed beans to the soup pot.

Vegetable broth being poured into the pot.

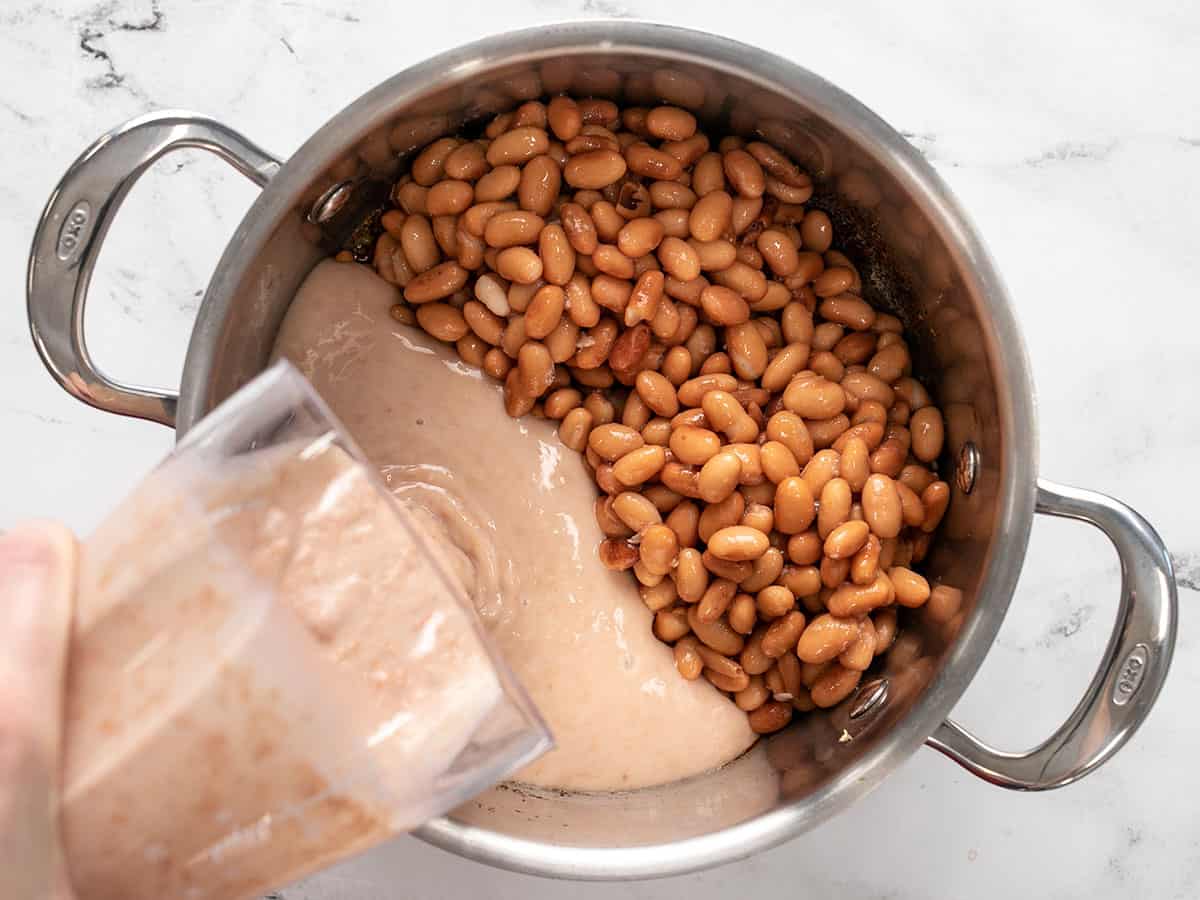
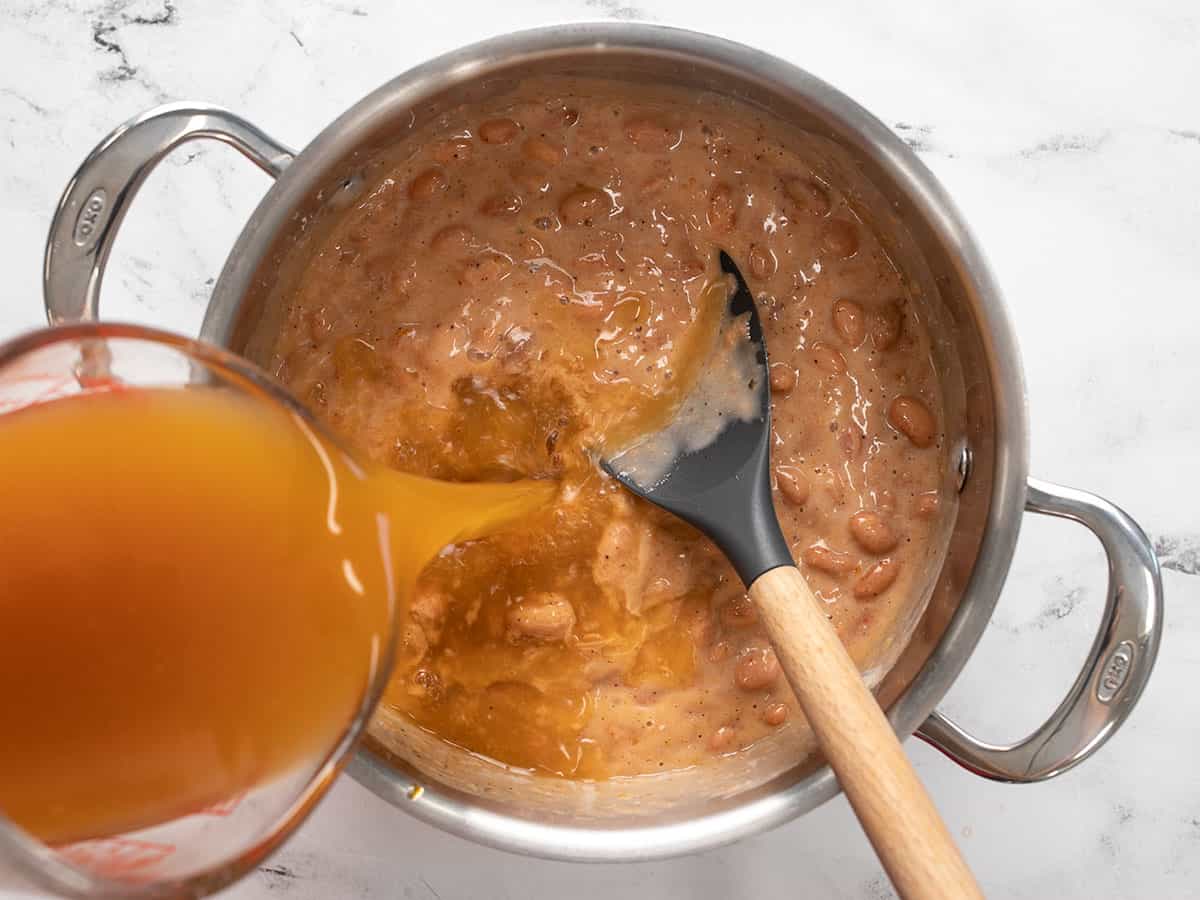
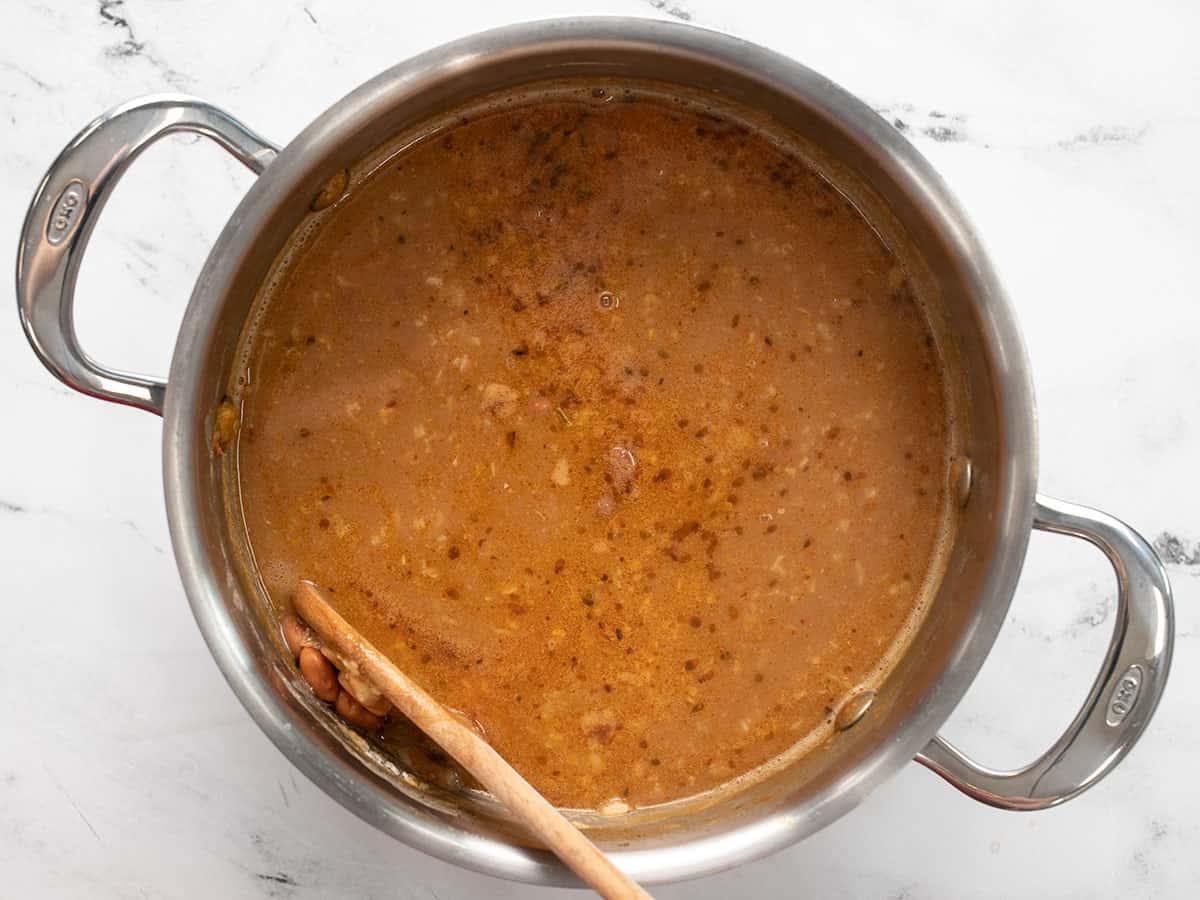
Add two cups of vegetable broth to the pot and stir to combine. Turn the heat up to medium-high to bring the soup up to a boil. Once boiling, turn the heat down slightly and let the soup simmer for 15 minutes (no lid). The soup will thicken slightly as it simmers and the flavors will deepen.

Beans being smashed on the side of the pot with a wooden spoon.

After simmering for 15 minutes, the beans should be quite a bit softer. Use the back of a cooking spoon to smash a few more of the beans to thicken the soup even more. Give the soup a taste and adjust the salt or any other seasoning to your liking.

Three bowls of pinto bean soup with toppings all around.

Serve the soup hot with your favorite toppings!

Sour cream being stirred into a bowl of pinto bean soup.

I particularly like sour cream because it makes the soup extra creamy and adds a light, bright flavor! What is your favorite topping?

The post Pinto Bean Soup appeared first on Budget Bytes.

Beef And Tomato Rice Bowl

This budget-friendly, easy Beef Tomato Rice Bowl is lip-smackingly good, endlessly adaptable, and perfect for a quick weeknight dinner!

The post Beef And Tomato Rice Bowl appeared first on Budget Bytes.

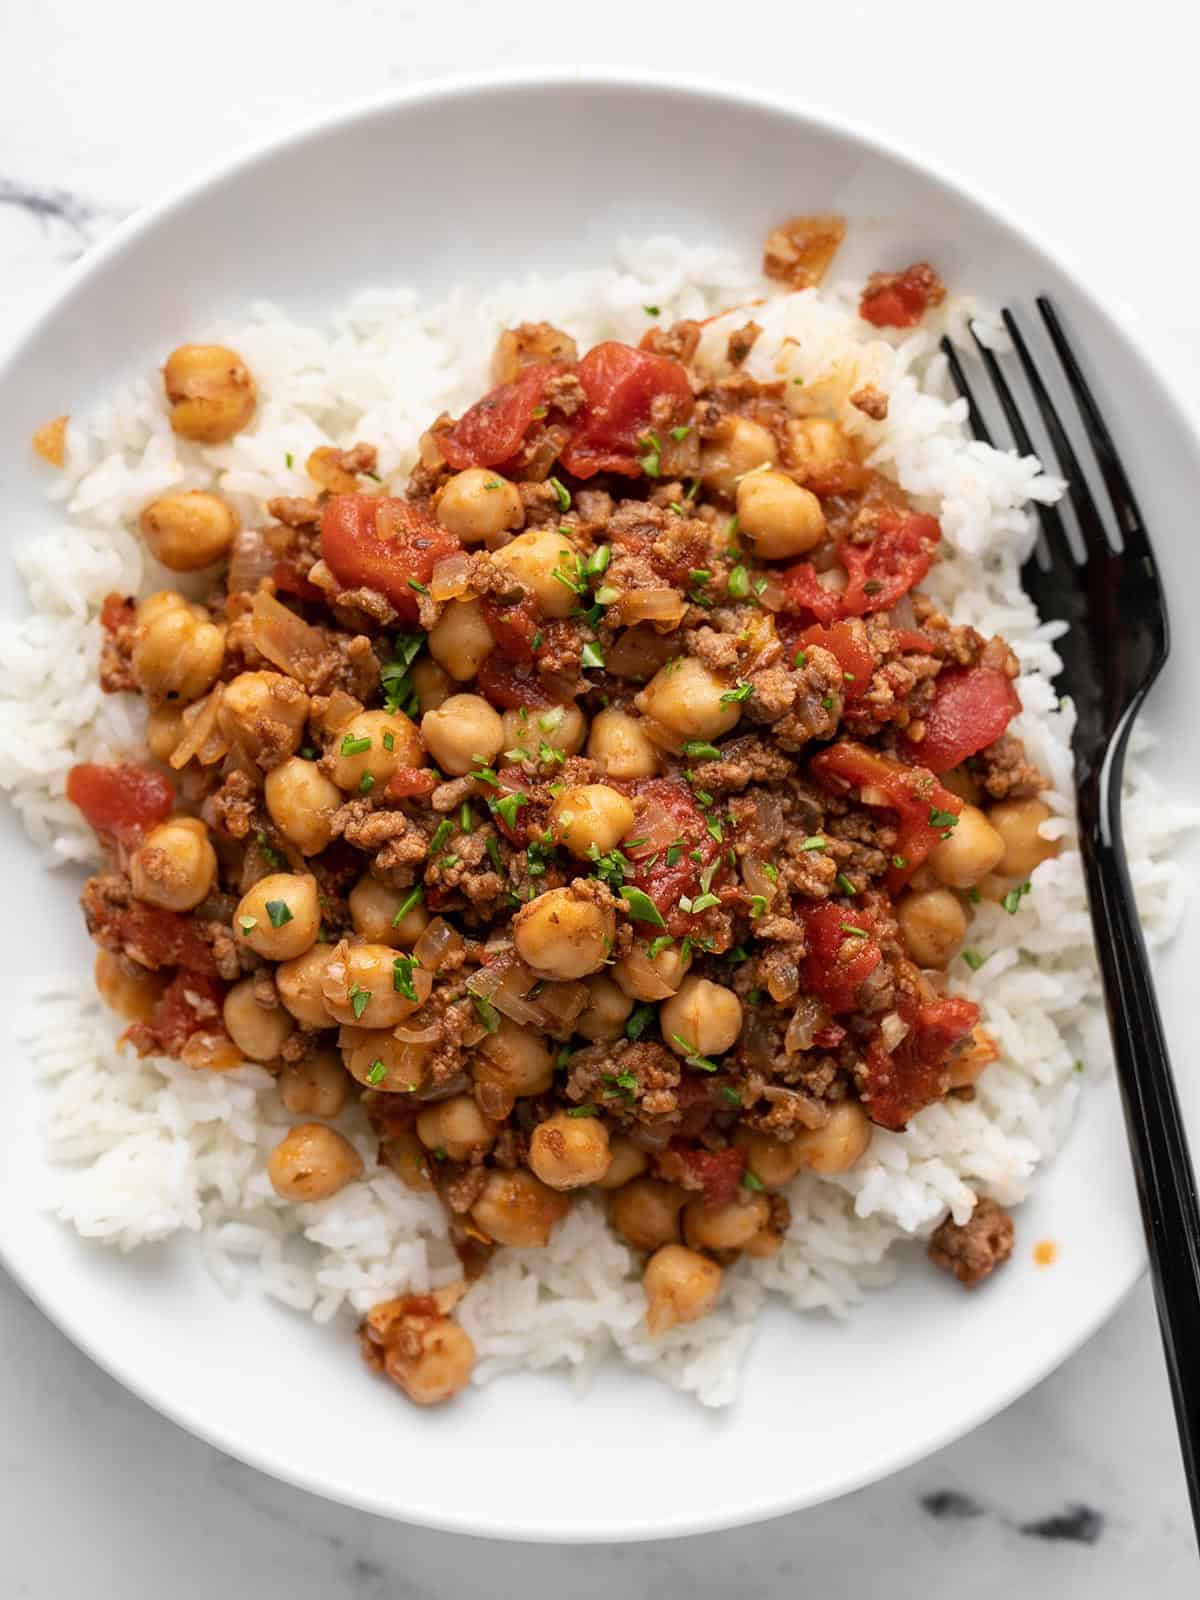
This budget-friendly, easy Beef and Tomato Rice Bowl is lip-smackingly good, endlessly adaptable, and perfect for a quick weeknight dinner! What’s not to love about buttery rice, unctuous ground beef, tangy tomatoes, and earthy garbanzo beans? Ready in thirty, I bet you have everything you need to make this incredibly tasty and super-filling meal in your pantry right now!

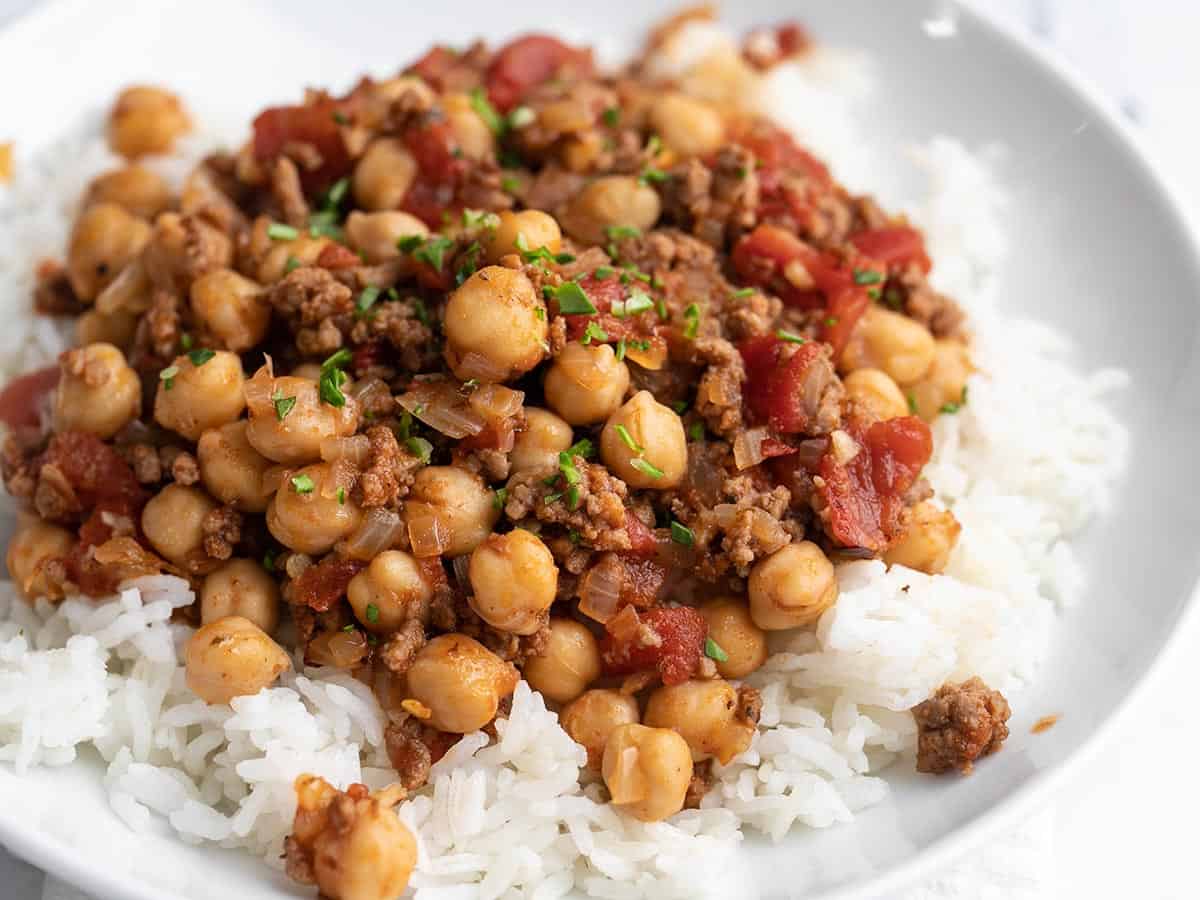
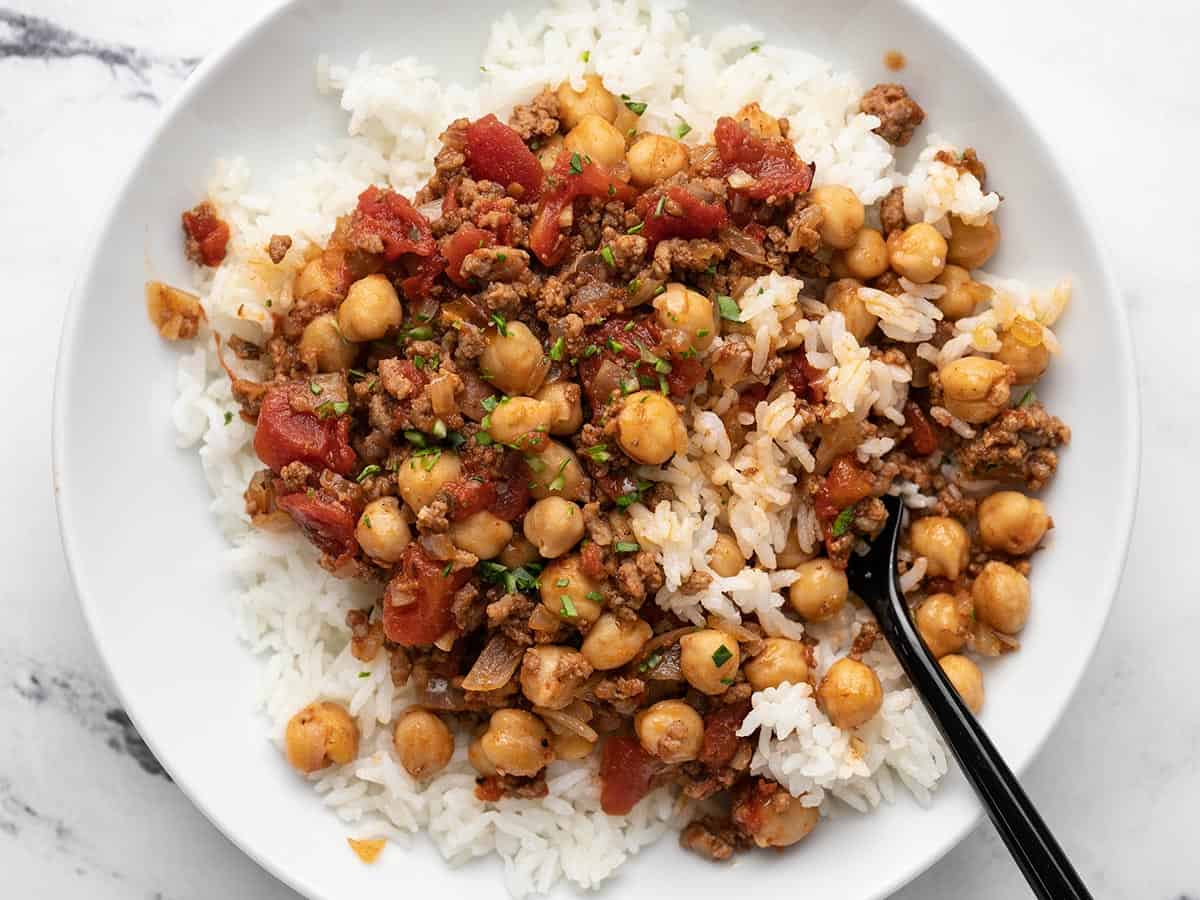
Overhead shot of Beef and Tomato Rice Bowl with fork in it.

Ingredients For Beef And Tomato Rice Bowl

What I love the most about this Beef and Tomato Rice Bowl recipe is how ridiculously versatile it is. But before we get into variations, let’s go over the ingredients you’re going to need:

  • Ground Beef – adds flavor and bulk to the mixture. You can substitute ground beef with plant-based ground beef or minced mushrooms.
  • Onion and Garlic – these aromatics help build depth and add flavor. Use 1 tablespoon of onion powder or 3 tablespoons of dried onion flakes as a substitute for the fresh onion. To substitute the fresh garlic, use a 1/2 teaspoon of granulated garlic.
  • Diced Tomatoes – add acidity that helps cut through the fattiness of the beef and increases the bulk. You can substitute the diced tomatoes with equal parts fresh tomatoes, crushed tomatoes, or tomato sauce. However, depending on your substitution, the texture of the beef mixture will change.
  • Chickpeas – add earthiness and increase bulk. Substitute with your favorite canned bean, just make sure they are drained. If you want to use dry beans, you will need to rehydrate them first and cook through.
  • Oregano, Cumin, and Red Pepper Flakes – all add flavor. Substitute with 3/4 teaspoon of your favorite spice blend.
  • Rice – We used Jasmine rice, but feel free to use whatever rice you have on hand. You can also serve the beef mixture over cauliflower rice, mashed potatoes, or over a bed of wilted greens.

Variations

  1. For a vegan version of this dish, use your favorite plant-based ground beef alternative and substitute the chicken broth with veggie broth. Use soy sauce instead of Worcestershire sauce.
  2. To add bulk and increase servings, consider adding diced carrots or potatoes, chopped spinach or kale, or sliced mushrooms or zucchini to the beef mixture.
  3. Skip the rice and serve the beef mixture over Riced Cauliflower, Mashed Potatoes, or Roasted Vegetables.
  4. Serve the dish with some of your favorite toppings like shredded cheddar cheese, a dollop of sour cream, or a side of sliced avocado.

How To Store Leftovers

You can store Beef and Tomato Rice Bowl leftovers in an air-tight container for up to four days in the fridge. They will keep up to four months in the freezer. If freezing, cover the surface with plastic wrap or parchment before sealing the container, which prevents freezer burn. If meal prepping, refrigerating, or freezing, add the beef mixture to the container first and then top it with the rice. This will prevent the rice from absorbing all of the sauce. You can reheat leftovers in a microwave. Cook in 30-second increments until the beef mixture is steaming.

Side shot of Beef and Tomato Rice Bowl.
Overhead shot of Beef and Tomato Rice Bowl with fork in it.
Print

Beef and Tomato Rice Bowl

This budget-friendly, easy Beef Tomato Rice Bowl is lip-smackingly good, endlessly adaptable, and perfect for a quick weeknight dinner!
Course Dinner, Lunch
Cuisine American
Total Cost ($7.78 recipe / $1.95 serving)
Prep Time 5 minutes
Cook Time 30 minutes
Total Time 35 minutes
Servings 4 bowls
Calories

Ingredients

  • 2 Tbsp cooking oil $0.08
  • 1/2 lb ground beef $4.00
  • 1 3/4 tsp salt, divided $0.05
  • 1 yellow onion, diced $0.42
  • 2 cloves garlic, minced $0.10
  • 1/2 tsp oregano $0.05
  • 1/4 tsp ground cumin $0.03
  • 1 tsp Worcestershire sauce $0.03
  • 1 can diced tomatoes, 15 oz $1.00
  • 1/2 cup chicken broth $0.08
  • 1 can chickpeas, 15 oz, drained $0.79
  • 2 cups rice $0.85
  • 3 cups water $0.00
  • 2 Tbsp salted butter $0.28
  • 1 pinch red pepper flakes $0.02

Instructions

  • Set a deep stainless steel skillet over medium-high heat and add the cooking oil. Once the oil has warmed, add the ground beef and sprinkle it with a 1/2 teaspoon salt. Once the beef has browned, remove it from the pan and set aside. Keep about 2 tablespoons of rendered fat in the pan.
  • Add the diced onion to the pan and cook until translucent, about 2 minutes. Add the minced garlic to the pan and cook until fragrant, about 1 minute.
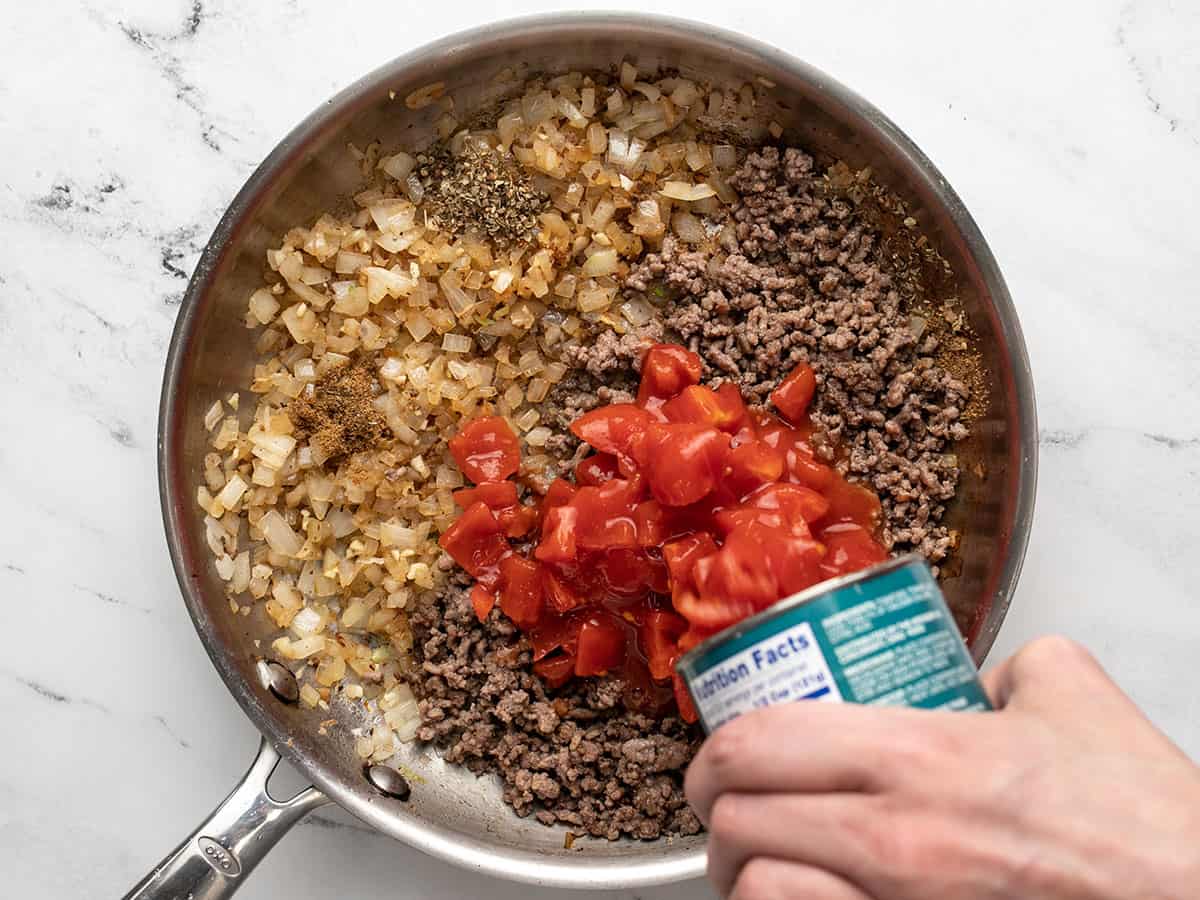
  • Add the beef back to the pan with oregano, ground cumin, and Worcestershire sauce. Top the meat with the diced tomatoes and their juices. Stir to combine.
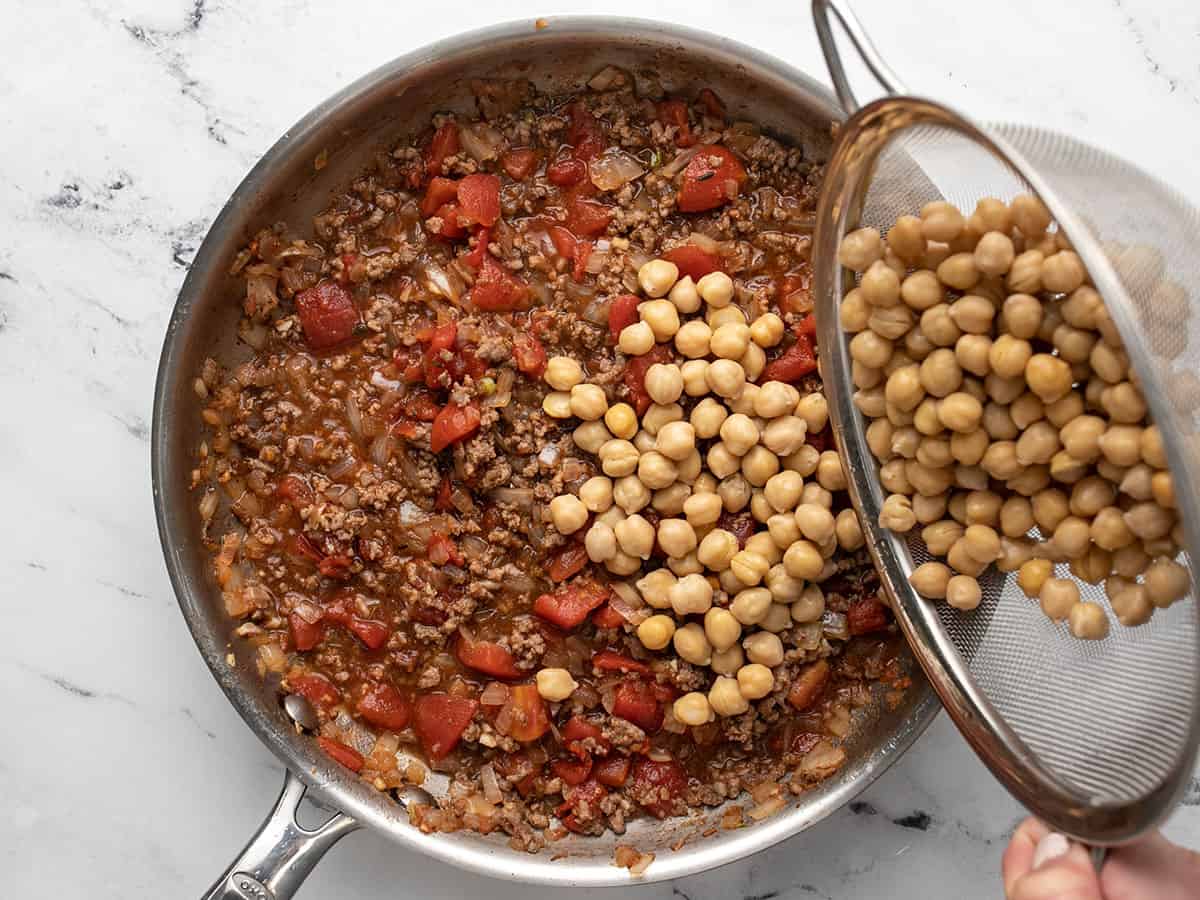
  • Add the chicken broth and drained chickpeas to the beef mixture. Sprinkle with 1/4 teaspoon salt and stir to combine. Cover the pan and cook until the chickpeas soften, about 20 minutes.
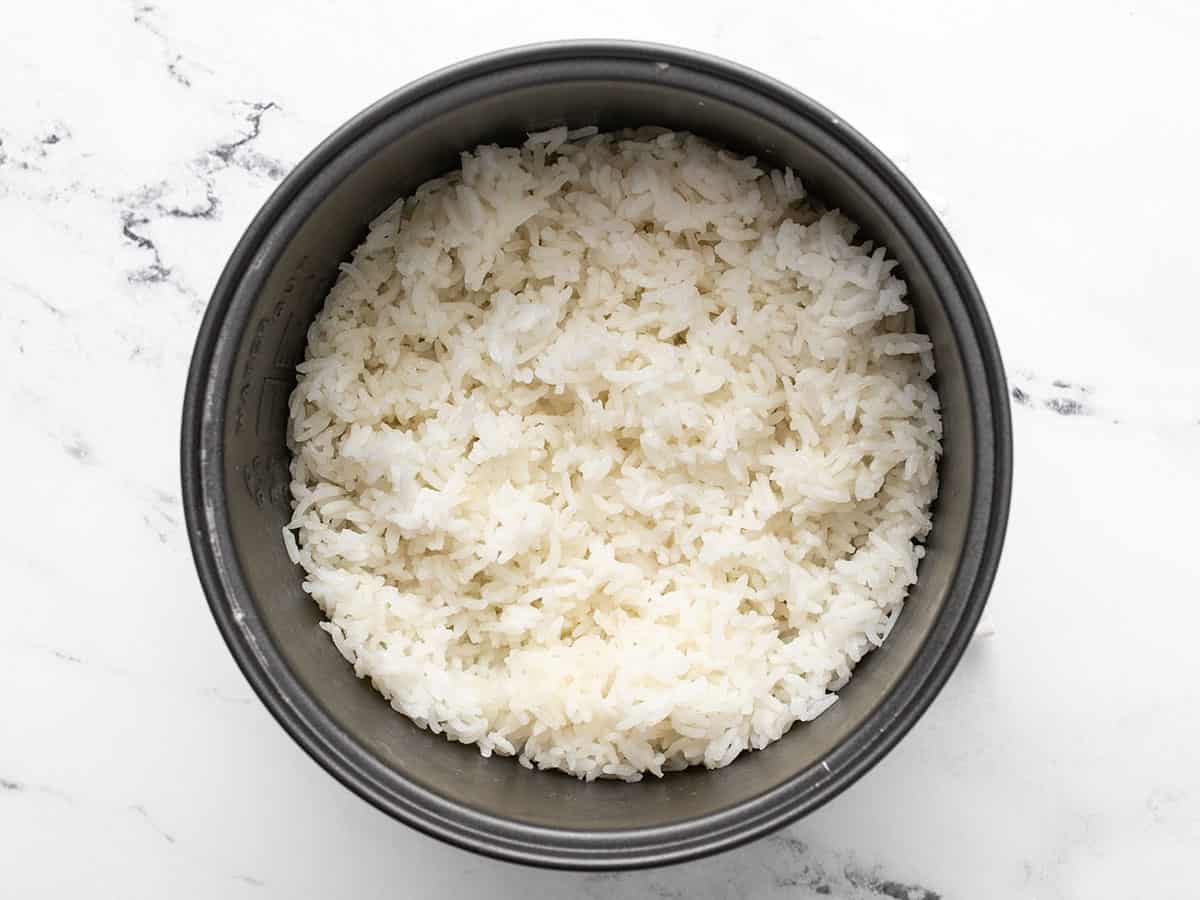
  • While the beef mixture cooks, add the rice to a rice cooker, alonf with the water, salted butter, and remaining 1 teaspoon of salt.
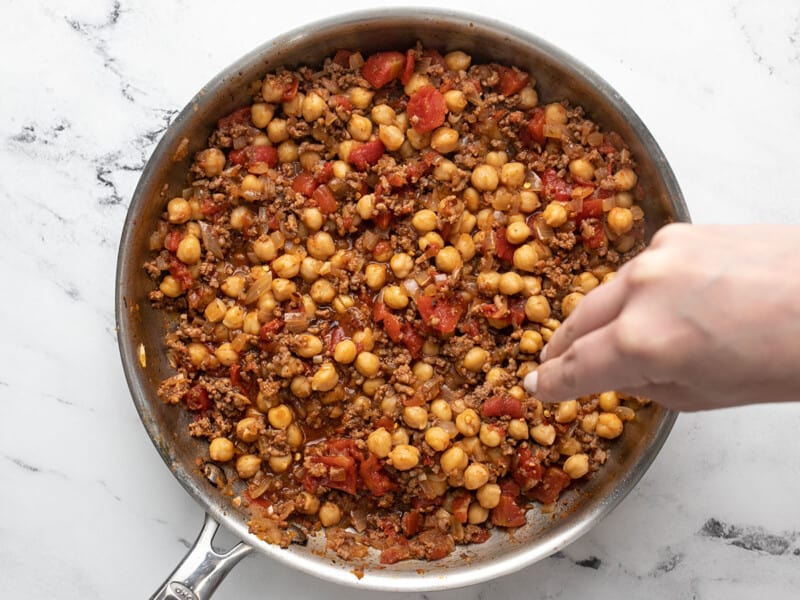
  • When the beef and tomato mixture finishes cooking, sprinkle with red pepper flakes. Divide the rice into four bowls and top with the beef mixture.

See how we calculate recipe costs here.

Overhead shot of Beef and Tomato Rice Bowl with fork in it.

How to Make Beef and Tomato Rice Bowl – Step by Step Photos

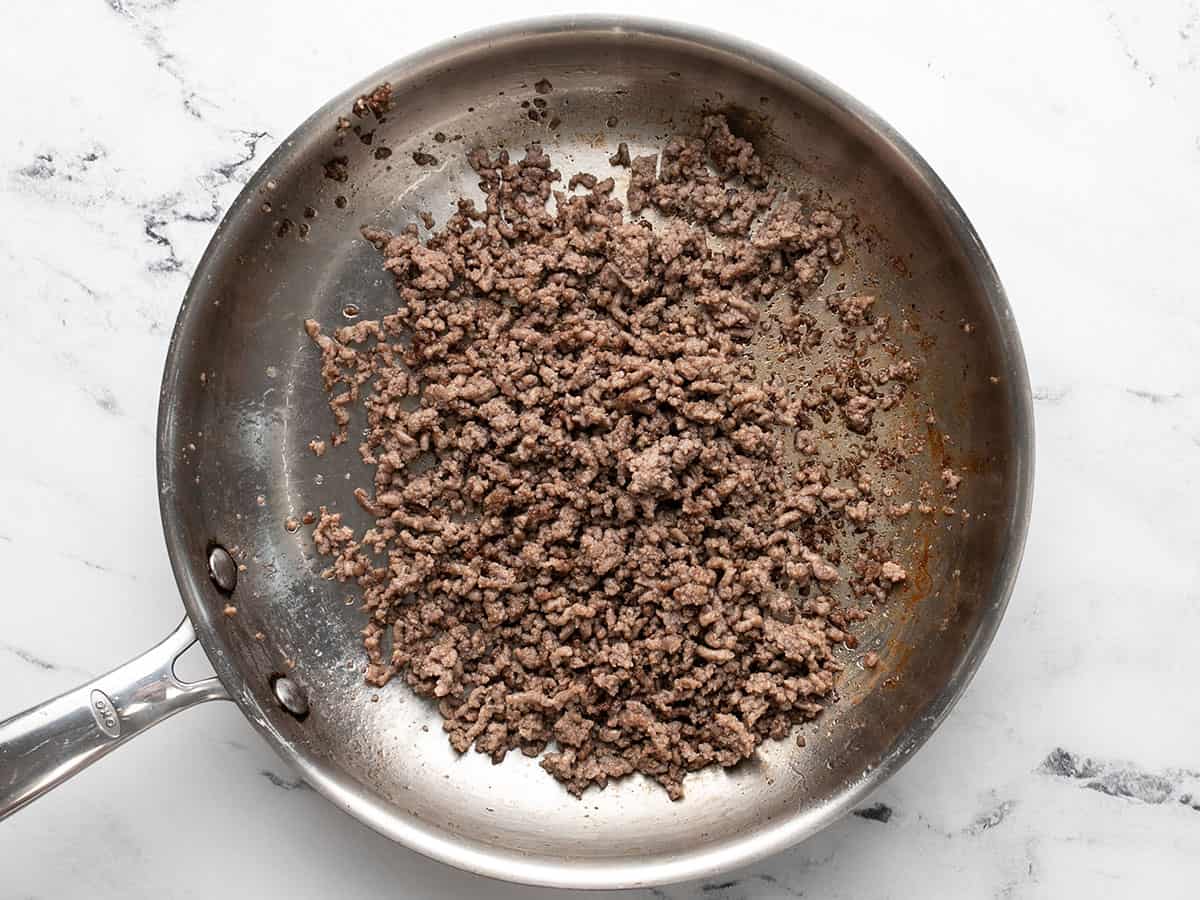
Overhead shot of ground beef browning in silver sauté pan.
Set a deep stainless steel skillet over medium-high heat and add 2 tablespoons of cooking oil. Once the oil has warmed, add the 1/2 pound of ground beef and sprinkle it with a 1/2 teaspoon salt. As the beef browns, use a wooden spoon to break up large chunks into smaller pieces. Once the beef has browned, remove it from the pan and set aside. Keep about 2 tablespoons of rendered fat in the pan.
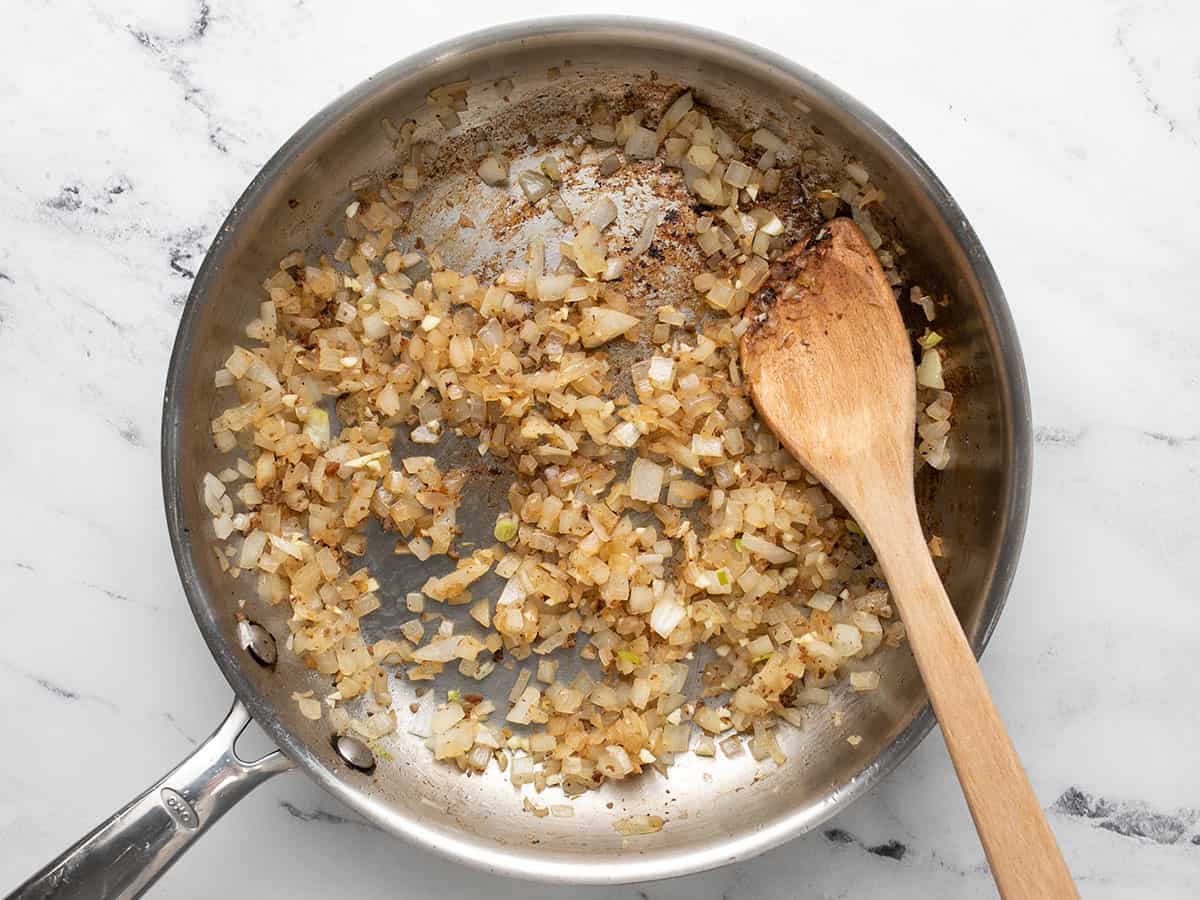
Overhead shot of onions cooking in ground beef fat in silver sauté pan.

Add the diced onion to the pan and cook until translucent, about 2 minutes. Next, add the 2 minced cloves of garlic to the pan and cook until fragrant, about 1 minute.

Overhead shot of beef and tomatoes added to onions in silver sauté pan.

Add the beef back to the pan along with 1/2 teaspoon of oregano, 1/4 teaspoon of ground cumin, and 1 teaspoon of Worcestershire sauce. Then top the meat with one 15-ounce can of diced tomatoes and their juices. Stir to combine.

Overhead shot of garbanzo beans added to ground beef mixture in sauté pan.

Add 1/2 cup of chicken broth and one 15-ounce can of drained chickpeas to the beef mixture. Then sprinkle with 1/4 teaspoon salt and stir to combine. Cover the pan and cook until the chickpeas have softened, about 20 minutes.

Overhead shot of cooked rice in a rice maker.

While the beef mixture cooks, add 2 cups of rice to a rice cooker, along with 3 cups of water, 2 tablespoons of salted butter, and 1 teaspoon of salt. Cover and cook. If you don’t own a rice cooker, check out our blog post on How To Cook Rice.

Overhead shot of hand sprinkling red pepper flakes into finished ground beef, tomato, and garbanzo bean mixture.

When the beef and tomato mixture is finished cooking, sprinkle with a pinch of red pepper flakes, or more to taste. Then, divide the rice into four bowls and top with the beef mixture. Finally, sit back and enjoy this hearty meal you’ve made with very minimal effort!

More Easy Rice Bowls

The post Beef And Tomato Rice Bowl appeared first on Budget Bytes.

Taco Soup

Taco soup is an easy and hearty soup with all the flavor of your favorite tacos in a warm and delicious bowl of soup.

The post Taco Soup appeared first on Budget Bytes.
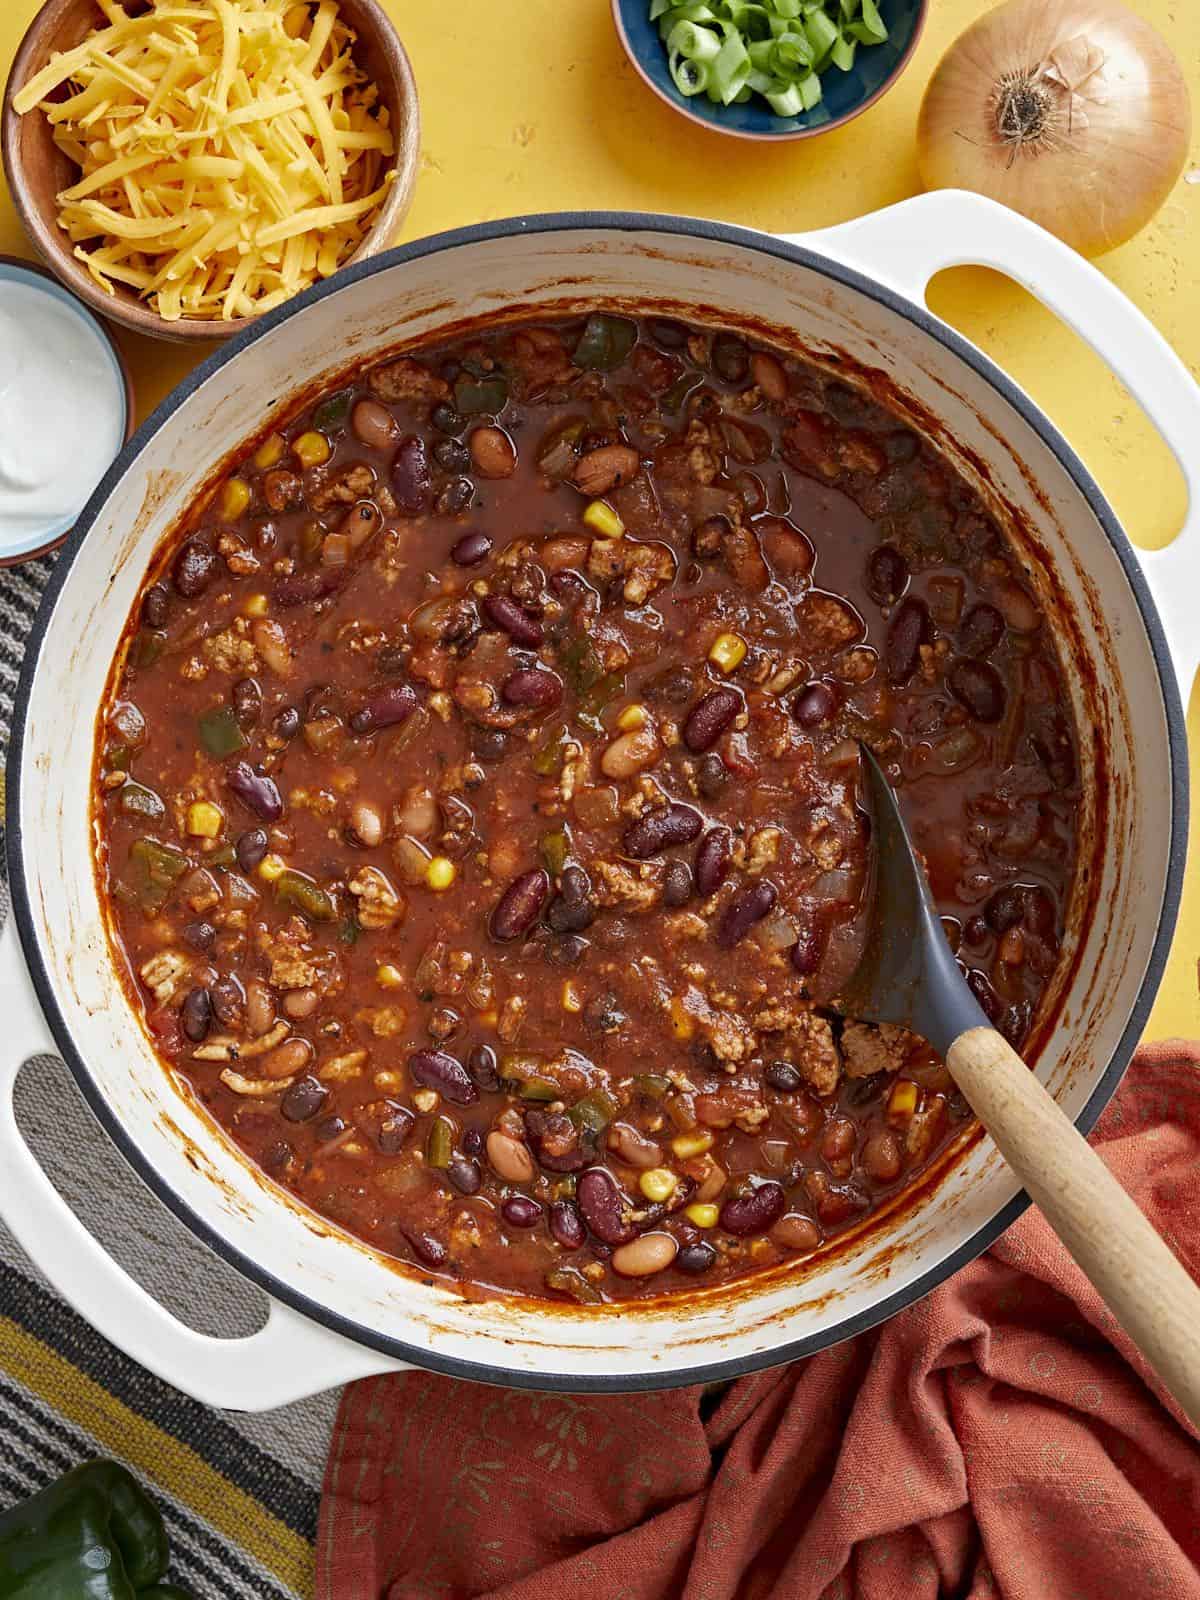
Taco soup was one of the first things I ever posted on Budget Bytes, and now I’m ready for this tasty soup to make a roaring comeback. Not only do I appreciate how quick and easy this soup is to make, but now I’ve got my own homemade versions of all the seasoning mixes so I can go 100% homemade, or take the store-bought shortcut when needed! I like having options. ;)

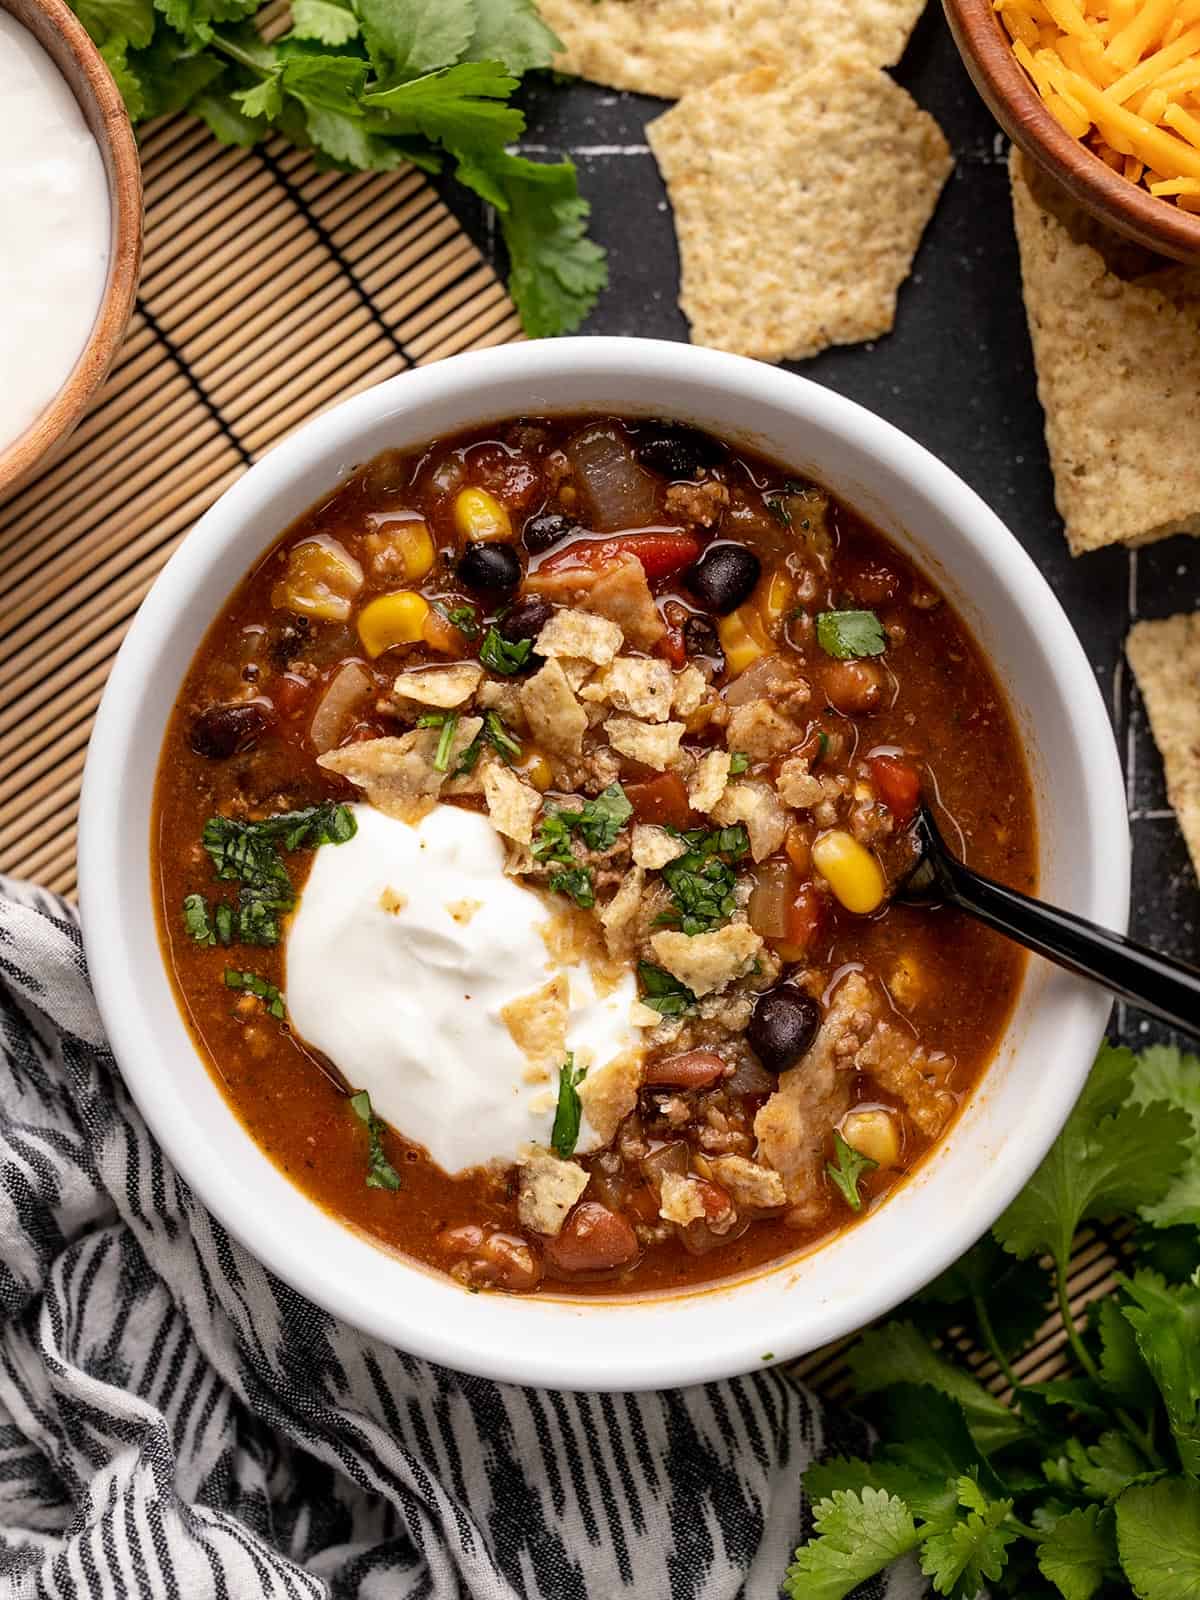
Overhead view of a bowl of taco soup with toppings.

What is Taco Soup?

Taco soup is a really easy soup made with ground beef, tons of beans, some vegetables like onions, tomatoes, green chiles, and corn, and a generously spiced tomato broth. It’s got a ton of flavor and texture, but requires barely any work to prepare. And the best part? It’s just begging for all the fun toppings that you might find on a taco!

Here’s what you’ll need to make taco soup:

  • Ground beef: Ground beef helps make this soup really hearty and meal-worthy, but if you don’t like beef you can substitute with ground turkey, pork, pulled pork, or even make it vegetarian by adding extra beans and vegetables.
  • Beans: Beans help bulk up this recipe while keeping the cost lost. For this recipe we use two kinds of beans (pinto and black beans), but you can always add more if you’d like!
  • Vegetables: A medley of vegetables keeps this bowl of soup colorful AND flavorful. We used onion, garlic, diced tomatoes with green chiles, and corn. And the sky’s the limit when it comes to adding more veggies.
  • Seasonings: This soup is not short on flavor thanks to not just one but TWO seasoning mixes, taco seasoning, and ranch seasoning. You can use our homemade recipe for either one or take a shortcut and use a store-bought seasoning packet. This bold mix of flavors makes sure that every spoonful is a ten!
  • Tomato paste: A few tablespoons of tomato paste helps thicken the broth just a bit and adds a little brightness to the soup.
  • Toppings: This is where the soup gets fun! Add all your favorite taco toppings to your bowl, or make it a spread and allow each person to build their own bowl.
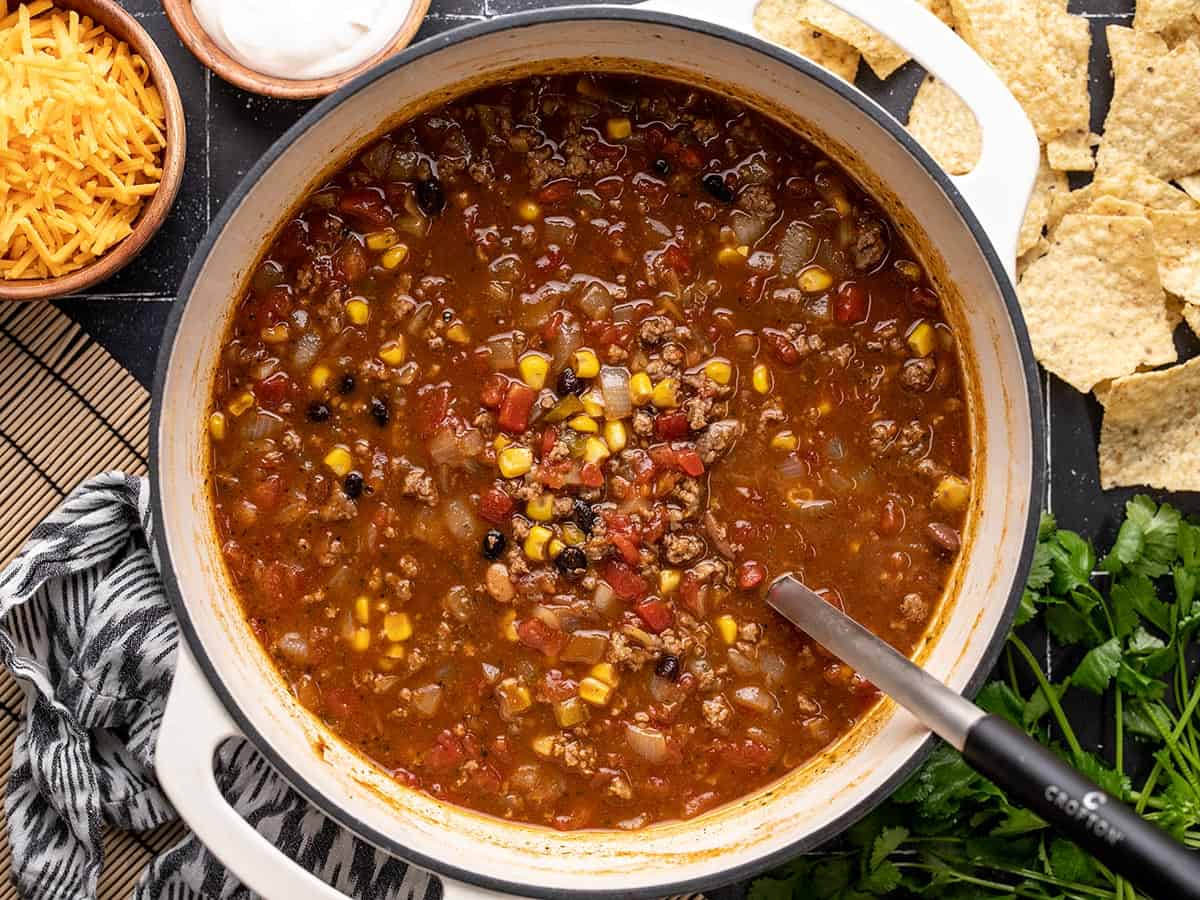
Overhead view of a pot of taco soup with toppings and a ladle.

What to Serve with Taco Soup

Taco soup has a lot going on in each bowl, so it could easily be considered a whole meal in one bowl, but if you want to add a little something-something on the side, I’d go for some simple cornbread or maybe some Cilantro Lime Rice.

But before you even get to the side dishes, make sure you have some of these fun toppings for taco soup:

  • Tortilla chips
  • Avocado
  • Sour Cream
  • Green onion
  • Pickled red onion
  • Cheddar cheese
  • Fresh cilantro
  • Fresh lime

Store-Bought vs. Homemade Seasonings

One of the reasons taco soup is so popular is because it’s easy to make and uses a lot of convenient, shelf-stable pantry ingredients. Instead of measuring out ten different herbs and spices you can use store-bought seasoning mixes in one go. But those store-bought seasoning packets do tend to be a sodium bomb. So if you want a little more control over the ingredients in your taco soup, we have homemade versions of BOTH seasoning packets that you can use in their place. :) See our Homemade Taco Seasoning and Homemade Ranch Seasoning for a more “from scratch” option.

How to Store taco Soup

Taco soup is great for meal prep because the flavors just get better as they chill in the fridge! Divide this soup up into single servings just after cooking to allow it to cool faster, then store in the fridge for 4-5 days. For longer storage, you can transfer the chilled soup to the freezer and store for about three months. The soup reheats easily in the microwave or in a saucepot over medium low.

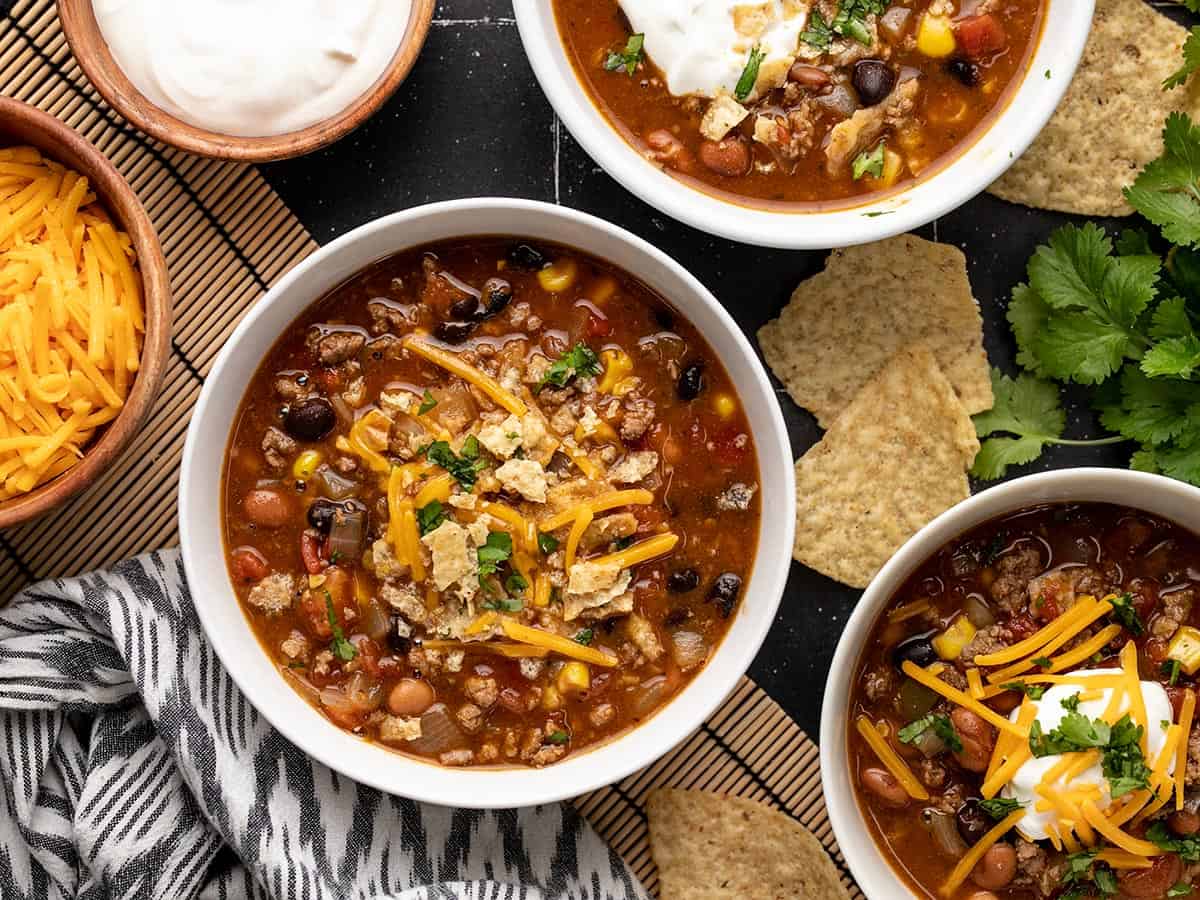
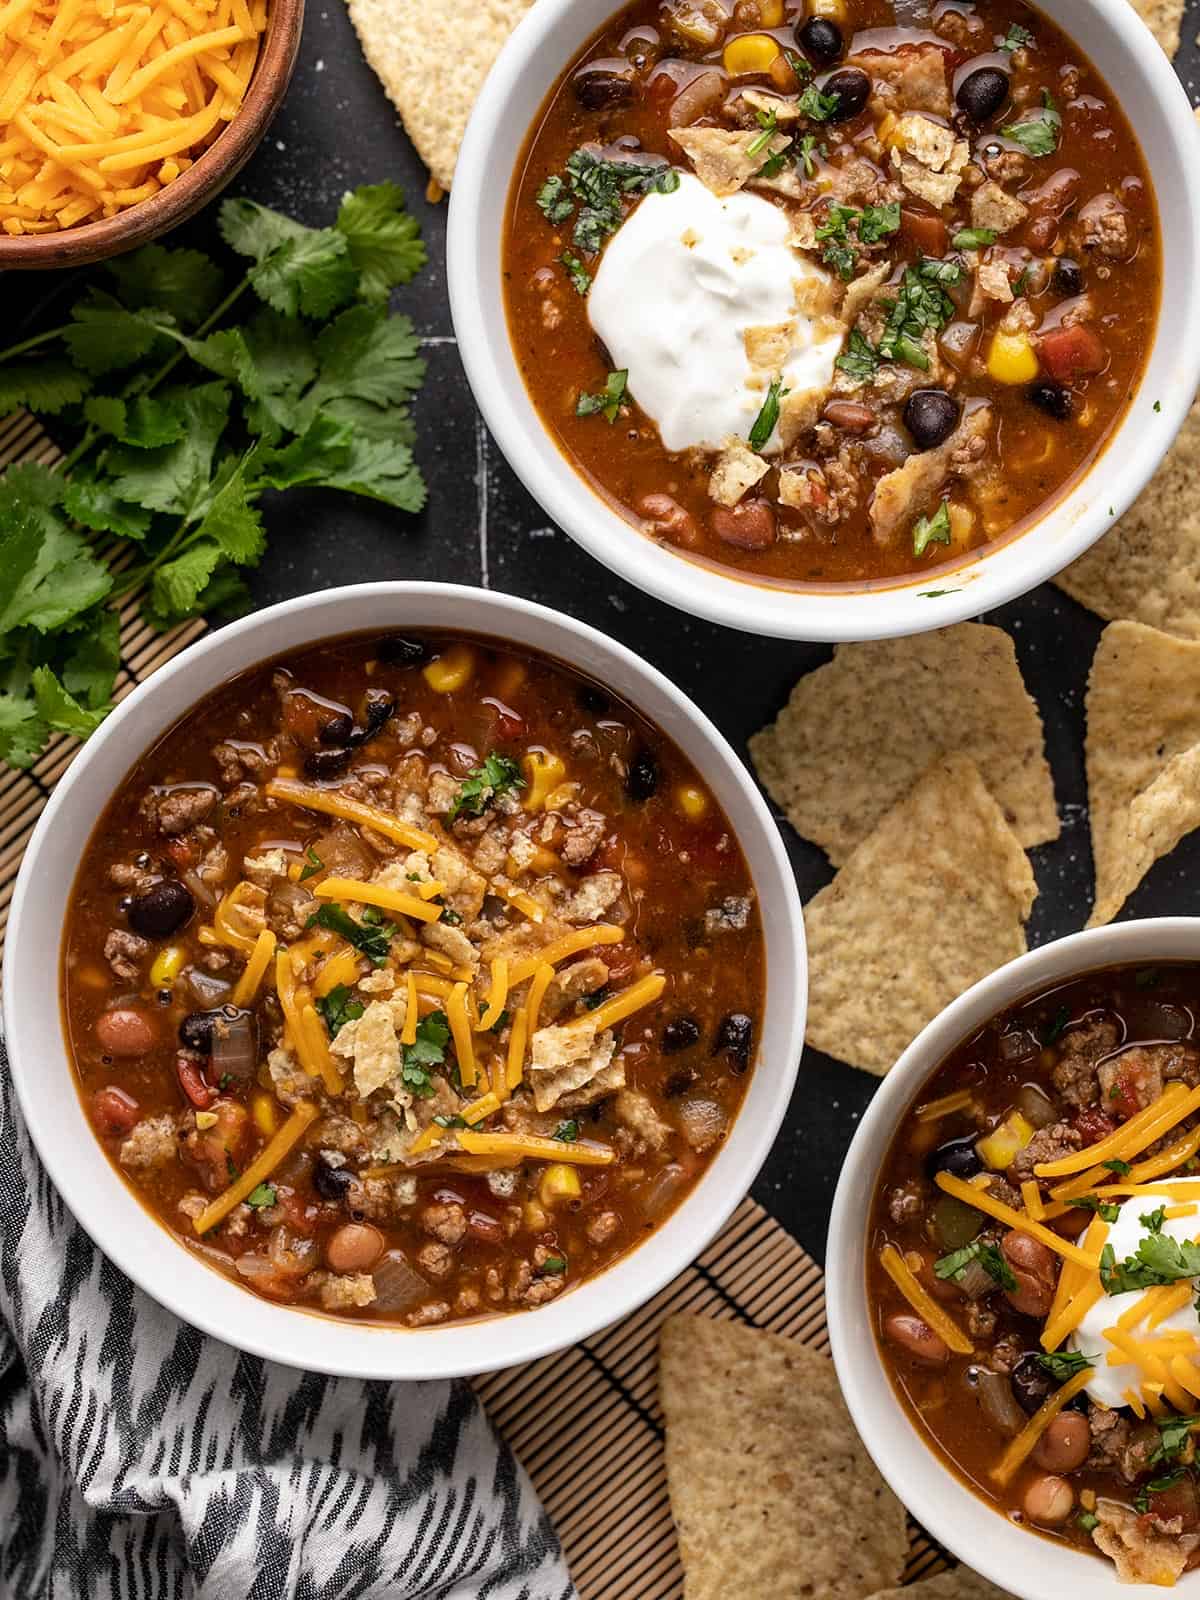
Overhead view of three bowls of taco soup with different toppings.
One bowl of taco soup with toppings.
Print

Taco Soup

Taco soup is an easy and hearty soup with all the flavor of your favorite tacos in a warm and delicious bowl of soup.
Course Dinner, Lunch, Main Course, Soup
Cuisine American
Total Cost $11.84 recipe / $1.97 serving
Prep Time 10 minutes
Cook Time 30 minutes
Total Time 40 minutes
Servings 6 1.5 cups each
Calories 419kcal

Equipment

Ingredients

Instructions

  • Add the olive oil and ground beef to a large soup pot. Cook over medium heat until the beef is fully browned. If using a high-fat content beef, drain the excess fat from the pot.
  • While the beef is cooking, dice the onion and mince the garlic. Add the onion and garlic to the pot with the beef and continue to cook until the onions are soft and translucent.
  • Add the frozen corn, pinto beans (drained), black beans (drained), and diced tomatoes with green chiles (with juices), and stir to combine.
  • Add the tomato paste, taco seasoning, ranch seasoning, and water to the pot. Stir to combine. Turn the heat up to high, place a lid on the pot, and bring the soup up to a boil.
  • Once boiling, reduce the heat to medium-low and let the soup simmer for 15 minutes, stirring occasionally.
  • Serve hot with your favorite toppings!

See how we calculate recipe costs here.

Notes

* In place of store-bought seasoning packets you can use our homemade taco seasoning and homemade ranch seasoning

Nutrition

Serving: 1.5cups | Calories: 419kcal | Carbohydrates: 43g | Protein: 23g | Fat: 18g | Sodium: 1412mg | Fiber: 12g

How to Make Taco Soup – Step by Step Photos

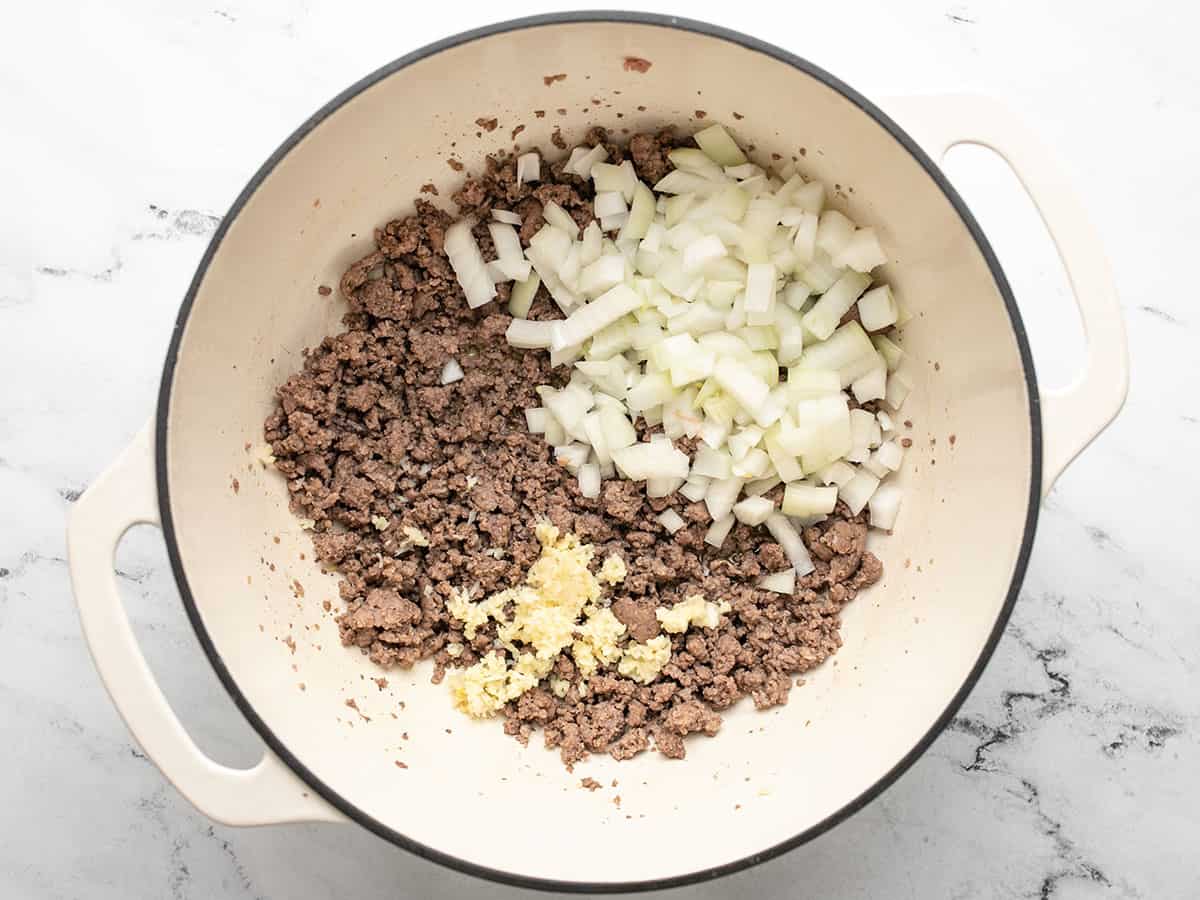
Cooked ground beef with diced onion and minced garlic in a soup pot.

Add 1 Tbsp olive oil and one pound of ground beef to a large soup pot. Cook over medium heat until the beef is cooked through. If using a high-fat content beef, drain the excess fat from the pot. Once the beef is cooked, add one diced yellow onion and 4 cloves of minced garlic. Continue to stir and cook until the onions are soft and translucent.

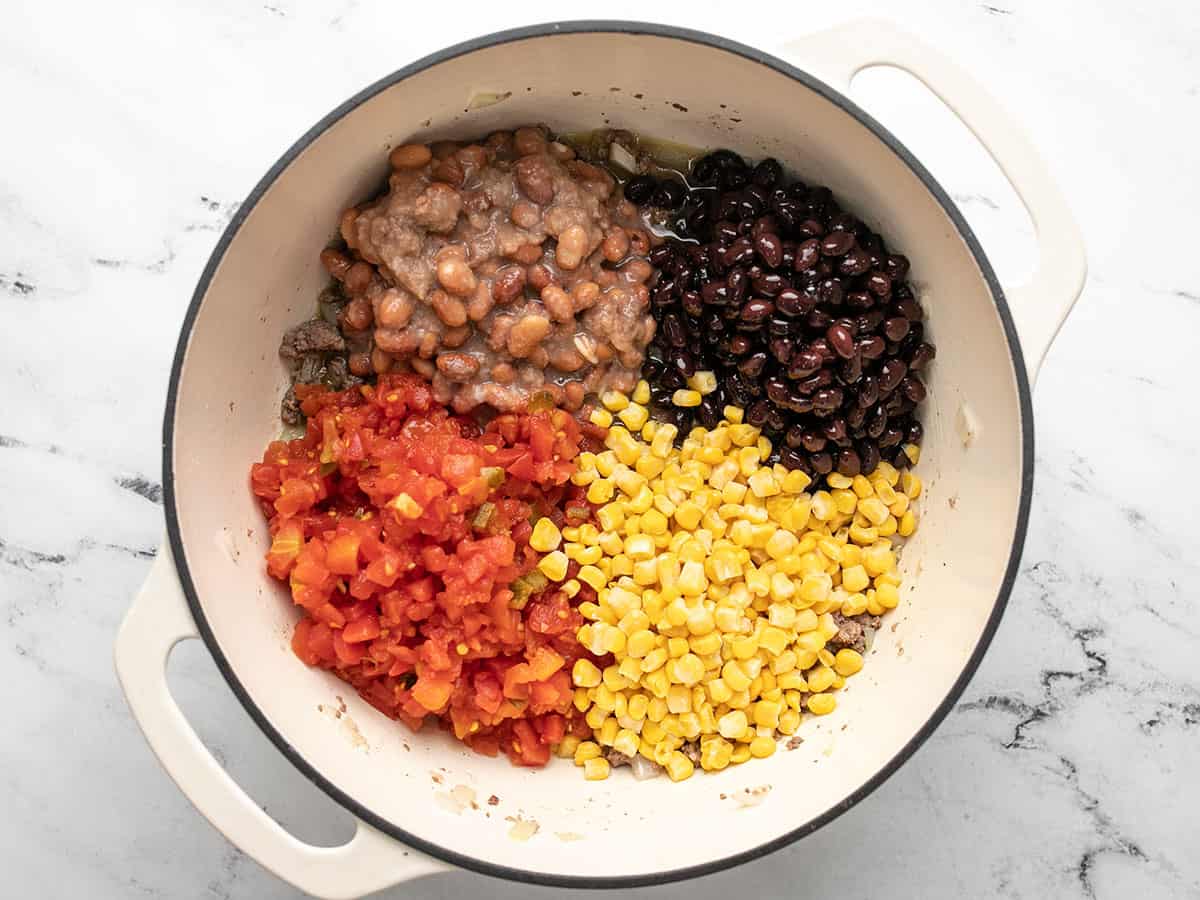
Beans, corn, and tomatoes in the pot.

Add one cup frozen corn kernels, one 15oz. can black beans (drained), one 15oz. can of pinto beans (drained), and two 10oz. cans of diced tomatoes with green chiles (with juices). Stir to combine.

Water pouring into the pot.

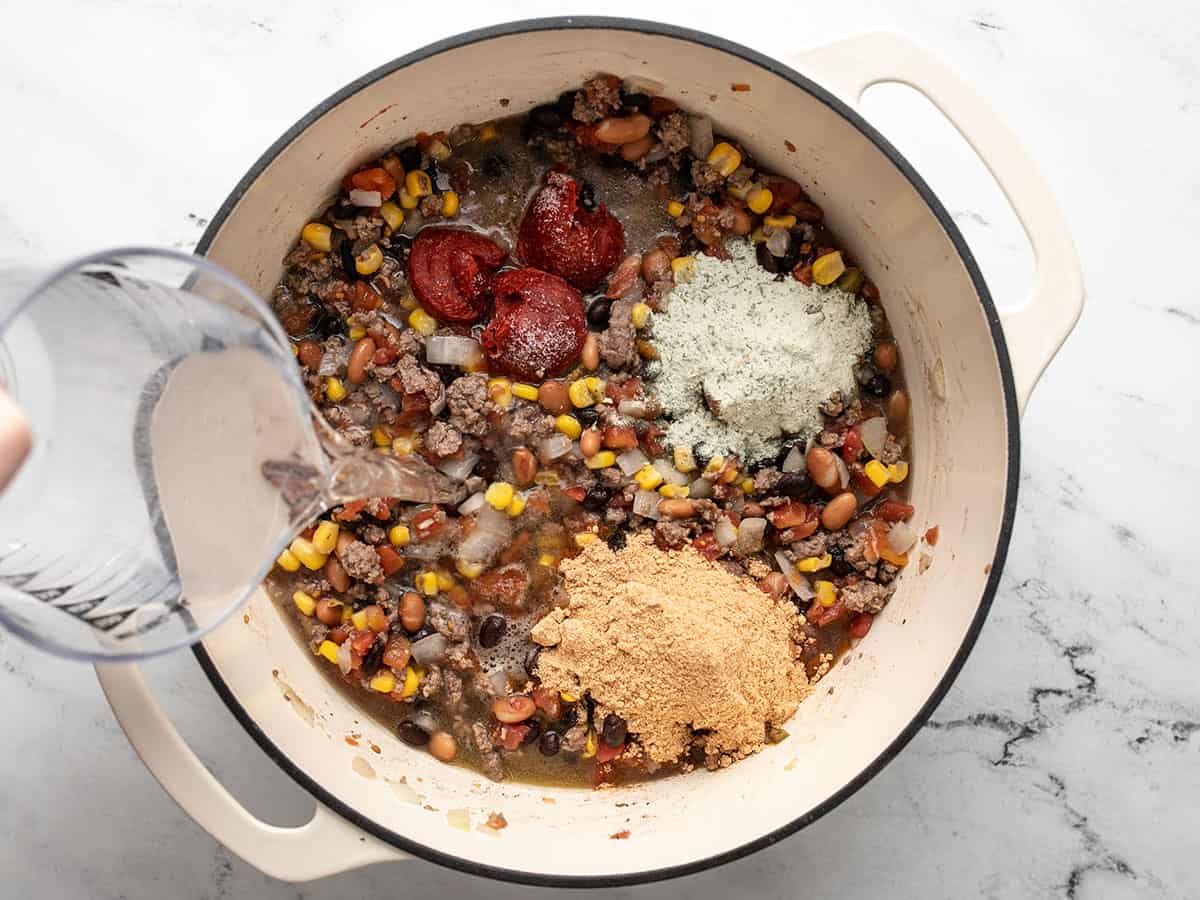
Add 3 Tbsp tomato paste, one packet of taco seasoning (or one recipe homemade taco seasoning), one packet of ranch seasoning (or one recipe homemade ranch seasoning), and 2 cups water. Stir to combine.

Finished taco soup in the pot.

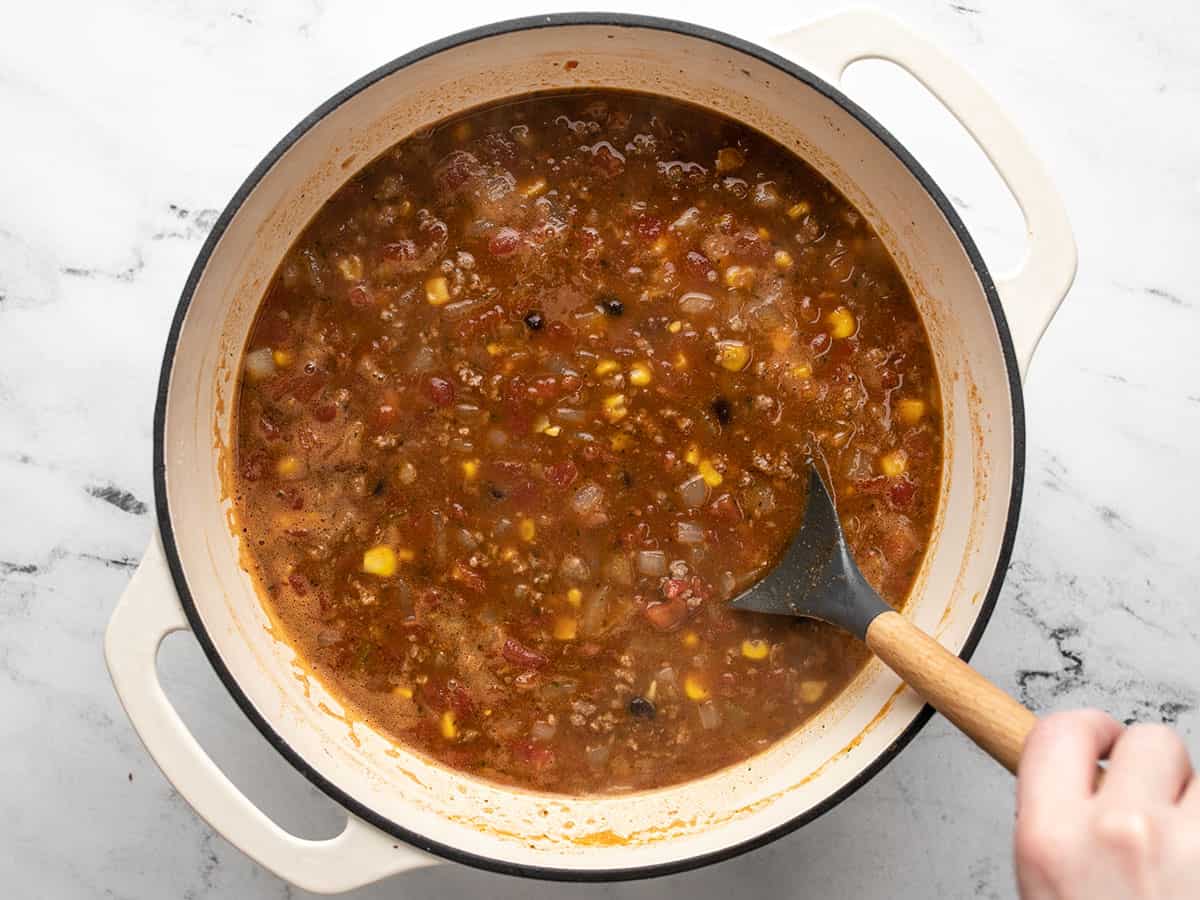
Turn the heat up to medium-high and place a lid on top. Allow the soup to come up to a boil. Once boiling, give it a stir, turn the heat down to medium-low, and let the soup simmer for 15 minutes, stirring occasionally.

Finished taco soup in the pot with no toppings.

Taste the soup and adjust the seasonings to your liking (I did not add anything additional).

One bowl of taco soup with toppings.

Serve the soup hot with your favorite toppings! (shown: tortilla chips, cilantro, and sour cream)

Three bowls of taco soup with different toppings.

The post Taco Soup appeared first on Budget Bytes.
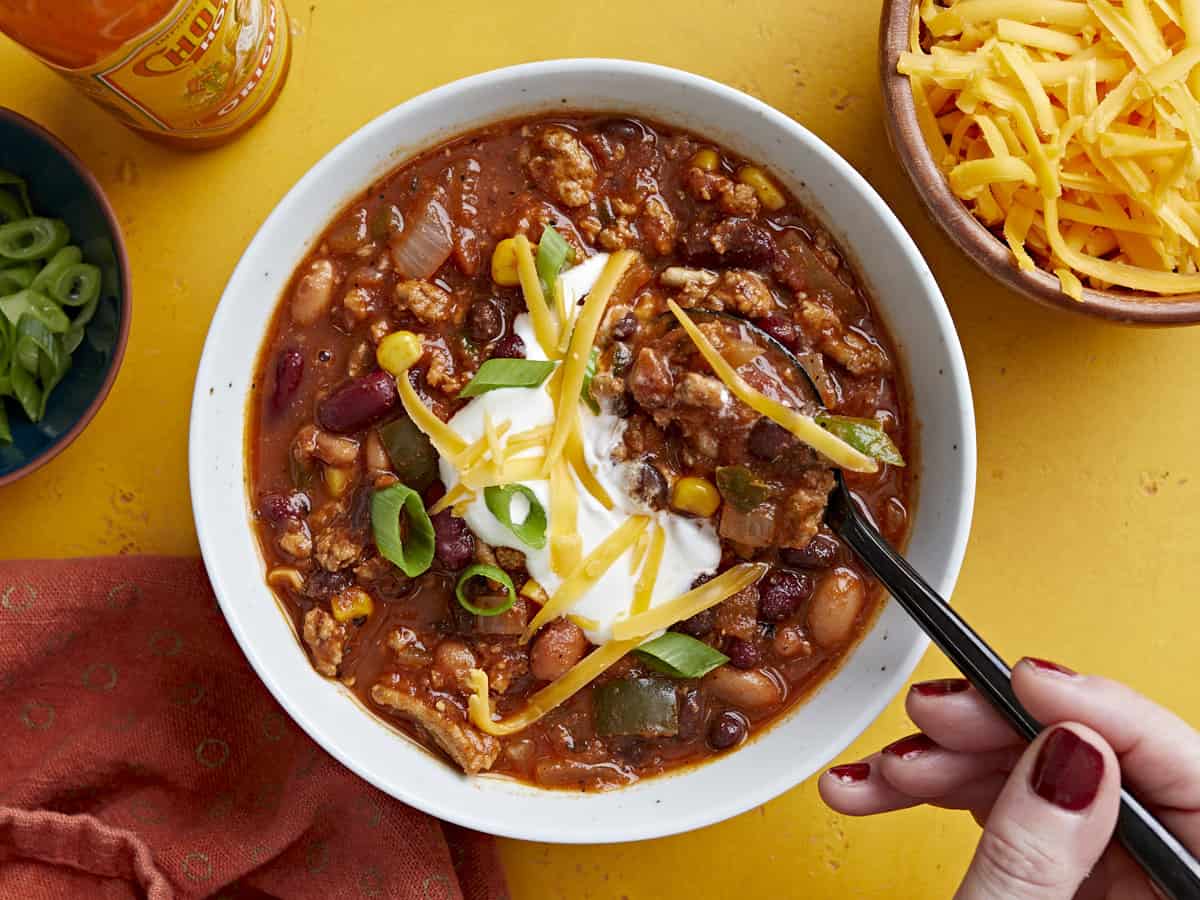
Blistered Green Bean Rice Bowl

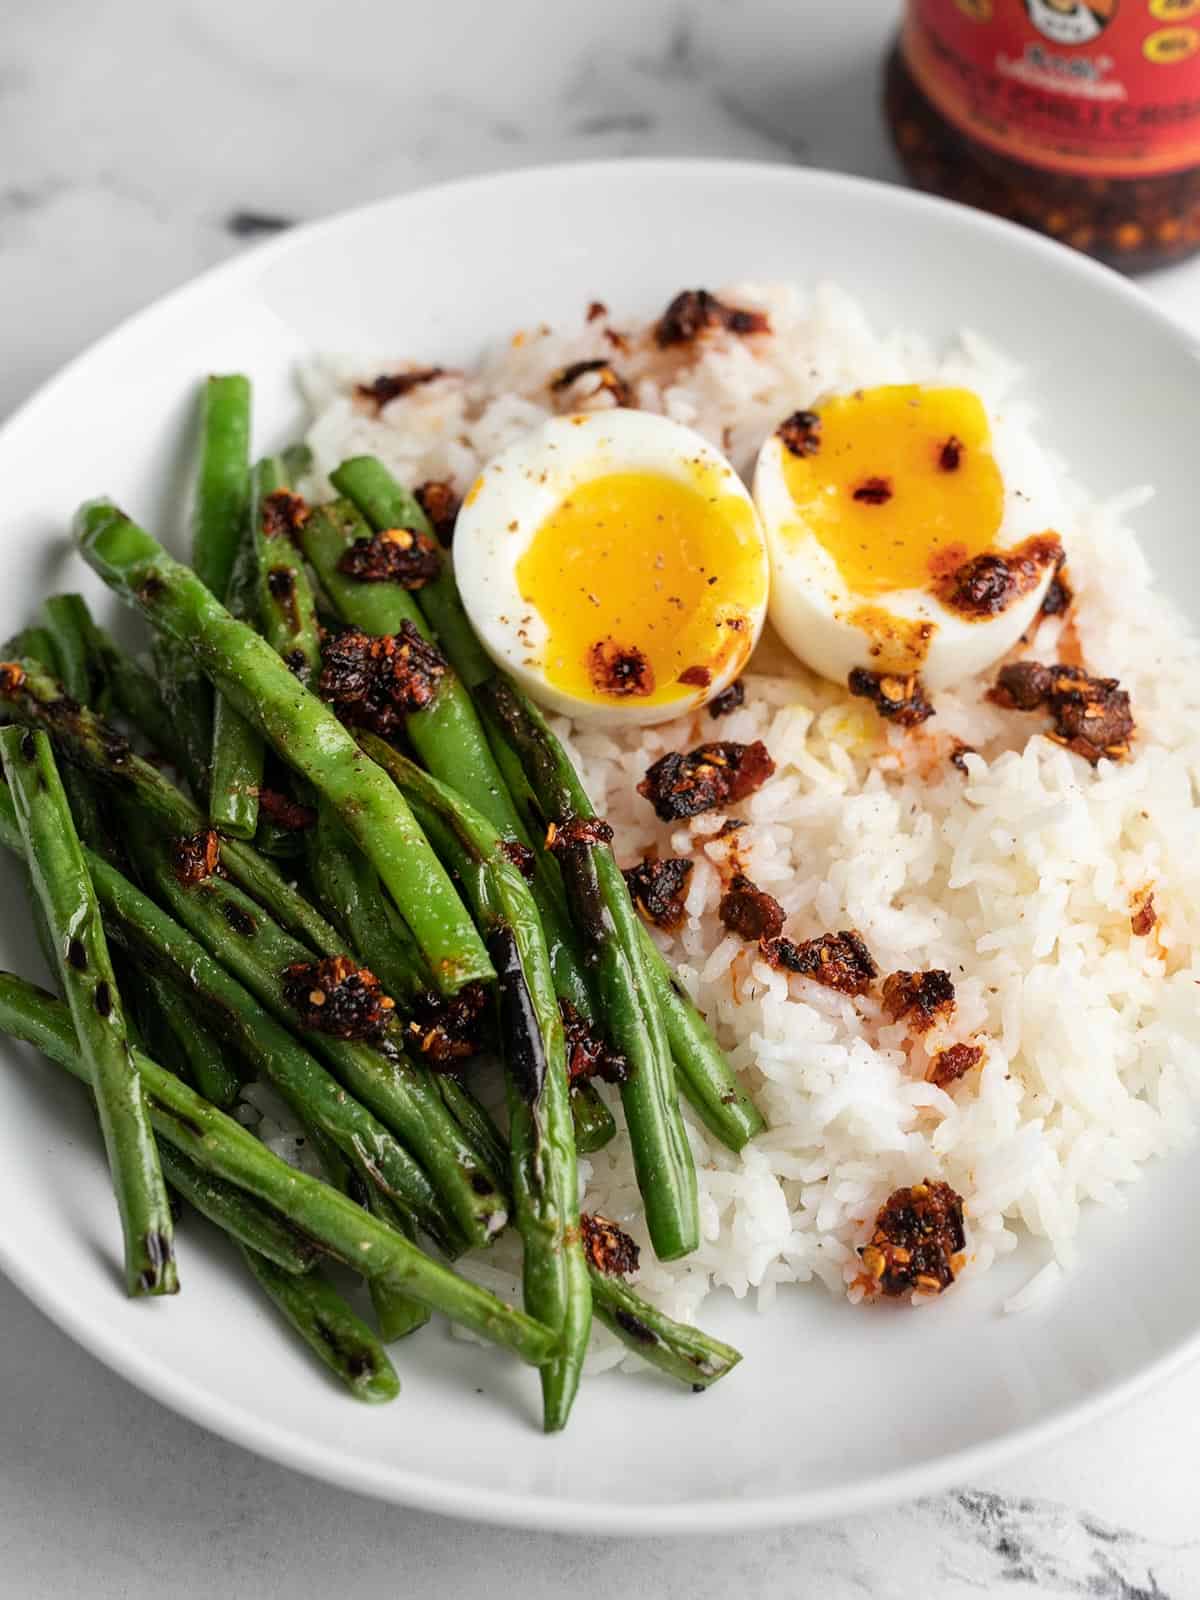
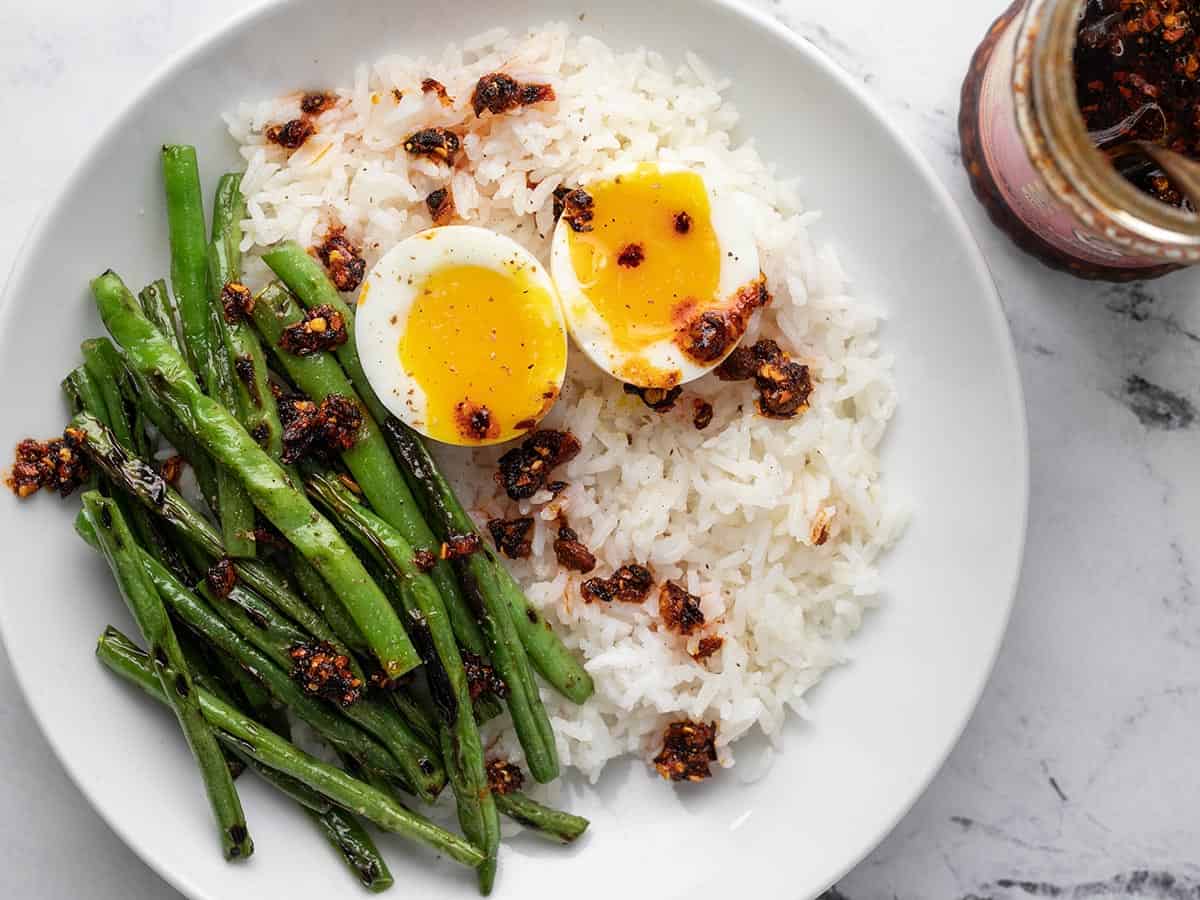
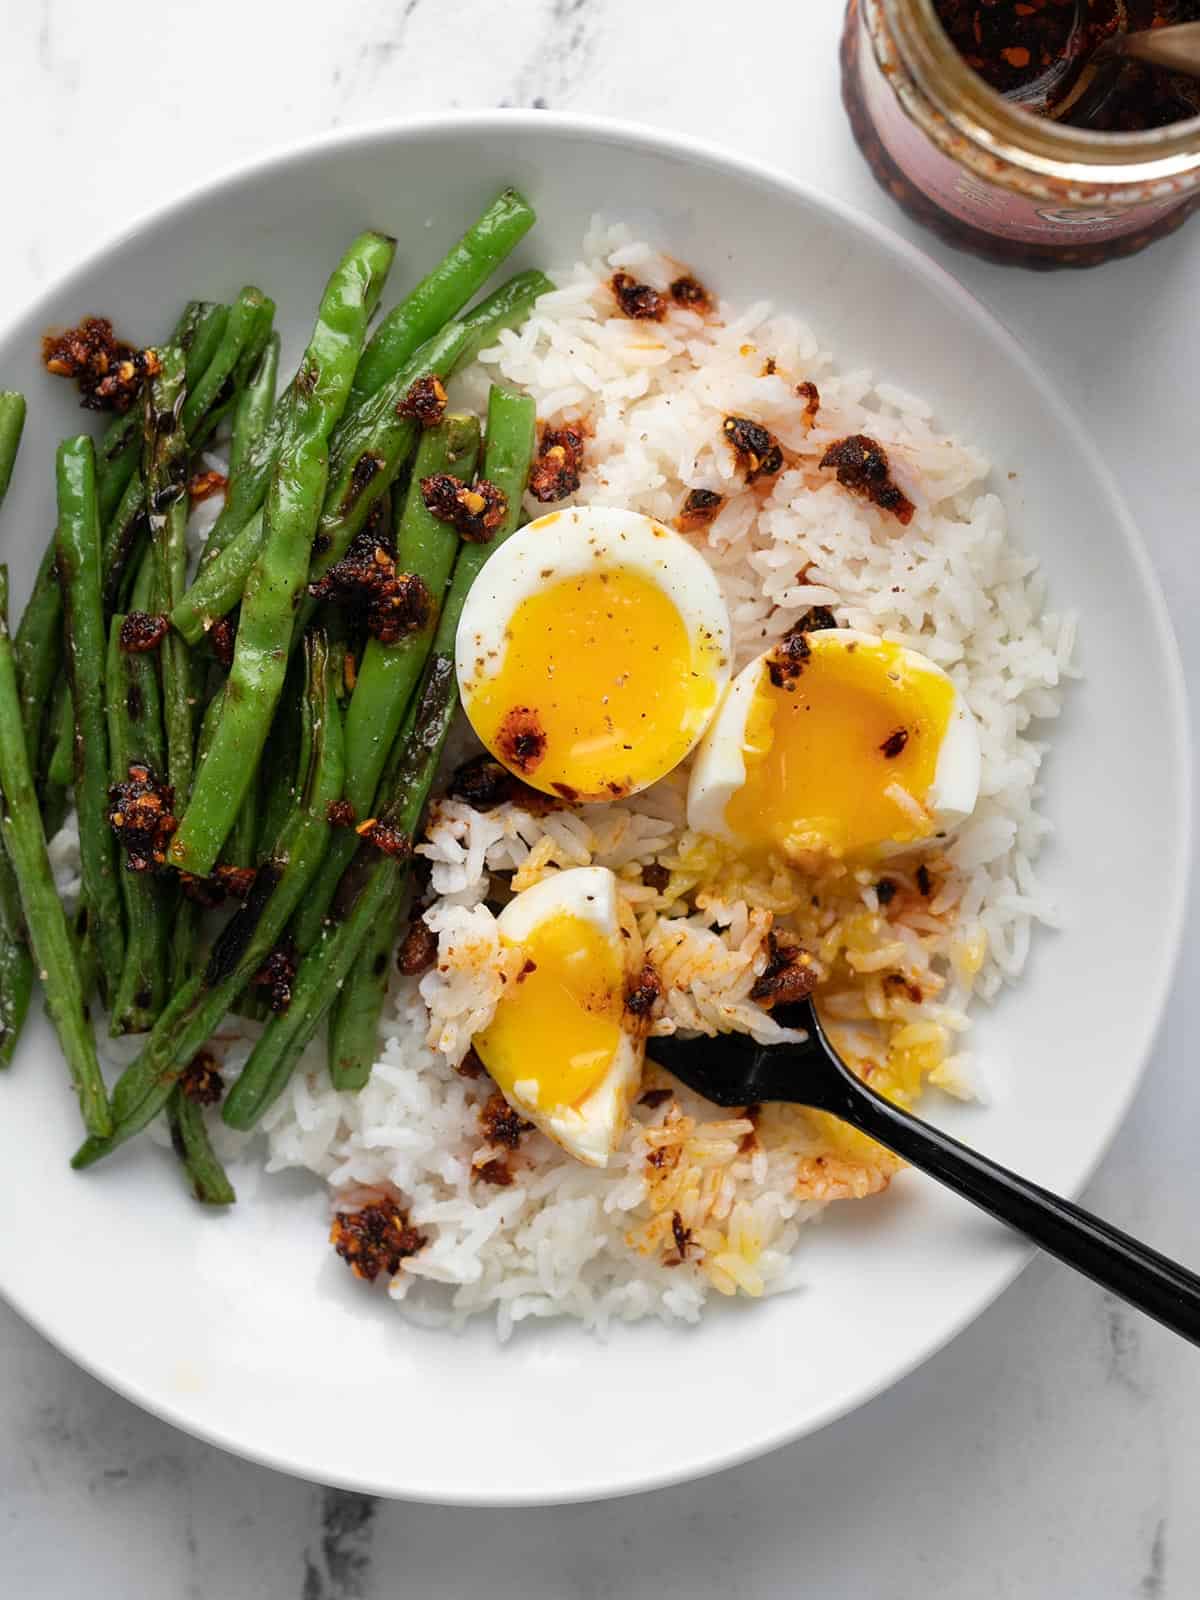
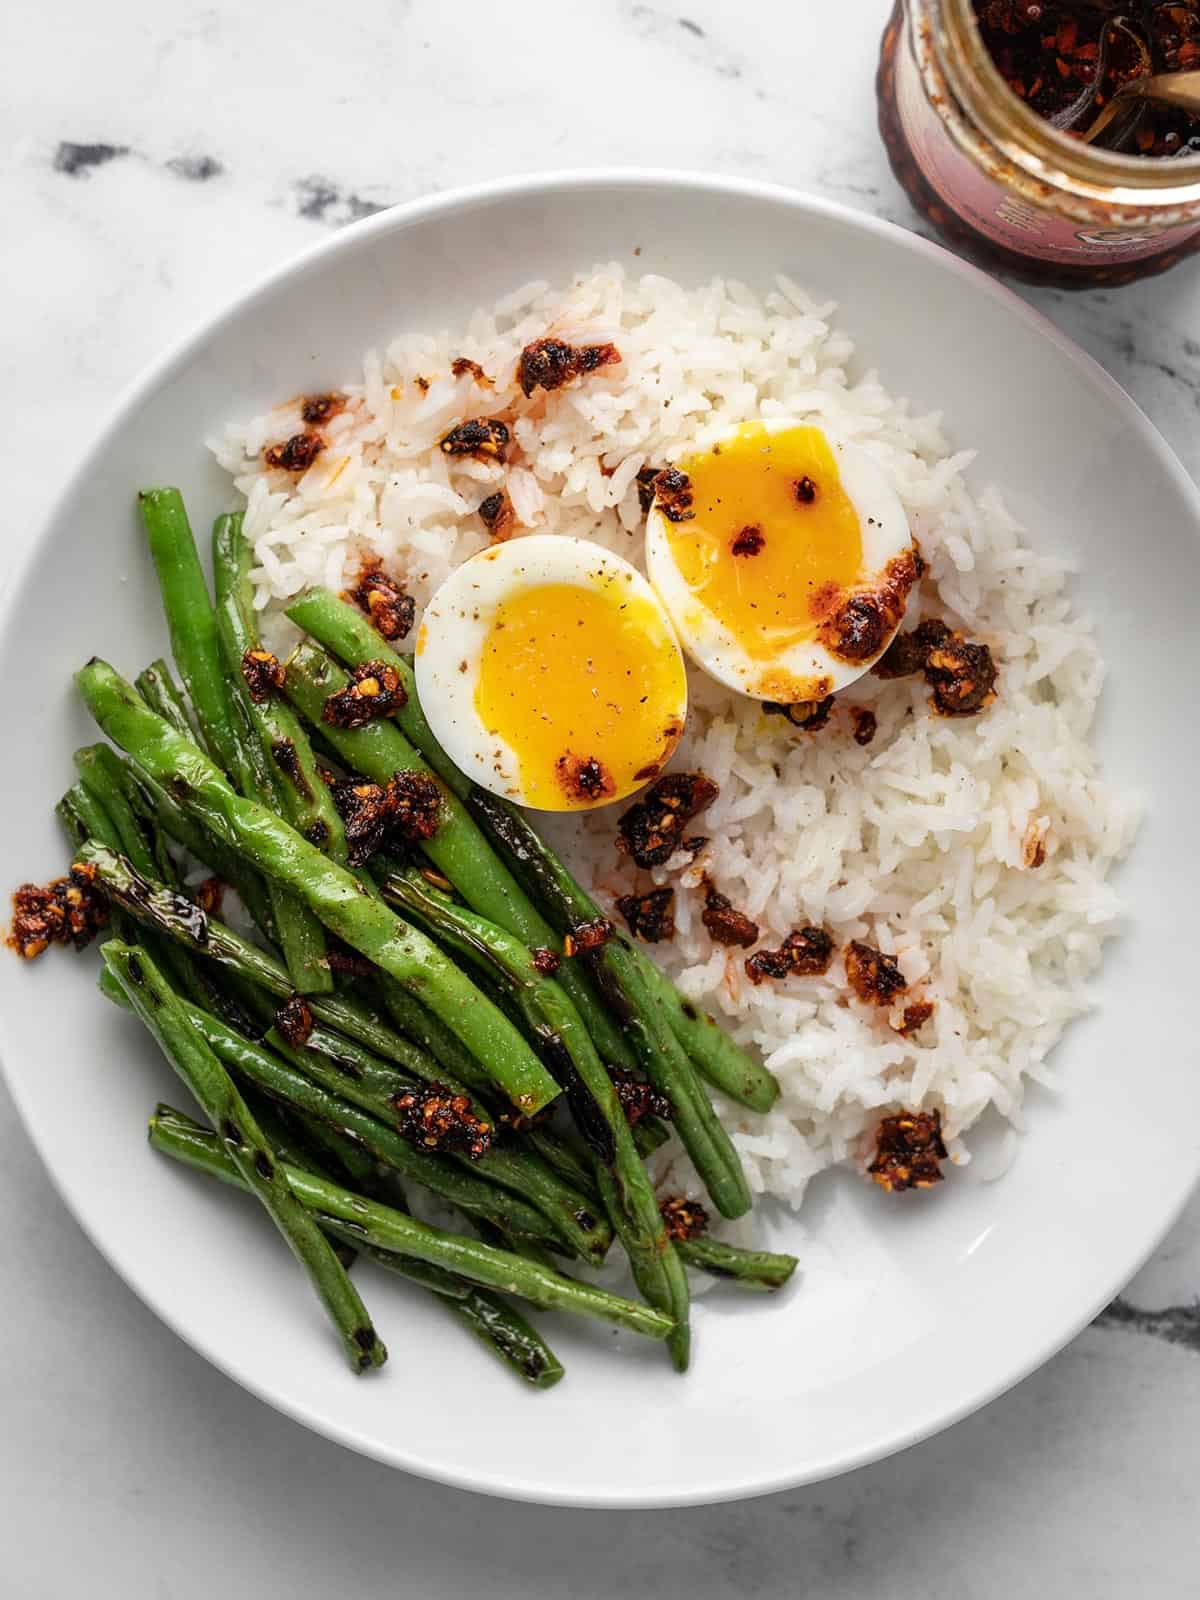
This easy and tasty blistered green bean rice bowl with spicy chili crisp and saucy soft-boiled egg is the perfect meal for a hectic week.

The post Blistered Green Bean Rice Bowl appeared first on Budget Bytes.
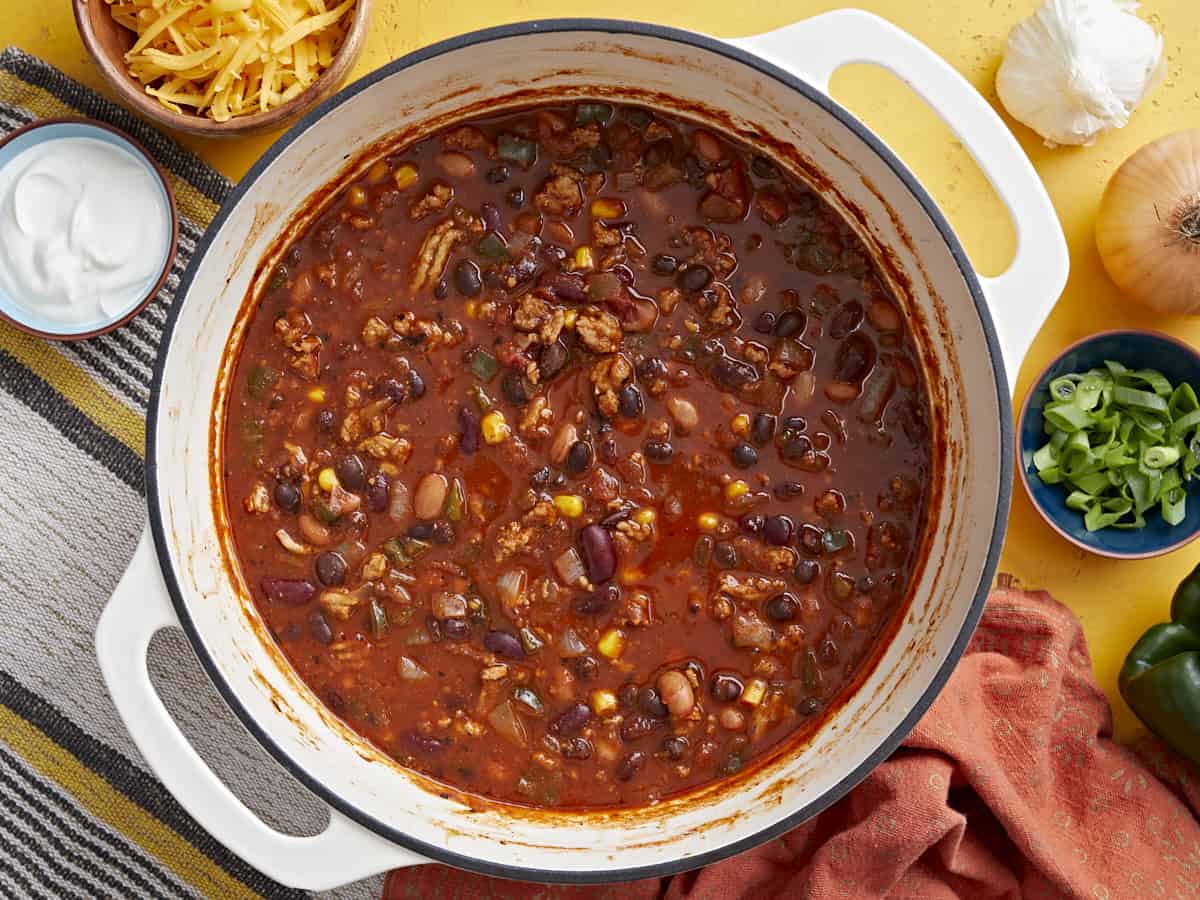
This easy and tasty blistered green bean rice bowl with spicy chili crisp and saucy soft-boiled egg is the perfect meal for a hectic week. It comes together effortlessly in about thirty minutes and it’s an absolute breeze to meal prep. Plus the combination of blistered green beans and smoky chili crisp is so good, you’ll end up craving it!

What You’ll Need

The beauty of this blistered green bean rice bowl recipe is that you can substitute any ingredient with what you have on hand. You’re literally a half hour away from what’s sure to become one of your favorite weeknight meals!

  • Chili Crisp– this oil-based Chinese condiment is brimming with spicy and crunchy ingredients like fried garlic, scallions, Sichuan peppercorns, and chiles. A few teaspoons add texture and smoky heat, but more importantly, make the blandest ingredients lip-smackingly good. Substitute it with your favorite hot sauce.
  • Rice – Any kind of rice will do, just make sure to adjust the liquid ratio and cook time. You can substitute the rice with your favorite whole grain or cauliflower rice. Just follow the cooking directions on the package.
  • Green Beans – are a perfect vehicle for chili crisp and add texture and a wallop of nutrition. Substitute green beans with asparagus, broccoli, cauliflower, or chickpeas. If you don’t mind losing out on texture, substitute the green beans with wilted kale, spinach, sliced peppers, or mushrooms.
  • Cooking Oil– Oil helps flavor green beans by blistering them quickly and creating char. Use your favorite cooking oil, but steer clear of olive oil and butter; you need a fat that can withstand high heat without burning. 
  • Eggs – Feel free to make the egg however you prefer but keep in mind that a soft-boiled egg’s yolk helps create a sauce. Check out our tutorial on How To Make Perfect Soft-Boiled Eggs. If you want to hard-boil the egg or skip it altogether, add a little butter to the rice to prevent a dry bite.

How To Meal Prep Blistered Green Bean Rice Bowls

Blistered green bean rice bowls meal prep beautifully because there are just a few ingredients and only a handful of steps. This recipe is for two servings, so if you want to make enough for the week, double or triple it. Simply portion the rice in an airtight container, top it with green beans, add the egg, and then season with chili crisp.

How To Store Leftovers

You can refrigerate leftovers for up to two days in an airtight container. To reheat, sprinkle the rice with 1/4 teaspoon of water, and microwave it until steaming. Though the rice and green beans both freeze well, I don’t recommend freezing soft-boiled eggs.

How To Cook Rice

Cooking rice is ridiculously easy if you keep these 5 tips in mind:

Know the type of rice you’re cooking. The ratio of rice to liquid changes with the kind of rice you use, as does the time it cooks. The below ratios make for a toothier, looser grain. If you prefer softer rice, increase the liquid by a half cup.

  • Short Grain Rice: 1 cup rice  1 cup liquid – cook 18 minutes
  • Medium & Long Grain Rice: 1 cup rice – 1 1/3 cups liquid – cook 15 minutes
  • Brown rice: Boil it like pasta (in lots of water until al dente ) for 30 minutes, strain all of the water out, cover the pot, and let the rice rest in it for 10 minutes

Wash the rice. Cleaning the grains under cool running water until the water runs clear eliminates the starches that give you a gloppy result.

Bring the water to a boil before you add it to the rice. It keeps your timing on point.

Low and slow is the way. When the rice comes to a boil, lower the heat. Making rice at a boil makes the grains burst, leaving you with a starchy mess.

Keep it covered. Lifting the lid releases steam, increasing cooking time and ruining the texture. Once the rice is done, rest it for 10 minutes before uncovering it.

Blistered green bean rice bowl with a black fork in it.
Blistered green bean rice bowl.
Print

Blistered Green Bean Rice Bowl

This easy and tasty blistered green bean rice bowl with spicy chili crisp and saucy soft-boiled egg is the perfect meal for a hectic week.
Course Dinner, Lunch
Cuisine American, Asian
Total Cost ($3.42 recipe / $1.71 serving)
Prep Time 5 minutes
Cook Time 15 minutes
Resting Time 10 minutes
Total Time 30 minutes
Servings 2 bowls
Calories 665kcal

Ingredients

  • 1 1/3 cup water $0.00
  • 1 cup long grain rice, rinsed until the water runs clear $0.30
  • 2 Tbsp salted butter $0.30
  • 2 Tbsp cooking oil $0.08
  • 8 oz fresh green beans, trimmed, rinsed, and dried $1.99
  • 1/4 tsp salt $0.01
  • 1/8 tsp black pepper $0.01
  • 2 eggs $0.53
  • 2 tsp chili crisp $0.20

Instructions

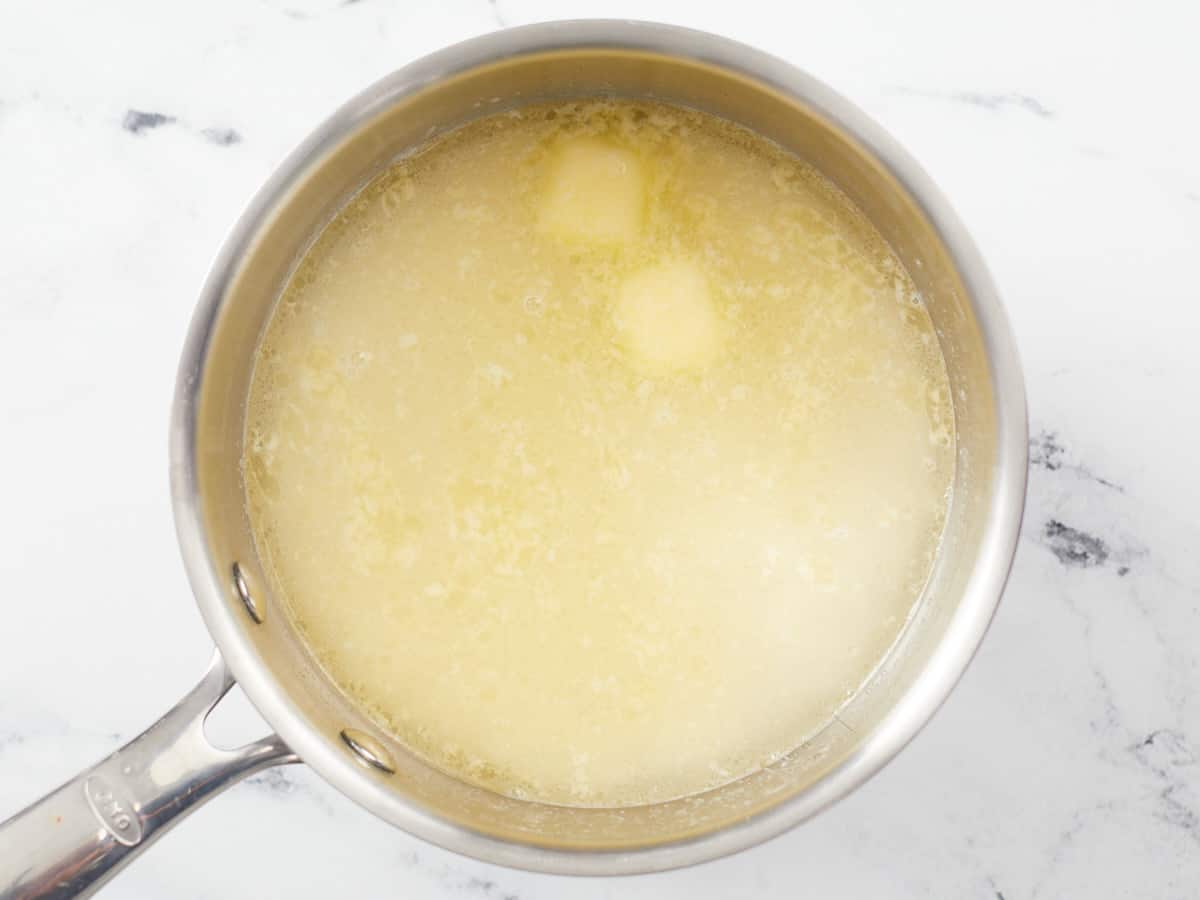
  • In a small heavy-bottomed pot set over medium high heat, bring the water to a boil. Then add the rice and the butter.
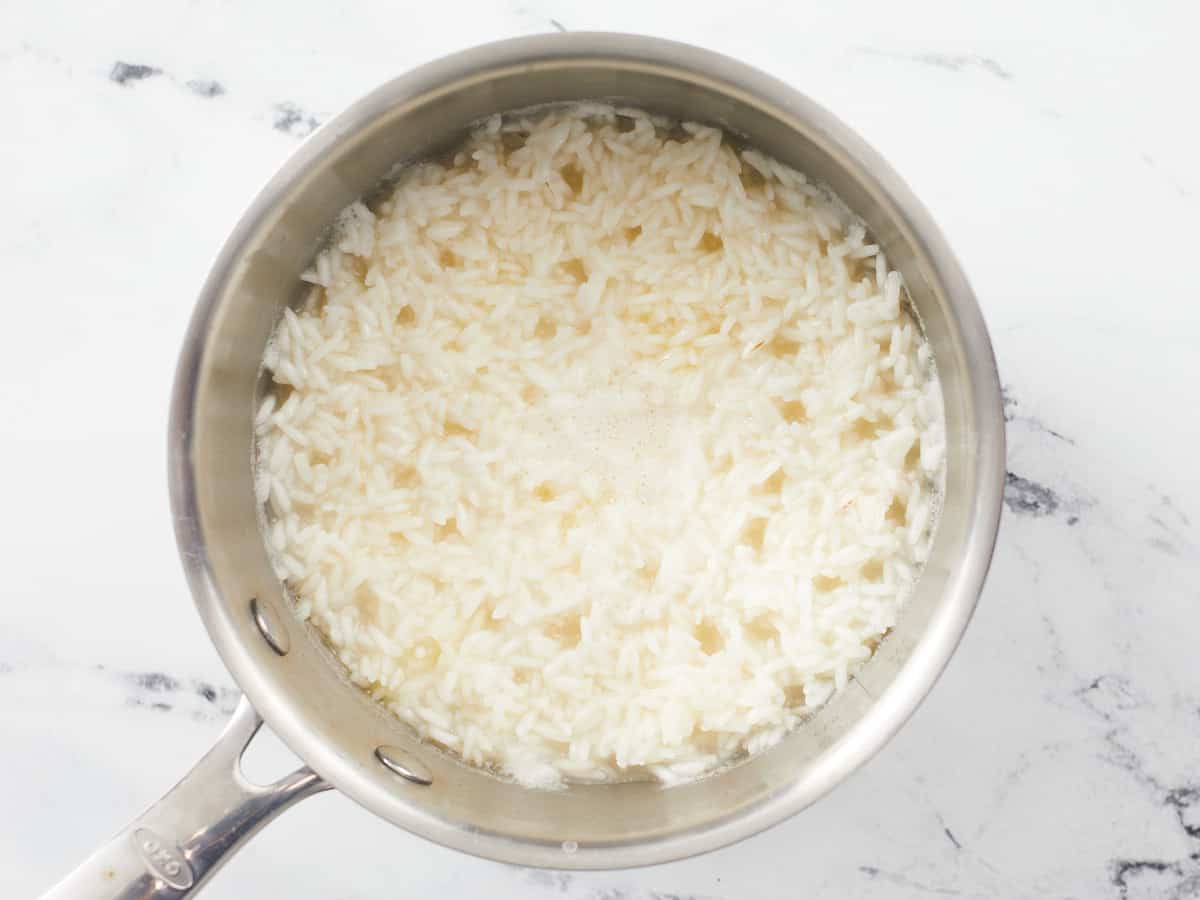
  • Once the water returns to a boil and steam vents begin to appear on the surface of the rice, cover the pot and reduce the heat to medium-low. Do not uncover the rice as it simmers.
  • While the rice cooks, soft boil two eggs in a small pot. Bring an inch of water to a boil, add the eggs straight from the fridge, lower the heat, cover the pot, and simmer the eggs for 6 minutes. Remove the eggs from the hot water and run them under cold water to stop them from cooking any further.
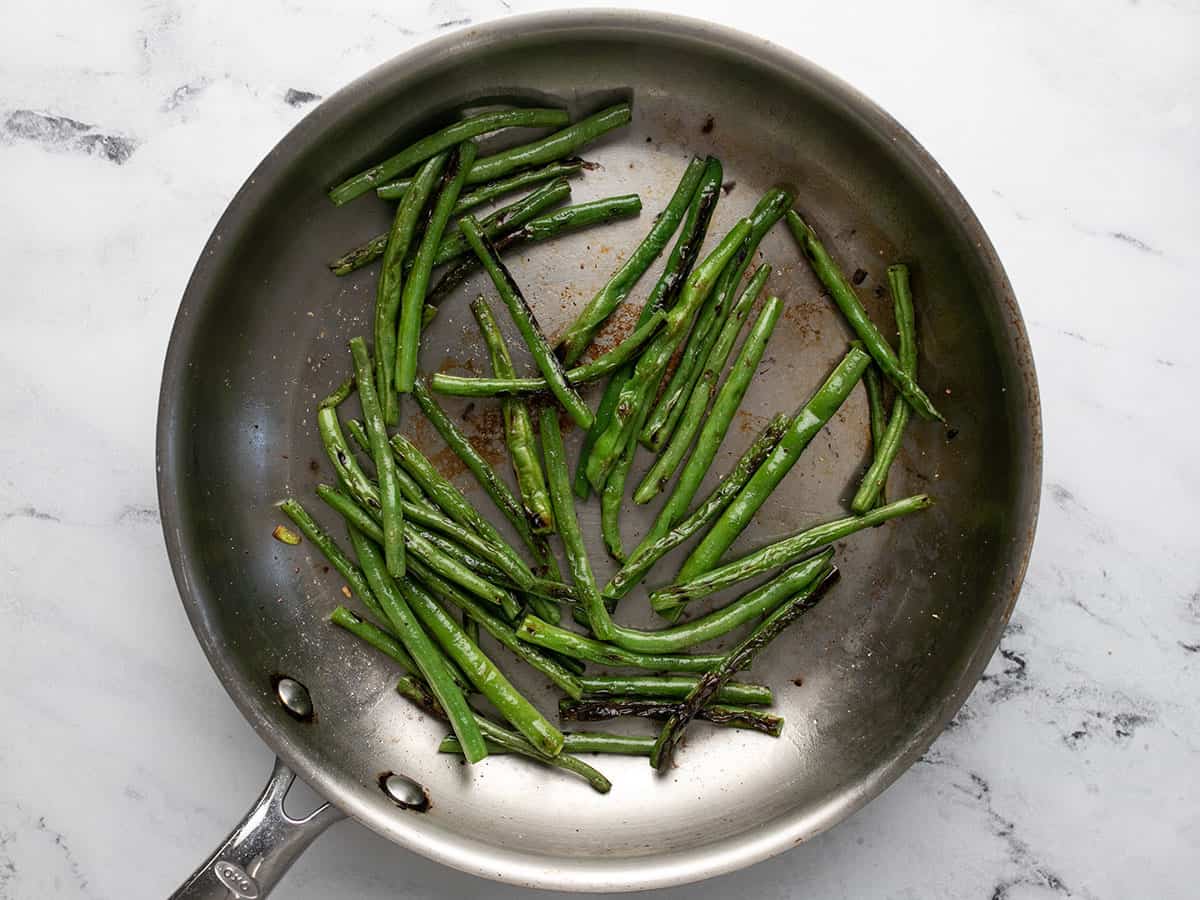
  • Set a large skillet over medium-high heat. Add the oil and then the green beans. Sprinkle salt and pepper over the green beans, give the beans a few good stirs, then let them brown on one side without moving, about 4 to 5 minutes. Once browned remove them from the heat, and set aside.

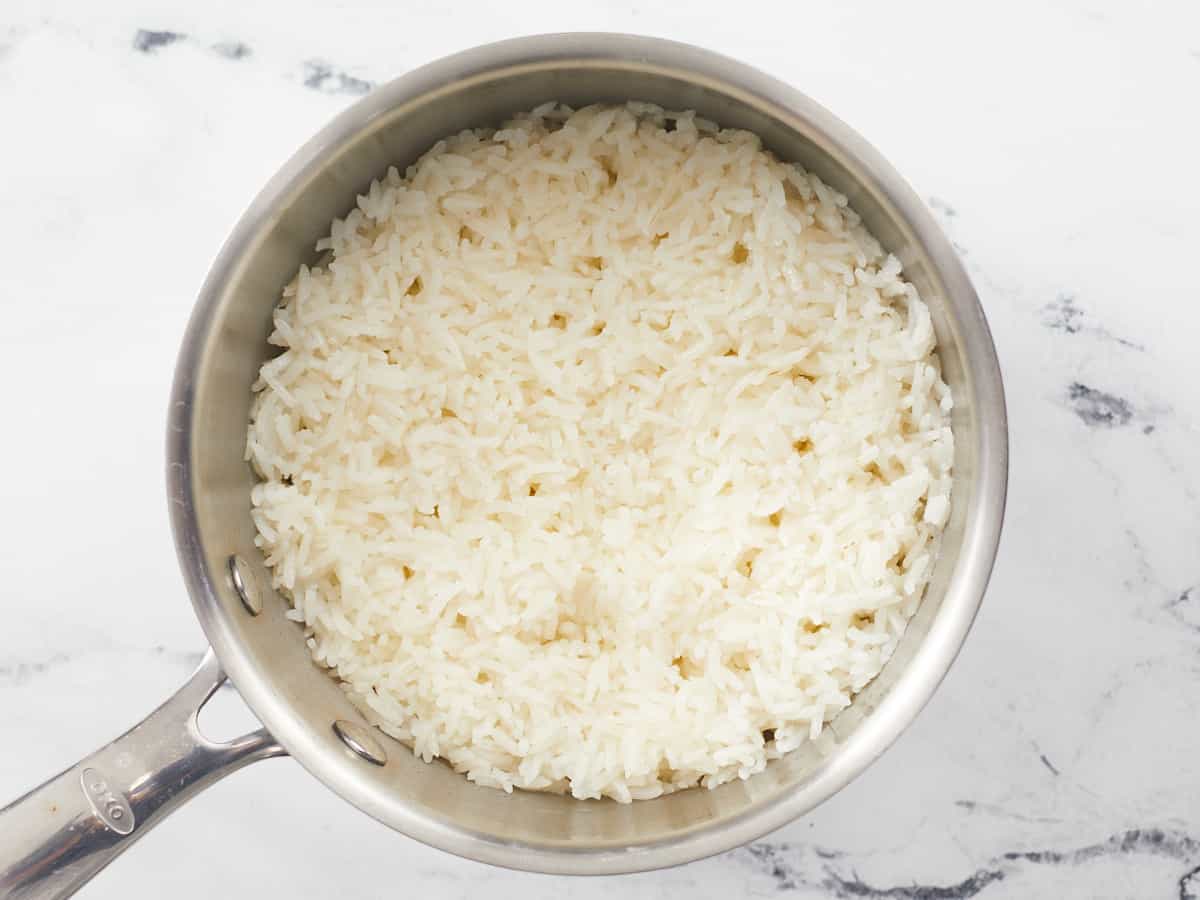
  • When the rice is done, take it off the heat and let it sit, covered, for ten additional minutes. Then uncover it and fluff it.


  • To serve, divide the rice between two bowls. Top each mound of rice with half the blistered green beans and half the chili crisp. Peel the eggs, slice them down the middle lengthwise, and garnish each bowl with an egg. Enjoy!

See how we calculate recipe costs here.

Nutrition

Serving: 1bowl | Calories: 665kcal | Carbohydrates: 83g | Protein: 14g | Fat: 30g | Sodium: 530mg | Fiber: 4g

How to Make Blistered Green Bean Rice Bowl- Step by Step Photos

In a small heavy-bottomed pot set over medium-high heat, bring the 1 1/3 cups of water to a boil. Then add 1 cup of rice and 2 tablespoons of butter.

Once the water returns to a boil and steam vents begin to appear on the surface of the rice, cover the pot and reduce the heat to medium-low. Cook for fifteen minutes. Do not uncover the rice as it simmers.
While the rice cooks, soft boil two eggs in a small pot. Bring an inch of water to a boil, add the eggs straight from the fridge, lower the heat, cover the pot, and simmer the eggs for 6 minutes. Remove the eggs from the hot water and run them under cold water to stop them from cooking any further.

Set a large skillet over medium-high heat. Add the 2 tablespoons of oil and 8 ounces of green beans. Sprinkle 1/4 teaspoon salt and 1/8 teaspoon pepper over the green beans, give the beans a few good stirs, then let them brown on one side for about 4 to 5 minutes without moving them. Once browned, remove them from the heat, and set aside.

Overhead shot of rice in a pot.

When the rice is done, take it off the heat and let it sit, covered, for ten additional minutes. Then uncover it and fluff it.

To serve, divide the rice between two bowls. Top each mound of rice with half of the blistered green beans and chili crisp. Peel the eggs, slice them down the middle lengthwise, and garnish each bowl with an egg. Dig in!

More Easy Rice Bowls

The post Blistered Green Bean Rice Bowl appeared first on Budget Bytes.