Breakfast Quiche

This breakfast quiche recipe is hearty and easy, starring a well-seasoned filling of hashbrowns and vegetables encased in pastry crust!…

A Couple Cooks – Recipes worth repeating.

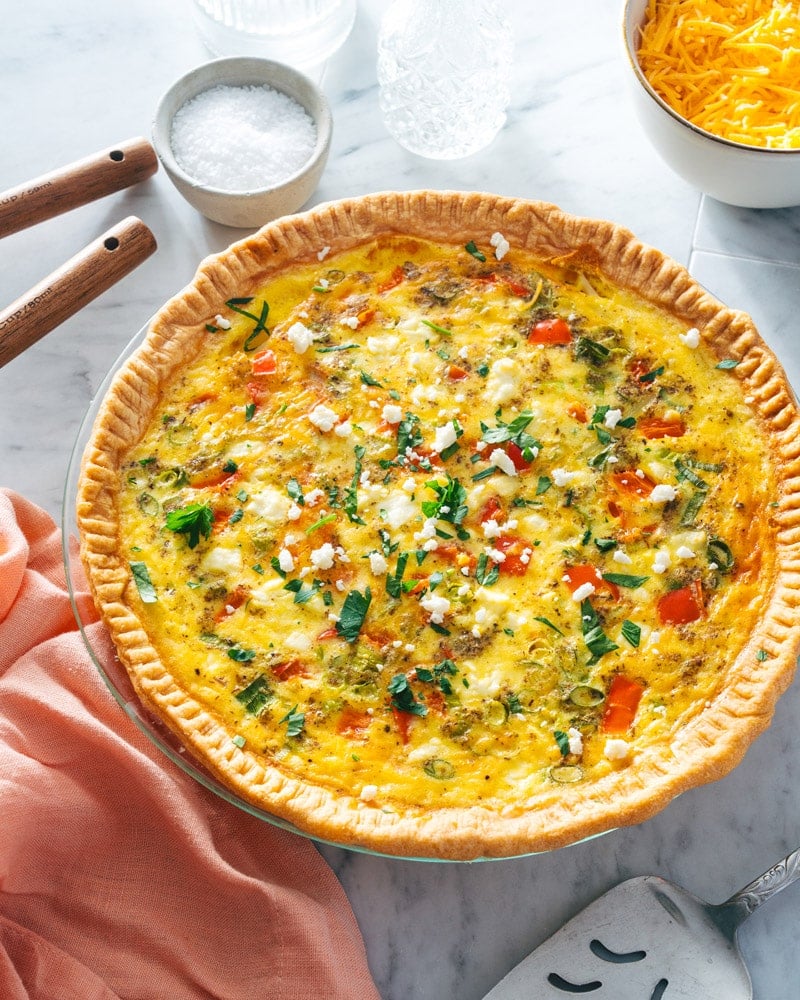
This breakfast quiche recipe is hearty and easy, starring a well-seasoned filling of hashbrowns and vegetables encased in pastry crust!
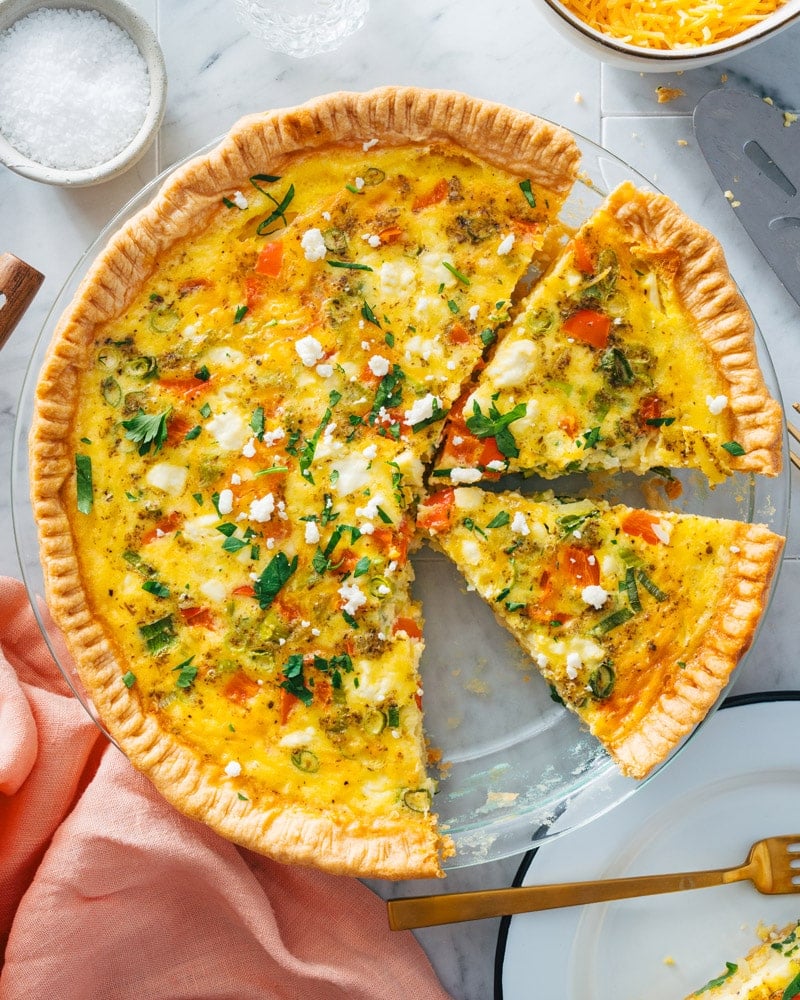
Breakfast Quiche

Looking for a standout quiche recipe to make mornings more delicious? Try this easy Breakfast Quiche! We’ve become positive quiche experts over here, trying every different flavor. This one has come out on top! Hearty hashbrowns, bell peppers, and feta cheese for a perfectly-seasoned savory filling. Encase it all in a flaky pastry crust, and it’s simple to bake up as a make-ahead breakfast or fancy brunch. Here’s how to do it!

Ingredients in this breakfast quiche

A quiche is a French pastry filled with a custard and savory fillings. Many quiche recipes you can eat for breakfast, brunch, lunch or dinner, making them extremely versatile! You can also eat them warm or cold, making leftovers a great snack or simple dinner. This breakfast quiche we created with ease in mind: the ingredients are simple and evocative of a breakfast casserole. Here’s what you’ll need:

  • Quiche crust: 1 homemade recipe or refrigerated pie dough*
  • Eggs
  • Milk
  • Heavy cream
  • Dried mustard, dried oregano, garlic powder, salt and pepper
  • Cheddar cheese
  • Feta cheese
  • Frozen or refrigerated hashbrowns
  • Green onions
  • Red bell pepper
Breakfast quiche recipe

For the crust: purchased is quickest

The best way to make a quiche recipe is with homemade quiche crust! But with a breakfast quiche, you may want to learn towards purchased crust to make preparation simpler. For this recipe, we used a purchased crust! Here are the pros and cons to each method:

  • Homemade crust holds its shape better and tastes better.  This quiche crust tastes so much better than store-bought: it’s more buttery and flaky. It can also hold a crimped crust better.
  • Purchased crust is faster. Purchased crust works too: especially for this breakfast quiche. We’ve had some issues with refrigerated pie dough holding its shape in a crimped pattern. For refrigerated or frozen crusts, we recommend using the decoration where you press the fork tines into the crust (see the photos).
Breakfast quiche

Tips for blind baking

The biggest key to making this breakfast quiche? Blind bake the crust! This means you bake the pastry crust without the filling first to avoid a soggy bottom. This is essential with quiche because the filling is so liquid (but not required with say, apple pie which has a chunkier filling). Here’s how to blind bake a crust:

  • Prick holes with a fork all over the crust. This is called docking: it helps keep the crust from puffing up while in the oven without filling.
  • Add parchment paper then pie weights, dried beans, or rice! Pour them right into the crust. We use two sets of these pie weights. Bake for 12 minutes at 400°F, then reduce the heat to 350°F.
  • Remove the pie weights. Remove the weights and bake 20 to 25 more minutes until the crust is golden.

For the pie crust shield

For this breakfast quiche recipe, you’ll also need to use a pie crust shield. This prevents the pie crust from burning in the oven by covering just the crust, allowing the filling to bake uncovered. There are two options for a pie crust shield:

  • Make a pie crust shield with aluminum foil. Cut a hole in the center of a large sheet of foil that’s the diameter of your pie plate. The foil will rest on the crust, but allow the filling to bake uncovered. Here’s a video with instructions for more details.
  • Or, buy a metal pie crust shield. Here’s a link to buy a pie crust shield online.
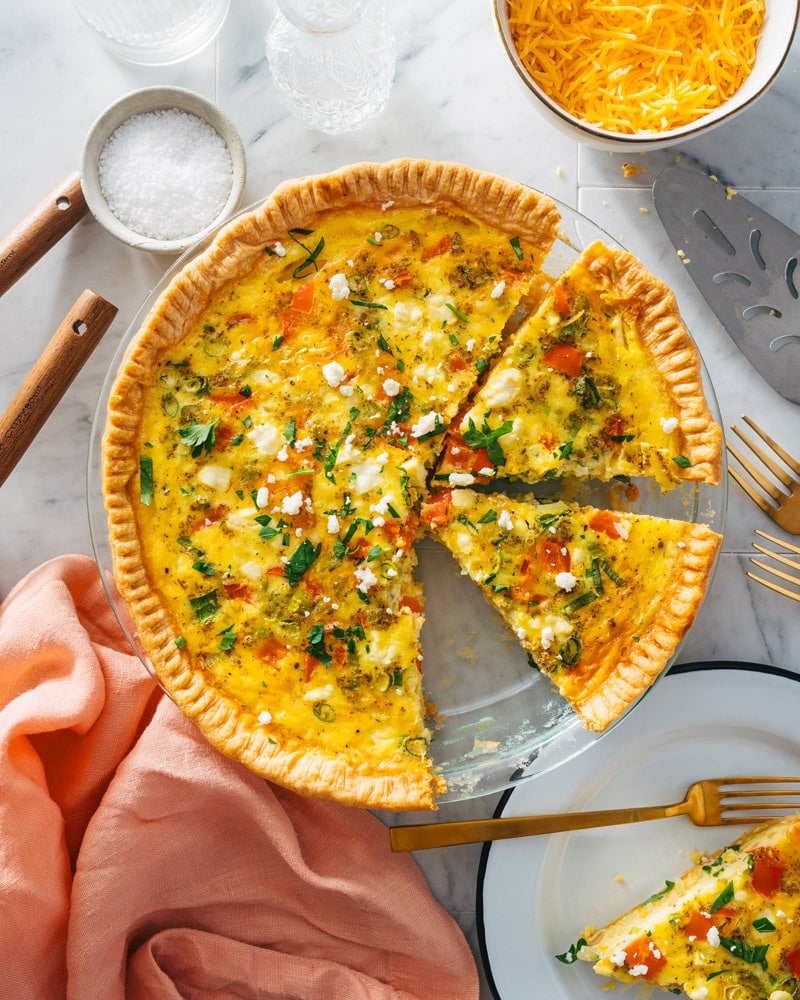
Breakfast Quiche

Breakfast quiche filling ideas

There are lots of ways to make a breakfast quiche! This one is flavored similar to our hashbrown breakfast casserole. But you can swap in different seasonings or filling ingredients to your liking! Here are a few ideas and tips:

  • Don’t overfill the quiche. Try to keep the approximate volume of vegetables similar to the recipe below.
  • Try other sauteed vegetables like very small broccoli florets, mushrooms, or onions.
  • Add fresh vegetables like sundried tomatoes, finely diced bell pepper, or frozen and thawed spinach (with all liquid squeezed out).
  • Vary the cheese. Try adding smoked gouda or smoked mozzarella in place of the cheddar cheese, or add grated Parmesan.

More quiche recipes

Love a good quiche? Here are a few other recipes you might enjoy:

This breakfast quiche recipe is…

Vegetarian.

Print
Breakfast Quiche

Breakfast Quiche


  • Author: Sonja Overhiser
  • Prep Time: 45 minutes
  • Cook Time: 45 minutes
  • Total Time: 1 hour 30 minutes
  • Yield: 8

Description

This breakfast quiche recipe is hearty and easy, starring a well-seasoned filling of hashbrowns and vegetables encased in pastry crust!


Ingredients

  • 1 Homemade Quiche Crust (made through Step 4) or 1 refrigerated pie dough*
  • 4 large eggs
  • ¾ cup milk
  • ½ cup heavy cream
  • 1 teaspoon dried mustard
  • 1 teaspoon dried oregano
  • 1 teaspoon garlic powder
  • 1 teaspoon kosher salt
  • Fresh ground black pepper
  • ¾ cup shredded mild cheddar cheese
  • ¼ cup feta cheese crumbles
  • 1 cup (4 ounces) frozen or refrigerated hashbrowns
  • 2 green onions, sliced (white, light and dark green portions)
  • ¼ cup finely diced red pepper

Instructions

  1. Prepare the crust: If using Homemade Quiche Crust, prepare it in the pie pan using the steps in the linked recipe. If using refrigerated pie dough, transfer the dough to the pie pan (make sure it is standard and not deep dish). Fold the overhanging dough backwards and seal it to form a rim. With refrigerated crust, it’s easiest to press in the tines of the fork to decorate the edges (like in the photos; it’s harder to get the crimped edges to keep their shape while baking). Use a fork to gently prick holes in the bottom and sides of the crust (which helps it to not puff up while blind baking).
  2. Freeze the crust: Freeze the crust in the pan for 15 minutes.
  3. Preheat the oven: Preheat the oven to 400°F.
  4. Blind bake the crust at 400°F: Place a sheet of parchment paper on top of the crust. Fill the dough with pie weights (we used two sets of these), dry beans, or dry rice. Bake for 12 minutes.
  5. Reduce the oven temperature and blind bake at 350°F: Reduce the oven temperature to 350°F and carefully remove the parchment and weights. Bake 20 to 25 minutes until the bottom is lightly browned (or more if necessary for refrigerated pie crust). Remove from the oven and add the filling once it is ready.
  6. Make the filling: In a medium bowl, whisk together the eggs, milk, cream, dried mustard, dried oregano, garlic powder, kosher salt, and several grinds black pepper. Place the cheddar cheese in the bottom of the crust, then add the hashbrowns. Pour the egg mixture over the top. Sprinkle the top with green onions and diced red pepper. Add feta and another handful of shredded cheese. 
  7. Bake: Add a pie crust shield (purchased or homemade with foil**). Bake at 350°F for 40 to 50 minutes minutes, until the center is set and the top is lightly browned. Cool at least 30 minutes, then serve or refrigerate. Re-warm in a 200 degree oven for 20 minutes. (You can also serve it cold.) Leftovers stay for 5 days refrigerated.

Notes

*Typically we recommend a homemade quiche crust, but to keep this breakfast quiche simple we used purchased crust.

**To make your own crust shield, cut a hole in the center of a large sheet of foil that’s the diameter of your pie plate. The foil will rest on the crust but let the pie filling be uncovered. Here’s a video with instructions for more details

  • Category: Breakfast
  • Method: Baked
  • Cuisine: French inspired
  • Diet: Vegetarian

Keywords: Breakfast quiche, breakfast quiche recipe

A Couple Cooks - Recipes worth repeating.

Mini Pancakes

Mini pancakes are a fun way to mix up breakfast! These bite-sized cakes are perfect for dunking into maple syrup.…

A Couple Cooks – Recipes worth repeating.

Mini pancakes are a fun way to mix up breakfast! These bite-sized cakes are perfect for dunking into maple syrup.

Mini Pancakes on plate with syrup and raspberries

This breakfast idea makes us smile just looking at the platter: try these Mini Pancakes! Here’s how to make breakfast more fun: make a miniature version of your favorite steaming platter of flapjacks. These cakes can be eaten with a fork, or eat them with your hands, dunking into a pool of maple syrup! It’s a natural recipe for kids, but we think they’re just as fun for adults too. (Both of us have a thing for miniaturized stuff!)

Ingredients in mini pancakes batter

These mini pancakes are so much fun, and we love making them for entertaining: especially when there are kids around. You can essentially use the batter from any of your favorite pancake recipes, but there’s one catch. It’s easiest to make these using a squeeze bottle, so you’ll want to have a nice smooth batter that won’t get stuck in the bottle.

Our mini pancakes recipe is a spin on our classic pancake recipe, which features both all-purpose and whole wheat flour for a developed, hearty flavor. Here are the ingredients you’ll need for mini pancakes:

  • Pantry: All-purpose flour, whole wheat flour, granulated sugar, baking powder, salt, vanilla
  • Dairy and eggs: Milk, eggs, butter (or oil)
  • Fresh ingredients: Lemon juice (or vinegar)
Mini pancakes dunking into syrup

Key tool: a squeeze bottle

The best way to make uniform mini pancakes? Use a condiment squeeze bottle, which helps to make perfect circles that are similar in size. You can also use a spoon or 1 tablespoon measuring spoon to spoon out the batter, but it gets messy and takes much longer than the squeeze bottle method. (Trust us! We’ve tested it out so you don’t have to.)

We highly recommend getting ahold of a squeeze bottle for this recipe! You can also use them for sauces and garnishes, like making a nice drizzle of sour cream over enchiladas, for example.

Tips for how to make mini pancakes

Mini pancakes are a little trickier than standard pancakes because they’re so small and you make so many at once! This recipe makes a total of 55 to 60 mini pancakes. Here are a few things to note about the process:

  • Use a large griddle: non-stick is helpful. You’ll want a large surface since you’ll be cooking so many cakes at once.
  • Use that squeeze bottle! It’s the easiest way to make dozens of mini pancakes at a time. If you don’t have one, consider making smaller batches since the process is slower and messier.
  • Experiment to find the right heat level. Medium low heat is ideal, but it’s different on every stovetop. It should take a few minutes to get the pan up to heat. Don’t worry if it’s not perfect at first: keep adjusting as you cook. Remember that batches after the first batch will cook faster than the first since the pan is hotter.
  • Don’t worry if the first batch of pancakes doesn’t work! Use it as a test for honing in your skills.
Mini pancakes

Ways to serve mini pancakes

Mini pancakes are designed to be handheld: so you don’t even need to use a fork! But you can eat them on a plate too. Here are a few ideas:

Or course, you can add things chocolate chips or whipped cream: if you like dessert for breakfast! Let us know how you plan to serve these in the comments below.

Mini Pancake on platter with syrup

More pancake recipes

Love flapjacks for breakfast? Try these tasty pancake recipes:

This mini pancakes recipe is…

Vegetarian. For vegan, use this Vegan Pancakes recipe and use the technique in the recipe below.

Print
Mini Pancakes

Mini Pancakes


  • Author: Sonja Overhiser
  • Prep Time: 10 minutes
  • Cook Time: 10 minutes
  • Total Time: 20 minutes
  • Yield: 55 to 60 mini pancakes

Description

Mini pancakes are a fun way to mix up breakfast! These bite-sized cakes are perfect for dunking into maple syrup.


Ingredients

  • ¾ cup all-purpose flour
  • ¼ cup whole wheat flour
  • 2 tablespoons granulated sugar
  • 2 teaspoons baking powder
  • ½ teaspoon kosher salt
  • 1 large egg
  • ¾ cup plus 2 tablespoons milk of choice
  • ¼ cup melted unsalted butter or neutral oil
  • ½ teaspoon vanilla extract
  • ½ teaspoon lemon juice or vinegar*

Instructions

  1. In a medium bowl, whisk together the all-purpose flour, whole wheat flour, sugar, baking powder, and salt.
  2. In a separate bowl, whisk the egg, then whisk in the milk, melted butter (or oil), vanilla extract, and lemon juice (or vinegar).
  3. Stir the wet ingredients into the dry ingredients until a smooth batter forms. (It will thicken after it sits 1 to 2 minutes.) Pour the batter into a squeeze bottle. 
  4. Lightly butter a skillet or griddle and wipe off the extra grease with a paper towel. Heat the skillet to medium low heat. Make about 2-inch diameter circles using a squeeze bottle (or you can use 1 tablespoon measure to scoop the batter onto the skillet and flatten into a circle**). Cook the pancakes until the bubbles pop on the top and the bottoms are golden, then flip and cook until cooked through (about 1 to 2 minutes per side). 
  5. Place the cooked pancakes under an inverted bowl to keep them warm. Repeat with the remaining batter. If necessary, add a teaspoon of milk to keep it a drizzlable consistency (if using a squeeze bottle, you can shake it in!). Adjust the heat as necessary to maintain an even temperature. Serve immediately with maple syrup for dipping.

Notes

*Adding an acidic ingredient helps to make fluffy pancakes. If you don’t have fresh lemon juice on hand, use apple cider vinegar or white vinegar.

**The squeeze bottle method is much easier and essential for this recipe, in our opinion. Here’s a link to the squeeze bottles we use.

  • Category: Breakfast
  • Method: Stovetop
  • Cuisine: Breakfast
  • Diet: Vegetarian

Keywords: Mini pancakes, mini pancake

A Couple Cooks - Recipes worth repeating.

Spinach Mushroom Quiche

This spinach mushroom quiche makes a delicious brunch or a light dinner! The buttery, flaky crust is packed with savory…

A Couple Cooks – Recipes worth repeating.

This spinach mushroom quiche makes a delicious brunch or a light dinner! The buttery, flaky crust is packed with savory mushrooms and a cheesy custard.

Spinach and Mushroom Quiche

We’re all about pie, and to us a savory pie is even more fun. Here’s one that’s become an instant favorite: this spinach mushroom quiche! The buttery, flaky crust is packed with savory mushrooms, wilted greens, onion, garlicky, and a creamy cheesy custard. Each tender bite is an explosion of flavor and textures, perfect as a savory brunch main dish or even as a light dinner! We’re already getting hungry.

Making a spinach mushroom quiche: overview

This classic spinach mushroom quiche recipe is best made on a day where you have a few hours set aside. The crust is best made completely from scratch with this homemade quiche crust, but it does require 20 minutes to put together and at least 1 hour of chilling. You can also make it in advance, which shortcuts the 1 hour chill time! You can also use store-bought refrigerated pie crust for a shortcut. Here’s an overview of the time you’ll need:

Make the homemade quiche crust (or use purchased)20 minutes active, 1 hour chilling for homemade (or make in advance for quicker prep!)
Shape the crust5 to 10 minutes, active
Refrigerate the dough30 minutes, inactive
Blind bake the dough + make the filling30 minutes, active
Bake the quiche40 to 50 minutes, inactive

Ingredients in the spinach quiche filling

This spinach mushroom quiche is one of our favorite quiche recipes because of the bold, meaty flavor that comes from the mushrooms and cheese. We like using frozen spinach for quick and easy prep, but you can also substitute fresh spinach if you prefer, adding it in with the onions in Step 6 of the recipe below. Here’s what you’ll need for the filling:

  • Frozen ingredients: Spinach
  • Fresh ingredients: Baby bella (aka cremini) mushrooms, white onion, garlic, eggs
  • Dairy: Butter, 2% milk, heavy cream, cheddar cheese, Parmesan cheese
  • Pantry: Dried oregano, dried mustard, salt and pepper
  • Special: Pastry crust or homemade quiche crust
Spinach and Mushroom Quiche

Cremini vs baby bella and button mushrooms

Our favorite type of mushroom for cooking are cremini mushrooms, also known as baby bella mushrooms. Look for packages marked with either name at the grocery store. They’re a small mushroom with a round brown top, and their flavor is more savory and developed than button mushrooms.

  • Cremini mushrooms are the same variety as button mushrooms and portobellos, just a different growth phase. White button mushrooms are an earlier growth stage and have a milder flavor. Portobello mushrooms are the oldest stage, so they have the most meaty and savory flavor.
  • Cremini mushrooms have an earthy, savory flavor that tastes like a milder version of a portobello and a more developed version of a white mushroom.
  • You can substitute white button mushrooms for cremini if desired. The flavor is not quite as savory, but they taste comparable.

Tip: blind bake the crust!

The biggest key to making a great quiche is to blind bake the crust! Blind baking is baking a pastry crust without the filling first. It’s necessary for pies with a very liquid filling, since they can make the bottom crust soggy without it. Here’s what to know about how to get the perfect flaky quiche crust:

  • First, refrigerate the crust 30 minutes. This helps the crust to hold its shape while blind baking.
  • Prick holes with a fork all over the crust. This is called docking: it helps keep the crust from puffing up while in the oven without filling.
  • Add parchment paper then pie weights, dried beans, or rice! Pour them right into the crust. We use two sets of these pie weights. Bake for 18 minutes at 400°F, then reduce the heat to 350°F.
  • Remove the pie weights. Remove the weights and bake 18 to 22 more minutes until the crust is golden. Then the quiche is ready to fill.
Spinach and Mushroom Quiche

How to make a pie crust shield

For this spinach mushroom quiche, you’ll also need a pie crust shield. This tool prevents pie crust from burning in the oven by covering just the crust, allowing the filling to bake normally. However, you don’t need to run out and buy anything: you can make your own! Here’s what to know:

  • It’s easy to make a pie crust shield with aluminum foil. Cut a hole in the center of a large sheet of foil that’s the diameter of your pie plate. The foil will rest on the crust but let the filling bake uncovered. Here’s a video with instructions for more details.
  • Or, buy a metal pie crust shield. Here’s a link to buy a pie crust shield online.

Make ahead instructions for spinach mushroom quiche

This spinach mushroom quiche saves very well. In fact, it’s even better after it’s cooled to room temperature. It even tastes great cold! You can bake it in advance and reheat it as desired. Here’s what to know about making quiche in advance:

  • Make the quiche 1 to 3 days in advance. Then refrigerate it until serving! You can eat it cold, room temperature or warm.
  • To reheat, warm in a 200°F oven for about 20 minutes.
  • The quiche saves 5 days refrigerated. Wrap it in plastic or aluminum foil to keep it fresh.
  • You can also freeze quiche! Go to How to You Freeze Quiche.
Spinach and Mushroom Quiche

More quiche recipes

Love a good quiche? It’s the perfect easy brunch idea that everyone will enjoy and there are lots of filling flavors to choose from! Here are a few other tasty quiche recipes to try:

This spinach mushroom quiche recipe is…

Vegetarian.

Print
Spinach and Mushroom Quiche

Spinach Mushroom Quiche


  • Author: Sonja Overhiser
  • Prep Time: 15 minutes
  • Chill Time: 30 minutes
  • Cook Time: 1 hour 40 minutes
  • Total Time: 2 hours 25 minutes
  • Yield: 8

Description

This spinach mushroom quiche makes a delicious brunch or a light dinner! The buttery, flaky crust is packed with savory mushrooms and a cheesy custard.


Ingredients

  • 1 Homemade Quiche Crust (made through Step 4) or 1 refrigerated pie dough
  • 4 ounces frozen spinach
  • 1 tablespoon unsalted butter
  • 1 tablespoon olive oil
  • 4 ounces baby bella or cremini mushrooms, thinly sliced (or white mushrooms)
  • ½ teaspoon dried oregano
  • ¼ cup white onion, finely minced
  • 2 garlic cloves, minced
  • 1 teaspoon kosher salt, divided
  • 4 large eggs
  • ¾ cup 2% milk
  • ½ cup heavy cream
  • ½ teaspoon dried mustard
  • Fresh ground black pepper
  • ¾ cup shredded mild cheddar cheese
  • ¼ cup shredded Parmesan cheese

Instructions

  1. Prepare the crust: If using Homemade Quiche Crust, prepare it in the pie pan using Steps 1 through 4 in the linked recipe. If using refrigerated pie dough, transfer the dough to the pie pan (make sure it is standard and not deep dish). Fold the overhanging dough backwards and seal it to form a rim. With refrigerated crust, it’s easiest to press in the tines of the fork to decorate the edges (like in this asparagus quiche; it’s harder to get the crimped edges to keep their shape while baking). Use a fork to gently prick holes in the bottom and sides of the crust (which helps it to not puff up while blind baking).
  2. Refrigerate the crust (30 minutes): Place the pan in the refrigerator for 30 minutes to chill (this prevents shrinkage during the blind bake).
  3. Preheat the oven: Preheat the oven to 400°F. Place a rack in the lower third of the oven with a rimmed baking sheet covered in foil to preheat.
  4. Blind bake the crust at 400°F: Crumple a piece of parchment paper, then open it and place on top of the crust. Fill the parchment paper with pie weights (we used two sets of these), dry beans, or dry rice. Bake for 18 minutes at 400°F.
  5. Reduce the oven temperature and blind bake at 350°F: Immediately reduce the oven temperature to 350°F. Remove the pie from the oven and carefully remove the parchment and weights, then place the pie back in the oven. Bake an additional 18 to 22 minutes until the bottom is lightly browned. Remove from the oven and add the filling once it is ready.
  6. Prepare the filling: Meanwhile, thaw the frozen spinach. Squeeze out all the moisture with your fingers (or use a strainer) until the spinach is dry and crumbly. In a sauté pan or skillet, heat the butter and olive oil over medium high heat. Add the mushrooms and cook for 2 minutes, stirring often (the mushrooms will start to release their liquid at this point). Reduce to medium and add the onion, garlic, oregano, ¼ teaspoon of the kosher salt and pepper. Cook 4 to 5 minutes, until mushrooms and onion are tender. Set aside.
  7. Make the filling: In a medium bowl, whisk together the eggs, milk, cream, dried mustard, ¾ teaspoon of the kosher salt, and several grinds black pepper. Place the cheddar and Parmesan cheese in the bottom of the crust, followed by an even mix of the spinach, mushrooms, onion and garlic, saving out a few handfuls for topping. Pour the egg mixture over the top. Sprinkle the top with another handful of shredded cheddar cheese and the reserved spinach and mushrooms.
  8. Bake: Add a pie crust shield (purchased or homemade with foil*). Bake at 350°F for 40 to 50 minutes minutes, until the center is set and the top is lightly browned. Cool at least 30 minutes, then serve or refrigerate. Re-warm in a 200 degree oven for 20 minutes. (You can also serve it cold.) Leftovers stay for 5 days refrigerated or frozen for up to 3 months (see How to Freeze Quiche).

Notes

*To make your own crust shield, cut a hole in the center of a large sheet of foil that’s the diameter of your pie plate. The foil will rest on the crust but let the pie filling be uncovered. Here’s a video with instructions for more details.

  • Category: Brunch
  • Method: Baked
  • Cuisine: French
  • Diet: Vegetarian

Keywords: Spinach mushroom quiche, spinach and mushroom quiche

A Couple Cooks - Recipes worth repeating.

Sourdough French Toast

This sourdough French toast recipe makes a breakfast everyone will love! The tang and structure of the bread is irresistible.…

A Couple Cooks – Recipes worth repeating.

This sourdough French toast recipe makes a breakfast everyone will love! The tang and structure of the bread is irresistible.

Sourdough French Toast

The best French toast, in our opinion? Sourdough French toast. As two cookbook authors and professional recipe developers, this is some of the best French toast we’ve made. Why? The tangy flavor hints and the chewy, textured structure of the bread take perfectly to the sweetened custard, making a breakfast plate that’s a head above the rest. It’s ideal for a special breakfast or brunch, topped with fresh fruit, sauces, or just a dusting of powdered sugar.

Why sourdough bread?

Sourdough bread has a naturally firm texture and a slight tang to the flavor, which it perfect for using in French toast. It’s a great way to use up a leftover sourdough loaf that’s about to go stale, but you can also use it on a fresh loaf.

We’ve been making this sourdough bread recipe for years, even before its heyday during the pandemic. These days we don’t always keep our starter alive, so we’ve started buying bread more regularly. Whether you make it fresh or purchase it, sourdough is a key candidate for using in French toast, as well as other ways to use up bread like bread pudding, soup, and croutons.

Sourdough bread

Ingredients in this sourdough French toast recipe

Classic French toast is sliced bread soaked in a mixture of egg, milk and sugar, then fried until golden crisp on a griddle. This genius way to reinvent stale bread has been around for hundreds of years, a combination of basic ingredients that make a hearty meal. Here’s what you need for this sourdough French toast recipe:

  • Eggs: Eggs are the backbone of a classic French toast. You can also substitute non-dairy milk and flour for a vegan French toast.
  • Milk: Whole milk gives the richest flavor, or use 2% or non-dairy milk. You can also substitute half and half or heavy cream for a decadent French toast.
  • Sugar: A hint of sugar helps to elevate the flavors.
  • Cinnamon, nutmeg, vanilla, and salt: These flavorings make a bold, nuanced flavor.
  • Sourdough bread: Day old bread or older makes the best French toast, but you can use a fresh loaf too. If it’s extremely fresh, you may want to toast it before using.
  • Butter: Use any type of neutral fat or oil for cooking your French toast, like butter, ghee, coconut oil, or neutral oil.

Tips for how to make it

French toast is arguably one of the simplest breakfasts you can make: it’s even easier than pancakes or waffles. All you’ve got to do is mix up the custard, dip the bread, and fry it up. Here are a few notes on the process:

  • Day old bread is ideal (sliced into 3/4-inch slices). Drier bread soaks up the custard but still holds its shape. A fresh loaf of sourdough has the potential to become soggy. If you want to use it as French toast right away, toast the slices before making.
  • Soak each side of the bread in the egg mixture for 10 to 15 seconds. Try not to oversoak the bread or it will become mushy.
  • Fry the bread about 2 to 3 minutes per side, until browned. Timing will vary based on your bread and the heat of the skillet.
  • A large griddle is helpful. Most skillets or griddles can fit 4 pieces at once, but we have a very large griddle that fits 8.
Sourdough French Toast

Toppings for sourdough French toast

All you need for topping sourdough French toast is a little maple syrup and a dusting of powdered sugar. But for special occasions, it’s fun to dress it up! Here are a few more topping ideas:

Dietary notes

This sourdough French toast recipe is vegetarian. It’s easy to make vegan: simply follow this Vegan French Toast recipe using sourdough bread, which uses a combination of non-dairy milk, coconut oil and flour to make a substitute for the eggs and milk.

For gluten-free, try a homemade gluten-free sourdough bread recipe or purchased gluten-free bread.

Sourdough French Toast

Leftovers and storage

Sourdough French toast stores well. It’s best on the day it was made, but it stores refrigerated in a sealed container for up to 4 days. Reheat on the stovetop before enjoying.

More French toast recipes

There are so many fun ways to enjoy French toast! Here are a few spins to try:

This sourdough French toast recipe is…

Vegetarian.

Print
Sourdough French Toast

Sourdough French Toast


  • Author: Sonja Overhiser
  • Prep Time: 5 minutes
  • Cook Time: 5 minutes
  • Total Time: 10 minutes
  • Yield: 8

Description

This sourdough French toast recipe makes a breakfast everyone will love! The tang and structure of the bread is irresistible.


Ingredients

  • 4 eggs
  • ½ cup milk (whole or 2%)
  • 2 tablespoons sugar
  • 2 teaspoons vanilla extract
  • 1 teaspoon cinnamon
  • ¼ teaspoon nutmeg
  • ⅛ teaspoon kosher salt
  • 8 slices sourdough bread, cut 3/4” thick
  • 2 tablespoons butter, for cooking

Instructions

  1. In a wide shallow bowl or container, whisk together eggs, milk, sugar, vanilla, cinnamon, nutmeg and kosher salt.
  2. Preheat a griddle over medium heat and melt 1 tablespoon butter. Soak each side of 4 slices of bread in the egg mixture until it becomes saturated, about 15 seconds per side. Place the bread on the hot skillet and cook 2 to 3 minutes per side, until browned.
  3. Repeat with the remaining butter and 4 slices bread. Serve immediately with maple syrup and a dusting of powdered sugar.
  • Category: Breakfast
  • Method: Stovetop
  • Cuisine: American

Keywords: Sourdough French toast, sourdough French toast recipe

A Couple Cooks - Recipes worth repeating.

Potato Waffles

Potato waffles are crispy and delicious! Made with mashed potatoes, they make a savory or sweet breakfast, appetizer, or brunch.…

A Couple Cooks – Recipes worth repeating.

Potato waffles are crispy and delicious! Made with mashed potatoes, they make a savory or sweet breakfast, appetizer, or brunch.

Potato Waffles

Want a fun way to make a savory breakfast: try Potato Waffles! These crispy waffles are to-die-for, with a crispy exterior and a fluffy, cheesy interior. They taste like a combination of a hashbrown and a waffle, and wow are they delicious. Serve them up savory with sour cream and chives (or as chicken and waffles). Or, they work just as well served sweet with maple syrup! They’re the perfect idea for using up leftover mashed potatoes from Thanksgiving or any meal.

What you need for potato waffles

This potato waffles recipe is perfect if you happen to have leftover mashed potatoes, but you can make them anytime. The delicious cheesy, savory potato flavor will have you hooked! This one went over extremely well in our family, and we loved both the savory and sweet ways to serve them. Other than the mashed potatoes, you don’t need much to bring these together:

  • Refrigerator ingredients: Leftover mashed potatoes, eggs
  • Pantry ingredients: Olive oil, baking powder, salt, all-purpose flour
  • Dairy: Shredded cheddar cheese, milk of choice

Got more leftover mashed potatoes? Also try Mashed Potato Pancakes.

Potato Waffles

Belgian waffles vs standard

This mashed potato waffles recipe works for either Belgian or standard waffles. Our personal preference is Belgian waffles, since they’re thicker and look more impressive. (Here’s the Belgian waffle iron we use.) Here’s more about the different types:

  • Belgian waffles are twice as large as regular waffles. They’re 1 ½ inches thick with a deep grid pattern. One serving size is half of a Belgian waffle, since it’s double the size of a standard waffle — unless you make the half size with ruffled edges (see below).
  • Regular waffles, aka American waffles are about 1/2-inch thick. They’re half the size of the Belgian waffles, and the serving size is 1 waffle.
Potato waffle

Tips on cooking potato waffles

For these potato waffles, we like to cook them in a Belgian waffle maker but make ruffled edges by using half the standard batter. We love the look of these: and you can make more waffles in a single batch! Here’s how to do it:

  • Ruffled edges: Simply use about ½ cup of the batter in a Belgian waffle maker and don’t spread it to the edges. You can also do this in a standard waffle maker by using about ¼ cup batter.
  • Full circular waffles: Use about 1 cup for a Belgian waffle maker or ½ cup for a standard waffle marker, and spread it the edges. These quantities depend on the waffle maker, so eyeball it and adjust quantities as necessary.

Toppings for potato waffles

You can serve potato waffles savory or sweet, which makes them incredibly versatile! We like them as a savory breakfast or appetizer topped with sour cream and chives. But they’re just as good sweet with maple syrup. Here are a few savory and sweet ways we like to top them:

  • Sour cream and chives for a savory breakfast or appetizer
  • Fried chicken for chicken and waffles
  • Pure maple syrup for a sweet breakfast
  • Fruit sauce or compote like raspberry compote or blueberry sauce
  • Fresh fruit like strawberries, raspberries, or sliced bananas
  • Whipped cream like homemade whipped cream
Mashed Potato Waffles

Dietary notes

As written, this potato waffles recipe is vegetarian. For dairy-free, omit the cheese and add another pinch of salt. Use oat milk, and serve with cashew cream.

For gluten-free, you can use gluten-free 1-for-1 flour. Almond flour is another option, but the pancakes would be more fragile and you might want to make them smaller to be easier to flip.

More waffle recipes

These potato waffles are great for using up leftover mashed potatoes at Thanksgiving, or just as a fun and unique savory breakfast idea. Here are a few more waffle recipes to try:

This potato waffles recipe is…

Vegetarian. For dairy-free and gluten-free, see the Dietary Notes section above.

Print
Potato Waffles

Potato Waffles


  • Author: Sonja Overhiser
  • Prep Time: 5 minutes
  • Cook Time: 5 minutes
  • Total Time: 10 minutes
  • Yield: 4 small waffles

Description

Potato waffles are crispy, cheesy, and delicious! Whip them up as a savory or sweet breakfast, side or brunch.


Ingredients

  • 2 large eggs
  • 1 tablespoon olive oil
  • ½ teaspoon baking powder
  • ¼ cup all-purpose flour
  • 1 pinch kosher salt*
  • ¾ cup shredded cheddar cheese
  • 2 cups cold leftover mashed potatoes
  • 1 tablespoon milk of choice

Instructions

  1. Whisk the eggs, then add the oil, baking powder, flour and salt and whisk until combined. Change to a spatula and stir in the shredded cheese, mashed potatoes and milk. 
  2. Grease or butter your waffle iron. Add about ½ cup of the batter into the center of the waffle iron (don’t spread it out if it’s a Belgian waffle maker**), then cook according to the waffle iron’s instructions until golden brown: about 3 to 4 minutes depending on your waffle iron. Note that this takes slightly longer than a standard waffle because the batter is denser. Remove the cooked waffles and place them on a parchment-lined or greased baking sheet without stacking. Make the waffles to order, or place cooked waffles in a 250°F oven to keep warm.
  3. Serve immediately with sour cream and chives or maple syrup. Cooked waffles can be frozen; place them in a plastic bag and remove the remaining air with a straw before sealing. To reheat, remove from the freezer and lightly toast in a toaster.

Notes

*If your mashed potatoes are not seasoned with salt, use ⅛ to ¼ teaspoon kosher salt.

**Make small Belgian waffles by using half the batter and not spreading to the edges, which makes for a ruffled edge look.

  • Category: Breakfast
  • Method: Waffles
  • Cuisine: Breakfast
  • Diet: Vegetarian

Keywords: Potato waffles, potato waffle, mashed potato waffles

A Couple Cooks - Recipes worth repeating.

Mashed Potato Pancakes

These mashed potato pancakes are absolutely delicious as a savory side or breakfast! Here’s how to make potato pancakes from…

A Couple Cooks – Recipes worth repeating.

These mashed potato pancakes are absolutely delicious as a savory side or breakfast! Here’s how to make potato pancakes from mashed potatoes.

Mashed Potato Pancakes

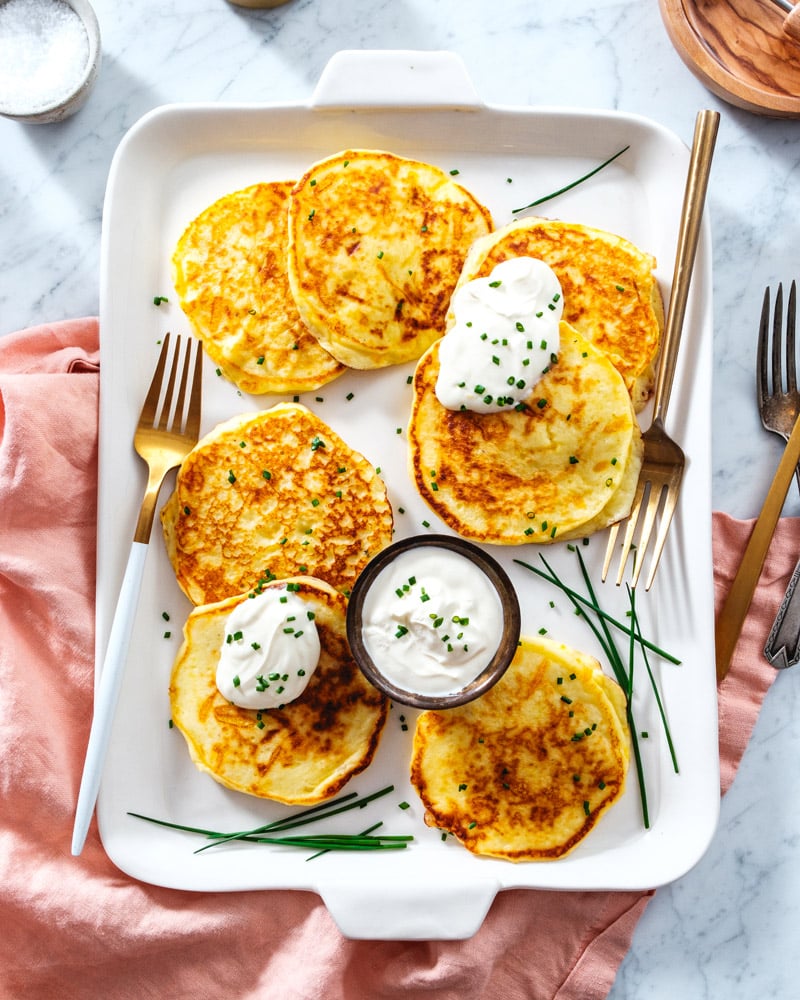
Got leftover mashed potatoes? Here’s a genius way to give them a new life: try mashed potato pancakes! You will fall head over heels for these tender, savory pancakes that taste like fluffy hashbrowns. Add a little eggs and cheese and fry them up: they work either savory served with sour cream and chives or sweet with maple syrup. The tender texture is out of this world good! They’re extremely easy to whip up, the perfect idea for leftover mashed potatoes from Thanksgiving or any meal.

Got lots of leftover mashed potatoes? Try Potato Waffles.

Ways to make mashed potato pancakes

How to make potato pancakes from mashed potatoes? There are two basic methods, both of which add eggs, flour and often cheese. This recipe uses the easier of the two methods, and makes deliciously moist, tender pancakes that are bursting with savory flavor.

  • One method makes a dough that is thick and dense and pats it into small disc shapes that are then pan-fried. However, this type of mashed potato pancake can be a little fussy. They’re hard to flip and need quite a bit of oil to fry them on all sides.
  • This recipe for leftover mashed potato pancakes uses an easier method that’s more like a pancake batter. The batter is thick but liquid enough to pour onto the griddle, so it fries up just like traditional pancakes. It’s so simple and there’s no need to form pancakes or deep fry: pour them right onto the skillet!
Best Mashed Potatoes Recipe

Ingredients for leftover mashed potato pancakes

To make mashed potato pancakes you’ve got to start with leftover mashed potatoes. The leftover part isn’t just cute: refrigerating the mashed potatoes helps dry them out, making a perfect texture for frying into flapjacks. But this method will work with any type of mashed potatoes you’ve got: even if they’re just a few hours old! We recommend using our best mashed potatoes recipe for best results. Here’s what you’ll need for this recipe:

  • Refrigerator ingredients: Leftover mashed potatoes, eggs
  • Pantry ingredients: Olive oil, baking powder, salt, all-purpose flour
  • Dairy: Shredded cheddar cheese, milk of choice
Mashed Potato Pancakes

Tips for the process

These leftover mashed potato pancakes are simple to whip up: you’ll make a simple batter and fry it up just like sweet breakfast pancakes. Here are a few things to keep in mind:

  • Use a large griddle: a non-stick surface is helpful. Some griddles have uneven heating, so use a quality griddle or skillet. A non-stick surface is a plus, though you’ll still want to cook the pancakes in butter to get them golden brown.
  • Experiment to find the right heat level. Medium low heat is ideal, but it’s different on every stovetop. It should take a few minutes to get the pan up to heat. If the heat is too low, the pancakes won’t puff as much when cooking.
  • Don’t worry if the first pancake isn’t perfect! Use it as a test for honing in your pancake skills and adjust the heat accordingly.
  • The batter sometimes becomes very thick while waiting for the second batch. If so, add a teaspoon or two of buttermilk until the batter is pourable. 

Ways to serve leftover mashed potatoes

Leftover mashed potato pancakes work savory or sweet, making them extremely versatile. They work as a sweet or savory breakfast, a side dish, or as an appetizer. Here are a few ways we like to serve them:

  • Topped with sour cream and chives as a savory breakfast or appetizer
  • As a side dish for salmon, chicken or vegetarian main dishes
  • Appetizer, made into smaller pancakes (similar to fritters)
  • Topped with maple syrup, fresh fruit and butter as a sweet breakfast
Mashed Potato Pancakes

Dietary notes

As written, this mashed potato pancakes recipe is vegetarian.

For dairy-free, omit the cheese and add another pinch of salt. Use oat milk, and serve with cashew cream.

For gluten-free, you can use gluten-free 1-for-1 flour. Almond flour is another option, but the pancakes would be more fragile and you might want to make them smaller to be easier to flip.

More mashed potato recipes

This mashed potato pancakes recipe is great for using up leftovers, whether it’s with classic mashed potatoes, sweet potatoes, or other types. Here are a few of our top mashed potato recipes:

This mashed potato pancake recipe is…

Vegetarian. For dairy-free or gluten-free, see the Dietary Notes section above.

Print
Mashed Potato Pancakes

Mashed Potato Pancakes


  • Author: Sonja Overhiser
  • Prep Time: 5 minutes
  • Cook Time: 10 minutes
  • Total Time: 15 minutes
  • Yield: 9 medium pancakes

Description

These mashed potato pancakes are absolutely delicious as a savory side or breakfast! Here’s how to make potato pancakes from mashed potatoes.


Ingredients

  • 2 large eggs
  • 1 tablespoon olive oil
  • ½ teaspoon baking powder
  • ⅛ teaspoon kosher salt*
  • ¼ cup all-purpose flour
  • ½ cup shredded cheddar cheese
  • 2 cups cold leftover mashed potatoes
  • 3 tablespoons milk of choice
  • Butter or more oil, for cooking
  • For serving: sour cream and chopped chives or maple syrup (or toppings of choice).

Instructions

  1. Whisk the eggs, then add the olive oil, baking powder, salt and whisk. Add the flour and whisk gain. Change to using a spatula and stir in the shredded cheese, leftover mashed potatoes and milk to make a thick but pourable batter. 
  2. Lightly butter a skillet or griddle and wipe off extra grease with a paper towel. Heat the skillet to medium low heat. Pour the batter into small circles (¼ cup for medium-sized pancakes, or smaller for small pancakes). Cook the pancakes until the bottoms are golden, about 1 to 2 minutes. Then flip them and cook until cooked through and no longer gooey at the edges, adjusting the heat as necessary so they don’t brown too fast.
  3. Place the cooked pancakes under an inverted bowl to keep them warm. Repeat with the remaining batter, adjusting the heat as necessary to maintain an even temperature (if the batter becomes too thick, you can add a teaspoon or two of milk until it becomes pourable). Serve immediately with sour cream and chopped chives (for savory), with maple syrup (for sweet), or with the toppings of your choice.

Notes

*If your mashed potatoes are not seasoned with salt, use ¼ teaspoon kosher salt.

  • Category: Breakfast or Side
  • Method: Stovetop
  • Cuisine: American
  • Diet: Vegetarian

Keywords: Mashed potato pancakes, potato pancakes, leftover mashed potato pancakes, potato pancakes from mashed potatoes, potato pancakes with mashed potatoes

A Couple Cooks - Recipes worth repeating.

Banana Bread French Toast

Banana bread French toast is a fun way to repurpose leftovers into breakfast or brunch! Topped with syrup, it’s a…

A Couple Cooks – Recipes worth repeating.

Banana bread French toast is a fun way to repurpose leftovers into breakfast or brunch! Topped with syrup, it’s a rich and decadent treat.

Banana Bread French Toast

Here’s a fun way to transform banana bread into a decadent breakfast treat: Banana Bread French Toast! This is the ultimate breakfast or brunch for banana lovers: the moist, dense texture of the quick bread is ideal for frying until golden brown and cinnamon-spiced. Topped with bananas, chopped pecans, and a drizzle of maple syrup, it’s a luxurious way to start the day (that’s honestly more like dessert). Needless to say, our family are big, big fans of this one!

Ingredients for banana bread French toast

Banana bread French toast starts with a good bread, of course! Our favorite is our best banana bread recipe, but you can use any recipe you like. Cut the bread into slices, then dredge it into our classic French toast custard mixture of eggs, milk, cinnamon, and nutmeg. The main difference is that the custard has none of the customary sugar, since this quick bread is very sweet. Here’s what you’ll need for this recipe:

  • Banana bread
  • Eggs
  • Milk
  • Vanilla
  • Cinnamon and nutmeg
  • Salt
  • Butter, for cooking
Banana Bread French Toast

A note on serving size

Banana bread is very filling: one slice is much denser and more filling than a typical slice of bread. For that reason, plan to eat only one slice of banana bread French toast per person. This recipe is rich and decadent, so you’ll want to account for that in your serving! For

Tips for making banana bread French toast

If you’ve got banana bread, this French toast recipe is a breeze! All you’ve got to do is whisk the custard, dip the bread, and fry it up. Here’s how to make French toast:

  • Slice: Slice the banana bread into 3/4-inch slices. (This is the perfect width; too thin and it falls apart but too thick and it’s too filling.)
  • Whisk: In a wide shallow bowl or container, whisk together eggs, milk, vanilla, cinnamon, nutmeg and kosher salt.
  • Dip: Preheat a griddle over medium heat and melt 1 tablespoon butter. Soak each side of 4 slices of bread in the egg mixture for about 30 seconds.
  • Fry: Place the bread on the hot skillet and cook 2 to 3 minutes per side, until browned.
Banana Bread French Toast

Topping ideas

Banana bread French toast is very rich in itself, so it doesn’t need a lot of toppings to make it taste incredible! We like it best with the following:

  • Pure maple syrup
  • Sliced bananas
  • Chopped pecans or walnuts, toasted if desired

If you like, you can add other toppings, but keep in mind it’s very sweet. You could try Greek yogurt sweetened with a little maple syrup to cut the sweetness with the acidity in the yogurt, or some sliced strawberries or raspberries. Or, go with a small dollop of whipped cream for an even more decadent treat.

Diet variations

Working with a special diet? Here are a few ways to modify this recipe to fit different dietary needs:

Banana Bread French Toast

More French toast recipes

There are many ways to make French toast: baked, casserole, stuffed, and more! Here are some of our favorites for a banana breakfast treat or a fun weekend brunch:

This banana bread French toast recipe is…

Vegetarian.

Print
Banana Bread French Toast

Banana Bread French Toast


  • Author: Sonja Overhiser
  • Prep Time: 5 minutes
  • Cook Time: 5 minutes
  • Total Time: 10 minutes
  • Yield: 4 (1 slice per person)

Description

Banana bread French toast is a fun way to repurpose leftovers into breakfast or brunch! Topped with syrup, it’s a rich and decadent treat.


Ingredients

  • 2 eggs
  • ¼ cup milk of choice (dairy or non-dairy)
  • 1 teaspoon vanilla extract
  • ½ teaspoon cinnamon
  • ⅛ teaspoon nutmeg
  • 1 pinch kosher salt
  • 4 slices banana bread, 3/4-inch thick
  • 1 tablespoon butter, for cooking
  • Banana slices and chopped pecans, for garnish
  • Maple syrup, for serving

Instructions

  1. In a wide shallow bowl or container, whisk together eggs, milk, sugar, vanilla, cinnamon, nutmeg and kosher salt.
  2. Preheat a griddle over medium heat and melt 1 tablespoon butter. Soak each side of 4 slices of bread in the egg mixture about 30 seconds per side until it becomes saturated. Place the bread on the hot skillet and cook 2 to 3 minutes per side, until browned.
  3. Repeat with the remaining butter and 4 slices bread. Serve immediately with maple syrup and a dusting of powdered sugar.
  • Category: Breakfast
  • Method: Stovetop
  • Cuisine: Breakfast
  • Diet: Vegetarian

Keywords: Banana bread french toast

A Couple Cooks - Recipes worth repeating.

Our Best Banana Bread Recipe

This easy banana bread recipe is simply the best! This moist, sweet, golden quick bread is a kitchen essential. Banana…

A Couple Cooks – Recipes worth repeating.

This easy banana bread recipe is simply the best! This moist, sweet, golden quick bread is a kitchen essential.

Banana Bread Recipe

Banana bread is a kitchen staple, and we’re confident this one needs to make its way into your recipe rotation. This easy banana bread recipe uses just one bowl and common pantry ingredients to make the very best loaf. It bakes up golden, moist, perfectly sweet and scented with a hint of cinnamon. There’s no need for secret ingredients: just ripe bananas and 15 minutes. Here’s how to make banana bread and ideas for how to customize it with mix-ins, glazes, and more!

Ingredients in this easy banana bread recipe

Banana bread is an old American standard: it started appearing the 1930’s in cookbooks when home cooks had access to baking powder and bananas. It may have stemmed from the Great Depression as a way to use up ripe bananas. Over the years, it’s become as essential to American culture as apple pie. It’s the most popular way to use ripe bananas in baked goods.

This banana bread recipe uses common pantry ingredients to make a moist, sweet loaf. Some recipes include tricks like sour cream to add moisture, but this recipe doesn’t need it. Here’s what you need for the best banana bread:

  • Very ripe bananas
  • Eggs
  • Granulated and brown sugar
  • Melted butter or neutral oil
  • Vanilla extract
  • Baking soda
  • Cinnamon
  • Kosher salt
Banana Bread Recipe

Use very ripe bananas

The key to the best banana bread is using very ripe bananas. Bananas with a blackened peel bring added moisture, sweetness, and pure fruity flavor to baked goods like bread, muffins, pancakes, cookies, cake, and more.

  • Do not use unripe bananas! The peel should have a large amount of black spots, or be uniformly black in color.
  • If the bananas have mold on the peel, do not use them. Bananas with mold or those leaking liquid should be discarded.
  • You can freeze very ripe bananas and use them in baked goods later. If you don’t have time to us very ripe bananas, freeze them by peeling them and slicing into rounds. You can use them later for bread, muffins and more: just make sure to include the liquid that separates from the fruit in the batter.

Butter vs oil in banana bread

This banana bread recipe uses melted butter in the batter, which makes it easy to make in one bowl with no mixer required! Here are a few notes on butter versus oil in breads:

  • Butter lends a richer flavor and makes a more even crumb. Using a dairy fat brings a tender, even crumb and texture to a quick bread.
  • Oil makes it even moister, and works as a substitute. The texture is a little spongier with oil, but it works well! You can substitute a neutral oil like vegetable or grapeseed for the butter here.
  • Or, you can use a combination of the two. Using half butter and half oil also has great results.

Another pro to using butter: cook it a few minutes longer when melting to make brown butter, which adds a toasty, caramel flavor to the bread. Vegan butter also works as a substitute.

Banana Bread Recipe

Pan size variations

This banana bread recipe works for both 9 x 5″ and 8 x 4″ pan sizes with a slight modification. Here are a few notes:

  • 8 x 4 pan: This pan size works well if you only have 1 ½ cups mashed bananas (and not 2 cups, as called for in the recipe below). You can make this recipe in an 8 x 4″ loaf pan using 1 ½ cups bananas and 1 ½ cups all-purpose flour. Watch the bake time and adjust accordingly.
  • 9 x 5″ pan: Make the recipe as written below for a 9 x 5″ loaf pan. You can also make it with 1 ½ cups bananas and flour, but it will not be as tall in shape. Again, adjust the bake time accordingly.
How to know when banana bread is done

The only tricky part about baking quick breads like this banana bread recipe is how to know when they are done. Here are a few visual cues to look for:
  • Banana bread is done when the top is set and springs back, and a tooth pick inserted comes out with a few clinging crumbs. The toothpick test does not have to be fully clean! In fact, if it comes out clean the bread may be overdone.
  • The bread is cooked when the internal temperature is 200°F. You can also insert the probe of a food thermometer to assess when the bread is cooked through.
Banana Bread

Banana bread variations: mix-ins and toppings

Banana bread is a canvas for endless variations! Here are a few ideas for additions to this banana bread recipe:

  • Toasted nuts: Fold ½ cup toasted pecans or toasted walnuts into the batter.
  • Chocolate chips: Fold ¾ cup semi-sweet or dark chocolate chips into the batter, then top with another ¼ cup.
  • Blueberries: Toss 1 ½ cups blueberries with 1 tablespoon flour, then fold them into the batter (the flour helps to prevent sinking).
  • Cinnamon sugar topping: Mix 2 tablespoons granulated or brown sugar with ½ teaspoon ground cinnamon, and sprinkle it across the top.
  • Streusel topping: Mix ¼ cup sugar, ¼ cup flour and 1 teaspoon cinnamon. Cut 2 tablespoons room temperature butter into small pieces, then use your fingers to rub it into the dry ingredients until crumbles form. Sprinkle over the bread and bake. Cover with foil at 30 to 45 minutes to prevent burning.
  • Brown butter: Make the bread with brown butter instead of melted butter to add nutty and caramel notes.
  • Glazes: Allow the bread to cool fully, then drizzle with vanilla glaze, cream cheese glaze or maple glaze.
  • Frosting: Allow the bread to cool fully, then top with cream cheese frosting.
Banana Bread Recipes

Ways to serve banana bread

There are a few creative ways to serve banana bread if you want to re-purpose leftovers. Try Banana Bread French Toast by cutting it into slices, then dipping it in an egg mixture and frying it for breakfast. Or serve it as a dessert “a la mode” by topping a slice with ice cream, salted caramel sauce, and chopped pecans.

Dietary swaps

There are a few ways to change up a banana bread recipe to make it vegan or gluten-free! Here are a few notes:

Banana bread storage

Banana bread holds up well over time. It lasts 5 days at room temperature wrapped in aluminum foil or refrigerated for 10 days. You can also freeze it for up to 3 months: slice it into pieces and wrap it in plastic wrap then a freezer-safe bag or container.

Let us know what you think of this recipe in the comments below. We hope you love it as much as our family does!
More banana bread recipes

This classic recipe has many variations. Here are a few more banana bread recipes to try:

Print
Banana Bread Recipe

Our Best Banana Bread Recipe


  • Author: Sonja Overhiser
  • Prep Time: 15 minutes
  • Cook Time: 60 minutes
  • Total Time: 1 hour 15 minutes
  • Yield: 12

Description

This easy banana bread recipe is simply the best! This moist, sweet, golden quick bread is a kitchen essential.


Ingredients

  • 2 cups* mashed ripe bananas (3 very large or 5 medium bananas)
  • 2 large eggs
  • ½ cup granulated sugar
  • ½ cup brown sugar
  • ½ cup melted butter** (or neutral oil)
  • 1 teaspoon vanilla extract
  • 1 teaspoon baking soda
  • 1 teaspoon cinnamon
  • ¾ teaspoon kosher salt
  • 2 cups [280 g] all-purpose flour
  • Optional mix ins: ½ cup chopped toasted pecans or toasted walnuts, ¾ cup chocolate chips

Instructions

  1. Preheat the oven to 350°F. Butter a 9 x 5″ loaf pan. Line the pan with a piece of parchment paper, cut so that it extends on two sides to easily remove the bread from the pan.
  2. Mash the bananas in the bottom of a large bowl, enough for 2 cups. Whisk in the eggs. Switch to a spatula and stir in the granulated sugar, brown sugar, butter, and vanilla extract.
  3. Stir in the baking soda, cinnamon, and kosher salt. Add the flour and gently stir until just combined and no streaks of flour remain. 
  4. Pour the batter into the prepared loaf pan. Bake 55 to 60 minutes*, until the top is set and a toothpick inserted into the center of the loaf comes out with a few clinging crumbs (or the internal temperature is 200°F). 
  5. Cool in the pan for 15 minutes. Then run a knife around the edge and invert the loaf onto a cooling rack. Serve warm or at room temperature. (If desired, allow to cool fully and top with a glaze.***)
  6. Storage info: The bread lasts 5 days at room temperature wrapped in aluminum foil, refrigerated for 10 days, or frozen for 3 months (slice it into pieces and wrap it in plastic wrap then a freezer-safe bag or container).

Notes

*If you only have 1 ½ cups mashed bananas, you can make this recipe in an 8 x 4″ loaf pan using 1 ½ cups bananas and 1 ½ cups all-purpose flour. You can also make it with 1 ½ cups bananas and flour in a 9 x 5″ pan, but it will not be as tall in shape. The bake time will vary based on pan size and batter amount, so watch and adjust accordingly.

**To make brown butter banana bread, brown the butter and then cool it in the freezer for 15 minutes before using in the bread.

***Try maple glaze, cream cheese glaze or vanilla glaze. See the section above for notes about cinnamon sugar or streusel toppings. 

  • Category: Bread
  • Method: Baked
  • Cuisine: American
  • Diet: Vegetarian

Keywords: Banana bread recipe, banana bread, how to make banana bread, best banana bread, easy banana bread

A Couple Cooks - Recipes worth repeating.

Apple Cinnamon Muffins

This apple cinnamon muffins recipe is so fluffy and moist, with a crunchy cinnamon sugar topping. A total family favorite!…

A Couple Cooks – Recipes worth repeating.

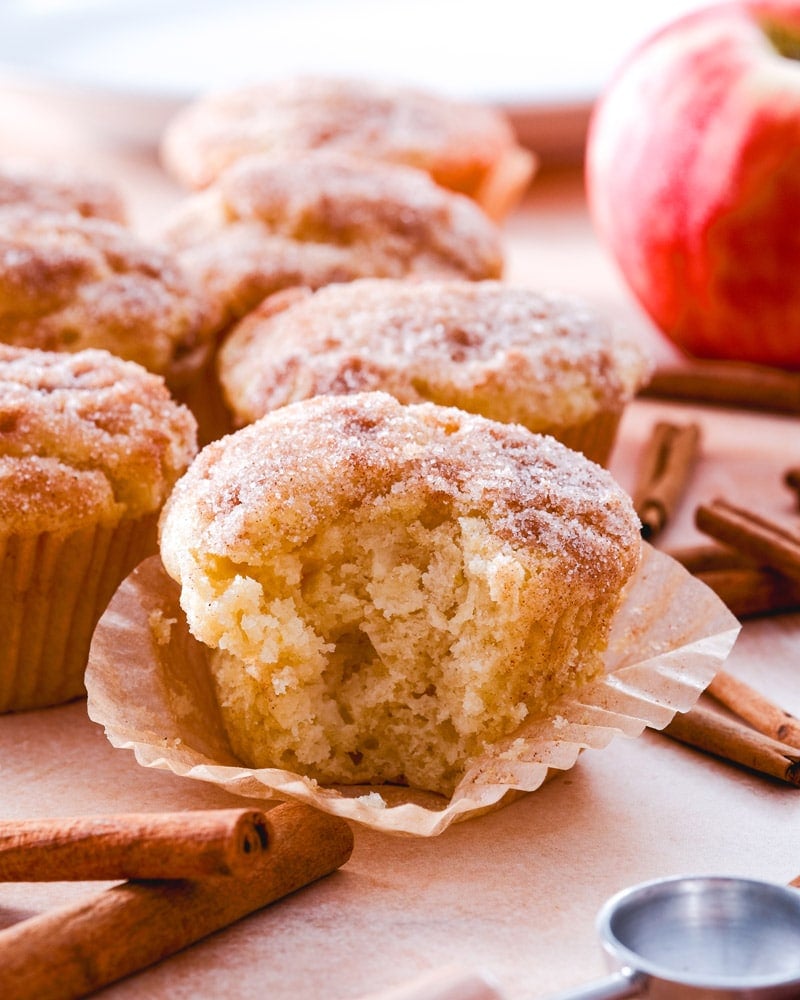
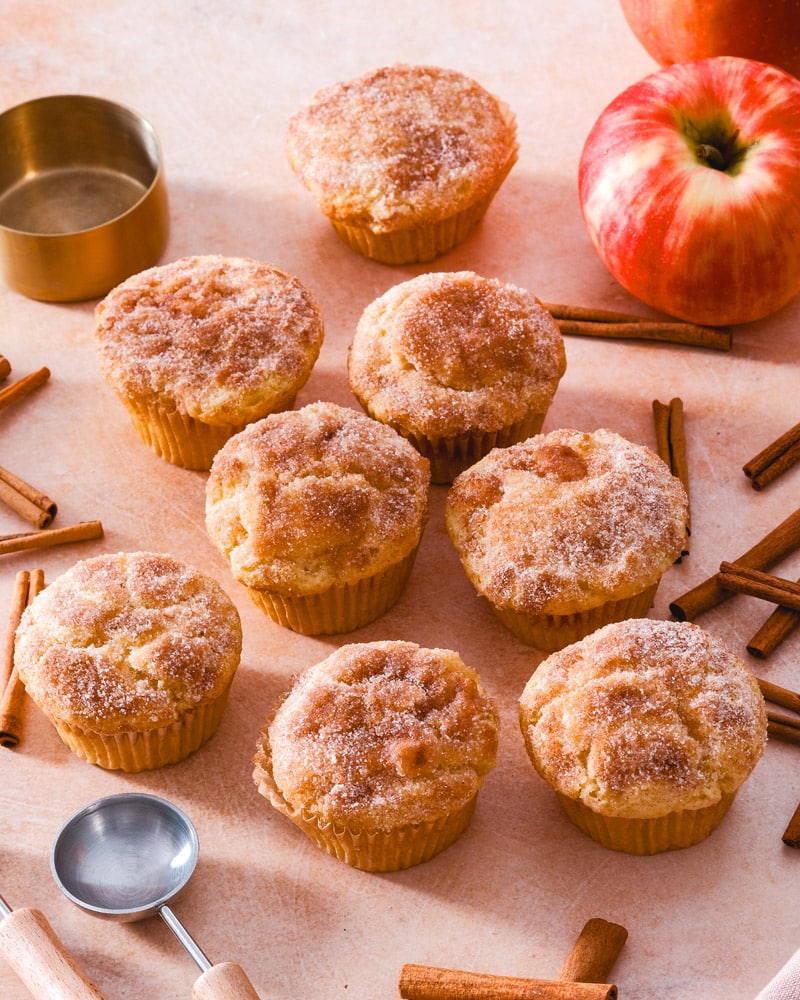
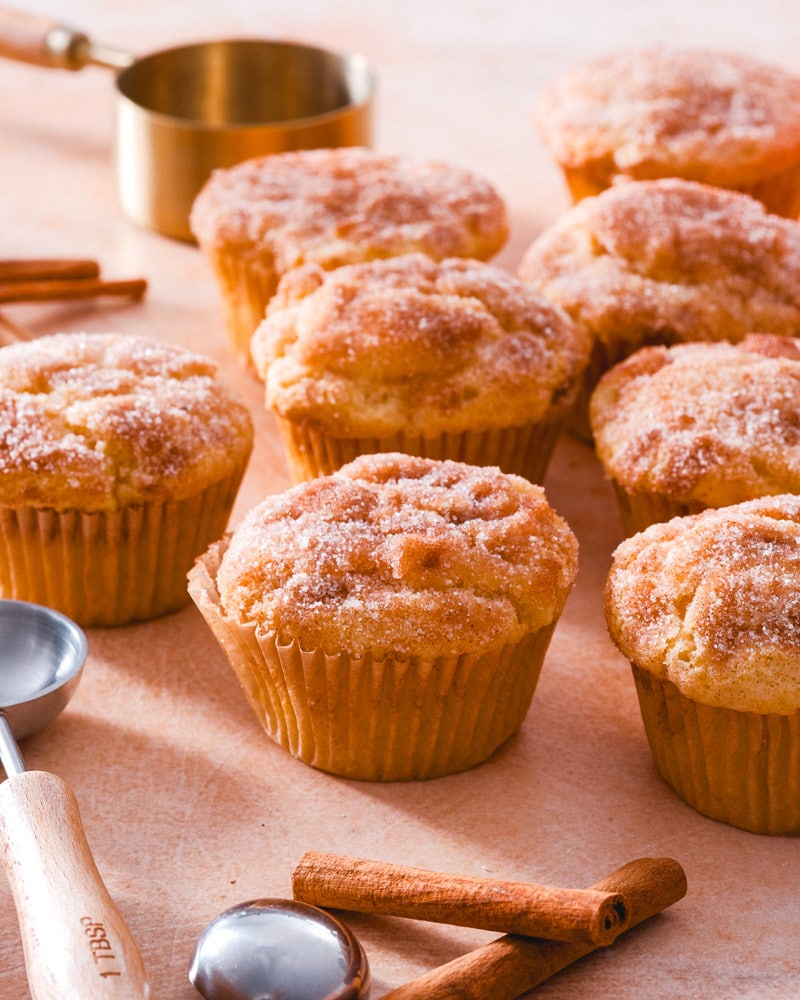
This apple cinnamon muffins recipe is so fluffy and moist, with a crunchy cinnamon sugar topping. A total family favorite!

Apple cinnamon muffins

Here’s a muffin recipe that’s the best cozy baking project: apple cinnamon muffins! These are so delicious everyone will beg for the recipe. Each one has a fluffy, tender crumb, with just the right amount of sweet tart bursts of apples. The best part? Sprinkling with cinnamon sugar before and after baking makes a crunchy, warm spiced topping. You won’t believe how tasty these are!

Ingredients in apple cinnamon muffins

Apples and cinnamon are the best combination, like in oatmeal or apple crisp. So why not translate that into muffin form? These little cakes taste like you picked them up at a local bakery. They’re tall, delicately sweet, and have the best crunchy cinnamon sugar topping. Here are the ingredients you’ll need:

  • All-purpose flour
  • Granulated sugar
  • Baking powder, baking soda, and salt
  • Buttermilk
  • Butter
  • Neutral oil
  • Eggs
  • Vanilla
  • Cinnamon
Apple Cinnamon Muffins

Best types of apples for baking

The best type of apples for baking? Bake with a firm, crisp tart apple. Crisp tart apples hold up well texture-wise, and their tangy tartness accents the sweetness of baked goods. Here are some of the best apples for baking and cooking. You can use other types too, but the flavor of these types have the best flavor:

  • Pink Lady
  • Jonathon or Jonagold
  • Granny Smith
  • Fuji

The keys to apple cinnamon muffins

These apple cinnamon muffins are so full of flavor, you’ll make them a fall baking staple! (They are in our house.) There are a few keys to the flavor and achieving an even bake. Here’s what to keep in mind:

  • Use real buttermilk (no substitutes!). Buttermilk is crucial to making a fluffy muffin with a tender crumb. We’ve tried all sorts of muffin recipes and buttermilk is truly the best! Don’t be tempted to use even a buttermilk substitute here! It’s got to be the real thing.
  • For an even bake, fill every other cup in two 12-cup muffin tins. Here’s a key to even baking for muffins: fill every other cup in a tin! This helps them to have beautiful domed tops and an even bake. It’s not required, but helpful for perfect muffins.
  • Baking at 375°F makes a taller muffin. Many muffin recipes bake at 350°F, but a slightly hotter oven makes a taller and fluffier muffin. This recipe also has a large amount of leavener (baking powder and baking soda) for a good rise.
Cinnamon apple muffins

Storage info

Apple cinnamon muffins taste best the day of baking, but they save well too! You’ll want to keep them refrigerated because of the crunchy topping and the moisture in the apples, which can make them soggy if stored at room temperature. Here’s what to know:

  • Refrigerator: Store refrigerated for up to 1 week! Let them stand at room temperature for a few minutes before eating.
  • Freeze: Freeze in a sealable container and store up to 3 months.
Apple Cinnamon Muffins

More apple recipes

Love baking with apples! When it’s the season, we love baking them up into muffins, breads, cookies, and crisps. Here are a few more apple recipes:

This apple cinnamon muffins recipe is…

Vegetarian. For vegan, go to Vegan Apple Muffins.

Print
Apple cinnamon muffins

Apple Cinnamon Muffins


  • Author: Sonja Overhiser
  • Prep Time: 30 minutes
  • Cook Time: 20 minutes
  • Total Time: 50 minutes
  • Yield: 12

Description

This apple cinnamon muffins recipe is so fluffy and moist, with a crunchy cinnamon sugar topping. A total family favorite!


Ingredients

For the muffins

  • 1 ½ cups apples, peeled and diced
  • 2 cups [280 g] all purpose flour
  • 2 teaspoons baking powder
  • ¼ teaspoon baking soda
  • ¾ teaspoon kosher salt
  • 1 cup granulated sugar
  • ¾ cup buttermilk*
  • 5 tablespoons melted unsalted butter
  • ⅓ cup neutral oil (grapeseed, canola, or vegetable oil)
  • 2 eggs
  • 1 teaspoon vanilla extract

For the topping

  • ¼ cup granulated sugar
  • 1 teaspoon cinnamon
  • 1 ½ tablespoons melted butter

Instructions

  1. Preheat the oven to 375°F.
  2. Peel and chop the apples and set them aside. Place muffin wrappers in every other muffin cup of two 12-cup muffin tins.**
  3. In a large bowl, whisk the flour, baking powder, baking soda, and salt. Make a well in the center. In a medium bowl, whisk the granulated sugar, buttermilk, melted butter, neutral oil, eggs, and vanilla extract.
  4. In a mix bowl, mix the sugar and cinnamon for the topping.
  5. Pour the wet ingredients from the batter into the well in the dry ingredients. Mix gently until just combined and there are no longer streaks of flour.
  6. Add the apples and fold it in with a spatula, taking care not to overwork the batter. (If desired, you can store the batter up to 24 hours before baking.)
  7. Scoop the batter into the muffin papers using a dough scoop: it should fill to the top of the muffin papers. Sprinkle the tops with the cinnamon sugar, using half of the cinnamon sugar mixture.
  8. Bake until the tops are golden and set and a toothpick in the center comes out with a few crumbs, about 20 to 26 minutes total (rotate the pans halfway through baking). Allow to cool for 5 minutes.
  9. Brush the top of each muffin with melted butter, place the remaining cinnamon sugar on a plate, and dip each muffin into the plate to coat the top. Transfer to a baking rack to fully cool (about 30 minutes to 1 hour). The muffins are best eaten the day they are made, but they store very well in an airtight container in the refrigerator and last up to 1 week.

Notes

*Buttermilk is the magic ingredient which makes the most consistent texture and rise! Don’t be tempted to leave it out or use a buttermilk substitute. It’s worth it (we promise).

**Baking in every other muffin cup makes for a more consistent bake. If all you have is a 12-cup muffin tin, you can use that too.

  • Category: Muffin
  • Method: Baked
  • Cuisine: Baked
  • Diet: Vegetarian

Keywords: Apple cinnamon muffins, apple cinnamon muffin, cinnamon apple muffin

A Couple Cooks - Recipes worth repeating.

Pumpkin Spice Pancakes

These pumpkin spice pancakes are fluffy and cozy-spiced! Whip up a batch as a tasty and easy breakfast idea. Fall…

A Couple Cooks – Recipes worth repeating.

These pumpkin spice pancakes are fluffy and cozy-spiced! Whip up a batch as a tasty and easy breakfast idea.

Pumpkin Spice Pancakes

Fall calls for all the pumpkin breakfast recipes, and here’s one to add to the regular rotation: pumpkin spice pancakes! These fluffy, tender flapjacks are perfectly spiced with cinnamon and pumpkin pie spice. Top with maple syrup and a melty pad of butter, and there’s nothing better for a cool morning! If you’ve got a jar of pumpkin spice, this is one of our top ways to use it.

Ingredients for pumpkin spice pancakes

This pumpkin spice pancakes recipe is optimized for that jar of pumpkin spices in your spice rack or cabinet: but you can also make your own DIY pumpkin pie spice! You’ll just need those key cozy spices: cinnamon, ginger, nutmeg, allspice and cloves. Other than that, pumpkin pancakes require the typical cast of fall characters, plus pumpkin puree! Here’s what you’ll need:

  • Flour
  • Brown sugar
  • Baking powder
  • Cinnamon
  • Pumpkin pie spice
  • Salt
  • Eggs
  • Pumpkin puree
  • Milk of choice
  • Neutral oil
Pumpkin Spice Pancakes

Why pumpkin spice + cinnamon?

When it comes to ingredients, you’ll notice that pumpkin spice pancakes require both pumpkin pie spices and cinnamon! In the many pumpkin recipes we’ve developed, we’ve noticed that for the best “pumpkin” flavor, it’s essential to have both.

Cinnamon brings in the sweet notes, and pumpkin spices bring in the spicy, cozy and more bitter elements. The combination of the two makes the best balanced flavor. We also use this trick in our pumpkin bars and pumpkin dip.

Tips for cooking pumpkin spice pancakes

Pumpkin spice pancakes are quick and simple: mix the wet ingredients with the dry ingredients, then fry until golden brown! Here are a few tips for the process:

  • Use a large griddle: a non-stick surface is helpful. Use a quality griddle or skillet, since some can have uneven heating. A non-stick surface is a plus, though you’ll still want to cook with butter to get them golden brown.
  • Experiment to find the right heat level. Medium low heat is ideal, but it’s different on every stovetop. It should take a few minutes to get the pan up to heat. If the heat is too low, the pancakes won’t puff as much when cooking.
  • Don’t worry if the first pancake isn’t perfect! Use it as a test for honing in your pancake skills and adjust the heat accordingly.
Pumpkin Spice Pancakes

Mix ins and toppings

Why not add a few mix-ins to pumpkin pancakes? Here are a few ideas for mixing into the batter to step up these pancakes or ideas for toppings:

  • Chocolate chips: Add a few handfuls of chocolate chips to the batter
  • Pecans: Add chopped pecans to the batter, or top the pancakes with candied pecans.
  • Walnuts: Add chopped walnuts to the batter, or top the pancakes with candied pecans.
  • Pumpkin spice syrup: Top the pancakes with Pumpkin Spice Syrup for an extra hit of spices.
  • Apple cider syrup: Add a fruity element with Apple Cider Syrup.

More pumpkin recipes

Love pumpkin? Here are a few more recipes to flex your pumpkin spice muscles:

This pumpkin spice pancakes recipe is…

Vegetarian. For vegan, use flax eggs in place of the eggs.

Print
Pumpkin spice pancakes

Pumpkin Spice Pancakes


  • Author: Sonja Overhiser
  • Prep Time: 10 minutes
  • Cook Time: 10 minutes
  • Total Time: 20 minutes
  • Yield: 8

Description

These pumpkin spice pancakes are fluffy and cozy-spiced! Whip up a batch as a tasty and easy breakfast idea.


Ingredients

  • 1 cup [140 g] all-purpose flour
  • 3 tablespoons brown sugar
  • 2 teaspoons baking powder
  • 2 teaspoons cinnamon
  • 2 teaspoons pumpkin pie spice
  • ½ teaspoon kosher salt
  • 2 large eggs
  • ¾ cup pumpkin puree
  • ¾ cup milk of choice
  • ¼ cup neutral oil

Instructions

  1. In a medium bowl, whisk together the flour, brown sugar, baking powder, cinnamon, pumpkin pie spice, and salt.
  2. In a separate bowl, whisk the eggs, then whisk in the pumpkin puree, milk, and oil (or melted butter).
  3. Stir the wet ingredients into the dry ingredients and mix with a spatula until no dry patches remain and a smooth batter forms.
  4. Lightly butter a skillet or griddle and wipe off extra grease with a paper towel. Heat the skillet to medium low heat. Pour the batter into small circles (about ¼ cup). Cook the pancakes until the bubbles pop on the top and the bottoms are golden. Then flip them and cook until cooked through and no longer gooey at the edges (the batter may ooze out a bit at the sides; just keep cooking until fully cooked, adjusting the heat as necessary so they don’t brown too fast).
  5. Place the cooked pancakes under an inverted bowl to keep them warm. Repeat with the remaining batter, adjusting the heat as necessary to maintain an even temperature. Serve immediately with butter and maple syrup.
  • Category: Breakfast
  • Method: Stovetop
  • Cuisine: Fall
  • Diet: Vegetarian

Keywords: Pumpkin spice pancakes

A Couple Cooks - Recipes worth repeating.