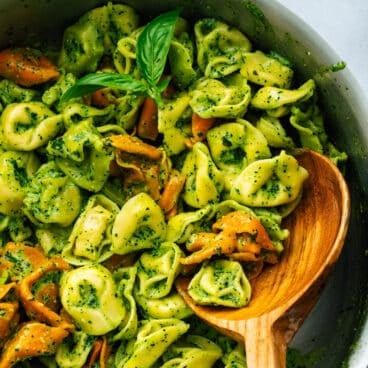
Want an easy dinner with a comfort food vibe? This roasted red pepper pasta delivers a creamy, vibrant sauce that clings to tender pasta. Savor the sweet, smoky flavors in every bite!

Dinnertime can be hectic, but it doesn’t have to be. This roasted red pepper pasta is the perfect solution for busy weeknights. It comes together in just 20 minutes with minimal ingredients, making it a lifesaver for those nights when you’re short on time! The creamy red pepper sauce is packed with flavor and clings perfectly to the cooked pasta. Each bite is a burst of sweetness and smokiness, leaving you wanting more. This easy dinner went over like a charm in our house!
Ingredients in roasted red pepper pasta
This roasted red pepper pasta stars our favorite red pepper sauce, a blender sauce that’s similar to romesco sauce, a Spanish sauce made with red peppers, olive oil, almonds, and garlic. Our tweaks to the sauce make it have more red peppers, and it’s lighter in texture. It also has both heavy cream and Parmesan cheese added to help it cling to the pasta. Here’s what you’ll need:
- Jarred roasted red peppers
- Unsalted almonds
- Olive oil
- Garlic
- Lemon juice
- Smoked paprika
- Kosher salt
- Heavy cream (or melted vegan butter, for vegan)
- Grated Parmesan cheese (omit or use vegan Parmesan for dairy-free)
- Pasta

Customizable serving size
This roasted red pepper pasta has a customizable serving size. The sauce recipe makes enough for 2 cups, which covers 1 pound (16 ounces) of pasta and makes 8 servings. So half the sauce recipe makes enough for 8 ounces pasta or 4 servings.
This pasta recipe tastes best when it’s freshly made. So if you only need 4 servings, we suggest that you make the sauce and 8 ounces pasta. Store the sauce refrigerated for up to 1 week, when you want to make another few servings!
Types of pasta to use
This roasted red pepper pasta recipe works with most types of long and short noodles! We like it with rigatoni, but you can use long noodles if desired. Here are some of the best types of pasta for this sauce:
- Rigatoni
- Spirals (fusilli)
- Penne
- Shells (conchiglie)
- Cavatappi
- Orecchiette
- Gemelli
- Gigli
- Spaghetti
- Linguine
- Bucatini

Tips for cooking roasted red pepper pasta
The most important part of this pasta recipe? Cook the pasta to al dente. Al dente means “to the bite” in Italian, and signifies to cook until it’s tender with a small white speck inside when you bite into a piece. There’s nothing worse than soft, rubbery pasta. Here are a few tips for cooking the perfect al dente roasted red pepper pasta:
- Add a generous amount of salt to the pasta water. You want the water to taste salty. Usually about 1 tablespoon kosher salt does the trick
- Boil the pasta a few minutes less than indicated on the package instructions. Often package instructions make for overcooked pasta.
- Start taste testing early. Start taste testing and stop cooking when the pasta is just tender but you can still see a small white speck inside.

Side dishes for roasted red pepper pasta
This roasted red pepper pasta is such a great easy dinner idea: it takes just 20 minutes to put together! Here are a few easy salad recipes and side dishes to make it a meal:
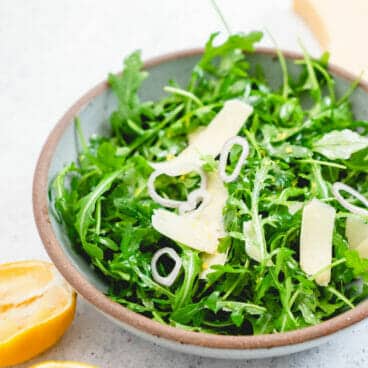
- Try Easy Arugula Salad
- Go for quick and easy Peas with Lemon
- Try Sauteed Spinach (That Tastes Amazing), Sauteed Kale or Sauteed Rainbow Chard
- Make simple Kale Slaw


This roasted red pepper pasta recipe is…
Vegetarian. For vegan, use vegan butter in place of the heavy cream and omit the Parmesan cheese or use vegan Parmesan.
Print
Roasted Red Pepper Pasta
-
 Prep Time: 10 minutes
 -
Cook Time: 10 minutes
-
Total Time: 20 minutes
-
 Yield: 4 to 8
Description
Want an easy dinner with a comfort food vibe? This roasted red pepper pasta delivers a creamy, vibrant sauce that clings to tender pasta. Savor the sweet, smoky flavors in every bite!
Ingredients
For the roasted red pepper sauce (makes 2 cups)
- 16-ounce jar roasted red peppers, liquid drained
- ¼ cup roasted unsalted almonds
- 3 tablespoons olive oil
- 2 garlic cloves, roughly chopped
- 1 tablespoon lemon juice
- 1 teaspoon smoked paprika
- ½ teaspoon kosher salt
- 2 tablespoons heavy cream
- ½ cup grated Parmesan cheese
For the pasta
- 8 to 16 ounces short or long pasta (we used rigatoni)
- Kosher salt and black pepper
- Finely chopped Italian parsley, to garnish
Instructions
- Start a large pot of generously salted water to a boil. Add the pasta and boil until al dente (check a few minutes before the package instructions indicate). When cooked, drain the pasta. If it finishes before the sauce, toss with a drizzle of olive oil to prevent sticking.
- Place the garlic in the blender and blend until finely chopped. Add the remaining ingredients and blend. Taste and adjust salt as necessary. The sauce stores refrigerated for up to 1 week.
- If making 8 ounces pasta (4 modest servings), mix in 1 cup roasted red pepper sauce and ¼ teaspoon kosher salt to the drained pasta. If making 16 ounces pasta (8 modest servings), mix in 2 cups sauce and about ½ teaspoon kosher salt to the drained pasta.
- Serve immediately, garnished with additional grated Parmesan cheese and chopped Italian parsley.
 Category: Main Dish
 Method: Stovetop
 Cuisine: American
- Diet: Vegetarian
Keywords: Roasted red pepper pasta