Strawberry Spinach Salad

A fresh, vibrant, Strawberry Spinach Salad with homemade balsamic vinaigrette dressing, candied pecans, and insanely delicious flavors!

The post Strawberry Spinach Salad appeared first on Budget Bytes.

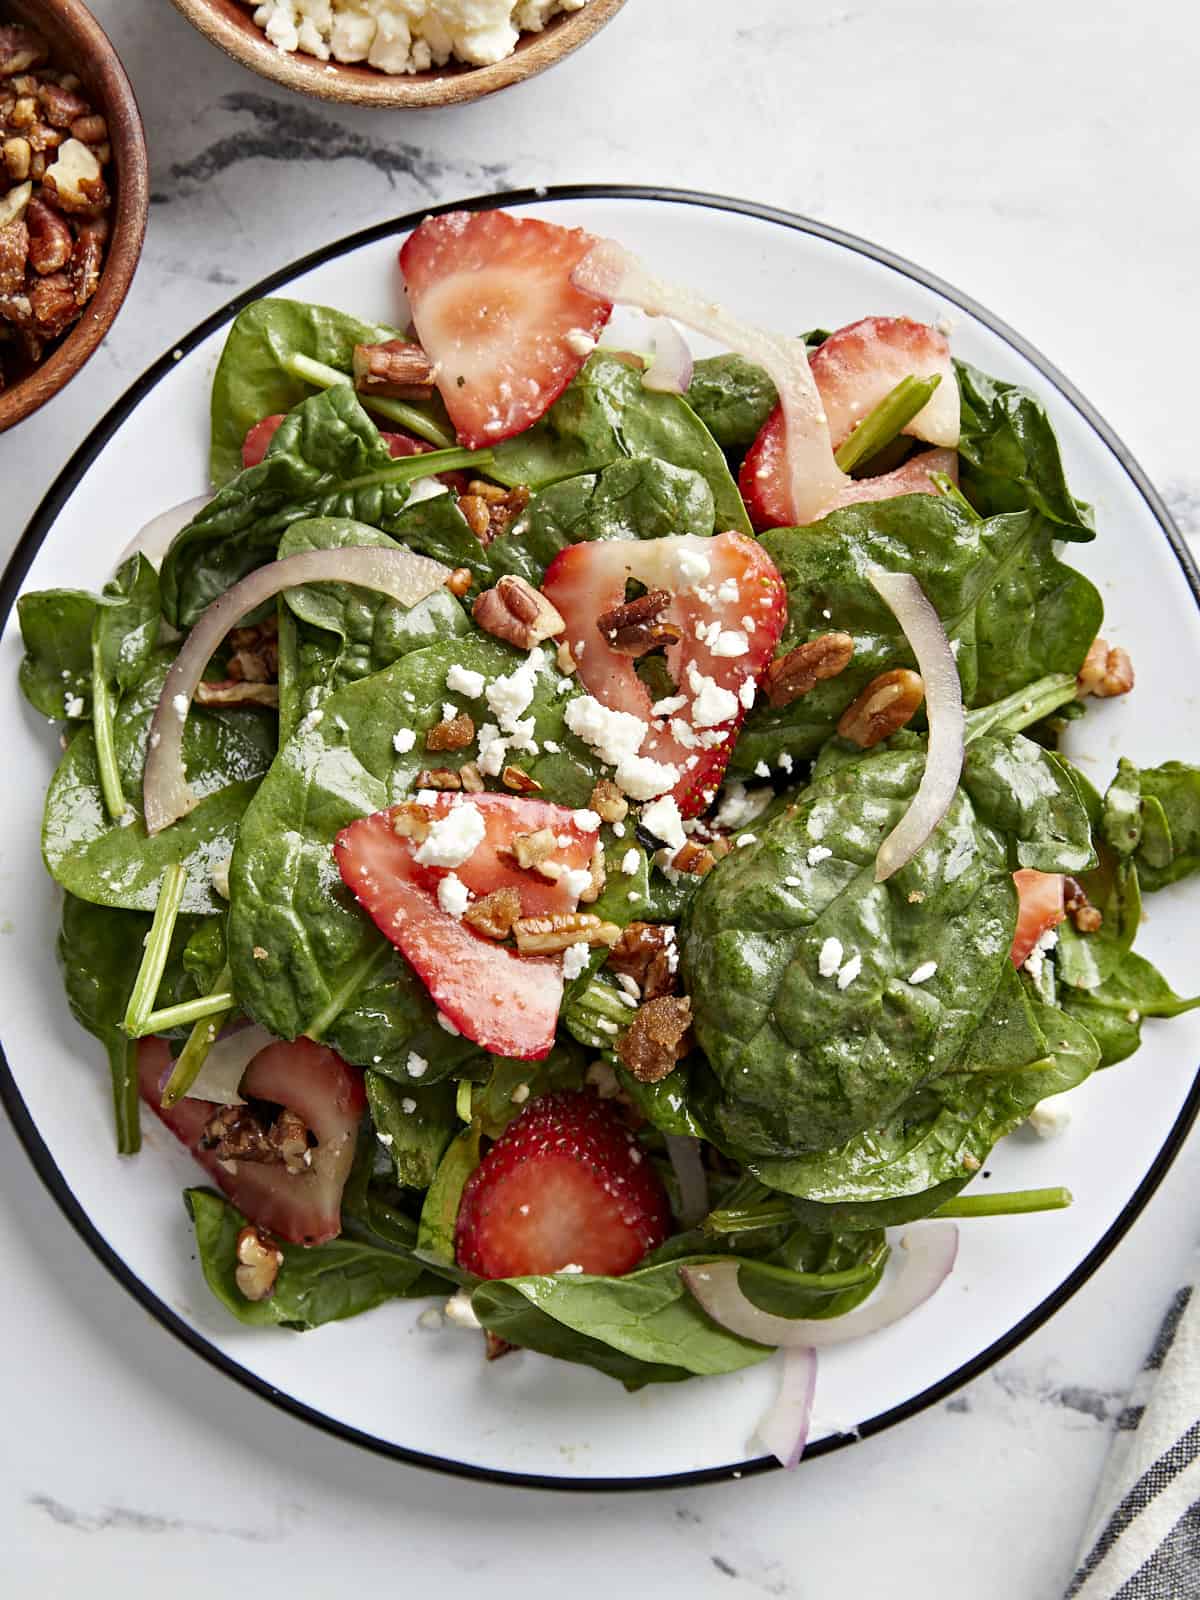
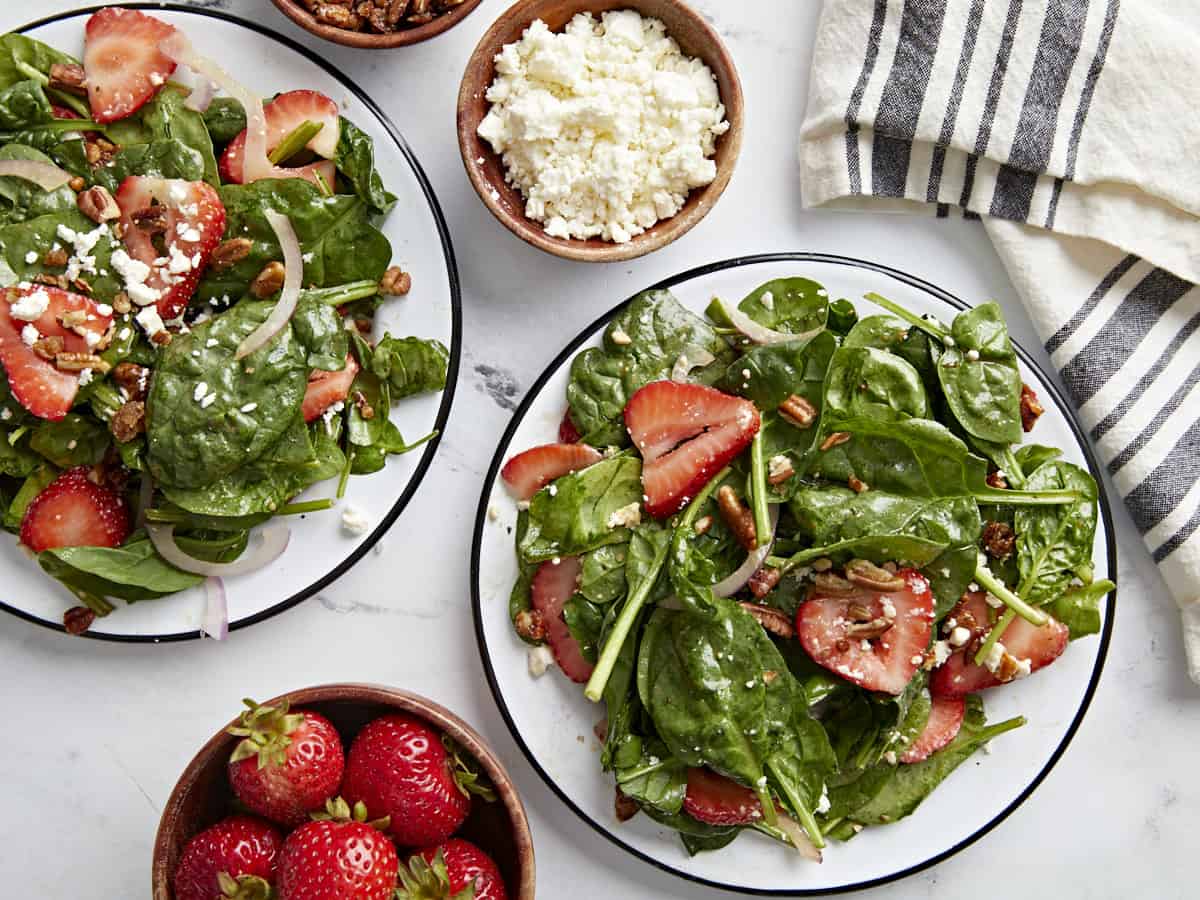
I’ve made several versions of Strawberry Spinach Salad over the years, but this by far is my favorite! It includes fresh strawberries, salty feta cheese, candied pecans, and an easy homemade balsamic vinaigrette. The textures and flavors are insanely delicious and compliment each other perfectly! It reminds you of a fancy salad that you’d get at a cafe, but you can make it at home for a fraction of the cost. This is one of those “summer” salads that I could literally eat all year long!

Close up overhead shot of plated strawberry spinach salad.

What’s in Strawberry Spinach Salad

Strawberry Spinach Salad includes lots of wonderful flavors and textures that compliment each other perfectly. Here’s what you’ll need:

  • Baby Spinach – a simple bed of spinach greens is the base foundation for this salad.
  • Strawberries – fresh, juicy, strawberries add a simple and wonderful sweetness.
  • Red onion – slightly sharp and a nice contrast to the sweetness of the strawberries and candied pecans. 
  • Feta cheese – soft, creamy, salty feta cheese pairs well with the strawberries in this salad. If you’re not a fan of feta cheese, goat cheese or blue cheese would also work well.
  • Candied pecans – these candied pecans, in my humble opinion, are one of the best parts of the salad. It adds a crunchy, sweet texture, and you can swap the pecans out for toasted walnuts or toasted sliced almonds, which would also be totally delicious!
  • Balsamic vinaigrette – easy homemade balsamic vinaigrette dressing tops it all off.

Balsamic Vinaigrette Dressing

The dressing for this strawberry salad is probably my favorite part…ok it’s actually tied with the candied pecans! I started with Beth’s easy homemade balsamic vinaigrette and made one adjustment by replacing the mayonnaise with honey for a slightly sweeter taste. The results – absolutely amazing!

You can certainly use a store bought balsamic vinaigrette if you don’t have a well stocked pantry with all the necessary ingredients on hand, but I promise this homemade balsamic vinaigrette will taste wayyy better! I highly recommend you give it a try! ;)

Budget-Friendly Recipe Tips

  1. If chopped nuts are a little too costly at your local store, toast up some day-old bread to use in place of the chopped pecans, similar to our Panzanella salad.
  2. To bulk up the salad and make it stretch a little further, add your favorite pasta like penne or bow-tie pasta.
Side view of plated strawberry spinach salad

How To Store Strawberry Spinach Salad

Strawberry spinach salad stores well in the fridge for up to 3 days. In order to keep the spinach from wilting too much, it’s best to store the strawberries and the dressing separately and add them to the salad right before you’re ready to serve.

Serving Suggestions

This salad makes a great lunch meal by itself, Monti and I totally gobbled it up at the test studio, but you can also add some grilled chicken or sautéed shrimp on top for a more filling meal. This salad also pairs well with other leaner protein like baked cod and pan-seared chicken.

Overhead shot of two plates of strawberry spinach salad with a small bowl of strawberries and feta cheese on the side.
Overhead close up shot of plated strawberry spinach salad.
Print

Strawberry Spinach Salad

A fresh, vibrant, Strawberry Spinach Salad with homemade balsamic vinaigrette dressing, candied pecans, and insanely delicious flavors!
Course Salad
Cuisine American
Total Cost $8.72 recipe / $2.18 serving
Prep Time 20 minutes
Total Time 20 minutes
Servings 4 side salads
Calories 405kcal

Ingredients

Balsamic Vinaigrette

  • 1/3 cup olive oil $1.10
  • 3 Tbsp balsamic vinegar $0.45
  • 2 Tbsp honey $0.50
  • 1/2 Tbsp Dijon mustard $0.09
  • 1 garlic clove, minced $0.08
  • 1/2 tsp dried basil $0.05
  • 1/4 tsp salt $0.01
  • 1/4 tsp freshly cracked black pepper $0.02

Candied Pecans

  • 1/2 Tbsp butter $0.07
  • 2 Tbsp brown sugar $0.08
  • 1 pinch salt $0.01
  • 1/2 cup chopped pecans $1.15

Salad

  • 8 oz baby spinach $1.83
  • 1/2 lb strawberries, sliced $1.25
  • 1/4 red onion, thinly sliced $0.21
  • 2 oz crumbled feta cheese $1.82

Instructions

  • Start by making the homemade balsamic vinaigrette dressing. Add the olive oil, balsamic vinegar, honey, Dijon mustard, minced garlic clove, dried basil, salt, and freshly cracked black pepper to a jar, bowl, or blender. Close the jar and shake the ingredients together, whisk in a bowl, or blend until the dressing is evenly combined. Set the dressing aside.
  • Next make the candied pecans. Add the butter, brown sugar and a pinch of salt to a small non-stick skillet. Heat over medium heat while stirring.
  • Once the butter and brown sugar begins to melt add the chopped pecans to the skillet and stir with the brown sugar mixture. Continue to cook over medium heat, stirring every 10-15 seconds until the brown sugar fully melts (looks glossy instead of grainy) and completely coats the pecans.
  • Remove the skillet from the heat immediately and transfer the candied pecans to a parchment lined baking sheet. Spread the pecans out evenly in a flat layer and allow them to cool for 10 minutes while the candied coating fully hardens.
  • Now prep the strawberries, red onion and feta cheese. Remove the stems and slice the strawberries, thinly slice the red onion, and crumble the feta. Set these ingredients to the side.
  • Divide the spinach between four plates. Drizzle 2 Tbsp of balsamic vinaigrette on top of each bed of spinach.
  • Add sliced strawberries, red onions, a tablespoon or two of candied pecans, and a tablespoon of feta cheese to each salad. Feel free to drizzle a little more balsamic vinaigrette over the top of each and enjoy!

See how we calculate recipe costs here.

Nutrition

Serving: 1serving | Calories: 405kcal | Carbohydrates: 27g | Protein: 6g | Fat: 33g | Sodium: 400mg | Fiber: 4g

Do you love easy summer salad recipes? Try our Creamy Cucumber Salad, Panzanella, or Summer Vegetable Pasta Salad.

HOW TO MAKE STRAWBERRY SPINACH SALAD – STEP BY STEP PHOTOS

Prepared balsamic vinaigrette dressing

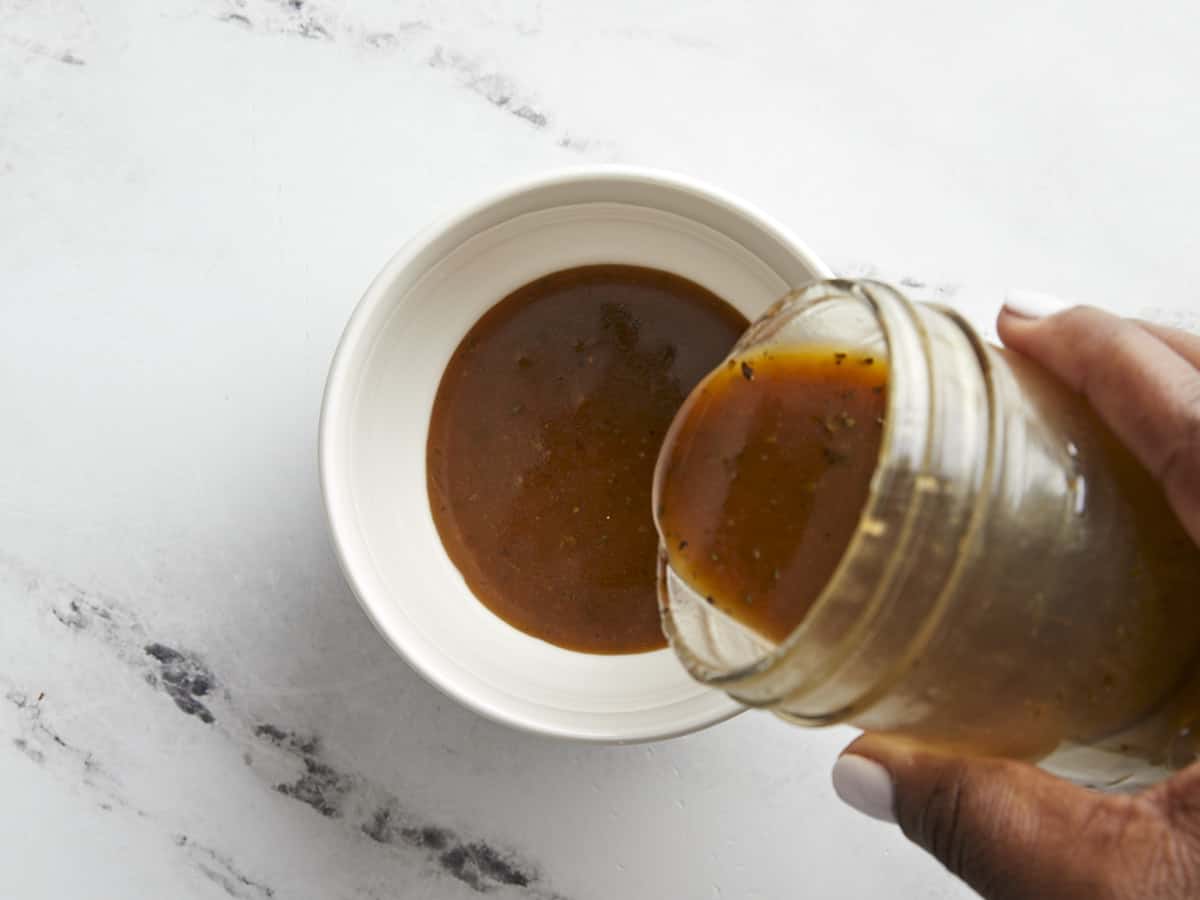
Start by making the homemade balsamic vinaigrette. Add 1/3 cup olive oil, 3 Tbsp balsamic vinegar, 2 Tbsp honey, 1/2 Tbsp Dijon mustard, 1 garlic clove minced, 1/2 tsp dried basic, 1/4 tsp salt, and 1/4 tsp freshly cracked black pepper to a jar, bowl, or blender. Add a top to the jar and shake, whisk in a bowl, or blend until all the ingredients are evenly combined. Set the vinaigrette dressing aside.

Chopped pecans, butter and brown sugar in a nonstick skillet

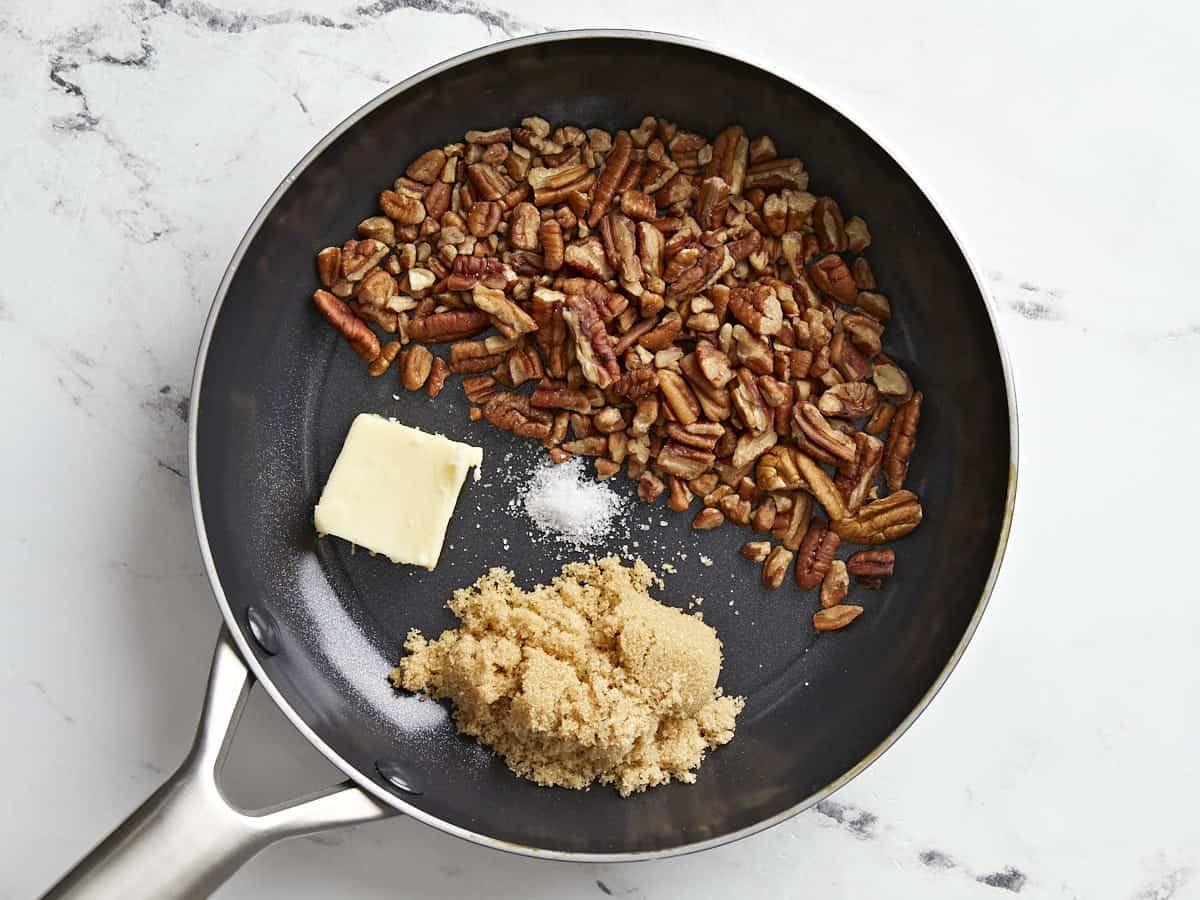
Next make the candied pecans. In a small non-stick skillet add 1/2 Tbsp butter, 2 Tbsp brown sugar, and a pinch of salt. Heat over medium heat while stirring just until the butter and brown sugar begins to melt. Add 1/2 cup of chopped pecan and stir to coat in the brown sugar mixture. Continue to cook for 2-4 minutes or until the brown sugar is fully melted (looks glossy, not grainy) and completely coating the pecans.

Candied pecans spread out on a parchment lined baking sheet

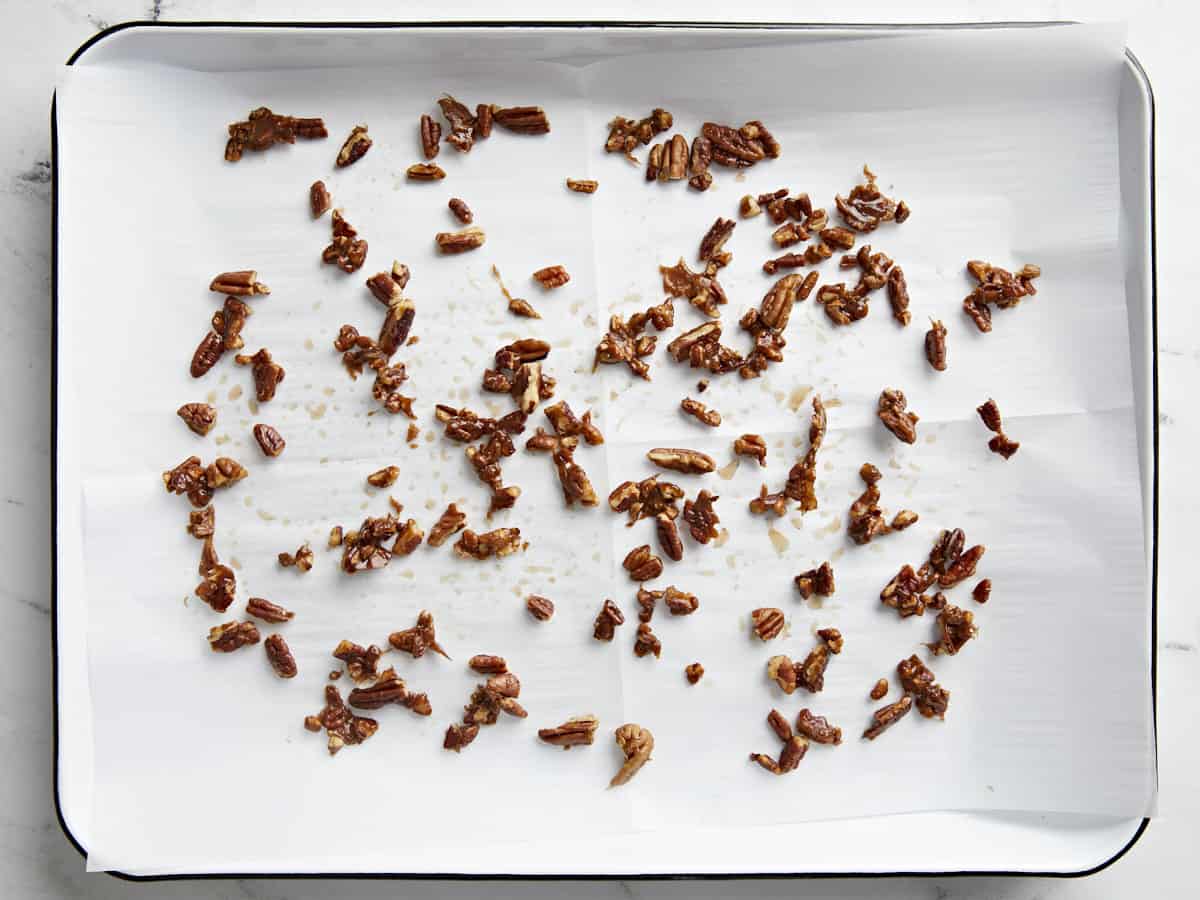
Remove the skillet from the heat immediately, to prevent the brown sugar from over cooking and burning. Transfer the candied pecans to a parchment lined baking sheet, spread out in a flat layer. Allow them to cool for 10 minutes and the sugar coating will fully harden.

Sliced strawberries, sliced red onion, feta cheese, and canided pecans on a wood cutting board

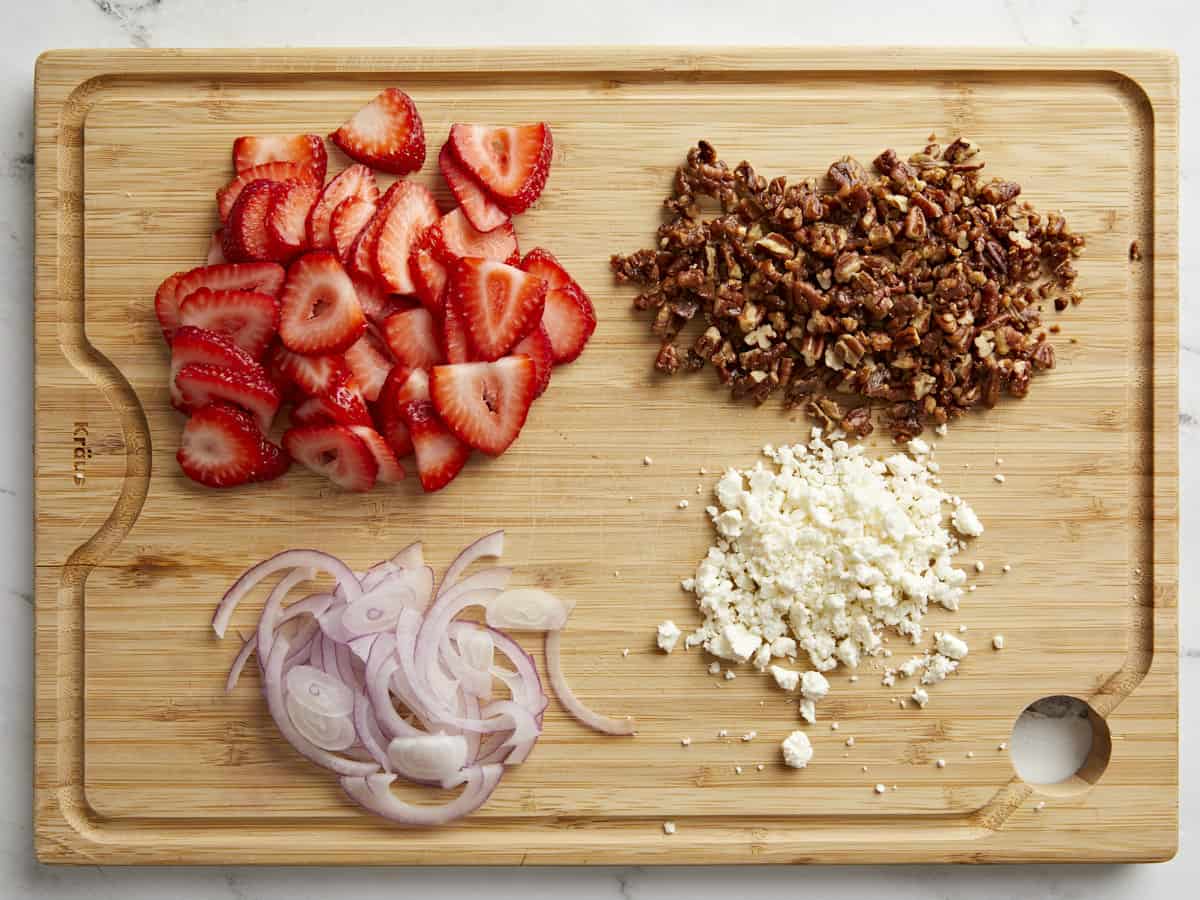
Now prep the rest of the salad ingredients. Wash and slice 1/2 pound of strawberries, thinly slice 1/4 of a red onion, portion out 2 oz of crumbled feta cheese, and gather your cooled candied pecans.

Baby spinach in a large serving bowl with balsamic vinaigrette dressing

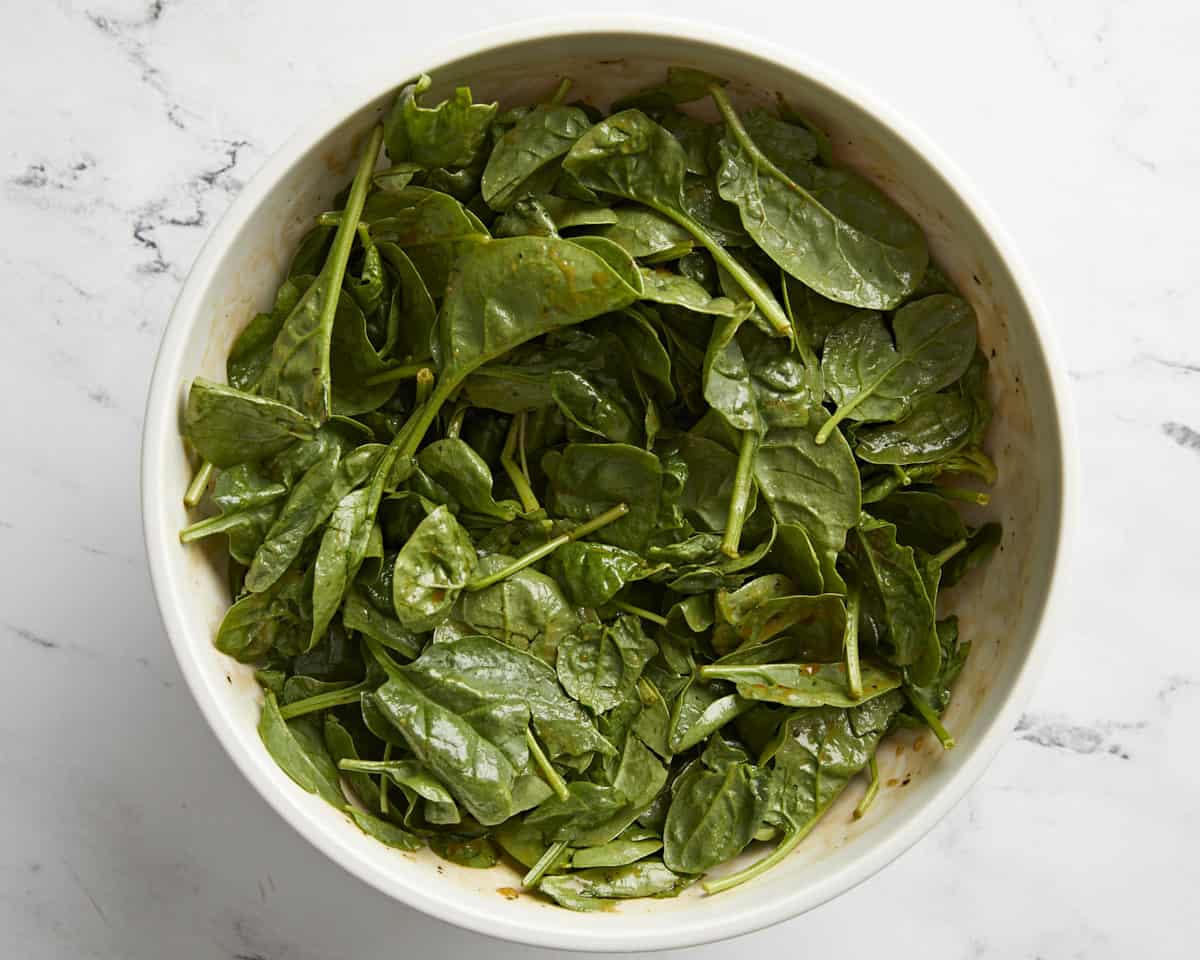
Divide 8 oz of spinach between four salad plates (roughly 2 oz per plate) or you can add all of the spinach to a larger serving bowl. Add 2 Tbsp of the balsamic vinaigrette to each salad plate or drizzle 1/3 cup of the dressing over the bowl of spinach. Reserve the rest of the dressing to add right before serving.

Overhead close up shot of plated strawberry spinach salad.

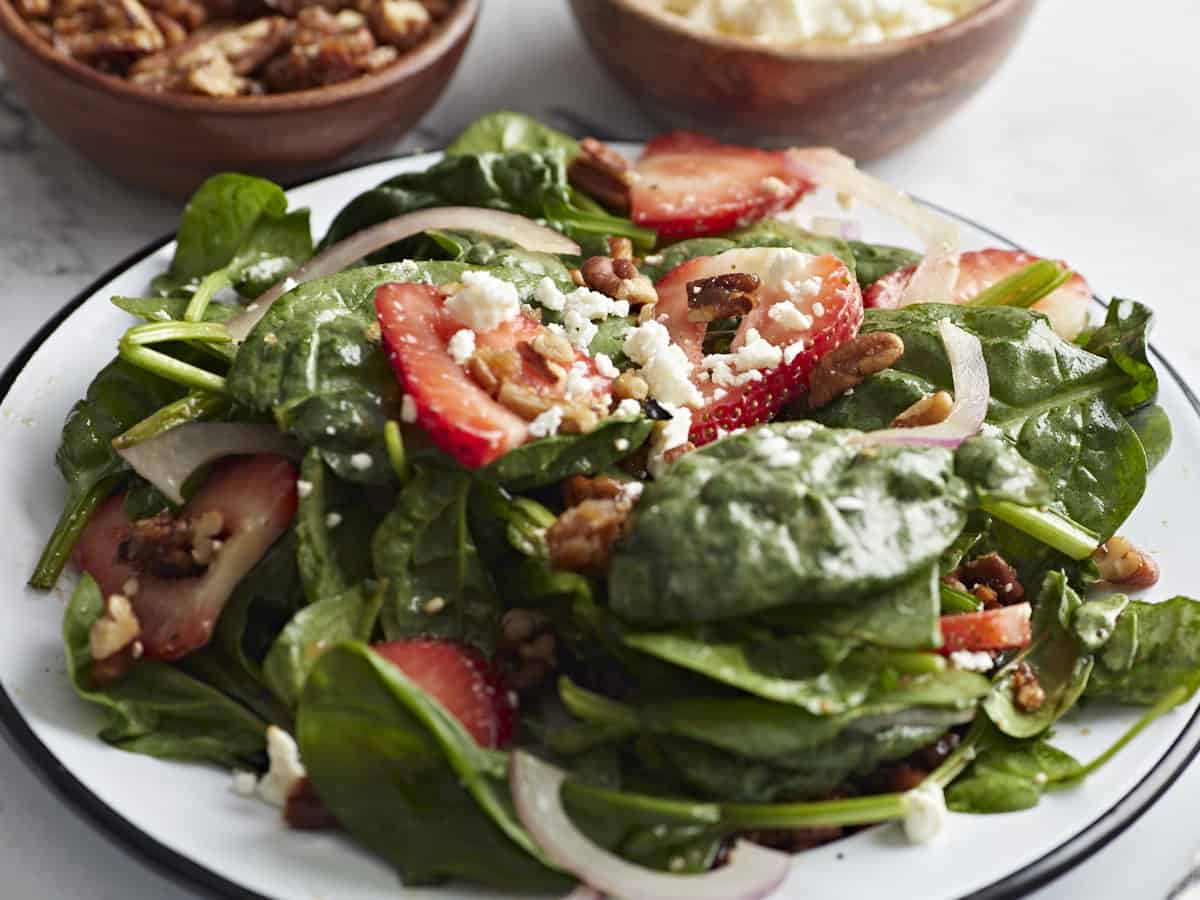
Divide the toppings (sliced strawberries, sliced red onion, 1 tablespoon of crumbled feta, and 1-2 tablespoons of candied pecans) between the four salad plates or add the toppings to a larger salad serving bowl. Drizzle each salad with a little more of the balsamic dressing and enjoy!

More Easy Salad Recipes

The post Strawberry Spinach Salad appeared first on Budget Bytes.

Creamy Turmeric Mango Vinaigrette

Friends, we know mangoes are SO good it’s challenging not to devour them all right off the cutting board. But take it from a fellow mango enthusiast: This time it’s worth letting them make it to the blender. You’re going to want a batch of this bright,…

Creamy Turmeric Mango Vinaigrette

Friends, we know mangoes are SO good it’s challenging not to devour them all right off the cutting board. But take it from a fellow mango enthusiast: This time it’s worth letting them make it to the blender. You’re going to want a batch of this bright, naturally sweet turmeric mango vinaigrette around for a salad recipe coming tomorrow!

Grab your blender and 9 ingredients (mostly pantry staples) and let’s do this!

This dressing is as simple as blending and enjoying!

Creamy Turmeric Mango Vinaigrette from Minimalist Baker →

Charred Shishito Mango Salsa

Mango salsa just got even better thanks to charred shishito peppers! The two combine for a sweet, smoky salsa that’s ready to elevate your tortilla chips, tacos, bowls, roasted plantains, and so much more.
Just 8 ingredients and 25 minutes required for…

Charred Shishito Mango Salsa

Mango salsa just got even better thanks to charred shishito peppers! The two combine for a sweet, smoky salsa that’s ready to elevate your tortilla chips, tacos, bowls, roasted plantains, and so much more.

Just 8 ingredients and 25 minutes required for this easy flavor bomb. Let’s make salsa!

How to Make Mango Shishito Pepper Salsa

This salsa begins with one of our favorite methods for cooking shishitos: pan searing until charred and smoky!

Charred Shishito Mango Salsa from Minimalist Baker →

Ramen Noodle Salad

This light and fresh ramen noodle salad features crisp cabbage, shredded chicken, crunchy ramen noodles and a simple homemade vinaigrette.

The post Ramen Noodle Salad appeared first on Budget Bytes.

This Ramen Noodle Salad is something we ate often when I was growing up and I still love it just as much today. Why? Because it’s light, fresh, filling, uses simple and inexpensive ingredients, and holds up well in the fridge so you can eat the leftovers for days (less cooking, more eating!). Keep this recipe bookmarked because it’s going to get you through those long hot days of Summer!

Close up overhead image of ramen noodle salad on an oval platter.

What is Ramen Noodle Salad?

This Ramen noodle salad is simply a mix of finely shredded cabbage, chicken, carrots, green onion, almonds, and …drum roll… uncooked instant ramen noodles for a little extra CRUNCH! The salad also features a simple light dressing that has Asian inspired flavors, like ginger, rice vinegar, and soy sauce. A lot of people call this salad Chinese Chicken Salad, but it’s not an authentic Chinese recipe, so we’re rebranding it with a more accurate name, Ramen Noodle Salad.

What Kind of Cabbage to Use

This salad is usually made with Napa cabbage, which has a slightly lighter and more delicate texture than regular green cabbage, but it’s totally flexible. Napa cabbage was a little on the expensive side when I was at the store this week so I swapped it out for some green cabbage and added a little purple cabbage for color. You can use all green cabbage if you want, or if you want to take an even bigger short cut just use two bags of pre-shredded coleslaw mix (cabbage and carrots) instead of shredding your own. …But freshly shredded always tastes better. ;)

What Else Can I Add?

I love salads because you can add so many different things to them and this Ramen Noodle Salad is no exception! Here are some other fun ingredients you can add to the ramen noodle salad, if you have them on hand:

  • Mandarin oranges
  • Sesame seeds
  • Cashews
  • Avocado
  • Cucumber
  • Edamame
  • Peanuts
  • Shredded broccoli stems

HOW TO STORE THE LEFTOVERS

If you plan to meal prep this ramen noodle salad (highly recommend), you have a couple of options. If you want the ramen noodles to stay super crunchy, don’t stir them into the salad before storing. Simply sprinkle them over each serving just before eating. I kind of like the way the ramen soaks up the flavor of the dressing over time, but you do you! The almonds will also soften slightly as the salad is refrigerated. The salad will last about 3-4 days in the fridge.

Overhead view of three bowls of ramen noodle salad.
Overhead view of ramen noodle salad on an oval serving platter.
Print

Ramen Noodle Salad

This light and fresh ramen noodle salad features crisp cabbage, shredded chicken, crunchy ramen noodles and a simple homemade vinaigrette.
Course Lunch, Salad
Cuisine American
Total Cost $8.33 recipe / $1.39 serving
Prep Time 30 minutes
Total Time 30 minutes
Servings 6 1.5 cups each
Calories 292kcal

Ingredients

Vinaigrette

  • 1/4 cup neutral salad oil* $0.16
  • 1/4 cup rice vinegar $0.60
  • 2 Tbsp honey $0.50
  • 2 tsp soy sauce $0.04
  • 1 tsp ground ginger $0.10
  • 1/4 tsp garlic powder $0.02
  • 1 tsp toasted sesame oil $0.10

Salad

  • 6 cups shredded cabbage $1.10
  • 1 carrot $0.14
  • 4 green onions $0.45
  • 1 3oz. package instant ramen $0.39
  • 1/4 cup sliced almonds $0.73
  • 2 cups shredded rotisserie chicken $4.00

Instructions

  • Make the dressing first. Whisk together the salad oil, rice vinegar, honey, soy sauce, ginger, garlic powder, and toasted sesame oil. Set the dressing aside.
  • Shred the cabbage as finely as possible. Shred the carrot and slice the green onions. Crush the instant ramen noodles (discard the seasoning packet or save it for another use).
  • Place the cabbage, carrot, green onion, almonds, crushed ramen noodles, and shredded chicken in a large bowl. Pour the prepared dressing over top. Toss the salad until everything is evenly combined and coated in dressing. Serve immediately or refrigerate until ready to eat.

See how we calculate recipe costs here.

Notes

*Use any light flavored or neutral oil like canola, peanut, sesame (not toasted), light olive oil, or avocado oil. 

Nutrition

Serving: 1.5cups | Calories: 292kcal | Carbohydrates: 22g | Protein: 17g | Fat: 16g | Sodium: 581mg | Fiber: 3g
Close up side view of ramen noodle salad in a serving platter.

How to Make Ramen Noodle Salad – Step by Step Photos

Dressing being whisked in a bowl.

Make the dressing first. Whisk together ¼ cup neutral salad oil, ¼ cup rice vinegar, 2 Tbsp honey, 2 tsp soy sauce, 1 tsp ground ginger, ¼ tsp garlic powder, and 1 tsp toasted sesame oil. Set the dressing aside.

Shredded green and purple cabbage on a cutting board.

Shred about six cups of cabbage for the salad. You can use green cabbage, purple cabbage, Napa cabbage, or any mix of the above. Shred the cabbage as finely as possible.

Shredded carrot and sliced green onion on a cutting board.

Shred one carrot and slice four green onions.

Shredded rotisserie chicken in a bowl.

Shred about two cups of cooked chicken breast. We used a rotisserie chicken, but you could cook your own chicken breast or even use canned chicken breast.

Salad ingredients in the bowl with dressing being poured over top.

Place the shredded cabbage, carrot, green onion, and chicken in a bowl. Crush one 3 oz. package of instant ramen noodles (discard seasoning packet or save for another use). Add the crushed ramen noodles and ¼ cup sliced almonds to the bowl. Pour the prepared dressing over top.

Salad being tossed with wooden utensils.

Toss the salad well until everything is evenly mixed and coated in dressing.

Finished Ramen Noodle Salad in a bowl with wooden spoons.

Serve the ramen noodle salad immediately or refrigerate up to four days. Always give the salad a good stir just before serving to redistribute the dressing.

Overhead view of three bowls of ramen noodle salad.

Enjoy that crunchy fresh goodness!!

The post Ramen Noodle Salad appeared first on Budget Bytes.

Herby Green Tahini Sauce (5 Minutes!)

There’s a (not-so-secret) secret that can take an average plate of veggies to the next level. Want in? It’s sauce! The secret sauce, if you will. We’re BIG fans of all kinds of sauces because they add flavor and pizzazz with minimal effort, and this he…

Herby Green Tahini Sauce (5 Minutes!)

There’s a (not-so-secret) secret that can take an average plate of veggies to the next level. Want in? It’s sauce! The secret sauce, if you will. We’re BIG fans of all kinds of sauces because they add flavor and pizzazz with minimal effort, and this herby, garlicky green tahini sauce does just that! 

Just 5 minutes and 8 ingredients required for this Mediterranean-inspired condiment, friends.

Herby Green Tahini Sauce (5 Minutes!) from Minimalist Baker →

Sheet Pan Pizza

Sheet-Pan Pizza is a low-effort recipe guaranteed to make any occasion special and satisfy cravings for take-out pizza at half the cost.

The post Sheet Pan Pizza appeared first on Budget Bytes.

Sheet Pan Pizza is the solution for anyone hoping to make crave-worthy, restaurant-quality pizza at home—at half the cost of carry-out! Our recipe for Sheet Pan Pizza will level up any casual date night in, make for an unforgettable family dinner, or serve as an interactive party dish where everyone helps pick the toppings. Sheet Pan Pizza is not just for special occasions. It’s also the perfect “take-out fake out” meal for two that will yield enough leftovers to check off some weekly meal prep!

A vertical image of a baked sheet pan pizza topped with pizza sauce, cheese, pepperonis, pickled jalepenos and honey that is not sliced.

WHAT IS SHEET PAN PIZZA?

This recipe for Sheet Pan Pizza combines my two favorite kinds of take-out pizza. The crust is a sturdy Foccacia bread, typically used for Sicilian-style “Grandma Pie,” that is baked and then covered edge-to-edge with tons of cheese and toppings—sort of like a Detroit-Style pizza—and then baked again! Sheet Pan Pizza is a fun way to feed a crowd and can easily be divided into sections so everyone in the family gets to have a few slices with their favorite sauce and toppings.

WHAT YOU NEED TO MAKE A SHEET PAN PIZZA:

  • A SHEET PAN: We suggest using a standard 18” x 13” rimmed metal baking sheet or the 16″ x 12.5″ x 1″ enamelware pan in our Shop.
  • PIZZA DOUGH: Our No-Knead Focaccia is oh-so-tasty on its own, but next level as the base of a giant pizza. Totally worth the extra time to make it from scratch! (You can also use store-bought pizza dough—see note below.)
  • OLIVE OIL: We used as little olive oil as possible to make this recipe budget-friendly. (Feel free to use a bit more!) You can substitute or mix it with plain cooking oil to reduce costs even more, but the pizza crust will lack the distinctive taste olive oil provides.
  • STORE-BOUGHT SAUCE: We chose a store-bought, traditional pizza sauce in order to keep things simple. You can totally make your own homemade pizza sauce! Or swap it out for a jar of alfredo sauce, vodka sauce, prepared pesto, or BBQ sauce!
  • TONS OF SHREDDED CHEESE: You need a good amount of cheese for this recipe, but it’s totally worth the extra ingredients to balance out all the bread, sauce, and toppings. 
  • YOUR FAVORITE PIZZA TOPPINGS: Keep it classic or mix it up—anything goes when it comes to Sheet Pan Pizza!
An extreme close up of a single slice of sheet pan pizza raised above the rest of the pizza with a spatula.

DO I HAVE TO MAKE MY OWN CRUST?

I would highly suggest making the pizza crust in this recipe – our shockingly-easy No-Knead Homemade Focaccia. It pretty much does the work on its own! You can substitute the homemade crust with 1 lb. of store-bought pizza dough for this Sheet Pan Pizza recipe (and start with the second set of instructions on the recipe card), but the results will be slightly different from the pizza we made.

TIP: Making Two Pizzas

  • If doubling the recipe: Prepare a doubled amount of pizza dough at once in a very large mixing bowl. Slice the large ball of dough in half (after the first ferment), and transfer each to its own 1/2 sheen pan for the second rise. Follow the recipe as written, also rotating and flipping the baking sheets halfway through both bakes so both pizzas cook evenly.
  • Alternatively, when making two smaller pizzas: Slice the risen ball of dough in half and transfer each to its own 1/4 sheet pan for the second rise. Split the remaining ingredients between the pizzas, and reduce both baking times by about 5 minutes each (also relying on the visual cues as a guide to prevent over-baking or under-baking the crust).

MAKE AHEAD & MAKE IT EASIER

  • You can make the dough for this Sheet Pan Pizza ahead and store it tightly covered in the fridge for up to 24 hours before baking it. Let it sit out at room temperature for about 30 minutes before transferring it to the sheet pan.
  • You can also pre-bake the pizza crust up to 8 hours ahead. Let the bread cool completely before covering it to keep it from getting soggy. When you’re ready to eat, just top the crust with sauce and toppings and bake it again for 10-15 minutes.
A horizontal image of a fully baked sheet pan pizza topped with pizza sauce, shredded cheese, pepperonis, jalepenos and honey that's held up with two white dish towels.
A vertical image of a baked sheet pan pizza topped with pizza sauce, cheese, pepperonis, pickled jalepenos and honey sliced and a spatula is removing the bottom right slice.
Print

Sheet Pan Pizza

Sheet Pan Pizza is a low-effort recipe guaranteed to make any occasion special and satisfy cravings for take-out pizza at half the cost.
Course Dinner, Main Course, Meal Prep
Cuisine American, Italian
Prep Time 30 minutes
Cook Time 45 minutes
Resting Time 2 hours 45 minutes
Total Time 4 hours
Servings 7 people
Calories 539kcal
Cost $9.98 RECIPE / $1.41 SERVING

Equipment

Ingredients

Crust:

  • 4 cups all-purpose flour $0.61
  • 2 cups water $0.00
  • 1 1/2 tsp salt $0.03
  • 2 tsp instant yeast 0.48
  • 2 Tbsp cornmeal $0.03
  • 1 Tbsp olive oil* $0.15

Pizza:

  • 3 Tbsp olive oil, divided* $0.45
  • 1/2 tsp salt $0.01
  • 1/2 tsp Freshly cracked black pepper $0.02
  • 1/2 tsp Italian seasoning $0.05
  • 1/2 tsp red pepper flakes $0.05
  • 1 14oz. jar pizza sauce $1.59
  • 2 cups shredded mozzarella $2.49
  • 1/2 cup Parmesan cheese, shredded or grated $0.75
  • 1/2 cup pepperoni slices (about 3 oz.) $1.50
  • 1/3 cup sliced pickled jalapeños $0.66
  • 2 Tbsp honey $0.38

Instructions

Crust:

  • In a large mixing bowl, combine the flour, water, salt, and instant yeast. Stir until just combined and no streaks of flour remain.
  • Drizzle 1 tablespoon of olive oil around the sides of the bowl, and lift the dough with your hands to make sure the bottom and sides of the bowl are well-coated with the oil.
  • Cover the bowl and let the dough rise in a warm, dry place for 2 hours, or in the refrigerator for up to 24 hours. The dough should double in size and appear bubbly, wet, and very fluffy.**
  • Coat your fingers with a few drops of olive oil and then scrape the dough from the sides of the bowl, turning it over a few times to form a ball. Rest the dough for 5 minutes.

Pizza:

  • Brush 1 tablespoon of olive oil on the bottom and sides of 1 rimmed baking sheet and then sprinkle 2 tablespoons of cornmeal evenly on the bottom of the pan.
  • Coat the ball of pizza dough with 1 tablespoon of oil and flip it out of the bowl (oil side down) on the rimmed baking sheet, using a spatula to scrape any oil left in the bowl on top of the dough.
  • Gently press down the center of the dough and push it outward toward each corner of the pan. Let the dough rest again, uncovered, until it rises slightly and spreads to fill the sheet pan completely (About 30-45 minutes). While the dough rests, preheat the oven to 425℉.
  • Coat your fingers with oil and make dimples all over the dough, also pushing the dough into the corners again if needed. Brush the dough with the remaining 1 tablespoon of olive oil and sprinkle over the salt, fresh-cracked black pepper, Italian seasoning, and red pepper flakes. Bake the crust for 25 minutes, or until the surface of the bread is evenly golden brown.
  • Remove the crust from the oven and carefully spread the pizza sauce on top from edge to edge. Then top with the mozzarella cheese, parmesan cheese, pepperoni, pickled jalapenos, and if desired, a pinch of salt, pepper, and other seasonings
  • Bake the pizza for another 10-15 minutes or until the cheese has melted and started to brown.
  • Remove the pizza from the oven and drizzle the entire surface lightly with honey. Let it cool for 5 minutes and then slice the pizza into 15 squares. Serve each slice topped with more parmesan cheese and fresh-cracked black pepper.

See how we calculate recipe costs here.

Notes

* Olive oil will add a distinct flavor to the pizza crust but can be substituted (or mixed) with cooking oil to make this recipe more budget-friendly. 
** The dough may need more time to rise in the sheet pan if coming out of a cold refrigerator. 

Nutrition

Serving: 2slices | Calories: 539kcal | Carbohydrates: 65g | Protein: 20g | Fat: 22g | Sodium: 1225mg | Fiber: 3g

How to Make Sheet Pan pIzza – Step by Step Photos

Ingredients for a foccacia-style pizza crust mixed together in a white bowl with a wooden spatula sticking out of the bottom left side of the bowl.

Combine 4 cups of all-purpose flour, 2 cups of water, 1 ½ teaspoons of salt, and 2 teaspoons of instant yeast in a large bowl. (If using a single-serving packet of yeast, which contains about 2 1/4 teaspoons, you can use the whole thing!) Stir until just combined and no streaks of flour remain. Drizzle 1 tablespoon of olive oil around the sides of the bowl, and lift the dough with your hands to make sure the bottom is also coated. Cover the bowl and let it ferment in a warm, dry place for 2 hours or in the refrigerator for up to 24 hours. (If coming from the fridge, the dough may need an additional 30 minutes of resting time at room temperature.)

Ingredients for a no-knead focaccia style pizza crust after they have fermented for two hours in a white bowl. A left hand is stablizing the bowl with the right hand pulls the dough away from the side of the bowl.

After the first ferment, the dough should roughly double in size and appear bubbly, wet, and very fluffy. Scrape the dough off the sides of the bowl with your hands, turning it over a few times to form a ball. Let it rest in the bowl for about 5 minutes to prevent the dough from tearing. Brush the bottom and sides of the sheet pan with 1 tablespoon of olive oil and sprinkle 2 tablespoons of cornmeal evenly on the bottom.

Raw pizza dough that has been fermented once and turned out onto a rimmed baking sheet and pressed out into a rectangle for a second ferment.

Coat the ball of pizza dough with 1 tablespoon of olive oil and flip it out of the bowl onto the prepared sheet tray (oil side down), using a spatula to scrape any oil left in the bowl on top of the dough. Gently press down the center of the dough and push it outward toward each corner of the pan. Let the dough rest again, uncovered, until it spreads to fill the sheet pan completely (about 30-45 minutes). Preheat the oven to 425℉.

A raw pizza dough that has fermented for a second time on a rimmed baking tray, two hands are pressing dimples into the center of the dough.

Coat your fingers with oil and make dimples all over the dough, also pushing the dough into the corners again if needed. Brush the dough with the remaining 1 tablespoon of olive oil and sprinkle over a 1/2 teaspoon of salt, 1/2 teaspoon of freshly-cracked black pepper, 1/2 teaspoon of Italian seasoning, and 1/4 teaspoon of red pepper flakes.

A lightly golden pizza crust that was topped with olive oil, salt, pepper, italian seasoning and red pepper flakes and then baked.

Bake the crust for 25 minutes, or until the surface of the bread is lightly golden brown and has developed a still-tender, but firm crust. When pressed lightly (And carefully, don’t burn yourself!), the center of the crust should spring back and should look and feel fully cooked – not squish and soft.

A par-baked pizza crust on a rimmed baking tray that's topped with pizza sauce, shredded mozzarella cheese, parmesan cheese, pepperonis and pickled jalapeño slices that needs to be baked again.

Top the fully-baked pizza crust evenly from edge-to-edge with 1 1/2 cups of prepared pizza sauce (from a 14 oz. jar), 2 cups of shredded mozzarella cheese, 1/2 cup of shredded or grated parmesan cheese, 1/2 cup of pepperoni slices (about 3 oz. or half a standard package), 1/3 cup of pickled jalapenos (about 1/3 of a standard jar), and if desired, another pinch of salt, pepper, and other seasonings.

A fully baked sheet pan pizza that is golden brown and topped with crispy pepperonis, melted cheese and pickled jalapeño slices and a hand is drizzling honey on the right center of the pizza.

Bake the pizza for another 10-15 minutes or until the cheese has melted and started to brown. Remove the pizza from the oven and drizzle the entire surface lightly with honey. Let it cool for about 5 minutes (so the toppings don’t slide off), and slice the pizza into 15 squares. Serve each slice topped with more parmesan cheese and fresh-cracked black pepper.

An extreme close up of baked sheet pan pizza topped with pepperonis and jalepenos that's being drizzled with honey.

Y’all, I love the combo of sweet & spicy toppings we used in this recipe, but I’m always looking for new ideas for my next Sheet Pan Pizza Party! What sauces and toppings will you put on your Sheet Pan Pizza? Tell us in the comments! ~ Marion :)

The post Sheet Pan Pizza appeared first on Budget Bytes.