Chicken Cordon Bleu is one of those recipes that feels super fancy but doesn’t actually take a ton of effort. It can be pricey if ordering at a restaurant, but we have developed a budget conscious recipe that can be made at home. With some simple technique and a little bit of patience, you can make this savory, cheesy, saucy dinner recipe in under an hour!
What is Chicken Cordon Bleu?
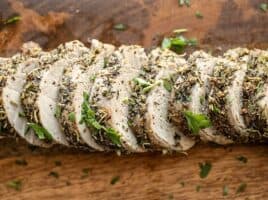
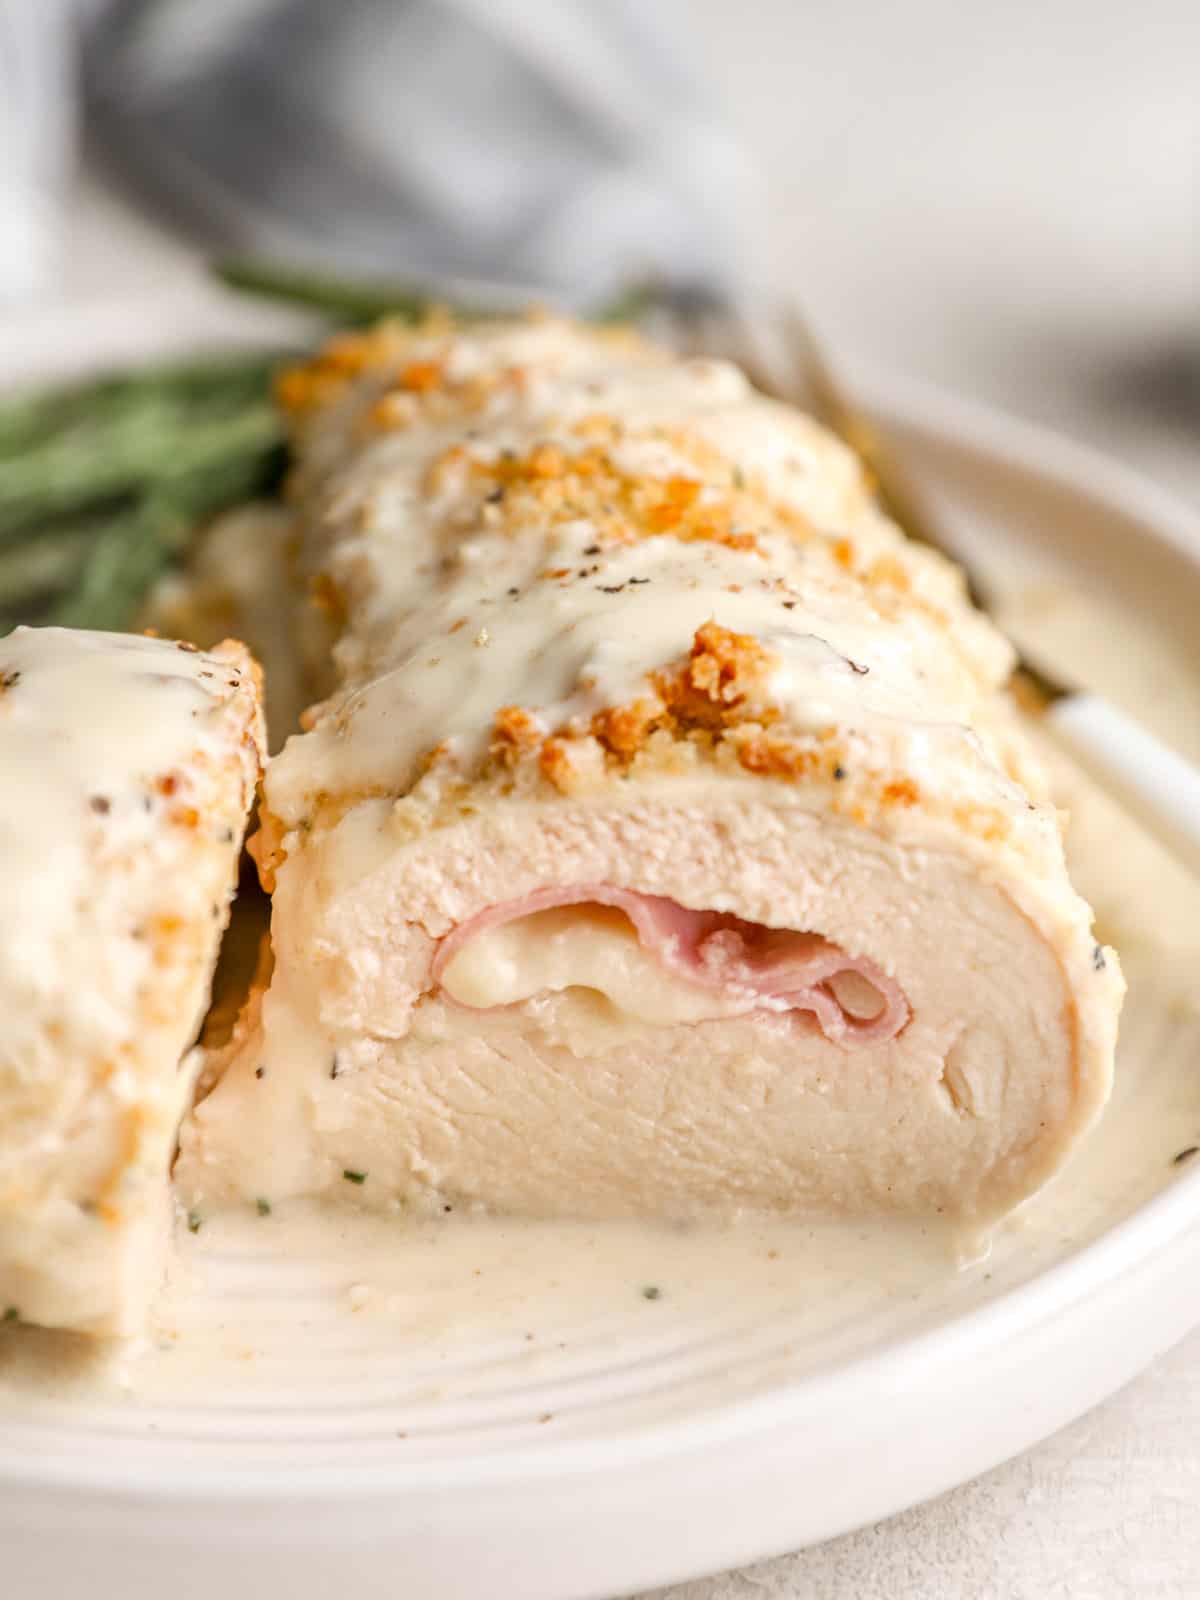
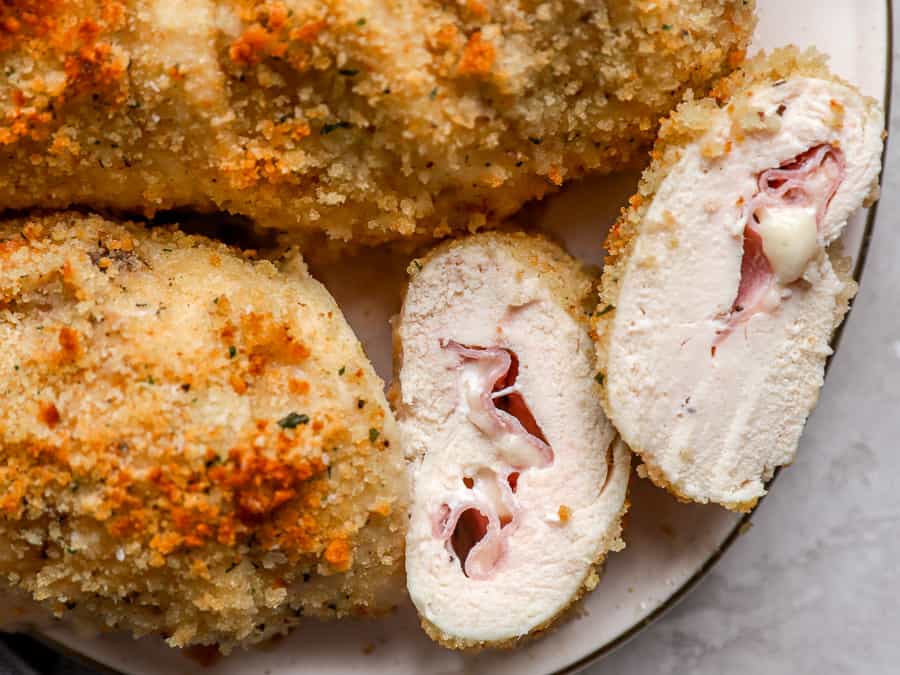
Chicken cordon bleu is made by butterflying a chicken breast and stuffing it with slices of creamy, melty Swiss cheese and salty deli ham. The whole thing gets rolled up, dipped in breadcrumbs, and doused in a creamy sauce for the ultimate decadent dinner. While it can be expensive when ordering out, our version is more cost effective but equally as delicious.
Ingredients For Chicken Cordon Bleu
- Boneless Skinless Chicken Breasts: You’ll need 4 large chicken breasts for this recipe so there’s plenty of room to stuff them. Look for ones that are about 7-8 ounces each.
- Ham: Any flavor of deli ham works well.
- Swiss Cheese: You can also use provolone or cheddar.
- Panko Breadcrumbs: Create a crunchy coating on the chicken. Regular or Italian-seasoned breadcrumbs are also a good choice.
- Seasonings: Italian seasoning, onion powder, garlic powder, salt, and freshly cracked black pepper season the chicken. Salt also enhances the flavor of the sauce.
- Butter: Unsalted butter helps the seasonings and breadcrumbs stick to the chicken, and it also forms the base of the sauce.
- All-Purpose Flour: A bit of flour helps to thicken the sauce.
- Milk: Milk adds richness and moisture to the sauce. Any kind works, including non-dairy.
- Dijon Mustard: A touch of mustard adds just a bit of warmth to the sauce.
- Worcestershire Sauce: This umami sauce adds incredible depth of flavor.
How to Butterfly a Chicken Breast
- Place the chicken breast flat on a cutting board and hold your knife horizontally to the cutting board.
- Place one hand on the chicken breast to keep it steady, then insert your knife into the center of the chicken breast and begin to cut horizontally until you have almost reached the other side.
- Open the chicken breast like a book.
What To Serve With Chicken Cordon Bleu
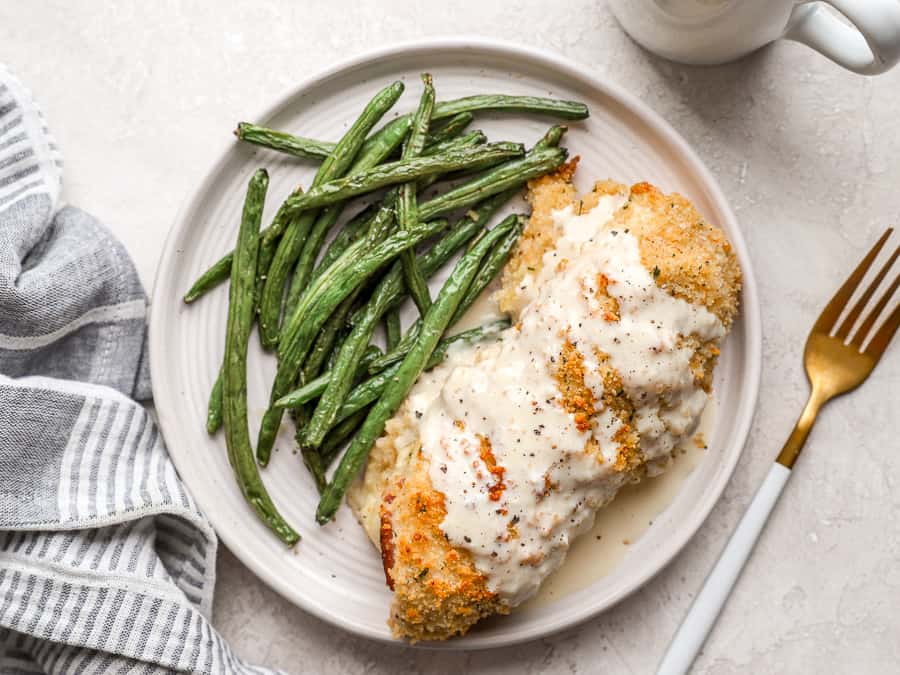
Chicken cordon bleu is rich and saucy, so it pairs beautifully with simple veggies, like Steamed Green Beans or Oven Roasted Broccoli. Soak up that beautiful sauce with Mashed Potatoes, Rice, or Garlic Herb Mashed Cauliflower.
How to Store Leftovers
Once cooked and cooled, store chicken cordon bleu in an air-tight container in the refrigerator for up to 3 days. If you plan to freeze this dish, I recommend doing so before baking it for the crispiest results. It will keep well for up to 3 months. Simply thaw overnight in the refrigerator, then bake as directed.
Chicken Cordon Bleu
Ingredients
Chicken:
- 4 large boneless skinless chicken breasts $10.50
- 4 slices ham $2.25
- 4 slices Swiss cheese $1.25
- 1 1/2 cup Panko breadcrumbs $0.85
- 1/2 tsp Italian seasoning $0.05
- 1/2 tsp onion powder $0.05
- 1/2 tsp garlic powder $0.05
- 1 tsp salt $0.04
- 1/4 tsp Freshly cracked black pepper $0.02
- 1/2 cup butter, melted $1.07
Sauce:
- 1/4 cup butter $0.53
- 2 Tbsp all-purpose flour $0.05
- 3/4 cup milk $0.40
- 1/2 Tbsp Dijon mustard $0.04
- 1 tsp Worcestershire $0.05
- 1/2 tsp salt $0.02
Instructions
- Preheat the oven to 350°F.
- Butterfly each chicken breast by slicing horizontally through the middle of the breast, taking care to not cut all the way through. Open the chicken breast up like a book.
- Lay the breast flat between 2 pieces of plastic wrap. Use a meat mallet or rolling pin to pound the chicken breasts into a thin, even layer.
- Sprinkle the chicken breasts with salt and pepper. Place a slice of ham and slice of Swiss cheese on each chicken breast.
- Gently roll up the chicken breast.
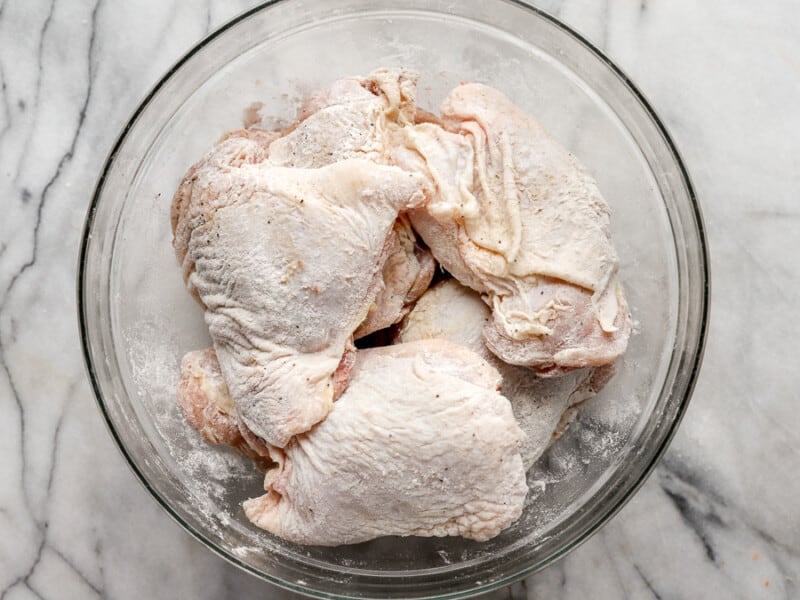
- In a shallow bowl, combine the breadcrumbs, Italian seasoning, onion powder, garlic, powder, salt, and pepper. Set up a breading station with 2 shallow bowls; one of melted butter and one for the breading.
- Dip the chicken rolls in the melted butter, and roll in the breadcrumbs until completely coated. Transfer to a parchment linked baking sheet.
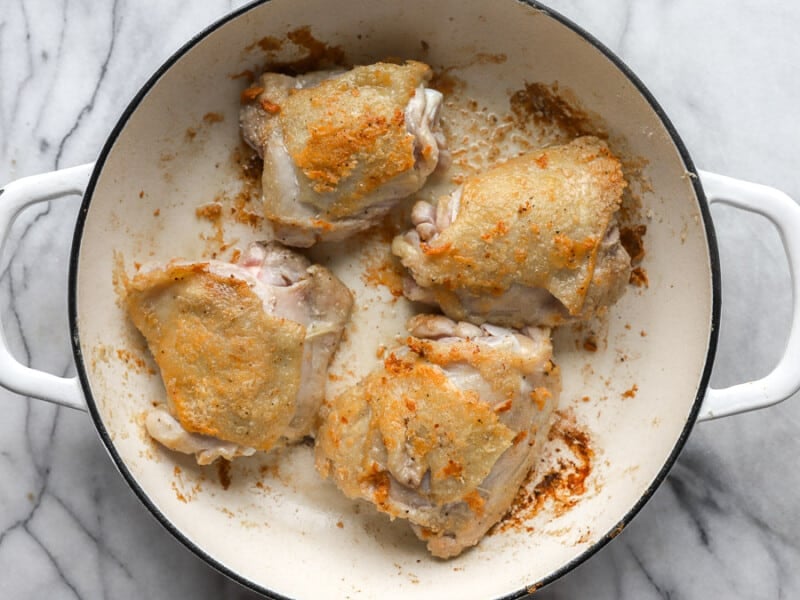
- Bake the chicken for 35-40 minutes or until it reaches an internal temperature of 165°F.
- To make the sauce, melt the butter in a saucepan over medium heat. Stir in the flour. Then, slowly pour in the milk while whisking to incorporate.
- Add in the Dijon mustard and Worcestershire sauce. Season with salt. Spoon the sauce over the chicken.
See how we calculate recipe costs here.
Nutrition
how to make Chicken Cordon Bleu – step by step photos
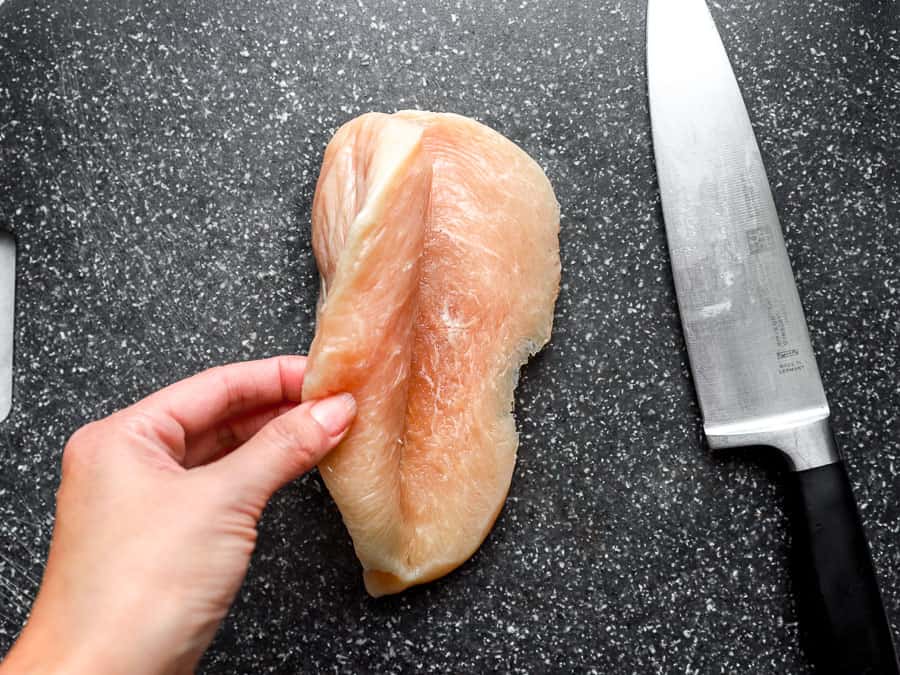
Preheat the oven to 350°F. Butterfly each of 4 chicken breasts by slicing horizontally through the middle of the breast, taking care to not cut all the way through. Open the chicken breast up like a book.
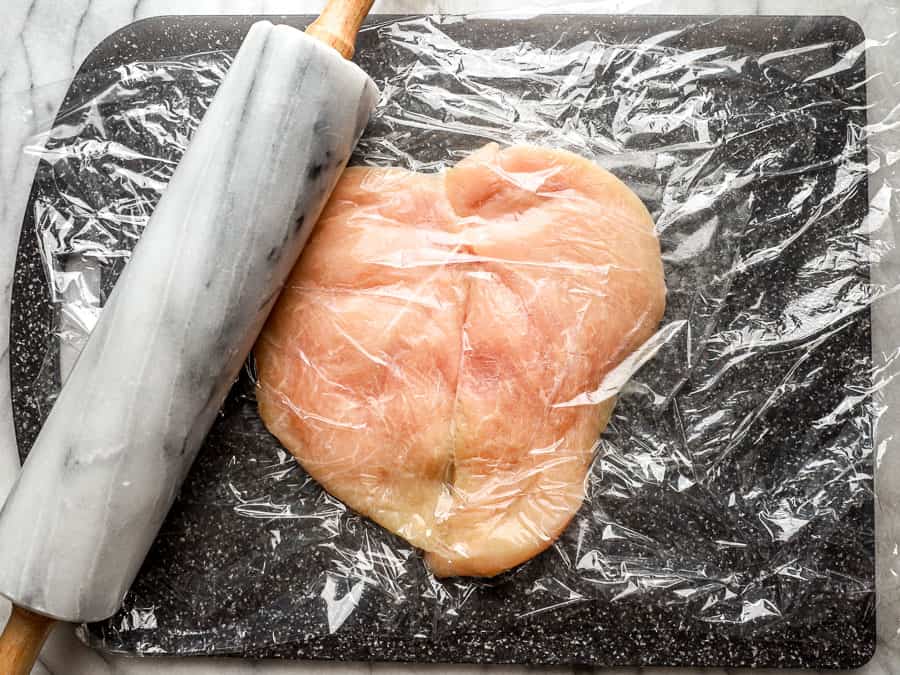
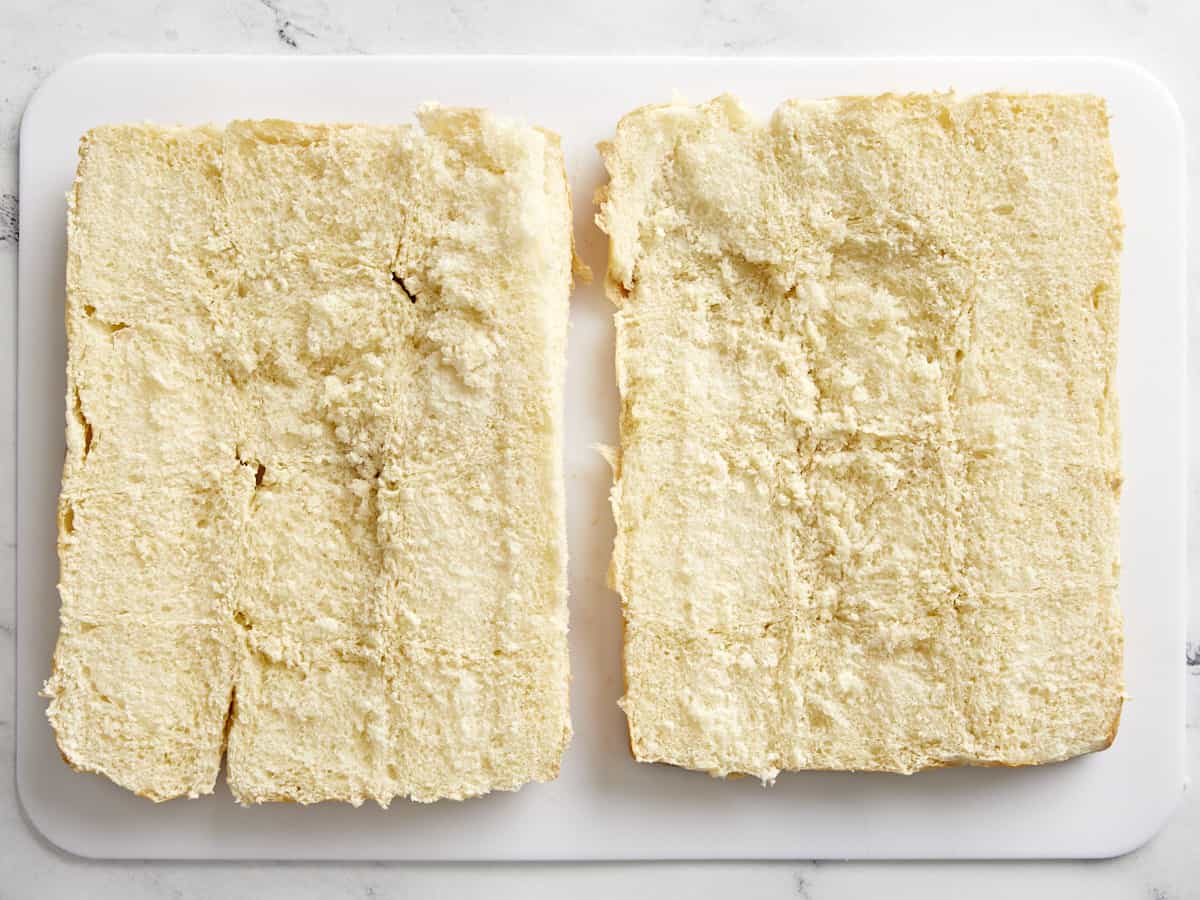
Lay the breast flat between 2 pieces of plastic wrap. Use a meat mallet or rolling pin to pound the chicken breasts into a thin, even layer.
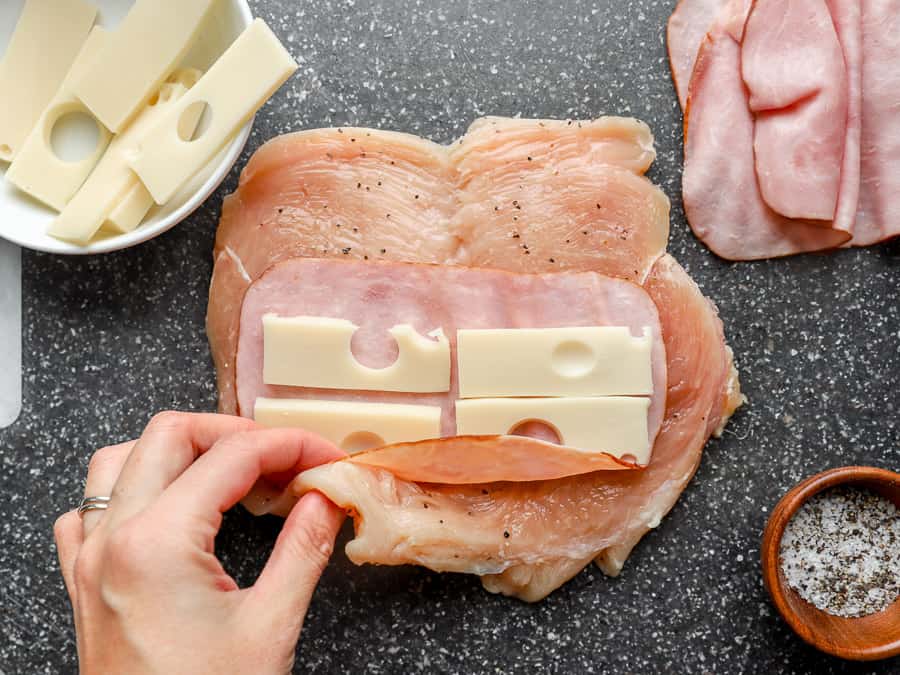
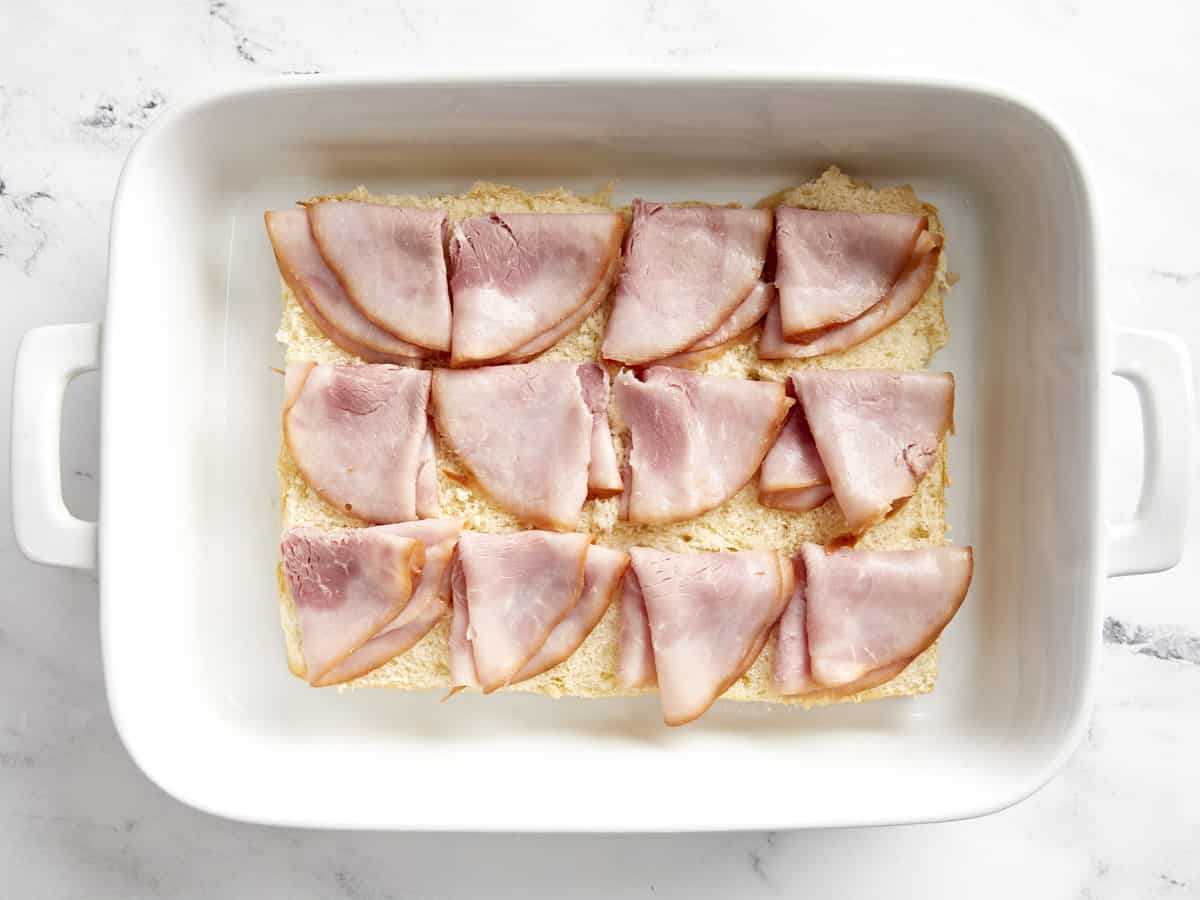
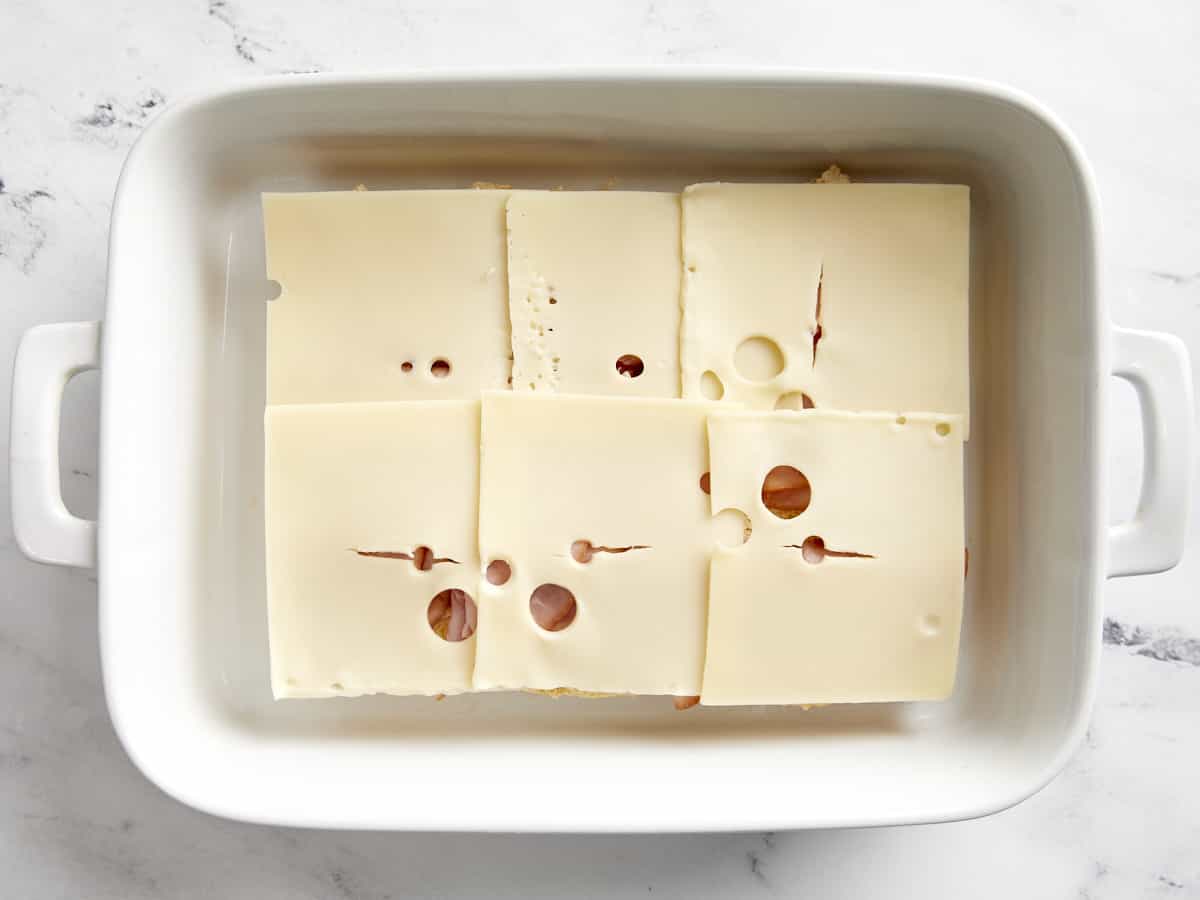
Sprinkle the chicken breasts with salt and pepper. Place a slice of ham and 1 ounce of Swiss cheese on each chicken breast.
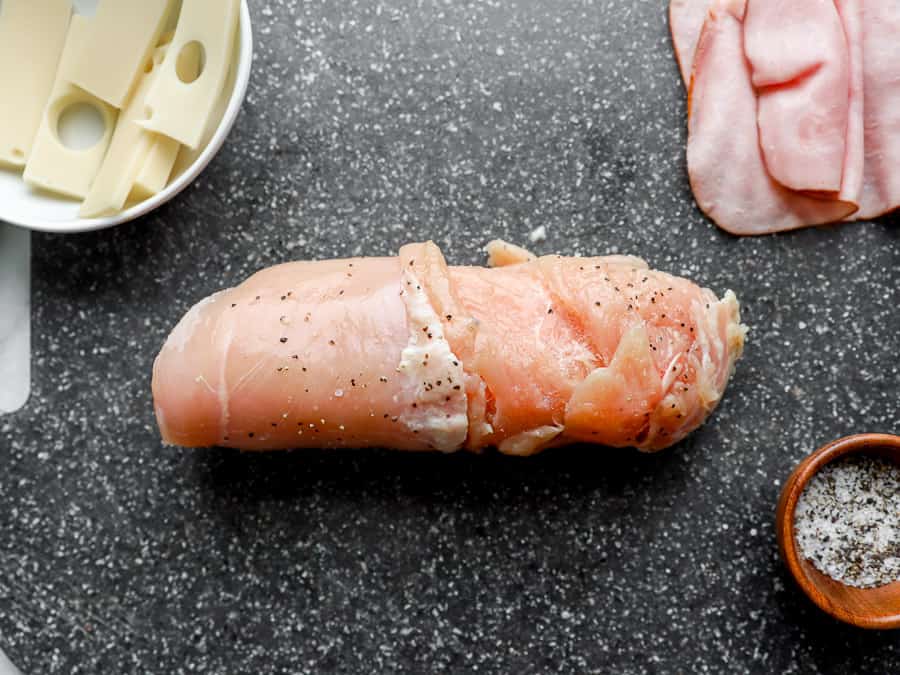
Gently roll up the chicken breast.
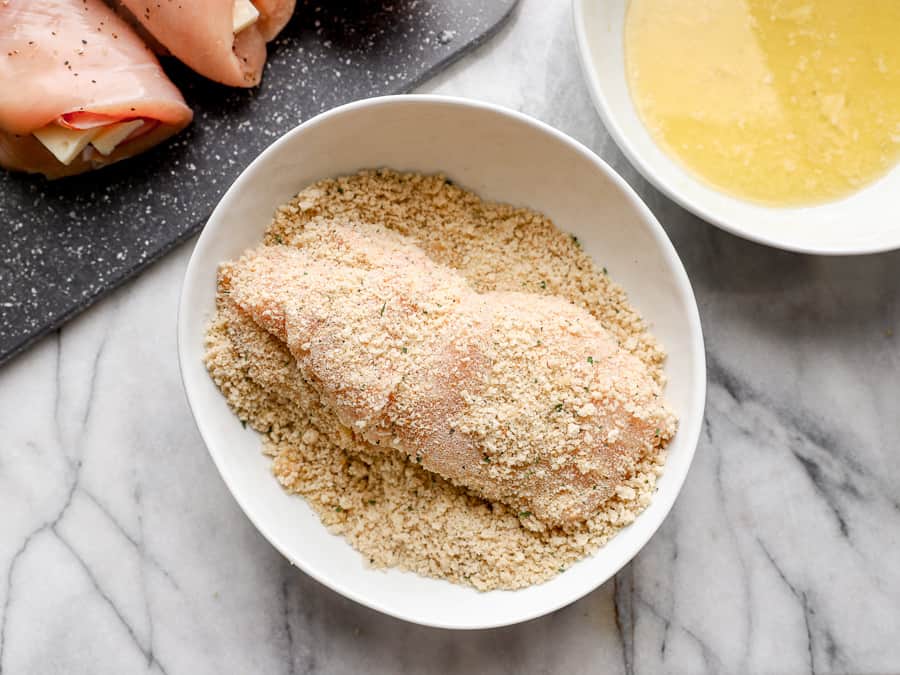
In a shallow bowl, combine 1 1/2 cups Panko breadcrumbs, 1/2 tsp Italian seasoning, 1/2 tsp onion powder, 1/2 tsp garlic powder, 1 tsp salt, and 1/4 tsp pepper. Set up a breading station with a shallow bowl of 1/2 cup melted butter and the breading. Dip the chicken rolls in the melted butter, and roll in the breadcrumbs until completely coated. Transfer to a greased casserole dish.
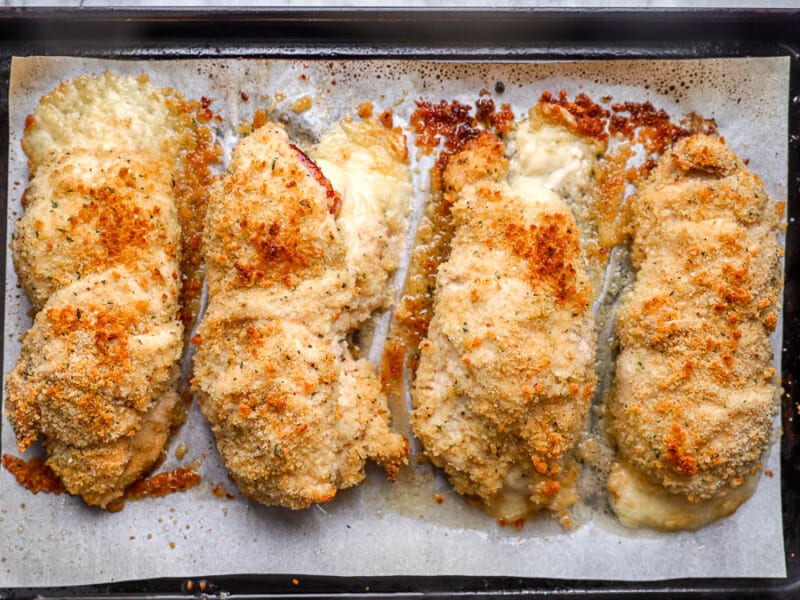
Bake the chicken for 35-40 minutes or until it reaches an internal temperature of 165°F.

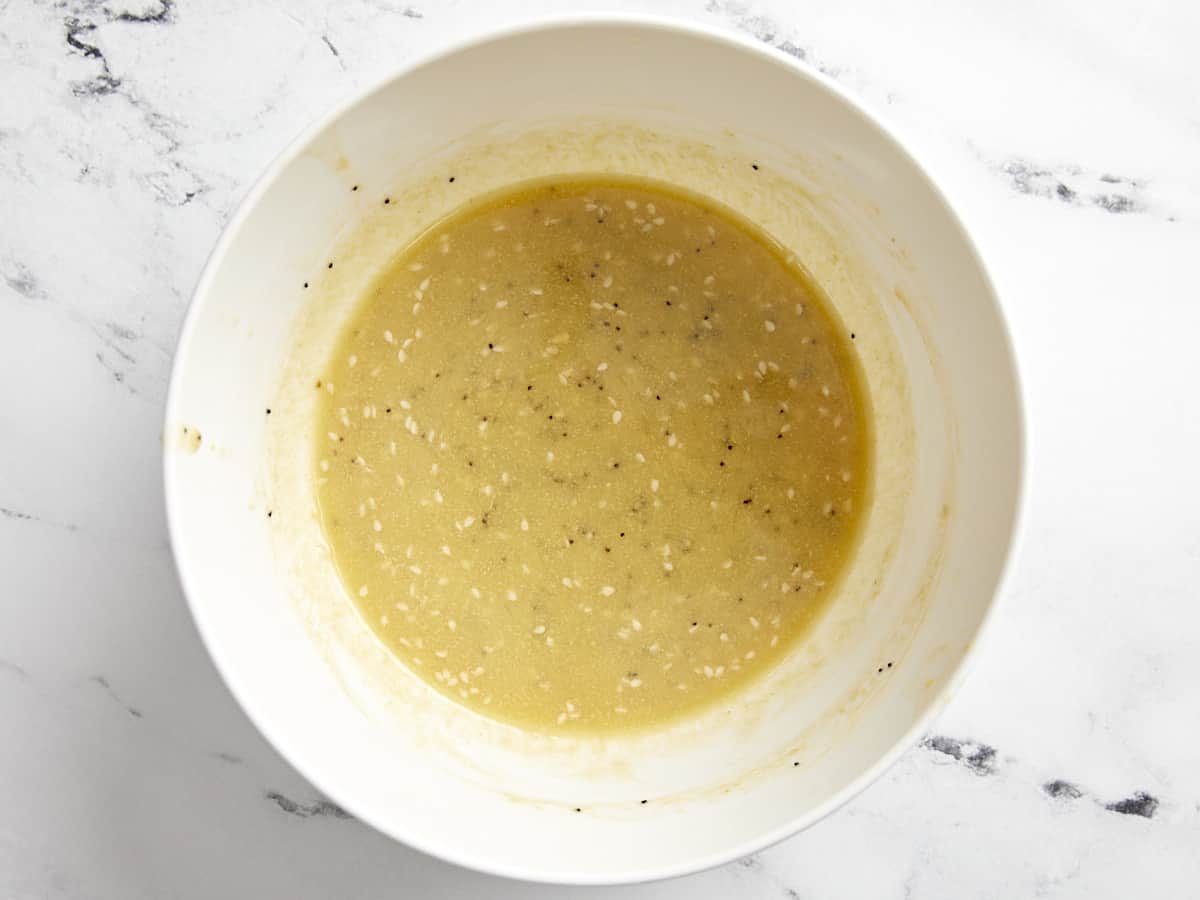
To make the sauce, melt 1/4 cup butter in a saucepan over medium heat. Stir in the 2 Tbsp flour. Then, slowly pour in 3/4 cup milk while whisking to incorporate.
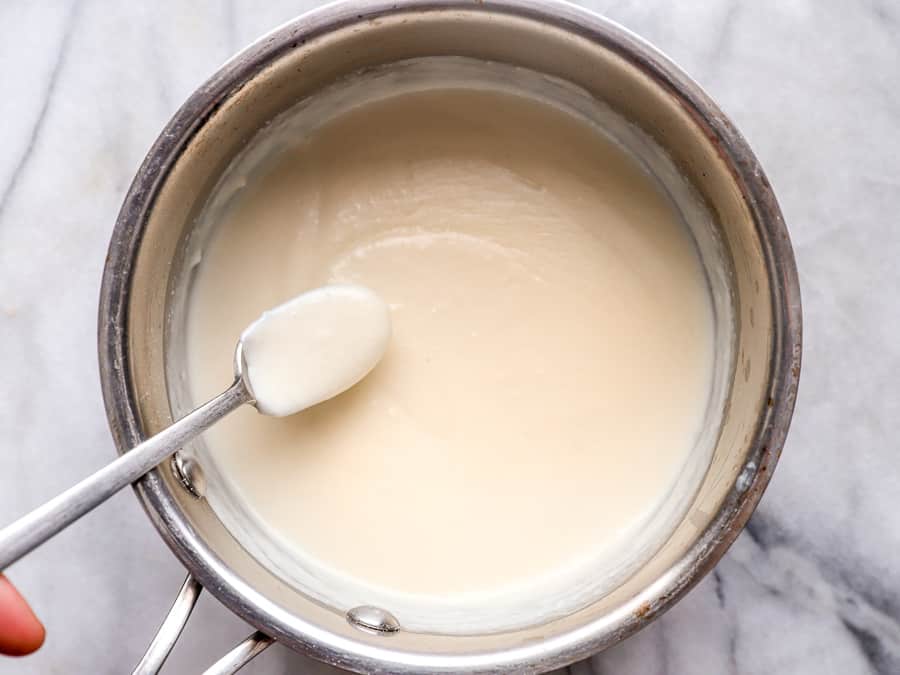
Add in 1/2 Tbsp Dijon mustard and 1 tsp Worcestershire sauce. Season with 1/2 tsp salt. Spoon the sauce over the chicken.
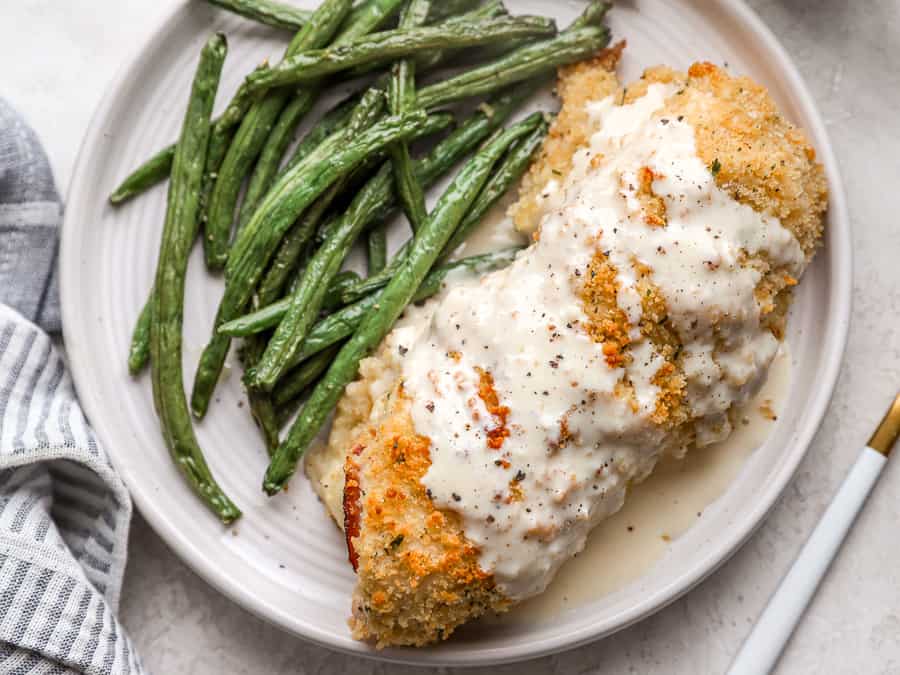
This crispy, cheesy, salty, and creamy chicken cordon bleu is the ultimate comfort food!
More Baked Chicken Recipes


The post Chicken Cordon Bleu appeared first on Budget Bytes.