Lemon Pound Cake

This delicious, moist and easy lemon pound cake recipe is made with fresh lemon juice and zest, and perfect for dessert or paired with coffee or tea.

The post Lemon Pound Cake appeared first on Budget Bytes.

This Lemon Pound Cake will make you swoon! It’s moist, tender, tart, and tangy. The light fluffy crumb is the perfect texture for soaking up the sweet and sour lemon glaze. Even better- it’s the absolute easiest cake to make. I bet you have everything you need in your pantry right now! 
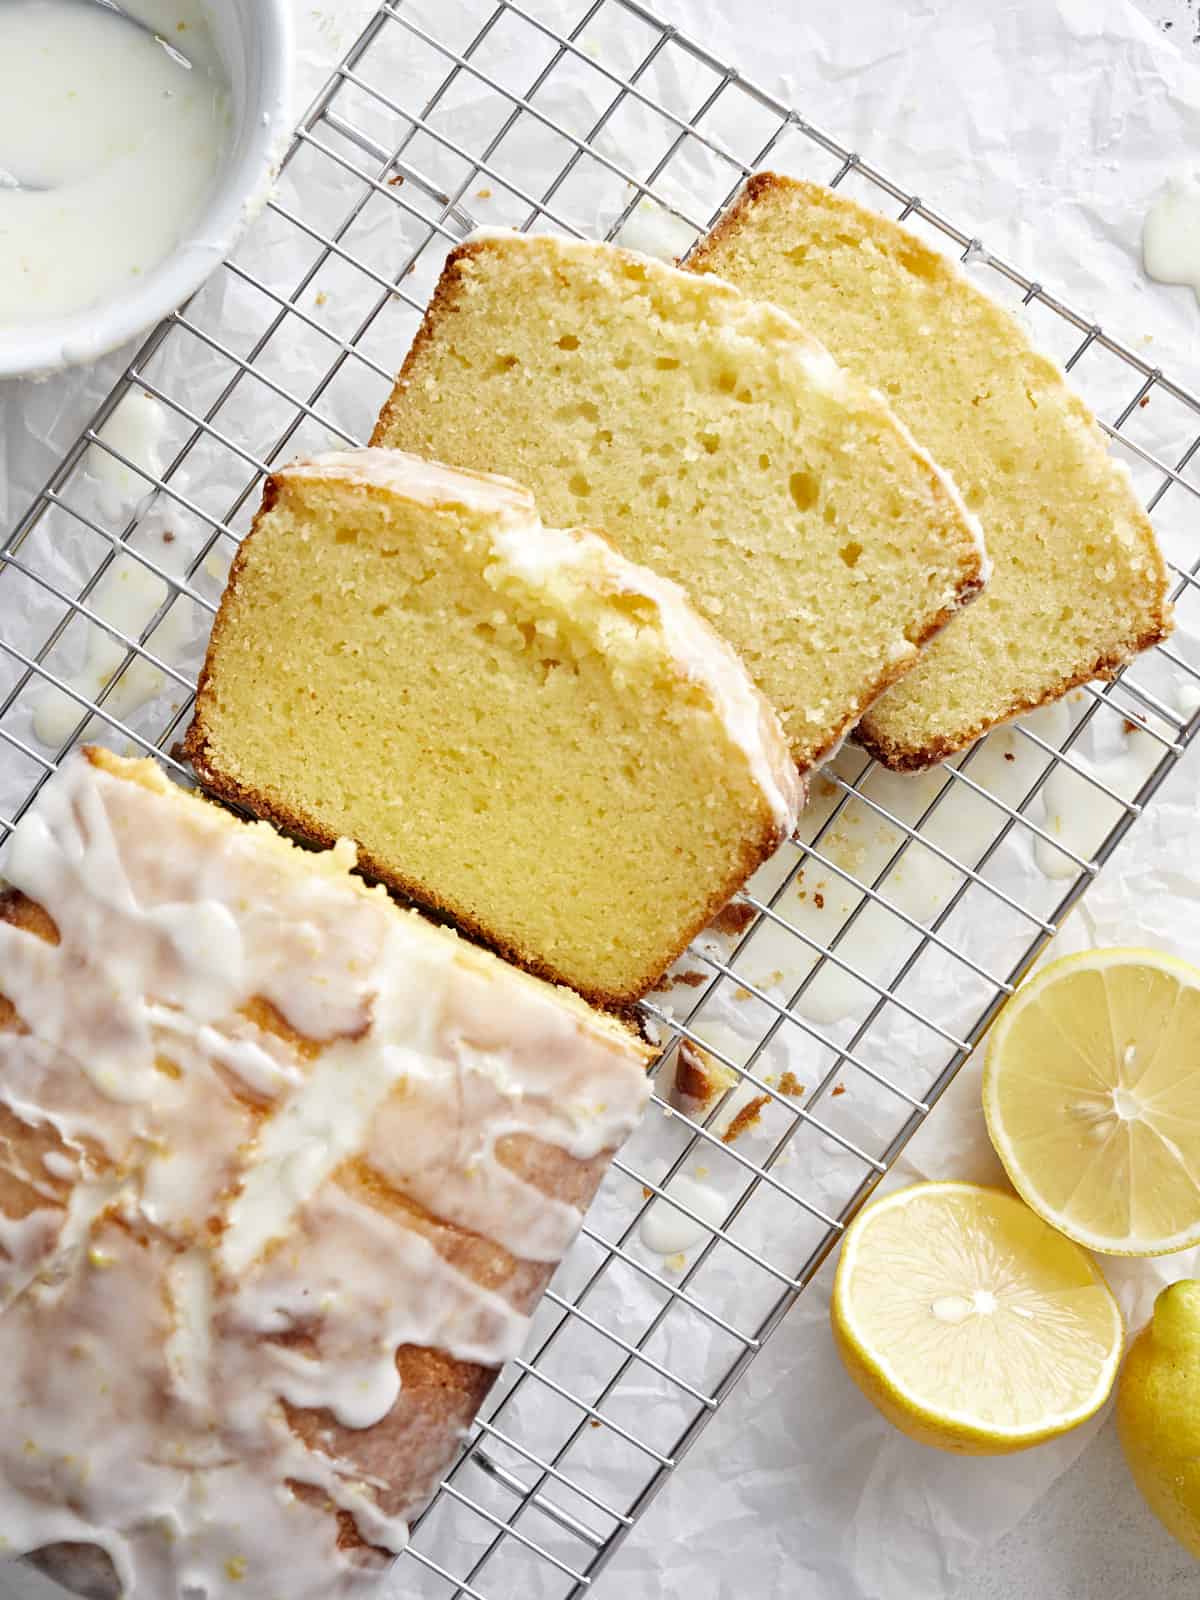
Overhead view of lemon pound cake sliced on a wire cooling rack.

What is Lemon Pound Cake?

This classic dessert is baked in a loaf pan and is bursting with refreshing citrus notes that cut through the buttery sweetness of the cake. This easy recipe for Lemon Pound Cake is also one of my favorite ways to use up extra lemons, as the batter and glaze are loaded with lemon juice and zest.

Ingredients for Lemon Pound Cake

This cake is gorgeous and the flavors are zippy and balanced. It’s the perfect easy dessert recipe for a casual dinner or a fancy get-together (or if you’re in the mood for cake that isn’t too sweet.) Here’s what you need to make Lemon Poundcake:

  • Butter:  creates a light, tender texture and helps the cake rise.
  • Granulated Sugar and Powdered Sugar: these sugars do more than sweeten the cake and the icing. Granulated sugar softens the cake crumb, adds moisture, and balances the tartness of the lemon juice in the batter. Powdered sugar creates structure in icing and helps mellow out the sourness of lemon juice.
  • Eggs: create structure that helps the cake rise and keeps the crumb airy.
  • Flour: the base of our batter, it creates the structure of the crumb. While we have not tested this recipe with gluten-free flour, a 1-to-1 gluten-free baking flour should be a great substitute.
  • Lemons: are the heart of this recipe. If lemons are out of your budget, you can try bottled lemon juice, and though it won’t taste quite as tart and refreshing, it will still be a good cake. If lemons are too tart for you, leave them out and just make plain, buttery, pound cake!

How To Serve Lemon Pound Cake

This cake is fantastic still warm from the oven or served at room temperature. It pairs beautifully with No-Churn Strawberry Ice Cream. Or served with a fresh dollop of Homemade Whipped Cream. Double down on the lemon flavor and try it with Homemade Lemon Curd

How To Store Lemon Pound Cake

Place leftovers in an air-tight container and store at room temperature for up to 3 days. You can also wrap leftovers tightly in a layer of parchment paper and a second layer of aluminum foil, then freeze for up to 3 months. While you can refrigerate pound cake, it does dull the flavors and changes the texture of the cake. If you choose to refrigerate or freeze it, try warming it in a 350°F with a touch of butter brushed on each slice. I don’t know if you’ve ever tried frozen cake, but it’s delightful straight out of the freezer as well. The crumb stays soft and it’s a perfect treat for a hot summer day.
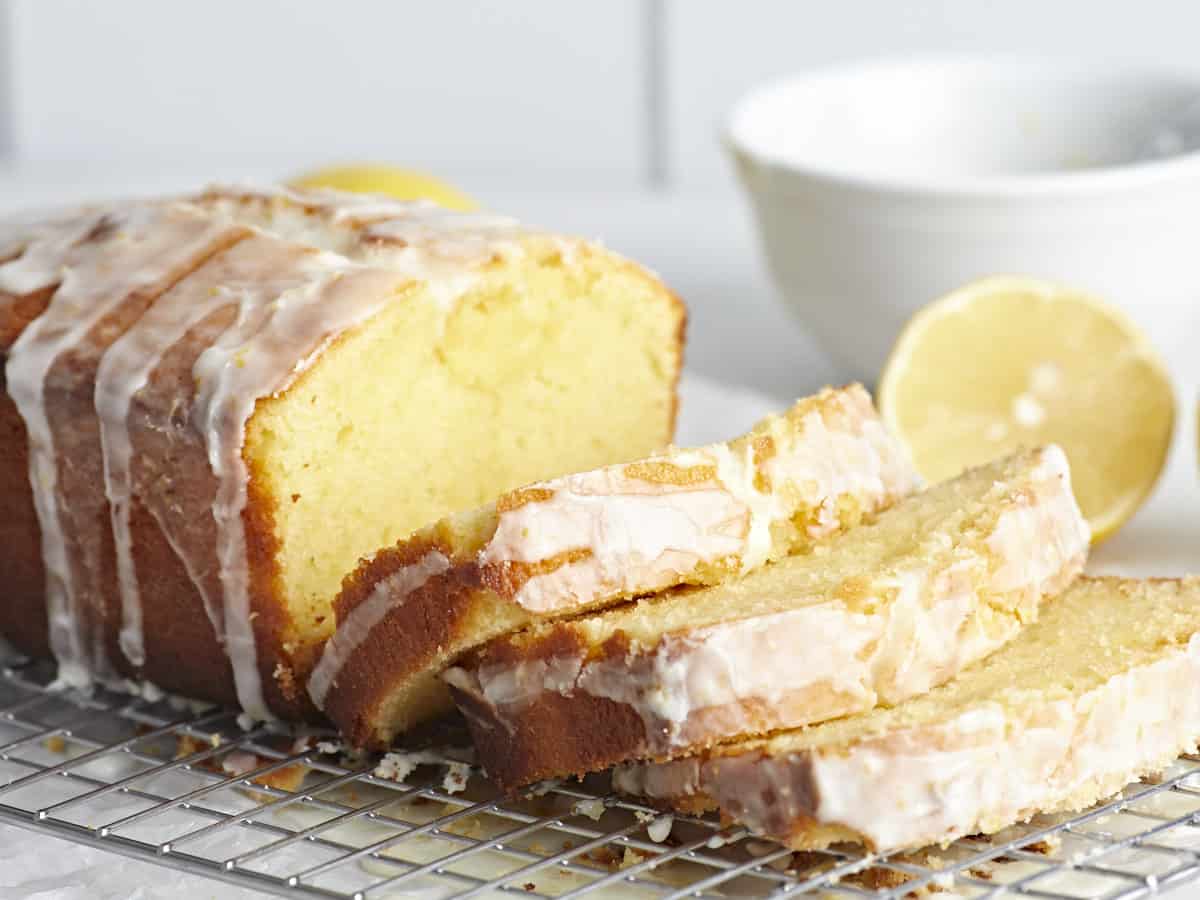
Side view of a sliced loaf of lemon pound cake.
Print

Lemon Pound Cake

This delicious, moist and easy lemon pound cake recipe is made with fresh lemon juice and zest, and perfect for dessert or paired with coffee or tea.
Course Dessert
Cuisine Amercian
Total Cost $4.85 recipe / $0.40 serving
Prep Time 20 minutes
Cook Time 1 hour
Cool Time 10 minutes
Total Time 1 hour 30 minutes
Servings 12 (1 slice each)
Calories 330kcal

Ingredients

  • 1 cup room temperature salted butter (plus more for greasing) $2.01
  • 1.5 cups all-purpose flour (plus more for dusting) $0.22
  • 1/2 tsp baking powder $0.03
  • 1/4 tsp baking soda $0.01
  • 1/4 tsp salt $0.02
  • 1 cup granulated sugar $0.39
  • 4 large eggs, beaten $0.36
  • 1/4 cup buttermilk $0.16
  • 3 lemons, juiced and zested, divided $1.32
  • 1 cup powdered sugar $0.33

Instructions

  • Place an oven rack in the center of your oven and preheat the oven to 350°F. Grease an 8×4 loaf pan with butter. Line the pan with parchment. Butter the parchment and dust with flour, shaking off excess flour.
  • Mix the flour, baking powder, baking soda, and salt in a medium bowl.
  • Mix the butter and sugar in a large bowl until light and fluffy. Add the beaten eggs, buttermilk, 1/4 cup lemon juice, and 1 tablespoon zest. Mix until incorporated.
  • Add the flour mixture to the butter and egg mixture in thirds, mixing after each addition and scraping down the sides before the next addition.
  • Add batter to the prepared pan. Bake for 50 to 60 minutes in the preheated 350°F oven until the cake springs back when you press the center and a toothpick inserted into the center comes out clean.
  • Remove the pound cake from the oven and cool for ten minutes before removing it from the pan and placing it on a cooling rack.
  • To make the glaze, mix the powdered sugar with 2 tablespoons lemon juice and 1 1/2 teaspoons lemon zest.
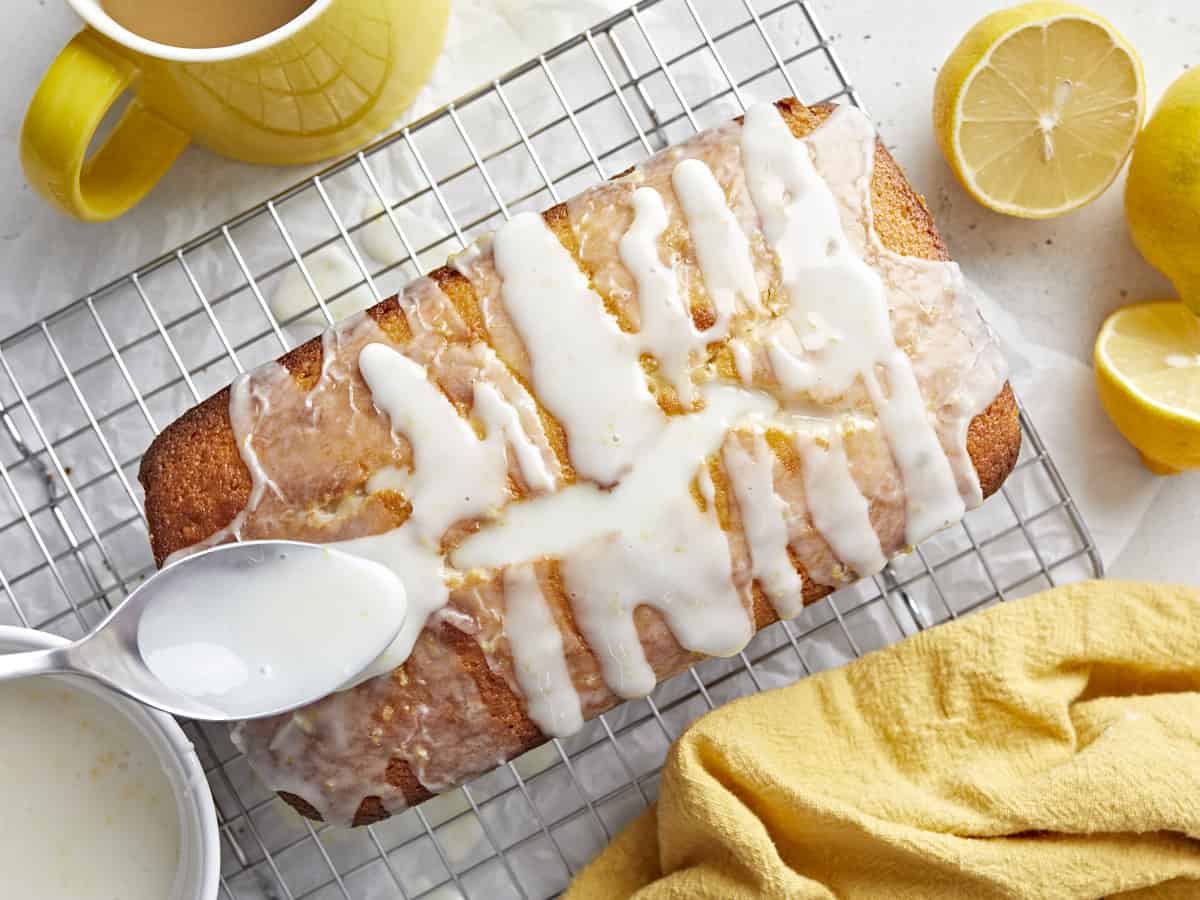
  • Drizzle the glaze on the cooled pound cake and serve!

See how we calculate recipe costs here.

Nutrition
Serving: 1slice | Calories: 330kcal | Carbohydrates: 41g | Protein: 4g | Fat: 17g | Sodium: 241mg | Fiber: 1g
Icing being drizzled over a loaf of lemon pound cake.

How to Make Lemon Pound Cake – Step by Step Photos
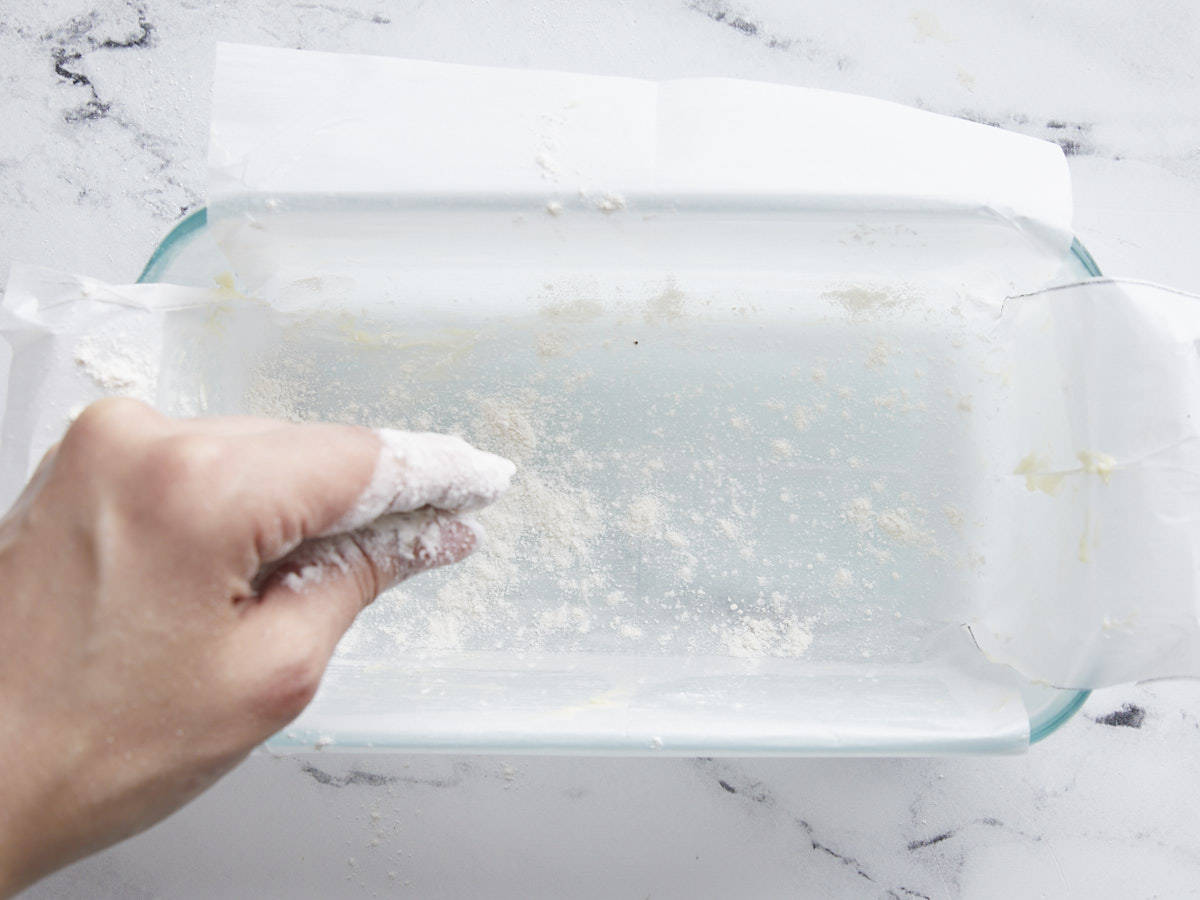
Loaf pan being buttered and dusted with flour.

Place an oven rack in the center of your oven and preheat the oven to 350°F. Grease an 8×4 loaf pan with butter. Line the pan with parchment. Butter the parchment and dust with flour, shaking off excess flour.
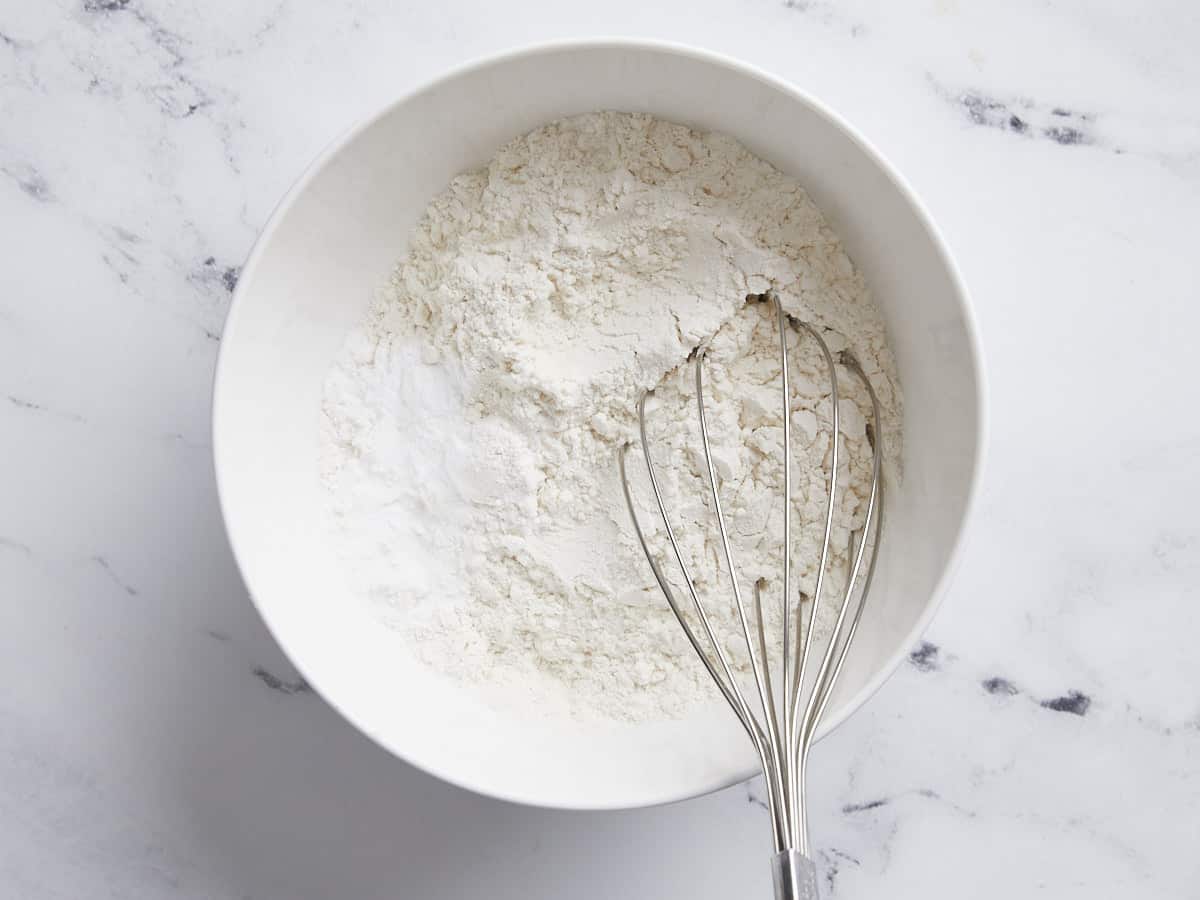
Dry ingredients for lemon pound cake being whisked together in a bowl.

Mix 1.5 cups of all-purpose flour, 1/2 tsp baking powder, 1/4 tsp baking soda, and 1/4 tsp salt in a medium bowl. 
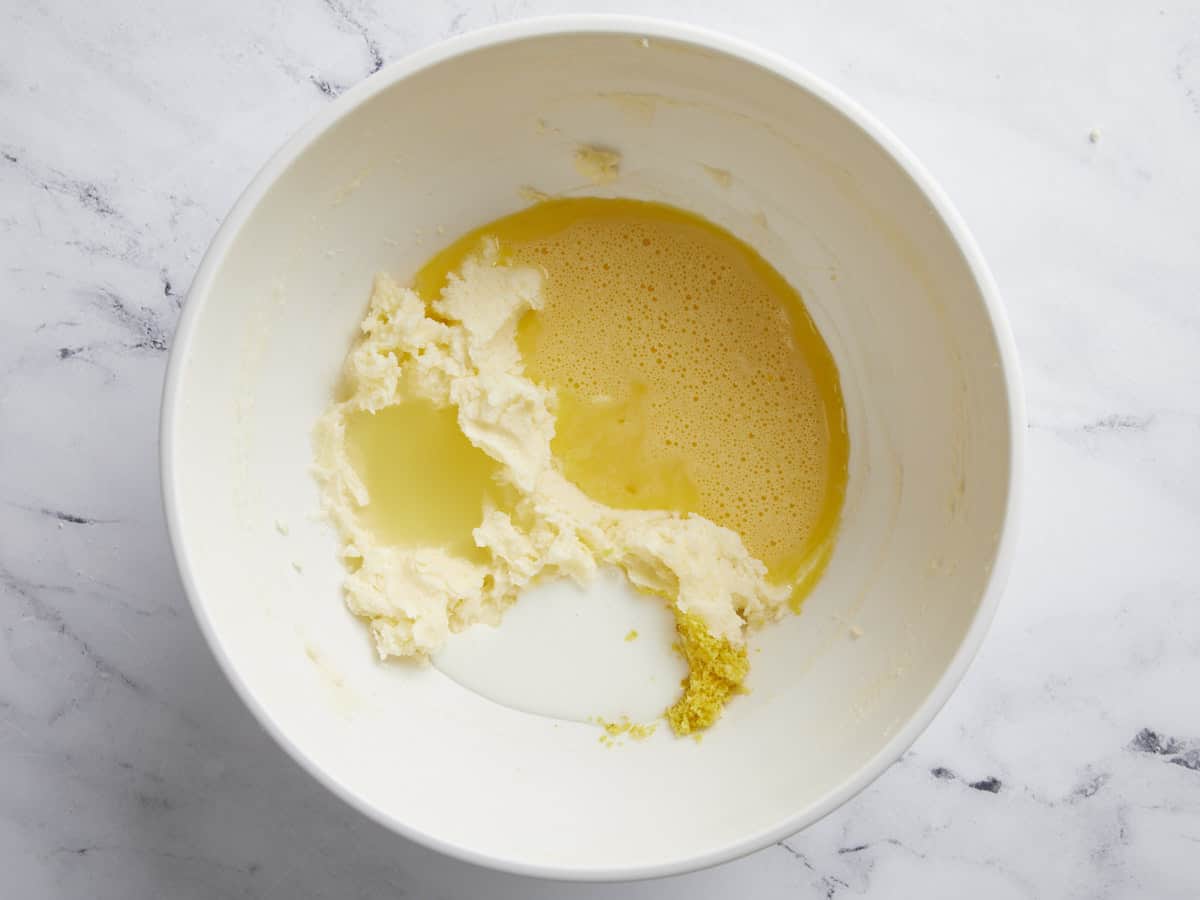
Wet ingredients for lemon pound cake in a bowl.

Mix 1 cup of room-temperature salted butter and 1 cup of granulated sugar in a large bowl until light and fluffy. Add 4 beaten large eggs, 1/4 cup of buttermilk,  1/4 cup lemon juice, and 1 tablespoon zest. Mix until incorporated.
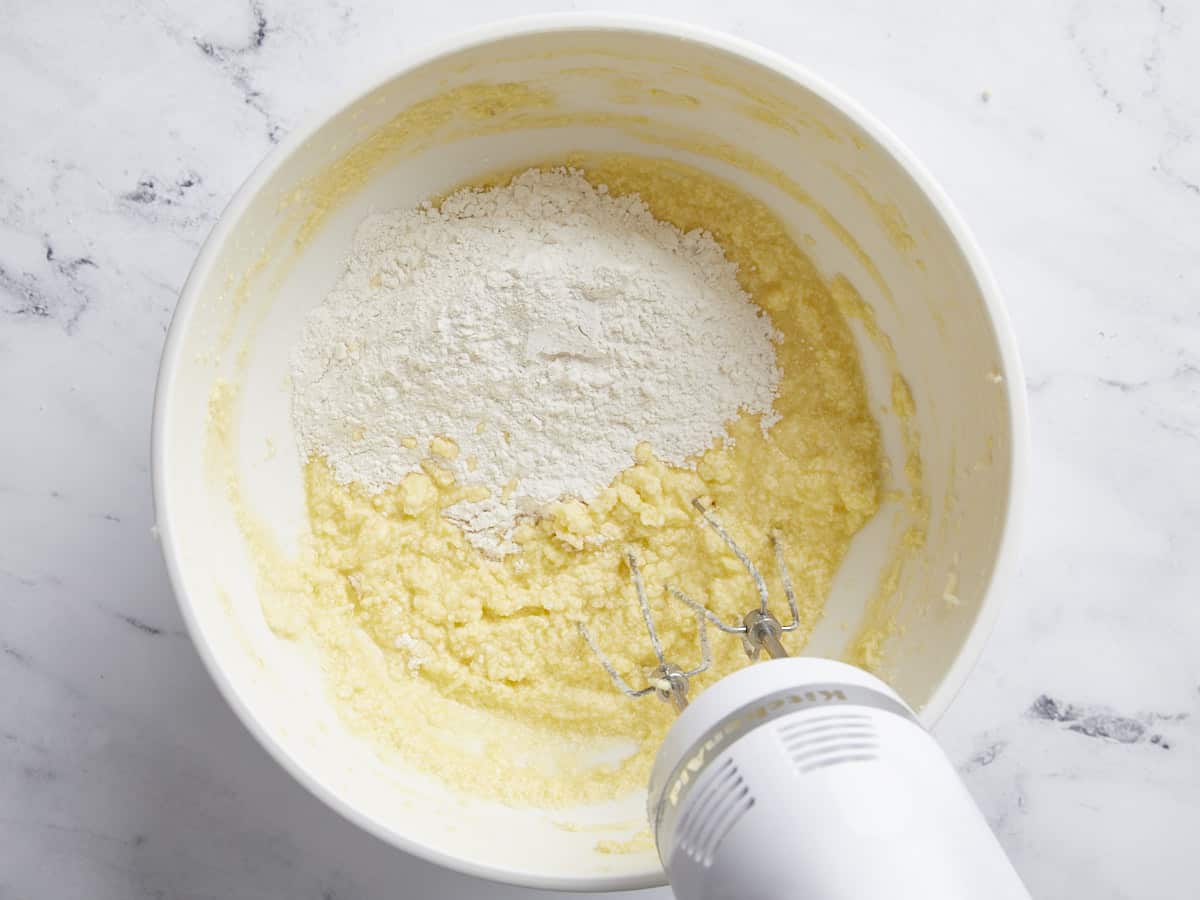
Wet and dry ingredients for lemon pound cake being mixed together.

Add the flour mixture to the butter and egg mixture in thirds, mixing after each addition and scraping down the sides before the next addition. 
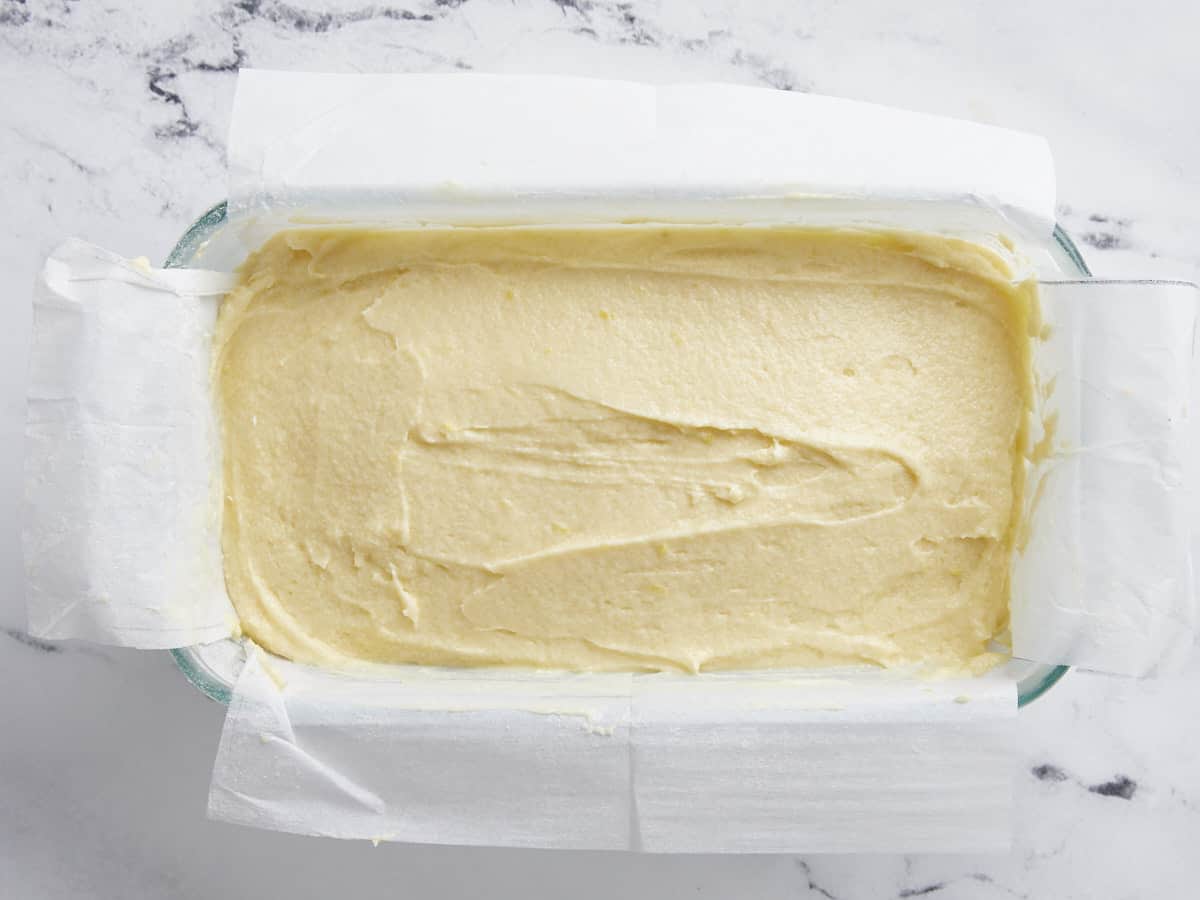
Lemon pound cake batter in the loaf pan ready to be baked.

Add batter to the prepared pan. Bake for 50 to 60 minutes in the preheated 350°F oven until the cake springs back when you press the center and a toothpick inserted into the center comes out clean.
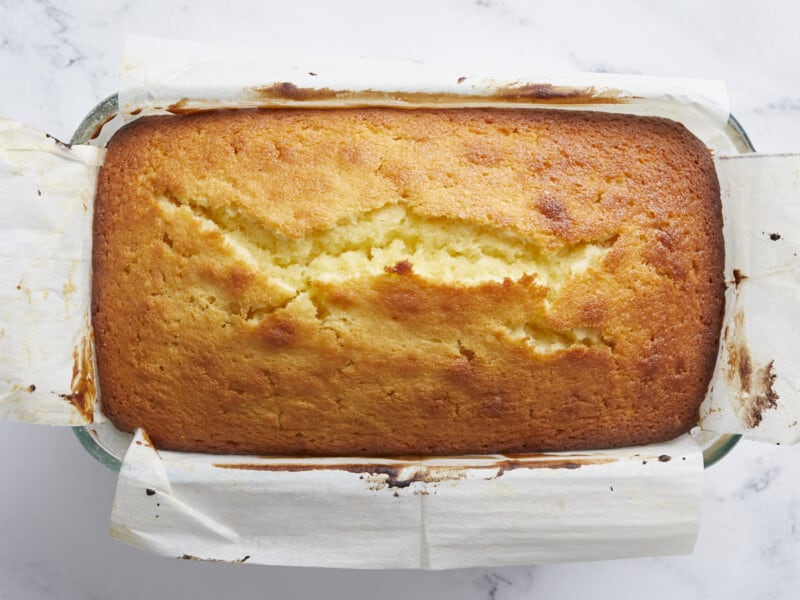
Baked lemon pound cake in the baking pan.

Remove the poundcake from the oven and cool for ten minutes before removing it from the pan and placing it on a cooling rack.
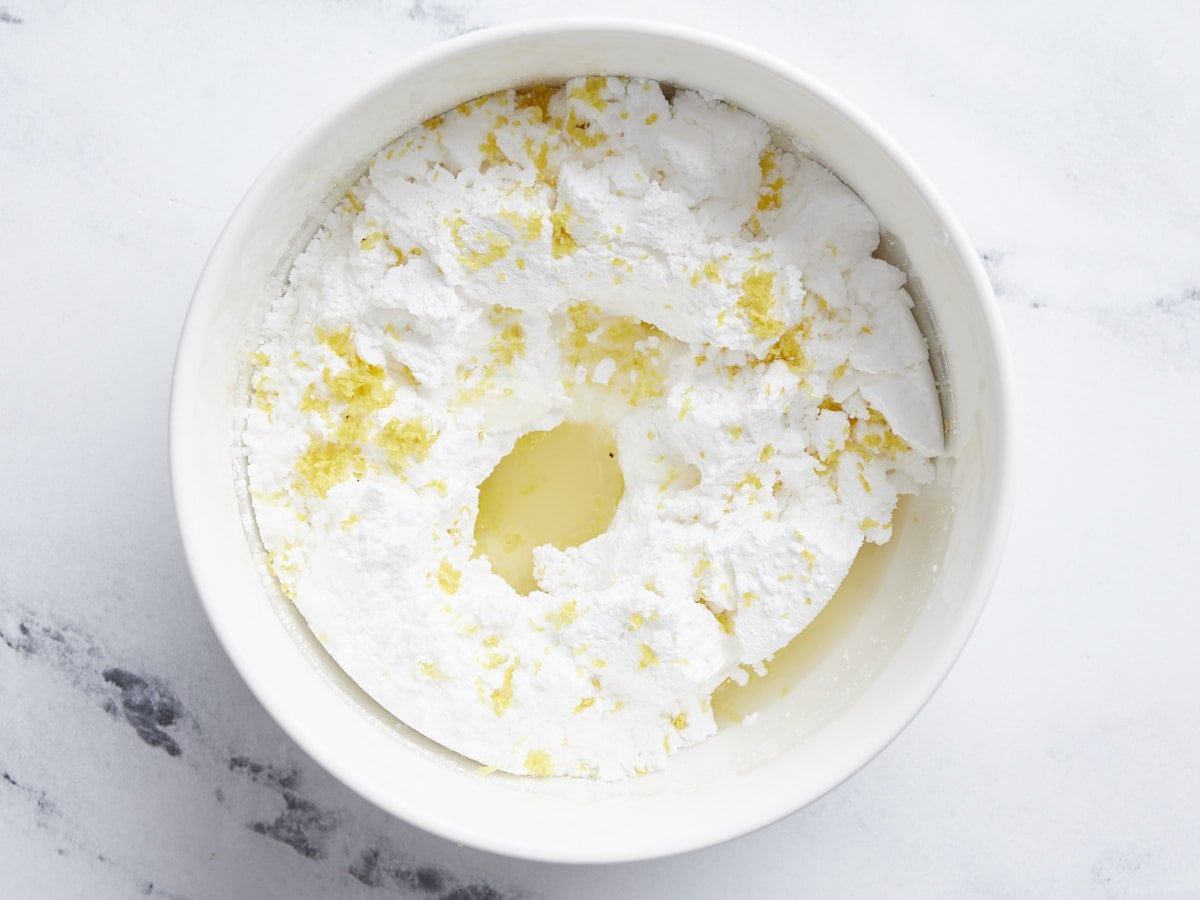
Ingredients for the icing in a bowl.

To make the glaze, mix 1 cup powdered sugar with 2 tablespoons lemon juice and 1 1/2 teaspoons lemon zest. 
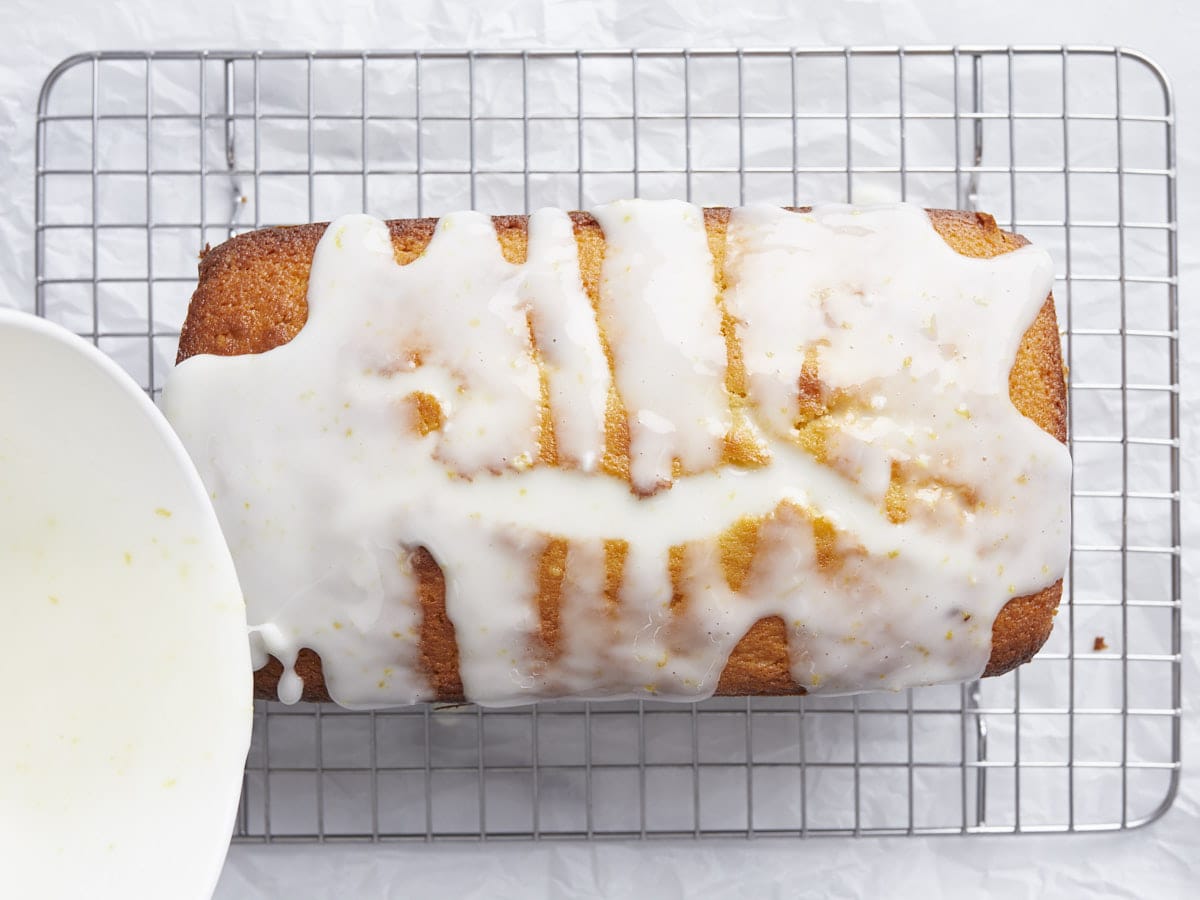
Glaze being poured over the pound cake.

Drizzle the glaze on the cooled pound cake and serve!
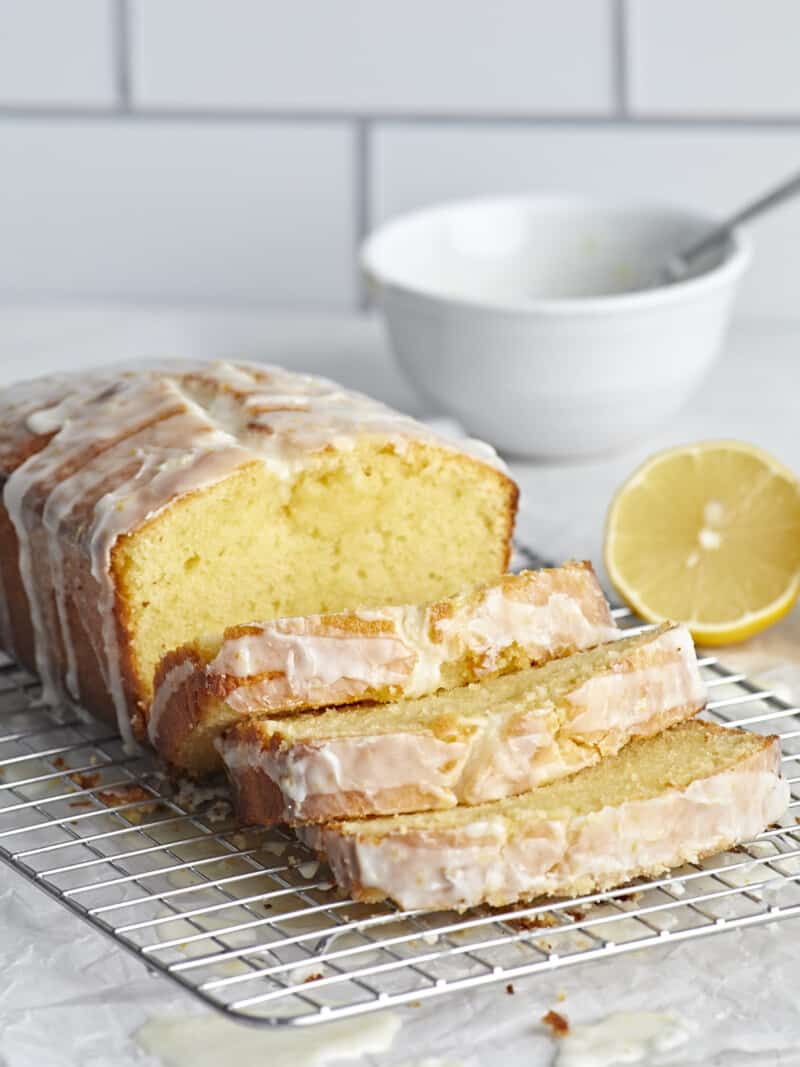
Front view of a loaf of lemon pound cake sliced on a cooling rack.

The post Lemon Pound Cake appeared first on Budget Bytes.

Cherry Turnovers

Cherry Turnovers are a delicious baked dessert made with flaky puff pastry and sweet, tart cherry sauce. This is the best easy dessert recipe!

The post Cherry Turnovers appeared first on Budget Bytes.

These Cherry Turnovers are a scrumptious dessert that’s super easy to make and land at a little over a dollar per serving! The best part? It takes just 20 minutes to get them in the oven! Get ready to collect loads of compliments after you make this easy Cherry Turnover recipe. Though, I should warn you: The puff pastry shatters into delicious buttery flakes as soon as you bite it, so you’ll want to wipe the crumbs off your shirt before heading into a meeting. (I guess that’s less of a “warning” and more of a “Note-To-Self,” but you catch my drift.)

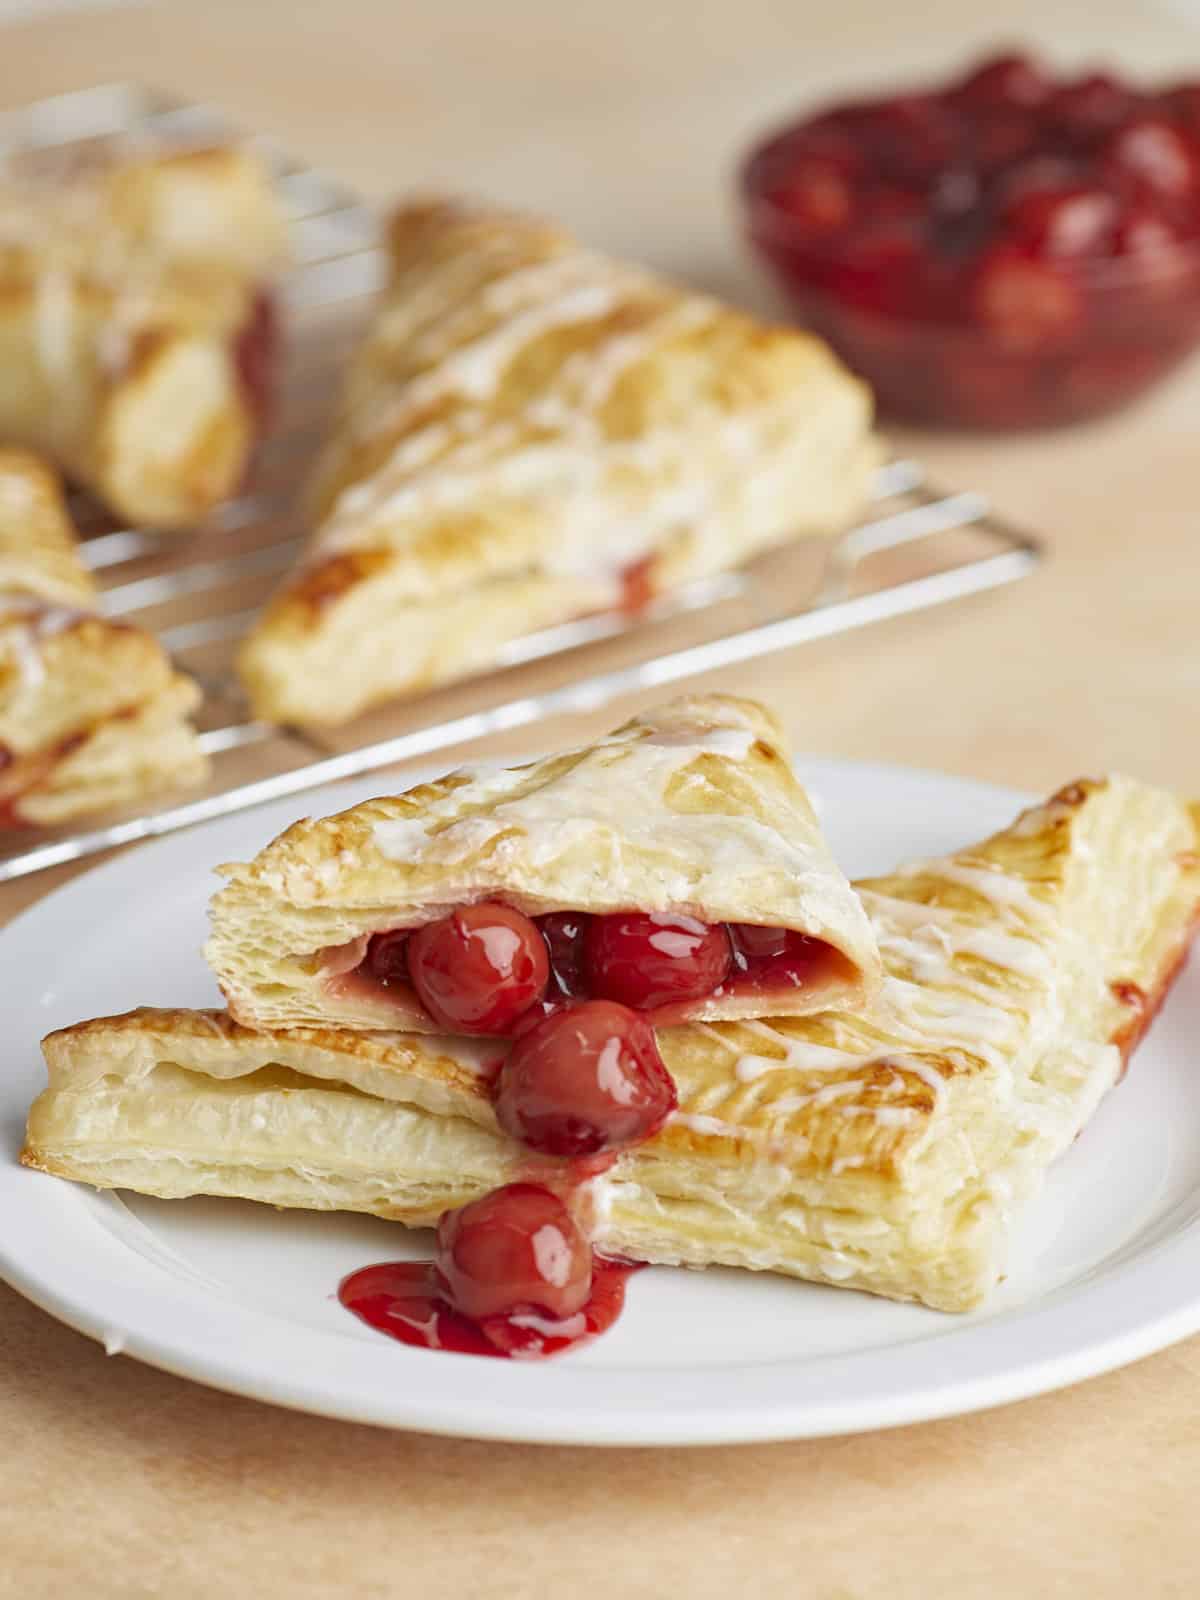
Two cherry turnovers on a plate, one cut in half with the filling dripping out.

What Are Cherry Turnovers

Cherry Turnovers are a popular baked dessert made of flaky puff pastry dough filled with sweet and tart Cherry Sauce. Though they’re a fantastic end-of-dinner delight, they can also be enjoyed for breakfast. (Argue all you want about the breakfast part, but you make puff pastry with flour, butter, and sometimes egg, which is basically a pancake. )

Ingredients For Cherry Turnovers

This is one of those perfect desserts that require minimal effort, so it’s a big win in my book. The ready-made dough is folded over the filling (which can also be ready-made). It’s then sealed, baked until golden brown, and drizzled with a sugar glaze. Boom! Heaven. Here’s what you’ll need to make my easy recipe for Cherry Turnovers!

  • Cherry Filling: I use canned cherry filling. Is it cheaper and better than my Cherry Sauce? No. But it’s convenient, and sometimes that beats the tastiest thing ever. But, if you have a few extra minutes, I highly recommend using my Cherry Sauce recipe.
  • Puff Pastry Sheets: this ready-made dough’s buttery layers crisp and rise when baked, giving you that thunderous shatter that’s a hallmark of any legit flaky pastry.
  • Egg: is beaten and used to help seal the seams of the folded dough. It’s also brushed over the dough to create a golden glossy finish. Yes, you can skip it. A golden laminated finish is strictly for presentation, and you can use water or milk to seal the dough. However, water or milk might not hold the bond, so take that gamble with your eyes wide open.
  • Powdered Sugar: is the foundation of our sugar glaze. If you don’t have powdered sugar, sprinkle granulated sugar on the pastries after washing them with egg to create a sweet textured finish. You can also skip the powdered sugar glaze and the granulated sugar. These pastries will still be knockouts. Promise.
  • Milk: is used to create a glaze from powdered sugar. You can also use water, though it will be less creamy.

How To Serve Cherry Turnovers

Cherry turnovers can be served warm or at room temperature. (Or cold as a late-night treat while bingeing your favorite Netflix show.) They are great paired with ice cream and will blow your mind when you have them with No-Churn Balsamic Peach Ice Cream or No-Churn Strawbery Ice Cream. As I mentioned, I also enjoy Cherry Turnovers as a breakfast pastry and love them paired with Maizena. They’re also a wonderful addition to any brunch table. (Did I just admit to stuffing my face with Cherry Turnovers 24 hours a day? Only if you read between the lines.)

How To Store Cherry Turnovers

You can store leftover Cherry Turnovers in an airtight container at room temperature for three to four days. (They will not last a day, much less 3 to 4 days, but I honor your hopes and dreams, homie.)

Other Turnover Flavor Ideas

With the magic of puff pastry, you’re always less than an hour away from a delicious, crispy, turnover. What you fill it with is only limited to your imagination! I love turnovers made with these sauces:

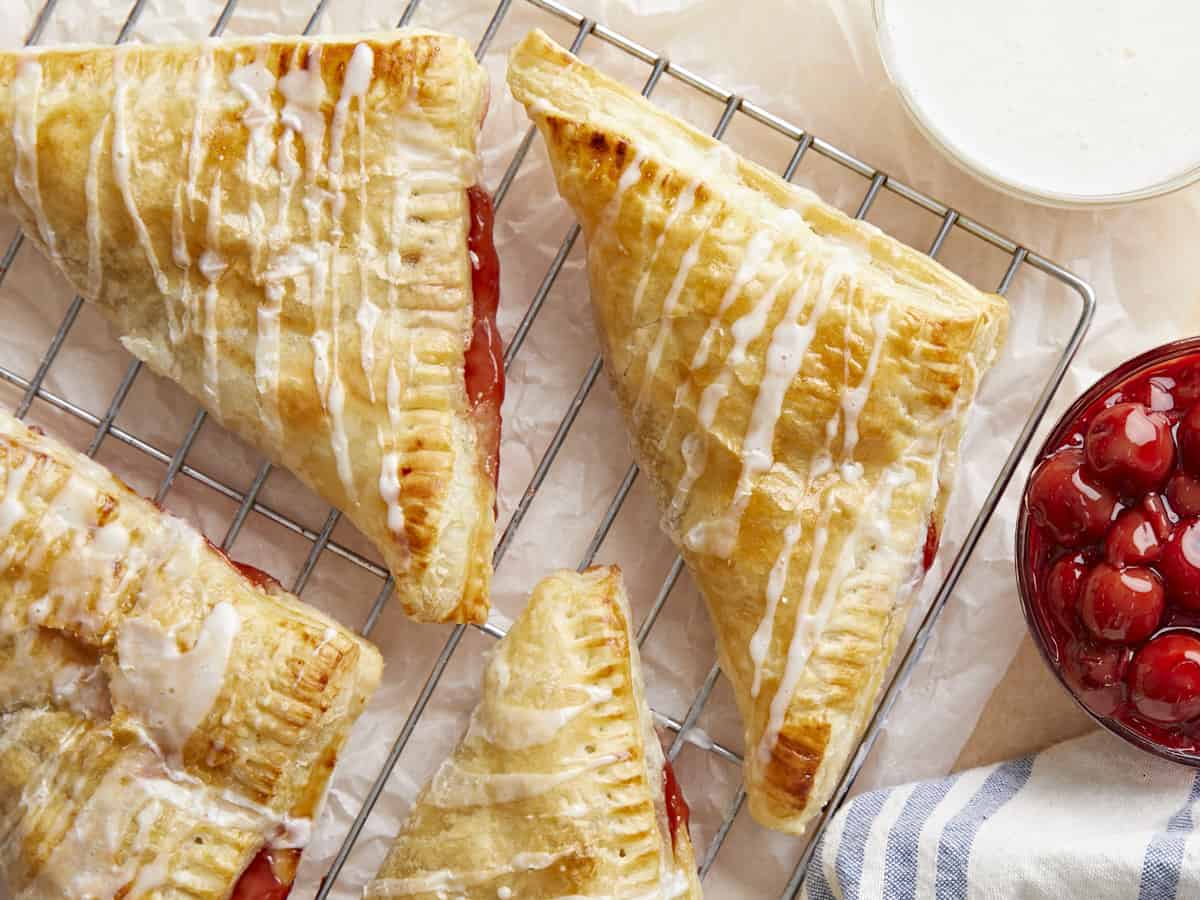
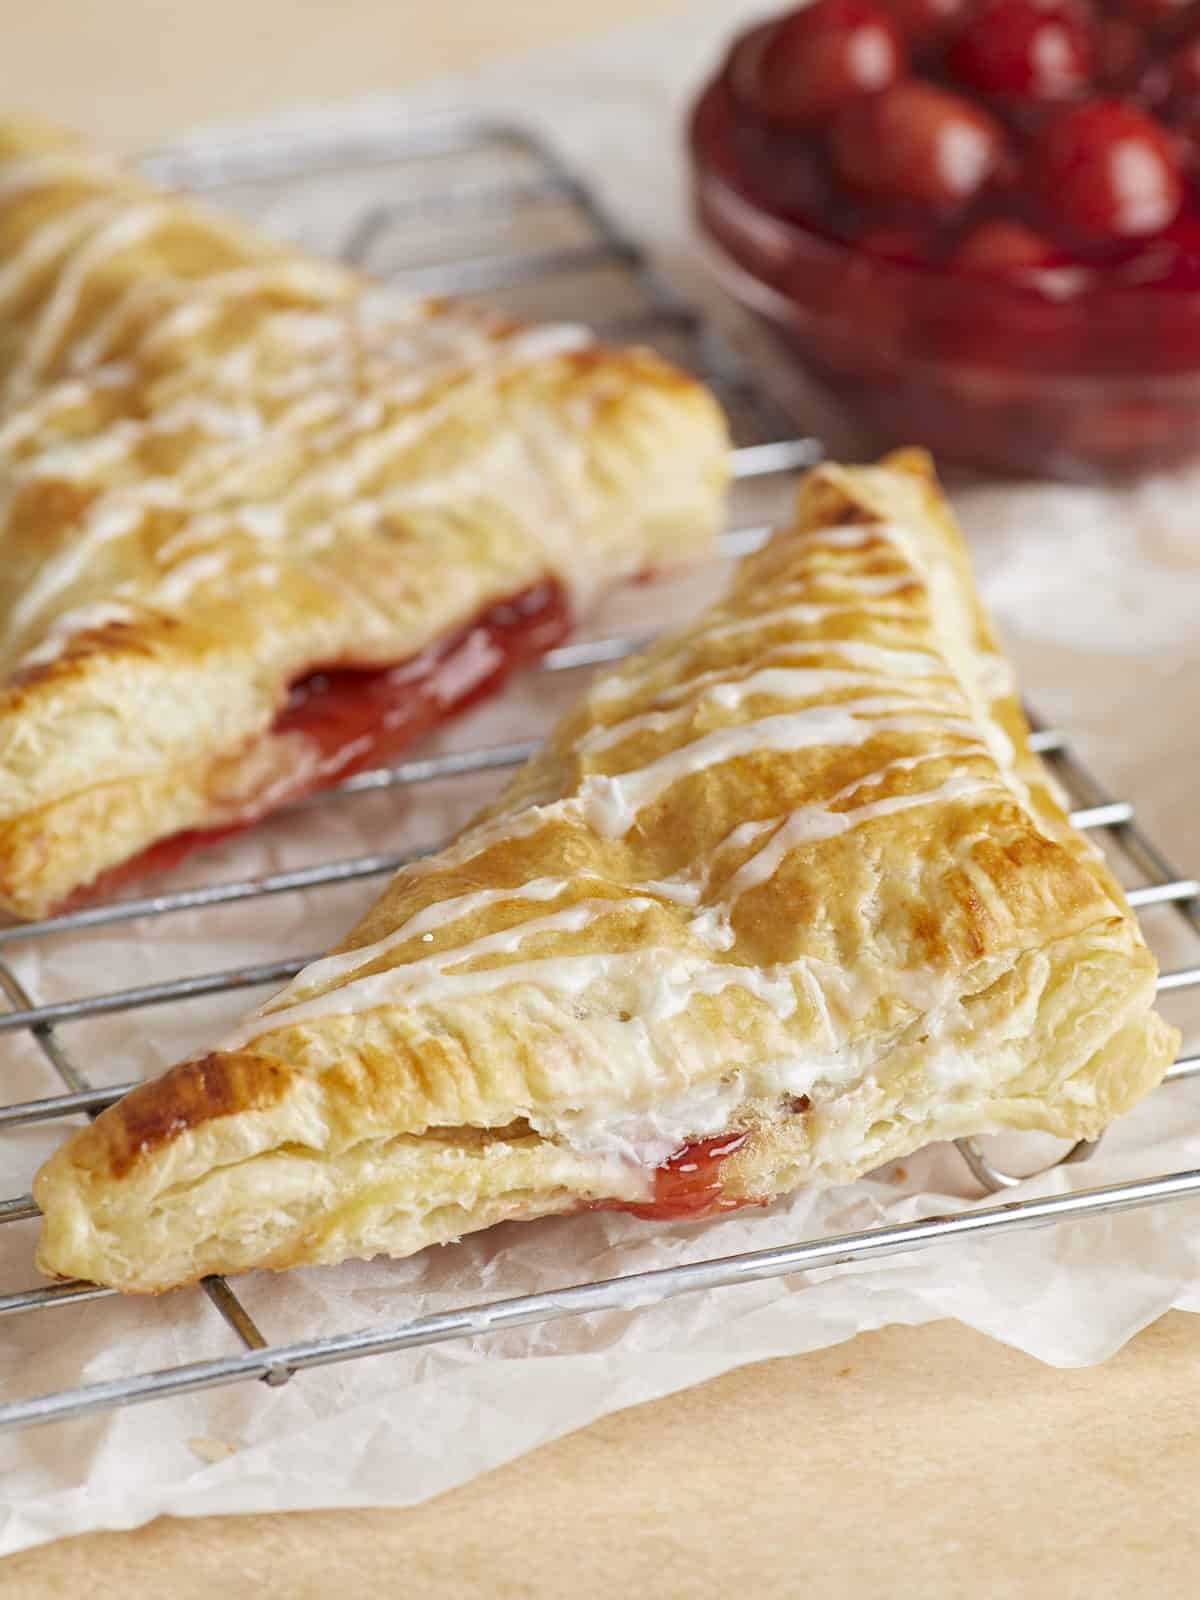
Overhead view of cherry turnovers on a wire cooling rack.
Two cherry turnovers stacked on a plate, one cut in half with filling spilling out.
Print

Cherry Turnovers

Cherry Turnovers are a delicious baked dessert made with flaky puff pastry and sweet, tart cherry sauce. This is the best easy dessert recipe!
Course Dessert
Cuisine American
Total Cost $9.85 recipe / $1.23 serving
Prep Time 20 minutes
Cook Time 25 minutes
Total Time 45 minutes
Servings 8
Calories 416kcal

Ingredients

  • 2 sheets puff pastry, thawed $5.49
  • 2 cups cherry pie filling $3.99
  • 1 large egg, beaten $0.09
  • 1/2 cup powdered sugar $0.27
  • 1 Tbsp milk $0.01

Instructions

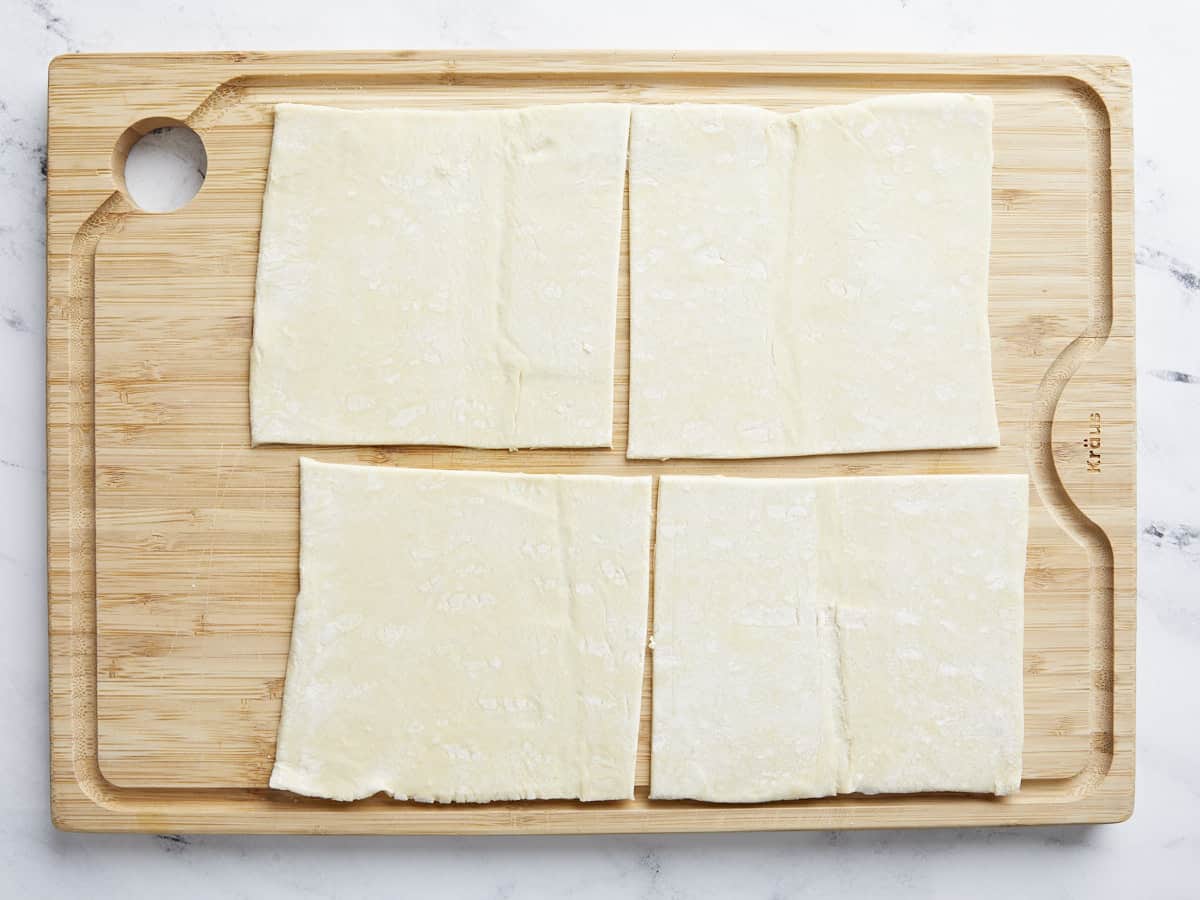
  • Line a baking sheet with parchment paper. Place an oven rack in the center of the oven and preheat the oven to 400°F. Roll each thawed piece of puff pastry gently into a square, then cut each sheet into 4 squares. Place the 8 squares on the baking sheet.
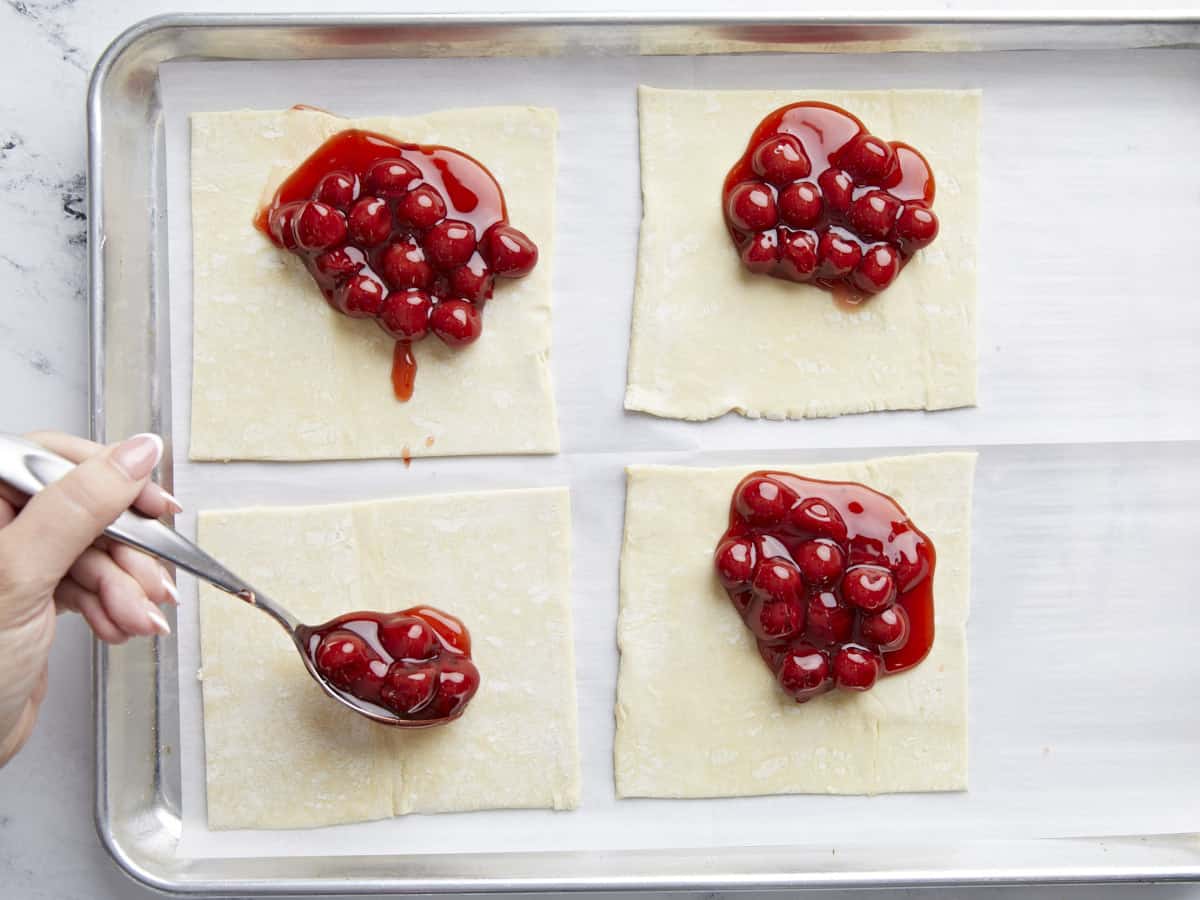
  • Place 1/4 cup of cherry pie filling into the middle, left of center, of each square.
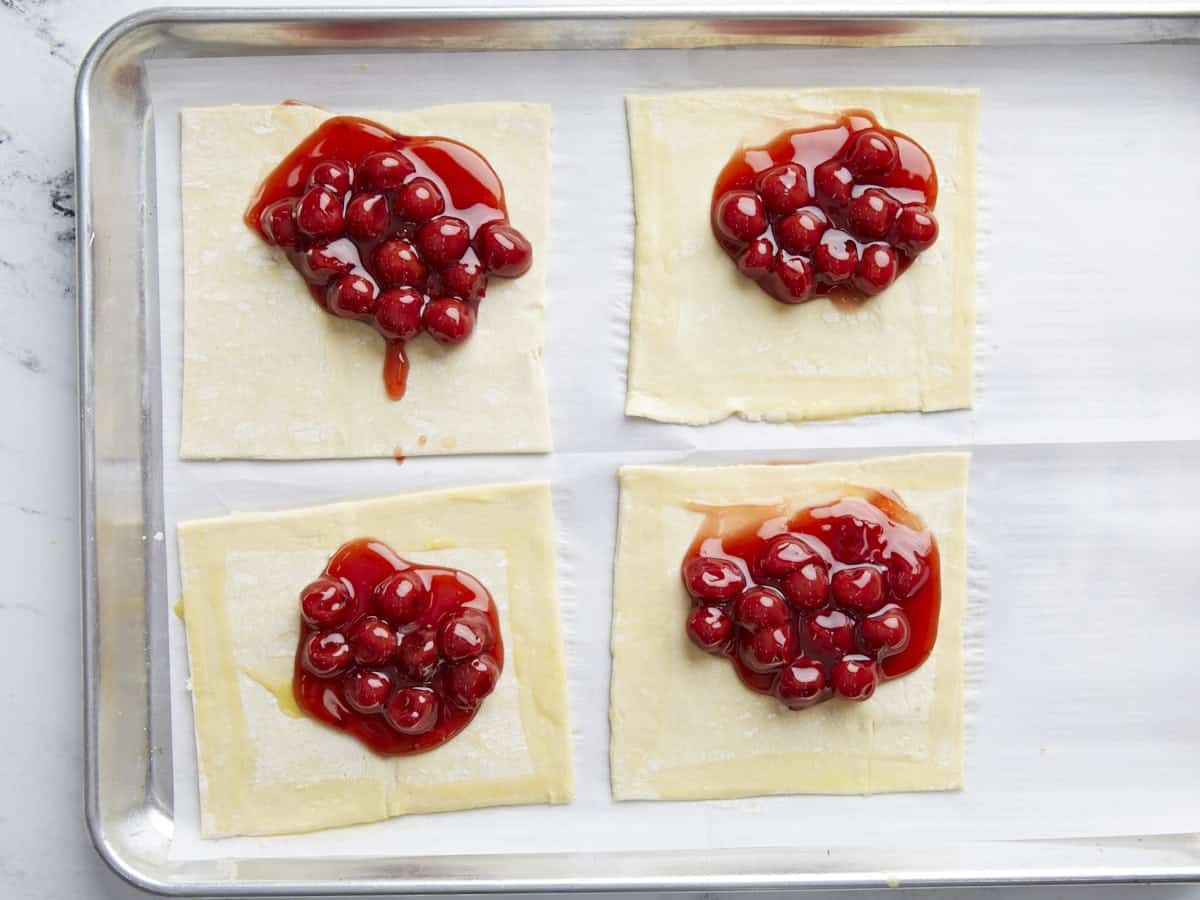
  • Brush a little of the beaten egg along the outside edges of each puff pastry square.
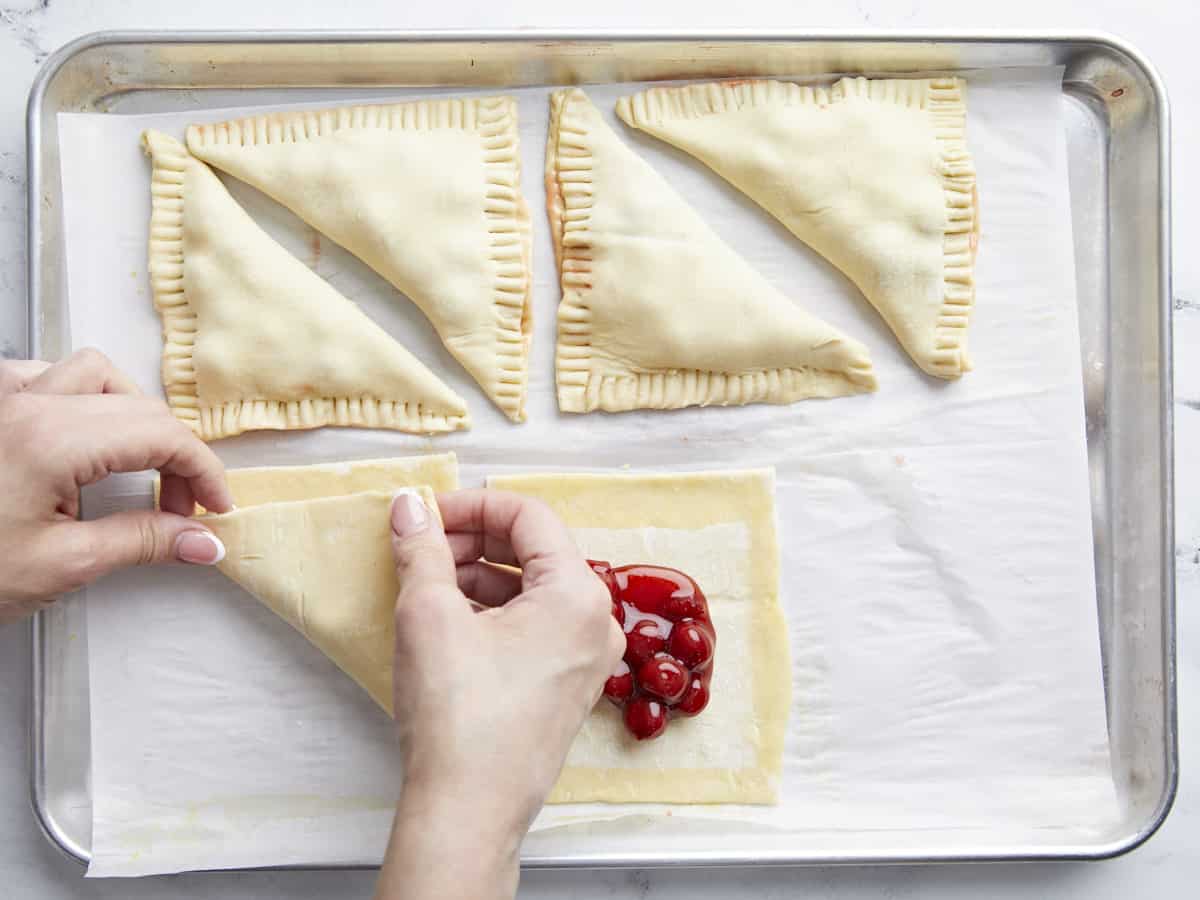
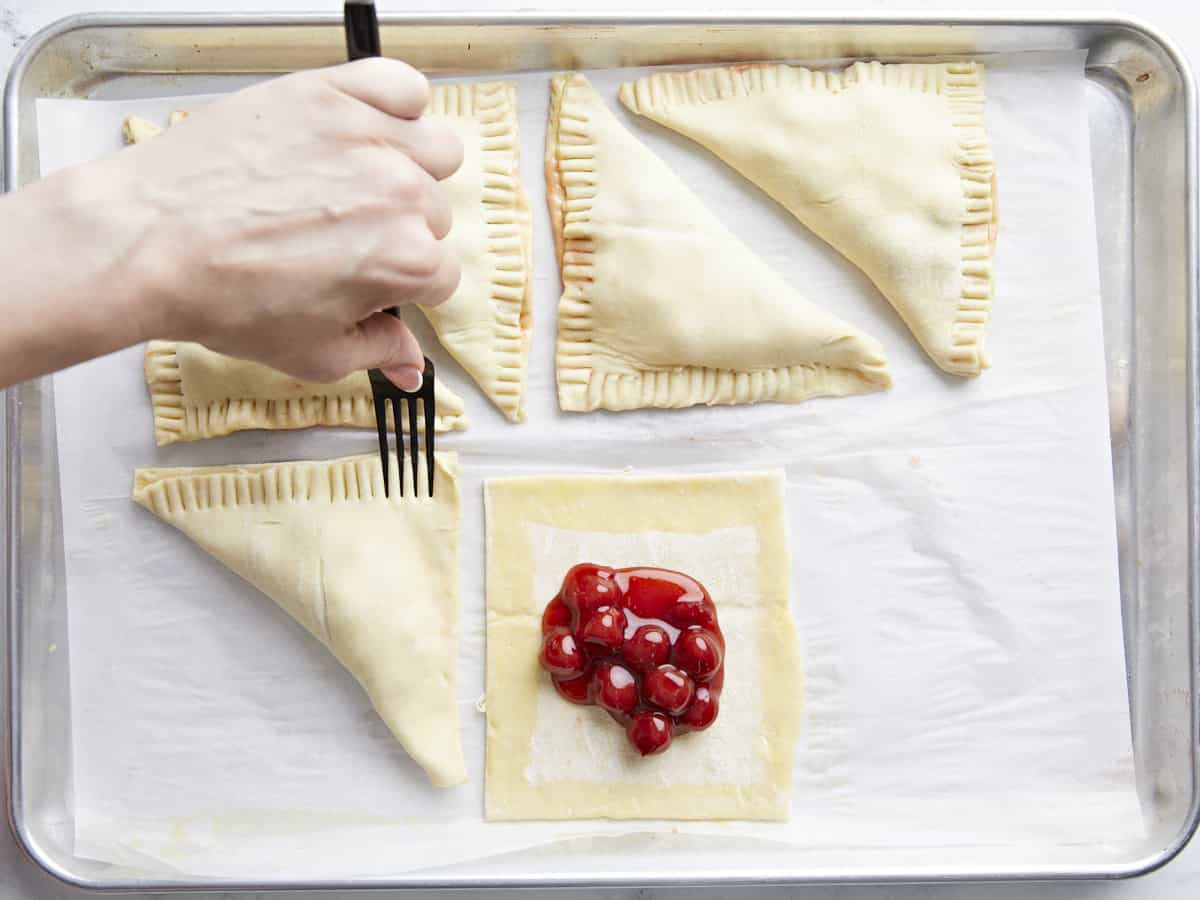
  • Fold the bottom right corner of the dough over the filling and press it into the top left corner. Seal the edges with a fork.
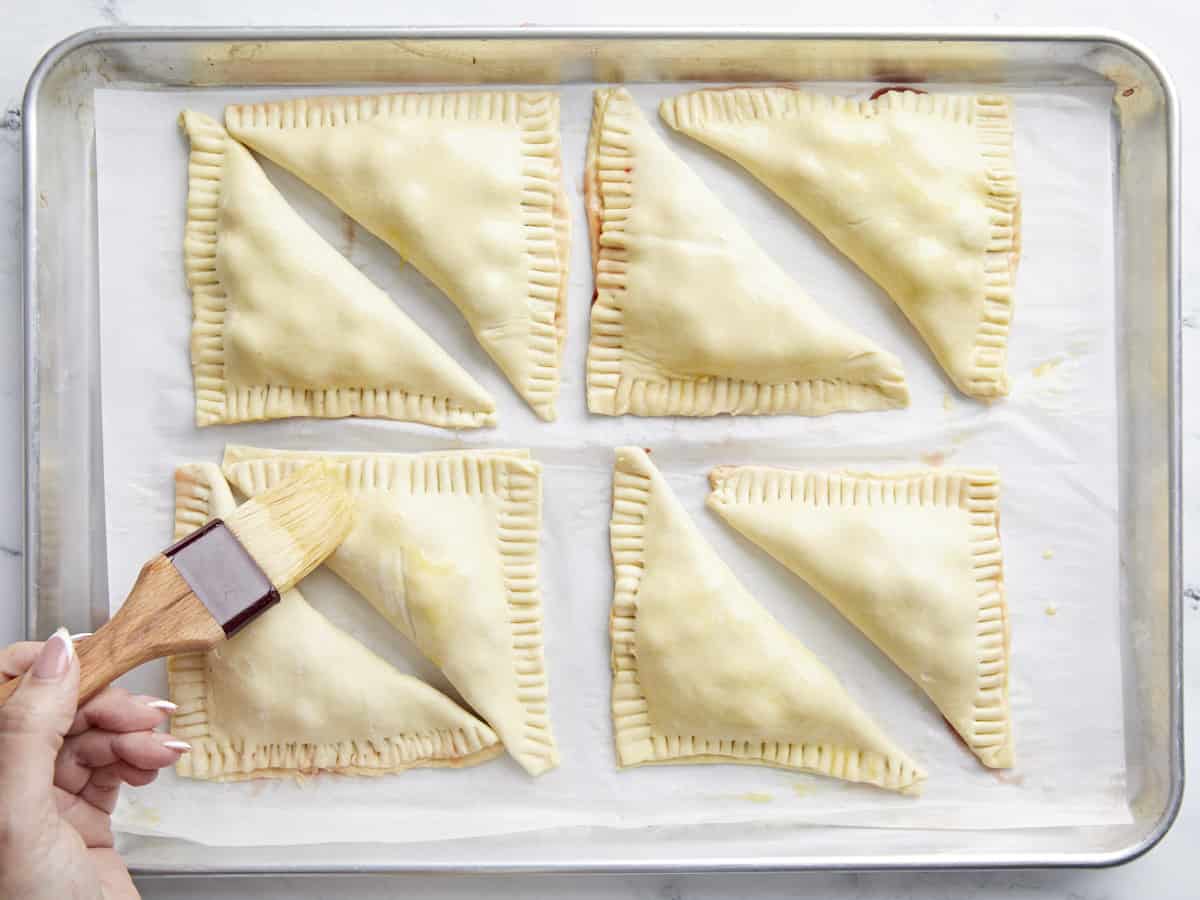
  • Use a pastry brush or paper towel to add a very light layer of the beaten egg over the top of the puff pastry turnover. Bake for 20 to 25 minutes until the puff pastry has risen and is golden brown. Remove from the oven and allow to cool on the baking sheet for a few minutes before placing the turnovers on a wire cooling rack.
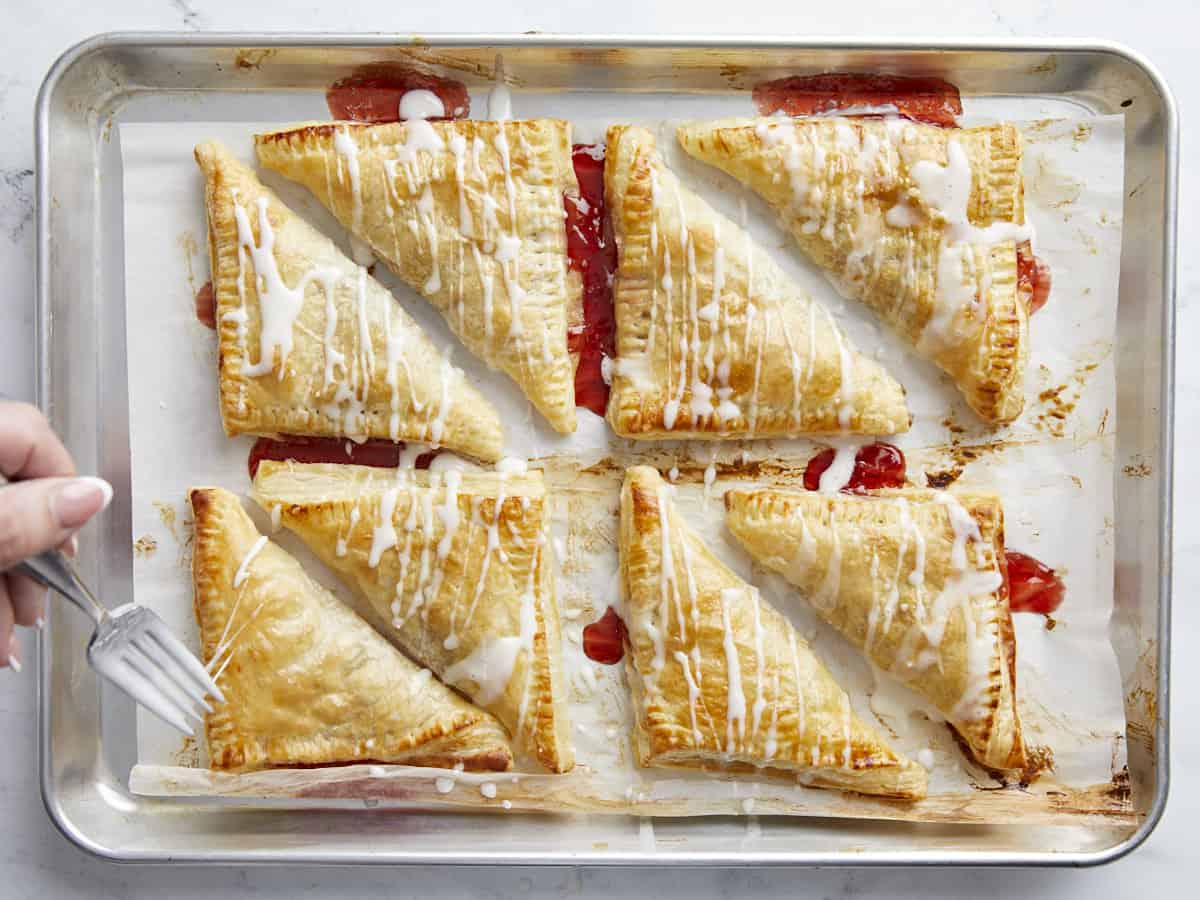
  • Mix the milk with the powdered sugar to make a glaze. Use a spoon to drizzle the glaze over the turnovers. Then enjoy!

See how we calculate recipe costs here.

Nutrition

Serving: 1pastry | Calories: 416kcal | Carbohydrates: 44g | Protein: 6g | Fat: 24g | Sodium: 173mg | Fiber: 1g
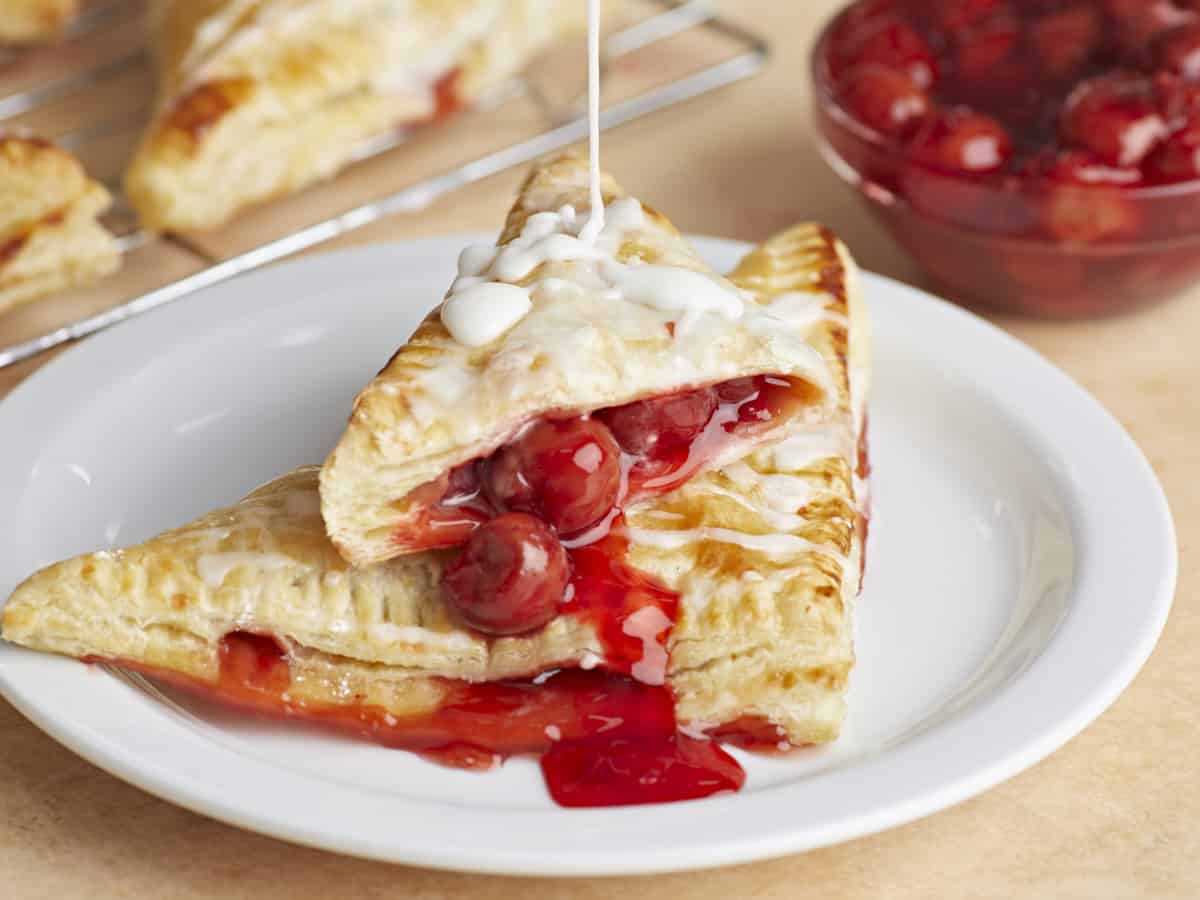
Icing being drizzled over two cherry turnovers on a plate.

How to Make Cherry Turnovers – Step by Step Photos

Puff pastry cut into squares on a cutting board.

Line a baking sheet with parchment paper. Place an oven rack in the center of the oven and preheat the oven to 400°F. Place the floured side of the thawed puff pastry sheet on your work surface and use a rolling pin (or wine bottle) to gently roll each sheet into a 12-inch by 12-inch square. Then cut each puff pastry sheet into four squares. Place the eight squares on the baking sheet.

Cherry filling being spooned onto puff pastry squares.

Place 1/4 cup of cherry pie filling (or Cherry Sauce) into each square’s middle, just left of center, and leave a 1-inch border around the edges. Don’t overfill the turnovers, or they will be difficult to seal.

Puff pastry brushed with egg wash.

Use a pastry brush, a paper towel, or your finger to brush a little of the beaten egg along the outside edges of each puff pastry square.

puff pastry being folded over the cherry filling.

Fold the bottom right corner of the dough over the filling and press it into the top left corner to create a triangle.

Puff pastry seams being sealed with a fork.

Seal the edges of the triangle with a fork. Trim any wonky corners with a small knife.

Egg being brushed on top of the puff pastry.

Use a pastry brush or paper towel to add a very light film of 1 beaten egg over the top of each puff pastry turnover. Bake in your preheated 400°F oven for 10 minutes. Move the baking pan so the front of the baking pan is now facing the back of the oven. Then bake an additional 10 to 15 minutes until the puff pastry rises and turns golden brown. Remove the pastries from the oven and cool on the baking sheet for a few minutes before placing the turnovers on a wire cooling rack.

Puff pastries being glazed.

Once the pastries have cooled, mix 1 tablespoon of milk with the 1/2 cup of powdered sugar until a thick glaze forms. Use a fork or spoon to drizzle the glaze over the turnovers. A fork creates more distinct lines and a spoon drizzles globs of glaze; choose your own adventure. Don’t tell anyone they’re ready until you’ve had at least one and enjoy your second with loved ones!

Side view of cherry turnovers on the wire cooling wrack.

More Easy Dessert Recipes

The post Cherry Turnovers appeared first on Budget Bytes.

Cheese Danish

This buttery, flaky, and budget-friendly Cheese Danish recipe is ridiculously easy to make and can be on your table in under a half hour.

The post Cheese Danish appeared first on Budget Bytes.

This buttery, flaky, vanilla-scented Cheese Danish recipe is so ridiculously delicious that Beth hasn’t stopped talking about it since I made it for her. This is one of my all-time favorite recipes because this breakfast pastry is a total breeze to put together, is ready in under a half hour, and it’s incredibly budget-friendly. PS I’m going to show you how to make this easy Cheese Danish at home for a third of what you’d pay at the fancy bakery. (Seriously. They sell them for $18 for a half dozen on Gold Belly.)

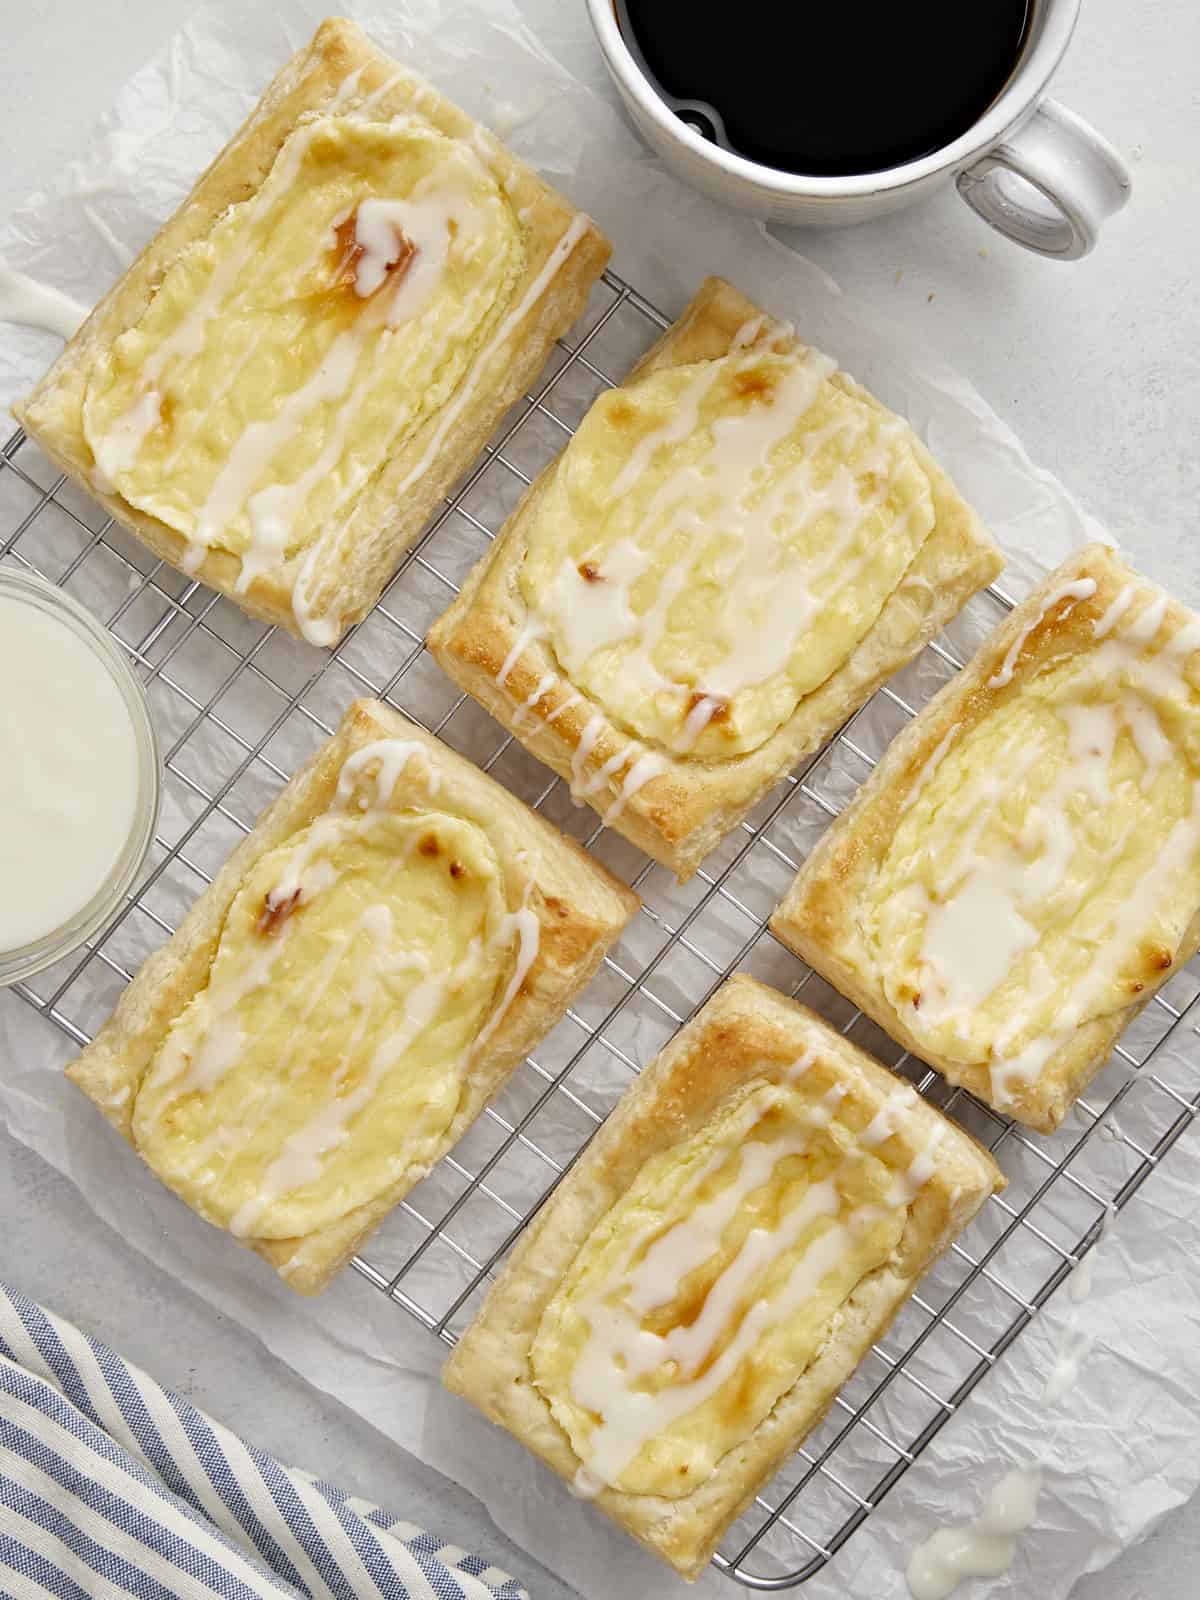
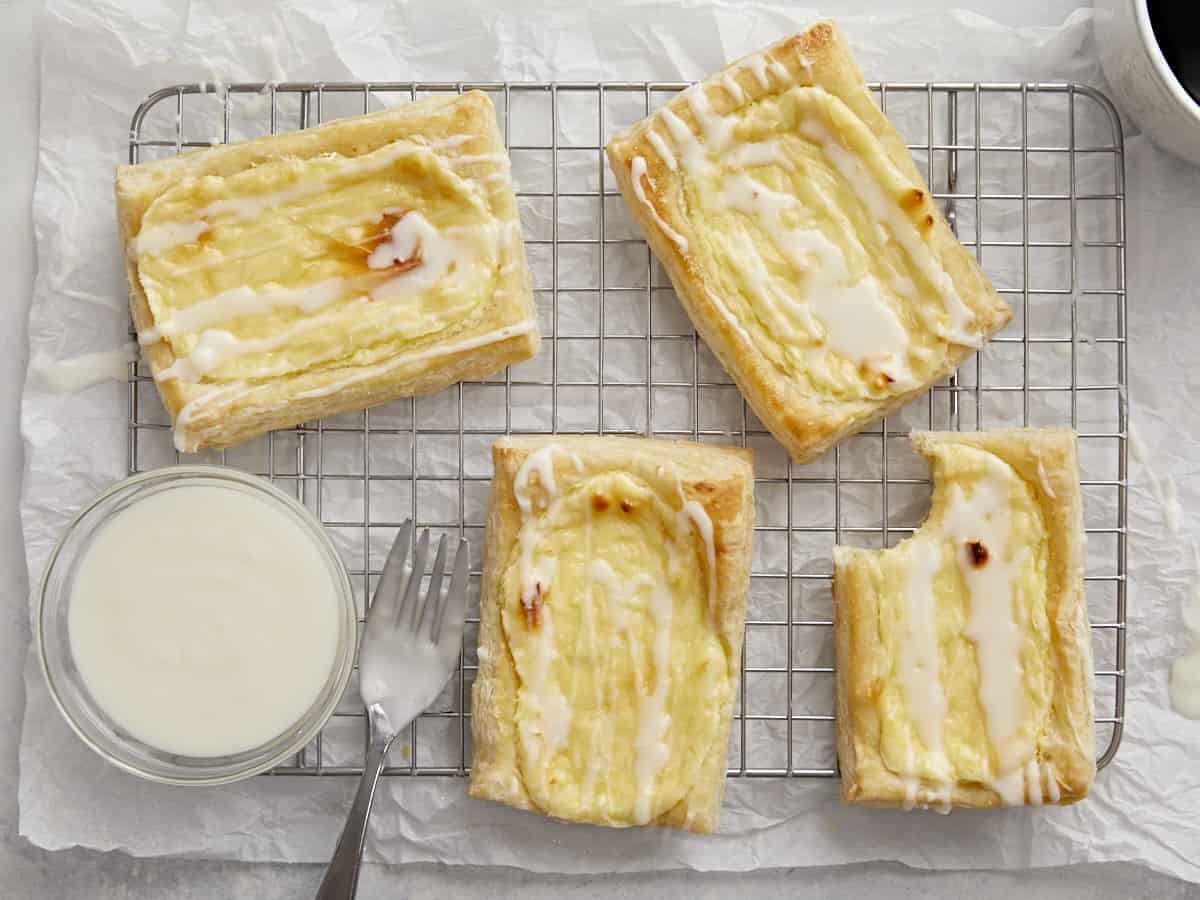
Overhead shot of cheese danish on a cooling rack with a small bowl of icing and a sup of coffee next to them.

What Is Cheese Danish?

Cheese Danish is a classic Danish breakfast treat made with a flaky puff pastry dough and a lightly flavored cream cheese filling. This easy Cheese Danish is also perfect for brunch or a quick after-dinner dessert and will score all of the compliments at the potluck or work party. (Pro Tip: Whip up a quick batch of Cheese Danish when a loved one has a bad day and get ready to collect All. Of. The. Hugs.)

What You Need To Make Cheese Danish

This is one of those recipes I use all of the time, so I stockpile the ingredients because when it comes to dessert, I stay ready. PS Once you make it, you will stockpile them too. TRUST. Here’s what you’ll need to make my easy recipe for Cheese Danish:

  • Puff Pastry – this buttery dough forms the base of flaky Cheese Danish. Find it in the frozen aisle section of most grocery stores. If you don’t have puff pastry, I don’t recommend making this recipe.
  • Cream Cheese – forms the filling of Cheese Danish. It must be at room temperature for you to mix it easily with other ingredients. In a pinch, leave it in its airtight foil wrapper and place it in a bowl of warm water for a few minutes to raise its temperature quickly straight from the fridge. If you don’t have cream cheese, I don’t recommend making this recipe.
  • Powdered Sugar – sweetens the filling and the icing. If you don’t have powdered sugar, use 1/4 cup of granulated sugar and mix it into the cream cheese until completely dissolved. You will need to skip the powdered sugar icing. Instead, thin out 2 tablespoons of your favorite jam with 1 teaspoon water and spoon over the pastry.
  • Vanilla – helps to flavor and lightly scent the cream cheese filling and the icing. If you don’t have vanilla, use 1/8 teaspoon of cinnamon or 1/4 teaspoon of lemon zest for the filling. You can omit the vanilla from the icing and substitute it with 1 tablespoon of melted butter.
  • Egg– You will use the egg yolk to help bind and add color and a velvety texture to the filling. You will use the egg white to brush on the puff pastry to seal it and add a golden sheen.
  • Milk– creates a velvety icing and helps thin it.
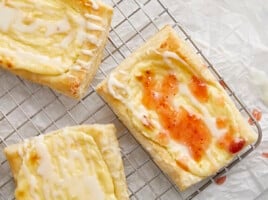
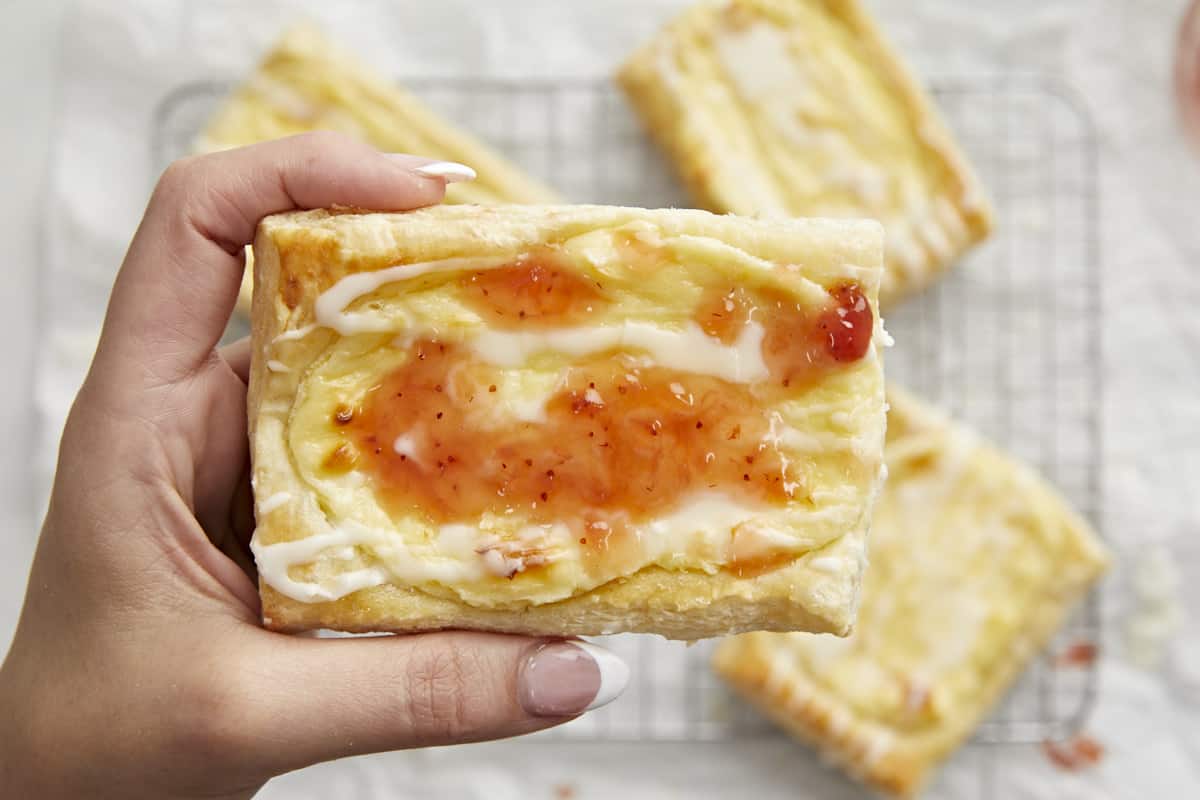
Overhead shot of a hand holding a cheese danish dressed with icing and strawberry jam in the foreground and three other cheese danish on a cooling rack in the background.

Tips For Making The Best Cheese Danish

  1. Thaw the puff pastry in the fridge for an hour or two, or it will crack when you try to cut it. Don’t thaw it at room temperature, as the butter will melt into the dough, and you won’t get the flaky finish puff pastry is known for.
  2. Add a teaspoon of lemon or orange zest to the filling to boost flavor.
  3. Use an oven thermometer to ensure the oven is at the correct temperature.
  4. Rotate the baking sheet, front to back, halfway through cooking to ensure even baking.
  5. Mix a tablespoon of melted butter into the icing to add flavor and an even more velvety finish.
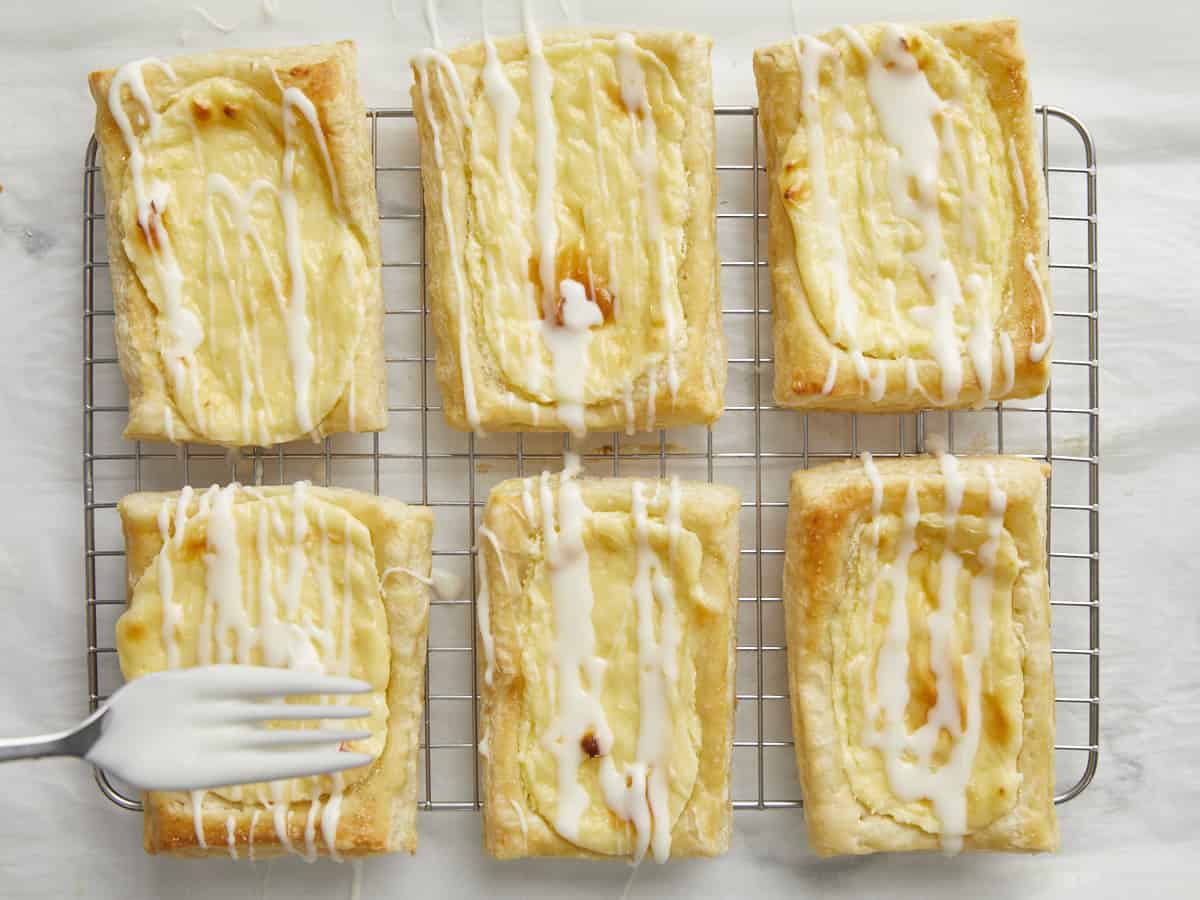
  6. Cool the Cheese Danish before adding the icing so it doesn’t melt into the pastry. To get lines of icing instead of pools of icing, use a fork, not a spoon, to drizzle the icing.

How To Store Cheese Danish

Cool the Cheese Danish completely in an airtight container with wax or parchment paper between layers and over the top surface. Store in the fridge for up to seven days or in the freezer for up to two months. Thaw in the fridge before serving or reheat in a 350°F oven, until warm, about 5 minutes.

Overhead shot of cheese danish on a cooling rack with a small bowl of icing and a sup of coffee next to them.
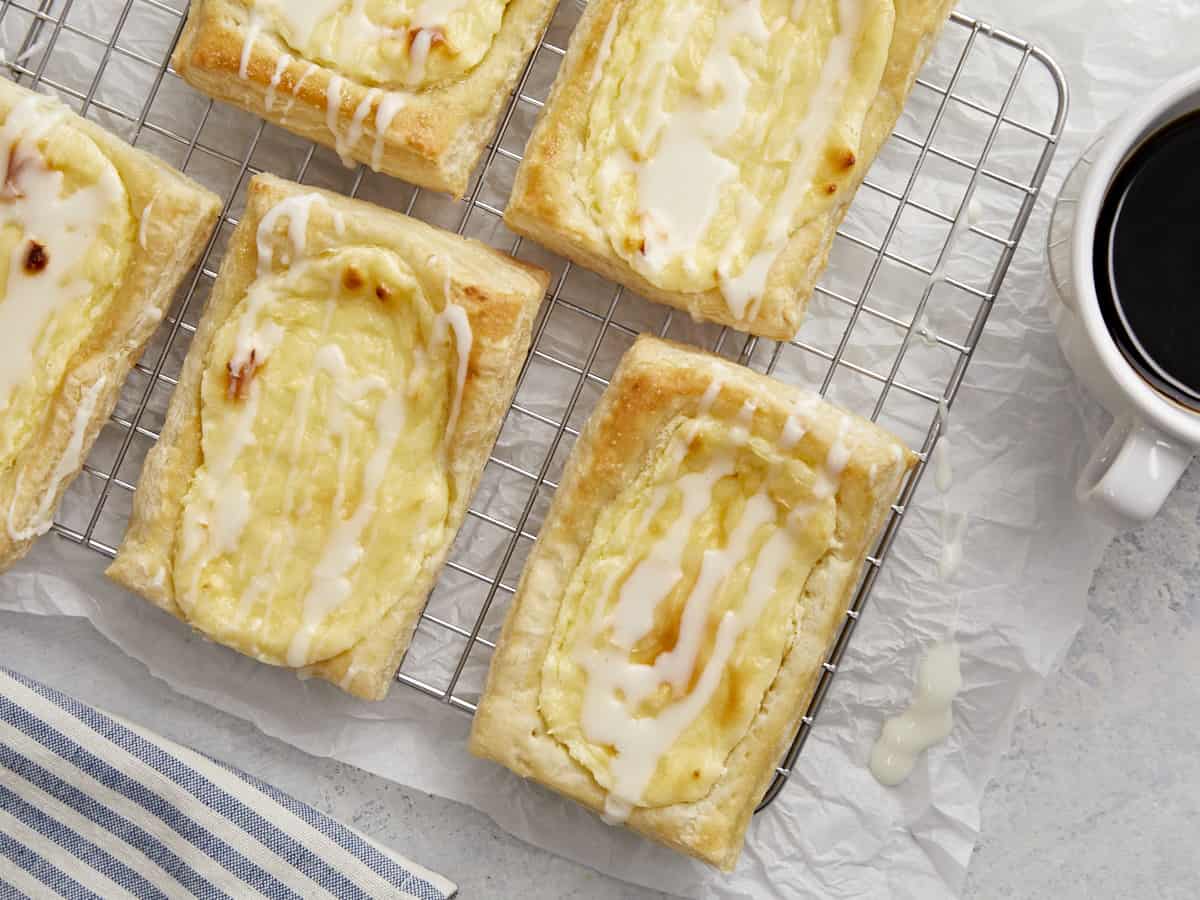
Overhead shot of three cheese danish on a cooling rack.
Print

Cheese Danish

This buttery, flaky, and budget-friendly Cheese Danish recipe is ridiculously easy to make and can be on your table in under a half hour.
Course Breakfast, Brunch, Dessert
Cuisine European
Total Cost ($6.07 recipe / $1.01 serving)
Prep Time 10 minutes
Cook Time 15 minutes
Total Time 25 minutes
Servings 6 danish
Calories 438kcal

Ingredients

Cheese Danish

  • 8 oz. cream cheese, softened $2.19
  • 1/3 cup powdered sugar $0.11
  • 1 tsp vanilla extract $0.58
  • 1 pinch salt $0.01
  • 1 sheet puff pastry, thawed $2.75
  • 1 egg, yolk and white separated $0.09

Icing

Instructions

  • Line a baking sheet with parchment paper. Place your oven's rack in the center and preheat it to 400°F. Mix the cream cheese, powdered sugar, vanilla, egg yolk, and salt until smooth and light in texture.
  • Unfold the sheet of puff pastry, dust off excess flour, and place it on the baking sheet. Cut down the seams of the folds so you have three equal-sized strips. Cut the strips into halves.
  • Use a fork to perforate around the sides of each puff pastry rectangle, leaving a half-inch border. This prevents the puff pastry from rising in the middle.
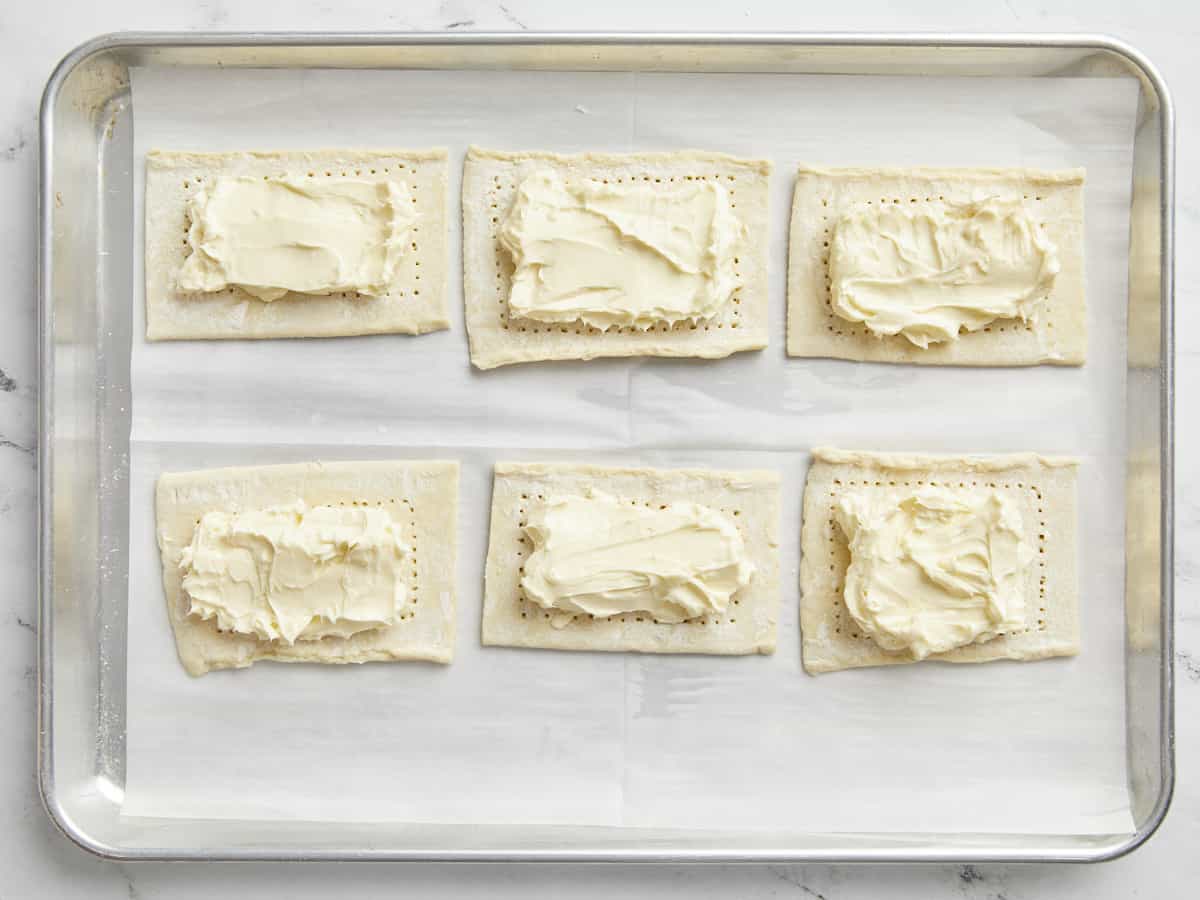
  • Add 2 heaping tablespoons of your cream cheese mixture to each square. Spread evenly, making sure to leave the borders clean.
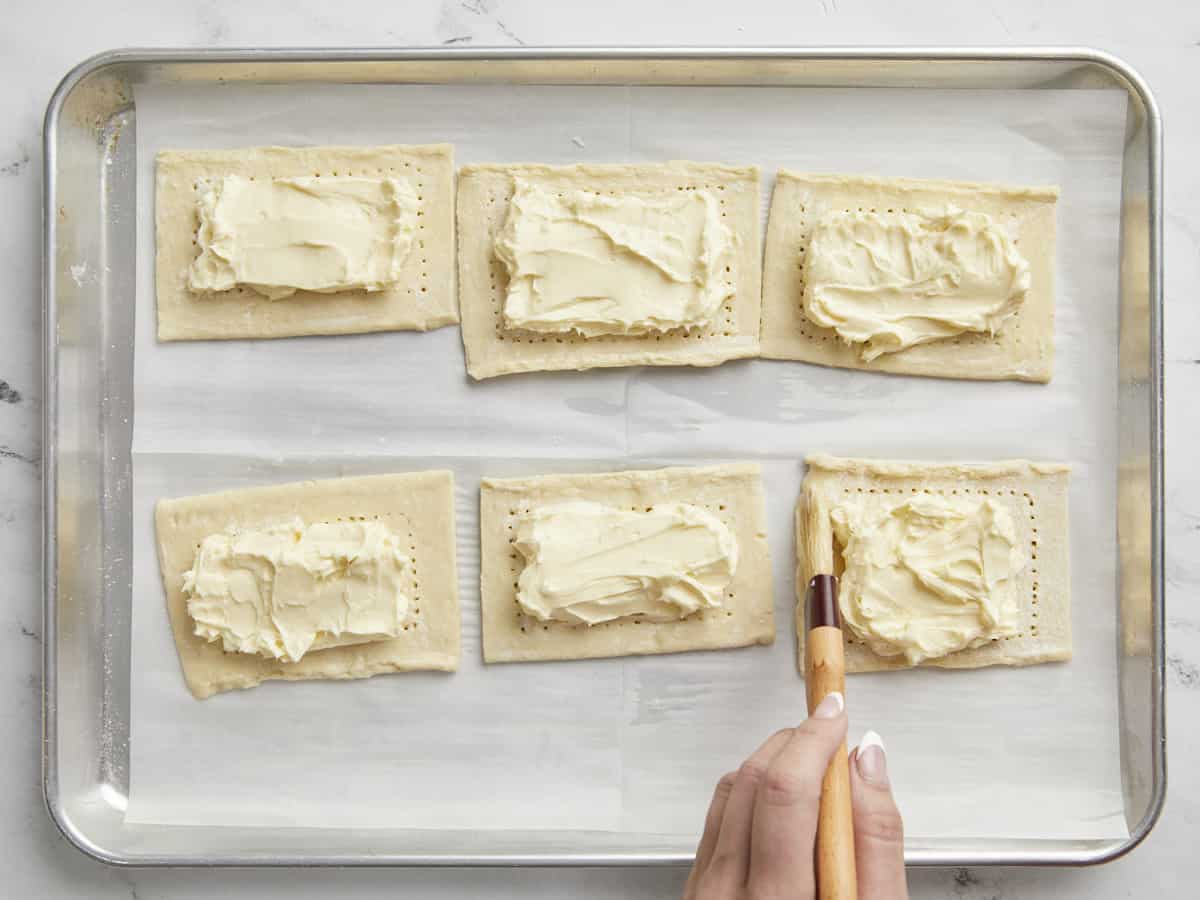
  • Beat the egg white until frothy. Dip a pastry brush into the beaten egg white and trace lightly along the borders. This will give the puff pastry a glossy finish and golden color.
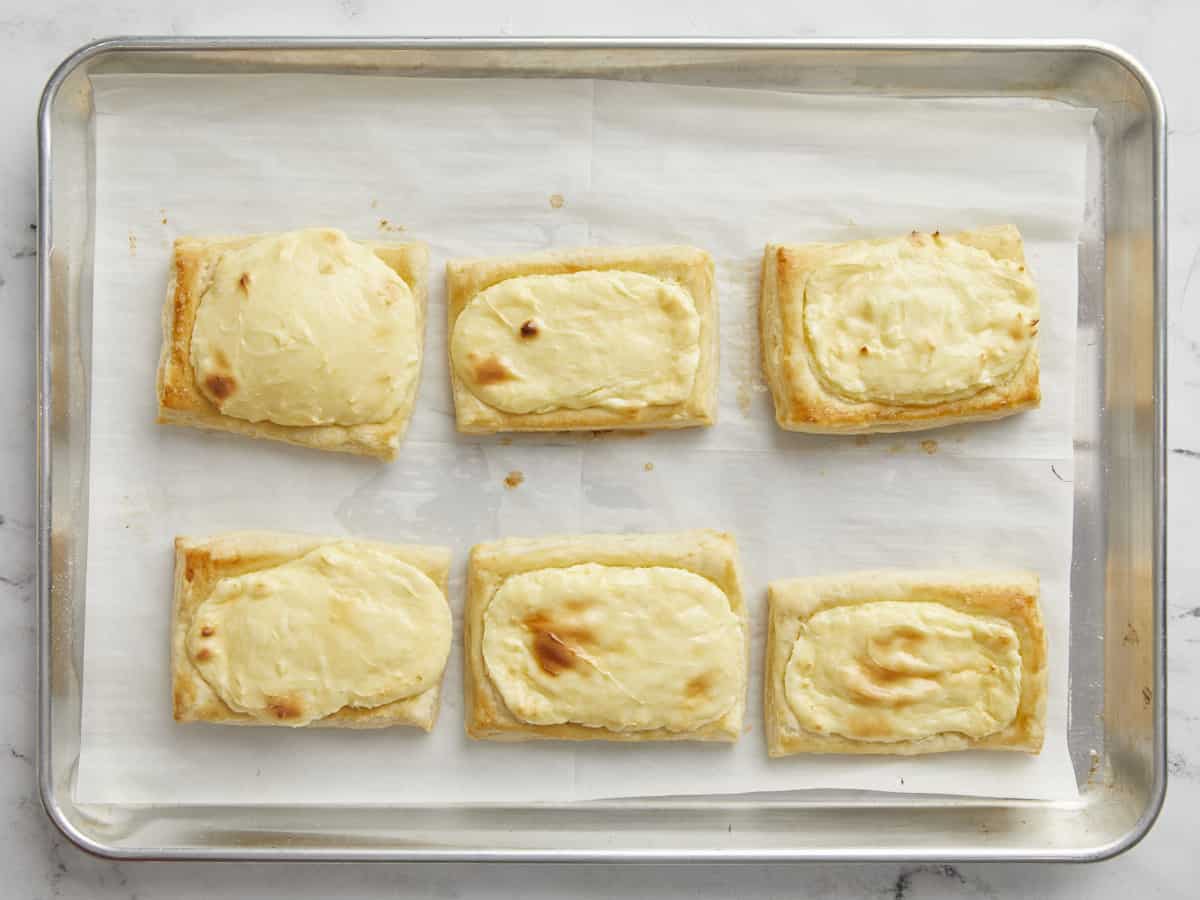
  • Bake at 400°F for 10 minutes then rotate the baking sheet, front to back. Continue to bake for 5 to 10 minutes, or until the borders of the puff pastry have risen and are golden brown. Use a spatula to remove the pastries from the sheet pan and cool on a rack.
  • In a separate bowl, mix the powdered sugar, vanilla, and milk. Finally, drizzle over cooled Cheese Danish and watch your loved ones gobble them down! Optional: drizzle with 2 tablespoons of strawberry jam thinned with 1 teaspoon of water.

See how we calculate recipe costs here.

Nutrition

Serving: 1danish | Calories: 438kcal | Carbohydrates: 38g | Protein: 6g | Fat: 29g | Sodium: 240mg | Fiber: 1g
Overhead shot of cheese danish on a cooling rack with a small bowl of icing and a silver fork next to them.

How to Make Cheese Danish – Step by Step Photos

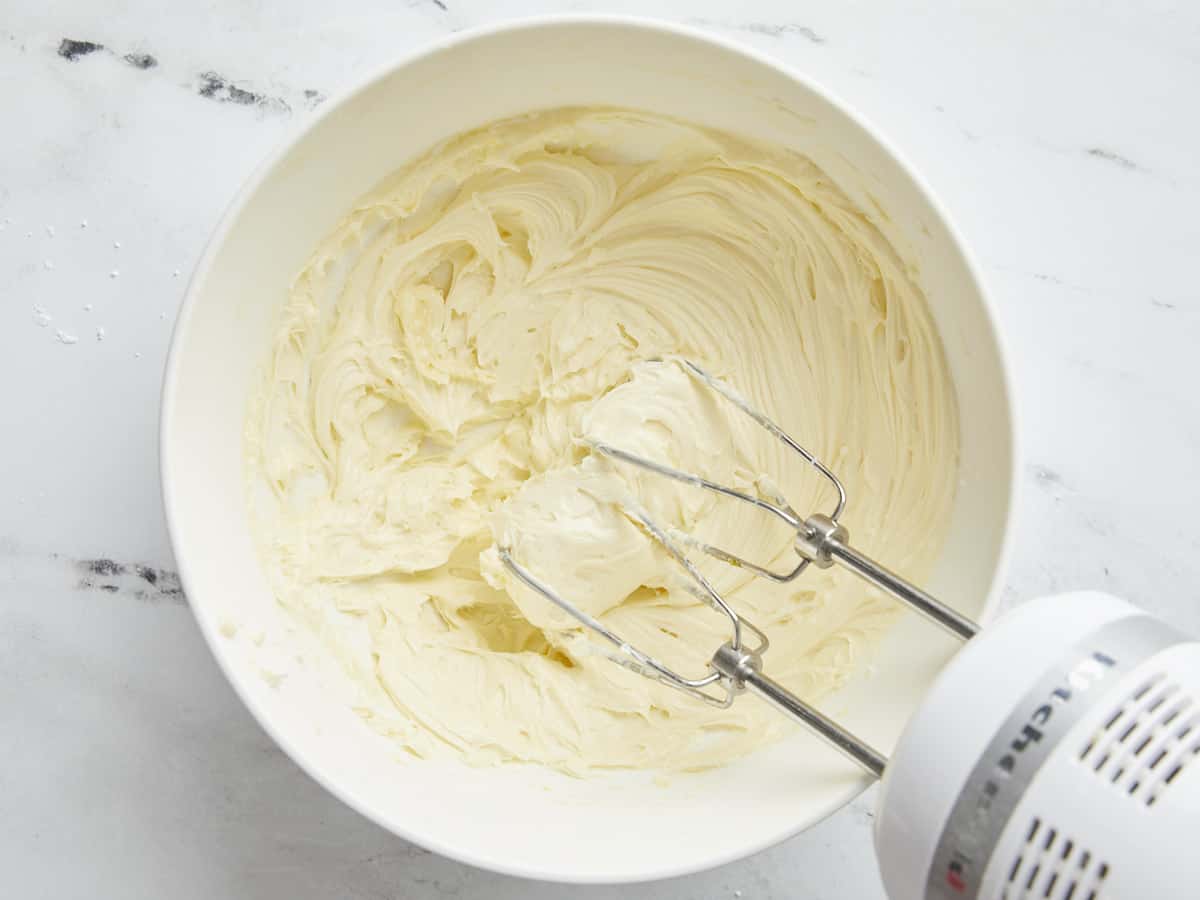
Overhead shot of filling mixed with a hand beater in a shite bowl.

Line a baking sheet with parchment paper. Place your oven’s rack in the center and preheat it to 400°F. Mix 8 ounces of cream cheese, 1/3 cup powdered sugar, 1 teaspoon vanilla, 1 egg yolk, and 1 pinch of salt until smooth and light in texture.

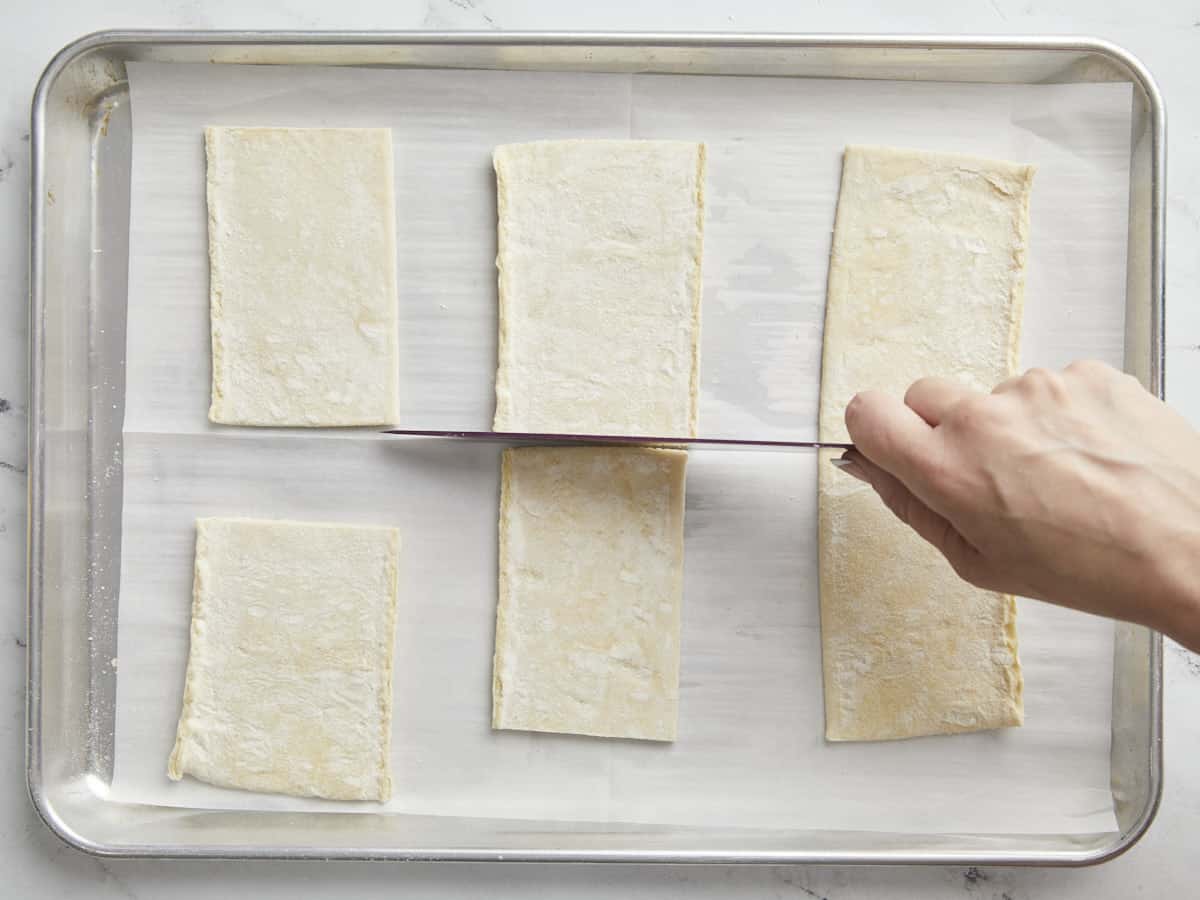
Overhead shot of sheet of puff pastry cut into six rectangles.

Unfold 1 sheet of puff pastry, dust off excess flour, and place it on the baking sheet. Then, cut down the seams of the folds so you have three equal-sized strips. Cut the strips into halves. Do not pull your knife through the dough, as it will make it lose its shape. Just press down.

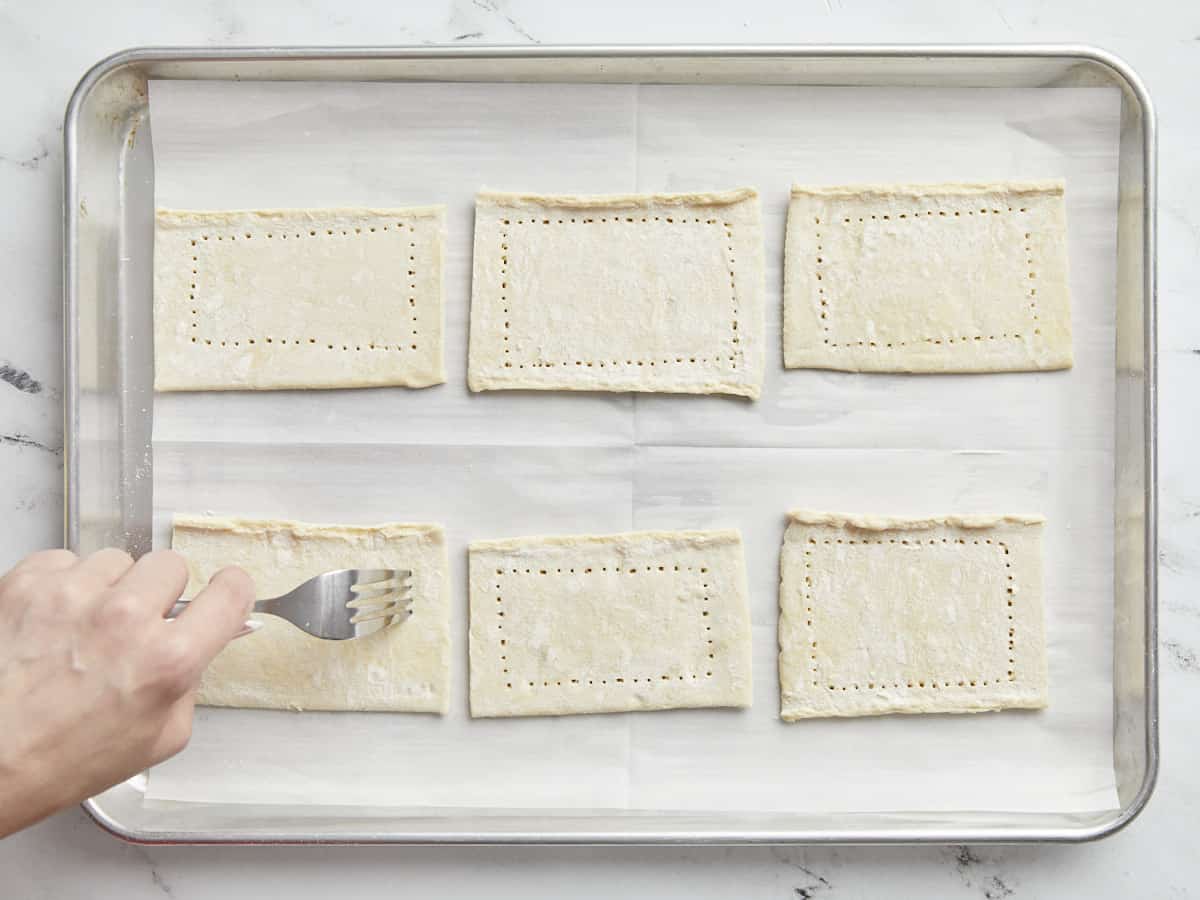
Overhead shot of puff pastry rectangles being docked with a fork.

Use a fork to perforate around the sides of each puff pastry rectangle, leaving a half-inch border. This prevents the puff pastry from rising in the middle.

Overhead shot of of filling added to the puff pastry rectangles.

Add two heaping tablespoons of the cream cheese mixture to each square. Then, spread the mixture evenly, making sure to leave the borders clean.

Overhead shot of egg wash being brushed on puff pastry.

Beat 1 egg white until frothy. Then, dip a pastry brush (in a pinch, just use your finger) into the beaten egg white and trace lightly along the borders. This will give the puff pastry a glossy finish and golden color.

Overhead shot of 6 baked cheese danish on.a sheet pan.

Bake at 400°F for 10 minutes, then rotate the baking sheet, front to back. Continue to bake for 5 to 10 minutes, or until the borders of the puff pastry have risen and are golden brown. Next, use a spatula to remove the pastries from the sheet pan and cool on a rack.

Overhead shot of cheese danish being spinkled with icing.

Then, in a separate bowl, mix 1/2 cup powdered sugar, 1/4 teaspoon vanilla, and 2 tablespoons milk. Finally, drizzle over cooled Cheese Danish.

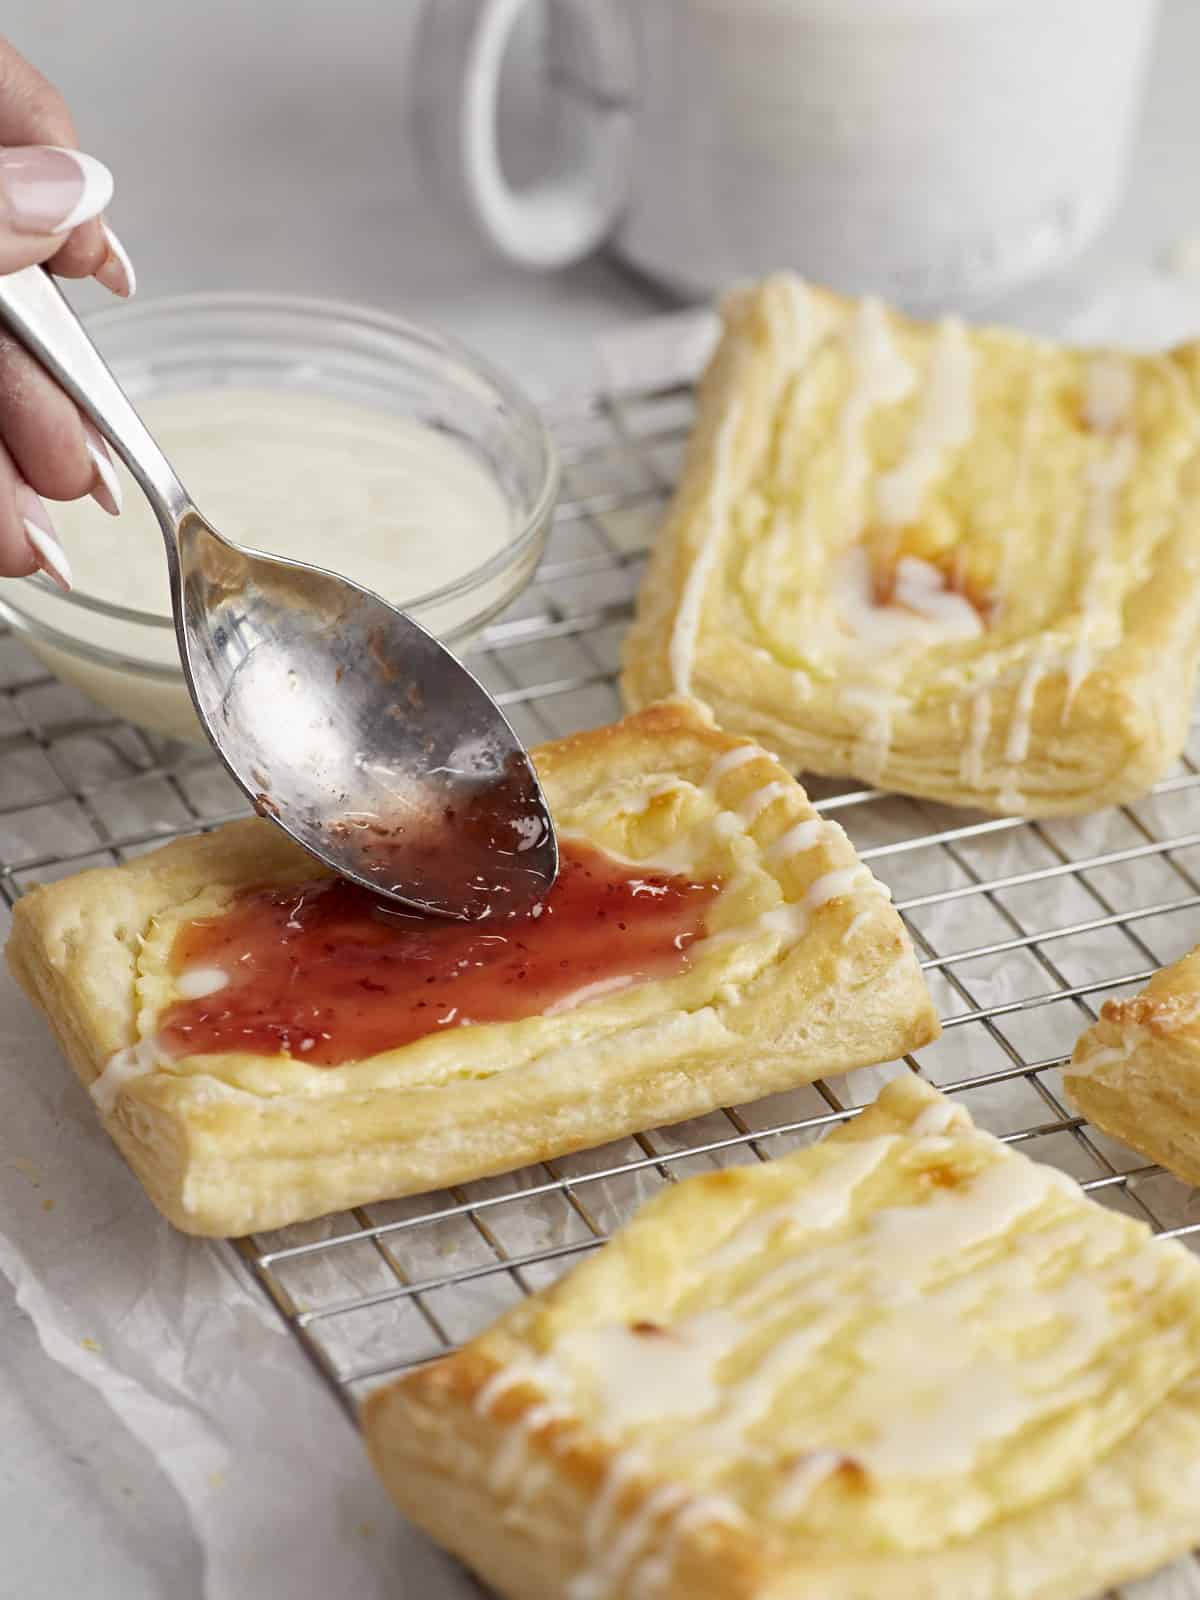
Side shot of cheese danish on a cooling rack with a small bowl of icing next to them wit hone danish being dressed with strawberry jam.

It’s optional, but I love to drizzle the Cheese Danish with 2 tablespoons of strawberry jam thinned with 1 teaspoon of water. Now all you have left to do is chow down and collect compliments!

You can easily double this recipe to use both sheets of puff pastry that come in the package (especially if you’re serving the Cheese Danish for brunch because they will go fast!). You can also use the second sheet of puff pastry to make our Easy Quiche Lorraine or Spinach Pie!

More Easy Dessert Recipes

The post Cheese Danish appeared first on Budget Bytes.

Strawberry Banana Bread

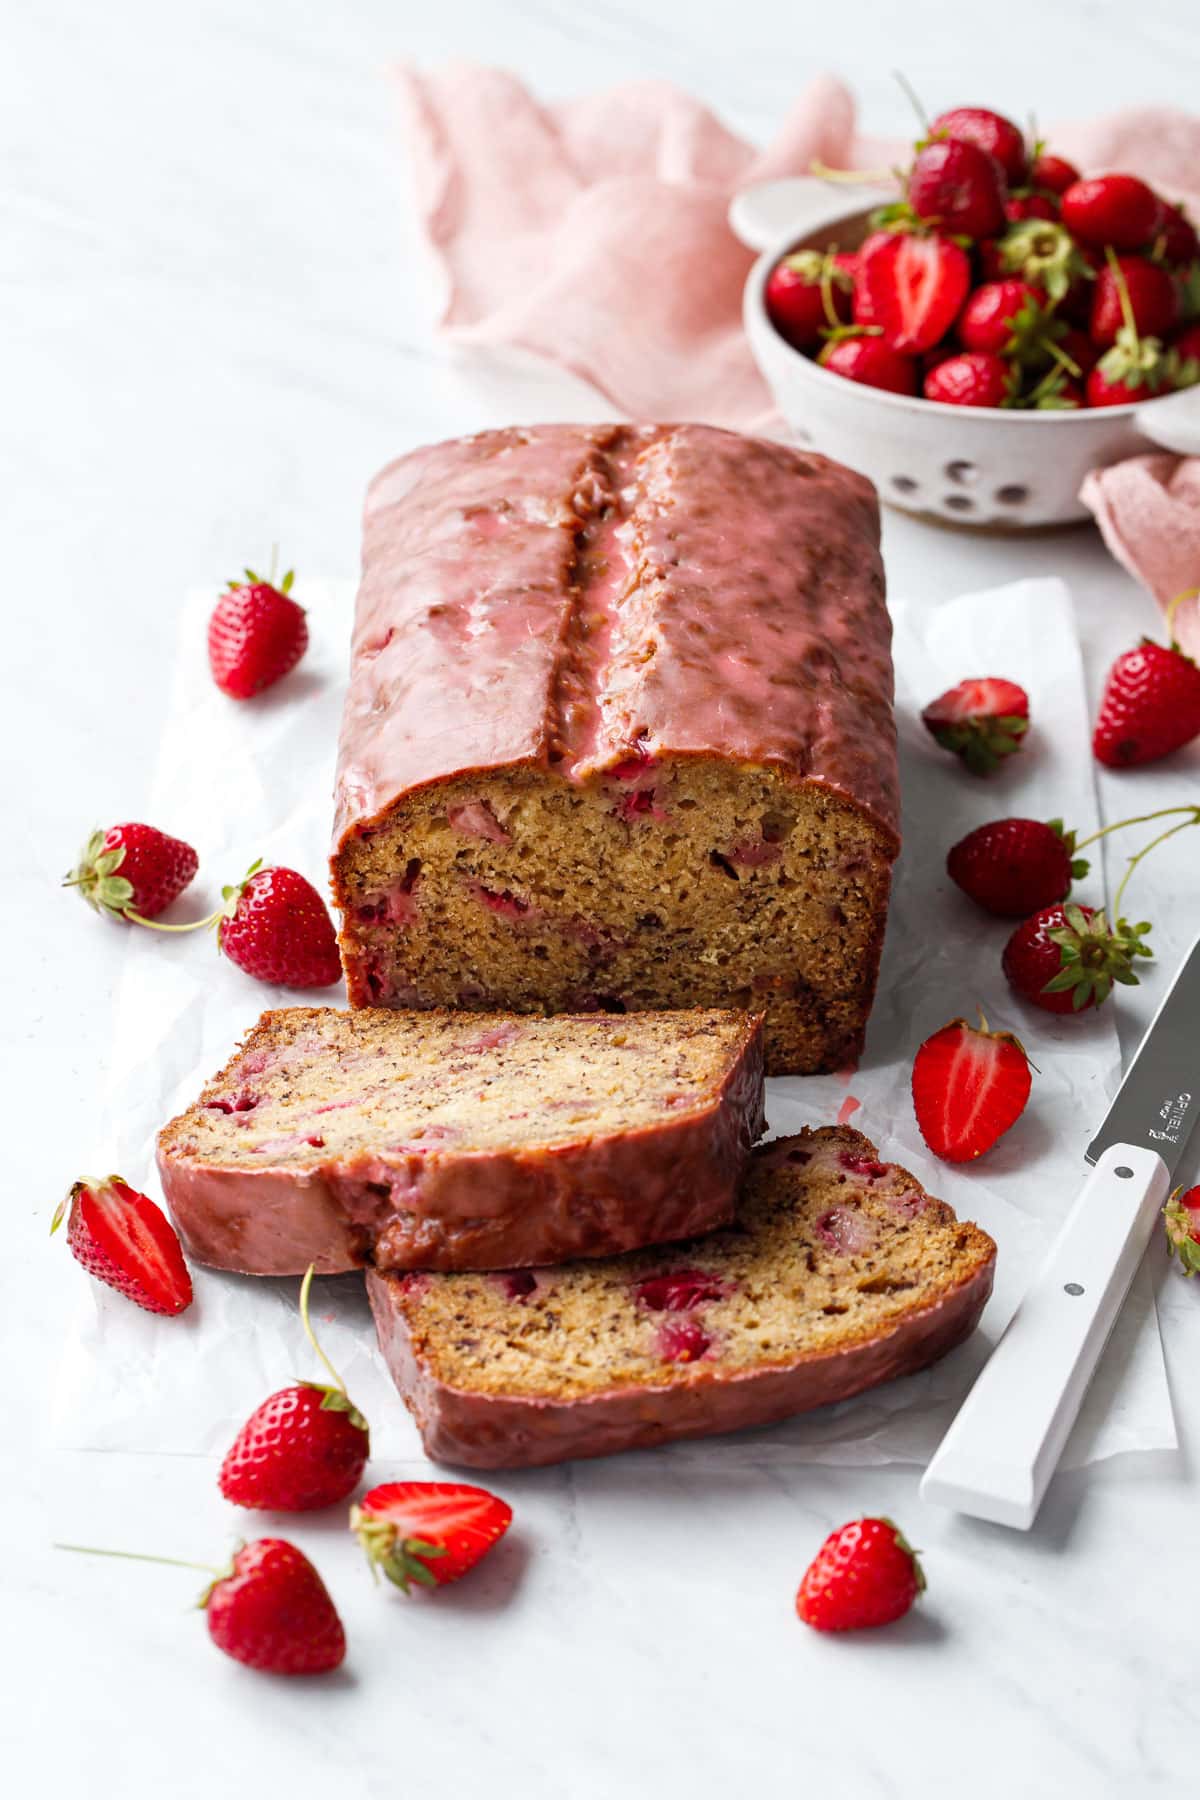
Moist, flavorful banana bread studded with chunks of fresh strawberries, a hint of cardamom, and brushed with a sweet strawberry glaze. Take your favorite banana bread recipe to new heights with fresh strawberries for a flavorful twist you’ll simply adore. The sweet strawberry glaze on top is—literally—the icing on the cake! The theme of this […]

The post Strawberry Banana Bread first appeared on Love and Olive Oil.

Moist, flavorful banana bread studded with chunks of fresh strawberries, a hint of cardamom, and brushed with a sweet strawberry glaze.

Take your favorite banana bread recipe to new heights with fresh strawberries for a flavorful twist you’ll simply adore. The sweet strawberry glaze on top is—literally—the icing on the cake!

Loaf of Strawberry Banana Bread with a pink glaze, two slices laying down to show the interior texture, and strainer with strawberries in the background.

The theme of this spring’s recipes is red and yellow, apparently. Strawberry + lemon, strawberry + passionfruit, and now, strawberry + banana.

I can’t help it if strawberries are just so darn versatile, it’s one of the reasons they are one of my favorite ingredients to bake with.

Unfortunately this recipe used the last of my spring berries, marking the official end of strawberry season here in Tennessee.

I was lucky to get in two good picking sessions this year, though all the rain we’ve had has made the season particularly short (the last time we went, half the fruit in the field was rotten. It was very sad, indeed.). Still, I managed to get 3 good strawberry recipes out of them, which I certainly consider a successful strawberry season!

And actually, make that 4 good recipes, I forgot I’ve got something chilling in the freezer that’ll ultimately work with all different kinds of fruit, not just strawberries, so I’ll be sharing that one later this summer.

(more…)

Texas Sheet Cake

Texas Sheet Cake might be the ultimate chocolate cake. It’s incredibly easy to make and has a buttery richness with a pure chocolate punch.

The post Texas Sheet Cake appeared first on Budget Bytes.

Texas Sheet Cake might be the ultimate chocolate cake. It’s incredibly easy to make and has a buttery, velvety richness with a pure chocolate punch. PS, because you make it in a sheet pan, it’s easy to slice and perfect for feeding a crowd. Seriously. You can get 25 slices from one cake! I’m in love.

Side shot of three slices of Texas Sheet Cake stacked on top of one another on a white plate.

What is Texas Sheet Cake?

Texas Sheet Cake is a very simple chocolate cake recipe made in a 10×15 sheet pan that’s two inches deep (also known as a jelly roll pan). You can also use a 12 x18 baking pan, but the cake won’t be as thick and will cook faster. Once cooled, you cover the sheet cake in a thick layer of warm, buttery homemade chocolate icing, right in the pan.

The difference between Texas Sheet Cake and regular cake is the thickness of the cake. Traditional cakes are thicker and sometimes layered. You also remove the cakes from the pans and then frost. Texas Sheet Cake is made in one pan. The thin layer of batter bakes quicker than traditional cakes. You then frost the cake right in the pan.

Ingredients For Texas Sheet Cake

This is one of those recipes that needs to be followed as written. Cakes are a science, so, unfortunately, I don’t have substitutions for any of the following ingredients. You are, of course, welcome to experiment, but I can’t offer guidance or guarantee results. Here’s what you need to make Texas Sheet Cake:

  • All-Purpose Flour – creates the structure of your crumb.
  • Brown Sugar, Granulated Sugar, and Powdered Sugar – these sugars do more than sweeten the cake and the icing. Brown and granulated sugar soften the cake crumb and add moisture. Powdered sugar creates structure in icing.
  • Baking Powder and Baking Soda – leaven the cake and create a light, airy crumb.
  • Butter– creates a light, tender texture and helps the cake rise. It also adds richness to the icing.
  • Unsweetened Cocoa Powder – adds a deep chocolate flavor to the cake and the icing.
  • Coffee– adds depth to the chocolate.
  • Eggs– provide structure to help leaven the cake.
  • Mayo – adds moisture and richness to the cake.
  • Heavy Cream– thins the icing and adds richness.
  • Vanilla – adds depth to the icing.
Overhead shot Texas Sheet Cake being sliced on a sheet pan.

Tips For Making Perfect Texas Sheet Cake

  • For a richer chocolate flavor, use dark cocoa powder.
  • Grease your sheet pan with melted butter, dust it with flour, and then freeze it while you make the batter. That way, the batter doesn’t move the butter around when it hits the pan, creating spots that your cake could stick to. 
  • You serve this cake in the sheet pan it was baked in, so I’d avoid using parchment. Your knife could shred the parchment as you slice the cake, and little bits of paper could get caught up in the slices.
  • To add a little texture and crunch to your cake, top it off with chopped nuts before you frost it. Toast them for extra yum-factor.
  • You can frost the cake while it’s still warm for an ooey-gooey, though slightly sloppy experience. If you want cleaner cuts, wait until the cake has completely cooled before icing it. And then let it sit for a bit and allow the icing to solidify some.
  • Texas sheet cake is traditionally served warm, but it’s also delicious at room temperature, chilled, or frozen. (IE Anytime.)

Can You Make The Cake Ahead?

Yes, you can make Texas Sheet Cake ahead of time. However, to keep the icing glossy, I would frost it the day of. Bake the cake up to 2 days ahead of time. Let it cool, wrap it in plastic, and then aluminum. Leave it at room temperature or freeze and then thaw. Make your icing when you’re ready to serve.

Side shot of Texas Sheet Cake in a sheet pan with a slice being taken out of it.

How To Cut Texas Sheet Cake

The beauty of this cake is that it’s simple to slice. You don’t have to cut through multiple layers hoping your slices are even. Instead, you cut through one layer in easy-to-manage squares or rectangles. We did brownie-sized 3×3 slices and got 15 pieces out of it. But you can cut 2×3 pieces and get 25 servings! This is the perfect cake for large gatherings like potlucks or school bake sales.

How To Store Texas Sheet Cake

Texas sheet cake can be stored at room temperature for up to three days. To prevent it from drying out, wrap the cake tightly in plastic wrap and then in a layer of aluminum foil. You can also freeze the double-wrapped cake for up to 2 months. It’s perfect for chocolate emergencies. (Beth and I have those at least once a week). You can thaw it at room temperature overnight. But you don’t have to bring it to room temperature to enjoy it. On hot summer days, I eat it straight from the freezer.

Overhead shot of three slices of Texas Sheet Cake on a sheet pan and two white plates.
Side shot of Texas Sheet Cake in a sheet pan with a slice being taken out of it.
Print

Texas Sheet Cake

Texas Sheet Cake might be the ultimate chocolate cake. It's incredibly easy to make and has a luscious buttery richness with a pure chocolate punch!
Course Dessert
Cuisine American
Total Cost ($11.27 recipe / $0.75 serving)
Prep Time 20 minutes
Cook Time 25 minutes
Total Time 45 minutes
Servings 15 slices
Calories 546kcal

Ingredients

Cake

  • 2 cups all-purpose flour, plus more for dusting $0.28
  • 1 cup granulated sugar $0.40
  • 1 cup brown sugar, light or dark $0.44
  • 1/2 tsp salt $0.04
  • 2 tsp baking powder $0.12
  • 1/2 tsp baking soda $0.02
  • 1 cup salted butter (2 sticks) $2.50
  • 1/3 cup unsweetened cocoa powder, sifted $0.31
  • 1 cup coffee, hot $0.15
  • 2 eggs $0.78
  • 1/2 cup mayonnaise $0.87
  • 1 tsp vanilla extract $0.72

Icing

Instructions

  • Place a rack in the center of your oven and preheat it to 350°F. Grease a jelly roll pan (10×15) with a 2-inch rim with melted butter. Lightly flour the pan. Shake off any excess and place in the freezer.
  • In a large bowl, combine the flour, granulated sugar, brown sugar, salt, baking powder, and baking soda.
  • In a saucepan over medium heat, melt the butter, then brown it. Take the pan off the heat.
  • Add the unsweetened cocoa powder to the brown butter, and stir to incorporate.
  • Place the pan back over medium heat. Add the hot coffee, and stir. Take the pan off the heat.
  • Add the eggs and vanilla to the mayonnaise and combine. Add a few tablespoons of chocolate to temper (warm) the egg mixture.
  • Once the egg mixture is warm, mix the chocolate and egg mixture together.
  • Pour the wet ingredients into the dry ingredients and stir just enough to combine.
  • Add the batter to the sheet pan and bake for 15 to 20 minutes, until the cake has a slight spring when you press a finger on its surface and a toothpick inserted into the middle comes out clean.
  • Once the cake is out of the oven, make the icing. Set a large saucepan over medium heat, and add the butter, heavy cream, cocoa, vanilla, and powdered sugar. Stir until incorporated.
  • Pour 3/4 of the warm frosting over the center of the cooled cake. Begin to spread it over the cake with a spatula and add more frosting if necessary to cover the cake from end to end. Cut, serve, then sit back and enjoy the marathon of compliments you're going to get!

See how we calculate recipe costs here.

Nutrition

Serving: 1slice | Calories: 546kcal | Carbohydrates: 63g | Protein: 4g | Fat: 33g | Sodium: 428mg | Fiber: 2g
Side shot of three slices of Texas Sheet Cake stacked on top of one another on a white plate.

How to Make Texas Sheet Cake – Step by Step Photos

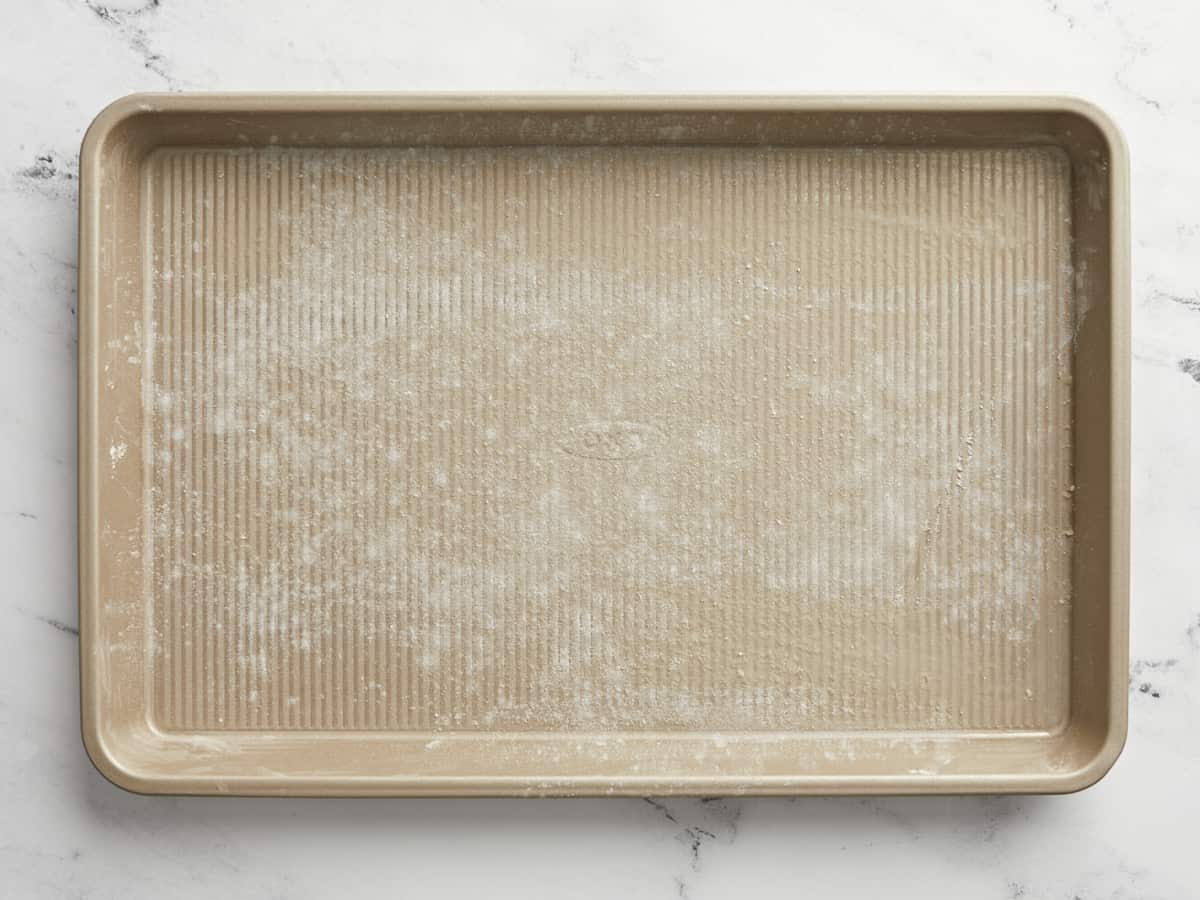
Overhead shot of sheet pan with a layer of frozen butter and a touch of flour on it.

Place a rack in the center of your oven and preheat it to 350°F. Use a pastry brush or paper towel to grease a jelly roll pan (10×15) with a 2-inch rim with 1 tablespoon of melted butter. Lightly flour the pan. Shake off any excess and place in the freezer.

Overhead shot of dry ingredients in a white bowl.

In a large bowl, combine the 2 cups of all-purpose flour, 1 cup white sugar, 1 cup brown sugar, 1/2 teaspoon salt, 2 teaspoons baking powder, and 1/2 teaspoon baking soda.

Overhead shot of browned butter in a silver skillet.

In a saucepan over medium heat, melt 1 cup of butter (2 sticks) in a light-colored pan. It will foam, then begin to brown. Stir constantly to distribute the heat evenly. As soon as it turns a light caramel color take it off the heat.

Overhead shot of of coca powder being added to browned buter.

Add 6 tablespoons of unsweetened cocoa powder, and stir to incorporate.

Overhead shot of coffee being added to chocolate batter.

Place the pan back over medium heat. Add 1 cup of hot coffee, and stir. Then take the pan off the heat.

Overhead Shot of egg mixture being tempered by a bit of chocolate.

In a large bowl combine the two eggs,1 teaspoon of vanilla, and 1/2 cup of mayonnaise. Add a few tablespoons of chocolate to temper the egg mixture. Tempering raises the temperature of the egg mixture slowly so that the eggs don’t heat too quickly and solidify into scrambled eggs.

Overhead shot of egg mixture being added to bowl of chocolate mixture.

Once the egg mixture is warm, add the tempered egg mixture to the chocolate mixture and combine.

Overhead shot of wet ingredients being added to dry ingredients in a white bowl.

Next, pour the wet ingredients into the dry ingredients and stir just enough to combine.

Overhead shot of finished Texas Sheet Cake in a sheet pan.

Then add the batter to the sheet pan and bake for 15 to 20 minutes, until the cake has a slight spring when you press a finger on its surface and a toothpick inserted into the middle comes out clean.

Overhead shot of icing ingredients in a pot.

Once the cake is out of the oven make the icing. Set a large saucepan over medium heat and add 1 cup of butter (two sticks), 1/4 cup of heavy cream, 1/3 cup of unsweetened cocoa powder (sifted to prevent lumps), 1 teaspoon of vanilla, and 2 1/2 cups of powdered sugar (sifted to prevent lumps). Stir until incorporated. Do not boil.

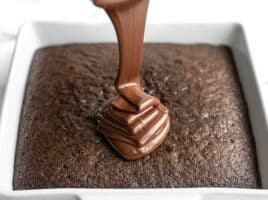
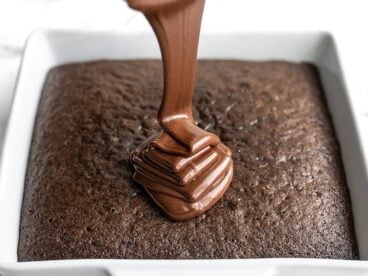
Overhead shot of icing being poured on top of Texas Sheet Cake.

Pour 3/4 of the warm frosting over the center of the cooled cake. There might be extra frosting depending on the depth of your pan and how much your cake has risen. Begin to spread it over the cake with a spatula and add more frosting if necessary to cover the cake from end to end. Cut, serve, then sit back and enjoy the marathon of compliments you’re going to get!

Overhead shot Texas Sheet Cake sliced in a sheet pan with a few slices taken out of it.

More Delicious Cakes

The post Texas Sheet Cake appeared first on Budget Bytes.

Marzipan-Stuffed French Toast

Talk about starting the day off right, this decadent marzipan-stuffed French toast is an almond lover’s delight. Two thick slices of buttery brioche with a layer of creamy marzipan spread in between, it takes Brunch to an entirely new level. If you love the flavor of marzipan, this stuffed French toast is right up your […]

The post Marzipan-Stuffed French Toast first appeared on Love and Olive Oil.

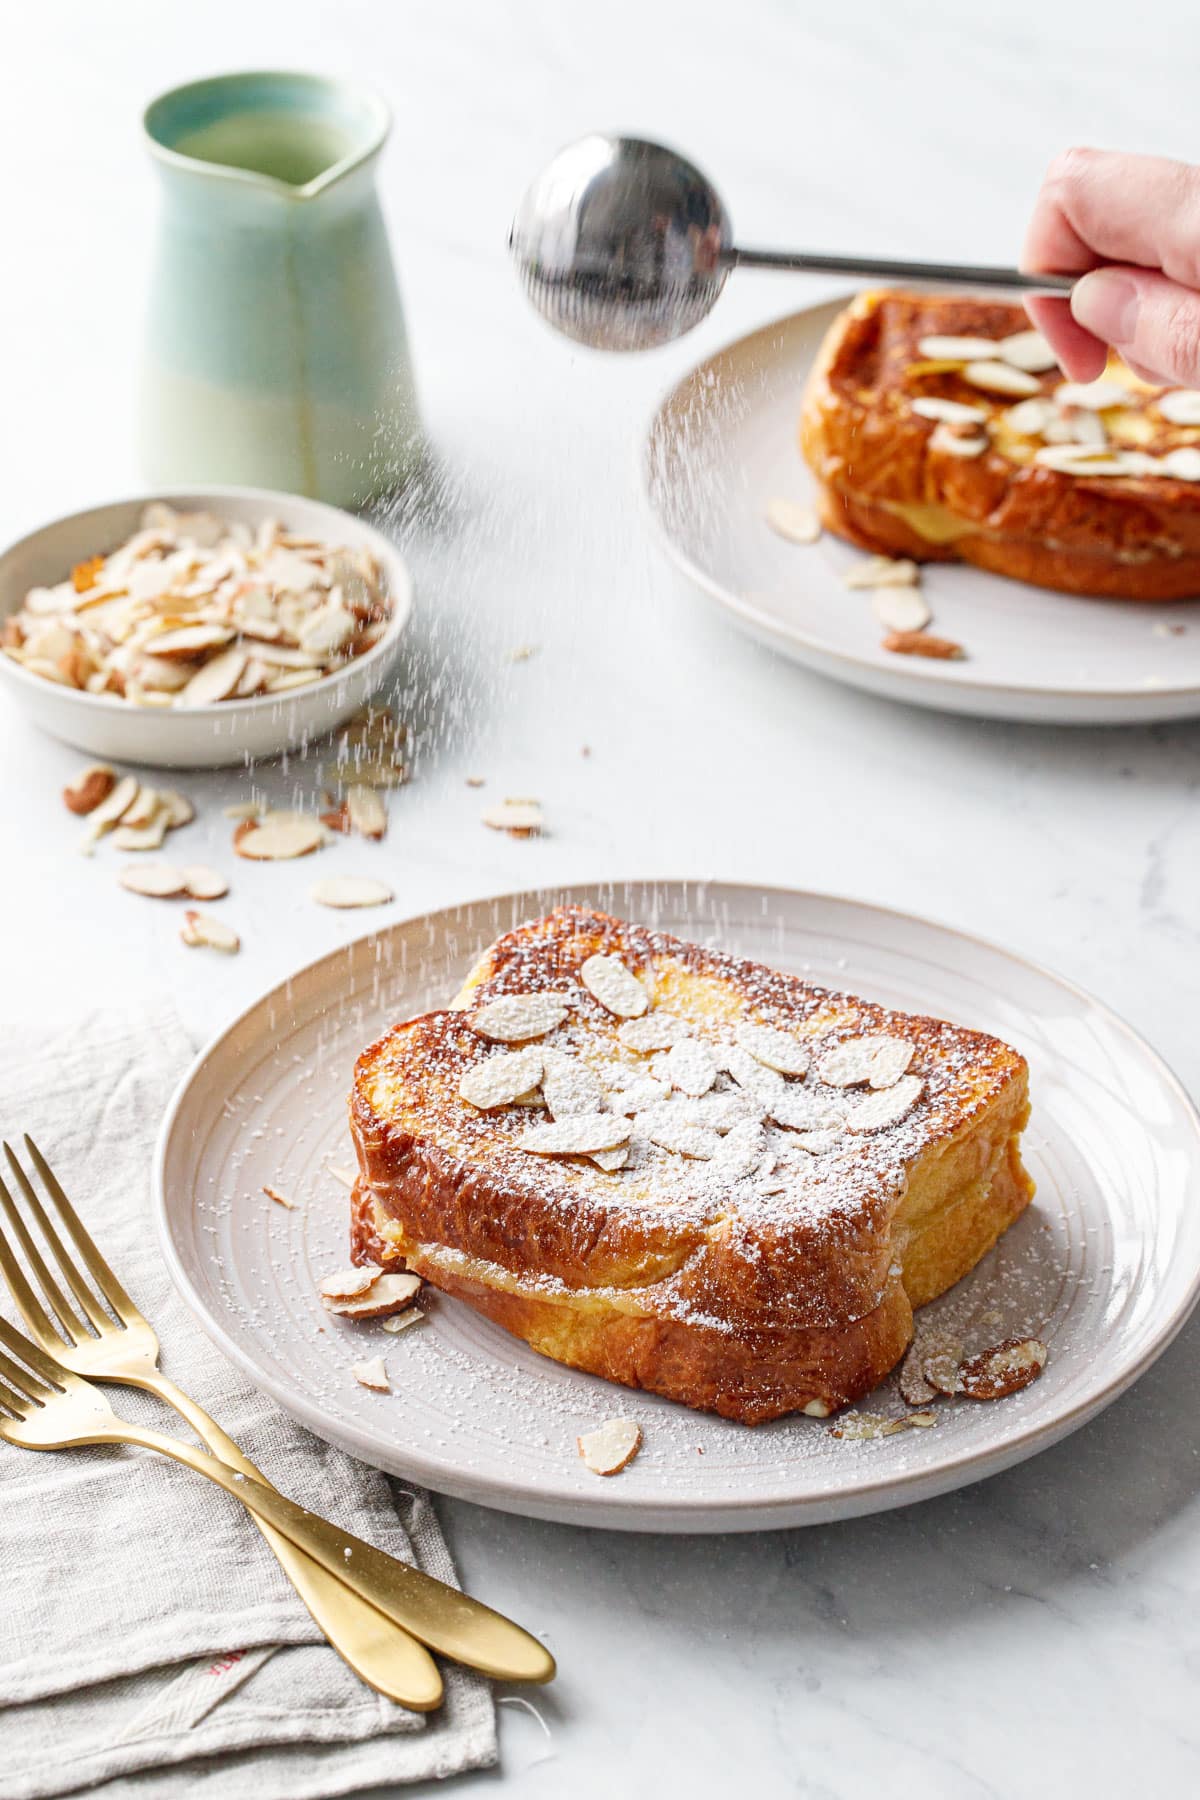
Talk about starting the day off right, this decadent marzipan-stuffed French toast is an almond lover’s delight. Two thick slices of buttery brioche with a layer of creamy marzipan spread in between, it takes Brunch to an entirely new level.

If you love the flavor of marzipan, this stuffed French toast is right up your alley. The creamy almond filling is similar to what you’d find in the middle of an almond croissant, soft and gooey and bursting with almond flavor.

Marzipan-Stuffed French Toast on a plate, action shot dusting the top with powdered sugar.

What’s not to love: a creamy almond filling sandwiched between two thick slices of buttery brioche, then soaked in an egg and milk custard and pan-fried for a perfectly golden brown and crispy finish. Topped with toasted almonds, a dusting of powdered sugar and a drizzle of maple syrup, it’s the perfect brunch recipe you never knew you needed.

Yes, I’ve called it marzipan-stuffed French toast, but if you want to nit pick, almond paste-stuffed would be the technically correct name. But that doesn’t sound nearly as appealing as marzipan-stuffed, does it? In reality almond paste is a more rustic version of marzipan, marzipan being a sweeter and more finely textured almond paste. At least here in the States, what is sold as marzipan and almond paste are two different things (in Europe good quality marzipans are much more prevalent, unlike the dried out, overly sweet stuff we’re stuck with here).

The filling is similar to that of an almond croissant; when it’s cooked it gets wonderfully gooey but still retains that distinct almond flavor (there’s no denying this recipe is plenty almondy even without any added extract).

The filling could also be described as a frangipane-like, which is an almond custard used in fruit tarts and other baked goods (though frangipane usually starts with almond flour rather than almond paste).

(more…)

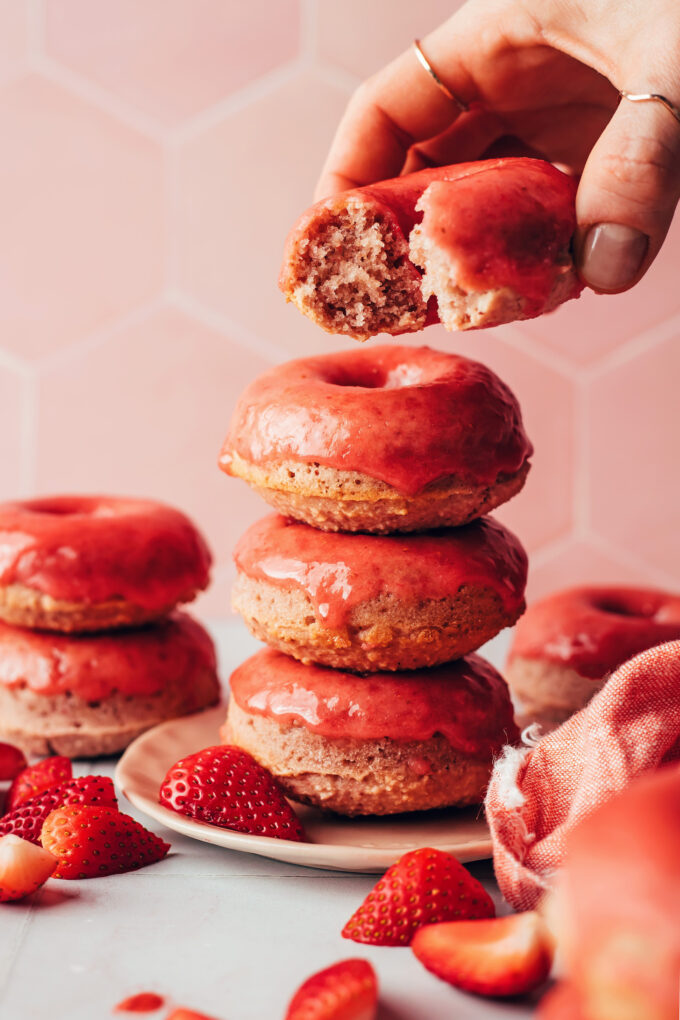
Easy Baked Strawberry Donuts (Vegan + GF)

Introducing a delicious new treat that’ll put your beautiful fresh strawberries to use: strawberry donuts! These bright, berry-packed beauties boast BIG strawberry flavor, crisp edges with fluffy centers, and a glaze so good you’ll want to lick the bow…

Easy Baked Strawberry Donuts (Vegan + GF)

Introducing a delicious new treat that’ll put your beautiful fresh strawberries to use: strawberry donuts! These bright, berry-packed beauties boast BIG strawberry flavor, crisp edges with fluffy centers, and a glaze so good you’ll want to lick the bowl clean. They’re vegan + gluten-free, but nobody will know it!

Just 10 ingredients and 30 minutes required! What are you waiting for?! Grab your strawberries and let’s make donuts!

Easy Baked Strawberry Donuts (Vegan + GF) from Minimalist Baker →

Hummingbird Cake

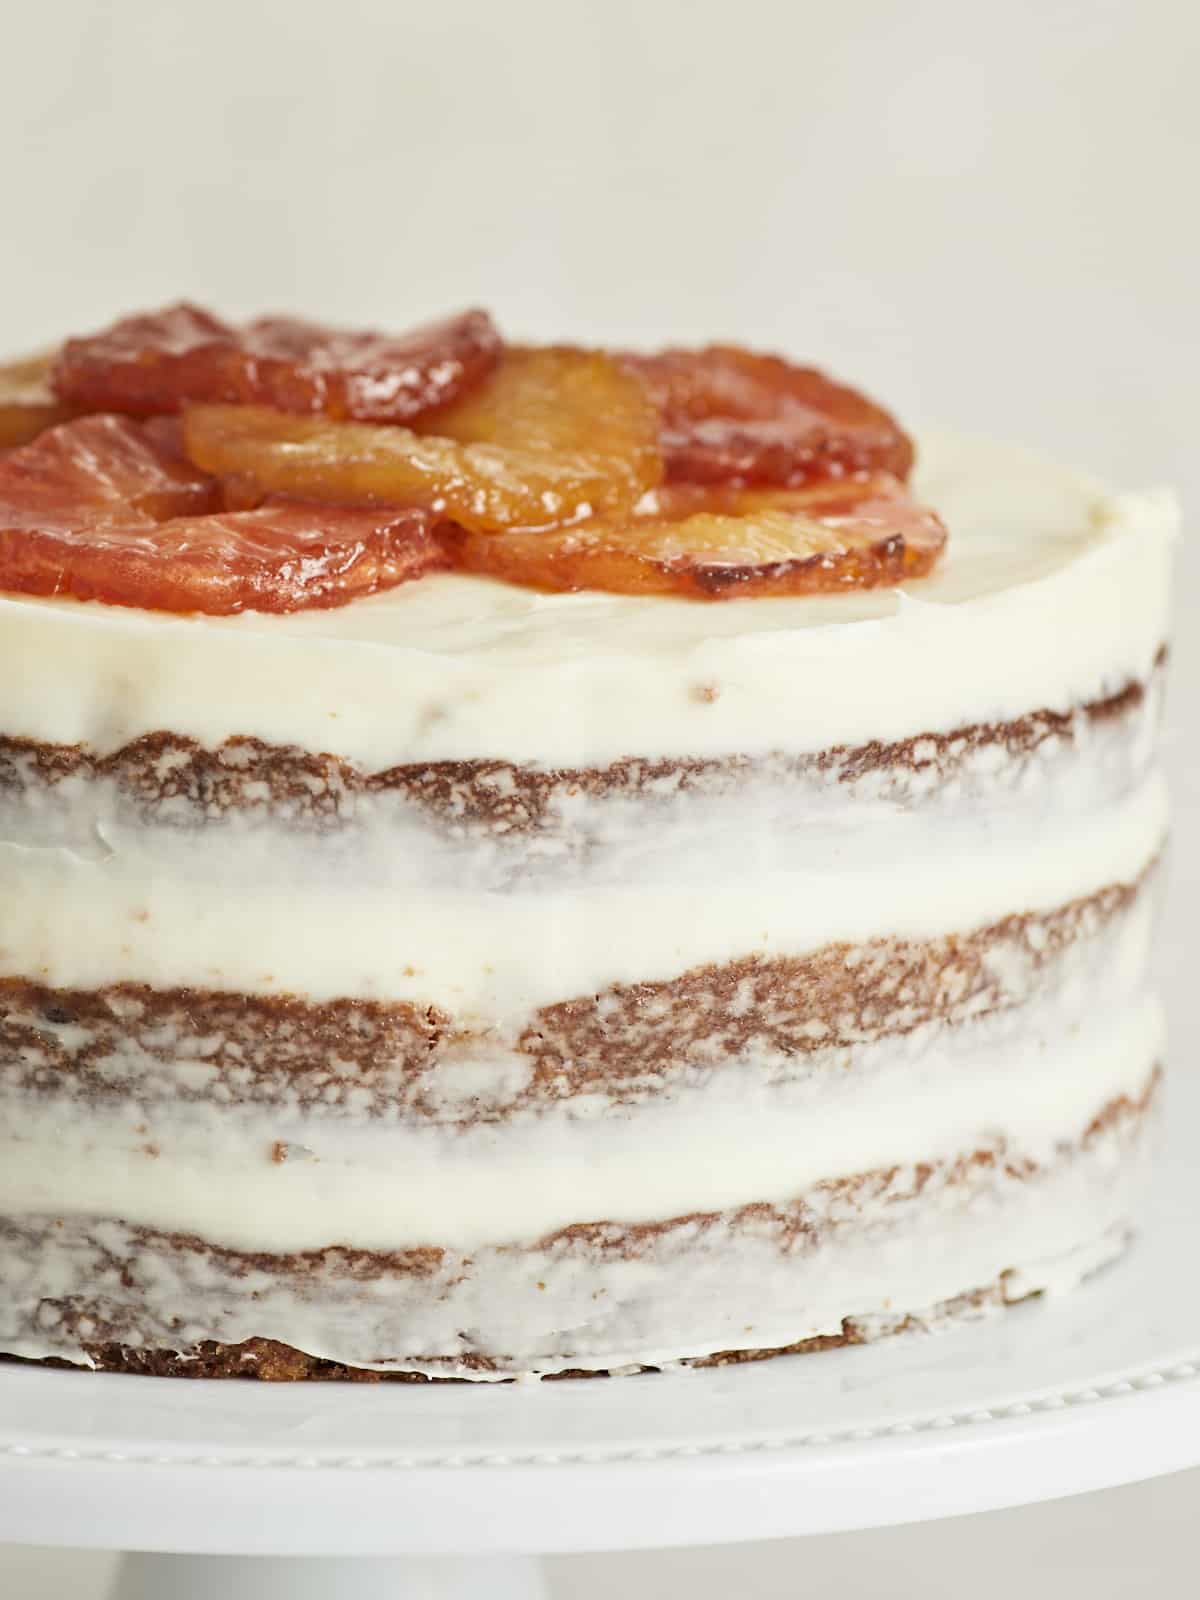
This luscious Hummingbird Cake is dotted with bananas, pineapple, and pecans, then smothered in cream cheese frosting- and it’s under $20!

The post Hummingbird Cake appeared first on Budget Bytes.

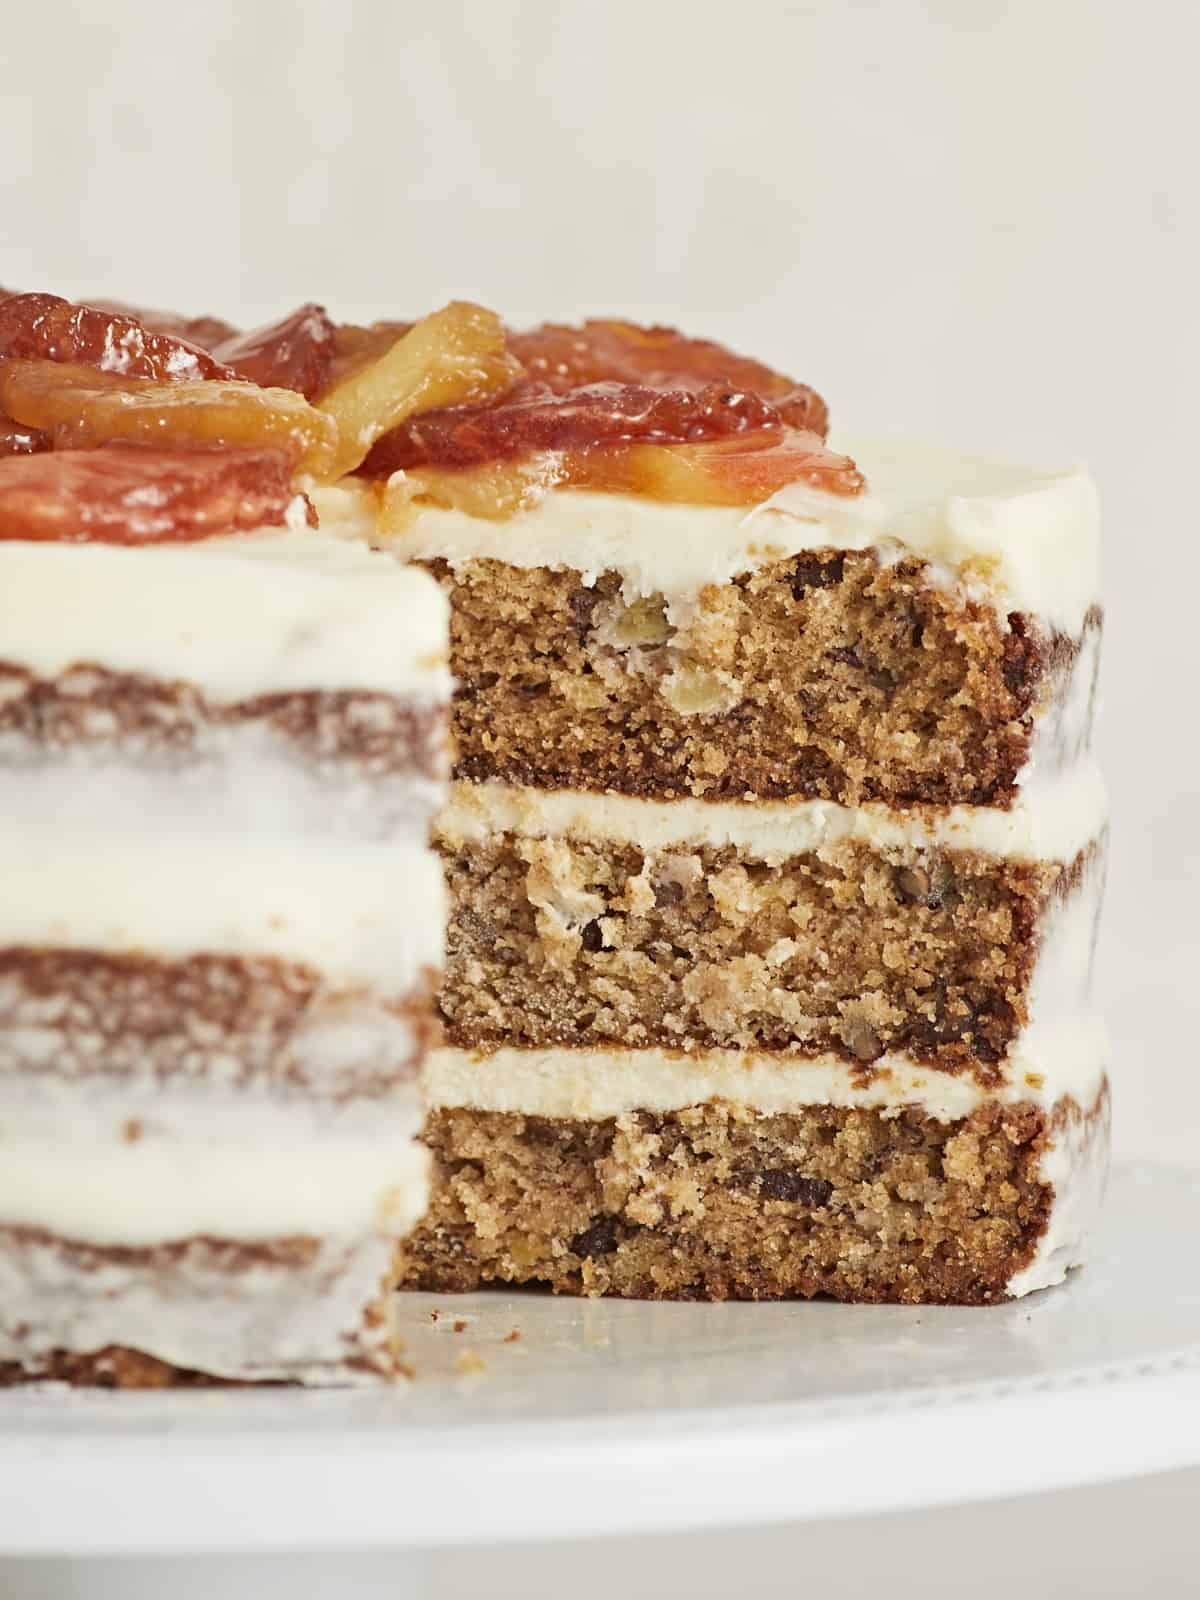
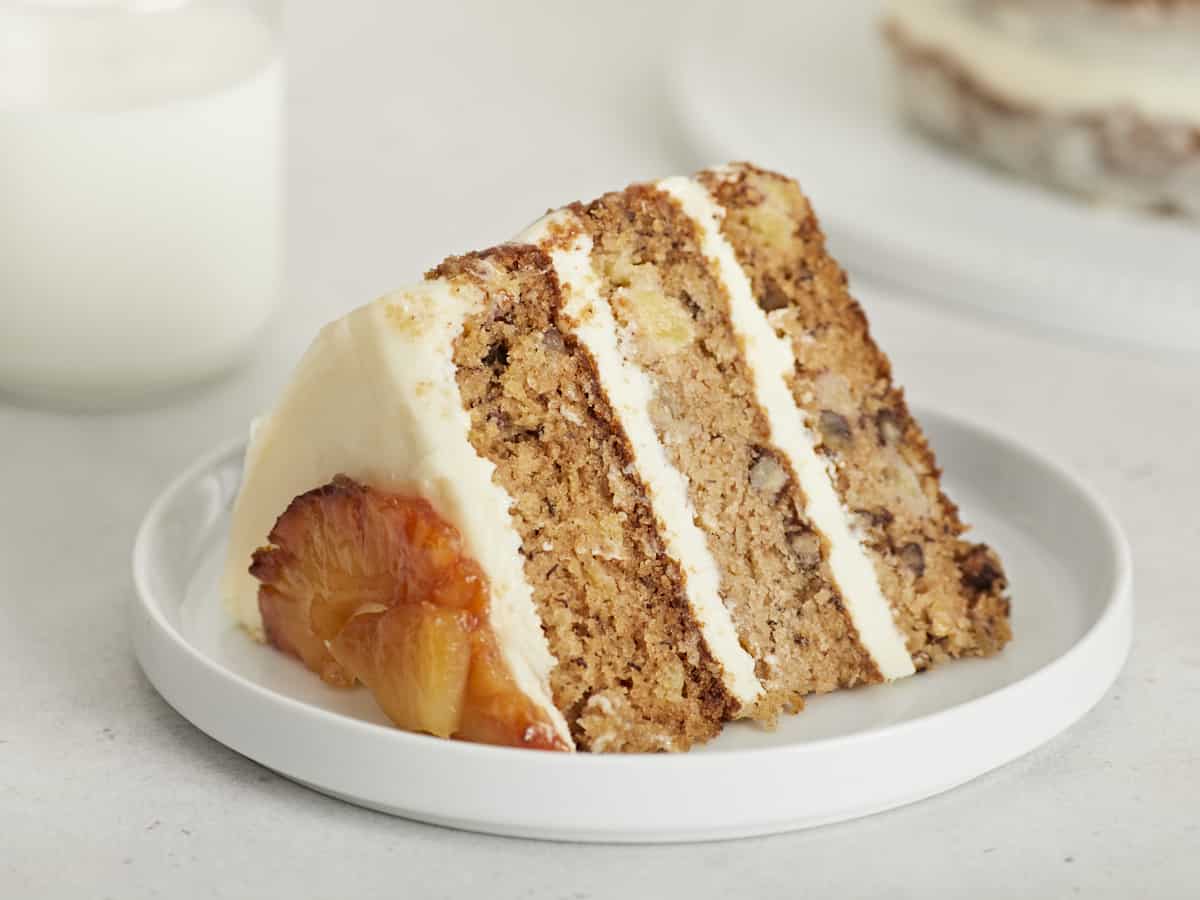
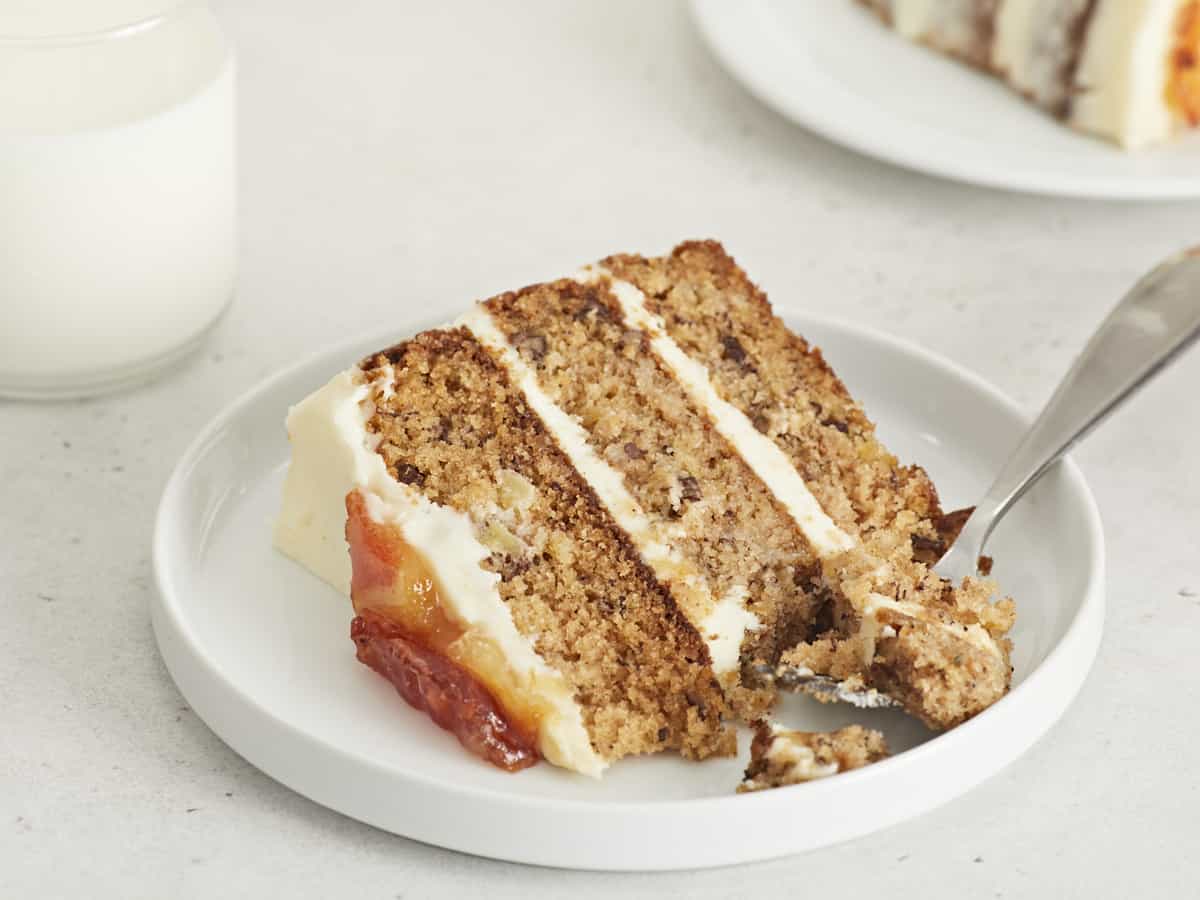
Hummingbird Cake doesn’t last- you’ll reach for a second slice before you finish your first! If you’ve never heard of it, this luscious banana cake is dotted with pineapple and pecans, then smothered in scrumptious cream cheese frosting. You’ll pay up to $80 for this beauty at a bakery, but I’m showing you how to make Hummingbird Cake for under $20! Here’s the best part: you can slice and freeze it, then gobble it up whenever you crave it!

What is Hummingbird Cake?

Hummingbird cake is a classic Southern recipe that originated in Jamaica. The batter goes heavy on the fruit and nuts; almost half of it is chopped banana, pineapple, and pecans. Once baked, the cake is layered and topped with buttery cream cheese frosting and garnished with more pecans or pineapple.

What You’ll Need

Is this an easy breezy recipe? No. But it’s manageable, and it’s worth it! Bakeries sell this cake for $50 to $80, but I’m showing you how to put it together for under $20! Here’s what you’ll need to make Hummingbird Cake.

  • Pecans – add texture and earthiness. You can omit them if there is a nut allergy.
  • Pineapple and Bananas– add sweetness and flavor. They also add moisture and tenderize the cake.
  • All Purpose Flour – creates the structure you need to stand up to all the fruit in the batter.
  • Sugar – sweetens the cake and locks in moisture.
  • Baking Soda and Baking Powder – these leavening agents help your cake rise.
  • Vegetable Oil – helps the cake bake evenly and rise higher.
  • Vanilla Extract – helps flavor the cake batter and the frosting.
  • Cream Cheese and Butter – add flavor and also give the frosting its structure, making it easier to spread.
  • Powdered Sugar – sweetens the frosting and gives the frosting structure.

Tips For The Best Hummingbird Cake

  • Use very ripe bananas and don’t drain the crushed pineapple.
  • Do not overmix the batter. The more you mix, the denser the cake becomes.
  • Prepare your pans like a pro: grease them, line the bottom with parchment, and then grease and flour the parchment and the sides of the pan.
  • Pour equal amounts of batter into the cake pans by using a dry measuring cup.
  • Cool the layers completely before frosting them and frost from the center out.

Can I Make It Ahead Of Time?

Yes, you can make your Hummingbird Cake layers ahead of time! Allow them to cool completely before wrapping them in a double layer of plastic wrap. You can keep them at room temperature for up to a day, refrigerate them for up to two days, or freeze them for up to a month. Frozen cake layers are easier to frost anyway. You can also make the frosting ahead of time. Keep it in an airtight container with plastic wrap over the surface of the frosting, and refrigerate for up to 5 days

How To Store Hummingbird Cake

You can store Hummingbird Cake in an airtight container or wrapped in plastic wrap in your refrigerator for up to 5 days. (Your loved ones will devour it way before then.) Hummingbird Cake also freezes well and can be stored in an airtight container or wrapped in a double layer of foil and plastic for up to 4 months. I usually portion mine in thick slices and keep them in the freezer for future cravings. Frozen cake on a hot summer day is AMAZING.

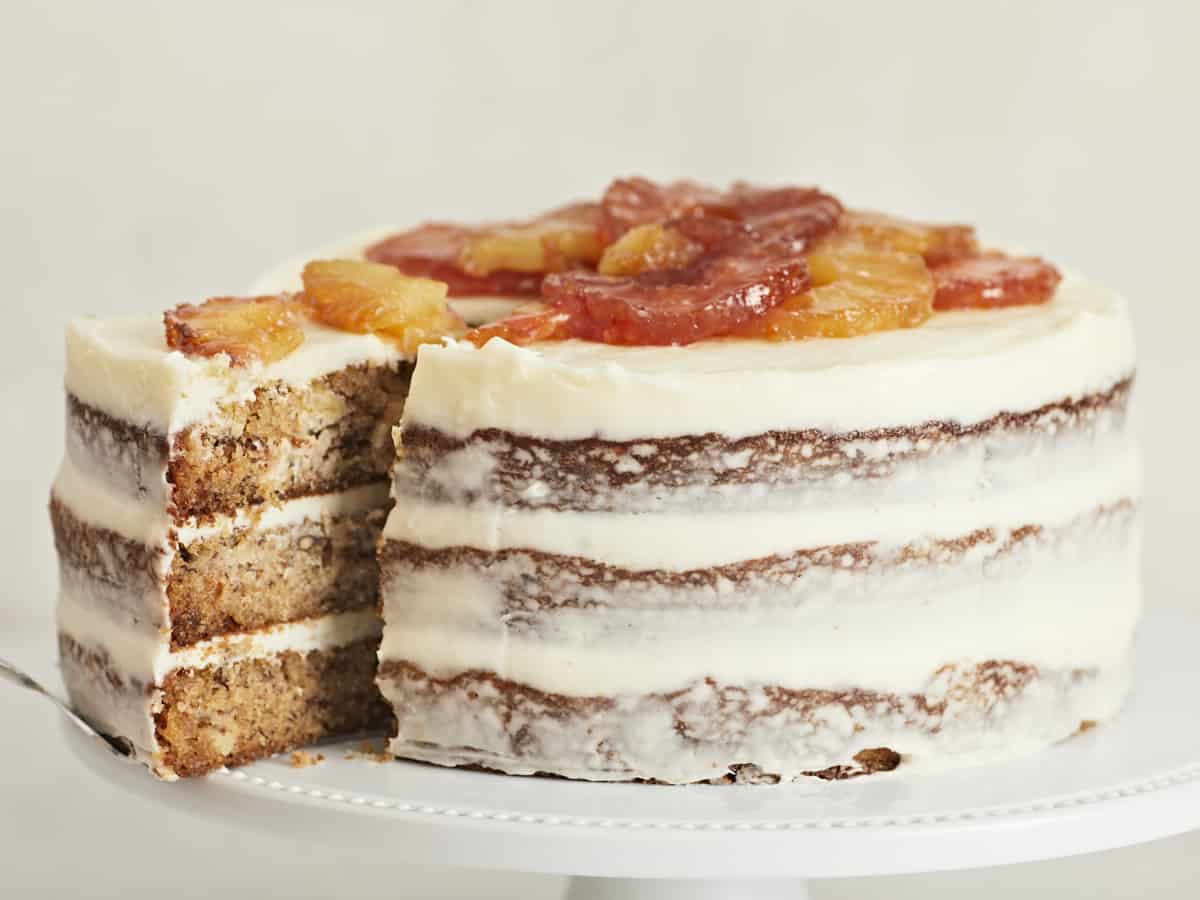
Side shot of Hummingbird Cake with a slice being taken out of it.
Print

Hummingbird Cake

This luscious Hummingbird Cake is dotted with bananas, pineapple, and pecans, then smothered in cream cheese frosting. It's scrumptious!
Course Dessert
Cuisine American
Total Cost $15.90 recipe / $1.33 serving
Prep Time 30 minutes
Cook Time 30 minutes
Resting Time 1 hour
Total Time 2 hours
Servings 12 slices
Calories 1287kcal

Ingredients

For the Cake

  • 1 cup chopped pecans $4.59
  • 3 cups all-purpose flour, plus more for dusting pans $0.42
  • 2 cups sugar $0.78
  • 1 tsp salt $0.08
  • 1 tsp baking soda $0.02
  • 1/2 tsp baking powder $0.03
  • 1 tsp ground cinnamon $0.08
  • 3 large eggs, lightly beaten $1.17
  • 1 ½ cups cooking oil $1.12
  • 1 ½ tsp vanilla extract $0.86
  • 1 (8 oz) can crushed pineapple in juice, undrained* $0.56
  • 2 cups chopped bananas (about 4 medium bananas) $1.00

For the Frosting

  • 12 oz cream cheese, softened $2.62
  • 12 Tbsp salted butter, softened $0.38
  • 3/4 tsp vanilla extract $0.43
  • 1 pinch salt $0.01
  • 6 cups powdered sugar $1.75

Instructions

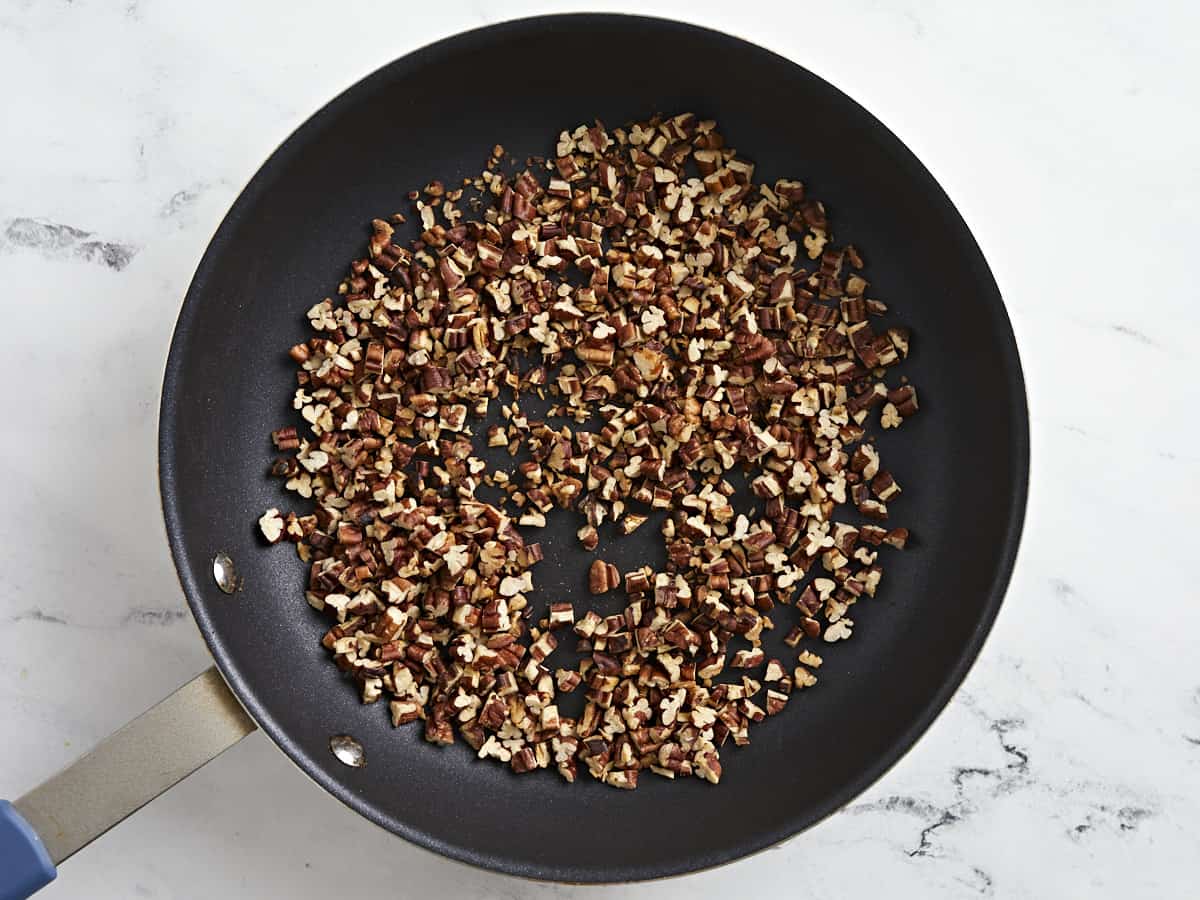
  • Set a rack in the center of your oven and preheat it to 350°F. While the oven preheats, set a heavy-bottomed skillet over medium heat and add the pecans in a thin layer. Toast the pecans for 5 to 8 minutes, stirring occasionally.
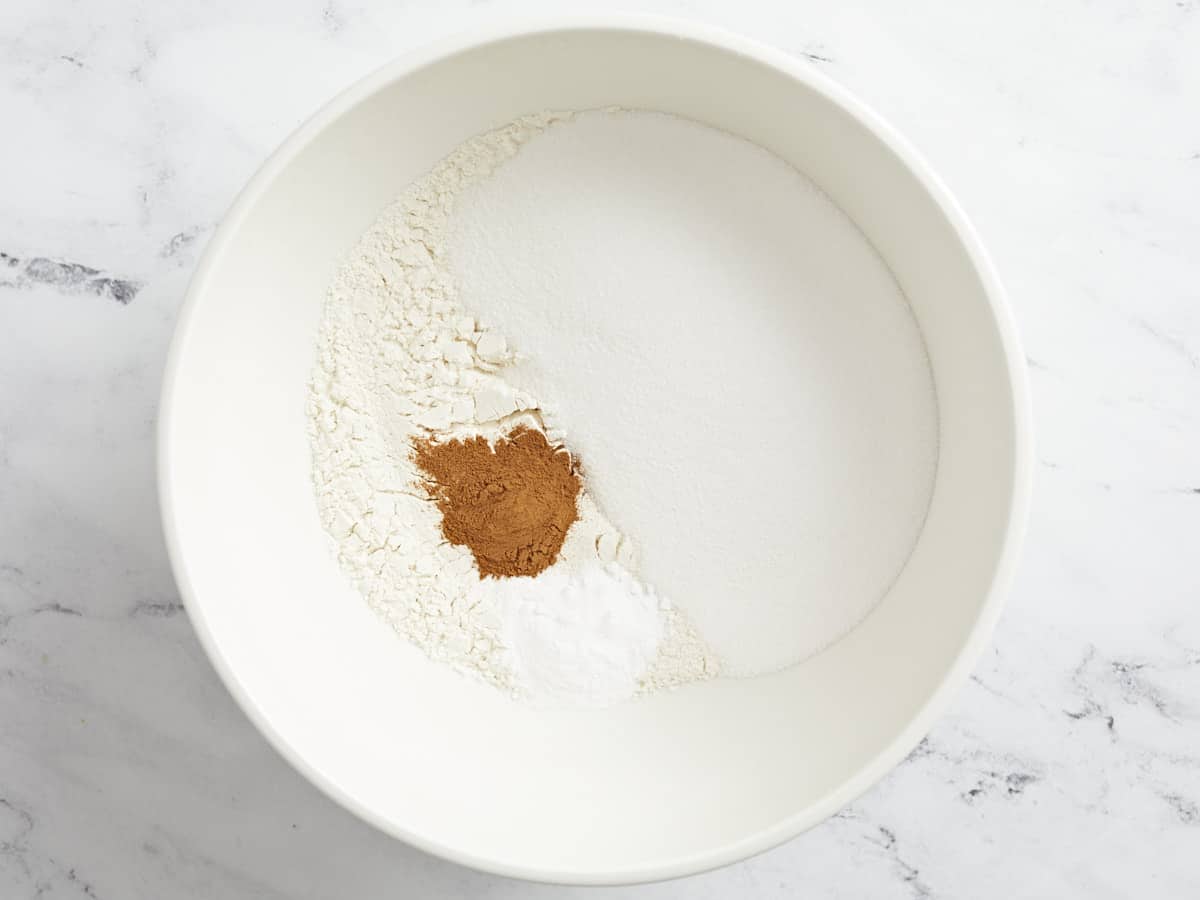
  • While the pecans toast, whisk together the flour, sugar, salt, baking soda, baking powder, and cinnamon in a large bowl.
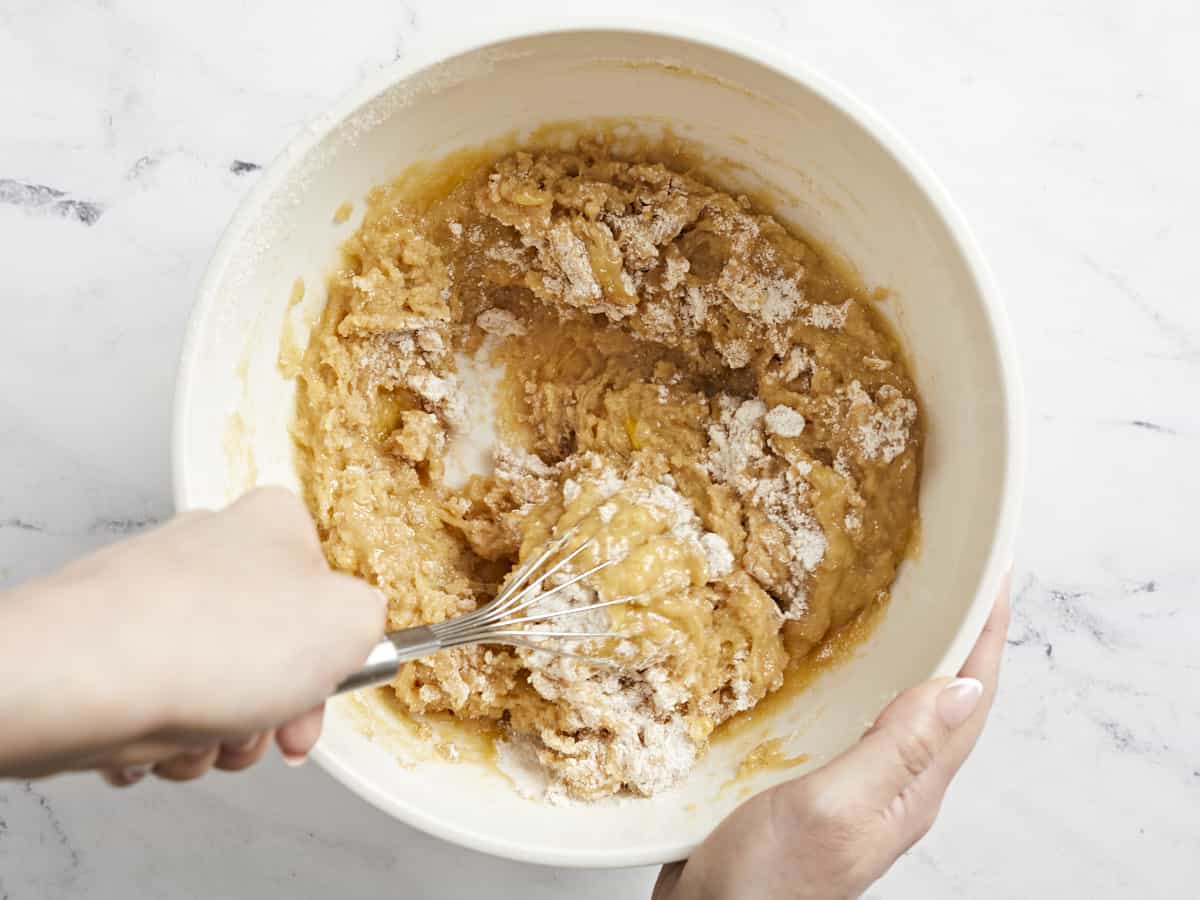
  • Add the eggs and vegetable oil, stirring just until the wet ingredients moisten the dry ingredients and no more.
  • Add vanilla, crushed pineapple in its juices, chopped bananas, and toasted pecans. Stir the ingredients as little as possible while fully incorporating them.
  • Grease three 9-inch cake pans. Cover the bottoms with parchment paper, grease the parchment, and lightly dust the bottom and sides of the pans with flour. Divide the batter evenly between the pans and bake until a toothpick inserted in the center comes out clean, about 25 to 30 minutes. Cool pans for 10 minutes before removing the cake layers. Cool layers for 1 hour.
  • While the cake bakes, in a very large bowl, add the cream cheese, salted butter, vanilla, and a pinch of salt. Beat with an electric mixer on medium speed until smooth. Then add the powdered sugar cup by cup, beating at low speed after each addition.
  • Once the sugar has been fully incorporated, increase the speed to medium-high, and beat until fluffy, 1 to 2 minutes.
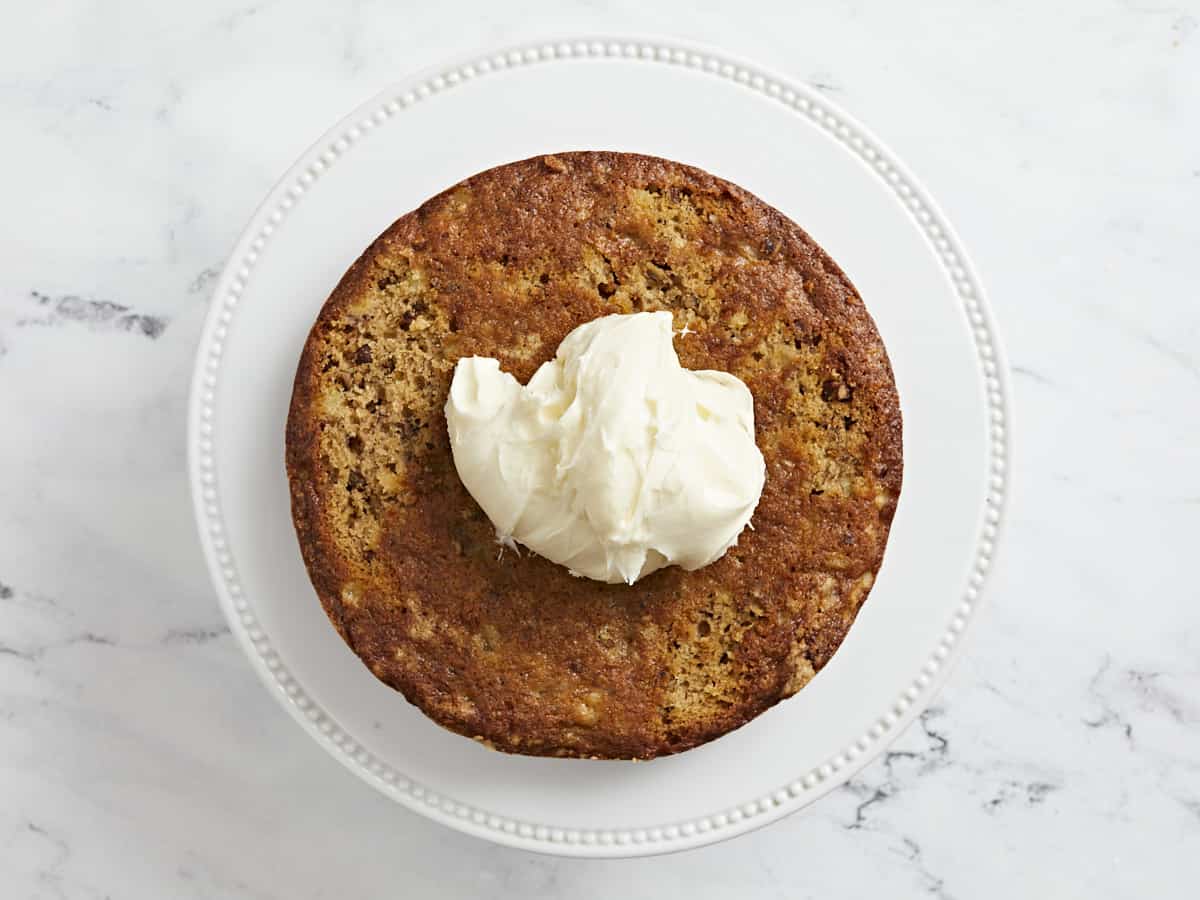
  • Place the first cake layer on a serving platter or cake stand. Spread 1 cup of the frosting on top, starting from the center and working your way out. You want a layer of frosting that is ¼ inch deep.
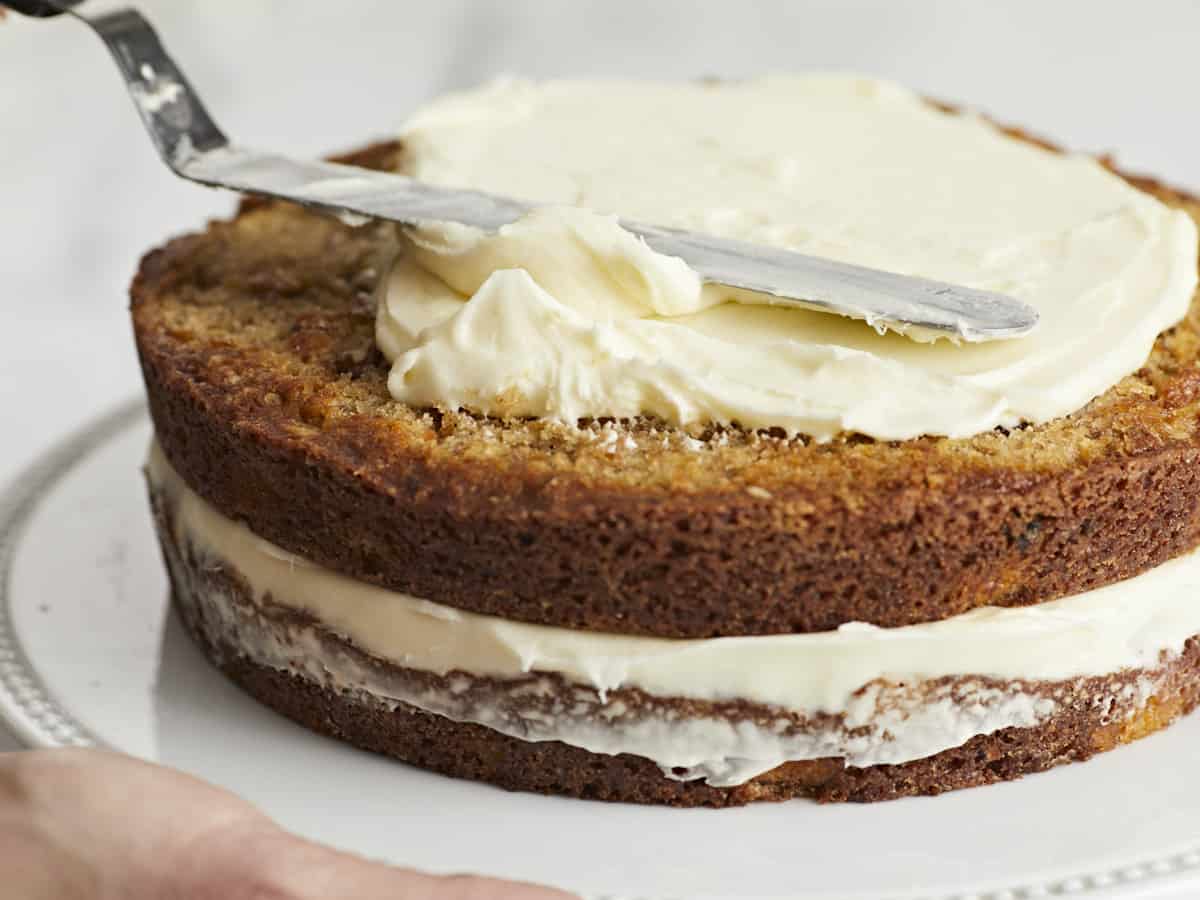
  • Top with the second cake layer and spread with 1 cup of frosting, working from the center out.
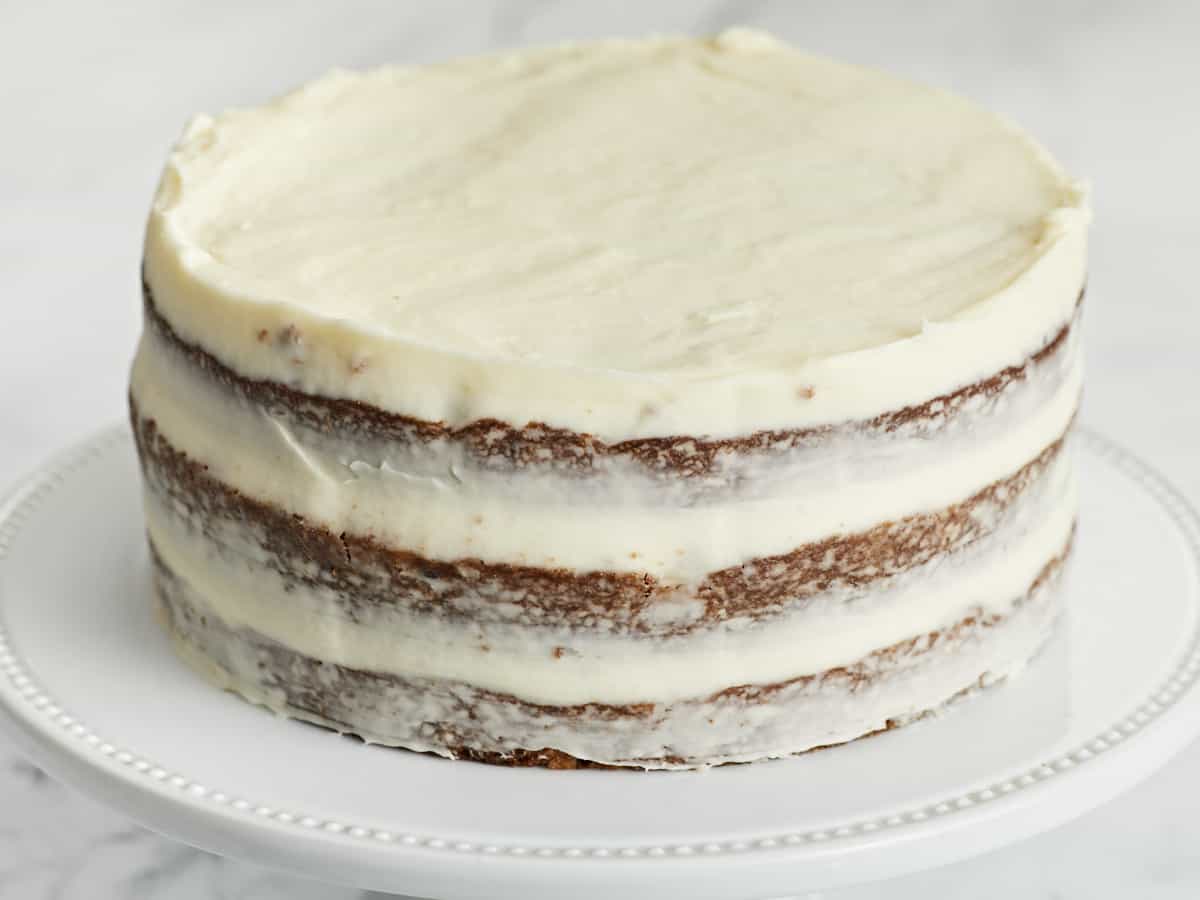
  • Top with the third layer, and spread the remaining frosting over the top and lightly around the sides. Garnish the top with pecans, berries, or candied pineapple rings.*

See how we calculate recipe costs here.

Notes

*An 8 ounce can contains ⅓ cup pineapple juice plus ½ cup crushed pineapple.
*This recipe is for a naked cake, IE the sides are barely frosted. If you’d like to frost the sides with a thicker layer, use 2 sticks of butter, 2 packages of cream cheese, 8 cups of powdered sugar, and 1 teaspoon of vanilla.
*To candy the pineapple rings cover them in a thick layer of brown sugar and fry them in 2 tablespoons of butter per ring over medium heat until golden.

Nutrition

Serving: 1slice | Calories: 1287kcal | Carbohydrates: 195g | Protein: 10g | Fat: 57g | Sodium: 510mg | Fiber: 8g

How to Make Hummingbird Cake – Step by Step Photos

Set a rack in the center of your oven and preheat it to 350°F. While the oven preheats, set a heavy-bottomed skillet over medium heat and add 1 cup of chopped pecans in a thin layer. Toast the pecans for 5 to 8 minutes, stirring occasionally. They’re ready when they have slightly deepened in color and the air smells toasty.

While the pecans toast, whisk together 3 cups of flour, 2 cups of sugar, 1 teaspoon of salt, 1 teaspoon of baking soda, 1/2 teaspoon of baking powder, and 1 teaspoon of cinnamon in a large bowl.

Add the 3 eggs and 1 1/2 cups vegetable oil, stirring just until the wet ingredients moisten the dry ingredients. Do not overmix.

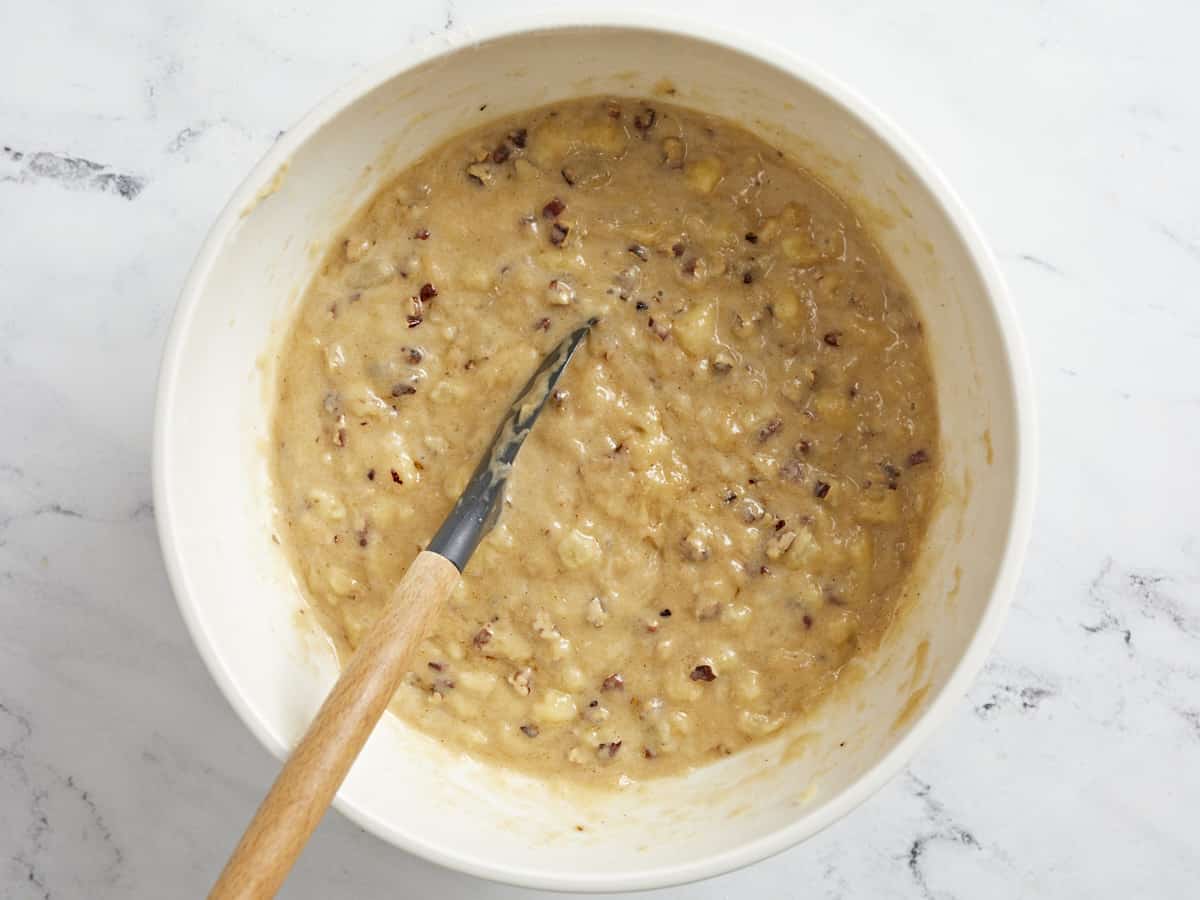
Add 1 1/2 teaspoons of vanilla, 8 ounces of crushed pineapple, 2 cups of chopped bananas, and a cup of toasted pecans. Then stir the ingredients as little as possible while fully incorporating them.

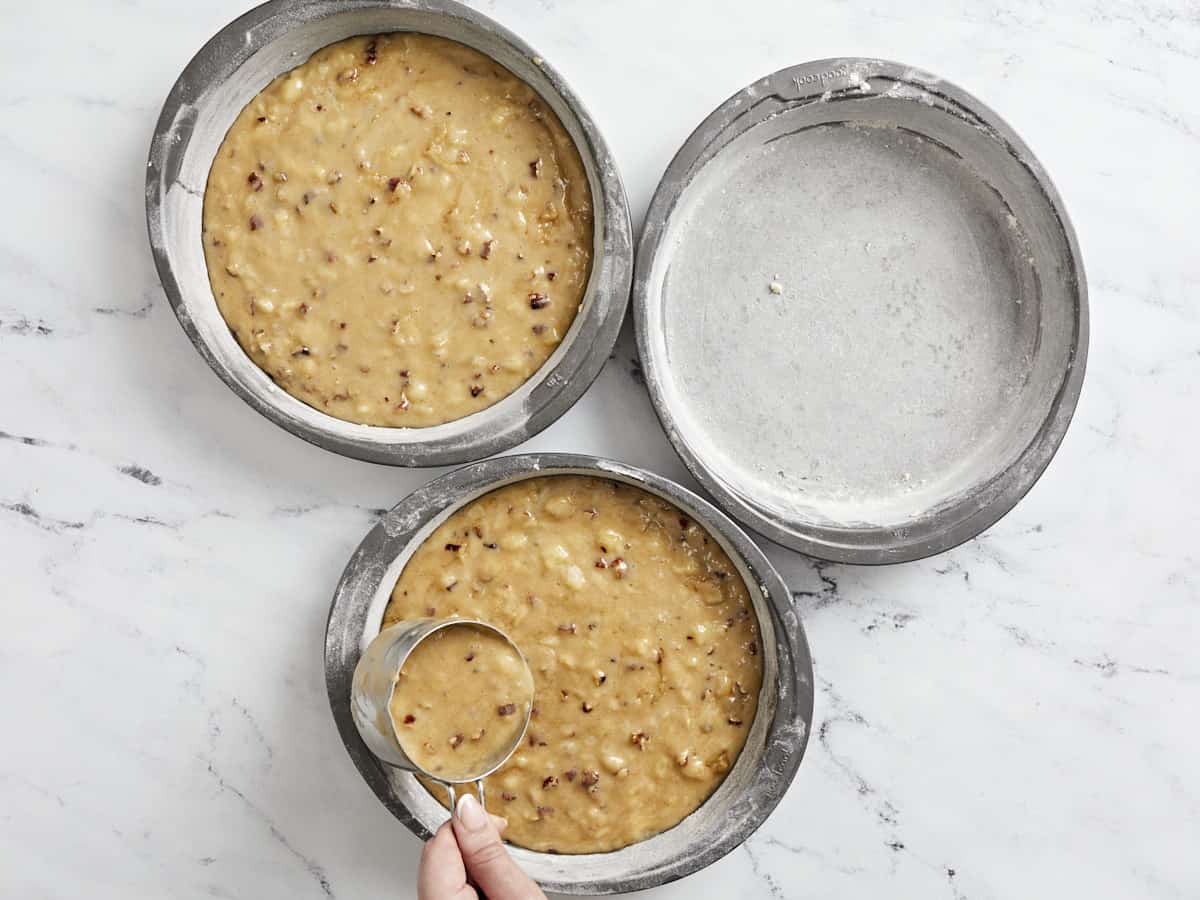
Grease three 9-inch cake pans. Cover the bottoms with parchment paper, grease the parchment, and lightly dust the bottom and sides of the pans with flour. Use a dry cup measure to divide the batter evenly. Bake until a toothpick inserted in the center comes out clean, about 25 to 30 minutes. Cool the pans on wire racks for 10 minutes before removing the cakes from the pans. Cool the layers on wire racks before frosting for 1 hour.

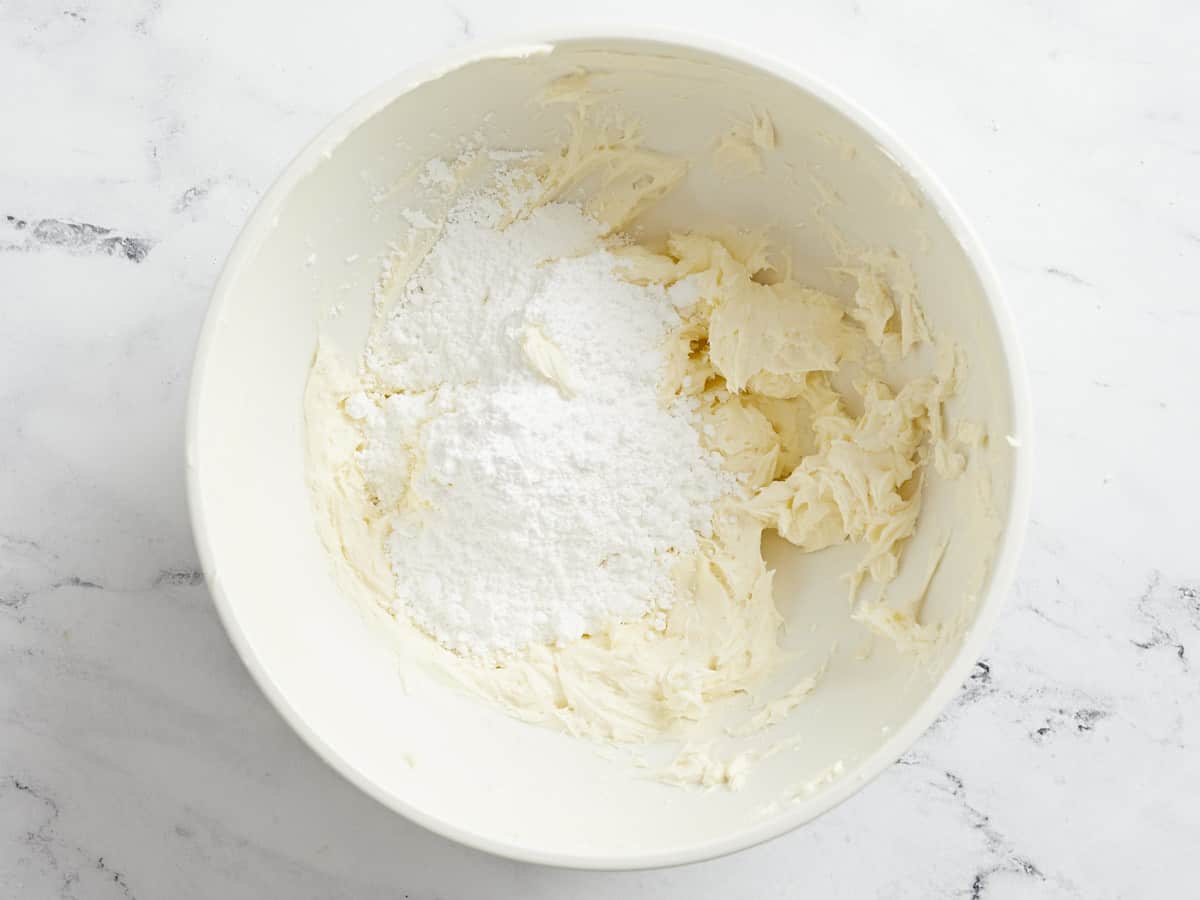
While the cake bakes, in a very large bowl, add the 12 ounces of cream cheese, the 12 tablespoons of salted butter, 3/4 teaspoon vanilla, and a pinch of salt. Beat with an electric mixer on medium speed until smooth. Then add the powdered sugar cup by cup, beating at low speed after each addition until blended.

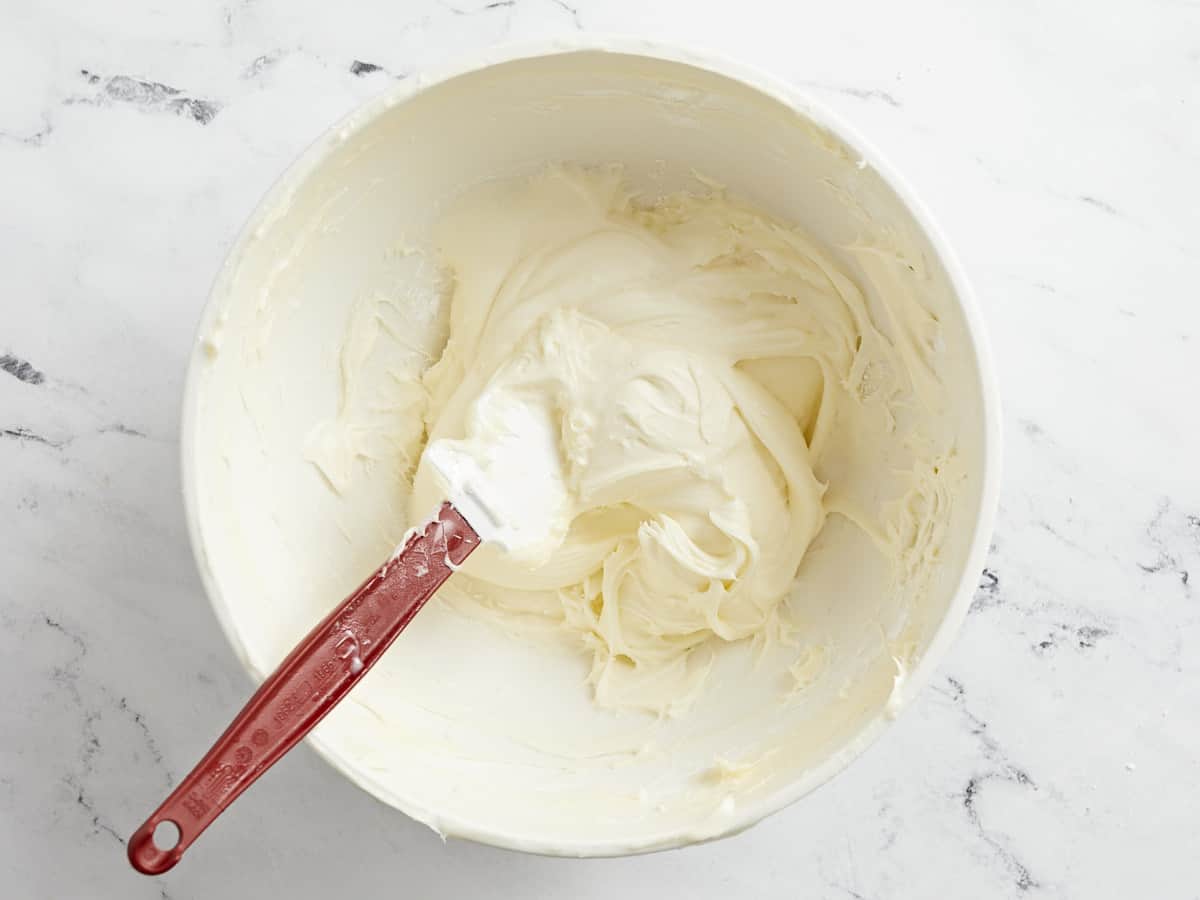
Once the sugar has been fully incorporated, increase the speed to medium-high, and beat until fluffy, 1 to 2 minutes.
To frost, first, place one cake layer on a serving platter or cake stand. Then spread 1 cup of the frosting on top, starting from the center and working your way out. You want a layer of frosting that is ¼ inch deep.
Next, top the cake with the second cake layer and spread with 1 cup of frosting, working from the center out.
Next, top the cake with the third layer, and spread the remaining frosting over the top and lightly around the sides. Finally, garnish the top with pecans, berries, or candied pineapple rings.*

Is this Hummingbird Cake a beauty, or what?! It’s truly a dessert you can’t get enough of. So much so, that Beth and I have slices of it in the test kitchen freezer for whenever our sweet tooth strikes! (Which is every single day TBH.) We were literally just looking at this post, contemplating driving to the test kitchen to get a slice! Get your cake pans ready for a win that’s under $20!

More Budget-Friendly Cakes

The post Hummingbird Cake appeared first on Budget Bytes.

Meyer Lemon Olive Oil Loaf Cake

This moist and flavorful lemon loaf is made with extra virgin olive oil and Meyer lemons for a unique flavor, moist texture and gorgeous golden yellow color. Winter is citrus season, and Meyer lemons (a cross between lemon and mandarin oranges) are one of my favorites. This lemon loaf cake is a celebration of all […]

The post Meyer Lemon Olive Oil Loaf Cake first appeared on Love and Olive Oil.

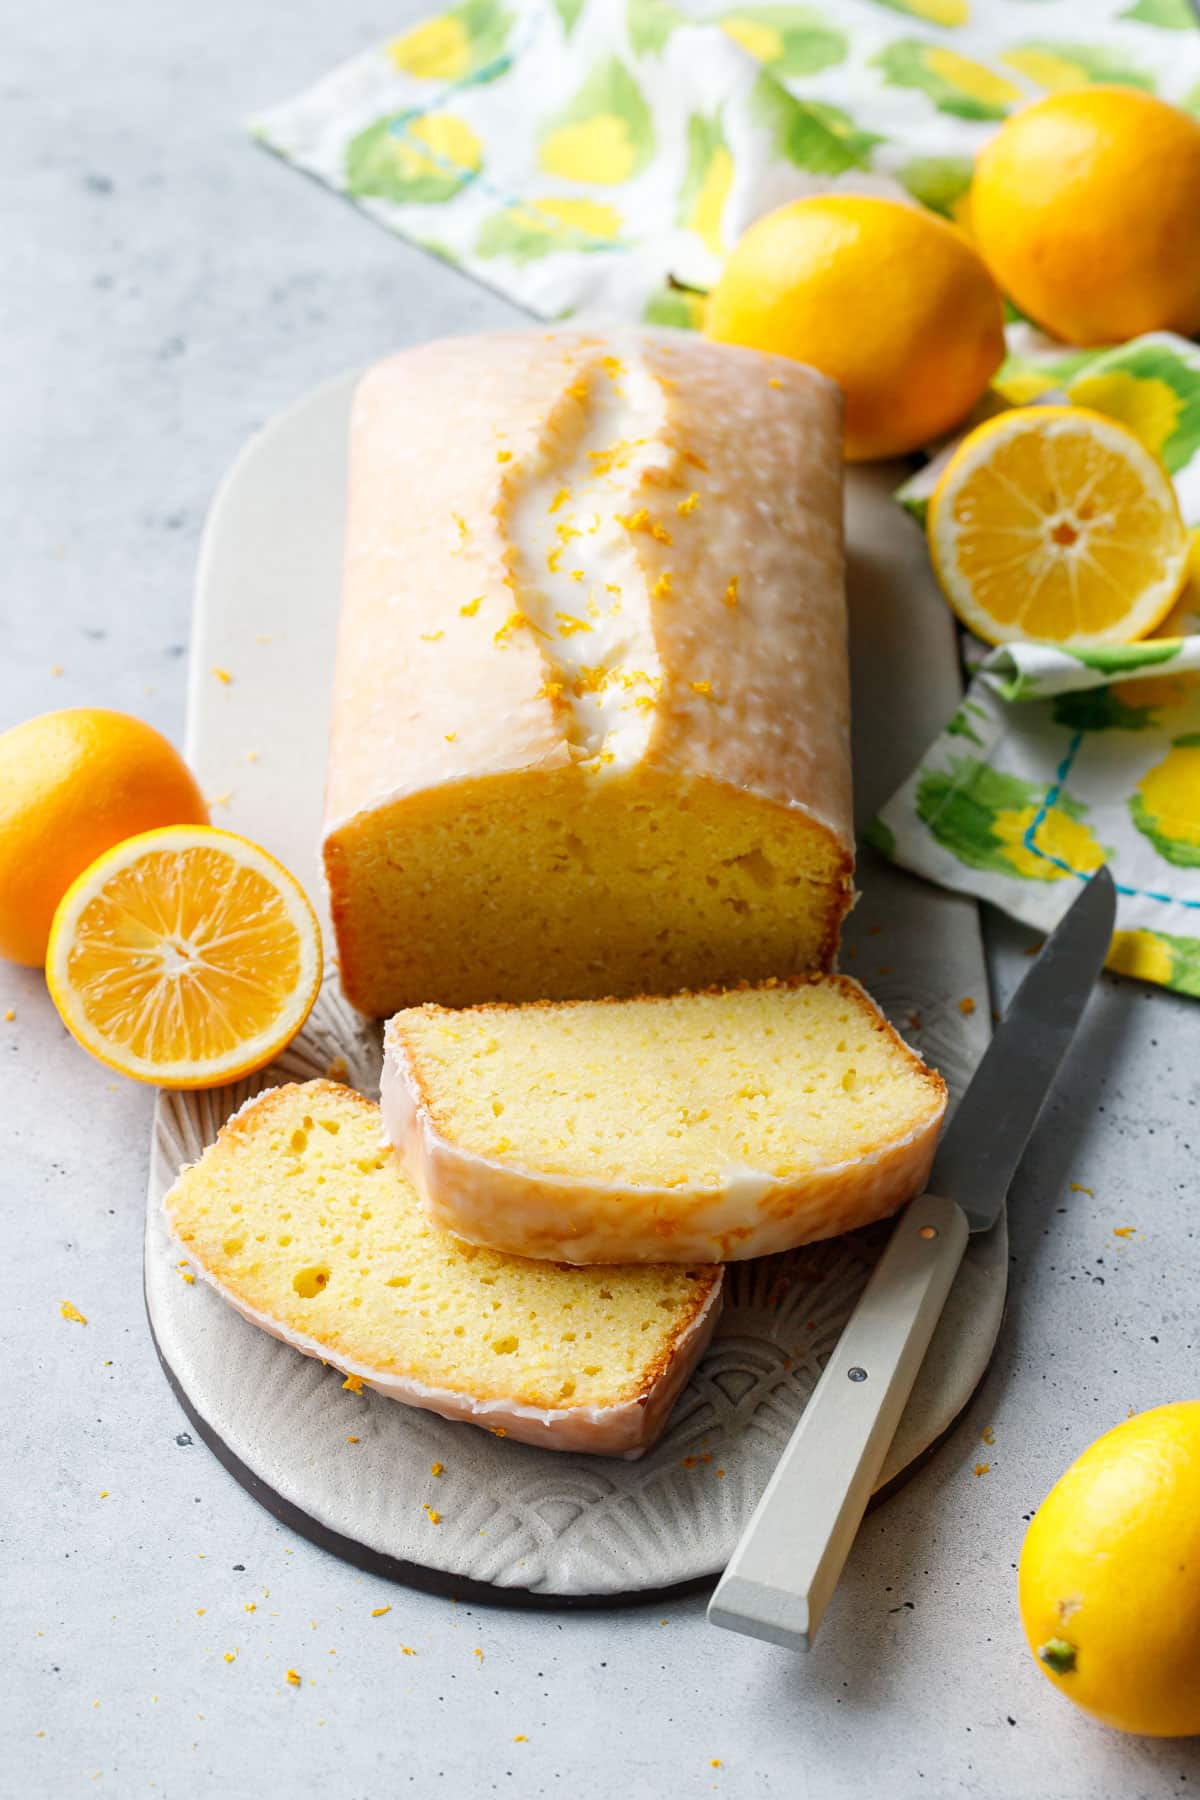
This moist and flavorful lemon loaf is made with extra virgin olive oil and Meyer lemons for a unique flavor, moist texture and gorgeous golden yellow color.

Winter is citrus season, and Meyer lemons (a cross between lemon and mandarin oranges) are one of my favorites. This lemon loaf cake is a celebration of all things Meyer lemon, with a tender crumb infused with copious amounts of zest, a sweet lemony soaking syrup, AND a crackly lemon glaze on top.

Meyer Lemon Olive Oil Loaf Cake with two slices cut to show the interior texture, whole/half lemons, napkin and a knife around it.

Citrus is the only redeeming part of winter, in my opinion. Sort of like peaches and tomatoes in summer (which are like a delicious consolation prize for dealing with all the darn humidity).

I wanted a beautiful, moist and lemony loaf cake with notes of extra virgin olive oil and a delicately sweet glaze. The EVOO flavor is subtle, but it does come through—you’d certainly taste the difference compared side by side to a cake made with vegetable oil.

This loaf cake falls somewhere between a pound cake and a yellow birthday cake in terms of texture, somehow buttery despite the fact that there’s no butter to be found. Infused with subtle Meyer lemon flavor and hints of fruity, verdant olive oil, it really is a delightful winter cake, and easy and impressive to boot!

Whatever you do, don’t skip the lemon soaking syrup or crackly lemon sugar glaze – that’s *literally* the icing on the cake (the perfect sweet finish where the punchiest lemon flavor comes through!) You may be tempted to just do one or the other, but trust me when I say you won’t regret the extra steps when you take your first bite of the finished cake.

(more…)

Chocolate Mousse

When it comes to a perfectly luscious and light dessert, it doesn’t get much simpler than this deeply flavored easy chocolate mousse recipe!

The post Chocolate Mousse appeared first on Budget Bytes.
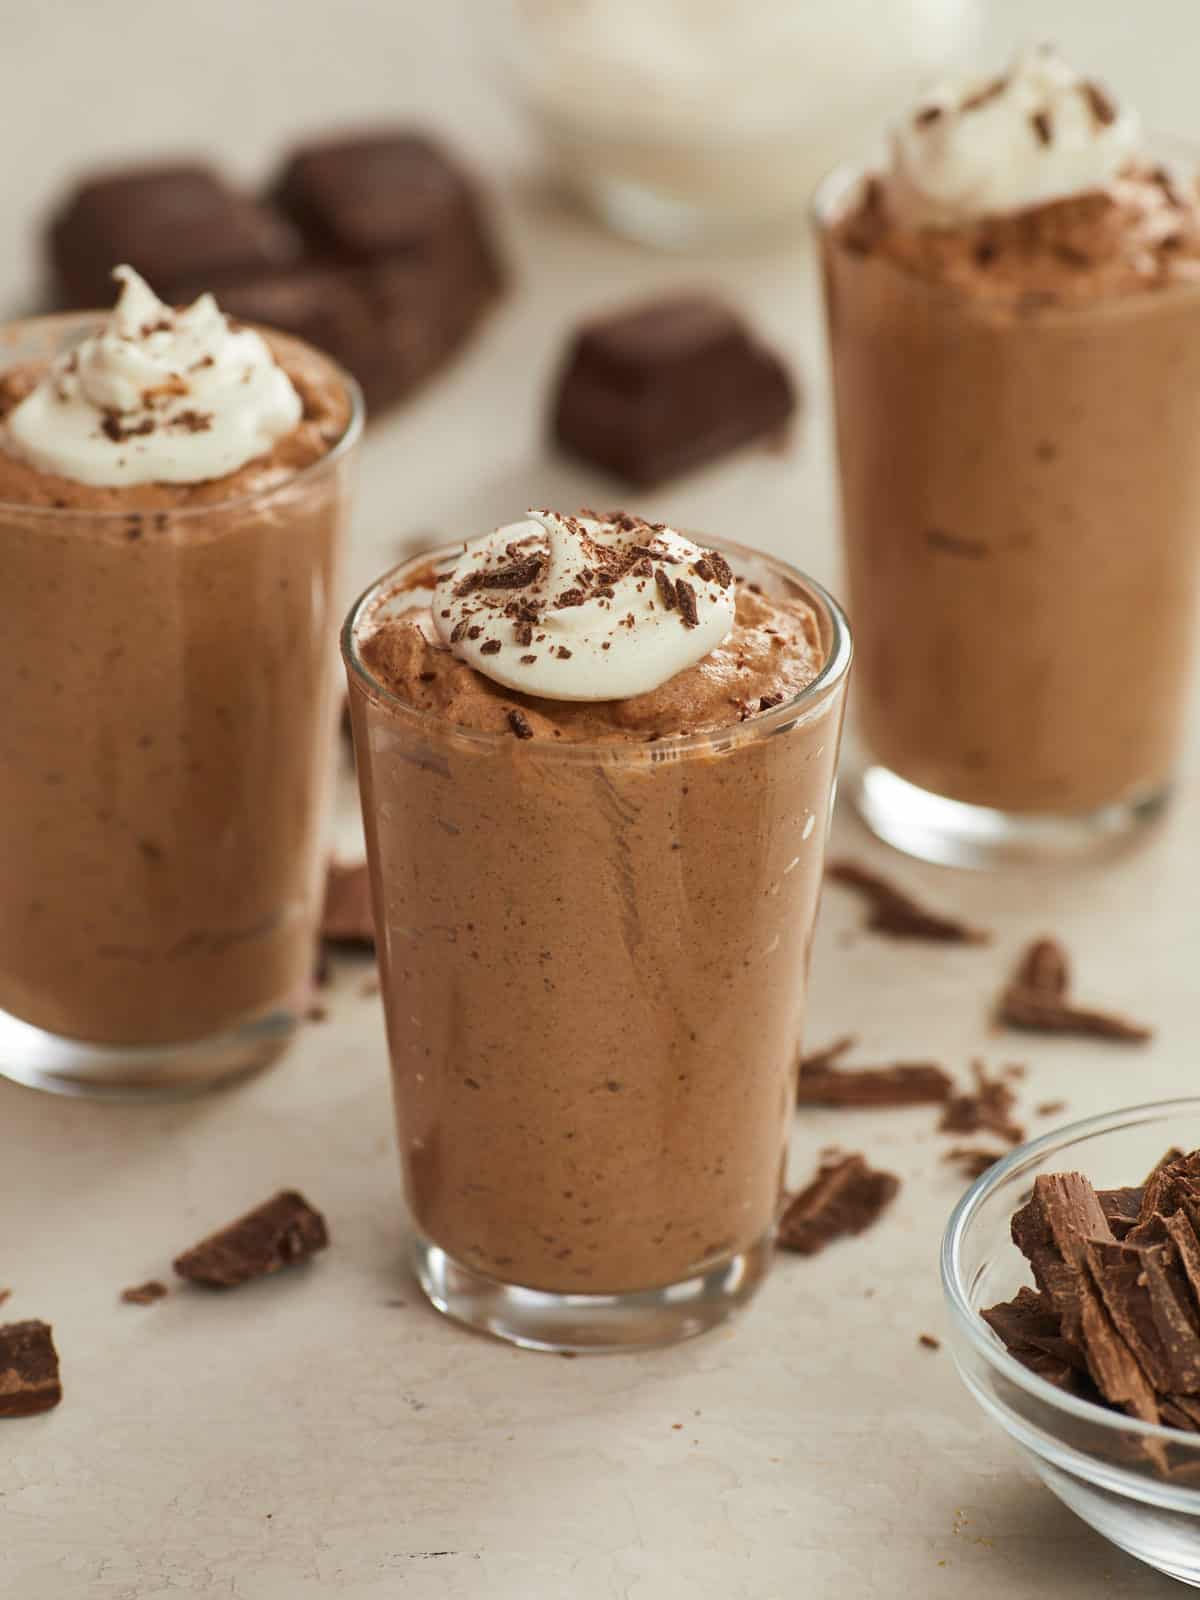
You are four ingredients away from heaven! When it comes to a perfectly luscious and light dessert, it doesn’t get much simpler than this deeply flavored easy chocolate mousse recipe. It takes fifteen minutes to whip up and you can make it a few days ahead. You can even replace the powdered sugar with your favorite sugar substitute and the heavy cream with dairy-free heavy whipping cream. What’s not to love?!

What Is Chocolate Mousse?

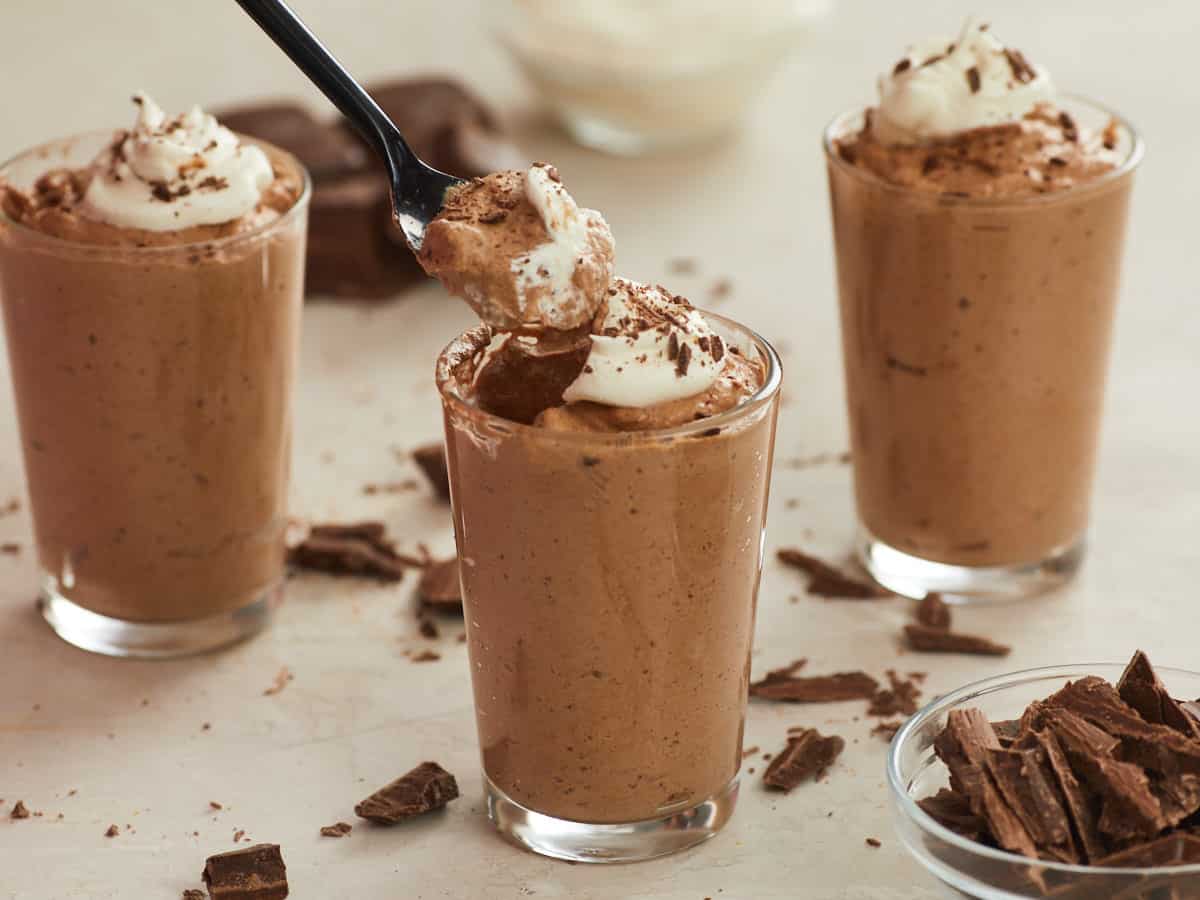
Chocolate mousse is a dessert with intensely deep notes of rich chocolate and a creamy, airy texture that melts as soon as it hits your palate. It’s the perfect dessert after a heavy meal. And because you can make it ahead of time, it’s one less thing to think about come dinner time.

What You’ll Need

  • Chocolate is the most important ingredient, so steer clear of low-quality chocolate. Semi-sweet or dark baking chocolate is a great choice. Milk chocolate can make the mousse very sweet, so cut it with semi or dark chocolate to balance the sugar.
  • Heavy Whipping Cream is necessary to create a mousse’s light texture and silky mouthfeel. Low-fat creams will not work for this recipe. You can also use a non-dairy heavy whipping cream. 
  • Egg Whites should be from fresh room temperature eggs, as they whip easier. Be careful when separating, as any yolk in the white will make it next to impossible to whip. If you are using older eggs, add a pinch of cream of tartar to help stabilize the whites.
  • Powdered Sugar adds sweetness and helps stabilize the whipped egg whites. Granulated sugar won’t dissolve easily in egg whites and leaves you with a grainy texture. If you only have granulated sugar, process it in a blender until powdery.

What Are Soft And Stiff Peaks?

You make chocolate mousse by whipping heavy cream to soft peaks and whipping egg whites with sugar in it to stiff peaks. A soft peak means that when you take the beater out of the egg whites or cream, a peak will form, but the tip of the peak will curl like an upside-down letter j. A stiff peak means when you take a beater out of the egg whites or cream, it will leave a stiff peak that stands straight up and does not curl over, like the letter i.

Tips For Making Chocolate Mousse

  • Use clean, dry bowls to melt chocolate and whip the egg whites in. Any grease or moisture in the bowls will ruin your results.
  • Don’t whip the cream or the whites at high speed, which creates larger bubbles. Large bubbles aren’t as stable as smaller ones. Use medium speed.
  • Make sure the chocolate is still warm when folding in the egg whites and cream. Adding cold cream or egg whites to cooled chocolate hardens the chocolate, creating a grainy texture.
  • Do not stir in the whipped cream and whites. Fold them into the chocolate in thirds to keep the mixture airy. Stirring breaks up air bubbles, flattening your batter.
  • To fold, use a spatula to cut from the top of the batter to the bottom. Then scoop the bottom ingredients onto the spatula and fold them gently over the top. Give the bowl a quarter turn and repeat until there are no white streaks.

How To Store Chocolate Mousse

The mousse will only keep at room temperature for a few hours, so take it out of the fridge when you are ready to serve. You can make chocolate mousse a few days ahead. It will keep in the fridge for up to 5 days, as long as it isn’t exposed to air. Place plastic wrap directly on the surface of the mousse before storing it.

You can also freeze mousse for up to two months, in an air-tight container, with a sheet of plastic wrap on the surface of the mousse. Defrost overnight in the fridge.

Chocolate Mousse with no Eggs

You can make this mousse without the egg whites, but it won’t be as stable and airy. To substitute the egg whites, whip 1/2 cup more heavy cream and add the sugar to that mixture.

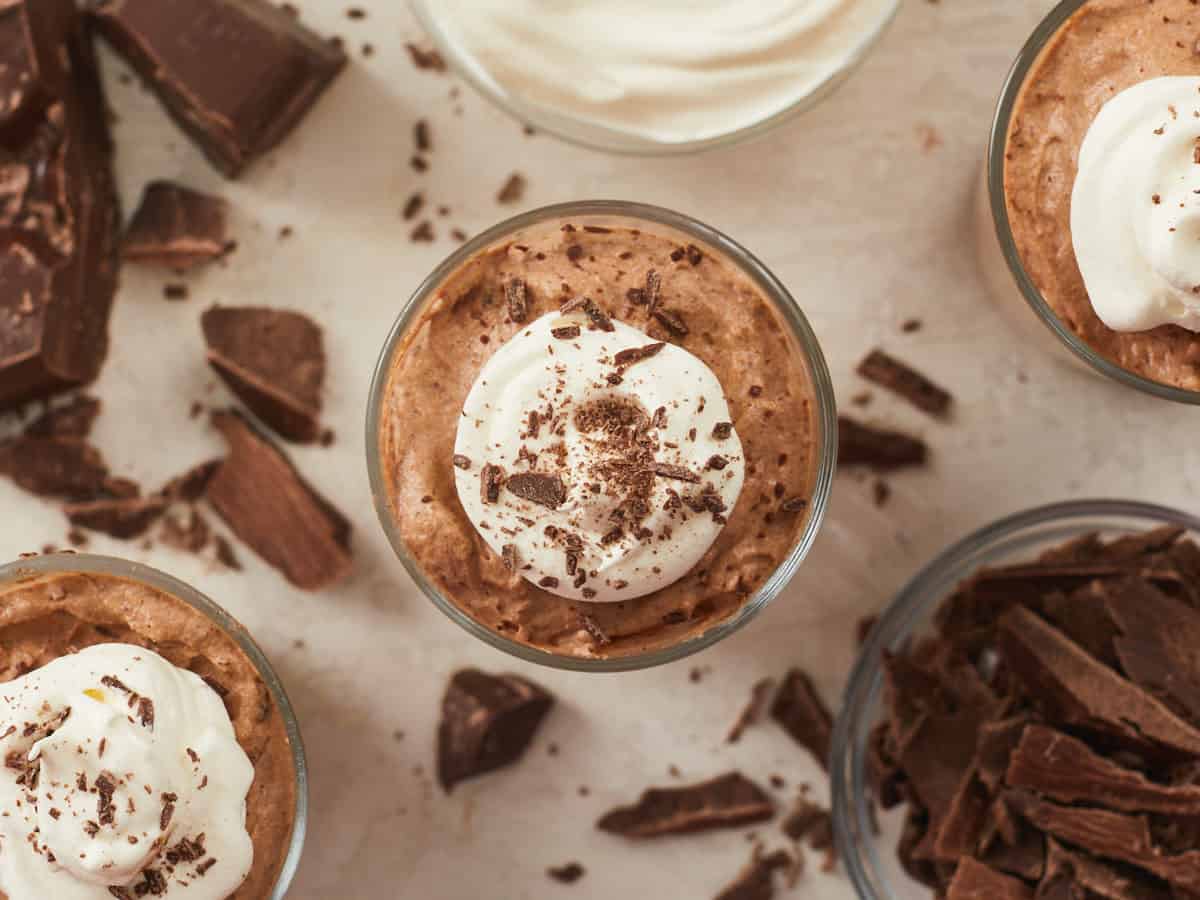
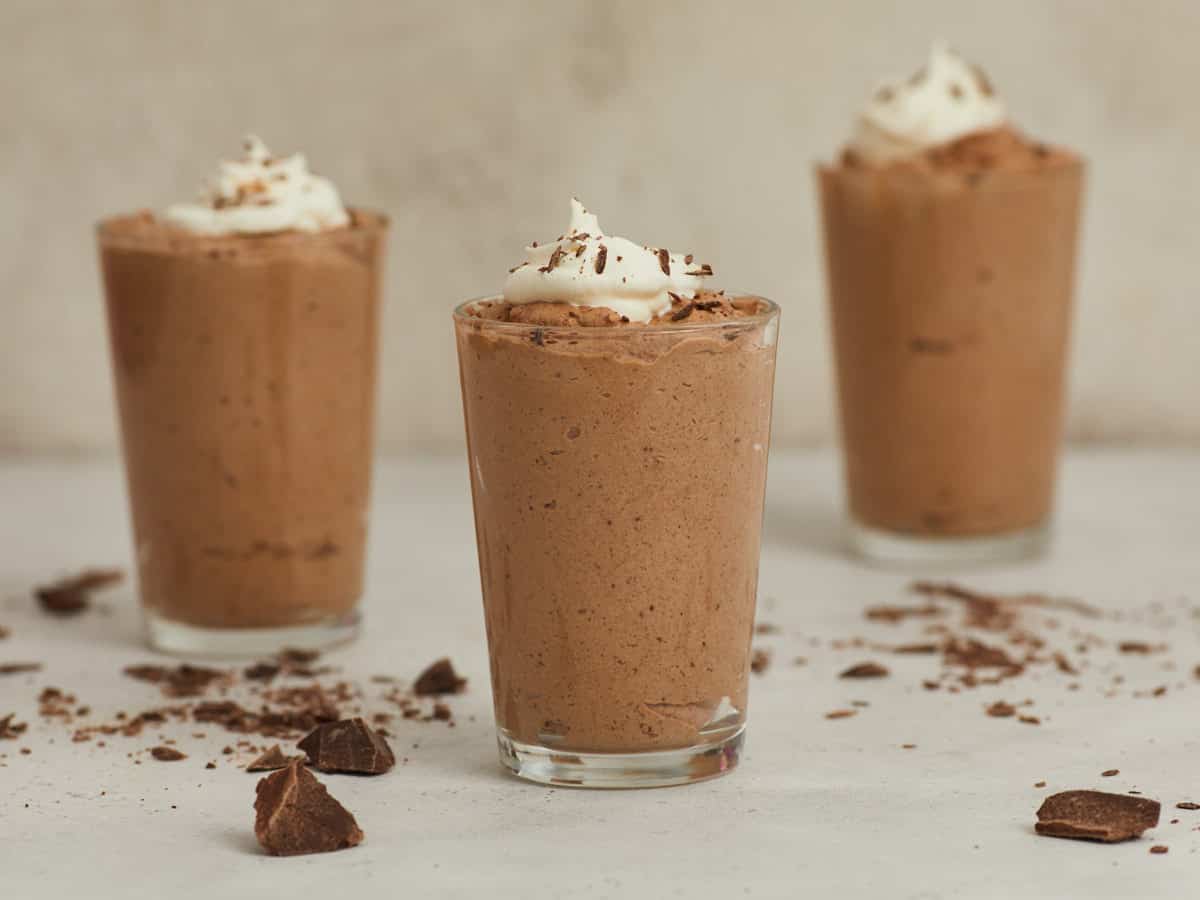
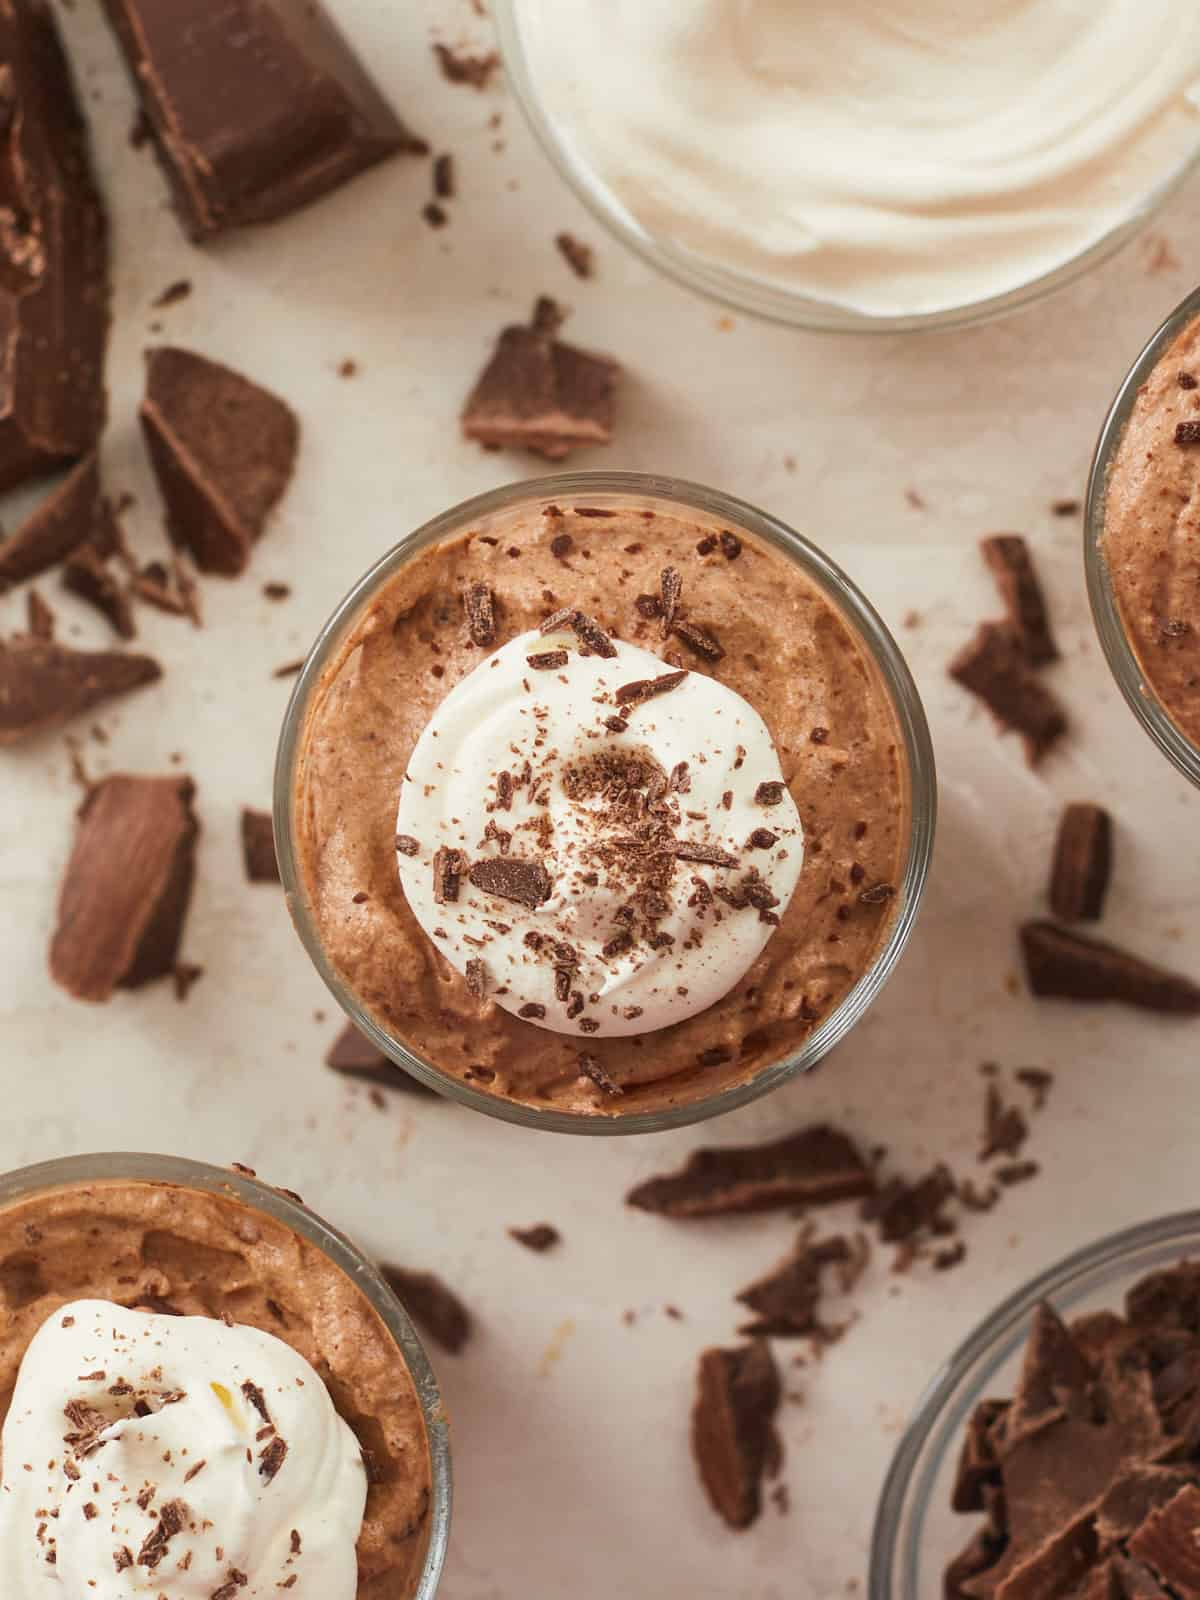
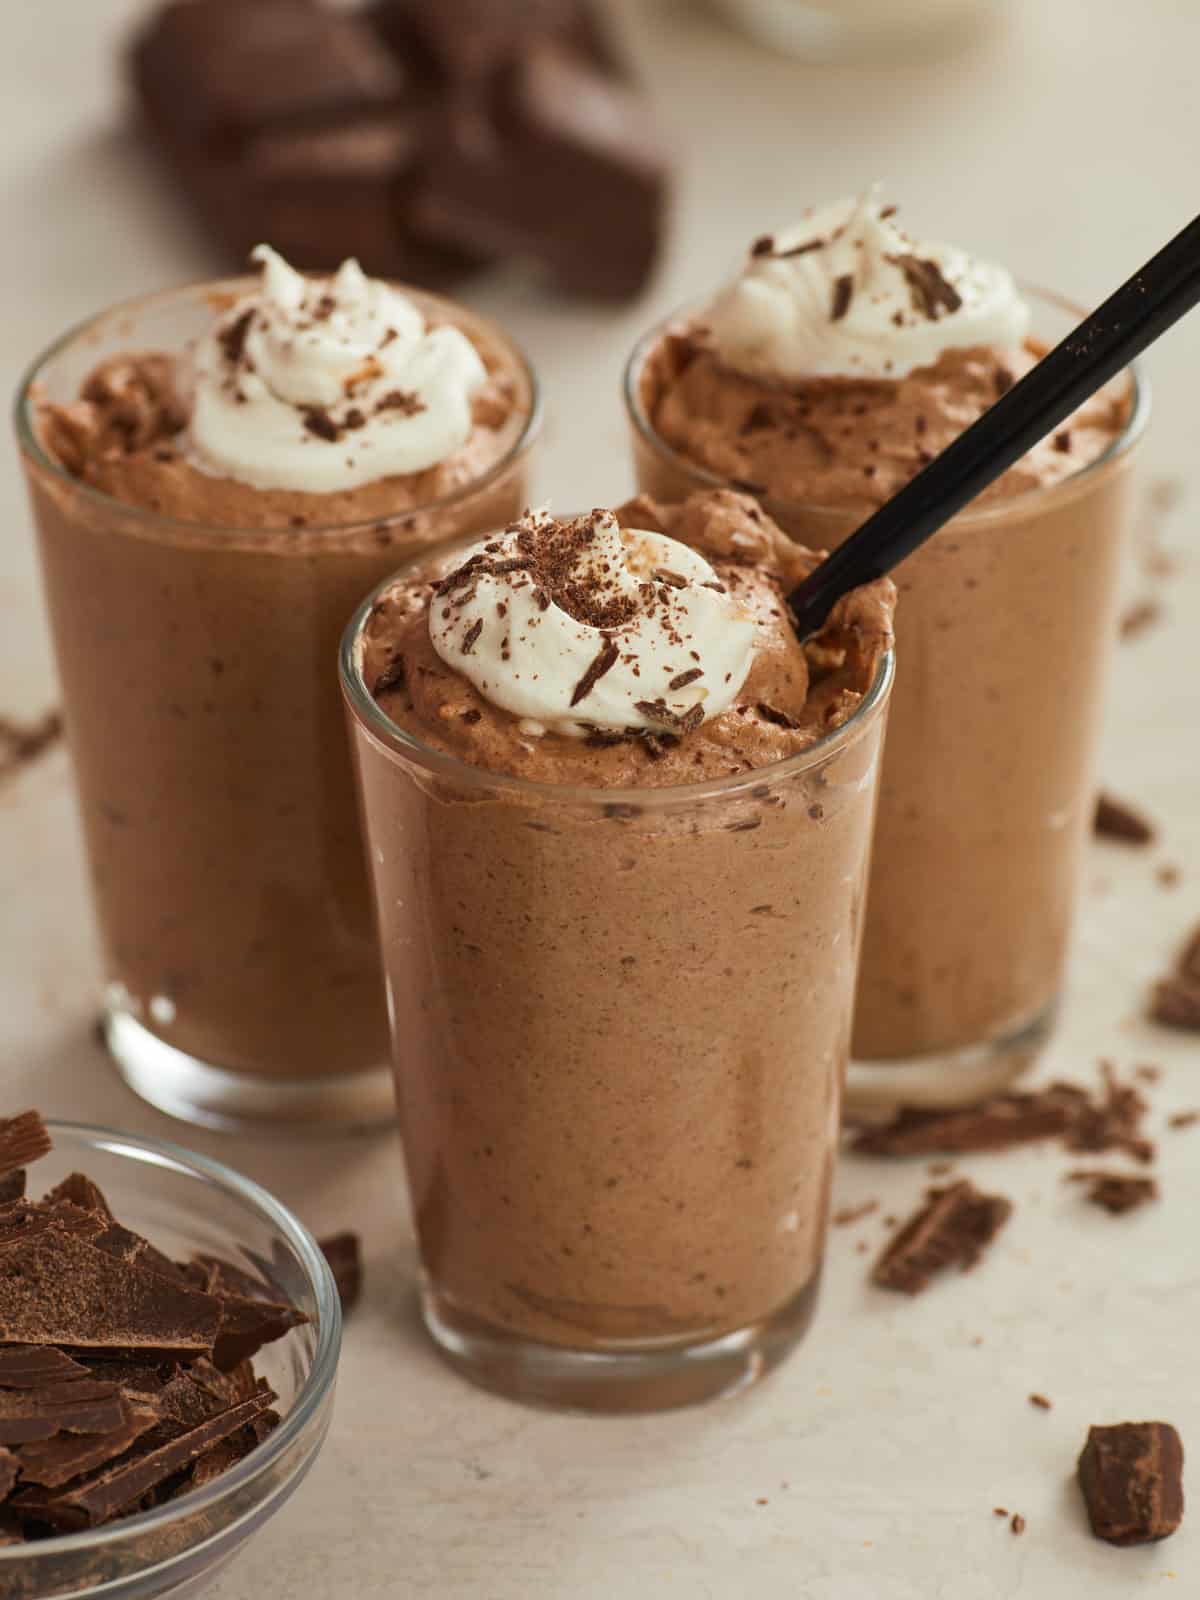
Overhead shot of three small glasses with chocolate mousse topped with whipped cream and shaved chocolate.
Print

Chocolate Mousse

When it comes to a perfectly luscious and light dessert, it doesn't get much simpler than this deeply flavored easy chocolate mousse. You are four ingredients away from heaven!
Course Dessert
Cuisine American
Total Cost $7.57 recipe / $1.26 serving
Prep Time 15 minutes
Resting Time 1 hour
Total Time 1 hour 15 minutes
Servings 6 1-cup servings
Calories 504kcal

Equipment

Ingredients

  • 8 oz dark or semi-sweet chocolate*, chopped $2.90
  • 1 pint heavy whipping cream, very cold $3.29
  • 3 egg whites, room temperature $1.25
  • 1/2 cup powdered sugar or sugar substitute $0.13

Instructions

  • Fill a pot halfway with water and bring it to a boil. Take it off the heat. Place the chocolate in a bowl and place the bowl in the hot water, being careful not to get any water in the bowl. Leave the bowl there until the chocolate melts.
  • Add the heavy cream to a large mixing bowl and beat on medium speed until soft peaks form.
  • In a separate large mixing bowl, whip the egg whites on medium speed to soft peaks. Add the sugar and continue beating until stiff peaks form.
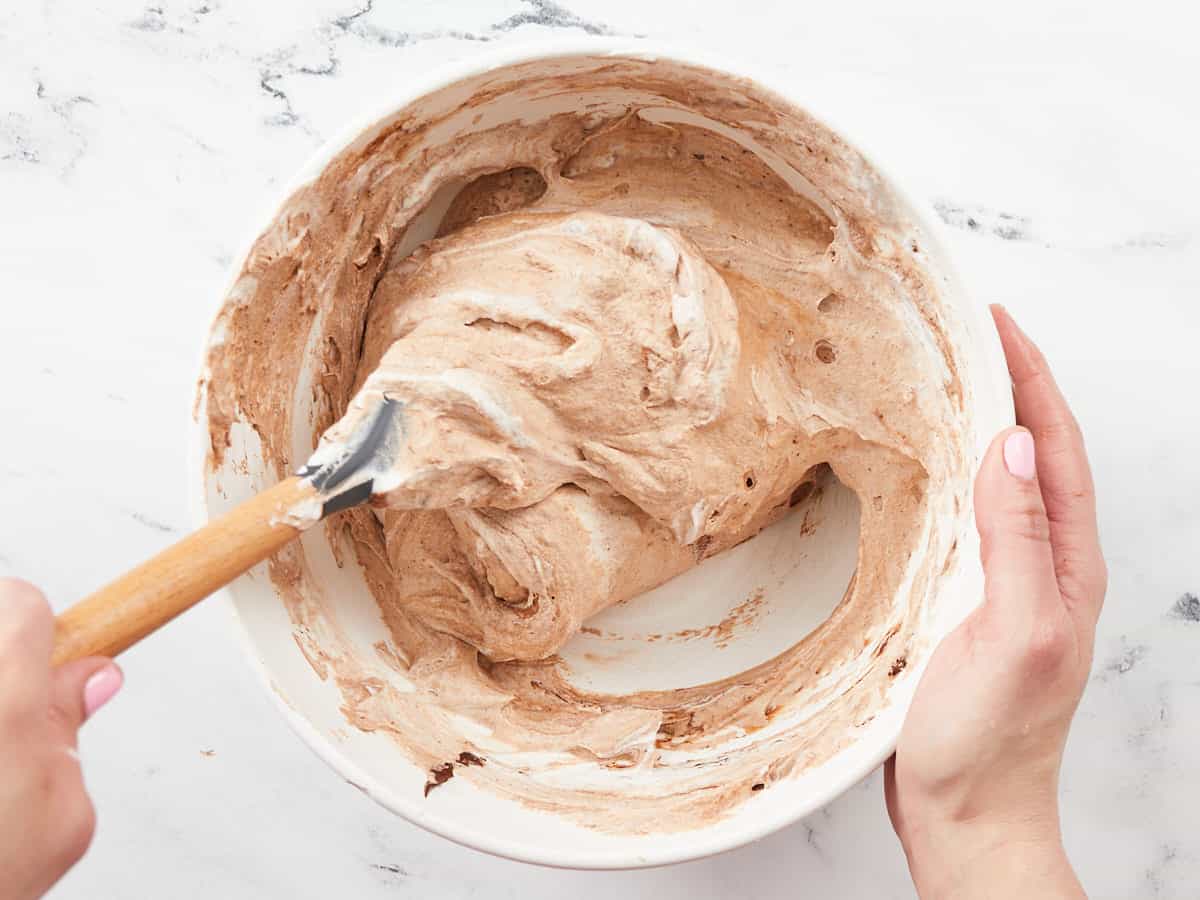
  • Gently fold the egg whites into the chocolate in thirds. Fold until no white streaks remain.
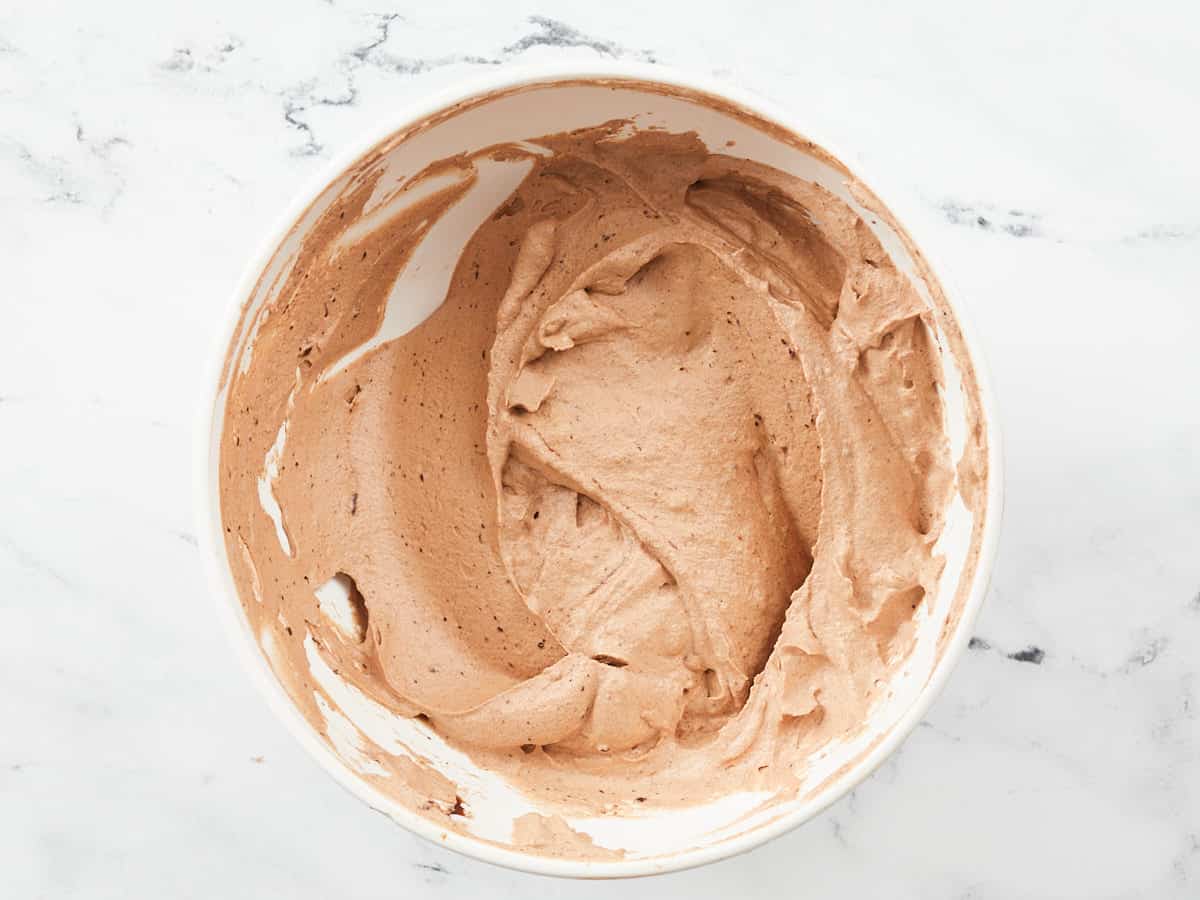
  • Gently fold the whipped cream into the chocolate in thirds. There should be no white streaks.
  • Scoop mousse into serving dishes, cover, and refrigerate for an hour. Garnish with sweetened whipped cream, raspberries, mint, or shaved chocolate.

See how we calculate recipe costs here.

Notes

*8 ounces of chocolate is about 1 1/2 cups

Nutrition

Serving: 1cup | Calories: 504kcal | Carbohydrates: 37g | Protein: 4g | Fat: 39g | Sodium: 46mg

How to Make Chocolate Mousse – Step by Step Photos

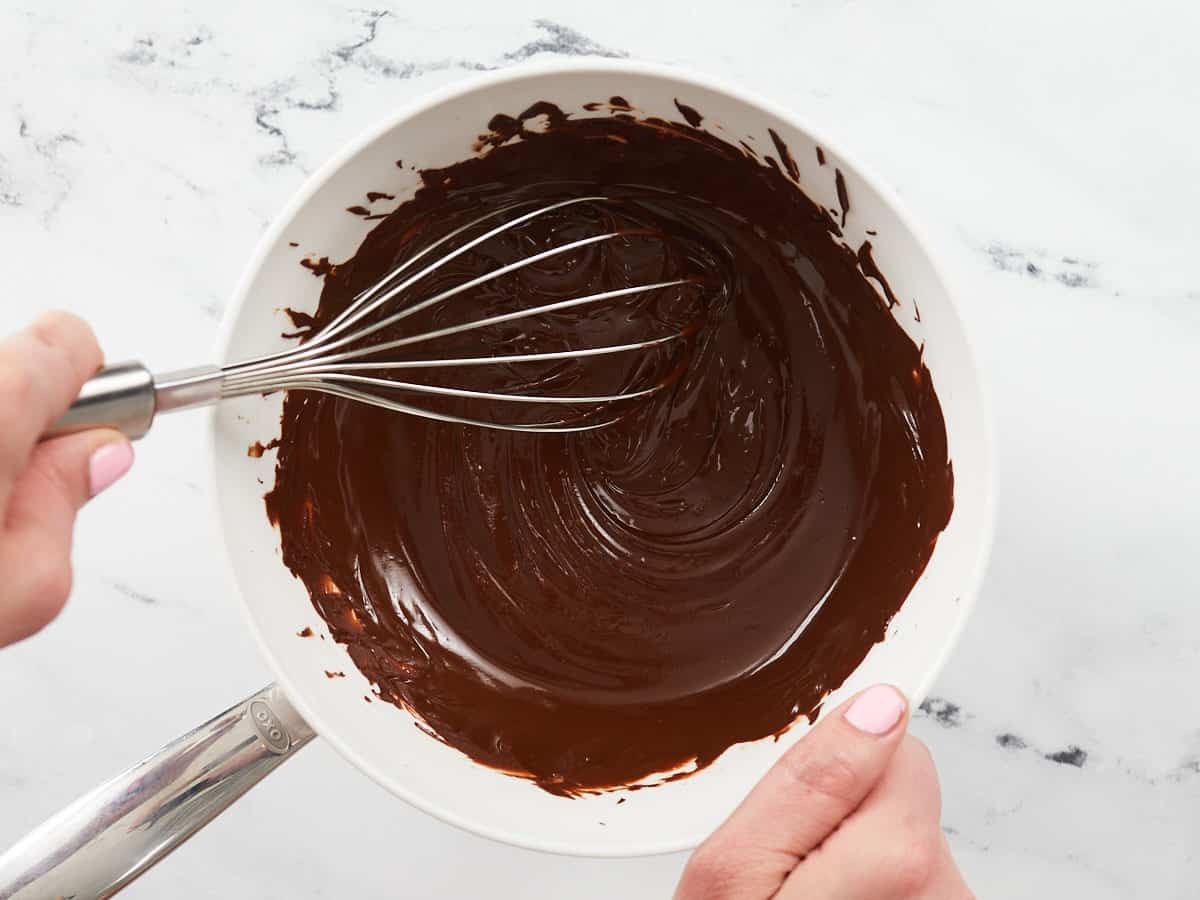
Bring a pot of water to a boil and take it off the heat. Add chopped chocolate to a clean, dry bowl and place it in the pan. Leave the bowl in the water for a few minutes, then stir the chocolate until smooth and silky.

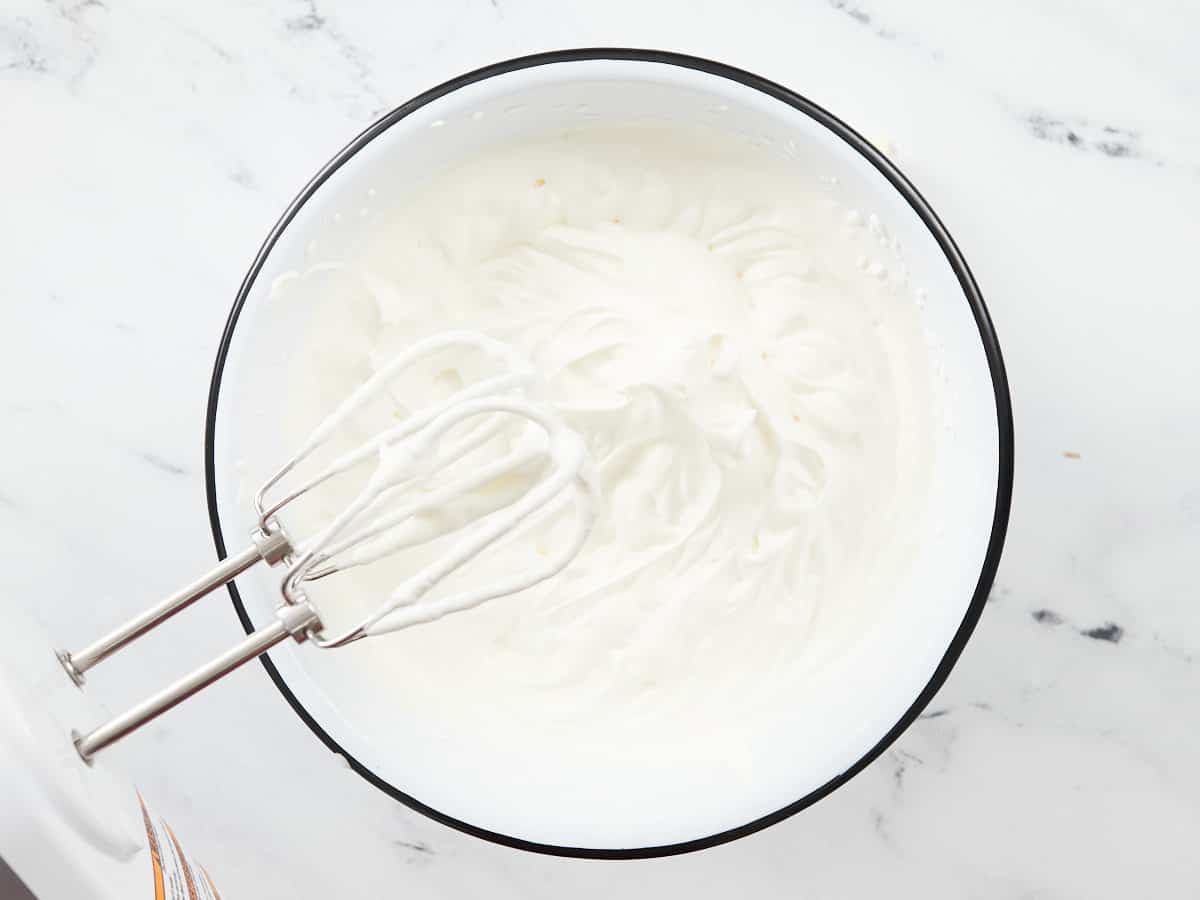
Beat the heavy cream on medium speed until it forms soft peaks. When you take the beater out of the bowl, the tips of the whipped cream will look like an upside-down J.

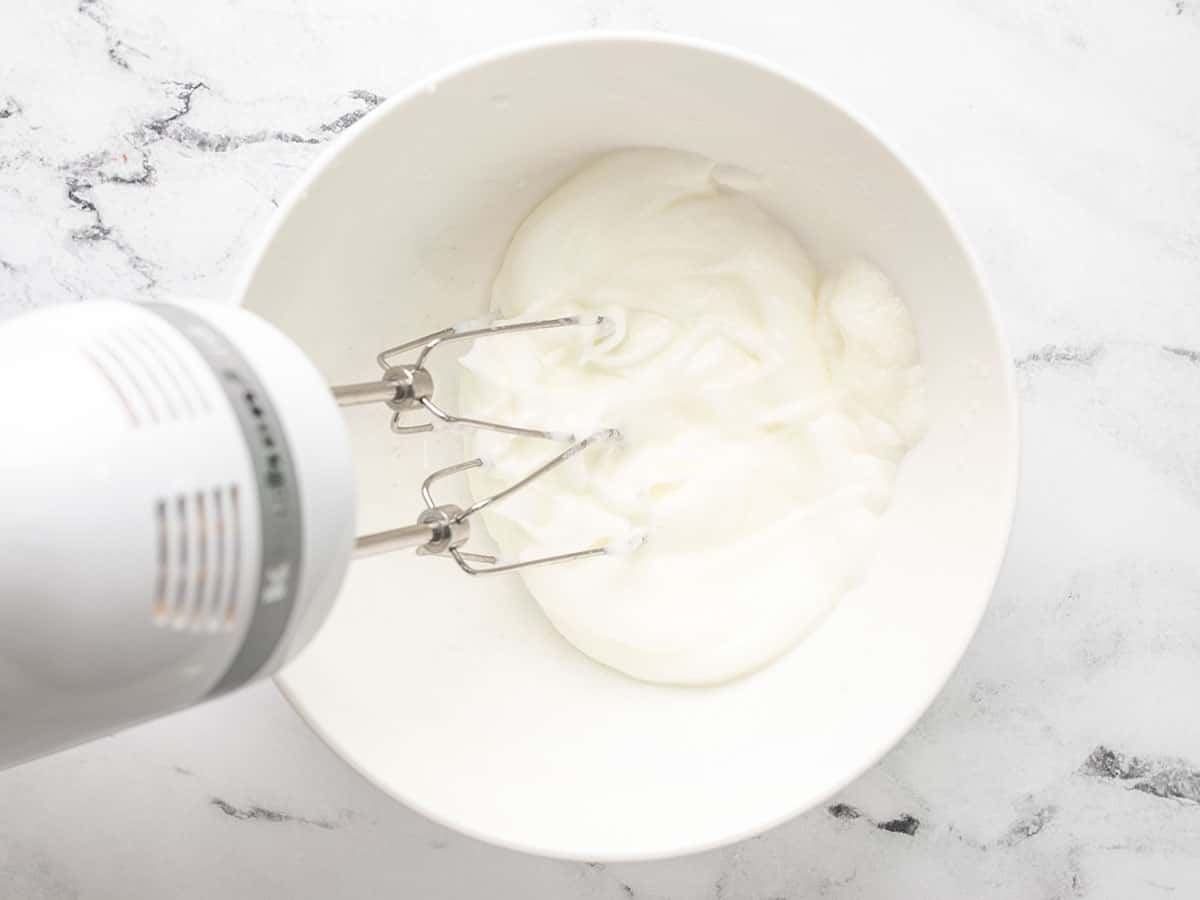
Whip the egg whites on medium speed to soft peaks. Add the sugar and continue beating until stiff peaks form. Stiff peaks will stand straight up and remain that way when you remove the beater from the bowl.

Gently fold the egg whites into the chocolate in thirds until no white streaks remain. Do not stir.

When the whites are thoroughly mixed in, fold in the whipped cream in thirds. There should be no white streaks. Leave the mousse in the bowl or scoop it into serving dishes. Cover and refrigerate for an hour. Garnish with sweetened whipped cream, raspberries, mint, or shaved chocolate. Enjoy the oohs and aahs you’ll get when you put this beauty on the table!

More Easy Dessert Recipes

The post Chocolate Mousse appeared first on Budget Bytes.