Crispy Hot Honey Shrimp Sheet Pan Quesadillas.

These hot honey shrimp quesadillas are savory and delicious, made with lots of melty cheese and served with mango salsa. These are baked in the oven until the tortillas are super crispy. The perfect easy meal! I love a good old quesadilla!  These shrimp quesadillas are super crispy and crunchy, filled with melty cheese and […]

The post Crispy Hot Honey Shrimp Sheet Pan Quesadillas. appeared first on How Sweet Eats.

These hot honey shrimp quesadillas are savory and delicious, made with lots of melty cheese and served with mango salsa. These are baked in the oven until the tortillas are super crispy. The perfect easy meal!

I love a good old quesadilla! 

crispy hot honey shrimp quesadilla

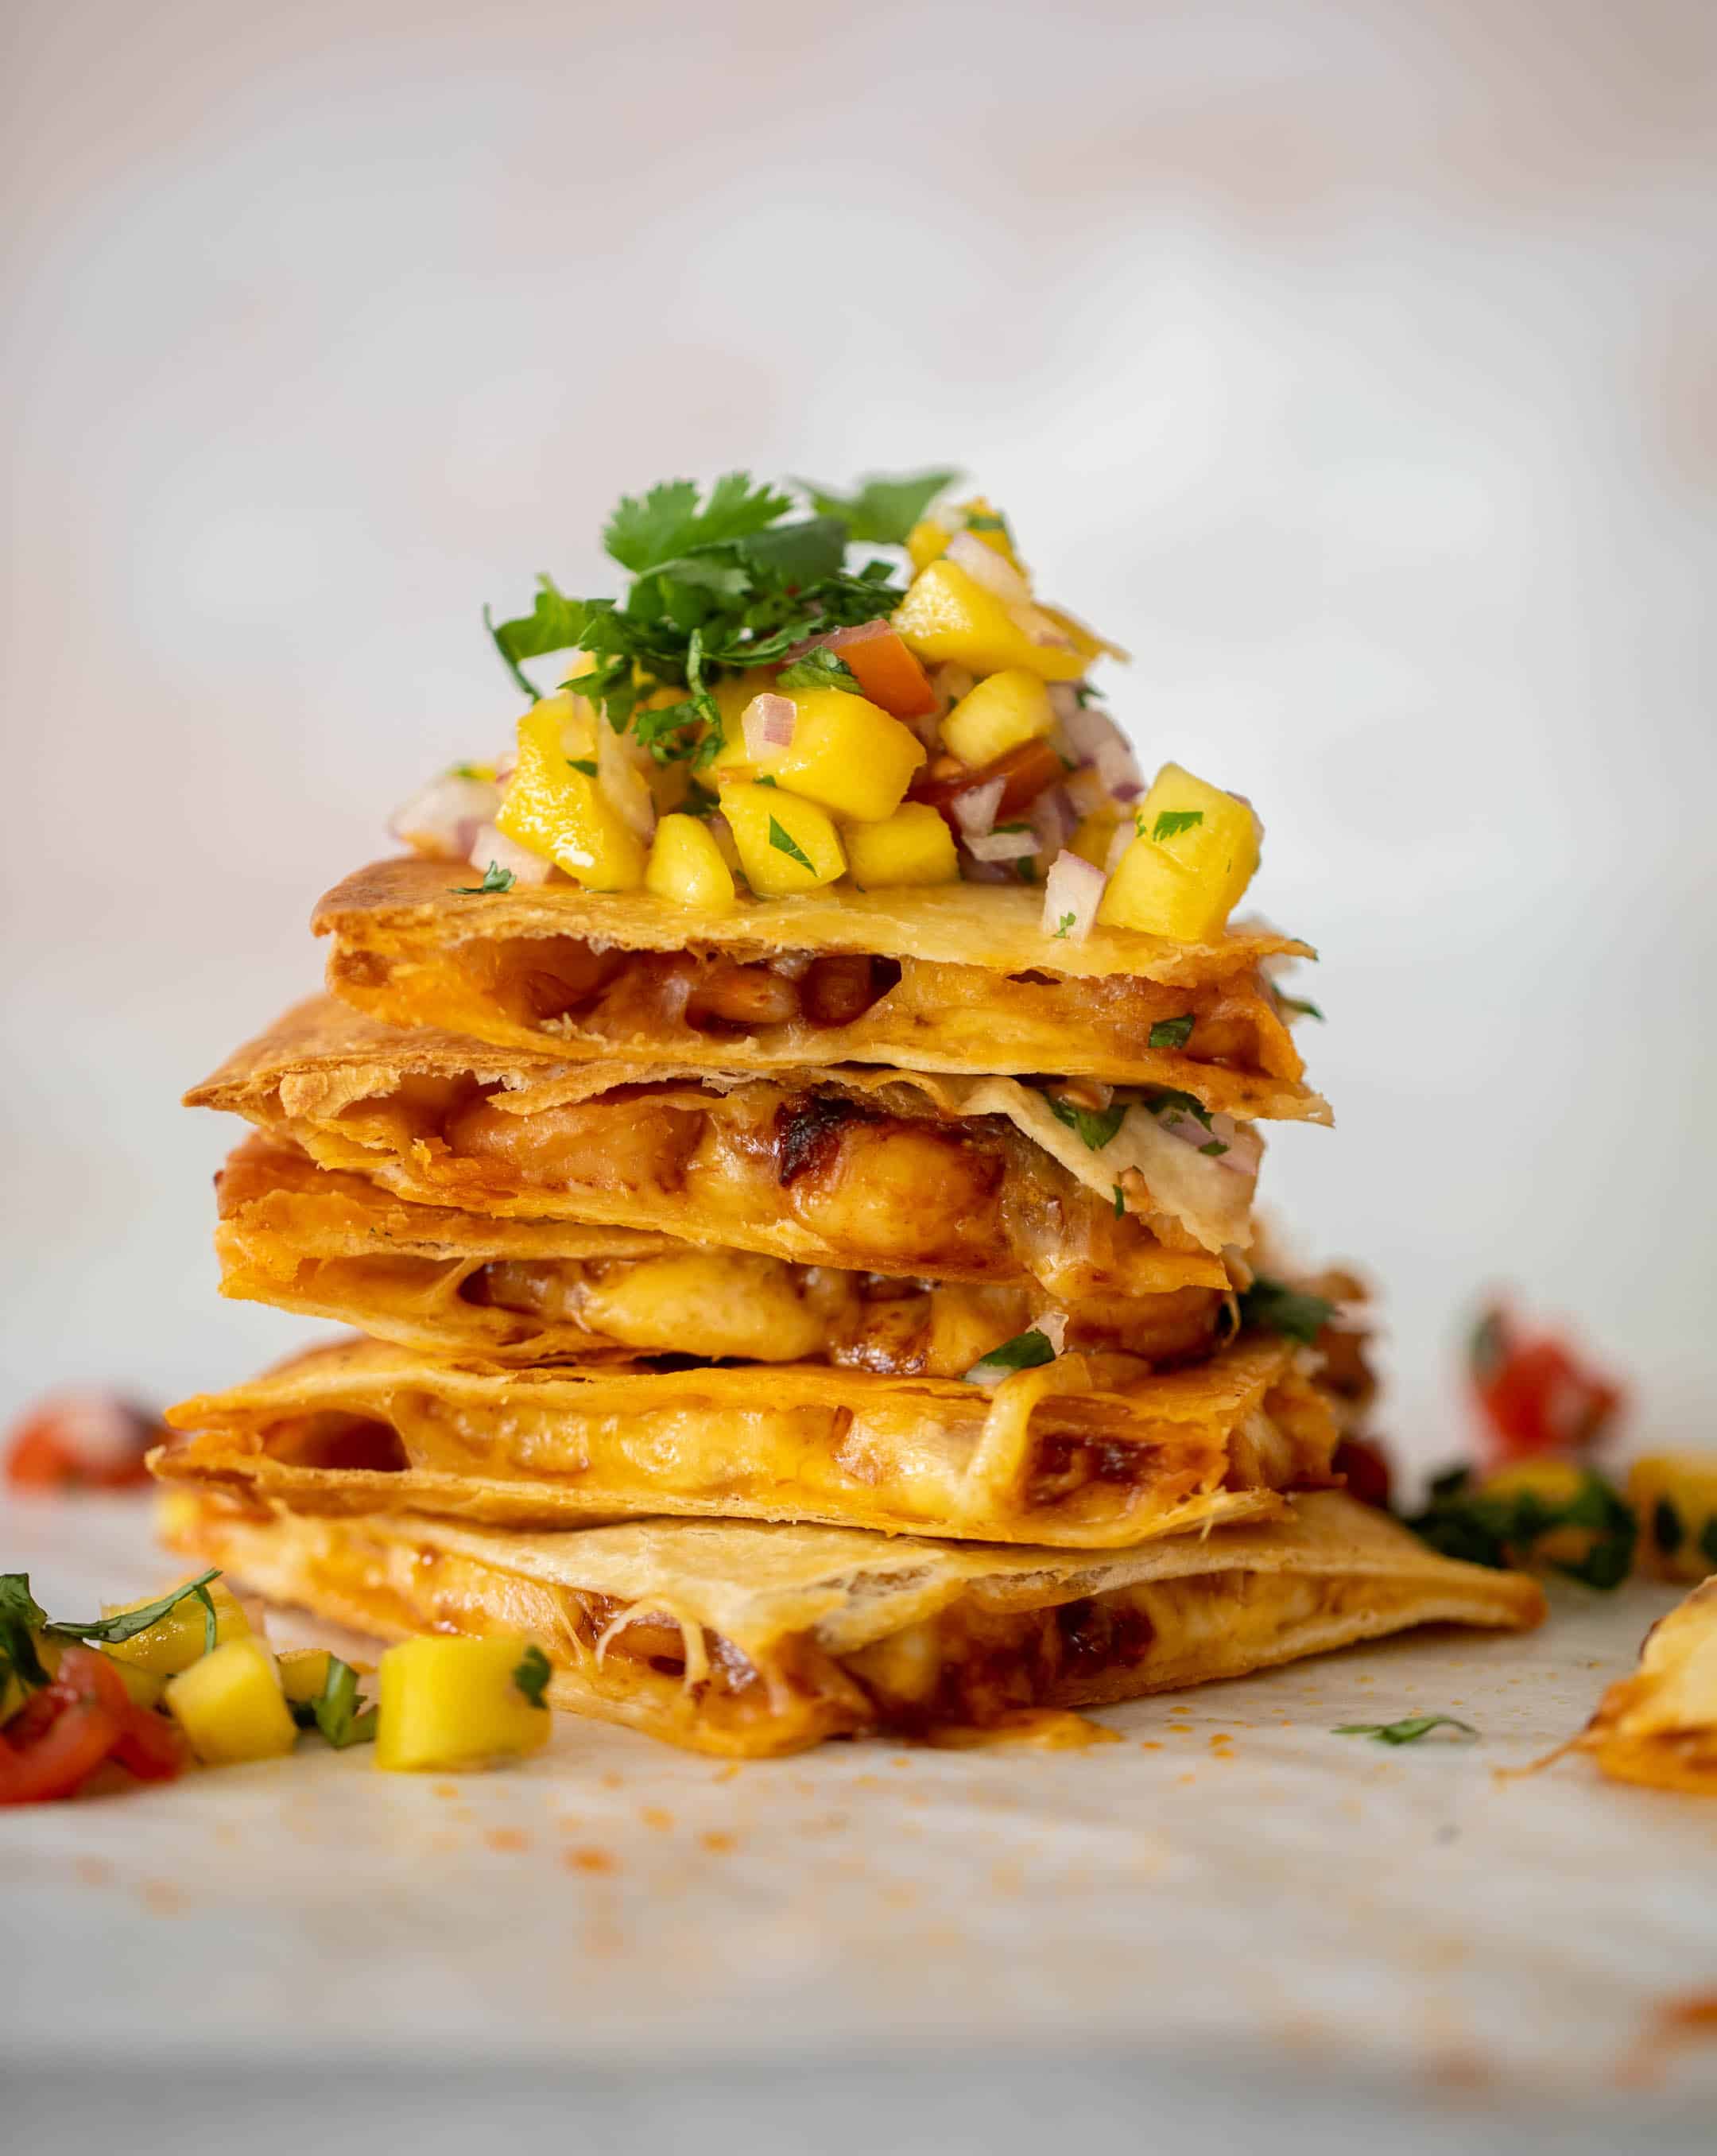
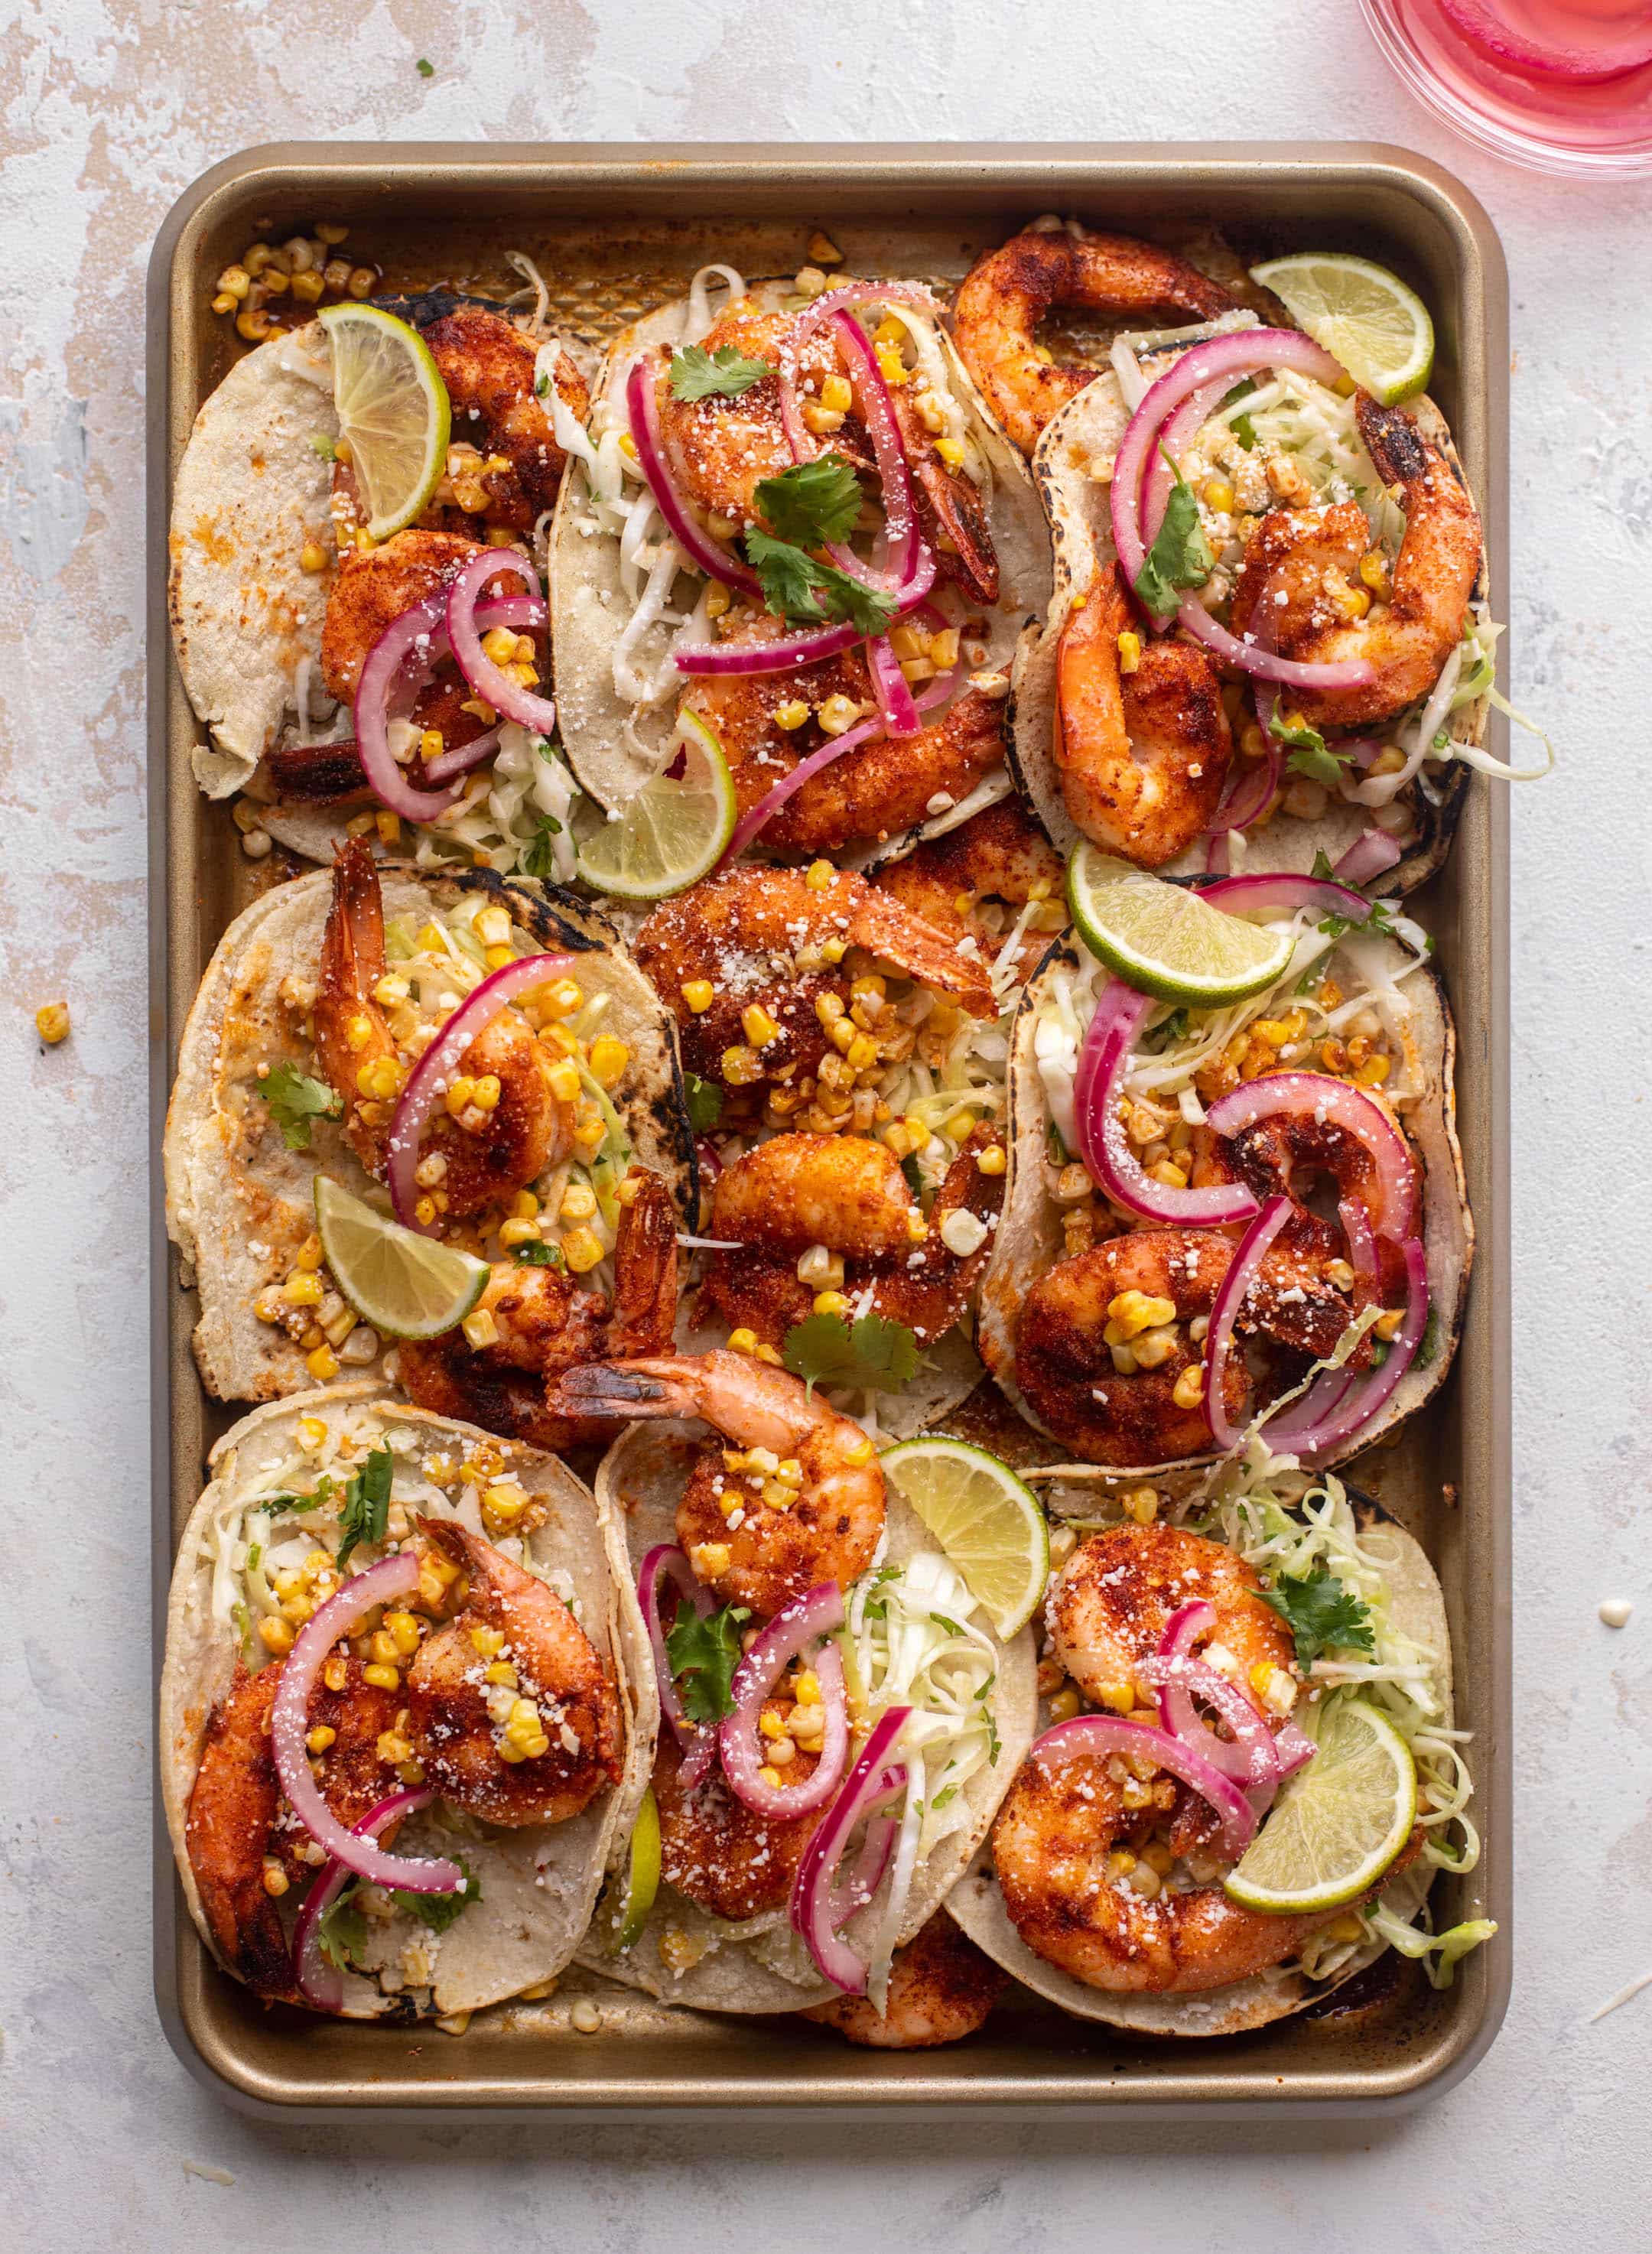
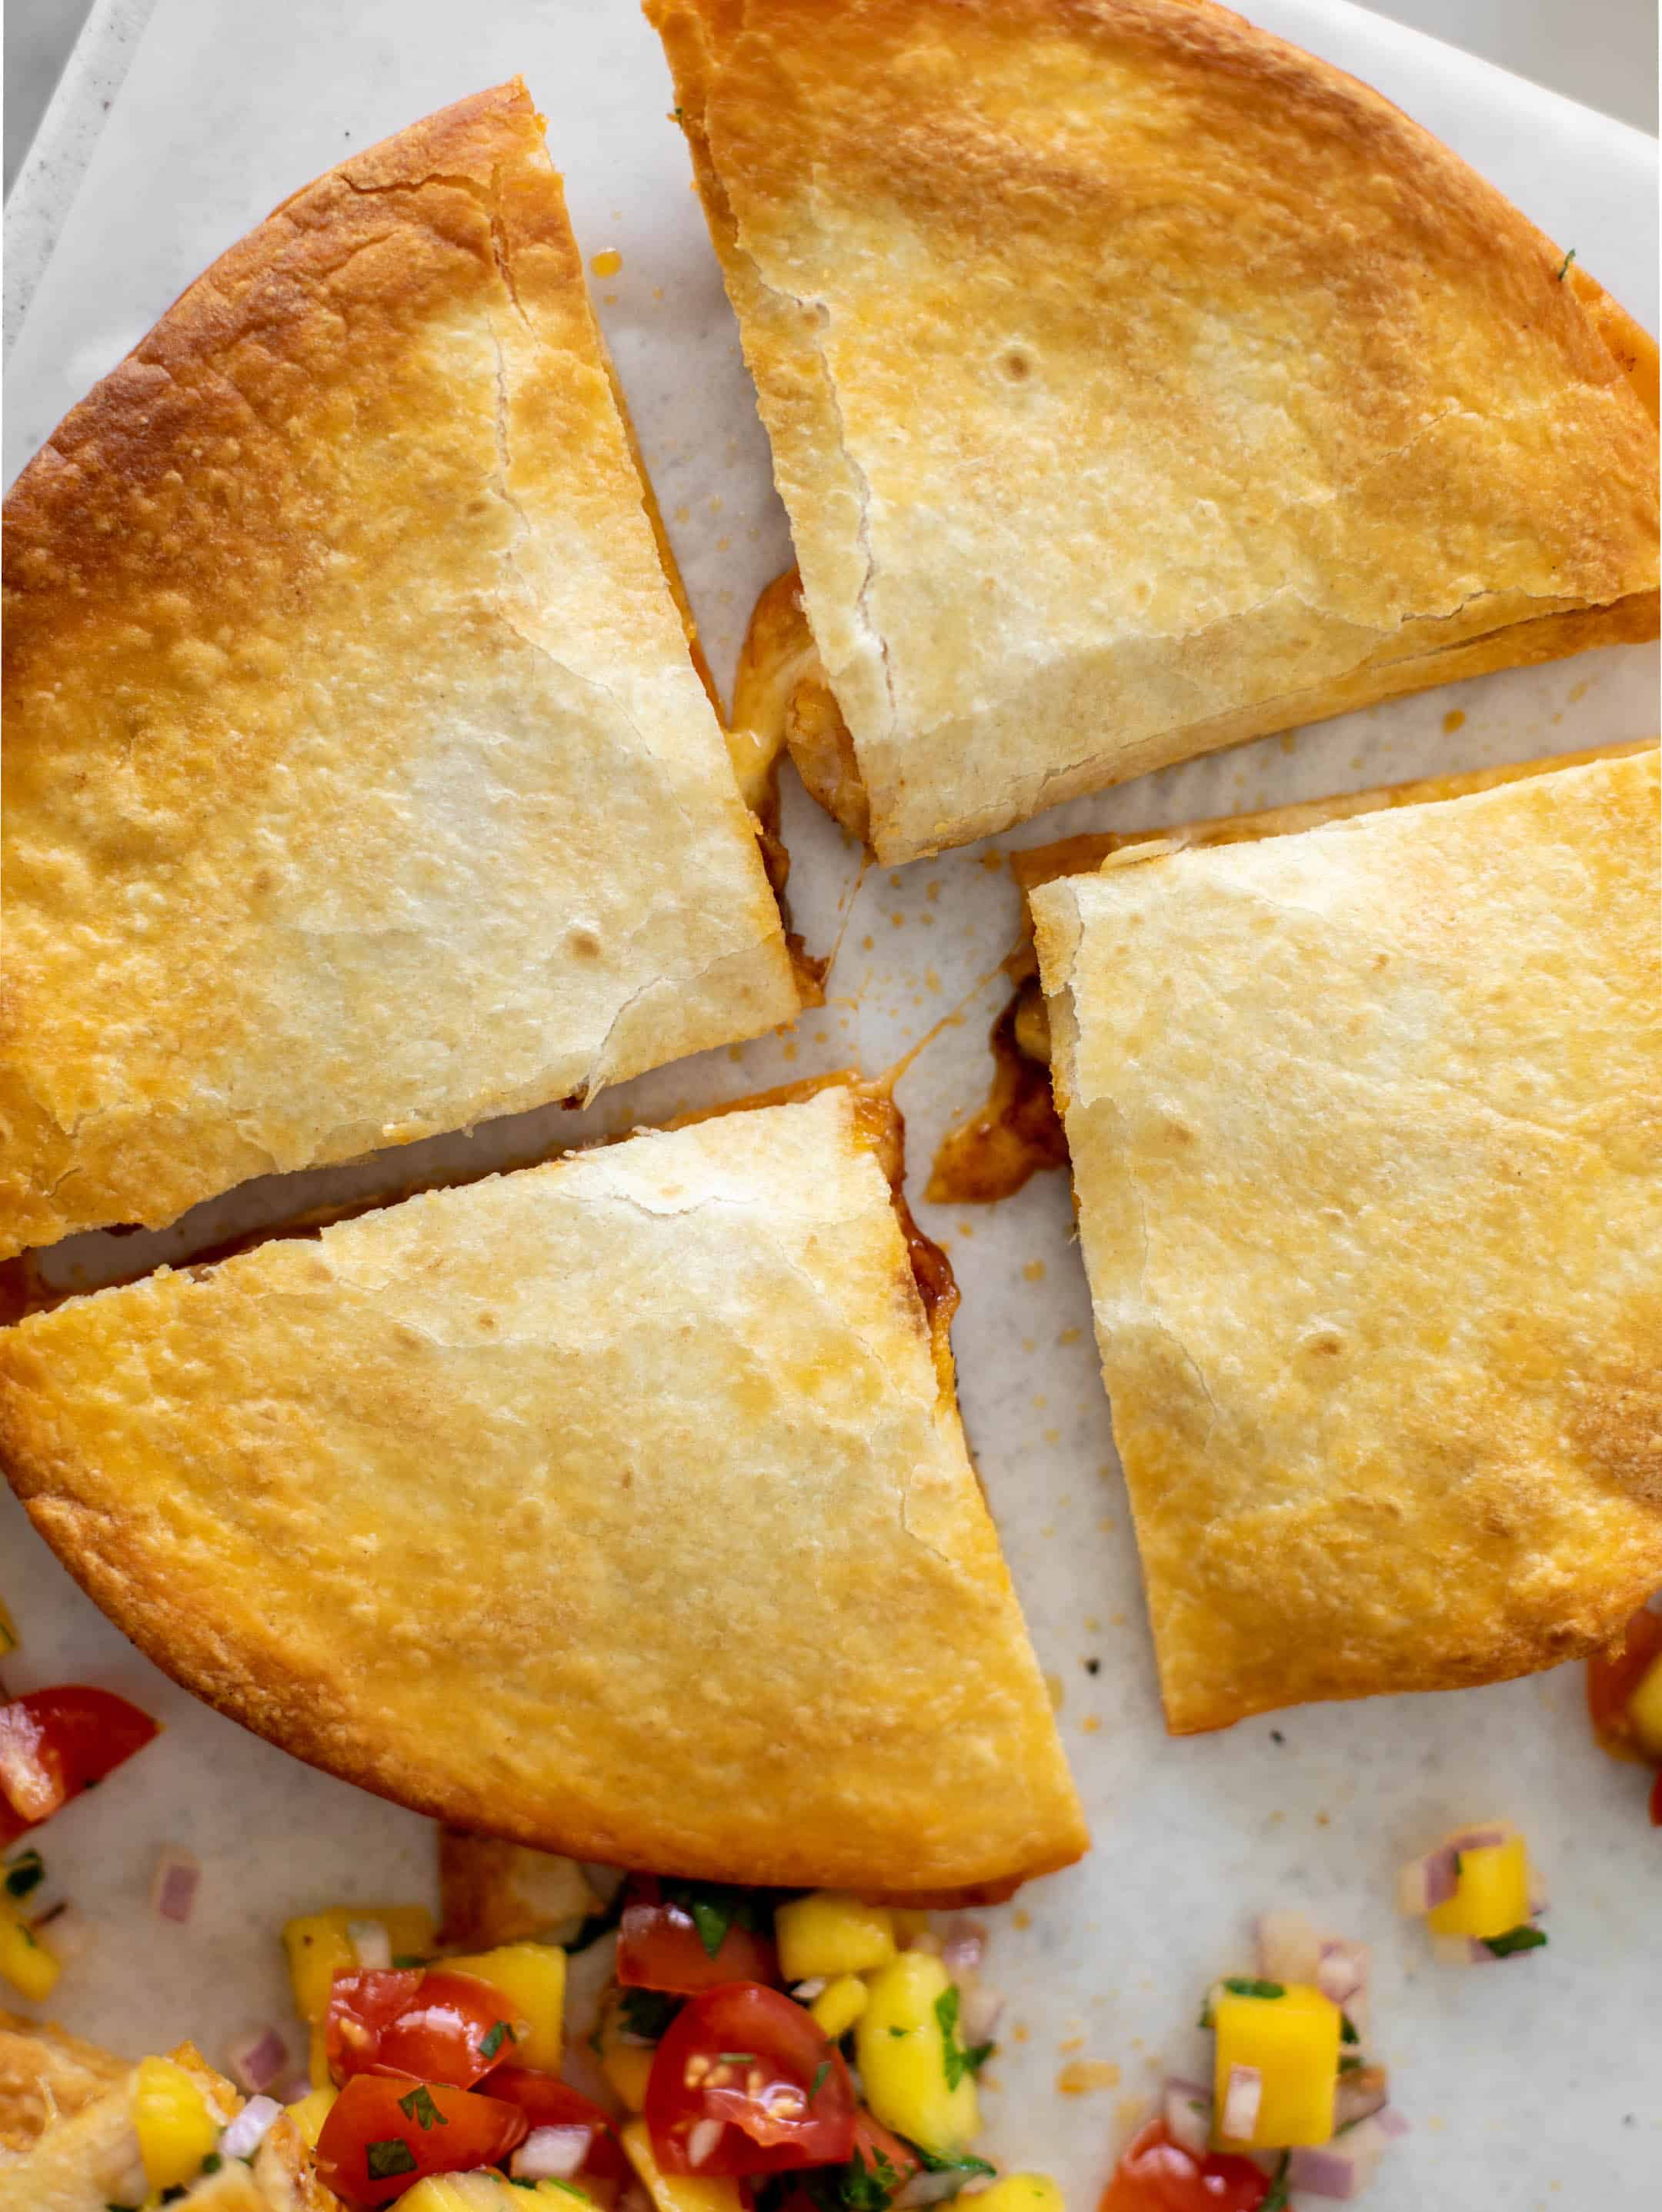
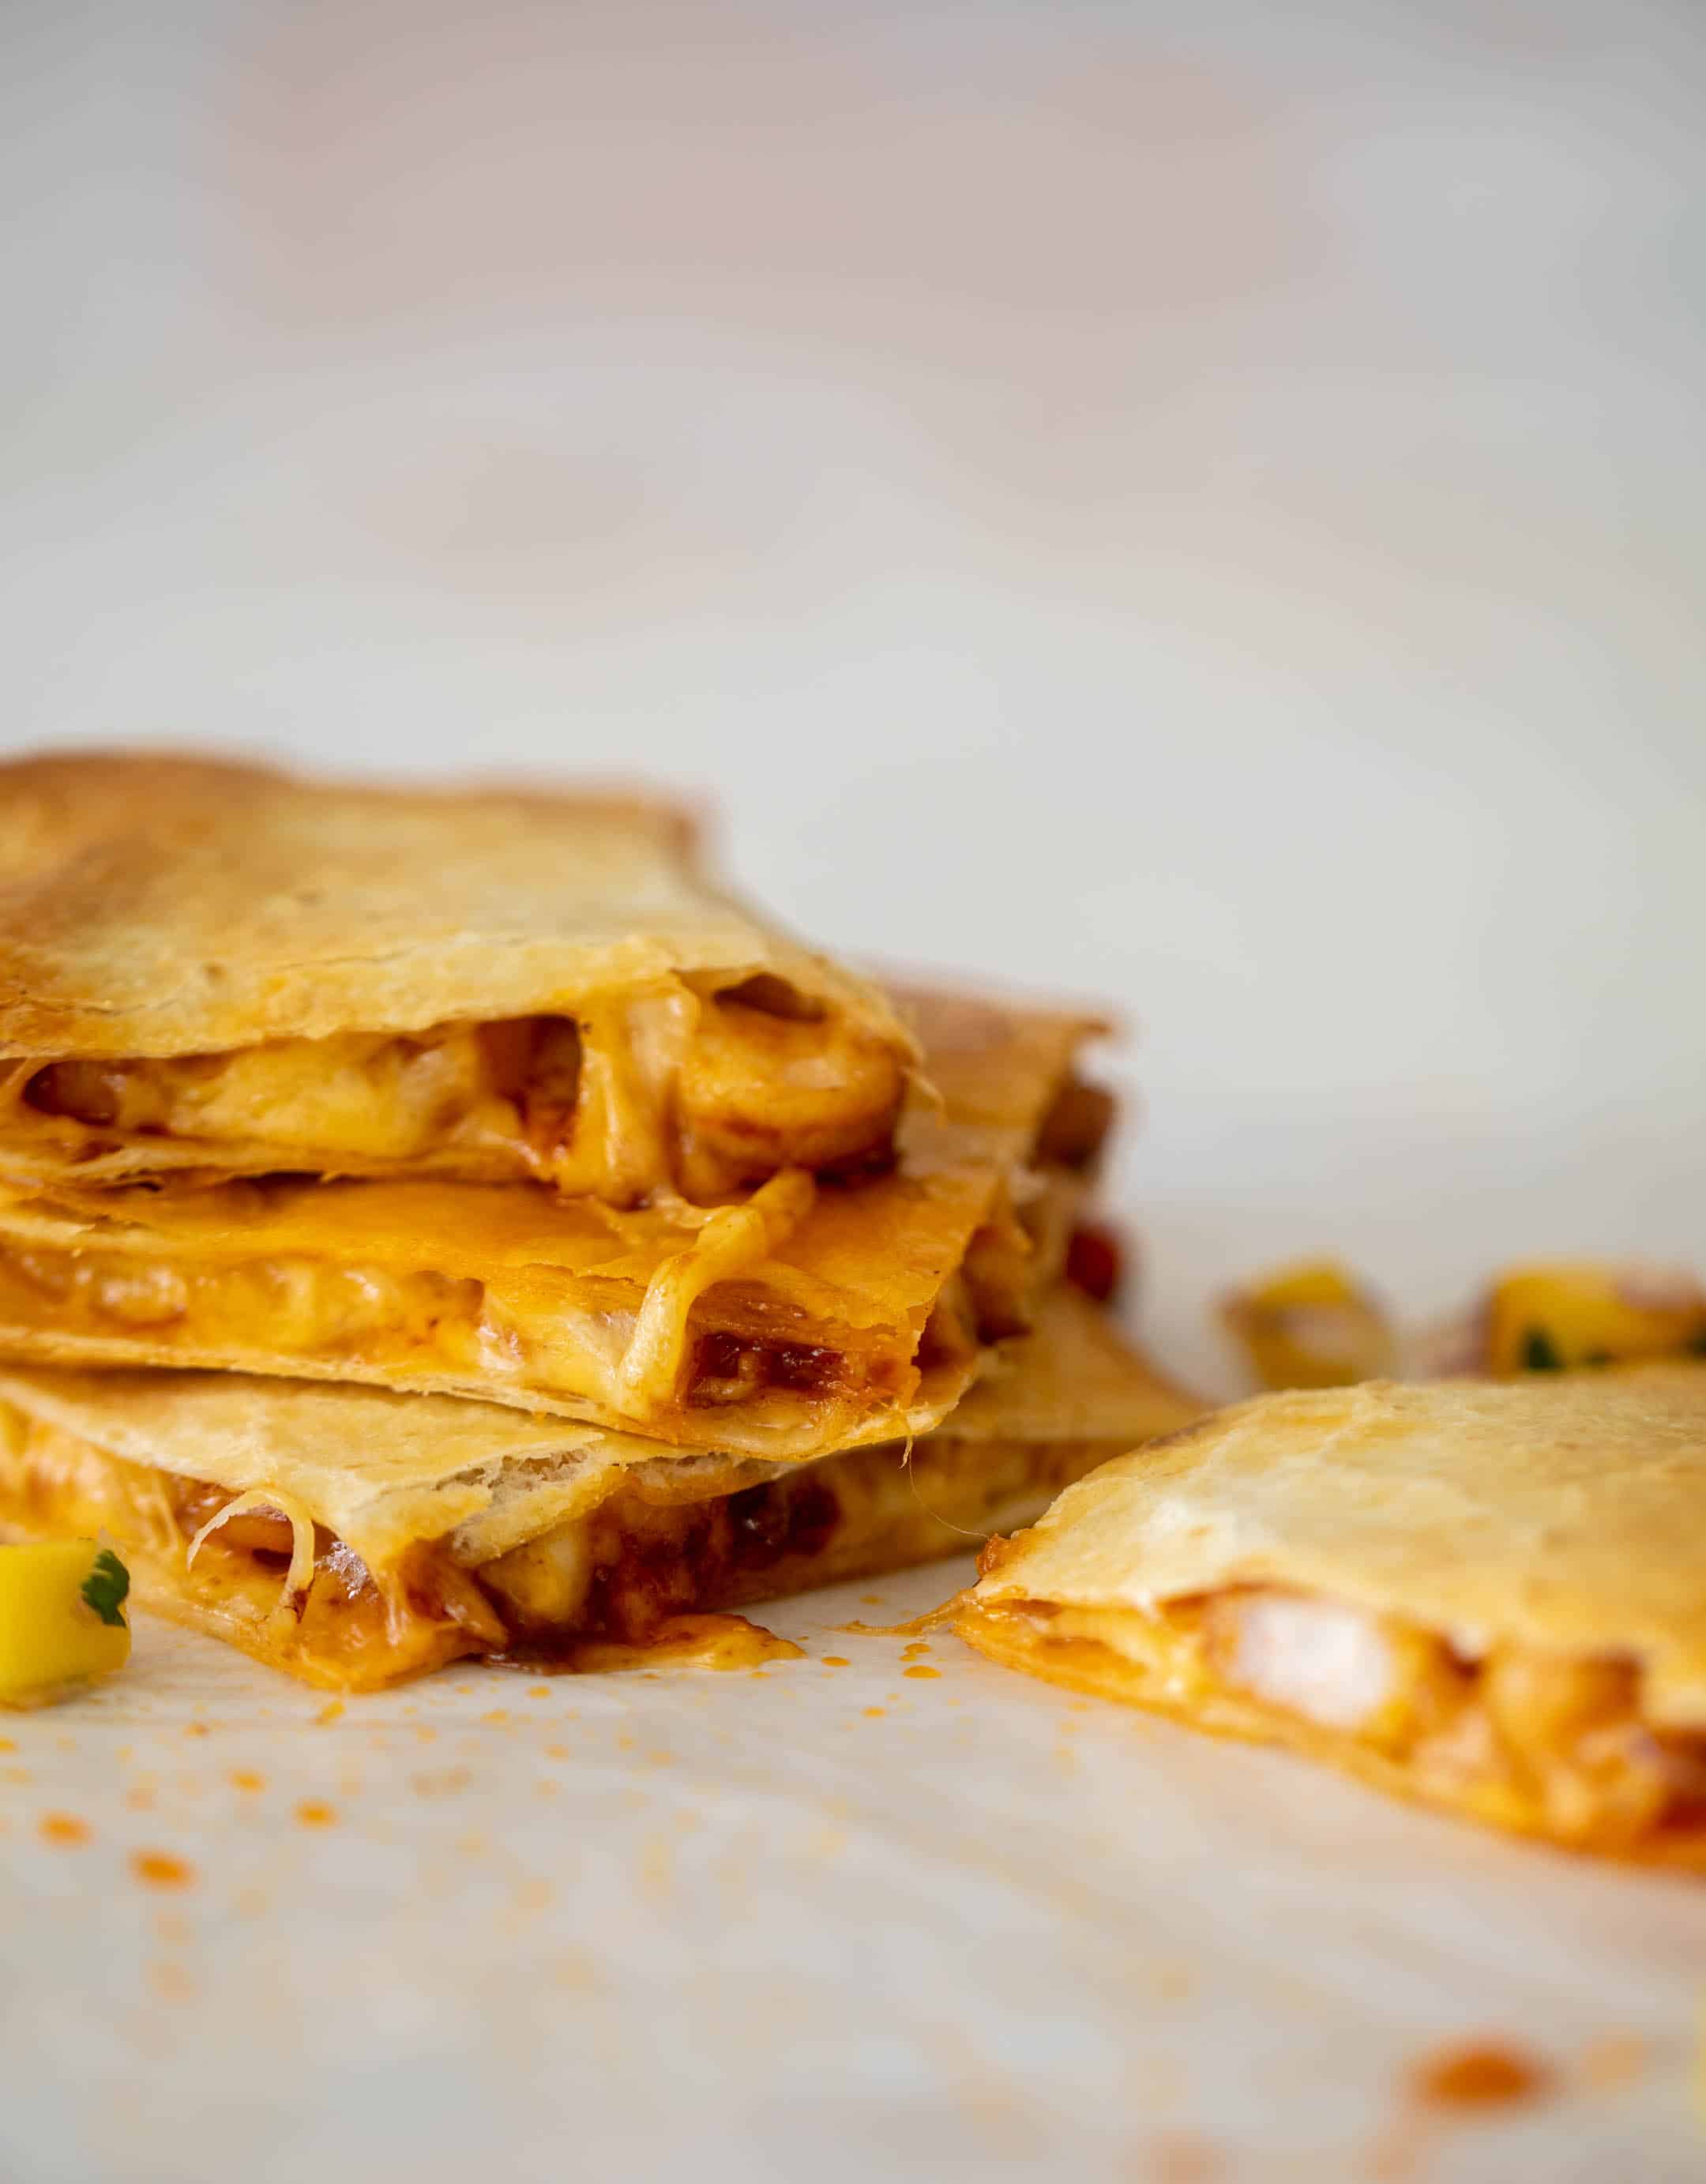
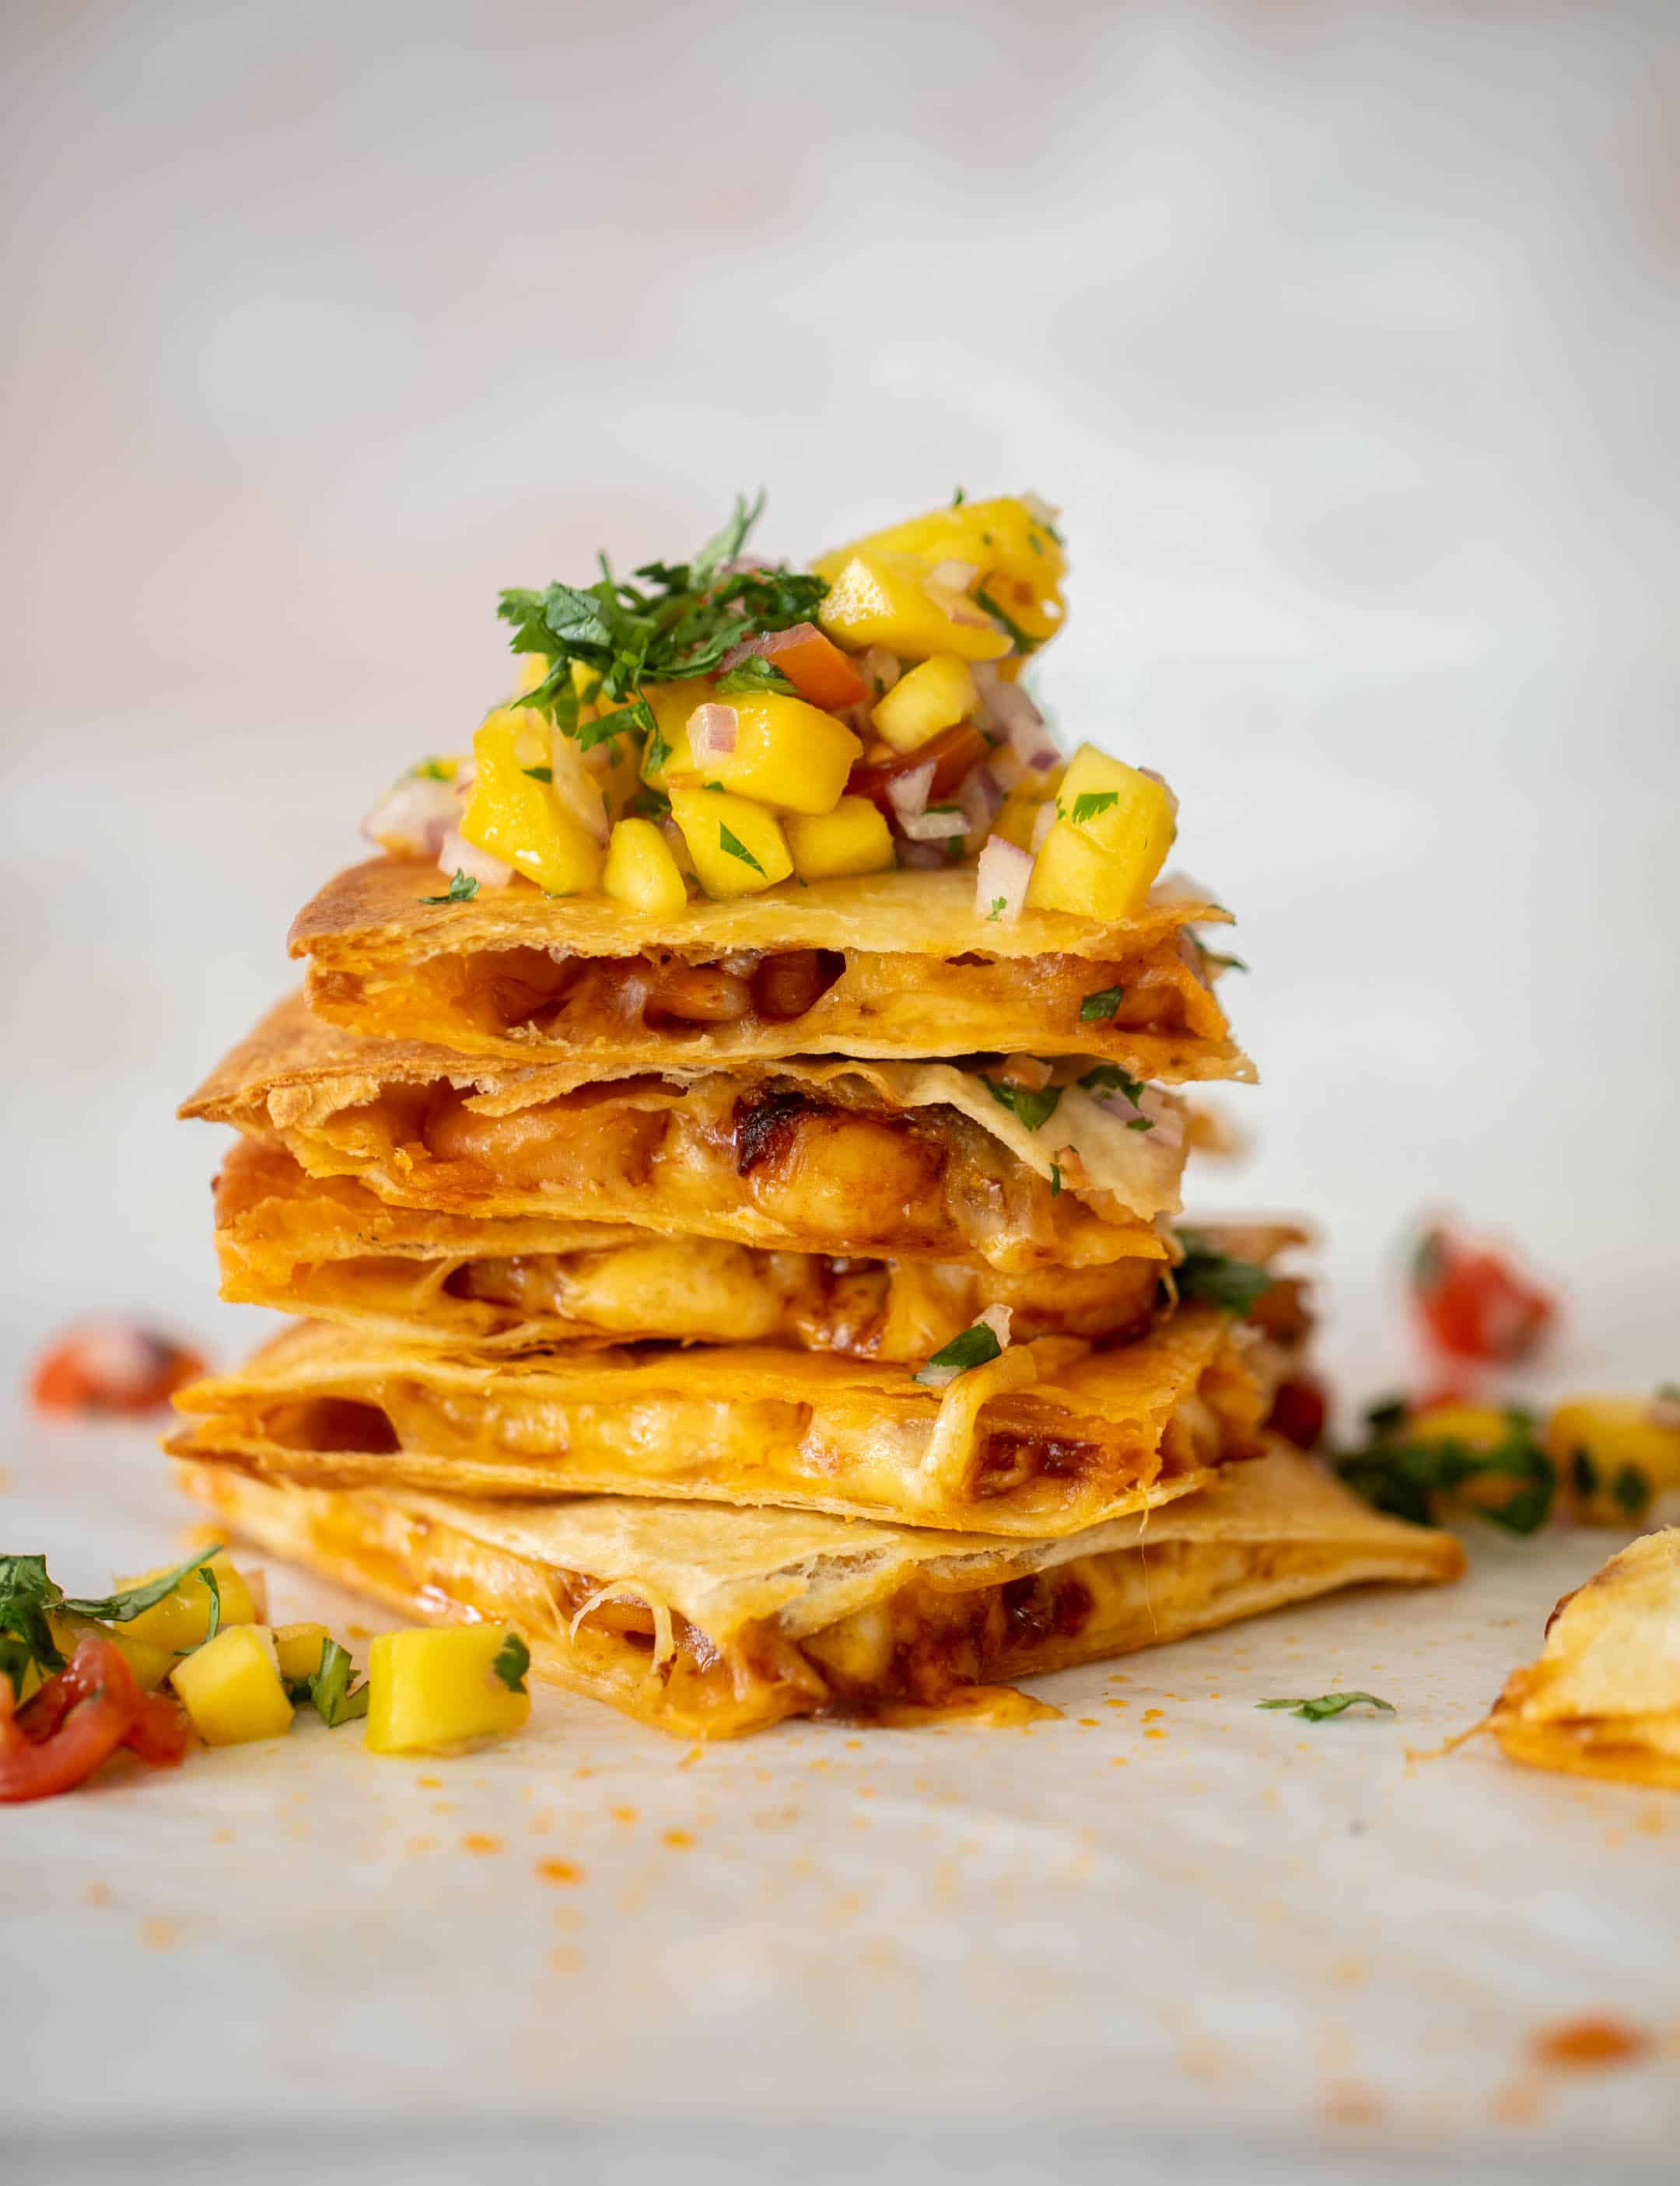
These shrimp quesadillas are super crispy and crunchy, filled with melty cheese and topped with mango sauce. They are easy and delicious, and even though they have minimal ingredients, they are seriously flavorful! 

crispy hot honey shrimp quesadilla

There is something so nostalgic about quesadillas. Even though most of the ones I ate in my childhood consisted of a bagged cheese and a microwave, they still hit the spot. However, everyone knows that the best kind of quesadilla is cooked in a skillet with some butter.

Oh my gosh, I can just smell the deliciousness.

For a long time, I thought that was the only way to make a quesadilla that was extra special and delicious. 

mango salsa

But then! I discovered my sheet pan method and it has been a game changer. HUGE game changer, every single time. I promise. 

Let’s talk about the flavor here though.

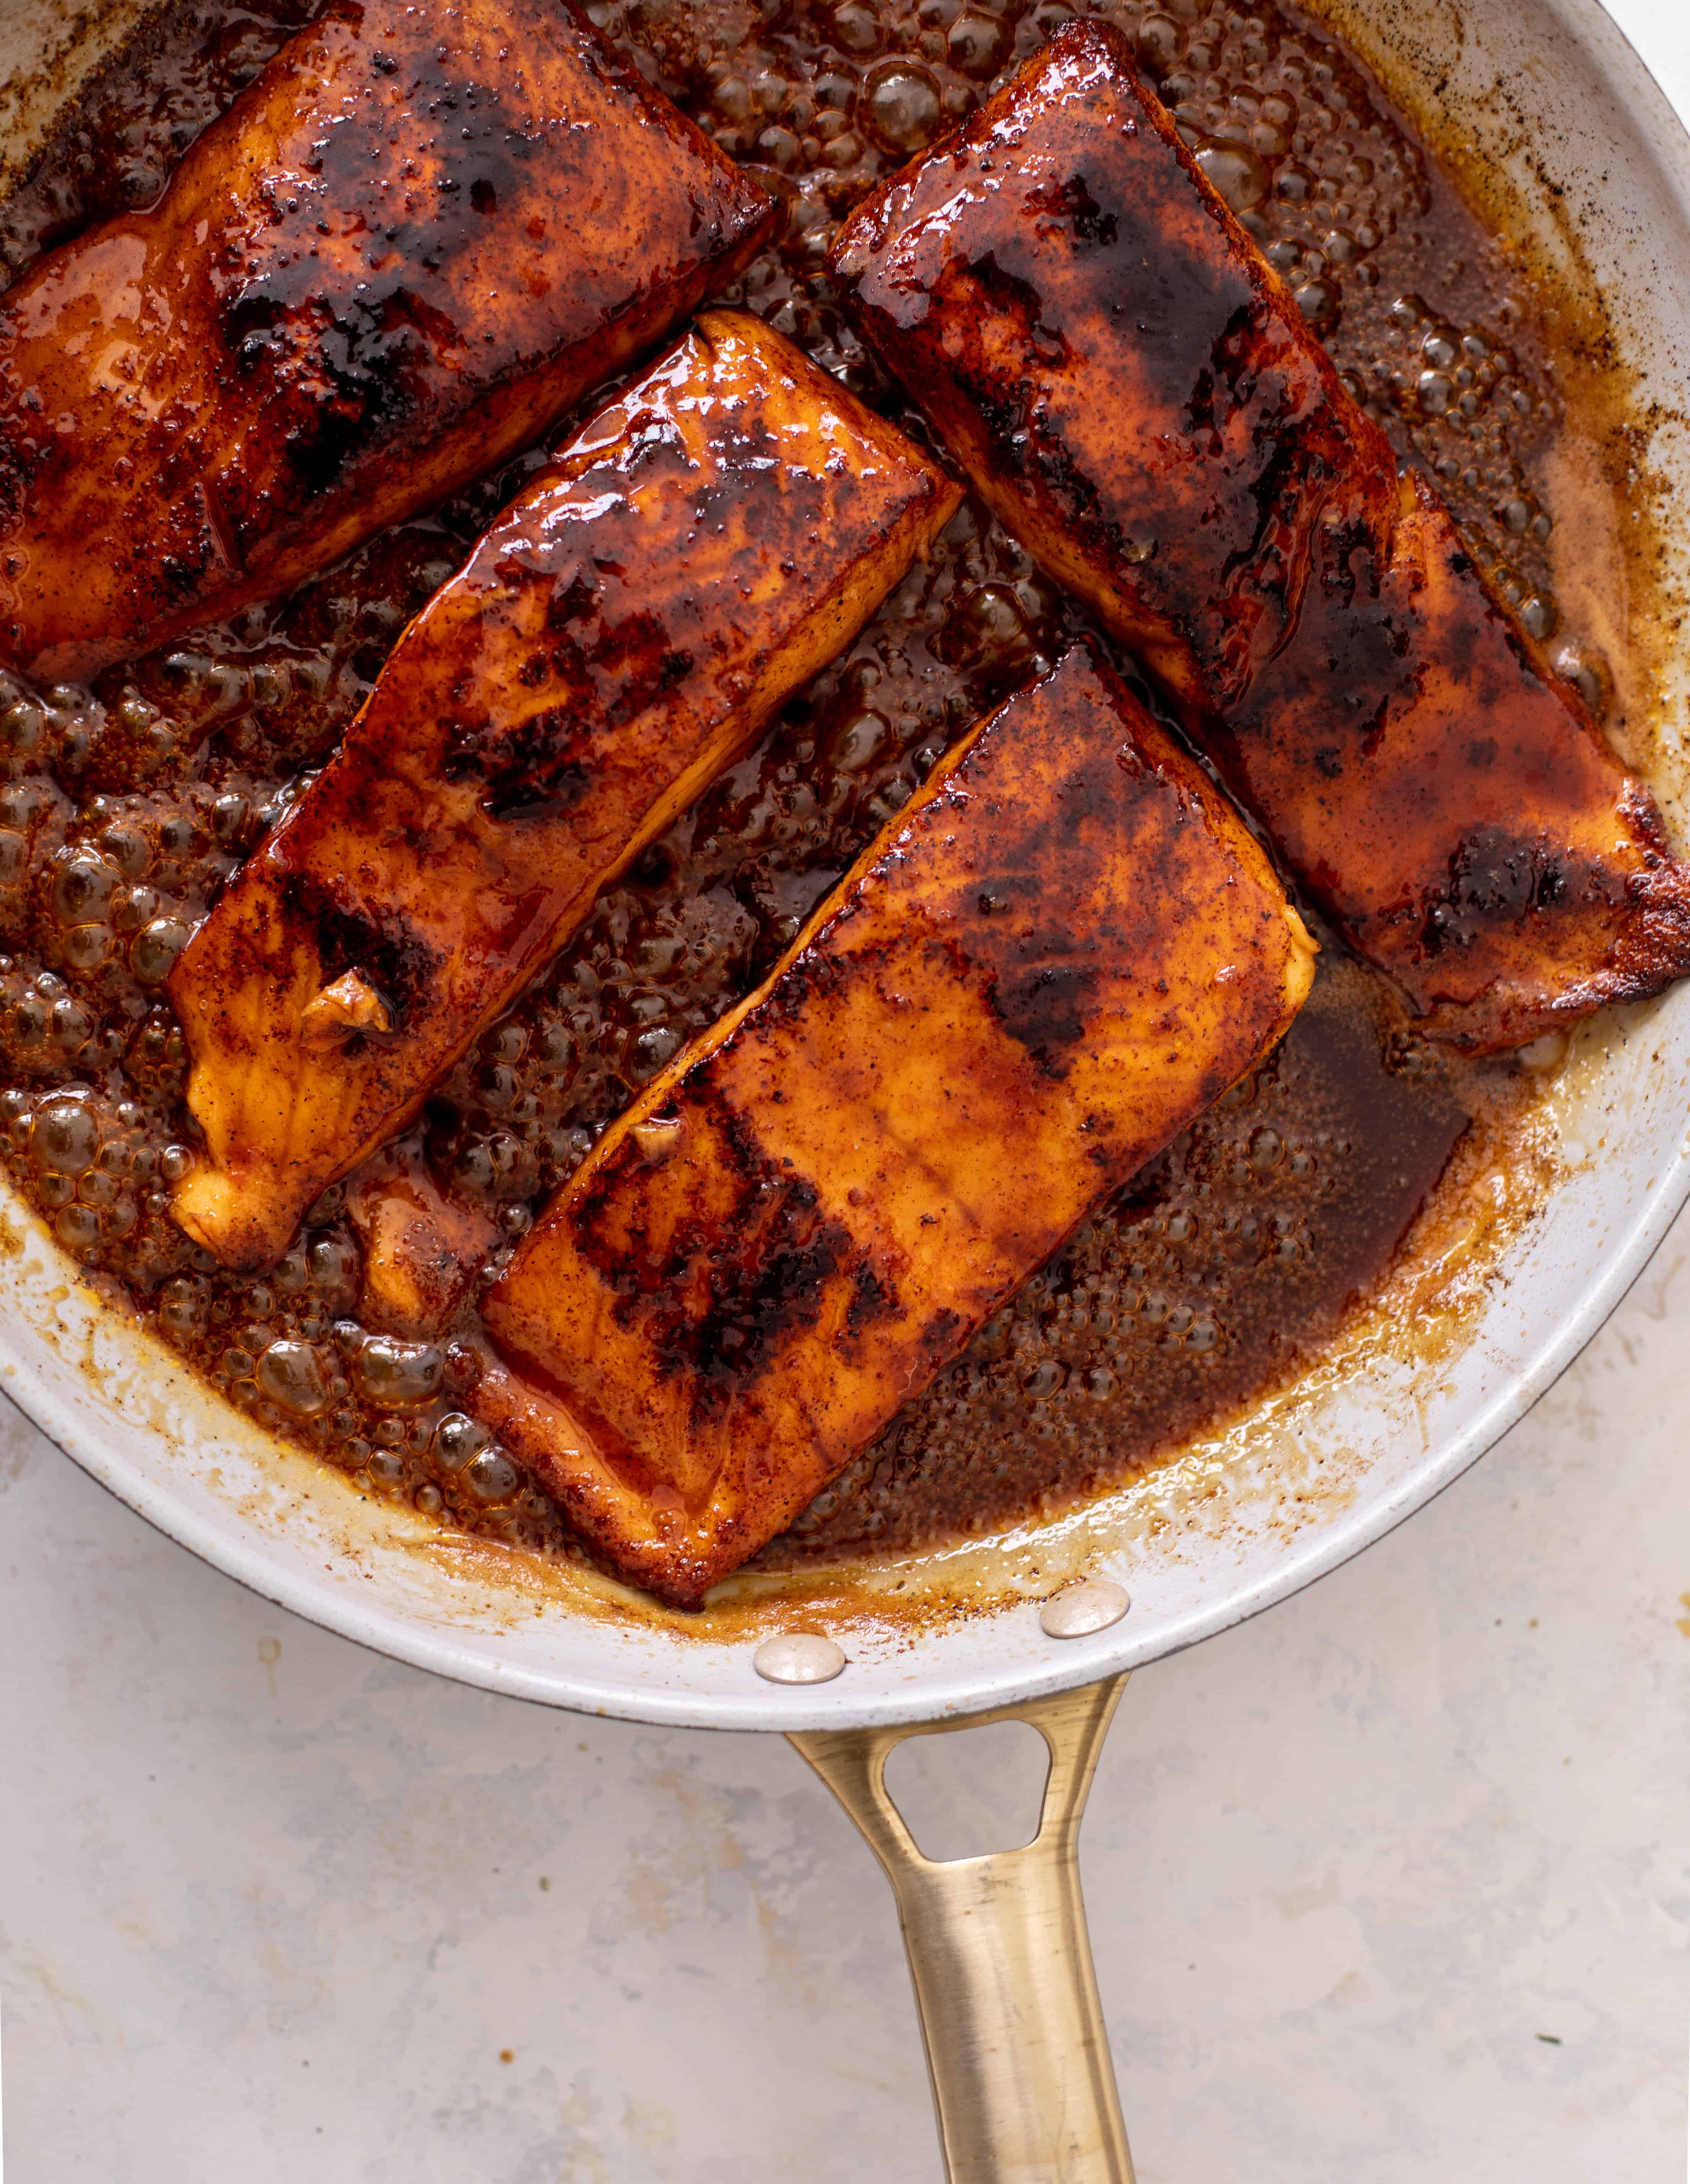
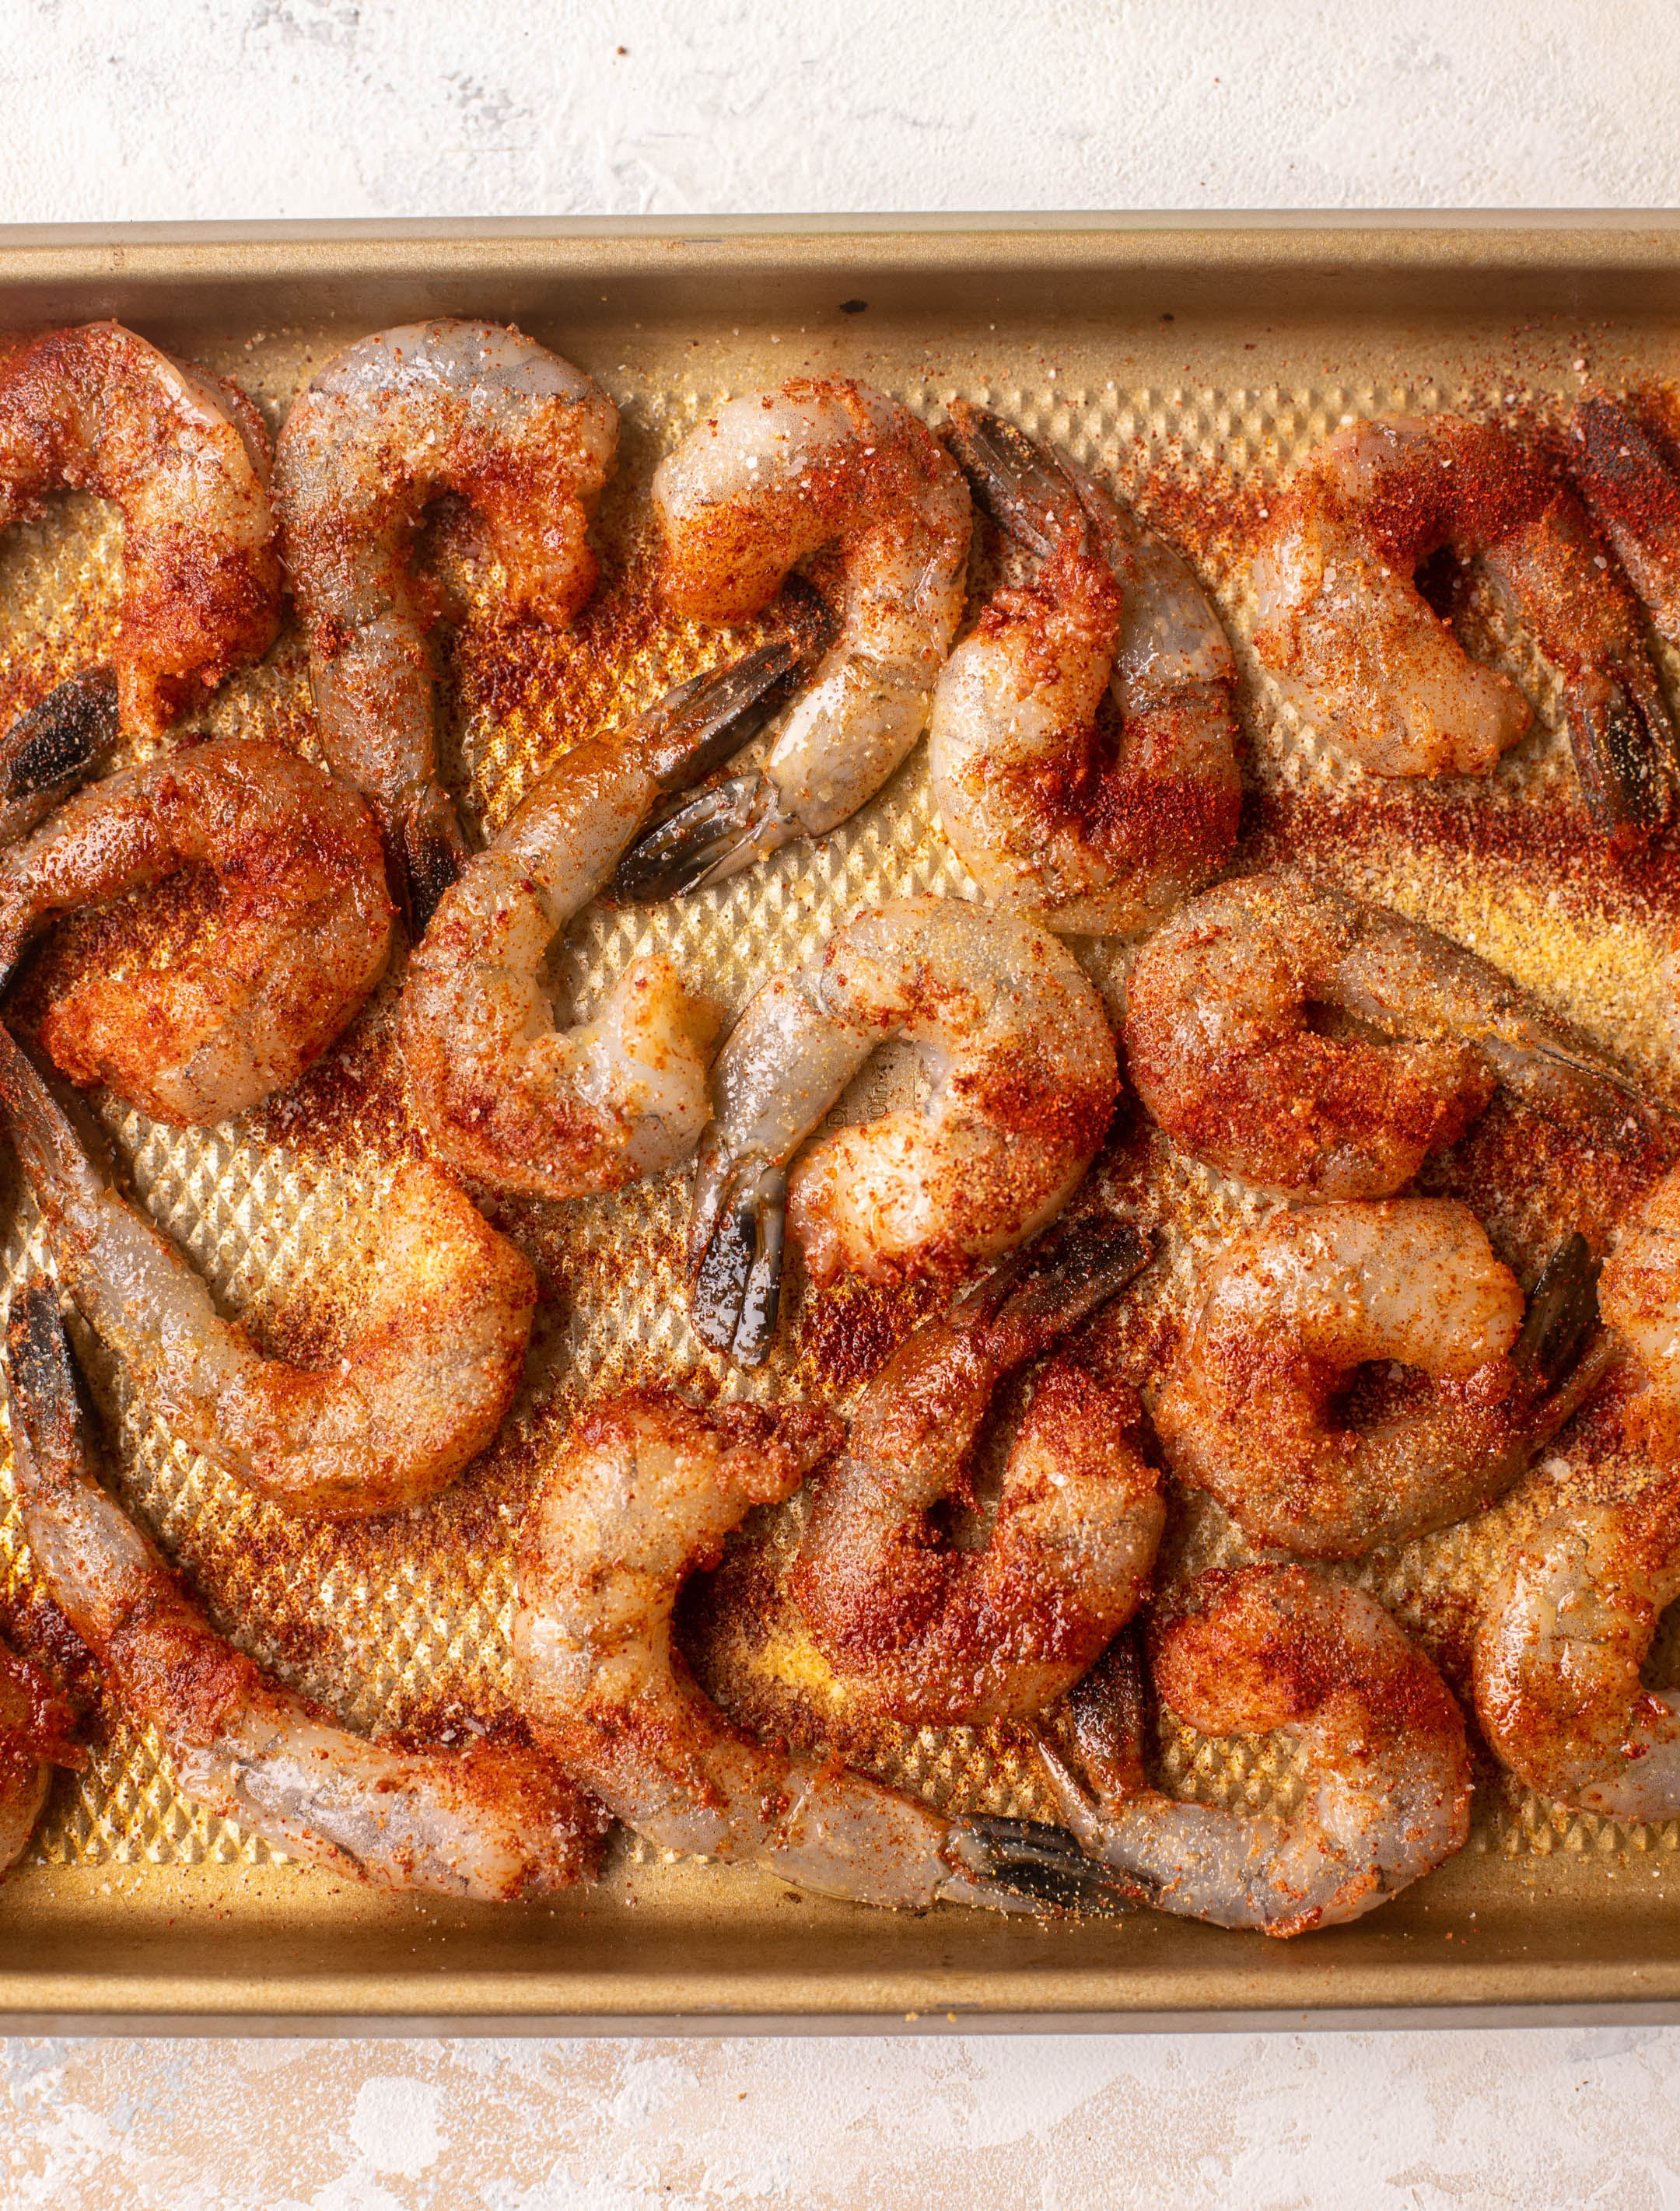
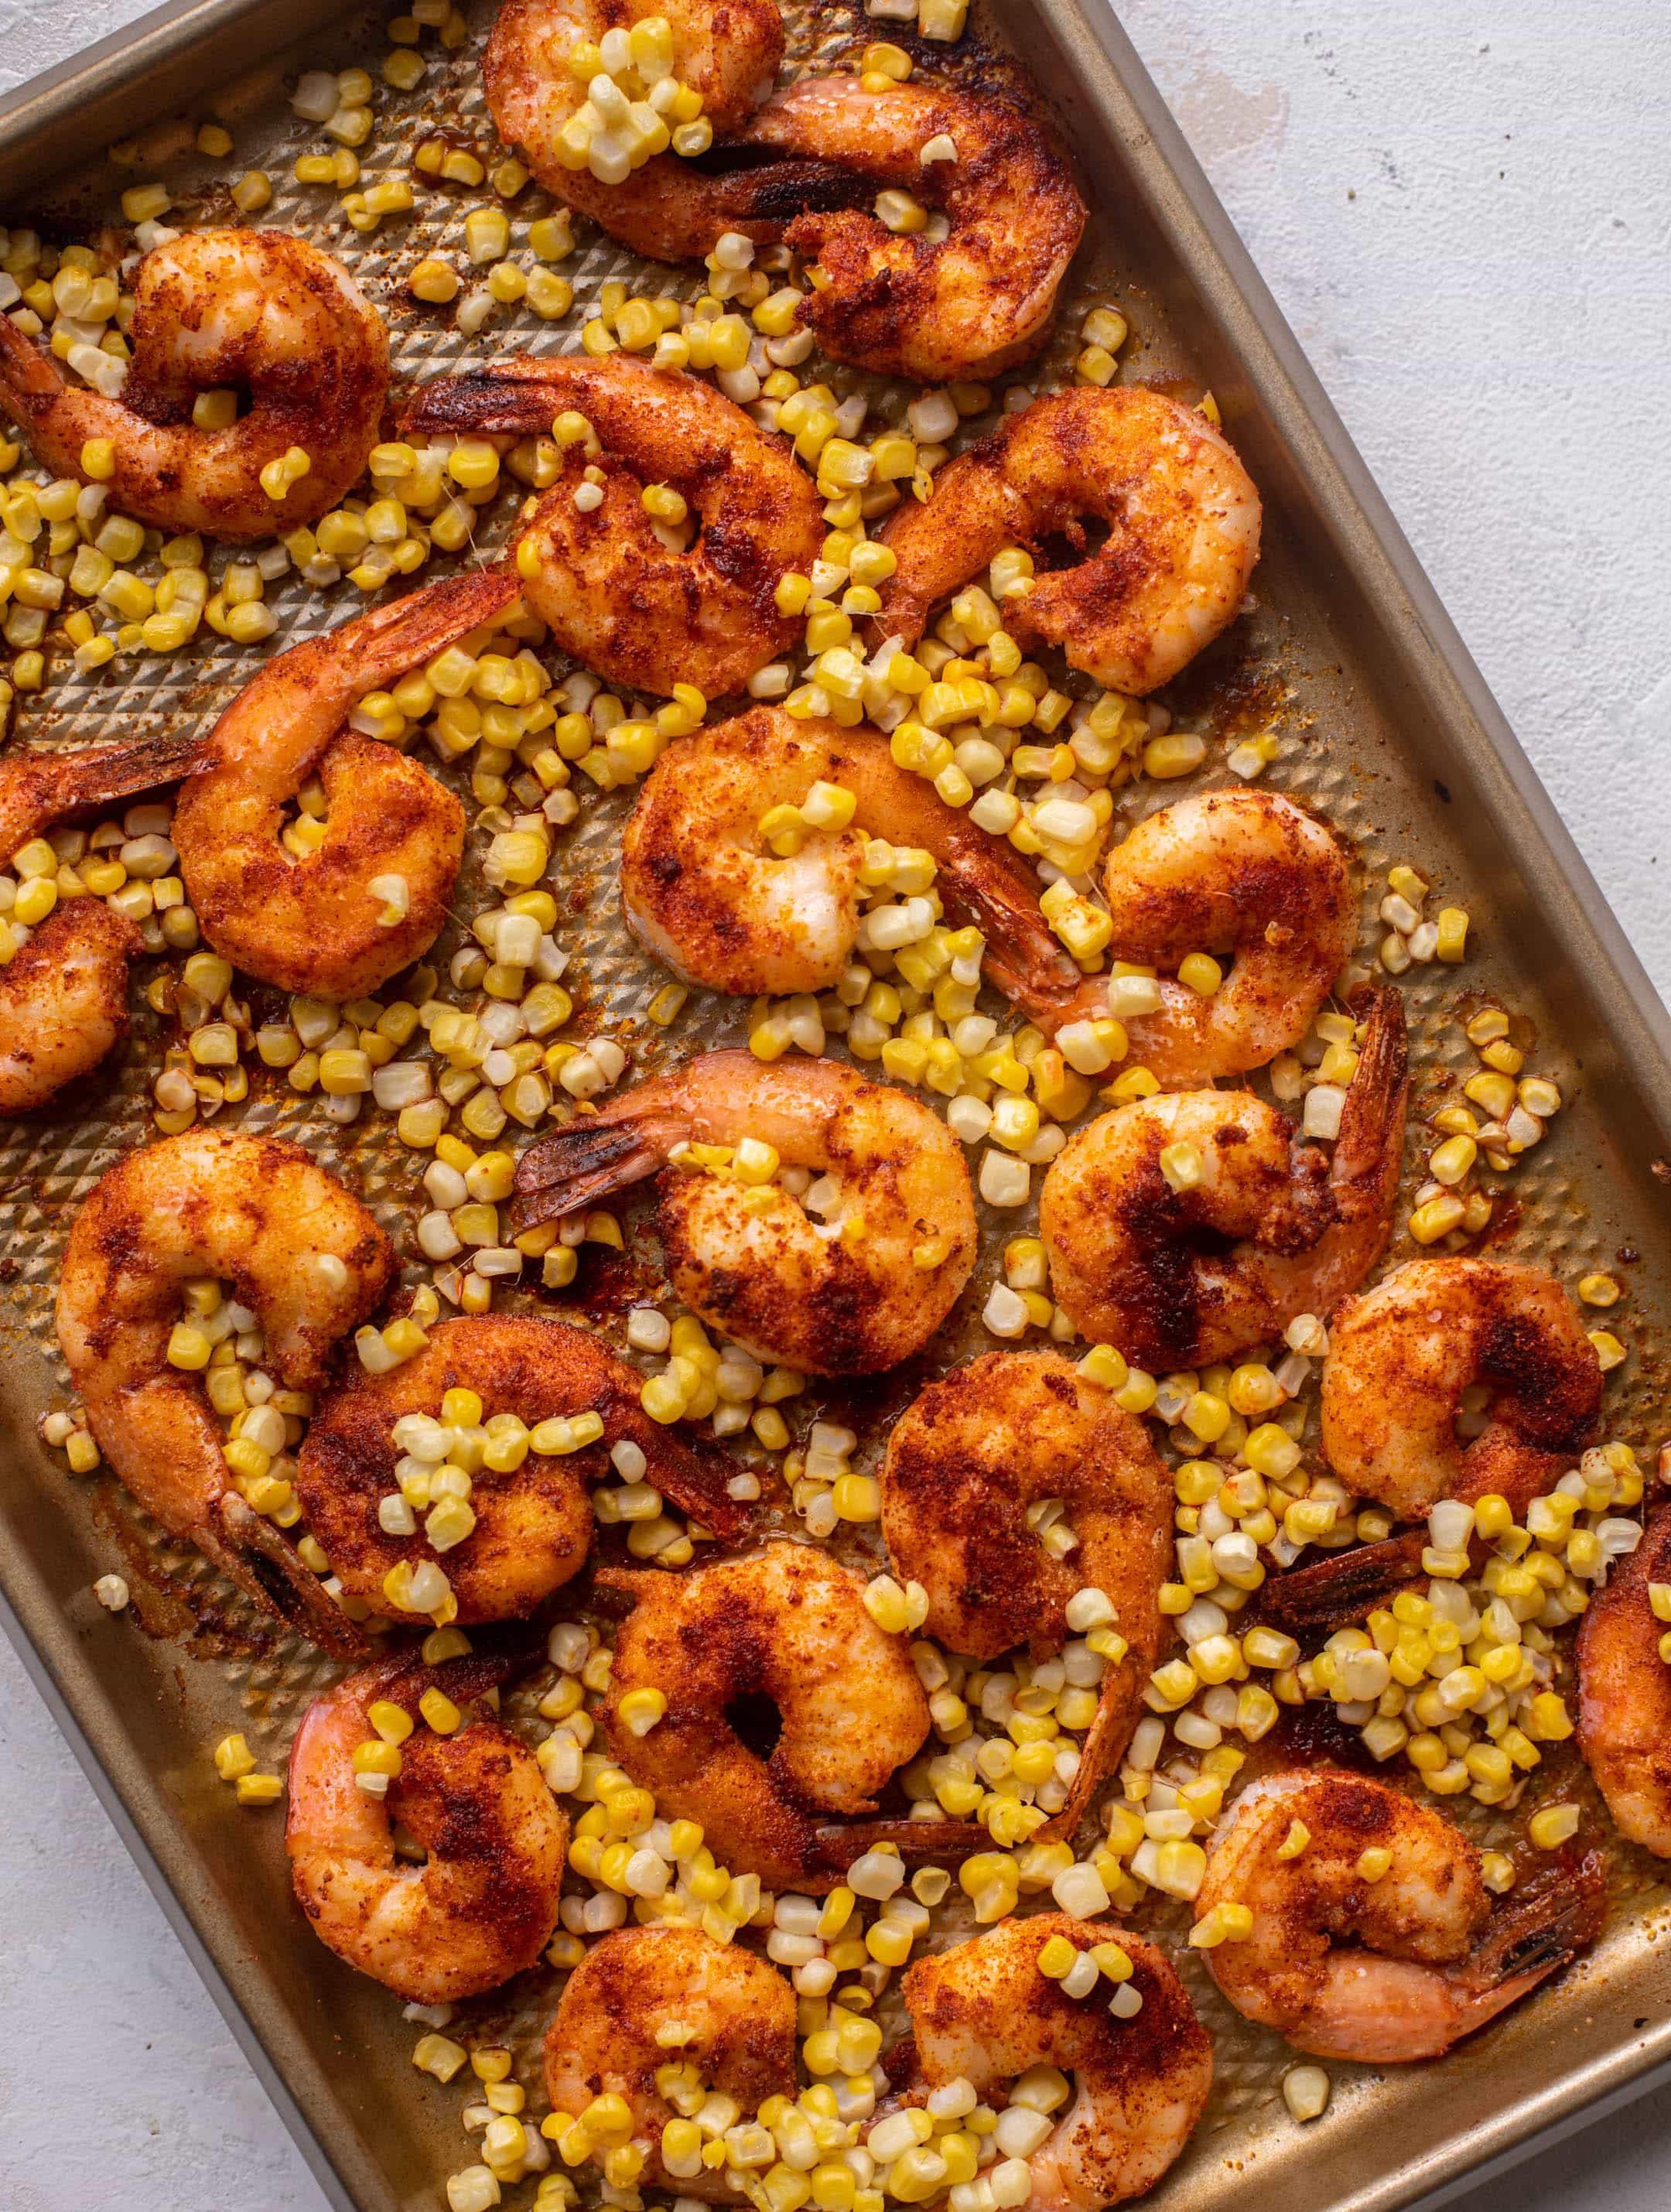
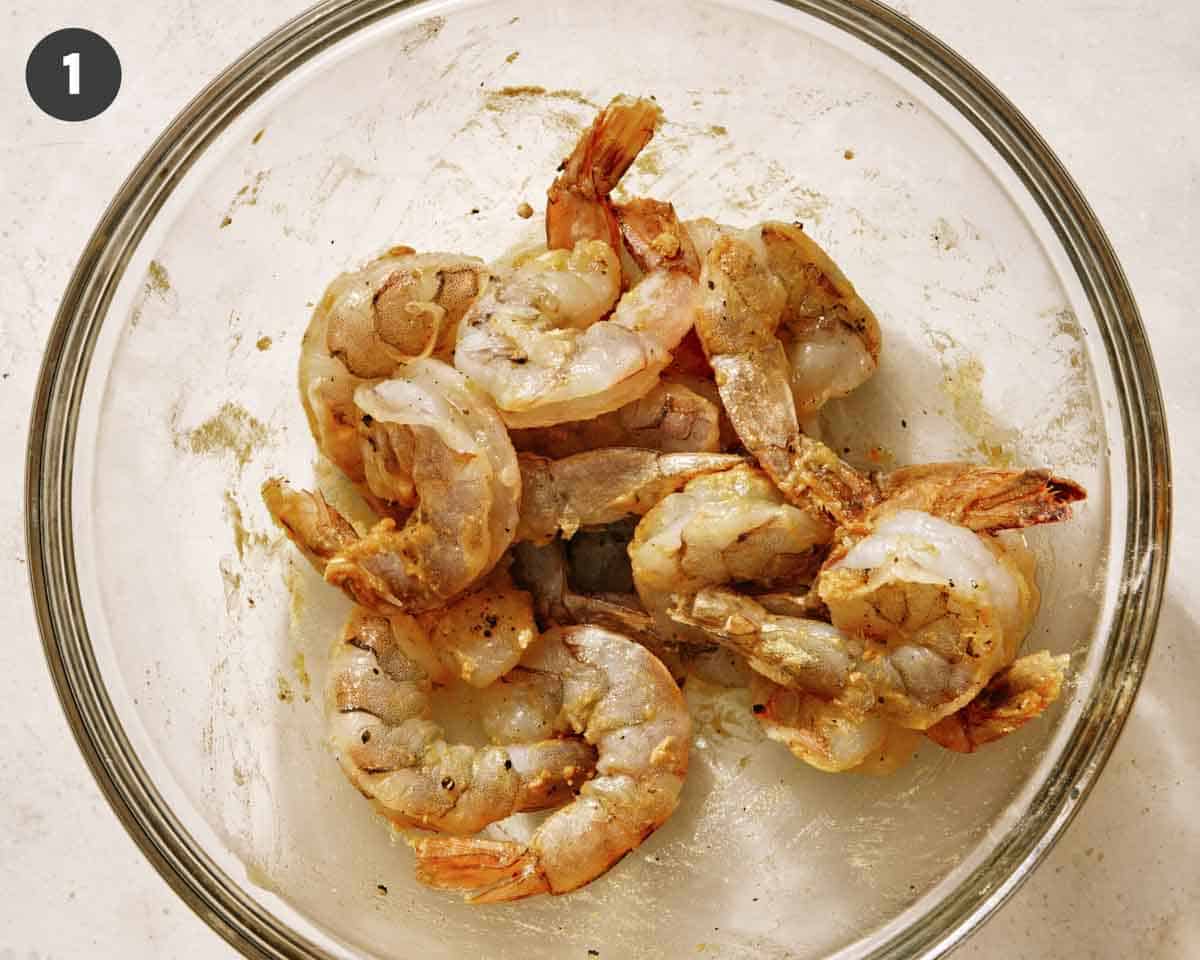
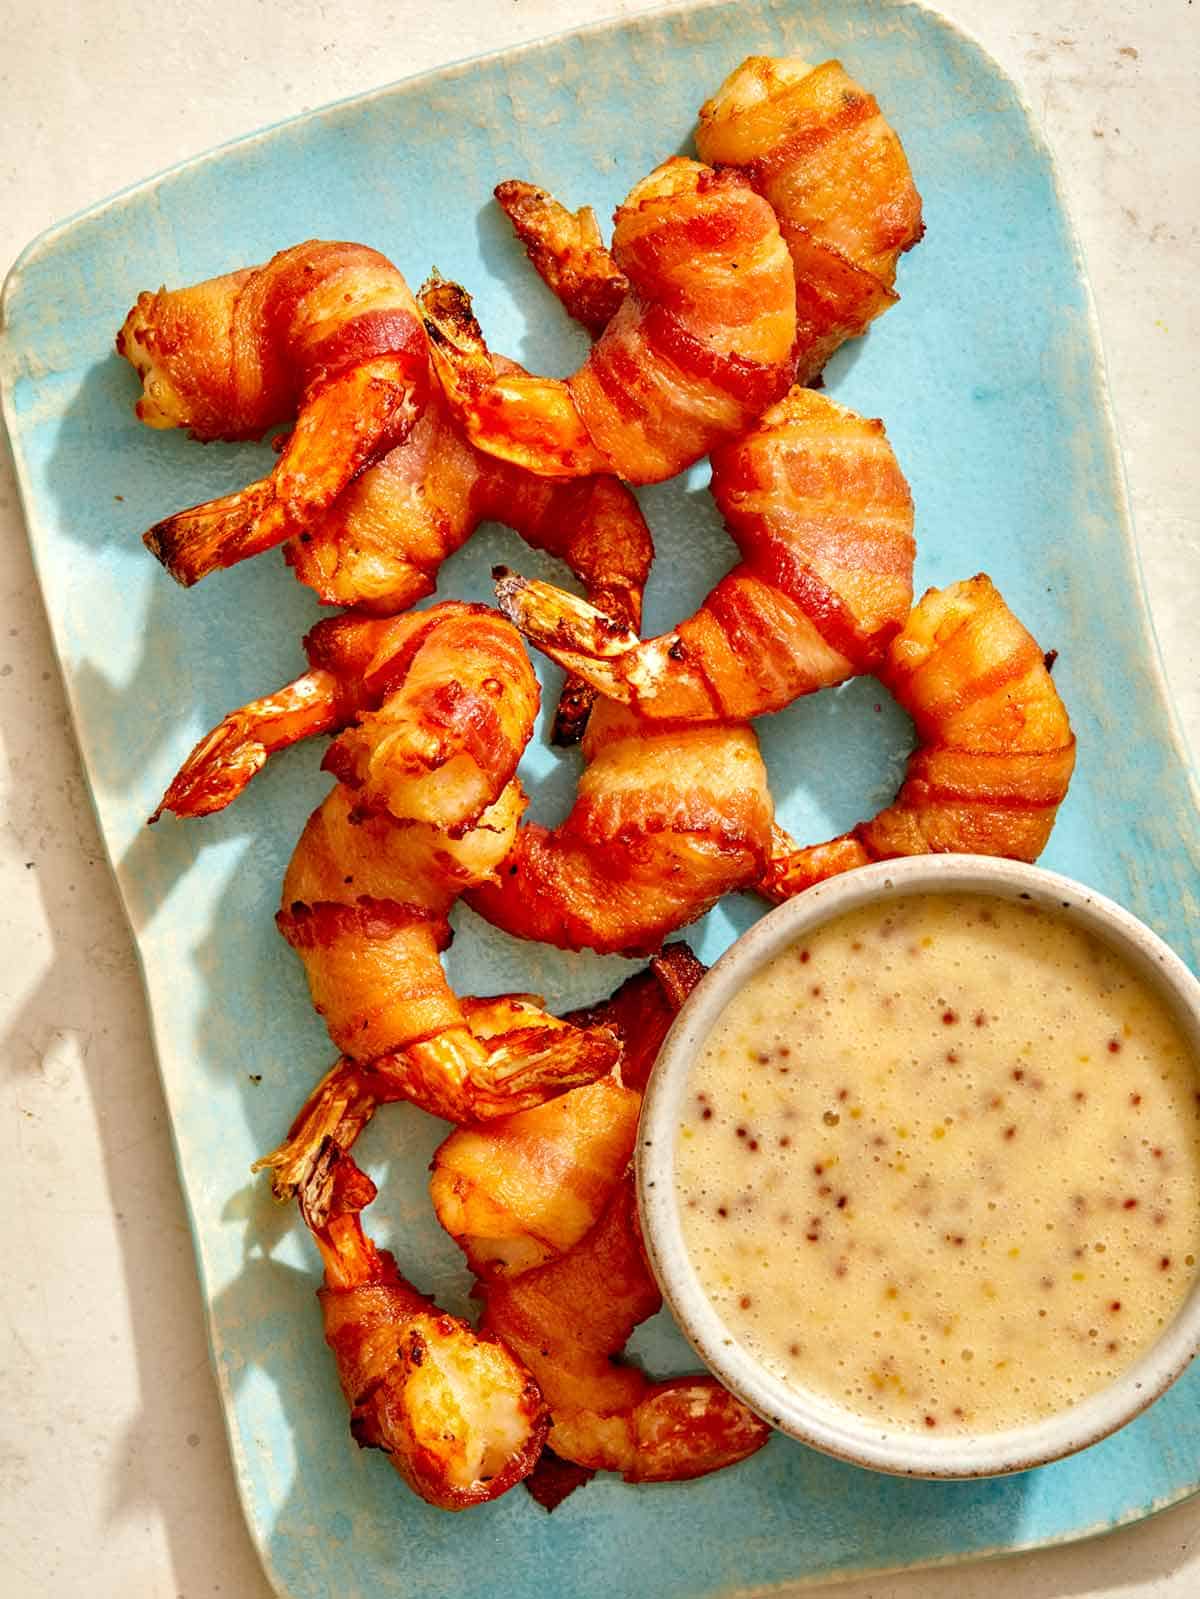
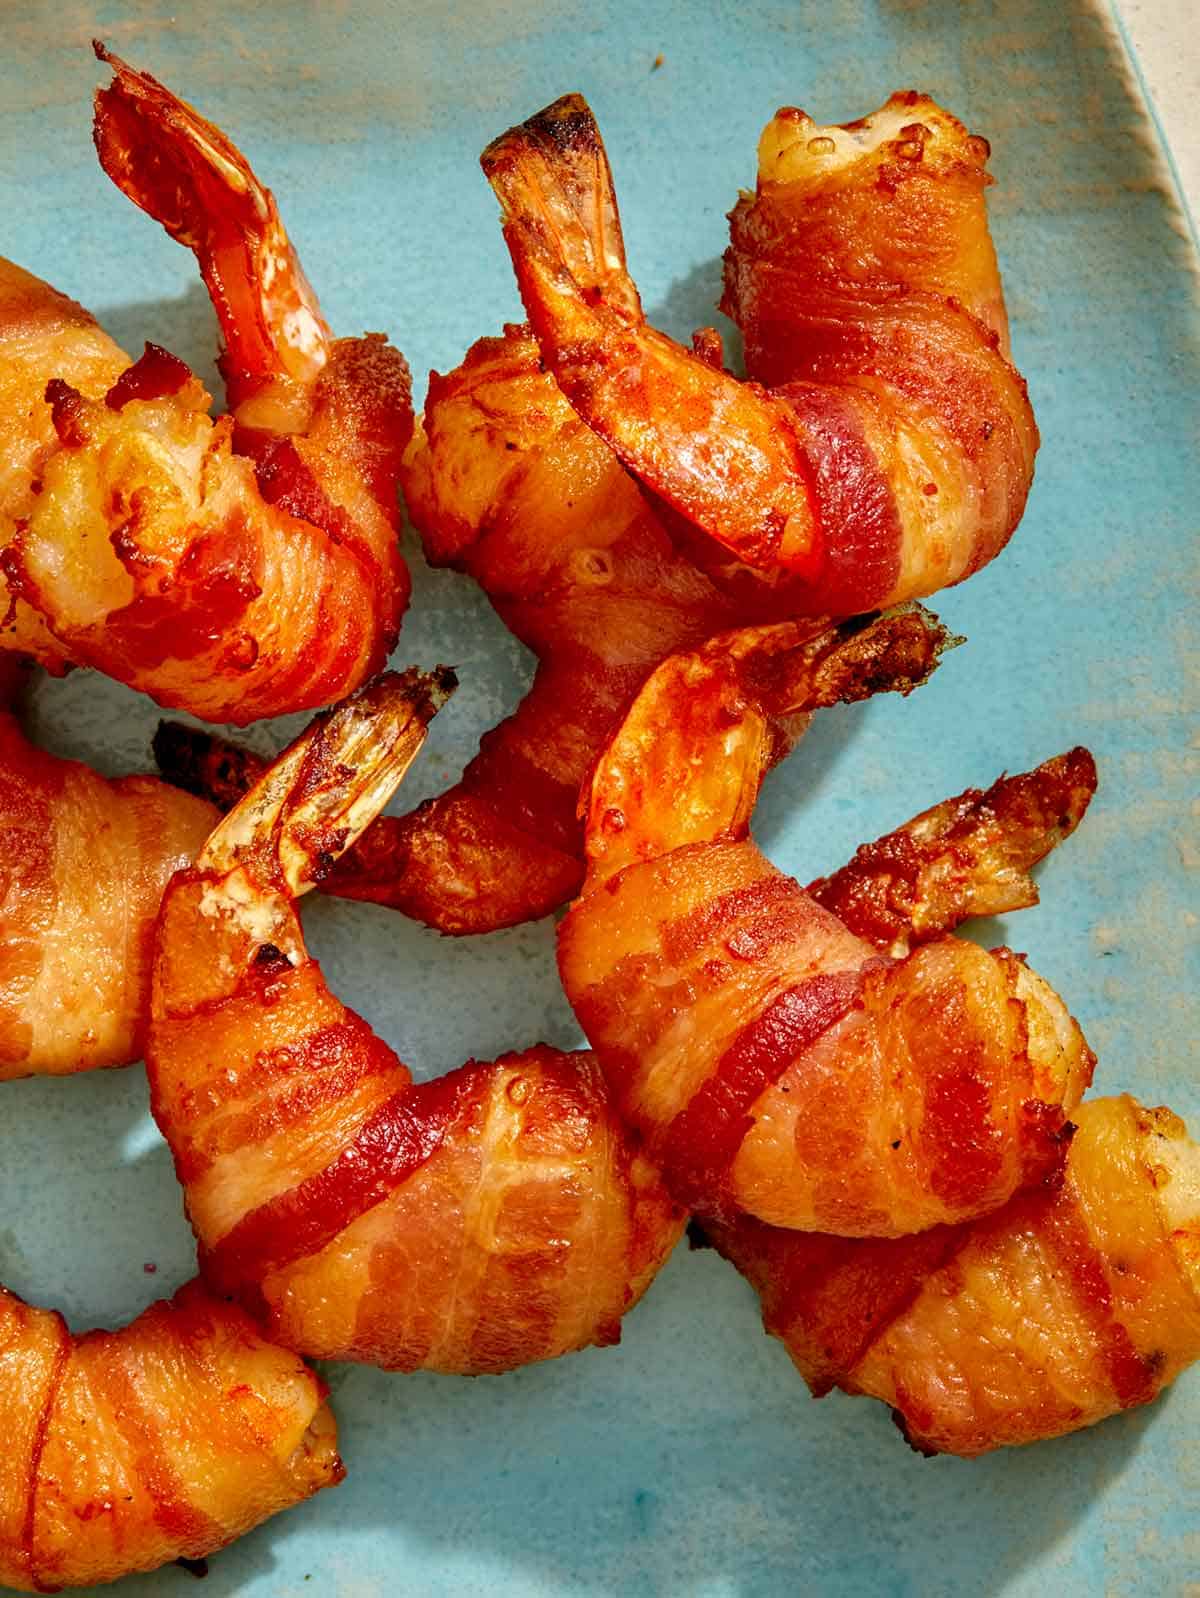
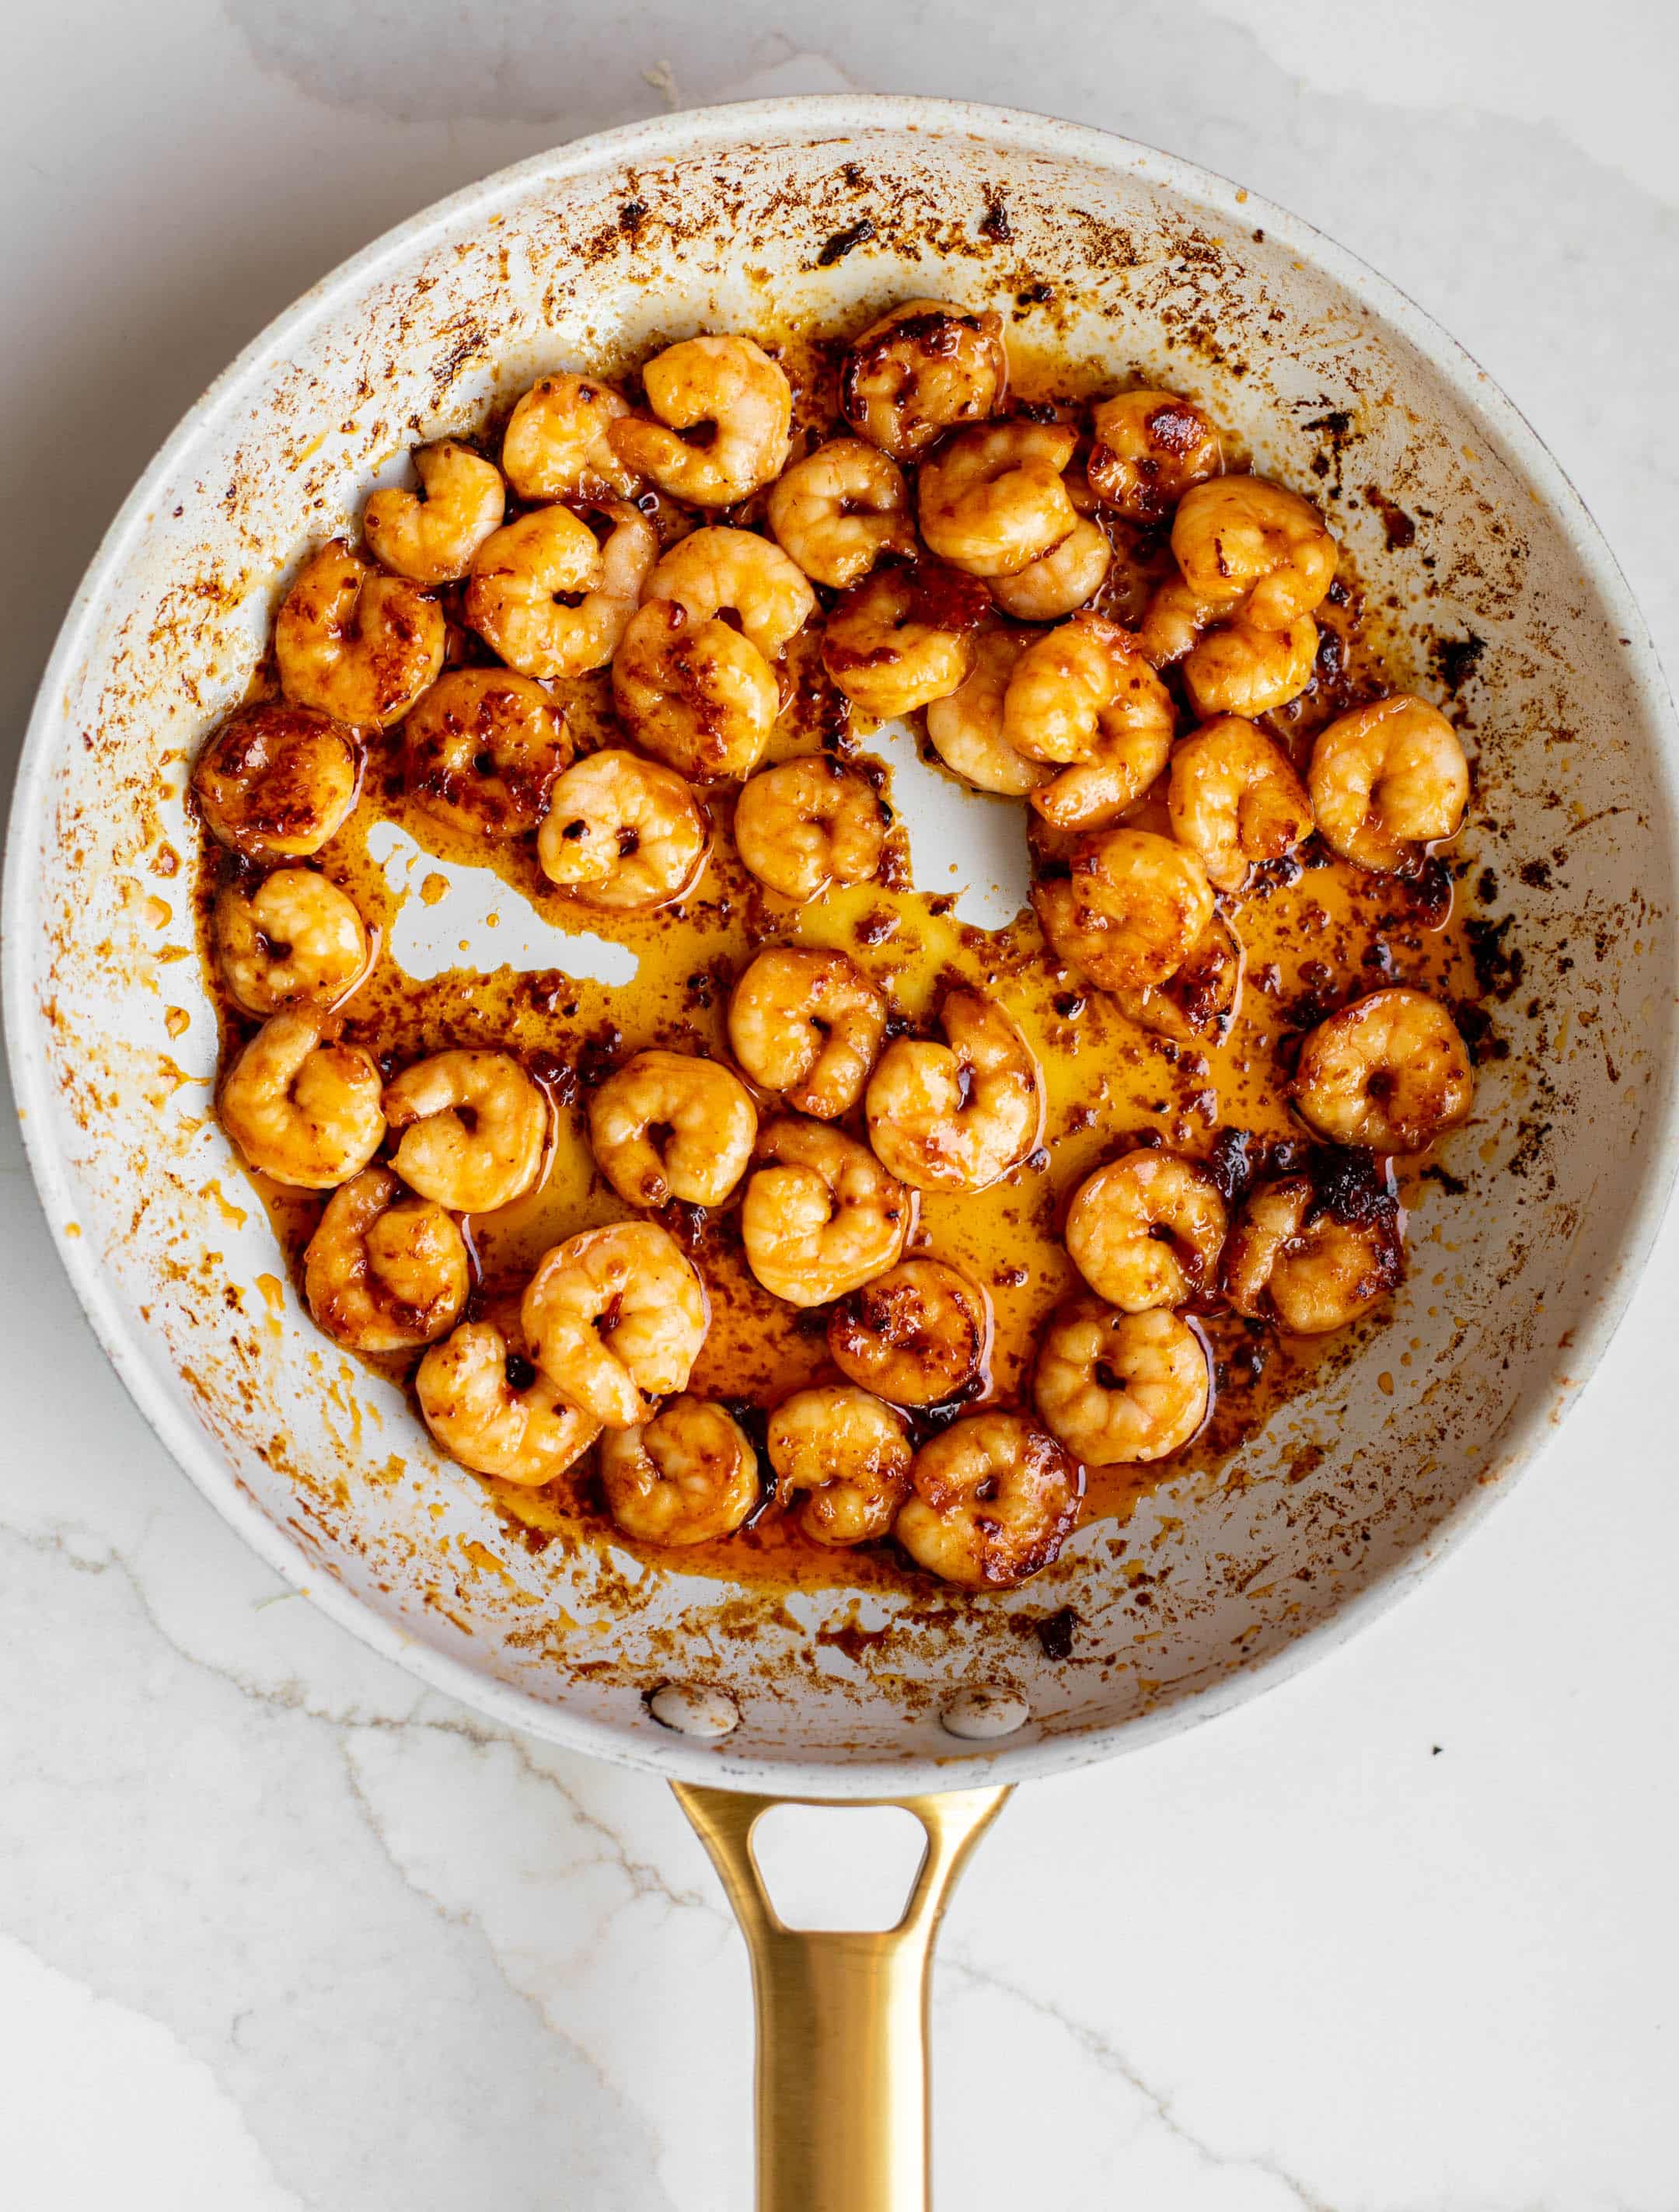
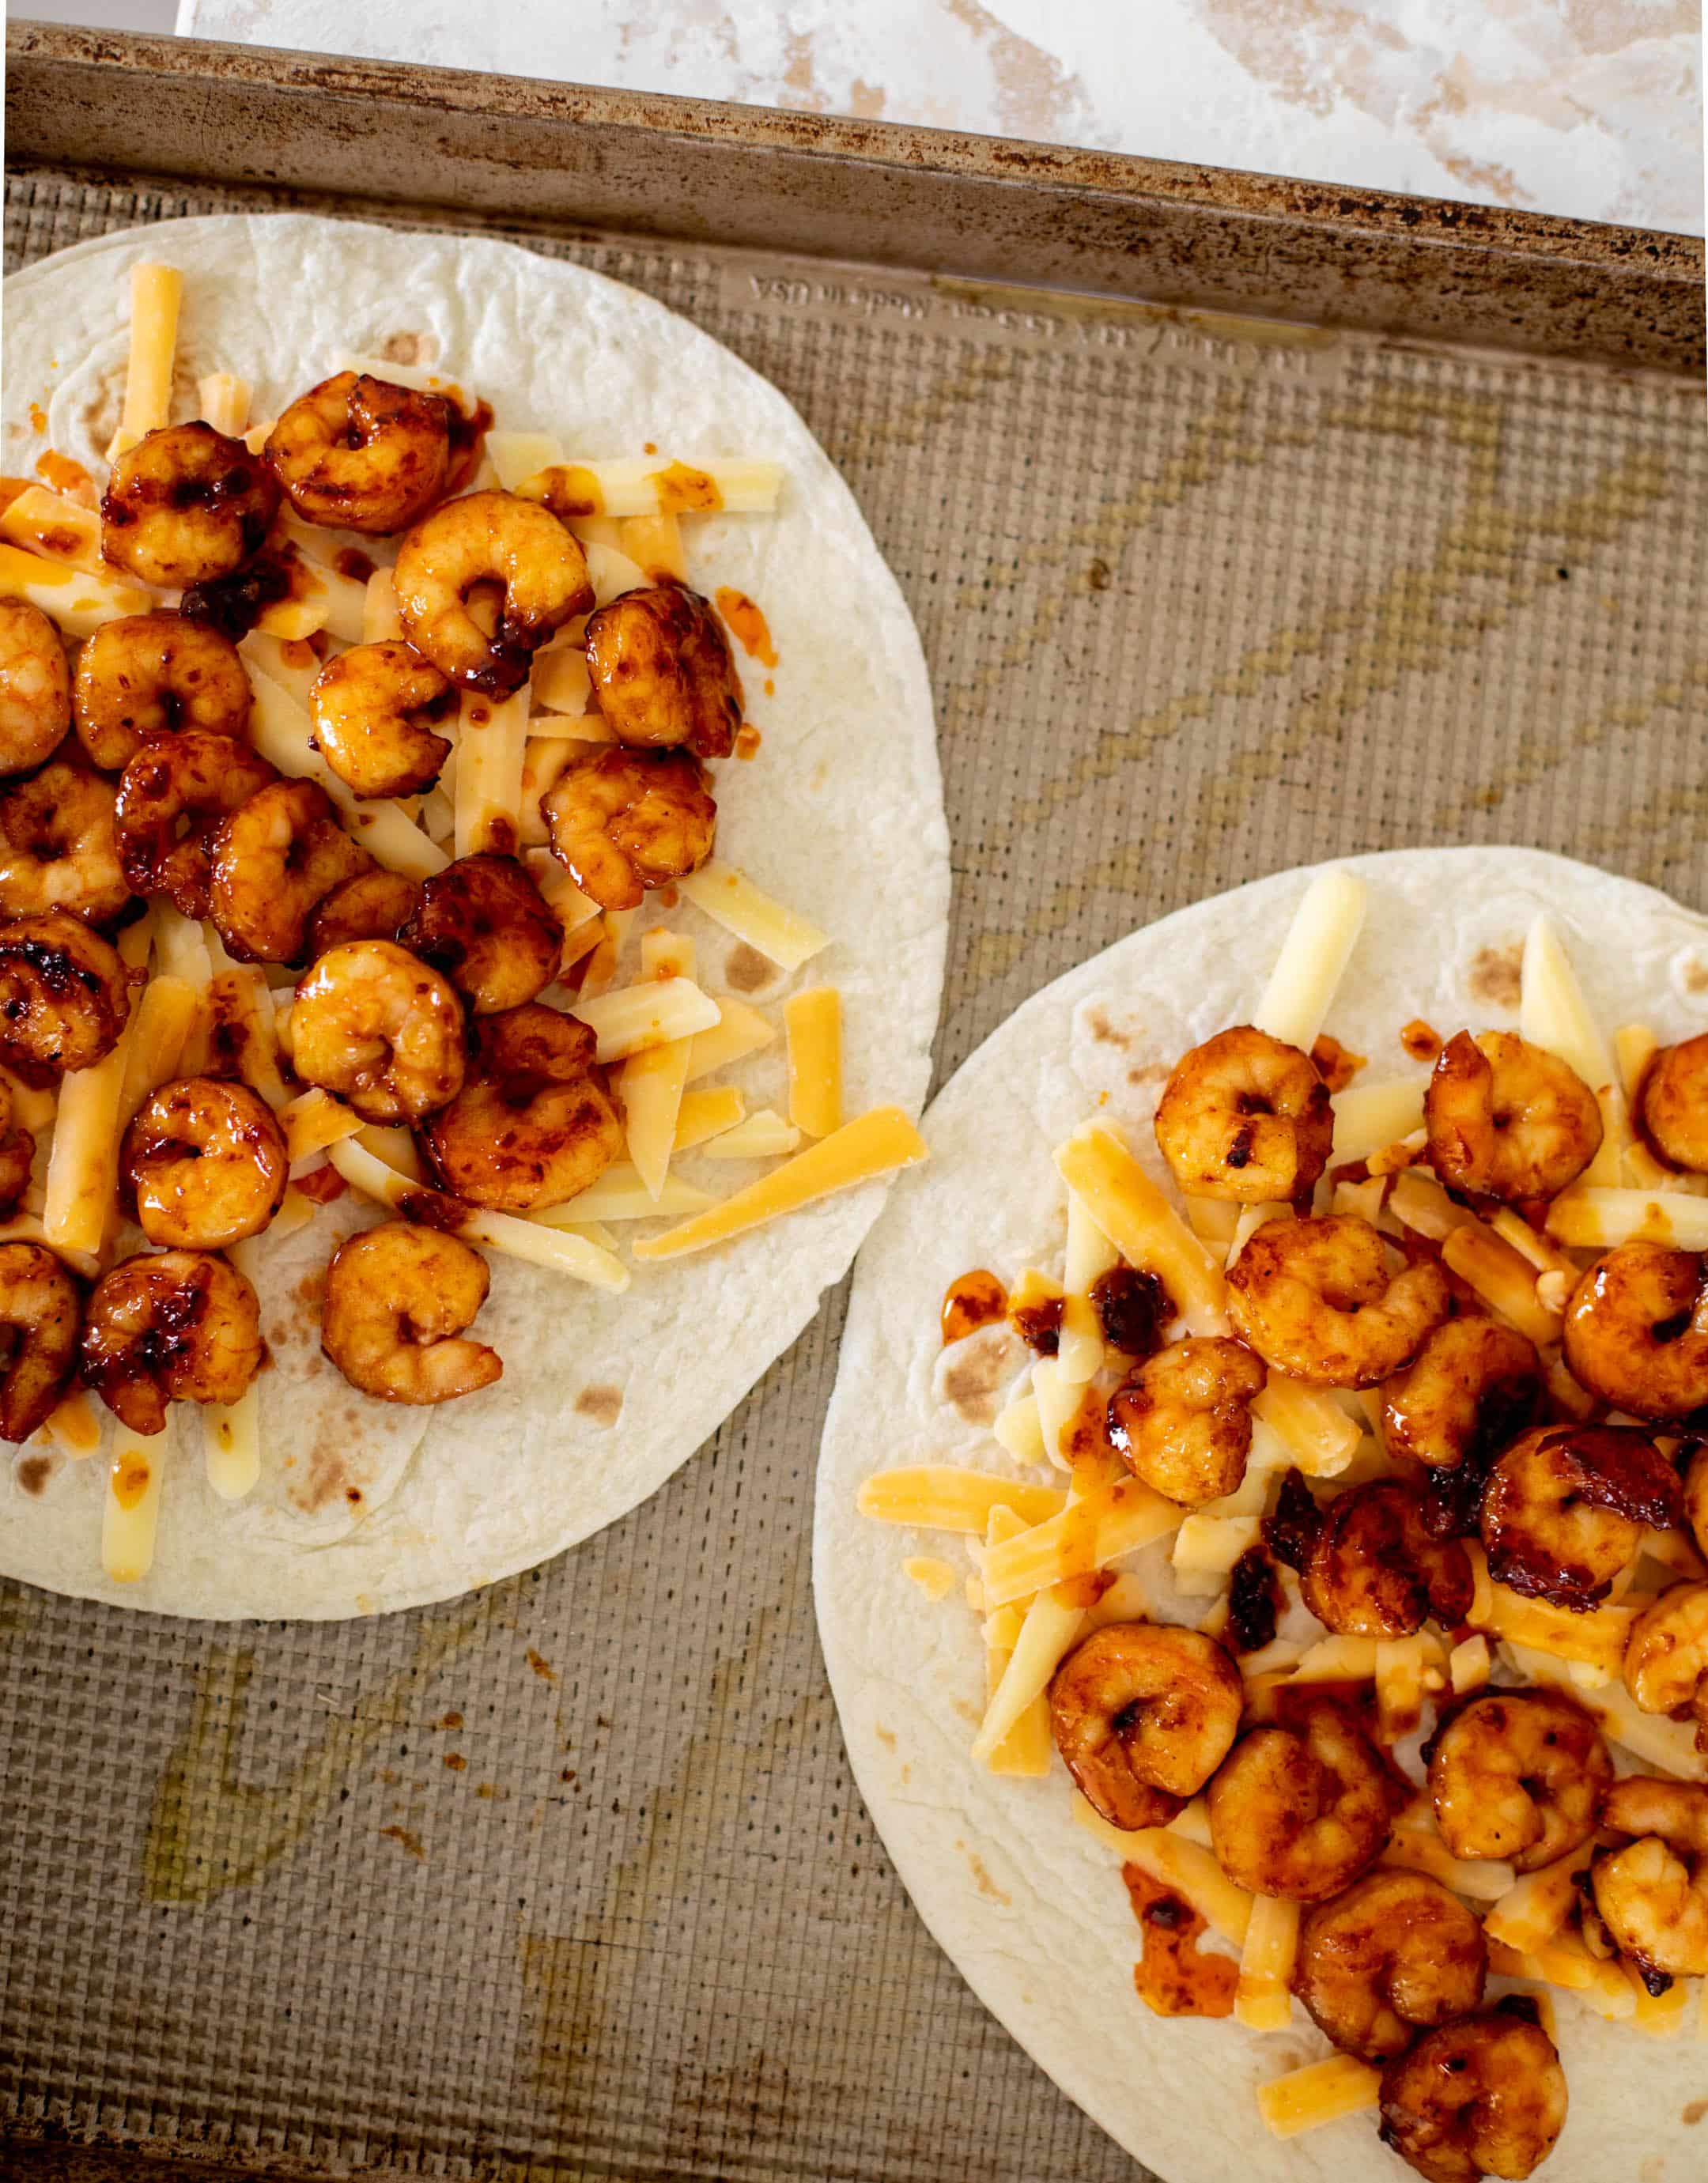
We’re cooking shrimp in some hot honey with chipotles in adobo for some heat. 

I like a mix of sharp cheddar and monterey jack cheese for the ultimate meltiness. 

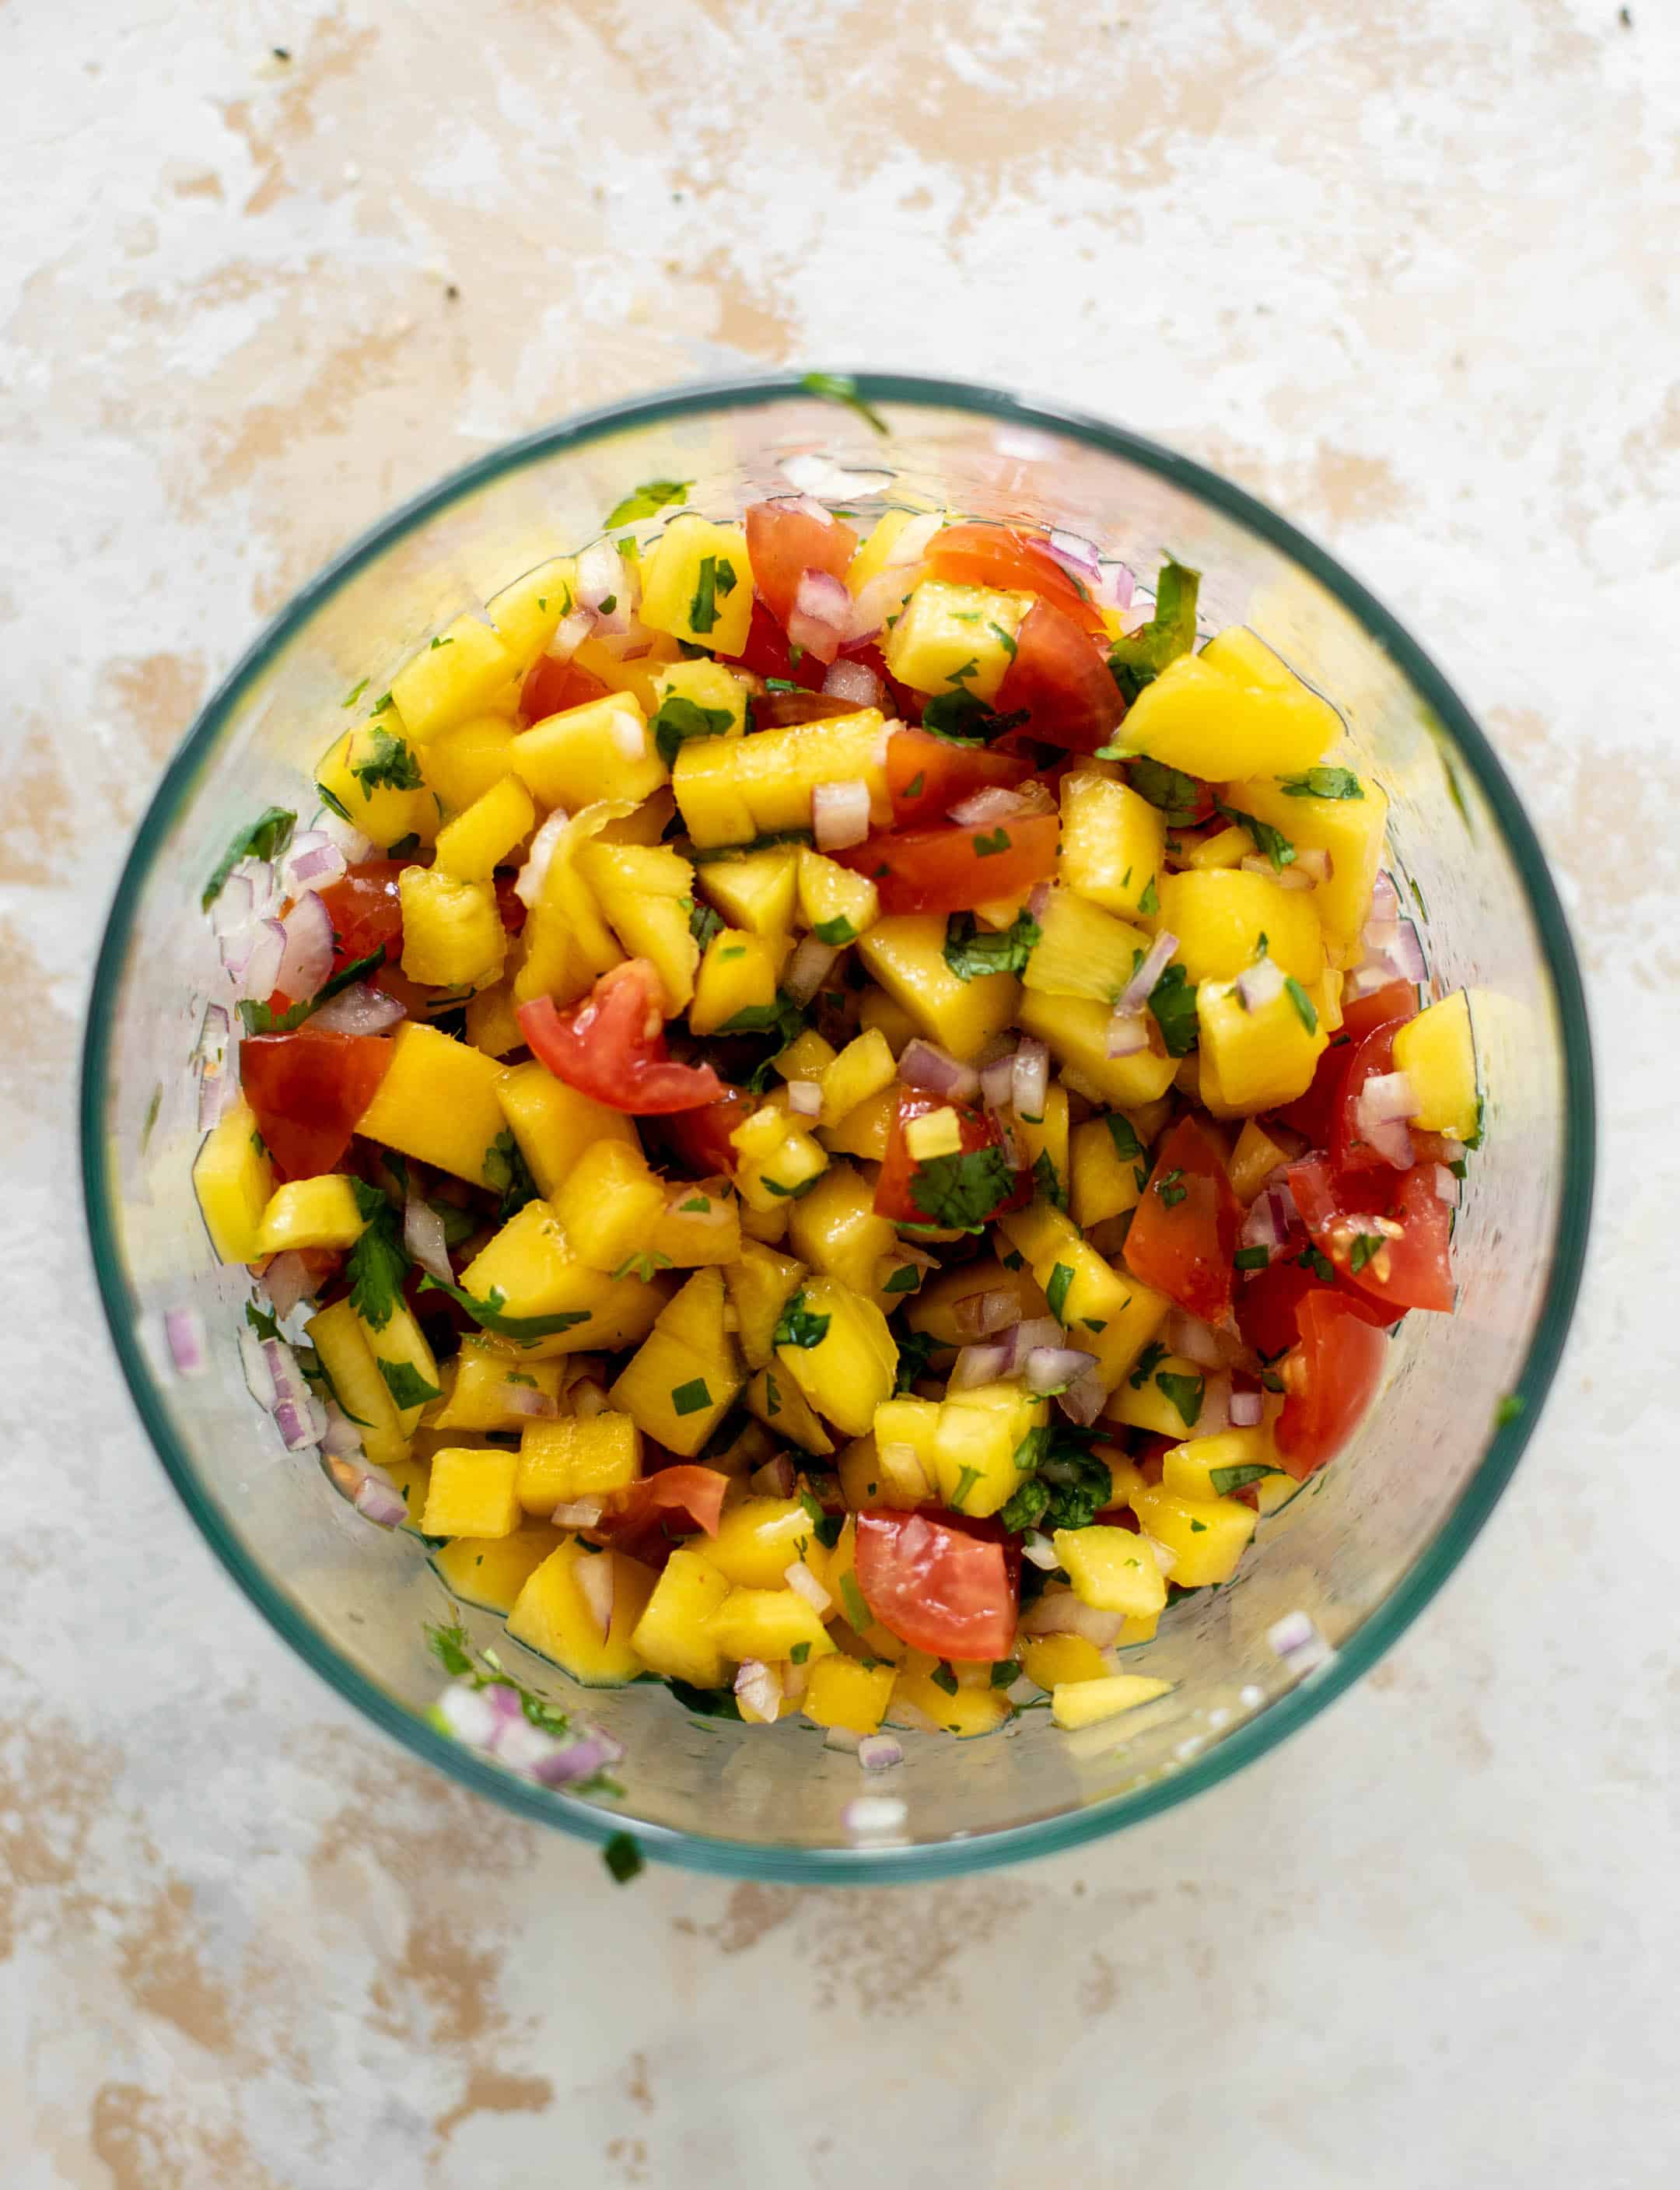
And we’re topping the entire thing with fresh mango salsa! Think cilantro, red onion, tomatoes, lots of lime. And the juiciest mango you can find. 

crispy hot honey shrimp quesadilla

It’s simple. And it’s full of flavors that will please everyone! 

I use my sheet pan method for these quesadillas and it is foolproof every single time. I love this for so many reasons!

First, and perhaps most importantly, it allows you to make more than one quesadilla at a time. If you are feeding a group of people, this is key! Because with one skillet, you can really only make one at a time. This way, you can make a few. It’s also a great method if you want to make quesadillas for an appetizer, snack or party! 

crispy hot honey shrimp quesadilla

Second, it’s easy! There is no flipping before the cheese is done. Everything is warm and melty, so the filling does not spill out. 

Next, it’s consistently crispy! Every edge of the tortilla is perfectly crisp and crunchy, but not burnt. 

Finally, it’s super easy to make different flavors of quesadillas on the sheet pan! You can change the varieties of cheese, make one spicy, include leftover vegetables, etc. It’s such a great method! 

crispy hot honey shrimp quesadilla

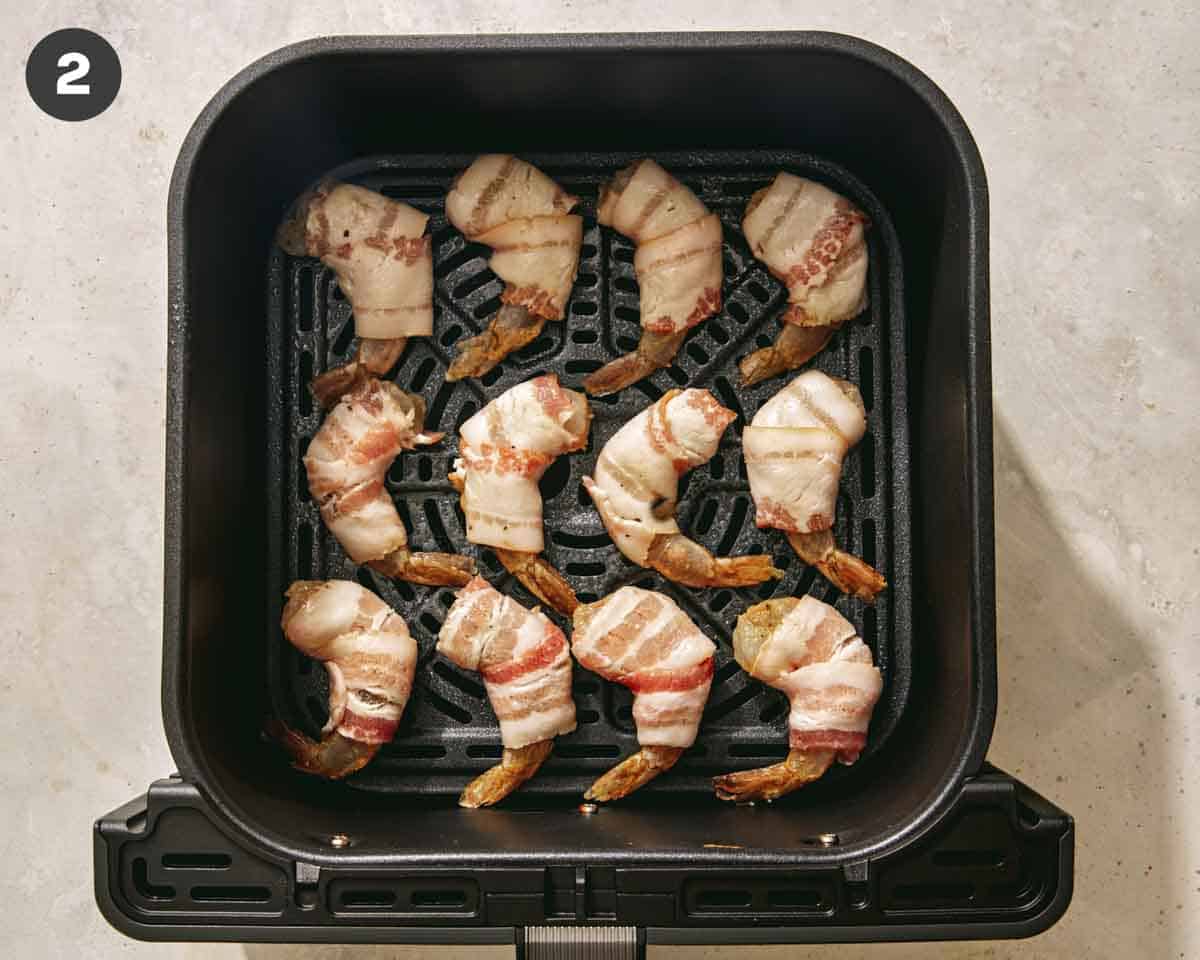
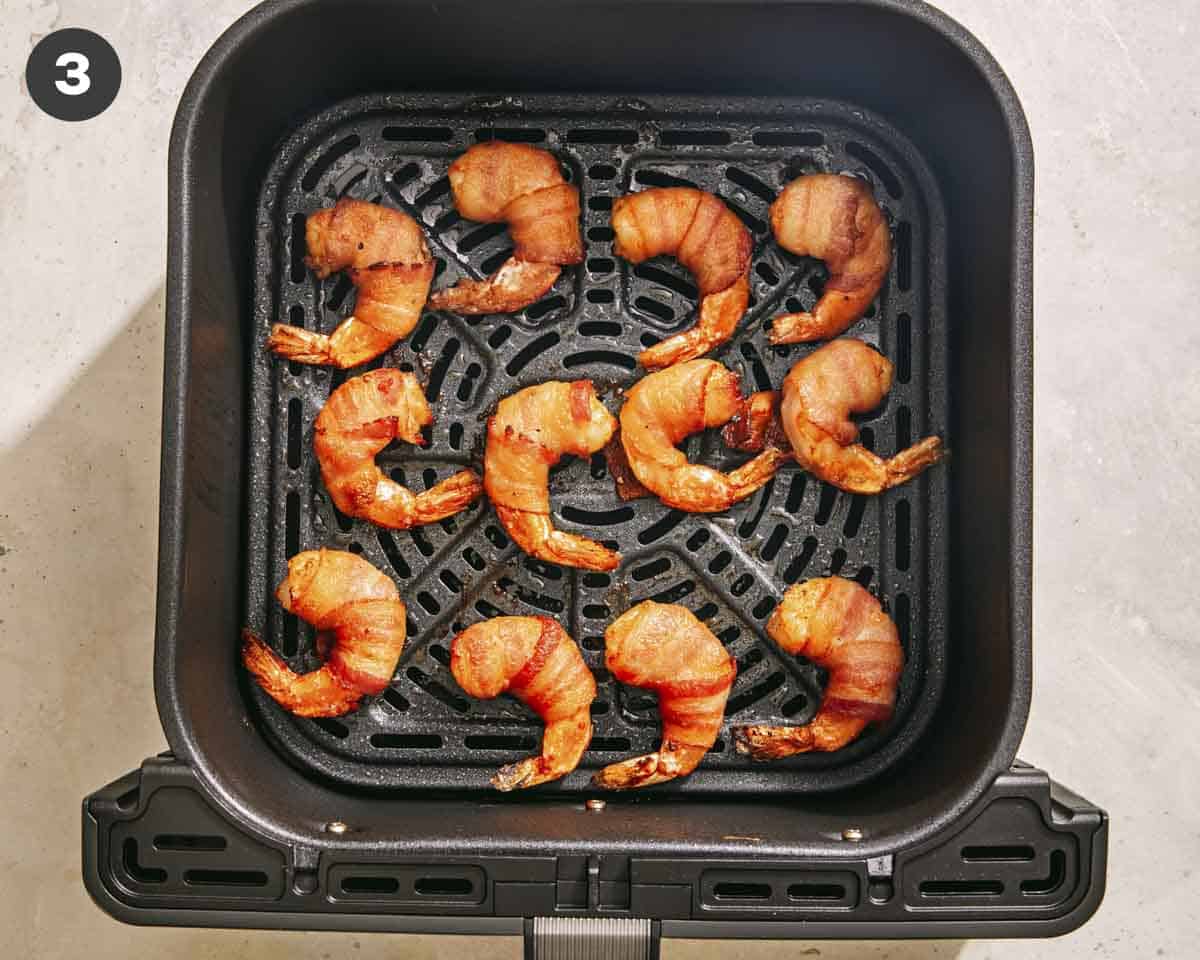
Now, for these shrimp quesadillas, they are slightly more high maintenance because I like to buy raw shrimp and cook it myself. This takes an extra step, but the shrimp is so good. 

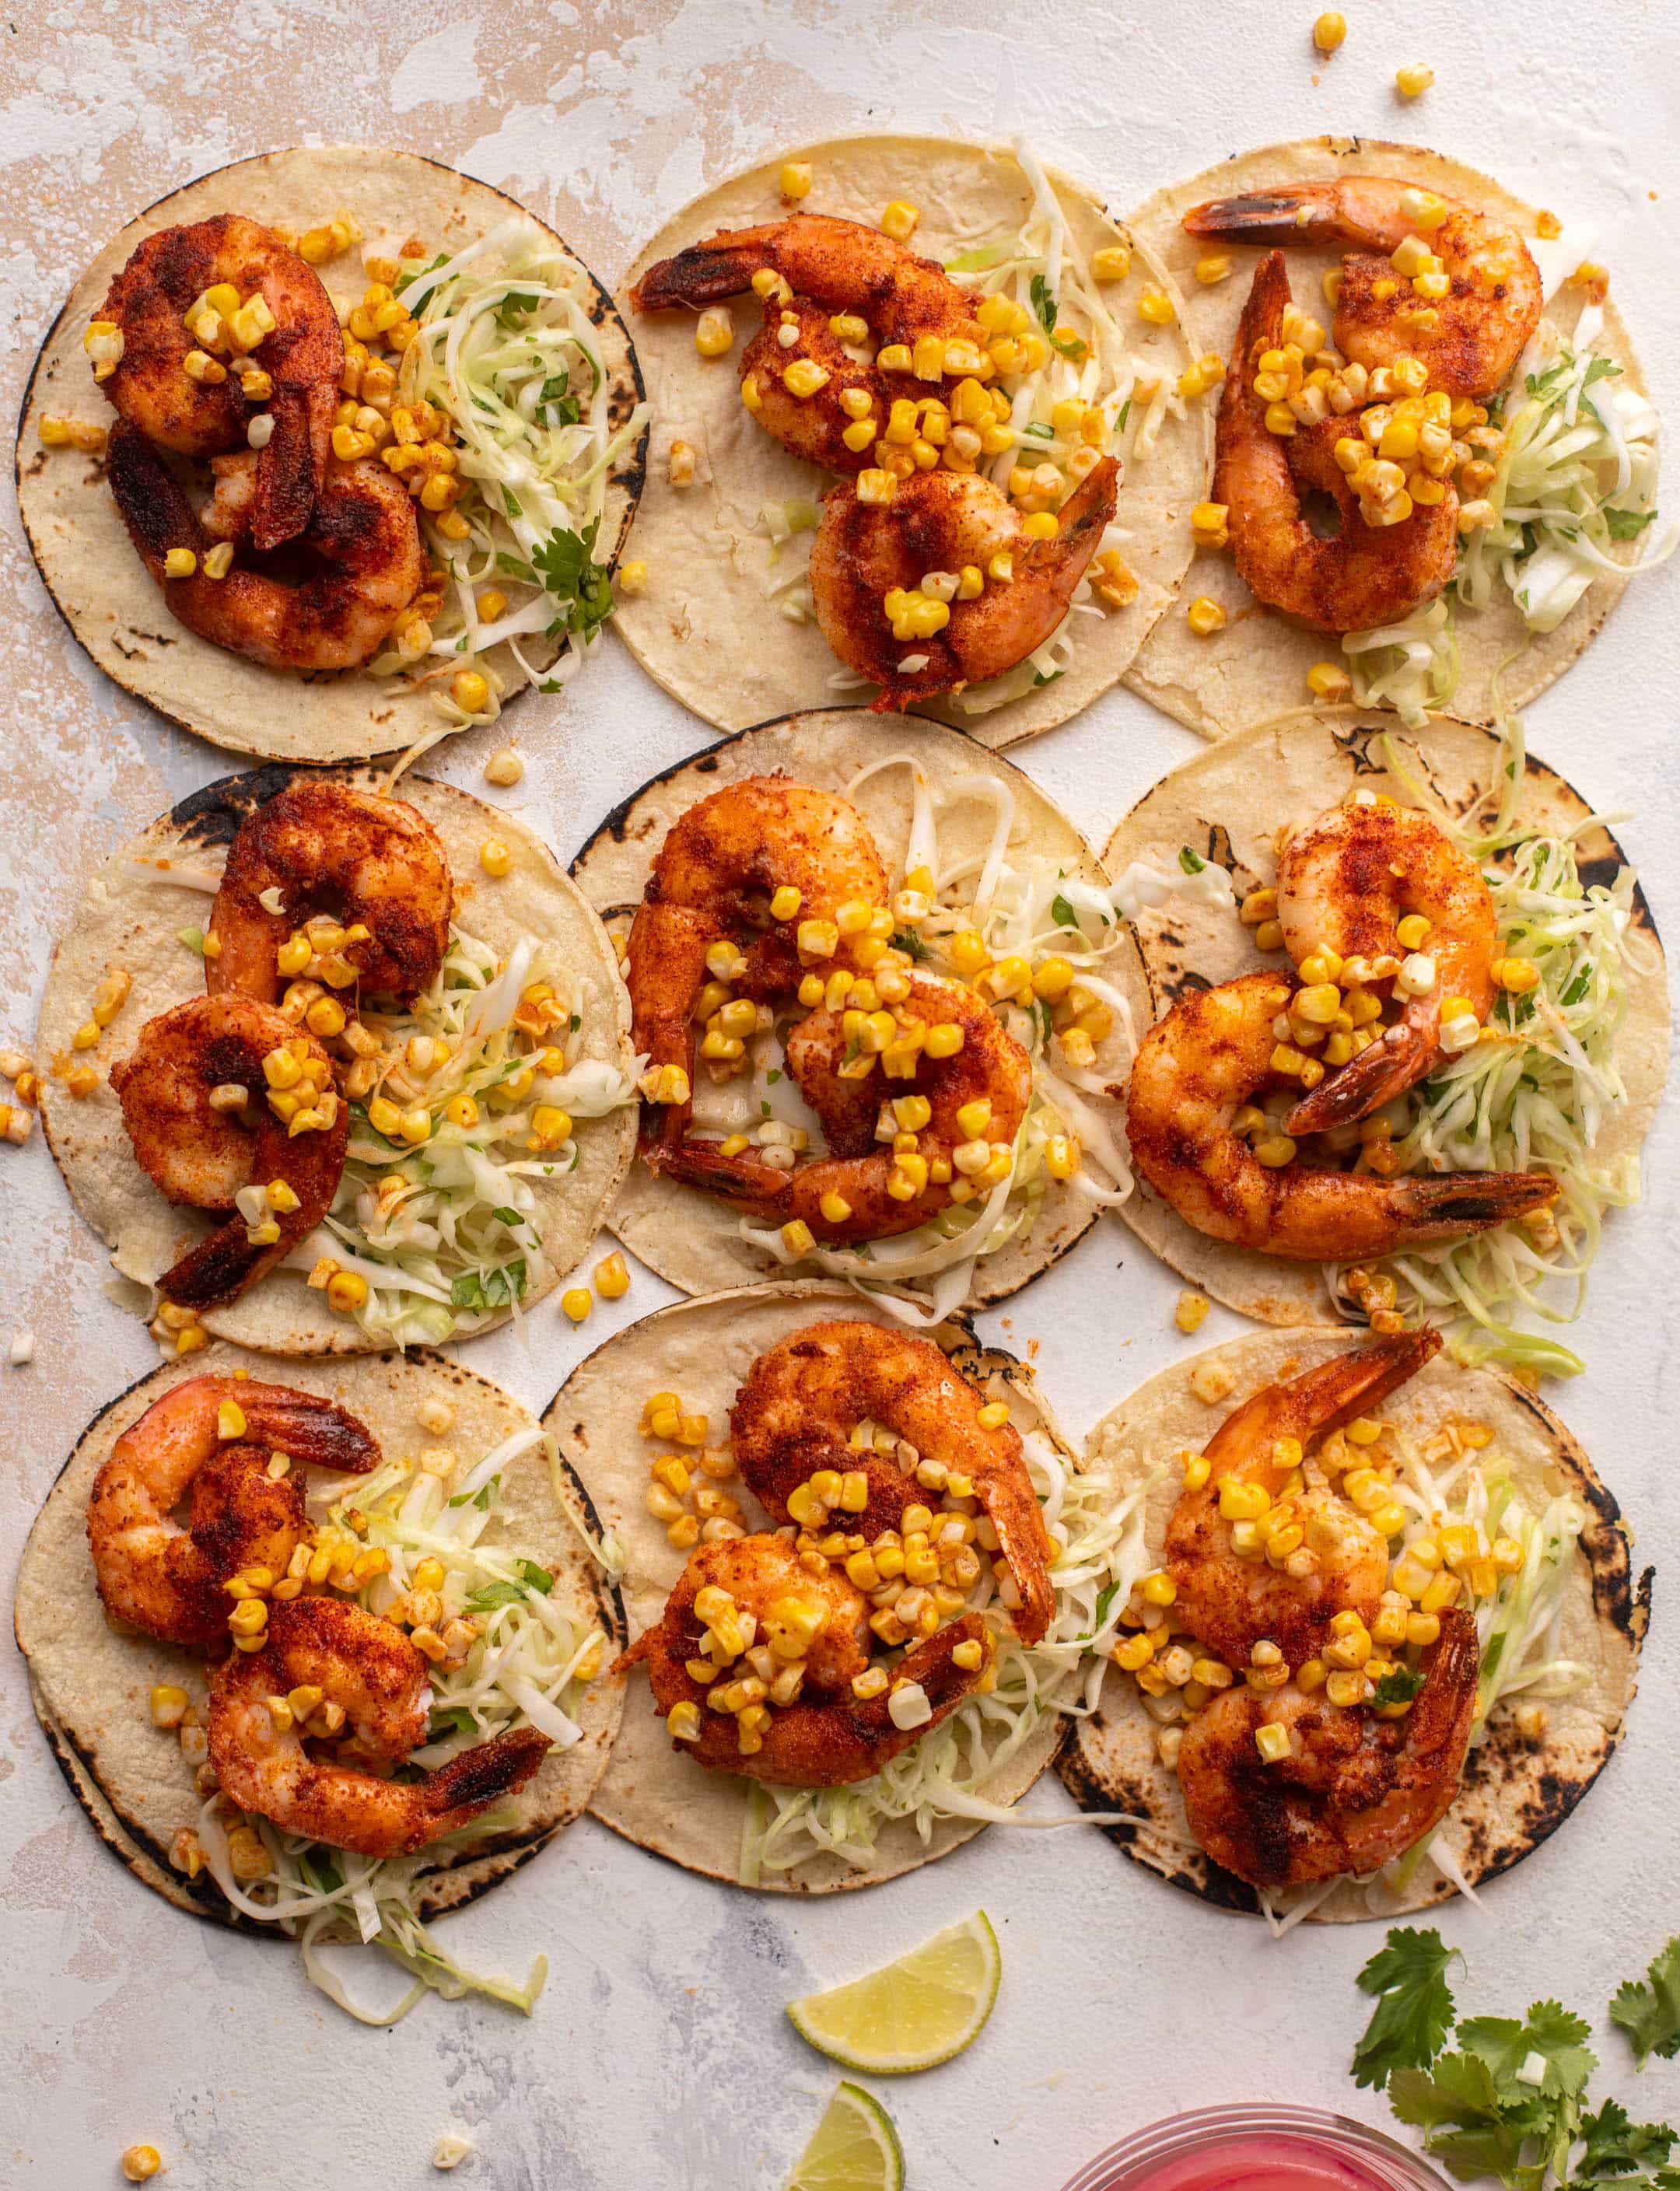
If you want to make it even easier, you could buy shrimp that is already cooked, simply toss it with the sauce and pile it into the quesadillas on the sheet pan. It will all get hot in the oven and will be done even more quickly since you’re skipping the saute step. 

crispy hot honey shrimp quesadilla

A twist on a classic quesadilla is always a welcomed change around here. There are so good! (more…)

The post Crispy Hot Honey Shrimp Sheet Pan Quesadillas. appeared first on How Sweet Eats.

Caesar Dressing Recipe

This homemade Caesar dressing recipe is creamy, garlicky, and made in minutes at home. The simple salad dressing is bursting…

A Couple Cooks – Recipes worth repeating.

This homemade Caesar dressing recipe is creamy, garlicky, and made in minutes at home. The simple salad dressing is bursting with flavor and perfect for salads, wraps, and more.

Caesar dressing

There’s something about the creamy, garlicky tang of Caesar dressing that is pure salad perfection. It’s as classic as a rich vanilla bean ice cream, or the salty crunch of a French fry hot from the fryer. Craving a rich, creamy Caesar but tired of the store-bought options? Try this homemade Caesar dressing recipe! It makes authentic-tasting salad dressing in minutes, bursting with fresh garlic, Parmesan cheese, and lemon juice. Drizzle it over romaine lettuce for a classic Caesar salad, or use it to elevate sandwiches, wraps, and more.

Caesar dressing ingredients

What’s in in Caesar dressing? This classic dressing may sound like it’s been around for centuries, but it was invented in the 1920’s. The story goes that Italian immigrant Caesar Cardini owned a restaurant in Tijuana, Mexico, and created Caesar salad on July 4, 1924. The original recipe had and egg and olive oil, which is essentially homemade mayonnaise, along with citrus, Worcestershire sauce, and Parmesan cheese.

Once you’ve tasted the homemade version of this salad dressing, you’ll never go back! Here are the ingredients in homemade Caesar dressing:

  • Mayonnaise: That signature savory creaminess comes from mayonnaise. Use a high-quality mayonnaise if you can: you can taste the difference.
  • Grated Parmesan cheese: Parmesan brings in a savory saltiness. Make sure to use grated (not shredded), which melds into the creamy texture.
  • Lemon juice: Fresh lemon juice brings in that signature tang. Don’t use bottled juice, since it doesn’t have the same fresh flavor as using a real lemon.
  • Anchovy paste or Worcestershire sauce: Anchovies are traditional, but apparently the original Caesar salad used Worcestershire sauce. Both add a savory umami to the dressing.
  • Fresh garlic: Fresh garlic is important; avoid using jarred or otherwise preserved garlic.
  • Dijon mustard: Dijon rounds out the tangy, savory flavor.
Caesar salad

So it has anchovies?

A classic Caesar dressing recipe typically anchovies or anchovy paste. This salty fish adds intensely salty, savory flavor (called umami) to dressings and sauces. Caesar dressing was invented by Italian immigrant Caesar Cardini in the 1920’s, who originally used Worcestershire sauce and not anchovies. However, anchovies became incorporated into the recipe by restaurateurs along the way, and they remain a common ingredient in the salad dressing today.

You can use either anchovy paste or anchovy fillets. You can find anchovy paste in your local grocery in a tube; then just store it in your refrigerator.

  • Do you have to use anchovies in Caesar salad? Not in this recipe! This recipe is so delicious that you can substitute Worcestershire sauce for the anchovies without losing any of the savory flavor. It just adds a little something extra. Or, make a vegetarian Caesar dressing by using a vegan Worcestershire sauce or this Worcestershire sauce substitute.
  • How many anchovies are in anchovy paste? If all you can find is whole anchovy fillets, blend 2 anchovy fillets to make 1 teaspoon anchovy paste. Keep in mind that anchovy paste has added vinegar and spices and is milder in flavor.

How to make this Caesar dressing recipe

This Caesar dressing recipe is very easy to make: you don’t even need a blender! Here are a few things to keep in mind when making this recipe:

  • No blender needed! Just whisk together the ingredients in a bowl.
  • Use a fine grater or microplane: To keep it extra creamy, use a fine grater or microplane on both the garlic and the Parmesan cheese. This helps the garlic and Parmesan melt right into the creamy texture of the dressing instead of making it chunky.
  • Don’t have one? Simply buy grated Parmesan cheese and finely mince the garlic with a knife.
Homemade Caesar salad dressing recipe

How to serve Caesar dressing

You can serve this Caesar dressing recipe in all sorts of ways, the most classic being the ubiquitous Caesar salad! But there are lots of other ways to use Caesar dressing. Here are a few of our favorite ways to use it:

Chicken caesar salad

Vegan variation

Want a plant-based or vegan variation? Whip up this Vegan Caesar Dressing! Unbelievably, it’s almost as good as the original. Here you’ll use a blender to mix chickpeas with Dijon mustard, garlic, olive oil and more. It might sound odd, but trust us. This Vegan Caesar Salad is just as dreamy.

More homemade salad dressing recipes

Love making homemade salad dressing? Ditch the grocery store bottles and opt for making our own! Here are some of our top favorite salad dressing recipes:

This Caesar dressing recipe is…

Pescatarian and gluten-free. For vegetarian, omit the anchovy paste. For vegan, go to Vegan Caesar Dressing.

Print
Caesar dressing

Caesar Dressing Recipe


  • Author: Sonja
  • Prep Time: 10 minutes
  • Cook Time: 0 minutes
  • Total Time: 10 minutes
  • Yield: About 1 cup

Description

This homemade Caesar dressing recipe is creamy, garlicky, and made in minutes at home. The simple salad dressing is bursting with flavor and perfect for salads, wraps, and more.


Ingredients

  • 1 medium garlic clove, minced or grated
  • ¼ cup grated Parmesan cheese
  • 2 tablespoons lemon juice (1/2 lemon)
  • ¾ cup high quality mayonnaise
  • ½ tablespoon Dijon mustard
  • 1 teaspoon anchovy paste (or Worcestershire sauce, optional)
  • ¼ teaspoon kosher salt
  • ¼ teaspoon ground black pepper

Instructions

  1. Whisk together all the ingredients in a bowl. Store refrigerated in a covered jar (keeps at least 1 week).
  • Category: Salad Dressing
  • Method: Whisked
  • Cuisine: American

Keywords: Caesar dressing, Caesar dressing recipe, Caesar salad dressing, Caesar salad dressing recipe, Caesar dressing ingredients, Homemade Caesar dressing

A Couple Cooks - Recipes worth repeating.

Blackened Fish Sandwiches with Avocado Tartar Sauce.

These blackened fish sandwiches are super easy and delicious! Served on buttery brioche buns with creamy avocado tartar sauce, this is the ultimate simple weeknight fish sandwich. So flavorful and a huge crowd pleaser! I love fish sandwich season. These blackened fish sandwiches are thrown together in just a few minutes! Fresh fish is covered […]

The post Blackened Fish Sandwiches with Avocado Tartar Sauce. appeared first on How Sweet Eats.

These blackened fish sandwiches are super easy and delicious! Served on buttery brioche buns with creamy avocado tartar sauce, this is the ultimate simple weeknight fish sandwich. So flavorful and a huge crowd pleaser!

I love fish sandwich season.

blackened fish sandwiches with avocado tartar sauce

These blackened fish sandwiches are thrown together in just a few minutes! Fresh fish is covered in spices and seared until flaky, then served on a buttery bun with lots of avocado tartar sauce.

LOVE it.

blackened fish sandwiches with avocado tartar sauce

I look forward to Fridays in lent so much. We have the most delicious fish sandwiches around us and while they aren’t something I crave or care for any of time of year… I always get excited for them during lent! 

Sometimes I make my own too.

avocado tartar

These blackened fish sandwiches are so easy to make. And they are absolutely delicious!

I use my classic blackening season which is very easy to throw together. Then I cook them in a skillet until they are flaky and buttery inside. 

SIMPLE.

Like, so so easy. 

blackened fish sandwiches with avocado tartar sauce

I also make a wonderful avocado tartar sauce. Think the best tartar sauce but with creamy avocado blended into it. It’s refreshing, flavorful and filling. 

And it works WONDERS on the sandwich.

Really, it actually makes the sandwich! The cooling, tangy tartar sauce is the perfect complement to the spicy crusted fish. The blackened crust has SO much going on – lots of flavor, texture, some heat – and it really needs something to cool it off. 

To make the blackening seasoning at home, you need smoked paprika, oregano, garlic powder, salt, pepper and crushed red pepper flakes. Given my adoration for smoked paprika, this is right up my alley.

The end result is a super smoky, seasoned well and slightly spicy coating.

I like to use cod for this. It’s incredibly flaky and foolproof. However, I’ve used it on salmon, shrimp and even halibut. I’ve also used it on chicken! So it will work on just about any protein. 

For the fish sandwiches, I think cod is the best. It’s affordable and easy to find. And it cooks so quickly right in a skillet. No oven necessary. 

I whip up the avocado tartar sauce while the fish cooks. This is incredibly easy. Mayo, dill pickles, sweet relish, a touch of lemon juice, fresh dill and avocado. Dreamy!  (more…)

The post Blackened Fish Sandwiches with Avocado Tartar Sauce. appeared first on How Sweet Eats.

Crab Cakes

This crab cakes recipe is uses a foolproof pan-frying method for golden, seasoned cakes that are crispy on the outside…

A Couple Cooks – Recipes worth repeating.

This crab cakes recipe is uses a foolproof pan-frying method for golden, seasoned cakes that are crispy on the outside and melt-in-your-mouth tender. Serve with creamy tartar sauce for a taste of magic!

Crab Cakes

Every time we see crab cakes on the menu at a restaurant, we have to order them. So finally we decided, why not try them at home? This amazing crab cake recipe makes patties that are golden and seasoned, crispy on the outside and tender on the inside. Old Bay, Dijon mustard and tarragon accentuate the juicy lump crabmeat perfectly, and served with creamy tartar sauce, they’re a little bit of heaven in each bite! We cannot resist these and they’re great as an appetizer or a simple dinner. Here’s how to experience the magic for yourself!

Cooking for vegan eaters, too? Make a batch of Vegan Crab Cakes alongside.

Ingredient notes for crab cakes

Many people claim to have the perfect crab cakes recipe. We’ve ordered crab cakes loads of times at restaurants, and we must admit: these taste just as good as our favorite rendition! You’ll just need crab meat, panko, and a few key spices to bring these together. Here are some notes on the ingredients for crab cakes:

  • Crab meat: Use fresh jumbo lump crabmeat if you can, but it can be expensive especially if you don’t live near a coast. Canned lump crab meat also works.
  • Eggs: Eggs hold the crab cakes together and are important as a binder.
  • Mayonnaise and Dijon mustard: Mayo and Dijon act both as binders and provide key flavoring for the crab cakes.
  • Worcestershire sauce: Worcestershire sauce adds savory flavor, but you can use these substitutes or omit if desired.
  • Old Bay: Old Bay seasoning is a classic American seafood seasoning that’s easy to find in the US in grocery stores in the spices aisle. Or, you can buy Old Bay online or make homemade Old Bay.
  • Dried tarragon: Tarragon is a common spice to pair with seafood, which has a delicate anise flavor. It’s key to the flavor, so we suggest using it here! If you’re in a pinch, you can omit.
  • Green onion: Fresh green onion adds freshness and savory flavor; you can substitute chives if desired.
  • Panko (plain): Panko is a Japanese-style breadcrumb mixture that is airier and lighter than traditional breadcrumbs. We suggested using panko for this recipe and not breadcrumbs, which have a finer texture.
Crab Cake recipe

Tips on making crab cakes

Crab cakes are made like fritters or other savory cakes like tuna cakes or salmon cakes. Mix up the batter, then form into patties and pan fry them until golden. Here are a few notes for the process:

  • Check over the crab before using. Depending on the brand and type of crab meat, you may find pieces of hard shells or cartilage. Take a quick look before using!
  • Form into ⅓ cup patties. Use your fingers to form the patties. You might have to wash your hands a few times if the batter becomes sticky.
  • Chill for at least 15 minutes before cooking. This step is key and helps the cakes to hold together when pan frying.
  • Pan fry in a thin layer of olive oil or butter. Pan fry the crab cakes about 3 minutes per side. If desired, remove them to a baking rack to keep the bottom crispy. Then fry the remaining batch.

Meal prep and storage info

Want to prep these crab cakes in advance? After forming them, you can refrigerate for up to 24 hours before cooking. If refrigerated, allow them to stand at room temperature for 10 minutes before cooking.

Store cooked crab cakes for up to 3 days refrigerated. They make great leftovers; reheat gently in a skillet.

Tartar sauce

Dipping sauces

Crab cakes taste great on their own, but of course they’re best dipped into a creamy sauce. Our top choice? Homemade tartar sauce is so simple to make and we often have most of the ingredients on hand. Remoulade is also common for crab cakes. Here are a few dipping sauce ideas:

  • Tartar Sauce is a mayonnaise-based sauce that’s often served with seafood, made with pickles, capers and seasonings
  • Remoulade Sauce is mayonnaise-based sauce that originated in France and is popular in US Cajun and Creole cuisine
  • Creamy Dill Sauce is a mix of sour cream, mayo, lemon, and fresh dill.
  • Horseradish Sauce is creamy and spicy, featuring sour cream, mayo, horseradish and chives.
Crab cakes recipe

What to serve with crab cakes

Crab cakes are often served as an appetizer, but for home cooks they work great as a main dish. Because they take a bit of effort to whip up, we prefer them as a light lunch or dinner. Here are a few ideas for what to serve with crab cakes:

Crab Cakes recipe

More types of cakes and patties

Crab cakes has spawned a whole list of seafood cakes using different types of fish and shellfish: you can even make them vegan! Here are a few more ideas:

This crab cake recipe is…

Pescatarian and dairy-free. For gluten-free, use gluten-free panko.

Print
Crab Cakes

Crab Cakes


  • Author: Sonja Overhiser
  • Prep Time: 15 minutes
  • Chill Time: 15 minutes
  • Cook Time: 15 minutes
  • Total Time: 45 minutes
  • Yield: 8

Description

This crab cakes recipe is uses a foolproof pan-frying method for golden, seasoned cakes that are crispy on the outside and melt-in-your-mouth tender. Serve with creamy tartar sauce for a taste of magic!


Ingredients

  • 1 pound jumbo lump crabmeat (fresh or canned)
  • 2 eggs
  • 3 tablespoons mayonnaise
  • 1 tablespoon Dijon mustard
  • 2 teaspoons Worcestershire sauce
  • 1 teaspoon Old Bay seasoning
  • ½ teaspoon dried tarragon
  • ¼ teaspoon kosher salt
  • 1 green onion, minced
  • ¾ cup plain panko (or gluten-free panko)
  • 2 tablespoons butter or olive oil, for frying
  • 1 recipe Tartar Sauce

Instructions

  1. Check through the crab meat for any hard pieces and discard. In a medium bowl, whisk the eggs, mayonnaise, Dijon mustard, Worcestershire sauce, Old Bay, tarragon, kosher salt, and green onion. Add the crab and panko and gently stir to combine, trying not to break up the chunks of meat.
  2. Form the dough into 8 patties using a ⅓ cup measuring cup to portion it out, then pat it into a patty with your hands. Refrigerate the patties for 15 minutes to firm up the texture (or up to 24 hours).
  3. When ready to cook, heat 1 tablespoon olive oil or butter in a non-stick skillet over medium high heat. Add the patties and cook for about 3 minutes until lightly browned, then gently flip them with a spatula and cook about 3 to 4 minutes more until lightly browned on the other side. Repeat with the next batch, adjusting the heat because the pan will be hotter on the second batch. Cool 1 to 2 minutes before serving.
  4. Serve immediately, with lemon wedges and tartar sauce (or remoulade).
  • Category: Main Dish
  • Method: Stovetop
  • Cuisine: American

Keywords: Crab cakes, crab cakes recipe

A Couple Cooks - Recipes worth repeating.

Sticky Salmon with Avocado Greens.

This sticky salmon kale salad is one of my favorite easy weeknight meals. The salmon is savory and sticky – it practically melts in your mouth. The kale salad is buttery from the avocado and fresh and lemony. Together, they’re a match made in heaven! This meal is on repeat around here!! Simple salmon with […]

The post Sticky Salmon with Avocado Greens. appeared first on How Sweet Eats.

This sticky salmon kale salad is one of my favorite easy weeknight meals. The salmon is savory and sticky – it practically melts in your mouth. The kale salad is buttery from the avocado and fresh and lemony. Together, they’re a match made in heaven!

This meal is on repeat around here!!

sticky salmon with avocado greens

Simple salmon with a sticky pan sauce served with a lemony kale salad loaded with creamy avocado. It’s the best combination when you want a satisfying, delicious meal! 

sticky salmon

This is my favorite way to make salmon. When I say I make it this way weekly, I am serious. We adore this!

And it could not be more simple, because the stickiness really only comes from two ingredients: honey and water. 

YES.

That is it.

 avocado greens

Now, of course, I add a few other spices on the salmon to change the flavor, depending on what else we are having for dinner.

For this reason, I cover the salmon in smoked paprika and garlic powder, which when combined with salt and pepper, is pretty much my howsweeteats house seasoning. Howsweeteats dust, if you will! 

I love this combo because it’s very sweet and smoky, almost BBQ sauce-like, without being saucy. 

sticky salmon with avocado greens

The other thing I like to do is sear the salmon in butter. I find that searing it in a little bit of butter gives it such a fabulous brown color. This alone makes it just look more appetizing, you know? That golden color, a little bit of crust – you can’t beat it!

See how deeply golden my salmon and sticky sauce look? That is just from using the spices and searing it in the butter. Get some color on it! 

sticky salmon with avocado greens

So needless to say, I serve this salmon with just about EVERYTHING. I eat it for lunch leftovers. I wrap it up in nori sheets with rice. Serve it with potatoes.

And today, I’m showing you my favorite avocado kale greens that come together so super fast.

Eddie doesn’t love avocado, so in real life, I might just be eating this salad alone. However, he does love kale salad. So he will skip the avocado and throw the salmon on top of the simple lemony greens. It’s still so, so good. 

Fresh lemon, a touch of honey, some dijon – all massaged into the kale. Top it with buttery avocado and boom – you’re done.

sticky salmon with avocado greens

I love serving these two side by side. The salmon is savory, hot and sticky. The salad is cold, refreshing and chewy. They work so well together and are a great complement!  (more…)

The post Sticky Salmon with Avocado Greens. appeared first on How Sweet Eats.

Tuscan Salmon

Impress everyone with this creamy Tuscan Salmon! It might just be the best salmon recipe ever, made in just 30…

A Couple Cooks – Recipes worth repeating.

Impress everyone with this creamy Tuscan Salmon! It might just be the best salmon recipe ever, made in just 30 minutes.

Tuscan Salmon

There are salmon recipes and then there’s this creamy Tuscan salmon. It might result in a few marriage proposals, which is why we also like to call it “Marry Me Salmon!” The tender fish is bathed in a luscious cream sauce with garlic, sun dried tomatoes, spinach, and capers, making each bite bright, salty, and luxurious. It tastes restaurant-style, but it’s easy to whip up at home in just 30 minutes. Honestly, it might be the best salmon recipe we’ve made!

Ingredients in this Tuscan salmon recipe

We’re not exaggerating when we say this is one of the best salmon recipes we’ve made. Multiple friends and family have tried it and can’t stop raving, then immediately ask for the recipe! This is the one we pull out to impress at dinner parties and for entertaining. Each ingredient here packs a flavor punch, so no substitutions. Here’s what you’ll need:

  • Protein: Salmon fillets, skin on and 1 to 1 ½ inches thick
  • Pantry: Olive oil, garlic powder, salt, pepper
  • Dairy: Salted butter, milk, heavy cream, Parmesan cheese
  • Fresh ingredients: Garlic, spinach, lemon (for garnish)
  • Special ingredients: Sun dried tomatoes, capers
Tuscan Salmon recuoe

Buying high-quality salmon is key

The most important thing for a great salmon recipe is a buying high quality fillets of salmon. Lower quality salmon can taste very fishy and have a mushy texture. It can also have a lot of white stuff (called albumin) when it’s cooked. While it’s not harmful, it doesn’t look appetizing! Here’s what to know when shopping for salmon:

  • 1 to 1 1/2-inch thick fillets are good for this recipe; you might find it labeled center cut at the store. Thicker fillets can take longer to cook and are slightly harder to pan fry since they can become blackened before they’re cooked on the inside.
  • Look for wild caught salmon. Fish that is wild caught in your country is usually a sustainable choice. (There are also quality options in well-regulated farms; see Seafood Watch Consumer Guide.)
  • Buy fresh salmon. Salmon that’s fresh from the fish counter usually has the best flavor. Frozen can work, but try to find highest-quality frozen salmon. Avoid big economy-sized bags, which have thinner fillets that can taste fishy.

Avoiding the white stuff

Ever noticed the white stuff that oozes to the top of some salmon recipes when cooking it? It is coagulated protein that seeps to the surface called albumin. The amount of albumin varies depending on the fish. We’ve bought certain varieties of salmon that have little to no albumin when cooked, but others that consistently have it ooze out.

There’s one thing we’ve found that helps: brining the salmon. In a side by side test, we found it helped to reduce the albumin in two similar fillets. (Keep in mind it did not reduce all of the albumin, so to fully reduce it you have to find a grocery store or other source for salmon that reliably has no white stuff.) Here’s what to do:

  • In a large shallow dish, whisk together 4 cups room temperature water and 3 tablespoons kosher salt until dissolved.
  • Place the salmon in the water and wait for 15 minutes.
Creamy Tuscan Salmon in pan

Making Tuscan salmon for a crowd

This Tuscan salmon recipe is perfect for impressing guests, whether it’s for a dinner party or a holiday like Christmas or Valentine’s Day. It’s pan seared, so you can cook as many fillets as fit in a large skillet. If you want to increase the serving size for this recipe for serving a crowd, you can do it two ways:

  • Pan sear the salmon in batches. Sear a double version of the salmon in batches.
  • Bake the salmon. Use the method in this Baked Salmon recipe, but season with the quantities of garlic powder, salt and pepper in the recipe below. For a crispy top similar to pan searing, broil for 2 minutes at the end of the bake time.
  • Make a large amount of the sauce in a skillet, then pour it into each fillet. Re-warm the salmon if necessary, then top with the creamy sauce right before serving.
Tuscan Salmon

Leftover storage

This Tuscan salmon recipe stores well, if you do end up having leftovers! (We rarely do.) Store in a sealed container for up to 3 days, refrigerated. Re-warm in a skillet over medium heat until warmed through. If the sauce becomes dried out, add a splash of milk or cream or a pat of butter.

More salmon recipes

Salmon is always a hit around here! Here are a few more salmon recipes to enjoy:

This Tuscan salmon recipe is…

Gluten-free and pescatarian.

Print
Tuscan Salmon

Creamy Tuscan Salmon


  • Author: Sonja Overhiser
  • Prep Time: 10 minutes
  • Cook Time: 20 minutese
  • Total Time: 30 minute
  • Yield: 4

Description

Impress everyone with this creamy Tuscan Salmon! It might just be the best salmon recipe ever, made in just 30 minutes.


Ingredients

  • 1 1/2 pounds or 4 (6-ounce) salmon fillets, wild caught if possible, about 1 to 1 1/2 inches thick
  • 1 ¼ teaspoon kosher salt, divided
  • ½ teaspoon garlic powder
  • Fresh ground black pepper
  • 3 tablespoons olive oil
  • 2 tablespoons salted butter
  • 2 cloves garlic, finely minced
  • ¼ cup chopped sun dried tomatoes
  • 2 tablespoons capers, drained
  • ¾ cup heavy cream
  • ¼ cup milk
  • 2 cups baby spinach, loosely packed
  • Grated Parmesan cheese, for serving
  • 2 lemon wedges, for serving

Instructions

  1. Allow the salmon to come to room temperature for 15 minutes (or brine it*). Pat the salmon dry with a clean towel. Rub it generously with olive oil and sprinkle it with 1 teaspoon of the kosher salt, the garlic powder, and a few grinds of black pepper.
  2. Heat a large skillet over medium high heat and add the olive oil. Add the salmon skin side up and cook for 3 to 5 minutes until cooked about halfway to the center of the thickest part of the salmon.
  3. Reduce to medium heat and flip the salmon (a fish spatula makes easy work of it). Tilt the pan down slightly and quickly spoon the pan juices over the top of the fish a few times. Cook for 4 to 5 minutes, continuously spooning the butter over the salmon. Cook until just tender and pink at the center (the internal temperature should be between 125 to 130°F in the center when removed).
  4. Remove the salmon to a plate and set aside. Drain the pan of any liquid and quickly wipe it out with a paper towel. 
  5. Place the pan over low heat and melt the butter. Then add the garlic and sun-dried tomatoes and cook for 30 seconds to 1 minute until the garlic is lightly browned and fragrant. Add the capers, cream, milk, and remaining ¼ teaspoon kosher salt. Simmer for 2 minutes, stirring occasionally and scraping the brown bits off the bottom of the pan. Add the spinach and cook until wilted, about 1 minute, then return the salmon to the pan and warm it for 2 minutes, spooning the sauce over the salmon.
  6. Serve topped with the sauce and grated Parmesan cheese.

Notes

*To help reduce the white stuff (albumin) that can ooze from salmon when it’s cooked, we recommend brining the salmon to bring it to room temperature. In a large shallow dish, whisk together 4 cups room temperature water and 3 tablespoons kosher salt until dissolved. Place the salmon in the water and wait for 15 minutes.

  • Category: Main dish
  • Method: Stovetop
  • Cuisine: Seafood
  • Diet: Vegetarian

Keywords: Tuscan salmon, tuscan salmon recipe, salmon tuscan, creamy tuscan salmon

A Couple Cooks - Recipes worth repeating.

Sheet Pan Roasted Shrimp Tacos.

These roasted shrimp tacos are a weeknight favorite! Easy smoky shrimp roasted with corn, served with a crisp and refreshing lime slaw. Delicious! I interrupt our Thanksgiving recipe programming for…  Regular food. Roasted shrimp tacos, to be exact. Smoky roasted shrimp tacos with corn and slaw, to be even more exact.  Whenever I have a […]

The post Sheet Pan Roasted Shrimp Tacos. appeared first on How Sweet Eats.

These roasted shrimp tacos are a weeknight favorite! Easy smoky shrimp roasted with corn, served with a crisp and refreshing lime slaw. Delicious!

I interrupt our Thanksgiving recipe programming for… 

sheet pan roasted shrimp tacos

Regular food. Roasted shrimp tacos, to be exact. Smoky roasted shrimp tacos with corn and slaw, to be even more exact. 

sheet pan roasted shrimp tacos

Whenever I have a few weeks of recipe testing, Eddie and the kids ask for “regular” food. Like, normal food. Nothing new or unusual, nothing crazy unique, just some good old regular food!

That’s what I consider these shrimp tacos to be. They are easy, simple, taste incredible and come together fast on a weeknight. They are also a crowd pleaser and relatively easy to serve when times are busy. Taco bars, forever!

sheet pan roasted shrimp tacos

I always find that we crave this kind of food during the holiday season. Something familiar and delicious, but not something heavy or wintery. After all the mashed potatoes and stuffing and gravy, I usually want a meal that tastes completely different! 

And that’s exactly what we have. 

sheet pan roasted shrimp tacos

To make these tacos, I throw raw shrimp, covered in spices, on a baking sheet. I toss in some corn, and while it all roasts, I make a slaw. 

Our favorite slaw is simple: green cabbage, lots of lime, salt, pepper, olive oil, cilantro. Simple but crunchy and refreshing. A taco must. 

Of course, other toppings are always welcome. We almost always have pickled onions and cotija cheese on hand. But any kind of salsa or pico is perfect too.  (more…)

The post Sheet Pan Roasted Shrimp Tacos. appeared first on How Sweet Eats.

Honey Glazed Salmon

Impress everyone with this honey glazed salmon recipe! The easy flavorful sauce features honey, soy, miso and garlic. Here’s a…

A Couple Cooks – Recipes worth repeating.

Impress everyone with this honey glazed salmon recipe! The easy flavorful sauce features honey, soy, miso and garlic.

Honey glazed salmon

Here’s a dinner idea that gives you maximum return on investment: this Honey Glazed Salmon recipe! In under 30 minutes, you’ve got tender, flaky salmon fillets that are bursting with flavor from a sticky glaze of honey, soy sauce, miso and garlic. That’s what we mean by return on investment: there’s little time needed to make this incredible dish that will have everyone licking their plates clean!

Ingredients in honey glazed salmon

This honey glaze for salmon can be made in just 5 minutes, making it the ideal quick sauce for weeknight meals. Mix up the 6-ingredient sauce in a bowl, then brush half of it onto the salmon. Broil it up, then pour the remaining glaze on before serving. It makes the best sticky sauce that coats everything in savory sweet flavor. Here’s what you’ll need for this recipe:

  • Salmon fillets, wild caught if possible
  • Olive oil
  • Yellow or white miso
  • Honey
  • Soy sauce
  • Rice wine
  • Garlic powder
  • Ground ginger
  • Olive oil, for brushing

Types of miso

Miso is a Japanese fermented soybean paste that’s full of nutrients and savory flavor. It’s known for its intense savory flavor, otherwise known as umami: the fifth flavor. You can find miso in the international foods aisle near the Japanese ingredients. There are many different types of miso, and they all taste different. We recommend using white or yellow miso for this miso butter recipe: sometimes they’re labeled as “light miso”.

  • White miso (Shiro miso): This variety has a mild, more delicate flavor and less salt than darker miso.
  • Yellow miso: This type is fermented a little longer than white miso and has a mild, lightly sweet flavor.
  • Red or dark miso: This variety is fermented longer than white or yellow miso. It has a very strong flavor and can overwhelm the flavors in a dish, so we don’t recommend using it here.
Honey Glazed Salmon

Tips for buying salmon

The most important thing when it comes to making this honey glaze salmon recipe is the quality of the fish. Lower quality salmon can taste very fishy and have a mushy texture. It can also have a lot of white stuff (called albumin) when it’s cooked: while it’s not harmful, it doesn’t look appetizing! Here’s what to know when shopping for salmon:

  • 1 to 1 1/2-inch thick fillets are good for this recipe and look impressive; you might find it labeled center cut at the store.
  • Look for wild caught salmon. Fish that is wild caught in your country is usually a sustainable choice. (There are also quality options in well-regulated farms; see Seafood Watch Consumer Guide.)
  • Buy fresh salmon. Salmon that’s fresh from the fish counter usually has the best flavor. Frozen can work too, but try to find highest-quality frozen salmon. Avoid those big economy-sized bags, which we’ve found it typically thinner and can taste fishy.

How to cook honey glazed salmon

This honey glazed salmon recipe is broiled salmon, an efficient method that skips the oven preheating time and cooks the fish in just 10 minutes! You can also make this recipe oven baked or grilled (see below), but our favorite way is broiled because it’s so quick and it gets nicely crisp and browned on top. Oven baking can work, but the salmon comes out more moist and soft. Here are a few tips for this recipe:

  • Allow the salmon to come to room temperature before cooking (brine it if possible!). This can take 15 to 20 minutes, but it’s important. If the salmon is too cold when heat is applied, the outside can cook much faster than the inside. We recommend brining the salmon, which is letting it sit in salt water while it comes to room temperature. This helps to season the fish and also avoids the white stuff (albumin) when the fish is cooked.
  • Remember the thickness determines the cook time. 1-inch salmon takes 8 to 11 minutes to broil. Very thin salmon can broil in just 5 minutes, so adjust the cook time accordingly.
  • Keep an eye on the broiler! Salmon can go from pink to brown very quickly in the broiler: so don’t stray too far away, especially at the end of the cook time.
  • The salmon is done with the internal temperature is 125 to 130°F when measured in the thickest part. The fish will continue to cook after you remove it from the heat. To ensure full safety, the FDA recommended temperature for seafood is 145°F, or well done.
Honey Glazed Salmon

Other methods: baked and grilled

This honey glazed salmon recipe also works baked or grilled! Here’s how to do it:

  • Baked: Follow the instructions in Easy Oven Baked Salmon, but follow the seasoning instructions in the recipe below. Brush on half the glaze before baking, then pour on the remaining half once it’s done.
  • Grilled: Follow the instructions in Grilled Salmon, but follow the seasoning instructions in the recipe below. Brush on half the glaze before grilling and brush on half afterwards.

More salmon recipes

This honey glazed salmon recipe is one of our favorite salmon recipes to date! Here are a few more to try with this tasty fish:

This honey glazed salmon recipe is…

Pescatarian, dairy-free, and gluten-free.

Print
Honey glazed salmon

Honey Glazed Salmon


  • Author: Sonja Overhiser
  • Prep Time: 15 minutes
  • Cook Time: 10 minutes
  • Total Time: 25 minutes
  • Yield: 4

Description

Impress everyone with this honey glazed salmon recipe! The easy flavorful sauce features honey, soy, miso and garlic.


Ingredients

  • 1 1/2 pounds salmon fillets, room temperature
  • Olive oil, for brushing
  • ½ teaspoon kosher salt, plus more for brining
  • 2 tablespoons yellow or white miso
  • 2 tablespoons honey
  • 1 tablespoon soy sauce (or tamari)
  • 1 tablespoon rice wine
  • ⅛ teaspoon garlic powder
  • ⅛ teaspoon ground ginger
  • Chopped parsley, for garnish (optional)

Instructions

  1. Brine the salmon* (optional): In a shallow dish whisk together 4 cups room temperature water and 3 tablespoons kosher salt until it dissolves. Place the salmon in the water and wait for 15 minutes.
  2. Preheat the broiler to high.
  3. Make the glaze: Meanwhile, in a small bowl, stir together the miso, honey, soy sauce, rice wine, garlic powder, and ground ginger.
  4. Prepare the salmon: Place a large sheet of aluminum foil on a baking sheet and brush it with olive oil. Pat each piece of salmon dry and place it on the foil skin side down. Brush the salmon with a bit of the olive oil and sprinkle with the ½ teaspoon kosher salt evenly divided among the fillets. Reserve about half of the glaze and brush the remainder on the salmon.
  5. Broil the salmon: Broil 7 to 10 minutes for 1-inch thick salmon (or less for thinner fish), until it’s just tender and pink at the center (the internal temperature should be between 125 to 130°F in the center). Pour the reserved glaze onto the salmon and garnish withe parsley, if using. Serve immediately. Leftovers last refrigerated for up to 3 days. 
  • Category: Main dish
  • Method: Broiled
  • Cuisine: Seafood
  • Diet: Gluten Free

Keywords: Honey glazed salmon

A Couple Cooks - Recipes worth repeating.

Air Fryer Tuna Melt

What makes comfort food even better? Letting the air fryer do all the work! Our Air Fryer Tuna Melt is packed with the creamy cozy flavors you love, sandwiched between two extra toasty slices of buttery bread. With a slight twist from our traditional tuna melt, this recipe gets a massive upgrade, with the air fryer making the bread extra crispy while the cheese and tuna warms and melts inside. From crab rangoon to chicken…

Read More

The post Air Fryer Tuna Melt appeared first on Spoon Fork Bacon.

Air fryer tuna melts on a plate stacked.

What makes comfort food even better? Letting the air fryer do all the work! Our Air Fryer Tuna Melt is packed with the creamy cozy flavors you love, sandwiched between two extra toasty slices of buttery bread.

With a slight twist from our traditional tuna melt, this recipe gets a massive upgrade, with the air fryer making the bread extra crispy while the cheese and tuna warms and melts inside. From crab rangoon to chicken tenders, the air fryer does a fantastic job at adding all the crispiness of a deep frier without the time, mess, or extra grease.

Pickled red onion, dill, and chives add extra zip to the creamy tuna salad that’s absolutely craveable. The two kinds of cheese melted on top and fresh juicy tomato slices make this one of our favorite toasted sandwiches yet!

How to Make Our Air Fryer Tuna Melt

Ingredients

Air Fryer Tuna melt ingredients all laid out.

Process

  1. Add tuna, mayonnaise, celery, pickled red onion, dill, and chives to a medium-sized mixing bowl. Season with salt and pepper and stir to combine.
  2. Spread 1/2 tablespoon butter over each slice of bread and turn the two slices butter side down.
Tuna salad mixed in a bowl.
Tuna melt with butter spread on the bread.
  1. Top each butter side down slice of bread with tuna mixture.
  2. Then top with sliced tomatoes, shredded cheese and remaining slices of bread.
Tuna salad spread on a piece of bread for tuna melt.
Tomatoes on top of tuna salad on bread.
  1. Preheat the air fryer to 400˚F (if needed). Spray the air fry basket with cooking spray and place sandwiches in the coated fryer basket.
  2. Air fry tuna melt for 4 minutes. Flip the sandwich and continue to air fry for an additional 3 minutes.
Tuna melt with cheese on top of the bread ready to be toasted.
A tuna melt ready to be made in an air fryer.
  1. Remove your tuna melt from the air fryer, cut it in half, and serve.
Tuna melt in an air fryer being cooked.

Why We Love the Air Fryer Tuna Melt?

  • The tuna salad can be made two days in advance. Making the salad ahead of time makes mealtime quick and easy. This irresistible lunch can be ready in less than 10 minutes!
  • The air fryer makes the bread extra toasty. Unlike toasting the bread on a pan, the air circulation makes the bread incredibly toasty without being greasy.
  • You can easily customize the tuna salad any way you’d like! If you don’t like the herbs included, leave them out or swap them for something else. Use different cheeses, whole wheat or sourdough bread, or add some lettuce if you’d like. Start with our recipe and make it your own!
Air fryer tuna melt recipe on a plate.

Variations and Substitutions

Make this air fryer tuna melt your own with any of these variations!

  • Swap the vegetables. While we love tomato slices on our tuna melts, you can add cucumbers, lettuce, sprouts, and raw onions.
  • Change the cheeses. Freshley shredded mozzarella and cheddar add great flavor and an extra cheesy creamy texture, but you can swap the cheese (or leave it out!) for anything you’d like. Try mozzarella, sharp cheddar, pepper Jack, Monterey Jack, Havarti, Swiss, or Colby Jack are all great choices. Try any one of them or a combination!
  • Bread or no bread. While we love thick slices of sourdough or Italian bread for this sandwich, you can use a tortilla and make a wrap, or make it a low-carb lunch and wrap your tuna salad in a big crunchy romaine lettuce leaf.

Prep Ahead Instructions

To make mealtime as easy as possible, you can prepare your tuna salad up to two days in advance. Just prepare the tuna salad as per the directions, then store it in an airtight container for up to two days in the refrigerator.

When you’re ready to make your sandwich, add the tuna to your bread and proceed with the directions.

Tips and Tricks for the Best Air Fryer Tuna Melt

  • Go light on the mayo. We want the creamy texture that the mayonnaise adds, but if you add too much, the tuna salad will be wet and soggy, which isn’t what we’re going for!
  • The onions, celery and chives add taste AND texture.  You could add these ingredients powdered for the flavor, but chopping them up and mixing them in the salad adds a fresh crunch that really complements the creamy salad and toasty bread.
  • Don’t forget the flip! Flipping your tuna melt halfway through will help both sides get equally toasty.
  • Choose a hearty bread. If you pick a thin or really lightweight bread, it may not hold up to the heavy filling. Thick slices of Italian or sourdough are perfect for this sandwich.

Our Favorite Side Dishes to Serve with Our Tuna Melt

You can’t go wrong with potato chips and pickles, but to make this tuna melt a complete meal, try some of our favorite sides:

More Delicious Sandwich Recipes You Will Love

Air fryer tuna melt recipe cut with potato chips on the side.
Air Fryer tuna melt recipe on a plate.
Print

Air Fryer Tuna Melt

This Air Fryer Tuna Melt is the perfect pairing of toasty buttery bread and creamy cheesy tuna salad. You'll love the combination of flavors and texture in this easy and comforting lunch!
Course lunch
Cuisine American
Prep Time 8 minutes
Cook Time 7 minutes
8 minutes
Total Time 15 minutes
Servings 2
Calories 699kcal

Ingredients

tuna salad

  • 5 ounces canned tuna drained
  • 1/4 cup diced pickled red onions
  • 3 1/2 tablespoons mayonnaise
  • 3 tablespoons diced celery
  • 1 1/2 tablespoons minced dill
  • 1 tablespoons thinly sliced chives
  • salt and pepper to taste

sandwich assembly

  • 4 slices bread of choice
  • 2 tablespoons unsalted butter
  • 1/2 beefsteak tomato (or 1 vine ripe tomato) sliced
  • 2 ounces shredded cheddar
  • 2 ounces shredded mozzarella
  • salt and pepper to taste

Instructions

  • In a mixing bowl combine tuna, mayonnaise, celery, pickled red onion, dill, and chives. Season with salt and pepper and stir together.
  • Spread 1/2 tablespoon butter over each slice of bread and turn two slices butter side down.
  • Top each butter side down slice of bread with tuna mixture.
  • Top with sliced tomatoes, shredded cheese and remaining slices of bread.
  • Preheat air fryer to 400˚F (if needed).
  • Spray air fry basket with cooking spray and place sandwiches in coated fryer basket.
  • Air fry tuna melt for 4 minutes.
  • Flip sandwich and continue to air fry for an additional 3 minutes.
  • Remove from air fryer, cut in half and serve.

Notes

Tips and Tricks
  • Go light on the mayo. We want the creamy texture that the mayonnaise adds, but if you add too much, the tuna salad will be wet and soggy, which isn’t what we’re going for!
  • The onions, celery and chives add taste AND texture.  You could add these ingredients powdered for the flavor, but chopping them up and mixing them in the salad adds a fresh crunch that really complements the creamy salad and toasty bread.
  • Don’t forget the flip! Flipping your tuna melt halfway through will help both sides get equally toasty.
  • Choose a hearty bread. If you pick a thin or really lightweight bread, it may not hold up to the heavy filling. Thick slices of Italian or sourdough are perfect for this sandwich.
Prep Ahead
The filling can be made up to 2 days in advance. Transfer the filling to an airtight container and refrigerate until ready to use. 

Nutrition

Calories: 699kcal | Carbohydrates: 31g | Protein: 35g | Fat: 49g | Saturated Fat: 20g | Polyunsaturated Fat: 13g | Monounsaturated Fat: 11g | Trans Fat: 1g | Cholesterol: 117mg | Sodium: 4431mg | Potassium: 586mg | Fiber: 5g | Sugar: 6g | Vitamin A: 1734IU | Vitamin C: 15mg | Calcium: 475mg | Iron: 3mg

The post Air Fryer Tuna Melt appeared first on Spoon Fork Bacon.

Air Fryer Bacon Wrapped Shrimp

Want to please a crowd with an appetizer that will fly off the plate as fast as you can serve them? These Air Fryer Bacon Wrapped Shrimp take less than 30 minutes from start to finish and are sure to please any crowd. The air fryer helps keep the shrimp succulent and tender while crisping up the thin-sliced bacon to absolute perfection. And if you’re worried about time, these are incredibly easy to prep ahead,…

Read More

The post Air Fryer Bacon Wrapped Shrimp appeared first on Spoon Fork Bacon.

Air fryer bacon wrapped shrimp on a platter with honey mustard.

Want to please a crowd with an appetizer that will fly off the plate as fast as you can serve them? These Air Fryer Bacon Wrapped Shrimp take less than 30 minutes from start to finish and are sure to please any crowd. The air fryer helps keep the shrimp succulent and tender while crisping up the thin-sliced bacon to absolute perfection. And if you’re worried about time, these are incredibly easy to prep ahead, and just toss in the air fryer when you’re ready to serve.

Serve these bacon-wrapped shrimp bites on a platter with a dish of our sweet and tangy honey mustard sauce, and maybe a dish of homemade BBQ sauce or Chick-fil-A Sauce for variety!

Why We Love Air Fryer Bacon Wrapped Shrimp

  • Easy to prep ahead of time and cook just before serving.
  • They take only 10 minutes to cook!
  • The air fryer gets the bacon extra crispy in less time than the oven.
  • Using the air fryer for these bacon-wrapped shrimp keeps the oven open for other foods you may be cooking when hosting a party.
  • While this is the perfect appetizer, you can also serve it over salads or as an entree.

How to Make Air Fryer Bacon Wrapped Shrimp

Ingredients

Bacon wrapped shrimp ingredients on a kitchen counter.

Process

  1. In a mixing bowl, toss shrimp, garlic powder, oil, and pepper together.
Shrimp seasoned and mixed with oil in a glass bowl.
  1. Wrap each shrimp in 1/2 slice of bacon. Lightly spray the air fryer basket with cooking spray and add the shrimp with the bacon seam side down.
Shrimp wrapped in bacon and in an air fryer ready to be cooked.
  1. Air fry the bacon-wrapped shrimp at 400˚F, for 10 minutes.
Air fryer shrimp wrapped in bacon cooked in an air fryer basket.

Tips and Tricks for Making This Recipe

  • Choose “large” shrimp, or ones that include 21-25 per pound. If you use smaller or bigger, the shrimp and bacon may not be done at similar times, causing one to become overcooked. If you use larger shrimp, you may be able to use a whole slice of bacon instead of a half, but the cooking time will be longer.
  • Use only thin-sliced bacon.
  • There’s no need for toothpicks if you air fry them with the bacon seam down.
  • We like to leave the tail on the shrimp so that we have something to hold while dipping it into the honey mustard sauce, but feel free to remove the tail first if serving these with a fork.
  • If you’re making an extra large batch of these, you can bake them in the oven. Preheat the oven to 400˚F, line and baking sheet with foil, and bake for 15-20 minutes or until the bacon is crispy.
Air fryer bacon wrapped shrimp on a platter.

Best Type of Bacon to Use for Bacon Wrapped Shrimp

When wrapping shrimp, the type of bacon you use matters. We recommend choosing regular or thin-sliced bacon that has the least amount of fat per strip as possible.

Choosing thick-cut or turkey bacon leads to the shrimp overcooking while the bacon is still undercooked.

Prep Ahead and Storing Instructions

You can prepare these bacon-wrapped shrimp up to 24 hours ahead of time. Just follow all of the steps until they’re ready to go into the air fryer, place them in an airtight container, and refrigerate until you’re ready to cook.

If you want to make them further in advance, freeze them in a freezer-safe container for up to three months. When you’re ready to use, take them out of the freezer, let them thaw overnight in the refrigerator, and continue to cook in the air fryer as directed.

Storing Leftovers and Reheating

Once cooked, store any leftovers in the refrigerator for up to 3 days in an airtight container. These can also be frozen when fully cooked. Just add them to a freezer bag or container and freeze for up to 3 months. When ready to use, thaw overnight in the refrigerator.

To reheat, we recommend popping them back in the air fryer for 3-4 minutes at 400˚F.

What to Serve with Air Fryer Bacon Wrapped Shrimp

There are so many ways to enjoy this recipe, whether it’s as an appetizer, side, or main course. Try some of these pairings:

Air fryer bacon wrapped shrimp on a platter.

More Delicious Air Fryer Recipes You Will Love

Air fryer bacon wrapped shrimp on a platter with honey mustard.
Print

Air Fryer Bacon Wrapped Shrimp

The perfect 30-minute appetizer, this Air Fryer Bacon Wrapped Shrimp has tender bites of shrimp wrapped in salty, crispy bacon, all slathered in a sweet and tangy honey mustard sauce.
Course Appetizer, Snack
Prep Time 15 minutes
Cook Time 10 minutes
Total Time 25 minutes
Servings 4
Calories 173kcal

Equipment

Ingredients

honey mustard

shrimp

  • 12 (21-25 count) shrimp peeled, deveined with tails intact
  • 2 teaspoons garlic powder
  • 1 teaspoon olive oil
  • 1/4 teaspoon black pepper
  • 6 slices bacon cut in half crosswise (with some of the fat trimmed)

Instructions

honey mustard

  • Combine honey mustard ingredients into a bowl and whisk together. Set aside.

shrimp

  • In a mixing bowl toss together shrimp, garlic powder, oil, and pepper.
  • Wrap each shrimp in 1/2 slice bacon.
  • Lightly spray air fryer basket with cooking spray and add shrimp, bacon seam side down.
  • Air fry bacon wrapped shrimp at 400˚F, for 10 minutes.
  • Remove from air fryer and serve with honey mustard

Notes

**Recipe Makes 12***
***1 Serving is 3 pieces (Nutritional Information Does Not Include Honey Mustard)***
Tips and Tricks for Making This Recipe
    • Choose “large” shrimp, or ones that include 21-25 per pound. If you use smaller or bigger, the shrimp and bacon may not be done at similar times, causing one to become overcooked. If you use larger shrimp, you may be able to use a whole slice of bacon instead of a half, but the cooking time will be longer.
    • Use only thin-sliced bacon.
    • There’s no need for toothpicks if you air fry them with the bacon seam down.
    • We like to leave the tail on the shrimp so that we have something to hold while dipping it into the honey mustard sauce, but feel free to remove the tail first if serving these with a fork.
    • If you’re making an extra large batch of these, you can bake them in the oven. Preheat the oven to 400˚F, line and baking sheet with foil, and bake for 15-20 minutes or until the bacon is crispy.
 

Nutrition

Calories: 173kcal | Carbohydrates: 2g | Protein: 9g | Fat: 14g | Saturated Fat: 5g | Polyunsaturated Fat: 2g | Monounsaturated Fat: 7g | Trans Fat: 0.05g | Cholesterol: 60mg | Sodium: 389mg | Potassium: 119mg | Fiber: 0.2g | Sugar: 0.04g | Vitamin A: 67IU | Vitamin C: 0.02mg | Calcium: 20mg | Iron: 0.3mg

The post Air Fryer Bacon Wrapped Shrimp appeared first on Spoon Fork Bacon.