Homemade Biscotti

Homemade biscotti are a simple sweet treat that are endlessly customizable and are the perfect companion for a hot cup of homemade coffee.

The post Homemade Biscotti appeared first on Budget Bytes.

I’m sure we all know by now that making coffee at home instead of hitting the drive-through can save you a TON of money over time, but those little side treats and baked goods also add up! So let’s make some homemade biscotti to elevate your entire homemade coffee experience and squash that temptation to go to the drive-through once and for all. These Homemade biscotti can be made into a million different flavors, they’re super easy, and freezer-friendly so you can work your way through a batch over time. Budget WIN!

Scattered biscotti on a surface with a cup of coffee.

What is Biscotti?

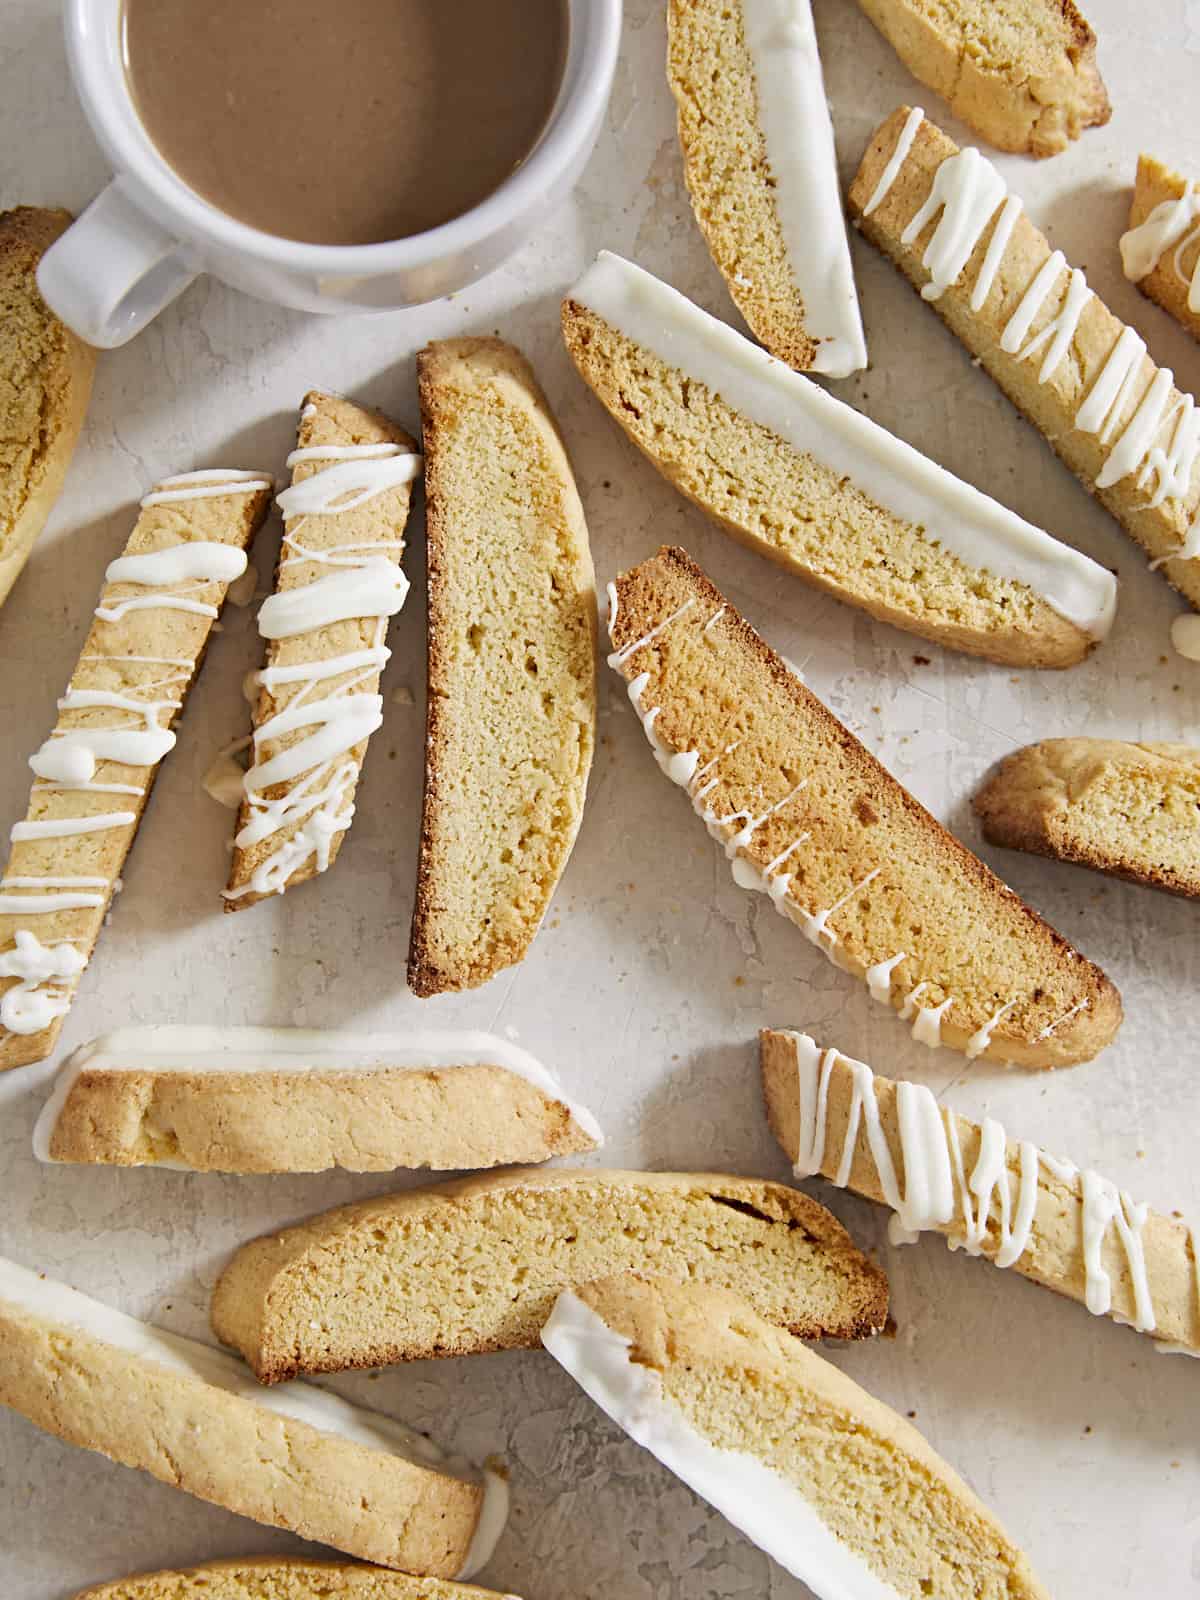
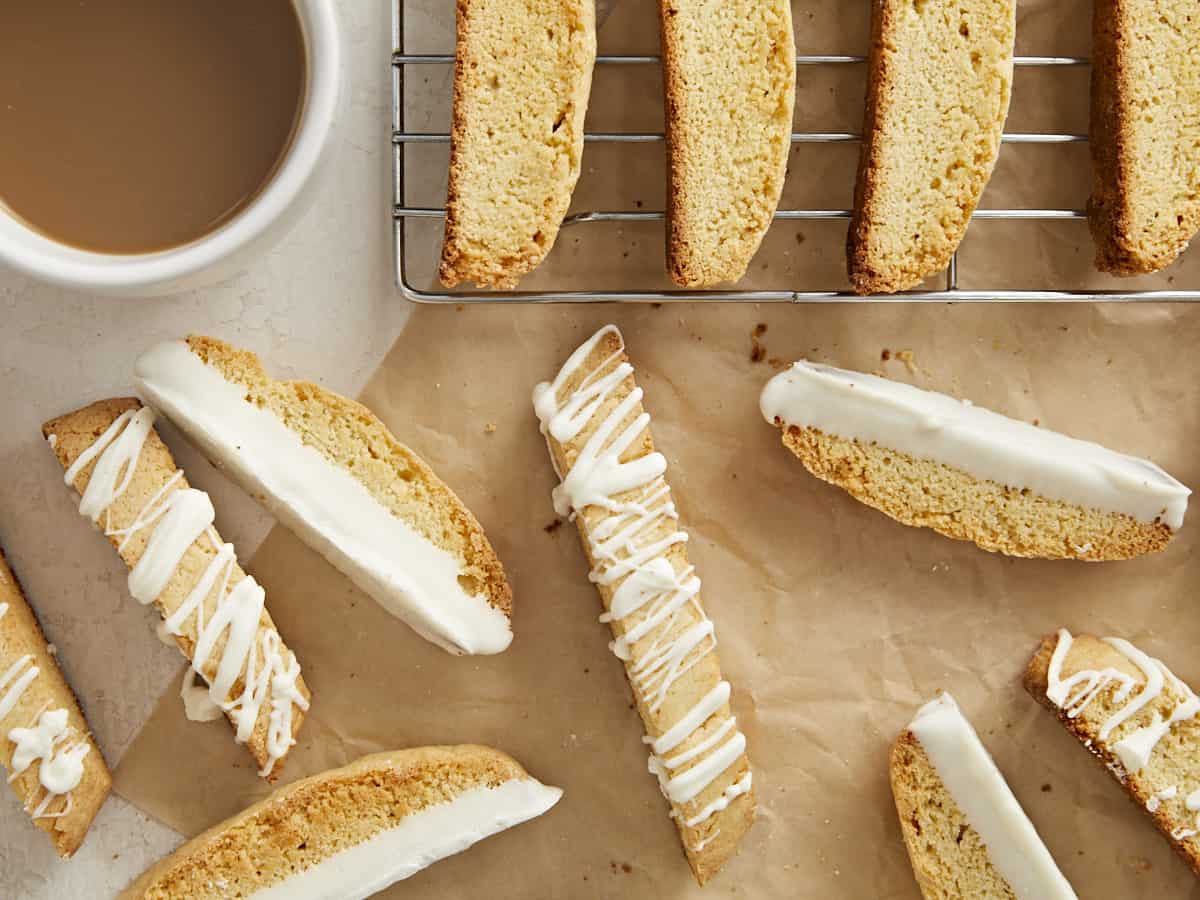
Biscotti, also known as cantucci, are Italian biscuits (or cookies) that are baked twice to yield a deliciously crunchy texture that is perfect for dunking into your favorite hot beverage. The American version of biscotti are typically slightly softer and sweeter than traditional Italian biscotti, they come in a variety of flavors, and are often dipped in chocolate. The recipe we have here today is definitely an American-style biscotti, similar to what you’d find in coffee shops across the U.S.

Ingredients for Biscotti

You really don’t need much to make biscotti, just a few pantry staples, which means they’re typically going to be very budget-friendly (about $0.20 each!). To make a simple homemade biscotti you’ll need the following ingredients:

  • Flour: the base for any biscuit or cookie! We used all-purpose flour to keep the recipe simple. If you experiment with a different type of flour, keep in mind that you may need to adjust the amount of flour to keep the same moisture ratio in the dough.
  • Baking Powder: this is the leavening agent for the dough. Biscotti are not a super light and airy cookie, so not a lot of leavening is needed.
  • Sugar: American biscotti are a little on the sweet side, but not quite as sweet as a typical cookie. We use white granulated sugar to provide sweetness and keep a crispy texture.
  • Butter: using butter as the fat in the biscotti provides a lot of flavor and helps keep the texture nice and crispy.
  • Eggs: eggs act as a binder for the biscotti and provide a little moisture to the dough, so they stay just a little bit soft in the center.
  • Vanilla or Almond Extract: a little bit of extract gives the biscotti just a hint of flavor. Almond is typical, but we’ve used vanilla which goes nicely with the white chocolate we used for decorating.
Biscotti lined up in a row showing different decorations.

What Else Can I Add?

This is where making homemade Biscotti gets FUN. You can add so many different ingredients and make a million different fun flavor combinations. Here are some other ingredients you can add to flavor biscotti:

  • Chocolate chips or cocoa powder (stir into the flour)
  • Dried fruit
  • Chopped nuts
  • Cinnamon, cardamom, or other ground spices
  • Citrus zest
  • Instant coffee
  • Matcha
  • Other flavor extracts (lemon, orange, peppermint, etc.)
  • Dip the biscotti into melted chocolate or drizzle with a flavored icing

Need some flavor combination ideas? Try Almond Apricot Biscotti, Cinnamon Spice Biscotti, Cranberry Almond Biscotti, double chocolate (cocoa dough with chocolate chips), cranberry pecan, dark chocolate orange, coconut matcha, pumpkin spice, white chocolate cranberry, or chocolate peppermint.

How to Store Biscotti

Make sure to allow your homemade biscotti to cool completely to room temperature before storing to avoid trapping any steam or moisture. Once cooled, store your biscotti in an air-tight container for up to two weeks. Biscotti can also be wrapped tightly and frozen for longer storage. Thaw frozen biscotti at room temperature for about 10 minutes before serving.

biscotti scattered on a surface with a cooling rack and cup of coffee.
Biscotti lined up in a row showing different decorations.
Print

Homemade Biscotti

Homemade biscotti are a simple sweet treat that are endlessly customizable and are the perfect companion for a hot cup of homemade coffee.
Course Dessert
Cuisine American, Italian
Total Cost $3.46 recipe / $0.19 each
Prep Time 20 minutes
Cook Time 35 minutes
Total Time 55 minutes
Servings 18 biscotti
Calories 158kcal

Ingredients

  • 2 cups all-purpose flour $0.28
  • 1 tsp baking powder $0.06
  • 1/4 tsp salt $0.02
  • 1/4 tsp nutmeg $0.02
  • 1 cup granulated sugar $0.39
  • 4 Tbsp butter, room temperature $0.62
  • 2 large eggs $0.78
  • 1/2 tsp vanilla or almond extract $0.29
  • 1/4 lb. white chocolate (optional for decorating) $1.00

Instructions

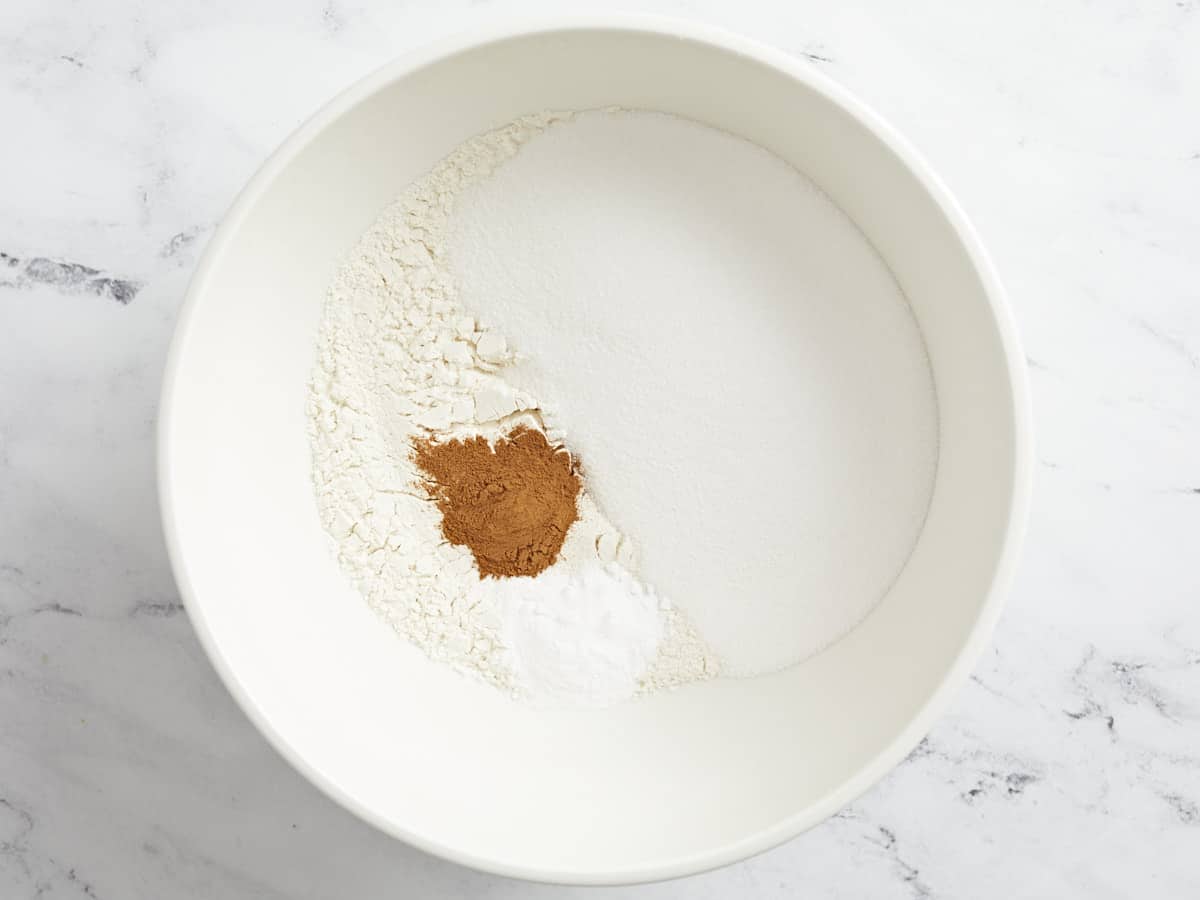
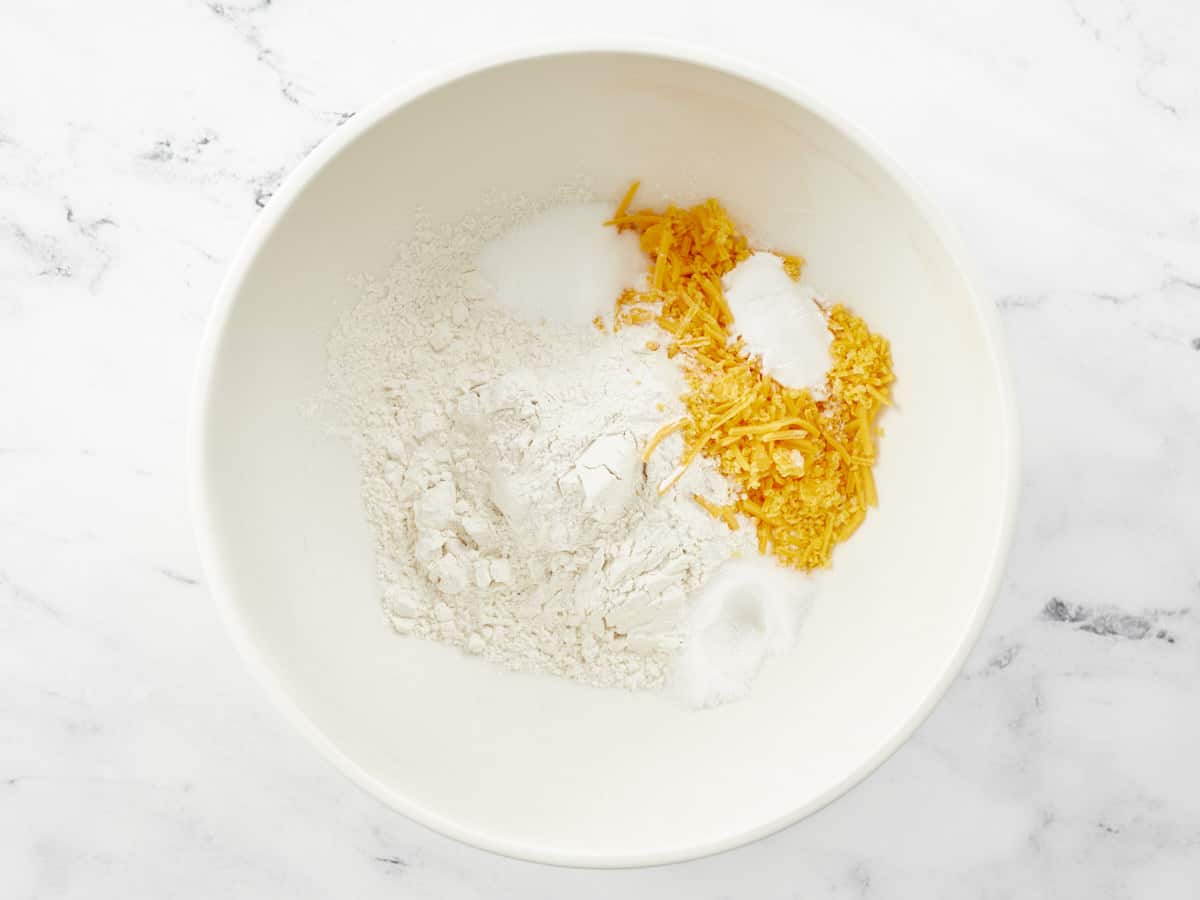
  • Preheat the oven to 350ºF. In a large mixing bowl, stir together the flour, baking powder, salt, and nutmeg.
  • In a separate bowl, beat together the sugar, butter, eggs, and vanilla extract with a mixer until mostly smooth (a few small lumps of butter is okay).
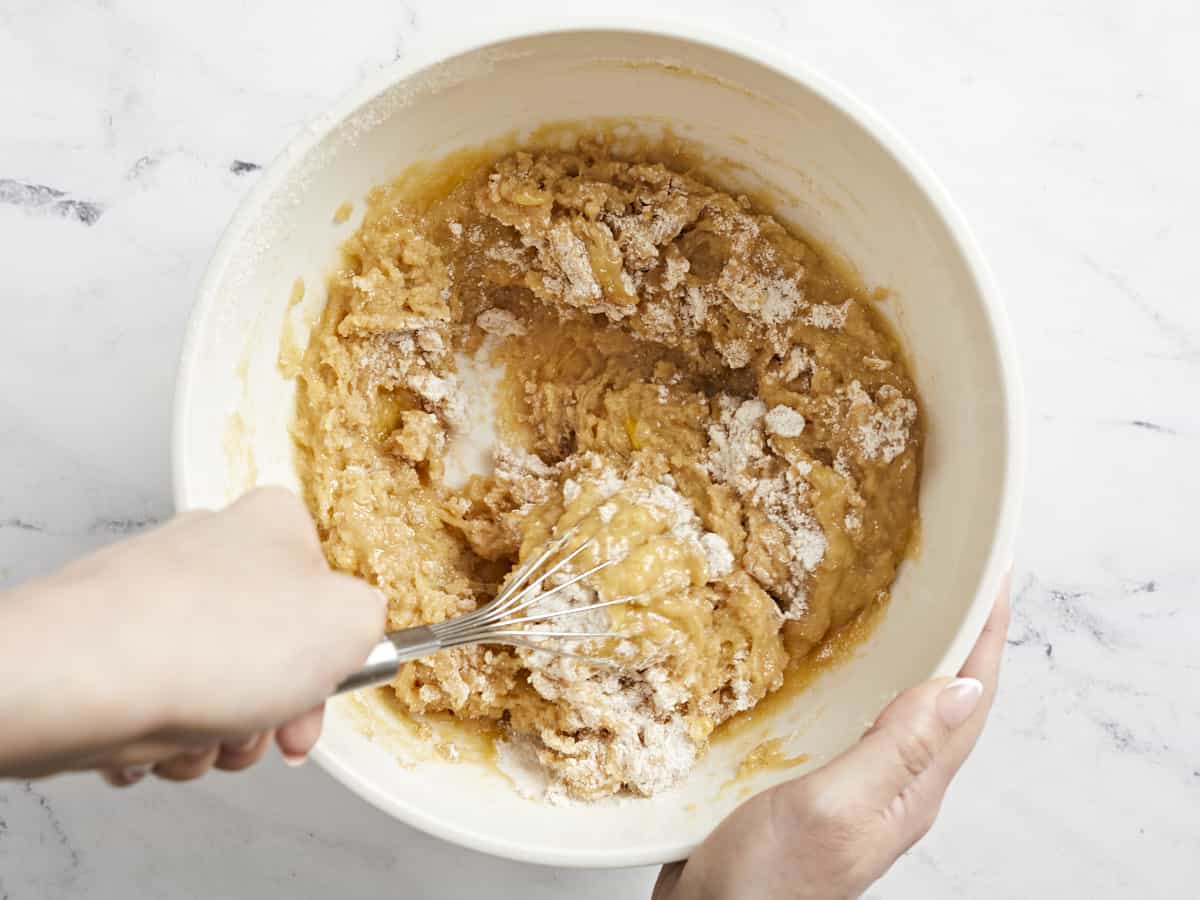
  • Add the dry ingredients to the bowl of wet ingredients and stir together until it forms a ball of dough.
  • Divide the dough into two and shape each one into a flattened log about eight inches long and 2-3 inches wide. Place the logs on a parchment-lined baking sheet.
  • Bake the biscotti logs for about 25 minutes, or until lightly golden on the edges and there are a few cracks in the top of the dough.
  • Remove the biscotti from the oven and carefully transfer to a cutting board. Use a finely serrated bread knife to slice the biscotti, on a diagonal, into ½-inch wide slices.
  • Place the slices back onto the baking sheet, laying flat, and bake for another 5 minutes. Remove the baking sheet, flip the biscotti, and bake for an additional 5 minutes, or until golden brown.
  • Remove the biscotti from the oven and allow them to cool completely before decorating with melted chocolate (if desired). Enjoy with a hot cup of coffee!

See how we calculate recipe costs here.

Nutrition

Serving: 1biscotti | Calories: 158kcal | Carbohydrates: 26g | Protein: 3g | Fat: 5g | Sodium: 90mg | Fiber: 0.4g

How to Make Biscotti – Step by Step Photos

Dry ingredients for biscotti in a bowl.

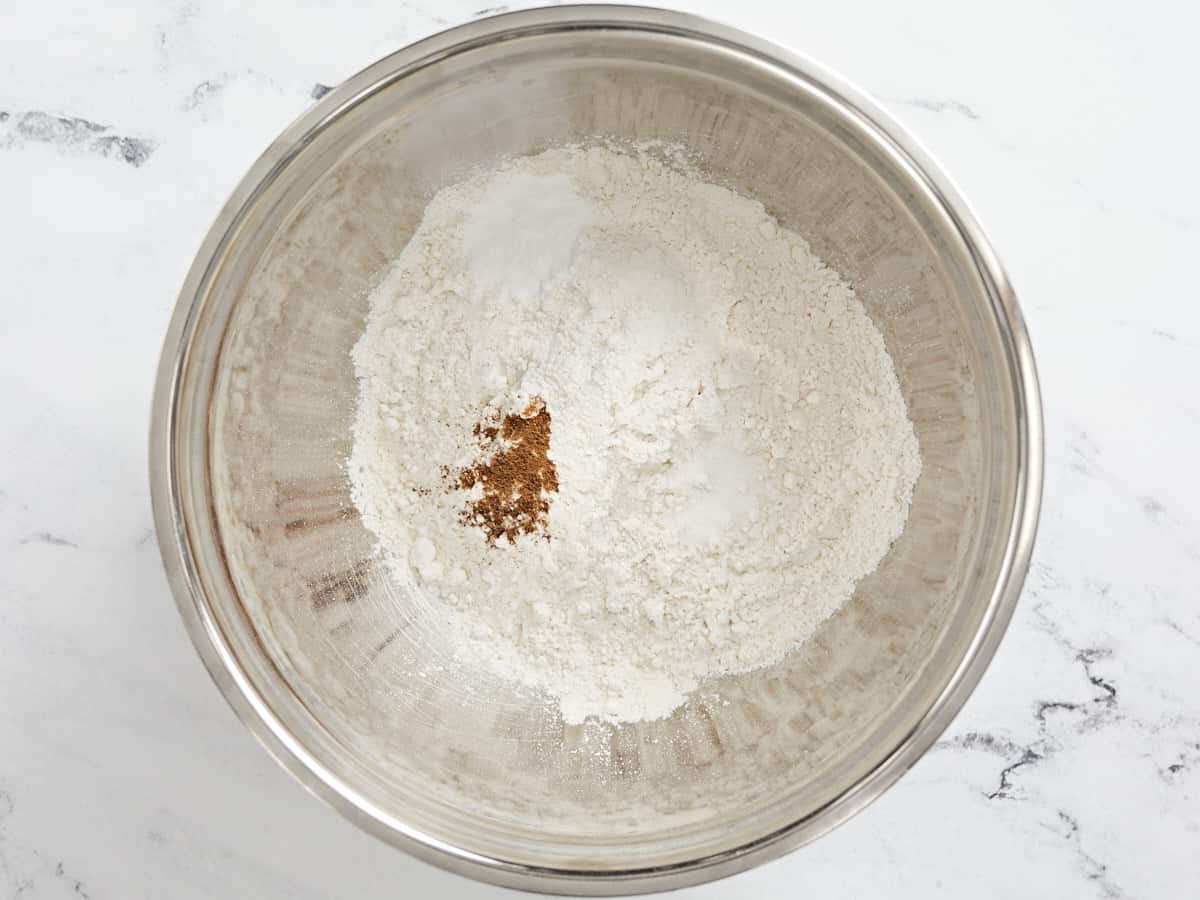
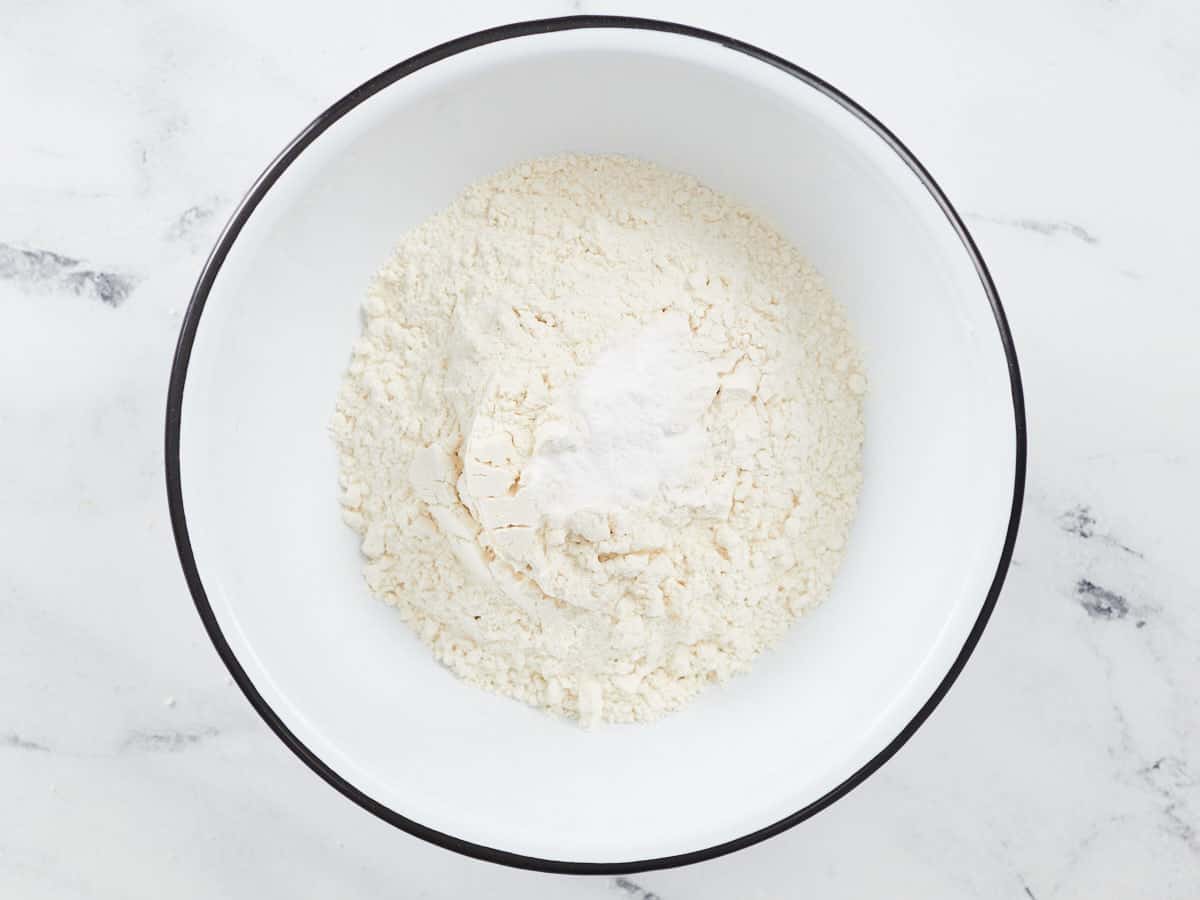
Preheat the oven to 350ºF. Combine 2 cups all-purpose flour, 1 tsp baking powder, ¼ tsp salt, and ¼ tsp nutmeg in a large bowl. Stir until well combined.

wet ingredients for biscotti in a mixing bowl, not yet mixed.

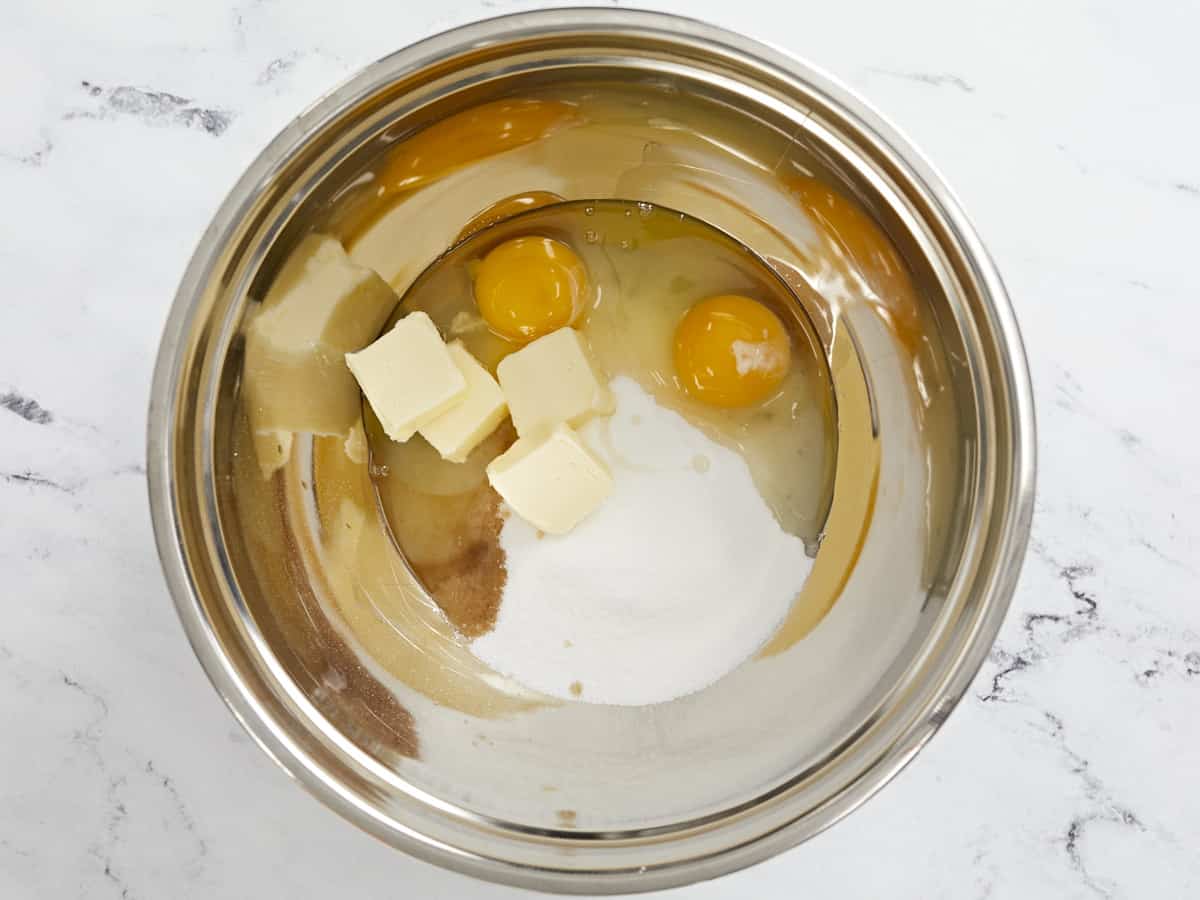
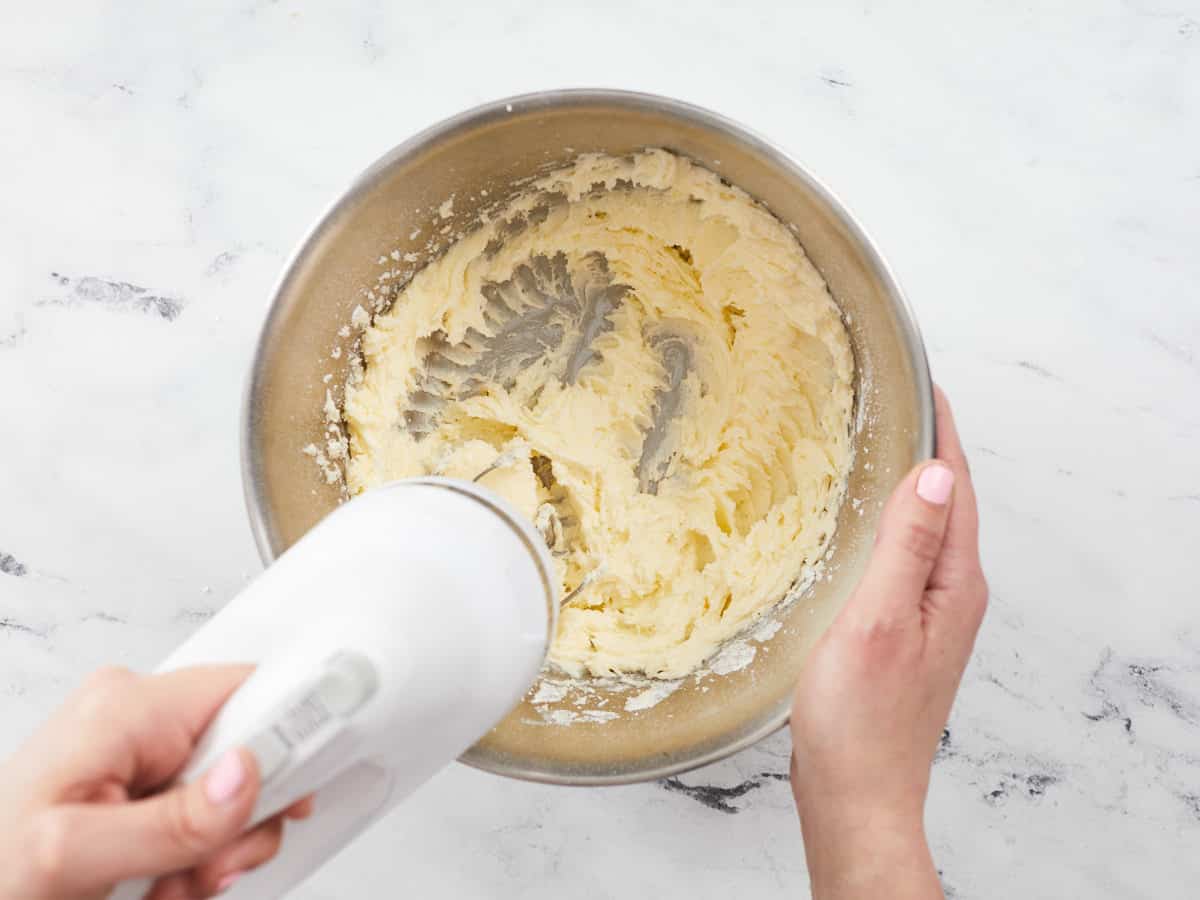
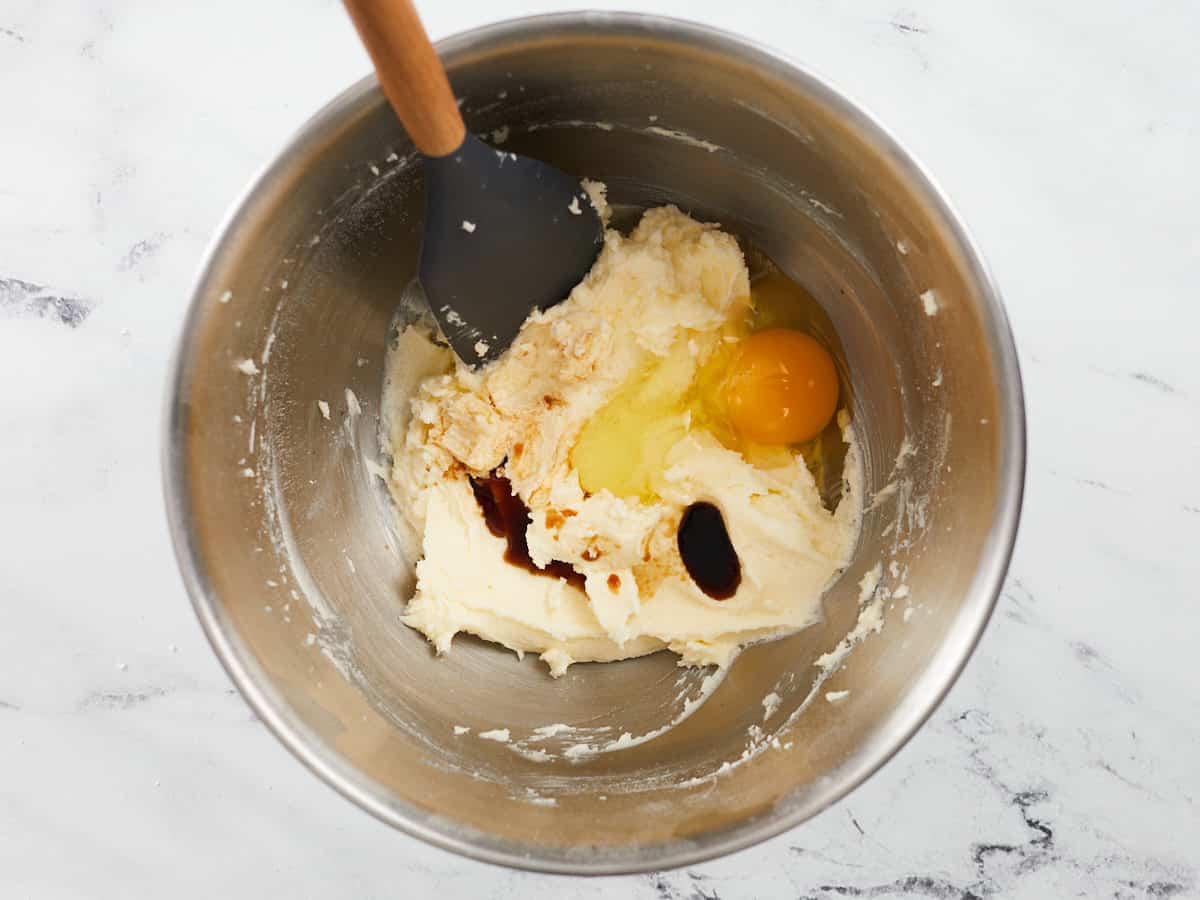
In a separate mixing bowl, add 1 cup sugar, 4 Tbsp room temperature butter, 2 large eggs, and ½ tsp vanilla extract.

Mixed wet ingredients in the bowl with a hand mixer.

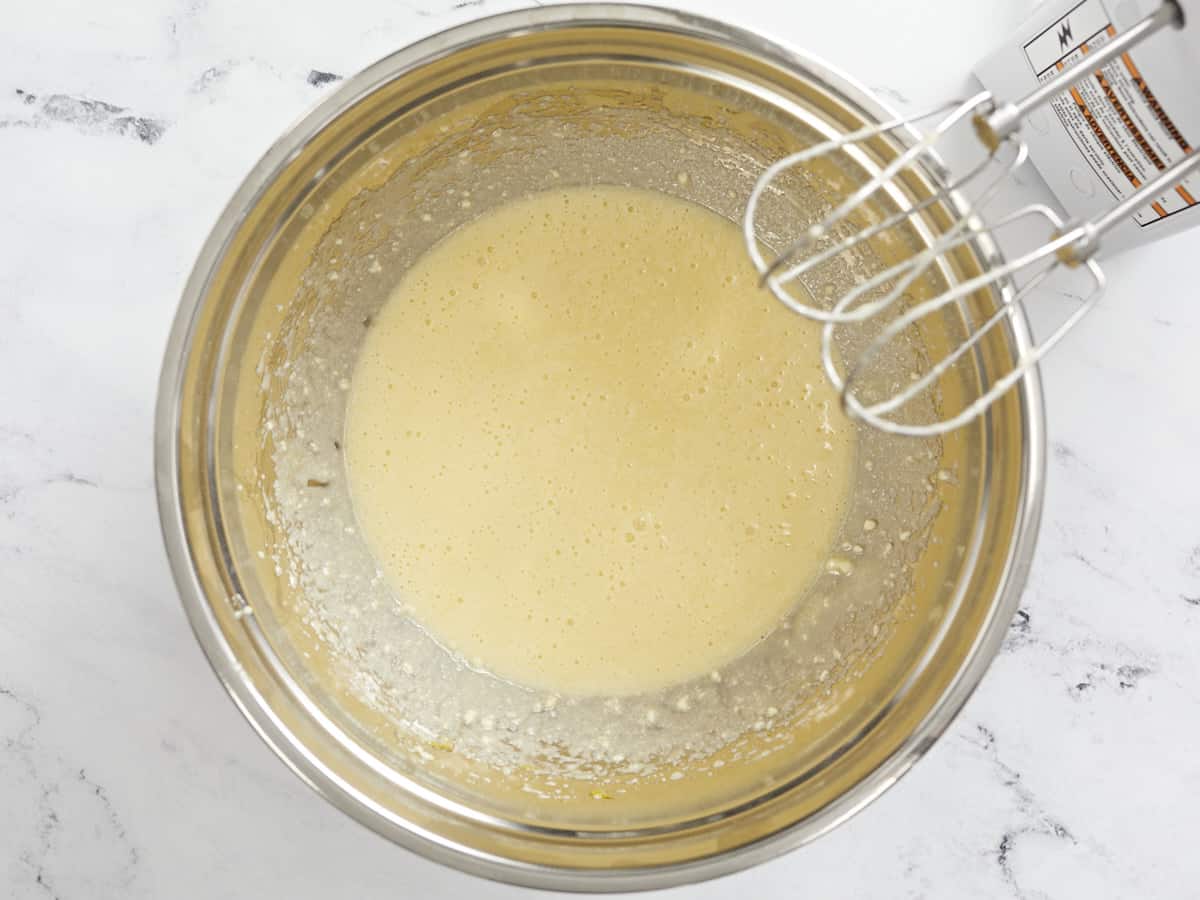
Use a mixer to combine the wet ingredients until mostly smooth (there may still be a few small pieces of butter).

Wet and dry ingredients combined into a ball of dough.

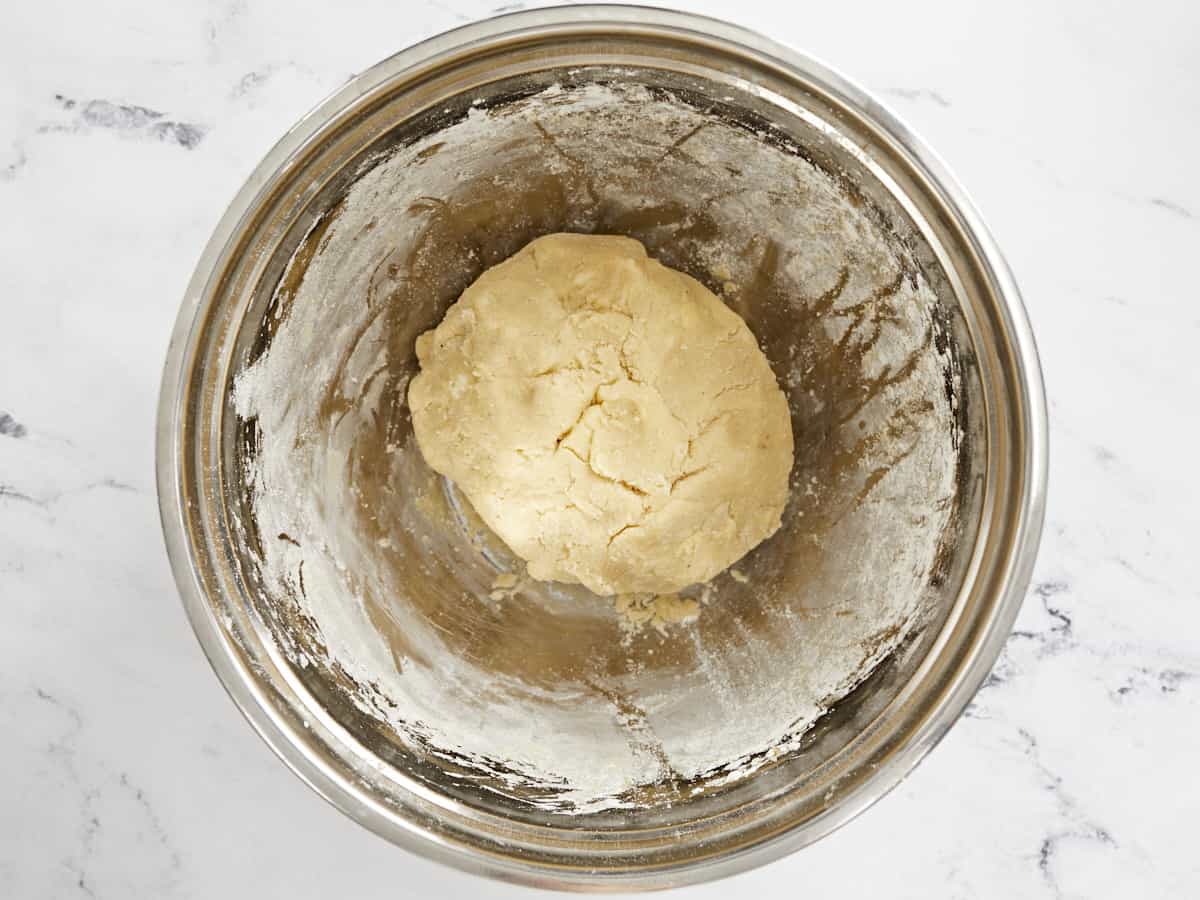
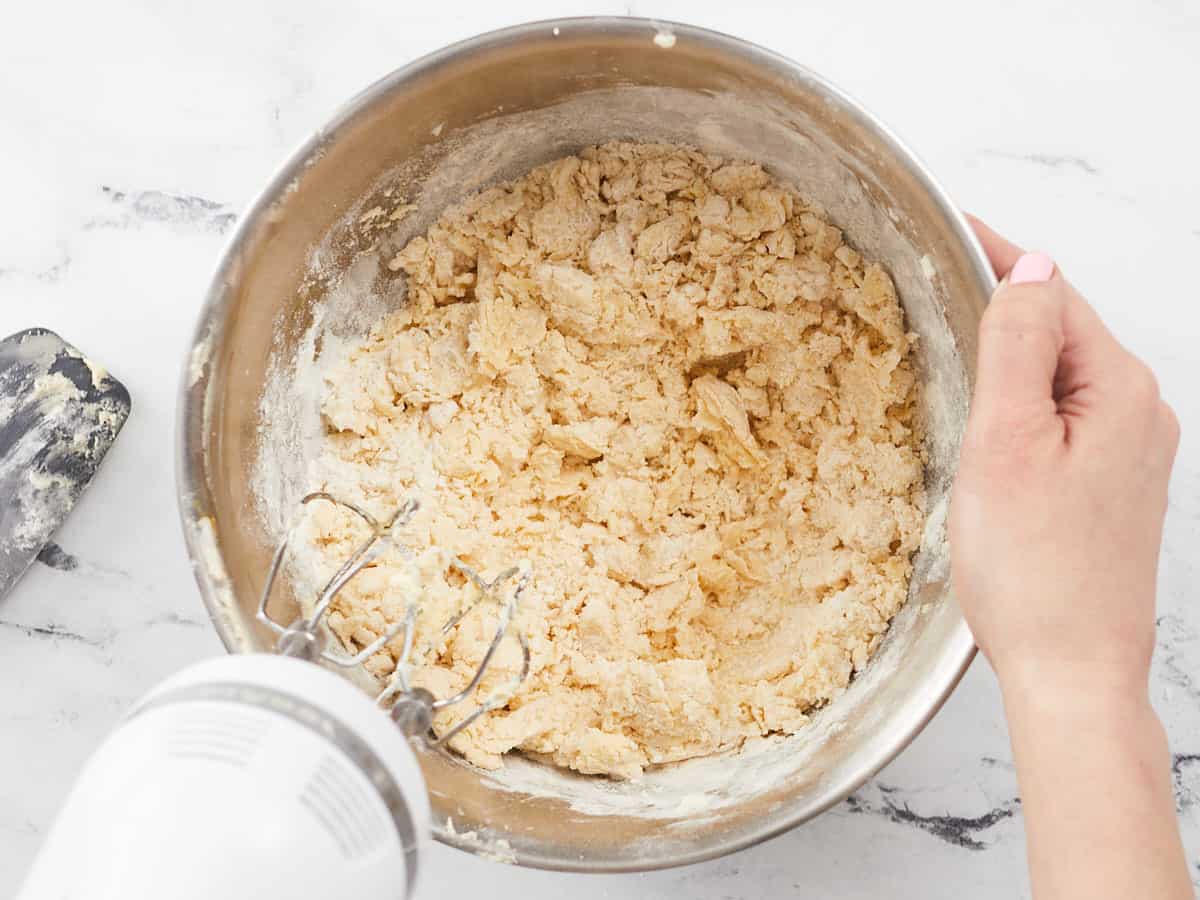
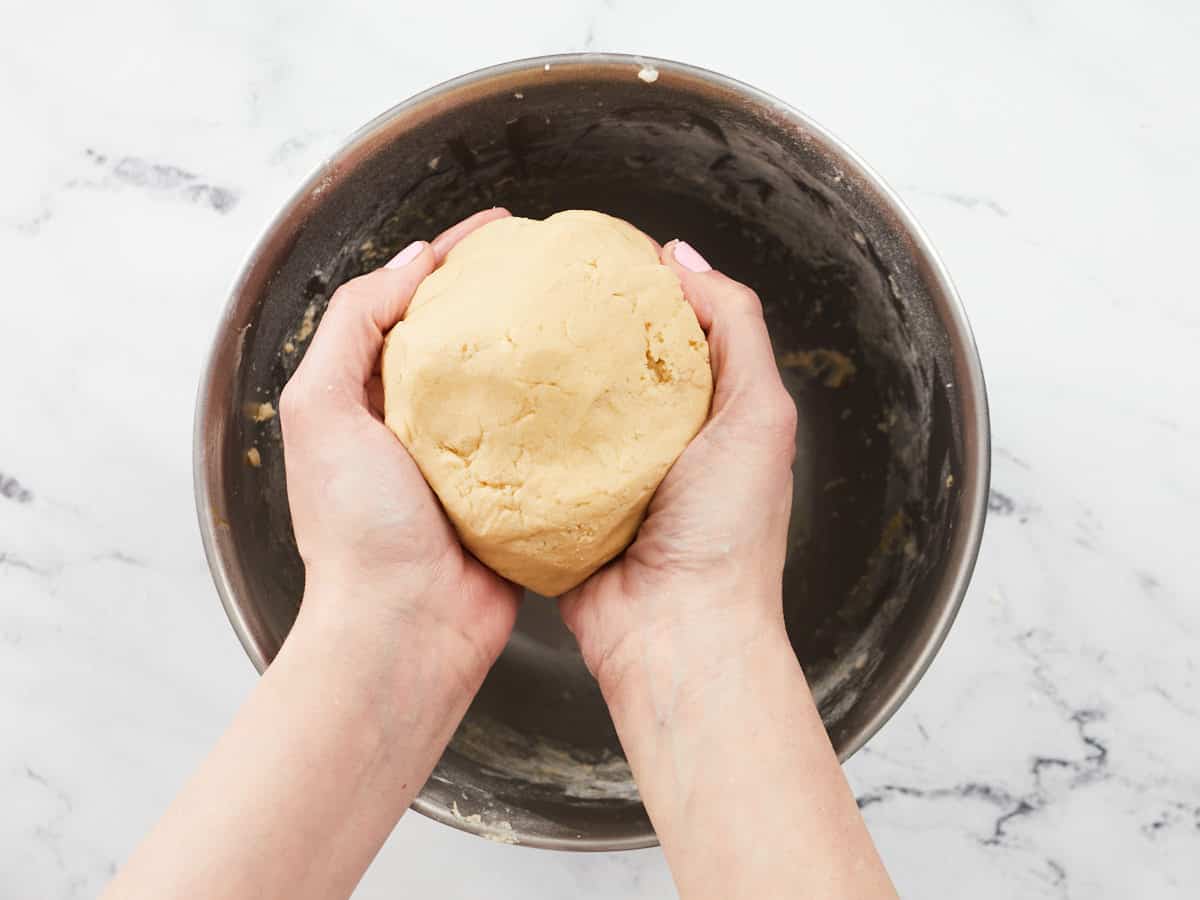
Add the dry ingredients to the bowl of wet ingredients and stir until it forms a ball of dough.

Divided and shaped biscotti dough on a baking sheet.

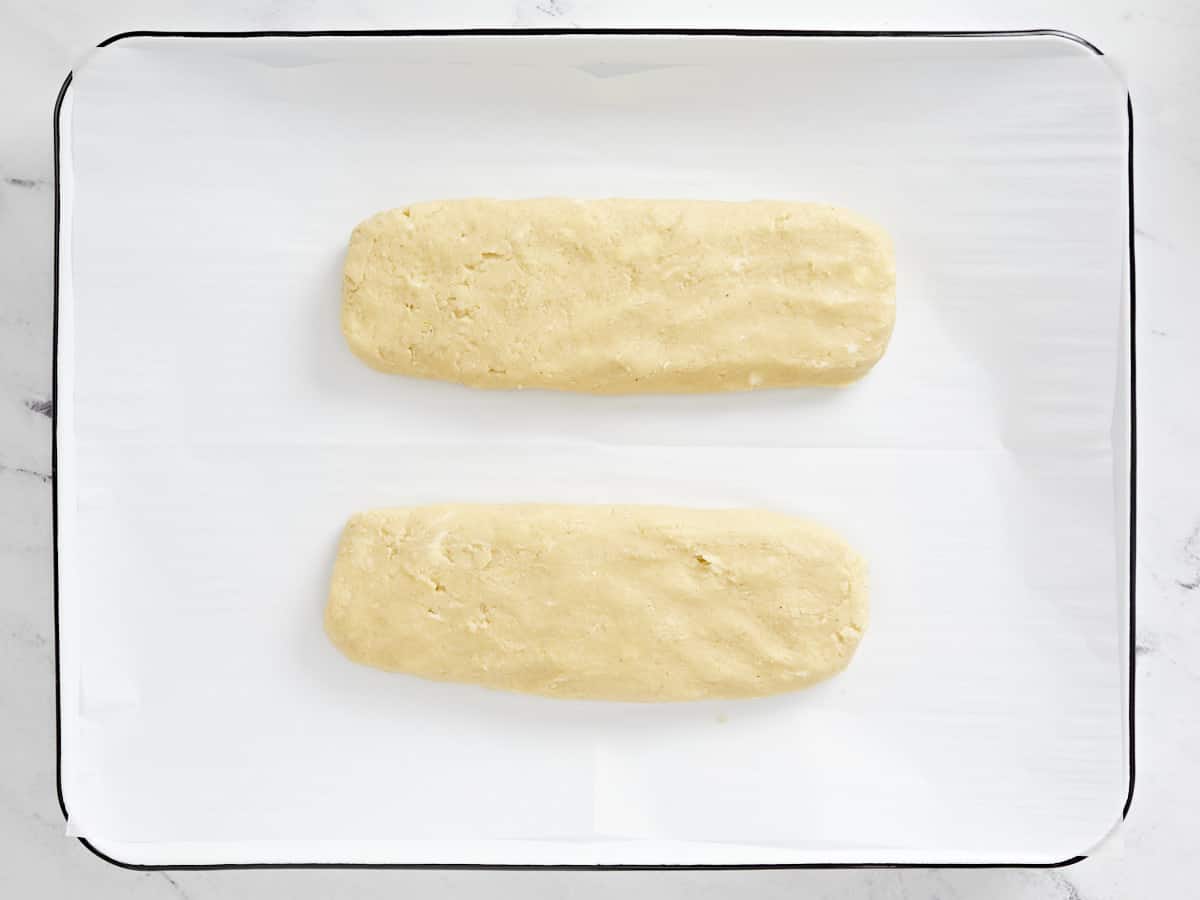
Divide the dough in half and form each half into a flattened log about 8 inches long and 2-3 inches wide. Place the logs on a parchment-lined baking sheet.

Half-baked biscotti on the baking sheet.

Bake the biscotti logs for about 25 minutes, or just until the edges are slightly golden brown and the tops have small cracks.

Biscotti being sliced.

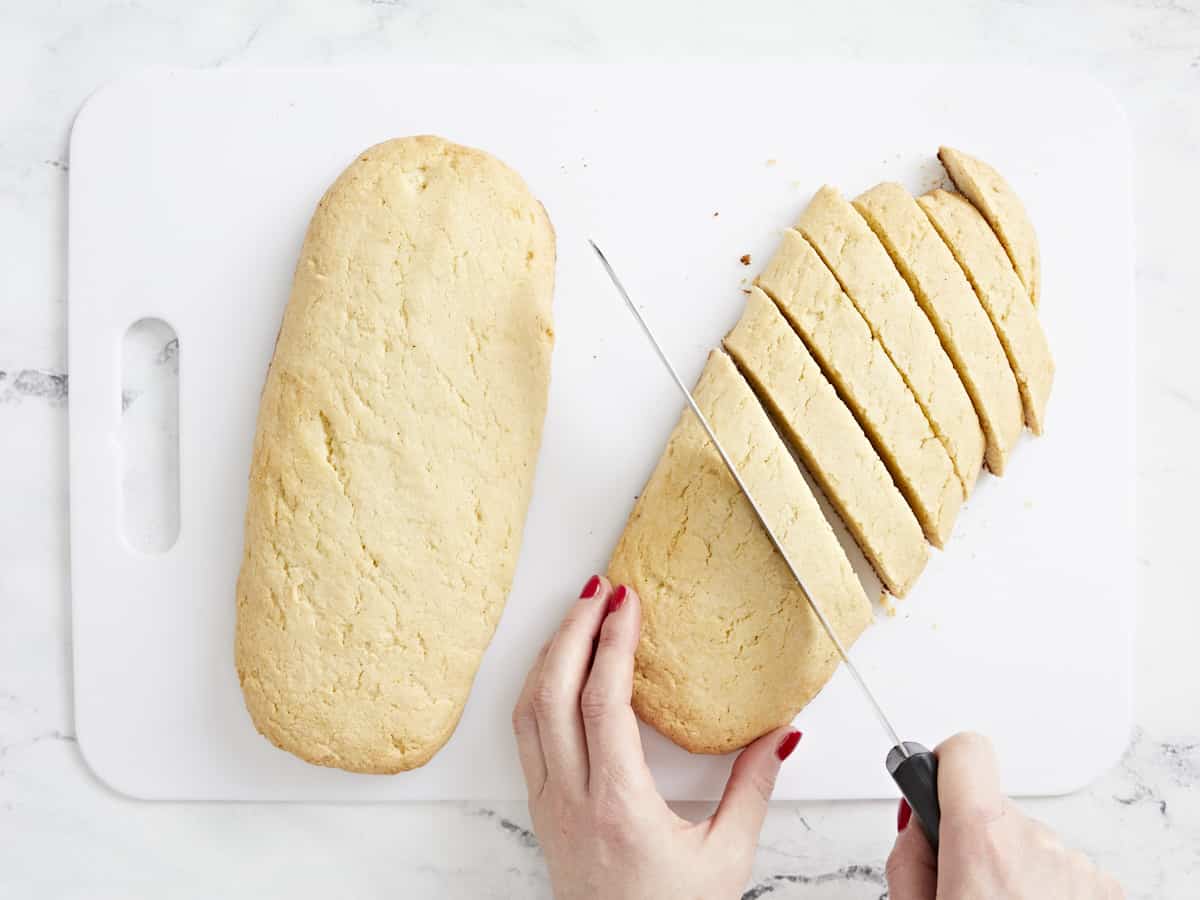
Carefully transfer the biscotti logs to a cutting board and use a finely serrated bread knife to slice the biscotti on a diagonal into ½-inch wide pieces.

sliced biscotti on the baking sheet.

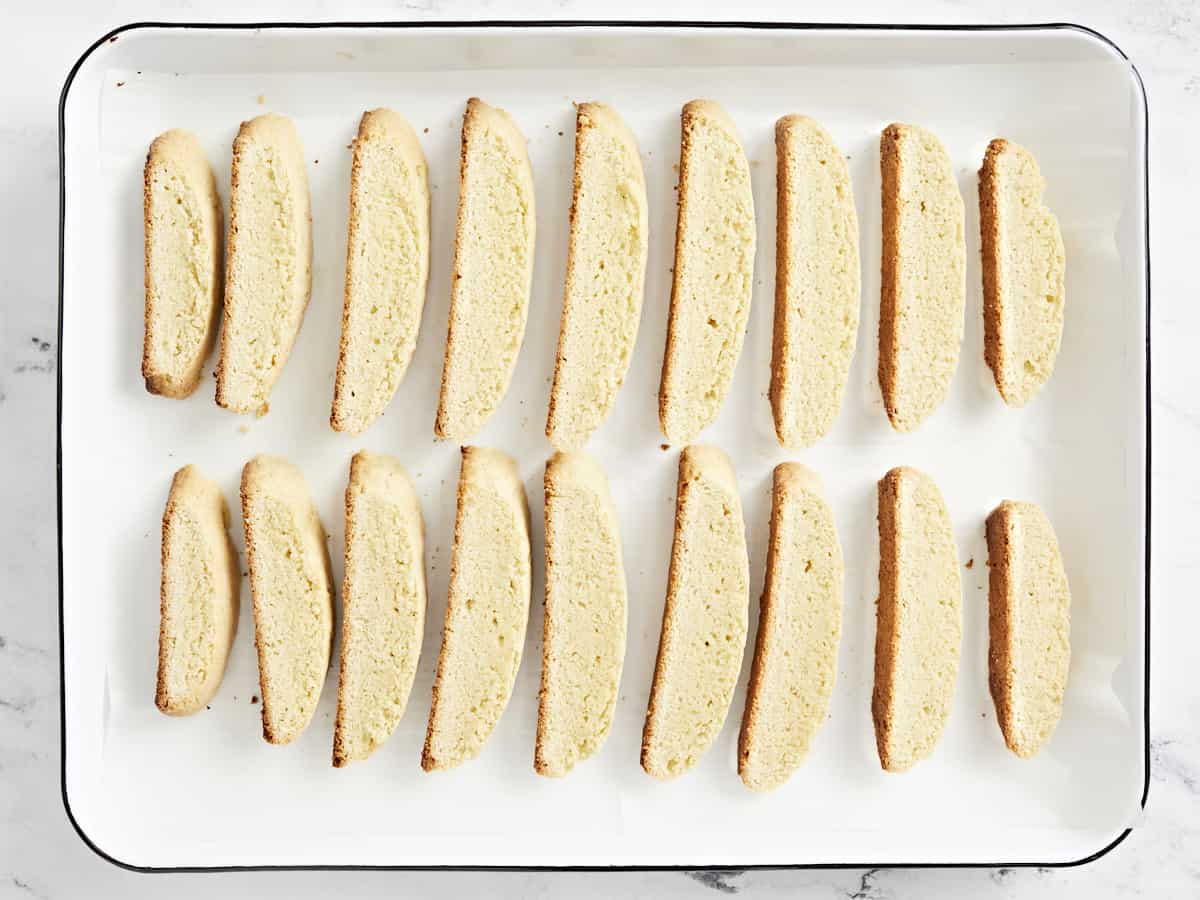
Place the sliced biscotti back on the baking sheet, laying flat, and place it back into the oven for five minutes.

Fully baked biscotti on a baking sheet.

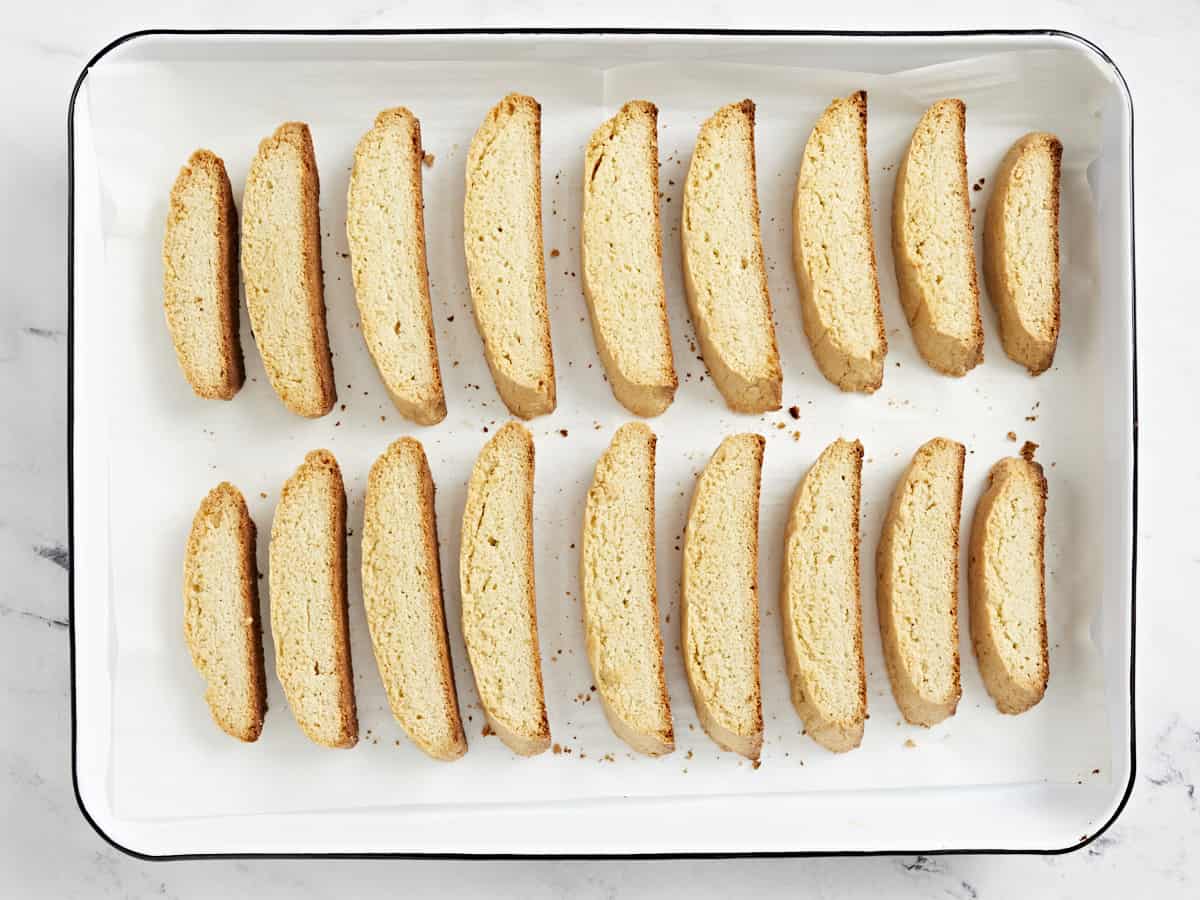
Remove the biscotti from the oven, flip them over to the other side, and then bake for an additional 5 minutes or until golden brown on both sides.

Decorated biscotti scattered next to a coffee cup.

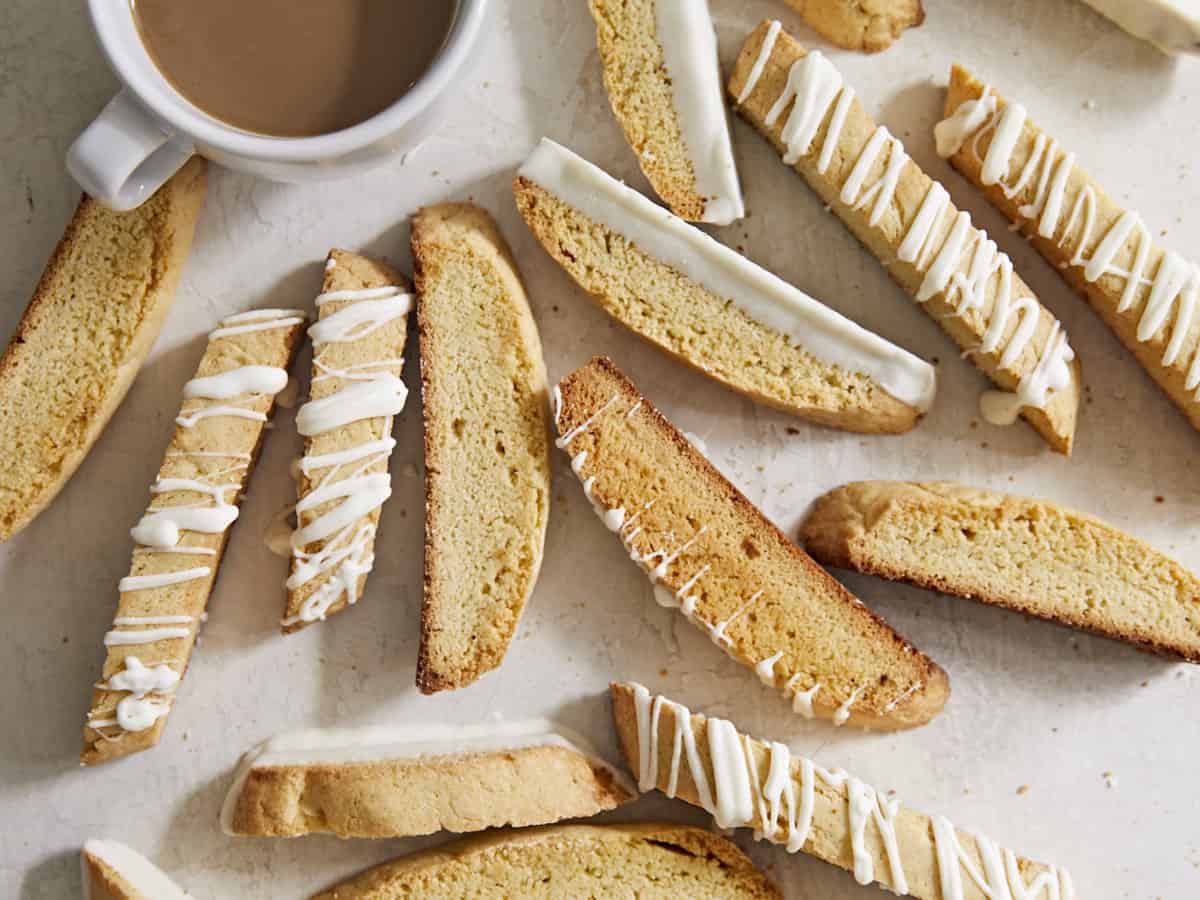
Allow the biscotti to cool completely, decorate with melted chocolate or icing if desired, then serve with a hot cup of coffee!

The post Homemade Biscotti appeared first on Budget Bytes.

Collard Greens

Collard Greens are an easy and delicious side dish that is a great way to use up leftover ham bones or a smoked ham hock.

The post Collard Greens appeared first on Budget Bytes.

Easter is coming up and I know a lot of people will be cooking a big Easter ham, so here’s an easy recipe that will help you make use of that leftover ham bone, OR that you can make anytime the craving hits using a smoked ham hock. These Collard Greens are super easy, the leftovers reheat beautifully, and they make a great side for just about any dinner. Collard greens are a southern dinner staple and one of my all-time favorite side dishes!

Overhead view of a bowl full of collard greens with ham.

What Are Collard Greens?

Collard greens are a super hearty green leafy cruciferous vegetable in the same family as cabbage and mustard greens. They have a smooth, sturdy, dark green leaf that can be used raw as a wrap, or cooked low and slow until they’re nice and tender.

We’re using the low and slow cooking method for these classic collard greens so the leaves become soft and easily digestible and the flavor deepens as it simmers in a mixture of chicken broth, ham, and aromatics and spices. The end result is a super comforting and flavorful green that you’ll love to serve with your favorite meal.

What Type of Ham to Use

Simmering collard greens with ham gives the greens extra rich flavor and tons of umami that will make you want to come back for seconds (yes, they’re THAT good). We used a smoked ham hock today because they’re inexpensive and provide TONS of flavor. You can also use a leftover ham bone from a ham roast, diced ham, salt pork, or pancetta. Just keep in mind that some type of bone-in ham will deliver the most scrumptious flavor.

Don’t want to use ham? No problem. Smoked turkey wings are a great alternative or you can make a delicious pot of vegetarian collard greens using the same method as our Vegetarian Mustard Greens recipe.

What to Serve with Collard Greens

Collard greens are a southern soul food staple and you’ll often see them served alongside other comfort foods like BBQ chicken, ribs, macaroni and cheese, potato salad, cornbread, and green beans. My mouth is watering just typing that out!!

Overhead view of collard greens on a plate with chicken and mac and cheese.
Print

Collard Greens

Collard Greens are an easy and delicious side dish that is a great way to use up leftover ham bones or a smoked ham hock.
Course Dinner, Side Dish
Cuisine American
Total Cost $5.92 recipe / $0.99 serving
Prep Time 10 minutes
Cook Time 1 hour 10 minutes
Total Time 1 hour 20 minutes
Servings 6 1 cup each
Calories 160kcal

Equipment

Ingredients

  • 1 lb. chopped collard greens $2.99
  • 1 yellow onion $0.37
  • 4 cloves garlic $0.32
  • 1 Tbsp cooking oil $0.04
  • 1 smoked ham hock* $1.50
  • 4 cups chicken broth $0.64
  • 1 tsp sugar $0.02
  • 1/4 tsp crushed red pepper $0.02
  • 1/4 tsp freshly cracked black pepper $0.02

Instructions

  • Prepare the collard greens by removing the stems and then chopping the leaves into one to two-inch pieces (or use bagged, pre-chopped collard greens). Place the collard greens in a colander and rinse well.
  • Dice the onion and mince the garlic. Add the onion and garlic to a large soup pot along with the cooking oil. Sauté over medium heat until the onions are soft and translucent.
  • Add the washed collard greens, ham hock, sugar, red pepper, black pepper, and chicken broth to the pot. Stir briefly to combine.
  • Place a lid on the pot and allow it to come up to a simmer. Once simmering, turn the heat down to low and let the green simmer for one hour, with a lid, stirring occasionally.
  • After simmering for one hour, taste the greens and see if they are simmered to your desired tenderness. If not, simmer longer.
  • Remove the ham hock and pull the meat from the bone. Chop the ham into small pieces, then stir it back into the greens.
  • Give the collard greens a final taste and adjust the salt, sugar, or other seasonings to your liking. Serve hot with your favorite meal!

See how we calculate recipe costs here.

Notes

*You can substitute the ham hock with a ham bone, smoked turkey wing, salt pork, pancetta, or ham.

Nutrition

Serving: 1cup | Calories: 160kcal | Carbohydrates: 8g | Protein: 12g | Fat: 10g | Sodium: 667mg | Fiber: 3g

How to Cook Collard Greens – Step By Step Photos

Bagged chopped collard greens.

I love to use these bagged chopped collard greens because they’re cheap and half of the work is already done for me! If you don’t have access to pre-chopped collard greens, simply cut out the tough stems of your collard greens then chop the leaves into one to two-inch pieces. You’ll need one pound of collard greens.

Washed collard greens in a colander.

Whether you’re using pre-chopped or chopping your own, make sure to wash your collard greens well. There’s no need to wait for them to drain well, as they’ll be simmering in a pot of liquid anyway.

Garlic, onion, and oil in a large soup pot.

Dice one yellow onion and mince four cloves of garlic. Add both to a large soup pot with one tablespoon of cooking oil. Sauté over medium heat until the onions are soft and translucent (about 5 minutes).

Collard greens and ham hock in the pot, chicken broth being poured in.

Add the washed collard greens, smoked ham hock, 1/4 tsp crushed red pepper, 1/4 tsp freshly cracked black pepper, 1 tsp sugar, and 4 cups of chicken broth to the pot. Give everything a brief stir, place the lid on top, and let it come up to a simmer.

Simmered collard greens in the pot.

Once simmering, turn the heat down to low, and allow the collard greens to simmer for one hour (with the lid on top), stirring occasionally. After simmering for one hour, taste the greens to see if they have tenderized to your liking. If not, you can simmer even longer.

Removing ham meat from the bone with a knife and fork.

Once the collard greens are the texture that you like, remove the ham hock and pull the meat from the bone. Chop the ham into small pieces then return the meat to the pot.

Finished collard greens in the pot with a spoon.

Give the collard greens a taste and adjust the salt, sugar, or other seasonings to your liking.

Overhead view of a bowl full of collard greens.

Serve hot alongside your favorite comfort foods!

The post Collard Greens appeared first on Budget Bytes.

Hummingbird Cake

This luscious Hummingbird Cake is dotted with bananas, pineapple, and pecans, then smothered in cream cheese frosting- and it’s under $20!

The post Hummingbird Cake appeared first on Budget Bytes.

Hummingbird Cake doesn’t last- you’ll reach for a second slice before you finish your first! If you’ve never heard of it, this luscious banana cake is dotted with pineapple and pecans, then smothered in scrumptious cream cheese frosting. You’ll pay up to $80 for this beauty at a bakery, but I’m showing you how to make Hummingbird Cake for under $20! Here’s the best part: you can slice and freeze it, then gobble it up whenever you crave it!

What is Hummingbird Cake?

Hummingbird cake is a classic Southern recipe that originated in Jamaica. The batter goes heavy on the fruit and nuts; almost half of it is chopped banana, pineapple, and pecans. Once baked, the cake is layered and topped with buttery cream cheese frosting and garnished with more pecans or pineapple.

What You’ll Need

Is this an easy breezy recipe? No. But it’s manageable, and it’s worth it! Bakeries sell this cake for $50 to $80, but I’m showing you how to put it together for under $20! Here’s what you’ll need to make Hummingbird Cake.

  • Pecans – add texture and earthiness. You can omit them if there is a nut allergy.
  • Pineapple and Bananas– add sweetness and flavor. They also add moisture and tenderize the cake.
  • All Purpose Flour – creates the structure you need to stand up to all the fruit in the batter.
  • Sugar – sweetens the cake and locks in moisture.
  • Baking Soda and Baking Powder – these leavening agents help your cake rise.
  • Vegetable Oil – helps the cake bake evenly and rise higher.
  • Vanilla Extract – helps flavor the cake batter and the frosting.
  • Cream Cheese and Butter – add flavor and also give the frosting its structure, making it easier to spread.
  • Powdered Sugar – sweetens the frosting and gives the frosting structure.

Tips For The Best Hummingbird Cake

  • Use very ripe bananas and don’t drain the crushed pineapple.
  • Do not overmix the batter. The more you mix, the denser the cake becomes.
  • Prepare your pans like a pro: grease them, line the bottom with parchment, and then grease and flour the parchment and the sides of the pan.
  • Pour equal amounts of batter into the cake pans by using a dry measuring cup.
  • Cool the layers completely before frosting them and frost from the center out.

Can I Make It Ahead Of Time?

Yes, you can make your Hummingbird Cake layers ahead of time! Allow them to cool completely before wrapping them in a double layer of plastic wrap. You can keep them at room temperature for up to a day, refrigerate them for up to two days, or freeze them for up to a month. Frozen cake layers are easier to frost anyway. You can also make the frosting ahead of time. Keep it in an airtight container with plastic wrap over the surface of the frosting, and refrigerate for up to 5 days

How To Store Hummingbird Cake

You can store Hummingbird Cake in an airtight container or wrapped in plastic wrap in your refrigerator for up to 5 days. (Your loved ones will devour it way before then.) Hummingbird Cake also freezes well and can be stored in an airtight container or wrapped in a double layer of foil and plastic for up to 4 months. I usually portion mine in thick slices and keep them in the freezer for future cravings. Frozen cake on a hot summer day is AMAZING.

Side shot of Hummingbird Cake with a slice being taken out of it.
Print

Hummingbird Cake

This luscious Hummingbird Cake is dotted with bananas, pineapple, and pecans, then smothered in cream cheese frosting. It's scrumptious!
Course Dessert
Cuisine American
Total Cost $15.90 recipe / $1.33 serving
Prep Time 30 minutes
Cook Time 30 minutes
Resting Time 1 hour
Total Time 2 hours
Servings 12 slices
Calories 1287kcal

Ingredients

For the Cake

  • 1 cup chopped pecans $4.59
  • 3 cups all-purpose flour, plus more for dusting pans $0.42
  • 2 cups sugar $0.78
  • 1 tsp salt $0.08
  • 1 tsp baking soda $0.02
  • 1/2 tsp baking powder $0.03
  • 1 tsp ground cinnamon $0.08
  • 3 large eggs, lightly beaten $1.17
  • 1 ½ cups cooking oil $1.12
  • 1 ½ tsp vanilla extract $0.86
  • 1 (8 oz) can crushed pineapple in juice, undrained* $0.56
  • 2 cups chopped bananas (about 4 medium bananas) $1.00

For the Frosting

  • 12 oz cream cheese, softened $2.62
  • 12 Tbsp salted butter, softened $0.38
  • 3/4 tsp vanilla extract $0.43
  • 1 pinch salt $0.01
  • 6 cups powdered sugar $1.75

Instructions

  • Set a rack in the center of your oven and preheat it to 350°F. While the oven preheats, set a heavy-bottomed skillet over medium heat and add the pecans in a thin layer. Toast the pecans for 5 to 8 minutes, stirring occasionally.
  • While the pecans toast, whisk together the flour, sugar, salt, baking soda, baking powder, and cinnamon in a large bowl.
  • Add the eggs and vegetable oil, stirring just until the wet ingredients moisten the dry ingredients and no more.
  • Add vanilla, crushed pineapple in its juices, chopped bananas, and toasted pecans. Stir the ingredients as little as possible while fully incorporating them.
  • Grease three 9-inch cake pans. Cover the bottoms with parchment paper, grease the parchment, and lightly dust the bottom and sides of the pans with flour. Divide the batter evenly between the pans and bake until a toothpick inserted in the center comes out clean, about 25 to 30 minutes. Cool pans for 10 minutes before removing the cake layers. Cool layers for 1 hour.
  • While the cake bakes, in a very large bowl, add the cream cheese, salted butter, vanilla, and a pinch of salt. Beat with an electric mixer on medium speed until smooth. Then add the powdered sugar cup by cup, beating at low speed after each addition.
  • Once the sugar has been fully incorporated, increase the speed to medium-high, and beat until fluffy, 1 to 2 minutes.
  • Place the first cake layer on a serving platter or cake stand. Spread 1 cup of the frosting on top, starting from the center and working your way out. You want a layer of frosting that is ¼ inch deep.
  • Top with the second cake layer and spread with 1 cup of frosting, working from the center out.
  • Top with the third layer, and spread the remaining frosting over the top and lightly around the sides. Garnish the top with pecans, berries, or candied pineapple rings.*

See how we calculate recipe costs here.

Notes

*An 8 ounce can contains ⅓ cup pineapple juice plus ½ cup crushed pineapple.
*This recipe is for a naked cake, IE the sides are barely frosted. If you’d like to frost the sides with a thicker layer, use 2 sticks of butter, 2 packages of cream cheese, 8 cups of powdered sugar, and 1 teaspoon of vanilla.
*To candy the pineapple rings cover them in a thick layer of brown sugar and fry them in 2 tablespoons of butter per ring over medium heat until golden.

Nutrition

Serving: 1slice | Calories: 1287kcal | Carbohydrates: 195g | Protein: 10g | Fat: 57g | Sodium: 510mg | Fiber: 8g

How to Make Hummingbird Cake – Step by Step Photos

Set a rack in the center of your oven and preheat it to 350°F. While the oven preheats, set a heavy-bottomed skillet over medium heat and add 1 cup of chopped pecans in a thin layer. Toast the pecans for 5 to 8 minutes, stirring occasionally. They’re ready when they have slightly deepened in color and the air smells toasty.

While the pecans toast, whisk together 3 cups of flour, 2 cups of sugar, 1 teaspoon of salt, 1 teaspoon of baking soda, 1/2 teaspoon of baking powder, and 1 teaspoon of cinnamon in a large bowl.

Add the 3 eggs and 1 1/2 cups vegetable oil, stirring just until the wet ingredients moisten the dry ingredients. Do not overmix.

Add 1 1/2 teaspoons of vanilla, 8 ounces of crushed pineapple, 2 cups of chopped bananas, and a cup of toasted pecans. Then stir the ingredients as little as possible while fully incorporating them.

Grease three 9-inch cake pans. Cover the bottoms with parchment paper, grease the parchment, and lightly dust the bottom and sides of the pans with flour. Use a dry cup measure to divide the batter evenly. Bake until a toothpick inserted in the center comes out clean, about 25 to 30 minutes. Cool the pans on wire racks for 10 minutes before removing the cakes from the pans. Cool the layers on wire racks before frosting for 1 hour.

While the cake bakes, in a very large bowl, add the 12 ounces of cream cheese, the 12 tablespoons of salted butter, 3/4 teaspoon vanilla, and a pinch of salt. Beat with an electric mixer on medium speed until smooth. Then add the powdered sugar cup by cup, beating at low speed after each addition until blended.

Once the sugar has been fully incorporated, increase the speed to medium-high, and beat until fluffy, 1 to 2 minutes.
To frost, first, place one cake layer on a serving platter or cake stand. Then spread 1 cup of the frosting on top, starting from the center and working your way out. You want a layer of frosting that is ¼ inch deep.
Next, top the cake with the second cake layer and spread with 1 cup of frosting, working from the center out.
Next, top the cake with the third layer, and spread the remaining frosting over the top and lightly around the sides. Finally, garnish the top with pecans, berries, or candied pineapple rings.*

Is this Hummingbird Cake a beauty, or what?! It’s truly a dessert you can’t get enough of. So much so, that Beth and I have slices of it in the test kitchen freezer for whenever our sweet tooth strikes! (Which is every single day TBH.) We were literally just looking at this post, contemplating driving to the test kitchen to get a slice! Get your cake pans ready for a win that’s under $20!

More Budget-Friendly Cakes

The post Hummingbird Cake appeared first on Budget Bytes.

Beer Bread

Transform a can of beer into a tasty loaf of Beer Bread! This easy, no-knead bread recipe is packed with flavor and only takes an hour.

The post Beer Bread appeared first on Budget Bytes.

Looking for a way to use that random can of beer hanging out in the back of the fridge? Transform it into a loaf of deliciously-cheesy Beer Bread! Thanks to the beer, this super-easy quick bread recipe still delivers on the classic, yeasty flavor of a long-fermented loaf, but comes together in a fraction of the time. Best of all, there’s no kneading required.

A loaf of beer bread with three slices overlapping on a long wooden cutting board surrounded by glass jars filled with beer, a PBR can, a wooden bowl of shredded cheese and a small metal dish of soft butter and a small butter knife.

WHAT IS BEER BREAD?

Beer Bread is a type of “quick bread” that uses the flavor and carbonation in beer to create a fluffy, buttery, tangy loaf in just an hour. Unlike most homemade bread recipes, this one doesn’t require any kneading, resting time, or additional yeast. We also included some shredded cheddar cheese to make our loaf extra rich and flavorful! 

BEST BEERS FOR BEER BREAD

We chose a budget-friendly, light beer for our loaf, but almost any kind of beer can be used to make this recipe. Keep in mind: the beer you choose will influence the flavor of the bread, so make sure to pick something you like! How to choose the best beer for beer bread:

  • Light beers – Generally, light beers will create a light-colored loaf with an airy texture and a more subtle, malty flavor.
  • Dark beers – Darker beers like stouts and porters will give the bread a slightly darker color and more robust flavor than light beer.
  • Hoppy beers & IPAs – Since pale ales tend to be very bitter, they aren’t an ideal choice. That intense flavor will carry over and may give the bread a lingering sour aftertaste.

HOW TO STORE LEFTOVERS

Once fully cooled, wrap the loaf in plastic wrap or aluminum foil. Store the bread in the pantry or on the counter (for 1-2 days) or in the fridge (for 4-5 days). This bread also freezes beautifully. Tightly wrap the loaf in a layer of plastic wrap and aluminum foil and freeze for up to 3 months.

serving suggestions

This beer bread lands somewhere between a regular, sliceable loaf of bread and a savory, ultra-rich loaf cake. So the possibilities are kind of endless!

A close up shot of long wooden cutting board with a half a loaf of beer bread in the left corner of the frame, two slices on the upper right corner of the frame and in between a slice is being covered with salted homemade butter with a small metal butter knife.
A side shot of a loaf of beer bread on a wooden cutting board with three slices slightly overlapping in the foreground of the image, and behind the cutting board is a small wooden bowl filled with shredded cheese and a glass cup of beer is visible in the upper right corner of the frame.
Print

Beer Bread

Transform a can of beer into a tasty loaf of Beer Bread! This easy, no-knead bread recipe is packed with flavor and only takes an hour.
Course Bread, Easy, Side Dish
Cuisine American, German
Total Cost $2.35 RECIPE / $0.29 SERVING
Prep Time 10 minutes
Cook Time 50 minutes
Total Time 1 hour
Servings 8 1 slice each
Calories 269kcal

Ingredients

  • 3 cups all-purpose flour $0.30
  • 1 Tbsp sugar $0.06
  • 1 Tbsp baking powder $0.12
  • 2 tsp salt $0.04
  • 1/2 cup shredded sharp cheddar cheese* $0.62
  • 4 Tbsp butter, divided** $1.20
  • 12 oz. beer (one regular-sized can) $0.92

Instructions

  • Preheat the oven to 375℉. In a large bowl, combine the flour, sugar, baking powder, salt, and shredded cheese. Mix well.
  • Melt the butter in a small sauce pot. Use a pastry brush to coat the inside of a 9×5 loaf pan with butter. Set the remaining butter aside.
  • Add the beer to the flour mixture and stir until a thick batter forms. Transfer the batter to the prepared bread pan, making sure to spread it out evenly inside the bread pan.
  • Pour the rest of the melted butter on top of the bread dough.
  • Bake the bread for 45-50 minutes, or until deeply golden brown on top.
  • Once slightly cool (about 10 minutes), run a butter knife around the inside edge of the pan gently to loosen the edges, and then turn the bread onto a cutting board to slice and serve.

See how we calculate recipe costs here.

Notes

* or Parmesan cheese
** If using unsalted butter, you may want to add an additional ¼ teaspoon of salt with the rest of the dry ingredients or sprinkle the same amount on top of the loaf just before baking.

Nutrition

Serving: 1slice | Calories: 269kcal | Carbohydrates: 39g | Protein: 7g | Fat: 9g | Sodium: 834mg | Fiber: 1g
An overhead shot of a half-sliced loaf of beer bread on a long, wooden cutting board surrounded by glass cups of beer, a can of beer, a butter dish and knife, and bowl of cheese, and a grey and white striped dish cloth.

How to Make BEER BREAD – Step by Step Photos

A white ceramic mixing bowl filled with piles of unmixed flour, sugar, baking powder, salt, sugar and shredded cheddar cheese.

Preheat the oven to 375℉. In a large bowl, combine 3 cups of all-purpose flour, 1 tablespoon of sugar, 1 tablespoon of baking powder, 2 teaspoons of salt, and 1/2 cup of shredded cheese.

An overhead shot of two hands preparing a metal loaf pan with a pastry brush next to a small skillet of melted butter.

Melt 4 tablespoons of butter in a small sauce pot or skillet. Use a pastry brush to coat the inside of a 9×5″ loaf pan with about 1/2 tablespoon of the melted butter. Set the rest of the butter aside.

A white, ceramic mixing bowl filled with the mixed dry ingredients to make beer bread, a spatula is resting in the right side of the bowl and beer is being poured into the left side of the bowl from a glass liquid measuring cup.

Pour 12 oz. (1 1/2 cups) of beer into the flour mixture. Mix until a thick batter forms and no clumps of dry ingredients remain. Transfer the batter to the prepared loaf pan, making sure to spread it out evenly. Tap it on the counter a few times to help eliminate any air pockets.

A metal loaf pan filled with unbaked bread dough is being covered with melted butter poured from a small, white bowl on the left side of the frame.

Pour the rest of the melted butter (about 3 1/2 tablespoons) on top of the bread dough. 

A horizonal image of a baked loaf of bread with a golden-brown, crunchy top in metal loaf pan.

Bake the beer bread for 45-50 minutes, or until the top is evenly golden brown and crispy. Let the bread cool slightly (about 10 minutes) in the loaf pan. Run a butter knife around the inside edge of the pan to loosen the edges, then flip the bread out onto a cutting board to slice and serve.

A vertical close up of a loaf of bread on a wooden cutting board with three slices slightly overlapping in the foreground of the image, and behind the cutting board is a small wooden bowl filled with shredded cheese and a can of beer is visible in the upper right corner of the frame.

As one of my favorite TikTok creators (@tanaradoublechocolate) would say: “It ain’t gonna slide down easy if it ain’t cheesy!” Hope y’all love this Easy Beer Bread as much as we do! ~Marion :)

The post Beer Bread appeared first on Budget Bytes.

Bread Pudding

This recipe for Bread Pudding is an easy, versatile, and budget-friendly way to transform leftover ingredients into a decadent dessert.

The post Bread Pudding appeared first on Budget Bytes.

It’s crazy how day-old bread can turn into something as delicious as Bread Pudding! This simple dessert is the perfect way to use up leftover ingredients in a way that feels special—and hopefully, without dropping a dime! Best of all, when it comes to throwing together this recipe, time does most of the work. Bread Pudding is one of my go-to dessert recipes because it is versatile, budget-friendly, and comes together effortlessly.

A vertical image of a baked bread pudding in round, white enamel cast iron baking dish topped with powdered sugar and fresh raspberries. There is a cutting board in the top left corner of the frame with a wooden bowl of raspberries and next to it is a cup of coffee partially out of frame.

WHAT IS BREAD PUDDING?

Bread Pudding is a sweet or savory casserole made from torn pieces of day-old bread that are dried out, soaked in custard, and baked. Since the need for repurposing old bread is truly universal, ancient recipes for Bread Pudding can be found in pretty much every cultural cuisine on Earth. Our recipe is loosely inspired by one of Princess Diana’s favorite desserts, “Bread and Butter Pudding.” This Old English version of the dish is flavored with cinnamon, vanilla, and raisins.

The basics of BREAD PUDDING

Aside from eggs and butter (two non-negotiables!), the other ingredients in this simple dessert are quite versatile. They can be adjusted to accommodate whatever you have on hand. Here are some ingredient substitutions for bread pudding:

  • Bread—Brioche, challah, burger buns, unflavored dinner rolls, sandwich bread, etc.
  • Dairy—Heavy cream, half & half, whole milk, buttermilk, or an extra-creamy, unsweetened alternative milk. Yogurt, sour cream, and softened cream cheese can also be thinned with milk.
  • Sugar—Granulated sugar, light or dark brown sugar, honey, maple syrup, etc. 
  • Warming spices—Cinnamon, nutmeg, cardamom, ginger, pumpkin pie spice, etc.
  • Flavorings—Vanilla extract, almond extract, melted chocolate or peanut butter, etc.
  • Mix-ins—Chocolate chips, fresh or dried fruit, chopped nuts, coconut flakes, pepitas, sunflower seeds, etc.
A close up, horizontal image displaying a side view of a baked bread pudding in a round, white enamel baking dish that is topped with powdered sugar and fresh raspberries.

Let’s get that bread

You can use virtually any kind of bread for Bread Pudding or combine the leftovers of different types to make up a full loaf. (No need to buy more!) Softer styles of bread will give the pudding a custardy texture while harder types will make the pudding more spongy. You want the bread to be dried out, but not so tough or hard it can’t soak up the custard.

HOW TO DRY OUT BREAD

DAY-OLD’ OR FROZEN BREAD:

  • From the Pantry: Tear up the bread and spread it out on a lined sheet tray, and let it sit out for a few hours, uncovered (or inside a cold oven overnight).
  • From the Freezer: Completely thaw the bread. When tearing, as described above, examine for any rock-hard areas of the bread and discard.

FRESH BREAD:

If the bread is fresh from the package or still not dry enough when you are ready to assemble the Bread Pudding, try this method for drying out bread:

  1. Preheat the oven to its lowest possible setting (150-200℉). Tear up the bread and lay it out on a parchment-lined baking sheet.
  2. Once the oven has preheated, put the tray of torn bread in the oven and immediately turn off the heat. Leave the oven door slightly ajar (if needed, prop it open with a wooden spoon), which will quickly lower the temperature and create air circulation.
  3. The bread should be thoroughly dried out in 8-12 minutes, depending on the type and moisture level of the bread. Keep an eye on it, so it doesn’t turn into toast! The outer edges of the torn bread will be rough to the touch and the pieces should feel slightly dried out, but should not crumble or take on any color.

Mix it up with mix-ins!

This extremely versatile recipe can be made with both sweet and savory flavors. Use your favorites or odds and ends cluttering your pantry! Here are some Bread Pudding flavor combinations we love to help get your wheels turning:

SERVING & STORING

You can serve Bread Pudding warm or cold. Traditionally, it is served with a vanilla-flavored sauce called crème anglaise (a.k.a. melted ice cream). But I love it fresh from the oven, topped with a scoop of vanilla ice cream instead. You could also serve it with whipped cream, fresh or cooked fruit, caramel sauce, or chocolate syrup. Leftovers will keep in the fridge for 4 days. Reheat gently in the oven at 325℉ for 10-15 minutes. We also reheated some in the air fryer – it was excellent! I do not recommend freezing this recipe.

A horizontal image of a single serving of bread pudding on a flat white plate topped with two raspberries and a scoop of vanilla ice cream. In the background, there are blurred bowls of toppings ingredients in the recipe, like a small bottle of heavy cream, a bowl of fresh raspberries and a bowl of cinnamon sugar topping.
An overhead view of a baked bread pudding in round, white enamel cast iron baking dish topped with powdered sugar and fresh raspberries. There is a cutting board in the top left corner of the frame with a wooden bowl of raspberries and next to it is a bowl of chocolate chips and cup of coffee partially out of frame.
Print

Bread Pudding

This recipe for Bread Pudding is an easy, versatile, and budget-friendly way to transform leftover ingredients into a decadent dessert.
Course Breakfast, Dessert, Easy
Cuisine American
Total Cost $6.73 recipe / $0.67 serving
Prep Time 20 minutes
Cook Time 55 minutes
SOAKING TIME 30 minutes
Total Time 1 hour 45 minutes
Servings 8
Calories 921kcal
Cost $6.73 RECIPE / $0.84 SERVING

Ingredients

  • 3 Tbsp butter, divided $0.45
  • 8 cups day-old bread, torn into 1" pieces $2.00
  • 3 large eggs $1.17
  • 2 cups half and half* $1.99
  • 2/3 cup sugar $0.22
  • 2 tsp cinnamon $0.20
  • 1 tsp vanilla extract $0.28
  • 1/4 tsp salt $0.01
  • 1/4 cup chocolate chips $0.34

Cinnamon Sugar Topping

  • 1 Tbsp sugar $0.02
  • 1/2 tsp cinnamon $0.05

Instructions

  • Tear the day-old bread into 1” pieces, and spread them out on a parchment-lined baking sheet until dried out but not hard.
  • Liberally grease a baking dish with about 1/2 tablespoon of butter. Melt the remaining butter in a small saucepan or microwave. Allow the melted butter to cool slightly but not enough to solidify.
  • In a large mixing bowl, whisk together the eggs, half & half, vanilla extract, ⅔ cup of sugar, 2 tsp of cinnamon, and salt. Once combined, slowly stream in the melted butter, whisking constantly to incorporate.
  • Add the pieces of bread to the egg mixture a few handfuls at a time, tossing gently to coat in the custard. Once all the bread has been added to the bowl, let it sit for 1-2 minutes to soak up as much of the mixture as possible.
  • Transfer half of the soaked bread to the prepared baking dish. Sprinkle in the chocolate chips and any other mix-ins you’d like, and then cover with the rest of the soaked bread. Scrape any liquid left in the bowl on top of the casserole. Tuck in any mix-ins (especially chocolate) visible from the top of the bread pudding to keep them from burning in the oven.
  • Cover the filled casserole dish with aluminum foil and let it soak at room temperature for least 30 minutes (up to 2 hours), or refrigerate overnight.
  • Preheat the oven to 375℉. If the bread pudding was refridgerated, let it warm slightly before placing in a hot oven (especially if using a glass baking dish).**
  • Bake the bread pudding, covered, for 30 minutes. Meanwhile, mix sugar and cinnamon for the topping in a small bowl and set aside.
  • Remove the foil, and sprinkle the cinnamon-sugar topping evenly over the pudding. Continue baking, uncovered, for another 20-25 minutes or until the top of the casserole is crunchy and deeply golden brown.

See how we calculate recipe costs here.

Notes

* You can also substitute the half & half with 1 cup milk + 1 cup heavy cream
** Ice-cold glass dishes can crack or explode in a hot oven if the temperature change is too extreme.

Nutrition

Calories: 921kcal | Carbohydrates: 138g | Protein: 27g | Fat: 29g | Sodium: 1066mg | Fiber: 6g

How to Make bread pudding – Step by Step Photos

A rimmed metal baking sheet lined with parchment paper and covered with torn pieces of bread sitting  drying out to make a bread pudding, and the sheet pan is sitting on a white marble background.

Tear 8 cups of bread (about 1 loaf) into 1” pieces, and spread them out on a parchment-lined baking sheet until dried out but not hard. For more guidance on how to properly dry out your bread, check out the tips in the blog post above!

A large metal mixing bowl filled with separated ingredients for bread pudding, which are eggs, half & half, vanilla extract, ⅔ cup of sugar, 2 tsp of cinnamon, and salt, sitting on a white marble background.

In a large mixing bowl, whisk together the 3 eggs, 2 cups of half and half, 1 teaspoon of vanilla extract, ⅔ cup of sugar, 2 tsp of cinnamon, and 1/4 teaspoon of salt to make a custard.

A large metal mixing bowl filled with the ingredients for bread pudding custard being whisked while a hand out of frame pours in melted butter from a small saucepan.

Liberally grease a baking dish with about 1/2 tablespoon of butter. Melt the remaining butter (about 2 1/2 tablespoons) in a small saucepan or in the microwave. Let it cool slightly (to prevent it from scrambling the eggs), and then slowly pour the melted butter into the custard, whisking constantly to incorporate it.

Hands adding pieces of torn bread into the left side of a large mixing bowl with the liquid ingredients for bread pudding while the right hand stirs with a red spatula. There is a tray of bread sitting in the upper left corner of the image, mostly out of frame.

Add the pieces of bread to the egg mixture a few handfuls at a time, tossing gently to coat in the custard.

A large metal mixing bowl filled with torn pieces of bread that have been tossed in a custard mixture and left to soak with a red spatula sitting in the bottom right corner of the bowl.

Once all the bread has been added to the bowl, let it sit for 1-2 minutes to soak up as much of the mixture as possible.

A round, white enamel baking dish with a black trim sitting on a white marble background. There is a single layer of soaked bread and a hand is sprinkling chocolate chips in an even layer from a small white bowl.

Transfer half of the soaked bread to the prepared baking dish. Sprinkle in the chocolate chips and any other mix-ins you’d like, and then cover with the rest of the soaked bread. Scrape any liquid left in the bowl on top of the casserole. Tuck in any mix-ins (especially chocolate) visible from the top of the bread pudding to keep them from burning in the oven.

A round, white enamel baking dish with a black rim on a white marble background that is filled with an unbaked bread pudding.

Cover the filled casserole dish with aluminum foil and let it soak at room temperature for at least 30 minutes (up to 2 hours), or refrigerate overnight. Preheat the oven to 375℉. If the bread pudding was refridgerated, let it warm slightly before placing it in a hot oven (especially if using a glass baking dish). Bake the bread pudding, covered with aluminum foil, for 30 minutes.

A round white enamel baking dish on a white marble background that is half baked. A hand in the lower right corner of the frame is sprinkling cinnamon sugar on top of the casserole.

Meanwhile, mix the sugar and cinnamon for the topping in a small bowl and set aside. After the bread pudding has baked the first time, take it out of the oven, remove the aluminum foil, and sprinkle the cinnamon-sugar topping evenly over the pudding. 

A fully baked bread pudding in a round, white enamel baking dish being topped with powdered sugar in a small fine mesh strainer in the lower right hand side of the dish.

Continue baking, uncovered, for another 20-25 minutes or until the top of the casserole is crunchy and deeply golden brown. If desired, dust the top of the baked casserole with powdered sugar before slicing and serving.

A vertical side view showing the cross section of slice of a baked bread pudding topped with powdered sugar and two raspberries as it is removed with a spatula in the left side of the frame, and blurred in the background are a small glass jar of heavy cream and wooden bowls filled with raspberries and cinnamon sugar..

Ooh, girl! Look at that SWIRL!

The post Bread Pudding appeared first on Budget Bytes.

Mini Oreo Cheesecakes

These mini Oreo cheesecakes are made with a delicious mix of cookies and cream, featuring a whole Oreo as the “crust.” I’ve been making these mini Oreo cheesecakes for over a decade now whenever I need a quick and easy treat for a gathering. And I’m telling you — especially when it comes to cheesecake […]

These mini Oreo cheesecakes are made with a delicious mix of cookies and cream, featuring a whole Oreo as the “crust.”

I’ve been making these mini Oreo cheesecakes for over a decade now whenever I need a quick and easy treat for a gathering. And I’m telling you — especially when it comes to cheesecake recipes — it doesn’t get much easier, cuter and tastier than this!

My favorite thing about this mini cheesecake recipe is that there’s no need to spend extra time crumbling, mixing, and pressing down a fancy crust. Simply pop an Oreo in the bottom of each baking cup and you’re good to go! The vanilla cheesecake batter here is also quick and easy to mix with 5 basic ingredients. Then simply bake for about 15 minutes, chill, top with whipped cream and an extra Oreo for garnish, and enjoy, enjoy.

These mini Oreo cheesecakes are the perfect make-ahead dessert for dinner parties, game days, or anytime you’re craving a sweet treat. And while I love making this recipe with classic Oreos, feel free to experiment with whatever Oreo flavors you love best.

Let’s make some Oreo cheesecakes!

(more…)

Valentine’s Day Cookies

Say the sweetest “I love you!” with these soft, buttery, chocolate-dipped Valentine’s Cookies! This recipe is easy and budget-friendly.

The post Valentine’s Day Cookies appeared first on Budget Bytes.

Say the sweetest “I love you!” with these soft, buttery, chocolate-dipped Valentine’s Cookies! (Cookies > Cards 🥰 #Trust) This recipe is so easy and so budget-friendly. Have you seen what people are charging for a dozen cookies lately? Highway robbery!! PS when I tell you this is such an easy recipe, I mean it. You can even make the sugar cookie dough ahead of time, so all you have to do on the big day is cut, bake, and dip.

Overhead shot of Valentine's Day Cookies being held by two hands.

What You’ll need

You’re just seven ingredients away from the most magnificent, luscious, unforgettable Valentine’s Day gift!

  • Softened Butter helps create texture and mouth feel. You’ll know your butter is soft enough when you press your finger on it and it leaves an indentation.
  • Sugar helps sweeten the cookie and creates a crisper texture, so the cookies keep their shape. It also creates air pockets in the softened butter that lighten the dough.
  • Vanilla flavors and scents the cookie.
  • Egg binds the ingredients together and creates texture. It also adds moisture to the dough.
  • All-purpose flour creates a cookie that holds its shape. Bread flour yields a chewier texture with more spread. Pastry or cake flour yields crisper and more crumbly results.
  • Baking powder lightens the dough by creating air pockets that help it rise.
  • Melting chocolate dissolves easily and dries quickly with a satiny finish. Use white, dark, or milk chocolate. You can also use chocolate chips, but they dry with a dull, foggy finish.

make THE Dough Ahead of Time

It’s a genius move to make your cookie dough ahead of time and not just for convenience’s sake. Chilling the dough hardens the butter and helps prevent the spread of your cookies, so they hold their shape better. Resting your dough for multiple days also evaporates moisture, which concentrates flavors and creates a crisper cookie. You can refrigerate cookie dough up to 5 days in advance.

Make Cookies Without A Cutter

You don’t need to buy a special cookie cutter to create the loveliest heart-shaped cookies. Instead, draw or print a heart shape, cut it out, and use it as a guide. Then, all you have to do is trace your knife along the cookie dough to create perfect heart-shaped cookies.

Side shot of Valentine's Day Cookies.

How To Fix Cookie Shapes

If you open your oven to find that your cookies have lost their shape, it can be an easy fix. First, allow the cookies to cool on the sheet pan for a minute, then reshape them by pressing the cookie cutter into them or tracing a knife around the paper cutout. Work quickly; the more the cookie cools, the more likely it is to shatter.

How To Melt Chocolate

You can easily melt chocolate on a stovetop or in a microwave as long as you follow these three golden rules:

  1. Chop the chocolate into small pieces so it melts faster
  2. Create a gentle heat so it doesn’t burn
  3. Keep water out of it so it doesn’t seize


How To Melt Chocolate in A Microwave
Place the chocolate in a microwave-safe bowl. Microwave in short 20-second bursts, stirring thoroughly after each burst until the chocolate has a syrupy consistency.

How To Melt Chocolate on The Stove
Add your chocolate to a heat-proof bowl and place it in a pan filled a third of the way with water. Bring the water to a boil over medium heat, then turn off the stove and let the chocolate melt until syrupy.

Storing Valentine’s Day Cookies

You can store these sugar cookies in an air-tight container for up to a week at room temperature. So feel free to make them a few days ahead. You can also freeze them in a freezer-safe container, separated with layers of parchment or wax paper, for up to 3 months. Don’t refrigerate sugar cookies, as it can dry them out and dull their flavor.

Overhead shot of Valentine's Day Cookies.
Overhead shot of Valentine's Day Cookies being held by two hands.
Print

Valentine’s Day Cookies

Say the sweetest I love you with these soft, buttery, chocolate-dipped Valentine's Cookies! Customize them with a white, dark, or milk chocolate dip.
Course Dessert
Cuisine American
Total Cost ($7.37 recipe / $0.61 serving)
Prep Time 50 minutes
Cook Time 7 minutes
Resting Time 30 minutes
Total Time 1 hour 27 minutes
Servings 24 cookies
Calories 233kcal

Equipment

Ingredients

Instructions

  • In a large bowl, use a hand mixer to whip the softened butter & cup of sugar until fluffy.
  • Add the beaten egg and vanilla to the creamed butter and mix to incorporate.
  • In a separate bowl, mix the all-purpose flour and the baking powder.
  • Add half the flour to the creamed butter and mix just until a wet dough forms. Add the second half of the flour and mix gently until a stiffer dough forms. Roll the dough into a ball.
  • Place the dough between two sheets of parchment paper and roll the dough ¼ inch thick. Cool for thirty minutes in the fridge. Preheat your oven to 350°F.
  • Once the dough has hardened, cut out the cookies, remove the scraps from the cookie sheet, and leave the cookies behind. Roll any scraps out on a separate piece of parchment, and chill before cutting them into cookies.
  • Place the sheet of parchment paper with the cookies on a baking sheet. Bake the cookies at 350°F for 3 minutes. Next, rotate the pan, so the front faces the back—then bake for 3 to 4 minutes until they slightly lighten in color.
  • Cool the cookies in the baking sheet for a few minutes before transferring them to a cooling rack. Decorate when cookies have cooled.

To Melt the Chocolate in the Microwave: Melt the chocolate in a bowl wide enough to dip the cookies into but small enough to create a deep pool of chocolate. If using a microwave, melt in 20-second increments, stirring after each.

    To Melt the Chocolate on the Stove Top: If using the stove, place a small wide-mouthed bowl in a pan filled a third of the way with water. Bring the water to a boil, then turn off the heat. Leave the bowl in the water and stir until the chocolate melts.

    • Dip half of the cookie in the chocolate and garnish if you'd like to. Then place back on the cooling rack, allowing the chocolate to harden.

    See how we calculate recipe costs here.

    Notes

    *If using unsalted butter, add 1/2 teaspoon of finely ground salt (like fine sea salt) or 1 teaspoon of coarsely ground salt (like kosher salt) to the butter
    *Use dark, milk, or white melting chocolate to decorate cookies. You can also use chocolate chips, but they will dry with a foggy finish.

    Nutrition

    Serving: 2cookies | Calories: 233kcal | Carbohydrates: 26g | Protein: 3g | Fat: 13g | Sodium: 63mg | Fiber: 2g
    Side shot of Valentine's Day Cookies.

    How to Make Valentine’s Day Cookies – Step by Step Photos

    Overhead shot of sugar being mixed into softened butter.

    In a large bowl, use a hand mixer to whip the 12 tablespoons of softened butter & cup of sugar until fluffy.

    Overhead shot of egg and vanilla being mixed into butter.

    Add the beaten egg and the teaspoon of vanilla to the creamed butter and mix to incorporate.

    Overhead shot of dry ingredients.

    In a separate bowl, mix the 2 cups of all-purpose flour and the 3/4 teaspoon of baking powder.

    Overhead shot of hand beater mixing dough.

    Add half the flour to the creamed butter and mix just until a wet dough forms. Add the second half of the flour and mix gently until a stiffer dough forms.

    Overhead shot ofof two hands holding a ball of dough over a bowl.

    Roll the dough into a ball, but do so quickly. You don’t want to overwork the dough, as it will create a tough texture.

    Two hands rolling out cookie dough between two sheets of parchment.

    Place the dough between two sheets of parchment paper and roll the dough ¼ inch thick, or about the thickness of an ear lobe. Cool for thirty minutes in the fridge. Place a rack in the center of your oven and preheat it to 350°F.

    Overhead shot of dough being cut with a heart-shaped cookie cutter.

    Once the dough has hardened, cut out the cookies, remove the scraps from the cookie sheet, and leave the cookies behind. Roll any scraps out on a separate piece of parchment, and chill before cutting them into cookies.

    Overhead shot of raw Valentine's Day cookies.

    Place the sheet of parchment paper with the cookies on a cookie sheet or sheet pan. Bake the cookies at 350°F for 3 minutes. Next, rotate the sheet pan so the front faces the back—then bake for 3 to 4 minutes until they slightly lighten in color.

    Overhead shot of baked Valentine's Day cookies.

    Cool the cookies in the sheet pan for a few minutes before transferring them to a cooling rack. Decorate when cookies have cooled.

    Overhead shot of milk chocolate being melted and stirred in a white bowl.

    Melt the chocolate in a bowl wide enough for to dip the cookies into but small enough to create a deep pool of chocolate. If using a microwave, melt in 20-second increments, stirring after each. If using the stove, place the bowl in a pan filled a third of the way with water. Bring the water to a boil, then turn off the heat. Leave the bowl in the water and stir until the chocolate melts.

    Overhead shot of Valentine's Day cookies dipped in white and milk chocolate and decorated with sprinkles.

    Dip half of the cookie in the chocolate and garnish if you’d like to. Then place it back on the cooling rack, allowing the chocolate to harden. Give these amazingly cute Valentine’s Day cookies out to your loved ones, but make sure to save some for yourself!!

    Overhead shot of Valentine's Day Cookies.

    The post Valentine’s Day Cookies appeared first on Budget Bytes.

    How to Make Homemade Brown Sugar

    How to Make Your Own Brown Sugar

    Brown sugar is a staple ingredient in my pantry, but there are times when I find myself running out of it and needing a replacement in a pinch. Usually, I would zip over to the store and buy some brown sugar, but you can also make brown sugar easily at home. This …

    The post How to Make Homemade Brown Sugar appeared first on Baking Bites.

    How to Make Your Own Brown Sugar

    Brown sugar is a staple ingredient in my pantry, but there are times when I find myself running out of it and needing a replacement in a pinch. Usually, I would zip over to the store and buy some brown sugar, but you can also make brown sugar easily at home. This basic recipe will produce a brown sugar that is similar in color and flavor to the “golden brown” brown sugar that you can buy at most grocery stores, a great all purpose brown sugar that can be used in any recipe.

    How to Make Homemade Brown Sugar
    Combine 1 cup of white sugar with 1 tablespoon of molasses. Mix until completely combined and uniform in color.

    You can mix the molasses in by using a fork or, believe it or not, by using your fingers to “rub” the molasses in the exact same way you might rub butter into a pie crust. That said, the process goes much more quickly if you combine everything in a food processor and whizz it a few times. I only pull out my food processor if I’m doing a large batch, however, and generally mix it by hand if I need a small amount.

    For a lighter flavor, simply cut back the molasses to 2 teaspoons. If you want a stronger molasses flavor for a “dark brown” brown sugar, increase the molasses by 2-3 teaspoons.

    Homemade brown sugar can be substituted for store-bought brown sugar in baking recipes. The texture and flavor will be almost exactly like store-bought brown sugar. The brown sugar should be packed in a measuring cup when measuring it out, just like store-bought brown sugar. You will also need to store it in an airtight container for it to maintain its soft, moist texture (see also: How to Keep Brown Sugar Soft). A ziploc bag is a great airtight option for any brown sugar (homemade or store-bought), but a tupperware-type container with an airtight lid is a good choice, too.

    The post How to Make Homemade Brown Sugar appeared first on Baking Bites.

    Lentil Bolognese

    Lentil bolognese is a rich and hearty pasta sauce that is budget-friendly and full of bold flavors. Plus, it makes tasty leftovers!

    The post Lentil Bolognese appeared first on Budget Bytes.

    It feels like meat is getting more and more expensive every day, y’all. But you know what is still cheap? LENTILS. 🙌 I know we’ve sung their praises a thousand times, but lentils are cheap, versatile, and will keep you full all. day. long. So they’re a great substitute for meat in bolognese, whether you’re vegan or not. This lentil bolognese is rich, hearty, full of big savory flavor, and budget-friendly!

    close up side view of lentil bolognese on a plate of rigatoni being pierced with a fork.

    What is Bolognese

    Bolognese is a super rich Italian meat sauce reigning from the city of Bologna, Italy. Typically, this sauce starts with finely diced vegetables (onion, celery, carrot) that are cooked down with fatty beef and pork. Tomatoes or tomato sauce are added to give the ragú a tomato base, and white wine and milk are added to give the sauce extra richness. This extra lush sauce is typically served over pasta.

    Because meat is getting so darn expensive these days, we decided to make a bolognese-like sauce using lentils instead of meat. The lentils make the bolognese sauce extra hearty for pennies on the dollar, and also add a great dose of fiber. We made sure to add tons of delicious herbs and spices, as well as some rich coconut milk, to make this lentil bolognese just as rich and flavorful as its meaty counterpart.

    What kind of lentils to use

    You’ll want to use red lentils for this recipe because they break down quickly, helping the sauce thicken up and get extra rich. They’ll retain just enough texture to feel “meaty,” without looking like lentils. The red/orange color of the cooked lentils also helps the bolognese sauce retain a nice deep red/brown color.

    How to Serve Lentil Bolognese

    Serve this hearty sauce over a pile of your favorite pasta, with some garlic bread and a light salad on the side. Because this sauce is so rich and thick, it pairs really well with larger pasta shapes, like rigatoni or tagliatelle because it clings well to pasta even without lots of ridges or crevices.

    Overhead view of a Dutch Oven full of Lentil Bolognese.
    Side view of a plate full of pasta and lentil bolognese with a fork in the side.
    Print

    Lentil Bolognese

    Lentil bolognese is a rich and hearty pasta sauce that is budget-friendly and full of bold flavors. Plus, it makes tasty leftovers!
    Course Dinner, Main Course
    Cuisine Italian
    Total Cost $5.58 recipe / $1.40 serving
    Prep Time 10 minutes
    Cook Time 45 minutes
    Total Time 55 minutes
    Servings 4 1 cup sauce
    Calories 478kcal
    Author Dalya Rubin

    Equipment

    Ingredients

    • 1 yellow onion $0.37
    • 1 carrot $0.15
    • 1 stalk celery $0.10
    • 2 Tbsp cooking oil $0.08
    • 4 cloves garlic $0.32
    • 1/4 tsp crushed red pepper $0.02
    • 1/2 cup finely chopped walnuts $1.07
    • 1 cup uncooked red lentils $0.67
    • 1 15oz. can crushed tomatoes $1.00
    • 3 Tbsp tomato paste $0.27
    • 1 tsp dried oregano $0.10
    • 1 tsp dried basil $0.10
    • 1 tsp garlic powder $0.10
    • 1 Tbsp sugar $0.02
    • 1/2 tsp salt $0.02
    • 1/4 tsp black pepper $0.02
    • 3 cups vegetable broth $0.36
    • 1/2 cup full-fat coconut milk $0.81

    Instructions

    • Finely dice the onion, carrot, and celery. Mince the garlic.
    • Add the olive oil, onion, celery and carrot to a large pot. Sauté the vegetables for about 5 minutes over a medium until the onions are translucent and the vegetables have softened.
    • Once vegetables have softened, add the minced garlic, crushed red pepper and walnuts to the pot. Saute for 2 minutes over medium-low heat, or until the garlic is fragrant.
    • Add the lentils, crushed tomatoes, tomato paste, dried oregano, dried basil, garlic powder, salt, sugar, pepper, and vegetable broth to the pot. Mix everything together and bring the sauce to a boil.
    • Reduce the heat to low and simmer, semi covered with a lid, stirring occasionally for 20-25 minutes. After about 25 minutes the lentils should be soft and the sauce thickened. If the sauce is still too thin for your liking, continue simmering until it has reached your desired consistency.
    • Once the bolognese has reached your desired consistency and texture, stir in the coconut milk and simmer for another 5 minutes. Taste the bolognese and add salt to taste. Turn off the heat. The bolognese will continue to thicken as it cools.

    See how we calculate recipe costs here.

    Nutrition

    Serving: 1cup | Calories: 478kcal | Carbohydrates: 52g | Protein: 18g | Fat: 25g | Sodium: 1261mg | Fiber: 19g
    Overhead view of a plate of pasta with lentil bolognese on top.

    How to Make Lentil Bolognese – Step by Step Photos

    Chopped vegetables on a cutting board.

    Finely dice one yellow onion, one carrot, and one stalk celery, and mince four cloves of garlic.

    Chopped vegetables in the pot.

    Add 2 Tbsp cooking oil to a large pot and heat over medium. Add the onion, celery, and carrot and sauté until the vegetables are soft and the onions are translucent.

    Garlic, walnuts, and red pepper added to the pot.

    Add the minced garlic, ¼ tsp crushed red pepper, and ½ cup finely chopped walnuts. Sauté over medium-low heat for about two minutes more.

    Lentils, tomatoes, and spices in the pot, broth being poured in the side.

    Add 1 cup uncooked red lentils, 1 tsp dried oregano, 1 tsp dried basil, ½ tsp salt, 1 Tbsp sugar, 1 tsp garlic powder, ¼ tsp black pepper, one 14.5 oz. can crushed tomatoes, and 3 Tbsp tomato paste to the pot. Add 3 cups vegetable broth and stir to combine.

    Simmered bolognese sauce being stirred in the pot.

    Allow the sauce to come up to a boil, then reduce the heat to low and let it simmer for 20-25 minutes, stirring occasionally.

    Coconut milk being poured into the sauce in the pot.

    After about 25 minutes, the lentils should be soft and the sauce should be thick. If the sauce is still too thin for your liking, allow the sauce to simmer a bit longer. If the lentils are not yet soft, continue to simmer, adding a small amount of water as needed to prevent it from drying out.

    Parsley being sprinkled on the pot of finished lentil bolognese.

    Once the sauce is thickened, stir in ½ cup full fat coconut milk and simmer for 5 minutes longer.

    Overhead view of the pot full of lentil bolognese garnished with parsley.

    Taste the sauce and add salt if needed.

    The post Lentil Bolognese appeared first on Budget Bytes.

    Sweet Lemon (bergamot) Marmalade

    Bergamots aren’t something one runs across every day in the supermarket, or even at greengrocers. But mid-winter, depending on where you live, you just might get lucky and happen across some, as I recently did in Paris. But no matter, this recipe can be made with other kinds of lemon, especially “sweet” lemons, such as Meyer lemons. There’s conflicting information on what a bergamot actually is,…

    Bergamot Sweet Lemon Marmalade

    Bergamots aren’t something one runs across every day in the supermarket, or even at greengrocers. But mid-winter, depending on where you live, you just might get lucky and happen across some, as I recently did in Paris. But no matter, this recipe can be made with other kinds of lemon, especially “sweet” lemons, such as Meyer lemons.

    There’s conflicting information on what a bergamot actually is, but it’s definitely a member of the citrus family and most consider it to be a relative of the bitter orange, which might have been mated with a lemon at some point in its murky past.

    Continue Reading Sweet Lemon (bergamot) Marmalade...