Introducing the perfect appetizer for game day festivities (and beyond): super crispy rice paper chips perfect for dipping in a bowl (get it?) of creamy avocado dip. It’s a party in a recipe!
Just 5 ingredients and 10 minutes required for this ea…
Introducing the perfect appetizer for game day festivities (and beyond): super crispy rice paper chips perfect for dipping in a bowl (get it?) of creamy avocado dip. It’s a party in a recipe!
Just 5 ingredients and 10 minutes required for this easy, crowd-pleasing snack. Let us show you how we chip ‘n’ dip!
These crispy rice paper chips and avocado dip are inspired by a similar dish at a Japanese-Mexican fusion restaurant called Manta.
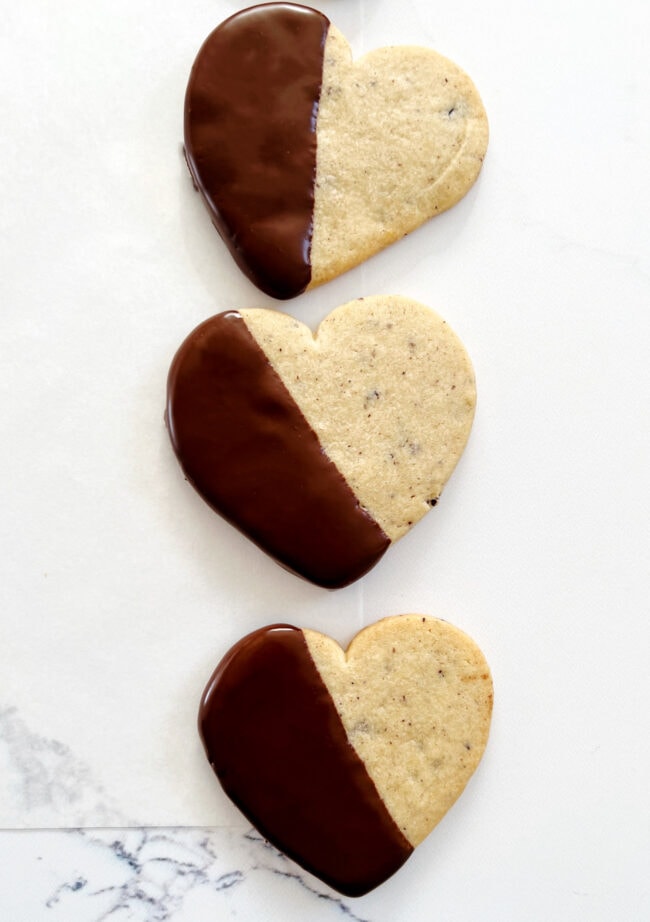
Cut out cookies come in handy many times throughout the year: Christmas, of course, but also Halloween and Valentine’s Day and birthdays and just because. This dough is very forgiving, rolls out smooth, and can be rerolled multiple times with goo…
Cut out cookies come in handy many times throughout the year: Christmas, of course, but also Halloween and Valentine’s Day and birthdays and just because. This dough is very forgiving, rolls out smooth, and can be rerolled multiple times with good results. It is based on my Cut Out Cookie Dough, but I’ve added cacao nibs for some crunch, and then dipped them in chocolate so they are extra special for Valentine’s Day. Ingredients for Cacao Nib Cookies: Tips for Rolling Out Cookie Dough: This dough is very forgiving, and does not need to be chilled first. Lightly flour your surface and rolling pin, and add flour as needed to keep it from sticking. A metal spatula is a good tool for transporting cut cookies from your work surface to the sheet pan. To Freeze Cookie Dough: Cookie dough can be formed and frozen for up to 2 weeks. Freeze the dough tightly wrapped in plastic wrap and in a freezer safe bag. When you’re ready to bake, let the dough sit out at room temperature until the oven preheats. More Cut-Out Cookie Recipes:
Here are the kitchen tools we think are worth buying multiples of (with product picks from our equipment reviews).
Serious Eats / Eric King
You've probably heard cooks or food people (and maybe we are guilty of this here at Serious Eats) lament the use of unitaskers, e.g., things with one very specific purpose, like avocado slicers, bagel cutters, or meat claws.
But what about the tools that are so useful and necessary that you need more than one? Have you ever started boiling pasta only to discover that your one and only strainer is in the dishwasher—and then abruptly stopped the dishwasher mid-cycle because you have nothing else to strain with? I sure have. Have you had to repeatedly wash and rewash a tool as you prep a recipe, stretching out what was supposed to be a 30-minute meal into a much longer affair? Yup, that's been me on a hurried weeknight.
Here's a list of items we find highly useful to have multiples of. Note: we didn't include cookware (that's a whole separate list!) or knives.
Two strainers (or more, of varying sizes)
If you're going to have one strainer, it should be a fine-mesh strainer, capable of so much more than just straining pasta and other things we rinse or boil in water. But strainers are one of those items that can't really be substituted for anything else—at least not well or comfortably. We've all—or maybe this is just me—tried to strain pasta water out of a pot by holding the lid and carefully pouring out the water, only to a) have lots of pasta water still leftover in the pot or b) splash yourself with hot starchy water. Simple tasks can become unnecessarily cumbersome if your only strainer is out of commission for any reason (i.e., running merrily through the dishwasher, as we mentioned before).
Along with my pair of fine-mesh strainers, I also have a colander with larger holes, which isn't quite as much of a workhorse, but can handle larger batches of pasta and strain large pieces out of stock. I also have a small mesh strainer perfect for double-straining cocktails and tea drinks, along with straining out oil and water solutions for things like olives and pickles.
A handful of quarter and half sheet trays
Quarter-sheet pans are my go-to for dry-brining meat. As you can probably guess, they're half the size of half-sheet pans.
Half-sheet pans are great for cooking and roasting, but I find quarter-sheet plans ideal for prep work and storage. I've gotten a little creative with my quarter-sheet pans (I have three), using them instead of half-sheet pans when I can, mostly because quarter-sheet pans fit in the toaster oven, which cooks food quicker for meals when I’m just feeding myself or one other person. But I also use quarter-sheet pans to wrap up leftovers I know are destined to be thrown in the oven (I'll cover the top with reusable beeswax covers or, in a pinch, aluminum foil).
Multiple sets of measuring spoons and cups
It is quite annoying to be going through a recipe and realize the measuring spoon you need is, say, slick with oil and not suitable for measuring spices until it's washed. It's worth having at least two (maybe three!) sets of measuring spoons. The same can be said for dry and liquid measuring cups. Having multiples around will save you a whole lot of time when prepping.
100-plus mini measuring cups
Ok, maybe not 100, but I have at least 10 of these small measuring cups by OXO. Having multiple measuring cups makes recipe prep a breeze: you don't have to wash out your measuring cups as you set up ingredients, which can be particularly annoying if you measure out something liquid or viscous, like olive oil, and then realize you need the measuring cup or spoon for dried spices.
I like the OXO mini measuring cups, which hold about 1/4 cup of liquid; the cups also display measurements in milliliters, ounces, and tablespoons, so you can use them to measure almost anything. They have a flat bottom and can serve as vessels for your prepped ingredients.
A few cutting boards
For cutting boards, you need at least one large wooden one, one large plastic one, and one small plastic one. No arguments! After that, a very large wooden one is nice to have as well, as it can also act as a serving board. Having multiple cutting boards is great for keeping food prep safe, e.g. cutting meats on one board and saving vegetables for another to avoid cross-contamination.
Two-plus pairs of tongs
How many pairs of tongs do I have? Don't ask. I have no idea, but it's more than two. Tongs can stir, scatter, and mix. Tongs can also pick stuff up and flip it, like a giant, dry-aged porterhouse steak. I've found myself in situations where I've used two tongs to flip over particularly large items, using the second set of tongs almost like a lever.
Serious Eats / Vicky Wasik
Sauce spoons
This is actually a pick from senior culinary director Daniel Gritzer: "I own one long-handled serving spoon, but I often find it annoying, since with home cooking I rarely need a metal spoon with such a long handle given the smaller pot size. It's nice to have one on occasion and for the table, but that's about it. Otherwise, sauce spoons that restaurant cooks use, both regular and slotted/perforated, are the way to go. They're less clunky thanks to their shorter handles, and make an easier transition between kitchen and dining table since they can be used in both places. And given how much use one gets out of this kind of spoon both in the kitchen and on the table, having a couple of each, or at least a couple of the solid (non-slotted) ones is very useful."
Silicone spatulas
I used to think silicone spatulas were only useful for baking—and I was wrong. Now silicone spatulas are what I'll use to scrape clean any plate, bowl, or dish. Why have just one!? Why have just two!?
Two Microplanes
Microplanes can be challenging to clean, so I have two. One I use for things like garlic, ginger, and citrus. The second I use for cheese, mostly to prevent cross-contamination with the items listed above, which get stuck easily in a microplane. Cheese is also something I might just grate a small amount from a larger block, so I try to keep anything that’s touched strongly-scented or flavored things away from them. How you categorize your microplanes is up to you: if you bake a lot, you might want one for whole spices like nutmeg, for example.
A couple of vegetable peelers
Our favorite super-affordable vegetable peelers are well worth having a few stashed in your drawer. Maybe you're peeling two different things, maybe you want to enlist a peeling partner, maybe you're a fan of different colors! Don't even ask about swivel peelers—Y-peelers are way better.
Serious Eats / Vicky Wasik
Wooden spoons
You probably already have more than one wooden spoon, but if you don't get on it! They can be used for scrapping, stirring, and scooping—all things helpful. Plus, if you care for them (i.e. hand wash-only), they'll last a very long time. We have a few wooden spoons we recommend here.
Stainless steel prep bowls, of all sizes
This doesn't need a lot of explanation: you need a ton of prep bowls. We like stainless steel ones. You can get a set like the one above or just go to a restaurant supply store (if you go the latter route, we recommend getting a lot of small ones).
Two pepper mills
If we're getting really granular, having two pepper mills on hand is a very nice thing—one for black and one for white pepper.
Multiple ice cream scoops
For portioning out cookies, cupcakes, and muffins and scooping ice cream, it's helpful to have a few of these scoops on hand. You can also just go to a restaurant supply store to get these, but, either way, they shouldn't cost you a lot.
Serious Eats / Vicky Wasik
FAQs
What essential kitchen gear do I need?
The list above comprises a lot of essentials (like tongs, spatulas, measuring spoons, etc.). However, we have guides to essential cookware and general essentials (including knives, cookware, cutting boards, and more).
Should I buy a kitchen utensil set?
We don't recommend buying a utensil set because, likely, you're getting some tools you don't actually need and that aren't the absolute best quality. Instead, we recommend buying things piece-by-piece. That way, you can also easily double up on tools you find you use the most.
Made well, crème brûlée is a magnificent dessert of silky, vanilla-scented custard beneath a shatteringly crisp topping of caramelized sugar.
Serious Eats / Amanda Suarez
I can’t remember the first crème brûlée I've ever eaten, but I do remember the worst. After an otherwise spectacular meal at an esteemed Manhattan restaurant several years ago, the dessert arrived at the table with a soggy, melted crust. There was no theatrical moment of smashing my spoon through the dessert’s signature crackling, burnt-sugar crust, just a sad puddle of liquified caramel pooled on top. It was a sign that the crème brûlée was torched too far in advance and had been sitting long enough for the once-crunchy topping to melt. We didn’t finish our dessert, and I haven’t ordered crème brûlée from a restaurant since. Why risk it when you can whip up a better one at home?
What Is Crème Brûlée?
Made well, crème brûlée is a magnificent dessert of silky, vanilla-scented custard—usually made with eggs, milk, and/or cream—beneath a shatteringly crisp topping of caramelized sugar. Made poorly, the dessert is often overcooked, too eggy, or served at the wrong temperature, whether too hot or too cold.
Serious Eats / Amanda Suarez
Most pastry chefs prepare crème brûlée by baking the custards in a water bath until just set, then refrigerating them for several hours to allow them to chill and firm up slightly before coating the tops with sugar and brûléeing them. Some, including chef and baking expert Nancy Silverton, skip the water bath entirely, preferring instead to make the custard on the stove before refrigerating it. This method may skip the water bath, but is ultimately fussier than I find necessary. While this process does give you slightly more control over the texture of your custard, it requires standing at or near the stove for almost an hour—turning what would otherwise be a pretty simple and straightforward dessert into a labor-intensive one.
The Origins of Crème Brûlée
Several writers and historians have claimed that crème brûlée has British roots. Both the late authors Dione Lucas, an English chef, and Theodora FitzGibbon, an Irish cookbook author, credited a cook at Cambridge University with making the first crème brûlée sometime in the 19th century, serving it under the name "Cambridge cream." In his book Beard on Food, James Beard wrote that the earliest recipe for the dessert came from a 17th century English cookbook with a recipe for “grilled cream.” But none of these English-origin explanations are likely, since continental recipes for crème brûlée-like desserts predate them.
The first printed recipe for crème brûlée can be traced to the 1693 French cookbook Cuisinier Royal et Bourgeois by François Massialot, a former cook at Versailles. Still, the combination of custard and caramel goes back even further, and various types of flan—likely the predecessor to crème brûlée and Spanish crema catalana today—can be traced back to ancient Rome.
Serious Eats / Amanda Suarez
Despite crème brûlée’s centuries-old history, its widespread popularity today is a recent phenomenon. Recipes for the dessert are “conspicuously absent from the major nineteenth- and early twentieth-century French cookbooks, including [Prosper] Montagné’s Larousse Gastronomique (1938),” Kyri W. Claflin notes in The Oxford Companion to Sugar and Sweets, an indication that less than a century ago it had not yet entered the classic French dessert canon. Though crème brûlée recipes do appear in some magazines and cookbooks throughout the 1900s, the custard didn’t become a highly sought-after dessert until Sirio Maccioni served it at his famed New York City restaurant Le Cirque, which opened in 1975.
“After an encounter with crema catalana in Spain in the early ‘80s,” Gabrielle Gershenson wrote for Saveur in 2012, “Maccioni insisted a version be developed for his menu.” Le Cirque’s pastry chef at the time, Dieter Schorner, told Gershenson that crème brûlée exploded in popularity after the legendary French chef Paul Bocuse dined at the restaurant and claimed it was “the best dessert he had eaten that year.” Soon, crème brûlées were gracing restaurant menus and the pages of cookbooks everywhere.
The Key Techniques for the Best Crème Brulée
A successful crème brûlée comes down to perfecting its two parts: the custard and the burnt-sugar topping. Though crème brûlée may be intimidating—the water bath, the blowtorch!—it really is a simple dessert that’s easy to execute once you understand the techniques and science behind it.
The Custard
One of the main questions for any custard is what the ideal ratio of ingredients is, as well as what kind of dairy to use. I examined multiple recipes from trusted sources to get a sense of which details were shared by most and also how they varied. Some chefs made their custards with just whole milk or heavy cream, while some called for a mixture of both. Schorner, the former Le Cirque pastry chef, swore by using just heavy cream.
Serious Eats / Amanda Suarez
Like Schorner, Julia Child and James Beard’s crème brûlée recipes skip the milk and opt entirely for heavy cream instead. Pierre Hermé uses 3 3/4 cups whole milk with 2/3 cup heavy cream, pastry chef Claudia Fleming calls for 1 cup whole milk with 2 cups heavy cream, while Jacques Pépin prefers equal parts (1 cup each) of whole milk and heavy cream.
Depending on which type (or combination) of dairy you choose, you’ll get significantly different custard textures—a direct result of shifting fat levels in the formula. Not only that, but the less fat in a custard, the harder it is to cook successfully. “Lean custards are more tricky to cook than rich ones,” the authors of The Joy of Cooking wrote. “Custards thicken because the egg proteins, excited by heat, move about, collide, and stick to one another… In a very rich custard like crème brûlée, there are so many fat molecules present that the egg proteins have trouble finding one another and bonding.”
Serious Eats / Amanda Suarez
Beyond fat, sugar also plays a role in determining the texture of custard. In On Food and Cooking, Harold McGee notes that whisking eggs together with dairy and sugar dilutes the egg proteins and raises the temperature at which they coagulate, resulting in a more tender custard. While egg proteins begin to coagulate at 160ºF (70ºC) on their own, a custard of eggs, sugar, milk and/or cream thickens within the range of 175 to 180ºF (78 to 80ºC). Custards containing adequate amounts of sugar and fat (like those made with heavy cream or whole milk) are less likely to curdle, while lean custards without enough of either to slow down the process of coagulation tend to overcook easily.
Curious to see for myself what kind of dairy would work best, I experimented with the following variations:
Only heavy cream: This was the most luxurious tasting crème brûlée. While delicious at first, the custard’s richness became cloying after several bites and I found it difficult to finish an entire serving by myself.
Only whole milk: This custard was much more firmly set than the one made with just heavy cream, and I found myself wanting something slightly richer.
2 parts heavy cream to 1 part whole milk: Getting closer! This had more body than the version made with 100% milk and was perhaps just a touch too rich.
2 parts whole milk to 1 part heavy cream: Slightly richer than the custard made only with whole milk but not as heavy as the one with only cream, this was a close runner-up to the winning combination below.
1 part heavy cream to 1 part whole milk: This (Pépin’s ratio) felt like the magic combination. The mixture was balanced and just rich enough to set into a velvety custard.
As for eggs, I tested with egg yolks and a combination of whole eggs with yolks. In theory, a lean, milk-only custard might be improved with only yolks, while a rich, cream-based custard might be improved with whole eggs. There are a dizzying number of permutations and possibilities that could work, but given that I preferred the 1:1 ratio, I found that using just egg yolks for this ratio (as opposed to whole eggs or whole eggs and yolks) lent the custards a vivid yellow hue and resulted in the silkiest crème brûlée with a much richer flavor.
Is a Water Bath Necessary?
If a silky smooth crème brûlée is what you’re after, then a water bath (also referred to as a bain-marie) is absolutely necessary. Water baths—whether used for cheesecake or custards—ensure that your desserts bake evenly and gently. The custards I tested without a water bath bubbled away aggressively and resulted in a curdled mess. In comparison, the crème brûlées I set in a water bath filled with just-boiled water baked beautifully until just set.
Serious Eats / Amanda Suarez
As Cindy Mushet, the author of The Art and Soul of Baking, noted, oven temperatures can fluctuate. Using a water bath, she notes, “moderates these fluctuations in temperature by absorbing the heat, then transferring it gently to the cups, keeping them at a constant, low temperature.” Your oven may be set to 325ºF (160ºC) for these custards, but water baths will never exceed water's boiling point of 212ºF (100ºC). For tender custards, it’s worth taking the time to use just-boiled (but not boiling) water that's around 190º to 200ºF (88º to 93ºC).
How to Determine Custard Doneness
All the details of dairy type, eggs, water baths, and more are useless if you over- or undercook a custard, and given that a custard doesn't dramatically change its appearance as it cooks, this can be tricky for inexperienced custard cooks to judge. If you have to go by sight, what you should be looking for are custards that seem barely set and jiggle ever so slightly when gently shaken. But that may seem maddeningly vague, which…it is. For better certainty, use your thermometer; the custards are done when they are between 170ºF (77ºC) and 180ºF (82ºC) in the center; just be sure your thermometer probe isn't accidentally touching the ramekin itself, which will be hotter, as it's conducting heat from the surrounding water bath.
Serious Eats / Amanda Suarez
Once the custards are cooked, carefully remove the water bath from the oven and, using tongs or gloved hands, transfer them to a wire rack to cool to room temperature before refrigerating until set. It is crucial to chill your custards: this allows them to firm up ever so slightly and ensures that they’ll be set enough to withstand the heat of your blowtorch or broiler when it’s time to caramelize the sugar topping. I Iike to take my crème brûlées out of the refrigerator and let them stand for 20 minutes at room temperature before serving so they are cool but not cold. I find this temperature much more pleasant for a custard than a refrigerator's chill: spooning into a cool custard that’s been slightly warmed by a blowtorch is much less jarring than digging into a custard that’s still completely cold underneath but has a warm top. (Your friends with sensitive teeth will thank you.)
Getting the Caramel Topping Right
Perfecting the caramelized sugar topping of your crème brûlée can be challenging. Ideally, the crust should be an even golden brown, shatter crisply, and be a happy medium between being too thick or too thin. Using too much sugar will result in a dense, thick topping that’s not only unpleasant to eat, but will also take longer to caramelize—which risks curdling or burning your carefully prepared custard. On the other hand, skimping on the sugar will produce a thin crust that’ll leave you wanting more.
Avoid torching your crème brûlées in advance; sugar is hygroscopic and loves to absorb moisture. Over the course of 20 to 30 minutes, the caramelized sugar topping will melt into a puddle in the middle of your custard—no satisfying crust to be had there! For best results, you should torch your sugar right before serving. (More on that below.)
Serious Eats / Amanda Suarez
Ultimately, how much sugar you use and how dark you want your crème brûlee to be is really personal preference—but knowing the different factors that can affect the color and thickness of your crust will help you achieve the best results for you.
Broiler vs. Blowtorch: Choosing the Right Tool for the Job
To make a crème brûlée's signature crackling caramel crust, you start by sprinkling sugar on top of the finished custards. You then have at least a few options for transforming those granules of sugar into a glassy sheet of hardened sugar. The original method—the very one instructed in that first-known 1691 recipe—is to use a branding iron, or, as that recipe calls it, a "pêle du feu" (fire spade? I don't know, that's some very old French). Heated in a live fire until glowing red, the branding iron is pressed down on the sugar coating, rapidly creating the caramel we're seeking. I didn't test this, because a branding iron is a unitasker of extremely limited utility that probably doesn't deserve any real estate in your utensils drawer.
That leaves two more practical methods: a broiler and a blowtorch. I'll admit, I love my blowtorch more than the average home cook, using it for everything from putting a little extra char on roasted vegetables and meats, to warming the side of my stand mixer when I’m trying to temper buttercream, and toasting meringues (and yes, brûléeing custards). But I'll also admit that just about everyone at home has a broiler, while not everyone has a blowtorch and may not be convinced they need one. So, it needed to be tested.
Serious Eats / Amanda Suarez
First, I tried my blowtorch, which did exactly what I expected: It gave me total control over the caramelization process. Gently passing the flame back and forth over the sugar, I was able to develop a perfect caramel crust quickly and evenly on each custard. Compare that to the broiler, where I watched as the sugar slowly melted, unevenly, during a lengthy 7 minutes. The sugar did melt into a crust, but it wasn’t quite as crisp as the crème brûlées I’d prepared with a blowtorch, and the extra time spent under the broiler meant the custards had also warmed a worrying amount; a minute or two longer, and I’d be concerned that they would have curdled. A broiler is an acceptable alternative if you don’t have a blowtorch, but it's a higher risk one, with less even results. It’s worth purchasing a blowtorch if you’d like to achieve a caramelized sugar crust that shatters easily (and guess what: we have a review just for you, if you're in the market).
The Best Sugar for Topping Crème Brûlée
Crème brûlée recipes often instruct you to top your custards with an even layer of regular old granulated sugar for caramelizing, and it’s not difficult to see why: granulated sugar is finer than raw sugar, but not as fine as confectioners’, making it an easy sugar to melt. When comparing different sugars for topping crème brûlée, though, I found that while granulated sugar made a perfectly fine topping, using raw sugar resulted in a much more satisfying crust. Confectioners’ sugar and brown sugar performed terribly: both melted into clumps and never fully solidified.
The one downside to using raw sugar is that it can take longer to fully melt. Because raw sugar crystals are slightly larger than those of granulated sugar, you’ll have to torch your crème brûlées very carefully and be mindful of how strong your flame is so they don’t get too dark and the top of the custard doesn’t curdle. While I prefer using raw sugar to create the crisp topping for my crème brûlées, you can use granulated sugar as a substitute if you don’t feel like watching your custards like a hawk as you brulée them.
Serious Eats / Amanda Suarez
I've found that moving the torch in a circular motion as the sugar melts is the easiest way to get it fully and evenly caramelized. After 2 to 3 minutes, the sugar should harden and you should be able to tap the bottom of your spoon against it and hear a clear “clink.”
All these techniques will help you make the perfect crème brûlée—just make sure you don’t leave your torched custards sitting like that restaurant I went to did. Otherwise, you’ll end up with a sad, soggy crème brûlée and all your hard work will be for naught!
In a 3-quart saucepan, combine heavy cream, whole milk, vanilla bean and seeds, and salt. Bring to a gentle simmer over medium-low heat, then remove from heat, cover, and let stand 1 hour.
Serious Eats / Amanda Suarez
Adjust oven rack to middle position and preheat oven to 325ºF (163ºC). In a large bowl, whisk yolks with granulated sugar until smooth (do not combine the sugar and yolks until you are ready to add the dairy; if left to stand before adding the dairy, the sugar will absorb moisture from the yolks and leave behind hard, clumpy bits, something pastry chefs refer to as “burning” the yolks). Set a fine-mesh strainer over yolk mixture and pour cream mixture through; discard vanilla bean. Whisk custard base until thoroughly combined.
Serious Eats / Amanda Suarez
Set six 4-ounce ramekins in a 9- by 13-inch baking dish. Divide custard base evenly among the ramekins, filling them 1/4 inch from the top of the rim. (If you have a few tablespoons of extra custard, that’s okay.) Pour just-boiled—but not boiling—water (around 180º to 200ºF; 88º to 93ºC) into baking dish until it comes 2/3 of the way up the ramekins; be careful not to splash water into the ramekins as you pour. Carefully transfer baking dish to middle rack of oven and bake until custards are just set (they should jiggle slightly in the middle and register 175ºF/79ºC to 178ºF/81ºC on an instant-read thermometer inserted in the center), about 35 minutes. Remove from oven, and, using towels or silicone-coated tongs, carefully transfer ramekins to a cooling rack. Allow custards to cool to room temperature, about 1 hour. Refrigerate until set, uncovered, at least 4 hours.
Serious Eats / Amanda Suarez
To finish and serve, let custards stand for 20 minutes at room temperature. Right before serving, top the surface of each custard with an even layer of raw sugar (about 2 teaspoons per ramekin), swirling the ramekins to distribute the sugar evenly. Working in a circular motion, use a butane blowtorch to pass a flame over the top of each crème brûlée, 1- to 2-inches away from the surface of the custard, until the sugar has caramelized and melted into a glossy, crackling sheet and turned golden brown (how closely and how long you should torch your custards will depend on the strength of your blowtorch; watch the sugar carefully as you pass the torch over the surface of the custard to avoid scorching your crème brûlées). Alternatively, for a broiler method, see notes.
Serious Eats / Amanda Suarez
Cool slightly for 1 to 2 minutes, then serve immediately.
Serious Eats / Amanda Suarez
Notes
Though it isn’t our recommended method, you can use your broiler to caramelize your crème brûlées if you don’t have a blowtorch. To do so, preheat your broiler, and set an oven rack 3 to 4 inches away from the flame. Top the surface of each custard with an even layer of raw sugar (about 2 teaspoons per ramekin) and broil until the sugar has melted, about 5 minutes. Keep an eye out, as broiler strength can vary quite a bit and the sugar may burn if left unattended.
Though I liked the results of using raw sugar more, opting for granulated sugar is lower-risk given its finer grain size and less likely to overbrown compared to already-brown raw sugar.
If you don’t have ramekins, you can bake the custard in a single 2-quart baking dish set in a larger baking dish with a hot water bath.
Special Equipment
3-quart saucepan; whisk; six 4-ounce ramekins; blowtorch (recommended)
Make Ahead and Storage
The custards can be made up to 2 days ahead and refrigerated uncovered. Avoid caramelizing the sugar topping until you are ready to serve; after 20 minutes, the crisp sugar topping will soften and liquify.
Buffalo Chicken Lettuce Wraps, delicious, low-carb lettuce wraps topped with shredded carrots, celery and my homemade light blue cheese dressing. Buffalo Chicken Lettuce Wraps Making shredded buffalo chicken in the slow cooker is super easy, anyone can…
Buffalo Chicken Lettuce Wraps, delicious, low-carb lettuce wraps topped with shredded carrots, celery and my homemade light blue cheese dressing. Buffalo Chicken Lettuce Wraps Making shredded buffalo chicken in the slow cooker is super easy, anyone can do this and you can use the chicken for everything from wraps and salads, to pizza toppings, sandwiches
This savory soup recipe with Italian meatballs and orzo pasta takes less than 30 minutes to make and is the perfect hearty,
The post Italian Meatball Soup appeared first on Salty Side Dish Recipes.
This savory soup recipe with Italian meatballs and orzo pasta takes less than 30 minutes to make and is the perfect hearty,
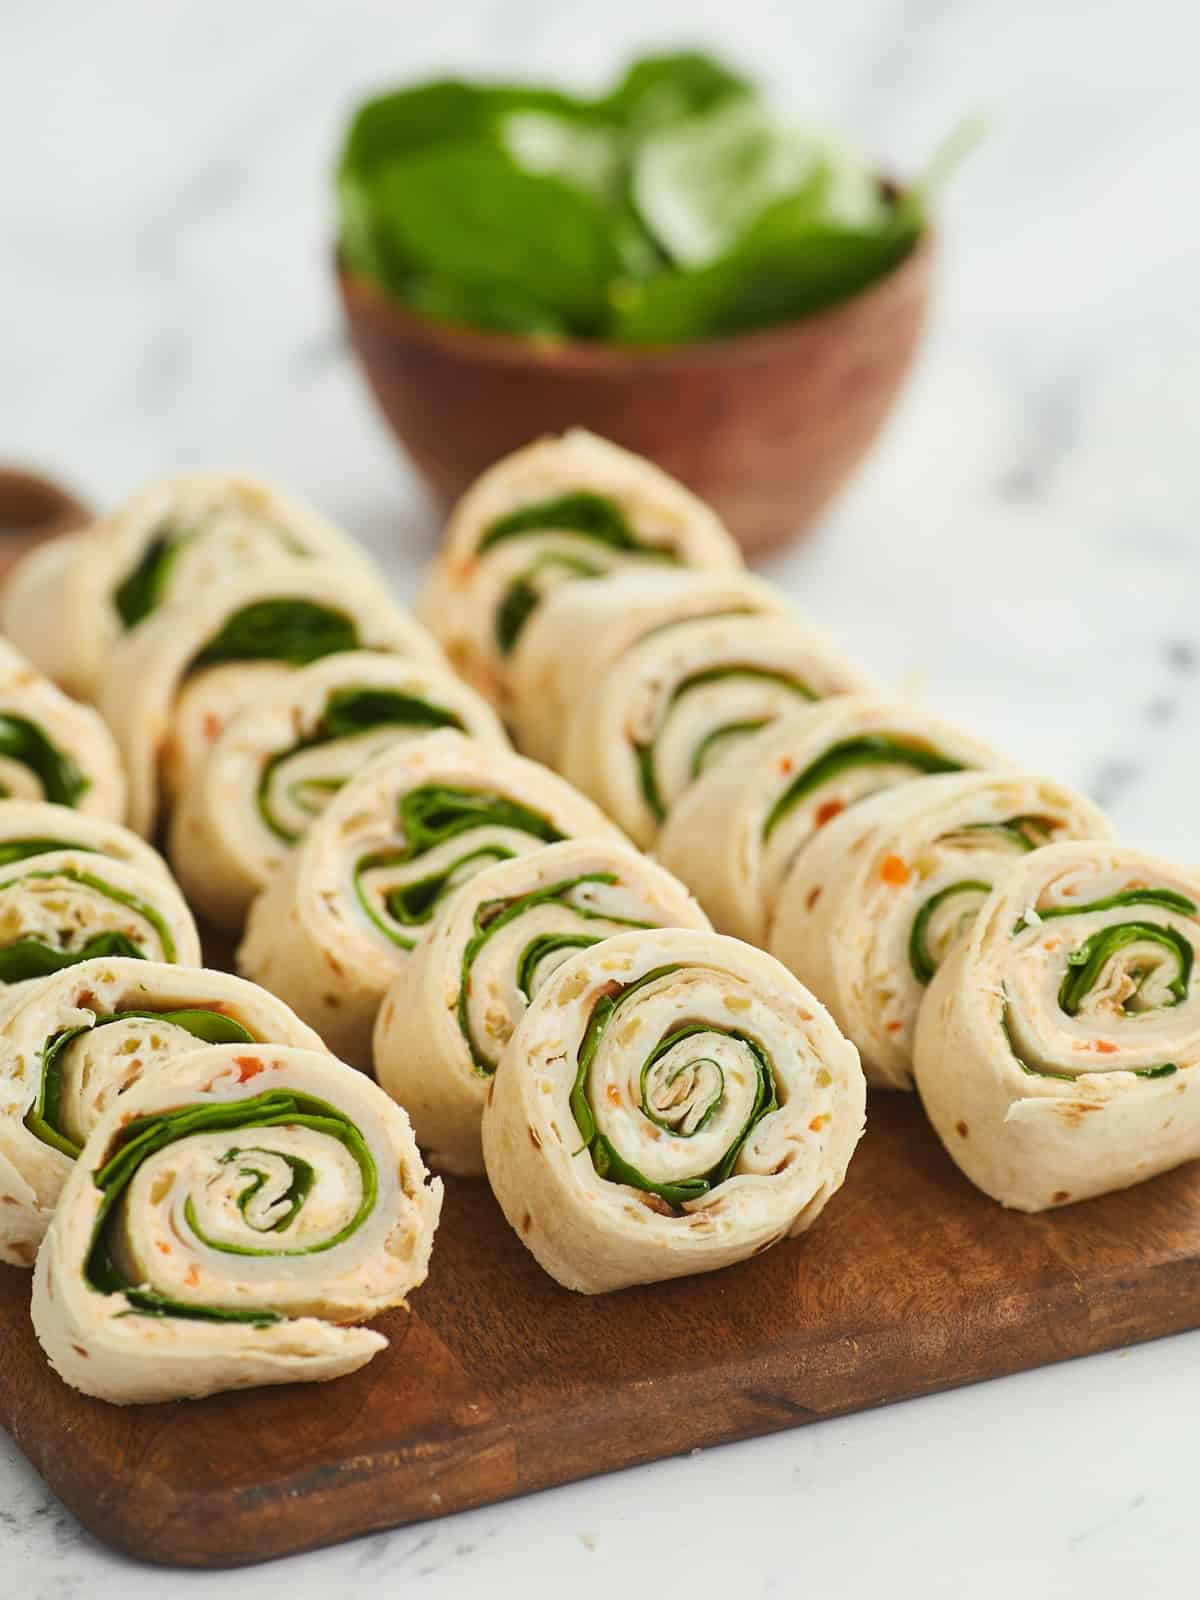
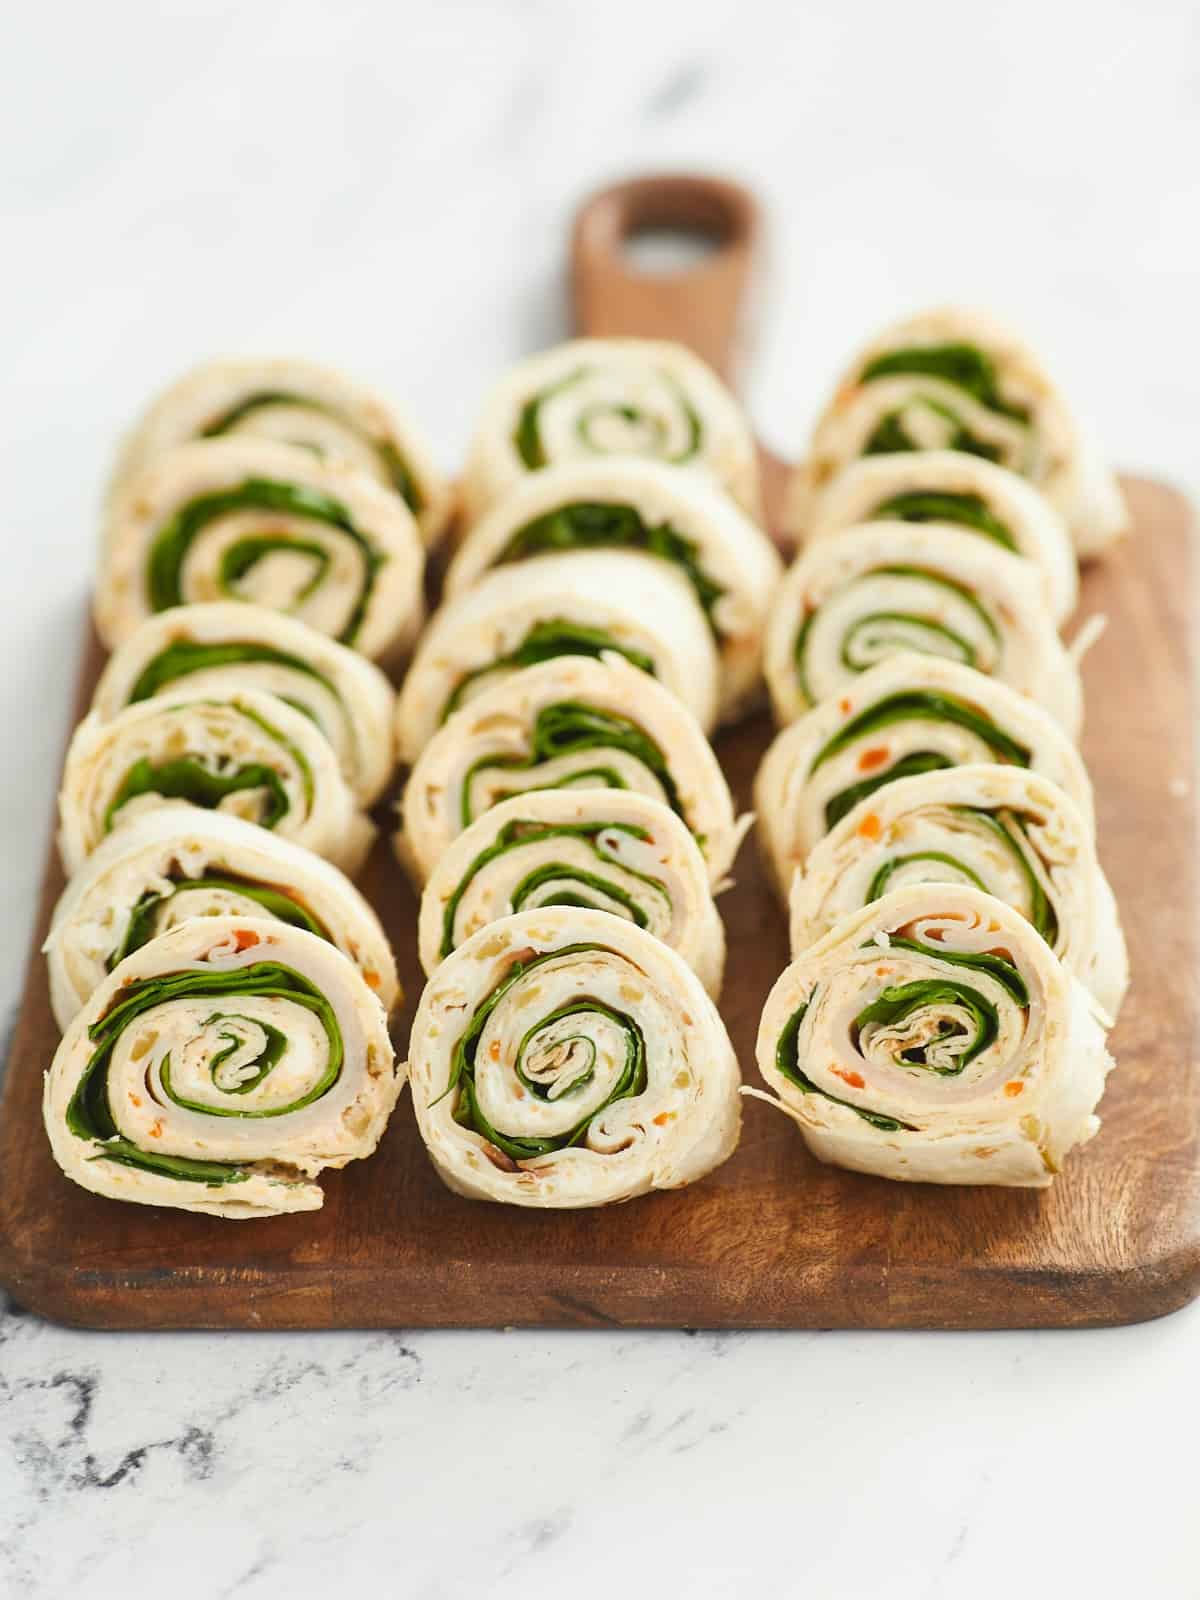
I started making Turkey Pinwheels for my daughter (a picky eater) to make her meals a little more fun. It’s also a great way to sneak some extra wholesome ingredients into her lunch undetected. (Mom hack!) Since you can make the cream cheese spread in advance, this Turkey Pinwheel recipe is also perfect for meal prep! Pinwheels are also super versatile and make an affordable appetizer that’s easy to throw together for brunches, party buffets, and potlucks. It’s as simple as making a sandwich…but with a twist!
What are pinwheel sandwiches?
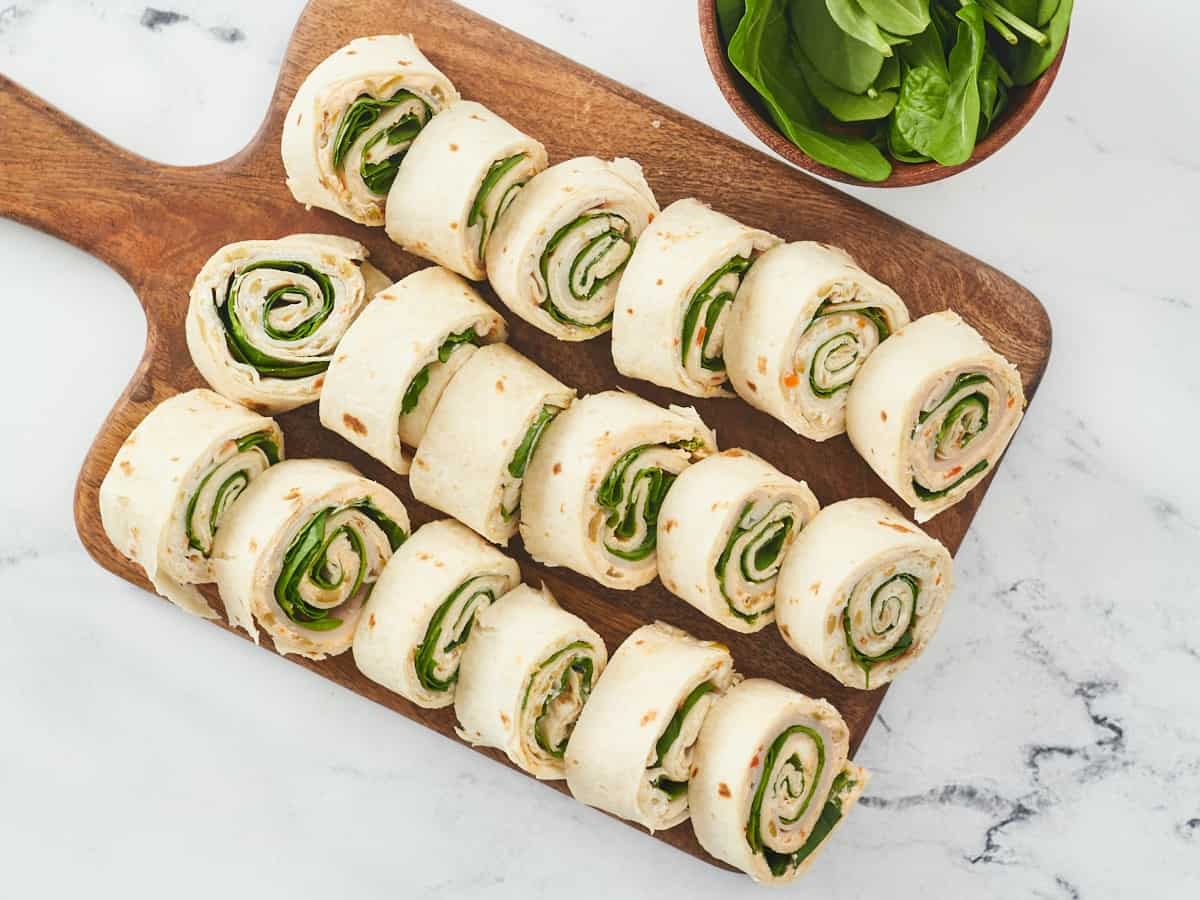
Turkey Pinwheels are made by evenly spreading cream cheese on one side of a flour tortilla (which acts as the glue), layering on classic sandwich ingredients, and then tightly rolling it all up into a log that’s sliced into 1” pieces. When each pinwheel is turned on its side, it will reveal a lovely spiral of the ingredients inside.
Pinwheel 101
Our simple recipe for Turkey Pinwheels uses deli meat, spinach, and a savory cream cheese spread inspired by pimento cheese. However, this is a super versatile recipe that can be made with many different combinations of ingredients. Here is what you need to make pinwheels:
Extra-Large Flour Tortillas: Burrito-size flour tortillas are best for pinwheels. They’re easier to roll, make a distinct spiral, and yield more per tortilla. You can use any flavor (plain, wheat, spinach, sun-dried tomato, etc.). Since corn tortillas are less pliable and tear easily, they are not an ideal choice.
A sticky spread: Typically, pinwheels are held together with cream cheese, but anything similar (like hummus or nut butter) can be used.
Deli Meat: Pinwheels usually include some kind of deli meat (turkey, chicken, ham, salami, etc.), but that can also be replaced with thinly-sliced veggies.
Cheese: Sliced cheeses are great for creating an added layer of filling. Shredded cheeses can be mixed in with cream cheese (like in our recipe) so they don’t fall out.
Salad greens and other sandwich toppings: These will help to create color contrast in the pinwheel’s spiral, and round out the other rich ingredients with freshness and flavor!
MORE PINWHEEL flavor COMBINATIONS TO TRY:
Ham + swiss cheese + dill pickles + yellow mustard
Turkey Pinwheels are a great recipe to make ahead for a party or help fill the gaps in your weekly meal prep. The cream cheese spread can be kept in an air-tight container and refrigerated for about a week. Pre-made pinwheels will also keep in the fridge for 2-3 days before they start to get soggy.
4extra-large or burrito-style flour tortillas$1.15
19oz. packagesliced turkey$4.99
1cupspinach$0.80
Instructions
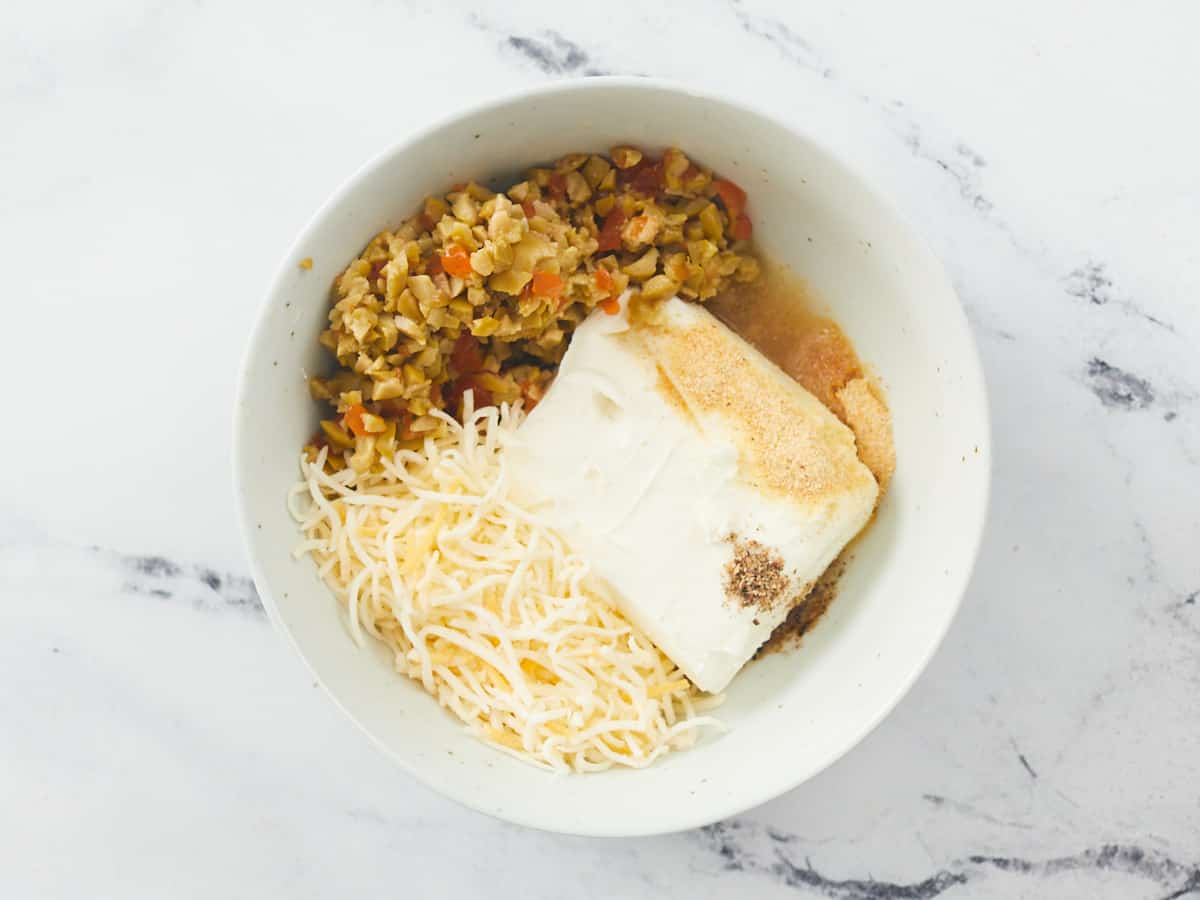
Stir together the softened cream cheese, finely-shredded cheddar cheese, finely-chopped pimento-stuffed olives, olive brine, garlic powder, and black pepper until very well combined.
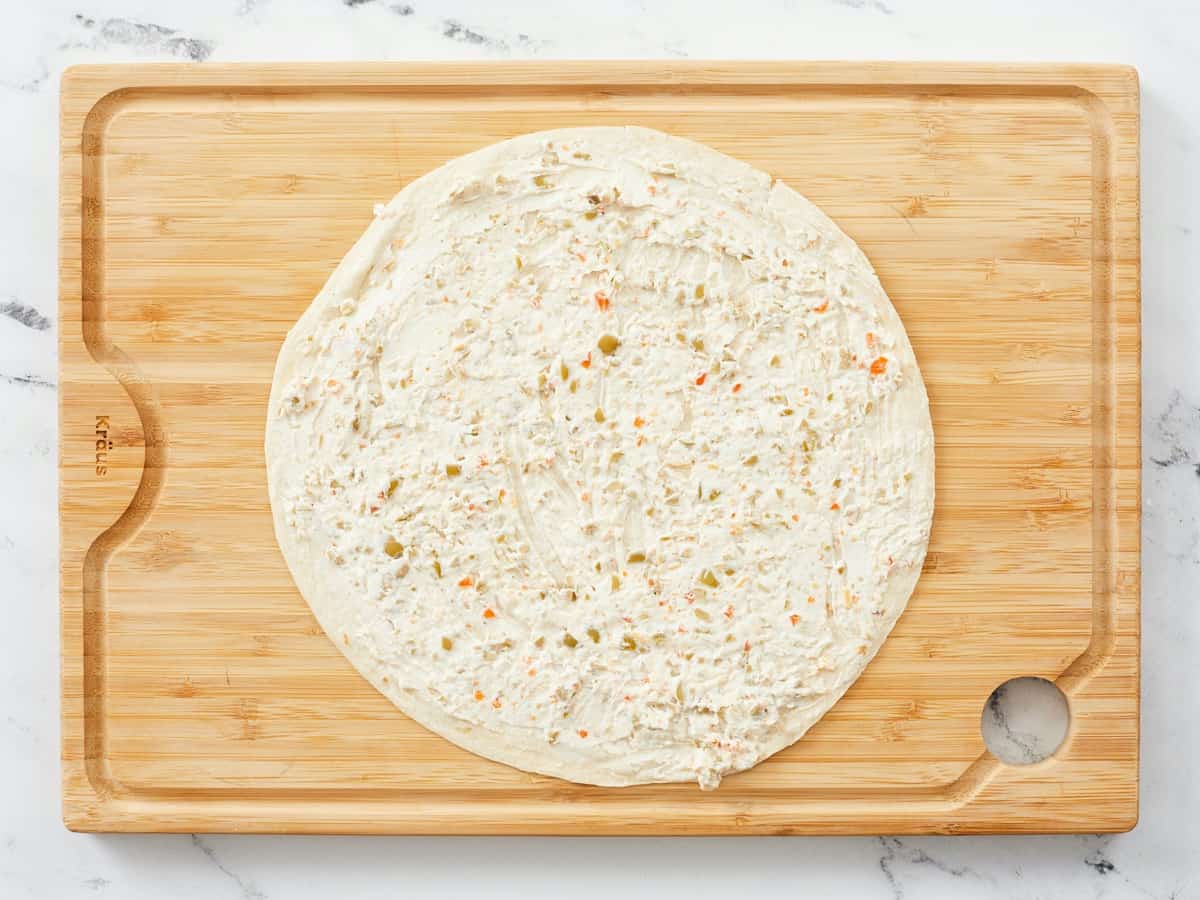
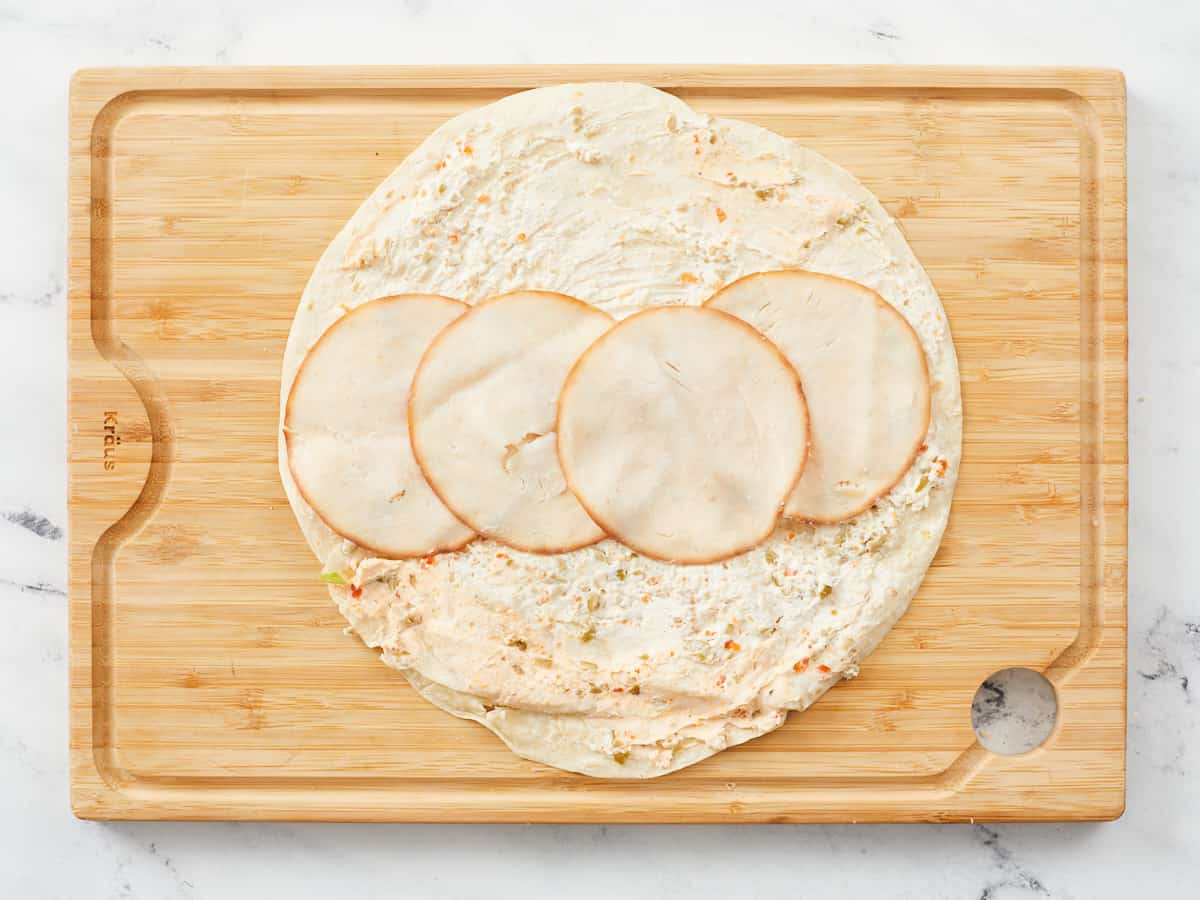
Lay the tortillas out flat. Spread 2-3 tablespoons of the cream cheese mixture on one side of each tortilla, coating the entire face evenly from edge to edge.
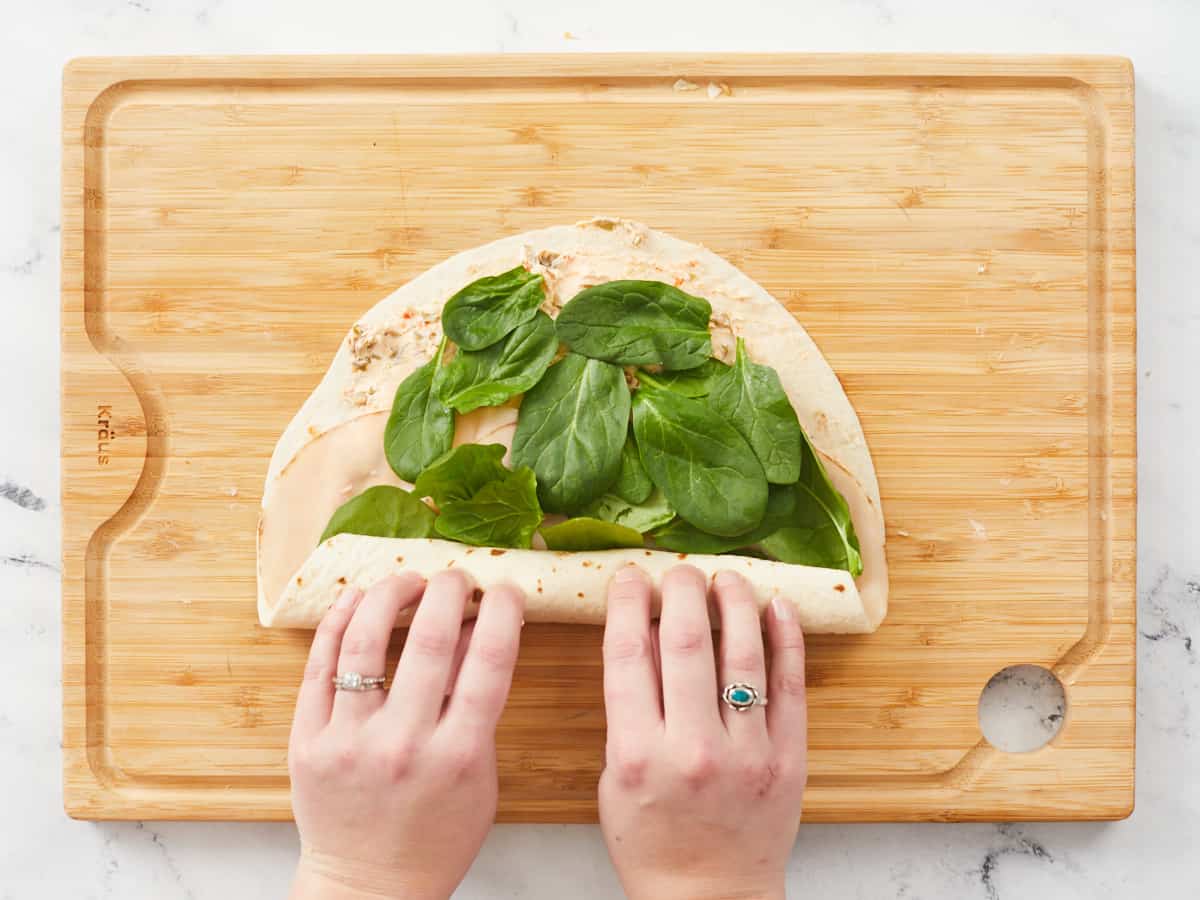
Arrange 3-4 slices of turkey along the center of the tortilla, overlapping them as little as possible to make an even layer, and leaving about ¼” of the cream cheese spread exposed on the top and bottom edges of the tortilla to help it stick together. Then add a single layer of spinach leaves on top of the turkey.
Starting with the edge closest to you, fold over the tortilla so it sticks, and then roll it up as tightly as possible, tucking in the fillings as you go.
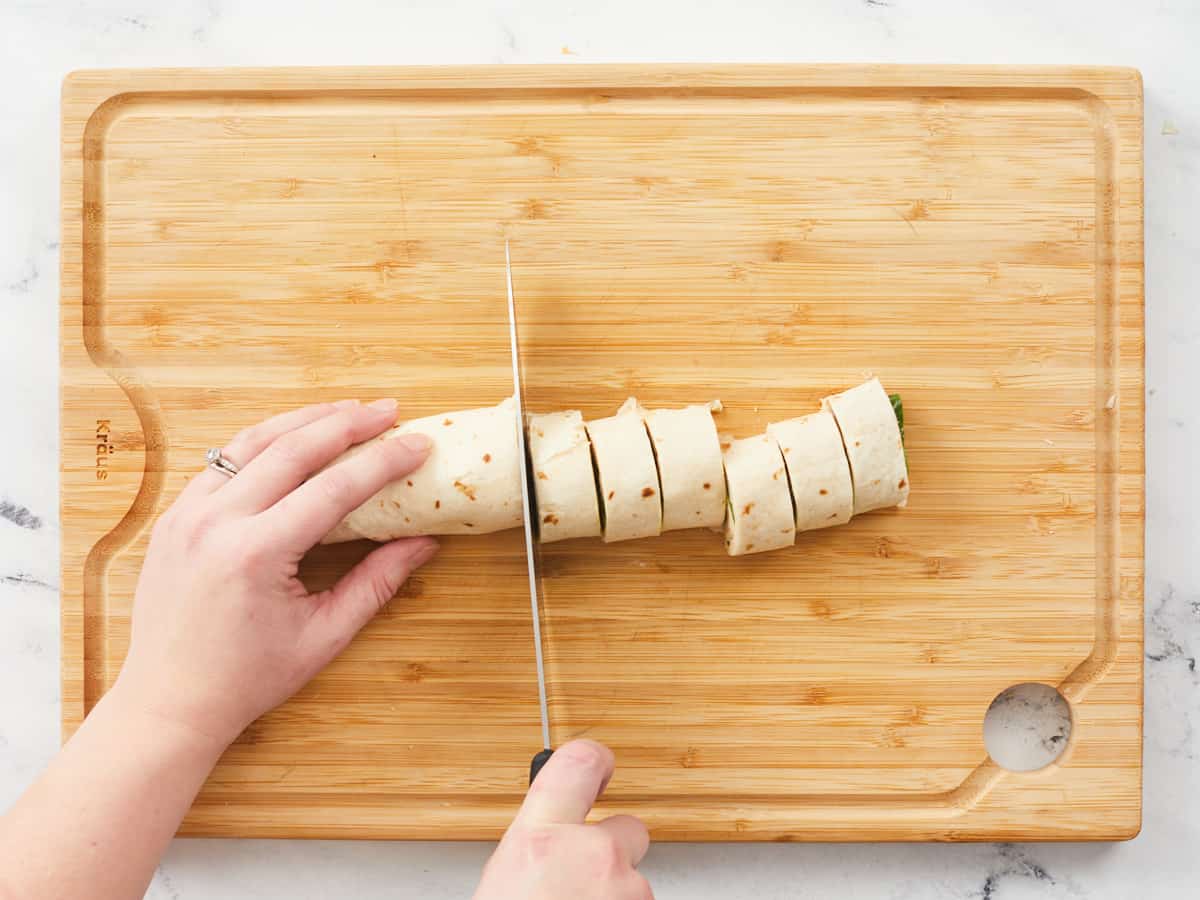
With the seam side facing down, slice the roll into 1" wide pieces.
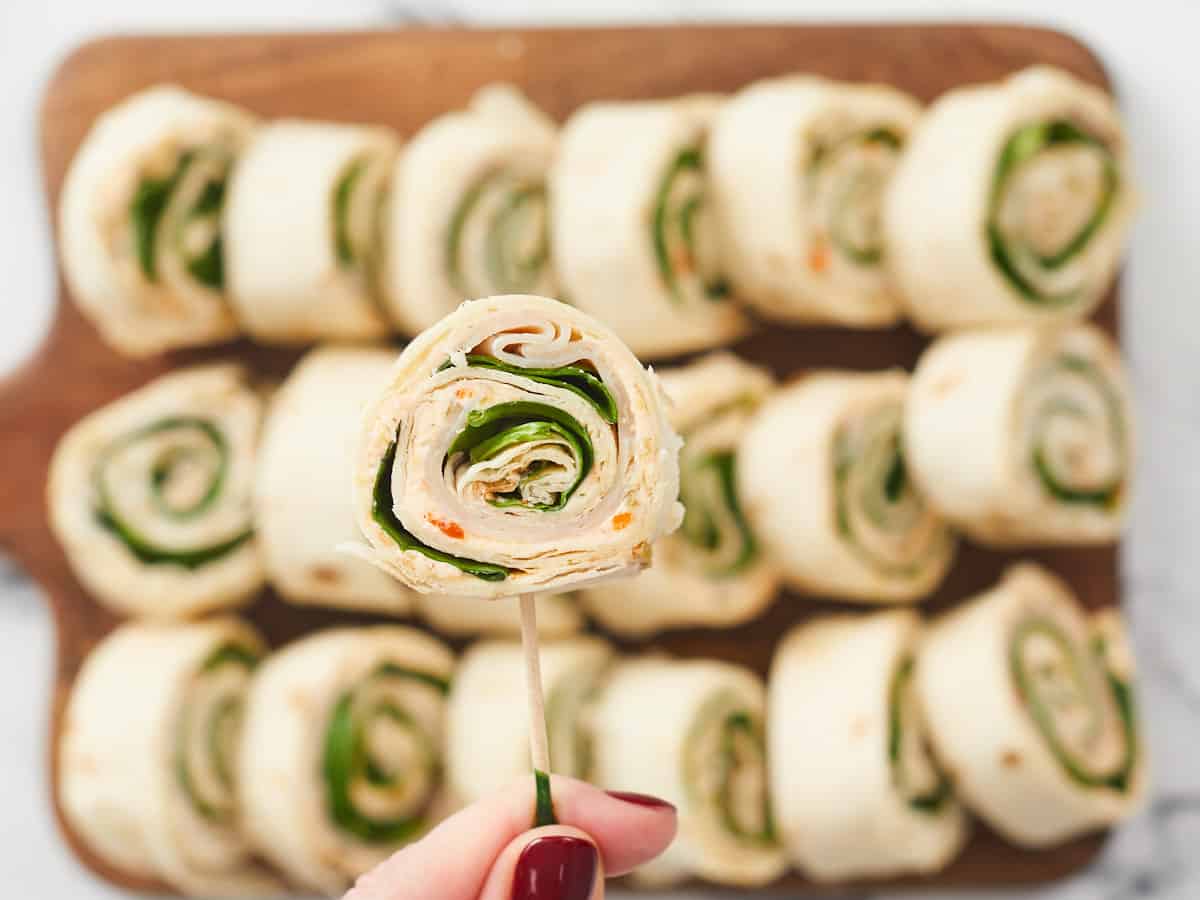
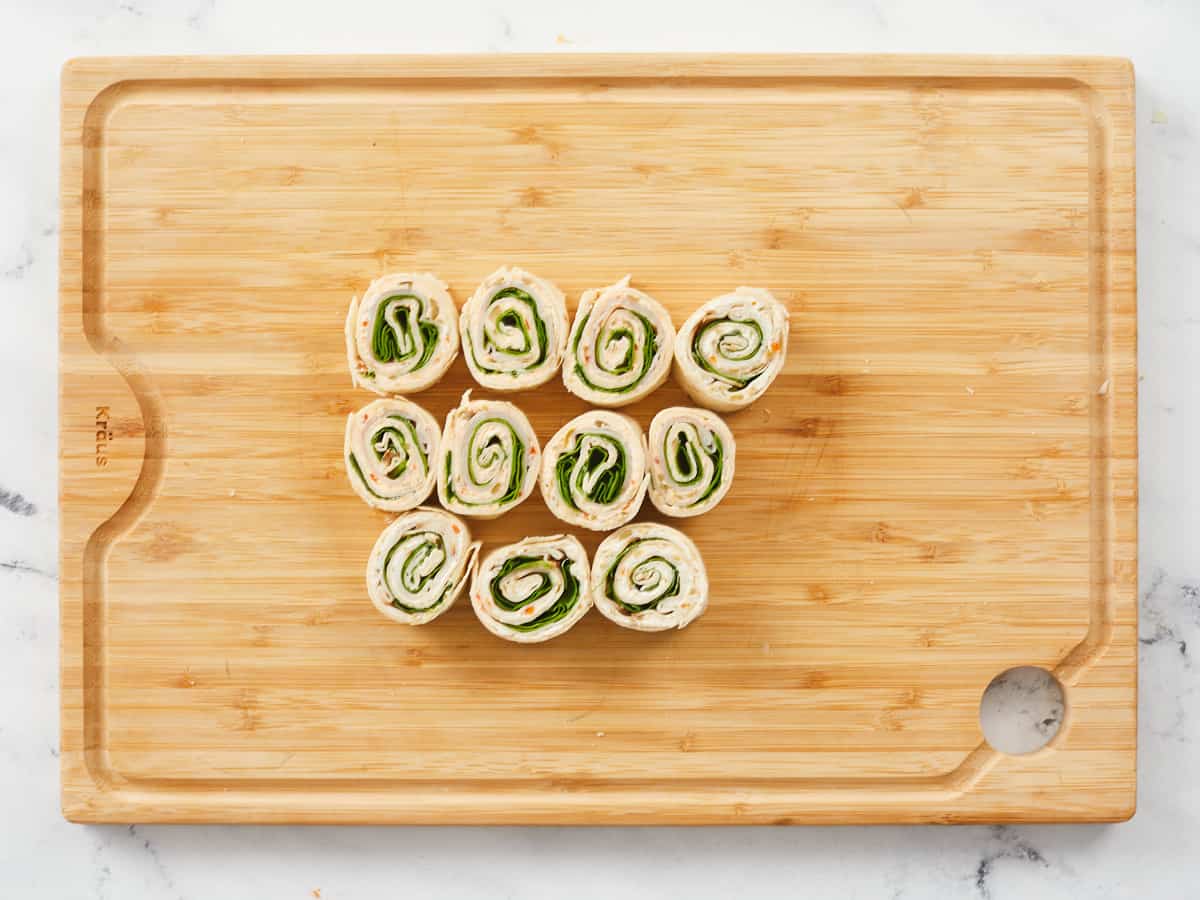
Flip each pinwheel on its face, exposing the spiral, and transfer it to a serving platter or air-tight meal prep container. The pinwheels should hold together on their own, but if desired, you can insert a decorative toothpick into each.
How to Make TuRKEY PINWHEELS – Step by Step Photos
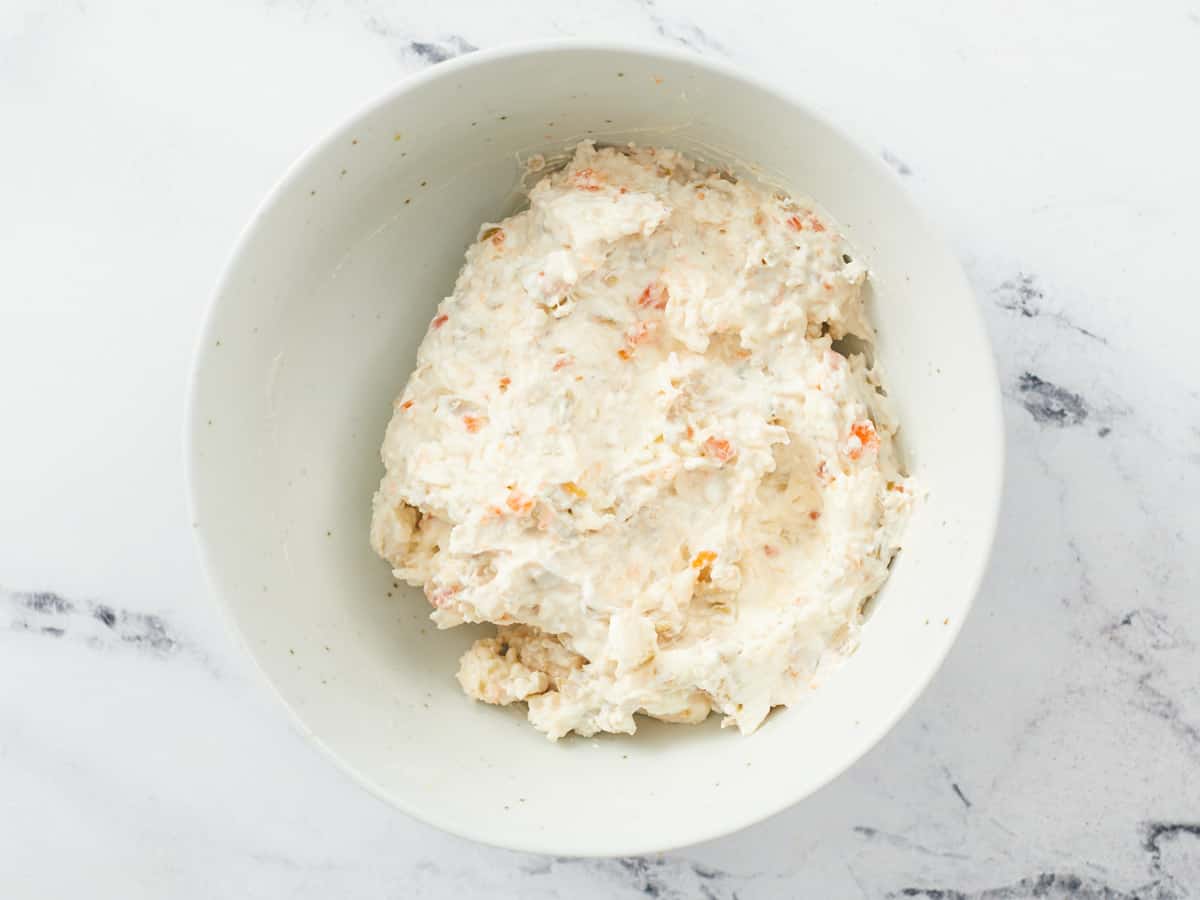
In a small bowl or air-tight container, make the cream cheese spread by stirring together 4 oz. of room-temperature cream cheese (cold cream cheese will be extremely difficult to mix and will likely create unpleasant lumps in the mixture), 1/8 cup of finely-shredded cheddar cheese, 1/3 cup of finely-chopped pimento-stuffed olives, 1 tablespoon of olive brine (which helps thin the cream cheese and eliminates the need for added salt), 1/2 teaspoon garlic powder, and 1/4 teaspoon of pepper until very well mixed.
This savory cream cheese spread, which is inspired by pimento cheese dip, can be made ahead and kept refrigerated for at least a week. If coming from the fridge, you will want to re-soften this mixture at room temperature (for about 30 minutes) before trying to spread it on the tortillas in the following step.
Lay each tortilla out flat on a clean work surface, and spread each tortilla with 2-3 tablespoons (about 1/4 of the mixture) of the savory cream cheese spread, covering it evenly from edge to edge. You can always add a bit more “glue” as you roll (or after slicing) if needed, but it’s much easier to do at this step.
Arrange 3-4 slices of turkey across the center of the tortilla, overlapping them slightly to make an even layer depending on the size and thickness of each slice. (Since ours were super thin, we overlapped the slices more so each bite was still as satisfying!)
Add a single layer of spinach leaves on top of the turkey, leaving about ¼” of the cream cheese spread exposed along the top and bottom edges of the tortilla so it will stick properly. I usually like to take the extra step of removing the longer stems.
Starting with the end closest to you, fold in the edge of the tortilla so it sticks, and then roll it all the way up, as tightly as possible, tucking and rearranging the fillings as you go — just to make sure you get a little bit of everything in every bite!
Adjust the log so that the exposed seam is secured against the cutting board before slicing it. Then, using a very sharp knife, slice the log into 8 even portions (about 1” wide). Be as gentle as possible, so the pinwheels maintain their shape as much as possible and the filling doesn’t squish out. To help, you can rotate the log as you slice, or just use a good knife and adjust them all here and there after slicing (as I have done!)
Flip each pinwheel on its face, exposing the spiral, and transfer to a serving platter or air-tight container. The pinwheels should hold together on their own, but if desired, you can insert a decorative toothpick into each pinwheel, starting with the outermost edge, to ensure they won’t unravel.
Making and eating these Turkey Pinwheels will totally have you feelin’ like a kid again!
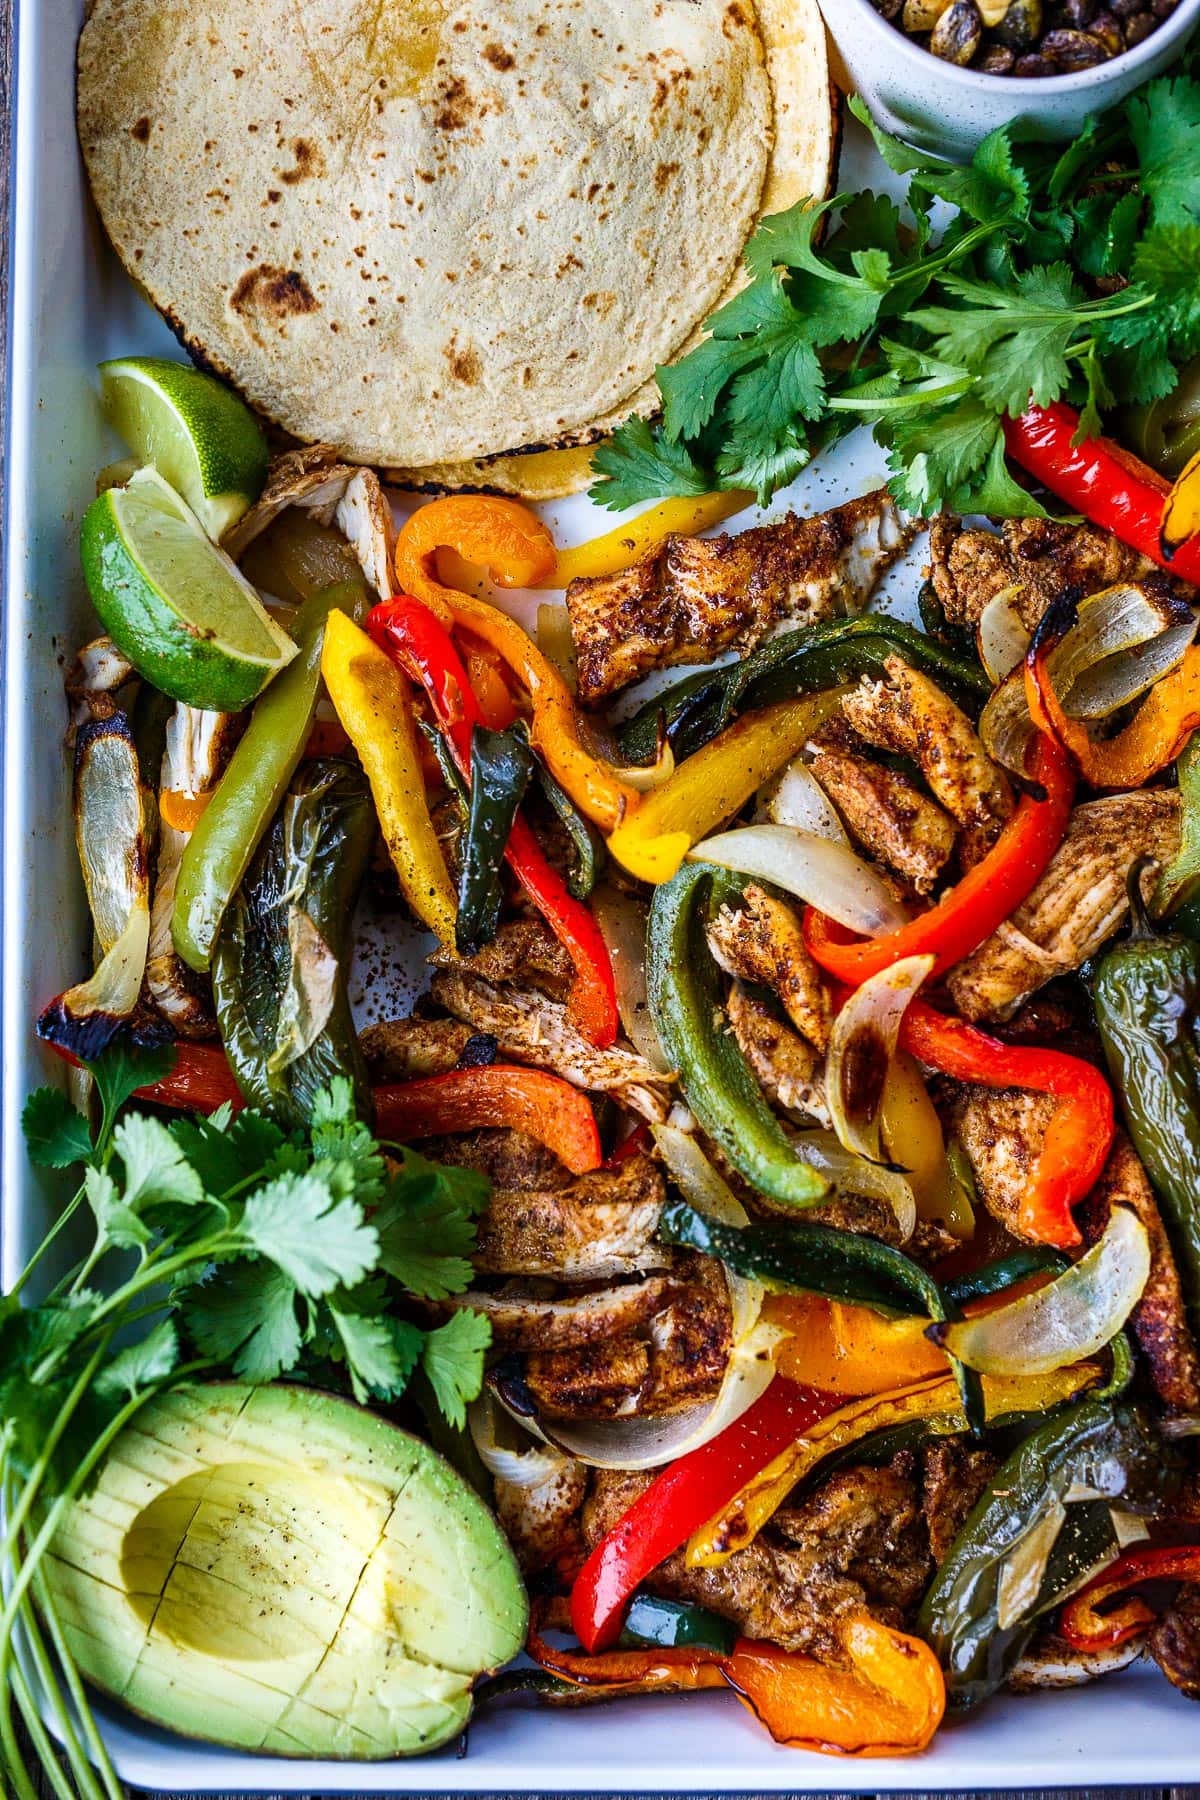
Sheet Pan Chicken Fajitas are a quick easy one-pan dinner! Deliciously marinated chicken and veggies are roasted until juicy and lightly charred. Fold them into warm tortillas with your favorite toppings or serve over rice. Either way, you’ll love this…
Sheet Pan Chicken Fajitas are a quick easy one-pan dinner! Deliciously marinated chicken and veggies are roasted until juicy and lightly charred. Fold them into warm tortillas with your favorite toppings or serve over rice. Either way, you'll love this quick easy meal!
Whipped Ricotta dip with honey is the perfect dip or spread for a crostini. Full of ridiculously flavorful flavor (say that three
The post Whipped Ricotta Dip appeared first on Salty Side Dish Recipes.
Whipped Ricotta dip with honey is the perfect dip or spread for a crostini. Full of ridiculously flavorful flavor (say that three
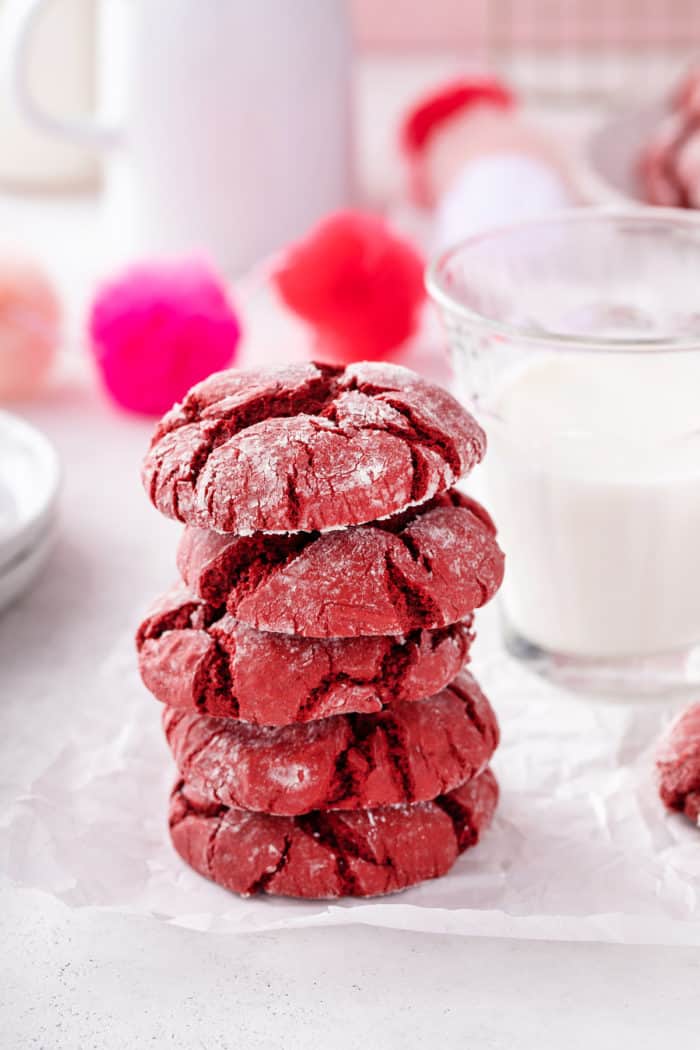
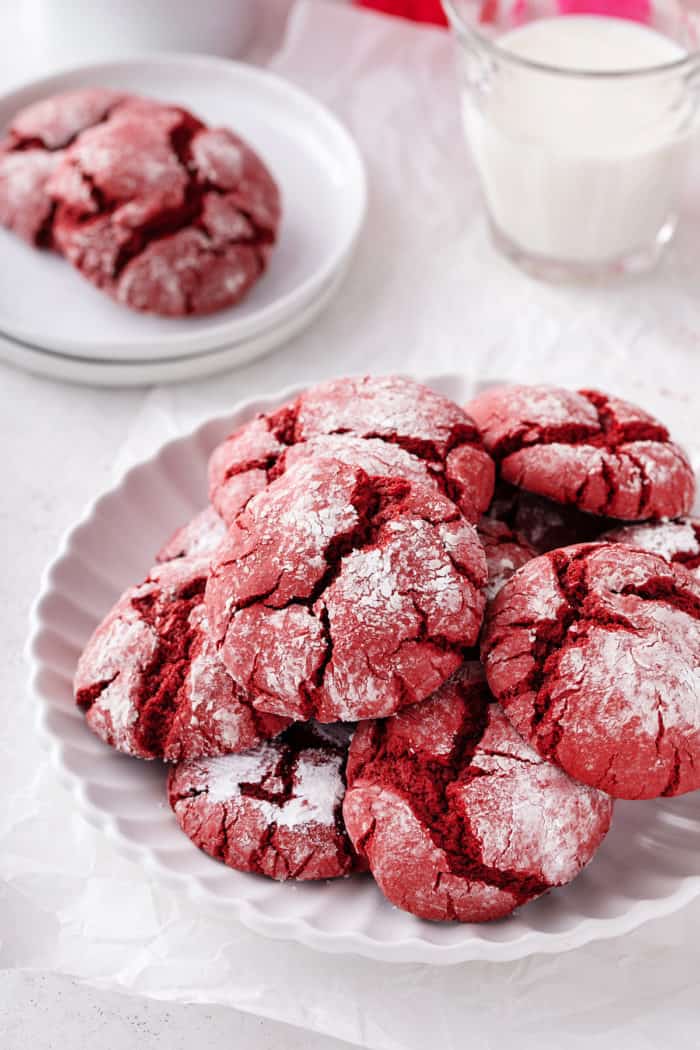
Use your favorite red velvet cake mix to whip up a batch of these red velvet crinkle cookies. These soft, chewy cookies are easy to make and their deep red color makes them perfect for celebrating Valentine’s Day. This post contains affiliate links. Do you think of red velvet as a Valentine’s Day thing or …
Use your favorite red velvet cake mix to whip up a batch of these red velvet crinkle cookies. These soft, chewy cookies are easy to make and their deep red color makes them perfect for celebrating Valentine’s Day.
This post contains affiliate links.
Do you think of red velvet as a Valentine’s Day thing or a Christmas thing?
I don’t know if it depends on where you live, but I tend to think of red velvet cake around Valentine’s Day – I guess because of the deep crimson color. But I know some people who love to enjoy it at Christmas instead.
I don’t really think you can go wrong with either option, although right now I am all about these red velvet crinkle cookies. They’re so easy that Elle can make them on her own to give to her friends for Valentine’s Day.
If you’re looking for a super simple Valentine’s treat, this is it!