This caramel apple trifle is the perfect balance of sweet, creamy, and crunchy, with layers of tender pound cake, smooth vanilla pudding, spiced apple pie filling, and a decadent caramel drizzle. Topped with whipped cream and pecans, each bite offers a…
This caramel apple trifle is the perfect balance of sweet, creamy, and crunchy, with layers of tender pound cake, smooth vanilla pudding, spiced apple pie filling, and a decadent caramel drizzle. Topped with whipped cream and pecans, each bite offers a delightful mix of flavors and textures. The use of store-bought pound cake and apple…
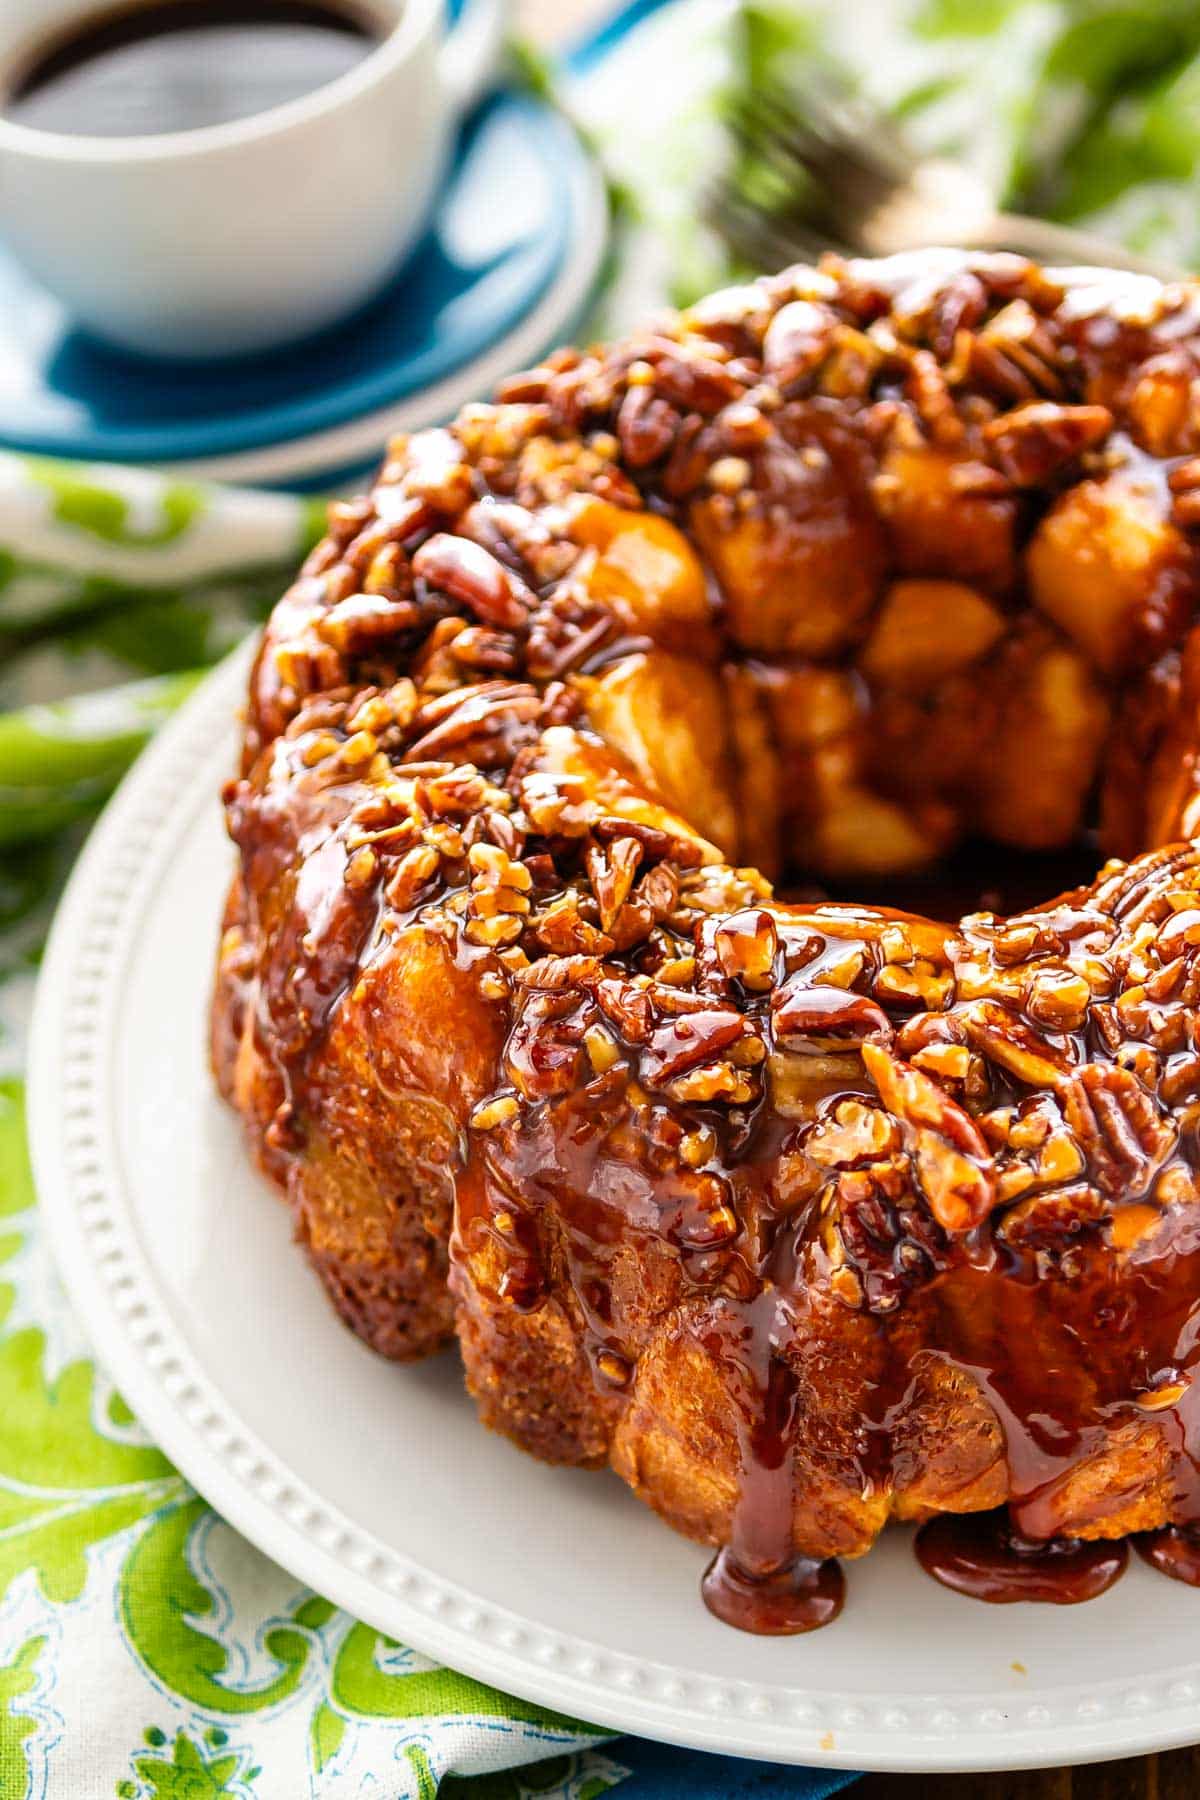
Caramel Monkey Bread is the perfect breakfast or dessert! It’s monkey bread mixed with sticky buns to make the best caramel pull-apart you’ve ever had! In my family, we would always make monkey bread for Christmas and we also love sticky buns – this recipe is the perfect combination of both. PLUS they’re easy to…
Caramel Monkey Bread is the perfect breakfast or dessert! It’s monkey bread mixed with sticky buns to make the best caramel pull-apart you’ve ever had!
In my family, we would always make monkey bread for Christmas and we also love sticky buns – this recipe is the perfect combination of both. PLUS they’re easy to make with frozen dinner rolls. Gooey Caramel Monkey Bread is the perfect breakfast or brunch and you don’t need any special equipment to make it.
Ingredients Needed
Dinner Rolls: This recipe uses frozen dinner rolls – like Rhodes brand – the kind that needs to rise.
Butterscotch Pudding: Not instant pudding! Use cook ‘n serve pudding mix.
Butter: I typically use unsalted but salted butter may be substituted.
Nuts: Pecans and Walnuts are great options, use your favorite.
Brown Sugar: This is what we use to make the gooey caramel sauce.
Using Pillsbury Biscuits
You can make this with the traditional ingredient – canned biscuit dough. You will be able to skip the rising step, but otherwise the recipe is the same. See the recipe below for instructions.
How to Make Caramel Monkey Bread
Thaw frozen rolls until they are just thawed (not risen), about 1-2 hours.
Use kitchen shears to cut biscuits into 6 pieces.
Mix together butter and brown sugar.
Place nuts and some biscuit pieces in your bundt pan, sprinkle with butterscotch pudding mix, continue layering, then add the butter mixture.
Cover and let rise.
Preheat oven to 350°F. Bake rolls until the top is somewhat firm and the center is soft but not gooey-soft. Cool no longer than 5 minutes, then turn pan over on serving plate.
Expert Tips
I speed up the rising process by placing the pan on top of my stove. The oven was running baking other things, and the rolls rose in about 1 hour.
I suggest making these the night before and refrigerating them until morning. Let them come to room temperature while the oven is preheating, then bake as directed.
Butterscotch pudding mix might seem strange, but that mixed with the brown sugar and butter is what creates the gooey caramel. It’s so much easier than using a saucepan to boil sugar and heavy cream.
These can also be made in a 9×13-inch cake pan. Baking time will be less.
Storage
Store leftover rolls in an airtight container in the refrigerator. You can also freeze leftovers!
Thaw frozen rolls until they are just thawed (not risen), about 1-2 hours.
Use kitchen shears to cut each roll into 6 pieces.
Coat a bundt pan with nonstick cooking spray. Sprinkle all of the nuts in the bottom of the pan. Place half of the roll pieces over the nuts. Sprinkle half of the pudding mix over the rolls.
Stir together melted butter and brown sugar in a small bowl. Pour half over the pudding mix. Top with remaining rolls, pudding mix, and sugar-butter mixture.
Cover with plastic wrap coated with nonstick cooking spray and let rise overnight, or at least 8 hours. (NOTE: I sped up the rising process by placing the pan on top of my stove. The oven was running baking other things, and the rolls rose in about 1 hour. I suggest making these the night before and refrigerating them until morning. Let them come to room temperature while the oven is preheating, then bake as directed.)
Preheat oven to 350°F. Bake rolls for 30-35 minutes until the top is somewhat firm and the center is soft but not gooey-soft. Cool no longer than 5 minutes, then turn pan over on serving dish. Enjoy warm right from the oven!
Video
Notes
To use Pillsbury canned biscuits, use 2 cans Grands! and slice each into 6 pieces. Skip all the rising steps; layer the biscuits in the pan as directed and then bake right away.
This white chocolate blackberry poke cake is an indulgent, creamy dessert made with layers of moist cake, blackberry preserves, white chocolate pudding filling, and sweet whipped topping.
This pumpkin bread pudding is a fun and easy fall dessert! Drizzled with rich bourbon butter sauce, everyone loves this…
This pumpkin bread pudding is a fun and easy fall dessert! Drizzled with rich bourbon butter sauce, everyone loves this classy dish. We love it for holidays like Thanksgiving or any fall dinner party.
Here’s an impressive dessert that’s got fall parties written all over it: pumpkin bread pudding! Imagine, bread cubes baked in a pumpkin-spiced custard until puffed and golden. Drizzle it with a bourbon butter sauce and it’s a little bit of heaven.
It’s the ideal fall dessert for dinner parties, and a great Thanksgiving alternative to pumpkin pie. We’re head over heels, and we hope you will be too!
Ingredients for pumpkin bread pudding
Bread pudding is a concept that dates back to the 11th century as a way for using up stale bread. Cooks would tear up pieces and bake them with a custard, a genius way of repurposing leftovers into a delicious dessert. It was a humble dish, but it spread and today it’s eaten around the world. Pumpkin bread pudding is a spin on the classic incorporating real pumpkin and pumpkin spices. Here’s what you’ll need:
Sourdough or other artisan bread like French bread, etc.
Eggs
Whole milk
Pumpkin puree
Brown and granulated sugar
Vanilla extract
Pumpkin pie spice
Salt
The best bread for bread pudding
Bread pudding recipes often call for challah or brioche: enriched breads made with milk, eggs or butter and sugar. But our preference for a bread pudding is that these enriched breads are too sweet and come out a little soggy. We prefer a bread pudding with a little more texture to each bite.
You can use any type of bread for pumpkin bread pudding: at it’s heart, it’s a simple, humble concept that should work with anything. But we liked the flavor of sourdough bread! The crustier crust also gave it a nice texture. We’d stay away from multi-grain bread here since it has a strong savory flavor. Here are a few types of bread we like for this recipe:
Sourdough
French bread (just make sure to buy 1 pound)
Artisan bread of any type: any crusty loaf you find at the store
Drizzle with bourbon sauce if desired
Pumpkin bread pudding is delicious on its own, but you can take it to an otherworldly level with bourbon butter sauce! Its tastes like liquid gold, and it’s incredibly easy to make. Here are a few notes on making bourbon sauce:
Simmer for about 3 minutes. Keep it at a constant simmer, not a boil! It only takes a few minutes to come together.
Taste to assess doneness. It’s done when it’s slightly thickened, golden in color and the bourbon flavor has mellowed.
Strain to make it perfectly smooth. The butter sauce comes out with a light layer of white foam on top, which is whey proteins. For the smoothest sauce, strain it into a pitcher before using it. If you prefer, you can skip this step: the white foam doesn’t affect the flavor, just the appearance!
Storing leftovers & make ahead notes
This pumpkin bread pudding the ideal dessert for entertaining because it’s very easy to make ahead. It’s very stable at room temperature for a few hours and saves well refrigerated. Here’s what to know about making this dessert ahead:
Let sit at room temperature for up to 2 hours, or refrigerate if 3 or more hours in advance. This recipe is great made ahead: make it day of and allow to sit at room temperature up to 2 hours until serving (or refrigerate if longer).
Make 1 day in advance and refrigerate. It keeps well in the refrigerator up to 1 day in advance. It’s best reheated but you can also serve cold.
Warm it in the oven prior to serving. If you’d like, you can crisp up the top by reheating it in a 350 degree oven until warmed.
Preheat the oven to 350 degrees Fahrenheit. Butter or grease a 9 x 13-inch baking dish.
Cut or tear the bread into 1-inch squares. Place it in the baking dish and place in the preheating oven for 5 to 10 minutes until lightly dried but not browned.
Meanwhile, whisk the eggs. Then whisk in the milk, pumpkin puree, brown sugar, granulated sugar, vanilla, pumpkin pie spice, and salt. Pour it over the bread in the pan and mix it with your hands until fully coated.
Place in the oven and bake 45 to 50 minutes, until it is puffed and golden and you can no longer see standing liquid. Allow to cool for at least 15 minutes before serving. Make ahead: This recipe is great made ahead: make it day of and allow to sit at room temperature until serving, or make it 1 day in advance and refrigerate. If you’d like, you can crisp up the top by reheating it in a 350 degree oven until warmed.
Make the bourbon sauce: Prior to serving, in a small saucepan, whisk together all bourbon sauce ingredients over medium heat. When it starts to simmer, simmer lightly bubbling for 3 minutes, maintaining the heat at medium to medium low so that it doesn’t bubble heavily. Once it turns golden brown at about 3 minutes, taste and make sure the flavor is caramelly with a hint of bourbon (the bite of the bourbon should be cooked out). Remove from the heat and strain it into a pitcher. Makes ¾ cup; make up to 3 days in advance, refrigerate, and warm over medium heat before serving.
Category:Dessert
Method:Baked
Cuisine:American
Diet:Vegetarian
A few more pumpkin desserts
This pumpkin bread pudding is one of our favorite pumpkin desserts for this time of year! It’s ideal for Thanksgiving instead of pumpkin pie, or any fall occasion. If you love pumpkin desserts:
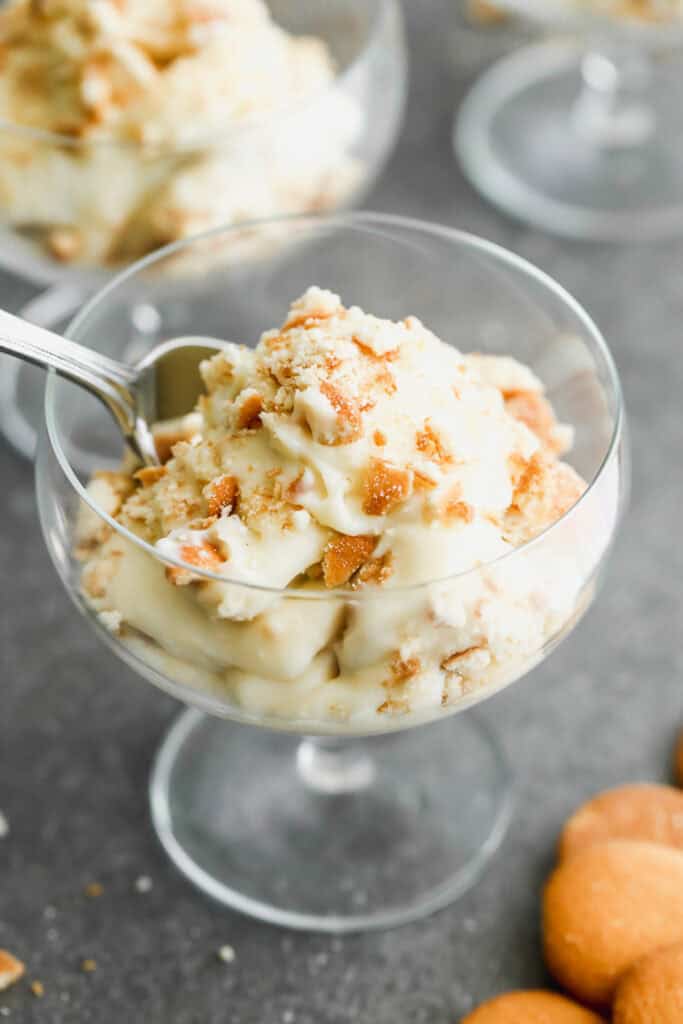
This Southern-inspired Vegan Banana Pudding is guaranteed to be a hit at your next get together. Vegan vanilla wafers and fresh banana slices layered between a creamy vegan custard, then topped with whipped cream and additional crushed wafers. All you need is 10 simple ingredients!
As you may know, the traditional creamy banana pudding was first published in Good Housekeeping in 1888 and is now a beloved, classic Southern dessert! The first variations of the dessert combined custard with sponge cake, but over time, the original sponge cake was swapped for vanilla wafer cookies and morphed into the no-bake layered dessert we know today.
We decided it was finally time to put our own vegan spin on the classic recipe, replacing the eggs and dairy with simple vegan-friendly ingredients that are easy to find in mainstream grocery stores today. Plus, we developed our own Homemade Vegan Vanilla Wafers, so everyone can make this recipe!
Bring this delicious vegan dessert to your next family gathering, Thanksgiving or Christmas dinner, or even summer BBQs. Everyone loves banana pudding any time of year!
Ingredients You’ll Need
For the Vegan Vanilla Pudding
Sugar: Granulated sugar sweetens the pudding while keeping the color light. To make sure your pudding is vegan-friendly, opt for organic sugar.
Cornstarch: Many traditional banana pudding recipes thicken the custard using eggs. In this egg-free, vegan dessert, cornstarch acts as the thickening agent and helps thicken the pudding while keeping it soft and velvety in texture.
Non-dairy milk: Any unsweetened non-dairy milk of choice will work, with the exception of homemade oat milk. Homemade oat milk is likely to gelatinize and become unpleasant and slimy. Instead, try our Homemade Almond Milk, or coconut milk, soy milk, or cashew milk!
Vegan butter: Adds richness and an extra smooth mouthfeel to the pudding.
Vanilla extract: Essential for the vanilla flavor!
Turmeric: Optional, but is used to add a bit of color to the pudding, mimicking the color of traditional egg-based custards.
Vegan condensed milk: Adds sweetness and enhances the rich, creamy texture of the pudding. We used our Homemade Vegan Sweetened Condensed Milk, but feel free to use a store-bought vegan condensed milk if you have access to it!
Vegan heavy cream: Used to lighten up the texture of the custard and to top the final dessert with homemade whipped cream! We used a store-bought vegan heavy cream. Look for one near you from brands like Silk, Country Crock, Violife, Let’s Do Organic, or Califia Farms!
For the Assembly:
Vegan vanilla wafers: We used our Homemade Vegan Vanilla Wafers, but if you’re lucky enough to have access to vegan-friendly store-bought cookies, feel free to use them!
Ripe bananas: The best bananas for banana pudding are fresh and ripe but not overly browned and spotty. They should be firm enough to hold their shape once sliced and keep well layered in the dessert.
Combine the cornstarch, sugar, and non-dairy milk. Add the sugar and cornstarch to a medium saucepan and combine. Add 1 cup of non-dairy milk and whisk together until smooth. Whisk in the remaining non-dairy milk.
Simmer the milk mixture until thickened. Place the saucepan over medium heat and cook, mixing constantly, until the mixture thickens, about 5-6 minutes.
Add vegan butter, vanilla, turmeric, and salt. Remove the pudding mixture from the heat and add the vegan butter, vanilla extract, turmeric and salt. Mix together until the vegan butter is melted and the mixture is smooth.
Set aside to cool. Pour the mixture into a large, heatproof bowl and press a piece pf plastic wrap directly on the surface so a skin doesn’t form. Set aside to cool to room temperature. If making it in advance, place it in the fridge until it is ready to assemble.
Add vegan condensed milk. Once the pudding is cooled to room temperature, add the vegan condensed milk. Mix together and set aside.
Whip the heavy cream. Add the vegan heavy cream to a large bowl. Use an electric hand mixer or stand mixer fitted with the whisk attachment and beat the heavy cream until stiff peaks form.
Fold the whipped cream into the pudding. Add the whipped cream to the bowl with the pudding and fold together gently until combined.
Assemble the Banana Pudding
Begin layering the pudding. To a trifle dish or large baking dish, add a quarter of the pudding mixture to the bottom and spread evenly. Add a layer of vegan vanilla wafers, followed by banana slices.
Layer two more times. Continue layering pudding, followed by wafers and banana slices two more times. Top with the remaining pudding mixture.
Refrigerate. Cover the dish tightly with plastic wrap and refrigerate for at least two hours or up to overnight.
Right Before Serving
Make the whipped cream for topping. Right before serving, add the remaining vegan heavy cream and sugar to a large bowl and whip to soft peaks.
Garnish and serve. Top the banana pudding with the whipped cream and crush any remaining vanilla wafers on top. Enjoy!
Recipe FAQs
Can I make this vegan banana pudding gluten-free?
We used our Homemade Vegan Vanilla Wafers and have not tested our homemade recipe with gluten-free flour yet. However, if you have access to vegan and gluten-free vanilla wafer cookies, this recipe can be easily made gluten-free!
How long does the assembled vegan banana pudding last?
Once assembled, this pudding is best enjoyed within 24 hours. The longer it sits, the softer the cookies will become.
Can I serve right away without chilling?
We recommend chilling for at least a few hours. Chilling the layered dessert helps the pudding firm up and creates a dessert that’s much easier to slice and serve. If you like your cookies to remain on the crunchier side, refrigerate for just 2-3 hours!
How to Prepare Vegan Banana Pudding in Advance
If you’re preparing your banana pudding ahead of a dinner your hosting or the holidays, there are a few components you can prep in advance to make the serving day stress-free.
First, prepare the homemade vanilla wafers, if they are being used, and store them in an airtight container at room temperature. Second, prepare the homemade pudding and refrigerate until ready to use.
Then, layer the dessert and refrigerate at least 2 hours ahead of serving or overnight!
Make sure you tag us on Instagram @sweetsimplevegan and @consciouschris and hashtag #sweetsimplevegan if you make this recipe. We love to see your photos!
This Southern-inspired Vegan Banana Pudding is guaranteed to be a hit at your next get together. Vegan vanilla wafers and fresh banana slices layered between a creamy vegan custard, then topped with whipped cream and additional crushed wafers. All you need is 10 simple ingredients!
Combine the cornstarch, sugar, and non-dairy milk. Add the sugar and cornstarch to a medium saucepan and combine. Add 1 cup of non-dairy milk and whisk together until smooth. Whisk in the remaining non-dairy milk.
Simmer the milk mixture until thickened. Place the saucepan over medium heat and cook, mixing constantly, until the mixture thickens, about 5-6 minutes.
Add vegan butter, vanilla, turmeric, and salt. Remove the pudding mixture from the heat and add the vegan butter, vanilla extract, turmeric and salt. Mix together until the vegan butter is melted and the mixture is smooth.
Set aside to cool. Pour the mixture into a large, heatproof bowl and press a piece of plastic wrap directly on the surface so a skin doesn’t form. Set aside to cool to room temperature. If making it in advance, place it in the fridge until it is ready to assemble.
Add vegan condensed milk. Once the pudding is cooled to room temperature, add the vegan condensed milk. Mix and set aside.
Whip the heavy cream. Add the vegan heavy cream to a separate large bowl. Using an electric hand mixer or stand mixer fitted with the whisk attachment, beat the heavy cream until stiff peaks form.
Fold the whipped cream into the pudding. Add the whipped cream to the bowl with the pudding and fold together gently until combined.
Assembly
Begin layering the pudding. To a trifle dish or large baking dish, add a quarter of the pudding mixture to the bottom and spread evenly. Add a layer of vegan vanilla wafers, followed by banana slices.
Layer two more times. Continue layering pudding, followed by wafers and banana slices two more times. Top with the remaining pudding mixture.
Refrigerate. Cover the dish tightly with plastic wrap and refrigerate for at least two hours or up to overnight.
Right Before Serving
Make the whipped cream for topping. Right before serving, add the remaining vegan heavy cream and sugar to a large bowl and whip to soft peaks.
Garnish and serve. Top the banana pudding with the whipped cream and crush any remaining vanilla wafers on top. Enjoy!
Notes
As the assembled pudding chills in the fridge, the cookies will soften to a cake-like texture and the pudding will firm up. If you prefer the cookies to retain more crunch, only chill for a few hours before serving!
This pudding is best enjoyed within 24 hours. The longer it sits, the softer the cookies will become.