Iced Gingerbread Oatmeal Cookies

These easy Gingerbread Oatmeal Cookies are chewy, loaded with cozy flavor, and the addition of molasses makes them extra delicious. Perfect for the holidays or any day!These easy Gingerbread Oatmeal Cookies are chewy, loaded with cozy flavor, and the addition of molasses makes them extra delicious.…
These easy Gingerbread Oatmeal Cookies are chewy, loaded with cozy flavor, and the addition of molasses makes them extra delicious. Perfect for the holidays or any day!

These easy Gingerbread Oatmeal Cookies are chewy, loaded with cozy flavor, and the addition of molasses makes them extra delicious. Perfect for the holidays or any day!

Want to try more variations on the classic oatmeal cookie? Add these Soft and Chewy Pumpkin Oatmeal Cookies to your list. These Maple Iced Oatmeal Cookies are another favorite!

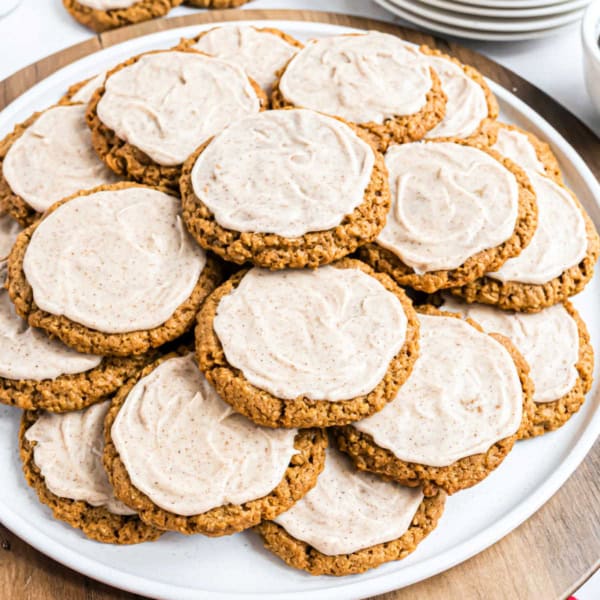
Iced gingerbread cookies with oatmeal on a cooling rack.

Chewy Iced Gingerbread Oatmeal Cookies

If old-fashioned gingerbread cookies and iced oatmeal cookies had a baby, it would be these Gingerbread Oatmeal Cookies.

Gingerbread oatmeal cookies have the chewy factor going for them, with slightly crispy edges.

Oats make them heartier and more satisfying in a stick-to-your-ribs kind of way than standard gingerbread recipes. The molasses and spices give these cookies bolder flavor than other oatmeal cookies.

Because of that ginger flavor, I could see these gingerbread oatmeal cookies fitting in nicely with any holiday cookie tray. I also think they’re flexible enough that you could serve them the rest of the year too, like gingerdoodles. 

  • This is an easy drop cookie recipe, which means there are no cookie cutters or rolling pins involved. Just portion the dough into balls and let the oven do the rest!
  • These gingerbread oatmeal cookies are full of cozy flavor! The molasses adds so much depth and complexity, which you just can’t get from other sweeteners.
  • There’s a bit of room to put your own spin on these gingerbread oatmeal cookies. Add some espresso powder for a gingerbread latter flavor!

Easy Ingredients

Ingredients needed to make iced gingerbread oatmeal cookies.

The full ingredient list is in the recipe card at the bottom of the post, but here are some highlights

  • Unsalted butter – Melt this and let it cool slightly before you start the recipe. 
  • Light brown sugar – The molasses adds plenty of flavor already, so you don’t need dark brown sugar (which is also flavored with molasses) here.
  • Molasses – Avoid blackstrap molasses, which is quite bitter. I prefer it in savory recipes rather than recipes where we need sweetness.
  • Quick-cook oats – You’ll process these to partially grind them. You can substitute old-fashioned oats, but do not substitute steel-cut oats.
  • Spices – Cinnamon, nutmeg, ground ginger, and ground cloves are classic gingerbread spices.
  • Powdered sugar – The smaller sugar particles mean this melts smoothly into the glaze. Powdered sugar is also known as confectioners’ sugar.
  • Heavy whipping cream – For a rich, thick glaze.

How to Make Gingerbread Oatmeal Cookies

Step by step photos showing how to make oatmeal gingerbread cookie dough.

Make the Dough:

  • Pulse the oats in a food processor until partially ground.
  • Beat together the butter with the sugars, then beat in the egg and molasses. Stir in the dry ingredients and oats. 
Step by step photos showing how to bake gingerbread oatmeal cookies.

Bake the Cookies:

  • Use a 2 tablespoon cookie scoop to drop the dough onto a parchment-lined baking sheet.
  • Bake in a 350ºF oven for 14-16 minutes. Remove the cookies from the oven and use a spoon to push in the edges and ensure they’re nice and round. 
Step by step photos showing how to ice gingerbread oatmeal cookies.

Glaze the Cookies:

  • Whisk the powdered sugar with the heavy cream and cinnamon until smooth. 
  • Dollop a teaspoon of icing onto each cookie.
  • Spread the glaze with a butter knife or offset spatula. 
  • Allow the icing to set, then store or serve.

Tips and Tricks

  • Use a 2 Tablespoon cookie dough scoop if you have one. This helps you get evenly sized gingerbread oatmeal cookies, which means they’ll finish baking at the same time and be roughly the same size.
  • Let the cookies cool completely before frosting them. If they’re even a little bit warm, the glaze will simply melt into the cookies.
  • Store gingerbread oatmeal cookies in an airtight container at room temperature for up to 1 week
  • Freeze these cookies in an airtight container or freezer bag with parchment separating the layers for up to 3 months. Thaw at room temperature before serving.
Iced gingerbread oatmeal cookies on a serving plate.

More Gingerbread Recipes

These easy Gingerbread Oatmeal Cookies are chewy, loaded with cozy flavor, and the addition of molasses makes them extra delicious. Perfect for the holidays or any day!
Print

Gingerbread Oatmeal Cookies Recipe

These easy Gingerbread Oatmeal Cookies are chewy, loaded with cozy flavor, and the addition of molasses makes them extra delicious. Perfect for the holidays or any day!
Course Cookies
Cuisine American
Keyword iced oatmeal cookie recipe, oatmeal cookies
Prep Time 15 minutes
Cook Time 14 minutes
Resting Time 30 minutes
Total Time 59 minutes
Servings 36 cookies
Calories 170kcal
Author Aimee

Ingredients

For the Cookie Dough

  • 1 cup unsalted butter, melted
  • ½ cup granulated sugar
  • 1 cup light brown sugar, packed
  • 1 large egg
  • cup molasses
  • 2 cups quick-cook oats
  • 2 cups all-purpose flour
  • 2 teaspoons cinnamon
  • 1 teaspoon nutmeg
  • 1 teaspoon ground ginger
  • ¼ teaspoon ground cloves
  • 1 teaspoon kosher salt
  • 1 teaspoon baking soda
  • 1 Tablespoon baking powder

For the Icing

  • 2 cups powdered sugar
  • ½ cup heavy whipping cream
  • 1 teaspoon cinnamon

Instructions

  • Start by processing the oats. Add quick-cook oats to a food processor (or blender) and pulse until partly ground. I pulsed mine 7 times, about 1 second each. Set oats aside.
  • In a large mixing bowl, blend together butter with sugars. Mix 1-2 minutes until combined. Add egg and molasses, until well blended.
  • Add in remaining dry ingredients, including the processed oats. Stir just until fully combined.
  • Using a 2 Tablespoon cookie scoop, drop dough onto a parchment paper lined cookie sheet about 2 inches apart. Bake in a 350 degree oven for 14-16 minutes. Remove cookies from the oven and use a spoon (or back of spatula) to reshape the cookies (some of the cookie dough may spread, making mis-shapen cookies). Allow cookies to cool on the pan for 5 minutes, then remove and cool completely on a wire cooling rack.
  • To make glaze, whisk together powdered sugar with heavy cream and cinnamon until smooth. Dollop 1 teaspoon of icing onto the top of each cooled cookie, spreading it with a knife or offset spatula. Allow the icing to harden, about 30 minutes.

Notes

  • Processing the oats creates a chewy texture without increasing the baking time. Quick oats when processed act as a binder in the cookie batter, helping create the perfect dough structure. You can use old-fashioned rolled oats too, if you process them as directed above. Do not use steel cut oats for this recipe.
  • Store frosted cookies in an airtight container at room temperature for up to one week.
  • Freeze cookies in a single layer separated by parchment paper for up to 3 months.

Nutrition

Serving: 1cookie | Calories: 170kcal | Carbohydrates: 27g | Protein: 2g | Fat: 7g | Saturated Fat: 4g | Polyunsaturated Fat: 0.4g | Monounsaturated Fat: 2g | Trans Fat: 0.2g | Cholesterol: 22mg | Sodium: 137mg | Potassium: 86mg | Fiber: 1g | Sugar: 18g | Vitamin A: 213IU | Vitamin C: 0.03mg | Calcium: 41mg | Iron: 1mg

Chewy Cardamom Cookies

These Cardamom Cookies are full of cozy holiday flavor! This Scandinavian-inspired cookie recipe is perfect for adding to your Christmas cookie menu.These Cardamom Cookies are full of cozy holiday flavor! This Scandinavian-inspired cookie recipe is perfect for adding to your Christmas…
These Cardamom Cookies are full of cozy holiday flavor! This Scandinavian-inspired cookie recipe is perfect for adding to your Christmas cookie menu.

These Cardamom Cookies are full of cozy holiday flavor! This Scandinavian-inspired cookie recipe is perfect for adding to your Christmas cookie menu. You’re only 30 minutes away from fresh baked cookies.

For more recipes with cardamom flavor, try my Chai Latte Cupcakes and Chai Donuts. If you enjoy a warm chai latte, you’ll love these cookies!

Cardamom cookies stacked on parchment paper.

Chewy Cardamom Orange Cookies

Cinnamon is everywhere this time of year, but I think it’s time for cardamom to have its moment in the spotlight! First up is this cardamom cookie!

Cardamom is similar to ginger, but it has a different flavor. This makes sense because ginger comes from a root, while cardamom comes from a seed. Like ginger, people consider cardamom a warm spice, but it has a citrusy undertone.

You’ll find cardamom in chai cookies and Indian curries. It is also very popular in Scandinavian baking, like Sweden’s famous cardamom buns.

Here’s why you’ll love this cardamom cookie recipe:

  • The unique combination of sweet, spicy, and citrusy notes makes these cardamom cookies a stand out!
  • Cardamom cookies are so perfect for the holidays!
  • These cardamom cookies are also easy to make. Just a simple drop sugar cookie packed with warm spices.

Important Ingredient Notes

Ingredients needed to make cardamom cookies.

The full ingredient list is in the recipe card at the bottom of the post, but here are some highlights.

  • Unsalted butter – Use my guide on how to soften butter quickly.
  • Dark brown sugar – Dark brown sugar has a stronger molasses flavor, which works well with the cardamom.
  • Egg yolks – Using yolks instead of whole eggs makes these cookies chewier and richer. You can refrigerate the whites for a few days or freeze them for a recipe like Peppermint Meringue Cookies.
  • Orange zest – Orange also pairs beautifully with cardamom thanks to its citrus notes.
  • Pure Vanilla extract- use my homemade vanilla extract for delicious flavor.
  • All-purpose flour – Lightly spoon this into the measuring cups instead of scooping. Use my tips on how to measure flour for best results.
  • Ground cardamom – Make sure yours is fresh! It should smell aromatic when you open the jar.

How to Make Cardamom Cookies

Step by step photos showing how to make cardamom cookies.

Make the cookie dough.

  • Using a hand blender or an electric stand mixer with paddle attachment, you’ll make the cookie dough.
  • I use a 2 Tablespoon cookie scoop to portion out the cookie dough.
Step by step photos showing how to bake cookies with cardamom.

Prepare to Bake.

  • Roll cookie dough in sugar, until fully coated.
  • Bake in oven on a parchment paper lined baking sheet sheet. Tap the tops of the cookies immediately after removing from the oven.

Tips and Tricks

  • Use my tips on how to zest a lemon to zest the orange.
  • You can store the cardamom cookies in an airtight container at room temperature for up to one week. Make sure to let them cool completely before storing them.
  • This cardamom cookie dough freezes well! See my guide on how to freeze cookie dough. You can also freeze these cookies after you bake them. Keep them in an airtight container for up to 3 months and thaw at room temperature. 
  • If you have a spice grinder at home, I highly recommend buying whole cardamom pods and grinding them yourself. Freshly ground cardamom is an extra step that is so worth it!
  • It’s easier to separate egg whites from yolks when the eggs are cold. Keep them in the refrigerator until you are ready to bake. 
Cardamom cookies with orange on a piece of parchment paper.
These Cardamom Cookies are full of cozy holiday flavor! This Scandinavian-inspired cookie recipe is perfect for adding to your Christmas cookie menu.
Print

Cardamom Cookies Recipe

These Cardamom Cookies are full of cozy holiday flavor! This Scandinavian-inspired cookie recipe is perfect for adding to your Christmas cookie menu.
Course Cookies
Cuisine Swedish
Keyword drop cookies
Prep Time 15 minutes
Cook Time 12 minutes
Servings 30 cookies
Calories 117kcal
Author Aimee

Ingredients

  • 1 cup unsalted butter, softened to room temperature
  • 1 cup dark brown sugar, packed
  • ½ cup granulated sugar
  • 2 large egg yolks
  • 1 Tablespoon orange zest, about 1 orange
  • 2 teaspoons pure vanilla extract
  • 2 ½ cups all-purpose flour
  • 1 ½ teaspoons baking powder
  • ½ teaspoon kosher salt
  • 2 teaspoons ground cardamom
  • ¼ cup granulated sugar, for rolling

Instructions

  • Preheat oven to 350 degrees F. Line a cookie sheet with parchment paper. Set it aside.
  • In a large mixing bowl (use the paddle attachment on a stand mixer), beat butter with sugars for 2-3 minutes. Add in egg yolks, orange zest, and vanilla extract. Beat until fully combined.
  • Add flour, baking powder, salt, and cardamom to the wet ingredients. Beat until the crumbly mixture comes together into a cookie dough ball.
  • Using a 2 Tablespoon cookie scoop, drop cookie dough into a bowl of the reserved 1/4 cup of granulated sugar. Roll cookie dough in sugar then place on parchment paper lined cookie sheet. Place cookie dough 2-inches apart.
  • Bake cookies for 12-14 minutes until edges are lightly browned. Remove from the oven and lightly tap the tops with a spatula. Cool on pans for several minutes, then remove and cool completely on a wire rack.

Notes

  • Use my guide on how to zest a lemon for best tips and tricks on zesting an orange.
  • Store cooled cookies in an airtight container at room temperature for up to one week.
  • Freeze dough using my guide on how to freeze cookie dough. Or freeze cookies in a freezer safe, airtight container for up to 3 months. Thaw on counter overnight.
  • See blog post for more recipe tips and tricks.

Nutrition

Serving: 1cookie | Calories: 117kcal | Carbohydrates: 13g | Protein: 1g | Fat: 7g | Saturated Fat: 4g | Polyunsaturated Fat: 0.3g | Monounsaturated Fat: 2g | Trans Fat: 0.2g | Cholesterol: 29mg | Sodium: 62mg | Potassium: 16mg | Fiber: 0.3g | Sugar: 5g | Vitamin A: 206IU | Vitamin C: 0.03mg | Calcium: 17mg | Iron: 1mg

Chewy Lemon Drop Sugar Cookies

These chewy Lemon Drop Cookies are full of bright citrus flavor in every bite! They are so easy to make and the lemon glaze on top is like the icing on a cake.These chewy Lemon Drop Cookies are full of bright citrus flavor in every bite! They are so easy to make…
These chewy Lemon Drop Cookies are full of bright citrus flavor in every bite! They are so easy to make and the lemon glaze on top is like the icing on a cake.

These chewy Lemon Drop Cookies are full of bright citrus flavor in every bite! They are so easy to make and the lemon glaze on top is like the icing on a cake.

Do you love lemon desserts? Try my Lemon Brownies for a citrusy twist on the classic! You’ll also enjoy these Lemon Gooey Butter Cookies.

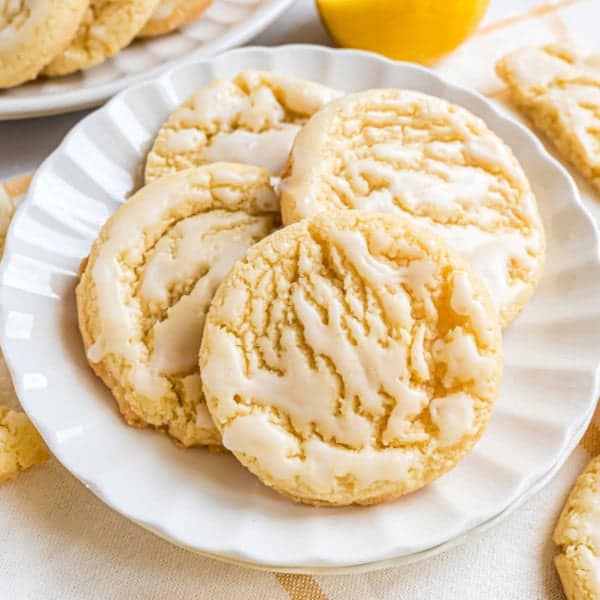
Lemon cookies on a white serving plate.

Lemon Sugar Cookies with Icing

There are times when you want a cookie that’s rich and decadent—something like Maple Bacon Cookies or Brown Butter Chocolate Chip Cookies. And then there are times when you’re in the mood for light, citrusy Lemon Drop Cookies.

I love lemon desserts for a nice change of pace. It’s not like they’re health food, but they feel a lot lighter than other treats. This recipe for lemon drop cookies has the perfect balance of sweetness and pucker!

Here’s why I love this recipe and why I think you will too:

  • Bright lemon flavor– they’re a must-make for lemon fans!
  • Easy to make– simple drop cookie recipe, which means there’s no rolling or cookie cutters needed.
  • Flavorful- zippy lemon flavor and that sweet-tart glaze makes this lemon sugar cookie recipe an instant hit.

Just a Handful of Ingredients

Ingredients needed to make lemon drop cookies.

Be sure to scroll down to the recipe card for a fully list of ingredients and amounts.

  • Unsalted butter – Use my guide on how to soften butter quickly to make these chewy lemon cookies.
  • Egg yolks – These add richness and make the cookies chewier than using whole eggs. You can use the whites to make an omelet or freeze them for a recipe where only whites are needed, like Chocolate Meringue Cookies.
  • Lemon extract – Lemon extract has more concentrated lemon flavor than lemon juice.
  • Lemon zest – Grate this finely so it distributes all throughout the dough. Use my guide on how to zest a lemon for best results.
  • Lemon juice – You can use the same lemon you used for the zest; just be sure to zest the lemon first, then juice it.

How to Make Lemon Sugar Cookies

Step by step photos showing how to make lemon sugar cookies.

Make the Lemon Cookie Dough:

  • Use an electric hand mixer or a stand mixer with paddle attachment. Beat the room temperature butter with the sugar until it’s light and fluffy.
  • Beat in the egg yolks, lemon extract, and lemon zest.
  • Mix in the flour, baking powder, and kosher salt until the mixture comes together into a dough.

Form the Cookies and Bake:

  • Use a 2 tablespoon cookie scoop to drop the dough onto the pan. 
  • Bake for 12 to 14 minutes, or until the edges begin to lightly brown. Remove the pan from the oven and tap the tops of the cookies gently with a spatula. 
  • Cool the cookies on the pans for a few minutes, then transfer to a wire rack to cool.
Step by step photos showing how to add glaze to cookies.

Glaze the Cookies:

  • Whisk together the powdered sugar and lemon juice. 
  • Dip just the tops of the cooled cookies into the icing.
  • Allow the lemon drop cookies to set for about 30 minutes.

Tips and Tricks

  • Read my guide on how to zest a lemon before getting started with this lemon drop cookie recipe.
  • To ensure that you’re not using too much flour, lightly spoon the flour into the measuring cups—don’t scoop it! Scooping compacts the flour and you’ll use more than you need.
  • Let the cookies cool completely before you dip them in the icing. If they’re still warm, the glaze will melt into the cookies. You can drizzle the cookies with icing instead of dipping if you’d like.
  • Store your lemon drop cookies in an airtight container at room temperature for up to one week.
  • Lemon drop cookies can be frozen in a freezer safe container for up to 3 months. You can also freeze cookie dough using my guide on how to freeze cookie dough.
Lemon cookies cooling on a wire cooling rack.

More Recipes for Lemon Lovers

Image of a cookie cake for upcoming Baking Basics cookbook.

My Cookbook is Here!

  • Free shipping on US orders!
  • Full page photos for EVERY recipe.
  • 35 mouth-watering, expert tested recipes!
These chewy Lemon Drop Cookies are full of bright citrus flavor in every bite! They are so easy to make and the lemon glaze on top is like the icing on a cake.
Print

Lemon Drop Cookies Recipe

These chewy Lemon Drop Cookies are full of bright citrus flavor in every bite! They are so easy to make and the lemon glaze on top is like the icing on a cake.
Course Cookies
Cuisine American
Keyword lemon cookies
Prep Time 15 minutes
Cook Time 12 minutes
Resting Time 30 minutes
Total Time 57 minutes
Servings 30 cookies
Calories 150kcal
Author Aimee

Ingredients

For the Cookie Dough

  • 1 cup unsalted butter, softened to room temperature
  • 1 ½ cups granulated sugar
  • 2 large egg yolks
  • 1 teaspoon lemon extract
  • 1 teaspoon lemon zest
  • 2 ½ cups all-purpose flour
  • 1 ½ teaspoons baking powder
  • ½ teaspoon kosher salt

For the Glaze

  • 1 cup powdered sugar
  • 2 Tablespoons lemon juice

Instructions

  • Preheat the oven to 350 degrees F. Line a cookie sheet with parchment paper and set it aside.
  • In a large mixing bowl, beat butter with sugar for 2-3 minutes, until light and fluffy.
  • Add in egg yolks, lemon extract, and lemon zest. Beat until fully combined.
  • Add in flour, baking powder, and kosher salt. The mixture will be crumbly, keep beating until a cookie dough forms, it will take about a minute.
  • Using a 2 Tablespoon cookie scoop, drop cookie dough onto prepared sheet pan. Bake for 12-14 minutes, until edges begin to lightly brown. Remove from the oven and tap the tops gently with a spatula. Cool cookies on pans for a few minutes, then remove and cool on a wire rack.
  • For the glaze, whisk together powdered sugar with lemon juice. Dip the tops of the cooled cookies into the icing then allow cookies to set about 30 minutes.

Notes

  • You’ll need one lemon for the zest and the juice. Use my guide on how to zest a lemon for best results.
  • Make sure cookies are completely cooled before dipping the tops in the icing. You can choose to dip the top fully, or just barely dipping the tips. You can also drizzle the icing if you prefer.
  • Store cookies in an airtight container at room temperature for up to one week.
  • Freeze cookies in a freezer safe container for up to 3 months. You can also freeze cookie dough using my guide on how to freeze cookie dough.
  • See blog post for more recipe tips and tricks.

Nutrition

Serving: 1cookie | Calories: 150kcal | Carbohydrates: 22g | Protein: 1g | Fat: 7g | Saturated Fat: 4g | Polyunsaturated Fat: 0.3g | Monounsaturated Fat: 2g | Trans Fat: 0.2g | Cholesterol: 29mg | Sodium: 62mg | Potassium: 16mg | Fiber: 0.3g | Sugar: 14g | Vitamin A: 206IU | Vitamin C: 0.5mg | Calcium: 17mg | Iron: 1mg

Brown Butter Rice Krispie Treats

These Brown Butter Rice Krispie Treats use the same basic ingredients as the classic recipe. However, browning the butter first adds a rich, nutty flavor!These Brown Butter Rice Krispie Treats use the same basic ingredients as the classic recipe. However, browning the butter first…
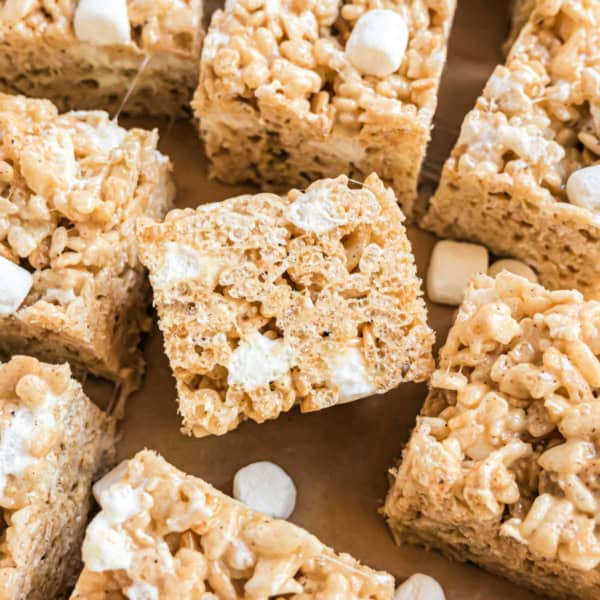
These Brown Butter Rice Krispie Treats use the same basic ingredients as the classic recipe. However, browning the butter first adds a rich, nutty flavor!

These Brown Butter Rice Krispie Treats use the same basic ingredients as the classic recipe. However, browning the butter first adds a rich, nutty flavor!

For more chewy marshmallow treats, try these Easy Nutella Rice Krispie Treats or Lemon Rice Krispie Treats next.

Squares of brown butter rice krispie treats on parchment paper.

Rice Krispie Treats with Browned Butter

Of all the things I make, Rice Krispie treats remain my favorite. I just can’t resist that crispy, chewy texture and buttery marshmallow flavor.

No matter how many variations I make, I just never get tired of them. But these Brown Butter Rice Crispy Treats are a back-to-basics kind of recipe.

This dessert is nothing fancy. The only thing that makes them different from the classic is browning the butter. What a difference it makes.

Here’s why you’ll love this recipe:

  • A more elevated flavor that adults will appreciate, with depth and nuttiness from browning the butter.
  • Despite this extra step, these Rice Krispie treats are just as easy as the classic recipe. You’ll just need to tack on a few extra minutes for browning the butter.
  • As with traditional Rice Krispie treats, this is a great recipe for bake sales, potlucks, and parties. And yes, even with their more sophisticated flavor profile, kids will still love them!

Important Ingredient Notes

Ingredients needed to make brown butter rice krispie treats.

Be sure to scroll down to the recipe card below. You’ll love that this sweet dessert only has a handful of ingredients.

  • Salted butter – Using salted butter adds a bit of contrast to the sweetness of Rice Krispie treats.
  • Mini marshmallows – Make sure they’re soft and fresh! Stale marshmallows don’t melt well.
  • Rice Krispies cereal – Use the real deal, not puffed rice or other imitations. I’ve found that knock-offs don’t have the same shape or texture.
  • Pure Vanilla Extract- this is the secret ingredient to always making the BEST treats. Use my homemade vanilla extract for delicious results.

How to Make Brown Butter Rice Krispie Treats

Prepare: Line a square baking dish with parchment paper. 

Step by step photos showing how to make brown butter marshmallow mixture.

Make the Brown Butter:

  • Melt the butter in a large saucepan set over low heat.
  • Add mini marshmallows to the pot and make a gooey marshmallow mixture.
Step by step photos showing how to make brown butter treats.

Make the Rice Krispie Treat Mixture:

  • Add the vanilla, the remaining 1 cup of marshmallows, and cereal to the pot.
  • Transfer to the prepared pan and press it gently to spread it evenly. Allow to set for an hour before cutting and serving. 
Brown butter krispie treats cut into squares.

Tips and Tricks

  • Don’t burn the butter! There’s no salvaging it once it goes from browned to burnt. If you’ve never made brown butter before, use my guide on how to brown butter for best results.
  • Dip your fingers in water and press the treats gently into the prepared pan. This keeps them from sticking to you.
  • Gently press when you’re adding the brown butter Rice Krispie treat mixture to the dish. If you do, you’ll crush the Rice Krispies and your bars will end up tough.
  • Store in an airtight container at room temperature for up to one week.
  • Freeze the treats for up to 3 months in a ziploc freezer bag. Thaw at room temperature before serving.

More Rice Krispie Treat Recipes

Image of a cookie cake for upcoming Baking Basics cookbook.

My Cookbook is Here!

  • Free shipping on US orders!
  • Full page photos for EVERY recipe.
  • 35 mouth-watering, expert tested recipes!
These Brown Butter Rice Krispie Treats use the same basic ingredients as the classic recipe. However, browning the butter first adds a rich, nutty flavor!
Print

Brown Butter Rice Krispie Treats Recipe

These Brown Butter Rice Krispie Treats use the same basic ingredients as the classic recipe. However, browning the butter first adds a rich, nutty flavor!
Course Rice Krispie Treats
Cuisine American
Keyword brown butter
Prep Time 5 minutes
Cook Time 10 minutes
Resting Time 1 hour
Total Time 1 hour 15 minutes
Servings 18 bars
Calories 75kcal
Author Aimee

Ingredients

  • 7 Tablespoons salted butter
  • 16 ounce bag mini marshmallows, divided
  • 1 teaspoon pure vanilla extract
  • 6 cups rice krispies cereal

Instructions

  • Line a 9-inch square baking dish with parchment paper and set it aside.
  • In a large saucepan, add butter and melt over low heat.
  • Continue heating for about five minutes, swirling the pan gently to see the butter browning (do not stir). The butter will begin to foam.
  • With a rubber spatula, move the foam aside to monitor the brown bits on the bottom of the pan. The butter will begin to smell nutty. Continue to heat until desired level of browning is achieved.
  • Be sure the color of the butter has changed from yellow to a light tan/brown color and there will be specks of browned butter in the bottom of the pan. At this point, add in all but 1 cup of the mini marshmallows. Stir until melted.
  • Remove from heat and add in vanilla extract. Stir until smooth. Add in cereal and remaining 1 cup of marshmallows. Stir until evenly coated. Pour into the prepared baking dish. Press gently with your fingertips, just until completely spread out. Allow to set about one hour.

Notes

  • The goal to browning butter is the brown the milk solids somewhere between a light golden brown to a darker brown. If the solids are black, the butter is burnt.
  • Use fresh marshmallows and fresh cereal for best results!
  • Store krispie treats in an airtight container at room temperature for up to one week.
  • Freeze krispie treats on parchment paper, slide into a ziploc freezer bag. Freeze for up to 3 months. Thaw at room temperature.

Nutrition

Serving: 1bar | Calories: 75kcal | Carbohydrates: 8g | Protein: 1g | Fat: 5g | Saturated Fat: 3g | Polyunsaturated Fat: 0.2g | Monounsaturated Fat: 1g | Trans Fat: 0.2g | Cholesterol: 12mg | Sodium: 84mg | Potassium: 13mg | Fiber: 0.04g | Sugar: 1g | Vitamin A: 757IU | Vitamin C: 6mg | Calcium: 2mg | Iron: 3mg

Special K Bars

If you have a soft spot for cereal treats, you’ll love these easy Special K Bars! They’re chewy, peanut buttery, and loaded with chocolate and butterscotch in every bite.If you have a soft spot for cereal treats, you’ll love these easy Special K Bars! They’re chewy, peanut buttery,…
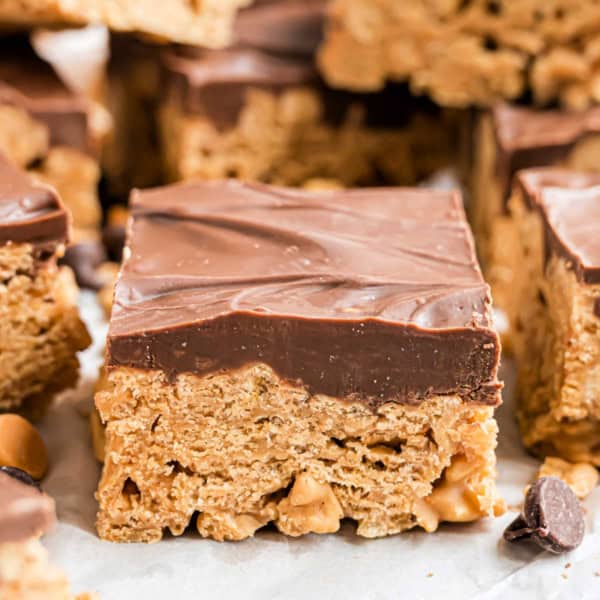
If you have a soft spot for cereal treats, you’ll love these easy Special K Bars! They’re chewy, peanut buttery, and loaded with chocolate and butterscotch in every bite.

If you have a soft spot for cereal treats, you’ll love these easy Special K Bars! They’re chewy, peanut buttery, and loaded with chocolate and butterscotch in every bite.

For more crispy, chewy cereal bar recipes, try my Neapolitan Krispie Treats. If you love cookie butter, these Biscoff Rice Krispie Treats are amazing too!

Special K Bars topped with chocolate cut into squares.

What Makes these Bars Special

Rice Krispie Treats are my favorite, but there’s really a whole world of cereal options out there that can be turned into delightfully chewy snack bars.

You might not have thought to turn Special K cereal into a sweet treat, but trust me: it works! Especially when you combine it with peanut butter, butterscotch morsels, and chocolate chips. 

Here’s why you’re going to love this recipe:

  • Like Peanut Butter Rice Krispie Treats and other cereal bar recipes, these Special K bars are ridiculously easy to make. There’s nothing to it!
  • The textures in this recipe are on point! Special K bars are the perfect combination of chewy and crispy. I used my scotcheroo recipe to create this tasty treat.
  • Make this recipe for a potluck, bake sale, or game day get-together with friends and watch them disappear. They’re always a crowd-pleaser!
Step by step photos showing how to make special k bars.

Tips and Tricks

  • It’s important that the sugar mixture boils for a full minute. Set a timer so you know for sure!
  • You can melt the chocolate and butterscotch in a double boiler or in the microwave. If melting in the microwave, heat it for 30 seconds, stir, then heat for another 30 seconds, and so on, until the mixture is smooth when stirred.
  • Be gentle when pressing the cereal mixture into the pan; if you press too hard, the cereal will crush and the bars will be hard instead of chewy.
  • Save the wrapper from the butter and use that to press down on the tops of the cereal bars, or use a piece of parchment paper. This will keep your hands clean!
  • Store these Special K bars in an airtight container at room temperature for up to one week.
  • You can also freeze these bars in an airtight freezer safe container for up to three months. Thaw on the counter overnight.
Gooey special k bars with chocolate.

More Recipes with Cereal

How to Make Special K Bars

If you have a soft spot for cereal treats, you’ll love these easy Special K Bars! They’re chewy, peanut buttery, and loaded with chocolate and butterscotch in every bite.
Print

Special K Bars Recipe

If you have a soft spot for cereal treats, you’ll love these easy Special K Bars! They’re chewy, peanut buttery, and loaded with chocolate and butterscotch in every bite.
Course Rice Krispie Treats
Cuisine American
Keyword scotcheroos
Prep Time 15 minutes
Cook Time 5 minutes
Resting Time 1 hour
Total Time 1 hour 20 minutes
Servings 24 bars
Calories 210kcal
Author Aimee

Ingredients

  • 2 Tablespoons unsalted butter
  • 1 cup granulated sugar
  • 1 cup light corn syrup
  • 1 cup creamy peanut butter
  • 1 teaspoon pure vanilla extract
  • 6 cups Special K cereal
  • 1 ½ cups semi-sweet chocolate chips
  • 1 ½ cups butterscotch morsels

Instructions

  • Line a 13×9 baking dish with parchment paper. Set it aside.
  • In a large pot, over medium-high heat, melt butter. Add in sugar and corn syrup. Mix gently and bring to a boil. Boil for one full minute, then remove from heat.
  • Stir in peanut butter and vanilla extract. Fold in Special K cereal gently. Pour the mixture into the prepared baking dish. Press into the dish gently.
  • While the treats cool, make the topping by melting the chocolate chips and butterscotch chips until smooth. Spread melted mixture over the top of the cereal bars. Allow to rest and set about one hour.

Notes

  • Make the sugar mixture begins to boil, then continue to stir while boiling for one minute.
  • Melt the chocolate and butterscotch in a double boiler or in the microwave. If melting in the microwave, do so in 30 second intervals to avoid overheating.
  • Store treats in an airtight container at room temperature for up to one week.
  • Freeze in an airtight freezer safe container for up to three months. Thaw on counter overnight.

Nutrition

Serving: 1bar | Calories: 210kcal | Carbohydrates: 28g | Protein: 3g | Fat: 11g | Saturated Fat: 4g | Polyunsaturated Fat: 1g | Monounsaturated Fat: 4g | Trans Fat: 0.05g | Cholesterol: 3mg | Sodium: 56mg | Potassium: 125mg | Fiber: 1g | Sugar: 25g | Vitamin A: 35IU | Calcium: 14mg | Iron: 1mg

Butter Pecan Cookies

Butter Pecan Cookies combine a chewy, buttery brown sugar dough with sweet, crunchy chopped pecans. These cookies will please anyone who enjoys a nutty crunch in their treats!Butter Pecan Cookies combine a chewy, buttery brown sugar dough with sweet, crunchy chopped pecans. These cookies will please anyone…
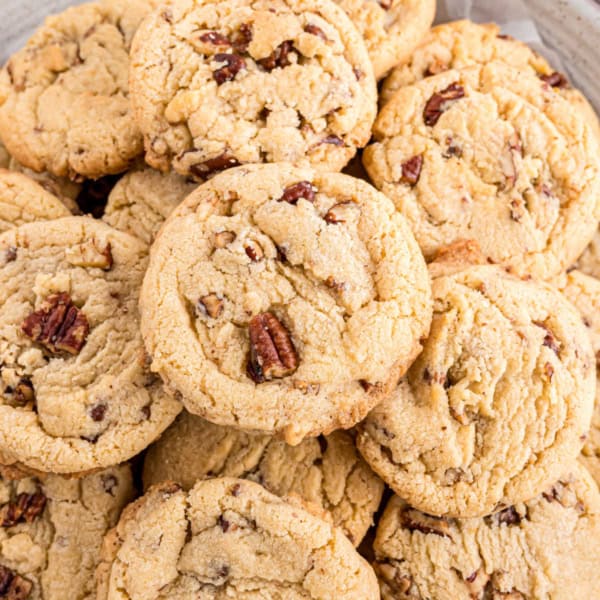
Butter Pecan Cookies combine a chewy, buttery brown sugar dough with sweet, crunchy chopped pecans. These cookies will please anyone who enjoys a nutty crunch in their treats!

Butter Pecan Cookies combine a chewy, buttery brown sugar dough with sweet, crunchy chopped pecans. These cookies will please anyone who enjoys a nutty crunch in their treats!

If pecans are your favorite, try these Pecan Pie Bars next. My Candied Cinnamon Pecans are another great way to put pecans to use!

Buttery pecan cookies stacked on a white plate.

Recipe for Butter Pecan Cookies

Butter pecan isn’t just an ice cream flavor! You can also just make buttered pecans by toasting pecans in a mixture of butter and sugar.

And then you can put those pecans into cookies and make Butter Pecan Cookies!

You can add chopped pecans to cookie dough, but toasting them in butter makes them taste even better. This extra step brings out their wonderful nutty flavor.

After making this recipe, I want to use buttered pecans in every cookie that needs pecans. This includes Pecan Sandies and Pecan Eggnog Cookies.

The base of these butter pecan cookies is a buttery dough that bakes up soft and chewy, with just a bit of browning and caramelization on the edges. The texture is the perfect complement to the crunchy nuts!

Here’s why this is the best butter pecan cookies recipe!

  • Butter pecan cookies have lots of rich flavor from the butter, brown sugar, and toasted nuts.
  • Despite the extra step of toasting the pecans, these cookies are easy to make. No need to chill the dough or even roll it into balls. Just drop the cookie dough onto the baking sheet.
  • These are cookies that store well, which is always a bonus as we approach holiday baking season. They’ll last a full week at room temperature, or you can freeze the cookie dough and bake the cookies when you need them.

Important Ingredient Notes

Ingredients needed to make butter pecan cookies.

The full ingredient list for these chewy butter pecan cookies is in the recipe card at the bottom of the post.

  • Unsalted butter – Using unsalted butter gives you more control over the flavor. You can use salted butter, just reduce the added kosher salt by half.
  • Pecans – Feel free to buy pecan pieces since you’ll be chopping the pecans anyway. Pecan halves are more expensive than already chopped pecans.
  • Light brown sugar – This contributes to the chewiness of the cookies and adds a caramel note to the dough. You’ll also need granulated sugar for the cookie dough.
  • Pure Vanilla Extract- Always choose a pure vanilla extract (or my homemade vanilla extract). Immitation vanilla will vary in flavor and leaves behind an unpleasant aftertaste.
  • Egg yolks – Using yolks instead of the whole egg also makes for a chewier cookie.
  • All-purpose flour- use my guide on how to measure flour to make sure you get the proper cookie texture!

How to Make Butter Pecan Cookies

Pecans in a saucepan with melted butter.

Make the Buttered Pecans:

  • Melt the butter in a saucepan over medium heat.
  • Stir in the pecans and sugar.
  • Cook for 3 to 5 minutes, or until the pecans are golden brown. (They’ll smell nutty and the butter will absorb into the nuts.)
Step by step photos showing how to make butter pecan cookie dough.

Make the Cookie Dough:

  • Beat the butter and sugars until fluffy.
  • Beat in the eggs and vanilla.
  • Mix in the flour, baking powder, and salt on low speed until the dough comes together.
  • Fold in the buttered pecans.
Step by step photos showing how to make butter pecan cookies.

Bake the Cookies:

  • Use a 2 tablespoon cookie dough scoop to drop the dough onto parchment-lined baking sheets.
  • Bake at 350ºF for 12 to 14 minutes, or until the edges are just starting to brown.
  • Remove the pan from the oven and tap the tops of the cookies with a spatula.
  • Cool on the pan for a few minutes, then transfer the butter pecan cookies to a wire rack to cool completely.
Butter pecan cookies on a wire cooling rack.

Tips and Tricks

  • Don’t skip adding the browned bits from the bottom of the pan to the cookie dough. They’re full of flavor and will add some brown butter goodness to the dough.
  • Instead of throwing egg whites down the drain, you can refrigerate them for a few days. You can also freeze them for up to 3 months. This way, you can use them in recipes that need whites instead of yolks. Recipes like meringue cookies and white cake!
  • Once the cookies cool, place them in an airtight container and store at room temperature for up to a week.
  • You can freeze butter pecan cookies in a freezer-safe container for up to three months. You can also freeze the cookie dough to bake later.

More Recipes With Pecans

Butter Pecan Cookies combine a chewy, buttery brown sugar dough with sweet, crunchy chopped pecans. These cookies will please anyone who enjoys a nutty crunch in their treats!
Print

Butter Pecan Cookies Recipe

Butter Pecan Cookies combine a chewy, buttery brown sugar dough with sweet, crunchy chopped pecans. These cookies will please anyone who enjoys a nutty crunch in their treats!
Course Cookies
Cuisine American
Keyword butter pecan, sugar cookies
Prep Time 20 minutes
Cook Time 12 minutes
Servings 34 cookies
Calories 153kcal
Author Aimee

Ingredients

For the Buttered Pecans

  • 3 Tablespoons unsalted butter
  • 1 cup chopped pecans
  • 1 Tablespoon granulated sugar

For the Cookie Dough

  • 1 cup unsalted butter, softened to room temperature
  • 1 cup granulated sugar
  • ½ cup light brown sugar, packed
  • 2 large egg yolks
  • 2 teaspoons pure vanilla extract
  • 2 ½ cups all-purpose flour
  • 1 ½ teaspoons baking powder
  • ½ teaspoon kosher salt

Instructions

  • Start by making your buttered pecans. In a saucepan, melt butter over medium heat. Add in chopped pecans and sugar. Using a wooden spoon or silicone spatula, cook pecans until toasted (about 3-5 minutes). Butter will be absorbed into the pecans and you will be left with a nutty fragrance. Set aside.
  • Preheat oven to 350 degrees F. Line a cookie sheet with parchment paper and set it aside.
  • In a large mixing bowl, beat butter with sugars for 2-3 minutes, until fluffy and fully combined. Add in eggs yolks and vanilla extract, beat until blended.
  • Add flour, baking powder, and salt. Mix on low until cookie dough goes from crumbly to combined. Fold in buttered pecans (be sure to get all the browned bits from the skillet too)!
  • Using a 2 Tablespoon cookie scoop, drop cookie dough onto prepared cookie sheets. Bake for 12-14 minutes until edges begin to lightly brown. Remove from oven and tap the tops of each cookie with a spatula. Cool on pan for a couple minutes, then remove and cool completely on a wire cooling rack.

Notes

  • Use the egg whites for meringue cookies or white cake!
  • Store cooled cookies in an airtight container at room temperature for up to one week.
  • Freeze cookies in a freezer safe container for up to 3 months. 
  • See blog post for more recipe tips and tricks.

Nutrition

Serving: 1cookie | Calories: 153kcal | Carbohydrates: 17g | Protein: 1g | Fat: 9g | Saturated Fat: 4g | Polyunsaturated Fat: 1g | Monounsaturated Fat: 3g | Trans Fat: 0.3g | Cholesterol: 28mg | Sodium: 55mg | Potassium: 31mg | Fiber: 1g | Sugar: 10g | Vitamin A: 215IU | Vitamin C: 0.04mg | Calcium: 20mg | Iron: 1mg

Copycat Chunky Candy Bars

These homemade Chunky Candy Bars are loaded with salty roasted peanuts, raisins, and rich chocolate in every bite and they’re super simple to put together.These homemade Chunky Candy Bars are loaded with salty roasted peanuts, raisins, and rich chocolate in every bite and they’re…
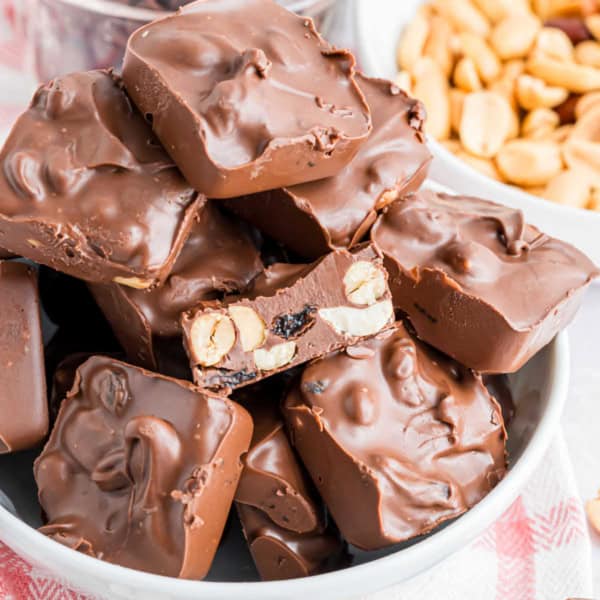
These homemade Chunky Candy Bars are loaded with salty roasted peanuts, raisins, and rich chocolate in every bite and they’re super simple to put together.

These homemade Chunky Candy Bars are loaded with salty roasted peanuts, raisins, and rich chocolate in every bite and they’re super simple to put together.

Want to try more homemade candy recipes? This Homemade English Toffee Recipe is one of my favorites. Crock Pot Candy is another incredibly easy candy recipe to try!

Chocolate candy squares with nuts and raisins.

Old Fashioned Chunky Candy Bars

Making homemade candy does not have to be hard. My easy peanut butter cups are the perfect example of an easy candy treat. And today’s old fashioned candy is right there.

No need for a thermometer, there’s no melted sugar involved, and you don’t even need to know what the soft ball stage is to make these easy, delicious candy bars.

Think of these Chunky Bars as a cluster of nuts, fruit, and chocolate. They have a chewy and crunchy texture. Making them is just a matter of melting chocolate and stirring everything together!

Here’s why you’re going to love this recipe:

  • Salty nuts contrast the sweet raisins, creamy chocolate with crunchy peanuts and chewy dried fruit—it’s absolute perfection.
  • It’s also easy to customize these chunky candy bars with your favorite ingredients.
  • Making these Chunky candy bars at home is quick and easy. They’re great for bake sales and tucking into tins of your favorite Christmas candies.

Only Five Ingredients

Ingredients needed to make chunky candy bars.

The full ingredient list is in the recipe card below, but here are some important things to note.

  • Chocolate – You’ll need milk chocolate morsels and unsweetened baking chocolate.
  • Coconut oil – This makes the chocolate smoother, shinier, and gives it an irresistible melt-in-your-mouth quality.
  • Salted peanuts – I love the contrast between salty roasted peanuts and raisins! Swap out for cashews or almonds for a nutty twist.
  • Raisins – If you’re not a fan, another dried fruit can be swapped in. Dried cherries and craisins are delicious alternatives.

How to Make Chunky Candy Bars

Melted chocolate for homemade candy.

Melt the Chocolate: Add the two types of chocolate and coconut oil to a warm double boiler. Stir until the chocolate is completely melted, then remove from heat.

Add the Mix-Ins: Stir the peanuts and raisins into the chocolate.

Step by step photos showing how to make homemade chunky bars.

Form the Candy Bars: Drop a tablespoon of chocolate into the cavities of a silicone brownie mold until you’ve used all of the chocolate mixture.

Set: Let the chocolate bars set at room temperature for 30 minutes, or in the refrigerator for 15 minutes.

Finish: Remove the Chunky candy bars from the molds and store in an airtight container at room temperature for up to 2 weeks.

Chunky candy bars served on parchment paper.

Tips and Tricks

  • I like to use a silicone brownie pan because it’s the perfect size and shape for homemade Chunky candy bars and the soft silicone makes it easy to pop out the bars once they’ve set. 
  • Alternatively, you can use a square baking dish with parchment paper and pour the chocolate mixture into that. Once it sets, pull the parchment out of the pan, transfer it to a cutting board, and use a sharp chef’s knife to cut it into bars.
  • If you’d like, you can use dark chocolate instead of milk chocolate. I like to use milk chocolate because that’s what’s in store-bought Chunky candy bars.

More Homemade Candy Recipes

These homemade Chunky Candy Bars are loaded with salty roasted peanuts, raisins, and rich chocolate in every bite and they’re super simple to put together.
Print

Chunky Candy Bars Recipe

These homemade Chunky Candy Bars are loaded with salty roasted peanuts, raisins, and rich chocolate in every bite and they’re super simple to put together.
Course Candy
Cuisine American
Keyword copycat candy bar
Prep Time 5 minutes
Cook Time 5 minutes
Set Time 30 minutes
Total Time 40 minutes
Servings 24 pieces
Calories 37kcal
Author Aimee

Ingredients

  • 1 bag 11.5 ounce milk chocolate morsels
  • 1 ounce unsweetened baking chocolate
  • 1 Tablespoon coconut oil
  • ½ cup salted peanuts
  • ½ cup raisins

Instructions

  • Using a double boiler method, bring a small saucepan with 1-inch of water to a boil. Place a double boiler, or glass bowl, that fits on top of the saucepan over the water.
  • Add milk chocolate, unsweetened chocolate, and coconut oil to the warmed double boiler. Stir continuously until chocolate is melted and smooth. Remove from heat.
  • Add in peanuts and raisins, stirring until combined,
  • Using a 1 Tablespoon scoop, drop a dollop of chocolate into the cavity of a silicone brownie mold (see notes below). Repeat until all the chocolate has been evenly divided into the mold.
  • Allow chocolate to set at room temperature for about thirty minutes, or place in the refrigerator for 15 minutes to speed set the chocolate.
  • Once firm, pop each piece of candy out of the silicone cavity and store in an airtight container at room temperature for up to 2 weeks.

Notes

  • I love using a silicone mold brownie pan, like this one on Amazon. You can also use a 9-inch square baking dish lined with parchment paper if you prefer.
  • Dark chocolate can also be substituted for milk chocolate. However the original Chunky Candy bar is a milk chocolate treat.
  • Store candy in an airtight container at room temperature for up to 2 weeks.
  • For a twist on flavor, swap out the raisins for other dried fruits.

Nutrition

Serving: 1piece | Calories: 37kcal | Carbohydrates: 3g | Protein: 1g | Fat: 3g | Saturated Fat: 1g | Polyunsaturated Fat: 1g | Monounsaturated Fat: 1g | Sodium: 14mg | Potassium: 58mg | Fiber: 1g | Sugar: 0.01g | Vitamin C: 0.2mg | Calcium: 5mg | Iron: 0.4mg

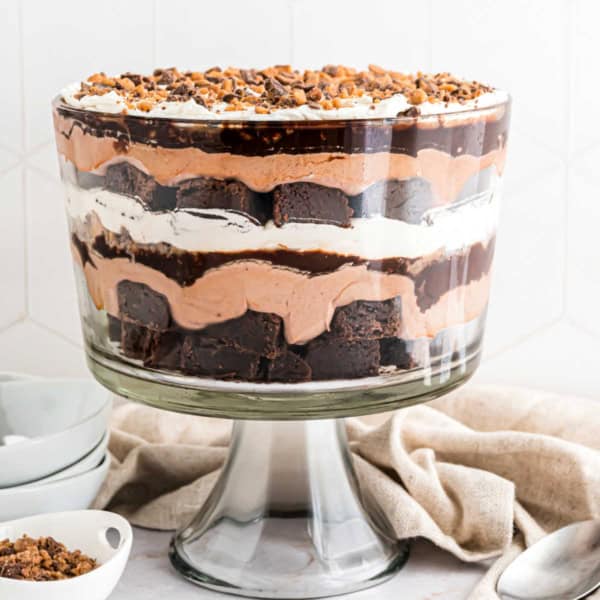
Easy Chocolate Brownie Trifle

This chocolate Brownie Trifle recipe couldn't be simpler! Homemade brownies layered with fluffy chocolate mousse, hot fudge, toffee bits, and Cool Whip for a rich dessert.This chocolate Brownie Trifle recipe couldn’t be simpler! Homemade brownies layered with fluffy chocolate mousse, hot fudge, toffee bits, and…

This chocolate Brownie Trifle recipe couldn't be simpler! Homemade brownies layered with fluffy chocolate mousse, hot fudge, toffee bits, and Cool Whip for a rich dessert.

This chocolate Brownie Trifle recipe couldn’t be simpler! Homemade brownies layered with fluffy chocolate mousse, hot fudge, toffee bits, and Cool Whip for a rich dessert.

If you love brownies, don’t miss my Brownie Ice Cream Cake or these Brownie Bites!

Chocolate pudding dessert assembled in a trifle bowl.

Brownie Trifle Dessert Recipe

When I think about trifles, I usually think about something light and fruity like this Jell-O Cake Trifle Recipe.

But the idea to make a more decadent trifle popped into my head and I just couldn’t shake it.

Are you searching for a dessert that packs a chocolate flavor, is super rich, and will definitely please a crowd? This chocolate trifle recipe is it. 

It starts with homemade brownies that are fudgy and decadent. Gets even better with layers of creamy chocolate pudding, hot fudge sauce, and crunchy, buttery toffee bits.

It all comes together to make an epic dessert. Here are a few reasons why you’ll love this brownie trifle recipe:

  • This is an excellent dessert for a crowd.
  • The combination of homemade brownies, rich chocolate cream, hot fudge and toffee bits gives this dessert layers of flavor and texture. I love the crunchy toffee with the chewy brownies and fluffy cream.
  • You can easily assemble it ahead of time, making it a great dessert for entertaining.
  • You can customize this trifle with brownies with your favorite toppings or add-ins. Add raspberries instead of toffee. Swap in a different flavor of pudding for a unique twist. This is one of those recipes that is almost impossible to mess up!

Important Ingredient Notes

Ingredients needed to make chocolate brownie trifle.

Make sure to scroll down to the recipe card. You will find the full list of ingredients and amounts for this recipe for a chocolate trifle.

  • Unsalted butter – My go-to for baking because it allows you more control of the flavor of the finished product.
  • Semi-sweet chocolate chips – You’ll melt these to create a rich base for the brownies.
  • Eggs – If you remember to, leave these out on the counter so they come to room temperature. They mix in more smoothly that way!
  • Pure vanilla extract – Don’t settle for imitation vanilla extract! Pure vanilla has much more depth. My homemade vanilla extract is perfect.
  • All-purpose flour – Lightly spoon this into the measuring cup rather than scooping it. This ensures you don’t use more flour than you need! Use my guide on how to measure flour.
  • Instant chocolate pudding mix – You can use another flavor if you’d like, but if you want absolute decadence, go with chocolate!
  • Sweetened condensed milk – Not evaporated milk! Condensed milk is sweetened. It can be easy to grab the wrong can!
  • Whole milk – I like to use whole milk for a richer, thicker pudding. 
  • Cool Whip – Thaw this before starting the recipe. You can also use whipped cream or my stabilized whipped cream recipe instead of Cool Whip.
  • Hot fudge – Or use chocolate syrup if you prefer. I like to use fudge in this easy trifle recipe because it’s thicker.
  • Heath English Toffee bits – Or a chopped candy bar you like. 

How to Make a Brownie Trifle

Step by step photos showing how to make the brownie layer of a trifle.

Make the Brownies:

  • Preheat your to 350ºF and line a 13×9 pan with parchment paper.
  • Melt the butter in a medium saucepan set over medium heat. Remove from heat and stir in the chocolate chips and sugar until the chocolate melts.
  • Stir in the eggs one at a time, followed by the vanilla extract.
  • Add the cocoa powder, flour, salt, and baking powder and mix until just combined.
  • Pour the batter into the baking dish and bake for 22-24 minutes. 
  • Cool completely before assembling the trifle.
Step by step photos showing how to make chocolate pudding layer.

Make the Filling:

  • Whisk the chocolate pudding mix, sweetened condensed milk, and whole milk in a mixing bowl.
  • Fold in the Cool Whip until it’s incorporated.
Step by step photos showing how to assemble brownie trifles.
Step by step photos showing how to add topping to brownie trifle.

Assemble:

  • Cut the brownies into bite-size pieces and place half of them in the bottom of a trifle bowl.
  • Pour half of the pudding mixture over the brownies.
  • Drizzle half of the hot fudge sauce over the pudding. 
  • Sprinkle with a half cup of the toffee bits. 
  • Top with half of the Cool Whip.
  • Repeat the layers again and finish with the Cool Whip on top and sprinkle the remaining toffee bits over the Cool Whip. 
  • Cover and chill the brownie trifle for 4 hours, or until ready to serve.
Brownie trifle served in a white bowl.

Tips and Tricks

  • Use a glass bowl or trifle dish—the fun thing about trifles is being able to peek at the layers through the side of the dish! 
  • Feel free to use store-bought brownies for this brownie trifle if you’re short on time. Just make sure they’re fudgy and delicious, and not too dry.
  • You can use my easy chocolate cake in place of the brownies for a delicious trifle recipe.
  • For a boozy twist, add a splash of your favorite liqueur to the pudding mixture. Or drizzle it over the brownie layers before adding the pudding. Kahlua would be fantastic!
  • To make individual trifles, use small mason jars or plastic wine cups. This creates a cute, personal-sized chocolate brownie trifle dessert option.
  • Don’t hesitate to experiment with different tastes and garnishes! You can adapt this brownie trifle recipe to match your preferences or the occasion. Experiment with different pudding flavors, brownie recipes, sauces, and candies.
Brownie trifle assembled in a glass bowl.

More Brownie Recipes

This chocolate Brownie Trifle recipe couldn't be simpler! Homemade brownies layered with fluffy chocolate mousse, hot fudge, toffee bits, and Cool Whip for a rich dessert.
Print

Brownie Trifle Recipe

This chocolate Brownie Trifle recipe couldn't be simpler! Homemade brownies layered with fluffy chocolate mousse, hot fudge, toffee bits, and Cool Whip for a rich dessert.
Course Brownies and Bars
Cuisine American
Keyword brownie dessert, chocolate trifle, trifle
Prep Time 45 minutes
Cook Time 25 minutes
Chill Time 4 hours
Total Time 5 hours 10 minutes
Servings 12 servings
Calories 386kcal
Author Aimee

Ingredients

For the Brownies

  • 1 cup unsalted butter
  • ½ cup semi-sweet chocolate chips
  • 2 cups granulated sugar
  • 4 large eggs
  • 1 teaspoon pure vanilla extract
  • ¾ cup unsweetened cocoa powder
  • 1 cup all-purpose flour
  • ½ teaspoon kosher salt
  • ½ teaspoon baking powder

For the Pudding

  • 1 box (3.9 ounce) Instant chocolate pudding mix
  • 1 can (14 ounce) sweetened condensed milk
  • ½ cup whole milk
  • 1 tub (8 ounce) Cool Whip, thawed

For the Filling

  • ½ cup hot fudge (or chocolate syrup), divided
  • 1 ¼ cup Heath English Toffee bits, divided
  • 1 tub (8 ounce) Cool Whip, thawed, divided

Instructions

For the Brownies

  • Preheat oven to 350 degrees F. Line a 13×9 baking dish with parchment paper, set aside.
  • In a medium sized saucepan, melt butter over medium heat. Remove from heat and add in the chocolate chips and sugar.
  • Stir until chocolate is completely melted. Add in eggs one at a time, stirring completely after each addition. Stir in vanilla extract.
  • Add the cocoa powder, flour, salt, and baking powder. Using big strokes, stir just until mixed and can no longer see the dry ingredients. Do not beat or over stir.
  • Pour batter into prepared baking dish. Bake for 22-24 minutes. Remove from oven and cool completely before assembling trifle.

For the Filling

  • In a medium bowl, whisk together the chocolate pudding mix, sweetened condensed milk, and whole milk. Fold in the tub of Cool Whip until combined.

To Assemble

  • Cut brownies into bite size pieces. Lay half the cubes of brownies into the bottom of a trifle bowl (or large glass bowl). Pour half of the chocolate pudding mixture onto the brownies.
  • Drizzle the chocolate pudding with half of the hot fudge sauce and sprinkle with half cup of the toffee bits. Top with half of the Cool Whip.
  • Repeat layers with brownies, pudding, hot fudge, and 1/2 cup toffee bits. Spread the remaining Cool Whip over the top. Sprinkle the remaining 1/4 cup toffee bits over the top of the trifle.
  • Cover and chill for 4 hours until ready to serve.

Notes

  • Use a glass bowl or trifle dish—the fun thing about trifles is being able to peek at the layers through the side of the dish! 
  • Feel free to use store-bought brownies for this brownie trifle if you’re short on time. Just make sure they’re fudgy and delicious, and not too dry.
  • You can use my easy chocolate cake in place of the brownies for a delicious trifle recipe.
  • For a boozy twist, add a splash of your favorite liqueur to the pudding mixture. Or drizzle it over the brownie layers before adding the pudding. Kahlua would be fantastic!
  • To make individual trifles, use small mason jars or plastic wine cups. This creates a cute, personal-sized chocolate brownie trifle dessert option.
  • Don’t hesitate to experiment with different tastes and garnishes! You can adapt this brownie trifle recipe to match your preferences or the occasion. Experiment with different pudding flavors, brownie recipes, sauces, and candies.

Nutrition

Calories: 386kcal | Carbohydrates: 49g | Protein: 5g | Fat: 21g | Saturated Fat: 12g | Polyunsaturated Fat: 1g | Monounsaturated Fat: 6g | Trans Fat: 1g | Cholesterol: 97mg | Sodium: 144mg | Potassium: 177mg | Fiber: 3g | Sugar: 37g | Vitamin A: 572IU | Calcium: 49mg | Iron: 2mg

Chewy White Chocolate Peppermint Cookies

These chewy White Chocolate Peppermint Cookies will take you on a trip down candy cane lane! They’re chewy, crispy, and delightfully minty, with the creaminess of white chocolate adding the perfect balance.These chewy White Chocolate Peppermint Cookies will take you on a trip down candy cane lane! They’re chewy, crispy, and…
These chewy White Chocolate Peppermint Cookies will take you on a trip down candy cane lane! They’re chewy, crispy, and delightfully minty, with the creaminess of white chocolate adding the perfect balance.

These chewy White Chocolate Peppermint Cookies will take you on a trip down candy cane lane! They’re chewy, crispy, and delightfully minty, with the creaminess of white chocolate adding the perfect balance.

Looking for more peppermint recipes? You’ll love this Peppermint Bark Recipe. My Peppermint Cream Bites are always a hit too!

White chocolate peppermint cookies on a wire cooling rack.

White Chocolate and Peppermint Cookies

Dark chocolate is usually the most common pairing with peppermint, and sometimes milk chocolate too. (These Chocolate Peppermint Shortbread Cookies are the perfect example.)

But I think these White Chocolate Peppermint Cookies prove it’s time to start putting these two flavors together more often!

It adds a creaminess that mellows the peppermint, cutting some of its bite and making it that much more cozy.

Here are some more reasons you’ll flip for this recipe:

  • These festive peppermint cookies are perfect for the holidays! Tuck them into a tin with Christmas Tree Sugar Cookies and Homemade English Toffee you’ve got a homemade gift everyone will love.
  • This is a recipe full of fantastic contrasting textures. I used my drop sugar cookie dough as a base for these cookies.
  • So many holiday cookie recipes require a lot of work, but not these white chocolate chip cookies with peppermint! These are as easy as making my Chocolate Chip Cookies.
  • With their creamy peppermint flavor, I guarantee everyone who tries them will love these cookies!

Important Ingredient Notes

Ingredients needed to make white chocolate peppermint cookies.

You can find the complete ingredient list for these peppermint and white chocolate cookies in the recipe card below. Here are some key highlights.

  • Unsalted butter – Let this soften to room temperature so it’s easy to mix with the other ingredients in the dough. Use my guide on how to soften butter quickly.
  • Egg yolks – Using just the yolks instead of the whole egg makes for a chewier texture.
  • Pure Vanilla extract – Another flavor that helps balance the peppermint. Use my homemade vanilla extract for delicious flavor.
  • Crushed peppermint candy – You can crush your own (see the tips later in this post) or buy crushed peppermints in the baking section. Crushed candy canes are a delicious option too.
  • White chocolate chips – Be sure to buy a good brand, because they can vary in quality. I like Ghirardelli white chocolate chips.
  • White sparkling sugar – is optional. However, it adds a nice texture and sparkle to the tops of these white chocolate peppermint cookies.

How to Make White Chocolate Peppermint Cookies

Step by step photos showing how to make white chocolate cookie dough.

I prefer using a hand mixer or a stand mixer with paddle attachment for making cookie dough.

Make the Cookie Dough:

  • Cream the butter and sugar for 2 to 3 minutes. 
  • Beat in the egg yolks and vanilla extract.
  • Add the all-purpose flour, baking powder, and kosher salt. 
  • Continue to mix until the dough comes together in a ball.
  • Mix in the crushed peppermints and white chocolate chips. 
Step by step photos showing how to bake white chocolate peppermint cookies.

Form the Cookies:

  • Drop the dough in 2 tablespoon portions onto baking sheets with parchment paper.
  • Flatten each cookie slightly with the palm of your hand.
  • Sprinkle the sparkling sugar on top, if you’re using it.

Bake:

  • Bake the cookies in a 350ºF oven for 12 to 14 minutes.
  • Cool on the pan for 10 minutes.
  • Carefully remove the cookies from the pan and transfer them to a wire rack to finish cooling. 
White chocolate cookies with peppermints on a white plate.

Tips and Tricks

  • To make your own crushed peppermints, use candy canes (peppermint ones, of course!) or starlight mints. Unwrap them, place them in a ziplock bag, and whack them with a rolling pin to crush them. Be careful when lifting the bag later. The sharp candy pieces can make small holes in the bag. If you move it, peppermint powder will spill out!
  • Using a Silpat or parchment paper for these cookies is important. The melted peppermint bits will make the cookies sticky. This is also why I recommend letting them cool on the baking sheet for 10 minutes.
  • After removing the cookies from the oven, you can use a spoon to shape the edges a bit so they’re more round.
  • Don’t toss the egg whites down the drain! You can pop them in the fridge for a few days to make Christmas Meringue Cookies, or freeze them if you won’t be able to use them that quickly. 
  • Store white chocolate peppermint cookies in an airtight container at room temperature for up to 3 days. You can freeze these cookies for up to 1 month.
Peppermint white chocolate cookies stacked on a wire rack.

More Peppermint Recipes

These chewy White Chocolate Peppermint Cookies will take you on a trip down candy cane lane! They’re chewy, crispy, and delightfully minty, with the creaminess of white chocolate adding the perfect balance.
Print

White Chocolate Peppermint Cookies Recipe

These chewy White Chocolate Peppermint Cookies will take you on a trip down candy cane lane! They’re chewy, crispy, and delightfully minty, with the creaminess of white chocolate adding the perfect balance.
Course Cookies
Cuisine American
Keyword christmas cookie, peppermint
Prep Time 20 minutes
Cook Time 12 minutes
Total Time 32 minutes
Servings 36 cookies
Calories 153kcal
Author Aimee

Ingredients

  • 1 cup unsalted butter softened to room temperature
  • 1 ½ cups granulated sugar
  • 2 egg yolks
  • 2 teaspoons pure vanilla extract
  • 2 ½ cups all-purpose flour
  • 1 ½ teaspoons baking powder
  • ½ teaspoon kosher salt
  • ½ cup crushed peppermint candy, see notes
  • 1 ½ cups white chocolate chips
  • 2 Tablespoons white sparkling sugar, optional

Instructions

  • Preheat oven to 350 degrees F. Line a cookie sheet with parchment paper and set it aside.
  • In a large mixing bowl, beat butter with sugar for 2-3 minutes until fully combined. Add in egg yolks and vanilla extract, beat until fluffy.
  • Add flour, baking powder, and kosher salt. The mixture will be crumbly, continue beating until a cookie dough ball forms. Stop mixing at this point. Add in crushed peppermints and white chocolate chips. Mix just until combined.
  • Using a 2 Tablespoon cookie scoop, drop cookie dough onto prepared cookie sheet. Flatten the top of each cookie just slightly (so it is not domed). Sprinkle with a pinch of the sparkling sugar. Bake for 12-14 minutes until edges are just starting to brown. Remove from the oven.
  • Allow cookies to cool on the pan for ten minutes, then remove and cool completely on a wire cooling rack.

Notes

  • For the crushed peppermint, you can either use candy canes or starlight mints (the crunchy hard candy mints, not the soft & chewy mints). You’ll need about 6-8 candy canes, or 18-20 mints to get 1/2 cup.
  • These cookies are sticky after baking! Be sure to use a silpat or parchment paper on your cookie sheet. Also, let them cool for at least ten minutes on the cookie sheet before transferring to the wire rack.
  • While the cookies are warm on the cookie sheet, use a spoon to push the edges in to make the cookies appear more circular in shape. This also helps if some of the peppermint candies have melted along the edge of the cookie.
  • Save the egg whites to make meringue cookies or white cupcakes!
  • Store cooled cookies in an airtight container for up to three days.
  • If freezing the cookies, store cooled cookies in airtight container in the freezer for up to one month. Thaw on counter overnight.

Nutrition

Serving: 1cookie | Calories: 153kcal | Carbohydrates: 19g | Protein: 2g | Fat: 8g | Saturated Fat: 5g | Polyunsaturated Fat: 0.3g | Monounsaturated Fat: 2g | Trans Fat: 0.2g | Cholesterol: 26mg | Sodium: 58mg | Potassium: 34mg | Fiber: 0.2g | Sugar: 13g | Vitamin A: 174IU | Vitamin C: 0.04mg | Calcium: 29mg | Iron: 0.5mg

Neiman Marcus Chocolate Chip Cookies

Chocolate chip cookie with pecans on parchment paper.These Neiman Marcus Cookies aren’t your ordinary chocolate chip recipe! Buttery, loaded with pecans and two types of chocolate, and…

Chocolate chip cookie with pecans on parchment paper.

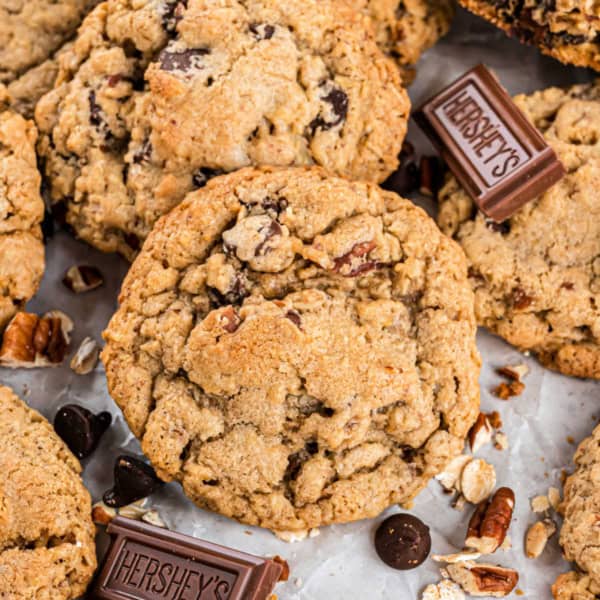
These Neiman Marcus Cookies aren’t your ordinary chocolate chip recipe! Buttery, loaded with pecans and two types of chocolate, and baked with ground oats for a unique texture, they’re famous for good reason.

My Brown Butter Chocolate Chip Cookies are another delicious variation on traditional chocolate chip cookies. You’ll also love my perfect Chocolate Chip Cookies.

Stacks of oatmeal chocolate chip cookies on parchment paper.

Neiman Marcus Recipe for Chocolate Chip Cookies

The Neiman Marcus $250 cookie recipe is more than just a cookie—it is also an urban myth!

The story goes that a customer asked for the cookie recipe from the Neiman Marcus cafe. When her credit card bill arrived, the company charged her $250 for it. Irritated at being over-charged, she started a chain letter to share the recipe with the world to get her revenge. 

Although people have debunked this story, the legendary cookie lives on.

A few things separate them from the classic chocolate chip cookie recipe. The primary difference is the addition of oats. This gives them a toasty flavor and a unique texture—chewy and heartier than your average cookie.

Here’s why these Neiman Marcus cookies are so well-loved:

  • The famous Neiman Marcus cookie recipe has a fantastic flavor. With richness from the butter, semisweet chocolate AND milk chocolate, nutty pecans, and oats. 
  • Great texture, with crispy, golden brown edges that give way to a soft, chewy center. And then there’s the melty chocolate contrasting with the crunchy pecans!
  • Guaranteed to be a hit at gatherings, potlucks, bake sales or any event. Maybe you could even make some money selling the original recipe? Just kidding!

Important Ingredient Notes

Ingredients needed to make neiman marcus chocolate chip cookies.

Be sure to scroll down to the recipe card for the full ingredient list so you can make Neiman and Marcus cookies at home.

  • Salted butter – I’m throwing you a curveball here! Most of my baking recipes call for unsalted butter, but Neiman Marcus cookies call for salted butter. This secret ingredient adds some interest to this recipe, with a salty contrast to the chocolate.
  • Dark brown sugar – Dark brown sugar has more moisture and a stronger molasses flavor than light brown. It adds more depth to these cookies and contributes to that chewy texture.
  • Granulated white sugar- Add more sweetness and texture for chewy chocolate chip cookies.
  • Old-fashioned oatmeal – Also known as rolled oats. Don’t use quick cook oats or steel cut oats here.
  • Milk chocolate bar – I use half of a Hershey bar.
  • Semi-sweet chocolate chips – Or use milk chocolate chips or dark chocolate chips.
  • Pecans – You could use walnuts if you’d like, but I think pecans are perfection in these Neiman Marcus cookies.

*Adding espresso powder (I like the King Arthur Flour brand) to the cookie dough makes these cookies even better.

How to Make Neiman Marcus Chocolate Chip Cookies

Step by step photos showing how to process oats for cookies.

Process the oats and chocolate.

Pulse the oatmeal with the chocolate bar (or chocolate chunks) in your food processor—just enough to chop them a little.

The best way to make sure you don’t over process the oats it to use the pulse feature on your food processor.

Make the Cookie Dough:

  • Using an electric mixer with paddle attachment (or a hand mixer), cream the butter and sugars in a large bowl for about 2-3 minutes.
  • Beat in the eggs and vanilla extract.
  • Add the dry ingredients. Mix the ground oatmeal mixture with the wet ingredients. Then, add the flour, salt, baking soda, and baking powder.
  • Stir to combine, then fold in the semisweet chocolate chips and pecans.
Step by step photos showing how to bake neiman marcus cookies.

Bake the Cookies:

  • Drop the dough onto a parchment paper-lined baking sheet (or greased cookie sheet) in 1 Tablespoon portions.
  • Bake in a 375ºF oven for 10 to 12 minutes, or until they’re golden brown.
  • Remove from the oven and cool on a wire rack.

Tips and Tricks

  • Make sure your butter and eggs are at room temperature before you start mixing.
  • Lightly spoon flour into your measuring cup and level it with a knife. Avoid scooping directly from the bag, as this can compact the flour and lead to dense cookies. Use my guide on how to measure flour for best results.
  • The step of pulsing the oatmeal with the chocolate bar is essential. It creates a unique texture that makes these cookies chewy without large chunks of oats. Be careful not to over-process, or you won’t achieve the right cookie texture.
  • Store chocolate chip pecan cookies at room temperature for up to one week in an airtight container.
  • Freeze the cookies in an airtight container for up to 3 months. Thaw overnight on counter. Want to freeze the dough for my neiman marcus chocolate chip cookie recipe? Read this: How to Freeze Cookie Dough.
Chocolate chip pecan cookies on a parchment paper lined cookie sheet.

Best Cookies

Image of a cookie cake for upcoming Baking Basics cookbook.

My Cookbook is Here!

  • Free shipping on US orders!
  • Full page photos for EVERY recipe.
  • 35 mouth-watering, expert tested recipes!
Chocolate chip cookie with pecans on parchment paper.
Print

Neiman Marcus Chocolate Chip Cookies Recipe

These Neiman Marcus Cookies aren’t your ordinary chocolate chip recipe! Buttery, loaded with pecans and two types of chocolate, and baked with ground oats for a unique texture, they’re famous for good reason.
Course Cookies
Cuisine American
Keyword chocolate chip pecan cookies, copycat, neiman marcus cookies
Prep Time 20 minutes
Cook Time 10 minutes
Servings 50 cookies
Calories 131kcal
Author Aimee

Ingredients

  • 1 cup salted butter, softened to room temperature
  • 1 cup dark brown sugar, packed
  • 1 cup granulated sugar
  • 2 large eggs
  • 1 teaspoon pure vanilla extract
  • 2 ½ cups old fashioned oatmeal
  • 4 ounces milk chocolate bar, 1/2 Hershey bar
  • 2 cups all-purpose flour
  • ½ teaspoon kosher salt
  • 1 teaspoon baking soda
  • 1 teaspoon baking powder
  • 12 ounces semi-sweet chocolate chips
  • 1 ½ cups chopped pecans

Instructions

  • Preheat oven to 375 degrees F. Line a cookie sheet with parchment paper and set it aside.
  • In a large mixing bowl, beat butter and both sugars together until well blended, about 2-3 minutes. Add in eggs and vanilla and mix until well combined.
  • In a blender or food processor, pulse the oatmeal with the chocolate bar several times to make smaller crumbs. You do not want "FINE" crumbs here, just several pulses, making sure both the oatmeal and the chocolate are broken down slightly.
  • Add the oatmeal with chocolate, flour, salt, baking soda, and baking powder to the butter mixture. Mix by hand just until combined. Fold in the semi-sweet chocolate chips and chopped pecans.
  • Drop cookies using a heaping 1 Tablespoon cookie scoop onto the prepared cookie sheet, about 2 inches apart. Bake for 10-12 minutes until lightly browned.
  • Remove from oven and cool on a wire rack.

Notes

  • Pulsing the oatmeal is a key to making these cookies have a delicious chewy texture without overwhelming them with oatmeal flavor.
  • Store cookies in airtight container at room temperature for up to one week.
  • Freeze cookies in freezer safe, airtight container for up to 3 months. Thaw overnight on counter.
  • See blog post for more recipe tips and tricks.

Nutrition

Serving: 1cookie | Calories: 131kcal | Carbohydrates: 12g | Protein: 1g | Fat: 9g | Saturated Fat: 4g | Polyunsaturated Fat: 1g | Monounsaturated Fat: 3g | Trans Fat: 0.2g | Cholesterol: 17mg | Sodium: 86mg | Potassium: 61mg | Fiber: 1g | Sugar: 7g | Vitamin A: 128IU | Vitamin C: 0.04mg | Calcium: 14mg | Iron: 1mg