German Chocolate Brownies
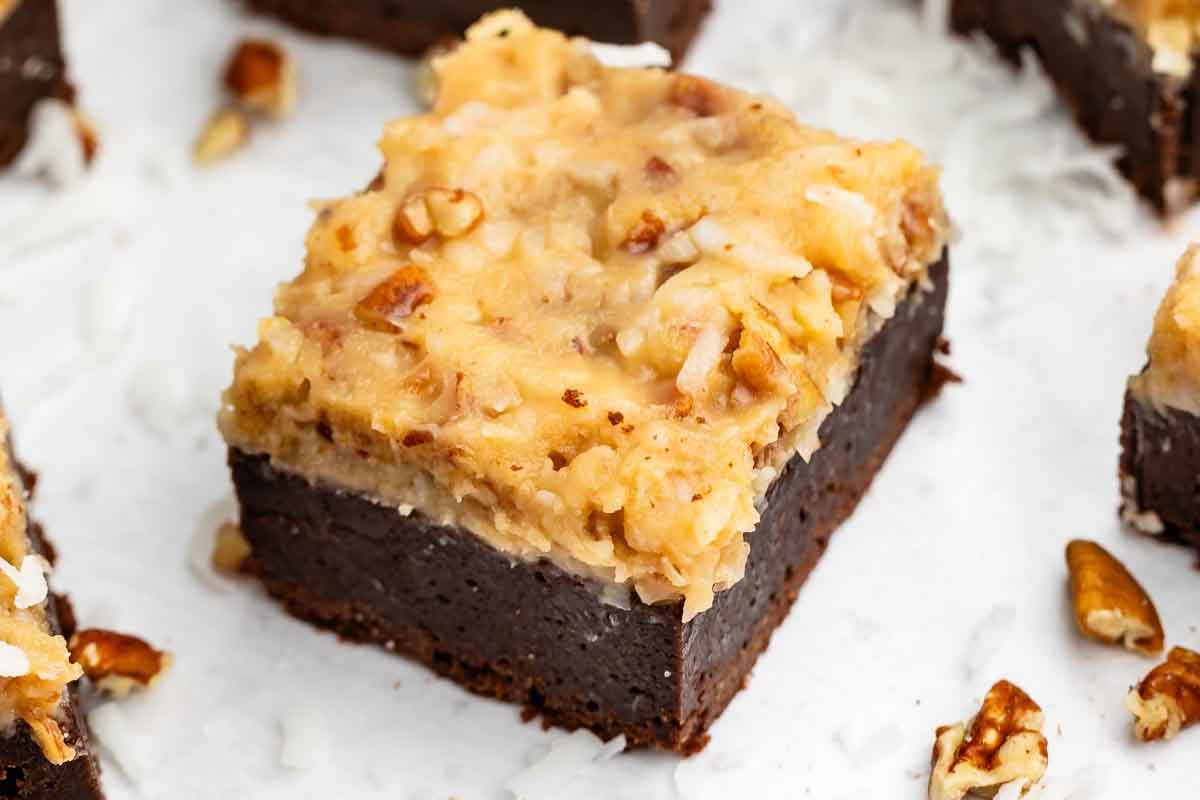 Rich, fudgy brownies topped with delicious coconut pecan frosting: these German Chocolate Brownies are even better than the classic cake recipe. The cooked frosting is sweet and chewy from the coconut and pecans and is the perfect compliment to the homemade brownies. I first made this recipe a countless number of years ago and it…
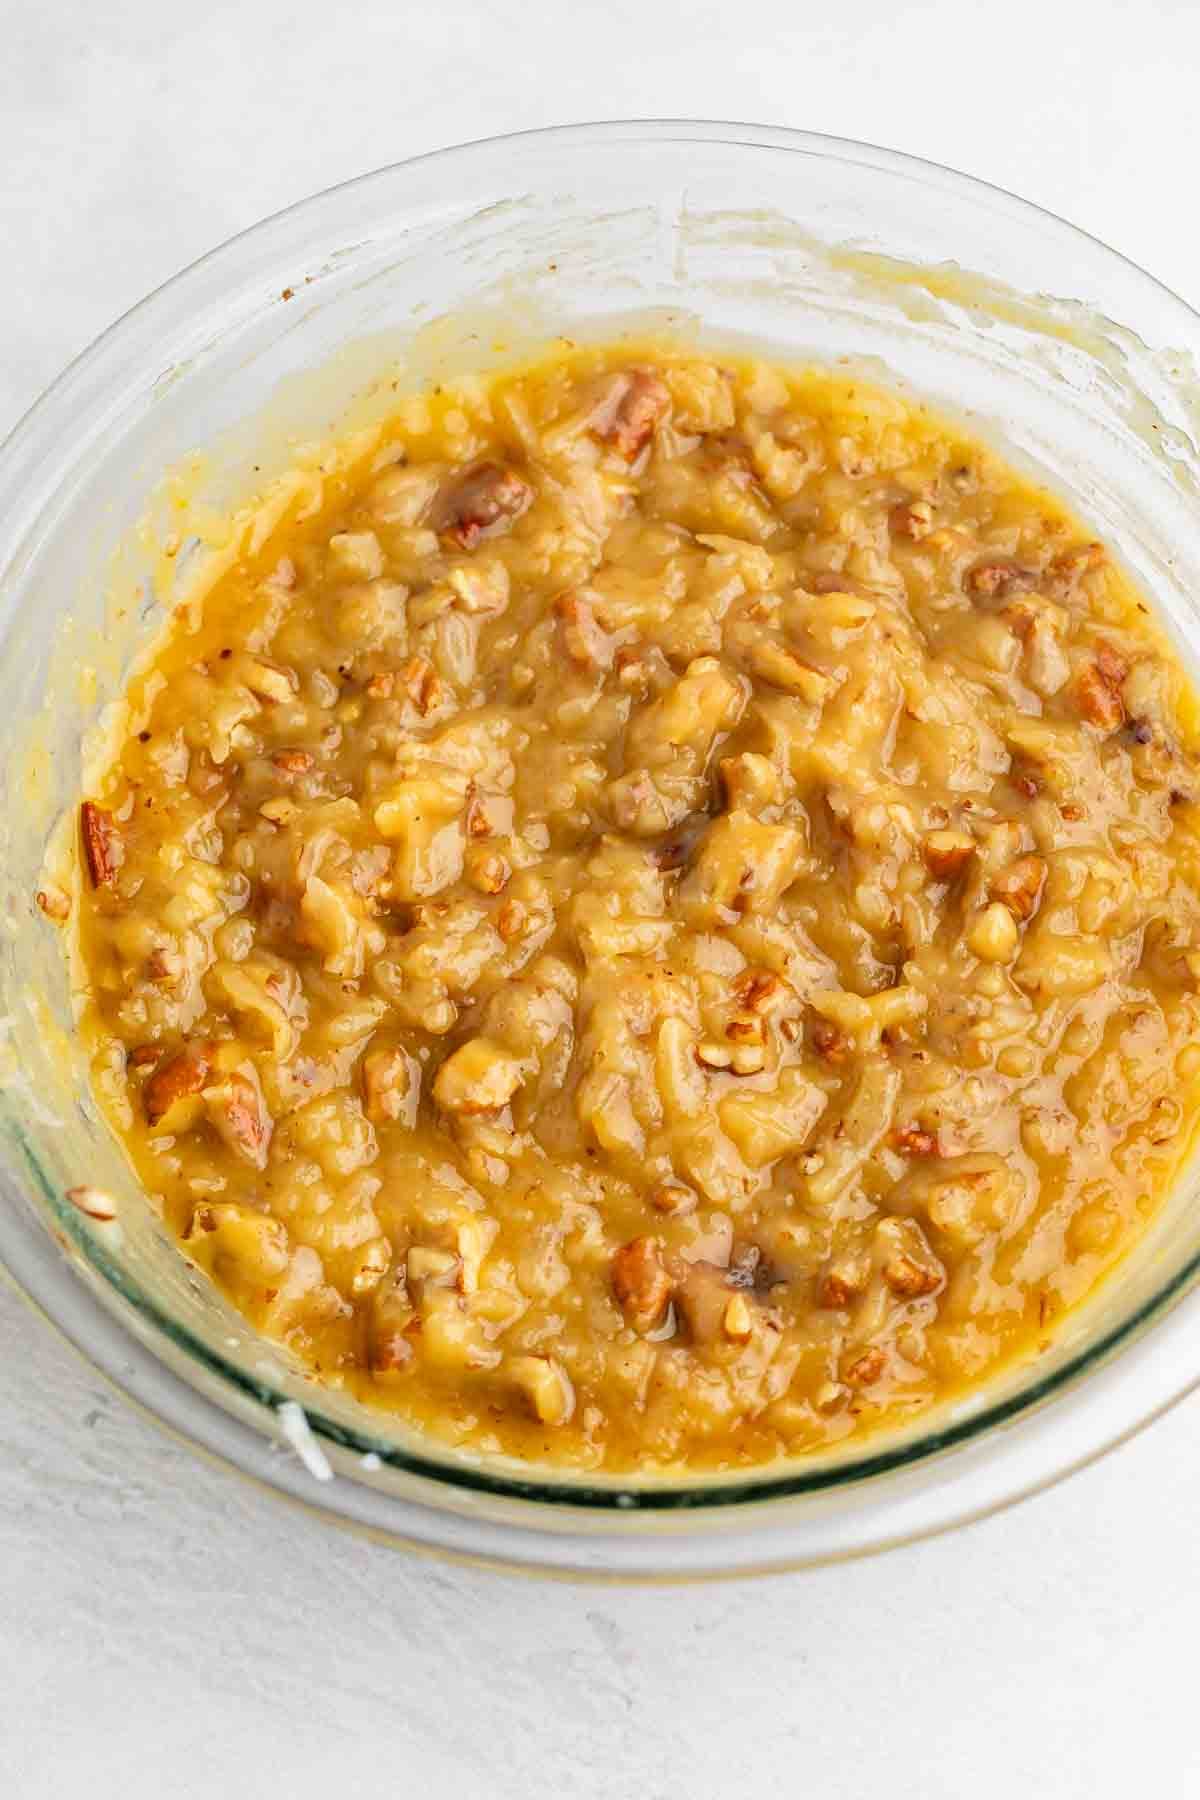 Coconut Pecan Frosting might be the classic recipe for frosting on German Chocolate Cake, but it’s also a delicious frosting for anything you want to add it to: it’s great on cookies, brownies, even as a dip. This recipe will show you exactly how to make this decadent frosting with sweetened coconut and pecans so…
 Toasted Coconut Rice Krispies Treats use my best recipe and add tons of coconut flavor! Coconut lovers are going to love these – they’re chewy and crunchy with coconut in every single bite. If you’re in search of the perfect treat – this is it! Coconut Rice Krispie Treats are my new favorite – these…
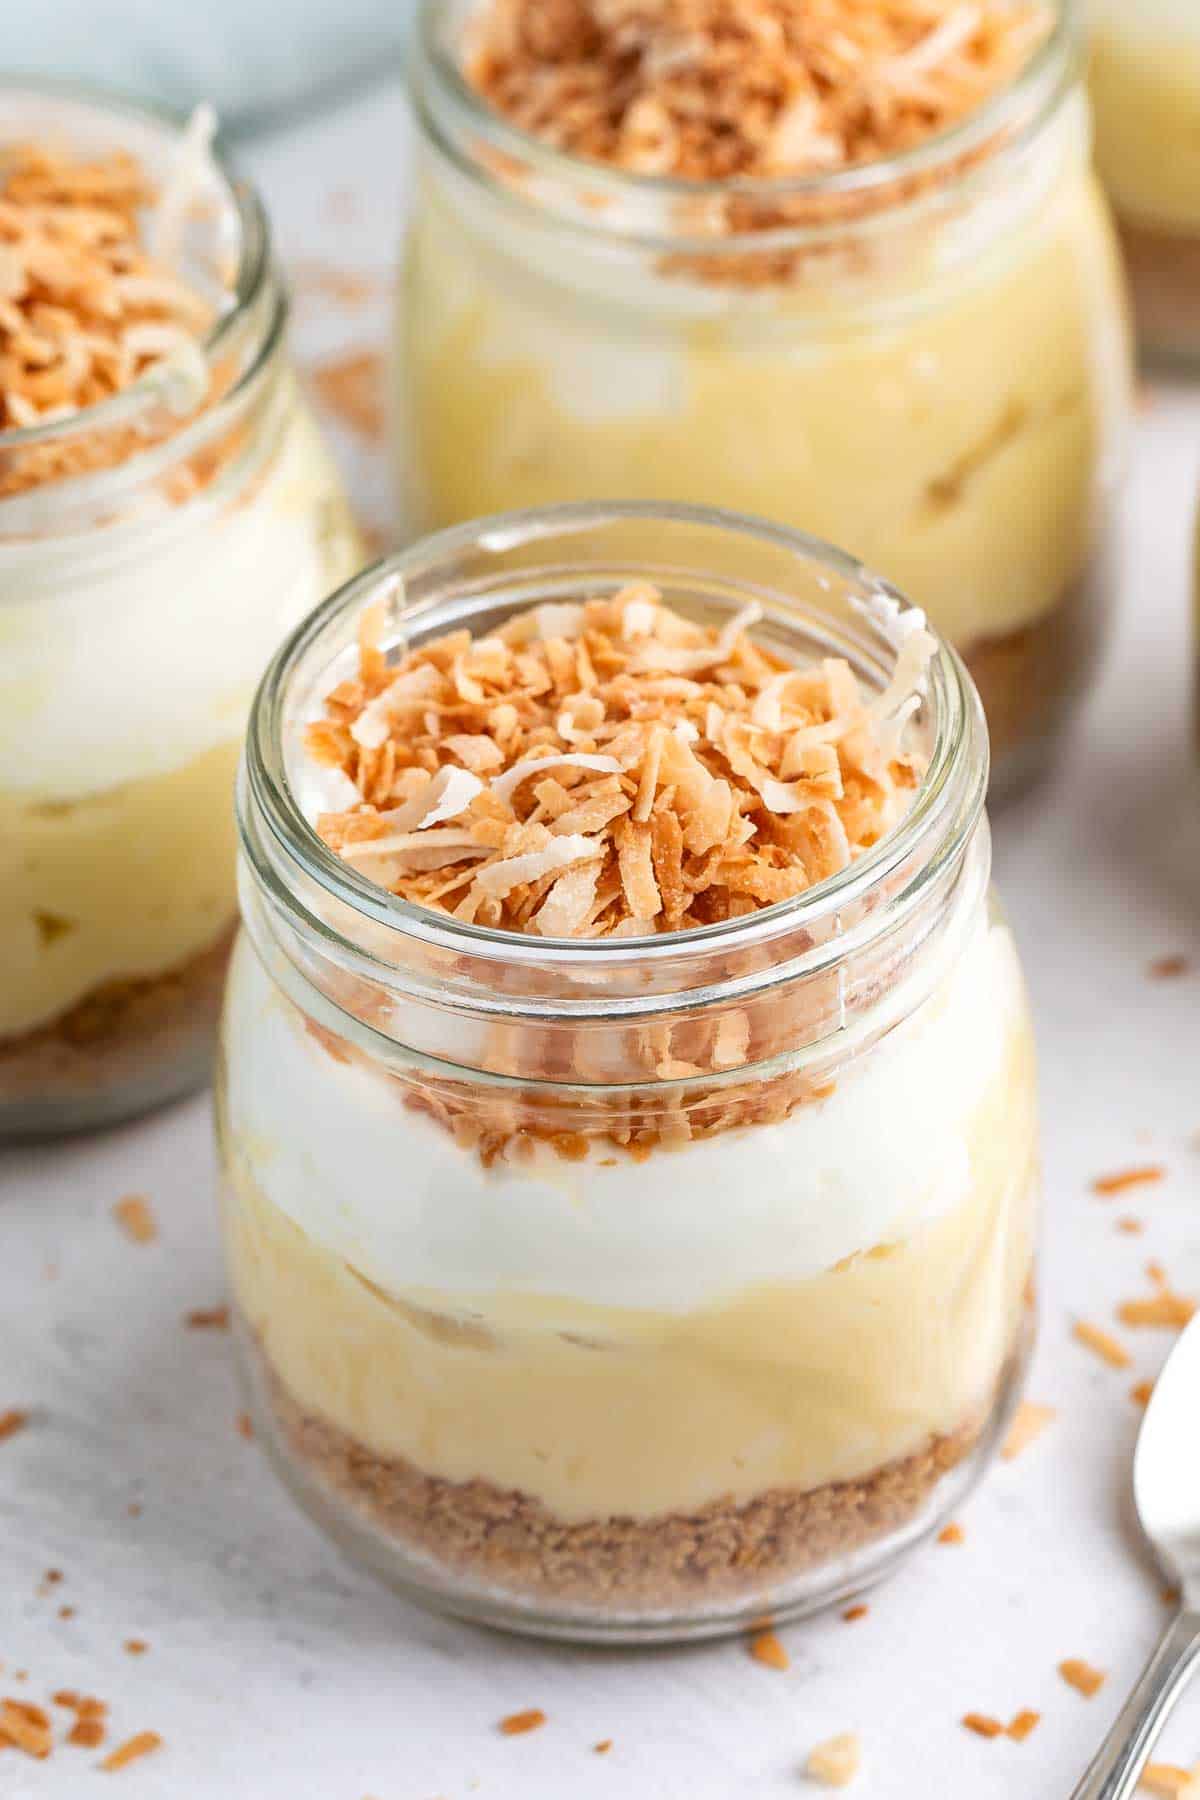 From scratch Coconut Cream Pies in jars or single servings – the perfect easy way to serve pie! These have a graham cracker crust and delicious creamy pudding with tons of coconut and whipped cream. I first made this recipe too many years ago to count – but it desperately needed a facelift (and recipe…
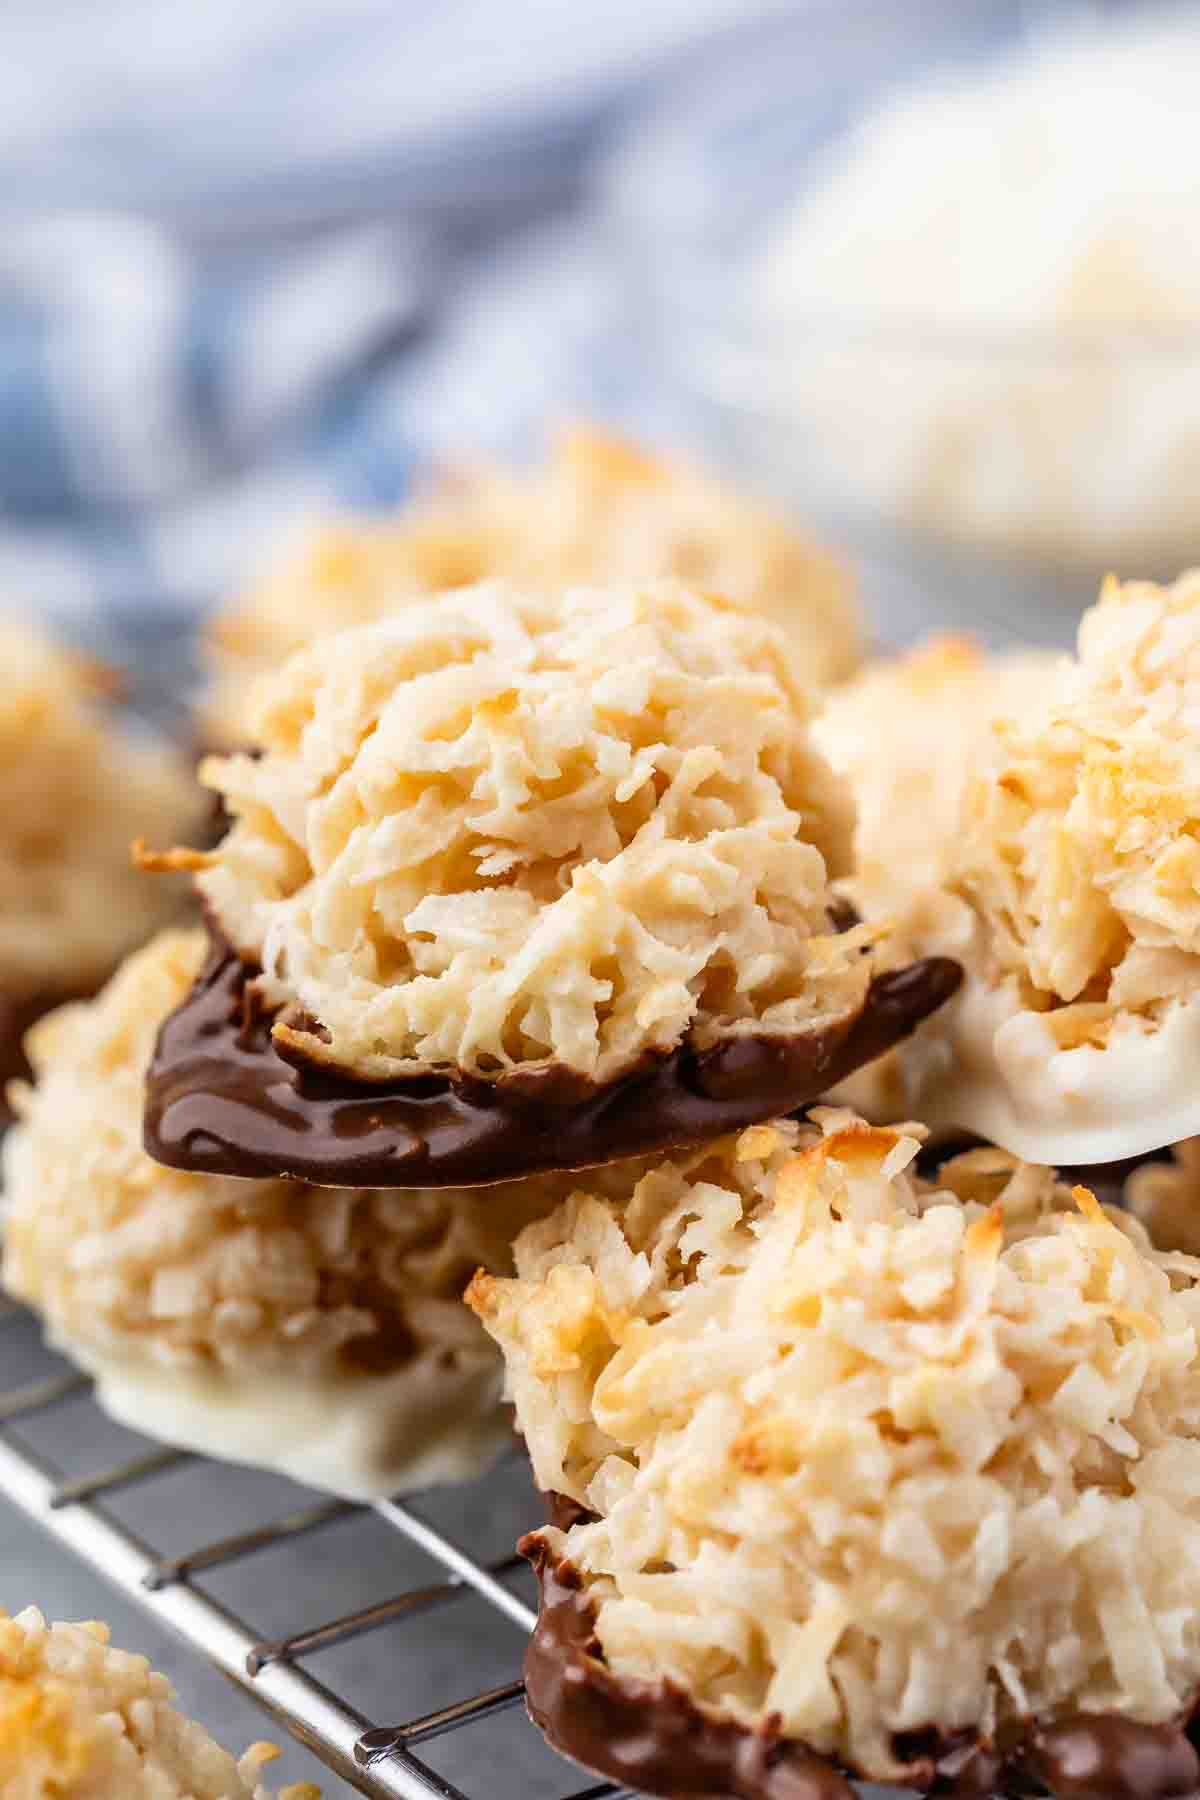 I found the perfect Coconut Macaroons Recipe – they’re made with sweetened condensed milk without eggs! They’re soft and chewy and have so much coconut flavor. This is my absolute favorite macaroon recipe and the only one I make! I’ve tried so many macaroon cookie recipes and not liked any of them; I’ve probably made…