Strawberry Mousse (3 Ingredients!)

This 3-ingredient strawberry mousse is light, fluffy, and bursting with berry flavor! Made with just strawberries, whipped cream, and a…

A Couple Cooks – Recipes worth repeating.

This 3-ingredient strawberry mousse is light, fluffy, and bursting with berry flavor! Made with just strawberries, whipped cream, and a touch of sweetness, it’s the perfect easy dessert for any occasion.

Strawberry Mousse

Here at A Couple Cooks we’ve been on a kick of creating 3 ingredient recipes, because who doesn’t love simplicity? (We’re even authors of a cookbook of simple recipes.) Here’s our latest simple dessert idea: this strawberry mousse recipe! A combination of ripe berries, heavy cream, and a touch of sweetener takes just minutes to whip up and makes a pile of fluffy, berry-scented goodness. We saw this concept on social media and created our own spin using maple syrup, an immersion blender, and a whisk. If you’re like us, add a handful of crushed pretzels for that nostalgic sweet and salty hit!

All you need are 3 ingredients for this strawberry mousse

There’s a certain satisfaction to making something with only 3 ingredients, right? This sweet treat is perfect for whipping up in a few minutes for dinner guests or with a kid in your life. You’ll need a small blender (or blender, keep reading for why), a whisk, and this handful of ingredients to make this lusciously fluffy berry mousse. Here are the ingredients you’ll need:

  • Strawberries: Try to find the ripest, reddest berries you can. Bonus points for local berries! Keep in mind that out of season berries can be tart and tasteless, so making this in the winter months it’s not as tasty (though you can add more sugar to compensate).
  • Pure maple syrup, honey or sugar: We like this dessert best sweetened with maple syrup, particularly the type marked “Grade A: Dark Color and Robust Flavor” in the US. We find it has the best flavor and avoid any syrups marked amber. Honey works well as a sweetener as well, as does granulated sugar.
  • Heavy cream: This ingredient is what makes the magic! There are no substitutes for heavy cream here, since the dairy fat is what makes the fluffy texture.
Bowl of strawberries in water

A delicious shortcut for mousse

We will admit this strawberry mousse is not “technically” a traditional mousse like this chocolate mousse, which is cooked on the stovetop and thickened with eggs. Think of it as a delicious shortcut! Because of that, the texture is more light and fluffy than a standard mousse. You can refrigerate the mousse after whipping it up, which helps to make more of a “set” texture.

You can adjust the sweetness to taste

We like making this strawberry mousse recipe with 2 tablespoons sweetener, which makes for a lightly sweet mousse. But if you’re used to very sweet desserts or are cooking for a crowd that is, use 3 tablespoons sweetener for a sweet-tasting strawberry mousse. You also may want to use sugar as your sweetener, as it brings a more direct sweetness compared to the nuanced flavor of maple syrup or honey.

Strawberry Mousse recipe in cup with crushed pretzels

Don’t have a small blender? No problem

This recipe uses a small or immersion blender because the overall quantity of berries is so small, it doesn’t blend well in a standard size of blender. (If you’ve tried it, you know!)

A food processor should also work for this recipe. Or, double the recipe and make it in a standard blender so the quantity is large enough to blend. Then just use half the strawberry puree for the mousse and use the rest in other ways (see these ideas!).

Another way to serve it: as strawberry mousse pie!

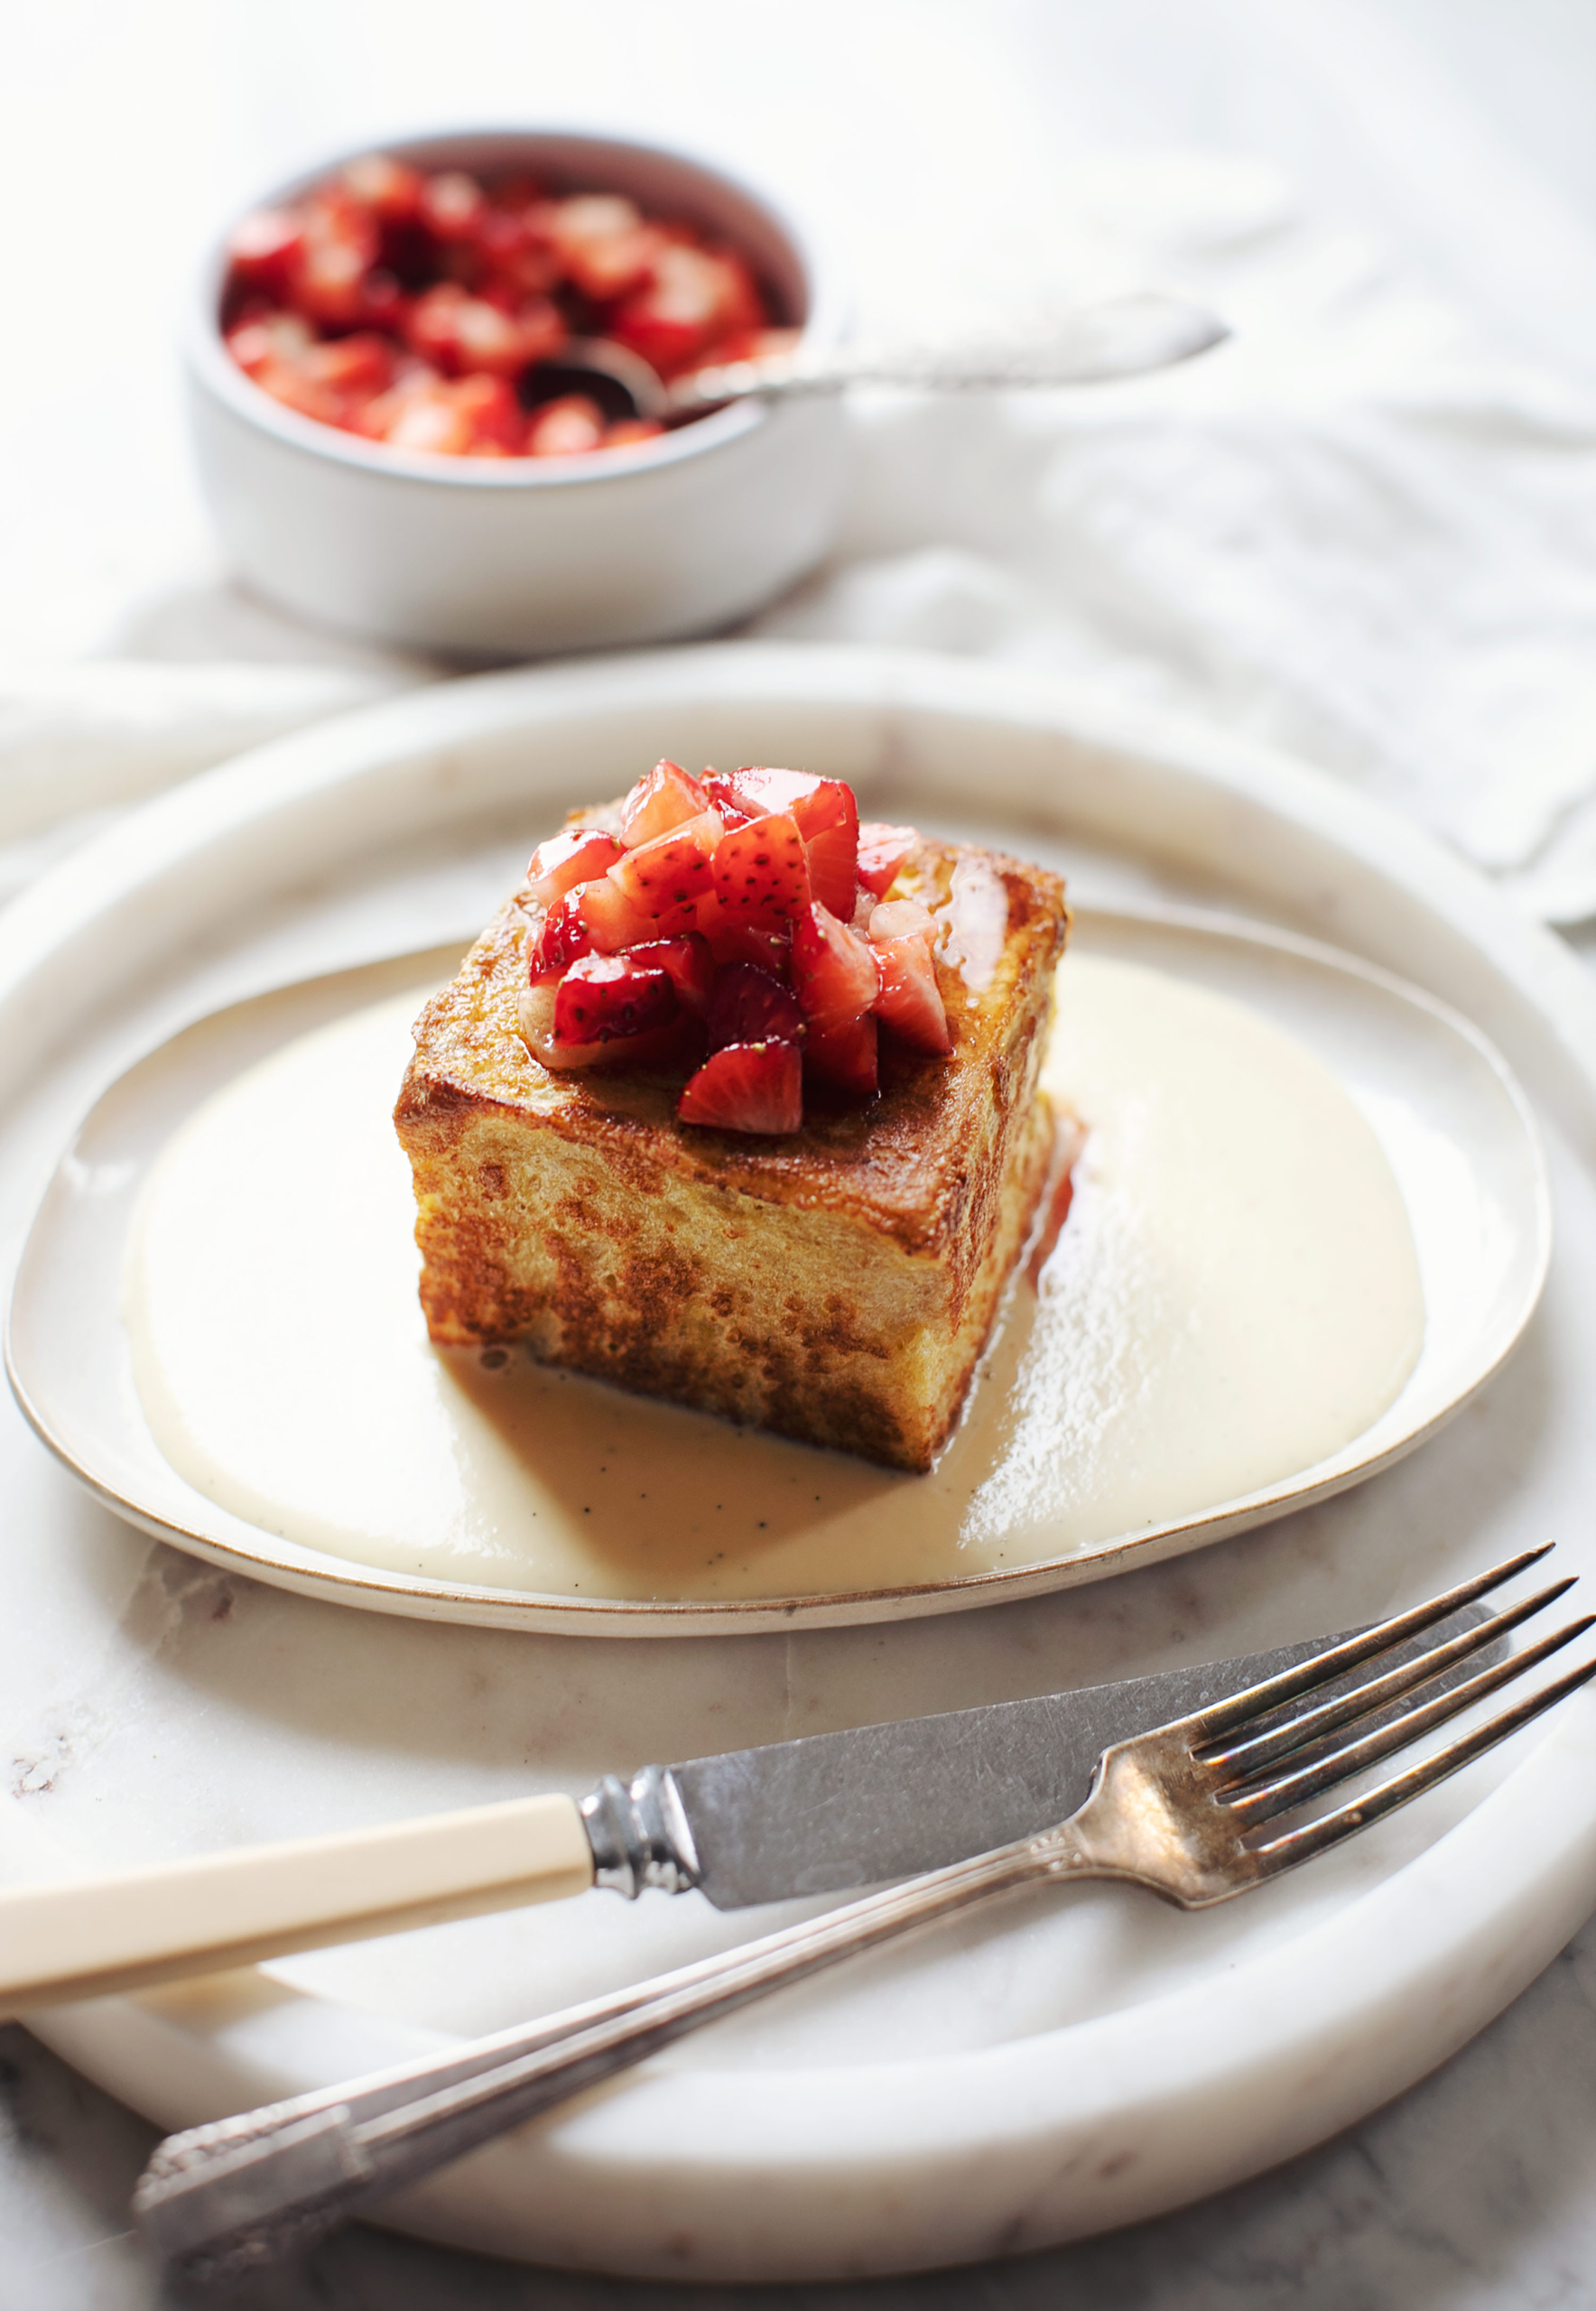
This strawberry mousse is delicious served up in little jars with crushed pretzels or graham crackers. Or if you like, you can make double the recipe and pour it into a pretzel crust or graham cracker crust! Make sure to refrigerate it for a few hours before serving to set the mousse to a thicker texture.

Strawberry Mousse recipe in cups with strawberries and pretzels in the background

Diet considerations, and a trick for vegan

This strawberry mousse recipe is vegetarian and gluten-free. We have not tested a vegan variation, but we’d suggest trying this vegan heavy whipping cream by Nora Cooks and gently folding in the strawberry puree. Let us know if you try it!

More strawberry recipes we love

Embrace the season with more of our favorite strawberry recipes! We hope you love this recipe and let us know what you think in the comments below.

01

Strawberry Rhubarb Pie

This strawberry rhubarb pie recipe is pure perfection, with thick sweet tart berry filling and flaky pie crust. 5 stars!…

02

Strawberry Ice Cream

This homemade strawberry ice cream recipe is the best! It’s creamy and bursting with pure, sweet tart berry flavor. Everyone…

03

Easy Strawberry Compote

This strawberry compote recipe makes a thick, sweet sauce that’s perfect for drizzling over ice cream, waffles, cheesecake and more!…

Print
Strawberry Mousse

Strawberry Mousse (3 Ingredients!)


  • Author: Alex Overhiser
  • Prep Time: 10 minutes
  • Cook Time: 0 minutes
  • Total Time: 10 minutes
  • Yield: 4 ½ cup servings

Description

This 3-ingredient strawberry mousse is light, fluffy, and bursting with berry flavor! Made with just strawberries, whipped cream, and a touch of sweetness, it’s the perfect easy dessert for any occasion.


Ingredients

  • 1 cup diced strawberries (about 8 ounces)
  • 2 tablespoons* maple syrup (or honey or sugar)
  • 1 cup heavy cream

Instructions

  1. Clean and chop the strawberries. Using a small blender or immersion blender,** blend the berries with the maple syrup. Add the cream and pulse 2 to 3 times until combined. 
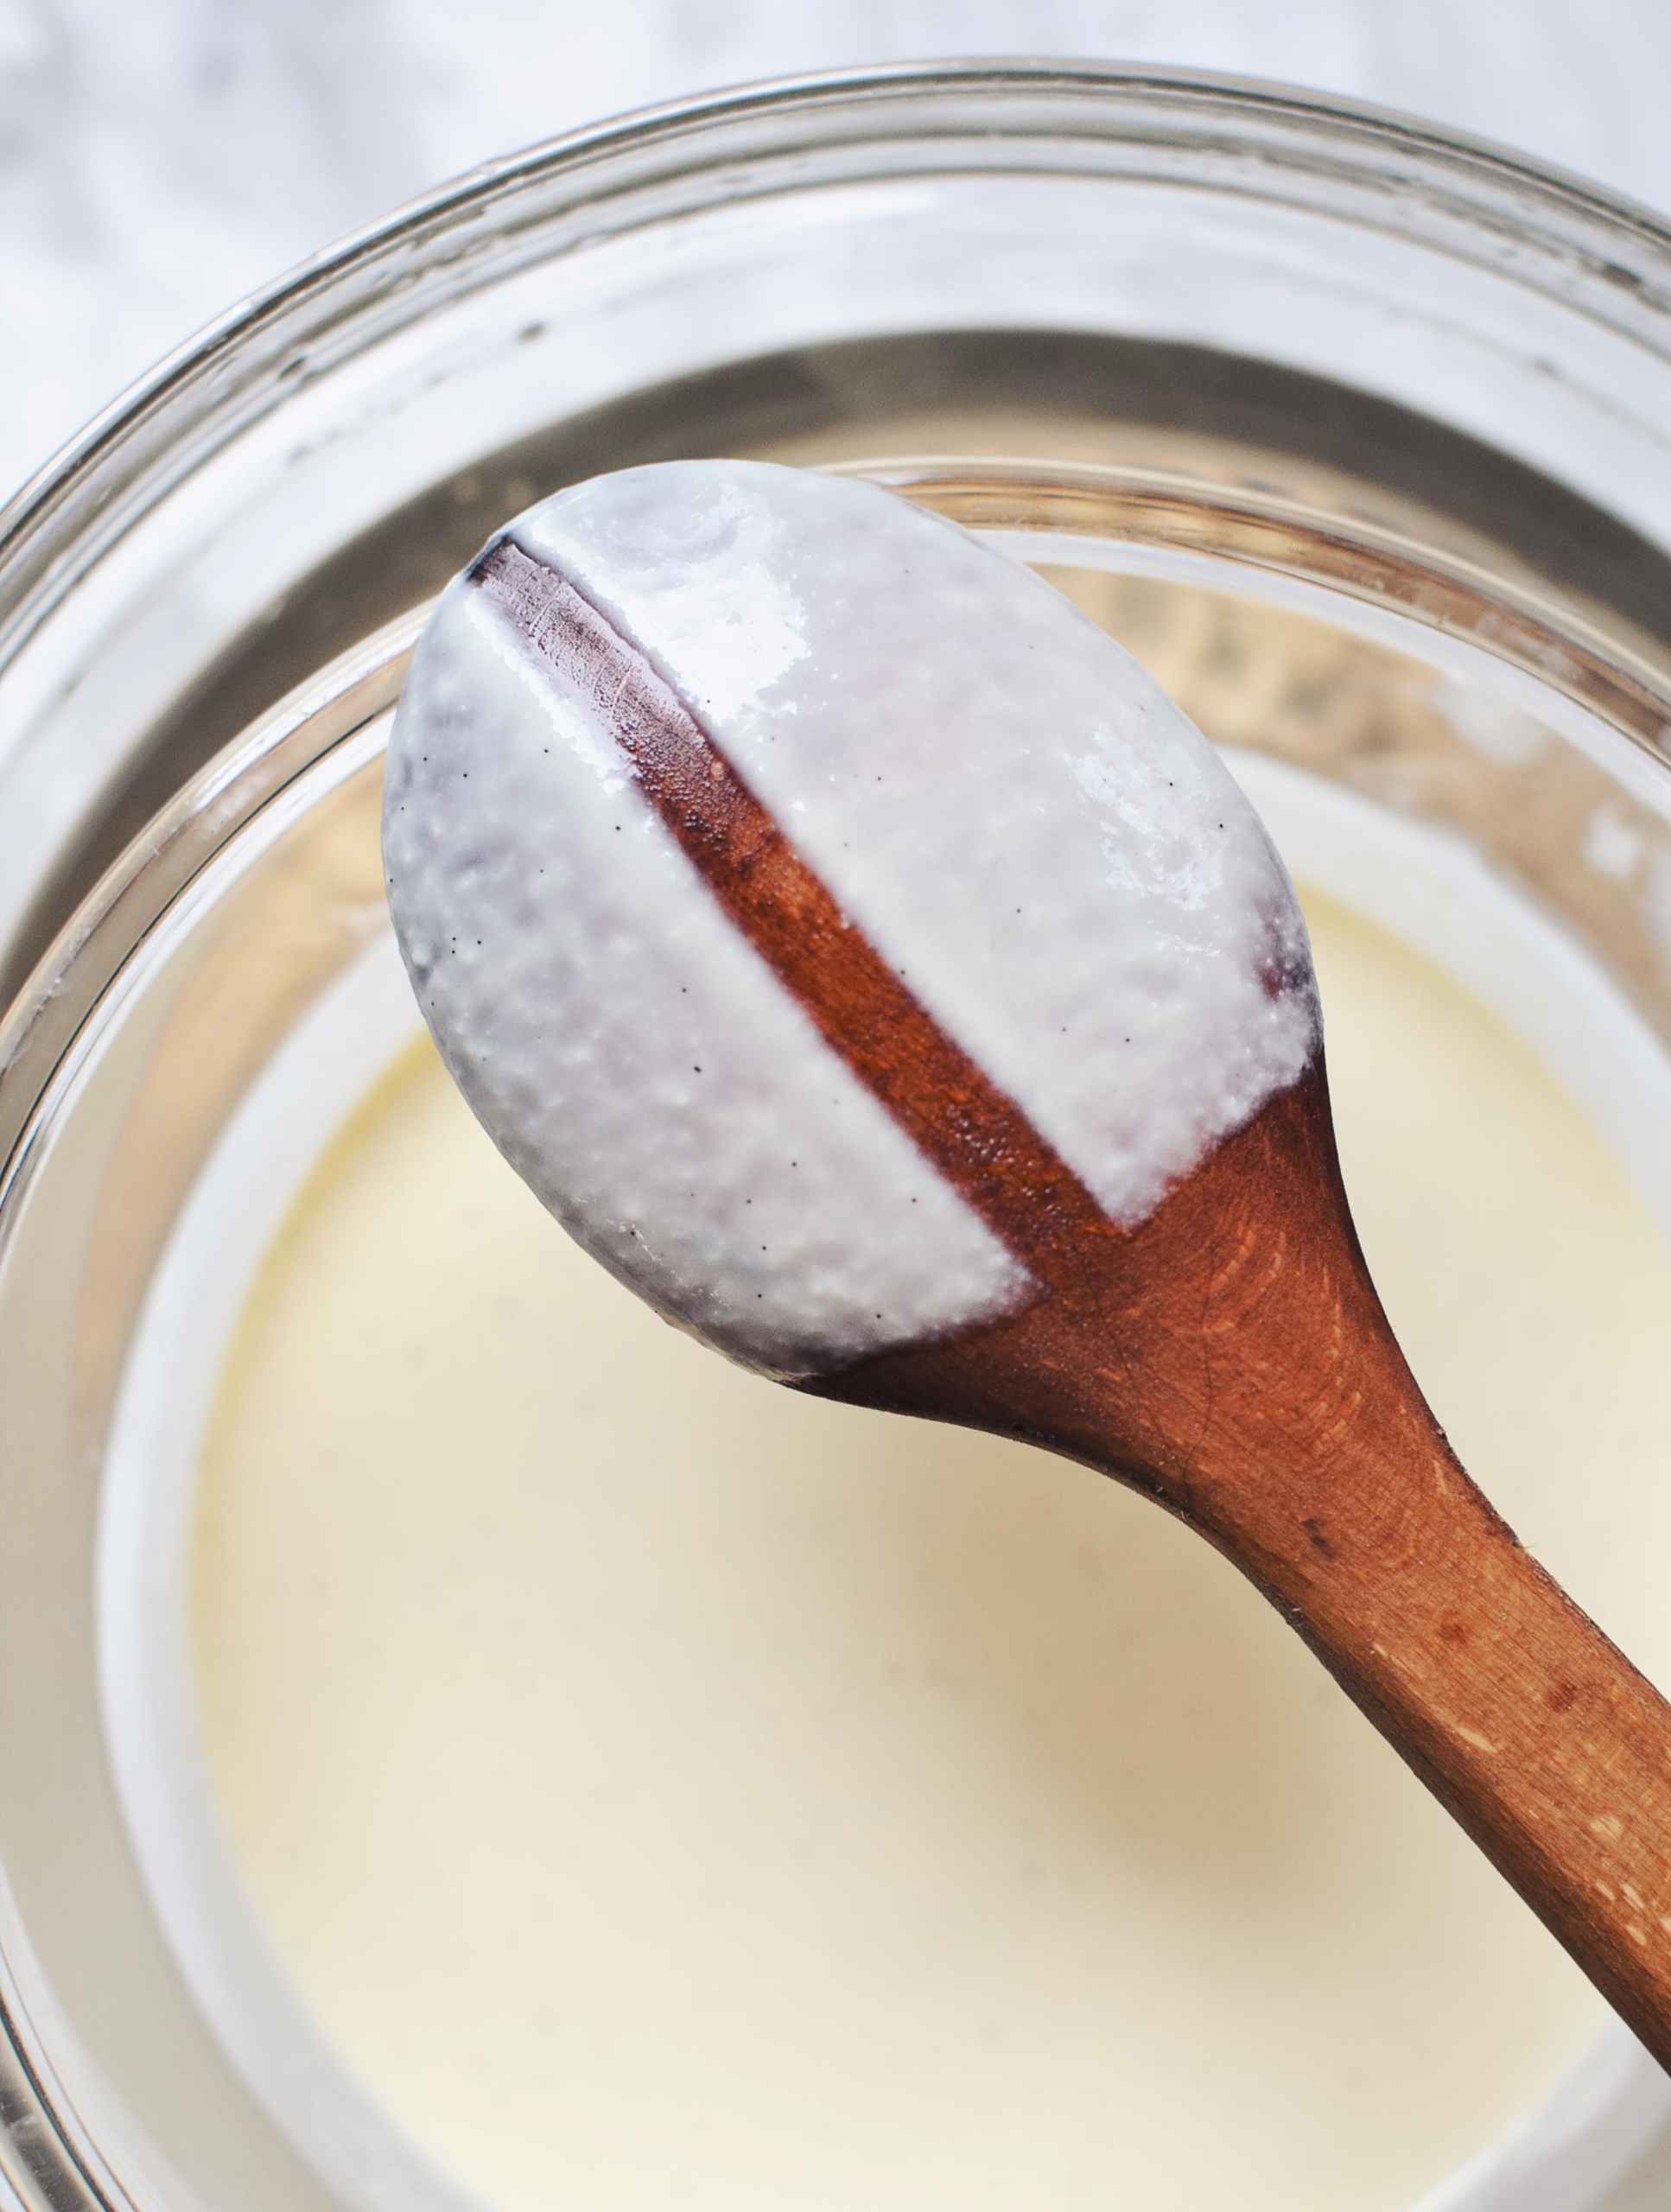
  2. Pour the cream mixture into a bowl. Whip with a whisk for 2 minutes until thickened and fluffy. 
  3. Serve immediately or refrigerate until serving. Serve with crushed pretzels or graham crackers if desired.

Notes

*2 tablespoons maple syrup makes for a lightly sweet mousse. Use 3 tablespoons if you prefer a sweet mousse.

**A food processor should also work. Doubling the recipe works in a standard blender since the quantity is large enough to blend. If you don’t have a small blender, you can blend double the berries in a large blender and use half the puree for the mousse.

  • Category: Dessert
  • Method: No Cook
  • Cuisine: Dessert
  • Diet: Vegetarian

Keywords: Strawberry mousse, strawberry mousse recipe

A Couple Cooks - Recipes worth repeating.

French Toast Cubes with Salted Honey Custard

Happy Spring my dear friends! It’s wonderful to be back in the blog space, and to bring you this new and *very* luscious recipe for French Toast Cubes. Where did this divinity come from?! I have no idea, but I was pretty excited to receive…

The post French Toast Cubes with Salted Honey Custard appeared first on My New Roots.

Happy Spring my dear friends! It’s wonderful to be back in the blog space, and to bring you this new and *very* luscious recipe for French Toast Cubes. Where did this divinity come from?! I have no idea, but I was pretty excited to receive the download. It’s a real egg-celebration! And right at the height of the season here in Ontario, as we witness the forces of life unfolding, in every moment. 

Since I’d like to focus on our star ingredient today, let’s talk about sourcing and buying eggs. There is so much to decipher when purchasing in regards to the grade, size, and raising claims, along with the nutritional, ethical, and environmental impacts of these varieties, so I hope that you find my guide to this highly nutritious and miraculous food helpful to you. 

GRADE 

Eggs are given grades (AA, A, or B) based on interior quality factors like defects and freshness, and exterior factors reflecting shell attributes.  Grade A eggs have thick whites (Grade AA whites are slightly thicker) which do not spread easily, making them a preferred choice for frying.  Meanwhile, Grade B eggs usually have thinner egg whites, making them ideal for baking, omelettes, fresh toast cubes for example, and yes, custard.

SIZE

Eggs vary in size (Extra Large, Large, and Medium are the most common sizes in stores) based on their weight.  The size markings on egg cartons tell the minimum net weight for a dozen eggs.  If you are looking for more protein, you should choose a larger sized egg.

RAISING CLAIMS

Many are concerned with the way egg-laying hens are raised.  Here’s a quick definition for some popular claims.

Conventional 

Conventionally-raised eggs typically come from chickens that are bred in large industrial facilities. These chickens are often confined to cages and given a diet of corn and soy, supplemented with vitamins and minerals. Conventional eggs are usually the least expensive option and widely available, but many people have concerns about the welfare of the chickens and the environmental impact of this type of farming.

Organic 

Organic eggs come from chickens that are fed an organic diet and are not given antibiotics or hormones. In order to be certified organic, at least by USDA standards, the chickens must be cage-free, and also have seasonal access to the outdoors. Organic eggs are typically more expensive than conventionally-raised eggs, but many people believe that they are healthier and better for the environment.

Fortified / Nutritionally-enriched 

Fortified eggs come from hens who have been raised by conventional standards, but have been given feed that is enriched in some capacity. Typically, this can include anything from ground flax seeds, to sea kelp, sunflower oil, fish oil, alfalfa, or rice bran. Depending on the feed, fortified eggs may have more Omega-3s, vitamin D, vitamin E, folate and iodine. 

Pasture-Raised

Pasture-raised eggs come from chickens that are allowed to roam freely on pasture, scratch, forage, and eat a natural diet that includes grasses, insects, and other plants. Pasture-raised chickens are often considered to be the most humane and sustainable way to produce eggs, and many people believe that the resulting eggs are more nutritious and flavorful than conventionally grown eggs. This is true depending on, you guessed it; what they are eating! 

So, what are the differences between these types of eggs? Here are some key factors to consider:

NUTRIENT CONTENT

There is some evidence to suggest that pasture-raised eggs may be more nutritious than conventionally grown eggs. Studies have shown that pasture-raised eggs can have higher levels of omega-3 fatty acids, vitamin D, and antioxidants than conventionally grown eggs. However, the differences in nutrient content between different types of eggs can be small (and in some cases hard to track due to season, soil health, and the specific foods eaten) and may not be significant enough to make a major difference in overall health.

ANIMAL WELFARE

If you are concerned about the welfare of the chickens that produce your eggs, you may want to consider buying pasture-raised or organic eggs because these types of eggs come from chickens that are allowed to roam freely and are not confined to small cages. However, it’s worth noting that the regulations around organic and pasture-raised farming can vary, and some farms may have more humane practices than others. If you have the possibility to do so, ask you local egg provider how the hens are raised, what their physical environment is like, and even their slaughtering practices. 

ENVIRONMENTAL IMPACT

All food production impacts the environment. To minimize the impact of egg production consider buying organic or pasture-raised eggs, as these types of farming practices often involve less use of or are free from pesticides and fertilizers, and may have a smaller carbon footprint than conventionally grown eggs. However, it’s worth noting that the environmental impact of egg production can be complex, and the specific practices used by each farm can vary. Again, ask your farmer!

In summary, the type of eggs you choose to buy will depend on your budget, priorities, and values. Organic and pasture-raised eggs may be more nutritious and have a smaller environmental impact, but they are often more expensive. Conventionally grown eggs may be easier to find and more affordable, but some people have concerns about the welfare of the chickens and the environmental impact of this type of farming. Ultimately, the best way to choose eggs is to do your research, read labels carefully, speak with your local egg provider if possible, and find the option that best suits your needs. 

Okay, now to the recipe 😀

Why French toast cubes, you ask? Because six sides of golden glory is way better than two, haha! I really wanted to create a standout dish, one that was both delectably indulgent and also visually stunning. Having this beauty placed in front of me would absolutely make my jaw drop!  

The real star of the show here however, is the custard, which is a completely new-to-me food, and one I’ve been curious to attempt! Also known as Crème Anglaise, it is the base of all ice cream (at least the really good stuff). That should already tell you that it is rich and satisfying – goddess food – as my dear friend Elenore puts it. I must say, I do feel exceptionally queen-like enjoying the ultra-creamy and luscious divinity. It’s like being kissed by angel!

The custard was surprisingly easy to make once I understood the science behind it: real cream and high-fat milk is infused with vanilla, cooled down until it can be combined with egg yolks without curdling them (this process is called tempering), then slowly back brought up to temperature so that the yolks cook and thicken the sauce. Simple in theory, but it does require some patience and your full, undivided attention at times. I found a lot of recipes for custard call for starches and thickeners, but I wanted to go the whole food route and stick with just eggs. So glad I did! I also replaced the refined sugar with creamed honey. This not only imparts such a stunning flavour, but also serves to help thicken the custard. 

Here are some recipe notes on the custard:

If you fumble and the eggs curdle or the sauce breaks, use an immersion blender to bring it all back together.  

If you have access to organic eggs (or better yet, pasture eggs from free-roaming hens!) I highly encourage you to use them here since you’re really going to taste them. Same goes for the dairy products; find the best you can, bonus points for local and grass-fed. For the whipping cream, choose between 35-40% fat. The whole milk should be around 3-4% fat. 

Do not try this with clear, runny honey as I cannot guarantee the same results. 

The custard makes more than you need for this dish, but leftovers will keep in the fridge for 5 days. You can warm the custard back up by gently heating it in a double-boiler over just-simmering water, stirring frequently. 

If strawberries aren’t in season, choose another fruit! The sky is the limit – you can even start with frozen if that is all you have. 

I hope you love this recipe for French toast cubes as much I do. It is an ode to eggs, to cream, to vanilla, to joy! I am very certain it will put a smile on your face and everyone who is lucky enough to enjoy it with you. 

Print

Salted Honey Custard

Author Sarah Britton

Ingredients

  • 1 vanilla bean
  • 3 egg yolks
  • cup / 75ml creamed honey
  • 1 cup / 250ml whole milk
  • 2 cups / 500ml whipping cream
  • salt to taste as desired

Instructions

  • Split the vanilla bean lengthwise, scrape out the seeds, and place in a heavy-bottomed saucepan with the milk and cream. Turn on the heat to medium and stir every so often, just until the mixture begins to bubble around the edge of the pan for about 2 minutes. Do NOT let the mixture boil. Remove from the heat and let cool and infuse for about 20 minutes.
  • Separate the egg whites and yolks (set the whites aside for the french toast). Whisk the egg yolks and honey together.
  • Ladle 1 scoop of the cooled cream mixture into the egg yolks and swiftly whisk to combine. Add another ladle and whisk, repeating until you have no cream left. Clean the saucepan well, making sure there is no residue left.
  • Pour the tempered cream and egg mixture through a sieve back in to the clean saucepan and turn on the heat to medium. Stir constantly with a wooden spoon for about 8-10 minutes (do NOT leave the stove!). The custard is ready when the mixture coats the back of the spoon and you can draw a clean line through with your finger (see photo).
  • Once it has thickened, remove from the heat and strain once again through a sieve into a bowl or other heat-proof vessel. Immerse this vessel in an ice bath to stop cooking, remembering to stir every so often. Let the mixture cool. Season with salt, as desired. Serve and enjoy immediately, and store leftovers in the fridge for up to five days.
Print

Strawberry Topping

Author Sarah Britton

Ingredients

  • 250 g / 9oz. fresh strawberries
  • pinch salt
  • ½ – 1 Tbsp. pure maple syrup as desired

Instructions

  • Hull and chop the strawberries into small cubes. Place in a bowl, sprinkle with salt, stir well to coat, then add maple syrup and fold to combine. Let sit for at least 10 minutes before serving.

Notes

Serves 4
Print

French Toast Cubes

Author Sarah Britton

Ingredients

  • 1 loaf sourdough bread preferably wholegrain
  • 2 eggs + egg whites from custard making
  • 1 tsp. vanilla extract
  • 1 cardamom pod optional but delicious
  • ghee or butter to cook

Instructions

  • Cut the bread, roughly, into four, 3” / 8cm cubes. Remove the crusts.
  • Whisk the eggs and vanilla together in a small bowl. Crush the cardamom pod, discard the skin and pummel the seeds until broken up into very small pieces. Whisk into the eggs mixture.
  • One by one, dunk each bread cube into the egg mixture, allowing each side to bathe for 15 seconds or so, then turning until all six sides have been coated.
  • Melt your fat in a skillet over medium heat. Add the bread cubes and cook on each side for 1 minute, or until golden brown.
  • To serve, spoon as much custard as you like onto each dish (I used about 1/4 cup / 60ml per serving), then place the french toast cube on top, and spoon over some of the strawberry mixture. Say thank you and enjoy.

Notes

Serves 4

Sending you all love and abundance for this glorious season! May you be nourished and a little spoiled 😉

xo, Sarah B

The post French Toast Cubes with Salted Honey Custard appeared first on My New Roots.

French Toast Cubes with Salted Honey Custard

Happy June my dear friends! It’s wonderful to be back in the blog space, and to bring you this new and *very* luscious recipe for French Toast Cubes. Where did this divinity come from?! I have no idea, but I was pretty excited to receive…

The post French Toast Cubes with Salted Honey Custard appeared first on My New Roots.

Happy June my dear friends! It’s wonderful to be back in the blog space, and to bring you this new and *very* luscious recipe for French Toast Cubes. Where did this divinity come from?! I have no idea, but I was pretty excited to receive the download. It’s a real egg-celebration! And right at the height of the season here in Ontario, as we witness the forces of life unfolding, in every moment. 

Since I’d like to focus on our star ingredient today, let’s talk about sourcing and buying eggs. There is so much to decipher when purchasing in regards to the grade, size, and raising claims, along with the nutritional, ethical, and environmental impacts of these varieties, so I hope that you find my guide to this highly nutritious and miraculous food helpful to you. 

GRADE 

Eggs are given grades (AA, A, or B) based on interior quality factors like defects and freshness, and exterior factors reflecting shell attributes. Grade A eggs have thick whites (Grade AA whites are slightly thicker) which do not spread easily, making them a preferred choice for frying. Meanwhile, Grade B eggs usually have thinner egg whites, making them ideal for baking, omelets, fresh toast cubes for example, and yes, custard.

SIZE

Eggs vary in size (Extra Large, Large, and Medium are the most common sizes in stores) based on their weight. The size markings on egg cartons tell the minimum net weight for a dozen eggs. If you are looking for more protein, you should choose a larger-sized egg.

RAISING CLAIMS

Many are concerned with the way egg-laying hens are raised. Here’s a quick definition for some popular claims.

Conventional 

Conventionally-raised eggs typically come from chickens that are bred in large industrial facilities. These chickens are often confined to cages and given a diet of corn and soy, supplemented with vitamins and minerals. Conventional eggs are usually the least expensive option and are widely available, but many people have concerns about the welfare of the chickens and the environmental impact of this type of farming.

Organic 

Organic eggs come from chickens that are fed an organic diet and are not given antibiotics or hormones. In order to be certified organic, at least by USDA standards, the chickens must be cage-free, and also have seasonal access to the outdoors. Organic eggs are typically more expensive than conventionally-raised eggs, but many people believe that they are healthier and better for the environment.

Fortified / Nutritionally-enriched 

Fortified eggs come from hens who have been raised by conventional standards, but have been given feed that is enriched in some capacity. Typically, this can include anything from ground flax seeds, to sea kelp, sunflower oil, fish oil, alfalfa, or rice bran. Depending on the feed, fortified eggs may have more Omega-3s, vitamin D, vitamin E, folate, and iodine. 

Pasture-Raised

Pasture-raised eggs come from chickens that are allowed to roam freely on pasture, scratch, forage, and eat a natural diet that includes grasses, insects, and other plants. Pasture-raised chickens are often considered to be the most humane and sustainable way to produce eggs, and many people believe that the resulting eggs are more nutritious and flavorful than conventionally grown eggs. This is true depending on, you guessed it; what they are eating! 

So, what are the differences between these types of eggs? Here are some key factors to consider:

NUTRIENT CONTENT

There is some evidence to suggest that pasture-raised eggs may be more nutritious than conventionally grown eggs. Studies have shown that pasture-raised eggs can have higher levels of omega-3 fatty acids, vitamin D, and antioxidants than conventionally grown eggs. However, the differences in nutrient content between different types of eggs can be small (and in some cases hard to track due to season, soil health, and the specific foods eaten) and may not be significant enough to make a major difference in overall health.

ANIMAL WELFARE

If you are concerned about the welfare of the chickens that produce your eggs, you may want to consider buying pasture-raised or organic eggs because these types of eggs come from chickens that are allowed to roam freely and are not confined to small cages. However, it’s worth noting that the regulations around organic and pasture-raised farming can vary, and some farms may have more humane practices than others. If you have the possibility to do so, ask your local egg provider how the hens are raised, what their physical environment is like, and even their slaughtering practices.

ENVIRONMENTAL IMPACT

All food production impacts the environment. To minimize the impact of egg production consider buying organic or pasture-raised eggs, as these types of farming practices often involve less use of or are free from pesticides and fertilizers, and may have a smaller carbon footprint than conventionally grown eggs. However, it’s worth noting that the environmental impact of egg production can be complex, and the specific practices used by each farm can vary. Again, ask your farmer!

In summary, the type of eggs you choose to buy will depend on your budget, priorities, and values. Organic and pasture-raised eggs may be more nutritious and have a smaller environmental impact, but they are often more expensive. Conventionally grown eggs may be easier to find and more affordable, but some people have concerns about the welfare of the chickens and the environmental impact of this type of farming. Ultimately, the best way to choose eggs is to do your research, read labels carefully, speak with your local egg provider if possible, and find the option that best suits your needs. 

Okay, now to the recipe 😀

Why French toast cubes, you ask? Because six sides of golden glory is way better than two, haha! I really wanted to create a standout dish, one that was both delectably indulgent and also visually stunning. Having this beauty placed in front of me would absolutely make my jaw drop!  

The real star of the show here, however, is the custard, which is a completely new-to-me food, and one I’ve been curious to attempt! Also known as Crème Anglaise, it is the base of all ice cream (at least the really good stuff). That should already tell you that it is rich and satisfying – goddess food – as my dear friend Elenore puts it. I must say, I do feel exceptionally queen-like enjoying the ultra-creamy and luscious divinity. It’s like being kissed by an angel!

The custard was surprisingly easy to make once I understood the science behind it: real cream and high-fat milk are infused with vanilla, cooled down until it can be combined with egg yolks without curdling them (this process is called tempering), then slowly back brought up to temperature so that the yolks cook and thicken the sauce. Simple in theory, but it does require some patience and your full, undivided attention at times. I found a lot of recipes for custard call for starches and thickeners, but I wanted to go the whole food route and stick with just eggs. So glad I did! I also replaced the refined sugar with creamed honey. This not only imparts such a stunning flavour, but also serves to help thicken the custard. 

Here are some recipe notes on the custard:

If you fumble and the eggs curdle or the sauce breaks, use an immersion blender to bring it all back together.  

If you have access to organic eggs (or better yet, pasture eggs from free-roaming hens!) I highly encourage you to use them here since you’re really going to taste them. Same goes for the dairy products; find the best you can, bonus points for local and grass-fed. For the whipping cream, choose between 35-40% fat. The whole milk should be around 3-4% fat. 

Do not try this with clear, runny honey as I cannot guarantee the same results. 

The custard makes more than you need for this dish, but leftovers will keep in the fridge for 5 days. You can warm the custard back up by gently heating it in a double-boiler over just-simmering water, stirring frequently. 

If strawberries aren’t in season, choose another fruit! The sky is the limit – you can even start with frozen if that is all you have. 

I hope you love this recipe for French toast cubes as much I do. It is an ode to eggs, to cream, to vanilla, to joy! I am very certain it will put a smile on your face and everyone who is lucky enough to enjoy it with you. 

Print

Salted Honey Custard

Author Sarah Britton

Ingredients

  • 1 vanilla bean
  • 3 egg yolks
  • cup / 75ml creamed honey
  • 1 cup / 250ml whole milk
  • 2 cups / 500ml whipping cream
  • salt to taste as desired

Instructions

  • Split the vanilla bean lengthwise, scrape out the seeds, and place in a heavy-bottomed saucepan with the milk and cream. Turn on the heat to medium and stir every so often, just until the mixture begins to bubble around the edge of the pan for about 2 minutes. Do NOT let the mixture boil. Remove from the heat and let cool and infuse for about 20 minutes.
  • Separate the egg whites and yolks (set the whites aside for the french toast). Whisk the egg yolks and honey together.
  • Ladle 1 scoop of the cooled cream mixture into the egg yolks and swiftly whisk to combine. Add another ladle and whisk, repeating until you have no cream left. Clean the saucepan well, making sure there is no residue left.
  • Pour the tempered cream and egg mixture through a sieve back in to the clean saucepan and turn on the heat to medium. Stir constantly with a wooden spoon for about 8-10 minutes (do NOT leave the stove!). The custard is ready when the mixture coats the back of the spoon and you can draw a clean line through with your finger (see photo).
  • Once it has thickened, remove from the heat and strain once again through a sieve into a bowl or other heat-proof vessel. Immerse this vessel in an ice bath to stop cooking, remembering to stir every so often. Let the mixture cool. Season with salt, as desired. Serve and enjoy immediately, and store leftovers in the fridge for up to five days.
Print

Strawberry Topping

Author Sarah Britton

Ingredients

  • 250 g / 9oz. fresh strawberries
  • pinch salt
  • ½ – 1 Tbsp. pure maple syrup as desired

Instructions

  • Hull and chop the strawberries into small cubes. Place in a bowl, sprinkle with salt, stir well to coat, then add maple syrup and fold to combine. Let sit for at least 10 minutes before serving.

Notes

Serves 4
Print

French Toast Cubes

Author Sarah Britton

Ingredients

  • 1 loaf sourdough bread preferably wholegrain
  • 2 eggs + egg whites from custard making
  • 1 tsp. vanilla extract
  • 1 cardamom pod optional but delicious
  • ghee or butter to cook

Instructions

  • Cut the bread, roughly, into four, 3” / 8cm cubes. Remove the crusts.
  • Whisk the eggs and vanilla together in a small bowl. Crush the cardamom pod, discard the skin and pummel the seeds until broken up into very small pieces. Whisk into the eggs mixture.
  • One by one, dunk each bread cube into the egg mixture, allowing each side to bathe for 15 seconds or so, then turning until all six sides have been coated.
  • Melt your fat in a skillet over medium heat. Add the bread cubes and cook on each side for 1 minute, or until golden brown.
  • To serve, spoon as much custard as you like onto each dish (I used about 1/4 cup / 60ml per serving), then place the french toast cube on top, and spoon over some of the strawberry mixture. Say thank you and enjoy.

Notes

Serves 4

Sending you all love and abundance for this glorious season! May you be nourished and a little spoiled 😉

xo, Sarah B

The post French Toast Cubes with Salted Honey Custard appeared first on My New Roots.

Coconut Dreamcake – Celebrating 15 Years of MNR

Happy birthday, My New Roots! We’re celebrating 15 years strong with a Danish dreamcake, and I am so grateful to you, dear reader, for following along. Whether you’ve been here since the beginning, or this is your first post, thank you for being here and…

The post Coconut Dreamcake – Celebrating 15 Years of MNR appeared first on My New Roots.

Happy birthday, My New Roots! We’re celebrating 15 years strong with a Danish dreamcake, and I am so grateful to you, dear reader, for following along. Whether you’ve been here since the beginning, or this is your first post, thank you for being here and supporting my vision of a healthier, happier world.

I could say something cliché, like “I cannot believe it’s been 15 years already” but I CAN! Haha, I’ve packed so much into this last decade-and-a-half, that I’m actually shocked it hasn’t been 30 years! Two cookbooks, countless international cooking classes and workshops, an online membership platform, a TV show, a TED talk, a wellness retreat business, and a global community of hundreds of thousands of fine folks just like yourself. WOW. 

This space has seen me through two overseas moves, four restaurant jobs, a marriage, a baby, home renovations, major health challenges and triumphs, and the personal evolution that comes along with all of it! I knew I needed to create a recipe that celebrated all of it and I’m so excited to share this Coconut Dreamcake with you.

Honouring a Classic

It was pretty fun deciding what I was going to bake for this anniversary and how I was going to photograph it. Those over-the-top layer cakes I made for previous birthdays felt fun and celebratory, but I also wanted something nostalgic and reverent for this one.

I have been wanting to try making a Sarah B-version of the classic Danish dessert, drømmekage (translation: “dreamcake”) for a very long time. When I lived in Copenhagen, this was one of my favourite treats because it is just so darn delicious and satisfying. The sponge is a moist and tender vanilla cake, with a topping of gooey, coconut caramel. Typically baked slab-style, and served in squares at bakeries all over the country, dreamcake is one of the most ubiquitous and well-loved desserts for a good reason – it truly is a dream! 

Playing with an a time-honoured recipe is challenging, because why mess with a good thing?! But I’ve built a career on making healthy-ish, more nourishing swaps in traditional dishes, so why not attempt a drømmekage of my own?

Happy Hemp

If you’ve been here a while, you know that one of my favourite ingredients to work with is hemp! These light-tasting and creamy seeds are the perfect addition to so many meals, boosting the Omega-3 fat and protein content. They also contain good amounts of magnesium, iron, and zinc, and we could all use more minerals! Best of all? They’re grown locally here in Canada!

I love hemp seeds sprinkled onto my Revolutionary Pancakes and granola, blended into a rich and delicious milk, made into a mock-parmesan cheese, and of course blended into hemp butter. I knew I had to include hemp seeds in this celebratory dessert since I feel it’s my *signature move*. So I incorporated them in two ways: first as part of the flour mix for the vanilla sponge; this adds a beautiful tooth and moisture to the cake, keeping it fresh for days! And I made a hemp cream to replace the dairy cream in both the cake and the topping (just for fun – nothing against dairy cream!).

Celebrating Coconut

Other notable variations include toasting the coconut for the topping, which really brings the coconut flavour to the max! I used two kinds of coconut, since I love having just a few larger pieces for a textural change-up, but if you only have finely desiccated coconut, that’s *fine* too 🙂 Using coconut sugar in the topping adds an incredible depth of flavour and complexity that I suggest you don’t miss out on – it brings so much more to the party than plain old brown sugar.  

Helpful Notes

I used unbleached cane sugar instead of coconut sugar in the dreamcake because I wanted to maintain the light colour of the cake. If you want to use another granulated sweetener, go for it! Substituting with a whole food liquid sweetener is a different ball game and I haven’t experimented with that yet. If you do, make sure to share in the comments and let us know how it goes!

You can use whole or light spelt, or a combination of those flours for the sponge – the combo was my favourite, a mix of half and half. You can substitute these with any other gluten-containing flours, or with a gluten-free mix that mimics all-purpose flour for baking (or make your own!). 

Now I gotta tell you about the topping, because there is a moment when you’re making that caramel that I know will make you think you’ve failed and you haven’t! The butter and coconut sugar are stubborn to meld. The whole thing will split and look chunky and strange, and the excess butter will be oozing around, not wanting to play with anyone. THEN! it will magically come together if you just keep stirring. Make sure the heat is very low, and stick with it. If you’re going on 8 to 10 minutes even… just keep stirring – you got this (and it’s SO worth it)!

Print

Coconut Dreamcake 

Author Sarah Britton

Ingredients

Sponge:

  • cup / 50g hemp seeds
  • 1 cup / 150g wholegrain or light spelt flour
  • 2 tsp. baking powder
  • ¼ tsp. fine sea salt
  • 50 g salted butter preferably organic
  • 4 eggs preferably organic
  • 1 cup / 250g unbleached cane sugar
  • cup / 80ml hemp cream see recipe below
  • 2 tsp. vanilla extract

Topping:

  • 100 g salted butter preferably organic
  • 1 ⅓ cup / 200g coconut sugar
  • 3 Tbsp. hemp cream see recipe below
  • ½ tsp. vanilla extract
  • 1 tsp. flaky salt such as Maldon
  • 1 ½ cups / 150g unsweetened desiccated coconut
  • ½ cup /25g unsweetened large flake coconut

Hemp Cream:

  • 1 cup / 250ml water
  • cup / 50g hemp seeds

Instructions

  • Start by preheating the oven to 400°F / 200°C. Prepare a 7” / 18cm round springform cake pan by greasing the interior with a little butter, and placing a parchment paper circle in the bottom (I find it easiest to trace the bottom of the cake form, then cut it out to fit perfectly). 
  • Make the hemp cream by placing the hemp seeds and water in a blender and blend on high for 30 seconds, or until the cream is smooth. Set aside.
  • In a food processor, blend hemp seeds until they’re the texture of sand (but don’t blend too much or you’ll end up with hemp butter!). Add the flour, baking powder, and salt. Pulse to blend and set aside.
  • Melt the butter over low heat and let cool. Meanwhile, beat the eggs and sugar together until light and fluffy (either with an electric mixer or your arm muscles!). Stir in the flour mixture, then fold in the butter, hemp cream and vanilla. Pour batter into the prepared springform pan and place in the oven to bake for 20 minutes. Then reduce oven temp to 350, and bake for another 20 minutes until a toothpick inserted comes out clean.
  • While the sponge is baking, make the topping by toasting the coconut in a large skillet over medium heat (work in batches if necessary, and toast the two types of coconut separately). Once golden and fragrant, set aside. Melt the butter over low heat, then stir in the coconut sugar. Stir frequently until they combine into a thick caramel (this make take a few minutes, but keep stirring!). Add the hemp cream and vanilla, stir to incorporate. Remove from the heat, then add the flaky salt, toasted coconut, and fold to thoroughly combine. 
  • Once the sponge is baked, remove from the oven and spread the topping over as evenly as possible. Place back int the oven for another 5 minutes, just until the topping is bubbling. Remove from oven and let cool completely, then place in the fridge to firm up, at least 2 hours. Remove cake from the fridge, then using a sharp knife, cut around the edge to release caramel that is stuck to the sides. Unlock the springform to reveal! Slice, say thank you, and enjoy. Leftovers can be stored covered, at room temperature for about a week.

Photographing this dreamcake was just as much fun as eating it. Since I was re-creating a Danish recipe, and those flavours got me all nostalgic for my Copenhagen home, I decided to try emulating that very special Nordic light that I truly miss. I feel like I succeeded! This was not an easy feat, but after 15 years of teaching myself how to take photos of food, I think I figured it out. This is all to say, that I’m still challenged by this ongoing project, and in love with everything I’ve learned along the way. What a trip! 

And one final thanks to you, for being here, for the time and energy you’ve spent here on the blog, engaging on social, on Grow, in my cooking classes and retreats, zoom hangs, or even those passing moments on the street when you come up and say hello (don’t ever NOT do that by the way. I love meeting you!). The thing I value most from the last 15 years of creating this space, is the people that I’ve had the privilege of connecting with inside of it. Words could not describe how big and full my heart feels when I remember the meaningful conversations, hugs, high-fives, tears and smiles that we’ve shared, while navigating this wild ride of life, and trying our best to look after our miraculous, individual bodies, together as one. 

Immense gratitude and love. Your friend always,

Sarah B

The post Coconut Dreamcake – Celebrating 15 Years of MNR appeared first on My New Roots.

Strawberry Rhubarb Rose Crumble Bars

My dear ones! It’s been another while since being in the blog space and I’m happy to be here with you, in the glory of summer unfolding. I love having the time to craft these posts, since they are a true outpouring from my heart…

The post Strawberry Rhubarb Rose Crumble Bars appeared first on My New Roots.

My dear ones! It’s been another while since being in the blog space and I’m happy to be here with you, in the glory of summer unfolding. I love having the time to craft these posts, since they are a true outpouring from my heart to yours, in the hopes that it will tether us to this time and place, land, season, and true nourishment. Strawberry Rhubarb Rose Crumble Bars is one of the special ones, that has been bubbling away in my consciousness since last summer.

I was cycling on the boardwalk at the beach near my home last August, and out of the corner of my eye, I saw a flash of fuchsia – the unmistakable pink of rose hips. Ahhh this gorgeous bushy plant is one that I first became familiar with in Denmark, where they bloom along the shores of every beach, punctuating the salty summer air with rose perfume. And here it was, at the water’s edge in Ontario, the very last petals dropping in the slanted summer sun. I knew I was too late to do anything with them at that point, so the idea-seed was planted for next year. Which is now, right on time!  

They say what grows together goes together, so for this recipe I waited for the rose hip to bloom, and then checked out what the other plants were peaking in my garden; strawberries and rhubarb! What a divine and classic combination! I couldn’t wait to get to celebrating this triple-blessing of flavours.  

Early Summer Stars

Peak-season strawberries are nutritional super stars. They’re loaded with vitamin C, and good amounts of manganese, folate, and fibre. Their total antioxidant capacity is extremely high, and as we learn more about this summer delight, there is evidence proving its positive effects on cardiovascular health. After consumption, there is less platelet aggregation, less lipid peroxidation and an increase in free-radical scavenging – meaning those antioxidants get to SNACK!

Rhubarb is also a high-fibre food, which is essential for digestion. Fibre is exclusively a plant nutrient, as plants grow it for structural support. Animals have bones, so fibre is not a significant part of their composition. Therefore, increasing our dietary intake of plants in comparison to animal-based foods means an increase in our fibre intake. Makes sense, right? 

So much of our nourishment depends on the healthy passage of food through our digestive tract. Without the fibre in things like strawberries and rhubarb, it is impossible for our digestion to take place in a balanced way. With imbalanced digestion comes the risk of poor nutrient absorption, and along with that comes compromised metabolism, immunity, even our mental health. The risk of most chronic diseases is lowest when whole plant foods, like a simple serving of strawberries and rhubarb, are plentiful in the diet. These bars also contain high-fibre oats, almonds and almond flour, so basically what I am saying is eat a lot of these. 

The Strawberry Rhubarb Rose Compote

I knew that I wanted the seasonal ingredient to really shine in this recipe, so I started by making a compote with the strawberries and rhubarb, adding a kiss of vanilla and rose. The results were like, mind-blowing, people. I’ve made this compote several times now, simply because it is delicious on everything and in so many ways. So far I’ve slathered it on the Revolutionary Pancakes with almond butter, hemp, salt, and even more fresh strawberries. I made popsicles with it (blended this with more strawberries and froze it). And warmed slightly over vanilla ice cream? Unreasonable. The fact that it comes together in under 15 minutes is also motivating for me – I know I’m not in for a huge project to make it, even though the end result *feels* like such a luxurious extra in my life.  Make a triple batch now and freeze it I say! 

If you want to get ahead, you can make the compote up to seven days in advance. And yes it lasts that long in the fridge. So convenient. 

You can use store-bought, instead of homemade rosewater in this recipe to skip a step, but I understand that sourcing store-bought might be just as much of a challenge for some. Surprisingly, I can find bottled rosewater at my local, small-town grocery store, so check with an employee at your closest market since you might be surprised they stock it! Heath foods stores are a good bet too. And if you can find fresh rose / rose hip flowers, then harvest them sustainably and make your own rose water. Recipe and two methods here. As a last resort, order online! 

The Crumble Bars

The top and bottom layer of these bars are a slight upgrade from my original crumble bar recipe with blackberries and hazelnuts, back in 2014 (!). This time I made more of a cookie base, kind of like a giant shortbread cookie with almond flour, which turned out to be more moist and easier to cut than the one just made with oats. I really love this change, and hope you will too! The crumble topping is exactly the same except for swapping out the brown rice flour for almond flour, since it’s yummier / fattier / moister. And since knowing that almonds are in the strawberry and rose family (Rosaceae!) it only made sense. 

Enjoy this literal slice of summer, friends and lovers. These Strawberry Rhubarb Rose Crumble Bars are truly a moment, captured. And I hope you choose to savour it. 

Print

Strawberry Rhubarb Rose Crumble Bars

Author Sarah Britton

Ingredients

Strawberry Rhubarb Rose Compote

  • 400 g / 14oz rhubarb
  • 2 Tbsp. pure maple syrup
  • 1 Tbsp. water
  • 300 g / 10.5oz ripe strawberries
  • pinch of salt
  • 1 tsp. vanilla extract
  • 2 tsp. rosewater to taste

Shortbread Base

  • 2 cups / 200g rolled oats divided (gluten-free if desired)
  • ¾ cup / 70g almond flour
  • ¾ tsp. fine grain sea salt
  • 1 tsp. baking powder
  • 60 g expeller-pressed coconut oil ghee or butter
  • ¼ cup / 60ml pure maple syrup
  • 1 tsp. vanilla extract

Crumble Topping

  • 1 cup / 100g rolled oats
  • 2 Tbsp. pure maple syrup
  • 2 Tbsp. expeller-pressed coconut oil ghee, or butter
  • cup / 100g almonds
  • ¼ tsp. fine sea salt
  • 3 Tbsp. almond flour

Instructions

  • Start by making the compote. Bring water and maple syrup to a simmer in a medium saucepan. Roughly chop rhubarb and add it to the pan, stir and cover. Simmer for 5 minutes, stir again and use the back of a wooden spoon to smash the rhubarb. If it’s still quite tough, cover and continue to cook until almost soft. While the rhubarb is simmering, wash and stem the strawberries, then roughly chop. Add them to the soft rhubarb, stir well and cook covered, for 2-3 minutes. Remove from heat, and smash the mixture with the back of your spoon, until it’s your desired texture. I like mine pretty chunky. Stir in the salt, vanilla and rosewater. Adjust the flavours to suit your taste. The compote will firm up as it cools. Measure out 2 ½ cups / 625ml of compote and set aside.
  • Preheat oven to 350°F / 175°C. In a food processor blend 1 ½ cups / 150 grams of oats on high until you have a rough flour, like coarse sand. Add almond flour, salt, and baking powder, then pulse to combine. Add maple syrup, coconut oil, and vanilla. Pulse until evenly moist, then fold or pulse in the whole oats. The dough will be quite firm and sticky.
  • Turn the dough out into a lightly greased, or parchment-lined 8" x 8” / 20 cm x 20 cm glass or metal pan and press firmly, especially around the edges – it helps to wet your hands so that the dough doesn’t stick to your fingers. Place in the preheated oven and bake for 15 minutes.
  • While the base is baking, make the crumble topping. Without cleaning the food processor, add the all the ingredients for the crumble, and pulse a few times to mix. You can chop the ingredients as finely as you like, but I like mine pretty chunky.
  • Remove the base from the oven, and spread the compote over top in an even layer. Crumble the topping over, and place back in the oven for another 30-35 minutes, until the top and bottom are golden brown, and the middle is a bit bubbly.
  • Let cool completely before cutting into bars. Say thank you and enjoy. Store in an airtight container in the fridge for five or six days. Freeze for up to 3 months and let warm for a few minutes before enjoying!

The post Strawberry Rhubarb Rose Crumble Bars appeared first on My New Roots.