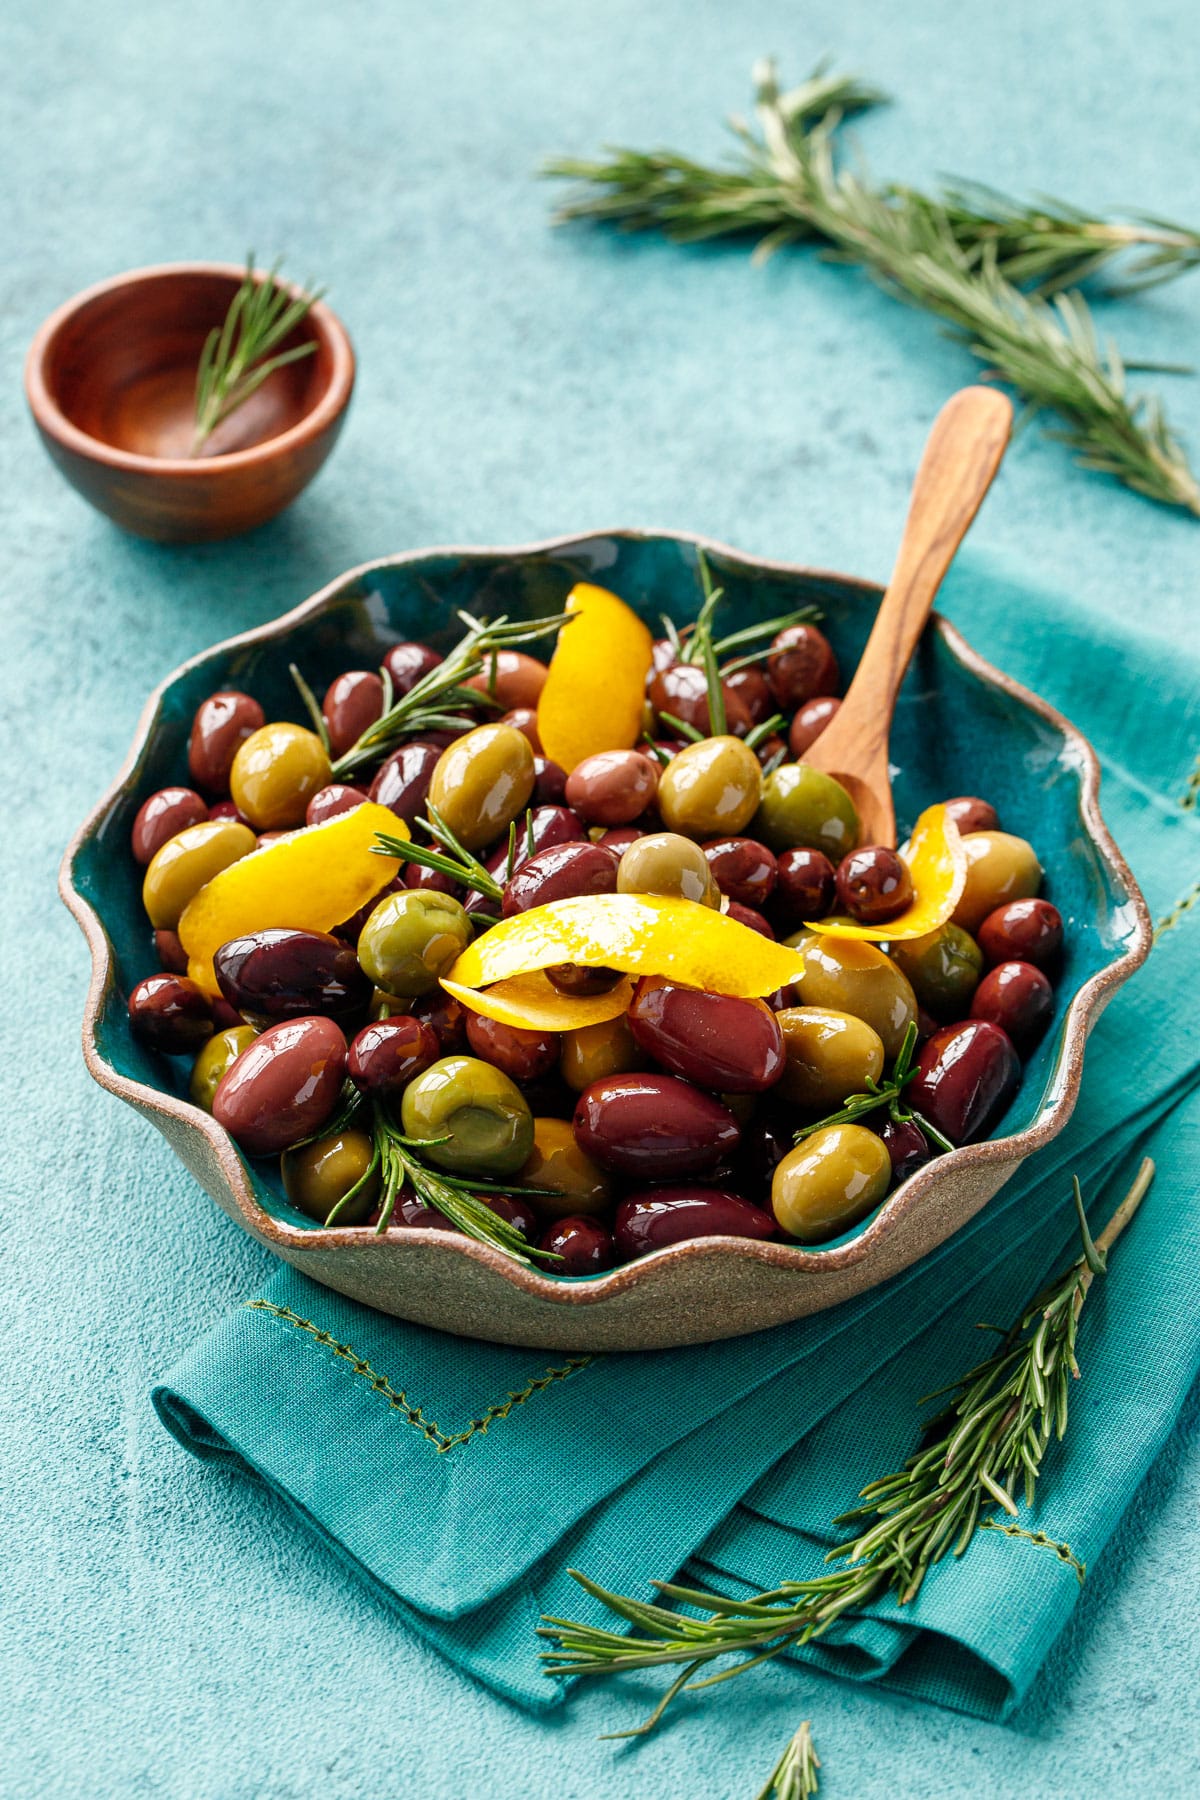
Ordinary olives? No, siree! Take your next antipasto spread from basic to brilliant with these warm sautéed olives with lemon and rosemary. Simply sautéing whole olives in extra virgin olive oil and serving them warm brings out their most flavorful characteristics; with the addition of fresh lemon peel and sprigs of verdant rosemary, they are […]
Ordinary olives? No, siree! Take your next antipasto spread from basic to brilliant with these warm sautéed olives with lemon and rosemary.
Simply sautéing whole olives in extra virgin olive oil and serving them warm brings out their most flavorful characteristics; with the addition of fresh lemon peel and sprigs of verdant rosemary, they are are oh so juicy and simply bursting with flavor.
I’ve always loved to snack on olives (the fact that I felt like I had my own personal olive brand possibly had something to do with that).
But as much as I love olives of all kinds, I have to say that warm olives are truly a revelation—the heat allows the true flavors of the olives to shine, while allowing the firm flesh to absorb even more flavor from the olive oil, lemon, and rosemary it’s cooked with.
It’s almost magical, how much better olives become by simply warming them.
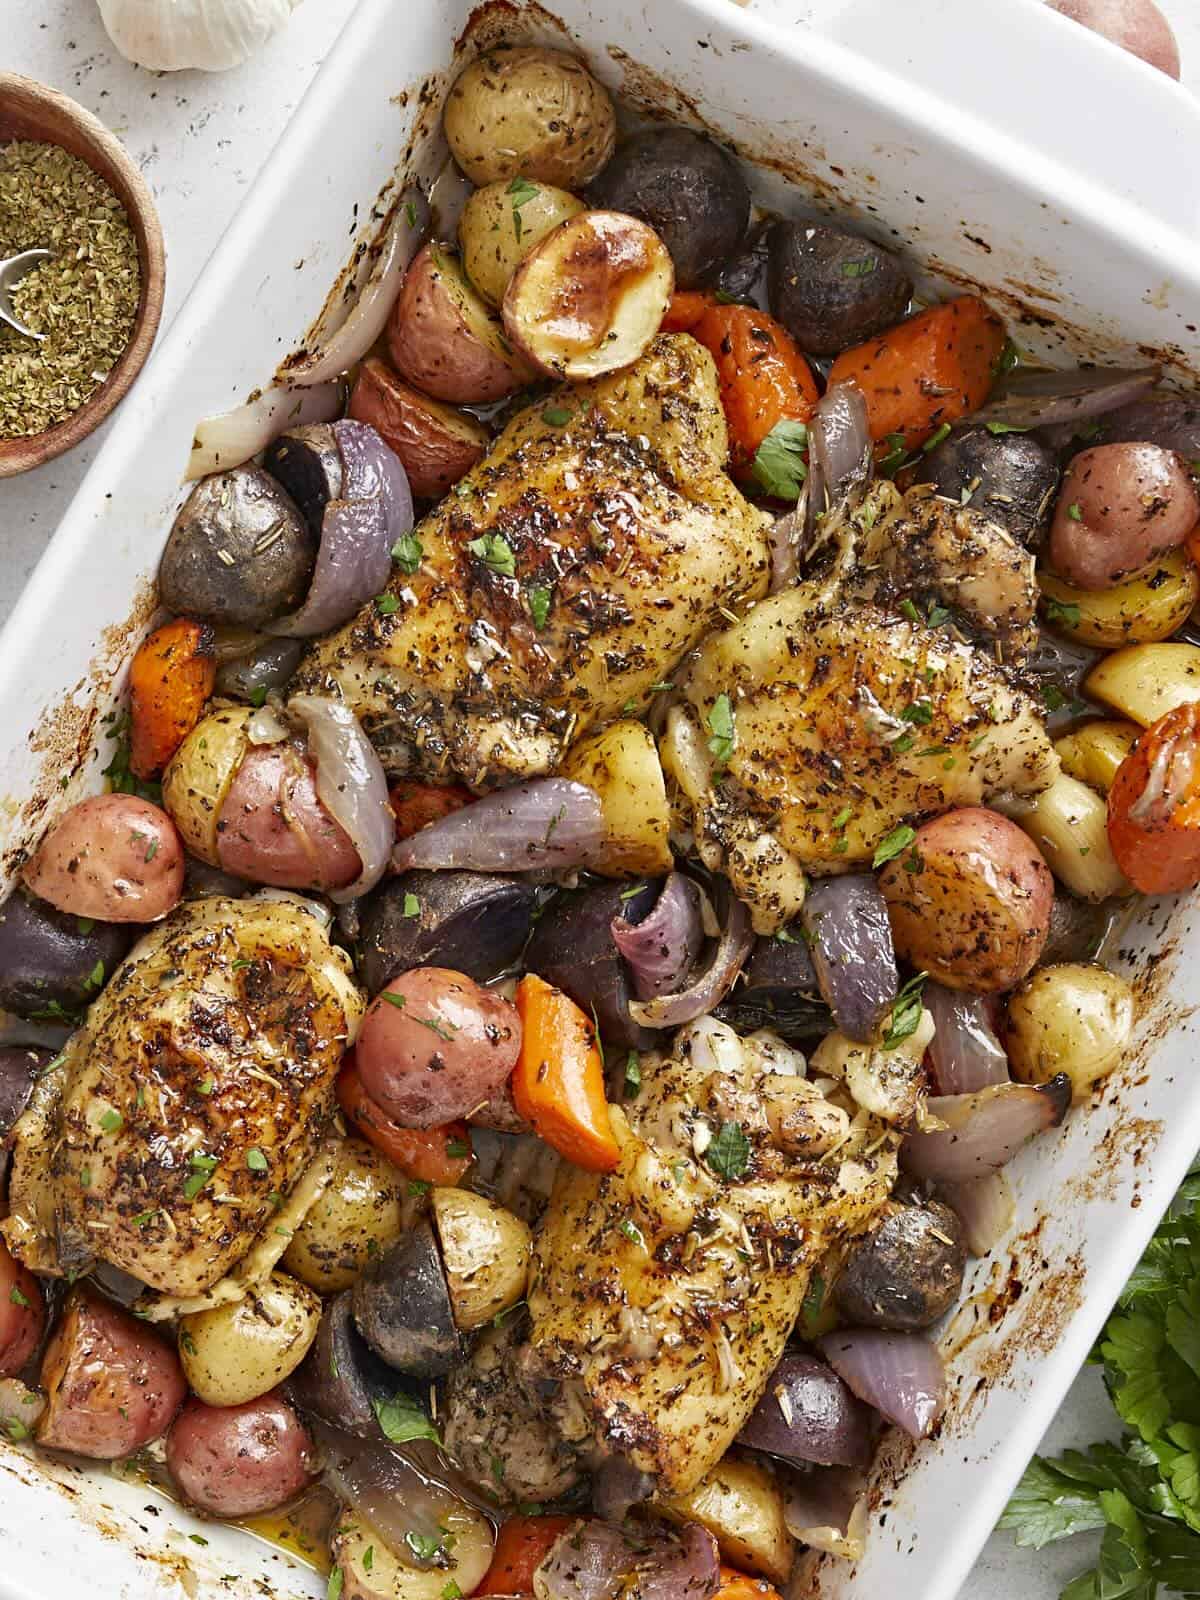
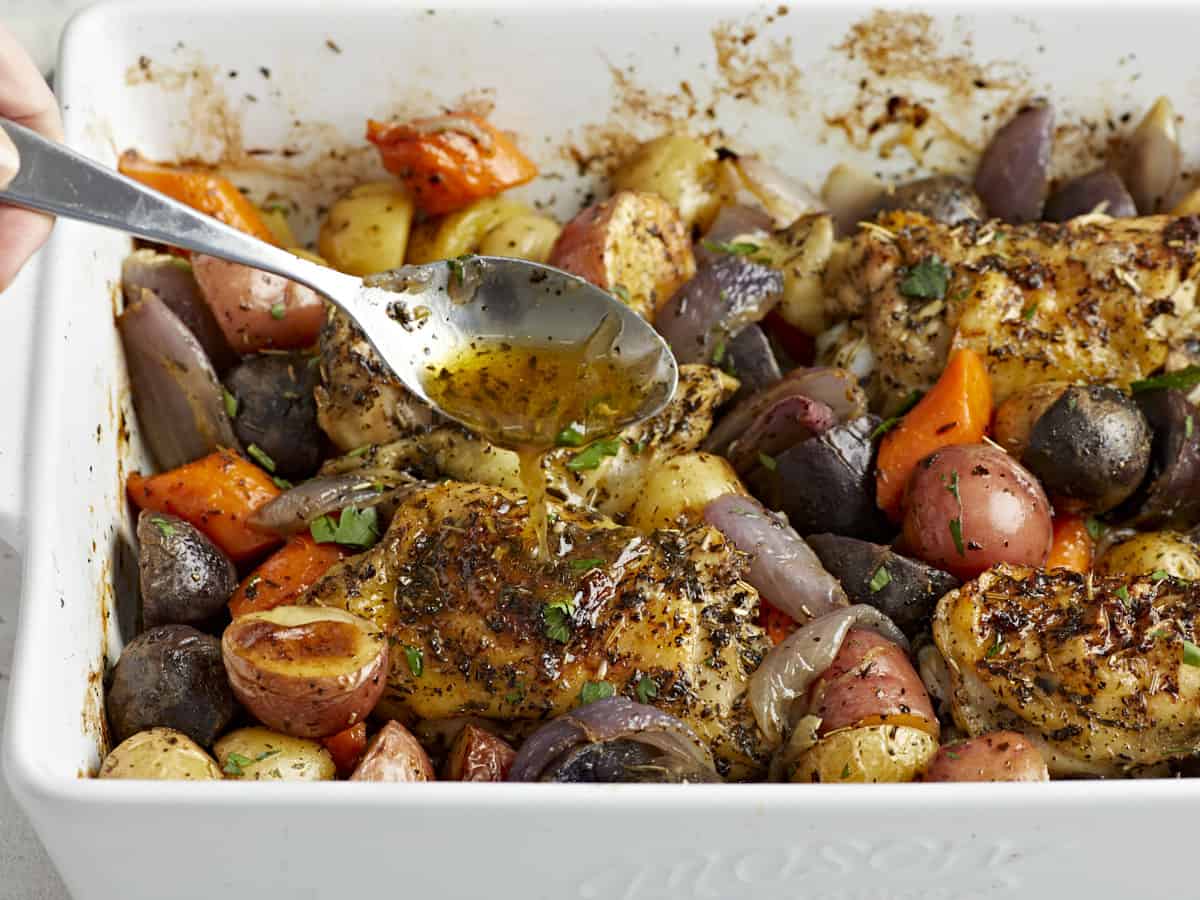
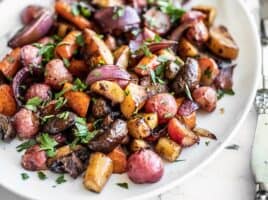
Roasting is my preferred method of cooking this time of year because it’s easy and hands-off, plus it creates the most scrumptious caramelized flavors and super tender and juicy meat. Not to mention, it will help keep your kitchen warm and cozy. 😏 This recipe for Roasted Chicken and Vegetables combines budget-friendly bone-in chicken thighs with a medley of winter vegetables and an herb-infused seasonoing for a hearty meal that will keep you full and warm on cold winter nights.
Why I Love This Dish
Roasting absolutely transforms food. It caramelizes the natural sugars in the vegetables, making their flavor deep and sweet. It browns the skin on the chicken making it crispy and delicious, all while keeping the meat inside tender and juicy. Plus, all of that time in the oven allows all of the flavor of the herbs to infuse every bite. It’s ✨magical✨.
The best part, though, is that roasting is very hands-off, meaning you can go take care of other things while the food in the oven working its magic. There’s a little bit of chopping and seasoning in the beginning, but then it just goes into the oven and an hour it comes out delicious! BOOM!
Ingredients for Roasted Chicken and Vegetables
Here’s what you’ll need to make this cozy winter dinner:
Chicken Thighs: I used bone-in, skin-on chicken thighs for this recipe because they are budget-friendly and always turn out super tender and juicy. You can also use chicken drumsticks, but I would avoid boneless or skinless cuts of chicken because they will dry out with this longer cooking time (and you won’t get that beautifully crispy skin!).
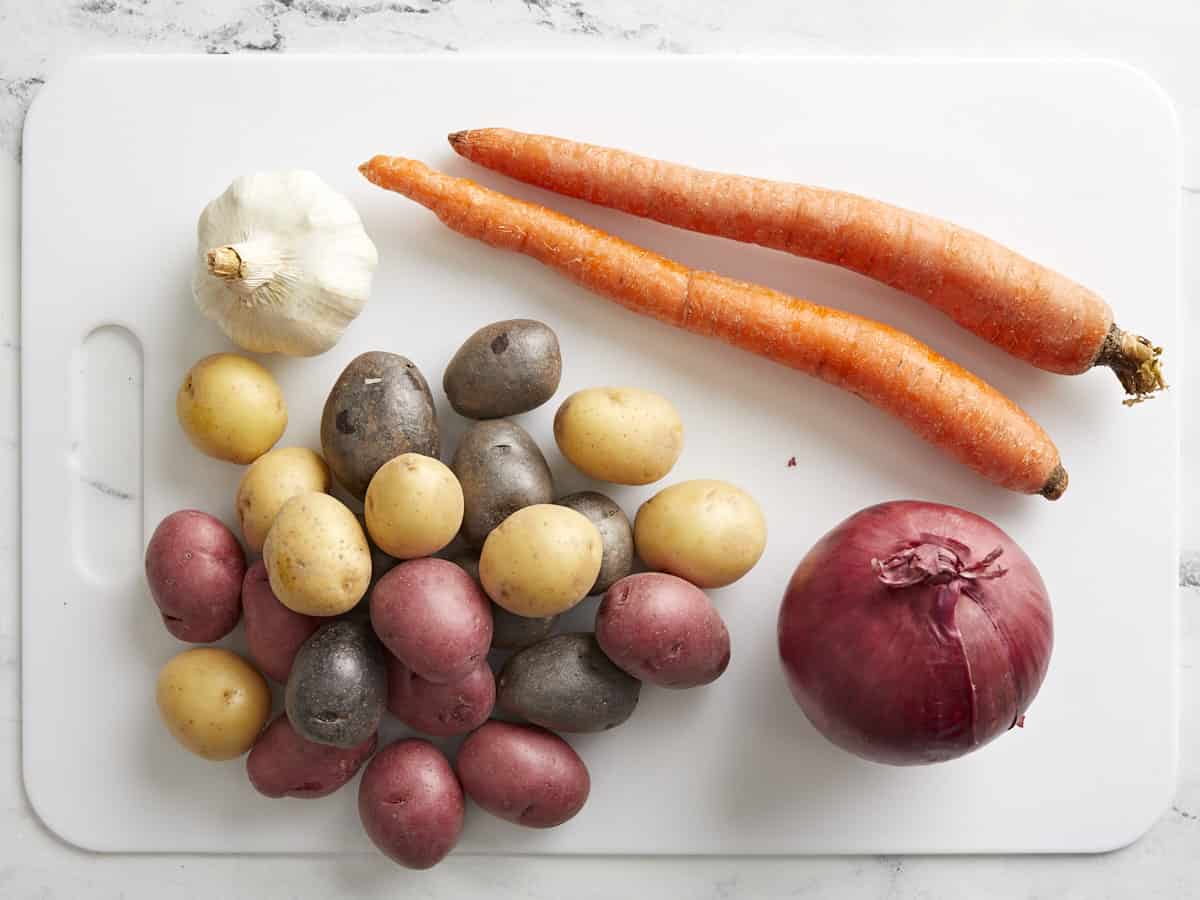
Vegetables: I used a combination of potatoes, carrots, garlic, and onions to create a colorful, filling, and flavorful mix. The potatoes and carrots are firm enough to hold up to the long roasting time, the potatoes absorb all of that amazing flavor, and the garlic and onions get deliciously soft and caramelized in the process. I used tri-colored baby potatoes, but if those are out of budget you can use red potatoes cut into 1-inch pieces.
Herbs and Spices: To add flavor to the chicken and vegetables I added a hefty dose of seasonings including dried basil, dried thyme, dried rosemary, paprika, garlic powder, salt, and pepper. Every bite will have maximum flavor!
Olive Oil: Oil helps the seasoning stick to the chicken and vegetables and it also helps prevent them from drying out from the heat of the oven. Instead of shriveled dry vegetables, you’ll get tender caramelized vegetables and crispy chicken skin!
What Kind of Baking Dish to Use
You’ll want to use a very large casserole dish for the roasted chicken and vegetables so the ingredients have good exposure to the hot air. Aim for a dish that is at least 9×13 inches and around 3-4 quarts in volume. Glass or ceramic work best, but if you have a metal casserole dish you may need to reduce the cooking time slightly as the dish will heat up faster. A sheet pan will allow the ingredients to be too far spread out, causing more evaporation and less of the flavorful juices that soak into the potatoes.
How to Store Leftovers
This cozy meal makes a great meal prep, if you are feeding just yourself or have a household of two. Simply divide the chicken and vegetables into single-serving containers after cooking, then refrigerate. The chicken and vegetables will stay good for about four days in the refrigerator and can be reheated quickly in the microwave.
Preheat the oven to 425ºF. Wash and cut the baby potatoes in half (or, if using larger potatoes, cut into 1-inch pieces). Wash and slice the carrots into 1-inch pieces. Peel and cut the red onion into wedges. Peel the garlic cloves and leave them whole.
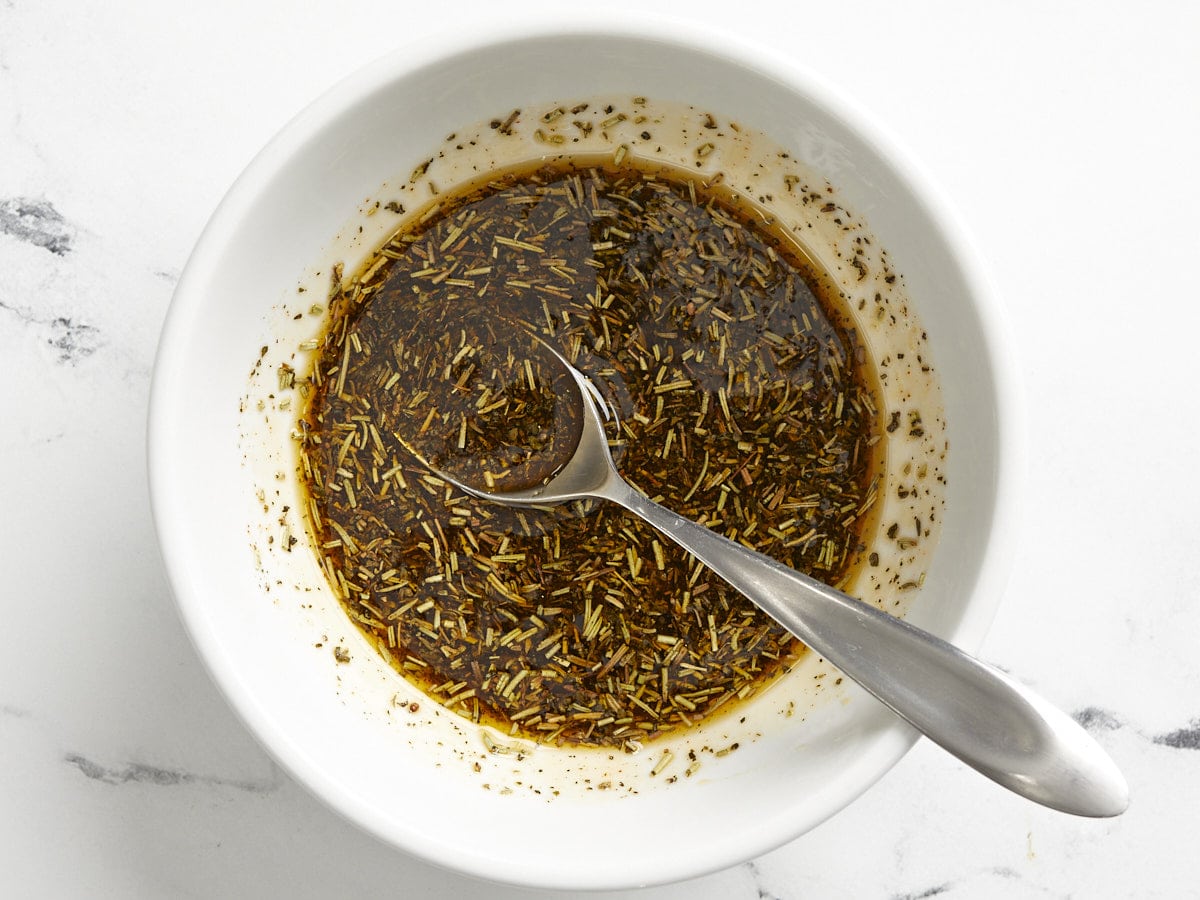
Add the olive oil, basil, rosemary, thyme, garlic powder, paprika, salt, and pepper in a bowl and stir until well combined.
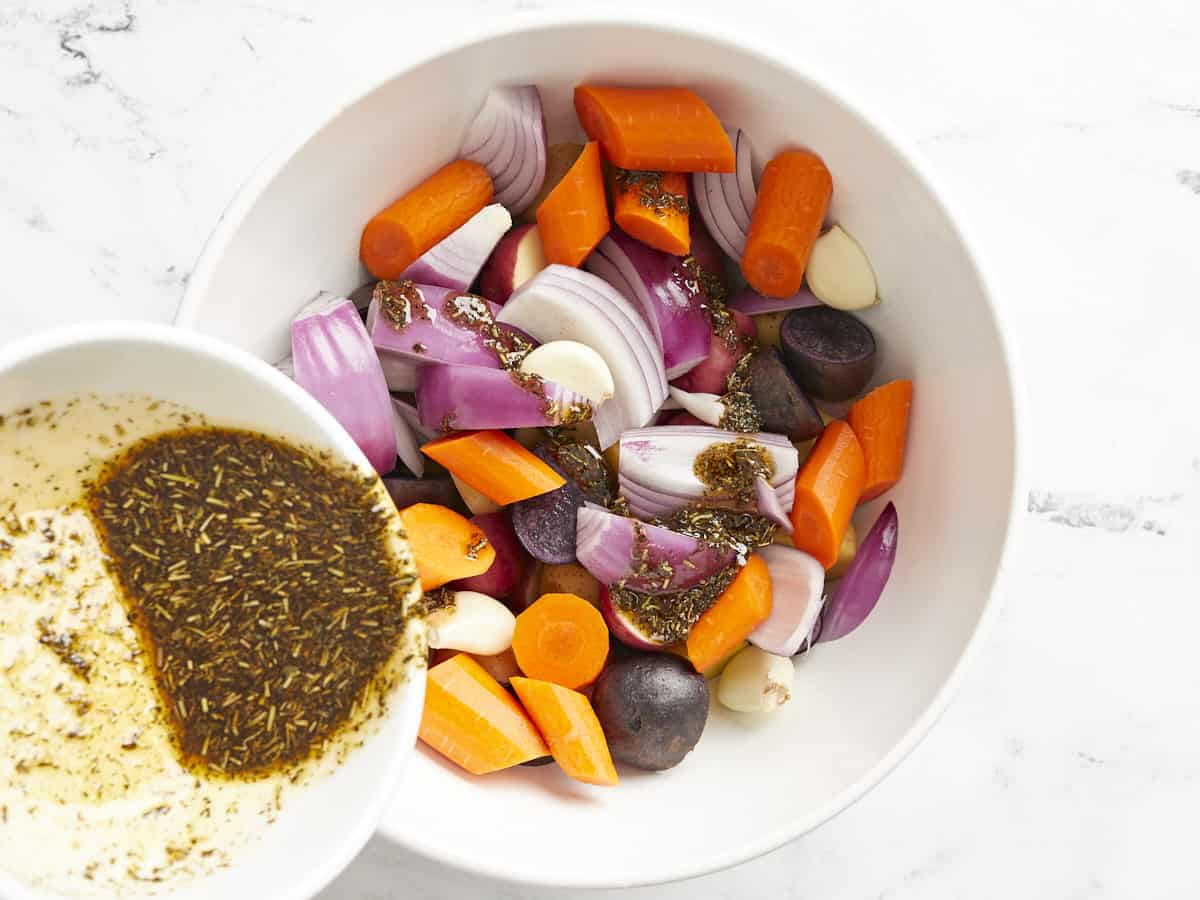
Place the prepared vegetables in a large bowl and drizzle half of the seasoning over top. Toss the vegetables until they are fully coated in oil and herbs, then transfer them to a 9×13-inch or larger casserole dish.
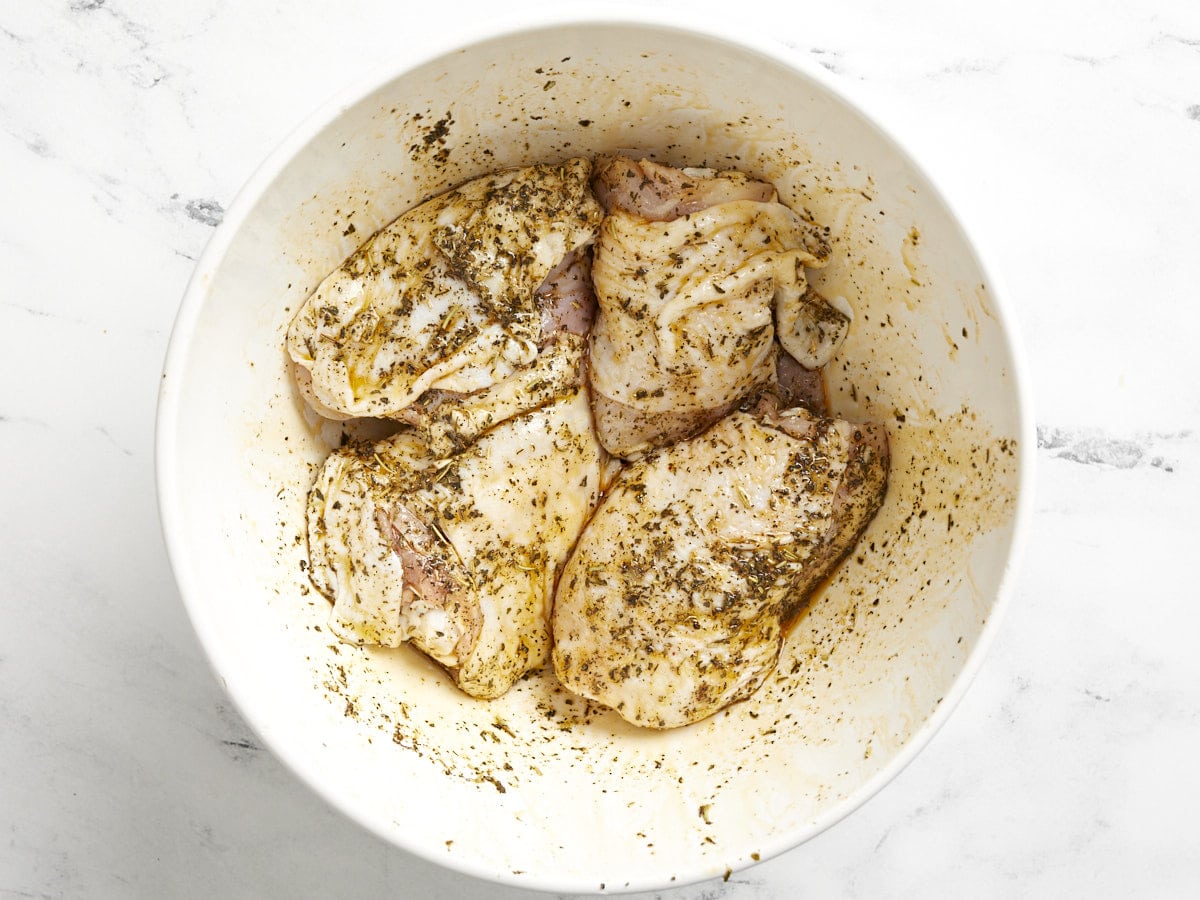
Place the chicken thighs into the same bowl and pour the remaining oil and herbs over top. Toss until the chicken is fully coated, then nestle the chicken down into the vegetables in the casserole dish, making sure the chicken is not covered with vegetables.
Roast the chicken and vegetables in the preheated 425ºF oven for 40 minutes, then remove the casserole dish and carefully stir the vegetables. Spoon some of the liquid from the bottom of the dish over the chicken, then return the dish to the oven and roast for an additional 20 minutes or until the chicken skin is golden brown and crispy and the vegetables are browned and caramelized. Serve hot.
How to Make Roasted Chicken and Vegetables – Step by Step Photos
Preheat the oven to 425ºF. Begin by preparing the vegetables. Wash and slice 24 oz. potatoes in half (or into 1-inch pieces if using larger red potatoes). Wash and slice two large carrots into 1-inch pieces. Peel and slice one red onion into wedges. Peel four cloves of garlic and leave them whole.
Prepare the seasoning mix for the chicken and vegetables. In a bowl combine ¼ cup olive oil with 2 teaspoons dried basil, 1 teaspoon dried thyme, 1 teaspoon dried rosemary, ½ teaspoon garlic powder, ¼ teaspoon paprika, 1 teaspoon salt, and ½ teaspoon black pepper.
Place the prepared vegetables in a large bowl and drizzle half of the seasoning mix over top. Toss the vegetables until they are fully coated in the oil and herbs. Transfer the seasoned vegetables to a very large casserole dish.
Place four bone-in, skin-on chicken thighs (about 2 lbs.) into the same bowl and pour the remaining seasoning over the top. Toss the chicken thighs until they are fully coated.
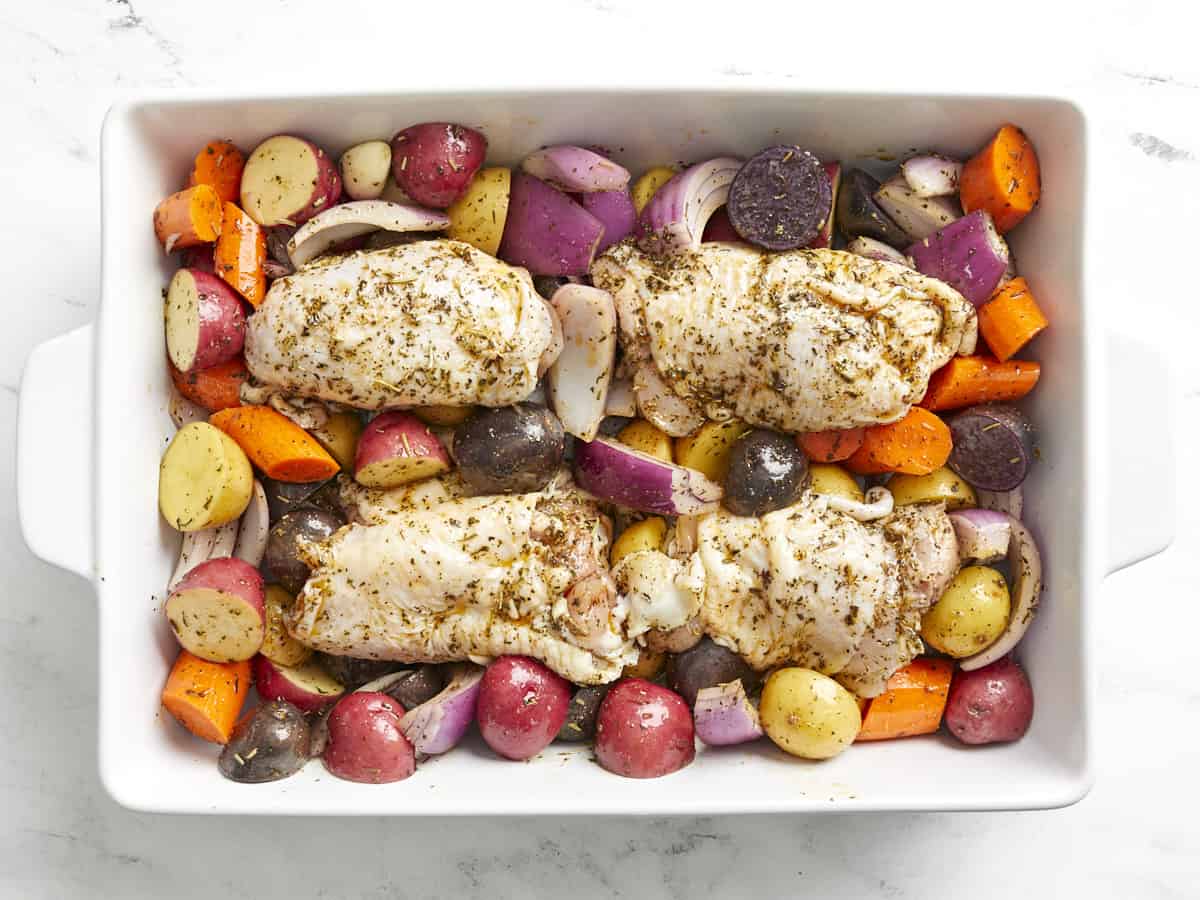
Nestle the chicken thighs down into the vegetables in the casserole dish. Make sure the vegetables are not covering the chicken. Transfer the casserole dish to the preheated 425ºF oven.
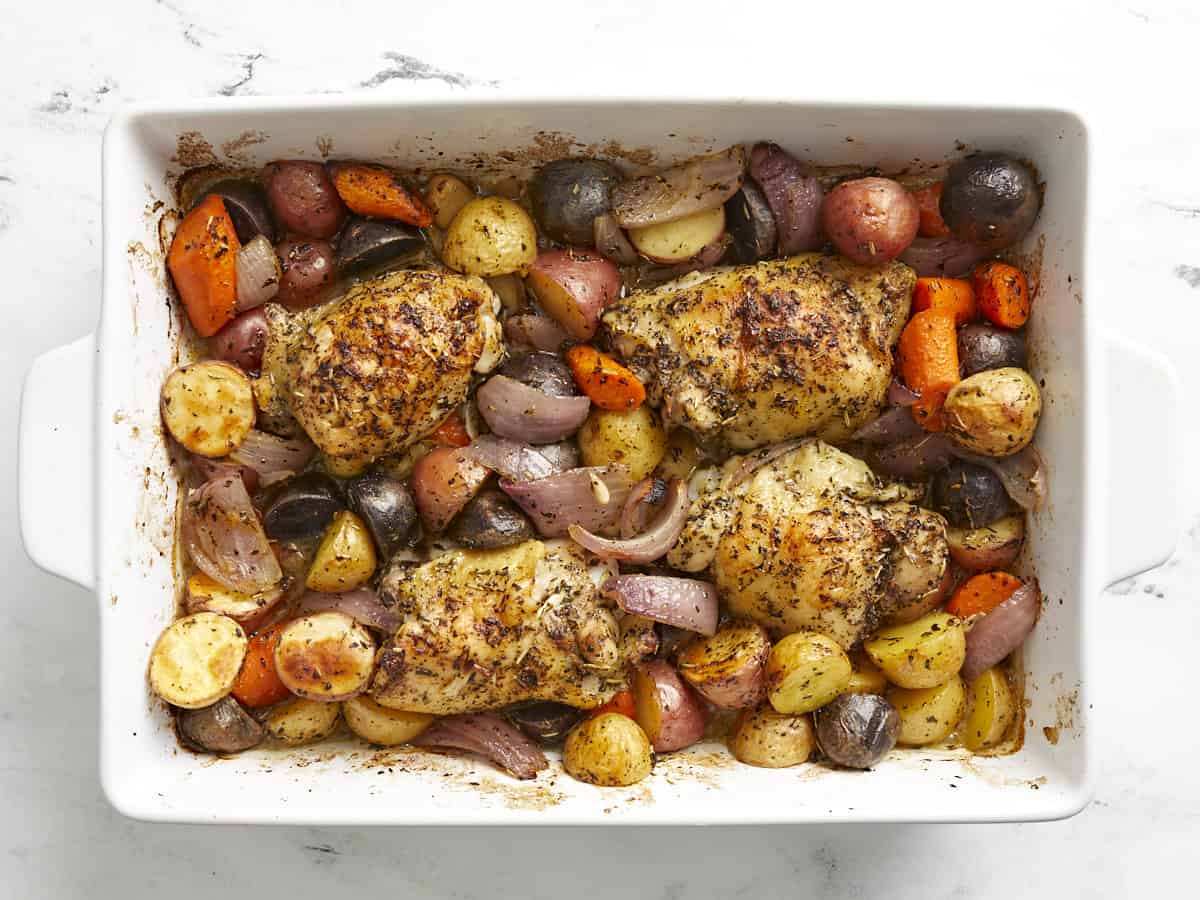
Roast the chicken and vegetables in the oven for about 40 minutes, then remove the dish and carefully stir the vegetables in the casserole dish and spoon some of the liquid from the bottom of the dish over the chicken. Return the chicken and vegetables to the oven and roast for another 20 minutes, or until the vegetables are golden and caramelized and the chicken skin is golden and crispy.
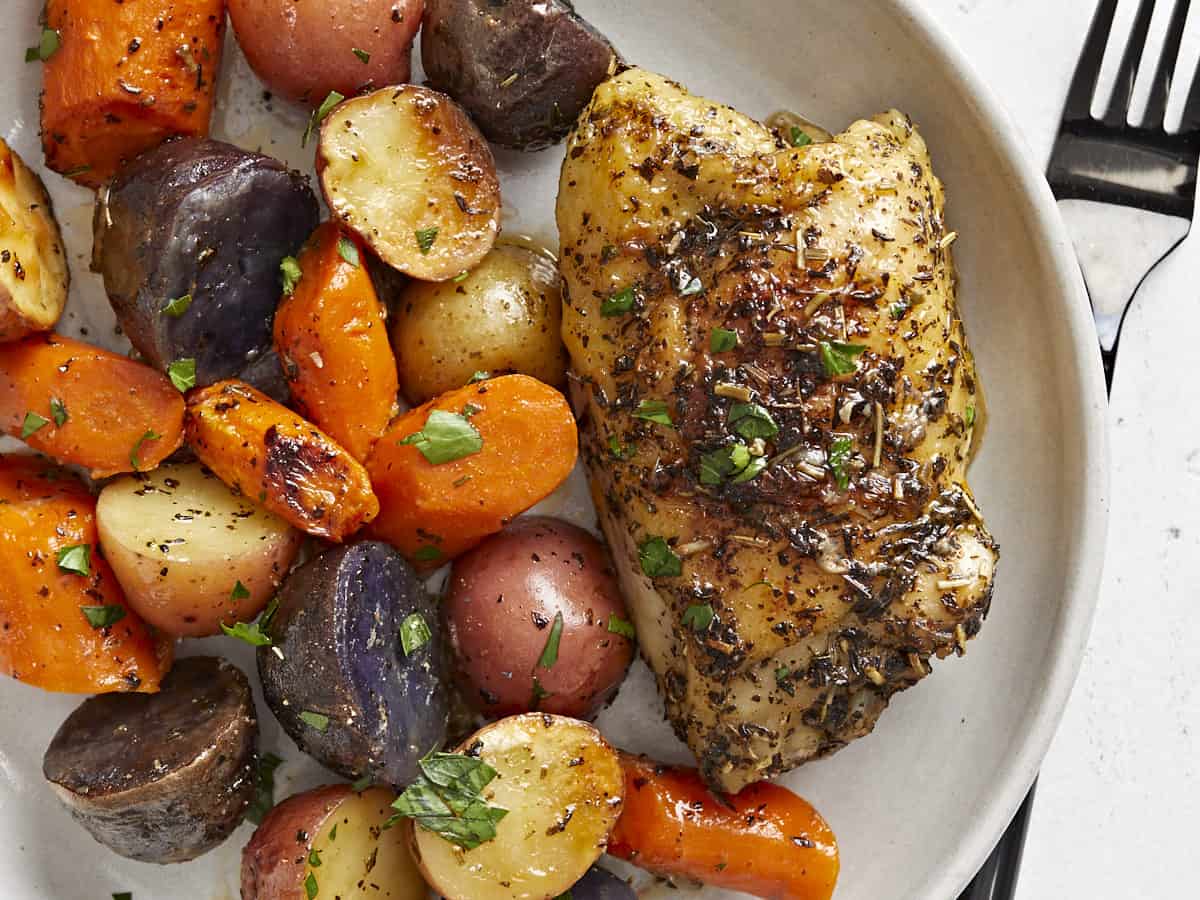
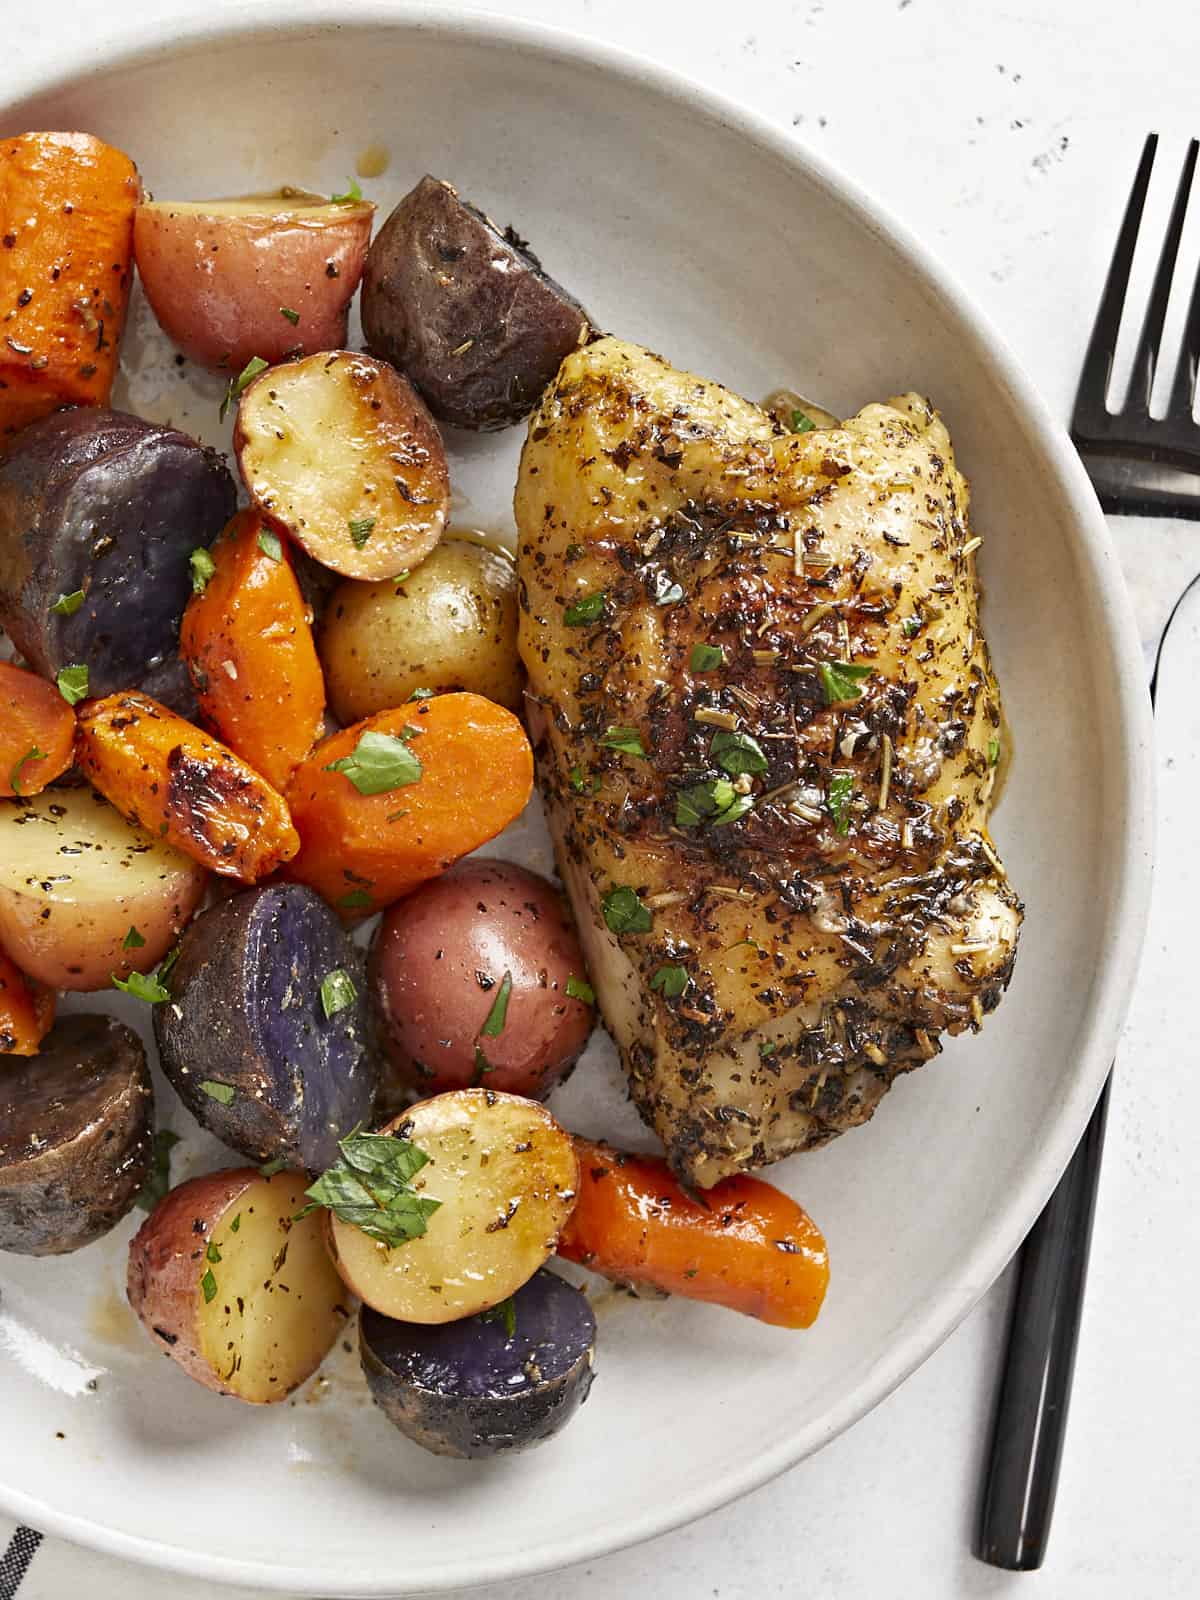
(Garnished with parsley for color, not needed for flavor.)
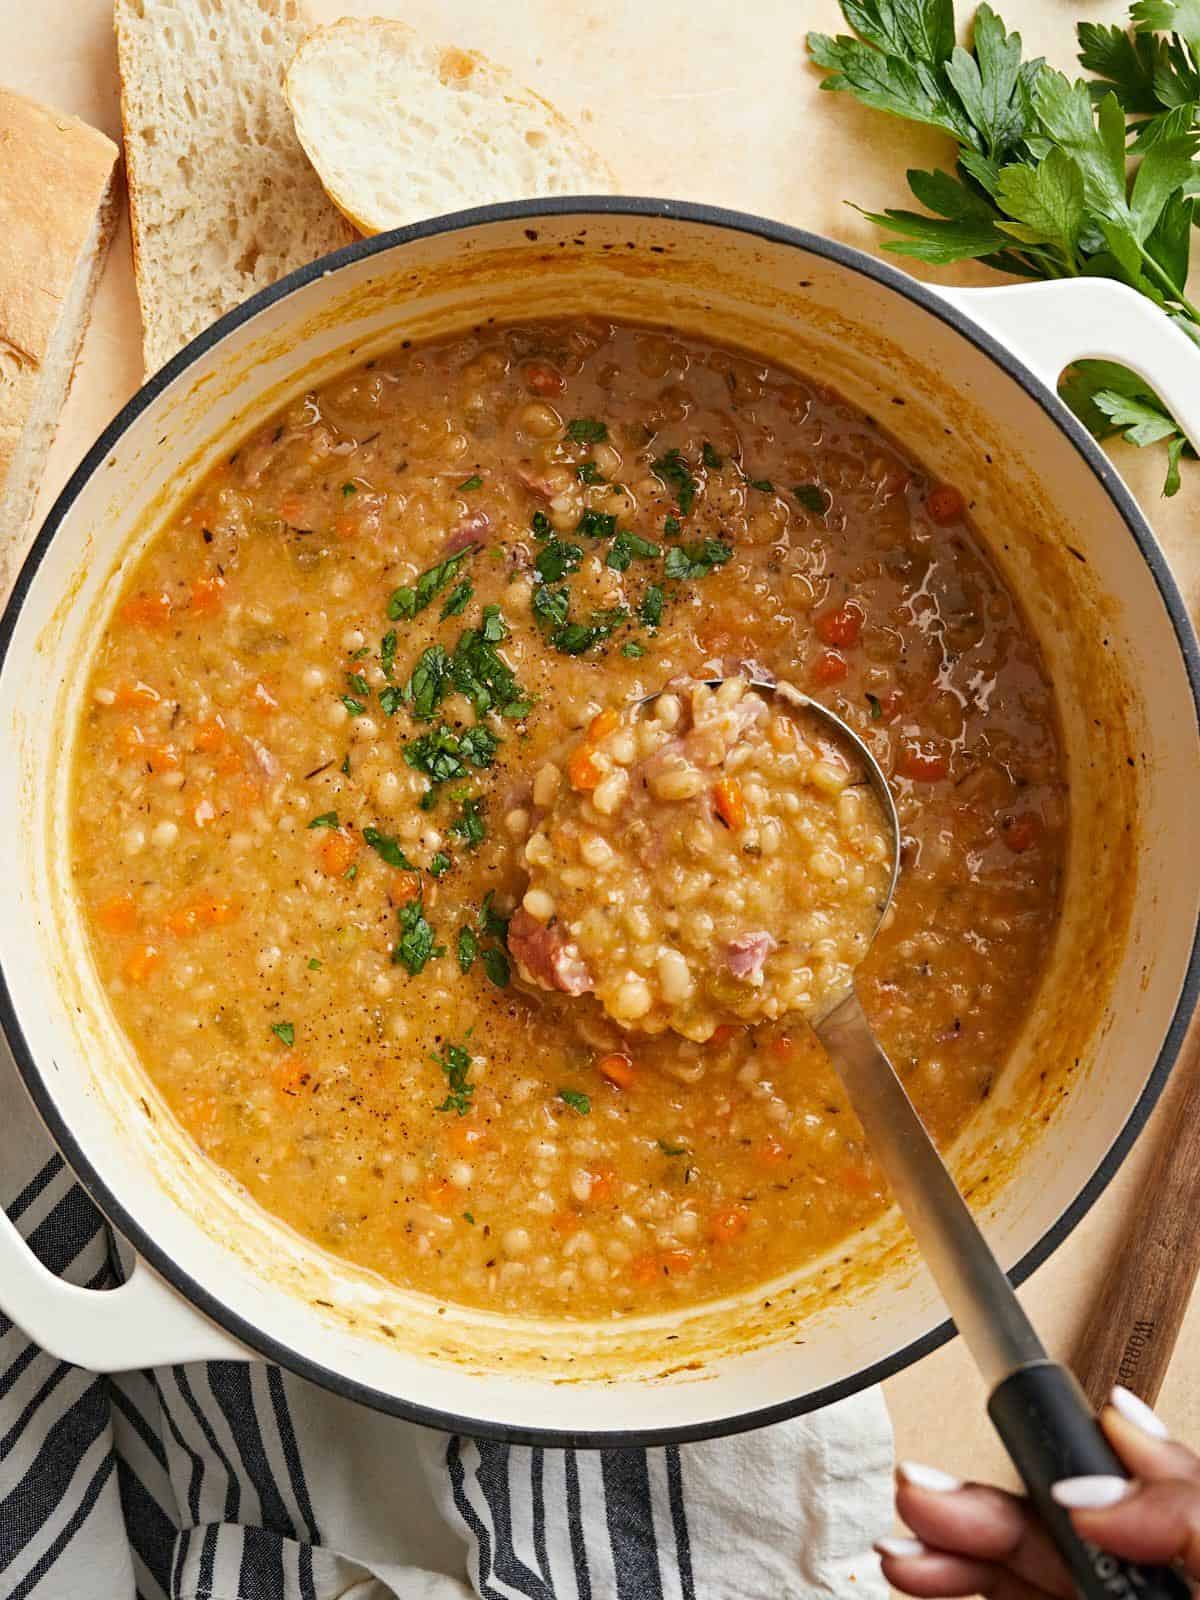
Y’all, I’m on a roll with these simple, cozy, soup recipes! I had one extra ham hock left over from making Split Pea Soup a few weeks ago, so I decided to test a simple Navy Bean Soup recipe. I used dry, uncooked navy beans because they’re more economical than canned beans and you can infuse a lot of flavor into them. Then I just paired the navy beans with some vegetables, a smoked ham hock, and lots of herbs and spices. The results…a hearty, creamy, and absolutely delicious navy bean soup! Trust me, you’ll be blown away by how flavorful this soup is and just how easy it is to make!
INGREDIENTS FOR NAVY BEAN SOUP
Here are the ingredients you’ll need to make this comforting & delicious navy bean soup:
Navy Beans – We start things off with dry, uncooked navy beans. Navy beans are creamy and break down easily in the soup.
Vegetables – A combination of aromatics like onion, celery, carrots, and garlic are sautéed with a little bit of olive oil to add a great base layer of flavor and depth to the soup.
Ham Hock – Ham and beans just go together like peanut butter and jelly!😄 The smoked ham hock we used infused a ton of smoky, salty, flavor into the navy beans! We also tested this recipe with just regular diced ham, but it did not provide the same type of rich flavor as a ham bone. However, smoked turkey wings are a great alternative to use if you don’t want to use ham.
Spices – A combination of dried spices like thyme, oregano, and smoked paprika adds a rich color and wonderful flavor to the soup.
Chicken Broth – Make sure you use a good quality chicken broth as a lot of the soup flavor will come from the broth. We use Better than Bouillon for our broth.
Do I Need To Soak Navy Beans Overnight?
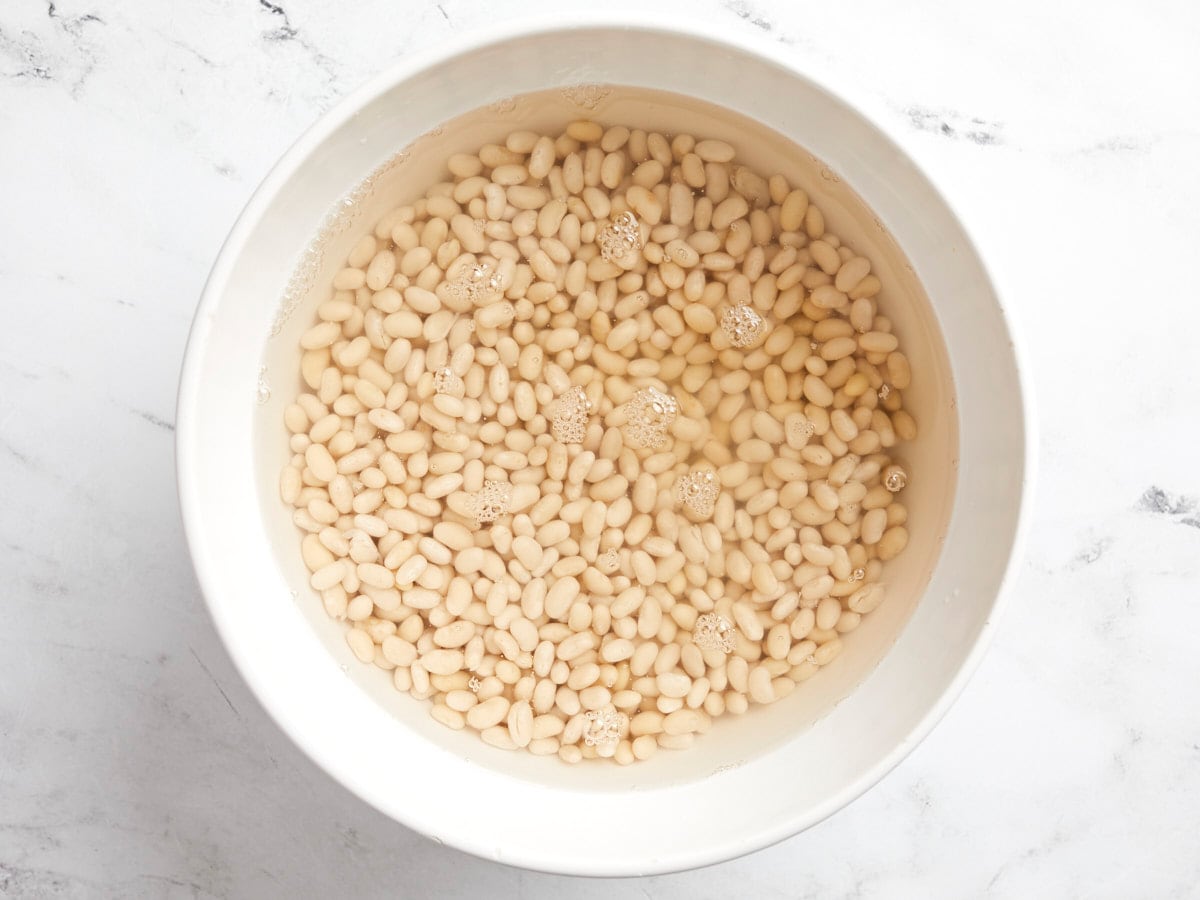
Although it’s not mandatory, we did soak the navy beans overnight to help soften the beans and speed up the cooking process. You could also do a quick soak method if you are pressed for time.
To do the “quick soak method” start by giving the dry beans a quick rinse with cold water in a colander. Remove any stones or debris that you see. Next add the navy beans to a large pot and cover with water. Bring the pot to a boil over high heat. Once boiling, continue to cook, uncovered, for 2 minutes. After 2 minutes, remove the pot from the heat, cover the pot with a lid, and allow the beans to soak in the hot water for 1 hour. Drain and rinse the beans well before cooking!
Storing Leftovers
This navy bean soup recipe makes a big batch, so save the leftovers for lunch the next day or freeze for later. You can store the soup in an airtight container in the refrigerator for up to 4-5 days. Or freeze in freezer-safe containers for up to 3 months.
Start by soaking the dry navy beans overnight. Place the beans in a bowl, cover them with cold water, and place the bowl in the refrigerator. The next day, drain and rinse the beans.
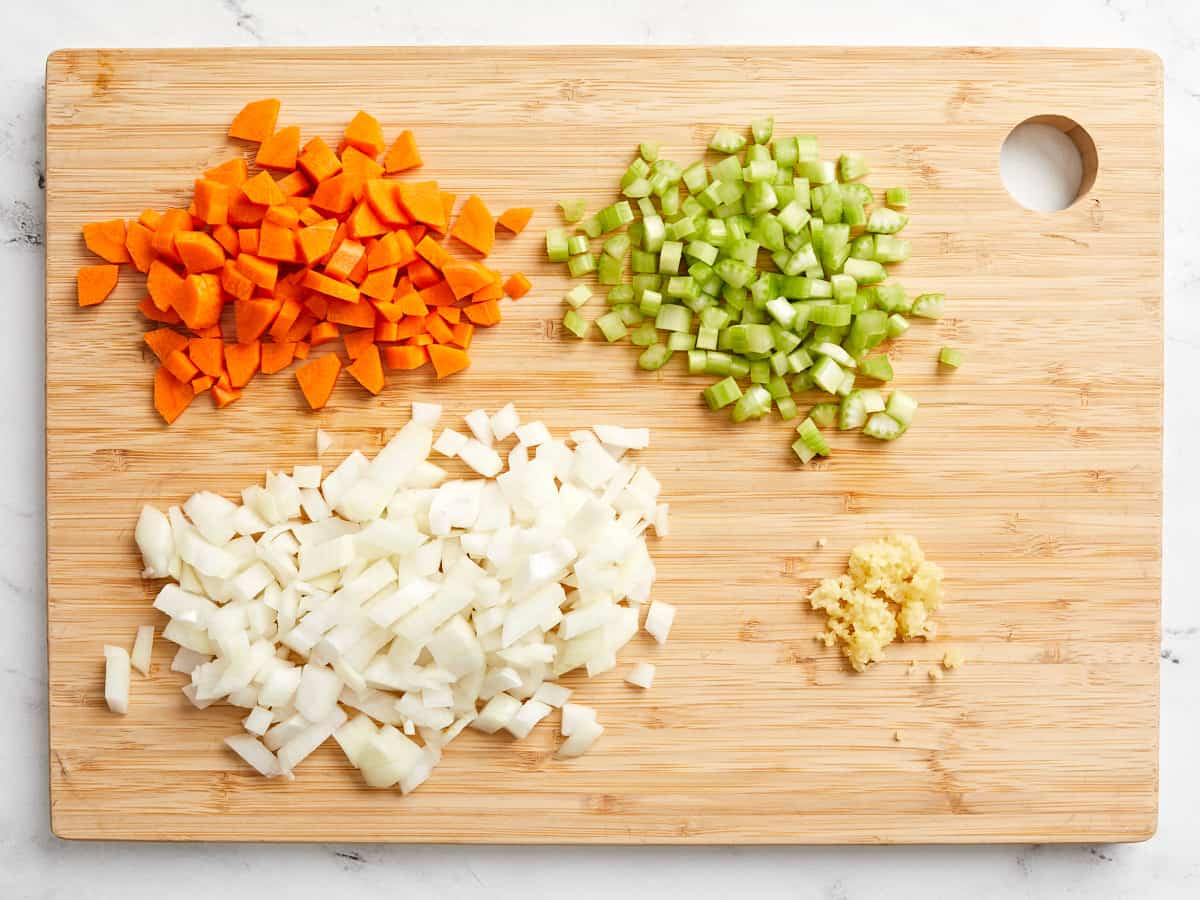
Dice the onion, the carrot, and the celery stalk. Mince the garlic cloves.
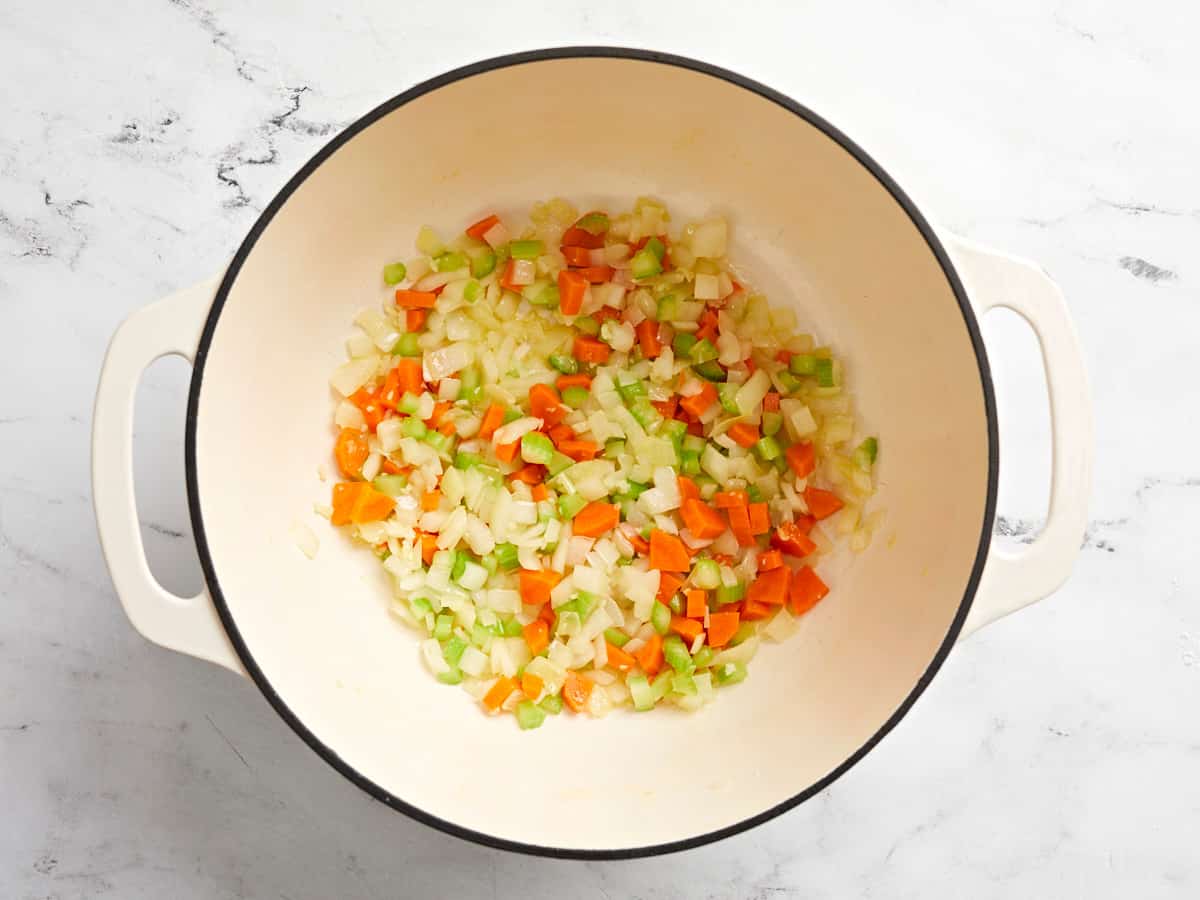
Sauté the onion, carrot, celery, and garlic in a large soup pot or Dutch oven with olive oil over medium heat, until the onions are soft and translucent.
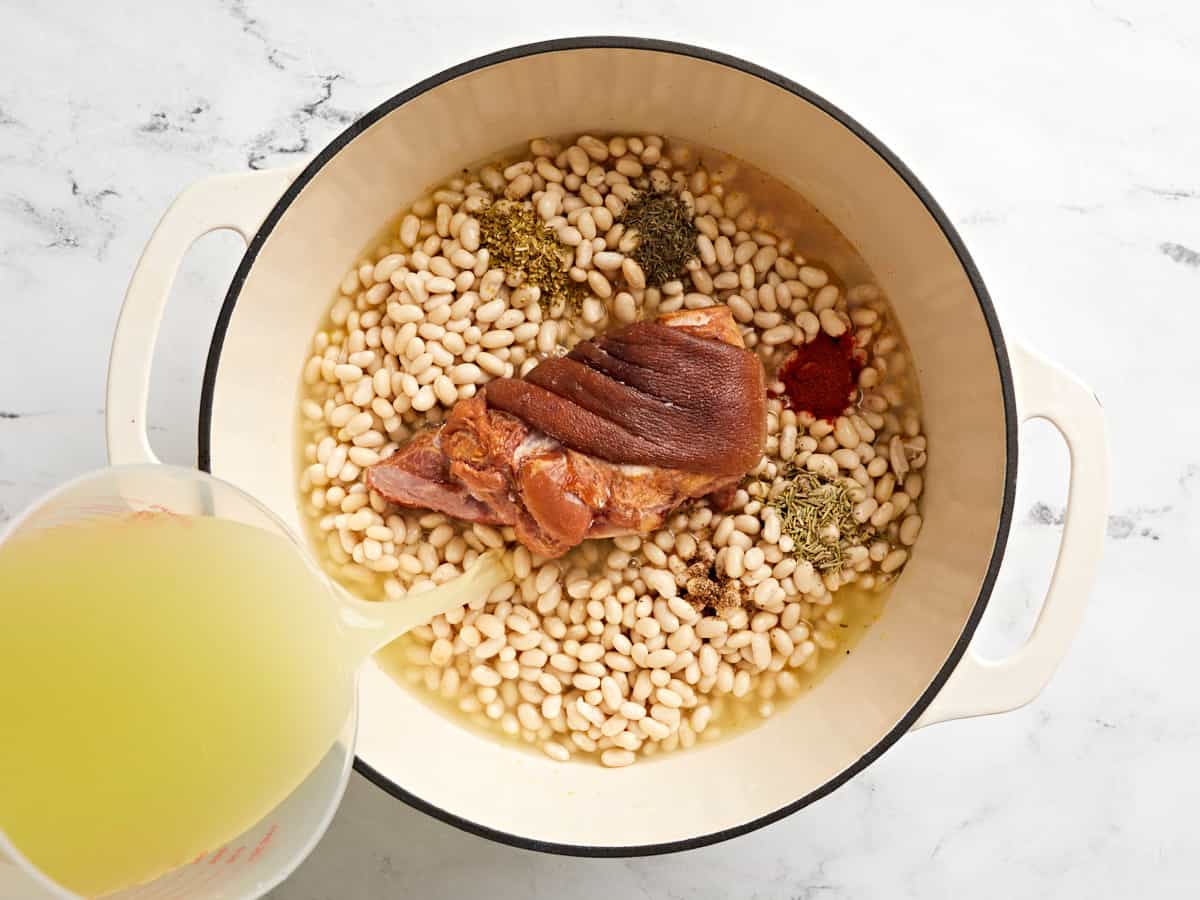
Add the soaked & drained beans, ham hock, dried thyme, dried oregano, dried rosemary, smoked paprika, black pepper, and chicken broth to the pot. Gently stir to combine all the ingredients.
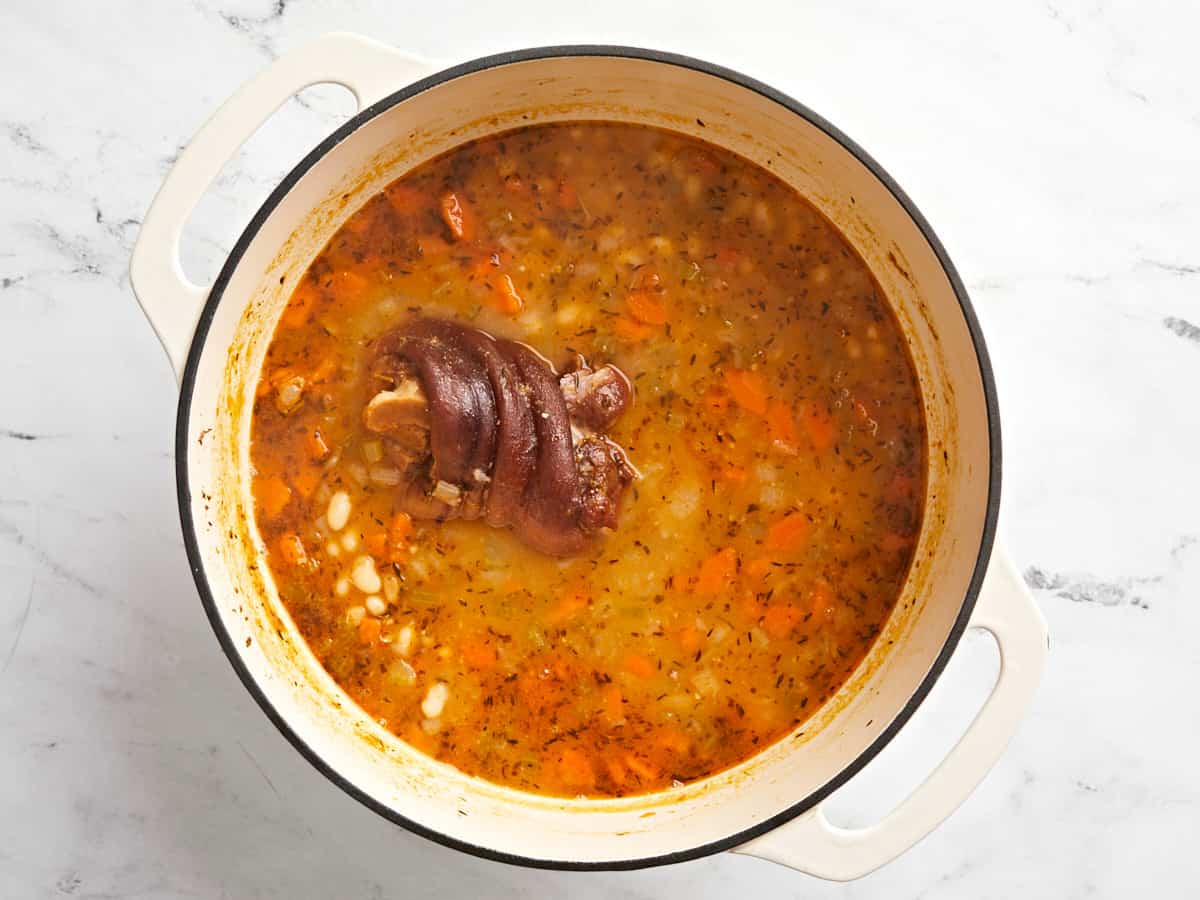
Place a lid on the pot and bring it up to a boil. Once boiling, turn the heat down to medium-low and let the soup simmer, stirring occasionally, until the beans are tender and begin to break down (approximately 1.5 hours). Flip the ham hock over once or twice, while the soup is simmering, so that it gets even exposure to the hot liquid.
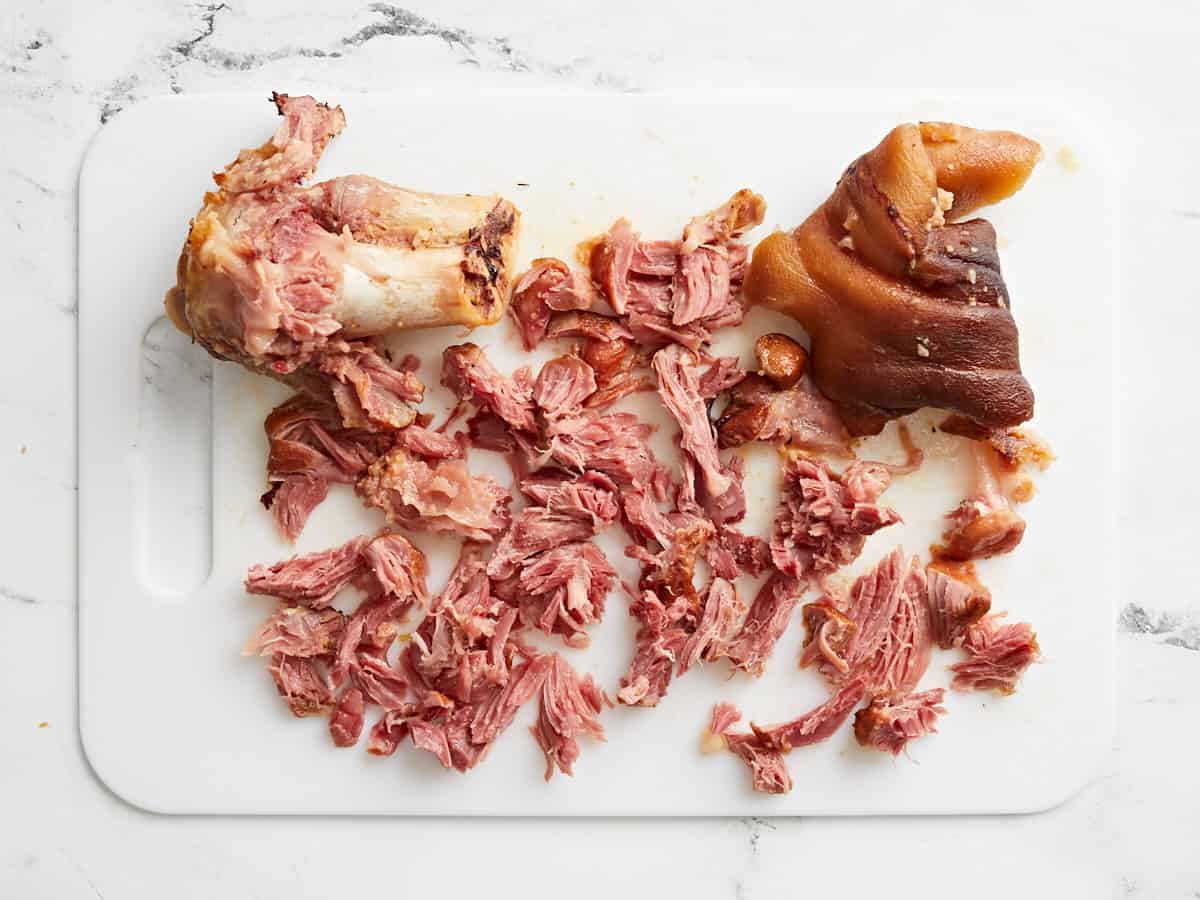
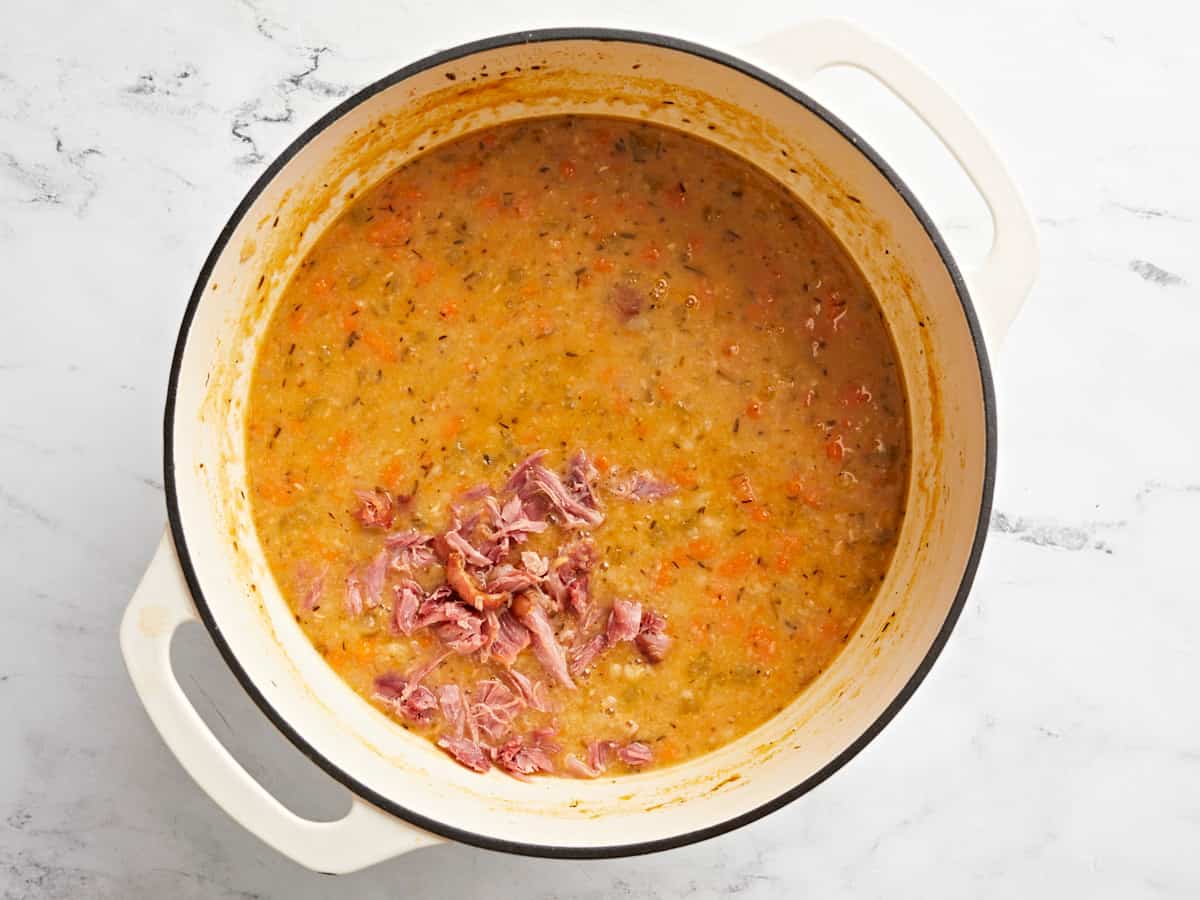
Once the beans are tender, remove the ham hock and pull the meat from the bone, then add the ham meat back to the soup.
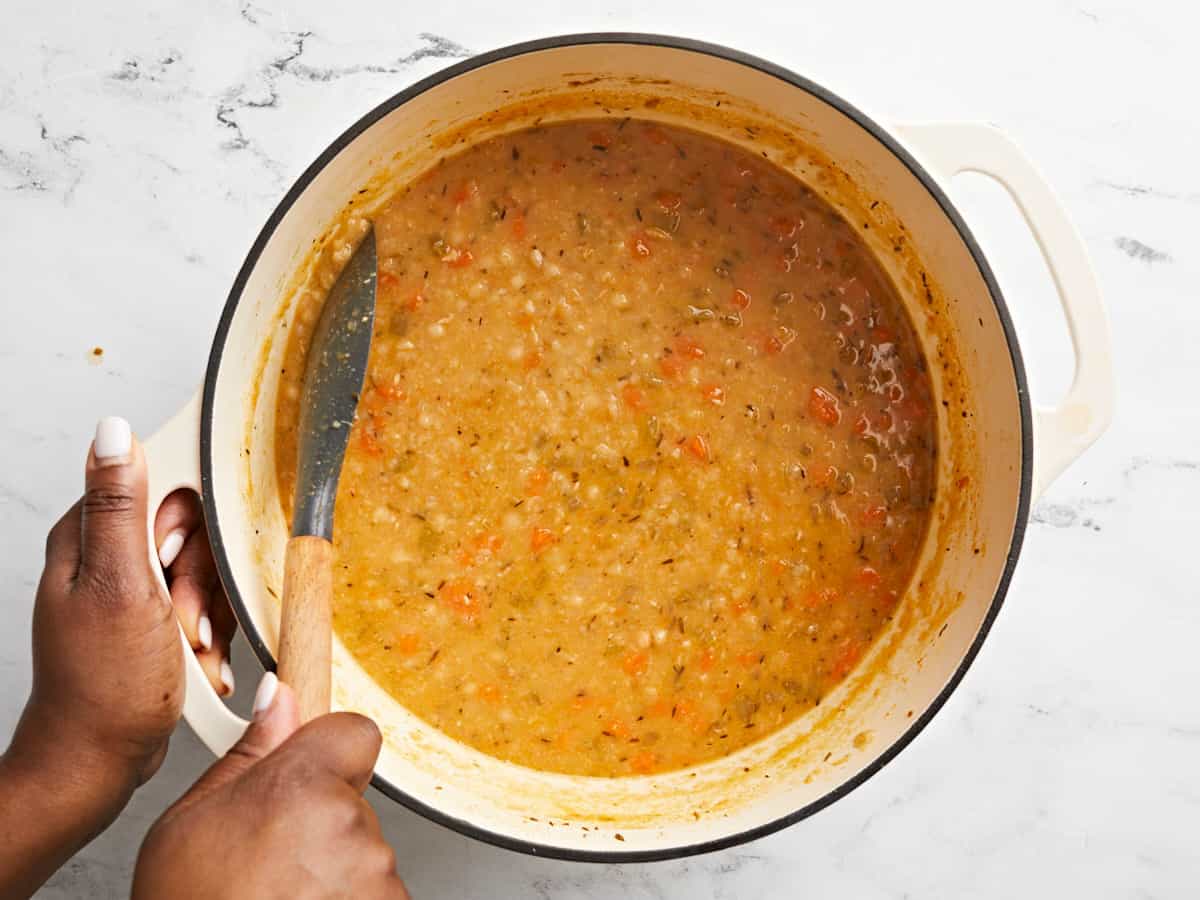
Now mash some of the beans against the side of the pot and stir the mashed beans back into the soup. Continue to simmer the soup uncovered for about 30 minutes to reduce some of the liquid and to thicken the soup further.
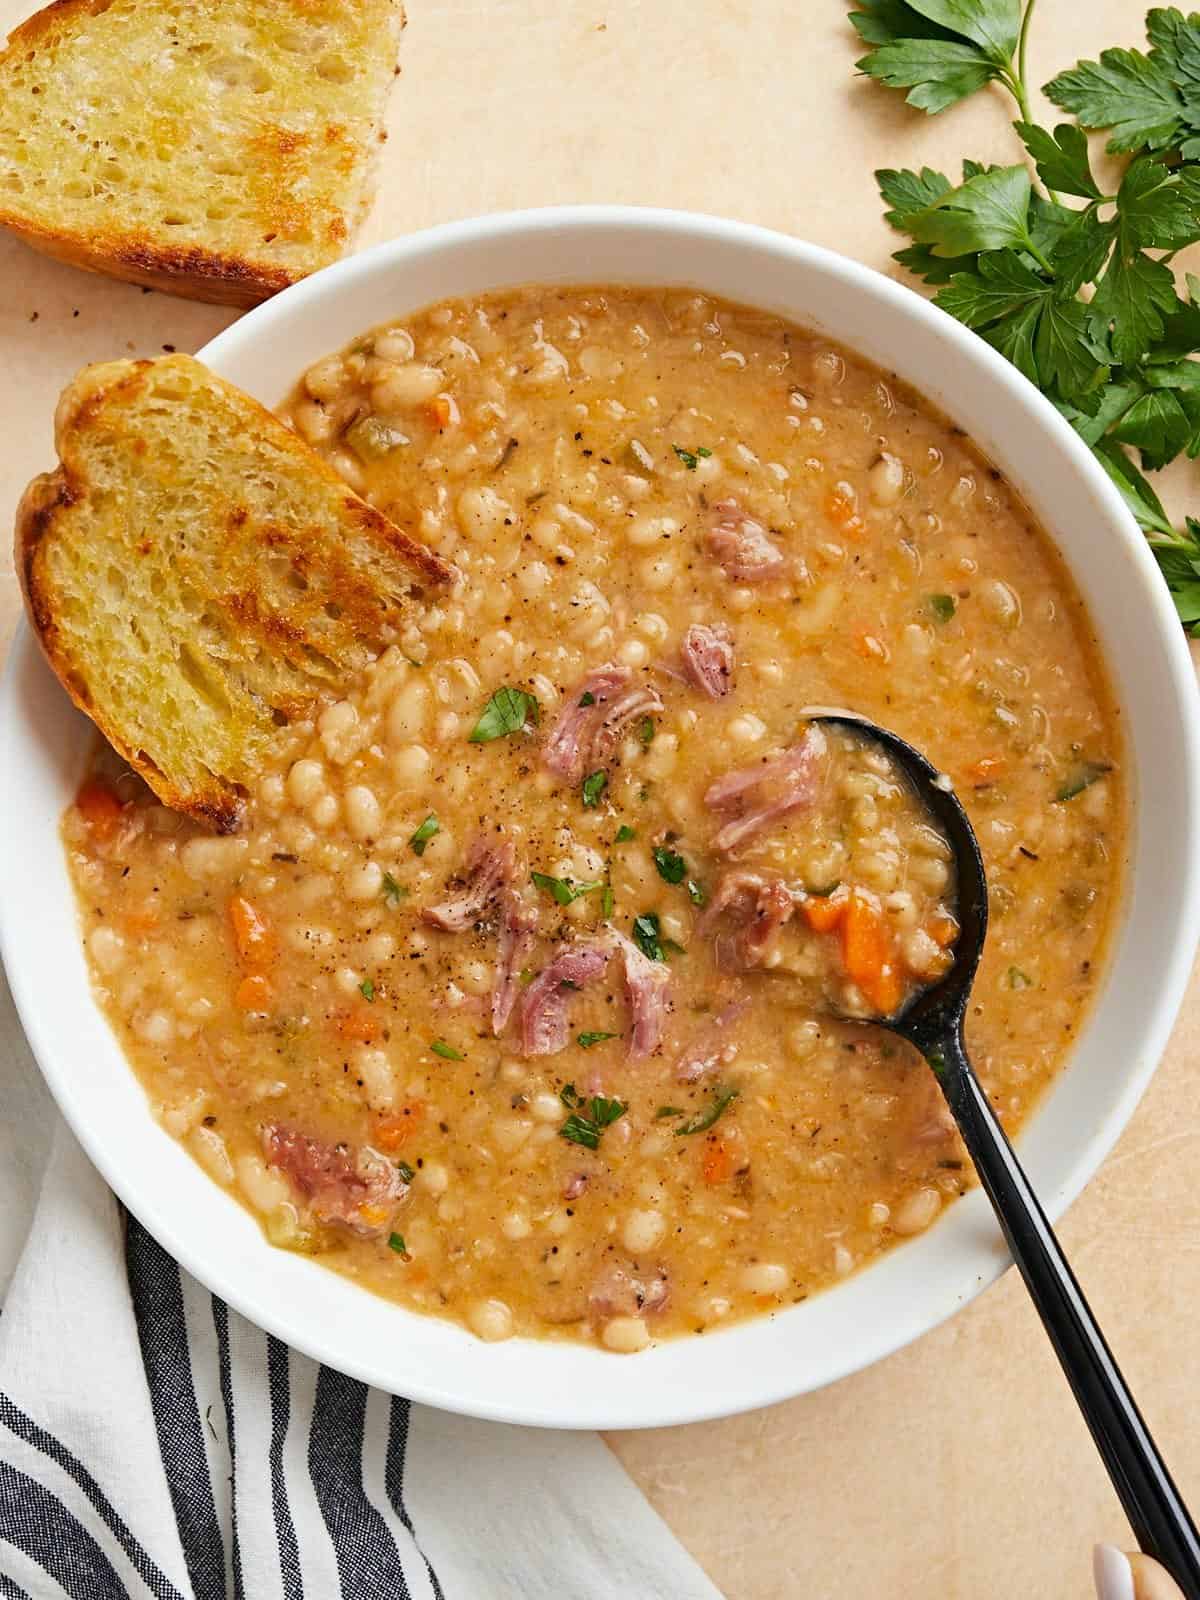
Taste the soup and add salt, if needed. I ended up adding 1/4 tsp of salt after tasting. The amount of salt needed will depend highly on the type of broth used. Serve hot with some crusty bread for dipping and enjoy!
Start by soaking the navy beans overnight. Place 1 lb. of dry navy beans in a bowl, cover them with cold water, and place the bowl in the refrigerator. The next day, drain and rinse the beans.
Dice one onion, one carrot, and one celery stalk. And mince two garlic cloves.
Sauté the onion, carrot, celery, and garlic in a large soup pot or dutch oven with 2 Tbsp olive oil over medium heat, until the onions are soft and translucent.
Now add the soaked & drained beans, 1 ham hock, 1/2 tsp dried thyme, 1/2 tsp dried oregano, 1/2 tsp dried rosemary, 1/2 tsp smoked paprika, 1/4 tsp freshly ground black pepper, and 6 cups of chicken broth to the pot. Gently stir to combine all the ingredients.
Place a lid on the pot and bring it up to a boil. Once boiling, turn the heat down to medium-low and let the soup simmer, stirring occasionally, until the beans are tender and begin to break down (approximately 1.5 hours).
Once the beans are tender, remove the ham hock and pull the meat from the bone.
Then add the ham meat back to the soup.
Now mash some of the beans against the side of the pot and stir the mashed beans back into the soup. Continue to simmer the soup uncovered for about 30 minutes to reduce some of the liquid and to thicken the soup further.
Taste the soup and add salt, if needed. I ended up adding 1/4 tsp of salt after tasting. The amount of salt needed will depend highly on the type of broth used. Garnish with some fresh chopped parsley (optional). Now the only thing left to do is enjoy a big bowl of this cozy navy bean soup with some crusty bread for dipping and soaking up all that yumminess! Enjoy!
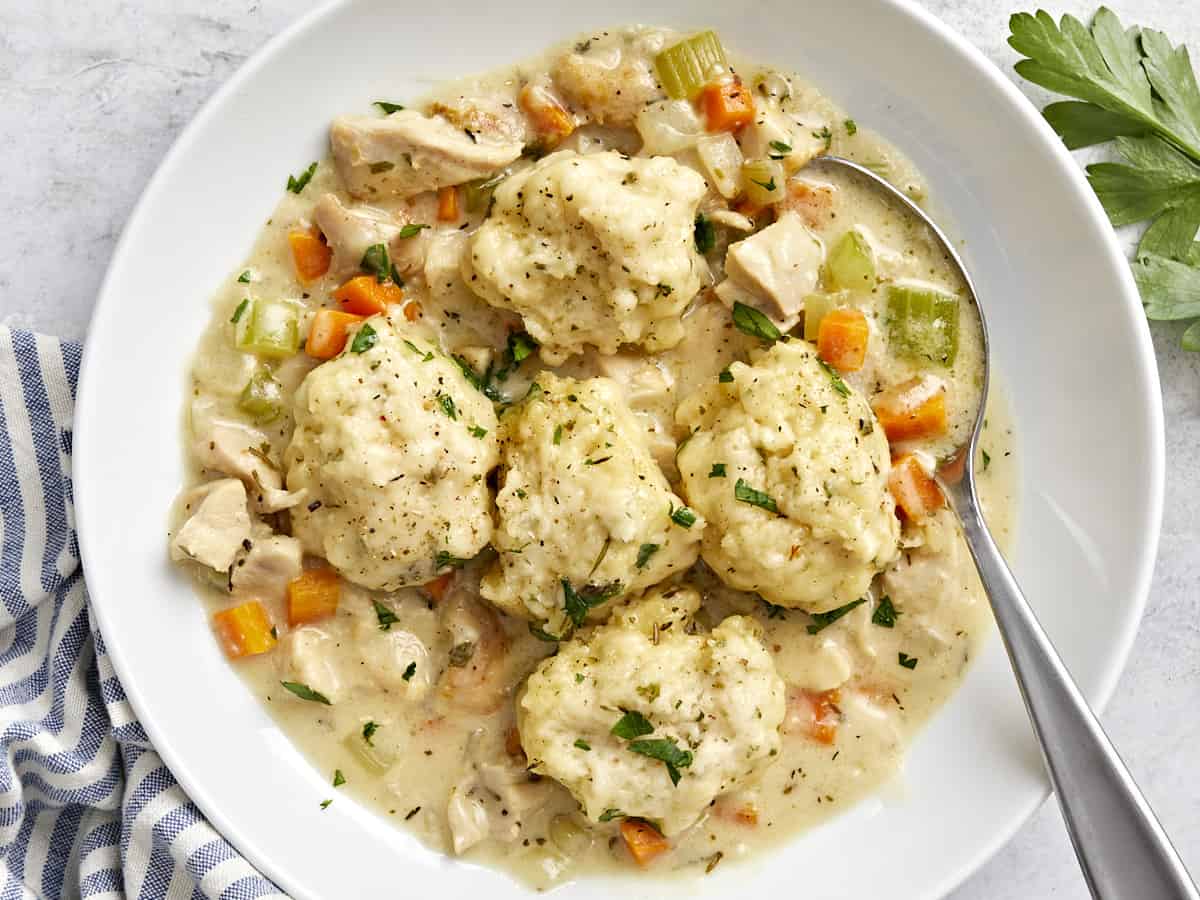
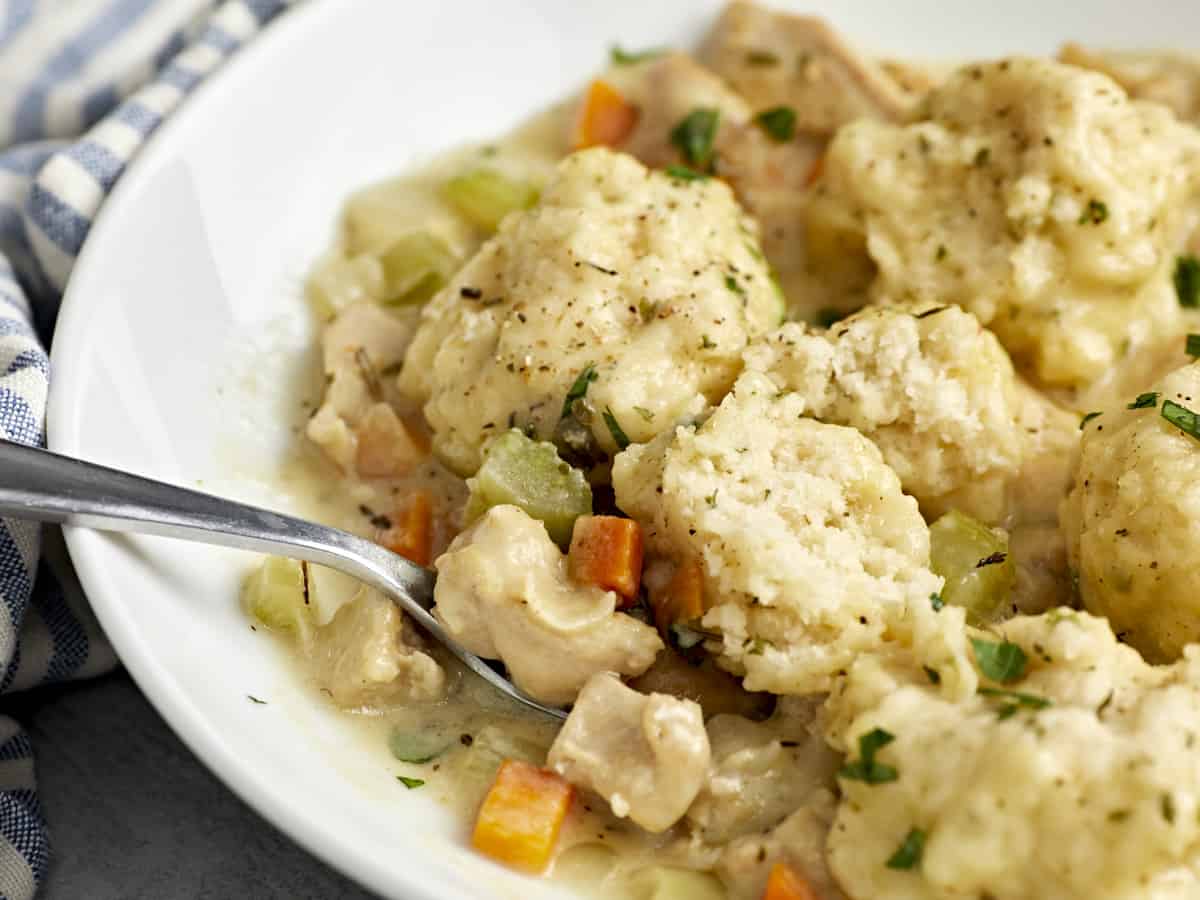
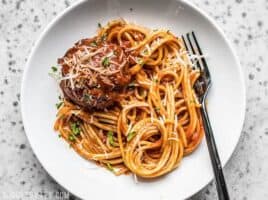
Tender chicken thighs simmered in a rich gravy and topped with fluffy dumplings makes these chicken and dumplings the perfect comfort food for cold nights.
I’m thoroughly obsessed with this chicken and dumplings recipe. This is some serious comfort food and I’m all about comfort food. 😅 We’re talking tender chicken thighs cooked in a rich gravy with a medley of colorful vegetables and then topped with tender, fluffy, and flavorful dumplings. This recipe is so cozy that eating a bowl of these chicken and dumplings feels like being wrapped up in a big warm hug. And the best part? They’re made 100% from scratch. 🙌 Ugh, brb, I need to go make another batch because my mouth is WATERING.
What Are Chicken and Dumplings?
Chicken and dumplings can mean different things depending on where you live, but they’re always super cozy, filling, and comforting. While they usually always have tender chicken smothered in a savory gravy as their base, the dumplings can either be a thick noodle, or a pillowy biscuit steamed on top of the gravy. I love both versions, but today we’re making the pillowy cloud dumplings!
Ingredients for Chicken and Dumplings
Here’s what you’ll need to make these delicious chicken and dumplings:
Chicken: I used boneless, skinless chicken thighs because they’re almost impossible to overcook and they always stay moist and tender, making this recipe foolproof. You can use chicken breast if you prefer, just be careful not to overcook the chicken.
Vegetables: A mix of onion, garlic, carrot, and celery provides the flavor base for the gravy, as well as adds a ton of color and texture to the dish.
Butter and Flour: A butter and flour roux is used to thicken the gravy and add a ton of rich flavor to the gravy.
Herbs: Parsley, thyme, rosemary, sage, and pepper create a classic chicken soup flavor profile that is extra warm and cozy.
Chicken Broth and Milk: The gravy is made with a combination of broth and milk for tons of flavor and a creamy finish.
Dumplings: The dumplings are made with a simple mix of flour, milk, melted butter, herbs, baking powder, salt, and sugar. They come together in minutes with very little mixing required!
How to Store the Leftovers
Leftover chicken and dumplings are SO delicious, so make sure to save some for lunch the next day! Simply divide the leftovers into single-serving containers and refrigerate. The gravy will get quite thick when refrigerated, but they’re still delicious! Chicken and dumplings will stay good in the refrigerator for about 3-4 days.
You can also freeze the chicken and dumplings. Once chilled in the refrigerator, transfer the chicken and dumplings to the freezer and store for 2-3 months. To reheat the frozen chicken and dumplings either thaw in the refrigerator overnight before microwaving until hot, or use the defrost function on the microwave.
Tips for Fluffy Dumplings
Make sure the dumpling batter is moist enough. It should be a soft, sticky, scoopable dough. If it’s too dry, the dumplings won’t be able to puff up as much.
Make sure the gravy is simmering before adding the dumplings. The dumplings need the steam action from the simmering gravy to cook and fluff up.
Keep the lid on the pot the entire time the dumplings are cooking (this holds in the steam and ensures they cook from all sides.
Don’t make the dumplings too big. They’ll double in size as they cook and larger dumplings will take much longer to cook.
Heat the olive oil in a deep skillet or Dutch oven over medium heat. Once hot, add the chicken thighs and brown on each side. The chicken does not need to be cooked through at this point, just make sure they get very brown on the outside. Transfer the partially cooked chicken to a clean bowl.
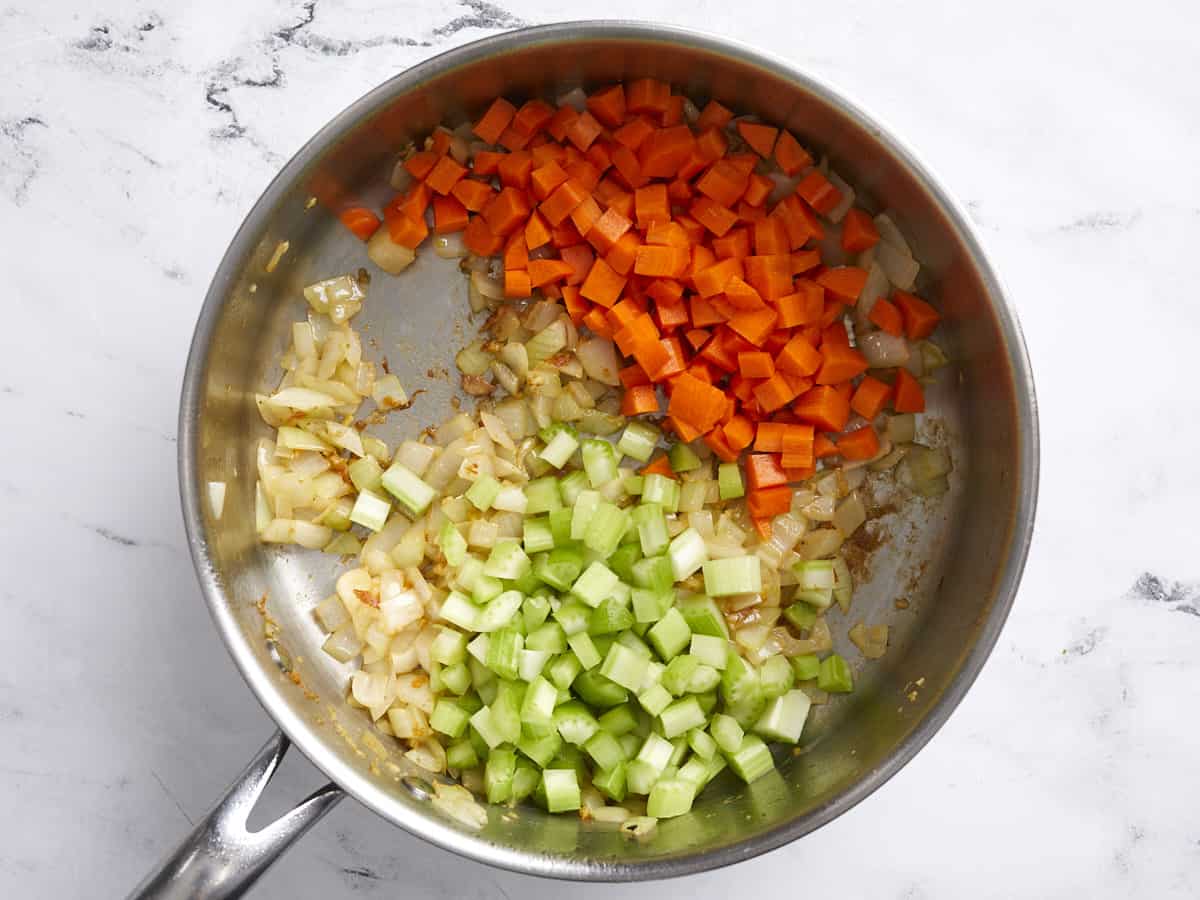
After removing the chicken from the skillet, add the diced onion and minced garlic and sauté over medium heat until the onions have softened. Stir to dissolve the browned bits off the bottom of the skillet as the onions cook.
Add the diced carrot and celery to the skillet with the onion and garlic and continue to sauté for about five minutes more.
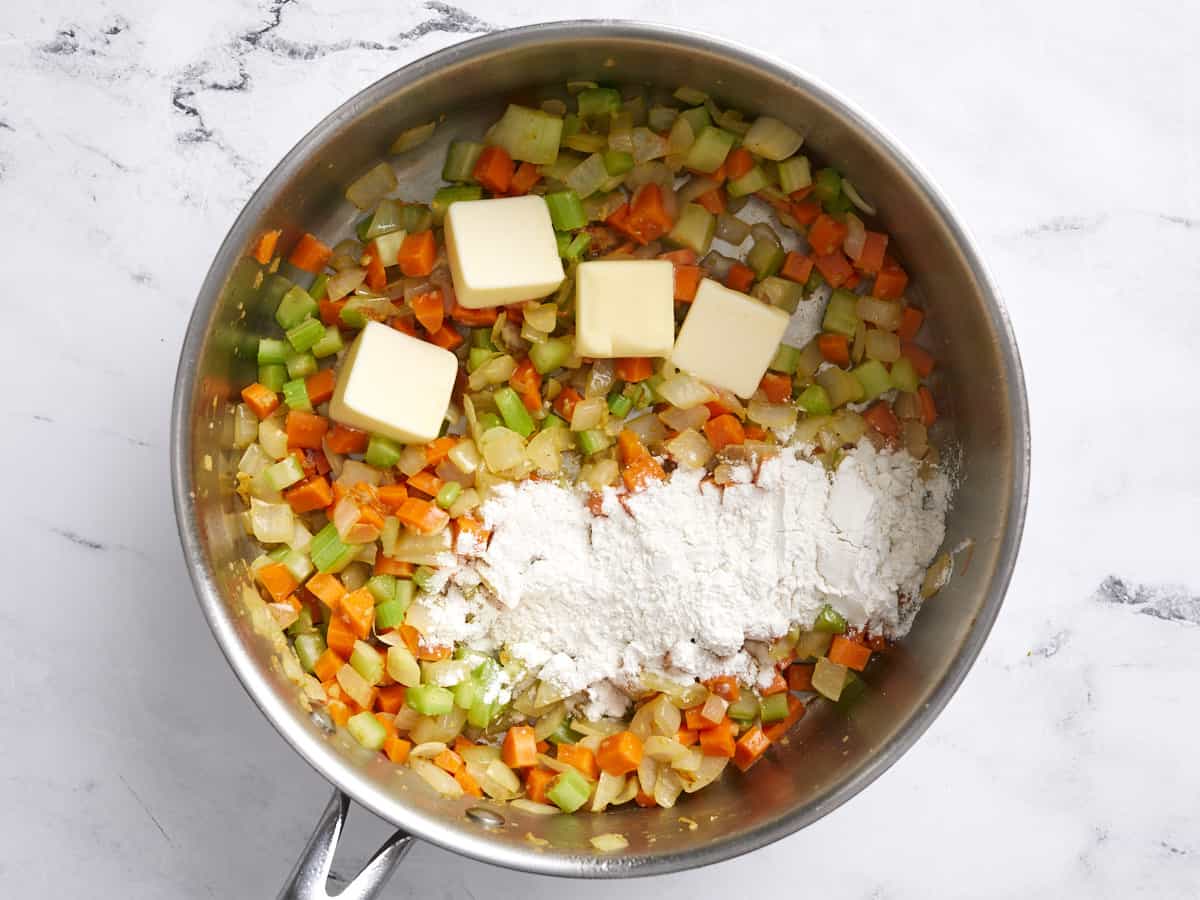
Add the butter and flour to the skillet and stir until the butter has melted and created a paste with the flour that coats the vegetables. Continue to cook and stir this mixture for about two minutes.
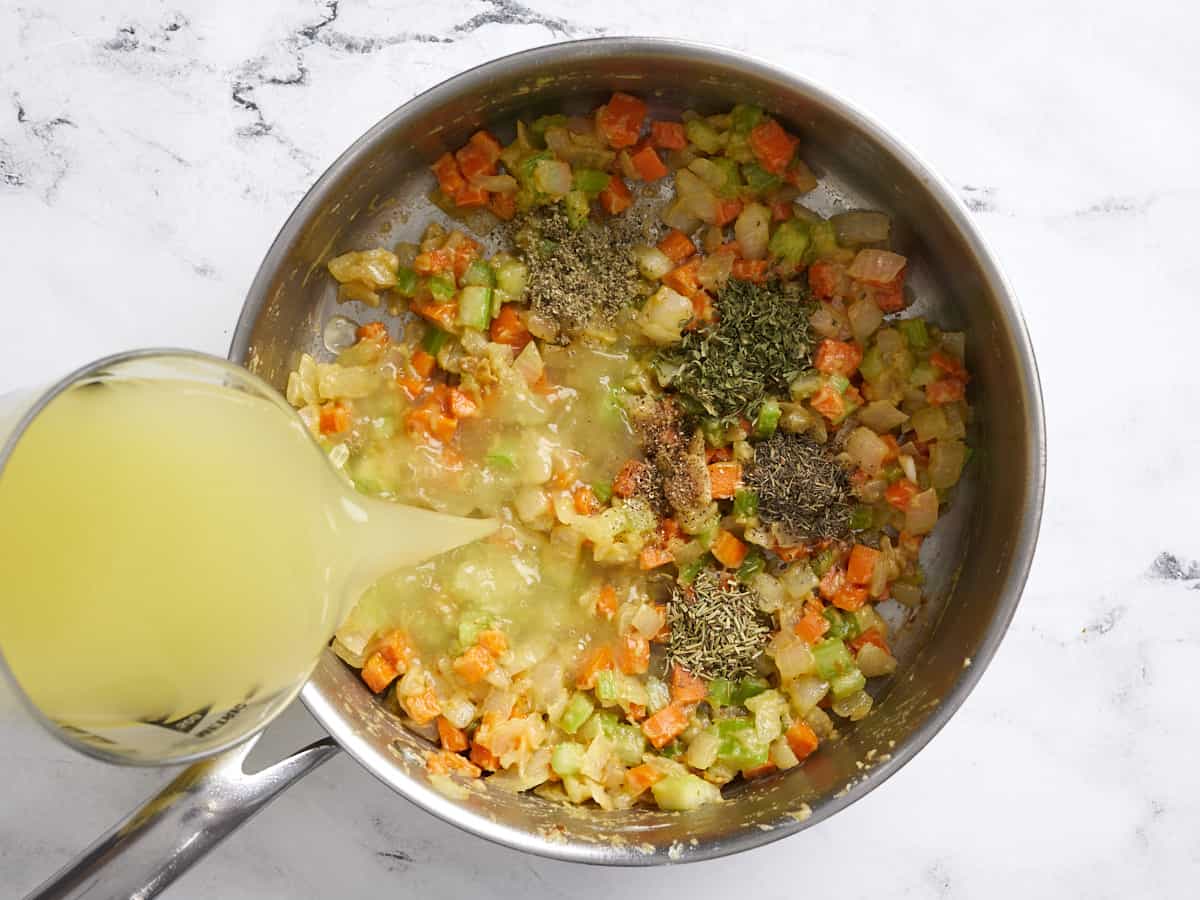
Add the parsley, thyme, rosemary, sage, salt, pepper, chicken broth, and milk to the skillet. Turn the heat up to medium-high and continue to stir and cook until the mixture comes up to a simmer and thickens into a gravy.
Dice the chicken and add it back to the skillet with the vegetables and gravy. Cover with a lid and let the chicken simmer in the gravy over medium heat while you prepare the dumplings.
Dumplings
To prepare the dumplings, combine the flour, parsley, sugar, salt, baking powder, garlic powder, and pepper in a bowl.
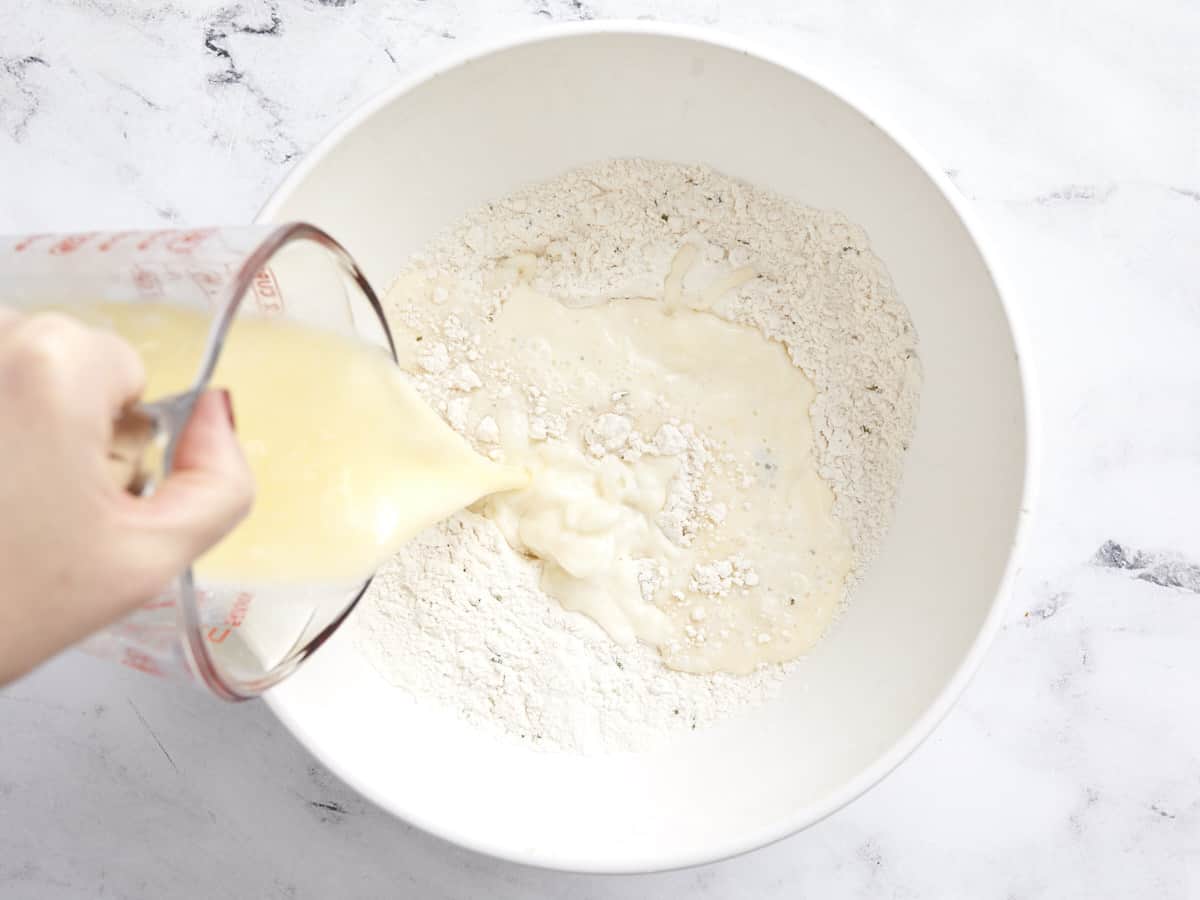
Pour the milk and melted butter into the flour mixture, then stir until a soft, scoopable batter is formed. Do not over stir.
Remove the lid from the chicken and gravy and drop the dumpling batter onto the surface of the gravy in 2 tablespoon dollops. You should get about 12 dumplings.
Make sure the gravy is still simmering, then place the lid back on the skillet and allow the dumplings to simmer for 15 minutes. Make sure they're simmering the entire time. After 15 minutes the dumplings should have doubled in size and will be fluffy and cooked in the center. Serve hot and enjoy!
Add 1 Tbsp olive oil to a large deep skillet and heat over medium. Once hot, add four boneless, skinless chicken breasts to the pan and allow them to brown very well on each side. The chicken doesn’t need to cook through at this point, just make sure it gets very brown. Remove the browned chicken to a clean cutting board and set aside.
Add two minced cloves of garlic and one diced yellow onion to the skillet and sauté over medium heat until the onions are softened. Add two diced carrots and two diced celery stalks and continue to sauté over medium for 2-3 minutes more.
Add four tablespoons of butter and ¼ cup of all-purpose flour to the skillet. Continue to stir and cook over medium heat. The butter will melt and combine with the flour to create a sort of paste that coats the vegetables. Continue to cook this mixture for about two minutes more.
Add 1 tsp dried parsley, ½ tsp dried thyme, ½ tsp dried rosemary, ½ tsp dried sage, ½ tsp salt, ¼ tsp pepper, 2 cups chicken broth, and 1 cup milk to the skillet. Whisk the ingredients together, making sure to dissolve any browned bits from the bottom of the skillet. Turn the heat up to medium-high and allow this mixture to come back up to a simmer, at which point it will thicken into a gravy.
Once the mixture has thickened to a gravy, dice the chicken thighs and stir them back into the skillet. Cover with a lid and allow the chicken to simmer in the gravy while you prepare the dumplings.
To make the dumplings, stir together 1 cup all-purpose flour, ½ tsp salt, 1.5 tsp baking powder, ⅛ tsp garlic powder, ⅛ tsp pepper, 1 tsp dried parsley, and ½ tsp sugar in a bowl. Melt 2 Tbsp butter and combine it with ½ cup milk. Pour the milk mixture into the flour mixture.
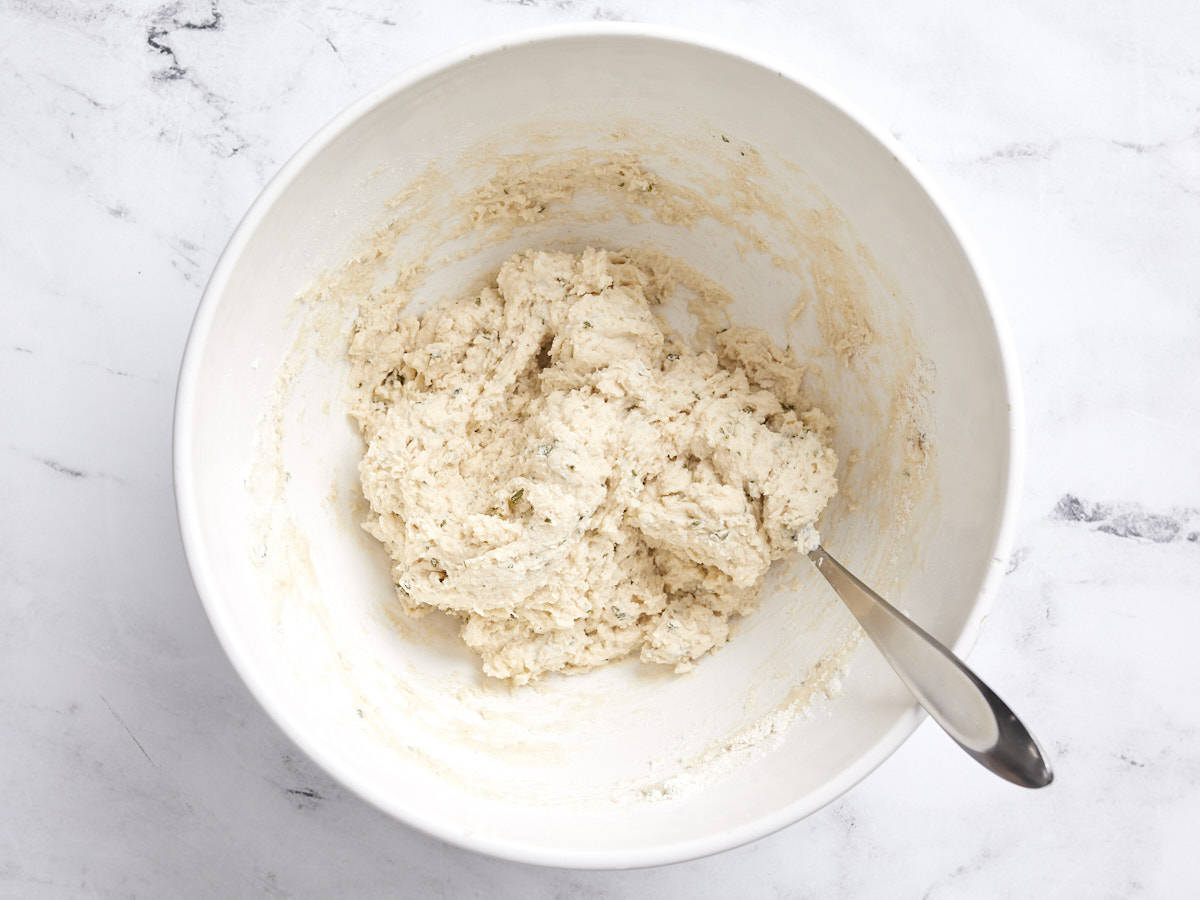
Stir the wet and dry ingredients together until it forms a soft, sticky dough. It should be soft enough that you can easily scoop it with a spoon.
Make sure the gravy is fully simmering, then drop the dumpling dough into the gravy in 2 Tbsp portions. The dumplings will expand quite a bit as they steam, so don’t worry that they don’t fully cover the surface.
Place the lid on the skillet and allow the dumplings to steam in the simmering gravy for 15 minutes without lifting the lid. Make sure the gravy is simmering the whole time. After 15 minutes they should be about double in size. Cut one open to make sure it’s fluffy all the way through.
Serve the chicken and dumplings hot and enjoy! (shown garnished with parsley for color)
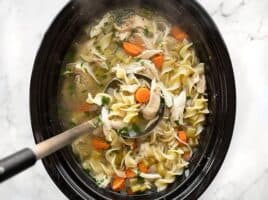
Whoa. Just, WHOA. I’ve never smelled anything as lovely and drool-inducing as the scent in my house while I cooked this Slow Cooker Beef Stew. The aroma had me checking the clock every 15 minutes to see if it was done yet. I couldn’t wait to lift the lid and take a quick taste. And when I finally did? INCREDIBLE. This is definitely a recipe you want to make before winter is over!
Ingredients for Beef Stew
Beef stew, in its most basic form, is really simple. It’s just chunky pieces of beef, vegetables, broth, and some herbs and spices, all cooked down until it forms a delicious cozy gravy. But I took this beef stew up a few notches with some extra special ingredients that add more umami and flavor to the stew gravy. The ingredient list may look long, but I promise it’s worth it. Here’s what you’ll need for the most incredible beef stew ever:
Beef Stew Meat – Stew meat, which is usually cubed chuck steak, tends to be a tougher cut, but it softens to an extremely tender texture when cooked low and slow (like in a slow cooker).
All-Purpose Flour – Lightly coating the stew meat in flour and then searing it before it goes into the slow cooker increases the Maillard reaction and deepens the flavor. The flour also helps thicken the stew’s gravy.
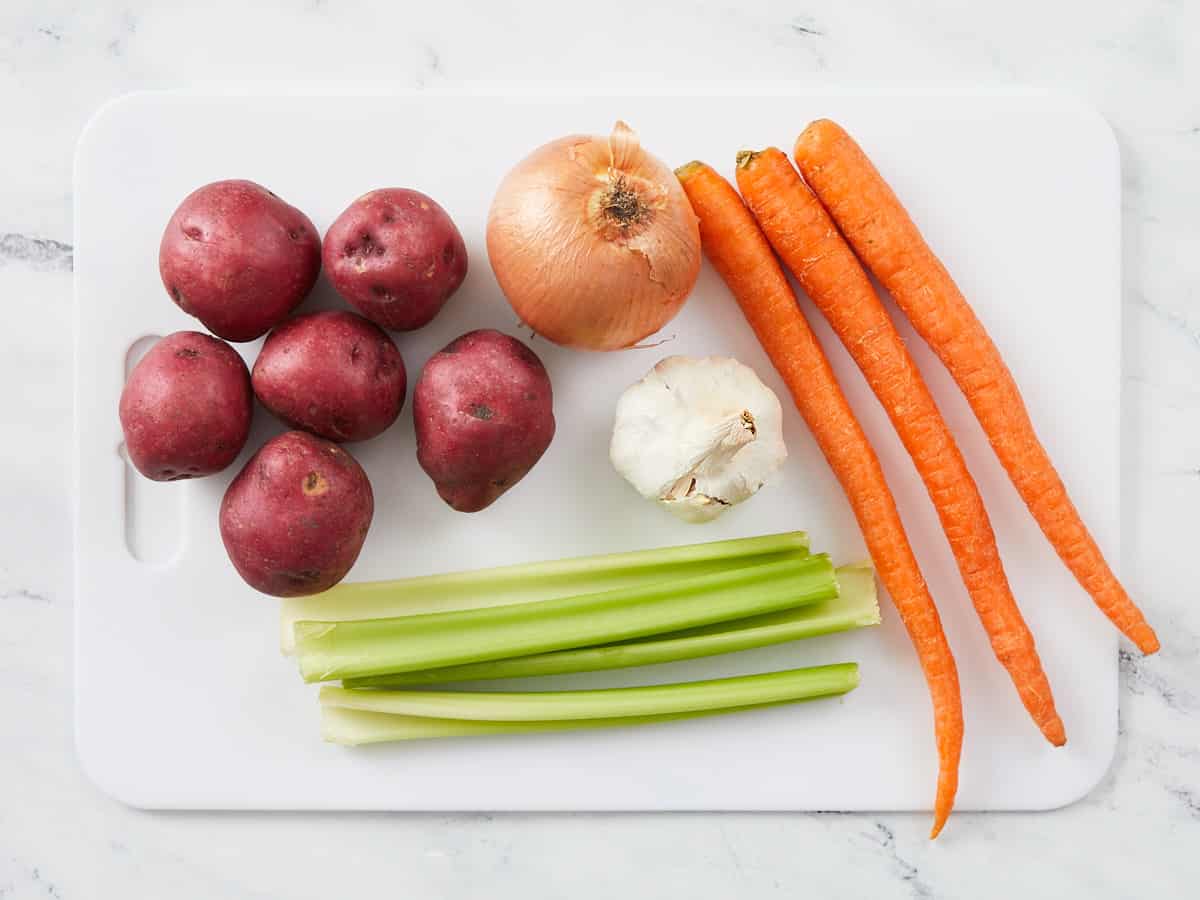
Vegetables – We use a hearty and flavorful mix of carrots, onions, celery, and potatoes to create a naturally flavorful gravy. The vegetables also help thicken the gravy as they break down into the broth.
Beef Broth – Broth acts as the base for the gravy and provides a nice moist environment for the meat to cook to tender perfection. Make sure to use a broth with great flavor. We like to use Better Than Bouillon to make our broth.
Seasonings – This is where we really take the flavor to the next level. For this recipe, we combined garlic, Dijon, Worcestershire sauce, soy sauce, brown sugar, rosemary, and thyme to make an over-the-top good gravy that is full of layered flavor and umami goodness.
Tips for the Best Beef Stew
Sear the meat first. Browning the beef gives it an extra deep flavor that can’t be achieved in the moist environment of the slow cooker alone.
Add extra umami. Adding ingredients to the broth that contain a lot of umami, like Worcestershire sauce and soy sauce, ramps up the flavor in the stew and makes the flavor extra “meaty”.
Don’t rush it. Stew meat needs to cook low and slow for a long time in order for the tough connective tissues to break down and become tender. If your stew meat is tough, reduce the heat and cook it a little longer.
Don’t skip the veggies. Including a variety of vegetables in your stew not only adds texture and color, but the vegetables add a ton of extra flavor to the gravy, so you’ll get a delicious, multi-dimensional flavor in the final stew.
How to Thicken Beef Stew
There are multiple ways to thicken a beef stew, but I prefer to allow the stew to thicken naturally as the vegetables cook and begin to break down into the broth. The stew may look a little watery when you first lift the lid, but once you begin to stir the vegetables (especially the potato) will begin to thicken the liquid in the slow cooker.
Alternately, if you prefer a firmer vegetable, you can add them in the last hour of cooking and then use a cornstarch slurry (3 Tbsp cornstarch + 3 Tbsp water) to thicken your stew. Once the cornstarch is mixed into the broth and brought to a boil, it will thicken into a gravy. This method will result in a less flavorful gravy and a glossy appearance.
What Else Can I add?
This slow cooker beef stew is pretty lush as is, but there are always options if you want to add more! Try adding 8 oz. mushrooms with the vegetables in the beginning (sliced in half) for more vegetable goodness. If you have some red wine on hand, deglaze the skillet used to brown the beef with the wine before proceeding with the gravy. Want it to look extra fancy? Sub 8 oz. pearl onions in place of the chopped onion in the recipe below.
What Do you Serve with Beef Stew?
Beef stew is a pretty well-rounded meal on its own, but you’ll want to sop up every drop of that deliciously thick brown gravy. I suggest serving your Slow Cooker Beef Stew with some bread on the side, like my Focaccia Rolls, or over a bowl warm rice or egg noodles.
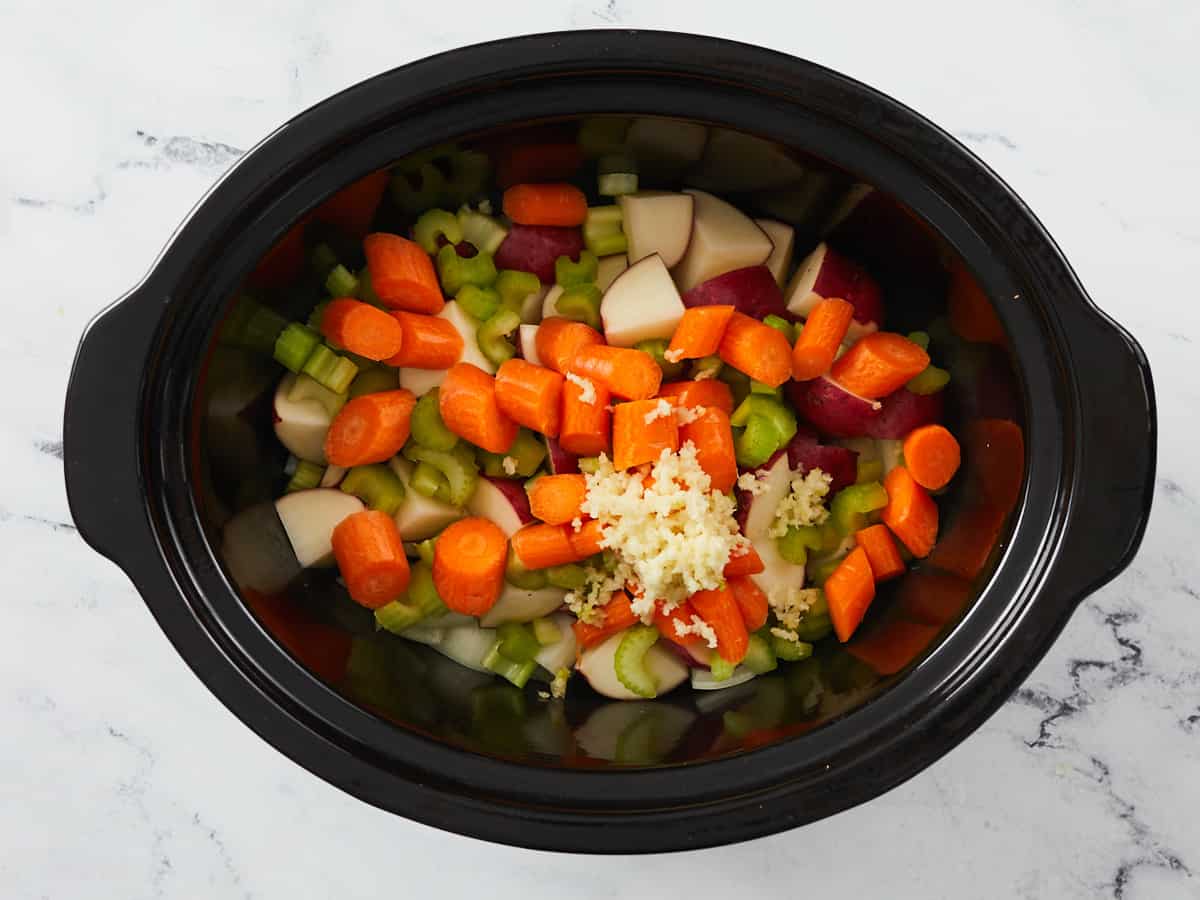
Dice the onion and red potatoes. Slice the carrots and celery. Mince the garlic. Place the prepared vegetables in a four or five quart slow cooker.
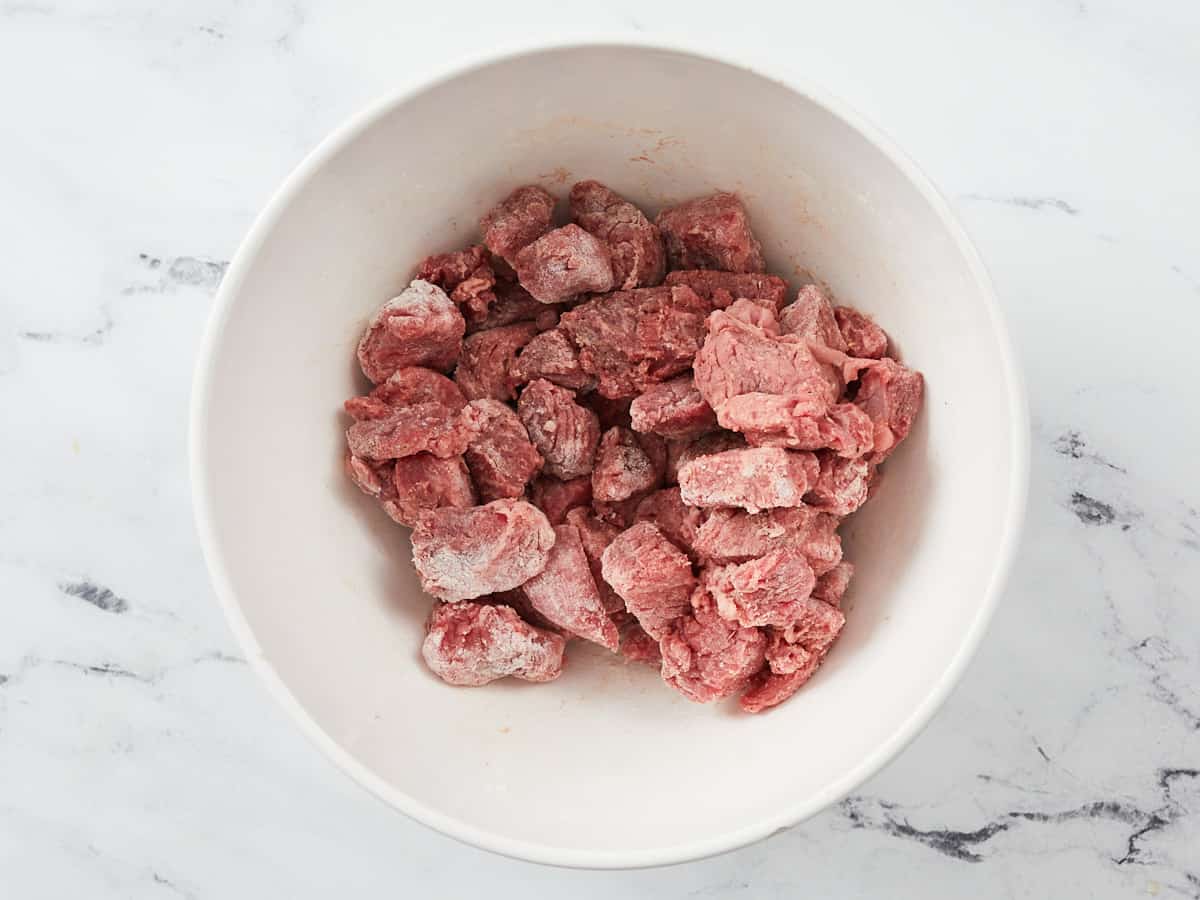
Place the stew meat in a bowl and sprinkle the flour, salt, and pepper over top. Toss the meat until it's evenly coated in flour.
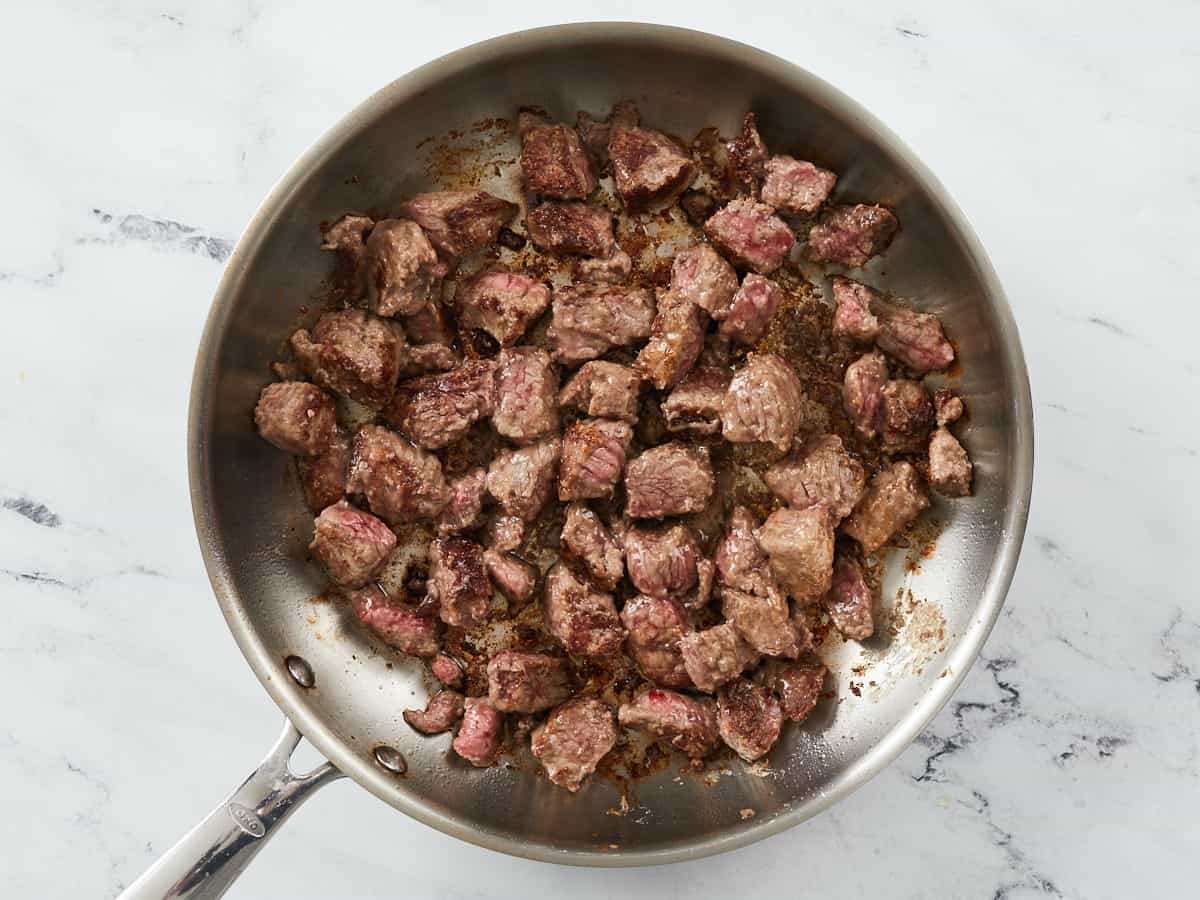
Heat a large skillet over medium-high. Once very hot, add the cooking oil and swirl to coat the surface of the skillet. Add the stew meat and cook, without stirring, until browned on the bottom. Stir and then allow the beef to brown on a second side. Transfer the meat to the slow cooker.
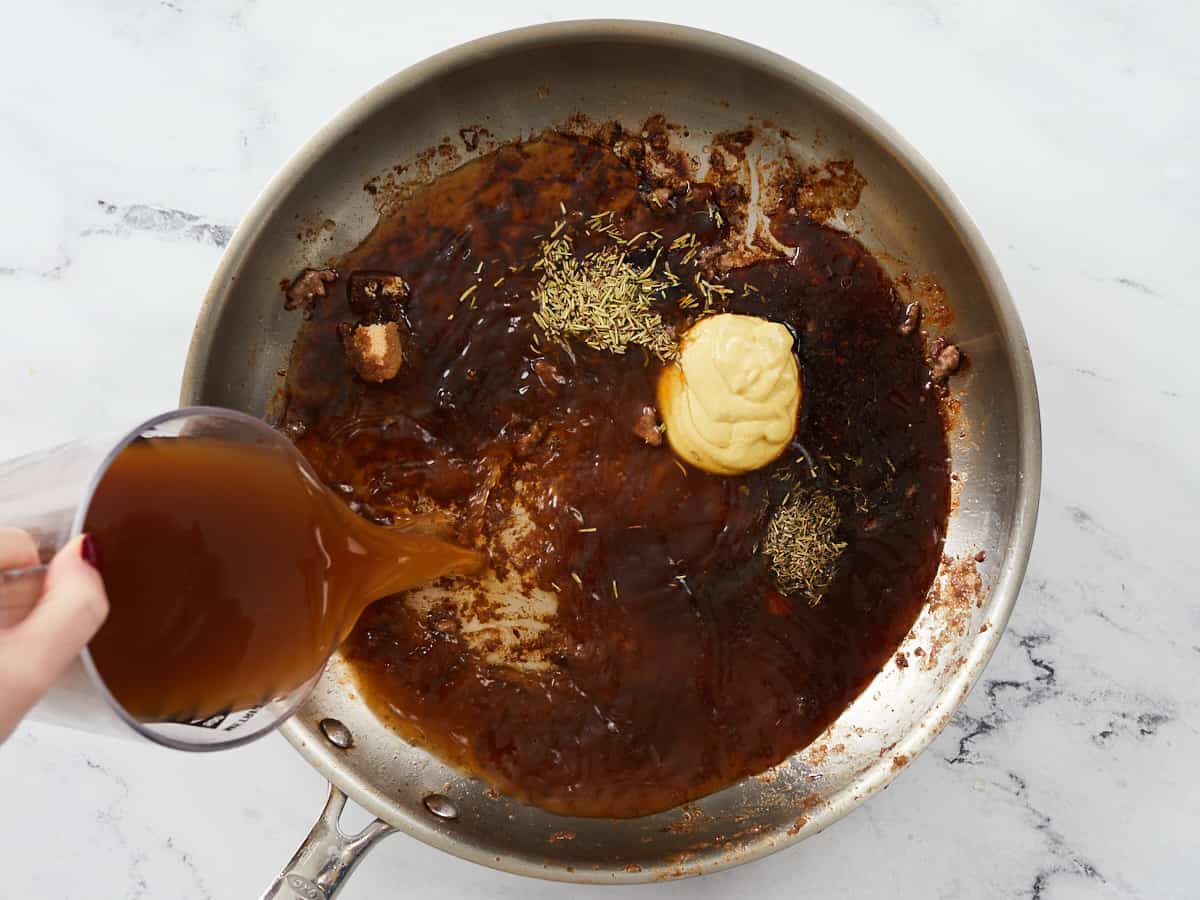
Turn the heat under the skillet down to medium-low. Add the broth, Dijon, Worcestershire sauce, soy sauce, brown sugar, rosemary, and thyme to the skillet. Stir and cook over medium-low until all the browned bits have dissolved off the bottom of the skillet.
Pour the broth over the ingredients in the slow cooker and everything a good stir.
Place the lid on the slow cooker and cook on high for four hours or low for eight hours.
After cooking the meat and vegetables should both be tender. Stir the stew well to allow the potatoes to slightly break down and thicken the gravy. Taste the stew and adjust the salt or other seasonings to your liking. Serve hot!
Love Beef Stew? You’ve got to try my Chicken Stew next!
How to Make Slow Cooker Beef Stew – Step by Step Photos
Prepare the vegetables for the stew first. You’ll need to dice 2 lbs. red potatoes and one yellow onion, slice 4 stalks of celery and 3 carrots, and mince 4 cloves of garlic.
Place all of your chopped vegetables in a 4 or 5 quart slow cooker.
Place 1.5 lbs. stew meat (beef chuck) in a bowl. Sprinkle 2 Tbsp all-purpose flour, ¼ tsp salt, and ¼ tsp pepper over the meat. Toss the beef until it’s evenly coated in flour, salt, and pepper.
Heat a large skillet over medium-high. When it’s very hot, add 2 Tbsp cooking oil and swirl to coat the surface of the skillet. Add the stew meat and let it cook until browned on the bottom, then stir and allow it to brown on the second side again. Do not stir often, or the beef will not have a chance to brown. Transfer the beef to the slow cooker.
Reduce the heat under the skillet to medium-low and add 2 cups beef broth, 2 Tbsp Dijon mustard, 1 Tbsp Worcestershire sauce, 1 Tbsp soy sauce, 1.5 tsp brown sugar, 1.5 tsp dried rosemary, and 1.5 tsp thyme. Heat and stir the ingredients until all of the browned bits are dissolved off the bottom of the skillet.
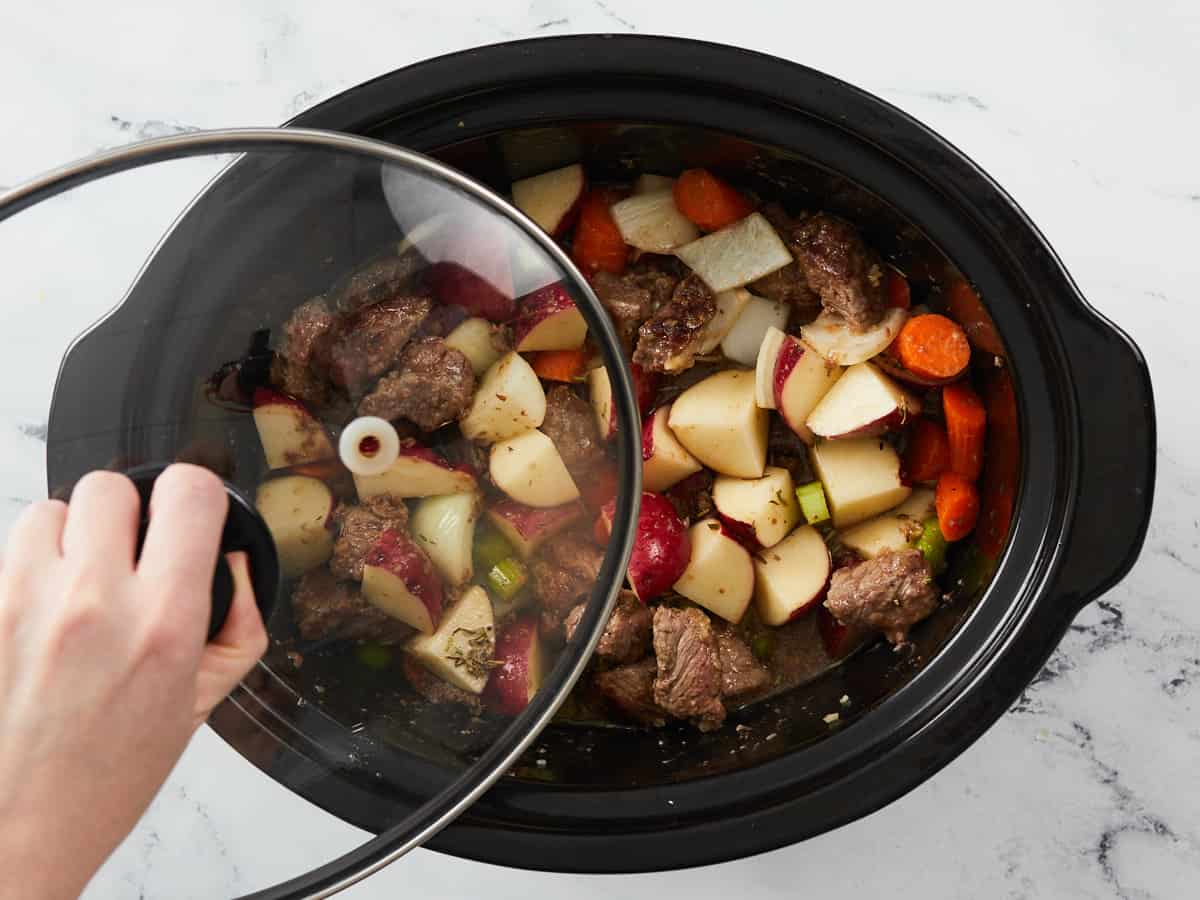
Pour the broth over the ingredients in the slow cooker. It’s okay if the broth does not fully cover the ingredients in the slow cooker at this point.
Place the lid on the slow cooker and cook on high for four hours or low for eight hours.
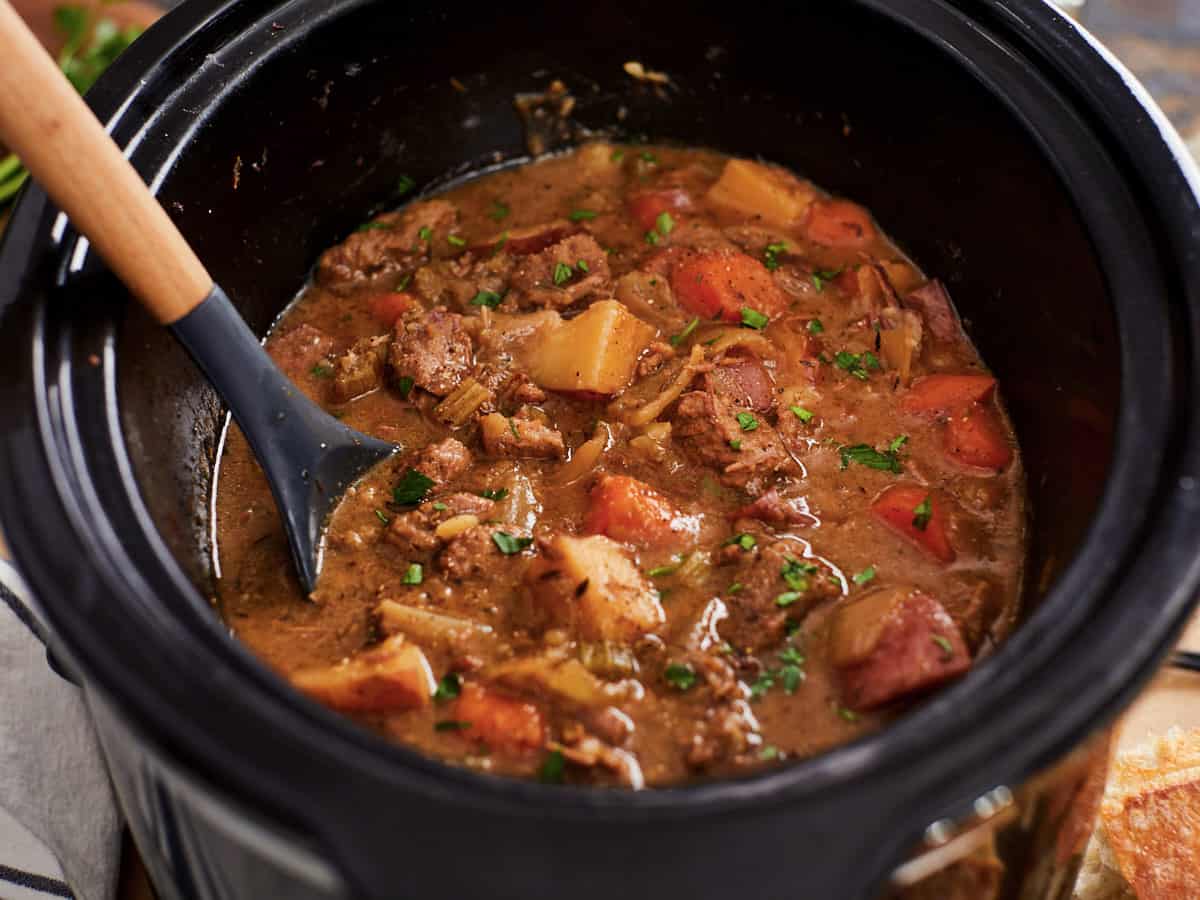
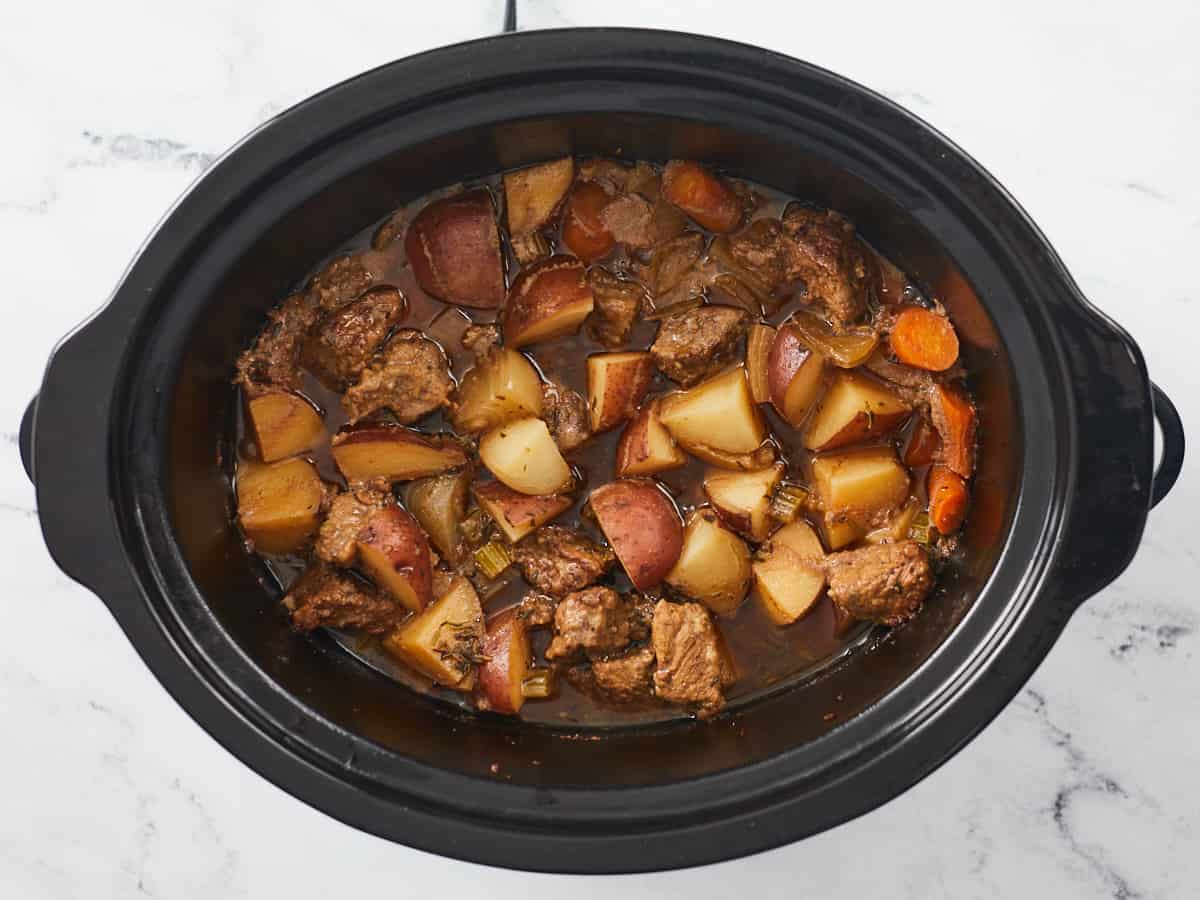
After four hours on high (or eight hours on low) the stew should look a little like this. The meat and vegetables should both be tender. The gravy may look a little thin at this point, but don’t worry…
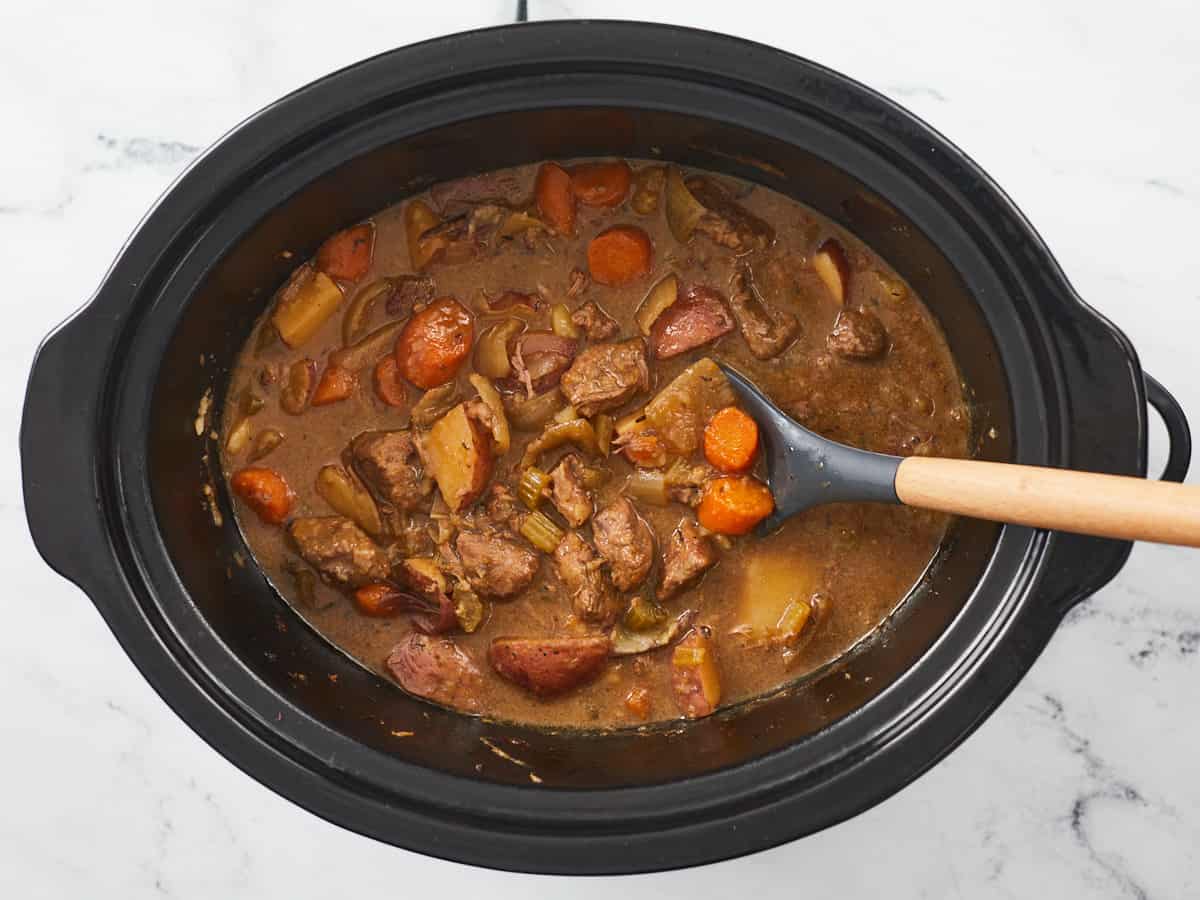
Give the stew a good stir and the potatoes will break down a bit and thicken the gravy into a nice rich consistency. Depending on the type of broth used, you may want to taste the stew and add salt to your liking (I did not add any).
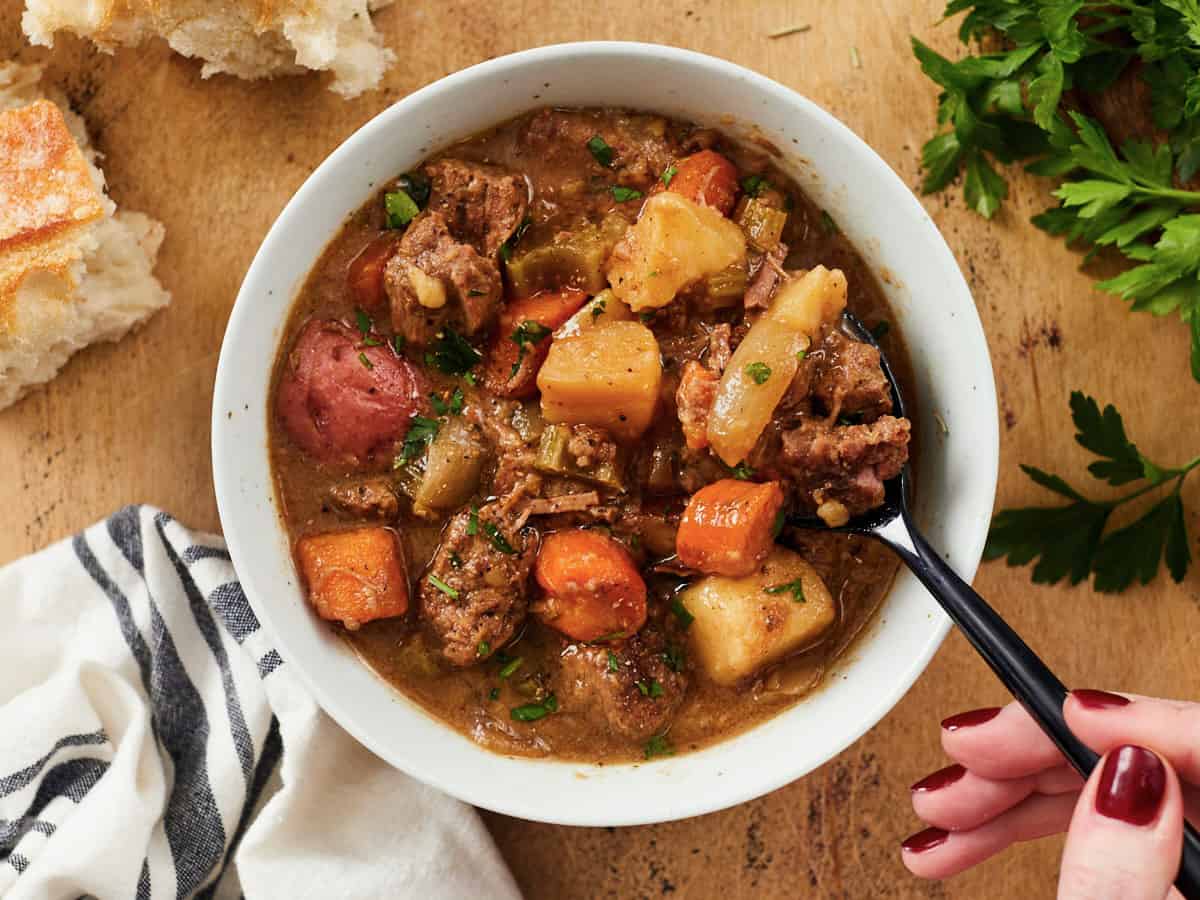
Serve the Slow Cooker Beef Stew as is or spooned over a bowl of hot rice or pasta. THIS will keep you warm and full on cold winter days!
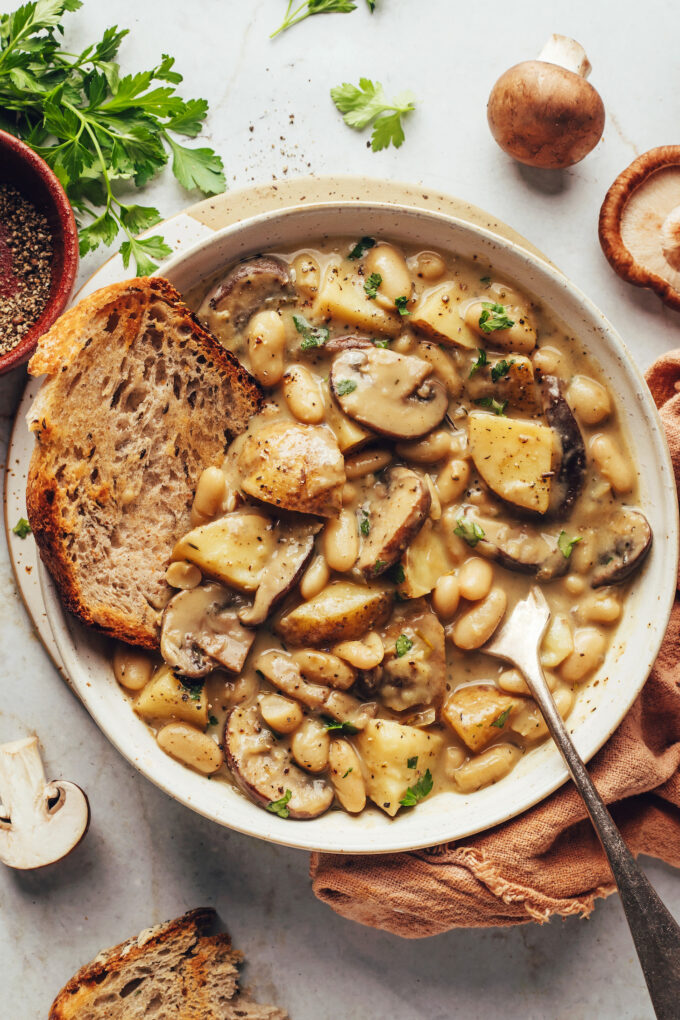
Cozy, hearty, and comforting — what more could you ask for in a winter meal? Easy, too? You’ve got it! This 1-pot white bean and mushroom stew is all that and more.
Savory mushrooms, tender potatoes, and fiber-packed white beans combine in a creamy, da…
Cozy, hearty, and comforting — what more could you ask for in a winter meal? Easy, too? You’ve got it! This 1-pot white bean and mushroom stew is all that and more.
Savory mushrooms, tender potatoes, and fiber-packed white beans combine in a creamy, dairy-free broth. It’s nourishment for the body and soul. Let’s make stew, friends!
This cozy, 1-pot stew begins with sautéing onion in vegan butter (or olive oil) to bring out its natural sweetness and infuse it with flavor.
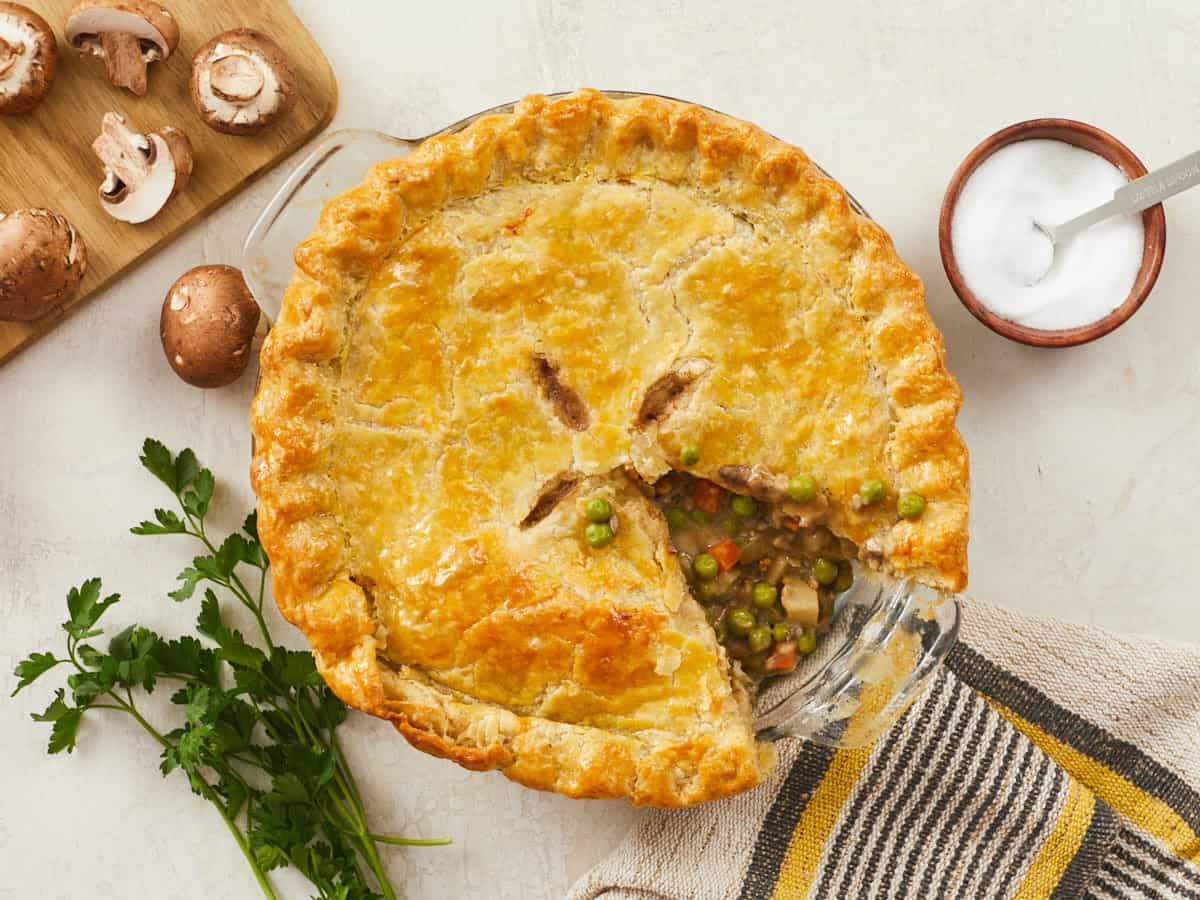
If you want your whole family clamoring around the dinner table with a dish everyone will love, this Veggie Pot Pie is All. Of. The. Things! Creamy, savory, hearty, crispy- you can even make this Veggie Pot Pie recipe vegan! It’s all cooked in a velvety sauce and encased in a flaky, buttery pie crust. Are you ready to make the ultimate comfort food? (Say yes!!!)
What Is Veggie Pot Pie?
A pot pie is just like a regular pie, except it’s usually savory and made in a creamy sauce. Pot pies can be made with a bottom and top crust or just a top crust. This pot pie recipe is a mix of colorful vegetables drenched in a savory gravy and cooked in a deliciously flakey double crust. Feel free to use just a top crust if you prefer it that way. I’m a crust person, so the more, the better!
What You’ll Need
For The Filling
Butter and Flour– with their powers combined, you’ll make a roux, and that blend of fat and flour will thicken your sauce.
Milk and Vegetable Broth– this is the base of your creamy sauce. You can substitute the milk with plant-based milk if you want to keep this bad boy dairy free. Alternatively, if you want to add more depth, try using chicken broth.
Mushrooms, Onions, Potatoes, and Mixed Veggies– these are the stars of your veggie filling. To minimize chopping, I use frozen mixed veggies. But any combination of veggies you have on hand will work. Just make sure to chop everything the same size and par-cook root veggies in the broth first.
Rosemary, Thyme, Bay Leaf, and Sage– add flavor and depth to the sauce. You can substitute them with your favorite spice blend.
Soy Sauce– adds umami, AKA savoriness, which anything vegetable-based will need loads of. You can also use a teaspoon of any Miso you have on hand or Worcestershire Sauce.
For The Crust
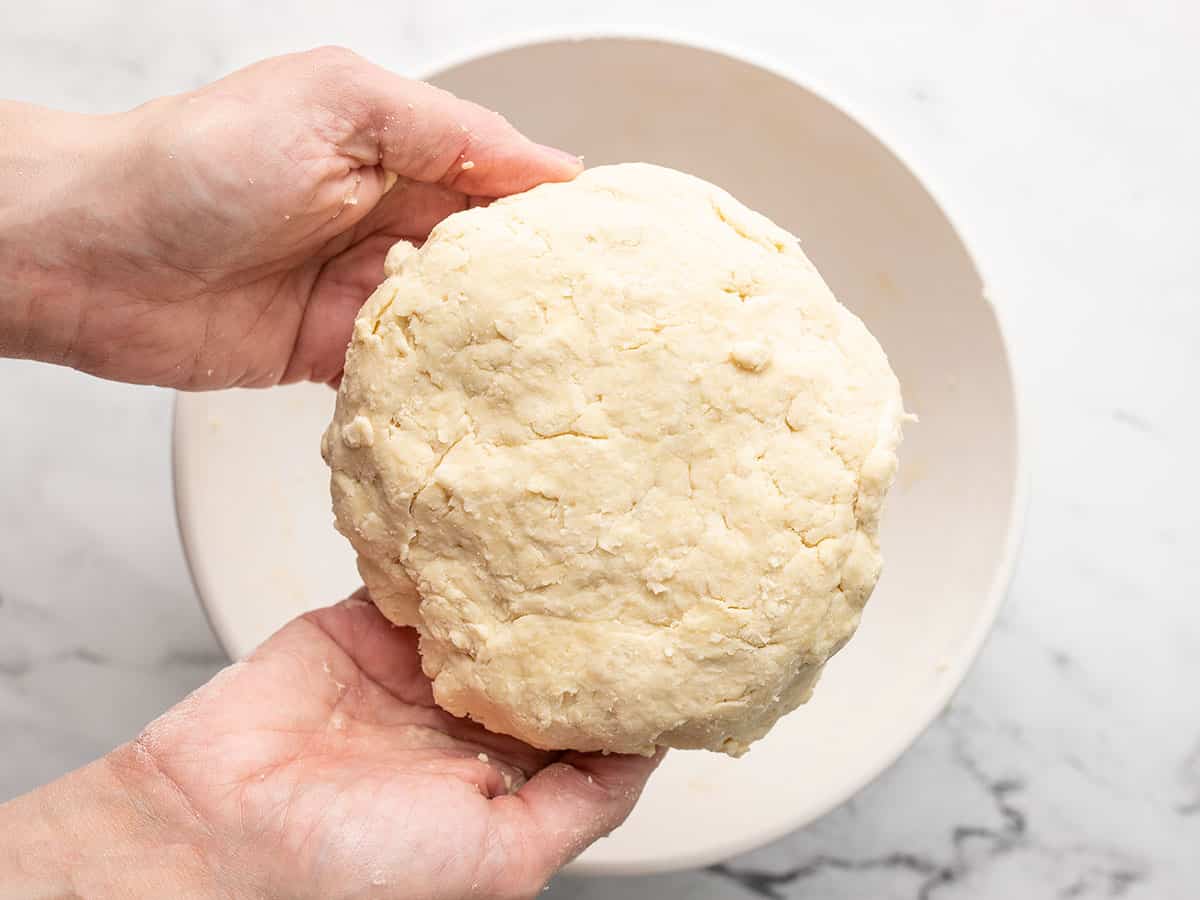
Double Pie Crust– encases everything in a buttery dream and adds incredible texture. You can use a store-bought crust, but I use my 3-Ingredient Pie Crust. You can also use puff pastry, but par-bake it before filling.
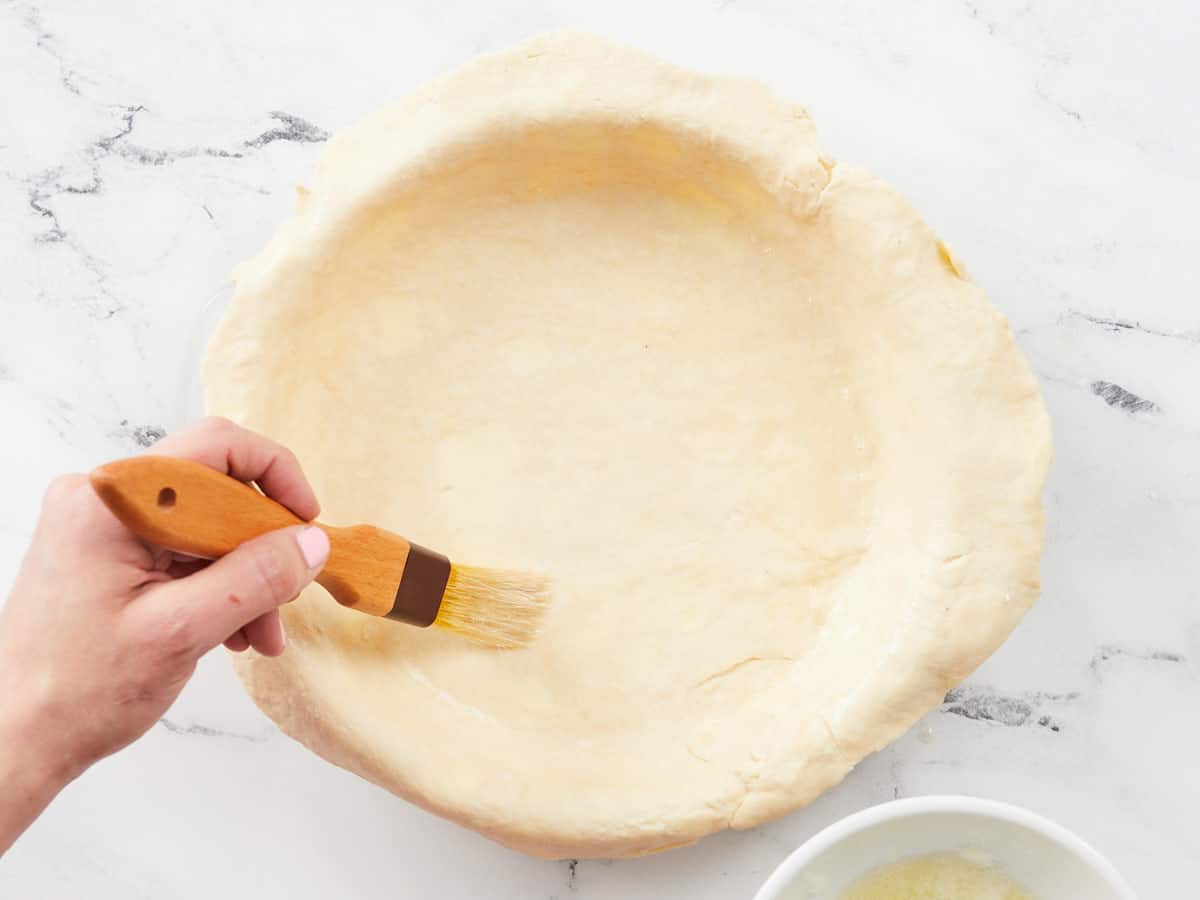
Egg– the white seals the bottom crust, so it doesn’t absorb liquid, and the yolk lacquers the top crust, giving you a golden finish. If you want to skip the egg, par-bake the bottom crust and use milk, cream, or plant-based milk to lacquer the top crust.
Make It Vegan
You can tweak this recipe to create an outstanding Vegan Pot Pie! Sub the butter with vegan butter or oil. Opt for a store-bought vegan pie crust, or make my Easy 3-Ingredient Pie Crust with Vegan Butter or Vegetable Shortening. Sub the milk with any plant-based milk. As far as the egg wash is concerned, you can brush your pie crust with water, aquafaba, or plant-based milk. Par-bake the bottom crust before filling.
Prevent A Soggy Bottom Crust
Brushing the bottom crust with egg white helps create a barrier that prevents the dreaded soggy bottom. You should also preheat the oven with a sheet pan in it. When you place the pie on it, the heat from the sheet pan melts the fat in the bottom pastry, creating a layer that prevents liquid from permeating the pie. You can also place an overturned cast iron skillet in your sheet pan and preheat them both. Bake your pie on the bottom of the overturned skillet. Cast iron holds heat and helps crisp up that bottom crust.
How To Store The Leftovers
You can store leftovers in an airtight container in the fridge for up to 4 days, though reheating is easier if you just store them in the pie plate and cover them tightly with foil. You can freeze a veggie pot pie for up to 2 months, tightly wrapped in plastic, then foil, and kept in an airtight container. Cover the top crust with foil to prevent burning, and reheat in a 350ºF oven until it has warmed throughout.
If you want your whole family clamoring around the dinner table with a dish everyone will love, this Veggie Pot Pie is All. Of. The. Things! Creamy, savory, hearty, crispy- you can even make this recipe vegan!
1Yukon gold potato, small dice* (about 1 cup)$0.27
1pintbaby bellas, small dice $2.89
12ozfrozen mixed vegetables $1.25
1egg, separated $0.46
Instructions
Grease a pie pan with 1 tablespoon of butter. If you're using store-bought dough, place the bottom crust in the pie pan. If you made 3-Ingredient Pie Crust, cut 1/3 of the dough off to be used as the top crust, wrap it in plastic, and refrigerate until you're ready to use it later.
Dust your work surface with flour and roll out the bigger 2/3 piece of dough into a circle that is 16 inches in diameter and about 1/4 inch thick. Line the pie pan with it.
Beat the egg white until frothy, then brush the bottom crust with it. Let the crust rest in the fridge.
Place a rack in the center of your oven along with a sheet pan and preheat it to 350ºF. Place a deep skillet over medium heat and add 5 tablespoons of salted butter to the pan. Once the butter foams, swish it around the pan until it turns an amber color and smells of hazelnuts.
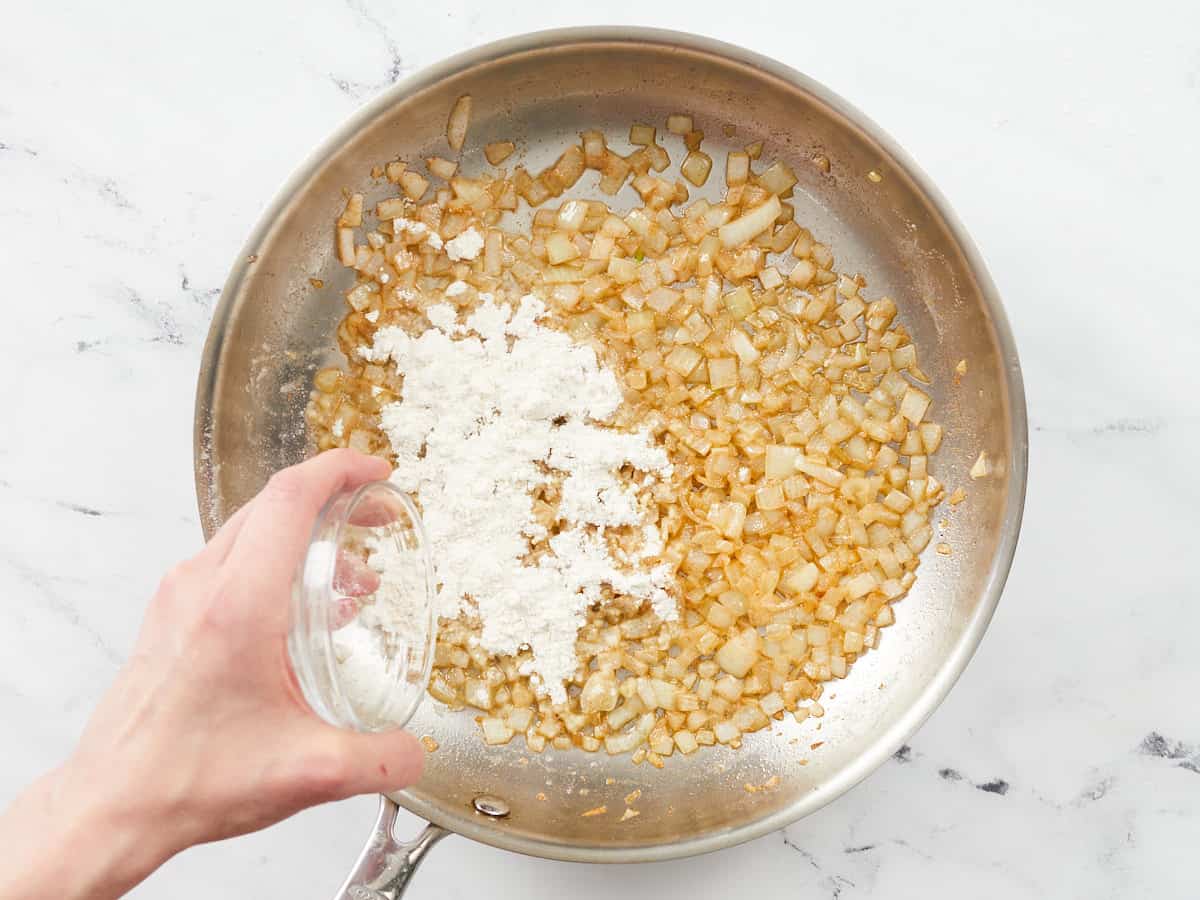
Add the diced onions to the brown butter. Cook until the onions are translucent, about 5 minutes. Add the garlic, and cook for one minute. Sprinkle the flour over the onions and garlic in the skillet and continue to cook and stir for two minutes more.
To the pan, add veggie broth, milk, and salt. Whisk to combine and dissolve any flour off the bottom of the skillet. Then add the bay leaf, rosemary, thyme, sage, pepper, and soy sauce. Whisk occasionally as the liquid simmers and thickens.
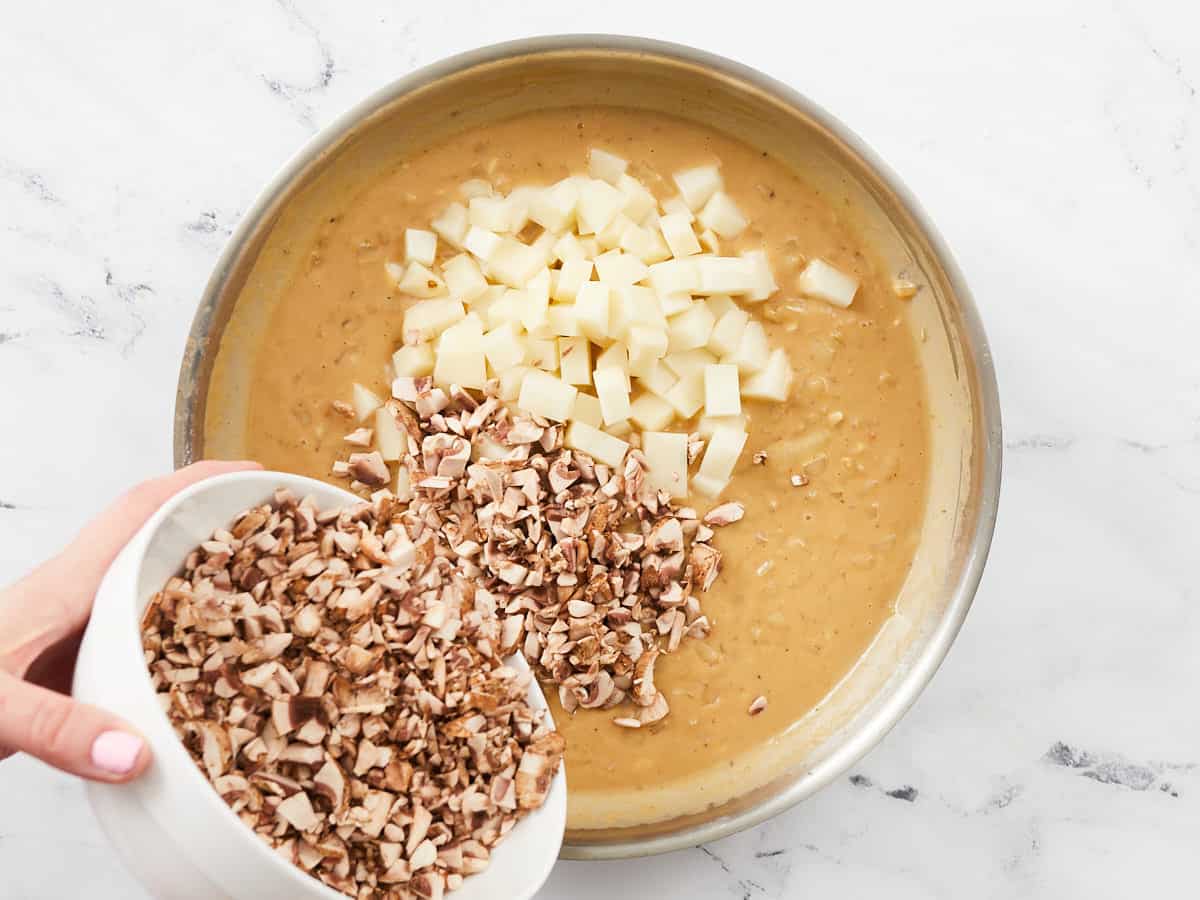
Add the pint of diced mushrooms and the diced potato to the pan. Stir to combine and cook until the gravy has thickened more and reduced some, about 5 minutes.
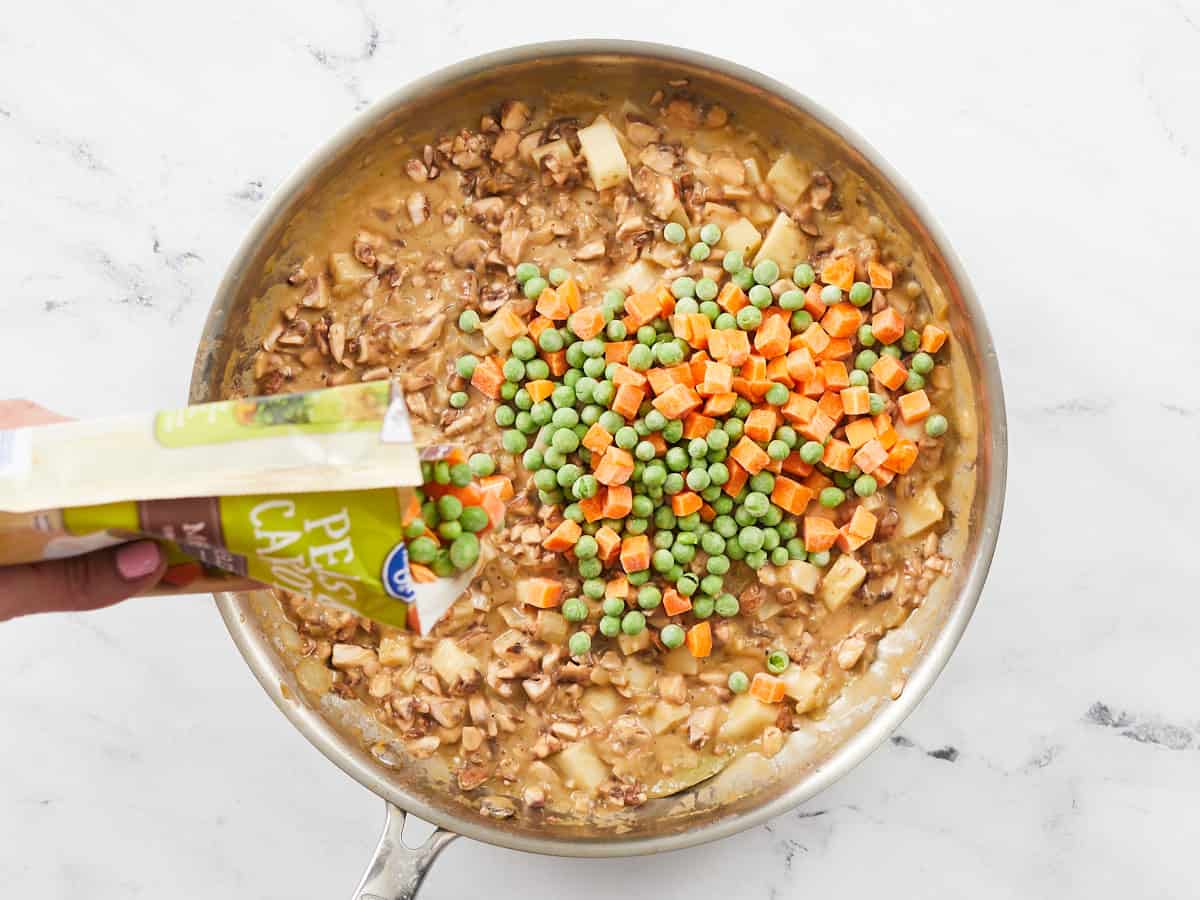
Remove the skillet from the heat. Finally, add the frozen mixed vegetables and allow them to cool the ingredients in the pan.
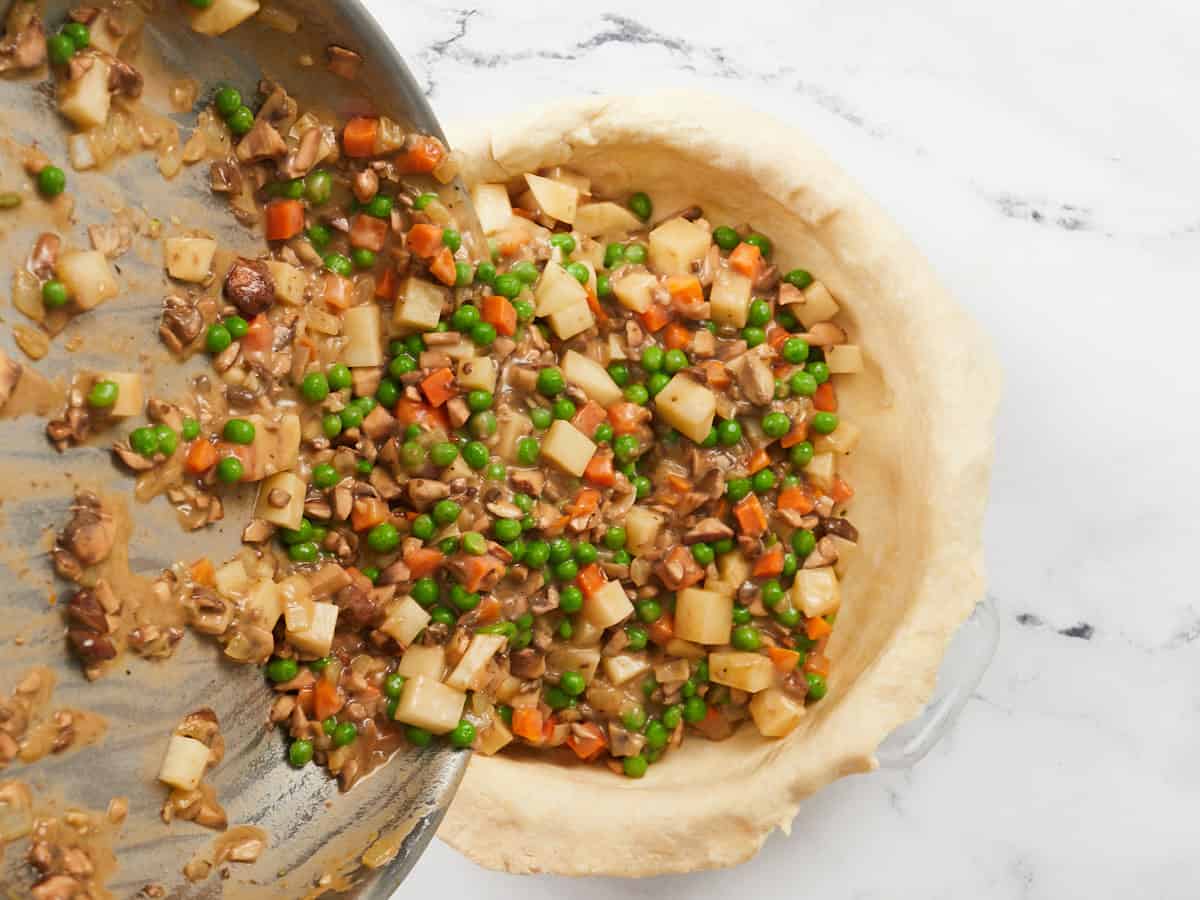
Take the pie pan out of the fridge, prick the bottom crust a few times with a fork, and add the cooled filling to the pie pan. Dice the last tablespoon of butter and sprinkle it over the filling.
Roll the smaller piece of dough into a circle, about 10 inches wide and 1/4 inch thick. Cover the pie with it.
Beat the egg yolk. Trace a bit of yolk along the top edge of the bottom and top crusts. Fold the bottom crust over the top crust and crimp the edges shut. Cut vents into your top crust. Brush egg yolk in a light layer over the top crust.
Bake for 45 to 50 minutes, or until the pie dough is golden and flaky. Allow the Veggie Pot Pie to cool for ten minutes before serving.
*You can also use a store-bought double crust or puff pastry. *To prevent the diced potato from turning gray, place it in salted water and cover it with a wet paper towel, so it stays submerged. Drain before using in the recipe.
Grease a pie pan with 1 tablespoon of butter. If you’re using store-bought dough, place the bottom crust in the pie pan. If you are making 3-Ingredient Pie Crust, roll it into a large disc about 6 inches wide and two inches thick. Then cut 1/3 of it off to use as the top crust later on. Wrap it in plastic, and refrigerate.
Dust your work surface with flour and roll out the bigger 2/3 piece into a circle that is 16 inches in diameter and about 1/4 inch thick. Drape it over the pie pan and press down gently, gently pushing it into the bottom crease and sides of the pan.
Beat the egg white til frothy and then brush the bottom crust with it. Let the crust rest in the fridge.
Place a rack in the center of your oven along with a sheet pan and preheat it to 350ºF. Place a deep skillet over medium heat, add 5 tablespoons of salted butter to the pan, and brown it. The butter will melt, then foam, and finally, the solids will separate from the fat and turn a golden brown. The air will smell of hazelnuts.
Add the diced onion to the brown butter. Cook until translucent, about 5 minutes. Then add the 2 minced cloves of garlic and cook for 1 minute, until fragrant. Finally, sprinkle 4 tablespoons of flour over the onions and garlic in the skillet and continue to cook and stir for 2 minutes more.
Add 1 cup of veggie stock, 1/2 cup of milk, and 3/4 teaspoon salt. Then whisk to combine and dissolve any flour off the bottom of the skillet. Finally, add the bay leaf, 1/4 teaspoon rosemary, 1/4 teaspoon thyme, 1/4 teaspoon sage, 1/4 teaspoon black pepper, and 1 teaspoon soy sauce. Whisk occasionally as the liquid comes up to a simmer and thickens into gravy.
Next, add the pint of diced mushrooms and the diced potato to the pan. Stir to combine and cook until the gravy has thickened more and reduced some, about 5 minutes. You want to cook the potatoes a touch, to ensure they cook fully in the oven.
Next, remove the skillet from the heat. Finally, add the 12 ounces of frozen mixed vegetables to the filling, where they will quickly cool the other ingredients in the pan. Your filling is done!
Next, take the pie pan out of the fridge, prick the bottom crust a few times with a fork, and add the cooled filling to the pie pan. Then dice the last tablespoon of butter and sprinkle it over the filling.
Roll the smaller piece of dough into a circle, about 10 inches wide and 1/4 inch thick. Cover the pie with it.
Beat the egg yolk. Then trace a bit of yolk along the top edge of the bottom and top crusts. Fold the bottom crust over the top crust and crimp the edges shut. Cut vents into your top crust. Finally, brush the egg yolk in a light layer over the entire top crust.
Bake for 45 to 50 minutes, or until the pie dough is golden and flaky. Allow the Veggie Pot Pie to cool for ten minutes before serving. I gobbled up three slices of this in one sitting! I hope you do the same!