Our Perfect Caesar Salad

This Caesar salad recipe is a flavor explosion with creamy dressing, crunchy croutons, and salty Parmesan cheese. It’s perfect as…

This Caesar salad recipe is a flavor explosion with creamy dressing, crunchy croutons, and salty Parmesan cheese. It’s perfect as a side dish, or make it an easy lunch or dinner by adding protein!

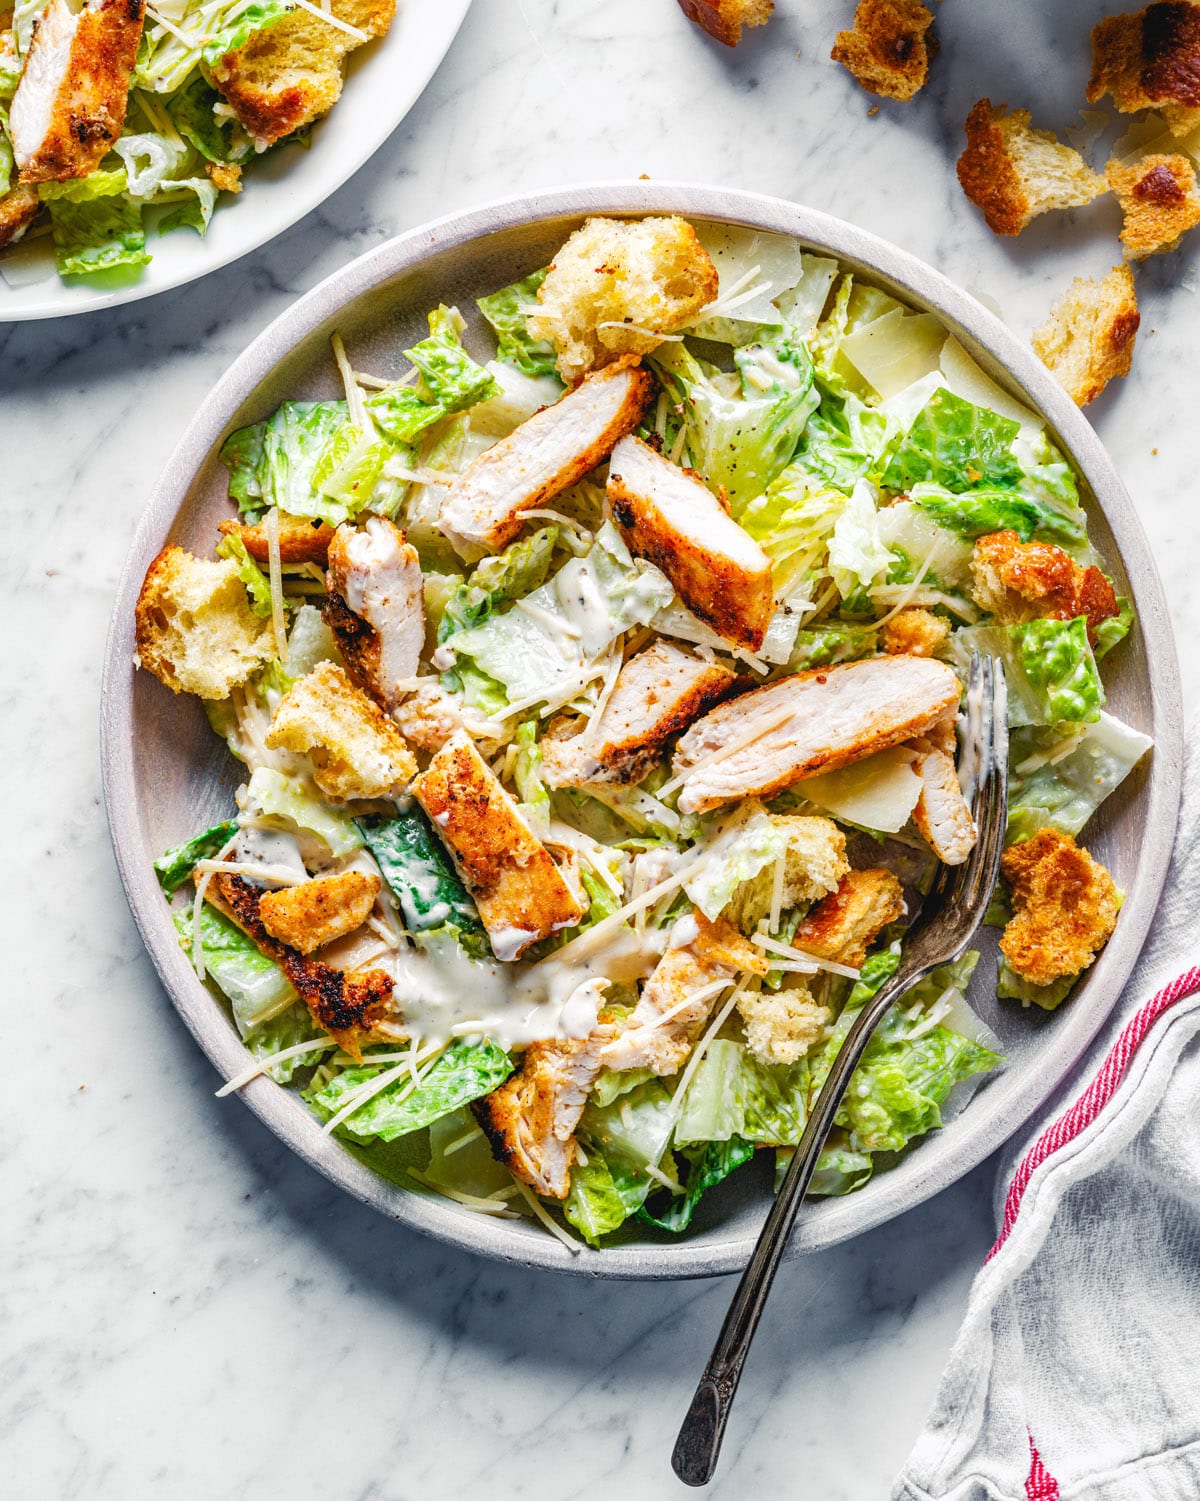
Caesar Salad recipe on plates with Caesar dressing and lemon.

Some foods are classic for a reason, like frosty vanilla bean ice cream or hot crispy French fries. This classic salad is another basic, but truly one of our favorite recipes ever. Meet the perfect Caesar salad! Of course you can buy a packaged store-bought version, but make it homemade there’s absolutely no comparison.

Why we love this recipe: We’ve perfected all the elements to a great homemade Caesar salad. The savory, creamy Caesar dressing will become a household favorite. Those crunchy garlicky croutons—well, you’ll be eating them off the baking sheet. Alex and I have made this recipe more times than we can count, often topped with protein for an easy dinner. We hope you’ve love it just as much!

Ingredients in a great Caesar salad

From the first bite of this homemade Caesar salad, you’ll be singing its praises! Here are the ingredients to make this classic salad:

  • Croutons: It’s best with homemade croutons, but you can use store-bought in a pinch. For homemade, tearing the the bread into uneven pieces before baking makes fluffy, crunchy orbs.
  • Caesar dressing: This homemade Caesar dressing recipe is so good, you won’t want to buy it again. It’s made primarily of mayonnaise, Parmesan cheese, Dijon mustard, garlic, and lemon juice. We’ve also got a lightened-up spin on it using Greek yogurt (keep reading).
  • Romaine hearts: Romaine hearts, the sweet and crunchy portion of a head of romaine, are best for a Caesar salad. These are sold usually in packs of 3 in the grocery. You can also use a large head of romaine lettuce, but the leafier dark green portions of the lettuce don’t taste as good.
  • Parmesan cheese shavings: You need grated Parmesan cheese for the dressing and shredded for the salad. If you don’t want to buy two separate types, grab a large block at the store.
Caesar Salad Ingredients: Mayo, garlic, Parmesan cheese, Dijon mustard, lemon juice, anchovy paste or Worcestershire sauce, croutons, Romaine lettuce.

Tips for homemade Caesar dressing

This Caesar dressing recipe is our favorite that we’ve been making for years! It’s easily made vegetarian using vegan Worcestershire sauce and vegetarian Parmesan cheese. Here are a few tips for this Caesar dressing:

  • Anchovy paste is optional, but adds great flavor. Traditional Caesar dressing gets its savory flavor from anchovies, and it adds a nice sharp flavor that’s the signature of the classic. A vegetarian Caesar dressing with vegan Worcestershire sauce (or this Worcestershire sauce substitute) tastes just as good.
  • Try our lighter version with Greek yogurt. Swap out the ¾ cup mayonnaise in this recipe for ¼ cup mayonnaise, ½ cup Greek yogurt, and 1 tablespoon olive oil. It helps reduce calories and makes the salad taste lighter and fresher. We like it even better!
Caesar Dressing in bowl with spoon.

Storing leftovers and make-ahead tips

Once you’ve got your creamy dressing and crunchy croutons, all you need is romaine hearts and Parmesan cheese shavings to bring together that perfect Caesar salad. Want a few time savers for putting it together? Here’s how to make it ahead:

  • Make the dressing up to 1 week in advance. The flavor tastes just as good made in advance.
  • Make the croutons 2 days in advance. Make the croutons and let them cool completely. Then store in a sealed container for up to 2 days. The flavor gets gradually staler over time, so the closer to fresh they are, the better.

Protein adders to make it a main dish

If you take all this time to make Caesar salad…why not turn it into a main dish meal? If you serve it topped with protein, it makes about 4 servings. Here are a few ideas:

Chicken Caesar Salad

Vegan variation

Want a plant-based or vegan variation? Whip up this Vegan Caesar Dressing! You’ll use a blender to mix chickpeas with Dijon mustard, garlic, olive oil and more. It might sound odd, but trust us. We think this Vegan Caesar Salad is just as tasty!

More variations: grilled and kale Caesar

Here are a few more variations on Caesar salad that put a fun spin on this classic salad:

  • Make it with kale: Our Kale Caesar Salad features leafy green kale and a showering of breadcrumbs. To die for!
  • Make it grilled: This Grilled Caesar Salad features grilled romaine lettuce and grilled avocado to bring big flavor.

Dietary notes

This Caesar salad recipe is vegetarian without anchovy paste. For gluten free, use gluten-free bread for the croutons. For vegan, use Vegan Caesar Dressing and omit the Parmesan cheese, or go to Vegan Caesar Salad.

Frequently asked questions

What type of lettuce is best for Caesar salad?

The classic Caesar salad uses romaine lettuce. Its sturdy leaves hold up well to the dressing and croutons without getting soggy. However, you can experiment with other lettuces like butter lettuce or even chopped kale for a different texture.

Can I make my own croutons for Caesar salad?

Yes, and we recommend it! Making homemade croutons is a great way to customize the flavor and texture. Simply cube bread, toss with olive oil and garlic powder, and bake until golden brown.

Do I need to use anchovies in Caesar dressing?

Anchovies are a traditional ingredient in Caesar dressing, but they mainly add a savory umami flavor that’s not overpowering. If you’re not a fan of anchovies, you can omit them or use a substitute like Worcestershire sauce or miso paste.

What if I don’t have Parmesan cheese?

You can substitute another hard cheese like Pecorino Romano or Grana Padano for the Parmesan cheese.

Can I make Caesar salad dressing ahead of time?

Yes, you can! Homemade Caesar dressing will keep in the refrigerator for up to 1 week in an airtight container.

Print
Caesar Salad recipe

Caesar Salad Recipe


  • Author: Sonja Overhiser
  • Prep Time: 10 minutes
  • Cook Time: 15 minutes
  • Total Time: 30 minutes
  • Yield: 6

Description

This Caesar salad recipe is a flavor explosion with creamy dressing, crunchy croutons, and salty Parmesan cheese. It’s perfect as a side dish, or make it an easy lunch or dinner by adding protein!


Ingredients

For the Caesar dressing (makes 1 cup)

  • 1 medium garlic clove, minced or grated
  • ¼ cup grated Parmesan cheese
  • 2 tablespoons lemon juice (1/2 lemon)
  • ¾ cup high quality mayonnaise (or ¼ cup mayonnaise, ½ cup Greek yogurt, and 1 tablespoon olive oil*)
  • ½ tablespoon Dijon mustard
  • ½ teaspoon anchovy paste or Worcestershire sauce (or omit)
  • ¼ teaspoon each kosher salt and fresh ground black pepper

For the Caesar salad


Instructions

  1. Make the croutons: Make the Homemade Croutons, tearing the bread into pieces instead of slicing it into cubes. (This makes the best Caesar salad, but homemade croutons are optional). 
  2. Make the dressing: Whisk together the dressing ingredients in a bowl. Store leftovers refrigerated in a covered jar for up to 1 week.
  3. Make the salad: Tear or chop the romaine leaves into bite-sized pieces. Top each salad with Parmesan cheese shavings, croutons, and dressing.

Notes

*Make a lighter version of the dressing by swapping in Greek yogurt and olive oil for part of the mayo. We like it even better!

**Romaine hearts are easy to find packaged separately in the produce aisle.

  • Category: Salad
  • Method: Raw
  • Cuisine: American
  • Diet: Vegetarian

Keywords: Caesar salad, Caesar salad recipe

Simple Sauteed Broccoli

Make your broccoli taste amazing in just 10 minutes! This easy sauteed broccoli highlights its fresh flavor and comes out…

Make your broccoli taste amazing in just 10 minutes! This easy sauteed broccoli highlights its fresh flavor and comes out perfectly crisp tender.

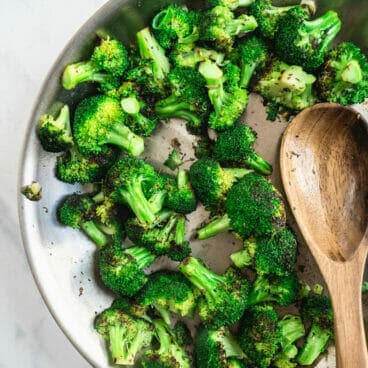
Sauteed broccoli in pan.

In need of a healthy and easy side dish? Here’s a “recipe” that’s more of an idea than anything: sauteed broccoli! It might sound basic, but you’ll be surprised at the amount of flavor it’s possible to get from perfectly cooking this vegetable!

Why we love this recipe: Broccoli is often overcooked, leaving it soggy and without flavor. Here Alex and I will show you our go-to simple sauteed broccoli recipe: how to cook it so it’s lightly browned but perfectly crisp tender and flavorful!

🥦 Other favorite ways to cook broccoli? Try our steamed broccoli, roasted broccoli, and roasted broccoli and carrots recipes, or head to How to Cook Broccoli for more!

Sauteed Broccoli in pan with spoon.

How to make sauteed broccoli…the right way!

Broccoli is basic, right? But so many home cooks cook it way beyond the point of no return. Overcooked broccoli is the worst: it’s limp and lifeless. Instead, you’ll want to cook it just to the point where it’s tender, but still bright green and crisp. Even better: it takes less time! There’s no reason to spend the time extra overcooking it (ha!). Here are our tips on how to make the best sauteed broccoli:

Step 1: Chop the broccoli into florets.

Step 1: Chop into medium-sized florets. Try to leave a good amount of the stem to make a lovely shape, so the broccoli doesn’t look stubby! Chop them into medium-sized pieces: not so small they disintegrate, but not so large they’re too tough to cut.

Step 2: Saute the broccoli in a large skillet.

Step 2: Heat olive oil in a large skillet over medium heat. Add the broccoli and sauté for 5 minutes. Watch the pan and stir so the broccoli doesn’t get too browned. Stir in the seasonings (salt, spices, etc).

Step 3: Cover the broccoli and steam.

Step 3: Cover and cook 2 minutes more. Covering the broccoli at the end locks in the moisture and steams it, helping it to get fully cooked through and tender instead of more browned.

And that’s it! Perfectly seasoned sauteed broccoli in just 10 minutes.

Ways to season sauteed broccoli

The key to great tasting sauteed broccoli is the seasonings! First and foremost, make sure to salt it perfectly to taste. Then to accessorize, we used sliced green onion, Italian seasoning, and garlic powder (see the recipe below). If you have a lemon, topping with lemon zest gives it the perfect zing! Here are a few more ideas for flavoring:

  • Grated Parmesan or Pecorino Romano cheese
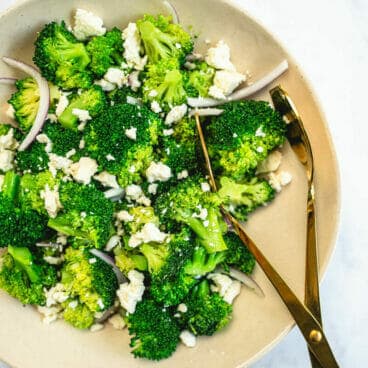
  • Feta cheese or goat cheese crumbles
  • Rice vinegar, soy sauce (in place of the last ¼ teaspoon salt), and sesame seeds
  • A drizzle of balsamic reduction
  • Slivered toasted almonds
  • Minced garlic
  • Grated ginger
  • Panko and dried herbs

A bit on broccoli nutrition

Broccoli is a super nutritious cruciferous vegetable! It’s high in fiber (with 2.4 grams per 1 cup), which is helpful for keeping you full and helping with digestion. It also has relatively high protein for a vegetable (2.5 grams per 1 cup), and is high in Vitamin C, K and iron. Read more broccoli nutrition facts here.

Main dishes to pair with it!

Of course, there’s no end to dishes to pair with this sauteed broccoli! It’s so versatile that it literally goes with anything (like a perfect pair of jeans!). Here are a few ideas for mains that would pair nicely:

Dietary notes

This sauteed broccoli recipe is vegetarian, vegan, plant-based, dairy-free, and gluten-free.

Frequently asked questions

What’s the best type of broccoli for sauteing?

Fresh broccoli florets are ideal. Look for firm, deep green florets with tight buds. Avoid broccoli with yellowing florets or a mushy texture.

Can I use frozen broccoli?

We don’t recommend it. Frozen broccoli florets have a softer texture and may release more water during cooking.

Steamed or sautéed? What’s the difference?

Steaming broccoli preserves its vibrant green color and slightly more nutrients. Sautéing allows for browning and caramelization, developing a deeper and more complex flavor.

Do I need to blanch broccoli before sauteing?

Blanching (briefly boiling) broccoli florets for a minute or two before sauteing can help soften them slightly and ensure even cooking. However, it’s not essential, especially if you prefer your broccoli with a bit of a bite.

What can I add to my sauteed broccoli for extra flavor?

The possibilities are endless! Popular additions include garlic, shallots, ginger, red pepper flakes, soy sauce, lemon juice, toasted nuts, or even a sprinkle of parmesan cheese.

Print
Sauteed broccoli

Simple Sauteed Broccoli


  • Author: Sonja Overhiser
  • Prep Time: 3 minutes
  • Cook Time: 7 minutes
  • Total Time: 10 minutes
  • Yield: 4

Description

Make your broccoli taste amazing in just 10 minutes! This easy sauteed broccoli highlights its fresh flavor and comes out perfectly crisp tender.


Ingredients

  • 1 1/2 pounds (2 large heads) broccoli 
  • 2 green onions
  • 2 tablespoons olive oil
  • 2 teaspoons Italian seasoning
  • ⅛ teaspoon garlic powder
  • ½ teaspoon kosher salt, plus more to taste
  • Optional: 1 teaspoon lemon zest
  • Dress it up: Add a sprinkle of shredded Parmesan cheese or feta cheese!

Instructions

  1. Chop the broccoli into medium sized florets (leave a good amount of the stem for a nice shape; see the photo). Thinly slice the green onions.
  2. In a large skillet over medium heat, heat the olive oil. Add the broccoli florets and sauté for 5 minutes, stirring occasionally (the broccoli will lightly brown in parts). Stir in the green onion, Italian seasoning, garlic powder, and kosher salt.
  3. Cover and cook for 2 to 3 minutes more, until crisp tender but still bright green. Taste and add a few pinches of salt if needed (make the flavor pop!) and fresh ground pepper. Remove the broccoli to a bowl and serve immediately. Sprinkle with the lemon zest, if using.
  • Category: Side Dish
  • Method: Sauteed
  • Cuisine: Vegan

Keywords: Sauteed Broccoli

How to Steam Vegetables

Here’s how to steam vegetables to get them on the table fast! Use this method to avoid soggy and bland…

Here’s how to steam vegetables to get them on the table fast! Use this method to avoid soggy and bland veggies: here they turn out crisp tender and delicious every time.

How to steam vegetables: steamed broccoli in steamer

Want to steam vegetables? We’re here to help! Steaming one of the quickest vegetable cooking methods there is. It also has a bad rap, since if not done properly it can result in overcooked, bland, and soggy veggies.

But guess what? If you cook them until crisp tender and season them correctly, the veggies come out delicious every time! Here’s our master method for how to steam vegetables: the right way.

Vegetable steaming methods

First, you have a specific vegetable in mind, we’ve got several specific recipes for you. Pick from one of the methods below:

Gear required for steaming

You’ll need a steamer basket or steamer pan to make this recipe. Here’s a steamer basket you can buy online that works for any pan you have. In these photos, you’ll see we used a skillet with a custom steamer basket. It’s an option too, but not required for steaming!

How to steam vegetables: a tutorial

The most important thing to remember when steaming vegetables: don’t be tempted to overcook them. Steam the vegetables until they’re crisp tender. You’ll need to be ready to taste test, fork in hand! Cooking vegetables even a few minutes past the right timing makes them go from bright and crisp to faded and mushy. Here’s how to steam vegetables using a steamer basket:

Step 1: Chopping vegetables.

Step 1: Chop the vegetables into uniform bite-sized pieces, which helps them to cook evenly. The thicker the vegetable, the longer it will take to cook. (This is important for hard vegetables like carrots: the smaller the pieces, the shorter the cook time.)

Step 2: Steaming vegetables in steamer basket.

Step 2: Add 1 inch water to the bottom of the saucepan or pot, then place the steamer basket in the pot. The surface of the water should be just under the basket. Bring it to a boil. Once boiling, add the vegetables to the basket and cover with a lid.

Step 3: Taste testing steamed vegetables.

Step 3: Cook covered, until just tender when pricked with a fork. As a rule of thumb, broccoli takes 3 to 5 minutes, green beans and carrots 4 to 5 minutes, and cauliflower 10 to 12 minutes. (See the Vegetable Timing Chart below.) Taste test to be sure; the exact cook time varies based on the thickness and maturity of the vegetable.

Step 4: Carefully remove the veggies to a bowl, then toss with a bit of olive oil or butter and kosher salt. If you’d like, add flavor by using fresh lemon juice, fresh herbs, feta cheese crumbles, or other spices.

Vegetable timing chart

Each vegetable takes a different amount of time to steam. Here is a chart with the approximate timing for common vegetables:

  • Asparagus: 2 to 5 minutes
  • Broccoli: 3 to 5 minutes
  • Green Beans: 4 to 5 minutes
  • Carrots: 4 to 5 minutes, depending on how thick you cut them
  • Brussels sprouts: 6 to 7 minutes
  • Cabbage: 7 to 10 minutes
  • Cauliflower: 10 to 12 minutes
  • Baby potatoes: 10 to 15 minutes
  • Sweet potatoes: 25 to 35 minutes (halved, shorter for diced)
Steamed broccoli

More side dish ideas

Steaming vegetables is a fantastic way to make them into a quick and easy side dish! Here are a few more of our favorite side dish resources:

Frequently asked questions

What’s the difference between steaming and boiling vegetables?

Steaming uses steam to cook vegetables, preserving more nutrients and their vibrant colors compared to boiling. Boiling vegetables can leach out vitamins and minerals into the water.

Do I need a fancy steamer?

No! You can easily steam vegetables at home with basic kitchen equipment. A pot with a lid and a steamer basket or colander that fits snugly inside will do the trick.

What’s the best way to cut vegetables for steaming?

Cut vegetables into uniform, bite-sized pieces for even cooking. This ensures all pieces cook through at the same time.

How much water do I need for steaming?

You only need a small amount of water – about 1-2 inches – in the bottom of the pot. The vegetables steam from the rising steam, not by being submerged in water.

How long does it take to steam vegetables?

Cooking time depends on the type and thickness of the vegetables. Tender vegetables like asparagus or green beans will cook in just a few minutes, while denser vegetables like carrots or potatoes will take longer. See the Vegetable Timing Chart above!

How can I tell if my vegetables are done?

The vegetables should be tender-crisp, with a slight bite when pierced with a fork.

Can I steam frozen vegetables?

You can, but keep in mind the vegetables will come out with a soft texture. Shorten the cook time by a few minutes and taste test to assess doneness.

Print
Steamed broccoli

How to Steam Vegetables


  • Author: Sonja Overhiser
  • Prep Time: 5 minutes
  • Cook Time: 5 to 10 minutes
  • Total Time: 4 minute
  • Yield: Varies

Description

Here’s how to steam vegetables to get them on the table fast! Use this method to avoid soggy and bland veggies: here they turn out crisp tender and delicious every time.


Ingredients

  • Vegetable of your choice (broccoli, cauliflower, green beans, carrots)
  • Olive oil
  • Kosher salt
  • Freshly ground black pepper

Instructions

  1. Chop: Chop the vegetables into uniform pieces.
  2. Boil water: Place about 1 inch of water in a pot or saucepan. If using a steamer basket without a handle, add it to the pot now: the water surface should be right under the basket. Bring the water to a boil.
  3. Steam: Once boiling, add the vegetables (in the steamer basket, if it has a handle). Steam with the lid on until crisp tender, taste testing with a fork to assess doneness. Make sure not to overcook! Set a timer and taste at the low end of the timing. Use a guide of: 3 to 5 minutes for asparagus and broccoli, 4 to 5 minutes for carrots and green beans, 6 to 7 minutes for Brussels sprouts, 7 to 10 minutes for shredded cabbage, 10 to 12 minutes for cauliflower, 10 to 15 minutes for baby potatoes, and 25 to 35 minutes for halved sweet potatoes. 
  4. Season: Carefully remove the vegetables to a bowl. Toss with olive oil, kosher salt, and freshly ground black pepper to taste. If you’d like, add other flavors like dried or fresh herbs, spices, fresh lemon juice, or chopped herbs. 
  • Category: Side Dish
  • Method: Steamed
  • Cuisine: Vegetables

Keywords: How to Steam Vegetables

Strawberry Salad

This easy strawberry salad recipe features a creamy homemade balsamic dressing, toasted nuts, and sweet ripe berries. It’s the perfect…

This easy strawberry salad recipe features a creamy homemade balsamic dressing, toasted nuts, and sweet ripe berries. It’s the perfect side dish!

Strawberry Salad recipe

Ready for our favorite strawberry salad recipe? Strawberries are a natural flavor pairing with the acidity of balsamic vinegar. So for this salad, we used our favorite balsamic vinaigrette dressing to perfectly accentuate the bright red sweet berries. Paired with red onions and toasted almonds, it’s a simple and delicious side everyone loves!

Why we love this recipe: As cookbook authors who’ve been sharing recipes online for over a decade, this is one of our favorite ways to eat strawberries! We’ve made it dozens of times with rave reviews, and it works with a variety of meals. The flavor combination just pops!

“Simple and yummy! I regularly make balsamic dressing but your directions took it up a notch from my usual. I’ll be enjoying this for the next few days!” -C.

Ingredients in strawberry salad; Strawberries, greens, pecans, red onion, feta cheese, balsamic vinaigrette

Ingredients in strawberry salad

Strawberry salad is a pretty classic dish, so our best strawberry salad stays true to form. Here’s what’s in our favorite strawberry salad recipe:

  • Ripe strawberries: Finding ripe strawberries is the number one key to a good strawberry salad! If you don’t have access to local berries, try to buy in the summer when strawberries are in season and find the ripest strawberries that you can. If you’re looking to mix it up with the type of berry, try our Blueberry Salad or Blackberry Salad.
  • Homemade balsamic dressing: Strawberries are a natural pair with the acidity of balsamic vinegar, which makes the berries shine! This homemade dressing is so simple, you’ll never go back.
  • Cheese crumbles: Cheese crumbles make for a perfect strawberry salad, though they’re not required. We like feta cheese or goat cheese. For vegan, simply omit the cheese crumbles and it’s just as good!
  • Nuts: Add nuts for crunch in this salad; you can use any you’d like! We recommend pecans, walnuts, or sliced toasted almonds.
  • Red onion: The color and flavor of red onion is our final touch to bring a savory flair to this salad. Here’s a tip to get rid of onion breath: soak the onion slices in cold water for about 15 to 20 minutes before serving! This mellows the flavor and softens the risk of onion breath.

How to make strawberry salad: step by step

A key to making this strawberry salad recipe is taking the time to mix up your own homemade balsamic vinaigrette salad dressing. It’s a nice alternative using purchased salad dressings, which can contain additives and most importantly, just don’t taste as good!

When Alex and I first started cooking together, we threw out our store-bought salad dressings and start making homemade! It makes a world of difference for a great salad. Here’s how to make strawberry salad (or jump to the full recipe for exact quantities):

Step 1: Prepare the fresh ingredients: wash and clean the strawberries, salad greens, and slice the onion.

Step 1: Clean the strawberries and slice them. Wash and dry the salad greens. Thinly slice the red onion (if desired, soak it in cold water for 15 minutes before serving to mellow the flavor).

Step 2: Toast the nuts in a skillet for 3 to 5 minutes.

Step 2: If desired, toast the nuts for a few minutes until they are golden brown, stirring frequently and watching carefully so that they don’t burn. Immediately remove the nuts to a plate.

Step 3: Whisk together the balsamic vinaigrette dressing in a medium bowl.

Step 3: In a medium bowl, whisk together the balsamic vinegar, Dijon mustard, maple syrup, and kosher salt. Then gradually whisk in the olive oil 1 tablespoon at a time until fully emulsified and creamy.

To serve, spread the greens on a plate and top with strawberries, red onion, nuts, cheese crumbles, vinaigrette, and several grinds of black pepper.

Want a different dressing? Other salad dressing options include Poppy Seed Dressing, Strawberry Vinaigrette, or Citrus Salad Dressing.

Strawberry Salad recipe

Variations on the nuts

If you have time, toasting the nuts is a great way to step up the flavors! It really does intensify the flavors in a noticeable way. Add the nuts to a dry skillet and toast for 3 to 5 minutes over medium heat, stirring frequently. Immediately remove to a plate. See How to Toast Pecans, How to Toast Almonds, or How to Toast Walnuts.

Other variations on the nuts include hazelnuts, chopped pistachios, candied pecans, or candied walnuts.

Other cheese ideas

Cheese is optional but adds a welcome savory contrast. We like feta cheese or goat cheese crumbles. Gorgonzola or Parmesan cheese also work. Omit cheese for a vegan salad and it’s just as tasty!

Make it into a main dish: protein adders

One of the things we like when we go out to eat is the ability to add protein to salads at many restaurants to make it into a meal! This strawberry salad works well with protein adders, since the savory protein compliments the sweet, juicy berries. Here are a few ideas of what we’d add here:

Storage and make ahead notes

Salads are notoriously suboptimal as leftovers, as they get soggy over time. For this reason, we like to plate individual salads when serving and simply drizzle the dressing over each plate or bowl. If making in advance, you can chop the components and store them refrigerated in separate individual containers. Directly before serving, allow the dressing to come to room temperature, then plate each salad.

More homemade salad dressing recipes

Here are a few of our favorite homemade salad dressing recipes:

Dietary notes

This strawberry salad recipe is vegetarian, gluten free, naturally sweet, and refined sugar free. For vegan, omit the cheese crumbles.

Frequently asked questions

What kind of strawberries are best for salad?

Ripe but firm strawberries are ideal: it’s best to buy them in strawberry season! Local berries are the best choice when you can find them. Avoid soft or mushy berries that will break down in the salad.

What can I add to my strawberry salad besides lettuce?

The possibilities are endless! Popular additions include spinach, arugula, crumbled feta cheese, chopped pecans or walnuts, or blueberries.

What kind of dressing is best for strawberry salad?

A light and flavorful dressing is key. A Balsamic Vinaigrette works very well, or try Poppy Seed Dressing, Strawberry Vinaigrette, or Citrus Salad Dressing.

Can I make this salad ahead of time?

It’s best to assemble the salad just before serving to prevent the strawberries from getting soggy. However, you can prepare the dressing and other ingredients in advance.

Print
Strawberry Salad recipe

Strawberry Salad


  • Author: a Couple Cooks
  • Prep Time: 15 minutes
  • Cook Time: 0 minutes
  • Total Time: 15 minutes
  • Yield: 4

Description

This easy strawberry salad recipe features a creamy homemade balsamic dressing and sweet ripe berries. It’s the perfect side dish!


Ingredients

For the salad

  • 2 cups ripe strawberries
  • 8 cups mixed salad greens (mix of spinach and lettuce)
  • 1/2 red onion
  • ⅓ cup pecan pieces, chopped walnuts, or sliced almonds*
  • ⅓ cup feta cheese crumbles**
  • Fresh ground black pepper

For the balsamic vinaigrette

  • 2 tablespoons aged balsamic vinegar
  • 2 tablespoons Dijon mustard
  • 2 tablespoons maple syrup or honey
  • ¼ teaspoon kosher salt
  • 6 tablespoons olive oil

Instructions

  1. Clean the strawberries and slice them. Wash and dry the salad greens. Thinly slice the red onion. To mellow the flavor, soak the onion slices in cold water for about 20 minutes prior to serving, then drain.
  2. Optional: In a small saucepan over medium heat, toast the nuts for a few minutes until they are golden brown, stirring frequently and watching carefully so that they don’t burn.
  3. Make the balsamic vinaigrette: In a medium bowl, whisk together the balsamic vinegar, Dijon mustard, maple syrup, and kosher salt. Then gradually whisk in the olive oil 1 tablespoon at a time until fully emulsified and creamy.
  4. To serve, spread the greens on a plate and top with strawberries, red onion, nuts, feta cheese crumbles, vinaigrette, and several grinds of black pepper.

Notes

*If you have time, toasting the nuts is a great way to step up the flavors! Add the nuts to a dry skillet and toast for 3 to 5 minutes over medium heat, stirring frequently. Immediately remove to a plate. See How to Toast Pecans, How to Toast Almonds, or How to Toast Walnuts. Other variations on the nuts include hazelnuts, chopped pistachios, candied pecans, or candied walnuts.

**Cheese is optional but adds a welcome savory contrast. We like feta cheese or goat cheese crumbles. Gorgonzola or Parmesan cheese also work. Omit cheese for a vegan salad and use maple syrup in the dressing. 

Leftover and make ahead tips: Salads are notoriously suboptimal as leftovers, as they get soggy over time. We like to plate individual salads when serving and simply drizzle the dressing over each plate or bowl. If making in advance, chop the components and store them refrigerated in separate individual containers. Directly before serving, allow the dressing to come to room temperature, then plate each salad. 

Other salad dressing options include Poppy Seed Dressing, Strawberry Vinaigrette, or Citrus Salad Dressing.

Consider adding protein to make it a main dish! Try chicken like Parmesan crusted chicken, grilled chicken, or blackened chicken, salmon like baked salmon, pan seared salmon, or grilled salmon, or tofu like baked tofu, crispy tofu, or grilled tofu.

  • Category: Side Dish
  • Method: Raw
  • Cuisine: Italian

Keywords: Strawberry Salad, Strawberry Salad recipe

Baked Asparagus with Parmesan

This easy baked asparagus recipe is ready in 20 minutes and bursting with flavor. Perfectly tender-crisp with a hint of…

This easy baked asparagus recipe is ready in 20 minutes and bursting with flavor. Perfectly tender-crisp with a hint of char, it’s the veggie side you’ll crave all spring and summer long!

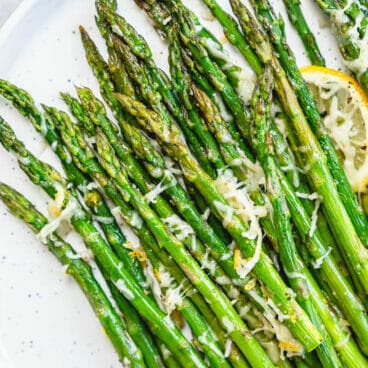
Baked Asparagus on plate.

What’s your favorite way to make asparagus? Here’s our favorite: this easy baked asparagus! It’s roasted in a hot oven until tender but still beautifully green. Then spritz it with lemon, the way to make this healthy veggie taste over-the-moon good. The finishing touch? Add some salty Parmesan cheese.

Yes, it’s the perfect way to eat asparagus, which can sometimes come out bland or stringy. Even better, it’s a side dish that’s simple enough to whip up while you’re in the midst of cooking easy dinner.

A few other ways to cook asparagus? Try grilled asparagus, roasted asparagus, broiled asparagus, sauteed asparagus or steamed asparagus.

How to make baked asparagus: step by step

To be honest, I was pretty iffy on asparagus growing up. The image of pushing lifeless green stalks around on my plate as a child is seared into my memory! It wasn’t until adulthood that I started to give it a chance. Even today, when asparagus isn’t cooked correctly it can send me right back to those days.

Luckily this baked asparagus recipe makes it taste so good, even our toddler gobbled it up! The lemon and Parmesan asparagus combo is a smash hit every time. How long to bake asparagus? Bake it for 10 to 15 minutes at 425°F. Here’s what to do (or go right to the recipe):

How to Cut Asparagus

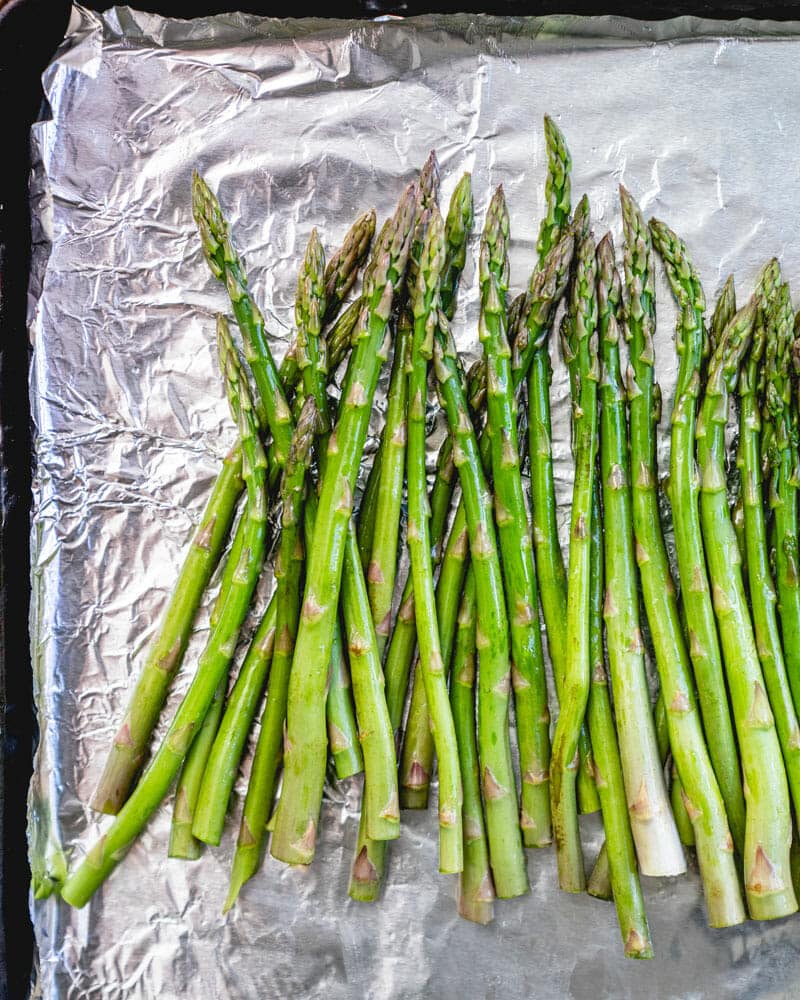
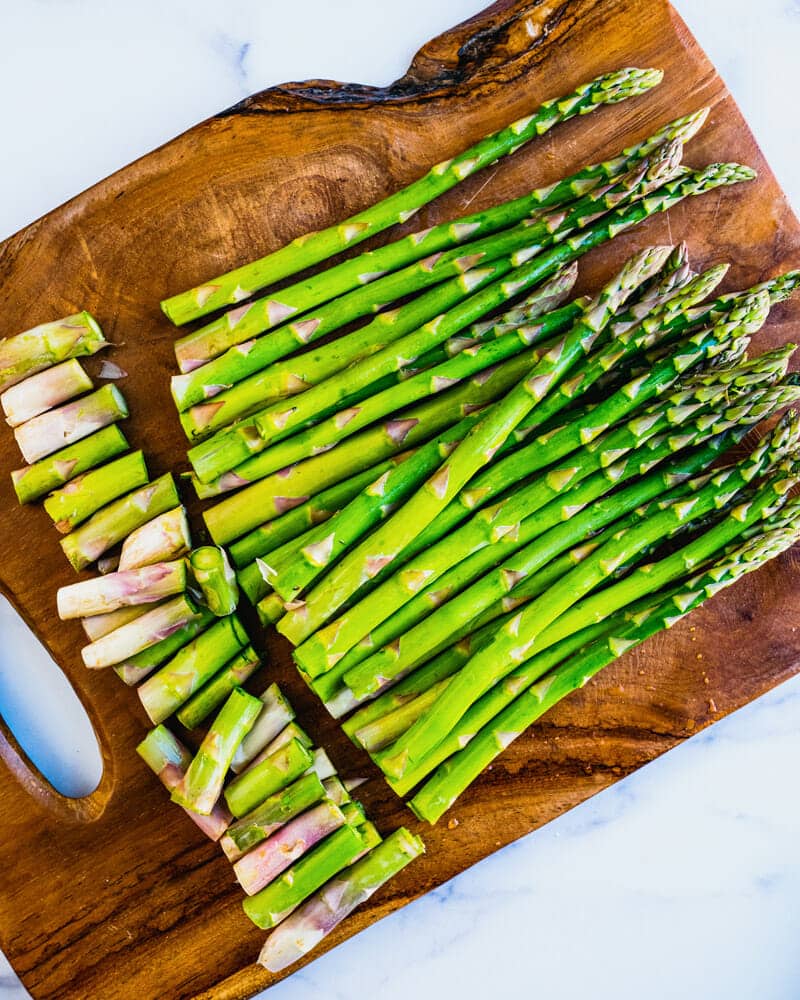
Step 1: Cut the asparagus to remove the woody ends. Throw them on a foil or parchment paper-lined baking sheet.

Asparagus on baking sheet

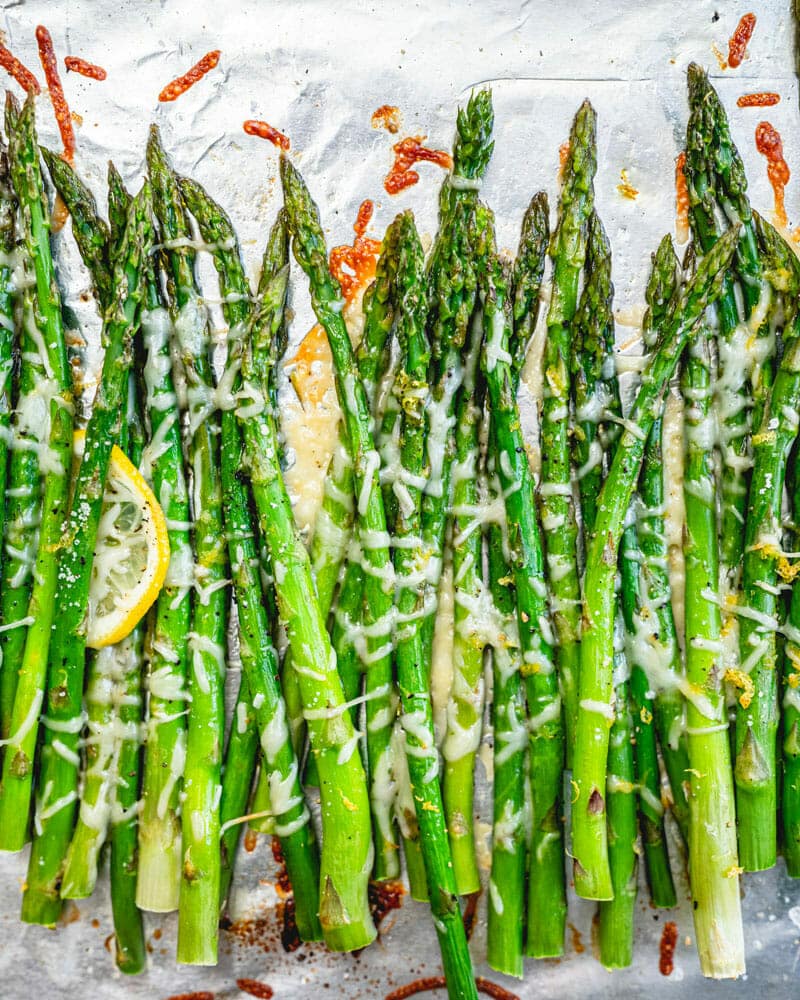
Step 2: Toss the asparagus with olive oil to coat, lemon zest, salt, and black pepper. Top with shredded Parmesan cheese (optional)

Baked asparagus

Step 3: Bake at 425°F for 10 to 15 minutes, until the largest stem is fork tender. The timing depends on the thickness of the stalks.

Flavor variations

We love this baked asparagus recipe most with lemon and Parmesan cheese. But there are so many ways to step it up! Here are a few ideas:

Ways to serve baked asparagus

This baked asparagus recipe is a great side dish to have as part of your repertoire because it’s so versatile. It has an elegant vibe: there’s nothing pedestrian about baked asparagus with Parmesan, right? It says, I have my stuff together. (Or whatever word you’d like to insert there.)

Another bonus for asparagus is that it’s relatively high in fiber (1 cup of cooked asparagus has 4 grams of fiber). So it’s great for pairing with a vegetable-free meal like cheesy risotto or mac and cheese. Here are a few great recipes to serve it with:

More easy side dish recipes

This baked Parmesan asparagus is part of a collection of our best vegetable side dishes! Ready to jump on the train? Let us know if you try it in the comments, or check out more of our easy asparagus recipes. Here are a few more you’ll love to make on the regular:

Dietary notes

This baked asparagus recipe is vegetarian and gluten-free. For vegan, plant-based, and dairy-free, omit the Parmesan cheese or go to roasted asparagus.

Frequently asked questions

How can I tell if my asparagus is fresh?

Fresh asparagus spears should be firm and snap easily when bent near the base. The tips should be tightly closed and not flowering.

Do I need to peel asparagus before baking?

No, peeling asparagus is not necessary for most recipes, especially if the spears are thin and tender. You can cut off the woody ends about an inch from the bottom.

What are some flavor variations for baked asparagus?

This recipe is a great base for customization! Explore different flavor combinations by adding a drizzle of balsamic glaze after baking, seasoning with Old Bay or Cajun seasoning, or topping with lemon dill sauce after baking.

Print
Baked asparagus

Baked Asparagus with Parmesan


  • Author: Sonja Overhiser
  • Prep Time: 5 minutes
  • Cook Time: 10 minutes
  • Total Time: 15 minutes
  • Yield: 4

Description

This easy baked asparagus recipe is ready in 20 minutes and bursting with flavor. Perfectly tender-crisp with a hint of char, it’s the veggie side you’ll crave all spring and summer long!


Ingredients

  • 1 pound asparagus
  • 1 tablespoon olive oil
  • ½ teaspoon kosher salt
  • Fresh ground black pepper
  • 1 lemon (zest from half, plus slices from the other half)
  • ¼ cup shredded Parmesan cheese (optional)

Instructions

  1. Preheat the oven to 425°F.
  2. Cut off the tough bottom ends of the asparagus. Add the asparagus stalks to a foil-lined baking sheet. Drizzle them with olive oil, and add the kosher salt and a few grinds of black pepper. Add the zest of ½ lemon and mix with your hands. Thinly slice 4 lemon wheels from the lemon, then add them right on the tray. Sprinkle everything with Parmesan cheese.
  3. Bake 10 to 15 minutes, until tender when pierced by a fork at the thickest part. The timing will depend on the thickness of the asparagus spears (ours in the photo were done at 12 minutes). Serve immediately.

Notes

This recipe is a great base for customization! Explore different flavor combinations by seasoning with Old Bay or Cajun seasoning, adding a drizzle of balsamic glaze, or serving with lemon dill sauce.

  • Category: Side Dish
  • Method: Baked
  • Cuisine: Vegetables

Keywords: Baked Asparagus, Easy Asparagus Recipe, Parmesan Asparagus, How Long to Bake Asparagus

Easy Steamed Asparagus

Making steamed asparagus unlocks the vibrant flavor and tender-crisp perfection! This simple method delivers a healthy and delicious side dish…

Making steamed asparagus unlocks the vibrant flavor and tender-crisp perfection! This simple method delivers a healthy and delicious side dish ready in minutes. It’s ideal for busy weeknights or a quick addition to any meal.

Steamed asparagus in bowl with lemon.

Looking for a quick and healthy way to cook asparagus? Try steamed asparagus. Our favorite ways to cook this veggie are lemony baked asparagus or broiled asparagus, or sauteed asparagus cooked with olive oil in a hot pan. But steaming is a great way healthy to cook vegetables and tastes great too!

What we love about this recipe: It’s quick, simple, and healthy! The spears come out bright green and crisp tender: perfect with a zing of lemon and a hint of grated Parmesan.

Gear tip

You’ll need a steamer basket or steamer pan to make this recipe. Here’s the steamer basket we recommend: it’s easy to find online!

How to make steamed asparagus: step by step

The trick to steamed asparagus is this: don’t overcook it! Because all asparagus differs in size and maturity, you’ll use a range for how long to steam it. The perfect timing for steaming this green veggie is about 2 to 5 minutes. Again, this all depends on the thickness: thin, slender asparagus steams faster than thick, tougher asparagus.

Asparagus on cutting board

Step 1: Chop the asparagus to remove the woody, tough ends. Then chop the spears into roughly 2-inch pieces.

How to steam asparagus

Step 2: Add water to a pot under the steamer basket. Add the basket and bring the water to a boil. Add the asparagus and steam with the lid on for about 2 to 5 minutes until crisp tender, taste testing with a fork to assess doneness. Make sure not to overcook.

Steamed asparagus

Step 3: Remove the asparagus to a bowl, draining away any water. Toss with the olive oil, lemon juice, kosher salt, and freshly ground black pepper to taste.

Ways to serve steamed asparagus

You can eat this steamed asparagus simply seasoned with lemon juice and zest, but there are many more serving ideas. Here are a few other options:

Steamed Asparagus in bowl with spoon.

More asparagus recipes

Love that healthy green vegetable? Here are some of our best asparagus recipes:

Dietary notes

This steamed asparagus recipe is vegetarian, vegan, plant-based, dairy-free, and gluten-free.

How long does it take to steam asparagus?

Thin asparagus spears only need 2-3 minutes of steaming, while thicker spears might take 4-5 minutes. The best way to tell if it’s done is to pierce a spear with a fork – it should be tender-crisp with a slight give.

What can I do with leftover steamed asparagus?

Leftover steamed asparagus can be chopped and added to omelets, frittatas, or pasta dishes. You can also toss it with a vinaigrette for a quick and refreshing salad.

Can I steam frozen asparagus?

We don’t recommend it! Frozen asparagus loses its texture, so it can become mushy when steamed.

Print
Steamed asparagus

Easy Steamed Asparagus


  • Author: Sonja Overhiser
  • Prep Time: 5 minutes
  • Cook Time: 2 minutes
  • Total Time: 7 minutes
  • Yield: 4

Description

Making steamed asparagus unlocks the vibrant flavor and tender-crisp perfection! This simple method delivers a healthy and delicious side dish ready in minutes. It’s ideal for busy weeknights or a quick addition to any meal.


Ingredients

  • 1 large bunch asparagus
  • ½ tablespoon olive oil
  • ½ tablespoon lemon juice
  • ¼ teaspoon kosher salt
  • Freshly ground black pepper

Instructions

  1. Wash and dry the asparagus. Chop off the tough ends of the stalks and discard them. Cut the stalks into 2-inch pieces.
  2. Boil the water: Add water to a pot so that the surface is right under the steamer basket. Add the steamer basket and bring the water to a boil.
  3. Steam: Once boiling, add the asparagus. Steam with the lid on for about 2 to 5 minutes until crisp tender at the thickest portion, taste testing with a fork to assess doneness. Take care not to overcook it.
  4. Season: Carefully remove the asparagus to a bowl, draining away any water. Toss with the olive oil, lemon juice, kosher salt, and freshly ground black pepper to taste. Taste and adjust seasonings as desired.
  • Category: Side Dish
  • Method: Steamed
  • Cuisine: Vegetables
  • Diet: Vegan

Keywords: Steamed asparagus, how to steam asparagus

Grilled Asparagus

Make perfectly tender grilled asparagus in minutes! Here are the secrets to achieving smoky char and bright flavor to this…

Make perfectly tender grilled asparagus in minutes! Here are the secrets to achieving smoky char and bright flavor to this delicious side dish.

Grilled asparagus with Parmesan cheese and lemon.

Usually we make roasted asparagus or broiled asparagus, but here’s our warm-weather favorite: grilled asparagus! Grilling might be the very best way to cook asparagus: it’s easy, requires only a few ingredients, and comes out tender and charred, with a hint of smoke.

Spritz it with lemon juice for a little brightness, and it’s a fresh and healthy side dish you won’t be able to stop eating! Alex and I have now added asparagus to our regular rotation for grill recipes for the season.

Ingredients for grilled asparagus

Two pluses to grilled asparagus: you only need a few ingredients and it’s extraordinarily quick to grill! Here’s what you’ll need:

  • Asparagus: Look for thin or medium thick spears, which have a sweet flavor and cook faster.
  • Lemon: Fresh citrus brings a zingy pop to the flavor.
  • Olive oil: This heart-healthy oil is ideal for grilling.

If you’d like you can sprinkle with some Parmesan cheese as a garnish, but it’s not necessary flavor-wise. It’s perfect with just a spritz of lemon!

Brunch of asparagus that is trimmed.

How to grill asparagus: step by step

You don’t need anything special for grilled asparagus like a grill basket: just place it right on the grill grates! The only thing to keep in mind is that thinner spears of asparagus cook faster. You may even want to cut off more of the tough thick ends that you usually would, because they’ll take longer to cook than the thin tops.

How to cut asparagus

Step 1: Trim the woody ends from the asparagus. Toss it with olive oil, salt and pepper.

Grilled asparagus

Step 2: Place the spears directly on the oven grates. Grill about 3 to 4 minutes until charred and tender.

Grilled asparagus

Step 3: Spritz with fresh lemon juice and serve. If desired, top with grated Parmesan cheese.

For exact steps and quantities, go to the full recipe below.

Variations: For a spicy kick, add a sprinkle of red chili flakes before serving. Or, serve topped with a sauce like lemon dill sauce or mustard sauce, or sprinkle with fresh herbs like basil, chives, or mint.

Ways to serve grilled asparagus

Since grilled asparagus is so easy to prepare, it’s a natural pairing with all sorts of grilled meals! Once you’ve got the grill fired up for the main dish, it’s easy to toss on some spears. Here’s what we’d recommend serving with it:

Firing up the grill?

🔥For more grilled recipes from proteins to vegetables, try our top 40 Grill Recipes for the Season. Some favorites are grilled green beans and grilled corn.

A few more asparagus recipes

Love asparagus? Check out how to cook asparagus and our favorite asparagus recipes below!

Dietary notes

This grilled asparagus recipe is vegetarian, vegan, plant-based, dairy-free, and gluten-free.

How thick should my asparagus be for grilling?

Asparagus spears come in various thicknesses. Choose thin or medium-thick spears for best results on the grill. They’ll cook evenly without getting mushy.

How long does it take to grill asparagus?

Grilling time depends on the thickness of your asparagus. Most spears take about 3 to 4 minutes per side.

How can I tell when my grilled asparagus is done?

The asparagus is ready when it turns bright green, becomes tender-crisp to the bite, and develops slight char marks. You can also gently pierce a spear with a fork – it should give slightly with minimal resistance.

Print
Grilled asparagus

Easy Grilled Asparagus


  • Author: Sonja Overhiser
  • Prep Time: 5 minutes
  • Cook Time: 5 minutes
  • Total Time: 10 minutes
  • Yield: 4

Description

Make perfectly tender grilled asparagus in minutes! Here are the secrets to achieving smoky char and bright flavor to this delicious side dish.


Ingredients

  • 1 pound asparagus (thin stalks preferable)
  • 1 tablespoon olive oil
  • ½ teaspoon kosher salt
  • Fresh ground black pepper
  • 1/2 lemon
  • Shredded Parmesan cheese to garnish, optional

Instructions

  1. Preheat a grill to medium-high heat (375 to 450°F or 190 to 230°C).
  2. Cut off the tough ends of the asparagus.
  3. In a bowl, mix the asparagus with the olive oil, kosher salt, and plenty of fresh ground black pepper.
  4. Place the asparagus directly on the grill grates and grill for about 3 to 4 minutes until charred and tender, turning once.
  5. Remove from the grill and spritz with lemon juice from wedges from half of the lemon. If desired, top with Parmesan cheese and serve.

Notes

Variations: For a spicy kick, add a sprinkle of red chili flakes before serving. Or, serve topped with a sauce like lemon dill sauce or mustard sauce.

  • Category: Side Dish
  • Method: Grilled
  • Cuisine: Vegetables
  • Diet: Vegan

Keywords: Grilled asparagus, how to grill asparagus

Pear Gorgonzola Salad

This sweet and savory pear gorgonzola salad is a 5 star side dish! Juicy pears mingle with creamy cheese and…

A Couple Cooks – Recipes worth repeating.

This sweet and savory pear gorgonzola salad is a 5 star side dish! Juicy pears mingle with creamy cheese and maple pecans, all tossed in a tangy balsamic vinaigrette dressing.

Pear Gorgonzola Salad

If you’re looking for an all star side dish, this pear gorgonzola salad is the one. This pretty little salad will have you smitten, and it tastes just as good as these swoon-worthy photos we took! It’s a celebration of flavors and textures, with juicy pears, funky cheese, dried cherries, and maple pecans glazed quickly in a skillet. It’s all tossed in our go-to balsamic vinaigrette dressing, and from first bite it will have you wanting more!

Types of pears for pear gorgonzola salad

There are several different types of pears you can find at the grocery store. Pretty much anything you can find works for this pear gorgonzola salad! The most common varieties you’ll find at grocery stores in the States are:

  • Bartlett pear: This classic pear is typically green with a rounded shape. It’s known for its soft, juicy flesh and sweet flavor.
  • Anjou pear (shown in photos): This pear comes in both green and red varieties. Anjou pears are slightly firmer than Bartletts and have a more balanced sweet and tart flavor.
  • Bosc pear: This type has a deep brown skin with fresh, juicy flesh that has earthy notes.
Pear Gorgonzola Salad

How to ripen pears

Pears that you buy from the grocery store are often very firm and can take a while to ripen. They look similar to apples, but you can think of them more in terms of bananas when it comes to ripening. Here are some tips on how to ripen pears:

  • The fastest way to ripen pears is to place them in a paper bag. Leave them at room temperature and they should be ripe in 2 to 4 days.
  • In a bowl on the counter, pears ripen in about 4 to 7 days. Check them by gently pressing the flesh to see if it is tender.
  • Don’t place pears in the refrigerator until they are ripe. The refrigerator slows the ripening process. If you place them in the fridge right away, they’ll be rock hard. Allow them to ripen first, then refrigerate only if you want to delay eating them.
Pears with knife

Tips for maple glazed pecans

A fun accessory for this pear gorgonzola salad is the quick maple glazed pecans. Our standard recipe for candied pecans is baked and takes about 30 minutes. If we’re looking to whip up a salad and we don’t have candied nuts on hand, we make these maple pecans!

It takes just 5 minutes: you toast the nuts in the skillet, then add cinnamon and salt for 30 seconds. Turn off the heat and stir in the maple syrup. It’s such a small amount that it will caramelize quickly with the residual heat of the pan. Set them on a plate to dry while you make the rest of the salad!

Gorgonzola vs blue cheese

Can you use blue cheese in a pear gorgonzola salad? Yes! Gorgonzola and blue cheese are terms that are often used interchangeably, but blue cheese is actually a category of cheese whereas gorgonzola is a type of blue cheese. Either cheese works here!

  • Gorgonzola is a cheese made in Italy. It’s made from cow’s milk and has a milder flavor compared to other blue cheeses. Its texture varies from creamy and spreadable to crumbly, depending on the aging process.
  • Blue cheese is a category of cheeses with blue veining from made from edible molds. This encompasses a wider range of varieties, made from milks like cow, goat, or sheep (gorgonzola is a type of blue cheese). Blue cheeses you find at the store can be much stronger and sharper than gorgonzola.
Balsamic Vinaigrette

Dressing variations for pear gorgonzola salad

This pear gorgonzola salad is delicious with the balsamic vinaigrette listed in the recipe below, which is one of our favorite salad dressing recipes on this website! However, it works with other vinaigrette-style dressings as well. Try one of the following:

Topping ideas

There are loads of ideas for different toppings for a pear gorgonzola salad. Keep the greens and pears but swap in different cheese, nuts or other mix-ins for a versatile side. Here are some of our top ideas:

  • Dried cranberries or raisins can stand in for the cherries.
  • Pomegranate seeds make a beautiful pop of color and could also substitute dried cherries.
  • Feta crumbles or goat cheese crumbles work well as a substitute for the cheese.
  • Walnuts work in the same way as the maple pecans.
  • Or, swap in almonds, pistachios, hazelnuts, or pine nuts (try toasting them first for the best flavor).
  • Use pepitas to add another crunchy element.
Pear Gorgonzola Salad

Add protein to make it a main dish

This pear gorgonzola salad works in any season, though it’s an ideal fall salad or winter salad. It can be made into an instant main dish by topping with a protein. It works well with chicken or salmon, though you could also add tofu as a vegetarian protein. Here are some recipes for cooking the protein:

More salad recipes

Fruit served over greens with nuts and a vinaigrette is our style of salad! Here are some more of our favorite salad recipes that incorporate fruit:

This pear gorgonzola salad recipe is…

Vegetarian and gluten-free. For vegan, omit the gorgonzola.

Print
Pear Gorgonzola Salad

Pear Gorgonzola Salad


  • Author: Sonja Overhiser
  • Prep Time: 20 minutes
  • Cook Time: 0 minutes
  • Total Time: 20 minutes
  • Yield: 4

Description

This sweet and savory pear gorgonzola salad is a 5 star side dish! Juicy pears mingle with creamy cheese and maple pecans, all tossed in a tangy balsamic vinaigrette dressing.


Ingredients

  • ½ cup pecan halves
  • ½ tablespoon maple syrup
  • 1/16 teaspoon cinnamon
  • 1 pinch kosher salt
  • 1 recipe Balsamic Vinaigrette
  • 1 ripe pear, sliced
  • 1 shallot
  • 8 cups butter lettuce (or other greens), torn
  • ⅓ cup gorgonzola cheese crumbles (or blue cheese)
  • ¼ cup dried cherries or cranberries

Instructions

  1. To make the maple pecans, toast the pecans in a skillet for 4 to 5 minutes until starting to brown and become fragrant. Add the cinnamon and salt and toast until fragrant, about 30 seconds. Turn off heat, and stir in maple syrup until well coated. Transfer to a plate to cool.
  2. Make the Balsamic Vinaigrette salad dressing.
  3. Prep the fresh ingredients: Slice the pear into thin slices. Thinly slice the shallot. 
  4. To serve, place the greens on a plate or platter. Top with the pear slices, shallot, maple pecans, and gorgonzola cheese crumbles. Drizzle with the desired amount of dressing and serve (use approximately 6 tablespoons for 4 servings; store the remaining dressing refrigerated).
  • Category: Salad
  • Method: No Cook
  • Cuisine: Salad
  • Diet: Vegetarian

Keywords: Pear gorgonzola salad, pear and gorgonzola salad

A Couple Cooks - Recipes worth repeating.

Garbanzo Bean Salad

This garbanzo bean salad is protein-packed and bursting with fresh flavors, perfect for a light lunch or side dish! Simple…

A Couple Cooks – Recipes worth repeating.

This garbanzo bean salad is protein-packed and bursting with fresh flavors, perfect for a light lunch or side dish! Simple ingredients and a quick prep time make it an easy and healthy meal prep option.

Garbanzo bean salad

When you’ve been writing recipes and cookbooks as long us we have (over a decade), it can feel like everything has been done before. So when it comes to simple ideas like garbanzo bean salad, we know it’s not revolutionary. But this one is so quick and tasty, we had to share it with you! It’s perfect for lunches or as a side dish, packed with protein and filled with zingy, herby and fresh flavors. We know we never tire of easy lunch ideas, so bring it on!

What you need for garbanzo bean salad

A can of garbanzo beans can magically become a meal with a few fresh ingredients, since they’re packed with protein for staying power. We often eat garbanzo beans for lunch, and this salad is a riff on one Alex makes often. You’ll need just a few fresh ingredients to pull it together, and you can swap things in and out easily. Here’s an outline of what you’ll need (jump to the recipe below for quantities):

  • Garbanzo beans: Drain and rinse the beans before adding.
  • Bell pepper: We used two colors of bell peppers for visual appeal, but you can use just one if you prefer. Here’s a handy guide for how to cut a bell pepper quickly.
  • Shallot: Shallot is integral to the flavor here; we prefer the mild onion flavor to a red onion.
  • Italian parsley: Fresh parsley brings an herby punch; look for Italian parsley, though curly also works.
  • Parmesan or Pecorino cheese: Grated sharp cheese adds a nuance to the flavor.
  • White wine vinegar, Dijon mustard, olive oil, dried tarragon, and salt: Mix these together to make a quick and simple dressing.
Garbanzo Bean Salad in bowl

Variations and additions

This garbanzo bean salad is more of a template, really: you can swap in any of your favorite herbs, seasonings, and whatever vegetables you have in your refrigerator. Use it as a way to get creative (and make the TV show Chopped come to life in your own kitchen). Try not to add too many vegetables or you’ll have to increase the amount of dressing. Here are a few additional options:

  • Carrot: Peeled and thinly sliced carrots can stand in for bell pepper or be an addition.
  • Cucumber: Cucumber adds a nice crunch. Add a bit of English cucumber or peeled and seeded standard cucumber.
  • Cherry tomatoes: A handful of sliced or quartered cherry tomatoes adds a nice addition.
  • Garlic: We add minced garlic to just about everything, and it’s great here.
  • Torn or chopped herbs: If they’re on hand, add fresh chives, basil, dill, oregano, or thyme.
  • Celery seed: A pinch of celery seed adds a bit of complexity.
  • Italian seasoning or Greek seasoningAdd just a pinch of these spices add a little boost.

Garbanzo bean salad storage

You can make garbanzo bean salad in advance if you’re using it for meal prep for lunches or dinners. It lasts refrigerated for up to 3 days. Keep in mind it’s best eaten at room temperature, so allow it to stand for a few minutes before serving. It also does dull in flavor over time, so refresh it with a pinch of salt and if desired, a drizzle of olive oil.

Garbanzo Bean Salad

Make it a meal

This garbanzo bean salad is perfect as a light lunch, served with a few sides. Here are a few great ways to serve this salad or make it a more filling meal:

  • Bread or crackers: Add a bit of crusty artisan bread (like this no knead loaf) or hearty crackers to serve as a lunch.
  • Add rice or quinoa. Cook a pot of white rice or quinoa in about 20 minutes.
  • Whip up couscous or orzo. For an even quicker side, couscous and orzo cook up in 10 minutes.
  • Make it into a bowl meal, and dollop with hummus or drizzle with sauce! A creamy sauce is nice if you have some hummus in the fridge, or our best tahini sauce is pretty fast.

And that’s it! Let us know if you try this garbanzo bean salad and what you think in the comments below.

More garbanzo bean recipes

Garbanzo beans are also known as chickpeas, and they’re a staple in our diet! If you’re trying to eat vegetarian and plant-based meals, these little guys are your friends. Here are a few of our top chickpea recipes for eating them in hearty meals:

Print
Garbanzo bean salad

Garbanzo Bean Salad


  • Author: Sonja Overhiser
  • Prep Time: 15 minutes
  • Cook Time: 0 minutes
  • Total Time: 15 minutes
  • Yield: 4 servings

Description

This garbanzo bean salad is protein-packed and bursting with fresh flavors, perfect for a light lunch or side dish! Simple ingredients and a quick prep time make it an easy and healthy meal prep option.


Ingredients

  • 1 can garbanzo beans, drained and rinsed
  • 1 orange bell pepper, thinly sliced
  • 1/4 red bell pepper, diced (optional)
  • 1 shallot, thinly sliced
  • ½ cup fresh Italian parsley, chopped
  • 2 tablespoons grated Parmesan or Pecorino cheese (optional)
  • 1 tablespoon white wine vinegar
  • ½ tablespoon Dijon mustard
  • 2 tablespoons olive oil
  • ½ teaspoon dried tarragon
  • ¾ teaspoon kosher salt

Instructions

  1. Drain and rinse the garbanzo beans.
  2. Chop all vegetables as noted in the ingredients list above.
  3. Mix all ingredients in a bowl. If omitting cheese, add a few extra pinches of salt. Store for up to 3 days refrigerated; tastes best at room temperature and if desired, add a pinch of salt or drizzle of olive oil to taste before serving.
  • Category: Salad
  • Method: No Cook
  • Cuisine: Vegetables
  • Diet: Vegetarian

Keywords: Garbanzo bean salad

A Couple Cooks - Recipes worth repeating.

How to Cook Farro

Here’s how to cook farro, an ancient grain with a chewy texture! Plus, browse our top farro recipes: side dishes,…

A Couple Cooks – Recipes worth repeating.

Here’s how to cook farro, an ancient grain with a chewy texture! Plus, browse our top farro recipes: side dishes, salads, soups and more.

Farro

Looking for a fun side dish idea, or a whole grain to make a killer salad? Farro is a whole grain that can be used as an alternative to rice, barley or other grains. We love it for its chewy texture and nutty taste. There’s nothing better than tossing this grain with butter, garlic and fresh herbs as a simple side dish! You can use this grain to whip up all sorts of recipes, and it’s become easy to find at the grocery. Here’s how to cook farro so it’s perfectly tender, and some of our favorite farro recipes for using it.

What is farro?

Farro is a whole grain that’s plump and chewy, with a texture similar to barley. It’s an ancient grain that was eaten in the Roman empire and even found in Egyptian tombs. Farro has been a staple in Italian cuisine for centuries, and spread to global popularity with the recent interest in whole grains. Farro can be boiled on the stovetop, cooked in a rice cooker or in a pressure cooker (Instant Pot). There are a few types you can find in American grocery stores:

  • Pearled farro has all of the bran removed from the grain, making it quicker to cook but removing some fiber. The cook time is 15 to 20 minutes.
  • Semi-pearled farro has part of the bran removed, retaining some additional fiber. The cook time is 25 to 30 minutes.
  • Whole farro is the whole grain and takes the longest to cook. It’s the hardest to find in grocery stores. The cook time is 30 to 40 minutes.

The recipe in this article is for pearled and semi-pearled farro. As a note, the labeling of this grain in the grocery store can be confusing. Many packages don’t contain the words pearled or semi-pearled. Check the cook time on the package as a guide, then follow our recipe below.

Uncooked farro in measuring cup

How to cook farro

Farro is easy to cook on the stovetop. For every 1 cup of farro, you’ll need 3 cups of water or broth for it to fully cook through. Then drain any excess liquid once it is tender, which is different from grains like rice or quinoa. Here are the basic steps for how to cook farro (or jump to the recipe below):

  1. Rinse: Rinse the grains under cold water in a fine mesh strainer.
  2. Add water: In a large saucepan, place 1 cup farro, 3 cups water and ½ teaspoon kosher salt and bring it to a boil.
  3. Simmer: Reduce the heat to a simmer and cover. Cook until the grains are tender, about 15 to 20 minutes for pearled and 25 to 30 minutes for semi-pearled.
  4. Drain: Drain any excess water. Stir in an additional ¼ teaspoon salt.

More FAQ

Here are a few more facts about farro:

  • How much does 1 cup dry farro make? About 2 to 2 ½ cups cooked.
  • What are other names for farro? Spelt, emmer, and einkorn are other names for the grain in English that denote different sizes, from largest to smallest. Emmer is what you’ll find in most American stores. In Italy farro is labeled to denote its size as farro grande, farro medio, and farro piccolo.
Farro in bowl with lemons and uncooked farro

How to season as a side dish

Want to serve farro as a simple side dish? Transform it into garlic herb farro! It’s fast and easy, and it makes this grain taste irresistible. Here’s what to add to the pot once you’ve drained it:

  • 1 tablespoon butter or olive oil
  • 1 garlic clove, minced
  • 2 tablespoons fresh herbs, like fresh thyme, chives, oregano or basil

Top farro recipes

Want to cook up a pot of this whole grain to use in recipes? Farro is an especially great base for grain salads. Mix it with some fresh or cooked vegetables, and drizzle with olive oil and vinegar. Or add it to soups and stews as an alterative to barley! Here are a few of our top farro recipes and serving suggestions for this ancient grain:

This farro recipe is…

Vegetarian, vegan, plant-based, dairy-free and gluten-free.

Print
Farro

How to Cook Farro


  • Author: a Couple Cooks
  • Prep Time: 5 minutes
  • Cook Time: 20 minutes
  • Total Time: 25 minutes
  • Yield: 4

Description

Learning how to cook farro is quite straightforward. In this recipe, we show you how to cook farro and how we like to flavor it with garlic and herbs.

Note: For how to cook farro in a pressure cooker, go to Instant Pot Farro.


Ingredients

  • 1 cup uncooked farro, pearled or semi-pearled (not whole)
  • 3 cups water
  • ¾ teaspoon kosher salt, divided
  • 1 tablespoon butter or olive oil
  • 2 tablespoons chopped fresh herbs (thyme, oregano, chives, or basil), optional
  • 1 garlic clove, minced, optional

Instructions

  1. Rinse the farro under cold water in a fine mesh strainer. In a large saucepan, place the farro, water and ½ teaspoon of the kosher salt and bring it to a boil.
  2. Reduce the heat to a simmer, cover, and cook until the grains are tender, about 15 to 20 minutes for pearled farro and 25 to 30 minutes for semi-pearled farro. Taste test a grain to see if it is tender (if the package is unmarked, just cook until tender).
  3. Drain any excess water. Add the additional ¼ teaspoon salt and the olive oil or butter. If using, stir in the minced garlic and herbs. Taste and add additional salt if desired. 
  • Category: Side Dish
  • Method: Stovetop
  • Cuisine: American
  • Diet: Vegan

Keywords: farro, how to cook farro, farro recipes, farro recipe


A Couple Cooks - Recipes worth repeating.