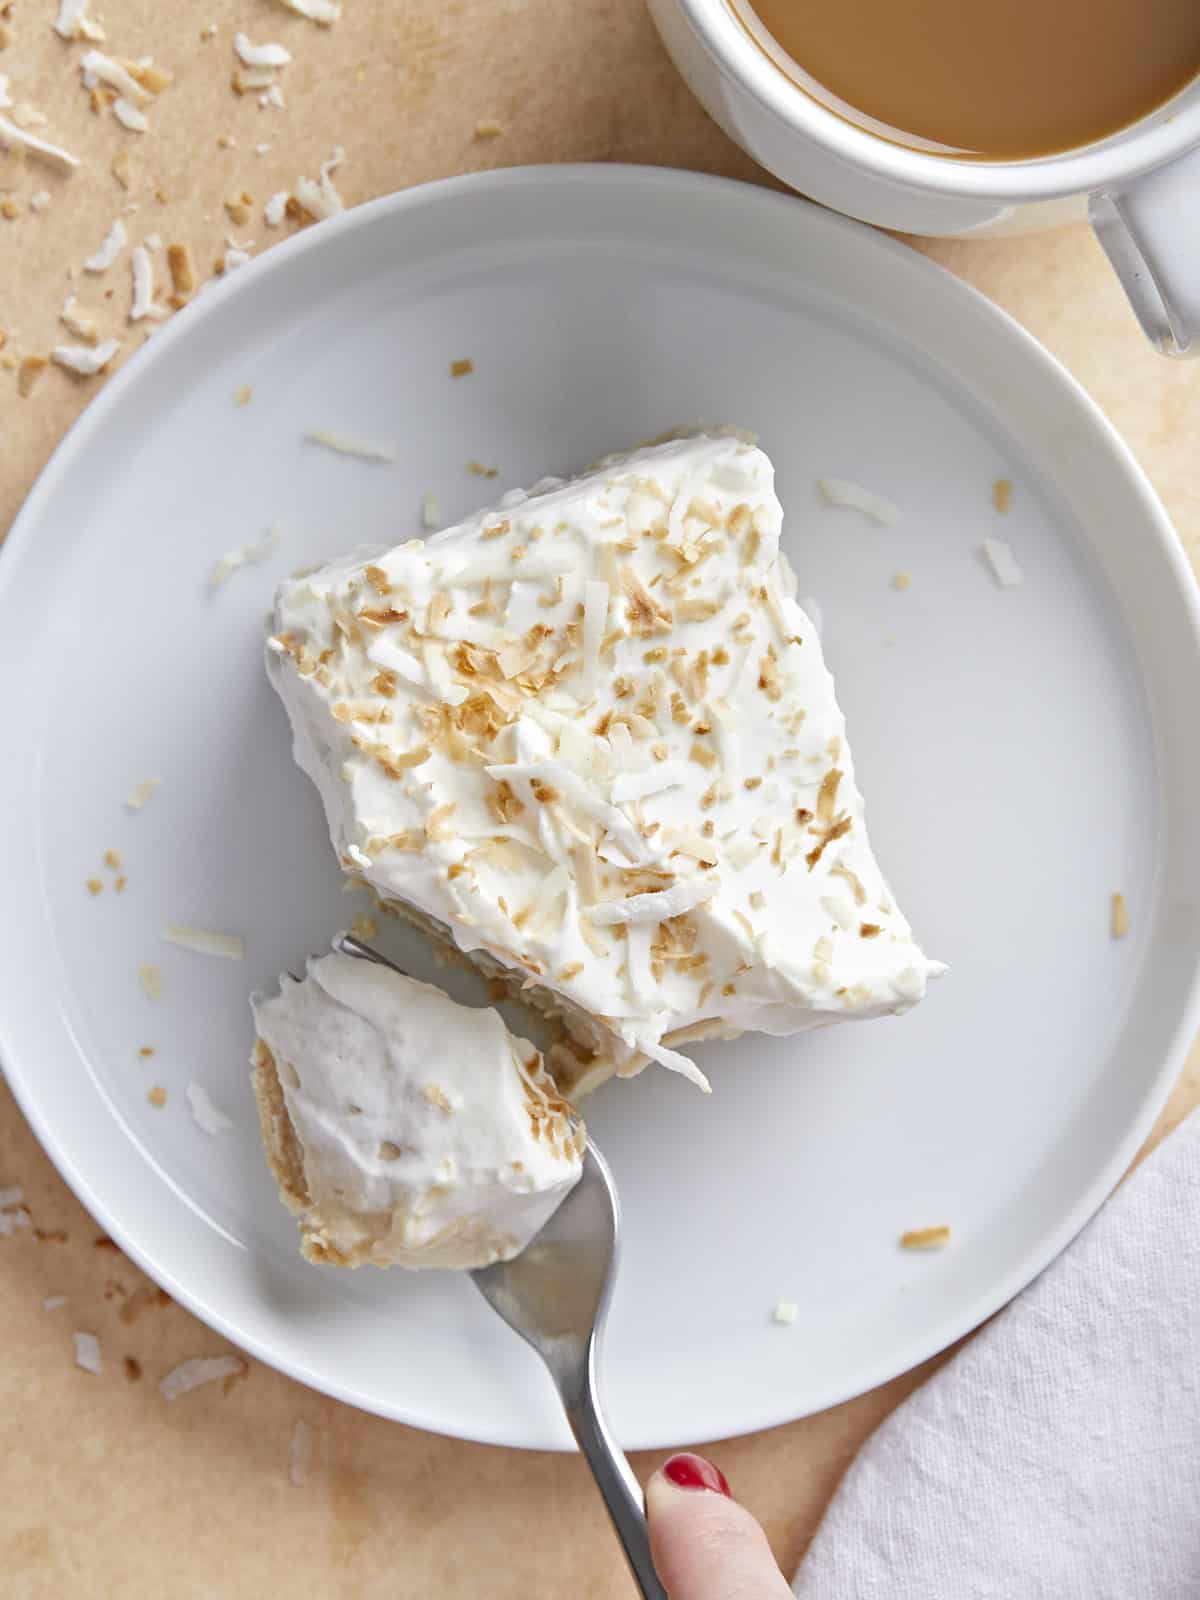
These Coconut Cream Pie Bars are so decadent that I could eat them for breakfast, lunch, and dinner. (And by could, I mean I HAVE.) They’re made with a buttery vanilla cookie crust and a rich and velvety coconut cream filling and topped with dollops of vanilla-scented whipped cream. You get 24 slices from this easy Coconut Cream Pie Bars recipe, so it’s perfect for a school bake sale or a large get-to-gether. I’m obsessed!
What Are Coconut Cream Pie Bars?
Coconut Cream Pie Bars are basically a simplified Coconut Cream Pie. Instead of making a pie crust and blind baking it, I use a cookie crust that comes together in seconds. I put the most work into the filling, steeping coconut milk with coconut flakes to really punch in on that tropical flavor. The flakes are strained out to create the silkiest texture, and the whole thing is topped with canned whipped cream (which can withstand a hot summer day without liquifying). The final touch is a generous sprinkle of crunchy toasted coconut flakes.
Ingredients For Coconut Cream Pie Bars
This recipe scores a 100 for convenience. You can make the crust and fill it with custard a day ahead, then refrigerate until it’s go time. You can even freeze it up for up to three months. Just leave the whipped cream topping and coconut flake garnish for when you’re ready to serve. Here’s what you need to make Coconut Cream Pie Bars:
- Unsweetened Flaked Coconut: helps flavor the coconut milk custard and is used as a garnish. I use unsweetened to control the amount of sugar in the recipe. If you want to use sweetened coconut flakes, skip the sugar. You don’t have to strain the coconut flakes out of the custard, but chunky custard isn’t my thing, so I do.
- Coconut Milk, Condensed Milk, and Evaporated Milk: create our custard base. If two cans of coconut milk are out of your budget, replace one can with a second can of evaporated milk and steep the mixture for an hour instead of 20 minutes.
- Brown Sugar and Granulated Sugar: these sweeten the custard, with the brown sugar adding notes of molasses to deepen the flavor.
- All-Purpose Flour and Cornstarch: help thicken the custard.
- Eggs: Egg yolks thicken the custard and help deepen its color. Reserve the white for a different preparation, or use them to make meringue!
- Salted Butter: adds a velvety finish to the custard.
- Vanilla Extract: rounds out the flavor of the filling
- Whipped Cream Topping: I use canned whipped cream because it’s stabilized and tends to hold up on a hot summer day. But if you’re eating this in a controlled and cool environment, and you’re not scared of the cream getting a little soupy, try it with frozen whipped cream or our easy Homemade Whipped Cream.
How To Store Coconut Cream Pie Bars
Place leftover bars in an airtight container, top with a piece of parchment paper, seal, and refrigerate for up to 3 days or freeze for up to 3 months. If you plan on making the bars to freeze for later, skip the whipped cream topping and coconut flake garnish. Pour the custard into the cookie crust and refrigerate it until it sets. Then top it with a sheet of parchment directly on the surface, wrap it in two layers of aluminum, and keep it in an airtight container (or wrap it in plastic.) Thaw the frozen bars in the refrigerator before topping them with whipped cream and garnishing them with coconut flakes.
Coconut Cream Pie Bars
Ingredients
Crust
- 8 oz. vanilla wafers $1.91
- 8 Tbsp salted butter, melted $1.00
- 1 pinch salt $0.01
Filling & Topping
- 1.5 cups unsweetened flaked coconut, divided $1.19
- 1 14oz. can sweetened condensed milk $2.19
- 1 12oz. can evaporated milk $1.50
- 2 13.5oz. cans coconut milk $5.98
- 1/4 tsp salt $0.02
- 1/4 cup brown sugar $0.11
- 2 Tbsp granulated sugar $0.05
- 3/4 cup all-purpose flour $0.11
- 1/4 cup cornstarch $0.12
- 2 Tbsp water $0.00
- 3 large eggs yolks, beaten $0.27
- 4 Tbsp salted butter $0.50
- 1 tsp vanilla extract $0.72
- 2 cups whipped cream $1.28
Instructions
Crust
- In a blender or food processor, blend the vanilla wafers into a sandy consistency.
- Mix in the melted butter and salt until the cookie crumbs are completely saturated and have deepened in color.
- Press the cookie crust into an 11×7-inch baking dish in an even layer and freeze. If you don't have an 11×7-inch dish, use any square or rectangle dish with a 10-cup (2.5 qt) volume.
Filling
- Add the unsweetened coconut flakes to a large saucepan set over medium heat. Toast the flakes, stirring occasionally so they don't burn. Remove them from the pan when they are golden brown.
- Add 1 cup of the toasted coconut flakes, the condensed milk, evaporated milk, coconut milk, salt, and flour to a heavy-bottomed saucepan set over medium heat. Stir until everything is combined and the milk has thickened, about 5 minutes.
- Take the milk mixture off the heat and let it steep for 20 minutes. Use a fine-mesh sieve to strain the coconut flakes from the milk mixture and discard. Add the milk mixture back to the pan and set over medium heat.
- In a small bowl, add the water to the egg yolks. Mix in the cornstarch to create a slurry, then add it to the milk mixture in the pan. Cook over medium heat, stirring constantly until the custard bubbles in spurts.
- Take the pan off the heat and add the butter and vanilla extract. Mix until the butter dissolves.
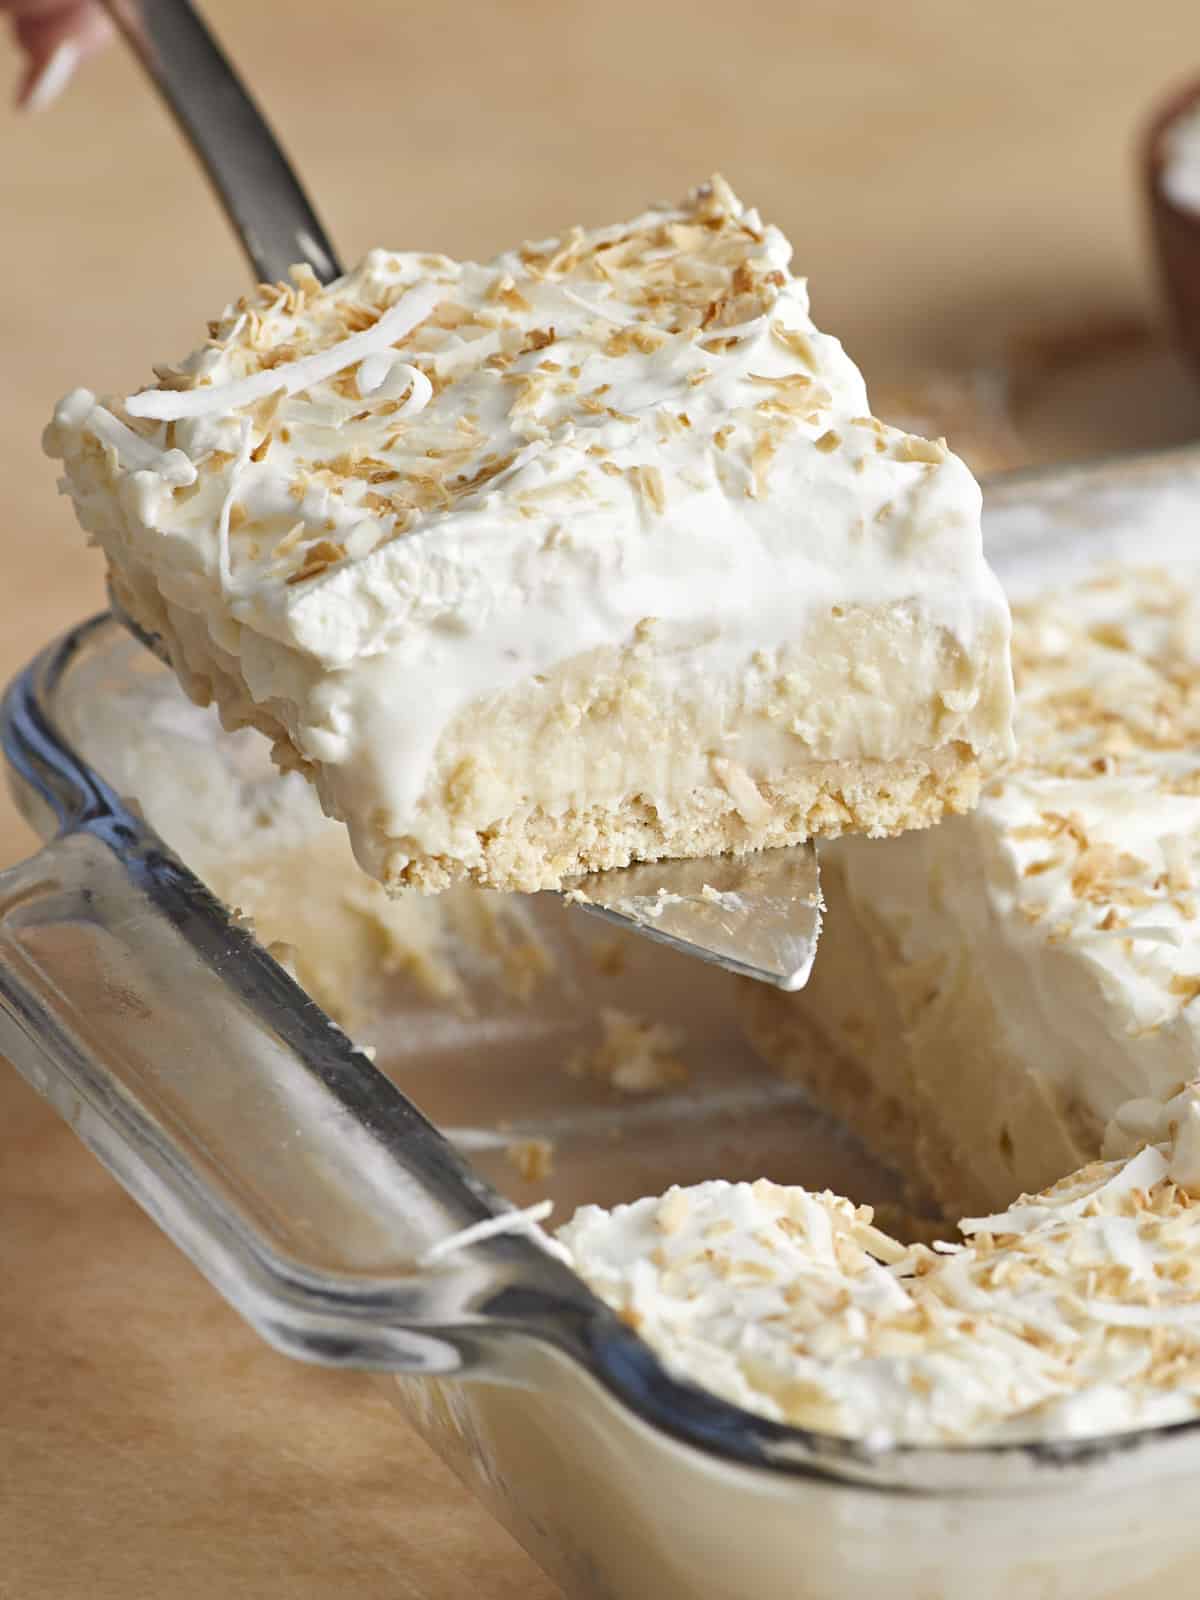
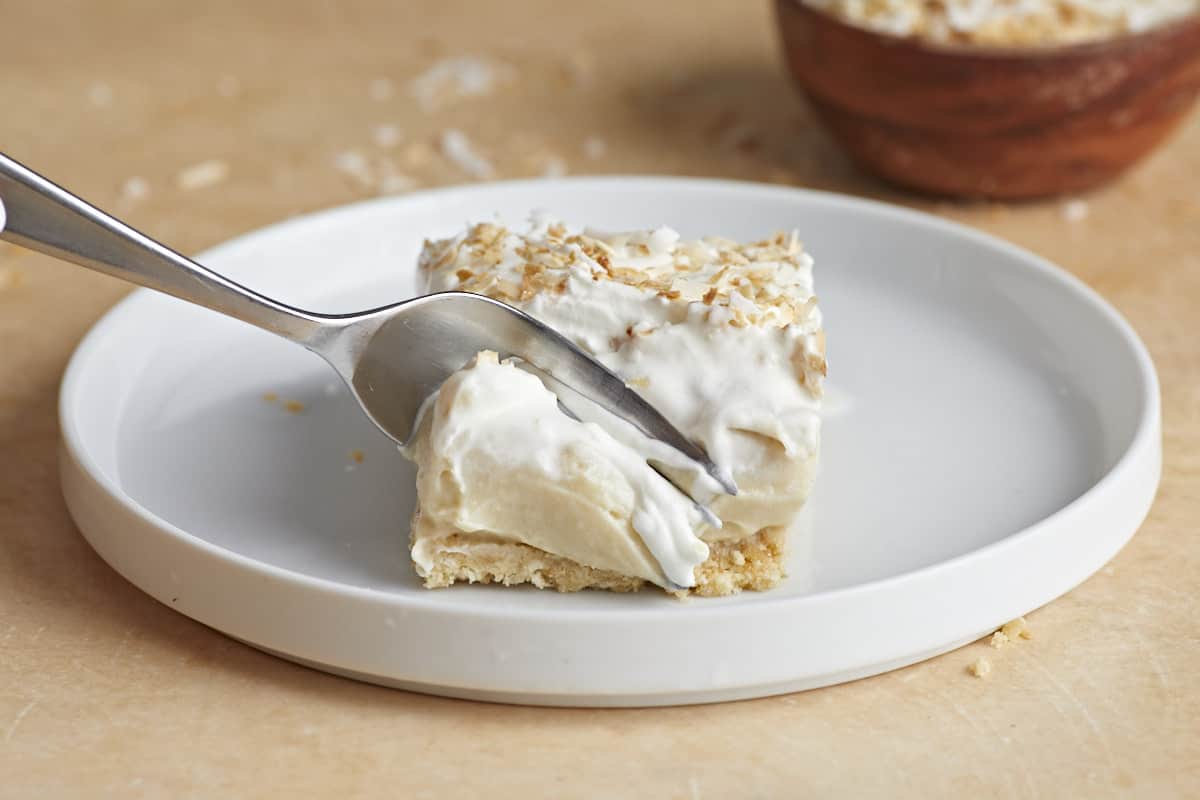
- Strain the mixture through a fine-mesh sieve directly into the chilled crust. Refrigerate until set, about 2 to 3 hours.
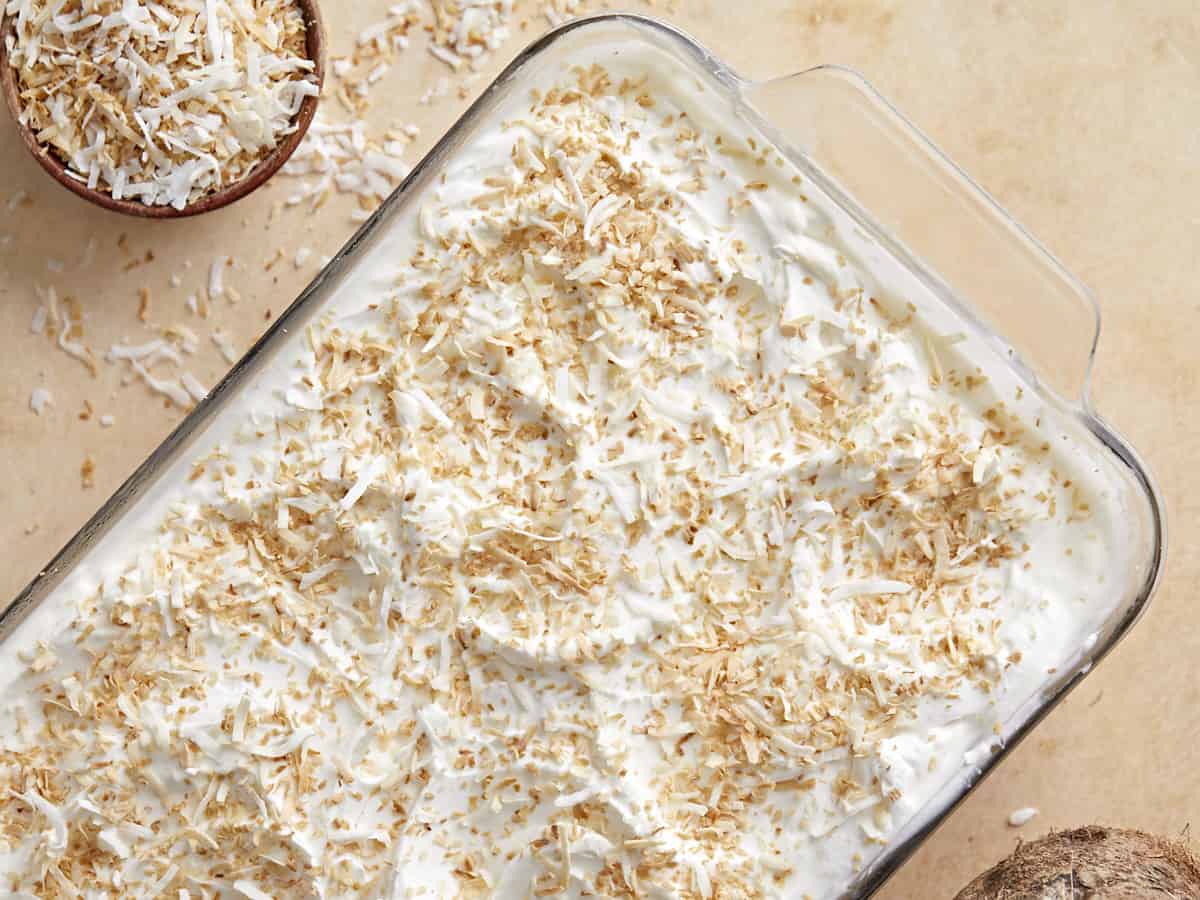
- Top with whipped cream topping and sprinkle the whipped cream with the remaining 1/2 cup of toasted coconut flakes.
See how we calculate recipe costs here.
Nutrition
How to Make Coconut Cream Pie Bars – Step by Step Photos
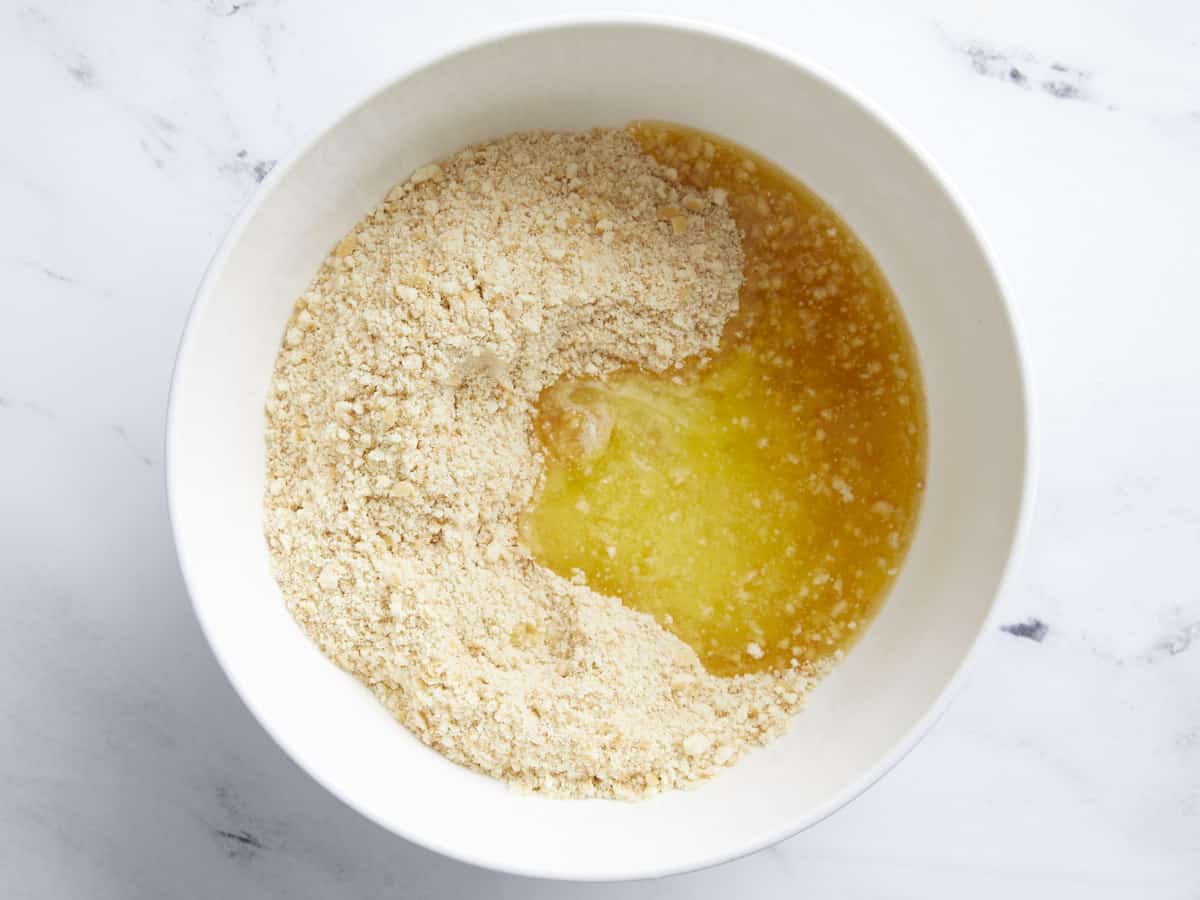
In a blender or food processor, blend the 8 ounces of vanilla wafers into a sandy consistency. Mix in 1/2 cup of melted butter and a pinch of salt until the cookie crumbs are completely saturated and have deepened in color.
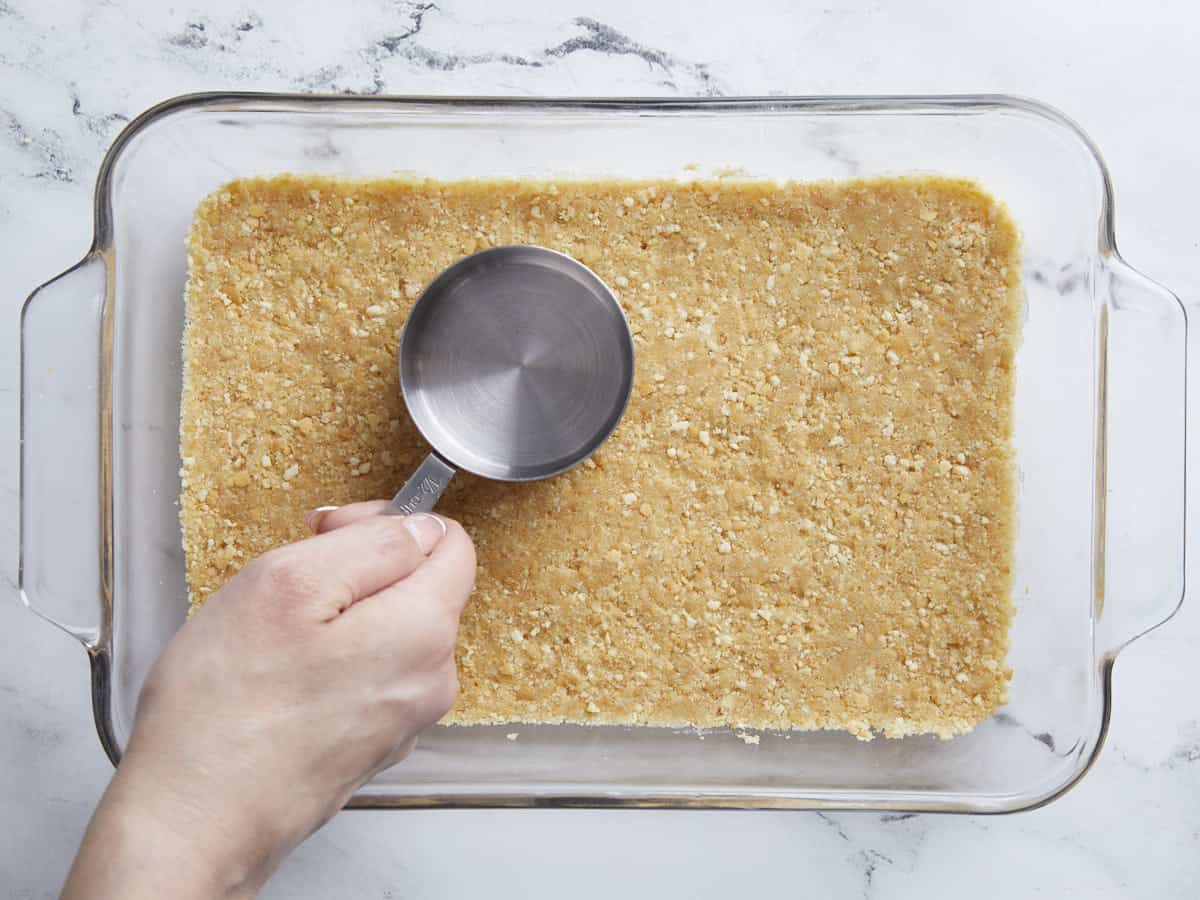
Press the cookie crust into an 11×7-inch baking dish in an even layer and freeze. If you don’t have an 11×7-inch dish, use any square or rectangle dish with a 10-cup volume.
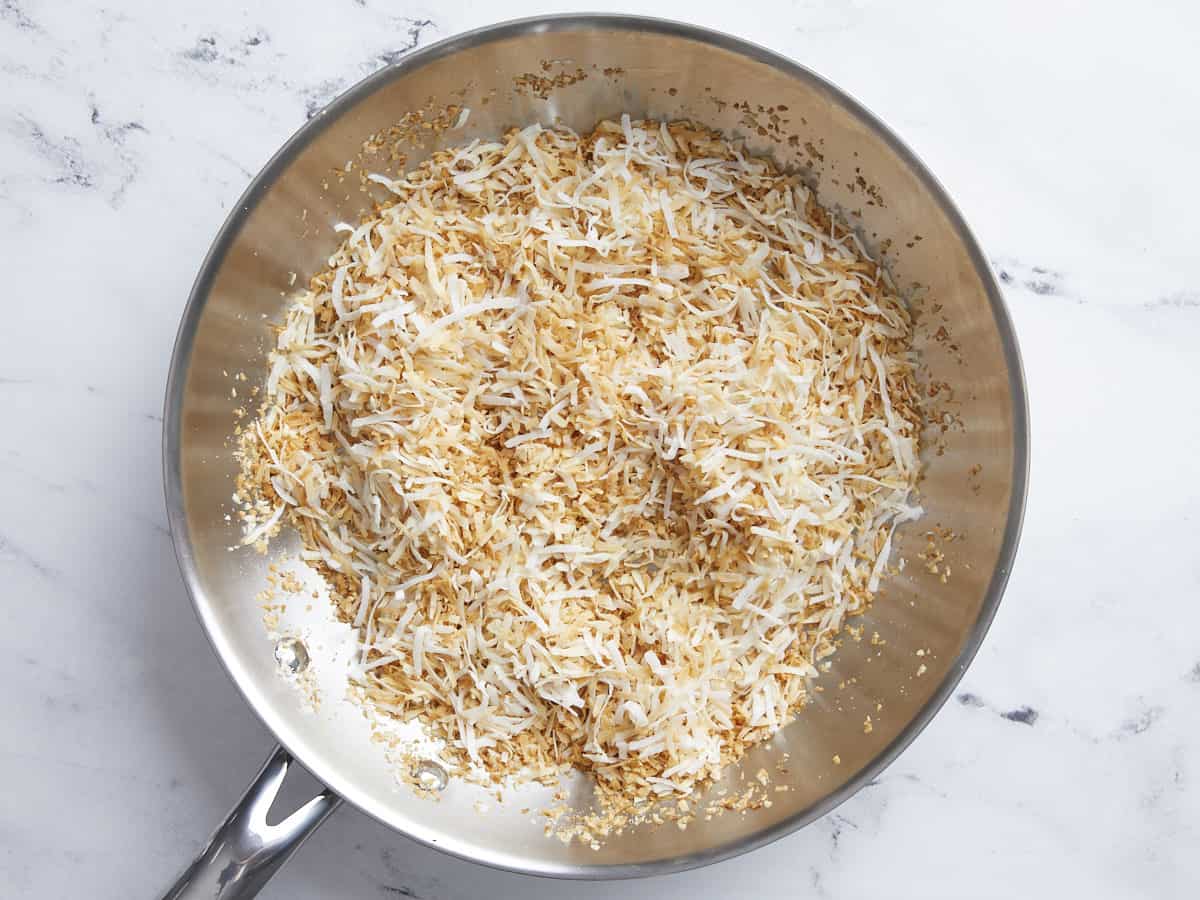
Add the 1 1/2 cups of unsweetened coconut flakes to a large saucepan set over medium heat. Toast the flakes, stirring occasionally so they don’t burn. Remove them from the pan when they are golden brown.
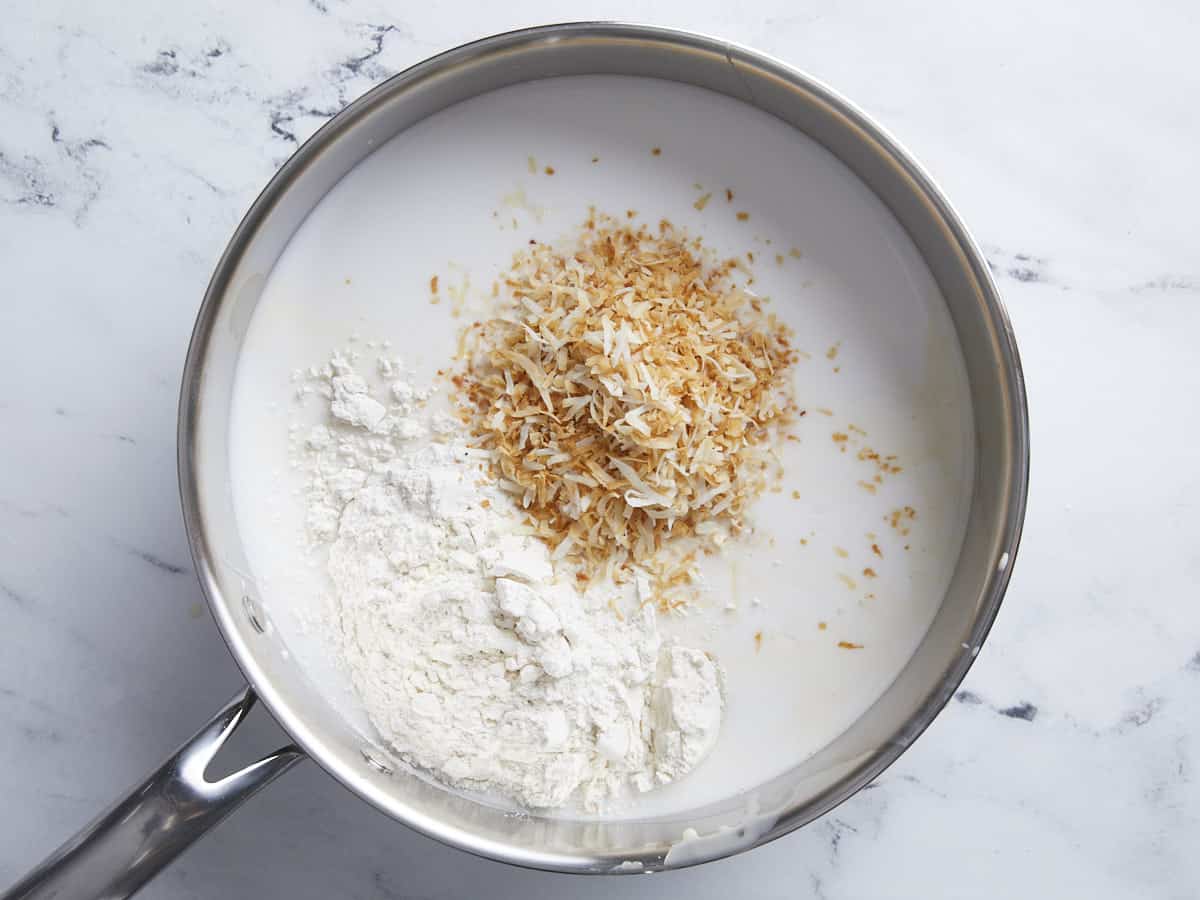
Add 1 cup of toasted coconut flakes, one 14oz. can of condensed milk, one 12oz. can of evaporated milk, two 13.5oz. cans of coconut milk, 1/4 teaspoon of salt, and 3/4 cup of flour to a heavy-bottomed saucepan set over medium heat. Stir until everything is combined and the milk has thickened, about 5 minutes.
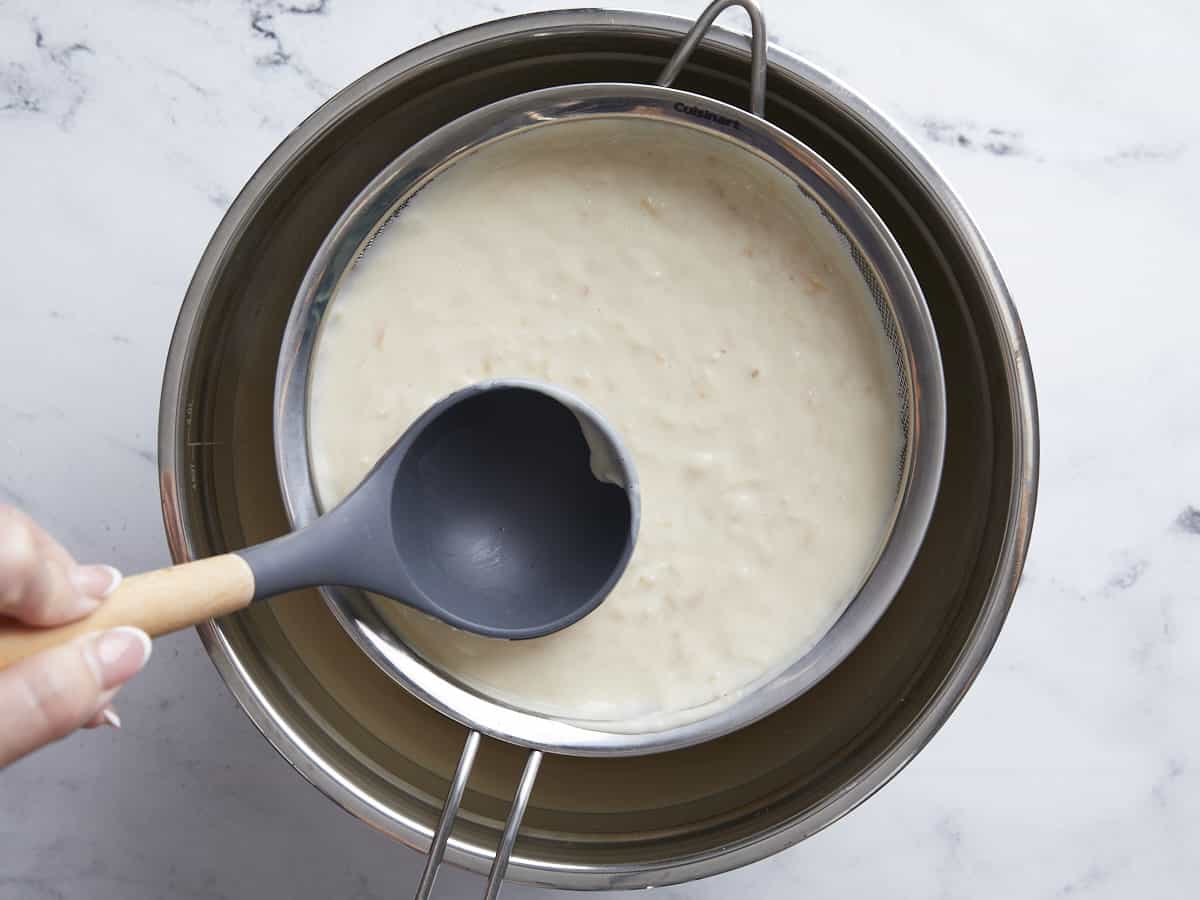
Take the milk mixture off the heat and let it steep for 20 minutes. Use a fine-mesh sieve to strain the coconut flakes from the milk mixture and discard. Add the milk mixture back to the pan and set over medium heat.
In a small bowl, add 2 tablespoons of water to the 3 egg yolks. Mix in the 1/4 cup of cornstarch to create a slurry, then add it to the milk mixture. Cook over medium heat, stirring constantly until the custard bubbles in spurts.
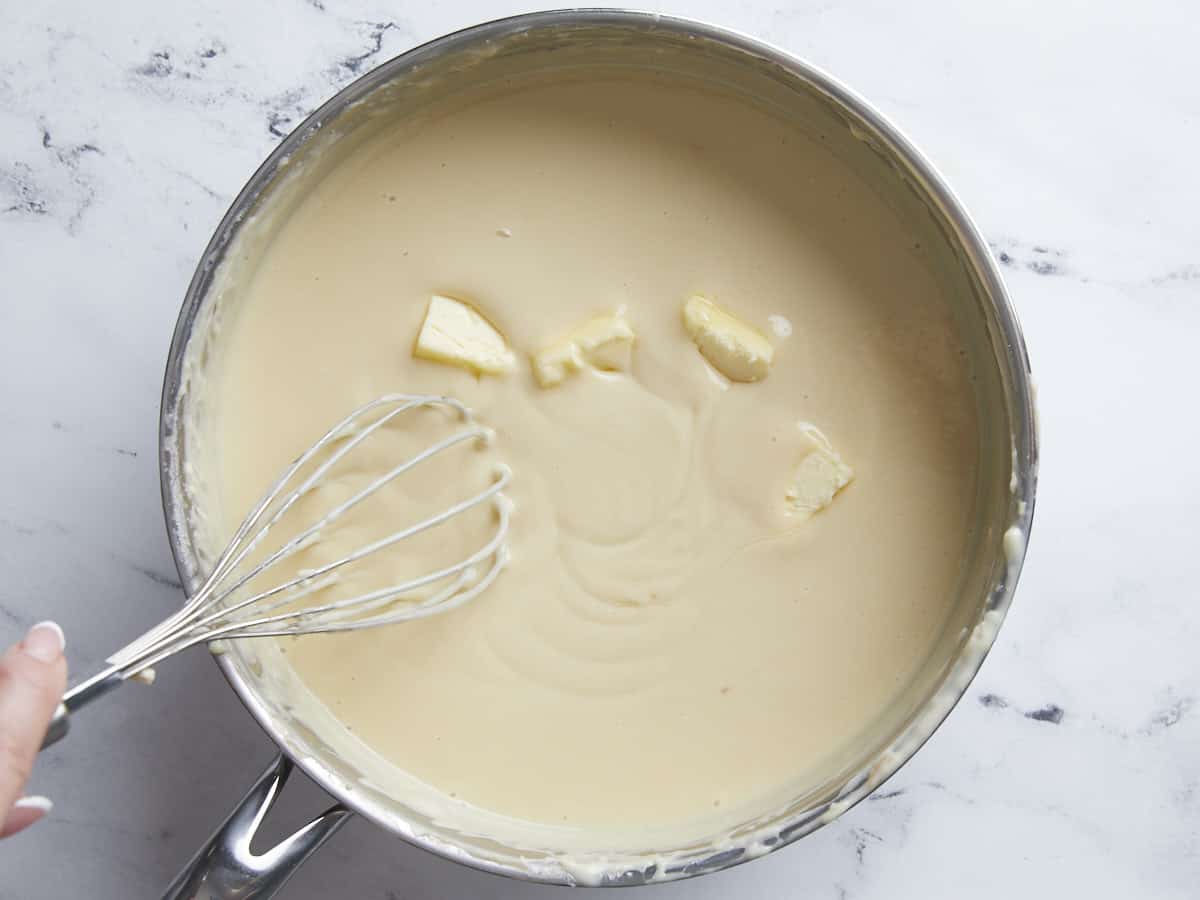
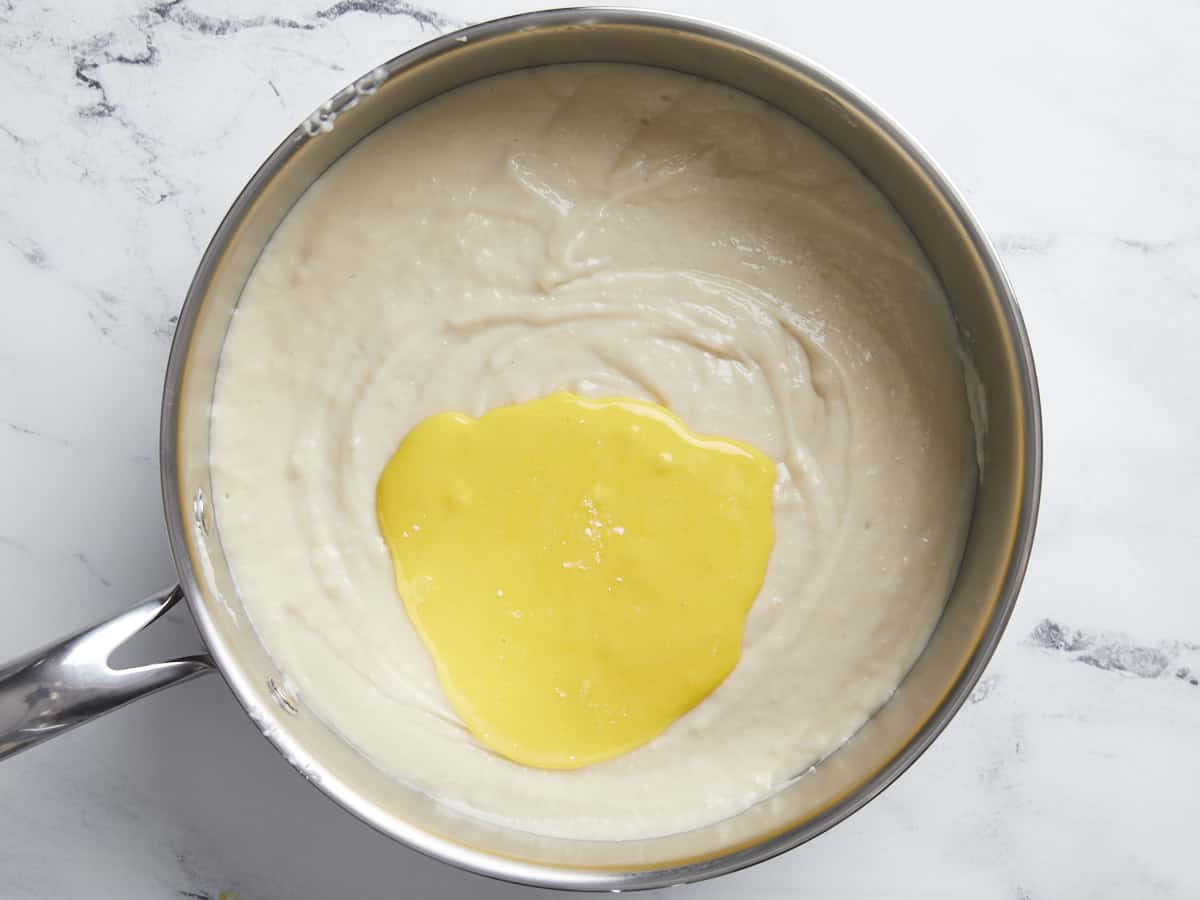
Take the pan off the heat and add the 4 tablespoons of butter and 1 teaspoon of vanilla extract. Mix until the butter dissolves.
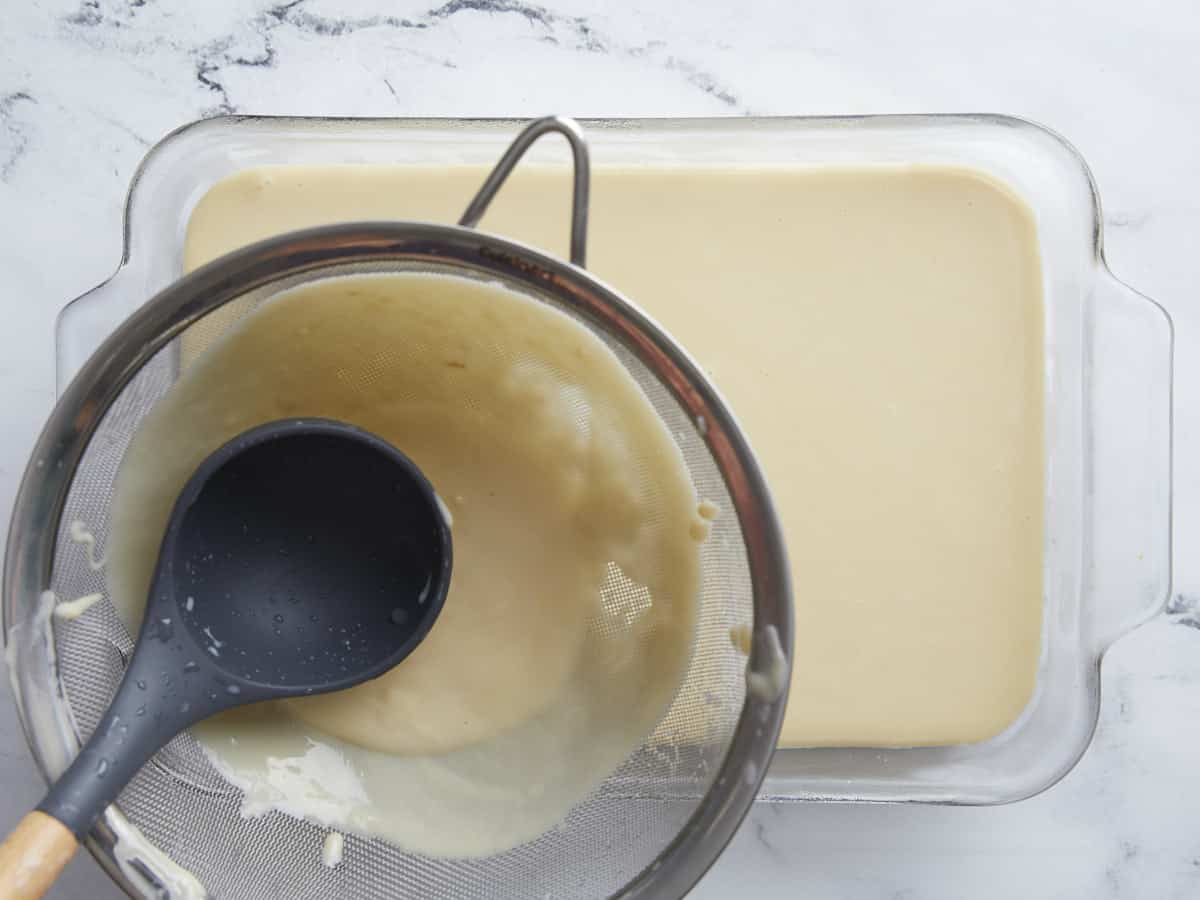
Strain the mixture through a fine-mesh sieve directly into the chilled crust.
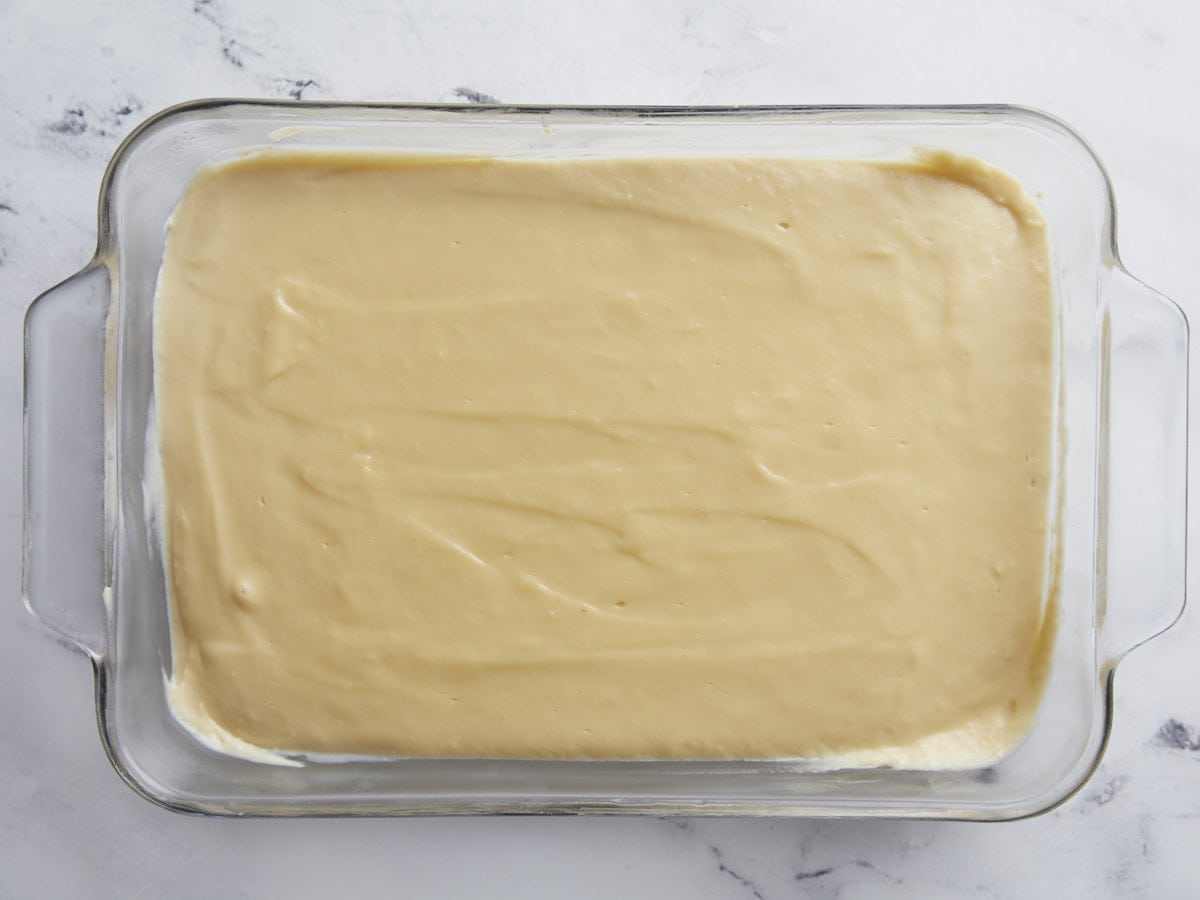
Refrigerate until set, about 2 to 3 hours.
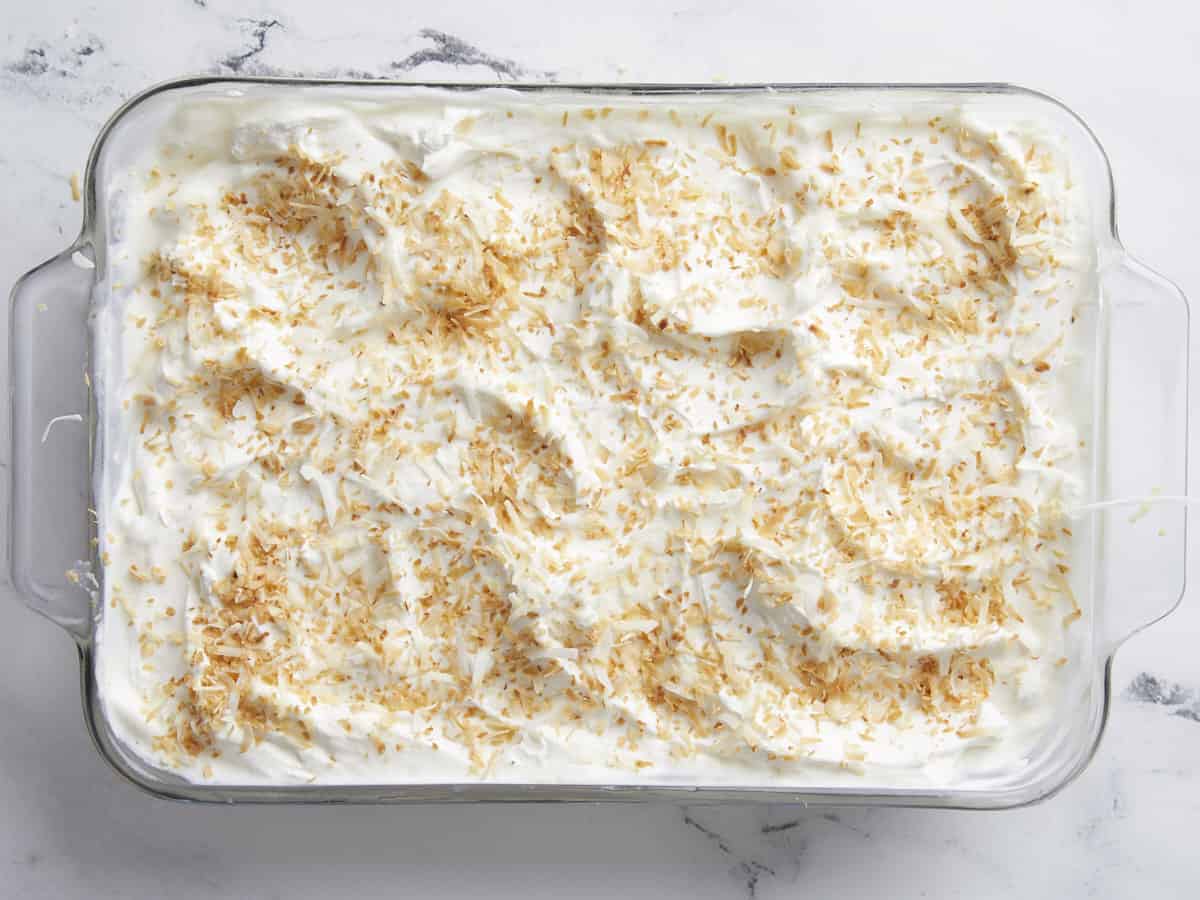
Top with 2 cups of whipped cream topping and sprinkle the whipped cream with the remaining 1/2 cup of toasted coconut flakes.
More Coconut Recipes


The post Coconut Cream Pie Bars appeared first on Budget Bytes.