Hey everyone! I hope you’re doing well and staying safe out there. This post is a shift from my usual recipe-related content, but it’s one I’ve been asked to do for ages now and I’m happy to finally have this post put together. It’s a bit of a beast! Be sure to see the bottom of this blog post because I’m announcing a fun live event in celebration of Oh She Glows for Dinner (which launches next week!). I hope you’ll join us on Oct 14th at 7pm EST!!
Skin care is such a personal journey, and I certainly don’t expect that what I do will work for you or that you should follow my routines because we all have vastly different skin care needs. That said, I personally love seeing skin care routines that other people follow (it’s a bit of an obsession in recent years). I hope you enjoy this post too!
As a teenager, I remember using strong acne cleansers and ointments that would strip my skin. And super coarse scrubs. I suffered from tons of bad breakouts in my teen years and just felt so insecure most of the time. I wish I could give that girl a big hug. Needless to say, my skin care has evolved over the years as I’ve learned more about my changing skin and which products and ingredients are effective for me. I actually didn’t get into a formal skin care routine until the past couple of years. When Adriana and Arlo were younger, I was lucky if I washed my face and threw on moisturizer before bed because I was so tired. I was also trying to solve ongoing allergic reactions so I was super careful about introducing new products and rarely ever did. If you are in a similar phase of life, be kind to yourself and don’t worry about having the perfect routine, or heck, a routine at all. Do what makes you happy and works for you, whatever stage you are in. Now that my kids are a bit older (and I seem to have figured out, at least in part, what was causing my allergic reactions), I’ve been loving getting back into skin care again because it helps me slow down and take some time for self-care. It’s a favourite part of my day!!
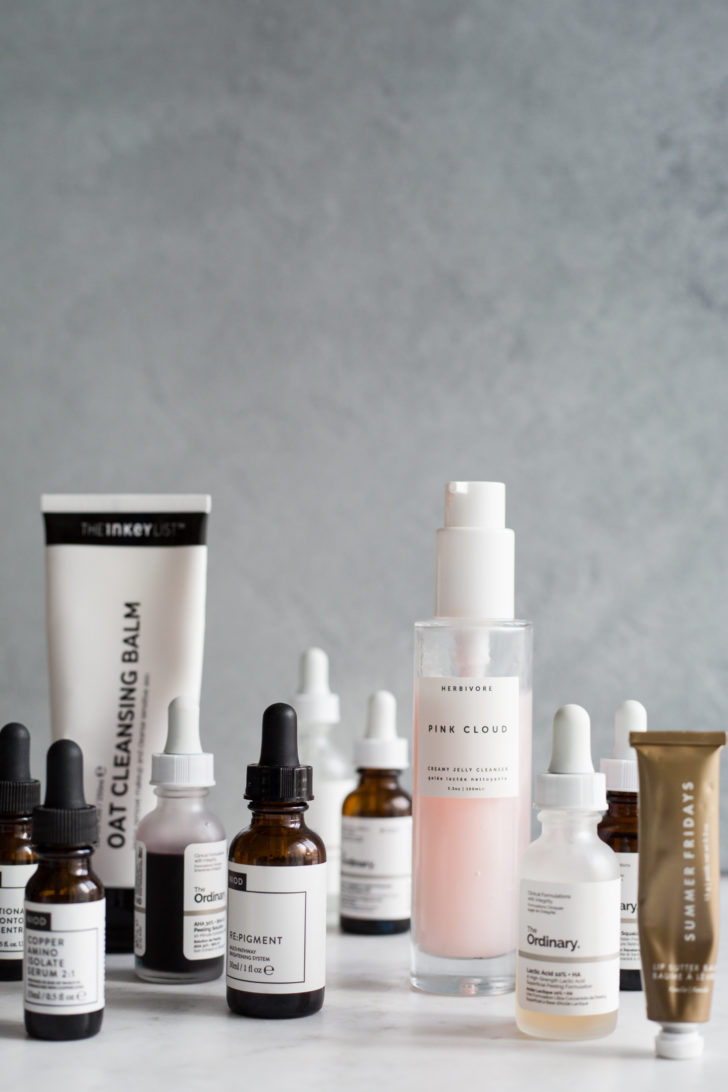
Without further ado, here are the cruelty-free products I’m using lately. I’ve also shared my AM and PM routines below. Keep in mind I am in no way claiming to be a skin care expert by any stretch of the imagination; I just love learning about it and consider this an evolving personal journey!
As always, this post is not sponsored. As you may know, I don’t do any sponsored content…this was a decision I made many years ago, but I like to mention it once in a while for new readers. :) I also purchased all of the products myself (nothing was gifted). There are affiliate links for some of the products below, however, so if you click an affiliate link and make a purchase I may earn a small percentage. I’m always grateful for your support!
First, a bit of info on my skin type to provide context:
- Combination skin (mixture of dry areas and normal/oily areas)
- Reactive (flushes easily)
- Prone to hyperpigmentation
- I’m still working on reducing melasma from my 2 previous pregnancies, and have made slow progress!
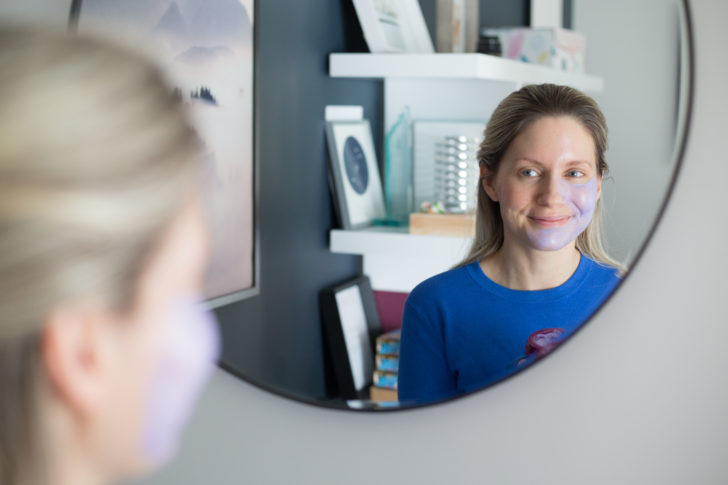
Thanks to Eric for taking this photo of me (this photo cracks me up…I’m looking all super creepy at myself while applying a mask).
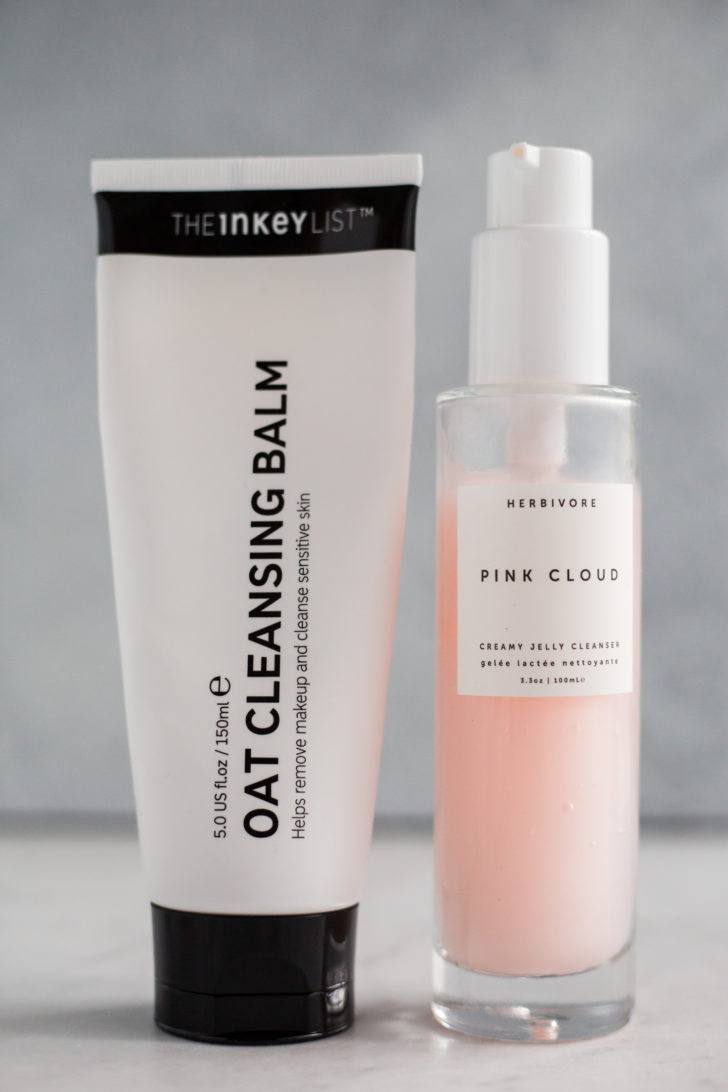
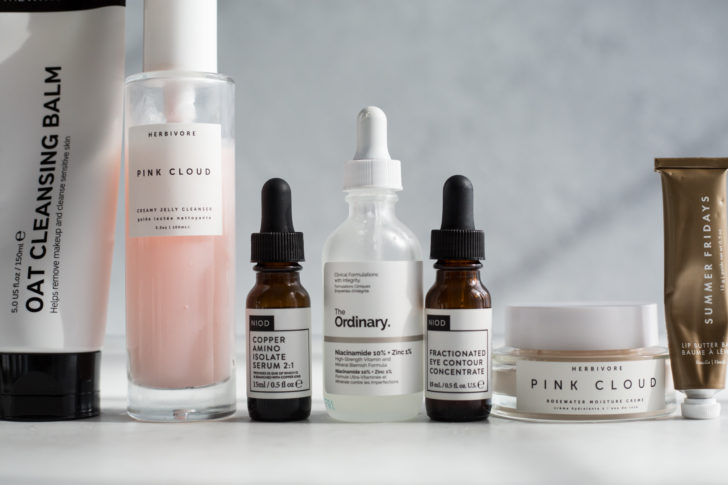
Cleansers
In the evening, I use the double cleanse method because it’s really helpful to break down sunscreen and makeup. I start with a rich cleansing balm, then move on to the jelly cleanser as my second cleanse. In the morning, I only use the jelly cleanser since my skin doesn’t need much cleansing.
The Inkey List Oat Cleansing Balm (150 mL: $12.99 CAD/$9.76 USD; this product contains no animal derivatives, however they are not yet vegan certified)
This ultra-thick and rich cleansing balm is often sold out and for good reason. It’s so luxurious to use (I love to give myself a little facial massage when I use it). It has a fantastic price point for a cleansing balm, and I find that it calms my skin down and makes it softer! I do have one complaint about this balm – the balm is very hard to squeeze out of the tube..I’m talking major arm workout. I hope the brand improves the packaging for this in the future.
Herbivore Pink Cloud Rosewater + Tremella Creamy Jelly Cleanser (100 mL: $32 CAD/$24 USD, vegan)
I like that this cleanser doesn’t leave my skin feeling dry! It’s gentle and moisturizing, and one small pump is all you need for a full face lather!
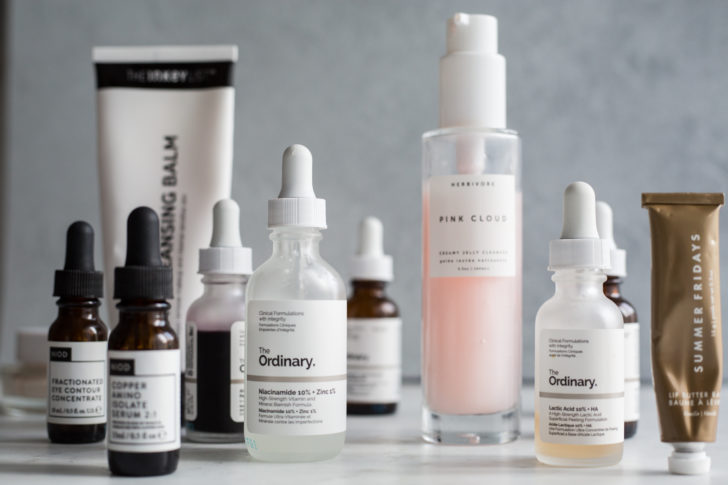
Serums
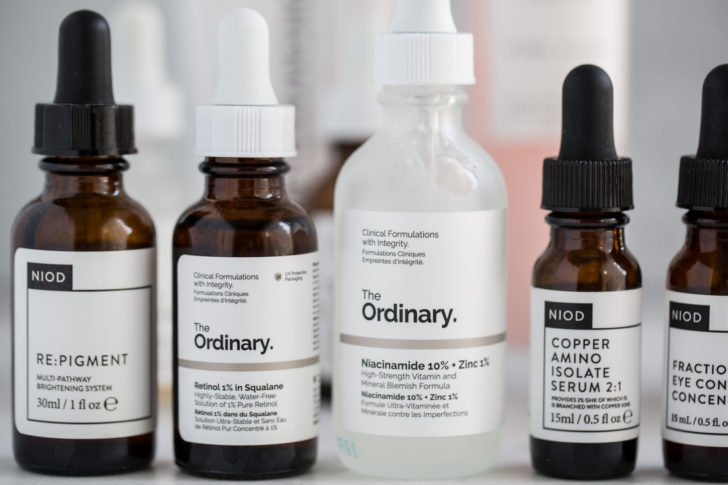
The Ordinary Niacinimide 10% + Zinc 1% (30 mL: $5.90 CAD/USD, vegan)
Targets: balances oil production, reduces appearance of acne, brightens skin tone
The Ordinary Retinol 1% in Squalane (30 mL: $6.70 CAD/USD, vegan)
Targets: fine lines, photo damage, texture (note: I’m going to move on from this retinol as it doesn’t sink in as well as I would like. I plan to try out The Inkey List 1% retinol as soon as it’s back in stock!)
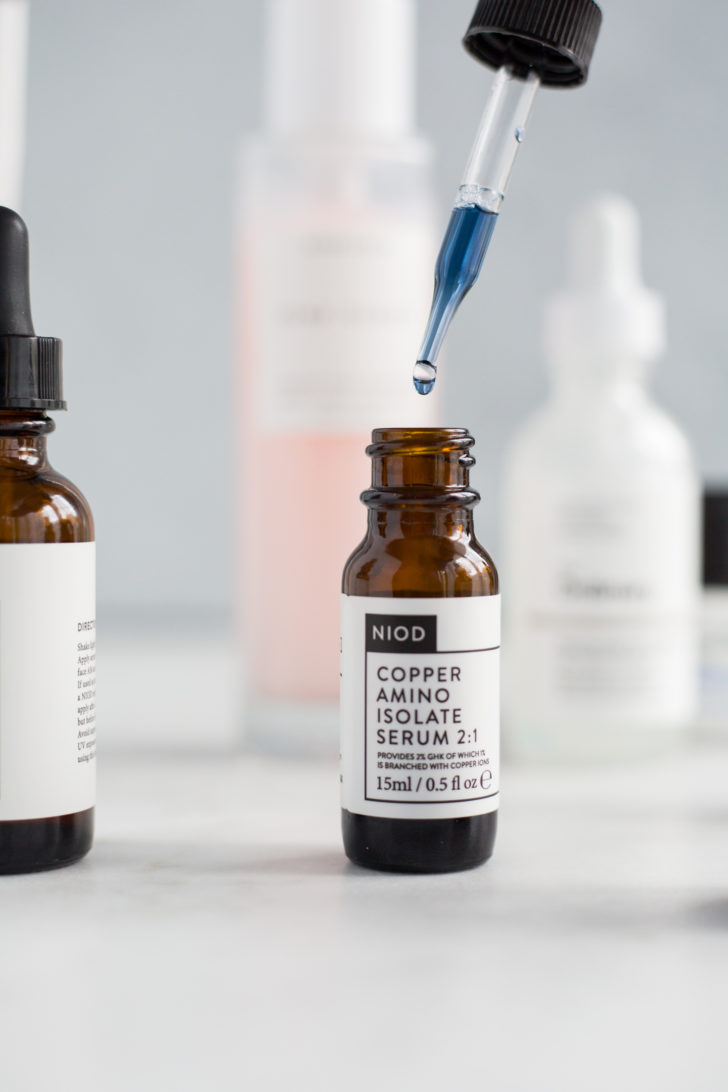
NIOD Copper Amino Isolate Serum 2:1 (15 mL: $60 CAD/USD, vegan)
Targets: textural damage, uneven tone, enlarged pores, lack of radiance
NIOD Re:pigment (15 mL: $39 CAD/USD, vegan)
Targets: hyperpigmentation
NIOD Fractionated Eye Contour Concentrate (15 mL: $68 CAD/USD, vegan)
Targets: dynamic lines, static lines, fine superficial under-eye lines, loss of elasticity (especially upper-eyelids), dark circles, puffiness and textural unevenness.
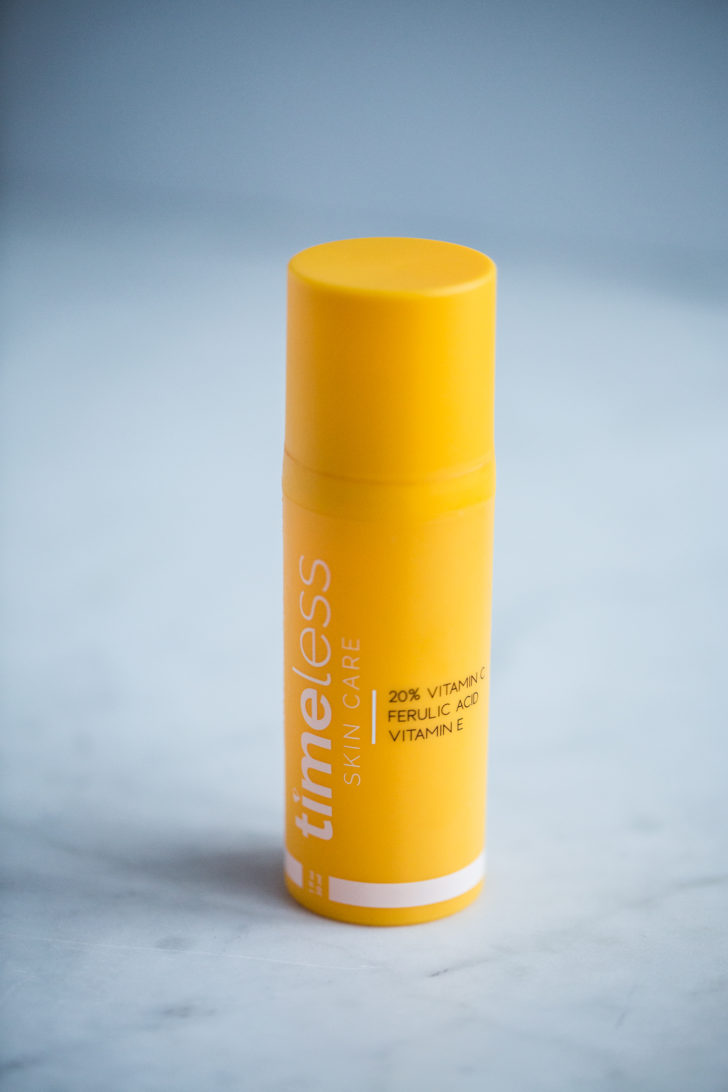
Vitamin C Serum
Timeless Vitamin C + E Ferulic Acid Serum (1 oz/30 mL: $34.55 CAD/$25.95 USD, vegan)
This is a lovely, L-ascorbic acid serum that helps brighten and smooth my skin! In the past, I’ve had problems with sticky or oily vitamin c serums, but this one has a watery texture. I keep it in the refrigerator when storing.
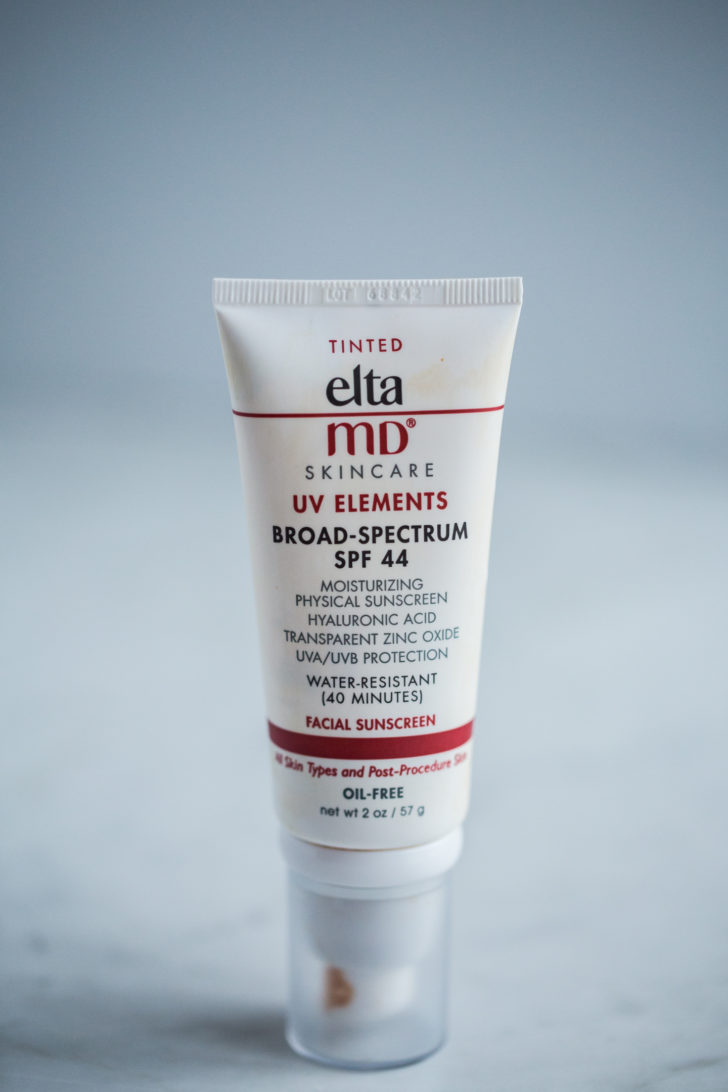
Moisturizer with SPF
EltaMD UV Elements Broad-Spectrum SPF 44 Moisturizing Physical Sunscreen (Tinted) (2 oz/60 mL: $45.33 CAD/$35.50 USD)
mixed with…
Colorescience Sunforgettable Total Protection Face Shield SPF 50 (original tint, 1.8 oz/53 mL: $49.52 CAD/$39 USD)
There is rarely a day I don’t wear sunscreen. I also wear hats religiously when outdoors…you’ll almost never find me outside without a hat on. When I’m outside in the summer during peak UV hours, I wear a goofy-looking wide brim hat, add a fresh layer of facial SPF, and mineral-based sunscreen on my body. Even though I can’t take away all those years I used to tan when I was younger (whyyyy, Ange, whyyy?), I’ve vowed to protect my skin now and in the future.
After finding out that my previous Paula’s Choice go-to sunscreen was not completely mineral-based like I thought it was (huge thanks for a couple OSG readers for mentioning this!), I set out on a quest to find my perfect physical sunscreen. I really like the tinted one linked above by EltaMD because it doesn’t leave a white cast. Unfortunately, the tint is a bit too dark for my skin tone. I now mix the EltaMD one with Colorescience Sunforgettable Total Protection Face Shield SPF 50 (also linked above) and I’m OBSESSED. I can create the perfect custom shade to match my skin. The finish when mixing these two sunscreens is also more matte compared to the EltaMD sunscreen used alone. When used together, they also make my complexion look more even toned.
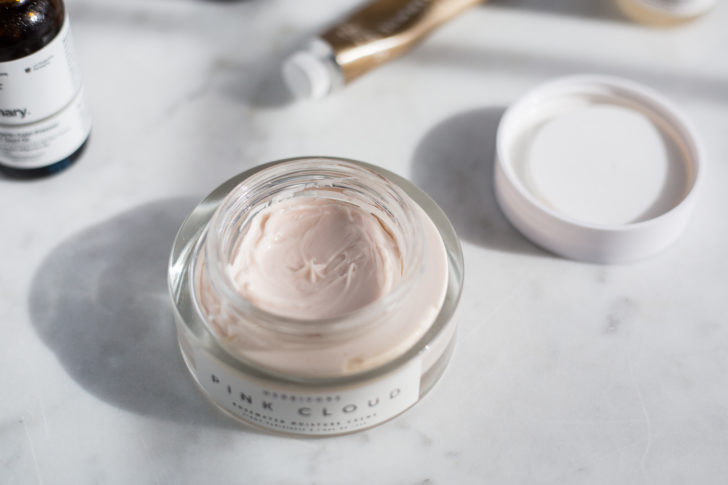
Night Cream
A thick moisturizer is the final step in my evening skin care routine and locks in my serums. I’m actually between night creams at the moment as a cream I love (Herbivore Pink Cloud Moisture Cream, vegan and pictured in this post) may have been discontinued (although I’ve seen that you can still find it at some physical Sephora locations). I also love Drunk Elephant’s Protini Polypeptide Cream (vegan), but I’m not a fan of the packaging.
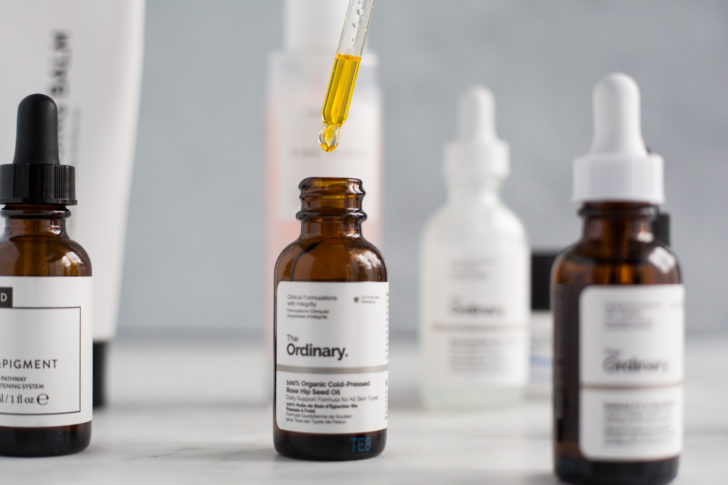
Oils
The Ordinary 100% Organic Cold-Pressed Rose Hip Seed Oil (30 mL: $9.80 CAD/USD, vegan)
I don’t use many oils, but this is a go-to of mine which I use some evenings. It gives the skin a nice glow! When my skin is looking extra thirsty, I’ll add a couple drops of this into my evening moisturizer or layer it underneath my moisturizer.
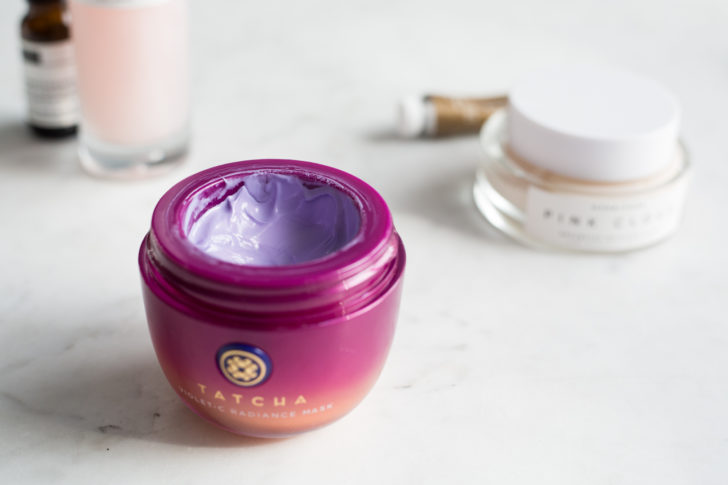
Masks
Tatcha Violet-C Radiance mask (50 mL: $117 CAD/$88 USD)
This new-to-me mask contains vitamin C as well as AHA’s from 7 different fruits (shown in mirror photo above). The biggest benefit I’ve noticed with this mask is that it makes the skin feel very smooth and is moisturizing. It’s a great one to use before makeup for a smooth application. I’ve noticed subtle brightening, but not as much brightening as I was hoping. Because of this and the high price point, I’m not sure whether I will repurchase it. I do like it overall, so I’ll have to see if something better comes along..I always like trying new things out!

Chemical & enzyme exfoliants
Since I don’t use any chemical exfoliants in my current daily AM or PM skincare routines, I like to get in one of these peels once a week. I always patch test new products, but this is especially important with peels. The Ordinary has a handy guide to patch testing here.
The Ordinary Lactic Acid 10% + HA (30 mL: $6.80 CAD/USD, vegan)
I primarily use this lactic acid for KP (Keratosis Pilaris), which I’ve struggled with on the back of my arms. Its gentle chemical exfoliation really helps smooth and soften bumpy skin with regular use and it keeps the skin hydrated at the same time. I tend to forget about applying it, but when I’ve used it regularly (every other day), it has really helped smooth my arms! Of course, you can also use this on your face, too, and it comes in an even more gentle 5% concentration, if need be.
The Ordinary AHA 30% + BHA 2% Peeling Solution (30 mL: $7.20 USD, vegan)
This is a really effective chemical exfoliation for my skin, but you have to be careful with it as it’s not for everyone. Before using, I patch tested this peel on my inner forearm for 10 minutes (the max recommended time). Then I waited 24 hours to see if a reaction formed. When my skin didn’t react, I applied it to my face for just 1 minute for the first use. For the second use, a week or two later, I left it on for 2 to 3 minutes, and I worked my way up from there, very slowly. I’ve used at home chemical exfoliants in the past without issue and my skin has no problems with this mask at the recommended ‘up to 10 minute’ time, but I wouldn’t recommend it for sensitive skin types. The Ordinary says, “It is only suitable for experienced users of acid exfoliation.” It’s also important to make sure your skin is dry before application – there should be no water on the skin. Anyway, this mask makes my skin absolutely glowing and smooth…it’s truly a ride or die for me. I find that I only need to keep it on for 5 to 8 minutes max for great results…less is more.
AlumierMD Enzymatic Peel
This lovely enzyme peel mask contains 10% lactic acid with fruit enzymes for a gentle but effective exfoliation. I purchased it from my sister Kristi who is a trained skin care specialist with AlumierMD and is so knowledgeable about skincare! I find you only need to leave this enzyme mask on for a few minutes, so it’s nice when you find yourself short on time. If you want to find out more about this product or AlumierMD products in general, drop Kristi a line at skinsavvyscience@gmail.com and say hello or follow her on Instagram :)
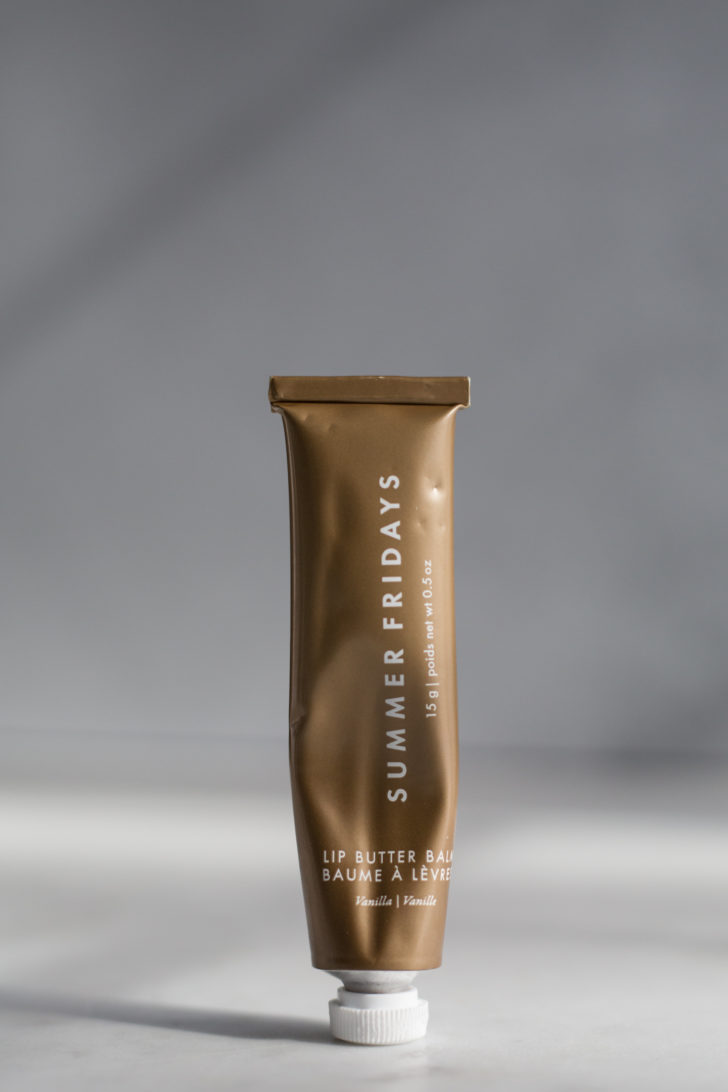
Moisturizing Lip Balm
Summer Fridays Vegan Lip Butter Balm, Vanilla (15g: $29 CAD, $22 USD)
Oh boy, do I love this balm! Summer Fridays says it’s a “silky vegan lip mask that hydrates and soothes parched lips while sealing in moisture.” I would have to agree. I’ve tried quite a few vegan balms and this one is my favourite so far. I use it morning and night…and before going outside in chilly weather!
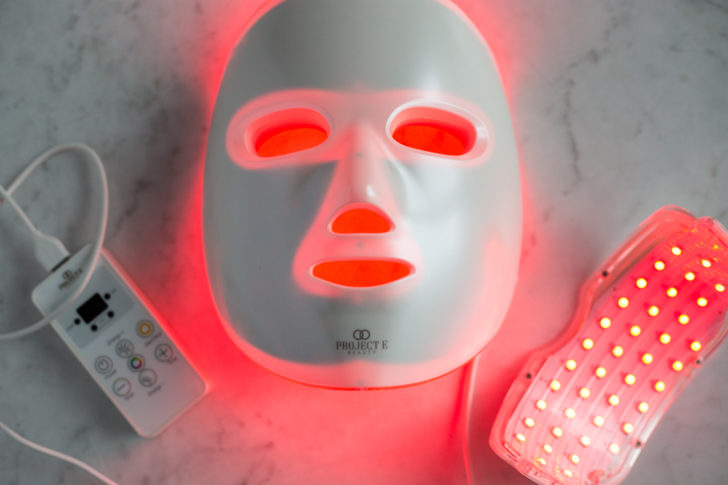
Light-emitting diodes (LED) low-level light therapy
Project E Beauty Photon Face Rejuvenation Face & Neck Mask ($260 CAD/$195 USD)
It’s getting CREEPY up in here! I’ll start with what I don’t love about this LED mask and I’ll end with what I do love. Don’t love: the mask is heavy on the face (particularly on the bridge of the nose). I use the LED mask while lying down in bed and I hold the mask slightly lifted off the bridge of my nose. I’ve found that if I keep my upper arm resting on the bed (rather than suspended in the air) my arm doesn’t get that tired, but it’s still a bit of an annoyance.
Okay, now onto what I love about it and what has made me stick with it—I’ve seen results. And I mean, my expectations were low. I use this diligently for 20 minutes, 5 to 6 times a week, and I’ve noticed that it has slightly plumped and firmed my skin over the past few months. My skin also feels smoother and softer to the touch. I love that this mask comes with a neck attachment. My neck used to be quite rough in texture and now it feels softer and is visibly smoother.
At first, I thought I was imagining the results and wondered if the results were actually from my skincare products, so I decided to try a little experiment. I tried this LED light on my thigh/knee area where I don’t use any serums. Lo and behold it had the same effect – skin softening and slight plumping. So, I’m pretty sure that the red LED light is doing some good things for my skin (consistent use is key). While this LED mask has a lot of wavelength options, I only use the red light which can help boost collagen production and it’s the one I have seen the most research backing (such as here, here, and here). The added benefit of using this device is that it has forced me to relax for 20 mins at a time – something I never used to make time for. Now I look forward to relaxing on my bed, closing my peepers, and kicking back while listening to various Youtube channels (about as close to meditation as I will likely get, but I’ll take it!). Anyway, I’m not totally happy with this product since it is uncomfortable on the bridge of my nose, so my advice would be to look into various brands.
UPDATE: I recently purchased this flexible Aduro 7+1 LED Face Mask after a blog reader highly recommended it and I’m loving it. It’s so much more comfortable than the Project E Beauty mask that I have been using for the past 6 months. The downside? It’s pricey and the import/duty fee set me back $100 CAD. The upside? The product arrived in only 3 days from the time I hit submit on my order.
My AM + PM skin care routines
Lately, I rotate between the following morning and evening routines. In other words, from the lists below, I pick only one morning routine and only one evening routine per day. I try to rotate them fairly evenly. The products in each routine are listed in order of use/application, too. For example, if I list NIOD Re:pigment before The Ordinary’s niacinamide, it means I apply Re:pigment first, let it soak in for about 30 to 60 seconds, then apply niacinamide afterwards.
I created these routines by chatting with DECIEM consultants to determine which products can be combined (and in what order to layer them), and which ones should not be combined. I also love to refer to The Ordinary’s Regime Guide and this handy conflict chart over at DECIEM Chat Room as starting off points.
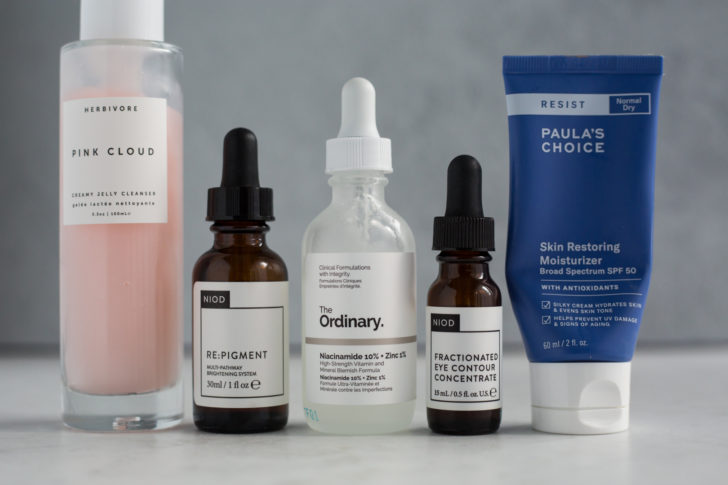
Morning routine #1:
Herbivore Pink Cloud Rosewater + Tremella Creamy Jelly Cleanser
NIOD Re:pigment
The Ordinary Niacinamide 10% + Zinc 1%
NIOD Fractionated Eye Contour Concentrate
Paula’s Choice Resist Skin Restoring Moisturizer with SPF 50
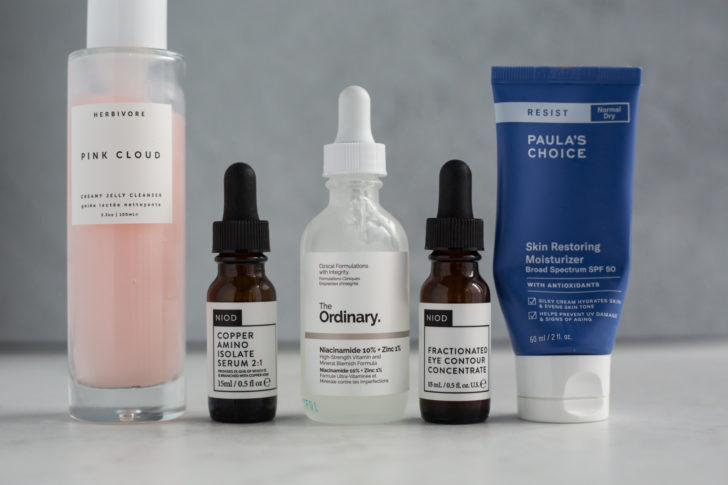
Morning routine #2:
Herbivore Pink Cloud Rosewater + Tremella Creamy Jelly Cleanser
The Ordinary Copper Amino Isolate Serum 2:1
The Ordinary Niacinamide 10% + Zinc 1%
NIOD Fractionated Eye Contour Concentrate
Paula’s Choice Resist Skin Restoring Moisturizer with SPF 50
Morning routine #3: (photo coming soon!)
Herbivore Pink Cloud Rosewater + Tremella Creamy Jelly Cleanser
Timeless Vitamin C + E Ferulic Acid Serum
NIOD Fractionated Eye Contour Concentrate
Paula’s Choice Resist Skin Restoring Moisturizer with SPF 50
Evening routine #1:
Double cleanse with The Inkey List Oat Cleansing Balm, then cleanse with Herbivore Pink Cloud Rosewater + Tremella Creamy Jelly Cleanser
NIOD Re:pigment
The Ordinary Niacinamide 10% + Zinc 1%
NIOD Fractionated Eye Contour Concentrate
Night cream
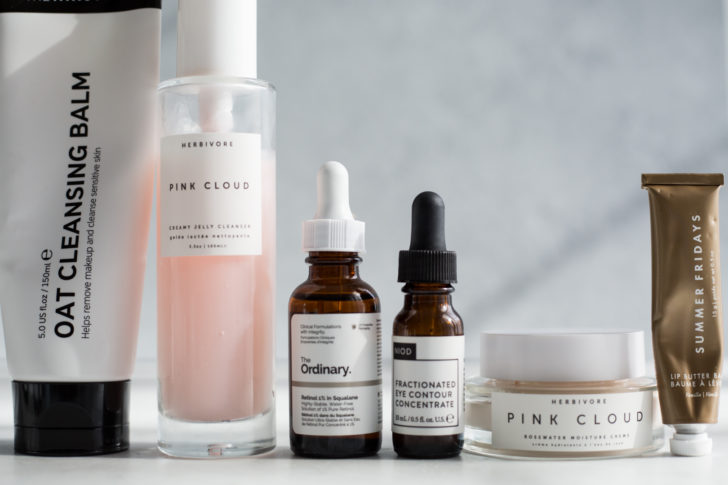
Evening routine #2:
Double cleanse with The Inkey List Oat Cleansing Balm, then cleanse with Herbivore Pink Cloud Rosewater + Tremella Creamy Jelly Cleanser
The Ordinary 1% retinol serum
NIOD Fractionated Eye Contour Concentrate
Night cream
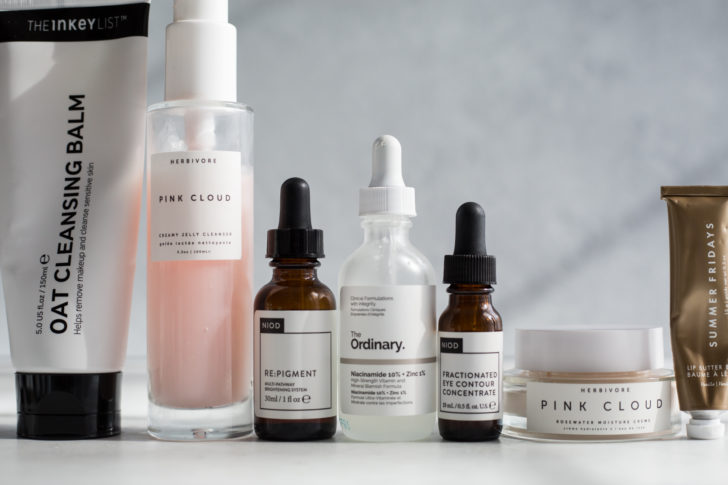
Evening routine #3:
Double cleanse with The Inkey List Oat Cleansing Balm, then Herbivore Pink Cloud Rosewater + Tremella Creamy Jelly Cleanser
NIOD Copper Amino Isolate Serum 2:1
The Ordinary Niacinamide 10% + Zinc 1%
NIOD Fractionated Eye Contour Concentrate
Night cream
Evening routine #4: (photo coming soon!)
Double cleanse with The Inkey List Oat Cleansing Balm, then Herbivore Pink Cloud Rosewater + Tremella Creamy Jelly Cleanser
Timeless Vitamin C + E Ferulic Acid Serum
NIOD Fractionated Eye Contour Concentrate
Night cream
Tips I follow:
- Always patch test new skin products. If using any The Ordinary or NIOD products, see their guide on patch testing.
- Follow product instructions carefully.
- I like to use a slow, gradual approach when introducing new products.
- Some of the products/ingredients above are not recommend for pregnancy or breastfeeding, so be sure to consult with your doctor before use.
- I try to do my evening routine 30 to 60 minutes before I go to bed, so the products have plenty of time to soak in and are less likely to rub off on my pillow.
Whew, was this a beast or what? It was so much fun to put together. :) Drop me a line and let me know about your favourite skin care products…I love hearing what you guys use and love!

I’m excited to announce that Indigo and Chatelaine are hosting a free online event on October 14th at 7pm EST in celebration of Oh She Glows for Dinner! I’ll be chatting with the lovely Maureen Halushak and really hope you will join us! There will also be signed copies of my new book for sale if you’d like to treat yourself or that special someone. =) I’ll be donating 100% of my personal proceeds on the book sales for this event to Building Roots! Be sure to reserve your spot here if you’d like to join us. :)
Only a week to go until Oh She Glows for Dinner launches into the world! This week is the last week to take advantage of my OSG for Dinner Bonus Bundle, so if you preorder, please make sure you download the free bundle. I am so grateful for your support and can’t wait for you to start cooking! xo
The post My AM + PM Skincare Routines and Current Fave Products! (cruelty-free) appeared first on Oh She Glows.