Deprecated: trim(): Passing null to parameter #1 ($string) of type string is deprecated in /home/davecampbell/foodwatcher.com/wp-content/plugins/feedwordpress/feedwordpress.php on line 2022

Black Bean Chili

This easy and comforting black bean chili is rich, full of warm chili spices, and fast enough to pull together on a busy weeknight.

The post Black Bean Chili appeared first on Budget Bytes.

Chili is seriously one of my favorite parts of the fall-winter season. It’s super easy to make, the leftovers are amazing, and it’s incredibly cozy and hearty. It’s basically all I want to eat from September to March. 😅 Our classic chili recipe is great, but I also love this simple black bean chili because it has a slightly lighter, brighter flavor, and I just have a soft spot for black beans. Gimme all the black beans all of the time! So if you’re looking for something to meal prep for the week or just something to keep you warm as the air outside gets colder, give this black bean chili a try!

Overhead view of a bowl full of black bean chili with toppings.

What’s in Black Bean Chili

Rather than just substituting all black beans in my classic chili recipe, I also changed the flavor profile of this chili slightly. I used tangy diced tomatoes with green chiles, which gives the chili a nice brightness. I paired that with a little more cumin than usual for a slightly earthy base, and then added some smoked paprika because that smoky flavor pairs really well with the black beans. I also wanted the black beans to be the star of this show, so I actually used half the amount of ground meat as my classic chili, which helps keep it very budget-friendly as well!

Ingredients for Black Bean Chili

Here’s what you’ll need to make this delicious and hearty pot of black bean chili:

  • Onion and Garlic: Any pot of chili is going to start with plenty of onion and garlic to get those savory base flavors in place!
  • Ground Beef: I used only a half pound of ground beef for this recipe, but you can increase it to one pound if you prefer a more meaty chili. You can also substitute with ground turkey if preferred.
  • Tomatoes: I used a combination of diced tomatoes with green chiles and tomato paste for this chili. The diced tomatoes add texture and a zingy flavor (thanks to the green chiles) and the tomato paste adds richness and helps thicken the chili.
  • Herbs and spices: The spice mix for this chili starts with a hefty dose of chili powder, then we add some extra cumin for earthiness, a little smoked paprika, oregano, salt, and pepper. Feel free to add a little cayenne if you like your chili spicy!

Toppings for Chili

One of the reasons I love chili the most is all of the fun toppings you can add to your bowl. It’s a great opportunity to use up leftovers in your fridge or pantry, and it can just add tons of flavor, color, and texture to the meal! Here are some of my favorite toppings for black bean chili:

  • Fresh or pickled jalapeños
  • Diced red onion
  • Avocado
  • Sliced green onion
  • Cilantro
  • Crushed tortilla chips
  • Sour cream
  • Cheddar cheese
  • Fresh lime juice
  • Diced avocado
  • Pico de gallo
Overhead view of a pot full of black bean chili.

Serve with a side of Jalapeño Cheddar Cornbread!

Overhead view of a bowl full of black bean chili with toppings.
Print

Black Bean Chili

This easy and comforting black bean chili is rich, full of warm chili spices, and fast enough to pull together on a busy weeknight. 
Course Dinner, Lunch, Main Course
Cuisine American
Total Cost $9.19 recipe / $1.53 serving
Prep Time 10 minutes
Cook Time 20 minutes
Total Time 30 minutes
Servings 6 (about 1.3 cups each)
Calories 358kcal

Ingredients

Instructions

  • Dice the onion and mince the garlic. Add the onion and garlic to a large pot with the olive oil and cook over medium heat just until the onions are softened (2-3 minutes).
  • Add the ground beef to the pot and continue to sauté until the beef is cooked through (5-7 minutes).
  • Add the drained black beans, diced tomatoes (with juices), tomato paste, chili powder, cumin, smoked paprika, and oregano. Stir everything to combine.
  • Place a lid on the chili and allow it to come up to a simmer. Let the chili simmer for about 15 minutes, stirring occasionally, to let the flavors blend and help the liquid thicken slightly.
  • Taste the chili and add salt as needed (this will depend on the salt content of your canned goods. I added about ½ tsp). Serve with your favorite chili toppings and enjoy!

See how we calculate recipe costs here.

Notes

*If you want a mild chili, you can use plain diced tomatoes instead of diced tomatoes with green chiles.

Nutrition

Serving: 1Cup | Calories: 358kcal | Carbohydrates: 46g | Protein: 22g | Fat: 11g | Sodium: 1292mg | Fiber: 17g
Side view of a bowl full of black bean chili with a spoon in the center.

How to Make Black Bean Chili – Step by Step Photos

Onions, garlic, and oil in a soup pot.

Begin by dicing one yellow onion and mincing four cloves of garlic. Sauté the onions and garlic with 1 Tbsp olive oil in a large pot over medium-low heat until softened (2-3 minutes).

Browned beef in the pot with garlic and onions.

Add ½ pound ground beef (or turkey) and continue to sauté until the meat is cooked through.

Tomatoes, spices, and water added to the soup pot.

Add three 15oz. cans of black beans (drained), one 10oz. can of diced tomatoes with green chiles (with the juices), one 6oz. can of tomato paste, 1 Tbsp chili powder, 1 tsp ground cumin, ½ tsp smoked paprika, ½ tsp oregano, ½ tsp salt, and 2 cups of water.

Chili ingredients in the pot, stirred, but not simmered.

Stir all of the ingredients together until evenly combined. Turn the heat up to medium-high, place a lid on the pot, and allow the chili to come up to a boil. Once it comes up to a boil, give the chili a stir, replace the lid, and reduce the heat to medium-low.

Simmered chili in the pot being stirred.

Let the chili simmer over medium-low heat for about fifteen minutes, which will help blend the flavors and thicken the sauce. Give it a taste and add salt if needed. I added about ½ tsp. And that’s it! You’re DONE making dinner! 

Overhead view of a pot full of black bean chili with toppings in the center of the pot.

Add your favorite toppings and go to town! Or divide it up into single-serving portions and refrigerate for really easy ready-to-heat meals for the rest of the week.

Overhead view of a bowl full of black bean chili with toppings.

The post Black Bean Chili appeared first on Budget Bytes.

Pork and Cherry Rice Bowl

These pork and cherry rice bowls are a quick and delicious rice bowl meal with a unique sweet and savory twist!

The post Pork and Cherry Rice Bowl appeared first on Budget Bytes.

If you want to break free from the same old same old, these Pork and Cherry Rice Bowls are a ridiculously delicious and unique twist on the classic rice bowl. Sweet and juicy cherries are a perfect contrast for unctuous, savory (and super budget-friendly) ground pork. The dish is finished with an acidic cherry sauce made with pork drippings that truly brings it all together. The best part: It’ll be on the table in about a half hour!

Overhead view of a pork and cherry rice bowl garnished with parsley.

What Is A Pork And Cherry Rice Bowl?

Ultimately, it’s a rice bowl. You have a grain, some protein, and produce. But rice bowls can get boring, and this out-of-the-box combination is savory with a touch of tart sweetness. For me, it was love at first bite.

Ingredients For Apple Slaw

While these rice bowls are easy enough for a weeknight meal (they come together in about a half hour!), their bold flavor makes them perfect for a special occasion. Here’s what you’ll need to make Pork and Cherry Rice Bowls:

  • Rice: This is the foundation of this rice bowl. I use jasmine rice in this recipe, feel free to use your favorite type, though of course the water ratio and cooking times might change depending on the type of rice used. If you need it, check out our handy tutorial on How To Cook Rice.  
  • Ground Pork: I use ground pork sausage patties because they’re budget-friendly and super convenient. They are already seasoned, so you only have to cook the pork through. Pork sausage patties are usually made with fennel or sage, seasonings that pair perfectly with savory cherries. You can, of course, use your favorite ground pork or plant-based sausage here; just make sure it isn’t something way out there like beer and cheese jalapeño.  
  • Cherries: I use frozen sweet cherries that are pitted and ready to go. They break down quickly into a sauce. Any type of sweet cherry will do here. If you want to use fresh, you’ll need to make sure they are pitted before putting them in the mix. Canned sweet cherries are fine as long as the don’t have added sugar. This is a savory preparation. If you don’t like cherries, I recommend you try one of our other fantastic rice bowls. 
  • Red Wine: Helps create our cherry sauce and adds depth of flavor. The alcohol thoroughly cooks out, so you won’t be getting anyone tipsy. If you want to skip the wine, use cranberry juice or chicken stock.
  • Red Pepper Flakes: Add dimension by bringing a touch of smoky heat. Though it is a subtle heat and nothing that will knock your socks off, feel free to omit it if you’re not a fan.
  • Lemon Juice: Adds a touch of acidity to the sauce. If you don’t have lemon juice, use apple cider vinegar. 
  • Italian Parsley: Adds herbaceous notes to the mix and is also used for garnish. 
  • Garlic and Yellow Onion: These are aromatics that help add bulk and flavor to the ground pork. You can substitute the onion with a tablespoon of onion powder and the garlic with ½ teaspoon of garlic powder. If you can’t do onions and garlic, skip them.
  • Butter: Helps pull the sauce together and gives it a nice sheen. 

What To Serve With Pork and Cherry Rice Bowls

If you want to bulk up your meal, pair these Pork and Cherry Rice Bowls with an easy Side Salad, Butternut Squash Salad, or Herby Potato Salad. They’re also excellent with Balsamic Roasted Mushrooms or Lemon Butter Green Beans.

How To Store The Leftovers

Store the rice and ground pork separately in airtight containers; otherwise, the rice will soak up that delicious sauce. You can refrigerate for up to 3 days or freeze for up to 3 months. Reheat in a microwave or on a stovetop until steaming. 

Side view of a pork and cherry rice bowl.
Close up overhead view of a pork and cherry rice bowl.
Print

Pork and Cherry Rice Bowls

These pork and cherry rice bowls are a quick and delicious rice bowl meal with a unique sweet and savory twist!
Course Dinner
Cuisine American
Total Cost $7.27 recipe / $1.82 serving
Prep Time 5 minutes
Cook Time 20 minutes
Rest Time 10 minutes
Total Time 35 minutes
Servings 4 (about 1.5 cups each)
Calories 749kcal

Ingredients

  • 4 Tbsp salted butter, divided $0.38
  • 2 cups long grain white rice, rinsed $0.75
  • 2.5 cups boiling water $0.00
  • 1/4 tsp salt, divided $0.01
  • 1 yellow onion, diced $0.32
  • 2 cloves garlic, minced $0.16
  • 12 oz. pork sausage $2.99
  • 1/2 cup Italian parsley, chopped $0.42
  • 1/2 cup frozen or fresh sweet cherries $1.25
  • 1/2 cup red wine $0.94
  • 1/8 tsp crushed red pepper $0.02
  • 1/4 tsp lemon juice $0.01

Instructions

  • In a medium pot with a heavy lid or in a rice cooker, melt 2 tablespoons of butter and mix in the rice. Toast the rice in the butter, stirring until fragrant. Then add the boiling water and 1/8 teaspoon salt.
  • Once the rice comes to a boil and there are small steam vent holes across the surface, cover and cook for 15 minutes. When the fifteen minutes are up, remove the rice from the heat, but do not uncover the pan. Allow the rice to steam for an additional 10 minutes before removing the lid.
  • In the meantime, place a skillet over medium-high heat and melt 1 tablespoon of butter in it. Add the diced yellow onion and cook until soft and translucent, about 2 minutes. Add the minced garlic cloves and cook until fragrant, about 30 seconds.
  • Add the pork sausage to the pan and cook until browned, about 5 minutes. Mix the chopped Italian Parsley into the pork.
  • Remove the pork from the pan, leaving the juices in the pan. Add the red wine to the pan and deglaze it, using a wooden spoon to scrape up all the brown bits. This should take about 1 minute.
  • Chop the cherries into quaraters and add them to the deglazed pan, stirring occasionally until the liquid reduces into a thin syrup, about 5 minutes. Take the cherries off the heat. The rice should also be done cooking by now, so make sure to take it off the heat and allow it to steam for 10 minutes.
  • Add the remaining 1/8 teaspoon salt, red pepper flakes, black pepper, and lemon juice to the cherry sauce. Stir to incorporate. Add the final tablespoon of butter to the cherry sauce and stir until it melts.
  • Once the ten-minute resting time for the rice is up, uncover and fluff it. Taste for salt and adjust the seasoning if necessary.
  • Divide the rice between four bowls. Top the rice with the ground pork. Drizzle with cherry sauce. Garnish with Italian parsley and serve.

See how we calculate recipe costs here.

Nutrition
Serving: 1.5cups | Calories: 749kcal | Carbohydrates: 81g | Protein: 20g | Fat: 35g | Sodium: 796mg | Fiber: 2g

How to Make Pork and Cherry Rice Bowls – Step by Step Photos

Boiling water being poured into a pot with rice.

In a medium pot with a heavy lid or in a rice cooker, melt 2 tablespoons of butter and mix in 2 cups of rice. Toast the rice in the butter, stirring until fragrant. Then add 2 1/2 cups boiling water and 1/8th teaspoon salt. 

Half cooked rice in the pot, showing air vents in the surface.

Once the rice comes to a boil and there are small steam vent holes across the surface, cover and cook for 15 minutes. When the fifteen minutes are up, remove the rice from the heat, but do not uncover the pan. Allow the rice to steam for an additional 10 minutes before removing the lid.

Sautéed onion in a skillet.

In the meantime, place a skillet over medium-high heat and melt 1 tablespoon of butter in it. Add 1 diced yellow onion and cook until soft and translucent, about 2 minutes. Add 2 minced garlic cloves and cook until fragrant, about 30 seconds. 

Cooked pork sausage in the skillet.

Add 12 ounces of pork sausage to the pan and cook until browned, about 5 minutes. Mix ½ cup chopped Italian Parsley into the pork. 

Red wine being poured into the pan to deglaze.

Remove the pork from the pan, leaving the juices in the pan. Add 1/2 cup red wine to the pan and deglaze it, using a wooden spoon to scrape up all the brown bits. This should take about 1 minute.

Reduced red wine sauce in the skillet.

Chop 1/2 cup fresh or frozen sweet cherries into quarters, then add them to the deglazed pan, stirring occasionally until the liquid reduces into a thin syrup, about 5 minutes. Take the cherries off the heat. The rice should also be done cooking by now, so make sure to take it off the heat and allow it to steam for 10 minutes. 

Butter added to the cherry red wine sauce in the skillet.

Add the remaining 1/8th tsp salt, 1/8 tsp red pepper flakes, 1/4 tsp black pepper, and 1/4 tsp lemon juice to the cherry sauce. Stir to incorporate. Add the final tablespoon of butter to the cherry sauce and stir until it melts.

Fluffed rice in the pot.

Once the ten-minute resting time is up, uncover the rice and fluff it. Taste for salt and adjust the seasoning if necessary.

Cherry pork rice bowl being assembled.

Divide the rice between four bowls. Top the rice with the ground pork. Drizzle with cherry sauce. Garnish with Italian parsley and serve.

A fork digging into a pork and cherry rice bowl.

The post Pork and Cherry Rice Bowl appeared first on Budget Bytes.

Sliders

This easy recipe for sliders is great for feeding a crowd at parties, potlucks, tailgates, or just for a quick weeknight meal.

The post Sliders appeared first on Budget Bytes.
These super-tasty, mouthwatering Sliders feature savory beef and pork patties tucked into pillowy Hawaiian rolls dripping with American cheese.  They’re a fabulous way to feed a crowd without much fuss because they come together quickly and are made by the dozen. That’s why this easy Slider recipe is my go-to for parties, potlucks, tailgates, or a quick weeknight meal. Make it once, and it’ll become the same for you!

Close up side view of a stack of sliders.

What Are Sliders?

For the most part, sliders refer to a miniature sandwich, in this case, tiny hamburgers. Traditionally, slider patties are made individually from a ball of beef smashed on a grill with chopped onions.  In this recipe, we mix raw onions in the meat and bake one giant patty. We then sandwich the patty between uncut sheets of Hawaiian rolls with loads of cheese, bake it again until the cheese melts, and then cut it into a dozen sliders. Easy!

Ingredients for Sliders

There are many ways to make sliders, but the basic ingredients are the same: ground meat, bread, onion, cheese, and toppings. You can get creative with your toppings, but I’ve kept things really simple here. This is what you’ll need to make quick and easy Sliders:

  • Ground Beef and Pork: You can buy ground pork for a third of the price of ground beef, so I used equal parts of each in the patty to keep things budget-friendly. Feel free to go with all ground beef (or all ground pork), as the recipe directions won’t change. Remember that pork is white meat, so the color of these patties is lighter than a traditional burger patty.
  • Onions: add depth and bulk to the patty but are not essential. If you’re not a fan, keep them out of the mix.
  • Burger Seasoning: The spices in this mix add deep flavor to the meat. We’ve got a great Homemade Burger Seasoning recipe, but your favorite seasoning blend will also work here. You can also just use up to a teaspoon of salt and a few cracks of black pepper. 
  • Cheese: American cheese slices are wallet-friendly and offer superior melting. Of course, you can substitute them with your preferred melting cheese. 
  • Hawaiian Rolls: These make up the bun of our sliders. They are sold in uncut sheets, simplifying the cooking process. You can substitute the rolls with your favorite hamburger rolls, though it will change the yield and, of course, the assembly steps.
  • Everything Bagel Seasoning: This is used to add flavor and texture to the slider buns. You can substitute it with sesame seeds, poppy seeds, or flaky salt. This ingredient can also be omitted

What To Serve With Sliders

You can’t go wrong pairing sliders with anything potato-based like French Fries, Sweet Potato Fries, or Potato Salad. They’re also great with Cole Slaw, Baked Beans, or, for the ultimate indulgence, Nacho Cheese Dip. (Don’t knock a nacho cheese-dipped Slider until you’ve tried it!)

How To Store Sliders

If you have leftovers, remove the patty from the bun and refrigerate the bread and meat in separate air-tight containers. When ready to eat, reheat in individual sheet pans in a 350°F oven. Warm the bread for a few minutes and pull the patties when they start to steam. Then assemble.

Side view of individual sliders on a wooden cutting board.
Print

Sliders

This easy recipe for sliders is great for feeding a crowd at parties, potlucks, tailgates, or just for a quick weeknight meal.
Course Appetizer, Dinner, Lunch
Cuisine American
Total Cost $16.11 recipe / $2.69 serving
Prep Time 20 minutes
Cook Time 35 minutes
cool time 5 minutes
Total Time 1 hour
Servings 6 (2 sliders each)
Calories 728kcal

Ingredients

Instructions

  • Set an oven rack in the center of your oven and preheat it to 375°F. Line a sheet pan with a sheet pan rack. Add the ground beef and pork to a bowl. Sprinkle with onions, salt, and burger seasoning, and lightly mix.
  • Add a sheet of parchment paper to your work surface. Press the meat onto the parchment paper and shape it into a 12 x 16 rectangle. Place the parchment paper with the meat on it on the sheet pan rack.
  • Top the meat with another sheet of parchment paper, then place a second sheet pan on top of it. Bake for 20 minutes or until the internal temperature of the meat reaches 150°F.
  • In the meantime, slice the rolls in half lengthwise. Brush the rolls with 2 tablespoons of butter.
  • Once the 20 minutes are up and the meat has reached an internal temperature of 150°F, remove the top sheet pan from the oven. Then remove the sheet pan that has the meat in it from the oven. Remove the top layer of parchment paper to reveal a large meat patty.
  • Use two large spatulas to remove the meat from the parchment paper on the sheet pan rack. Top the bottom rolls with the large meat patty.
  • Add the 6 slices of American cheese in a single layer.
  • Place the top rolls on top of the meat and cheese. Brush the tops with the last 2 tablespoons of butter. Sprinkle with 2 teaspoons of Everything But The Bagel Seasoning.
  • Cook for 15 minutes or until the bread toasts and the cheese melts. Remove from the oven and cool for a few minutes before slicing into individual sliders. Serve on a platter and enjoy your the oohs and ahhs at your get-together!

See how we calculate recipe costs here.

Nutrition

Serving: 2sliders | Calories: 728kcal | Carbohydrates: 34g | Protein: 36g | Fat: 49g | Sodium: 954mg | Fiber: 1g
A hand picking up a slider from a platter, viewed from above.

How to Make Sliders – Step by Step Photos

Ground beef and pork in a bowl with diced onion.

Set an oven rack in the center of your oven and preheat it to 375°F. Line a sheet pan with a sheet pan rack. Add the ground beef and pork to a bowl. Sprinkle with onions, salt, and burger seasoning, and lightly mix. 

Seasoned meat mixture shaped into a rectangle on a sheet pan with parchment.

Add a sheet of parchment paper to your work surface. Press the meat onto the parchment paper and shape it into a 12 x 16 rectangle. Place the parchment paper with the meat on it on the sheet pan rack. 

Parchment and second sheet pan on top of meat.

Top the meat with another sheet of parchment paper, then place a second sheet pan on top of it. Bake for 20 minutes or until the internal temperature of the meat reaches 150°F.

Hawaiian rolls cut in half being brushed with butter.

In the meantime, slice the rolls in half lengthwise. Brush the rolls with 2 tablespoons of butter. 

Cooked slider meat on the sheet pan.

Once the 20 minutes are up and the meat has reached an internal temperature of 150°F, remove the top sheet pan from the oven. Then remove the sheet pan that has the meat in it from the oven. Remove the top layer of parchment paper to reveal a large meat patty.

Baked meat on the bottom Hawaiian rolls.

Use two large spatulas to remove the meat from the parchment paper on the sheet pan rack. Top the bottom rolls with the large meat patty.

American cheese slices on top of the meat.

Add the 6 slices of American cheese in a single layer.

Rolls on top and everything bagel seasoning being sprinkled on top.

Place the top rolls on top of the meat and cheese. Brush the tops with the last 2 tablespoons of butter. Sprinkle with 2 teaspoons of Everything But The Bagel Seasoning. 

Final baked sliders out of the oven.

Cook for 15 minutes or until the bread toasts and the cheese melts. Remove from the oven and cool for a few minutes before slicing into individual sliders. Serve on a platter and enjoy your the oohs and ahhs at your get-together!

Slider being picked up from the group with the cheese pulling.

The post Sliders appeared first on Budget Bytes.
Air Fryer Chicken Nuggets

These Air Fryer Chicken Nuggets are tender, juicy, easy to make, and perfect with your favorite dipping sauce!

The post Air Fryer Chicken Nuggets appeared first on Budget Bytes.
Am I the only one late to the Air Fryer club? I assumed it was just another kitchen appliance that I probably didn’t need taking up space on my countertop. Well I finally received an air fryer as a gift recently, and boy was I wrong! I’m loving the air fryer now, especially when it comes to making simple recipes like these Air Fryer Chicken Nuggets! They’re super easy to make, I can control the ingredients, and I can get about 2 dozen homemade chicken nuggets for half the cost compared to a fast food restaurant, #winning!

Air fryer chicken nuggets in a serving dish with BBQ and ranch dipping sauces.

What You’ll Need for Air Fryer Chicken Nuggets

When I say these nuggets are super easy to make, I mean you really only need a few ingredients:

  • Chicken – I’m a chicken breast girl so I’m using a boneless, skinless chicken breast for my nuggets. You can certainly use boneless, skinless chicken thighs, however I haven’t tested it with chicken thighs, so the cook time may vary.
  • All Purpose Flour – A light coating of flour helps the buttermilk to adhere to the chicken. 
  • Buttermilk – Thick buttermilk keeps the chicken tender & moist, and also helps the breadcrumbs adhere to the chicken nuggets. 
  • Breadcrumbs – Of course it wouldn’t be a chicken nugget without that iconic golden brown breading. We’re using regular plain breadcrumbs so we can season them to our liking.
  • Oil and Spices – A little bit of cooking oil to help the breadcrumbs crisp up and brown evenly. And a simple spice mix flavors the chicken.

Buttermilk Alternatives

Buttermilk is a common ingredient used in baked and fried chicken recipes, but you may not always have it on hand and it can sometimes be a little pricey. So here are some other alternatives:

  1. Milk + Vinegar or Lemon juice – Mix 1 Tbsp of vinegar or lemon juice with 1 cup of milk. Stir and let the mixture sit for 10 minutes. Proceed to use in the recipe in place of buttermilk.
  2. Greek yogurt – Plain greek yogurt, like buttermilk, is a cultured milk product that can also help keep the nuggets tender and moist. This is what we used in our Baked Chicken Nuggets recipe and they turned out great! In a small bowl add ⅓ cup greek yogurt, ⅛ tsp salt, and 3 Tbsp of water. Stir together until smooth, but still thick enough to coat the chicken. Proceed to use in the recipe in place of buttermilk.

Buttermilk is definitely the best option, so if you do have some on hand use that instead of an alternative.

Plated air fryer chicken nuggets with one nugget being grabbed.

Recipe Tips For Success!

  1. Add the oil and spices to the breadcrumbs separately. Add the spices to the breadcrumbs first and give it a good mix, then add the oil and combine. This allows the spices to be evenly distributed.
  2. When adding the breading to the chicken, flip and press the nuggets into the breadcrumb mixture making sure it’s completely coated evenly all the way around.
  3. Remember to preheat the air fryer. Similar to preheating your oven, it’s a good idea to preheat your air fryer so the chicken nuggets can cook evenly and get crispy on the outside.
  4. Don’t crowd the basket. Space the nuggets out in an even layer so the hot air can circulate around the chicken. Cook in two separate batches if you need to.

How to Reheat Air Fryer Chicken Nuggets

If you have any leftover chicken nuggets the best way to reheat them to maintain their texture and flavor would be in the air fryer. Simply preheat the air fryer to 375°F, place the nuggets in the air fryer basket in a single layer, and cook for 2-3 minutes or until heated through, making sure they reach an internal temperature of 165°F.

What To Serve With Chicken Nuggets

What’s a chicken nugget without a great dipping sauce? Here are some of our favorites:

And if you’re looking for more side dish ideas to go with these chicken nuggets, try our Oven Baked Steak Fries, Homemade Mac and Cheese, a side of Simple Sautéed Vegetables, or a quick Pasta Salad!

Plated air fryer chicken nuggets with one nugget being dipped in ranch dipping sauce.
Air fryer chicken nuggets plated in a serving dish with ranch and BBQ dipping sauces on the side.
Print

Air Fryer Chicken Nuggets

These Air Fryer Chicken Nuggets are tender, juicy, easy to make, and perfect with your favorite dipping sauce!
Course Dinner, Lunch
Cuisine American
Total Cost $5.64 recipe / $1.41 serving
Prep Time 15 minutes
Cook Time 8 minutes
Total Time 23 minutes
Servings 4 5-6 nuggets each
Calories 211kcal

Equipment

Ingredients

  • 1 boneless, skinless chicken breast (about 2/3 lb.) $4.50
  • 3/4 tsp salt, divided $0.05
  • 1 Tbsp all-purpose flour $0.02
  • 1 cup plain breadcrumbs $0.60
  • 1 tsp garlic powder $0.10
  • 1/2 tsp smoked paprika $0.05
  • 2 Tbsp cooking oil $0.08

Instructions

  • On a cutting board, cut the chicken breast into 3/4 inch pieces. You should get approximately 20-24 chicken nuggets depending on the size of your chicken breast.
  • Sprinkle ¼ tsp of salt evenly over the chicken pieces. Next sprinkle the flour over the chicken and toss to coat evenly.
  • In a small bowl add the breadcrumbs, garlic powder, smoked paprika, and ½ tsp salt. Mix seasoning into the breadcrumbs. Next add the cooking oil to the breadcrumbs and stir until the oil is evenly coating the breadcrumbs. It should look like damp sand.
  • In another small bowl add ½ cup buttermilk.
  • Now line up the chicken, buttermilk, and breadcrumbs. Using tongs or your hands, begin to coat the chicken nugget pieces by first dipping them in the buttermilk, then transfer them to the breadcrumbs and coat them evenly with the breadcrumbs. Set the coated chicken pieces to the side.
  • Preheat the air fryer to 400°F. Once preheated, place the chicken nuggets in the air fryer basket in a single layer. Try not to overcrowd the basket. You can cook the chicken nuggets in 2 batches if needed. Air fry for 8 minutes, flipping the nuggets halfway through.
  • Remove chicken nuggets from the air fryer and let cool for 3-5 minutes, then serve with your favorite dipping sauce.

See how we calculate recipe costs here.

Nutrition

Serving: 1serving | Calories: 211kcal | Carbohydrates: 22g | Protein: 10g | Fat: 9g | Sodium: 667mg | Fiber: 1g

How to Make Air Fryer Chicken NUggets – Step by Step Photos

Chicken breast being cut into 1 inch pieces on a cutting board

On a clean cutting board, cut the chicken breast into 3/4 inch pieces. You should get approximately 20-24 chicken nuggets depending on the size of your chicken breast.

Chicken breast nuggets seasoned with salt and dusted with flour.

Season the chicken by adding ¼ tsp of salt evenly over the chicken pieces. Next sprinkle 1 Tbsp all purpose flour over the chicken pieces. Toss the chicken to coat evenly.

Breadcrumbs with seasoning and oil mixed together.

In a small bowl add 1 cup of plain breadcrumbs, 1 tsp garlic powder, ½ tsp smoked paprika, and ½ tsp salt. Mix seasoning into breadcrumbs. Next add 2 Tbsp of cooking oil to the breadcrumbs and stir until the oil is evenly coating the breadcrumbs. It should look like damp sand.

Chicken nugget assembly line with chicken pieces on the left, buttermilk and breadcrumbs in the middle, and coated chicken nuggets on the right.

In another small bowl add ½ cup buttermilk. Line up the chicken, buttermilk, and breadcrumbs. Using tongs or your hands, begin to coat the chicken nugget pieces by first dipping them in the buttermilk, then transfer them to the breadcrumbs and coat them evenly with the breadcrumbs.

Breaded chicken nuggets

Set the coated chicken pieces to the side.

Breaded chicken nuggets added to air fryer basket.

Preheat the air fryer to 400°F. Once preheated, place the chicken nuggets in the air fryer basket in a single layer. Try not to overcrowd the basket. You can cook the chicken nuggets in 2 batches if needed.

Cooked chicken nuggets in the air fryer basket with one being lifted with tongs.

Air fry for 8 minutes, flipping the nuggets halfway through.

Cooked Air Fryer Chicken Nuggets plated in a serving dish.

Remove the chicken nuggets from the air fryer and let cool for 3-5 minutes, then serve with your favorite dipping sauce. Enjoy!

Plated Air Fryer Chicken Nuggets with one nugget being dipped into ranch sauce.

The post Air Fryer Chicken Nuggets appeared first on Budget Bytes.

Deprecated: trim(): Passing null to parameter #1 ($string) of type string is deprecated in /home/davecampbell/foodwatcher.com/wp-content/plugins/feedwordpress/feedwordpress.php on line 2022

Mushroom stroganoff

A few years ago, my publisher approached me about doing a one-pot cookbook. After writing the proposal, they decided that they didn’t like it and passed on the project. My…
Source

A few years ago, my publisher approached me about doing a one-pot cookbook. After writing the proposal, they decided that they didn’t like it and passed on the project. My...

Source

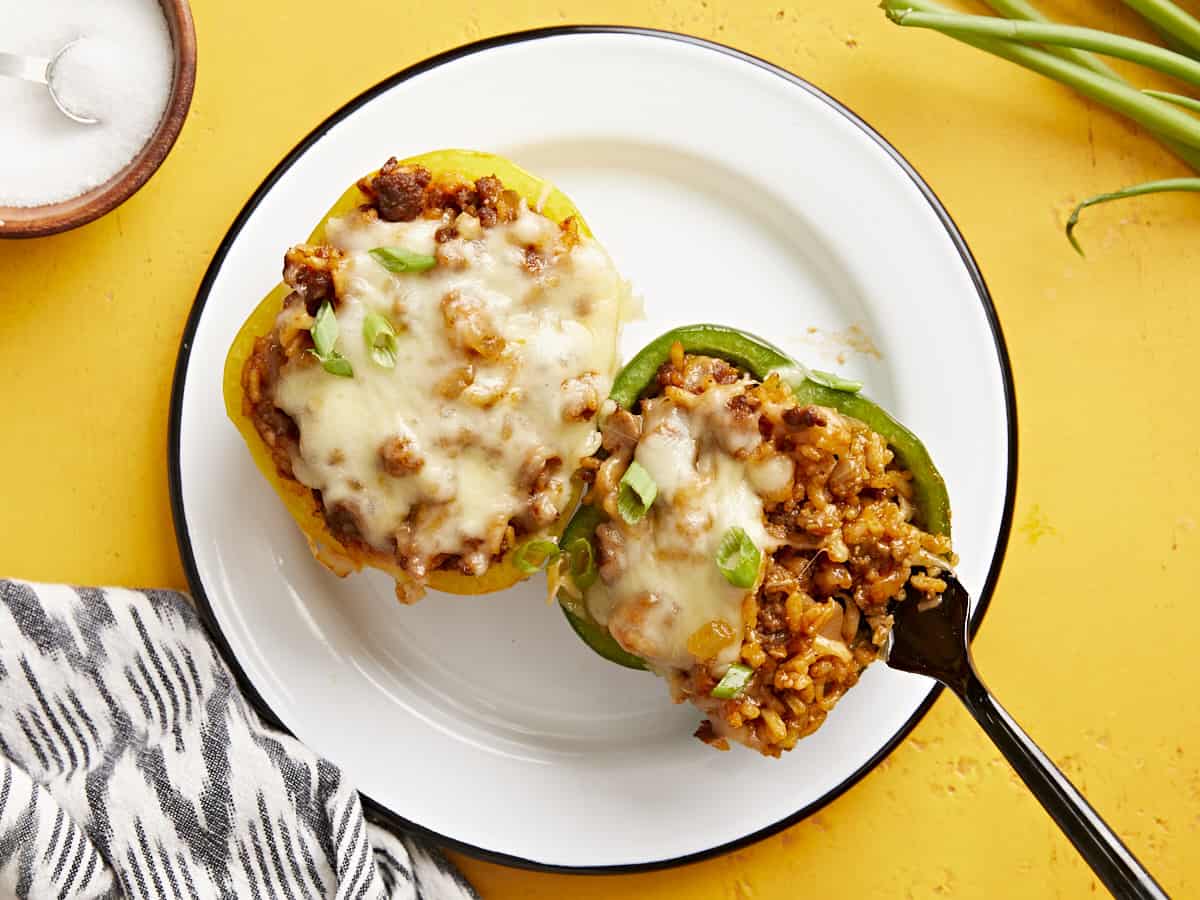
Stuffed Bell Peppers

These Stuffed Bell Peppers are a classic comfort food that’s hearty, filling, has incredible flavors, and can easily feed a large family.

The post Stuffed Bell Peppers appeared first on Budget Bytes.
Stuffed Bell Peppers have been a huge favorite of mine since my aunt first made them for me many many years ago. At the time it seemed like such an elaborate, fancy recipe, but who knew they were really this simple to make! It’s a classic comfort food recipe that’s hearty, filling, easy to customize, and can feed a large family. Plus the flavors in this version are incredibly delicious! So much so that we’re still talking about it over a month later! ;)

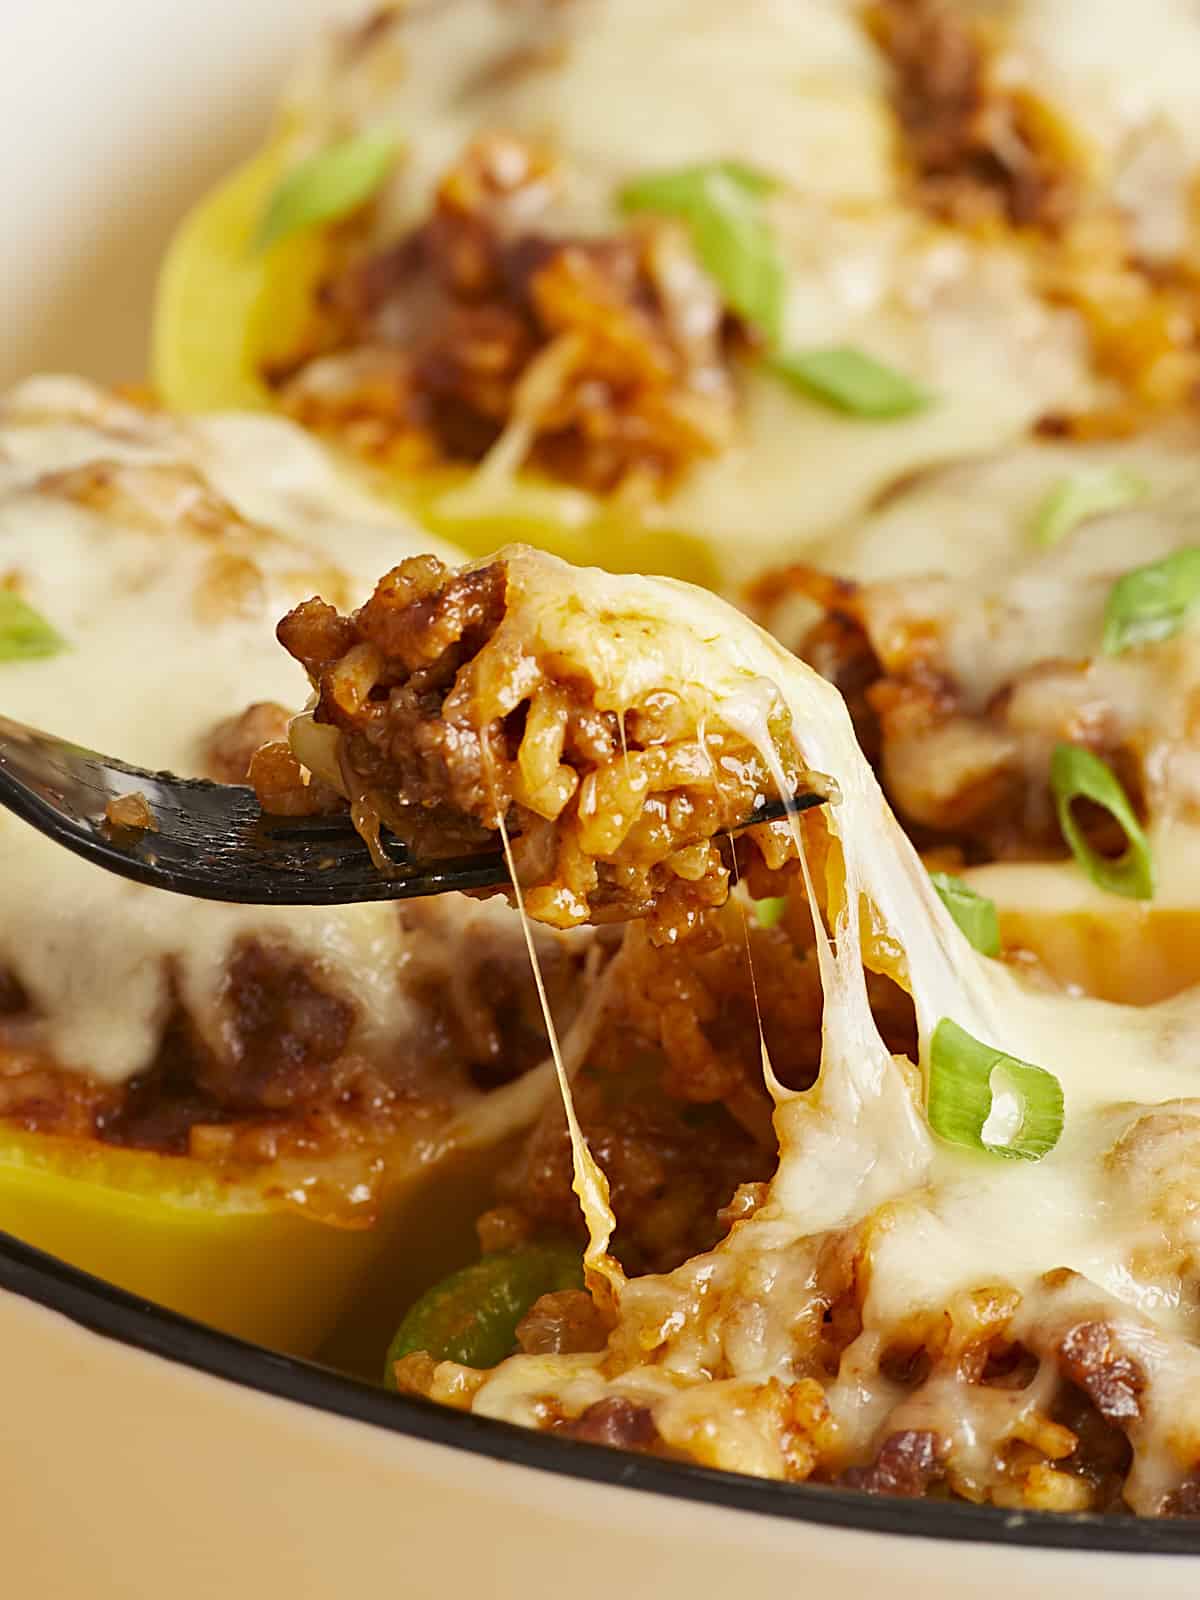
Close up side view of stuffed bell peppers in a casserole dish garnished with parsley.

What’s in Stuffed Bell Peppers?

There are several versions of stuffed bell peppers out there and most usually include ground beef, rice, tomatoes, and cheese. I got a little creative with this recipe as I wanted it to be simple to make, but still have tons of flavor! Here’s what you’ll need:

  • Bell Peppers: I used different colors of bell peppers because I love how colorful and vibrant they look, but if you’re working with a tight budget you can certainly just use all green bell peppers instead.
  • Italian Sausage: Italian sausage instead of ground beef for an extra boost of flavor. But you can use ground beef, ground turkey or even Italian turkey sausage if you like.
  • Onion and garlic: These two ingredients produce a great combination of aromatics to help flavor the sausage and rice.
  • Seasoning: A simple mix of Italian seasoning, salt, pepper, and garlic powder is all you’ll need. If you want an extra kick, you can also add a pinch of red pepper flakes too!
  • Marinara sauce: Instead of adding a can of tomatoes or tomato sauce, I used marinara sauce. It’s tomatoes with extra herbs & spices all in one…aka more flavor!
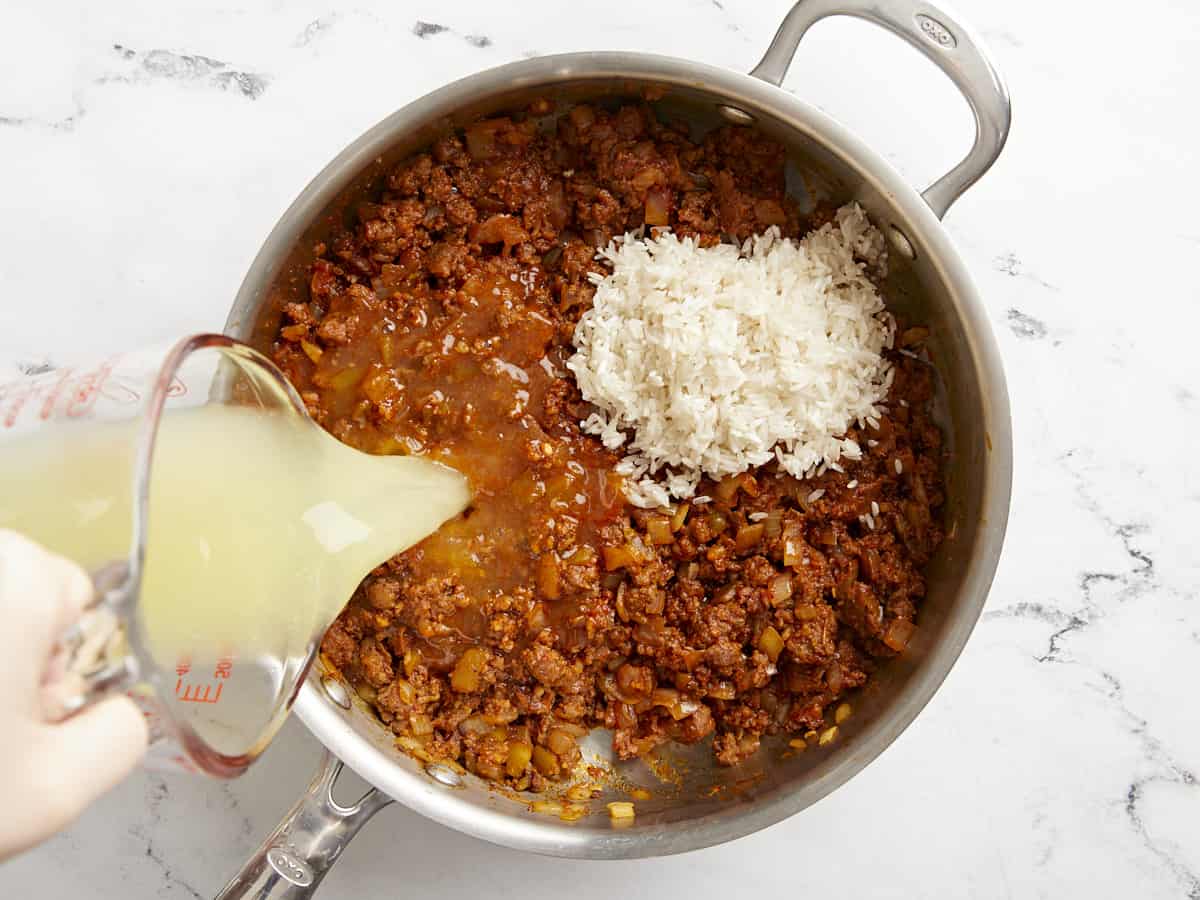
  • Long grain white rice: The rice helps bulk up the filling for the bell peppers. In this recipe the rice is cooked in the same skillet as the meat filling. It gives the rice a ton of flavor and let’s be honest…who wants to clean more dishes by cooking a separate pot of rice? Not me!
  • Chicken broth: Broth is used to help cook the rice and it provides even more flavor of course!
  • Shredded Mozzarella: And mozzarella cheese sprinkled on top for a gooey, tasty finish!

Should I cook the bell peppers first?

I definitely suggest par-cooking the bell peppers first, just a little bit before stuffing them. Not only does this help to soften the bell peppers, but it also cuts down on your cook time. As the bell peppers are cooking you can make the filling, shaving off about 20 minutes from your total cook time.

Budget Saving Tips!

Here are a few tips to help you stretch your money when making Stuffed Bell Peppers:

  1. Use the green bell peppers! Although it makes for a colorful final dish when you use red, yellow or orange bell peppers, these colors often cost a little bit more. You can just buy all green bell peppers instead and save some coins.
  2. Cut a 4th bell pepper in half and stretch the filling out to make 8 servings instead of 6. Trust me..we stuffed these bell peppers quite a bit, but you could totally stretch the filling if you wanted to.
  3. If you want to just use 1/2 a pound of sausage, that works too! Just add an additional 1/2 cup of rice and 3/4 cup of broth to what is listed in the recipe below, to increase the filling and make up the difference.
  4. Feel free to use ground beef instead if it’s cheaper than the Italian sausage at your local store. You may need to add a bit more seasoning to make up for the flavor you would get in the sausage though.
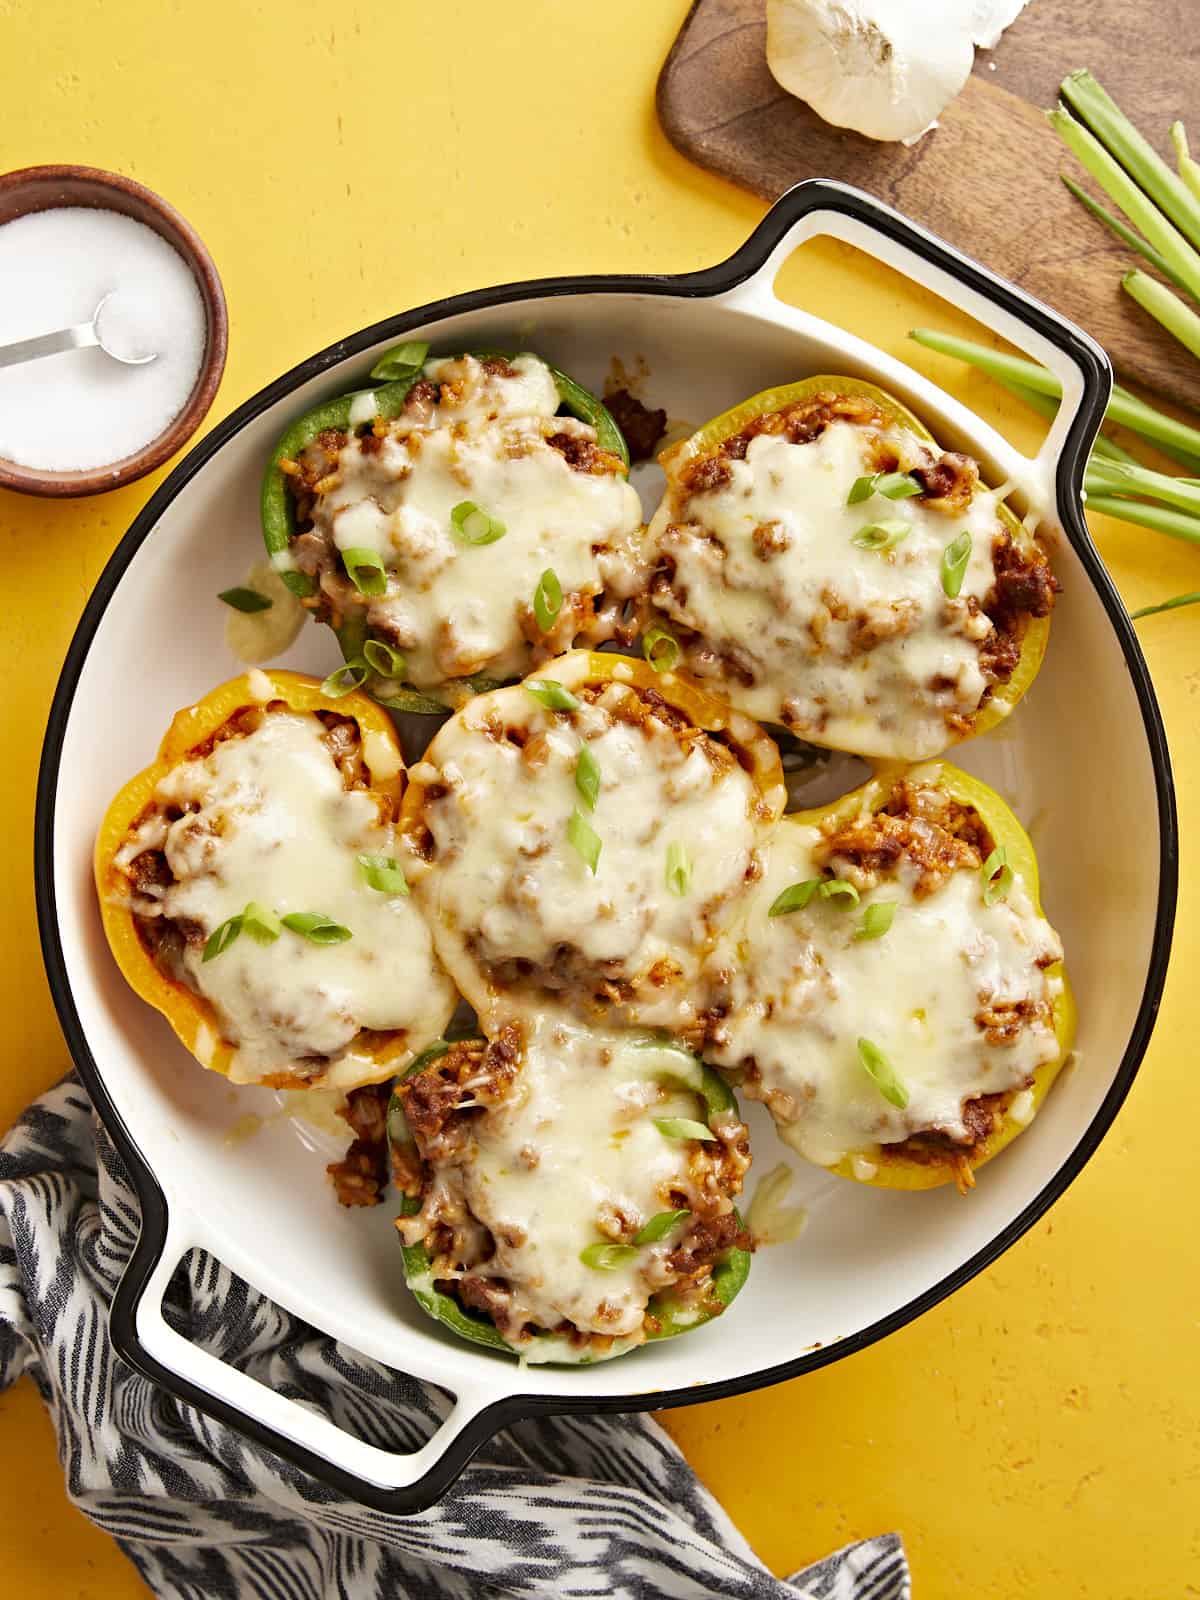
Overhead view of 6 stuffed bell peppers in a white casserole dish.

What to serve with Stuffed Bell Peppers

The filling inside each of these stuffed bell peppers are pretty hearty by themselves, but if you want to serve something with it on the side, they would also be great with a simple salad or some crusty garlic bread. If you want to double down on the veggies, you can also serve these with some roasted broccoli, roasted Brussels sprouts, or a side of simple sautéed vegetables.

Storing & Reheating

Got leftovers? No problem! These stuffed bell peppers hold up very well in the refrigerator stored in an airtight container for up to 4 days. They can be reheated in the microwave or the oven and the leftovers taste just as good the next day, making them perfect for meal prep!

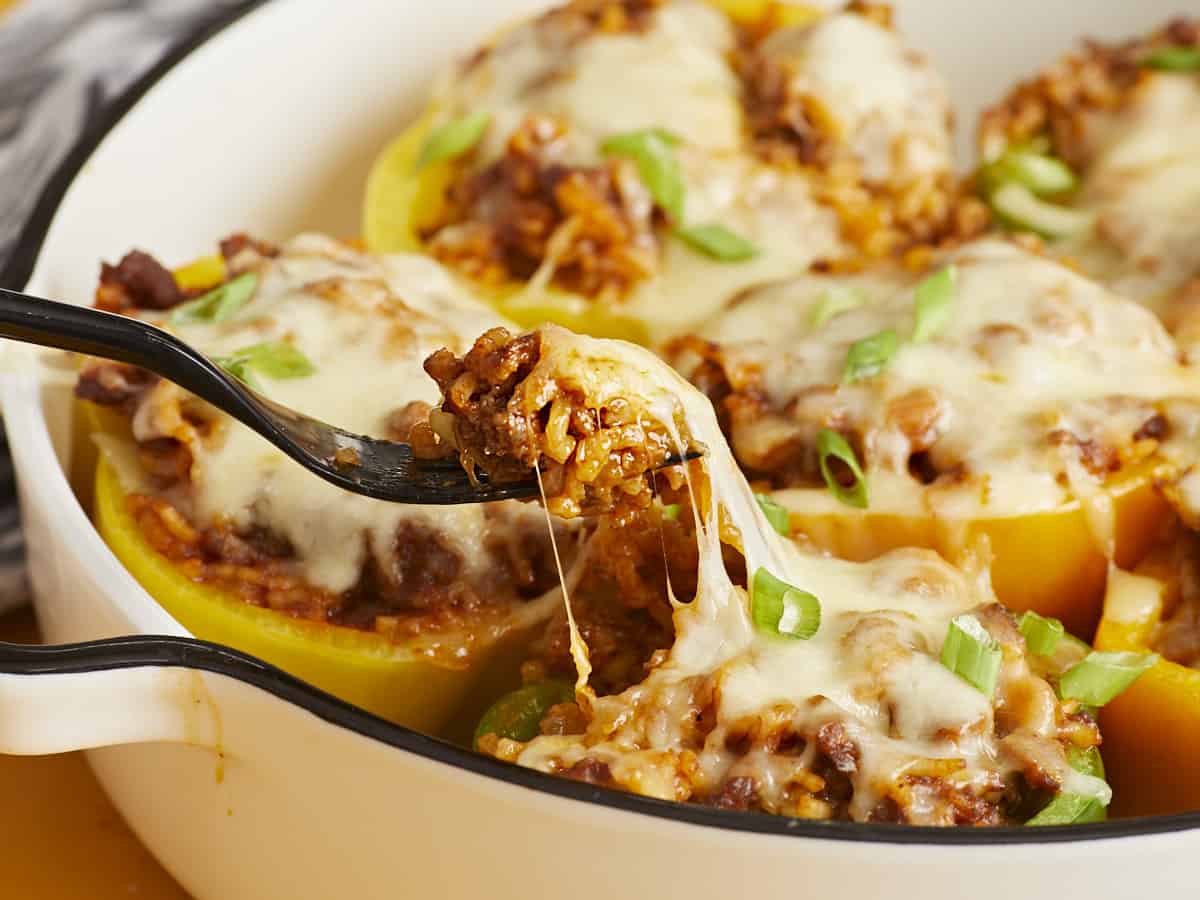
Close up side view of stuffed bell peppers on a serving plate.
Overhead close up view of stuffed bell peppers on a serving plate.
Print

Stuffed Bell Peppers

These Stuffed Bell Peppers are a classic comfort food that’s hearty, filling, has incredible flavors, and can easily feed a large family.
Course Dinner
Total Cost $12.21 recipe / $2.03 serving
Prep Time 15 minutes
Cook Time 50 minutes
Total Time 1 hour 5 minutes
Servings 6 servings
Calories 454kcal

Ingredients

  • 3 bell peppers $3.97
  • 2 Tbsp cooking oil, divided $0.08
  • 1 lb Italian sausage $4.99
  • 1 yellow onion, diced $0.38
  • 3 garlic cloves, minced $0.24
  • 1 tsp Italian seasoning $0.10
  • 1/2 tsp garlic powder $0.05
  • 1 1/4 tsp salt, divided $0.06
  • 1/4 tsp freshly cracked black pepper $0.02
  • 1 cup marinara sauce $0.71
  • 1/2 cup uncooked long grain white rice $0.21
  • 3/4 cup chicken broth $0.15
  • 1 cup shredded mozzarella $1.25

Instructions

  • Preheat the oven to 350°F. Wash and dry each bell pepper, then cut the bell peppers in half horizontally. Make sure to cut them as evenly as possible. Using a sharp paring knife carefully cut and remove the stem from the top half of each bell pepper (see picture below). It's okay if there is a small hole left where the stem was removed.
  • Place each bell pepper half in a 9×13-inch casserole dish. Brush the bell peppers with 1 Tbsp oil and season with ¼ tsp of salt and ¼ tsp cracked black pepper. Bake the bell peppers in a preheated oven for 20 minutes to soften. After 20 minutes remove the bell peppers from the oven and set aside.
  • While the bell peppers are baking, make the filling. Heat a large skillet over medium heat and add 1 Tbsp of oil. Brown the Italian sausage.
  • Once the sausage has browned, add the diced onion and minced garlic to the skillet. Continue to sauté over medium heat until the onion is translucent and the garlic is fragrant.
  • Next add the uncooked rice, marinara sauce, Italian seasoning, garlic powder, 1 tsp of salt, and chicken broth to the skillet. Stir to combine.
  • Place a lid on the skillet, turn the heat up to medium-high, and allow the mixture to come to a full boil. Once boiling, immediately reduce the heat to medium-low and allow the mixture to simmer, without lifting the lid or stirring, for 20 minutes. After 20 minutes, turn the heat off and let it rest, without lifting the lid, for an additional 5 minutes.
  • Next remove the lid, fluff the rice, and stir the mixture again to redistribute the ingredients. Begin to fill each bell pepper with the meat filling. Stuff as much filling as you can into each, filling them all the way to the top.
  • Top each bell pepper evenly with shredded mozzarella cheese. Loosely place some tented aluminum foil over the top of the casserole dish and bake for 15 minutes. After 15 minutes the bell peppers should be tender but not mushy.
  • Now remove the foil and turn the heat on to broil. Broil the stuffed bell peppers for 2-3 minutes or just until the cheese gets a little brown on top. Be sure to watch the bell peppers closely at this step to prevent the cheese from over browning. Garnish with parsley, if desired, and enjoy!

See how we calculate recipe costs here.

Nutrition

Serving: 6servings | Calories: 454kcal | Carbohydrates: 22g | Protein: 18g | Fat: 33g | Sodium: 1461mg | Fiber: 3g

How to Make STUFFED BELL PEPPERS – Step by Step Photos

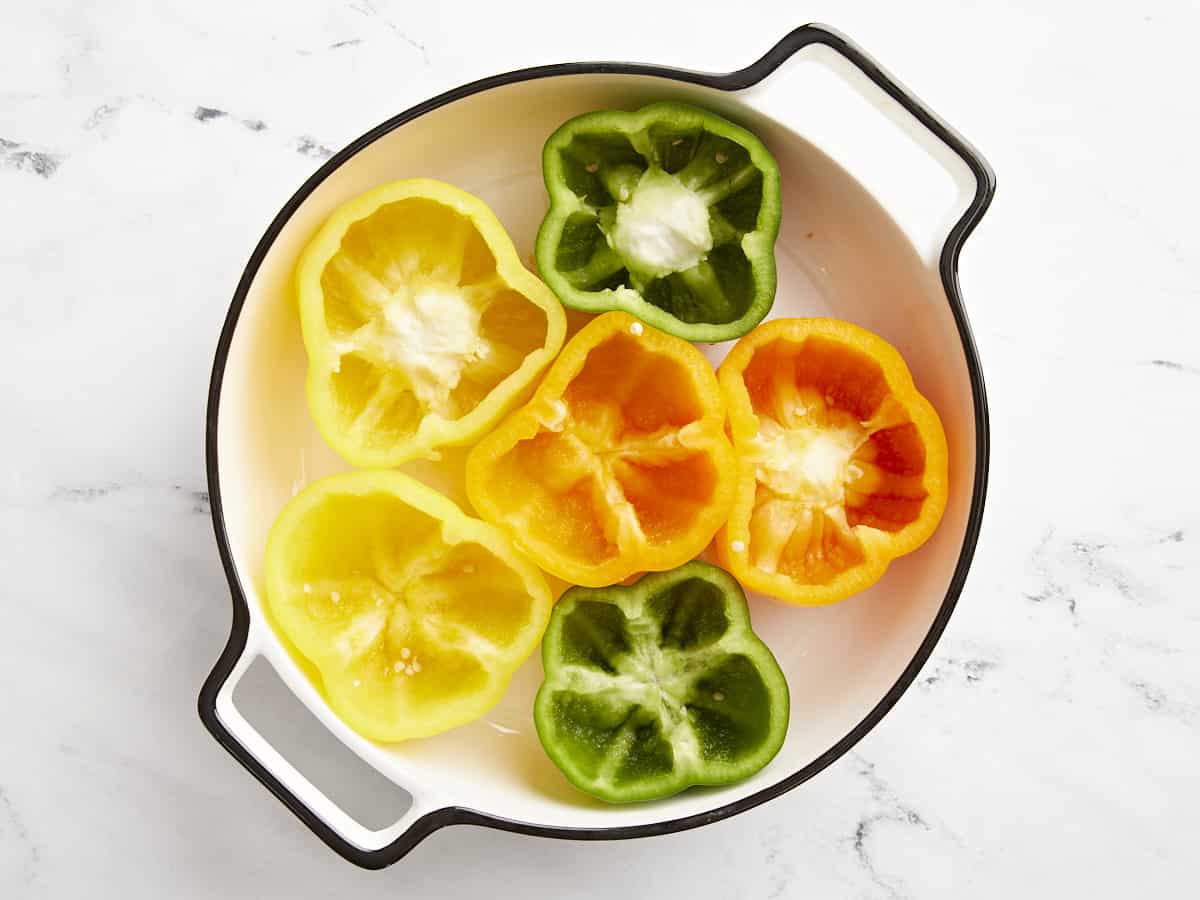
Bell peppers cut in half and placed in a casserole dish. One bell pepper lifted up towards the camera.

Preheat the oven to 350°F then wash and dry 3 bell peppers. Cut the bell peppers in half horizontally, yes horizontally. Most stuffed bell pepper recipes either keep the bell peppers whole or cut them vertically, but by cutting them horizontally you end up with a flatter bottom service and it’s easier to stuff. Trust me! Make sure to cut them as evenly as possible. Using a sharp pairing knife carefully cut and remove the stem from the top half of each bell pepper. It’s okay if there is a small hole left where the stem was removed.

Bell peppers being brushed with olive oil.

Place each bell pepper half in a 9×13-inch casserole dish. Brush the bell peppers with 1 Tbsp cooking oil, divided between all 6 halves, and season with ¼ tsp of salt and ¼ tsp cracked black pepper, also divided between all 6 halves. Bake the bell peppers in a preheated oven for 20 minutes to soften. After 20 minutes remove them from the oven and set aside.

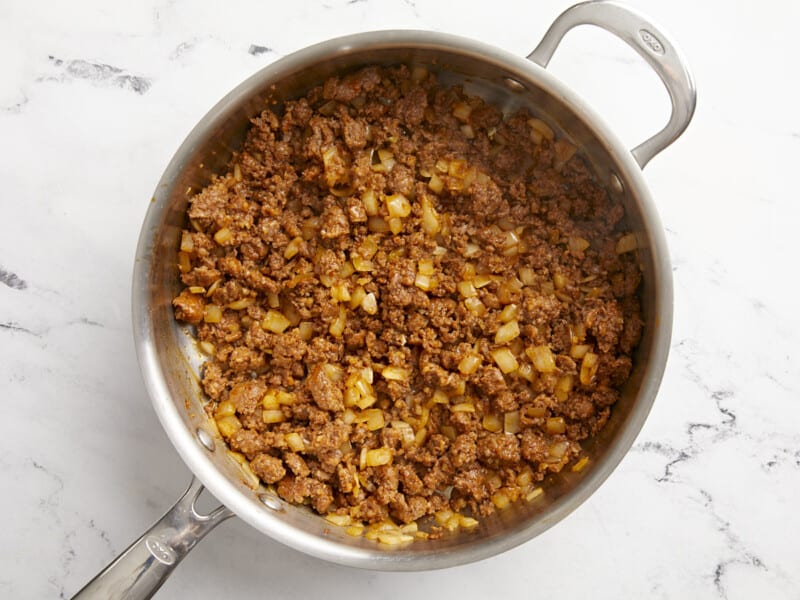
Cooked Italian sausage in a large skillet.

While the bell peppers are baking, make the filling. Heat a large skillet over medium heat and add 1 Tbsp of oil. Add 1 lb Italian sausage and cook until brown.

Cooked Italian sausage with onions and garlic.

Once the sausage has browned, add the 1 diced yellow onion and 3 minced garlic cloves to the skillet. Continue to sauté over medium heat until the onion is translucent and the garlic is fragrant.

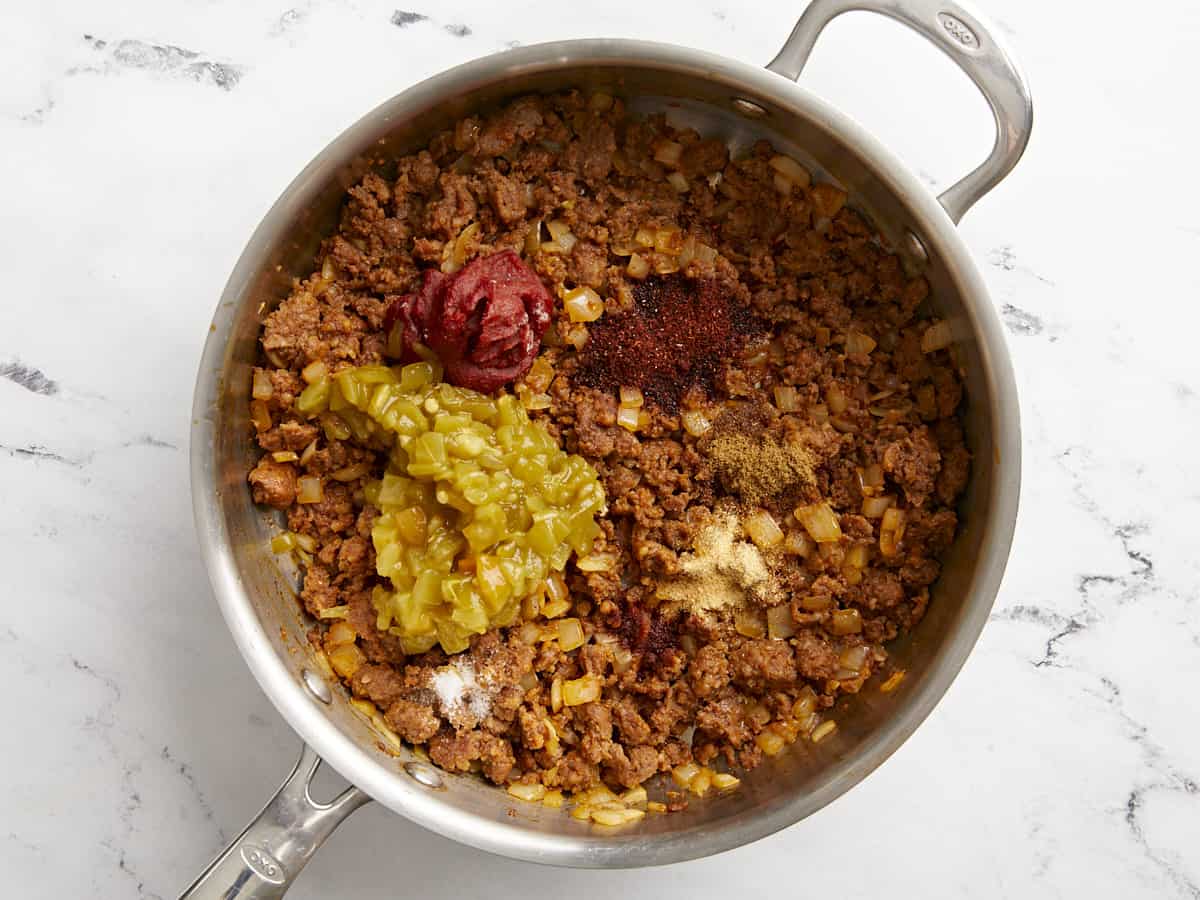
Cooked sausage, rice, marinara, seasoning and chicken broth.

Next add ½ cup uncooked white rice, 1 cup of marinara sauce, 1 tsp Italian seasoning, ½ tsp garlic powder, 1 tsp of salt, and ¾ cups chicken broth to the skillet. Stir to combine. Place a lid on the skillet, turn the heat up to medium-high, and allow the mixture to come to a full boil. Once boiling, immediately reduce the heat to medium-low and allow the mixture to simmer, without lifting the lid or stirring, for 20 minutes. After 20 minutes, turn the heat off and let it rest, without lifting the lid, for an additional 5 minutes.

Cooked stuffed bell pepper filling.

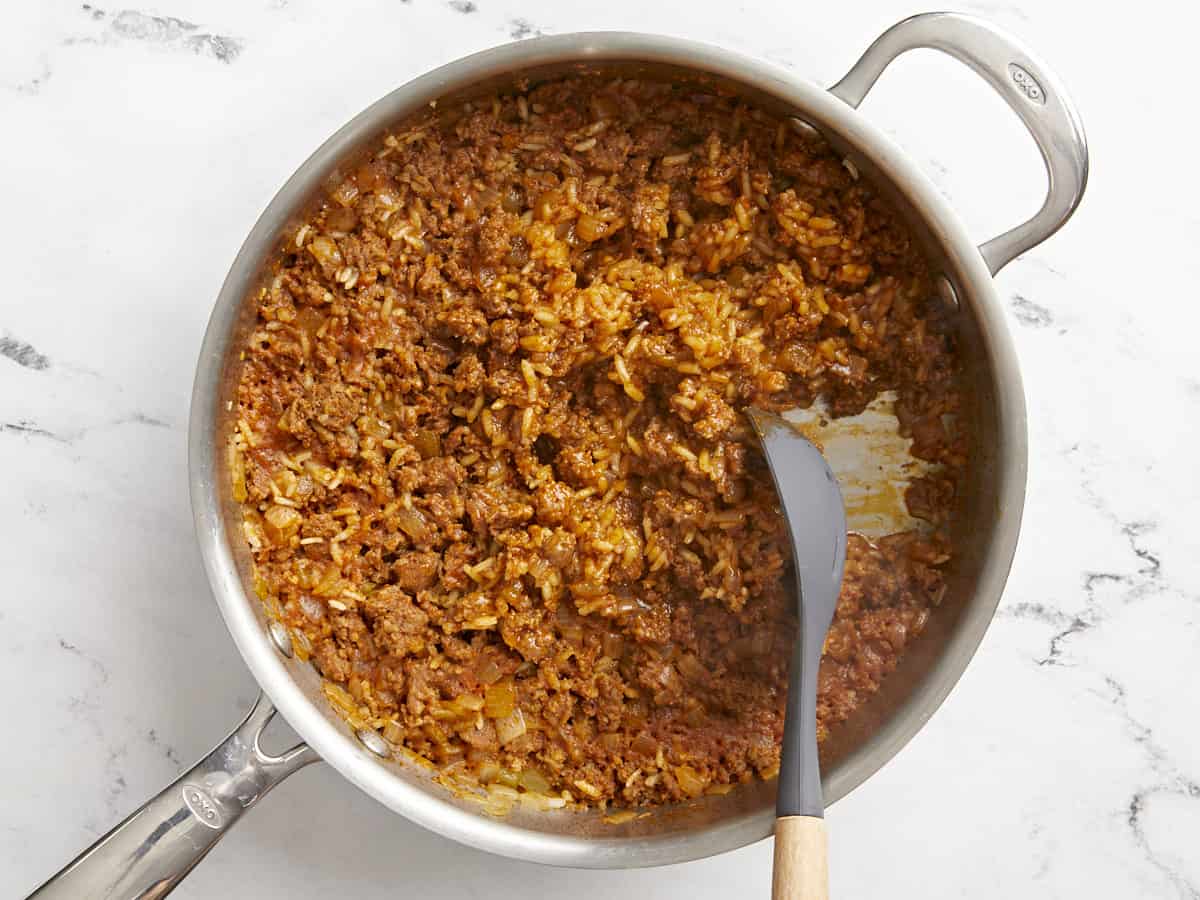
Next remove the lid, fluff the rice, and stir the mixture again to redistribute the ingredients. Begin to fill each bell pepper with the sausage and rice mixture. Stuff as much filling as you can into each, filling them all the way to the top.

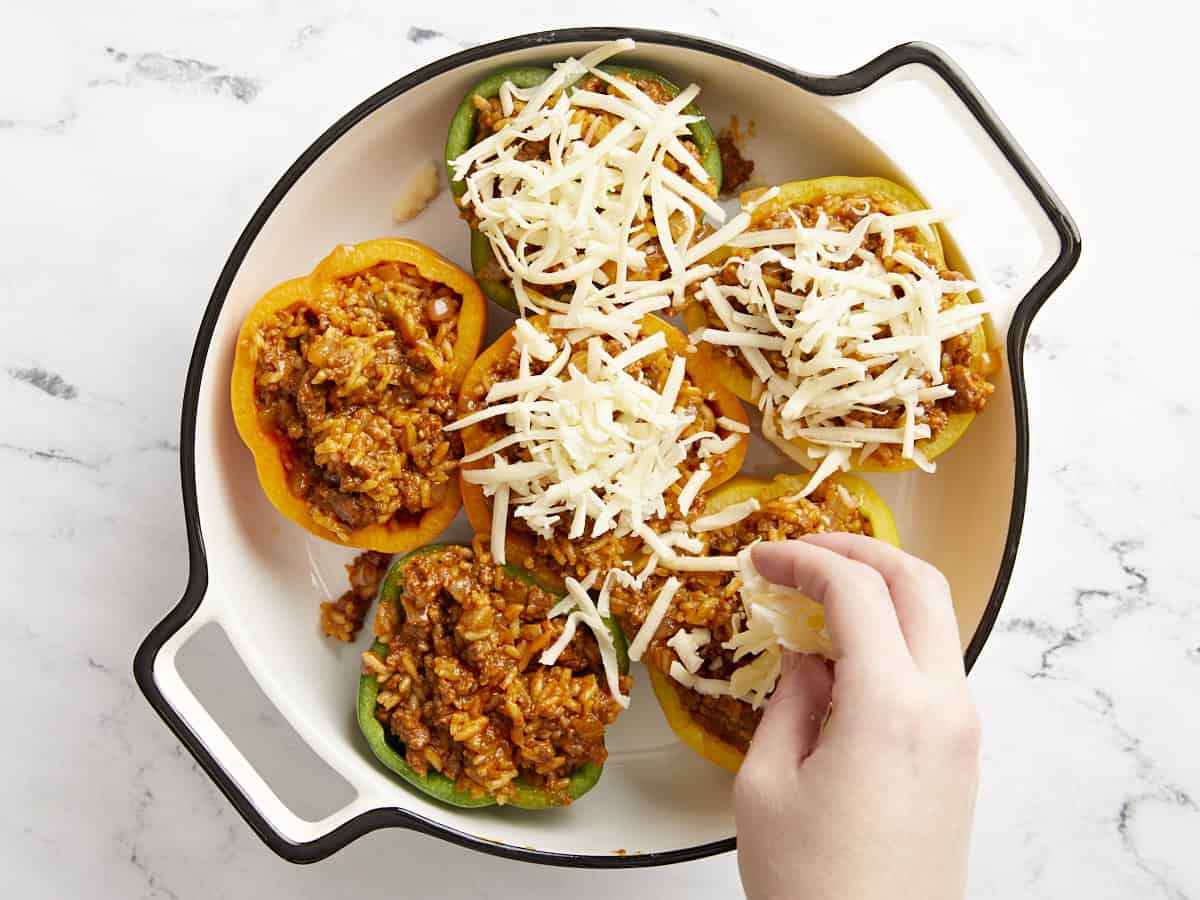
Overhead view of stuffed bell peppers with mozzarella cheese being added on top.

Divide 1 cup of shredded mozzarella cheese on top of each bell pepper evenly. Loosely place some tented aluminum foil over the top of the casserole dish and bake in the oven for 15 minutes.

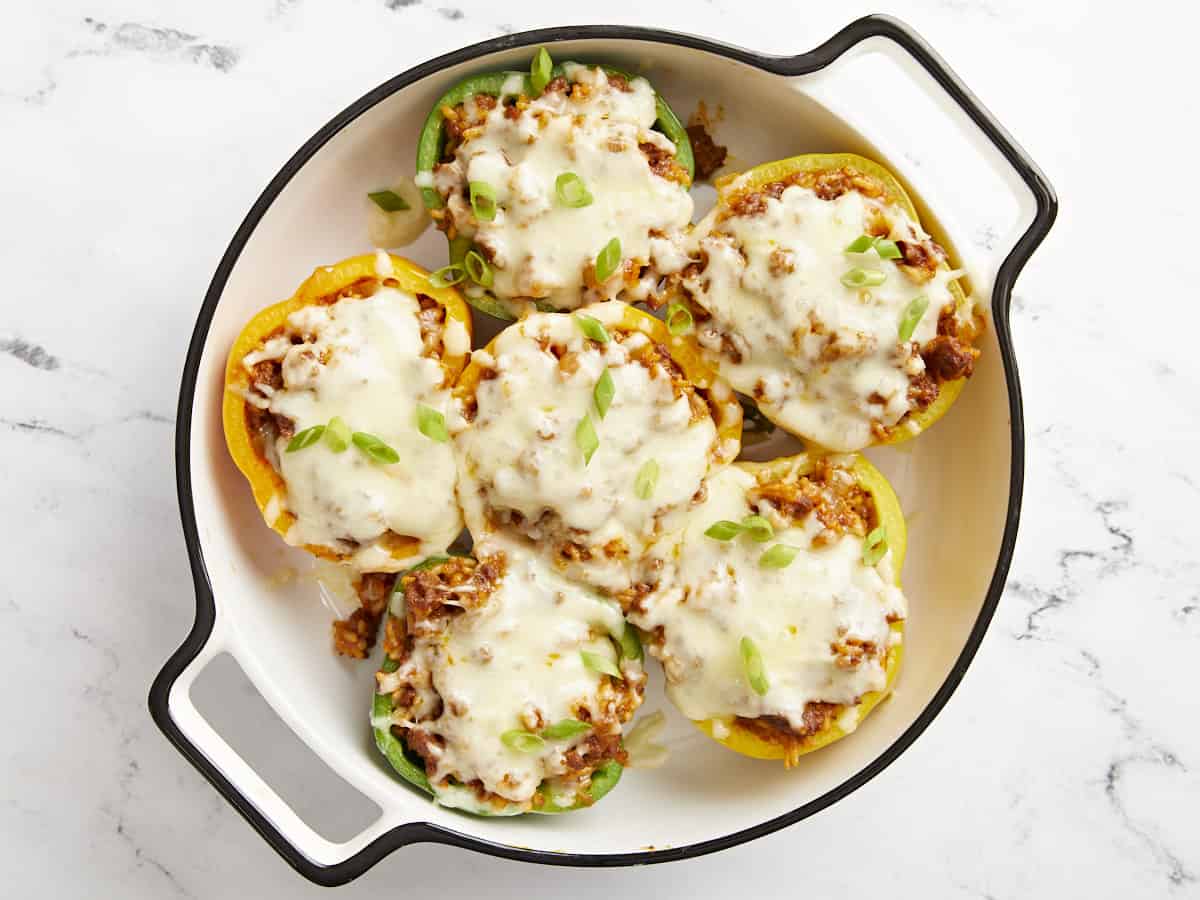
Overhead view of finished stuffed bell peppers in a casserole dish.

After 15 minutes, remove the foil and turn the heat to broil. Broil the stuffed bell peppers for 2-3 minutes or just until the cheese gets a little brown on top. Be sure to watch the bell peppers closely at this step to prevent the cheese from getting too brown. Garnish with parsley, if desired, and enjoy!

Overhead shot of stuffed bell peppers topped with mozzarella cheese and fresh parsley. Served in a white casserole dish.

The post Stuffed Bell Peppers appeared first on Budget Bytes.
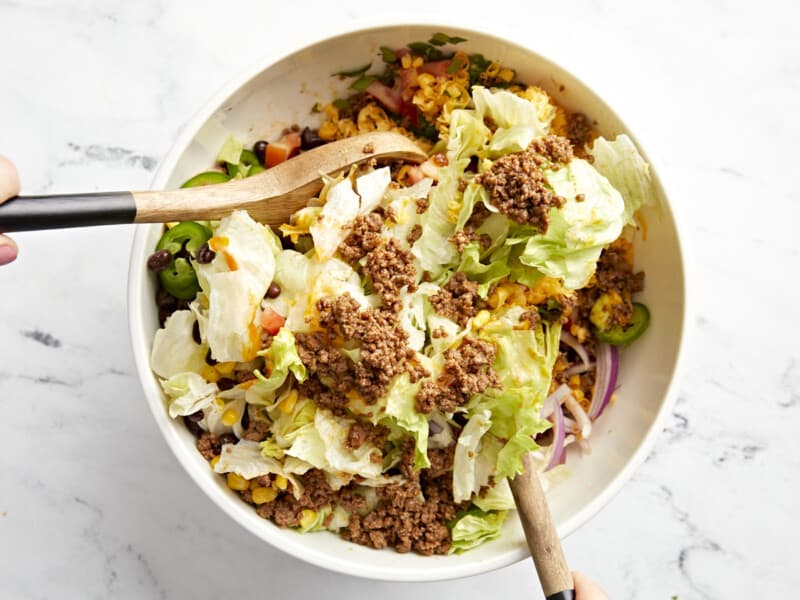
Coconut Curry Chickpeas

Coconut Curry Chickpeas are flavorful and filling easy weeknight dinner packed with chickpeas, kale, and a flavorful creamy curry sauce!

The post Coconut Curry Chickpeas appeared first on Budget Bytes.
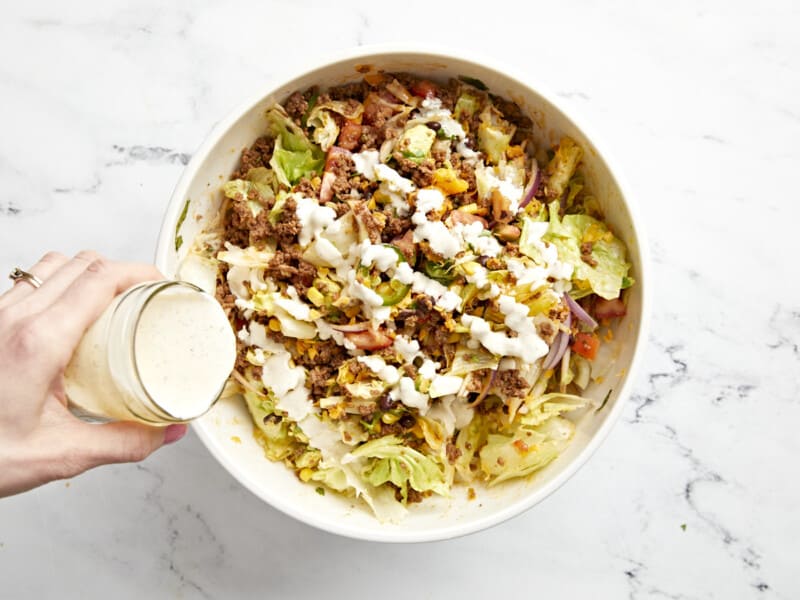
Quick curries are my favorite kind of weeknight dinner because they’re incredibly flavorful, require very little effort, and the leftovers are even better the next day. Plus, that creamy curry sauce makes everything taste good, so you can pack them with all sorts of nutrient-dense goodies, like chickpeas and kale. So basically, what I’m trying to say is, you need to make these Coconut Curry Chickpeas ASAP!

Close up overhead view of a bowl full of coconut curry chickpeas with naan bread on the side.

What’s in Coconut Curry Chickpeas

You’ll only need a handful of ingredients to make this warm and hearty dish, most of which you can keep on hand for last-minute dinners. Here are the ingredients you’ll need to make coconut curry chickpeas:

  • Aromatics: onion, garlic, and ginger create a powerful flavor base for this dish.
  • Spices: Curry powder and cumin. If you want a hot curry, you can always add a bit of cayenne pepper, too!
  • Tomato sauce: a little bit of tomato sauce adds just the right amount of acidity to the dish to balance the creamy coconut.
  • Coconut milk: full-fat coconut milk gives the curry sauce a ton of body and provides a creamy base to balance the potent flavors of the spices and aromatics.
  • Chickpeas: Inexpensive chickpeas fill out this dish, providing tons of belly-filling power and good-for-you fiber.
  • Kale: kale adds a little more variety in texture, color, and flavor to this dish. If you’re not into kale, you can substitute with fresh spinach.

What Kind of Curry Powder to Use

Curry powders can vary quite a bit in flavor from brand to brand, so make sure you experiment to find one that you enjoy. I’ve never met a curry powder that I didn’t like, so I don’t have one particular brand to suggest, but you definitely want to make sure it’s fresh! Old spices that have been sitting in your pantry a while begin to lose flavor and become dull and bland with time.

You also have the option to use either hot or mild curry powder. If you enjoy spicy foods you can use a hot curry powder, OR simply add some crushed red pepper or cayenne pepper to the dish when adding the curry powder and cumin.

How to Serve Coconut Curry Chickpeas

This warm and saucy dish is great over rice, or crusty bread or naan for dipping. You definitely want some sort of starchy goodness to soak up all of that sauce! You can also experiment with topping your chickpeas with fresh cilantro or even a squeeze of lime. Something light and refreshing, like Creamy Cucumber Salad, would also pair nicely with these curry chickpeas.

Overhead view of a skillet full of coconut curry chickpeas with a wooden spoon.
Overhead view of a bowl full of coconut curry chickpeas with a piece of naan.
Print

Coconut Curry Chickpeas

Coconut Curry Chickpeas are flavorful and filling easy weeknight dinner packed with chickpeas, kale, and a flavorful creamy curry sauce!
Course Dinner, Main Course
Cuisine Indian
Total Cost $7.44 recipe / $1.86 serving
Prep Time 10 minutes
Cook Time 25 minutes
Total Time 35 minutes
Servings 4 1.5 cups each
Calories 615kcal

Ingredients

  • 1 yellow onion $0.38
  • 2 cloves garlic $0.16
  • 1 tsp grated fresh ginger $0.10
  • 1.5 Tbsp curry powder $0.45
  • 1 tsp cumin $0.10
  • 2 15oz. cans chickpeas, drained $1.58
  • 1 8oz. can tomato sauce $0.50
  • 1 13.5oz. can full-fat coconut milk $2.99
  • 4 oz. chopped kale (about 3 cups) $0.75

Instructions

  • Dice the onion, mince the garlic, and grate the ginger. Add the onion, garlic, and ginger to a large deep skillet along with the olive oil. Sauté the aromatics over medium-low heat for about five minutes, or until the onions are soft and translucent.
  • Add the curry powder and cumin to the skillet and continue to stir and cook for about one minute more to toast the spices.
  • Drain the chickpeas, then add them to the skillet along with the tomato sauce and coconut milk. Stir everything to combine.
  • Turn the heat up to medium-high to bring the sauce up to a simmer. Once simmering, turn the heat back down to medium-low and allow the curry to continue to simmer for 15 minutes, stirring occasionally.
  • Add the kale and stir it into the sauce. Continue to cook and stir until the kale has wilted to your desired tenderness (I cook for about 5 minutes more). Finally, taste the curry and add salt to taste (about ½ tsp). Serve hot with rice or bread for dipping!

See how we calculate recipe costs here.

Nutrition

Serving: 1.5cups | Calories: 615kcal | Carbohydrates: 73g | Protein: 23g | Fat: 29g | Sodium: 316mg | Fiber: 22g
Close up side view of a bowl full of coconut curry chickpeas.

How to Make Coconut Curry Chickpeas – Step by Step Photos

Diced onion, minced garlic, and grated ginger in a deep skillet.

Dice one yellow onion, mince two cloves of garlic, and grate about one teaspoon of fresh ginger. Add the onion, garlic, and ginger to a deep skillet along with 2 Tbsp olive oil. Sauté the aromatics over medium-low heat for about five minutes, or until the onion is soft and translucent.

Spices added to the skillet with onions, garlic, and ginger.

Add 1.5 Tbsp curry powder and 1 tsp cumin to the skillet. Continue to stir and cook for about one minute more to toast the spices.

Chickpeas, tomato sauce, and coconut milk added to the skillet.

Drain two cans of chickpeas, then add them to the skillet along with 8 oz. tomato sauce and a 13.5 oz. can of coconut milk (full fat).

Simmered chickpeas in curry sauce.

Stir until everything is evenly combined, turn the heat up to medium-high, and allow the sauce to come up to a simmer. Once simmering, turn the heat down to medium-low and let it continue to simmer for 15 minutes, stirring occasionally.

Fresh kale added to the skillet.

Add 4 oz. (about three cups) of fresh chopped kale to the skillet. I buy the pre-chopped bagged kale to make this easier.

Finished coconut curry chickpeas with wilted kale.

Continue to cook and stir until the kale has wilted to your desired tenderness. I enjoy the kale with a bit more texture, so I only simmer for a few minutes more. Taste the curry and add salt to taste to help the flavors pop (about ½ tsp).

Finished skillet full of coconut curry chickpeas with naan and a wooden spoon.

The post Coconut Curry Chickpeas appeared first on Budget Bytes.
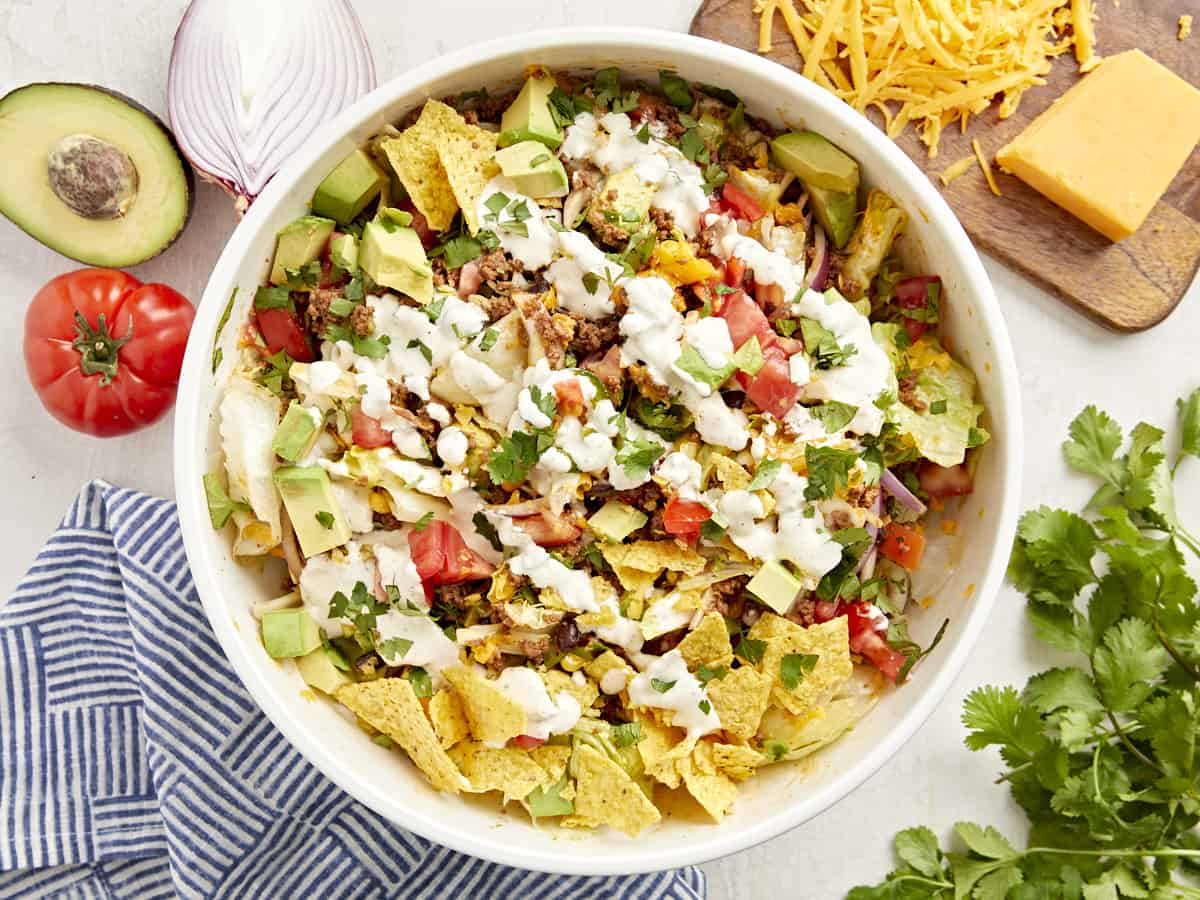
Arroz Con Salchichas (Puerto Rican Rice With Sausage)

This Puerto Rican Arroz Con Salchichas recipe is a budget-friendly quick weeknight meal of rice and sausage that’s filling and flavorful!

The post Arroz Con Salchichas (Puerto Rican Rice With Sausage) appeared first on Budget Bytes.

Arroz Con Salchichas, or Puerto Rican Rice and Sausage, is one of my favorite pantry meals because it’s comforting, easy to make, and packed with flavor. As Beth would say, just put an egg on it and then eat until you hate yourself. (OK… that last part is all me.) PS It comes in under a dollar per serving and can be made in under an hour!

Overhead shot of wooden spoon in a red Dutch oven full of Arroz Con Salchichas.

A Note On Authenticity

This is not a historically authentic recipe. We strive to create recipes that are accessible to everyone, which means ingredients need to be available at a mainstream budget grocery store. We test recipes using the least amount of steps, tools, and ingredients while still honoring the spirit of the recipe. I was born and raised in Puerto Rico and look forward to a time when our ingredients are available in mainstream markets. Until then, buen provecho!

What Is Arroz Con Salchichas?

Arroz con salchichas, or rice with sausage, is a classic comfort food in many Latin American cultures. In Puerto Rico, it’s a staple weeknight meal traditionally made with canned Vienna sausages cooked in a flavorful sofrito sauce and yellow rice studded with briny olives and capers. Sometimes corn is added as well.

Ingredients for Arroz Con Salchichas

My recipe for Arroz Con Salchichas is pretty traditional. I keep it budget friendly by skipping the corn and the salt pork that’s present in many of my little island’s rice dishes. But if you’d like to add them in, fry about a 1/4 cup of diced salt pork before the sofrito hits the pan, and add about 1 1/2 cups of frozen, fresh, or drained canned corn when you add the olives. Here’s what you’ll need to make my easy Arroz Con Salchichas.

  • Sofrito – this powerful Puerto Rican blend of aromatics is the flavor base of many of our savory dishes. Canned sofrito is available, but fresh will always be better. Check out my simple recipe for a basic Puerto Rican Sofrito.
  • Adobo and Sazón– these spice blends give the rice a beautiful golden color and add earthy notes to the dish. If you can’t find adobo and sazón in your neck of the woods, I’ve included basic recipes in the notes section of the recipe card.
  • Tomato Sauce– helps add acidity and color to the dish.
  • Onion, Garlic, and Cilantro – these aromatics add earthy notes to the dish. Substitute the onion with 1 tablespoon of onion powder and the garlic with 1/4 teaspoon of garlic powder. If you don’t have cilantro, substitute it with fresh Italian parsley or just skip it.
  • Vienna Sausages– these small open-ended canned sausages taste a little like hot dogs, though they are softer in texture. They bulk up the rice and add deep meaty flavors. Substitute them with any sausage or hot dog.
  • Rice – traditionally, in Puerto Rico, medium-grain white rice is used. But in the Budget Bytes kitchen, we use long-grain Jasmine Rice. Feel free to use whatever rice you prefer, just follow the package directions for cooking times and cooking liquid amounts.
  • Olives and Capers– this mixture is known as Alcaparrado and delivers a pop of acidic brininess to every bite! If you don’t have olives or capers, just skip them and add two tablespoons of distilled white vinegar instead.
Overhead shot of wooden spoon serving rice out of a red Dutch oven onto a white plate.

Arroz Con Salchichas Variations

One of my favorite things about Arroz con Salchichas is how easy it is to customize. You can use brown rice or wild rice. Just follow the package directions for cook time and adjust your liquid. Add corn or other veggies you have on hand to bulk it up. Though it’s not traditional, I sometimes add peas, carrots, or diced tomatoes. If you don’t have Vienna sausages try:

  • Hot Dogs
  • Chorizo
  • Kielbasa
  • Spam
  • Chicken Sausage

What To Serve with Arroz Con Salchichas

Arroz Con Salchichas pairs beautifully with Ensalada de Aguacate (Avocado Salad), Yuca En Escabeche (Pickled Yuca), or the beans in this easy Puerto Rican Rice and Beans recipe. It’s also fantastic with Fried Eggs.

How To Store Leftovers

Refrigerate any leftover Arroz Con Salchichas in an airtight container for up to 5 days. You can also portion the rice and freeze it in a freezer-safe container for up to 6 months. Reheat in a microwave until steaming.

Overhead shot of Arroz Con Salchichas on a plate with a hand holding a forkful.
Overhead shot of wooden spoon in a red Dutch oven full of Arroz Con Salchichas.
Print

Arroz Con Salchichas

This Puerto Rican Arroz Con Salchichas recipe is a budget-friendly quick weeknight meal of rice and sausage that's both filling and flavorful. Make it once and you'll put it in heavy rotation!
Course Dinner, Lunch
Cuisine Latin
Total Cost $5.39 recipe / $0.90 serving
Prep Time 5 minutes
Cook Time 30 minutes
Resting Time 10 minutes
Total Time 45 minutes
Servings 6 about 1.5 cups each
Calories 376kcal

Equipment

Ingredients

  • 1 Tbsp cooking oil $0.04
  • 1 Tbsp adobo* $0.30
  • 1 packet sazón** $0.19
  • 1/4 cup diced yellow onion $0.19
  • 1 Tbsp minced garlic $0.24
  • 1/4 cup sofrito $0.36
  • 2 Tbsp tomato sauce $0.06
  • 2 Tbsp pimiento stuffed Spanish olives $0.29
  • 2 tsp capers $0.21
  • 2 5oz. cans Vienna sausages $1.50
  • 2 cups long-grain white rice $0.74
  • 2 1/2 cups chicken broth, boiling $1.12
  • 1 tsp salt $0.04
  • 1/4 cup chopped cilantro leaves for garnish $0.11

Instructions

  • Add the cooking oil to a large heavy-bottomed pot set over medium-high heat. Add the adobo and sazón and cook until fragrant, about 30 seconds. Add the diced yellow onion and cook until translucent, about 2 minutes. Add the minced garlic and cook until fragrant, about 30 seconds.
  • Add the sofrito, tomato sauce, green olives, and capers to the pot, and cook until fragrant, about 2 minutes. In the meantime, slice the Vienna sausages into 1/2-inch-thick rounds and rinse the rice until the water runs clear, making sure to drain off all excess water after rinsing.
  • Add the sliced Vienna sausages to the pot and sauté until browned. Finally, add the rinsed rice, salt, and boiling chicken broth to the pot. Stir and bring to a hard boil, with large bubbles breaking through the surface of the rice. Stir once more, turn the heat to low, and cover the pot.
  • Simmer the rice over low until the rice is tender, about 15 minutes. Take the pot off the heat, but leave it covered. Let it rest, covered, for 10 minutes. Uncover, stir the rice, taste, and adjust the seasoning to your liking. Stir in cilantro leaves then serve yourself a big bowl full and prepare to chow!

See how we calculate recipe costs here.

Notes

*If you cannot source adobo, mix your own and then use the amount called for in the recipe. Store the rest in an airtight container.
  • 2 Tbsp salt
  • 1 Tbsp garlic powder
  • 1 tsp ground oregano
  • 1 tsp onion powder
  • 1 tsp black pepper
  • 1 tsp ground cumin
  • 1/2 tsp turmeric
**A packet of sazón contains about 1.5 teaspoons of sazón. If you cannot source sazón, use the following:
1/4 teaspoon garlic powder
  • 1/4 teaspoon garlic powder
  • 1/4 teaspoon ground cumin
  • 1/4 teaspoon ground coriander
  • 1/3 teaspoon ground annatto
  • 1/8 teaspoon turmeric
  • 1/8 teaspoon ground oregano
  •  
 Sazón and adobo share a lot of similar ingredients but are used at different points in the cooking process and will develop slightly different colors and flavors.

Nutrition

Serving: 1serving | Calories: 376kcal | Carbohydrates: 54g | Protein: 11g | Fat: 13g | Sodium: 1328mg | Fiber: 1g

How to Make Arroz Con Salchichas – Step by Step Photos

Overhead shot of a hand adding onion to a red Dutch oven while a second hand stirs with a wooden spoon.

Add 1 tablespoon of cooking oil to a large heavy-bottomed pot set over medium-high heat. Add the 1 tablespoon adobo and 1 packet of sazón and cook until fragrant (about 30 seconds). Then, add the 1/4 cup of diced yellow onion and cook until translucent, about 2 minutes. Next, add 1 tablespoon of minced garlic and cook until fragrant, about 30 seconds.

Overhead shot of sofrito, tomato sauce, olives and capers in a red Dutch oven.

Add the 1/4 cup of sofrito, 2 tablespoons of tomato sauce, 2 tablespoons of green olives, and 2 teaspoons of capers, and cook until fragrant, about 2 minutes. If you are planning to add corn or other veggies, put them in the pot now as well.

Overhead shot of salchichas added to sofrito, tomato sauce, olives and capers in a red Dutch ov

Add two 5-ounce cans of drained and sliced Vienna sausages and saute until browned. Finally, add 2 cups of rice, 1 teaspoon of salt, and 2 1/2 cups of boiling chicken broth. Stir and bring to a hard boil, with large bubbles breaking through the surface of the rice. Stir once more, turn the heat to low, and cover the pot.

Overhead shot of Arroz Con Salchichas in a red Dutch Oven.

Simmer the rice over low heat until the rice is tender, about 15 minutes. Take the pot off the heat, but leave it covered. Let it rest, covered, for 10 minutes. Uncover, stir the rice, taste, and adjust the seasoning to your liking, if needed. Stir in 1/4 cup chopped cilantro leaves.

Overhead shot of Arroz Con Salchichas on a plate in the background with a fork holding some in the foreground.

Then serve yourself a big bowl full! You can garnish, like I did, with freshly sliced avocado. I also prepare for a happy belly, by undoing the top button of my jeans, but you do you. As we say in Puerto Rico, “Buen provecho!”

More Easy Puerto Rican Recipes

The post Arroz Con Salchichas (Puerto Rican Rice With Sausage) appeared first on Budget Bytes.

Chilaquiles

These budget-friendly Chilaquiles are made with crispy, homemade tortilla chips soaked in a flavorful red enchilada sauce and served with loads of toppings.

The post Chilaquiles appeared first on Budget Bytes.

Chilaquiles are a hearty, delicious, and easy-to-make Mexican breakfast dish that’ll knock your socks off! These budget-friendly bad boys are made with crispy tortilla chips soaked in a flavorful red enchilada sauce and served with loads of toppings. While cheese, cilantro, avocado, sour cream, and eggs are traditional toppings for a Chilaquiles recipe, you can also clean out your fridge and use leftover veggies or meats. Budget win! This recipe is adapted from my friend Yvette Marquez Shapnack’s new cookbook, Muy Bueno Fiestas.

Overhead shot of chilaquiles served on a white plate.

What Are Chilaquiles?

The word “chilaquiles” comes from the Nahuatl word “chīlliaquilitl,” which means “chili-soaked.” The freshly fried tortilla chips that this recipe calls for are lightly soaked in a chili sauce. Traditionally the fried tortillas are cooked in this salsa which softens the chips, but Yvette prefers her chips crunchier, so she drizzles the sauce on them instead. You can top chilaquiles with whatever your heart desires! When I was testing the recipe, I had a little bit of rotisserie chicken left (the back part that no one ever seems to want to eat), and I pulled it and topped my Chilaquiles with it. Delicious!

What You Need To Make Chilaquiles

The best thing about Chilaquiles is that you can top them with whatever you want and adjust the toppings to create a lighter or heartier dish. Yvette’s recipe keeps things pretty traditional. To make these Chilaquiles, you’ll need the following ingredients:

  • Tortilla chips – You’ll need thick tortilla chips that can withstand getting soaked in a sauce without getting soggy. This usually means frying your own, which is super easy and budget-friendly. But if you can find really thick, restaurant-style tortilla chips, you can use those to speed up the preparation process.
  • Cooking oil- You’ll use this to fry the tortilla chips in, and any neutral-flavored oil will do. Use corn oil, vegetable oil, or canola oil.
  • Enchilada sauce – You can find this premade smoky red chile sauce in the Latin section of most grocery stores. Yvette also has a great recipe, which I’ve included in the notes section of the recipe card below.
  • Your choice of toppings– For this recipe, we topped our chilaquiles with sliced green onions, fresh cilantro leaves, diced avocado, shredded Oaxaca cheese, and crumbled queso fresco. If you can’t source Oaxaca cheese, use a pre-shredded Mexican cheese blend. We also use Mexican crema, which can be replaced with sour cream. We skipped the eggs in this recipe to keep it budget-friendly, but if you’d like to make it a heartier breakfast, top it with fried eggs.
Side shot of chilaquiles served on a white plate.

Tips For Making Chilaquiles

Chilaquiles are delicious and versatile, but there are a few tricks to getting them just right.

  1. Make sure the oil you are frying the tortillas in is hot enough so they don’t end up soggy. Add a small piece of tortilla to the hot oil. If you’re at the right temperature, it will bubble and sizzle then turn golden in about 40 to 50 seconds.
  2. Drain freshly fried tortilla chips on a large paper towel-lined plate or sheet pan. The paper towels will soak up excess oil, which helps keep the tortilla chips crispy. Salt the chips while they are still hot.
  3. Prep toppings before you add sauce to the tortilla chips, so they don’t get soggy while you cut herbs and veggies.
  4. If serving a larger group, make the tortilla chips in advance. If you’re making the sauce from scratch, make that in advance as well. Instead of topping the Chilaquiles with cheeses and veggies etc., serve toppings in small bowls so guests can create their perfect combinations. It’ll save you loads of time.

What To Serve With Chilaquiles

While chilaquiles can be a stand-alone breakfast dish, you can make them part of a bigger meal by adding side dishes. Serve Chilaquiles with our Cheesy Pinto Beans, Guacamole, Cowboy Caviar, or Tomato Rice. And don’t forget, they’re amazing with Fried Eggs!

Side shot of a hand picking up a chilaquile served on a white plate.
Overhead shot of chilaquiles served on a white plate.
Print

Chilaquiles

These budget-friendly bad boys are made with crispy, homemade tortilla chips soaked in a flavorful red enchilada sauce and served with loads of toppings.
Course Breakfast
Cuisine Latin
Total Cost $5.75 recipe/ $2.89 serving)
Prep Time 5 minutes
Cook Time 10 minutes
Total Time 3 minutes
Servings 2 servings
Calories 546kcal

Ingredients

  • 1/4 cup cooking oil $0.16
  • 8 white or yellow corn tortillas (8-inch) $0.07
  • 1/4 tsp salt $0.02
  • 1 10oz. can red enchilada sauce* $2.49
  • 1/4 cup crumbled queso fresco $0.50
  • 1/2 cup shredded Oaxaca cheese $0.80
  • 1/4 cup fresh cilantro leaves $0.11
  • 1/3 cup sliced green onions $0.35
  • 1 avocado, diced $0.99
  • 2 Tbsp Mexican crema $0.25

Instructions

  • Line a sheet pan or large plate with paper towels. Stack 8 corn tortillas and cut them into quarters.
  • In a large skillet set over medium heat, warm the cooking oil until shimmering. Add two layers of tortilla quarters at a time and fry, turning as needed, until lightly browned and slightly crunchy, about 1 minute on each side. Transfer the tortilla quarters to the paper towel-lined plate to drain. Repeat with the remaining tortilla quarters.
  • Warm the red enchilada sauce* in a large saucepan.
  • Divide tortilla chips between two large plates. Divide the warm sauce equally, drizzling it over the tortilla chips on each plate.
  • Sprinkle each plate equally with the shredded Oaxaca cheese, crumbled queso fresco, fresh cilantro leaves, sliced green onions, diced avocado, and Mexican crema. Enjoy the ridiculously yummy contrasting flavors, textures, and temperatures immediately!

See how we calculate recipe costs here.

Notes

*Yvette Marquez-Shapnack’s recipe for Red Chile Sauce
 
Ingredients
1⁄4 lb dried California or New Mexico red chiles
3 cups water
3 tablespoons all-purpose flour
2 cloves garlic, coarsely chopped
11⁄2 teaspoons salt
Olive oil, for cooking
Directions
Remove the stems, seeds, and veins from the chiles, then put them into a colander and rinse well under cool running water.
In a saucepan over high heat, combine the chiles with water to cover and bring to a boil. Reduce the heat to medium, cover, and simmer for 10 minutes.
Using tongs, turn the chiles over so they will soften evenly, re-cover, and continue to simmer until softened, about 10 minutes longer. Drain well, discard the water, and let cool for several minutes before blending.
In a blender, combine the cooled chiles, water, flour, garlic, and salt and purée until smooth. Pass the sauce through a fine-mesh sieve set over a bowl to remove the skins and seeds. Discard the solids in the sieve. Use immediately, or transfer to an airtight container and store in the refrigerator for up to 1 week or in the freezer for up to 6 months.

Nutrition

Serving: 1serving | Calories: 546kcal | Carbohydrates: 7g | Protein: 17g | Fat: 51g | Sodium: 1005mg | Fiber: 1g
Side shot of chilaquiles served on a white plate.

How to Make Chilaquiles – Step by Step Photos

Overhead shot of quartered tortillas on a white cutting booard.

Line a sheet pan or large plate with paper towels. Stack 8 corn tortillas and cut them into quarters.

Overhead shot of tortilla slices being fried in a silver pan.

In a large deep skillet set over medium heat, warm 1/4 cup cooking oil until shimmering. Add two layers of tortilla quarters at a time (8 quarters) and fry, turning as needed, until lightly browned and slightly crunchy, about 1 minute on each side. Transfer the tortilla quarters to the paper towel-lined plate to drain. Sprinkle with a pinch of salt. Repeat with the remaining tortilla quarters.

Overhead shot of red sauce "salsa roja" in a silver sauce pan.

Warm the 10 ounces of enchilada sauce in a large saucepan. If you’d like to make your own enchilada sauce, you will find Yvette’s recipe in the notes section of the recipe card.

Overhead shot of fried tortillas served on a white plate with red sauce being drizzled on top.

Divide tortilla chips between two large plates. Divide the warm enchilada sauce equally, drizzling it over the tortilla chips on each plate.

Overhead shot of chilaquiles served on a white plate with sour cream being drizzled on top.

Next, divide the 1/2 cup shredded Oaxaca cheese, 1/4 cup crumbled queso fresco, 1/4 cup fresh cilantro leaves, 1/3 cup green onions, 1 diced avocado, and 2 tablespoons of Mexican crema. between two plates.

Side shot of a hand picking up a chilaquile served on a white plate.

That’s it! I told you it was easy. Enjoy the ridiculously yummy contrasting flavors, textures, and temperatures immediately. Woot! And another one. (Said in my best DJ Khaled.)

More Recipes With Tortillas

The post Chilaquiles appeared first on Budget Bytes.

Chicken Lettuce Wraps

These Chicken Lettuce Wraps are full of freshness and bold flavor, easy to prepare, and satisfying in every bite!

The post Chicken Lettuce Wraps appeared first on Budget Bytes.
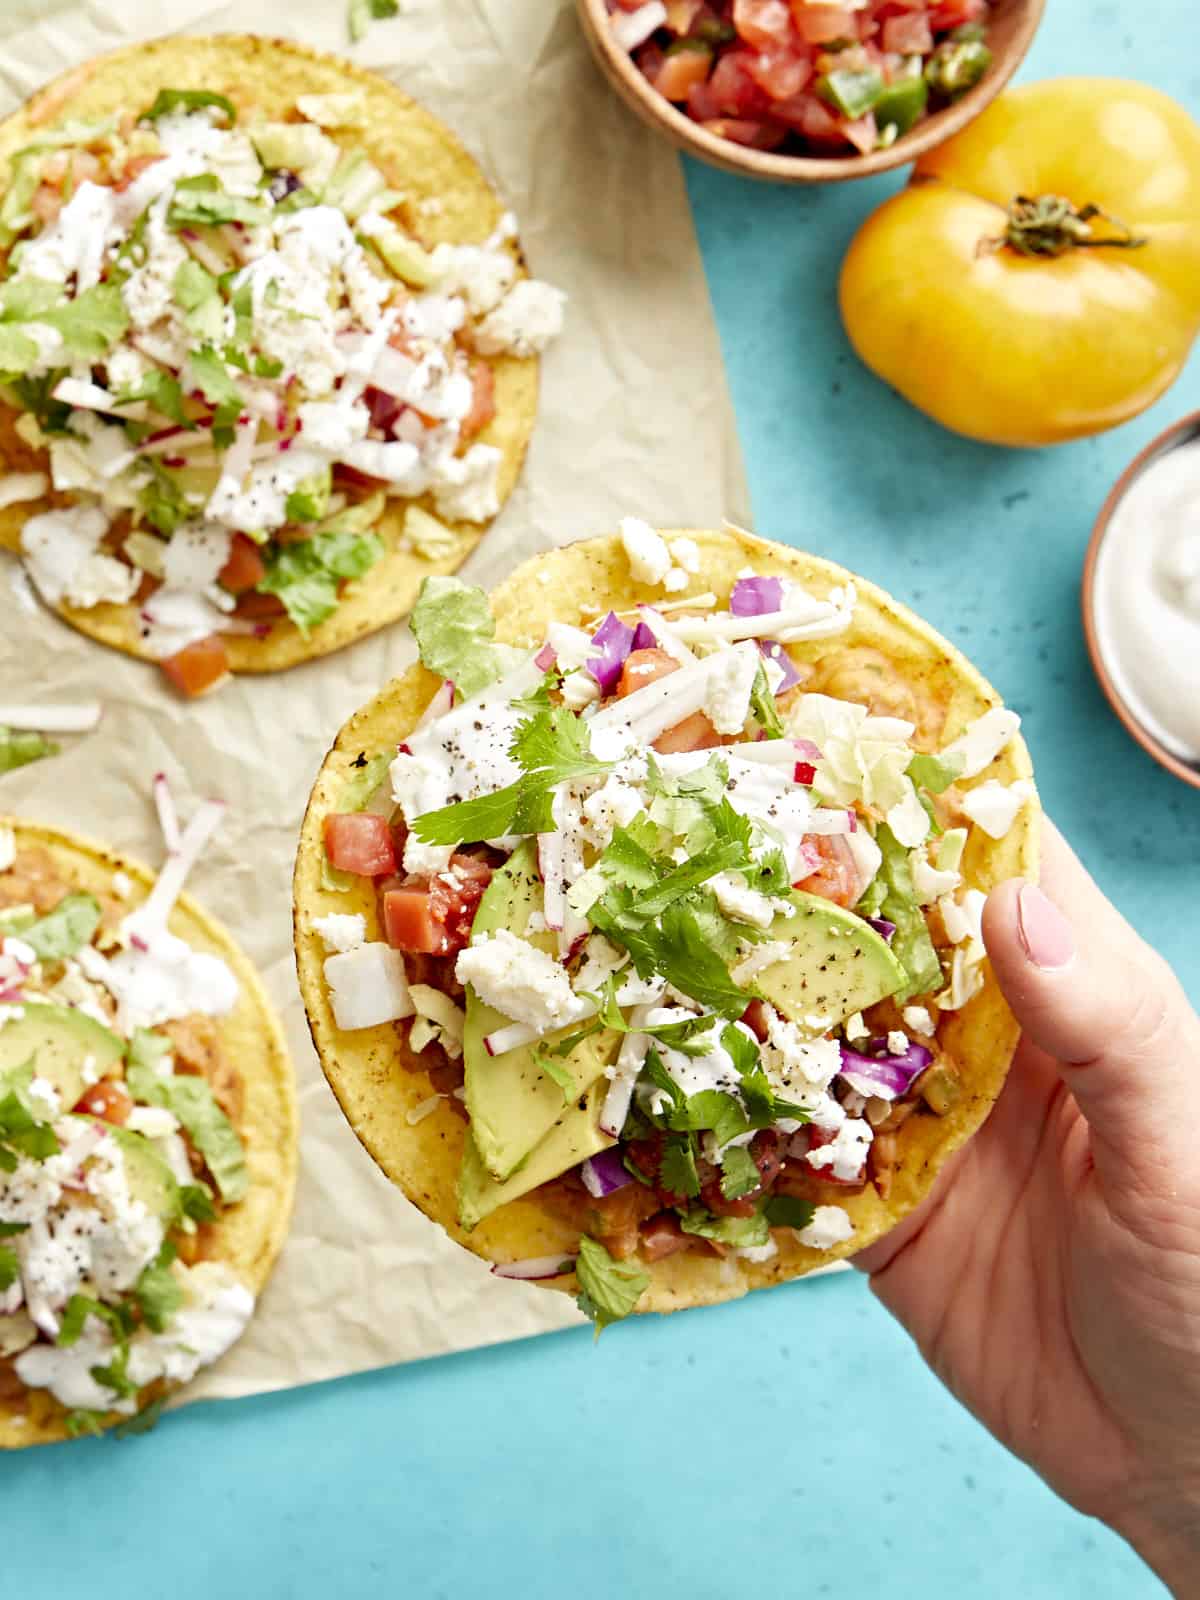
Of all the small plate recipes, one of the easiest to prepare and one of my personal favorites is Chicken Lettuce Wraps. The crisp lettuce leaves hold a saucy ground chicken and vegetable mixture and every bite is full of freshness and bold flavor! If you love to make Asian-inspired recipes as much as I do, then you might already have a lot of these ingredients at home, which makes this recipe simple, easy to prepare, and satisfying in every bite!

Overhead shot of chicken lettuce wraps with a small bowl of chopped peanuts and a small bowl of peanut lime dressing served on the side.

Ingredients Needed For Chicken Lettuce Wraps

This recipe includes 3 simple elements: a sauce, the chicken and vegetable filling and a dressing drizzled on top. The dressing is optional, but highly recommended :)

  • Ground Chicken – ground chicken is a very lean meat with not a lot of fat, but it comes to life with this delicious sauce poured on top. You can easily sub the chicken for ground turkey or ground pork if you prefer.
  • Vegetables – I kept things simple with some chopped water chestnuts and a diced red bell pepper. You can find the water chestnuts usually in the International food aisle.
  • The Sauce – the sauce is the star of the show in these lettuce wraps! It’s made with a simple mixture of asian sauces, sesame oil, rice vinegar, and a little bit of fresh ginger and garlic.
  • Peanut Lime Dressing – when you order chicken lettuce wraps in a restaurant it’s often served with a dipping sauce, but we decided to pair ours with a half portion of our fav creamy Peanut Lime Dressing! You only need a little bit drizzled on each lettuce wrap and it adds great depth of flavor to these tasty wraps.

What Lettuce Is Best For Lettuce Wraps?

You can use a variety of different types of lettuce for chicken lettuce wraps including bibb lettuce, butter lettuce, green leaf lettuce or even romaine lettuce. We opted for these cute iceberg lettuce boats that we caught on sale, and the chicken filling fits perfectly inside each one. Bibb lettuce will wrap nicely around the filling and looks beautiful plated, but it can also be on the pricier side.

Ingredient Substitutions

I love recipes that you can easily customize with ingredients you already have in your fridge or pantry. Here are few suggestions:

  • Ground turkey – ground turkey also works well in these lettuce wraps. It’s leaner than beef and tastes great with the sauce! Just make sure you buy 93% lean ground turkey and not ground turkey breast which has almost zero fat in it. You definitely don’t want to make that mistake.
  • Vegetables – you can easily add or swap out the vegetables with some of your own favorites like diced onions, green bell peppers, or chopped baby bella mushrooms. Just make sure to dice them up into smaller bite size pieces so they fit nicely in the lettuce wraps.
  • Dressing & Toppings – we paired these lettuce wraps with our creamy peanut lime dressing, which worked beautifully, a few green onions and peanuts for extra texture; but feel free to skip the dressing and top with a sprinkle of sesame seeds or a little sriracha if you wanna add some spice!
Very close up shot of chicken lettuce wraps being drizzled with peanut lime dressing.

What to Serve With Chicken Lettuce Wraps

You can have chicken lettuce wraps as an appetizer or your main dish, but they also taste great paired with some coconut rice, a quick & easy vegetable lo mein, sesame cucumber salad, crispy rice noodles, or this simple cold peanut noodle salad. The noodle salad uses the same sweet & tangy peanut lime dressing so you can easily just make a full batch of the dressing and drizzle it on both!

How To Store Leftovers

If you’re lucky enough to have any leftovers, be sure to store the chicken filling and the lettuce separately. You can store the chicken filling in an airtight container in the refrigerator for up to 4 days. Then store any extra lettuce in a food storage bag in the fridge for up to 4 days as well.

Side angle shot of chicken lettuce wraps
Overhead shot of chicken lettuce wraps with bowls of chopped peanuts, chopped green onions and peanut lime dressing on the side.
Print

Chicken Lettuce Wraps

These Chicken Lettuce Wraps are full of freshness and bold flavor, easy to prepare, and satisfying in every bite!
Course Appetizer, Dinner, Lunch
Cuisine Asian
Total Cost $12.94 recipe / $3.23 serving
Prep Time 15 minutes
Cook Time 15 minutes
Total Time 30 minutes
Servings 4 3 lettuce wraps each
Calories 496kcal

Ingredients

Chicken Lettuce Wraps

  • 1/4 cup hoisin sauce $0.42
  • 2 Tbsp soy sauce $0.14
  • 1 Tbsp rice vinegar $0.10
  • 1 Tbsp toasted sesame oil $0.30
  • 1 Tbsp fresh grated ginger $0.60
  • 2 cloves garlic, minced $0.16
  • 1 lb ground chicken $4.49
  • 1 Tbsp cooking oil $0.04
  • 1 red bell pepper $1.25
  • 8 oz canned water chestnuts, drained $1.69
  • 2 green onions $0.22
  • 1/4 cup peanuts $0.12
  • 12 lettuce leaves $2.20

Peanut Lime Dressing

  • 1.5 Tbsp natural style peanut butter $0.11
  • 1/2 Tbsp brown sugar $0.02
  • 1 clove garlic, minced $0.08
  • 1/4 tsp fresh grated ginger $0.05
  • 1 lime $0.50
  • 1 tsp soy sauce $0.04
  • 2 Tbsp neutral oil $0.41

Instructions

  • First, make the sauce for the chicken lettuce wraps. In a small bowl combine the hoisin sauce, soy sauce, rice vinegar, toasted sesame oil, fresh grated ginger and minced garlic. Set the sauce aside.
  • Next chop the red bell pepper and water chestnuts into similar size pieces. Then slice the green onions and give the peanuts a rough chop. Set veggies and nuts aside.
  • Heat a large skillet over medium heat and add the cooking oil. Once oil is heated, add the ground chicken, crumble and cook until browned.
  • Add the red bell pepper and water chestnuts to the skillet. Saute for two minutes.
  • Pour the prepared sauce mixture into the skillet and mix well. Cook for two more minutes to allow the sauce to soak into the chicken and vegetables.
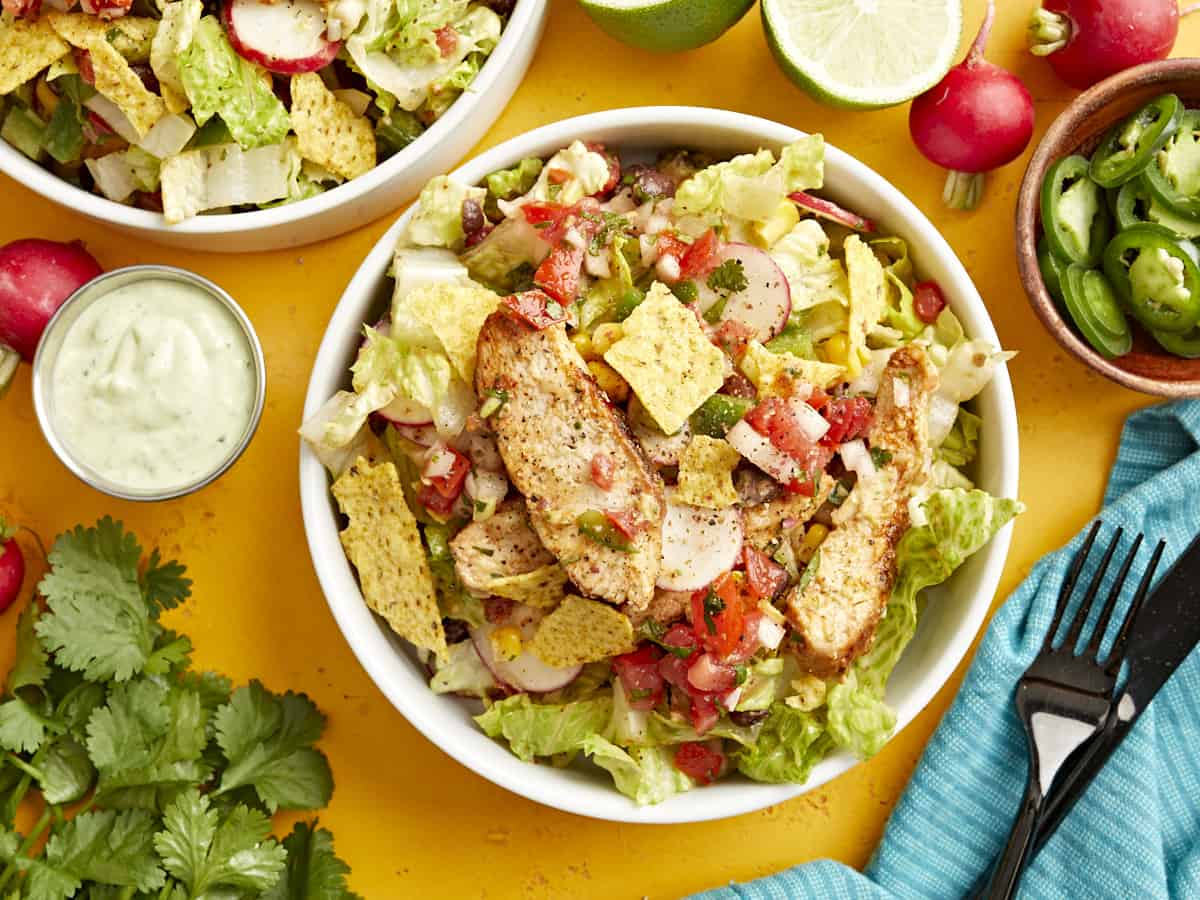
  • Remove from heat and top with green onions and chopped peanuts. Serve 1/3 cup of the chicken and vegetable mixture inside each lettuce wrap and drizzle a little of the peanut lime dressing on top. Enjoy!
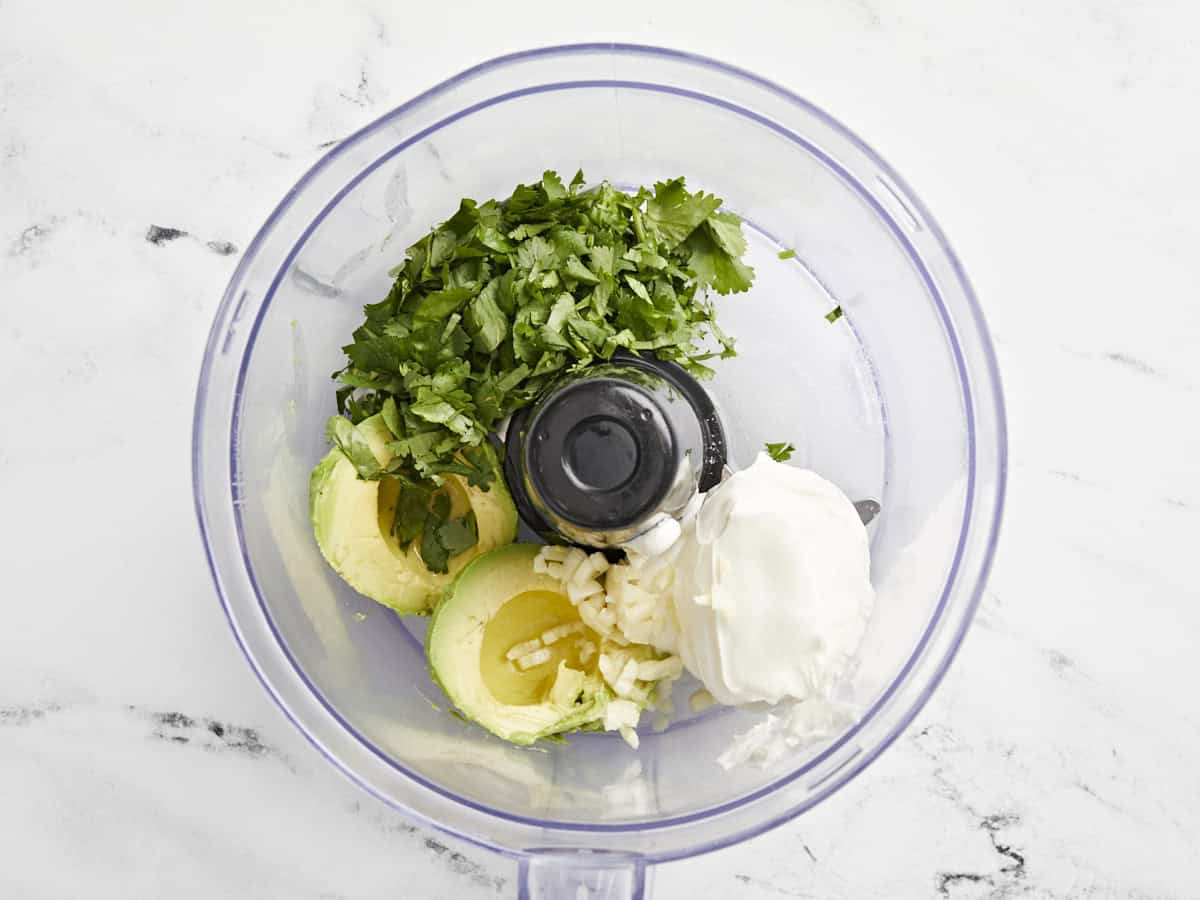
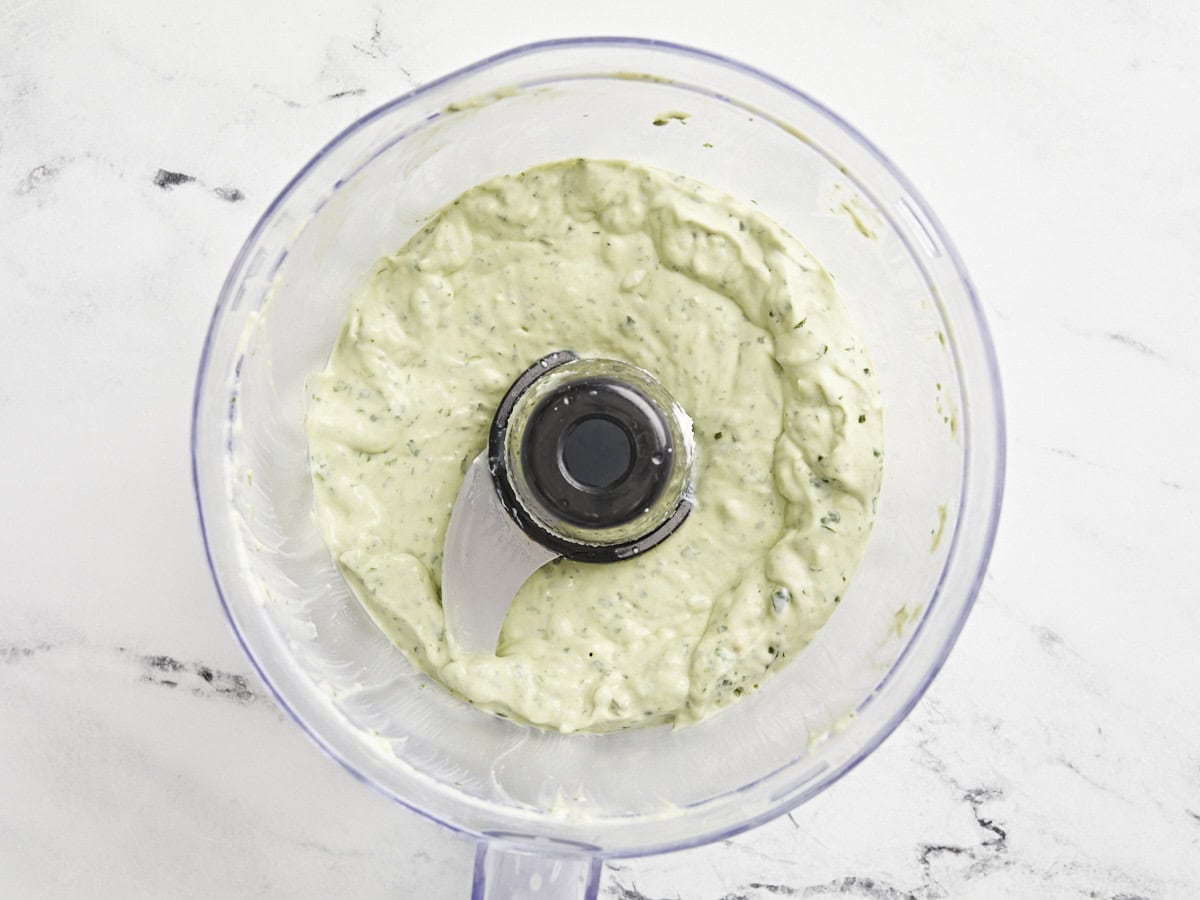
See how we calculate recipe costs here.

Nutrition

Serving: 3lettuce wraps | Calories: 496kcal | Carbohydrates: 29g | Protein: 27g | Fat: 32g | Sodium: 966mg | Fiber: 6g

How To Make Chicken Lettuce Wraps – Step By Step Photos

Overhead shot of a bowl of asian sauce mixture.

Start by making the sauce for the chicken. In a small bowl mix 1/4 cup hoisin sauce, 2 Tbsp soy sauce, 1 Tbsp rice vinegar, 1 Tbsp toasted sesame oil, 1 Tbsp fresh grated ginger, and 2 garlic cloves minced. Stir well and set aside.

Chopped bell pepper, water chestnuts, green onions and peanuts on a wood cutting board.

Dice one red bell pepper. Drain and dice one 8oz. can of water chestnuts. Slice 2 green onions and give the peanuts a rough chop. Set these ingredients to the side.

Cooked ground chicken in a large stainless steel skillet.

Add 1 Tbsp cooking oil to a large skillet and heat over medium. Once oil is hot, add 1 lb ground chicken, crumble, and cook until browned.

Cooked ground chicken with red bell pepper and water chestnuts.

Mix in diced bell pepper and water chestnuts into the skillet and saute for 2 minutes.

Asian sauce mixture being poured over cooked chicken and vegetables.
Pour the sauce mixture into the skillet and mix well. Continue to cook and stir for 2 minutes.
Finished chicken and vegetables with green onions and chopped peanuts sprinkled on top.

Remove from heat and add 2 sliced green onions and 1/4 cup chopped peanuts. Feel free to reserve some of the green onions and peanuts to add on top of the individual lettuce wraps.

Overhead close up shot of peanut lime dressing.

Next, make the peanut dressing. In a small bowl combine 1.5 Tbsp natural style peanut butter, 1/2 Tbsp brown sugar, 1 minced garlic clove, 1/4 tsp grated fresh ginger, 1 lime, 1 tsp soy sauce, 2 Tbsp neutral oil. Mix well.

Chicken and vegetable filling being added to chicken lettuce wraps.

Serve chicken filling inside lettuce with a drizzle of the peanut lime dressing and enjoy!

close up shot of chicken lettuce wraps with peanut lime dressing being drizzled on top.

More Asian Inspired Recipes

The post Chicken Lettuce Wraps appeared first on Budget Bytes.