Deprecated: trim(): Passing null to parameter #1 ($string) of type string is deprecated in /home/davecampbell/foodwatcher.com/wp-content/plugins/feedwordpress/feedwordpress.php on line 2022

Apple Cinnamon Baked Oatmeal

This cozy apple cinnamon baked oatmeal is the perfect hot breakfast for cool fall mornings, and it’s great for meal prep, too!

The post Apple Cinnamon Baked Oatmeal appeared first on Budget Bytes.

Who needs those autumn-themed candles when you’ve got Apple Cinnamon Baked Oatmeal in the oven? NO ONE. This warm and cozy oatmeal casserole, of sorts, is the epitome of fall vibes. Not only will this baked oatmeal make your house smell amazing, but it’s an easy way to meal prep breakfast for the week ahead. It’s cozy, delicious, filling, and EASY. 🙌

Overhead view of a casserole dish full of apple cinnamon baked oatmeal with the corner being scooped out.

What is Baked Oatmeal?

If you’re new to baked oatmeal, it’s kind of like bread pudding, but made with oats instead of chunks of bread. It’s sweet, rich, hearty, and absolutely amazing. The texture is soft and moist, but not goopy like traditional oatmeal can be, and it gets just a little bit crispy around the edges of the baking dish. You can eat it hot out of the oven and the leftovers can be eaten cold or reheated in the microwave. I like to pour a little cold milk over top for a delicious hot-cold combo. Baked oatmeal can also be frozen in single-serving containers for quick reheatable weekday breakfasts!

Ingredients for Apple Cinnamon Baked Oatmeal

This apple cinnamon baked oatmeal combines our usual baked oatmeal base with apples that are coated in a little cinnamon and sugar, and then baked until they form an apple pie-like layer on the bottom of the oats. Here are the ingredients you’ll need to make this incredible apple cinnamon baked oatmeal:

  • Fresh apples: Pick a sweet or semi-sweet variety of apple, like Fuji, Gala, or Honeycrisp. And, of course, take advantage of the fresh fall apples for the best price and flavor!
  • Oats: Make sure to use old-fashioned rolled oats for this recipe, not quick oats or minute oats, to achieve the best texture. Quick oats are too thin and will create a mushier texture.
  • Milk and eggs: Milk and eggs create a custard that keeps the baked oats soft, tender, and moist. I like to use whole milk, but you can substitute it with non-dairy milk if needed.
  • Brown sugar and applesauce: Using both broth sugar and applesauce to sweeten the baked oatmeal creates an even bigger apple pie-like flavor without having to use too much added sugar.
  • Spices: Cinnamon, cloves, and vanilla make these baked oats that classic fall aroma!
  • Lemon juice: A little lemon juice brightens up the baked apples and really makes their flavor shine.
  • Cornstarch and baking powder: These two ingredients are added for texture. The cornstarch helps thicken the apple juices as they bake, creating a pie-filling-like texture. The baking powder lightens the oat mixture just a touch so it’s not quite so heavy.

How to Serve Apple Cinnamon Baked Oatmeal

Baked oatmeal is pretty versatile. You can eat it either hot OR cold. I love it just out of the oven with a little cold milk poured over top, but it’s also great cold after it’s been refrigerated overnight. You can top it with some nuts or even some whipped cream for an even more dessert-like treat!

How to Store The Leftovers

After baking, divide the oatmeal into single-serving portions and refrigerate until completely cool. The baked oatmeal can be stored in the refrigerator for 4-5 days, or you can transfer it to the freezer for longer storage (about three months). Refrigerated or frozen baked oatmeal can be reheated quickly in the microwave.

A bowl full of apple cinnamon baked oatmeal with milk.
Overhead view of a casserole dish of apple cinnamon baked oatmeal with the corner being scooped out.
Print

Apple Cinnamon Baked Oatmeal

This cozy apple cinnamon baked oatmeal is the perfect hot breakfast for cool fall mornings, and it's great for meal prep, too!
Course Breakfast, Brunch
Cuisine American
Total Cost $5.92 recipe / $0.99 serving
Prep Time 15 minutes
Cook Time 45 minutes
Total Time 1 hour
Servings 6 (about 1.3 cups each)
Calories 336kcal

Ingredients

Baked Apple Layer

  • 4 medium apples (about 2 lbs. total) $2.66
  • 1 Tbsp lemon juice $0.06
  • 2 Tbsp brown sugar $0.06
  • 1 Tbsp cornstarch $0.03
  • 1/2 tsp cinnamon $0.05
  • 1/8 tsp cloves $0.02

Baked Oatmeal Layer

  • 1.5 cups unsweetened applesauce $0.91
  • 1/4 cup brown sugar $0.12
  • 2 large eggs $0.18
  • 1 tsp vanilla extract $0.59
  • 1 tsp salt $0.05
  • 1 tsp baking powder $0.06
  • 1 tsp cinnamon $0.10
  • 1.5 cups milk* $0.72
  • 2.5 cups old-fashioned rolled oats $0.72

Instructions

  • Preheat the oven to 375ºF. Core and dice the apples.
  • Place the diced apples in the bottom of a 9×9-inch (or 2 qt.) casserole dish. Add the lemon juice, brown sugar, cornstarch, cinnamon, and cloves. Stir until the apples are coated in sugar and spices.
  • Cover the dish with foil and bake for 15 minutes.
  • While the apples are baking, prepare the baked oatmeal mixture. In a large bowl, whisk together the applesauce, brown sugar, eggs, vanilla, salt, baking powder, and cinnamon. Then add the milk and whisk to combine again.
  • Finally, stir the dry oats into the applesauce mixture and stir until fully combined.
  • After the apples come out of the oven, give them a good stir, then pour the oat mixture over top. Return the dish to the oven (uncovered) and bake for an additional 30 minutes.
  • After baking for 30 more minutes the oats should be golden brown on top and you may see some of the apple cinnamon layer bubbling up around the edges. Let the oats cool for about five minutes before serving.

See how we calculate recipe costs here.
Notes

*I use whole milk but you can use any type of milk, including non-dairy varieties.

Nutrition

Serving: 1.3cups | Calories: 336kcal | Carbohydrates: 64g | Protein: 9g | Fat: 6g | Sodium: 514mg | Fiber: 7g
Overhead view of a casserole dish full of apple cinnamon baked oatmeal with ingredients on the sides.

How to Make Apple Cinnamon Baked Oatmeal – Step by Step Photos

Four apples on a cutting board.

Preheat the oven to 375ºF. Core and dice four medium apples (about ½ lb. each).

Apples in the casserole dish with sugar, spices, and cornstarch added.

Place the apples in the bottom of a 9×9-inch or 2-quart casserole dish. Add 1 Tbsp lemon juice, 2 Tbsp brown sugar, 1 Tbsp cornstarch, ½ tsp cinnamon, and ⅛ tsp cloves. Stir until the apples are evenly coated in sugar and spices.

Baked apples in the casserole dish.

Cover the dish with foil and bake the apples for 15 minutes in the preheated 375ºF oven.

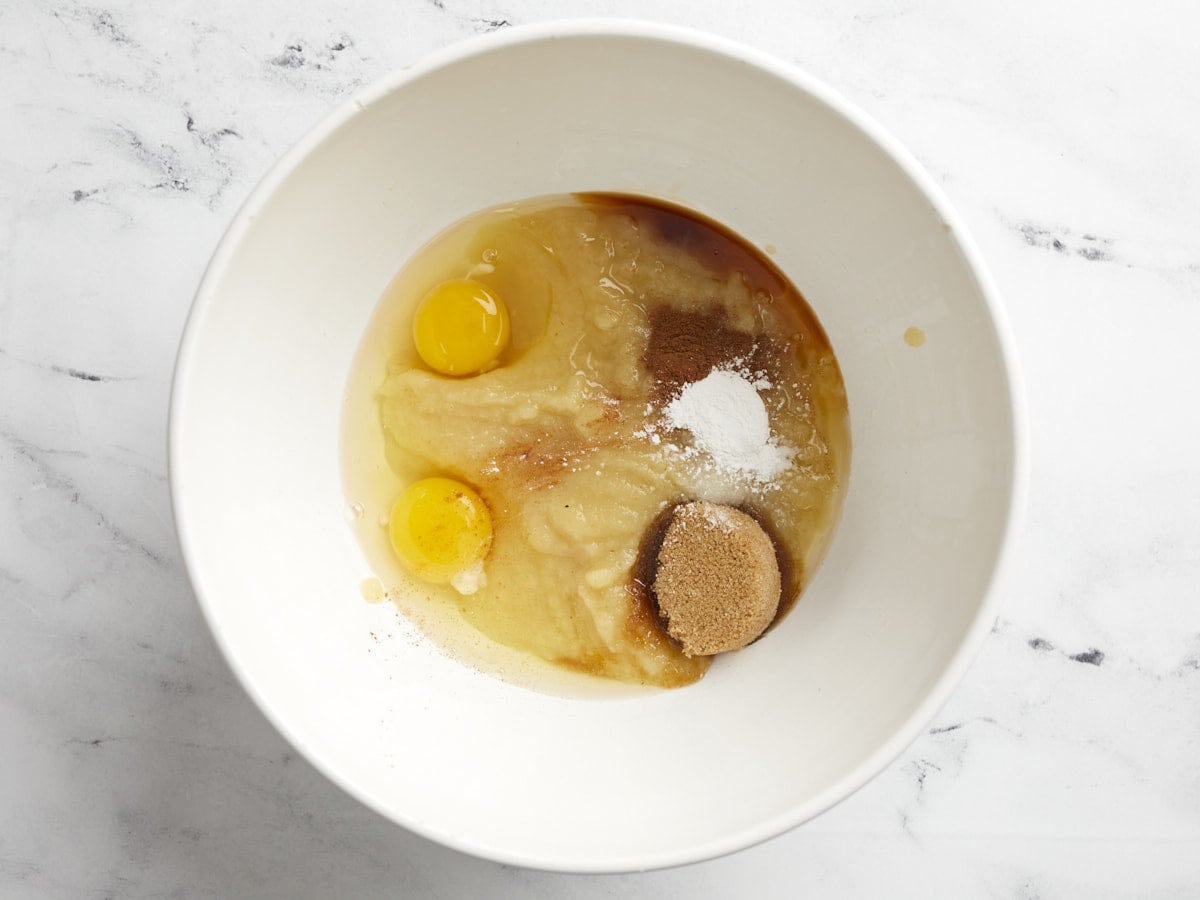
Eggs, applesauce, sugar, and spices in a bowl.

While the apples are baking, begin preparing the oat mixture. In a large bowl, whisk together 2 large eggs, 1.5 cups unsweetened applesauce, 1 tsp vanilla, 1 tsp salt, 1 tsp baking powder, 1 tsp cinnamon, and ¼ cup brown sugar.

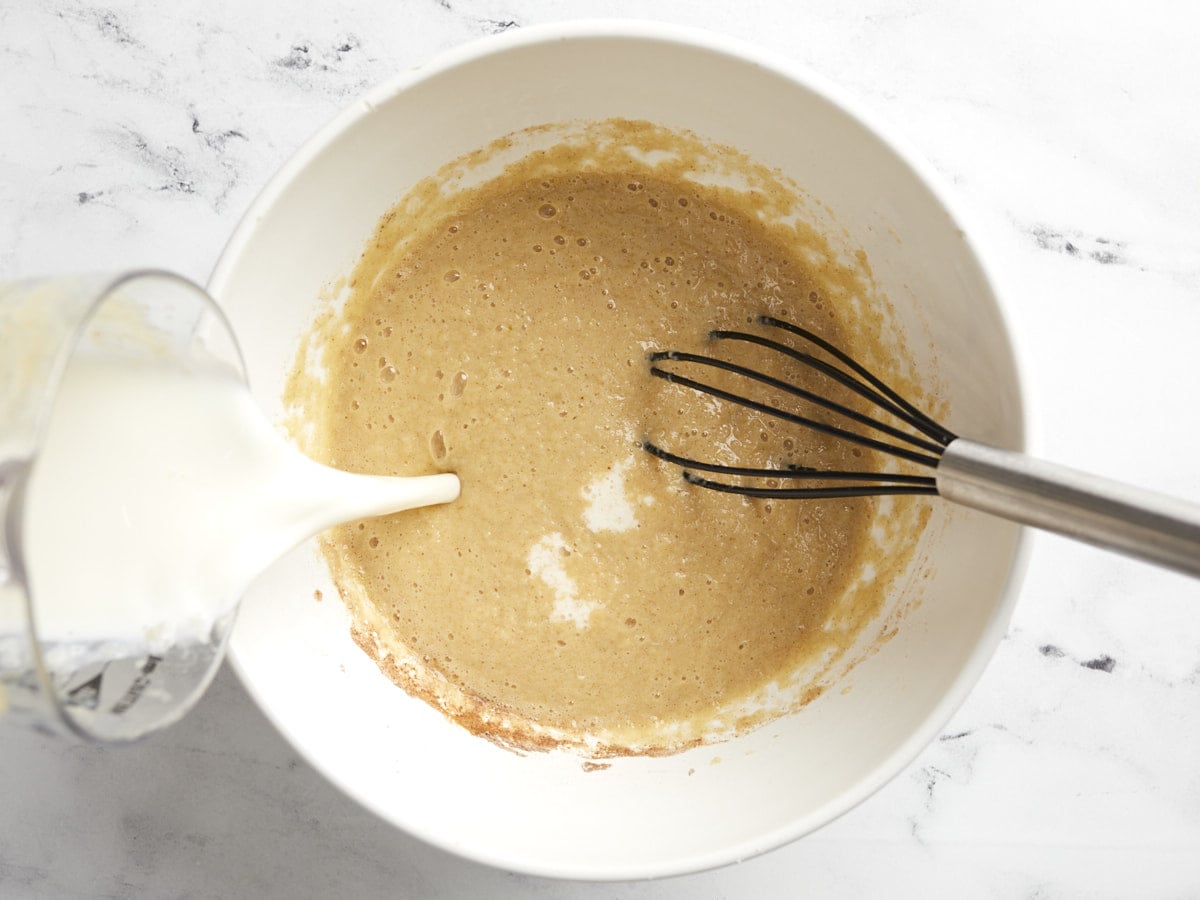
Milk being poured into the bowl of applesauce mixture.

Add 1.5 cups milk to the applesauce mixture, then whisk again to combine.

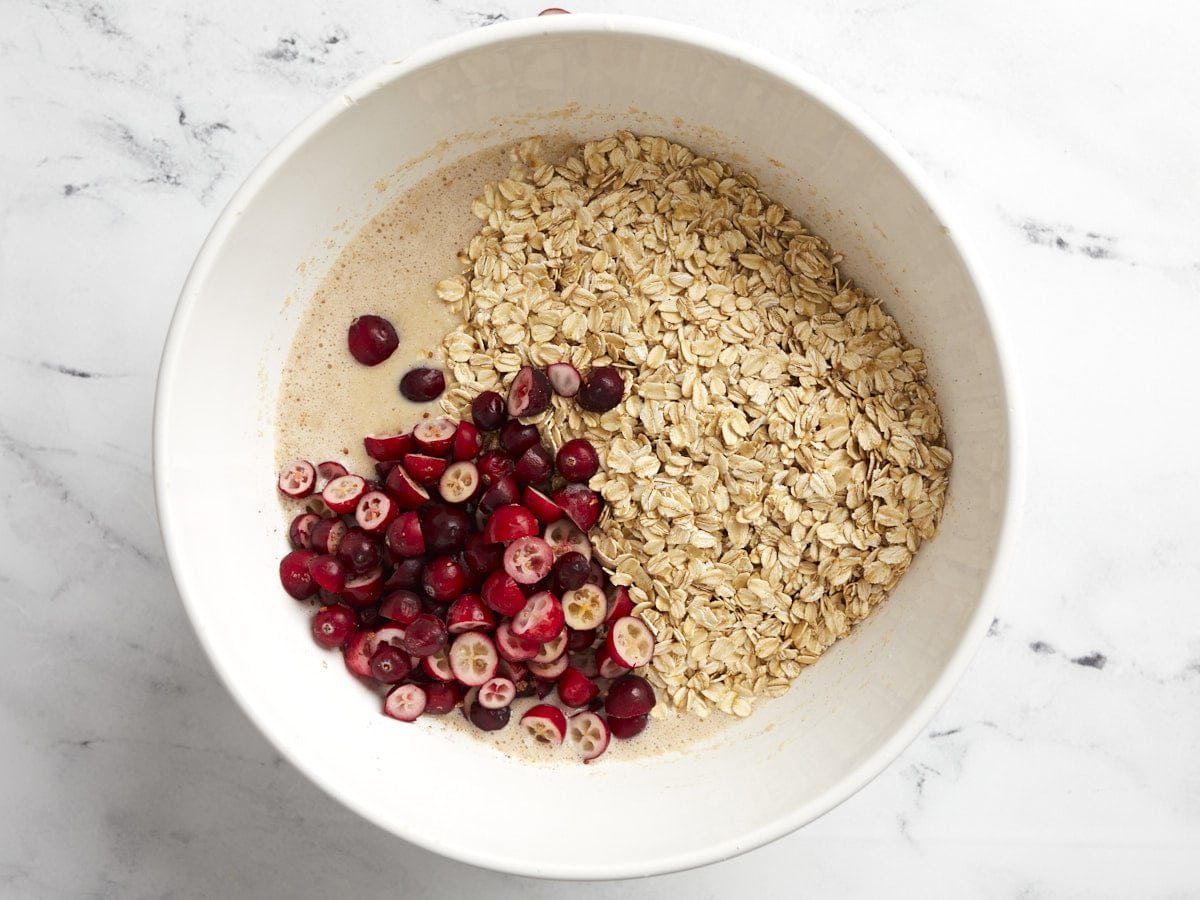
Dry oats stirred into the applesauce and milk mixture.

Add 2.5 cups rolled oats (not quick oats) and stir until everything is evenly combined.

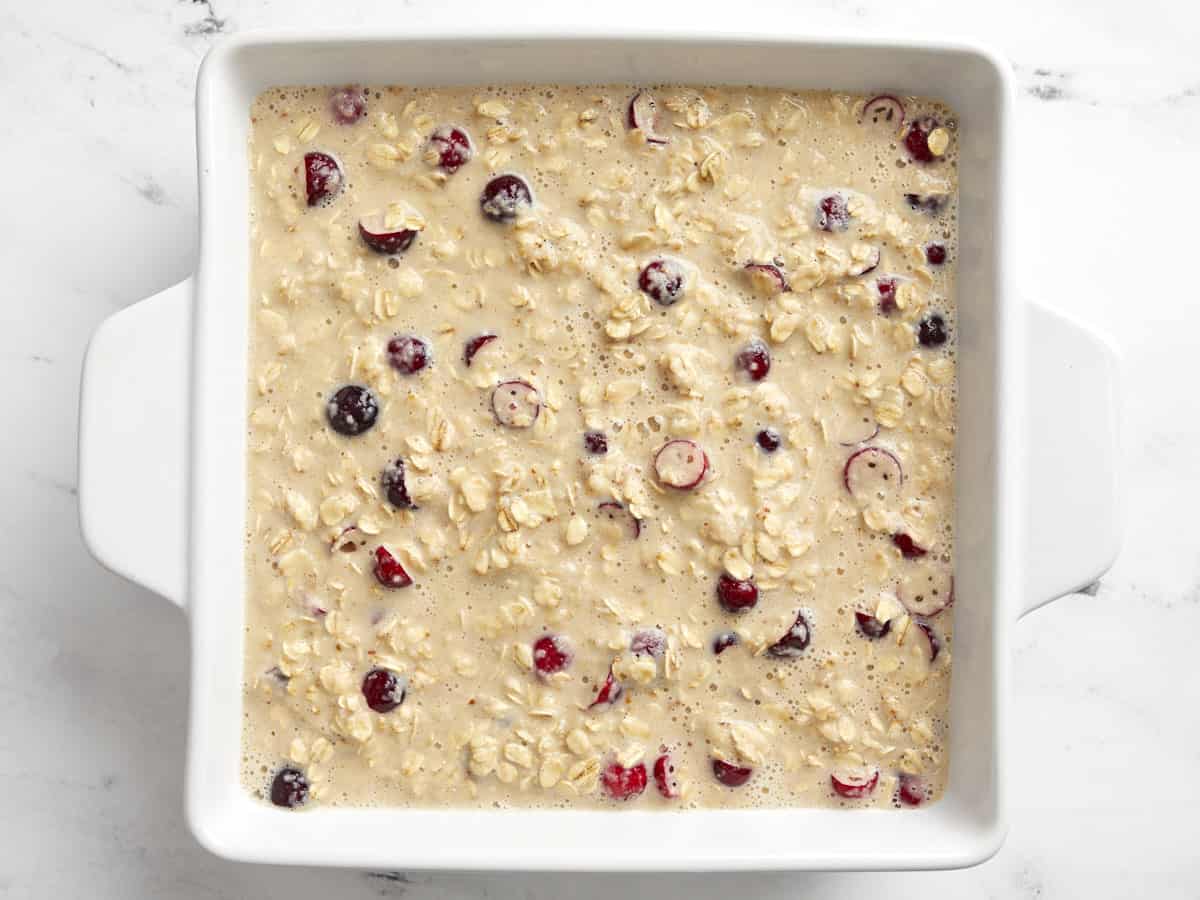
Oat mixture in the casserole dish on top of the baked apples.

After the baked apples come out of the oven, give them a stir, then pour the oat mixture over top of the apples. Place the dish back into the oven (uncovered) and bake for 30 minutes more.

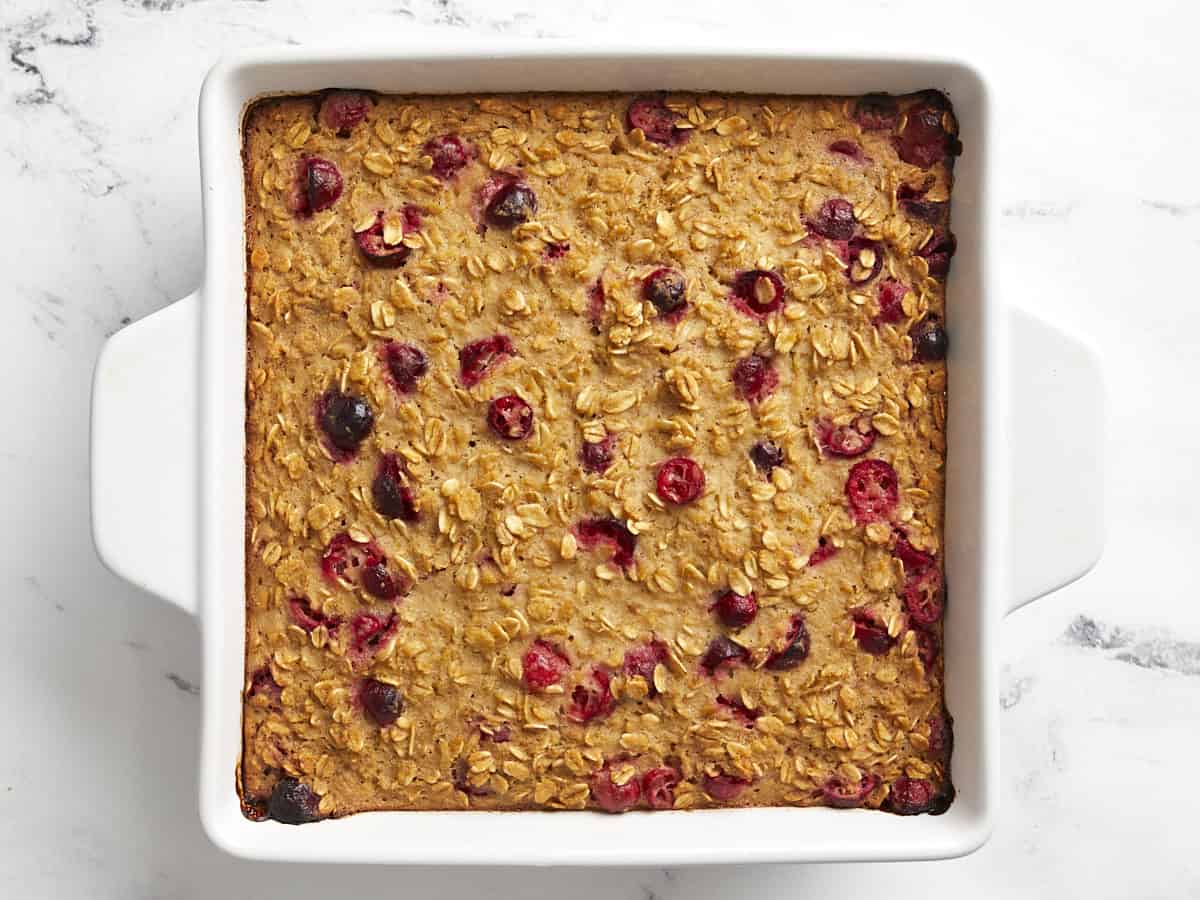
Baked oatmeal in the casserole dish from above.

After 30 minutes the oats should be golden brown around the edges and you might see some of the apple cinnamon layer bubbling up around the edges. Remove the baked oatmeal from the oven and let it cool for about 5 minutes before serving.

Side view of a casserole dish full of apple cinnamon baked oatmeal with a portion scooped out.

The bottom layer will be sweet and tender baked apples and the top layer will be a soft baked oatmeal. SO GOOD!

Milk being poured into a bowl of apple cinnamon baked oatmeal.

I like to eat my apple cinnamon baked oatmeal with a splash of cold milk on top!

The post Apple Cinnamon Baked Oatmeal appeared first on Budget Bytes.

Apple Slaw

This crisp and refreshing apple slaw is the perfect easy side dish for weeknight meals or potlucks during the fall season.

The post Apple Slaw appeared first on Budget Bytes.

This light, crunchy, and refreshing Apple Slaw recipe takes just a few minutes to put together and makes a huge amount of slaw for well under a dollar a serving. It’s one of my favorite slaw recipes because it’s incredibly versatile and can be served as a main dish (I love it topped with Roasted Chicken) or as a side dish for a quick weeknight meal. It also travels really well, so it’s an excellent option for your next potluck. The best part? It holds up beautifully throughout the week. 

Overhead view of a bowl full of apple slaw with ingredients on the sides.

What Is Apple Slaw?

Apple Slaw is a cold chopped salad. Crunchy sliced apples, carrots, green onions, and shredded cabbage are tossed in a creamy dressing, creating the perfect addition to any weeknight meal or backyard BBQ.

Ingredients For Apple Slaw

  • Green Cabbage: Is the foundation of this slaw. Cabbage is hearty but loaded with water, so always taste your slaw before serving it and adjust the seasoning accordingly. You can substitute green cabbage with red cabbage or even kale.
  • Apples: I use Granny Smith, but if you really want to have fun with it, use a mixture of apples. My favorites to throw in are Fuji, Gala, and Honeycrisp (they’re affordable when they’re in season). Keep apples from turning brown by submerging them in water that has an acid added to it. For every cup of water, use 2 teaspoons of lemon juice or 1 teaspoon of distilled or apple cider vinegar.
  • Carrots: Bring sweetness and crunch to the salad and a pop of color. If you don’t have carrots, substitute with raw butternut squash, parsnips, or add an extra cup of cabbage to the mix.
  • Green Onions: Lends a mild onion flavor to the salad. You can substitute them with chives or sweet onions. If you only have white or red onions, soak them in water for a minute or two to help decrease their pungency. 
  • Mayonnaise: Is the backbone of the dressing and adds a tangy creaminess. Substitute it with Greek Yogurt or Sour Cream.
  • Dijon Mustard: Adds a peppery kick and a touch of color to the dressing. If you don’t have Dijon mustard, use brown or yellow mustard.
  • Honey: Creates a touch of sweetness in the dressing. If you don’t have honey, substitute it with one teaspoon of brown sugar. Just dissolve it well before adding the dressing to the salad.
  • Apple Cider Vinegar: Adds a tangy note to the dressing and keeps the apples from browning. 

What To Serve With Apple Slaw

Serve this tangy slaw topped with roasted chicken for a light lunch. Or use it as topping on a Pulled Pork or Pulled Chicken sandwich. I also love it served as a side for BBQ Ribs paired with Corn On The Cobb.

How To Store Leftovers

Store Apple Slaw in an airtight container and refrigerate up to 5 days. Do not freeze, as it will change the texture of the cabbage. Always mix the slaw a few times and taste for salt before serving.

Close up side view of a bowl of apple slaw.
Overhead view of a bowl full of apple slaw with the ingredients on the sides.
Print

Apple Slaw

This crisp and refreshing apple slaw is the perfect easy side dish for weeknight meals or potlucks during the fall season.
Course Dinner, Lunch, Side Dish
Cuisine American
Total Cost $6.46 recipe / $0.65 serving
Prep Time 15 minutes
Total Time 15 minutes
Servings 10 (1 cup each)
Calories 109kcal

Ingredients

  • 1/3 cup mayonnaise $0.63
  • 2 tsp Dijon mustard $0.05
  • 2 tsp honey $0.11
  • 2 Tbsp apple cider vinegar $0.09
  • 1/4 tsp salt (plus more to taste) $0.01
  • 1/8 tsp black pepper $0.01
  • 1 small cabbage, thinly sliced (about 5 cups) $2.23
  • 3 Granny Smith apples, julienned (about 2 cups)* $2.55
  • 2 carrots, julienned (about 2 cups)* $0.42
  • 3 green onions, sliced (about 1 cup)* $0.36

Instructions

  • Mix the mayonnaise, Dijon, honey, vinegar, salt, and pepper to make a dressing.
  • Shred or thinly slice the cabbage into 2-inch by ¼-inch strips. Shred or slice the carrots into 2-inch by ⅛-inch strips. Peel and core the apples. Shred or slice them into 2-inch by ⅛-inch strips and keep them in water with lemon juice or vinegar added, so they don't brown.** Cut the green onions on the diagonal into 1/8-inch thick slices.
  • Mix the apples and vegetables with the dressing in a large bowl. If necessary, add more salt to taste.
  • Keep the salad refrigerated until ready to serve. Mix before serving, and add more salt to taste.

See how we calculate recipe costs here.
Notes

*If finely slicing vegetables is difficult for you, use the slicing or shredding attachment on a food processor, a mandoline, or a large-holed cheese grater.
**For every one cup of water add 2 tsp lemon juice or 1 tsp distilled or apple cider vinegar.

Nutrition

Serving: 1cup | Calories: 109kcal | Carbohydrates: 14g | Protein: 1g | Fat: 6g | Sodium: 139mg | Fiber: 4g

How to Make Apple Slaw – Step by Step Photos

Ingredients for dressing in a bowl, not mixed.

Mix 1/3 cup mayonnaise, 2 tsp Dijon mustard, 2 tsp honey, 2 Tbsp apple cider vinegar, 1/4 tsp salt, and 1/8 tsp pepper to make a dressing.

Prepared vegetables on a cutting board.

Shred or slice one small cabbage into 2 by ⅛-inch strips. Shred or slice two carrots into 2 by ¼-inch strips. Peel and core two apples, then shred or slice them into 2 by ⅛-inch strips and keep them in water with lemon juice or vinegar added, so they don’t brown. Cut three green onions on the diagonal into 1/8-inch thick slices.

Dressing being poured over the bowl of shredded vegetables.

Mix the apples and vegetables with the dressing in a large bowl. If necessary, add more salt to taste.

Finished apple slaw in a bowl.

Keep the apple slaw refrigerated until ready to serve. Mix before serving, and add more salt to taste.

Close up side view of a bowl of apple slaw.

The post Apple Slaw appeared first on Budget Bytes.

Lemon Pound Cake

This delicious, moist and easy lemon pound cake recipe is made with fresh lemon juice and zest, and perfect for dessert or paired with coffee or tea.

The post Lemon Pound Cake appeared first on Budget Bytes.

This Lemon Pound Cake will make you swoon! It’s moist, tender, tart, and tangy. The light fluffy crumb is the perfect texture for soaking up the sweet and sour lemon glaze. Even better- it’s the absolute easiest cake to make. I bet you have everything you need in your pantry right now! 

Overhead view of lemon pound cake sliced on a wire cooling rack.

What is Lemon Pound Cake?

This classic dessert is baked in a loaf pan and is bursting with refreshing citrus notes that cut through the buttery sweetness of the cake. This easy recipe for Lemon Pound Cake is also one of my favorite ways to use up extra lemons, as the batter and glaze are loaded with lemon juice and zest.

Ingredients for Lemon Pound Cake

This cake is gorgeous and the flavors are zippy and balanced. It’s the perfect easy dessert recipe for a casual dinner or a fancy get-together (or if you’re in the mood for cake that isn’t too sweet.) Here’s what you need to make Lemon Poundcake:

  • Butter:  creates a light, tender texture and helps the cake rise.
  • Granulated Sugar and Powdered Sugar: these sugars do more than sweeten the cake and the icing. Granulated sugar softens the cake crumb, adds moisture, and balances the tartness of the lemon juice in the batter. Powdered sugar creates structure in icing and helps mellow out the sourness of lemon juice.
  • Eggs: create structure that helps the cake rise and keeps the crumb airy.
  • Flour: the base of our batter, it creates the structure of the crumb. While we have not tested this recipe with gluten-free flour, a 1-to-1 gluten-free baking flour should be a great substitute.
  • Lemons: are the heart of this recipe. If lemons are out of your budget, you can try bottled lemon juice, and though it won’t taste quite as tart and refreshing, it will still be a good cake. If lemons are too tart for you, leave them out and just make plain, buttery, pound cake!

How To Serve Lemon Pound Cake

This cake is fantastic still warm from the oven or served at room temperature. It pairs beautifully with No-Churn Strawberry Ice Cream. Or served with a fresh dollop of Homemade Whipped Cream. Double down on the lemon flavor and try it with Homemade Lemon Curd

How To Store Lemon Pound Cake

Place leftovers in an air-tight container and store at room temperature for up to 3 days. You can also wrap leftovers tightly in a layer of parchment paper and a second layer of aluminum foil, then freeze for up to 3 months. While you can refrigerate pound cake, it does dull the flavors and changes the texture of the cake. If you choose to refrigerate or freeze it, try warming it in a 350°F with a touch of butter brushed on each slice. I don’t know if you’ve ever tried frozen cake, but it’s delightful straight out of the freezer as well. The crumb stays soft and it’s a perfect treat for a hot summer day.

Side view of a sliced loaf of lemon pound cake.
Print

Lemon Pound Cake

This delicious, moist and easy lemon pound cake recipe is made with fresh lemon juice and zest, and perfect for dessert or paired with coffee or tea.
Course Dessert
Cuisine Amercian
Total Cost $4.85 recipe / $0.40 serving
Prep Time 20 minutes
Cook Time 1 hour
Cool Time 10 minutes
Total Time 1 hour 30 minutes
Servings 12 (1 slice each)
Calories 330kcal

Ingredients

  • 1 cup room temperature salted butter (plus more for greasing) $2.01
  • 1.5 cups all-purpose flour (plus more for dusting) $0.22
  • 1/2 tsp baking powder $0.03
  • 1/4 tsp baking soda $0.01
  • 1/4 tsp salt $0.02
  • 1 cup granulated sugar $0.39
  • 4 large eggs, beaten $0.36
  • 1/4 cup buttermilk $0.16
  • 3 lemons, juiced and zested, divided $1.32
  • 1 cup powdered sugar $0.33

Instructions

  • Place an oven rack in the center of your oven and preheat the oven to 350°F. Grease an 8×4 loaf pan with butter. Line the pan with parchment. Butter the parchment and dust with flour, shaking off excess flour.
  • Mix the flour, baking powder, baking soda, and salt in a medium bowl.
  • Mix the butter and sugar in a large bowl until light and fluffy. Add the beaten eggs, buttermilk, 1/4 cup lemon juice, and 1 tablespoon zest. Mix until incorporated.
  • Add the flour mixture to the butter and egg mixture in thirds, mixing after each addition and scraping down the sides before the next addition.
  • Add batter to the prepared pan. Bake for 50 to 60 minutes in the preheated 350°F oven until the cake springs back when you press the center and a toothpick inserted into the center comes out clean.
  • Remove the pound cake from the oven and cool for ten minutes before removing it from the pan and placing it on a cooling rack.
  • To make the glaze, mix the powdered sugar with 2 tablespoons lemon juice and 1 1/2 teaspoons lemon zest.
  • Drizzle the glaze on the cooled pound cake and serve!

See how we calculate recipe costs here.
Nutrition

Serving: 1slice | Calories: 330kcal | Carbohydrates: 41g | Protein: 4g | Fat: 17g | Sodium: 241mg | Fiber: 1g
Icing being drizzled over a loaf of lemon pound cake.

How to Make Lemon Pound Cake – Step by Step Photos

Loaf pan being buttered and dusted with flour.

Place an oven rack in the center of your oven and preheat the oven to 350°F. Grease an 8×4 loaf pan with butter. Line the pan with parchment. Butter the parchment and dust with flour, shaking off excess flour.

Dry ingredients for lemon pound cake being whisked together in a bowl.

Mix 1.5 cups of all-purpose flour, 1/2 tsp baking powder, 1/4 tsp baking soda, and 1/4 tsp salt in a medium bowl. 

Wet ingredients for lemon pound cake in a bowl.

Mix 1 cup of room-temperature salted butter and 1 cup of granulated sugar in a large bowl until light and fluffy. Add 4 beaten large eggs, 1/4 cup of buttermilk,  1/4 cup lemon juice, and 1 tablespoon zest. Mix until incorporated.

Wet and dry ingredients for lemon pound cake being mixed together.

Add the flour mixture to the butter and egg mixture in thirds, mixing after each addition and scraping down the sides before the next addition. 

Lemon pound cake batter in the loaf pan ready to be baked.

Add batter to the prepared pan. Bake for 50 to 60 minutes in the preheated 350°F oven until the cake springs back when you press the center and a toothpick inserted into the center comes out clean.

Baked lemon pound cake in the baking pan.

Remove the poundcake from the oven and cool for ten minutes before removing it from the pan and placing it on a cooling rack.

Ingredients for the icing in a bowl.

To make the glaze, mix 1 cup powdered sugar with 2 tablespoons lemon juice and 1 1/2 teaspoons lemon zest. 

Glaze being poured over the pound cake.

Drizzle the glaze on the cooled pound cake and serve!

Front view of a loaf of lemon pound cake sliced on a cooling rack.

The post Lemon Pound Cake appeared first on Budget Bytes.

Jello Salad

Jello salad is a sweet, creamy, popular dessert that’s easy to make and always a crowd favorite for potlucks, picnics, and holidays!

The post Jello Salad appeared first on Budget Bytes.

When I say Jello, you say Salad! :) Friends, we’re taking you back in time today…way back! We’re making Jello Salad! A simple, sweet treat and potluck classic. This recipe has been popular for many years; maybe because it’s a simple, inexpensive dessert that can feed a large group. Or maybe it’s because it’s so good that family and friends are always asking for it. Either way we couldn’t wait to share our version with you. Keep reading for all the deets!

Overhead photo of jello salad.

What is Jello Salad

Jello Salad is a retro American dessert that was really popular in the 1960s. It’s usually made with flavored gelatin, fruit, and sometimes marshmallows, nuts, or even pretzels. Over the years this popular dish has transformed, to say the least, and now you can find several variations of jello salad.

I vividly remember my mother making a similar version of jello salad every Christmas. It was the perfect light & airy dessert to cap off a heavy holiday meal. Although this nostalgic dessert was super popular “back in the day” it’s still a big favorite today. Go ahead and make this jello salad for your next get-together, BBQ, potluck dinner, or holiday occasion!

Ingredients Needed For Jello Salad

We’re keeping this Jello Salad recipe simple, sweet, and delicious! Here’s what you’ll need:

  • Strawberry Gelatin: Choose your favorite flavored gelatin powder. Since we are including fresh strawberries in our jello salad, a strawberry flavored gelatin is the perfect choice.
  • Cottage Cheese: Yes, cottage cheese! It adds a wonderful creamy texture and a tangy flavor to help balance the sweetness of the dessert. And if you don’t like the texture of cottage cheese, don’t worry! We use a blender to whip the cottage cheese and gelatin together until they form a smooth and creamy consistency.
  • Homemade Whipped Cream – Whipped cream is the foundation for this salad, but you can totally use cool whip instead. More details on the difference between the two is listed below.
  • Strawberries and Crushed Pineapple – Finally add in your favorite fruit or other mix-ins. Fresh strawberries and crushed pineapple taste heavenly with this version.

Homemade Whipped Cream vs. Frozen Whipped Topping

We try to make things from scratch when we can, so we opted for homemade whipped cream in this jello salad. However, homemade whipped cream isn’t as stable as frozen whipped topping. If you plan to set this dessert outside at potlucks or parties, consider using cool whip or a store-bought whipped topping as these will hold their texture a bit longer. There are also ways to stabilize homemade whipped cream and make it last longer, usually by adding additional ingredients. Here’s a great article from Food52 about ways to stabilize whipped cream.

How to Store Jello Salad

We stored this Jello Salad in an airtight container in the refrigerator and it was still delicious the next day. It will last a day or two in the refrigerator, any longer than that and the whipped cream starts to slowly deflate. So be sure to share this dreamy dessert with your family and friends or gobble it all up yourself within a day or so!

Jello salad in 3 mason jars with sliced strawberry on top.

Let us know in the comments if you remember this classic, sweet dessert! ;)

Overhead photo of a whole full of jello salad topped with sliced strawberries.
Print

Jello Salad

Jello salad is a sweet, creamy, popular dessert that’s easy to make and always a crowd favorite for potlucks, picnics, and holidays!
Course Dessert
Cuisine American
Total Cost $7.87 recipe / $1.12 serving
Prep Time 15 minutes
Refrigerate Time 2 hours
Total Time 2 hours 15 minutes
Servings 7 (about 1 cup each)
Calories 295kcal

Ingredients

  • 3 oz strawberry flavored gelatin $0.89
  • 2 cups cottage cheese, small curd $1.86
  • 20 oz crushed pineapple in juice (drained & juice reserved) $1.49
  • 1/2 lb fresh strawberries $1.49
  • 1 cup cold heavy whipping cream* $1.37
  • 1 tsp vanilla extract $0.72
  • 2 Tbsp granulated sugar $0.05

Instructions

  • Wash, remove the stems, and quarter the strawberries. Feel free to cut any large pieces in half again. Set the strawberries to the side.
  • With a strainer and a small bowl, drain the crushed pineapples really well and reserve the pineapple juice.
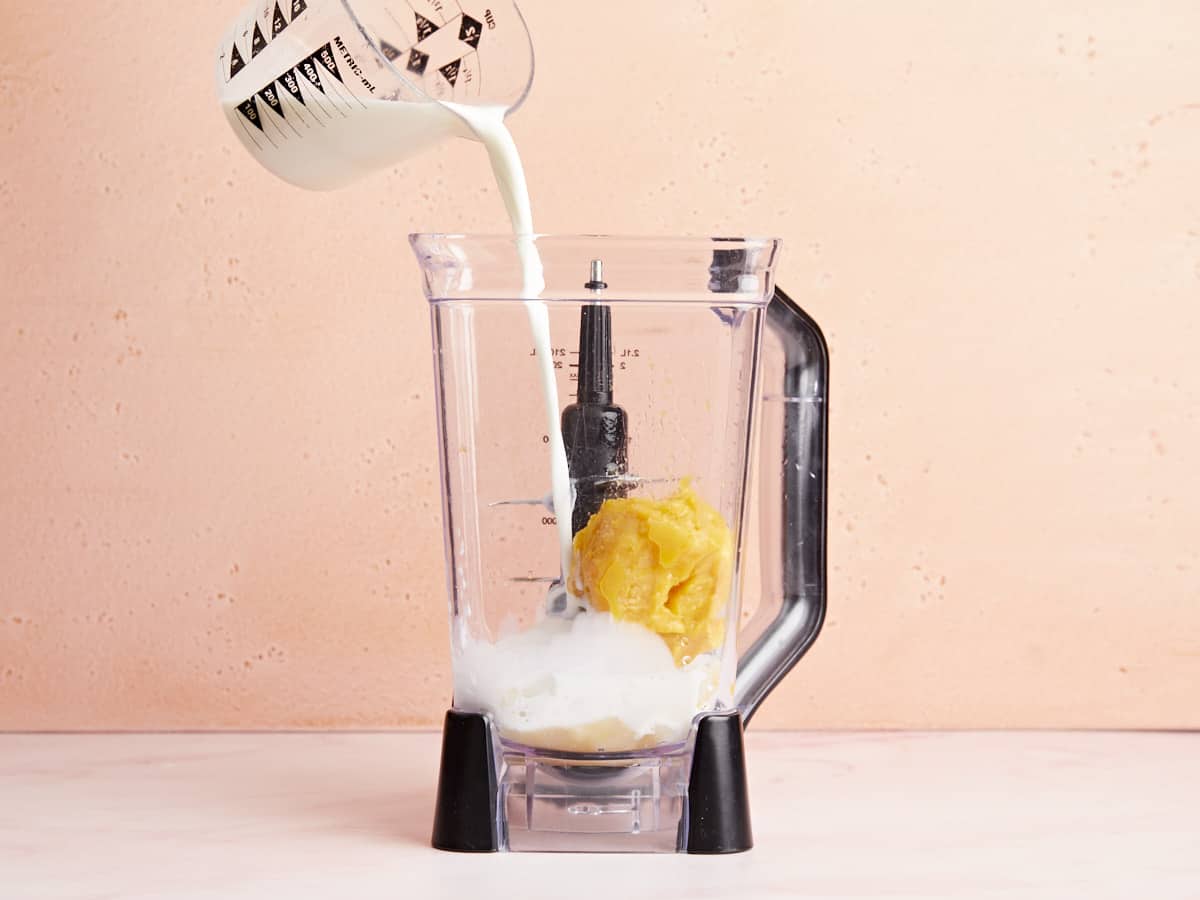
  • In a blender*, add the strawberry gelatin, cottage cheese, and ⅓ cup of the reserved pineapple juice. Blend until smooth then add the mixture to a large bowl.
  • Next make the whipped cream. In a separate metal or glass bowl, preferably a bowl that has been chilled in the refrigerator, add heavy cream, vanilla extract, and granulated sugar. Use a hand mixer or stand mixer to whip the cream on high until stiff peaks form. Stop the mixer occasionally to test the stiffness of the peaks and to avoid over whipping.
  • Now carefully fold the whipped cream into the strawberry gelatin mixture.
  • Add the crushed pineapples and chopped strawberries to the bowl and carefully fold them into the whipped cream mixture until everything is evenly distributed.
  • Refrigerate jello salad for at least 2 hours so the ingredients have a chance to set and chill before serving. Enjoy!

See how we calculate recipe costs here.
Notes

*An 8 oz container of store-bought whipped topping can be used in place of the homemade whipped cream.
*We use a blender to whip the cottage cheese and gelatin together until they form a smooth consistency. This helps break down the texture of cottage cheese.

Nutrition

Serving: 1cup | Calories: 295kcal | Carbohydrates: 33g | Protein: 9g | Fat: 15g | Sodium: 256mg | Fiber: 2g
Jello salad in 3 mason jars with sliced strawberry on top.

How to Make Jello Salad – Step by Step Photos

Chopped strawberries on a white cutting board.

Wash, remove the stems and quarter 1/2 pound of strawberries. Feel free to cut any large pieces in half again.

Crushed pineapples with the juice drained into a separate bowl.

Drain a 20 oz can of crushed pineapples really well and reserve 1/3 cup of the pineapple juice.

Strawberry gelatin, cottage cheese and pineapple juice in a blender.

In a blender, add a 3 oz package of strawberry flavored gelatin, 2 cups of small curd cottage cheese, and 1/3 cup of reserved pineapple juice.

Strawberry gelatin, cottage cheese and pineapple juice blended in blender.

Blend until smooth then add the mixture to a large bowl.

Whipped cream in a mixing bowl.

In a separate metal or glass bowl, add 1 cup heavy cream, 1 tsp vanilla extract, and 2 Tbsp granulated sugar. Use a hand mixer or stand mixer to whip the cream on high until stiff peaks form. Stop the mixer occasionally to test the stiffness of the peaks and to avoid over whipping.

Strawberry gelatin mixture and whipped cream folded together.

Now carefully fold the whipped cream into the strawberry gelatin mixture.

Chopped strawberries and crushed pineapple added to strawberry gelatin.

Add the crushed pineapples and chopped strawberries to the bowl and carefully fold them into the whipped cream mixture until everything is evenly distributed.

Jello Salad fully mixed together.

Refrigerate the jello salad for at least 2 hours so the ingredients have a chance to set and chill before serving.

Jello salad in 4 mason jars with one jar being filled

Enjoy by serving in a serving bowl or portion them into fun, individual sized mason jars. Either way this is sure to be a big hit at your next occasion! ;)

Overhead photo of a bowl of jello salad, topped with sliced strawberries and a spoon scooping a small serving out.

The post Jello Salad appeared first on Budget Bytes.

Cherry Turnovers

Cherry Turnovers are a delicious baked dessert made with flaky puff pastry and sweet, tart cherry sauce. This is the best easy dessert recipe!

The post Cherry Turnovers appeared first on Budget Bytes.

These Cherry Turnovers are a scrumptious dessert that’s super easy to make and land at a little over a dollar per serving! The best part? It takes just 20 minutes to get them in the oven! Get ready to collect loads of compliments after you make this easy Cherry Turnover recipe. Though, I should warn you: The puff pastry shatters into delicious buttery flakes as soon as you bite it, so you’ll want to wipe the crumbs off your shirt before heading into a meeting. (I guess that’s less of a “warning” and more of a “Note-To-Self,” but you catch my drift.)

Two cherry turnovers on a plate, one cut in half with the filling dripping out.

What Are Cherry Turnovers

Cherry Turnovers are a popular baked dessert made of flaky puff pastry dough filled with sweet and tart Cherry Sauce. Though they’re a fantastic end-of-dinner delight, they can also be enjoyed for breakfast. (Argue all you want about the breakfast part, but you make puff pastry with flour, butter, and sometimes egg, which is basically a pancake. )

Ingredients For Cherry Turnovers

This is one of those perfect desserts that require minimal effort, so it’s a big win in my book. The ready-made dough is folded over the filling (which can also be ready-made). It’s then sealed, baked until golden brown, and drizzled with a sugar glaze. Boom! Heaven. Here’s what you’ll need to make my easy recipe for Cherry Turnovers!

  • Cherry Filling: I use canned cherry filling. Is it cheaper and better than my Cherry Sauce? No. But it’s convenient, and sometimes that beats the tastiest thing ever. But, if you have a few extra minutes, I highly recommend using my Cherry Sauce recipe.
  • Puff Pastry Sheets: this ready-made dough’s buttery layers crisp and rise when baked, giving you that thunderous shatter that’s a hallmark of any legit flaky pastry.
  • Egg: is beaten and used to help seal the seams of the folded dough. It’s also brushed over the dough to create a golden glossy finish. Yes, you can skip it. A golden laminated finish is strictly for presentation, and you can use water or milk to seal the dough. However, water or milk might not hold the bond, so take that gamble with your eyes wide open.
  • Powdered Sugar: is the foundation of our sugar glaze. If you don’t have powdered sugar, sprinkle granulated sugar on the pastries after washing them with egg to create a sweet textured finish. You can also skip the powdered sugar glaze and the granulated sugar. These pastries will still be knockouts. Promise.
  • Milk: is used to create a glaze from powdered sugar. You can also use water, though it will be less creamy.

How To Serve Cherry Turnovers

Cherry turnovers can be served warm or at room temperature. (Or cold as a late-night treat while bingeing your favorite Netflix show.) They are great paired with ice cream and will blow your mind when you have them with No-Churn Balsamic Peach Ice Cream or No-Churn Strawbery Ice Cream. As I mentioned, I also enjoy Cherry Turnovers as a breakfast pastry and love them paired with Maizena. They’re also a wonderful addition to any brunch table. (Did I just admit to stuffing my face with Cherry Turnovers 24 hours a day? Only if you read between the lines.)

How To Store Cherry Turnovers

You can store leftover Cherry Turnovers in an airtight container at room temperature for three to four days. (They will not last a day, much less 3 to 4 days, but I honor your hopes and dreams, homie.)

Other Turnover Flavor Ideas

With the magic of puff pastry, you’re always less than an hour away from a delicious, crispy, turnover. What you fill it with is only limited to your imagination! I love turnovers made with these sauces:

Overhead view of cherry turnovers on a wire cooling rack.
Two cherry turnovers stacked on a plate, one cut in half with filling spilling out.
Print

Cherry Turnovers

Cherry Turnovers are a delicious baked dessert made with flaky puff pastry and sweet, tart cherry sauce. This is the best easy dessert recipe!
Course Dessert
Cuisine American
Total Cost $9.85 recipe / $1.23 serving
Prep Time 20 minutes
Cook Time 25 minutes
Total Time 45 minutes
Servings 8
Calories 416kcal

Ingredients

  • 2 sheets puff pastry, thawed $5.49
  • 2 cups cherry pie filling $3.99
  • 1 large egg, beaten $0.09
  • 1/2 cup powdered sugar $0.27
  • 1 Tbsp milk $0.01

Instructions

  • Line a baking sheet with parchment paper. Place an oven rack in the center of the oven and preheat the oven to 400°F. Roll each thawed piece of puff pastry gently into a square, then cut each sheet into 4 squares. Place the 8 squares on the baking sheet.
  • Place 1/4 cup of cherry pie filling into the middle, left of center, of each square.
  • Brush a little of the beaten egg along the outside edges of each puff pastry square.
  • Fold the bottom right corner of the dough over the filling and press it into the top left corner. Seal the edges with a fork.
  • Use a pastry brush or paper towel to add a very light layer of the beaten egg over the top of the puff pastry turnover. Bake for 20 to 25 minutes until the puff pastry has risen and is golden brown. Remove from the oven and allow to cool on the baking sheet for a few minutes before placing the turnovers on a wire cooling rack.
  • Mix the milk with the powdered sugar to make a glaze. Use a spoon to drizzle the glaze over the turnovers. Then enjoy!

See how we calculate recipe costs here.

Nutrition

Serving: 1pastry | Calories: 416kcal | Carbohydrates: 44g | Protein: 6g | Fat: 24g | Sodium: 173mg | Fiber: 1g
Icing being drizzled over two cherry turnovers on a plate.

How to Make Cherry Turnovers – Step by Step Photos

Puff pastry cut into squares on a cutting board.

Line a baking sheet with parchment paper. Place an oven rack in the center of the oven and preheat the oven to 400°F. Place the floured side of the thawed puff pastry sheet on your work surface and use a rolling pin (or wine bottle) to gently roll each sheet into a 12-inch by 12-inch square. Then cut each puff pastry sheet into four squares. Place the eight squares on the baking sheet.

Cherry filling being spooned onto puff pastry squares.

Place 1/4 cup of cherry pie filling (or Cherry Sauce) into each square’s middle, just left of center, and leave a 1-inch border around the edges. Don’t overfill the turnovers, or they will be difficult to seal.

Puff pastry brushed with egg wash.

Use a pastry brush, a paper towel, or your finger to brush a little of the beaten egg along the outside edges of each puff pastry square.

puff pastry being folded over the cherry filling.

Fold the bottom right corner of the dough over the filling and press it into the top left corner to create a triangle.

Puff pastry seams being sealed with a fork.

Seal the edges of the triangle with a fork. Trim any wonky corners with a small knife.

Egg being brushed on top of the puff pastry.

Use a pastry brush or paper towel to add a very light film of 1 beaten egg over the top of each puff pastry turnover. Bake in your preheated 400°F oven for 10 minutes. Move the baking pan so the front of the baking pan is now facing the back of the oven. Then bake an additional 10 to 15 minutes until the puff pastry rises and turns golden brown. Remove the pastries from the oven and cool on the baking sheet for a few minutes before placing the turnovers on a wire cooling rack.

Puff pastries being glazed.

Once the pastries have cooled, mix 1 tablespoon of milk with the 1/2 cup of powdered sugar until a thick glaze forms. Use a fork or spoon to drizzle the glaze over the turnovers. A fork creates more distinct lines and a spoon drizzles globs of glaze; choose your own adventure. Don’t tell anyone they’re ready until you’ve had at least one and enjoy your second with loved ones!

Side view of cherry turnovers on the wire cooling wrack.

More Easy Dessert Recipes

The post Cherry Turnovers appeared first on Budget Bytes.

Cherry Sauce

Make this easy and delicious Cherry Sauce recipe for a sweet and tart topping for your favorite desserts or as a filling for Cherry Turnovers!

The post Cherry Sauce appeared first on Budget Bytes.

This sweet and tart Cherry Sauce is a delicious and simple way to add a fantastic finishing touch to your desserts. It’s ridiculously versatile and an absolute knockout drizzled over ice cream, cakes, or pancakes. This easy Cherry Sauce recipe is made with frozen sweet cherries, so it’s also incredibly budget-friendly. But you can also use fresh sweet cherries, which are really easy on your wallet when they’re in season. Win!!

Overhead view of a glass dish full of cherry sauce.

What Is Cherry Sauce?

Cherry Sauce is a tangy syrupy dessert dressing made with fresh or frozen cherries. It can be served warm or cold as a topping for ice creams, pancakes, waffles, flan, and cheesecake. This easy cherry sauce recipe is also wonderful drizzled over chocolate, lemon, and vanilla cakes! It can also be used as a filling for Cherry Pie and Cherry Turnovers. (OMG, am I making a Cherry Sauce-inspired dessert table at my next brunch? Don’t doubt it!)

Ingredients For Cherry Sauce

I love that you can cook this yummy Cherry Sauce in about fifteen minutes with very minimal effort. And then all you have to do is not eat it all in before you pour it over your favorite dessert. (That’s a lot harder than it sounds. Trust.) Here’s what you’ll need to make this easy Cherry Sauce recipe:

  • Sweet Cherries: have more sugar and less acidity than tart cherries. They’re usually labeled Dark Sweet Cherries. You can use fresh or frozen dark sweet cherries or mixed variety cherries. If you use tart cherries (usually a lighter brighter red) you’ll have to up the sugar content of this sauce by 2 to 4 tablespoons of sugar, depending on the tartness of the fruit.
  • Sugar: Helps to sweeten the sauce and balance out the natural tartness of cherries. We use granulated white sugar but feel free to use brown sugar for deeper caramel notes.
  • Lemon: The zest adds a nice citrus note to the sauce while the juice also adds flavor and naturally thickens the sauce with pectin.
  • Cornstarch: helps thicken the sauce and gives it a glossy finish.

What To Serve With Cherry Sauce

Cherries pair perfectly with the flavor of almonds, lemon, orange, cream, caramel, cheese, vanilla, and chocolate. These are just a few of the recipes it will take over the top:

How To Store Cherry Sauce

Once the sauce has cooled, refrigerate it in an airtight container. It will keep for up to 2 weeks. You can also freeze Cherry Sauce. Store it in an airtight container with plastic or beeswax wrap directly on the surface of the sauce. It will keep for up to 3 months. Then, thaw it out in your refrigerator overnight.

Cherry sauce being drizzled over a piece of cheesecake.
Overhead view of cherry sauce in a glass dish.
Print

Cherry Sauce

Make this easy and delicious Cherry Sauce recipe for a sweet and tart topping for your favorite desserts or as a filling for Cherry Turnovers!
Course Dessert
Cuisine American
Total Cost $3.88 recipe / $0.24 serving
Prep Time 5 minutes
Cook Time 10 minutes
Total Time 15 minutes
Servings 16 (2 Tbsp each)
Calories 37kcal

Ingredients

  • 2 cups frozen or fresh sweet cherries $3.33
  • ½ cup sugar $0.22
  • 1 pinch salt $0.01
  • 1 lemon $0.30
  • 1 Tbsp cornstarch $0.03
  • 3/4 cup water $0.00

Instructions

  • Place a medium-sized pot over medium heat. Add cherries, sugar, salt, and 1/2 cup of water. Stir to incorporate and bring the mixture to a soft boil.
  • Use a vegetable peeler to zest the lemon in long strips. Then juice the lemon. Add the zest and just 1/2 tablespoon of the lemon juice to the pot. Stir to incorporate.
  • In a separate bowl, mix the cornstarch into the remaining 1/4 cup of water until it is completely dissolved and creates a slurry. Add the cornstarch slurry and stir until incorporated. Boil the sauce for at least one more minute to activate the cornstarch.
  • Continue to stir until the syrup in the cherry sauce is bubbling softly and has thickened enough to coat the back of a spoon. Take the cherry sauce off the heat, allow it to cool, and remove the strips of lemon zest. It will thicken as it cools. Enjoy!

See how we calculate recipe costs here.

Nutrition

Serving: 2Tbsp | Calories: 37kcal | Carbohydrates: 10g | Protein: 0.2g | Fat: 0.1g | Sodium: 3mg | Fiber: 0.4g

How to Make Cherry Sauce – Step by Step Photos

Cherries, sugar, and water in a sauce pot.

Place a medium-sized pot over medium heat. Add 2 cups frozen cherries, 1/2 cup sugar, 1 pinch of salt, and 1/2 cup of water. Stir to incorporate and bring the mixture to a soft boil.

Lemon peels added to the sauce pot.

Use a vegetable peeler to zest 1 lemon in long strips. Then juice the lemon. Add the zest and just 1/2 tablespoon of the lemon juice to the pot.

Cornstarch slurry being added to the sauce.

In a separate bowl, mix the cornstarch into the remaining 1/4 cup of water until it is completely dissolved and creates a slurry. Add the cornstarch slurry and stir until incorporated. Boil the sauce for at least one more minute to activate the cornstarch.

Finished cherry sauce coating the back of a spoon.

Continue to stir until the syrup in the cherry sauce is bubbling softly and has thickened enough to coat the back of a spoon. Take the cherry sauce off the heat, allow it to cool, and remove the strips of lemon zest. It will thicken as it cools. Enjoy!

Finished cherry sauce in a glass dish, viewed from the side.

The post Cherry Sauce appeared first on Budget Bytes.

Tostones (Fried Green Plantain)

Tostones are the crispy, salty snack of your dreams! These slices of twice-fried green plantain are perfect for dipping and so easy to make.

The post Tostones (Fried Green Plantain) appeared first on Budget Bytes.

Tostones, or fried green plantains, are the tasty, crispy, salty snack of your dreams! Though they might look intimidating, they’re easy to make. PS They’re more delicious than french fries! (In my humble Puerto Rican opinion, which is OBVIOUSLY super biased.) Made from thick slices of twice-fried green plantain, this delicious Latin American side dish is a great snack and a total must-have side dish whenever you’re serving island food.

Overhead shot of fried tostones in a black bowl with mayo-ketchup sauce in the middle of the bowl.

What Are Tostones?

Tostones are delicious, crispy, thick slices of fried green plantain, usually served as a snack or side dish with a dipping sauce. The name “tostones” comes from the Spanish word “tostar,” which means “to toast.” This is because the plantains are “toasted” twice (i.e., fried twice) during cooking. Think of them as Puerto Rican french fries. Though, of course, they’re popular in most Latin cuisines, not just my little island. They can be served as a snack or a side dish and are lovely with a dipping sauce.

Ingredients For Tostones

The first time you make tostones, you might be slightly intimidated by the process. But don’t worry; as you’ll see, it’s actually quite simple. Here’s what you’ll need to make the best tostones:

  • Green Plantains: are the star of the show. Look for plantains that are firm to the touch and have unblemished dark pea-green skin with no yellowing. If the plantains are ripe, they’ll be too soft and won’t hold their shape when you fry them. Be warned- green plantains have sap that will stain anything it touches. If you don’t want dark stains on your hands, wear gloves. It’s also a good idea to wear an apron.
  • Cooking Oil: any type will do, but you’ll need plenty of it. Tostones are best deep fried, which means filling your medium-sized pot with at least 4 cups of oil. To cut costs, reach for a smaller pot to fry in. Though you’ll have to fry in smaller batches, you’ll need less oil.
  • Vinegar: like potatoes, plantains oxidize and turn gray when they are exposed to air. Vinegar helps to stop the plantains from browning, but anything acidic will do. Lime juice is an excellent (though more expensive) substitution.
  • Garlic Powder: is used in the water bath for the tostones to add flavor. If you don’t have garlic powder, garlic salt is a great substitution. You can also smash a few cloves of fresh garlic and let them work their magic.
Side shot of fried tostones in a black bowl with mayo-ketchup sauce in the middle of the bowl.

What Can I Serve With Tostones?

Serve tostones with your favorite dipping sauce. Traditionally, they are served with Puerto Rican Mayo Ketchup sauce, a blend that can be as simple as 1 part ketchup to 2 parts mayo. But I also love them with Guacamole, Lime Crema, and even Comeback Sauce.

While fantastic on their own, Tostones are incredible when served as a side dish with Puerto Rican Rice and Beans, Arroz Con Pollo (Puerto Rican Chicken and Rice), Pollo Guisado (Puerto Rican Chicken Stew), Chuletas Guisadas (Puerto Rican Stewed Pork Chops), Pinchos de Pollo (Puerto Rican Chicken Skewers) or Arroz Con Salchichas, (Puerto Rican Rice With Sausage).

Making Tostones Ahead Of Time

Tostones are best served still piping hot from the frying pan, so they don’t store well after their final fry. However, they prep beautifully. To prep tostones, fry them once and mash them. Then cool them and store them in an airtight container layered with parchment paper. Tostones will stay fresh in the fridge for up to 3 days and in the freezer for up to 3 months. Finally, thaw them, give them a quick dunk in salt water, and fry them again.

What Do I Do With Leftover Oil?

Cool the oil to room temperature and then strain it into a resealable air-tight container. You can store it for another day of fabulous Tostones making or use it for other recipes that require cooking oil. Try making our Coconut Chicken Strips With Sweet Chili Sauce, Turkey Meatballs, Sweet Potato Corn Cakes, or Chilaquiles.

Side shot of a hand dipping a toston in mayo-ketchup sauce.
Overhead shot of fried tostones in a black bowl with mayo-ketchup sauce in the middle of the bowl.
Print

Tostones

Tostones are the crispy, salty snack of your dreams! These slices of twice-fried green plantain are perfect for dipping and so easy to make.
Course Appetizer, Side Dish
Total Cost $4.42 recipe / $1.06 servving)
Prep Time 6 minutes
Cook Time 8 minutes
Soaking Time 1 minute
Total Time 15 minutes
Servings 4 servings
Calories 2118kcal

Ingredients

  • 4 cups cooking oil $2.79
  • 2 green plantain $1.38
  • 1/4 tsp garlic powder $0.03
  • 1 Tbsp vinegar $0.03
  • 1/8 tsp salt $0.01

Instructions

  • Fill a medium heavy-bottomed pot with cooking oil and place it over medium heat. Trim off both ends of the green plantain, then make three lengthwise cuts through the skin, each about two inches apart. Peel the skin off the plantains.
  • Slice the plantains into 1 1/2-inch thick rounds.
  • When the oil is at 350°F, add the sliced plantains, working in batches to not crowd the pot. When the plantain slices change in color from bone white to a golden yellow (about 3 to 4 minutes) remove them from the pot and drain them on a paper towel-lined plate.
  • Add about 4 inches of water to a bowl large enough to hold the plantains. Add the garlic powder and the vinegar to the water and mix. Soak the fried plantains for 1 minute and dry them on the paper towel-lined plate.
  • Add two sheets of parchment to your work surface and ready a heavy skillet. Place one slice of fried plantain on one sheet of parchment, then top it with the second piece of parchment. Use the heavy skillet to smash the plantain flat, about 1/4 inch thick. Set aside and repeat with the remaining slices.
  • Turn the heat up on the oil. When the oil has reached 375°F, fry the plantains again, working in batches so the pot isn't crowded. Fry the tostones until golden and crispy, about 3 minutes. Drain on the paper towel-lined plate and sprinkle with 1/8 teaspoon salt immediately. Serve with your favorite dipping sauce and enjoy!

See how we calculate recipe costs here.

Nutrition

Serving: 1g | Calories: 2118kcal | Carbohydrates: 33g | Protein: 1g | Fat: 224g | Sodium: 147mg | Fiber: 2g

How to Make X – Step by Step Photos

Overhead shot of green plantain being peeled on a wood cutting board.

Fill a medium heavy-bottomed pot with 4 cups of oil and place it over medium heat. Trim off the ends of 2 green plantains, then make three lengthwise cuts through the skin, each about two inches apart. Make them deep enough to cut through the 1/4 inch thick skin, but not so deep you cut the flesh. The skin doesn’t peel down like a banana. Instead, peel from the side, pushing the skin away from the flesh, using a spoon or butter knife to help start the process.

Overhead shot of slices of green plantain on a wood cutting board.

Discard the skin and slice the plantains into 1 1/2-inch thick rounds.

Overhead shot of slices of green plantain that have been fried once.

When the oil is at 350°F, add the sliced plantains, working in batches to not crowd the pot. If you do not own a fry thermometer, the oil is ready when a small piece of plantain sizzles softly when it hits the oil. Turn the plantain slices occasionally to ensure they fry evenly. When the plantain slices change in color from bone white to a golden yellow (about 3 to 4 minutes) remove them from the pot and drain them on a paper towel-lined plate.

Overhead shot of slices of fried green plantain soaking in a salt water bath.

Add about 4 inches of water to a bowl large enough to hold the plantains. Add 1/4 teaspoon garlic powder and 1/4 teaspoon vinegar to the water and mix. Soak the fried plantains for 1 minute and dry them on the paper towel-lined plate. (For my traditionalists, you can also dip the plantains for 10 to 15 seconds after they have been smashed, but I find the tostones can get water-logged doing it that way, causing the oil to bubble furiously and the tostones to break apart during the second fry. You do you!)

Overhead shot of smashed green plantain on white parchment paper.

Add two sheets of parchment to your work surface and ready a heavy skillet. Place one slice of fried plantain on one sheet of parchment and top it with the second piece of parchment. Use the heavy skillet to smash the plantain flat, about 1/4 inch thick. Set aside and repeat with the remaining slices.

Overhead shot of fried tostones on paper towel-lined plate.

Turn up the heat on the oil. When the oil has reached 375°F, carefully place the tostones in the frying oil, working in batches so the pot isn’t crowded. If you don’t own a thermometer, the oil is ready when a small piece of plantain bubbles furiously when it hits the oil. Fry the tostones until golden and crispy, about 3 minutes. Drain on the paper towel-lined plate and sprinkle with 1/8 teaspoon salt immediately. Serve with your favorite dipping sauce, and enjoy!

Side shot of hand dipping a fried toston in mayo-ketchup sauce.

More Puerto Rican Vegetarian Recipes

The post Tostones (Fried Green Plantain) appeared first on Budget Bytes.


Deprecated: trim(): Passing null to parameter #1 ($string) of type string is deprecated in /home/davecampbell/foodwatcher.com/wp-content/plugins/feedwordpress/feedwordpress.php on line 2022

50 Farmers Market Recipes!

If you’ve been here a while, you’ll know how much we love to cook seasonally with the best produce available. This is usually found in your own garden (if you are lucky) or at your local Farmer’s Market. Not only does this produce tas…

Quick Pickled Vegetables - A simple delicious recipe that can be used with any veggie! Beets, turnips, radishes, carrots, kohlrabi, onions, cauliflower, peppers, or green beans! | www.feastingathome.com #pickledveggies #pickled #pickledvegetables
If you’ve been here a while, you’ll know how much we love to cook seasonally with the best produce available. This is usually found in your own garden (if you are lucky) or at your local Farmer’s Market. Not only does this produce taste better,(it travels less, so left on the vine or tree longer…

Peach Cobbler

This buttery peach cobbler hits! You can use fresh or canned peaches, which makes this easy peach cobbler recipe a crowd and wallet-pleaser!

The post Peach Cobbler appeared first on Budget Bytes.

This buttery old-fashioned peach cobbler hits! Juicy summer peaches and a crispy cake-like topping will always be a crowd-pleaser, which is why this homemade peach cobbler recipe is perfect for any occasion, from a simple weeknight dessert to the star of the potluck. Plus, you can make it with fresh, canned, or frozen peaches, so it’s an easy recipe that’s also easy on your wallet! (It comes in at under a dollar a serving! Woot!!)

Overhead shot of peach cobbler with a scoop taken out in a glass pie plate.

What Is Peach Cobbler

Peach Cobbler is often credited as a dessert created in the American South, but it’s actually Native American in origin. This dish of sweet, juicy summer peaches baked with a simple buttery batter is so easy to make and so yummy it’s almost criminal. Be warned: it smells so good that your loved ones will beg to devour it straight from the oven. Let it rest a few minutes before you dig in because it’s LAVA HOT. I speak from experience.

Ingredients For Peach Cobbler

You might want to double this recipe for Peach Cobbler because it will go fast, and you might have some feelings about that. I recently had two teenagers destroy the whole thing before I finished my first serving, and I was inundated with waves of deep resentment. Here’s what you’ll need to make Peach Cobbler:

  • Peaches– are the star of the show here. You can use fresh, canned, or frozen. You don’t have to peel your peaches if you don’t want to. It’s a textural thing for me. If using canned, get them in their own juices, and don’t discard the juices. If they are canned in syrup, again, keep the juices, but omit the brown sugar in the recipe. If using frozen, let them thaw before mixing with the other ingredients.
  • Sugar – helps sweeten the batter and the filling and deepens the color of the crust. You’ll use brown and granulated, though if you only have one type, use what you have. This recipe is very forgiving.
  • Spices – cinnamon pairs beautifully with peaches, adding a gentle dimension to the flavor profile. I also use a touch of ground ginger and nutmeg to create a deeper flavor, but if your peaches are super tasty, feel free to skip them both.
  • Lemon Juice– adds a much-needed acidity to the sweet filling and helps thicken the peach juices. You can use fresh or bottled.
  • Cornstarch– helps thicken the peach juices while keeping them clear and glossy. If you don’t have cornstarch, thicken the filling with 2 teaspoons of all-purpose flour. FYI, it might get a little cloudy.
  • All Purpose Flour– creates the batter for the cobbler. We have not tested this recipe with gluten-free flour and can’t give any specific guidance, though I bet it would be tasty with almond flour.
  • Baking Powder – leavens and aerates the batter. If you don’t have baking powder, use 1/2 teaspoon of baking soda and add a tablespoon of lemon juice to the cup of milk called for in this recipe.
  • Almonds – pair incredibly with peaches and add texture to the cobbler. While I use sliced, feel free to use chopped. You can substitute the almonds with pecans or walnuts. Skip the almonds if you have a nut allergy or if they’re not as budget-friendly as you’d like.
  • Milk and Butter– create the batter. The fat in the milk keeps the crumb velvety, so use whole or add a tablespoon more butter if you’re using 2% milk. If you want to keep things vegan, use plant-based butter and milk.
  • Vanilla – scents the batter but can also be skipped if you don’t have any on hand.
Overhead shot of a scoop of peach cobbler in a white bowl topped with a scoop of vanilla ice cream.

What To Serve WitH Peach Cobbler

Warm Peach Cobbler pairs perfectly with our easy recipe for No-Churn Strawberry Ice Cream or double down on that peach flavor and make our amazing No-Churn Balsamic Peach Ice Cream. You can also drizzle it with our Easy Caramel Sauce or a few tablespoons of silky Blueberry Sauce. I love it topped with our Homemade Whipped Cream and Small Batch Crunchy Candied Walnuts.

How To Store Peach Cobbler

Peach cobbler is good for up to three days. Since it contains dairy, you’ll want to refrigerate it after it cools in an air-tight container. If you have leftovers, try to enjoy them within a day, as the flavors and textures dull quickly. You can also freeze peach cobbler. Cool it before storing it in an air-tight container with parchment paper on the surface. It will keep for up to 3 months.

How To Reheat Peach Cobbler

It’s best to reheat peach cobbler in a 350°F oven until steaming. If reheating from frozen, it’s fine to put the cobbler in the oven straight from the freezer. While you can reheat peach cobbler leftovers in a microwave, the texture of the cobbler will change. If you choose to go the microwave route, heat it in 30-second increments until steaming.

Side shot of peach cobbler with a scoop taken out in a glass pie plate.
Overhead shot of peach cobbler with a scoop taken out in a glass pie plate.
Print

Peach Cobbler

This buttery peach cobbler hits! You can use fresh or canned peaches, which makes this easy peach cobbler recipe a crowd and wallet-pleaser!
Course Dessert
Cuisine Southern
Total Cost ($7.15 recipe / $0.89 serving)
Prep Time 15 minutes
Cook Time 50 minutes
Resting Time 10 minutes
Total Time 1 hour 15 minutes
Servings 8 servings
Calories 443kcal

Ingredients

Filling

  • 6 peaches*, peeled and cut into 3/4 inch slices $2.76
  • 1/2 cup brown sugar $0.22
  • 1/4 tsp salt $0.02
  • 1/8 tsp ground ginger $0.02
  • 1 tsp cornstarch $0.04
  • 1 tsp lemon juice $0.03

Batter

  • 8 Tbsp salted butter, melted $1.02
  • 1 1/2 cups flour $0.21
  • 1 cup sugar $0.40
  • 1/2 cup sliced toasted almonds $1.27
  • 1 1/2 tsp baking powder $0.09
  • 1/4 tsp cinnamon $0.02
  • 1 pinch nutmeg $0.01
  • 1/4 tsp salt $0.02
  • 1 cup milk $0.30
  • 1 tsp vanilla extract $0.72

Instructions

  • Set a rack in the middle of the oven and preheat it to 350°F. In a large bowl, mix the sliced peaches, brown sugar, salt, and ground ginger. Let the peaches sit for five minutes to absorb the sugar and spices and release their juices.
  • Set a large skillet over medium heat and add the peaches and their juices. Cook down the juices for about 5 minutes. Mix the cornstarch with the lemon juice to create a slurry, then add it to the peaches and stir well. Turn the heat to mid-high and bring to a boil.
  • When the juices have thickened to the point that they stay separated when you run a spoon through them (about 5 minutes), take the pan off the heat.
  • Add the melted butter to the pie dish and add the cooked peaches and their juices to the dish.
  • In a large bowl, mix the flour, sugar, sliced toasted almonds, baking powder, cinnamon, nutmeg, and salt.
  • Stir in the milk and vanilla and mix lightly, just until a batter forms. Pour the batter on top of the peaches.
  • Bake until the cobbler is golden brown, about 35 minutes. Cool before serving and enjoy!!

See how we calculate recipe costs here.

Notes

*You do not have to peel the peaches if you don’t want to. If using canned peaches, use two 15-ounce cans of peaches in their own juices. Do not drain the juices. If using frozen sliced peaches, use 2 pounds, but thaw them before mixing them with the brown sugar.

Nutrition

Serving: 1serving | Calories: 443kcal | Carbohydrates: 71g | Protein: 6g | Fat: 16g | Sodium: 346mg | Fiber: 3g

How to Make Peach Cobbler – Step by Step Photos

Overhead shot of peaches and brown sugar with other filling ingredients in a white bowl.

Set a rack in the middle of the oven and preheat it to 350°F. In a large bowl, mix the 6 sliced peaches, 1/2 cup brown sugar, 1/4 teaspoon salt, and 1/8 teaspoon ground ginger. Let the peaches sit for five minutes to absorb the sugar and spices and release their juices.

Overhead shot of of cornstarch slurry being added to peaches in a silver pan.

Set a large skillet over medium heat and add the peaches and their juices. Cook down the juices for about 5 minutes. Mix 1 teaspoon of cornstarch with 1 tablespoon of lemon juice to create a slurry, then add it to the peaches and mix in well. Turn the heat to mid-high and bring to a boil.

Overhead shot of of peaches being cooked in a silver pan to thicken their juices.

When the juices have thickened to the point that they stay separated when you run a spoon through them (about 5 minutes), take the pan off the heat.

Overhead shot of cooked peaches being added to butter.

Add 8 tablespoons of melted butter to the pie dish and add the cooked peaches and their juices to the dish.

Overhead shot of wet ingredients being mixed into dry ingredients.

In a large bowl, mix the 1 1/2 cups flour, 1 cup sugar, 1/2 cup sliced toasted almonds, 1 1/2 teaspoons baking powder, 1/4 teaspoon cinnamon, 1 pinch nutmeg, and 1/4 teaspoons salt. Stir in 1 cup milk and 1 teaspoon vanilla and mix lightly, just until a batter forms.

Overhead shot of raw peach cobbler in a glass pie plate.

Pour the batter on top of the peaches. The butter will rise to the top. I prefer a buttery, crispy topping, so I don’t stir the batter into the peaches. If you’d like to have some of the peaches popping through the topping, mix it lightly into the peaches.

Overhead shot of baked peach cobbler in a glass pie plate.

Bake until the cobbler is golden brown, about 35 minutes. Let it cool for a few minutes before serving and collecting ALL OF THE COMPLIMENTS. For the most amazing experience, top it with ice cream or whipped cream!

Overhead shot of a scoop of peach cobbler in a white bowl topped with a scoop of vanilla ice cream.

More Easy Peach Recipes

The post Peach Cobbler appeared first on Budget Bytes.

Huckleberry Cake

A delicious one-bowl recipe for Huckleberry Cake with a Lemony Glaze made with lemon zest, vanilla, yogurt and olive oil. Light and summery, perfect for brunch, dessert or afternoon tea.

Huckleberry Cake with Lemony Glaze
A delicious one-bowl recipe for Huckleberry Cake with a Lemony Glaze made with lemon zest, vanilla, yogurt and olive oil. Light and summery, perfect for brunch, dessert or afternoon tea.