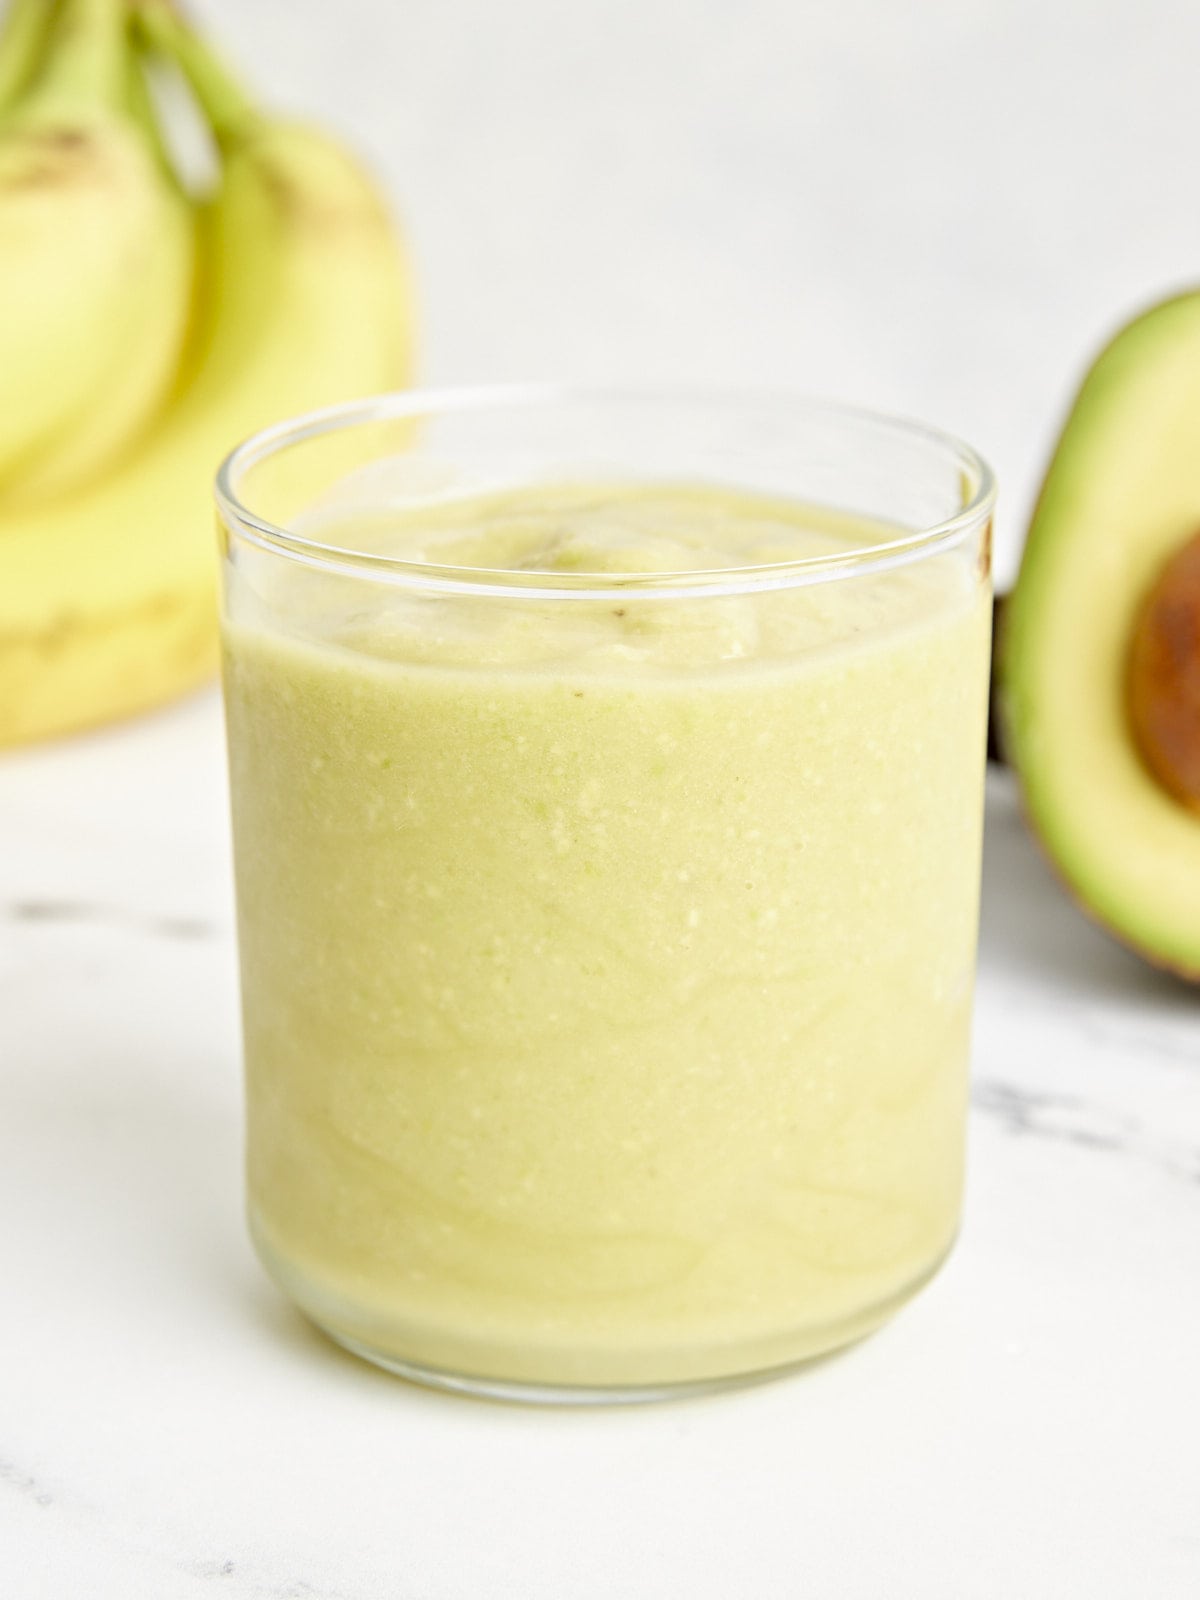
Did you know you can freeze avocados? This information was life-changing when I opened my former restaurant, AVO, in Nashville back in 2015; we used frozen avocado in our signature drink, the Avocado Margarita and let me tell you, freezing ripe avocados saved us a bunch of dough! Now, I buy ripe avocados any time they’re on sale, slice them up, and toss them in the freezer for later. This avocado smoothie is the perfect way to use up frozen avocado. I know avocado in a drink might sound crazy, but trust me, it’s the secret to an ultra-rich, dessert-like smoothie. It’s packed with healthy fats and imparts that same creamy texture that avocados (and guacamole) are known for! This is your new favorite green smoothie.
What Is An Avocado Smoothie?
Citrus and avocado are a classic combination. In this smoothie, I add a creamy, ripe banana and a little extra sweetness from agave nectar, making it an instant winner! Super creamy, bright, and fun, this avocado smoothie is the perfect treat with lots of healthy ingredients involved.
Ingredients
Here’s what you’ll need to make an avocado smoothie:
Frozen Avocado: Makes this smoothie lusciously creamy and adds heart-healthy fats, fiber, and omega-3s.
Agave: This syrup adds a touch of sweetness to this smoothie to balance out the acidic flavors. Agave is a neutral flavored sweetener unlike maple and honey (which are delicious!) but can sometimes take over flavor-wise.
Frozen Banana: Adds flavor, subtle sweetness and creaminess.
OJ: Balances the fattiness of the avocado, adding a bright flavor.
Lime Juice: Adds a touch of extra acidity to balance out the sweet and creamy flavors.
What Else Can I Add?
This smoothie is a great base to add extra greens or fruit to!
I love to add spinach or kale.
Frozen blueberries or pineapple make great fruity additions!
For a protein boost, add a scoop of peanut butter or vanilla protein powder!
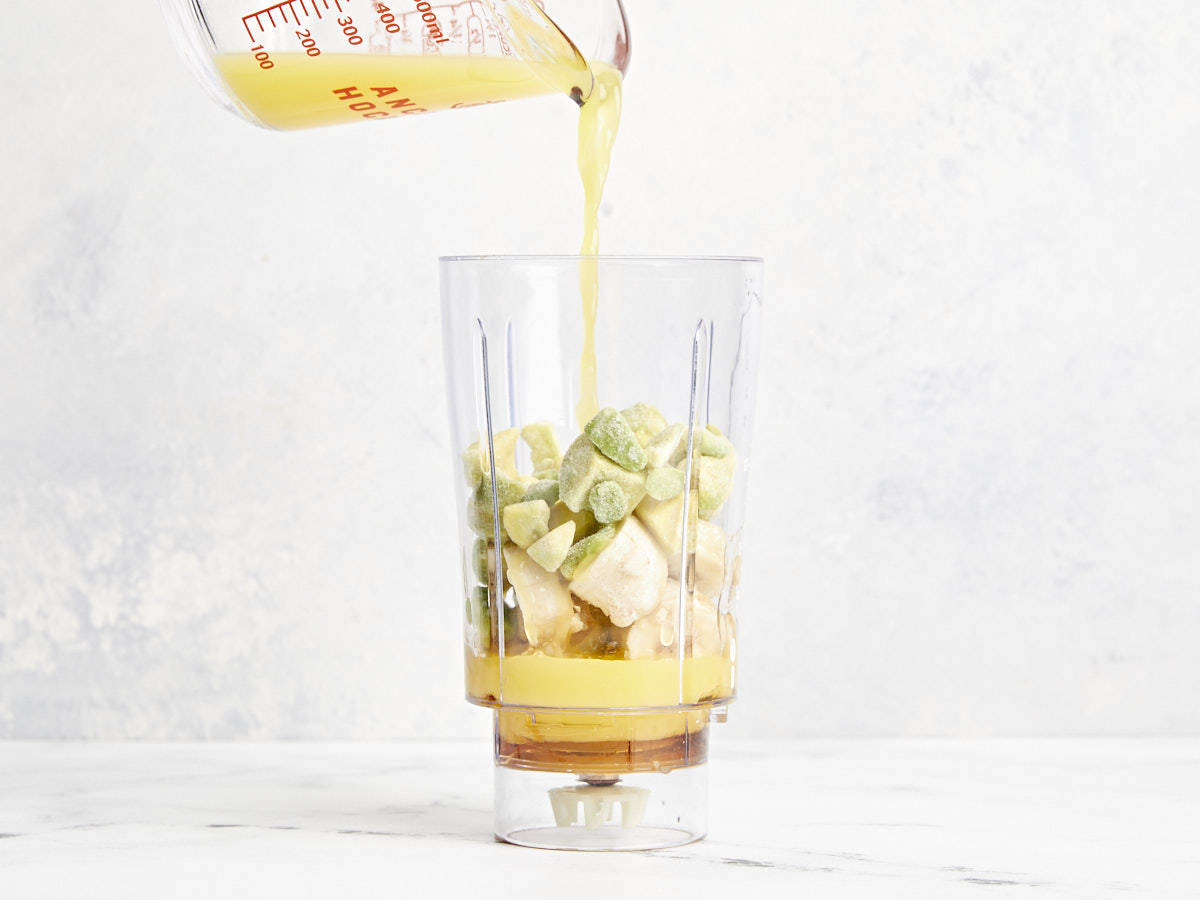
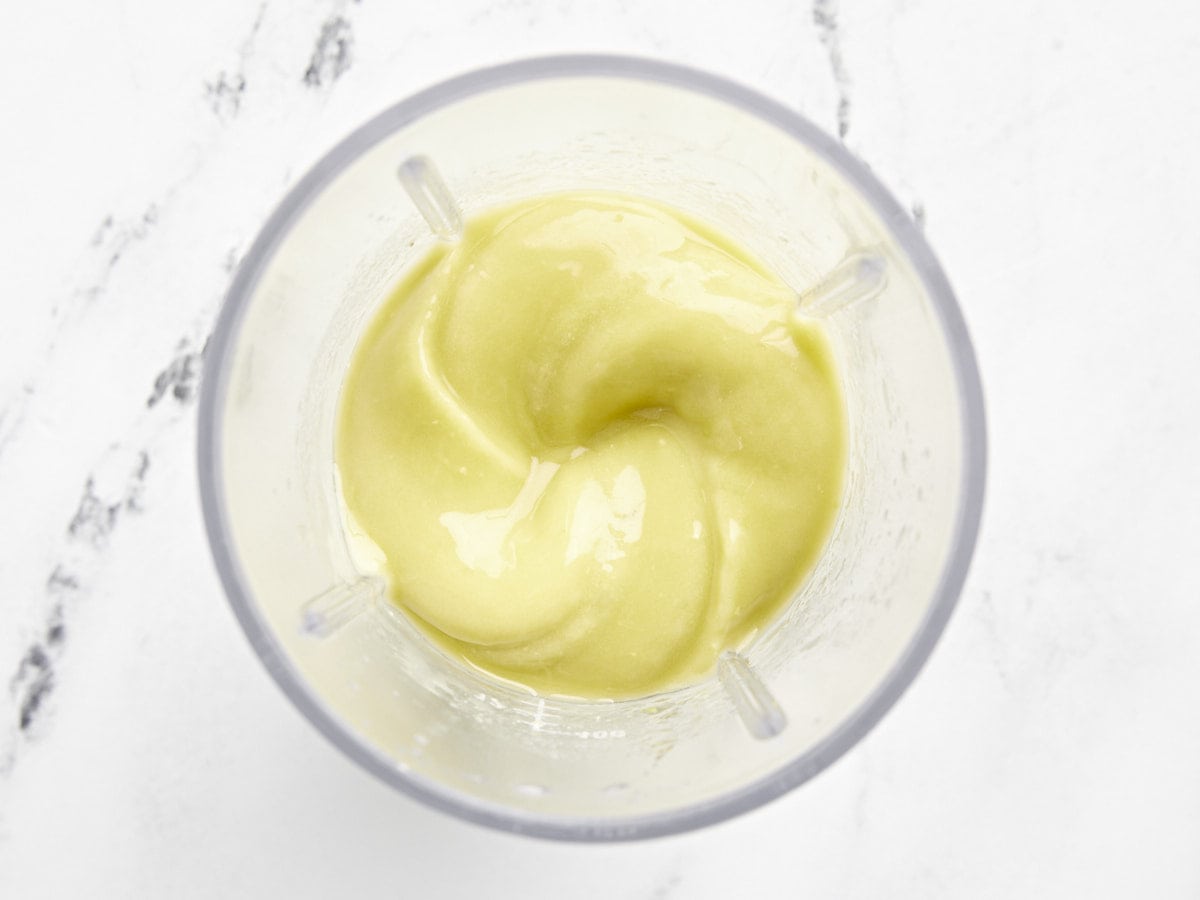
how to make An Avocado Smoothie – step by step photos
Blend 1/2 cup frozen avocado, 1 Tbsp agave syrup, 1/2 of a frozen ripe banana, 1/2 cup OJ, and 1 Tbsp lime juice together until smooth. Serve ice cold!
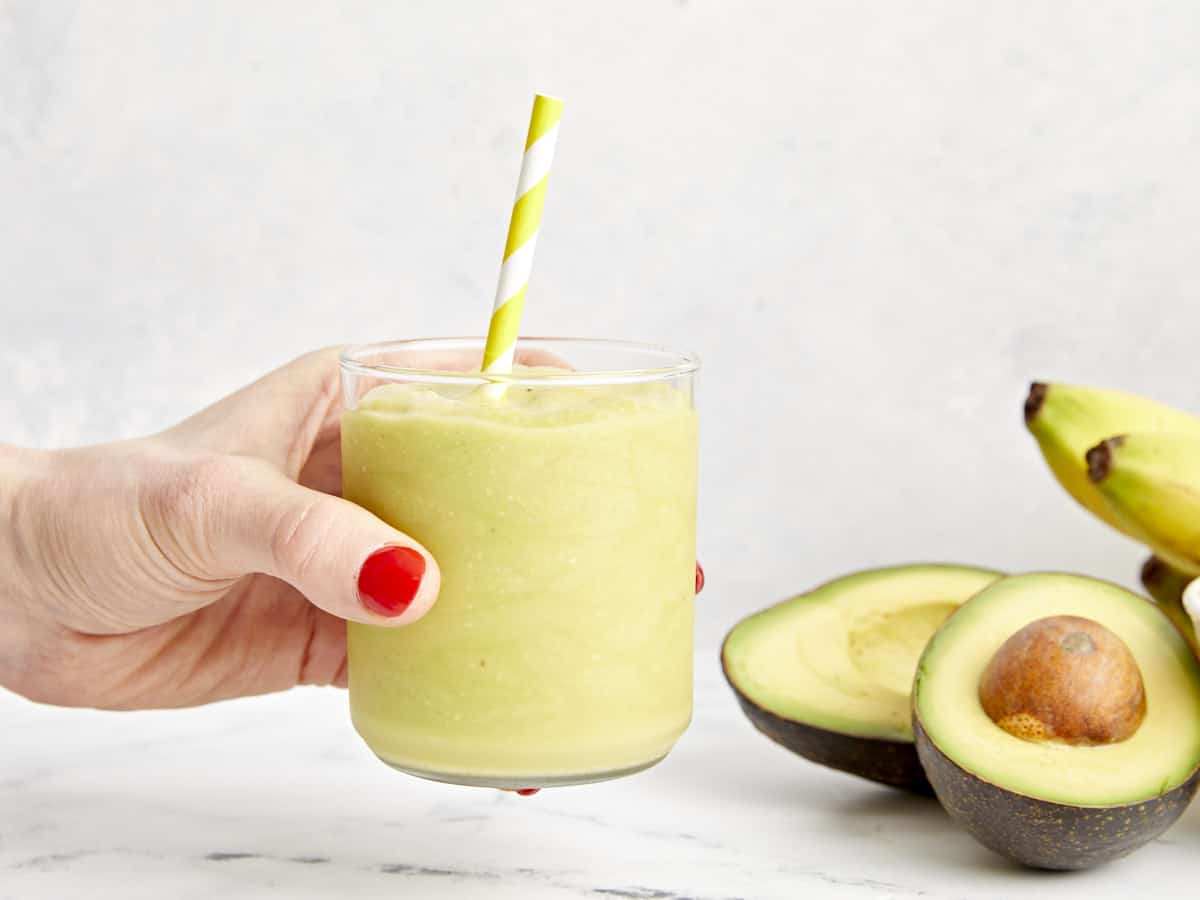
This creamy and refreshing avocado smoothie is the best way to start your morning or rescue you mid-day!
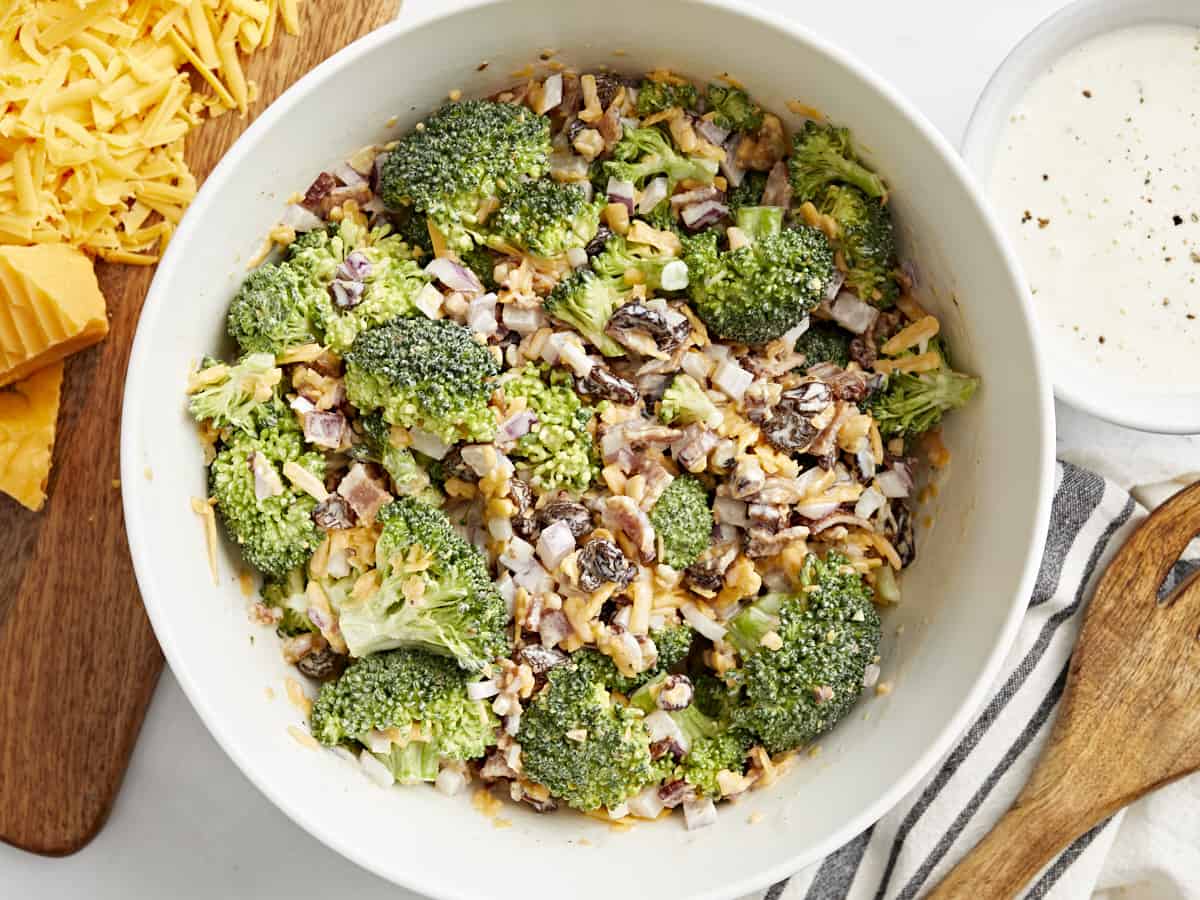
It’s nearly grilling season, and I need a reliable side dish to bring to parties, family reunions, and barbecues. This broccoli salad is the perfect creamy, crunchy, rich, and flavorful side to go with any meal. It has a great balance of sweet and tangy flavors, and the texture is unbeatable. It’s a fact that if you add bacon to any vegetable dish, even the most discerning meat eaters will give it a try. Baby steps, right?! I love making sure my loved ones eat their vegetables!
What Is Broccoli Salad?
Broccoli salad is a classic side dish made from broccoli florets tossed with cheddar cheese, raisins, bacon, walnuts, and red onion, coated in a creamy and tangy dressing. This salad has a wonderful balance of flavors and textures and is so versatile!
Ingredients
Here’s what you’ll need to make broccoli salad:
Broccoli: Has an earthy and slightly sweet, slightly bitter flavor, as well as a delightful crunch!
Cheddar Cheese: Adds a creamy and salty component to the salad.
Raisins: Add a pop of sweet and fruity flavor.
Bacon: Adds a great savory and umami flavor. You’ll need 6 strips of cooked bacon. Vegetarian? No problem, just leave it out. Sometimes I put the bacon on the side for gatherings where there might be varied dietary restrictions.
Walnuts: Add a nutty flavor and delicious crunch.
Red Onion: Adds a bit of bite to the recipe and a wonderful crunchy texture, creating a great contrast to the sweet and chewy raisins.
Mayo: Adds richness and creaminess to the dressing.
Greek Yogurt: Makes the dressing extra creamy and tangy with fewer calories and fat than sour cream. I highly recommend Greek yogurt over plain yogurt or sour cream for its thicker, creamy texture.
White Vinegar: Adds a refreshing brightness and tanginess to the dressing to balance the richness.
Sugar: Adds sweetness to balance out the vinegar.
Salt and Pepper: Enhance the overall flavor of the salad.
Should I Blanch The Broccoli?
In testing, I preferred the final texture of raw broccoli over blanched, but you certainly can blanch the broccoli if you prefer. The blanching process takes out some of the natural bitter flavor from the broccoli; simply drop the florets in a large pot of salted boiling water for 1 minute, then quickly shock in a bowl of ice water. Instead, I opted to simply rinse my broccoli florets in hot water to make them extra bright green and make sure they were nice and clean.
Top Tip
To keep your broccoli salad from turning out watery, make sure to thoroughly dry the florets. The salt in the dressing will naturally draw out some of the moisture from the veggies, so making sure they are dry after washing them is an important step! I like to spread them out on a clean kitchen towel and gently pat them dry with another towel laid on top while I prep the rest of my ingredients.
What To Serve with Broccoli Salad
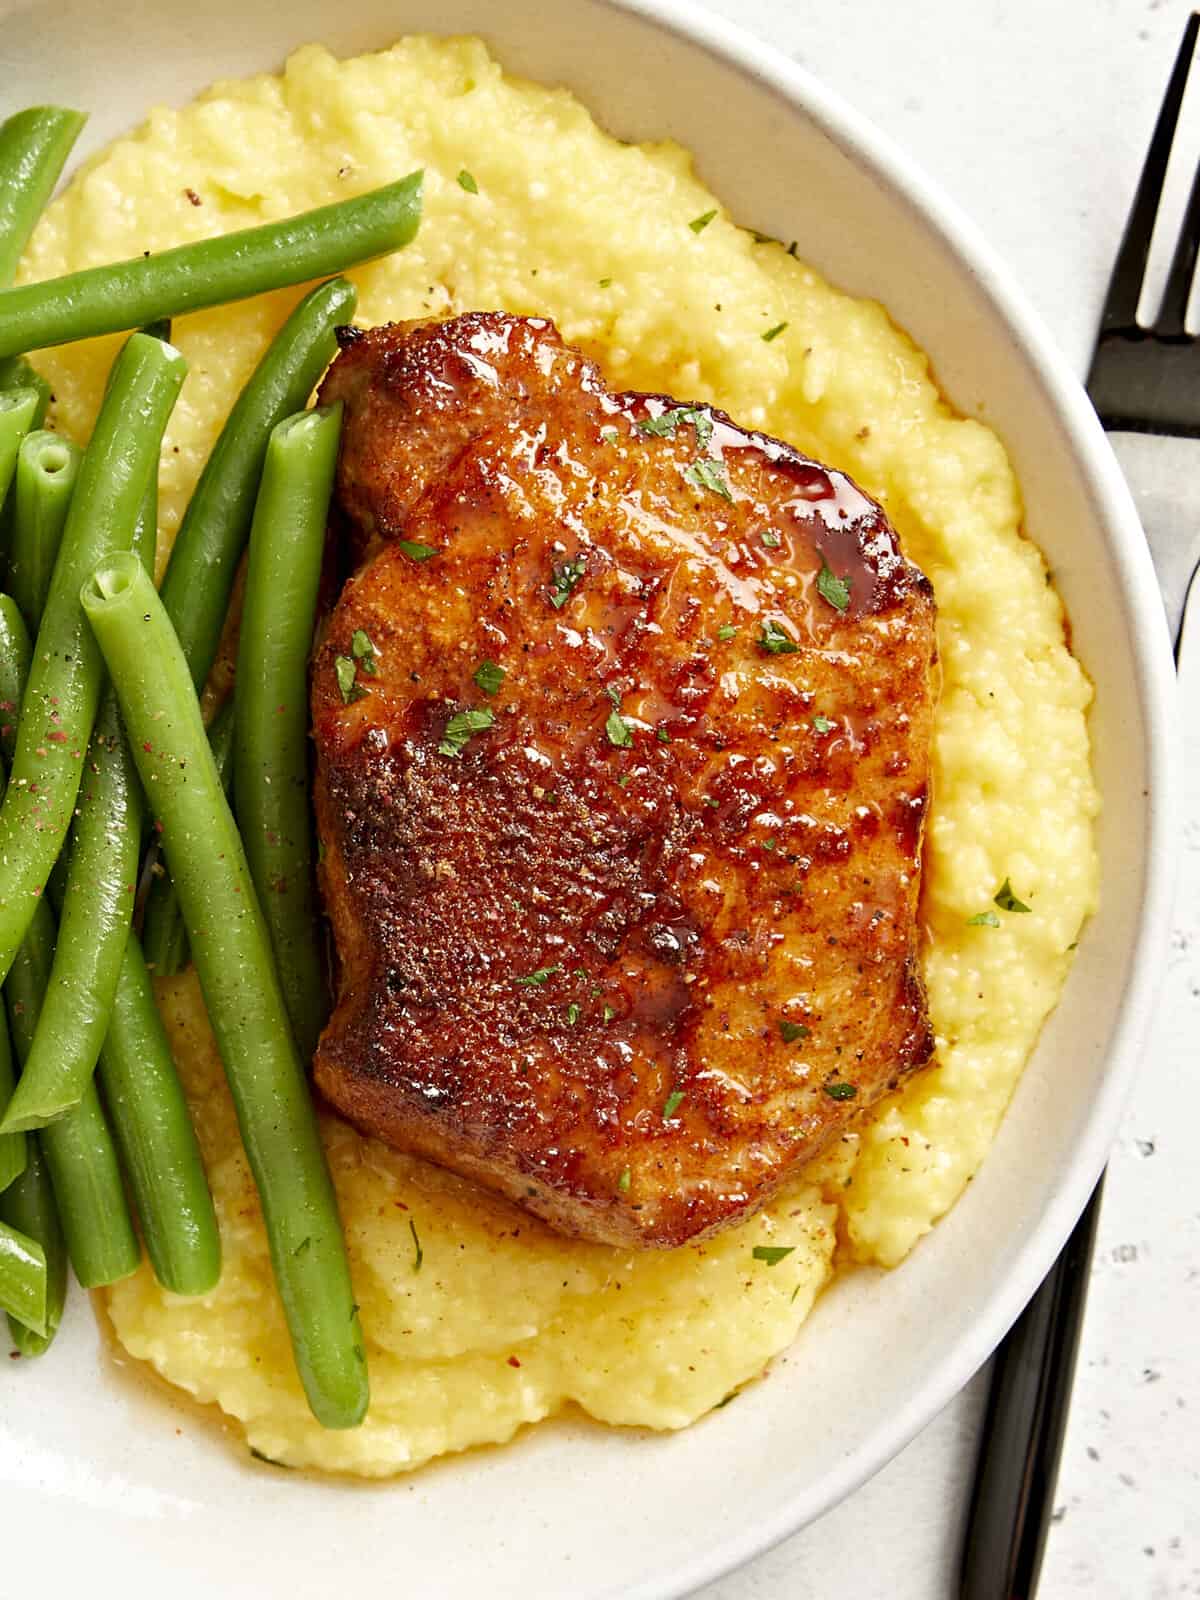
Broccoli salad is such a fresh and crunchy dish with a ton of flavor, so I suggest pairing it with simple proteins, like air fryer chicken breast or glazed pork chops.
Cook the bacon until crispy. Let cool on clean paper towel-lined plate. Chop into bite sized bits and set aside.
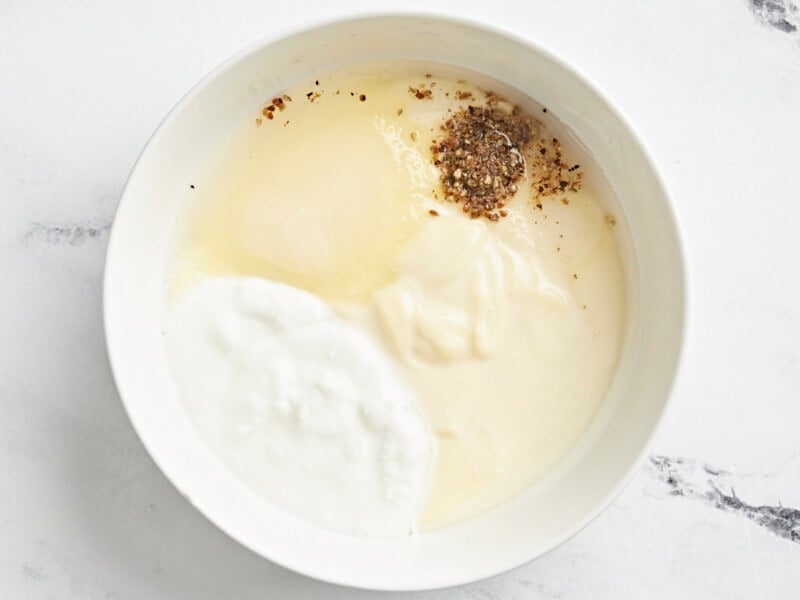
In a small mixing bowl, combine mayo, Greek yogurt, white vinegar, sugar, salt, and pepper. Whisk together and set dressing aside.
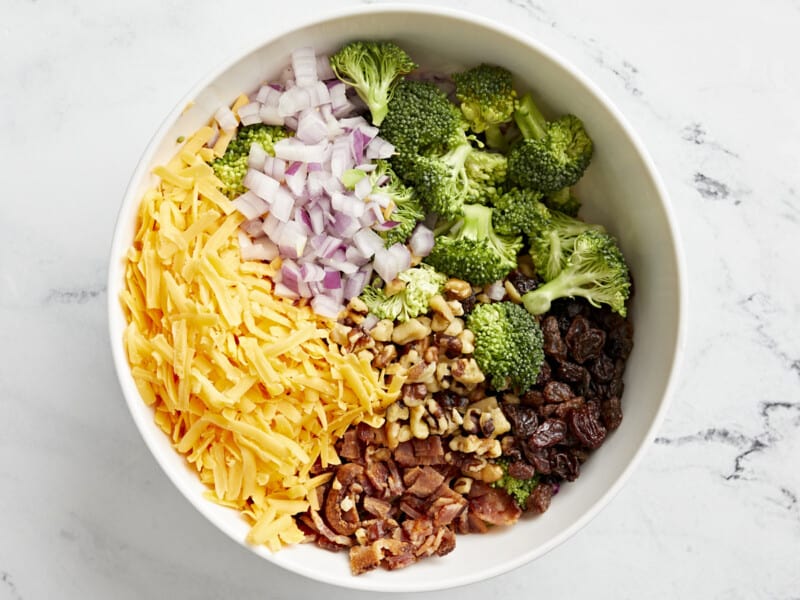
Cut broccoli into florets, shred the cheddar cheese, gather raisins, crumble bacon, crush walnuts, and dice red onion.
Combine salad ingredients in a large mixing bowl and toss to combine.
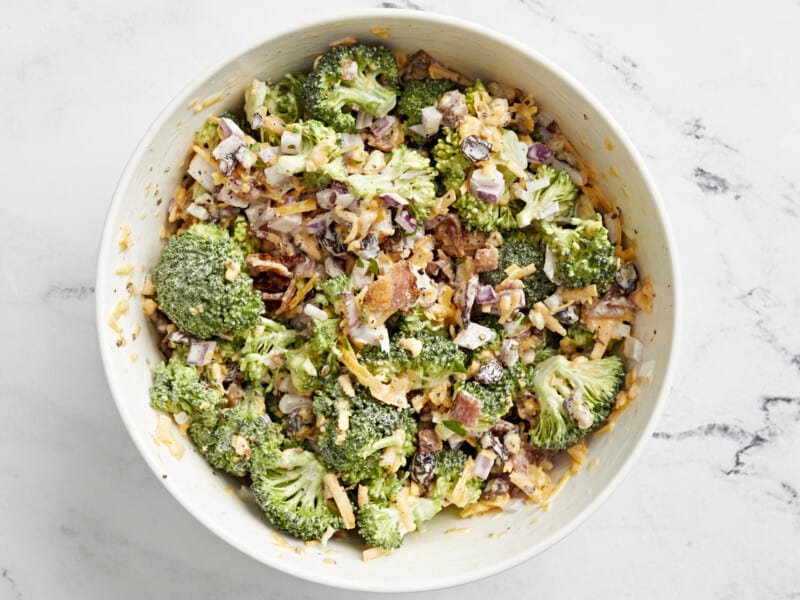
Pour the dressing over broccoli salad and toss together until completely coated. Serve immediately, or let it marinate and get extra yummy in the fridge for up to 5 days!
In a small mixing bowl, combine 1/2 cup mayo, 2 Tbsp Greek yogurt, 1 Tbsp white vinegar, 1 Tbsp sugar, 1/4 tsp salt, and 1/4 tsp pepper.
Whisk together and set dressing aside.
Cut 1 large crown of broccoli into florets, shred 1 cup of cheddar cheese, gather 1/4 cup of raisins, crumble 6 strips of crispy bacon, crush 1/4 cup walnuts, and dice 1/4 of a red onion.
Combine salad ingredients in a large mixing bowl and toss to combine.
Pour the dressing over broccoli salad and toss together until completely coated. Serve immediately, or let it marinate and get extra yummy in the fridge for up to 5 days!
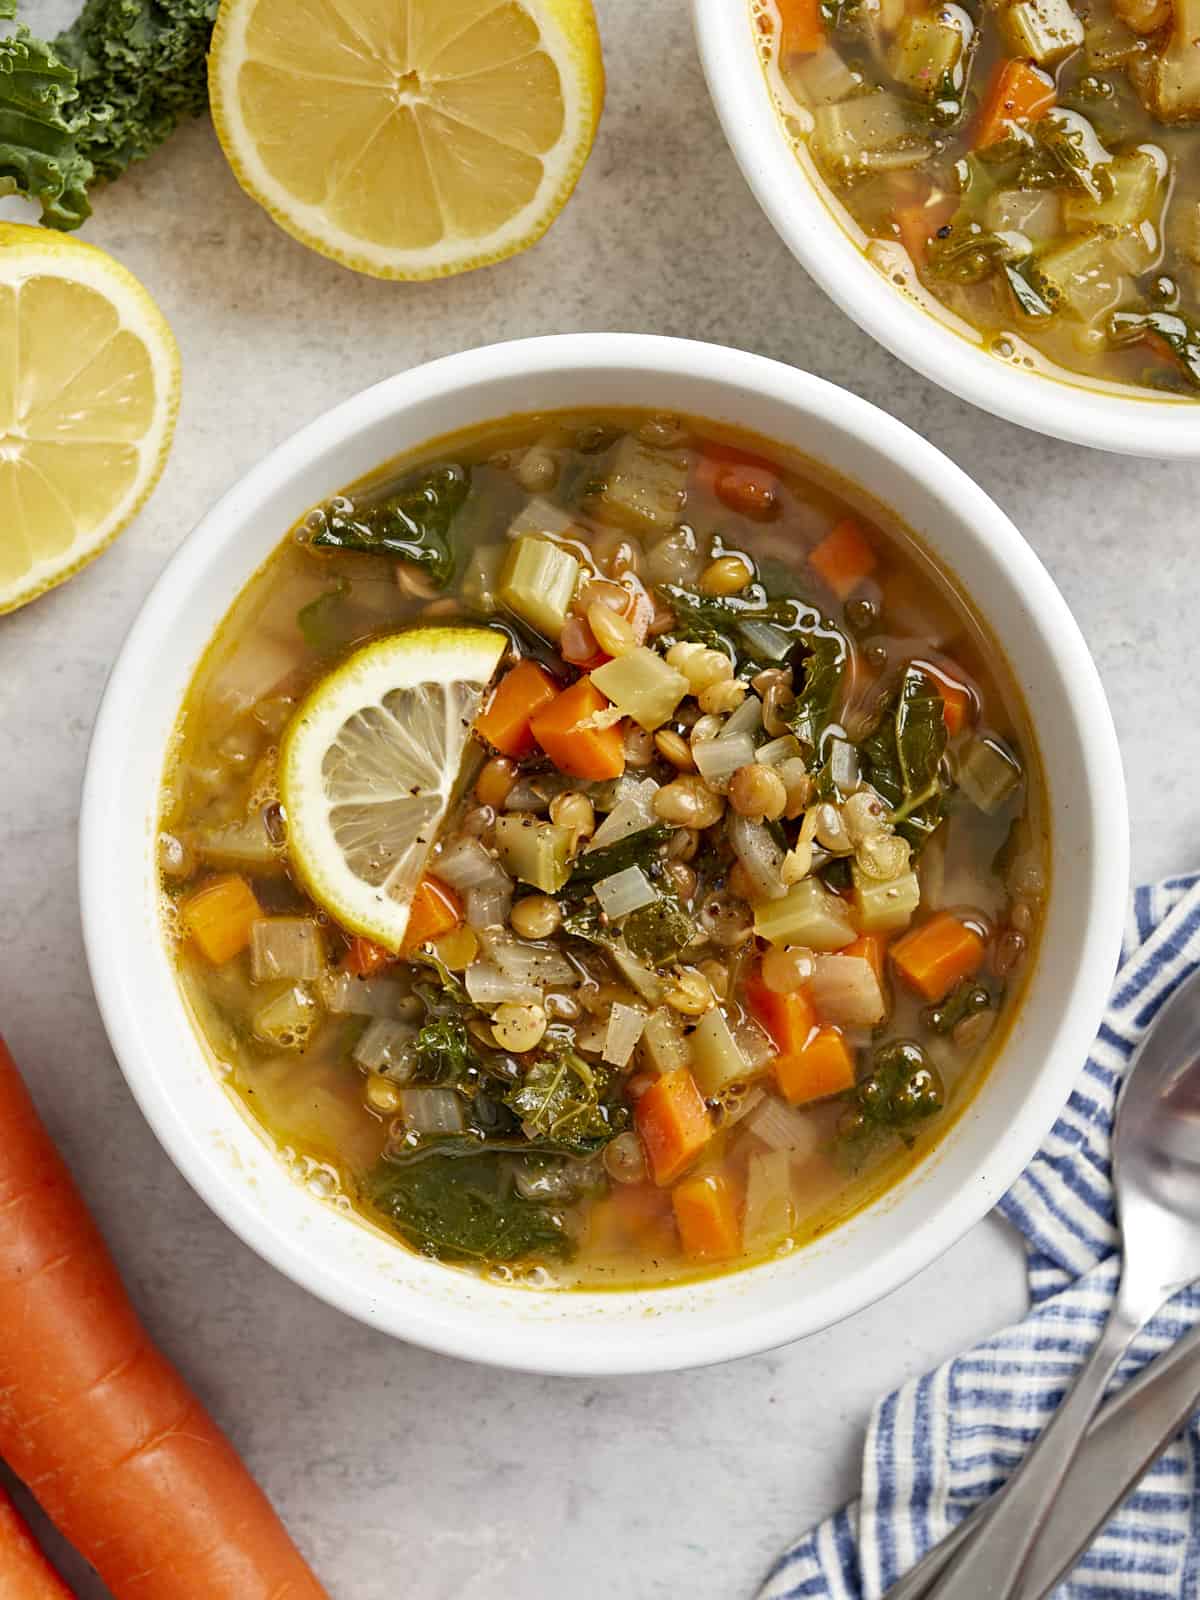
In my opinion, a bright and refreshing soup is the perfect way to welcome spring, and this vegan Mediterranean Lentil Soup is the perfect comforting meal for the rainy days to come. A rich and flavorful broth loaded with veggies, lentils, and kale will fill you up for pennies and is a great recipe for fridge clean out day. Finish it off with a squeeze of lemon juice for a delicious and easy weeknight meal.
Why Make Mediterranean Lentil Soup?
The first time I experienced cinnamon in a savory dish was while cooking at a Lebanese restaurant and it was life changing! This Mediterranean Lentil Soup is the perfect introduction to the savory use of cinnamon. This clean and flavorful lentil soup is a vegan flavor explosion. It’s loaded with protein and fiber, naturally gluten-free, and super versatile. You can toss in just about any veggie or green, so raid the fridge and get cooking!
Ingredients for Mediterranean Lentil Soup
Here’s what you’ll need to make Mediterranean lentil soup:
Oil: Olive oil is our preferred choice in this recipe for its Mediterranean flavor profile, but vegetable or canola oil will work in a pinch.
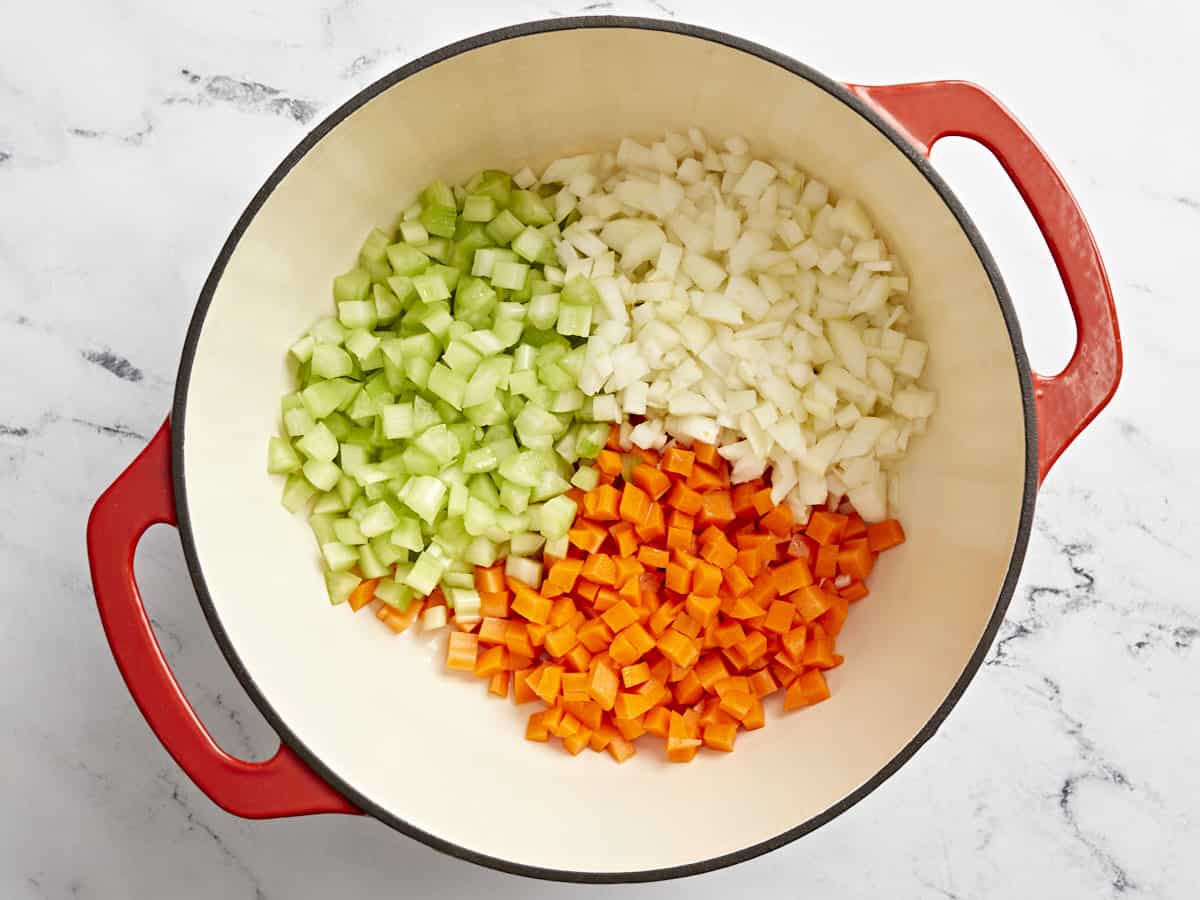
Mirepoix: A combination of small diced yellow onion, carrots, and celery creates an earthy and sweet base of flavor for this soup.
Garlic: The large pieces of crushed garlic versus mincing it fine is intentional to bring out the natural sweetness and flavor of cooked garlic instead of the sometimes-overwhelming bite it has when minced.
Cumin: Adds a savory and nutty Mediterranean flavor to this soup.
Cinnamon: A great savory application of the spice! It will warm you up from the inside out and make your house smell fantastic.
Lentils: We used brown lentils for their firm texture.
Vegetable Broth: We used Vegetable flavored Better Than Bouillon in this recipe. If using another brand, make sure salt is not the first ingredient or it’s a waste of money!
Lemon Juice: Gives the soup a brightness that is seriously addictive. You can use fresh-squeezed lemon juice and save half of your lemon for garnishing each bowl, or you can use a bottled lemon juice. I always have lemons in the kitchen, so we had some to garnish with, too!
Kale: Swiss chard, rainbow chard, spinach, escarole, and all varieties of kale work great, too.
Salt and Pepper: Enhance the natural flavors of the soup.
Which color lentils are best for soup?
Brown or green lentils work best for this soup, as they will keep their shape after cooking, which is what we’re looking for texture-wise. Red lentils are not recommended because they cook quicker and will dissolve into the soup as they cook, creating a thick and mushy texture.
How to Store Leftovers
Store leftover Mediterranean lentil soup in an air-tight container in the refrigerator for up to 4 days. This soup also freezes super well for up to 3 months when stored properly in an air-tight container. Let thaw overnight in the refrigerator before reheating in a pot set over medium-low heat until warmed through.
Rinse the lentils in a strainer under cold water until the water runs clear.
Heat the oil in a large soup pot set over medium-high heat. Add in the onions, carrots, and celery and cook until they become tender, about 6-7 minutes, stirring frequently. Season with salt and pepper.
Stir in the garlic, cumin, and cinnamon. Heat until fragrant, about 60 seconds. Add the lentils to the pan and heat for 1-2 minutes to slightly toast.
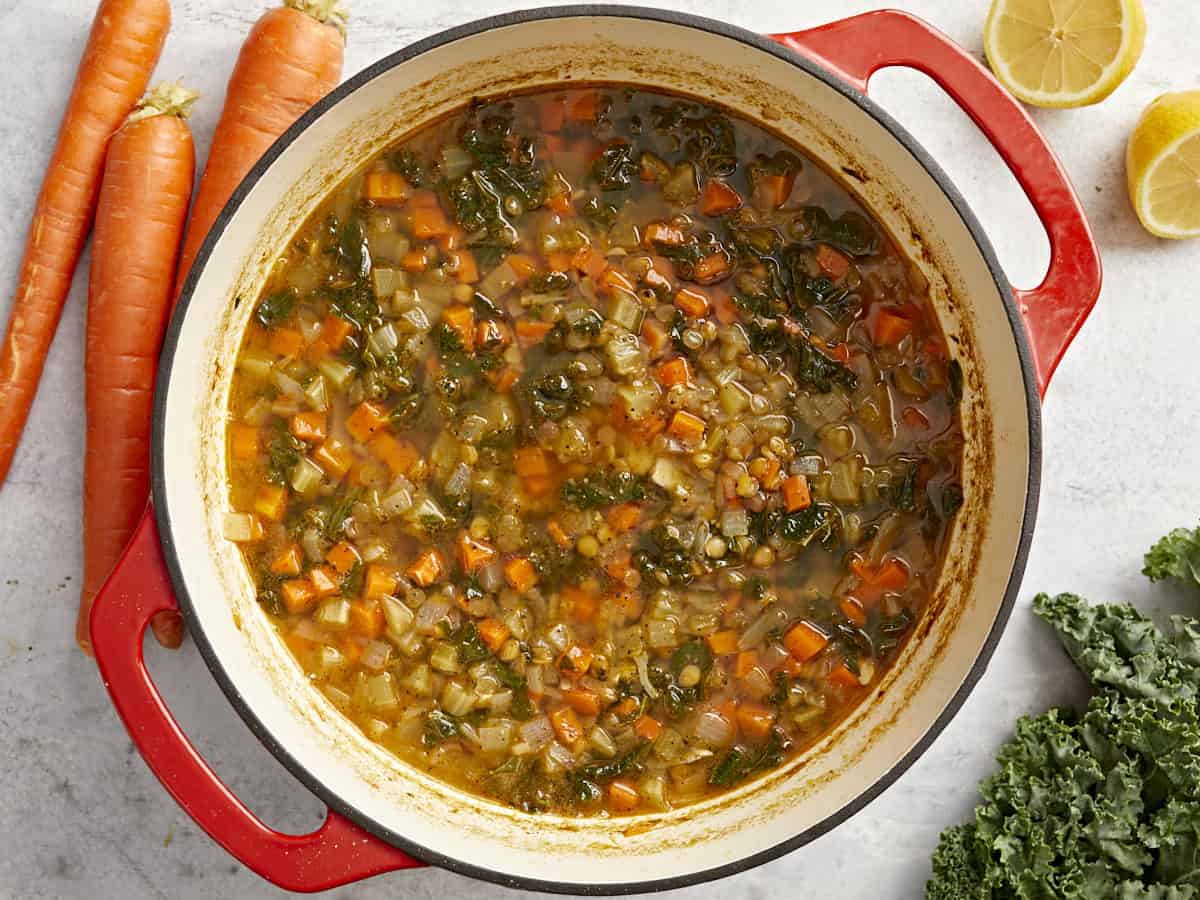
Pour in the vegetable broth, water, and lemon juice, then bring the pot to a boil. Reduce heat to low and simmer until the lentils are tender, about 30-45 minutes.
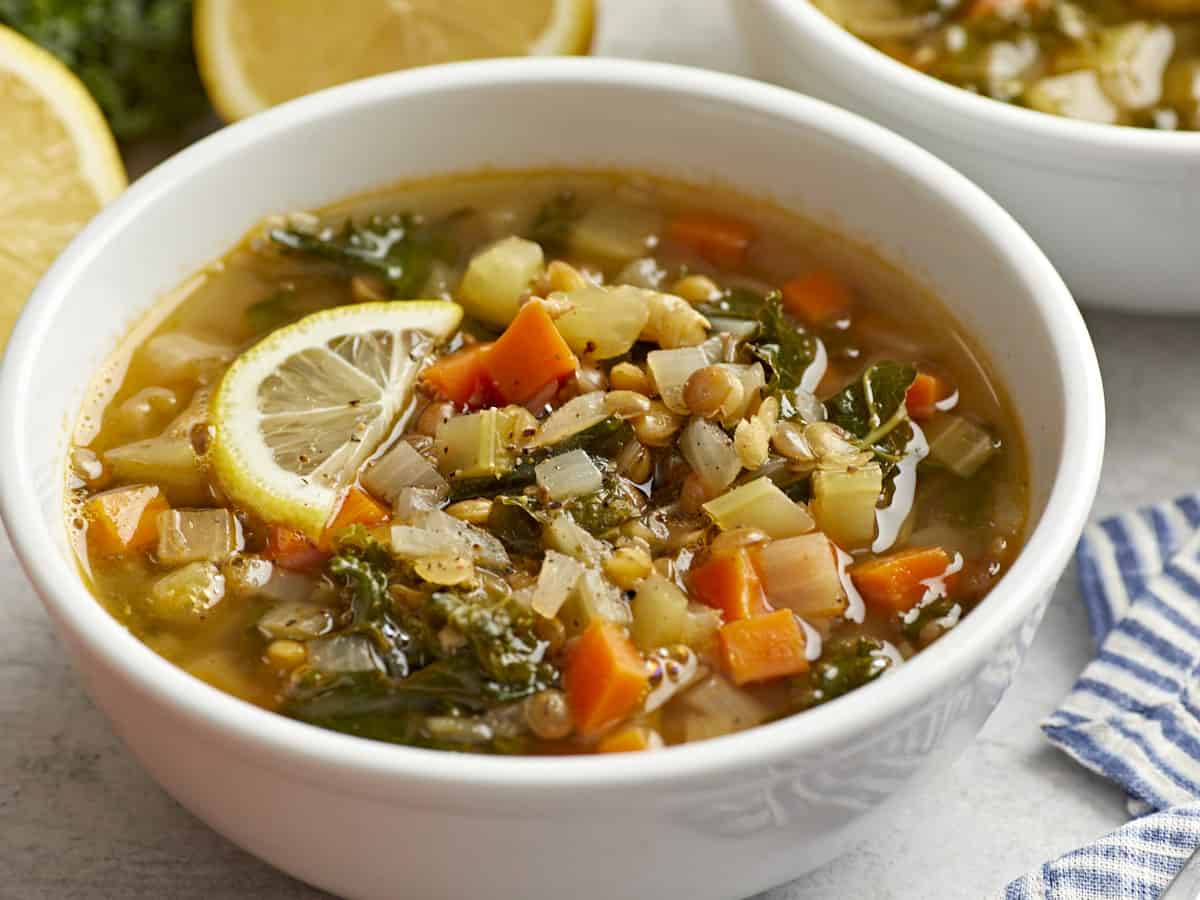
Stir in the greens, season with additional salt, pepper, and lemon juice to taste before serving.
how to make Mediterranean Lentil Soup – step by step photos
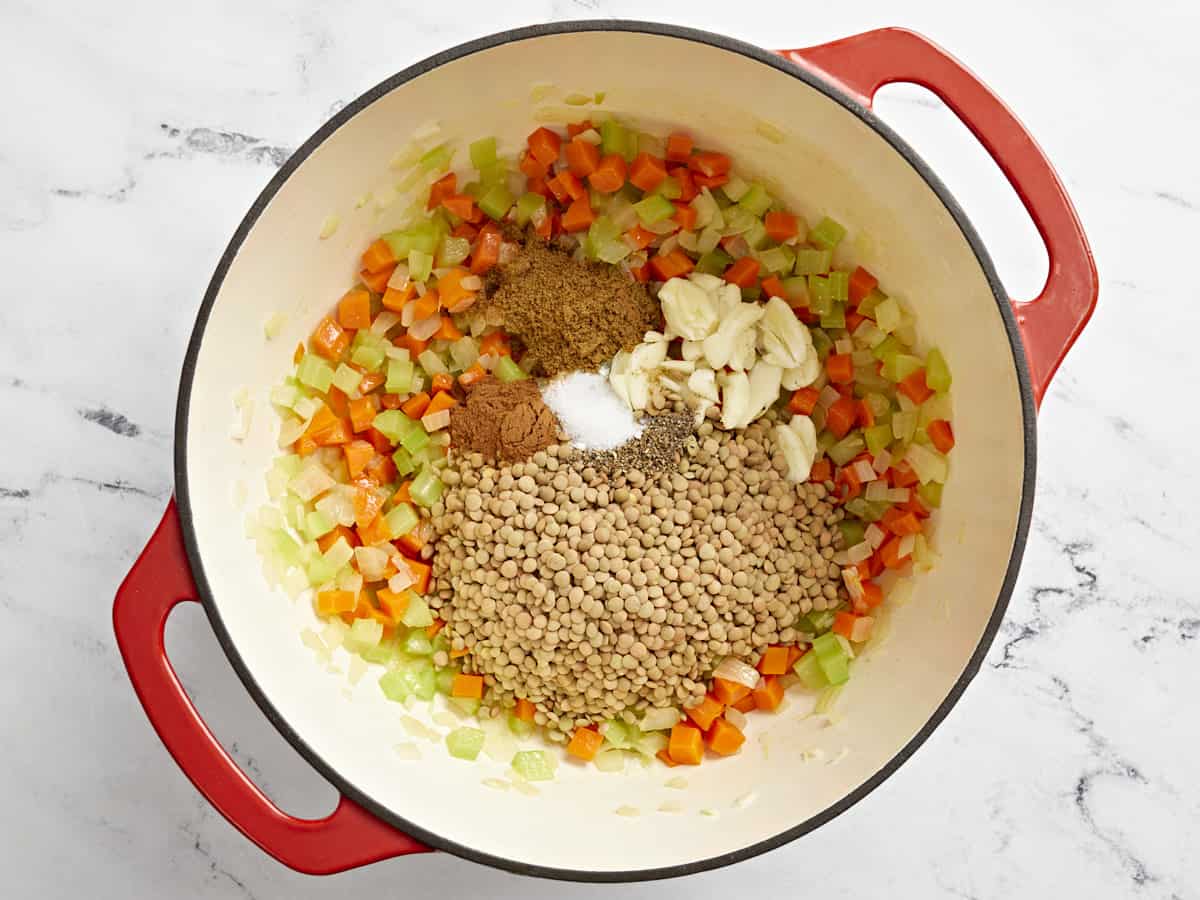
Rinse 1 cup brown or green lentils in a strainer under cold water until the water runs clear. Heat 2 Tbsp olive oil in a large soup pot set over medium-high heat. Add in 1 diced yellow onion, 2 diced medium carrots, and 3 diced stalks celery and cook until they become tender, about 6-7 minutes, stirring frequently. Season with 1 tsp salt and 2 tsp pepper.
Stir in 5 crushed cloves garlic, 2 tsp ground cumin, and 1 tsp cinnamon. Heat until fragrant, about 60 seconds. Add the lentils to the pan and heat for 1-2 minutes to slightly toast.
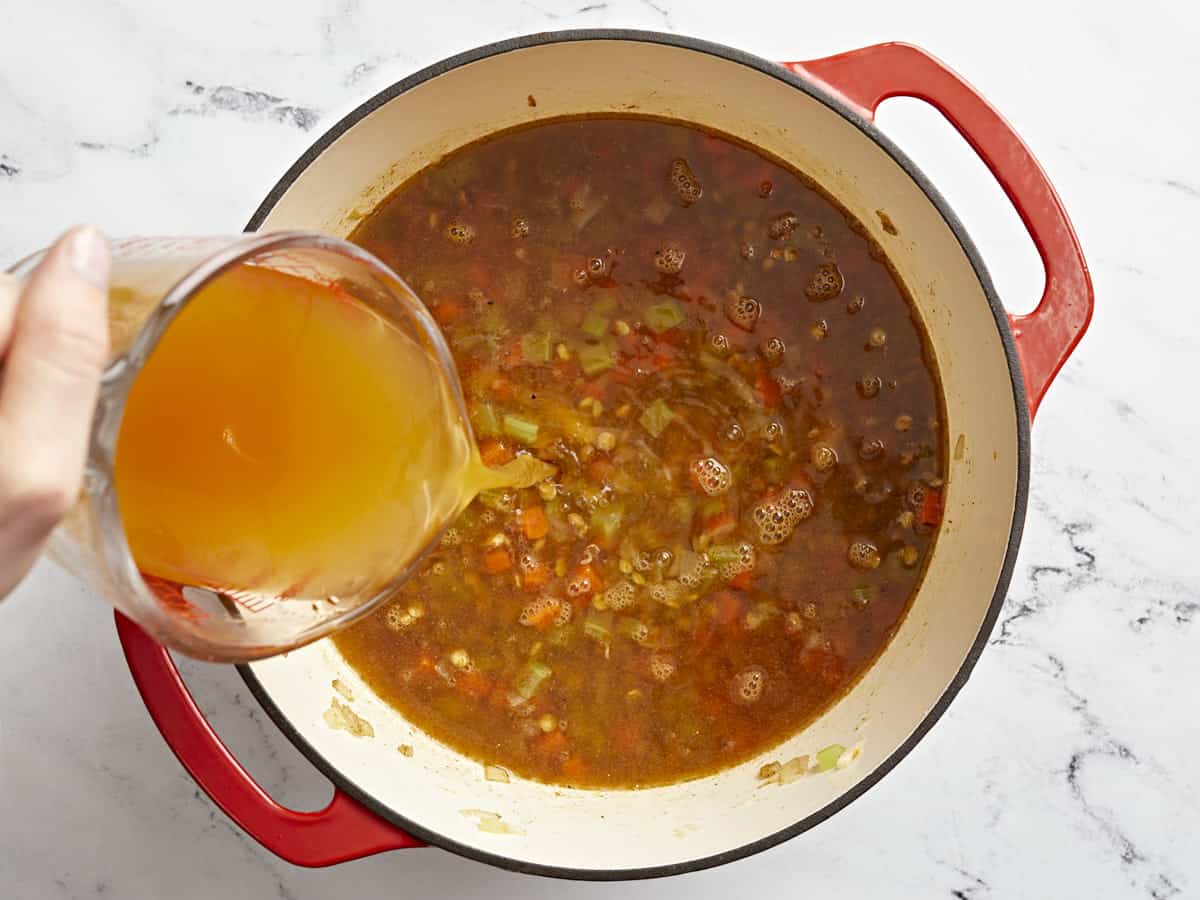
Pour in 8 cups vegetable broth and 4 oz. lemon juice, then bring the pot to a boil. Reduce heat to low and simmer until the lentils are tender, about 30-45 minutes.
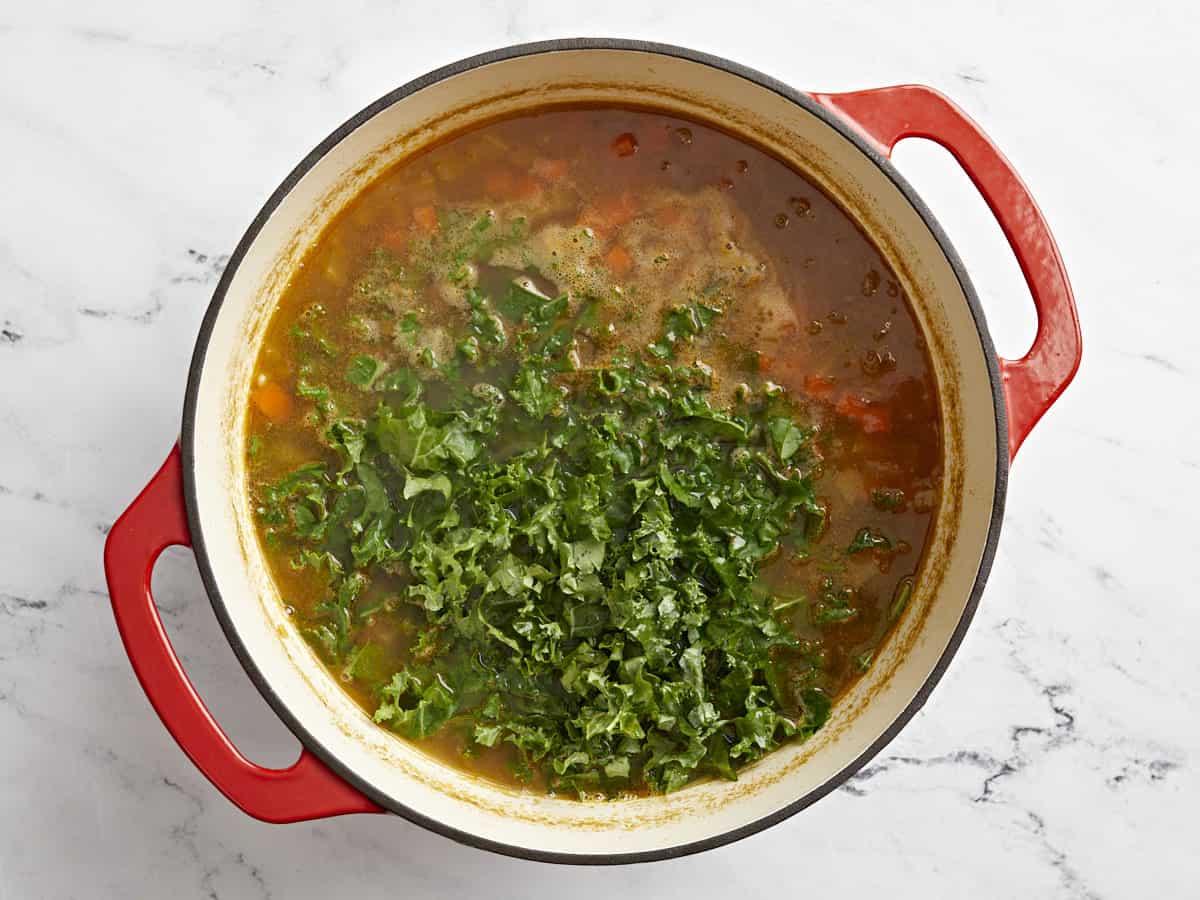
Stir in 3 cups chopped kale, season with additional salt, pepper, and lemon juice to taste before serving.
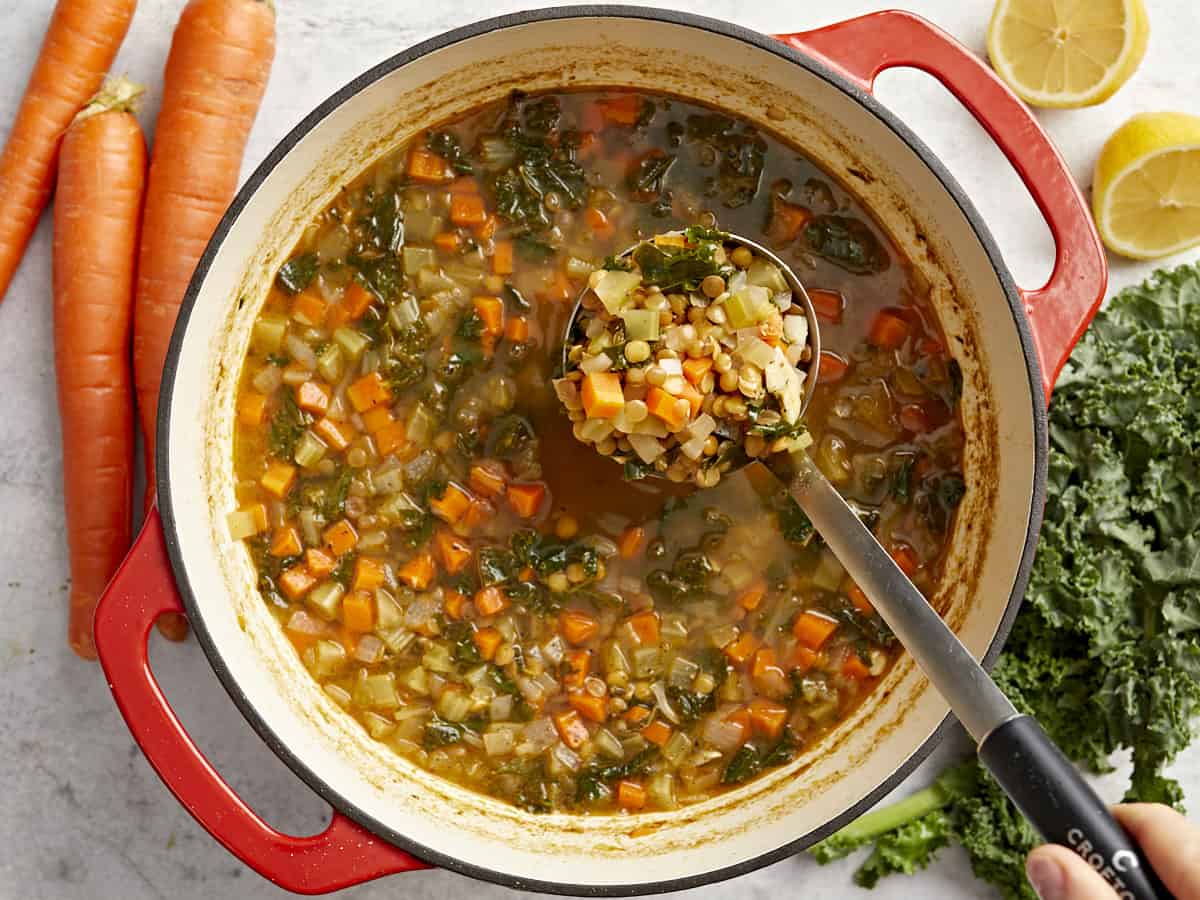
This Mediterranean lentil soup is going to be your new favorite!
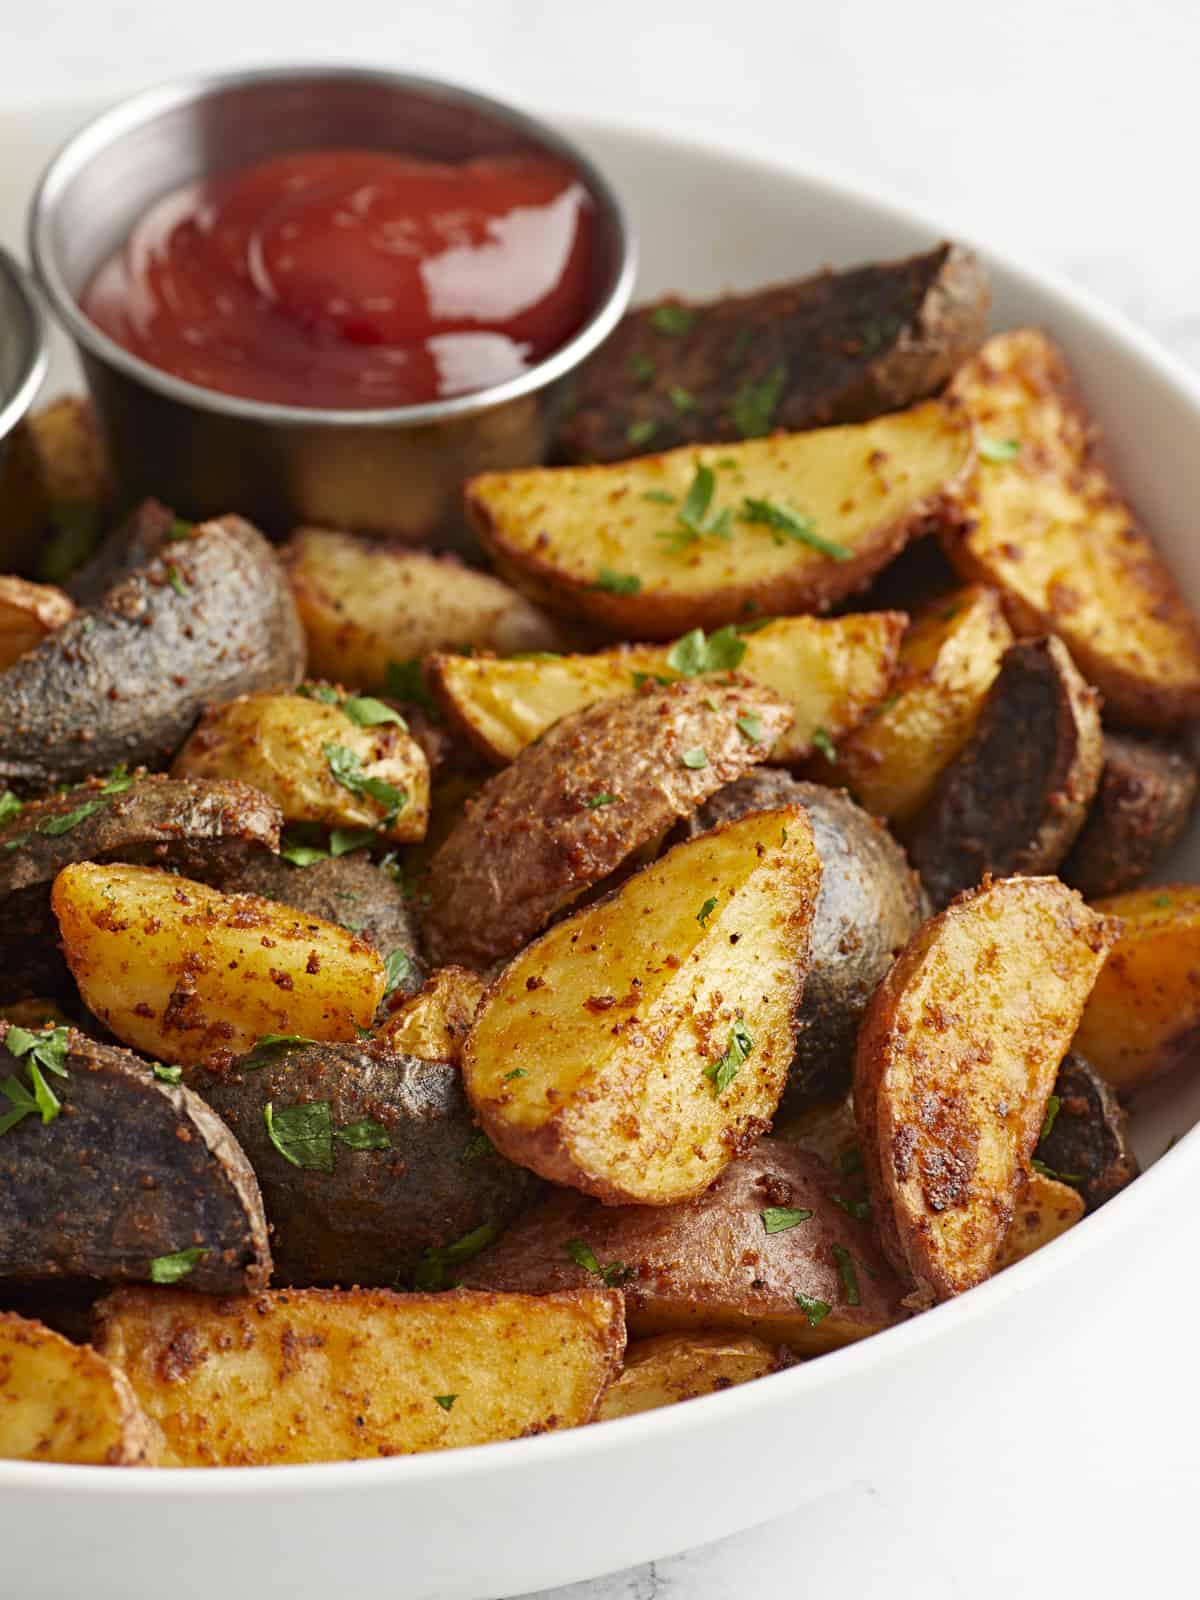
Potatoes, or “spuds” as my Irish brother-in-law affectionately calls them, are truly a favorite for just about everyone. Potatoes can be cooked 1,000 ways and they always steal the show! These air fryer potatoes are proof of that. Soft on the inside and crispy on the outside, they’re like mini baked potatoes. They are seriously delicious dipped in ketchup, mayo, or Comeback Sauce. This air fryer potato recipe is great to use with whatever potatoes you have on hand, making it the perfect recipe for fridge clean out day.
Why Make Potatoes in the Air Fryer?
Listen, we love roasted potatoes. They’re simple and delicious. But sometimes you need potatoes right now, and roasting just isn’t quick enough. Using an air fryer, these potatoes are roasted to perfection in less than half the time. So, the next time you have a potato emergency, this air fryer potato recipe is here for you. You can thank us later!
Ingredients for Air Fryer Potatoes
Here’s what you’ll need to make air fryer potatoes:
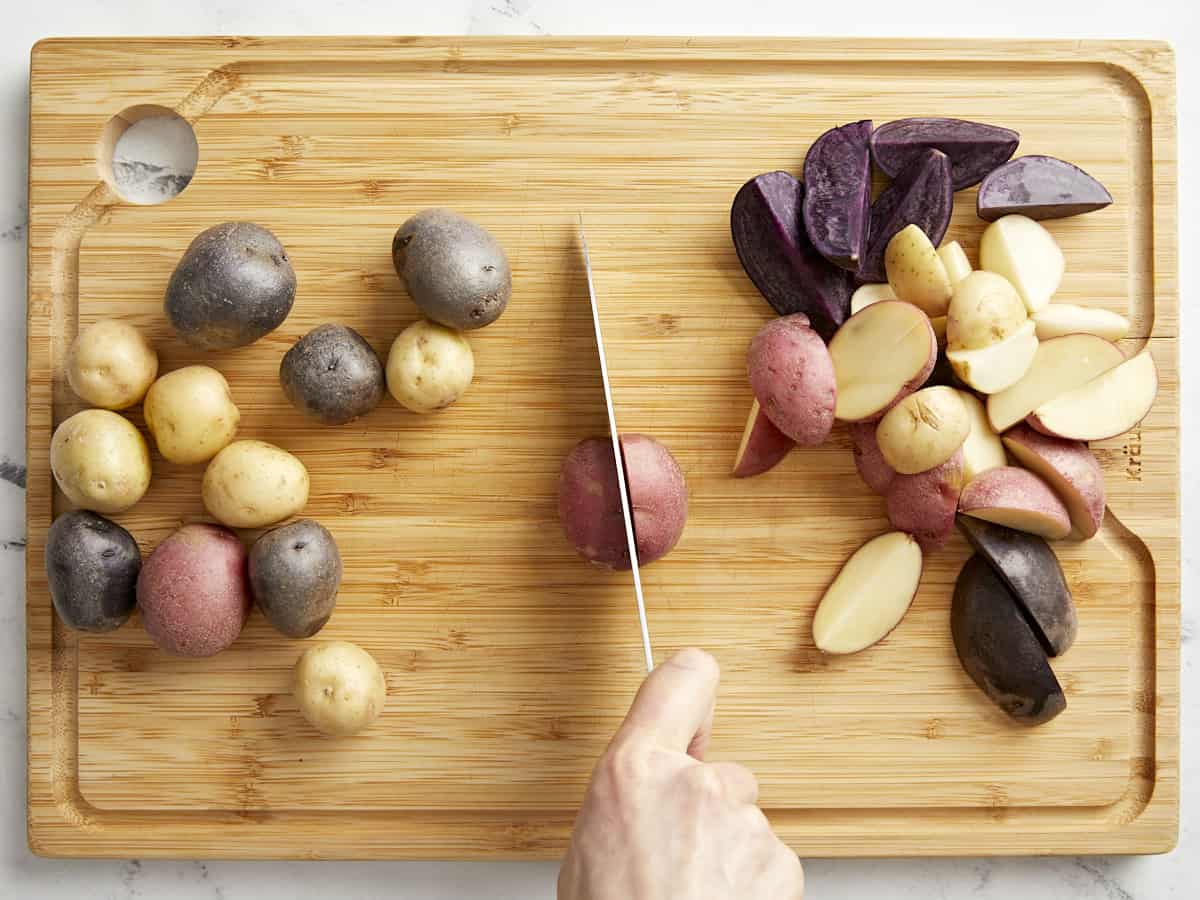
Potatoes: You can use any variety of mini potatoes. We found some tri-color potatoes on sale, so we used those!
Oil: Helps keep the potatoes moist as they cook and helps them get nice and crispy on the outside. We used olive oil, but you could also use vegetable or canola oil.
Spices: A combination of garlic powder, onion powder, smoked paprika, salt, and pepper creates a smoky and savory flavor and the paprika adds a pop of color.
Fresh Parsley: Adds a little bit of greenery and freshness.
Should I Soak the Potatoes?
We did not do this, but cutting and soaking potatoes in cold water releases some of the starches and can make the potatoes crispier! Our potatoes were more like tiny bites of the perfect baked potato!
What Else Can I Put On Air Fryer Potatoes?
We love the seasoning mix listed in the recipe below, but the sky is the limit! Here are some other ways you can season your air fryer potatoes:
how to make Air Fryer Potatoes – step by step photos
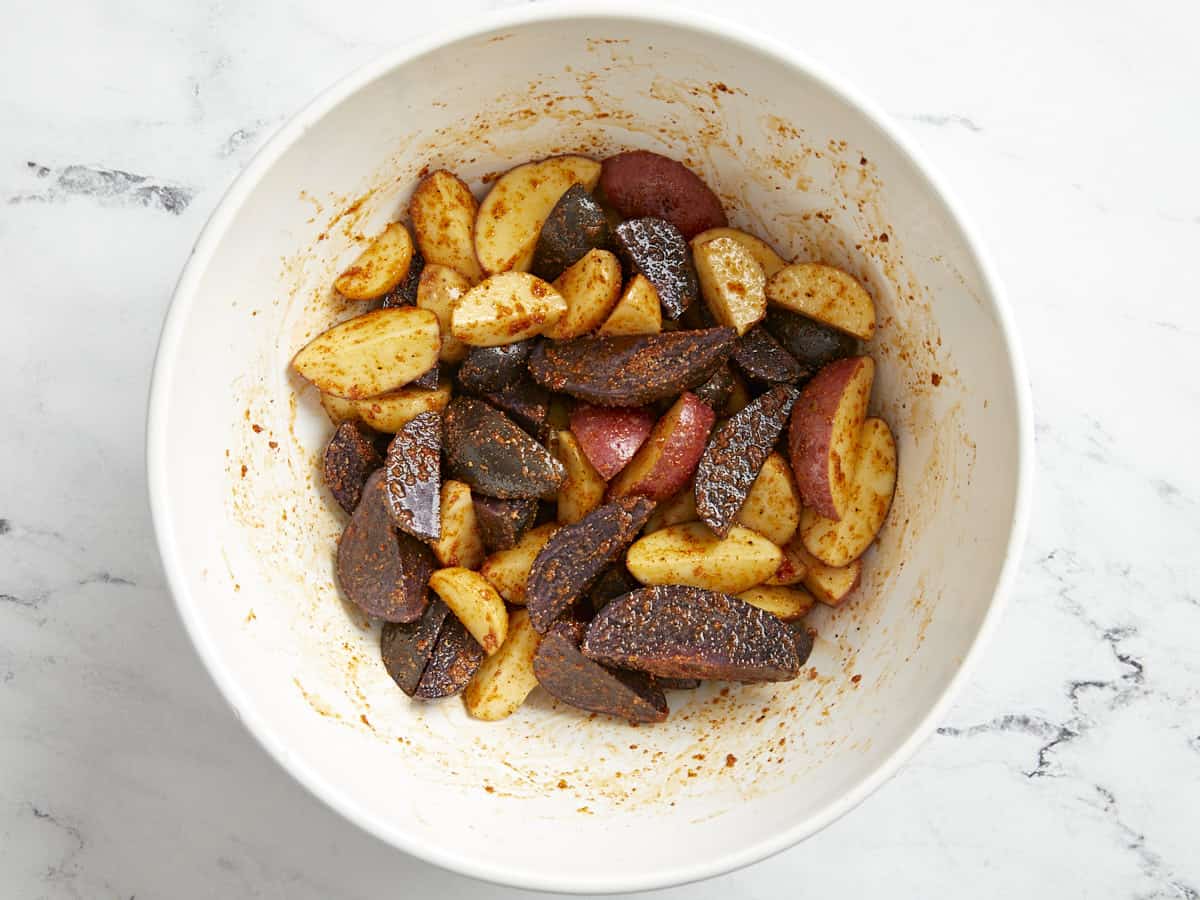
Preheat the air fryer to 400°F for 4 minutes. Quarter 1 lb. of baby potatoes.
Add the potatoes to a large bowl. Toss the quartered baby potatoes with 1/2 Tbsp olive oil, 1/2 tsp garlic powder, 1/2 tsp smoked paprika, 1/2 tsp onion powder, and a pinch of salt and pepper.
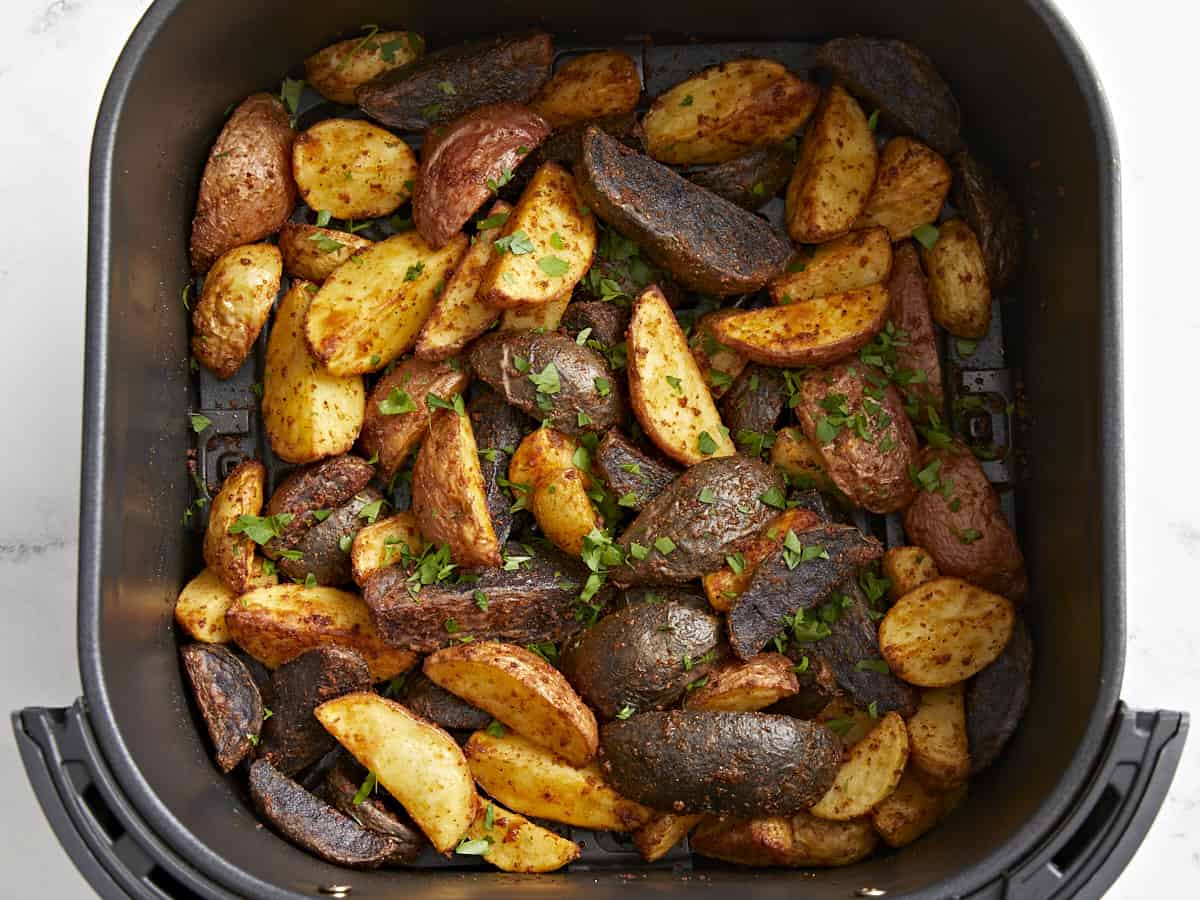
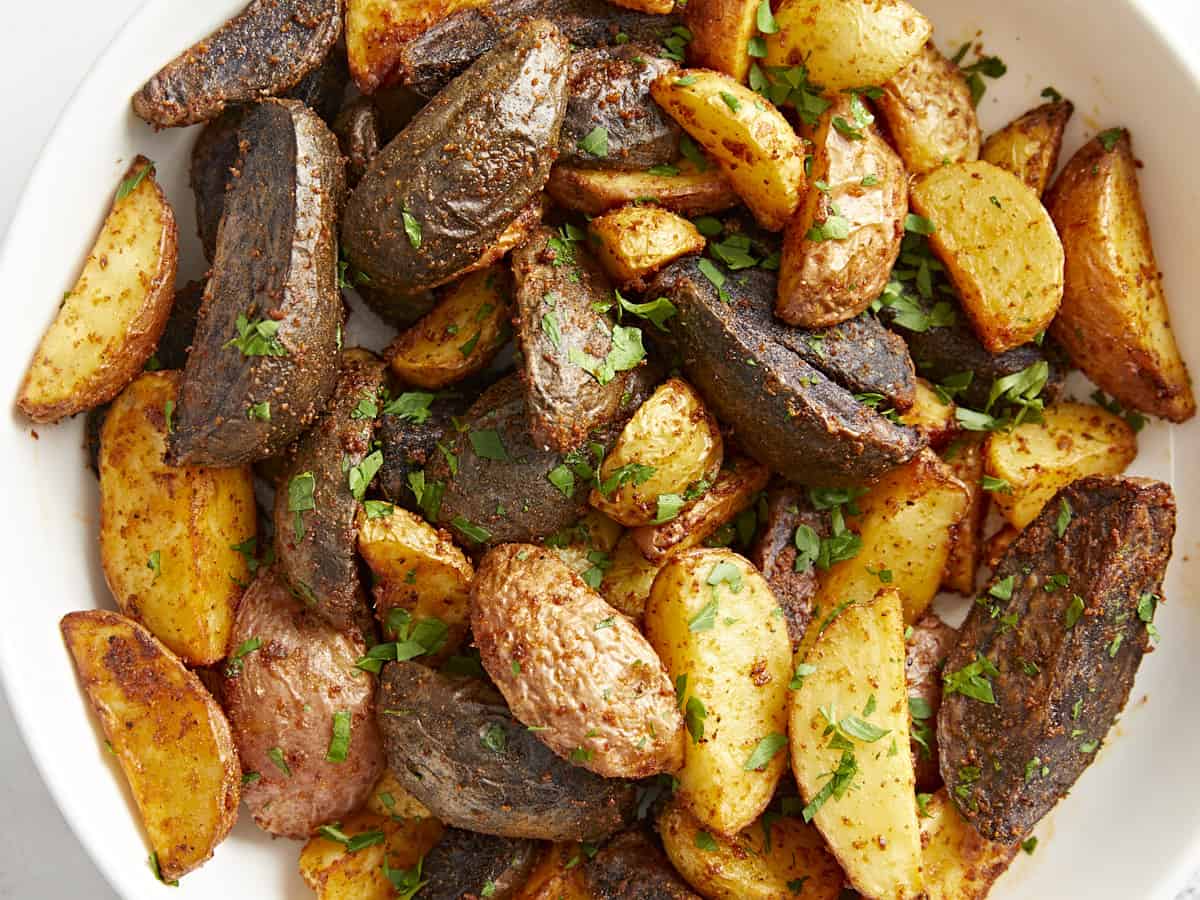
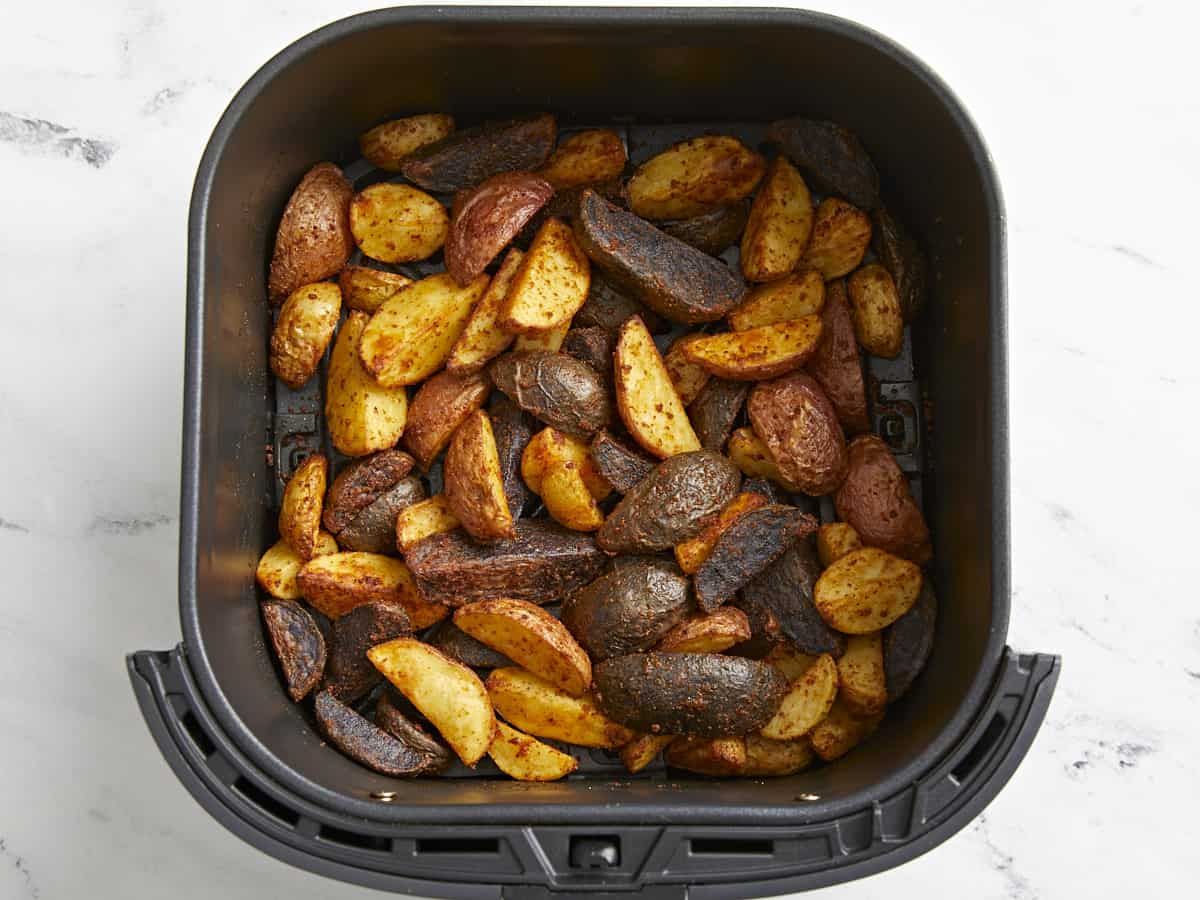
Cook for 15 minutes in the air fryer, until golden brown with crispy edges, stopping halfway through to shake. Garnish with 1 tsp minced fresh parsley and additional salt and pepper, if needed.
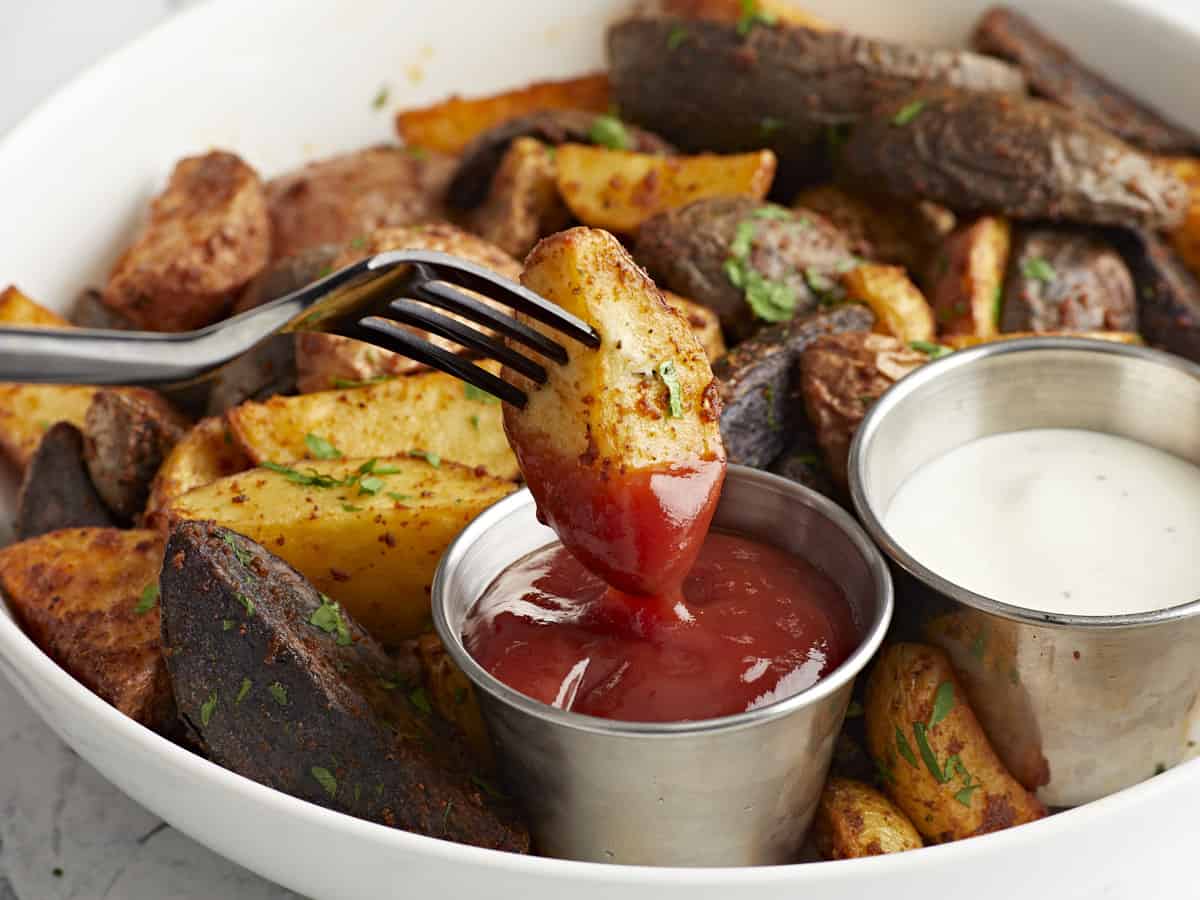
These air fryer potatoes are the ultimate crispy side dish!
We’re in love with stuffed bell peppers here at the Budget Bytes kitchen, so I decided to make a new variation just so I could have an excuse to eat stuffed bell peppers again. These Chorizo Stuffed Bell Peppers are full of super flavorful Mexican chorizo, hearty rice, and a rich sauce, then topped with melty mozzarella cheese. They’re SO filling, perfectly portioned for meal prep or freezer cooking, and quite flexible if you want to change up the ingredients to make them even more budget-friendly! Put this one one your to-cook list because I know you’re going to love them!
Ingredients for Chorizo Stuffed Bell Peppers
These stuffed bell peppers are packed with flavorful herbs and spices and a rich tomato-y sauce so that every bite is deee-licious. Here are the ingredients for chorizo stuffed bell peppers:
Bell Peppers: You’ll need three bell peppers to make six servings for this recipe. We used a mix of colors to make it more festive, but you can use any color pepper that fits your budget.
Mexican Chorizo: Mexican chorizo is a fresh (not cured) sausage that is packed with spices. You can usually either buy this loose or in links. If you buy them in links, simply squeeze the meat out of the casing into the skillet. I like Johnsonville brand, but many larger grocery stores also make their own generic version.
Garlic & Onion: A little fresh onion and garlic add flavor and texture to the bell pepper stuffing.
Rice: Long grain white rice bulks up this meal to make it filling while keeping the cost low. We cook the rice right in the pot with the chorizo, spices, and broth for maximum flavor.
Chicken Broth: The rice is cooked in chicken broth to ensure that every bite is super flavorful. We use Better Than Bouillon to make our broth because it’s budget-friendly and has great flavor.
Tomato Paste: Tomato paste is added to the broth to help create an enchilada sauce-like flavor in the rice mixture.
Diced Green Chiles: Green chiles add even more flavor, color, and texture to the filling. If you prefer a milder stuffed pepper, you can leave out the green chiles or look for a mild green chile.
Spices: We packed this bell pepper stuffing with even more spices including chili powder, cumin, garlic powder, cayenne pepper, and salt.
Mozzarella: The stuffed bell peppers are topped with mozzarella cheese for a rich finish, but you can substitute with a different type of cheese if preferred, like Monterey jack, pepper jack, cheddar, or a Mexican blend.
Green Onion: A few sliced green onions sprinkled over top of the stuffed bell peppers add a fresh finish, but are entirely optional!
What Else Can I Add?
This recipe is pretty flexible, so if you want to change it up or make it more budget-friendly, here are some other ingredients you can add:
Beans: Try swapping half of the chorizo with a can of black beans or pinto beans for more fiber and less cost.
Diced Tomatoes: If you want more color and texture in your bell pepper filling, try adding a drained can of petite diced tomatoes, or diced tomatoes with chiles (Rotel).
Sweet Potato: Chorizo and sweet potato are a perfect flavor pair. Replace half of the chorizo with one small finely diced sweet potato for a spicy-sweet flavor profile (add it with the rice so it can simmer and soften with the rice).
Mexican Chorizo vs. Spanish Chorizo
It’s really important to use the correct type of chorizo for this recipe. You’ll need Mexican chorizo, which is a fresh (uncooked & uncured) sausage. You’ll find Mexican chorizo in the fresh meat department, usually near bratwurst and other fresh sausages. Spanish chorizo is a cured, sliceable sausage that you’ll usually find near cheese, pepperoni, or other charcuterie-type foods.
I love making stuffed bell peppers for meal prep, so this is how I store and reheat them. The cooked bell peppers can be stored in the refrigerator for 4-5 days. I like to reheat them quickly in the microwave (about 2 minutes each).
Or, once chilled in the refrigerator, you can transfer them to the freezer. I suggest packaging them individually in a freezer-safe, air-tight container, so you can reheat one at a time as needed. Frozen stuffed bell peppers can be thawed in the refrigerator overnight and then reheated the next day in the microwave, or thawed straight from the freezer in the microwave using the defrost function, then heated through on full power.
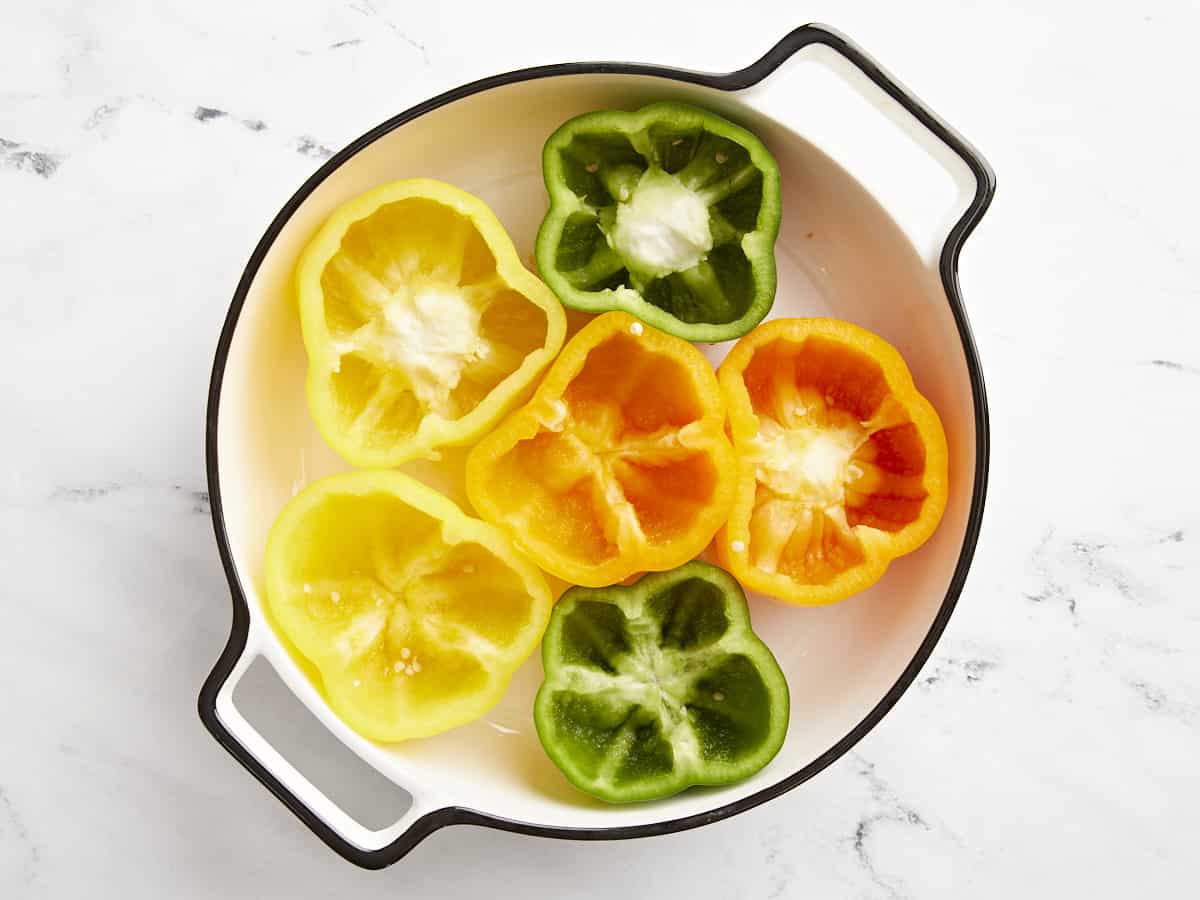
Preheat the oven to 350ºF. Cut each bell pepper in half so there is a top and bottom portion, then remove the seeds and ribs. You can either carefully cut the stem out of the center of the top half, or eat around it later. Place the halved bell peppers in a baking dish, cut sides up. Par-bake in the preheated oven for 15 minutes.
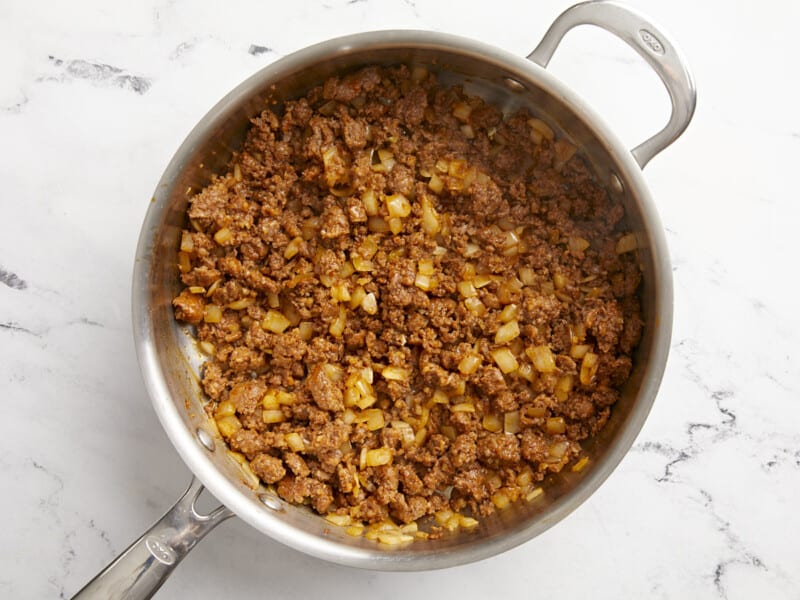
Add the chorizo to a large deep skillet and cook over medium heat until browned. While the chorizo is cooking, dice the onion and mince the garlic. Add the onion and garlic to the chorizo and continue to cook until the onions are softened.
Add the diced green chiles, tomato paste, chili powder, cumin, garlic powder, cayenne pepper, and salt to the skillet and stir until combined.
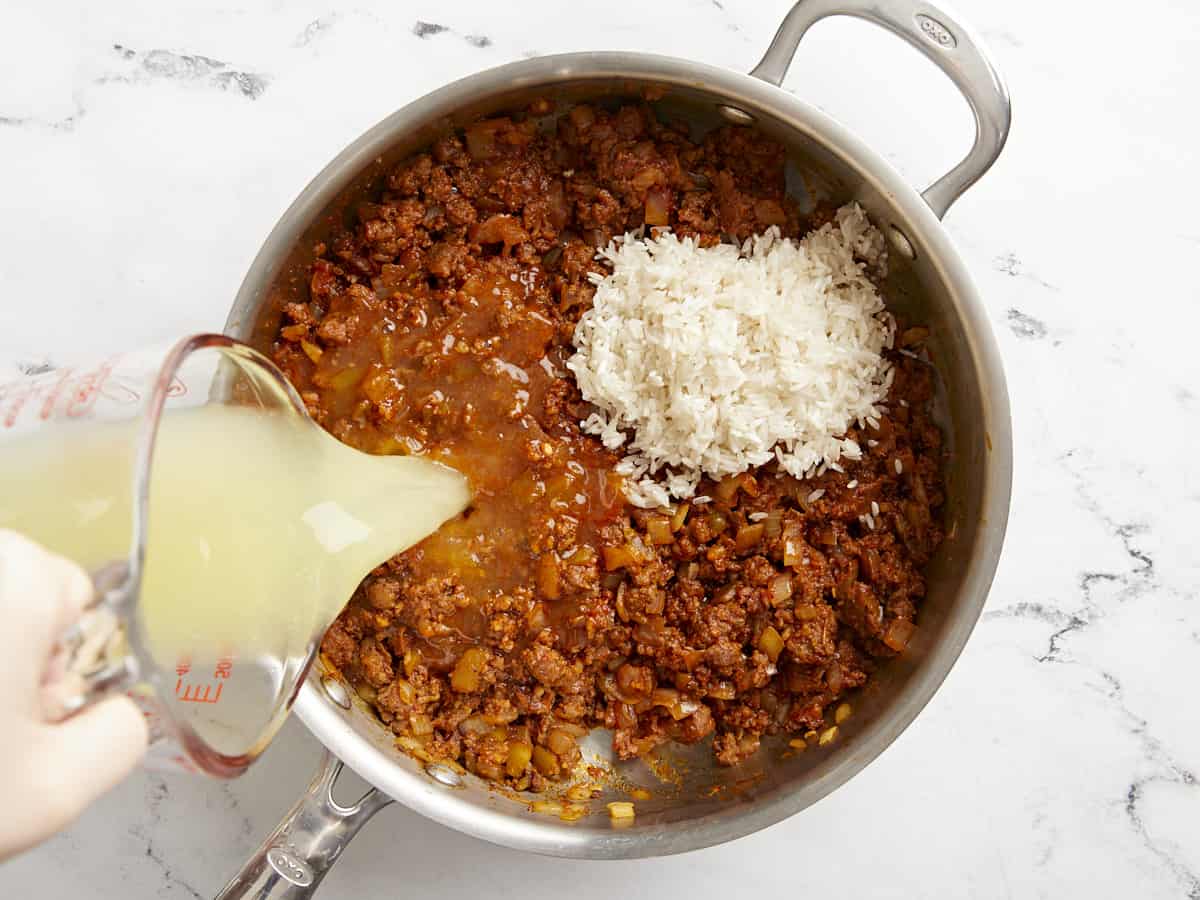
Add the uncooked rice and chicken broth to the skillet and stir until combined again. Place a lid on the skillet, turn the heat up to medium-high, and allow the broth to come up to a boil.
As soon as the broth begins to boil, turn the heat down to low and let the rice simmer over, low without lifting the lid or stirring, for 20 minutes. After 20 minutes, turn off the heat and let it rest for five more minutes.
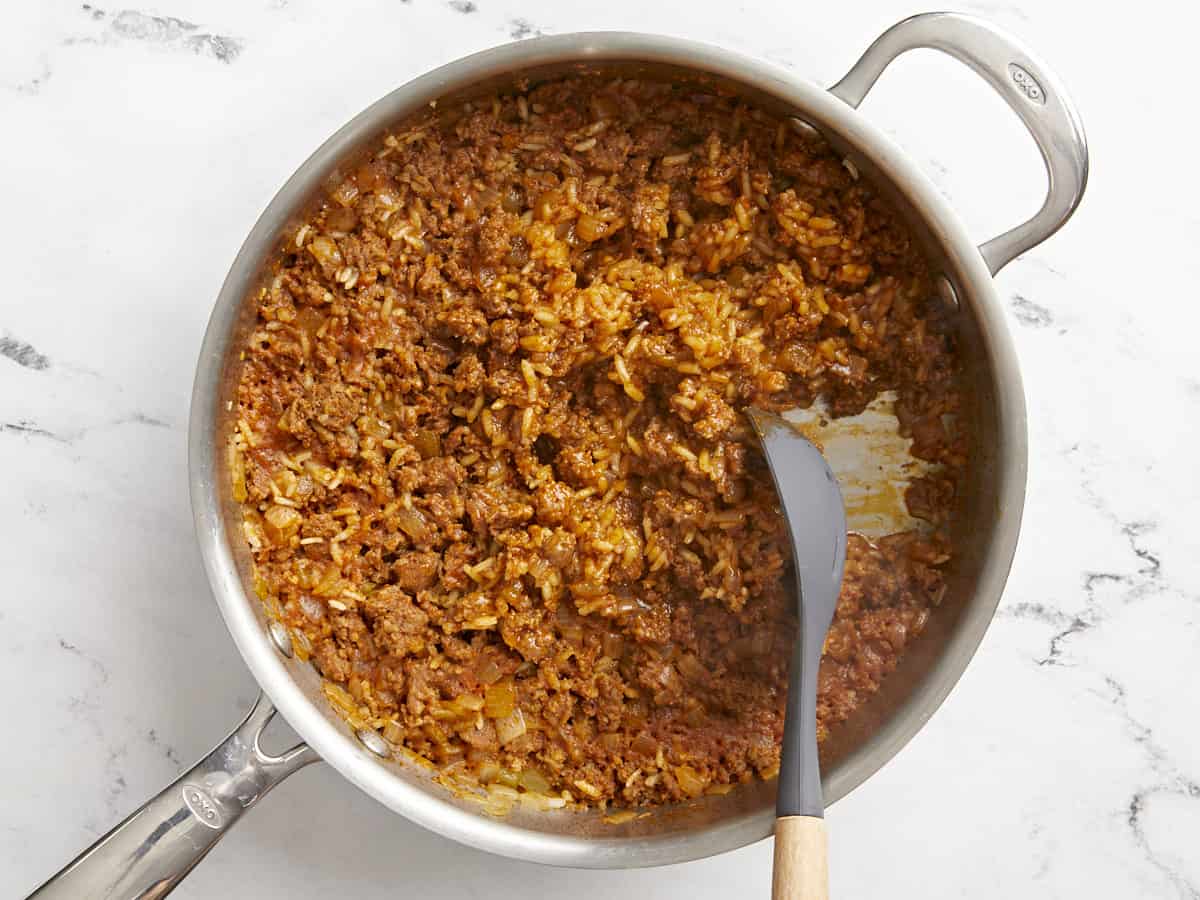
Finally, remove the lid and gently stir the rice and chorizo mixture. All of the broth should be absorbed and the rice tender.
Divide the rice and chorizo mixture between the six bell pepper halves, then top with shredded cheese. Cover the baking dish and return it to the 350ºF oven and bake for 20 minutes more. Finally, top with sliced green onions and serve!
How to Make Chorizo Stuffed Bell Peppers – Step by Step Photos
Begin by preheating the oven to 350ºF. Cut three bell peppers in half to create a top and bottom piece for each pepper. Scoop out the seeds and ribs. You can either cut out the stem from the top half of the peppers, or eat around them later. Place the halved peppers in a baking dish and par-bake them for 15 minutes in the fully preheated 350ºF oven.
Meanwhile, cook 1 lb. of Mexican chorizo in a large deep skillet over medium heat until browned. The chorizo has plenty of fat, so you likely won’t need to add any additional to the skillet. Dice one yellow onion and mince 2 cloves of garlic. Add the onion and garlic to the skillet with the chorizo, and continue to cook until the onions are softened.
Add one 4oz. can of diced green chiles, 2 Tbsp tomato paste, 2 tsp chili powder, ½ tsp cumin, ½ tsp garlic powder, ¼ tsp cayenne pepper, and ¼ tsp salt to the meat and onions. Stir to combine.
Add ½ cup of uncooked long grain white rice and 1 cup of chicken broth to the skillet. Stir well to combine, then place a lid on top, and turn the heat up to medium-high. When the broth reaches a full boil, turn the heat down to low and allow it to continue to simmer over low (without removing the lid or stirring) for 20 minutes. After 20 minutes, turn the heat off and let it rest for 5 more minutes.
After simmering for 20 minutes the broth should be absorbed and the rice should be tender. Gently stir the rice and chorizo mixture with a spoon.
Divide the rice and chorizo mixture between the six par-baked bell pepper halves, then top with shredded mozzarella cheese (about 1 cup). Cover the dish and bake in the 350ºF oven for 20 minutes.
Top the chorizo stuffed bell peppers with sliced green onions and serve!
If you’re looking for a simple yet flavorful pork recipe, these Air Fryer Pork Chops are it! Coated in a sweet and savory spice blend and cooked to crispy perfection, this air fryer pork chops recipe is a far cry from the leathery chops you may have experienced in the past. We’re raiding the pantry for this one, utilizing staples that really pack in the flavor for not a lot of added cost. With this easy dinner recipe, you’ll have tender, juicy pork chops in 30 minutes!
The spice rub for these air fryer pork chops is the real star of the show. Classic onion and garlic powder combine with smoked paprika for a smokey, savory flavor, while brown sugar adds a balancing sweetness and delightful texture to the crust. A little bit of ground mustard adds pleasant bitter notes and tanginess. This rub is super versatile and also works great on extra firm tofu and chicken!
Ingredients for Air Fryer Pork Chops
Here’s what you’ll need to make Air Fryer Pork Chops:
Pork Chops: We were able to fit two boneless center-cut pork chops in our air fryer basket. You’ll want chops that are 1-1 1/2 inches thick to ensure they stay nice and juicy.
Seasoning: Smoked paprika, garlic powder, onion powder, salt, pepper, ground mustard, and dark brown sugar create a smoky, sweet, savory, and tangy spice rub. Make sure to save extra for dusting on top when you flip the chops– this helps them crisp up beautifully.
Cooking Oil: We like budget options like canola or vegetable oil, but olive oil will also work.
MORE SEASONING IDEAS
If you want to switch things up, here are some other ways you can season your air fryer pork chops:
Seasoning the chops with the seasoning rub 20-30 minutes before cooking and letting them sit on the counter at room temp will ensure 1. the flavor is as maximized as possible and 2. the outside doesn’t overcook while the inside gets to the proper temperature. Giving your chops a little extra time on the counter before they hit your air fryer ensures that they will have a nice crust on the outside while remaining juicy on the inside!
There should be about 1 Tbsp of the seasoning leftover. Save it and sprinkle it over the chops after flipping them. This will help to ensure they stay nice and crispy.
Remove your pork chops from the air fryer as soon as they reach 145°F and let them rest for at least 3 minutes before slicing to lock in the juices.
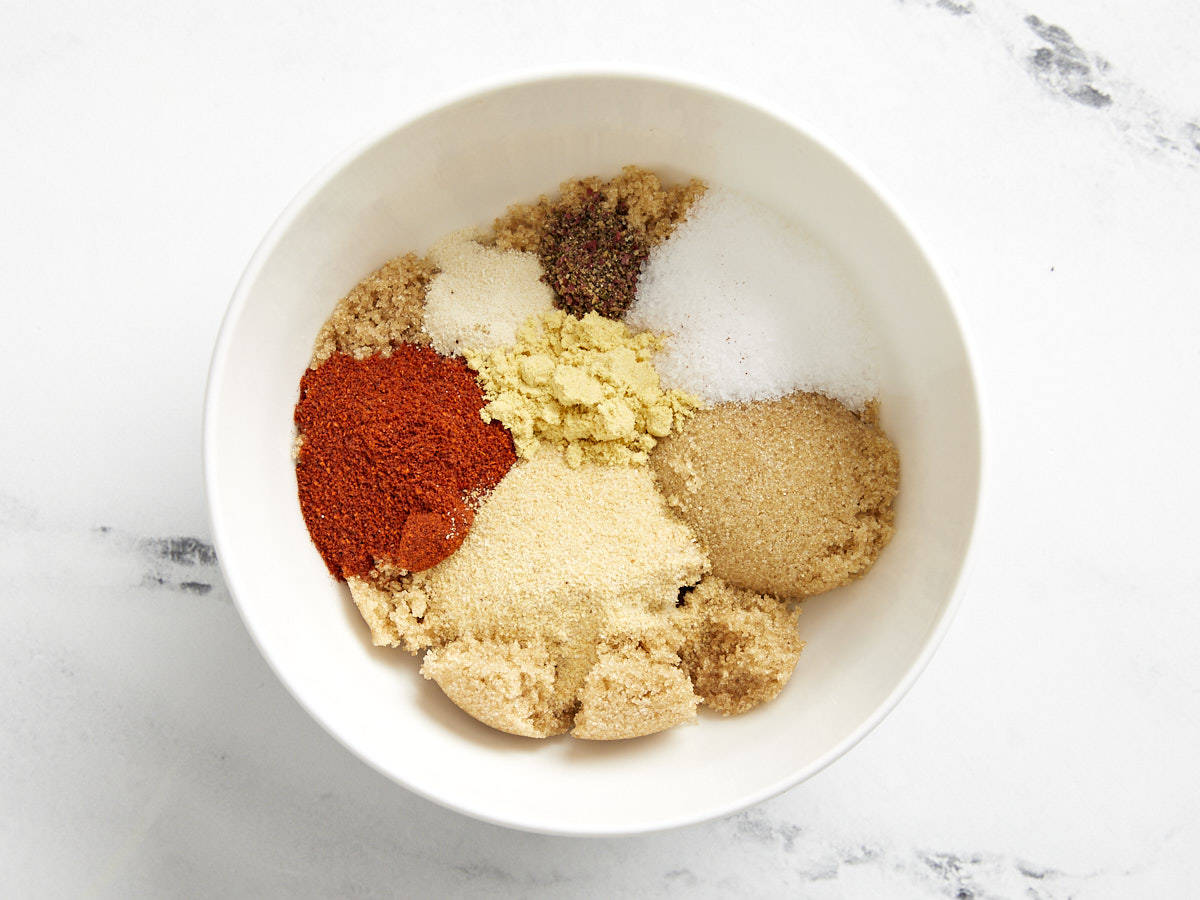
In a small bowl, combine the smoked paprika, garlic powder, ground mustard, onion powder, brown sugar, salt, and pepper.
Preheat the air fryer to 420ºF for at least 5 minutes. Pat pork chops dry with a paper towel.
Drizzle the cooking oil over top of pork chops on cutting board, then add the seasoning mixture. Rub the pork chops until they are well coated in oil and spices. The brown sugar will caramelize in the air fryer and make the texture of the pork chops perfect! Reserve at least 1 Tablespoon of the sugar seasoning mixture to rub on top when you flip half way through!
Place the pork chops in the air fryer basket and cook for 7 minutes. Flip, sprinkling reserved seasoning mixture evenly over top and cook for 8 minutes more.
Use a meat thermometer to make sure the internal temperature has reached 145ºF, and if not, cook for 1-2 minutes longer.
Remove from heat and let the pork chops rest for 3 minutes and then serve with your favorite simple sides!
how to make Air Fryer Pork Chops – step by step photos
In a small bowl, combine 1 1/2 tsp smoked paprika, 1 tsp garlic powder, 1 tsp ground mustard, 1/4 tsp onion powder, 4 Tbsp dark brown sugar, 1 1/2 tsp salt, and 1/4 tsp pepper. Preheat the air fryer to 420ºF for at least 5 minutes. Pat 2 boneless center-cut pork chops dry with a paper towel.
Drizzle 1 Tbsp cooking oil over the top of the pork chops on a cutting board, then add the seasoning mixture. Rub the pork chops until they are well coated in oil and spices. The brown sugar will caramelize in the air fryer and make the texture of the pork chops perfect! Reserve at least 1 Tablespoon of the sugar seasoning mixture to rub on top when you flip halfway through!
Place the pork chops in the air fryer basket and cook for 7 minutes. Flip, sprinkling the reserved seasoning mixture evenly over top, and cook for 8 minutes more.
Use a meat thermometer to make sure the internal temperature has reached 145ºF, and if not, cook for 1-2 minutes longer. Remove from heat and let the pork chops rest for 3 minutes and then serve with your favorite simple sides!
These juicy, crispy air fryer pork chops are the perfect weeknight meal!
I know it’s still spring, but the days are getting warmer, the sun is starting to shine, and I am ready for summer and all of its cold, fruity drinks. And let me tell you, this Orange Julius is going to be the drink of the summer for me. It only takes a few minutes to whip up this super easy Orange Julius recipe and is the perfect cold and creamy treat to make me feel like I’m vacationing somewhere in the tropics (a girl’s gotta dream). Not to mention, there are so many ways you can vary this Orange Julius recipe to make it more dessert-like, more healthy like a breakfast smoothie, or even turn it into an afternoon cocktail, so I’m truly going to be sipping this one all. summer. long. Don’t miss my variation suggestions below!
What is An Orange Julius?
Orange Julius is a refreshing and creamy orange drink made with orange juice, milk, sugar, vanilla, and egg whites which create a super frothy texture. The drink was invented by Julius Freed at his Los Angeles juice stand in 1926 and has been a summertime favorite ever since. The drink grew in popularity over the years and was even deemed the official drink of the 1964 World’s Fair Exposition. In the decades since it has become a staple in shopping malls and on Dairy Queen’s menu. Today’s it’s usually made without egg white, but it’s still just as dreamy and creamy as ever. And the best part? You don’t have to shell out $6 per Julius at an ice cream stand because these deliciously creamy citrus drinks are so easy to make at home!
Ingredients for Orange Julius
You’ll only need four simple ingredients to make a homemade Orange Julius (plus ice). Here’s what you’ll need for this recipe:
Frozen Orange Juice Concentrate: This is the secret ingredient for making a super citrusy Orange Julius without it getting too watery. The orange juice concentrate adds a ton of sweet-tart orange flavor while allowing the smoothie to stay thick and frothy.
Milk: Whole milk is added to balance the acidity in the orange juice and give the Orange Julius its characteristic creamy flavor. While you can use a lower fat milk, it will affect the creaminess of the drink. Whole milk is recommended.
Sugar: A little bit of sugar helps balance the acidity and bitterness in the orange juice concentrate so the Julius has a deliciously sweet and smooth finish.
Vanilla: Vanilla adds to the creamy flavor profile and gives the drink an orange creamsicle-like flavor.
Ice: Ice makes the Orange Julius super cold and helps create a deliciously thick and frothy texture. You can increase or decrease the ice to make the smoothie your desired texture.
Can You Make Orange Julius with Orange Juice?
The recipe below uses frozen orange juice concentrate to deliver a really strong orange flavor while keeping the smoothie thick and rich. You can substitute about 2 cups of fresh orange juice in place of the orange juice concentrate, but it will make the Julius much less thick and the flavor will not be as bold. For the richest, boldest flavor, definitely buy orange juice concentrate. The remainder of the can can be easily stored in your freezer for your next Orange Julius, so it’s worth purchasing!
Orange Julius Variations
I love a simple classic Orange Julius, but there are so many fun ways you can change the recipe to make it your own. Here are some other ingredients you can add to an Orange Julius for variety:
Fruity Flavors: Try adding banana, mango, or pineapple for a tropical twist, or strawberries for a summery flavor.
Vegan Orange Julius: Make it vegan by replacing the whole milk with canned light coconut milk (not the kind in a carton that is intended as a milk substitute).
Protein Julius: Turn it into a protein smoothie by adding vanilla Greek yogurt or your favorite vanilla protein powder.
Green Julius: Add a handful or two of baby spinach to make a creamy, citrusy, green smoothie.
Boozy Orange Julius: Add vodka or rum to make a fun “adult” Orange Julius.
Place all of the ingredients in a blender and blend until smooth and frothy.
If your Orange Julius is not thick enough, add more ice. If the Julius is too thick, add a little water or milk and blend again until you reach the desired consistency. Serve immediately and enjoy!
How to Make An Orange Julius – Step by Step Photos
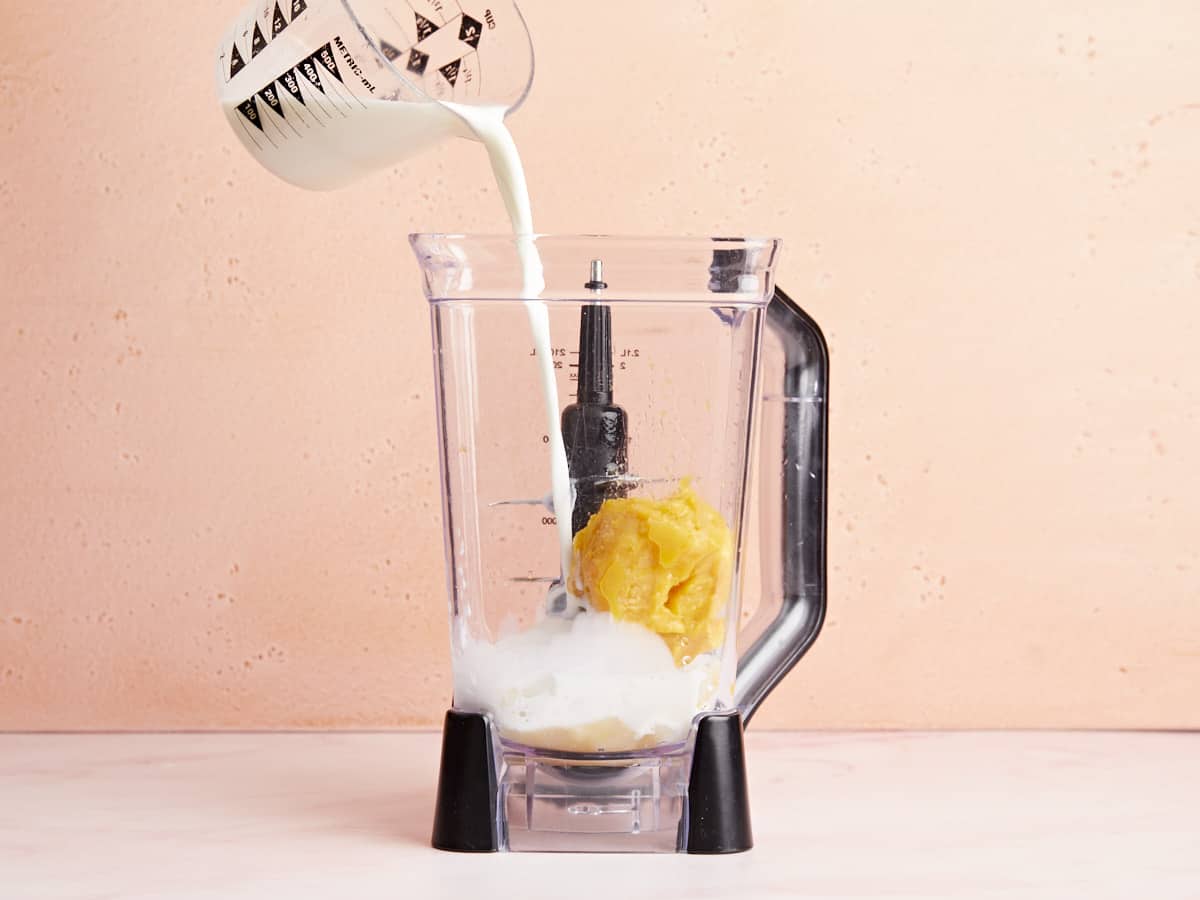
Add ½ cup frozen orange juice concentrate, 1 cup whole milk, 1 tsp vanilla extract, 3 Tbsp granulated sugar, and 1 cup ice to a blender.
Blend everything together until it is smooth and frothy. Adjust the consistency of your Orange Julius by adding more ice to make it thicker or adding a little water or milk to thin it out.
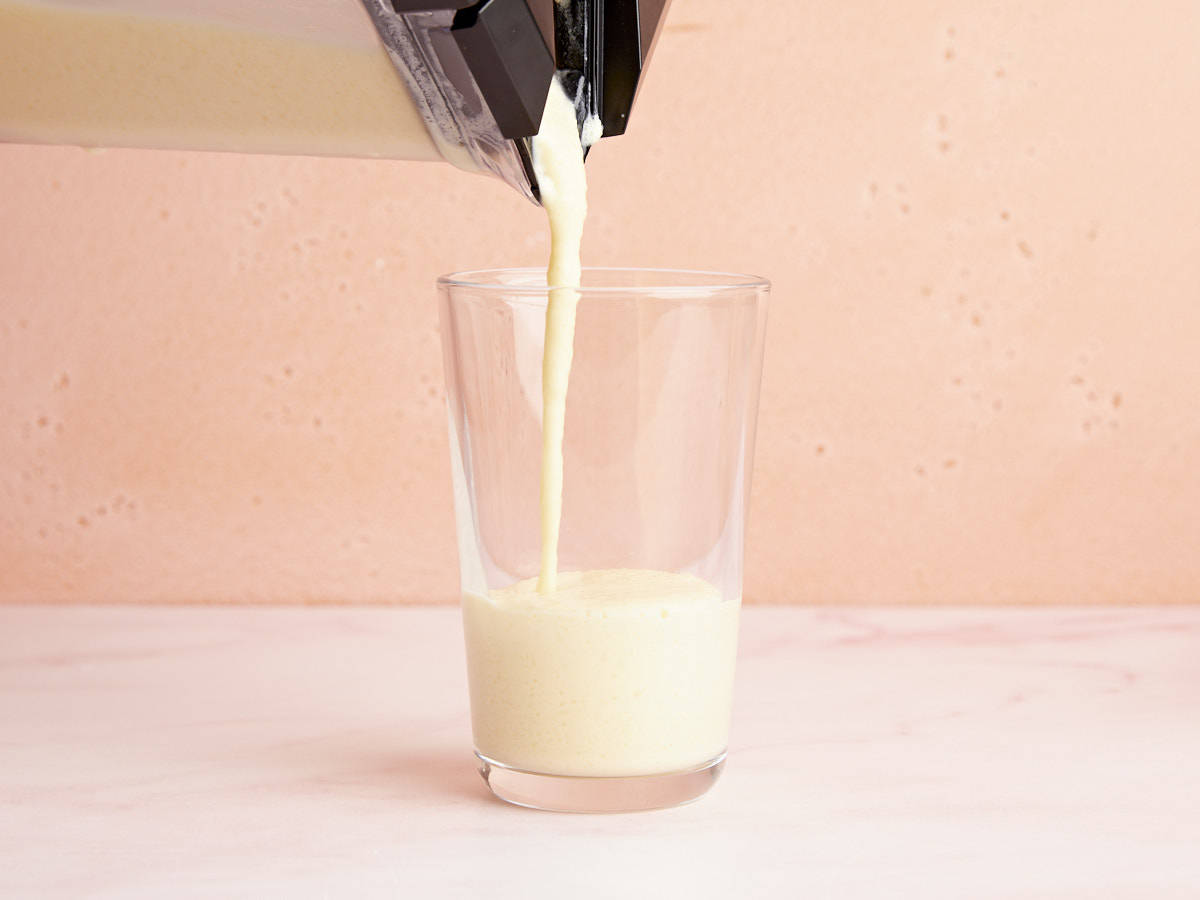
Pour the homemade Orange Julius into a large glass and enjoy immediately!
These hot and cold spring days have me feeling all kinds of confused about what to make for dinner. One day it’s warm and sunny, and the next it feels like winter all over again. But no matter the mood, I feel like soup is always the right answer, and this Ham and Potato Soup is a crowd pleaser. Creamy but not too heavy, and loaded with fresh veggies and salty ham, this soup is perfect for this transitional season!
What is Ham and Potato Soup?
This rich and creamy soup is made from a base of vegetable broth enriched with milk and butter and stuffed to the brim with fresh veggies, chunky potatoes, and salty ham. It’s real belly-warming food, perfect for taking the chill off!
Ingredients for Ham and Potato Soup
Here’s what you’ll need to make ham and potato soup:
Oil: I used olive oil, but a neutral-flavored oil like canola or vegetable oil will also work well.
Mirepoix: A base of celery, carrots, and onion builds the flavor of this soup.
Potatoes: I used 2 medium potatoes, which came out to be 3 1/2 cups once diced. I prefer to peel my potatoes for this recipe, but you can leave the skins on if you like them!
Cooked Ham: You can buy a ham steak or use your leftover ham from our Baked Ham recipe! Vegetarian? No problem. You can leave out the ham and this becomes more of a vegetable chowder and it is delicious!
Vegetable Broth: You’ll need 6 cups, or you can dissolve 2 Tbsp of vegetable bouillon in 6 cups of water. You can also use Chicken Broth if that’s what you have on hand!
Salted Butter: Adds richness and helps form the roux that thickens the soup.
All-Purpose Flour: Combines with the butter to form a roux that thickens the soup.
Milk: Adds creaminess to the soup.
Salt and Pepper: Enhance the overall flavor of the soup.
Parsley: A bit of minced fresh parsley adds some color and freshness to the soup.
What Potatoes Are Best For Soup?
The best potato for any given soup really depends on the texture you’re after.
With this soup, I wanted to keep distinct chunks of intact potato, so I went for red potatoes. Other varieties that hold their shape well include new potatoes, baby potatoes, and fingerlings.
If you’re looking for your potatoes to soften up a bit more but still mostly hold their shape, Yukon Golds are a great choice for this soup.
Starchier potatoes, like Russets, will melt into the soup, making it super thick, but you won’t get the whole potato texture in every bite.
A Note on Salt
You may not need any salt depending on the ham you’re using, so taste often and adjust as you see fit. Between the salted butter, bouillon, and the ham from our Baked Ham recipe, I didn’t have a need for more than a pinch of additional salt.
How Do You Thicken Ham and Potato SOup?
I chose to thicken this soup with what’s known as a “blonde roux.” It’s a mixture of butter and flour that is cooked over medium-low heat until it juuust starts to change color from white to blonde. This deepens the flavor of the soup without overpowering the natural flavor of the other ingredients.
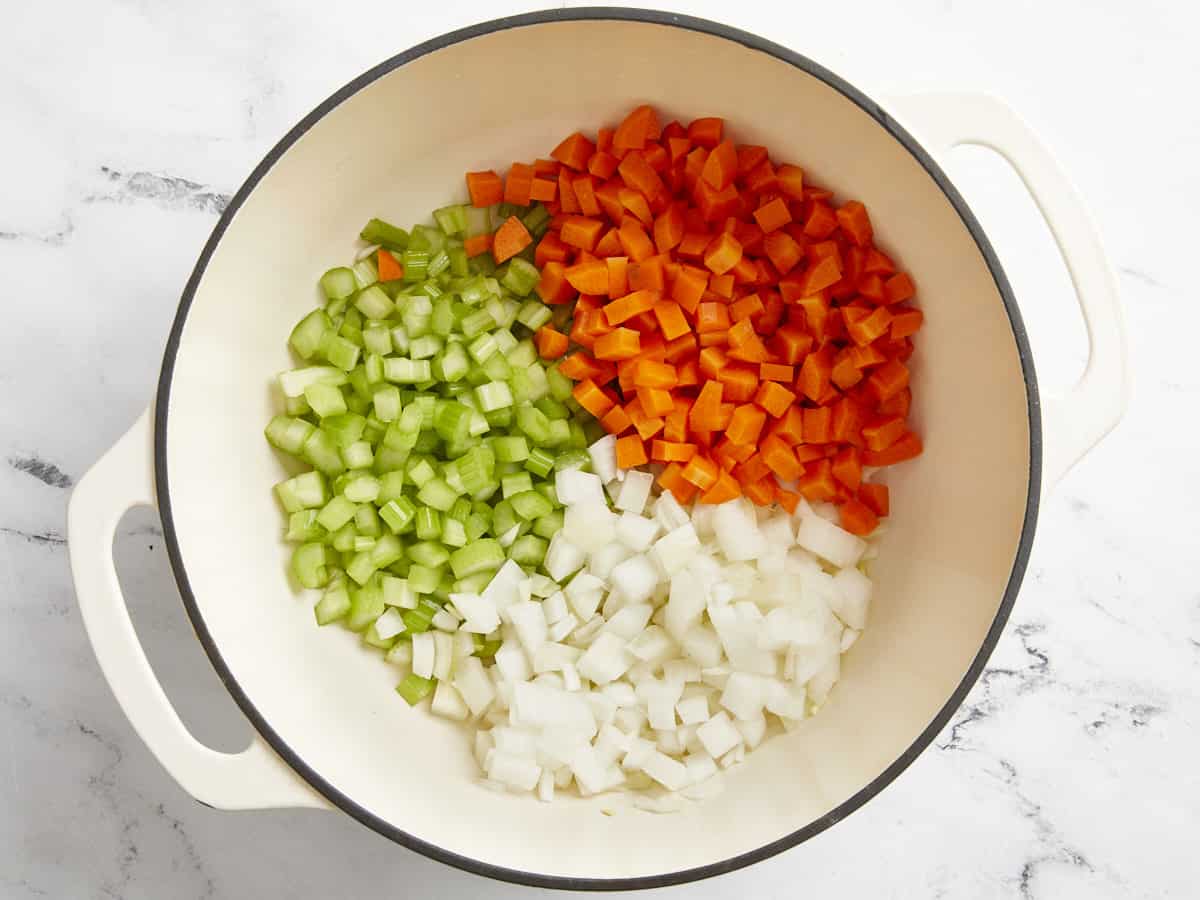
In the stock pot, add 2 Tbsp olive oil on medium heat. Add the carrots, celery, and onion and cook down until slightly softened and the onions are nice and glossy, about 5 minutes.
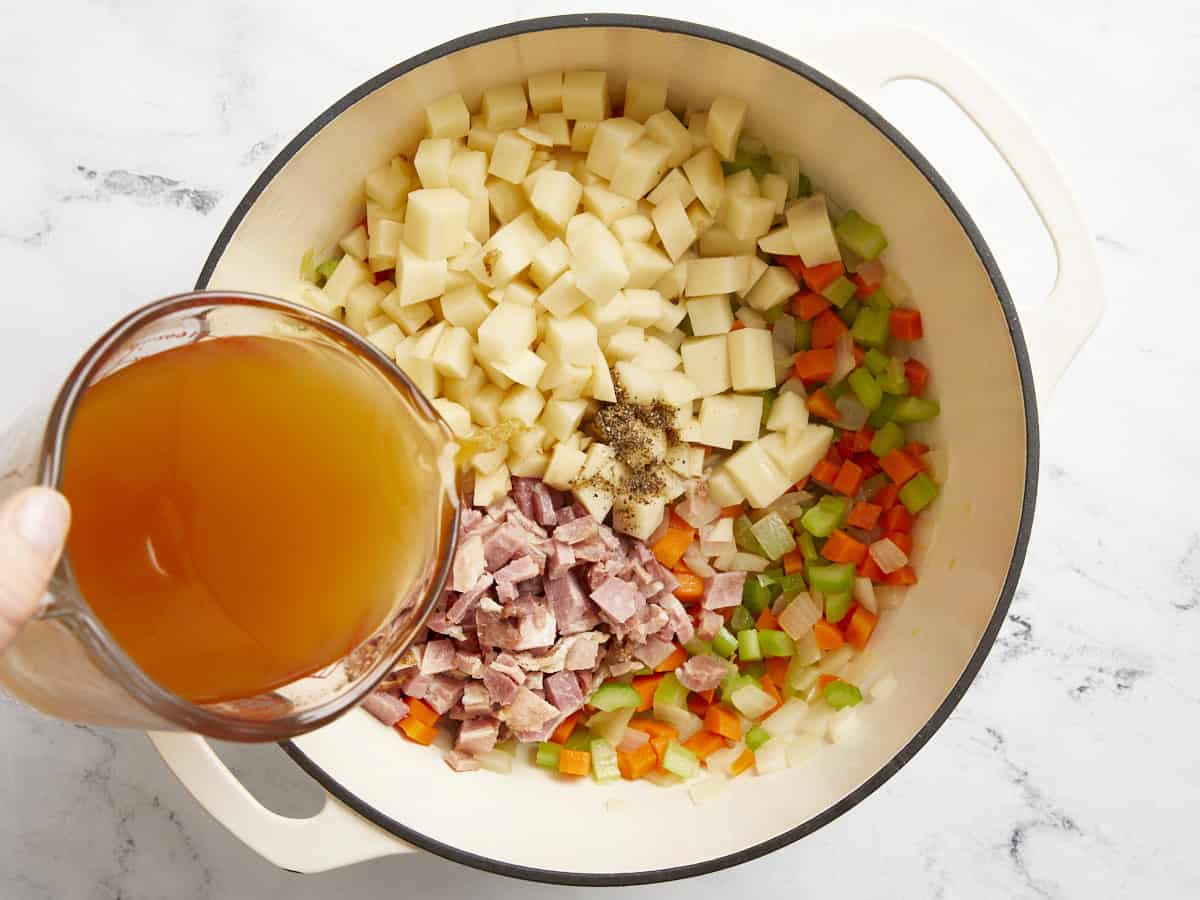
Add potatoes, vegetable broth, and ham in the stockpot. Bring the pot to a boil. Once boiling, turn the heat down to medium and let the potatoes simmer for about 15 minutes, or until they are tender. Stir in the pepper.
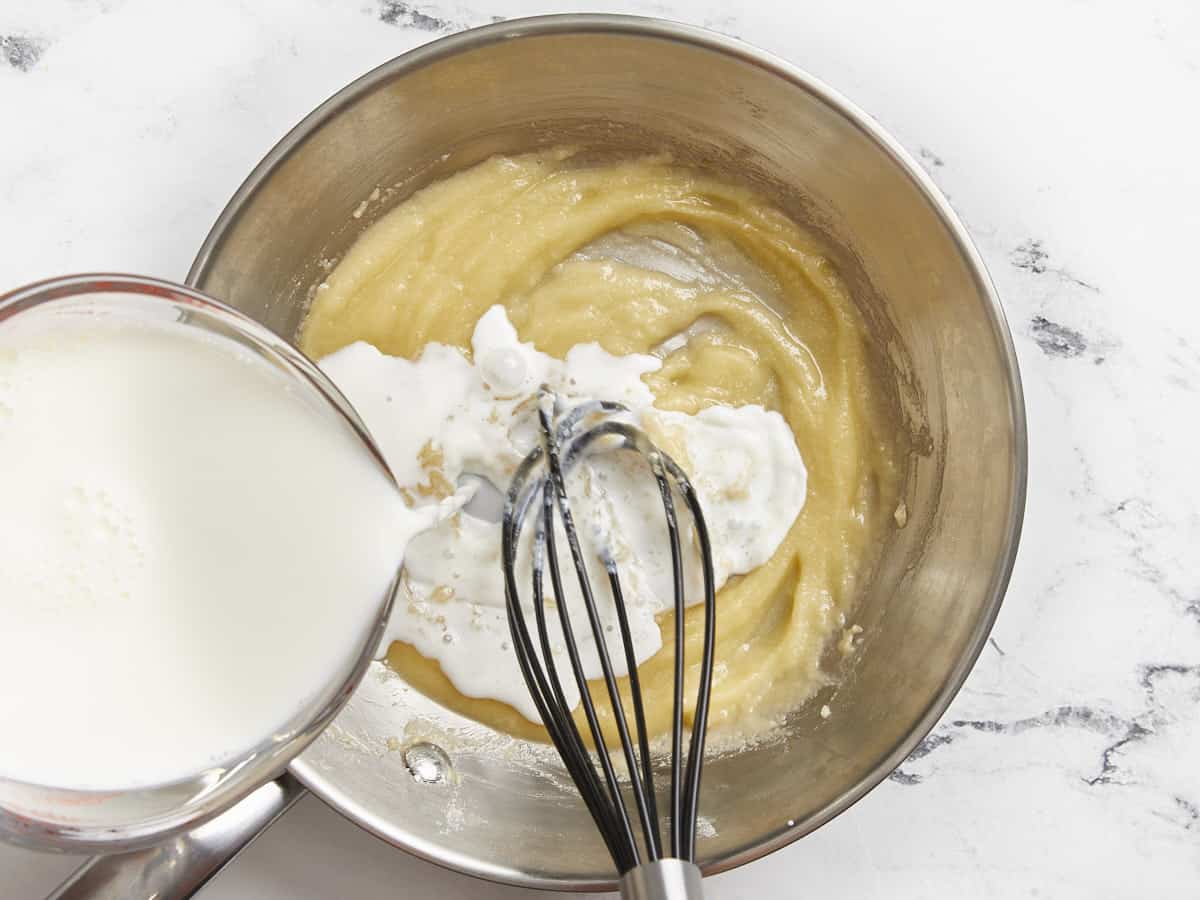
Melt the butter in a separate medium-size saucepan over medium-low heat. Whisk in the all-purpose flour until smooth. Cook for about 1 minute. (Note: this is a “blonde roux” so you don’t want the flour to toast too much!) Whisk in milk and cook for about 4 minutes until thick and warm.
Pour milk/roux mixture into the stockpot with ham soup and whisk to combine. Cook until all vegetables reach desired tenderness and soup thickens to your liking, another 10 minutes should do it. Add the parsley, additional salt and pepper if needed and enjoy!
how to make Ham and Potato Soup – step by step photos
In your stock pot, add 2 Tbsp olive oil on medium heat. Add 2 peeled and diced carrots, 3 diced stalks celery, and 1 diced small white onion and cook down until slightly softened and the onions are nice and glossy, about 5 minutes.
Add 2 peeled and diced potatoes, 6 cups vegetable broth, and 2 cups diced cooked ham in the stockpot. Bring to a boil; simmer over medium heat until potatoes are tender, about 15 minutes. Stir in your 1 tsp black pepper.
Melt 2 Tbsp salted butter in a separate medium-size saucepan over medium-low heat. Whisk in 1/4 cup all-purpose flour until smooth. Cook for about 1 minute. (Note: this is a “blonde roux” so you don’t want the flour to toast too much!) Whisk in 2 cups milk and cook for about 4 minutes until thick and warm.
Pour milk/roux mixture into the stockpot with ham soup and whisk to combine. Cook until all vegetables reach desired tenderness and soup thickens to your liking, another 10 minutes should do it. Add parsley, additional salt, and pepper if needed and enjoy!
This creamy ham and potato soup is perfect for the changing seasons!
Carrot cake is one of those recipes where some people love it and others strongly dislike it. Well today, these Carrot Cake Muffins deserve to be in a class of their own. They’re soft, fluffy, and perfectly moist with all the wonderful flavors of carrot cake, but in a convenient, easy to share muffin size. And spoiler alert, I’m a carrot cake lover, so I’ll be enjoying these muffins all season long! Have fun adding your favorite carrot cake mix-ins like sweet raisins and walnuts, or you can keep things simple and save a little bit on your budget. Either way you’re guaranteed to love these delicious carrot cake muffins.
Ingredients For Carrot Cake Muffins
I used my zucchini muffins recipe, that I absolutely love, as inspiration for these muffins. I adjusted the measurements and added a few extra spices to fit the flavor profile of carrot cake. The results were absolutely ahhmazing! Here’s everything you need:
Carrots: Carrots are of course the star of the show, so you’ll need about 3-4 large whole carrots, finely grated for this recipe.
All-Purpose Flour: All-purpose flour gives the muffins structure. You can safely substitute up to half of the flour for whole wheat flour without affecting the flavor or texture too much.
Baking Powder & Baking Soda: These are both leavening agents to help the muffins rise. I use both due to the extra acidity from the applesauce.
Eggs: Eggs to help bind all of the muffin ingredients together.
White Granulated Sugar & Dark Brown Sugar: The combination of both sugars help balance the sweetness, moisture and texture of the muffins.
Applesauce & Oil: The combination of both cooking oil and applesauce keeps the muffins moist, but not too oily, and you gain more flavor and moisture by incorporating the applesauce.
Cinnamon, Nutmeg & Ginger: These are classic spices that are often found in carrot cake. We use the right amount of each one to give these carrot cake muffins a wonderful flavor!
Vanilla: A touch of vanilla extract adds more rich flavor to the carrot muffins.
Golden Raisins: The added raisins were honestly my favorite part of the muffins. They added a subtle sweetness and more texture to the muffins. Feel free to use regular raisins instead of golden raisins if that’s what you have on hand.
Turbinado Sugar (optional): Adding a sprinkle of turbinado sugar on top of each muffin is totally optional, but such a special treat. It gives each muffin a sweet and light crunch on the top. If you don’t have turbinado sugar, no worries, these muffins are still delicious without it.
How To Grate Your Carrots
As I mentioned above, you definitely want to grate fresh whole carrots for this recipe. Although its tempting to buy pre-shredded matchstick carrots at the grocery store, they simply are not moist enough for these muffins. They also aren’t grated fine enough and won’t mix well with the batter. Grating fresh carrots yourself is the way to go!
Also, most box graters come with a coarse, medium, and fine grating side. I tested these muffins using both medium and finely grated carrots. The finely grated carrots were the winner! They blended better in the batter and provided a bit more moisture compared to the medium-size grated carrots.
Recipe Tips & Add-Ins
Don’t over mix the batter! Over-mixing will cause the muffins to become dense instead of light and fluffy. Mix the dry and wet ingredients together until they are just barely combined and there are no traces of dry flour left in the bowl.
Oil your muffin pan really well. Even if you are using a nonstick muffin pan, make sure to oil it well or use cupcake liners to prevent your muffins from sticking to the pan.
You can easily stretch this batter and get 12 regular size muffins. I wanted larger, bakery style muffins, so I divided the batter into ten muffin wells.
If you want even more of a carrot cake taste, try adding some chopped walnuts, pecans, or shredded coconut to the batter. And if you really want to take these carrot muffins over the top, add some cream cheese frosting on top! ;)
How To STore Carrot Cake Muffins
Allow the muffins to cool completely at room temperature before storing. You can store leftover carrot cake muffins in an airtight container or a food storage bag in the fridge for 4-5 days. For longer storage, store in a freezer-safe storage bag for up to 3 months. Thaw frozen muffins at room temperature or microwave for about 30 seconds until warm.
Preheat the oven to 350°F. Wash, peel and grate the carrots using the small/fine holes on a box grater. Set the grated carrots to the side.
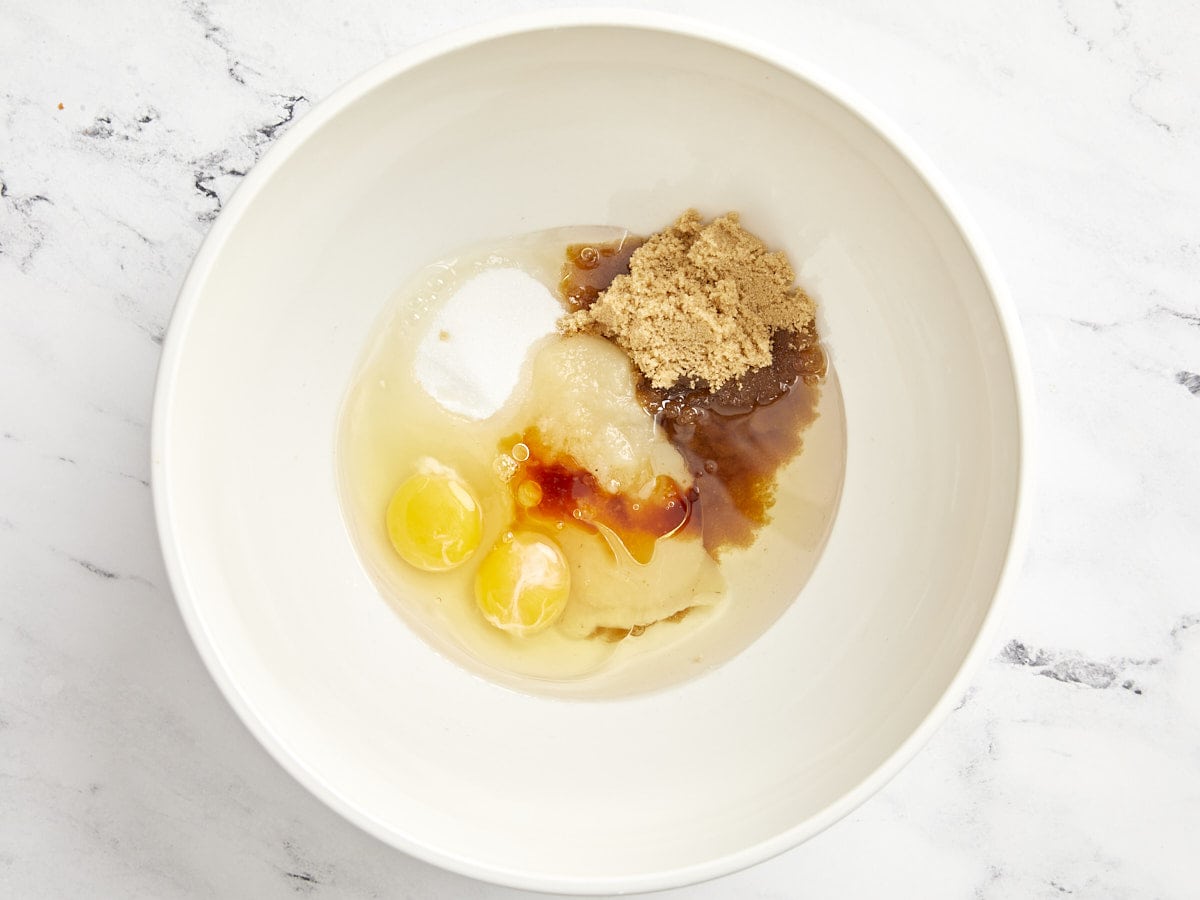
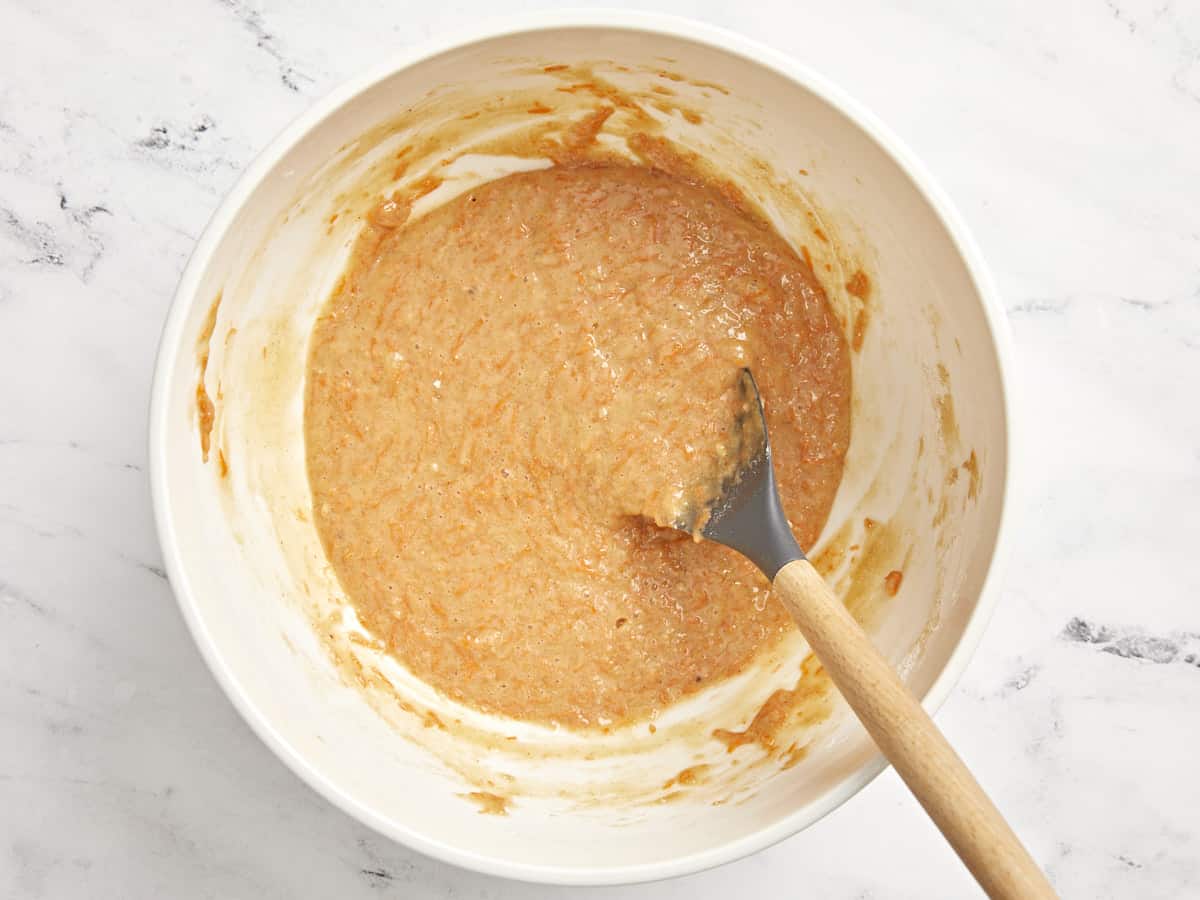
In a large bowl, whisk together the wet ingredients (eggs, dark brown sugar, granulated sugar, applesauce, oil and vanilla extract) until well combined.
Add the grated carrots to the bowl with the wet ingredients. Stir until combined.
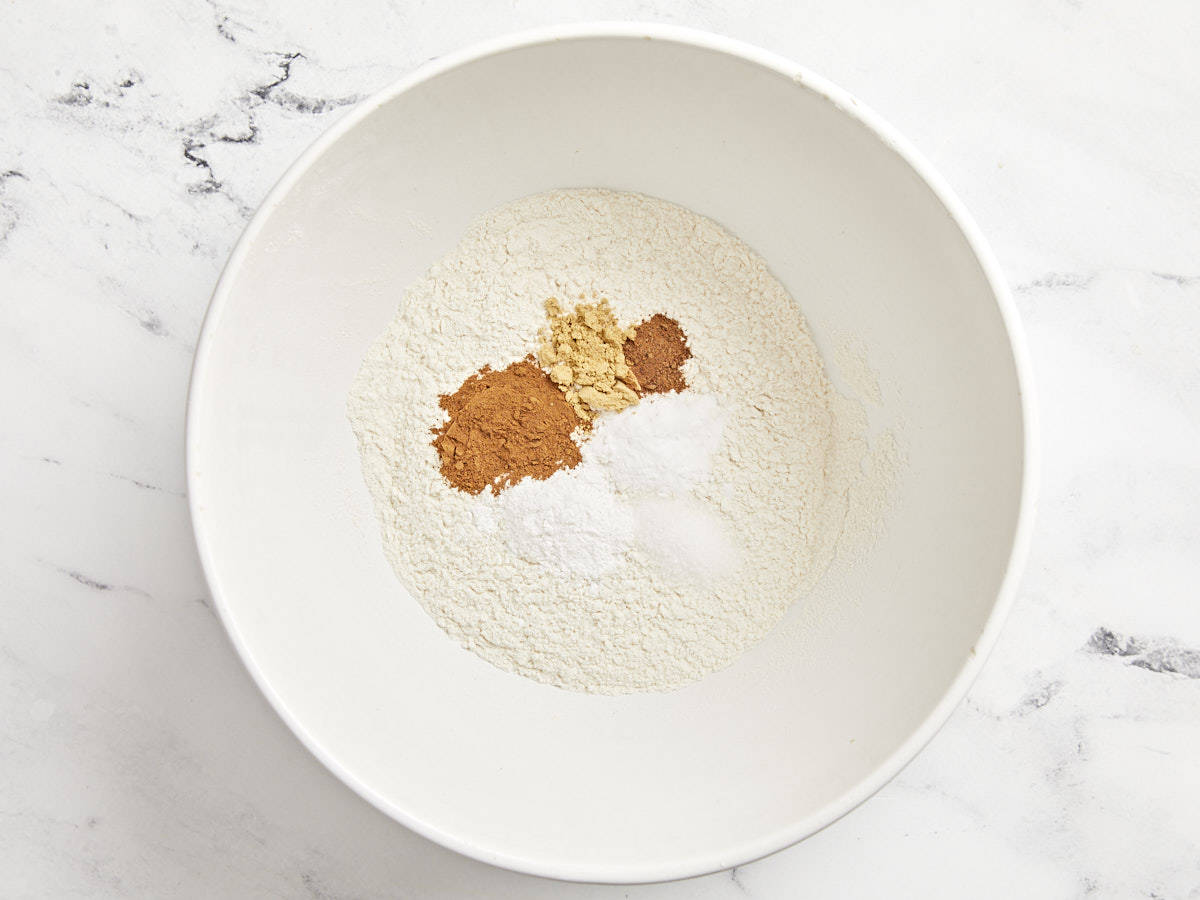
In a separate bowl, whisk together the dry ingredients (flour, baking powder, baking soda, salt, cinnamon, ground nutmeg, and ground ginger) until well combined.
Add the dry ingredients to the same bowl as the wet ingredients. Stir together until just combined. Be careful not to overmix at this point.
Add the raisins to the bowl and fold them into the batter until just combined.
Divide the batter between ten greased or lined muffin wells. Sprinkle a little turbinado sugar on top of each muffin, optional.
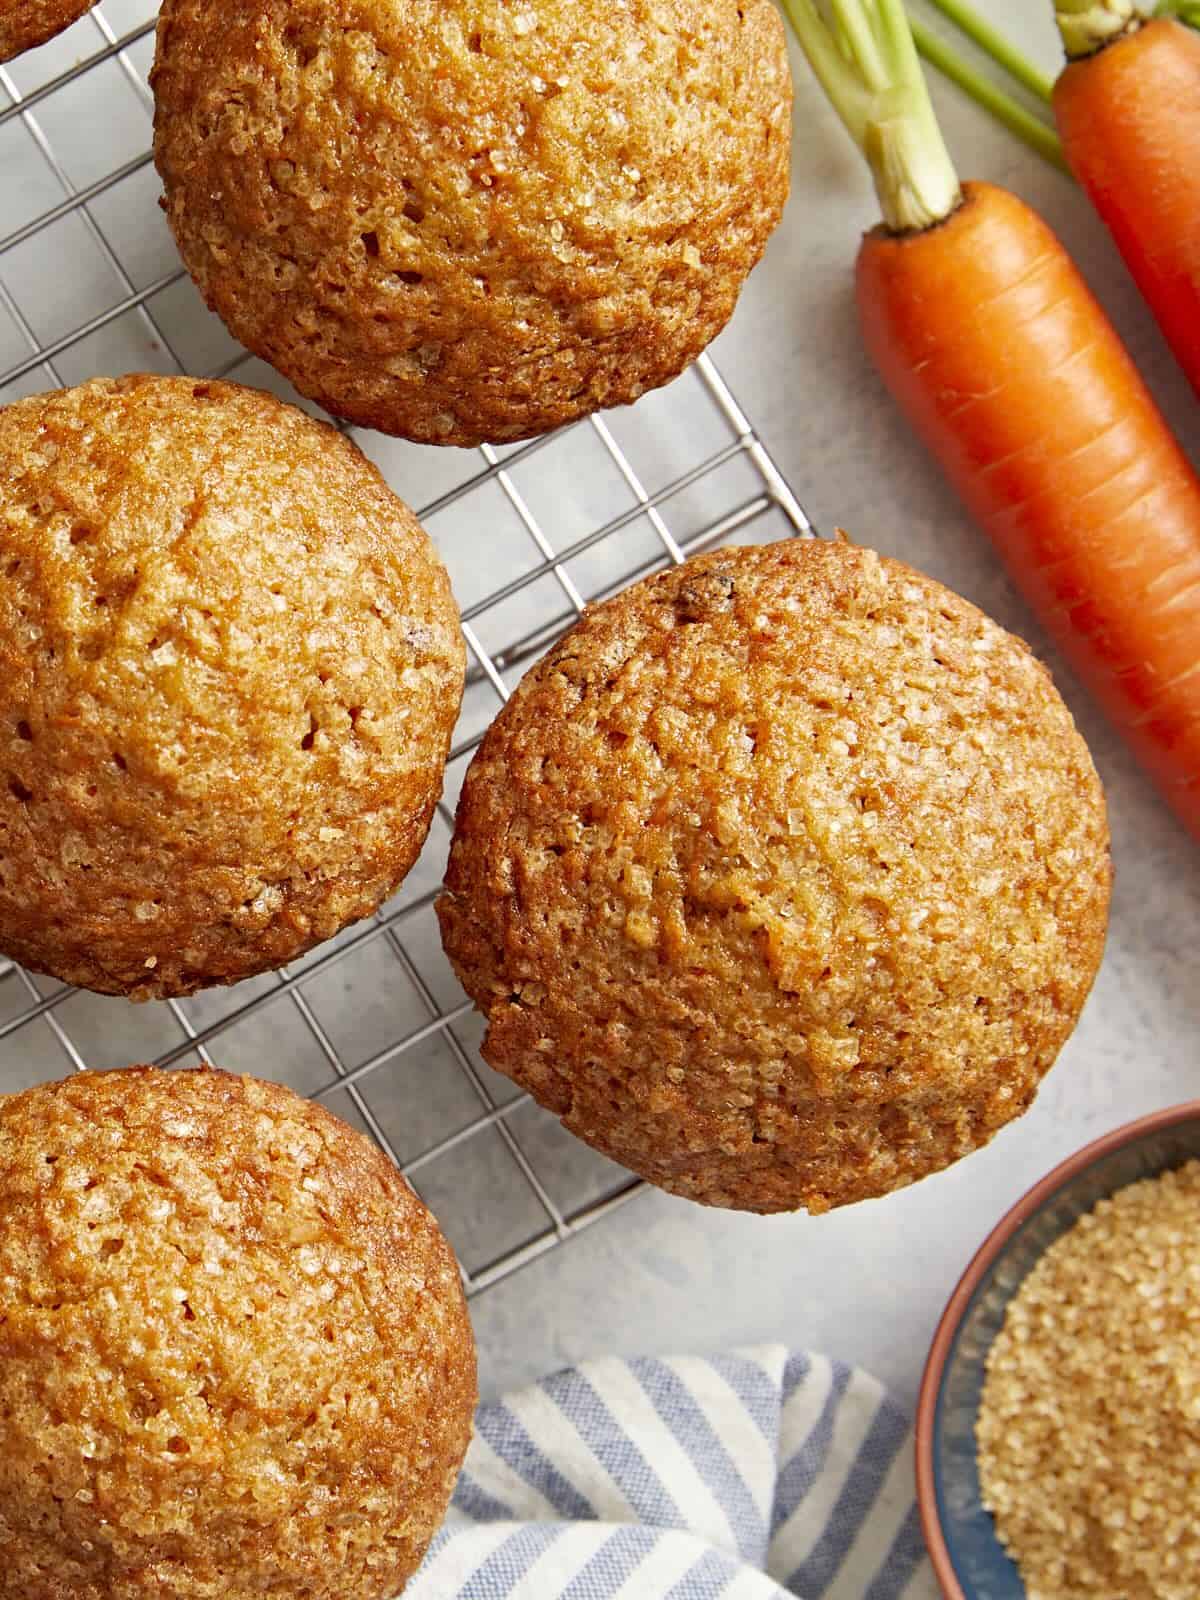
Bake the muffins for 20-22 minutes or until golden brown and puffed in the center. Allow the muffins to cool for about 5 minutes, then carefully loosen the edges with a knife and transfer the muffins to a wire rack to finish cooling. Enjoy!
How to Make Carrot Cake Muffins – Step by Step Photos
Preheat the oven to 350°F. Wash, peel and grate 2 cups of finely grated carrots using the small/fine holes on a box grater. Set the grated carrots to the side.
In a large bowl, whisk together 2 eggs, 1/2 cup dark brown sugar, 1/2 cup granulated sugar, 1/3 cup applesauce, 1/2 cup cooking oil and 1 tsp vanilla extract until well combined.
Add the grated carrots to the bowl with the wet ingredients. Stir until combined.
In a separate bowl, whisk together 1 1/2 cups all-purpose flour, 1 tsp baking powder, 1/2 tsp baking soda, 1/2 tsp salt, 1 tsp cinnamon, 1/4 tsp ground nutmeg, and 1/2 tsp ground ginger until well combined.
Add the dry ingredients to the same bowl as the wet ingredients. Stir together until just combined. Be careful not to overmix at this point.
Add 3/4 cup golden raisins to the bowl and fold them into the batter until just combined.
Divide the batter between ten well-greased or lined muffin wells.
Optional: Divide 1 Tbsp turbinado sugar and sprinkle a little on top of each muffin.
Bake the muffins for 20-22 minutes or until golden brown and puffed in the center. Allow the muffins to cool for about 5 minutes, then carefully loosen the edges with a knife and transfer the muffins to a wire rack to finish cooling. Enjoy!
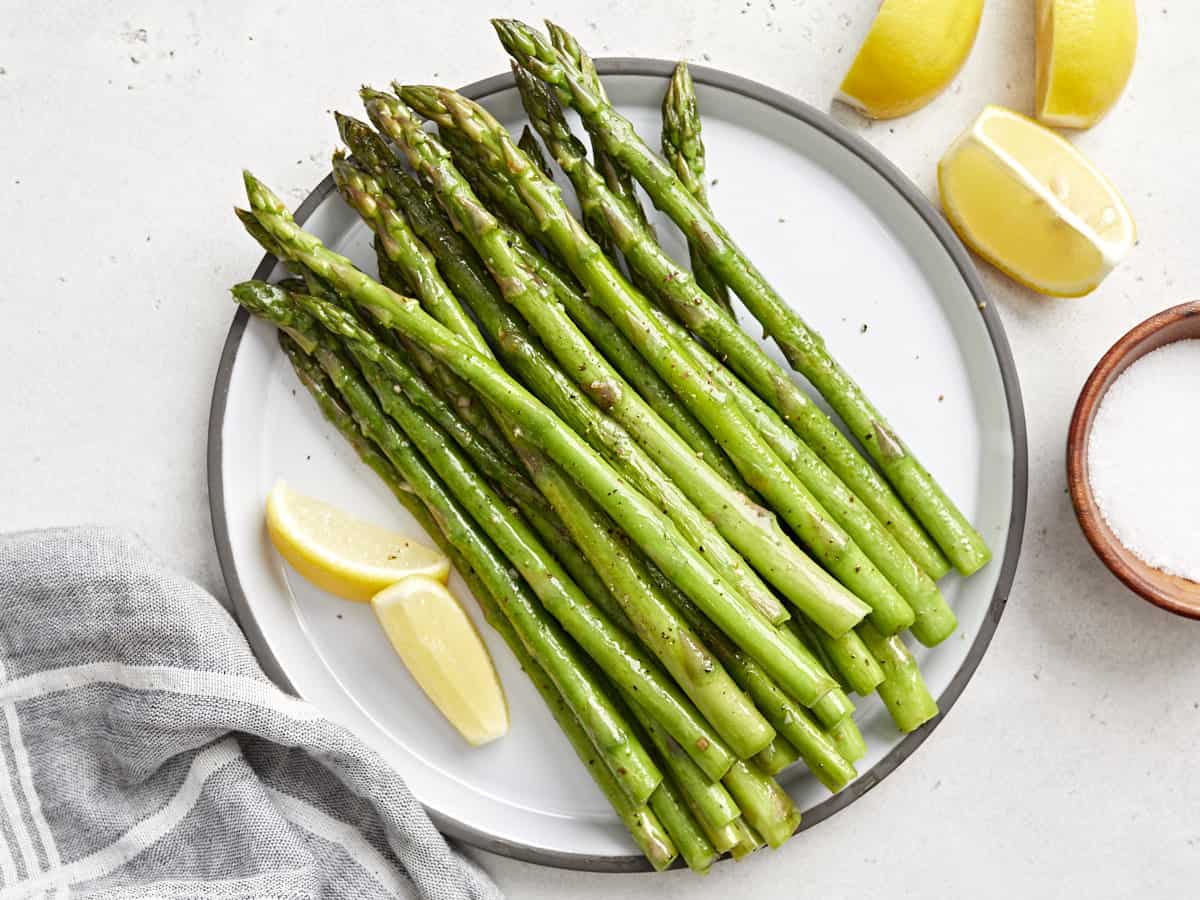
Making an impressive main dish is hard work, so we’re partial to simple sides that pack a punch with little effort. This sauteed asparagus is crunchy, flavorful, and delightfully easy to make. All you need is a bunch of asparagus, oil, garlic, salt, and pepper. It’s almost too easy!
Ingredients for Sauteed Asparagus
Here’s what you’ll need to make sauteed asparagus (psst: there are only 6 ingredients!):
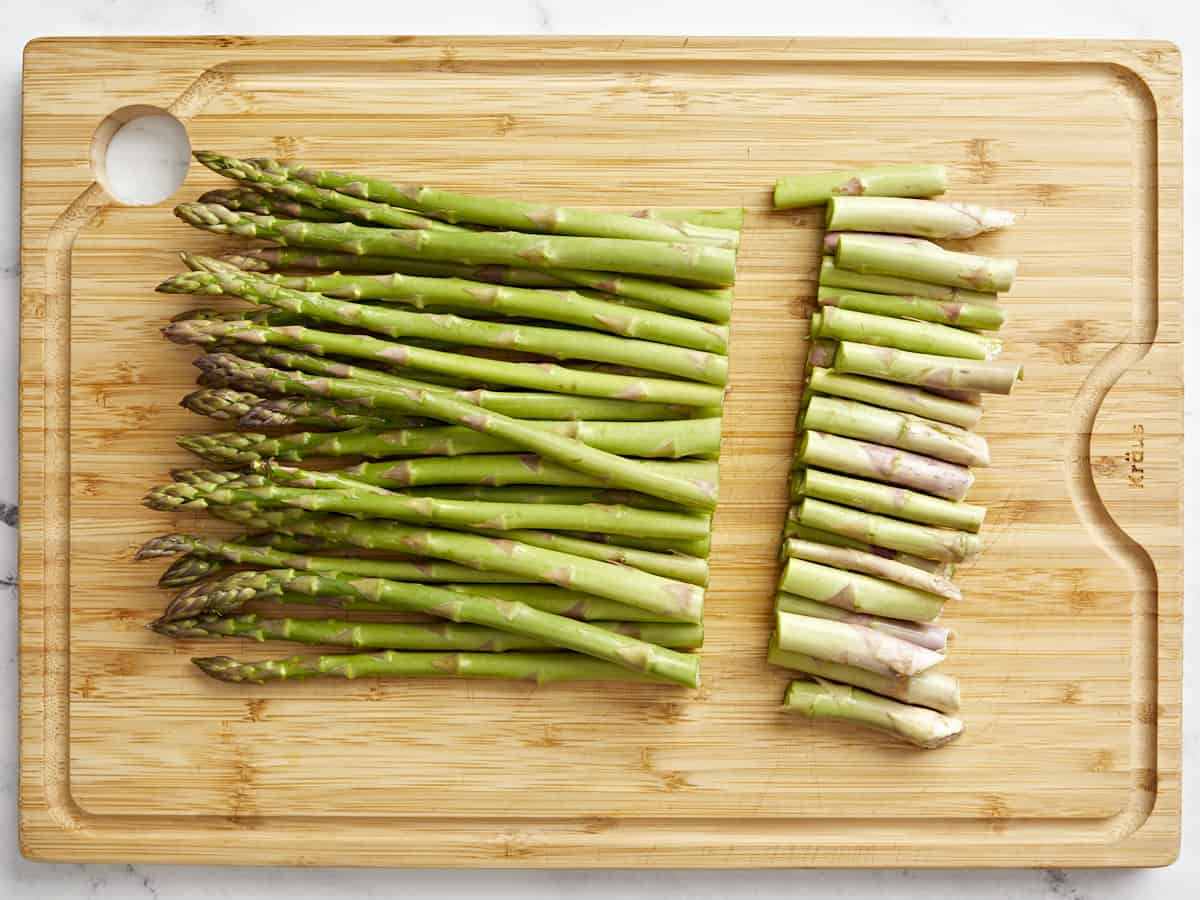
Asparagus: Choose stalks that are firm to the touch and do not appear limp or wilted. The tips should be closed tightly.
Oil: Coats the asparagus to help it brown in the pan without burning. We like olive oil for the rich taste it imparts, but canola or vegetable will also work well.
Garlic: Adds a subtle earthy and savory flavor.
Salt and Pepper: Enhance the natural flavor of the asparagus.
Lemon: Adds a pop of brightness and freshness to the cooked asparagus.
What Else Can I Add?
This is a great recipe for playing with different seasoning blends. Try: nmn nbgy
Asparagus does not need to be cooked for long. Once it turns bright green from end to end, it’s done! In fact, it’s even better a little underdone. It should not be mushy or floppy in texture and appearance, it should hold its “spear” shape when cooked correctly.
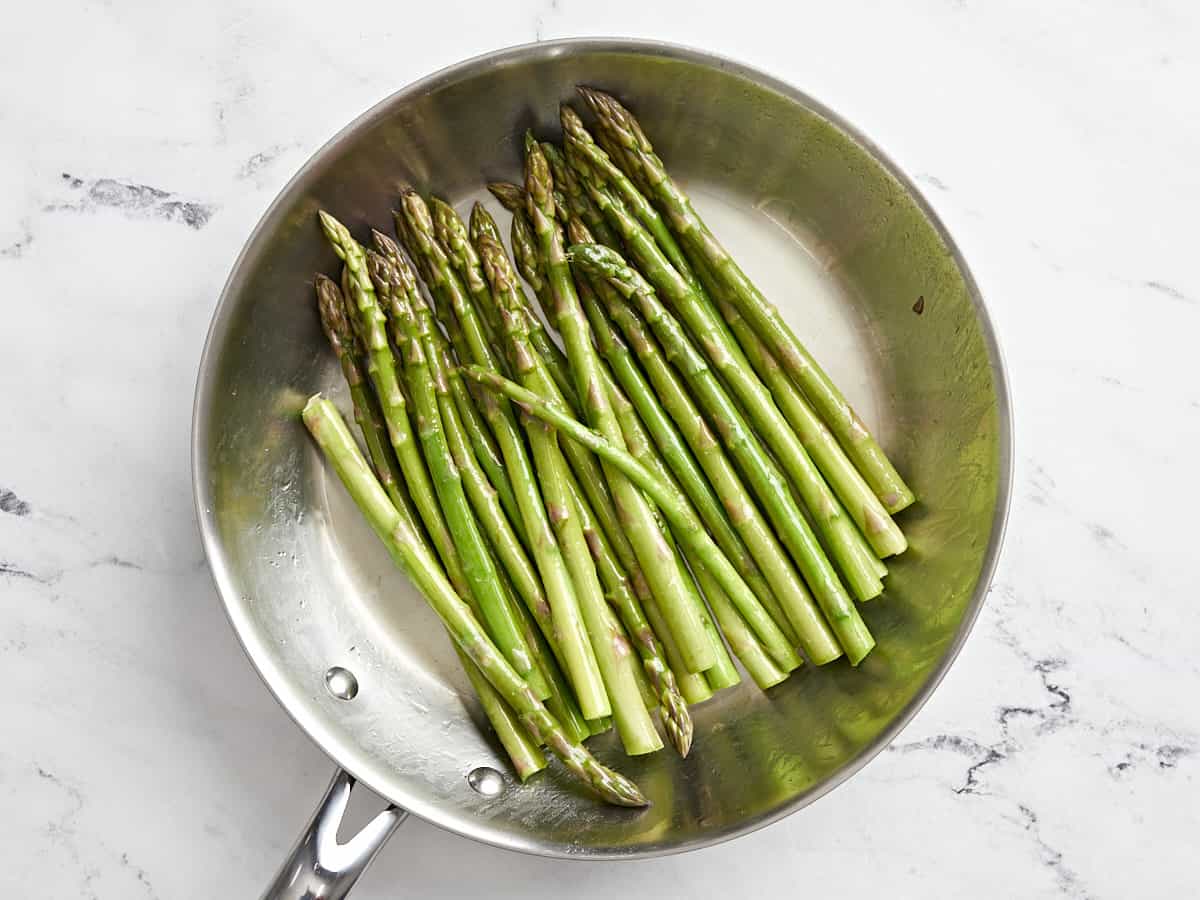
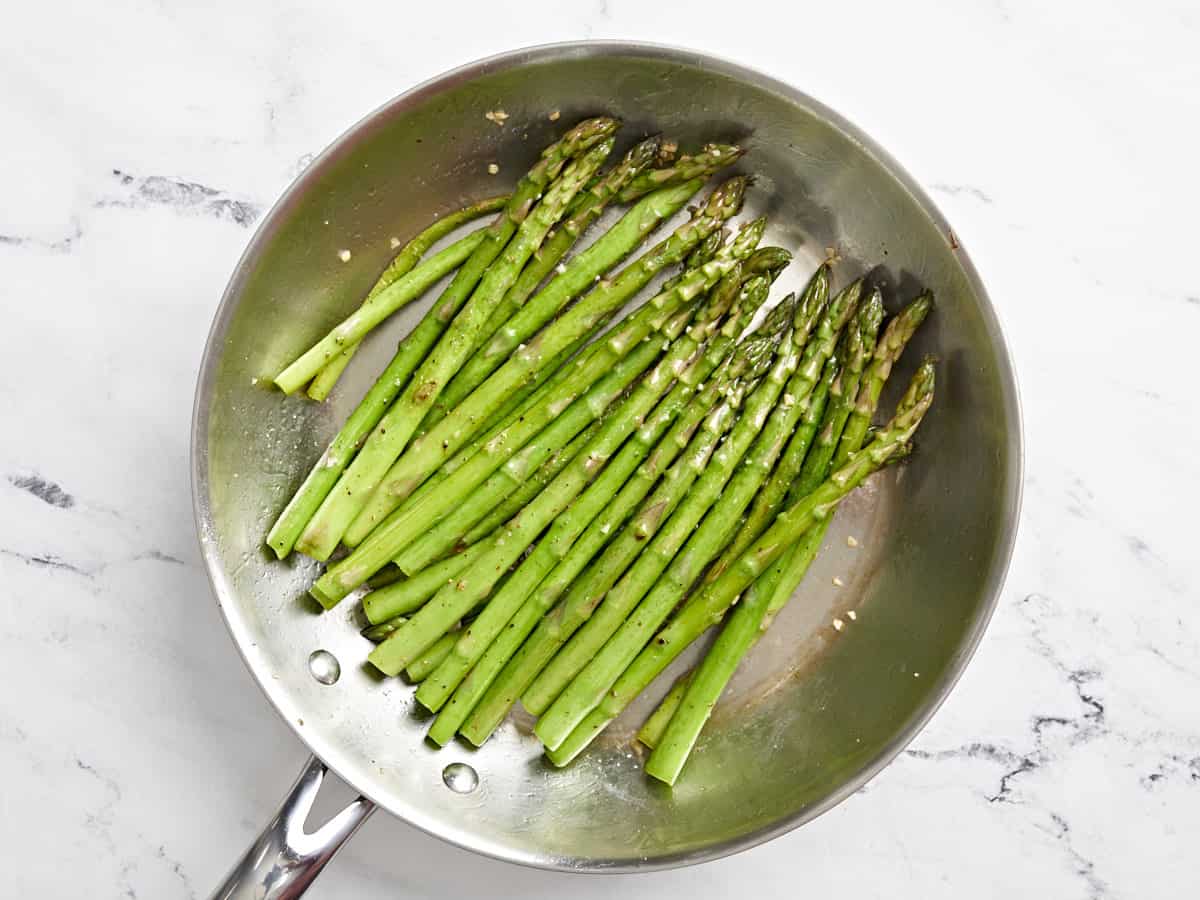
Add oil to a large frying pan on medium high heat. Add asparagus and gently shake to cover each spear with oil. Add the salt and pepper and cook, shaking every so often, until asparagus turns bright green, about 5 minutes.
Add the minced garlic to pan and cook for another 1-2 minutes until fragrant.
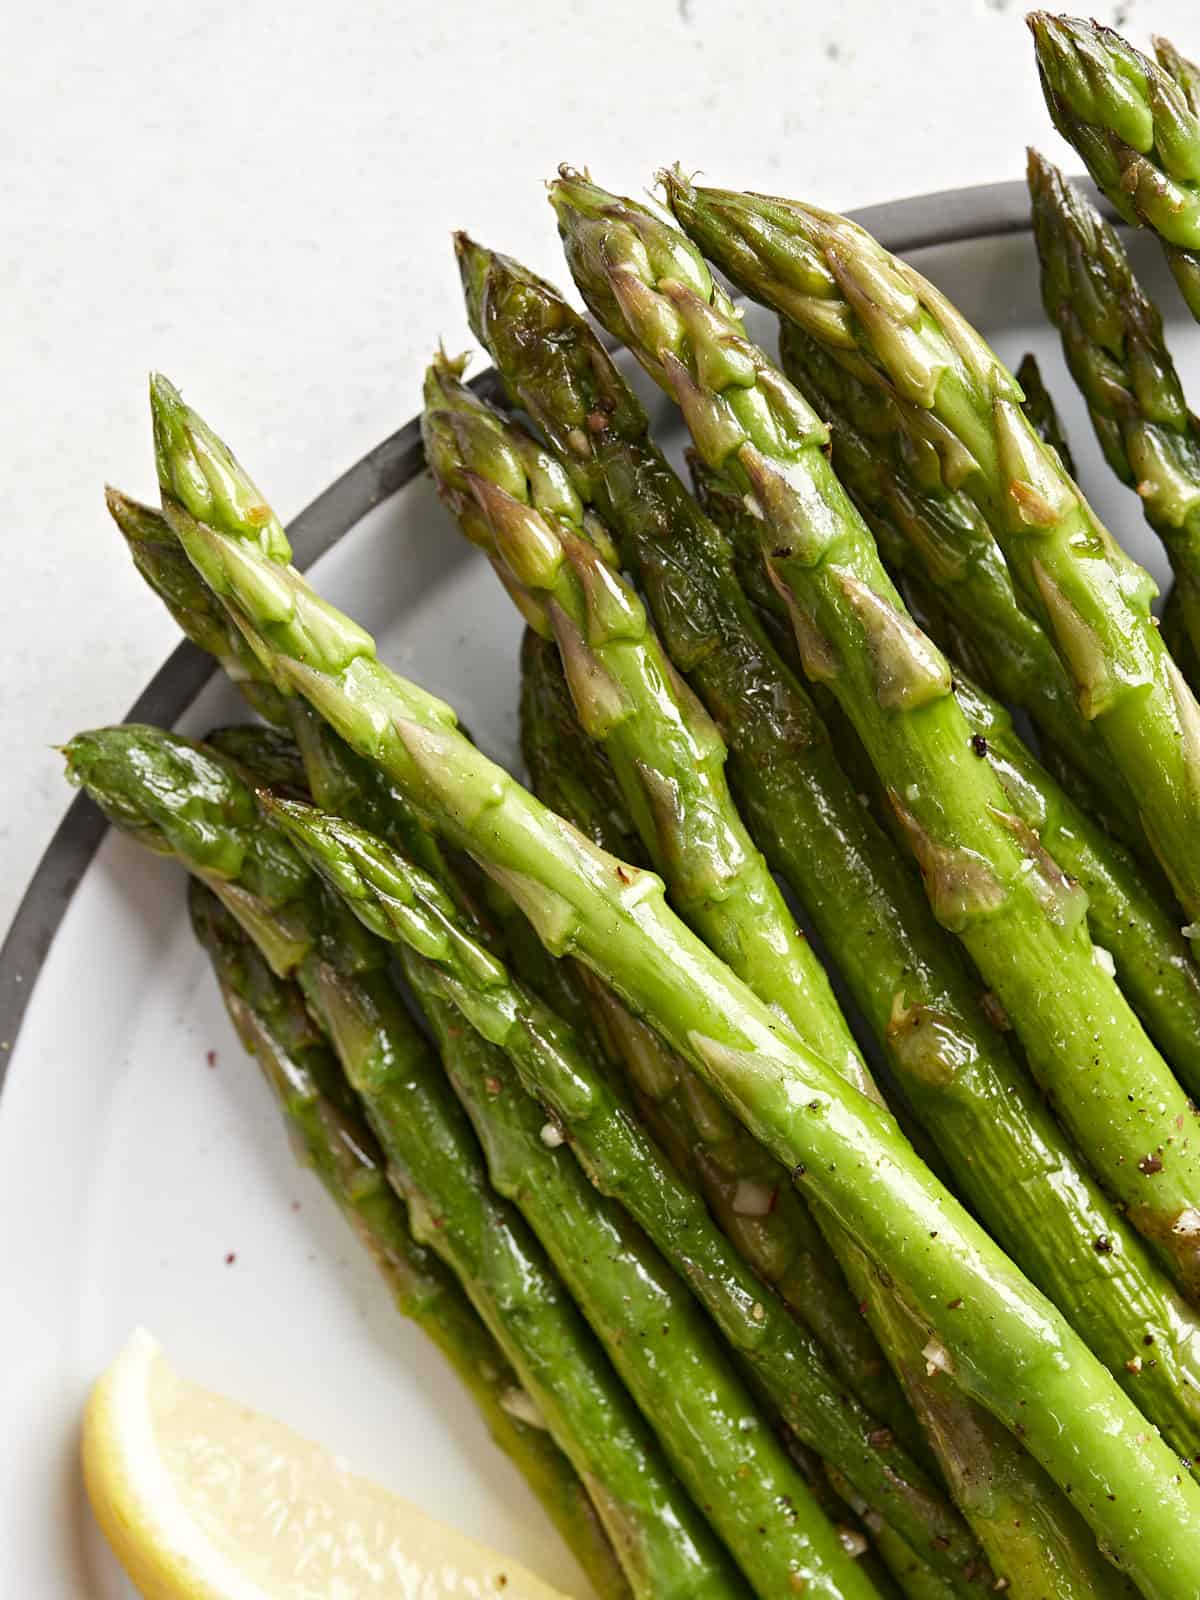
Remove the asparagus and spritz with a squeeze of lemon juice. Adjust salt and pepper to your liking.
how to make Sautéed Asparagus – step by step photos
Cut off the woody ends of 1 bunch asparagus.
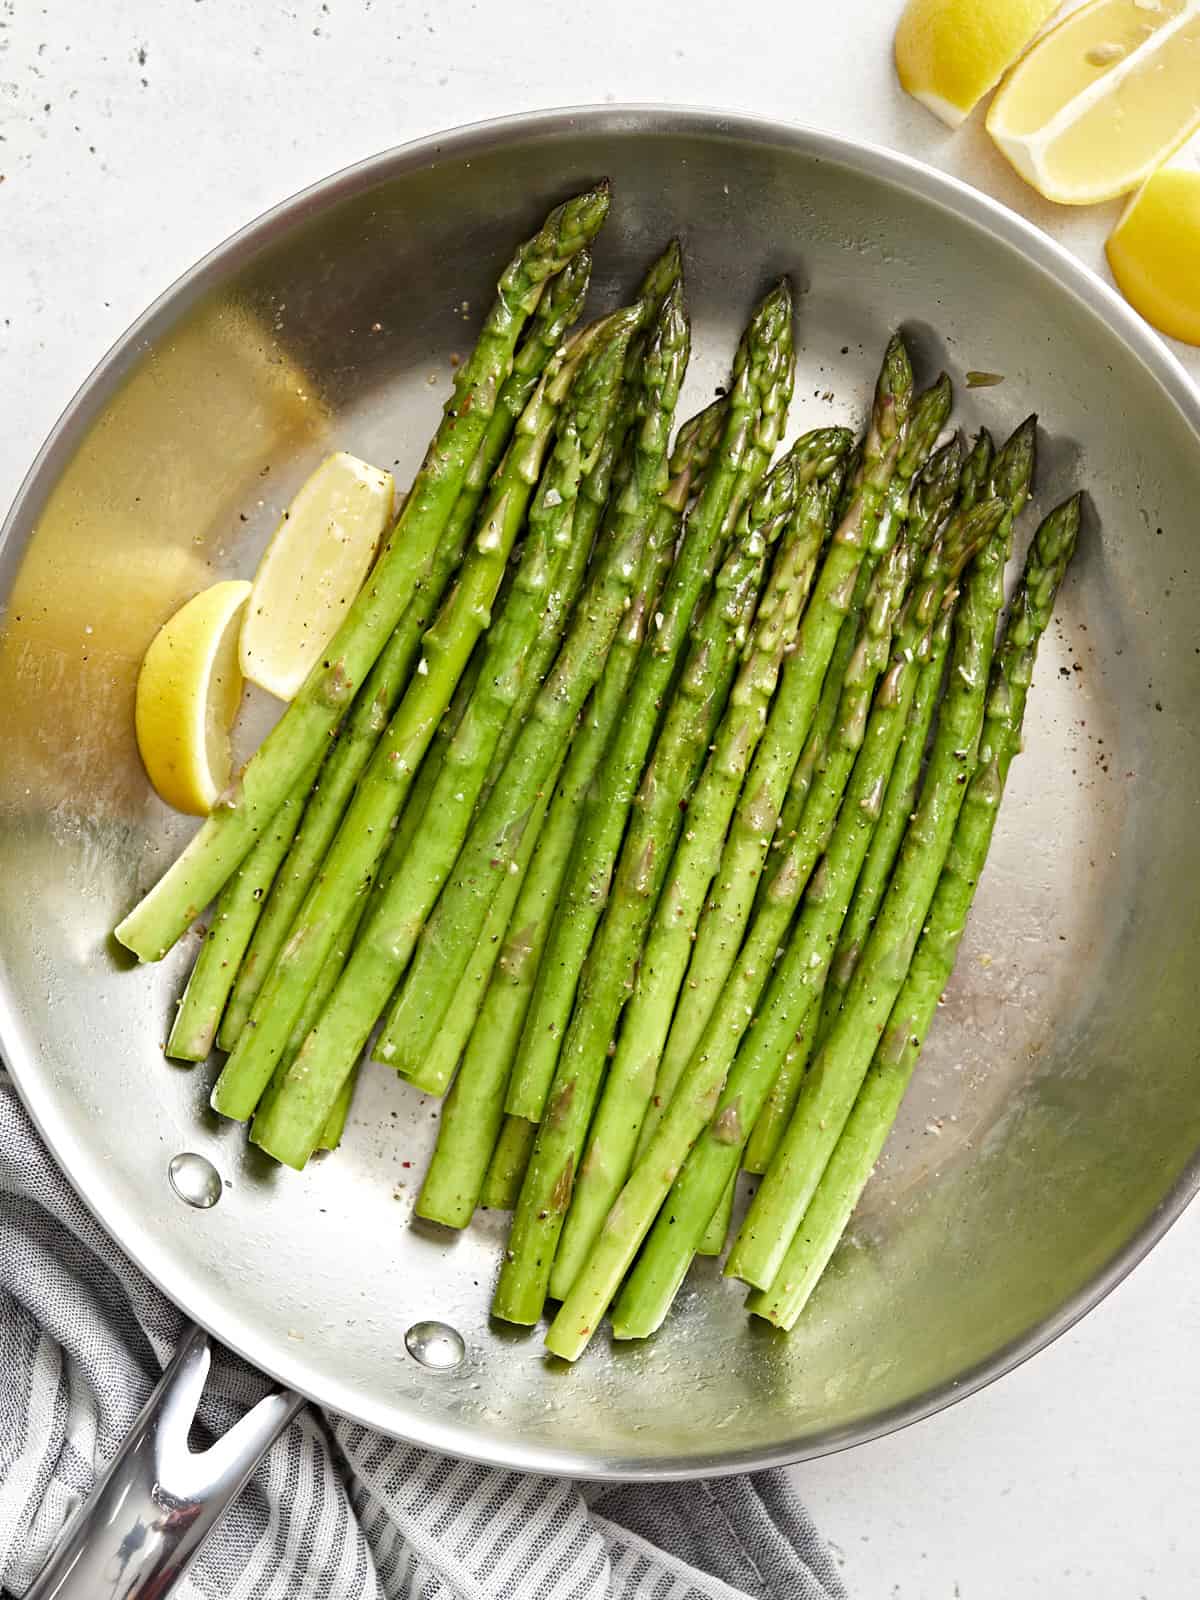
Add 1 Tbsp olive oil to a large frying pan on medium-high heat, then add the asparagus and gently shake to cover each spear with oil. Shake every so often, until asparagus turns bright green, about 5 minutes.
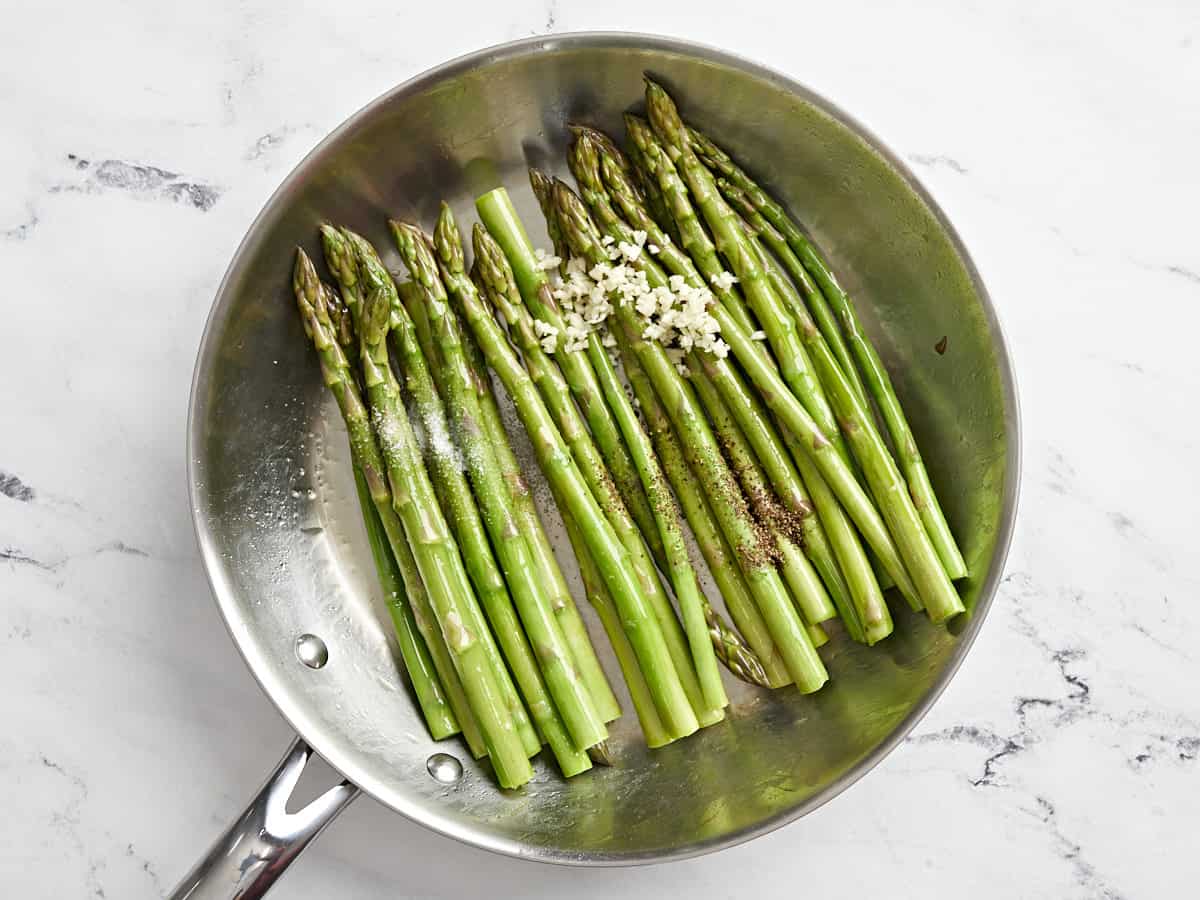
Sprinkle over 1 tsp salt and 1 tsp pepper and add 1 clove minced garlic to the pan and cook for another 1-2 minutes until fragrant.
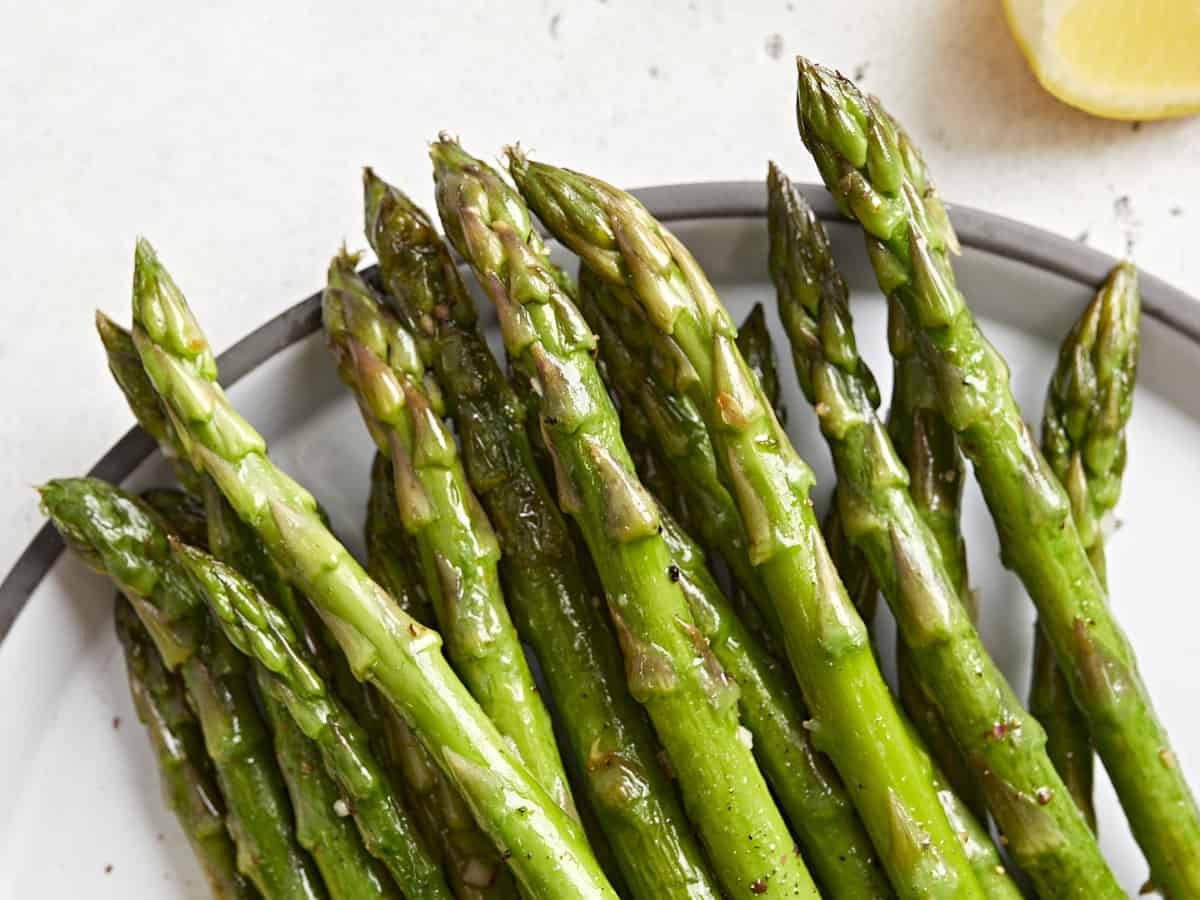
Remove asparagus and spritz with a squeeze of lemon juice from 1 whole lemon. Adjust salt and pepper to your liking.
This sautéed asparagus is so simple and delicious!