Sheet Pan Pancakes

These sheet pan pancakes make breakfast on weekends a breeze! They’re easy to whip up and they’re freezer-friendly. Perfect for breakfast meal prep!

The post Sheet Pan Pancakes appeared first on Budget Bytes.

I’m always looking for ways to get breakfast and dinner on the table faster and these Sheet Pan Pancakes might just be my new best friend! Not only are they easy to whip up, but they’re super convenient. You can pour the entire pancake batter on one baking sheet and top it with your favorite toppings, or leave it plain and let everyone add their own toppings after it bakes. What I love most about these sheet pan pancakes are that they’re perfect for breakfast meal prep. They freeze perfectly and whenever I need a quick breakfast, I just pop 2 pancakes in my toaster and breakfast is done!🙌
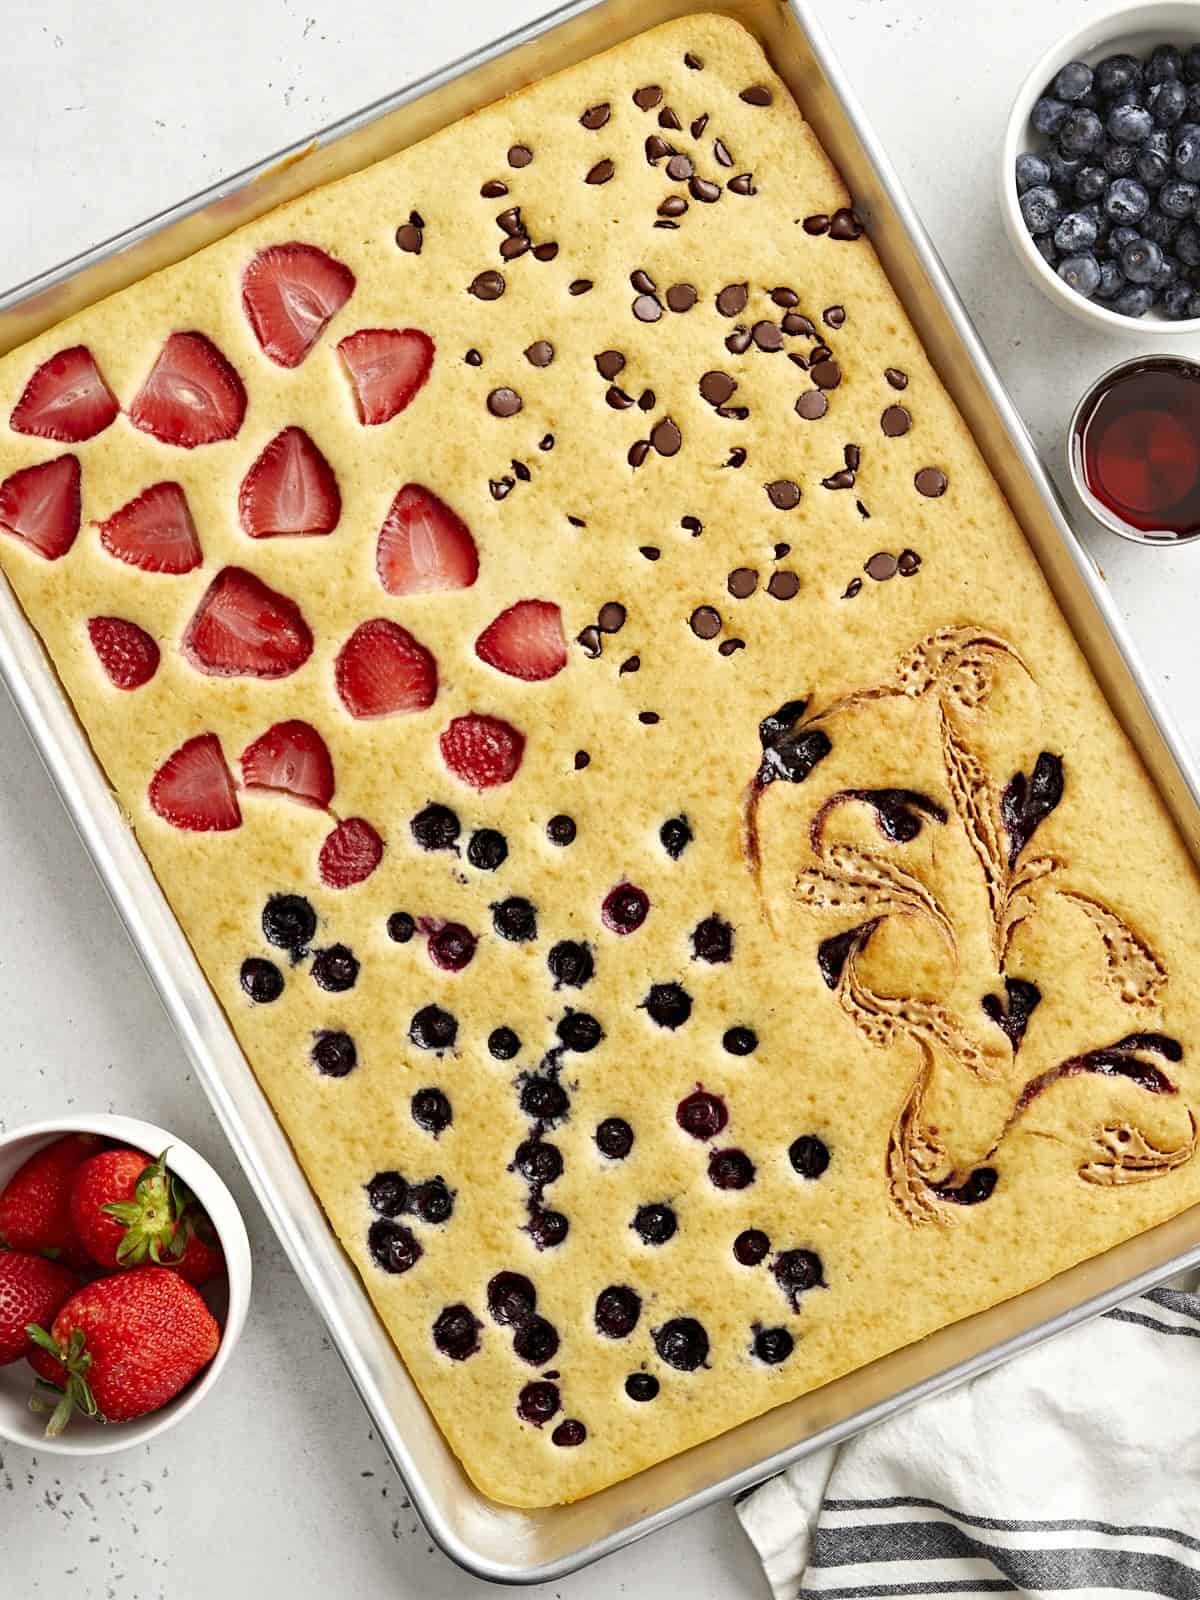
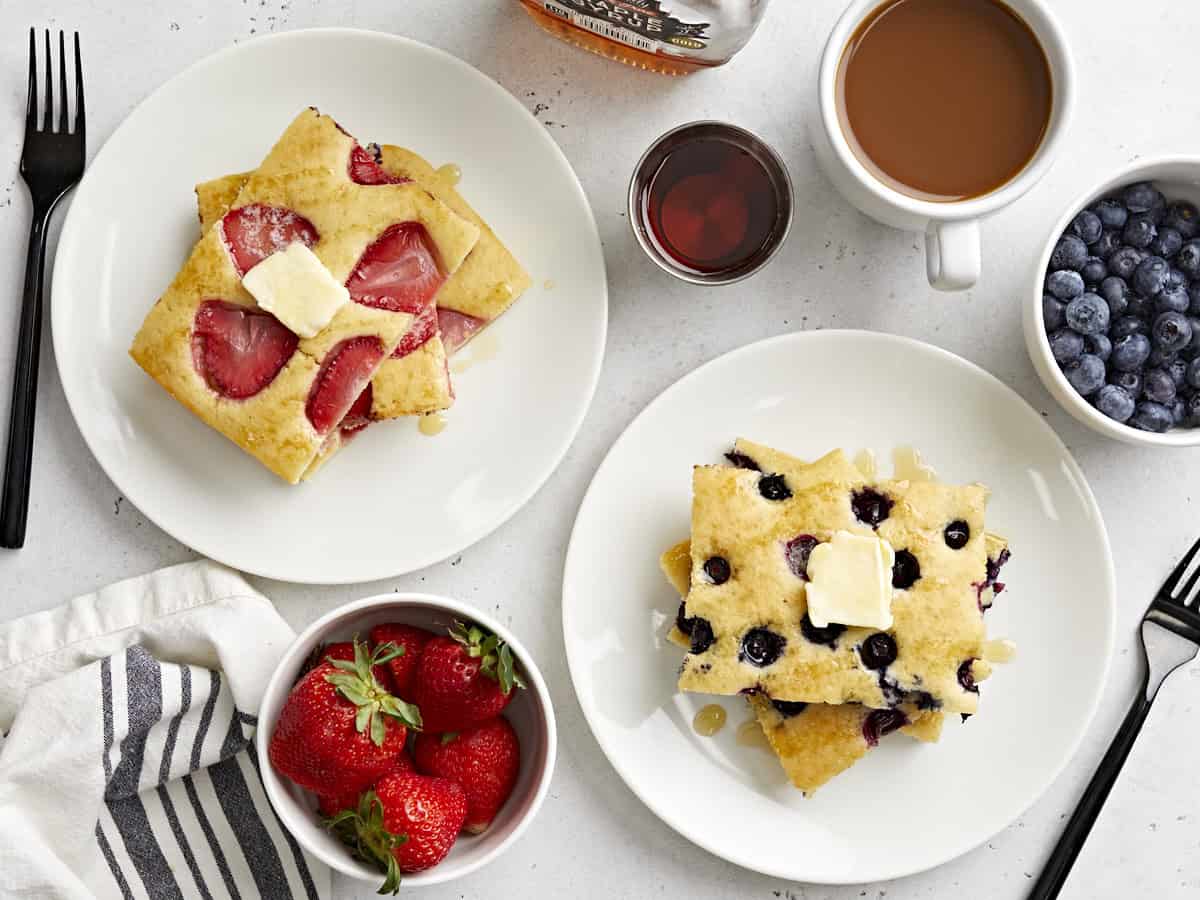
Overhead view of sheet pan pancakes with fresh fruit and maple syrup on the side.

Why Sheet Pan Pancakes?

I’m not sure if your family loves pancakes as much as mine, but it has now turned into our Saturday morning routine. But flipping and making several batches of regular pancakes takes quite a while. And I have to try and keep the first few batches warm in the oven, while I make the rest of the pancakes. Sheet Pan Pancakes keeps you from having to do that back and forth dance. You can make pancakes for the whole family in one big batch, all on one baking sheet, and customize it with their favorite mix-ins and toppings. It’s honestly genius!

Ingredients For Sheet Pan Pancakes

To make these sheet pan pancakes, I used our homemade pancakes recipe as a base foundation and adjusted the measurements to accommodate a larger portion size. Here’s what you’ll need:

  • All-Purpose Flour: Flour adds structure and is the foundation of the pancakes.
  • Baking Powder: Baking powder is what makes the pancakes light and fluffy instead of dense and gummy.
  • Sugar: A little bit of sugar adds the perfect amount of sweetness to the pancakes.
  • Milk: Milk combines with the flour to add moisture and helps create the batter.
  • Egg: Eggs help hold the pancakes together and also helps leaven the pancakes.
  • Butter: Butter adds flavor and richness to the pancakes.
  • Vanilla Extract: A small amount of vanilla extract adds a wonderful flavor and depth to the pancake.
  • Salt: A little bit of salt helps enhance the flavor of the pancakes.
  • Toppings: This is where you can really have fun! I used a combination of my favorite fruits like strawberries and blueberries. And for some variety I added some chocolate chips and peanut butter & raspberry jam.

More Toppings and Mix-in Ideas

My favorite part about making sheet pan pancakes is adding different mix-ins and toppings. I personally love adding fresh fruit, but here are some more topping ideas for you to try:

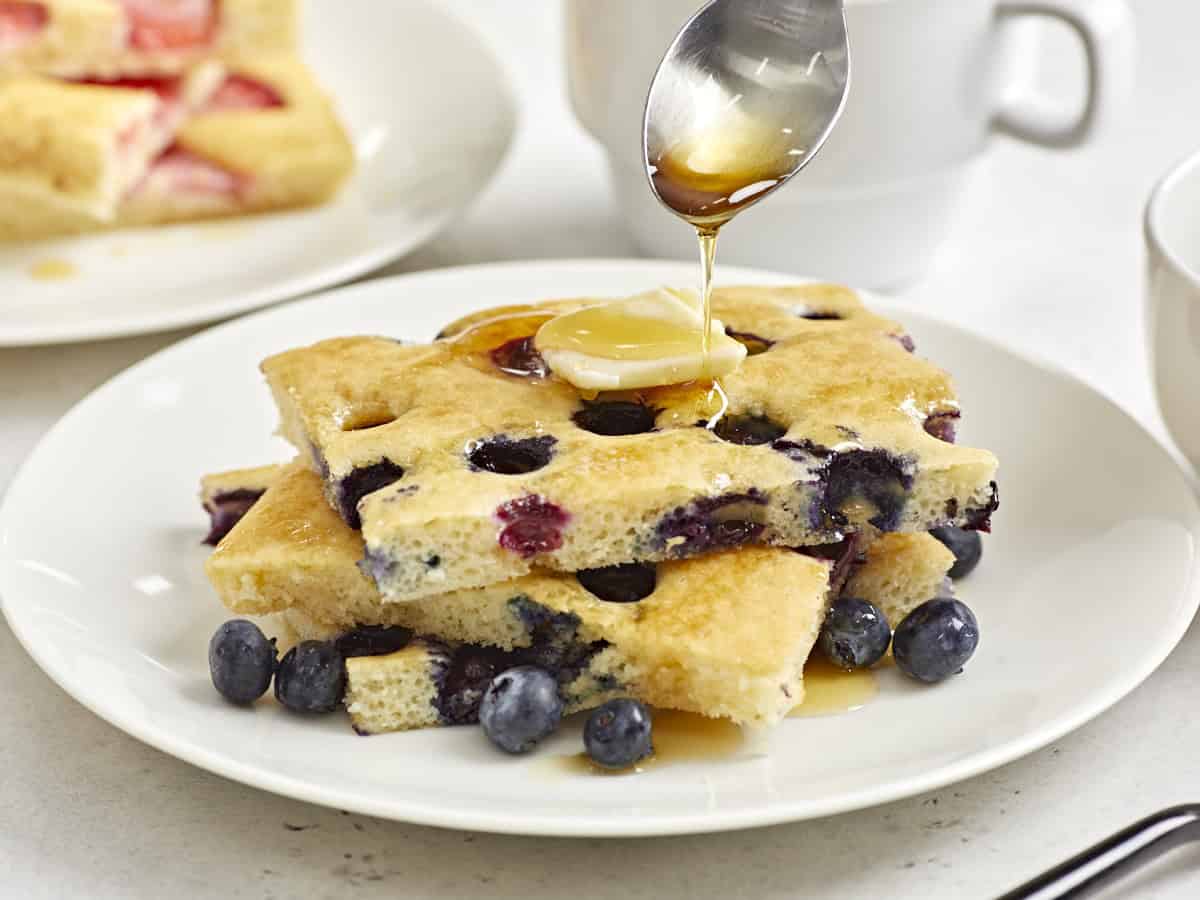
Close up side view of sheet pan pancakes on a serving plate with maple syrup being drizzled over the top.

Recipe Tips!

  1. Don’t overmix the batter. Stir the dry and wet ingredients together until they are just combined and there are no traces of dry flour left in the bowl. Over-mixing the batter will develop the gluten in the flour and make the pancakes rubbery rather than soft and fluffy.
  2. Grease your sheet pan well. Make sure to generously coat your sheet pan well with cooking spray to keep the pancakes from sticking.
  3. Dry your fruit well. If you’re adding fresh fruit, make sure to wash and dry your fruit well with paper towels to prevent any excess water or fruit juices from bleeding into the pancake batter.
  4. If necessary, use some parchment paper. Sheet pan pancakes seem to work better with baking sheets that aren’t too old. So if your baking sheet is older or a little beat up, you may want to line it with some parchment paper first.

How To Store & Freeze Sheet Pan Pancakes

What I love most about making sheet pan pancakes is that they’re extremely easy to store and freeze for later when you need a quick & easy breakfast. To store, let the pancakes cool completely, then transfer them to an airtight container and refrigerate for up to 3 days.

To freeze, place the cooled pancakes in a freezer safe storage bag, in single layers with parchment paper between the layers to prevent sticking. Freeze for up to 3 months. You can easily reheat frozen pancakes in a toaster or in the microwave until hot.
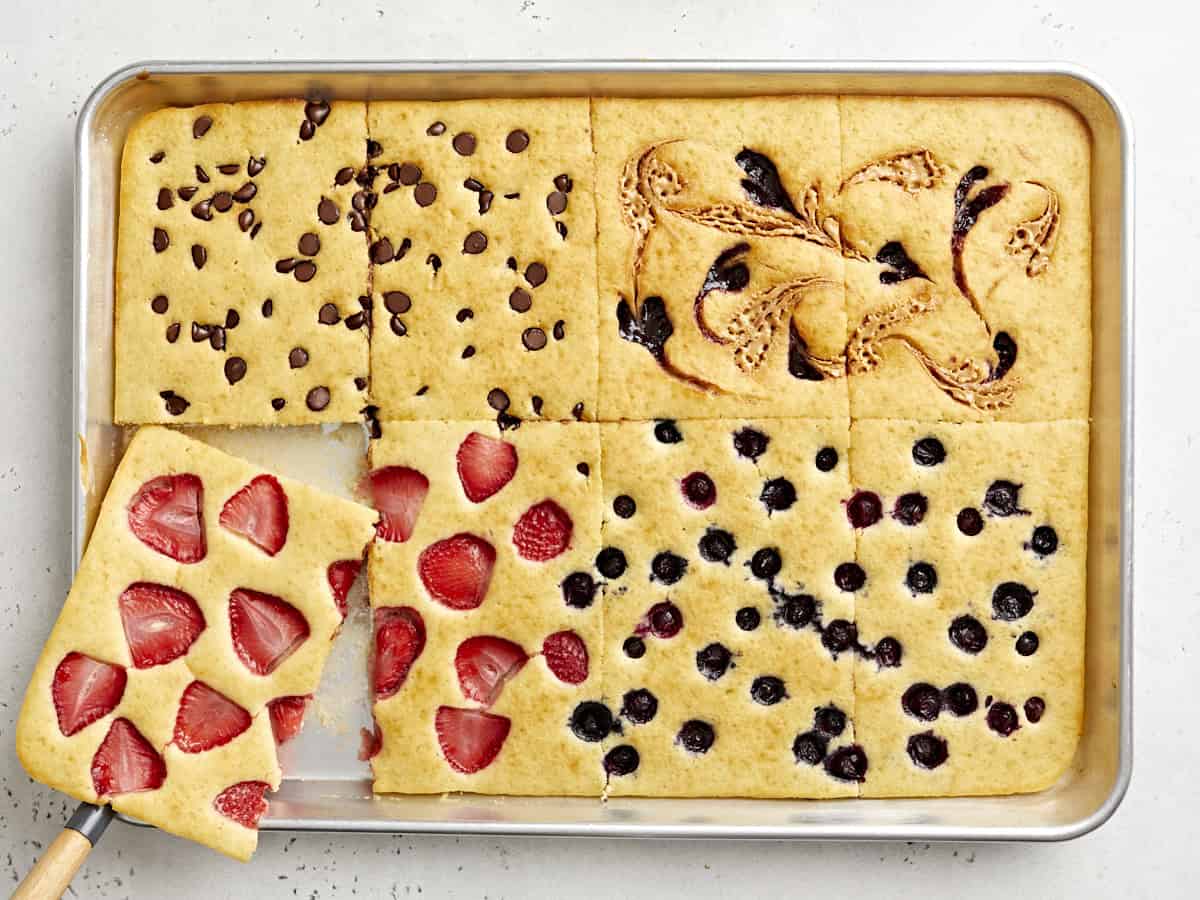
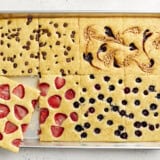
Overhead view of sheet pan pancakes cut into squares with one slice being lifted out.
Print

Sheet Pan Pancakes

These sheet pan pancakes make breakfast on weekends a breeze! They’re easy to whip up and they’re freezer-friendly. Perfect for breakfast meal prep!
Course Breakfast, Brunch
Cuisine American
Total Cost $2.22 recipe / $0.55 serving
Prep Time 10 minutes
Cook Time 20 minutes
Total Time 30 minutes
Servings 4 (2 pancakes each)
Calories 467kcal

Equipment

Ingredients

  • 2 cups all-purpose flour $0.40
  • 1/4 cup granulated sugar $0.10
  • 1 Tbsp baking powder $0.18
  • 3/4 tsp salt $0.08
  • 1 1/2 cup milk $0.30
  • 2 large eggs $0.33
  • 4 Tbsp butter, melted $0.53
  • 1 tsp vanilla extract $0.30
  • cooking spray

Optional Toppings*

  • fresh strawberries, sliced
  • blueberries
  • chocolate chips
  • peanut butter and fruit jam

Instructions

  • Preheat the oven to 425°F. In a large bowl whisk together the flour, sugar, baking powder, and salt.
  • In the same bowl, add in the milk, eggs, melted butter, and vanilla extract. Whisk the wet ingredients together with the dry ingredients until just combined. Be careful not to over mix.
  • Generously coat a 11×17-inch rimmed baking sheet with cooking spray. Pour the pancake batter onto the baking sheet. Spread the batter evenly around the baking sheet with a rubber spatula or tap the pan a few times on the counter to even out the batter.
  • Visually divide the pancake batter into four equal sections and add your desired toppings on top into each section. I used a combination of sliced strawberries, blueberries, chocolate chips, and a peanut butter and raspberry jam swirl. To make the pb&j swirl, I simply added dollops of natural peanut butter and jam, then swirled the two together using a toothpick.
  • Place the sheet pan in the oven and bake for 18-20 minutes or until golden brown.
  • Allow the pan to cool slightly, then slice the sheet pan pancake into 8 equal portions. Feel free to make smaller slices if you want to make more servings. Serve warm with syrup and extra toppings if you like. Enjoy!

See how we calculate recipe costs here.

Notes

*I added about 1/4 cup of chocolate chips and blueberries. For the strawberries and PB&J swirl, I simply eyeballed it until I filled up each section.

Nutrition

Serving: 2pancakes | Calories: 467kcal | Carbohydrates: 66g | Protein: 12g | Fat: 17g | Sodium: 912mg | Fiber: 2g
Overhead view of sliced sheet pan pancakes on two serving dishes with fruit and syrup on the side.

How to Make Sheet Pan Pancakes – Step by Step Photos
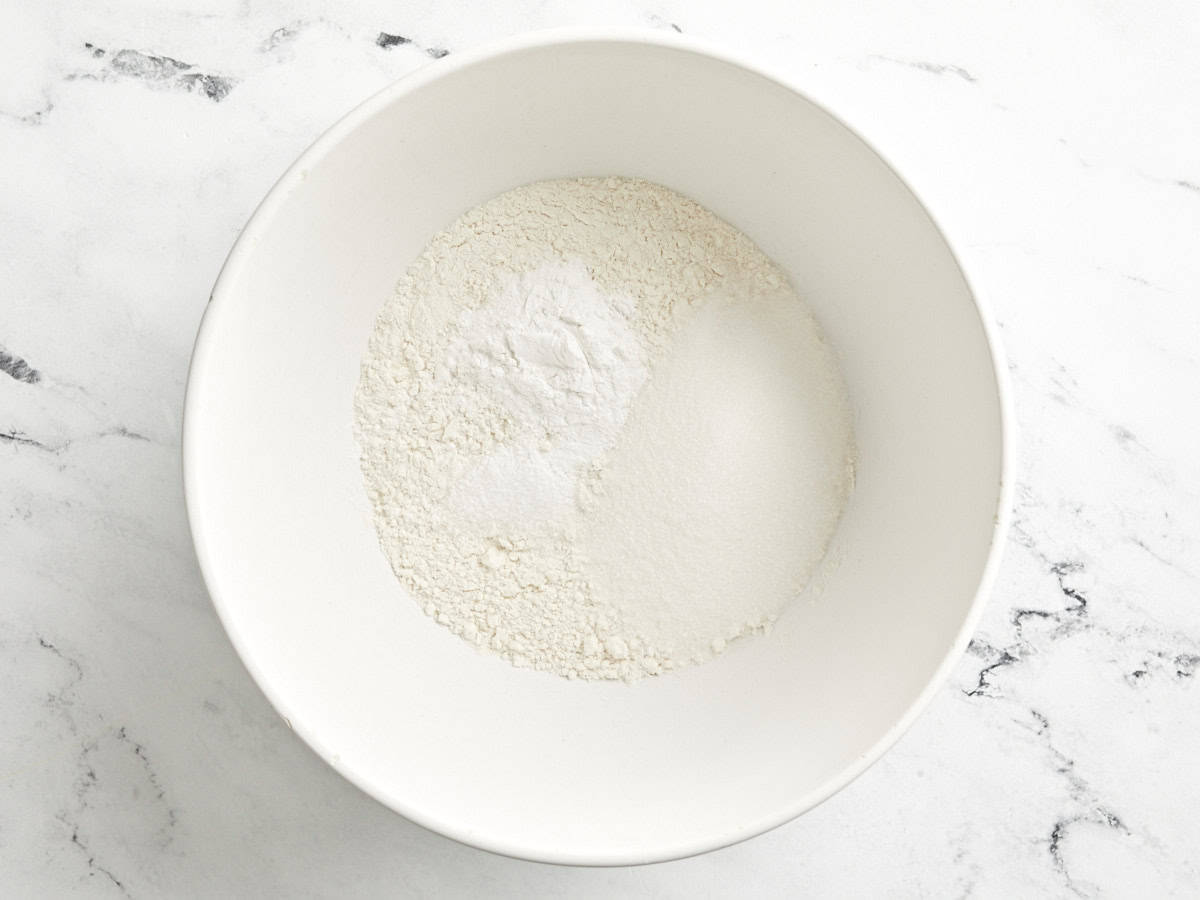
Dry ingredients in a bowl for sheet pan pancakes.

Preheat the oven to 425°F. In a large bowl whisk together 2 cups all-purpose flour, 1/4 cup granulated sugar, 1 Tbsp baking powder, and 3/4 tsp salt.
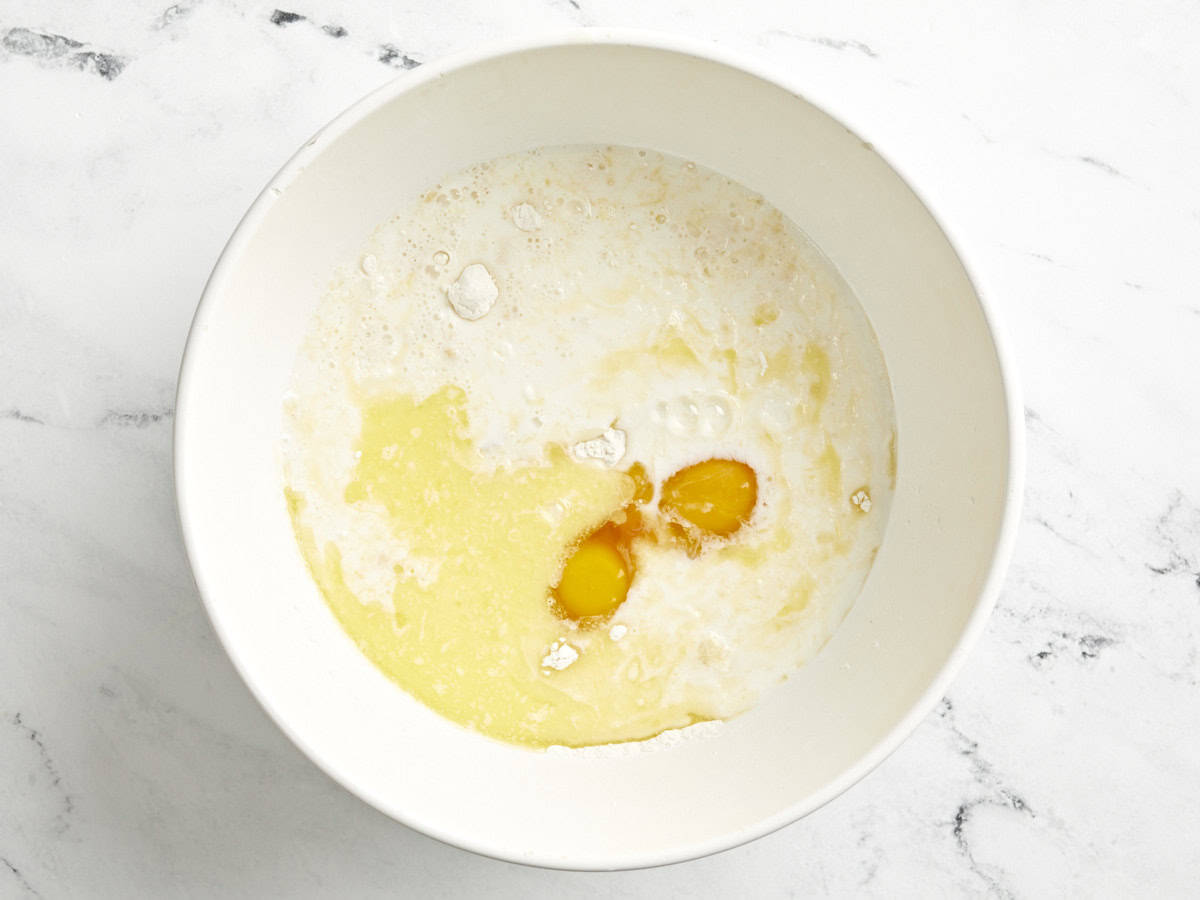
Dry and wet ingredients in a bowl for sheet pan pancakes.

In the same bowl, add in 1 1/2 cups milk, 2 large eggs, 4 Tbsp melted butter, and 1 tsp vanilla extract.
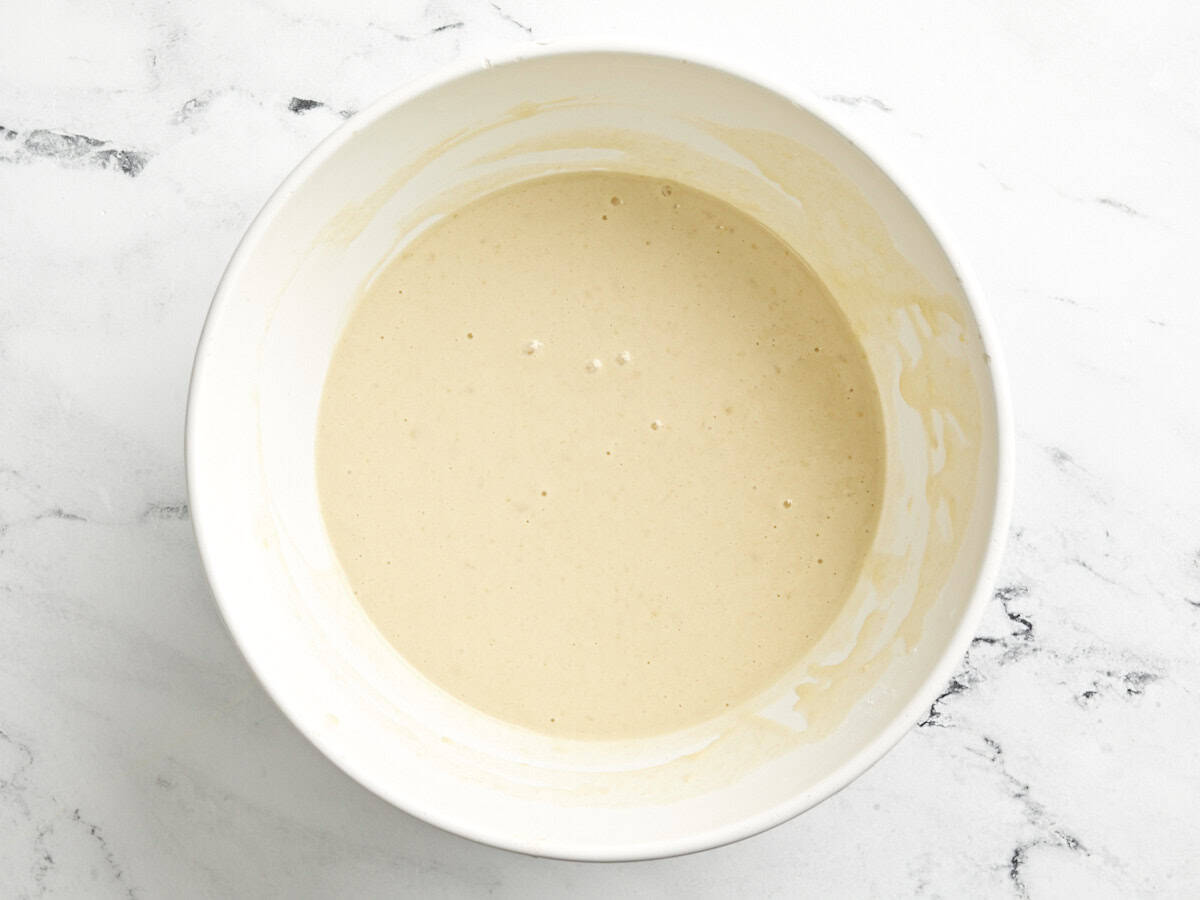
Sheet pan pancake ingredients mixed in a bowl.

Whisk the wet ingredients together with the dry ingredients until just combined. Be careful not to over mix at this point.
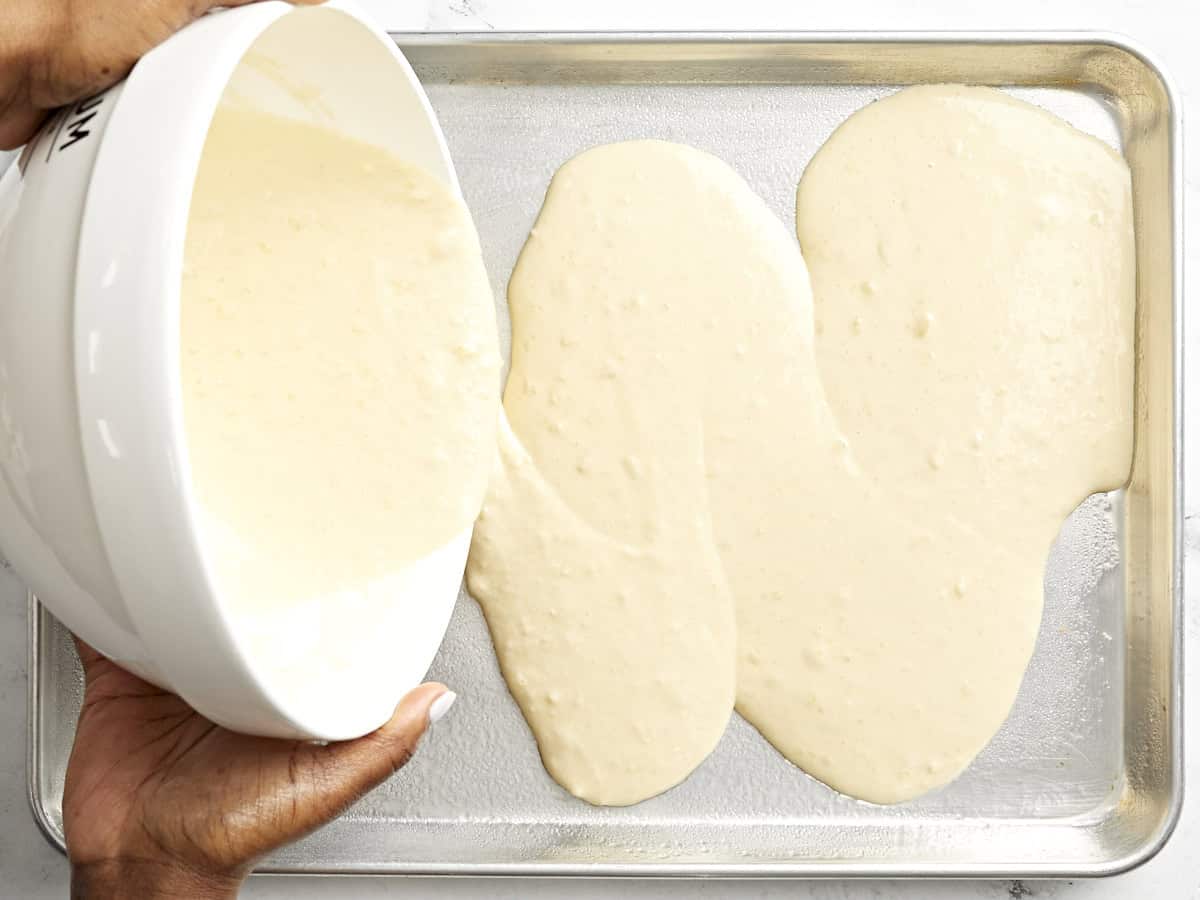
Sheet pan pancake batter poured onto a sheet pan.

Generously coat an 11×17-inch rimmed baking sheet with cooking spray. Pour the pancake batter onto the baking sheet. Spread the batter evenly around the baking sheet with a rubber spatula or tap the pan a few times on the counter to even out the batter.
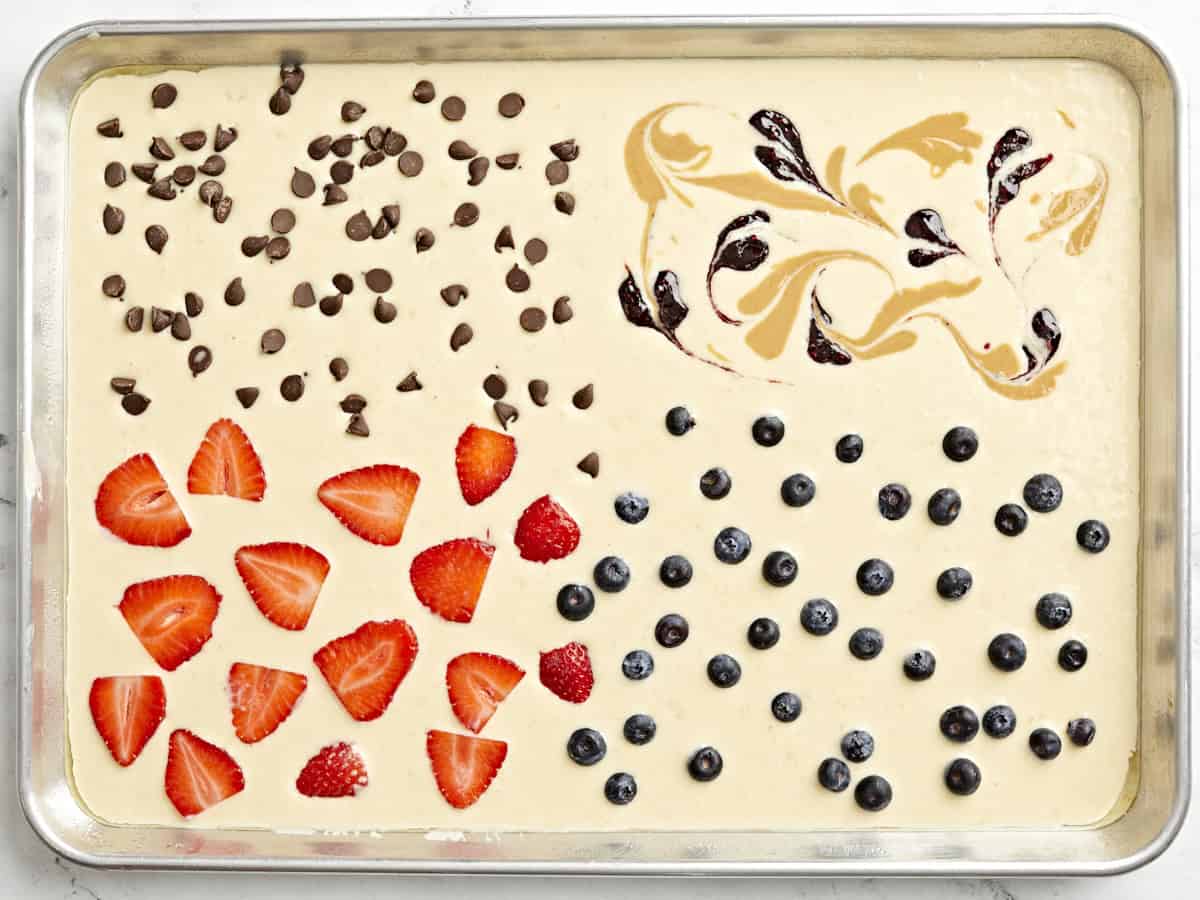
Sheet pan pancake batter with fruit added on top poured onto a sheet pan.

Visually divide the pancake batter into four equal sections and add your desired toppings on top into each section. I used a combination of sliced strawberries, blueberries, chocolate chips, and a peanut butter and raspberry jam swirl. To make the pb&j swirl, I simply added dollops of natural peanut butter and jam, then swirled the two together using a toothpick.
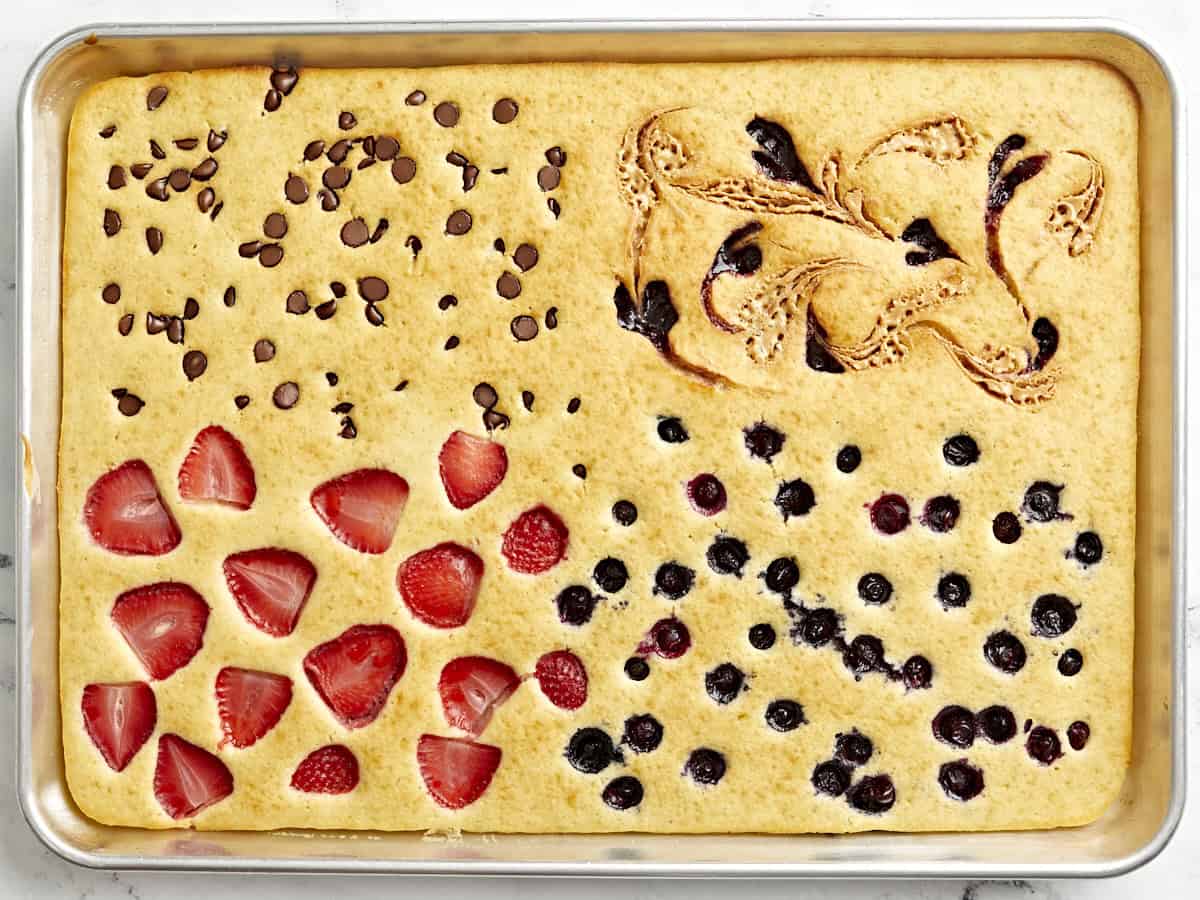
Finished sheet pan pancakes with four different toppings on top.

Place the sheet pan in the pre-heated oven and bake for 18-20 minutes or until golden brown.

Overhead view of sheet pan pancakes cut into squares with one slice being lifted out.

Allow the pan to cool slightly, then slice the sheet pan pancake into 8 equal portions. Feel free to make smaller slices if you want to make more servings. Serve warm with syrup and extra toppings if you like!
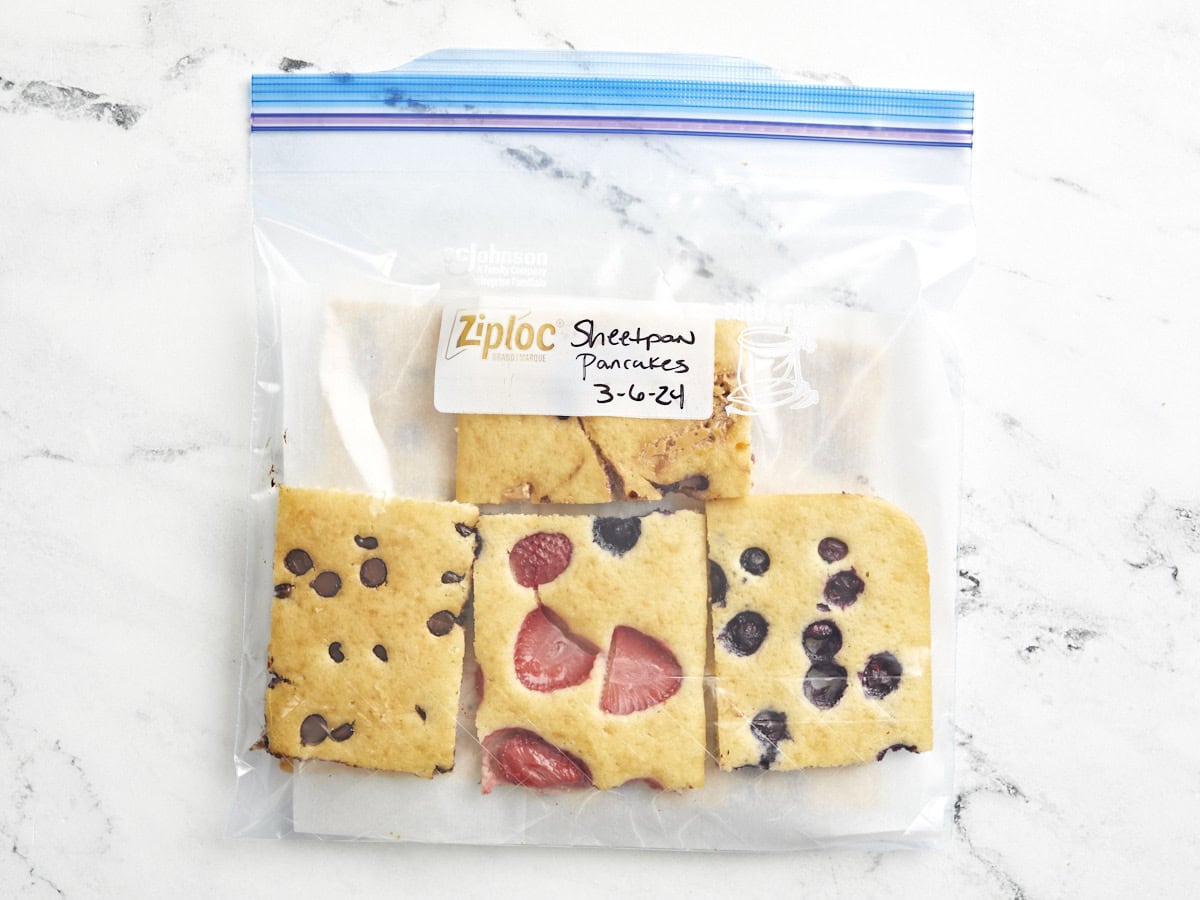
Sheet pan pancakes in a freezer bag.

These pancakes are super easy to freeze! Just place the cooled pancakes in a freezer safe storage bag, in single layers with parchment paper between the layers to prevent sticking. Freeze for up to 3 months.
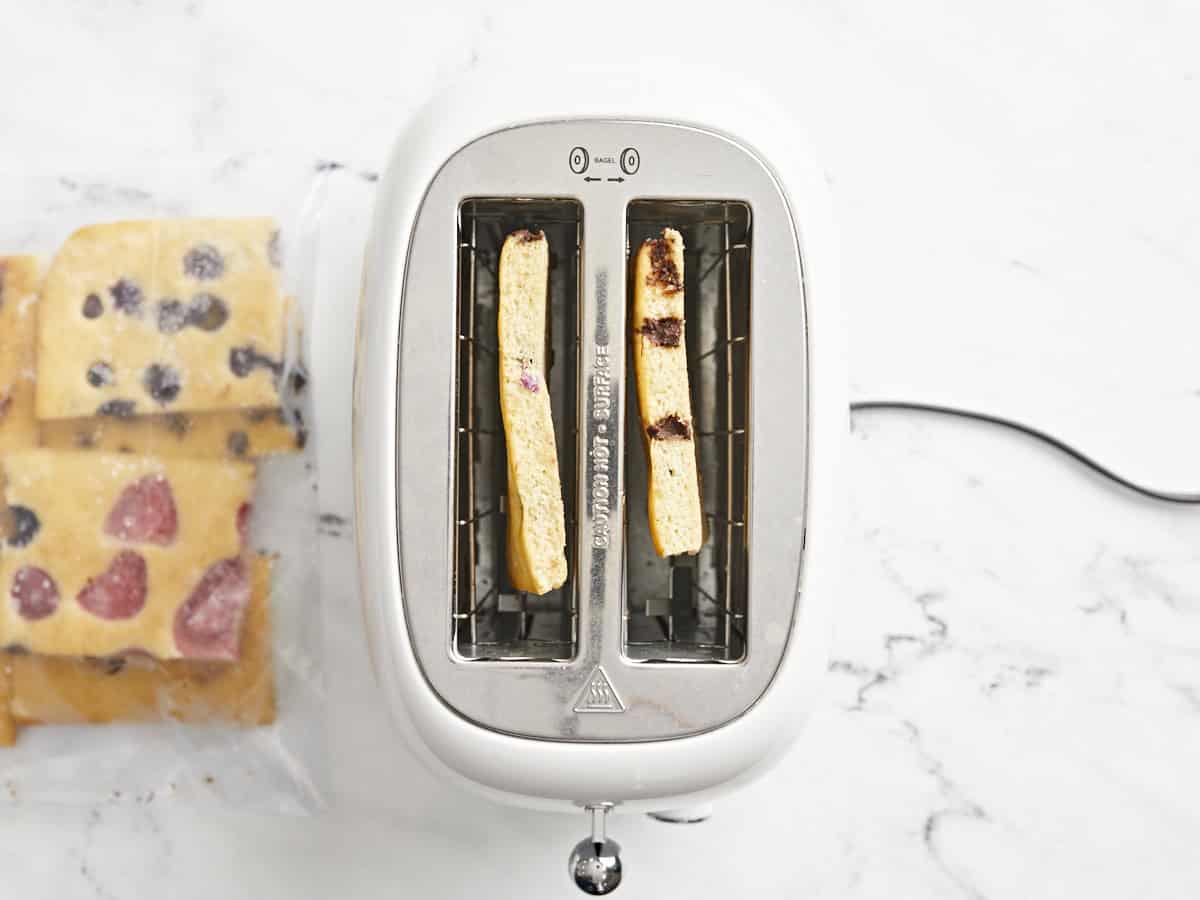
Frozen sheet pan pancakes in a toaster.

You can easily reheat frozen pancakes in a toaster or in the microwave until hot.
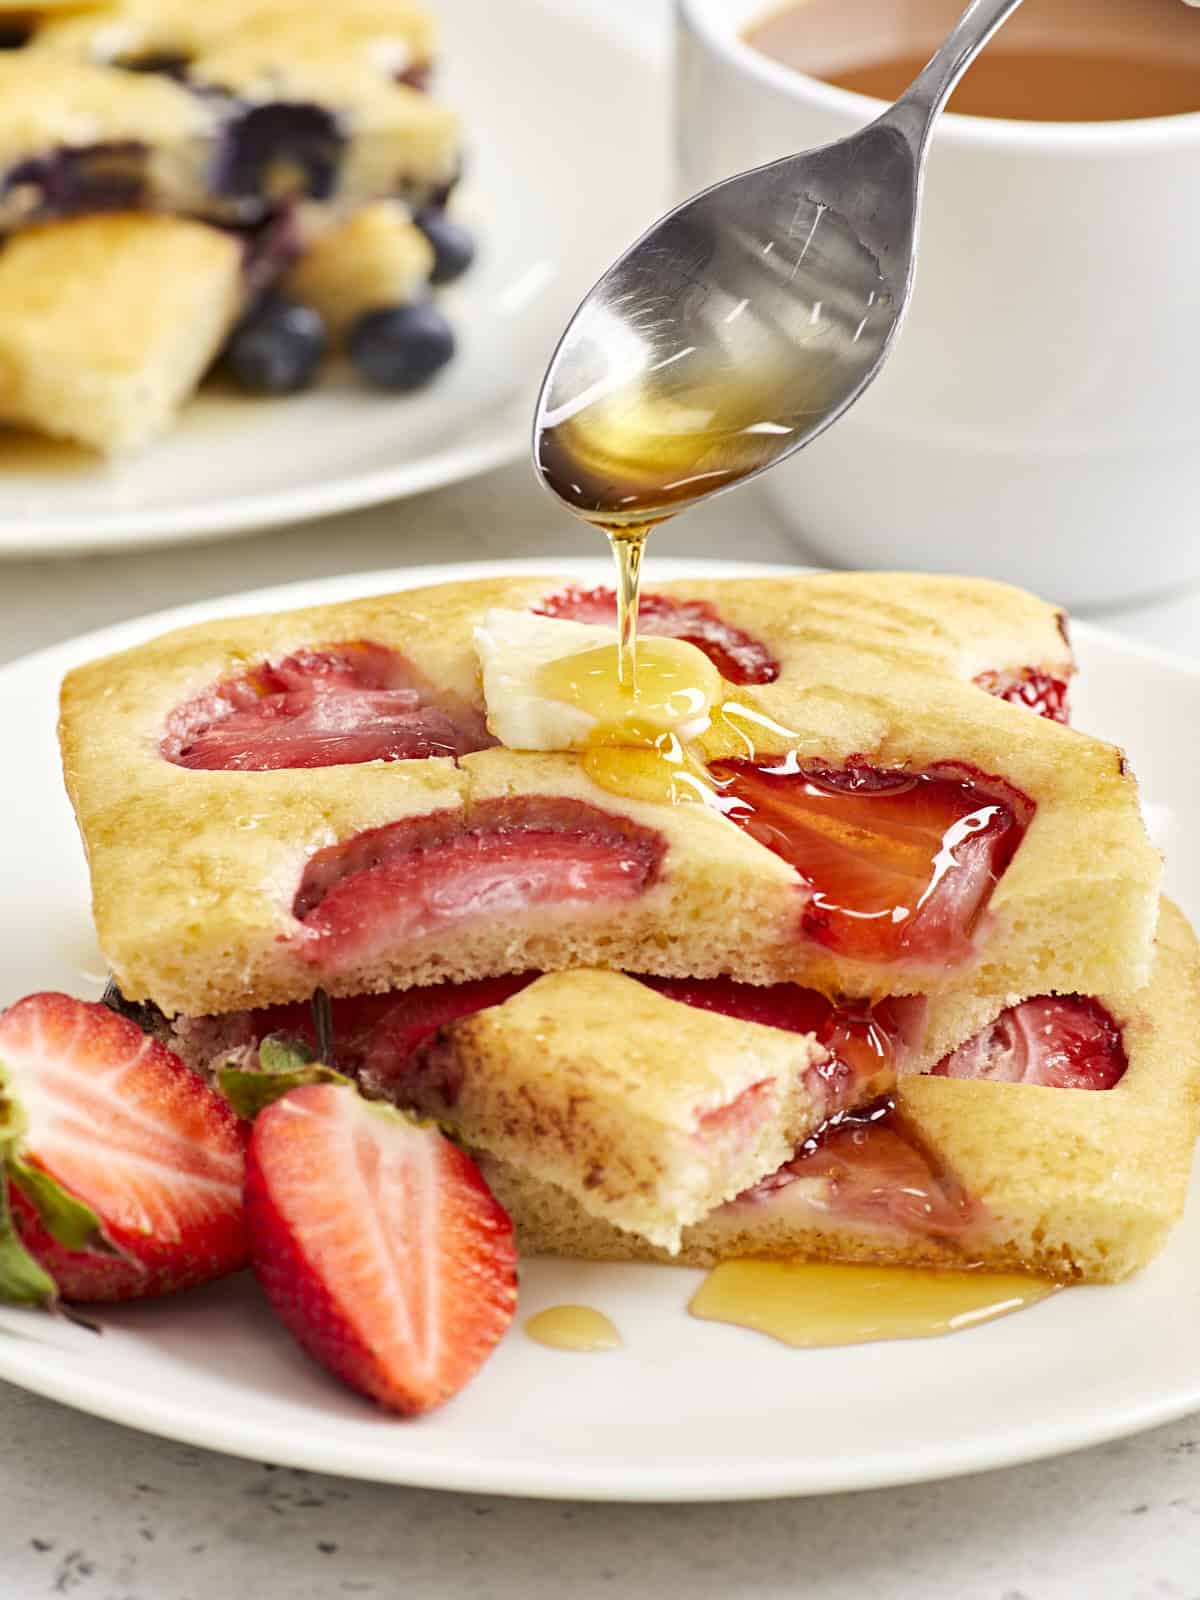
Close up side view of strawberry sheet pan pancakes on a serving plate with maple syrup being drizzled over the top.

The post Sheet Pan Pancakes appeared first on Budget Bytes.
Lemon Blueberry Baked Oatmeal Cups

Baked oatmeal is one of my all-time favorite breakfasts. It is so hearty and comforting. I also love making baked oatmeal cups. The individual size cups are so fun and they make a great grab and go breakfast or snack. These Lemon Blueberry Baked Oatmea…

Baked oatmeal is one of my all-time favorite breakfasts. It is so hearty and comforting. I also love making baked oatmeal cups. The individual size cups are so fun and they make a great grab and go breakfast or snack. These Lemon Blueberry Baked Oatmeal Cups are bursting with lemon flavor and juicy blueberries. The…

Bushwacker Drink

The Bushwacker drink is like a mashup of a chocolate milkshake and piña colada! This boozy frozen cocktail stars Kahlua…

The Bushwacker drink is like a mashup of a chocolate milkshake and piña colada! This boozy frozen cocktail stars Kahlua and creme de cacao.

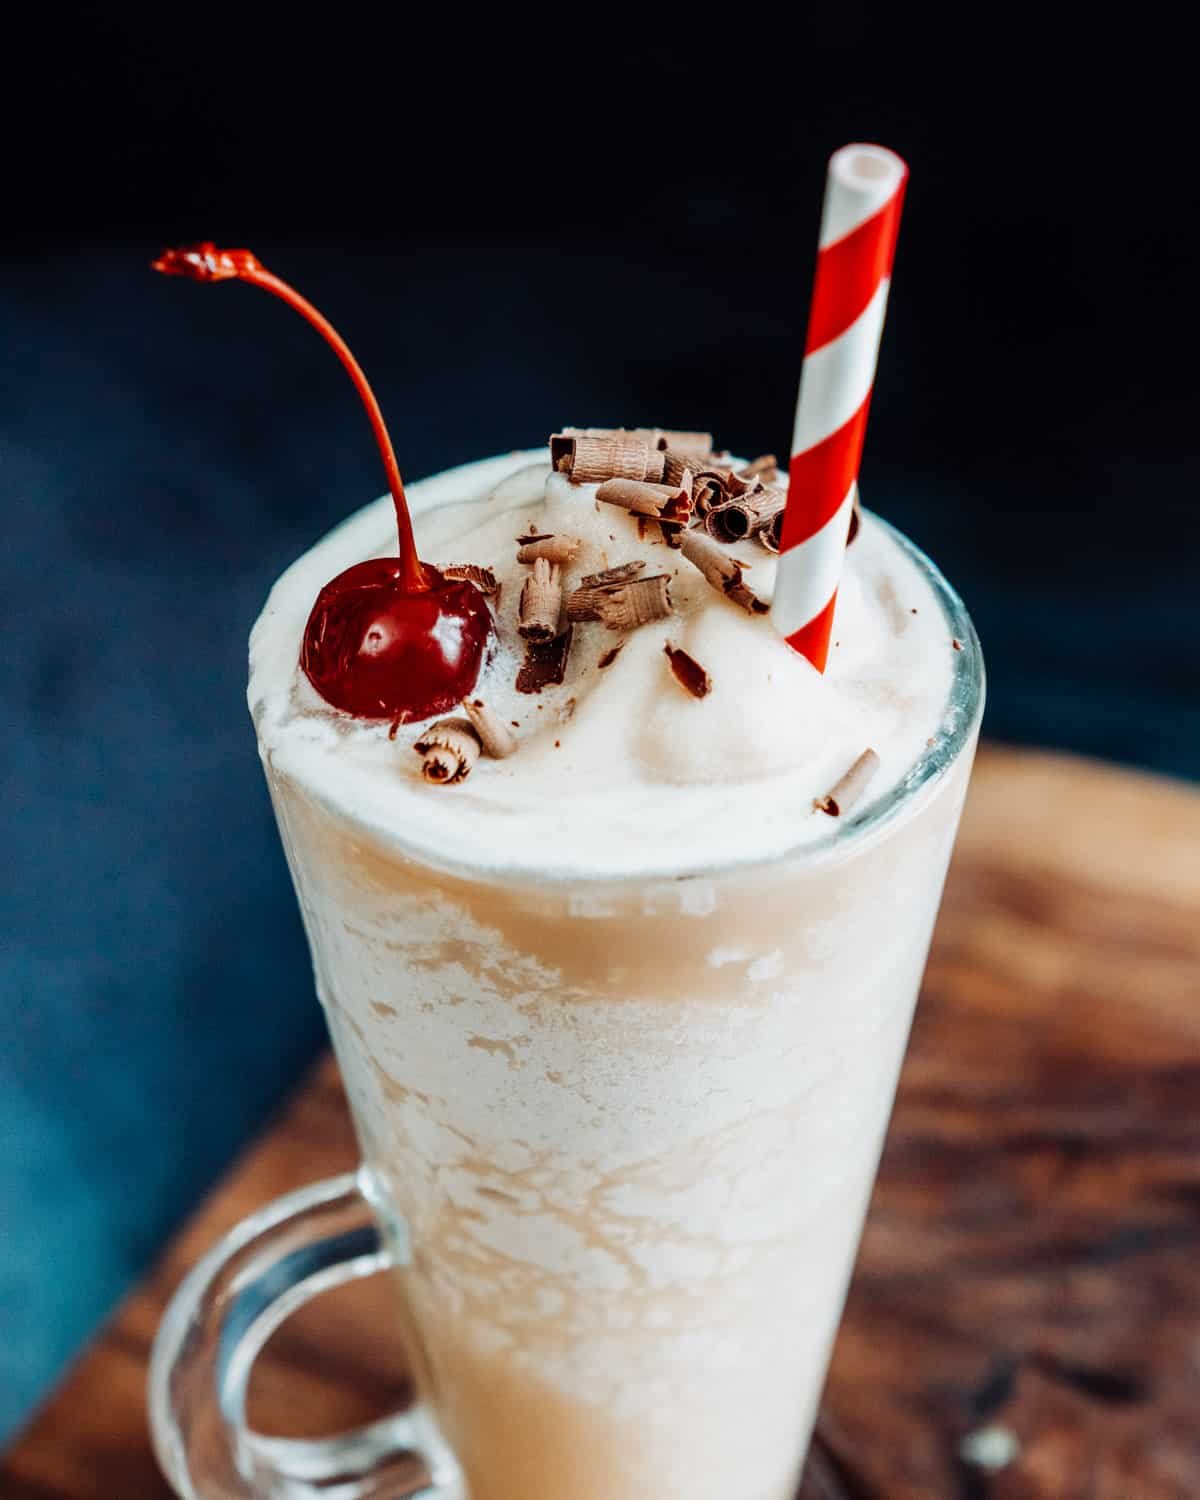
Bushwacker Drink in glass with cherry and chocolate shavings

Here’s a frozen cocktail that will blow your mind with its creamy, chocolaty flavor: the Bushwacker drink! It’s equal parts refreshing and rich—essentially a mashup of a chocolate milkshake and piña colada.

Why we love this recipe: The Bushwacker is lusciously smooth with notes of chocolate, coffee and vanilla. It’s perfect for sipping poolside as a summer cocktail, or as a dessert drink any time you’re dreaming of sun. Here’s everything you need to know to make it!

Bushwacker cocktail ingredients

The Bushwacker is a frozen cocktail made with rum, Kahlua, creme de cacao, cream of coconut, and milk, known for its creamy texture, sweet flavor, and boozy kick. Invented in the 1970’s in St. Thomas, US Virgin Islands, it has since become popular in Florida and the American South. What’s in a Bushwacker? This frozen boozy milkshake relies on these ingredients blended to perfection:

  • Rum: Dark rum is common in a Bushwacker, but you can use aged or white rum. We like this drink with aged rum (golden or añejo), because it has subtle flavor notes of vanilla, coconut, and caramel.
  • Kahlua: Kahlua is a coffee liqueur that’s made in Mexico. You can use other types of coffee liqueur like Tia Maria.
  • Creme de cacao: This chocolate liqueur carries the milkshake flavor.
  • Cream of coconut: Make sure to buy cream of coconut, a sweetened syrup for drinks (not coconut cream, which is a different product).
  • Milk and ice: Any type of milk works here, from 2% to whole to non-dairy milk like oat milk or almond milk. Blend everything with ice to make the Bushwacker!

The story behind the name?

The Bushwacker was invented at the Ship’s Store Pub in St Thomas, U.S. Virgin Islands in 1975 as a tropical spin on the White Russian by bartender Angie Conigliaro and manager Tom Brokamp. Apparently they named it after a guest’s dog, an Afghan hound named Bushwack!

Bushwacker Drink in glass with chocolate shavings and cherry

How to make a Bushwacker drink: step by step

Once you’ve got your specialty liquors, mixing up the Bushwacker drink is a breeze! Here’s what to do (or jump to the full recipe):

  • Step 1: Place 2 ounces (¼ cup) each rum, Kahlua, creme de cacao, cream of coconut, and 2% milk in a blender. Add 3 cups ice and blend.
  • Step 2: Pour into a glass and garnish with a straw. Garnish with a maraschino cherry for a classic presentation. The drink tends to separate, which is normal: just stir it up with your straw while drinking!

Pro tip: There’s no dairy in any of the liqueurs in a Bushwacker drink, so it’s easy to make it a dairy free or vegan cocktail using oat milk.

What is creme de cacao?

Despite what you might think, creme de cacao is not creamy or made with dairy! This special liqueur is one of the oldest around. Here’s more about it:

  • Creme de cacao is a chocolate liqueur, available in both white and dark varieties. It’s possibly one of the first alcoholic beverages, made in the 1600’s by monks after cocoa beans were brought back to Europe from America (source). The original Bushwacker had dark creme de cacao, but white is easier to find and what we call for here.
  • What does creme de cacao taste like? White creme de cacao tastes like milk chocolate with notes of vanilla. The darkvariety tastes richer with dark chocolate notes.
  • Is it worth buying? Yes, if you like dessert drinks! Use it to make creme de cacao drinks like the Brandy AlexanderChocolate Martini, or Grasshopper.

Look for cream of coconut

Another important ingredient in the Bushwacker drink: cream of coconut! If you read one thing in this article, note this: Buy cream of coconut, not coconut cream! What’s the difference? Here’s what to know about cream of coconut vs coconut cream:

  • Cream of coconut is a sweetened syrup for drinks, made with coconut cream and sugar. It’s sold in handy squeeze bottles (a popular brand is Coco Real). Cream of coconut is easy to find online or at liquor stores. Use up leftovers in coconut cocktails like the Piña Colada, Chi Chi, Painkiller, or Coconut Martini.
  • Coconut cream is unsweetened, very thick, and has a strong coconut flavor. It’s typically sold in cans next to the coconut milk. Coconut cream is made from chilling coconut milk and then skimming off the layer of cream that floats to the top. Avoid using it in cocktails!

Pro tip: If you accidentally buy coconut cream, you can still save your Bushwhacker drink! Use 1 oz coconut cream and 1 oz simple syrup in place of the 2 oz cream of coconut.

Use Kahlua or any coffee liqueur

The last ingredient of note in the Bushwacker drink is Kahlua, a popular brand of coffee liqueur. Here’s more about it:

Bushwacker Drink

More sweet & frozen drinks

The Bushwacker is one in a family of sweet cocktails and frozen alcoholic drinks. Here are a few related drinks you might enjoy:

Frequently asked questions

What exactly is a Bushwacker?

This frozen cocktail is a tropical blend of rum, coffee liqueur, cream of coconut, dark crème de cacao, and cream or milk. It’s known for its creamy texture, sweet flavor profile, and boozy kick.

Is a Bushwacker strong?

Generally, it’s not an overly strong drink, but it packs enough alcohol content to be enjoyed responsibly.

What does a Bushwacker taste like?

The dominant flavors are chocolate and coconut, with hints of coffee and rum. The creaminess adds a luxurious mouthfeel, and the overall taste is sweet and refreshing.

Is a Bushwacker similar to a Piña Colada?

While both are creamy and tropical, a Piña Colada features rum, pineapple juice, and cream of coconut. The Bushwacker adds coffee liqueur, dark crème de cacao, and skips the pineapple juice, resulting in a more chocolatey and coffee-forward flavor.

What kind of rum is best for a Bushwacker?

Dark rum is the traditional choice, offering a deeper flavor compared to lighter rums. However, you can also aged rum (anejo) with great results. White rum works too, and has a more straightforward flavor.

Can I use a different type of milk?

Yes! Opt for whole milk for a richer texture, or skim milk for a lighter option. You can also use non-dairy milks like oat milk and almond milk, which make this drink vegan and dairy-free.

What’s the best way to serve a Bushwacker?

Serve your Bushwacker in a chilled hurricane glass for a festive touch. Garnish with a maraschino cherry for a classic presentation.

Print
Bushwacker drink

Classic Bushwacker


  • Author: Sonja Overhiser
  • Prep Time: 5 minutes
  • Cook Time: 0 minutes
  • Total Time: 5 minutes
  • Yield: 2 drinks

Description

The Bushwacker drink is like a mashup of a chocolate milkshake and piña colada! This boozy frozen cocktail stars Kahlua and creme de cacao.


Ingredients

  • 2 ounces (¼ cup) aged, white or dark rum*
  • 2 ounces Kahlua
  • 2 ounces creme de cacao (white or dark; we used white)
  • 2 ounces cream of coconut
  • 2 ounces 2% milk
  • 3 cups ice
  • For the garnish: Shaved chocolate or grated nutmeg, cocktail cherry (optional)

Instructions

  1. Add all ingredients to a blender and blend until smooth.
  2. Garnish with shaved chocolate or grated nutmeg, if desired. Add straws and serve. (You can stir with the straw when the drink starts to separate.)

Notes

*We like using aged rum in this drink, since it brings oak and vanilla undertones. But either white or dark rum work as well. 

  • Category: Drink
  • Method: Blender
  • Cuisine: Cocktails
  • Diet: Vegetarian

Keywords: Bushwacker drink

Blueberry Cake

This blueberry cake recipe is easy to make and bursting with fresh blueberries. Blueberry season calls for my favorite blueberry cake! ♡ I first shared this blueberry cake recipe here ten years ago. And now, over a decade later, it still continues to be a favorite tradition of ours each spring when blueberry season rolls […]

This blueberry cake recipe is easy to make and bursting with fresh blueberries.

Blueberry season calls for my favorite blueberry cake! ♡

I first shared this blueberry cake recipe here ten years ago. And now, over a decade later, it still continues to be a favorite tradition of ours each spring when blueberry season rolls back around. It’s loaded up with a full two pints of fresh blueberries, which add a burst of vibrant sweetness to each bite. Then when mixed with a simple vanilla white cake batter, baked up in a bundt pan, and drizzled lightly with a sweet glaze, this cake is downright lovely through and through. Always such a beautiful cake for springtime!

In the years since I first shared this recipe, I’ve come to love adding a hint of lemon to brighten up the cake batter and glaze. And while I love this cake with fresh blueberries, I’ve also updated the notes below with instructions on how to make it using frozen blueberries too if that’s what you have on hand.

This recipe is always a winner in our house, so I hope you enjoy it as much as we do!

(more…)

Orange Julius

This perfect Orange Julius recipe is refreshing, easy-to-make, and packed with creamy citrus flavor for a quick summer treat or healthy snack.

The post Orange Julius appeared first on Budget Bytes.

I know it’s still spring, but the days are getting warmer, the sun is starting to shine, and I am ready for summer and all of its cold, fruity drinks. And let me tell you, this Orange Julius is going to be the drink of the summer for me. It only takes a few minutes to whip up this super easy Orange Julius recipe and is the perfect cold and creamy treat to make me feel like I’m vacationing somewhere in the tropics (a girl’s gotta dream). Not to mention, there are so many ways you can vary this Orange Julius recipe to make it more dessert-like, more healthy like a breakfast smoothie, or even turn it into an afternoon cocktail, so I’m truly going to be sipping this one all. summer. long. Don’t miss my variation suggestions below!

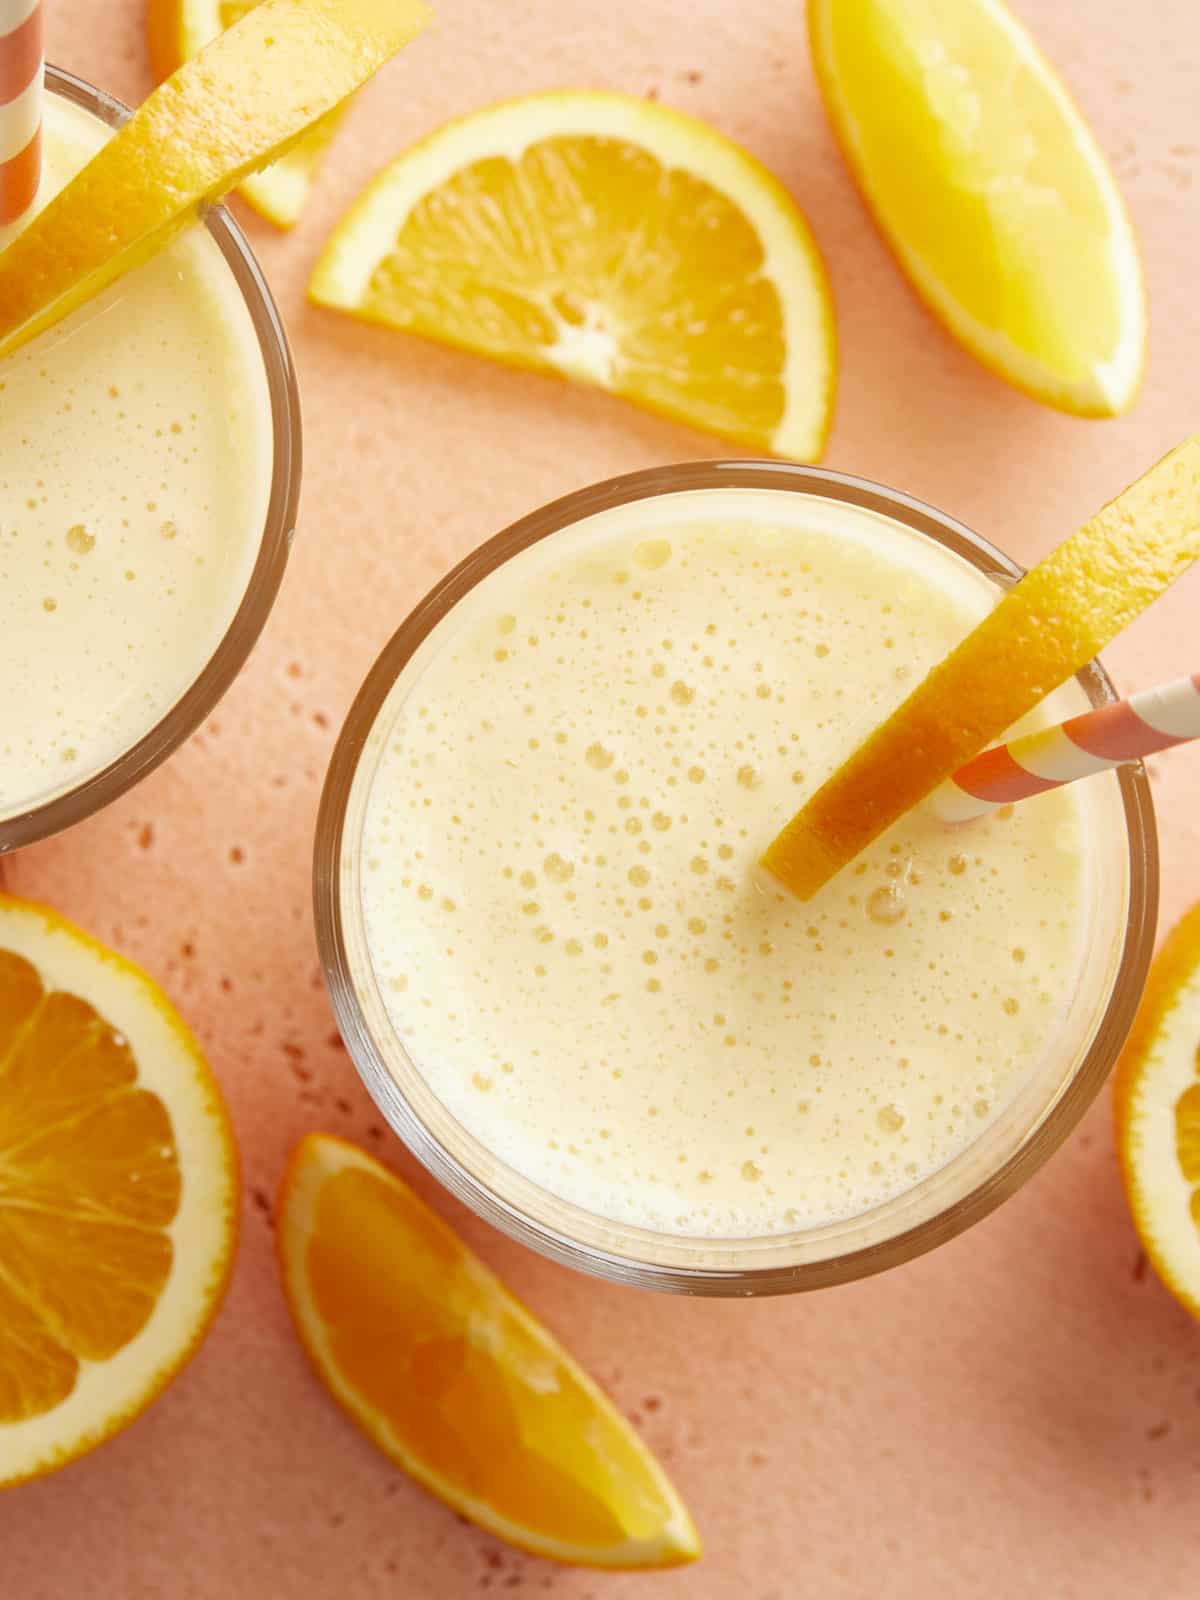
overhead view of two glasses full of orange juilius with straws and orange slices.

What is An Orange Julius?

Orange Julius is a refreshing and creamy orange drink made with orange juice, milk, sugar, vanilla, and egg whites which create a super frothy texture. The drink was invented by Julius Freed at his Los Angeles juice stand in 1926 and has been a summertime favorite ever since. The drink grew in popularity over the years and was even deemed the official drink of the 1964 World’s Fair Exposition. In the decades since it has become a staple in shopping malls and on Dairy Queen’s menu. Today’s it’s usually made without egg white, but it’s still just as dreamy and creamy as ever. And the best part? You don’t have to shell out $6 per Julius at an ice cream stand because these deliciously creamy citrus drinks are so easy to make at home!

Ingredients for Orange Julius

You’ll only need four simple ingredients to make a homemade Orange Julius (plus ice). Here’s what you’ll need for this recipe:

  • Frozen Orange Juice Concentrate: This is the secret ingredient for making a super citrusy Orange Julius without it getting too watery. The orange juice concentrate adds a ton of sweet-tart orange flavor while allowing the smoothie to stay thick and frothy.
  • Milk: Whole milk is added to balance the acidity in the orange juice and give the Orange Julius its characteristic creamy flavor. While you can use a lower fat milk, it will affect the creaminess of the drink. Whole milk is recommended.
  • Sugar: A little bit of sugar helps balance the acidity and bitterness in the orange juice concentrate so the Julius has a deliciously sweet and smooth finish.
  • Vanilla: Vanilla adds to the creamy flavor profile and gives the drink an orange creamsicle-like flavor.
  • Ice: Ice makes the Orange Julius super cold and helps create a deliciously thick and frothy texture. You can increase or decrease the ice to make the smoothie your desired texture.

Can You Make Orange Julius with Orange Juice?

The recipe below uses frozen orange juice concentrate to deliver a really strong orange flavor while keeping the smoothie thick and rich. You can substitute about 2 cups of fresh orange juice in place of the orange juice concentrate, but it will make the Julius much less thick and the flavor will not be as bold. For the richest, boldest flavor, definitely buy orange juice concentrate. The remainder of the can can be easily stored in your freezer for your next Orange Julius, so it’s worth purchasing!

Orange Julius Variations

I love a simple classic Orange Julius, but there are so many fun ways you can change the recipe to make it your own. Here are some other ingredients you can add to an Orange Julius for variety:

  • Fruity Flavors: Try adding banana, mango, or pineapple for a tropical twist, or strawberries for a summery flavor.
  • Vegan Orange Julius: Make it vegan by replacing the whole milk with canned light coconut milk (not the kind in a carton that is intended as a milk substitute).
  • Protein Julius: Turn it into a protein smoothie by adding vanilla Greek yogurt or your favorite vanilla protein powder.
  • Green Julius: Add a handful or two of baby spinach to make a creamy, citrusy, green smoothie.
  • Boozy Orange Julius: Add vodka or rum to make a fun “adult” Orange Julius.
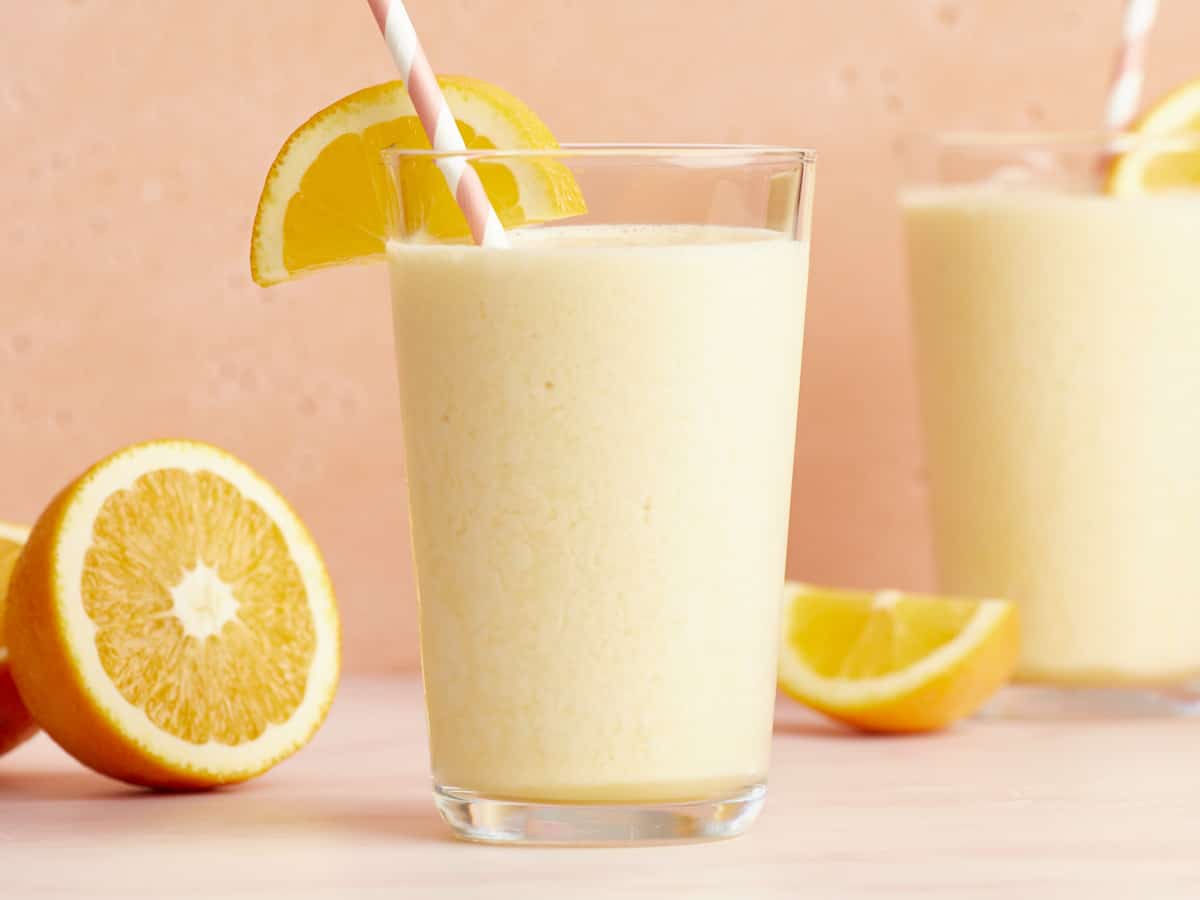
Side view of two glasses full of Orange Julius with striped straws and orange slices.
Overhead view of two glasses of orange julius with straws and orange slices.
Print

Orange Julius

This perfect Orange Julius recipe is refreshing, easy to-make, and packed with creamy citrus flavor for a quick summer treat or healthy snack.
Course Beverage, Breakfast, Dessert
Cuisine American
Total Cost $1.87 recipe / $0.94 serving
Prep Time 5 minutes
Total Time 5 minutes
Servings 2 (12oz. each)
Calories 253kcal

Equipment

Ingredients

  • 1/2 cup frozen orange juice concentrate $1.16
  • 1 cup whole milk $0.20
  • 1 tsp vanilla extract $0.45
  • 3 Tbsp granulated sugar $0.06
  • 1 cup ice $0.00

Instructions

  • Place all of the ingredients in a blender and blend until smooth and frothy.
  • If your Orange Julius is not thick enough, add more ice. If the Julius is too thick, add a little water or milk and blend again until you reach the desired consistency. Serve immediately and enjoy!

See how we calculate recipe costs here.

Nutrition

Serving: 12oz | Calories: 253kcal | Carbohydrates: 49g | Protein: 6g | Fat: 4g | Sodium: 58mg | Fiber: 1g

How to Make An Orange Julius – Step by Step Photos

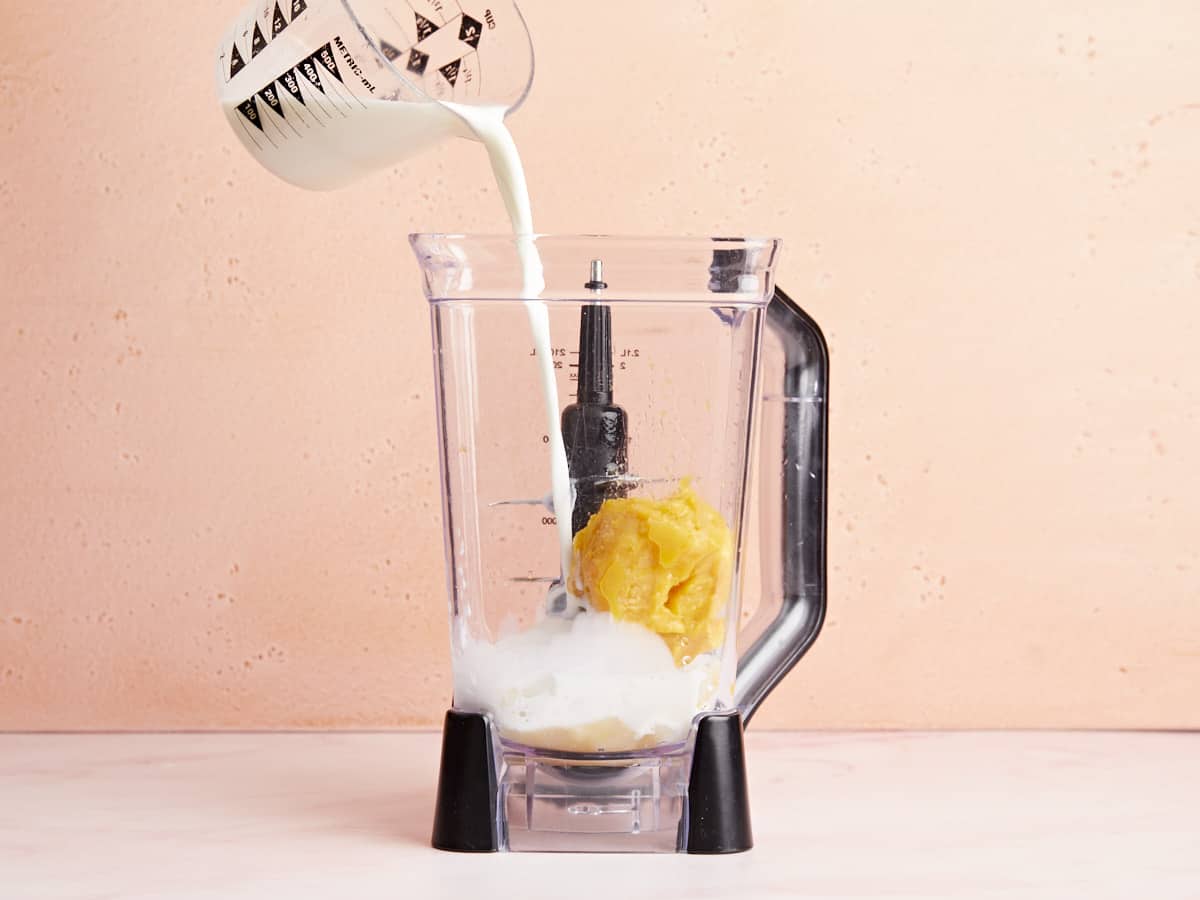
Ingredients being added to a blender.

Add ½ cup frozen orange juice concentrate, 1 cup whole milk, 1 tsp vanilla extract, 3 Tbsp granulated sugar, and 1 cup ice to a blender.

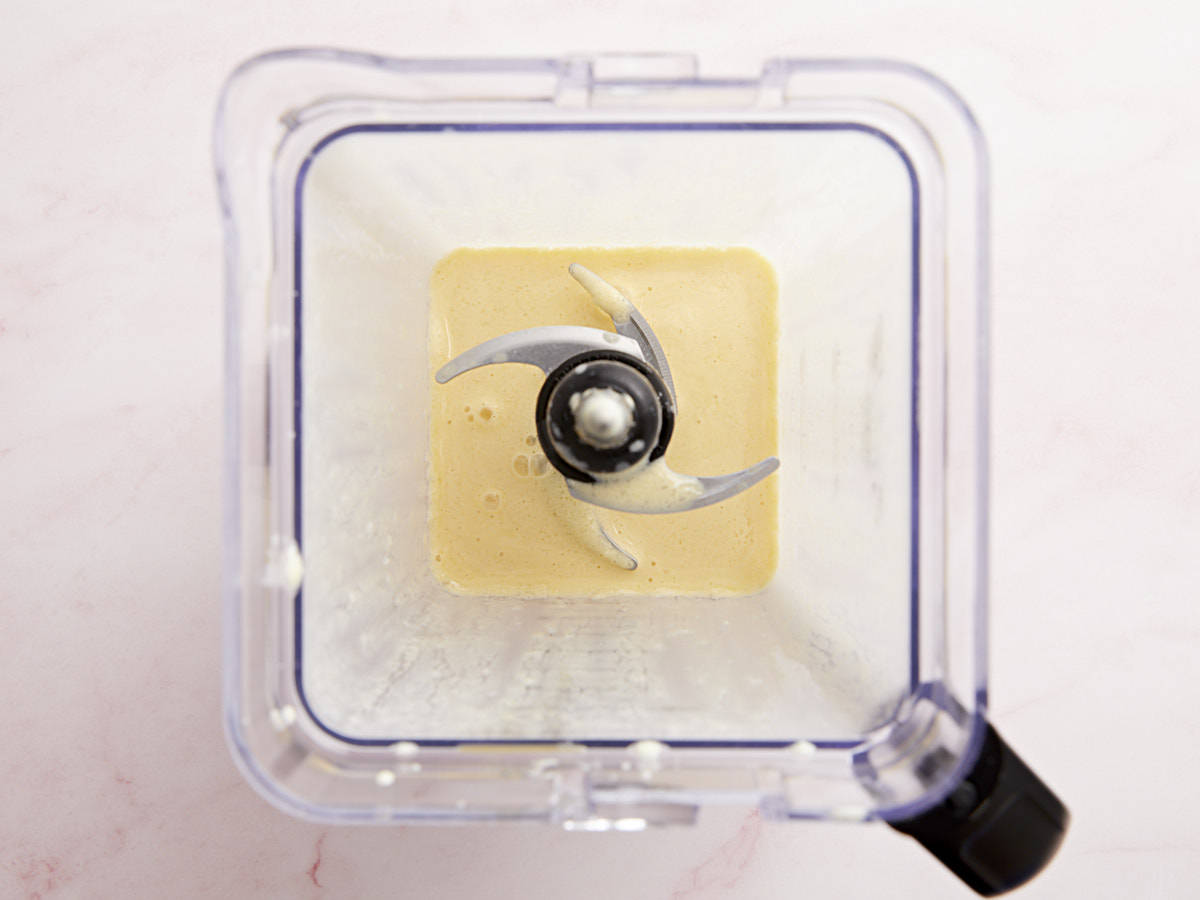
Blended Orange Julius in a blender from above.

Blend everything together until it is smooth and frothy. Adjust the consistency of your Orange Julius by adding more ice to make it thicker or adding a little water or milk to thin it out.

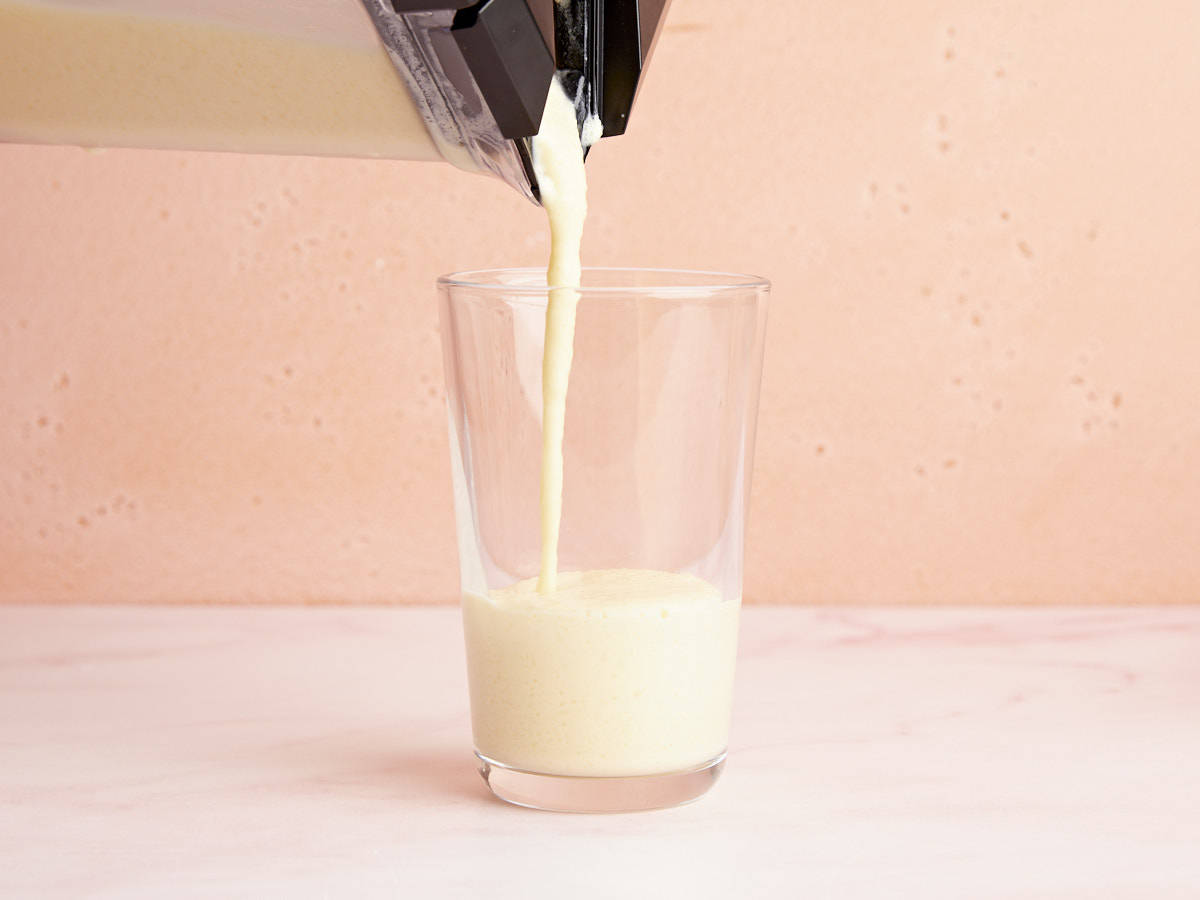
Orange Julius being poured from the blender into a glass.

Pour the homemade Orange Julius into a large glass and enjoy immediately!

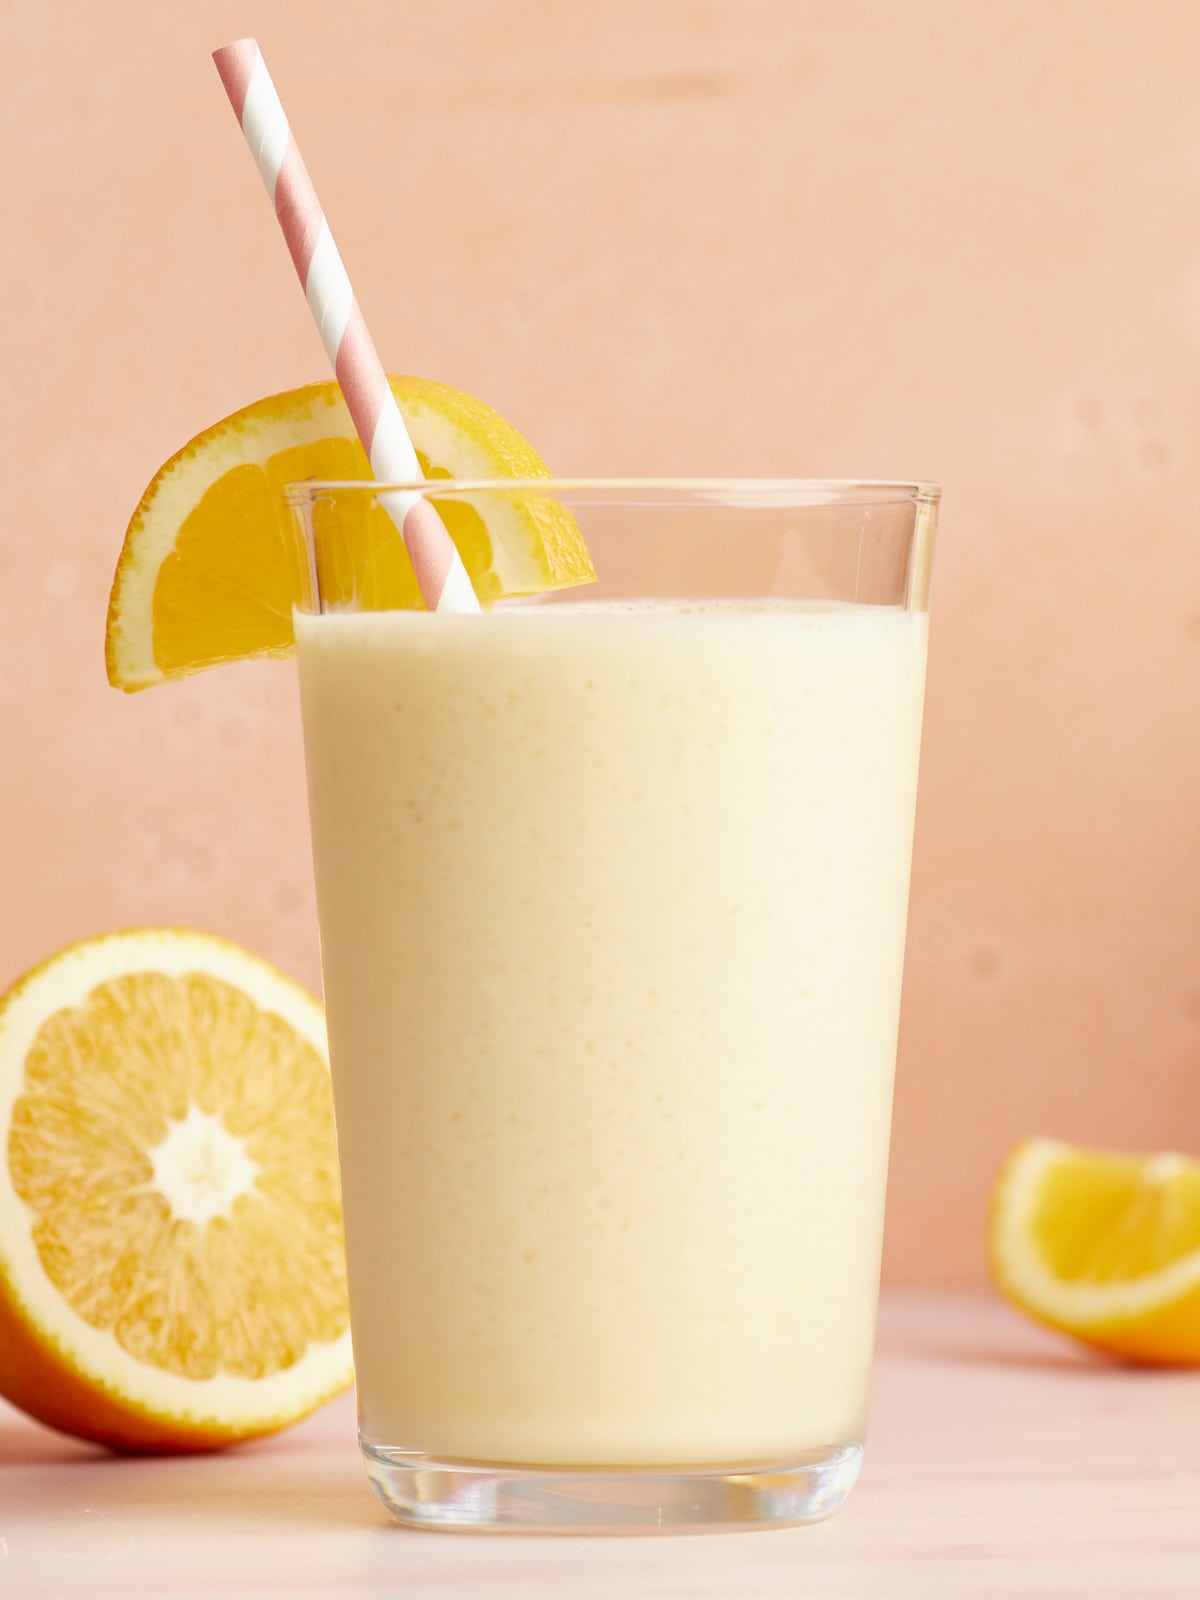
Side view of an Orange Julius in a glass with a striped straw and orange slices.

The post Orange Julius appeared first on Budget Bytes.

Ham and Potato Soup

This ham and potato soup is creamy but not too heavy and loaded with fresh veggies and salty ham. It’s perfect for the seasonal transition!

The post Ham and Potato Soup appeared first on Budget Bytes.

These hot and cold spring days have me feeling all kinds of confused about what to make for dinner. One day it’s warm and sunny, and the next it feels like winter all over again. But no matter the mood, I feel like soup is always the right answer, and this Ham and Potato Soup is a crowd pleaser. Creamy but not too heavy, and loaded with fresh veggies and salty ham, this soup is perfect for this transitional season!

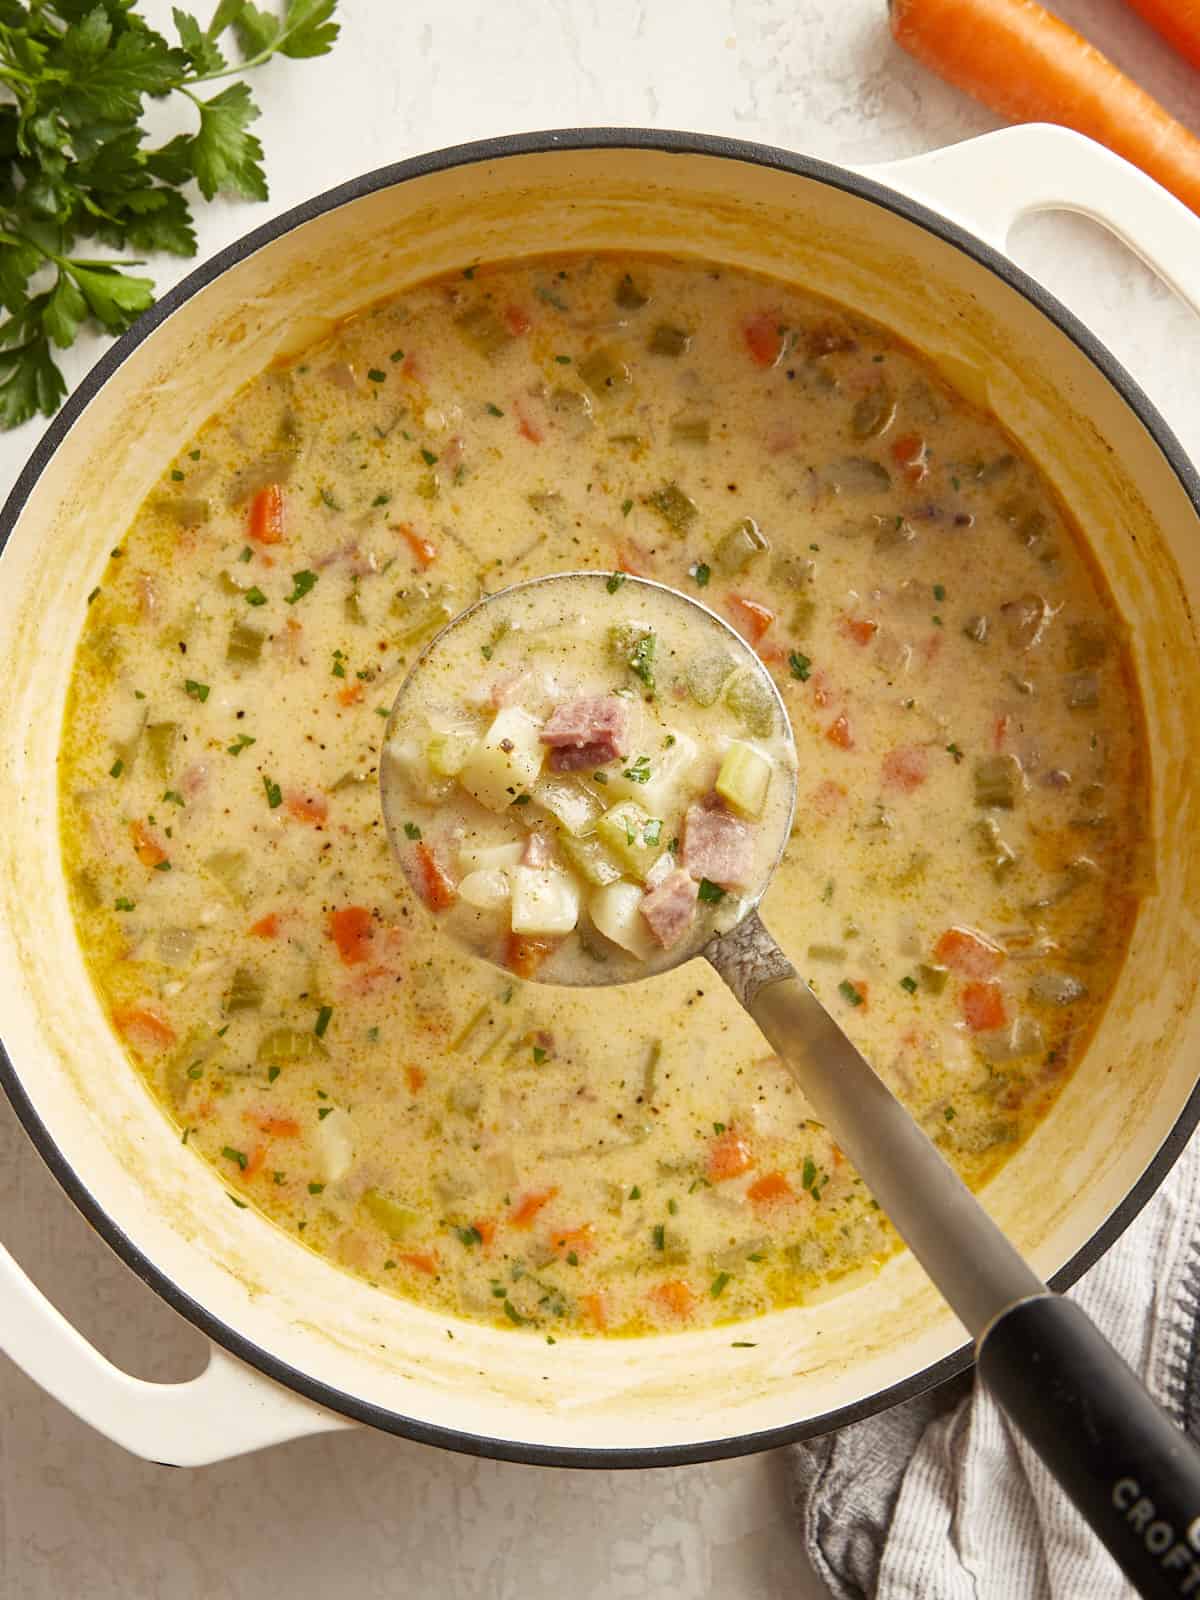
a ladleful of ham and potato soup suspended over a pot of soup.

What is Ham and Potato Soup?

This rich and creamy soup is made from a base of vegetable broth enriched with milk and butter and stuffed to the brim with fresh veggies, chunky potatoes, and salty ham. It’s real belly-warming food, perfect for taking the chill off!

Ingredients for Ham and Potato Soup

Here’s what you’ll need to make ham and potato soup:

  • Oil: I used olive oil, but a neutral-flavored oil like canola or vegetable oil will also work well.
  • Mirepoix: A base of celery, carrots, and onion builds the flavor of this soup.
  • Potatoes: I used 2 medium potatoes, which came out to be 3 1/2 cups once diced. I prefer to peel my potatoes for this recipe, but you can leave the skins on if you like them!
  • Cooked Ham: You can buy a ham steak or use your leftover ham from our Baked Ham recipe! Vegetarian? No problem. You can leave out the ham and this becomes more of a vegetable chowder and it is delicious!
  • Vegetable Broth: You’ll need 6 cups, or you can dissolve 2 Tbsp of vegetable bouillon in 6 cups of water. You can also use Chicken Broth if that’s what you have on hand!
  • Salted Butter: Adds richness and helps form the roux that thickens the soup.
  • All-Purpose Flour: Combines with the butter to form a roux that thickens the soup.
  • Milk: Adds creaminess to the soup.
  • Salt and Pepper: Enhance the overall flavor of the soup.
  • Parsley: A bit of minced fresh parsley adds some color and freshness to the soup.

What Potatoes Are Best For Soup?

The best potato for any given soup really depends on the texture you’re after.

  • With this soup, I wanted to keep distinct chunks of intact potato, so I went for red potatoes. Other varieties that hold their shape well include new potatoes, baby potatoes, and fingerlings.
  • If you’re looking for your potatoes to soften up a bit more but still mostly hold their shape, Yukon Golds are a great choice for this soup.
  • Starchier potatoes, like Russets, will melt into the soup, making it super thick, but you won’t get the whole potato texture in every bite.

A Note on Salt

You may not need any salt depending on the ham you’re using, so taste often and adjust as you see fit. Between the salted butter, bouillon, and the ham from our Baked Ham recipe, I didn’t have a need for more than a pinch of additional salt.

How Do You Thicken Ham and Potato SOup?

I chose to thicken this soup with what’s known as a “blonde roux.” It’s a mixture of butter and flour that is cooked over medium-low heat until it juuust starts to change color from white to blonde. This deepens the flavor of the soup without overpowering the natural flavor of the other ingredients.

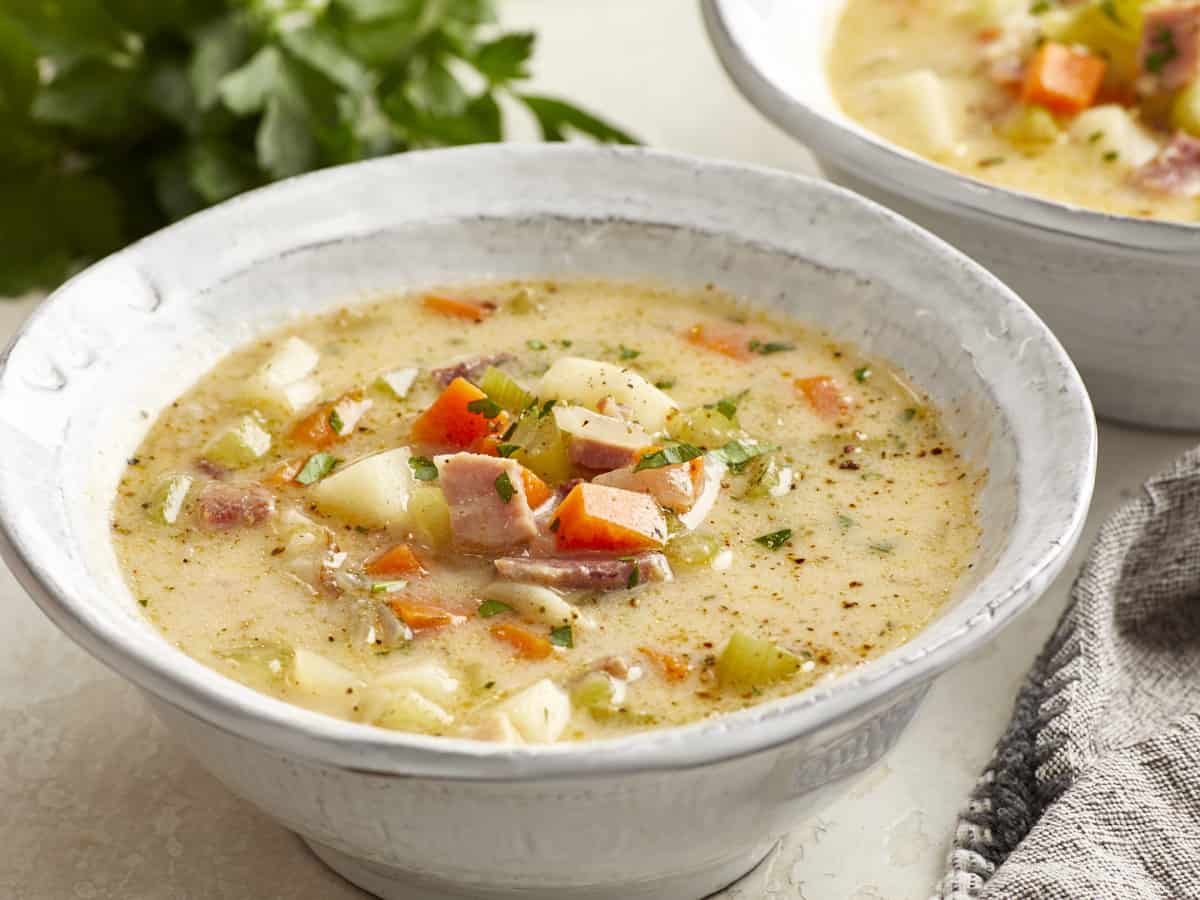
three-quarters view of a serving of ham and potato soup in a white bowl.
a ladleful of ham and potato soup suspended over a pot of soup.
Print

Ham and Potato Soup

This ham and potato soup is creamy but not too heavy and loaded with fresh veggies and salty ham. It's perfect for the seasonal transition!
Course Dinner, Main Course, Soup
Cuisine American
Total Cost $11.24 recipe / $1.40 serving
Prep Time 20 minutes
Cook Time 40 minutes
Total Time 1 hour
Servings 8 (1.5 cups each)
Calories 212kcal
Author Jess Rice

Equipment

Ingredients

  • 2 Tbsp olive oil $0.34
  • 2 carrots, peeled and diced $0.20
  • 3 stalks celery, diced $0.30
  • 1 small white onion, diced $1.02
  • 2 medium potatoes, peeled and diced (roughly 3½ cups) $1.66
  • 6 cups vegetable broth $0.53
  • 2 cups cooked diced ham $6.38
  • 2 Tbsp salted butter $0.24
  • 1/4 cup all-purpose flour $0.05
  • 2 cups milk $0.38
  • 2 Tbsp minced fresh parsley $0.08
  • 1 tsp freshly cracked black pepper $0.05
  • Salt, to taste $0.01

Instructions

  • In the stock pot, add 2 Tbsp olive oil on medium heat. Add the carrots, celery, and onion and cook down until slightly softened and the onions are nice and glossy, about 5 minutes.
  • Add potatoes, vegetable broth, and ham in the stockpot. Bring the pot to a boil. Once boiling, turn the heat down to medium and let the potatoes simmer for about 15 minutes, or until they are tender. Stir in the pepper.
  • Melt the butter in a separate medium-size saucepan over medium-low heat. Whisk in the all-purpose flour until smooth. Cook for about 1 minute. (Note: this is a “blonde roux” so you don’t want the flour to toast too much!) Whisk in milk and cook for about 4 minutes until thick and warm.
  • Pour milk/roux mixture into the stockpot with ham soup and whisk to combine. Cook until all vegetables reach desired tenderness and soup thickens to your liking, another 10 minutes should do it. Add the parsley, additional salt and pepper if needed and enjoy!

See how we calculate recipe costs here.

Notes

This makes 12 cups of soup, but we found 1 1/2 cups to be perfect for a meal, so if that’s your serving size, you can serve 8 people.

Nutrition

Serving: 1bowl | Calories: 212kcal | Carbohydrates: 20g | Protein: 9g | Fat: 11g | Sodium: 1109mg | Fiber: 2g
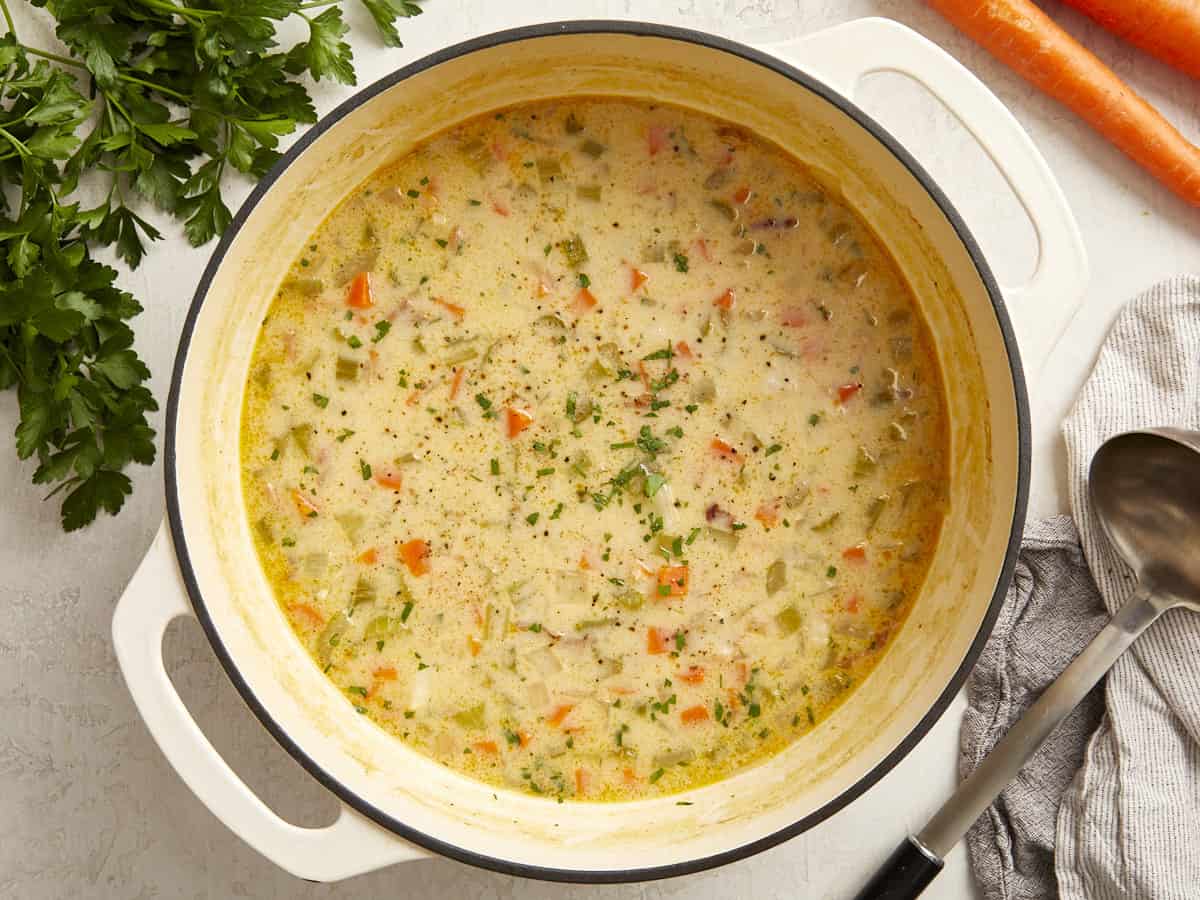
overhead view of ham and potato soup in a white dutch oven.

how to make Ham and Potato Soup – step by step photos

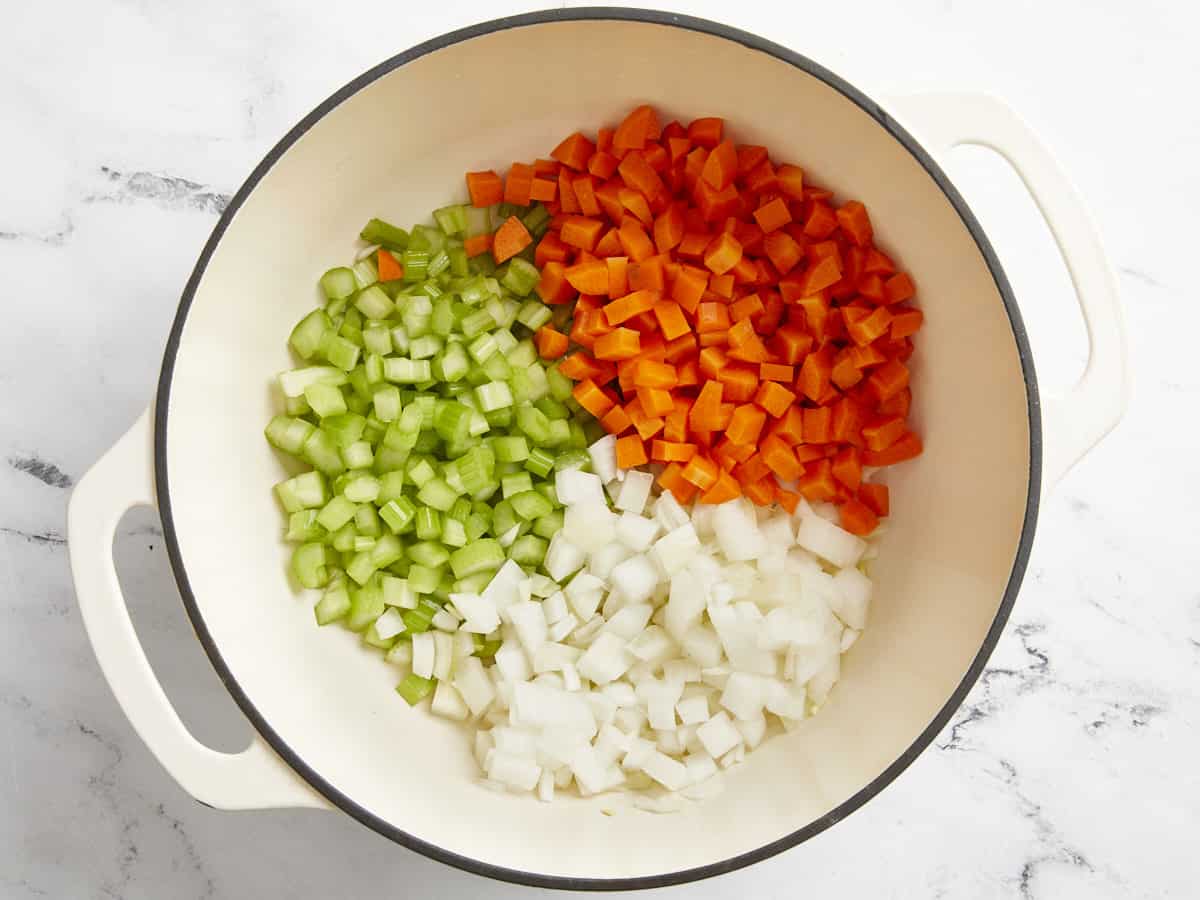
chopped celery, carrots, and onions in s white dutch oven.

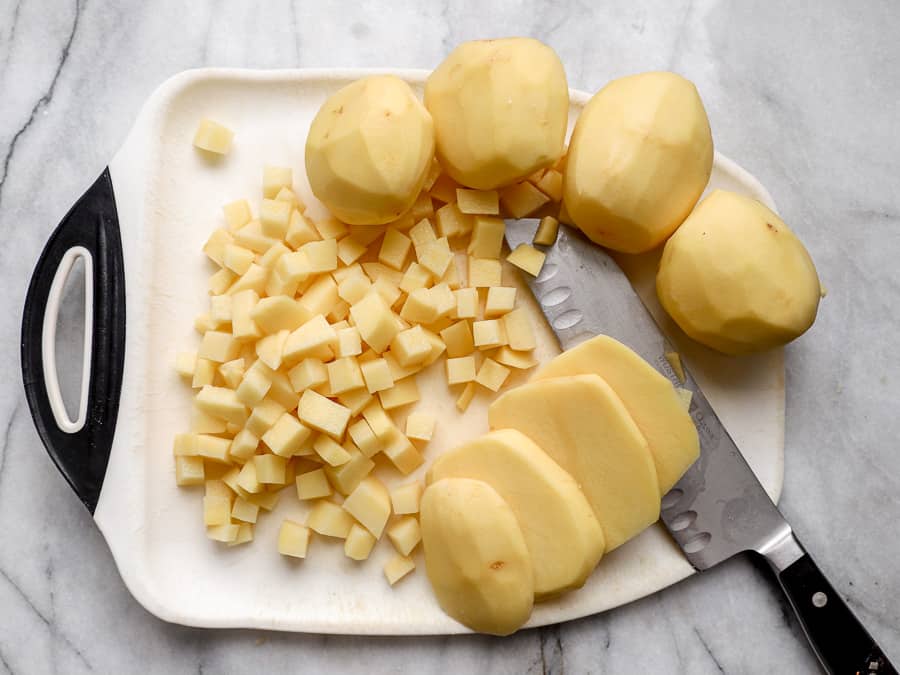
In your stock pot, add 2 Tbsp olive oil on medium heat. Add 2 peeled and diced carrots, 3 diced stalks celery, and 1 diced small white onion and cook down until slightly softened and the onions are nice and glossy, about 5 minutes.

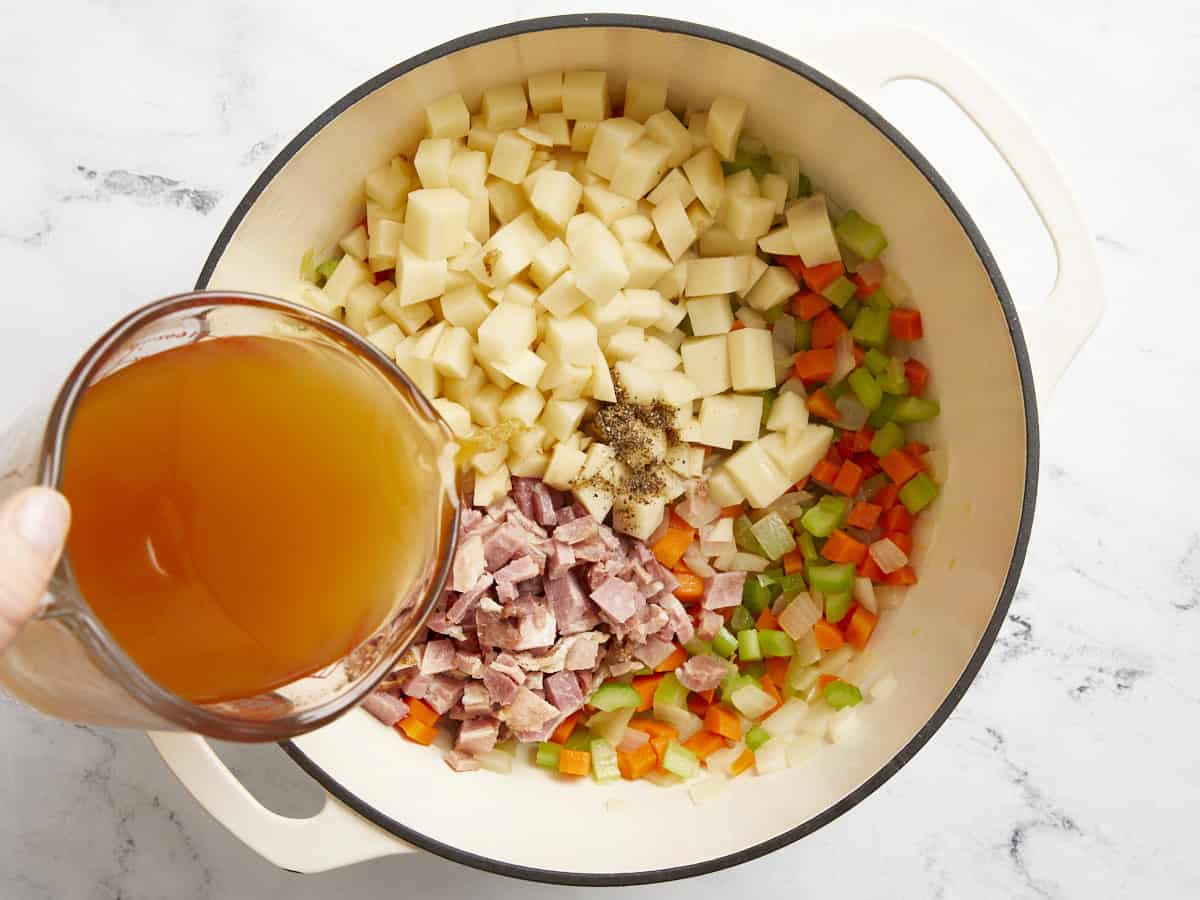
broth poured over mirepoix, potatoes, and ham in a dutch oven.

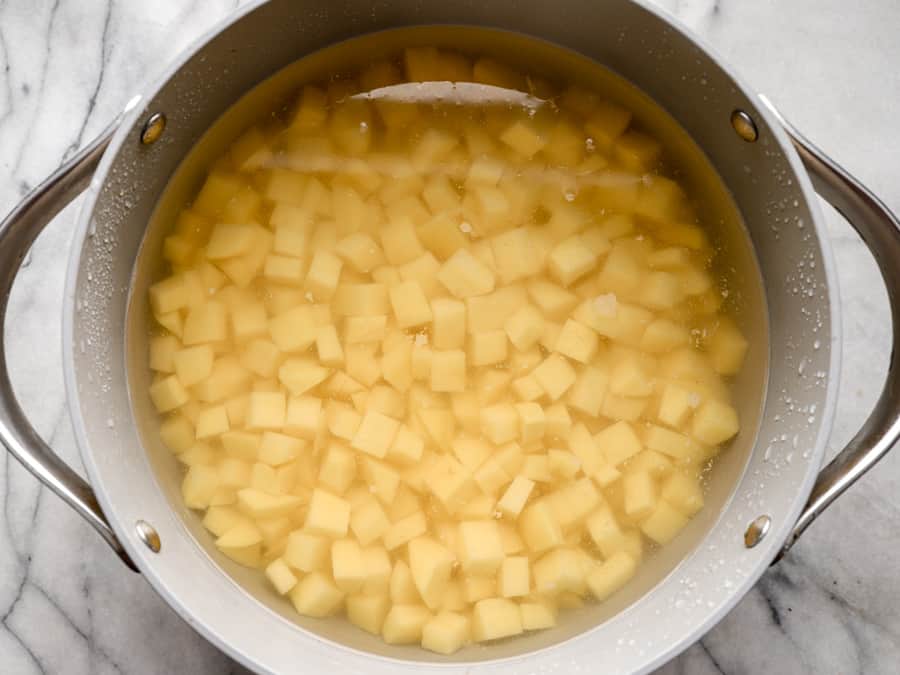
Add 2 peeled and diced potatoes, 6 cups vegetable broth, and 2 cups diced cooked ham in the stockpot. Bring to a boil; simmer over medium heat until potatoes are tender, about 15 minutes. Stir in your 1 tsp black pepper.

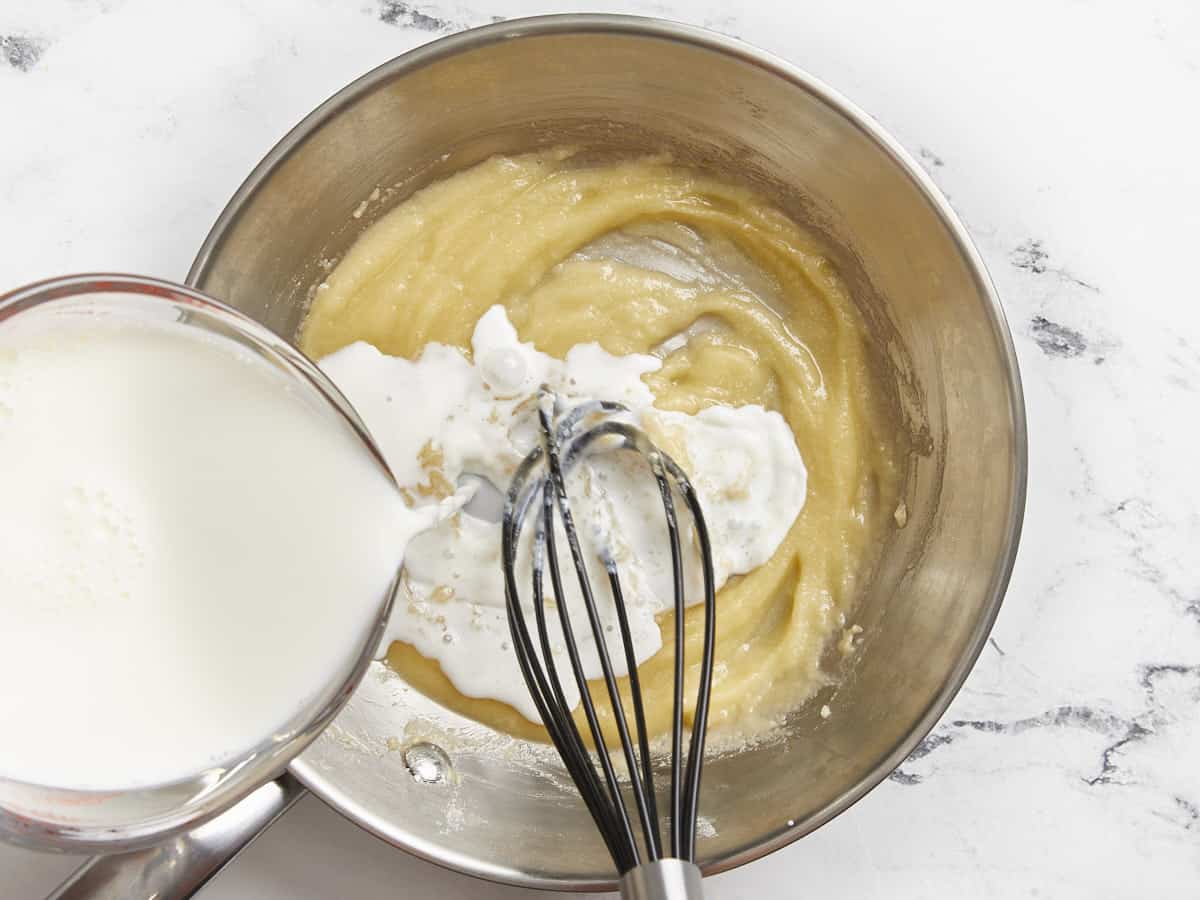
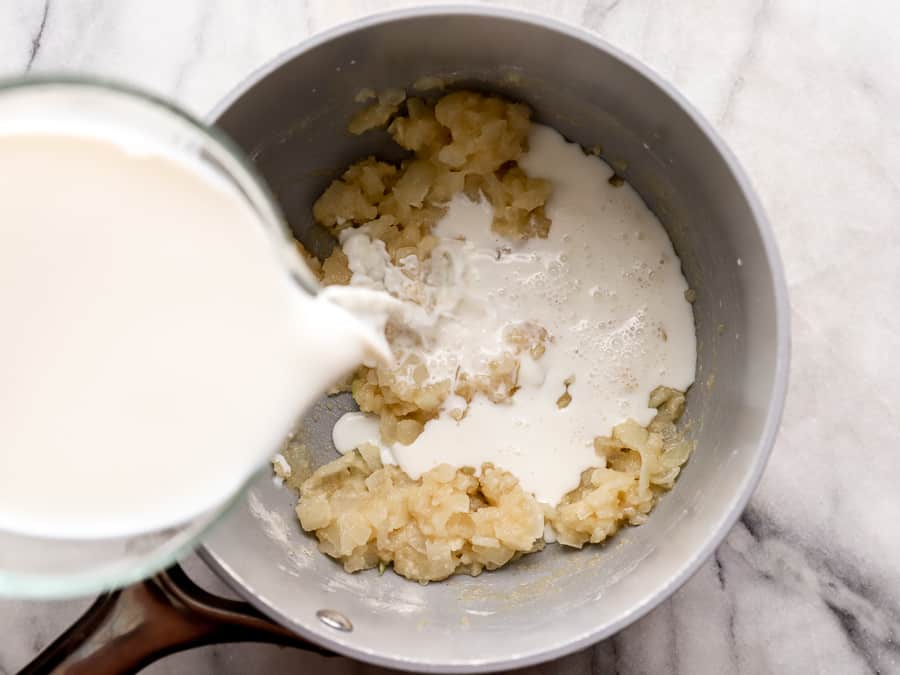
milk poured over butter and flour paste in a frying pan with a whisk.

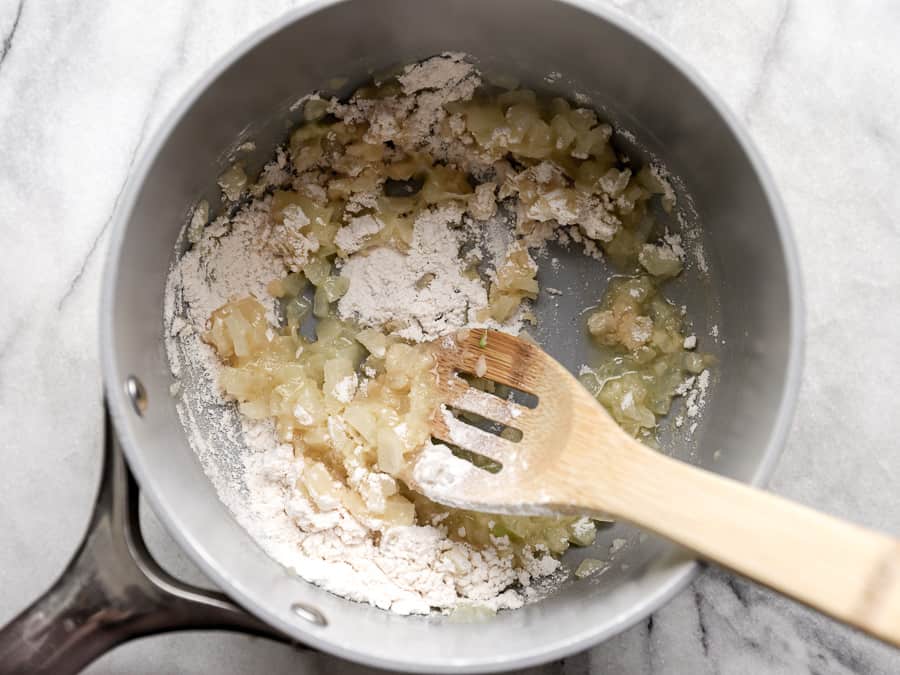
Melt 2 Tbsp salted butter in a separate medium-size saucepan over medium-low heat. Whisk in 1/4 cup all-purpose flour until smooth. Cook for about 1 minute. (Note: this is a “blonde roux” so you don’t want the flour to toast too much!) Whisk in 2 cups milk and cook for about 4 minutes until thick and warm.

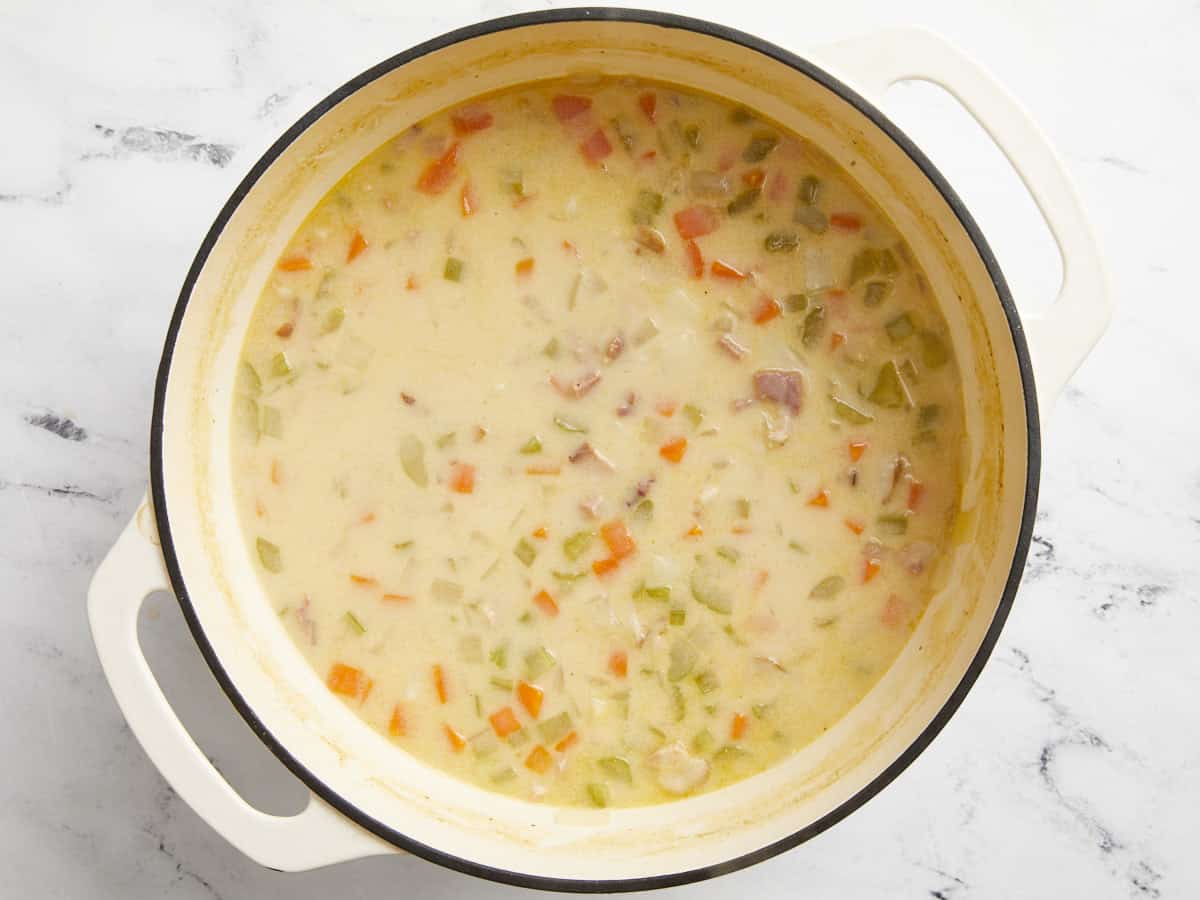
ham and potato soup in a dutch oven.

Pour milk/roux mixture into the stockpot with ham soup and whisk to combine. Cook until all vegetables reach desired tenderness and soup thickens to your liking, another 10 minutes should do it. Add parsley, additional salt, and pepper if needed and enjoy!

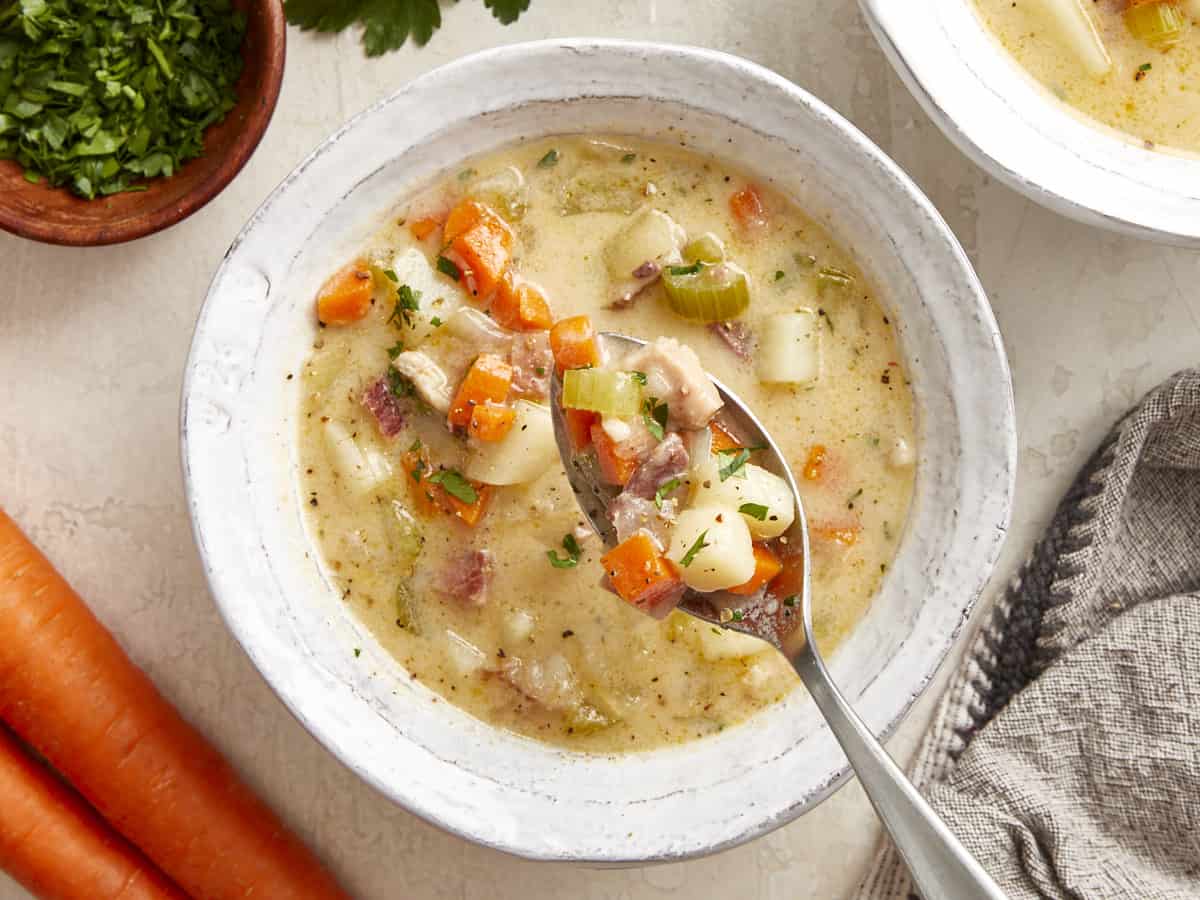
overhead view of a spoonful of ham and potato soup suspended above a serving of soup in a white bowl.

This creamy ham and potato soup is perfect for the changing seasons!

The post Ham and Potato Soup appeared first on Budget Bytes.

Broccoli Mac and Cheese

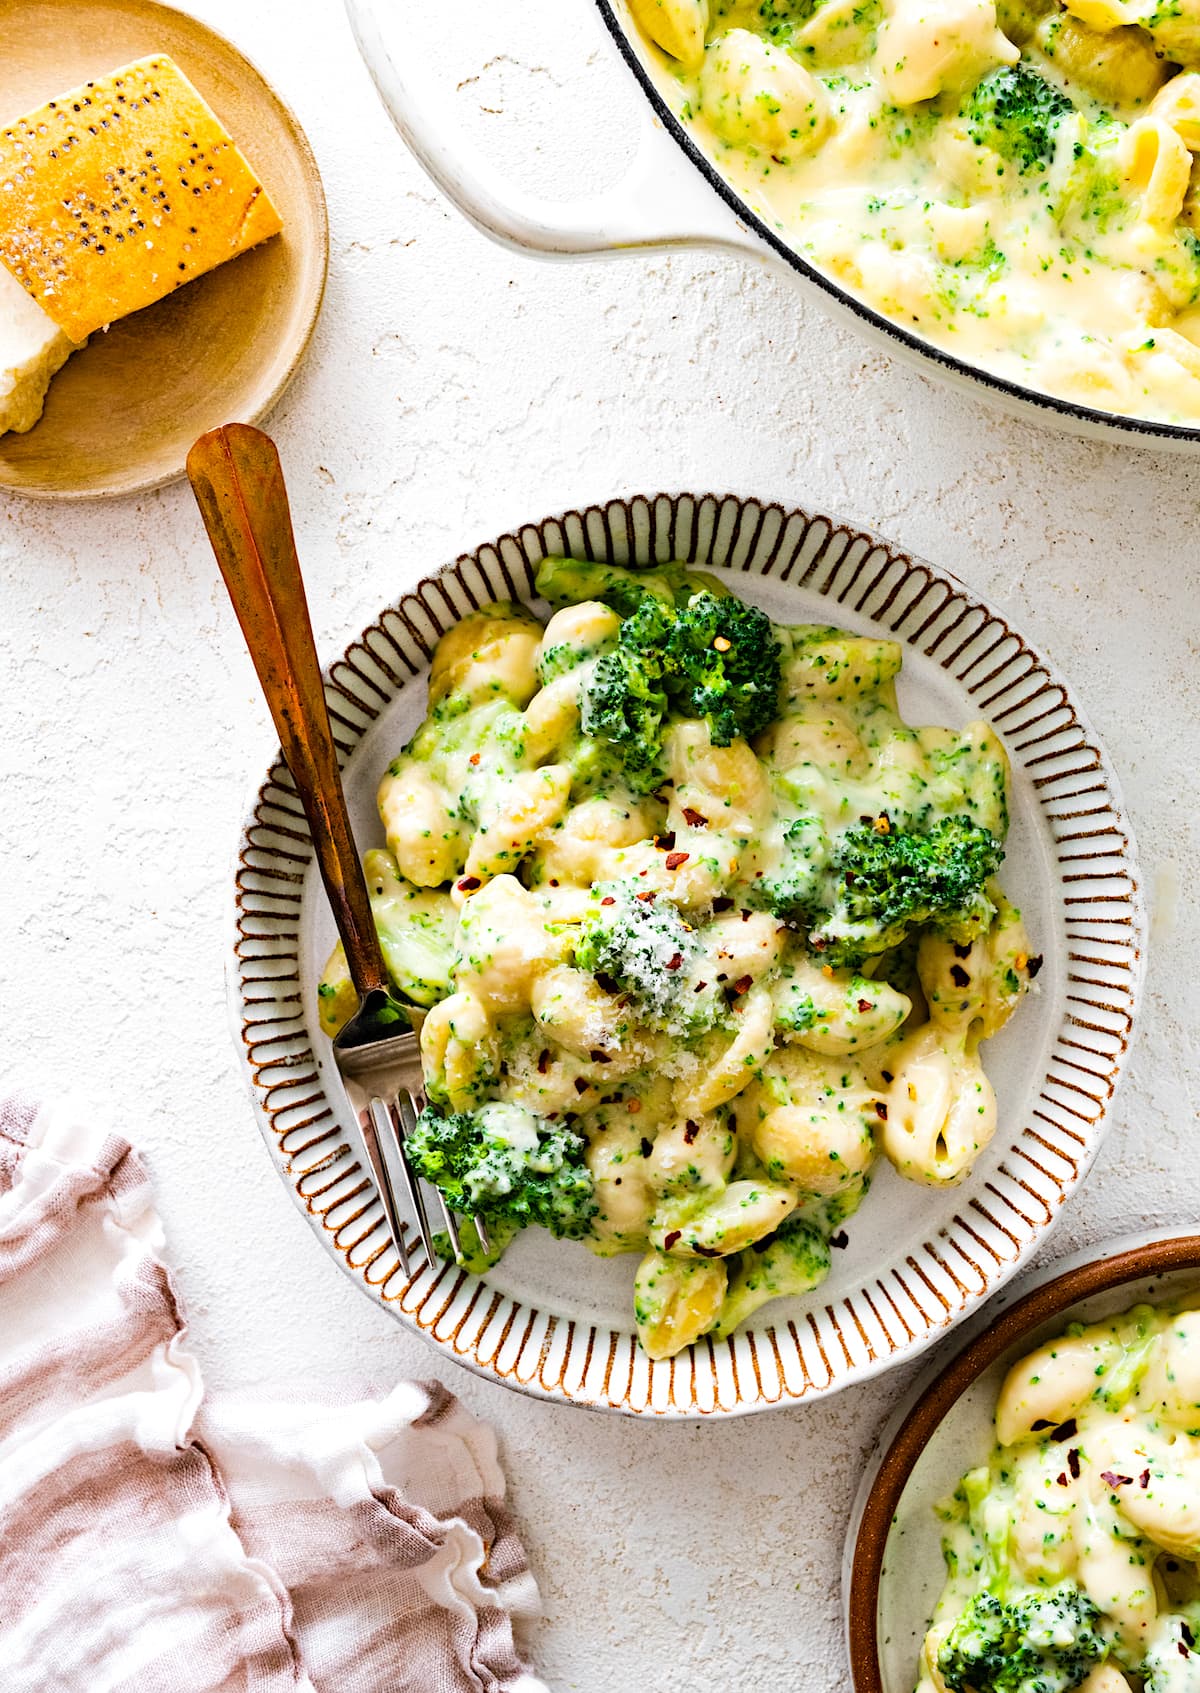
Mac and cheese is classic comfort food. We love making baked mac and cheese and stovetop mac and cheese, but we also love this easy Broccoli Mac and Cheese. The addition broccoli is SO good, broccoli and cheese are a match made in heaven…if you&#…

Mac and cheese is classic comfort food. We love making baked mac and cheese and stovetop mac and cheese, but we also love this easy Broccoli Mac and Cheese. The addition broccoli is SO good, broccoli and cheese are a match made in heaven…if you’ve made Broccoli Cheese Soup, you know it’s true! I love…
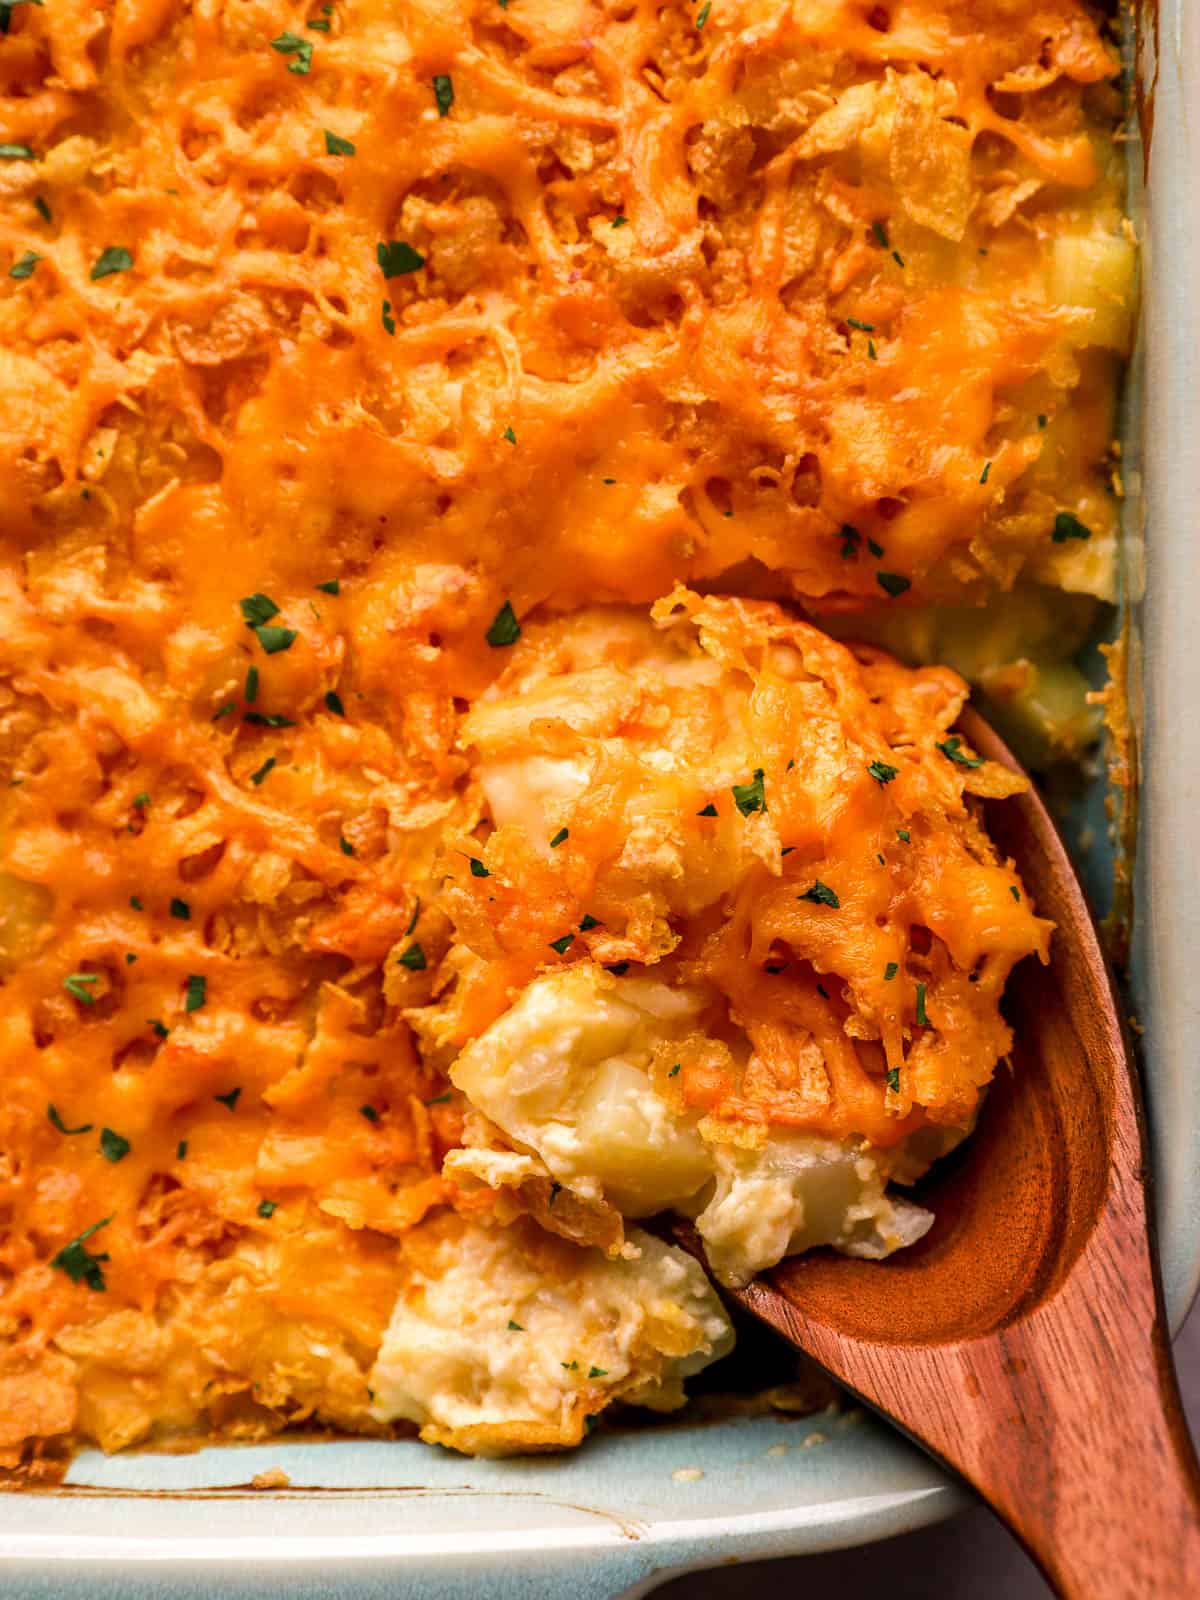
Potato Casserole

Make those potatoes go the extra mile with this cheesy potato casserole! Fit to serve a crowd, this casserole is the ultimate comfort food.

The post Potato Casserole appeared first on Budget Bytes.

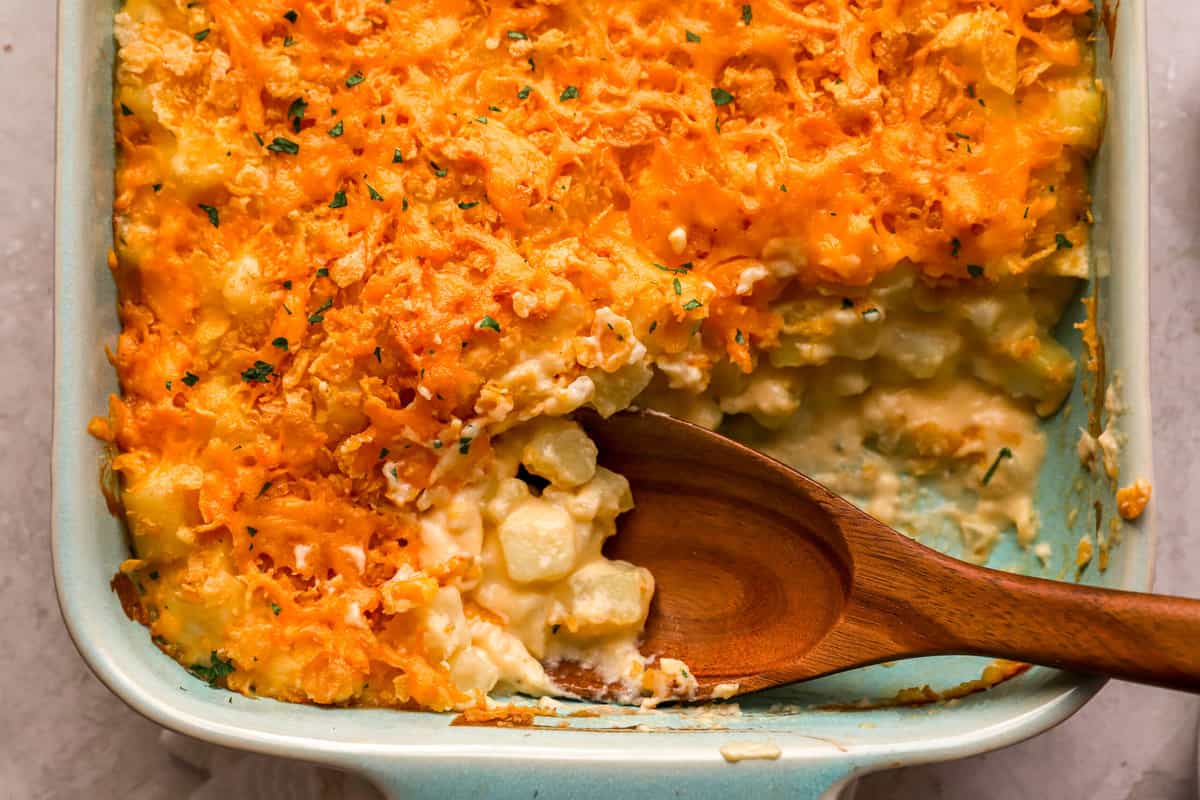
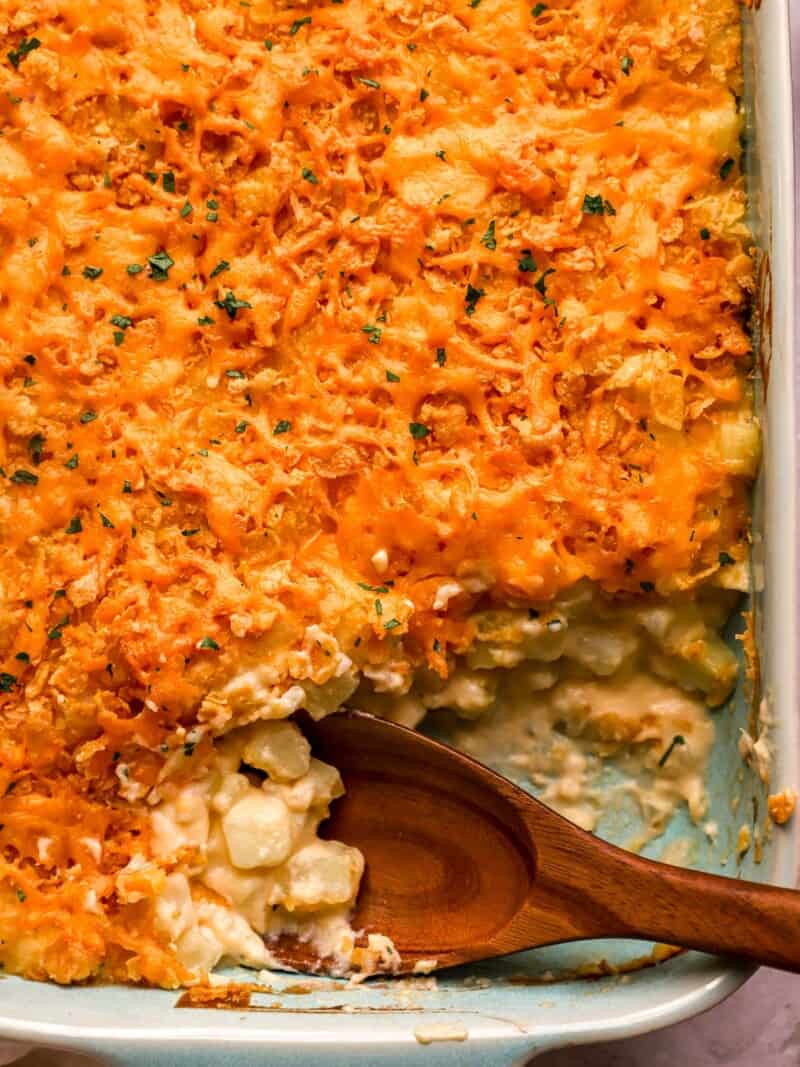
Make those potatoes go the extra mile with this creamy, cheesy potato casserole! Fit to serve a crowd, this potato casserole recipe is comfort food at its best. The crunchy, cheesy topping is a little sweet, a lot savory, and makes this the perfect side for Easter, Thanksgiving, or Christmas.

What is Potato Casserole?

Diced potatoes are blanketed in a sauce made from cheddar cheese, milk, and sour cream; seasoned with onions and garlic; and topped with crunchy corn flake cereal. It’s the ultimate cheesy, creamy, and crunchy side dish. So grab a 5 lb. bag or potatoes and get cooking!

Ingredients for Potato Casserole

  • Yukon Gold Potatoes: These potatoes are in between starchy and waxy, making them perfect for this casserole since they hold their shape well. You’ll need 3 lbs. or about 6 medium potatoes.
  • Butter: Unsalted butter adds a rich flavor to the dish and helps prevent the onions and garlic from burning in the pan.
  • Onion and Garlic: These alliums add a classic earthy and sweet flavor that adds depth to this dish.
  • Salt: Kosher salt enhances the natural flavor of the potatoes.
  • All-Purpose Flour: A little bit of flour helps to thicken up the sauce.
  • Milk: Milk adds moisture to the sauce. You can use any kind of milk you have on hand, including plant-based.
  • Extra Sharp Cheddar Cheese: We love the flavor of extra sharp, but any kind of cheddar works well.
  • Sour Cream: Sour cream adds a touch of brightening tanginess and richness to the dish.
  • Corn Flake Cereal: Crushed corn flakes create the perfect slightly sweet, super crunchy topping for this casserole. You can also use Panko breadcrumbs or crushed butter crackers if that’s what you have on hand.

What Else Can I Add To Potato Casserole?

This is a great recipe for using up leftovers. Got some bacon or ham burning a hole in your refrigerator? Throw it in! You can swap the sour cream for Greek Yogurt if that’s what you have on hand. And feel free to top it with any leftover herbs you have lying around– parsley, chives, or scallions would all be delicious!

How to Serve Potato Casserole

Serve this creamy, cheesy potato casserole with Air Fryer Chicken Breasts, Classic Homemade Meatloaf, or some Turkey Meatballs. It’s also great for breakfast with Fried Eggs or Maple Sage Breakfast Sausage.

How to Store Leftovers

Store leftover potato casserole tightly covered with aluminum foil in the refrigerator for up to 5 days, or you can wrap it in a double-layer of plastic wrap and aluminum foil to store in the freezer for up to 3 months. You can reheat it covered with foil in a 350°F oven for 20-30 minutes, or until warmed through and bubbly.

close up view of a wooden spoon in potato casserole.
Print

Potato Casserole

Make those potatoes go the extra mile with this cheesy potato casserole! Fit to serve a crowd, this casserole is the ultimate comfort food.
Course Side Dish
Cuisine American
Total Cost $9.06 recipe / $0.90 serving
Prep Time 30 minutes
Cook Time 20 minutes
Total Time 50 minutes
Servings 10
Calories 459kcal

Ingredients

  • 3 lbs. Yukon gold potatoes $3.00
  • 1/4 cup butter $0.53
  • 1/2 onion $0.16
  • 2 cloves garlic $0.16
  • 1/2 tsp salt $0.02
  • 1/4 cup all-purpose flour $0.05
  • 2 cups milk $0.96
  • 3 1/2 cups extra sharp cheddar cheese, divided $3.21
  • 1/2 cup sour cream $0.53
  • 1 cup crushed corn flake cereal $0.44

Instructions

  • Preheat the oven to 375°F. Peel and dice the potatoes, finely chop the onion, and mince the garlic.
  • Add the potatoes to a large pot of water. Bring to a boil, cooking for 8-10 minutes until fork tender. Strain in a colander. Then, transfer the potatoes to a greased 9×13 casserole dish.
  • While the potatoes are boiling, melt the butter in a large saucepan or pot over medium heat.
  • Add in the onion and salt, and cook for a few minutes until softened. Add in the garlic and cook for a minute. Then, stir in the flour.
  • Slowly pour in the milk while whisking to incorporate.
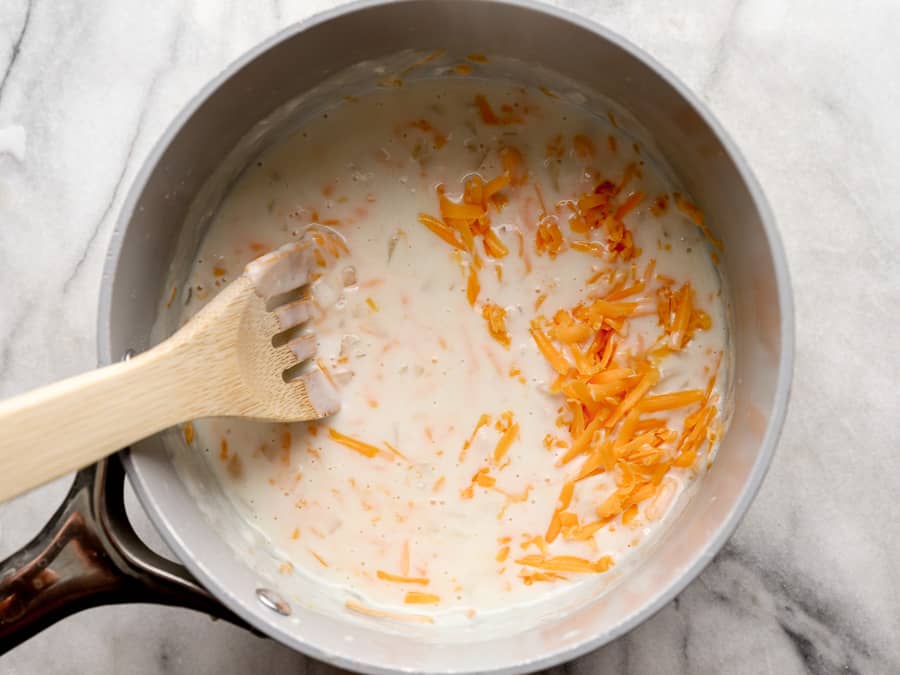
  • Add in 2 cups of cheese and the sour cream. Stir until melted and incorporated.
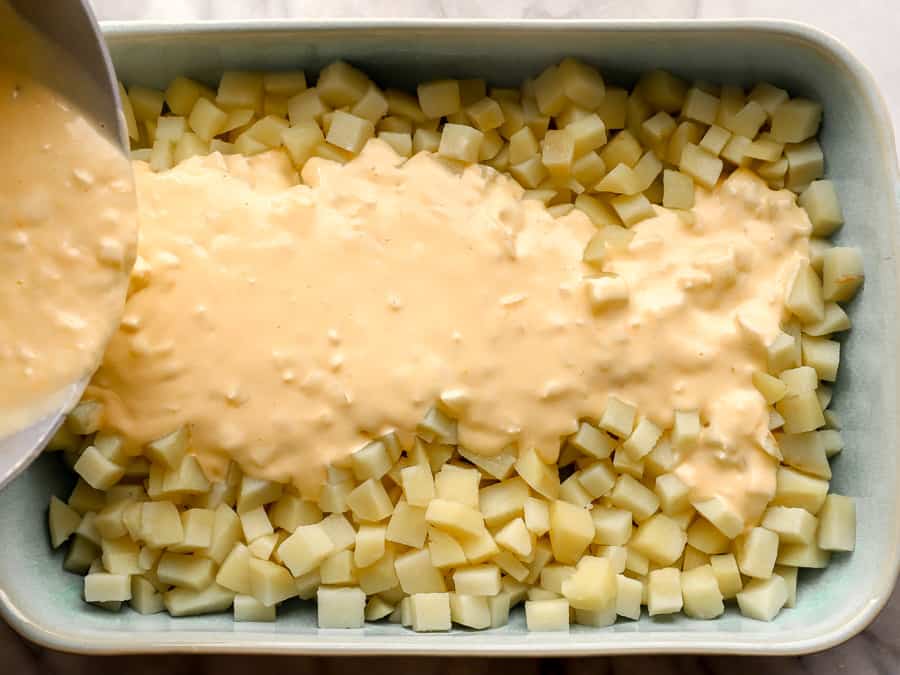
  • Pour the cheese sauce over the potatoes. Gently combine until the potatoes are fully coated.
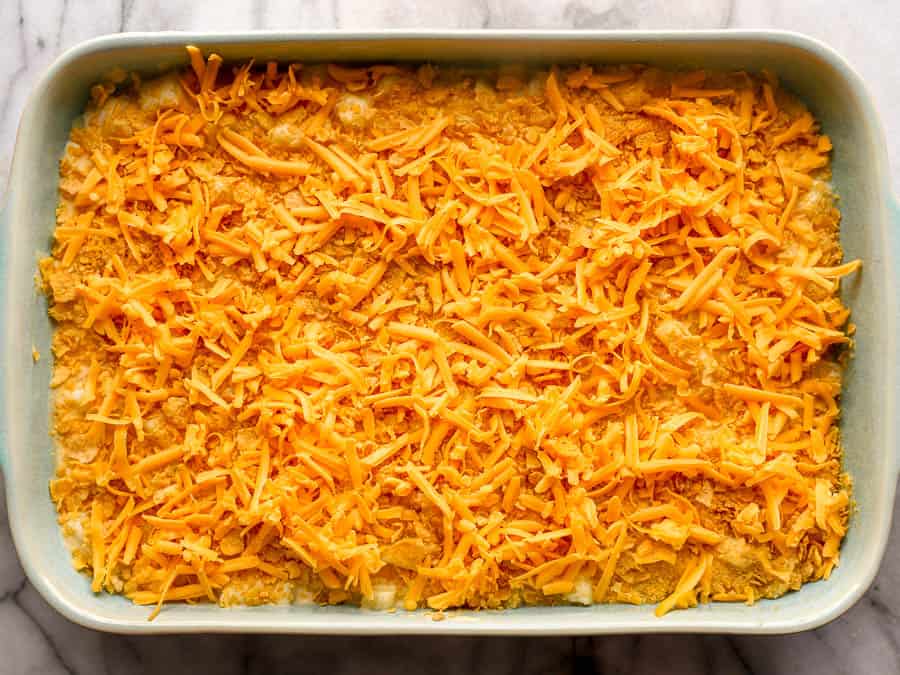
  • Top with the crushed cereal and the remaining 1 1/2 cups of cheddar cheese.
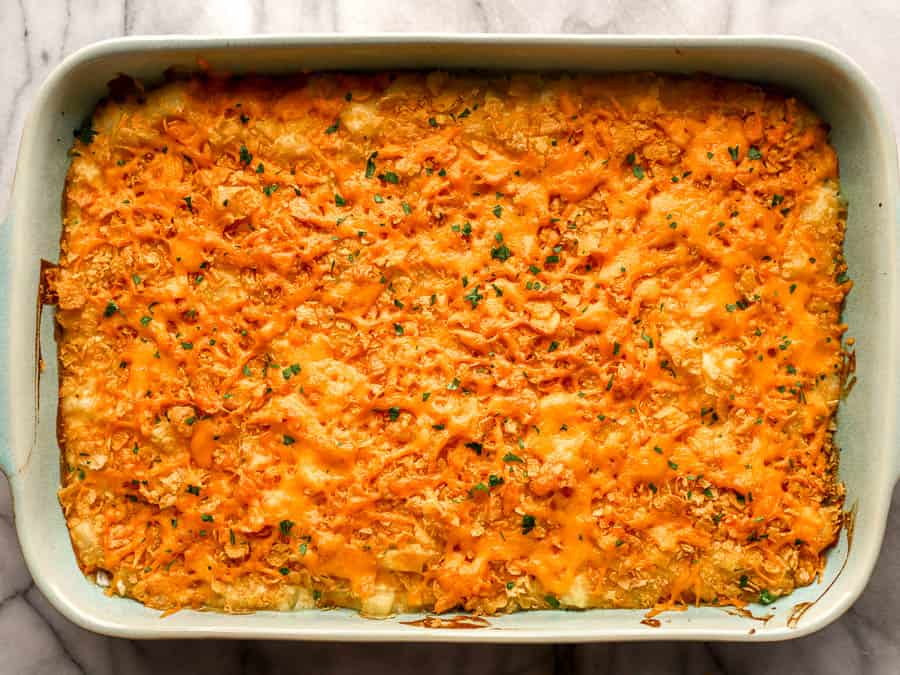
  • Bake for 20 minutes until the cheese is bubbly.

See how we calculate recipe costs here.

Nutrition

Serving: 1serving | Calories: 459kcal | Carbohydrates: 51g | Protein: 16g | Fat: 22g | Sodium: 615mg | Fiber: 4g

how to make Potato Casserole – step by step photos

Preheat the oven to 375°F. Peel and dice 3 lbs. Yukon gold potatoes, finely chop 1/2 onion, and mince 2 cloves garlic.

Add the potatoes to a large pot of water. Bring to a boil, cooking for 8-10 minutes until fork tender. Strain in a colander. Then, transfer the potatoes to a greased 9×13 casserole dish.

While the potatoes are boiling, melt 1/4 cup butter in a large saucepan or pot over medium heat. Add in the onion and 1/2 tsp salt, and cook for a few minutes until softened. Add in the garlic and cook for a minute. Then, stir in 1/4 cup all-purpose flour.

Slowly pour in 2 cups milk while whisking to incorporate.

Add in 2 cups of cheese and 1/2 cup sour cream. Stir until melted and incorporated.

Pour the cheese sauce over the potatoes. Gently combine until the potatoes are fully coated.

Top with 1 cup crushed corn flake cereal and the remaining 1 1/2 cups of cheddar cheese.

Bake for 20 minutes until the cheese is bubbly.

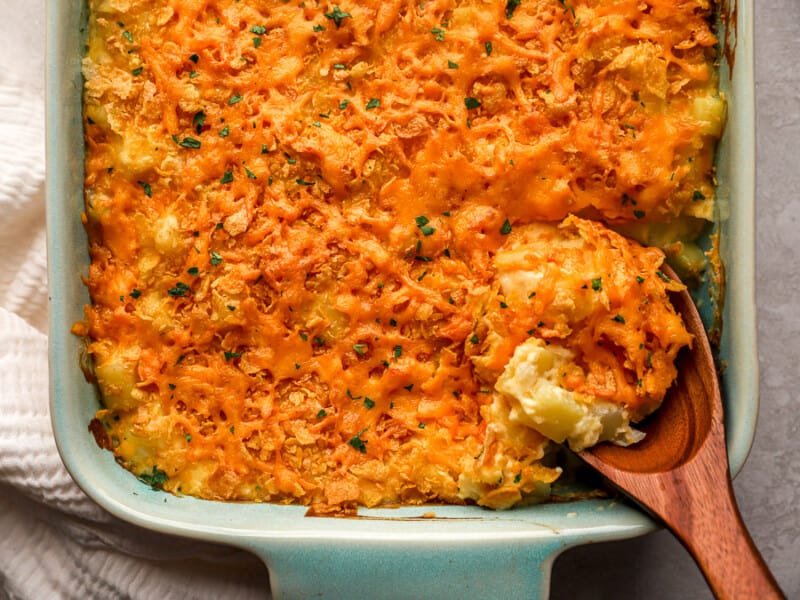
This savory and cheesy potato casserole is the perfect side dish for your next brunch or dinner party!

The post Potato Casserole appeared first on Budget Bytes.

Apple Cranberry Baked Oatmeal

This Cranberry Apple Baked Oatmeal recipe is an easy, warm, and comforting breakfast that is perfect for fall and winter meal prep.

The post Apple Cranberry Baked Oatmeal appeared first on Budget Bytes.

I have an intense love for cranberries, but you can usually only find them in the supermarket for a few months out of the year. So this year, I bought a couple extra bags and tossed them in the freezer so I could enjoy them for months after the season had ended. Well, that day is today and I used some of my cranberry stash to make this delicious Apple Cranberry Baked Oatmeal. And if you didn’t happen to stash any cranberries last fall, you can sometimes find them in the freezer section year-round. Baked oatmeal is one of my favorite breakfast meal preps because it’s SO easy to make and the leftovers are great. Plus, it’s freezer-friendly!

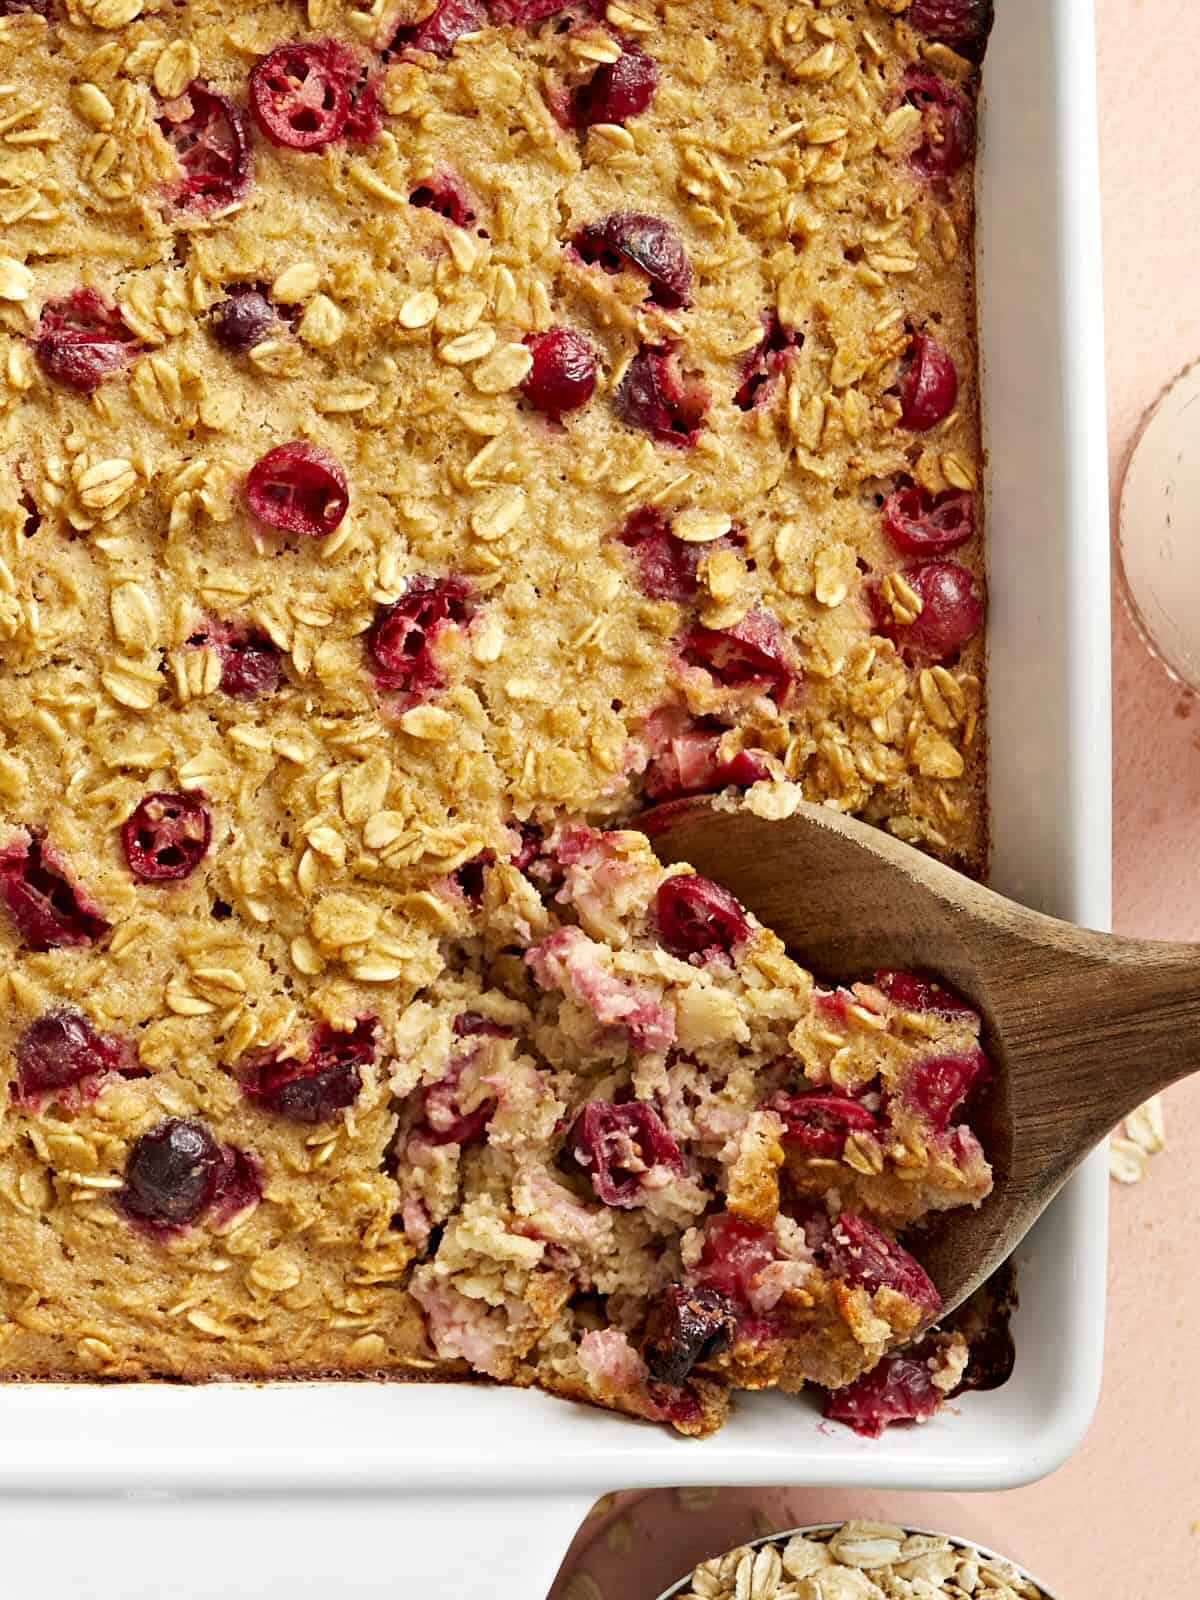
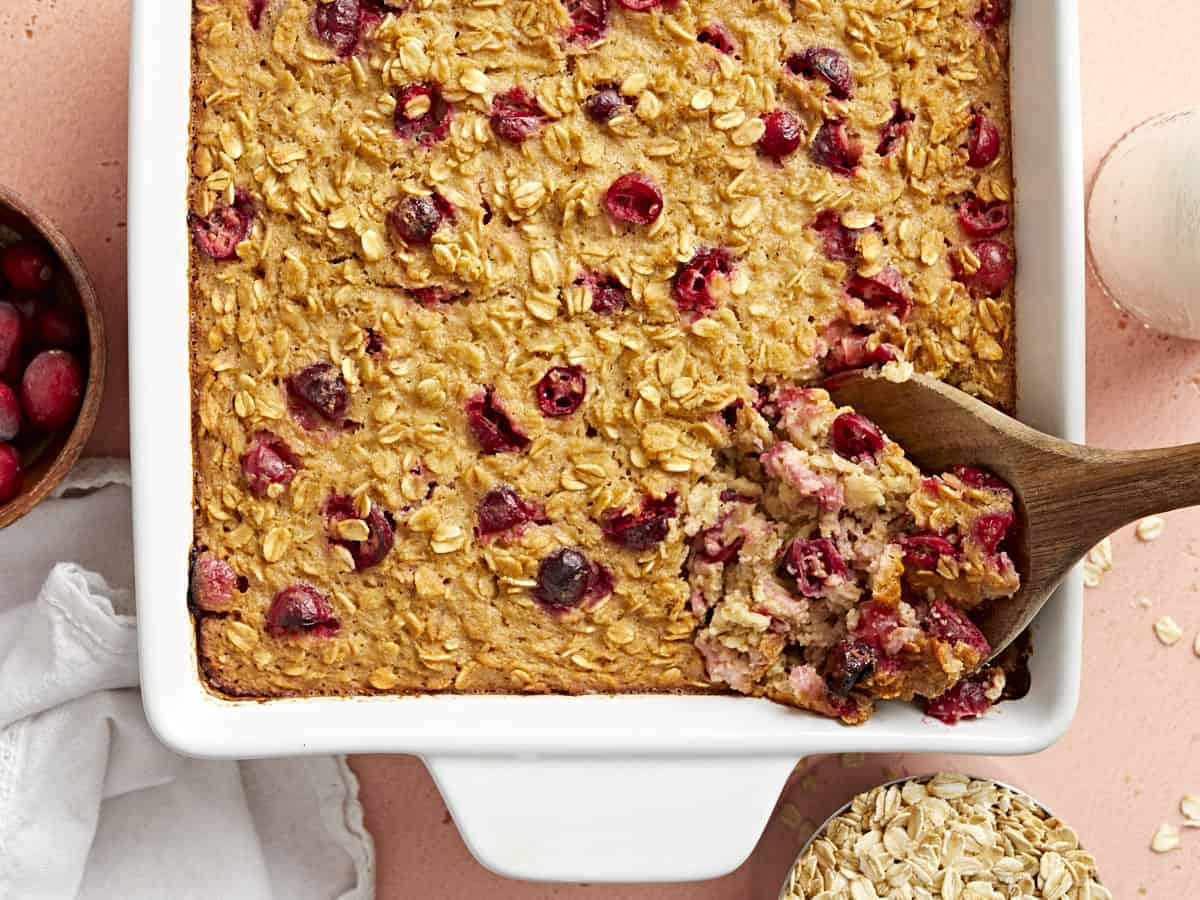
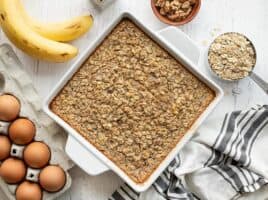
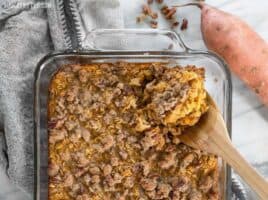
Close up overhead view of a casserole dish full of cranberry apple baked oatmeal and a wooden spoon scooping some out.

What is Baked Oatmeal?

Baked oatmeal is a lot like bread pudding, but instead of chunks of hearty bread baked into the custard, it’s rolled oats. The end result is a soft, moist, scoopable oatmeal that is not at all gloopy like those instant oatmeal packets. It’s filling, rich, slightly sweet, and one of my absolute favorite ways to enjoy oats.

Ingredients for Apple Cranberry Baked Oatmeal

Baked oatmeal recipes are super simple by nature, and this apple cranberry version is no exception. Here’s all you’ll need to make this baked oatmeal recipe:

  • Applesauce: Unsweetened applesauce keeps the baked oatmeal soft and moist, adds a delicious apple flavor, and provides some natural sweetness to the baked oatmeal so you don’t have to add as much sugar.
  • Eggs: Eggs combine with the milk to create the custard that helps the baked oatmeal bake firm up into a scoopable texture instead of the thick porridge-like texture that you get with stovetop cooked oats.
  • Brown Sugar: A little extra sugar helps balance the tart flavor of the cranberries and makes the baked oats just sweet enough that you feel like you’re having a treat.
  • Vanilla: Vanilla extract helps the oats taste extra rich.
  • Cinnamon: A touch of cinnamon gives the baked oatmeal a warm and cozy flavor.
  • Salt: Salt helps all of the individual flavors of the oatmeal pop.
  • Baking Powder: A small amount of baking powder gives the baked oatmeal loft so it’s not quite so dense.
  • Milk: Milk softens the oats and combines with the egg to create a rich custard.
  • Cranberries: Cranberries give the baked oatmeal a deliciously sweet-tart flavor and gorgeous pink color. We used cranberries that had been previously frozen, but you can use fresh as well.
  • Old-Fashioned Rolled Oats: Oats are the main ingredient, the star of the show. Make sure to get old-fashioned rolled oats instead of quick oats because they have a lot more texture and will keep your baked oatmeal from being too mushy.

Is It Breakfast or Dessert?

Baked oatmeal can be served as either breakfast or dessert! It’s only slightly sweet, so it’s still a balanced breakfast, but it’s delicious enough that I’d happily eat it as a dessert or sweet treat. If you want to make it even more dessert-like, try topping it with a simple streusel before baking. Just combine ¼ cup flour, 2 Tbsp brown sugar, 2 Tbsp white sugar, and 3 Tbsp softened butter until it forms a crumbly mixture that resembles wet sand. Sprinkle that over the baked oatmeal before baking and it turns this baked oatmeal into a decadent dessert!

How to Serve Baked Oatmeal

People always ask if baked oatmeal is supposed to be served hot or cold, and the answer is that it can be enjoyed either way! I love it when it’s still warm out of the oven and topped off with a splash of cold milk. But when I’m eating the leftovers for meal prep, sometimes I eat it cold and sometimes I warm it in the microwave. It’s totally up to you!

Whether you enjoy it hot or cold, I love to add a little milk or half and half to my bowl, or even a scoop of Greek yogurt for extra protein. If you have any walnuts on hand, they would also make a great topper for this Apple Cranberry Baked Oatmeal flavor. Or, if you want it a little sweeter, try topping it with some maple syrup!

How to Store The Leftovers

To store the leftovers of your baked oatmeal for meal prep, divide it into single portions and place them into air-tight food storage containers. They can be refrigerated for up to five days. Or, once cooled in the refrigerator, you can transfer them to the freezer for longer storage (about 3 months). To reheat frozen baked oatmeal either let it thaw in the refrigerator overnight and then microwave until hot, or reheat straight from the freezer using the microwave’s defrost function.

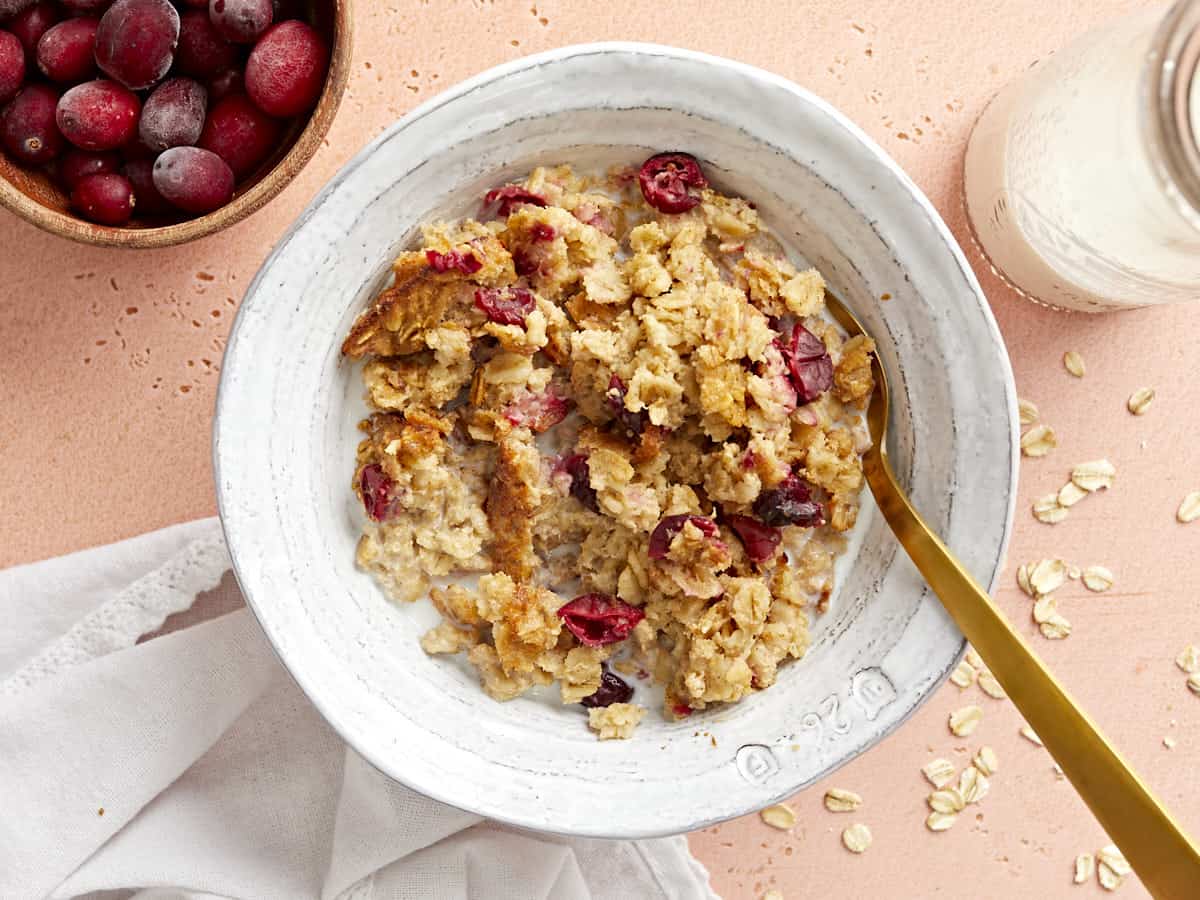
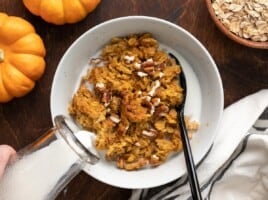
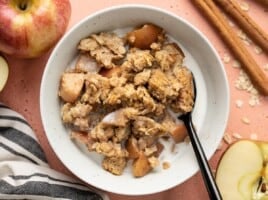
Overhead view of cranberry apple baked oatmeal in a bowl with a golden spoon.
Baked oatmeal being scooped out of the casserole dish with a wooden spoon.
Print

Apple Cranberry Baked Oatmeal

This Apple Cranberry Baked Oatmeal recipe is an easy, warm, and comforting breakfast that is perfect for fall and winter meal prep.
Course Breakfast, Dessert
Cuisine American
Total Cost $3.51 recipe / $0.59 serving
Prep Time 15 minutes
Cook Time 45 minutes
Total Time 1 hour
Servings 6
Calories 220kcal

Ingredients

  • 1 1/2 cups unsweetened apple sauce $0.95
  • 2 large eggs $0.28
  • 1/4 cup brown sugar $0.14
  • 1/2 tsp vanilla extract $0.30
  • 1/2 tsp cinnamon $0.05
  • 1/2 tsp salt $0.02
  • 3/4 tsp baking powder $0.04
  • 1 cup milk* $0.48
  • 1 cup cranberries (frozen or fresh) $0.67
  • 2 cups old-fashioned rolled oats $0.58

Instructions

  • Preheat the oven to 375ºF. Add the apple sauce, eggs, brown sugar, vanilla, cinnamon, salt, and baking powder to a large bowl and whisk together until smooth. Add the milk and whisk until smooth again.
  • Slice the cranberries in half (no need to thaw if frozen) and add them to the bowl of wet ingredients along with the rolled oats. Stir until everything is evenly combined.
  • Pour the oat mixture into a 2-quart casserole dish. Bake the oatmeal in the preheated 375ºF oven for 45 minutes, or until the surface is a light golden brown and it is no longer sticky in the center. Serve hot or refrigerate until ready to eat.

See how we calculate recipe costs here.

Nutrition

Serving: 1Serving | Calories: 220kcal | Carbohydrates: 39g | Protein: 7g | Fat: 5g | Sodium: 292mg | Fiber: 4g
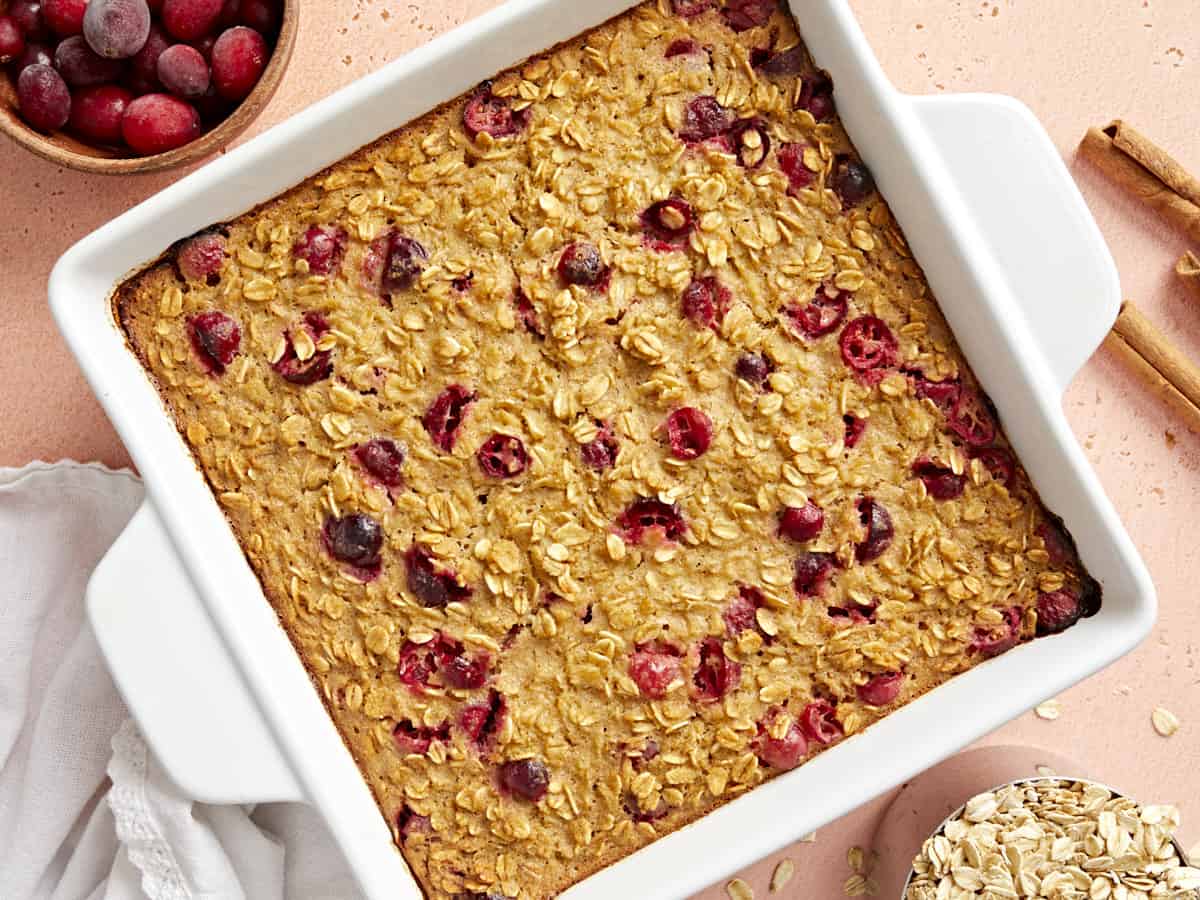
Overhead view of cranberry apple baked oatmeal in the casserole dish, freshly baked.

How to Make Cranberry Apple Baked Oatmeal – Step by Step Photos

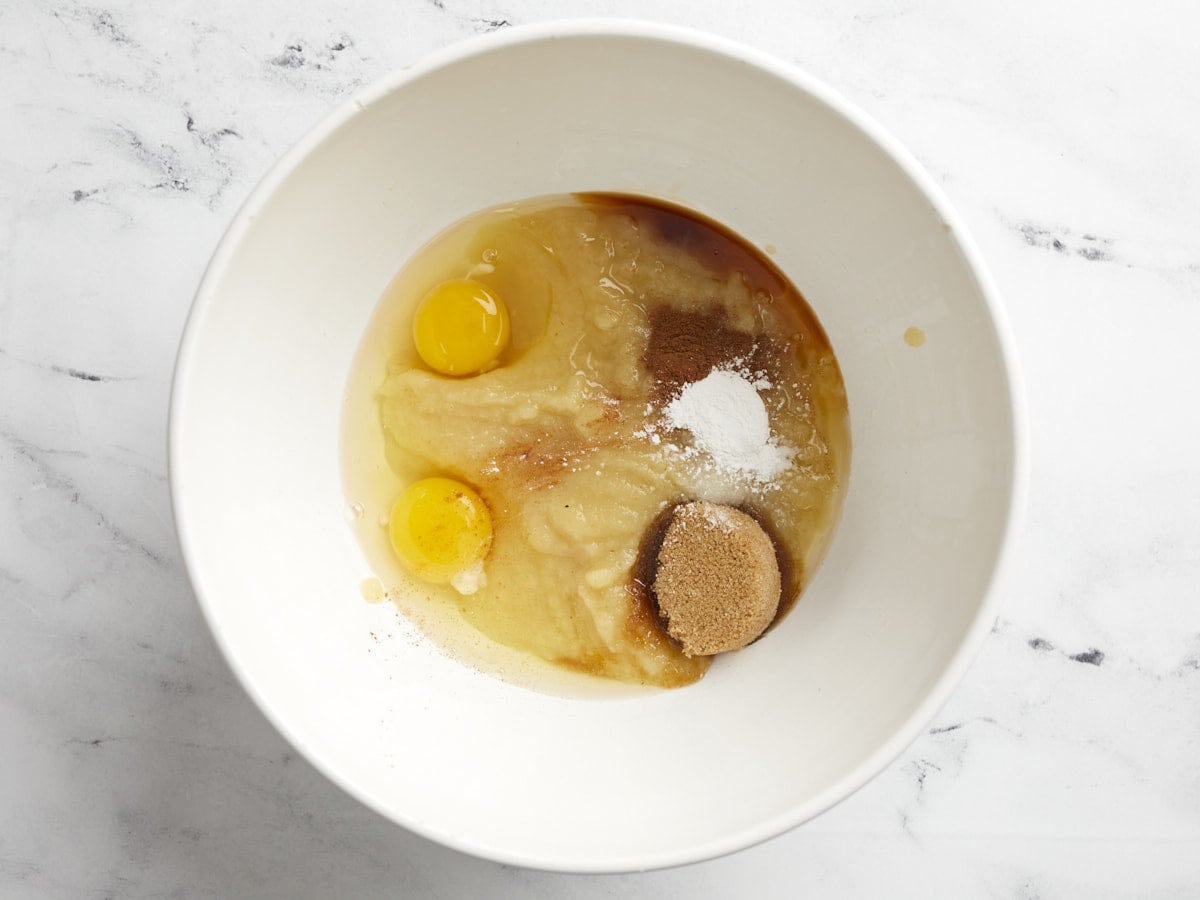
Wet ingredients for the baked oatmeal in a bowl.

Preheat the oven to 375ºF. In a large bowl, whisk together 1.5 cups of unsweetened applesauce, 2 large eggs, ¼ cup brown sugar, ½ teaspoon vanilla, ½ teaspoon cinnamon, ½ teaspoon salt, and ¾ teaspoon baking powder.

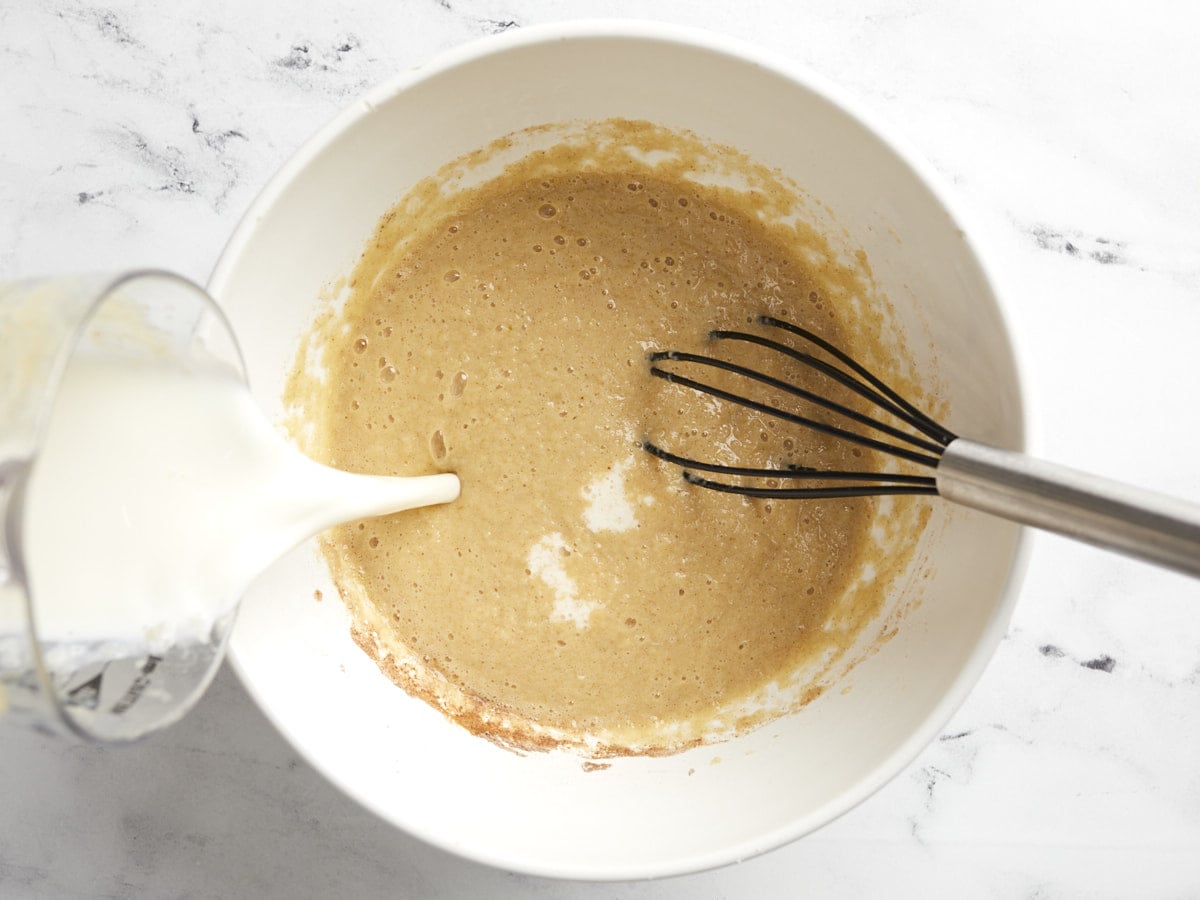
Milk pouring into the side of the bowl with the applesauce mixture.

Once the previous ingredients are evenly combined, add 1 cup of milk and whisk again until evenly combined.

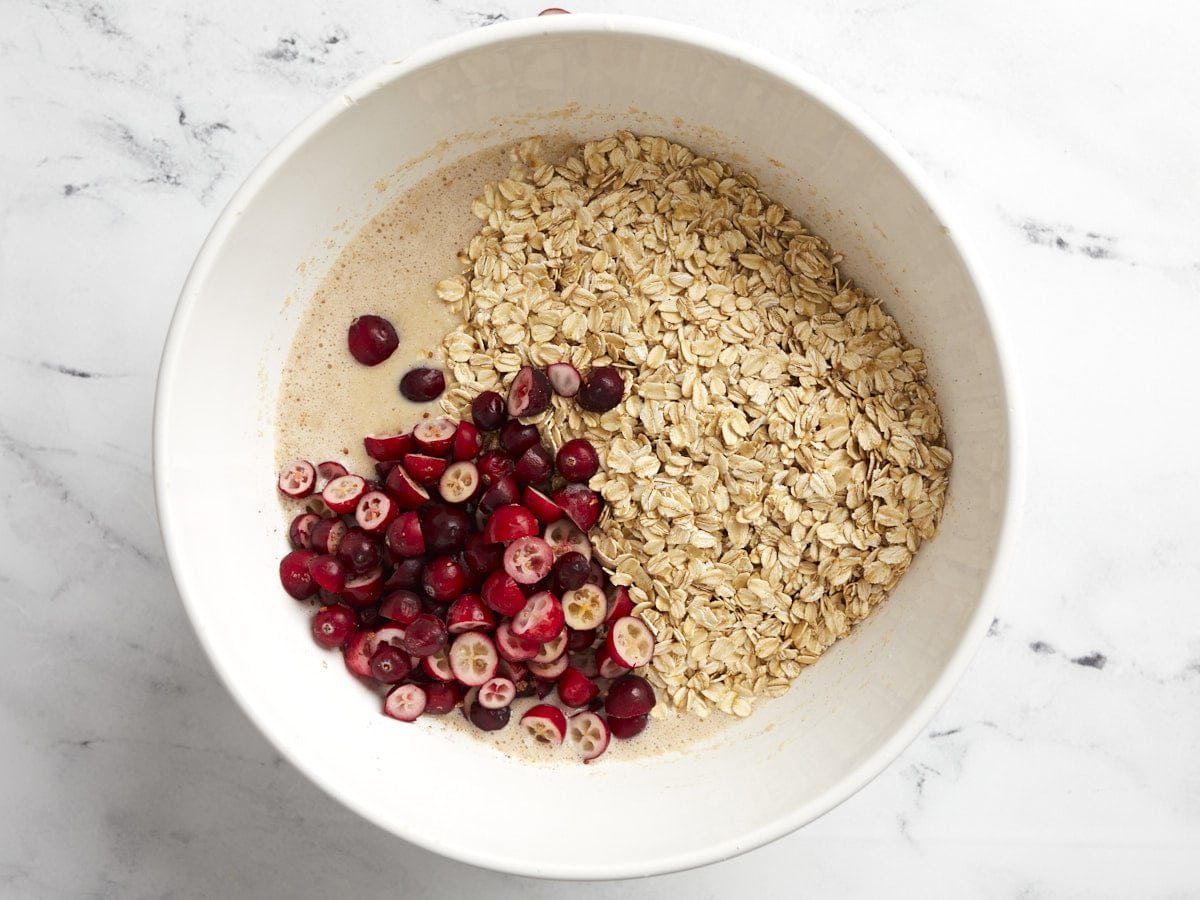
Sliced cranberries and dry oats added to the bowl.

Slice one cup of cranberries in half (if frozen, no need to thaw) and add them to the bowl along with 2 cups of old-fashioned rolled oats. Stir the cranberries and oats into the milk mixture.

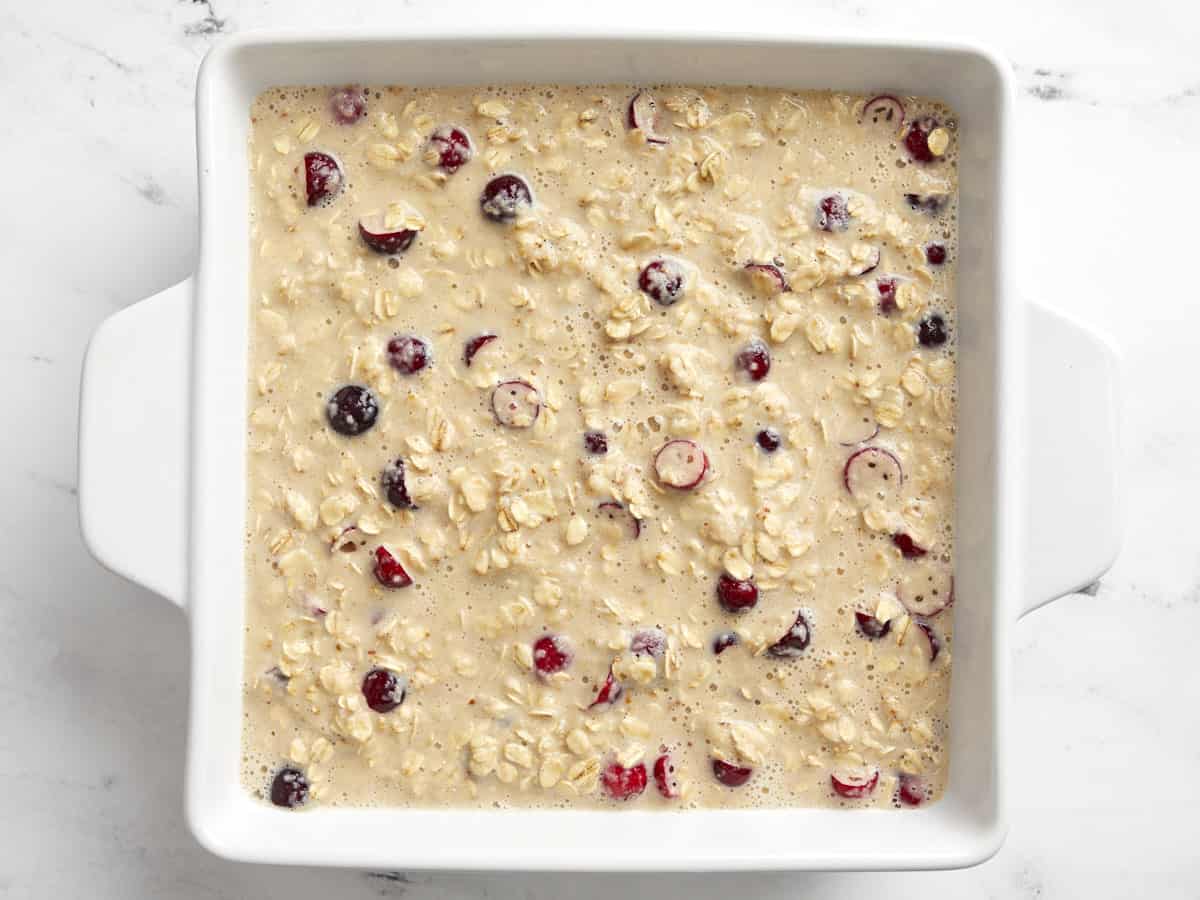
Baked oatmeal mixture in the casserole dish before being baked.

Pour the oat mixture into a 9×9-inch (or 2-quart) casserole dish.

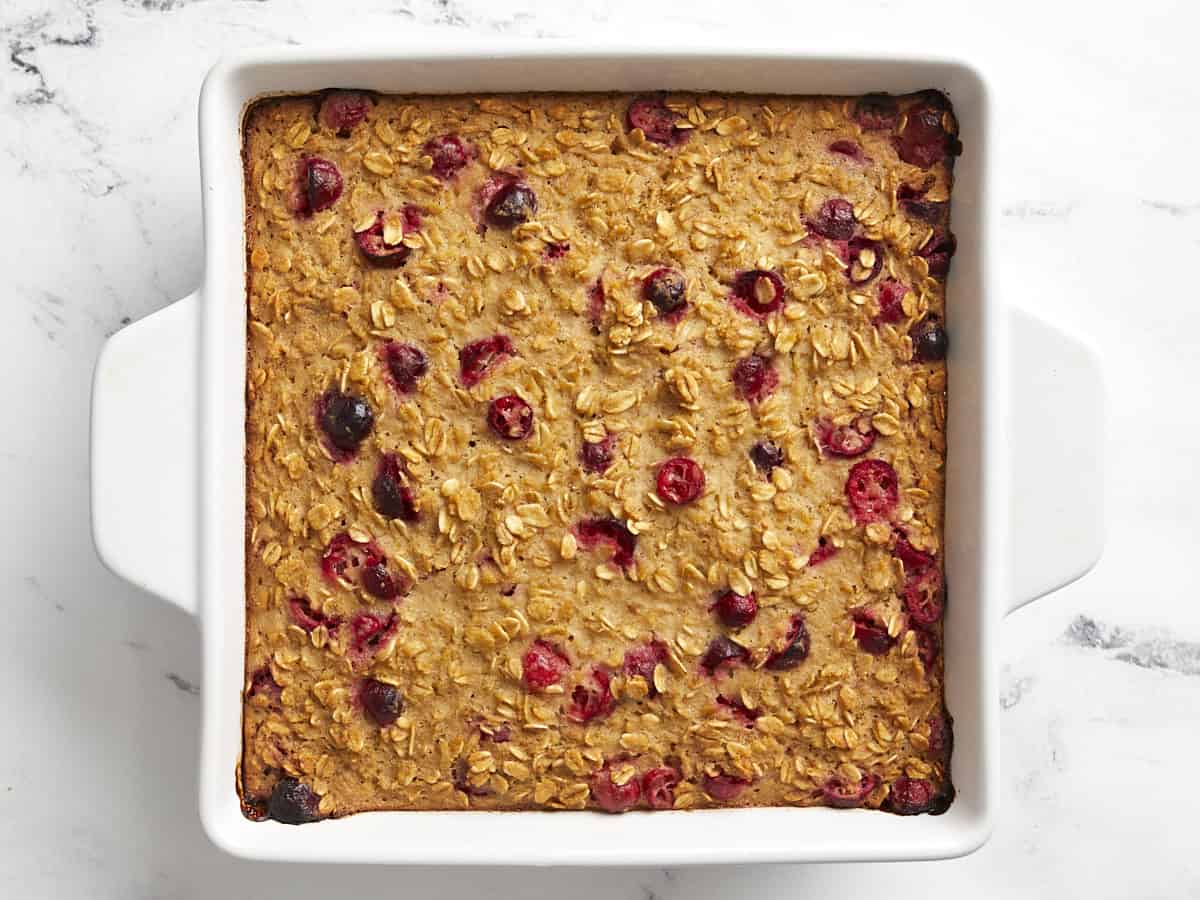
Baked oatmeal in the casserole dish after coming out of the oven.

Bake the oatmeal for 45 minutes or until it’s golden brown on top and the center is no longer wet.

Baked oatmeal being scooped out of the casserole dish with a wooden spoon.

Serve the apple cranberry baked oatmeal warm or divide into single portions and refrigerate until ready to eat!

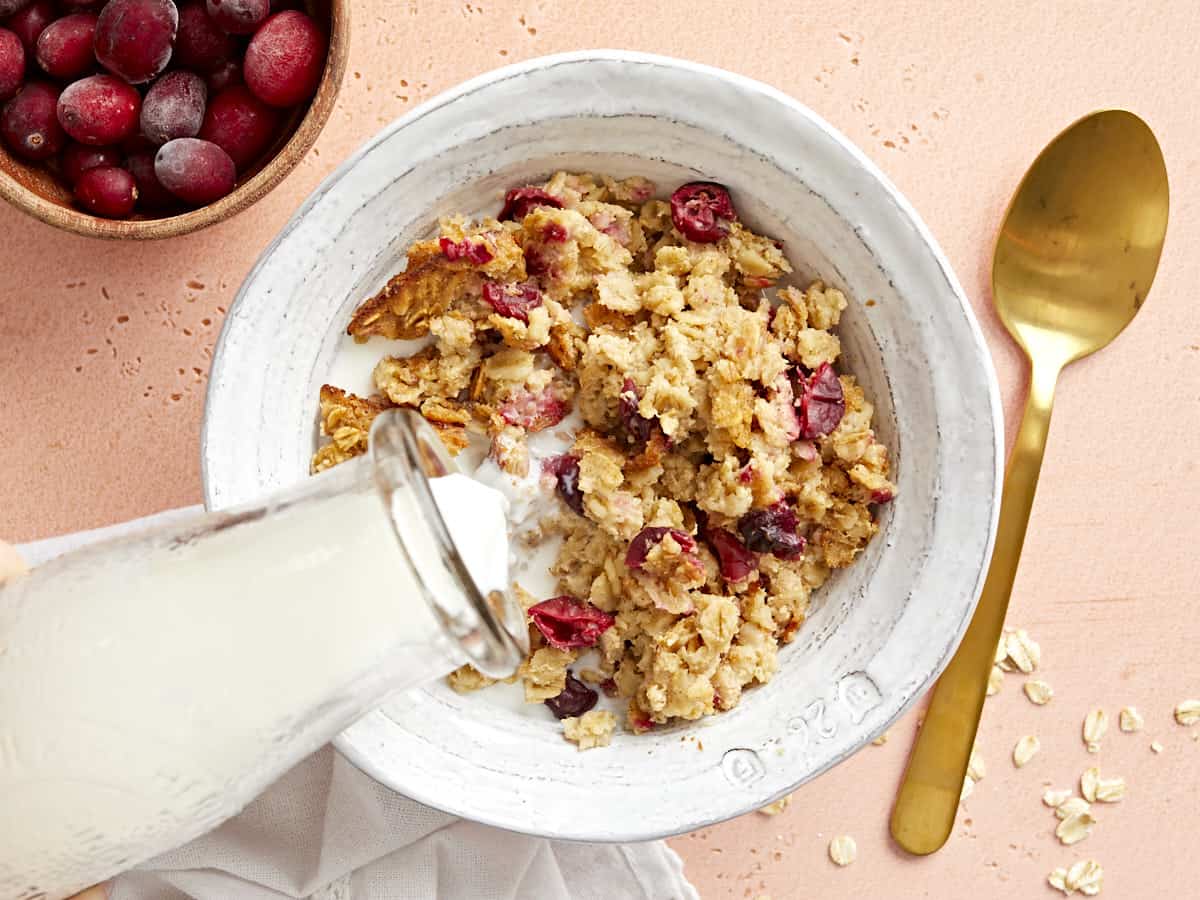
Milk being poured over a bowl of cranberry apple baked oatmeal.

I like to enjoy my Apple Cranberry Baked Oatmeal with cold milk poured over top! 🤤

The post Apple Cranberry Baked Oatmeal appeared first on Budget Bytes.

Chicken Cordon Bleu

Chicken Cordon Bleu is one of those recipes that feels super fancy but is ready in under an hour! It’s so saucy, cheesy, and delicious!

The post Chicken Cordon Bleu appeared first on Budget Bytes.

Chicken Cordon Bleu is one of those recipes that feels super fancy but doesn’t actually take a ton of effort. It can be pricey if ordering at a restaurant, but we have developed a budget conscious recipe that can be made at home. With some simple technique and a little bit of patience, you can make this savory, cheesy, saucy dinner recipe in under an hour!

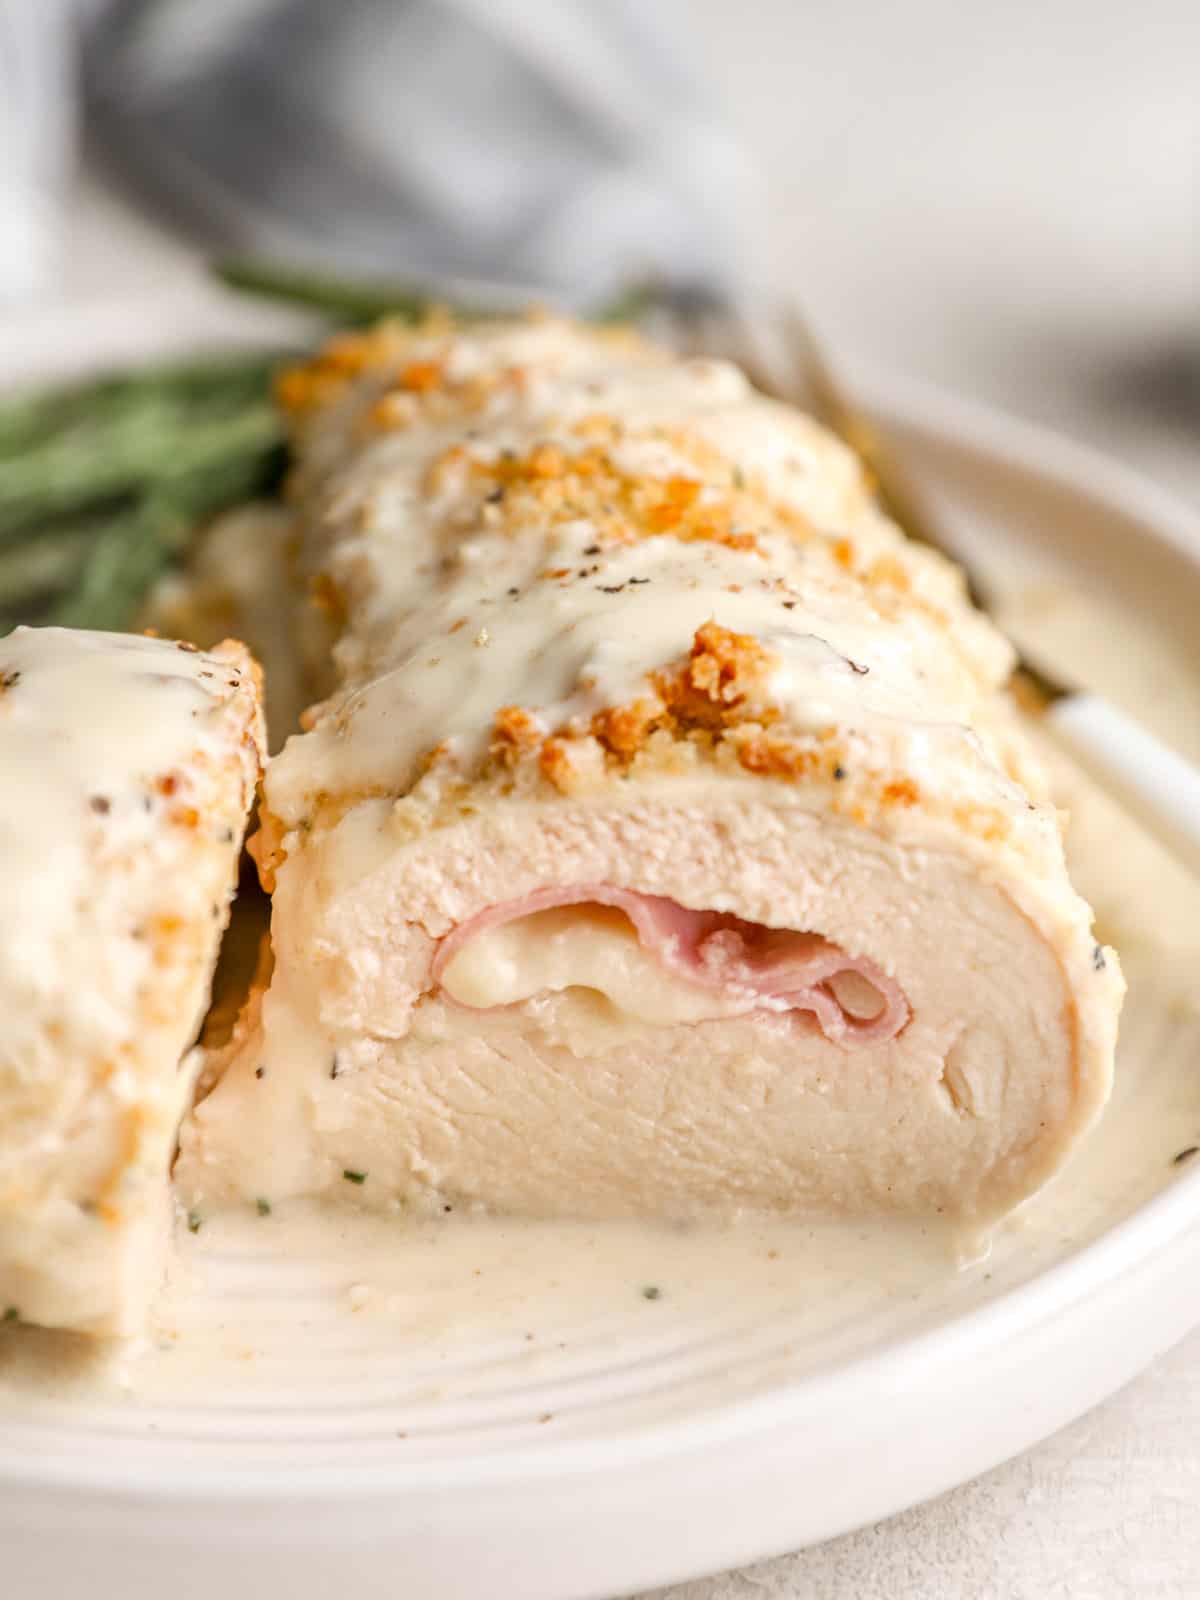
close-up view of a sliced chicken cordon bleu breast.

What is Chicken Cordon Bleu?

Chicken cordon bleu is made by butterflying a chicken breast and stuffing it with slices of creamy, melty Swiss cheese and salty deli ham. The whole thing gets rolled up, dipped in breadcrumbs, and doused in a creamy sauce for the ultimate decadent dinner. While it can be expensive when ordering out, our version is more cost effective but equally as delicious.

Ingredients For Chicken Cordon Bleu

  • Boneless Skinless Chicken Breasts: You’ll need 4 large chicken breasts for this recipe so there’s plenty of room to stuff them. Look for ones that are about 7-8 ounces each.
  • Ham: Any flavor of deli ham works well.
  • Swiss Cheese: You can also use provolone or cheddar.
  • Panko Breadcrumbs: Create a crunchy coating on the chicken. Regular or Italian-seasoned breadcrumbs are also a good choice.
  • Seasonings: Italian seasoning, onion powder, garlic powder, salt, and freshly cracked black pepper season the chicken. Salt also enhances the flavor of the sauce.
  • Butter: Unsalted butter helps the seasonings and breadcrumbs stick to the chicken, and it also forms the base of the sauce.
  • All-Purpose Flour: A bit of flour helps to thicken the sauce.
  • Milk: Milk adds richness and moisture to the sauce. Any kind works, including non-dairy.
  • Dijon Mustard: A touch of mustard adds just a bit of warmth to the sauce.
  • Worcestershire Sauce: This umami sauce adds incredible depth of flavor.

How to Butterfly a Chicken Breast

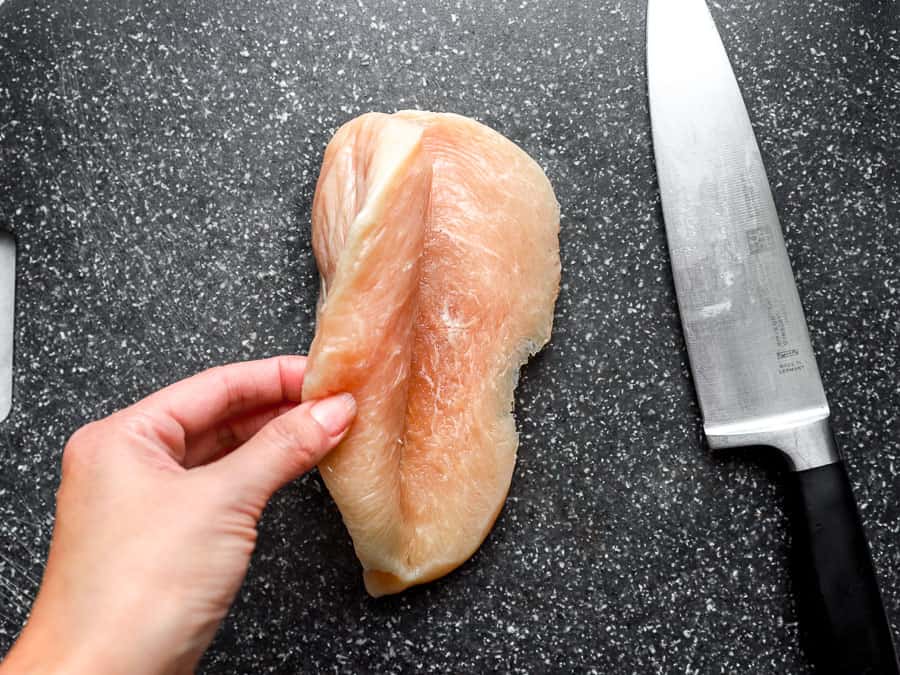
  1. Place the chicken breast flat on a cutting board and hold your knife horizontally to the cutting board.
  2. Place one hand on the chicken breast to keep it steady, then insert your knife into the center of the chicken breast and begin to cut horizontally until you have almost reached the other side.
  3. Open the chicken breast like a book.

What To Serve With Chicken Cordon Bleu

Chicken cordon bleu is rich and saucy, so it pairs beautifully with simple veggies, like Steamed Green Beans or Oven Roasted Broccoli. Soak up that beautiful sauce with Mashed Potatoes, Rice, or Garlic Herb Mashed Cauliflower.

How to Store Leftovers

Once cooked and cooled, store chicken cordon bleu in an air-tight container in the refrigerator for up to 3 days. If you plan to freeze this dish, I recommend doing so before baking it for the crispiest results. It will keep well for up to 3 months. Simply thaw overnight in the refrigerator, then bake as directed.

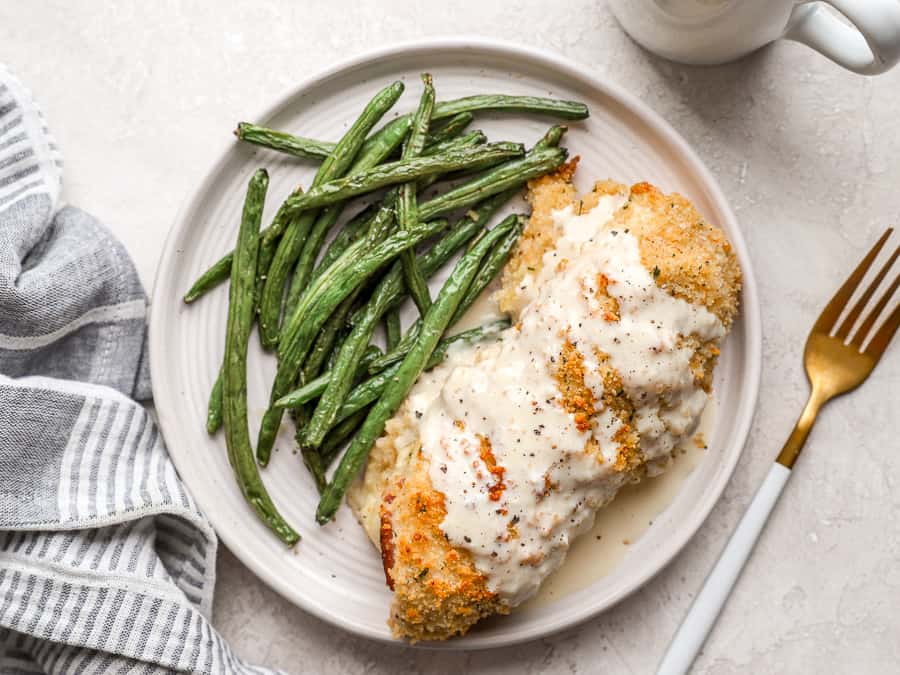
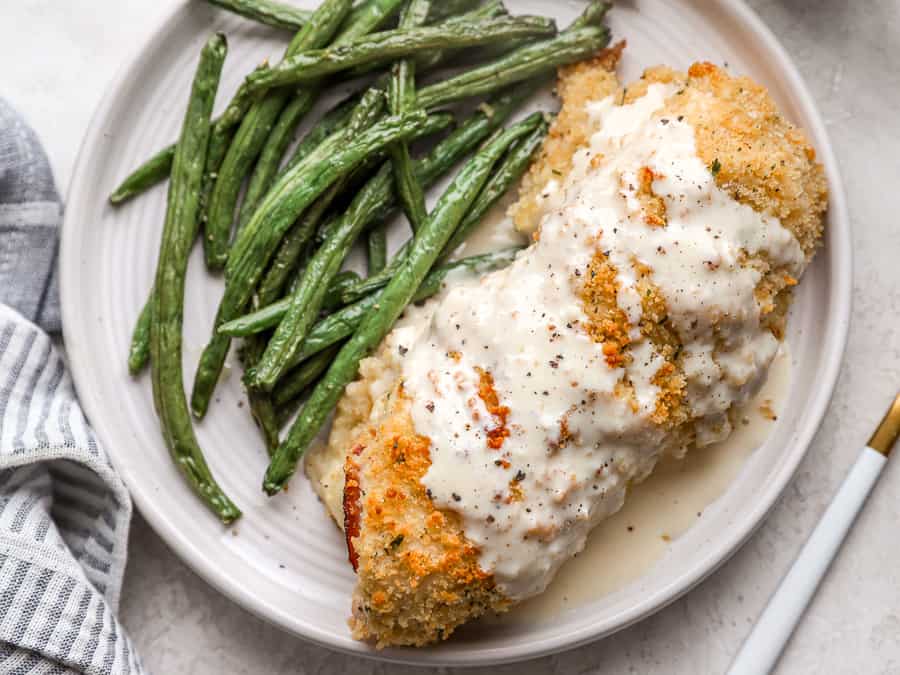
overhead view of chicken cordon bleu covered with sauce on a plate with green beans.
Print

Chicken Cordon Bleu

Chicken Cordon Bleu is one of those recipes that feels super fancy but is ready in under an hour! It's so saucy, cheesy, and delicious!
Course Dinner, Main Course
Cuisine French
Total Cost $17.22 recipe / $4.30 serving
Prep Time 20 minutes
Cook Time 35 minutes
Total Time 55 minutes
Servings 4
Calories 889kcal

Ingredients

Chicken:

Sauce:

  • 1/4 cup butter $0.53
  • 2 Tbsp all-purpose flour $0.05
  • 3/4 cup milk $0.40
  • 1/2 Tbsp Dijon mustard $0.04
  • 1 tsp Worcestershire $0.05
  • 1/2 tsp salt $0.02

Instructions

  • Preheat the oven to 350°F.
  • Butterfly each chicken breast by slicing horizontally through the middle of the breast, taking care to not cut all the way through. Open the chicken breast up like a book.
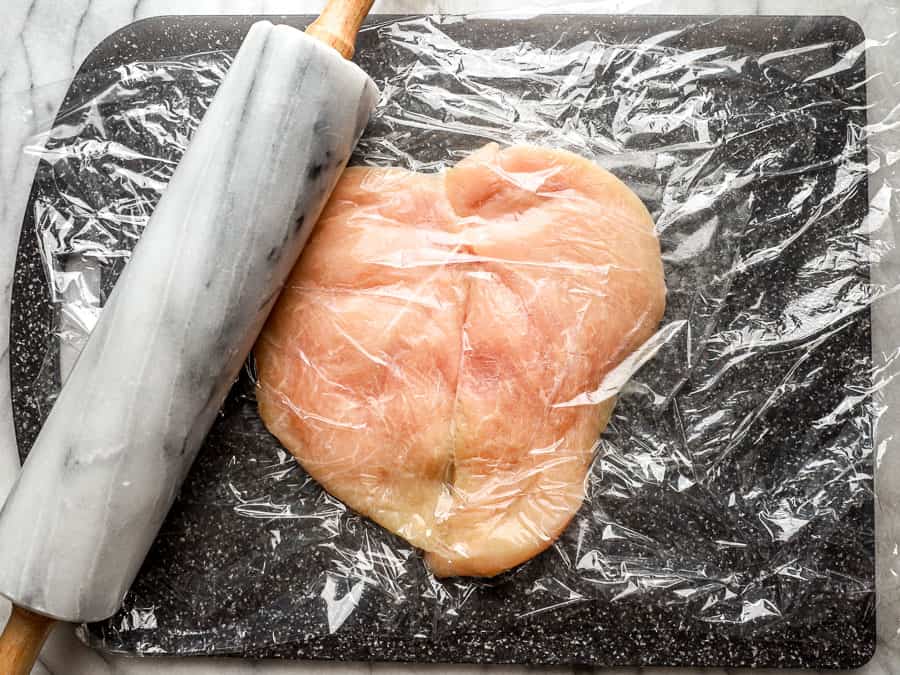
  • Lay the breast flat between 2 pieces of plastic wrap. Use a meat mallet or rolling pin to pound the chicken breasts into a thin, even layer.
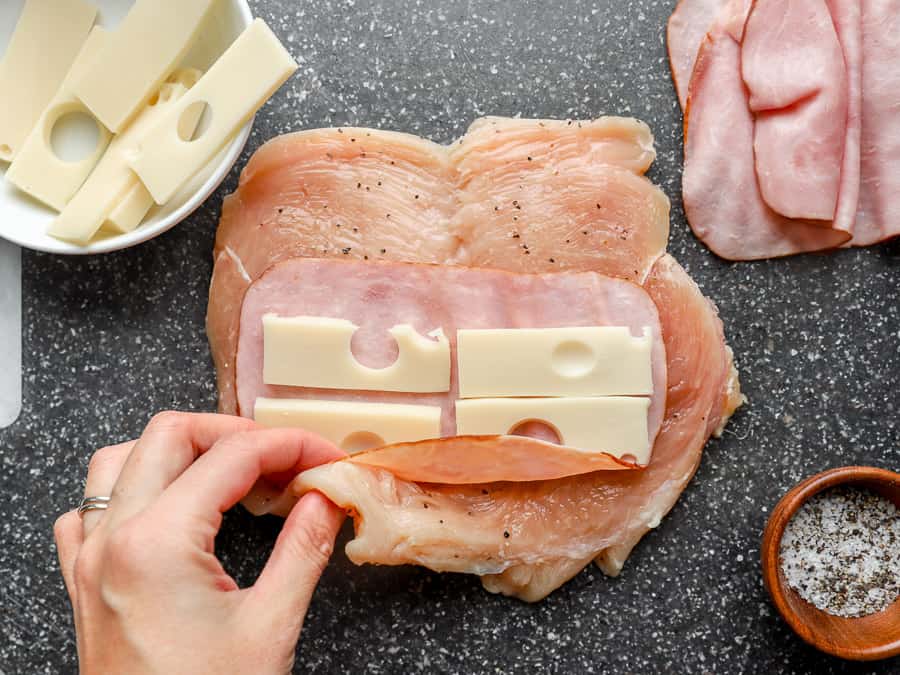
  • Sprinkle the chicken breasts with salt and pepper. Place a slice of ham and slice of Swiss cheese on each chicken breast.
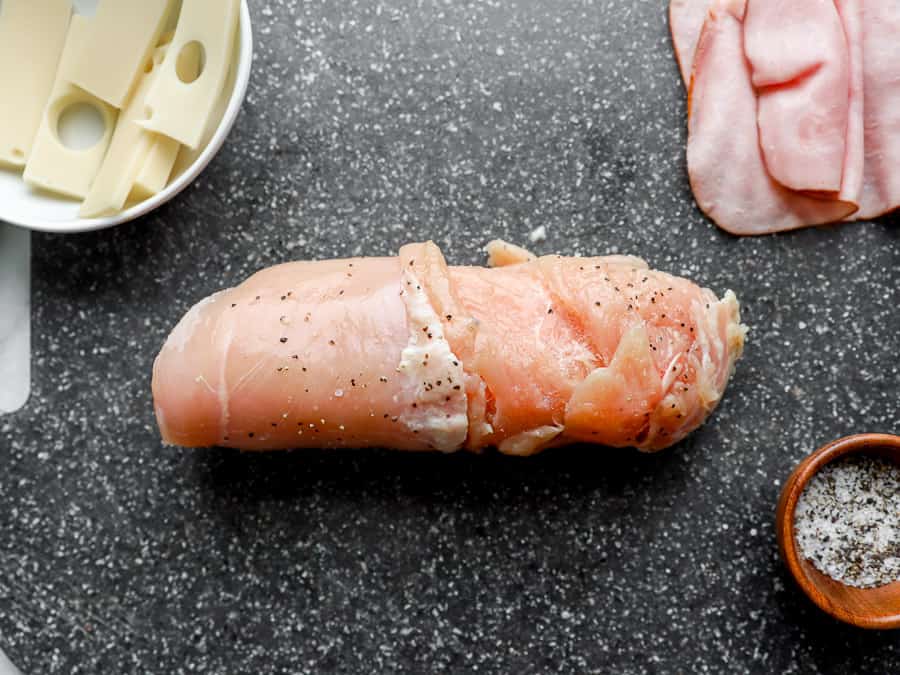
  • Gently roll up the chicken breast.
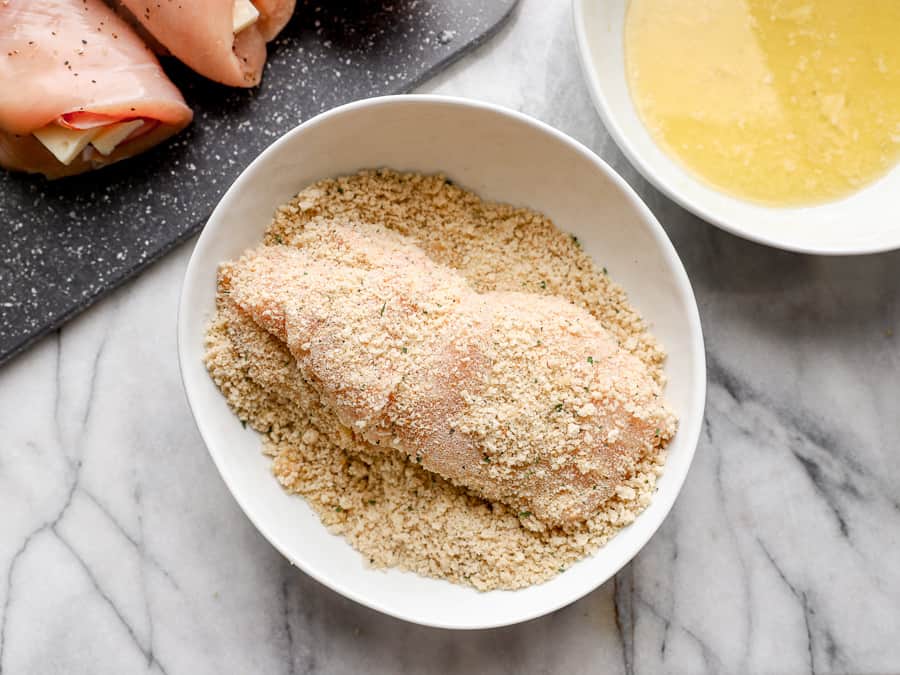
  • In a shallow bowl, combine the breadcrumbs, Italian seasoning, onion powder, garlic, powder, salt, and pepper. Set up a breading station with 2 shallow bowls; one of melted butter and one for the breading.
  • Dip the chicken rolls in the melted butter, and roll in the breadcrumbs until completely coated. Transfer to a parchment linked baking sheet.
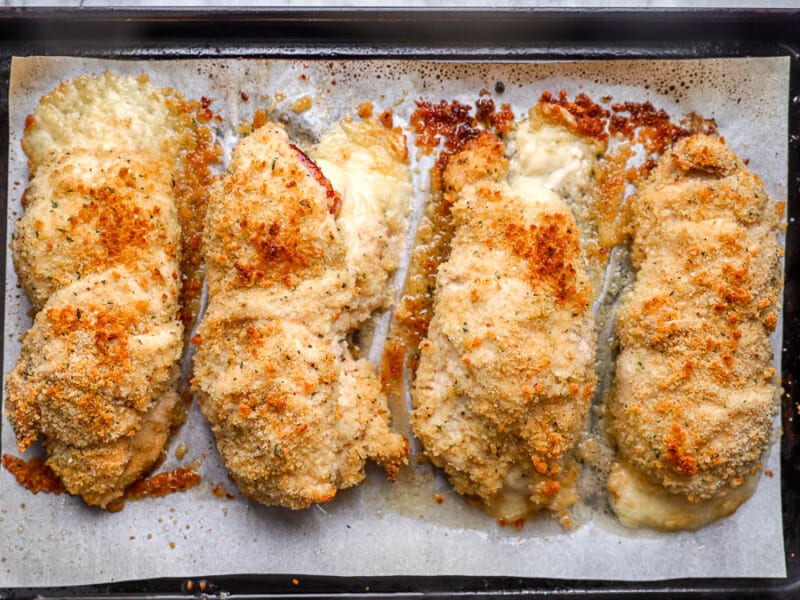
  • Bake the chicken for 35-40 minutes or until it reaches an internal temperature of 165°F.
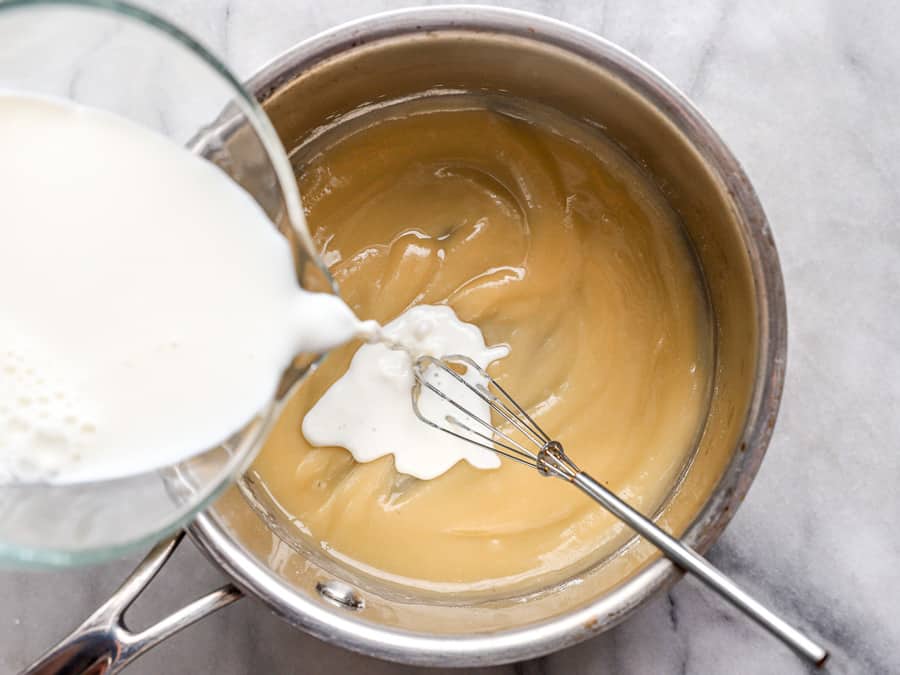
  • To make the sauce, melt the butter in a saucepan over medium heat. Stir in the flour. Then, slowly pour in the milk while whisking to incorporate.
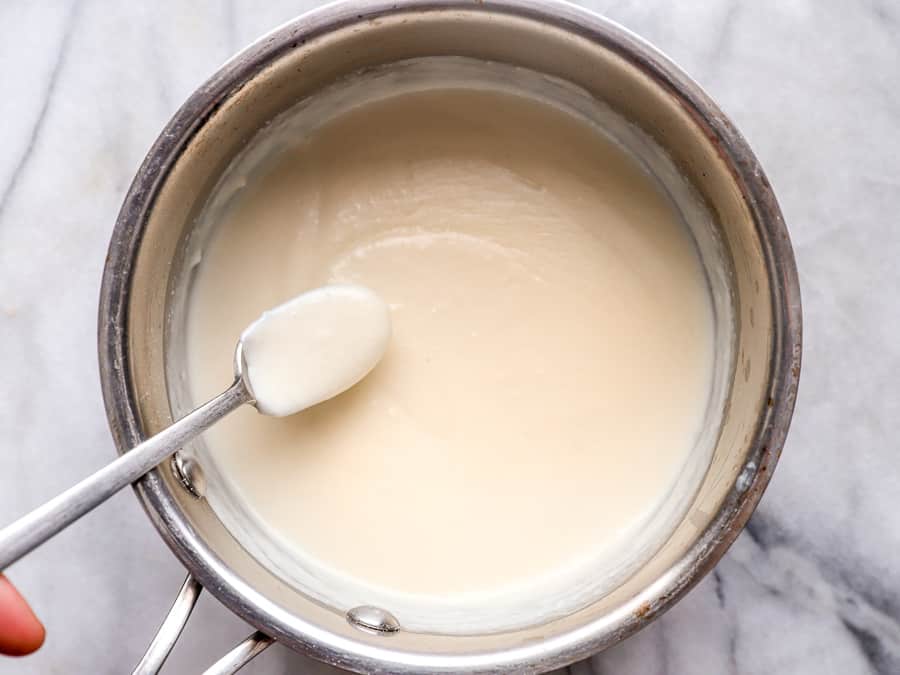
  • Add in the Dijon mustard and Worcestershire sauce. Season with salt. Spoon the sauce over the chicken.

See how we calculate recipe costs here.

Nutrition

Serving: 1serving | Calories: 889kcal | Carbohydrates: 23g | Protein: 69g | Fat: 57g | Sodium: 2027mg | Fiber: 1g
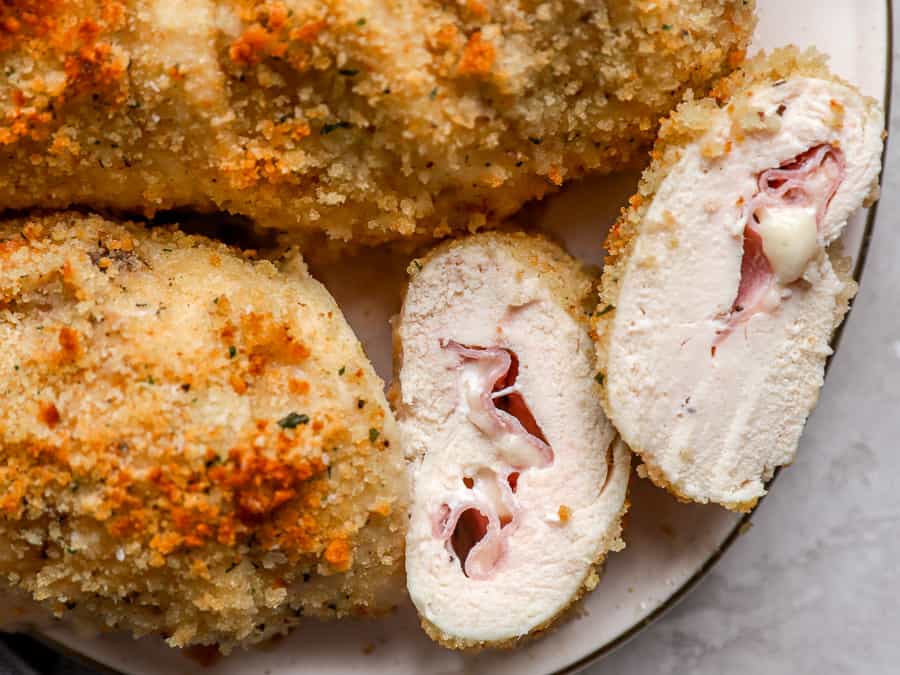
overhead view of slices of chicken cordon bleu on a plate.

how to make Chicken Cordon Bleu – step by step photos

a hand opening a butterflied chicken breast next to a knife.

Preheat the oven to 350°F. Butterfly each of 4 chicken breasts by slicing horizontally through the middle of the breast, taking care to not cut all the way through. Open the chicken breast up like a book.

a butterflied chicken breast under plastic wrap with a rolling pin.

Lay the breast flat between 2 pieces of plastic wrap. Use a meat mallet or rolling pin to pound the chicken breasts into a thin, even layer.

a butterflied chicken breast with a slice of ham and swiss cheese on top.

Sprinkle the chicken breasts with salt and pepper. Place a slice of ham and 1 ounce of Swiss cheese on each chicken breast.

a rolled-up stuffed chicken breast.

Gently roll up the chicken breast.

a rolled-up chicken breast dipped in breadcrumbs.

In a shallow bowl, combine 1 1/2 cups Panko breadcrumbs, 1/2 tsp Italian seasoning, 1/2 tsp onion powder, 1/2 tsp garlic powder, 1 tsp salt, and 1/4 tsp pepper. Set up a breading station with a shallow bowl of 1/2 cup melted butter and the breading. Dip the chicken rolls in the melted butter, and roll in the breadcrumbs until completely coated. Transfer to a greased casserole dish.

4 breaded and baked rolled-up chicken breasts on a baking sheet.

Bake the chicken for 35-40 minutes or until it reaches an internal temperature of 165°F.

milk added to a thick roux in a saucepan with a whisk.

To make the sauce, melt 1/4 cup butter in a saucepan over medium heat. Stir in the 2 Tbsp flour. Then, slowly pour in 3/4 cup milk while whisking to incorporate.

thick and creamy white sauce in a saucepan with a spoon.

Add in 1/2 Tbsp Dijon mustard and 1 tsp Worcestershire sauce. Season with 1/2 tsp salt. Spoon the sauce over the chicken.

overhead view of chicken cordon bleu covered with sauce on a plate with green beans.

This crispy, cheesy, salty, and creamy chicken cordon bleu is the ultimate comfort food!

The post Chicken Cordon Bleu appeared first on Budget Bytes.