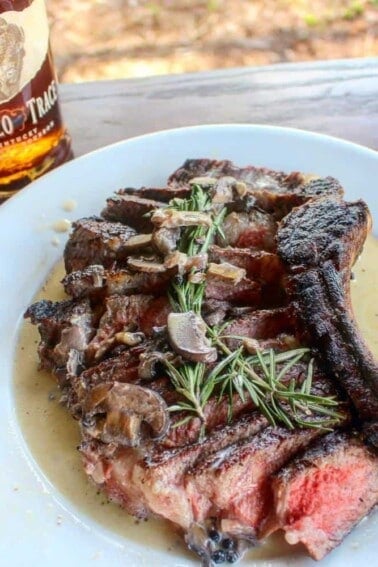
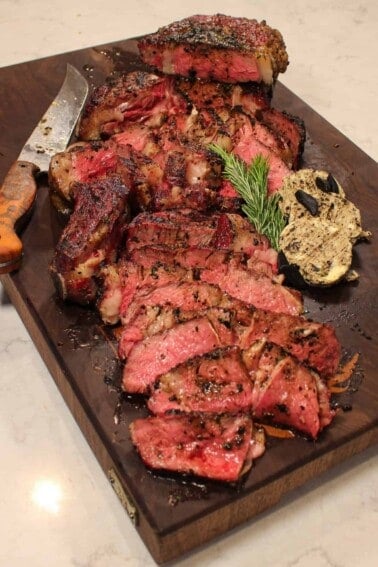
Few things in life are as mouth-watering as the Perfect Ribeye Steak. If you’re a fan of juicy steak, this ribeye recipe is about to become your new go-to for epic results. Fiery hot coals kick off the smoky cooking, followed by a butter-basting technique in a cast iron pan that infuses the meat with rich, savory goodness. Meanwhile, smashed garlic and fresh Mediterranean herbs elevate the flavors to the next level.
Cooking ribeye steak isn’t just about tossing it on the grill. Instead, the secret to a perfectly cooked steak lies in the cooking process. That’s where I come in to guide you step by step. This easy recipe is crafted to help you achieve ribeye steak perfection every single time.
Why You’ll Love This Juicy Ribeye Steak Recipe
First, you’ll love the cooking time on this recipe because it’ll be ready faster than you can get a table at your favorite steakhouse. Next, there’s nothing quite like a tender ribeye steak with that rich marbling that gives it its signature flavor. But what really sets this recipe apart is the butter basting for the last 20 degrees of cooking.
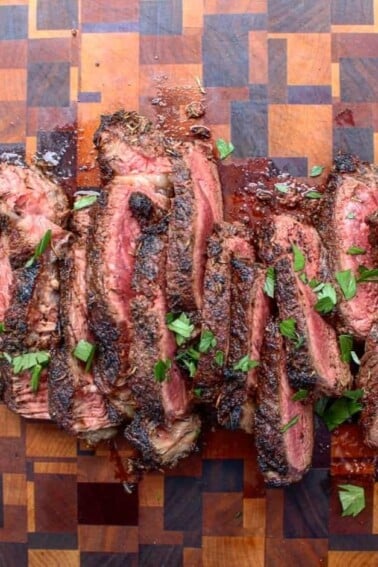
This steak recipe starts by first getting a good sear on the grill. After that, it moves to a cast iron skillet with a garlic-herb butter baste. Consequently, this method delivers a steak that’s perfectly cooked and full of flavor. It works especially well with thick cuts, such as a tomahawk steak or our bone-in ribeye steak, because it allows you to get a delicious crust while keeping the inside tender and juicy.
If you love grilling steak, you’ll want to check out The Best Grilled Steak Recipes roundup.
Ingredients Needed for Perfect Ribeye Recipe
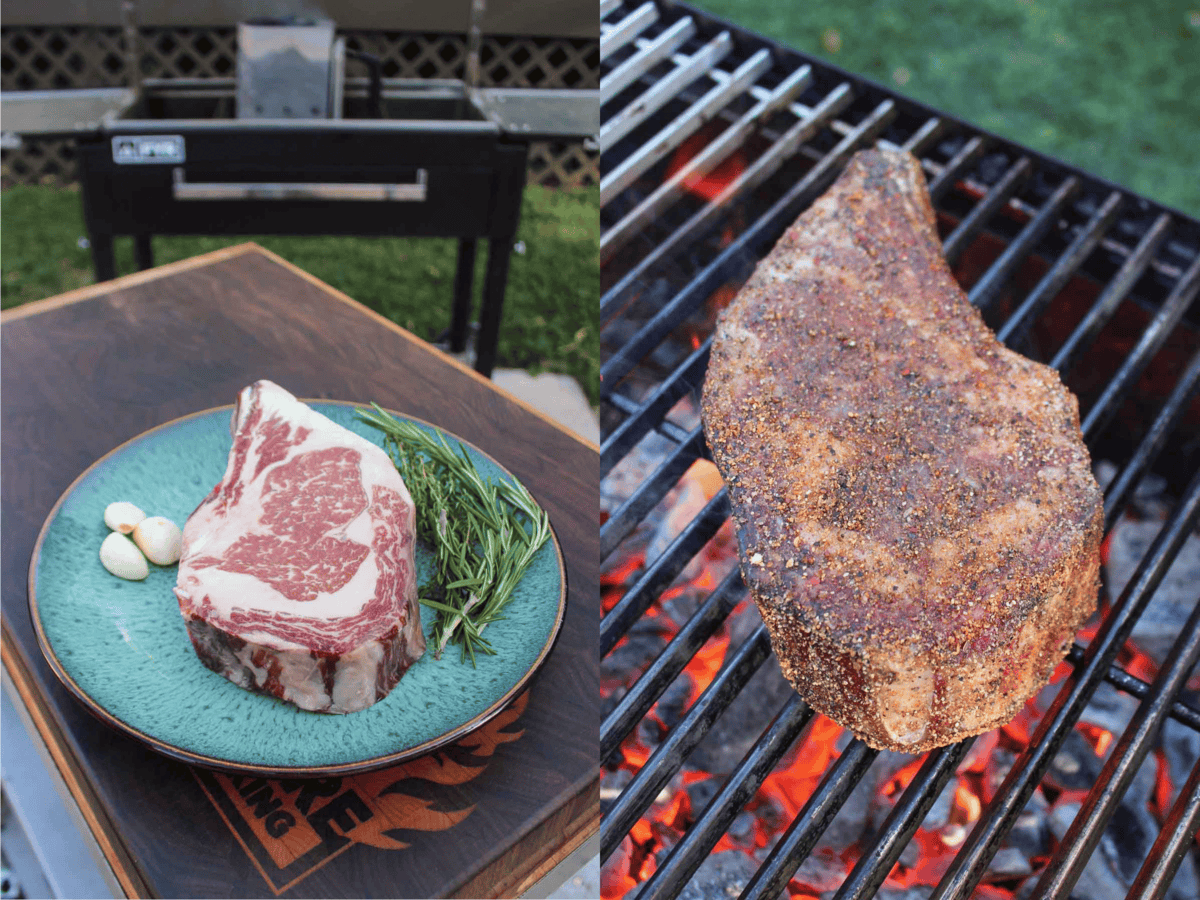
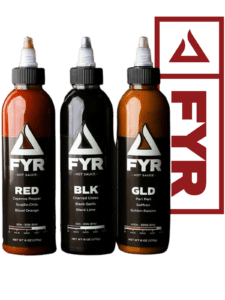
- Beautiful Ribeye Steak – Good steak is essential for the best flavor. A ribeye cut that has good marbling gives the best results. Next, we’ll slather the outside of the steak with FYR BLK Hot Sauce as a binder. Then, we’ll generously season it with black pepper, kosher salt, garlic powder, and some Bourbon Prime seasoning.
Get stoked for life
This sauce is FYR!
Born from a deep passion for food and flavor. Whether you’re grilling in the backyard or live fire cooking around the world, we have what you need to transform every meal into an adventure.
- Butter Baste – Unsalted butter, fresh sprigs of rosemary and thyme, and a few smashed garlic cloves are all that’s needed.
This combo of fresh herbs and then the butter gives your steak a next-level flavor. It’s absolutely perfect for special occasions or just a weeknight dinner for two with a glass of red wine.
How to Cook the Perfect Ribeye Steak
Let’s get into the cooking process. First, take your ribeye steak out of the fridge. For the best results, let them come to room temperature. Preheat your grill to super high heat, aiming for about 400-450 degrees F. This high heat is undoubtedly the first key to the recipe’s success.
Place your steak over the hot coals and then let them sear for about 4-5 minutes per side. Or once the meat reaches an internal temperature of 100 degrees F. This step allows us to achieve a good crust on the steak while also capturing all the extra flavor from the smoky grill.
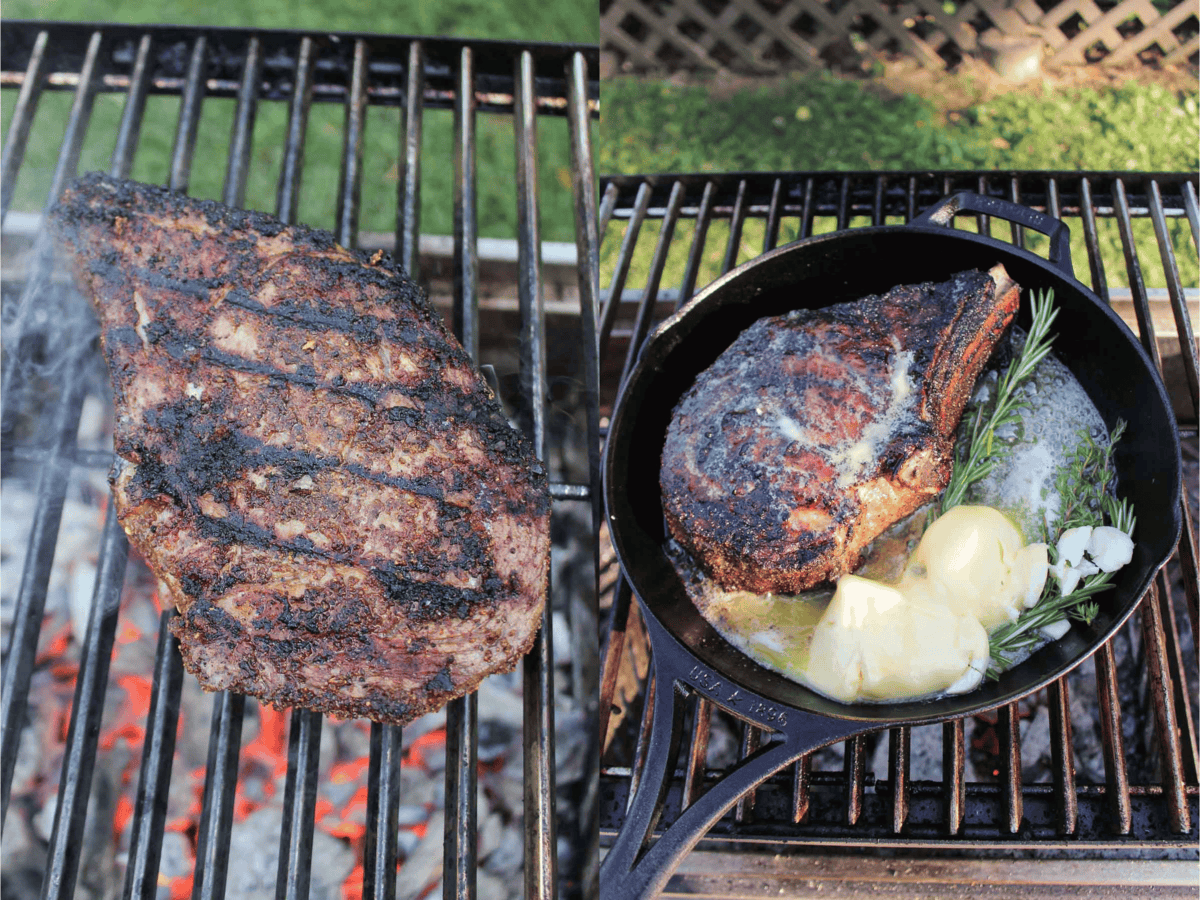
Next, pull the steak off the grill and then lower the heat to medium (around 325 degrees F). Add a cast iron skillet to the grill and then let it heat up fully.
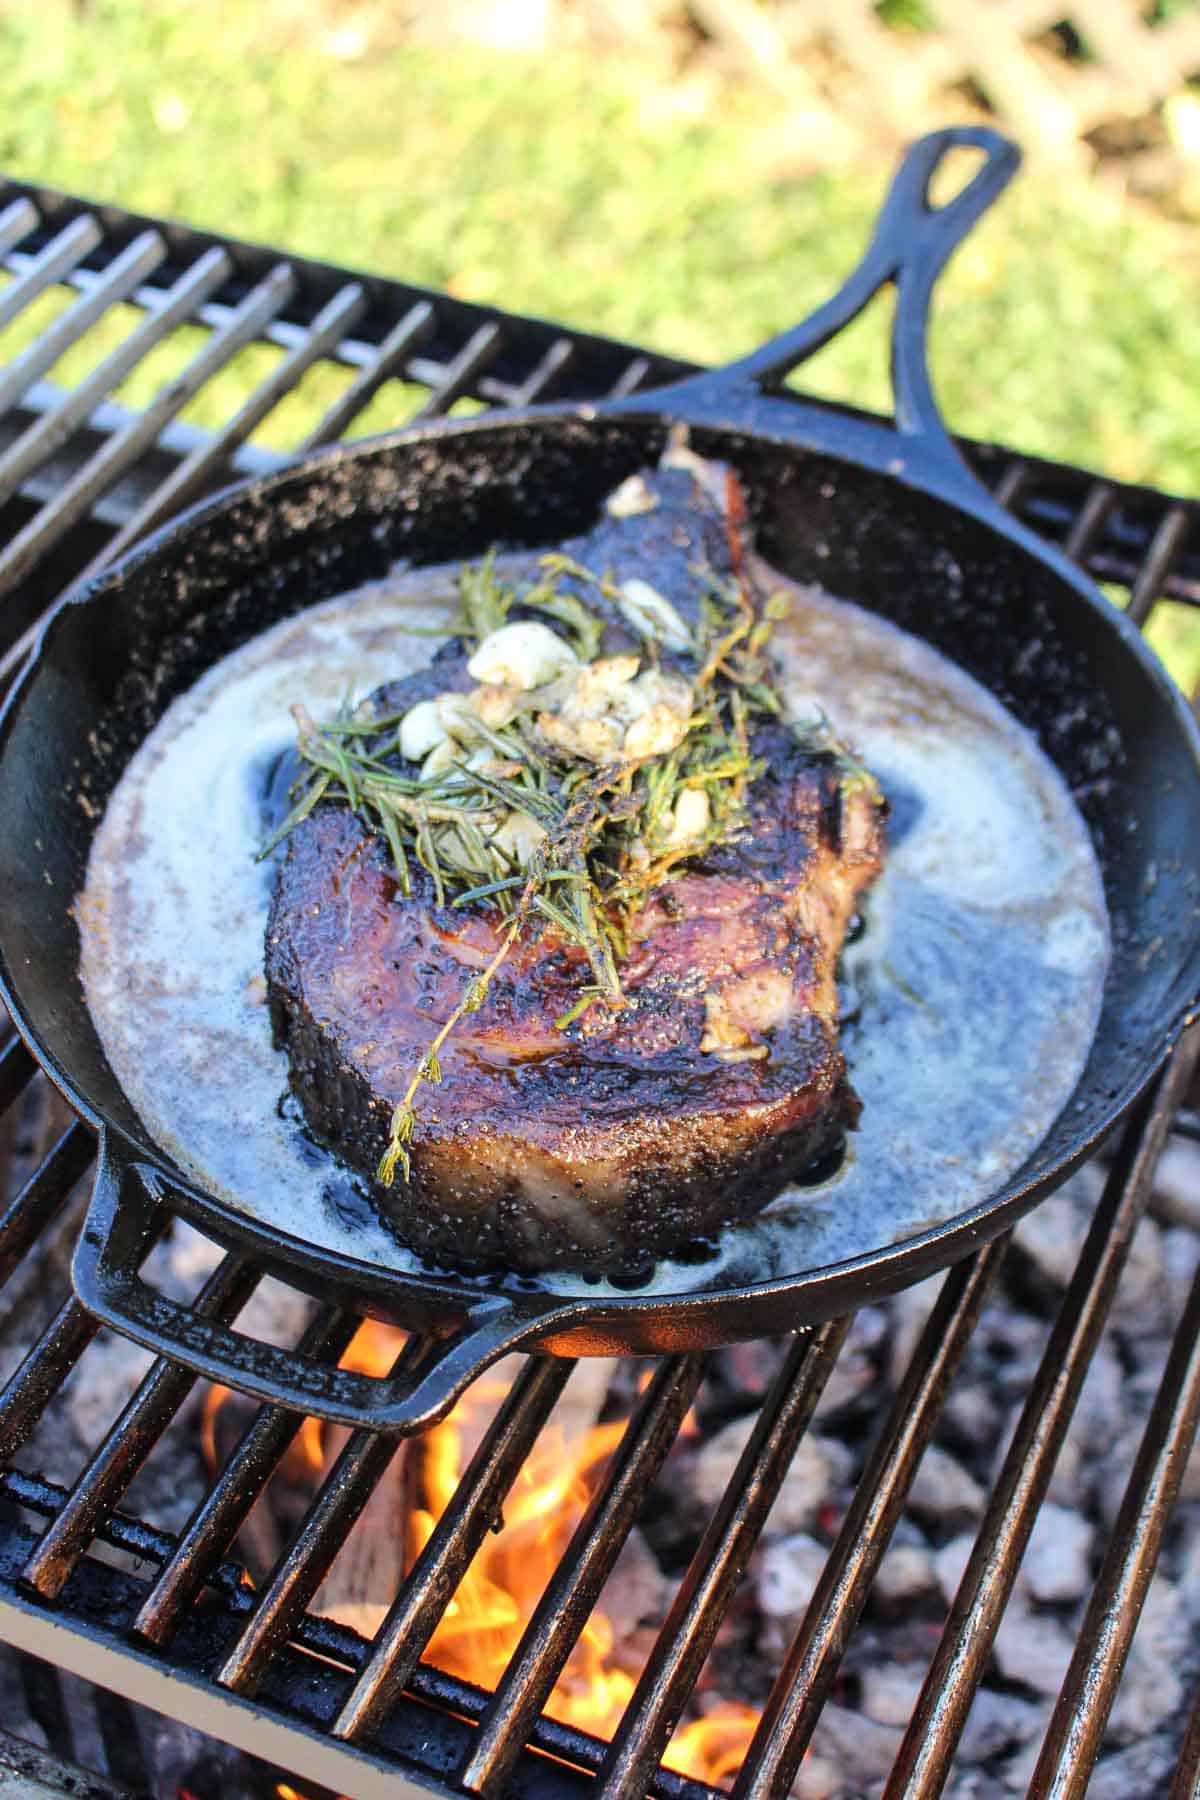
Place your steak back into the pan once the cast iron pan is hot. Drop in the butter, rosemary, thyme, and garlic cloves. As the butter melts, spoon-baste the steaks, ensuring the foam stays white or yellow. If the butter starts to brown or blacken, immediately remove the hot skillet and cool. If needed, replace the butter to avoid bitterness.
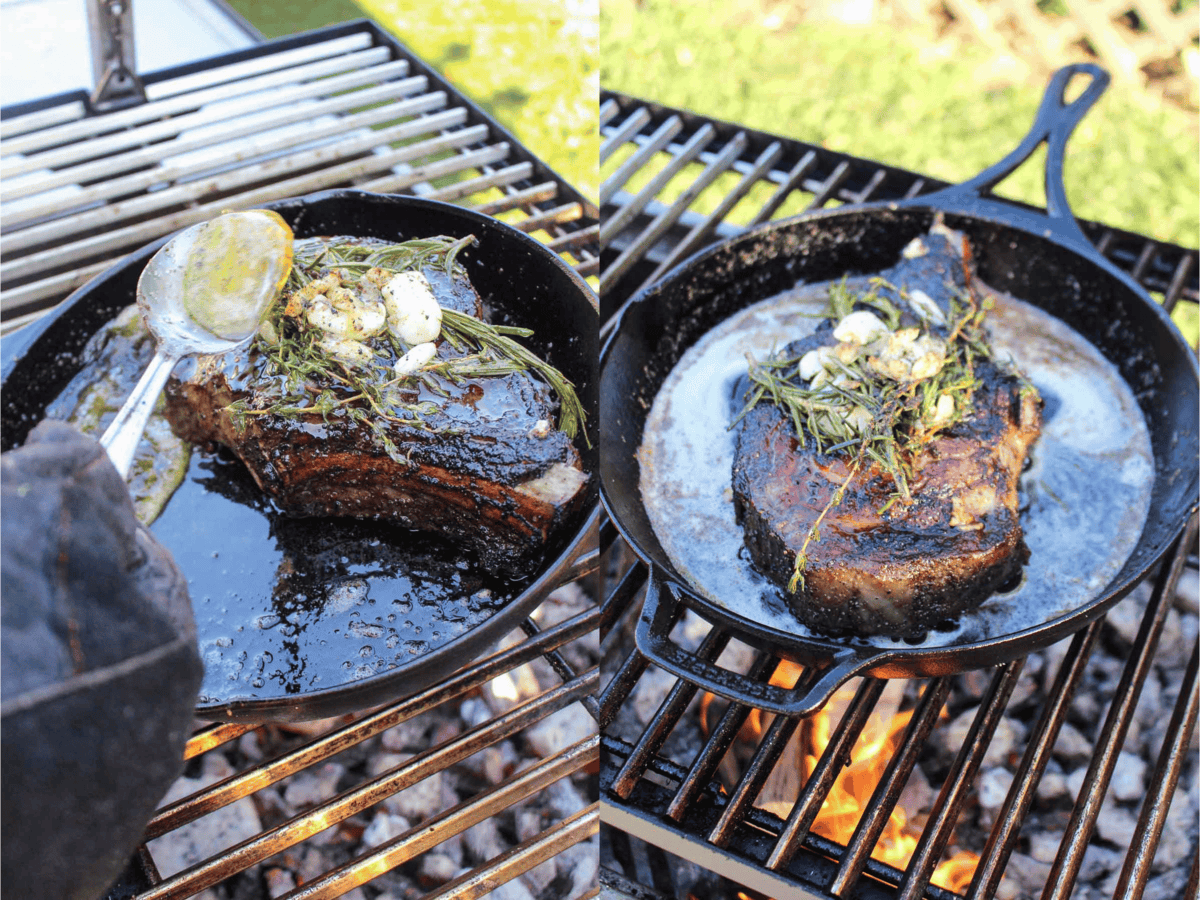
Cook the steak until it reaches an internal temperature of 120 degrees F. Once the steak is perfectly cooked, go ahead and remove it from the skillet. Now, let it rest on a warm plate for 5-10 minutes to settle all the juices.
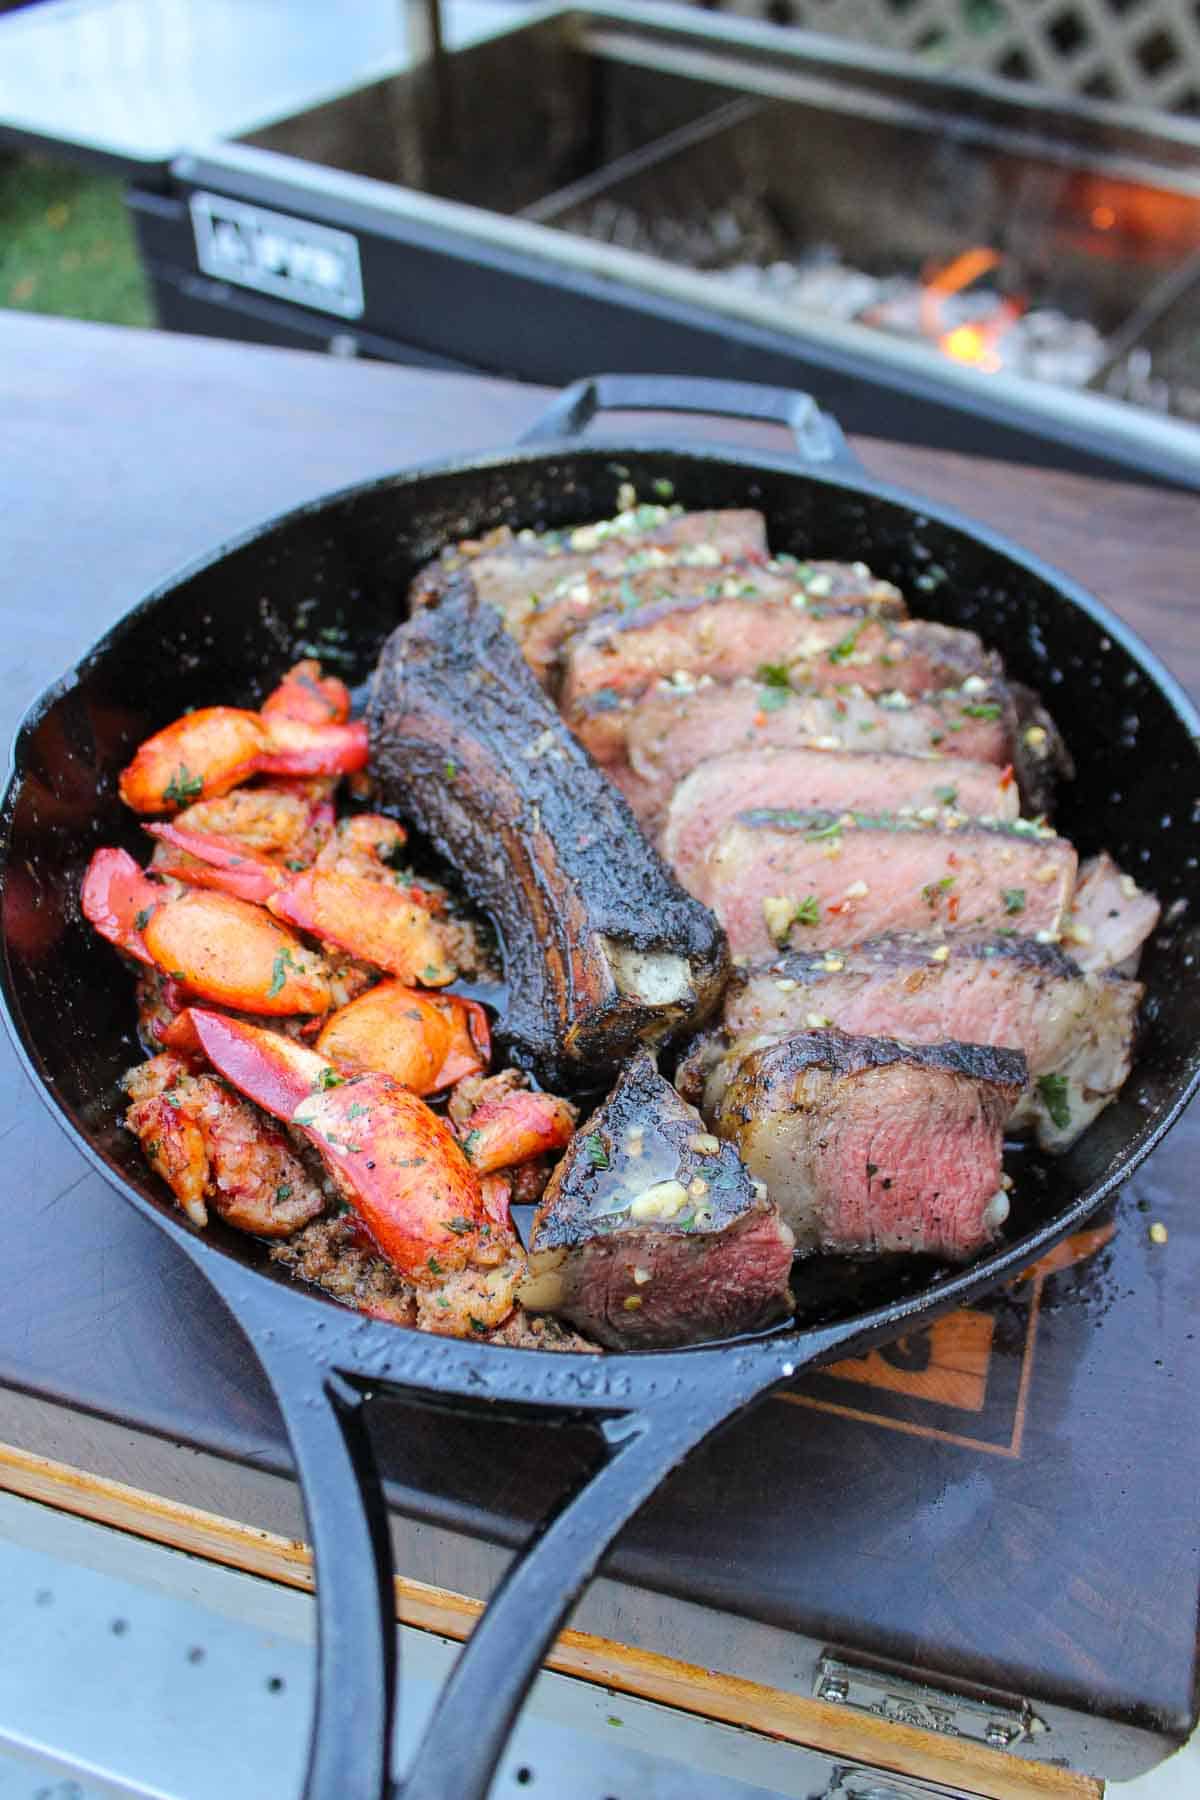
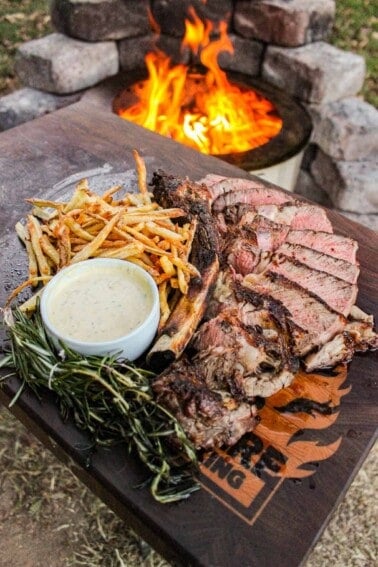
If you’re feeling fancy, toss some shrimp or lobster meat into the skillet for 2-3 minutes. It goes perfectly with that steak and garlic butter! Plus, the delicious butter baste is already created, so you might as well take advantage of it!
For more surf and turf recipes, check out my Best Surf and Turf Recipes.
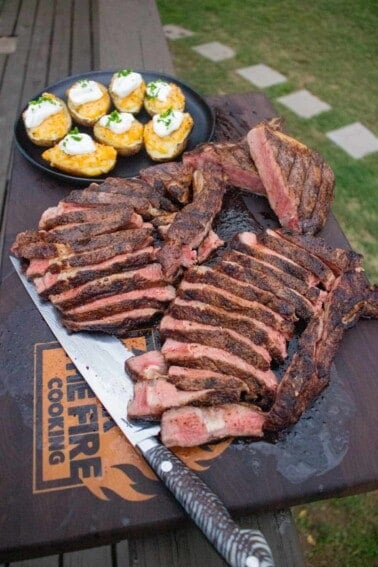
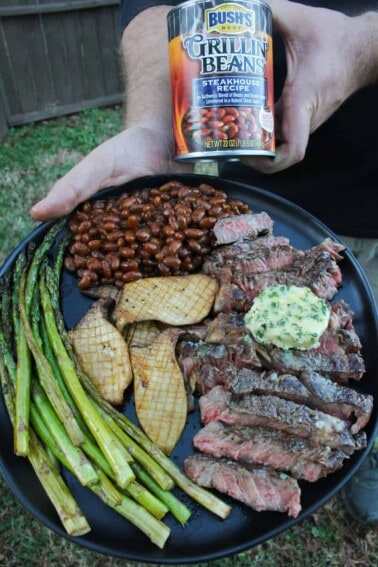
What to Serve with Your Ribeye Steak
After mastering the perfectly delicious ribeye steak, some killer sides will complete the feast. You can’t go wrong with some baked potatoes smothered in butter, sour cream, and chives. Or, consider some creamy mashed potatoes, some roasted vegetables, or a fresh green salad.
More Ribeye Recipes
Also, if you’re on the hunt for different butters to enhance your steak recipes, make sure to check out my Best Butter Recipes.
Storing & Reheating Leftovers
If you have leftovers, then be sure to store your steak in an airtight container in the fridge for up to 3-4 days. When you’re ready to reheat avoid the microwave and, alternatively, warm the steak in a hot pan over medium heat to keep it juicy and tender.
FAQs
To get that perfect sear, make sure your ribeye steak is at room temperature before cooking. Also make sure your coals are nice and hot and that your grill has preheated before laying them down on the grill grates. Just like an oven, we want the grill to already be hot before placing the steak on it!
While this step is not required, if you’ve got the time, it’s definitely worth trying. This process, known as dry brining, enhances the steak’s flavor and helps to tenderize it.
Simply season your ribeye with kosher salt, then place it uncovered in the fridge for at least 1 hour, or up to 24 hours for the best results. This allows the salt to penetrate the meat, drawing out moisture and then reabsorbing it, which results in a juicier and more flavorful steak when cooked.
For more info on brining, check out my deep dive into The Benefits of Brining.
When looking to source the highest-quality ribeye steaks online, you have several excellent options. Reputable sources include Snake River Farms, known for their American Wagyu beef, and Porter Road, which offers dry-aged, pasture-raised ribeye steaks.
Additionally, ButcherBox delivers grass-fed, grass-finished beef directly to your door, and Crowd Cow allows you to choose from a variety of sustainable farms. For those seeking premium cuts, Holy Grail Steak Co. is another top choice, offering a selection of ribeye steaks from renowned farms and producers.
Add flavor to everything you’re cooking
shop over the fire spice lines

Perfect Ribeye Steak
Ingredients
Steak:
- 1-2 Ribeye Steaks
- 2 tbsp Black Pepper
- 2 tbsp Garlic Powder
- 2 tbsp Kosher Salt
- 1 tbsp Bourbon Prime
- FYR BLK Hot Sauce binder
- Herb Brush optional
Butter Baste:
- 4 tbsp Butter unsalted
- 3 sprigs Rosemary
- 2 sprigs Thyme
- 3 Garlic Cloves smashed
Instructions
Steak:
- Slather your steak in FYR BLK Hot Sauce. Then, generously season your favorite cut of steak with salt, pepper and garlic powder all over. Add a little seasoning of Bourbon Prime or your favorite steak rub.
- Preheat your grill for high heat direct cooking (about 400-450F).
- Add your steaks to the grill to sear directly over the hot coals for 4-5 minutes per side or until it is 100F internal. This will add all that smokiness to the outside of your steaks.
- Pull the steaks off and lower the temp on the grill to medium (about 325F).
- Add a cast iron skillet with some oil over the fire and add the steak back to the skillet.
- Drop in the butter, rosemary, thyme and garlic cloves. Slowly baste the steaks with the butter. Make sure the butter’s foam is white and not brown or black. If it's brown or black, then pull the skillet off to cool more.
- When the steak is 120F internal or done to your liking, pull it off and let rest for 10 minutes.
- (Optional) Add some shrimp or lobster meat to the skillet with all that butter to cook for 2-3 minutes for an extra punch of flavor!
- Slice the steak up, serve and enjoy!
Nutrition
The post Perfect Ribeye Steak appeared first on Over The Fire Cooking.


 Why buy organic chicken? We recommend buying organic since it’s the high-quality meat that is raised sustainably without chemicals.