Hummus and Ground Beef Puff Pastry
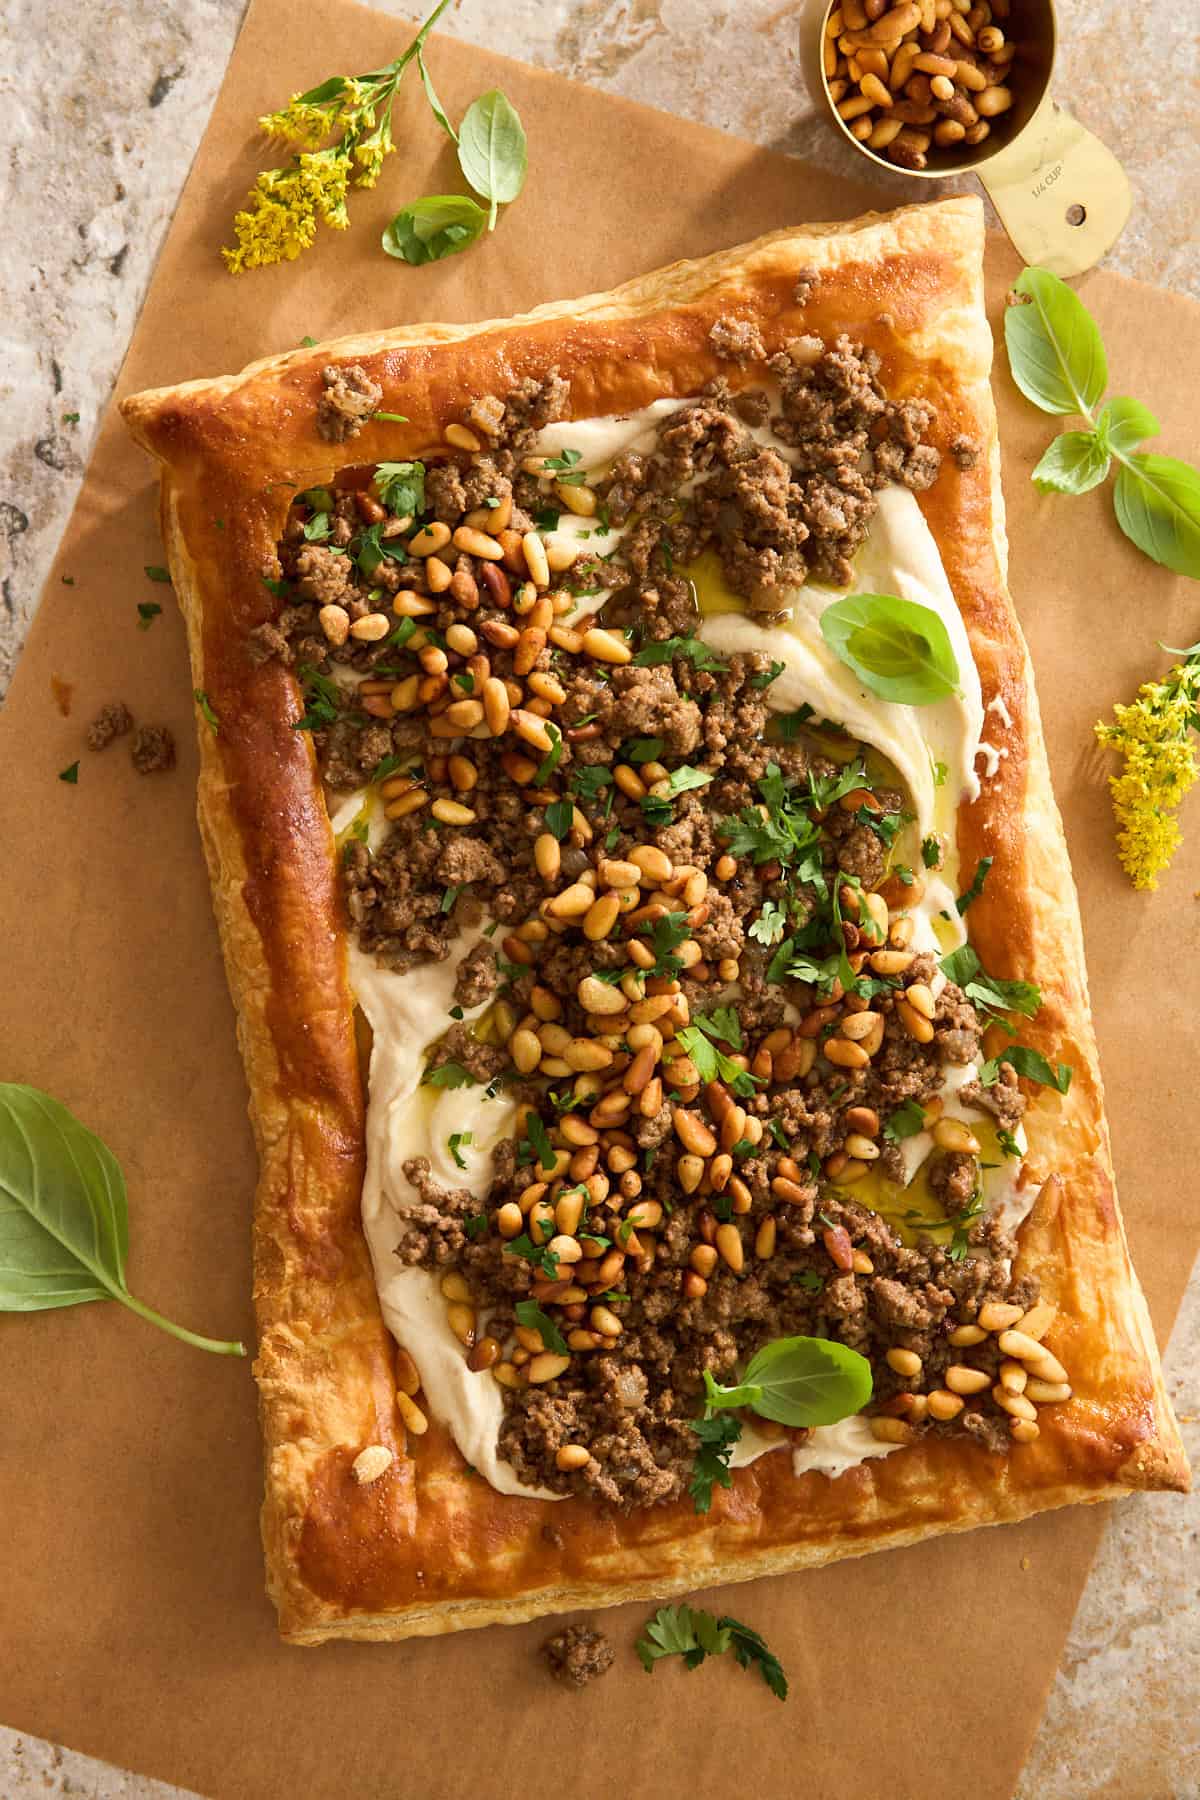 Impress your friends and family with the flaky, creamy, savory layers of this ground beef puff pastry layered with hummus!
Impress your friends and family with the flaky, creamy, savory layers of this ground beef puff pastry layered with hummus!
 Roasted garlic potatoes are crisp on the outside, soft and fluffy in the center, and loaded with bright savory flavor!
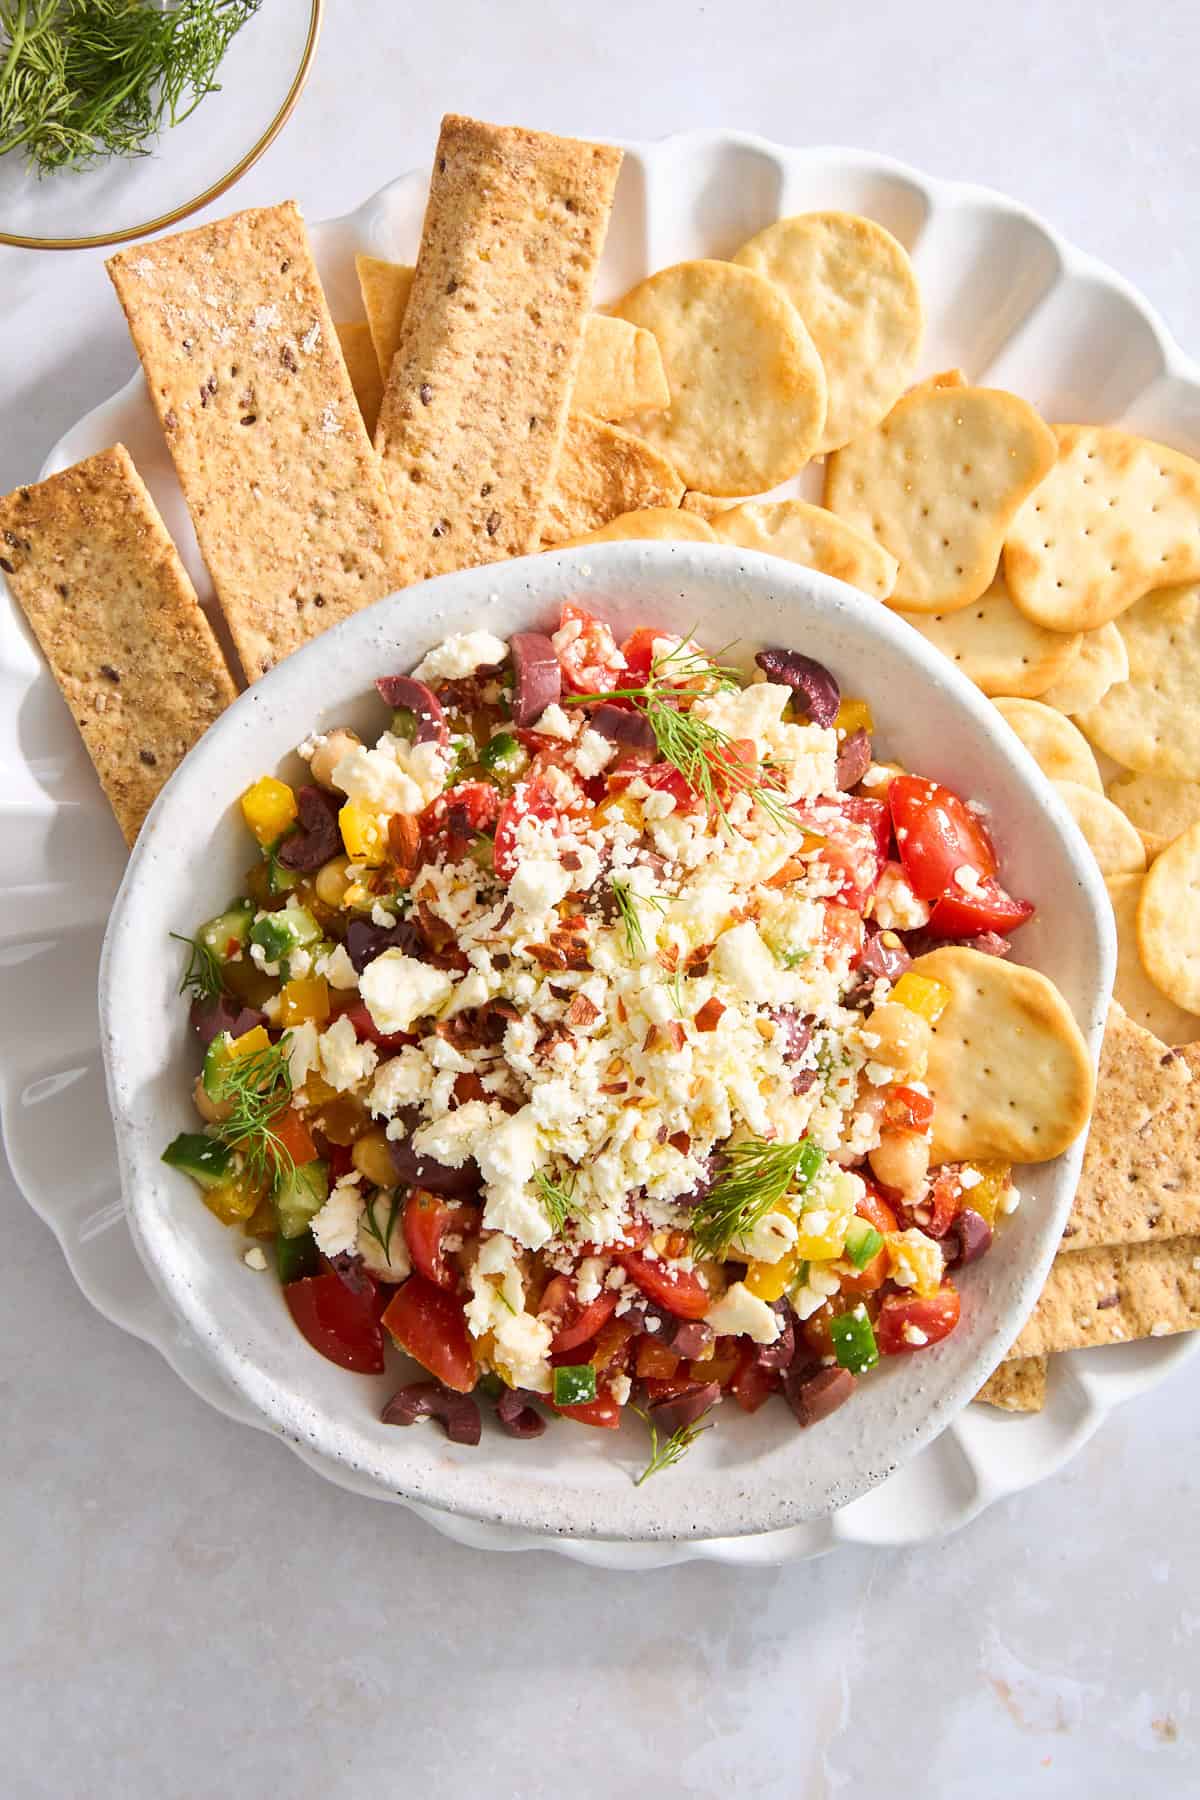
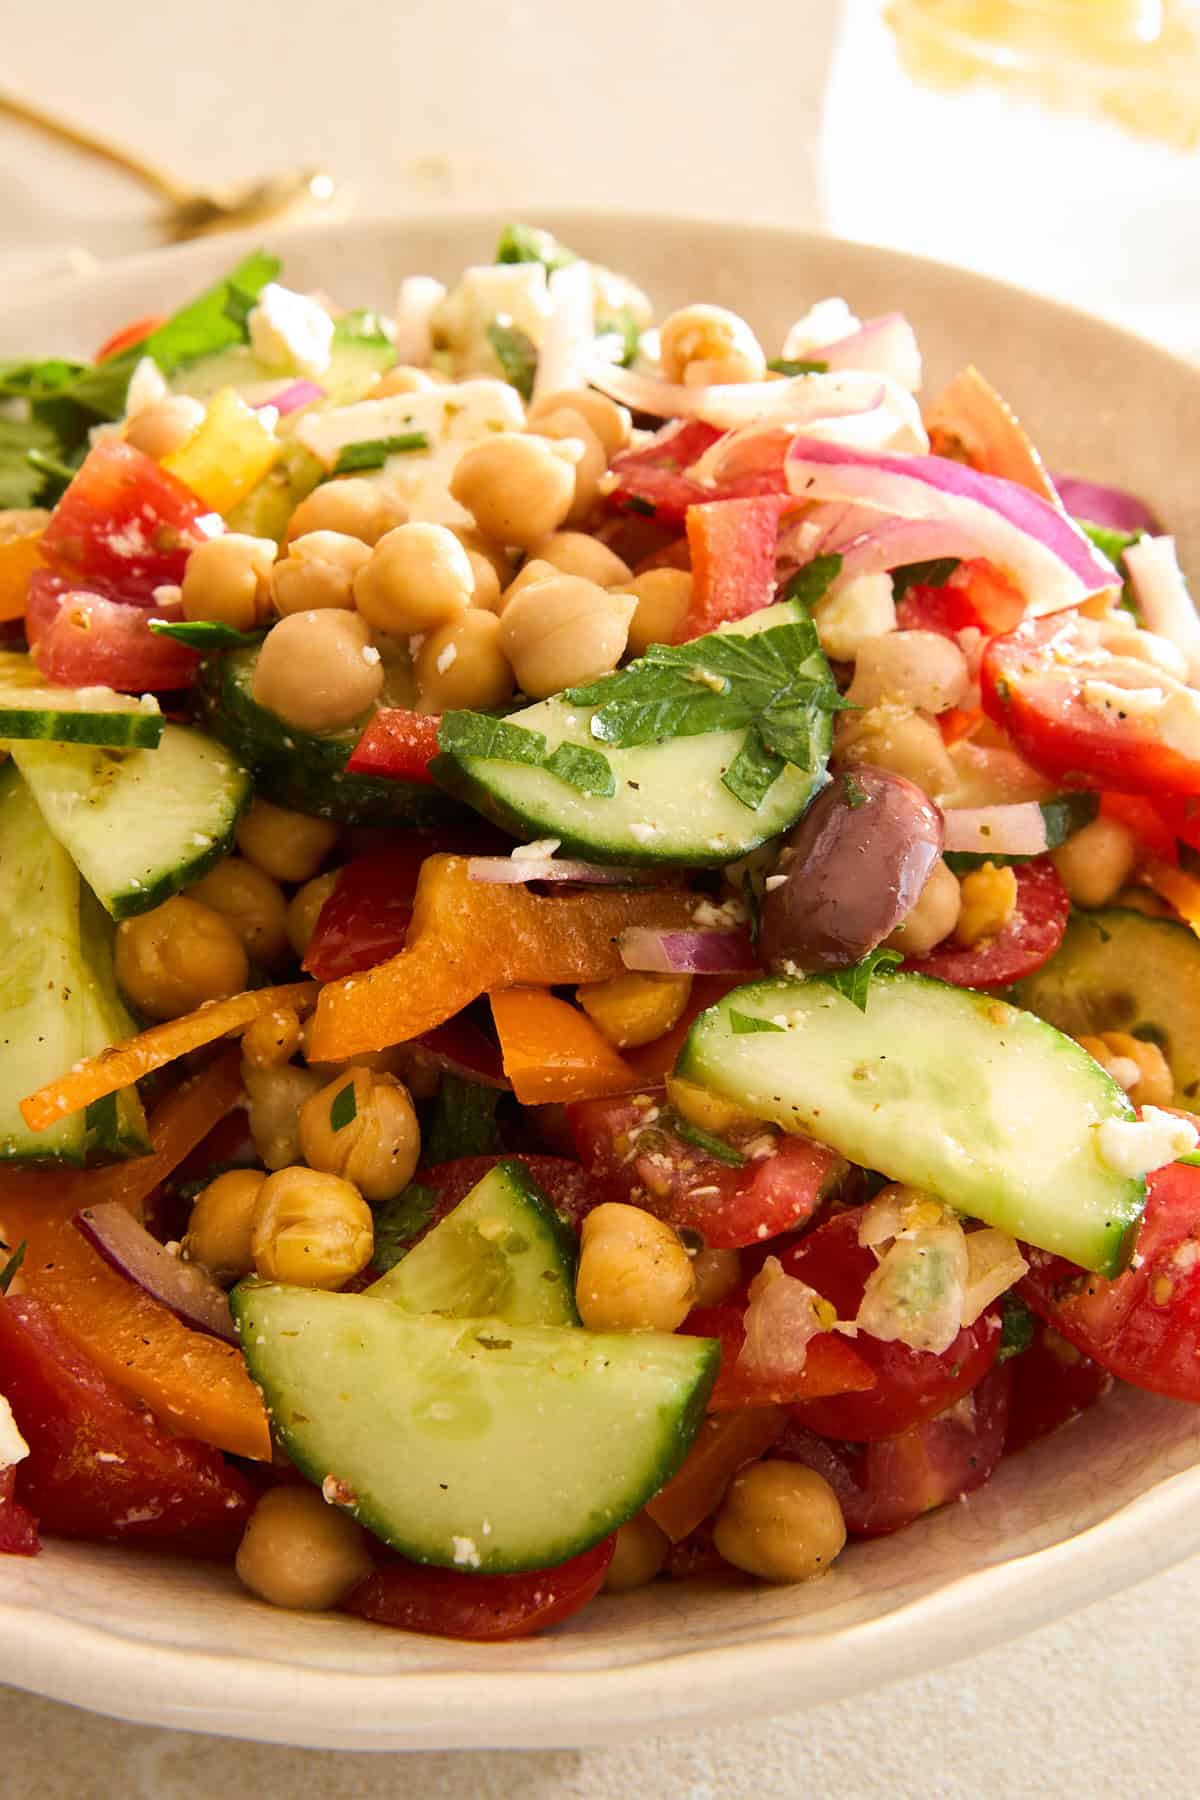 This Greek chickpea salad is savory, tangy, and quick to make. Full of nutrients and plant-based protein it’s a quick main course or side!
Eat like an Egyptian with the bold flavors of these simplified recipes offering all the warm and comforting flavors of Egyptian cuisine!
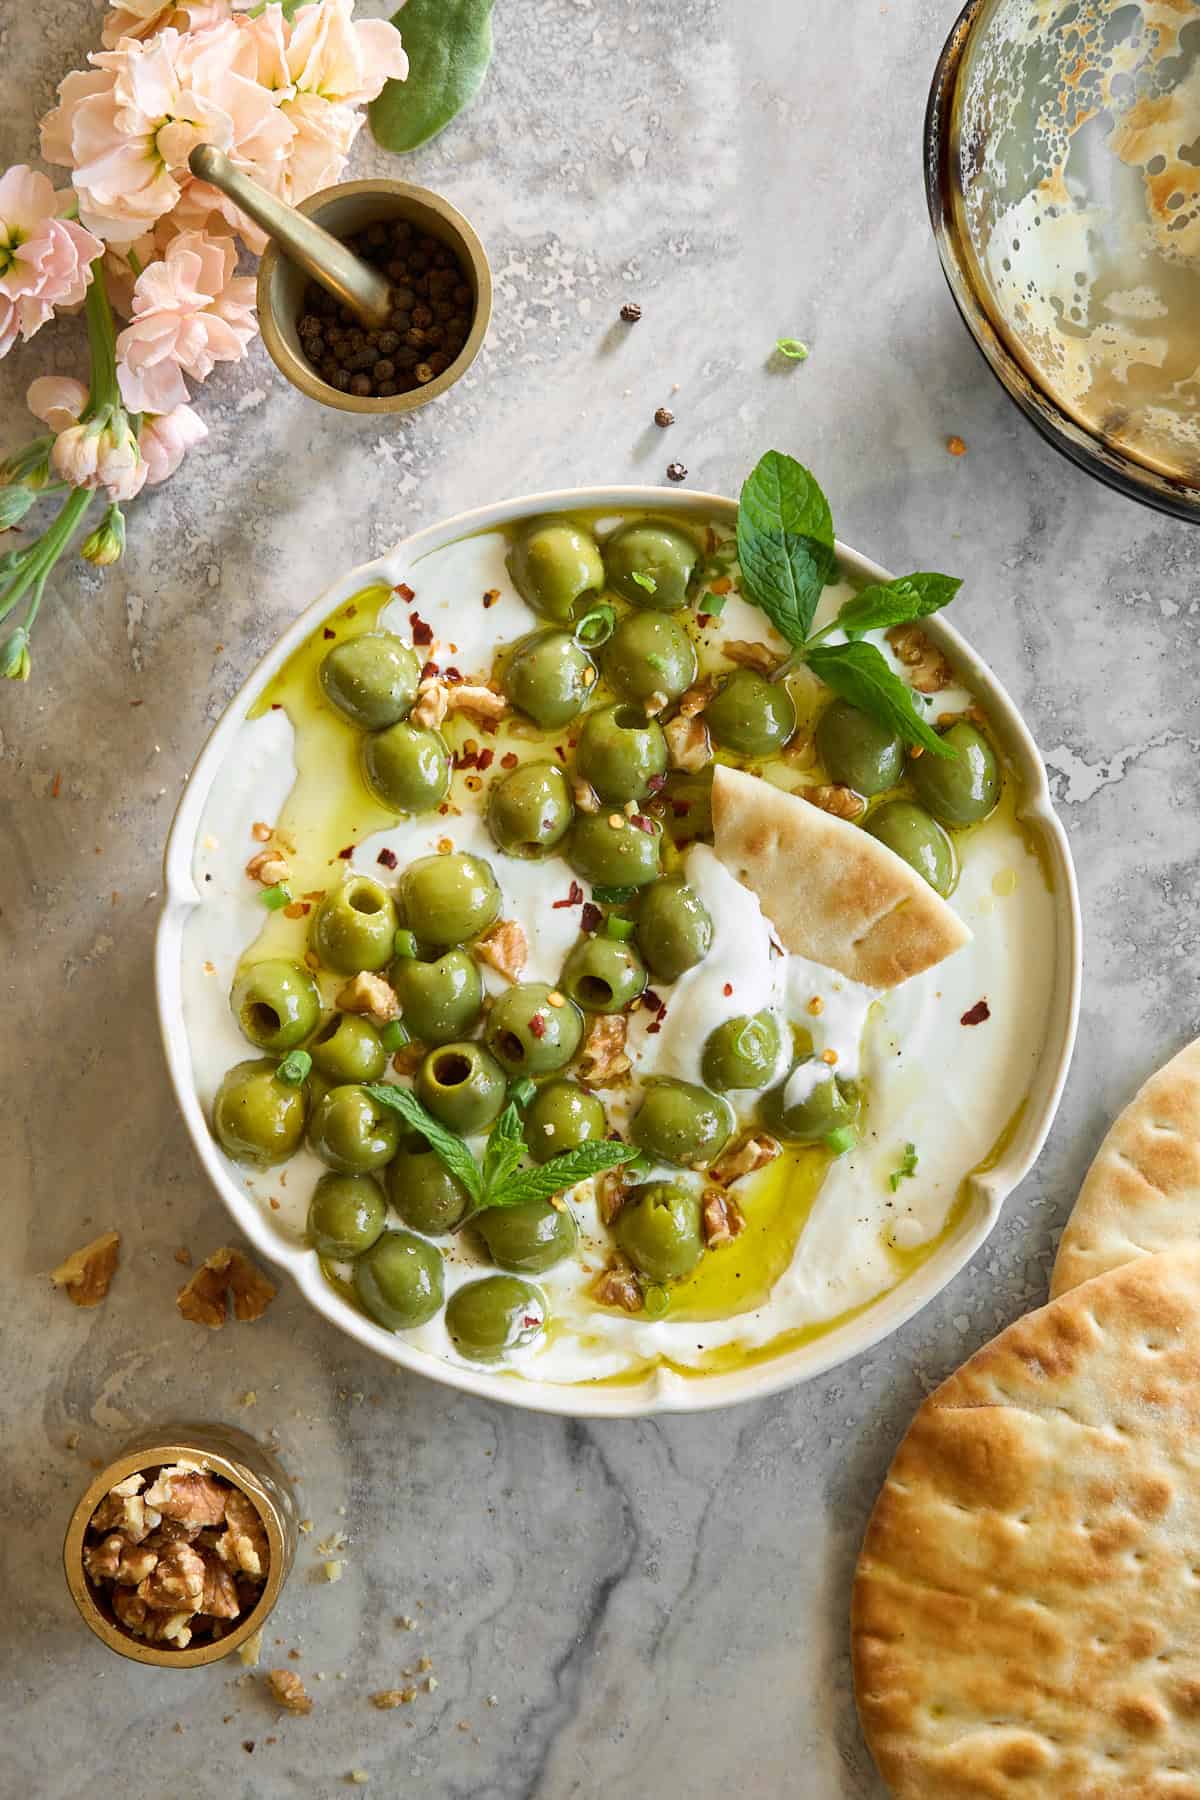 Enjoy the flavors of the Mediterranean with this creamy, tangy, marinated olive dip with whipped cottage cheese!
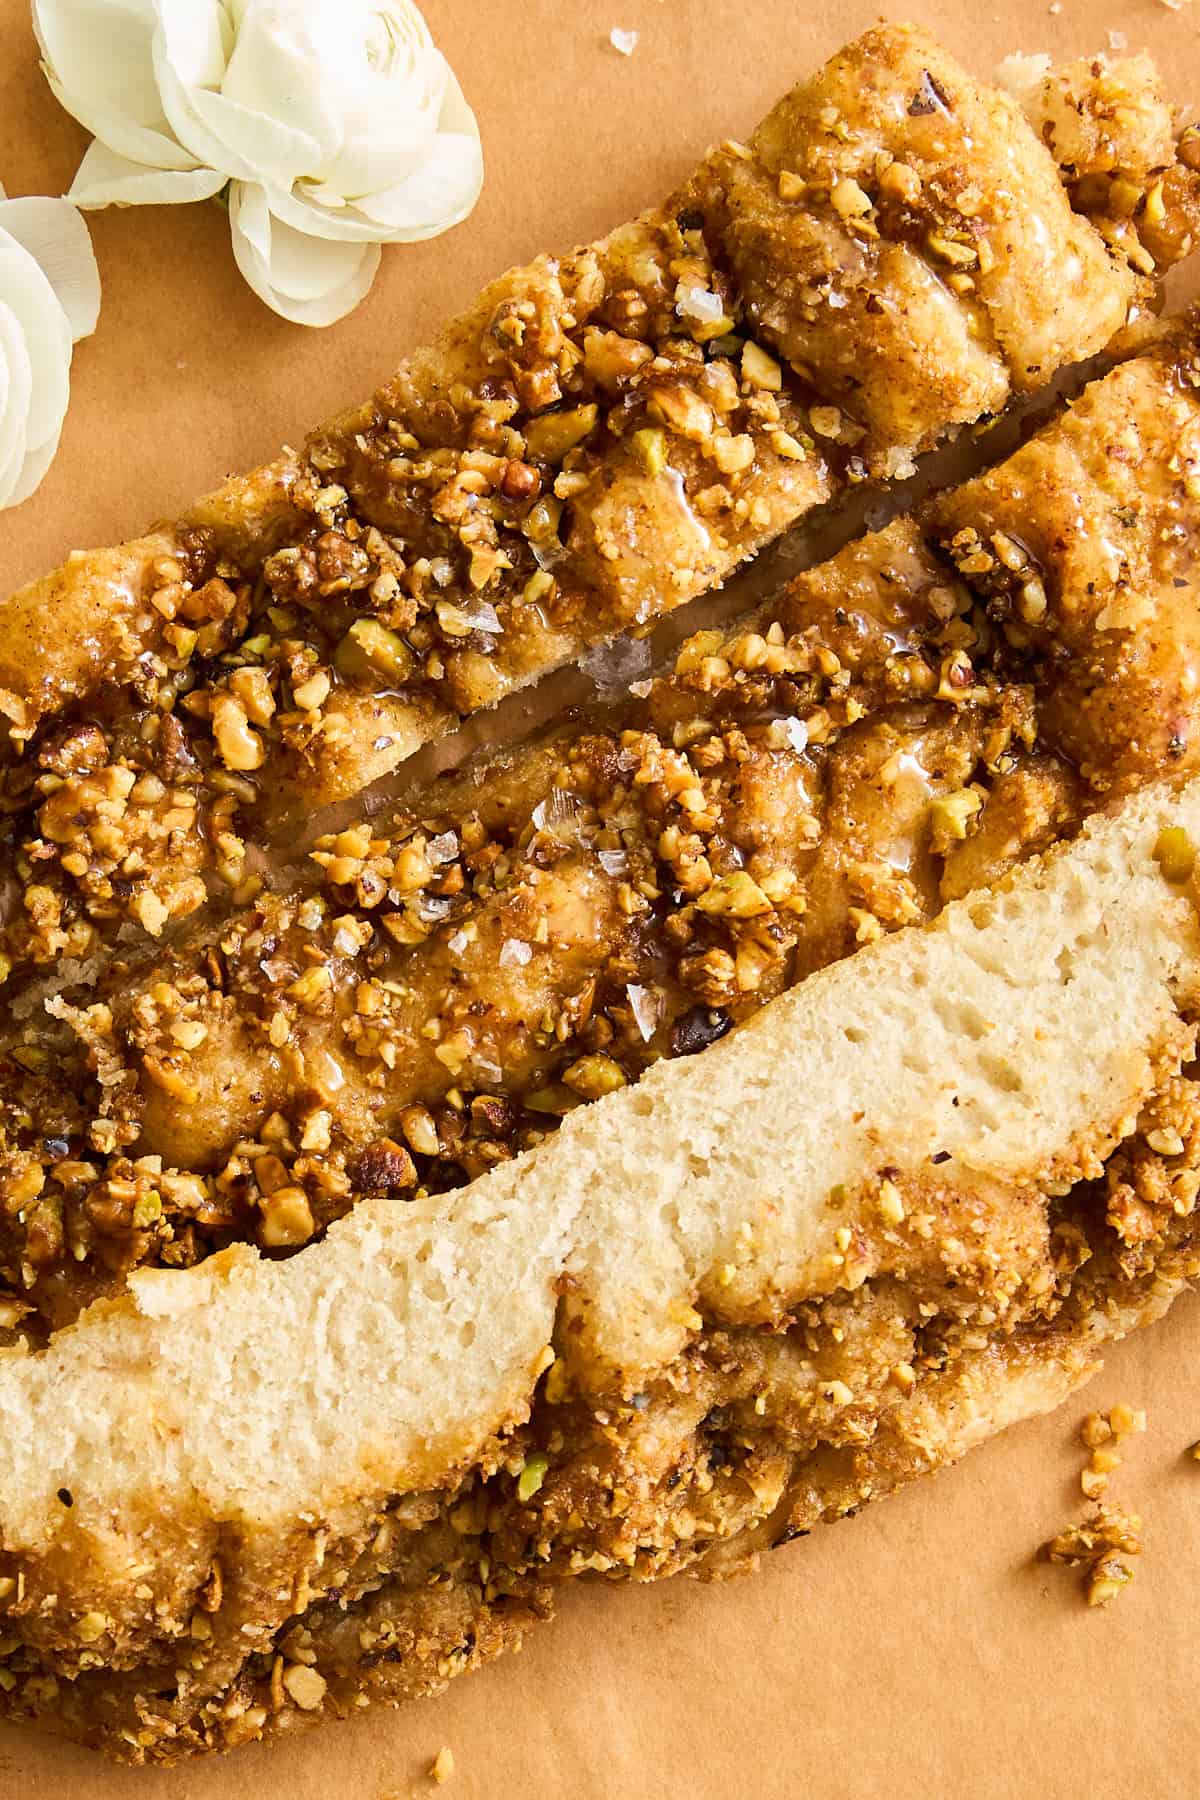 Enjoy the flavors of your favorite treat with this rich, nutty dessert focaccia that tastes just like classic focaccia!
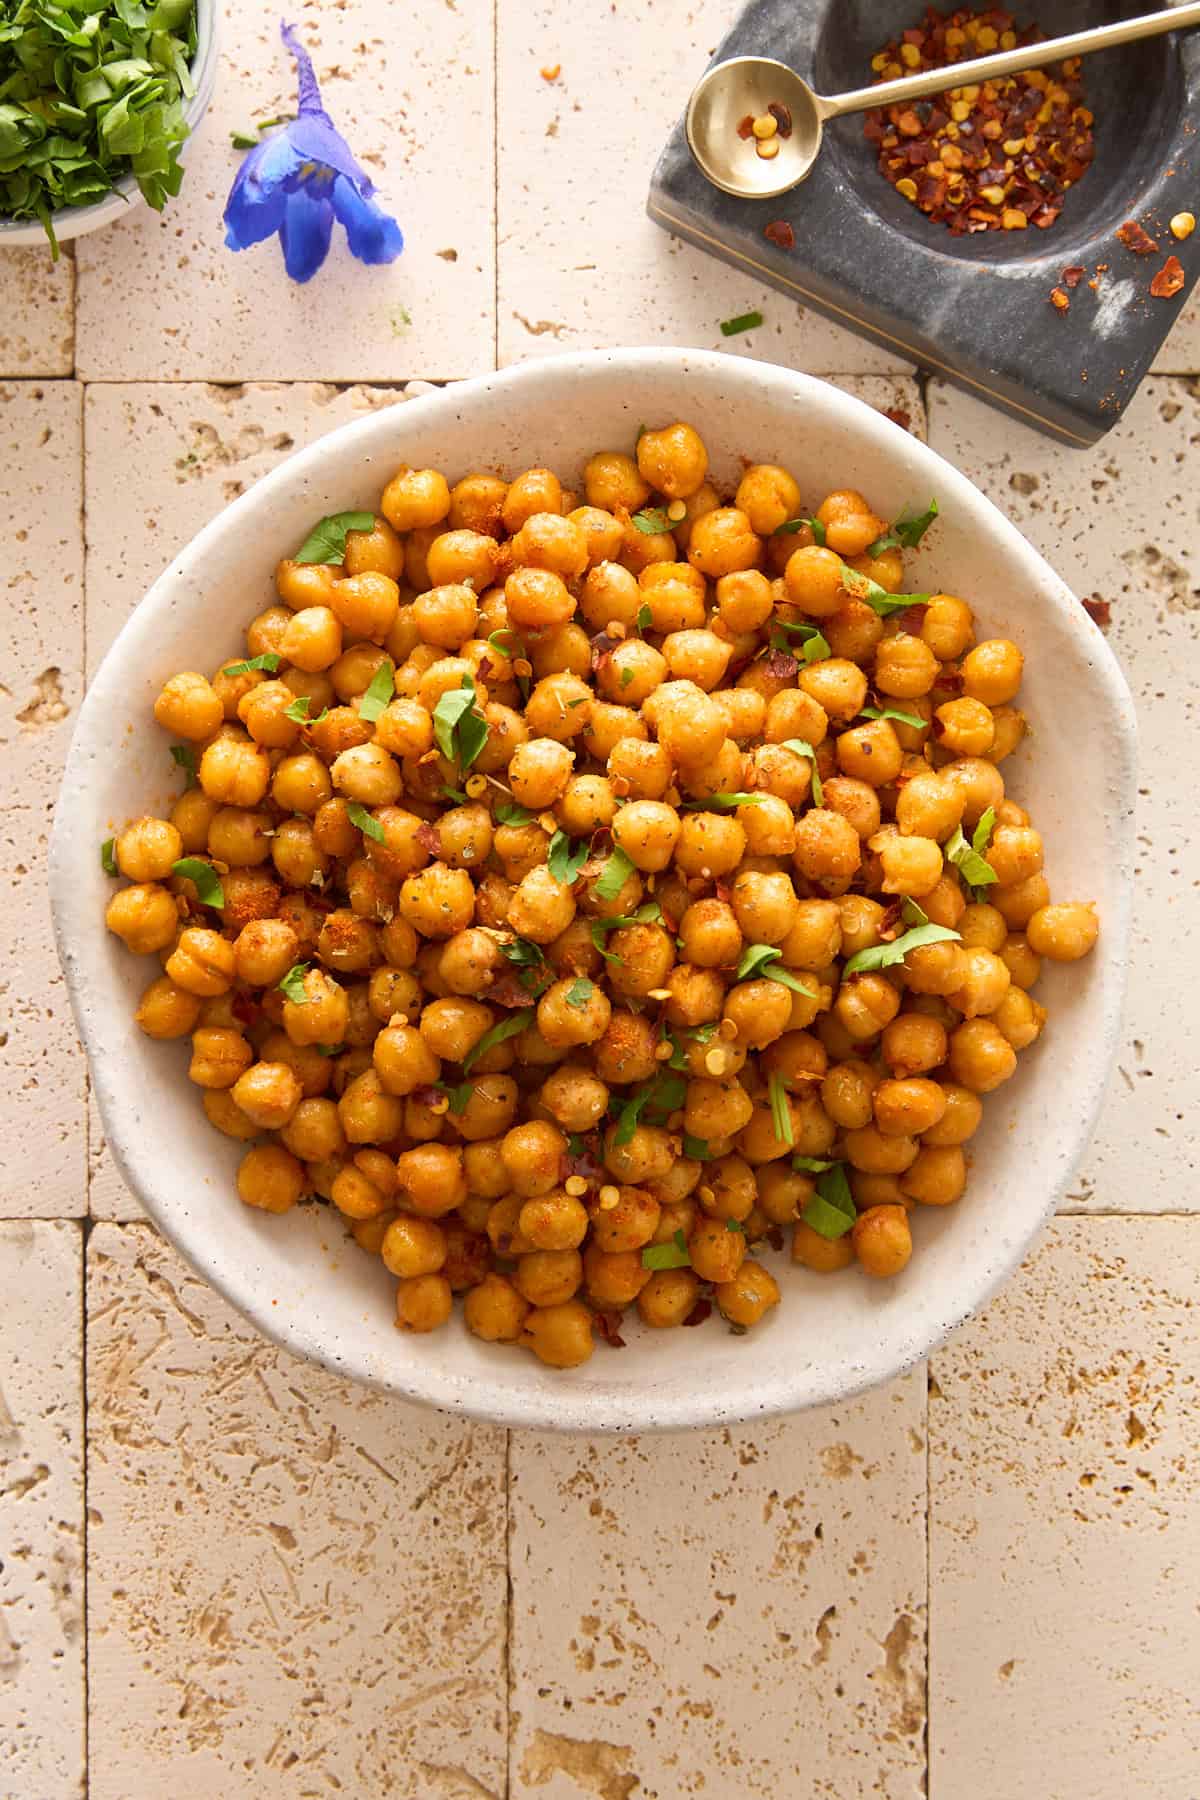 Learn how to make savory, spicy, crispy air fryer chickpeas in minutes for a tasty snack or fun topping to add to all your meals!
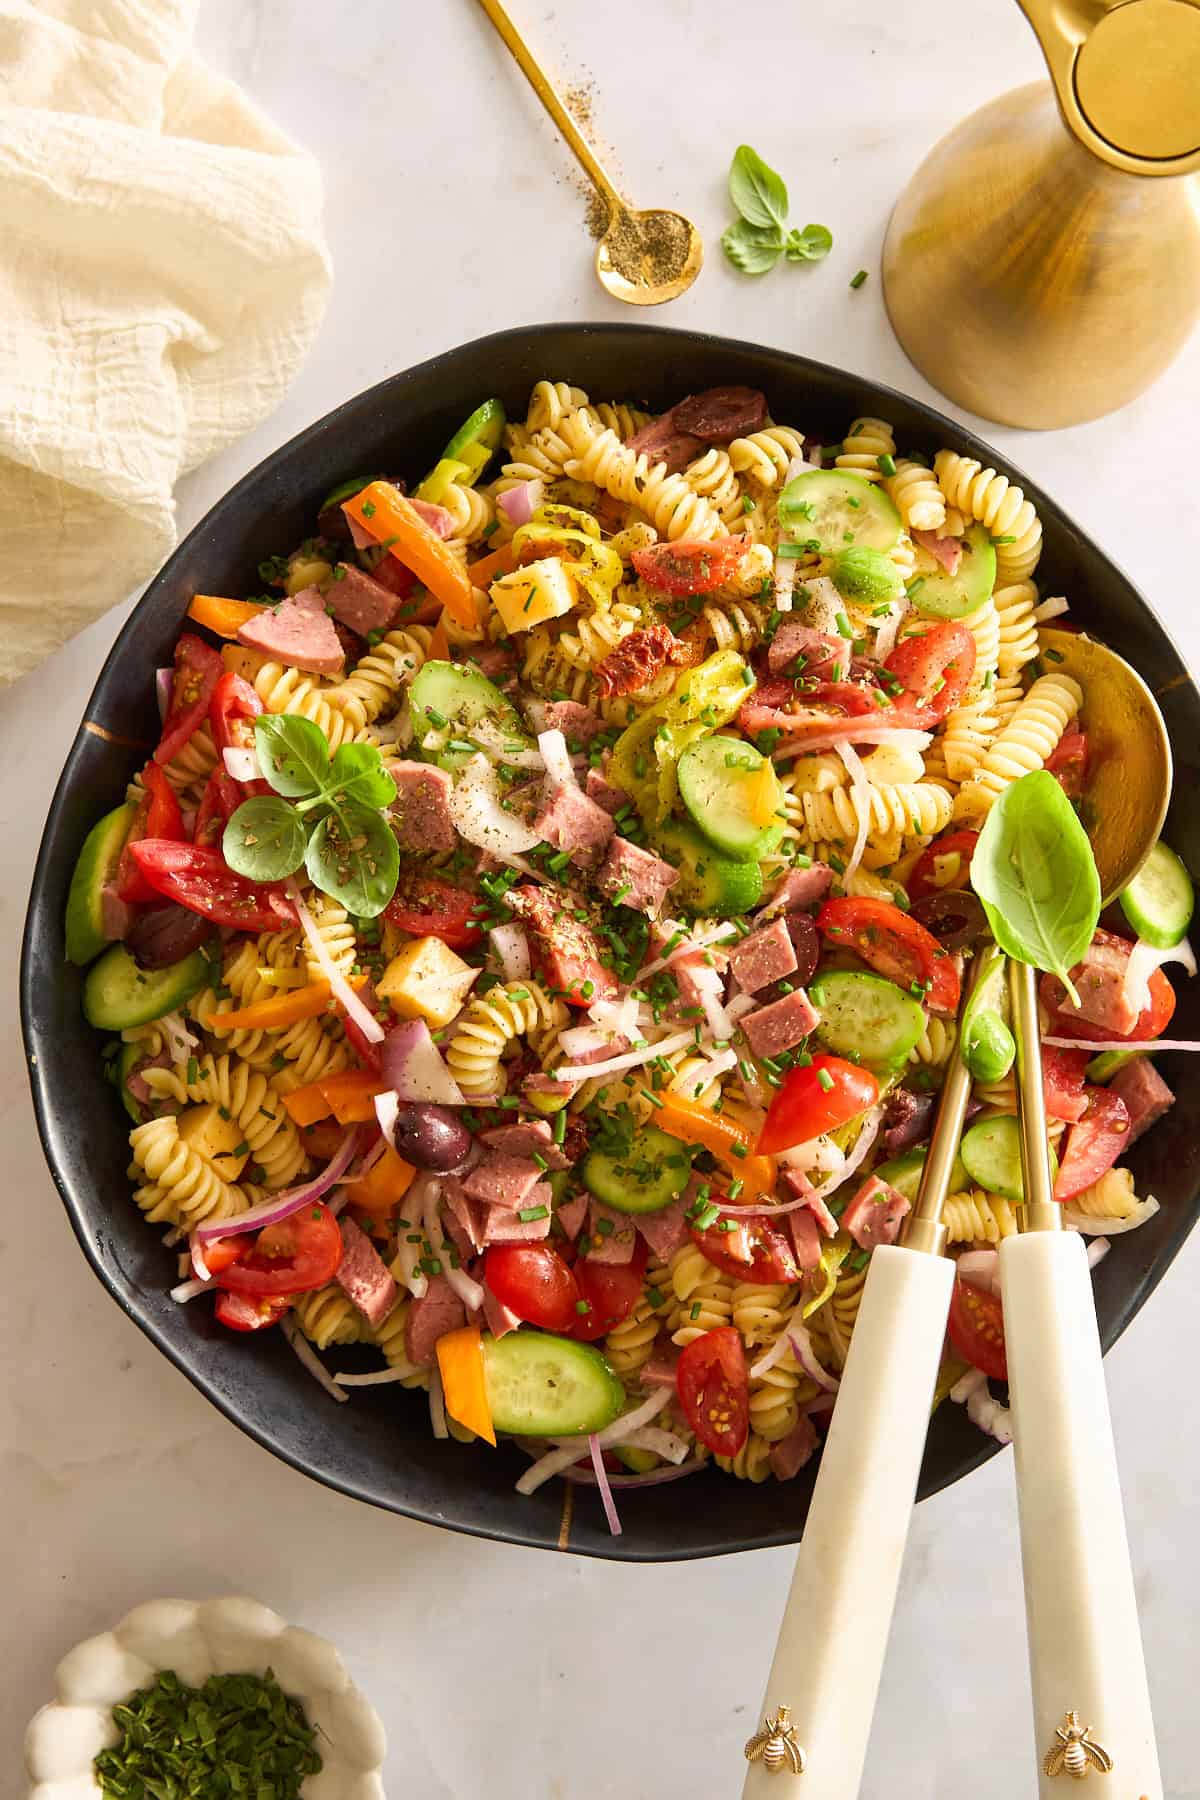 Make this easy cold Mediterranean pasta salad with fresh veggies, cheese, salami, and a homemade vinaigrette dressing!
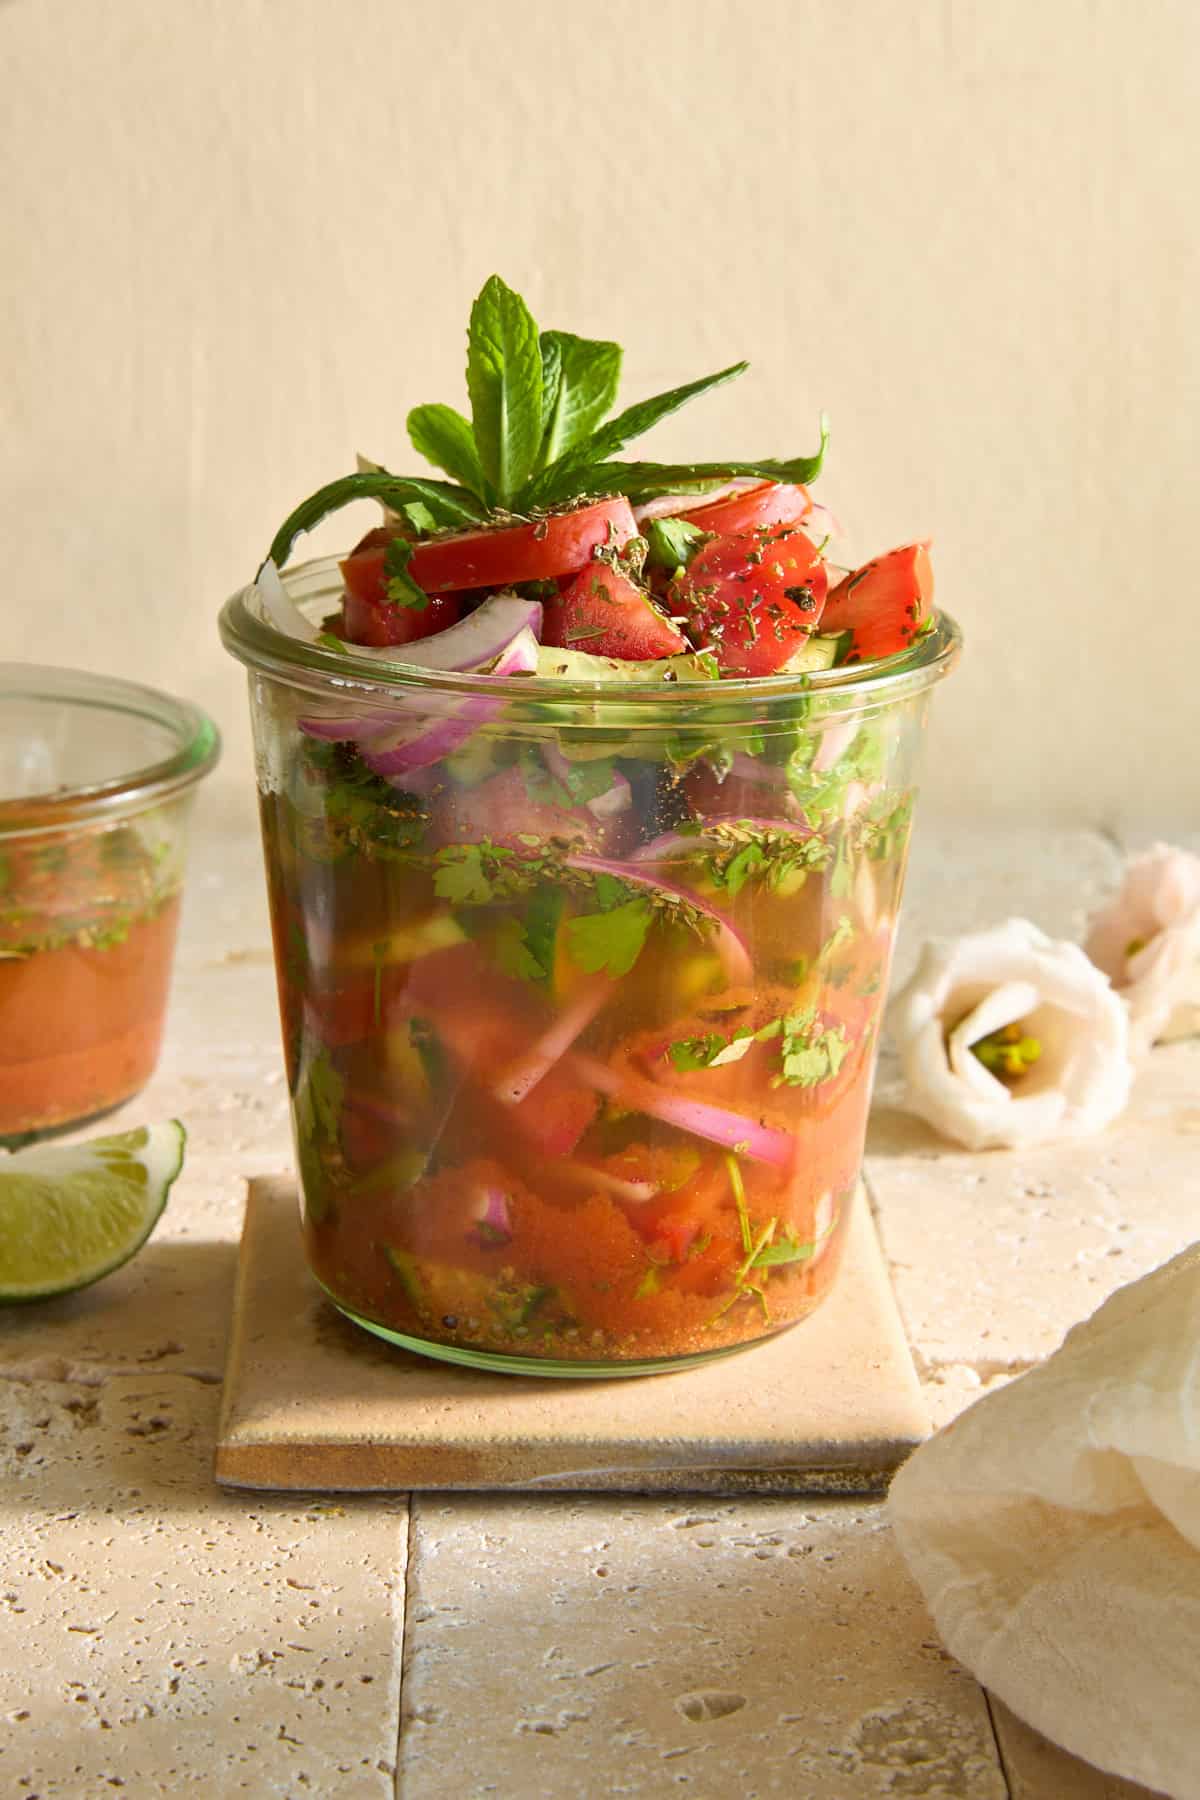 Enjoy a common restaurant salad from the comfort of home with this Egyptian cucumber and tomato salad with vinegar!
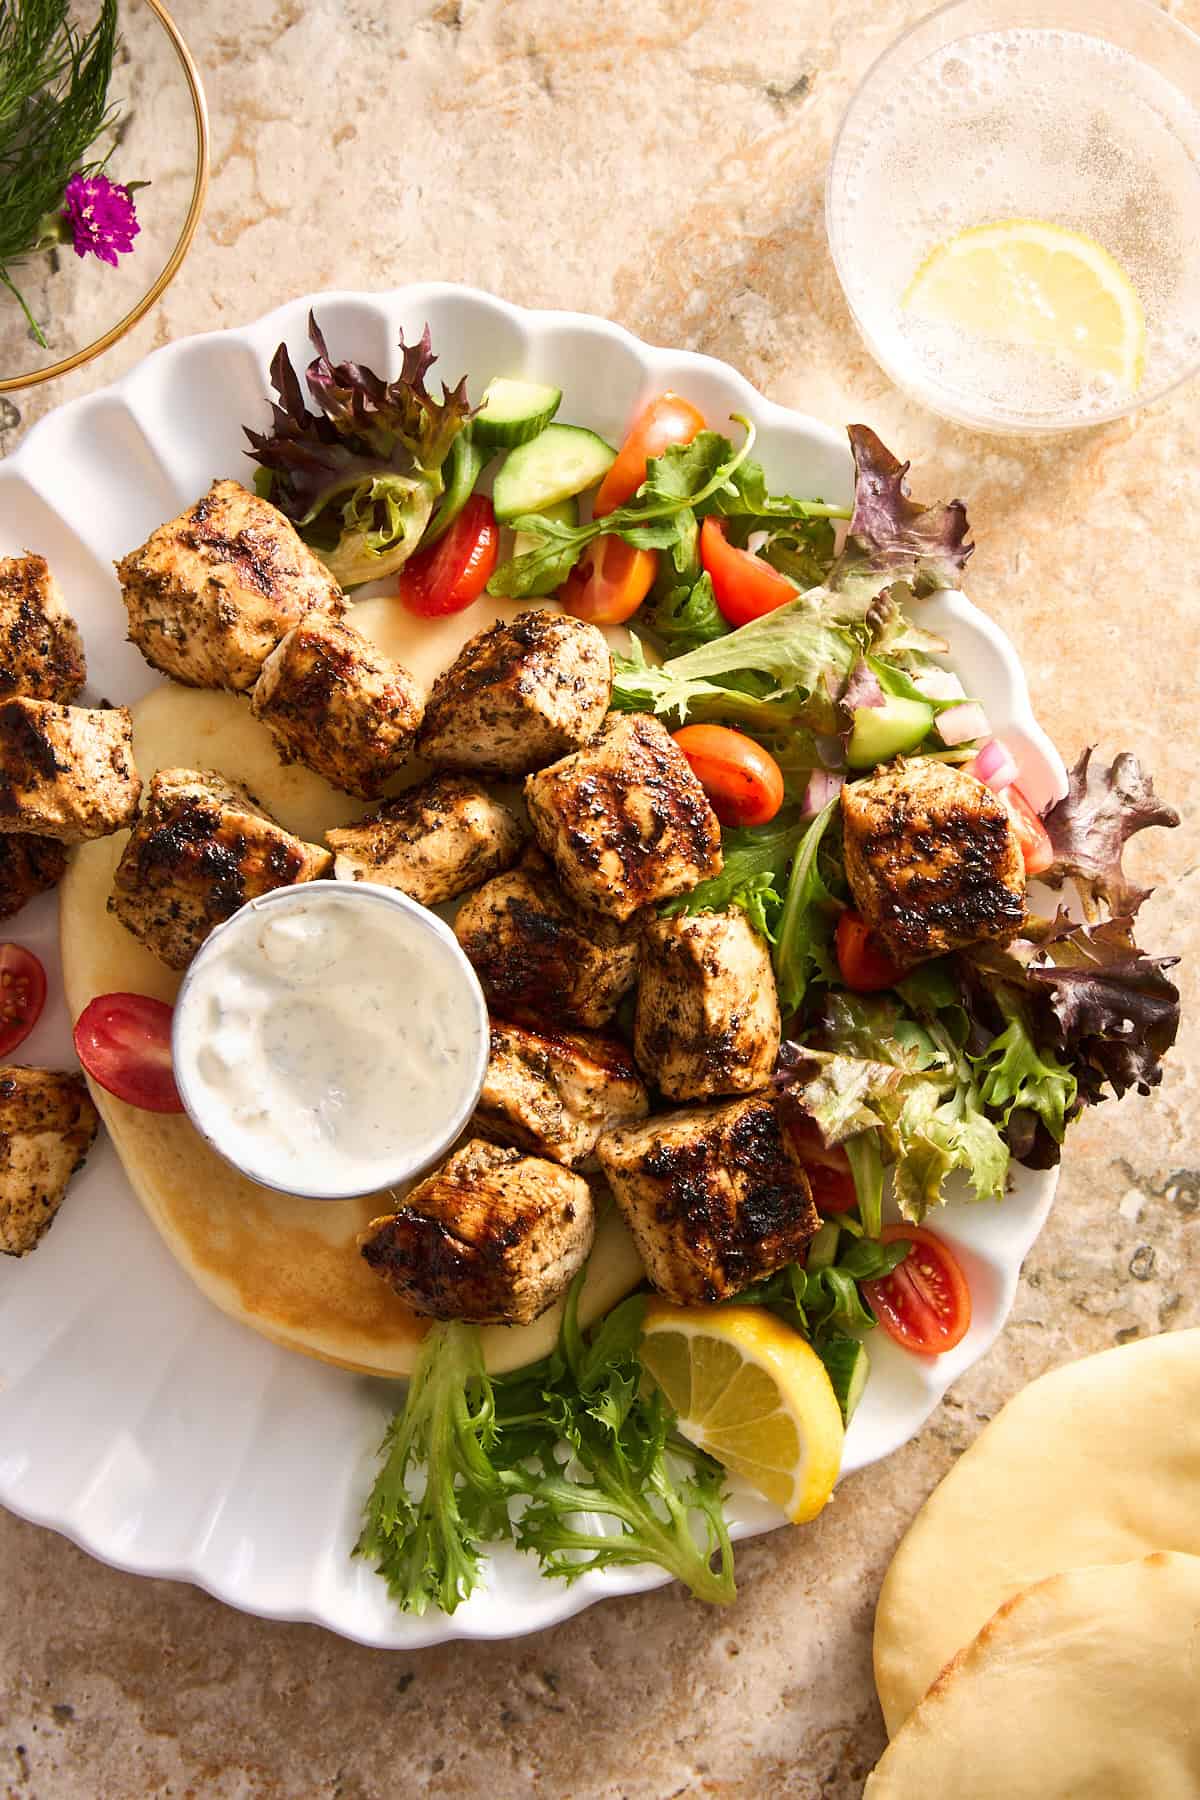 Make this marinated Mediterranean chicken breast recipe on the grill, in an air fryer, or in the oven for a juicy, flavorful protein source!
 Serve this cucumber and tomatoes with cottage cheese recipe for a quick and easy appetizer, snack, or light lunch!
 Discover what all the fuss is about with the rich, chocolatey flavor and soft, moist texture of this copycat viral lazy cat cake recipe!
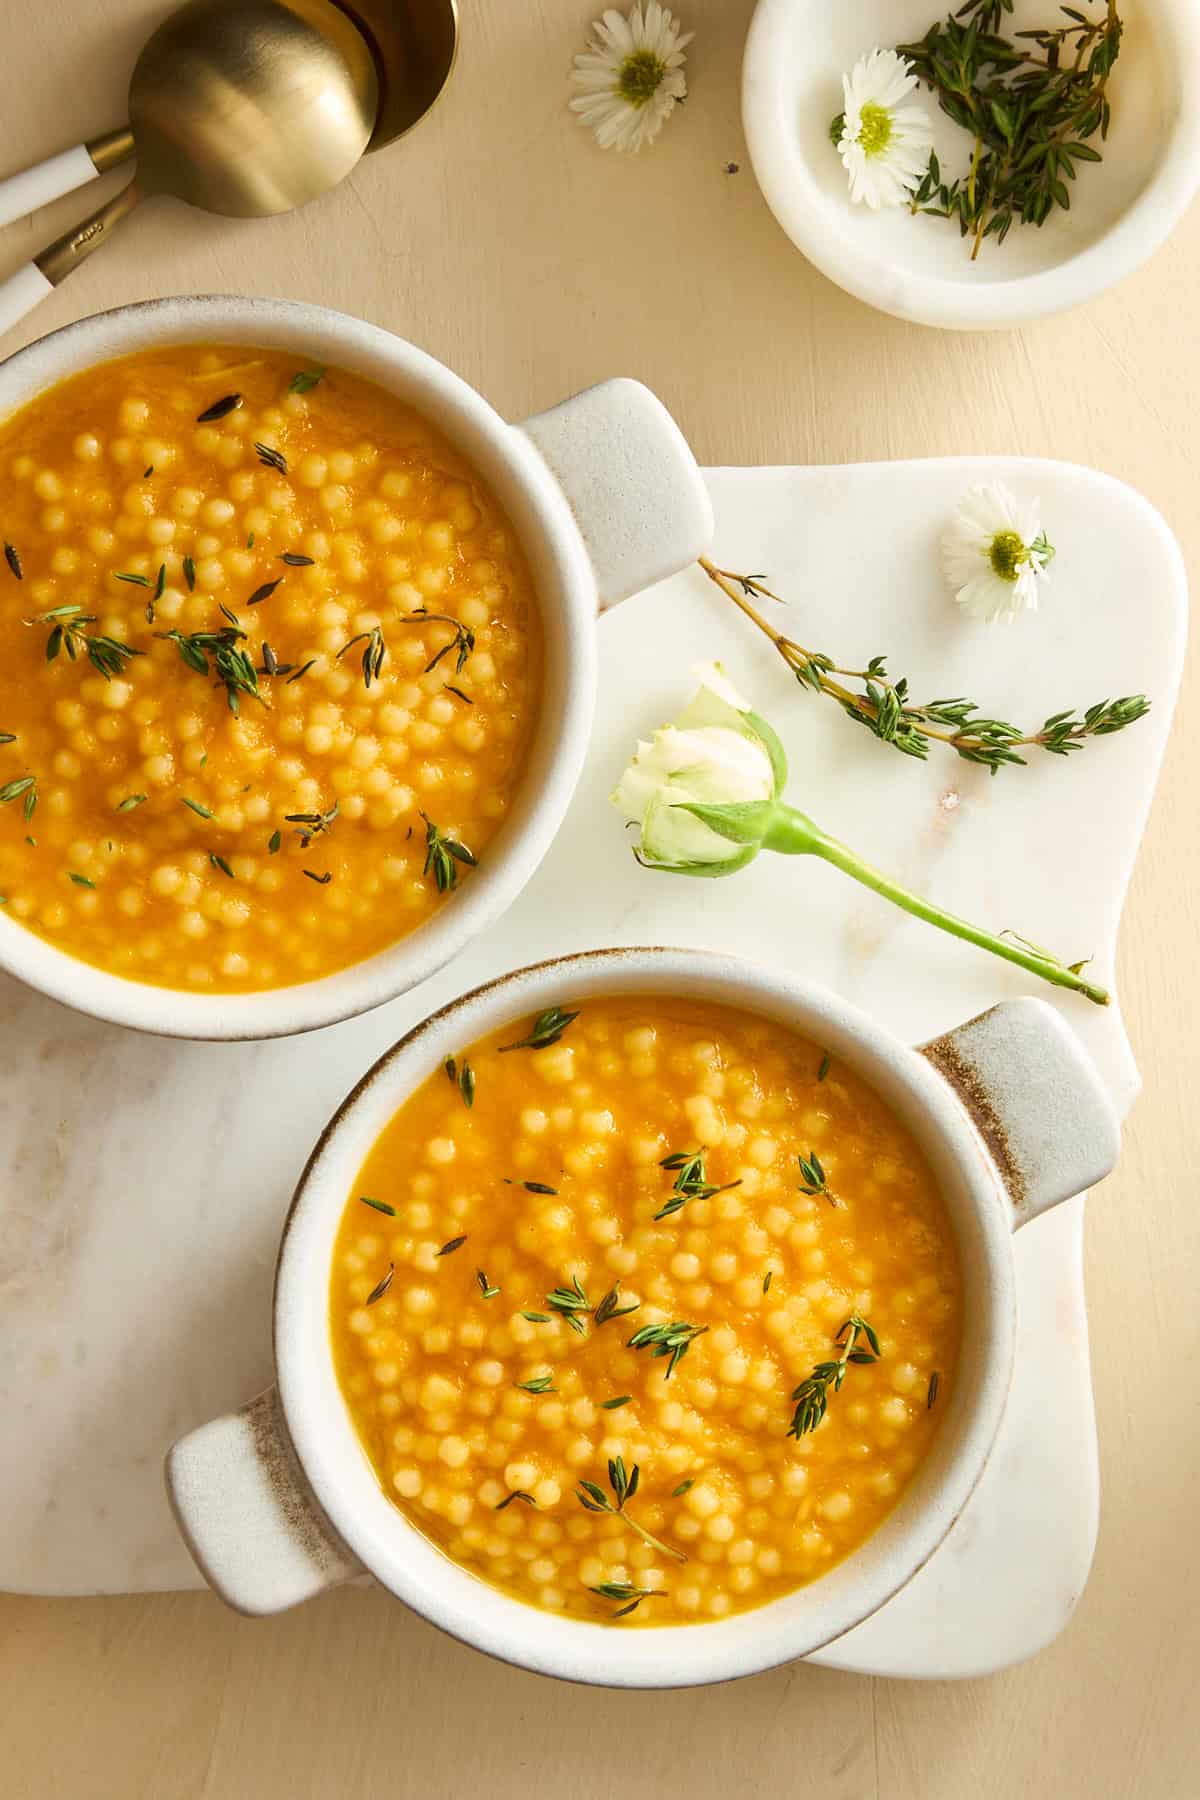 Make this easy, cheesy pastina soup recipe in under an hour for a rich, comfort food secretly full of veggies!
 Learn how to make the best Turkish pasta with with garlic yogurt and a spiced butter sauce for a rich, hearty comfort food dinner!
 Learn how to make a homemade marinated olives recipe for briny, tangy, mildly spicy olives to add bold flavor to all your favorite recipes!
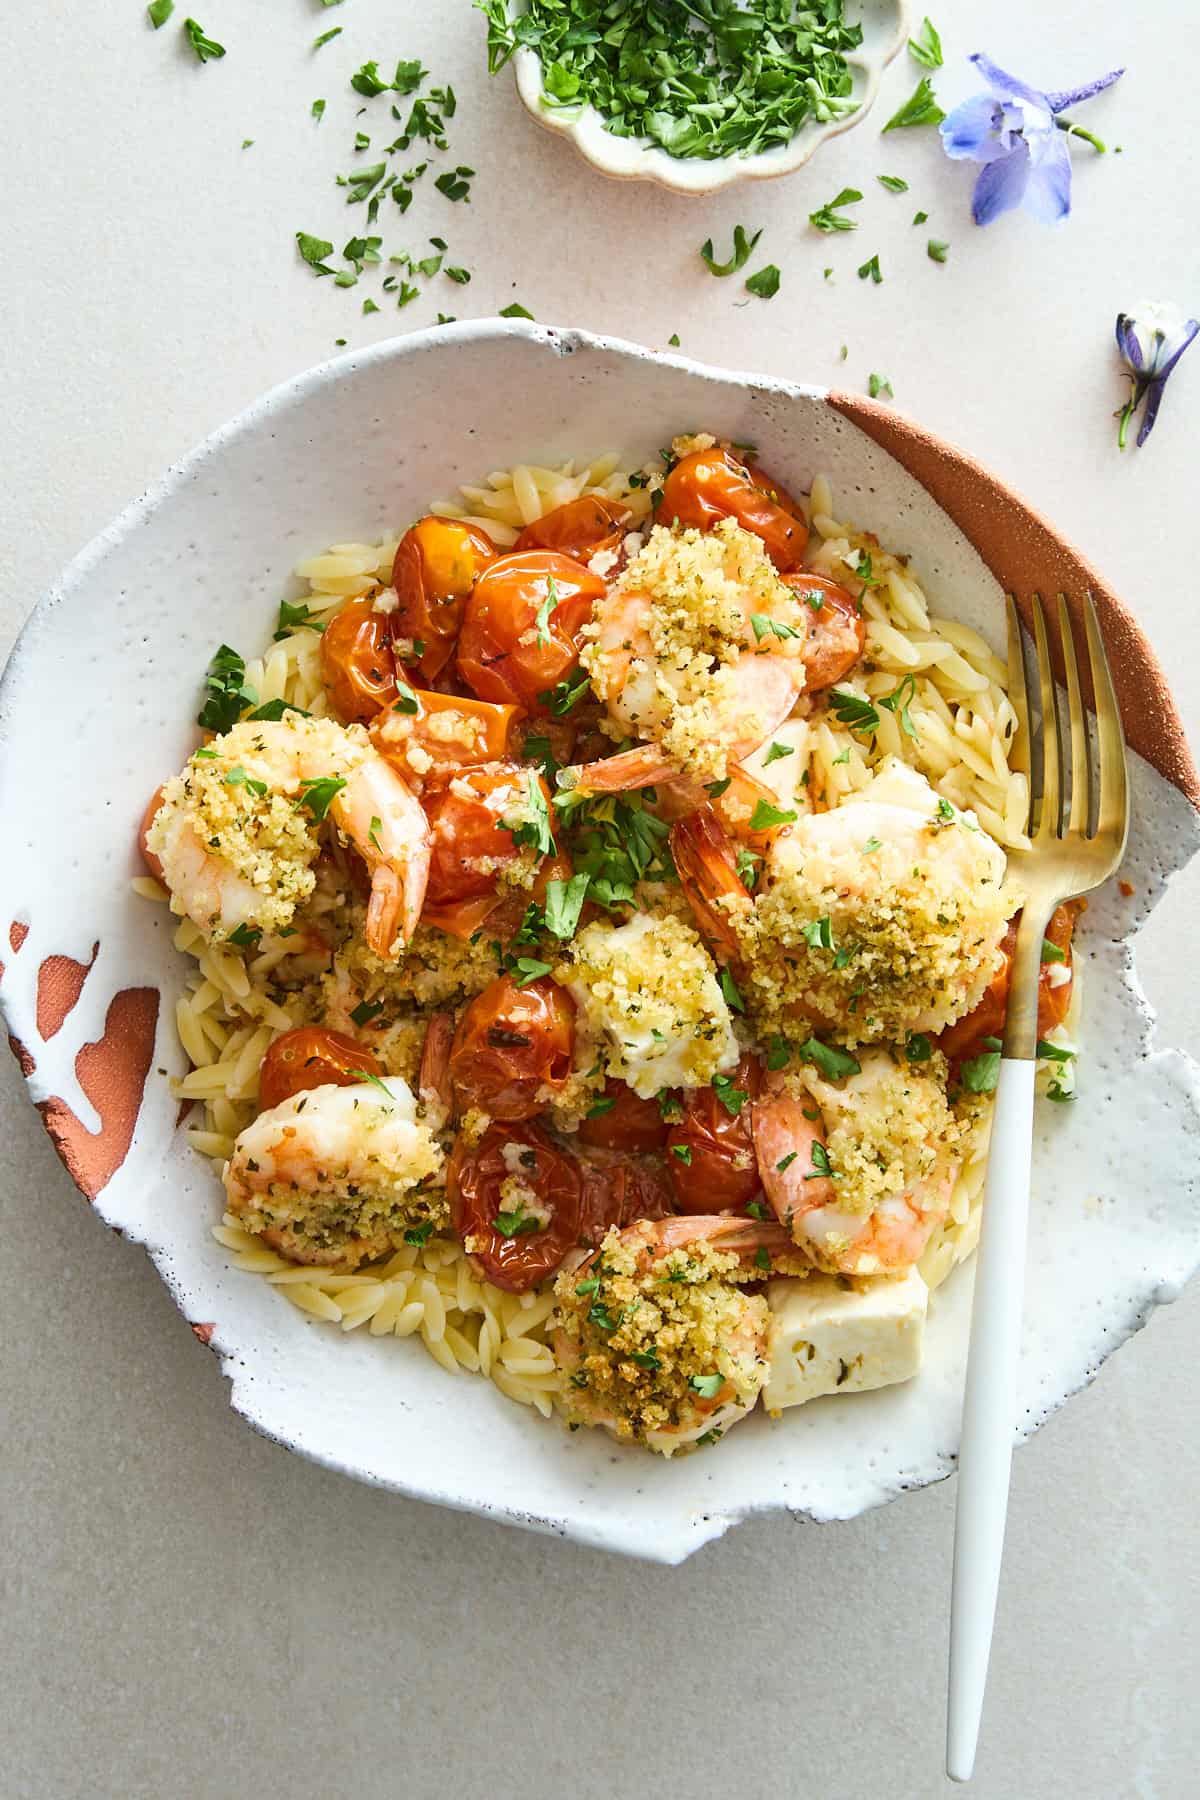 Make this flavor-packed panko shrimp and feta bake recipe in just over 30 minutes for a high-protein dish the whole family will love!
 Find a collection of easy Egyptian and Middle Eastern recipes from main courses, to snacks, and desserts for all your needs!
 Make this Mediterranean feta dip recipe with a handful of ingredients in five minutes for a nutritious, flavorful appetizer or snack!
 Make these hot honey feta phyllo rolls with just six ingredients for a show-stopping appetizer or snack that’s sweet, savory, and delicious!
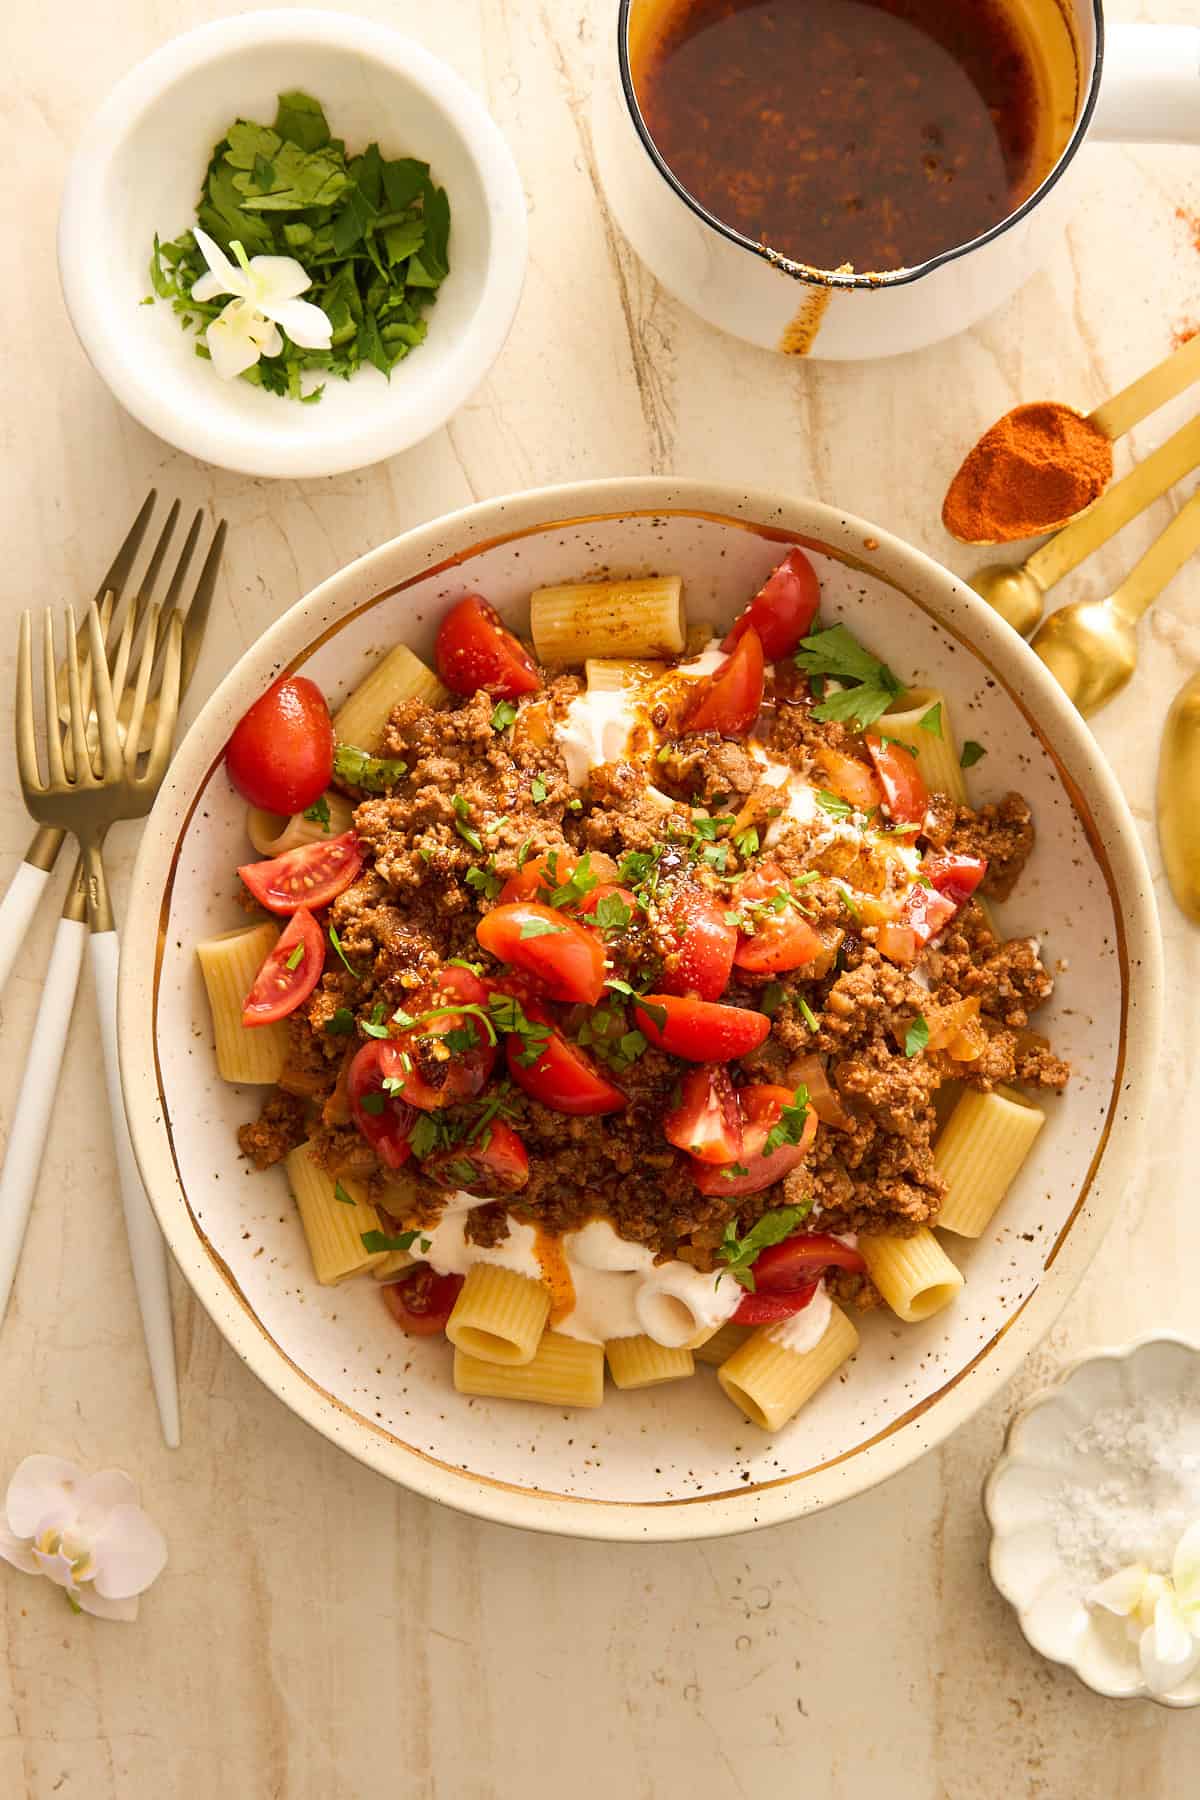
 Enjoy all the warm, savory flavors of koshary in an easy-to-make Egyptian pasta dish for a hearty comfort food everyone will love!
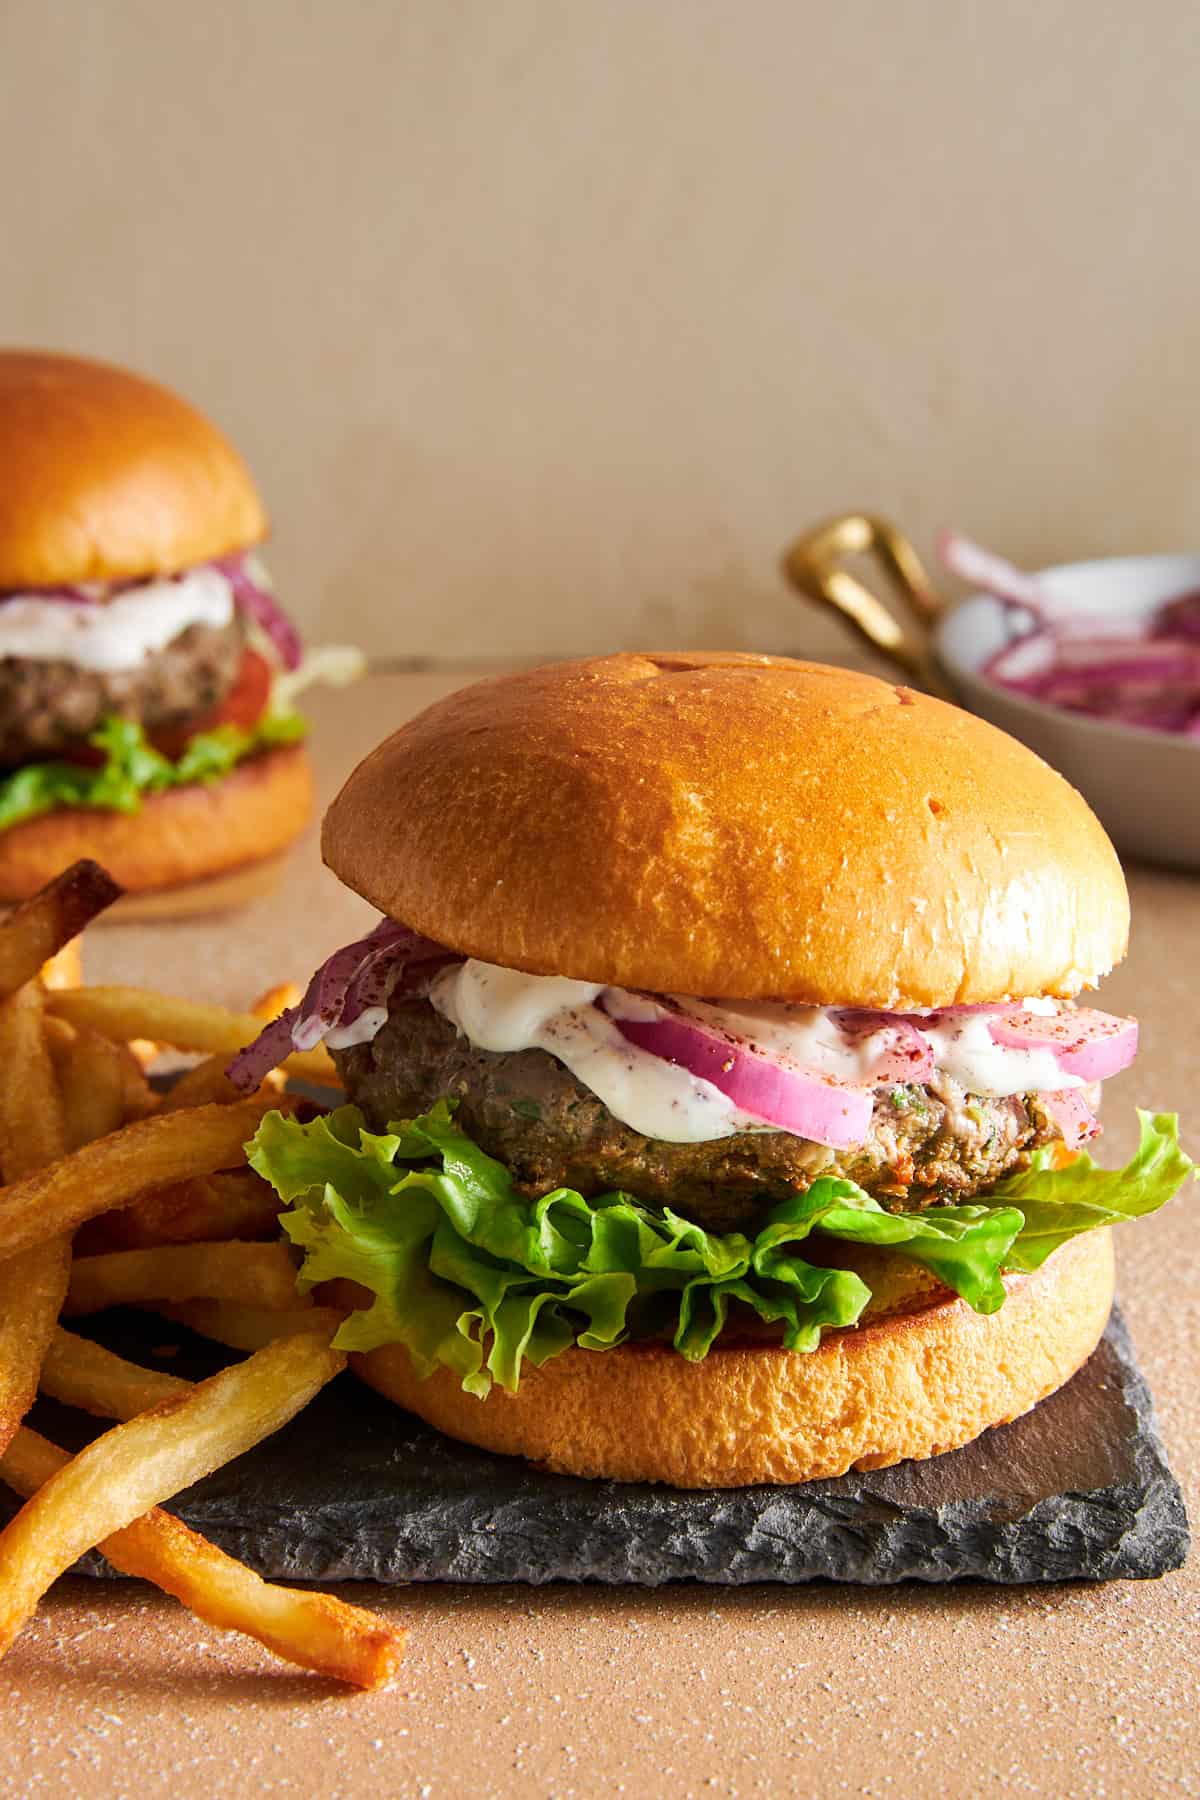 Experience kofta in a whole new way with the juicy texture and warm, savory flavors of these lamb kofta burgers!
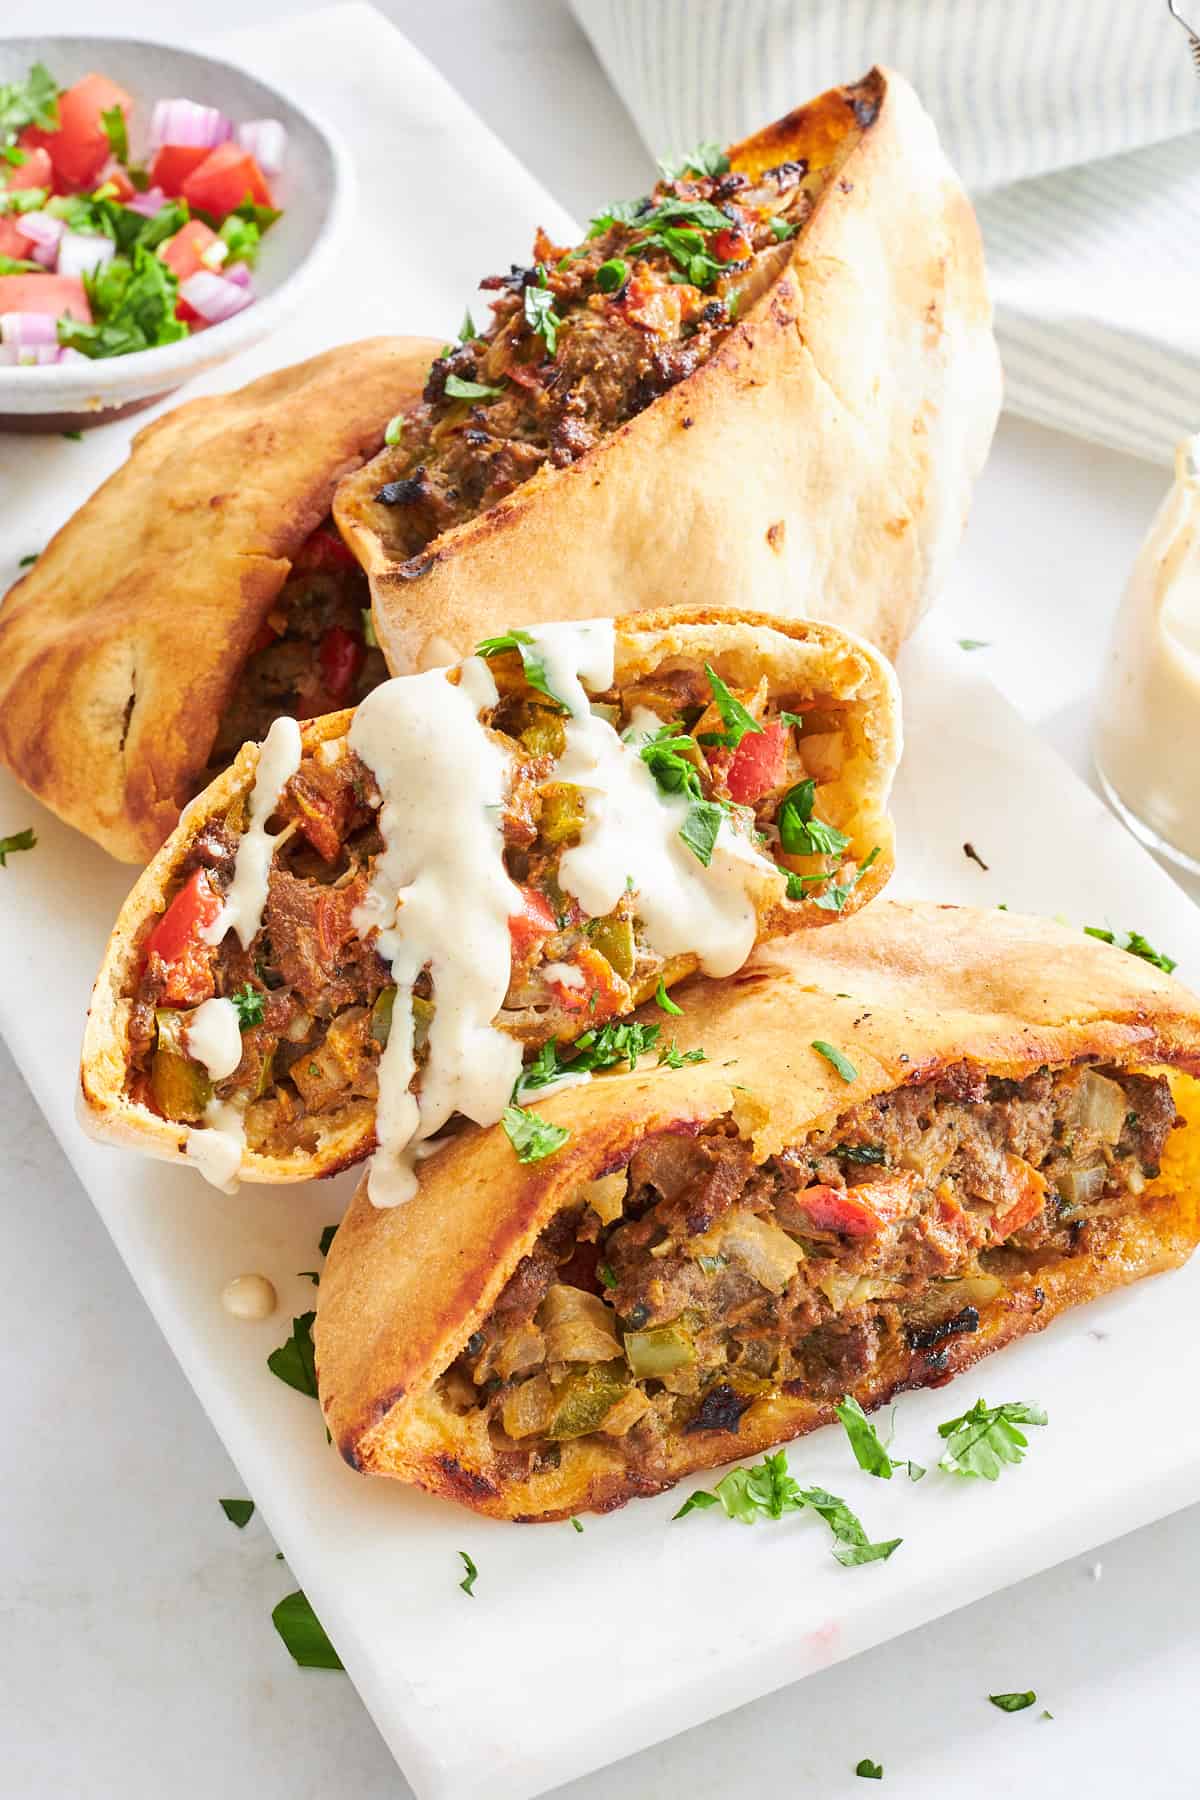 Learn how to make veggie-packed Hawawshi, a kofta-like mixture stuffed into pita bread and baked until crisp!
 If you’re looking for a sweet snack that’s simultaneously crunchy and creamy, you’re going to want to run to your…
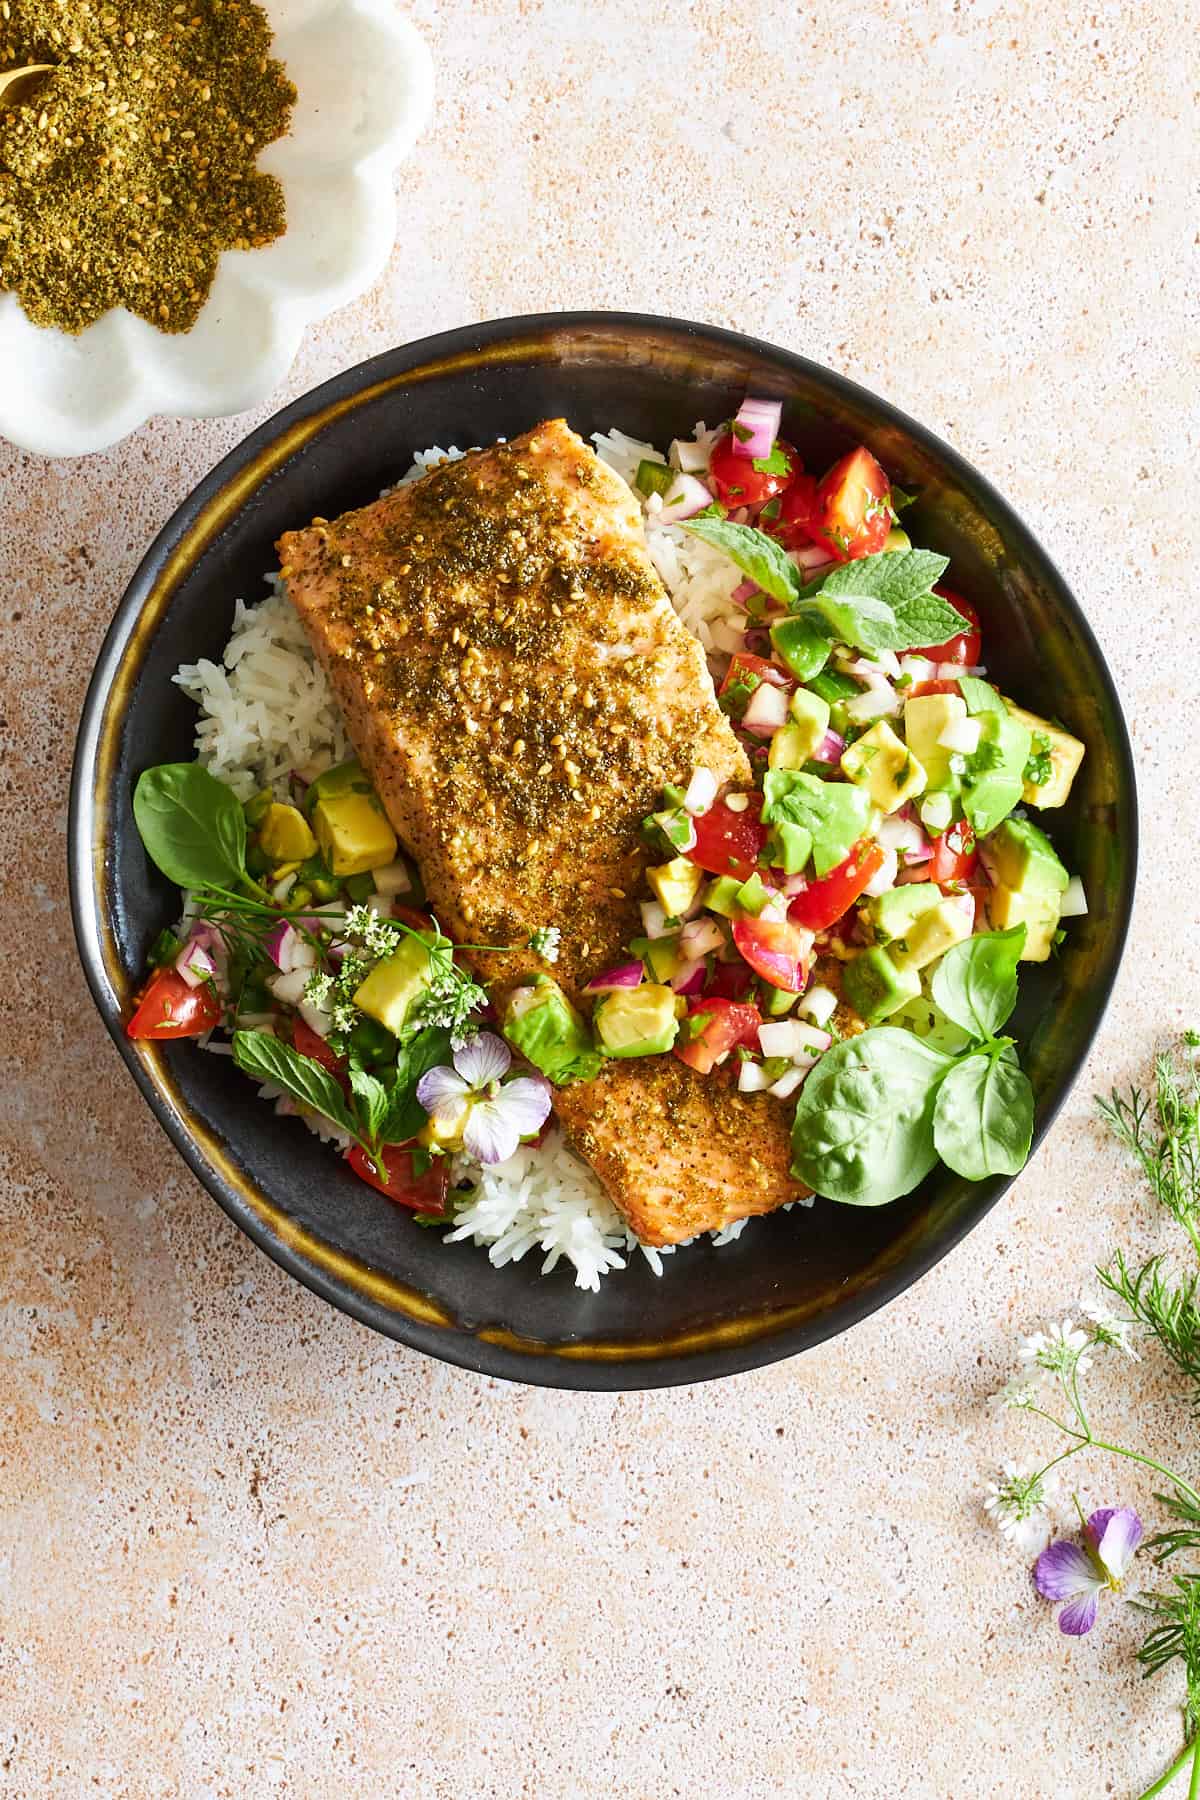 Learn how to make flakey baked salmon with za’atar and Egyptian avocado salsa for a healthy meal full of flavor!
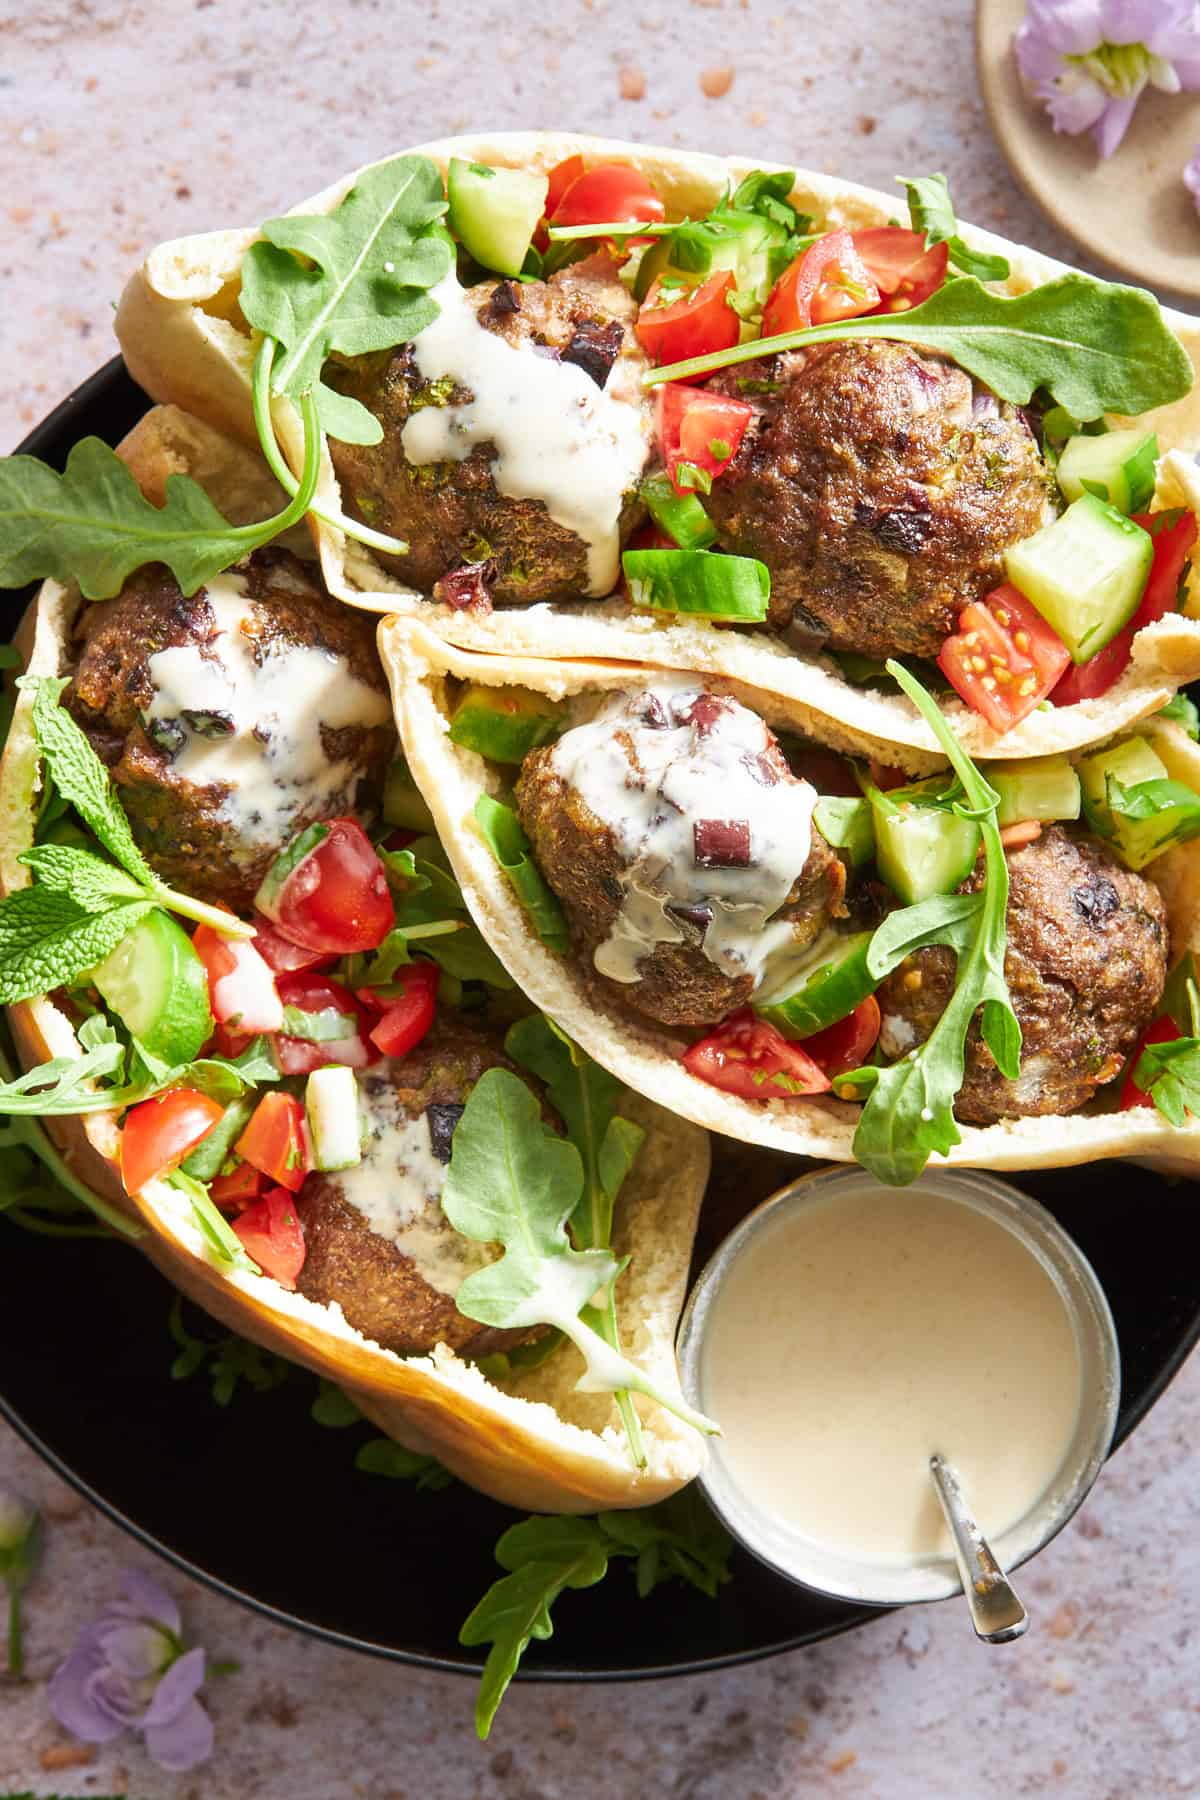 This ground beef meatballs recipe features ground beef, fresh herbs, & tahini, for savory, refreshing meatballs full of Mediterranean flavors!