Grilled Fish Tacos with Citrus Slaw and Green Sauce

Close up of Grilled Fish Taco with Citrus Slaw and Green Sauce.I can’t get enough of fish tacos so I am so excited to add another to the blog with these…

The post Grilled Fish Tacos with Citrus Slaw and Green Sauce appeared first on The Defined Dish.

Close up of Grilled Fish Taco with Citrus Slaw and Green Sauce.

I can’t get enough of fish tacos so I am so excited to add another to the blog with these flavorful Grilled Fish Tacos with Citrus Slaw and Green Sauce!

Grilled Fish Tacos with Citrus Slaw and Green Sauce assembled on tray.

Don’t let the ingredient list or steps overwhelm you with this recipe. I promise you it all comes together beautifully! For this #DDGrillWeek 2024 recipe, you’ll start by simply marinating the fish with olive oil and dried spices. Next, you’ll toss together the simple slaw and let that marinate as you hit the grill.

Close up of Grilled Fish Taco with Citrus Slaw and Green Sauce.

Once your grill is prepped, you’ll start by grilling the poblanos for your green sauce then set those aside as you grill the fish and tortillas. The fish and tortillas will be kept warm as you blend up your green sauce with the poblanos, Greek yogurt, cilantro, and more. After your sauce is blended up, flake your fish, assemble your tacos, and enjoy! With a Clayton Margarita if you are feeling extra festive.

Grilled Fish Tacos with Citrus Slaw and Green Sauce Ingredients:

  • Ground Cumin
  • Smoked Paprika
  • Garlic Powder
  • Onion Powder
  • Dried Oregano
  • Salt
  • Freshly Ground Black Pepper
  • Extra Virgin Olive Oil
  • Mahi Mahi or Halibut
  • Freshly Squeezed Lime Juice
  • Freshly Squeeze Lemon Juice
  • Honey
  • Shredded Green Cabbage
  • Shredded Purple Cabbage
  • Green Onions
  • Fresh Cilantro
  • Poblano Peppers
  • Garlic
  • Greek Yogurt
  • Corn Tortillas
  • Jalapeño or Serrano Pepper
  • Lime Wedges

Recipe Step-by-Step:

Step One: Make the Fish Marinade

In a small bowl, combine the cumin, paprika, garlic powder, onion powder, oregano, salt, black pepper, and olive oil. Stir until well combined until it turns into a paste-like consistency.

Step Two: Marinate the Fish

Pat the fish dry and brush the spice mixture over the top flesh of the fish and rub it in so that it evenly coats the fish. Set aside for 15 minutes to marinate while you prepare the slaw.

Salmon filets marinating on sheet pan.

Step Three: Make the Slaw

In a large bowl, whisk together the olive oil, lime juice, lemon juice, honey, salt, and black pepper until well combined. Add the green and purple cabbage, green onion, and cilantro. Gently toss to coat. Set aside.

Slaw for Grilled Fish Tacos on low plate.

Step Four: Prep the Grill

When ready to cook, heat the grill over medium-high heat (350-400℉) and oil the grill grates. To do this, dip a wadded paper towel in a little avocado oil and, using tongs, wipe the oil evenly over the grate. Be careful not to use too much oil, because that’s a sure-fire way to start a good flare-up—a little goes a long way here.

Step Five: Grill the Poblano Peppers

Add the poblano peppers to the hot grill and grill for about 12 to 15 minutes until the skin is charred and blackened, flipping here and there to achieve an even grill. Transfer the cooked poblanos to a bowl and cover with foil or saran wrap to allow to steam while you cook the fish.

Step Six: Grill the Fish

Add the fish to the greased grill and cook until the fish is opaque and flakes easily with a fork, 5 to 6 minutes per side. Transfer to a platter and cover with foil until ready to serve.

Step Seven: Grill the Tortillas

Add the tortillas to the grill and char until just warm and more pliable, about 2 minutes per side. Transfer to a plate and cover with foil to keep warm until ready to serve.

Step Eight: Make the Green Sauce

After the poblanos have steamed, they should peel very easily. Peel off the skin on the top layer, then remove the stem and seeds. Add the peeled poblanos to a blender with the cilantro, garlic, Greek yogurt, lime, and salt to make the sauce. Blend until smooth.

Green sauce in small bowl for Grilled Fish Tacos

Step Nine: Serve and Enjoy!

To serve, flake fish and serve in the warm tortillas. Top with the slaw, a drizzle of the green sauce, and thinly sliced jalapeño or serrano pepper if desired! Serve with a wedge of lime.

Grilled Fish Tacos with Citrus Slaw and Green Sauce assembled on tray.

Recipe FAQs:

Is the green sauce spicy?

I do not find poblanos particularly spicy! If you want to spice up your tacos, serve with thinly sliced jalapeño or serrano peppers.

Could I omit the tortillas?

Yes! This is great served in a bowl over the cabbage slaw and with a side of rice if preferred.

For More Fish Recipes:

Grilled Salmon Tacos with Jalapeño Tartar Sauce

Cedar Plank Salmon and Corn with Serrano-Butter

Paleo Battered Fish Tacos

Close up of Grilled Fish Taco with Citrus Slaw and Green Sauce.
Print

Grilled Fish Tacos with Citrus Slaw and Green Sauce

Gluten-Free
Total Time 50 minutes
Servings 6

Ingredients

For the Fish:

  • 1 teaspoon ground cumin
  • 2 teaspoons smoked paprika
  • 2 teaspoons garlic powder
  • 2 teaspoons onion powder
  • 2 teaspoons dried oregano
  • 2 teaspoons Kosher salt
  • 1 teaspoon freshly ground black pepper
  • 2 tablespoons extra virgin olive oil
  • 2 lbs mahi mahi or halibut, cut into two 1-lb filets

For the Citrus Slaw:

  • 3 tablespoons extra virgin olive oil
  • 2 tablespoons freshly squeezed lime juice
  • 1 tablespoon freshly squeezed lemon juice
  • 2 teaspoons honey
  • ½ teaspoon freshly ground black pepper
  • ½ teaspoon Kosher salt
  • 2 cups finely shredded green cabbage
  • 2 cups finely shredded purple cabbage
  • 4 green onions, thinly sliced on the diagonal
  • ½ cup roughly chopped cilantro leaves

For the Green Sauce:

  • 2 medium poblano peppers
  • 1 cup packed roughly chopped cilantro leaves
  • 3 garlic cloves
  • ¼ cup plain Greek yogurt
  • 2 tablespoons freshly squeezed lime juice
  • ½ teaspoon Kosher salt

For Serving:

  • 12 corn tortillas
  • 1 jalapeño or serrano pepper, very thinly sliced (optional)
  • 1 lime cut into wedges

Instructions

Marinate the Fish:

  • In a small bowl, combine the cumin, paprika, garlic powder, onion powder, oregano, salt, black pepper, and olive oil. Stir until well combined until it turns into a paste-like consistency.
  • Pat the fish dry and brush the spice mixture over the top flesh of the fish and rub it in so that it evenly coats the fish. Set aside for 15 minutes to marinate while you prepare the slaw.

Make the Slaw:

  • In a large bowl, whisk together the olive oil, lime juice, lemon juice, honey, salt, and black pepper until well combined. Add the green and purple cabbage, green onion, and cilantro. Gently toss to coat. Set aside.

Grill the Fish, Poblanos, and Tortillas:

  • When ready to cook, heat grill over medium-high heat (350-400℉) and oil the grill grates. To do this, dip a wadded paper towel in a little avocado oil and, using tongs, wipe the oil evenly over the grate. Be careful not to use too much oil, because that’s a sure-fire way to start a good flare-up—a little goes a long way here.
  • Add the poblano peppers to the hot grill and grill for about 12 to 15 minutes until the skin is charred and blackened, flipping here and there to achieve an even grill. Transfer the cooked poblanos to a bowl and cover with foil or saran wrap to allow to steam while you cook the fish.
  • Add the fish to the greased grill and cook until the fish is opaque and flakes easily with a fork, 5 to 6 minutes per side. Transfer to a platter and cover with foil until ready to serve.
  • Add the tortillas to the grill and char until just warm and more pliable, about 2 minutes per side. Transfer to a plate and cover with foil to keep warm until ready to serve.

Make the Green Sauce:

  • After the poblanos have steamed, they should peel very easily. Peel off the skin on the top layer, then remove the stem and seeds. Add the peeled poblanos to a blender with the cilantro, garlic, Greek yogurt, lime, and salt to make the sauce. Blend until smooth.

Serve and Enjoy:

  • To serve, flake fish and serve in the warm tortillas. Top with the slaw, a drizzle of the green sauce, and thinly sliced jalapeño or serrano pepper if desired! Serve with a wedge of lime.

Photography and styling by Eat Love Eats.

The post Grilled Fish Tacos with Citrus Slaw and Green Sauce appeared first on The Defined Dish.

Pork Pastor Skewers

Pork Pastor Skewers assembled on plate. Limes and pickled onions scattered around.I love the flavor of al pastor and knew I needed to bring the flavor into my kitchen. These Pork…

The post Pork Pastor Skewers appeared first on The Defined Dish.

Pork Pastor Skewers assembled on plate. Limes and pickled onions scattered around.

I love the flavor of al pastor and knew I needed to bring the flavor into my kitchen. These Pork Pastor Skewers are even more delicious than I could have imagined!

Pork Pastor Skewers assembled on plate. Limes and pickled onions scattered around.

Here’s another #DDGrillWeek 2024 recipe I cannot get enough of! Although al pastor is traditionally prepared on a rotating vertical spit grill, I brought the flavor to my grill by skewering the marinated meat and cooking until slightly charred but still soft. The meat is marinated in a sweet, tangy, and smoky sauce that is sweetened with pineapple and packed with so much flavor that I cannot get enough of!

Pork Pastor Skewers plated over rice in blue bowl.

You will also set aside some of the marinade to baste the pork while it is grilling and you will serve additional sauce drizzled over top of the final bowl. Which, let’s discuss how this is served! I like to serve these in a bowl over cilantro-lime rice (I make the rice from this recipe!), with guacamole, pickled red onions, cilantro, and a wedge of lime.

Ingredients:

  • Pineapple
  • Distilled White Vinegar
  • Ancho Chile Powder 
  • Chili Powder
  • Ground Cumin
  • Ground Cinnamon
  • Fresh Oregano Leaves
  • Garlic
  • Freshly Squeezed Lime Juice
  • Freshly Squeezed Orange Juice
  • Low-Sodium Chicken Broth
  • Salt
  • Freshly Ground Black Pepper
  • Pork Tenderloin 
  • Prepared Cilantro-Lime Rice
  • Pickled Red Onions
  • Guacamole
  • Fresh Cilantro Leaves
  • Lime

Recipe Step-by-Step: Gas Grill Method

Step One: Make the Pork Marinade

In a high-speed blender, combine all of the pastor sauce ingredients and blend until smooth. Reserve 1 cup of the sauce and store in the fridge until ready to use when cooking and serving the pork.

Step Two: Marinate the Pork

To a large bowl, add the cubed pork, salt, and pepper with the remaining pastor sauce. Cover and marinade in the fridge for at least 2 hours.

Pork Pastor marinating in white bowl.

Step Three: Assemble the Skewers

Next, thread the pork and pineapple onto the skewers. Hold two skewers side by side, parallel to one another, upright, and carefully thread the pork and pineapple onto the skewers. I like to do 3 to 4 cubes of pork, then a pineapple cube, then repeat. Using two skewers together makes it easier to flip and less likely to spin or slither off.

Pork Pastor Skewers assembled on sheet pan before grilling.

Step Four: Prep the Grill

Heat grill over medium-high heat (350-400℉) and oil the grill grates. To do this, dip a wadded paper towel in a little avocado oil and, using tongs, wipe the oil evenly over the grate. Be careful not to use too much oil, because that’s a sure fire way to start a good flare-up—a little goes a long way here.

Step Five: Grill the Skewers

Place the pork skewers directly on the preheated grill grates. Line up the skewers side by side without overlapping. Cook the pork skewers, brushing with ½ cup of the reserved sauce (saving the rest for serving) every so often, for 3 to 4 minutes. Flip the skewers and grill another 3 to 4 minutes on the other side, painting with sauce. When done, the edges will be slightly charred and the middle of the pieces should be soft, juicy, and cooked through.

Step Six: Serve and Enjoy

Serve the skewers over cilantro-lime rice and drizzle with a bit of the remaining pastor sauce. Add a scoop of guacamole alongside the skewers. Top with pickled red onions, a little cilantro, and a wedge of lime on the side!

Pork Pastor Skewers assembled on plate. Limes and pickled onions scattered around.

Recipe FAQs:

Could I serve this in tortillas instead?

You can serve this however you prefer! I like serving in bowls, but you can always set up a taco bar instead.

I am worried about the spice level, any suggestions?

While I do not find these too spicy, I know others can be more spice-sensitive. Try 1 teaspoon of the ancho chile powder instead if preferred!

I hope y’all enjoy these skewers as much as I do! Comment below once you try them!

For More Skewer Recipes:

Grilled BBQ Chicken Skewer Salad

Spicy Curried Shrimp Skewers with Grilled Veggie Couscous

Grilled Sesame Chicken Skewers

Bang Bang Shrimp Skewers with Sesame Slaw

Pork Pastor Skewers plated over rice in blue bowl.
Print

Pork Pastor Skewers

Gluten-Free, Dairy-Free, Paleo (if modified), Whole30 (if modified)
Prep Time 20 minutes
Cook Time 15 minutes
Marinating 2 hours
Servings 5

Ingredients

For the Pastor Sauce:

  • 2 cups medium-diced pineapple
  • 1 tablespoon distilled white vinegar
  • 2 teaspoons ancho chile powder (see note)
  • 2 teaspoons chili powder
  • 1 teaspoon ground cumin
  • ½ teaspoon ground cinnamon
  • 1 tablespoon fresh oregano leaves
  • 4 garlic cloves
  • ¼ cup freshly squeezed lime juice
  • ¼ cup freshly squeeze orange juice
  • ½ cup low-sodium chicken broth
  • 1 teaspoon kosher salt
  • ½ teaspoon freshly ground black pepper

For the Pork:

  • 2 pounds pork tenderloin excess fat removed and cut into 1-inch cubes
  • 1 teaspoon kosher salt
  • ½ teaspoon freshly ground black pepper

For the Skewers:

  • Ten 6-inch skewers (if wooden, pre-soak for 15 minutes)
  • 1 cup medium diced pineapple

For the Bowls:

  • 1 cup prepared cilantro-lime rice (sub cauliflower rice for paleo and Whole30)
  • Pickled red onions
  • Guacamole
  • Fresh cilantro leaves
  • 1 lime cut into wedges

Instructions

Marinate the Pork:

  • In a high-speed blender, combine all of the pastor sauce ingredients and blend until smooth. Reserve 1 cup of the sauce and store in the fridge until ready to use when cooking and serving the pork.
  • To a large bowl, add the cubed pork, salt, and pepper with the remaining pastor sauce. Cover and marinade in the fridge for at least 2 hours.

Assemble the Skewers:

  • Next, thread the pork and pineapple onto the skewers. Hold two skewers side by side, parallel to one another, upright and carefully thread the pork and pineapple onto the skewers. I like to do 3 to 4 cubes of pork, then a pineapple cube, then repeat. Using two skewers together makes it easier to flip and less likely to spin or slither off.

Grill the Skewers (Gas-Grill Method):

  • Heat grill over medium-high heat (350-400℉) and oil the grill grates. To do this, dip a wadded paper towel in a little avocado oil and, using tongs, wipe the oil evenly over the grate. Be careful not to use too much oil, because that’s a sure fire way to start a good flare-up—a little goes a long way here.
  • Place the pork skewers directly on the preheated grill grates. Line up the skewers side by side without overlapping. Cook the pork skewers, brushing with ½ cup of the reserved sauce (saving the rest for serving) every so often, for 3 to 4 minutes. Flip the skewers and grill another 3 to 4 minutes on the other side, painting with sauce. When done, the edges will be slightly charred and the middle of the pieces should be soft, juicy, and cooked through.

Grill the Skewers (Weber XL Searwood Method): 

  • Add Mesquite pellets to the grill and preheat to 375℉ 
  • Place the pork skewers directly on the preheated grill grates. Line up the skewers side by side without overlapping. Cook the pork skewers, brushing with ½ cup of the reserved sauce (saving the rest for serving) every so often, for 3 to 4 minutes. Flip the skewers and grill another 3 to 4 minutes on the other side, painting with sauce. When done, the middle of the pieces should be soft, juicy, and cooked through. 

To Serve:

  • Serve over cilantro-lime rice and drizzle with a bit of the remaining pastor sauce. Add a scoop of guacamole alongside the skewers. Top with pickled red onions, a little cilantro and a wedge of lime!

Notes

Ancho Chile Note: Ancho chile powder packs a punch of heat. If you want milder, use 1 teaspoon.

Photography and styling by Eat Love Eats.

The post Pork Pastor Skewers appeared first on The Defined Dish.

Grilled Antipasto Pasta Salad

Grilled Antipasto Pasta Salad on large oval serving platter.I love a pasta salad in general, but a pasta salad with grilled sausage and veggies?! Sign me up. I’ll…

The post Grilled Antipasto Pasta Salad appeared first on The Defined Dish.

Grilled Antipasto Pasta Salad on large oval serving platter.

I love a pasta salad in general, but a pasta salad with grilled sausage and veggies?! Sign me up. I’ll be making this Grilled Antipasto Pasta Salad all season long and hope you will too.

Grilled Antipasto Pasta Salad on large oval serving platter.

Pasta salads are one of the easiest meals for spring and summertime cooking so I knew I wanted one for #DDGrillWeek 2024! Here, we take all the flavors from our favorite antipasto platter and turn it into an easy, pasta salad fit for entertaining or a weekend away.

We grill Italian chicken sausage, red bell peppers, and red onion until smoky and charred, and toss it with a simple, garlic and oregano dressing that brings it all together! You can either serve this as a side with your other grilling items or enjoy it as a main meal. Either way, I know you will love it!

Grilled Antipasto Pasta Salad on large oval serving platter.

Ingredients:

  • Penne Pasta: Sub Gluten-Free
  • Extra-Virgin Olive Oil
  • Garlic
  • Red Wine Vinegar
  • Fresh Lemon Juice
  • Dijon Mustard
  • Dried Oregano
  • Salt
  • Freshly Ground Black Pepper
  • Mild Italian Chicken Sausage: Sub Hot Italian Chicken Sausage
  • Red Bell Pepper
  • Red Onion
  • Pitted Castelvetrano Olives
  • Sweet and Tangy Pepper Drops or Peppadews: Optional
  • Freshly Grated Parmesan Cheese
  • Fresh Italian Parsley
  • Baby Arugula

Recipe Step-by-Step:

Step One: Cook the Pasta

Bring a large pot of well-salted water to a rolling boil. Add the pasta and cook, according to package instructions, until al dente.

Step Two: Make the Vinaigrette

While the pasta is boiling, make the vinaigrette. In a large mixing bowl, add the olive oil, garlic, red wine vinegar, lemon juice, Dijon, dried oregano, salt, and pepper. Whisk until combined.

Step Three: Combine the Pasta and Vinaigrette

Once the pasta is done cooking, strain, and add the hot pasta directly to the vinaigrette. Using tongs, toss to combine. The hot pasta will mellow out the raw garlic. Set aside at room temperature while you grill the sausage and veggies.

Cooked pasta in large bowl with vinaigrette. Additional Grilled Antipasto Pasta Salad ingredients scattered around.

Step Four: grill the sausage

Preheat your gas grill to medium-low heat (about 250-325°F). Grease the grates with avocado oil. Once hot, add the chicken sausages. Cook on medium-low, turning every few minutes, until the sausages register to about 145°F, about 8-10 minutes. Meanwhile, using a pastry brush, coat the veggies with olive oil and season with salt.

Step Five: Grill the Veggies

Once the sausages have been par-cooked, turn up the heat to medium-high. Add the veggies to the other side of the grill. Grill the sausages until charred and they reach an internal temperature of 165-170°F. Remove from the grill and allow to rest while the veggies finish cooking. The veggies should take about 8-10 minutes total, flipping halfway through. They should be softened and charred in places.

Grilled veggies and sausage on platter.

Step Six: Begin Assembling the Pasta Salad

Transfer the sausages to a cutting board and cut in ¼” slices on the diagonal. Add to the pasta. Once the veggies have cooled to the touch, chop into a medium-dice, and add the veggies to the pasta. Toss to combine.

Step Seven: Finish the Pasta and Serve

Add the olives, pepper drops (if using), ½ cup of the grated parmesan, parsley, and the arugula. Toss gently, until the sausage and veggies are evenly combined and all elements are equally dressed. Garnish with the remaining parmesan. Serve immediately.

Grilled Antipasto Pasta Salad on serving platter and plates.

Recipe FAQs:

Is this recipe gluten-free?

It can be! Feel free to sub the penne with gluten-free penne.

What are Sweet and Tangy Pepper Drops?

These Italian peppers are just as described — sweet and tangy! They add a pop of brightness that complements this pasta salad nicely. I usually find them in the deli section of my grocery store and if not there, in the jarred section. If you cannot find those, peppadews work as well

Could I make this vegetarian?

Of course! If you prefer to omit the sausage and make this into a vegetarian meal, I’d suggest grilling zucchini instead then chopping and adding to the pasta like you do the sausage.

I hope y’all enjoy this Grilled Antipasto Pasta Salad all grilling season long! Comment below once you try it!

for more pasta salad recipes:

Creamy Italian Pasta Salad

Green Goddess Pasta Salad

Crunchy Ramen Noodle Salad

Grilled Antipasto Pasta Salad on large oval serving platter.
Print

Grilled Antipasto Pasta Salad

Gluten-Free (if modified)
Serves 4 as Main, 6 as a Side
Prep Time 10 minutes
Cook Time 30 minutes
Total Time 40 minutes
Servings 4

Ingredients

  • 12 oz. penne pasta, sub gluten-free penne for gluten-free

For the Vinaigrette:

  • 6 tablespoons extra-virgin olive oil
  • 2 cloves garlic, grated
  • 3 tablespoons red wine vinegar
  • 3 tablespoons fresh lemon juice
  • 1 teaspoon Dijon mustard
  • 1 teaspoon dried oregano
  • ½ teaspoon kosher salt
  • ¼ teaspoon freshly ground black pepper

For the Grill:

  • 4 mild Italian chicken sausages, sub hot Italian chicken sausage if you want more heat!
  • 1 tablespoon extra-virgin olive oil
  • 1 large red bell pepper, cored and cut into 4 large pieces
  • 1 medium red onion, peeled and sliced into 1/2” slices
  • ½ teaspoon kosher salt

For Assembly:

  • ½ cup roughly chopped pitted Castelvetrano olives
  • ¼ cup sweet and tangy pepper drops or peppadews (optional; if using peppadews, roughly chop)
  • ¾ cup freshly grated parmesan cheese
  • ¼ cup finely chopped Italian parsley
  • 2 large handfuls baby arugula

Instructions

  • Bring a large pot of well salted water to a rolling boil. Add the pasta and cook, according to package instructions, until al dente.

Make the Vinaigrette:

  • While the pasta is boiling, make the vinaigrette. In a large mixing bowl, add the olive oil, garlic, red wine vinegar, lemon juice, Dijon, dried oregano, salt, and pepper. Whisk until combined.
  • Once the pasta is done cooking, strain, and add the hot pasta directly to the vinaigrette. Using tongs, toss to combine. The hot pasta will mellow out the raw garlic. Set aside at room temperature while you grill the sausage and veggies.

Grill Your Sausage and Veggies:

  • Preheat your gas grill to medium-low heat (about 250-325°F). Grease the grates with avocado oil. Once hot, add the chicken sausages. Cook on medium-low, turning every few minutes, until the sausages register to about 145°F, about 8-10 minutes.
  • Meanwhile, using a pastry brush, coat the veggies with olive oil and season with salt.
  • Once the sausages have been par-cooked, turn up the heat to medium-high. Add the veggies to the other side of the grill. Grill the sausages until charred and they reach an internal temperature of 165-170°F. Remove from the grill and allow to rest while the veggies finish cooking. The veggies should take about 8-10 minutes total, flipping halfway through. They should be softened and charred in places.

Assemble and Serve:

  • Transfer the sausages to a cutting board and cut in ¼” slices on the diagonal. Add to the pasta. Once the veggies have cooled to the touch, chop into a medium-dice, and add the veggies to the pasta. Toss to combine.
  • Add the olives, pepper drops (if using), ½ cup of the grated parmesan, parsley, and the arugula. Toss gently, until the sausage and veggies are evenly combined and all elements are equally dressed. Garnish with the remaining parmesan. Serve immediately.

Photography and styling by Eat Love Eats.

The post Grilled Antipasto Pasta Salad appeared first on The Defined Dish.

Monterey Melt Smash Burgers

Monterey Melt Smash Burger assembled on parchment paper.Whataburger fans rejoice — I’ve brought a classic home with these Monterey Melt Smash Burgers! Spicy, creamy, and just a…

The post Monterey Melt Smash Burgers appeared first on The Defined Dish.

Monterey Melt Smash Burger assembled on parchment paper.

Whataburger fans rejoice — I’ve brought a classic home with these Monterey Melt Smash Burgers! Spicy, creamy, and just a guilty pleasure I am so happy to now be able to make at home.

Monterey Melt Smash Burgers on parchment paper.

If you are not familiar, Whataburger is a fast-food chain that started in Texas and has since made it s way out of the state to other locations. Whataburger’s Monterey Melt is a fanatic cult classic, but unfortunately not on the menu year-round. It’s a favorite order for Clayton when it is on the menu so I finally decided to remake it for #DDGrillWeek 2024!

Monterey Melt Smash Burger assembled on parchment paper.

The Monterey Melt consists of two beef patties topped with Monterey and American cheese, peppers and onions then finished with Whataburger’s Jalapeño ranch sauce. I’ve followed this pretty closely with even making my own Jalapeño Ranch, but with a Greek yogurt base that adds a delicious tanginess, plus makes it easier to make than a mayo-based dressing.

Ingredients:

  • Plain Greek Yogurt
  • Extra Virgin Olive Oil
  • Distilled White Vinegar
  • Jalapeño 
  • Garlic
  • Fresh Parsley
  • Fresh Dill
  • Onion Powder
  • Salt
  • Black Pepper
  • Ground Beef
  • Poblano Peppers 
  • Yellow Onion 
  • Avocado Oil
  • White Bread Buns: Sub Gluten-Free Buns
  • Salted Butter
  • Yellow Mustard
  • American Cheese
  • Monterey Jack Cheese

Step-by-Step:

Step One: Make the Jalapeño Ranch

In a blender or using an immersion blender in a wide-mouth jar, combine all of the Jalapeño Ranch ingredients and blend until smooth. Refrigerate until ready to serve. This keeps well for 5 to 7 days in the fridge.

Jalapeño ranch for Monterey Melt Smash Burgers in glass jar.

Step Two: Portion the Ground Beef

Divide the ground beef into 8 equal portions (about 3 ounces each). Roll them into balls, being careful not to overwork the meat, and set them on a baking sheet. Set aside.

Step Three: Cook the Peppers and Onions

Heat the grill over medium-high heat (between 400 and 450℉) with a griddle on top. When the griddle is hot, add 2 tablespoons of oil and the sliced peppers and onions. Sprinkle with a pinch of salt and pepper. Cook, tossing often, until the veggies are tender, about 8 minutes total. When the veggies are cooked through, transnfer them to a plate or bowl and cover with foil to keep warm. Set aside.

Step Four: Toast the Buns

Butter and toast buns over medium heat until golden on the buttered side. Transfer to a platter and set aside.

Step Five: Begin Cooking the Burgers

Place 4 burger balls onto the hot griddle. Working quickly, firmly smash straight down into a thin patty. Season the patties with a pinch of salt, pepper, a drizzle of yellow mustard. Cook for 2 minutes on the first side, or until seared and juices start to come to the surface.

Step Six: Add Cheese and FInish the Burgers

Scrape under the burger with a sturdy spatula and flip. Cover and cook for 1 more minute. Top half of the burgers with American cheese, and half with the Monterey Jack cheese. Transfer the cooked smashed burgers to a platter and continue until all of the burgers are done.

Step Seven: Assemble and Serve!

Place one American cheese-covered smash burger on the bottom of the bun, then top with a Monterey Jack cheese-covered smash burger. Top the double patties with the onion and pepper mixture and then a very generous drizzle of the Jalapeño Ranch. Serve and enjoy!

Monterey Melt Smash Burgers being assembled on parchment paper.

Recipe FAQ:

Can I make the Jalapeño Ranch in advance?

Yes! This keeps well for 5 to 7 days in the fridge.

Can I make this gluten-free?

You can make some swaps when serving to make this gluten-free! You can serve on a gluten-free bun, in a lettuce wrap, or over greens!

Monterey Melt Smash Burgers on parchment with ranch in background.

I hope y’all love these Monterey Melt Smash Burgers as much as my husband and I do! Comment below once you make these!

For More Recipes:

Juicy Indoor Burgers with Burger Sauce

Greek-Inspired Grilled Lamb Burgers

Avocado Turkey Burgers

Oven Fries

Monterey Melt Smash Burger assembled on parchment paper.
Print

Monterey Melt Smash Burgers

Gluten-Free if Modified
Total Time 45 minutes
Servings 4

Ingredients

For the Jalapeño Ranch:

  • 1 cup plain greek yogurt
  • 2 tablespoons extra virgin olive oil
  • 1 tablespoon distilled white vinegar
  • 1 jalapeño, stem and seeds removed and roughly chopped
  • 2 garlic cloves, minced
  • ¼ cup roughly chopped parsley
  • ¼ cup roughly chopped dill fronds
  • ½ teaspoon onion powder
  • ½ teaspoon Kosher salt

For the Smash Burgers:

  • 1.5 lbs ground beef
  • 2 medium-sized poblano peppers, seeds and stem removed, halved and thinly sliced
  • 1 small yellow onion, halved and thinly sliced
  • 2 tablespoons avocado oil
  • Salt and pepper
  • 4 soft white bread buns, sub gluten-free buns for gluten-free
  • 2 tablespoons salted butter
  • 2 tablespoons yellow mustard
  • 4 slices American cheese
  • 4 slices Monterey jack cheese

Instructions

Make the Jalapeño Ranch:

  • In a blender or using an immersion blender in a wide-mouth jar, combine all of the Jalapeño Ranch ingredients and blend until smooth. Refrigerate until ready to serve. This keeps well for 5 to 7 days in the fridge.

Make the Smash Burgers, Grilled Onions, and Peppers:

  • Divide the ground beef into 8 equal portions (about 3 ounces each). Roll them into balls, being careful not to overwork the meat, and set them on a baking sheet. Set aside.
  • Heat the grill over medium-high heat (between 400 and 450℉) with a griddle on top.
  • When the griddle is hot, add 2 tablespoons of oil and the sliced peppers and onions. Sprinkle with a pinch of salt and pepper. Cook, tossing often, until the veggies are tender, about 8 minutes total. When the veggies are cooked through, transnfer them to a plate or bowl and cover with foil to keep warm. Set aside.
  • Butter and toast buns over medium heat until golden on the buttered side. Transfer to a platter and set aside.
  • Place 4 burger balls onto the hot griddle. Working quickly, firmly smash straight down into a thin patty. Season the patties with a pinch of salt, pepper, a drizzle of yellow mustard. Cook 2 minutes on the first side, or until seared and juices start to come to the surface.
  • Scrape under the burger with a sturdy spatula and flip. Cover and cook for 1 more minute. Top half of the burgers with American cheese, and half with the Monterey Jack cheese. Transfer the cooked smashed burgers to a platter and continue until all of the burgers are done.

Assemble and Serve:

  • Place one American cheese-covered smash burger on the bottom of the bun, then top with a Monterey Jack cheese-covered smash burger. Top the double patties with the onion and pepper mixture and then a very generous drizzle of the Jalapeño Ranch. Serve and enjoy!

Photography and styling by Eat Love Eats.

The post Monterey Melt Smash Burgers appeared first on The Defined Dish.

Spicy Coconut Grilled Chicken Lettuce Wraps

Spicy Coconut Grilled Chicken Lettuce Wraps assembled with additional limes and picked shallots surrounding.I have plenty of chicken wrap recipes on my website but these Spicy Coconut Grilled Chicken Lettuce Wraps are in…

The post Spicy Coconut Grilled Chicken Lettuce Wraps appeared first on The Defined Dish.

Spicy Coconut Grilled Chicken Lettuce Wraps assembled with additional limes and picked shallots surrounding.

I have plenty of chicken wrap recipes on my website but these Spicy Coconut Grilled Chicken Lettuce Wraps are in a league of their own! So much flavor packed into such a delicious bite.

Spicy Coconut Grilled Chicken Lettuce Wraps assembled with additional limes and picked shallots surrounding.

Grilled chicken is a go-to at my house during grilling season but I am always trying to think of new ways to keep it interesting! So for #DDGrillWeek 2024, I wanted to pack some delicious flavor into chicken thighs and then pile them into lettuce wraps.

The star of the show here is the combination of the green curry paste and coconut milk! Those two along with ginger, cilantro, and a few other ingredients come together to make a beautiful marinade for your chicken, plus you will reserve some of it to drizzle on top of your lettuce wraps when serving. Paired with some quick-pickled shallots, more cilantro, mint, and peanuts, you will be going back for seconds with these Spicy Coconut Grilled Chicken Lettuce Wraps!

Ingredients:

  • Unsweetened Coconut Milk  
  • Green Curry Paste: I like Mae Ploy brand
  • Grated Ginger: From a jar
  • Fresh Cilantro Leaves
  • Fish Sauce 
  • Coconut Aminos  
  • Coconut Sugar 
  • Lime Zest
  • Kosher Salt
  • Boneless, Skinless Chicken Thighs
  • Shallots
  • Rice Vinegar
  • Butter Lettuce
  • Fresh Mint Leaves
  • Crushed Unsalted Peanuts  

Recipe Step-by-Step:

Step One: Make the Chicken Marinade

In a high-speed blender or wide-mouth jar using an immersion blender, combine the coconut milk, green curry paste, garlic, ginger, cilantro, fish sauce, coconut aminos, coconut sugar, lime zest, and salt. Blend until smooth. Reserve ½ cup of the marinade and refrigerate until ready to use.

Marinade for Spicy Coconut Grilled Chicken Lettuce Wraps in blender.

Step Two: Marinate the Chicken

Place the chicken thighs in a food storage container and pour the remaining marinade over the chicken and toss to coat. Cover and let marinade at room temperature for 30 minutes or in the fridge for up to 6 hours.

Spicy Coconut Chicken marinating in white bowl.

Step Three: Make the Quick-Pickled Shallots

Meanwhile, make the quick-pickled shallots by combining all of the ingredients in a small bowl and tossing to combine. These keep well in the fridge for about 4 days.

Quick-pickled shallots in glass bowl.

Step Four: Prepare the Grill

When ready to cook, heat the grill over medium-high heat (350- 400℉) and oil the grill grates. To do this, dip a wadded paper towel in a little avocado oil and, using tongs, wipe the oil evenly over the grate. Be careful not to use too much oil, because that’s a sure-fire way to start a good flare-up— a little goes a long way here.

Step Five: Grill the Chicken

Cook the chicken over the heat for 4 minutes per side, until the pieces turn golden and grill marks appear. The lid should be closed throughout the cooking process. Flip the pieces once more and turn the heat to medium-low, about 300°F. Using some of the reserved coconut sauce (saving some for serving), use a grill brush and brush the chicken so that it is coated in more of the sauce. Continue to cook for 3 to 5 minutes, or until the chicken has cooked through and the internal temp is 165°F.

Step Six: Let the Chicken Rest

Remove from the grill and transfer to a cutting board and let rest for 5 to 8 minutes before slicing into 1-inch strips.

Spicy Coconut Grilled Chicken on large white platter with lime wedges and fresh cilantro.

Step Seven: Serve and Enjoy!

To serve, place the sliced chicken in lettuce leaves and drizzle with some of the remaining sauce. Top with pickled shallots, crushed peanuts, fresh mint, cilantro, and a wedge of lime for squeezing.

Spicy Coconut Grilled Chicken Lettuce Wraps assembled with additional limes and picked shallots surrounding.

Recipe FAQs:

Can I marinate the chicken in advance?

Yes! You can let marinate at room temperature for 30 minutes or in the fridge for up to 6 hours. I would not suggest longer than this due to the coconut milk.

What is the best way to serve this to a crowd?

This recipe is great for a “build-your-own” set-up! I place the chicken on a platter, the lettuce leaves on a platter, then have all of the toppings in bowls for people to pick and choose how they want to top their lettuce wraps.

I hope y’all enjoy these lettuce wraps all season long! Comment below once you make them!

For More chicken Lettuce Wrap Recipes:

Gochujang Grilled Chicken Lettuce Wraps

Honey-Garlic Chicken Lettuce Wraps

Easy Rotisserie Chicken Lettuce Wraps with Peanut Sauce

Whole30 Chicken Lettuce Cups

Spicy Coconut Grilled Chicken Lettuce Wraps assembled with additional limes and picked shallots surrounding.
Print

Spicy Coconut Grilled Chicken Lettuce Wraps

Prep Time 20 minutes
Cook Time 30 minutes
Total Time 47 minutes
Servings 6

Ingredients

For the Marinade:

  • 1 cup unsweetened coconut milk
  • 2 tablespoons green curry paste I like Mae Ploy brand
  • 4 garlic cloves
  • 1 teaspoon grated ginger
  • 1 cup fresh cilantro leaves
  • 1 tablespoon fish sauce
  • 1 tablespoon coconut aminos
  • 2 tablespoons coconut sugar
  • Zest of 1 lime
  • 2 teaspoons Kosher salt
  • 3 pounds boneless skinless chicken thighs, trimmed of excess fat

For the Quick-Pickled Shallots:

  • 2 large shallots very thinly sliced
  • ¼ teaspoon kosher salt
  • ½ teaspoon fish sauce
  • 3 tablespoons rice vinegar

For the Lettuce Wraps:

  • 2 heads of butter lettuce leaves separated
  • ½ cup cilantro leaves
  • ½ cup mint leaves
  • ½ cup crushed unsalted peanuts

Instructions

Marinate the Chicken:

  • In a high-speed blender or wide-mouth jar using an immersion blender, combine the coconut milk, green curry paste, garlic, ginger, cilantro, fish sauce, coconut aminos, coconut sugar, lime zest, and salt. Blend until smooth. Reserve ½ cup of the marinade and refrigerate until ready to use.
  • Place the chicken thighs in a food storage container and pour the remaining marinade over the chicken and toss to coat. Cover and let marinade at room temperature for 30 minutes or in the fridge for up to 6 hours.

Make the Quick-Pickled Shallots:

  • Meanwhile, make the quick-pickled shallots by combining all of the ingredients in a small bowl and tossing to combine. These keep well in the fridge for about 4 days.

Grill the Chicken:

  • When ready to cook, heat grill over medium-high heat (350- 400℉) and oil the grill grates. To do this, dip a wadded paper towel in a little avocado oil and, using tongs, wipe the oil evenly over the grate. Be careful not to use too much oil, because that’s a sure-fire way to start a good flare-up—a little goes a long way here.
  • Cook the chicken over the heat for 4 minutes per side, until the pieces turn golden and grill marks appear. The lid should be closed throughout the cooking process. Flip the pieces once more and turn the heat to medium-low, about 300°F. Using some of the reserved coconut sauce (saving some for serving), use a grill brush and brush the chicken so that it is coated in more of the sauce. Continue to cook for 3 to 5 minutes, or until the chicken has cooked through and the internal temp is 165°F.
  • Remove from the grill and transfer to a cutting board and let rest for 5 to 8 minutes before slicing into 1-inch strips.

Serve:

  • To serve, place the sliced chicken in lettuce leaves and drizzle with some of the remaining sauce. Top with pickled shallots, crushed peanuts, fresh mint, cilantro and a wedge of lime for squeezing.

Photography and styling by Eat Love Eats.

The post Spicy Coconut Grilled Chicken Lettuce Wraps appeared first on The Defined Dish.

Caprese Grilled Chicken

Caprese Grilled Chicken on large white serving platter.This Caprese Grilled Chicken is so simple to make but packed with fresh, delicious flavor! I love this recipe for…

The post Caprese Grilled Chicken appeared first on The Defined Dish.

Caprese Grilled Chicken on large white serving platter.

This Caprese Grilled Chicken is so simple to make but packed with fresh, delicious flavor! I love this recipe for a quick, grilled recipe during the week.

Caprese Grilled Chicken on large serving platter.

The flavor of a classic Caprese salad never gets old to me. Creamy mozzarella, bright tomatoes, fresh basil, and balsamic simply pair together for a delicious bite. With those flavors in mind, I recently made a quick dinner on my Instagram that you all went crazy for so I decided to give it a permanent home on the blog.

Close up of Caprese Grilled Chicken on white serving platter.

For this Caprese Grilled Chicken, chicken is first simply marinated to infuse flavor into the chicken. Next, it is grilled until the chicken is cooked through then topped with basil pesto, either storebought or homemade, and mozzarella cheese that you allow to melt. To finish, you top with a simple cherry tomato salad that adds a burst of brightness and flavor! Serve as desired and you will have a simple, delicious meal everyone around your table will enjoy.

Ingredients:

  • Boneless, Skinless Chicken Breasts
  • Extra Virgin Olive Oil
  • Balsamic Vinegar
  • Freshly Squeezed Lemon Juice
  • Italian Seasoning
  • Kosher Salt
  • Freshly Ground Black Pepper
  • Basil Pesto: Storebought or Homemade
  • Shredded Mozzarella Cheese
  • Cherry or Grape Tomatoes
  • Shallot
  • Fresh Basil Leaves
  • Balsamic Vinegar
  • Crushed Red Pepper Flakes: Optional
Ingredients for Caprese Grilled Chicken on counter.

Step-by-Step:

Step One: Pound the Chicken

Place the chicken breasts on a cutting board and cover with parchment paper or plastic wrap. Using a meat mallet or the bottom of a heavy skillet, pound the chicken until it is a uniform ½-inch thickness. Pat dry with paper towels.

Raw chicken breasts on parchment. Other ingredients scatter around.

Step Two: Marinate the Chicken

Place the chicken in a large bowl and add the olive oil, balsamic, lemon juice, Italian seasoning, salt, and pepper. Toss until well combined and set aside to marinade for 15 minutes.

Raw chicken breasts marinating in large white bowl.

Step Three: Make the Cherry Tomato Topping

In a medium-sized bowl, combine all of the tomato topping ingredients and toss to combine. Set aside while you grill the chicken.

Cherry tomato topping in large bowl.

Step Four: Prep the Grill

Heat the grill over medium-high heat (350-400℉) and oil the grill grates (to do this, dip a wadded paper towel in a little oil and, using tongs, wipe the oil evenly over the grate. Be careful not to use too much oil, because that’s a sure-fire way to start a good flare-up—a little goes a long way here.

Step Five: Grill the Chicken

Cook the chicken over the heat for about 4 minutes per side, until grill marks appear and the chicken is cooked through. The lid should be closed throughout the cooking process.

Step Six: Top the Chicken

Reduce the heat to medium-low and spoon about 1 tablespoon of the pesto on top of each chicken breast and spread it across the top into an even layer. Then, evenly sprinkle the tops with the mozzarella cheese. Cover and cook until the cheese is just melted, about 2 minutes. Remove from the grill and transfer to a clean platter to allow to rest for about 4 minutes.

Grilled chicken breasts with cheese melted on top on white platter.

Step Seven: Serve and Enjoy!

To serve, spoon the cherry tomato mixture across the tops of the chicken.

Caprese Grilled Chicken on white serving platter.

Recipe FAQs:

Could I marinate the chicken in advance?

Yes! If preferred, you could marinate the chicken up to 24 hours in advance and store int eh fridge until ready to grill.

What should I serve this with?

This would be great with just about anything! Grilled asparagus or broccolini would be wonderful. Plus, my girls like this served with a little pasta as well.

I hope you enjoy this recipe! Comment below once you try it!

for more grilled chicken recipes:

Tex-Mex Grilled Chicken

Grilled Sesame Chicken Skewers

Grilled Chili Chicken Tacos with Tomatillo Salsa

Print

Caprese Grilled Chicken

Total Time 35 minutes
Servings 4

Ingredients

For the Chicken:

  • 4 boneless skinless chicken breasts
  • 3 tablespoons extra virgin olive oil
  • 2 tablespoons balsamic vinegar
  • 1 tablespoons freshly squeezed lemon juice
  • 2 tablespoons Italian Seasoning
  • 1 teaspoon Kosher salt
  • ½ teaspoon freshly ground black pepper
  • 1/3 cup Basil Pesto, storebought or homemade
  • ½ cup shredded mozzarella cheese

For the Cherry Tomato Topping:

  • 2 cups halved cherry or grape tomatoes
  • 1 large shallot, halved and thinly sliced
  • ½ cup thinly sliced basil leaves
  • 1 tablespoon extra virgin olive oil
  • 1 tablespoon balsamic vinegar
  • Pinch of salt and pepper
  • Pinch of crushed red pepper flakes (optional)

Instructions

Marinate the Chicken:

  • Place the chicken breasts on a cutting board and cover with parchment paper or plastic wrap. Using a meat mallet or the bottom of a heavy skillet, pound the chicken until it is a uniform ½-inch thickness. Pat dry with paper towels.
  • Place the chicken in a large bowl and add the olive oil, balsamic, lemon juice, Italian seasoning, salt, and pepper. Toss until well combined and set aside to marinate for 15 minutes.

Make the Cherry Tomato Topping:

  • In a medium-sized bowl, combine all of the tomato topping ingredients and toss to combine. Set aside while you grill the chicken.

Grill the Chicken:

  • Heat the grill over medium-high heat (350-400) and oil the grill grates (to do this, dip a wadded paper towel in a little oil and, using tongs, wipe the oil evenly over the grate. Be careful not to use too much oil, because that's a sure-fire way to start a good flare-up—a little goes a long way here.
  • Cook the chicken over the heat for about 4 minutes per side, until grill marks appear and the chicken is cooked through. The lid should be closed throughout the cooking process.
  • Reduce the heat to medium-low and spoon about 1 tablespoon of the pesto on top of each chicken breast and spread it across the top into an even layer. Then, evenly sprinkle the tops with the mozzarella cheese. Cover and cook until the cheese is just melted, about 2 minutes.
  • Remove from the grill and transfer to a clean platter to allow to rest for about 4 minutes.

Serve and Enjoy:

  • To serve, spoon the cherry tomato mixture across the tops of the chicken.

The post Caprese Grilled Chicken appeared first on The Defined Dish.

Grilled Jalapeño Popper Chicken

Grilled Jalapeño Popper Chicken stacked on top of one another.While we are still a month away from #DDGrillWeek2024, I am so excited to kick off grilling season with this…
The post Grilled Jalapeño Popper Chicken appeared first on The Defined Dish.

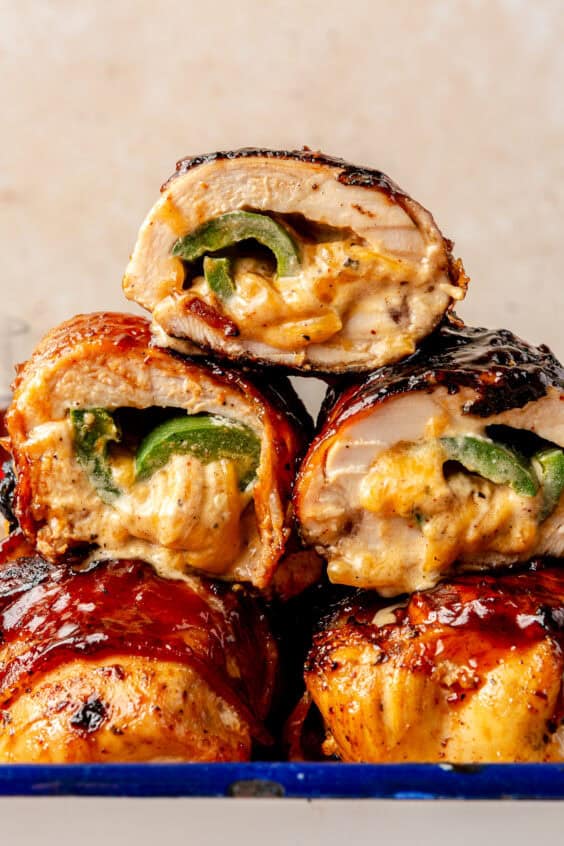
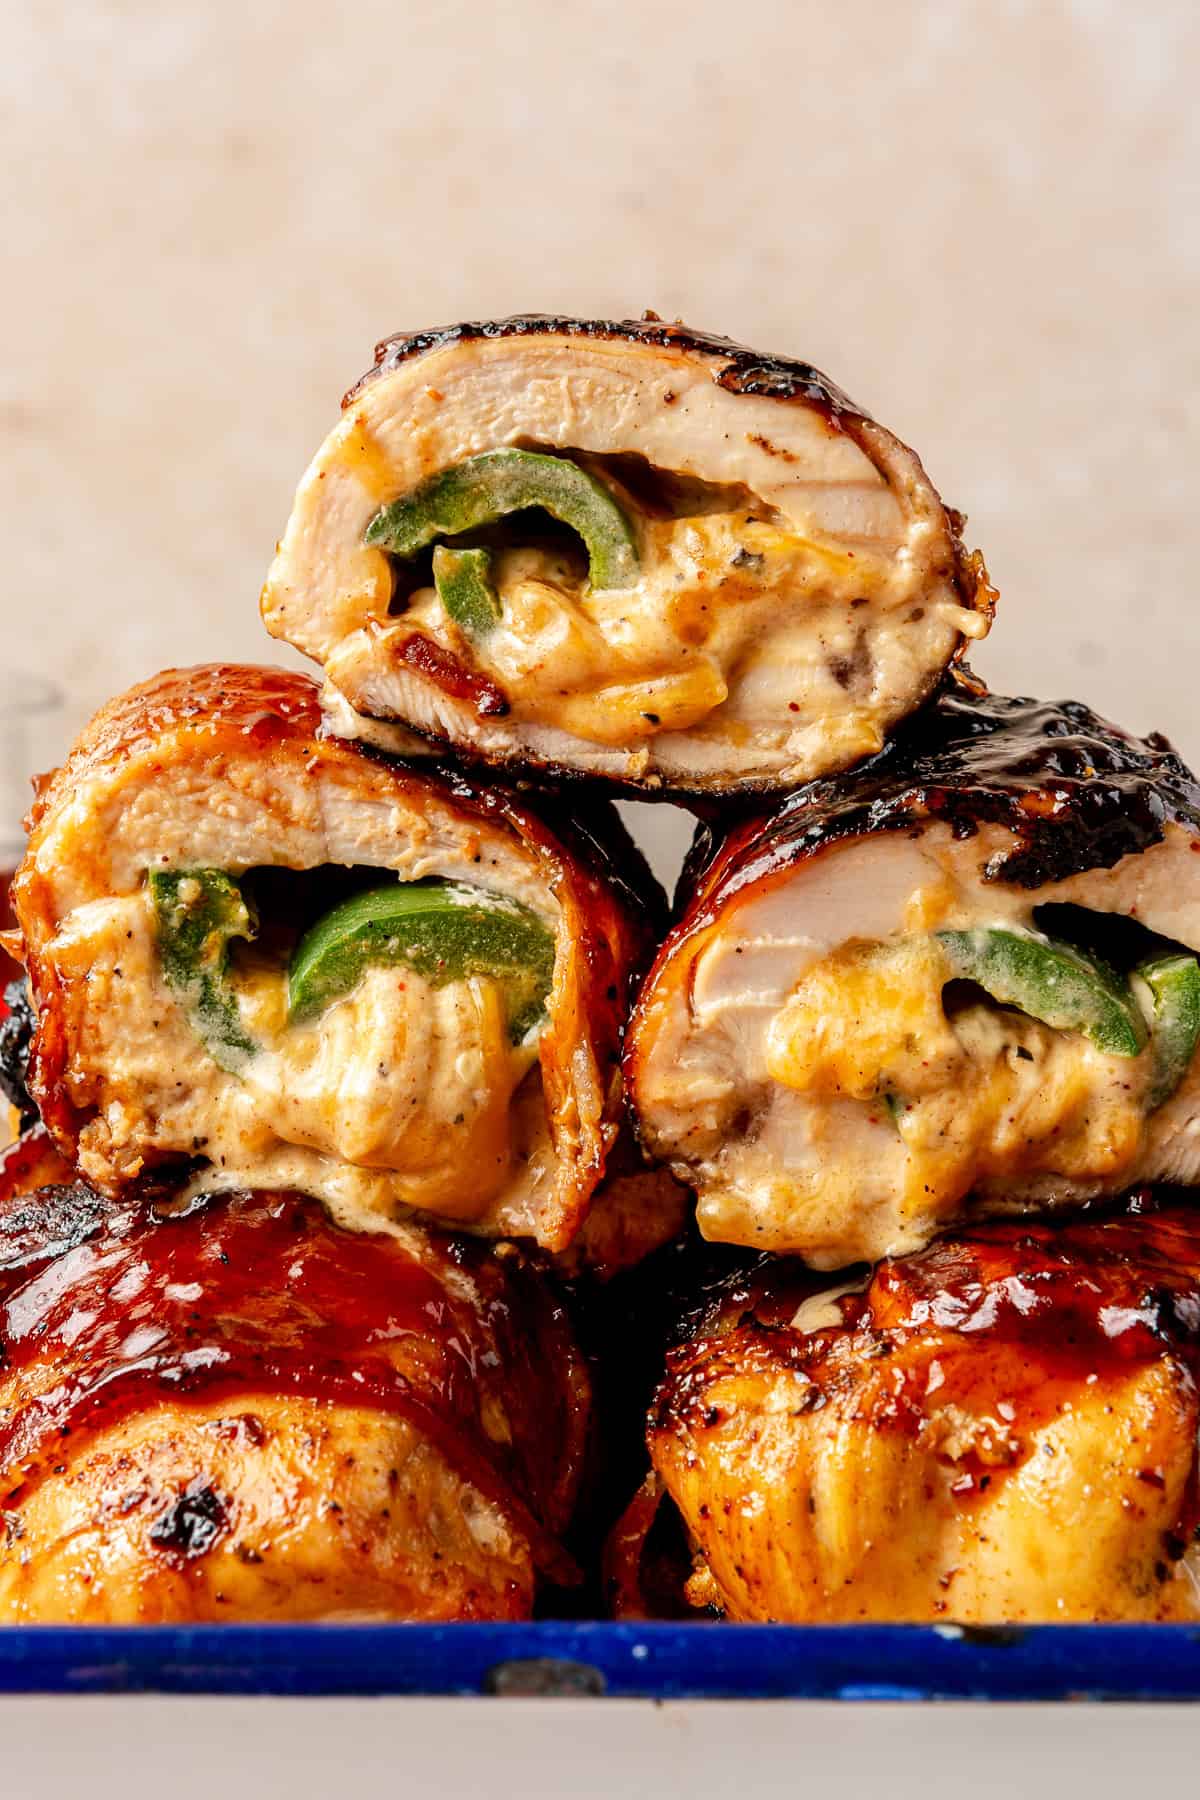
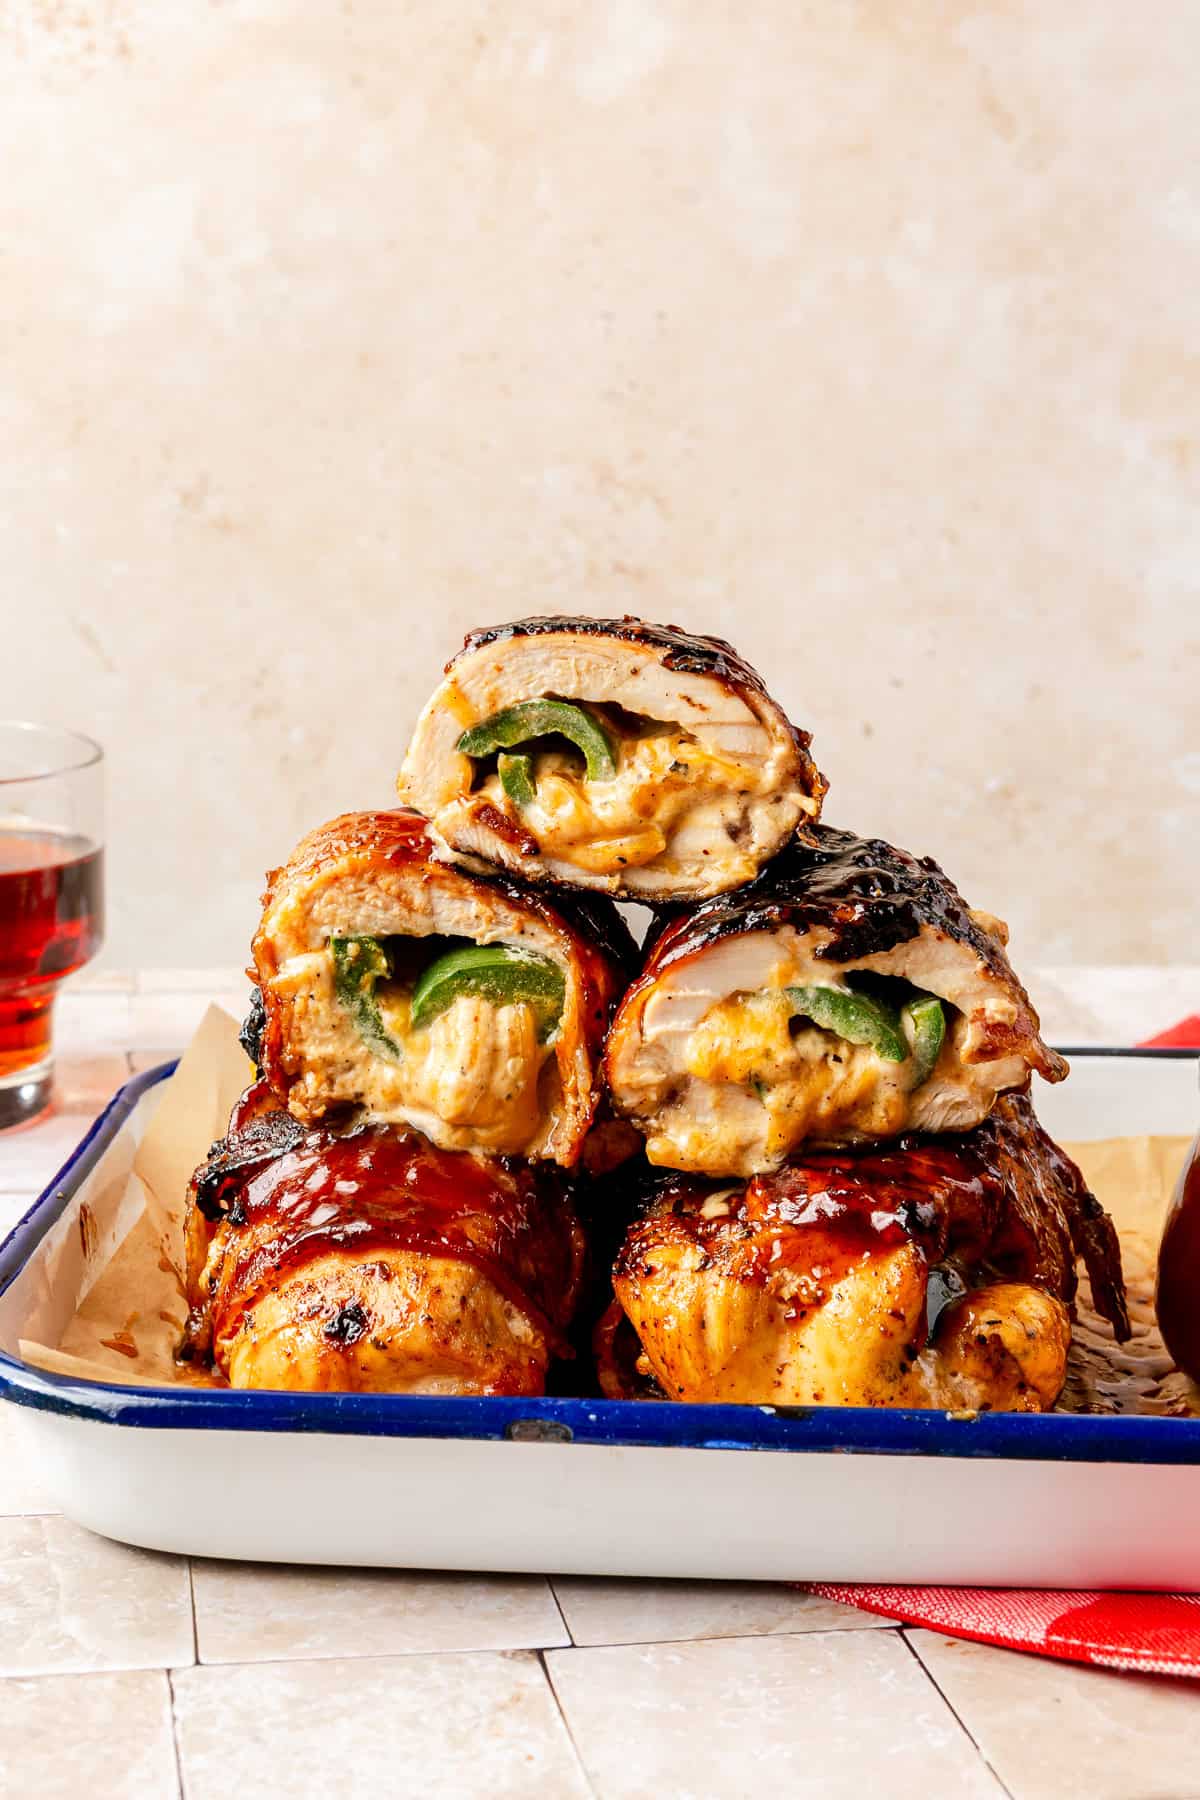
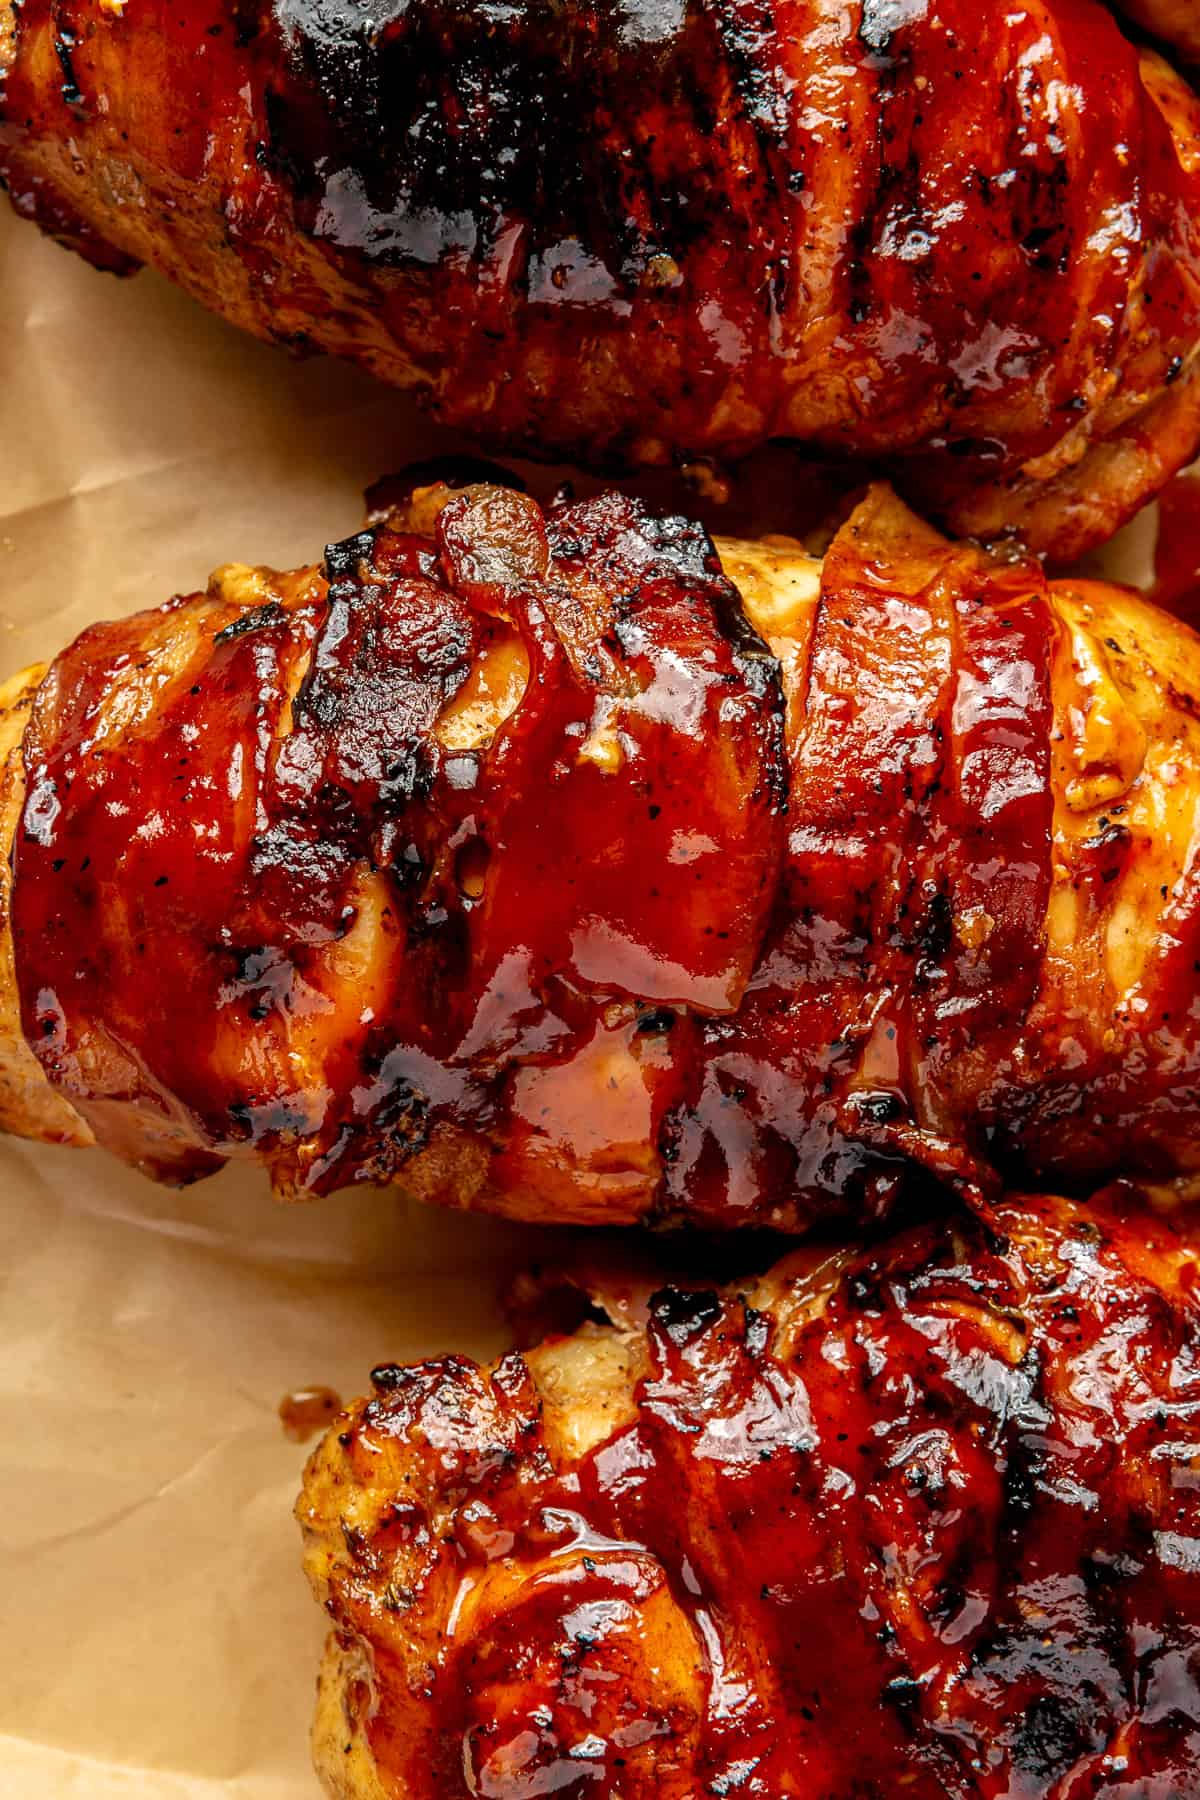
Grilled Jalapeño Popper Chicken stacked on top of one another.

While we are still a month away from #DDGrillWeek2024, I am so excited to kick off grilling season with this Grilled Jalapeño Popper Chicken recipe! It is spicy, sweet, smoky, and creamy — what more could you ask for?

Grilled Jalapeño Popper Chicken stacked on top of one another.

Y’all know I love some spice so when thinking about a new grilling recipe, I knew I wanted to incorporate jalapeños which, of course, lead me to jalapeño poppers. From there, I thought, “Why not stuff it into a chicken breast?” And y’all, this turned out better than I could have imagined.

Grilled Jalapeño Popper Chicken on parchment paper.

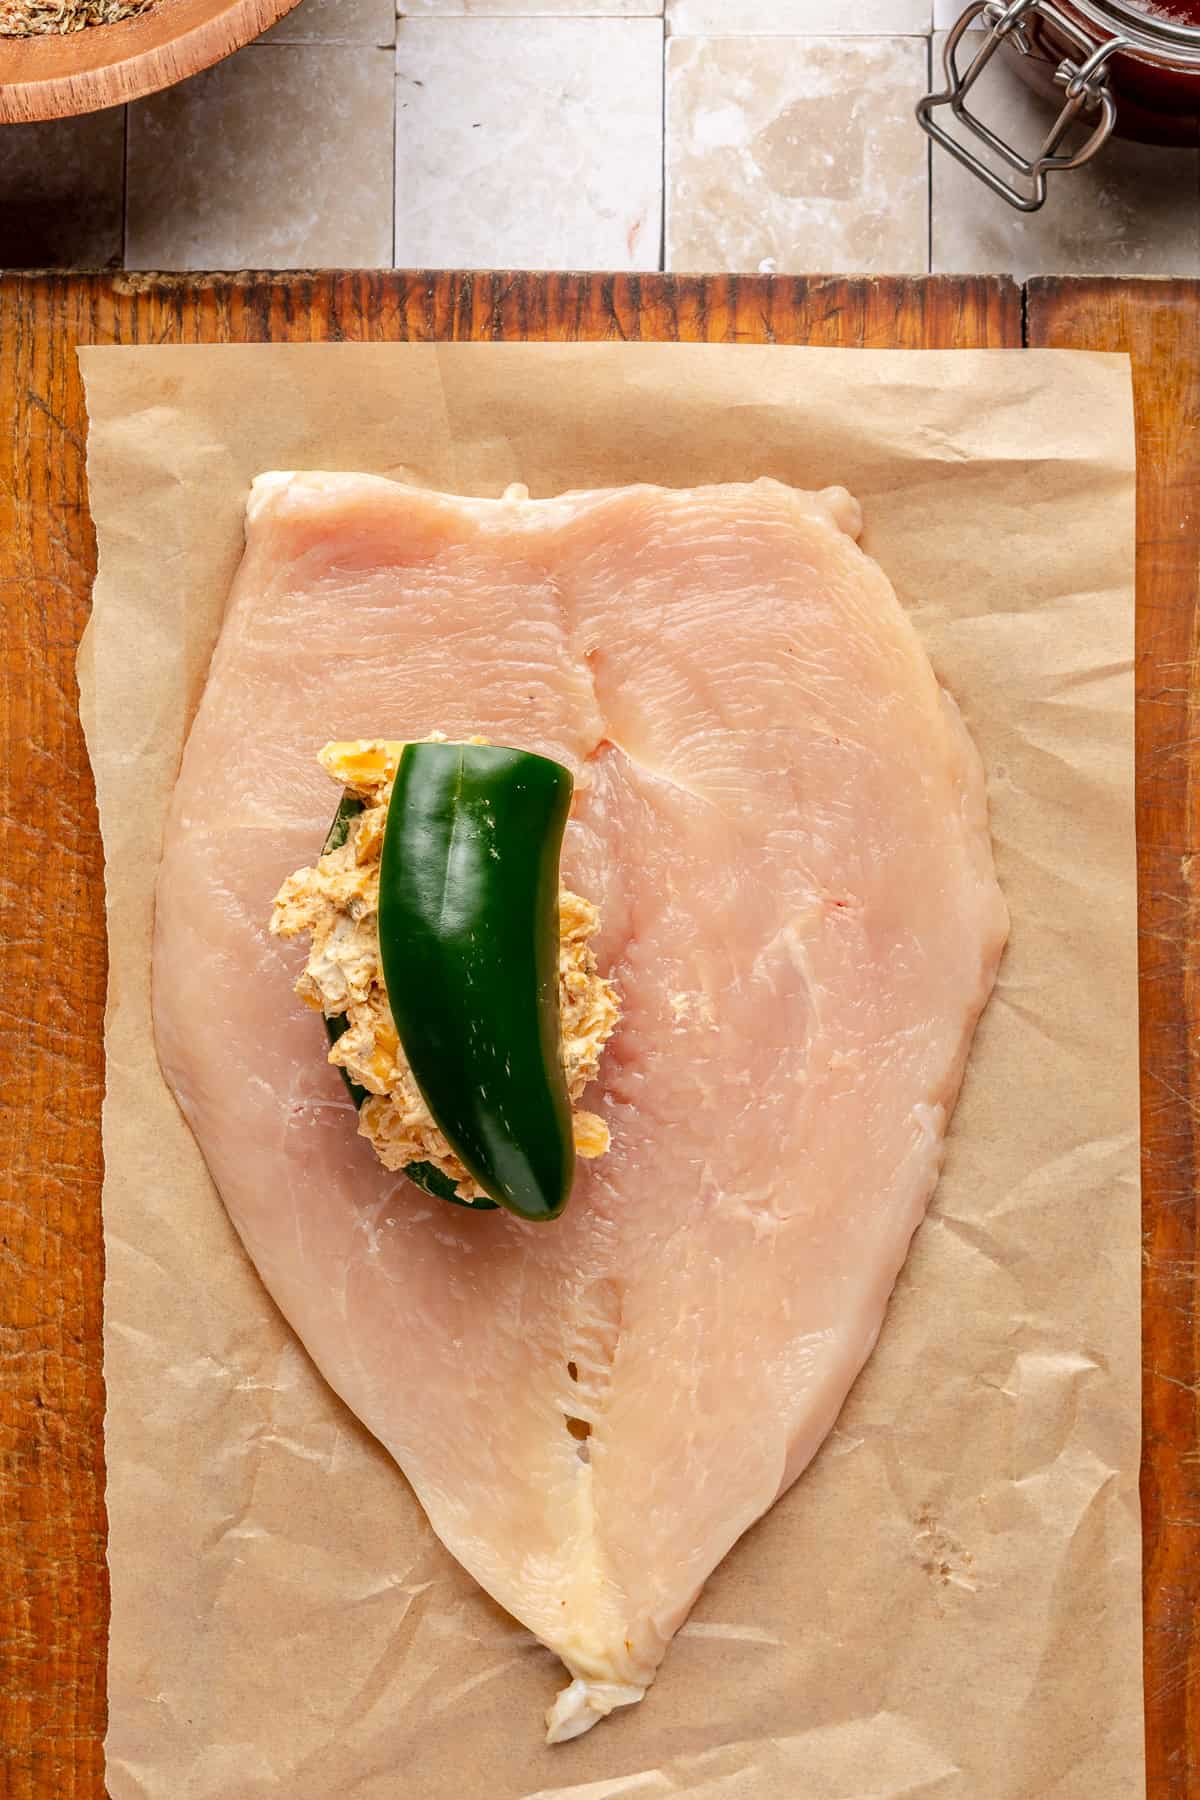
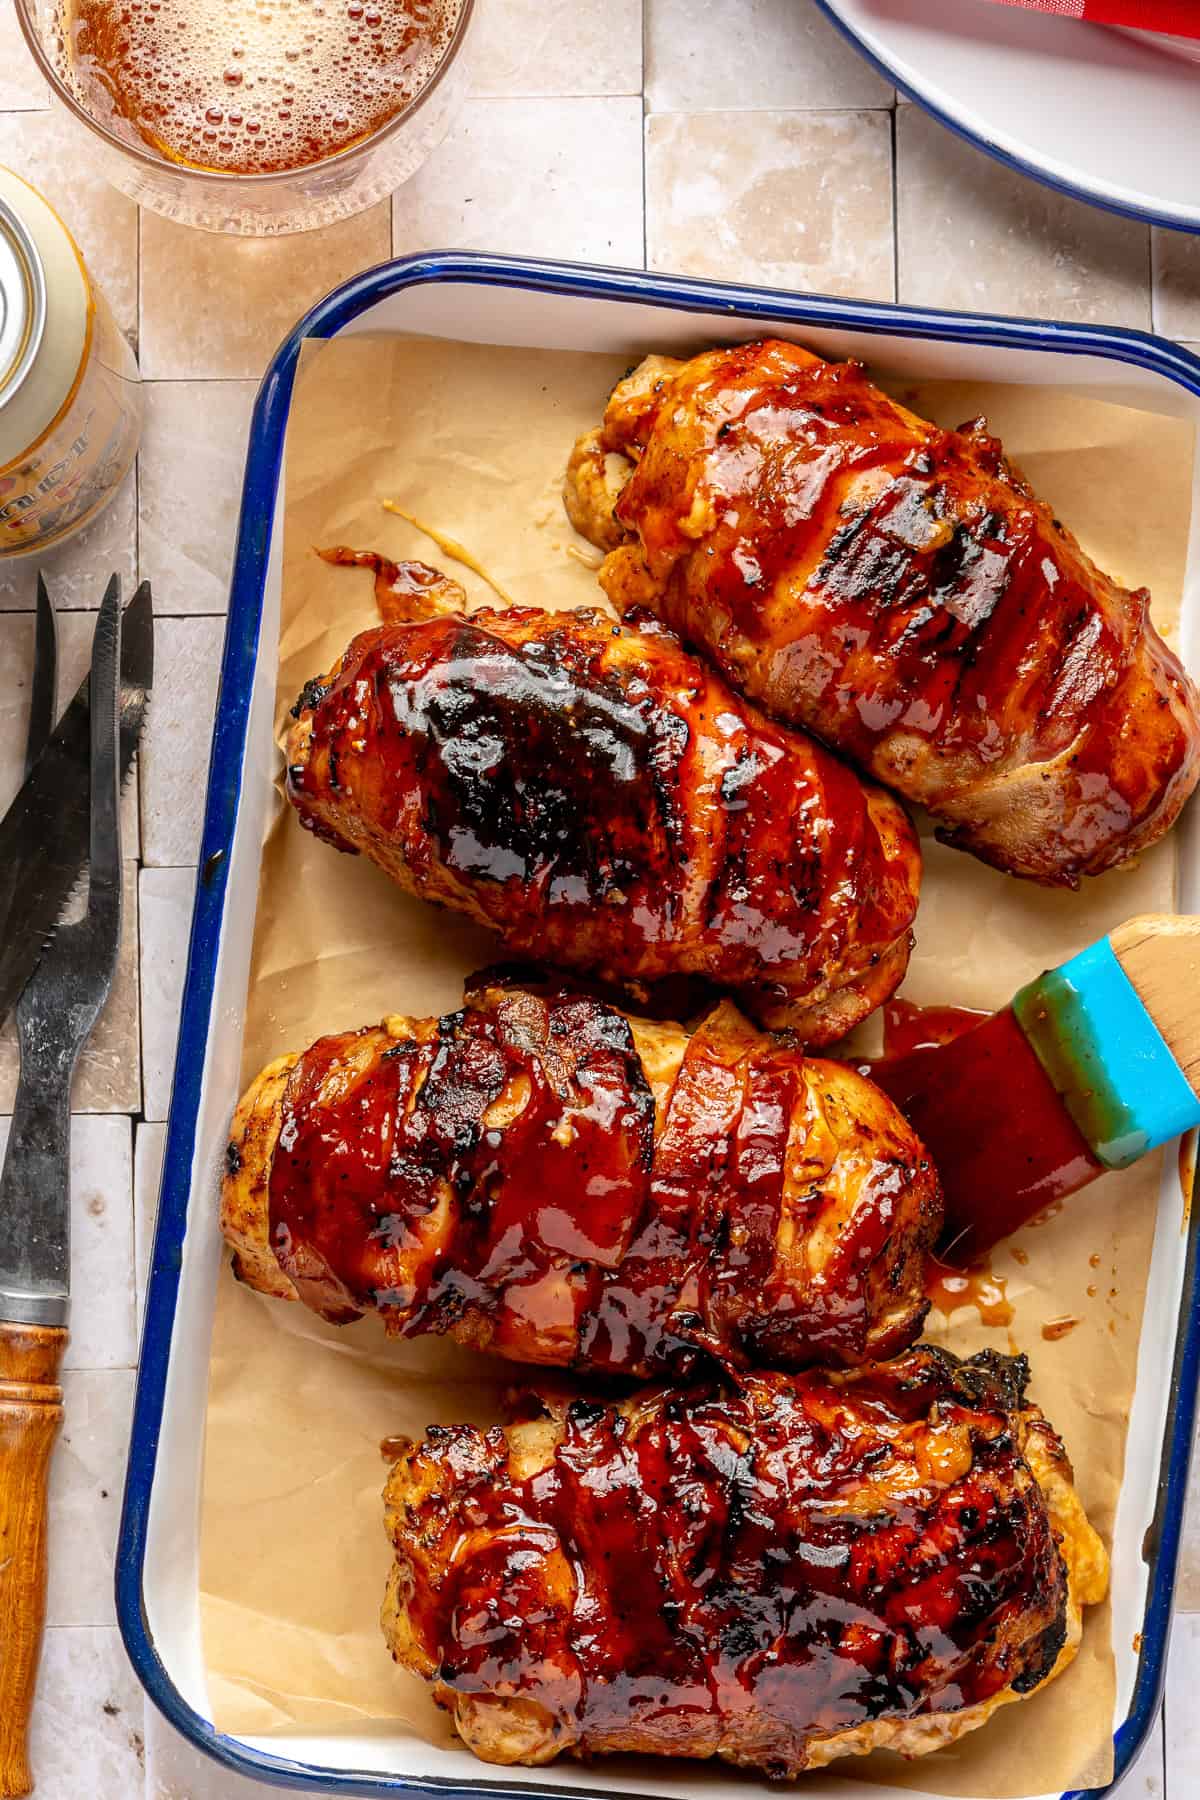
In this recipe, a chicken breast is butterflied then stuffed with a whole jalapeño that is filled with a cream cheese mixture. Wrap this in bacon then pop it on the grill! At the very end, baste the chicken with some BBQ sauce to add a subtle touch of smokiness and sweetness to the chicken. The final result is something you are going to crave all grilling season long!

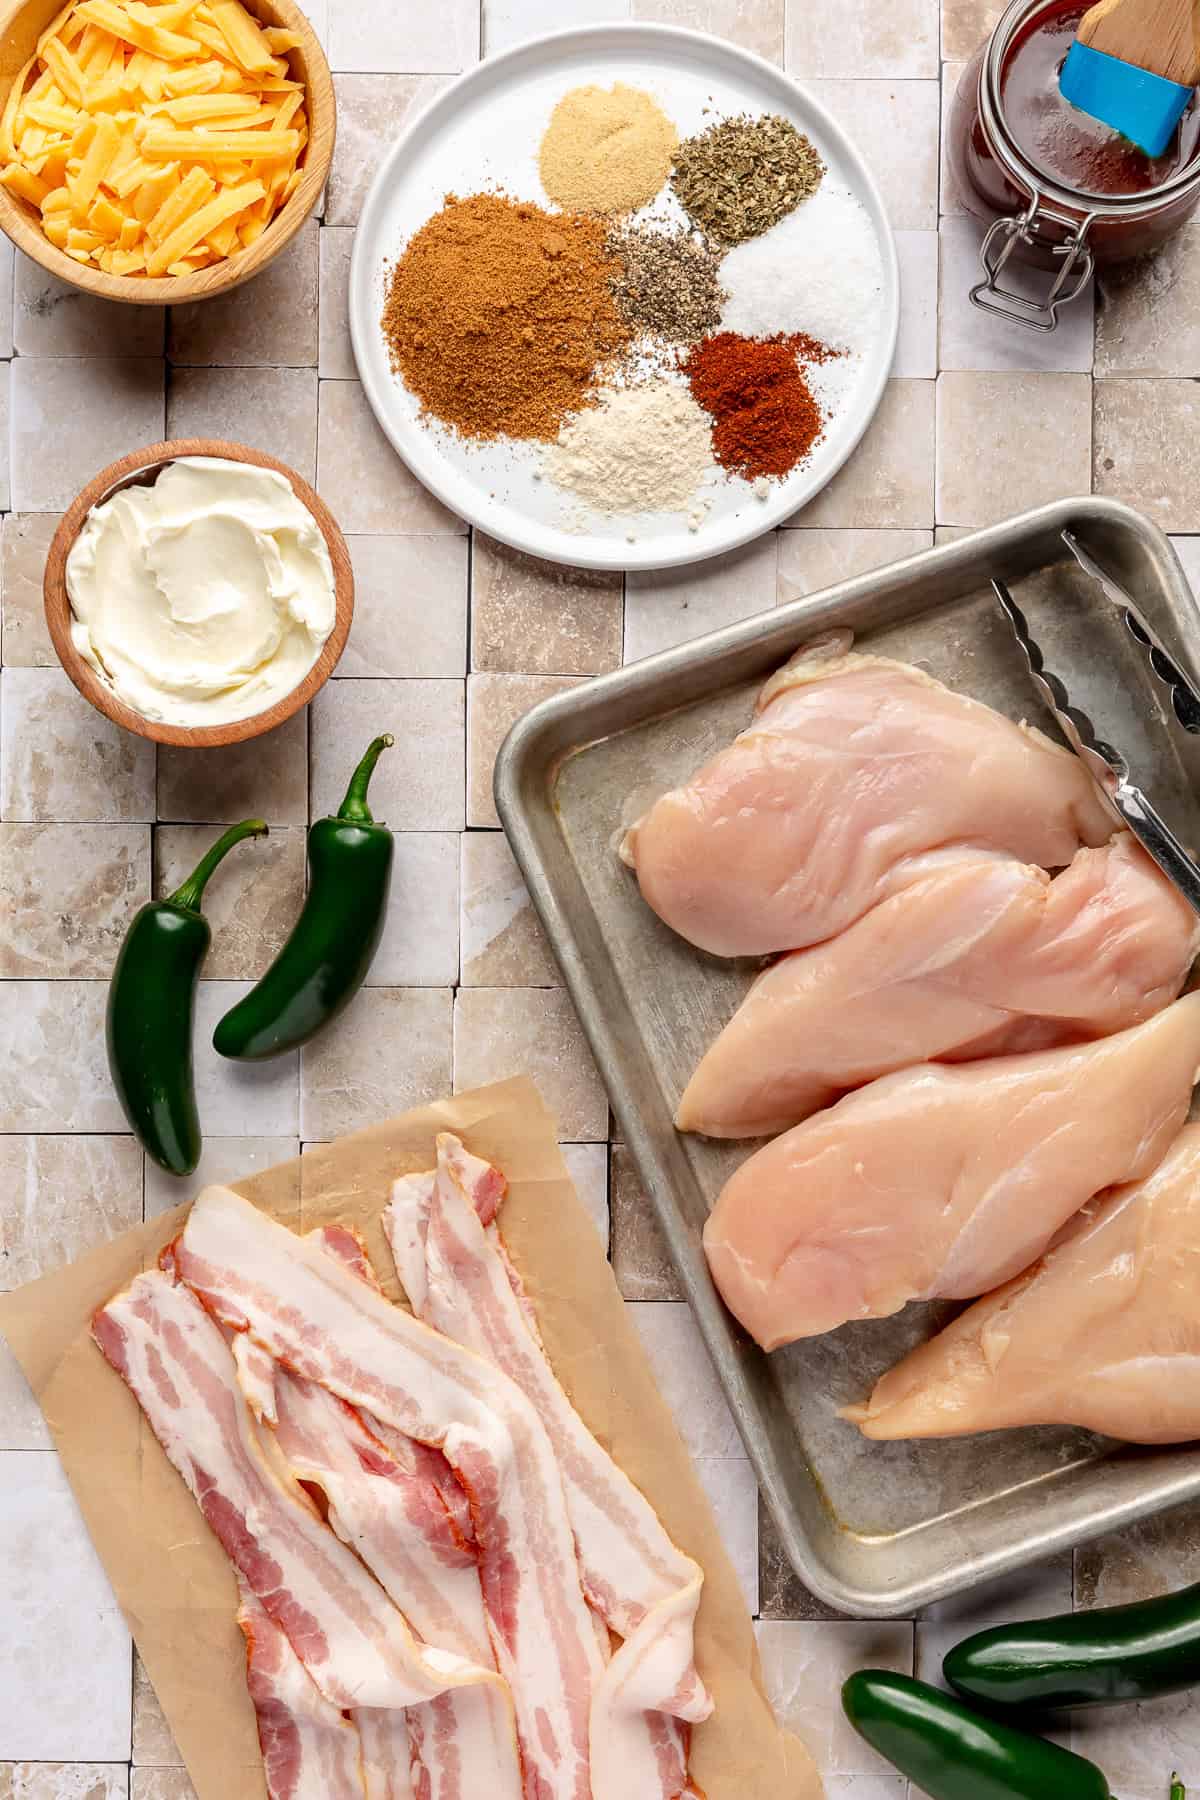
Grilled Jalapeño Popper Chicken Ingredients:

  • Coconut Sugar 
  • Garlic Powder 
  • Onion Powder 
  • Dried Oregano  
  • Chili Powder 
  • Kosher Salt  
  • Freshly Ground Black Pepper  
  • Softened Cream Cheese  
  • Shredded Medium Cheddar Cheese: I like Tillamook brand
  • Jalapeños 
  • Boneless, Skinless Chicken Breasts 
  • Bacon  
  • BBQ Sauce  
Grilled Jalapeño Popper Chicken ingredients on countertop.

Step-By-Step: Traditional Grill Method

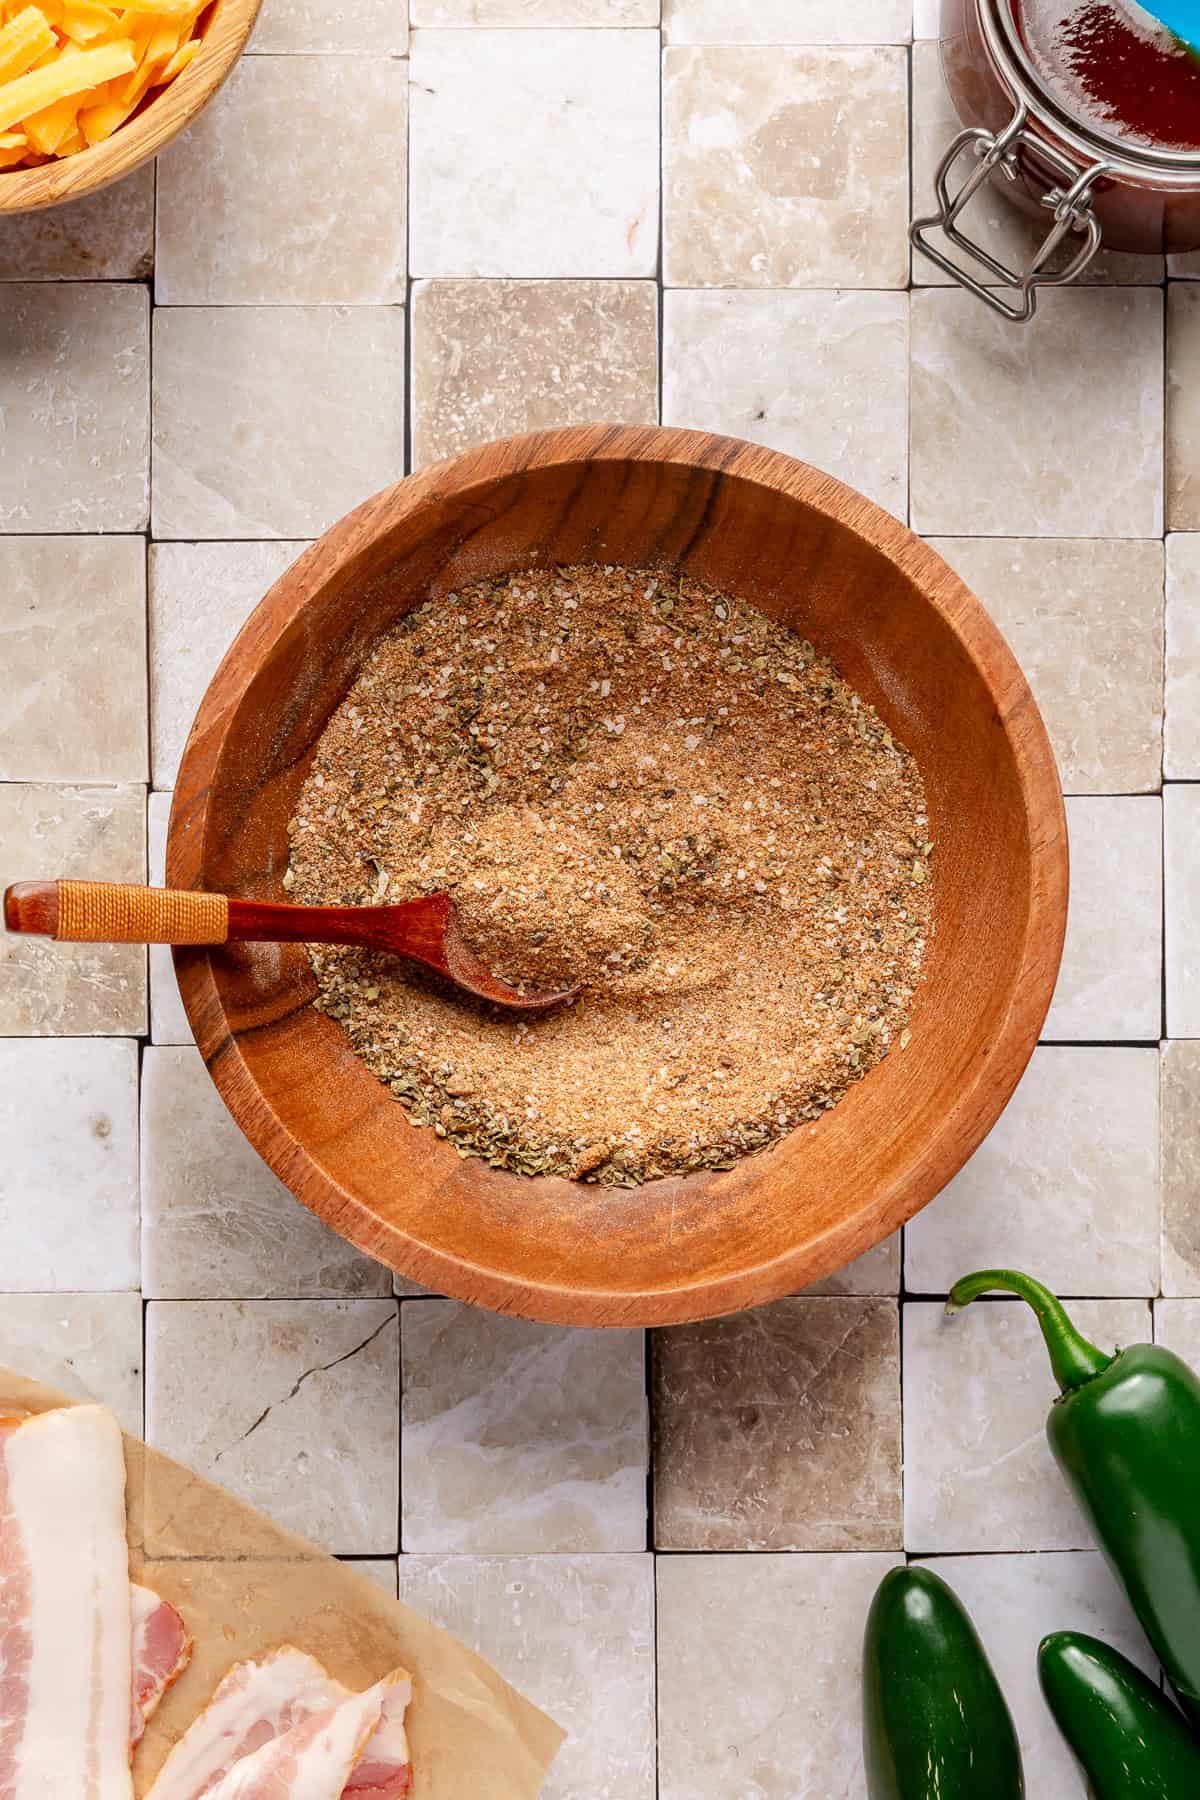
Step one: make the rub:

In a small bowl, combine all of the rub ingredients. Set aside.

Seasoning rub for Grilled Jalapeño Popper Chicken in a small wooden bowl.

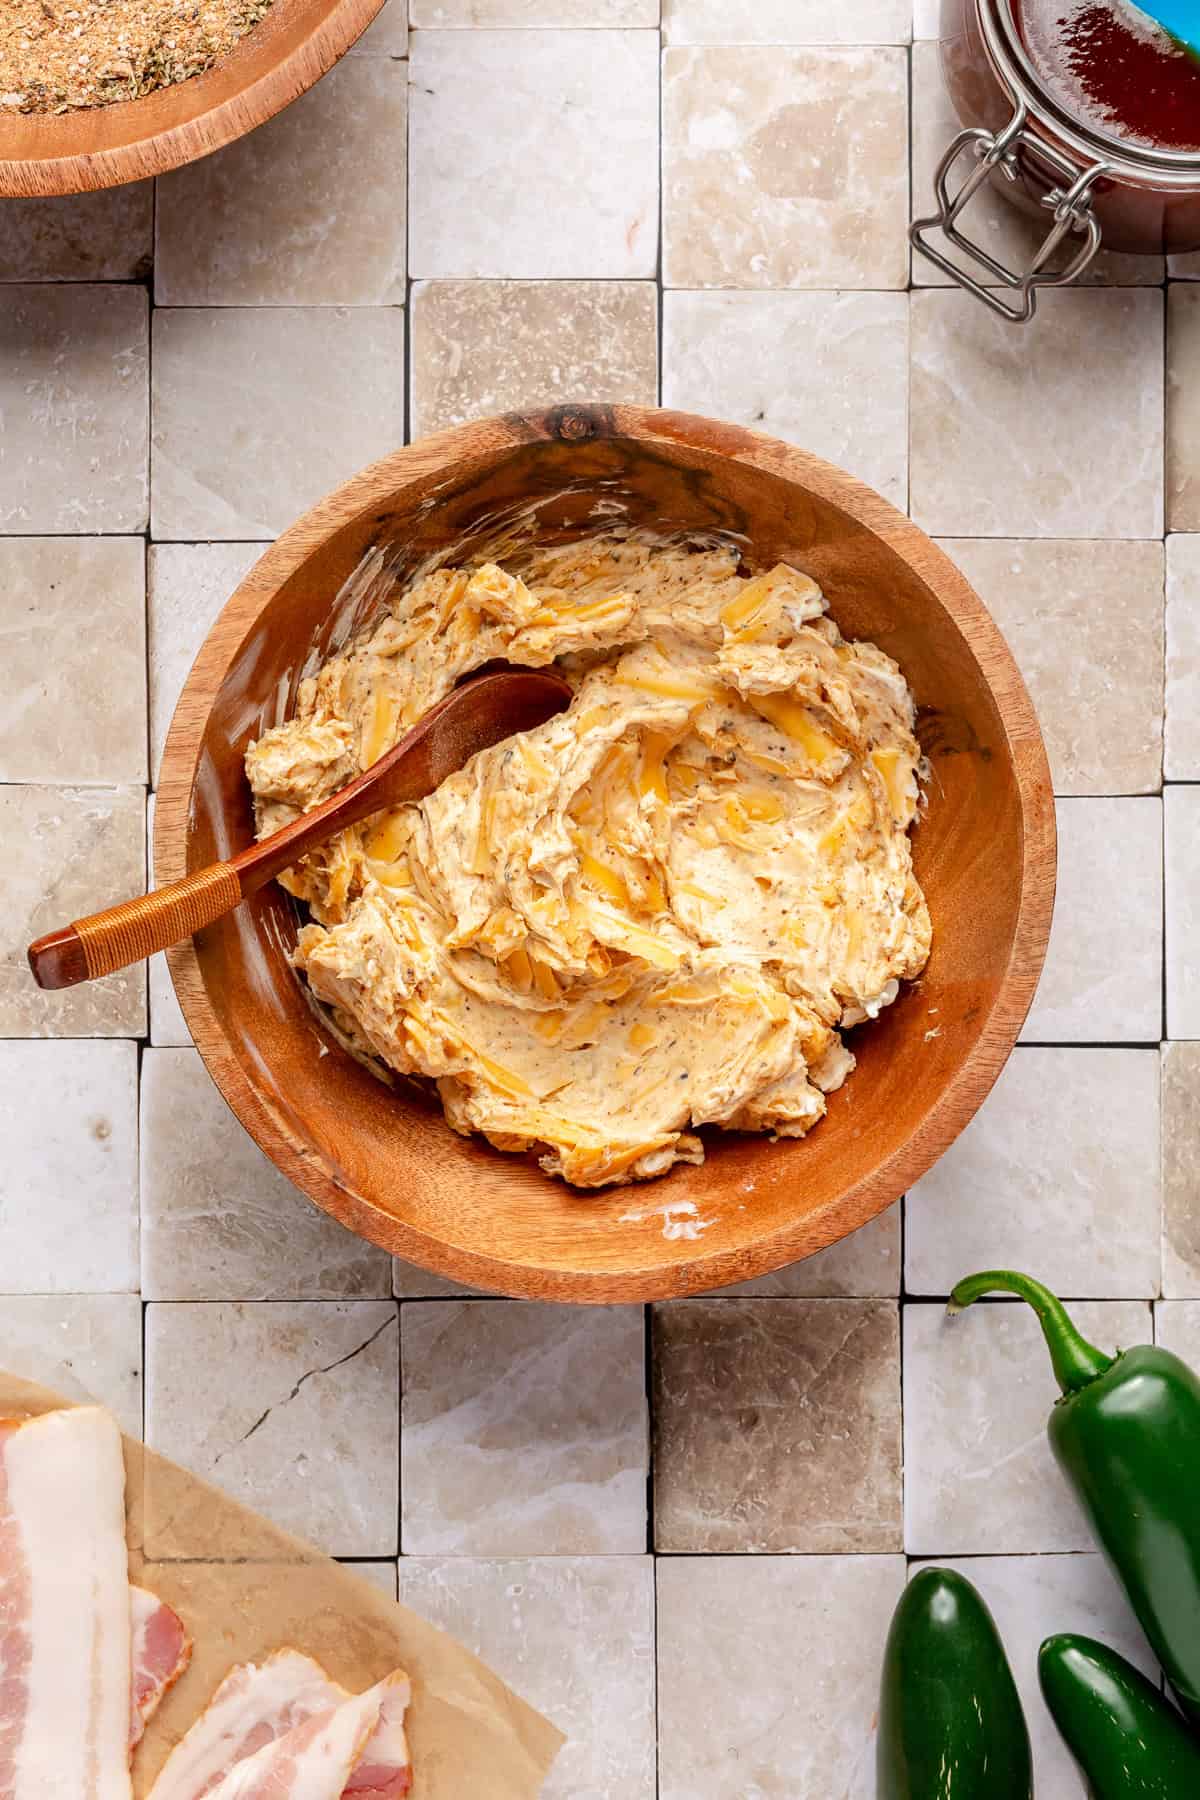
Step Two: make the cream cheese filling:

In a medium bowl, combine the cream cheese, 2 tablespoons of the rub, and the shredded cheddar. Mix until well combined.

Cream cheese filling in small wooden bowl.

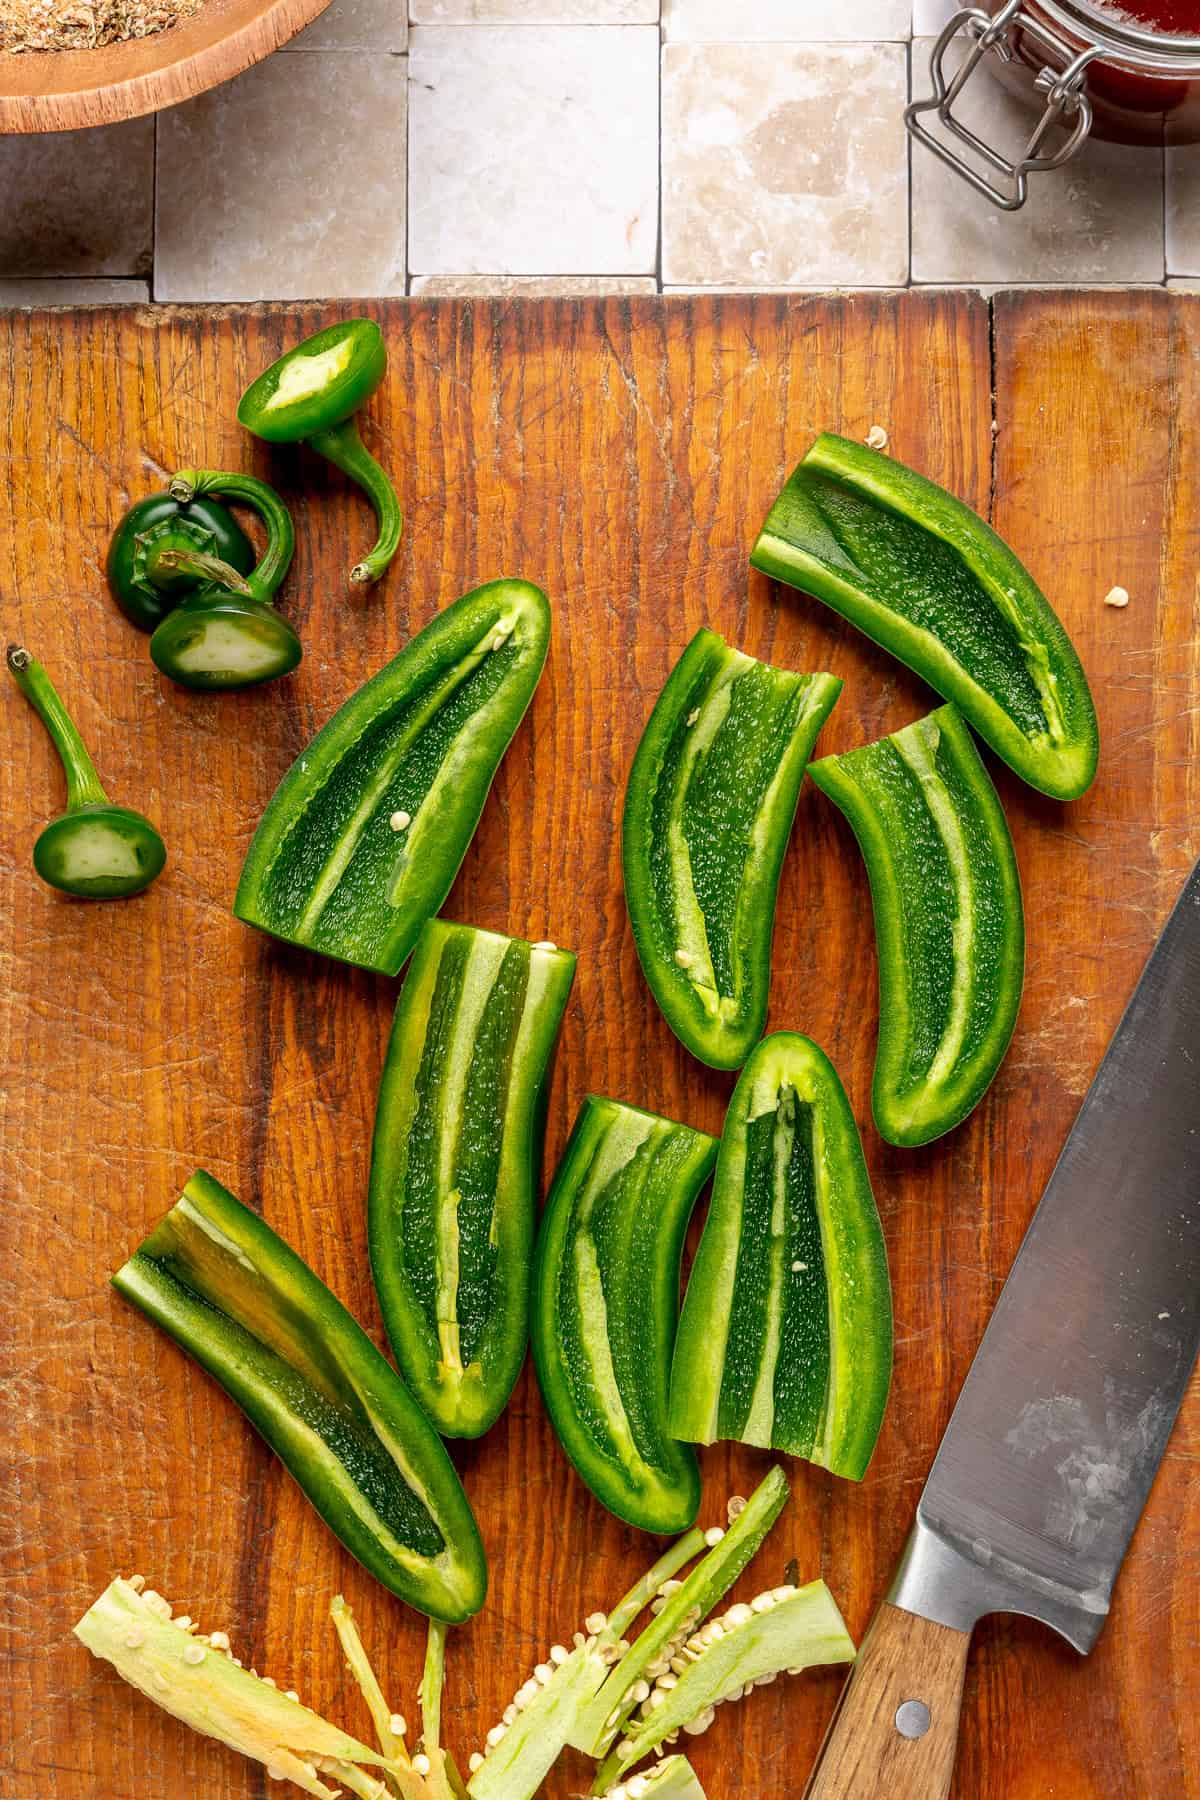
Step Three: prep the jalapeños

Cut the tops off of the jalapeños and slice in in half lengthwise. Scoop out the seeds and set aside.

Sliced jalepenos on cutting board.

Step Four: Prep the Chicken

On a large cutting board, slice the chicken breasts open lenght-wise, without slicing all of the way through the breasts, like a book. Cover with saran wrap and using a meat mallet, pound the chicken so that it is an even ¼-inch thickness.

Step Five: Assemble the Chicken

Place a half of a jalapeños slice on top of one half of the open chicken breast. Top it with ¼ of the cream cheese mixture, top it with the other half of the jalapeños, then close it like a book. Season both sides evenly with ¼ of the rub. Wrap the chicken breast with 2 slices of bacon, securing the ends with toothpicks. Repeat until all chicken breasts are assembled.

Chicken breast on cutting board stuffed with jalepeno and cream cheese filling.

Step Six: Preheat the Grill

Heat the grill to medium heat, between 350℉ and 375℉.

Step Seven: Grill the Chicken

Place the chicken on grill, cover and cook until the bacon fat has rendered and the chicken has cooked through, about 6 minutes per side. If the bacon begins to flame up, reduce the heat to medium-low and bring the chicken up to the front of the grill where there is less flame. Cover and continue to cook, checking every 2 to 3 minutes, turning until the chicken is cooked through and the bacon is done.

Step Eight: Baste the Chicken

Reduce the heat to low. Using a grill-safe brush, baste the chicken with the BBQ sauce on both sides and continue to cook on low so that the sauce coats the chicken nicely, another 3 to 4 minutes.

Bacon-wrapped chicken basted with BBQ sauce.

Step Nine: Rest then Enjoy!

Remove from the heat and let rest for about 4 minutes. Remove the toothpicks from the chicken and enjoy!

Grilled Jalapeño Popper Chicken stacked on top of one another.

For the Weber Searwood XL 600 Wood Pellet Grill Method, see below!

Recipe FAQ:

i AM WORRIED ABOUT THE SPICE LEVEL, WHAT SHOULD i DO?

If you have a sensitive palate or are serving those who do, you could definitely omit the jalapeños and just fill with the cream cheese filling! I do this for my kiddos and they LOVE it.

The chicken breasts look very thick, are you sure they will be cooked through?

Once assembled, these definitely look pretty big! But because you are pounding the chicken breasts and cutting in half, each side is much thinner than it looks. If you are concerned about whether or not they are cooked, you can always use a meat thermometer to check the internal temperature for it to be at least 165℉.

I promise y’all this recipe is worth the assembly! The chicken is so flavorful and is sure to be a hit. Comment below once you try this once!

For more grilled chicken recipes:

Tex-Mex Grilled Chicken

Grilled Sesame Chicken Skewers

Grilled Chili Chicken Tacos with Tomatillo Salsa

Gochujang Grilled Chicken Lettuce Wraps

Grilled Jalapeño Popper Chicken stacked on top of one another.
Print

Grilled Jalapeño Popper Chicken

Gluten-Free 
Total Time 45 minutes
Servings 4

Ingredients

For the Rub:

  • 2 tablespoons coconut sugar
  • 1 teaspoon garlic powder
  • 1 teaspoon onion powder
  • 1 teaspoon dried oregano
  • 1 teaspoon chili powder
  • 1 ½ teaspoon Kosher salt
  • ½ teaspoon freshly ground black pepper

For the Cream Cheese Filling:

  • 4 ounces softened cream cheese
  • 2 tablespoons rub mixture
  • 1 cup shredded medium cheddar cheese I like Tillamook brand

For the Chicken:

  • 4 medium sized jalapeños
  • 4 boneless skinless chicken breasts
  • 8 slices bacon
  • ½ cup BBQ Sauce

Instructions

Make the Rub:

  • In a small bowl, combine all of the rub ingredients. Set aside.

Make the Cream Cheese Filling:

  • In a medium bowl, combine the cream cheese, 2 tablespoons of the rub, and the shredded cheddar. Mix until well combined.

Assemble the Chicken:

  • Cut the tops off of the jalapeño and slice in in half lengthwise. Scoop out the seeds and set aside.
  • On a large cutting board, slice the chicken breasts open lenghtwise, without slicing all of the way through the breasts, like a book. Cover with saran wrap and using a meat mallet, pound the chicken so that it is an even ¼-inch thickness.
  • Place a half of a jalapeños slice on top of one half of the open chicken breast. Top it with ¼ of the cream cheese mixture, top it with the other half of the jalapeños, then close it like a book. Season both sides evenly with ¼ of the rub. Wrap the chicken breast with 2 slices of bacon, securing the ends with toothpicks. Repeat until all chicken breasts are assembled.

Grill the Chicken (Regular Grill Method):

  • Heat the grill to medium heat, between 350℉ and 375℉.
  • Place the chicken on grill, cover and cook until the bacon fat has rendered and the chicken has cooked through, about 6 minutes per side. If the bacon begins to flame up, reduce the heat to medium-low and bring the chicken up to the front of the grill where there is less flame. Cover and continue to cook, checking every 2 to 3 minutes, turning until the chicken is cooked through and the bacon is done.
  • Reduce the heat to low. Using a grill-safe brush, baste the chicken with the BBQ sauce on both sides and continue to cook on low so that the sauce coats the chicken nicely, another 3 to 4 minutes.
  • Remove from the heat and let rest for about 4 minutes. Remove the toothpicks from the chicken and enjoy!

Grill the Chicken (Weber Searwood XL 600 Wood Pellet Grill Method):

  • When ready to grill, set the Searwood XL Weber Grill to 375℉ and preheat with the lid closed.
  • Place the chicken directly on the grill grates and close the lid, cook, flipping once or twice, until the bacon is crisp and golden and the chicken is cooked through, 8 to 10 Minutes.
  • Using a grill-safe brush, baste the chicken with the BBQ sauce on both sides and continue to cook, with the lid open, so that the sauce coats the chicken nicely, another 3 to 4 minutes, flipping once.
  • Remove from the heat and let rest for about 4 minutes. Remove the toothpicks from the chicken and enjoy!

The post Grilled Jalapeño Popper Chicken appeared first on The Defined Dish.