Cornish Hen is roasted with fresh veggies until juicy & crispy. Serve with a side salad and homemade buns for a hearty meal that will impress your guests!
Cornish Hen is roasted with fresh veggies until juicy & crispy. Serve with a side salad and homemade buns for a hearty meal that will impress your guests!
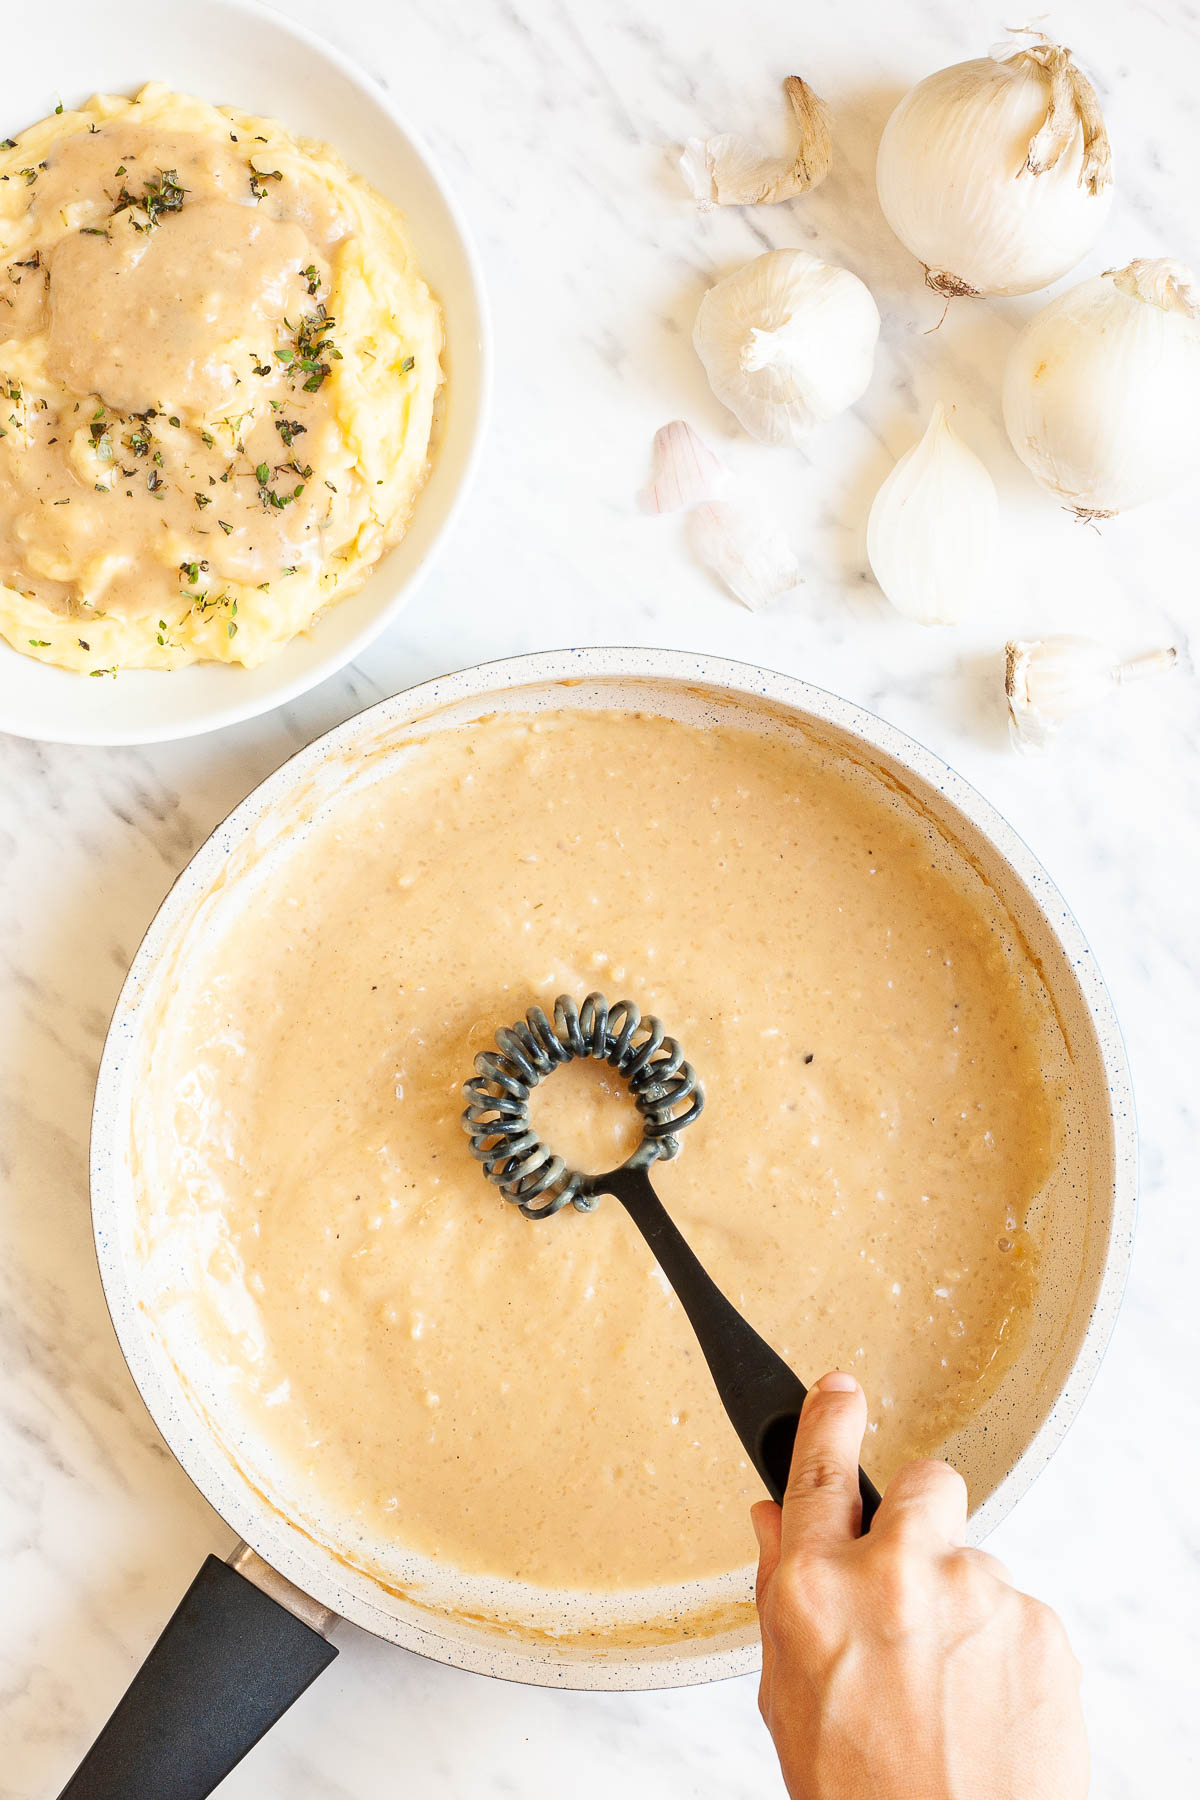
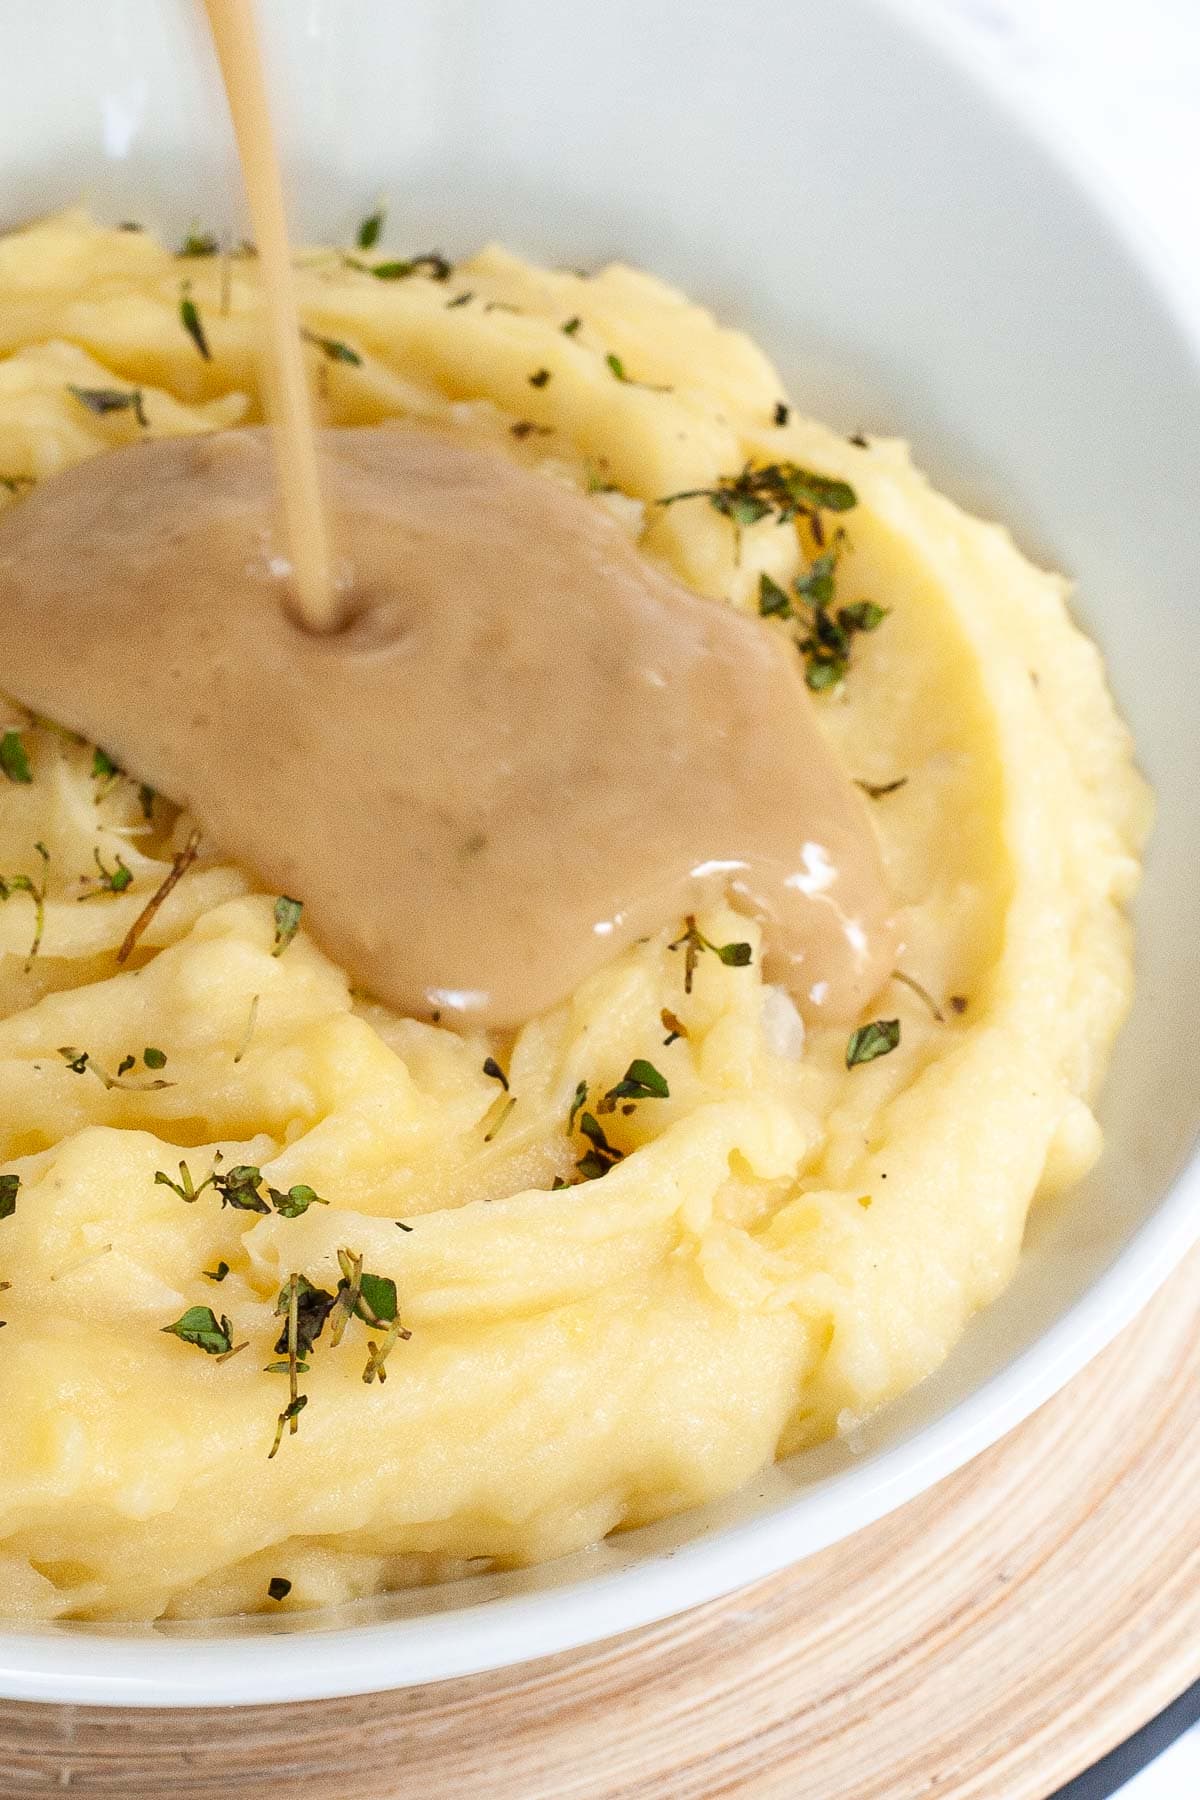
This vegan onion gravy is light, creamy, and packed with flavor from caramelized onions and garlic. It requires just 7 ingredients and can be made in under 20 minutes. Enjoy it over some mashed potatoes for a comforting meal, or serve it as part of your Thanksgiving or Christmas dinner. The trick to getting a…
This vegan onion gravy is light, creamy, and packed with flavor from caramelized onions and garlic. It requires just 7 ingredients and can be made in under 20 minutes. Enjoy it over some mashed potatoes for a comforting meal, or serve it as part of your Thanksgiving or Christmas dinner.
The trick to getting a deep flavor in this vegan onion gravy is to caramelize the onions. It might take a little longer, but it’s worth it. Also, make sure to blend the gravy until it is super smooth for the best texture.
I absolutely adore this vegan onion gravy recipe for its simplicity. It is a light, simple, and creamy gravy that requires only 7 ingredients. The best part is that it does not require any meat drippings to achieve a rich, savory flavor.
The use of simple ingredients like onion, garlic, vegetable broth, and dairy-free milk, along with the unique combination of soy sauce, brings out a depth of flavor that is simply irresistible. Plus, using corn starch instead of all-purpose flour as a thickening agent gives this gravy a velvety smooth texture that is just perfect.
I also love how easy and quick it is to make. The entire process takes just 20 minutes, making it a go-to recipe for me, especially on busy weeknights. It is a foolproof recipe that anyone, regardless of their cooking skills, can master.
🧾 Key ingredients
This vegan onion gravy is a simple and delicious recipe that uses easy-to-find, plant-based ingredients. You can find these ingredients at your local grocery store or even in your pantry.
Onion and garlic are the stars of this recipe, giving it a rich, savory flavor that is the perfect complement to mashed potatoes, vegan roasting, or your favorite plant-based dishes.
Cornstarch is the key to achieving a thick, lusciously smooth gravy texture, which is essential for a good onion gravy. It is a vegan-friendly and gluten-free option for thickening the gravy.
Vegetable broth and soy sauce add a depth of flavor that is both savory and satisfying. They help to achieve that classic umami flavor that is so characteristic of a good gravy.
🛒 You can find detailed measurements for all ingredients in the printable version of the recipe card at the bottom of this post.
🥘 Equipment
To make this delicious vegan onion gravy, the most important piece of equipment you will need is a good quality saucepan. It is essential for sautéeing the onions and garlic, as well as for properly combining and heating the rest of the ingredients. I recommend using a heavy-bottom saucepan, as it distributes the heat more evenly, helping to prevent the gravy from sticking or burning.
👩🍳 Instructions
Making the vegan onion gravy
STEP 1 Start by peeling and finely chopping your onion and garlic. For a super fine chop, use a garlic press or a chopping bowl of a hand blender.
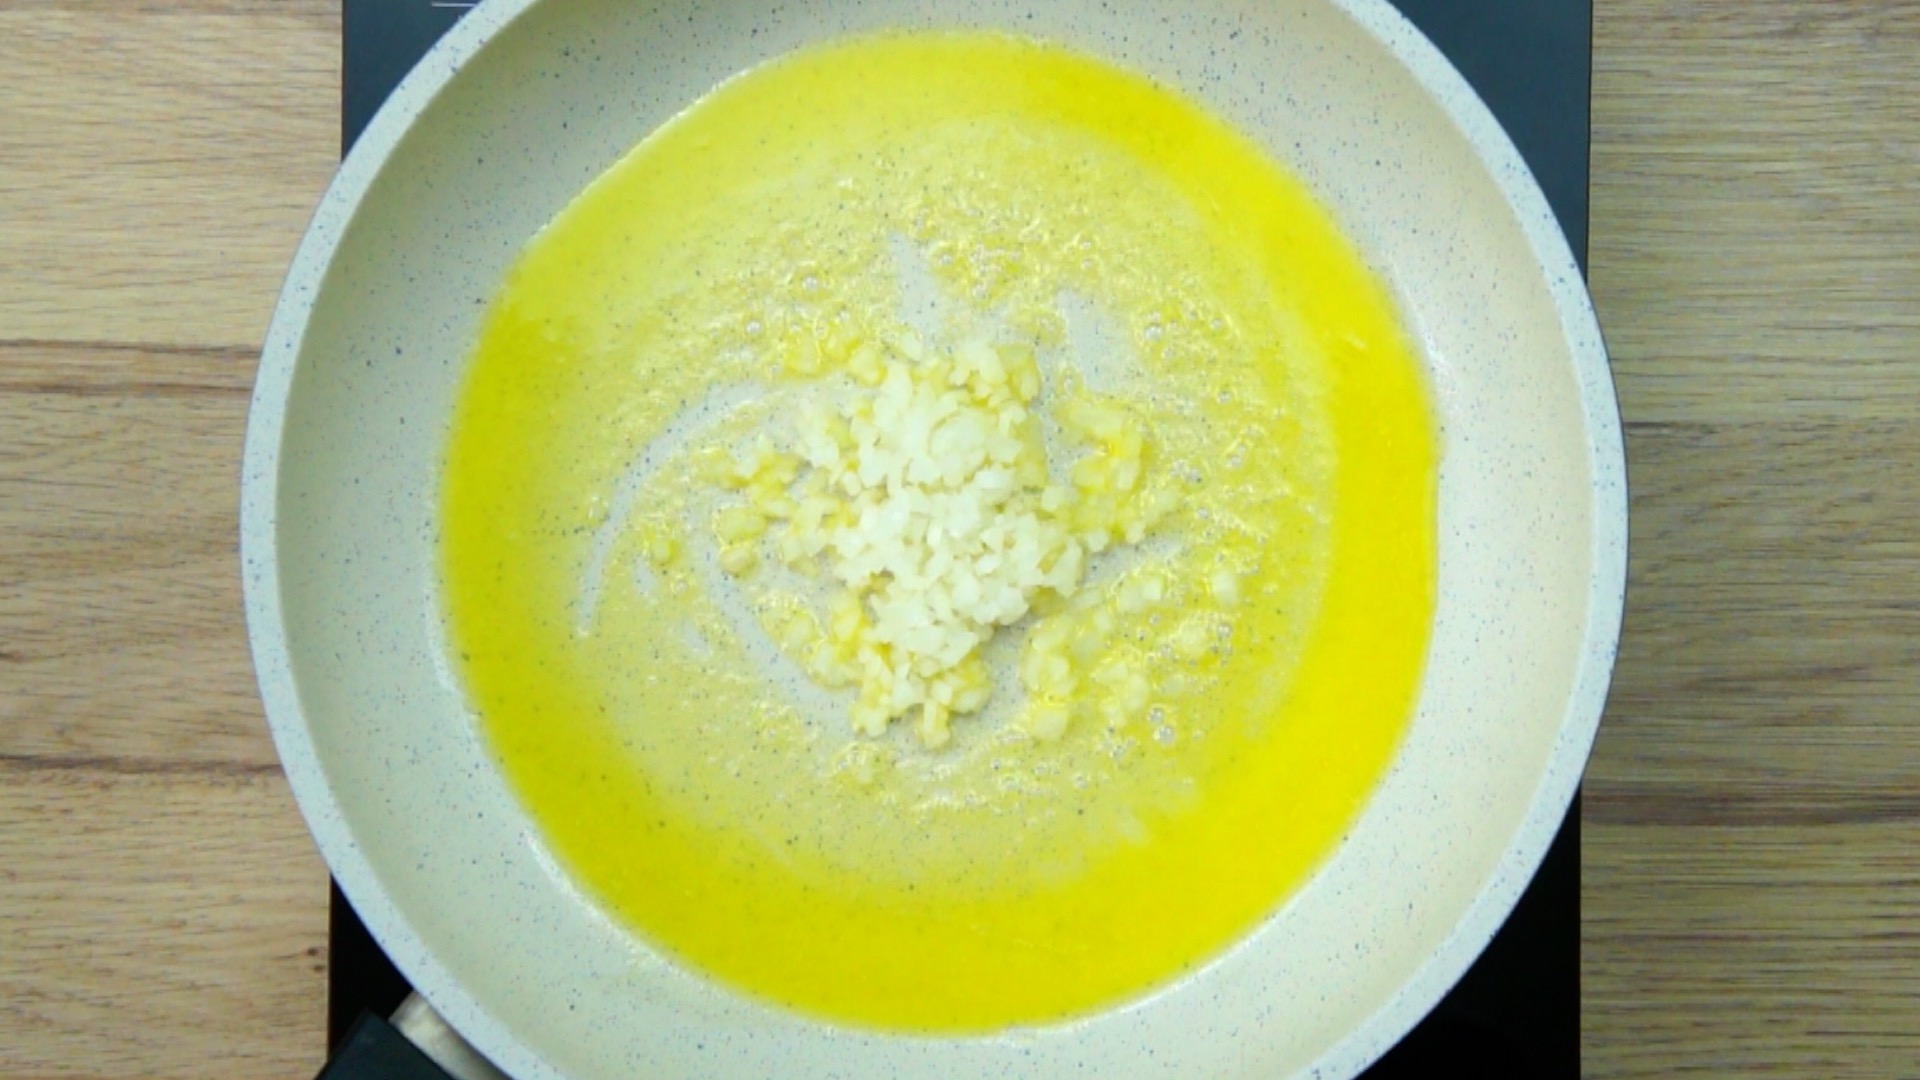
STEP 2 Heat a saucepan to medium heat and add your vegan butter. Stir until it is completely melted. Then, add the finely chopped onion and cook for two minutes.
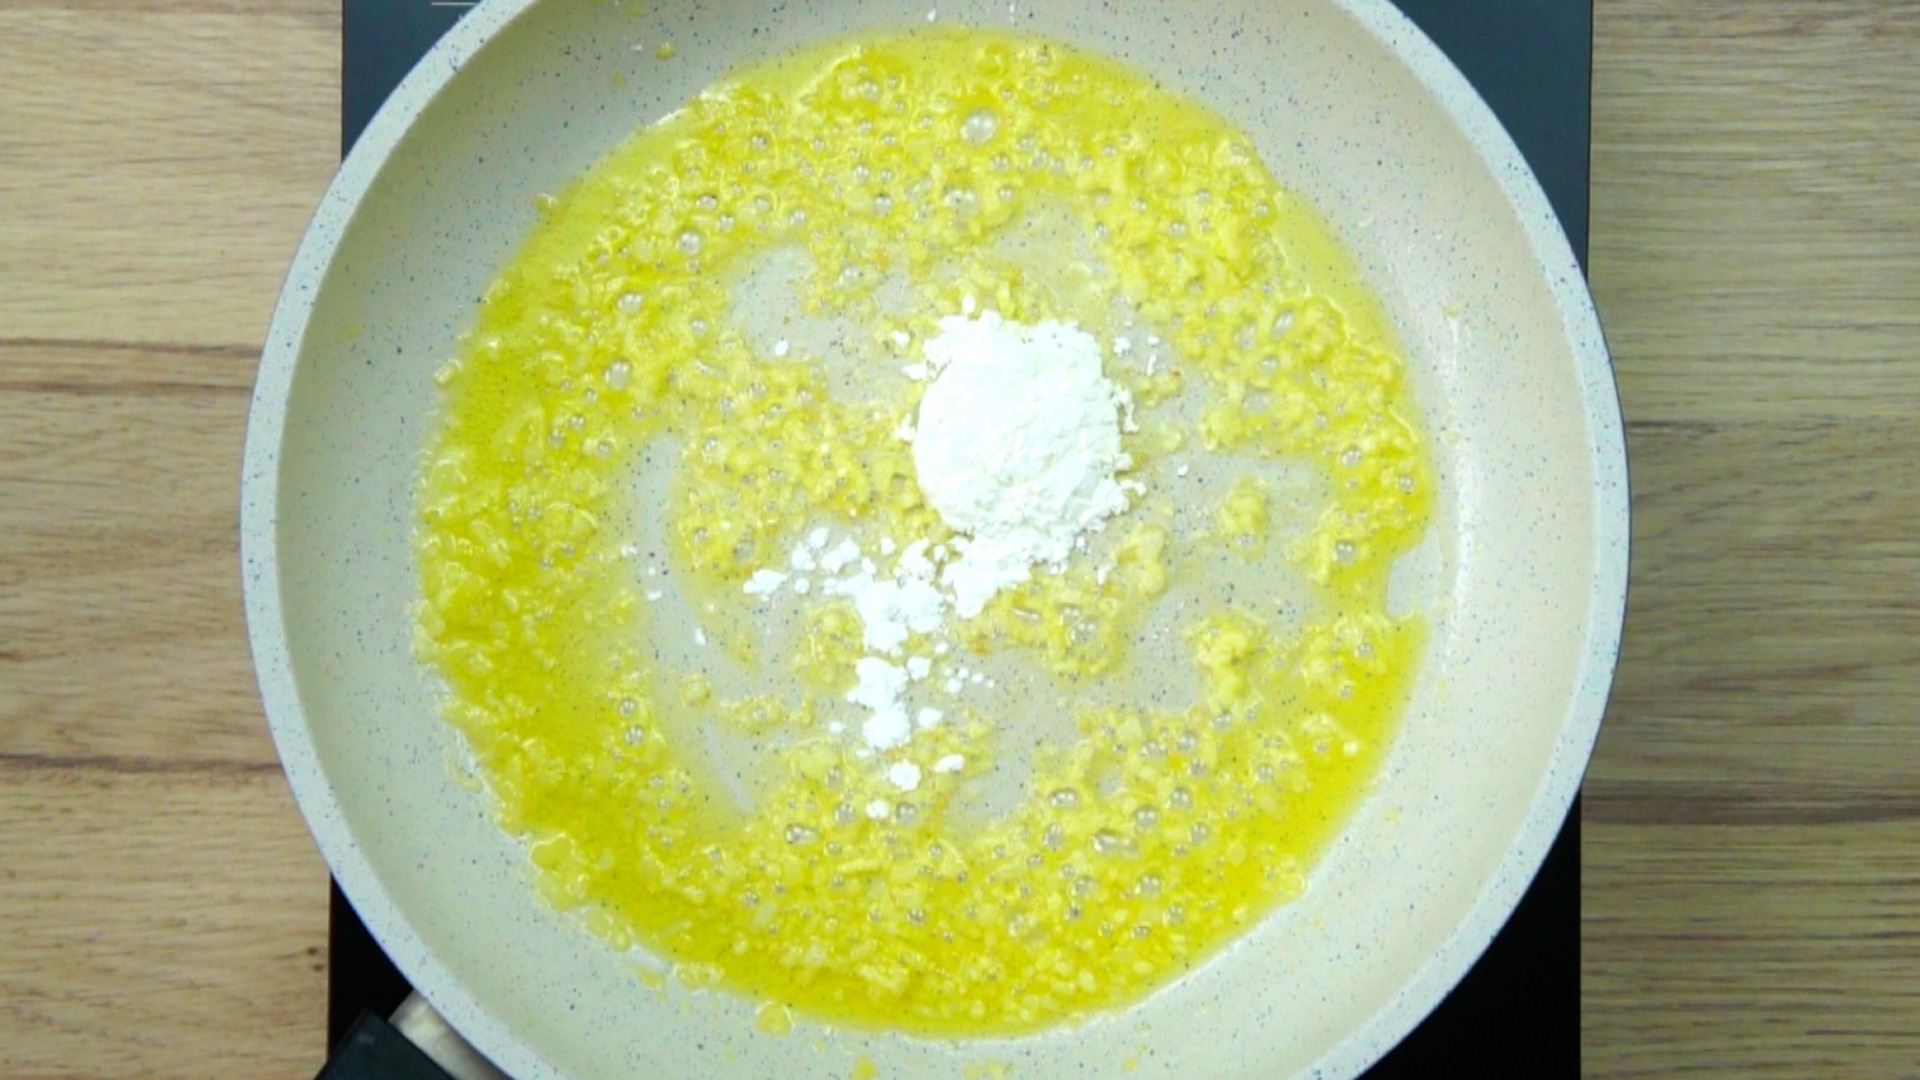
STEP 3 Next, add the finely chopped garlic and cook for an additional minute. Now, add the cornstarch and whisk quickly to combine with the butter.
STEP 4 Gradually add the vegetable broth to the saucepan, about half a cup at a time, making sure to mix until perfectly combined to avoid lumps.
STEP 5 Then, add soy sauce or tamari and whisk again.
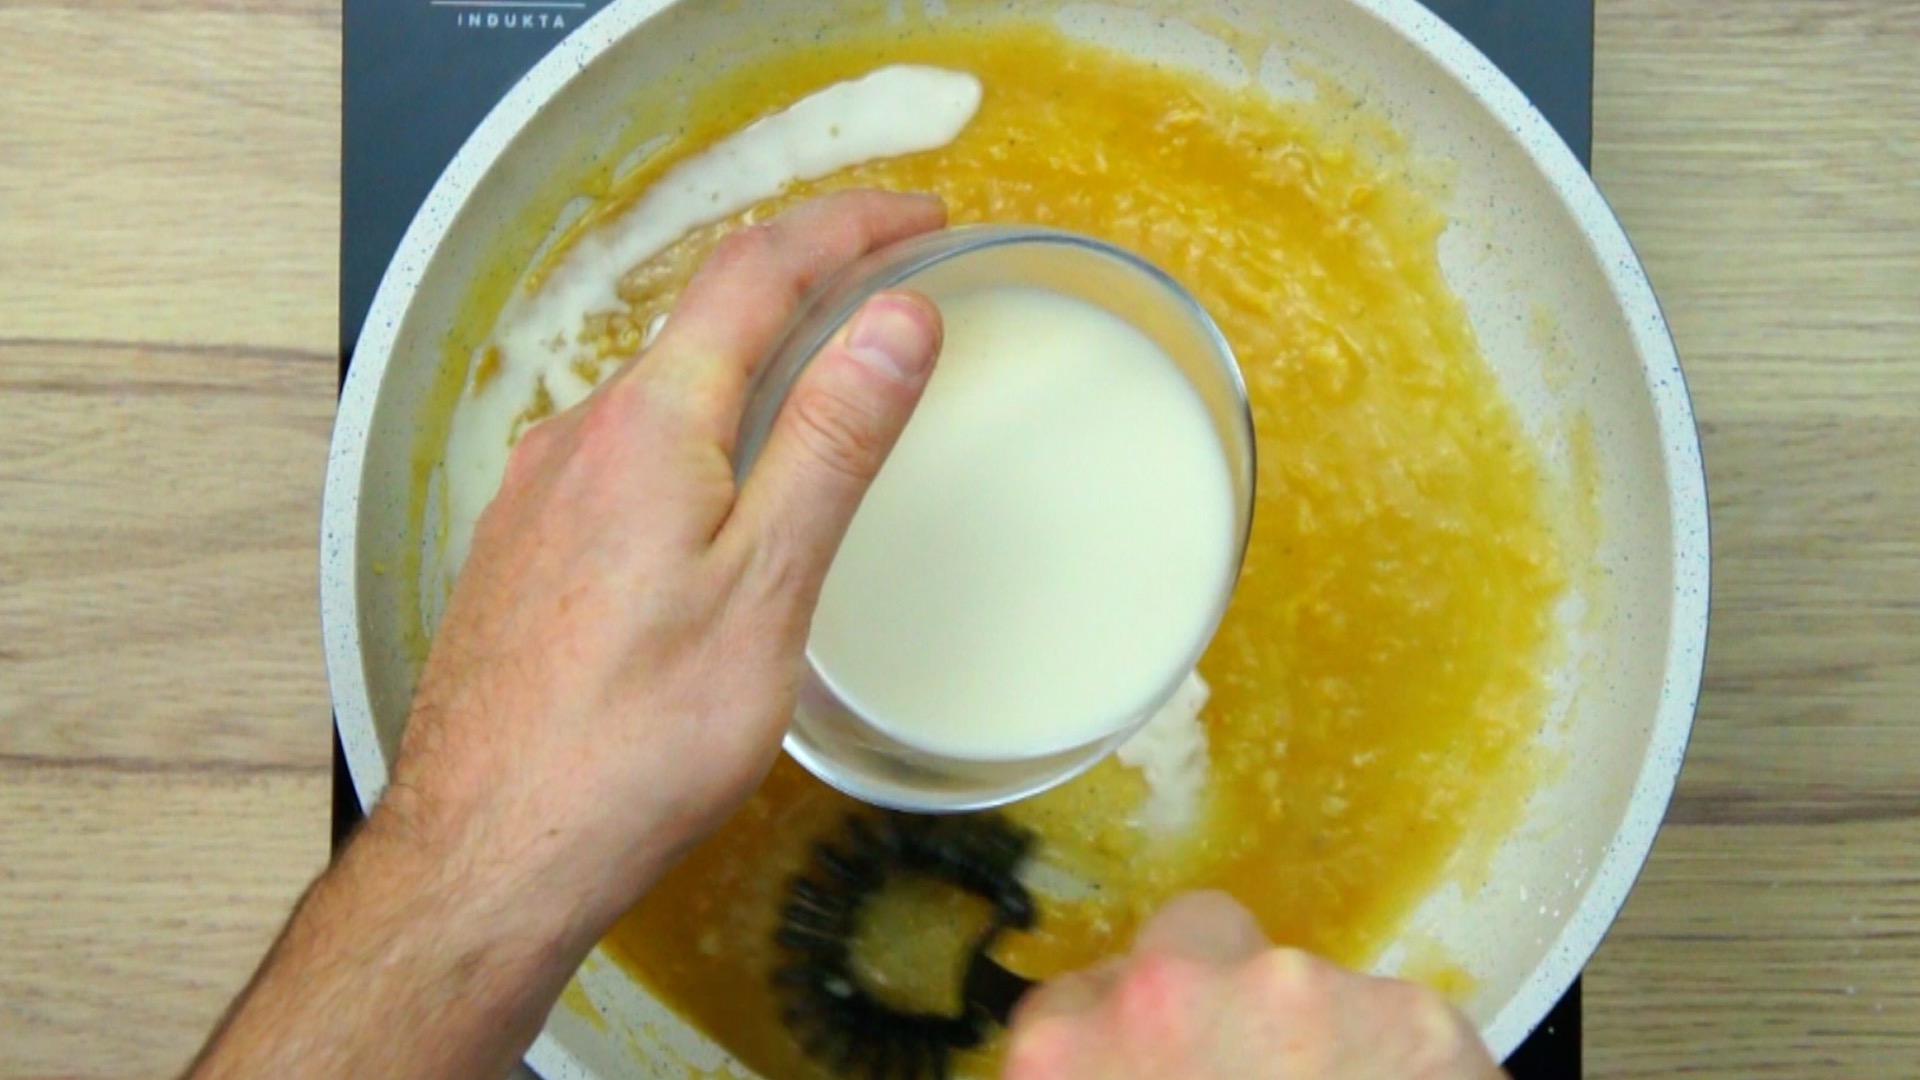
STEP 6 Now, add the dairy-free milk in the same manner, about half a cup at a time. Make sure to mix well after each addition. Finally, season the gravy with salt, pepper, and any optional dried ground herbs. Your vegan onion gravy is ready to serve.
💡 Expert tip
For the best vegan onion gravy, the key is to add the vegetable broth and dairy-free milk gradually, mixing thoroughly as you go. This technique helps to prevent lumps from forming, giving you a smooth, velvety gravy.
🔄 Variations
For a richer flavor, consider caramelized onions. This will add a touch of sweetness and a deeper, richer flavor to your gravy. Simply cook the onions for a longer time until they are soft, brown, and caramelized before adding the garlic and proceeding with the recipe as usual.
If you are a fan of mushrooms, why not add them to your gravy? I suggest adding finely chopped mushrooms when you sauté the onions. They will bring a unique texture and a rich, earthy flavor to the gravy.
If you prefer a smoother gravy, use an immersion blender to blend the gravy until it reaches your desired consistency. This will give you a velvety smooth gravy that is perfect for pouring over mashed potatoes or biscuits.
🥣 Serving ideas
This easy vegan onion gravy is a versatile and delicious addition to a variety of plant-based meals. It pairs beautifully with classic comfort foods and is a great way to elevate your favorite dishes.
Consider serving it with a hearty plate of vegan mashed potatoes with celeriac for a comforting and satisfying meal that is perfect for any night of the week.
It also goes well with a variety of potato dishes. Try it with some roasted potatoes, a side of potato fries for a Canadian Poutine, or even some Yorkshire pudding for a traditional British meal.
For a lighter option, this gravy is a delicious addition to roasted cauliflower. The rich, savory flavor of the gravy perfectly complements the nutty, caramelized flavors of the cauliflower, making for a truly delicious dish.
And don’t forget about the main dishes. It is a perfect accompaniment to a variety of vegan meat substitutes. Consider serving it with a lentil loaf, shepherd’s pie, meatballs, nut roast, or sausages for a hearty and satisfying meal.
❄️ Storing tips
Storing and reheating this vegan onion gravy is simple, and the best part is that the flavors continue to meld and intensify, making it even more delicious with time.
To store the leftovers, allow the gravy to come to room temperature after cooking. Once cooled, transfer it to an airtight and place it in the refrigerator. It should stay fresh for about 3 to 4 days.
I do not recommend freezing this particular recipe, as the texture of the onions and the consistency of the gravy can be compromised once it is thawed. However, you can always make a larger batch and store the extra portions in the refrigerator for a few days.
To reheat, simply transfer the gravy to a saucepan and place it over medium heat. Stir it occasionally as it heats to ensure that it warms evenly. If you prefer, you can also reheat it in the microwave. Just be sure to stir it every minute or so to prevent it from developing any cold spots.
🤔 FAQs
Can I use all-purpose flour instead of cornstarch?
Yes, you can. If you don’t need the recipe to be gluten-free, all-purpose flour is a great alternative to corn starch. Just keep in mind that it may take a bit longer to thicken the gravy, so you will need to adjust the cooking time accordingly.
What can I use instead of vegan butter?
If you don’t have vegan butter on hand, you can use sunflower oil, coconut oil, or another neutral-tasting shortening. These will all help to give your gravy that rich, creamy texture. However, if you want to mimic the buttery flavor, you can add a little bit of nutritional yeast to the gravy.
What can I use instead of soy sauce or tamari?
If you are allergic to soy or simply don’t like the flavor of soy sauce, you can use coconut aminos instead. Coconut aminos are made from the sap of the coconut tree and have a similar salty flavor to soy sauce. Alternatively, you can use a bit of miso paste or just season the gravy with salt to your liking.
THANK YOU so much for visiting our website. Please comment below if you have tried this recipe. We LOVE hearing from you! If you loved the recipe, please don’t forget to give us a ⭐⭐⭐⭐⭐ RATING. We appreciate all of our readers.
This vegan onion gravy is light, creamy, and packed with flavor from caramelized onions and garlic. It requires just 7 ingredients and can be made in under 20 minutes. Enjoy it over some mashed potatoes for a comforting meal, or serve it as part of your Thanksgiving or Christmas dinner.
Peel and finely chop onion and garlic. You can use a knife, but if you want super fine here is what we recommend using a simple garlic press and a chopping bowl of a hand blender.
Make vegan gravy
Take a saucepan and heat it up to medium heat. When it is hot, add the vegan butter. Stir until it is melted completely.
First, add the finely chopped onion. Stir and cook for 2 minutes.
Then, add the finely chopped garlic. Stir and cook for a minute.
Now, add the corn starch and use a whisk to mix them quickly and thoroughly.
No need to wait here. After the corn starch and the butter are combined, you can add the vegetable broth in 2 or 3 parts – at most ½ cup at a time. Mix until perfectly combined before adding more to avoid lumps.
Add soy sauce or tamari and whisk again.
The last one to add is the dairy-free milk also in 2 or 3 parts – at most ½ cup at a time.
Season at the end with salt, pepper and optional dried ground herbs like rosemary, thyme or sage. The vegan gravy is ready if it thickened to the desired consistency.
Video
Notes
How to mince finely? – Have you preferred using powders only because you were afraid that the gravy will be lumpy if you cannot chop the ingredients finely enough? Well, here is what we recommend. For the garlic, we use this simple garlic press that makes it super easy to have finely minced garlic. For the onion, we use the chopping bowl of our hand blender. It chops the onion so finely that it is practically pureed.
Add liquid in batches – To avoid lumps, make sure that you add any liquid ingredient ½ cup at a time and mix thoroughly before adding more.
Warm veggie broth – To avoid lumps, add warm veggie broth instead of room temperature or cold.
Thickening the gravy – Start with 2 Tbsp of flour or starch and repeat if needed. Please note that the gravy thickens further while it is cooling. If you need to thicken it further, make a slurry in a separate bowl by mixing 1 Tablespoon of starch with 1-2 Tablespoons of cold water. Add it and reheat the gravy.
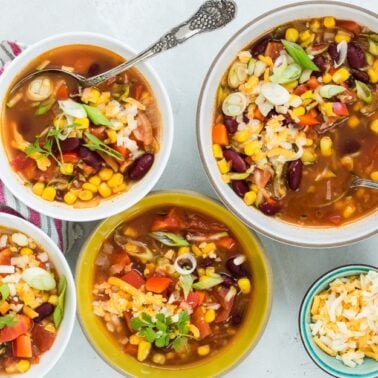
Succotash has remained a popular dish for a reason. In this recipe all the sweet, savory, and aromatic flavors are perfectly combined. Make this your next bring along to a potluck, BBQ, or picnic.
Succotash has remained a popular dish for a reason. In this recipe all the sweet, savory, and aromatic flavors are perfectly combined. Make this your next bring along to a potluck, BBQ, or picnic.
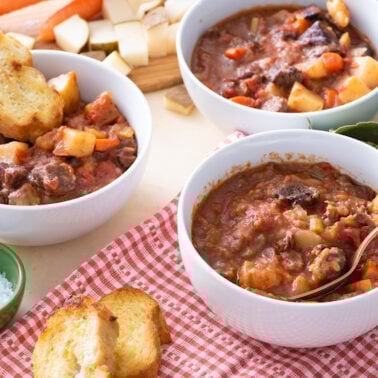
This hamburger soup crockpot is a comforting and easy-to-make dish featuring lean ground beef, russet potatoes, and mixed vegetables, perfect for a satisfying meal.
This hamburger soup crockpot is a comforting and easy-to-make dish featuring lean ground beef, russet potatoes, and mixed vegetables, perfect for a satisfying meal.
Maybe it’s an unpopular opinion, but I prefer a savory breakfast to a sweet breakfast 10/10. I’m even happier when my breakfast has a spicy kick to it, and this simple Shakshuka recipe delivers! Loaded with fragrant spices, this hearty and filling homemade Shakshuka pleases all the senses with great textures, deep flavors, and a beautiful red color that comes out of the oven sizzling hot. You won’t be disappointed. Not to mention, the leftovers are even better, making this vegetarian budget-friendly staple a regular in my breakfast recipe rotation.
What is Shakshuka?
Shakshuka, also known as shakshouka and chakchouka, is believed to have originated in Tunisia and is a staple dish in many North African and Middle Eastern countries. In some Arabic dialects, “shakshuka” translates to “all mixed up’ or “mixture,” which perfectly describes this flavorful recipe. Eggs are gently poached in a spicy red pepper and tomato sauce, which is seasoned with fragrant spices like cardamom, cumin, paprika, and chili powder. It’s a one-pan meal often served for breakfast, but I’d never say no to having it for dinner!
Ingredients
Here’s what you’ll need to make this easy shakshuka recipe:
Olive Oil: Softens the veggies and adds some healthy fats.
Vegetables: Yellow onion, red bell pepper, and celery add texture and bulk out the sauce.
Seasonings: Salt, black pepper, smoked paprika, cumin, and cayenne pepper are traditional seasonings in many egg shakshuka recipes. I also add oregano, cinnamon, and cardamom for even more depth of flavor. (If cardamom isn’t a spice you often gravitate towards, I recommend giving it a try! It adds so much warmth and complexity to dishes, like in this recipe or these chai spiced scones.)
Jalapeño: I said I love a spicy kick! If you’re not into spicy, you can skip the cayenne and add only 1 jalapeño, or skip the jalapeño altogether and add a green bell pepper.
Garlic: A staple in many savory recipes.
Canned Fire Roasted Diced Tomatoes: Adds a smoky note to the sauce. Plain diced tomatoes will also work.
Tomato Paste: Creates an even richer tomato flavor.
Lemon: I use the zest from a lemon and one tablespoon of lemon juice to brighten up the flavors.
Sugar: A small amount of sugar helps balance out the acidity of the tomatoes.
Water: Depending on how thick you like your sauce, you can add a little water to thin it out.
Eggs: Use as many or as few eggs as you like, depending on how many servings you want. You don’t even need to use eggs if you want to make a vegan version or you don’t like eggs! The tomato sauce is flavorful enough on its own, and you can skip the oven step altogether if you don’t use eggs.
Fresh Parsley: For garnishing.
What Else Can I Add?
This is a great ‘clear your fridge out’ recipe because it’s so forgiving and tastes great no matter what you throw in. Here are some fun variations you can try:
Add in extra veggies like zucchini, mushrooms, or spinach.
If you eat meat, cook up ground beef or sausage before adding the other ingredients.
Switch out the fresh jalapeño for canned green chilies and use cilantro instead of parsley for a southwestern twist (like in this salsa poached eggs recipe!)
Olives, capers, or artichoke hearts would also be delicious additions to the sauce.
Top with crumbled feta or dollops of labneh (cheese made from strained yogurt) for a creamy, tangy contrast.
Eggs in Purgatory vs Shakshuka
Shakshuka is often compared to other baked egg recipes, such as Italian eggs in purgatory. While they’re prepared in a similar way (eggs cooked in tomato sauce), eggs in purgatory have a more Italian influence, with ingredients like basil and Parmesan. This differs from shakshuka, which has North African and Middle Eastern flavors, utilizing spices like cumin and cardamom. Also, eggs in purgatory recipes don’t usually include red bell pepper—a staple in shakshuka. Both are delicious in their own right but originate from different regions and have distinct flavor profiles!
This recipe tastes just as good when served as leftovers! Let your baked shakshuka cool completely before storing in an airtight container in the fridge for 1-2 days (with eggs) or 3-4 days (without eggs). For freezing, remove the eggs and store in a freezer-safe container for up to 6 months. Let it thaw before reheating on the stove top. You can always add fresh eggs when reheating for a hot breakfast or dinner option!
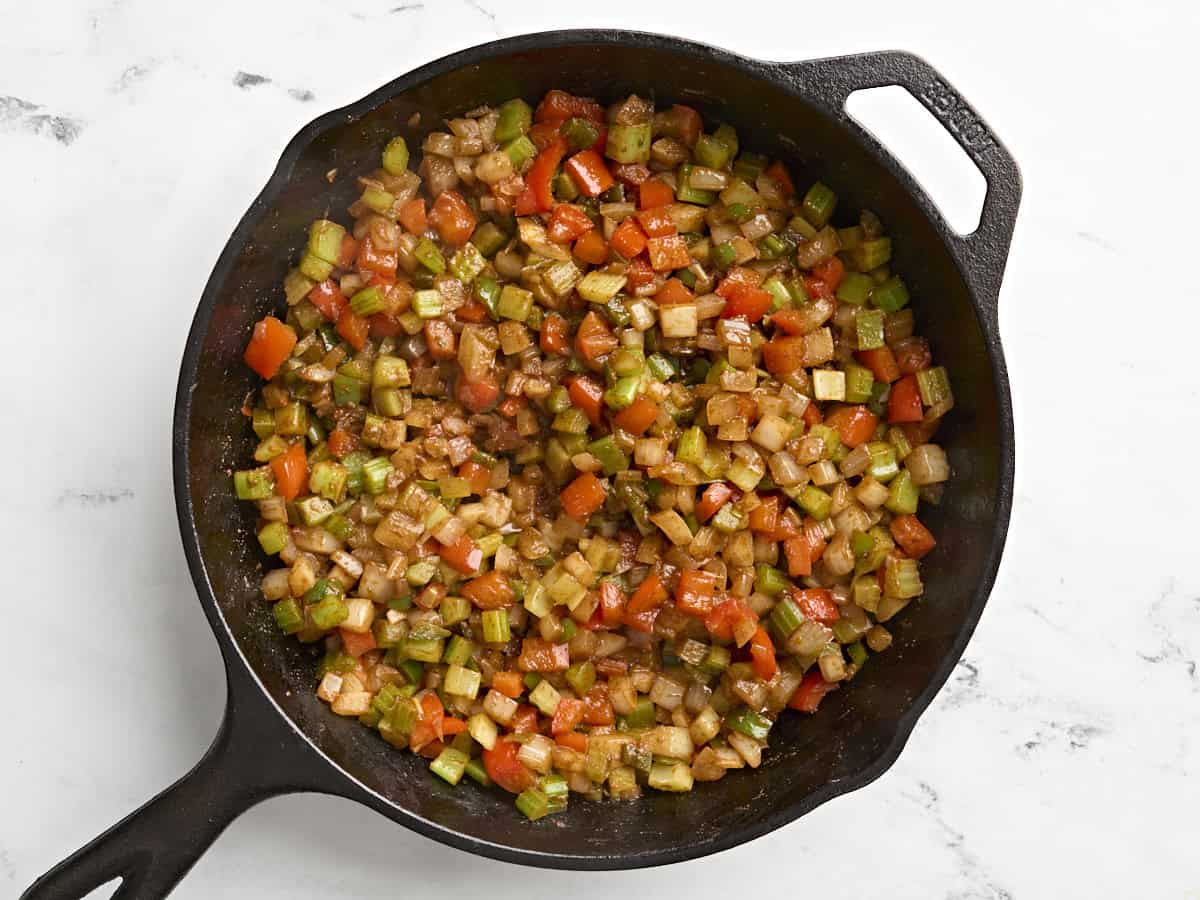
Preheat oven to 350 degrees. Drizzle olive oil in a large, oven-safe skillet or oven-safe sauté pan and add diced yellow onion, diced red bell pepper, seeded and diced jalapeño, and diced celery. Add salt, smoked paprika, cardamom, cinnamon, cayenne pepper, oregano, cumin and black pepper.
Stir and cook down on medium heat until all vegetables are softened and spices are fragrant, about 10-12 minutes.
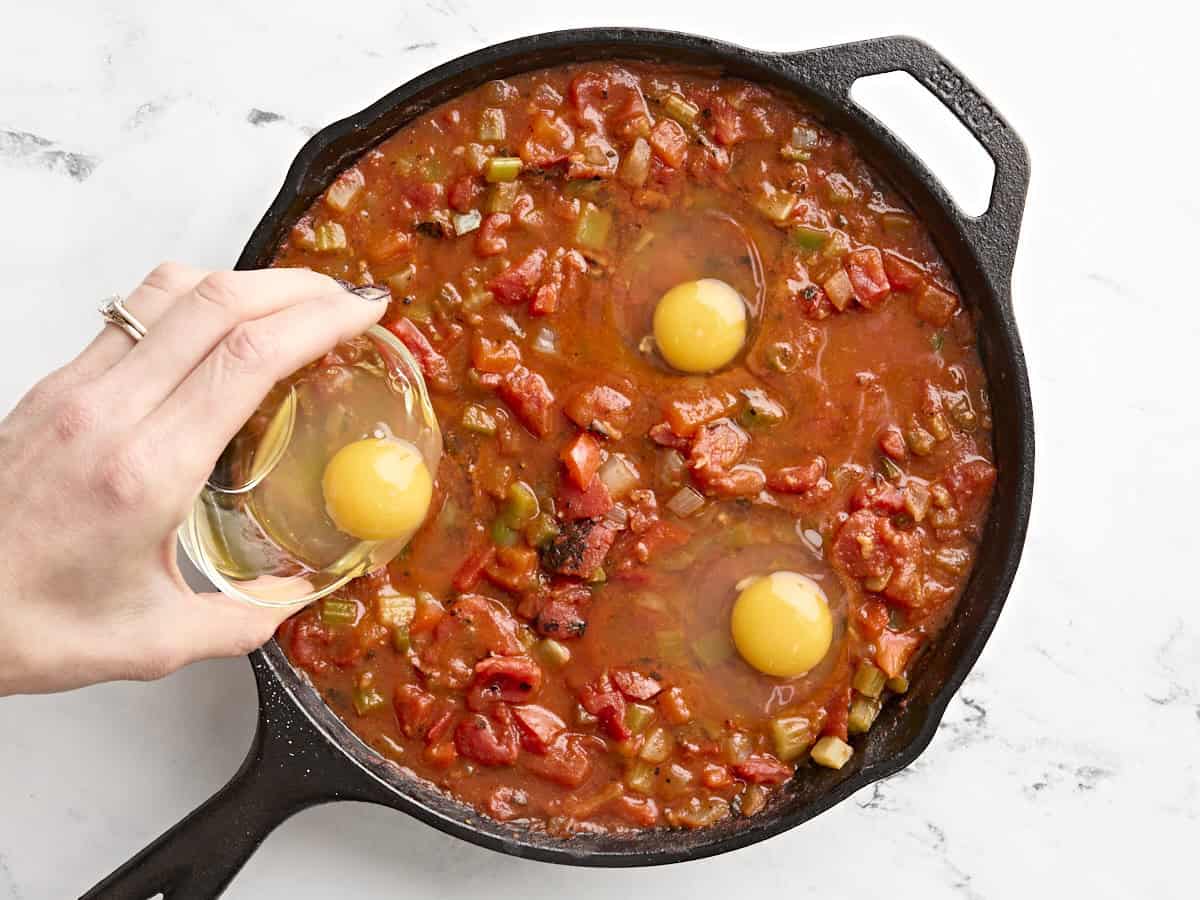
Add minced garlic, fire roasted diced tomatoes with juices, tomato paste, lemon zest and juice, and sugar. Stir and cook an additional 10 minutes, until fragrant and well-combined. Add water, as needed to thin out the sauce if you want it to be a little more brothy and less thick. I like mine to be the consistency of a hearty stew or chili, but not pasty.
Make egg-size dents in the sauce with the back of a large spoon or a ladle, and crack an egg into each spot. You can add one egg for however many people you are trying to serve.**
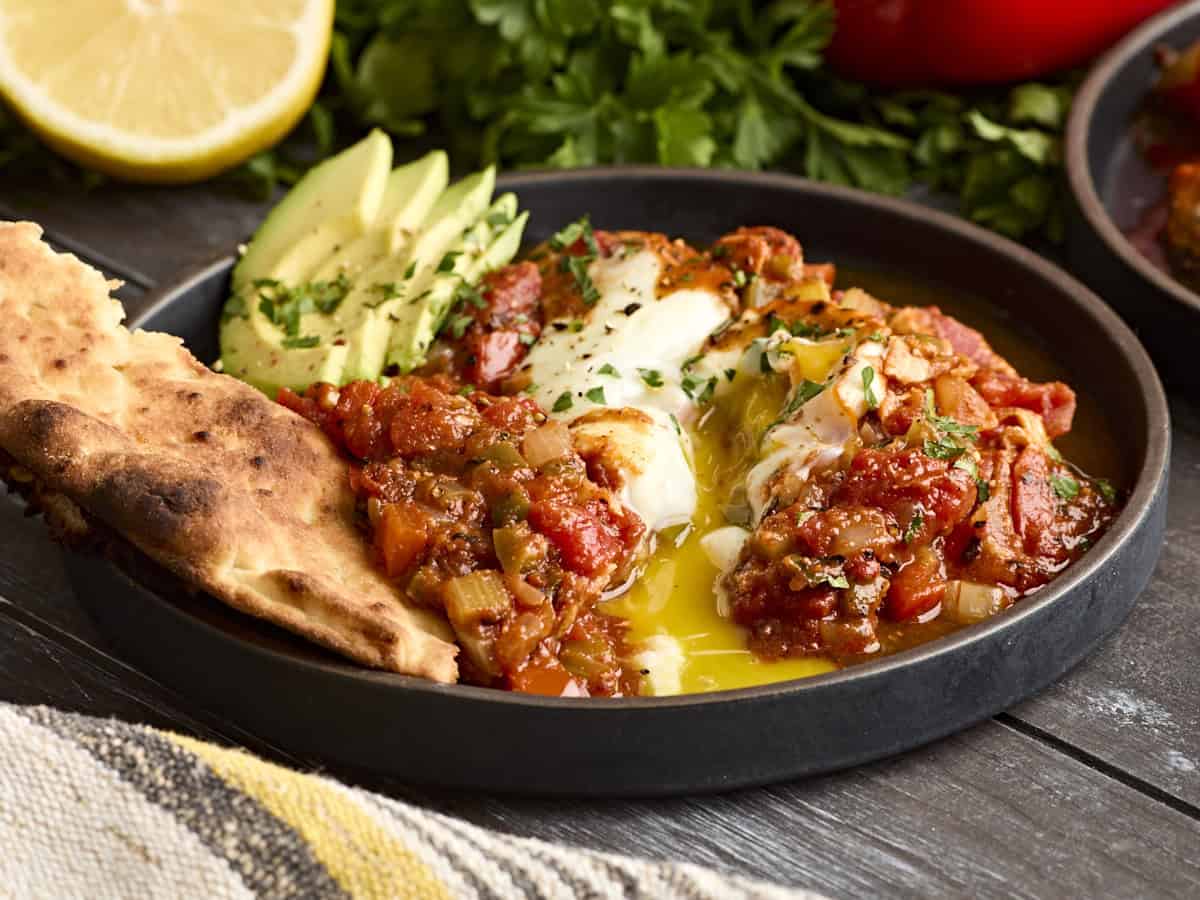
Transfer the pan with the eggs to the preheated oven for 8-12 min until the egg whites are opaque.*** Top with black pepper and fresh parsley.
Serve with toasted pita and fresh avocado (optional). Enjoy!
*If you can’t find fire roasted diced tomatoes in a can, plain diced tomatoes work just fine.**This recipe makes at least 4 hearty servings. We used 3 eggs in the studio because one of our taste testers does not eat eggs. You can stretch this recipe further than 4 servings if everyone is having it with eggs and you serve this with toasted or grilled pita!***If you’re planning to enjoy this without eggs, you can skip the oven step.
Preheat oven to 350 degrees. Drizzle 3 Tbsp olive oil in a large, oven-safe skillet or oven-safe sauté pan and add 1 diced yellow onion, 1 diced red bell pepper, 2 seeded and diced jalapeño, and 5 diced ribs celery. Add 2 tsp salt, 2 Tbsp smoked paprika, 1 ½ tsp cardamom, ¼ tsp cinnamon, ¼ tsp cayenne pepper, 1 tsp oregano, 1 tsp cumin and ½ tsp black pepper.
Stir and cook down on medium heat until all vegetables are softened and spices are fragrant, about 10-12 minutes.
Add 4 cloves minced garlic, a 14.5 oz can of fire roasted diced tomatoes with juices, 2 Tbsp tomato paste, lemon zest from 1 lemon, 1 Tbsp lemon juice, and 2 tsp sugar. Stir and cook an additional 10 minutes, until fragrant and well-combined. Add 1 cup water, as needed to thin out the sauce if you want it to be a little more brothy and less thick. I like mine to be the consistency of a hearty stew or chili, but not pasty.
Make egg-size dents in the sauce with the back of a large spoon or a ladle, and crack an egg into each spot. You can add one egg for however many people you are trying to serve.
Transfer the pan with the eggs to the preheated oven for 8-12 min until the egg whites are opaque. Top with black pepper and 2 Tbsp fresh parsley. Serve with toasted pita and fresh avocado (optional). Enjoy!
If you’re serving this recipe for shakshuka with eggs, break the yolk and let it ooze into the tomato sauce for maximum flavor explosion!
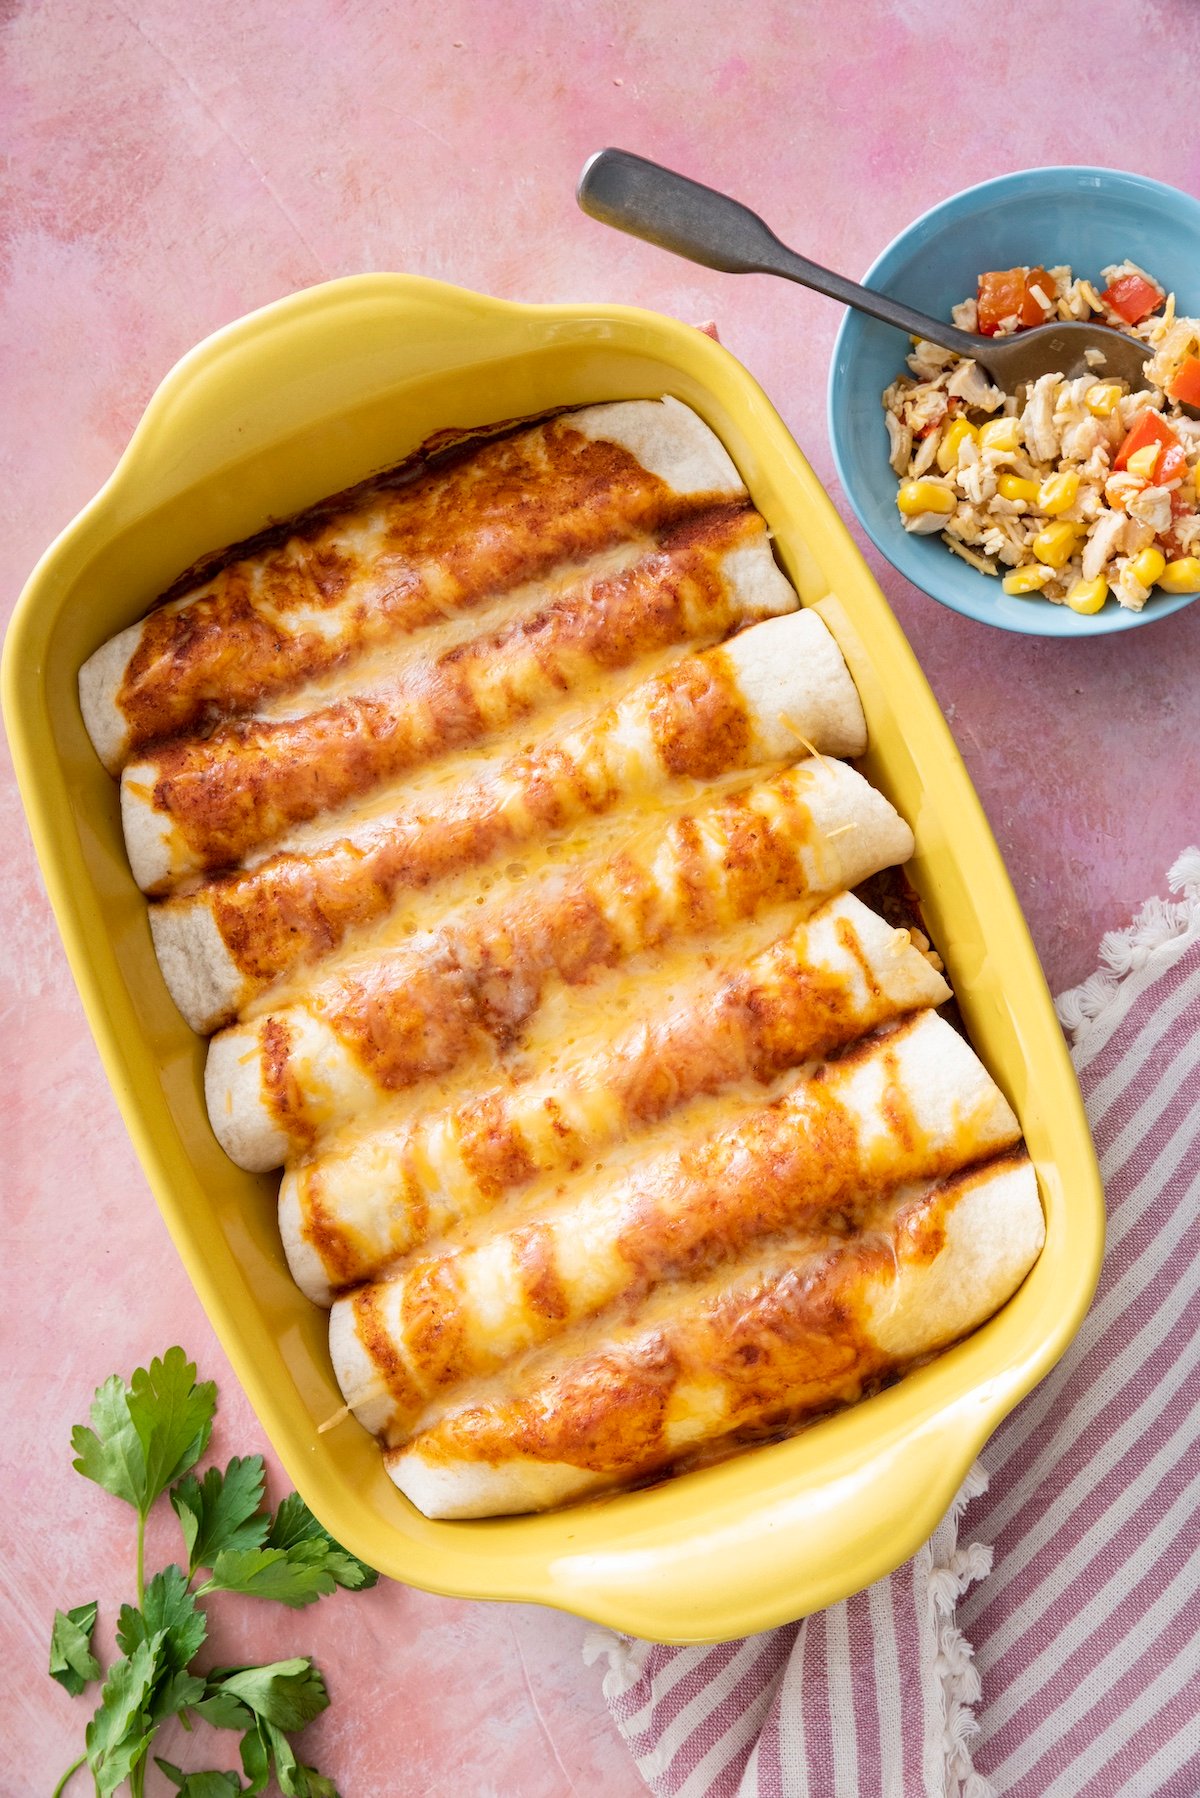
If you’re busy parent looking for an easy, crowd-pleasing meal, these Mexican Enchiladas are just what you need. They’re packed with tender shredded chicken, gooey cheese, and smothered in enchilada sauce. Plus, they’re super customizable, so you can make them just the way you like! Mexican Enchiladas are one of my go-to weeknight meals! Why I Love This Recipe…
If you’re busy parent looking for an easy, crowd-pleasing meal, these Mexican Enchiladas are just what you need. They’re packed with tender shredded chicken, gooey cheese, and smothered in enchilada sauce. Plus, they’re super customizable, so you can make them just the way you like! Mexican Enchiladas are one of my go-to weeknight meals!
Family favorite: My kids ask for these chicken enchiladas on repeat! It’s always a hit and never fails to make everyone happy.
Simple, but packed with flavor: With just a few ingredients, you get a dish that tastes like you spent hours in the kitchen. If you love quick and flavorful meals, check out my Beef and Broccoli Stir Fry for another weeknight winner.
Great for busy nights: Whether I’m rushing between work, kids’ activities or just need something easy, this enchiladas recipe is a lifesaver. Make things even simpler by having Mexican Chicken in the Crock Potready to shred!
Make-ahead friendly: These enchiladas are perfect for prepping ahead and freezing, similar to how I prep my Mexican Lasagna. It’s so convenient to have something in the freezer ready to pop in the oven for those hectic days.
Customizable for picky eaters: You can easily switch up the fillings depending on what everyone likes.
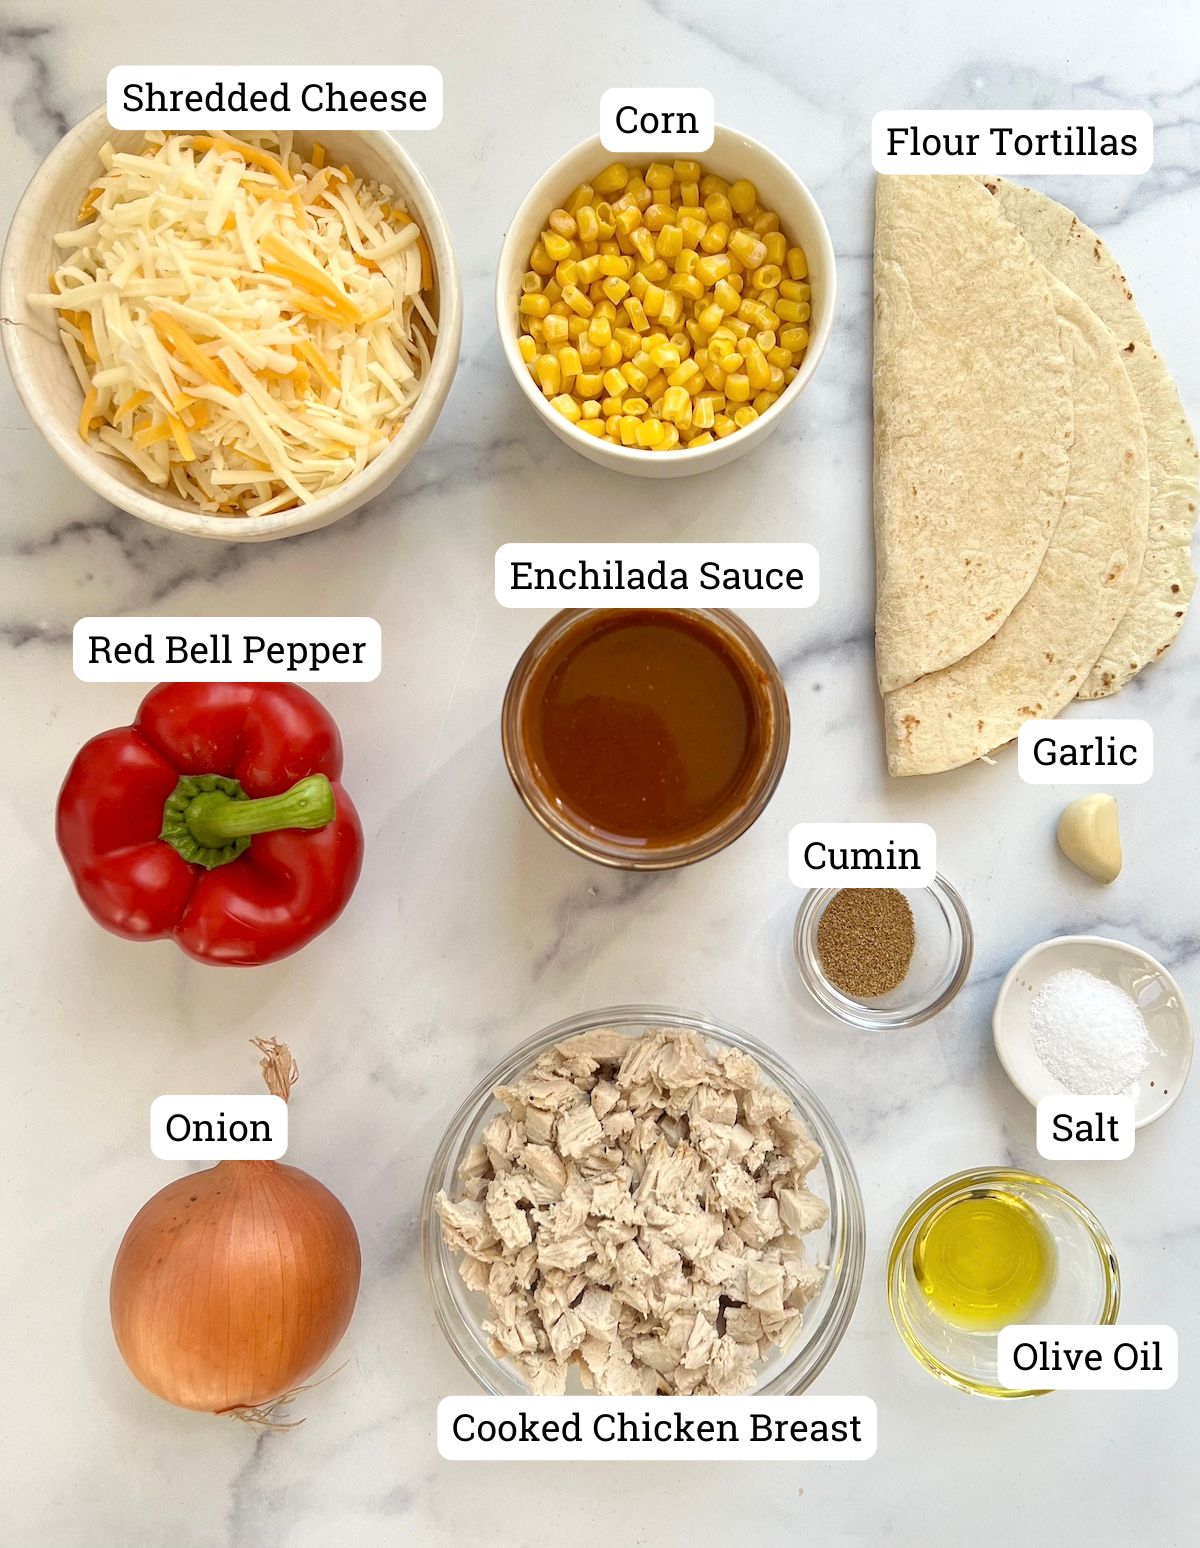
The Ingredients
Onion & Red Bell Pepper: These veggies add flavor and texture to the filling, making these enchiladas irresistibly delicious.
Ground Cumin: This warm, earthy spice provides the classic Mexican flavor that enchiladas are known for.
Garlic Clove: Just one clove adds an aromatic kick that enhances all the other flavors.
Corn: Whether you use fresh corn off the cob or defrosted frozen corn, it adds a touch of sweetness and crunch to the enchiladas.
Mexican Cheese Blend: This mix of melty cheeses like cheddar and Monterey Jack makes your enchiladas cheesy and irresistible.
Enchilada Sauce: The key to rich, flavorful enchiladas. Use your favorite store-bought or try making your own homemade enchilada sauce (find my enchilada sauce recipe in this Vegetarian Enchilada Casserole post)!
Flour Tortillas: I use flour tortillas because they’re soft, easy to roll, and crack less than corn tortillas. Perfect for holding all that delicious filling inside!
Substitutions and Variations
Feel free to get creative with your enchiladas! Here are some ways you can switch it up:
Meat options: Swap out chicken for ground beef, turkey, or even Mexican shredded pork.
Cheese choices: While I love the Mexican cheese blend, you could also use cheddar, Monterey Jack, Mozzarella or even pepper jack for a bit of heat.
Corn Tortillas: Feel free to use corn tortillas instead of flour. You will want to heat them up in a pan or microwave for 10-15 seconds before rolling so they’re more pliable and less likely to break apart.
Red or Green Sauce: Feel free to use red or green enchilada sauce for different flavor profiles!
How to Make Mexican Enchiladas
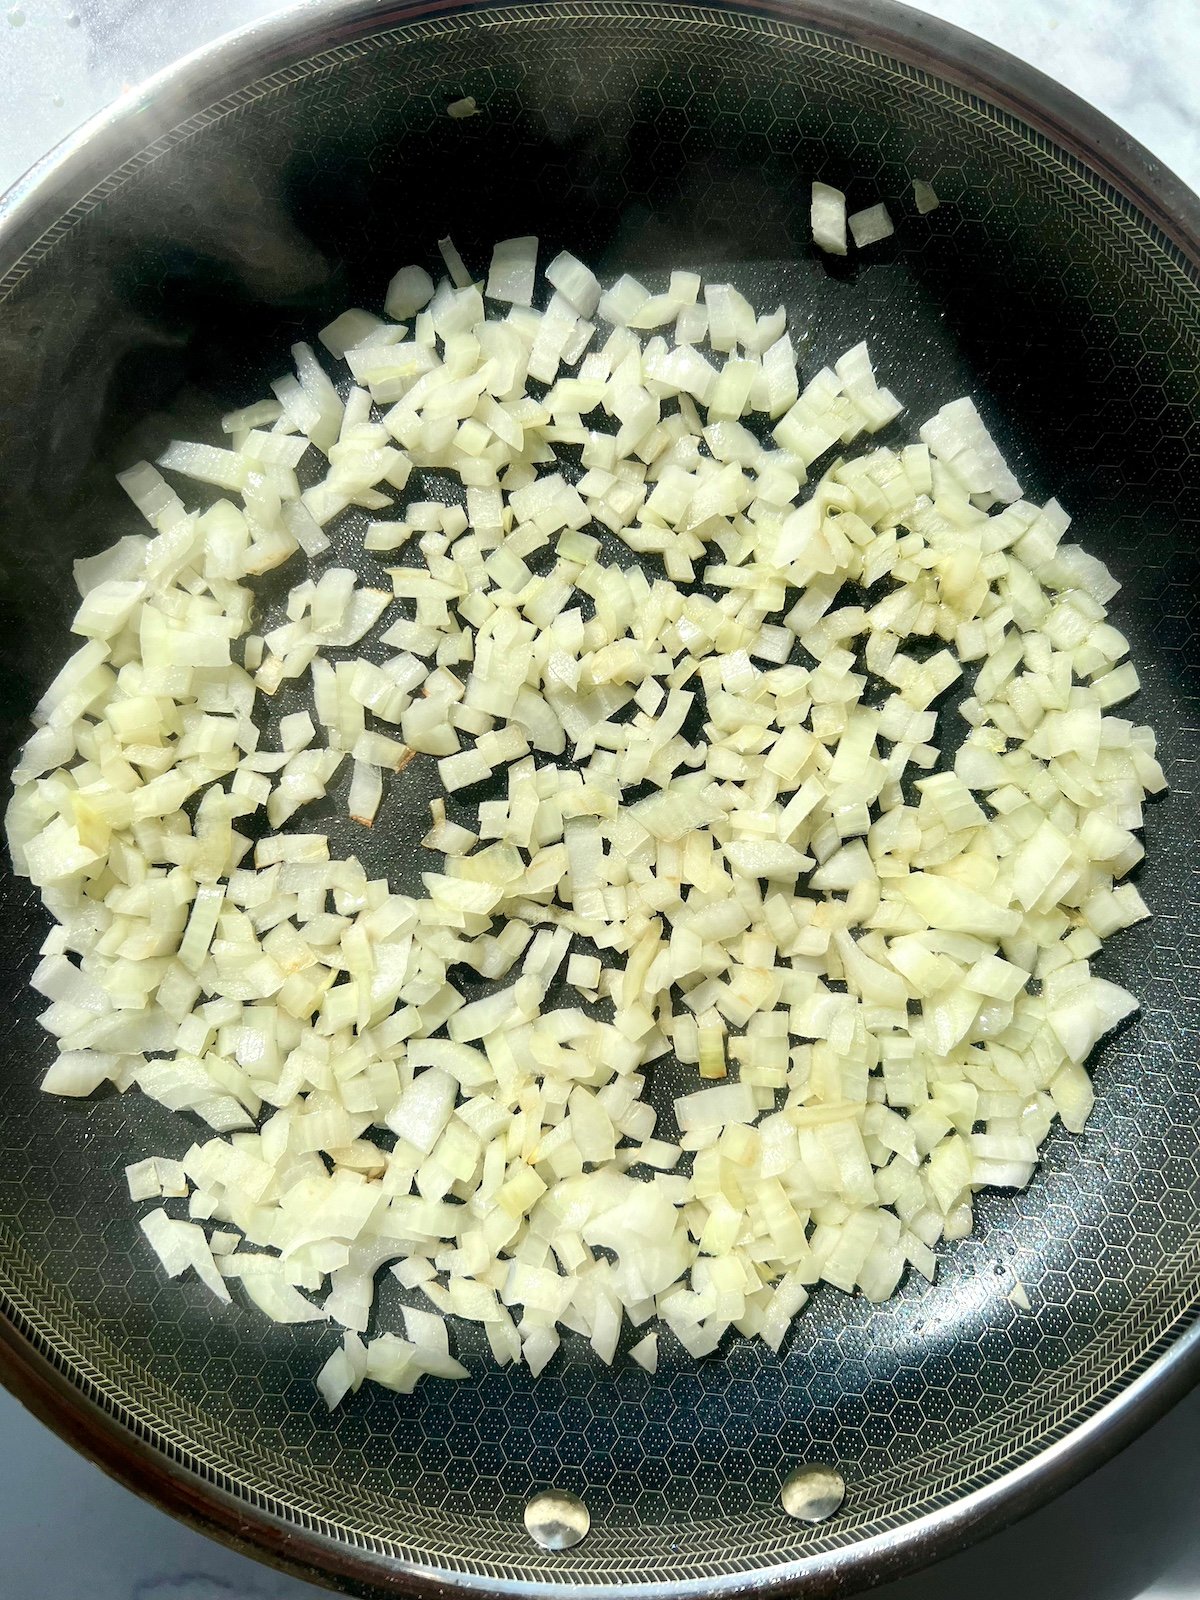
Step 1: Preheat the oven to 350°F. In a sauté pan, heat 1 tablespoon of olive oil over medium heat. Add chopped onions and salt, cooking for 3 minutes.
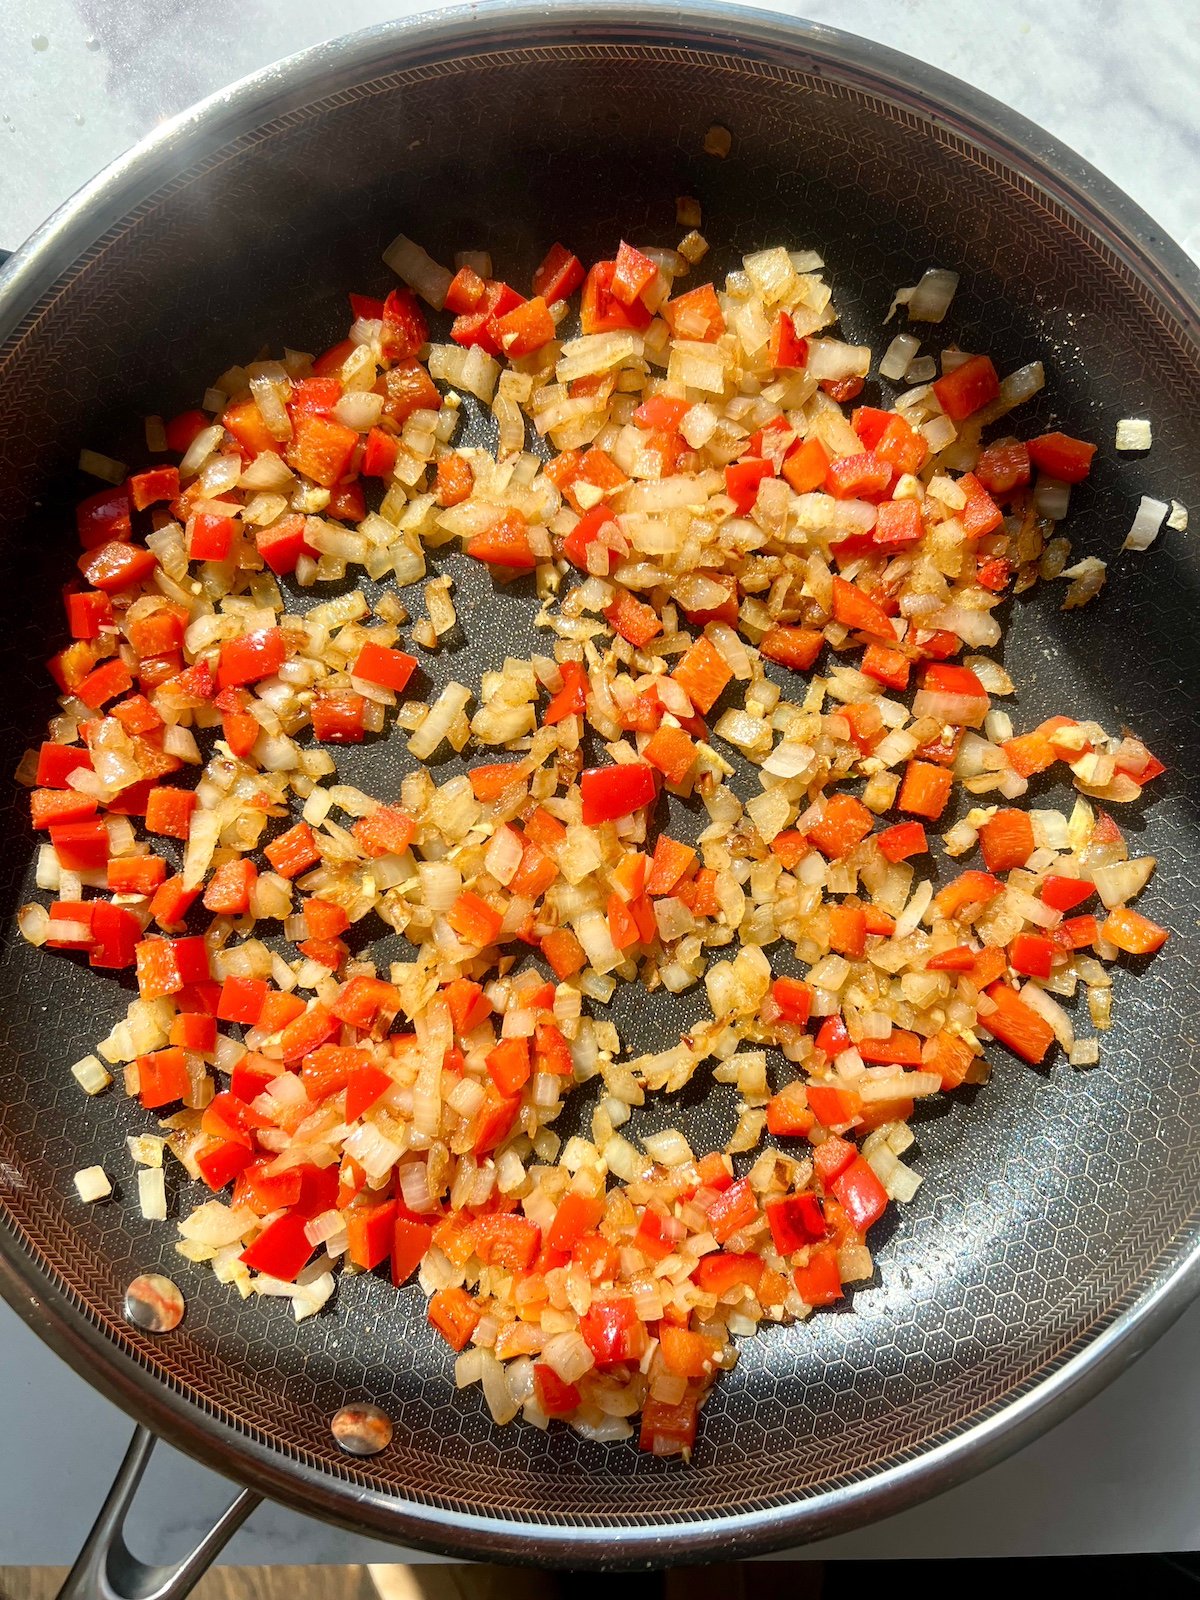
Step 2: Add the red bell pepper and cook for another 2 minutes. Stir in cumin and garlic, and cook for an additional minute before removing the mixture from the pan.
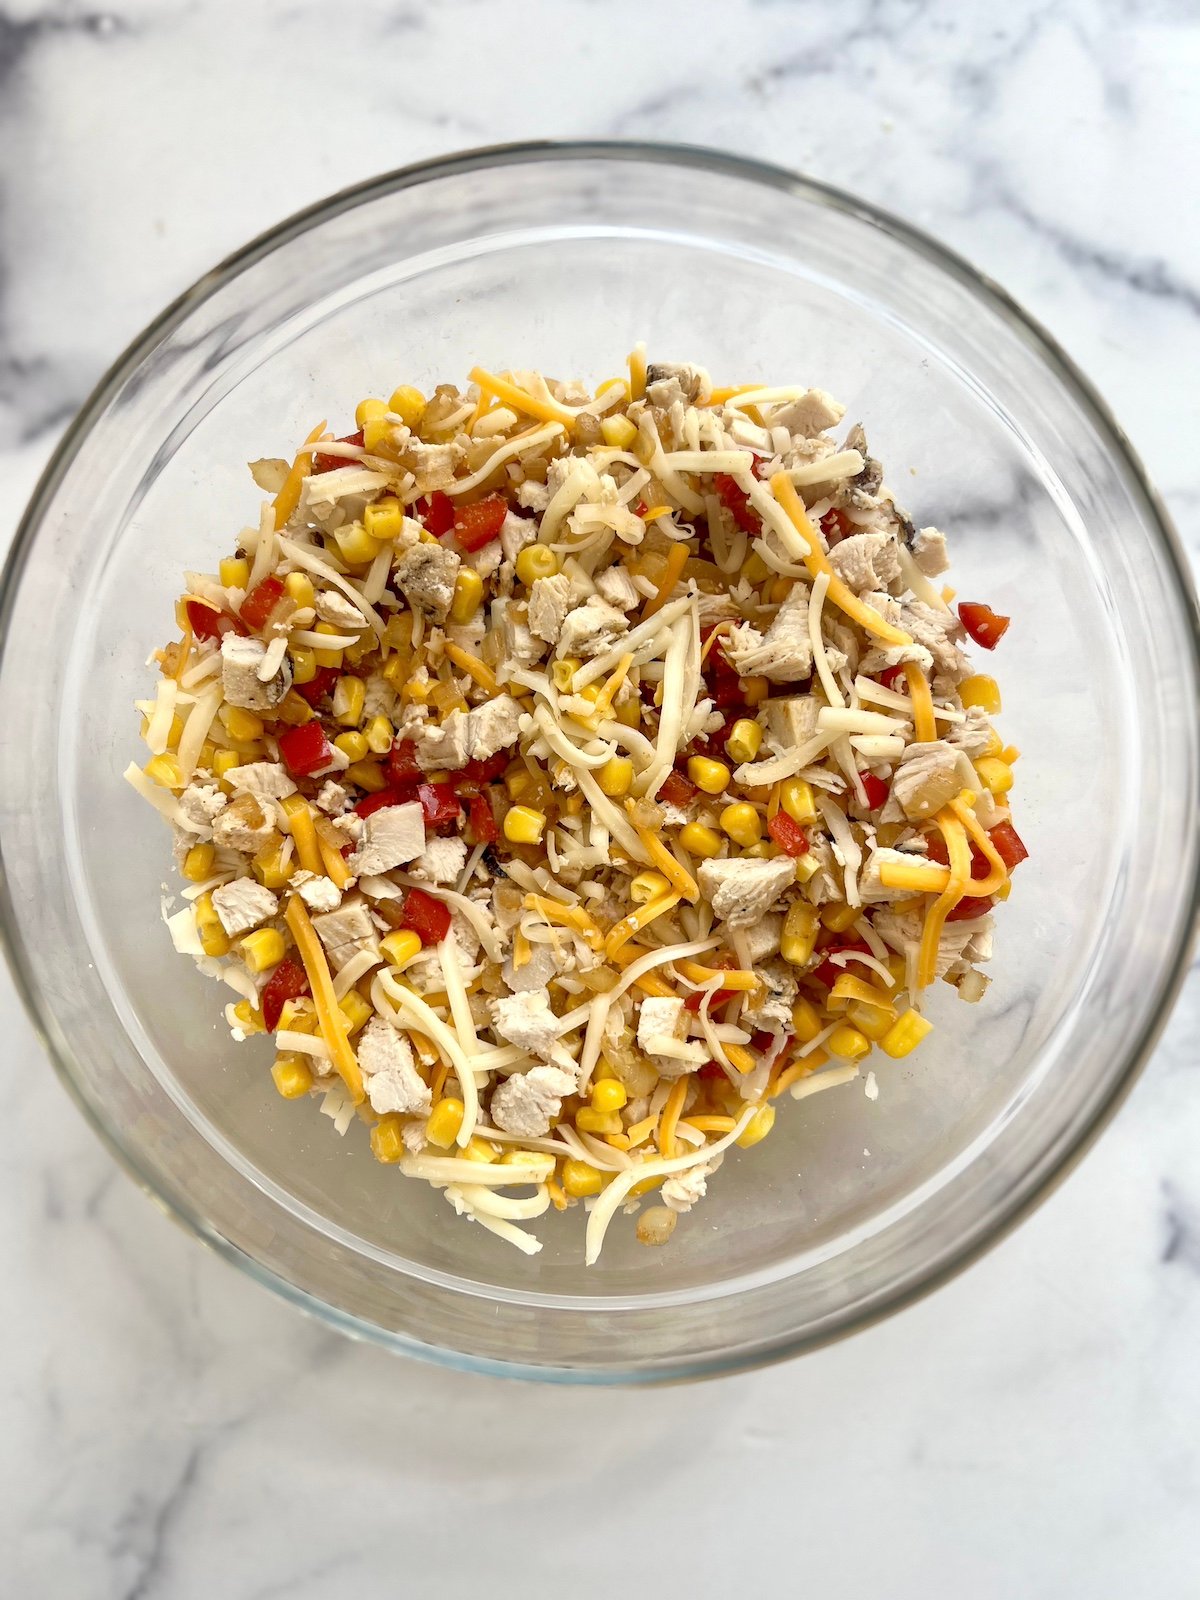
Step 3: Let the mixture cool slightly, then add the shredded chicken, corn, and 1 cup of cheese. Stir to combine.
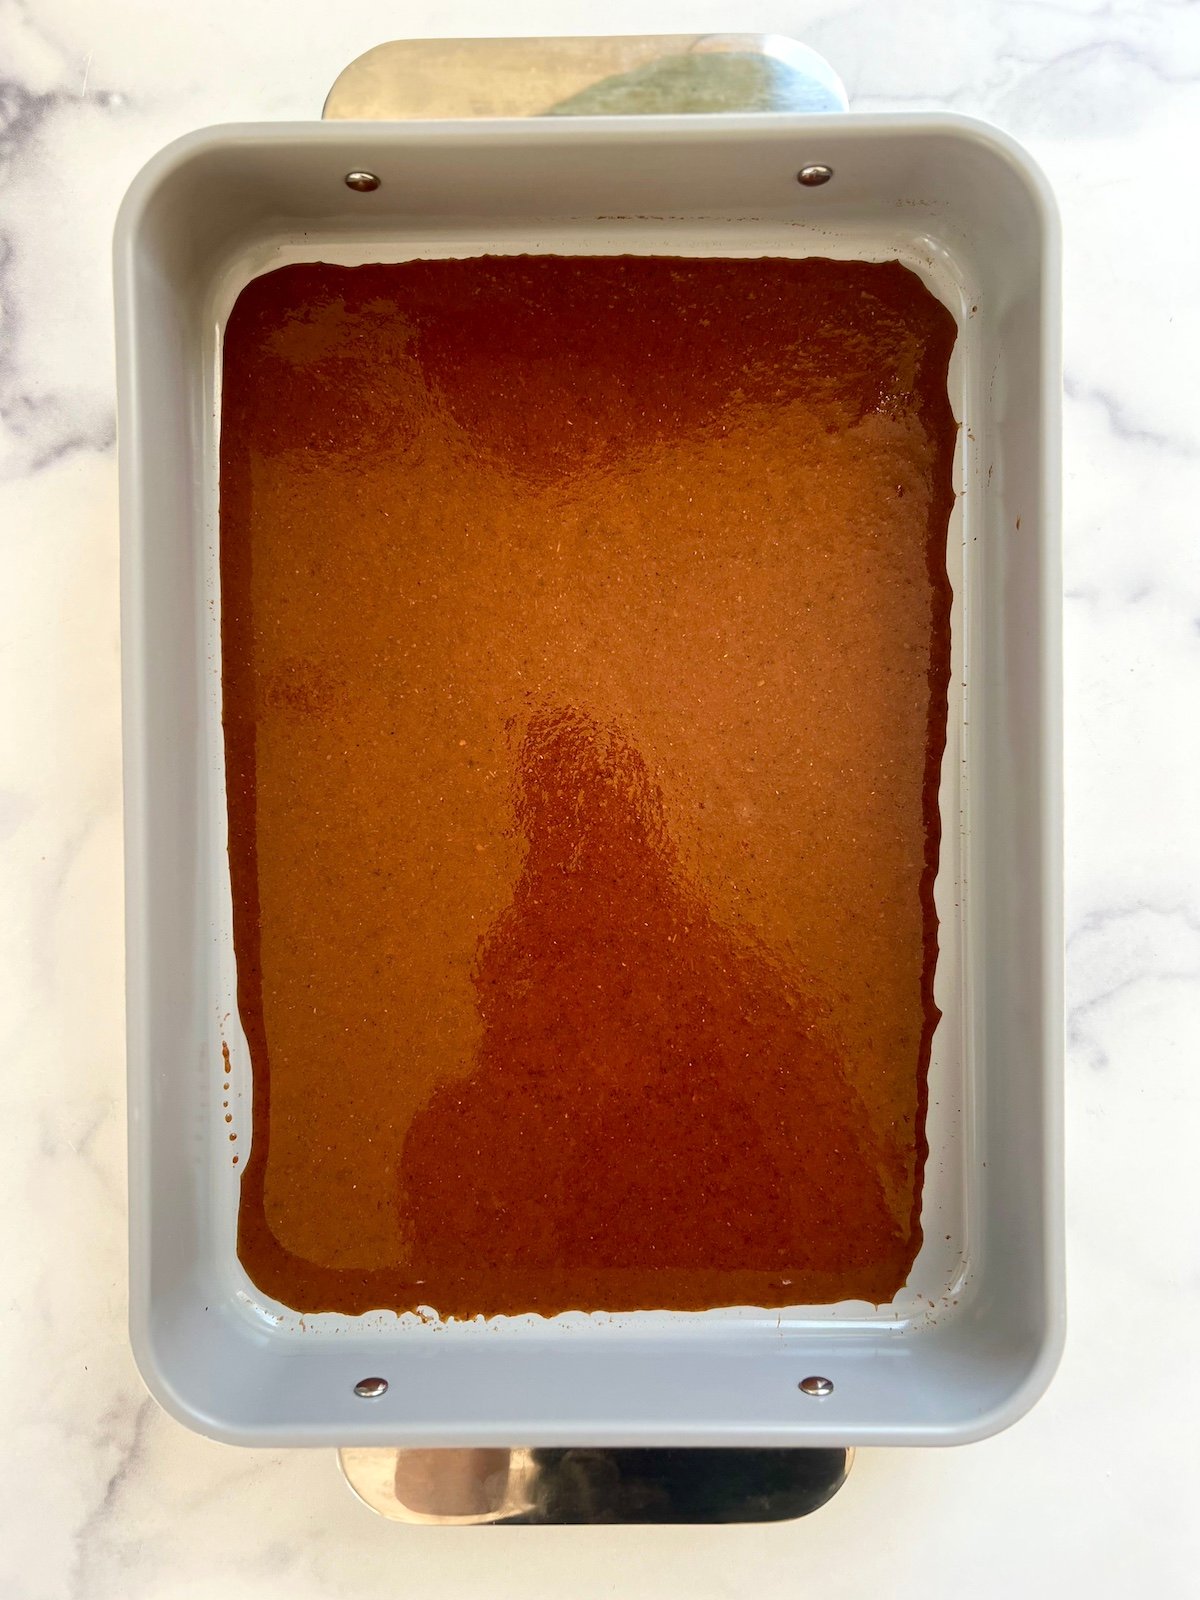
Step 4: Pour half of the enchilada sauce into a 9 x 11-inch baking dish.
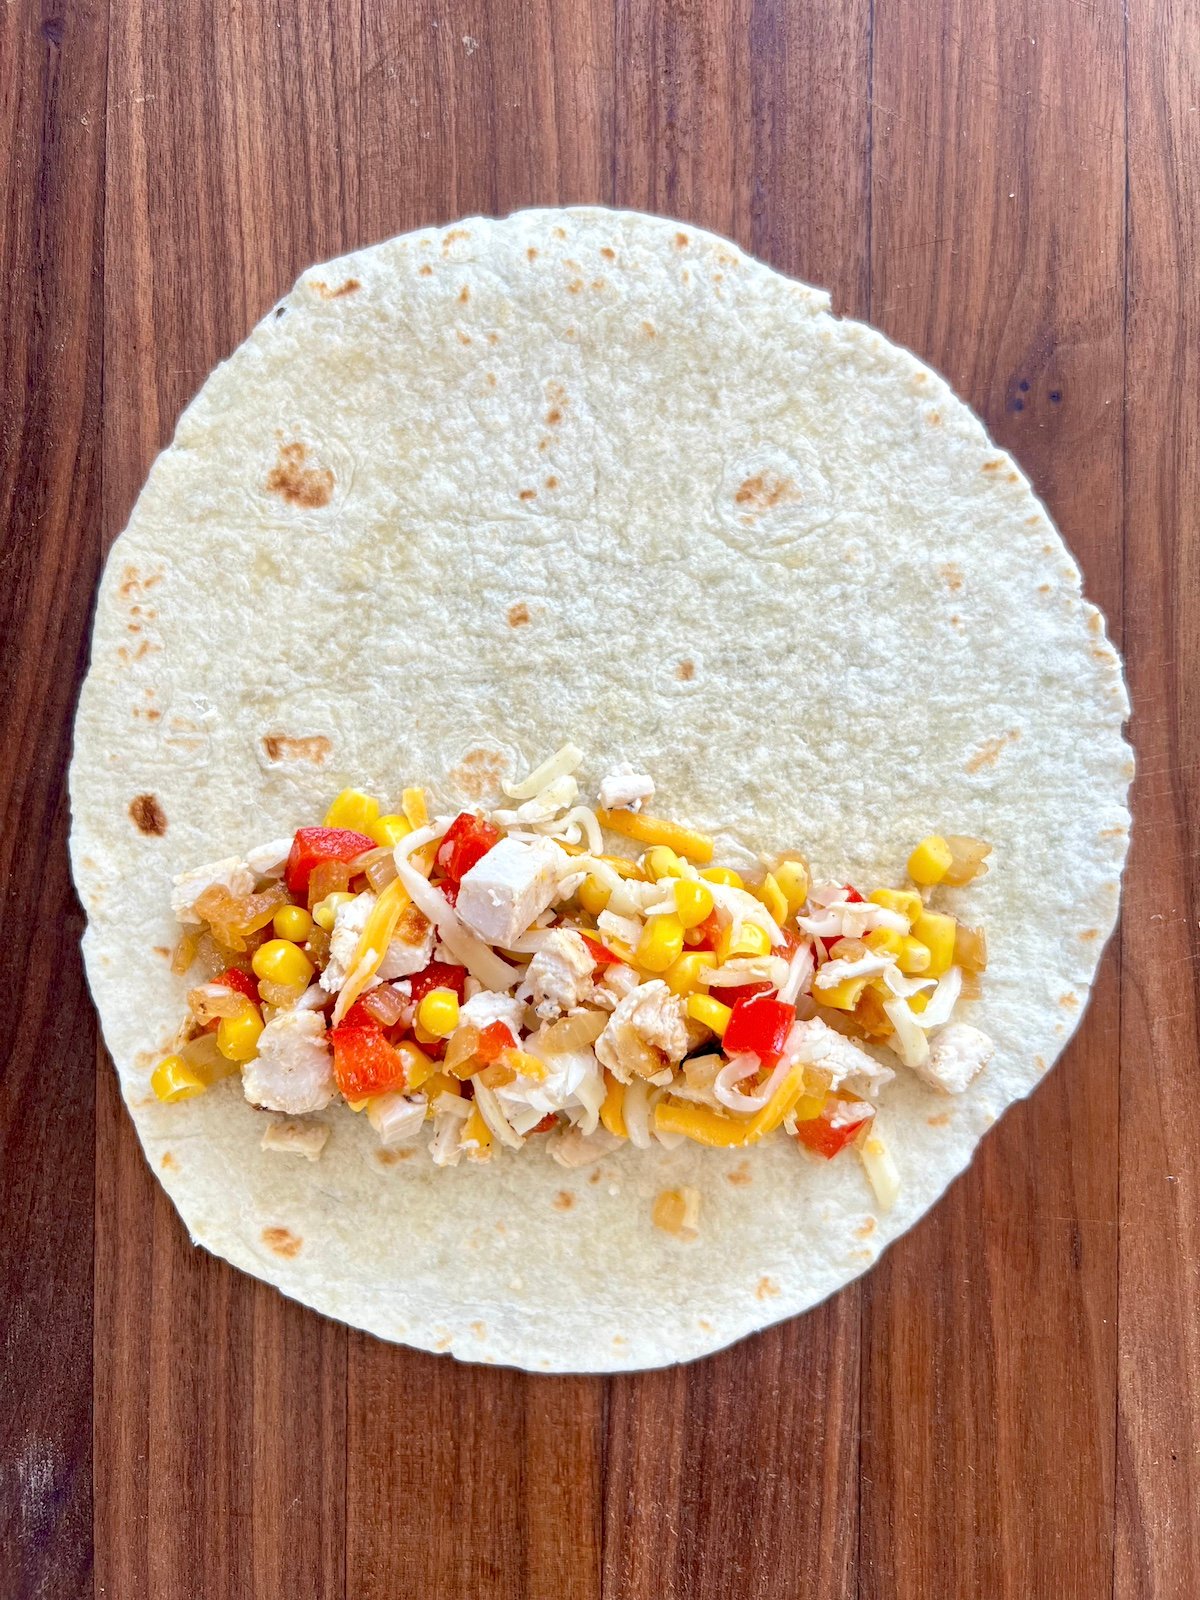
Step 5: Lay a tortilla flat, add about ½ cup of filling, and roll tightly, like a burrito. Place the enchiladas seam-side down in the baking dish. Repeat with the remaining tortillas and filling, placing them snugly in the dish.
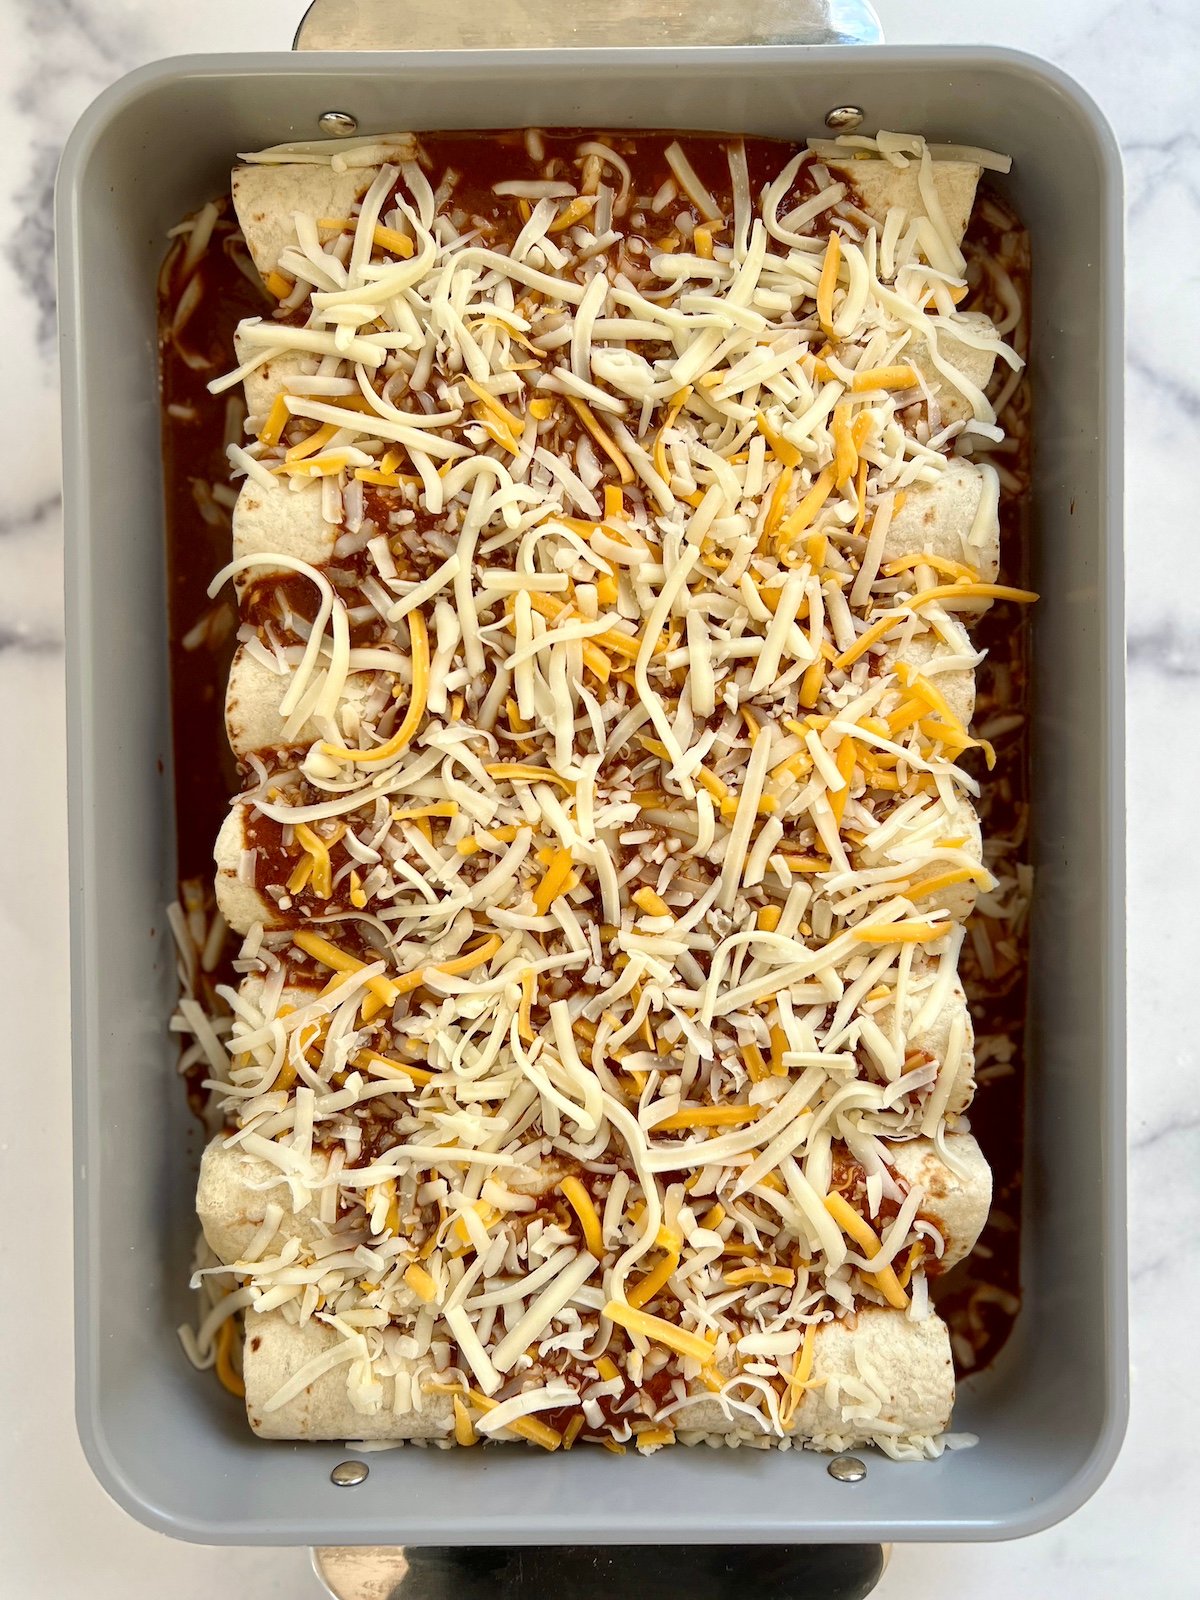
Step 6: Pour the remaining enchilada sauce over the top and sprinkle with the remaining ½ cup of cheese. (If planning to freeze, do so after this step!).
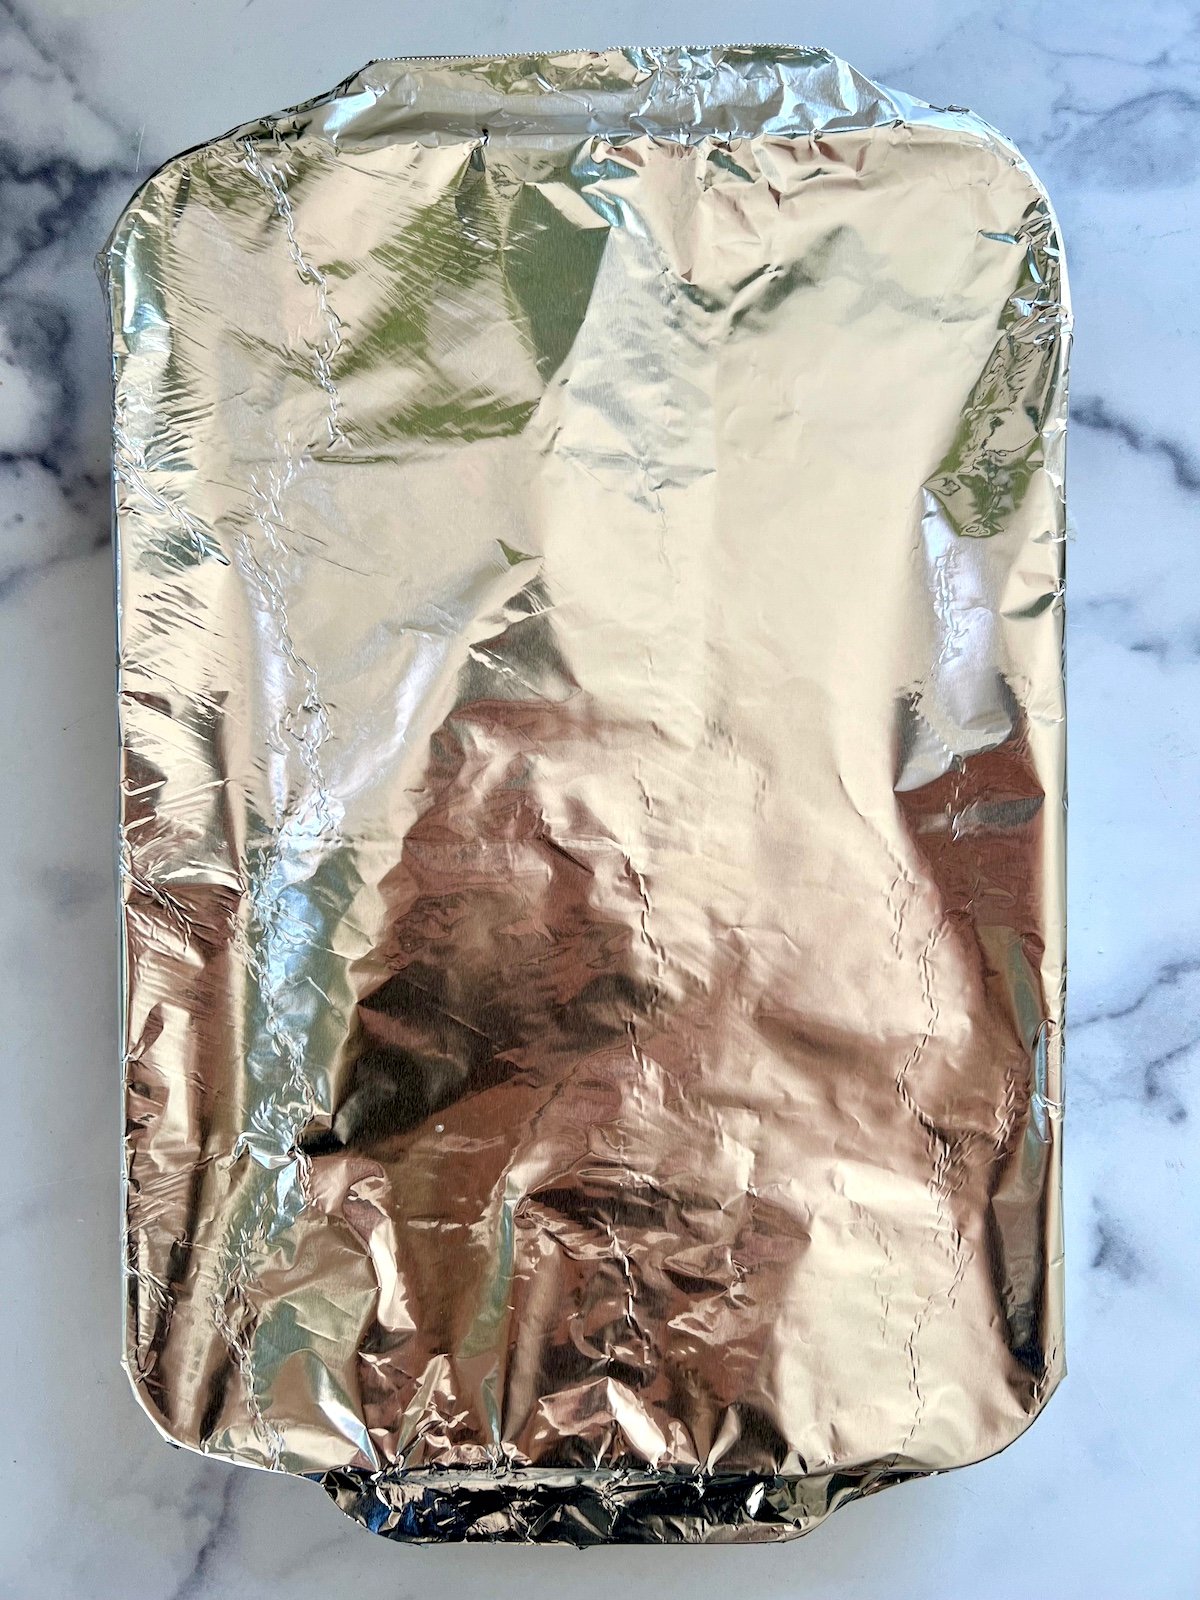
Step 7: Cover with foil and bake for 25-30 minutes (35-40 minutes if baking from frozen).
Step 8: Serve with a dollop of sour cream and chopped cilantro if desired.
Tips and Tricks
Don’t overfill: Be careful not to overstuff the tortillas to avoid tearing them when rolling.
Freezing: If you plan to freeze these enchiladas (they freeze really well!), assemble them but don’t bake them yet. Wrap the dish in foil so that it’s airtight and freeze for up to 4 months. When you’re ready to cook, just pop them in the oven straight from the freezer and add 10-15 minutes to the baking time!
Warming tortillas: If your tortillas are stiff or cracking, warm them in the microwave for 10-15 seconds before filling to make them more pliable.
FAQs
Can I make Mexican enchiladas ahead of time?
Absolutely! You can assemble the enchiladas and refrigerate or freeze them before baking. Just add 10-15 minutes to the cooking time if starting from frozen.
If you’re looking for a dish that’s packed with flavor, easy to make, and sure to please the whole family, then you’re going to love these Mexican Enchiladas! This recipe is a go-to for busy nights when I need something hearty and delicious on the table fast. Whether you’re making them for a weeknight meal or prepping ahead to freeze, these enchiladas are as satisfying as they are simple.
Heat 1 tablespoon of olive oil in a sauté pan over medium heat and cook onions and salt for 3 minutes.
Add red bell pepper and sauté for another 2 minutes.
Add cumin and garlic and sauté for an additional minute.
Remove the mixture from the pan and place in a bowl. After the mixture has cooled, add the chicken, corn, and 1 cup cheese. Mix to combine.
Pour half of the enchilada sauce in a 9 x 11 inch baking dish.
Lay a tortilla flat, add about 1/2 cup of filling, and roll tightly, like a burrito. Place the enchiladas seam-side down in the baking dish.
Repeat with the remaining tortillas and filling, placing them snugly in the dish.
Pour the remaining enchilada sauce over the top and sprinkle with the remaining 1/2 cup of cheese. (*If you’re planning on cooking this dish another day, cover it and freeze up to 4 months at this point.)
Cover the dish with foil and bake in the oven for 25-30 minutes. If you are starting with frozen enchiladas, bake covered for 35-40 minutes.
Serve with chopped cilantro and a dollop of sour cream if desired.
Notes
Freezing: Enchiladas will stay in the freezer for up to 4 months. For best results, prepare enchiladas then freeze. Do not bake. When ready to serve, bake from frozen adding 10-15 minutes to the cook time.
Warming tortillas: If your tortillas are stiff or cracking, warm them in the microwave for 10-15 seconds before filling to make them more pliable.