Flap Steak Tacos with Jalapeño Chimichurri
 These Flap Steak Tacos with Jalapeño Chimichurri have a serious flavor punch — the marinade brings deep umami from tamari…
These Flap Steak Tacos with Jalapeño Chimichurri have a serious flavor punch — the marinade brings deep umami from tamari…
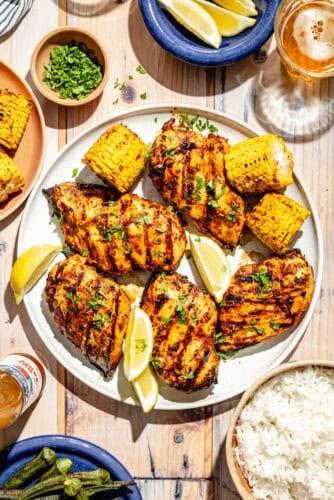 Bold, smoky, and packed with flavor, this Grilled Cajun Chicken is the kind of recipe that earns a permanent spot…
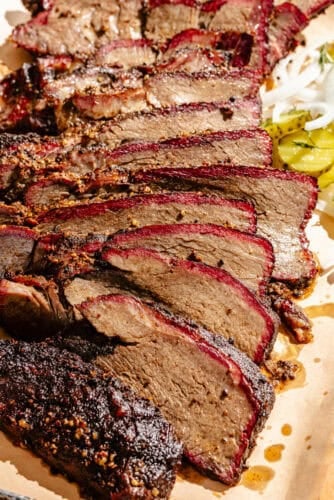 We’re ending #DDGrillWeek2026 on a high note with this crowd-friendly Chipotle-Coffee Smoked Chuck Roast. I’ve been so excited to share…
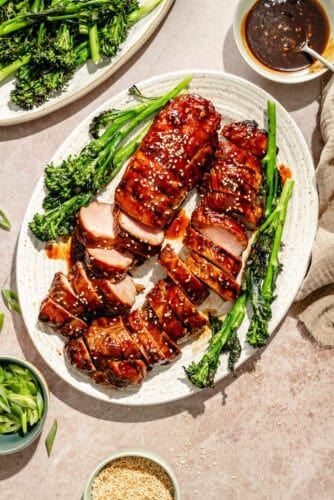 These Hoisin-Glazed Grilled Pork Tenderloin Bowls are truly the ultimate summer dinner. With a make-ahead marinade and build-your-own bowl format…
 Today’s #DDGrillWeek2026 recipe is a throwback that is inspired by one of my favorite college taco spots, Salsa Limon, in…
 The time has finally come! Happy #DDGrillWeek 2026!!! This is my absolute favorite week of the whole year and I’m…
 It’s #DDSoupWeek 2025! This Turkey Taco Soup is a cross between a turkey chili and a fragrant, Mexican-inspired soup that…
The post Turkey Taco Soup appeared first on The Defined Dish.
 On the nights when you don’t have the energy to cook dinner but still want to put a homemade meal…
The post One-Pan Roasted Chicken with Lemony White Beans appeared first on The Defined Dish.
 This Mediterranean Beef and Veggie Skillet might just be the easiest dinner ever. Packed with veggies and fresh herbs, it’s…
The post Mediterranean Beef and Veggie Skillet appeared first on The Defined Dish.
 If you’re like me and always keep a bottle of Sriracha in the fridge, you’ll love this quick and easy…
The post Sriracha Chicken Stir Fry appeared first on The Defined Dish.
 I can’t believe that it’s back to school season! If you’re looking for a quick and nourishing dinner to feed…
The post Curried Turkey Sloppy Joes appeared first on The Defined Dish.
 A healthier take on the classic southern casserole, this Skillet King Ranch Casserole features rotisserie chicken, veggies, green chiles two…
The post Skillet King Ranch Casserole appeared first on The Defined Dish.
 Impress your guests with Smashburgers with Special Truffle Sauce, which are topped with Gruyère cheese, arugula, and caramelized onions. I…
The post Smashburgers with Special Truffle Sauce appeared first on The Defined Dish.
 I love taking this Deli Chop Chicken Salad to the beach or pool parties. It’s make-ahead friendly, which means you…
The post Deli Chop Chicken Salad appeared first on The Defined Dish.
 From the versatile cooking methods (oven! stovetop! grill!) to the balance of zesty, savory, and spicy flavors, there are so…
The post Smoky Chipotle Lime Marinated Chicken appeared first on The Defined Dish.
 Vermicelli noodles, crisp veggies, and loads of herbs are the MVPs of these Vietnamese-Inspired Chicken and Noodle Bowls. A Nuoc…
The post Vietnamese-Inspired Chicken and Noodle Bowls appeared first on The Defined Dish.
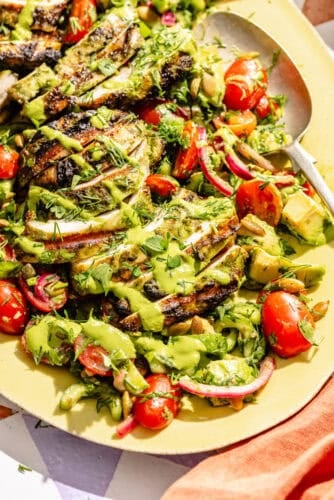
 These Grilled Lamb Chops with Arugula Pesto make for a flavorful, elegant dinner that comes together in under one hour—perfect…
The post Grilled Lamb Chops with Arugula Pesto appeared first on The Defined Dish.
 Clayton’s Favorite Chicken Salad is creamy, tangy, and slightly spicy and sure to become a staple at your house. I…
The post Clayton’s Favorite Chicken Salad appeared first on The Defined Dish.
 These Chipotle Sesame Adobo Steak Tacos are on repeat at my house! Juicy, well-seasoned steak is cooked to perfection and…
The post Chipotle Sesame Adobo Steak Tacos appeared first on The Defined Dish.
 This Korean-Inspired Skirt Steak and Shaved Veggie Salad is what dreams are made of! Fresh, vibrant, and bursting with flavor.…
The post Korean-Inspired Skirt Steak and Shaved Veggie Salad appeared first on The Defined Dish.
 These Pepperoncini Grilled Chicken Sandwiches are next level good! Tender, tangy, and creamy, you can’t ask for much more. If…
The post Pepperoncini Grilled Chicken Sandwiches appeared first on The Defined Dish.
 I cannot contain my excitement for these Persian-Inspired Grilled Chicken Kebabs! Tender, juicy, and flavorful on its own but even…
The post Persian-Inspired Grilled Chicken Kebabs appeared first on The Defined Dish.
 This Roast, Rice, and Gravy recipe is based on a friend’s beloved family recipe that consists of tender, braised meat…
The post Roast, Rice, and Gravy appeared first on The Defined Dish.
 Skillet Shepherd’s Pie is a classic dish we all need in our repertoire! A savory meat-and-potatoes meal that is perfect…
The post Skillet Shepherd’s Pie appeared first on The Defined Dish.
 This Tangy Thai Braised Chicken is a perfect choice if you’re looking for something that comes together quickly but will…
The post Tangy Thai Braised Chicken appeared first on The Defined Dish.