Yay, it’s May! For my college students and middle schoolers, May marks the end of the school year. It kicks off with Mother’s Day, on to family-filled Graduation parties, and then ends with Memorial Day BBQs and beach days (and my birthday)…
Yay, it’s May! For my college students and middle schoolers, May marks the end of the school year. It kicks off with Mother’s Day, on to family-filled Graduation parties, and then ends with Memorial Day BBQs and beach days (and my birthday). It’s a fun food holiday month with many reasons to whip up a...
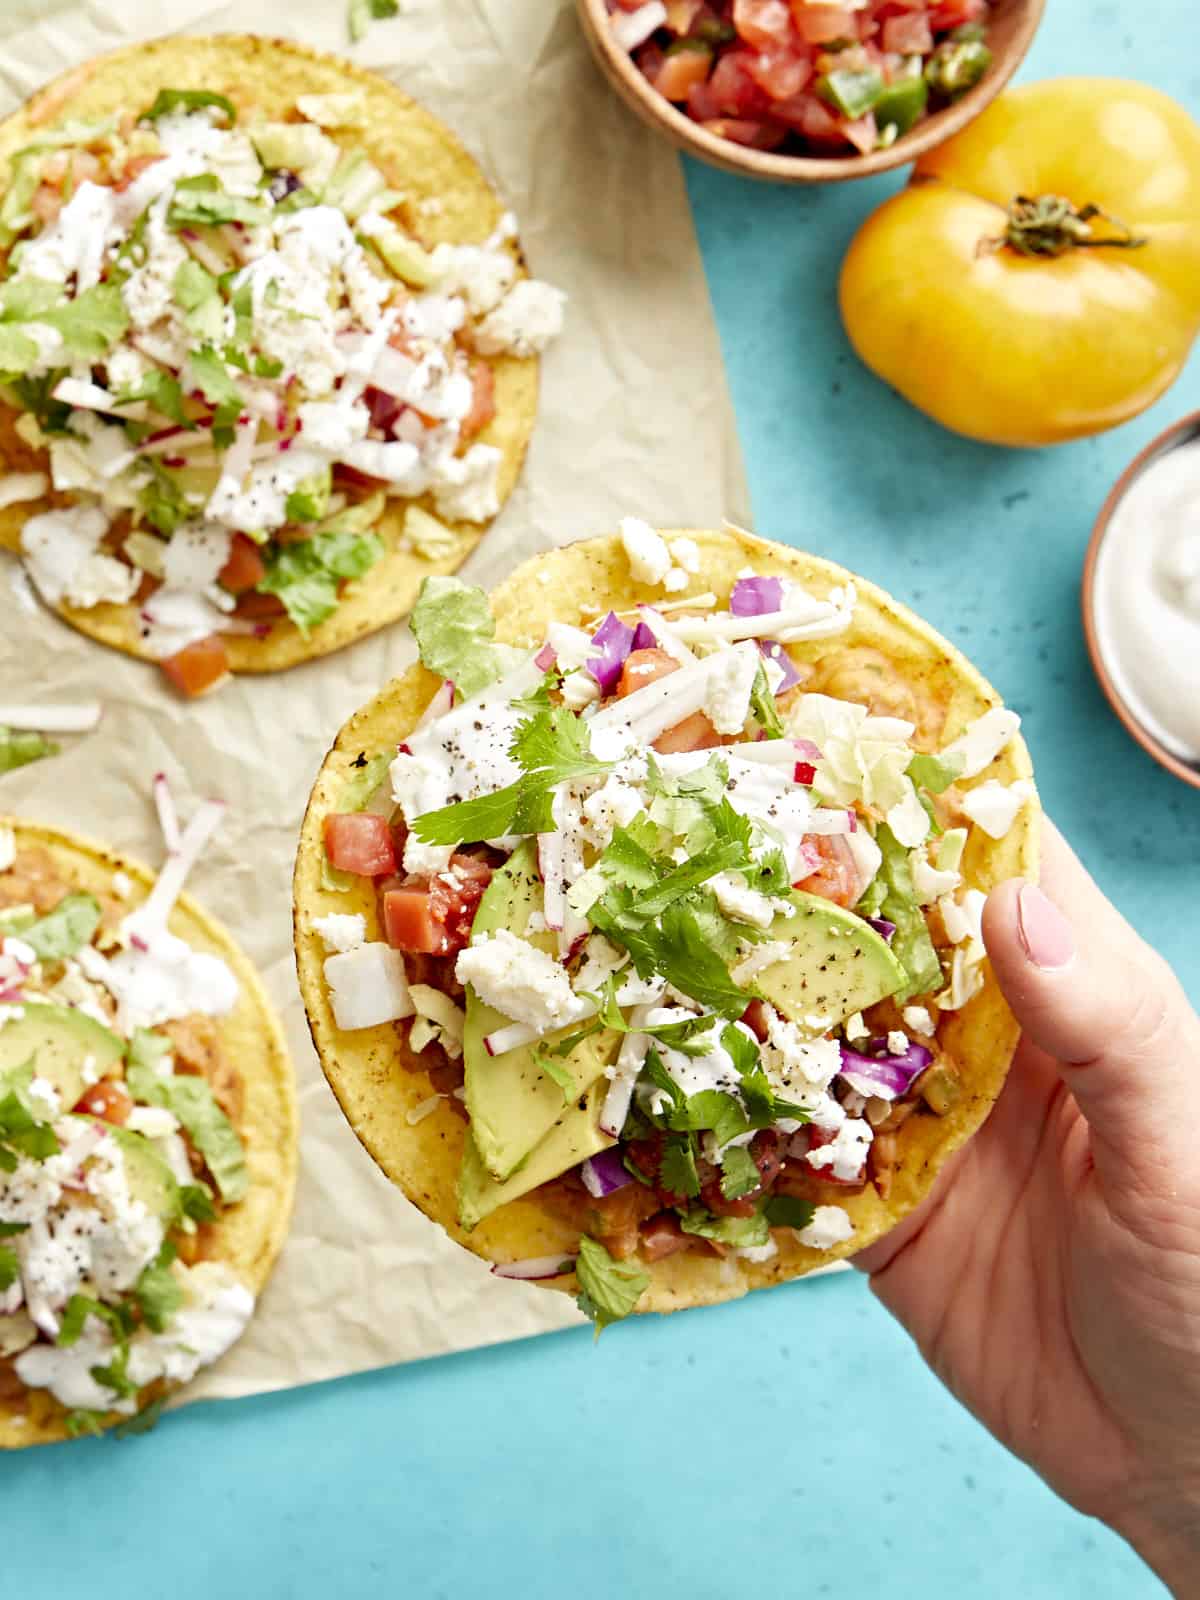
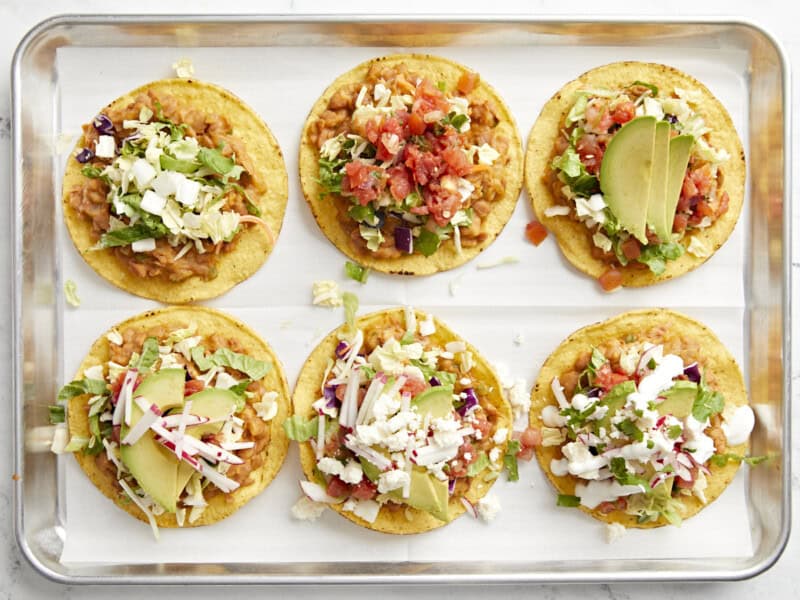
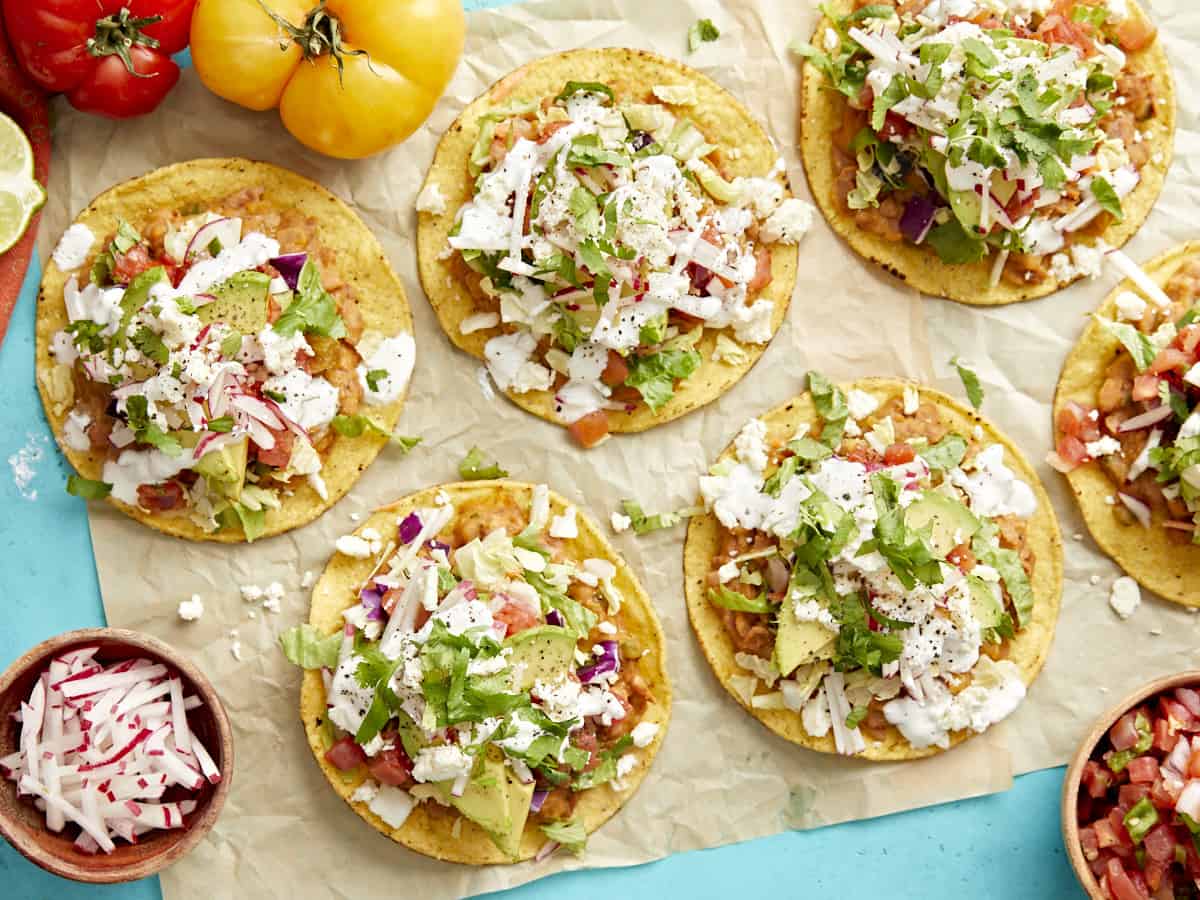
With the sun working overtime during these hot summer months, I’ve got tacos on my mind (and tortillas in my fridge) 24/7. I love how balanced and fresh Mexican-inspired cuisine can be, and these tostadas are no exception! Crispy tortillas are piled high with mashed pinto beans, salsa, veggies, and cheese for a different spin on your typical taco night. Plus, I love that I can use up any leftover tortillas I have on hand so nothing goes to waste! These are super customizable based on your family’s preferences, so you can add or omit just about anything you want.
What Is A Tostada?
The word “tostada” translates to “toasted” in reference to the crispy toasted tortilla shell that serves as the base of the dish. It’s sort of like a flattened taco piled high with filling. It’s also a great way to use up the last of those leftover tortillas that are starting to go stale!
Ingredients
Here’s what you’ll need to make these tostadas:
Onion: I used white onion because it was on sale, but yellow or Vidalia will also work well in this recipe.
Jalapeño: Adds a bit of heat to the filling.
Olive Oil: Helps the filling cook without burning. Neutral cooking oils like canola or vegetable also work well.
Pinto Beans: Create a mushy, refried bean-like texture. If you have some leftover, our favorite (Not) Refried Beans can also work well in this recipe!
Taco Seasoning: An easy way to add classic Mexican flavors.
Water: Helps make the beans easier to mash.
Salsa: Adds freshness to the tostadas. I love this Fire Roasted Salsa, but store-bought works just fine.
Tostada Shells: These small, crunchy corn tortillas are like a flat hard taco shell. A Mexican open-faced sandwich, if you will!
Radishes: Add a delightful, fresh crunch!
Slaw Mix: A cheap and easy hack to add extra veggies to this dish.
Sour Cream: Adds creaminess and tanginess.
Cilantro: Adds a pop of freshness and color.
Avocado: Adds a creamy texture. Guacamole also works well.
Queso Fresco: Can’t find queso fresco or cotija cheese? Cheddar cheese will do just fine, or omit it altogether.
What Is the Difference Between A Tostada and a Tortilla?
A tostada is a tortilla that has been baked or fried until it is crispy. You can purchase ready-made tostada shells from popular brands like Old El Paso, or you can make your own by baking 6-inch corn tortillas until toasted and crispy.
How to Eat A Tostada
Tostadas are finger foods, so use your hands, not a fork and knife! I like the two-handed method of holding the edges of the tostada and taking bites like a slice of toast. I also like to crack the tostadas into smaller pieces and eat it in smaller bites that way.
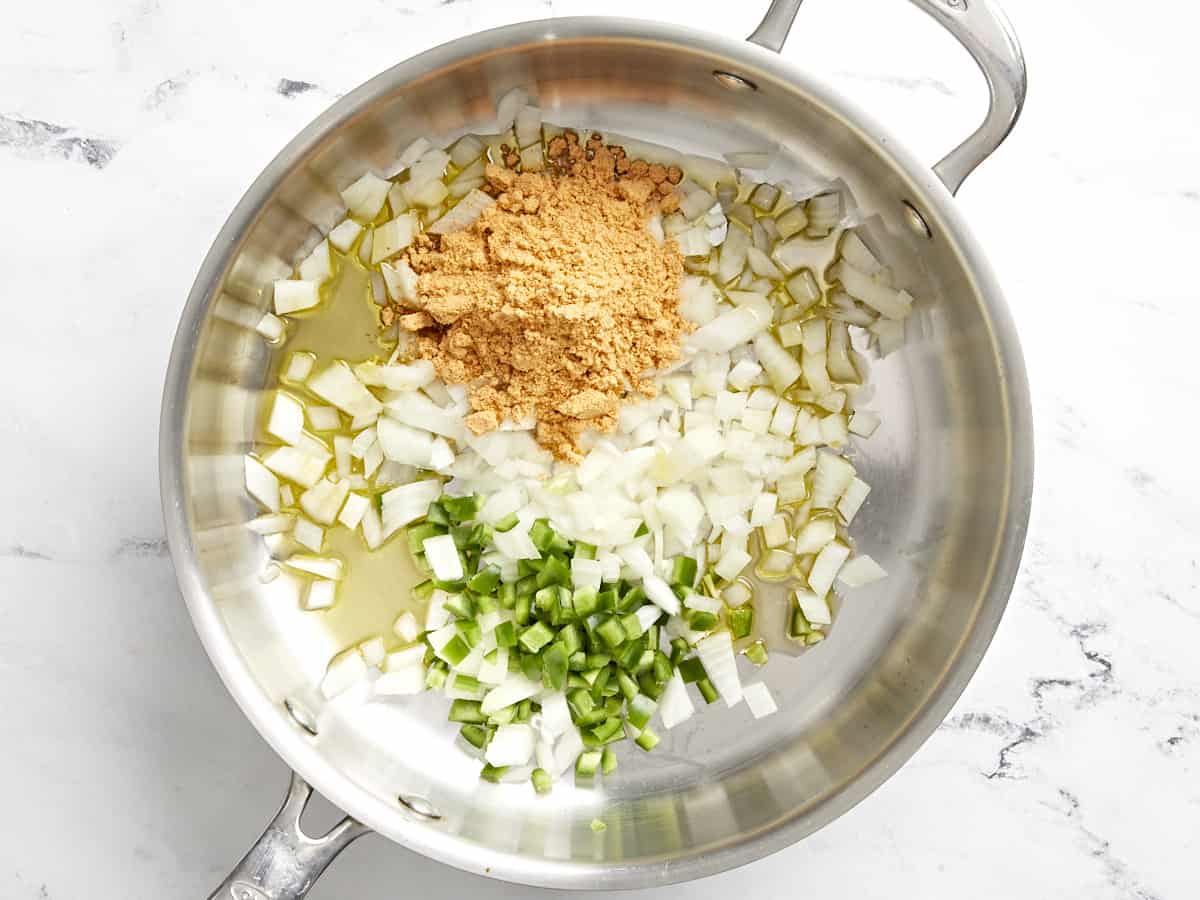
Add the olive oil, onions, jalapeño, and taco seasoning mix to a skillet. Stir to combine and cook over medium heat until the onions are soft and glossy.
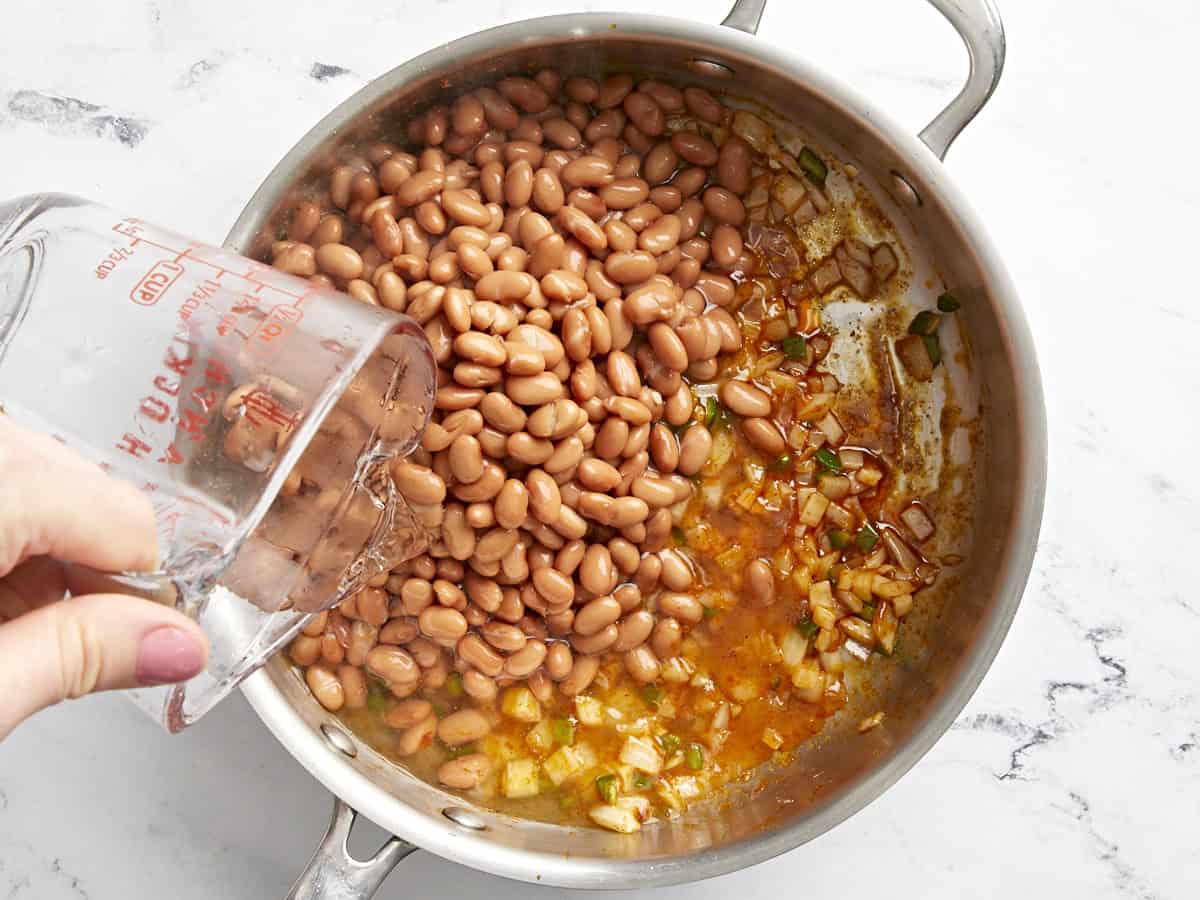
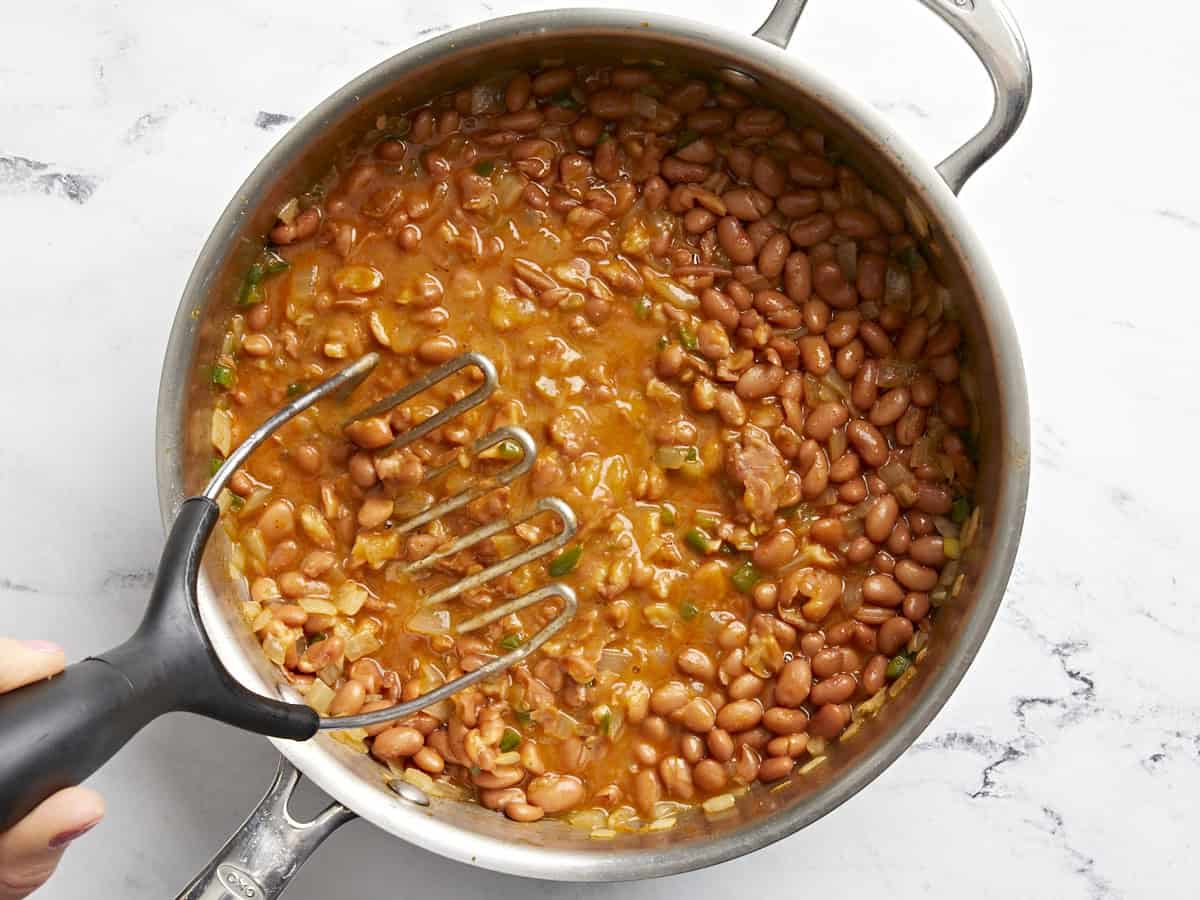
Add the drained and rinsed pinto beans to the skillet with 1 cup of water and simmer for 5-8 minutes, until the beans start to dissolve and break down and the liquid reduces to about 1/2.
Remove from the heat and mash the bean mixture together. Set aside.
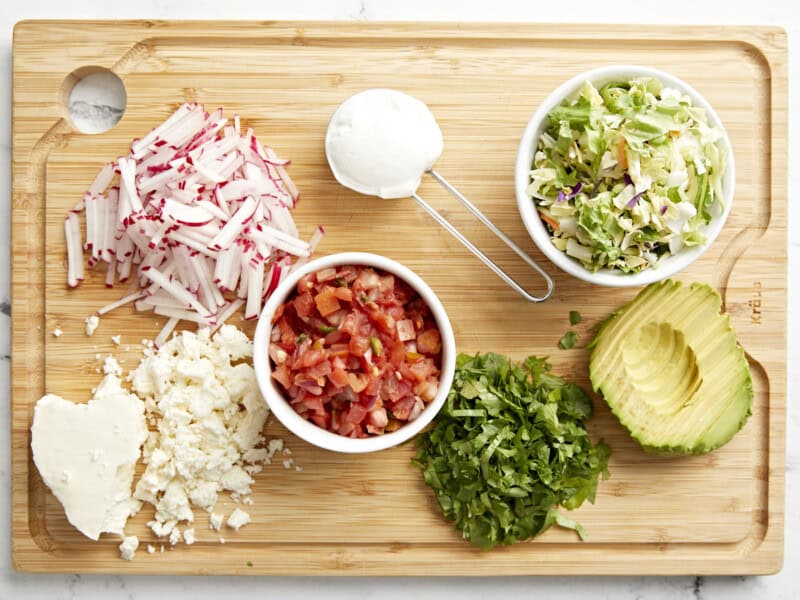
Crumble queso fresco, julienne or slice radishes, mince cilantro, thinly the avocado, and gather your premixed cabbage and salsa of choice.
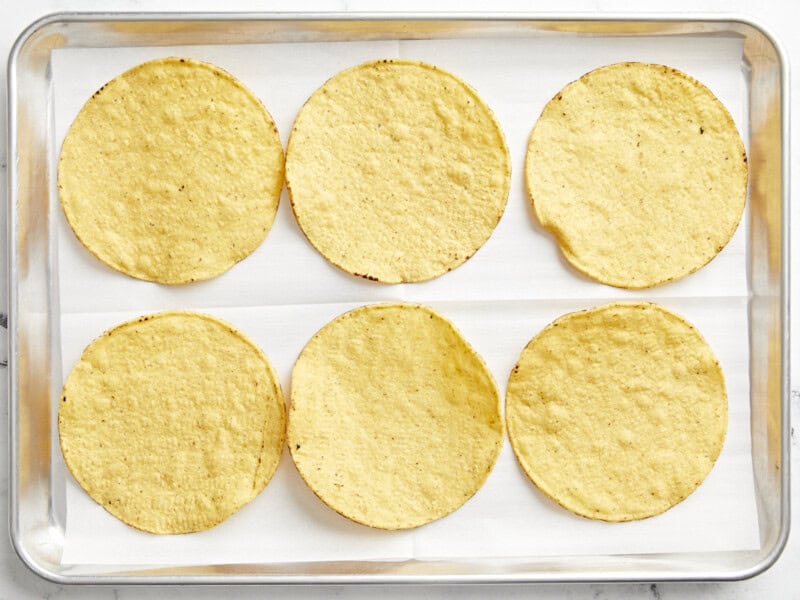
Spread out tostada shells on a cookie sheet and toast in the oven at 350°F for 5 minutes. This makes the tostadas extra crunchy!
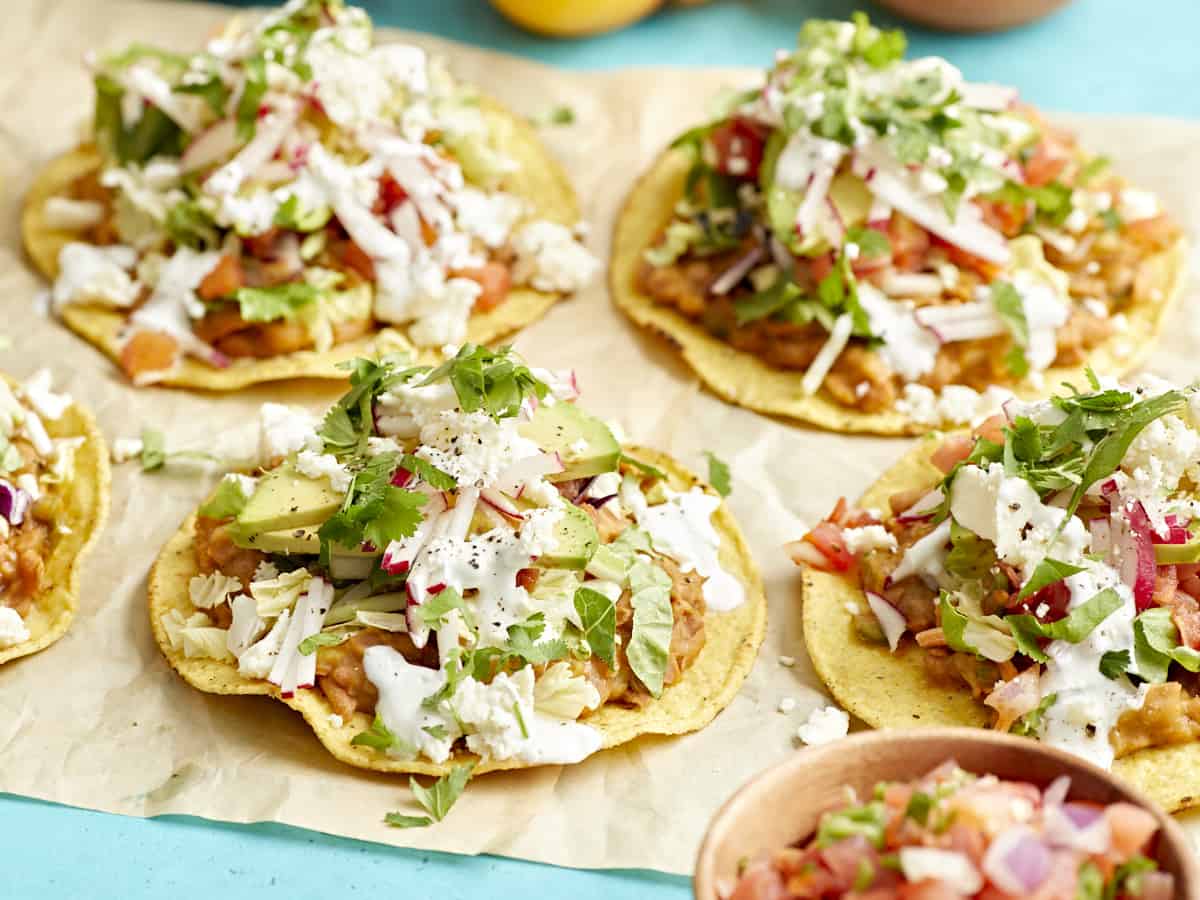
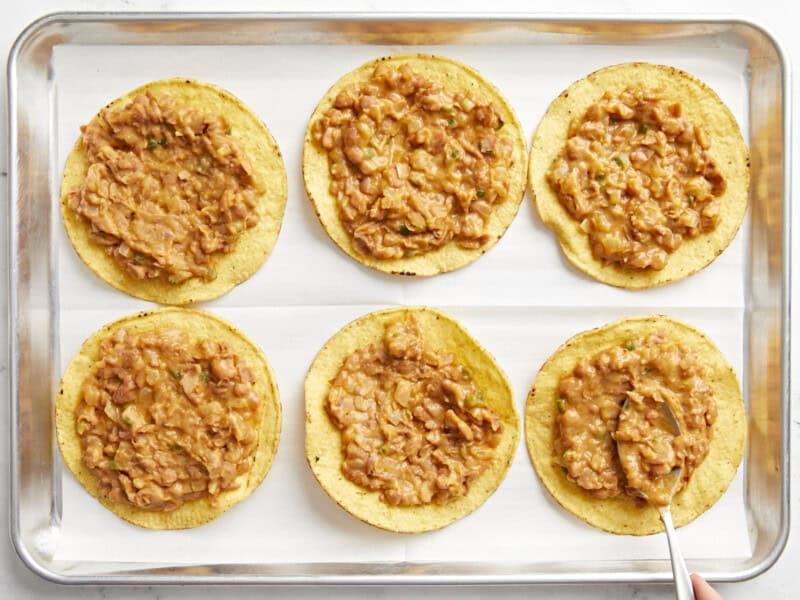
Assemble tostadas: The tostada shell will be on the bottom, topped with mashed pinto beans.
Then, add all other toppings; divide the pre-chopped slaw mix, salsa, sour cream, chopped fresh cilantro, avocado, and crumbled queso fresco between all tostadas. Enjoy!
This recipe is easily made vegan by leaving off the sour cream and cheese. There are amazing vegan substitutes available for both of those ingredients nowadays, too!
Add the 1 Tbsp olive oil, 1/2 diced white onion, 1 seeded and diced jalapeño, and 1 oz. packet of taco seasoning mix to a skillet. Stir to combine and cook over medium heat until the onions are soft and glossy.
Add the 2 cans of drained and rinsed pinto beans to the skillet with 1 cup of water and simmer for 5-8 minutes, until the beans start to dissolve and break down and the liquid reduces by about 1/2.
Remove from the heat and mash the bean mixture together.
Crumble 2 Tbsp queso fresco, julienne or slice 3 radishes, mince 2 Tbsp cilantro, thinly slice the avocado, and gather your premixed cabbage and salsa of choice.
Spread out 8 tostada shells on a cookie sheet and toast in the oven at 350°F for 5 minutes. This makes the tostadas extra crunchy!
Assemble tostadas: The tostada shell will be on the bottom, topped with mashed pinto beans.
Then, add all other toppings; divide the 1/2 bag of pre-chopped slaw mix, 1/2 cup salsa, 1/4 cup sour cream, 2 Tbsp chopped fresh cilantro, 1 sliced avocado, and 2 Tbsp crumbled queso fresco between all tostadas. Enjoy!
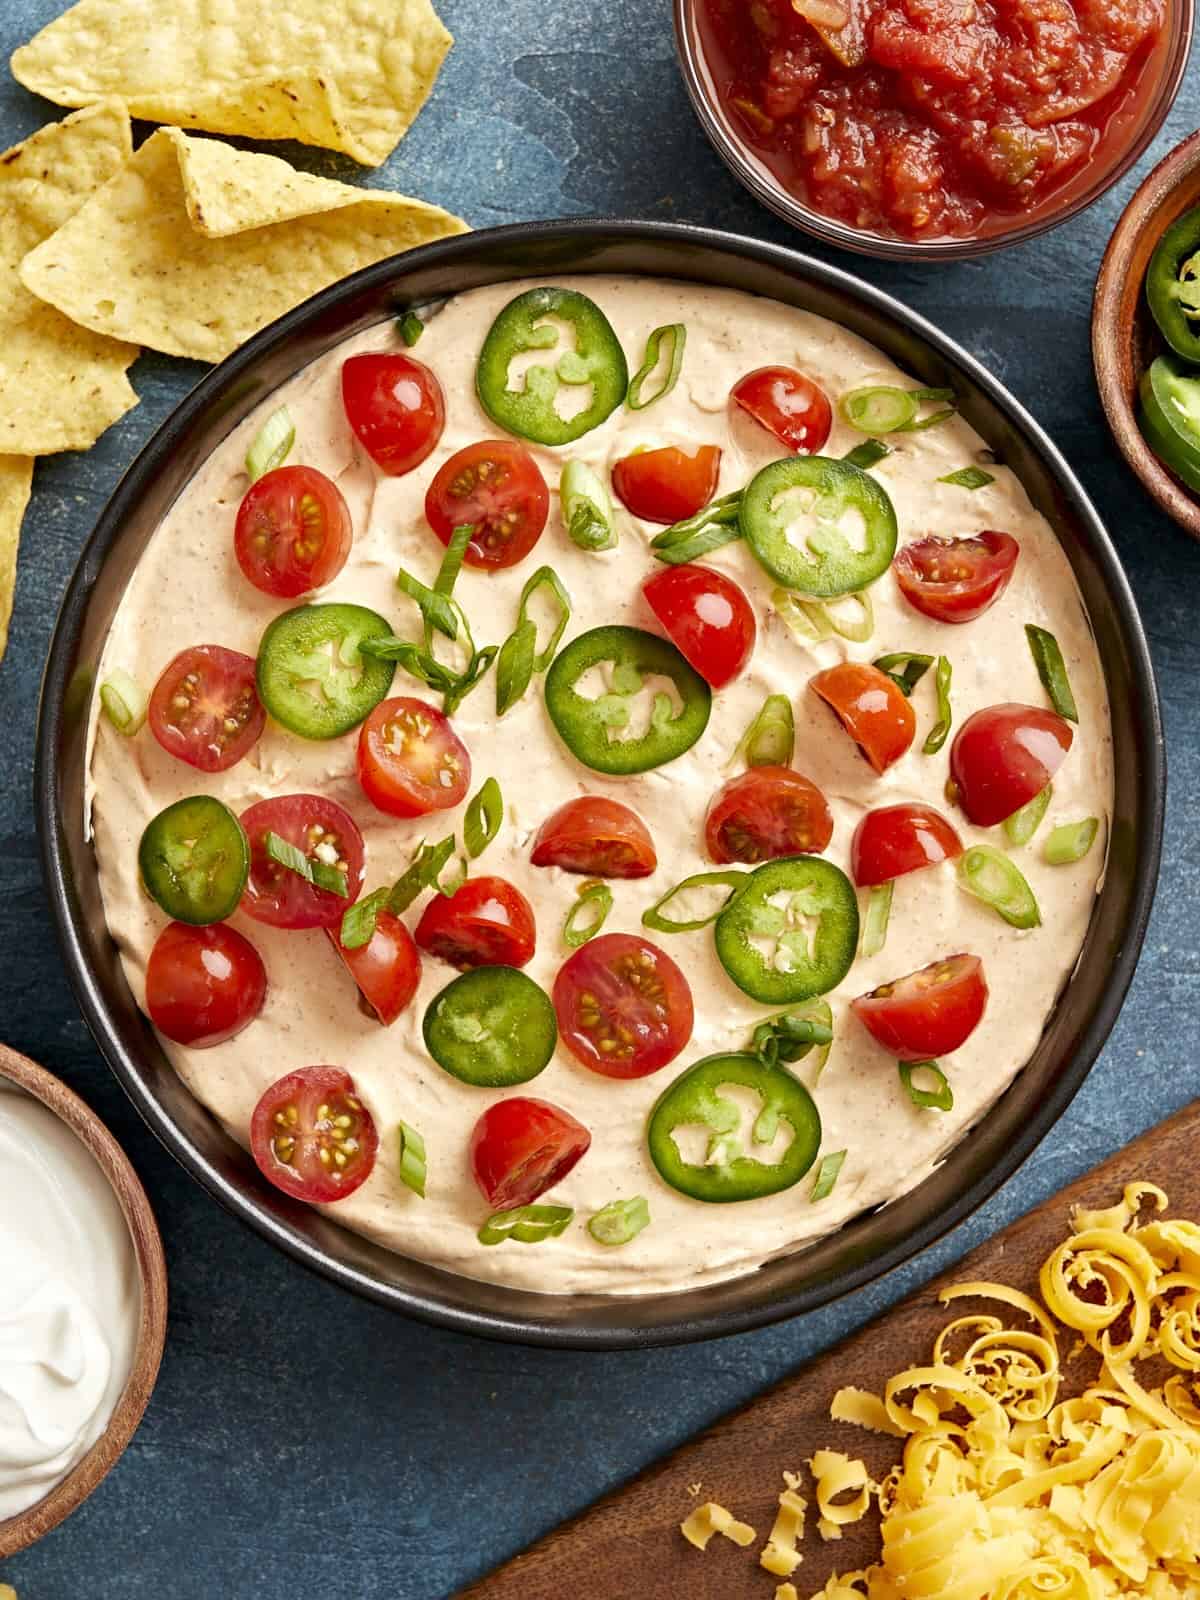
I’m that person who always chooses queso or spinach dip when I go out to my favorite restaurants. Dips are my absolute favorite appetizer and they’re perfect for sharing at parties and family gatherings. This 4-ingredient Taco Dip is creamy, super easy to make, and has the perfect amount of spice. Toppings are optional but I loved adding some tomatoes, jalapeños and sliced green onions on top of mine. And you don’t have to wait until the next big event to make this taco dip recipe…treat yourself this weekend to some chips & dip, you deserve it!😉
What’s In Taco Dip?
When I say this dip recipe is super easy, I really mean it. It’s one of those recipes you can memorize after making it one time and it’s easy to keep all the ingredients on hand for whenever you want to whip up a quick batch. For this taco dip we simply used cream cheese, sour cream, taco seasoning, and a little bit of salsa. That’s it! You can customize it by adding your favorite toppings or keep it simple and enjoy with lots of tortilla chips!
Can I Add Meat?
Oftentimes you may see taco dip made similar to our 7 layer dip recipe with ground beef added and layered with lots of veggies. I opted for a simpler version that can be made quickly with fewer ingredients, but still packs in lots of those Mexican-inspired flavors that I love. With that being said, you can definitely add some seasoned taco meat if you want to make this dip more filling. I suggest adding ½ lb. of seasoned ground beef on top of the cream cheese layer, then finish with your favorite toppings.
Topping Ideas
I love adding my favorite nacho-style toppings to this creamy dip. You can keep things simple like we did with a few tomatoes, sliced jalapeños, and sliced green onions or have fun adding any of these toppings listed below:
You can easily make this taco dip ahead of time and just wait to add on any extra toppings. Follow the recipe listed below then cover the dip tightly with plastic wrap or in an airtight container and place it in the refrigerator until you’re ready to serve. Store any leftovers covered tightly in the refrigerator for up to 3 days.
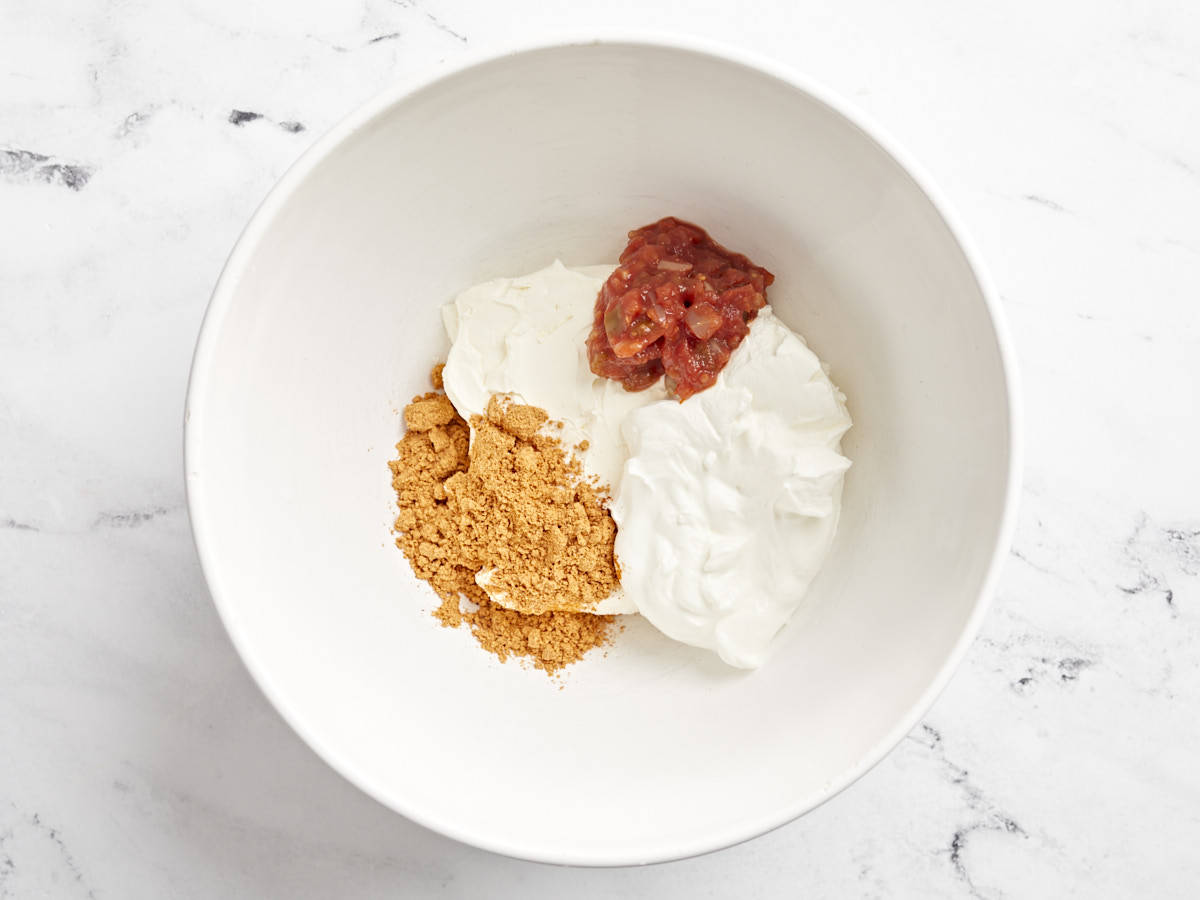
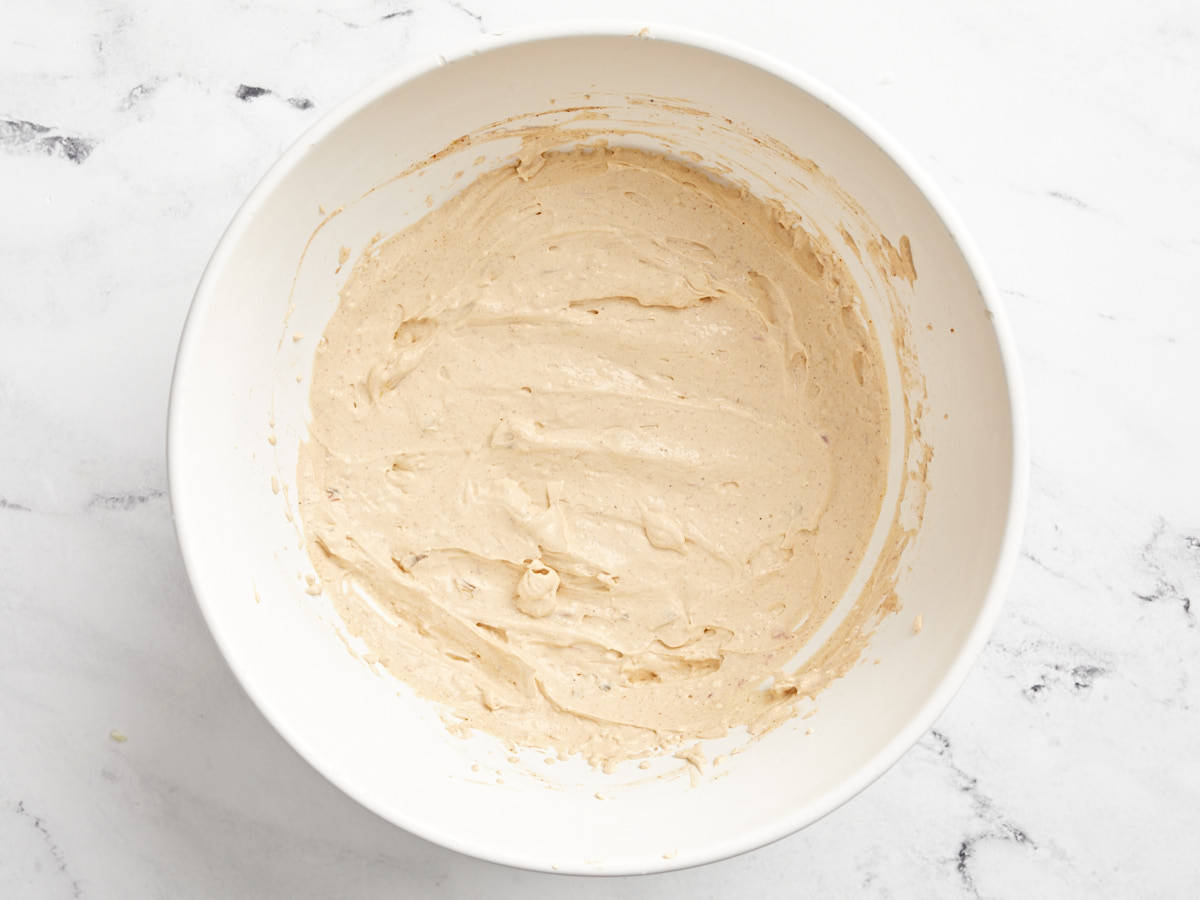
In a large bowl combine the softened cream cheese, sour cream, taco seasoning, and salsa.
Using a hand mixer blend all the ingredients together until completely smooth and the cream cheese is fully incorporated.
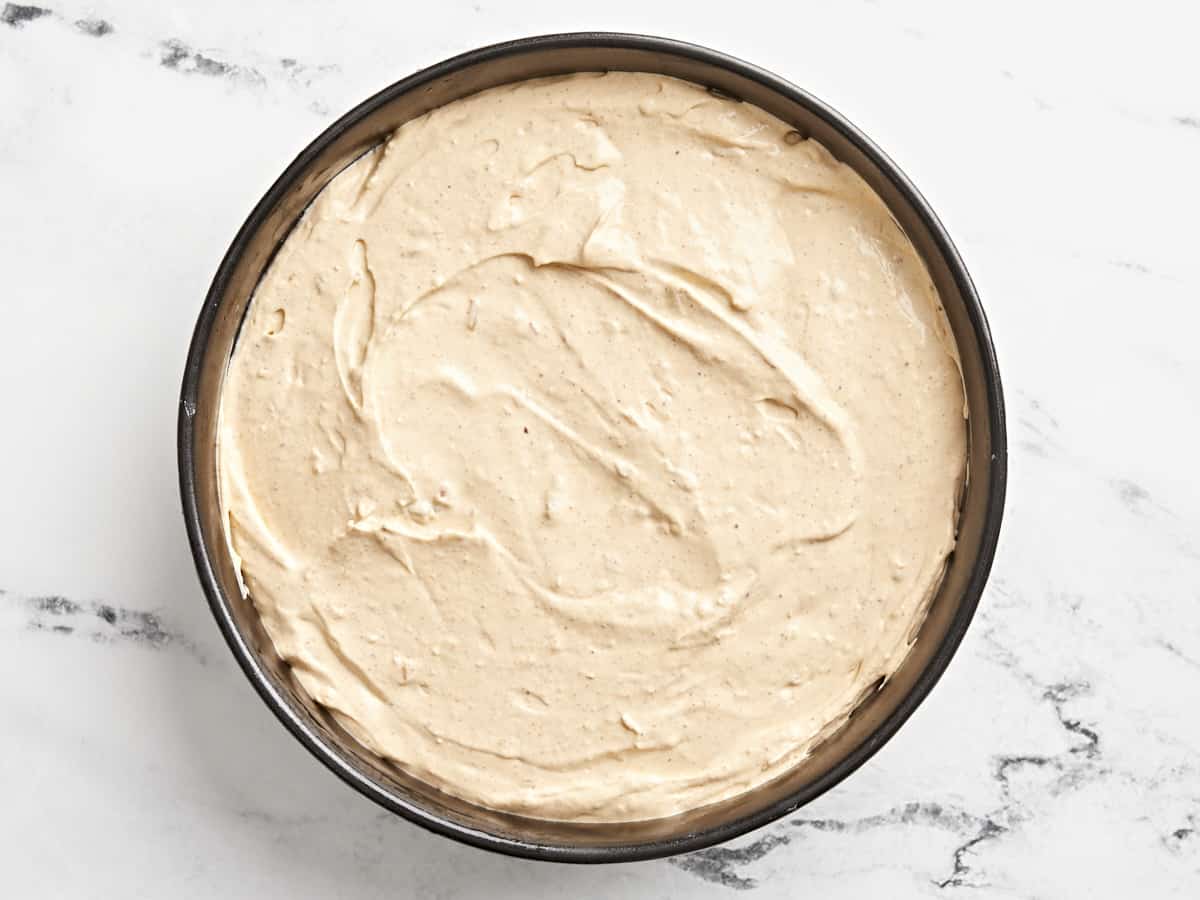
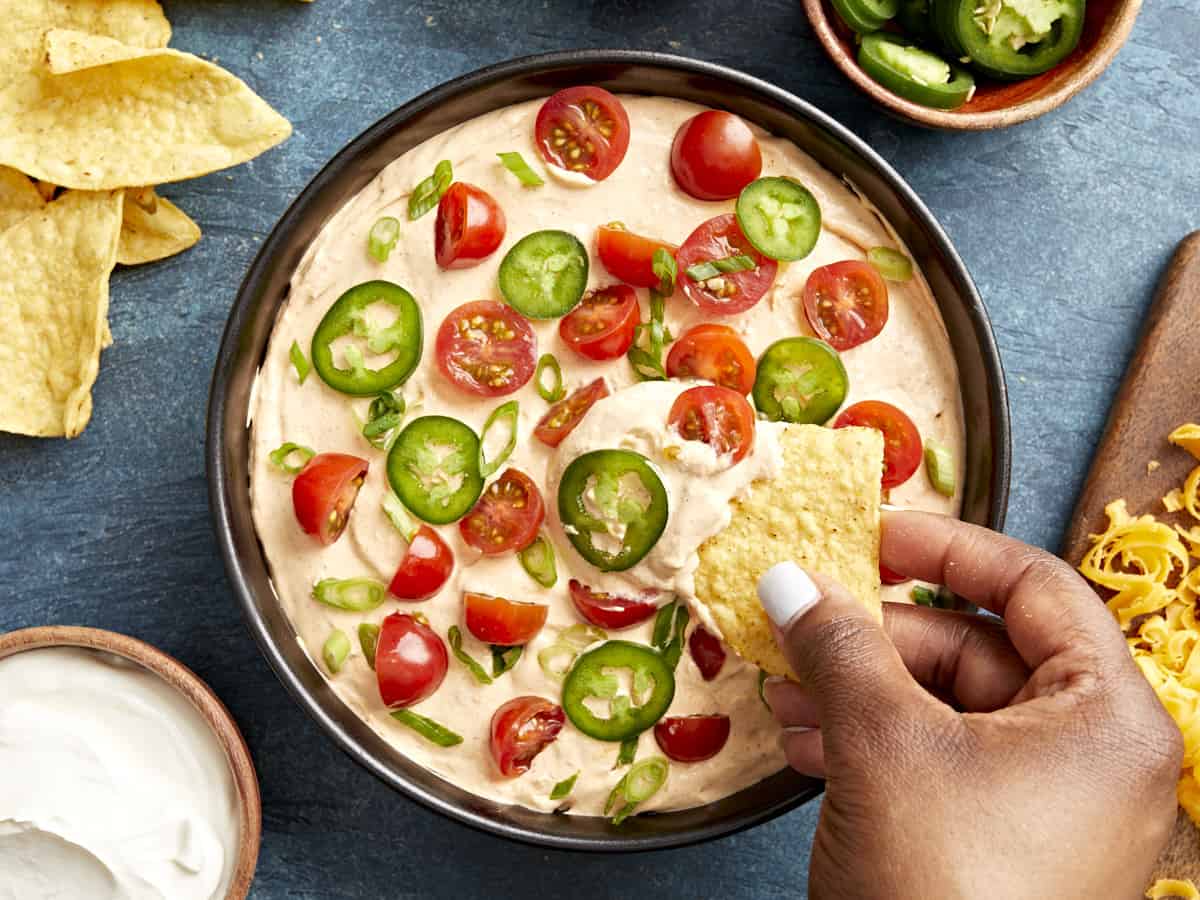
Add the taco dip to a serving dish and top with your favorite toppings. I topped mine with some grape tomatoes, sliced jalapeño, and sliced green onions. Enjoy!
*Make sure your cream cheese is softened so the ingredients can blend easily and smoothly.**You can use our homemade taco seasoning recipe or a store-bought taco seasoning packet. The store-bought packets are about 3 Tbsp of seasoning mix. You can use the entire packet for a more intense flavor or measure out 2 Tbsps and save the rest for later. I tested this recipe with 2 Tbsp of seasoning mix vs. the entire seasoning packet, and 2 Tbsp was definitely the way to go!
In a large bowl combine 8 oz. softened cream cheese, 1 cup sour cream, 2 Tbsp taco seasoning, and 1/4 cup salsa. I like using chunky mild salsa.
Using a hand mixer blend all the ingredients together until completely smooth and the cream cheese is fully incorporated.
Transfer the taco dip to a serving dish or bowl and top with your favorite toppings. I topped mine with some grape tomatoes, sliced jalapeño, and sliced green onions.
Now just grab a bag or tortilla chips and enjoy by yourself or with your family and friends!
If you are looking for a simple snack with bold, bright flavors, ranch cucumbers might be the perfect choice! Viral on tiktok, this three-ingredient combination of mini cucumbers, ranch seasoning, and a touch of lemon has the internet talking. Let̵…
If you are looking for a simple snack with bold, bright flavors, ranch cucumbers might be the perfect choice! Viral on tiktok, this three-ingredient combination of mini cucumbers, ranch seasoning, and a touch of lemon has the internet talking. Let’s start on one of this year’s most delicious and easy bite-sized appetizers. We love a...
Are you looking for the perfect bite-sized appetizer? Our mini cucumber sandwiches are delicious, elegant, and incredibly easy to make. Promising to be a hit, these tea sandwiches have a creamy dill and cream cheese filling, crisp cucumber slices, and …
Are you looking for the perfect bite-sized appetizer? Our mini cucumber sandwiches are delicious, elegant, and incredibly easy to make. Promising to be a hit, these tea sandwiches have a creamy dill and cream cheese filling, crisp cucumber slices, and a hint of everything bagel seasoning. Read on to discover how simple it is to...
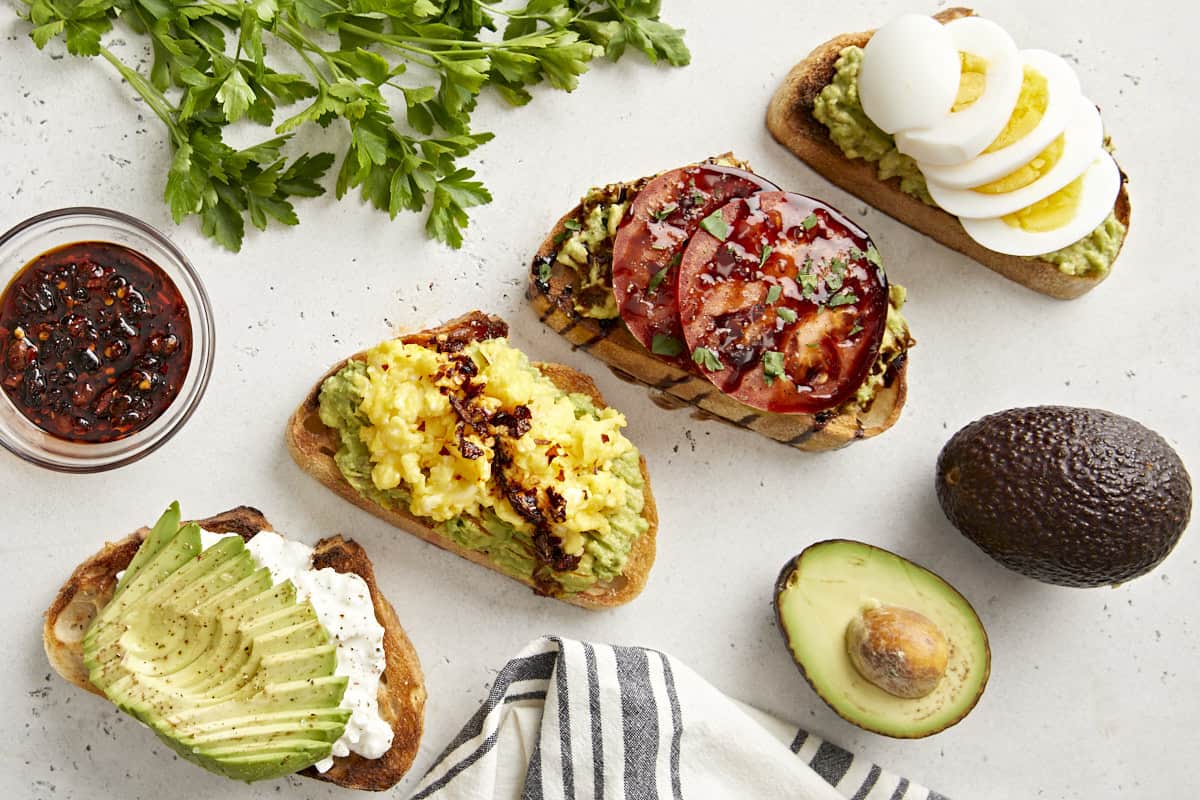
Avocado toast was all the rage just a few years ago, but I have good news…this easy 5-10 minute meal never goes out of style. It only requires a few simple ingredients, but you can always spice things up with extra toppings to make it a super filling meal. Today I’m sharing my favorite basic avocado toast recipe along with helpful tips and 3 easy recipe variations. It’s quick and easy which makes it perfect to whip up for breakfast, lunch or a midday snack. And for those of you who are avocado toast experts, like my colleague Jess, then I’m sure you have a few favorite combinations as well. Wanna share? Let’s meet in the comments!😉
Ingredients For Avocado Toast
You only need a few simple ingredients to make a classic avocado toast. Here’s what I used:
Avocado: Avocado is one of the main ingredients, so you’ll want to choose it wisely. Look for avocados that have a slight give when squeezed, but are not mushy.
Bread: You’ll want to choose a good quality, sturdy bread. I like using sourdough or whole grain bread.
Garlic: Rubbing a little bit of fresh garlic over toasted bread while it’s still warm adds incredible flavor.
Lemon: A small squeeze of fresh lemon juice adds a pop of brightness and keeps the avocado from browning.
Salt & Pepper: Don’t skip the salt! Just a pinch of salt and pepper enhances the flavor of the avocado toast.
Red pepper flakes (optional): This is optional but it adds a kick and a little bit of extra heat to the avocado toast.
Tips For Making The Best Avocado Toast
Choose your bread wisely: Use a good quality, sturdy bread for the base of your avocado toast like sourdough, multigrain or whole grain bread. Toasted, sturdy bread holds the mashed avocado and any extra toppings a lot better than white sandwich bread.
Picking the perfect avocado: When picking your avocado, look for blackish, dark-green skin, which indicates the avocado has ripened. Also give the avocado a gentle press with your finger, the flesh should give slightly under pressure. If it’s mushy, its time has passed.
Don’t skip the extras! Yes, rubbing your toast with a fresh garlic clove may seem like an unnecessary step, but it adds SO much flavor and compliments this simple meal perfectly. Also the small squeeze of lemon juice gives just the right about of brightness and the pinch of salt makes all the flavors pop!
Topping Ideas
There are lots of fun ways to enjoy your avocado toast! In addition to the recipe variations listed in the step-by-step photos below, here are a few more ingredients and topping ideas for you to try:
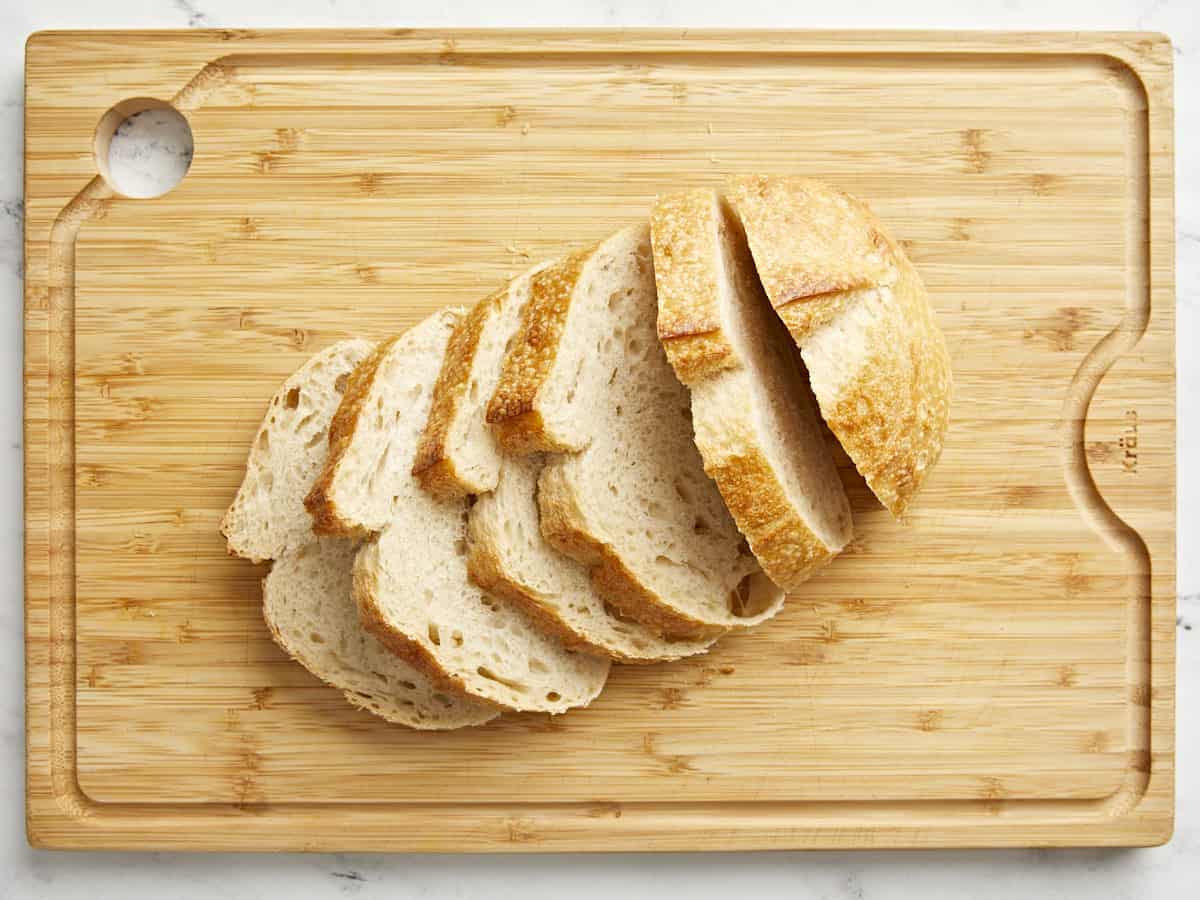
Cut 2 slices of sturdy bread. Toast the bread in a toaster or in a skillet on the stovetop until golden brown.
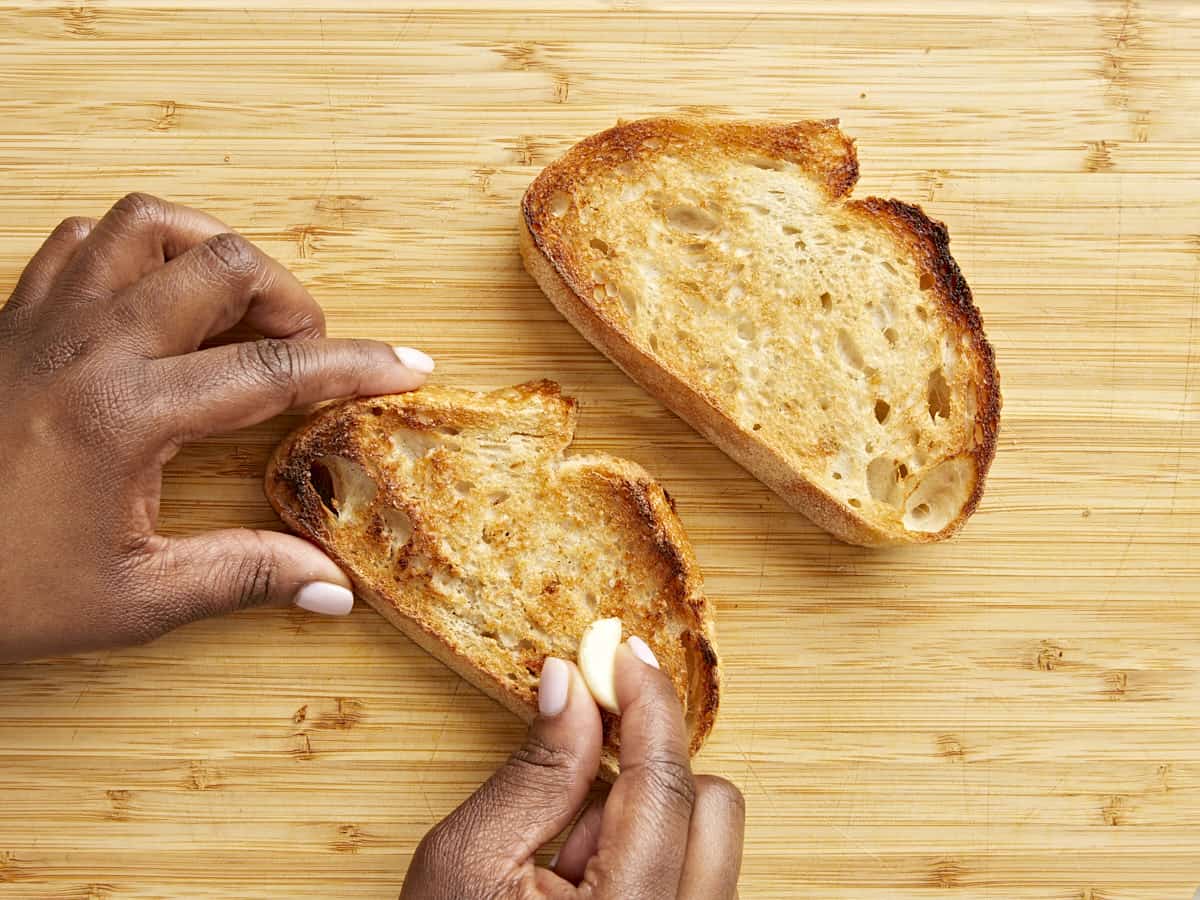
Rub the peeled garlic clove over the top of the warm toasted bread, making sure to fully cover the entire surface area.
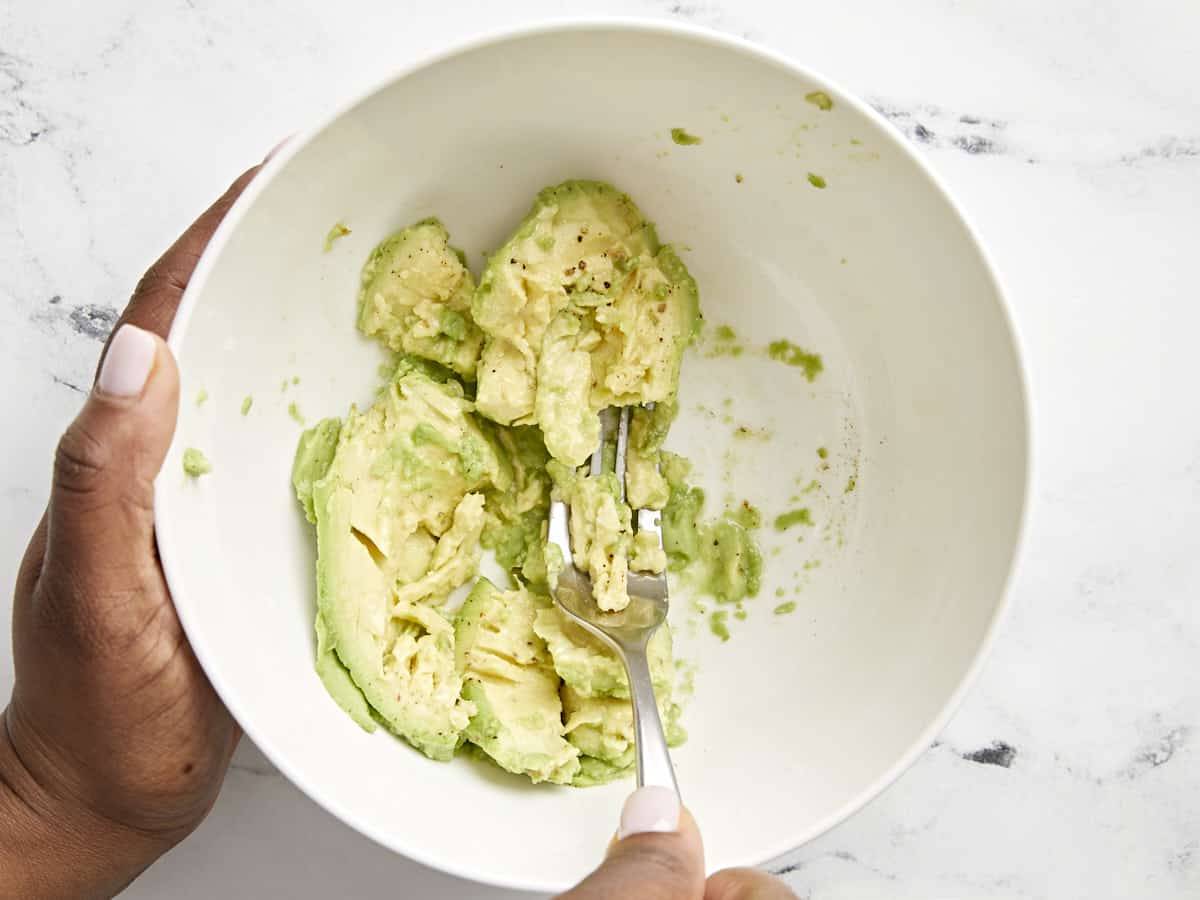
Next, halve the avocado and remove the pit. Scoop out the avocado flesh from both halves and place it in a bowl. Add a small squeeze of fresh lemon juice (about 1 tsp), salt and pepper to the bowl and mash the avocado with a fork. I recommend leaving it just a little chunky.
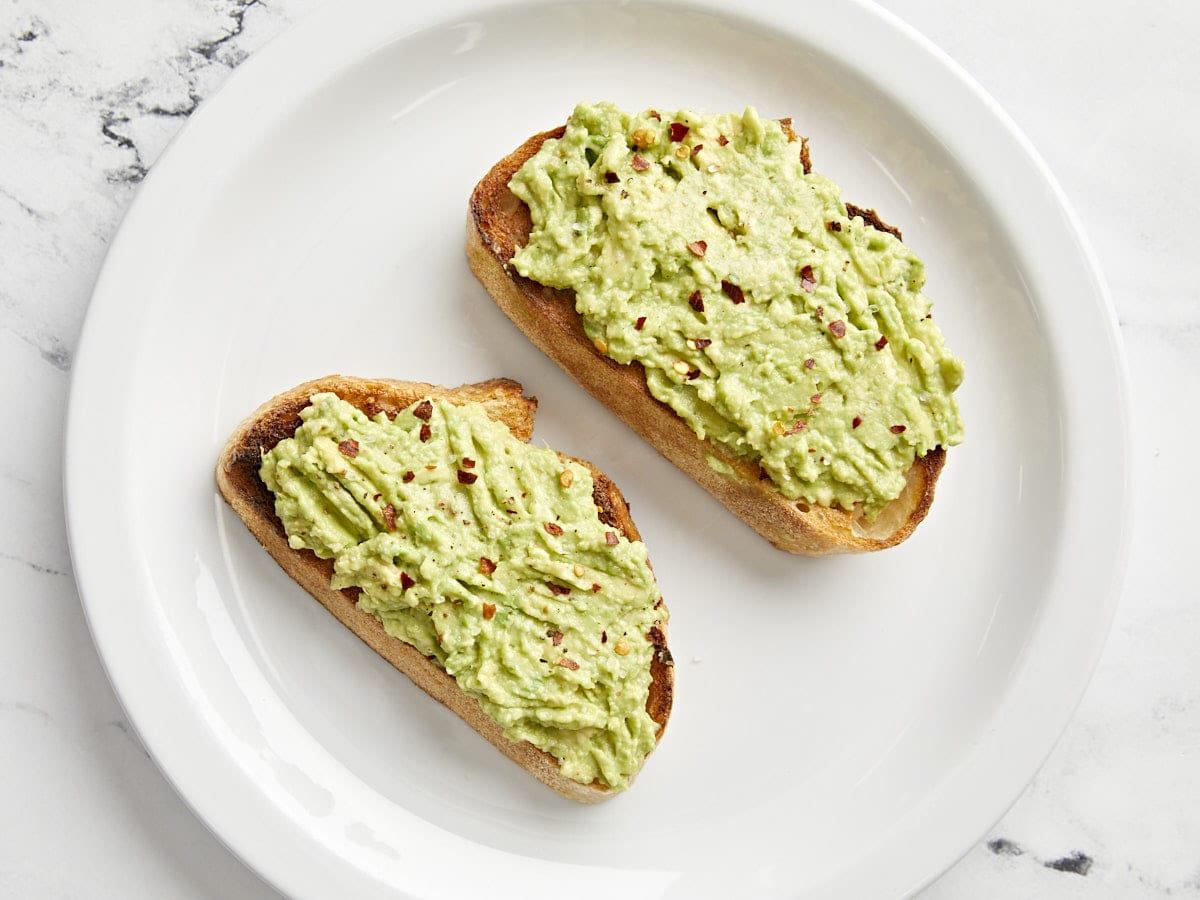
Divide the avocado mixture and spread it on top of each slice of toast. Top with a pinch of red pepper flakes and a pinch of sea salt (optional).
Cut 2 slices of sturdy bread. Toast the bread in a toaster or on the stovetop until golden brown.
Rub 1 peeled garlic clove over the top of the warm toasted bread, making sure to fully cover the entire surface area.
Next, halve 1 avocado and remove the pit. Scoop out the avocado flesh from both halves and place it in a medium bowl. Add a small squeeze of lemon juice (about 1 tsp), 1/8 tsp salt and 1/8 tsp freshly cracked black pepper to the bowl and mash the avocado with a fork. I recommend leaving it just a little chunky, but you can certainly mash until it’s completely smooth. It’s up to you!
Divide the avocado mixture and spread on top of each slice of toast. Top with a pinch of red pepper flakes and a pinch of sea salt (optional). Enjoy as is or try out one of the recipe variations listed below.😉
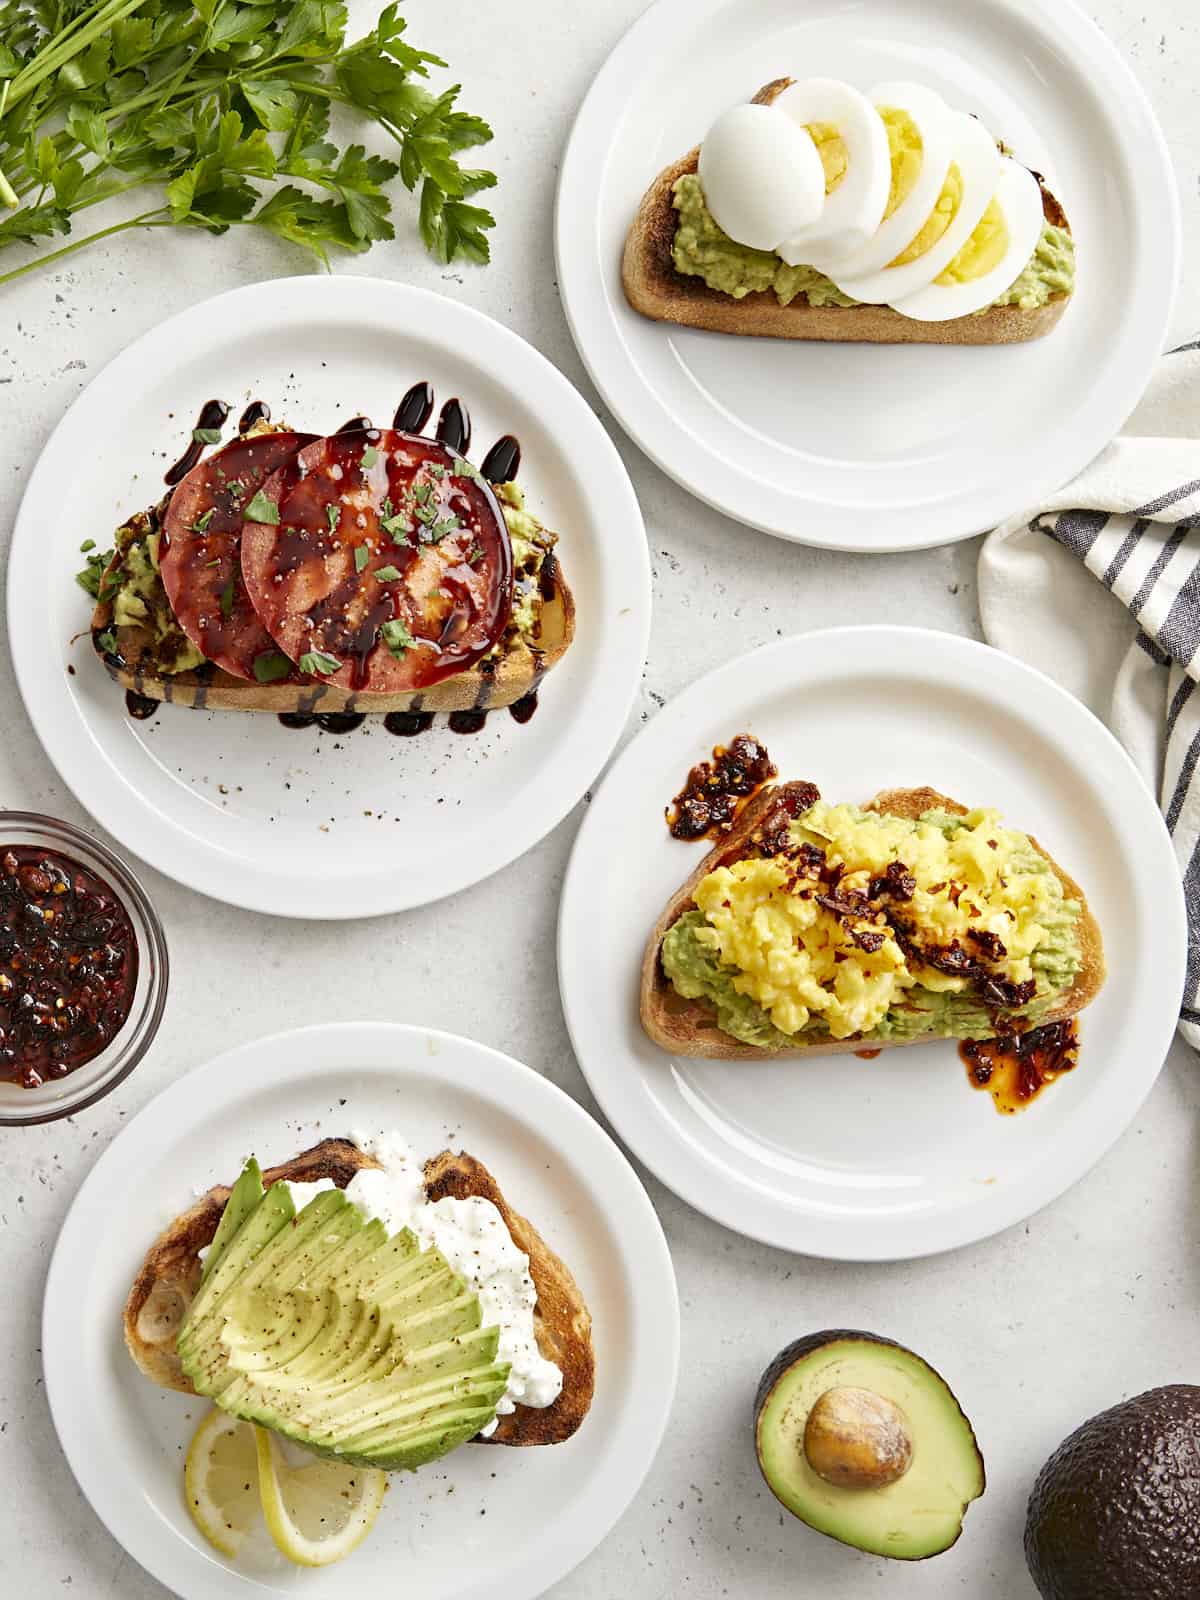
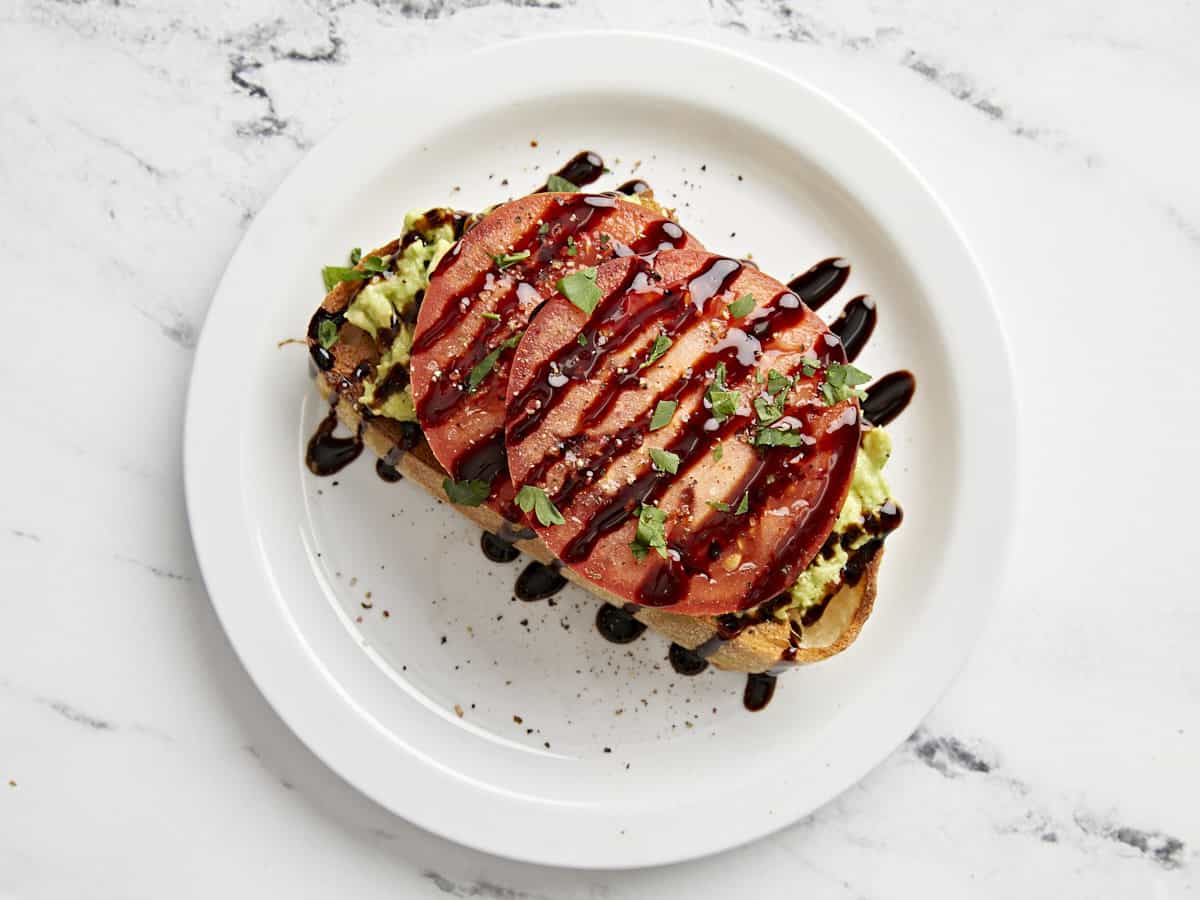
Recipe Variation 1: If you love juicy, ripe tomatoes then this variation is just for you! Top your avocado toast with two slices of tomatoes, a drizzle of balsamic glaze, and freshly cracked black pepper. This combo is perfect for the summer when tomatoes are in their peak season. So delicious!
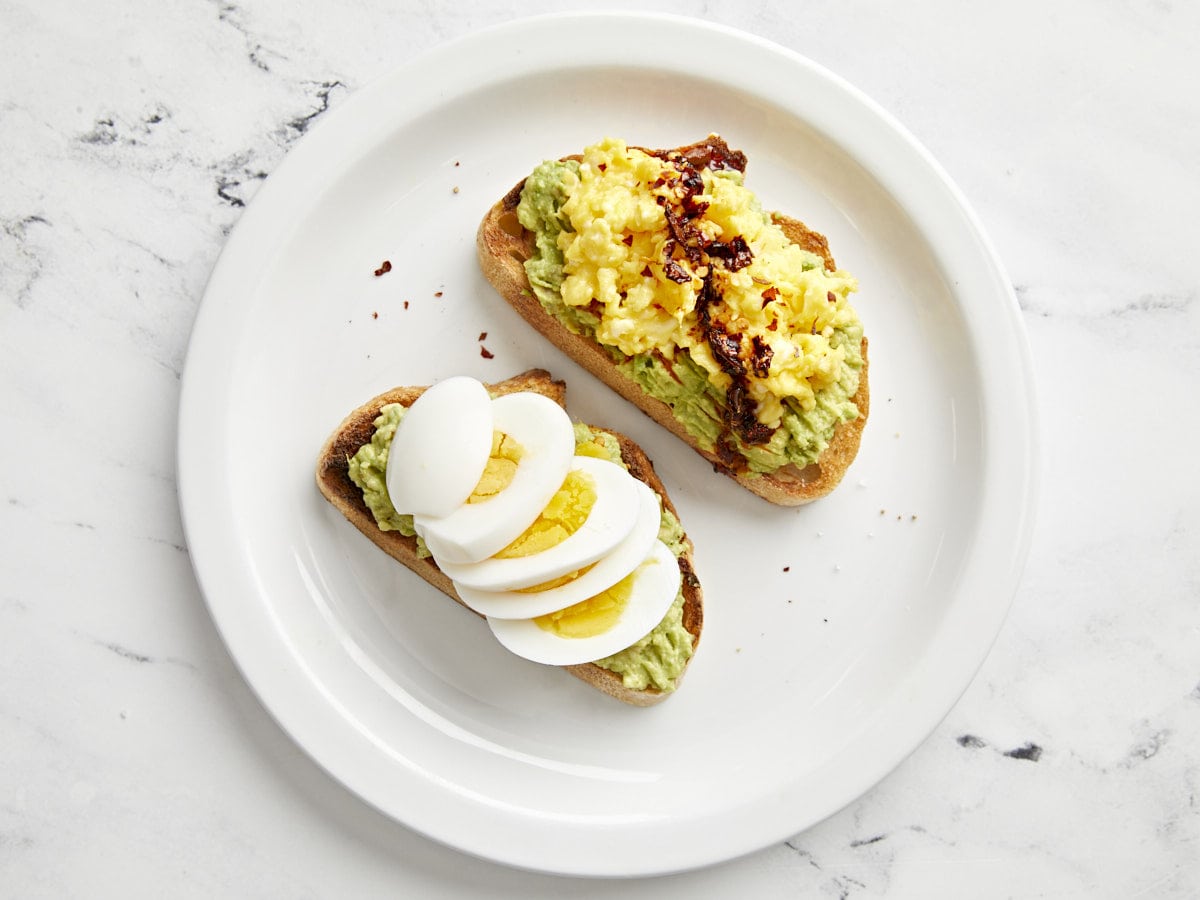
Recipe Variation 2: My absolute favorite way to enjoy avocado toast is by adding some scrambled eggs, a fried egg, or hard boiled egg on top. You can even take it a step further and add a little chili crisp on top too!
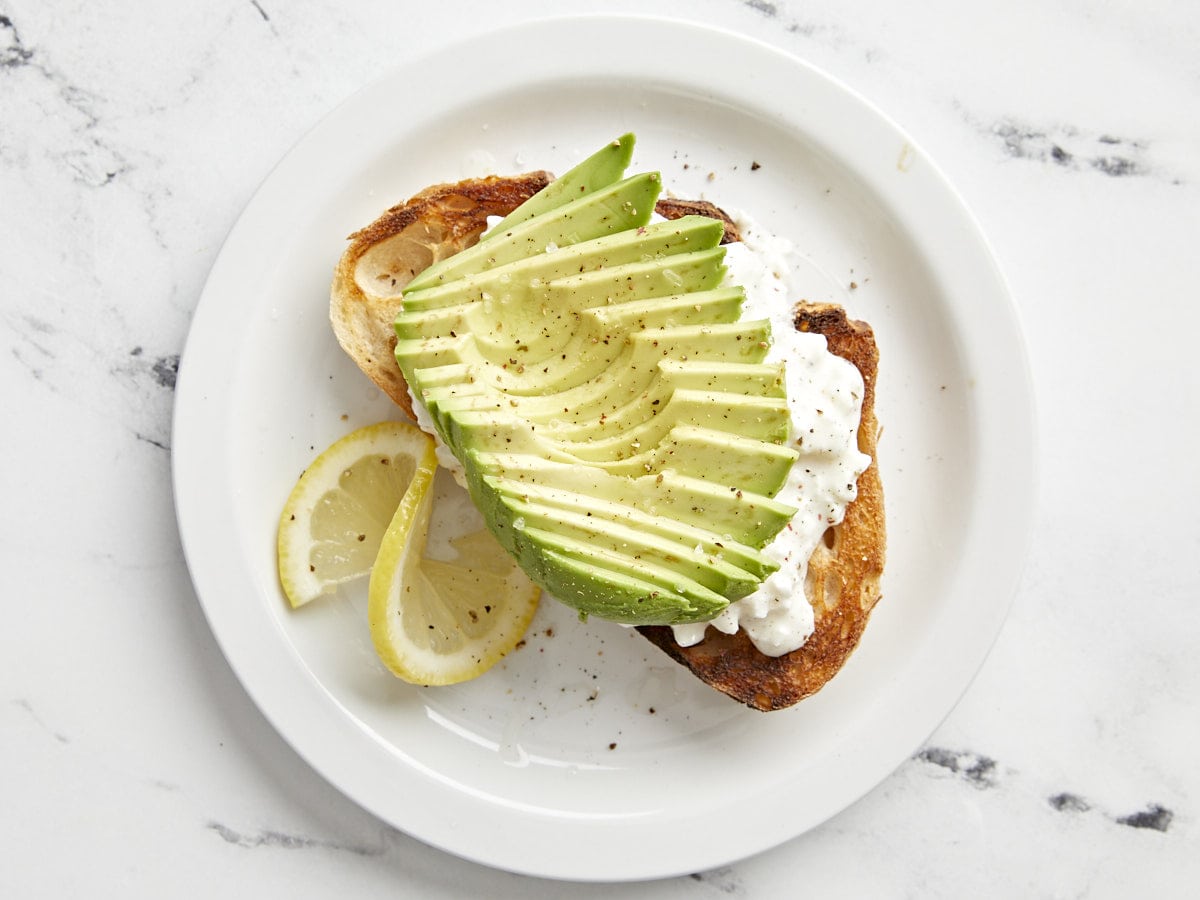
Recipe Variation 3: And for all of my cottage cheese lovers out there, try topping your thick crusty bread with a spoonful or two of small curd cottage cheese, 1/2 avocado sliced, salt, freshly cracked black pepper, and a squeeze of fresh lemon juice. Enjoy!
I can easily classify a few types of sandwiches as classics that everyone should learn to make. This simple chicken salad recipe is great as a sandwich for lunch, with crackers, inside lettuce and tortilla wraps, or as a finger food tea sandwich for pa…
I can easily classify a few types of sandwiches as classics that everyone should learn to make. This simple chicken salad recipe is great as a sandwich for lunch, with crackers, inside lettuce and tortilla wraps, or as a finger food tea sandwich for parties. The best way to cook chicken for a chicken salad:...
Looking for a quick, delicious lunch or finger food appetizer for your next party? Club sandwiches, the multilayer sandwich conveniently cut in small triangles for grabbing and eating, is a great choice. Today I am going to teach you how to make a club…
Looking for a quick, delicious lunch or finger food appetizer for your next party? Club sandwiches, the multilayer sandwich conveniently cut in small triangles for grabbing and eating, is a great choice. Today I am going to teach you how to make a club sandwich with chicken, so you can easily create this meal without...
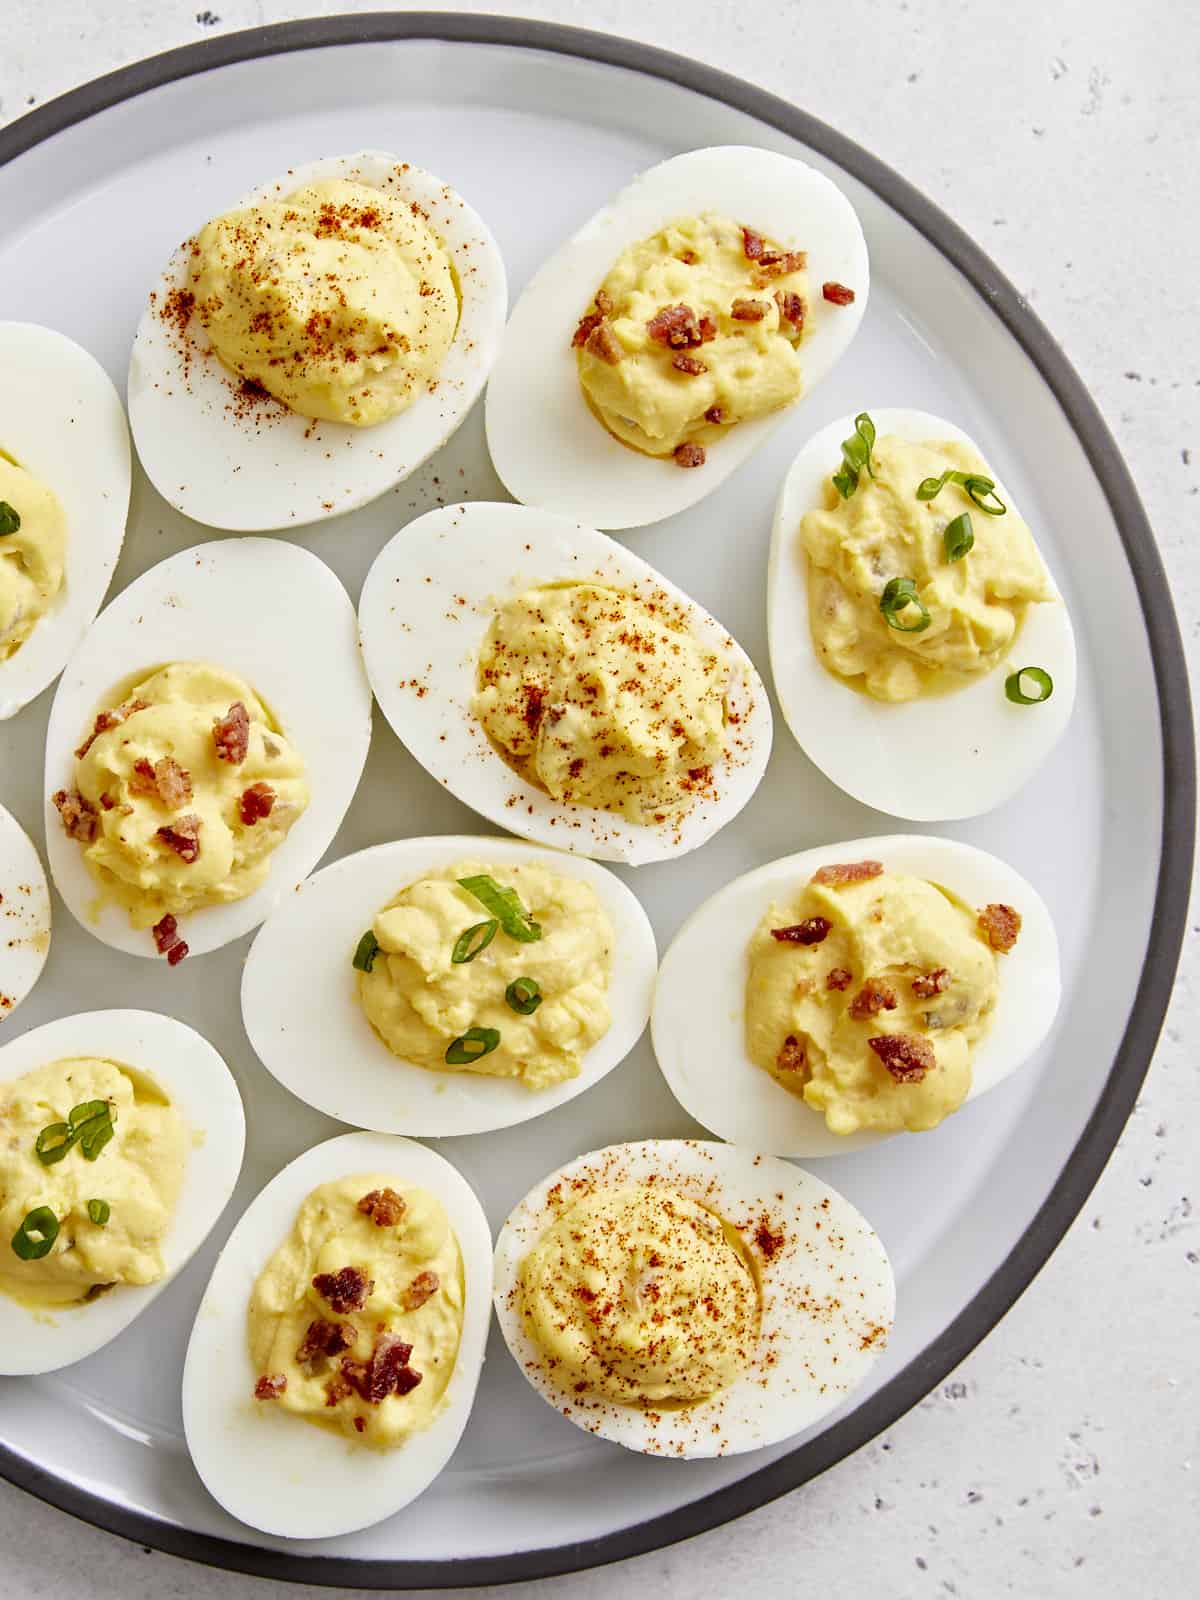
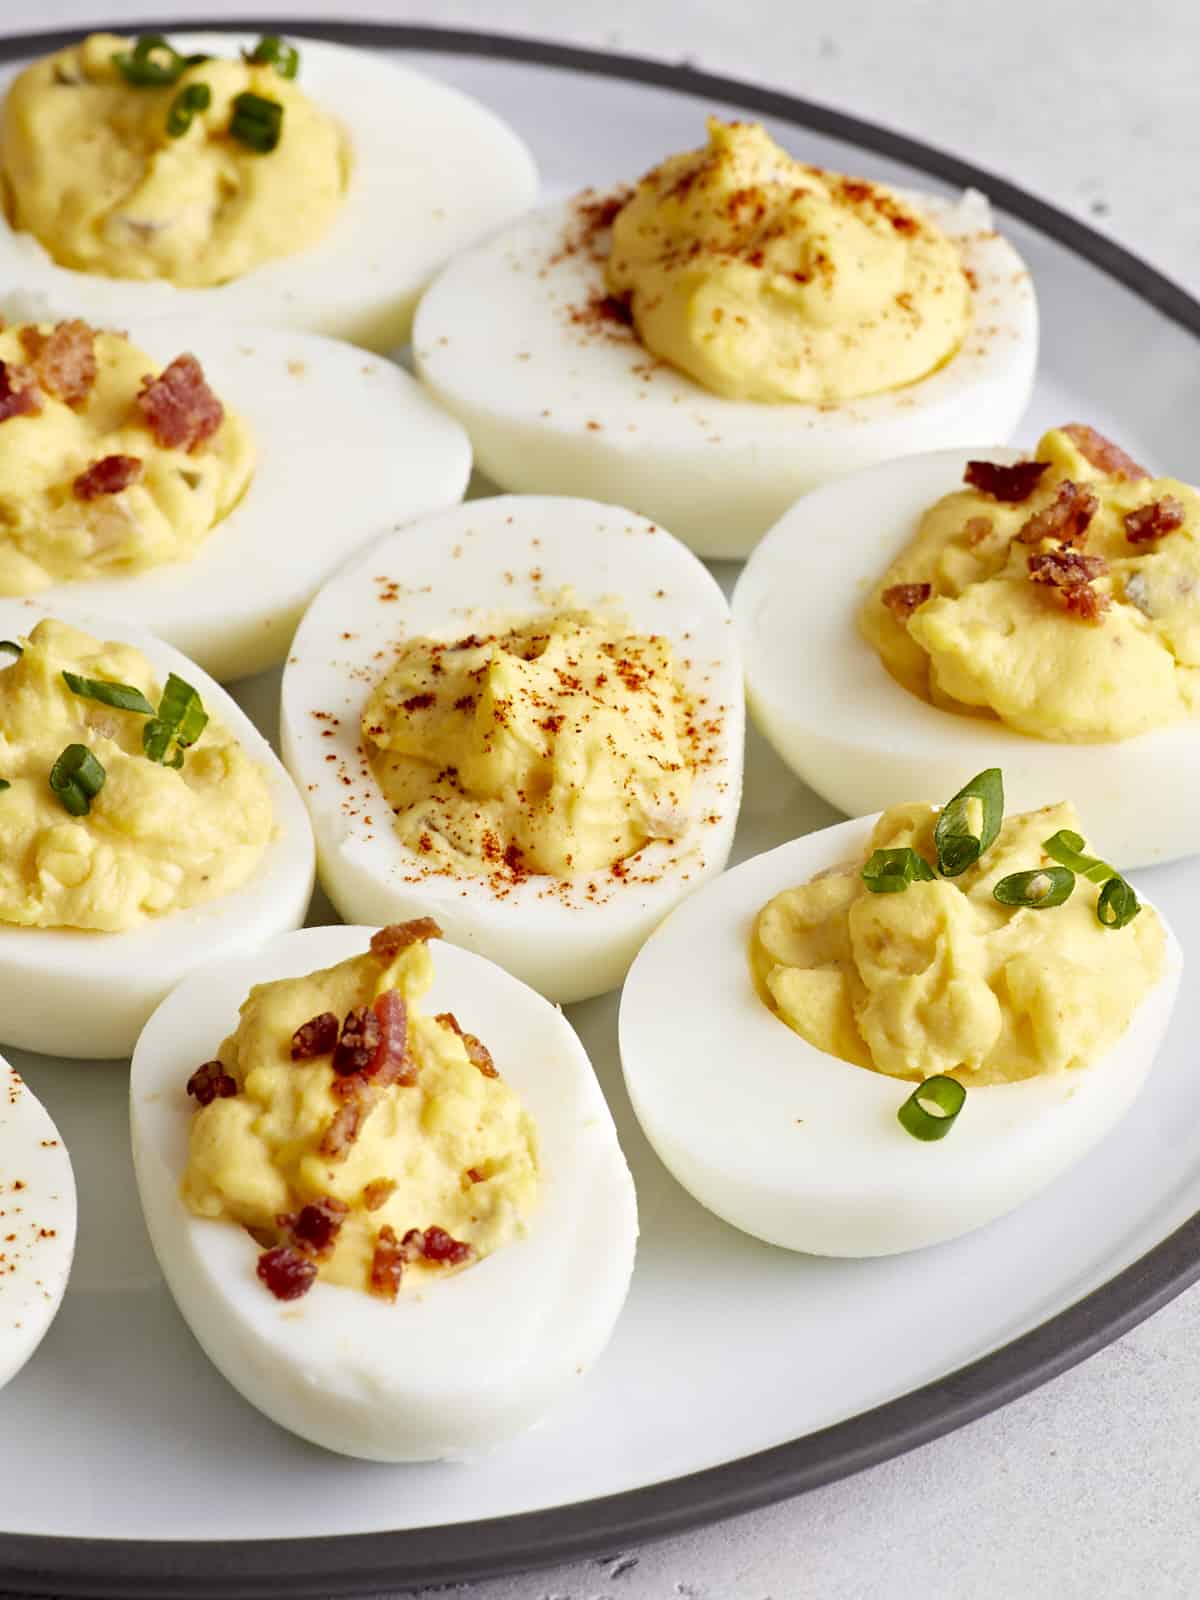
Deviled Eggs are a classic appetizer that’s always fun to serve at parties, Easter, potlucks, and during the holidays. It’s one of my mom’s favorite dishes to make for family gatherings and it always surprises me how fast they disappear! But it doesn’t have to be a special occasion to make these tasty little bites. They’re easy enough to make any day of the week and they’re a lot cheaper to make homemade. Keep the toppings simple or play around with some of our favorites listed below!😉
What Are Deviled Eggs?
Deviled eggs are eggs that have been hard-boiled, cut in half, then the yolks mixed with other ingredients before stuffing them back into the whites. They can be basic, super fancy, or anywhere in between. They’re perfect for parties, potlucks, family gatherings, and during the holidays. Or during the week when you just have a craving for some tasty deviled eggs! There are so many options and different toppings to choose from when making deviled eggs, which makes them a LOT of fun!
Ingredients For Deviled Eggs
To make things easy we followed the same formula as our small batch deviled eggs recipe, that we already love, with one extra addition. So here’s everything you’ll need:
Mayonnaise: Mayo gives the filling a creamy, smooth texture.
Dijon mustard: Dijon mustard adds great tang and flavor to the deviled eggs.
Seasoning salt: To season the egg mixture we use Tony Chachere’s Creole seasoning, but you can use any brand of seasoning salt like Lawry’s, Morton’s, or even a generic store brand.
Dill relish: Relish is the extra added ingredient and my personal favorite! It adds lots of great dill flavor and some much-needed texture to the filling.
How Long Should You Boil Your Eggs?
When it comes to how long to boil eggs for deviled eggs, I followed our step-by-step guide on How To Make Hard Boiled Eggs and the eggs came out perfect!
The short answer is – boil large eggs for about 12 minutes to make hard boiled eggs. But there are a few other factors to keep in mind. I’ll share more details below.
Topping Ideas
This is where it really gets fun! We topped our deviled eggs with some chopped air fryer bacon, sliced green onions, and a little bit of paprika. But you can use all sorts of other toppings to make them your own or just to use up different ingredients in your fridge. Here are some more ideas for deviled eggs toppings:
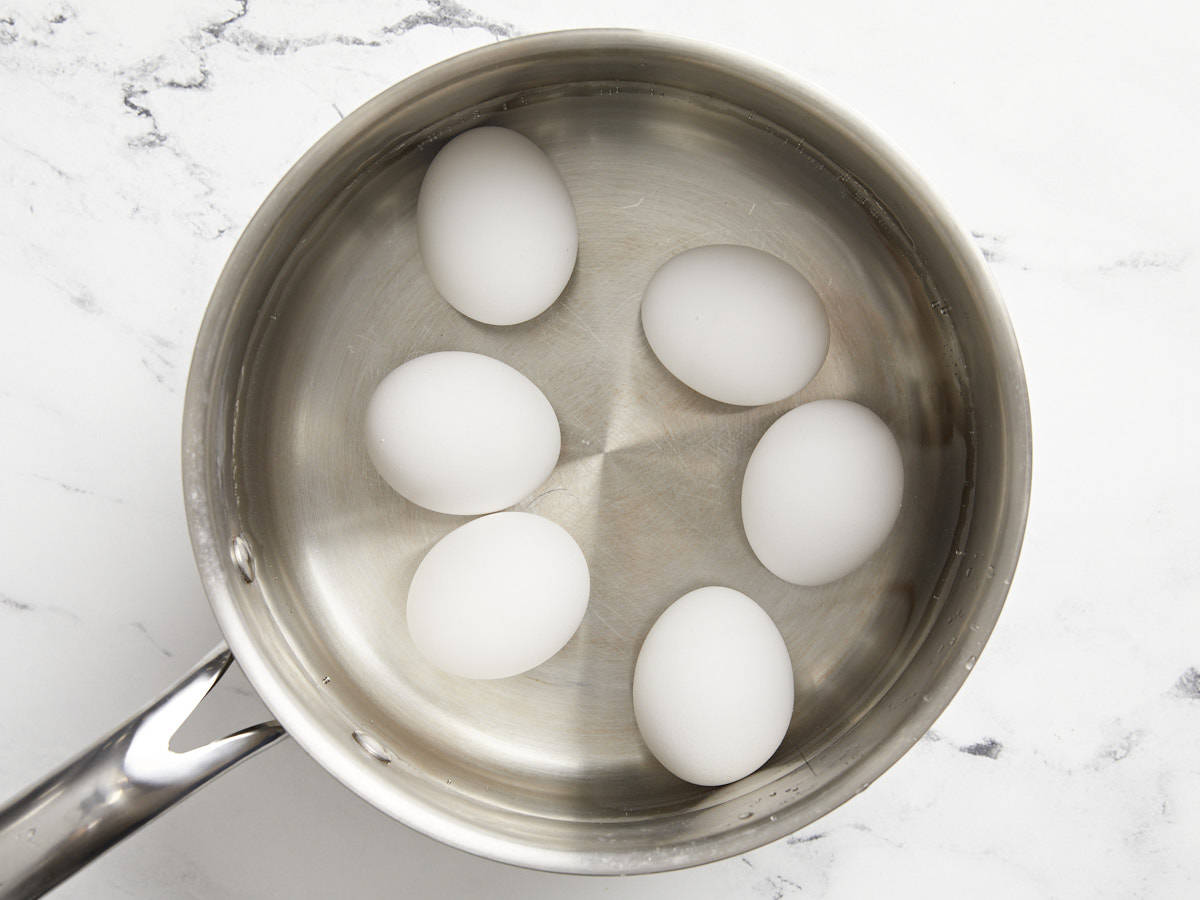
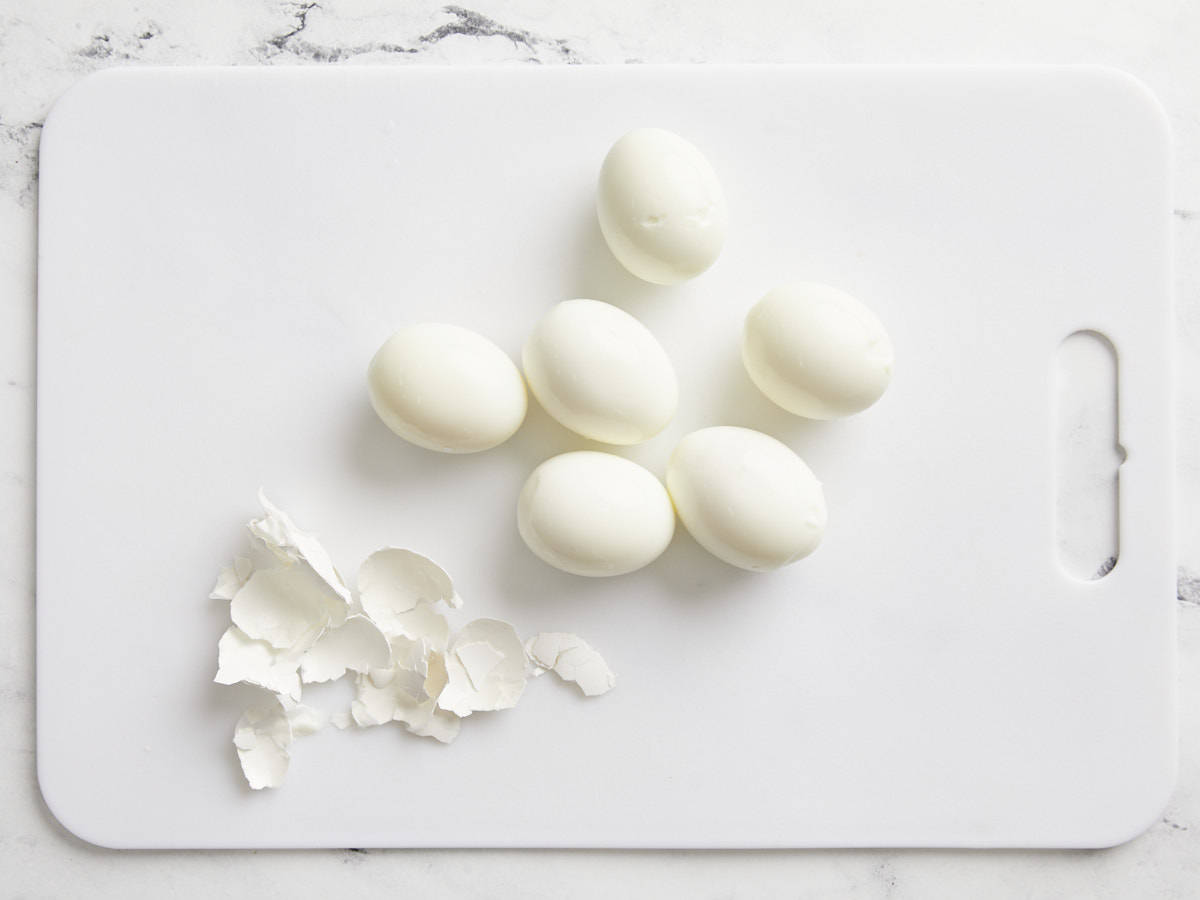
Add the cold eggs to a saucepot. Add enough water to the pot to cover the eggs by one inch.
Place a lid on the pot and bring the water up to a boil over high heat. Once the water reaches a full rolling boil, turn the heat off and leave the pot on the burner (with the lid on) for about 12 minutes.
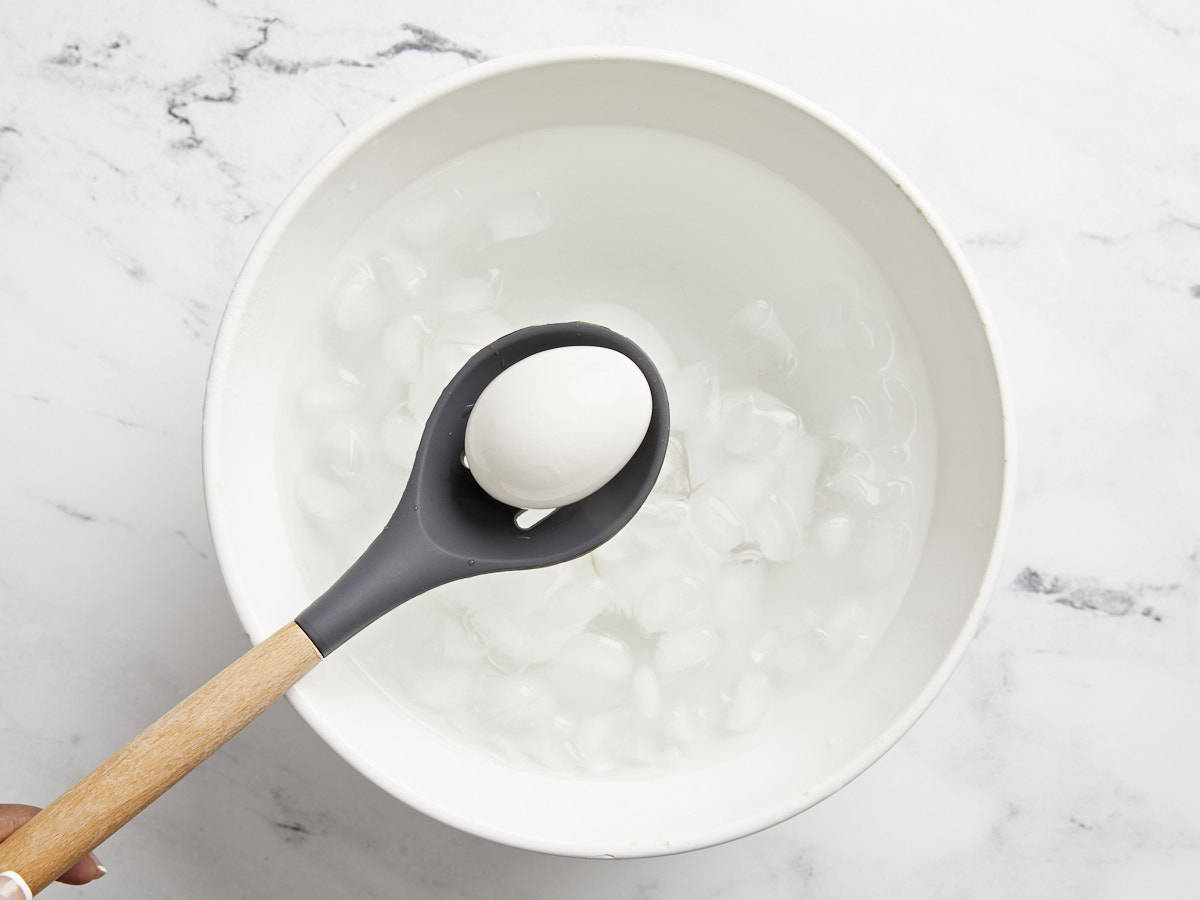
After 12 minutes, transfer the eggs to a bowl of ice water and chill the eggs for about 5 minutes.
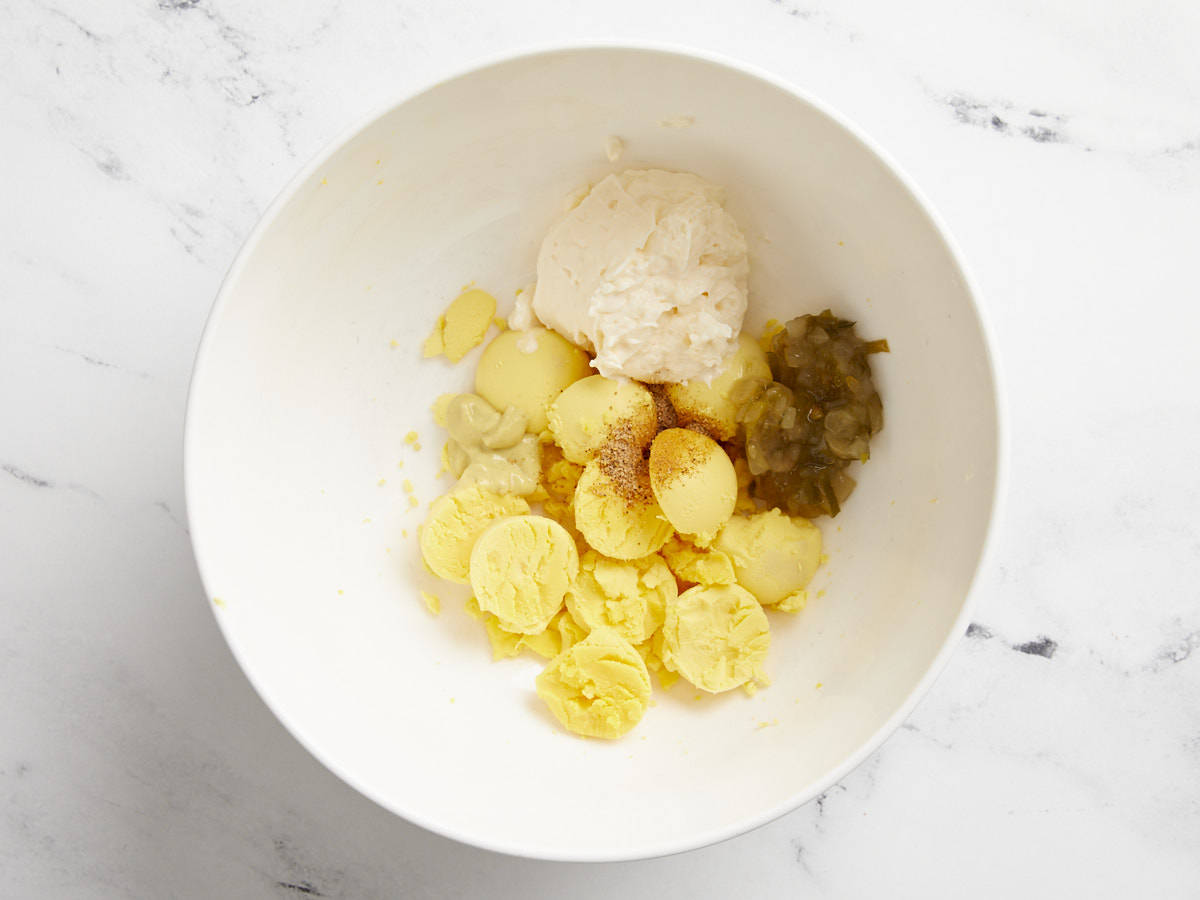
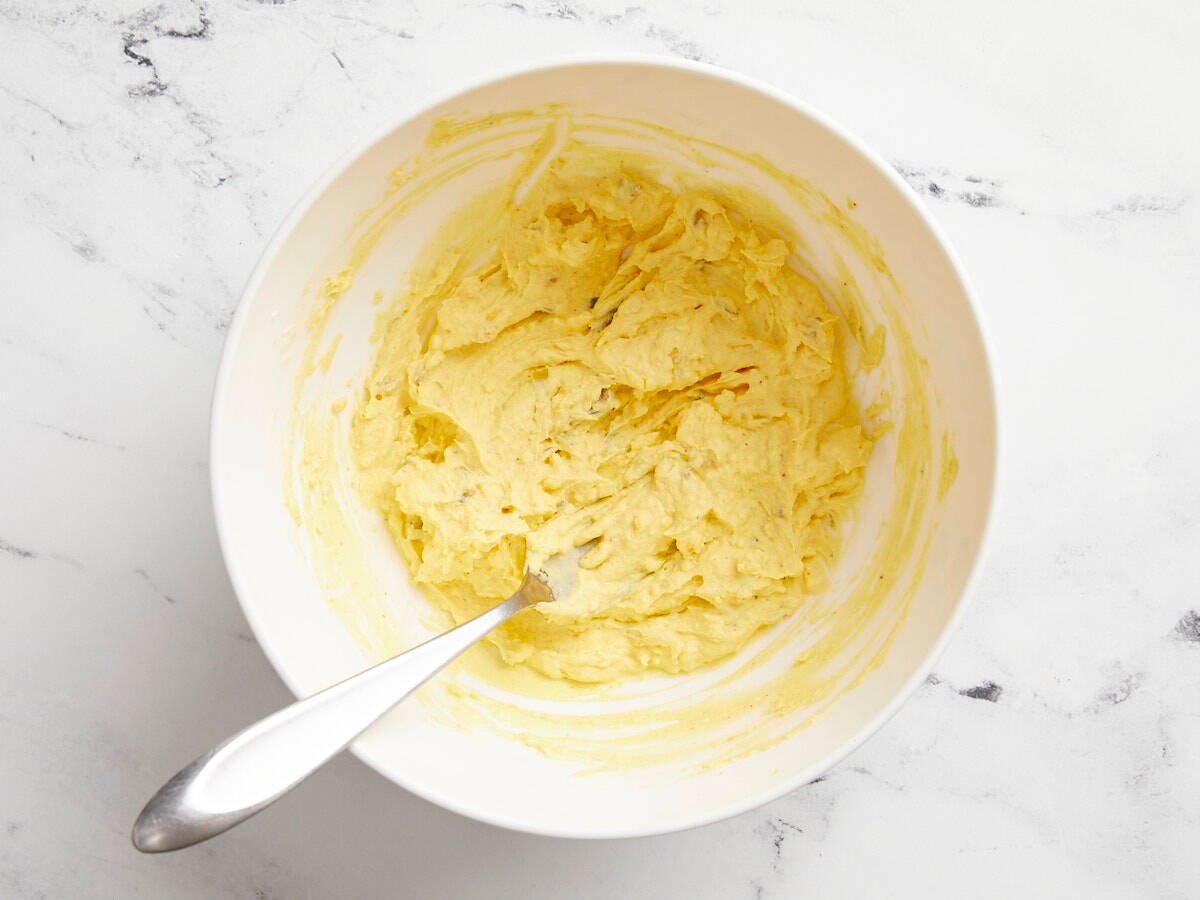
Next, peel the eggs then slice them in half. Pop the yolks out of the white and place them in a bowl. Add the mayonnaise, Dijon mustard, seasoning salt, and dill relish and mash everything together to combine.
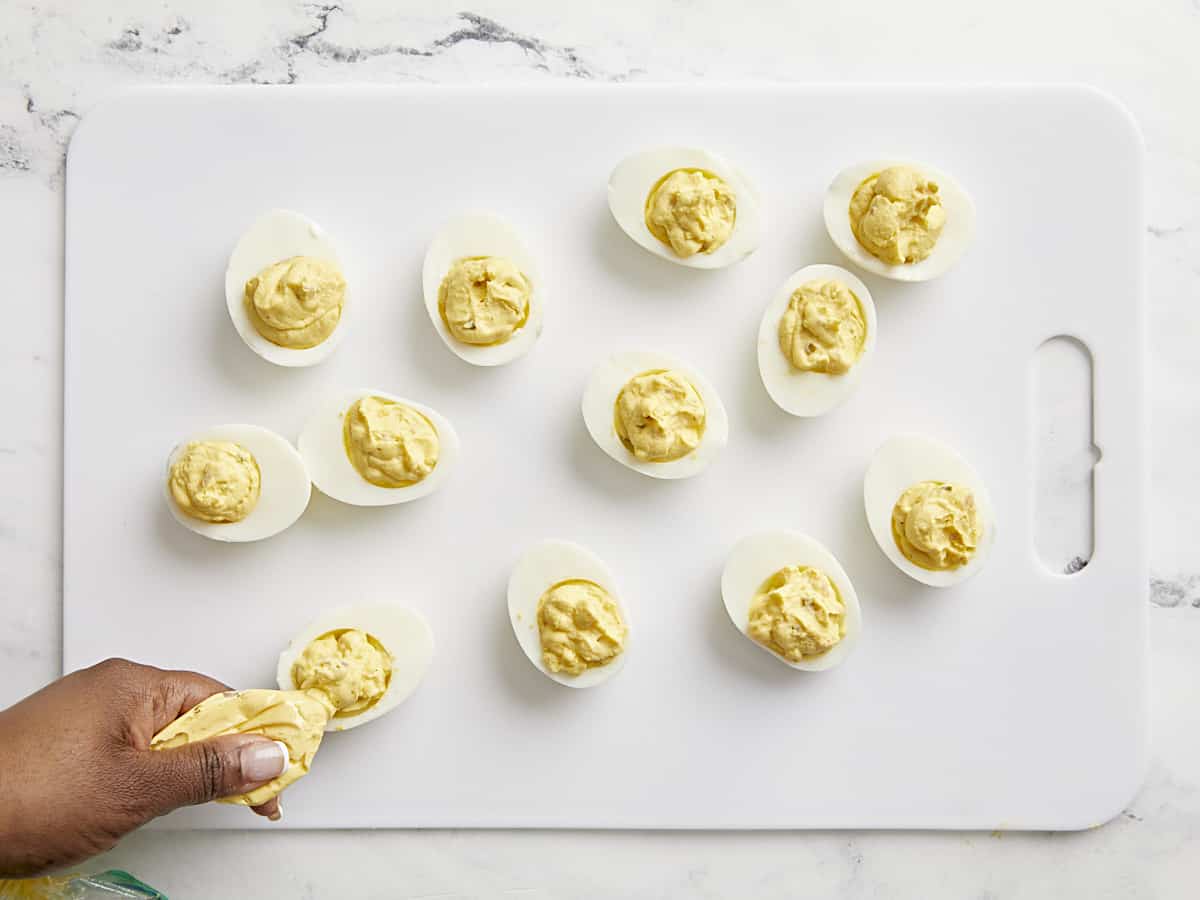
Spoon the seasoned yolk mixture back into the whites or place the mixture in a sandwich or freezer bag, snip off one corner of the bag, and pipe the filling into the egg whites.
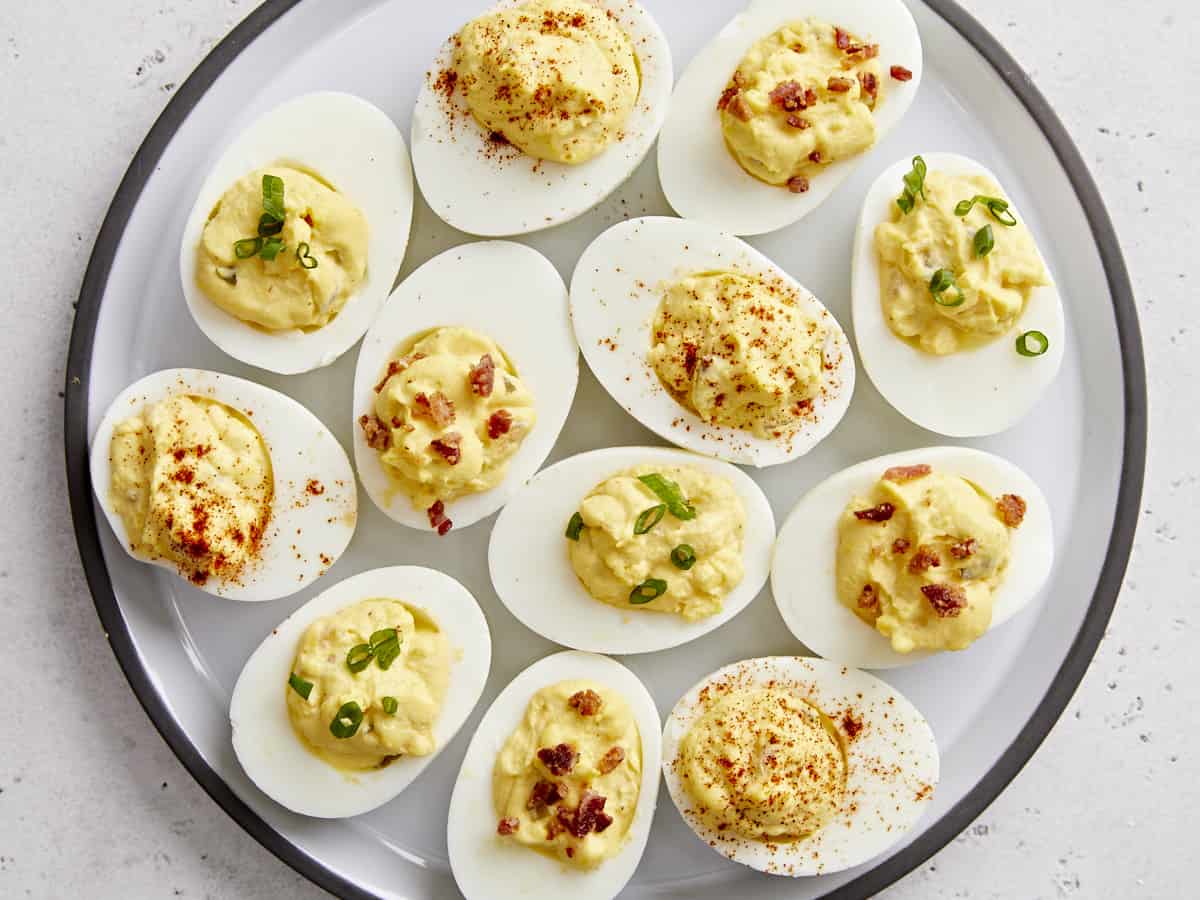
Garnish the deviled eggs with your favorite toppings like paprika, chopped bacon, or sliced green onions. Serve and enjoy!
Add 6 large cold eggs to a sauce pot. Add enough water to the pot to cover the eggs by one inch. Place a lid on the pot and bring the water up to a boil over high heat. Once the water reaches a full rolling boil, turn the heat off and leave the pot on the burner (with the lid on) for about 12 minutes.
After 12 minutes, transfer the eggs to a bowl of ice water for about 5 minutes.
After the eggs have chilled, carefully peel the eggs then slice them in half.
Pop the yolks out of the white and place them in a bowl. Add 1/4 cup mayonnaise, 3/4 tsp Dijon mustard, 1/4 tsp seasoning salt, and 1 Tbsp dill relish.
Mash the yolks together with the rest of the ingredients to combine.
Spoon the seasoned yolk mixture back into the whites or place the mixture in a sandwich or freezer bag, snip off one corner of the bag, and pipe the filling into the egg whites.
Garnish the deviled eggs with your favorite toppings like paprika, chopped bacon, or sliced green onions. Serve and enjoy!
—————————————————— Thank you for reading! This is a premium post available to subscribers only. While most of the site is open to all, if you’d like access to this and…
Source
------------------------------------------------------ Thank you for reading! This is a premium post available to subscribers only. While most of the site is open to all, if you'd like access to this and...