Olive Pizza

This olive pizza stars green and black olives with gooey mozzarella and a zingy pizza sauce. A simply stunning topping…

A Couple Cooks – Recipes worth repeating.

This olive pizza stars green and black olives with gooey mozzarella and a zingy pizza sauce. A simply stunning topping combo!

Olive Pizza

Here’s a pizza topping combination that’s stunningly simple and one of the best pies around. Try this Olive Pizza! The simpler the better with Italian cuisine, and we’ve found that with pizza, a few curated ingredients can make magic. Here a mix of briny green and black olives interplay with thin slivers of red onion, pops of salty capers, and gooey mozzarella cheese. It’s one dream pie for olive lovers! We couldn’t get enough of this pie: the flavor is surprisingly greater than the sum of its parts.

Ingredients for olive pizza

This olive pizza is perfect for lovers of this ingredient, but even the olive averse might be swayed by this pie. The olives used here are ripe olives, and their flavor is a burst of salty and savory. They’re less briny than a pimento-stuffed olive and not as strong as the super-salty Kalamata. We like a variety called Castelvetrano for the green olives, which has a milder flavor and buttery texture. Here’s what you’ll need for this recipe:

Olive Pizza

What are Castelvetrano olives?

Castelvetrano olives are a green olive variety grown in Sicily with a signature rich, buttery flavor and crisp texture. They have a mild and fruity flavor, making them suitable for people who shy away from very strong and briny varieties. Unlike other olives, they’re not cured: they’re washed in lye and water for a few weeks until the bitter flavor is removed.

There’s something about the buttery, mild flavor of Castelvetranos that’s unlike any other type. We’ve served these to people who claim not to like olives, only to have them park themselves in front of the bowl! They’re the perfect addition to this olive pizza.

Green Olive Pizza

Recipes for homemade pizza dough

The trick to the best olive pizza? Homemade pizza dough. Check out that photo: see that beautiful pillowy crust? This crust recipe works perfectly in a standard oven or pizza oven to make next-level, artisan style pies. Pick from these recipes:

  • Best Pizza Dough: The standard! This is our best oven pizza dough and works best on a pizza stone.
  • Thin Crust Pizza Dough: It’s easy and you can roll it out instead of stretching it.
  • Pizza Oven Dough: Got a pizza oven? This is the dough recipe for you.
  • Alternatives: Try a Pan Pizza in a cast iron skillet, no special pizza tools required. Or, make our Best-Ever Sheet Pan Pizza for serving a crowd: it makes the equivalent of two pizzas in a sheet pan.

Pizza making tools

Great pizza requires a few tools. If you choose the standard or thin crust pizza recipes above, you’ll need a stone and peel. (Pizza ovens typically come with their own pizza peel that can withstand the high temperatures.) The pan pizza and sheet pan pizza above require no extra tools. :

  • Pizza stone: Baking on a pizza stones makes the crust crisp on the outside and chewy on the inside. Here’s the pizza stone we recommend.
  • Pizza peel: A peel is a paddle used to slide a pie onto the hot stone in the oven. We recommend this standard pizza peel or this conveyor pizza peel, which makes transferring to the oven a breeze.
  • Pizza oven (optional): An outdoor pizza oven makes next level pizza! We own and have experience with both the Ooni pizza oven and the ROCCBOX (the ROCCBOX is our preferred). We used a pizza oven to get the charred crust you see in the photos.
Olive Pizza

Olive pizza variations

There are lots more ways to make an olive pizza! Here are a few topping ideas you might also enjoy that go well with the flavor profile:

  • Kalamata olives instead of green and black olives (use less since they have a stronger, saltier flavor)
  • Feta cheese (but keep it light to balance the salty olives)
  • Goat cheese or ricotta cheese, in dollops
  • Sausage crumbles
  • Prosciutto
  • Hot honey
  • Spinach, frozen and thawed (see this Spinach Pizza)
  • Jarred roasted red pepper, cut into strips
  • Fresh herbs like chives, oregano, thyme, or basil

More pizza recipes

Want more? From dough to sauce to topping ideas, we’ve got everything you need to make incredible pizza pies at home. Here are a few ideas:

Print
Olive Pizza

Olive Pizza


Ingredients


Instructions

  1. Make the pizza dough: Follow the Best Pizza DoughThin Crust Pizza Dough or Pizza Oven Dough recipes to prepare the dough. (This takes about 15 minutes to make and 45 minutes to rest.)
  2. Place a pizza stone in the oven and preheat to 500°F. OR preheat your pizza oven (here’s the pizza oven we use).
  3. Make the pizza sauce: Make the Homemade Pizza Sauce. (You’ll use about ½ cup for the pizza; reserve the remaining sauce and refrigerate for up to 1 week.)
  4. Bake the pizza: When the oven is ready, dust a pizza peel with cornmeal or semolina flour. (If you don’t have a pizza peel, you can use a rimless baking sheet or the back of a rimmed baking sheet. But a pizza peel is well worth the investment!) Stretch the dough into a circle; see How to Stretch Pizza Dough for instructions. Then gently place the dough onto the pizza peel.
  5. Spread a thin layer of the pizza sauce over the dough. Add the mozzarella cheese, then sprinkle with the Parmesan cheese. Top with the sliced olives, red onion, and capers, then sprinkle with dried oregano.
  6. Use the pizza peel to carefully transfer the pizza onto the preheated pizza stone. Bake the pizza until the cheese and crust are nicely browned, about 5 to 7 minutes in the oven (or 1 to 2 minutes in a pizza oven).
  7. Allow the pizza to cool for a minute or two before slicing into pieces. Serve immediately.

A Couple Cooks - Recipes worth repeating.

Summer Fruit Galette

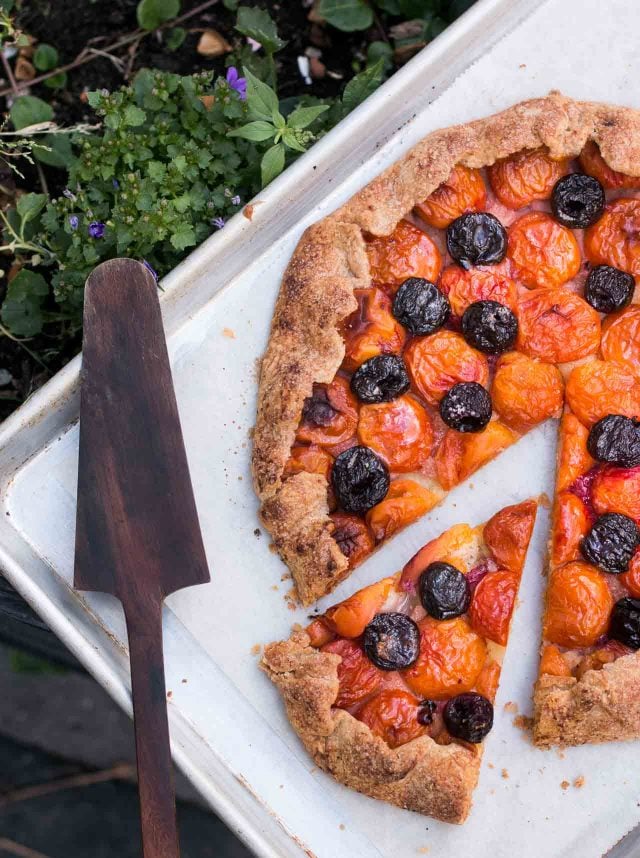
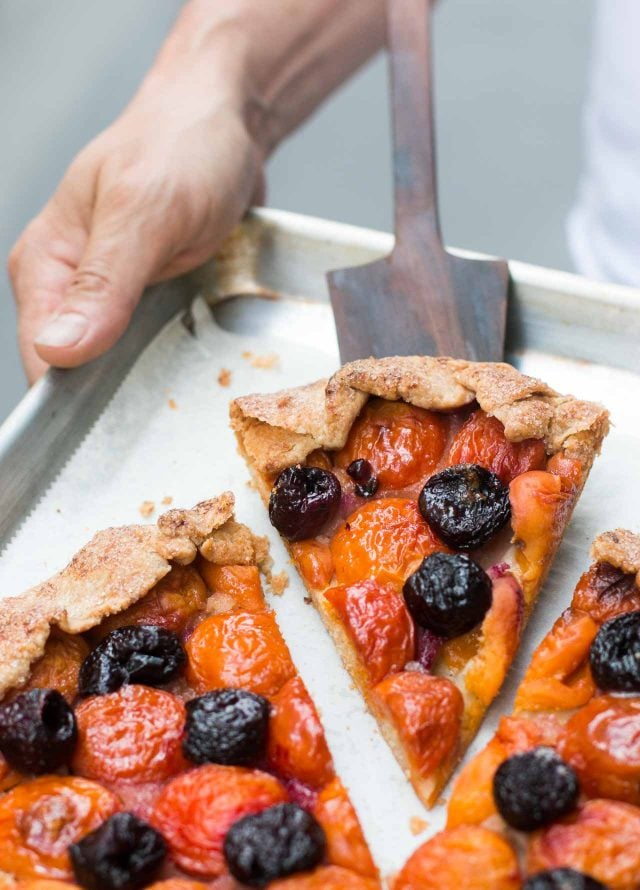
Being a baker, summer is my favorite time of year. Not only are peaches, nectarines, cherries and plums abundant at the market, but as the seasons progress, the volume of fruits lowers the price, and I stock up on whatever I can, whenever I can. At Paris markets, I try to search out producteurs, the vendors who grow the food they sell, and every summer, one in…

Being a baker, summer is my favorite time of year. Not only are peaches, nectarines, cherries and plums abundant at the market, but as the seasons progress, the volume of fruits lowers the price, and I stock up on whatever I can, whenever I can.

At Paris markets, I try to search out producteurs, the vendors who grow the food they sell, and every summer, one in particular shows up at my market with lots of Reine Claude and mirabelle plums, a few different varieties of cherries, plump melons that you can smell standing a few feet away, tender figs, and fresh apricots.

Making the shopping experience even better, were the fellows who sold the fruits. Not only were they easy on the eyes, but they often put punky-looking cherries in baskets, labeling them “for clafoutis” (a nicer way of saying “for baking”) and selling them at a reduced price. This year, there seems to have been a turnover in staff – zut – but the replacements also offer up the imperfect fruit, or even an overload, at a discount.

Continue Reading Summer Fruit Galette...

Basic Quiche Recipe

This quiche recipe features a hearty, savory filling encased in a flaky pastry crust! Brunch just got better. It’s savory,…

A Couple Cooks – Recipes worth repeating.

This quiche recipe features a hearty, savory filling encased in a flaky pastry crust! Brunch just got better.

Quiche Recipe

It’s savory, hearty and works for breakfast, brunch, or a light dinner: it’s quiche! A good quiche recipe can move mountains (we think). We’ve become obsessed with honing the perfect recipe and discovering all the best tips and fillings. This quiche has a simple filling of onion, garlic, spinach and sundried tomato, and it’s encased in a golden flaky pastry crust. Try this filling idea or use it as a base for your own variation (see below). Here’s what to do!

How to make quiche (overview)

A quiche is a French tart filled with custard and savory fillings. It’s become a classic brunch recipe in the Western world, stuffed with fillings from cheese to spinach to bacon (quiche Lorraine).

This classic quiche recipe comes together in less than 2 hours, made completely from scratch with a homemade quiche crust. Or, you can use store-bought refrigerated pie crust as a shortcut. Here’s what to expect:

Make the quiche crust (or use purchased)20 minutes, active
Freeze the dough15 minutes, inactive
Blind bake the dough + make the filling30 minutes, active
Bake the quiche40 to 50 minutes, inactive

Quiche recipe filling

This quiche recipe has a basic formula that you can use for creating filling variations of your choice! It’s got a custard base, then various vegetable fillings. If you want to add more volume of veggies, you can remove one egg from the mixture (see below). Keep in mind that most vegetables should be sauteed, but some you can use raw (green onion, sundried tomato, and bell pepper). Here’s what’s in this basic quiche recipe filling:

  • Custard: 5 large eggs, ¾ cup milk, ½ cup heavy cream, ½ teaspoon each dried mustard and oregano, salt and pepper
  • Sauteed vegetables: Butter, ¼ cup minced white onion, 2 garlic cloves, 3 cups baby spinach
  • Raw vegetables: 2 green onions, ⅓ cup sundried tomatoes
  • Cheese: ¾ cup shredded mild cheddar cheese, ¼ cup Parmesan cheese
Quiche recipe

For the quiche crust

The best way to make a quiche recipe is with homemade quiche crust! However, you can use purchased refrigerated pie dough if you prefer. There are pros and cons to each method.

  • Homemade crust holds its shape better and tastes better.  This quiche crust tastes so much better than store-bought: it’s more buttery and flaky. It can also hold a crimped crust better (at least with the purchased brands we’ve tested!).
  • Purchased crust is faster, but can lose its shape. Purchased crust works too! It’s not quite as delicious, but it comes close. We’ve had some issues with refrigerated pie dough holding its shape, so we recommend using the shape where you press the fork tines into the crust (see photo below).
How to make quiche

Blind baking the crust is key

The biggest key to making a quiche? Blind bake the crust! This means you bake the pastry crust without the filling first to avoid a soggy bottom. This is essential with quiche because the filling is so liquid (but not required with say, apple pie which has a chunkier filling). Here’s how to blind bake a crust:

  • Prick holes with a fork all over the crust. This is called docking: it helps keep the crust from puffing up while in the oven without filling. (Make sure to dock gently so you don’t create holes in the dough!)
  • Add parchment paper then pie weights, dried beans, or rice! Pour them right into the crust. We use two sets of these pie weights. Bake for 12 minutes at 400°F, then reduce the heat to 350°F.
  • Remove the pie weights. Remove the weights and bake 20 to 25 more minutes until the crust is golden. Then the quiche is ready to fill.

How to make a pie crust shield

For this quiche recipe, you’ll also need to use a pie crust shield. This tool prevents pie crust from burning in the oven by covering just the crust, allowing the filling to bake normally. There are two options for a pie crust shield:

  • Make a pie crust shield with aluminum foil. Cut a hole in the center of a large sheet of foil that’s the diameter of your pie plate. The foil will rest on the crust, but allow the filling to bake uncovered. Here’s a video with instructions for more details.
  • Or, buy a metal pie crust shield. Here’s a link to buy a pie crust shield online.
Quiche recipe

Quiche recipe ideas (variations)

There are so many different ways to fill a quiche! Here are a few classic flavors:

Spinach: Use 4 eggs instead of 5 and increase to 1 teaspoon kosher salt in the custard. For the filling, keep the onion and garlic. Add 8 ounces defrosted frozen spinach with all liquid squeezed out (no need to saute). See this Spinach Quiche recipe.

Broccoli: Use 4 eggs instead of 5. For the filling, saute 2 cups very small broccoli florets with the onion and garlic and an extra ¼ teaspoon kosher salt.

Asparagus: Use 4 eggs instead of 5. For the filling, saute 4 ounces asparagus (about 8 thin stalks) with the onion and garlic, and an extra ¼ teaspoon kosher salt. Use smoked gouda cheese instead of cheddar and top with feta crumbles instead of Parmesan. See this Asparagus Quiche recipe.

Breakfast quiche: Use 4 eggs instead of 5 and increase to 1 teaspoon kosher salt in the custard. Remove the onion and garlic. Add 1 cup (4 ounces) frozen or refrigerated hashbrowns to the bottom of the crust. Top with 2 sliced green onions, ¼ cup finely diced red pepper and feta cheese crumbles instead of Parmesan.

01

Classic Spinach Quiche

This spinach quiche recipe has a flaky pastry crust and a savory, cheesy interior! It’s perfect for brunch or a…

02

Classic Asparagus Quiche

This asparagus quiche recipe is a total showstopper! Smoked mozzarella and feta make an irresistible filling for the flaky pastry…

03

Quiche Crust Recipe

This quiche crust recipe makes a crisp, buttery crust with no soggy bottom! Here’s the secret to the perfect pie…

This quiche recipe is…

Vegetarian.

Print
Quiche recipe

Basic Quiche Recipe


  • Author: Sonja Overhiser
  • Prep Time: 45 minutes
  • Cook Time: 45 minutes
  • Total Time: 1 hour 30 minutes
  • Yield: 8

Description

This quiche recipe features a hearty, savory filling encased in a flaky pastry crust! Brunch just got better.


Ingredients

  • 1 Homemade Quiche Crust (made through Step 4) or 1 refrigerated pie dough
  • 1 tablespoon butter
  • ¼ cup white onion, finely minced
  • 2 garlic cloves, minced
  • 3 cups baby spinach
  • ¾ teaspoon plus 1 pinch kosher salt, divided
  • 5 large eggs
  • ¾ cup milk
  • ½ cup heavy cream
  • ½ teaspoon dried mustard
  • ½ teaspoon dried oregano
  • Fresh ground black pepper
  • ¾ cup shredded mild cheddar cheese
  • ¼ cup shredded Parmesan cheese
  • 2 green onions, sliced
  • ⅓ cup chopped sundried tomatoes

Instructions

  1. Prepare the crust: If using Homemade Quiche Crust, prepare it in the pie pan using the steps in the linked recipe. If using refrigerated pie dough, transfer the dough to the pie pan (make sure it is standard and not deep dish). Fold the overhanging dough backwards and seal it to form a rim. With refrigerated crust, it’s easiest to press in the tines of the fork to decorate the edges (like in this asparagus quiche; it’s harder to get the crimped edges to keep their shape while baking). Use a fork to gently prick holes in the bottom and sides of the crust (which helps it to not puff up while blind baking).
  2. Freeze the crust: Freeze the crust in the pan for 15 minutes.
  3. Preheat the oven: Preheat the oven to 400°F.
  4. Blind bake the crust at 400°F: Place a sheet of parchment paper on top of the crust. Fill the dough with pie weights (we used two sets of these), dry beans, or dry rice. Bake for 12 minutes.
  5. Reduce the oven temperature and blind bake at 350°F: Reduce the oven temperature to 350°F and carefully remove the parchment and weights. Bake 20 to 25 minutes until the bottom is lightly browned (or more if necessary for refrigerated pie crust). Remove from the oven and add the filling once it is ready.
  6. Prepare the filling: Meanwhile, in a medium skillet, heat the butter over medium heat. Add the onion and garlic and sauté for 5 minutes. Add the spinach and a pinch of salt and cook until wilted, about 2 to 3 minutes. Set aside.
  7. Make the filling: In a medium bowl, whisk the eggs, milk, cream, dried mustard, dried oregano, ¾ teaspoon kosher salt, and several grinds black pepper. Place the cheddar and Parmesan cheese in bottom of the crust, followed by the sliced green onions and sundried tomatoes (saving out a few to sprinkle on top). Add an even mix of the spinach, onion and garlic. Pour the egg mixture over the top. Sprinkle the top with another handful of shredded cheese and the reserved green onions and sundried tomatoes.
  8. Bake: Add a pie crust shield (purchased or homemade with foil*). Bake at 350°F for 40 to 50 minutes minutes, until the center is set and the top is lightly browned. Cool at least 30 minutes, then serve or refrigerate. Re-warm in a 200 degree oven for 20 minutes. (You can also serve it cold.) Leftovers stay for 5 days refrigerated.

Notes

*To make your own crust shield, cut a hole in the center of a large sheet of foil that’s the diameter of your pie plate. The foil will rest on the crust but let the pie filling be uncovered. Here’s a video with instructions for more details.

  • Category: Brunch
  • Method: Baked
  • Cuisine: French inspired
  • Diet: Vegetarian

Keywords: Quiche recipe, how to make quiche, how to make a quiche

A Couple Cooks - Recipes worth repeating.

Mushroom Galette

This hearty mushroom galette is a tasty savory tart recipe bursting with flavor! This vegetarian dinner idea will wow everyone.…

A Couple Cooks – Recipes worth repeating.

This hearty mushroom galette is a tasty savory tart recipe bursting with flavor! This vegetarian dinner idea will wow everyone.

Mushroom galette

Looing for a stunning fall or winter vegetarian dinner idea? Try a savory Mushroom Galette! This free-form French tart isn’t just for dessert. Make it with a savory filling and it’s a fun vegetarian main dish, like a quiche. This one stars meaty mushrooms, layered over a fluffy smear of ricotta and Parmesan cheese and scented with garlic and fresh thyme. It’s all packed into a flaky, buttery crust and baked to perfection. The smell alone had us salivating before the first bite. Ready to bake?

Ingredients for this mushroom galette

galette is a rustic French tart: a round pie made without a pie dish using a folded pastry crust. That’s right: no pie plates or precise rolling and cutting! Simply roll out the dough, add filling and fold over the crust. Galettes are most often served as desserts, like a peach galette or blueberry galette. But they work as savory pies too, like a tomato galette or mushroom galette. Here’s what you’ll need for this mushroom galette recipe:

  • Mushrooms: a mix of cremini (baby bella) and shiitakes makes for a nuanced, complex flavor
  • Olive oil
  • Soy sauce
  • Garlic powder, onion powder, smoked paprika, dried thyme
  • Ricotta cheese
  • Parmesan cheese
  • Garlic
  • Fresh thyme
  • Flour
  • Butter
  • Salt
  • Baking powder
  • Egg
Mushroom Galette

Tips for working with galette dough

The main part of this mushroom galette that takes a bit of technique? The pastry dough! Now, this galette dough is easy to work with, but there are a few things to keep in mind when making the pastry. Here are a few tips:

  • Weigh the flour in grams (or spoon and level it). Weighing your flour on a food scale in grams provides the most accurate measurement (and it’s less messy, we find!) Or you can spoon the flour into the measuring cup, then level it with the back of the spoon. This is more accurate than scooping flour right out of the container, which can result in more flour per cup.
  • Add just enough water for the dough to come together. It should take around 5 to 6 tablespoons, but maybe slightly more depending on the exact flour amount.
  • Chill 1 hour. Chilling is important, so that the butter can solidify. Otherwise, the crust can melt in the oven.
  • Roll into a 12-inch circle, then add the filling. Flour your work surface first. Pick up the dough and add more flour to the surface as necessary if it’s sticking. Then add the ricotta filling and mushrooms.
  • Gently fold it up to create a 2-inch crust. Overlap the folds to make a circle around the filling: see the photos.

For the egg wash

Before baking this mushroom galette, it’s important to brush the crust with an egg wash and sprinkle with salt. An egg wash makes a nice golden sheen on the crust. Full disclosure: we were out of eggs and had to brush on heavy cream to the crust for these photos (a substitute for an egg wash). You can tell it doesn’t have quite the sheen as the crusts in our other galette recipes! So an egg wash is the way to go.

Mushroom Galette

Serving this mushroom galette

Once you bake up your mushroom galette, don’t dig into it just yet! The cooling time is important for achieving the best texture. Here’s what to know:

Storage info

Got leftovers of this mushroom galette? Place it in a storage container and refrigerate for up to 3 days. You can also make it 1 day in advance: bake it, then refrigerate over night. Before serving, leave it out on the counter for about 30 minutes to let it come to room temperature. If desired, reheat it in a 350 degree oven until warmed through.

Mushroom Galette

More galette recipes

You can make a galette in every season with many fruits and vegetables! Here are a few more recipes to try:

This mushroom galette recipe is…

Vegetarian.

Print
Mushroom galette

Mushroom Galette


Description

This hearty mushroom galette is a tasty savory tart recipe bursting with flavor! This vegetarian dinner idea will wow everyone.


Ingredients

For the galette dough 

  • 1 ½ cups [210 grams] all-purpose flour, spooned and leveled
  • ¾ teaspoon kosher salt
  • ¼ teaspoon baking powder
  • 10 tablespoons cold unsalted butter
  • 5 to 6 tablespoons cold water
  • 1 egg, for the egg wash
  • Flaky sea salt, for sprinkling

For the filling

  • 16 ounces cremini mushrooms, cleaned and sliced
  • 4 ounces shiitake mushrooms, stems removed and sliced
  • 2 tablespoons olive oil
  • 1 tablespoon soy sauce (or tamari)
  • 2 teaspoons garlic powder
  • 1 teaspoon onion powder
  • 1 teaspoon smoked paprika
  • ½ teaspoon dried thyme
  • ¾ teaspoon kosher salt, plus more to sprinkle
  • ¾ cup whole milk ricotta
  • ½ cup shredded Parmesan cheese
  • 1 small garlic clove, grated
  • Fresh ground black pepper
  • 2 sprigs fresh thyme, for topping

Instructions

  1. In a medium bowl, mix the flour, kosher salt, and baking powder. Slice the butter into small pieces, then use a pastry blender or fork to cut it into the flour mixture until mostly incorporated and a pebbly texture forms (with pea-sized or smaller pieces).
  2. Sprinkle 4 tablespoons of the cool water over the flour, mixing gradually with a fork until the flour is mostly incorporated. Add the additional 1 to 2 tablespoons of water until all the flour is incorporated, kneading with your fingers until the dough comes together. (Resist the urge to add more water; it should come together!) Form the dough into a ball and flatten into a thick disk. Wrap it in plastic or place it in a covered container and chill the dough for 1 hour. (To make in advance, you can refrigerate the dough up to 3 days; allow to sit at room temperature 30 minutes before rolling. Or, wrap in plastic wrap or aluminum foil and freeze up to 3 months, then defrost overnight in the refrigerator before rolling.)
  3. Preheat the oven to 400 degrees Fahrenheit.
  4. Clean and slice the mushrooms. Toss them in a bowl with the olive oil, soy sauce, garlic powder, onion powder, smoked paprika, thyme, and ½ teaspoon kosher salt. Place them in a single layer on a parchment lined baking sheet and bake for 20 minutes until tender.
  5. In a medium bowl, mix the ricotta cheese, Parmesan cheese, garlic, ¼ teaspoon kosher salt, and a few grinds black pepper. 
  6. On a floured surface, roll the dough into an even 12” circle, leaving the edges rough (if needed, move the dough around and add a bit more flour underneath to keep it from sticking). Carefully transfer the dough to a sheet of parchment paper on a rimmed baking sheet. 
  7. Gently spread the ricotta mixture on the dough, then add the mushrooms, leaving at least 2 inches of dough around the outside edge. Fold in the outside edges of the dough over the filling to form an approximately 2-inch crust, overlapping the folds as shown in the photos. Top with fresh thyme leaves.
  8. Whisk the egg and use a pastry brush to brush it onto the crust. Then top the crust with a small sprinkle of flaky sea salt. 
  9. Bake the galette for 30 to 33 minutes until the crust is golden brown. Remove from the oven and transfer the parchment paper to a baking rack to cool. Cool for at least 10 minutes, then slice into pieces and serve. It’s also great at room temperature or cold. Store leftovers for up to 3 days refrigerated; bring to room temperature or warm in the oven before serving.

A Couple Cooks - Recipes worth repeating.

French Tomato Tart

This week I saw the first promise of tomato season. A few brightly colored cherry specimens were brought home from the local market, as well as the more standard varieties. I was down in Gascony visiting my friend Kate Hill, and her photographer friend Tim Clinch was there preparing to lead a photography workshop. Looking for something tempting and colorful, tomatoes seemed the obvious choice…

tomato tart

This week I saw the first promise of tomato season. A few brightly colored cherry specimens were brought home from the local market, as well as the more standard varieties. I was down in Gascony visiting my friend Kate Hill, and her photographer friend Tim Clinch was there preparing to lead a photography workshop. Looking for something tempting and colorful, tomatoes seemed the obvious choice to be willing subjects for pictures, and for dinner.

cherry tomatoes erika

In addition to the profusion of flowers plucked from the lush garden by the canal du Midi, the tomatoes had their moment in front of the camera. But once the participants stopped clicking, we grabbed them and put them where they rightfully belong: In the kitchen.

Continue Reading French Tomato Tart...

Quiche Lorraine

Quiche got a peculiar rap back in the 1980s when eating it was described as something that was not masculine. I’m not sure where that came from, but in France, everybody eats quiche. As the French debate how to address gender pronouns, in a language where crème, baguette, and salade are feminine and pâté, vin, and quinoa are masculine (although quinoa is a plante céréalière, which…

Quiche got a peculiar rap back in the 1980s when eating it was described as something that was not masculine. I’m not sure where that came from, but in France, everybody eats quiche.

As the French debate how to address gender pronouns, in a language where crème, baguette, and salade are feminine and pâté, vin, and quinoa are masculine (although quinoa is a plante céréalière, which is feminine), for no reason other than to make the language more challenging for the rest of us to learn (whether tique, the word for tick, was masculine or feminine has been hotly debated), quiche is enjoyed by tous (or everyone, which is masculine) in France, without any blowback.

Got that?

Continue Reading Quiche Lorraine...

Blacker Berry Galette

My Netflix queue has gotten out of control and is entirely too long. And to make matters worse, I keep adding to it. Being out of the U.S. for so long, I missed watching binge-worthy, must-watch classics like The Wire and Breaking Bad when they came out, and I’d love to sit down on the sofa for another few months and watch them now that…

My Netflix queue has gotten out of control and is entirely too long. And to make matters worse, I keep adding to it. Being out of the U.S. for so long, I missed watching binge-worthy, must-watch classics like The Wire and Breaking Bad when they came out, and I’d love to sit down on the sofa for another few months and watch them now that they are streaming, as well as rewatch all five seasons of Six Feet Under, which was one of the best shows that’s even been on television. How they managed to make a show about death so human is beyond me, with a finale that’s lauded as the best ending for a television series ever. Which also made me wonder how they could have left the end of The Sopranos, another incredible show, land with such a thud?

The pandemic and confinements were certainly good for whittling down those “Watch Lists” but one show that jumped to the top of the queue was High on the Hog. It’s an eye-opening, unnerving, and emotionally difficult look at the role that African-Americans, who were brought to America as slaves, had in shaping American cooking. The subtitle of the show is “How African-American Cuisine Transformed America” which sounds like a big bill for fill, but the four-episode show traces how that happened.

And lest anyone doubt the rich contribution African-Americans have made to our cooking, author and Cook’s Country editor Toni Tipton-Martin pointed out in the program that Black Americans have been used by food brands for decades in America to denote quality, by brands like Aunt Jemima and Uncle Ben, which gave host Stephen Satterfield pause as well, flipping the narrative about those culinary characters (or caricatures) that many of us grew up with.

Continue Reading Blacker Berry Galette...

Tourtiere

I’m not going to beat around the bush here: The new Joy of Cooking is huge. When I first heard about it, I wondered, “Do we need a new Joy of Cooking?” First published in 1931, the book went through several revisions over the years, to become what has the most enduring of all American cookbooks. Yet I wondered if the book would (or could)…

I’m not going to beat around the bush here: The new Joy of Cooking is huge. When I first heard about it, I wondered, “Do we need a new Joy of Cooking?” First published in 1931, the book went through several revisions over the years, to become what has the most enduring of all American cookbooks. Yet I wondered if the book would (or could) still be relevant, in the age of the internet, and as several other books had come along through the year, that could also be considered “encyclopedias” of cooking. I had some doubts.

Continue Reading Tourtiere...

Best Apple Pie Recipe

This really is the best apple pie recipe. It’s got flaky lattice pie crust and a tender, perfectly spiced apple filling. Prepare to be amazed! This post was created in partnership with ALDI. All opinions are our own. Are you ready for this? This really is the best apple pie recipe. Every single thing about it has been tweaked to perfection: the flaky crust, the rustic lattice, and the tender, spiced filling. Alex and I may have eaten one too many apple pies testing this recipe for you (oops!). But the end result is absolutely worth it. This apple pie is a stunner, perfect for Thanksgiving or any dinner party or holiday. We got all the ingredients for this pie from ALDI, our go-to for affordable, high-quality organic ingredients for holiday entertaining. Ready for everything you need to know to make the very best apple pie on the internet? Make this pie? We want to know! Tag @acouplecooks and @aldiusa on Instagram.Coupon: ALDI now delivers using Instacart! Use coupon code “ALDIACC” to get $10 off your first three orders of at least $35 (for first-time Instacart shoppers only). What makes the best apple pie recipe? Of course, “best apple pie recipe” […]

A Couple Cooks – Healthy, Whole Food, Vegetarian Recipes

This really is the best apple pie recipe. It’s got flaky lattice pie crust and a tender, perfectly spiced apple filling. Prepare to be amazed!

Best apple pie recipe

This post was created in partnership with ALDI. All opinions are our own.

Are you ready for this? This really is the best apple pie recipe. Every single thing about it has been tweaked to perfection: the flaky crust, the rustic lattice, and the tender, spiced filling. Alex and I may have eaten one too many apple pies testing this recipe for you (oops!). But the end result is absolutely worth it. This apple pie is a stunner, perfect for Thanksgiving or any dinner party or holiday. We got all the ingredients for this pie from ALDI, our go-to for affordable, high-quality organic ingredients for holiday entertaining. Ready for everything you need to know to make the very best apple pie on the internet?

Make this pie? We want to know! Tag @acouplecooks and @aldiusa on Instagram.
Coupon: ALDI now delivers using Instacart! Use coupon code “ALDIACC” to get $10 off your first three orders of at least $35 (for first-time Instacart shoppers only).

Best apple pie recipe

What makes the best apple pie recipe?

Of course, “best apple pie recipe” is pretty subjective! Alex and I have designed this pie recipe to be exactly what we want in our perfect apple pie. Here’s what it’s got:

  • Rustic lattice crust and maple glaze. Thick lattice work gives the pie a stunning, rustic look. Painting on a maple glaze makes it beautifully shiny.
  • Super flaky pie dough. This dough is perfectly flaky and tender, and the bottom stays perfectly crisp.
  • Tender apple filling. The apples are tender and gooey, with just the right amount of sweet.
  • Perfect spices. Using fresh ginger adds big flavor, and a hint of cloves makes it extra cozy.

Best apples for apple pie

What are the best apples for apple pie? We’re glad you asked. First off: if you can, use organic apples. Apples are one of the best fruits to buy organic! We used organic Gala apples from ALDI. Here are what we’ve found are the best apple varieties that hold their shape and flavor in apple pie:

  • Gala
  • Jonathon or Jonagold
  • Ida Red
  • Honeycrisp
  • Golden Delicious
  • Granny Smith
Best apple pie recipe

Equipment you need for the best apple pie

All you really need for this best apple pie recipe is a pie pan and a rolling pin! But a few pieces of equipment are helpful if you have them. Here’s what we recommend:

  • Metal pie plate: A metal pie plate can help the bottom crust to come out crispier. But you can use any pie plate you have on hand!
  • Pastry cloth and rolling pin cover: A pastry cloth and rolling pin cover help to avoid sticking when you’re rolling out the dough. If you don’t have one, generously flour your work surface and rolling pin.
  • Microplane grater: You’ll use a grater to grate the butter when making the crust. A coarse grate microplane is easiest, but you can also use a box grater.
  • Food scale: In baking it’s helpful to weigh flour because it can change based on environmental conditions. If you don’t have one, just measure the flour in cups and adjust the water as needed.

Simplify it: If you’re craving simple: try our Apple Crumble recipe instead! It uses similar ingredients but is quick and easy to put together.

Cooking the apple filling

How to slice apples: in a flash!

You’ll need to slice quite a few apples for this recipe. And we have a trick to make it faster! Here’s what to do: watch the 10-second video below! You’ll be surprised how quickly it is to slice the apple this way. (It’s my new favorite!)

How to slice apples

How to make a lattice pie crust

The biggest area of technique in this best apple pie recipe is making the lattice crust! If you’ve never made a lattice pie crust before, it looks tricky but it’s actually quite simple. Here we’ll show you how to weave the lattice pieces, and then tuck them under to form with the bottom pie crust. Watch the 20-second video below to see how it’s done.

How to make a lattice pie crust

Error-proofing apple pie

Alex and I have done all the recipe testing and error-proofing of this best apple pie recipe so you don’t have to! Here are a few things we learned about pie making through this recipe.

  • How do you make sure the pie crust doesn’t shrink when baked? A few things: letting the dough rest after rolling it out helps. Placing the pie in the freezer between filling steps can also help.
  • How to you avoid a soggy apple pie? The apple filling is cooked before baking to reduce liquid. Preheating the baking sheet in the oven helps to crisp up the bottom, and the pie is baked at a higher temperature (425 degrees) for the first 15 minutes. We also find using a metal pie pan can help to get the bottom extra crispy.
  • How do you make flaky pie crust? Freezing the butter and grating it into the dough helps make sure the butter is extra cold, which makes it flaky. (We use the same trick in our Blueberry Scones.)
Slice of apple pie

Serve it with…

Of course, the best apple pie is perfection with a high quality vanilla ice cream topping. Or, top with homemade whipped cream (or a fancy version: bourbon whipped cream).

Are you ready to make the best apple pie recipe?

The recipe below might look a little daunting, but it’s actually pretty easy to make! Just follow the step by step instructions and hit us up on Instagram if you have any questions. Make sure to tag us and @aldiusa if you make it: we can’t wait to see your creations!

Best apple pie recipe
Print
Best apple pie recipe

Best Apple Pie Recipe


1 Star2 Stars3 Stars4 Stars5 Stars (8 votes, average: 5.00 out of 5)

  • Author: Sonja Overhiser
  • Prep Time: 1 hour 15 minutes
  • Cook Time: 1 hour
  • Total Time: 2 hours 15 minutes
  • Yield: 8

Description

This really is the best apple pie recipe. It’s got flaky lattice pie crust and a tender, perfectly spiced apple filling. Prepare to be amazed!


Ingredients

For the crust

  • 11 tablespoons frozen unsalted butter
  • 2 cups Baker’s Corner All Purpose Flour (260 grams)
  • 3/4 teaspoon kosher salt
  • 1/2 teaspoon baking powder
  • 1/2 cup cool water
  • 1/2 tablespoon fresh lemon juice
  • 2 ice cubes

For the filling

  • 8 small organic cooking apples (2 1/2 pounds), such as Gala
  • 1 tablespoon cornstarch
  • 1/2 cup granulated sugar
  • 1 1/2 teaspoons ground Simply Nature Organic Cinnamon
  • 1/8 teaspoon ground cloves
  • 1/4 teaspoon kosher salt
  • 1/2 teaspoon finely grated fresh ginger or 1/4 teaspoon ground ginger
  • 1 teaspoon lemon zest plus 2 tablespoons lemon juice (about 1/2 lemon)
  • 1 tablespoon vanilla extract

For the glaze

  • 1/4 cup Specially Selected 100% Pure Maple Syrup
  • 1/8 teaspoon cinnamon

Instructions

  1. Make the pie dough: Freeze the butter at least 30 minutes.
  2. In a mixing bowl, use a spatula to stir together the flour, baking powder, and salt (using a food scale to weigh out the flour, if you have one). In a small bowl, mix the water, lemon juice, and ice.
  3. Use a grater or microplane to large grate the butter into the bowl with the dry ingredients (it will look like shredded cheese!). Then stir it gently with a spatula to coat the butter with flour. Add 3 tablespoons water and stir with the spatula to combine. Add 3 more tablespoons and stir again. Add up to 3 more tablespoons and use your hands to gently knead until a ball of dough is formed. You may need to add a little more water a tablespoon at a time so that the flour is just incorporated. Divide the dough into two equal balls. Place in a covered container and refrigerate while you’re making the filling. (You can also make the dough in advance. See the notes below!)
  4. Preheat the oven: Place a baking sheet on the middle rack of the oven and preheat to 425 degrees.
  5. Make the filling; Peel and core the apples, then thinly slice them about 1/8 inch thick (see the “How to slice apples” section above). Place the apples in a large pot with lid or Dutch oven. In a small bowl, mix the cornstarch, sugar, cinnamon, cloves, and salt. Stir into the apples. Then stir in the peeled and grated ginger, lemon zest, lemon juice, and vanilla. Cover and cook over medium heat for 6 minutes, stirring occasionally, until softened slightly and liquid is thickened. Remove from the heat and remove the lid.
  6. Roll out the dough: If you have a pastry cloth, set it up and dust it with flour; otherwise, flour a clean work surface. Put on a rolling pin cover (optional), and coat the pin in extra flour. Remove one ball of dough from refrigerator and roll it evenly from the center to the edge, until the dough is a large circle about 1/8-inch thick. If it starts to get sticky, dust lightly with flour. Rest the dough for 3 minutes. Then trim the dough to an even 12-inch circle with a pizza cutter (this corresponds to the 9-inch circle on the pastry cloth).
  7. Add the filling: Gently place the dough into center of the pie plate, using the rolling pin to transfer it. Use your fingers to press the pastry into the form of the pie pan. Then fold the excess dough around the edges under itself, so that it sits evenly on the rim of the pie plate (see photos above). Spoon the apple filling into the pie plate, discarding any remaining liquid at the bottom of the pot. Place the pie into the freezer while rolling out the lattice topping.
  8. Make the lattice: Roll out the second dough ball into an 11” x 14” rectangle (it will be intentionally slightly thinner than the previous dough). Rest 3 minutes. Then use a straight edge to cut it into 7 strips, where each strip is 11” x 2”.
  9. Weave the lattice: Remove the pie plate from freezer. Carefully lay out 4 strips of dough in same direction on the pie (see the “How to make a lattice pie crust” above). Be careful to place the strips down without stretching. Weave the strips together to create the lattice with the remaining 3 strips.
  10. Bake & glaze the pie (3 steps): Place the pie on the preheated baking sheet and bake for 10 minutes at 425 degrees. Reduce the heat to 375 degrees and bake for 30 minutes. About 5 minutes before the 30 minute timer goes off, make the maple glaze: In a small pot add the maple syrup and cinnamon. Heat over medium heat until bubbles just start to appear (about 2 minutes). Turn off the heat. Remove the pie from the oven and brush an even layer of the maple glaze (leftover glaze can be discarded). Bake an additional 10 to 15 minutes until golden brown and bubbly. Remove from the oven and place on a cooling rack. Allow to cool for at least 1 hour until warm, or a few hours until it is room temperature. Then slice into pieces and enjoy! The pie is best eaten the day it is made. For make ahead and reheating instructions, see below.

Notes

Make ahead / reheating instructions: 

  • Pie is best eaten the day of making it. 
  • You can make the pie dough in advance: make it up to 3 days ahead, wrap well and refrigerate. Or, wrap in plastic wrap and freeze it for up to 3 months. When ready to use, remove from the freezer and let it thaw in the refrigerator overnight or up to 24 hours. 
  • Store leftovers at room temperature loosely covered with foil, plastic wrap, or with an overturned bowl. Reheat at 350 degrees for 15 minutes. When reheated, the glaze will not be shiny like after the original bake, but leftovers still taste fantastic!
  • Category: Dessert
  • Method: Baked
  • Cuisine: American

Keywords: Best Apple Pie Recipe, Apple Pie, Apple Pie Recipe

A Couple Cooks - Healthy, Whole Food, Vegetarian Recipes