Broccoli Salad

This broccoli salad is the perfect creamy, crunchy, rich, and flavorful side to go with any meal. It’s my new go-to for parties!

The post Broccoli Salad appeared first on Budget Bytes.

It’s nearly grilling season, and I need a reliable side dish to bring to parties, family reunions, and barbecues. This broccoli salad is the perfect creamy, crunchy, rich, and flavorful side to go with any meal. It has a great balance of sweet and tangy flavors, and the texture is unbeatable. It’s a fact that if you add bacon to any vegetable dish, even the most discerning meat eaters will give it a try. Baby steps, right?! I love making sure my loved ones eat their vegetables!
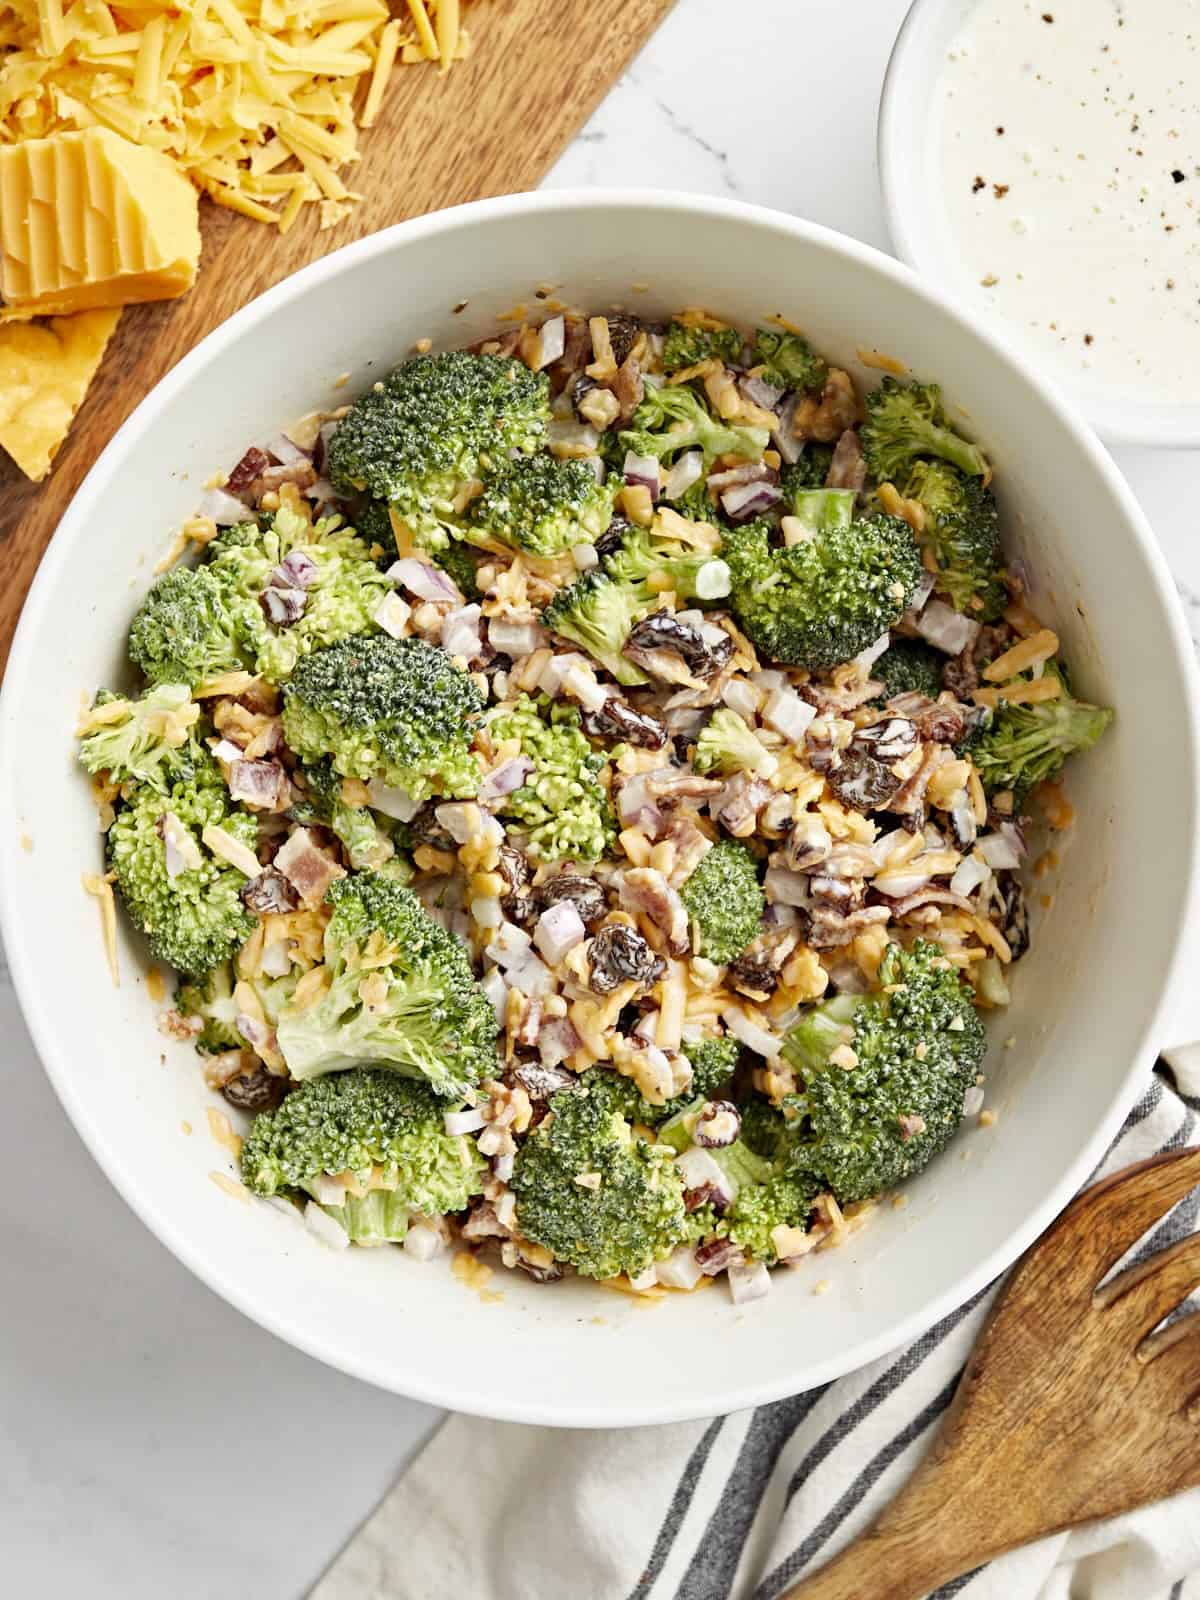
overhead view of broccoli salad in a white bowl.

What Is Broccoli Salad?

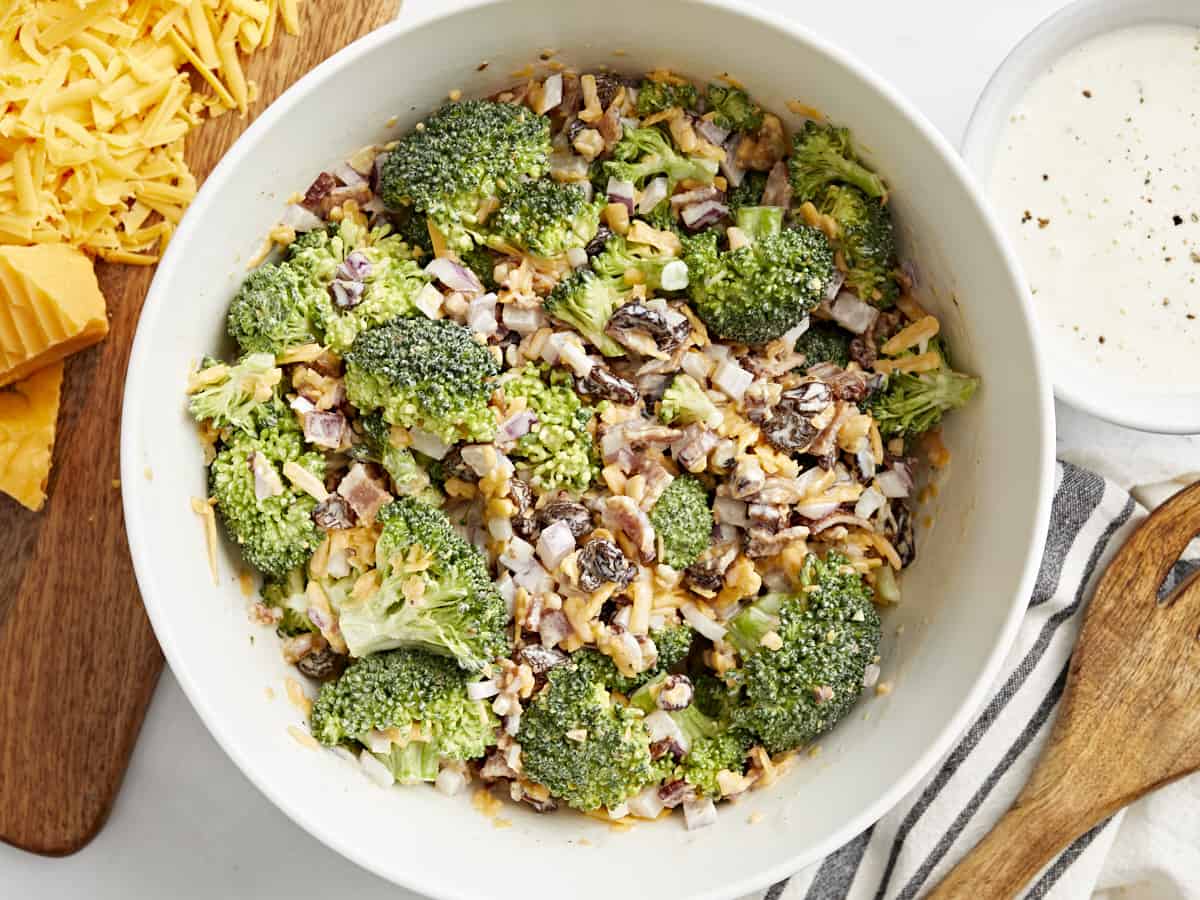
Broccoli salad is a classic side dish made from broccoli florets tossed with cheddar cheese, raisins, bacon, walnuts, and red onion, coated in a creamy and tangy dressing. This salad has a wonderful balance of flavors and textures and is so versatile!

Ingredients

Here’s what you’ll need to make broccoli salad:

  • Broccoli: Has an earthy and slightly sweet, slightly bitter flavor, as well as a delightful crunch!
  • Cheddar Cheese: Adds a creamy and salty component to the salad.
  • Raisins: Add a pop of sweet and fruity flavor.
  • Bacon: Adds a great savory and umami flavor. You’ll need 6 strips of cooked bacon. Vegetarian? No problem, just leave it out. Sometimes I put the bacon on the side for gatherings where there might be varied dietary restrictions.
  • Walnuts: Add a nutty flavor and delicious crunch.
  • Red Onion: Adds a bit of bite to the recipe and a wonderful crunchy texture, creating a great contrast to the sweet and chewy raisins.
  • Mayo: Adds richness and creaminess to the dressing.
  • Greek Yogurt: Makes the dressing extra creamy and tangy with fewer calories and fat than sour cream. I highly recommend Greek yogurt over plain yogurt or sour cream for its thicker, creamy texture.
  • White Vinegar: Adds a refreshing brightness and tanginess to the dressing to balance the richness.
  • Sugar: Adds sweetness to balance out the vinegar.
  • Salt and Pepper: Enhance the overall flavor of the salad.

Should I Blanch The Broccoli?

In testing, I preferred the final texture of raw broccoli over blanched, but you certainly can blanch the broccoli if you prefer. The blanching process takes out some of the natural bitter flavor from the broccoli; simply drop the florets in a large pot of salted boiling water for 1 minute, then quickly shock in a bowl of ice water. Instead, I opted to simply rinse my broccoli florets in hot water to make them extra bright green and make sure they were nice and clean.

Top Tip

To keep your broccoli salad from turning out watery, make sure to thoroughly dry the florets. The salt in the dressing will naturally draw out some of the moisture from the veggies, so making sure they are dry after washing them is an important step! I like to spread them out on a clean kitchen towel and gently pat them dry with another towel laid on top while I prep the rest of my ingredients.

What To Serve with Broccoli Salad

Broccoli salad is such a fresh and crunchy dish with a ton of flavor, so I suggest pairing it with simple proteins, like air fryer chicken breast or glazed pork chops.
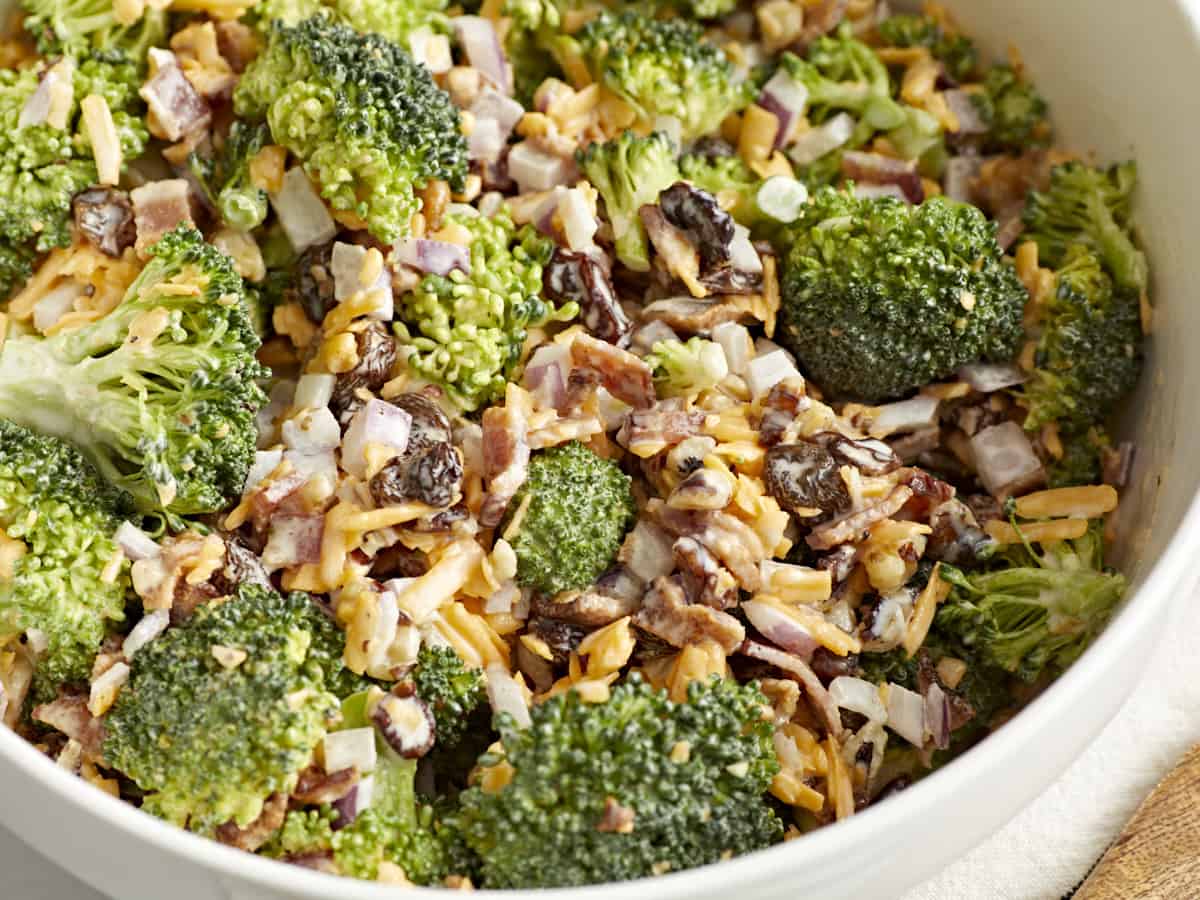
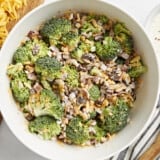
close up of broccoli salad on a white plate.
overhead view of broccoli salad in a white bowl.
Print

Broccoli Salad

This broccoli salad is the perfect creamy, crunchy, rich, and flavorful side to go with any meal. It's my new go-to for potlucks!
Course Salad
Cuisine American
Total Cost ($5.79 recipe / $0.96 serving)
Prep Time 15 minutes
Cook Time 5 minutes
Total Time 20 minutes
Servings 6 (about 1 cup each)
Calories 305kcal

Ingredients

Broccoli Salad

  • 1 large broccoli crown, separated into florets (about 4 cups) $1.10
  • 1 cup shredded cheddar cheese $1.24
  • 1/4 cup raisins $0.39
  • 6 strips bacon $0.90
  • 1/4 cup walnuts, crushed $0.80
  • 1/4 red onion, diced into small pieces $0.21

Broccoli Salad Dressing

  • 1/2 cup mayo $0.75
  • 2 Tbsp Greek yogurt $0.21
  • 1 Tbsp white vinegar $0.04
  • 1 Tbsp sugar $0.05
  • 1/4 teaspoon salt $0.05
  • 1/4 teaspoon pepper $0.05

Instructions

  • Cook the bacon until crispy. Let cool on clean paper towel-lined plate. Chop into bite sized bits and set aside.
  • In a small mixing bowl, combine mayo, Greek yogurt, white vinegar, sugar, salt, and pepper. Whisk together and set dressing aside.
  • Cut broccoli into florets, shred the cheddar cheese, gather raisins, crumble bacon, crush walnuts, and dice red onion.
  • Combine salad ingredients in a large mixing bowl and toss to combine.
  • Pour the dressing over broccoli salad and toss together until completely coated. Serve immediately, or let it marinate and get extra yummy in the fridge for up to 5 days!

See how we calculate recipe costs here.

Nutrition
Serving: 1serving | Calories: 305kcal | Carbohydrates: 9g | Protein: 9g | Fat: 26g | Sodium: 477mg | Fiber: 1g
overhead view of broccoli salad in a white bowl.

how to make Broccoli Salad – step by step photos
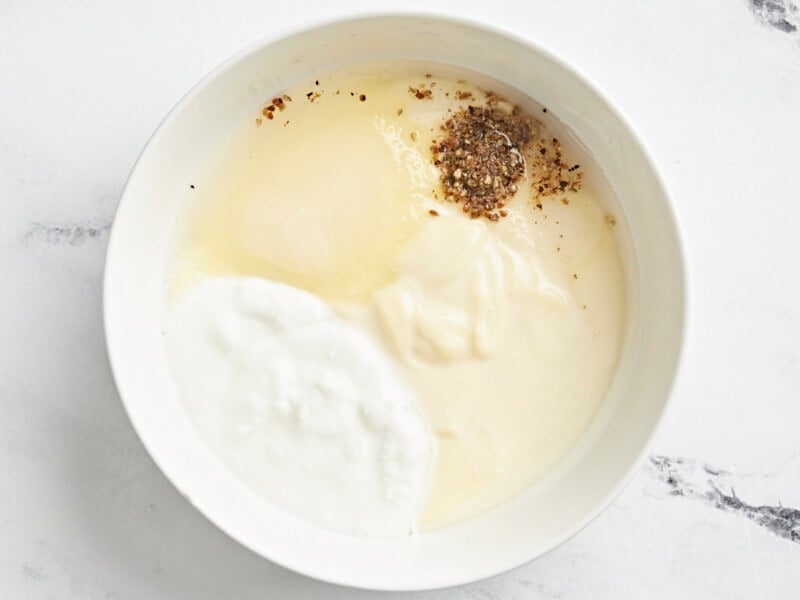
ingredients for salad dressing in a white bowl.

In a small mixing bowl, combine 1/2 cup mayo, 2 Tbsp Greek yogurt, 1 Tbsp white vinegar, 1 Tbsp sugar, 1/4 tsp salt, and 1/4 tsp pepper.
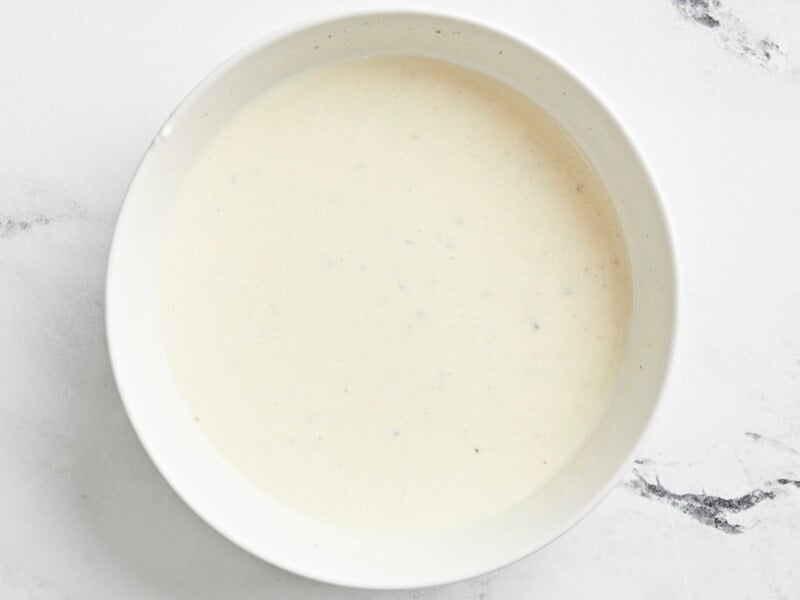
creamy dressing in a white bowl.

Whisk together and set dressing aside.

overhead view of ingredients for broccoli salad on a wooden cutting board.

Cut 1 large crown of broccoli into florets, shred 1 cup of cheddar cheese, gather 1/4 cup of raisins, crumble 6 strips of crispy bacon, crush 1/4 cup walnuts, and dice 1/4 of a red onion.
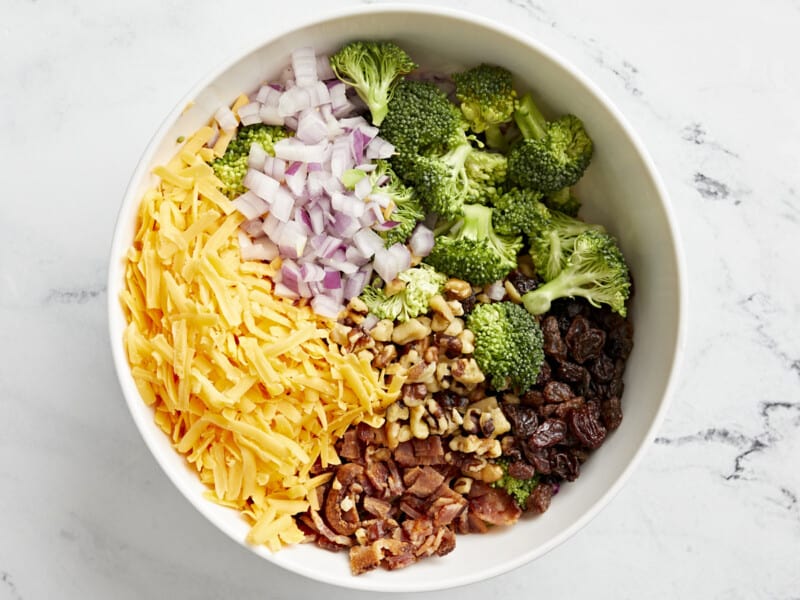
ingredients for broccoli salad in a white bowl.

Combine salad ingredients in a large mixing bowl and toss to combine.
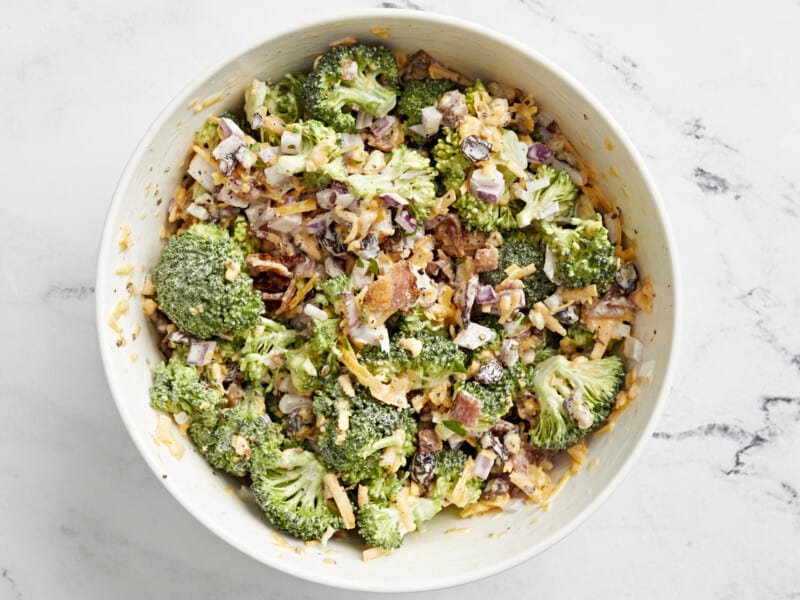
broccoli salad in a white bowl.

Pour the dressing over broccoli salad and toss together until completely coated. Serve immediately, or let it marinate and get extra yummy in the fridge for up to 5 days!

The post Broccoli Salad appeared first on Budget Bytes.
Carrot Cake Muffins

These soft, fluffy, and super-moist carrot cake muffins are full of delicious carrot cake flavor and the perfect sweet treat any time of the day!

The post Carrot Cake Muffins appeared first on Budget Bytes.
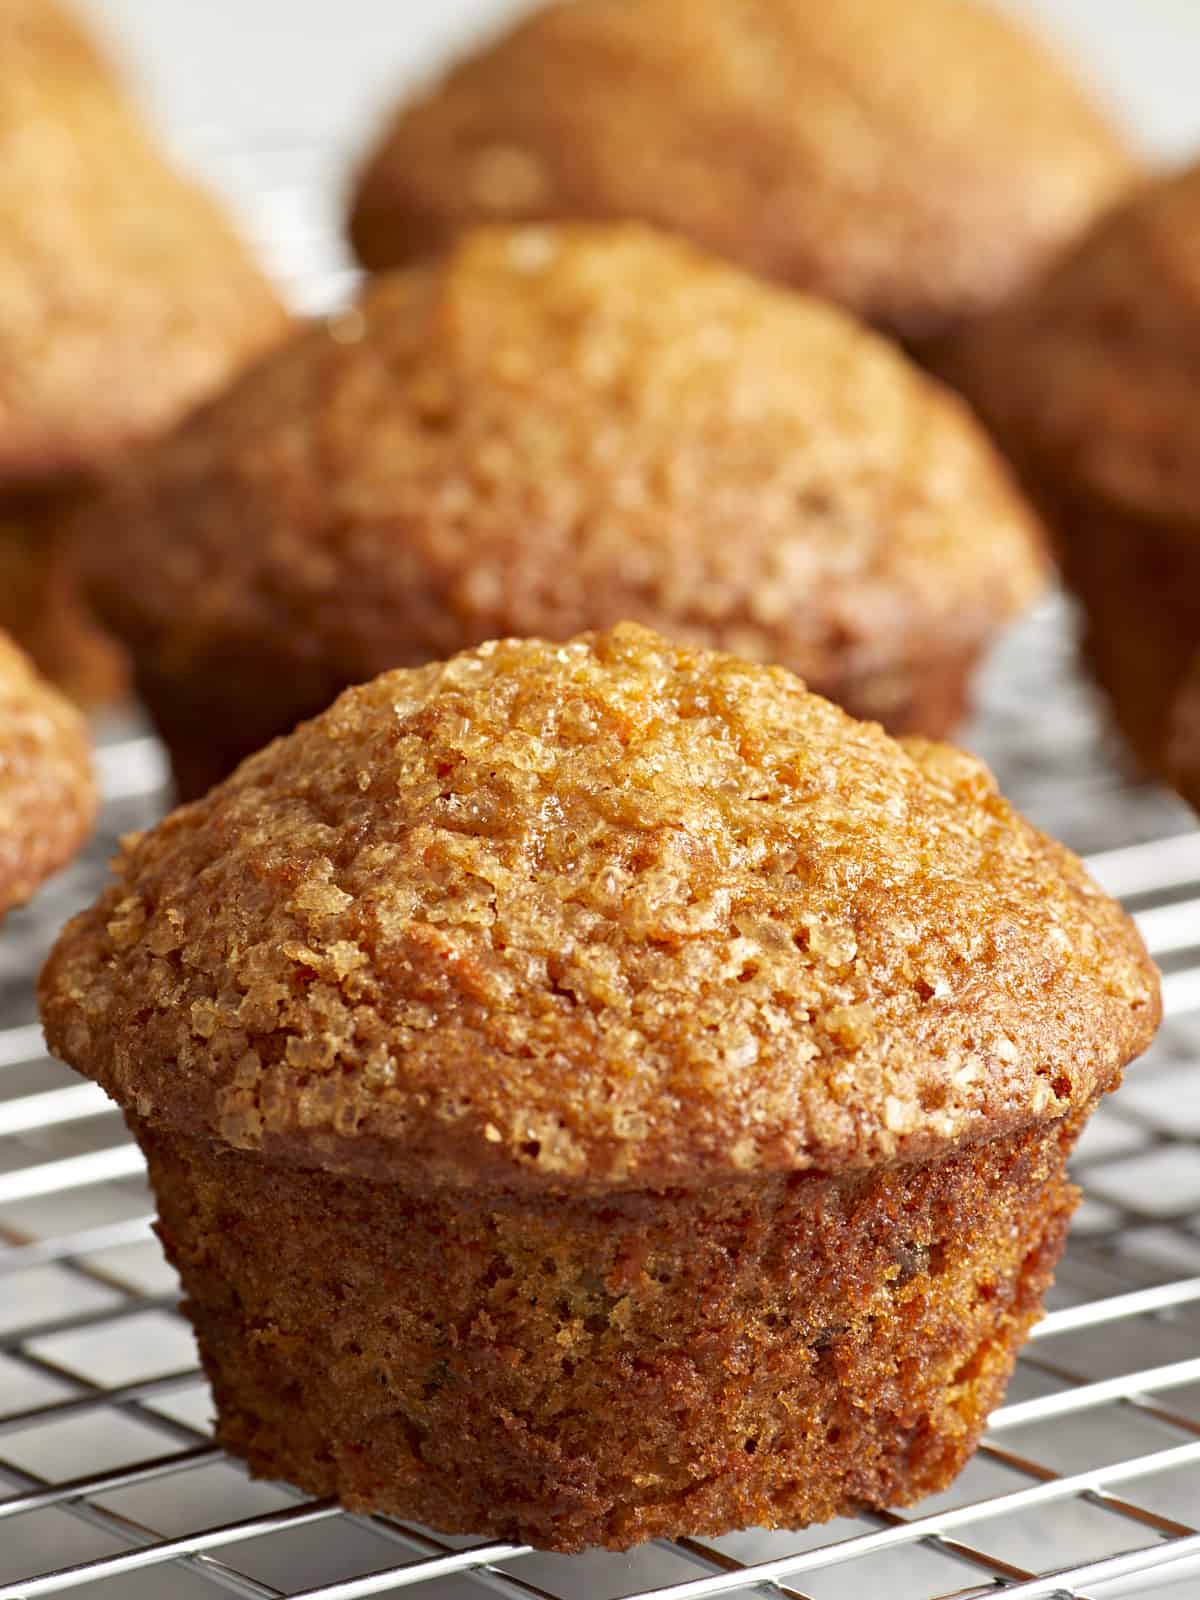
Carrot cake is one of those recipes where some people love it and others strongly dislike it. Well today, these Carrot Cake Muffins deserve to be in a class of their own. They’re soft, fluffy, and perfectly moist with all the wonderful flavors of carrot cake, but in a convenient, easy to share muffin size. And spoiler alert, I’m a carrot cake lover, so I’ll be enjoying these muffins all season long! Have fun adding your favorite carrot cake mix-ins like sweet raisins and walnuts, or you can keep things simple and save a little bit on your budget. Either way you’re guaranteed to love these delicious carrot cake muffins.

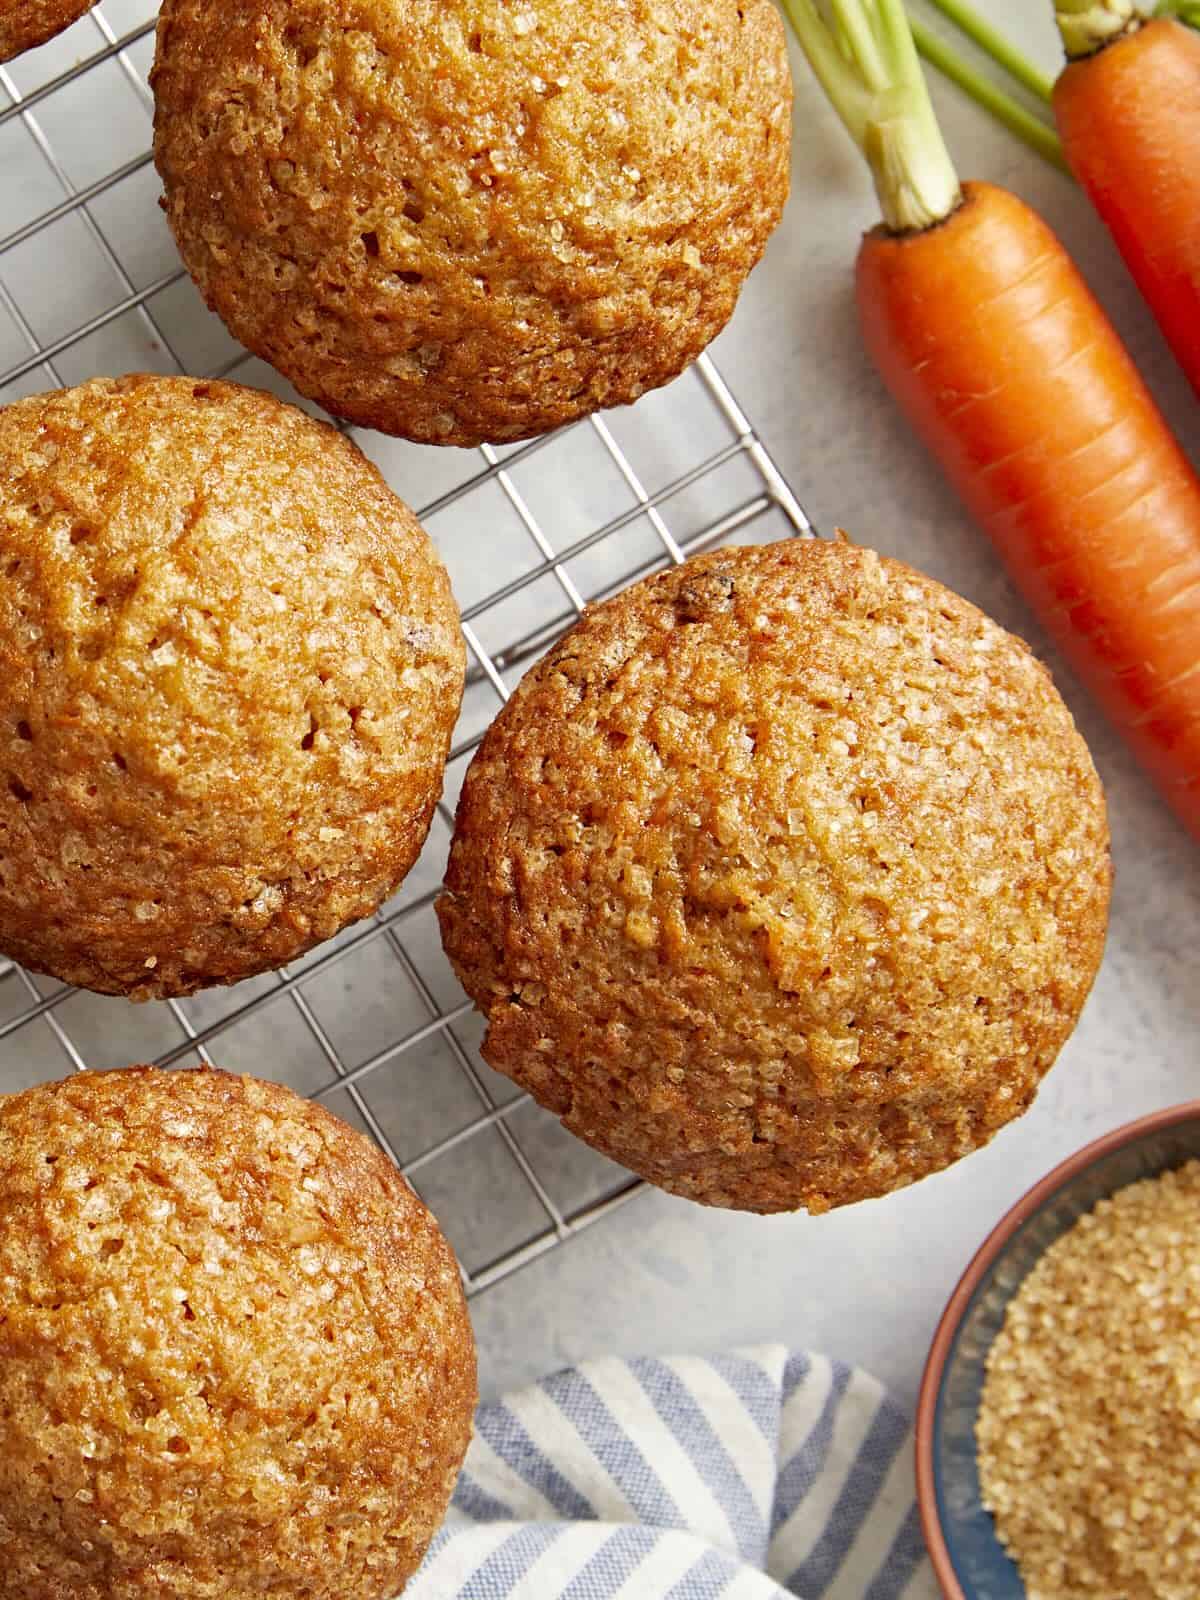
Close up side view of carrot cake muffins on a cooling rack.

Ingredients For Carrot Cake Muffins

I used my zucchini muffins recipe, that I absolutely love, as inspiration for these muffins. I adjusted the measurements and added a few extra spices to fit the flavor profile of carrot cake. The results were absolutely ahhmazing! Here’s everything you need:

  • Carrots: Carrots are of course the star of the show, so you’ll need about 3-4 large whole carrots, finely grated for this recipe. 
  • All-Purpose Flour:  All-purpose flour gives the muffins structure. You can safely substitute up to half of the flour for whole wheat flour without affecting the flavor or texture too much.
  • Baking Powder & Baking Soda: These are both leavening agents to help the muffins rise. I use both due to the extra acidity from the applesauce.
  • Eggs: Eggs to help bind all of the muffin ingredients together.
  • White Granulated Sugar & Dark Brown Sugar: The combination of both sugars help balance the sweetness, moisture and texture of the muffins.
  • Applesauce & Oil: The combination of both cooking oil and applesauce keeps the muffins moist, but not too oily, and you gain more flavor and moisture by incorporating the applesauce.
  • Cinnamon, Nutmeg & Ginger: These are classic spices that are often found in carrot cake. We use the right amount of each one to give these carrot cake muffins a wonderful flavor!  
  • Vanilla: A touch of vanilla extract adds more rich flavor to the carrot muffins.
  • Golden Raisins: The added raisins were honestly my favorite part of the muffins. They added a subtle sweetness and more texture to the muffins. Feel free to use regular raisins instead of golden raisins if that’s what you have on hand.
  • Turbinado Sugar (optional): Adding a sprinkle of turbinado sugar on top of each muffin is totally optional, but such a special treat. It gives each muffin a sweet and light crunch on the top. If you don’t have turbinado sugar, no worries, these muffins are still delicious without it.

How To Grate Your Carrots

As I mentioned above, you definitely want to grate fresh whole carrots for this recipe. Although its tempting to buy pre-shredded matchstick carrots at the grocery store, they simply are not moist enough for these muffins. They also aren’t grated fine enough and won’t mix well with the batter. Grating fresh carrots yourself is the way to go!

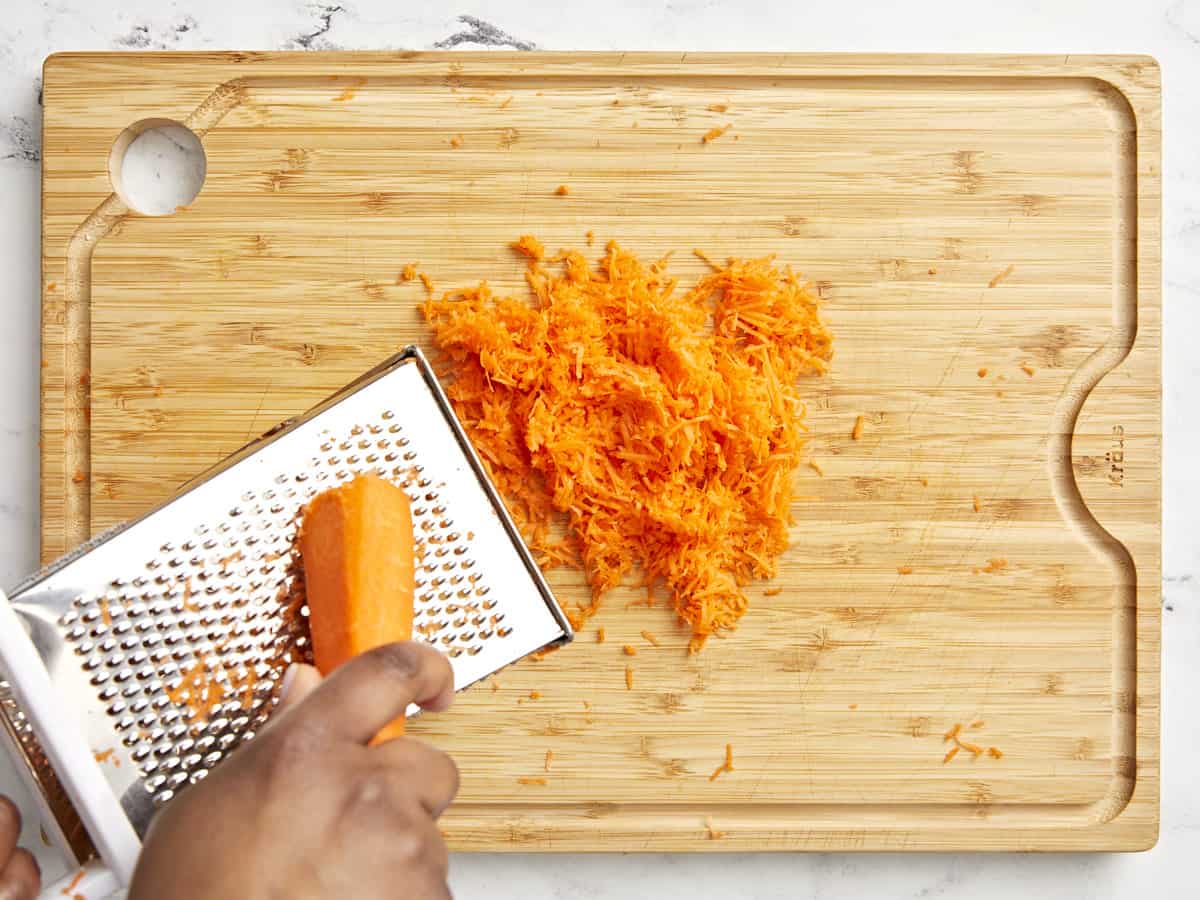
Also, most box graters come with a coarse, medium, and fine grating side. I tested these muffins using both medium and finely grated carrots. The finely grated carrots were the winner! They blended better in the batter and provided a bit more moisture compared to the medium-size grated carrots.

Recipe Tips & Add-Ins

  1. Don’t over mix the batter! Over-mixing will cause the muffins to become dense instead of light and fluffy. Mix the dry and wet ingredients together until they are just barely combined and there are no traces of dry flour left in the bowl.
  2. Oil your muffin pan really well. Even if you are using a nonstick muffin pan, make sure to oil it well or use cupcake liners to prevent your muffins from sticking to the pan.
  3. You can easily stretch this batter and get 12 regular size muffins. I wanted larger, bakery style muffins, so I divided the batter into ten muffin wells.
  4. If you want even more of a carrot cake taste, try adding some chopped walnuts, pecans, or shredded coconut to the batter. And if you really want to take these carrot muffins over the top, add some cream cheese frosting on top! ;)

How To STore Carrot Cake Muffins

Allow the muffins to cool completely at room temperature before storing. You can store leftover carrot cake muffins in an airtight container or a food storage bag in the fridge for 4-5 days. For longer storage, store in a freezer-safe storage bag for up to 3 months. Thaw frozen muffins at room temperature or microwave for about 30 seconds until warm.

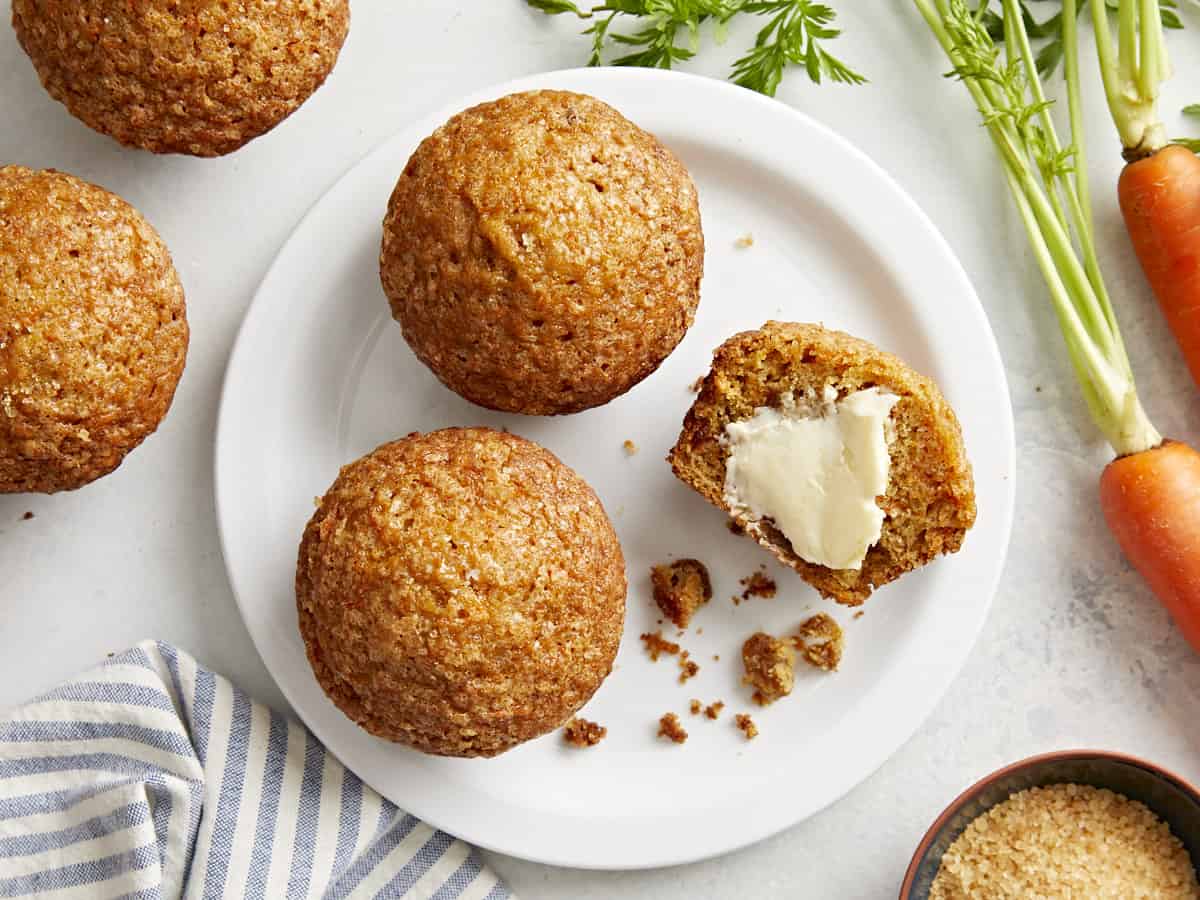
Overhead view of 3 carrot cake muffins on a white plate and 2 carrot cake muffins sitting beside the plate.
Close up side view of carrot cake muffins on a cooling rack.
Print

Carrot Cake Muffins

These soft, fluffy, and moist carrot cake muffins are full of delicious carrot cake flavor and the perfect sweet treat any time of the day!
Course Breakfast
Cuisine American
Total Cost $4.55 recipe / $0.45 serving
Prep Time 20 minutes
Cook Time 22 minutes
Total Time 42 minutes
Servings 10 muffins
Calories 314kcal

Ingredients

  • 2 cups finely grated carrots (3-4 large carrots) $0.57
  • 2 large eggs $0.33
  • 1/2 cup dark brown sugar $0.28
  • 1/2 cup granulated sugar $0.20
  • 1/3 cup sweetened applesauce $0.18
  • 1/2 cup cooking oil $0.32
  • 1 tsp vanilla extract $0.50
  • 1 1/2 cups all-purpose flour $0.30
  • 1 tsp baking powder $0.06
  • 1/2 tsp baking soda $0.02
  • 1/2 tsp salt $0.04
  • 1 tsp cinnamon $0.10
  • 1/4 tsp ground nutmeg $0.05
  • 1/2 tsp ground ginger $0.05
  • 3/4 cup golden raisins $1.49
  • 1 Tbsp turbinado sugar* $0.06

Instructions

  • Preheat the oven to 350°F. Wash, peel and grate the carrots using the small/fine holes on a box grater. Set the grated carrots to the side.
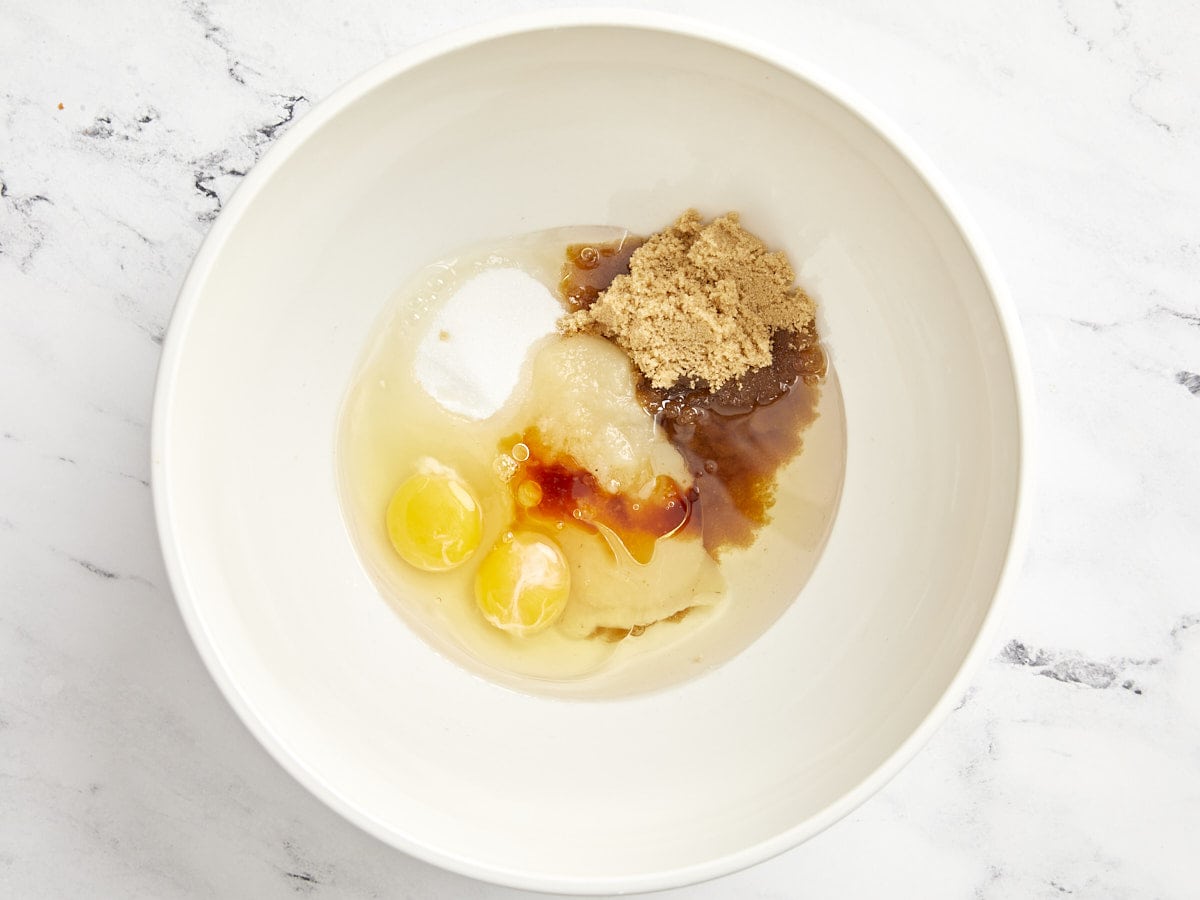
  • In a large bowl, whisk together the wet ingredients (eggs, dark brown sugar, granulated sugar, applesauce, oil and vanilla extract) until well combined.
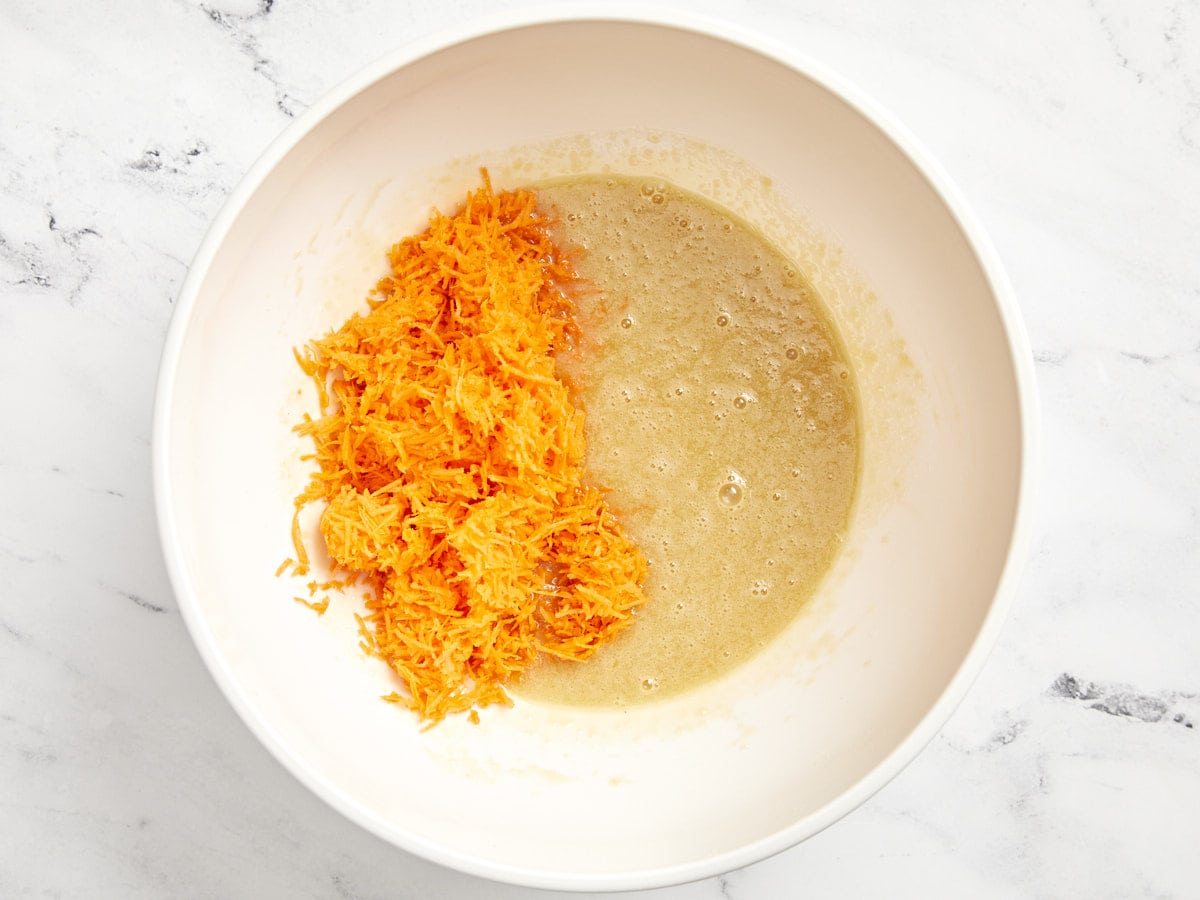
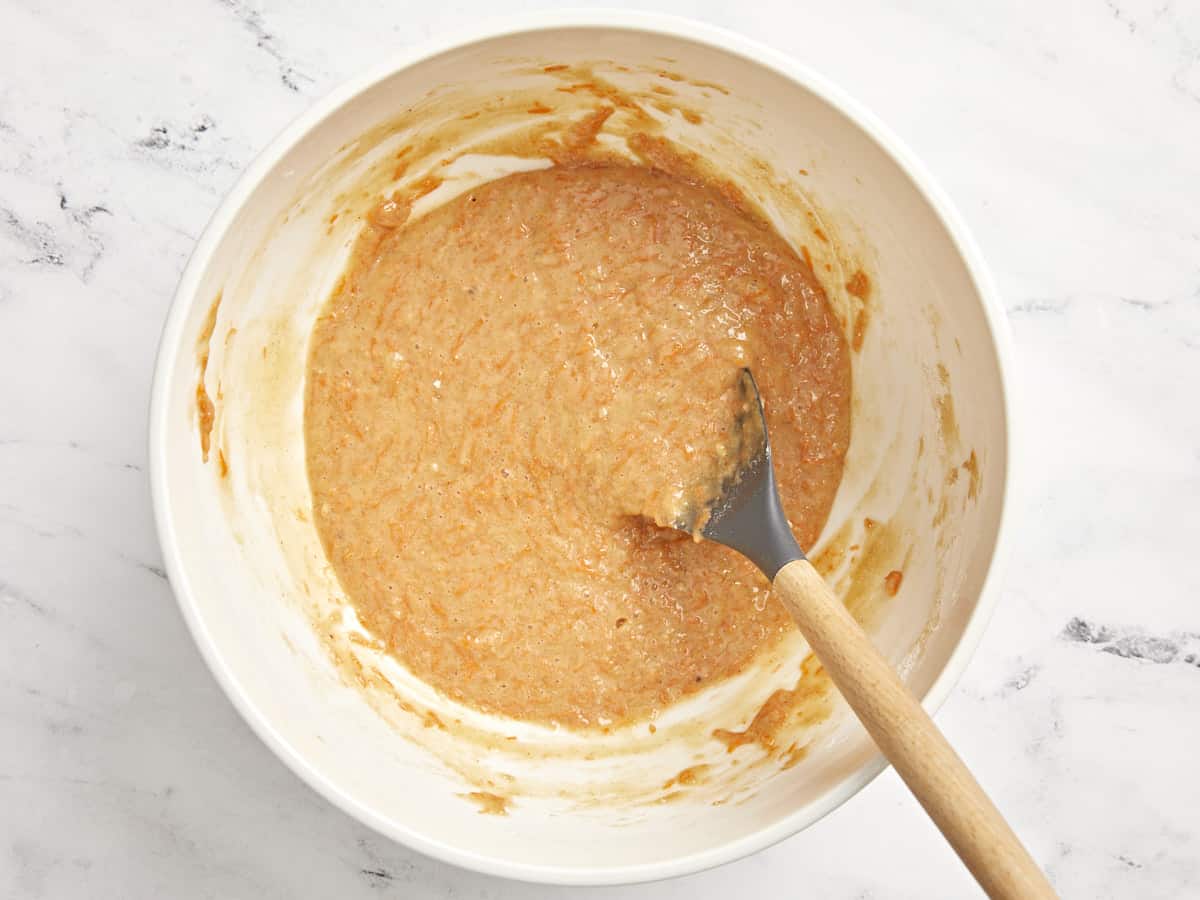
  • Add the grated carrots to the bowl with the wet ingredients. Stir until combined.
  • In a separate bowl, whisk together the dry ingredients (flour, baking powder, baking soda, salt, cinnamon, ground nutmeg, and ground ginger) until well combined.
  • Add the dry ingredients to the same bowl as the wet ingredients. Stir together until just combined. Be careful not to overmix at this point.
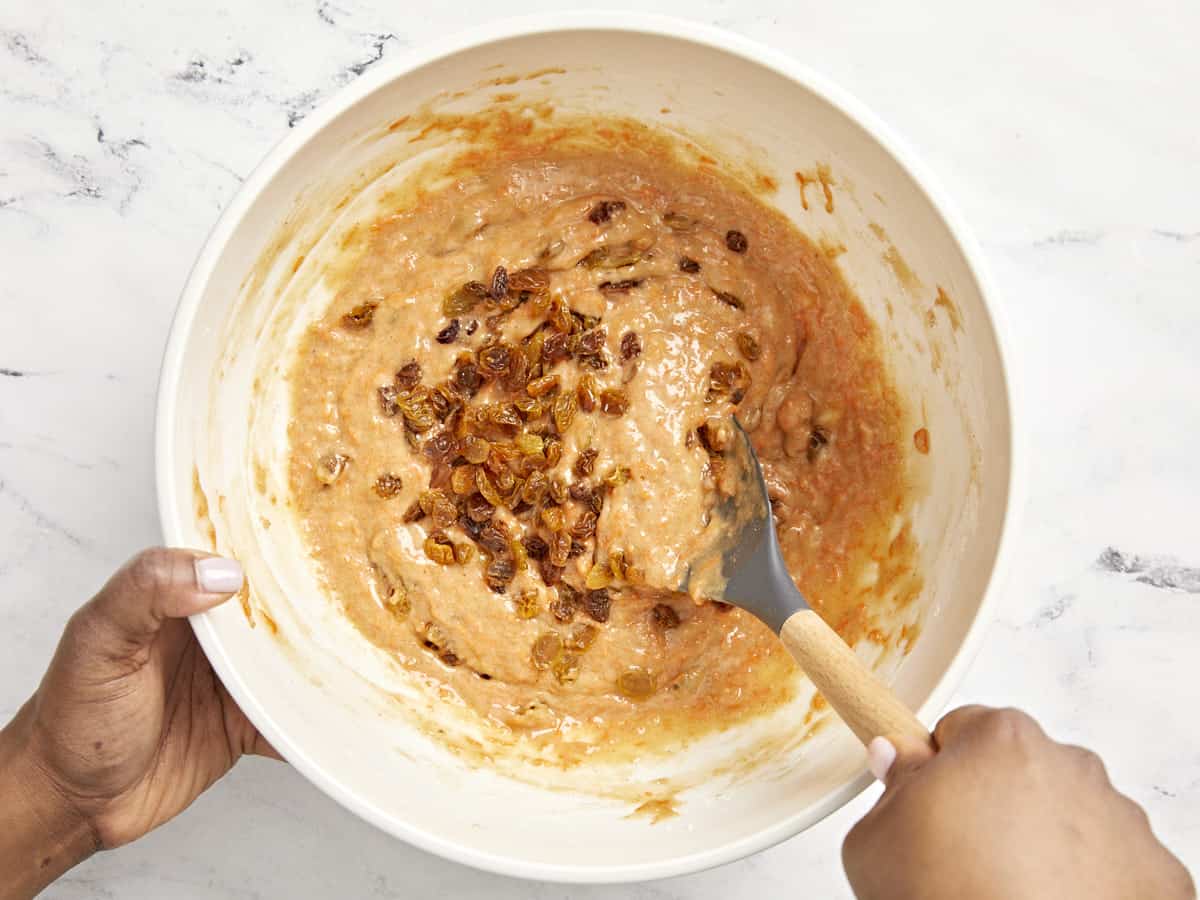
  • Add the raisins to the bowl and fold them into the batter until just combined.
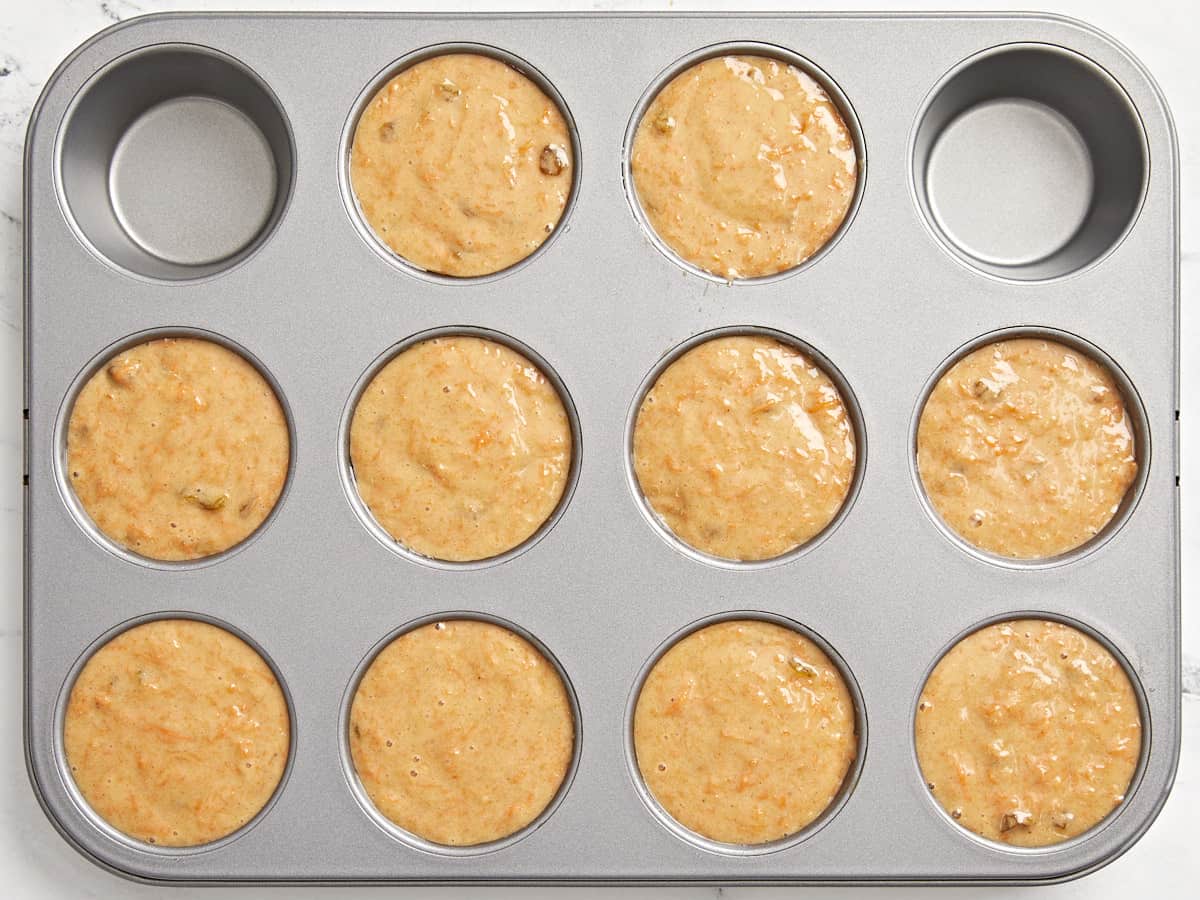
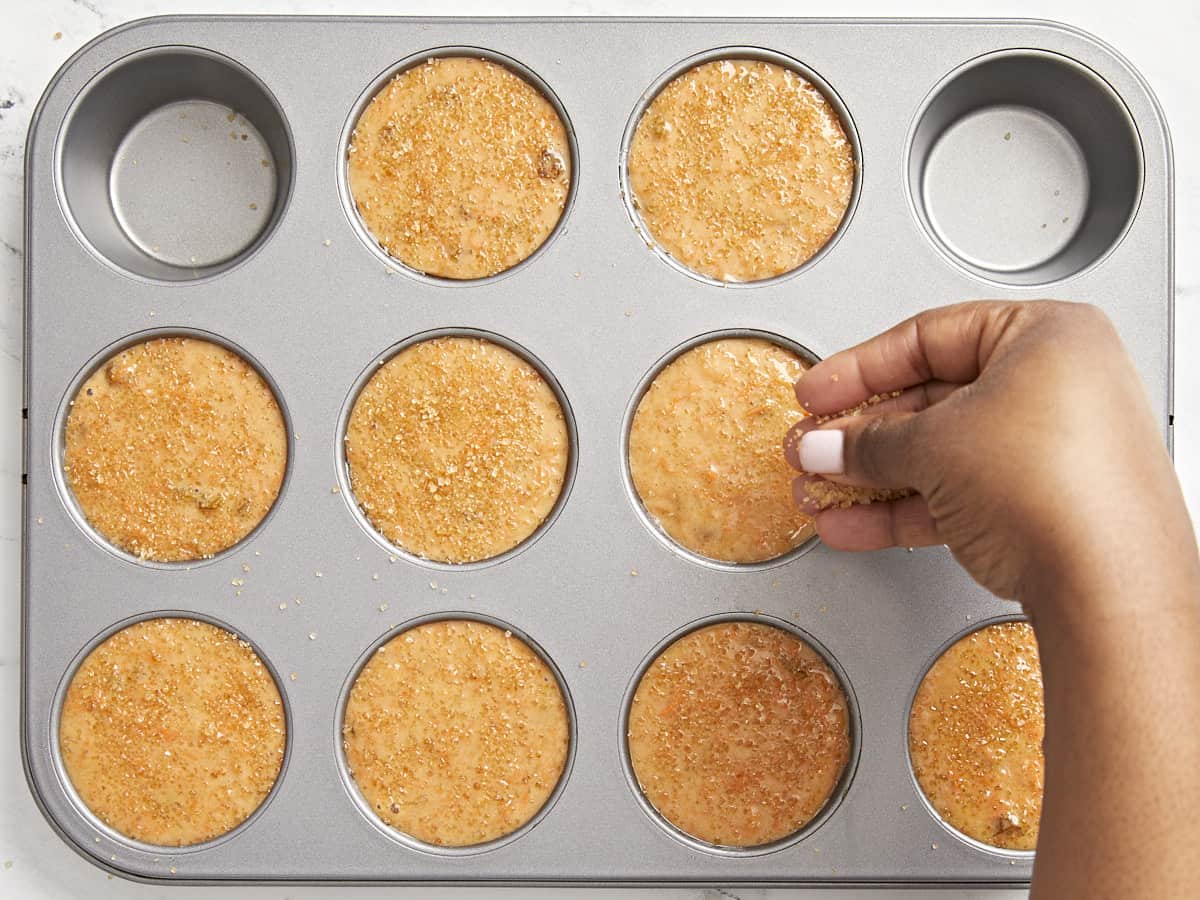
  • Divide the batter between ten greased or lined muffin wells. Sprinkle a little turbinado sugar on top of each muffin, optional.
  • Bake the muffins for 20-22 minutes or until golden brown and puffed in the center. Allow the muffins to cool for about 5 minutes, then carefully loosen the edges with a knife and transfer the muffins to a wire rack to finish cooling. Enjoy!

See how we calculate recipe costs here.

Notes

*Adding a sprinkle of turbinado sugar on top of each muffin is optional, but it does add a special sweet crunch to the muffins.

Nutrition

Serving: 1muffin | Calories: 314kcal | Carbohydrates: 49g | Protein: 4g | Fat: 12g | Sodium: 249mg | Fiber: 2g
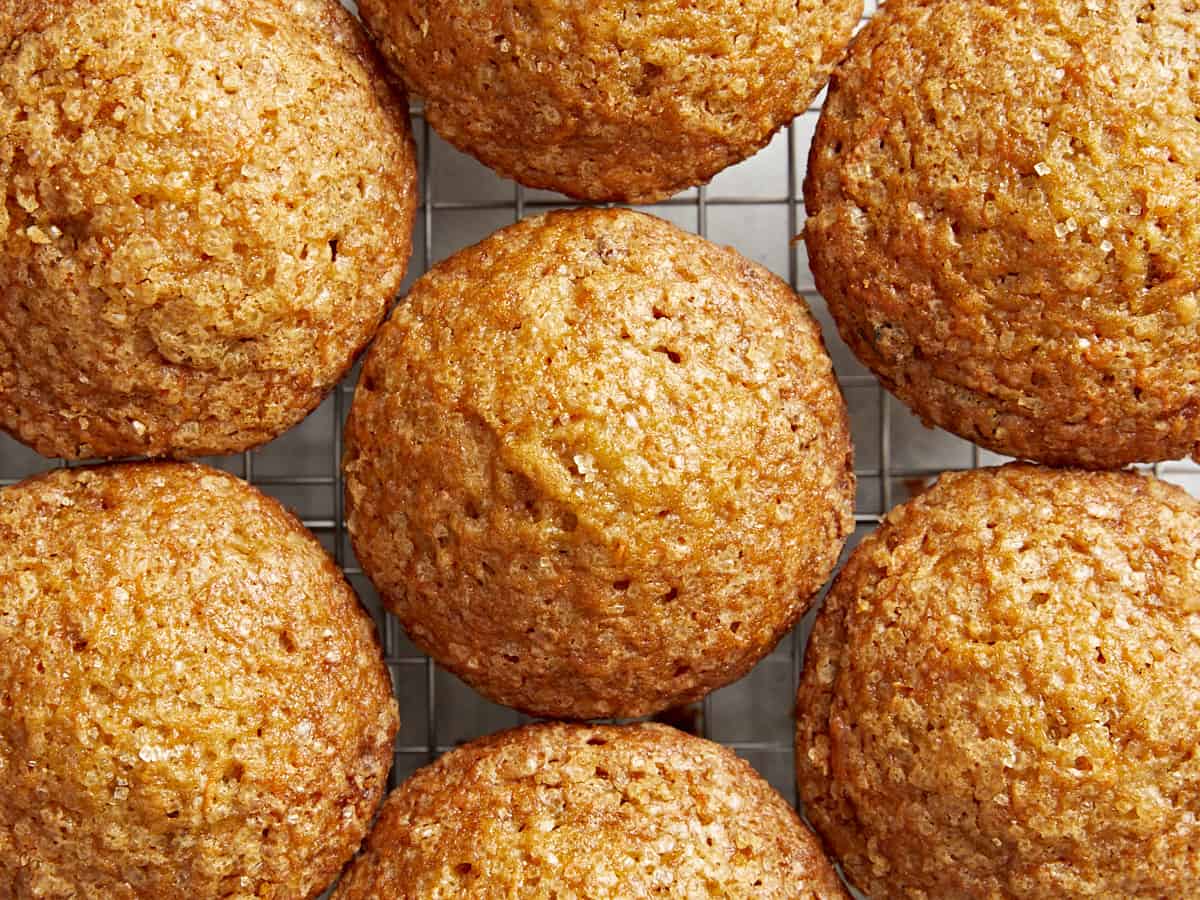
Overhead view of carrot cake muffins close together on a cooling rack.

How to Make Carrot Cake Muffins – Step by Step Photos

A carrot being grated on a wood cutting board.

Preheat the oven to 350°F. Wash, peel and grate 2 cups of finely grated carrots using the small/fine holes on a box grater. Set the grated carrots to the side.

Wet ingredients for carrot cake muffins added to a large bowl.

In a large bowl, whisk together 2 eggs, 1/2 cup dark brown sugar, 1/2 cup granulated sugar, 1/3 cup applesauce, 1/2 cup cooking oil and 1 tsp vanilla extract until well combined.

Grated carrots added to mixed wet ingredients.

Add the grated carrots to the bowl with the wet ingredients. Stir until combined.

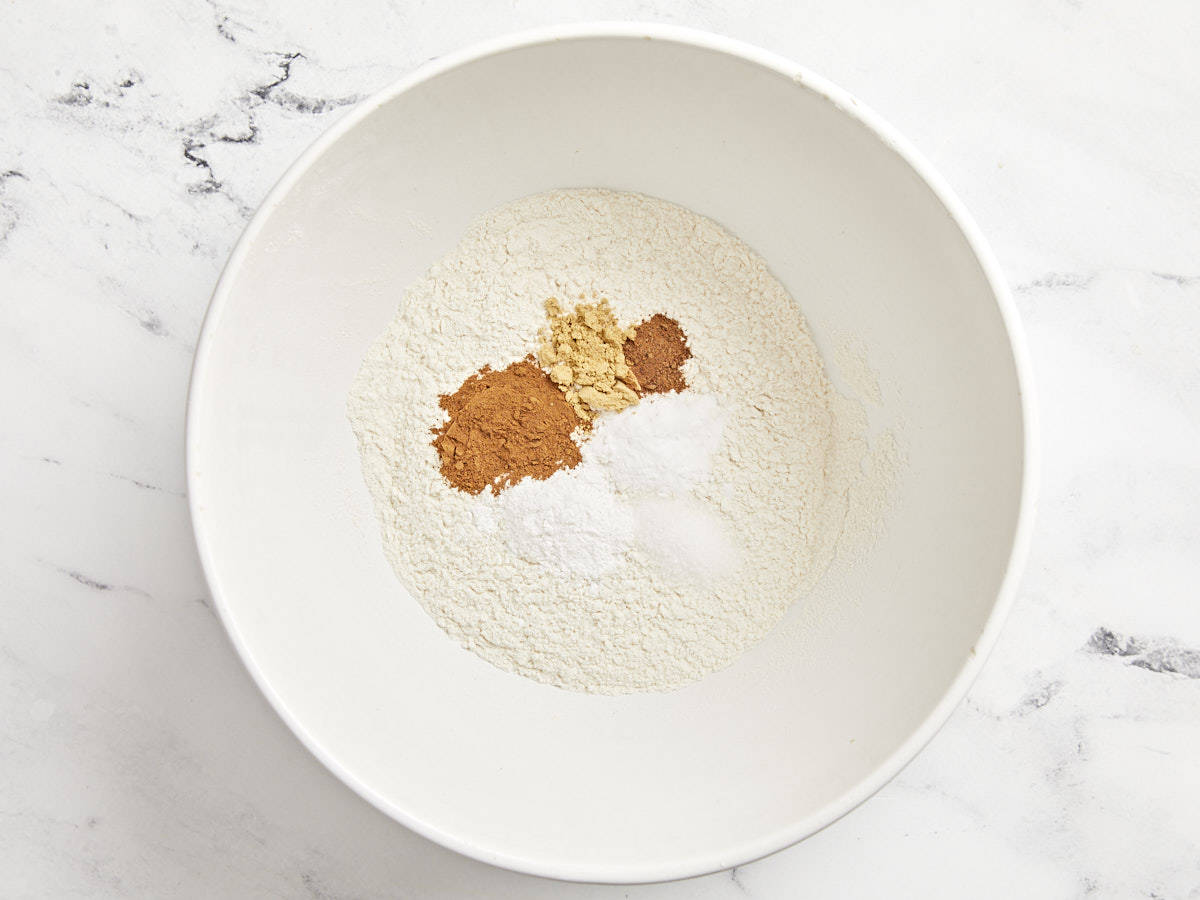
Dry ingredients for carrot cake muffins

In a separate bowl, whisk together 1 1/2 cups all-purpose flour, 1 tsp baking powder, 1/2 tsp baking soda, 1/2 tsp salt, 1 tsp cinnamon, 1/4 tsp ground nutmeg, and 1/2 tsp ground ginger until well combined.

Wet ingredients and dry ingredients combined in a large bowl.

Add the dry ingredients to the same bowl as the wet ingredients. Stir together until just combined. Be careful not to overmix at this point.

Golden raisins being added to carrot cake muffin batter.

Add 3/4 cup golden raisins to the bowl and fold them into the batter until just combined.

Carrot cake muffin batter added to muffin tins

Divide the batter between ten well-greased or lined muffin wells.

Turbinado sugar being added to Carrot Cake Muffins

Optional: Divide 1 Tbsp turbinado sugar and sprinkle a little on top of each muffin.

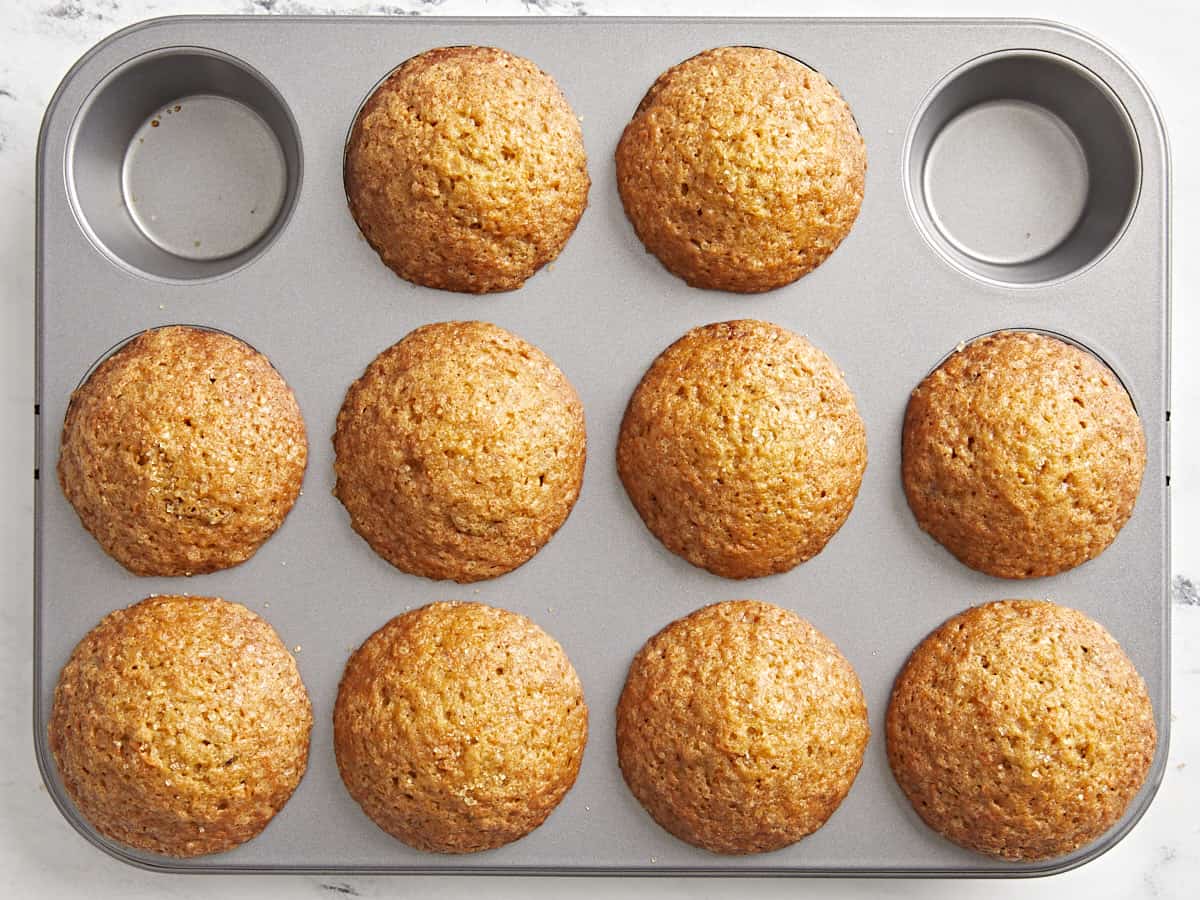
Overhead view of cooked Carrot Cake muffins in a muffin tin.

Bake the muffins for 20-22 minutes or until golden brown and puffed in the center. Allow the muffins to cool for about 5 minutes, then carefully loosen the edges with a knife and transfer the muffins to a wire rack to finish cooling. Enjoy!

Overhead view of Carrot Cake Muffins on a cooling rack.

The post Carrot Cake Muffins appeared first on Budget Bytes.
Oatmeal Cookies

These delicious Oatmeal Cookies are crispy around the edges and soft & chewy in the center. The perfect way to satisfy your sweet tooth!

The post Oatmeal Cookies appeared first on Budget Bytes.
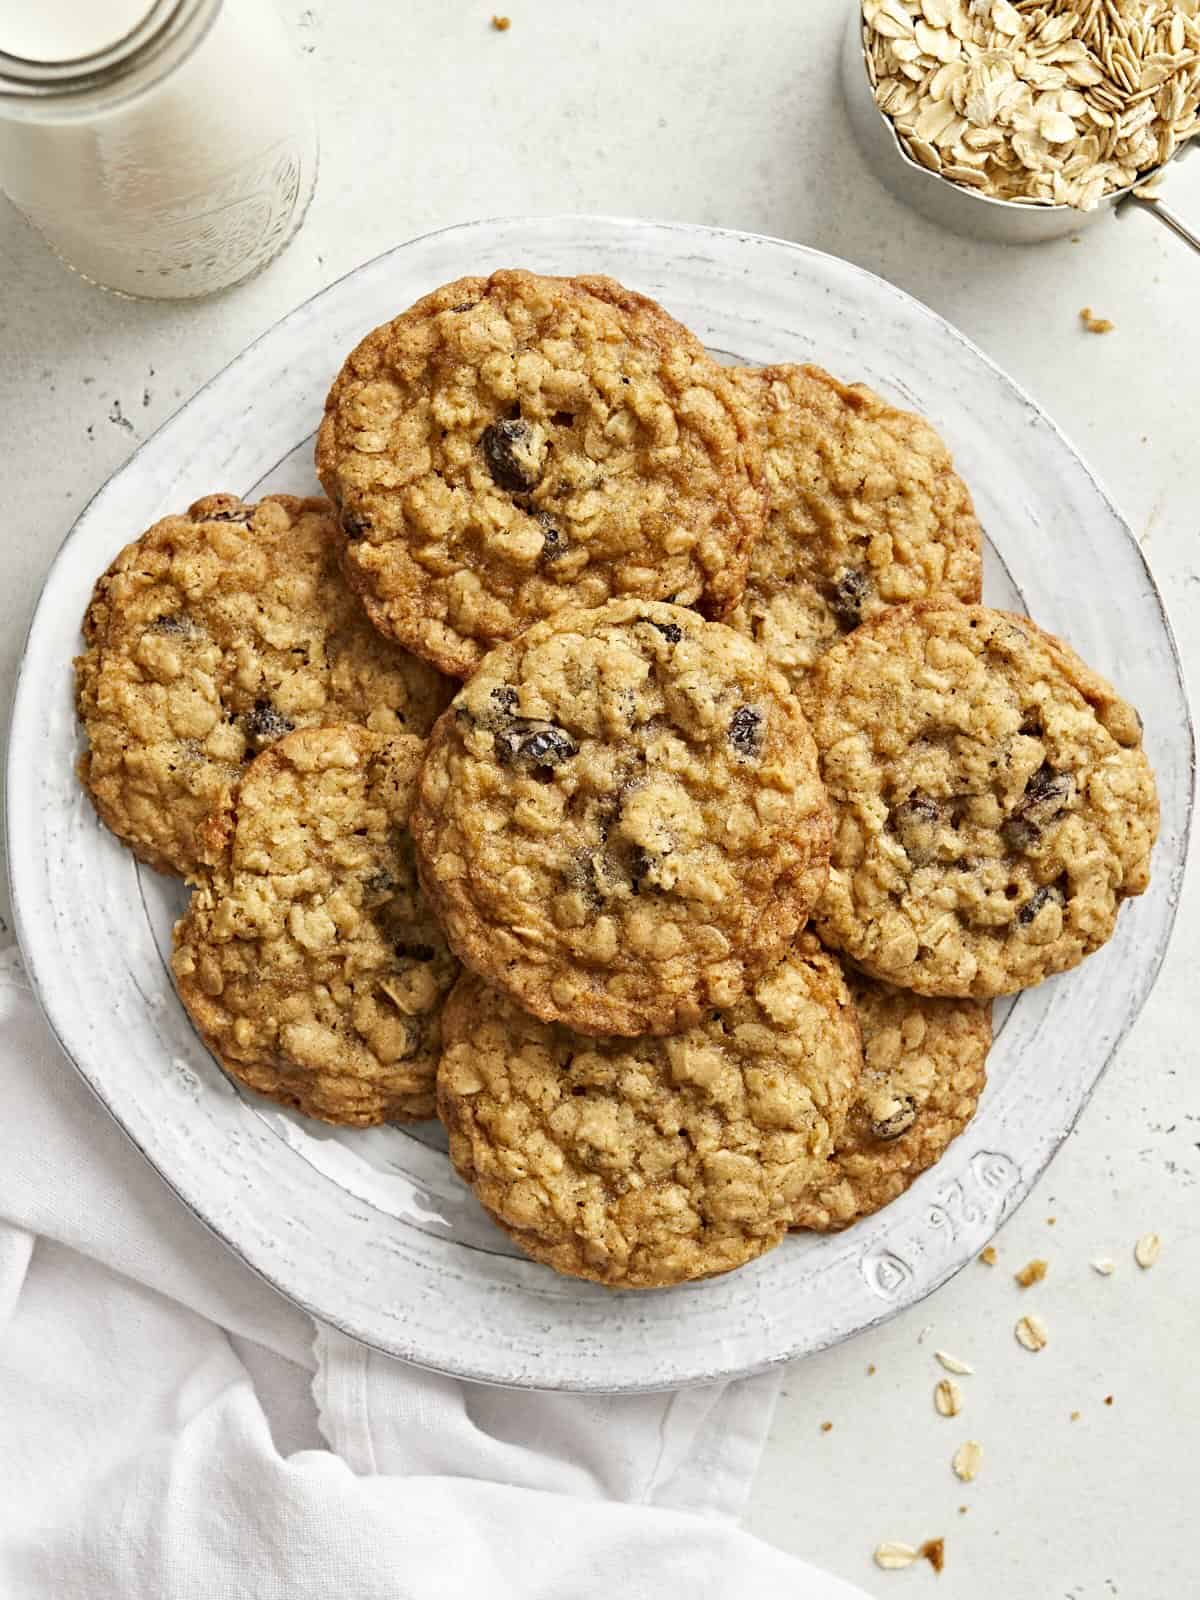
What could possibly be so good that it keeps our team talking about it for weeks? You guessed it…these insanely delicious Oatmeal Cookies! The golden crispy edges and chewy center had us hooked! We added raisins for the classic oatmeal raisin cookie, but feel free to swap out the raisins for your own favorite cookie add-ins. I’ll share a few different options below. Just know these oatmeal cookies are the absolute best way to satisfy your sweet tooth on a budget!😉

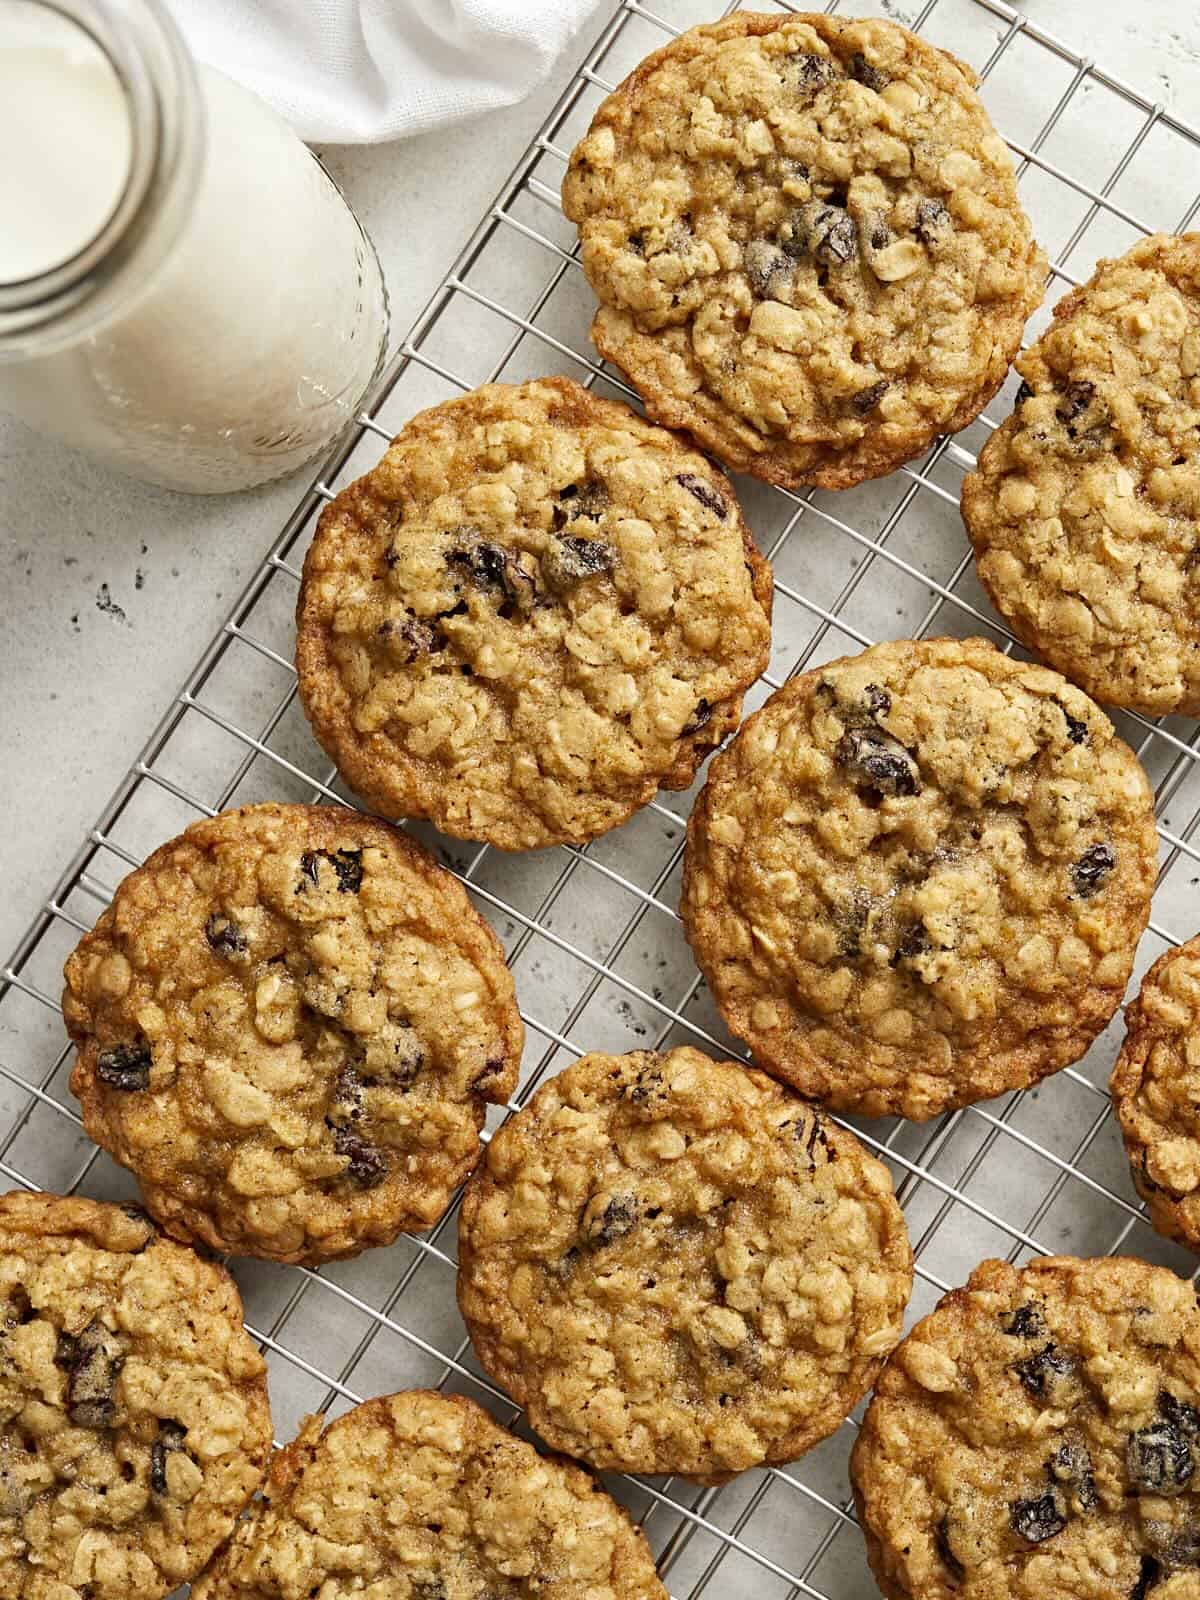
Overhead view of oatmeal raisin cookies on a cooling rack.

Ingredients For Oatmeal Cookies

Here are the ingredients you need to make these delicious oatmeal raisin cookies:

  • Old-fashioned Rolled Oats:  It wouldn’t be an oatmeal cookie without the oats! The oats provide a chewy texture to the cookies. Make sure to use old-fashioned rolled oats and not quick oats.
  • Butter: Butter is the base for many cookies. It gives the cookies plenty of richness and creamy buttery flavor.
  • Brown sugar & Granulated white sugar: I like using a combination of both brown and white sugar to sweeten the cookies.
  • Egg: Egg helps bind all of the ingredients together.
  • Vanilla: Vanilla extract adds a touch of warm flavor to the cookies.
  • Baking Soda: A small amount of baking soda helps the cookies rise just a little bit.
  • Flour: All-purpose flour gives the cookies structure.
  • Cinnamon: Cinnamon spice adds just a little bit more flavor and the perfect finishing touch to these chewy cookies.
  • Raisins: Raisins are a classic addition to oatmeal cookies with the perfect contrast and sweetness. But feel free to try some other variations if you wan’t a slightly different flavor profile. We’ll list a few suggestions below.

Oatmeal Cookie Variations

Here are a few different options if you want to switch things up with your oatmeal cookies:

  • Dried cranberries: I love swapping the raisins for Craisins or dried cranberries whenever I can catch them on sale at my local grocery store.
  • Chopped nuts: Looking for a little crunch? Add about 1/2 cup of chopped pecans or walnuts to the dough.
  • Chocolate or Butterscotch chips: These oatmeal cookies also taste great with your favorite baking chips. My favorite combination is a few butterscotch chips and a few chopped pecans. SO good! If you’re adding chocolate or butterscotch chips, I would add them in place of the raisins.

Many cookie recipes suggest chilling the cookie dough in the refrigerator prior to baking. This is to prevent the cookies from spreading too much in the oven as they bake. We tested these oatmeal cookies two different ways. First, chilling the dough for 30 minutes prior to baking, and second, baking the cookies without chilling the dough. We actually preferred the texture of the cookies without chilling the dough. It yielded a thinner cookie with crispy edges and a perfect chewy center. However, this is more of a personal preference. If you prefer a thicker cookie, then feel free to refrigerate the cookie dough for 30-60 minutes prior to baking.

Storing Oatmeal Cookies

So what happens when you’re feeling snack-ish, you’re craving something sweet, and you forgot about the extra oatmeal cookies that you stashed in your freezer? You realize you just hit the jackpot!! That’s exactly what happened to us at the studio. We had extra cookies that we stored in the freezer and were super excited to gobble them up 2 weeks later. These cookies store very well in an air-tight container at room temperature for up to 1 week or store in a freezer-safe bag for up to 3 months. When you’re in the mood for a little something sweet, just take one or two cookies out of the freezer, thaw at room temperature and enjoy!

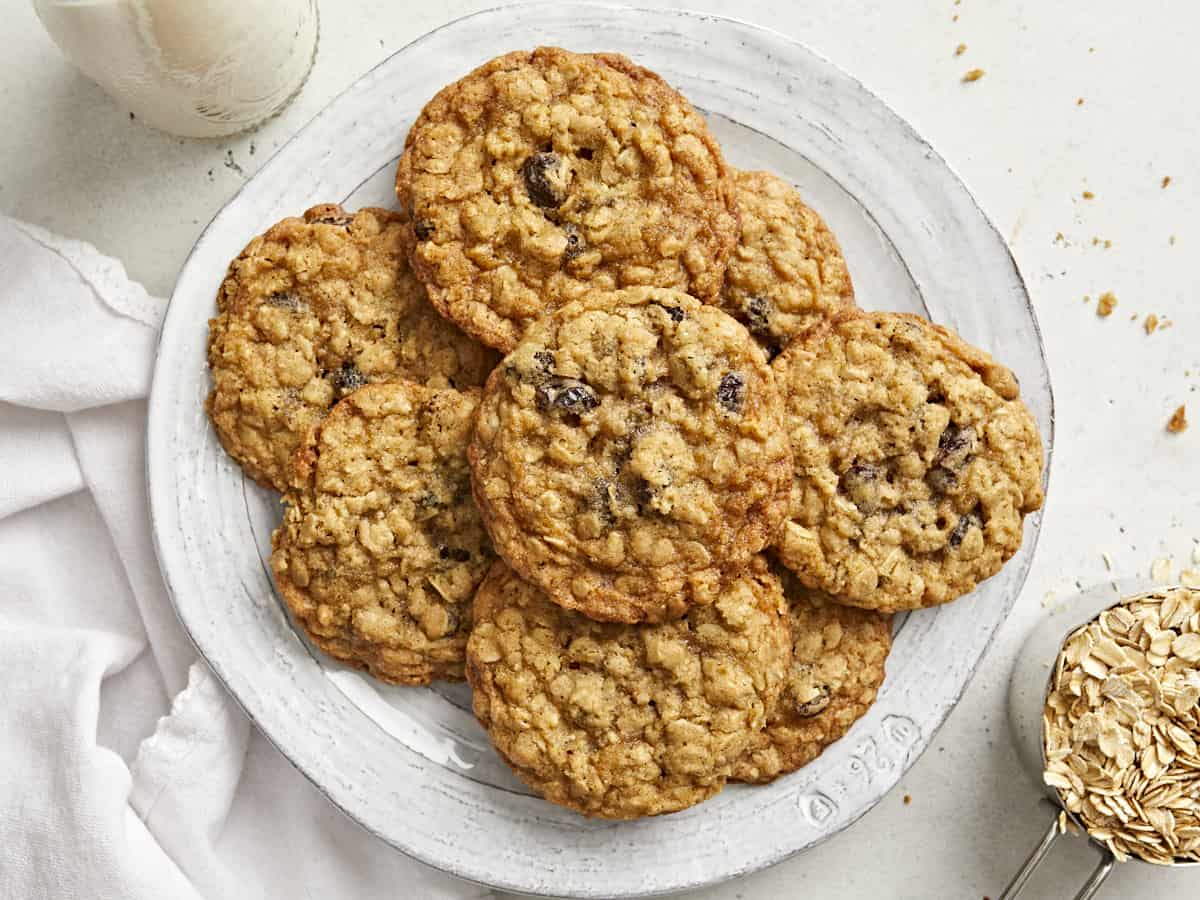
Overhead view of a pile of oatmeal cookies on a plate with a white napkin and a cup of milk on the side.
Print

Oatmeal Cookies

These delicious Oatmeal Cookies are crispy around the edges and soft & chewy in the center. The perfect way to satisfy your sweet tooth!
Course Dessert
Cuisine American
Total Cost $3.77 recipe / $0.21 each
Prep Time 15 minutes
Cook Time 13 minutes
Total Time 28 minutes
Servings 18 cookies
Calories 173kcal

Ingredients

  • 10 Tbsp salted butter, softened $1.33
  • 1/2 cup granulated white sugar $0.17
  • 1/2 cup brown sugar $0.27
  • 1 egg $0.14
  • 1 tsp vanilla extract $0.25
  • 1 cup all-purpose flour $0.20
  • 1/2 tsp salt $0.02
  • 1/2 tsp baking soda $0.02
  • 1/2 tsp cinnamon $0.05
  • 1.5 cups old-fashioned rolled oats $0.39
  • 3/4 cup raisins $0.93

Instructions

  • Preheat the oven to 350°F. In a large mixing bowl, add the softened butter, white sugar, and brown sugar. Blend the ingredients together with a hand mixer until smooth.
  • Add the egg and vanilla extract to the bowl and blend with the sugar mixture until smooth.
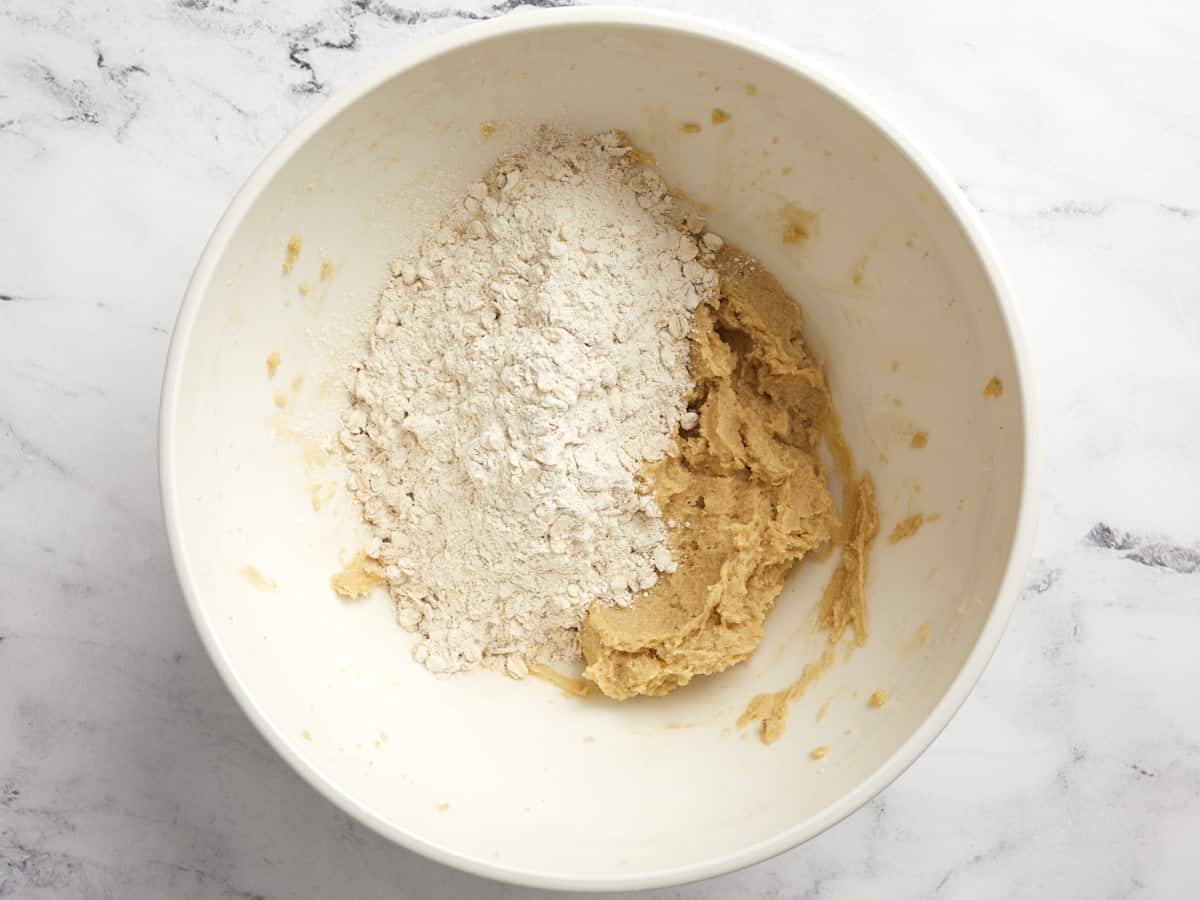
  • Next in a separate bowl, whisk together the dry ingredients (flour, salt, baking soda, and cinnamon) until well combined. Add the rolled oats to the dry ingredients and mix until combined.
  • Add all of the dry ingredients to the same bowl as the sugar mixture. Blend the ingredients together with a hand mixer on low speed until just combined. Do not overmix.
  • Next add the raisins to the bowl and fold them into the cookie dough with a spatula.
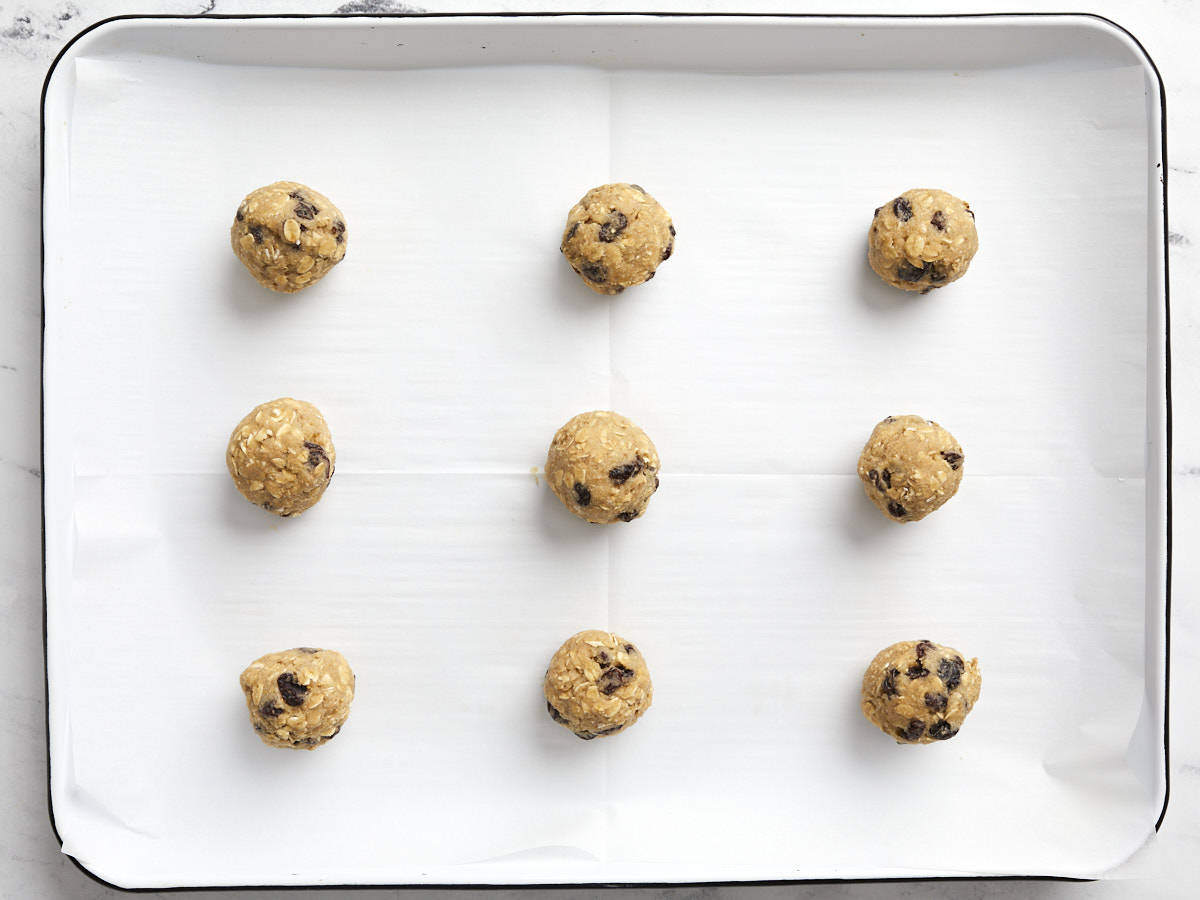
  • Using a medium cookie scoop or your hands, scoop the cookie dough into roughly 2 Tbsp portions then roll into a ball. Place the cookies on a parchment lined baking sheet about 2-3 inches apart. You'll likely need to cook the cookies in two batches, so keep the remaining dough chilled until ready to roll and bake.*
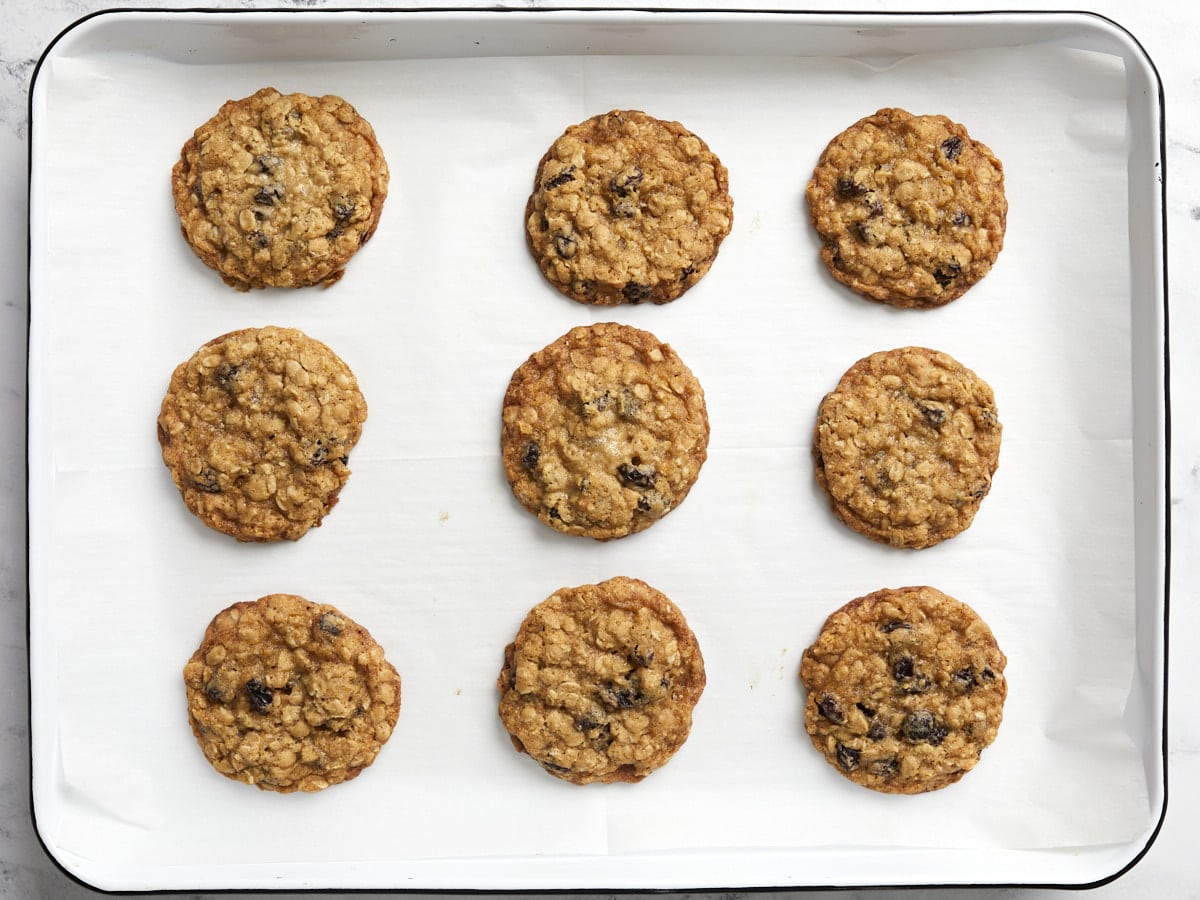
  • Bake the cookies for 13-14 minutes or until lightly golden brown. The center of the cookies may look too soft when you remove them from the oven, but keep in mind the cookies will continue to set as they cool. Let the cookies cool slightly on the baking sheet before transferring to a wire rack to cool completely. Enjoy!

See how we calculate recipe costs here.

Notes

*Feel free to chill the entire dough in the refrigerator for 30 minutes if you do not want the cookies to spread too much. 

Nutrition

Serving: 1cookie | Calories: 173kcal | Carbohydrates: 26g | Protein: 2g | Fat: 7g | Sodium: 153mg | Fiber: 1g
Very close up view of a pile of oatmeal cookies.

How to Make Oatmeal Cookies – Step by Step Photos

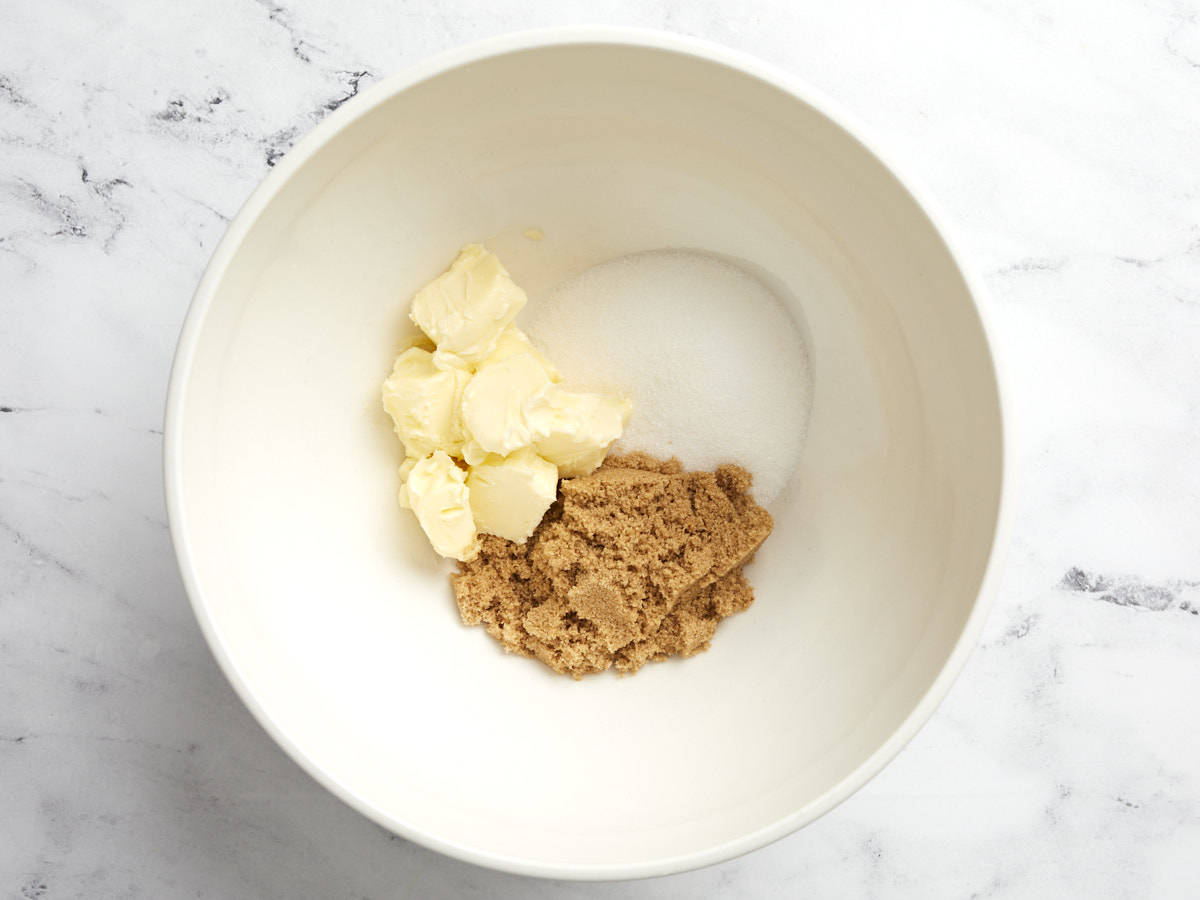
Butter, white sugar and brown sugar in a bowl.

Preheat the oven to 350°F. In a large mixing bowl, add 10 Tbsp of softened butter, 1/2 cup granulated white sugar, and 1/2 cup brown sugar. Blend the ingredients together with a hand mixer until smooth.

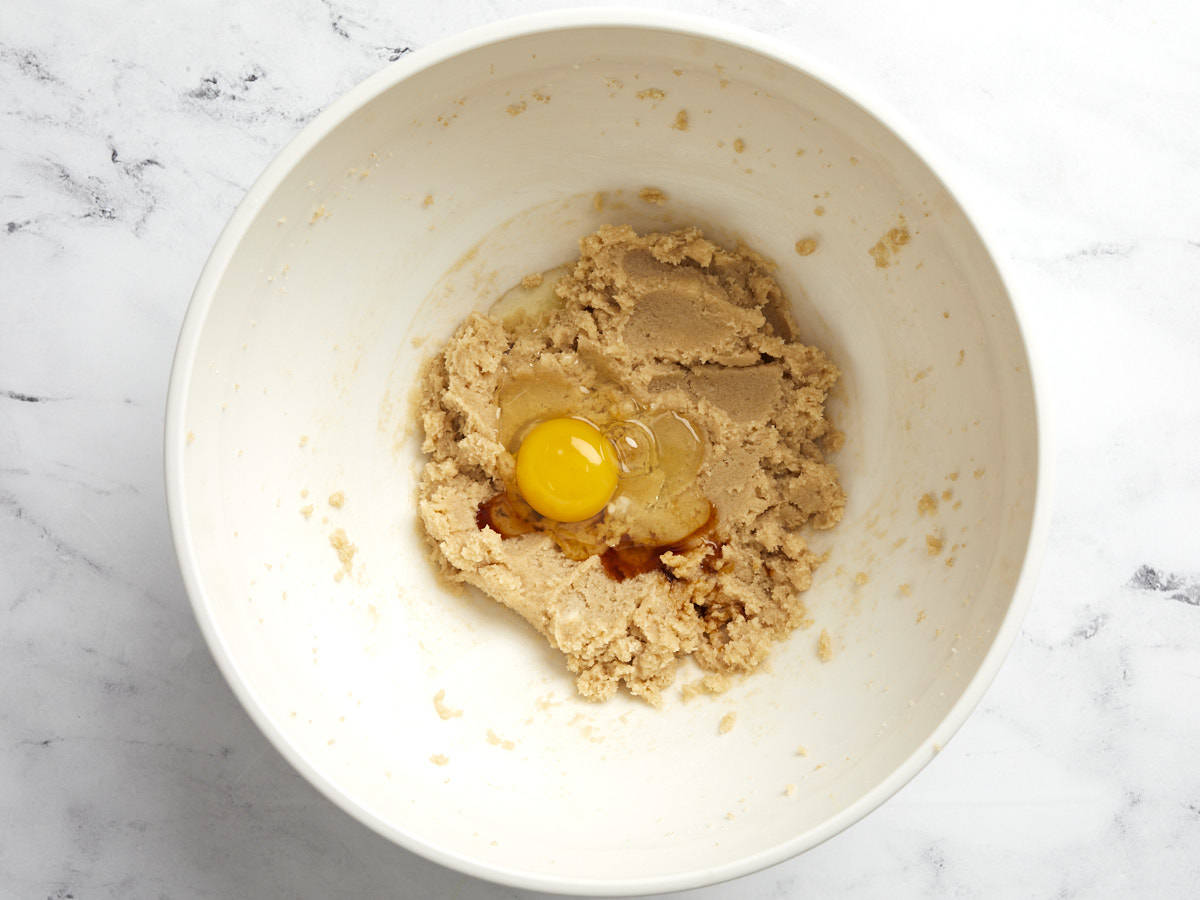
Egg and vanilla added to the sugar mixture in a bowl.

Add 1 egg and 1 tsp vanilla extract to the bowl and blend with the sugar mixture until smooth.

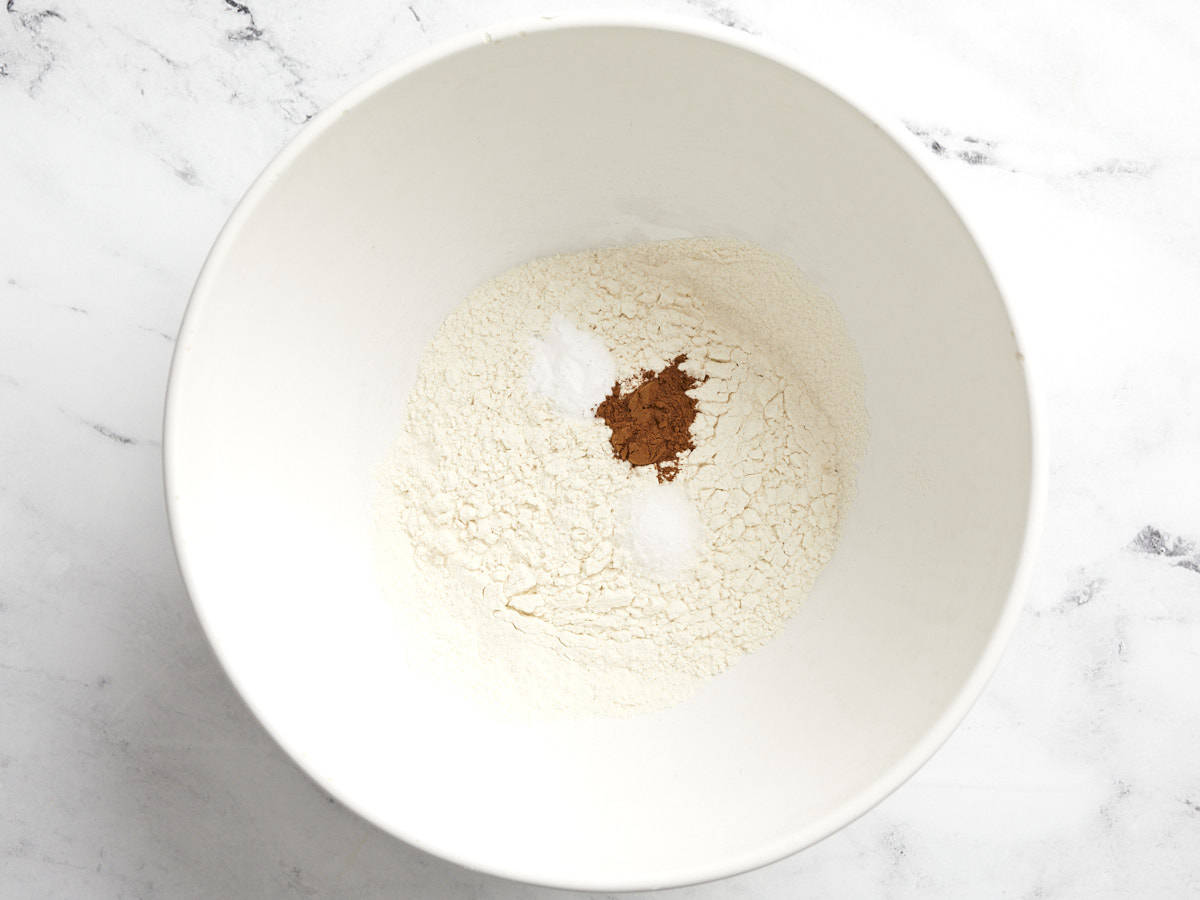
Flour, cinnamon and dry ingredients added to a bowl.

In a separate bowl, whisk together 1 cup all-purpose flour, 1/2 tsp salt, 1/2 tsp baking soda, and 1/2 tsp cinnamon until well combined.

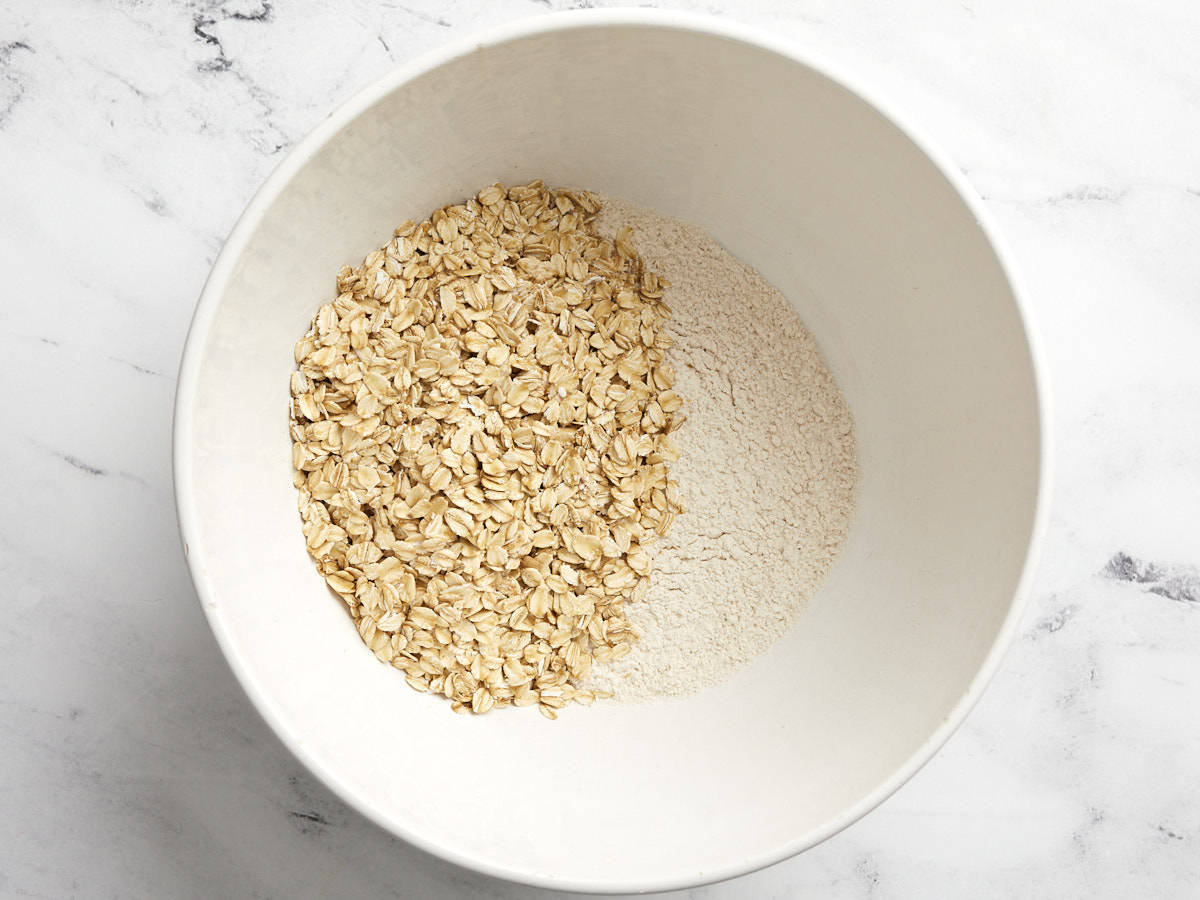
Oats mixed with flour in a bowl.

Add 1 1/2 cups old-fashioned rolled oats to the dry ingredients and mix until combined.

Oat and flour mixture added to butter and sugar mixture in a bowl.

Add all of the dry ingredients to the same bowl as the sugar mixture. Blend the ingredients together with a hand mixer on low speed until just combined. Do not overmix.

Raisins added to cookie batter in a bowl.

Next add 3/4 cup of raisins to the bowl and fold them into the cookie dough with a spatula.

Cookie dough shaped on a parchment lined baking sheet.

Using a medium cookie scoop or your hands, scoop the cookie dough into roughly 2 Tbsp portions, then roll into a ball. Place the cookies on a parchment lined baking sheet about 2-3 inches apart. You’ll likely need to cook the cookies in two batches, so keep the remaining dough chilled until ready to roll and bake.

Baked oatmeal raisin cookies on a parchment lined baking sheet.

Bake the cookies for 13-14 minutes or until lightly golden brown. The center of the cookies may look too soft when you remove them from the oven, but keep in mind the cookies will continue to set as they cool.

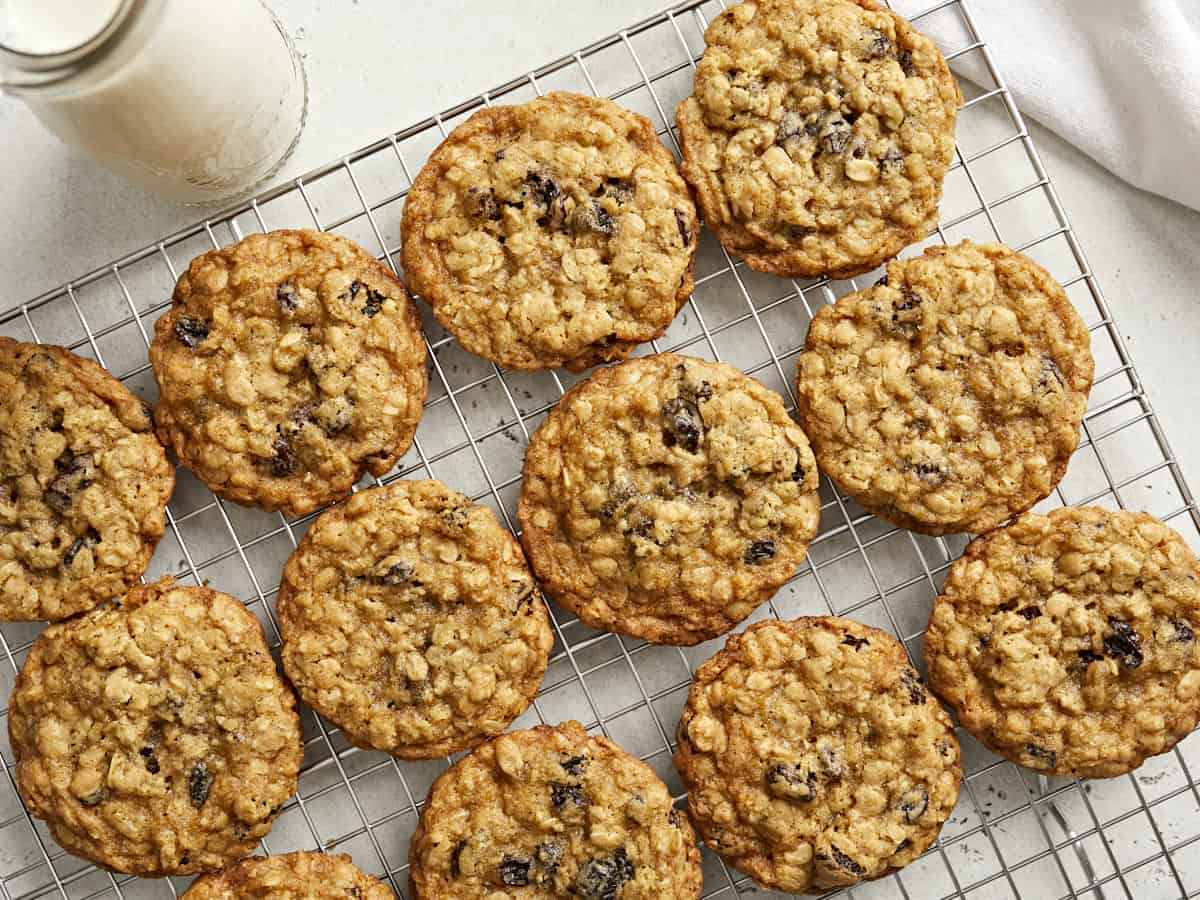
Overhead view of oatmeal raisin cookies on a cooling rack.

Let the cookies cool slightly on the baking sheet before transferring to a wire rack to cool completely. Enjoy these irresistible oatmeal cookies with a glass of milk or simply enjoy by themselves and don’t forget to share with your family and friends!😊

Overhead view of a pile of oatmeal cookies on a plate with a white napkin and a cup of milk on the side.

The post Oatmeal Cookies appeared first on Budget Bytes.
Trail Mix

Making homemade trail mix is a quick and easy way to make a delicious snack AND use up leftover ingredients in your pantry.

The post Trail Mix appeared first on Budget Bytes.
Trail mix is a great way to clean out your pantry and make a quick and easy snack out of your leftover forgotten-about ingredients. Because I don’t know if you’re like me, but small amounts of random ingredients tend to collect in the back of my pantry just like half-used bottles of sauces in my fridge. If you don’t stay on top of them it can quickly get out of control and result in a LOT of food waste. Instead of letting those ingredients get lost in the pantry, let’s do some Spring cleaning and make trail mix! Reduce waste and make a delicious snack? YES PLEASE.

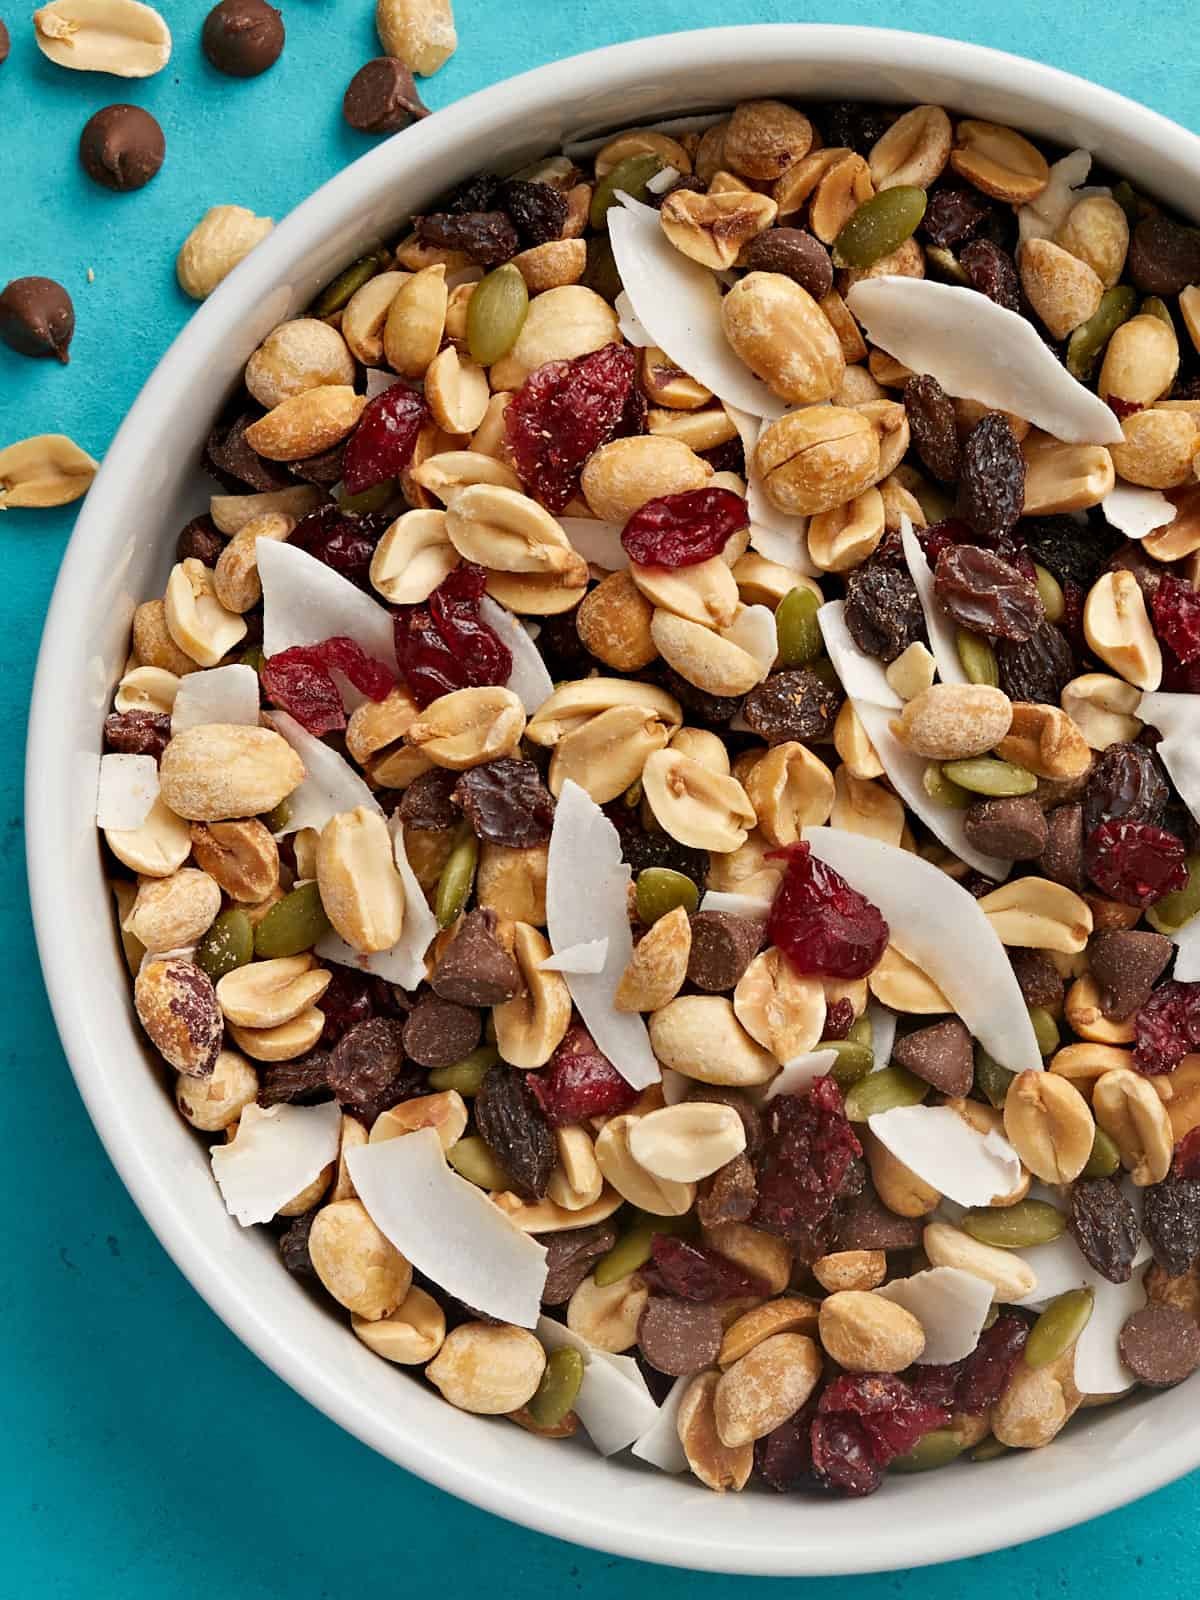
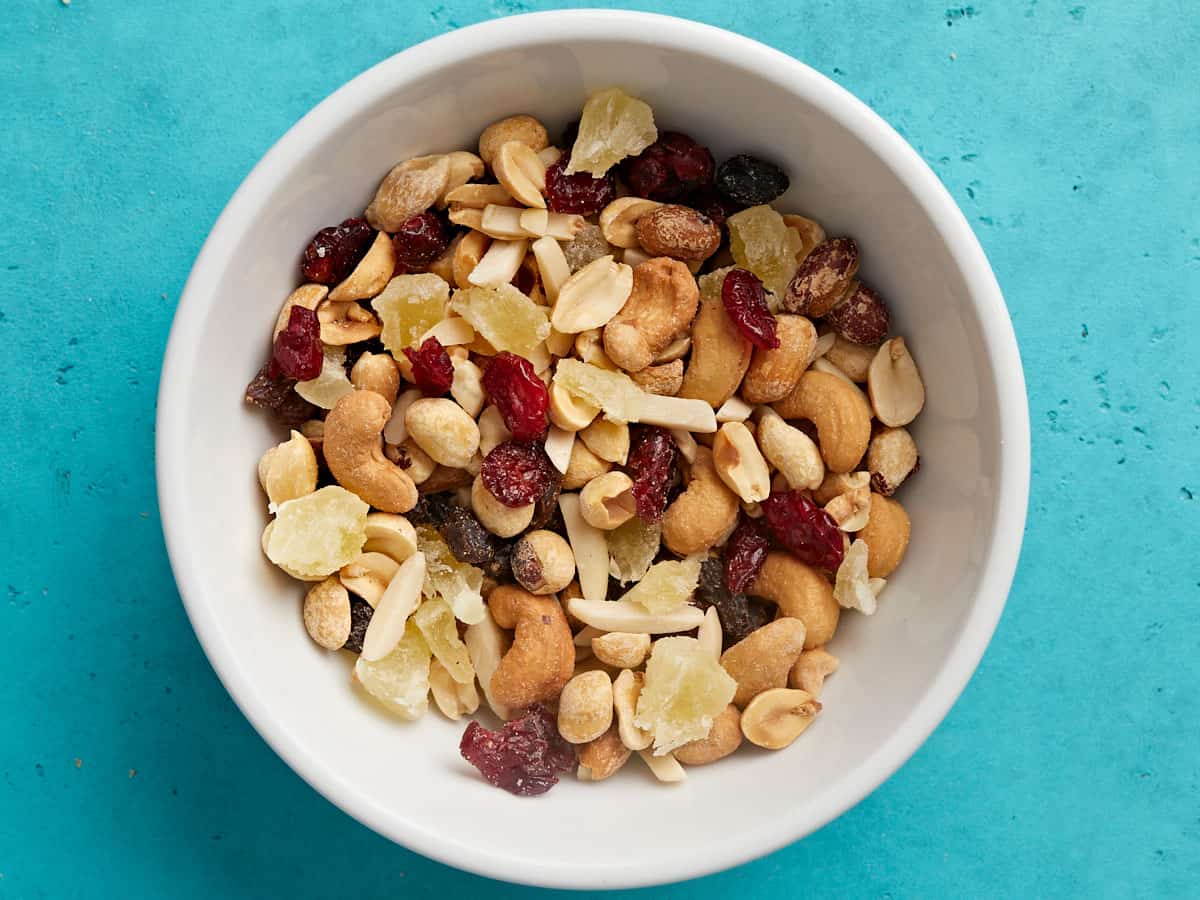
Close up overhead view of a bowl full of trail mix.

What iS Trail Mix Made Of?

Trail mix (also known as scroggin) is simply a mix of nuts, seeds, fruit, and sometimes other ingredients. With every handful of this simple snack mix you get a nice combination of sweet and savory flavors, protein, carbs, and fat, plus tons of texture and color, making it fun to eat. It’s an easy snack to eat on the go (no heating or utensils required) and is a great source of energy during activities where you don’t want a super full stomach, like hiking.

Everyone makes trail mix a little bit different, but the classic mix that you’ll find in stores is usually peanuts, raisins, M&Ms, and sometimes a second nut like almonds or cashews. I love how flexible trail mix is because it allows you to make any combination of ingredients that fits your budget, the ingredients you have on hand, and the flavors you prefer.

Other Ingredients for Trail Mix

If looking in your pantry for trail mix ideas is a little overwhelming, here are some ingredients that are perfect for trail mix:

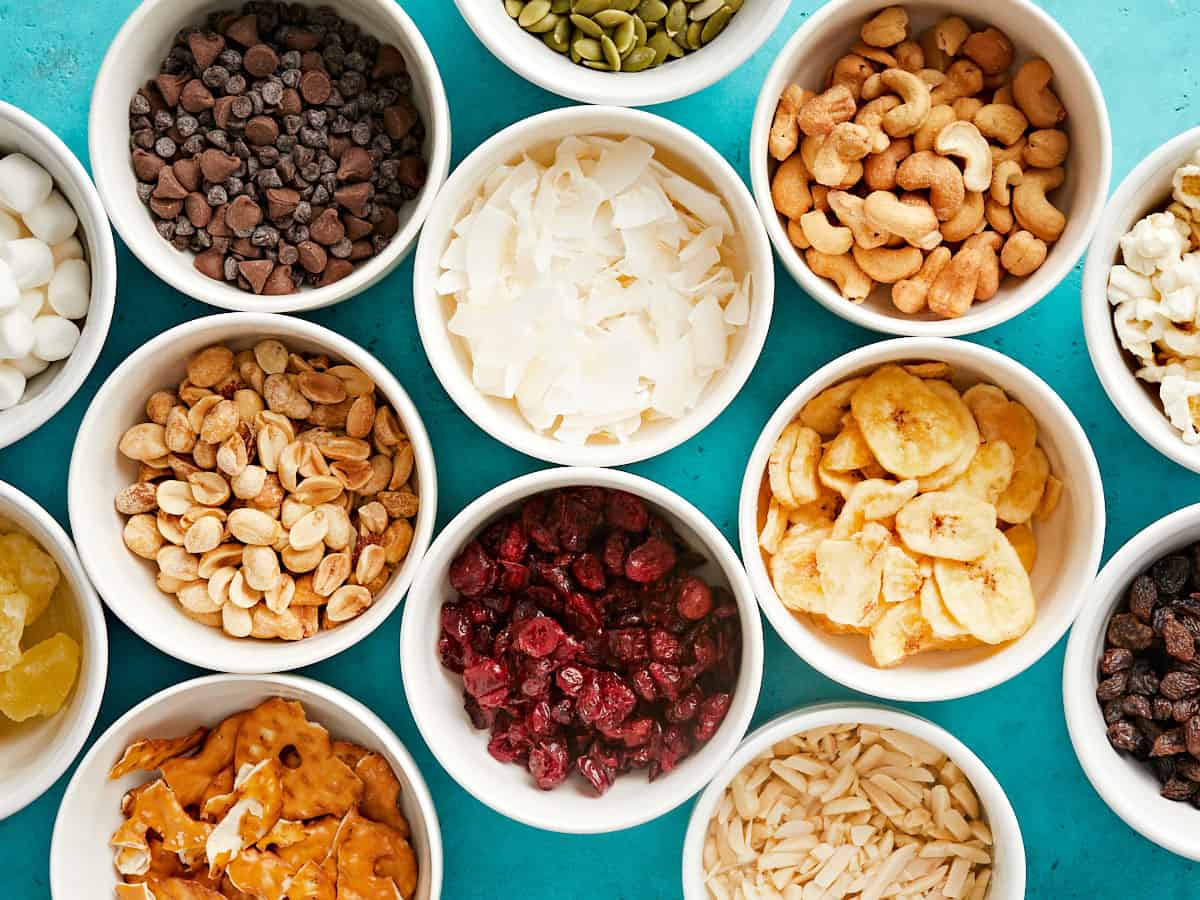
  • Nuts: peanuts, almonds, cashews, pecans, walnuts, coconut, hazelnuts, pistachios, mixed nuts
  • Seeds: sunflower seeds, pumpkin seeds (pepitas)
  • Dried Fruit: raisins, cranberries, banana chips, apple, pineapple, ginger, dates, apricots, freeze-dried strawberries
  • Chocolate: chocolate chips, carob chips, M&Ms, white chocolate chips, butterscotch chips
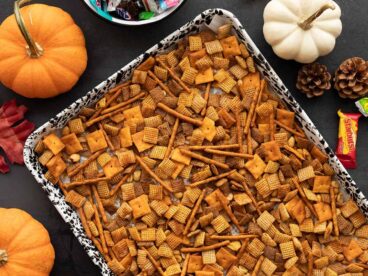
  • Snacks & Candy: pretzels, granola, popcorn, Chex, Cheeze-its, chocolate or yogurt covered raisins, marshmallows, licorice, rice crackers, Reece’s Pieces
Overhead view of bowls of ingredients for trail mix.

Make Trail Mix Budget-Friendly

Nuts and dried fruit can be expensive, which is why I like to just use random leftover ingredients that I find in my pantry. BUT you can also tweak the ratios of your trail mix to keep the total cost low. Make sure to bulk up your trail mix with less expensive ingredients and then add in just a small handful of the more expensive ingredients.

Low Cost: peanuts, cereal, raisins, pretzels, marshmallows, coconut, popcorn

Expensive: most nuts, pumpkin seeds, dried fruit (other than raisins), brand name snacks (M&Ms, Cheeze-its, etc.)

Trail Mix Flavor Combinations

I’ve included a very basic trail mix recipe below, but if you still need a little inspo for your own homemade mix, here are some fun combos that I’ve made in the past:

  • Fruit & Nut Trail Mix: peanuts, cashews, almonds, raisins, dried cranberries, dried apricots
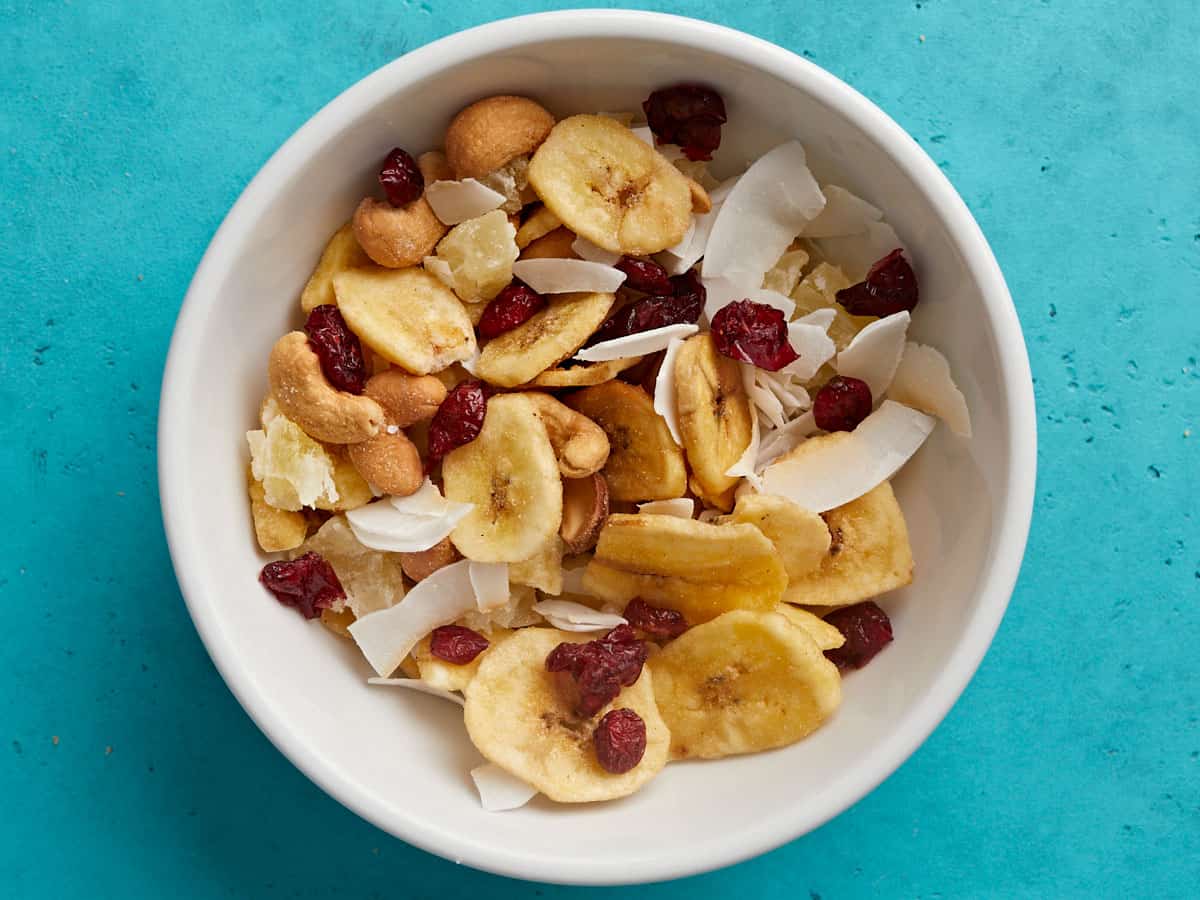
  • Tropical Trail Mix: banana chips, cashews, coconut, dried pineapple, dried cranberries
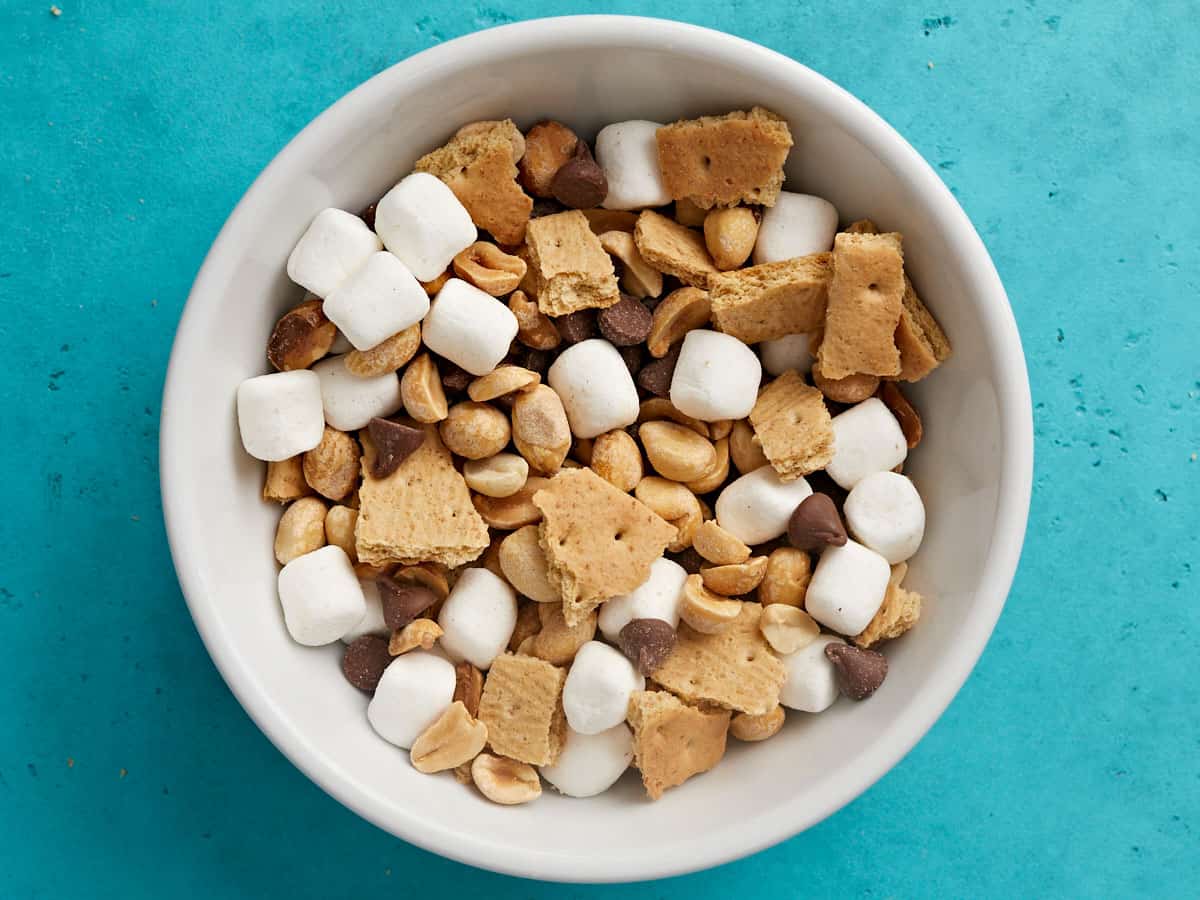
  • S’mores Trail Mix: peanuts, mini marshmallows, chocolate chips, graham crackers (broken into pieces) or golden grahams cereal
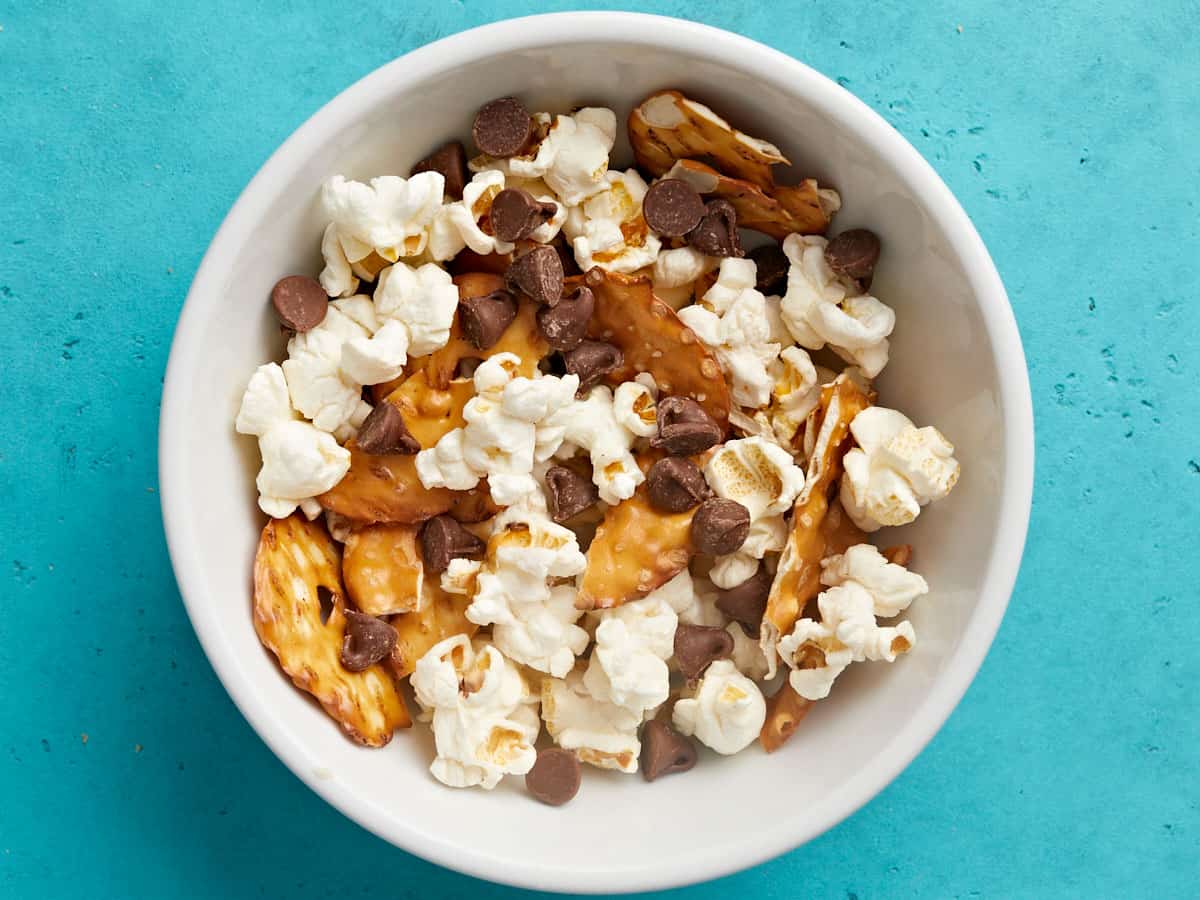
  • Snack Trail Mix: popcorn, pretzels, chocolate chips, peanuts

How to Store Trail Mix

Because trail mix is made out of all dry, shelf stable ingredients, you’ll want to store it the same way you store the individual ingredients–in an air-tight container away from sunlight and moisture. I highly suggest keeping the trail mix in something clear, like a glass jar or zip top baggies, so you’ll see and remember that you have the trail mix on hand. Even better yet, divide it into small single-serving containers so you’ve got snacks ready to grab and go for the day!

Overhead close up view of a bowl full of trail mix.
Print

Trail Mix

Making homemade trail mix is a quick and easy way to make a delicious snack AND use up leftover ingredients in your pantry.
Course Snack
Cuisine American
Prep Time 5 minutes
Total Time 5 minutes
Servings 4 ½ cup each
Calories 372kcal

Ingredients

  • 1 cup peanuts $0.70
  • 1/4 cup raisins $0.39
  • 1/4 cup pepitas (pumpkin seeds) $0.50
  • 1/4 cup chocolate chips $0.49
  • 1/4 cup shaved coconut $0.42
  • 1/4 cup dried cranberries $0.31

Instructions

  • Combine all ingredients in a bowl or resealable container and stir to combine. Enjoy one handful at a time!

See how we calculate recipe costs here.

Nutrition

Serving: 0.5cup | Calories: 372kcal | Carbohydrates: 28g | Protein: 11g | Fat: 27g | Sodium: 13mg | Fiber: 6g

What’s your favorite ingredient or ingredient combination for trail mix? Let us know in the comments below!

The post Trail Mix appeared first on Budget Bytes.
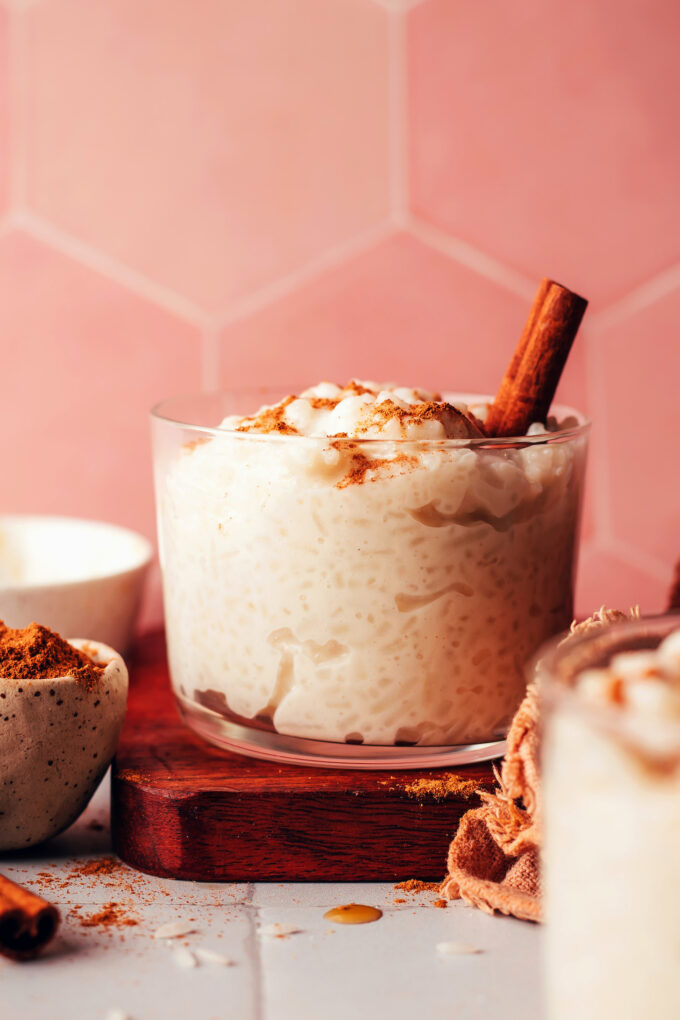
Creamy Vegan Rice Pudding

Does it get more classic than a bowl of rice pudding? Talk about nostalgia! We’d been craving this comforting dessert for far too long, and so our perfected vegan version was born. It’s perfectly sweet, super creamy, and SO classic!
Naturally sweetened…

Creamy Vegan Rice Pudding

Does it get more classic than a bowl of rice pudding? Talk about nostalgia! We’d been craving this comforting dessert for far too long, and so our perfected vegan version was born. It’s perfectly sweet, super creamy, and SO classic!

Naturally sweetened and just 7 ingredients, 1 pot, and 25 minutes required. Let’s make rice pudding!

Origins of Rice Pudding

Rice pudding exists in many forms in cultures around the world (source).

Creamy Vegan Rice Pudding from Minimalist Baker →

Morning Glory Muffins

Start your day with Morning Glory muffins! This recipe is packed with goodness: carrots, raisins, nuts, and warm spices. Looking…

A Couple Cooks – Recipes worth repeating.

Start your day with Morning Glory muffins! This recipe is packed with goodness: carrots, raisins, nuts, and warm spices.

Morning Glory Muffins

Looking for a cozy breakfast or snack? Try these Morning Glory Muffins! This 1970’s muffin recipe is everything it’s cracked up to be. Each one is moist and warm-spiced, studded with carrots, pineapple, raisins and pecans. There’s a bit of whole wheat flour for nutty body and a hint of coconut sprinkles as a topping. It’s like a combination of carrot cake and applesauce cake, in muffin form! Here’s how to whip up a batch.

Why are they called Morning Glory muffins?

Turns out, this famous flavor was born in the 1970’s in Nantucket. Chef Pam McKinstry created the muffin recipe for her restaurant, the Morning Glory Café, in 1978. They quickly became popular and the recipe was published in Gourmet Magazine in 1981.

The original Morning Glory muffins recipe was a straightforward muffin. The batter featured all-purpose flour and cinnamon, and it was stuffed with raisins, carrots, apple, pineapple, pecans, and coconut.

Many riffs on the original have popped up in restaurants around the country, and the muffin started to take on a vaguely “health food” vibe, sometimes including either bran or whole wheat flour.

Morning Glory muffin recipe

Ingredients in Morning Glory muffins

For this Morning Glory muffins recipe, we wanted to stay true to the original character of the muffins while also celebrating its vaguely “healthy” history. We took inspiration from this Epicurious source and former head of Tartine Bakery, who likes to add whole wheat flour and brown sugar to the mix to add that signature “brown” muffin texture. Here’s what you’ll need for this Morning Glory muffins recipe:

  • All-purpose and whole wheat flour
  • Granulated and light brown sugar
  • Cinnamon and allspice
  • Baking powder and salt
  • Canned pineapple
  • Grated carrots
  • Raisins
  • Pecans
  • Eggs
  • Applesauce
  • Vegetable oil
  • Milk
  • Vanilla extract

Mix-ins and variations

Morning Glory muffins have a variety of mix-in options, depending on the chef. If you’re used to this type of muffin, you may want to add one of the following:

  • Walnuts: use chopped walnuts instead of pecans
  • Coconut: add ¼ to ½ cup sweetened shredded coconut
  • Apples: add ½ cup peeled and diced apples
  • Orange zest: add 1 teaspoon orange zest for a beautifully zingy flavor
Morning Glory Muffins

Tips for these Morning Glory Muffins

This Morning Glory muffin recipe comes together quickly and simply: just mix the dry ingredients, mix the wet ingredients, and combine! Here are a few tips to making these muffins a success:

  • Resist the urge to overmix. Overmixing muffin batter can cause holes in the crumb and a denser texture. Mix just until the streaks of flour disappear.
  • Chop the pineapple finely. You don’t want huge chunks of pineapple here.
  • The muffin cups will be full to the brim. This is intentional: it makes for a hefty muffin with a generous muffin top.
  • Baking at 400°F makes a taller muffin. This temperature makes a taller muffin and it’s quicker to bake, versus 350°F which is standard.

Storage info

These Morning Glory muffins are even better the next day! Store them at room temperature overnight, and they become even more moist and delicious. Here are a few pointers:

  • Store up to 4 days at room temperature. Store in a sealed container and they become even more moist over time.
  • Store refrigerated for 1 week or more. Store refrigerated up to 1 week or more. Make sure to allow to come to room temperature before serving, otherwise they are very dense.
  • Frozen: Freeze the muffins in a sealed container for up to 3 months.

And that’s it! Let us know if you try these Morning Glory muffins and what you think.

Morning Glory Muffins

More muffin recipes

Want to try more classic muffin flavors? Here are a few to try?

This Morning Glory muffins recipe is…

Vegetarian.

Print
Morning Glory Muffins

Morning Glory Muffins


  • Author: Sonja Overhiser
  • Prep Time: 30 minutes
  • Cook Time: 25 minutes
  • Total Time: 55 minutes
  • Yield: 12

Description

Start your day with Morning Glory muffins! This recipe is packed with goodness: carrots, raisins, nuts, and warm spices.


Ingredients

  • 1 cup [140 g] all-purpose flour
  • 1 cup [140 g] whole wheat flour
  • ½ cup [100 g] granulated sugar
  • ½ cup [100 g] light brown sugar
  • 1 tablespoon cinnamon
  • 1 teaspoon allspice
  • 1 tablespoon baking powder
  • ½ teaspoon kosher salt
  • 1 cup canned pineapple (in juice), drained and chopped into small pieces
  • 1 cup peeled and grated carrots (2 medium)
  • ½ cup raisins
  • ½ cup chopped pecans, plus more for topping
  • 2 eggs
  • ½ cup applesauce
  • ½ cup vegetable oil
  • ½ cup milk (or orange juice*)
  • 1 teaspoon vanilla extract
  • Optional: Coconut flakes, for topping

Instructions

  1. Preheat the oven to 400°F. Spray a standard 12-cup muffin tin with cooking spray or add muffin cup papers.
  2. In a large bowl, whisk the all-purpose flour, whole wheat flour, granulated sugar, light brown sugar, cinnamon, ginger, baking powder, and kosher salt. Stir in the pineapple, carrots, raisins and chopped pecans.
  3. In a separate medium bowl, whisk the eggs, then whisk in the applesauce, vegetable oil, milk and vanilla extract until smooth. Stir the dry ingredients into the wet ingredients with a spatula until a thick, smooth batter forms.
  4. Scoop the batter evenly into the muffin cups: the cups will be full to the top. Sprinkle the tops with more chopped pecans and if desired, coconut flakes.
  5. Bake the muffins for 20 to 23 minutes, until puffed and golden and a toothpick comes out clean. Cool for 5 minutes in the pan, then transfer to a rack to cool fully, about 1 hour. Eat immediately or they taste even better the next day after storage in a sealed container at room temperature. Store up to 4 days in a sealed container at room temperature, refrigerated up to 1 week or more (allow to come to room temperature before serving), or frozen up to 3 months.

Notes

*Adding 1 teaspoon orange zest also brightens the flavor! Other mix in ideas: add ½ cup shredded coconut, use walnuts instead of pecans, or golden raisins instead of raisins.

  • Category: Muffin
  • Method: Baked
  • Cuisine: Breakfast
  • Diet: Vegetarian

Keywords: Morning glory muffins, morning glory muffin recipe, morning glory muffins recipe, morning glory muffin

A Couple Cooks - Recipes worth repeating.

Picadillo

Sweet, savory Puerto Rican-style Picadillo is a tomato-based ground beef stew that’s ridiculously delicious, versatile, and ready in thirty.

The post Picadillo appeared first on Budget Bytes.
Sweet and savory Puerto Rican-Style Picadillo is a ground beef stew that’s so ridiculously delicious it brings table talk to a complete stop because everyone’s too busy stuffing their face. This beef picadillo recipe is budget-friendly, comes together quickly, and is incredibly versatile. I don’t know any other way to say it: You. Need. To. Make. Picadillo.

A NOTE ON AUTHENTICITY

This is not a historically authentic recipe. We strive to create recipes that are accessible to everyone, which means ingredients need to be available at a mainstream budget grocery store. We test recipes using the least amount of steps, tools, and ingredients while still honoring the spirit of the recipe. I was born and raised in Puerto Rico and look forward to a time when our ingredients are available in mainstream markets. Until then, buen provecho!

What Is Picadillo?

Picadillo is a traditional sweet and savory Latin dish usually made with ground beef stewed in tomato sauce. In Puerto Rico, we cook it in a hearty tomato-based sauce with sofrito, adobo, olives, raisins, and sometimes diced potatoes. To the uninitiated, pairing raisins with beef sounds like blasphemy. But I promise you, IT WORKS.

What You’ll Need

Picadillo comes together in one pan in under 30 minutes. There’s a little chopping involved, and it takes about 7 minutes to assemble the recipe, but the rest of the time it simmers on the stovetop. I love a one-pot hands-off recipe! Don’t you?

  • Onion, Garlic, and Bell Pepper – this combination creates an aromatic and intensely flavored base
  • Sofrito – this is the flavor base of many Puerto Rican dishes. I have a simple recipe for you here, though you can definitely take it further if you have access to traditional ingredients like aji dulce and recao.
  • Sazón and Adobo – these seasoning blends go hand in hand to develop deep, earthy notes. The annatto in the sazón also deepens the color of the sauce. If these are hard to source, I have included recipes for both in the notes section of the recipe card.
  • Ground Beef – 80/20 is best as the fat adds flavor, but use what you have. You can also make this recipe with ground pork, chicken, lamb, or turkey. If you’re vegetarian or vegan, you can substitute ground beef with a plant-based alternative, chopped mushrooms, or black beans.
  • Green Olives – I prefer to use the sliced kind with pimento because it’s less work, but feel free to slice whole ones. If you can’t find Green Olives with Pimento (AKA Manzanilla or Spanish Olives), get pitted green olives and add a tablespoon of chopped roasted red pepper to the mix.
  • Raisins – though dark raisins are traditional, you can also use golden. I sometimes sub raisins with chopped prunes.
  • White Distilled Vinegar – helps cut through the fattiness of the ground beef and adds a sharp top note. Sub it with Apple Cider Vinegar.
  • Bay Leaves – have a mild tea-like flavor that sits in the background and helps enhance bolder flavors. Sub with a teaspoon of oregano.
  • Tomato Sauce – creates a liquid for the ground beef to stew in and adds acidic, fruity brightness.
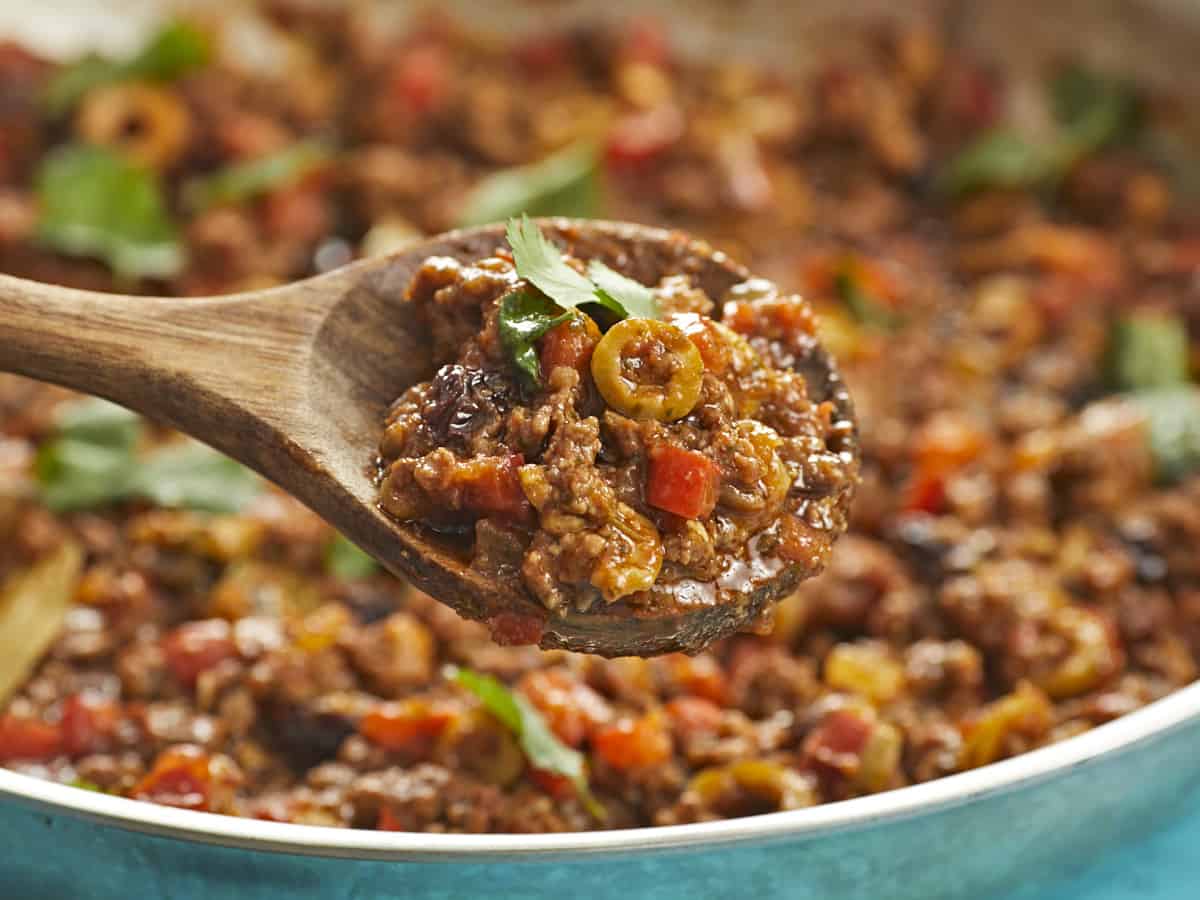
Wooden spoon full og picadillo in the foreground with picadillo in a silver skillet in the background.

What TO Serve With Picadillo

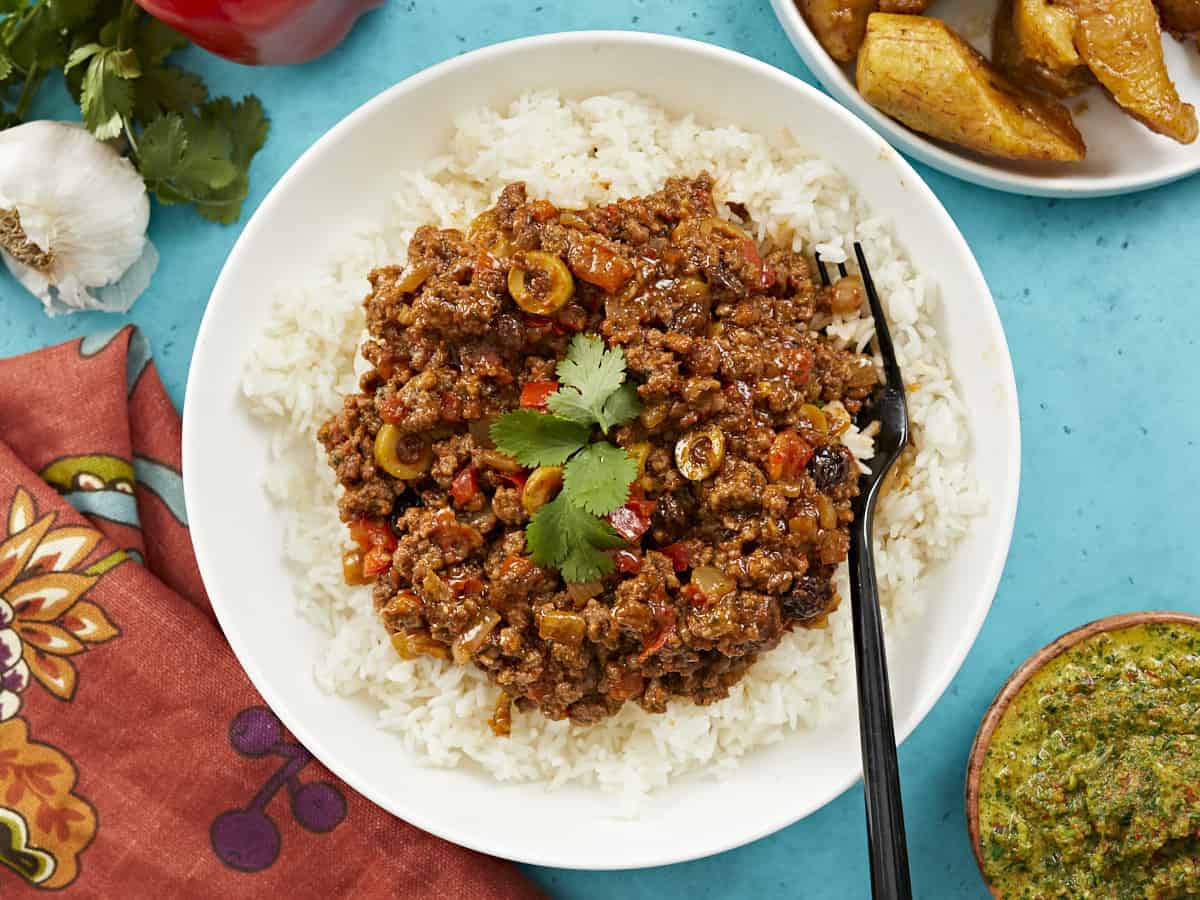
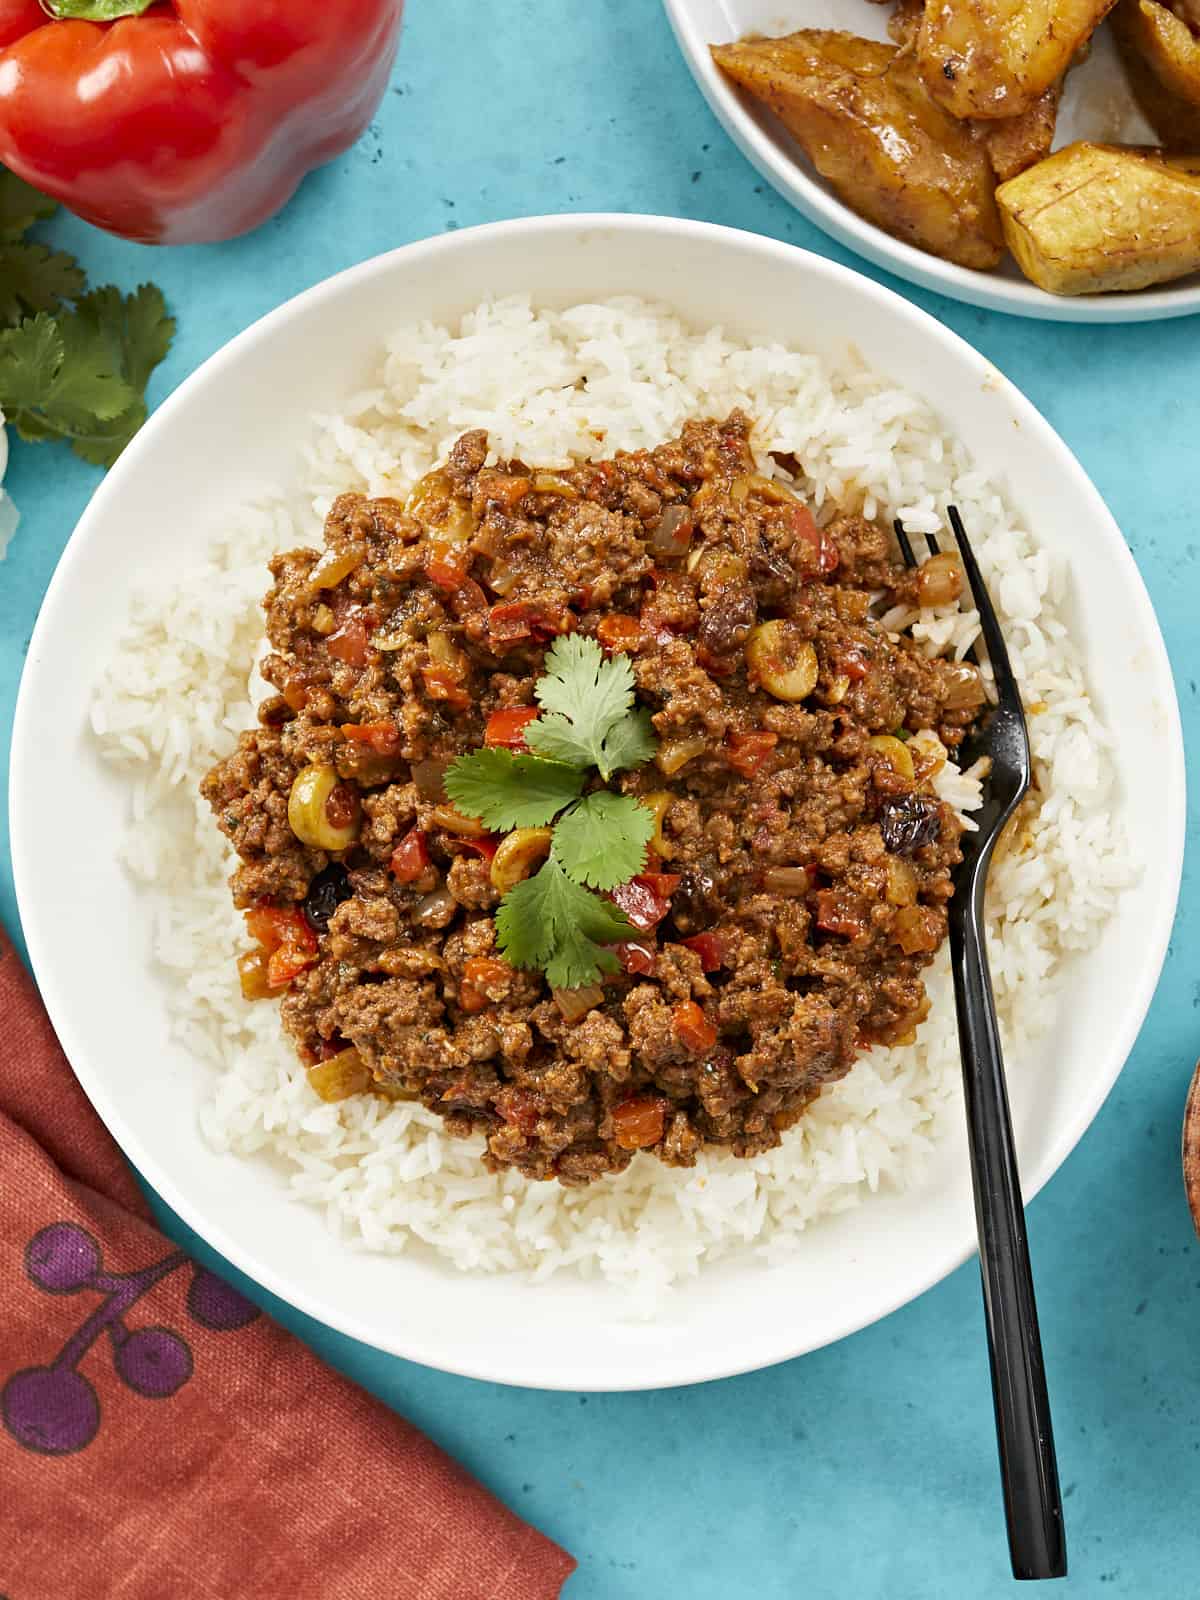
This sweet and savory ground-beef stew is a weeknight staple at my house because I can eat it as is, or served over rice and mashed potatoes. I can also stuff it into an empanada, a burrito, or a lettuce wrap. I’ve even added it to marinara for Puerto Rican-style spaghetti. Picadillo is all-purpose!

How To Store Picadillo

This is one of those recipes that tastes even better the next day. (I love those recipes.) Store cooled Picadillo in an airtight container with plastic film or wax paper directly on the surface. It keeps in the fridge for up to 5 days and in the freezer for up to 3 months. Thaw frozen Picadillo overnight in the refrigerator, then warm it in a pan set over medium heat or microwave it until steaming.

Picadillo served over white rice in a white bowl.
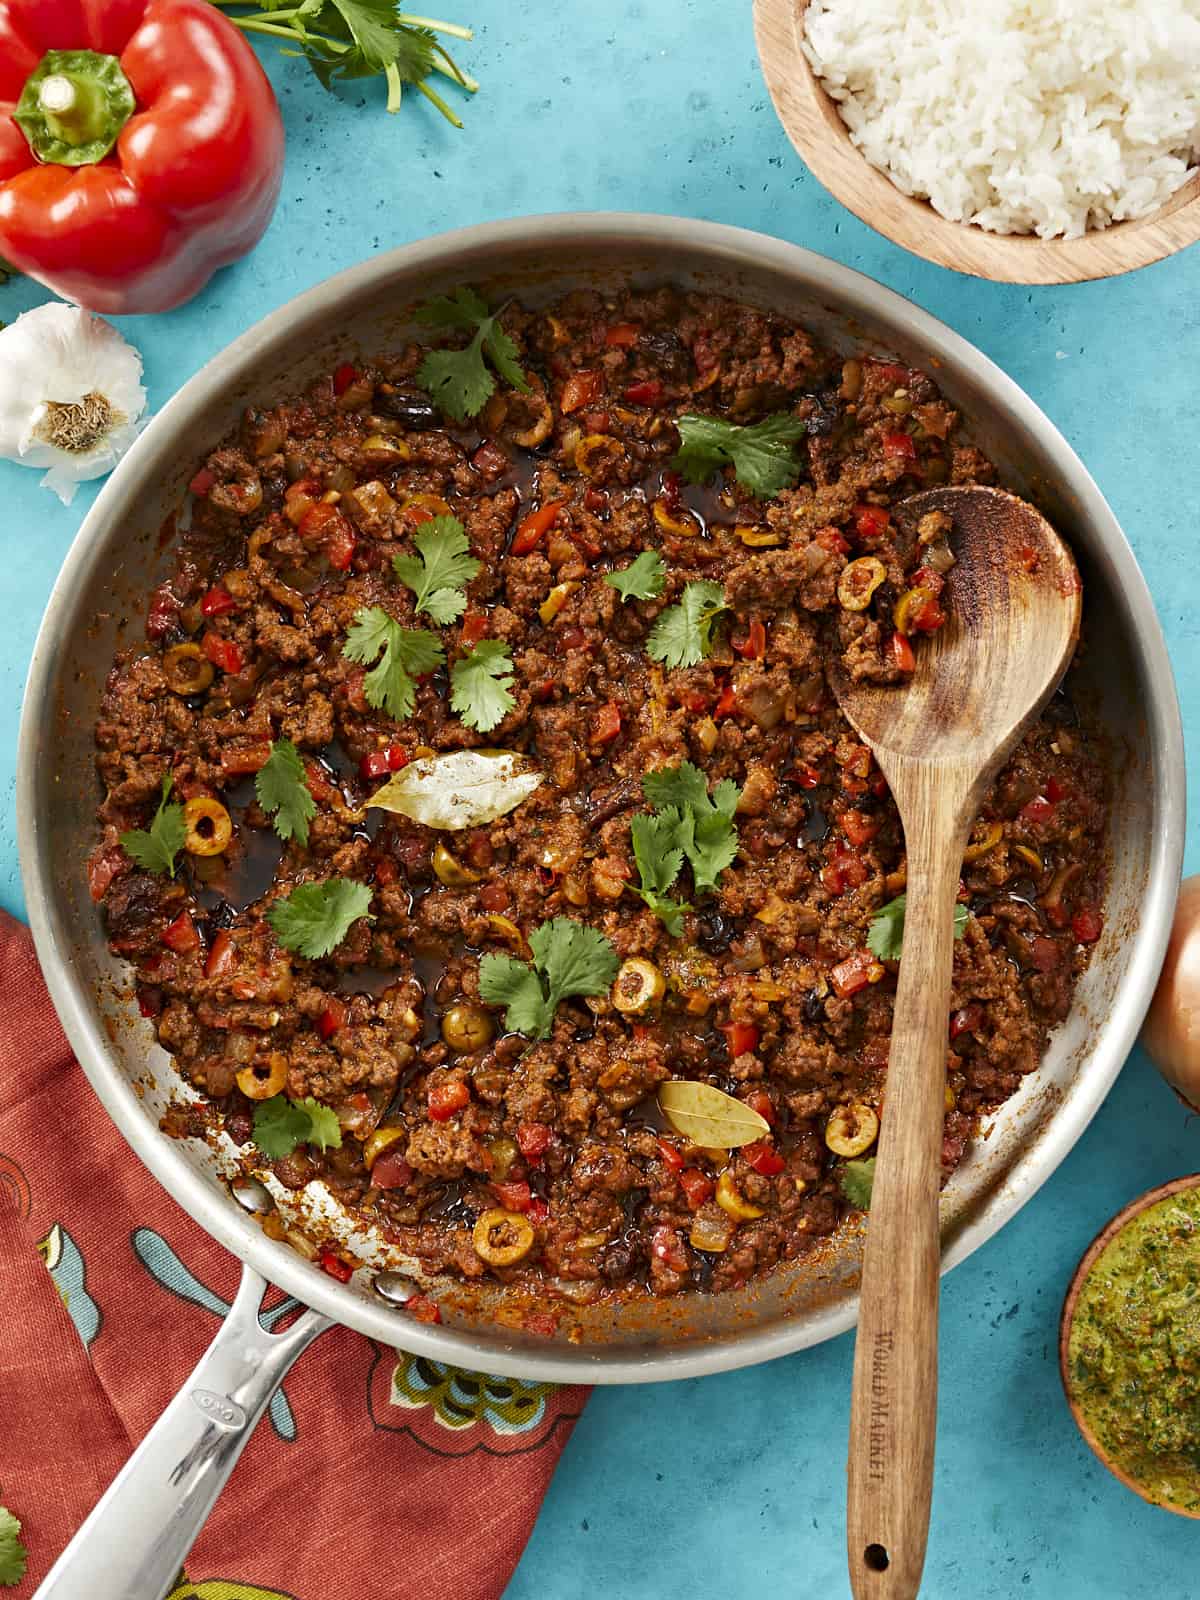
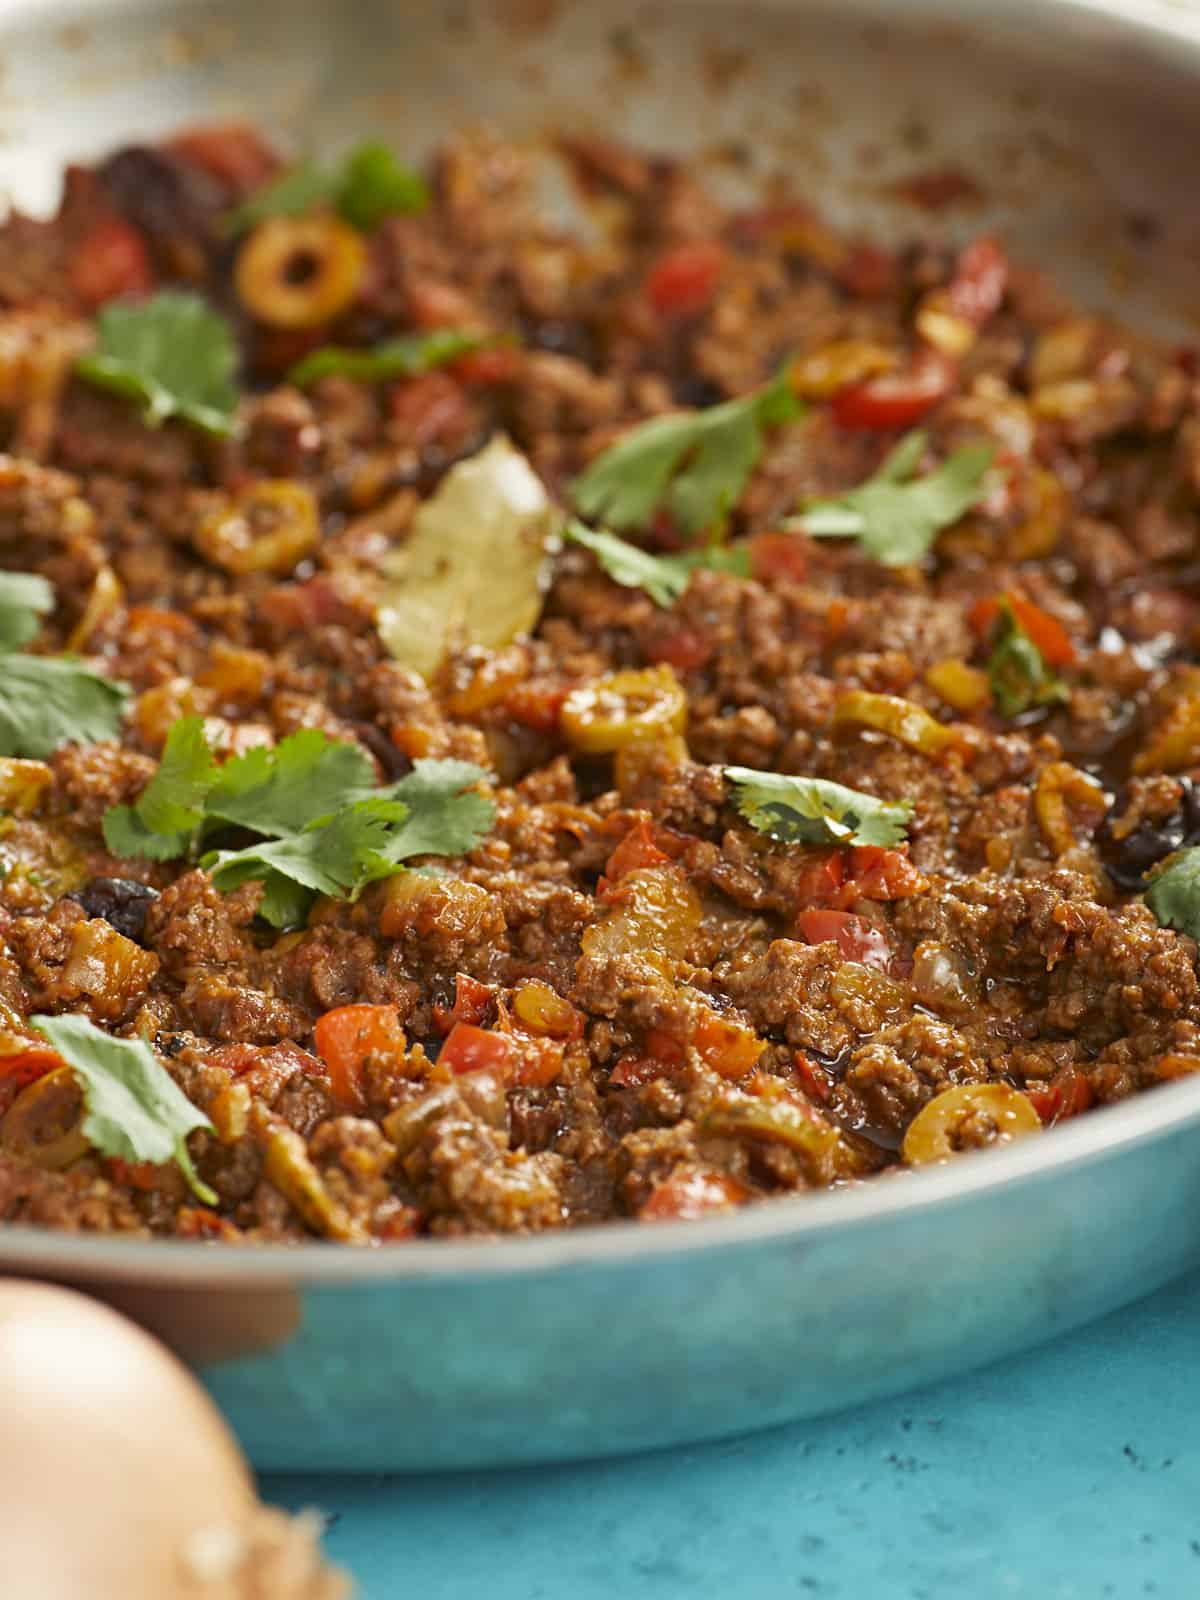
Overhead shot of picadillo in a silver skillet with a wooden spoon in it.
Print

Picadillo

Sweet, savory Puerto Rican-style Picadillo is a tomato-based ground beef stew that's ridiculously delicious, versatile, and ready in thirty.
Course Dinner, Lunch
Cuisine Latin, Puerto Rican
Total Cost ($11.44 recipe / $1.43 serving)
Prep Time 5 minutes
Cook Time 25 minutes
Total Time 30 minutes
Servings 8 cups
Calories 212kcal

Ingredients

  • 1 1/2 Tbsp olive oil $0.06
  • 1 yellow onion, small dice $0.42
  • 1 red bell pepper, small dice $1.59
  • 1 Tbsp tablespoon garlic, minced $0.14
  • 1 lb ground beef (80/20) $5.49
  • 1 tsp coarse salt* $0.04
  • 1 1/2 tsp sazón* (1 packet) $0.17
  • 1 tsp adobo* $0.04
  • 1/2 cup sofrito $0.72
  • 1/2 cup sliced pimento-stuffed green olives * $0.66
  • 1/4 cup raisins $0.87
  • 1/2 Tbsp white vinegar $0.04
  • 15 oz tomato sauce $1.00
  • 2 bay leaves $0.20
  • 1/4 cup water $0.00

Instructions

  • Place a large skillet over medium-high heat and add the olive oil. When the oil is hot, add the onions and peppers to the pan and cook until the onions are transparent.
  • Add the garlic to the pan and cook until fragrant.
  • Add the beef to the pan and sprinkle with salt, sazón, and adobo. As the beef browns, break up big chunks with your spoon.
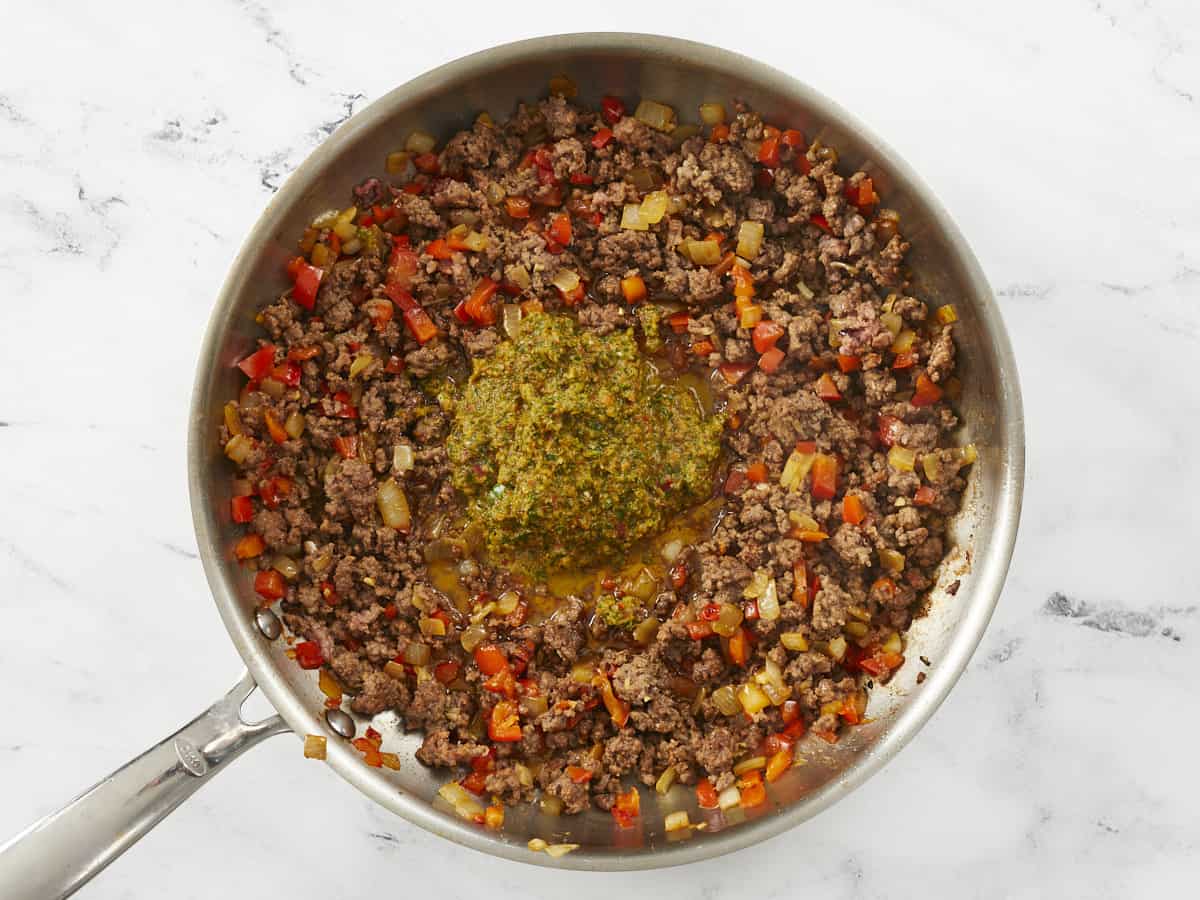
  • When the beef has browned, add the sofrito and cook, stirring constantly, until fragrant, about 2 minutes.
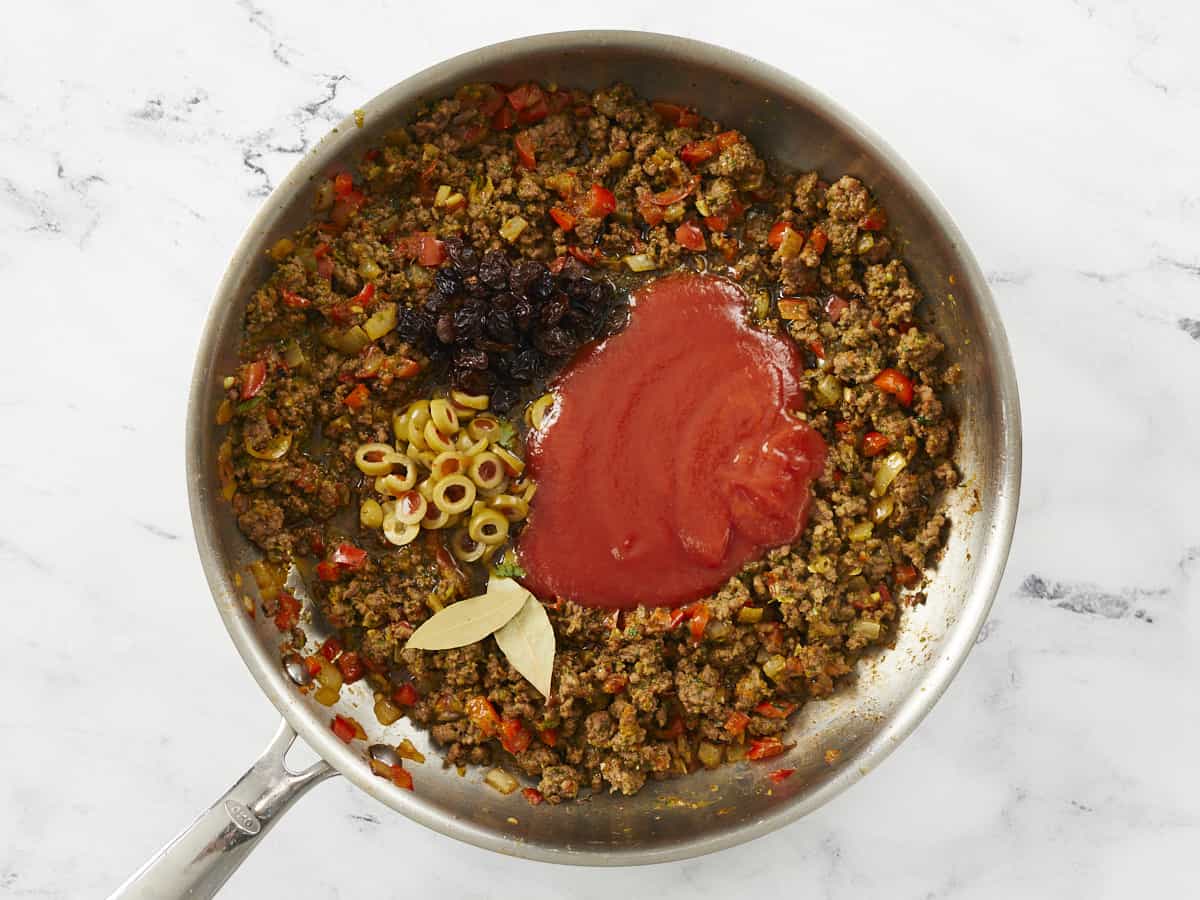
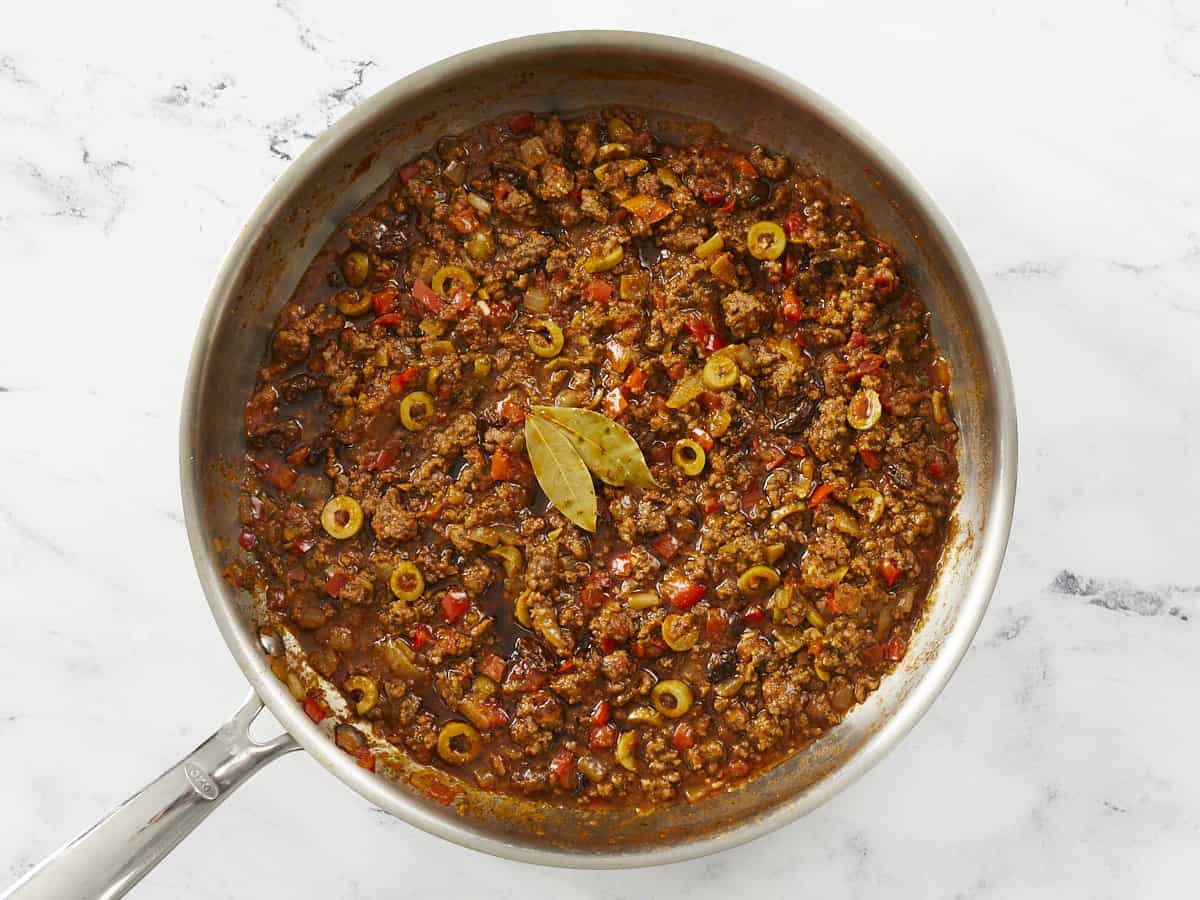
  • Add the olives, raisins, white vinegar, tomato sauce, bay leaves, and water. Continue to cook, occasionally stirring, for 10 minutes. Take the pan off the heat and allow it cool.

See how we calculate recipe costs here.

Notes

*If using fine salt, lower to 1/2 teaspoon.
*A packet of sazón contains about 1.5 teaspoons of sazón. If you cannot source sazón use the following:
1/4 teaspoon of garlic powder
1/4 teaspoon ground cumin
1/4 teaspoon ground coriander
1/3 teaspoon ground annatto
1/8 teaspoon turmeric
1/8 teaspoon ground oregano
*If you cannot source Adobo, mix your own and then use the amount called for in the recipe. Store the rest in an airtight container.
2 Tbsp salt
1 Tbsp garlic powder
1 tsp ground oregano
1 tsp onion powder
1 tsp black pepper
1 tsp ground cumin
1/2 tsp turmeric
*Pimento-stuffed green olives are also known as Spanish Olives or Manzanilla Olives.

Nutrition

Serving: 1cup | Calories: 212kcal | Carbohydrates: 7g | Protein: 11g | Fat: 16g | Sodium: 491mg | Fiber: 1g
Side shot of picadillo in a silver skillet.

How to Make Picadillo – Step by Step Photos

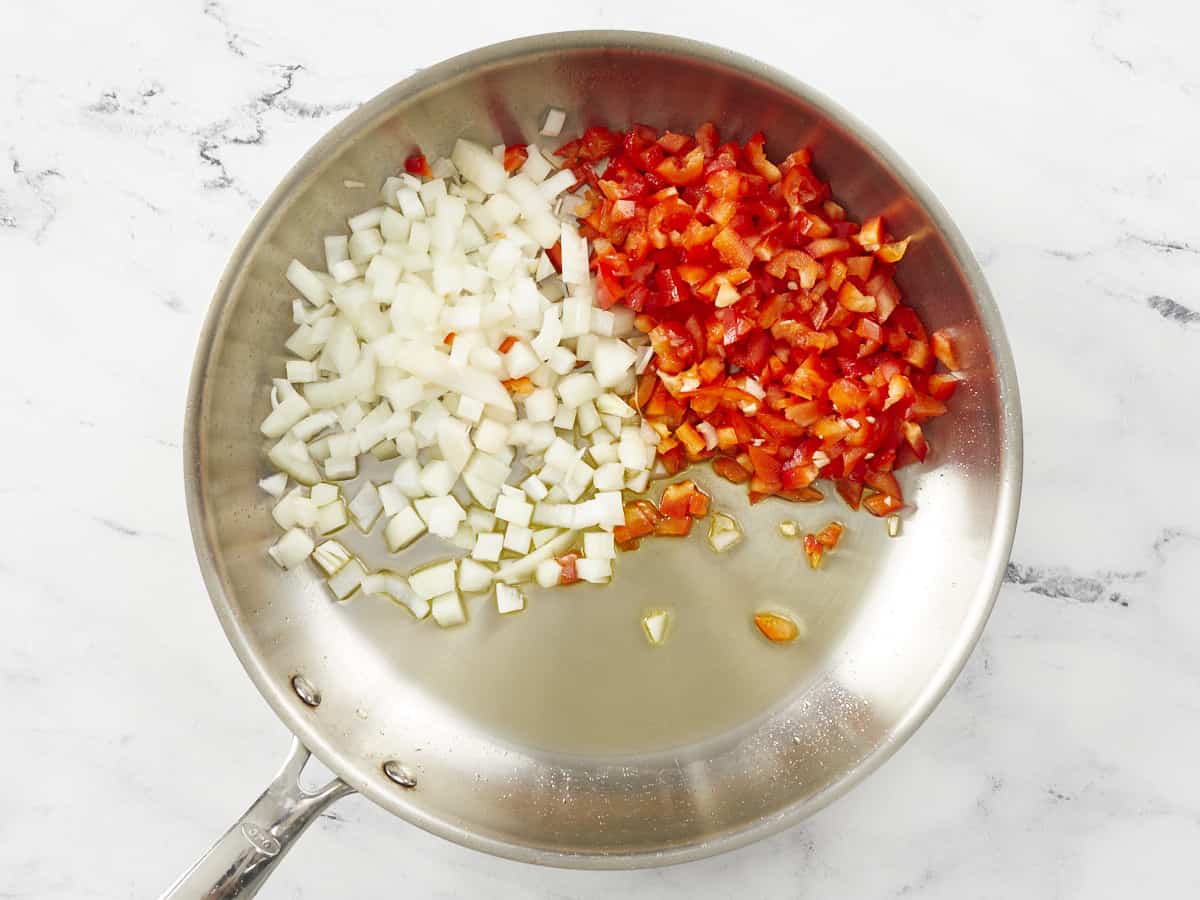
Onions and peppers in a silver pan.

Place a large saute pan over medium-high heat and add 1 1/2 tablespoons of olive oil. When the oil is hot, add 1 diced onion and 1 diced red bell pepper to the pan and cook until the onions are transparent.

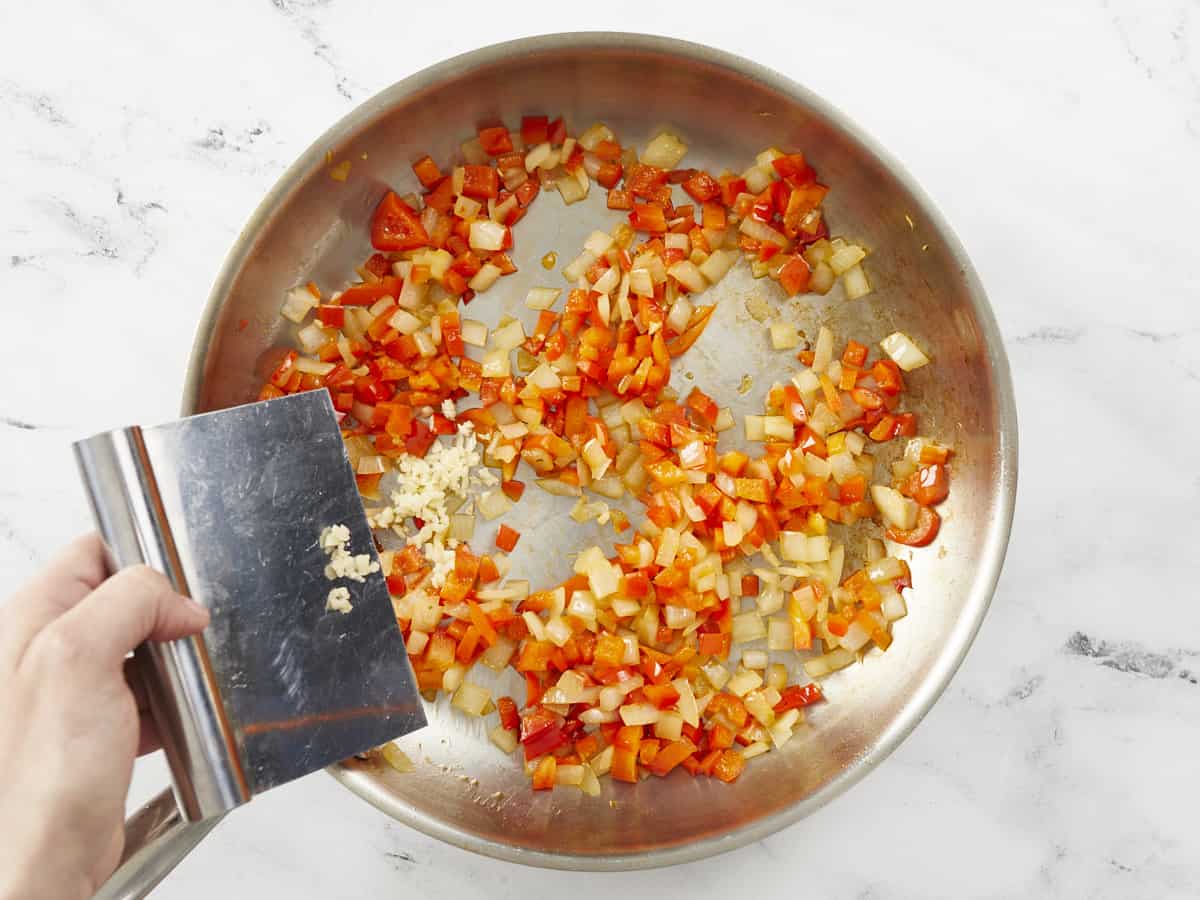
Overhead shot of garlic being added to a pan of onions and peppers.

Add 1 tablespoon of minced garlic to the pan and cook until fragrant.

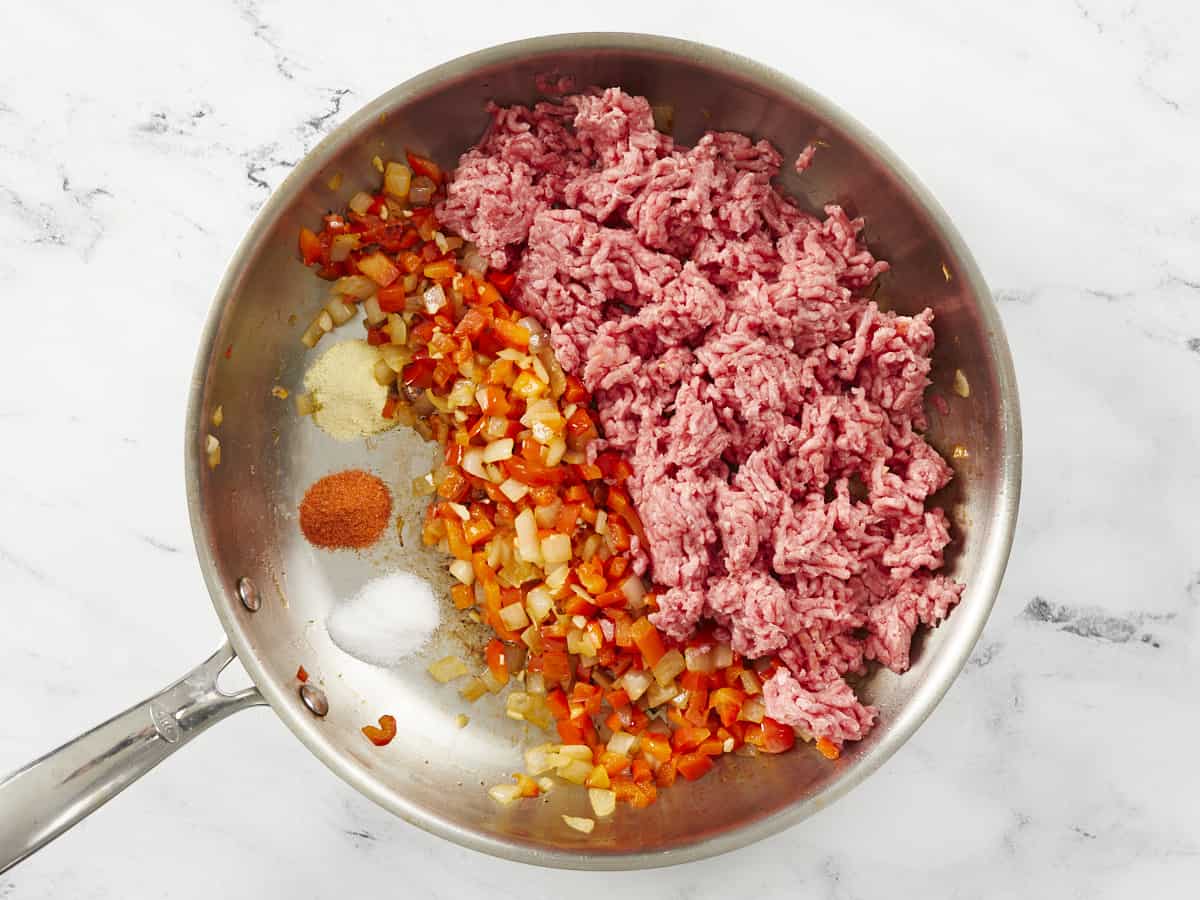
Meat being added to a pan of garlic, onions, and peppers.

Add the pound of ground beef to the pan and sprinkle with 1 teaspoon coarse salt, 1 and 1/2 teaspoons sazón, and 1 teaspoon adobo. As the beef browns, break up big chunks with your spoon.

Sofrito being added to a pan with browned meat in it.

When the beef has browned, add the 1/2 cup sofrito and cook, stirring constantly, until fragrant, about 2 minutes. Break up any remaining chunks of ground beef.

Tomato sauce, olives, and raisins added to a pan of browned meat and sofrito.

Add the 1/2 cup olives, 1/4 cup raisins, 1/2 tablespoon white vinegar, 15 ounces tomato sauce, 2 bay leaves, and 1/4 cup water.

Finished pan of picadillo.

Continue to cook, occasionally stirring, for 10 minutes. Take the pan off the heat and allow the Picadillo to cool slightly before serving. Tell me how long it takes for everyone to start talking again!

Picadillo served over white rice in a white bowl.

More Easy One-Pot Recipes

The post Picadillo appeared first on Budget Bytes.

Oatmeal Raisin Cookies

Chewy, lightly spiced, and studded with Raisinets, this incredible recipe will change the way you view oatmeal raisin cookies.  I love baking with oats. Whether it’s whipping up no bake cookies, making a pan of raspberry bars, or sandwiching together homemade oatmeal cream pies, so many desserts are better with oats in them.  Which means …
The post Oatmeal Raisin Cookies appeared first on My Baking Addiction.

Chewy, lightly spiced, and studded with Raisinets, this incredible recipe will change the way you view oatmeal raisin cookies. 

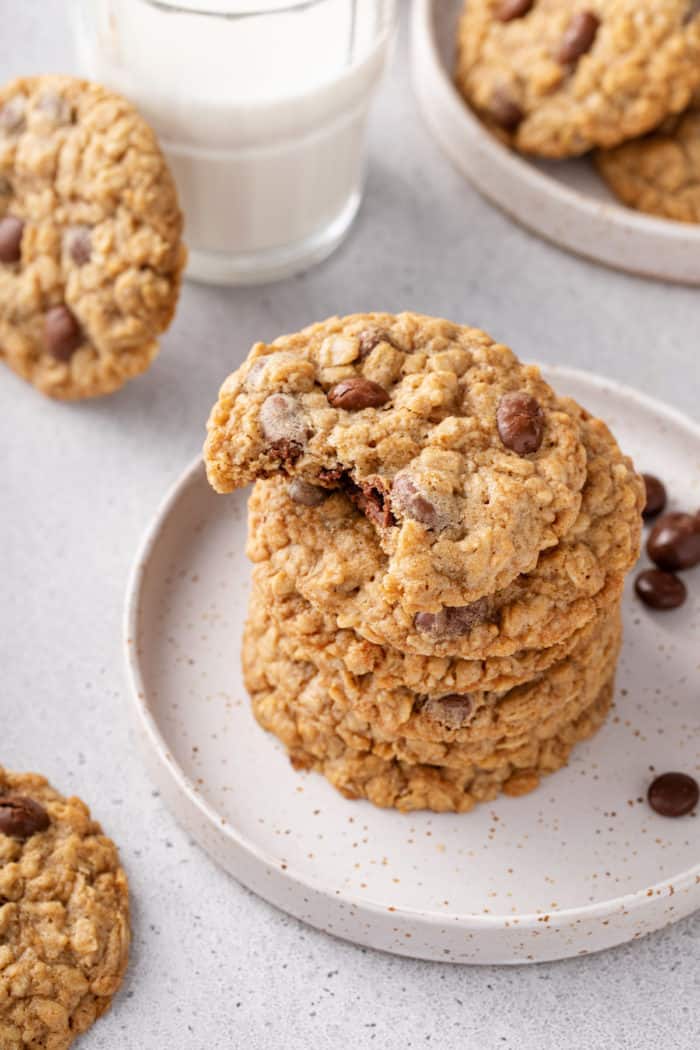
Stack of oatmeal raisin cookies on a white plate. The top cookie has a bite taken out of it.

I love baking with oats. Whether it’s whipping up no bake cookies, making a pan of raspberry bars, or sandwiching together homemade oatmeal cream pies, so many desserts are better with oats in them. 

Which means I also love classic oatmeal cookies.

But not just any oatmeal cookie – I like them nice and chewy, full of flavor, and packed full of chocolate-covered raisins.

That’s right: We’re taking oatmeal raisin cookies to a whole new level today.

(more…)

The post Oatmeal Raisin Cookies appeared first on My Baking Addiction.