Santa Fe Salad

This Santa Fe salad is the ultimate Southwestern salad. It’s loaded with tender, juicy chicken, fresh veggies, and creamy black beans.

The post Santa Fe Salad appeared first on Budget Bytes.

I have a major weakness for Southwestern flavors, and this Santa Fe salad is the ultimate combination. It’s loaded with tender, juicy chicken, fresh veggies, and creamy black beans. I love it tossed in our creamy avocado dressing. It’s a great hearty entrée-sized salad that’ll keep you full for hours. If you are plant-baseed, this flavor bomb of a salad still packs the same punch without the chicken. This salad is a true crowd pleaser.
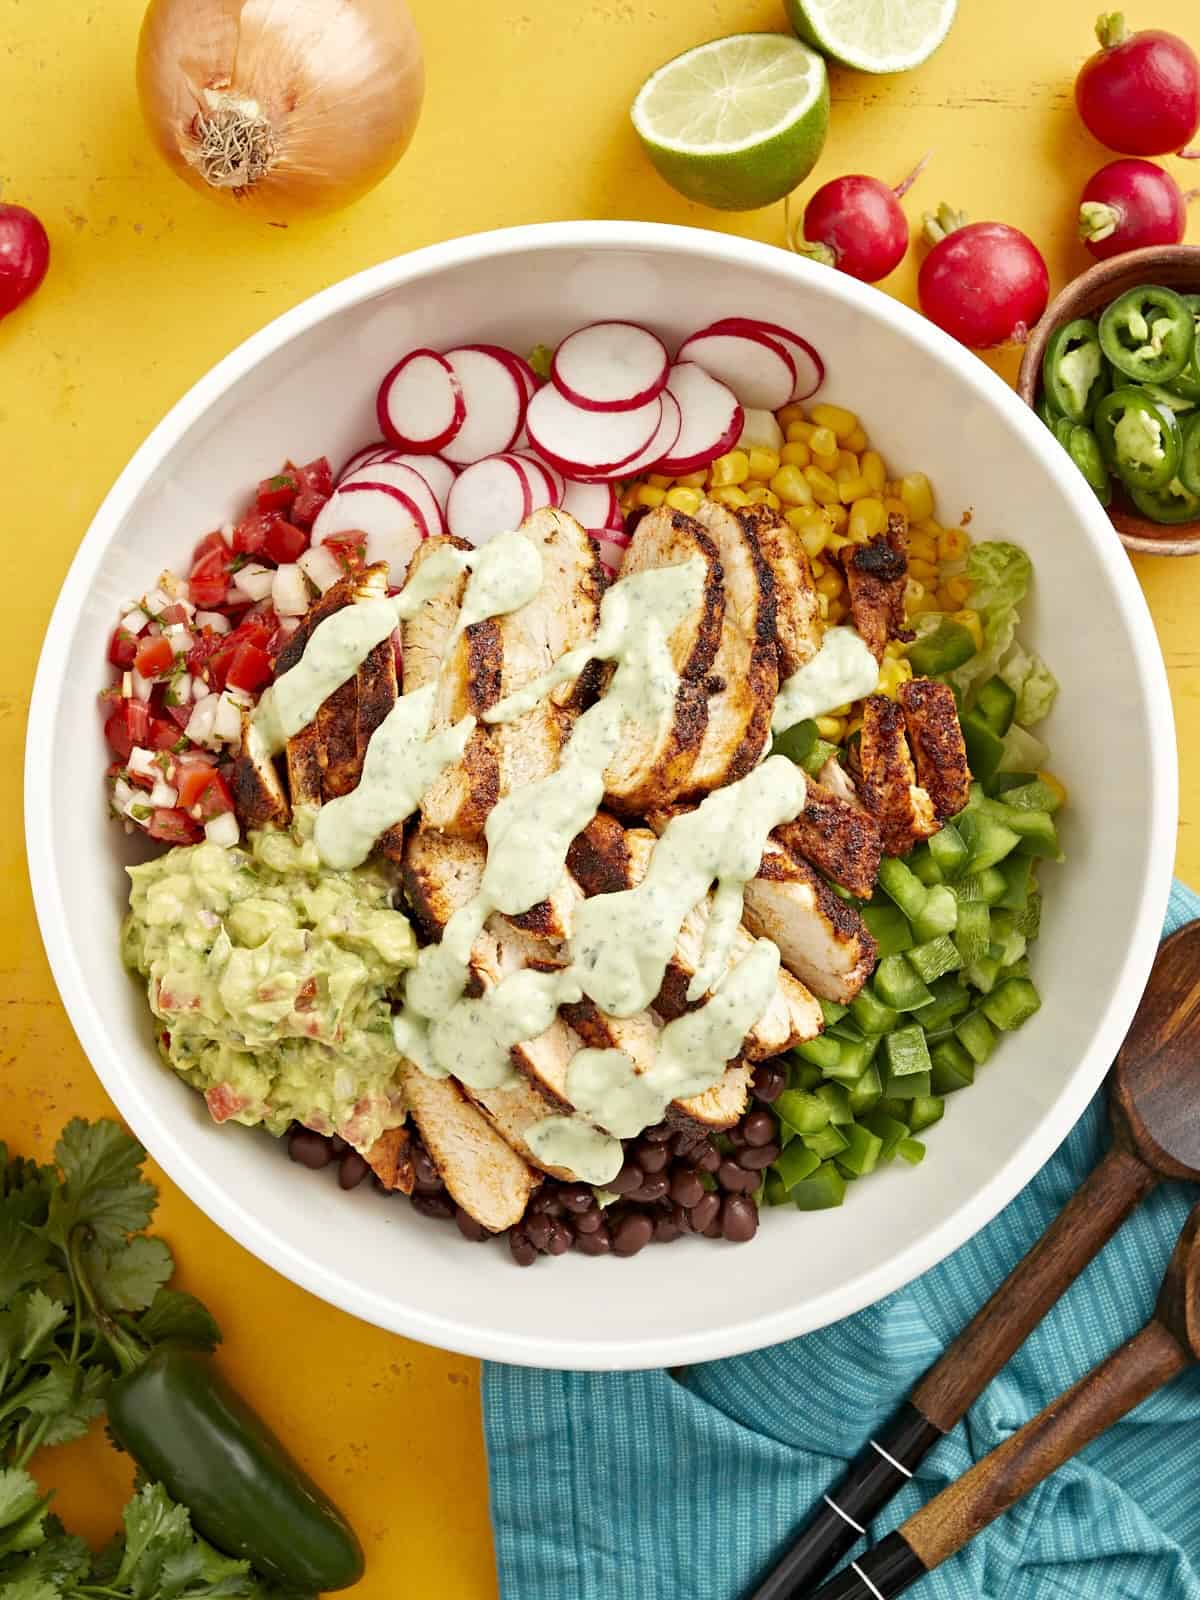
creamy avocado dressing drizzled over santa fe salad in a large white bowl.

What Is A Santa Fe Salad?

This tasty Santa Fe salad recipe starts with a bed of romaine lettuce topped with Southwestern favorites, like corn, black beans, bell pepper, cheese, and tortilla chips. Top it off with our favorite creamy avocado dressing, some fresh pico de gallo, and a dollop of homemade guacamole for a filling salad that’s bursting with flavor!

Ingredients

Here’s what you’ll need to make a Santa Fe salad:

  • Chicken Breasts: Tender, juicy chicken breasts are a great source of protein on this hearty salad. For a budget-saving option, chicken thighs work well. If you’re vegetarian or vegan, substitute the chicken with extra-firm tofu (seasonings and all) or go heavier on the black beans. Mmm!
  • Olive Oil: Helps the spices stick to the chicken and helps the chicken sear in the pan.
  • Seasonings: Chili powder, paprika, cayenne pepper, ground cumin, garlic powder, onion powder, salt, and pepper add Southwestern flair to the chicken.
  • Romaine Lettuce: The perfect crunchy base for this salad. Buy whole heads rather than the pre-chopped bagged stuff to save money.
  • Bell Pepper: I like to use a green bell pepper, but any color works well to add some crunch!
  • Frozen Corn: You can also use fresh or canned corn– just be sure to drain and rinse first if you use canned.
  • Canned Black Beans: Add creaminess and extra protein to this salad.
  • Cheddar Cheese: Adds a hint of saltiness. Mexican blend also works well.
  • Tortilla Chips: I like to crumble some on top for extra crunch.
  • Creamy Avocado Dressing: Pulls the whole salad together. If you’re short on time, use a store-bought chipotle or Southwest ranch dressing.
  • Pico de Gallo: Adds a hit of freshness and acidity.
  • Guacamole: This is totally optional but ups the creaminess of this salad!

What Else Can I Add?

This Southwestern salad is a great fridge clean-out recipe. Here are some other things I love to add when I have them on hand:

How To Store Leftovers

As with most salads, I recommend storing the veggie components separately from the chicken and dressing and tossing everything together just before serving. This helps protect the lettuce from wilting. Stored correctly, this salad should keep well in the refrigerator for up to 3 days, making it great for meal prep!
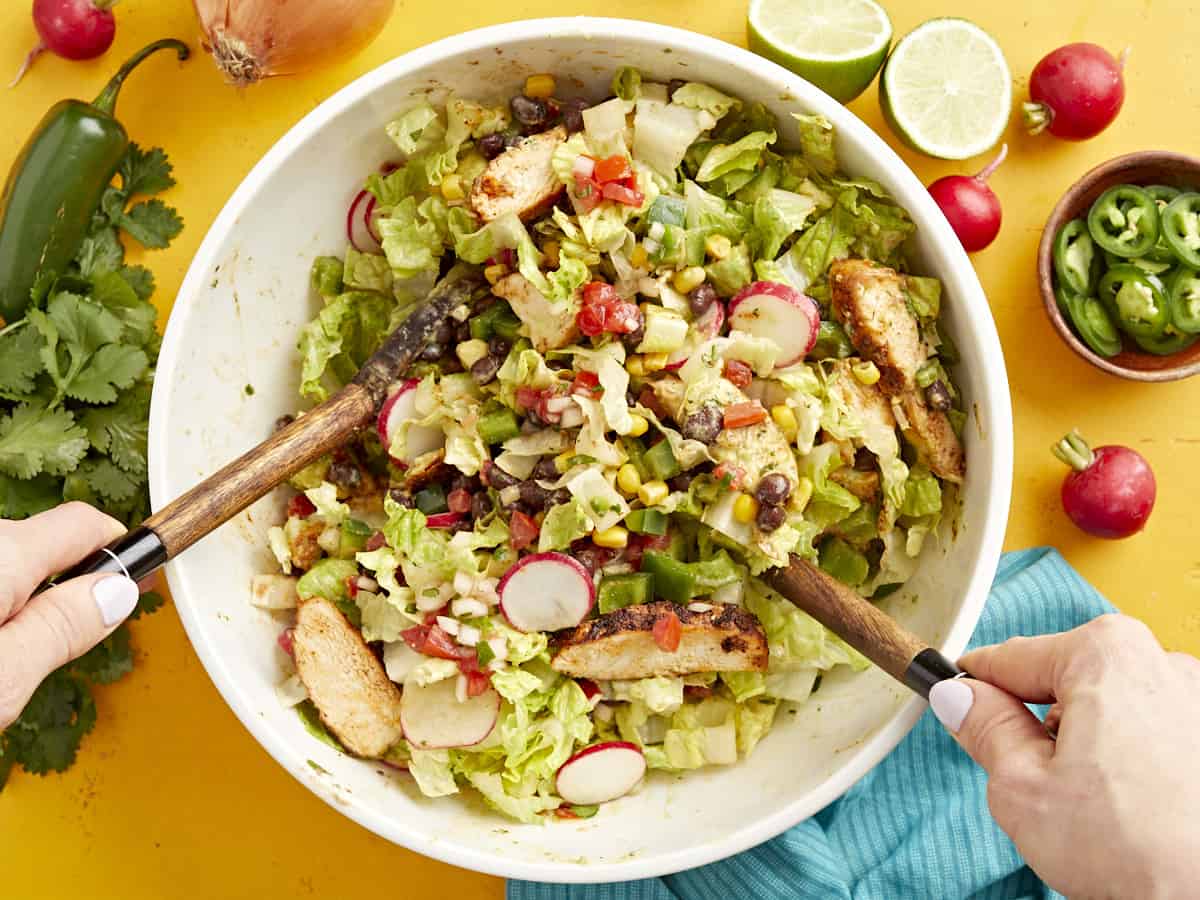
tossing santa fe salad in a large white bowl with wooden spoons.
creamy avocado dressing drizzled over santa fe salad in a large white bowl.
Print

Santa Fe Salad

This Santa Fe salad is the ultimate Southwestern salad. It's loaded with tender, juicy chicken, fresh veggies, and creamy black beans.
Course Salad
Cuisine American, texmex
Total Cost ($17.21 recipe / $2.95 serving)
Prep Time 30 minutes
Cook Time 10 minutes
Total Time 40 minutes
Servings 6
Calories 516kcal

Ingredients

For the Dressing

  • 1 avocado $0.89
  • 1/2 cup sour cream $0.24
  • 1 clove garlic, minced $0.08
  • 1/4 tsp salt $0.02
  • 2 tbsp lime juice $0.50
  • 1/4 bunch fresh cilantro $0.20
  • 1/4 cup water $0.00

For the Salad

  • 2 heads romaine lettuce, chopped into bite-size pieces $2.98
  • 1 green bell pepper, diced $0.89
  • 5 radishes, sliced thin $0.49
  • 1 cup frozen corn, thawed and rinsed $0.47
  • 1 15oz. can black beans, rinsed and drained $0.89
  • 1/4 cup shredded cheddar cheese $0.83
  • 1/2 cup pico de gallo $0.44
  • 1 cup crushed tortilla chips $0.50

For the Chicken

  • 2 boneless, skinless chicken breasts $5.69
  • 2 Tbsp olive oil, divided $0.08
  • 1 Tbsp chili powder $0.30
  • 2 tsp paprika $0.20
  • 1/2 tsp cayenne pepper $0.06
  • 1 tsp ground cumin $0.10
  • 1 tsp garlic powder $0.05
  • 1 tsp onion powder $0.05
  • 1 tsp salt $0.05
  • 1 tsp freshly ground black pepper $0.05

Instructions

  • Add the avocado, sour cream, minced garlic, salt, lime juice, and cilantro to a food processor or blender. Puré until smooth. Cover and set aside in the refrigerator.
  • Chop romaine lettuce into bite-sized pieces and transfer to a large salad bowl.
  • Dice bell peppers, slice radishes, thaw frozen corn, and rinse and strain canned black beans. Add this and 1/2 cup of pico de gallo to the large salad bowl on top of chopped romaine lettuce. Cover and keep in the refrigerator while you prepare the chicken.
  • Place the chicken breasts inside a heavy duty food storage bag and flatten with a rolling pin or a tenderizing mallet until the breasts are consistently about 3/4 inch thick. Start in the middle at the thickest part of each breast for more even cooking. This step helps the chicken cook more evenly.
  • Prepare the Santa Fe Chicken seasoning blend by combining chili, paprika, cayenne, cumin, garlic powder, onion powder, salt, and black pepper.
  • Rub chicken breasts with 1 Tbsp olive oil and divide the seasoning blend between the them, making sure to thoroughly coat the entire surface of each chicken breast with seasoning.
  • In a large skillet, add 1 Tbsp olive oil over medium-high heat. When the oil is glistening and hot, add the chicken breasts. Cook your chicken for a total of 10-12 minutes, flipping halfway. While the chicken cooks, do not wiggle or disturb it except for flipping. Remove the chicken from the heat when it reaches an internal temperature of 160°F. Allow chicken to rest on a cutting board for 5-10 minutes before slicing into strips. After resting, the chicken should reach an internal temperature of 165°F. 
  • Fan out the sliced chicken on top of the salad and drizzle creamy avocado dressing over the top. Toss and serve!

See how we calculate recipe costs here.

Notes

Nutritional information does not include the guacamole. Click the recipe link to view nutritional information.

Nutrition

Serving: 1bowl | Calories: 516kcal | Carbohydrates: 61g | Protein: 29g | Fat: 21g | Sodium: 1791mg | Fiber: 14g
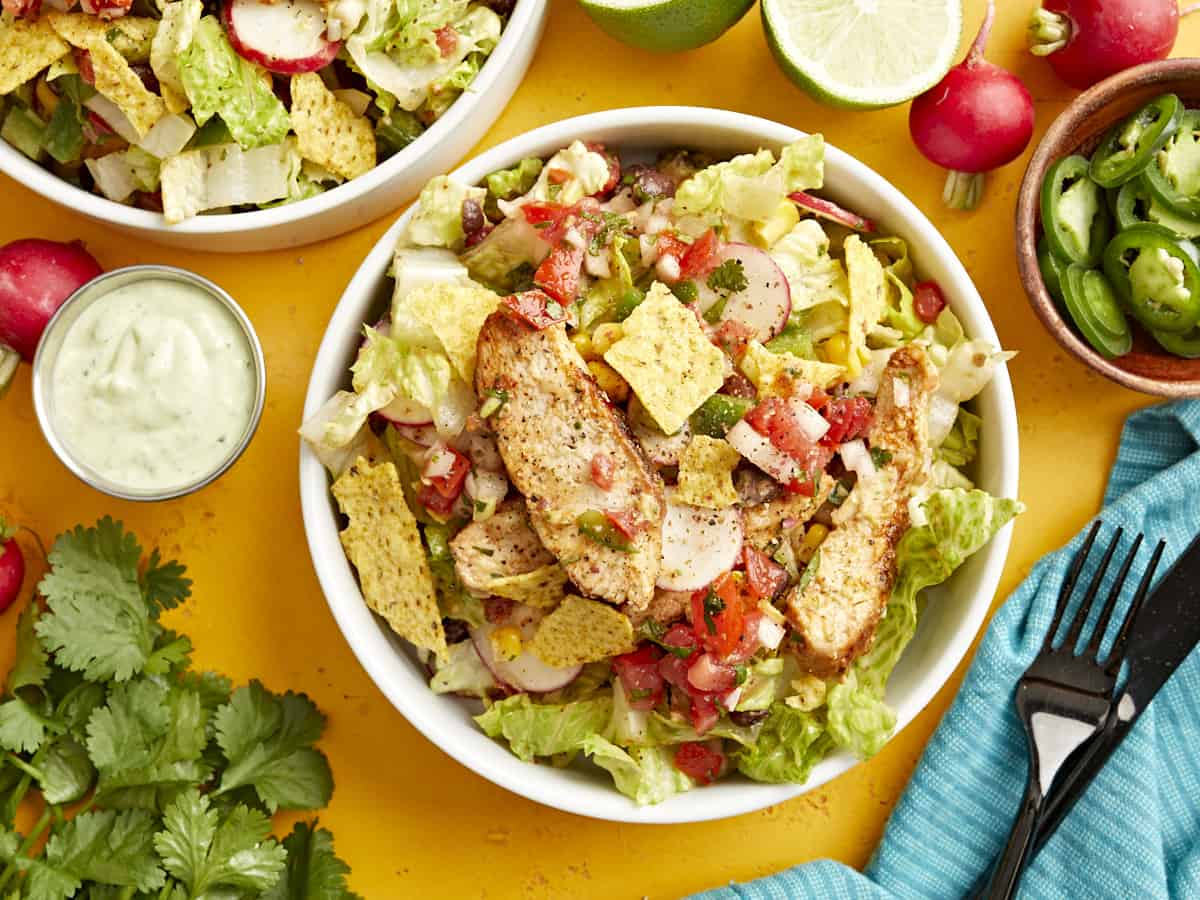
overhead view of a santa fe salad in a white bowl.

how to make a Santa Fe Salad – step by step photos
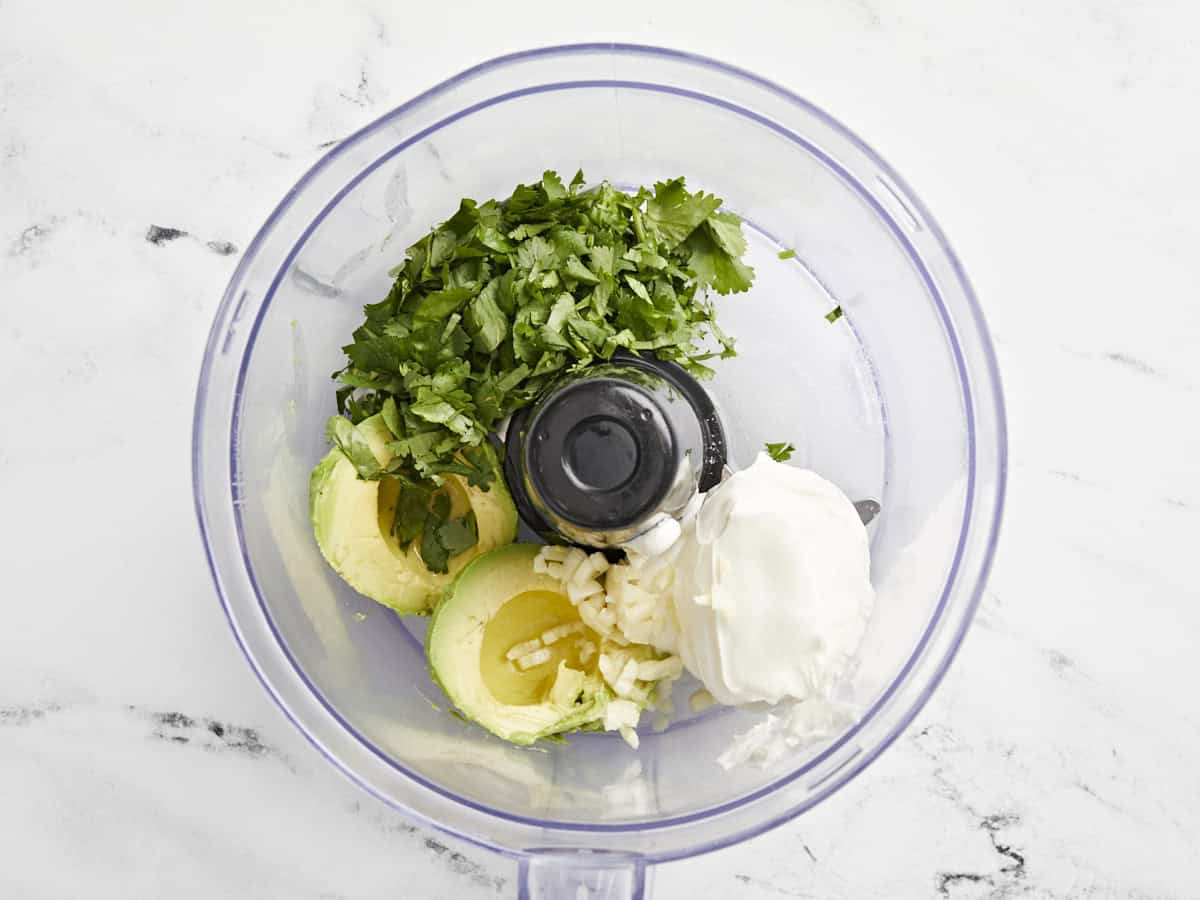
ingredients for avocado dressing in food processor

Add 1 avocado, ½ cup sour cream, 1 clove of garlic (minced), ¼ tsp salt, 2 Tbsp lime juice, and ¼ bunch cilantro to a food processor or blender.
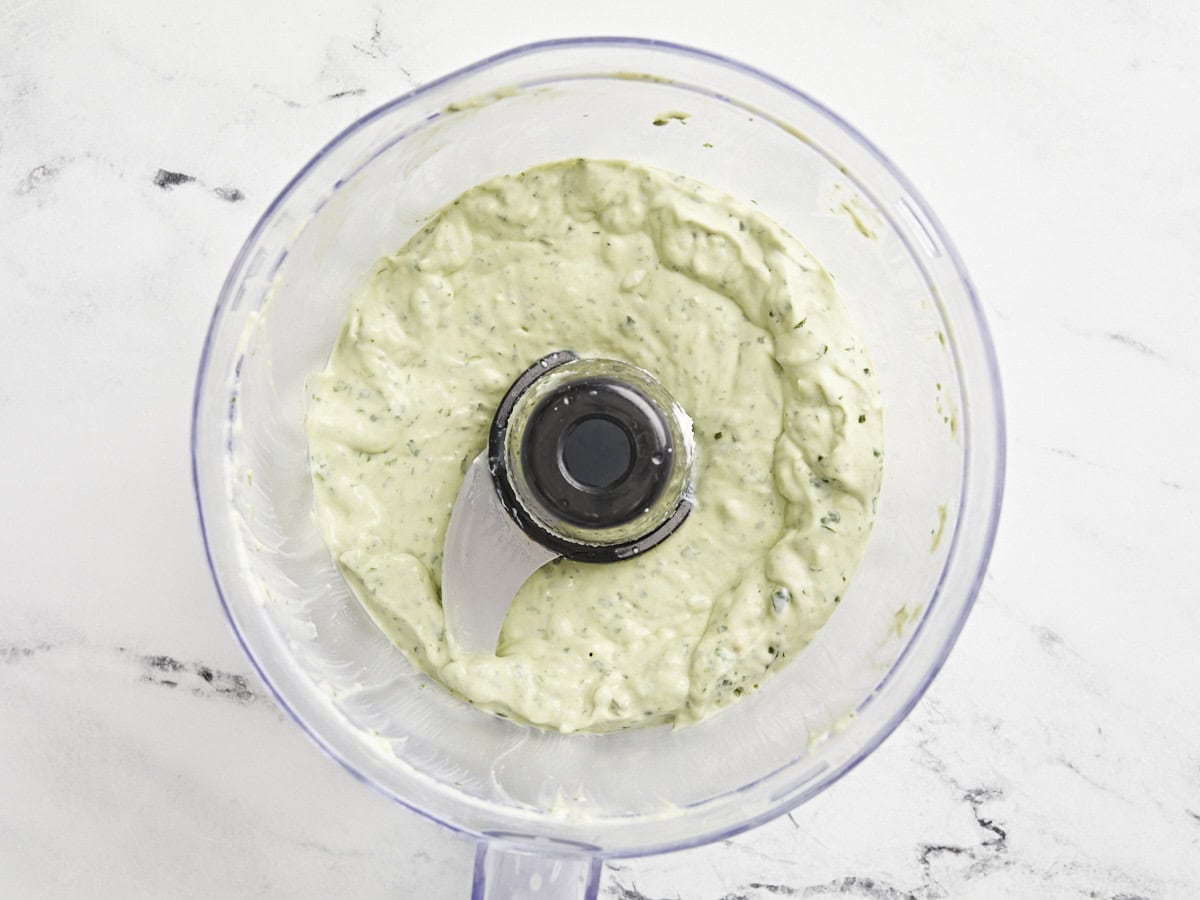
creamy avocado dressing in food processor

Puré until smooth. Cover and set aside in the refrigerator.
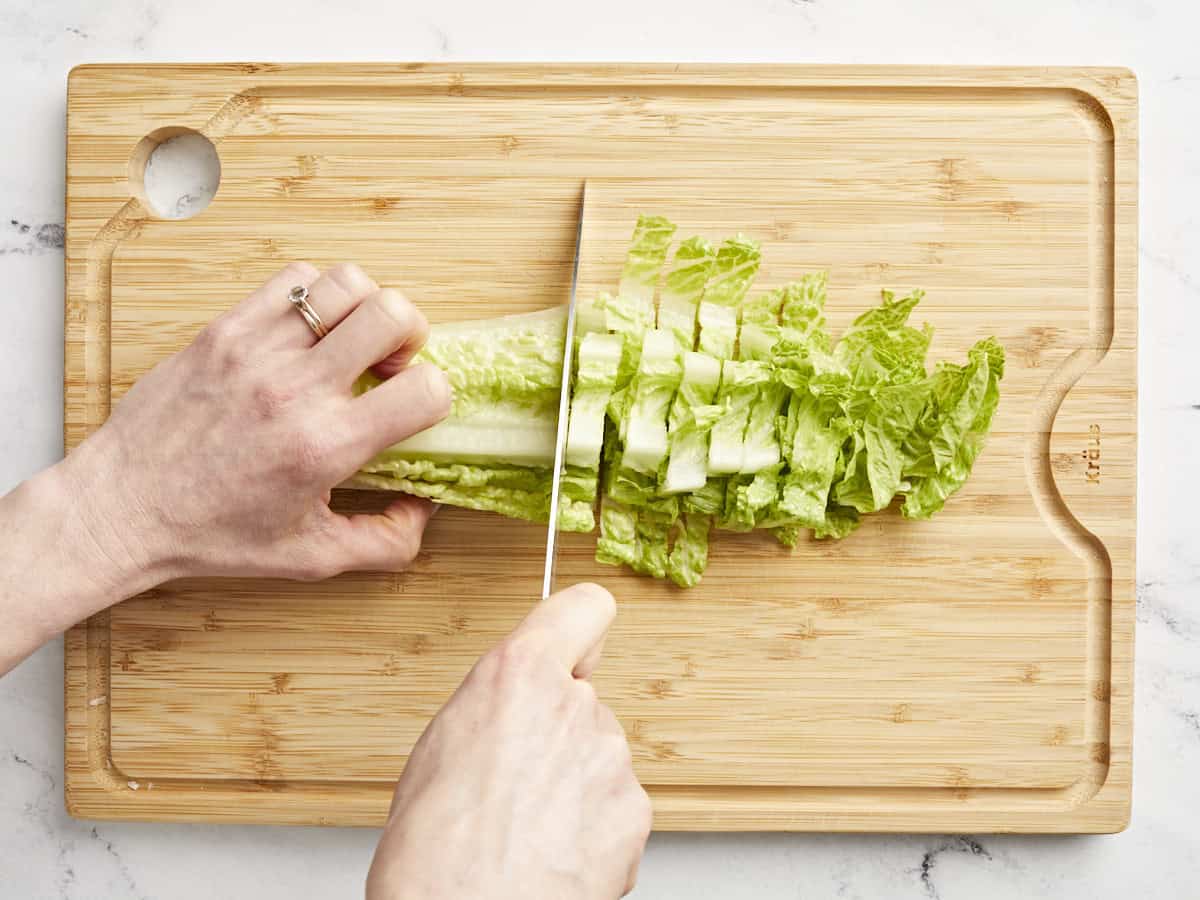
chopping lettuce

Chop 2 heads of romaine lettuce into bite-sized pieces and transfer to a large salad bowl.
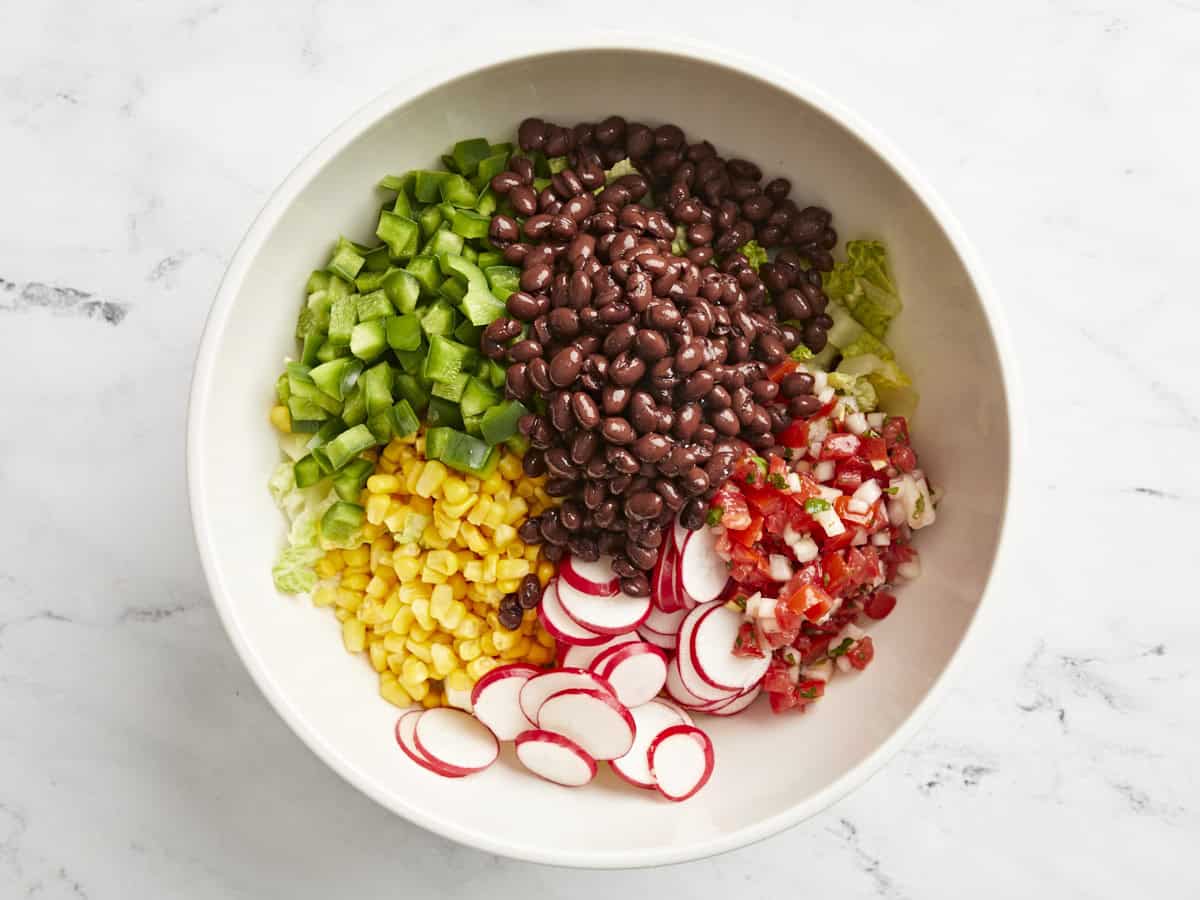
ingredients for santa fe salad in a white bowl

Dice 1 bell pepper, slice 5 radishes, thaw 1 cup frozen corn, and rinse and strain 1 can of black beans. Add this and 1/2 cup of pico de gallo to the large salad bowl on top of chopped romaine lettuce. Cover and keep in the refrigerator while you prepare the chicken.
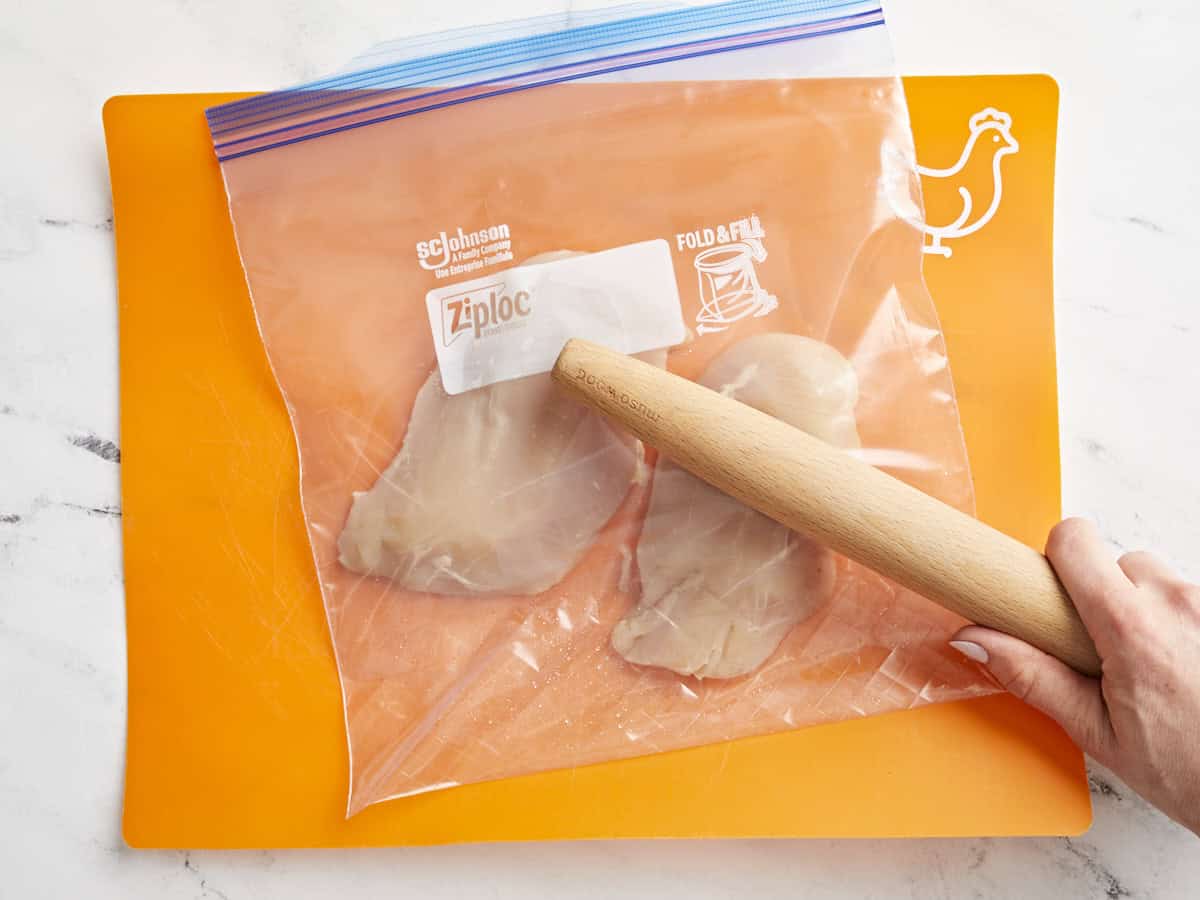
pounding chicken

Place the chicken breasts inside a heavy duty food storage bag and flatten with a rolling pin or a tenderizing mallet until the breasts are consistently about 3/4 inch thick. Start in the middle at the thickest part of each breast for more even cooking. This step helps the chicken cook more evenly.
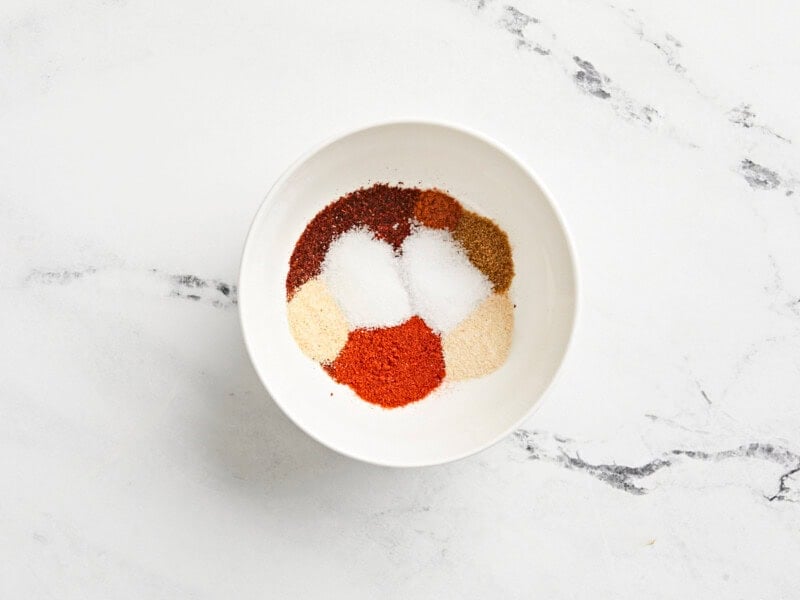
spice rub for chicken

Prepare the Santa Fe Chicken seasoning blend by combining 1 Tbsp chili, 2 tsp paprika, 1/2 tsp cayenne, 1 tsp cumin, 1 tsp garlic powder, 1 tsp onion powder, 1 tsp salt and 1 tsp black pepper together.
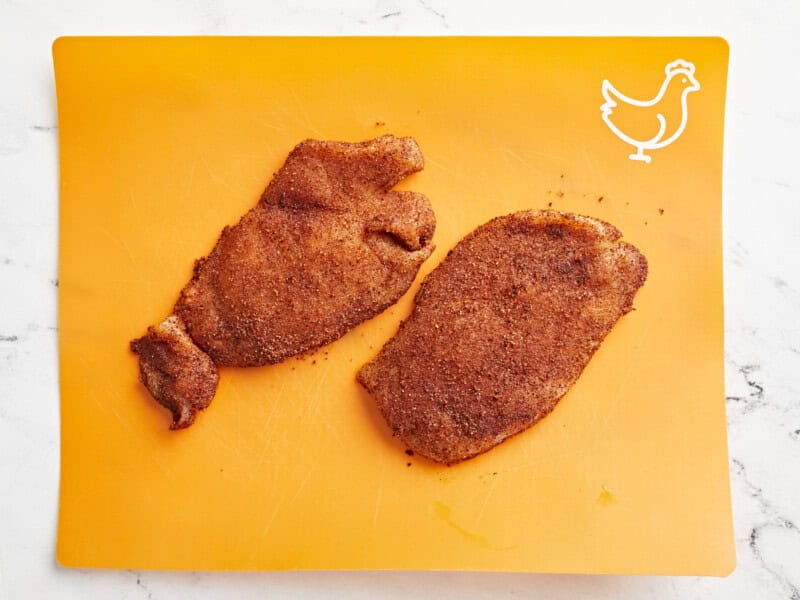
chicken coated with spice rub

Rub chicken breasts with 1 Tbsp olive oil and divide the seasoning blend between the them, making sure to thoroughly coat the entire surface of each chicken breast with seasoning.
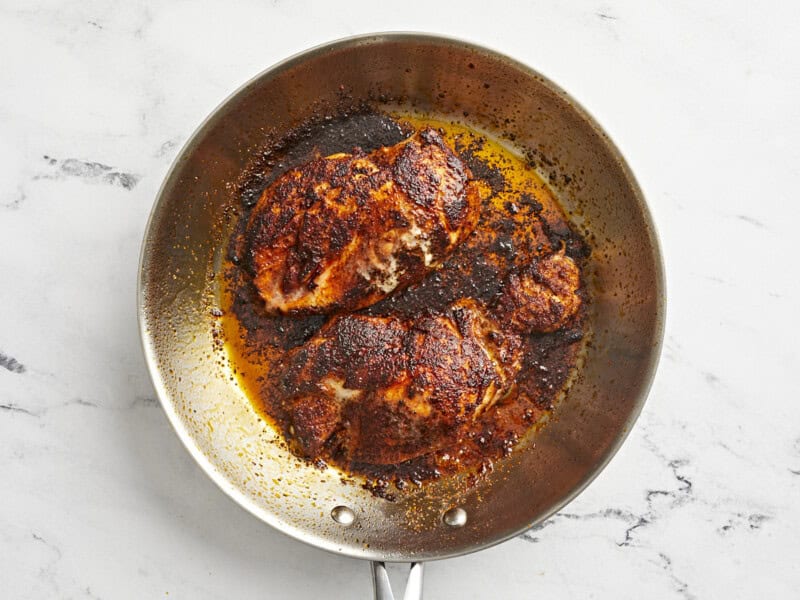
chicken in skillet

In a large skillet, add 1 Tbsp olive oil over medium-high heat. When the oil is glistening and hot, add the chicken breasts. Cook your chicken for a total of 10-12 minutes, flipping halfway. While the chicken cooks, do not wiggle or disturb it except for flipping. Remove the chicken from the heat when it reaches an internal temperature of 160°F. Allow chicken to rest on a cutting board for 5-10 minutes before slicing into strips. After resting, the chicken should reach an internal temperature of 165°F. 
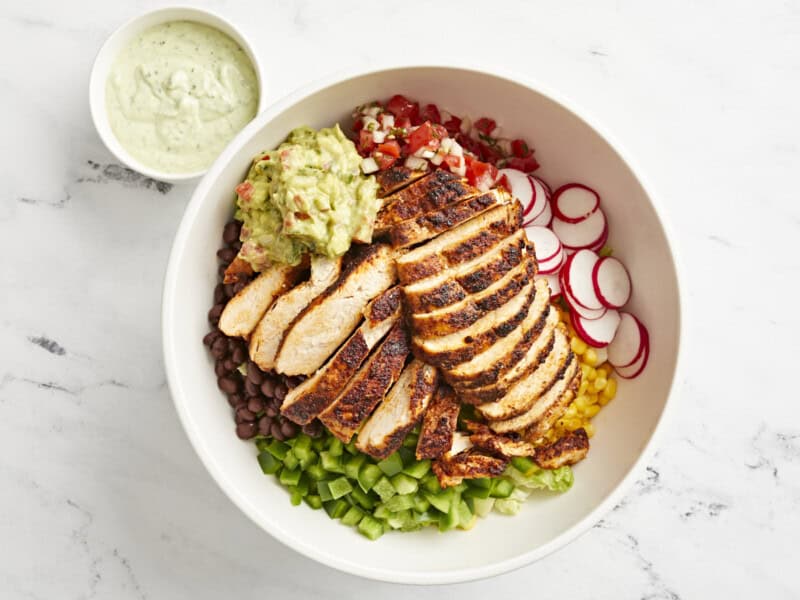
completed santa fe salad

Fan out the sliced chicken on top of the salad and drizzle Creamy Avocado Dressing over the top. Toss and serve!

The post Santa Fe Salad appeared first on Budget Bytes.
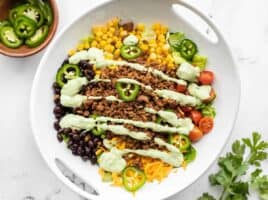
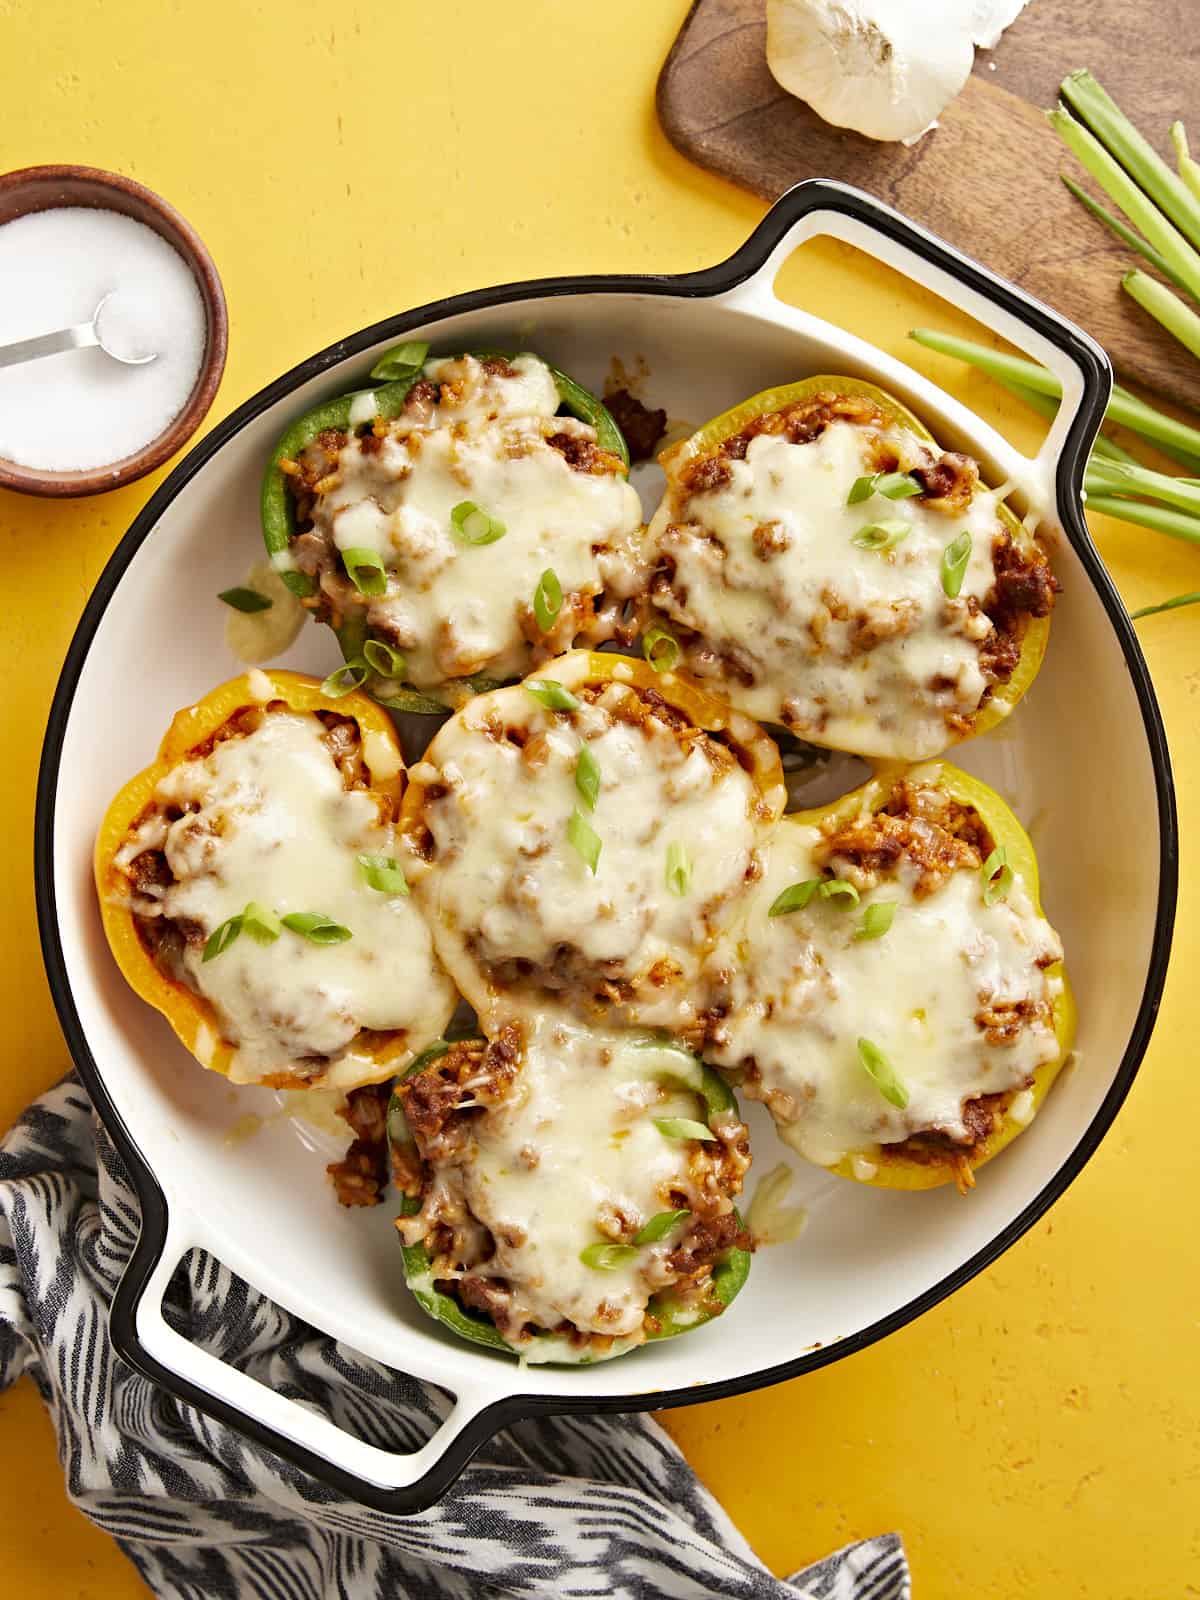
Chorizo Stuffed Bell Peppers

These Chorizo Stuffed Bell Peppers are packed with southwest flavor, perfectly portioned for meal prep, and freezer-friendly!

The post Chorizo Stuffed Bell Peppers appeared first on Budget Bytes.
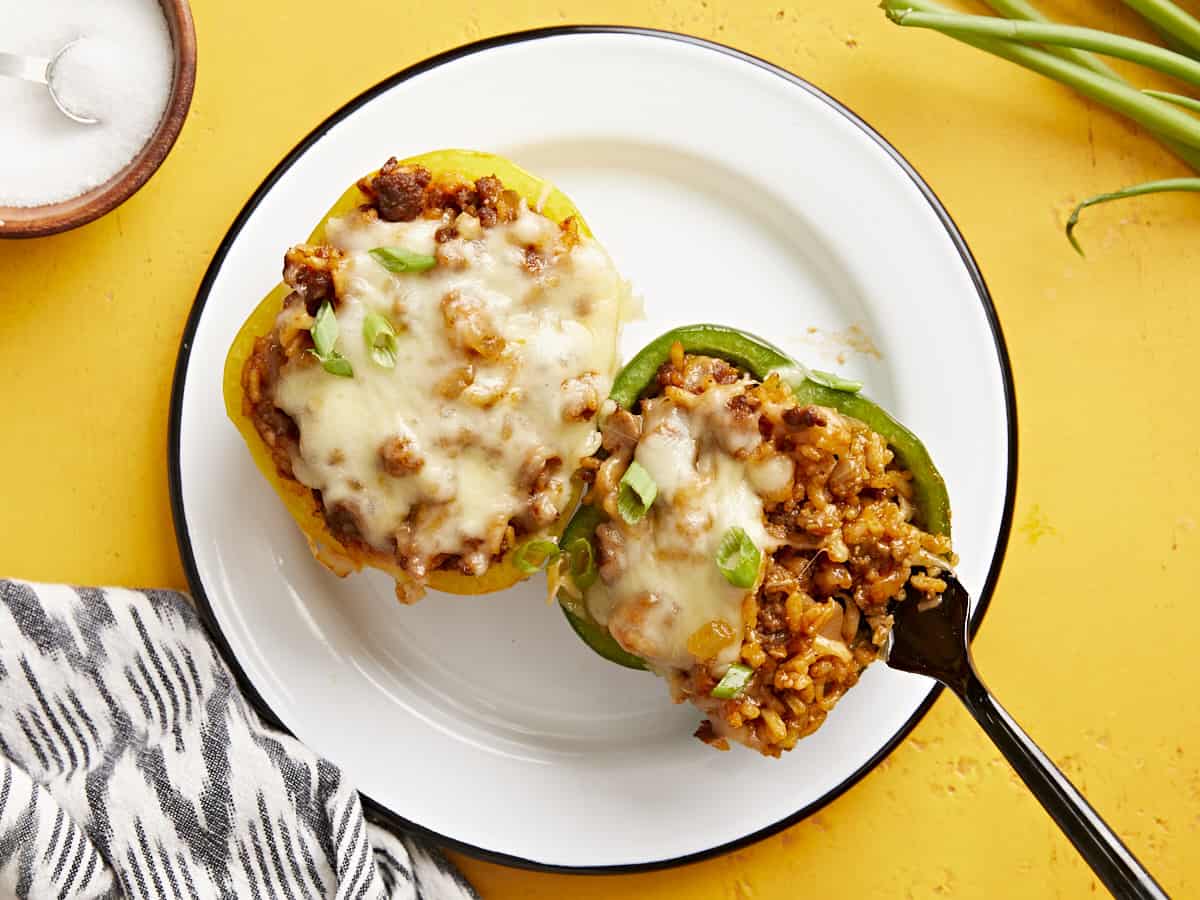
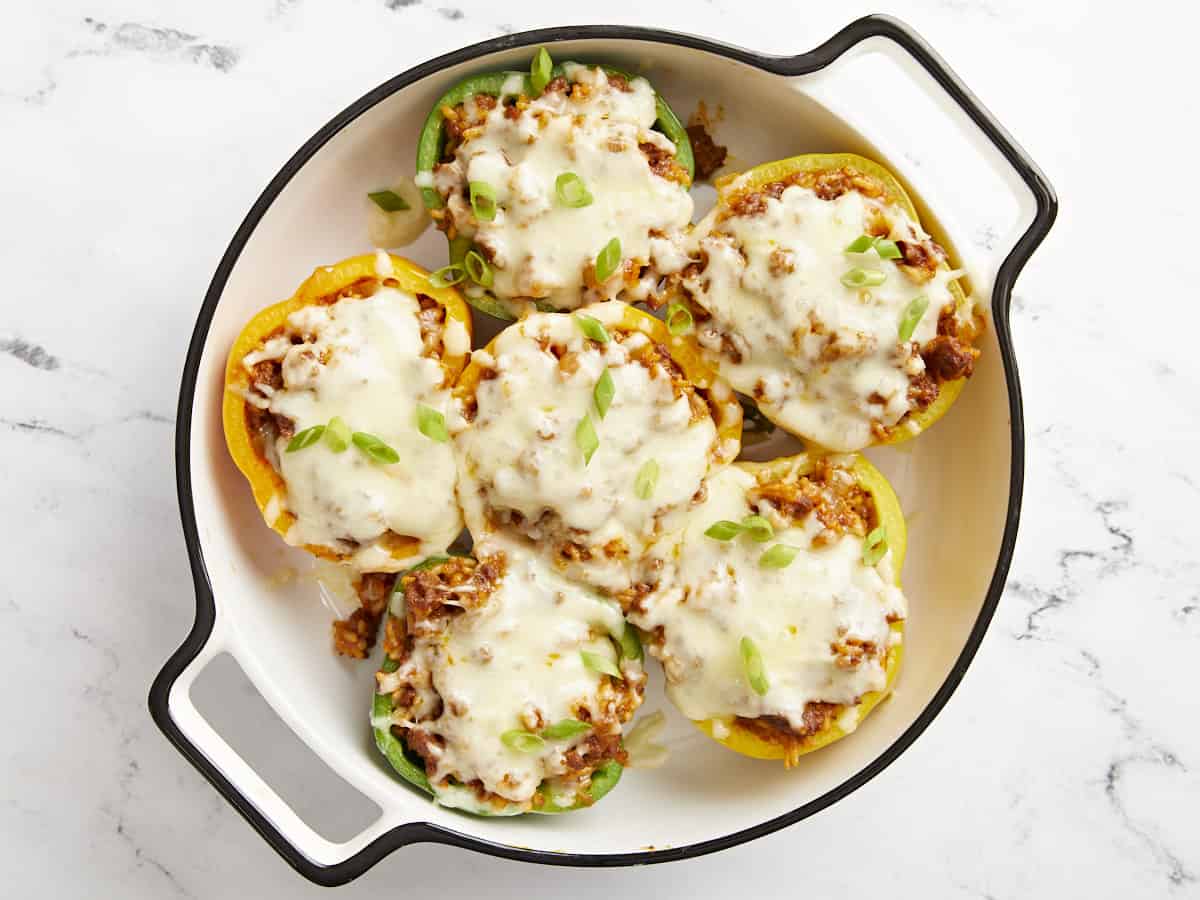
We’re in love with stuffed bell peppers here at the Budget Bytes kitchen, so I decided to make a new variation just so I could have an excuse to eat stuffed bell peppers again. These Chorizo Stuffed Bell Peppers are full of super flavorful Mexican chorizo, hearty rice, and a rich sauce, then topped with melty mozzarella cheese. They’re SO filling, perfectly portioned for meal prep or freezer cooking, and quite flexible if you want to change up the ingredients to make them even more budget-friendly! Put this one one your to-cook list because I know you’re going to love them!

Overhead view of chorizo stuffed bell peppers in a baking dish on a yellow background.

Ingredients for Chorizo Stuffed Bell Peppers

These stuffed bell peppers are packed with flavorful herbs and spices and a rich tomato-y sauce so that every bite is deee-licious. Here are the ingredients for chorizo stuffed bell peppers:

  • Bell Peppers: You’ll need three bell peppers to make six servings for this recipe. We used a mix of colors to make it more festive, but you can use any color pepper that fits your budget.
  • Mexican Chorizo: Mexican chorizo is a fresh (not cured) sausage that is packed with spices. You can usually either buy this loose or in links. If you buy them in links, simply squeeze the meat out of the casing into the skillet. I like Johnsonville brand, but many larger grocery stores also make their own generic version.
  • Garlic & Onion: A little fresh onion and garlic add flavor and texture to the bell pepper stuffing.
  • Rice: Long grain white rice bulks up this meal to make it filling while keeping the cost low. We cook the rice right in the pot with the chorizo, spices, and broth for maximum flavor.
  • Chicken Broth: The rice is cooked in chicken broth to ensure that every bite is super flavorful. We use Better Than Bouillon to make our broth because it’s budget-friendly and has great flavor.
  • Tomato Paste: Tomato paste is added to the broth to help create an enchilada sauce-like flavor in the rice mixture.
  • Diced Green Chiles: Green chiles add even more flavor, color, and texture to the filling. If you prefer a milder stuffed pepper, you can leave out the green chiles or look for a mild green chile.
  • Spices: We packed this bell pepper stuffing with even more spices including chili powder, cumin, garlic powder, cayenne pepper, and salt.
  • Mozzarella: The stuffed bell peppers are topped with mozzarella cheese for a rich finish, but you can substitute with a different type of cheese if preferred, like Monterey jack, pepper jack, cheddar, or a Mexican blend.
  • Green Onion: A few sliced green onions sprinkled over top of the stuffed bell peppers add a fresh finish, but are entirely optional!

What Else Can I Add?

This recipe is pretty flexible, so if you want to change it up or make it more budget-friendly, here are some other ingredients you can add:

  • Beans: Try swapping half of the chorizo with a can of black beans or pinto beans for more fiber and less cost.
  • Diced Tomatoes: If you want more color and texture in your bell pepper filling, try adding a drained can of petite diced tomatoes, or diced tomatoes with chiles (Rotel).
  • Sweet Potato: Chorizo and sweet potato are a perfect flavor pair. Replace half of the chorizo with one small finely diced sweet potato for a spicy-sweet flavor profile (add it with the rice so it can simmer and soften with the rice).

Mexican Chorizo vs. Spanish Chorizo

It’s really important to use the correct type of chorizo for this recipe. You’ll need Mexican chorizo, which is a fresh (uncooked & uncured) sausage. You’ll find Mexican chorizo in the fresh meat department, usually near bratwurst and other fresh sausages. Spanish chorizo is a cured, sliceable sausage that you’ll usually find near cheese, pepperoni, or other charcuterie-type foods.

What to Serve with Chorizo Stuffed Bell Peppers

These southwest-inspired peppers are really filling on their own, but if you want to serve something on the side they pair really well with Cumin Lime Roasted Sweet Potatoes, Cowboy Caviar, Sweet Potato Cornbread, or Warm Corn and Avocado Salad.

How To Store Leftovers

I love making stuffed bell peppers for meal prep, so this is how I store and reheat them. The cooked bell peppers can be stored in the refrigerator for 4-5 days. I like to reheat them quickly in the microwave (about 2 minutes each).

Or, once chilled in the refrigerator, you can transfer them to the freezer. I suggest packaging them individually in a freezer-safe, air-tight container, so you can reheat one at a time as needed. Frozen stuffed bell peppers can be thawed in the refrigerator overnight and then reheated the next day in the microwave, or thawed straight from the freezer in the microwave using the defrost function, then heated through on full power.

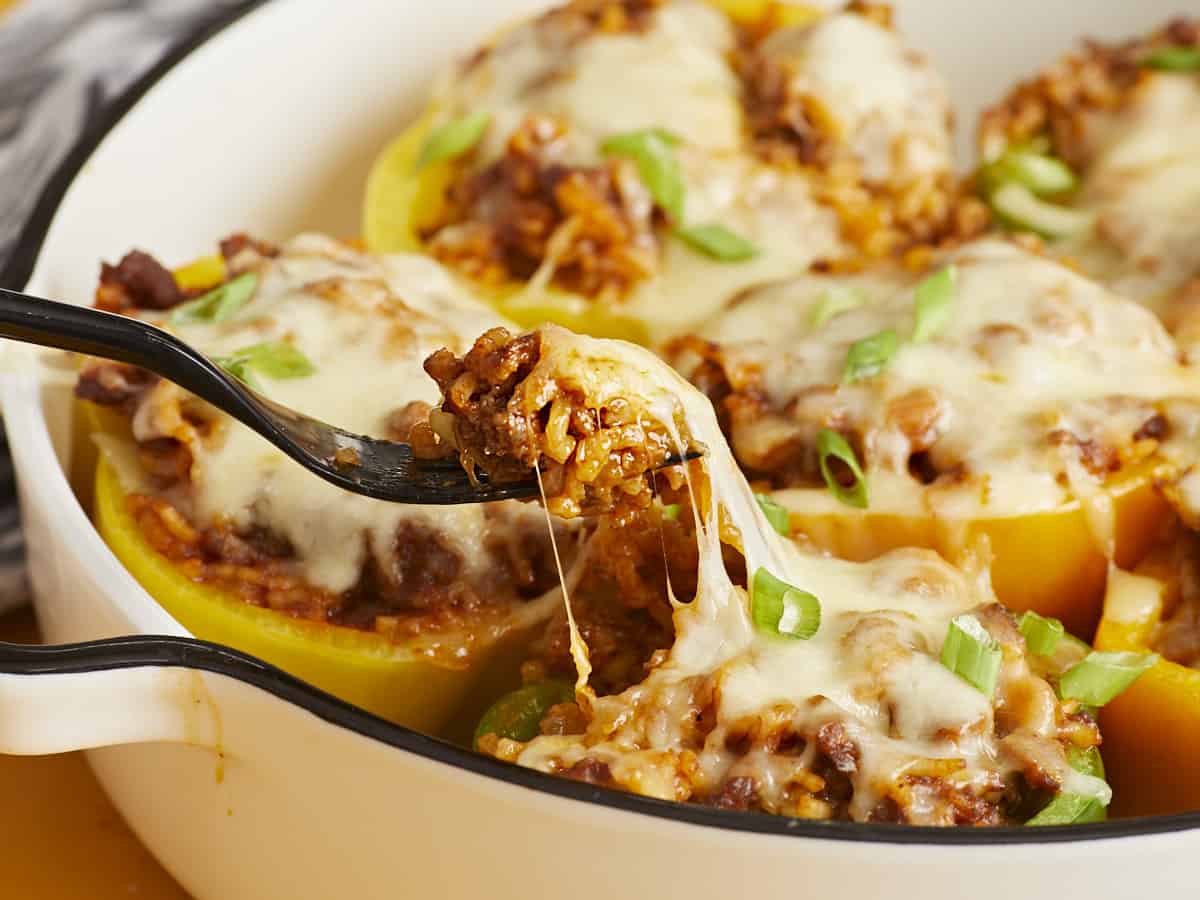
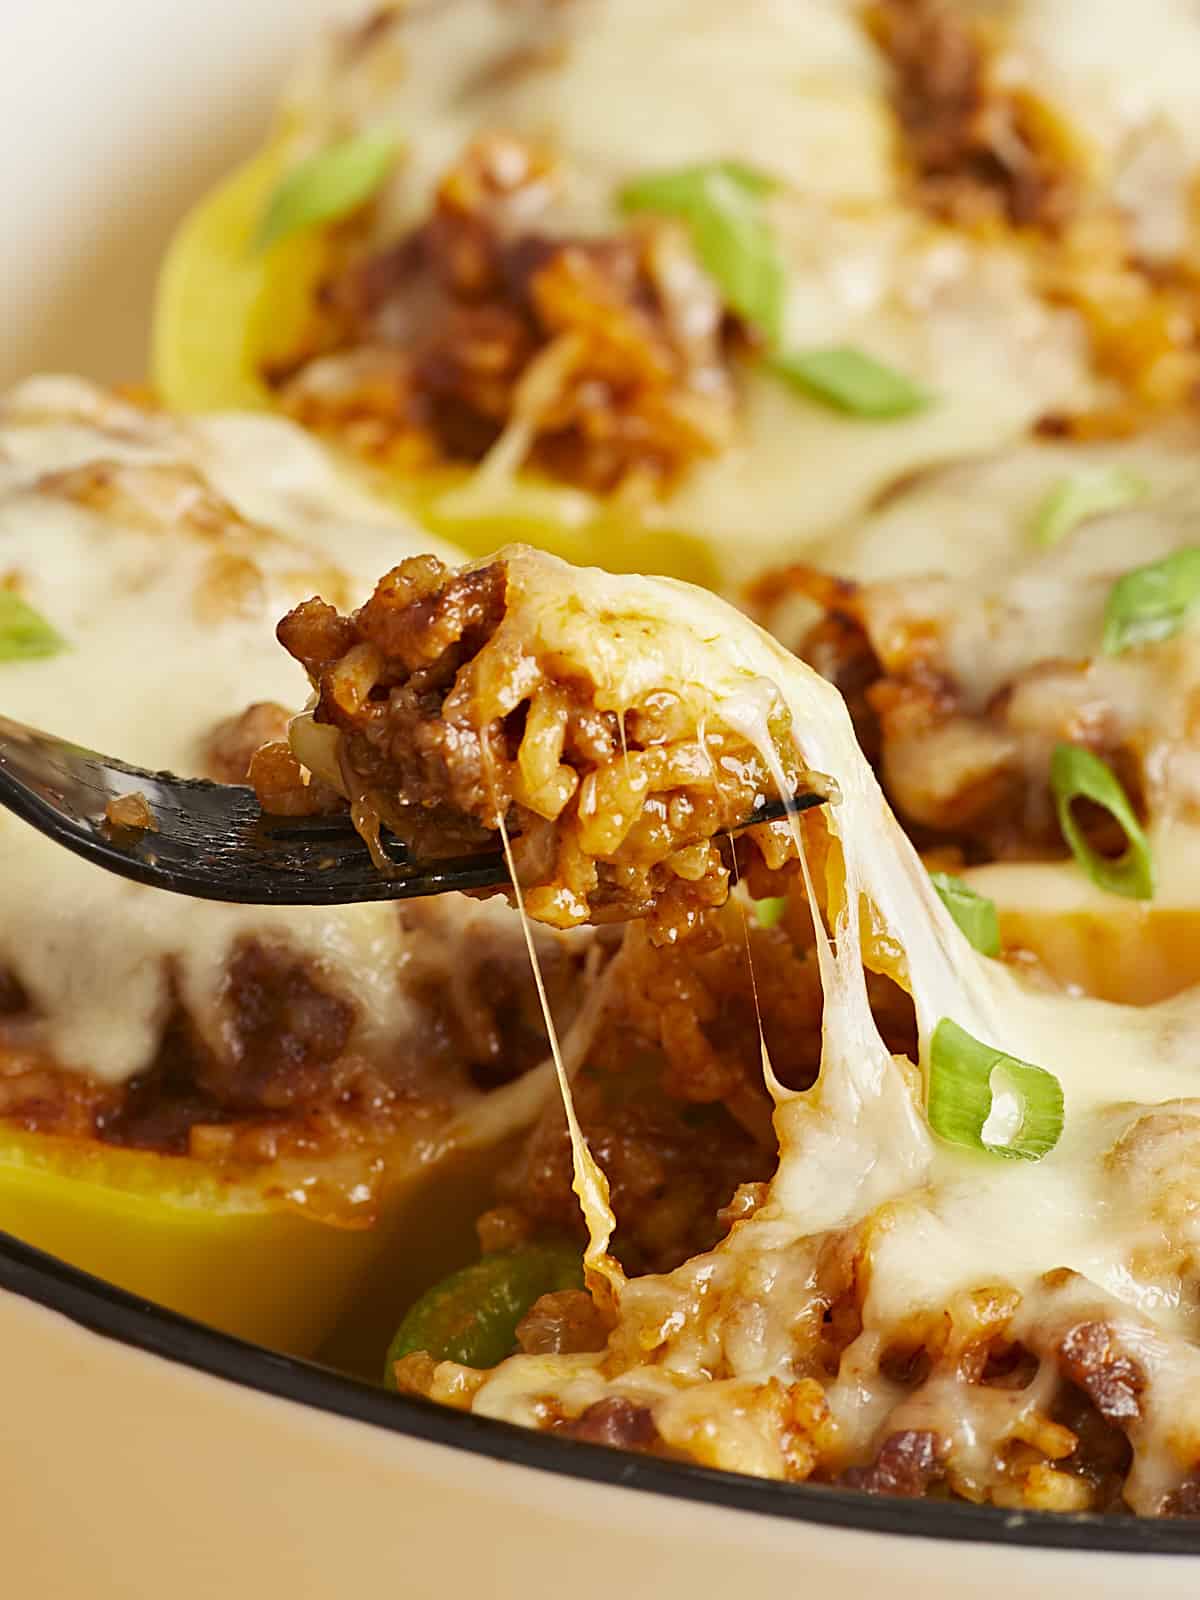
Side view of a fork lifting some stuffing out of the bell pepper with the cheese pulling.
Overhead view of chorizo stuffed bell peppers in a round baking dish.
Print

Chorizo Stuffed Bell Peppers

These Chorizo Stuffed Bell Peppers are packed with southwest flavor, perfectly portioned for meal prep, and freezer-friendly!
Course Dinner, Main Course
Cuisine Amercian, Mexican
Total Cost $12.91 recipe / $2.15 serving
Prep Time 5 minutes
Cook Time 1 hour
Total Time 1 hour 5 minutes
Servings 6
Calories 380kcal

Ingredients

  • 3 bell peppers $4.07
  • 1 lb. Mexican chorizo $4.99
  • 1 yellow onion $0.37
  • 2 cloves garlic $0.16
  • 1 4oz. can diced green chiles $0.99
  • 2 Tbsp tomato paste $0.20
  • 2 tsp chili powder $0.20
  • 1/2 tsp cumin $0.05
  • 1/2 tsp garlic powder $0.05
  • 1/4 tsp cayenne pepper $0.02
  • 1/4 tsp salt $0.02
  • 1/2 cup long grain white rice (uncooked) $0.13
  • 1 cup chicken broth $0.19
  • 1 cup shredded mozzarella $1.25

Instructions

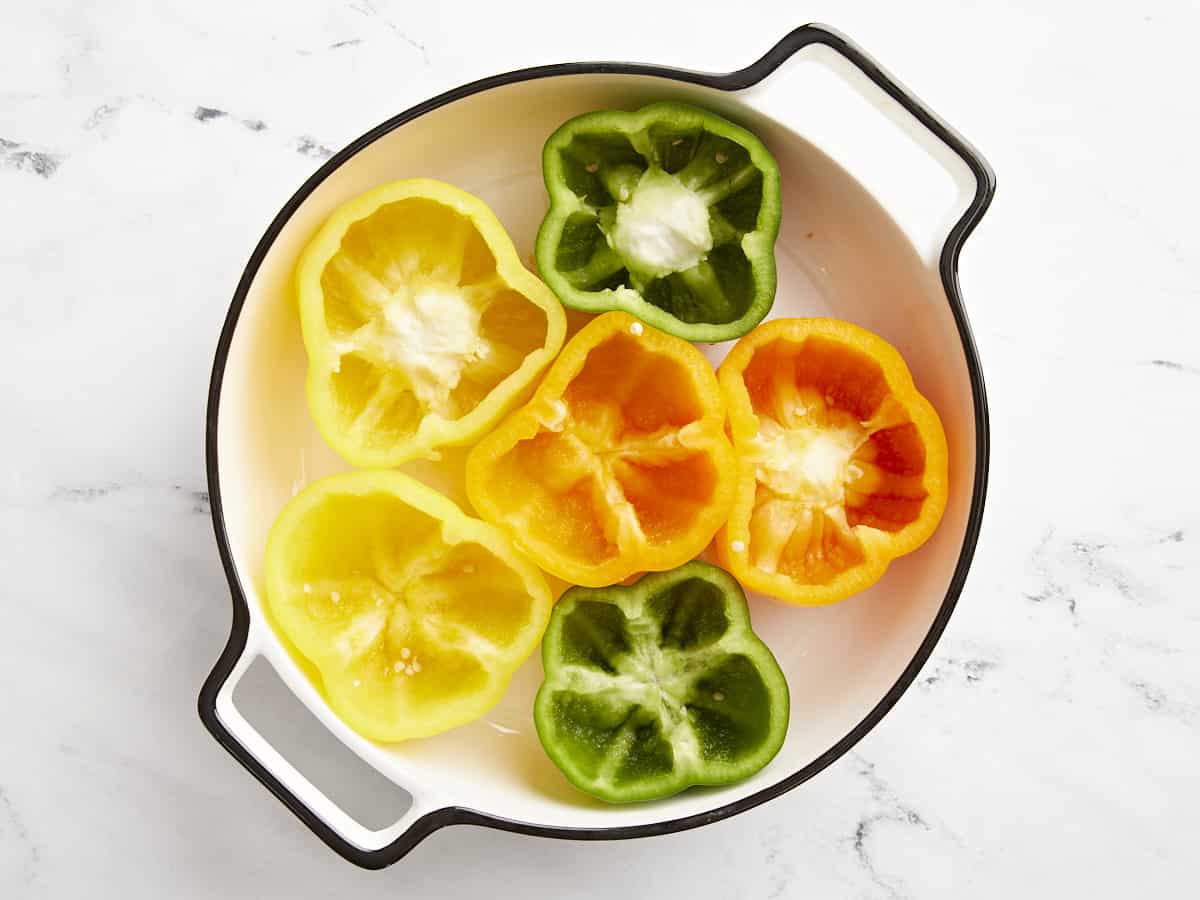
  • Preheat the oven to 350ºF. Cut each bell pepper in half so there is a top and bottom portion, then remove the seeds and ribs. You can either carefully cut the stem out of the center of the top half, or eat around it later. Place the halved bell peppers in a baking dish, cut sides up. Par-bake in the preheated oven for 15 minutes.
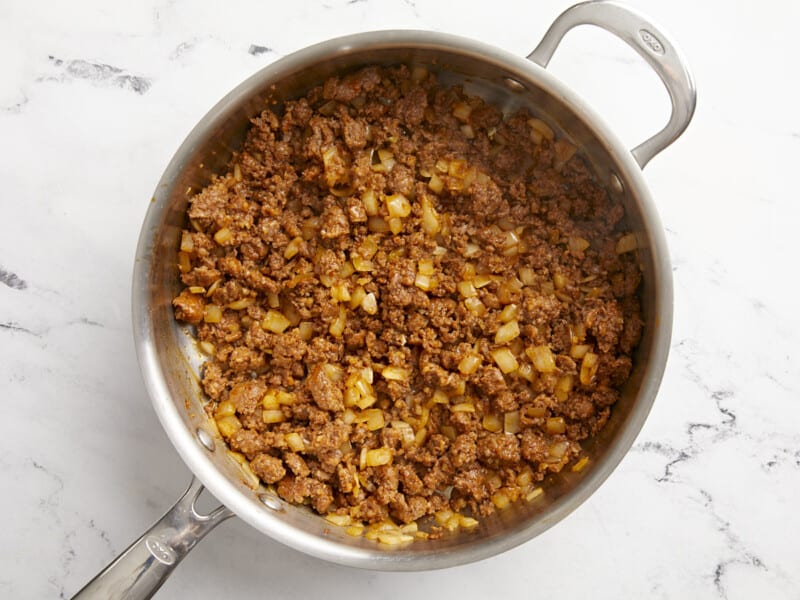
  • Add the chorizo to a large deep skillet and cook over medium heat until browned. While the chorizo is cooking, dice the onion and mince the garlic. Add the onion and garlic to the chorizo and continue to cook until the onions are softened.
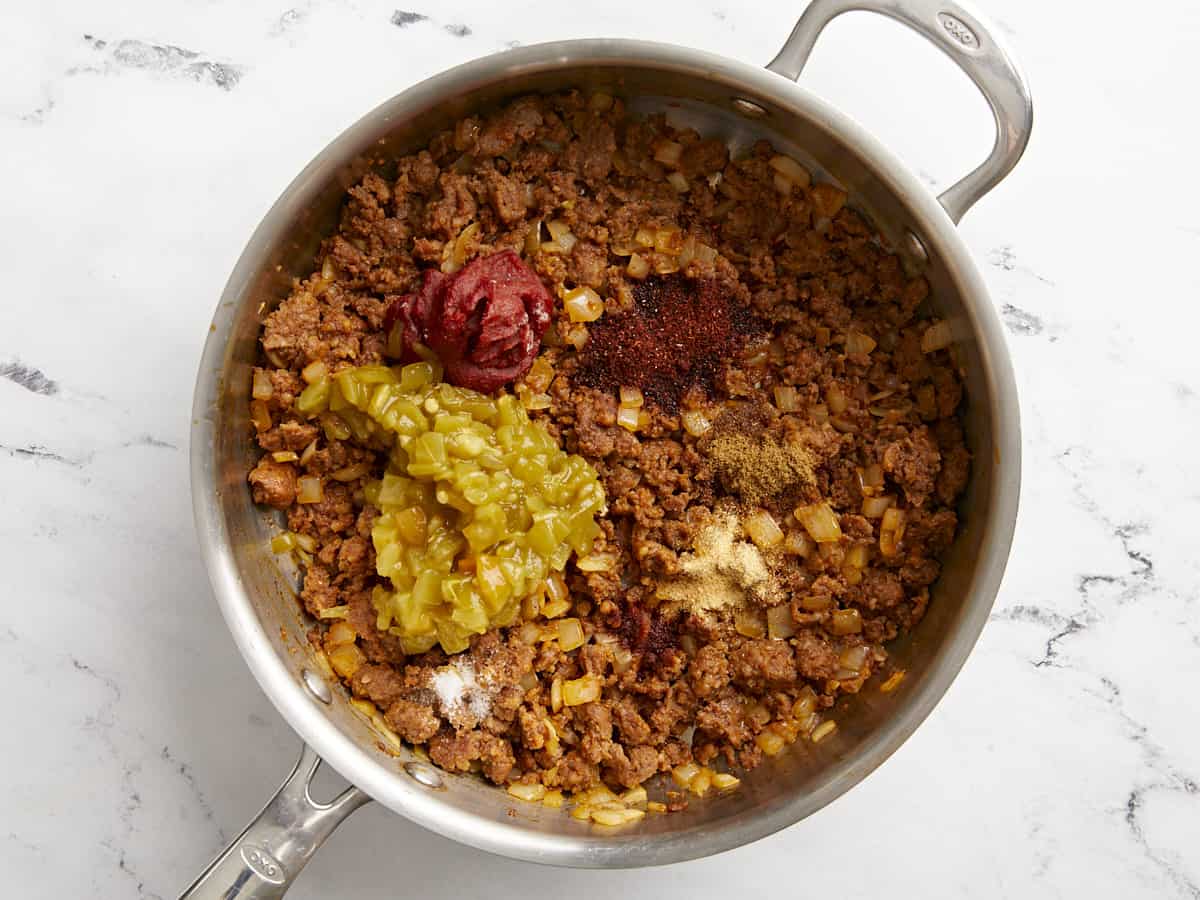
  • Add the diced green chiles, tomato paste, chili powder, cumin, garlic powder, cayenne pepper, and salt to the skillet and stir until combined.
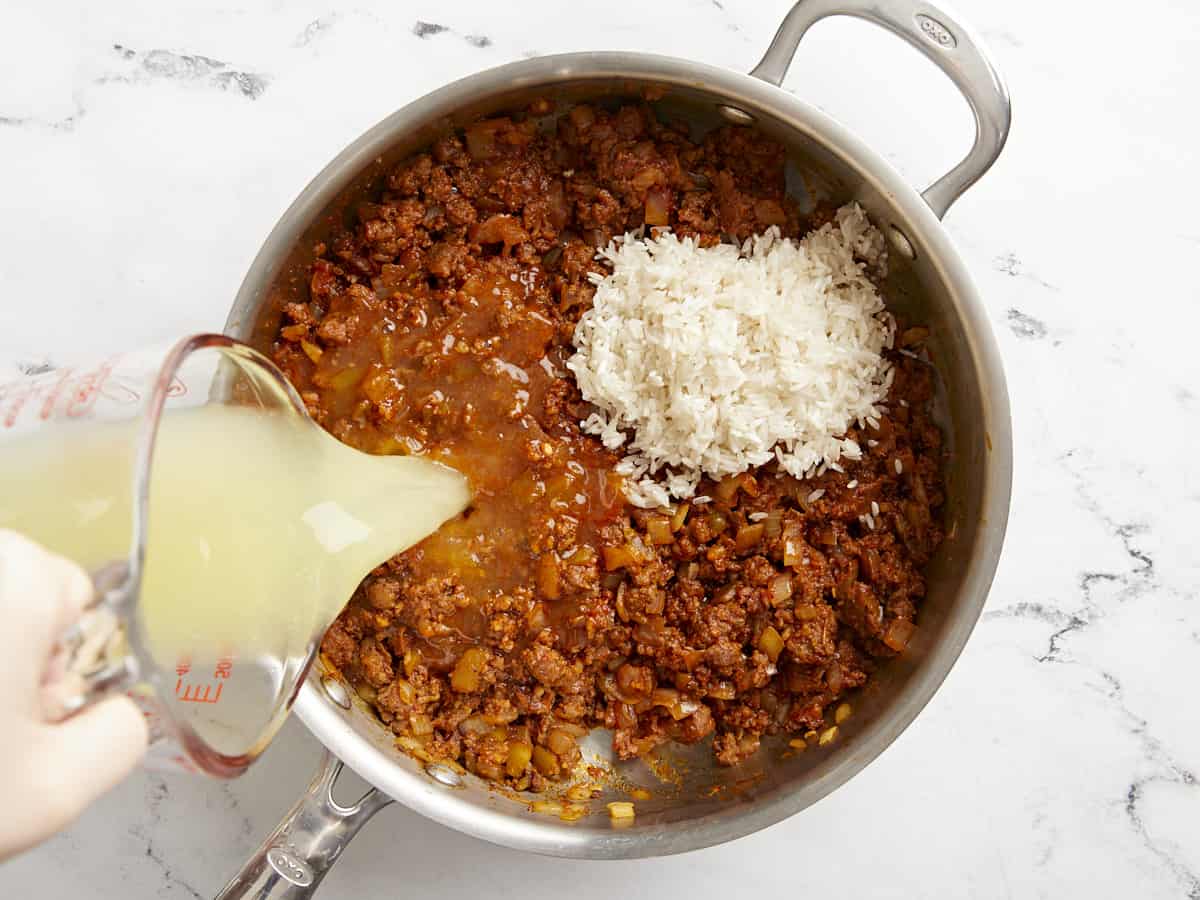
  • Add the uncooked rice and chicken broth to the skillet and stir until combined again. Place a lid on the skillet, turn the heat up to medium-high, and allow the broth to come up to a boil.
  • As soon as the broth begins to boil, turn the heat down to low and let the rice simmer over, low without lifting the lid or stirring, for 20 minutes. After 20 minutes, turn off the heat and let it rest for five more minutes.
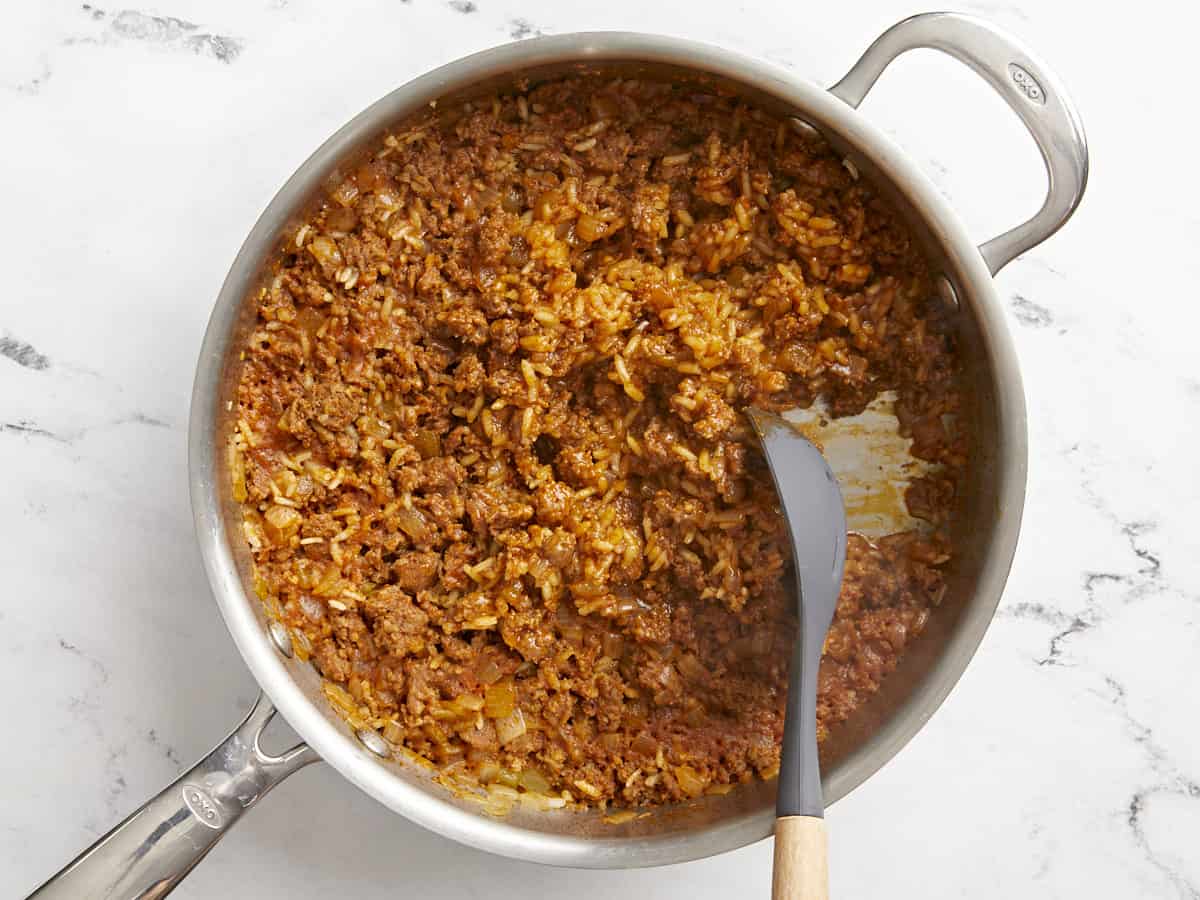
  • Finally, remove the lid and gently stir the rice and chorizo mixture. All of the broth should be absorbed and the rice tender.
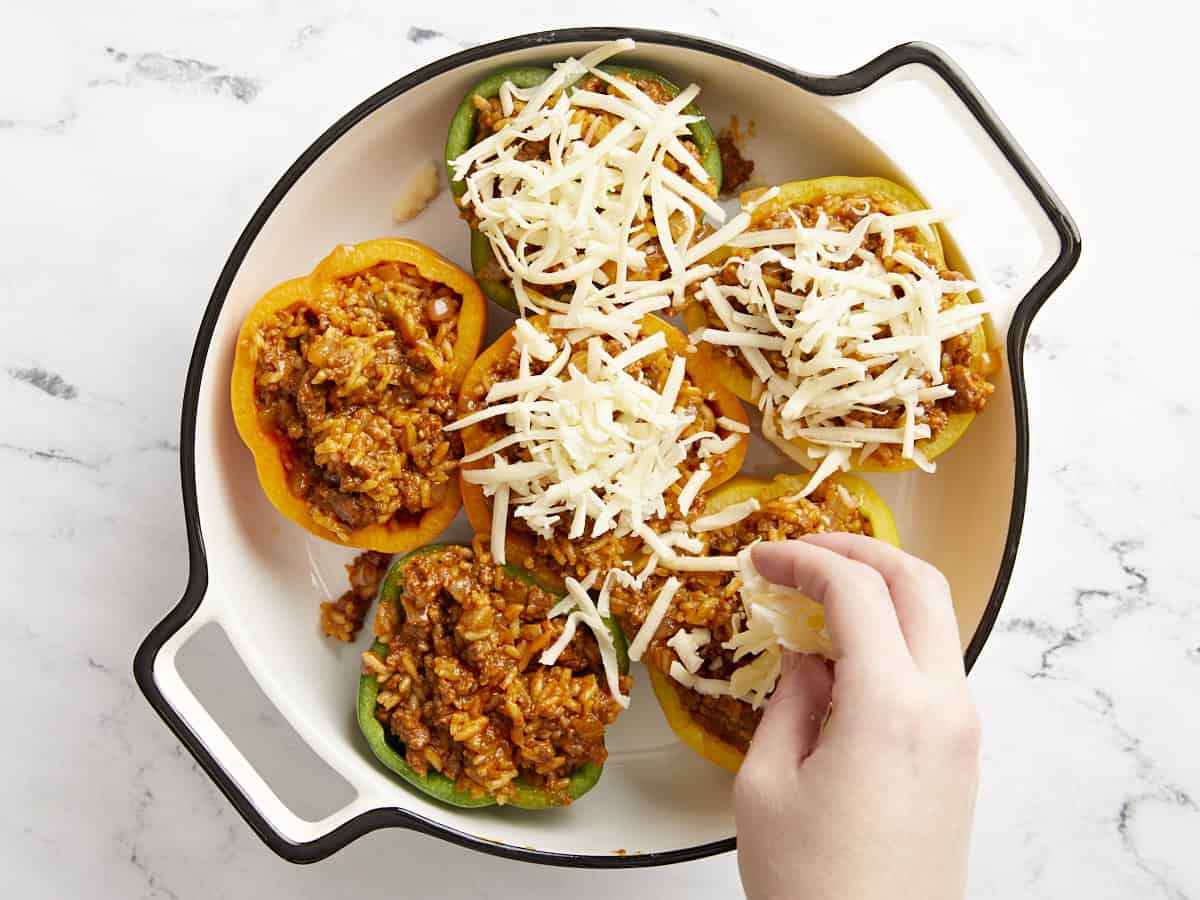
  • Divide the rice and chorizo mixture between the six bell pepper halves, then top with shredded cheese. Cover the baking dish and return it to the 350ºF oven and bake for 20 minutes more. Finally, top with sliced green onions and serve!

See how we calculate recipe costs here.

Nutrition

Serving: 1pepper | Calories: 380kcal | Carbohydrates: 24g | Protein: 18g | Fat: 24g | Sodium: 1032mg | Fiber: 3g
Overhead view of two stuffed bell peppers on a plate with a fork digging into one.

How to Make Chorizo Stuffed Bell Peppers – Step by Step Photos

Prepped bell peppers in a baking dish.

Begin by preheating the oven to 350ºF. Cut three bell peppers in half to create a top and bottom piece for each pepper. Scoop out the seeds and ribs. You can either cut out the stem from the top half of the peppers, or eat around them later. Place the halved peppers in a baking dish and par-bake them for 15 minutes in the fully preheated 350ºF oven.

Cooked chorizo and onion in a skillet.

Meanwhile, cook 1 lb. of Mexican chorizo in a large deep skillet over medium heat until browned. The chorizo has plenty of fat, so you likely won’t need to add any additional to the skillet. Dice one yellow onion and mince 2 cloves of garlic. Add the onion and garlic to the skillet with the chorizo, and continue to cook until the onions are softened.

Green chiles, tomato paste, and spices added to the skillet.

Add one 4oz. can of diced green chiles, 2 Tbsp tomato paste, 2 tsp chili powder, ½ tsp cumin, ½ tsp garlic powder, ¼ tsp cayenne pepper, and ¼ tsp salt to the meat and onions. Stir to combine.

Rice added to the skillet, broth being poured in the side.

Add ½ cup of uncooked long grain white rice and 1 cup of chicken broth to the skillet. Stir well to combine, then place a lid on top, and turn the heat up to medium-high. When the broth reaches a full boil, turn the heat down to low and allow it to continue to simmer over low (without removing the lid or stirring) for 20 minutes. After 20 minutes, turn the heat off and let it rest for 5 more minutes.

Cooked chorizo and rice in the skillet being scooped to the side with a spoon.

After simmering for 20 minutes the broth should be absorbed and the rice should be tender. Gently stir the rice and chorizo mixture with a spoon.

Filled bell peppers in a baking dish being topped with shredded cheese.

Divide the rice and chorizo mixture between the six par-baked bell pepper halves, then top with shredded mozzarella cheese (about 1 cup). Cover the dish and bake in the 350ºF oven for 20 minutes.

Finished stuffed bell peppers topped with sliced green onion.

Top the chorizo stuffed bell peppers with sliced green onions and serve!

Close up side view of a fork lifting some of the filling out of a stuffed bell pepper.

Enjoy the cheesy chorizo-y goodness!!

The post Chorizo Stuffed Bell Peppers appeared first on Budget Bytes.
Black Bean Fajitas

These flavorful black bean fajitas are a delicious, vegetarian way to enjoy one of the most popular Tex-Mex dishes! Made with black beans, freshly seasoned veggies, and a colorful medley of toppings, this easy fajita recipe will quickly become a family…

These flavorful black bean fajitas are a delicious, vegetarian way to enjoy one of the most popular Tex-Mex dishes! Made with black beans, freshly seasoned veggies, and a colorful medley of toppings, this easy fajita recipe will quickly become a family favorite. Requiring less than 30 minutes to prepare, they will be hot, fresh, and...

Read More

The post Black Bean Fajitas appeared first on My Pure Plants.

Vegan Fajitas (Oyster Mushroom)

These flavorful vegan fajitas use marinated oyster mushrooms instead of the traditional chicken to help create an irresistible Mexican-inspired dish that you can serve up in various ways! Enjoy them with your favorite fajita toppings or Mexican side di…

These flavorful vegan fajitas use marinated oyster mushrooms instead of the traditional chicken to help create an irresistible Mexican-inspired dish that you can serve up in various ways! Enjoy them with your favorite fajita toppings or Mexican side dishes for an easy dinner that the whole family will love! With a meaty texture similar to...

Read More

The post Vegan Fajitas (Oyster Mushroom) appeared first on My Pure Plants.

Fajita Bowl (Vegan Option)

This 20-minute fajita bowl is the perfect answer to your needs for a quick yet flavorful and nutritious weeknight dinner! This easy recipe combines seasoned oyster mushrooms with colorful fajita veggies, two types of Mexican rice, a delicious corn sals…

This 20-minute fajita bowl is the perfect answer to your needs for a quick yet flavorful and nutritious weeknight dinner! This easy recipe combines seasoned oyster mushrooms with colorful fajita veggies, two types of Mexican rice, a delicious corn salsa, creamy guacamole, zesty vegan Chipotle mayo, and a side of crisp lettuce to create an...

Read More

The post Fajita Bowl (Vegan Option) appeared first on My Pure Plants.

Mexican Fried Rice (Vegan)

A Mexican-style dinner isn’t Mexican-style without this fluffy and flavorful Mexican fried rice! This easy recipe comes together in just half an hour and is made with basmati rice, flavorful tomato puree, and various herbs, spices, and veggies. S…

A Mexican-style dinner isn’t Mexican-style without this fluffy and flavorful Mexican fried rice! This easy recipe comes together in just half an hour and is made with basmati rice, flavorful tomato puree, and various herbs, spices, and veggies. Serve it piping hot with lime wedges for an aromatic, flavor-packed side dish or entree that the...

Read More

The post Mexican Fried Rice (Vegan) appeared first on My Pure Plants.

Black-Eyed Peas

Black Eyed Peas are a flavorful, budget-friendly, and nutrient packed meal for New Year’s Day or any day of the year!

The post Black-Eyed Peas appeared first on Budget Bytes.
It may be tradition to eat black-eyed peas on New Year’s Day, but I’m here to say that you need to be making these delicious and budget-friendly beans year-round! This big ol’ pot of peas is hearty, delicious, freezer-friendly, and about as budget-friendly as it gets. So try them out this New Year’s Day and then add them to your regular rotation for the coming year. Your wallet and taste buds will thank you. ;)

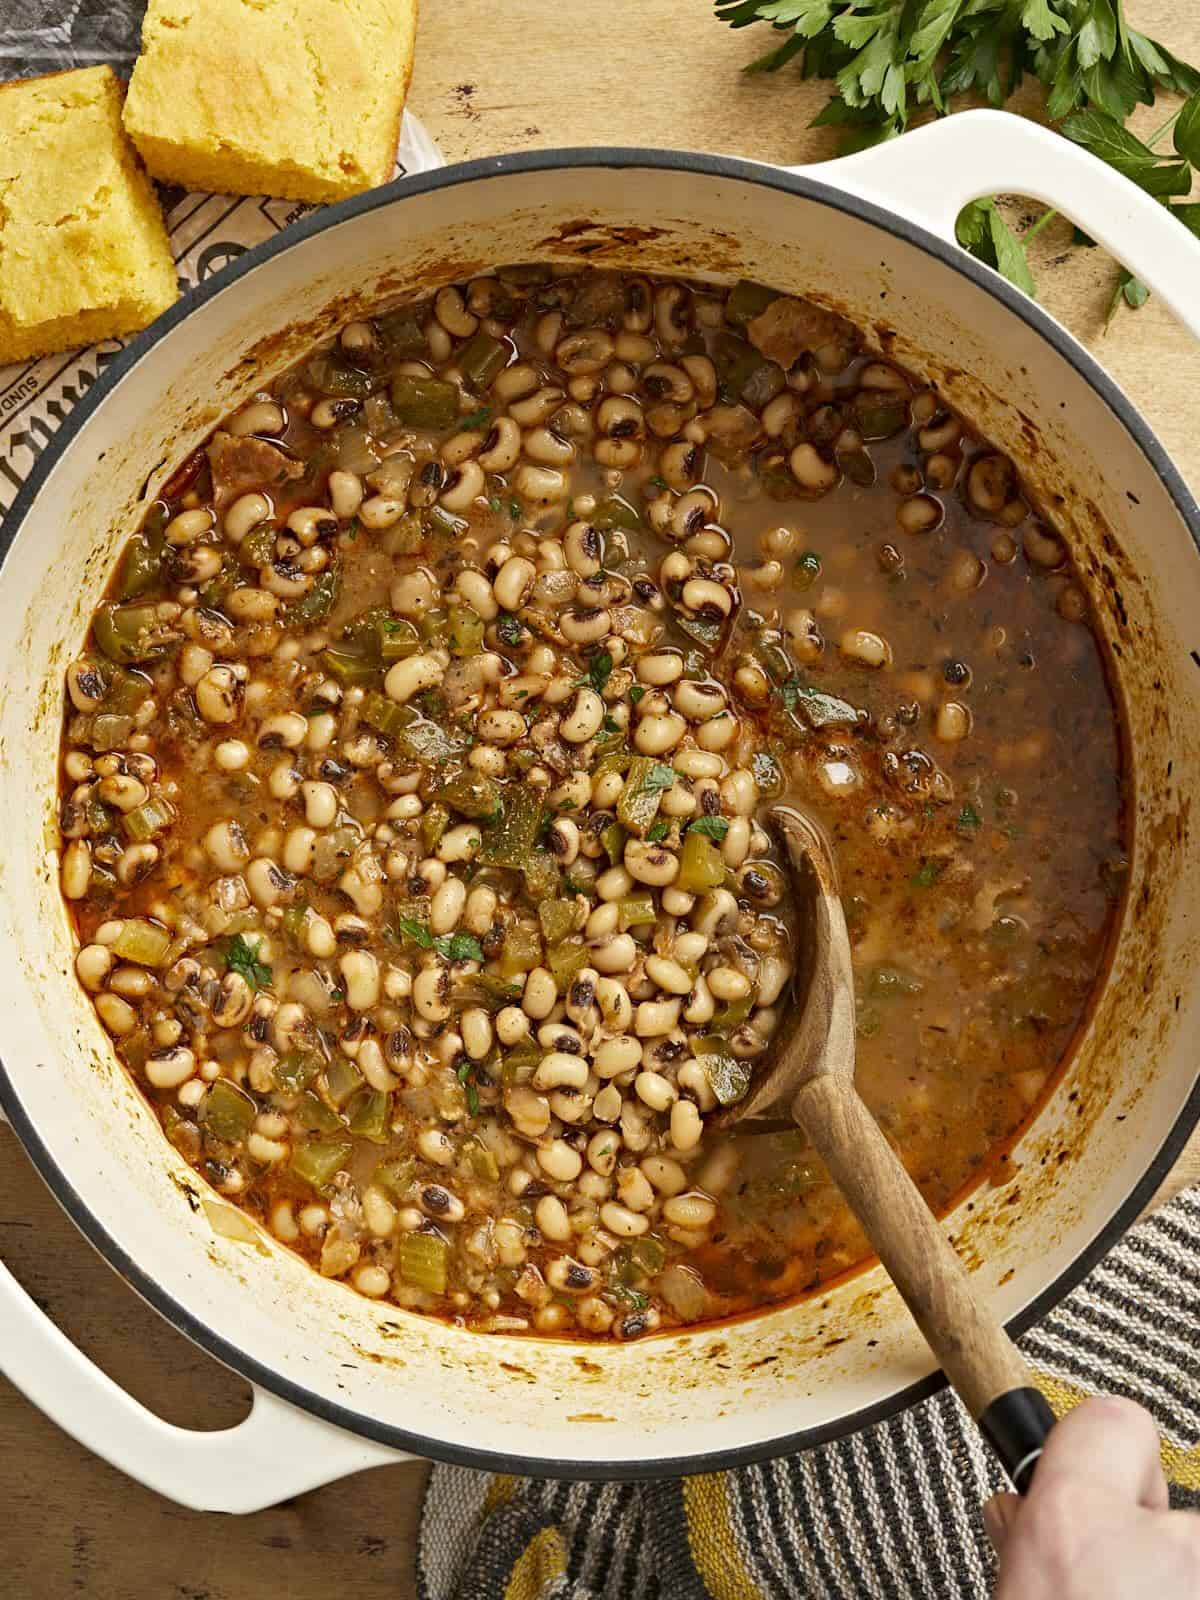
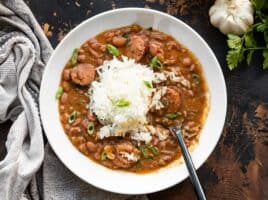
Overhead view of a pot of black-eyed peas being stirred with a wooden spoon.

What Are Black-Eyed Peas?

Black-eyed peas are a small white legume with a black dot, or “eye”, in the center. They’re traditionally served on New Year’s Day in the United States alongside collard greens (or mustard or turnip greens) to bring wealth in the new year. The black-eyed peas represent coins, while the greens signify paper dollars. Some even believe you must consume 365 black-eyed peas to bring the wealth, so make sure to dish yourself up an extra large bowl!

Ingredients for Black-Eyed Peas

Here’s what you’ll need to make this incredibly delicious pot of black-eyed peas:

  • Black-Eyed Peas: You’ll need one pound of dry black-eyed peas. You can find these near the other dry beans in the grocery store, or on a special display if you’re buying near the New Year!
  • Bacon: Bacon gives the black-eyed peas a deliciously smoky flavor and the fat gives the peas body and a wonderful mouthfeel. You can substitute by adding a ham hock or smoked turkey wing to the peas before simmering and using a bit of oil to sauté the vegetables in the beginning.
  • Vegetables: The black-eyed peas are flavored with a medley of vegetables like onion, garlic, bell pepper, and celery. The vegetables add flavor, color, and texture to the dish.
  • Spices: The pot of peas is seasoned with a savory mix of smoked paprika, oregano, thyme, cayenne pepper, and black pepper.
  • Chicken Broth: The black-eyed peas cook in chicken broth for maximum flavor. Make sure to use a good broth to ensure the peas are very flavorful. We like to use Better Than Bouillon because it’s cost-effective and has great flavor
  • Salt: As with any bean, it’s very important to add salt to taste at the end of cooking. Salt doesn’t just make food “salty” but it amplifies all of the flavors so you can taste each and every ingredient.

Recipe Variations

Vegetarian or Vegan: To make these black-eyed peas vegetarian, simply skip the bacon and use a few tablespoons of coconut oil to sauté the vegetables. The coconut oil has a similar mouthfeel to pork fat, making the peas extra hearty. You’ll also want to increase the smoked paprika slightly to make up for the smokiness of the bacon and swap vegetable broth for chicken broth.

Slow Cooker: To make black-eyed peas in the slow cooker, simply add all of the ingredients (including the pre-soaked peas) to a slow cooker and cook on high for about four hours, or until the peas are tender.

Canned Black-Eyed Peas: If you’re in a rush or forgot to soak your peas, canned black-eyed peas are a great shortcut. Simply follow our recipe for Quickie Black-Eyed Peas with Greens.

The Quick Soak Method

If you don’t have time to soak your beans overnight (or you just forgot), you can use the quick soak method to get the beans ready for cooking in about an hour. Here’s how to quick soak beans:

  1. Rinse the beans with cold water, then add them to a large pot. Add enough fresh water to cover the beans by 2-3 inches.
  2. Place a lid on the pot, turn the heat on to high, and bring the beans up to a boil. Allow the beans to boil for two minutes.
  3. Remove the beans from the heat and let them sit in the hot water, with the lid in place, for one hour.
  4. Rinse the soaked beans and continue to use them in place of the beans soaked overnight.

How to Store Leftover Black-Eyed Peas

This recipe is great for meal prep because the leftovers are amazing. Store the cooked black-eyed peas in the refrigerator for up to five days, or, once they’re chilled, transfer single portions to the freezer for longer storage. They can be kept in the freezer for about three months and easily reheated in the microwave or on the stovetop over medium-low heat, stirring often.

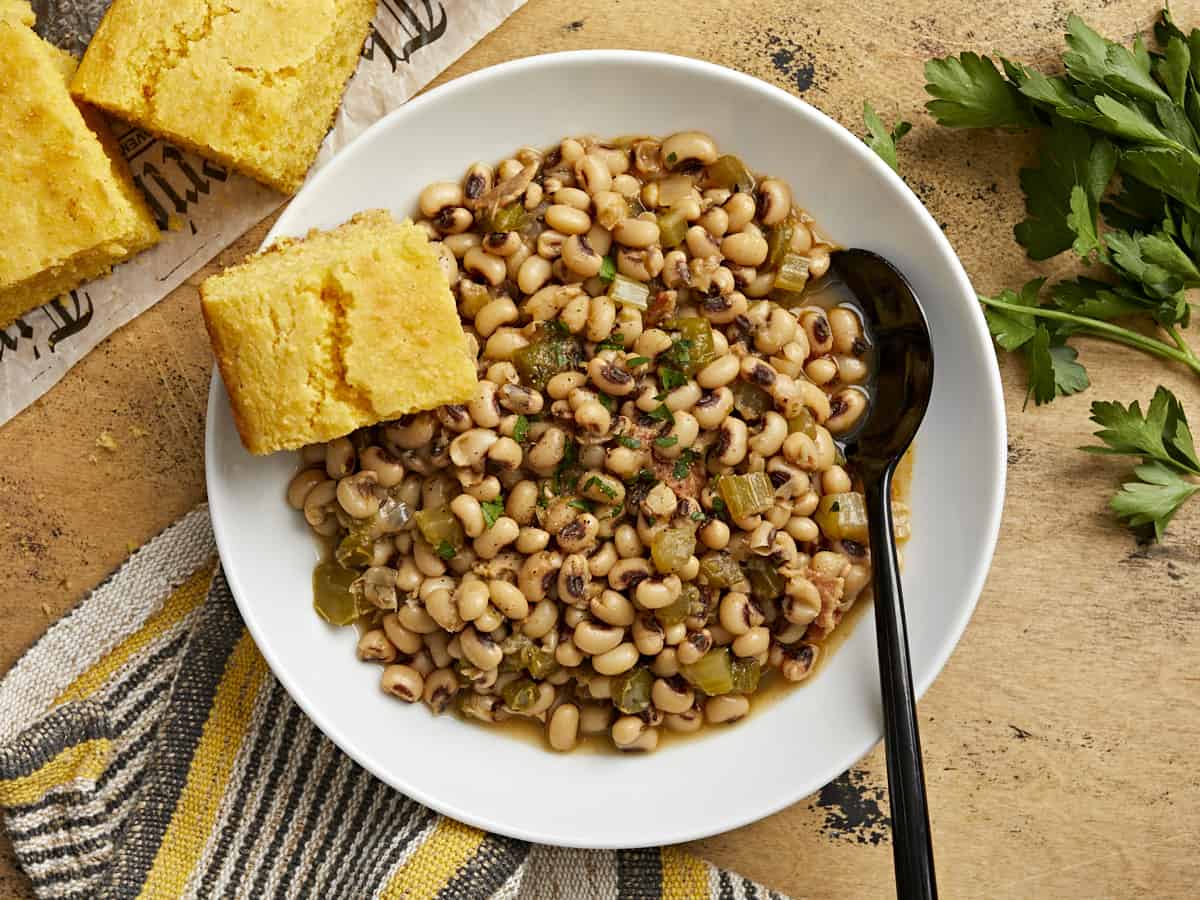
Overhead view of a bowl of black-eyed peas with a piece of cornbread on the side.
Overhead view of a pot of black-eyed peas with a wooden spoon.
Print

Black-Eyed Peas

Black Eyed Peas are a flavorful, budget-friendly, and nutrient packed meal for New Year's Day or any day of the year!
Course Dinner, Main Course
Cuisine American
Total Cost $6.36 recipe / $1.06 serving
Prep Time 15 minutes
Cook Time 1 hour 15 minutes
Soak Time 8 hours
Total Time 9 hours 30 minutes
Servings 6 (1.3 cups each)
Calories 362kcal

Equipment

Ingredients

  • 1 lb. dry black-eyed peas $1.99
  • 4 oz. bacon $1.33
  • 1 yellow onion $0.32
  • 4 cloves garlic $0.32
  • 1 bell pepper $0.99
  • 2 stalks celery $0.45
  • 1 tsp smoked paprika $0.10
  • 1 tsp dried oregano $0.10
  • 1 tsp dried thyme $0.10
  • 1/4 tsp cayenne pepper $0.02
  • 1/4 tsp black pepper $0.02
  • 1 bay leaf $0.15
  • 4 cups chicken broth $0.42
  • 1 tsp salt (or to taste) $0.05

Instructions

  • The day before, rinse the peas with cool water then place them in a large bowl and cover with 2-3 inches of cold water. Soak the peas in the refrigerator for eight hours or overnight.
  • When you're ready to cook the peas, add the bacon to a large pot and cook over medium heat until the bacon is brown and crispy. Remove the bacon, saving it for later, and leave all of the bacon grease in the pot.
  • Dice the onion, bell pepper, and celery, and mince the garlic. Add the onion to the pot with the bacon grease and cook over medium until the onion is tender.
  • Add the bell pepper, celery, and garlic to the pot and continue to cook for about five minutes more.
  • Drain the peas and give them a brief rinse. Add the peas to the pot along with the smoked paprika, oregano, thyme, cayenne pepper, black pepper, bay leaf, and chicken broth. Stir everything to combine, then place a lid on the pot.
  • Turn the heat up to medium-high and allow the pot to come to a boil. Once it reaches a full boil, turn the heat down to medium-low and let the peas simmer for one hour, stirring occasionally, or until the peas are tender.
  • Once the peas have softened, crumble the bacon and stir it back into the pot. Season the peas with salt to taste, starting with ½ tsp and adding more until the flavors of the pot pop.
  • Remove the bay leaf from the pot and serve the peas with a side of collard greens and cornbread, or over a bowl of rice.

See how we calculate recipe costs here.

Nutrition

Serving: 1.3cups | Calories: 362kcal | Carbohydrates: 51g | Protein: 22g | Fat: 9g | Sodium: 1119mg | Fiber: 9g
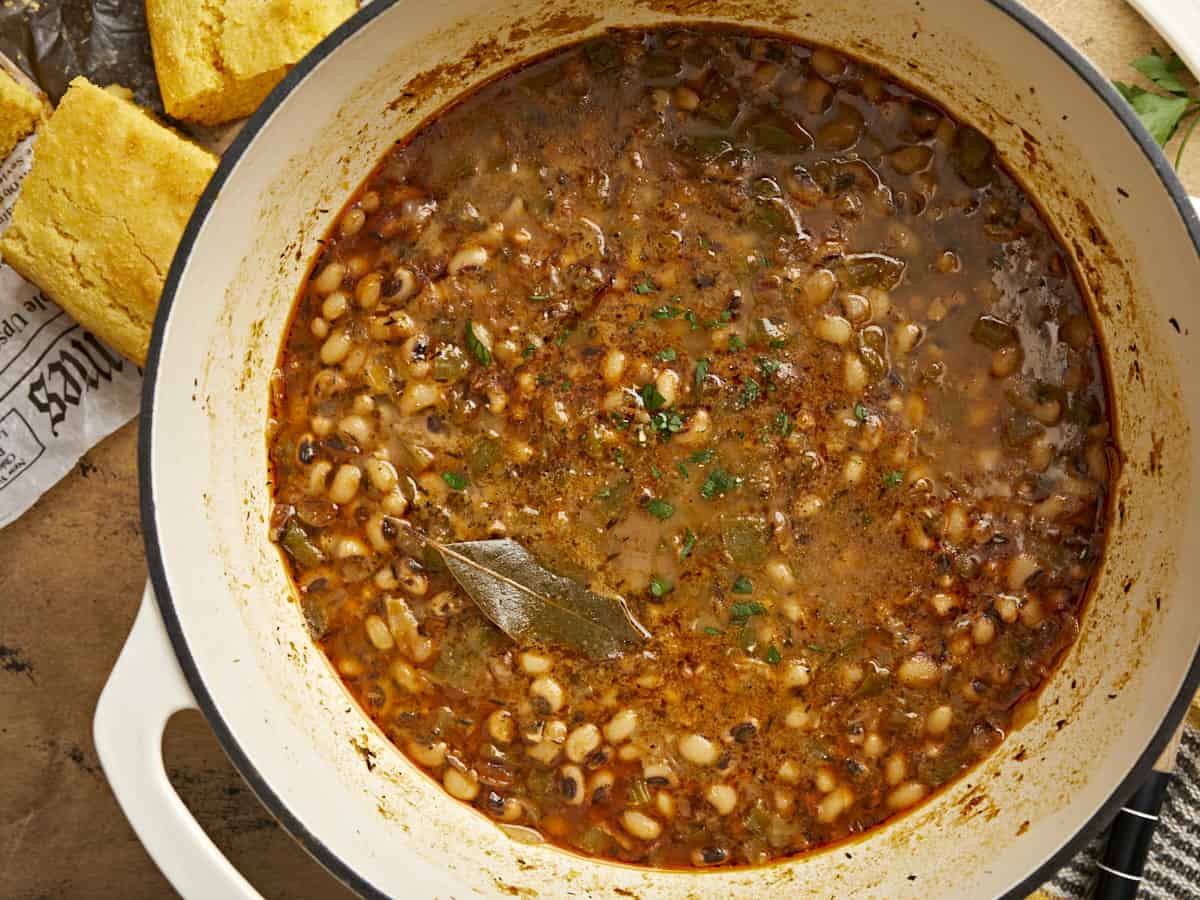
Close up overhead view of a pot of black eyed peas with a bay leaf.

How to Make Black-Eyed Peas – Step By Step Photos

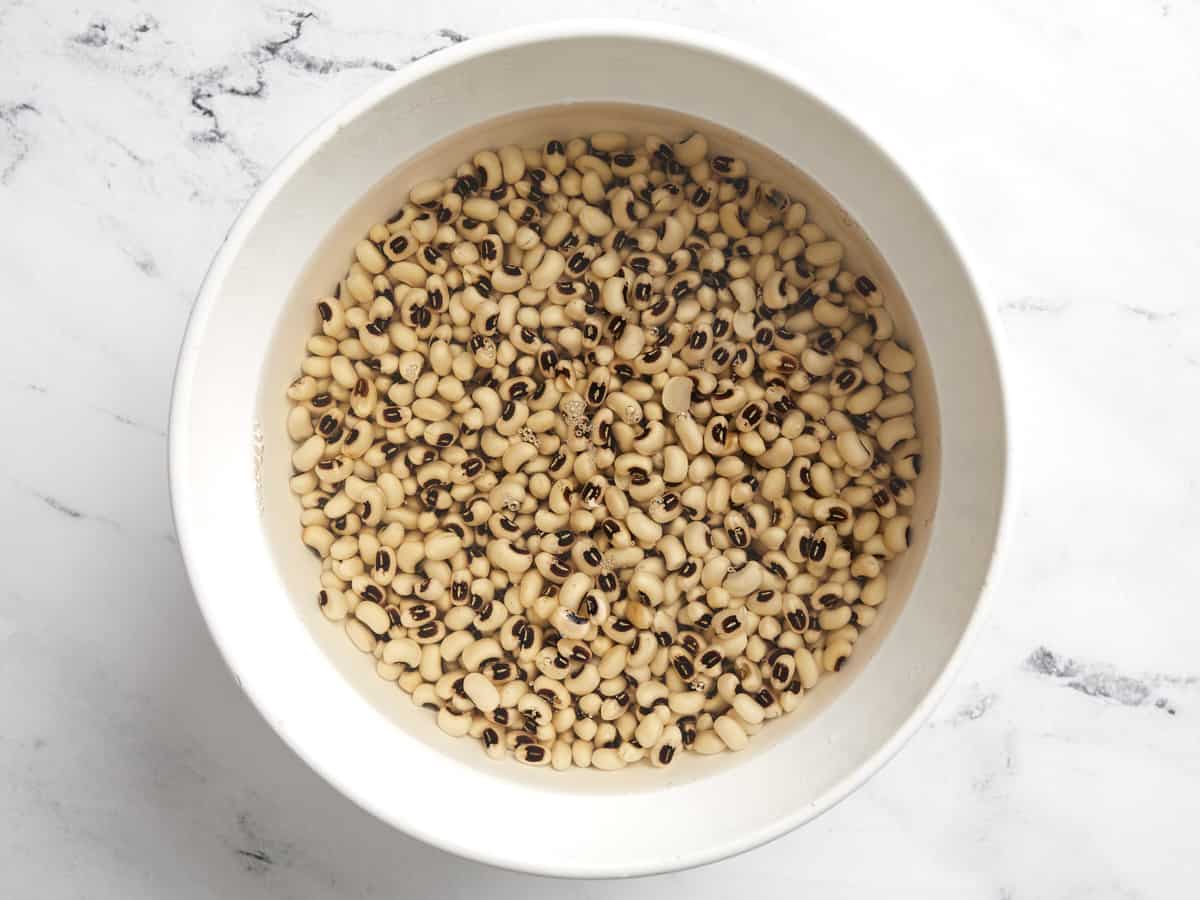
Soaked black-eyed peas in a bowl.

The night before, begin soaking the black-eyed peas. Rinse the peas well with cool water, then place them in a large bowl and cover with at least three inches of water. Soak the peas for at least eight hours in the refrigerator.

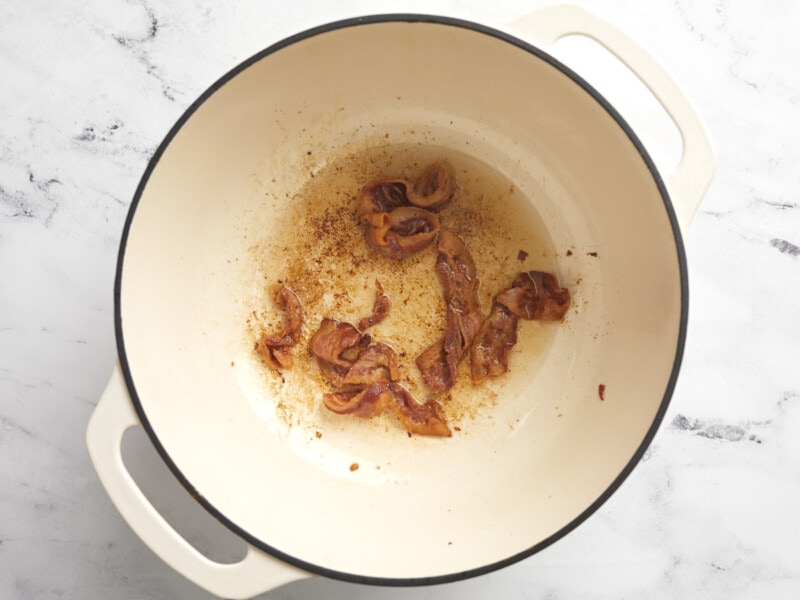
Browned bacon in a Dutch oven.

When you’re ready to cook the peas, add 4oz. bacon to a large pot and cook over medium heat until the bacon is brown and crispy. Remove the bacon and set it aside for later, leaving all of the bacon grease in the pot.

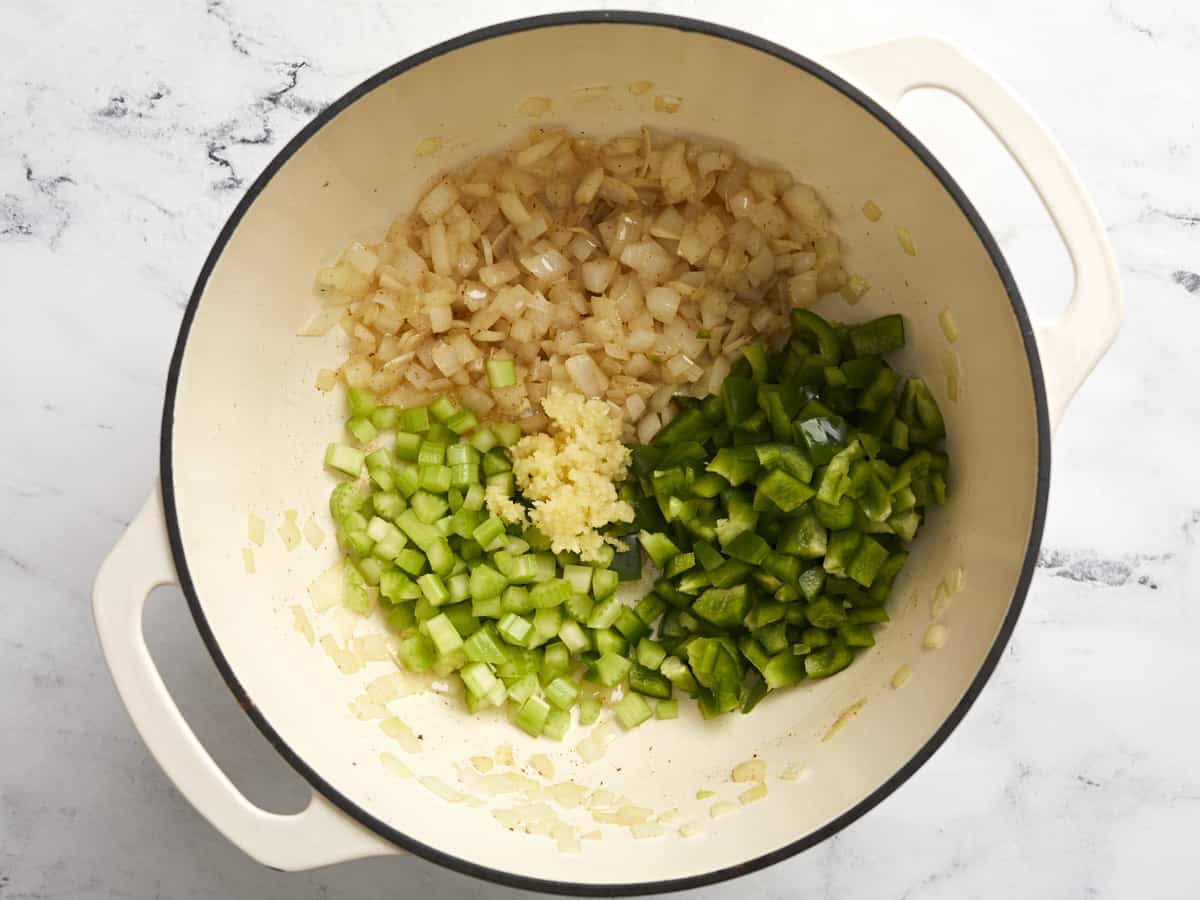
Diced bell pepper and celery added to the pot with sautéed onion and garlic.

Dice one yellow onion, one green bell pepper, and two stalks of celery. Mince four cloves of garlic. Add the diced onion to the pot with the bacon grease and sauté over medium heat until the onions are soft, then add the bell pepper, celery, and garlic. Continue to sauté for about five minutes more.

Beans, spices, and chicken broth added to the pot.

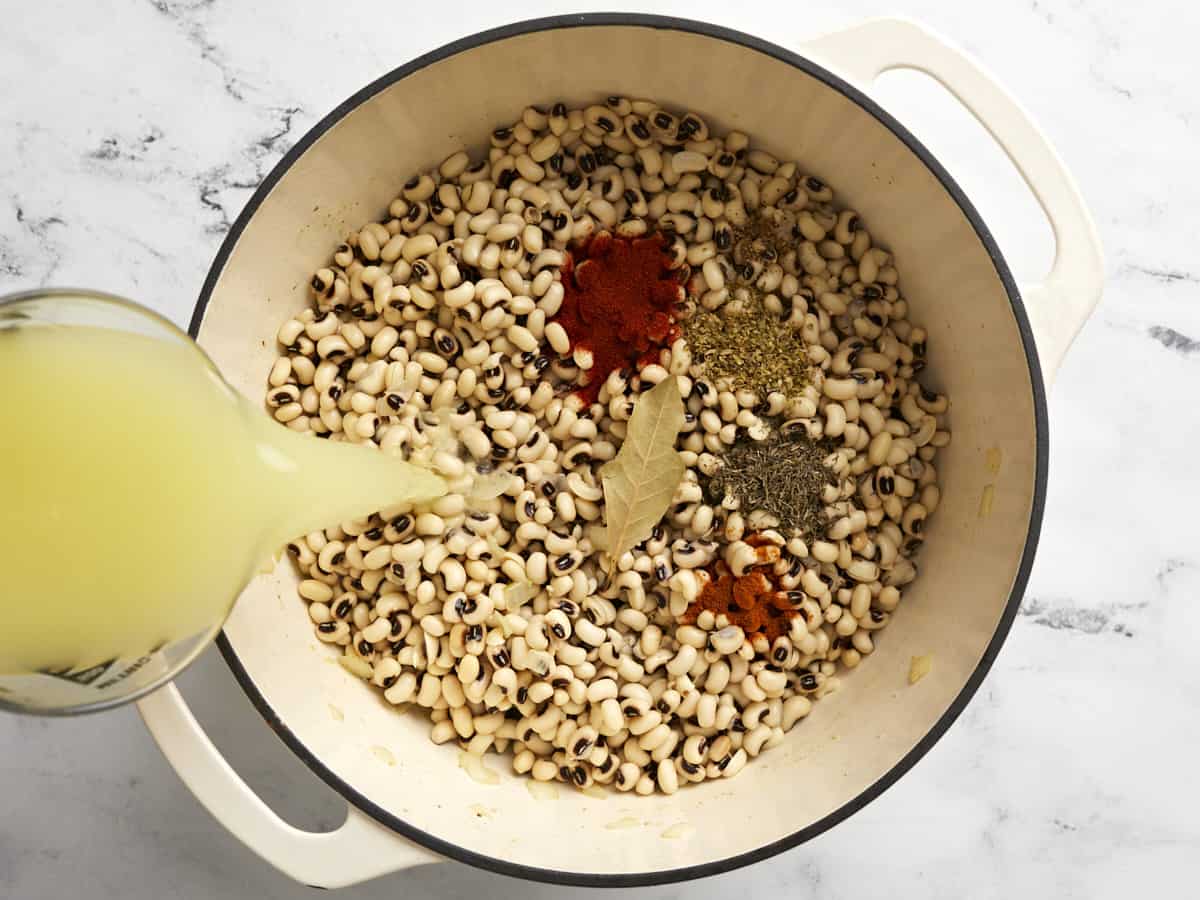
Add the drained black-eyed peas to the pot along with 1 teaspoon smoked paprika, 1 teaspoon dried oregano, 1 teaspoon dried thyme, ¼ teaspoon cayenne pepper, ¼ tsp black pepper, one bay leaf, and four cups of chicken broth.

Ingredients being stirred in the pot before cooking.

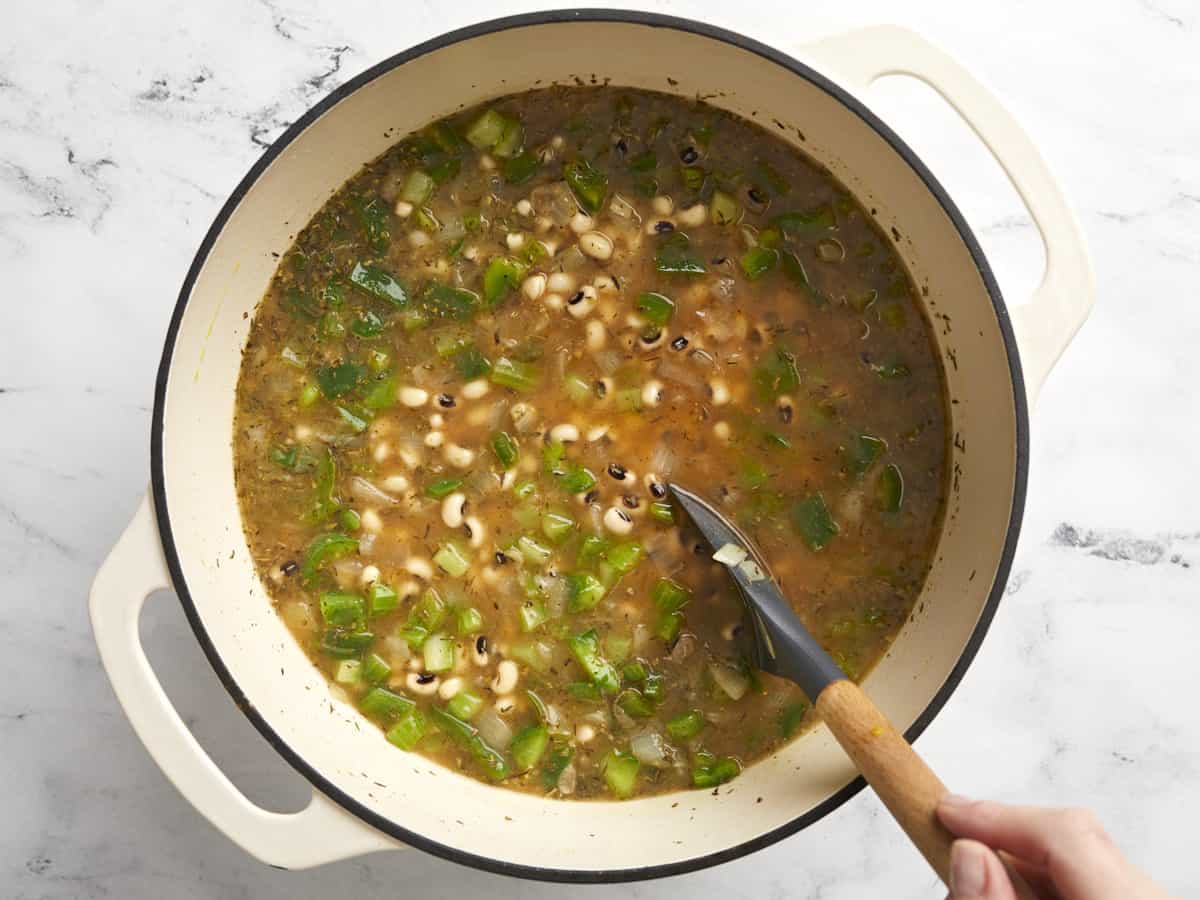
Stir all of the ingredients together, place a lid on the pot, and turn the heat up to medium-high. Allow the pot to come to a boil. Once it reaches a full boil, turn the heat down to medium-low and let the peas simmer, stirring occasionally, for one hour or until the peas are tender.

Salt being added to the pot of beans.

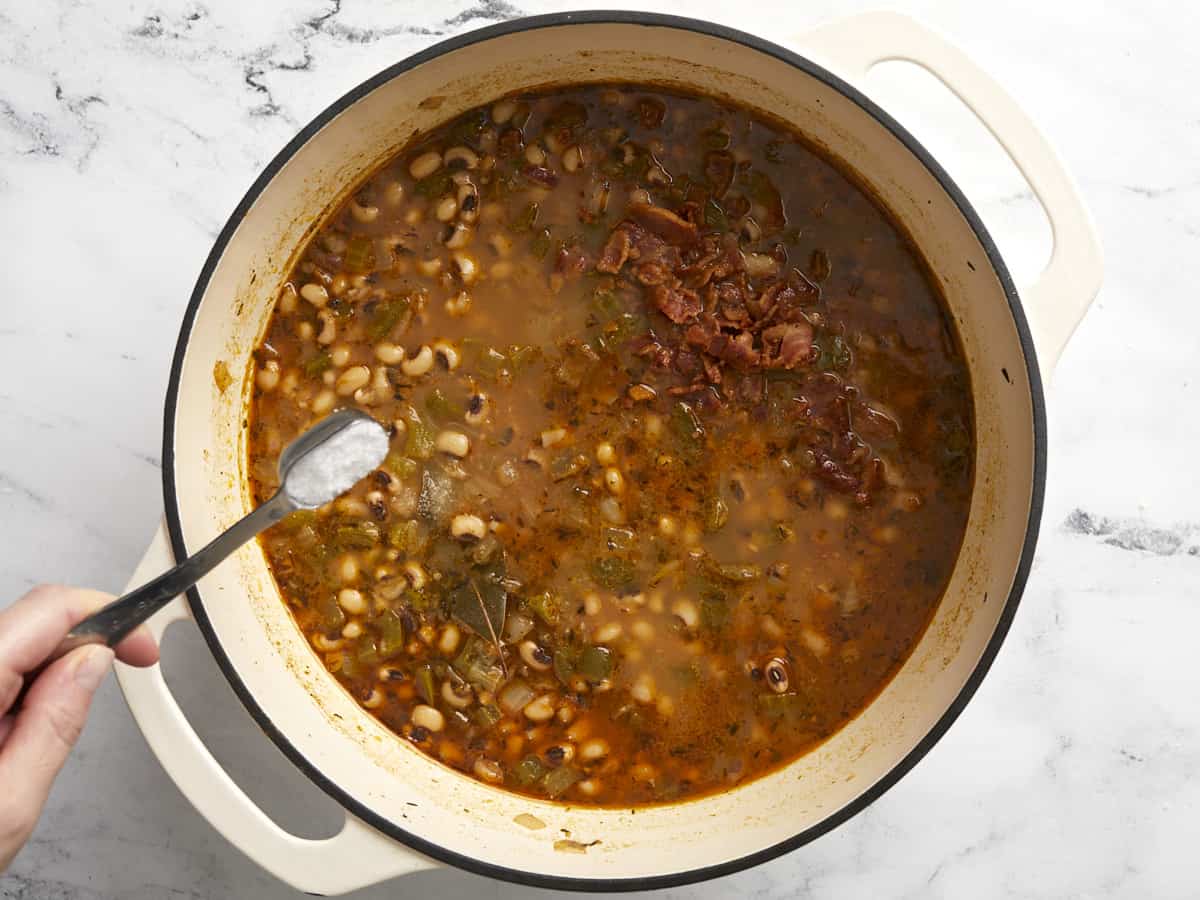
Once the peas are soft, crumble the bacon and stir it into the pot. Season the pot of peas with salt, starting with ½ teaspoon, and then add more to taste. The total amount needed will vary depending on how much salt is in the chicken broth used, but we used one teaspoon total.

Overhead view of a pot of black-eyed peas with a wooden spoon.

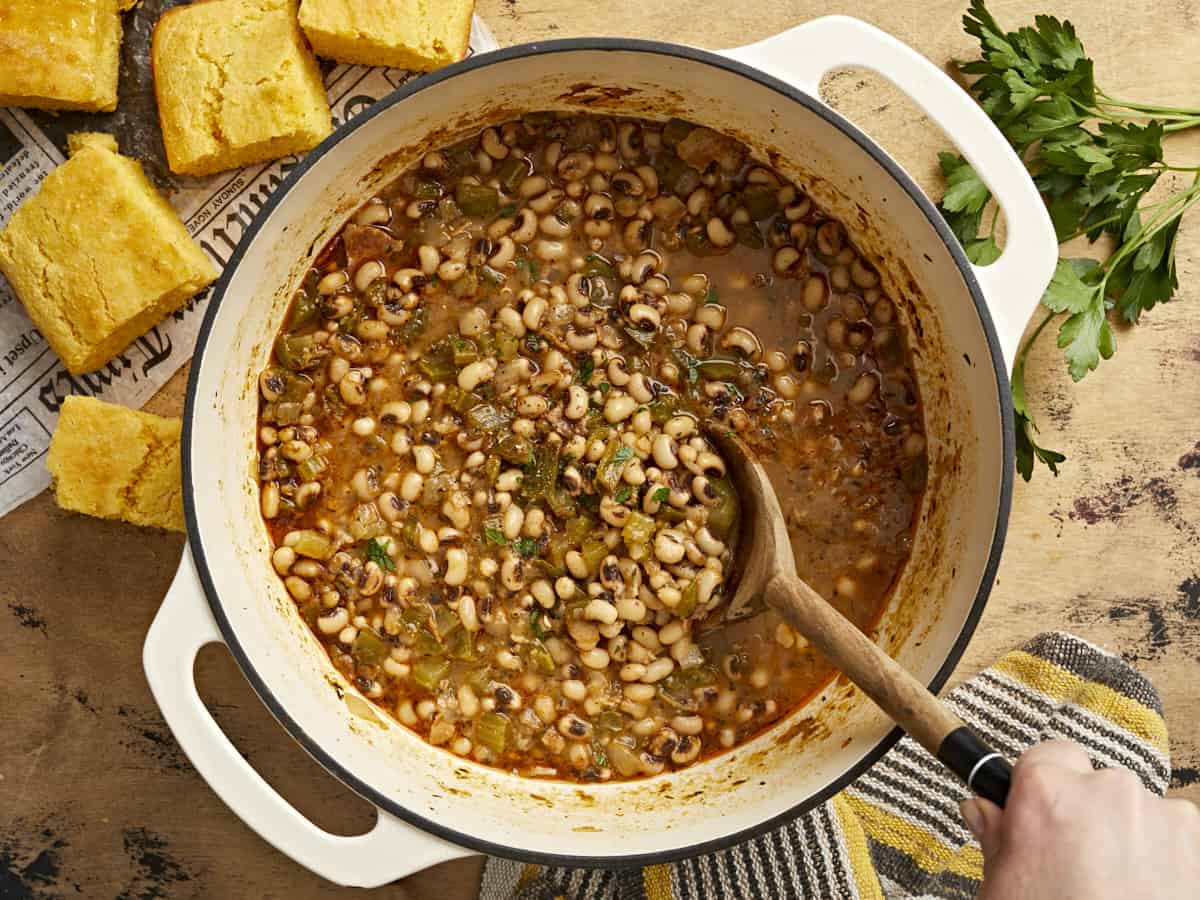
Remove the bay leaf then serve with a side of collard greens and cornbread, or over a bed of rice. Enjoy!

The post Black-Eyed Peas appeared first on Budget Bytes.
Bell Pepper Salad

This bell pepper salad is simple and refreshing! It combines colorful peppers and onion with a tangy vinaigrette and fresh…

A Couple Cooks – Recipes worth repeating.

This bell pepper salad is simple and refreshing! It combines colorful peppers and onion with a tangy vinaigrette and fresh herbs.

Bell Pepper Salad

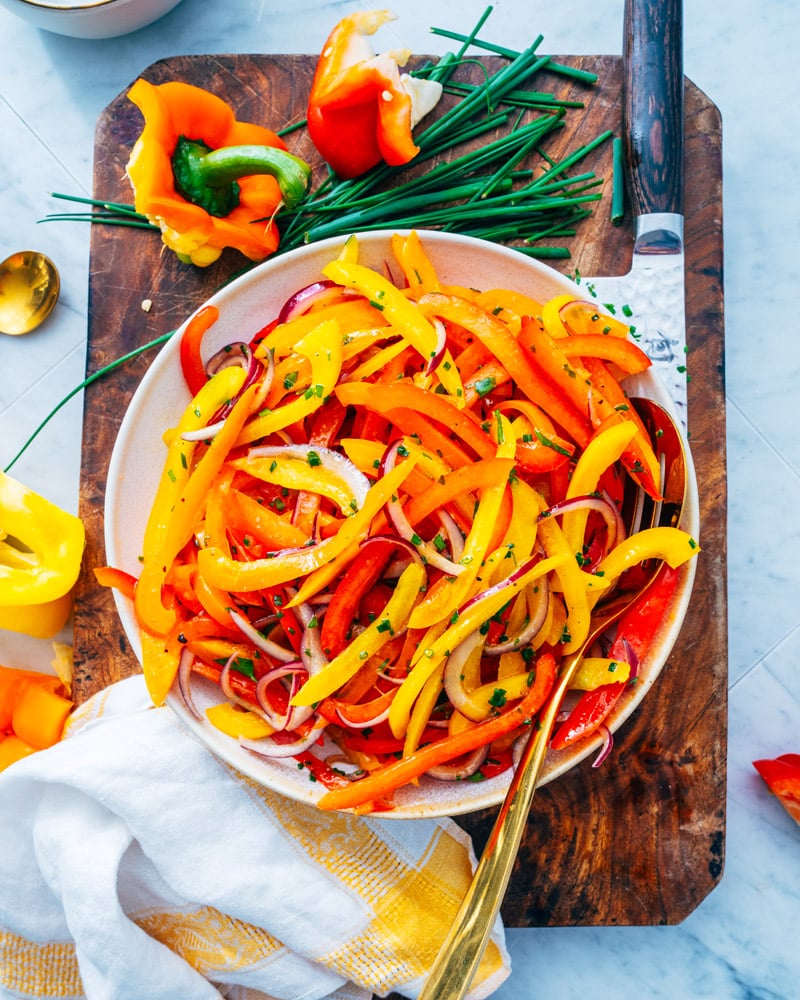
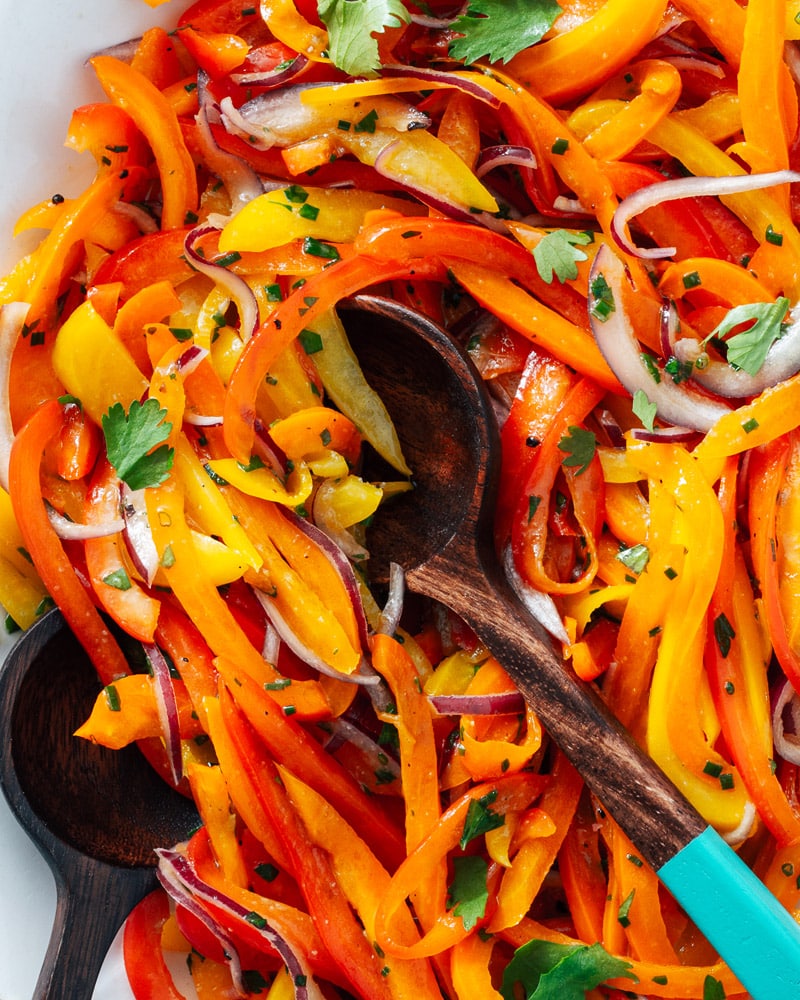
Here’s a colorful, tasty and healthy side dish that pairs with just about any main: bell pepper salad! Sweet bell peppers need only a few ingredients to make them shine. Combine them with a tangy vinaigrette of white wine vinegar, Dijon mustard, and olive oil, then throw in a few handfuls of chopped herbs like parsley and chives. It’s a true rainbow of flavors and it’s quick and simple to whip up! This is a fun idea for using up bell peppers or whenever you need an easy side dish idea.

Ingredients in bell pepper salad

This pepper salad is a celebration of one ingredient: bell peppers! You’ll need just one other vegetable and a handful of herbs to play a supporting role here. It’s straightforward to throw together: you’ll simply chop the vegetables and pour over a quick dressing. Here are the ingredients you’ll need for this recipe:

  • Multi-colored bell peppers (you’ll need 3!)
  • Red onion
  • Fresh chives
  • Fresh parsley
  • White wine vinegar
  • Dijon mustard
  • Sugar or maple syrup
  • Garlic powder
  • Olive oil
  • Salt and pepper
Bell pepper salad

Best way to slice peppers

Bell peppers are notoriously tricky to try to slice: often the seeds spill out get all over the cutting board! We’ve got a quick and easy trick for how to cut a bell pepper:

  • Using a large chef’s knife, slice straight down on each side to form 4 straight pieces of the pepper (see this video!). This keeps the seeds and ribs intact in the center.
  • Slice off the bottom and top of the pepper, and pull out the stem.
  • Place the skin side of the pepper down, and cut it into thin slices.

Ingredient variations

There are so many different ways to mix up this bell pepper salad! It’s a great summer salad idea you can use for other fresh ingredients you have on hand, but it works any time of the year. You can add or swap out ingredients depending on your tastes. Here are a few ideas:

  • Use different fresh herbs! Basil tastes great here, though keep in mind it turns dark during storage (parsley stays bright green). Cilantro or dill would taste great as well.
  • Use shallot or white onion. Swap out the red onion for milder shallot, or use a white onion instead!
  • Add cucumber. Cucumber works well here too! Swap out 1 bell pepper for 1 to 2 cups sliced English cucumber. (This variety tastes better and has a brighter green color than a standard cucumber; if using a standard cucumber, peel it and thinly slice it.)
  • Add feta cheese. If you love cheese, everything tastes better with a sprinkle of feta!
Pepper salad

Bell pepper salad storage

This bell pepper salad tastes best the day it’s made. But leftovers taste great too! Store the salad refrigerated for up to 3 days. You’ll notice that the peppers become softer over time and their color dulls slightly, but it tastes just as good. You may find you need to add a few pinches salt to revive the flavors.

Again, using fresh parsley is nice if you’re looking to keep the colors vibrant, since it stays green over time. (Fresh basil tends to dull in flavor as well.)

Bell peppers nutrition

Another reason to eat this pepper salad? Bell peppers are loaded with vitamins, especially Vitamin C. In fact, one serving provides 169% of daily Vitamin C. Bell peppers are:

  • A low calorie food. One medium bell pepper has only 40 calories!
  • Loaded with Vitamin C. A medium red bell pepper provides a whopping 169% of your daily vitamin C! (Source)
  • A potential preventer of anemia. Some studies indicate peppers could prevent low iron (Source).

More pepper recipes

Love cooking with bell peppers? Here are a few more bell pepper recipes to try:

This pepper salad recipe is…

Vegetarian, vegan, plant-based, dairy-free and gluten-free.

Print
Bell Pepper Salad

Bell Pepper Salad


  • Author: Sonja Overhiser
  • Prep Time: 15 minutes
  • Cook Time: 0 minutes
  • Total Time: 15 minutes
  • Yield: 4 to 6

Description

This bell pepper salad is simple and refreshing! It combines colorful peppers and onion with a tangy vinaigrette and fresh herbs.


Ingredients

  • 1 red bell pepper, thinly sliced
  • 1 yellow bell pepper, thinly sliced
  • 1 orange bell pepper, thinly sliced
  • 1/4 red onion, thinly sliced
  • 1 tablespoon thinly sliced chives
  • 2 tablespoons finely chopped parsley (or other fresh herbs*)
  • 1 ½ tablespoons white wine vinegar
  • 1 tablespoon Dijon mustard
  • 2 teaspoons sugar or maple syrup
  • ½ teaspoon garlic powder
  • 3 tablespoons olive oil
  • ¾ teaspoon kosher salt
  • Fresh ground black pepper

Instructions

  1. Slice the peppers, sliced the onion, and chop the herbs. Place them in a medium bowl.
  2. In a small bowl, whisk together the white wine vinegar, Dijon mustard, sugar, garlic powder, olive oil, kosher salt, and a few grinds of black pepper. Taste and adjust seasonings as desired. Stores up to 3 days refrigerated. The peppers become softer and their color fades slightly over time, but it’s just as tasty (bring to room temperature; you may need to add a few pinches salt to revive the flavors).

Notes

*Basil works well for flavor here; keep in mind the color becomes darker during storage (parsley stays bright green).

  • Category: Side dish
  • Method: No Cook
  • Cuisine: Vegetables
  • Diet: Vegan

Keywords: Bell pepper salad, pepper salad

A Couple Cooks - Recipes worth repeating.

Cheeseless Pizza

This easy cheeseless pizza recipe puts a fun and nutritious twist on traditional pizza and is a meal the whole family will love! In just 30 minutes or less, you will have a delicious veggie- and flavor-packed pizza without the dairy. It is the perfect …

This easy cheeseless pizza recipe puts a fun and nutritious twist on traditional pizza and is a meal the whole family will love! In just 30 minutes or less, you will have a delicious veggie- and flavor-packed pizza without the dairy. It is the perfect answer to a quick, family-friendly meal! For more fun, easy,...

Read More

The post Cheeseless Pizza appeared first on My Pure Plants.

Stuffed Bell Peppers

These Stuffed Bell Peppers are a classic comfort food that’s hearty, filling, has incredible flavors, and can easily feed a large family.

The post Stuffed Bell Peppers appeared first on Budget Bytes.
Stuffed Bell Peppers have been a huge favorite of mine since my aunt first made them for me many many years ago. At the time it seemed like such an elaborate, fancy recipe, but who knew they were really this simple to make! It’s a classic comfort food recipe that’s hearty, filling, easy to customize, and can feed a large family. Plus the flavors in this version are incredibly delicious! So much so that we’re still talking about it over a month later! ;)

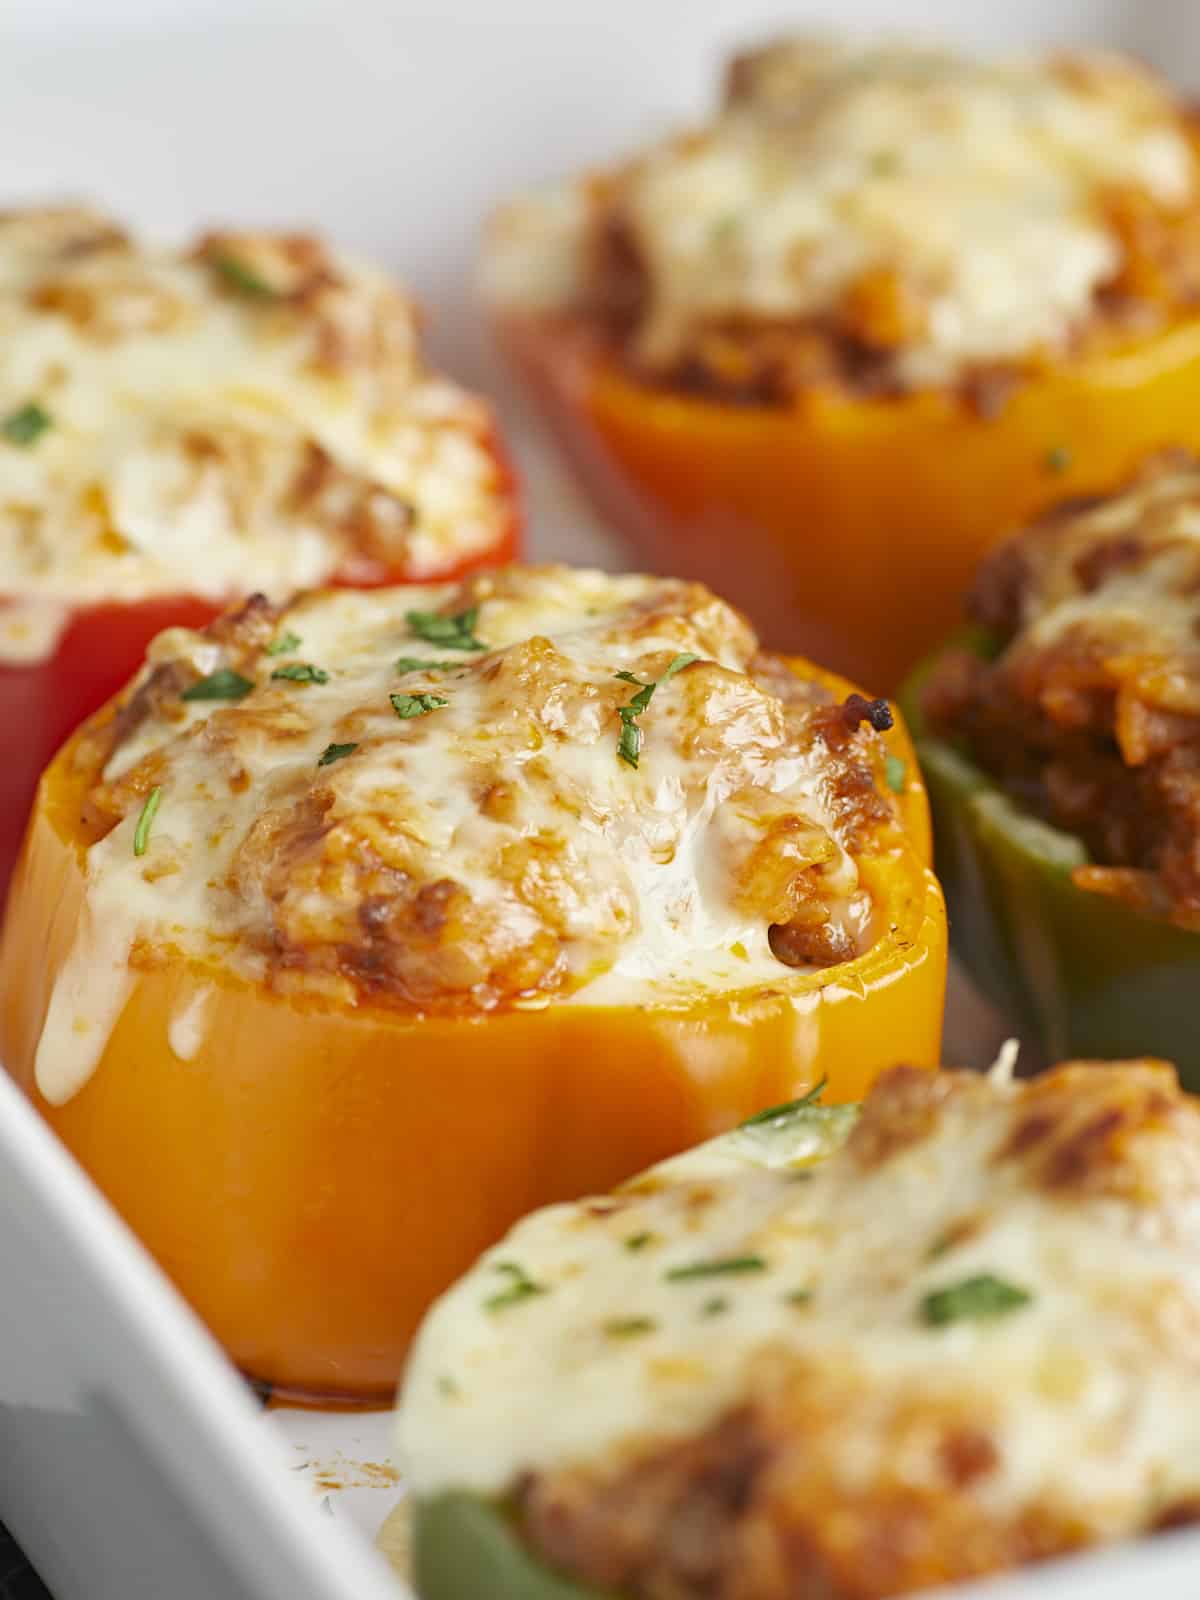
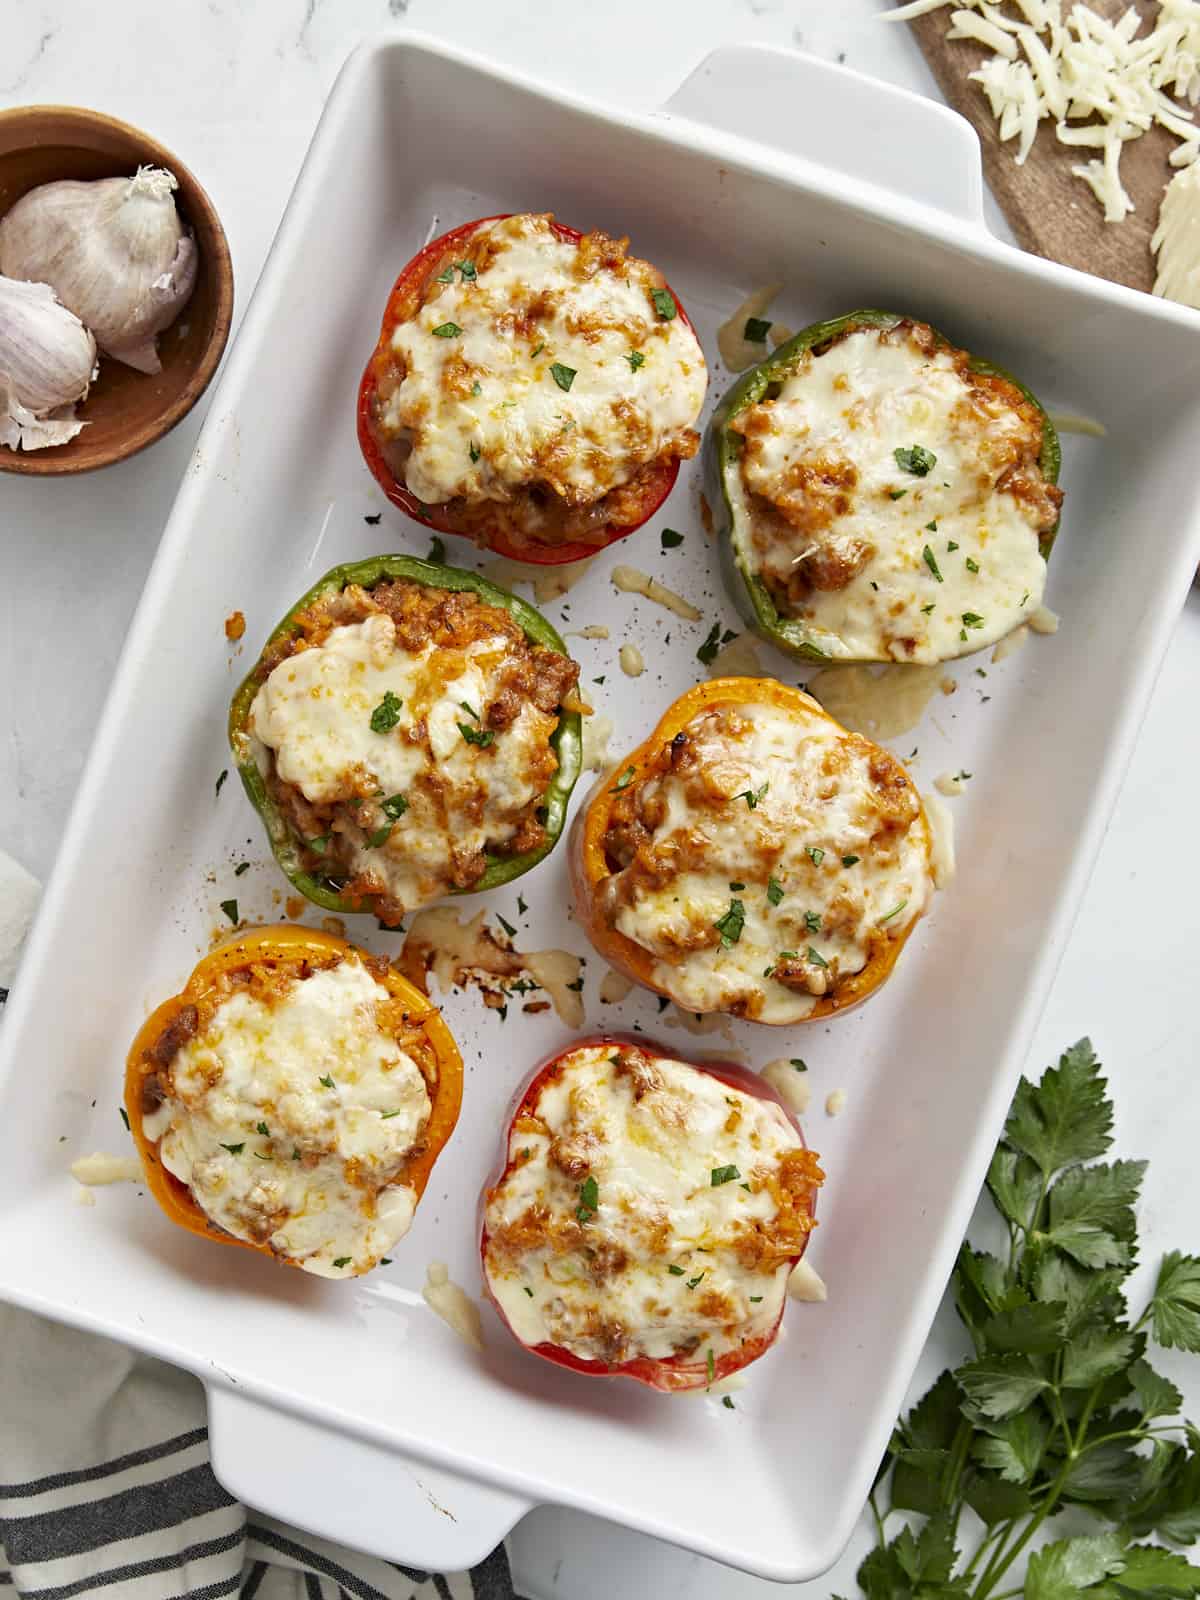
Close up side view of stuffed bell peppers in a casserole dish garnished with parsley.

What’s in Stuffed Bell Peppers?

There are several versions of stuffed bell peppers out there and most usually include ground beef, rice, tomatoes, and cheese. I got a little creative with this recipe as I wanted it to be simple to make, but still have tons of flavor! Here’s what you’ll need:

  • Bell Peppers: I used different colors of bell peppers because I love how colorful and vibrant they look, but if you’re working with a tight budget you can certainly just use all green bell peppers instead.
  • Italian Sausage: Italian sausage instead of ground beef for an extra boost of flavor. But you can use ground beef, ground turkey or even Italian turkey sausage if you like.
  • Onion and garlic: These two ingredients produce a great combination of aromatics to help flavor the sausage and rice.
  • Seasoning: A simple mix of Italian seasoning, salt, pepper, and garlic powder is all you’ll need. If you want an extra kick, you can also add a pinch of red pepper flakes too!
  • Marinara sauce: Instead of adding a can of tomatoes or tomato sauce, I used marinara sauce. It’s tomatoes with extra herbs & spices all in one…aka more flavor!
  • Long grain white rice: The rice helps bulk up the filling for the bell peppers. In this recipe the rice is cooked in the same skillet as the meat filling. It gives the rice a ton of flavor and let’s be honest…who wants to clean more dishes by cooking a separate pot of rice? Not me!
  • Chicken broth: Broth is used to help cook the rice and it provides even more flavor of course!
  • Shredded Mozzarella: And mozzarella cheese sprinkled on top for a gooey, tasty finish!

Should I cook the bell peppers first?

I definitely suggest par-cooking the bell peppers first, just a little bit before stuffing them. Not only does this help to soften the bell peppers, but it also cuts down on your cook time. As the bell peppers are cooking you can make the filling, shaving off about 20 minutes from your total cook time.

Budget Saving Tips!

Here are a few tips to help you stretch your money when making Stuffed Bell Peppers:

  1. Use the green bell peppers! Although it makes for a colorful final dish when you use red, yellow or orange bell peppers, these colors often cost a little bit more. You can just buy all green bell peppers instead and save some coins.
  2. Cut a 4th bell pepper in half and stretch the filling out to make 8 servings instead of 6. Trust me..we stuffed these bell peppers quite a bit, but you could totally stretch the filling if you wanted to.
  3. If you want to just use 1/2 a pound of sausage, that works too! Just add an additional 1/2 cup of rice and 3/4 cup of broth to what is listed in the recipe below, to increase the filling and make up the difference.
  4. Feel free to use ground beef instead if it’s cheaper than the Italian sausage at your local store. You may need to add a bit more seasoning to make up for the flavor you would get in the sausage though.
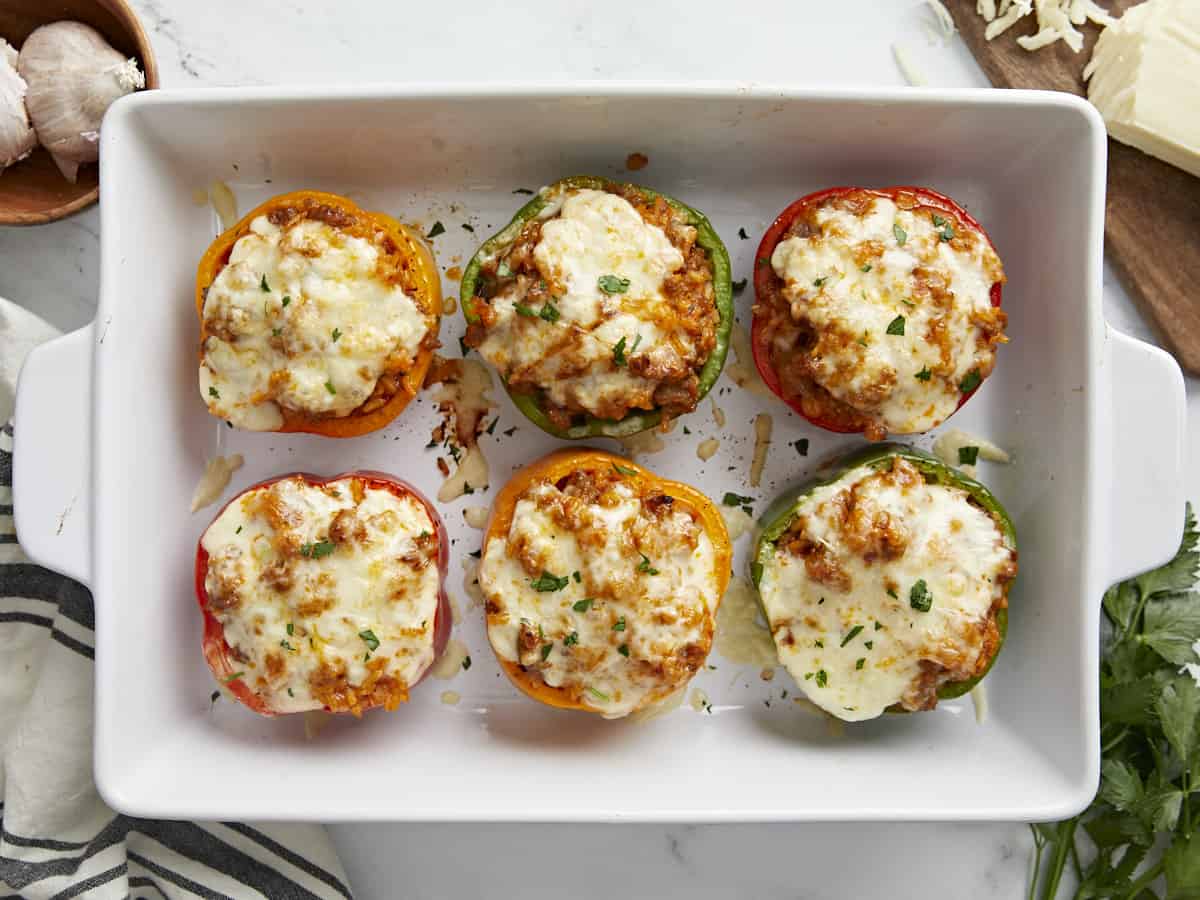
Overhead view of 6 stuffed bell peppers in a white casserole dish.

What to serve with Stuffed Bell Peppers

The filling inside each of these stuffed bell peppers are pretty hearty by themselves, but if you want to serve something with it on the side, they would also be great with a simple salad or some crusty garlic bread. If you want to double down on the veggies, you can also serve these with some roasted broccoli, roasted Brussels sprouts, or a side of simple sautéed vegetables.

Storing & Reheating

Got leftovers? No problem! These stuffed bell peppers hold up very well in the refrigerator stored in an airtight container for up to 4 days. They can be reheated in the microwave or the oven and the leftovers taste just as good the next day, making them perfect for meal prep!

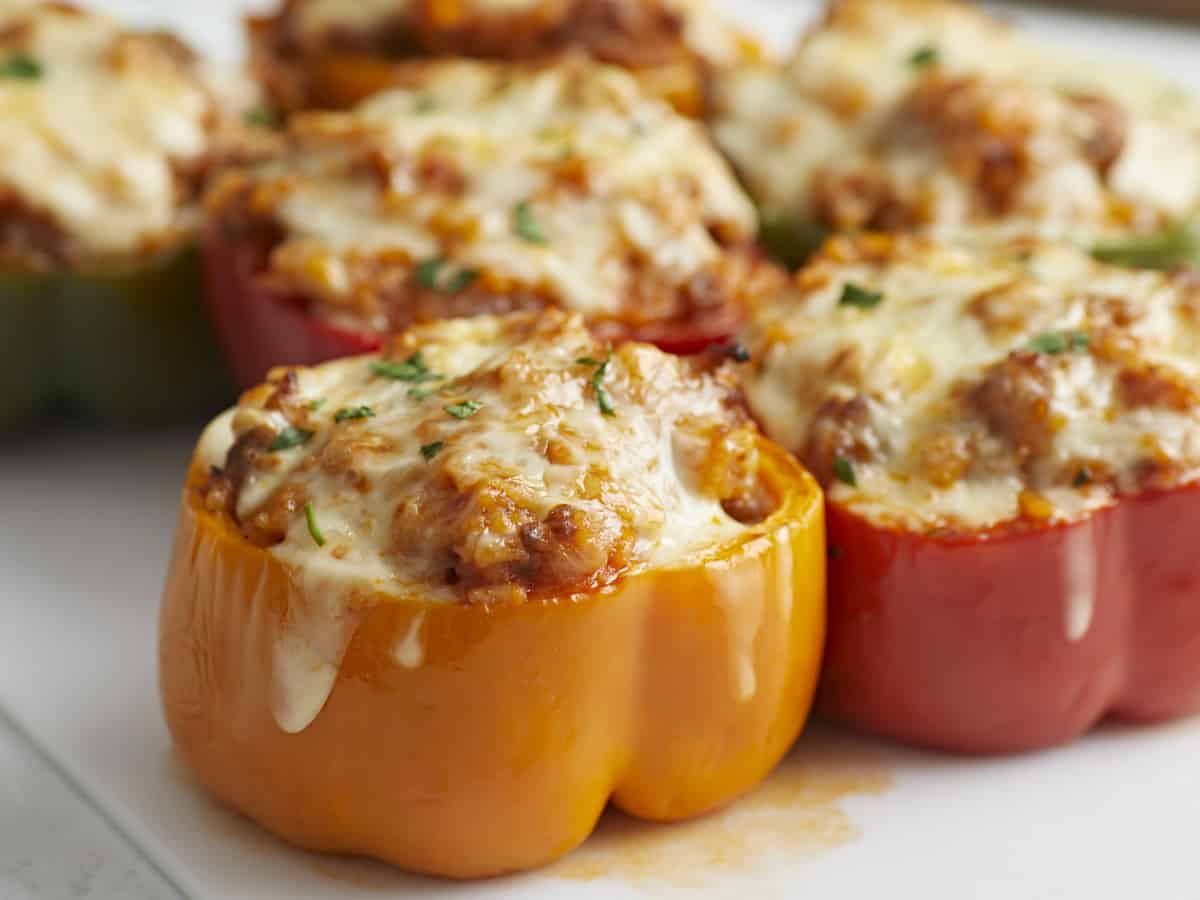
Close up side view of stuffed bell peppers on a serving plate.
Overhead close up view of stuffed bell peppers on a serving plate.
Print

Stuffed Bell Peppers

These Stuffed Bell Peppers are a classic comfort food that’s hearty, filling, has incredible flavors, and can easily feed a large family.
Course Dinner
Total Cost $12.21 recipe / $2.03 serving
Prep Time 15 minutes
Cook Time 50 minutes
Total Time 1 hour 5 minutes
Servings 6 servings
Calories 454kcal

Ingredients

  • 3 bell peppers $3.97
  • 2 Tbsp cooking oil, divided $0.08
  • 1 lb Italian sausage $4.99
  • 1 yellow onion, diced $0.38
  • 3 garlic cloves, minced $0.24
  • 1 tsp Italian seasoning $0.10
  • 1/2 tsp garlic powder $0.05
  • 1 1/4 tsp salt, divided $0.06
  • 1/4 tsp freshly cracked black pepper $0.02
  • 1 cup marinara sauce $0.71
  • 1/2 cup uncooked long grain white rice $0.21
  • 3/4 cup chicken broth $0.15
  • 1 cup shredded mozzarella $1.25

Instructions

  • Preheat the oven to 350°F. Wash and dry each bell pepper, then cut the bell peppers in half horizontally. Make sure to cut them as evenly as possible. Using a sharp paring knife carefully cut and remove the stem from the top half of each bell pepper (see picture below). It's okay if there is a small hole left where the stem was removed.
  • Place each bell pepper half in a 9×13-inch casserole dish. Brush the bell peppers with 1 Tbsp oil and season with ¼ tsp of salt and ¼ tsp cracked black pepper. Bake the bell peppers in a preheated oven for 20 minutes to soften. After 20 minutes remove the bell peppers from the oven and set aside.
  • While the bell peppers are baking, make the filling. Heat a large skillet over medium heat and add 1 Tbsp of oil. Brown the Italian sausage.
  • Once the sausage has browned, add the diced onion and minced garlic to the skillet. Continue to sauté over medium heat until the onion is translucent and the garlic is fragrant.
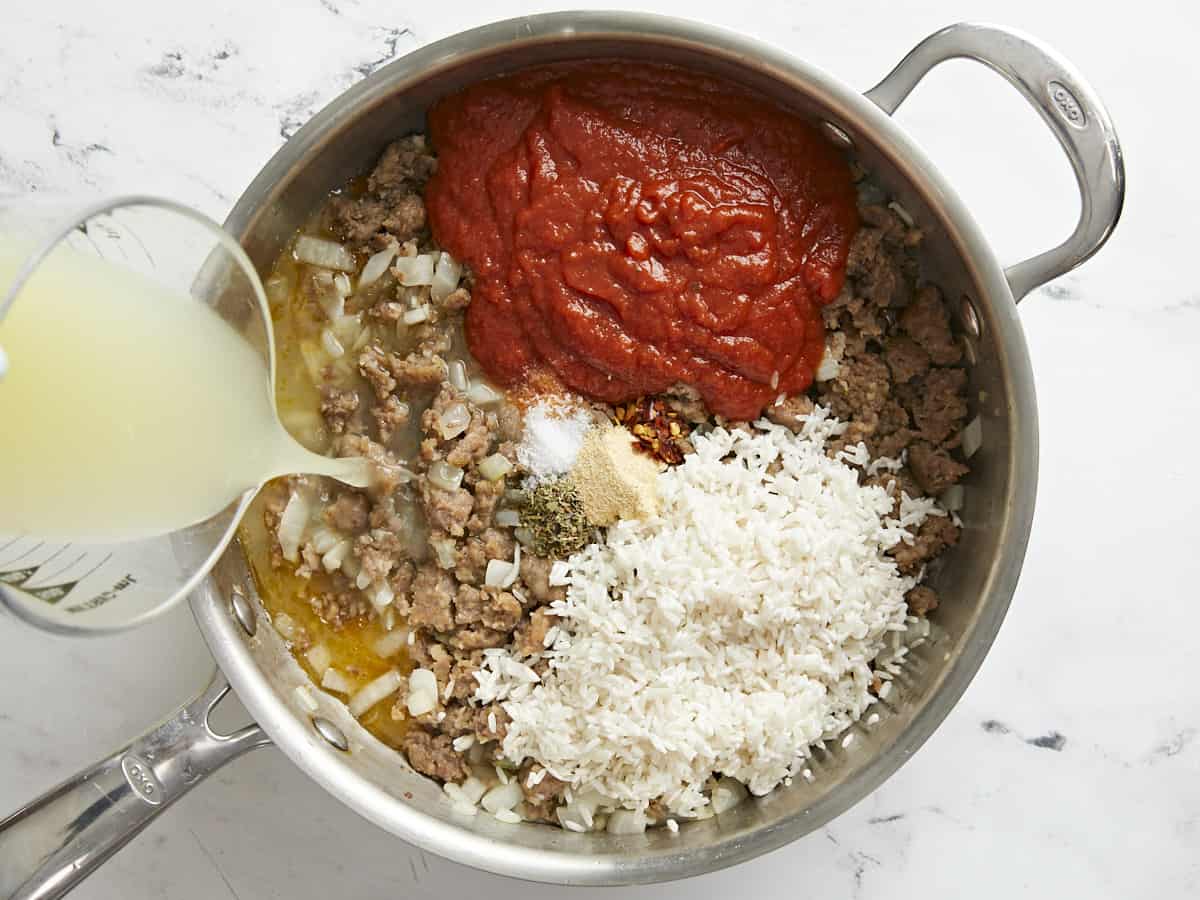
  • Next add the uncooked rice, marinara sauce, Italian seasoning, garlic powder, 1 tsp of salt, and chicken broth to the skillet. Stir to combine.
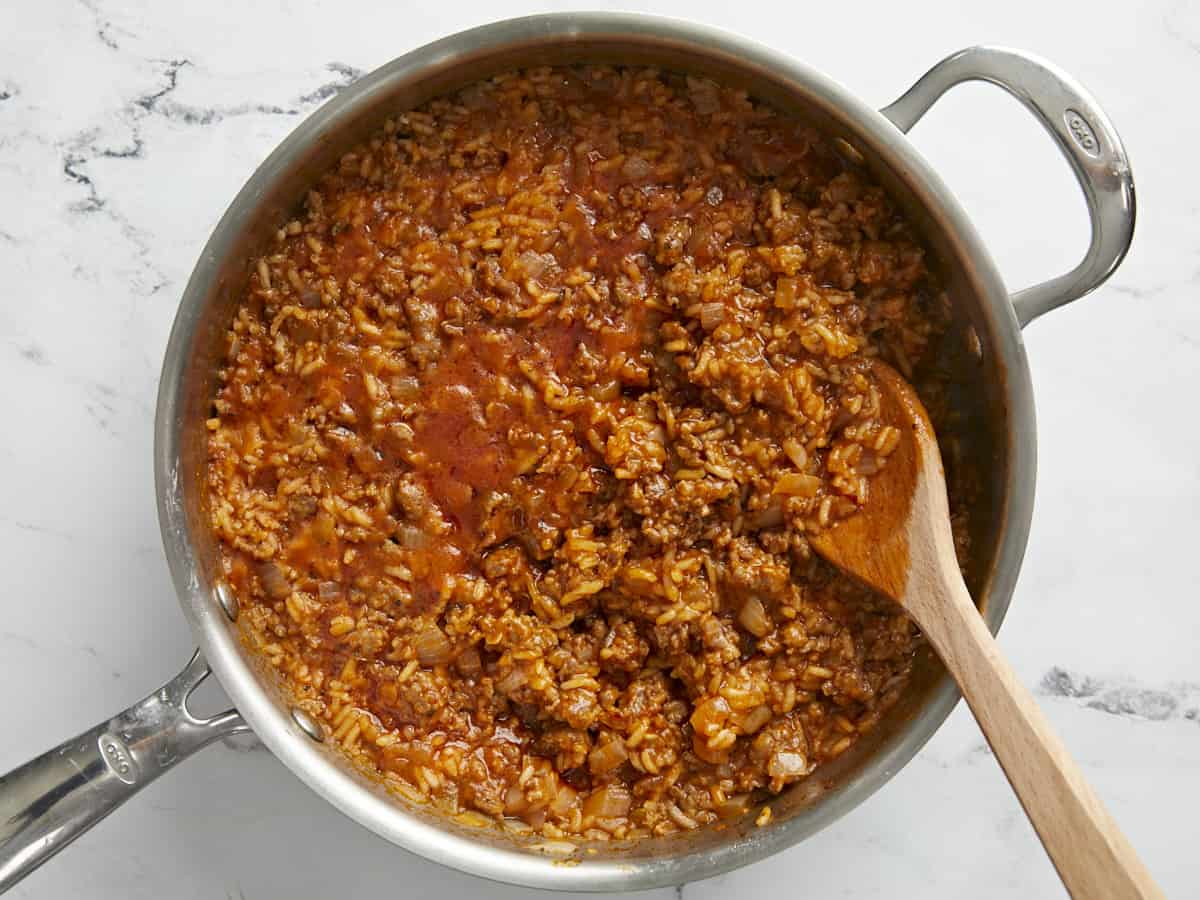
  • Place a lid on the skillet, turn the heat up to medium-high, and allow the mixture to come to a full boil. Once boiling, immediately reduce the heat to medium-low and allow the mixture to simmer, without lifting the lid or stirring, for 20 minutes. After 20 minutes, turn the heat off and let it rest, without lifting the lid, for an additional 5 minutes.
  • Next remove the lid, fluff the rice, and stir the mixture again to redistribute the ingredients. Begin to fill each bell pepper with the meat filling. Stuff as much filling as you can into each, filling them all the way to the top.
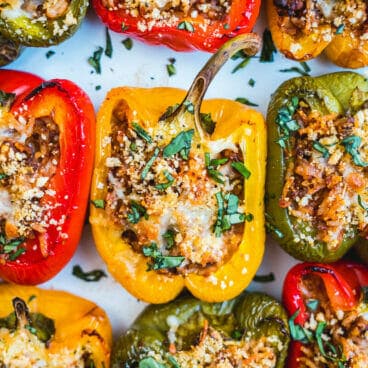
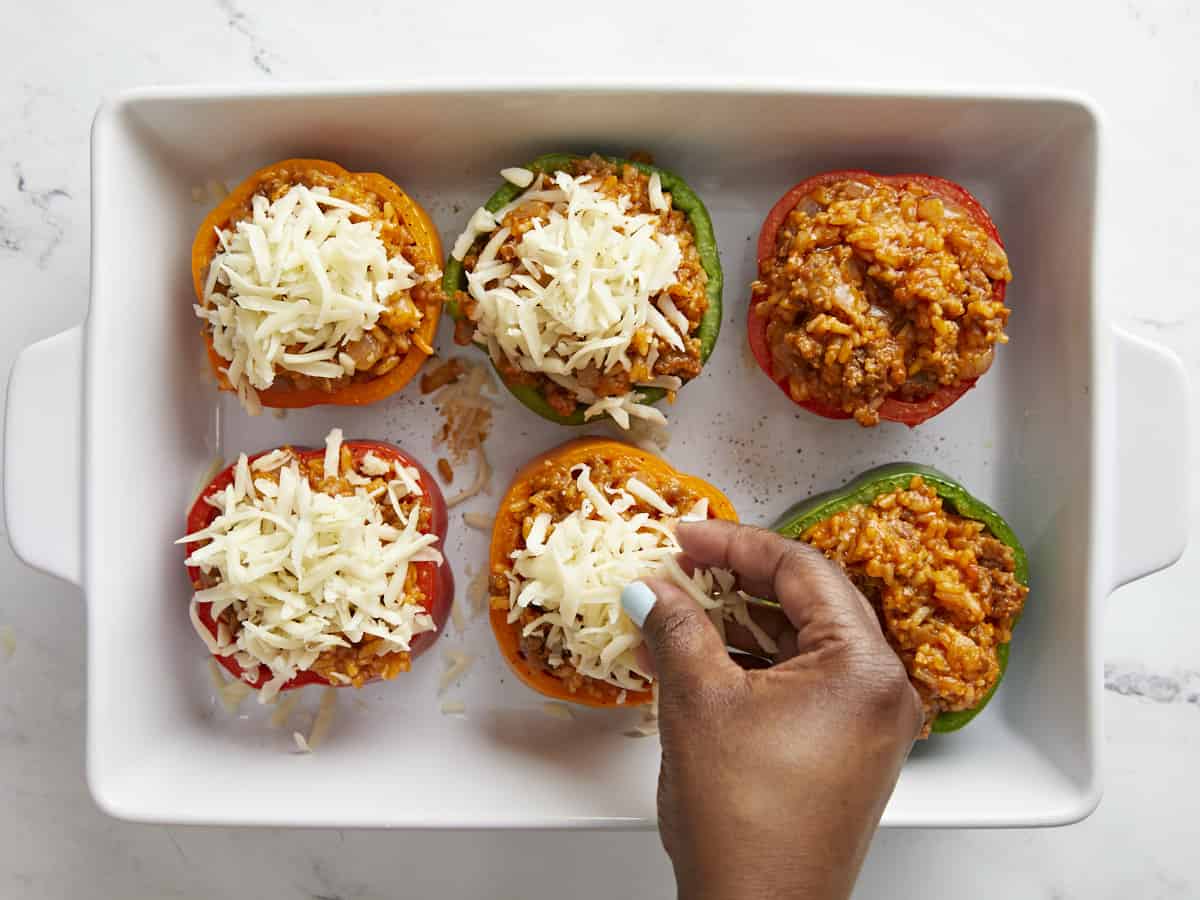
  • Top each bell pepper evenly with shredded mozzarella cheese. Loosely place some tented aluminum foil over the top of the casserole dish and bake for 15 minutes. After 15 minutes the bell peppers should be tender but not mushy.
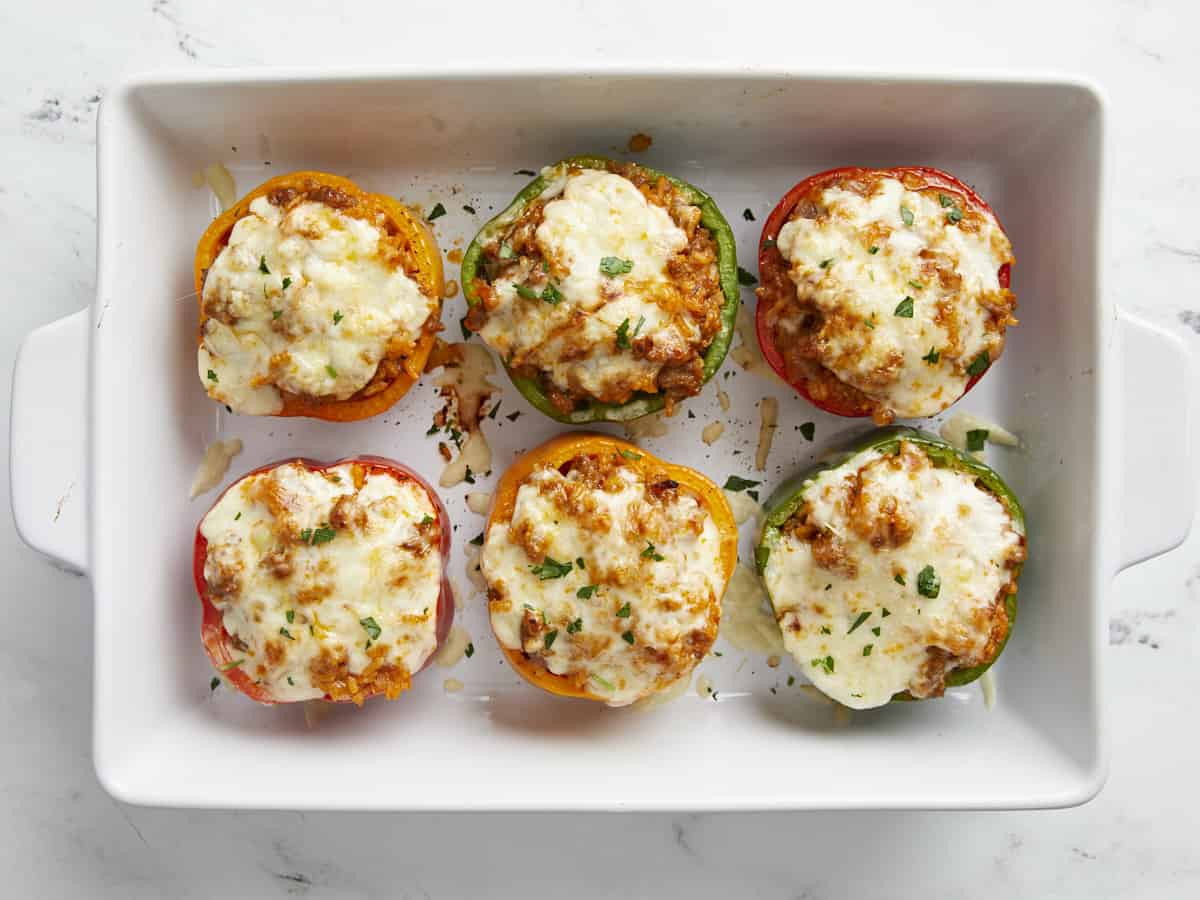
  • Now remove the foil and turn the heat on to broil. Broil the stuffed bell peppers for 2-3 minutes or just until the cheese gets a little brown on top. Be sure to watch the bell peppers closely at this step to prevent the cheese from over browning. Garnish with parsley, if desired, and enjoy!

See how we calculate recipe costs here.

Nutrition

Serving: 6servings | Calories: 454kcal | Carbohydrates: 22g | Protein: 18g | Fat: 33g | Sodium: 1461mg | Fiber: 3g

How to Make STUFFED BELL PEPPERS – Step by Step Photos

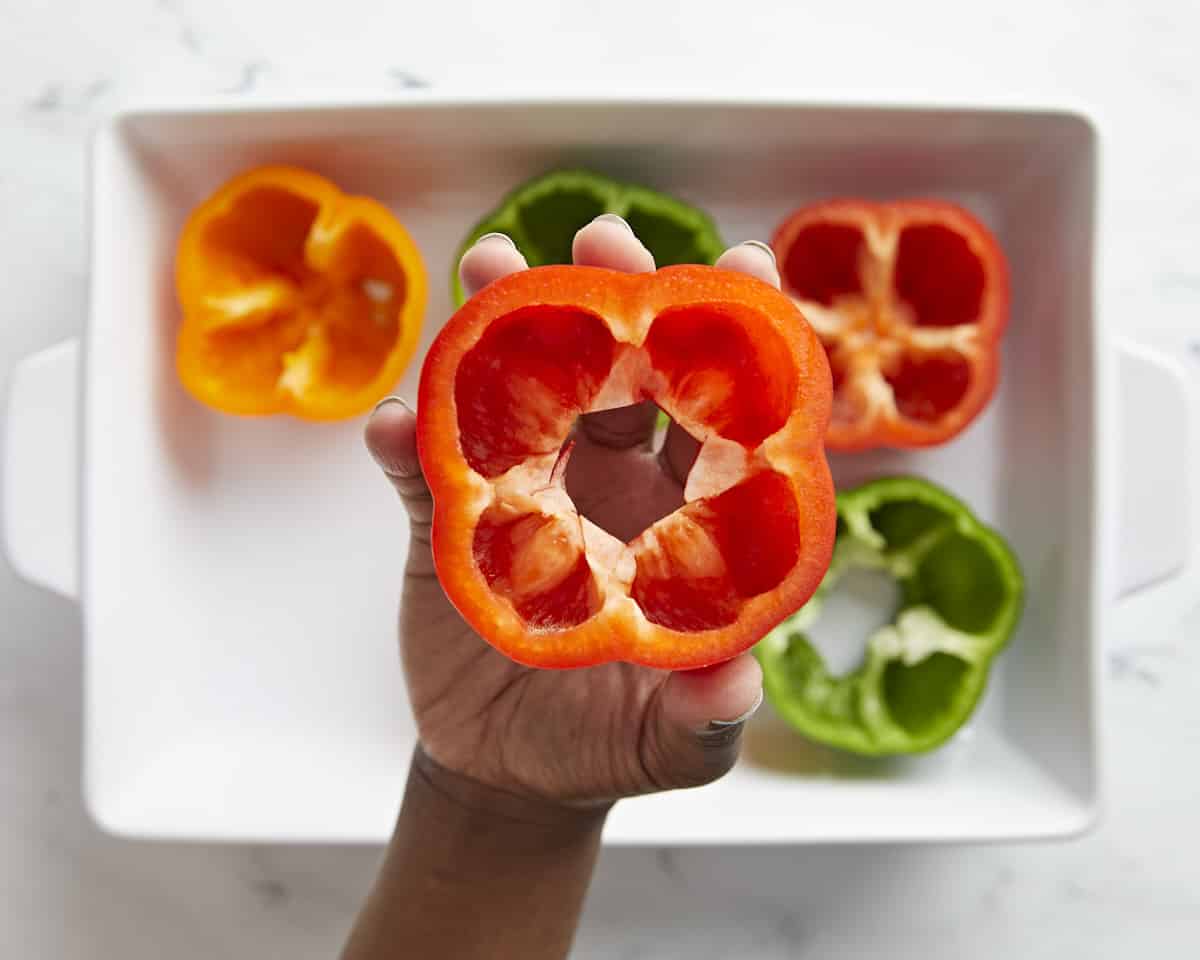
Bell peppers cut in half and placed in a casserole dish. One bell pepper lifted up towards the camera.

Preheat the oven to 350°F then wash and dry 3 bell peppers. Cut the bell peppers in half horizontally, yes horizontally. Most stuffed bell pepper recipes either keep the bell peppers whole or cut them vertically, but by cutting them horizontally you end up with a flatter bottom service and it’s easier to stuff. Trust me! Make sure to cut them as evenly as possible. Using a sharp pairing knife carefully cut and remove the stem from the top half of each bell pepper. It’s okay if there is a small hole left where the stem was removed.

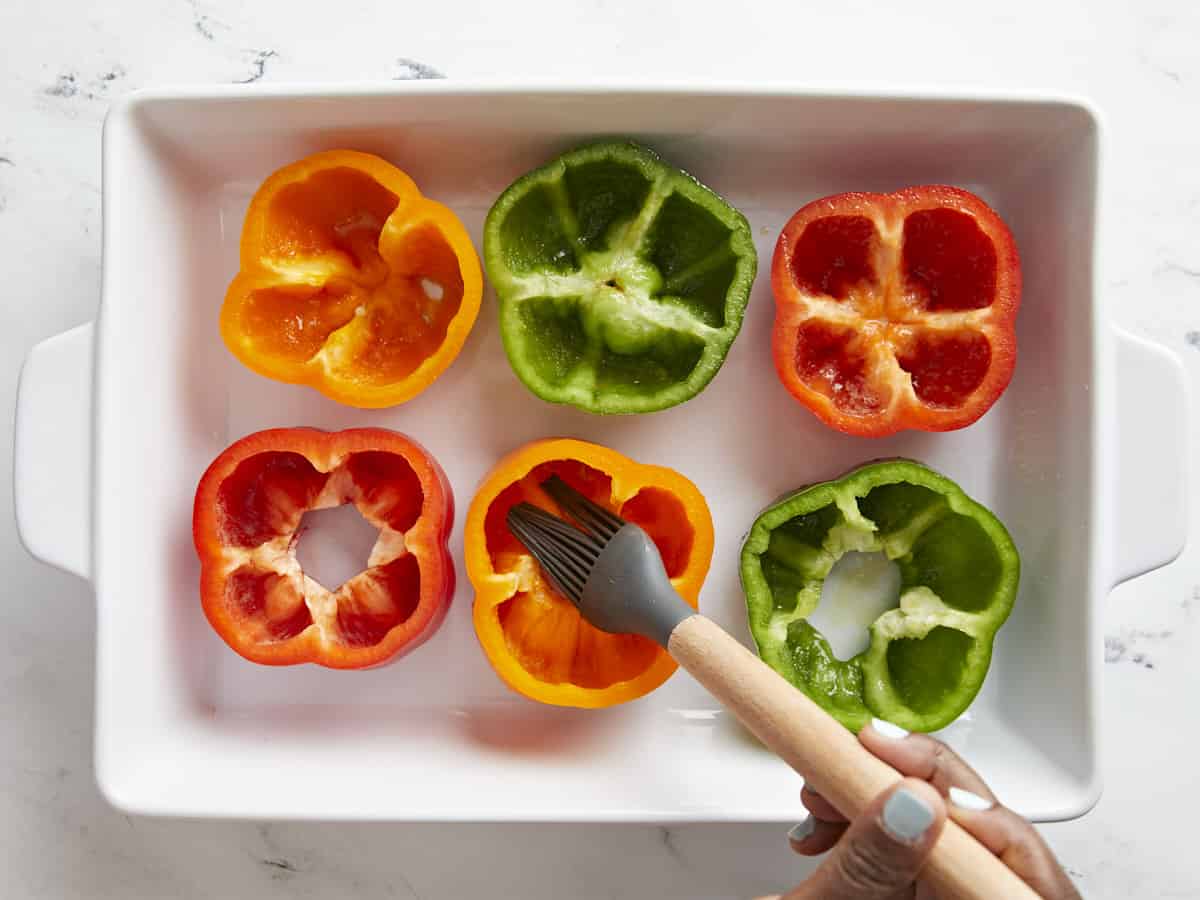
Bell peppers being brushed with olive oil.

Place each bell pepper half in a 9×13-inch casserole dish. Brush the bell peppers with 1 Tbsp cooking oil, divided between all 6 halves, and season with ¼ tsp of salt and ¼ tsp cracked black pepper, also divided between all 6 halves. Bake the bell peppers in a preheated oven for 20 minutes to soften. After 20 minutes remove them from the oven and set aside.

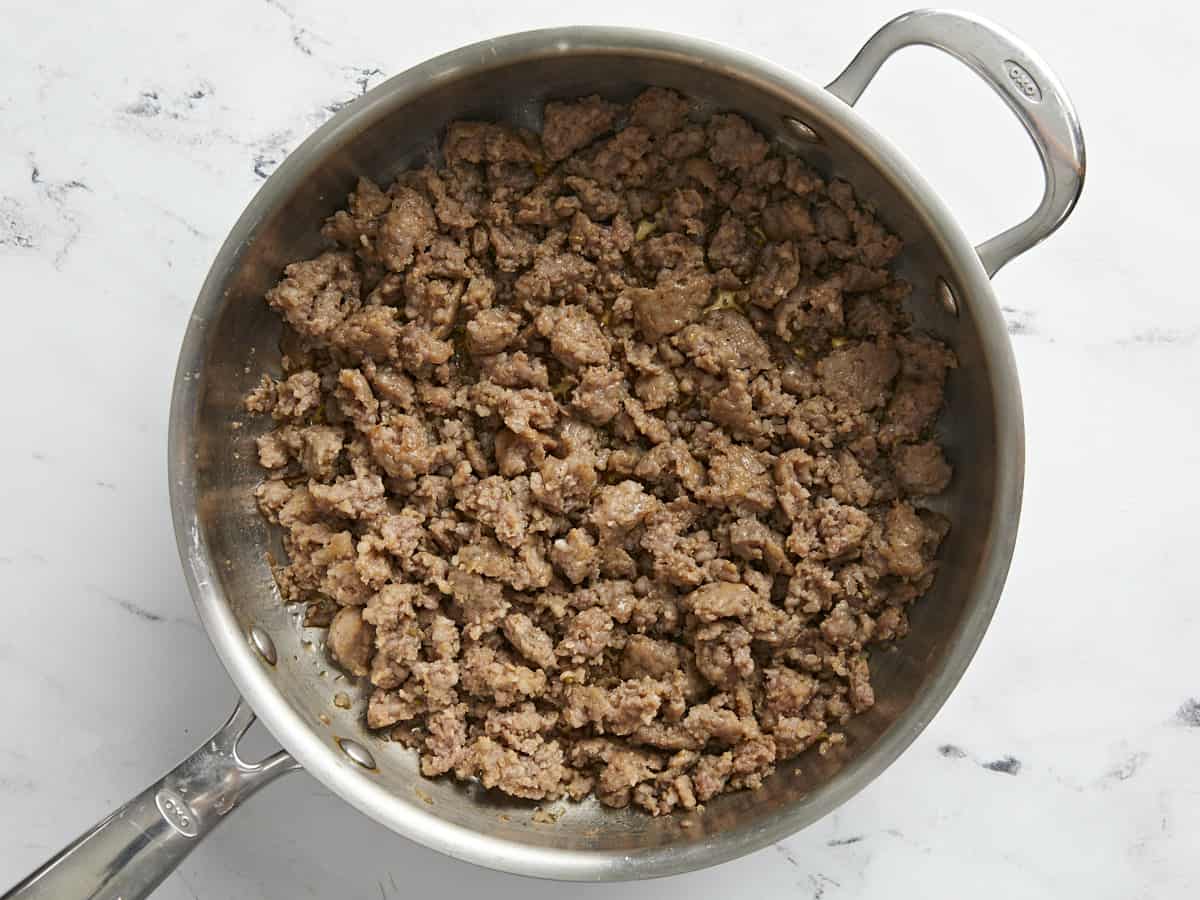
Cooked Italian sausage in a large skillet.

While the bell peppers are baking, make the filling. Heat a large skillet over medium heat and add 1 Tbsp of oil. Add 1 lb Italian sausage and cook until brown.

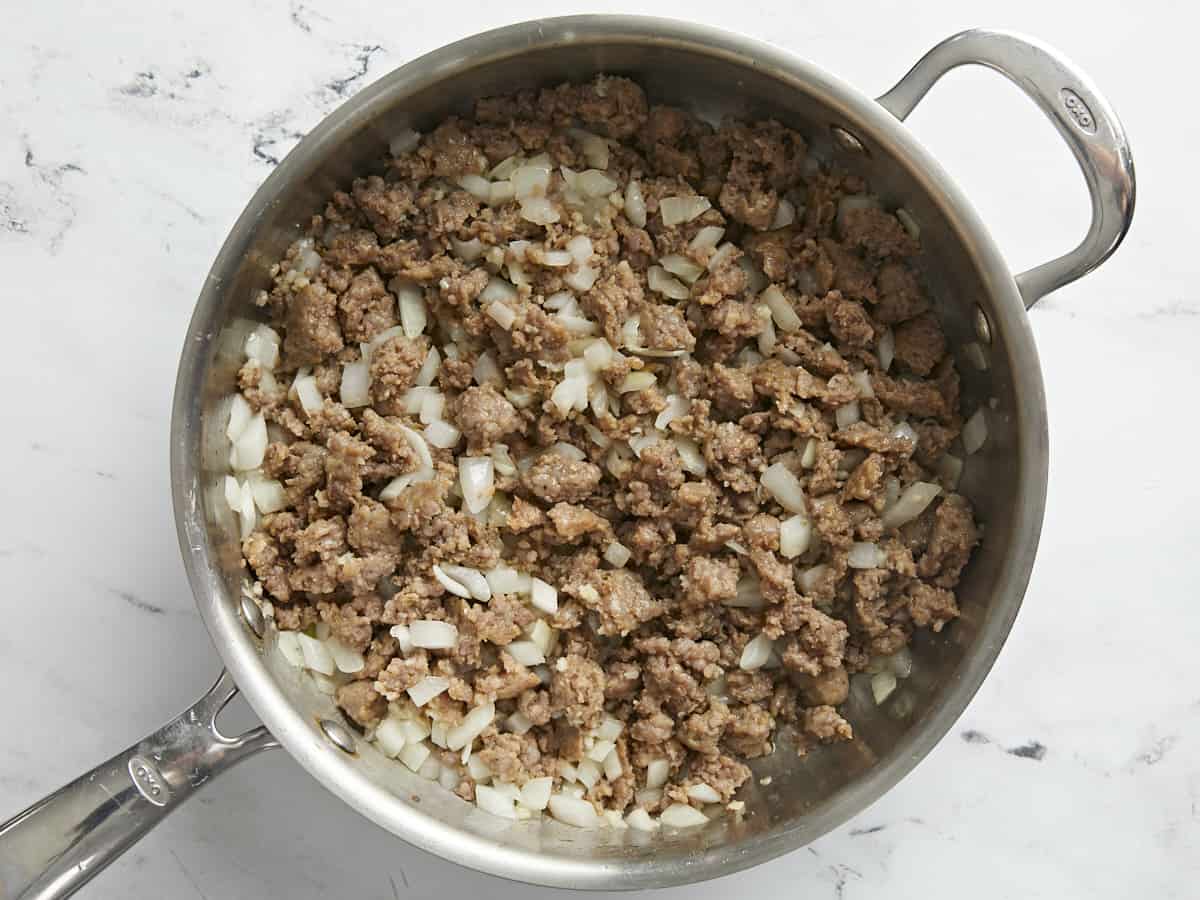
Cooked Italian sausage with onions and garlic.

Once the sausage has browned, add the 1 diced yellow onion and 3 minced garlic cloves to the skillet. Continue to sauté over medium heat until the onion is translucent and the garlic is fragrant.

Cooked sausage, rice, marinara, seasoning and chicken broth.

Next add ½ cup uncooked white rice, 1 cup of marinara sauce, 1 tsp Italian seasoning, ½ tsp garlic powder, 1 tsp of salt, and ¾ cups chicken broth to the skillet. Stir to combine. Place a lid on the skillet, turn the heat up to medium-high, and allow the mixture to come to a full boil. Once boiling, immediately reduce the heat to medium-low and allow the mixture to simmer, without lifting the lid or stirring, for 20 minutes. After 20 minutes, turn the heat off and let it rest, without lifting the lid, for an additional 5 minutes.

Cooked stuffed bell pepper filling.

Next remove the lid, fluff the rice, and stir the mixture again to redistribute the ingredients. Begin to fill each bell pepper with the sausage and rice mixture. Stuff as much filling as you can into each, filling them all the way to the top.

Overhead view of stuffed bell peppers with mozzarella cheese being added on top.

Divide 1 cup of shredded mozzarella cheese on top of each bell pepper evenly. Loosely place some tented aluminum foil over the top of the casserole dish and bake in the oven for 15 minutes.

Overhead view of finished stuffed bell peppers in a casserole dish.

After 15 minutes, remove the foil and turn the heat to broil. Broil the stuffed bell peppers for 2-3 minutes or just until the cheese gets a little brown on top. Be sure to watch the bell peppers closely at this step to prevent the cheese from getting too brown. Garnish with parsley, if desired, and enjoy!

Overhead shot of stuffed bell peppers topped with mozzarella cheese and fresh parsley. Served in a white casserole dish.

The post Stuffed Bell Peppers appeared first on Budget Bytes.