Chorizo Stuffed Bell Peppers

These Chorizo Stuffed Bell Peppers are packed with southwest flavor, perfectly portioned for meal prep, and freezer-friendly!

The post Chorizo Stuffed Bell Peppers appeared first on Budget Bytes.

We’re in love with stuffed bell peppers here at the Budget Bytes kitchen, so I decided to make a new variation just so I could have an excuse to eat stuffed bell peppers again. These Chorizo Stuffed Bell Peppers are full of super flavorful Mexican chorizo, hearty rice, and a rich sauce, then topped with melty mozzarella cheese. They’re SO filling, perfectly portioned for meal prep or freezer cooking, and quite flexible if you want to change up the ingredients to make them even more budget-friendly! Put this one one your to-cook list because I know you’re going to love them!
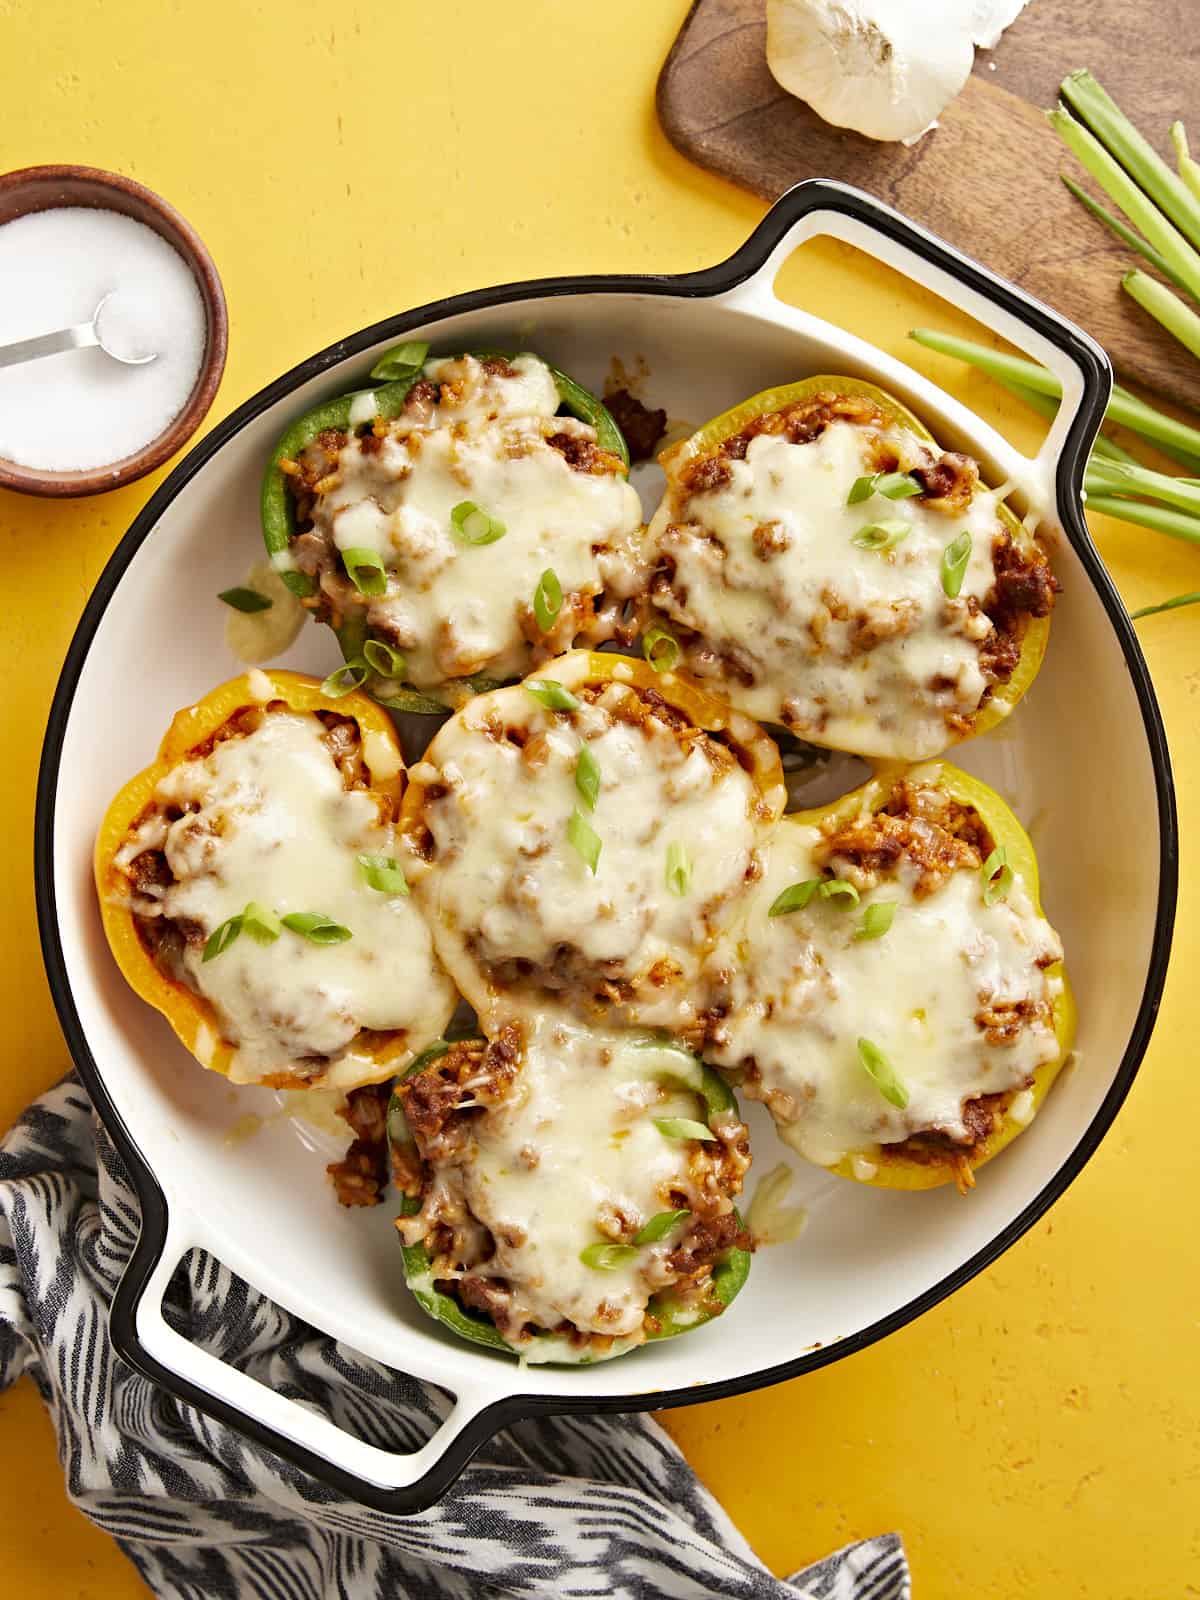
Overhead view of chorizo stuffed bell peppers in a baking dish on a yellow background.

Ingredients for Chorizo Stuffed Bell Peppers

These stuffed bell peppers are packed with flavorful herbs and spices and a rich tomato-y sauce so that every bite is deee-licious. Here are the ingredients for chorizo stuffed bell peppers:

  • Bell Peppers: You’ll need three bell peppers to make six servings for this recipe. We used a mix of colors to make it more festive, but you can use any color pepper that fits your budget.
  • Mexican Chorizo: Mexican chorizo is a fresh (not cured) sausage that is packed with spices. You can usually either buy this loose or in links. If you buy them in links, simply squeeze the meat out of the casing into the skillet. I like Johnsonville brand, but many larger grocery stores also make their own generic version.
  • Garlic & Onion: A little fresh onion and garlic add flavor and texture to the bell pepper stuffing.
  • Rice: Long grain white rice bulks up this meal to make it filling while keeping the cost low. We cook the rice right in the pot with the chorizo, spices, and broth for maximum flavor.
  • Chicken Broth: The rice is cooked in chicken broth to ensure that every bite is super flavorful. We use Better Than Bouillon to make our broth because it’s budget-friendly and has great flavor.
  • Tomato Paste: Tomato paste is added to the broth to help create an enchilada sauce-like flavor in the rice mixture.
  • Diced Green Chiles: Green chiles add even more flavor, color, and texture to the filling. If you prefer a milder stuffed pepper, you can leave out the green chiles or look for a mild green chile.
  • Spices: We packed this bell pepper stuffing with even more spices including chili powder, cumin, garlic powder, cayenne pepper, and salt.
  • Mozzarella: The stuffed bell peppers are topped with mozzarella cheese for a rich finish, but you can substitute with a different type of cheese if preferred, like Monterey jack, pepper jack, cheddar, or a Mexican blend.
  • Green Onion: A few sliced green onions sprinkled over top of the stuffed bell peppers add a fresh finish, but are entirely optional!

What Else Can I Add?

This recipe is pretty flexible, so if you want to change it up or make it more budget-friendly, here are some other ingredients you can add:

  • Beans: Try swapping half of the chorizo with a can of black beans or pinto beans for more fiber and less cost.
  • Diced Tomatoes: If you want more color and texture in your bell pepper filling, try adding a drained can of petite diced tomatoes, or diced tomatoes with chiles (Rotel).
  • Sweet Potato: Chorizo and sweet potato are a perfect flavor pair. Replace half of the chorizo with one small finely diced sweet potato for a spicy-sweet flavor profile (add it with the rice so it can simmer and soften with the rice).

Mexican Chorizo vs. Spanish Chorizo

It’s really important to use the correct type of chorizo for this recipe. You’ll need Mexican chorizo, which is a fresh (uncooked & uncured) sausage. You’ll find Mexican chorizo in the fresh meat department, usually near bratwurst and other fresh sausages. Spanish chorizo is a cured, sliceable sausage that you’ll usually find near cheese, pepperoni, or other charcuterie-type foods.

What to Serve with Chorizo Stuffed Bell Peppers

These southwest-inspired peppers are really filling on their own, but if you want to serve something on the side they pair really well with Cumin Lime Roasted Sweet Potatoes, Cowboy Caviar, Sweet Potato Cornbread, or Warm Corn and Avocado Salad.

How To Store Leftovers

I love making stuffed bell peppers for meal prep, so this is how I store and reheat them. The cooked bell peppers can be stored in the refrigerator for 4-5 days. I like to reheat them quickly in the microwave (about 2 minutes each).

Or, once chilled in the refrigerator, you can transfer them to the freezer. I suggest packaging them individually in a freezer-safe, air-tight container, so you can reheat one at a time as needed. Frozen stuffed bell peppers can be thawed in the refrigerator overnight and then reheated the next day in the microwave, or thawed straight from the freezer in the microwave using the defrost function, then heated through on full power.
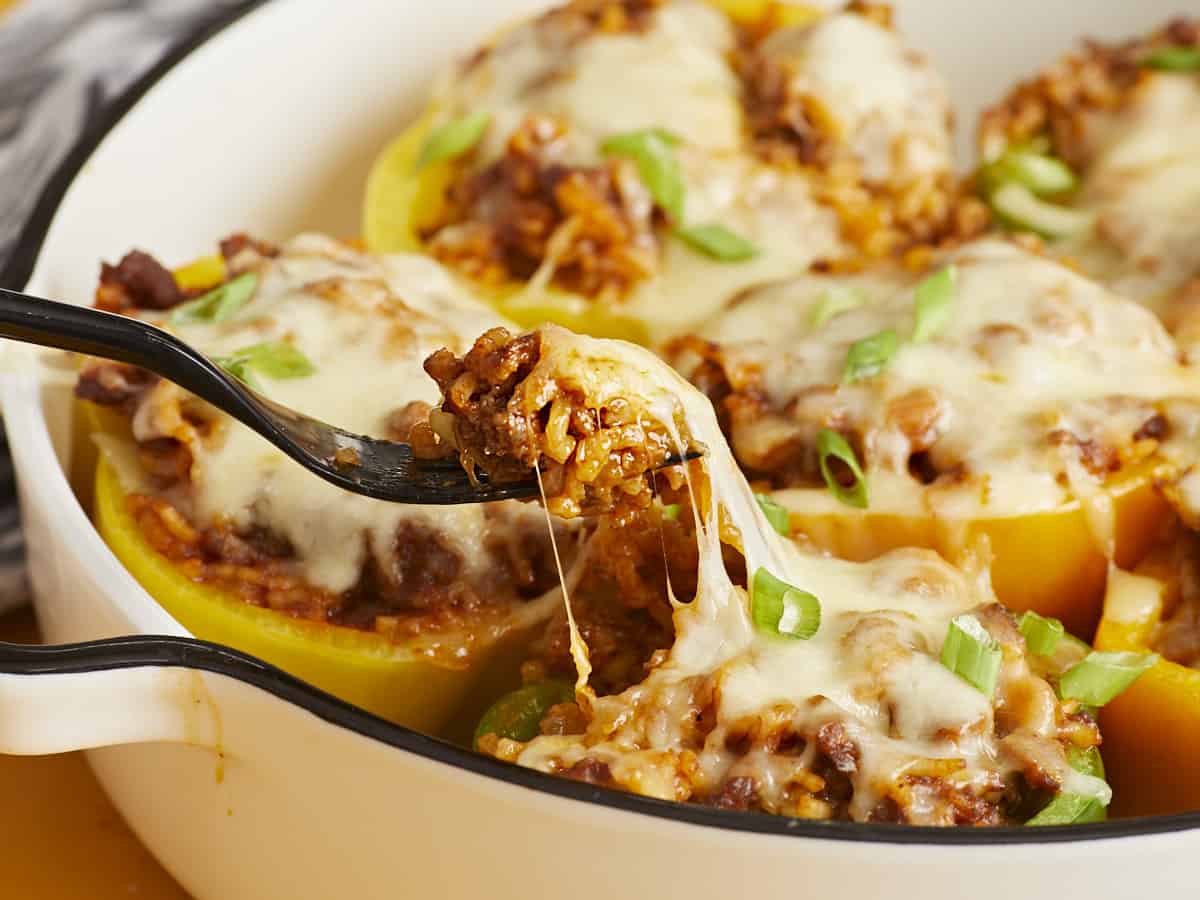

Side view of a fork lifting some stuffing out of the bell pepper with the cheese pulling.
Overhead view of chorizo stuffed bell peppers in a round baking dish.
Print

Chorizo Stuffed Bell Peppers

These Chorizo Stuffed Bell Peppers are packed with southwest flavor, perfectly portioned for meal prep, and freezer-friendly!
Course Dinner, Main Course
Cuisine Amercian, Mexican
Total Cost $12.91 recipe / $2.15 serving
Prep Time 5 minutes
Cook Time 1 hour
Total Time 1 hour 5 minutes
Servings 6
Calories 380kcal

Ingredients

  • 3 bell peppers $4.07
  • 1 lb. Mexican chorizo $4.99
  • 1 yellow onion $0.37
  • 2 cloves garlic $0.16
  • 1 4oz. can diced green chiles $0.99
  • 2 Tbsp tomato paste $0.20
  • 2 tsp chili powder $0.20
  • 1/2 tsp cumin $0.05
  • 1/2 tsp garlic powder $0.05
  • 1/4 tsp cayenne pepper $0.02
  • 1/4 tsp salt $0.02
  • 1/2 cup long grain white rice (uncooked) $0.13
  • 1 cup chicken broth $0.19
  • 1 cup shredded mozzarella $1.25

Instructions

  • Preheat the oven to 350ºF. Cut each bell pepper in half so there is a top and bottom portion, then remove the seeds and ribs. You can either carefully cut the stem out of the center of the top half, or eat around it later. Place the halved bell peppers in a baking dish, cut sides up. Par-bake in the preheated oven for 15 minutes.
  • Add the chorizo to a large deep skillet and cook over medium heat until browned. While the chorizo is cooking, dice the onion and mince the garlic. Add the onion and garlic to the chorizo and continue to cook until the onions are softened.
  • Add the diced green chiles, tomato paste, chili powder, cumin, garlic powder, cayenne pepper, and salt to the skillet and stir until combined.
  • Add the uncooked rice and chicken broth to the skillet and stir until combined again. Place a lid on the skillet, turn the heat up to medium-high, and allow the broth to come up to a boil.
  • As soon as the broth begins to boil, turn the heat down to low and let the rice simmer over, low without lifting the lid or stirring, for 20 minutes. After 20 minutes, turn off the heat and let it rest for five more minutes.
  • Finally, remove the lid and gently stir the rice and chorizo mixture. All of the broth should be absorbed and the rice tender.
  • Divide the rice and chorizo mixture between the six bell pepper halves, then top with shredded cheese. Cover the baking dish and return it to the 350ºF oven and bake for 20 minutes more. Finally, top with sliced green onions and serve!

See how we calculate recipe costs here.

Nutrition
Serving: 1pepper | Calories: 380kcal | Carbohydrates: 24g | Protein: 18g | Fat: 24g | Sodium: 1032mg | Fiber: 3g
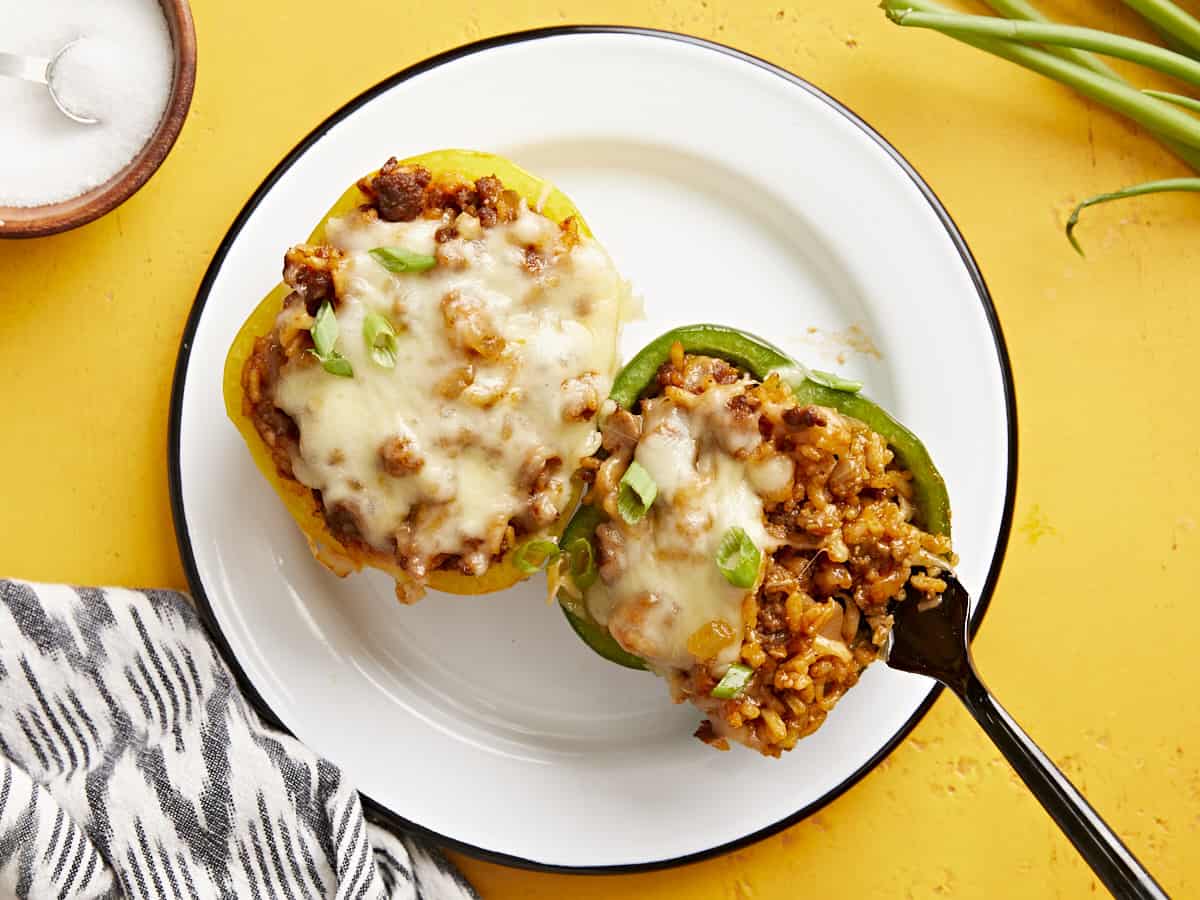
Overhead view of two stuffed bell peppers on a plate with a fork digging into one.

How to Make Chorizo Stuffed Bell Peppers – Step by Step Photos
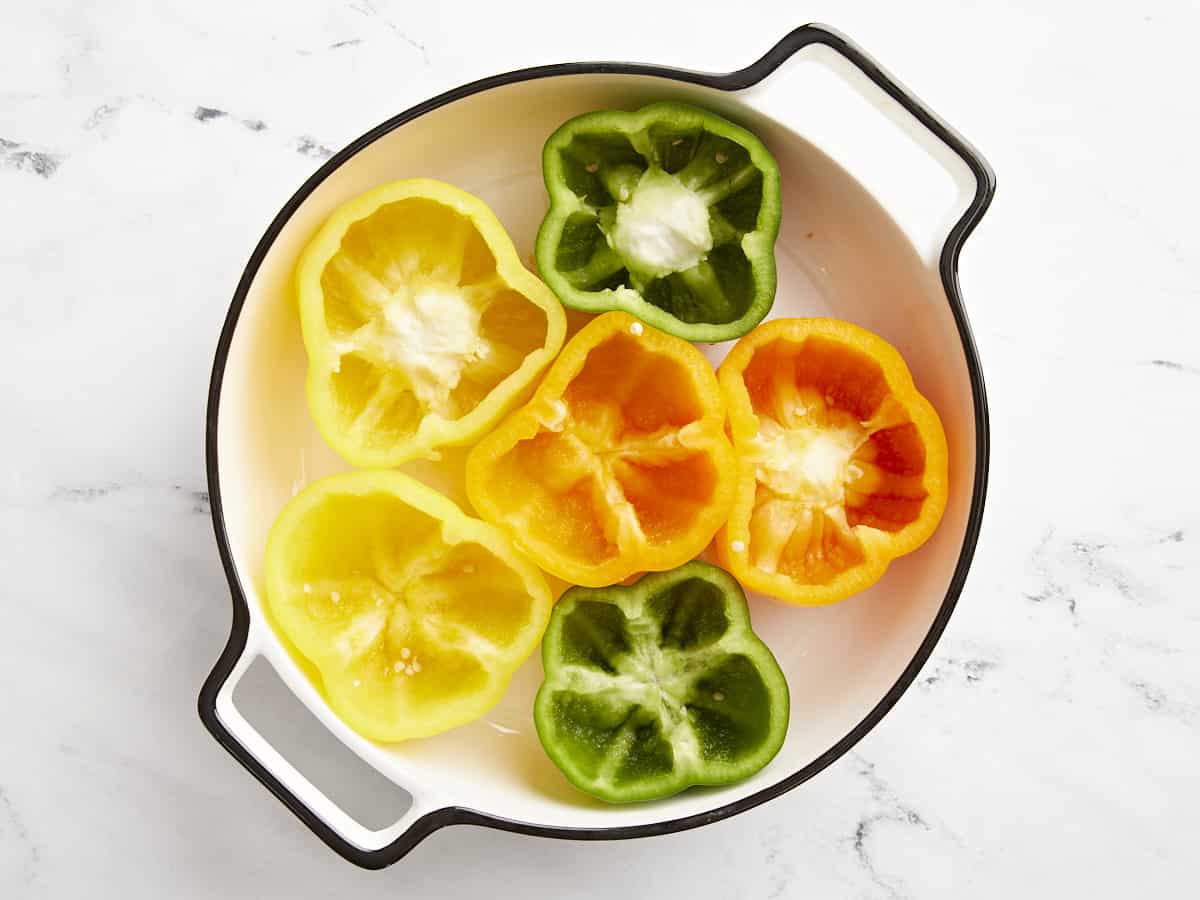
Prepped bell peppers in a baking dish.

Begin by preheating the oven to 350ºF. Cut three bell peppers in half to create a top and bottom piece for each pepper. Scoop out the seeds and ribs. You can either cut out the stem from the top half of the peppers, or eat around them later. Place the halved peppers in a baking dish and par-bake them for 15 minutes in the fully preheated 350ºF oven.
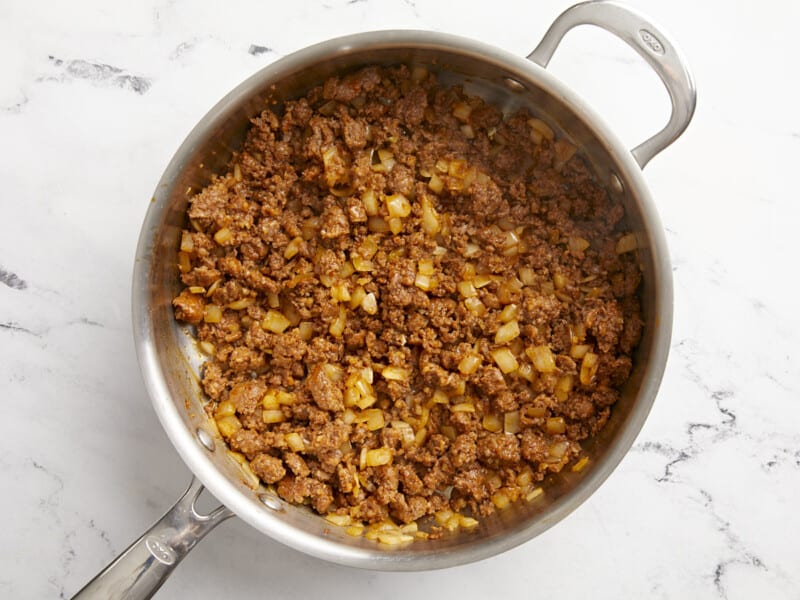
Cooked chorizo and onion in a skillet.

Meanwhile, cook 1 lb. of Mexican chorizo in a large deep skillet over medium heat until browned. The chorizo has plenty of fat, so you likely won’t need to add any additional to the skillet. Dice one yellow onion and mince 2 cloves of garlic. Add the onion and garlic to the skillet with the chorizo, and continue to cook until the onions are softened.
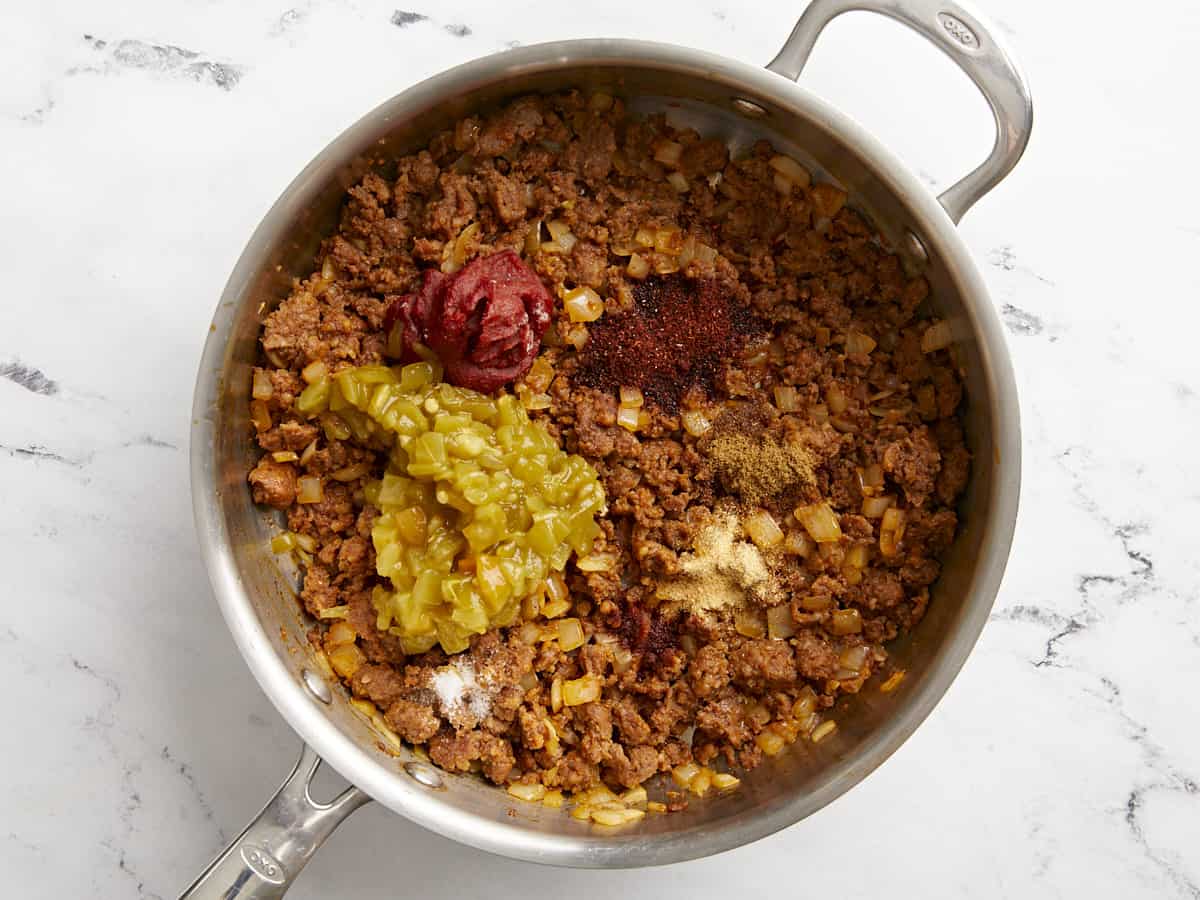
Green chiles, tomato paste, and spices added to the skillet.

Add one 4oz. can of diced green chiles, 2 Tbsp tomato paste, 2 tsp chili powder, ½ tsp cumin, ½ tsp garlic powder, ¼ tsp cayenne pepper, and ¼ tsp salt to the meat and onions. Stir to combine.
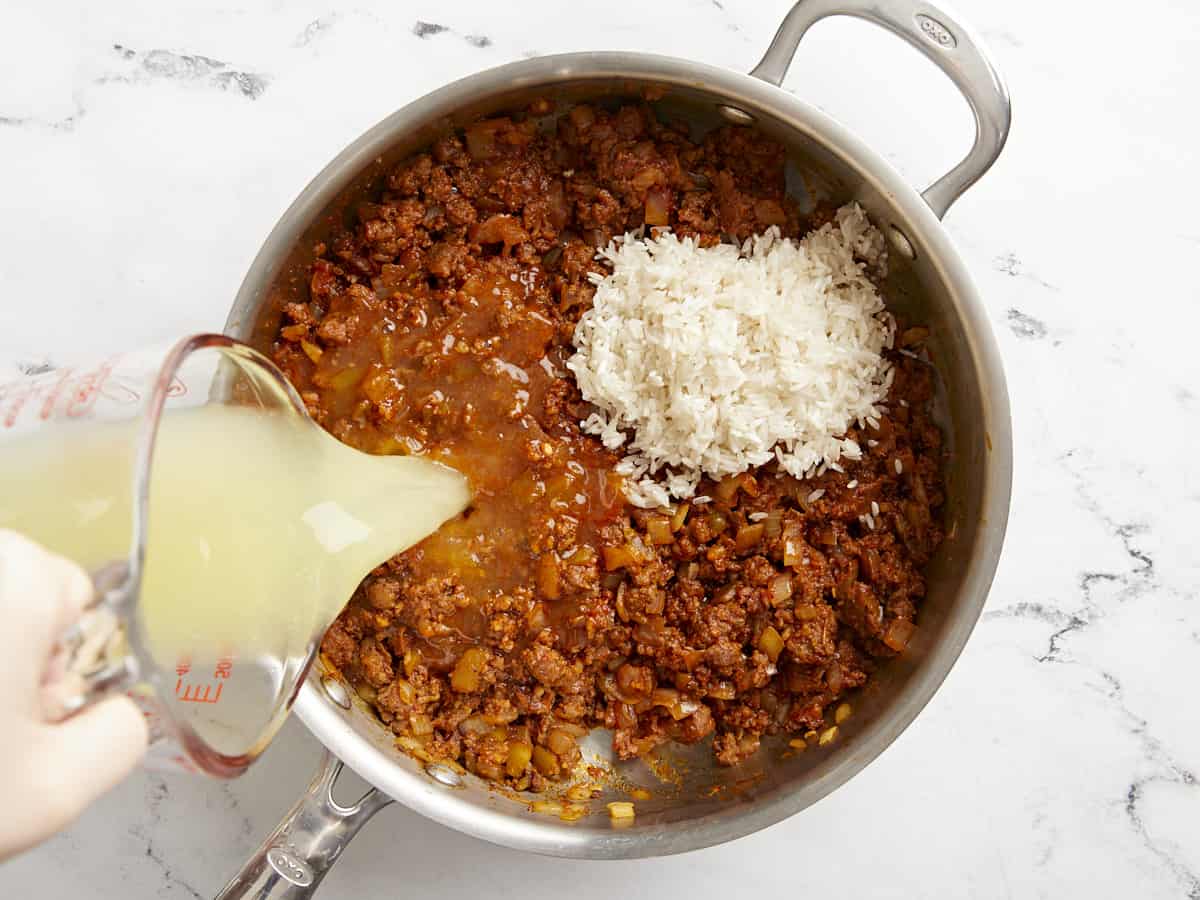
Rice added to the skillet, broth being poured in the side.

Add ½ cup of uncooked long grain white rice and 1 cup of chicken broth to the skillet. Stir well to combine, then place a lid on top, and turn the heat up to medium-high. When the broth reaches a full boil, turn the heat down to low and allow it to continue to simmer over low (without removing the lid or stirring) for 20 minutes. After 20 minutes, turn the heat off and let it rest for 5 more minutes.
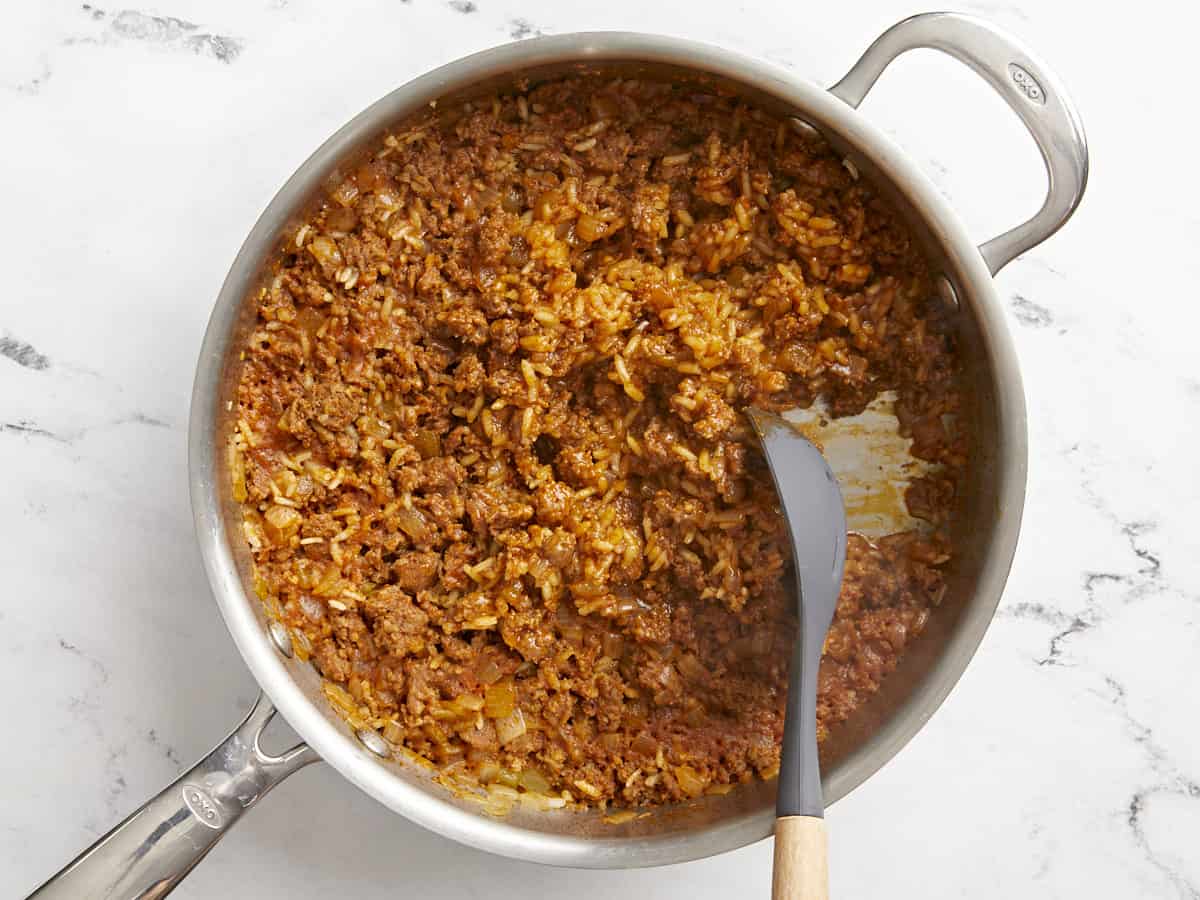
Cooked chorizo and rice in the skillet being scooped to the side with a spoon.

After simmering for 20 minutes the broth should be absorbed and the rice should be tender. Gently stir the rice and chorizo mixture with a spoon.
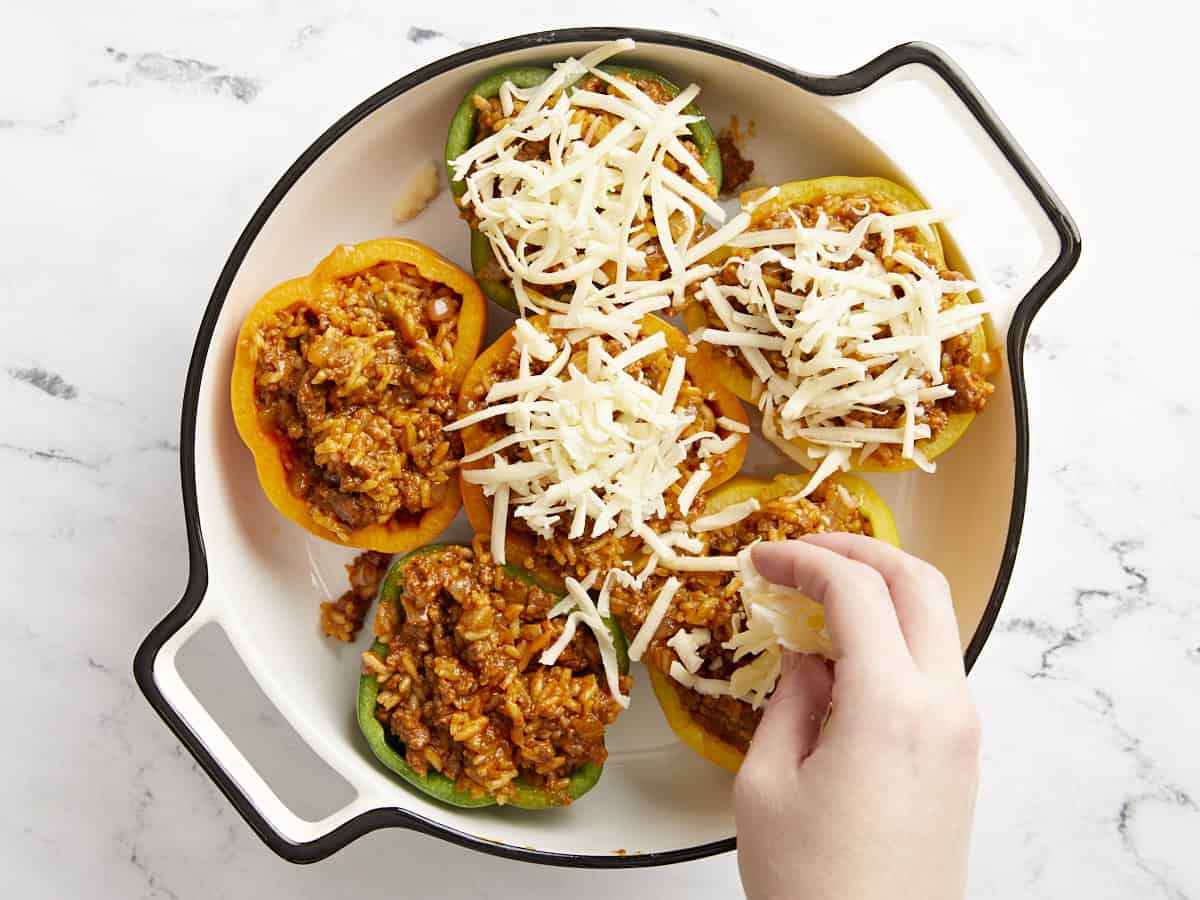
Filled bell peppers in a baking dish being topped with shredded cheese.

Divide the rice and chorizo mixture between the six par-baked bell pepper halves, then top with shredded mozzarella cheese (about 1 cup). Cover the dish and bake in the 350ºF oven for 20 minutes.
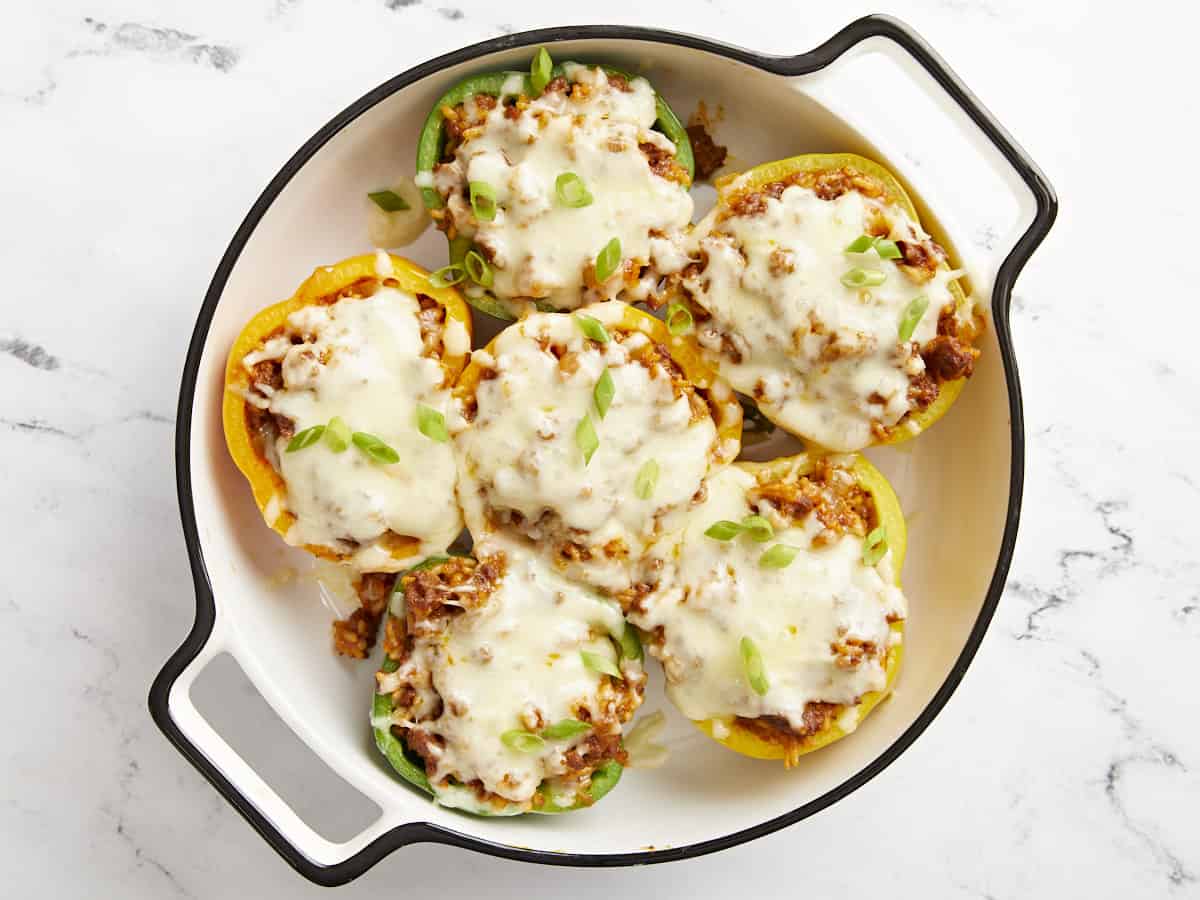
Finished stuffed bell peppers topped with sliced green onion.

Top the chorizo stuffed bell peppers with sliced green onions and serve!
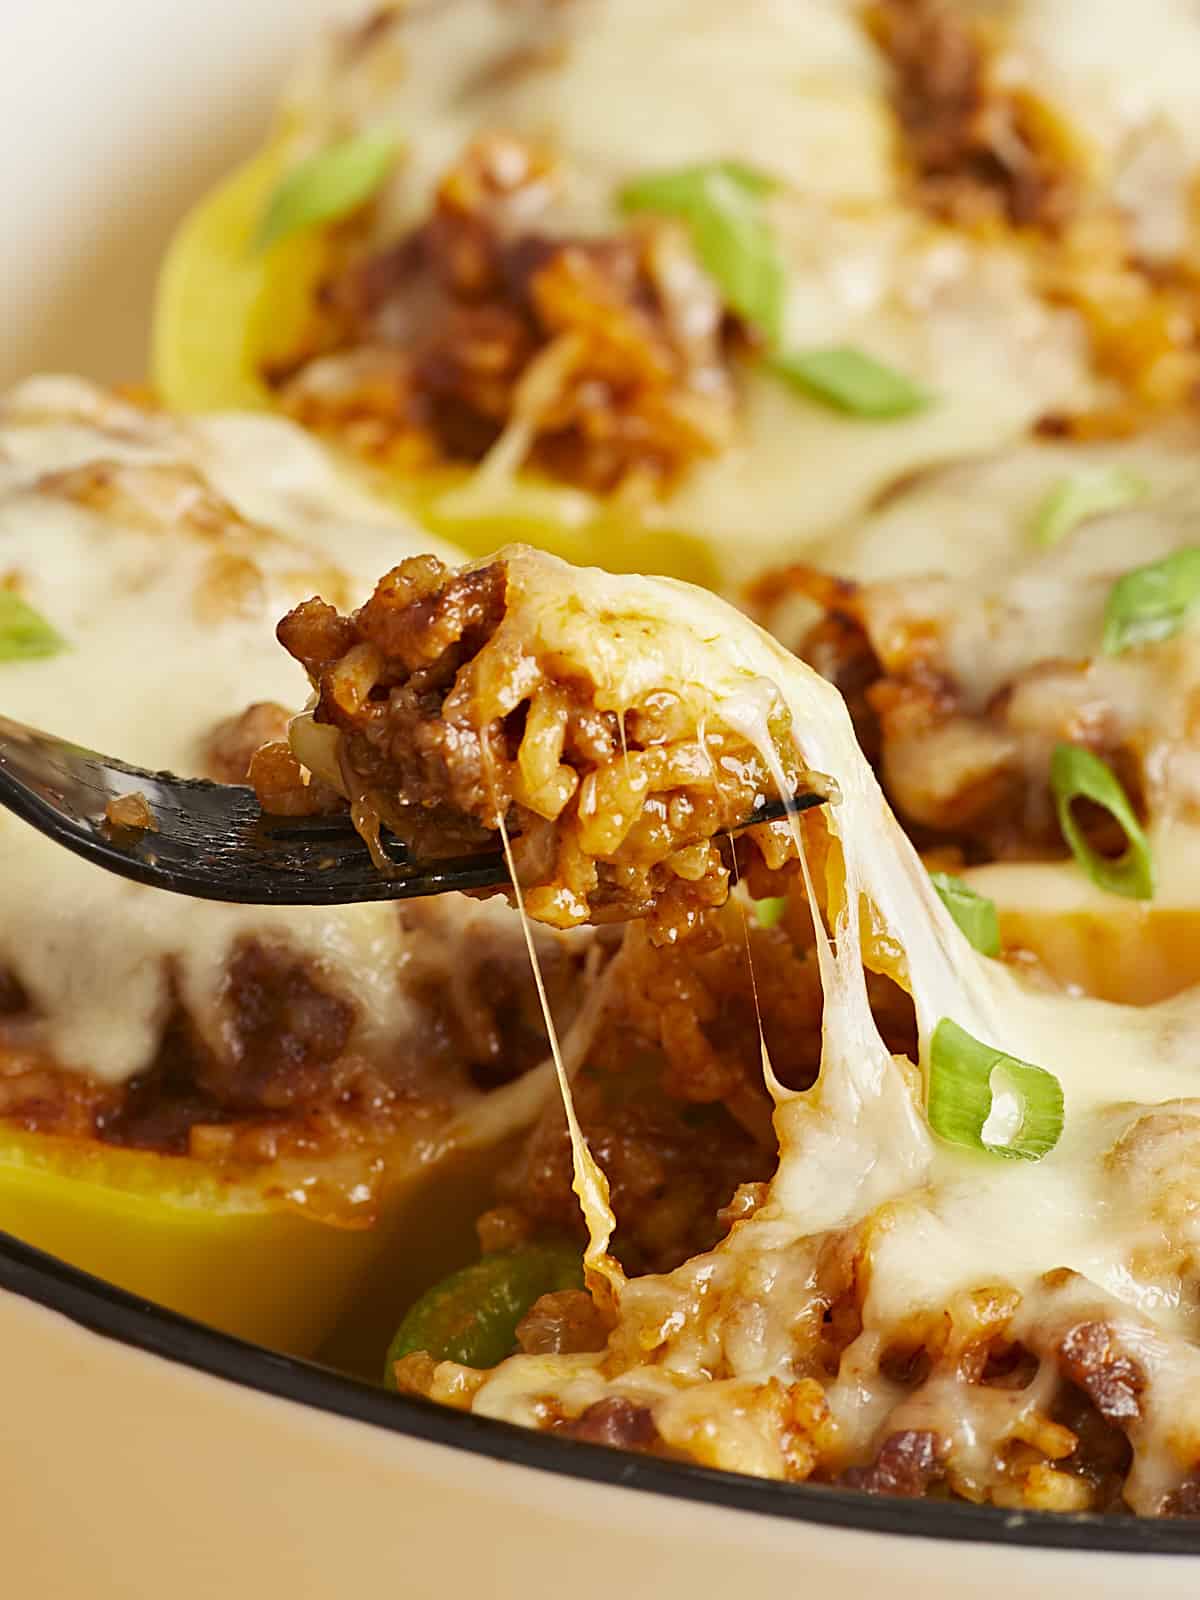
Close up side view of a fork lifting some of the filling out of a stuffed bell pepper.

Enjoy the cheesy chorizo-y goodness!!

The post Chorizo Stuffed Bell Peppers appeared first on Budget Bytes.

Air Fryer Pork Chops

These Air Fryer Pork Chops are the perfect weeknight recipe! They’re deliciously seasoned and ready in just 30 minutes!

The post Air Fryer Pork Chops appeared first on Budget Bytes.
If you’re looking for a simple yet flavorful pork recipe, these Air Fryer Pork Chops are it! Coated in a sweet and savory spice blend and cooked to crispy perfection, this air fryer pork chops recipe is a far cry from the leathery chops you may have experienced in the past. We’re raiding the pantry for this one, utilizing staples that really pack in the flavor for not a lot of added cost. With this easy dinner recipe, you’ll have tender, juicy pork chops in 30 minutes!

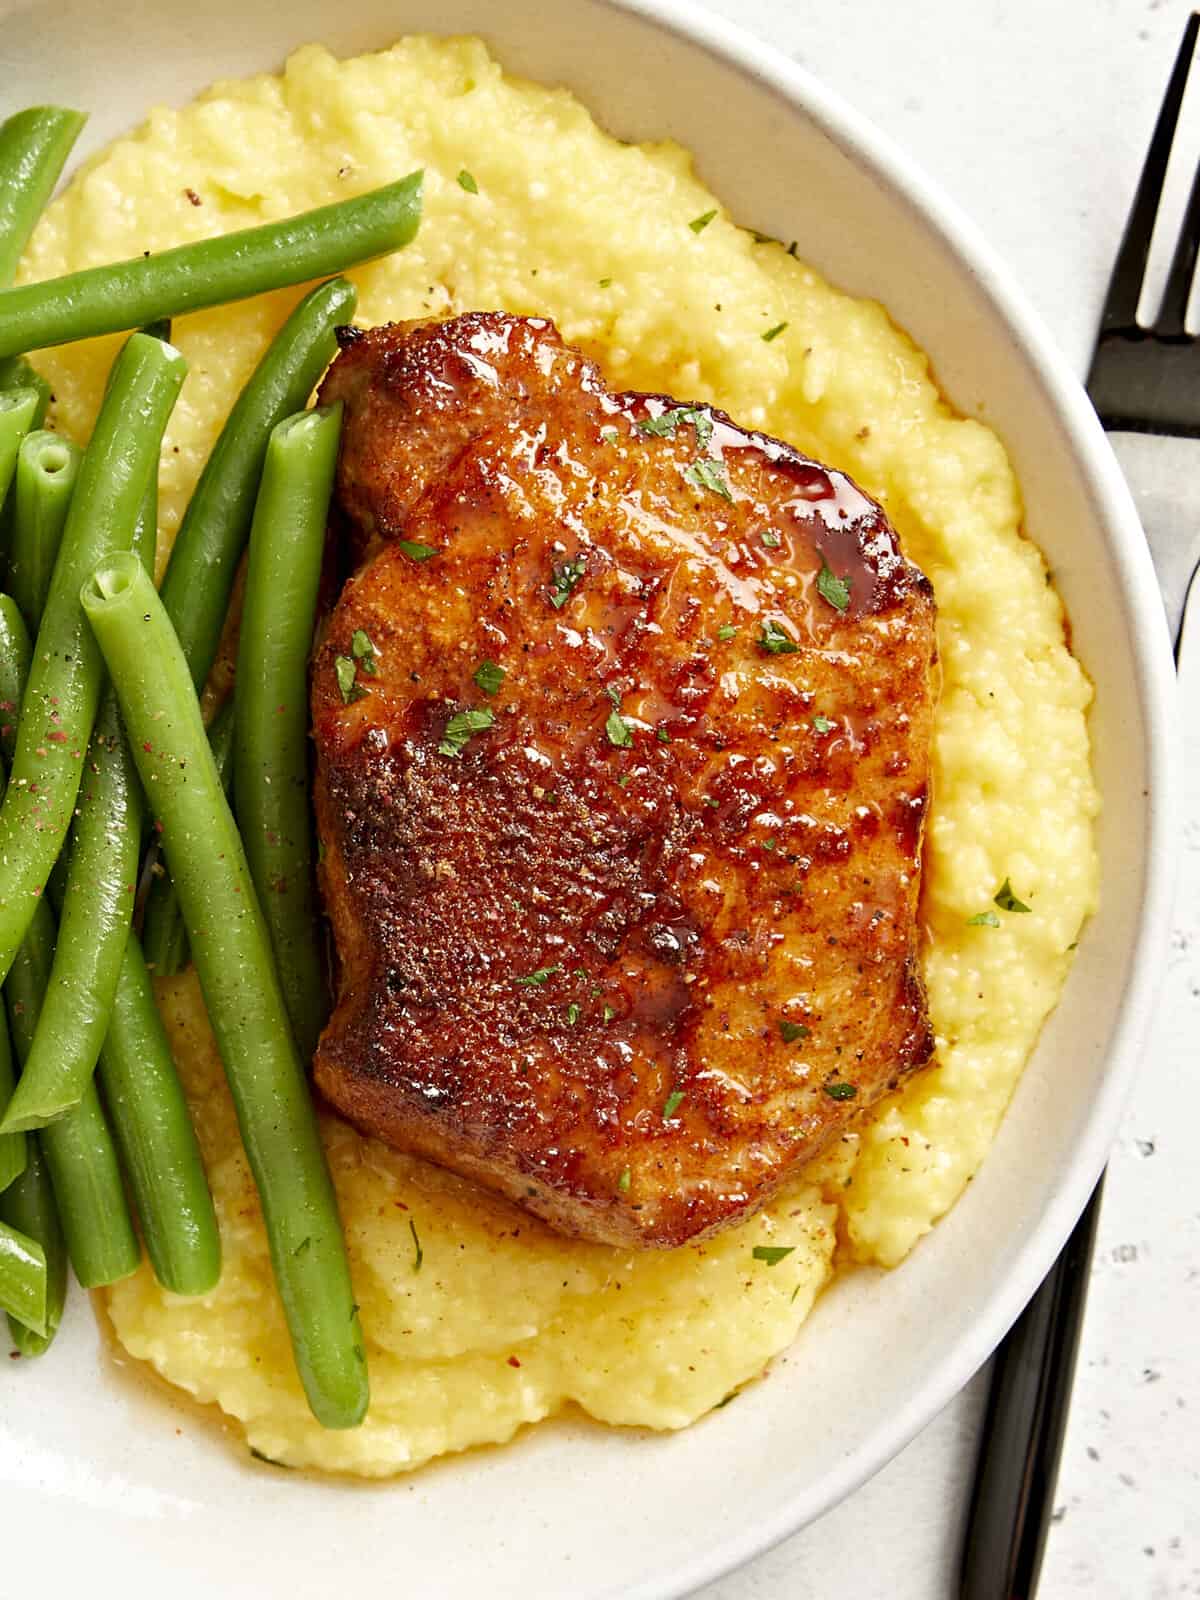
partial overhead view of an air fryer pork chop on a white plate with potatoes and green beans.

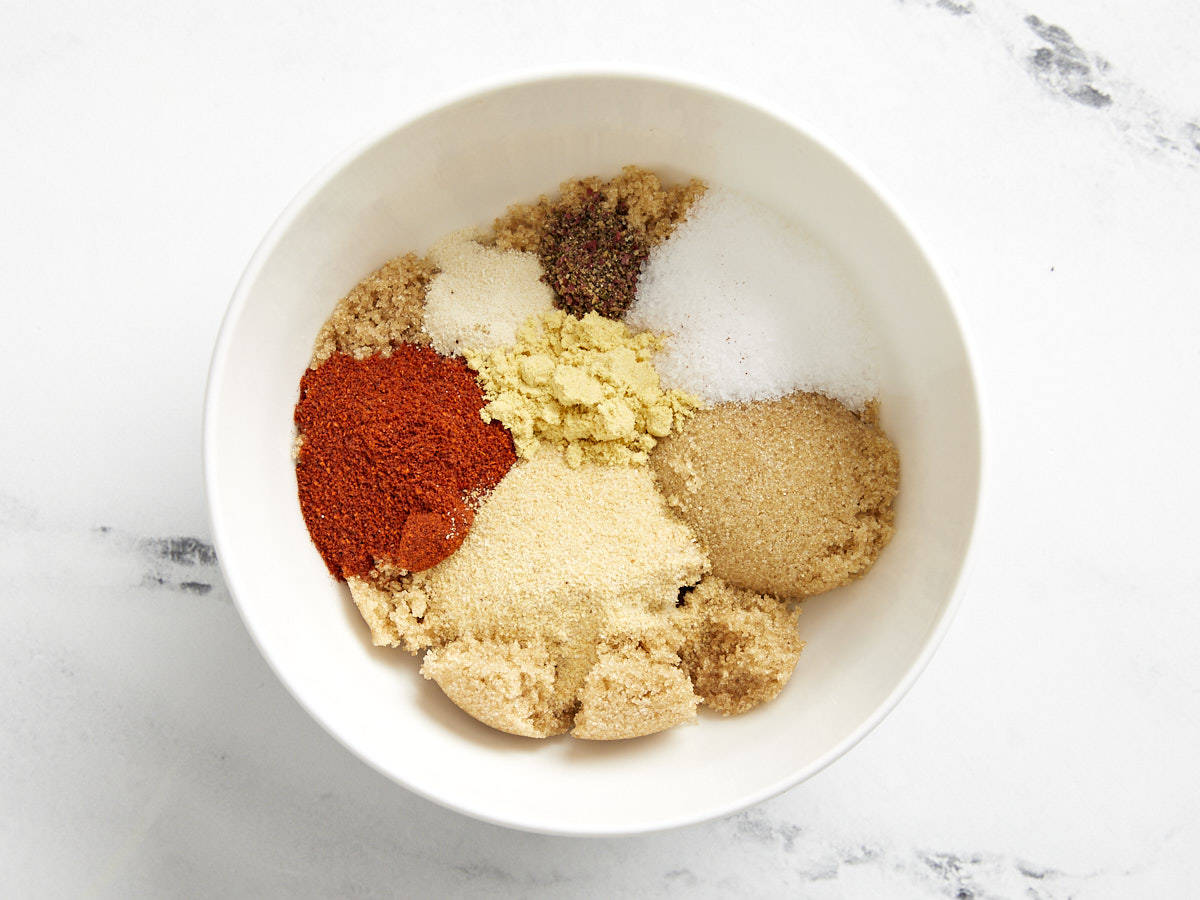
The spice rub for these air fryer pork chops is the real star of the show. Classic onion and garlic powder combine with smoked paprika for a smokey, savory flavor, while brown sugar adds a balancing sweetness and delightful texture to the crust. A little bit of ground mustard adds pleasant bitter notes and tanginess. This rub is super versatile and also works great on extra firm tofu and chicken!

Ingredients for Air Fryer Pork Chops

Here’s what you’ll need to make Air Fryer Pork Chops:

  • Pork Chops: We were able to fit two boneless center-cut pork chops in our air fryer basket. You’ll want chops that are 1-1 1/2 inches thick to ensure they stay nice and juicy.
  • Seasoning: Smoked paprika, garlic powder, onion powder, salt, pepper, ground mustard, and dark brown sugar create a smoky, sweet, savory, and tangy spice rub. Make sure to save extra for dusting on top when you flip the chops– this helps them crisp up beautifully.
  • Cooking Oil: We like budget options like canola or vegetable oil, but olive oil will also work.

MORE SEASONING IDEAS

If you want to switch things up, here are some other ways you can season your air fryer pork chops:

Tips For Making Air Fryer Pork Chops

  • Seasoning the chops with the seasoning rub 20-30 minutes before cooking and letting them sit on the counter at room temp will ensure 1. the flavor is as maximized as possible and 2. the outside doesn’t overcook while the inside gets to the proper temperature. Giving your chops a little extra time on the counter before they hit your air fryer ensures that they will have a nice crust on the outside while remaining juicy on the inside!
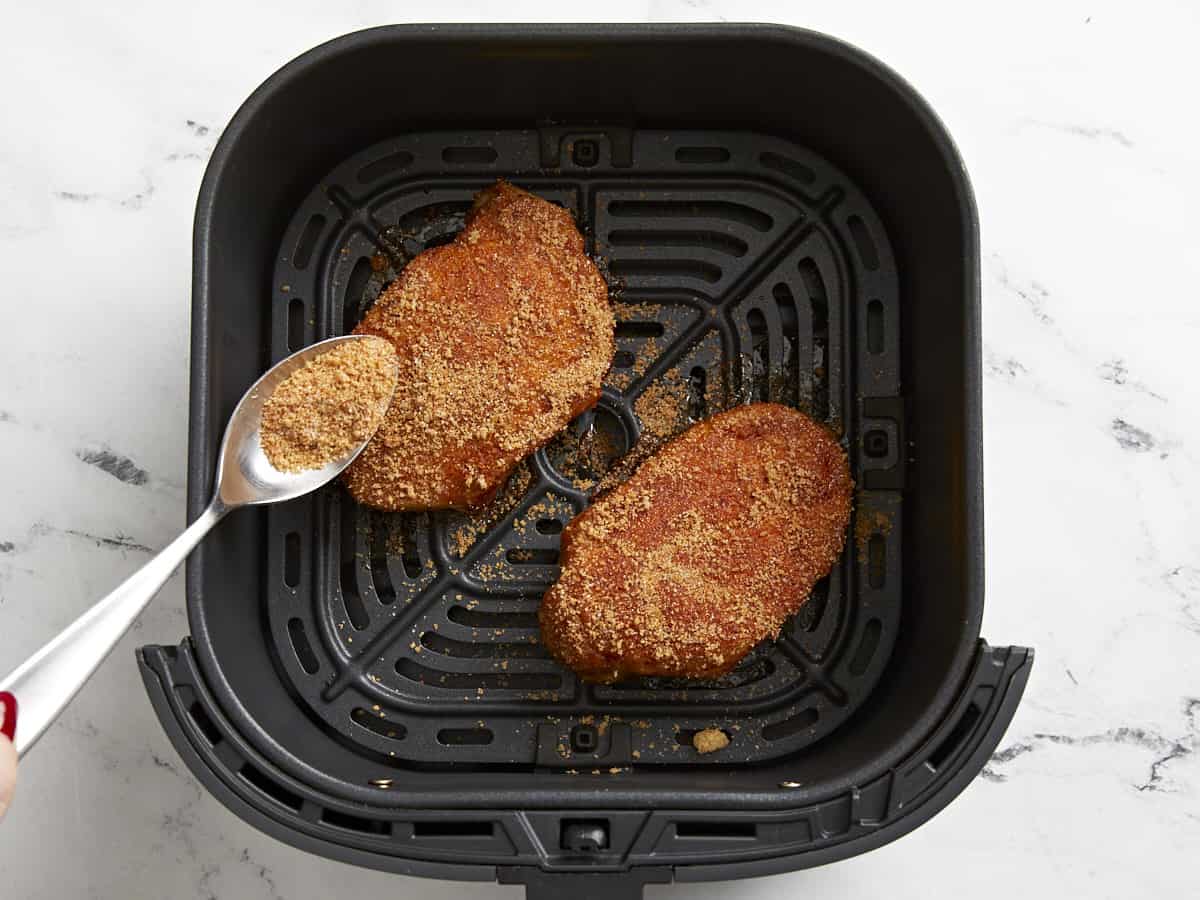
  • There should be about 1 Tbsp of the seasoning leftover. Save it and sprinkle it over the chops after flipping them. This will help to ensure they stay nice and crispy.
  • Remove your pork chops from the air fryer as soon as they reach 145°F and let them rest for at least 3 minutes before slicing to lock in the juices.

What to Serve with Air Fryer Pork Chops

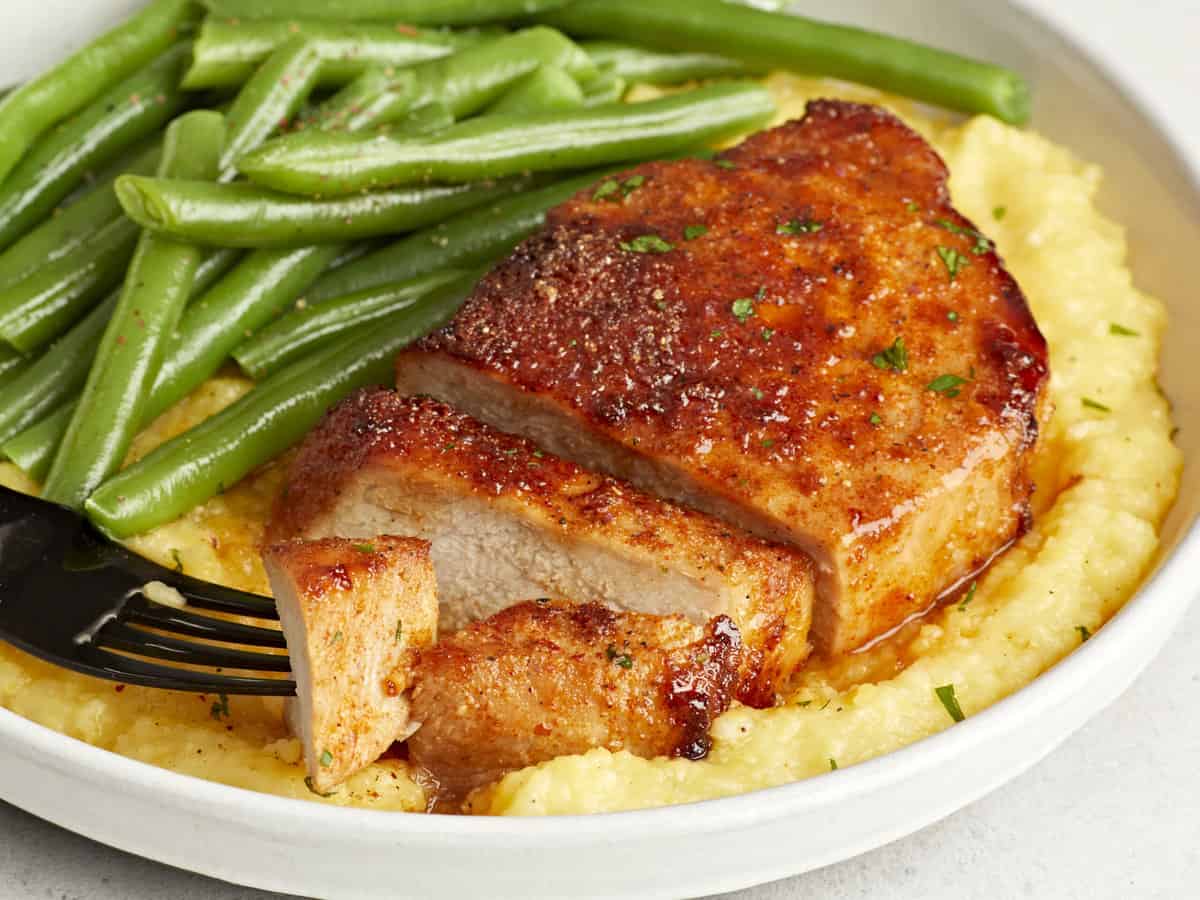
These air fryer pork chops are so versatile and pair well with just about anything you can imagine. You could make a simple side saladsteamed green beans, or creamy polenta. Or use your air fryer to quickly whip up some air fryer Brussels sprouts!

overhead view of a partially sliced air fryer pork chop on a white plate with potatoes and green beans.
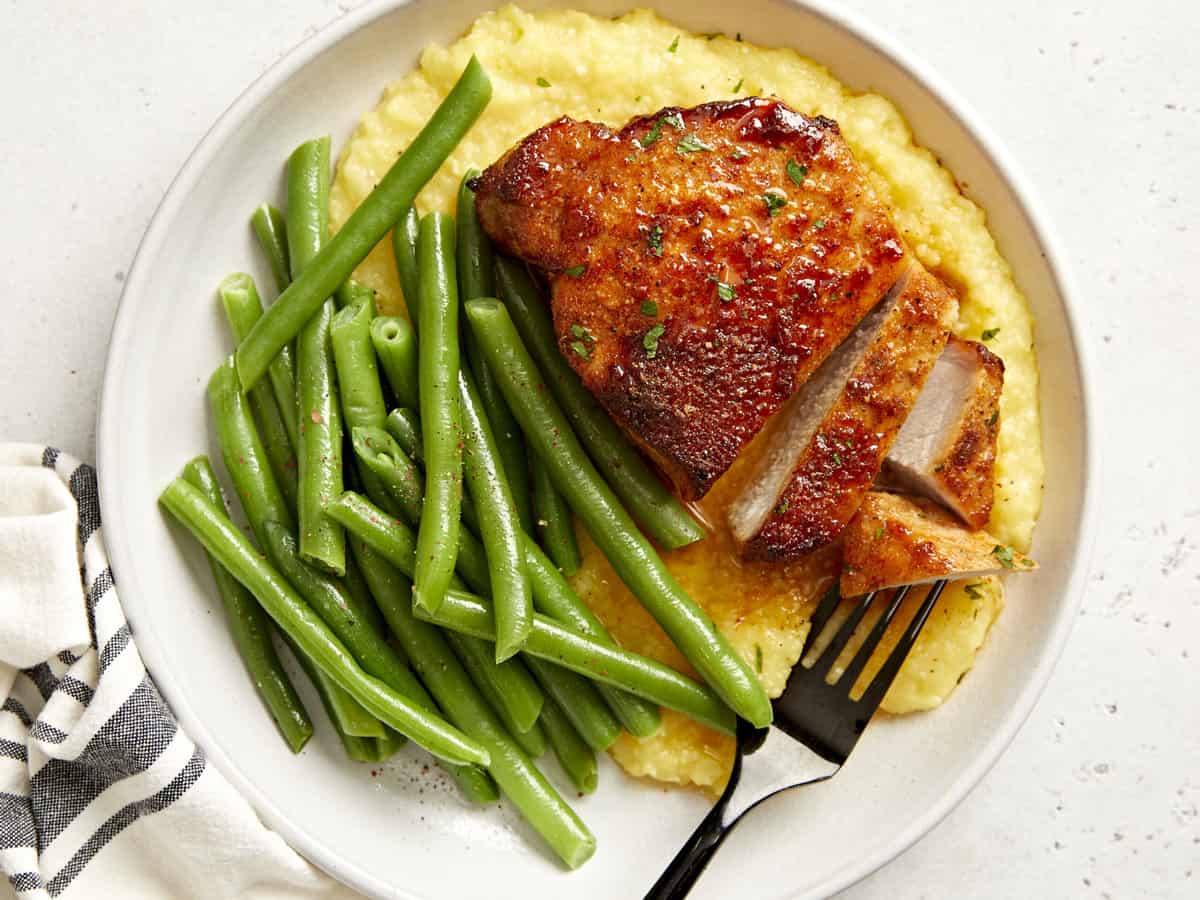
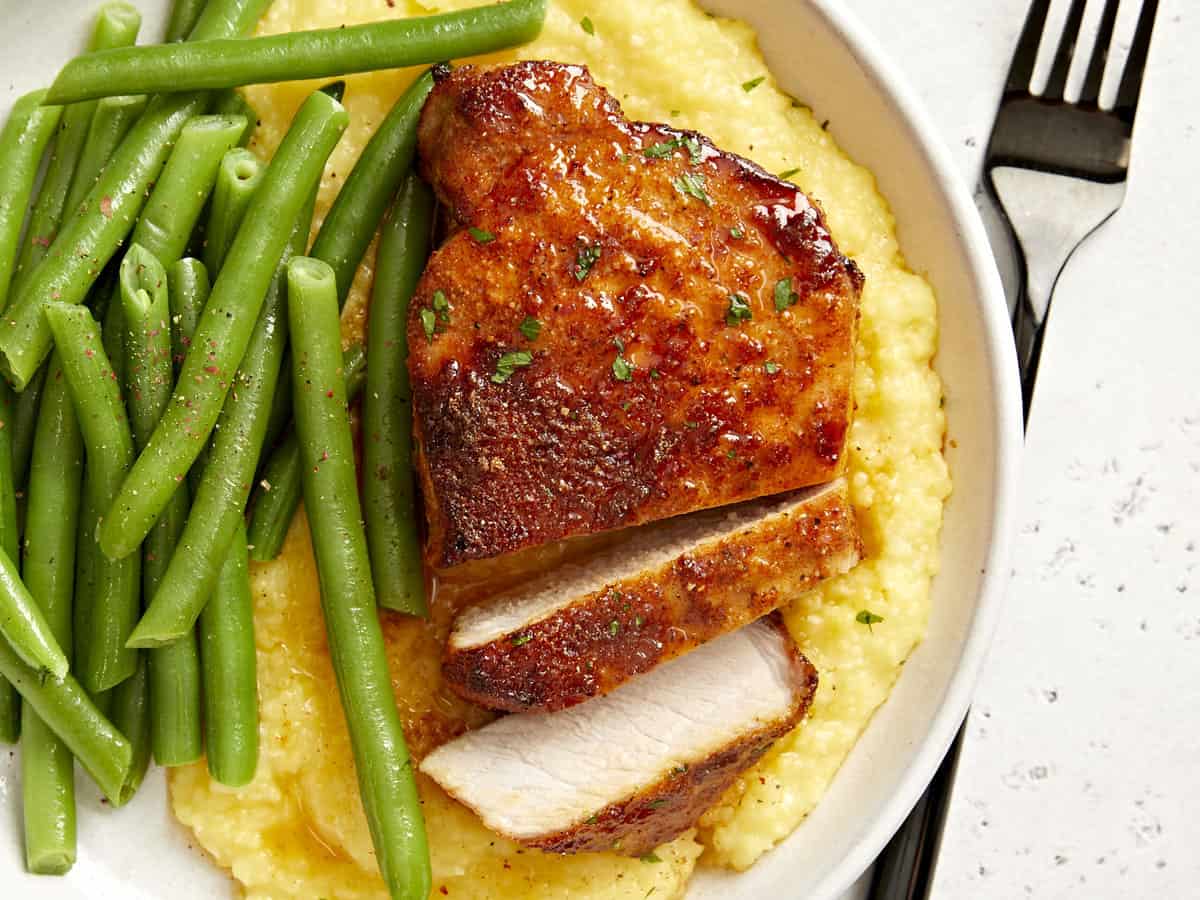
overhead view of a partially sliced air fryer pork chop on a white plate with grits and green beans.
Print

Air Fryer Pork Chops

These Air Fryer Pork Chops are the perfect weeknight recipe! They're deliciously seasoned and ready in just 30 minutes!
Course Dinner, Main Course
Cuisine American
Total Cost ($3.82 recipe / $1.91 serving)
Prep Time 15 minutes
Cook Time 15 minutes
Total Time 30 minutes
Servings 2
Calories 373kcal
Author Jess Rice

Equipment

Ingredients

Instructions

  • In a small bowl, combine the smoked paprika, garlic powder, ground mustard, onion powder, brown sugar, salt, and pepper.
  • Preheat the air fryer to 420ºF for at least 5 minutes. Pat pork chops dry with a paper towel.
  • Drizzle the cooking oil over top of pork chops on cutting board, then add the seasoning mixture. Rub the pork chops until they are well coated in oil and spices. The brown sugar will caramelize in the air fryer and make the texture of the pork chops perfect! Reserve at least 1 Tablespoon of the sugar seasoning mixture to rub on top when you flip half way through!
  • Place the pork chops in the air fryer basket and cook for 7 minutes. Flip, sprinkling reserved seasoning mixture evenly over top and cook for 8 minutes more.
  • Use a meat thermometer to make sure the internal temperature has reached 145ºF, and if not, cook for 1-2 minutes longer.
  • Remove from heat and let the pork chops rest for 3 minutes and then serve with your favorite simple sides!

See how we calculate recipe costs here.

Nutrition

Serving: 1pork chop | Calories: 373kcal | Carbohydrates: 26g | Protein: 30g | Fat: 17g | Sodium: 1845mg | Fiber: 1g
three-quarters view of a partially sliced air fryer pork chop on a white plate with grits and green beans.

how to make Air Fryer Pork Chops – step by step photos

spices in a white bowl.

In a small bowl, combine 1 1/2 tsp smoked paprika, 1 tsp garlic powder, 1 tsp ground mustard, 1/4 tsp onion powder, 4 Tbsp dark brown sugar, 1 1/2 tsp salt, and 1/4  tsp pepper. Preheat the air fryer to 420ºF for at least 5 minutes. Pat 2 boneless center-cut pork chops dry with a paper towel.

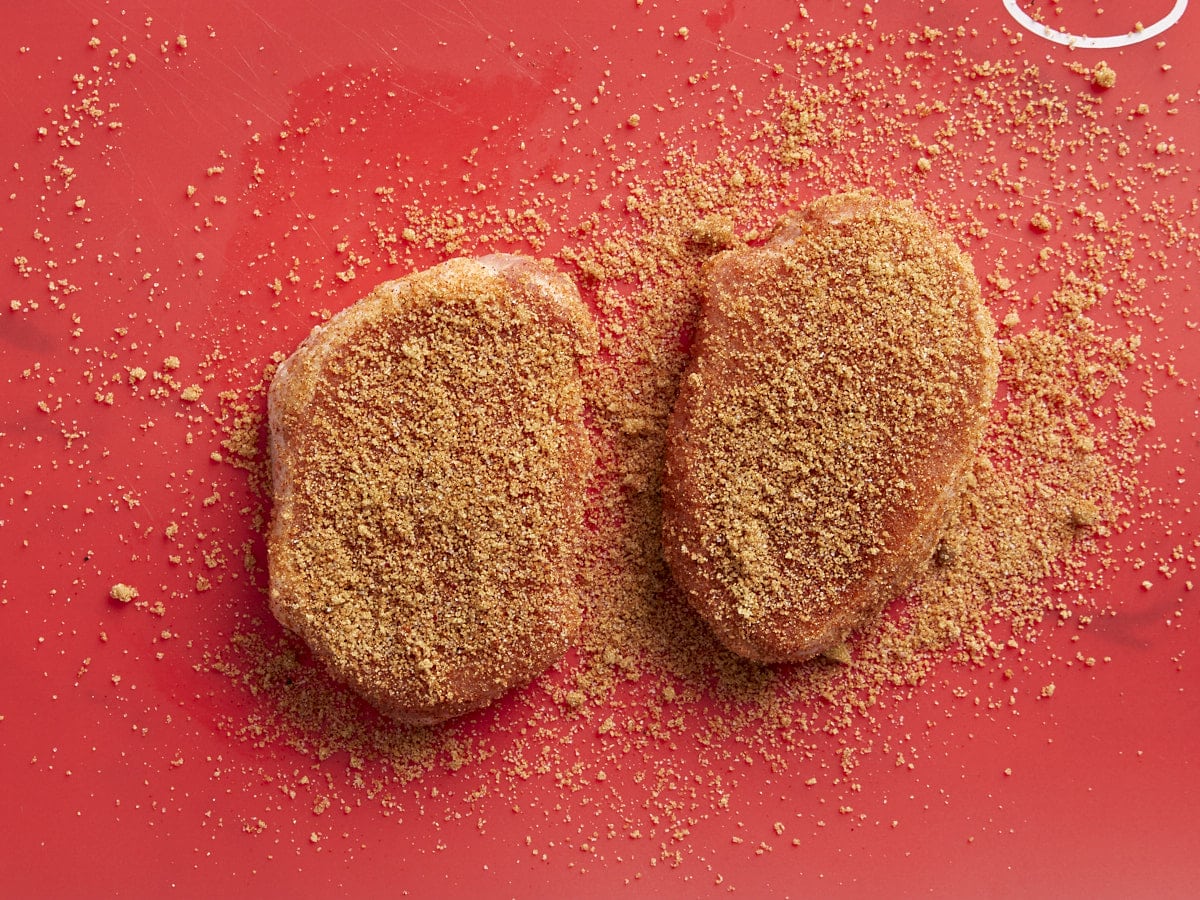
seasoned raw pork chops on a red cutting board.

Drizzle 1 Tbsp cooking oil over the top of the pork chops on a cutting board, then add the seasoning mixture. Rub the pork chops until they are well coated in oil and spices. The brown sugar will caramelize in the air fryer and make the texture of the pork chops perfect! Reserve at least 1 Tablespoon of the sugar seasoning mixture to rub on top when you flip halfway through!

spooning spices over seasoned pork chops in an air fryer basket.

Place the pork chops in the air fryer basket and cook for 7 minutes. Flip, sprinkling the reserved seasoning mixture evenly over top, and cook for 8 minutes more.

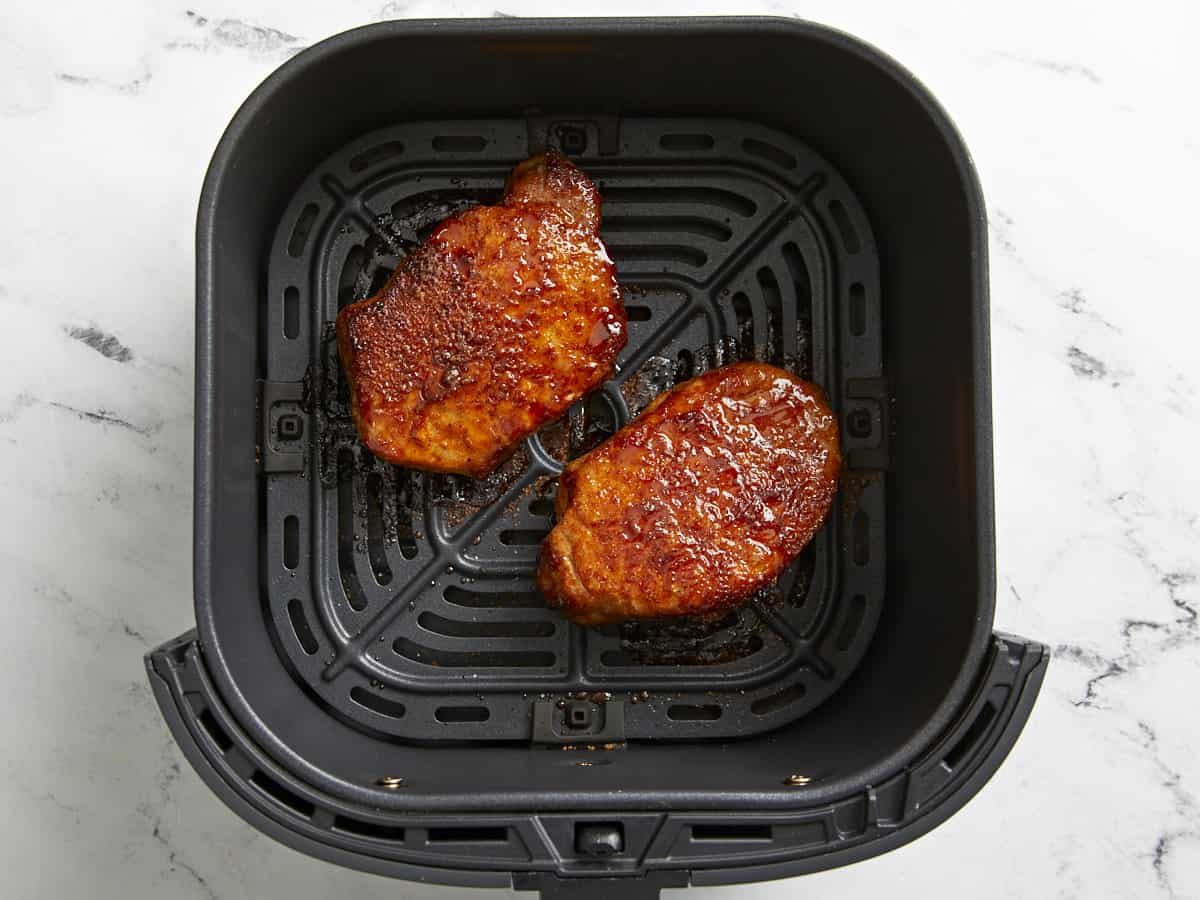
cooked seasoned pork chops in an air fryer basket.

Use a meat thermometer to make sure the internal temperature has reached 145ºF, and if not, cook for 1-2 minutes longer. Remove from heat and let the pork chops rest for 3 minutes and then serve with your favorite simple sides!

partial overhead view of a partially sliced air fryer pork chop on a white plate with grits and green beans.

These juicy, crispy air fryer pork chops are the perfect weeknight meal!

The post Air Fryer Pork Chops appeared first on Budget Bytes.
Ham and Potato Soup

This ham and potato soup is creamy but not too heavy and loaded with fresh veggies and salty ham. It’s perfect for the seasonal transition!

The post Ham and Potato Soup appeared first on Budget Bytes.
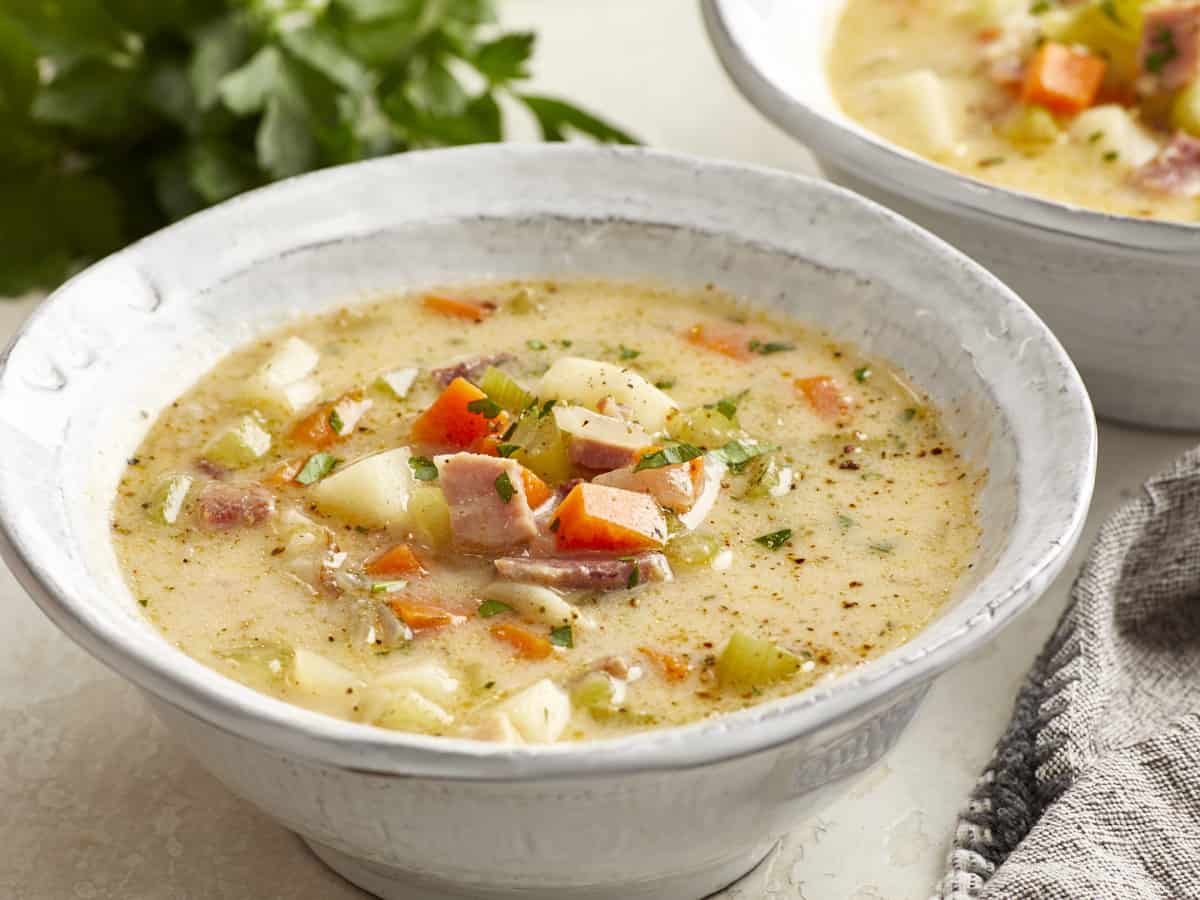
These hot and cold spring days have me feeling all kinds of confused about what to make for dinner. One day it’s warm and sunny, and the next it feels like winter all over again. But no matter the mood, I feel like soup is always the right answer, and this Ham and Potato Soup is a crowd pleaser. Creamy but not too heavy, and loaded with fresh veggies and salty ham, this soup is perfect for this transitional season!

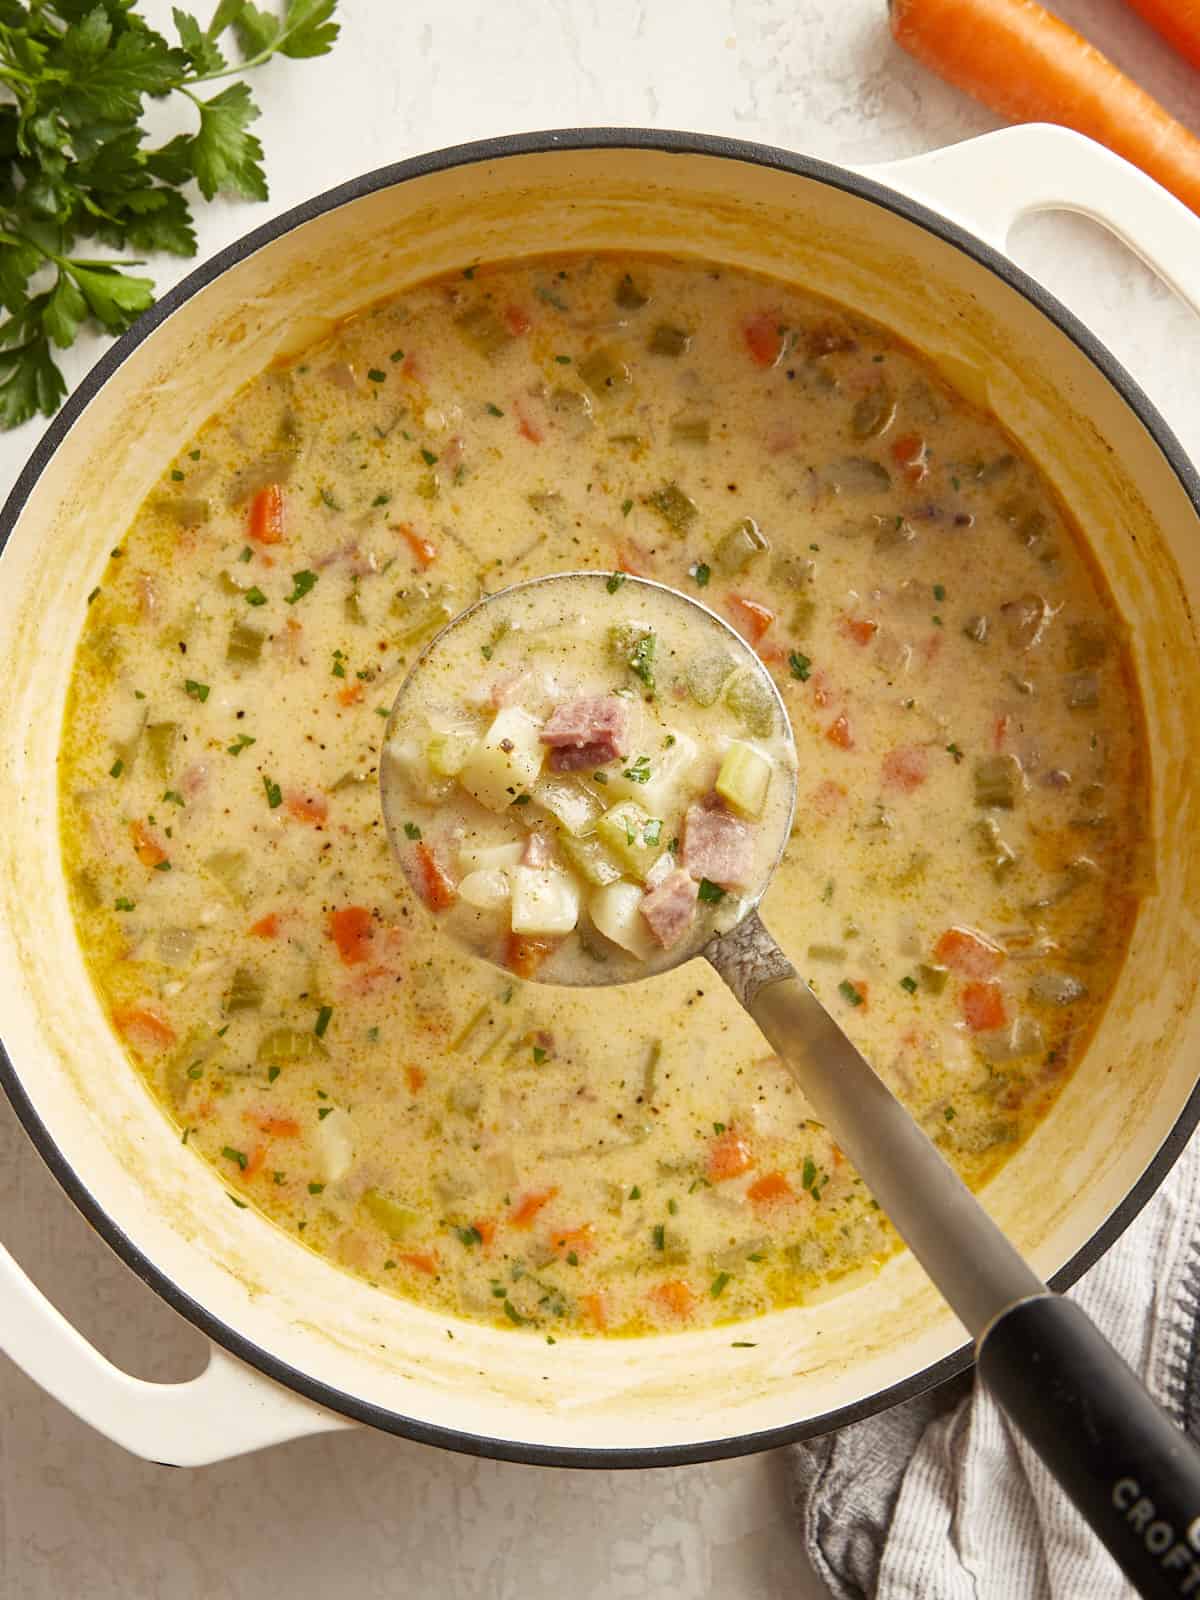
a ladleful of ham and potato soup suspended over a pot of soup.

What is Ham and Potato Soup?

This rich and creamy soup is made from a base of vegetable broth enriched with milk and butter and stuffed to the brim with fresh veggies, chunky potatoes, and salty ham. It’s real belly-warming food, perfect for taking the chill off!

Ingredients for Ham and Potato Soup

Here’s what you’ll need to make ham and potato soup:

  • Oil: I used olive oil, but a neutral-flavored oil like canola or vegetable oil will also work well.
  • Mirepoix: A base of celery, carrots, and onion builds the flavor of this soup.
  • Potatoes: I used 2 medium potatoes, which came out to be 3 1/2 cups once diced. I prefer to peel my potatoes for this recipe, but you can leave the skins on if you like them!
  • Cooked Ham: You can buy a ham steak or use your leftover ham from our Baked Ham recipe! Vegetarian? No problem. You can leave out the ham and this becomes more of a vegetable chowder and it is delicious!
  • Vegetable Broth: You’ll need 6 cups, or you can dissolve 2 Tbsp of vegetable bouillon in 6 cups of water. You can also use Chicken Broth if that’s what you have on hand!
  • Salted Butter: Adds richness and helps form the roux that thickens the soup.
  • All-Purpose Flour: Combines with the butter to form a roux that thickens the soup.
  • Milk: Adds creaminess to the soup.
  • Salt and Pepper: Enhance the overall flavor of the soup.
  • Parsley: A bit of minced fresh parsley adds some color and freshness to the soup.

What Potatoes Are Best For Soup?

The best potato for any given soup really depends on the texture you’re after.

  • With this soup, I wanted to keep distinct chunks of intact potato, so I went for red potatoes. Other varieties that hold their shape well include new potatoes, baby potatoes, and fingerlings.
  • If you’re looking for your potatoes to soften up a bit more but still mostly hold their shape, Yukon Golds are a great choice for this soup.
  • Starchier potatoes, like Russets, will melt into the soup, making it super thick, but you won’t get the whole potato texture in every bite.

A Note on Salt

You may not need any salt depending on the ham you’re using, so taste often and adjust as you see fit. Between the salted butter, bouillon, and the ham from our Baked Ham recipe, I didn’t have a need for more than a pinch of additional salt.

How Do You Thicken Ham and Potato SOup?

I chose to thicken this soup with what’s known as a “blonde roux.” It’s a mixture of butter and flour that is cooked over medium-low heat until it juuust starts to change color from white to blonde. This deepens the flavor of the soup without overpowering the natural flavor of the other ingredients.

three-quarters view of a serving of ham and potato soup in a white bowl.
a ladleful of ham and potato soup suspended over a pot of soup.
Print

Ham and Potato Soup

This ham and potato soup is creamy but not too heavy and loaded with fresh veggies and salty ham. It's perfect for the seasonal transition!
Course Dinner, Main Course, Soup
Cuisine American
Total Cost $11.24 recipe / $1.40 serving
Prep Time 20 minutes
Cook Time 40 minutes
Total Time 1 hour
Servings 8 (1.5 cups each)
Calories 212kcal
Author Jess Rice

Equipment

Ingredients

  • 2 Tbsp olive oil $0.34
  • 2 carrots, peeled and diced $0.20
  • 3 stalks celery, diced $0.30
  • 1 small white onion, diced $1.02
  • 2 medium potatoes, peeled and diced (roughly 3½ cups) $1.66
  • 6 cups vegetable broth $0.53
  • 2 cups cooked diced ham $6.38
  • 2 Tbsp salted butter $0.24
  • 1/4 cup all-purpose flour $0.05
  • 2 cups milk $0.38
  • 2 Tbsp minced fresh parsley $0.08
  • 1 tsp freshly cracked black pepper $0.05
  • Salt, to taste $0.01

Instructions

  • In the stock pot, add 2 Tbsp olive oil on medium heat. Add the carrots, celery, and onion and cook down until slightly softened and the onions are nice and glossy, about 5 minutes.
  • Add potatoes, vegetable broth, and ham in the stockpot. Bring the pot to a boil. Once boiling, turn the heat down to medium and let the potatoes simmer for about 15 minutes, or until they are tender. Stir in the pepper.
  • Melt the butter in a separate medium-size saucepan over medium-low heat. Whisk in the all-purpose flour until smooth. Cook for about 1 minute. (Note: this is a “blonde roux” so you don’t want the flour to toast too much!) Whisk in milk and cook for about 4 minutes until thick and warm.
  • Pour milk/roux mixture into the stockpot with ham soup and whisk to combine. Cook until all vegetables reach desired tenderness and soup thickens to your liking, another 10 minutes should do it. Add the parsley, additional salt and pepper if needed and enjoy!

See how we calculate recipe costs here.

Notes

This makes 12 cups of soup, but we found 1 1/2 cups to be perfect for a meal, so if that’s your serving size, you can serve 8 people.

Nutrition

Serving: 1bowl | Calories: 212kcal | Carbohydrates: 20g | Protein: 9g | Fat: 11g | Sodium: 1109mg | Fiber: 2g
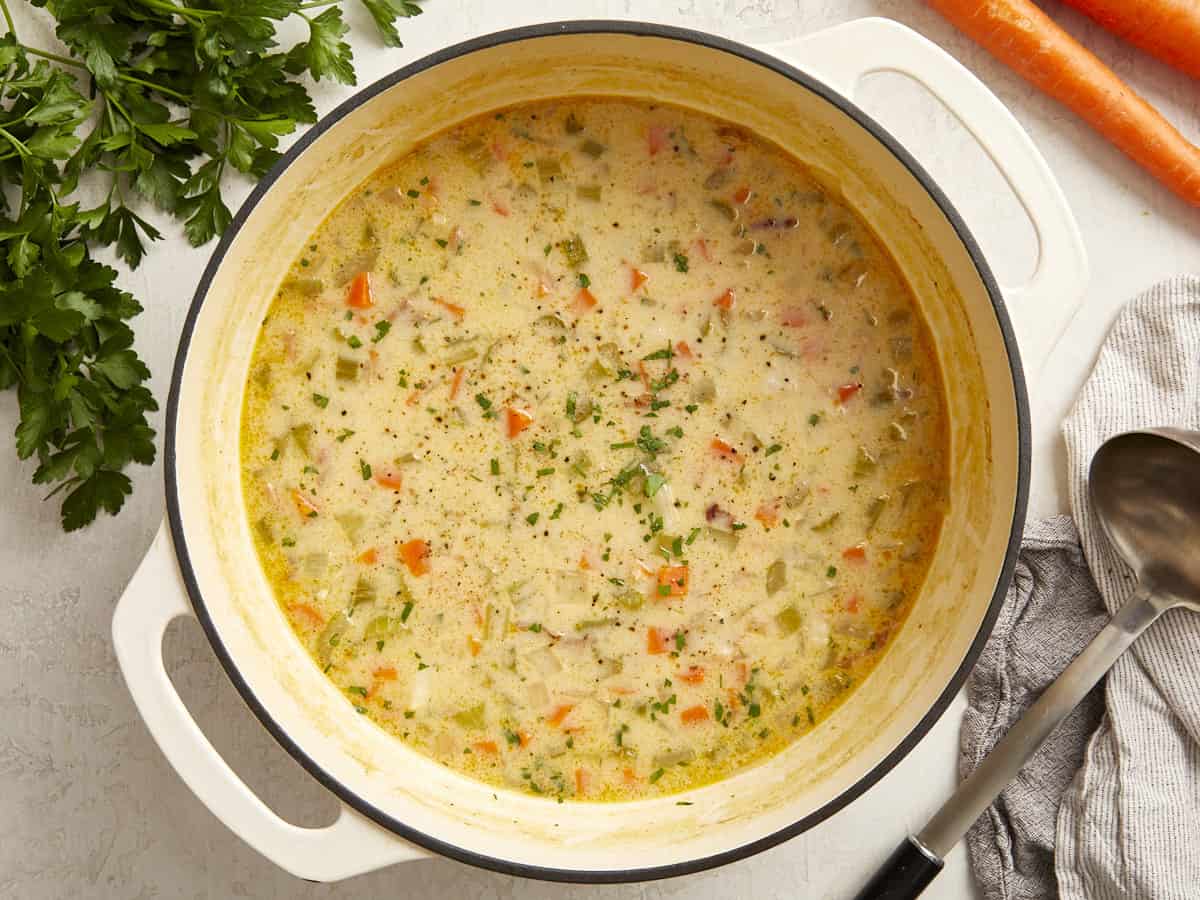
overhead view of ham and potato soup in a white dutch oven.

how to make Ham and Potato Soup – step by step photos

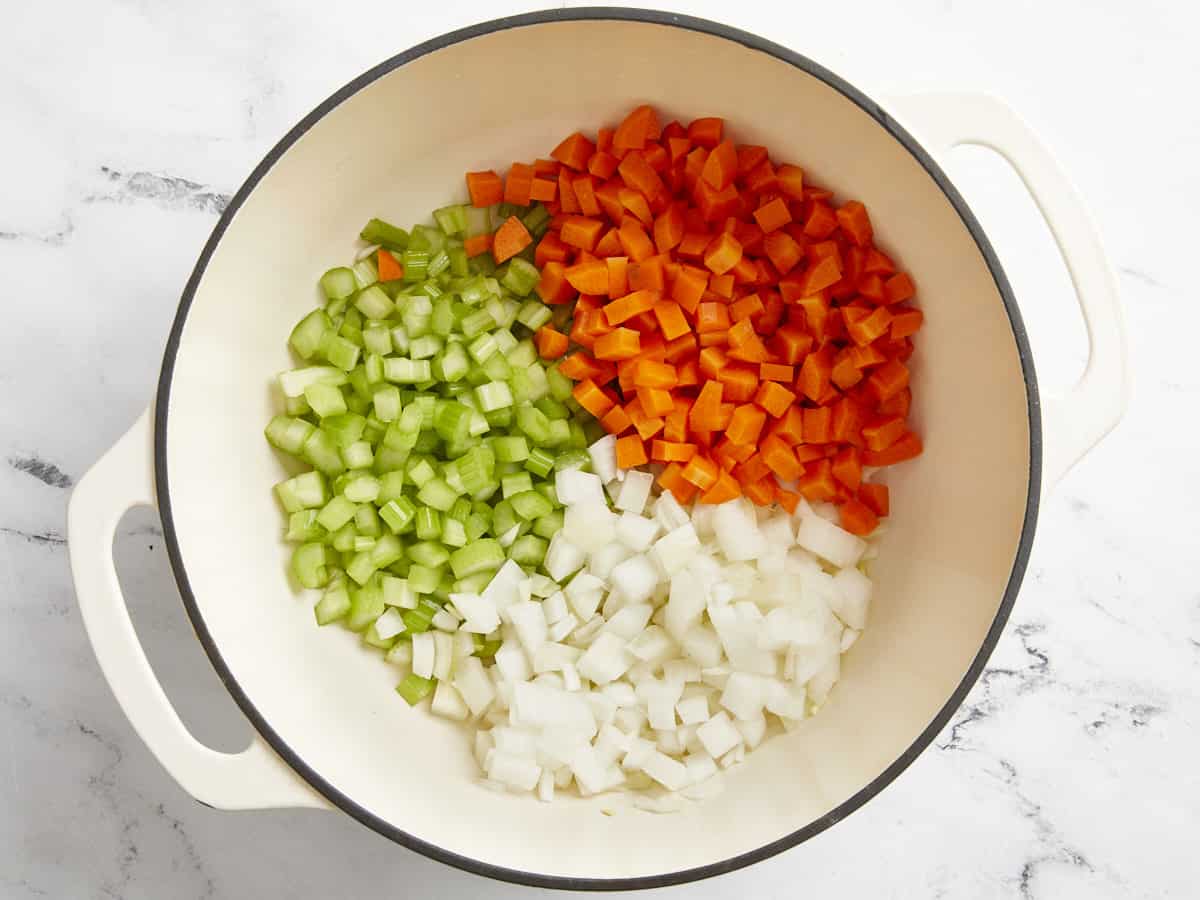
chopped celery, carrots, and onions in s white dutch oven.

In your stock pot, add 2 Tbsp olive oil on medium heat. Add 2 peeled and diced carrots, 3 diced stalks celery, and 1 diced small white onion and cook down until slightly softened and the onions are nice and glossy, about 5 minutes.

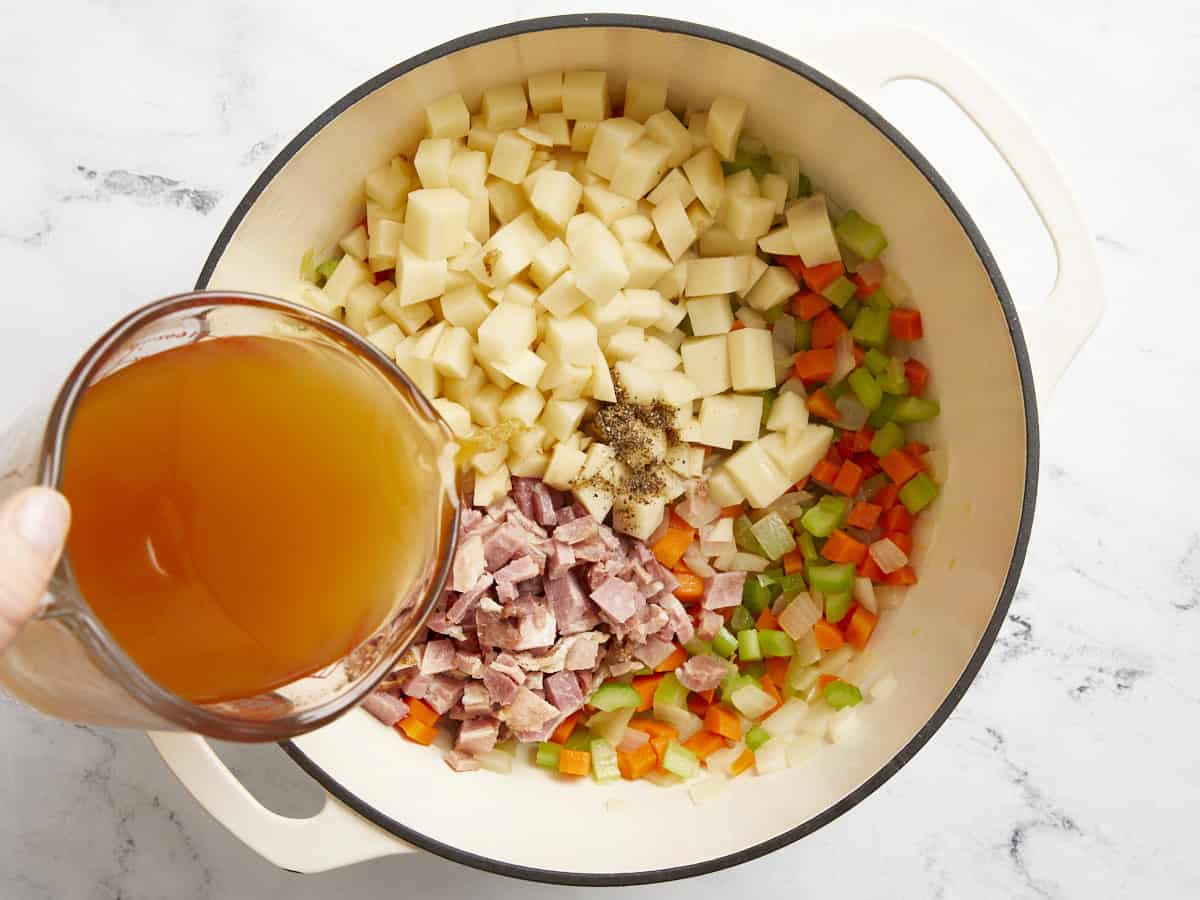
broth poured over mirepoix, potatoes, and ham in a dutch oven.

Add 2 peeled and diced potatoes, 6 cups vegetable broth, and 2 cups diced cooked ham in the stockpot. Bring to a boil; simmer over medium heat until potatoes are tender, about 15 minutes. Stir in your 1 tsp black pepper.

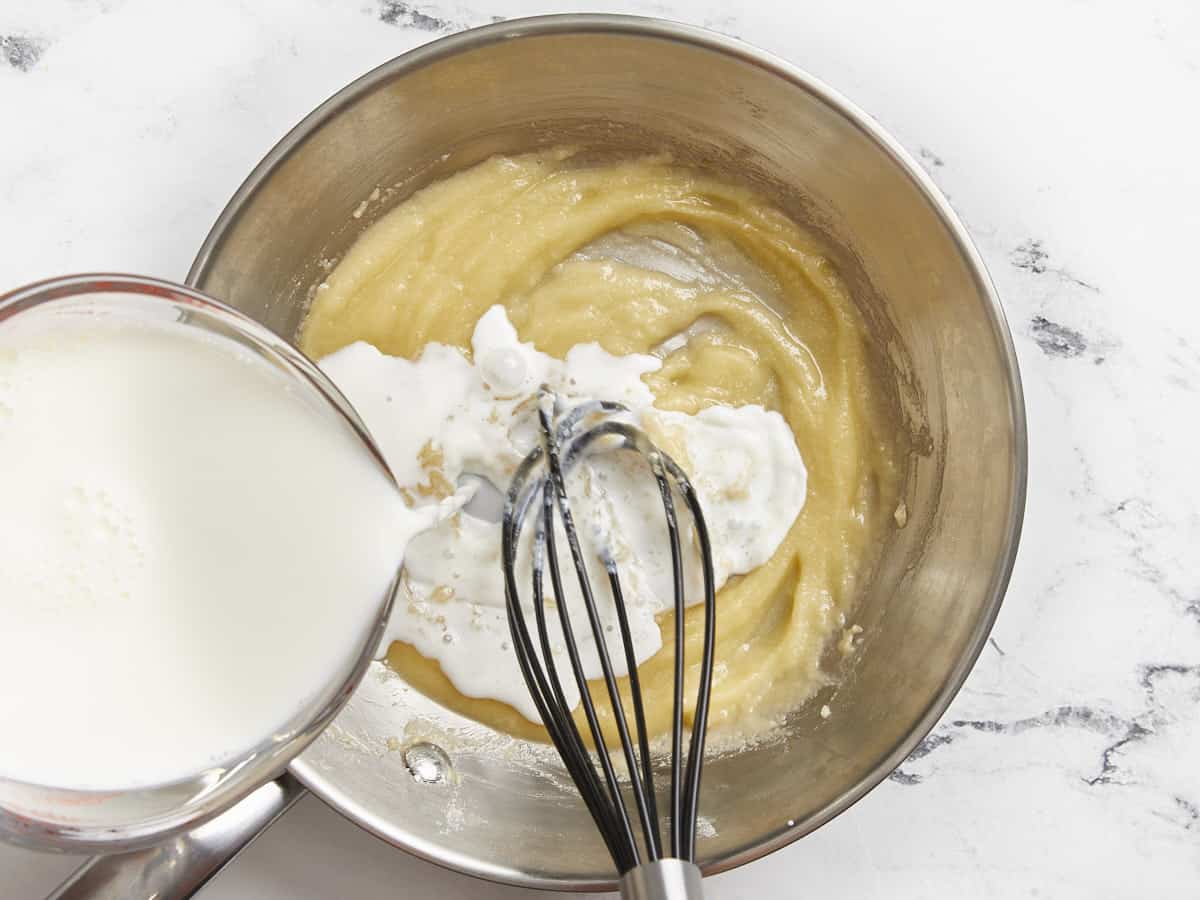
milk poured over butter and flour paste in a frying pan with a whisk.

Melt 2 Tbsp salted butter in a separate medium-size saucepan over medium-low heat. Whisk in 1/4 cup all-purpose flour until smooth. Cook for about 1 minute. (Note: this is a “blonde roux” so you don’t want the flour to toast too much!) Whisk in 2 cups milk and cook for about 4 minutes until thick and warm.

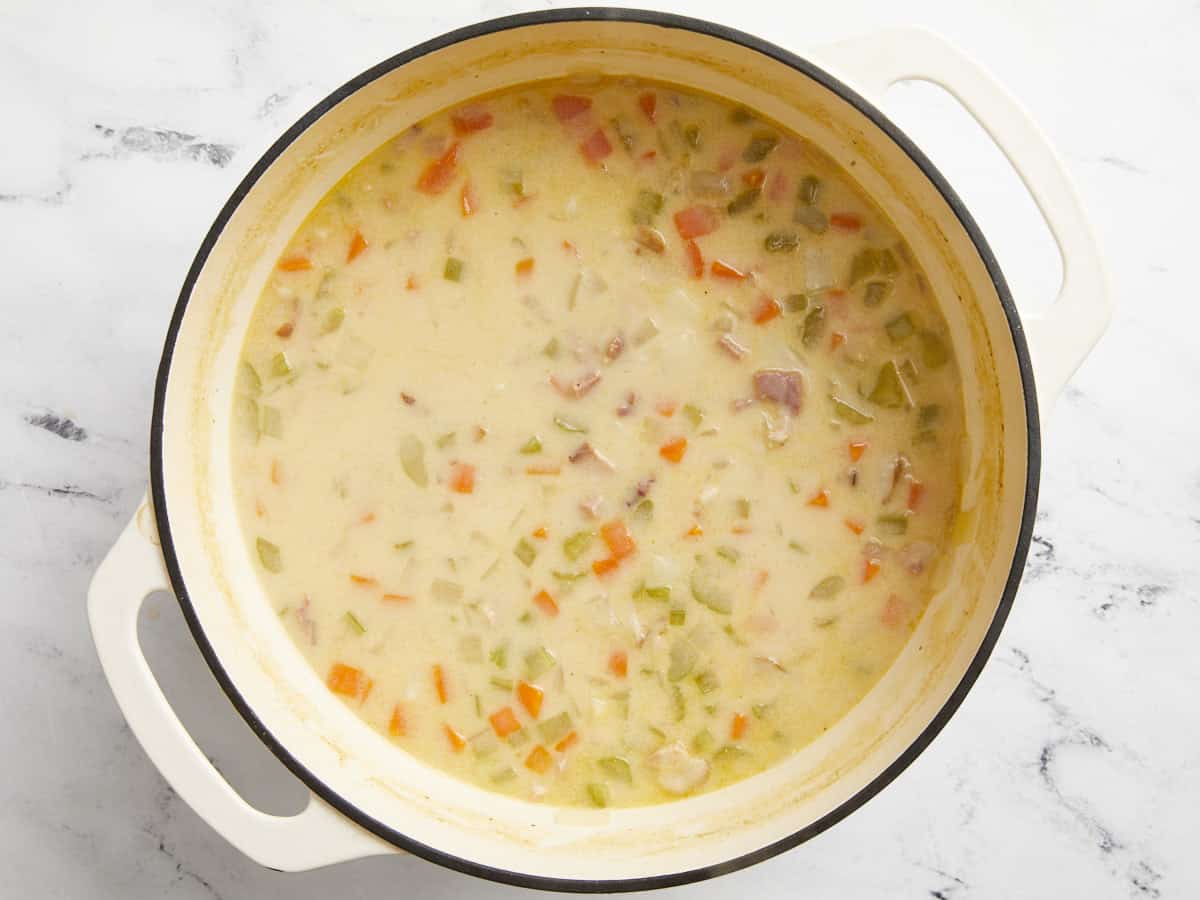
ham and potato soup in a dutch oven.

Pour milk/roux mixture into the stockpot with ham soup and whisk to combine. Cook until all vegetables reach desired tenderness and soup thickens to your liking, another 10 minutes should do it. Add parsley, additional salt, and pepper if needed and enjoy!

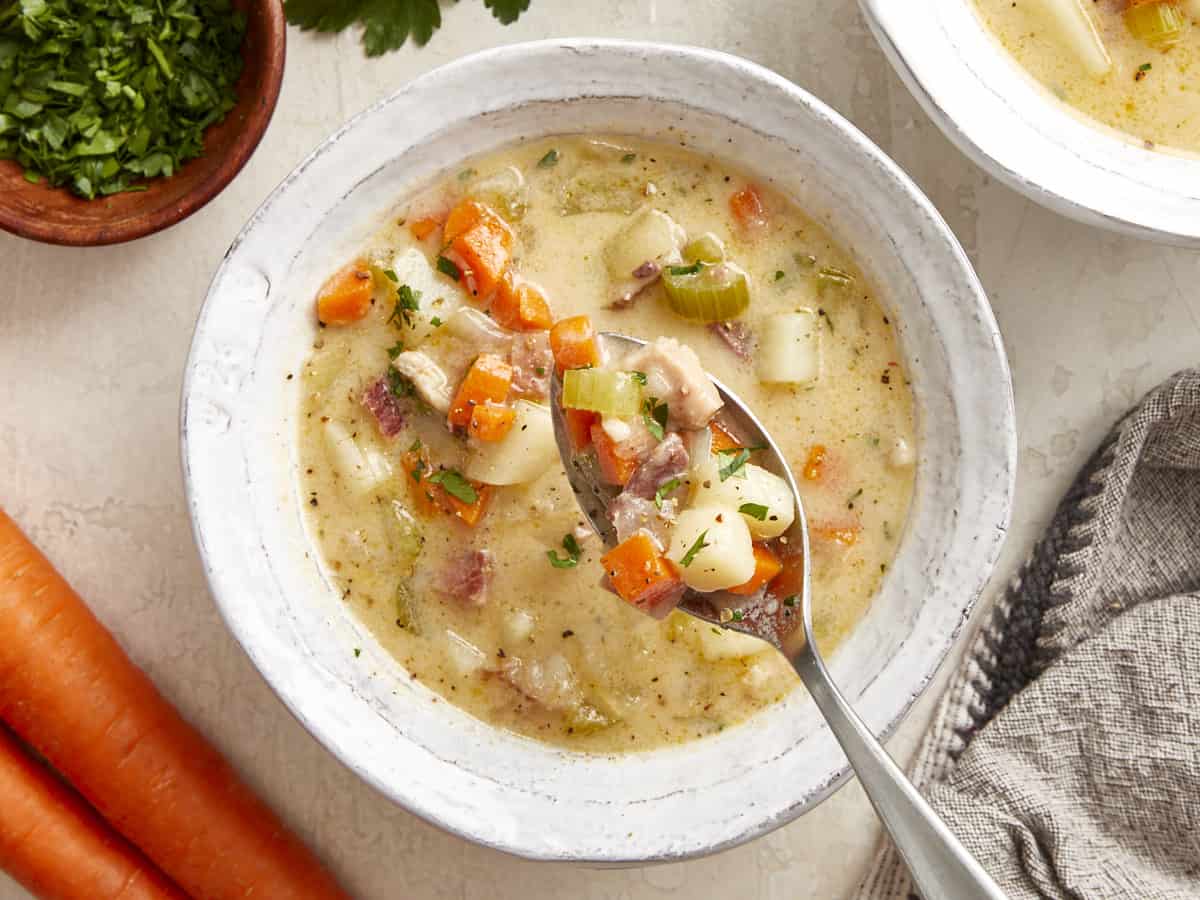
overhead view of a spoonful of ham and potato soup suspended above a serving of soup in a white bowl.

This creamy ham and potato soup is perfect for the changing seasons!

The post Ham and Potato Soup appeared first on Budget Bytes.
Baked Honey-Mustard Ham

This easy, 4-ingredient Honey-Mustard Ham recipe is made with honey, Dijon mustard, and a touch of brown sugar on a baked spiral ham. Honey-Mustard Ham Honey mustard is delicious on ham! This simple spiral ham glaze, with only 3 ingredients, balances t…

This easy, 4-ingredient Honey-Mustard Ham recipe is made with honey, Dijon mustard, and a touch of brown sugar on a baked spiral ham. Honey-Mustard Ham Honey mustard is delicious on ham! This simple spiral ham glaze, with only 3 ingredients, balances the sweet and tangy flavors and complements the taste of the ham. It’s so […]

Baked Ham

This Baked Ham is sweet, savory, and juicy– the perfect holiday meal. The glaze makes the outside nice and crisp but still tender.

The post Baked Ham appeared first on Budget Bytes.
When the holidays roll around (Hello, Easter!), there’s nothing my family craves more than a sweet and savory baked ham. I know what you’re thinking, ham is expensive. But this baked ham recipe is proof that a typically expensive meat can be budget-friendly. By using a boneless ham, we don’t waste a single dollar on bones, and it comfortably feeds 11 people. That’s a lot of ham! The texture of this ham is perfectly juicy with a great chew to it. The glaze makes the outside nice and crisp but still tender. There’s nothing quite like a beloved holiday tradition!

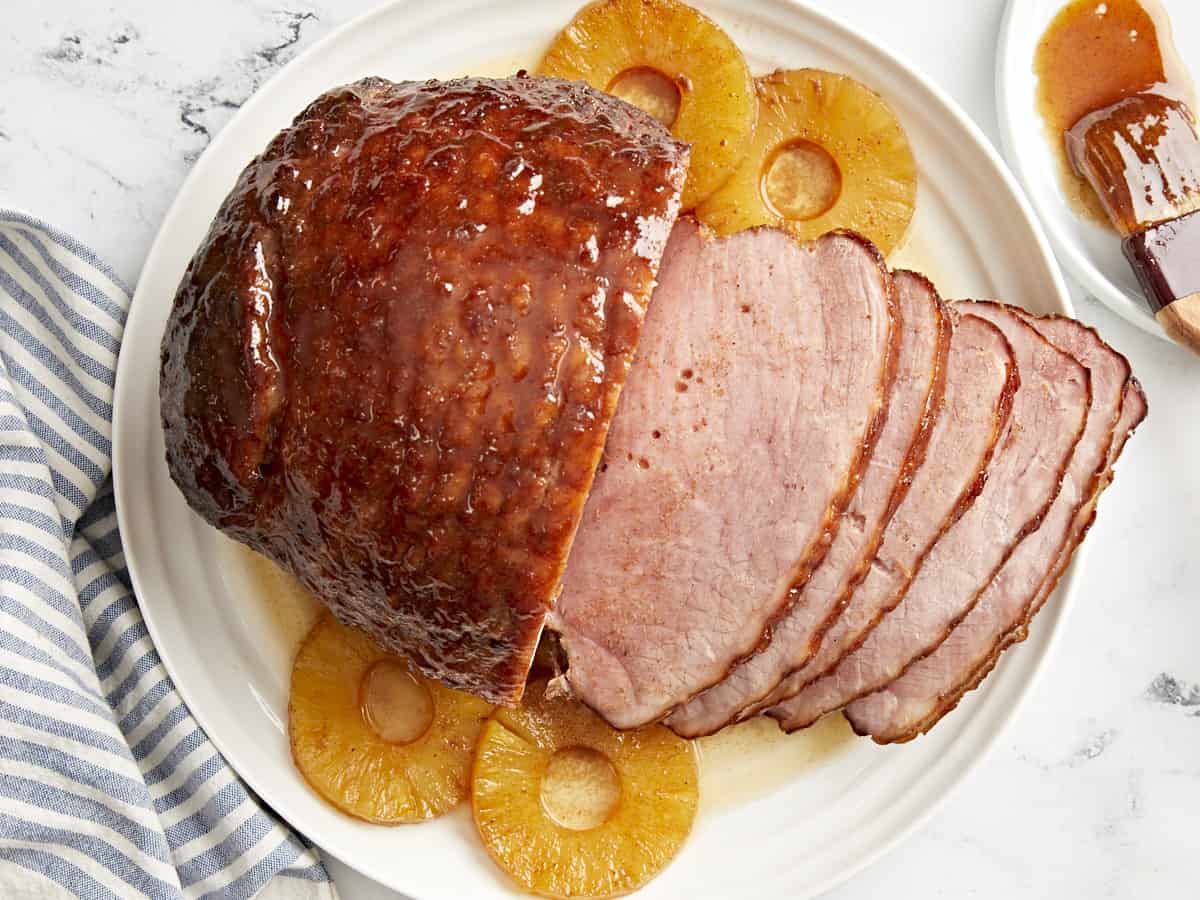
slicing a baked ham on a white plate with pineapple rings.

Why Make Baked Ham?

While Easter traditionally calls for lamb, ham has become the dominant centerpiece because it’s much less expensive and more readily available, both things we love here at Budget Bytes. This baked ham recipe is a true superstar. Salty, savory ham coated in a sweet and tangy glaze made from brown sugar and pineapple juice is just so good. The glaze is super sticky, extra sweet, and gives a beautiful color to your ham. Adding the pineapple juice to the glaze recipe really makes this glaze shine (literally and figuratively!)

Ingredients for Pineapple Ham

Here’s what you’ll need to make baked ham:

  • Smoked Ham: We tested a bone-in ham and a boneless ham. Because hams are priced by weight, we found the boneless hams to be cheapest and offered in smaller quantities. We ended up going with a 5.5lb. ham for this recipe.
  • Sliced Pineapple: The pineapple helps keep the ham moist during cooking. Did you know pineapple also contains natural acidic enzymes that help tenderize any meat you cook with it?
  • Water: Helps steam heat your ham and keep it moist. The amount varies based on the size of your roasting pan. You will want 1/2 inch of liquid in the bottom of the pan to ensure your ham is nice and juicy.
  • Spices: Salt, pepper, garlic powder, onion powder, and pumpkin pie spice create a beautiful blend of sweet and savory flavors.
  • Brown Sugar: Adds depth of flavor, a beautiful color and sweetness to the glaze.
  • Dijon Mustard: Adds balancing bitter notes, earthiness and tanginess to the glaze.

Do you bake a ham covered or uncovered?

We found that it’s best to bake this ham tented with foil to seal in moisture. Without the foil, the ham tends to dry out and turn tough. Remove the foil in the last 10 or so minutes of baking to reduce and brown the glaze.

Tips

  • Most hams sold in the U.S. are fully cooked but require several hours of heating in the oven. So, you can pop it in the oven and then focus on the rest of your side dishes!
  • If you do not need this much meat or your budget is stretched because of the cost of the ham, hunt for a smaller ham. Sometimes if you go to the deli counter, they can help you. Hams are sold by weight, so if you plan on 1/2 – 1/3 pound per person, that will help you choose which size ham your family needs!
  • I know the thought of “pumpkin spice ham” may sound strange, but pumpkin pie spice is a blend of cinnamon, cloves, allspice, ginger, nutmeg, and black pepper… all perfect flavors to compliment a juicy, sweet-but-savory ham!
  • I only filled the bottom of our roasting dish with 1/2 inch of water. A lot of recipes call for 1 inch, but the drippings are great for basting or using as a gravy and we found them to be too diluted if we did the 1 inch of water.
  • The pineapples slid off to the side after the glazing at the end, but they did their job keeping the ham moist and tender. The glazing at the end of cooking will make your ham nice and shiny on the outside, so don’t worry about taking your ham in and out of the oven to baste it (unless you want to, certainly won’t hurt it!) You can always opt to just keep it tented and baste at the end.

What to Serve with Baked Ham

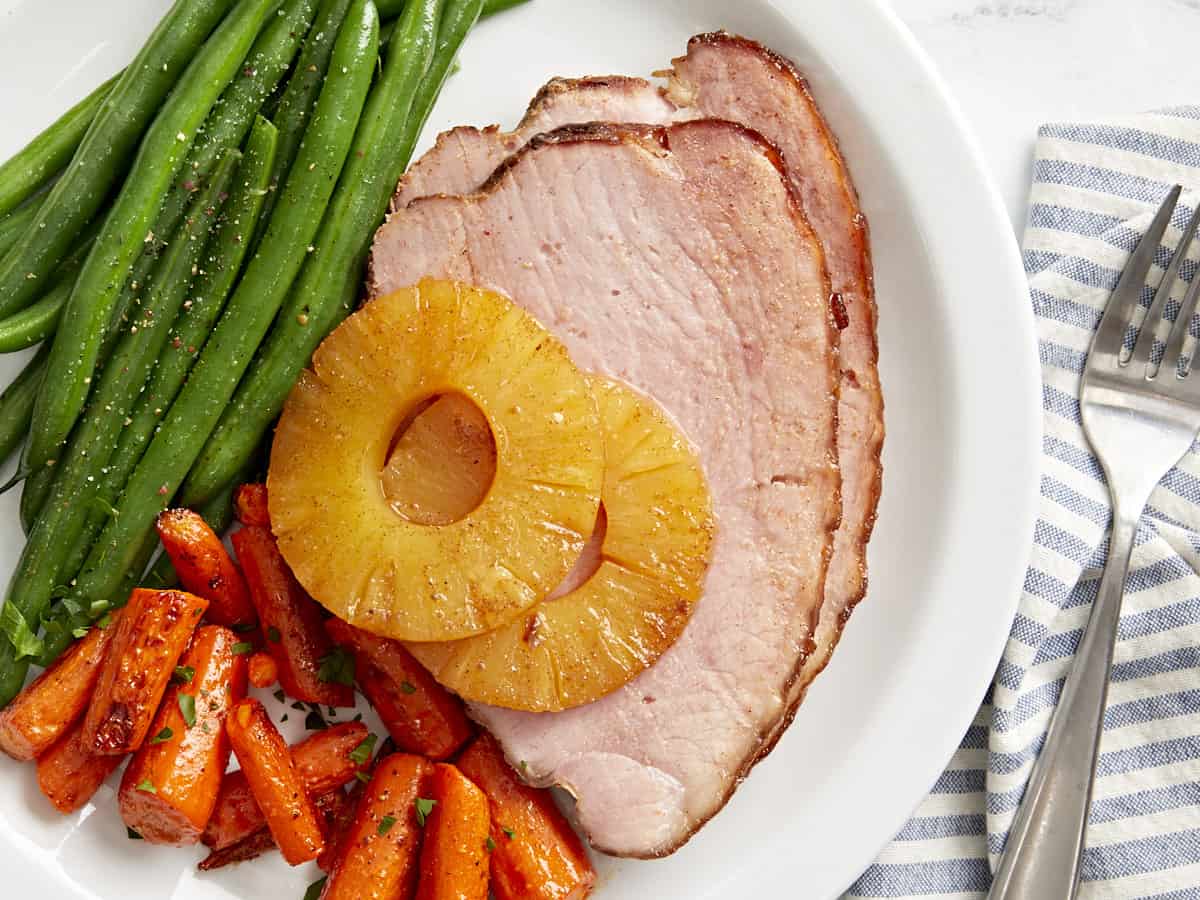
This tasty baked ham is truly the star of the show, so we recommend serving it with simple roasted carrots and steamed green beans.

overhead view of slices of baked ham topped with pineapple rings on a white plate with carrots and green beans.
slicing a baked ham on a white plate with pineapple rings.
Print

Baked Ham

This Baked Ham is sweet, savory, and juicy– the perfect holiday meal. The glaze makes the outside nice and golden but still tender.
Course Main Course
Cuisine American
Total Cost $24.09 recipe / $2.19 serving
Prep Time 15 minutes
Cook Time 1 hour 30 minutes
Total Time 1 hour 45 minutes
Servings 11 (about 1/2 lb. each)
Calories 449kcal
Author Jess Rice

Equipment

  • 9×13 roasting pan – You can use whatever size roasting pan the ham will comfortably fit in with room for the added water and drippings that run off.

Ingredients

Instructions

  • Gather all glaze ingredients and preheat oven to 350°F.
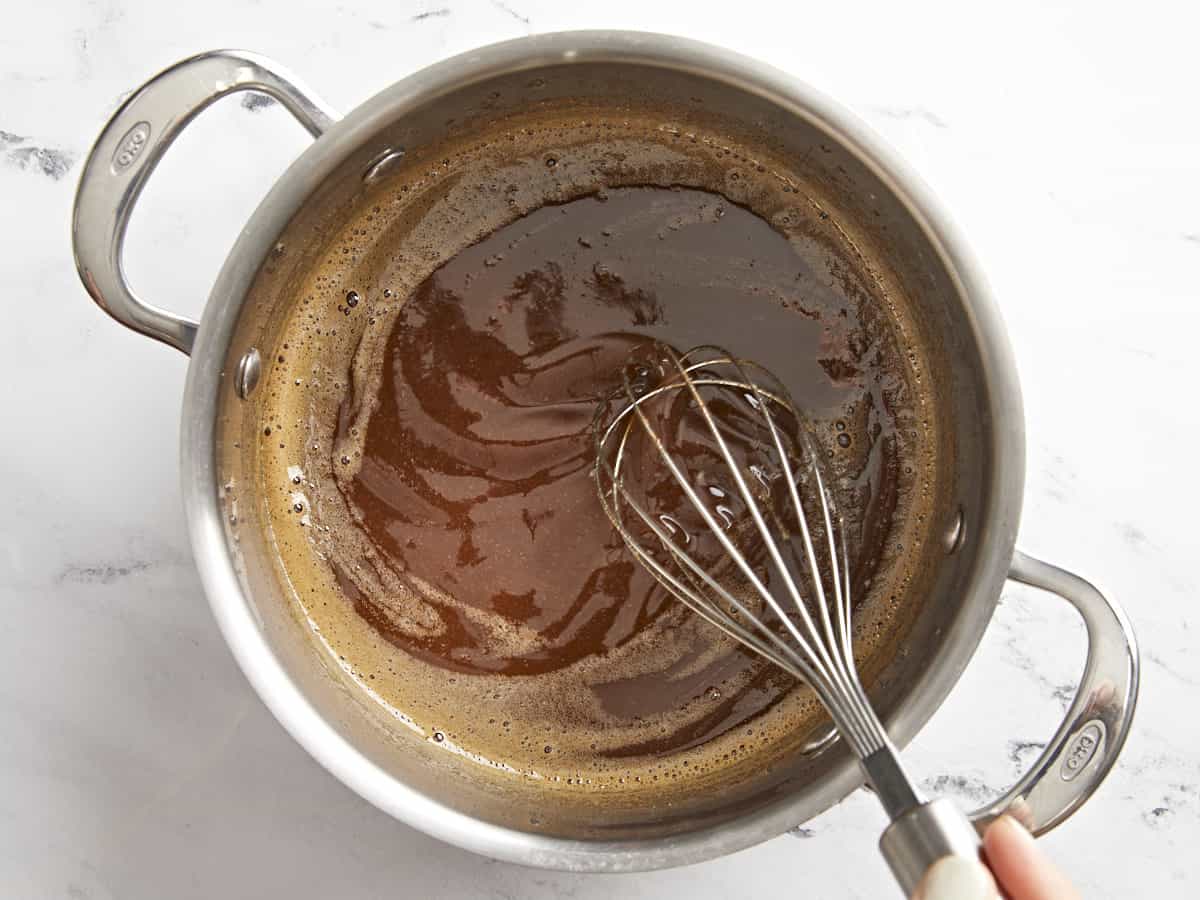
  • In a saucepan, whisk together pineapple juice (one 15oz can yields about 1 cup of juice), brown sugar, dijon mustard, garlic powder, salt, pepper, onion powder, and pumpkin pie spice.
  • Cook the glaze down over medium heat until it is reduced by half.
  • Place the ham cut side down in the roasting pan of your choosing.
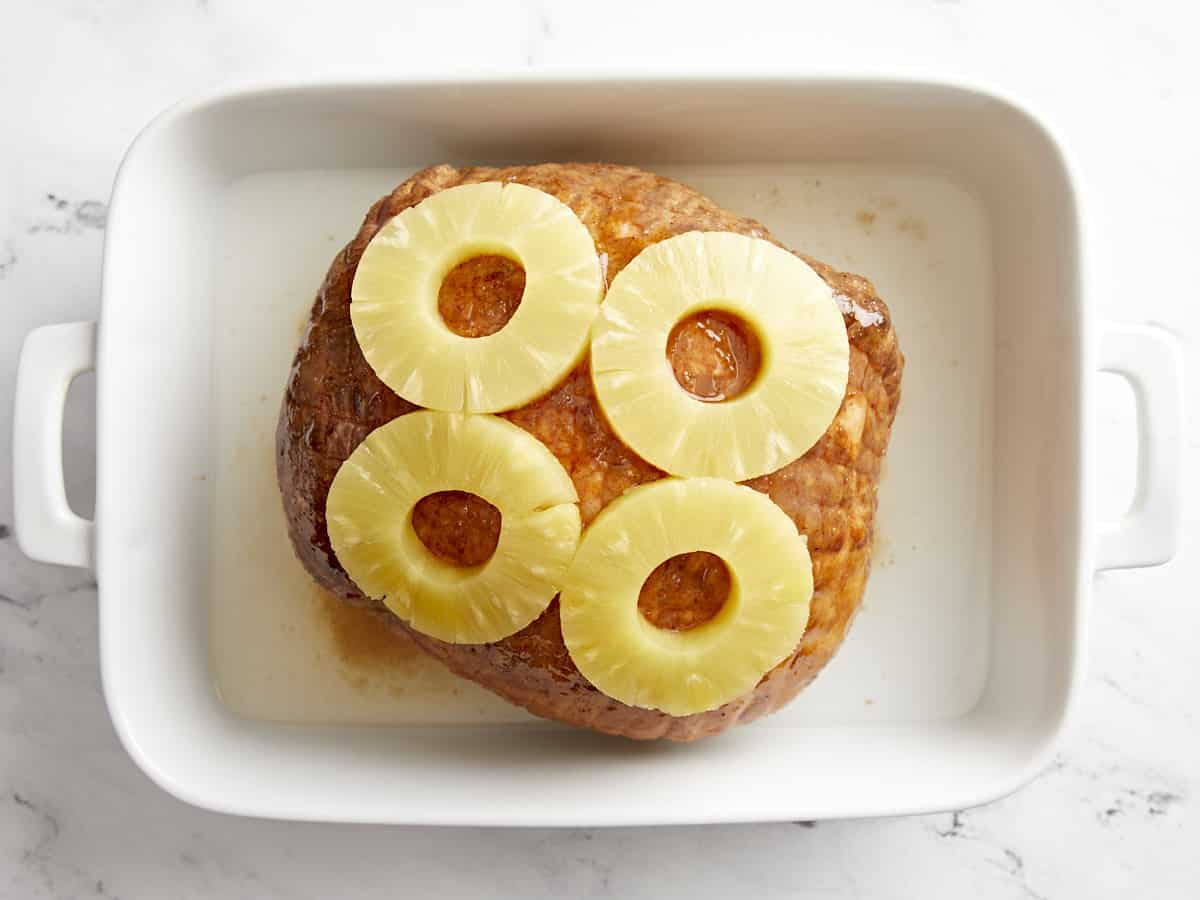
  • Brush the ham with half the glaze mixture and cover it with slices of canned pineapple. Add 1/2 inch of water to the bottom of the roasting pan.
  • Make a tinfoil tent to cover the entire ham. Place the tinfoil over the ham and bake for 20 minutes per pound of meat, or until the internal temperature reaches 145°F. Baste the ham periodically, using a baster or a large spoon.
  • Once the ham reaches 145°F, remove the tinfoil tent and baste. Then, brush the ham with all remaining glaze.

See how we calculate recipe costs here.

Nutrition

Serving: 0.5lb | Calories: 449kcal | Carbohydrates: 28g | Protein: 43g | Fat: 17g | Sodium: 2853mg | Fiber: 1g
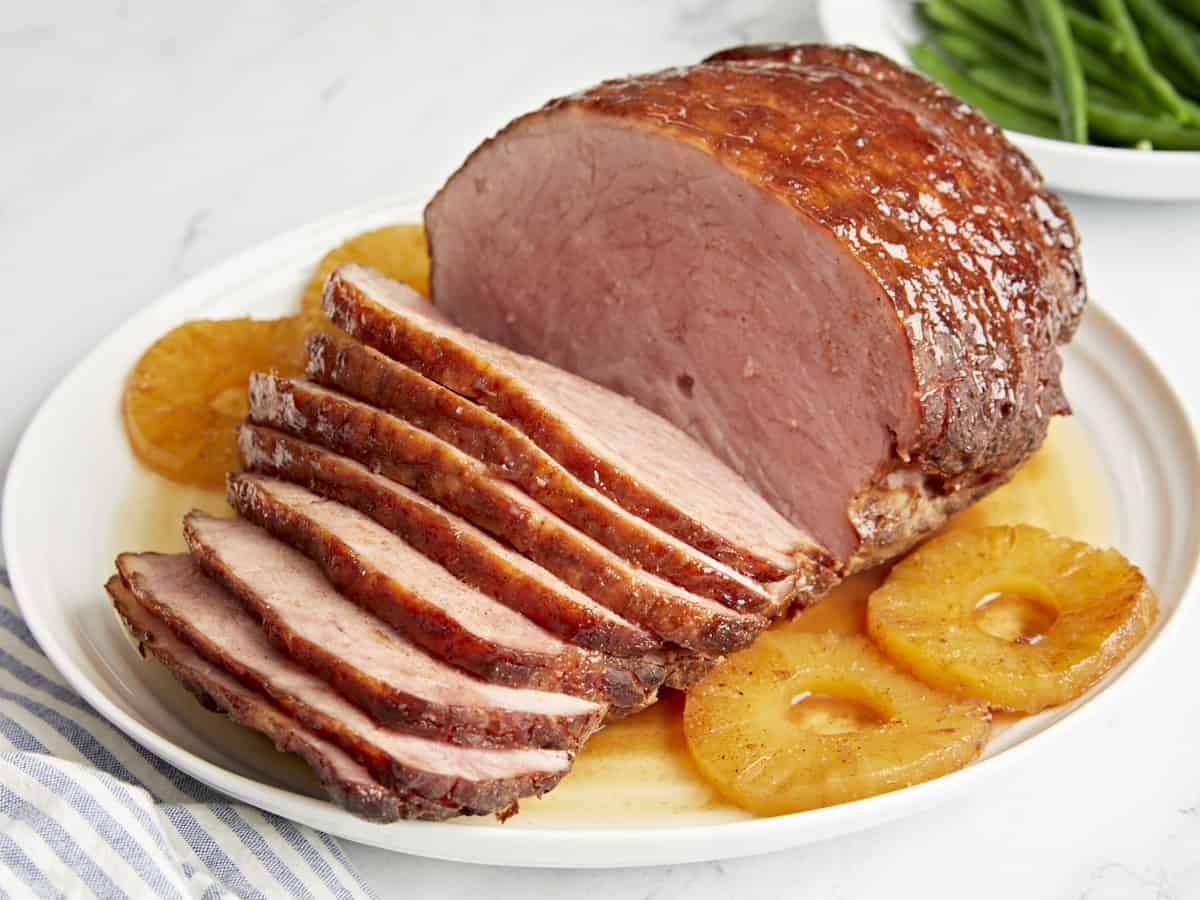
three-quarters view of a partially sliced baked ham on a white plate with pineapple rings.

how to make Baked Ham – step by step photos

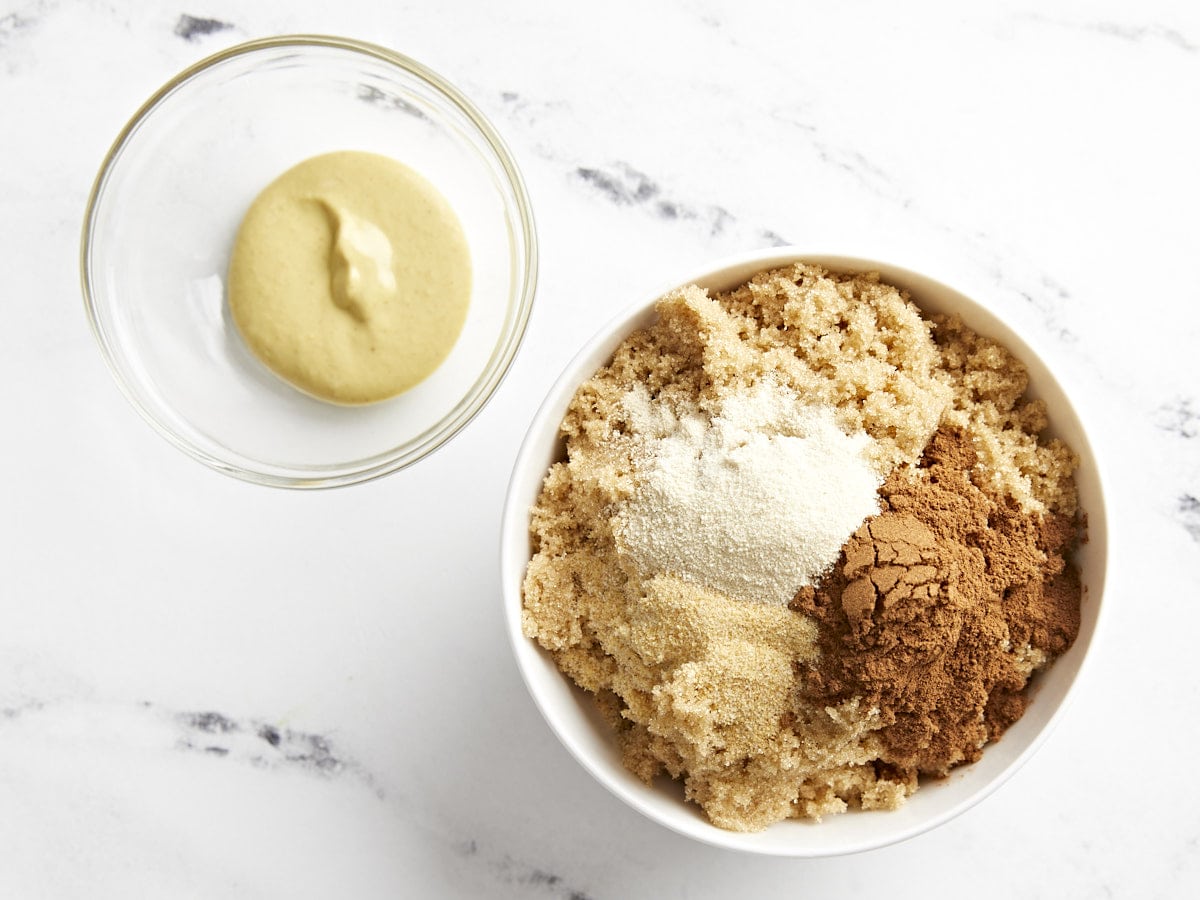
ham glaze ingredients in bowls.

Gather all glaze ingredients and preheat oven to 350°F.

ham glaze in a saucepan with a whisk.

Whisk together pineapple juice (one 15 oz. can yields about 1 cup of juice), 1 cup brown sugar, 1 Tbsp Dijon mustard, 1 tsp garlic powder, 1 tsp salt, 1 tsp pepper, 1 tsp onion powder, and 2 tsp pumpkin pie spice. Cook the glaze down over medium heat until it is reduced by half.

pineapple rings on top of a glazed ham in a baking dish.

Place 5.5 lb. boneless smoked ham cut side down in the roasting pan of your choosing. Pour 1/2 inch of water into the bottom of the roasting pan. Brush the ham with half of the glaze mixture and cover it with slices of canned pineapple. Then, make a tinfoil tent to cover the entire ham. You want to cook the ham for approximately 20 minutes per pound, or until the internal temperature reaches 145°F. Baste the ham periodically, using a standard baster or a large spoon.

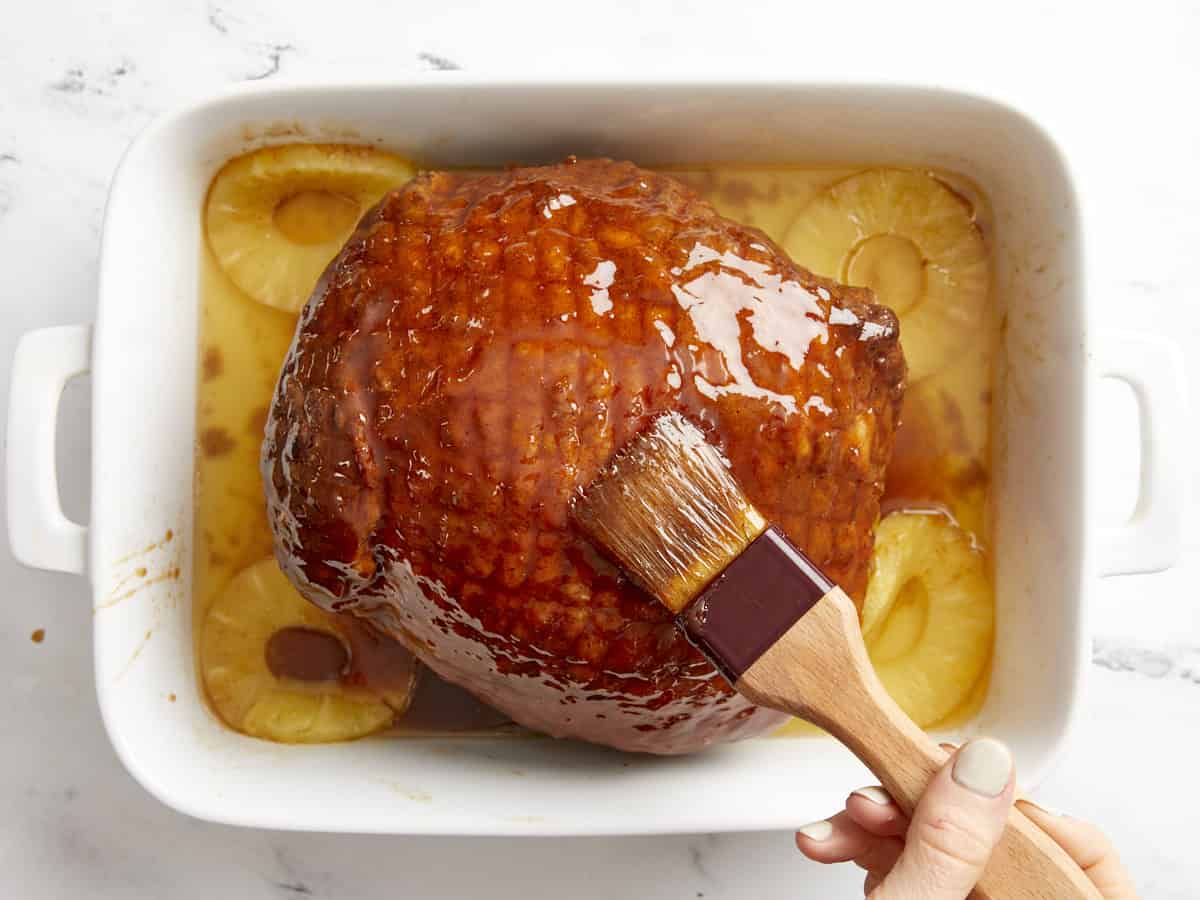
brushing glaze over a baked ham in a white baking dish with pineapple rings.

Once the ham reaches an internal temperature of 145°F, remove the tinfoil tent and baste the ham with pan drippings and brush the ham with all remaining glaze.

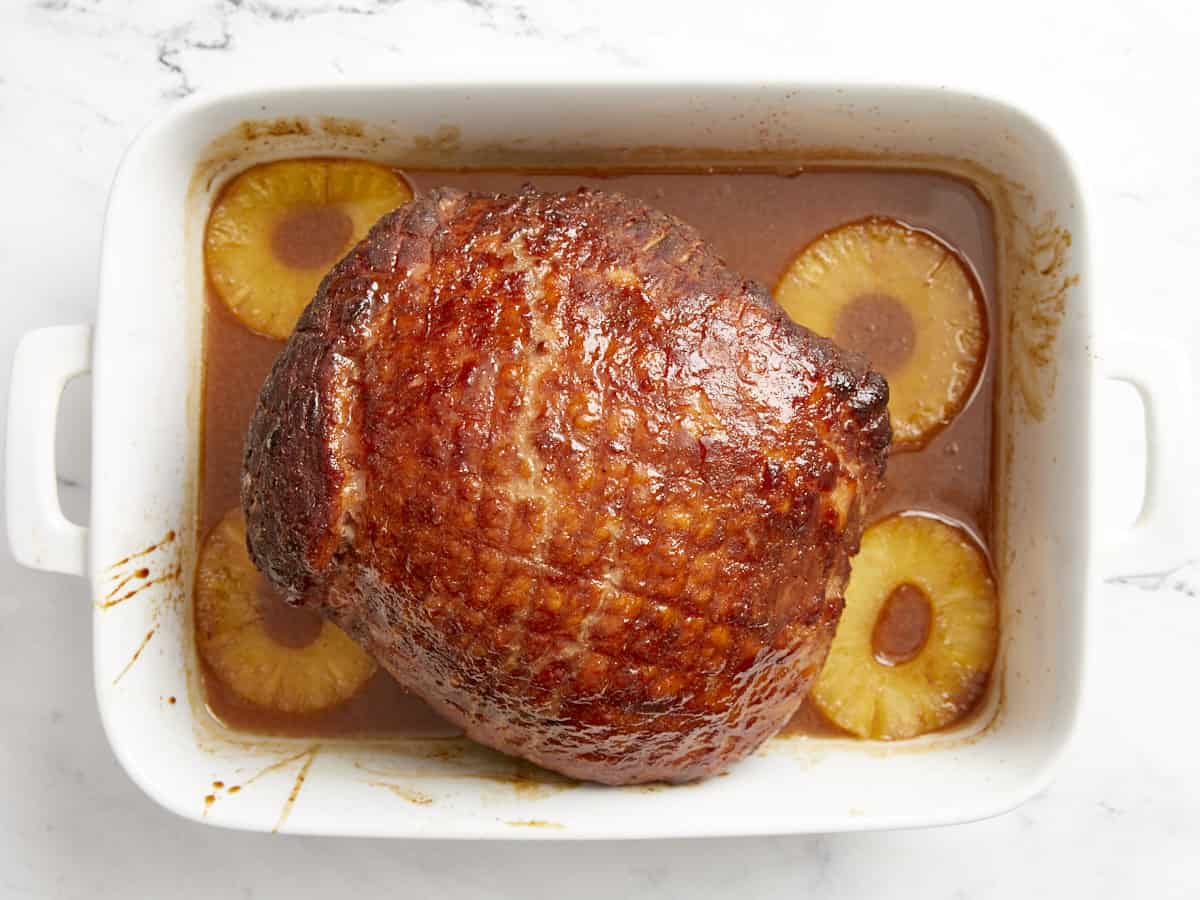
baked ham in a white baking dish surrounded by pineapple rings.

When your ham is done, it should have an internal temperature of 145°F.

overhead view of a partially sliced baked ham on a white plate with pineapple rings.

This delicious baked ham will be the star of your holiday table!

The post Baked Ham appeared first on Budget Bytes.
Honey Baked Spiral Ham

Baked spiral ham with a simple homemade glaze made with fresh orange juice, pineapple juice, honey, Dijon mustard, and a touch of brown sugar is the perfect holiday dish! Honey Baked Ham Spiral hams are great for serving at large parties because they a…

Baked spiral ham with a simple homemade glaze made with fresh orange juice, pineapple juice, honey, Dijon mustard, and a touch of brown sugar is the perfect holiday dish! Honey Baked Ham Spiral hams are great for serving at large parties because they are precooked and sliced, which makes for easy serving when it comes […]

Crustless Quiche

This low-carb Crustless Quiche is light and delicious, perfect for breakfast or brunch (or even a light dinner)! Made with leftover ham or ham steak, broccoli and cheese. Crustless Quiche For those looking to lighten their meal or simply save on prepar…

This low-carb Crustless Quiche is light and delicious, perfect for breakfast or brunch (or even a light dinner)! Made with leftover ham or ham steak, broccoli and cheese. Crustless Quiche For those looking to lighten their meal or simply save on preparation time, this crustless quiche is a wonderful alternative. This version retains all the […]

Pea Salad

Super simple and inexpensive, this creamy pea salad is the perfect side dish for your next family get-together.

The post Pea Salad appeared first on Budget Bytes.
Super simple and inexpensive, this creamy pea salad is the perfect side dish for your next family get-together. We coat sweet peas, salty ham, and savory cheddar cheese in a creamy dressing, creating the perfect balance of sweet and savory flavors. It makes a huge batch and comes together in just minutes, no cooking required!

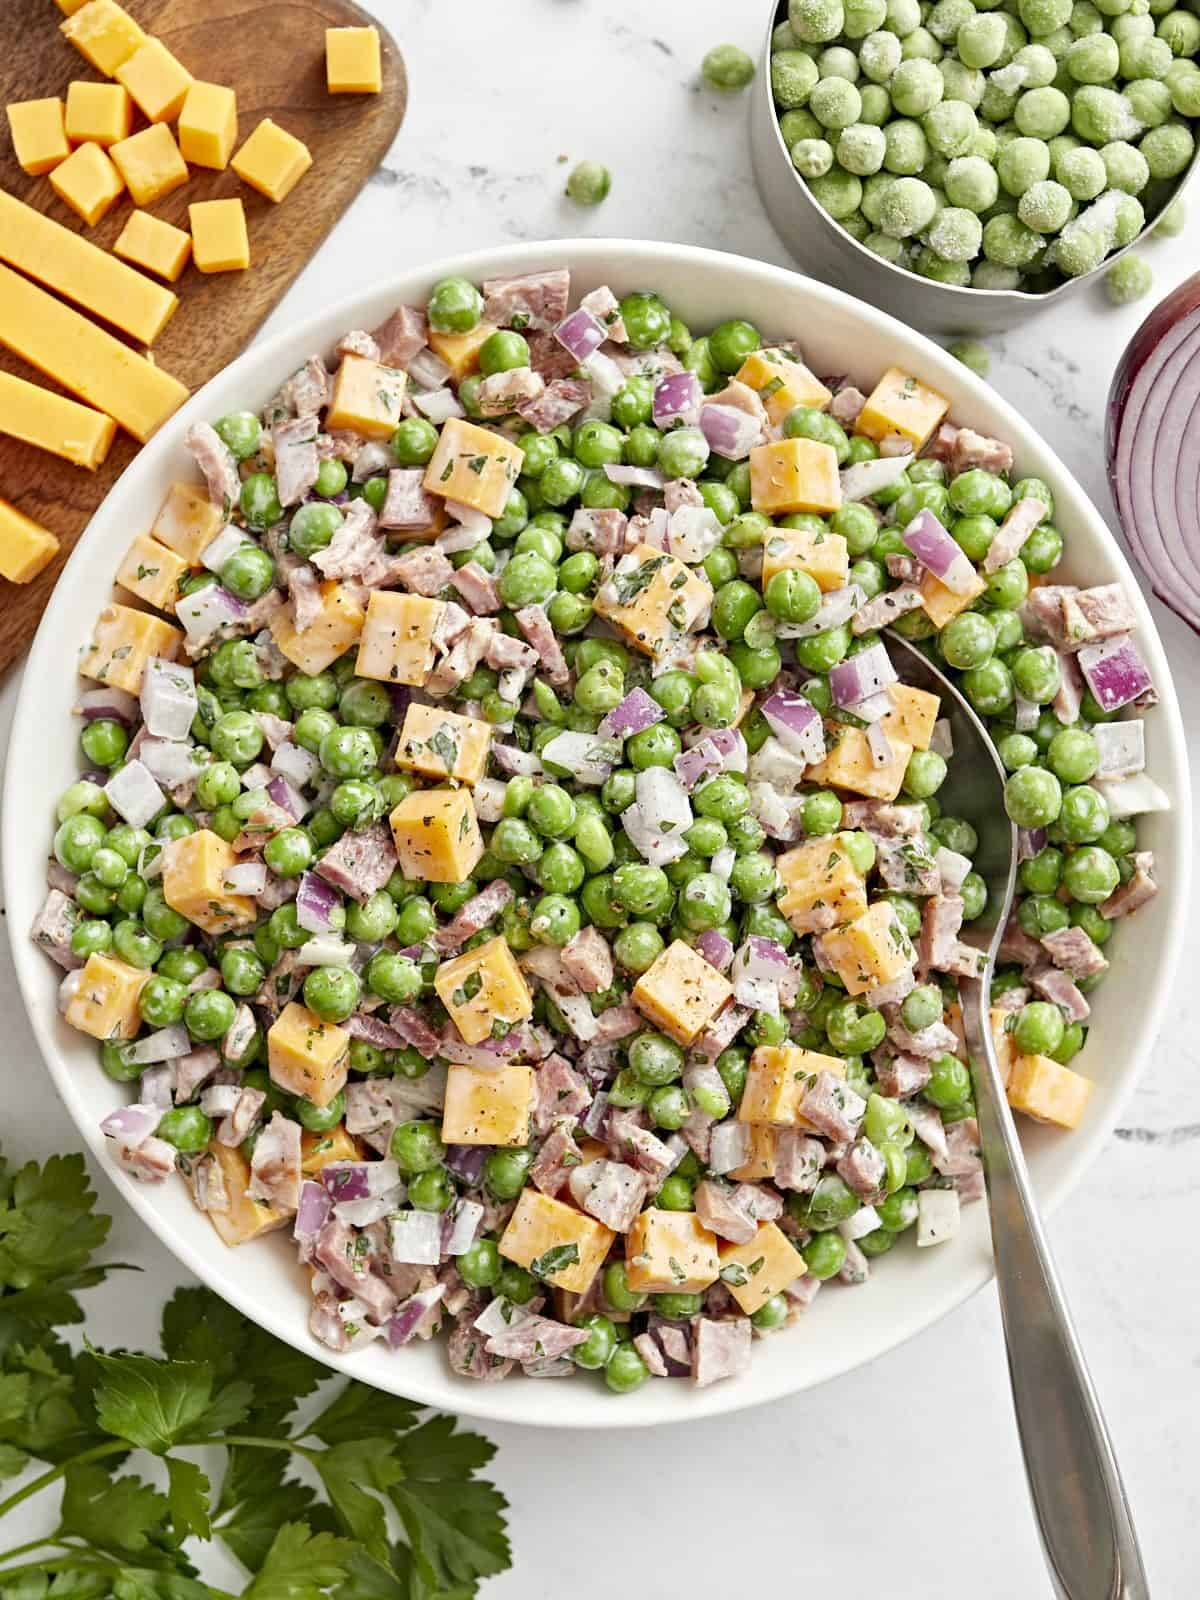
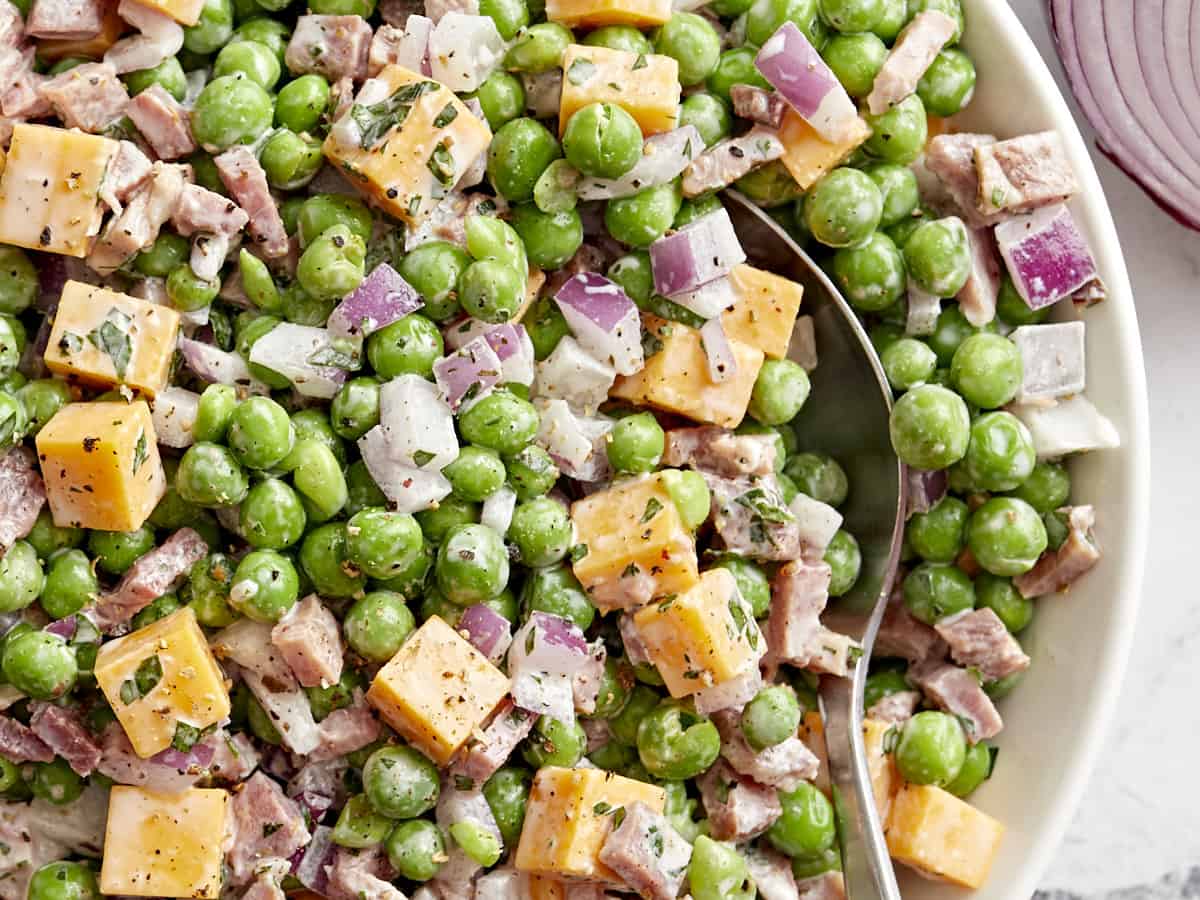
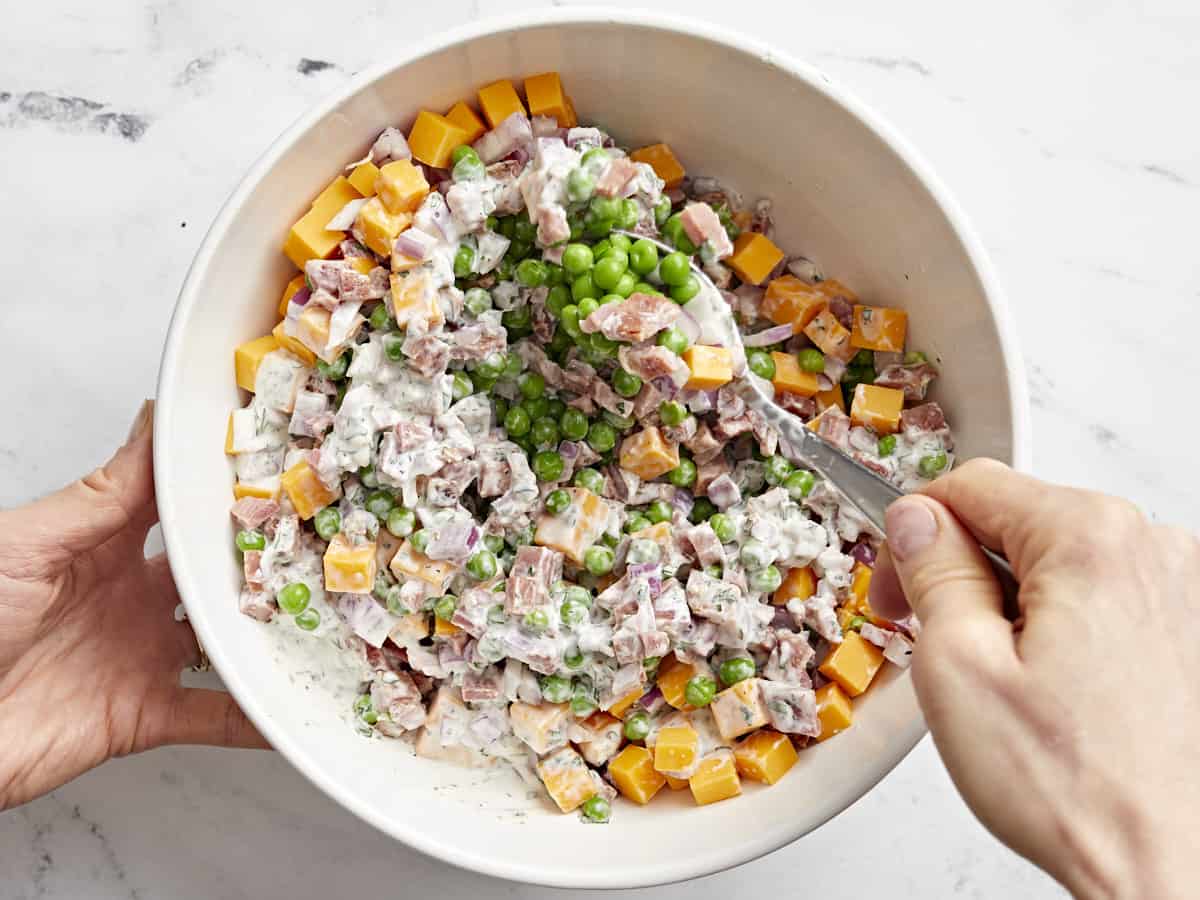
overhead view of pea salad with a spoon.

What is Pea Salad?

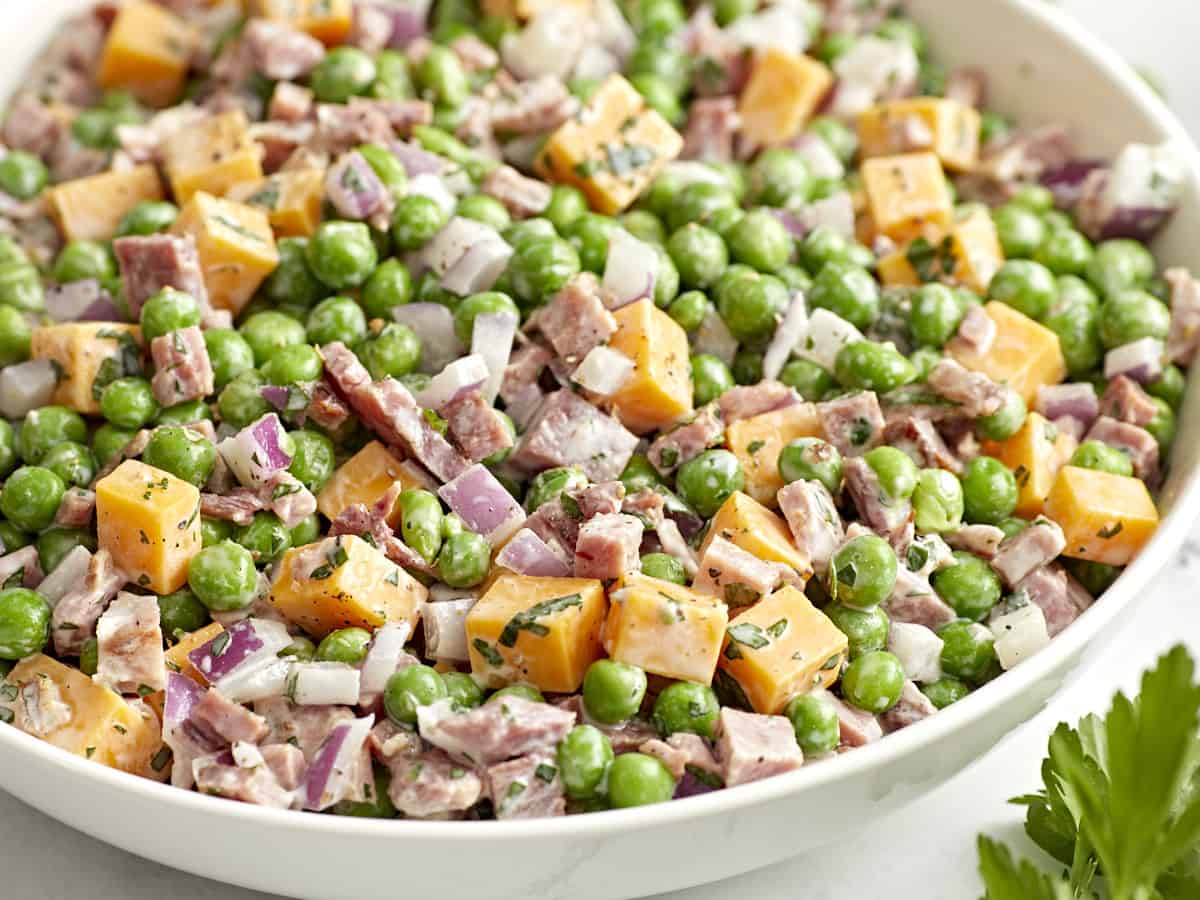
Pea salad is a classic side dish made from sweet peas tossed with ham, cheddar cheese, and red onion, and coated in a creamy and tangy dressing. This salad has a beautiful balance of flavors and is so versatile!

Ingredients for Pea Salad

Here’s what you’ll need to make pea salad:

  • Greek Yogurt: Makes the dressing creamy and tangy with fewer calories and fat than sour cream. We highly recommend Greek yogurt over plain yogurt or sour cream for its thicker texture.
  • Mayonnaise: Adds richness and creaminess to the dressing.
  • White Vinegar: Adds a refreshing tanginess to the dressing to balance the creaminess.
  • Parsley: Adds a pop of freshness.
  • Frozen Peas: Just as bright and flavorful as fresh, these are a great budget option for this salad.
  • Ham Steak: You’ll need a 12 oz. ham steak, or you can use leftover ham or cooked bacon. Vegetarian? No problem! If you leave out the ham, this pea salad is still flavorful and fresh.
  • Red Onion: Adds a bit of bite to the recipe and a wonderful crunchy texture, creating a great contrast to the sweet peas.
  • Cheddar Cheese: Adds a creamy and salty component to this delicious salad.
  • Salt and Pepper: Enhance the overall flavor of the salad.

What Else Can I Add to Pea Salad?

This creamy salad is a great recipe to add leftovers to. We like to add:

  • Leftover short noodles, like macaroni or bowties
  • Finely diced carrots
  • Chopped broccoli florets
  • Raisins or other dried fruits
  • Vegetarian meat substitutes also work well.

Budget-Saving Tip!

If you want to make your money stretch a little bit further, then this is a great recipe to use up any leftover ham that you might have from the holidays. It will help reduce waste and make the recipe cheaper. That’s a win-win!😊

What to Serve with Pea Salad

This cold pea salad is the perfect refreshing side for smoky BBQ ribs, savory smash burgers, or garlic marinated chicken.

close up view of pea salad with a spoon.
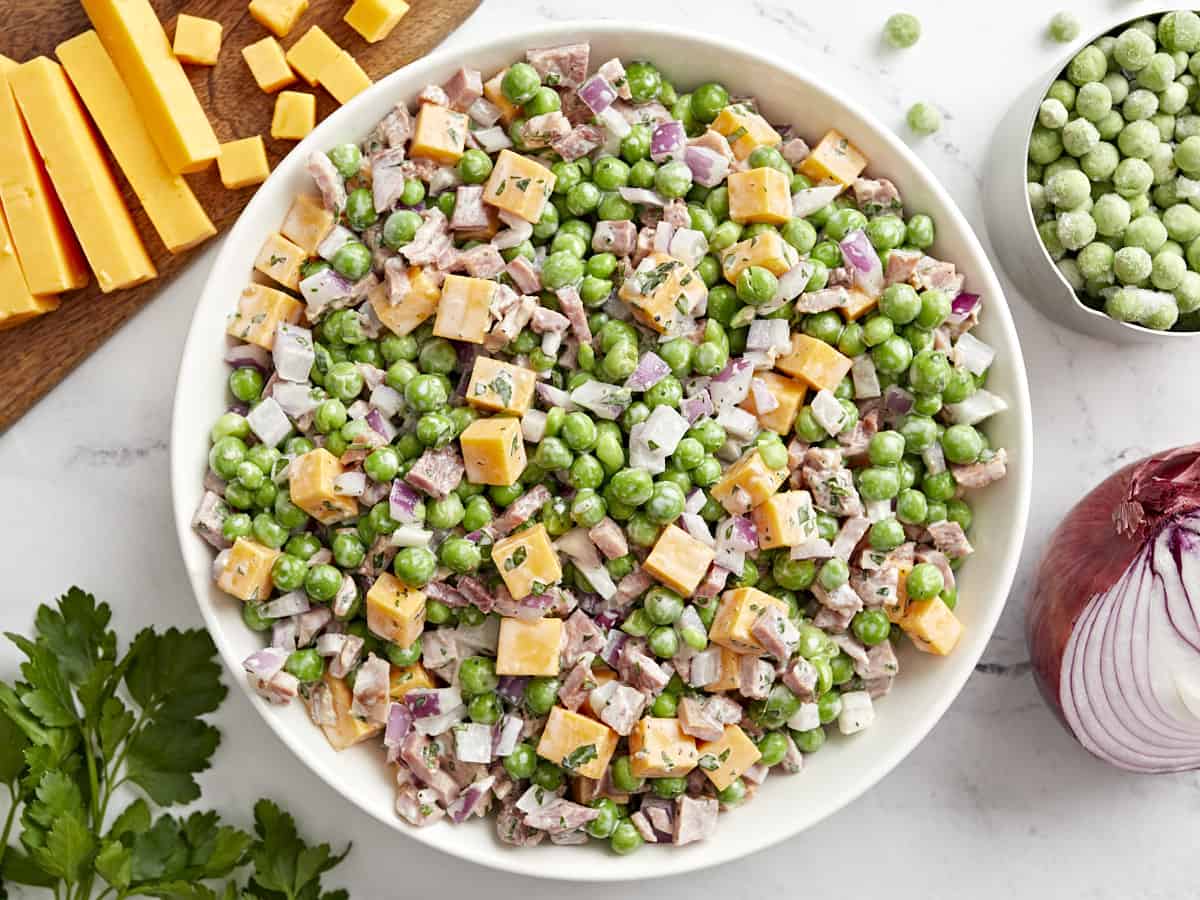
overhead view of pea salad with a spoon.
Print

Pea Salad

Super simple and inexpensive, this creamy pea salad is the perfect side dish for your next family get-together.
Course Side Dish
Cuisine American
Total Cost $9.54 recipe / $0.95 serving
Prep Time 10 minutes
Cook Time 0 minutes
Total Time 10 minutes
Servings 10 (1 cup each)
Calories 214kcal
Author Jess Rice

Ingredients

  • 4 cups frozen peas $2.28
  • 2 cups cubed ham steak $3.99
  • 1/2 small red onion, diced small $0.22
  • 8 oz. cheddar cheese, cubed small $2.49
  • 1 Tbsp minced parsley $0.05
  • 1/3 cup plain Greek yogurt $0.32
  • 1 Tbsp mayonnaise $0.07
  • 1 Tbsp white vinegar $0.02
  • 1 tsp salt $0.05
  • 1 tsp freshly cracked black pepper $0.05

Instructions

  • Rinse the frozen peas in cool water. Strain and leave out at room temperature. Meanwhile, cut the ham into small dice cubes and prep the red onion, cheddar cheese, and parsley.
  • In a small mixing bowl, whisk together Greek yogurt, mayonnaise, white vinegar, minced parsley, and salt and pepper.
  • Toss all ingredients together in a large bowl. Serve immediately or enjoy all week!

See how we calculate recipe costs here.

Nutrition

Serving: 1serving | Calories: 214kcal | Carbohydrates: 10g | Protein: 18g | Fat: 11g | Sodium: 996mg | Fiber: 3g
pea salad in a white bowl.

how to make Pea Salad – step by step photos

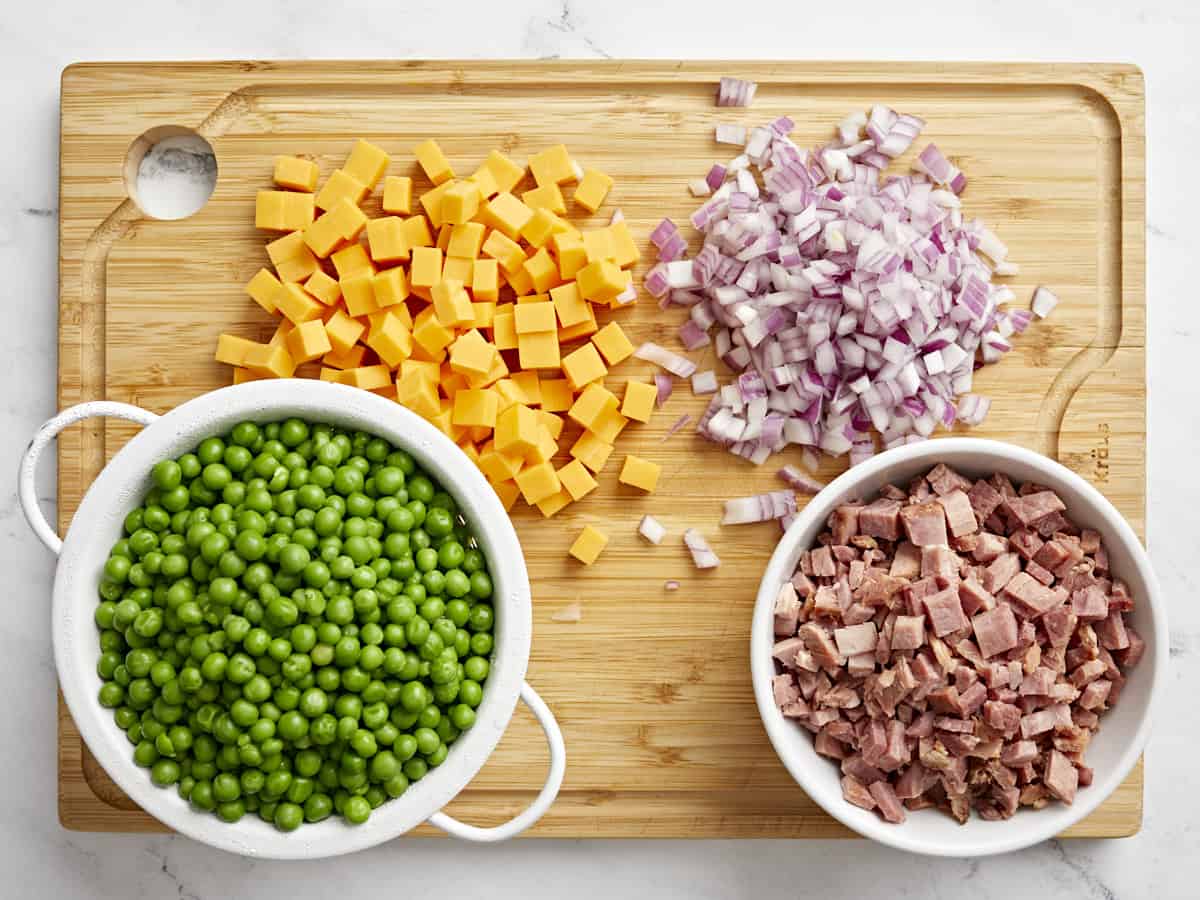
ingredients for pea salad on a cutting board.

Rinse 4 cups frozen peas in cool water. Strain and leave out at room temperature. Meanwhile, cut 2 cups ham into small dice cubes, dice 1/2 small red onion, cube 8 oz. cheddar cheese, and mince 1 Tbsp fresh parsley.

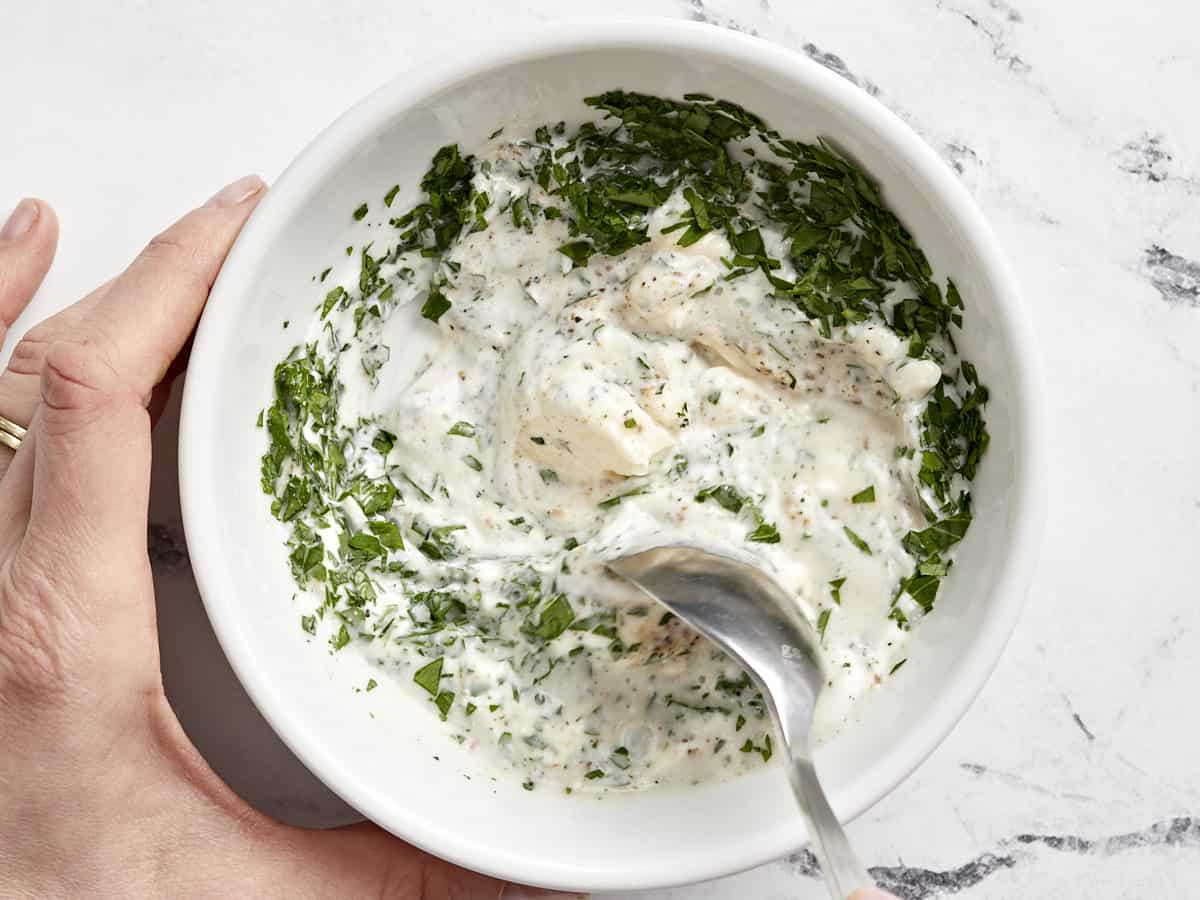
stirred mayonnaise dressing with herbs in a white bowl.

In a small mixing bowl, whisk together 1/3 cup Greek yogurt, 1 Tbsp mayonnaise, 1 Tbsp white vinegar, the minced parsley, and 1 tsp each salt and pepper.

ingredients for pea salad in a white bowl.

Toss all ingredients together in a large bowl. Serve immediately or enjoy all week!

overhead view of pea salad in a white bowl.

This pea salad is such a beautiful centerpiece to any table!

The post Pea Salad appeared first on Budget Bytes.
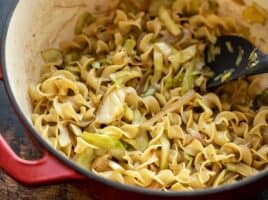
Fried Cabbage

This fried cabbage recipe is a super easy side dish that goes with just about any meal. It’s flavorful, budget-friendly comfort food at its best!

The post Fried Cabbage appeared first on Budget Bytes.
Fried cabbage is an incredibly underrated side dish, IMHO. It’s cheap, you only need a handful of simple ingredients, and it goes with everything. Plus, cabbage is one of my favorite budget ingredients because it’s so filling and nutritious, and you really don’t need a lot to make it taste great. This Fried Cabbage recipe is as easy as it gets and it’s so good that I find myself making it over and over. It’s one of those recipes where I actually look forward to eating the leftovers!

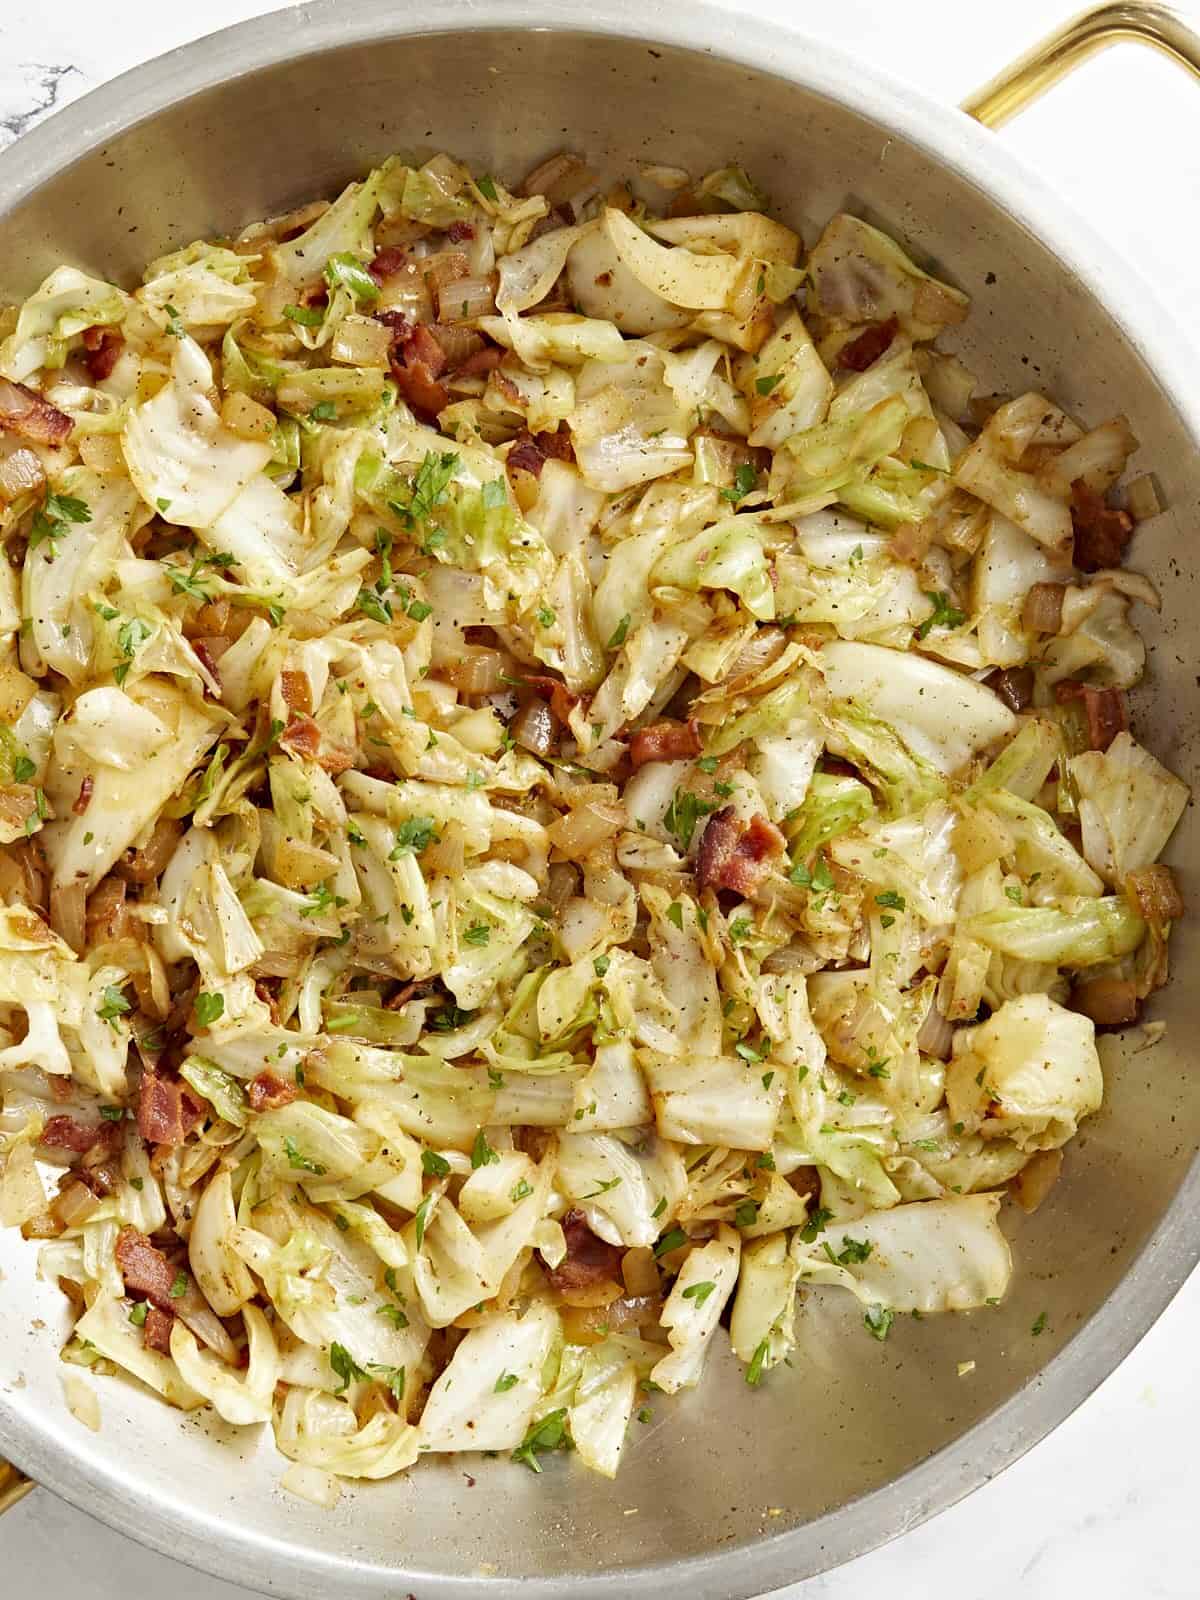
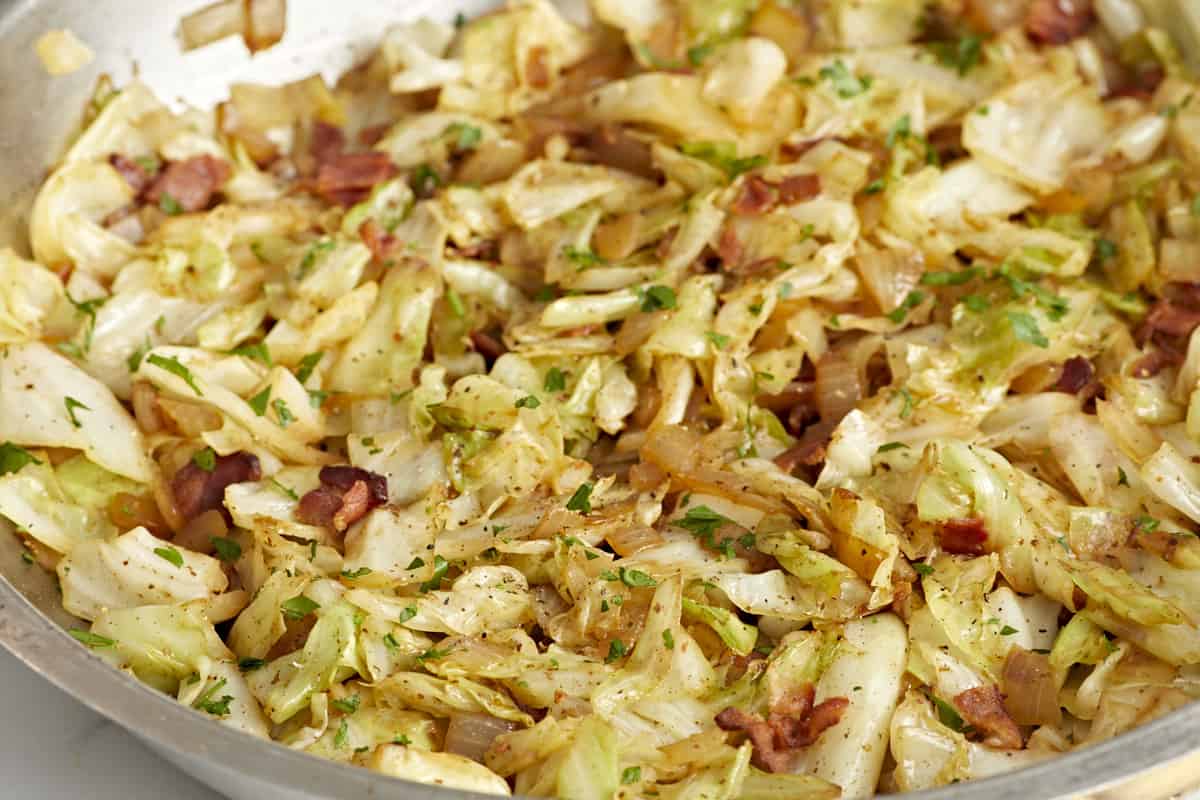
Overhead view of fried cabbage in a skillet.

Fried cabbage is a classic Southern side dish that you’re likely to find at BBQ joints and soul food kitchens across the Southern United States. It’s simply chopped cabbage that has been fried in bacon grease until golden brown and delicious. Seriously, words can not describe how amazing this melt-in-your-mouth cabbage is.

Ingredients for Fried Cabbage

It doesn’t take a lot to make fried cabbage taste incredible. Here are the few simple ingredients you’ll need to make this fried cabbage recipe:

  • Cabbage: This is the bulk of the recipe. It’s inexpensive, filling, and has tons of fiber (yay)! Look for cabbage that has a nice green color and isn’t very heavy for its size. Dense, compact cabbage can be underripe, have a tough texture, and lack flavor.
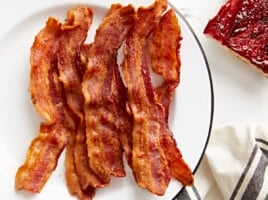
  • Bacon: Bacon adds flavor, salt, and fat to the cabbage, making it extra finger-licking good. See below for suggestions if you prefer a vegetarian fried cabbage or can’t eat pork.
  • Onion: Adding an onion to the fried cabbage brings both savory and sweet flavors to the table. The onion caramelizes a bit in the skillet bringing a slight natural sweetness.
  • Chicken Broth: Liquid helps steam and soften the cabbage, which can otherwise be quite tough. Using chicken broth instead of plain water ensures maximum flavor. You can substitute with other broth flavors, if preferred.
  • Seasoning Salt: I like to season my fried cabbage with an all-in-one seasoning salt, like Lawry’s or Tony Chacherie’s. We used Tony’s because I love the slightly spicy kick, but Lawry’s is equally as delicious.
  • Butter: A little bit of butter melted into the cabbage at the end gives the fried cabbage a deliciously rich finish.

Vegetarian Fried Cabbage

The bacon and chicken broth bring a large portion of the flavor to this dish, but you do have options if you’d like to make a vegetarian fried cabbage recipe. Simply swap out the chicken broth for vegetable broth or a vegetarian “chicken” flavored broth to start. To replace the smoky flavor and fatty mouthfeel of the bacon, I suggest either adding more butter or a tablespoon of coconut oil and some smoked paprika. You may also want to increase the seasoning salt to replace the salt from the bacon.

What to Serve with Fried Cabbage

Fried cabbage is the perfect side dish for any Southern-style dinner. Try pairing it with Pulled Pork, BBQ chicken, pork chops, potato salad, black-eyed peas, cornbread, or ham.

How to Store Leftovers

Fried cabbage is quite delicious as a leftover and you don’t need to take any special measures when refrigerating it. Simply place it in a food storage container and refrigerate for up to five days. To reheat the fried cabbage you can either microwave until hot or place it back into a non-stick skillet and sauté over medium heat until heated through. I do not suggest freezing fried cabbage as it will likely get very mushy upon thawing.

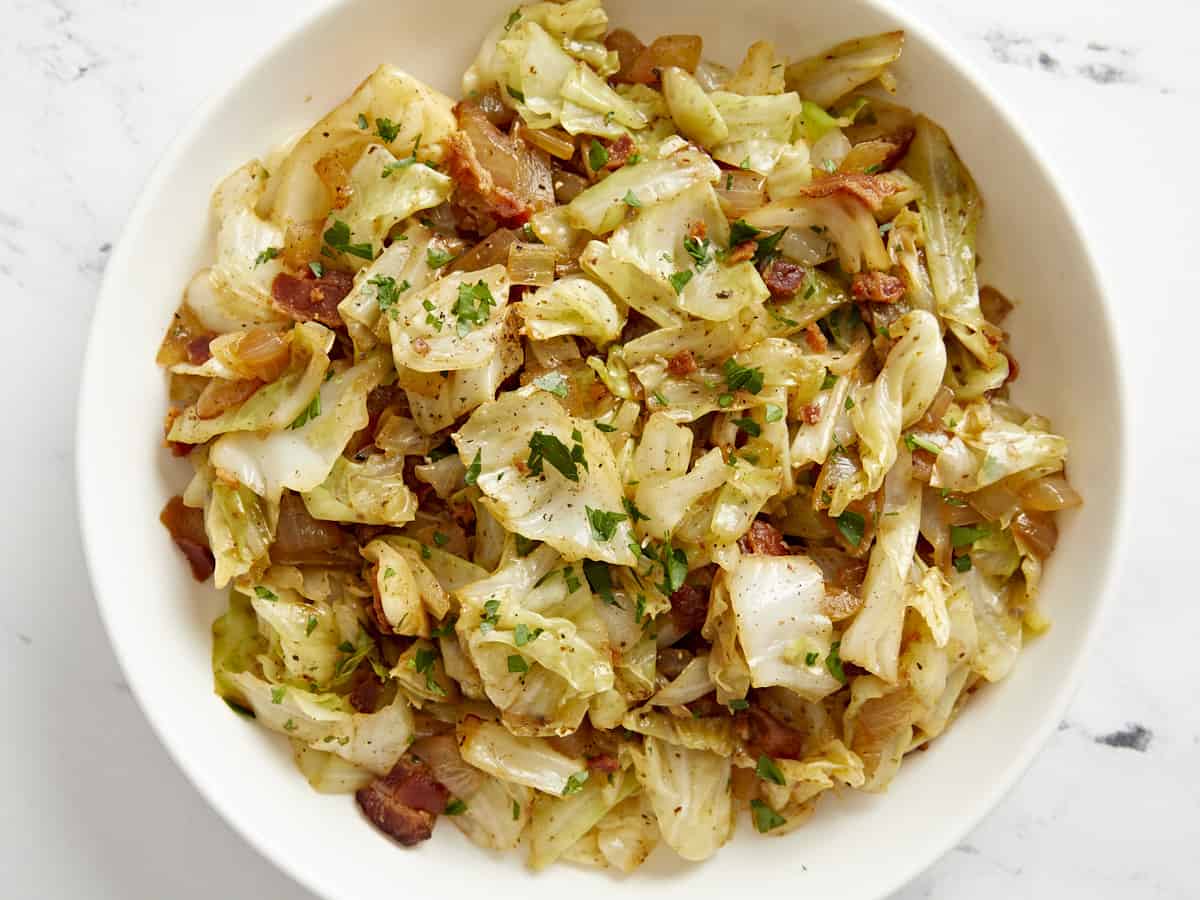
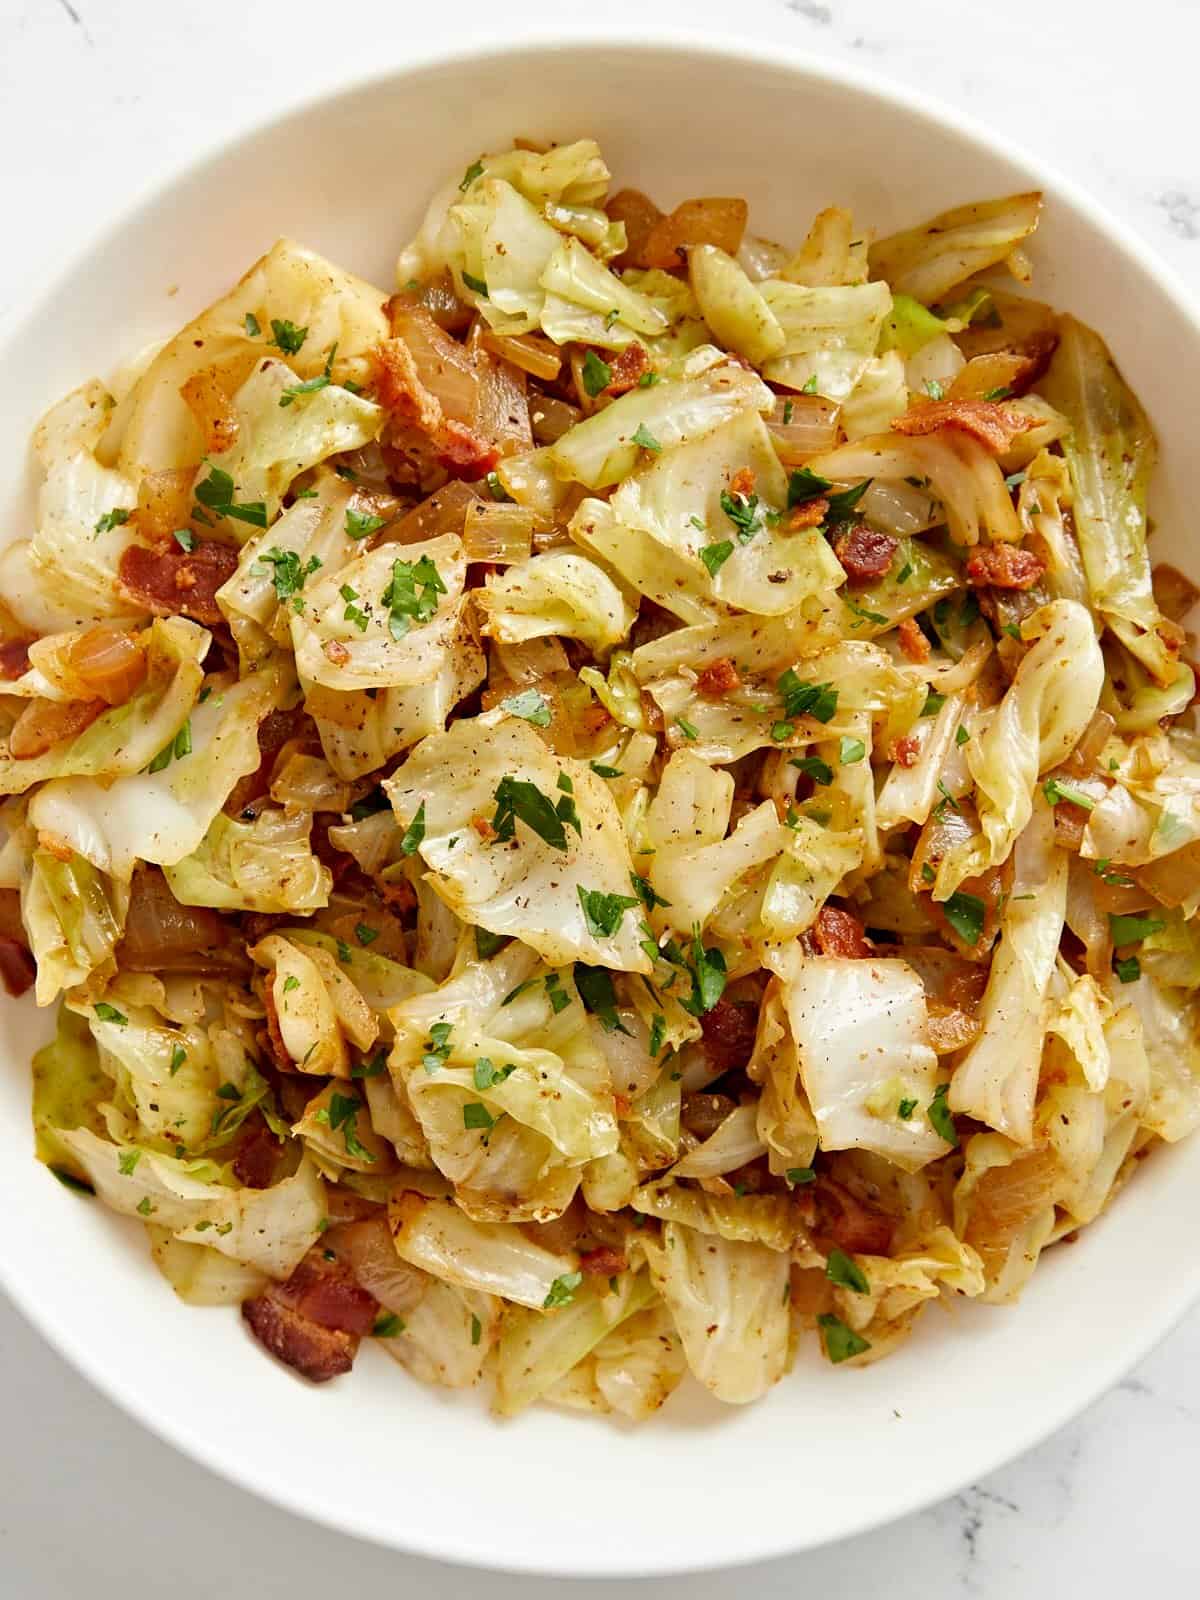
Overhead view of fried cabbage in a bowl.
Close up overhead view of fried cabbage in a skillet.
Print

Fried Cabbage

This fried cabbage recipe is a super easy side dish that goes with just about any meal. It's flavorful, budget-friendly comfort food at its best!
Course Dinner, Side Dish
Cuisine American
Total Cost $3.39 recipe / $0.85 serving
Prep Time 10 minutes
Cook Time 20 minutes
Total Time 30 minutes
Servings 4 (about 1 cup each)
Calories 184kcal

Ingredients

  • 4 oz. bacon $1.33
  • 1/2 head green cabbage (about 1.25 lbs or 6 cups chopped) $0.99
  • 1 yellow onion $0.37
  • 1/4 cup chicken broth $0.52
  • 1/2 tsp seasoning salt $0.05
  • 1 Tbsp butter $0.13

Instructions

  • Add the bacon to a very large skillet and cook over medium heat until the bacon is brown and crispy. Remove the bacon from the skillet and drain the excess bacon fat, leaving about 2 Tbsp in the skillet (reserve the drained fat for later).
  • While the bacon is cooking, finely dice the onion and chop the cabbage into 1-inch pieces.
  • After removing the bacon from the skillet, add the diced onion and continue to sauté over medium heat until the onions become soft and translucent (about 5 minutes). The moisture from the onions will begin to dissolve the browned bacon bits from the bottom of the skillet.
  • Once the onions are soft, add the chopped cabbage and chicken broth. Continue to let the cabbage cook over medium, stirring occasionally, until it has softened, most of the liquid has evaporated, and the edges begin to brown. If the skillet dries up before the cabbage is soft, add 2 Tbsp of water and continue to sauté until softened.
  • Once the cabbage is soft and the liquid has evaporated, add the butter to the skillet and stir until it has melted and coated the cabbage. Turn the heat off and add the seasoning salt, starting with ¼ tsp, then adding more to taste.
  • Finally, crumble the cooked bacon and stir it back into the cabbage. Give the cabbage a taste and adjust to your liking. Garnish with some freshly cracked pepper, serve, and enjoy!

See how we calculate recipe costs here.

Nutrition

Serving: 1cup | Calories: 184kcal | Carbohydrates: 10g | Protein: 5g | Fat: 14g | Sodium: 577mg | Fiber: 3g
Close up side view of fried cabbage in the skillet.

How to Make Fried Cabbage – Step by Step Photos

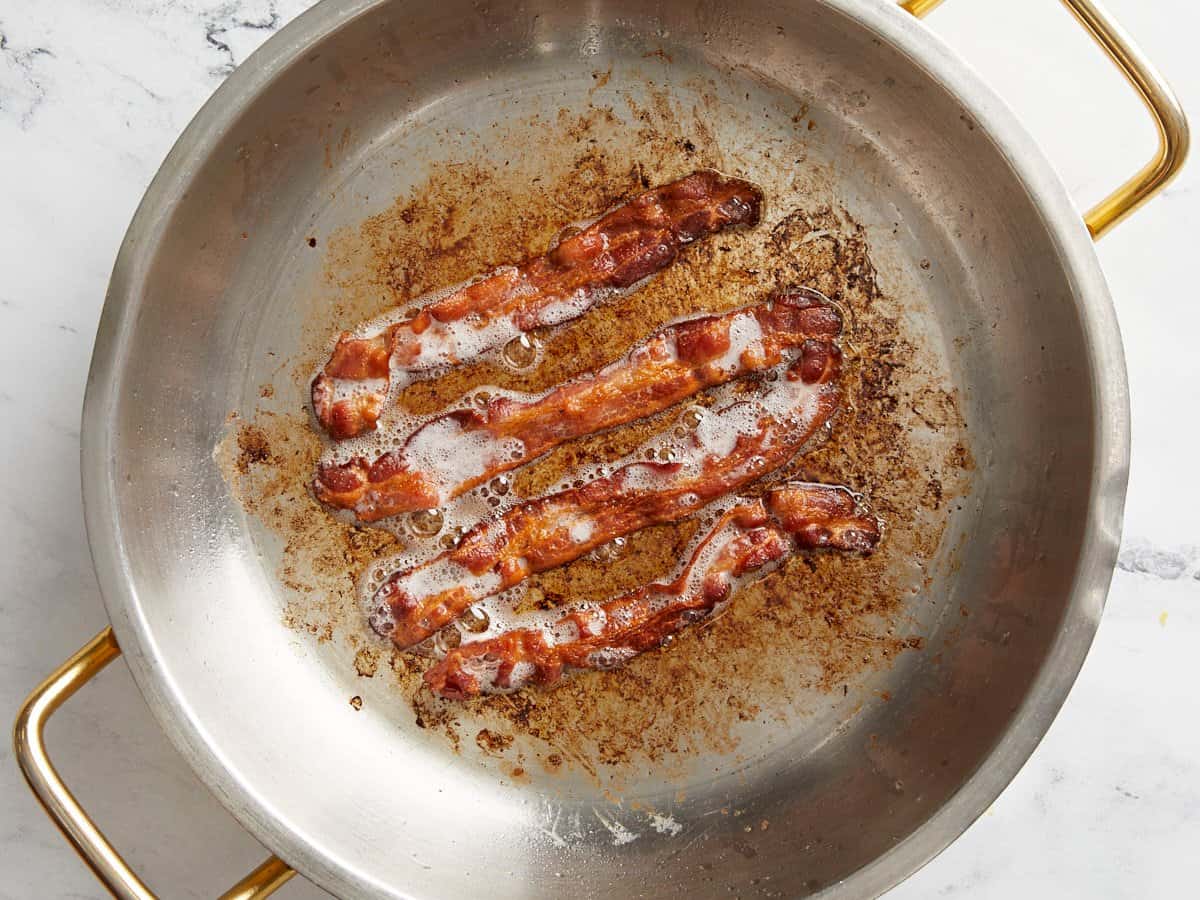
Cooked bacon in a large skillet.

Cook 4oz. of bacon in a very large skillet over medium heat until well browned and crispy. While the bacon is cooking, finely dice one yellow onion and chop ½ head of cabbage into 1-inch pieces (about 6 cups once chopped).

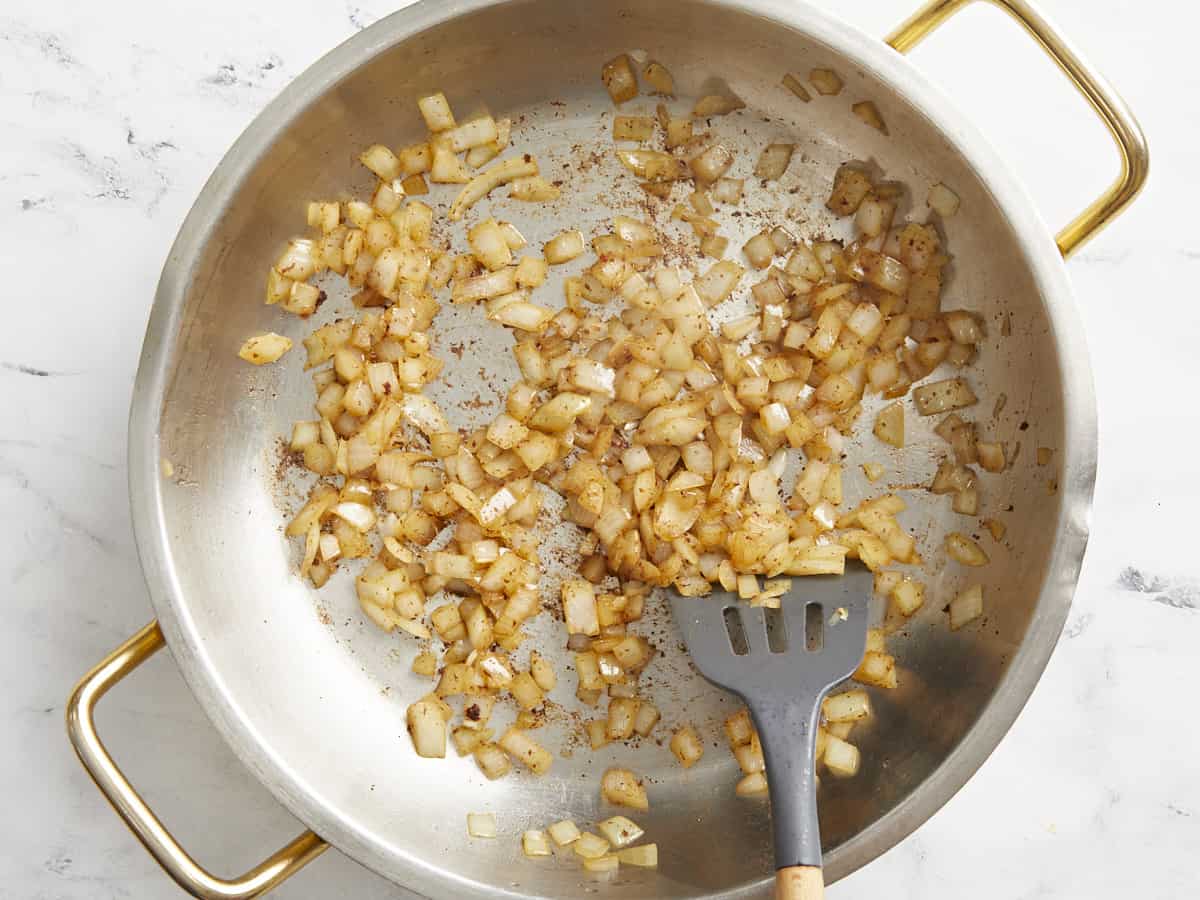
Sautéed onion in the bacon fat.

Once the bacon is cooked, remove it from the skillet and drain most of the bacon fat leaving about 2 Tbsp in the skillet (reserve the drained bacon fat for later). Add the diced onion and continue to sauté over medium heat until the onions are soft and translucent. The moisture from the onions should dissolve the browned bacon bits from the bottom of the skillet.

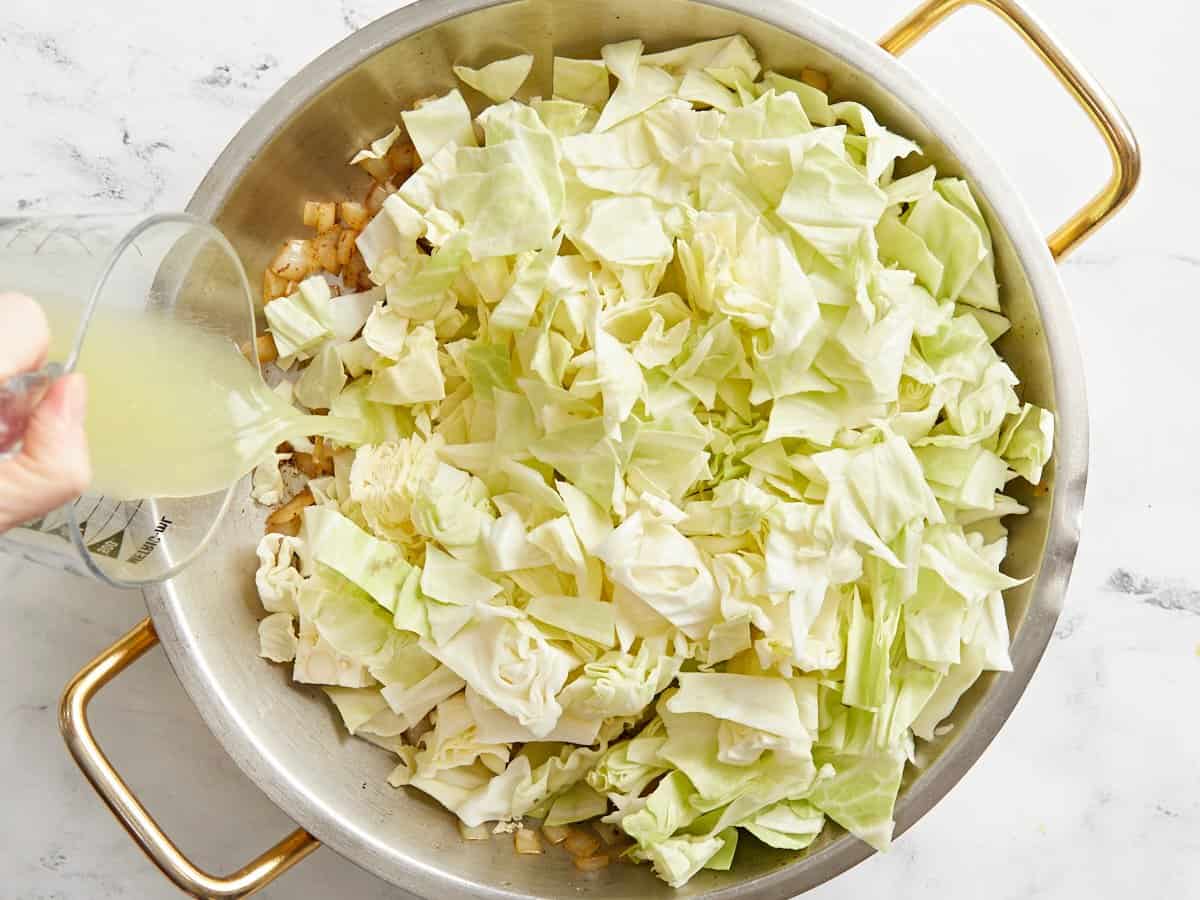
Chopped cabbage added to the skillet, broth being poured into the side.

Add the chopped cabbage and chicken broth to the skillet. Let the cabbage cook over medium heat, stirring occasionally, allowing it to wilt down. If the skillet becomes too dry before the cabbage has softened, reduce the heat and add a couple of tablespoons of water.

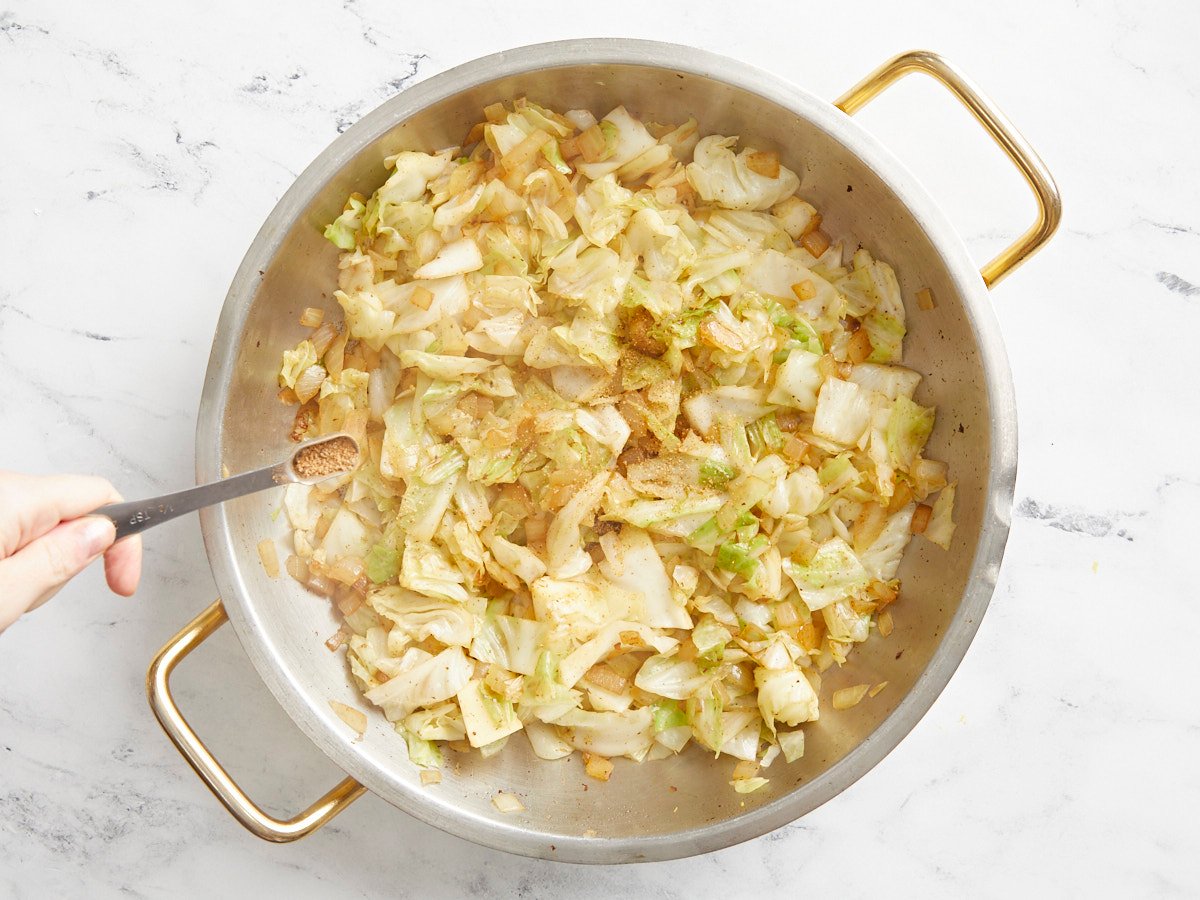
Wilted cabbage in the skillet, seasoning being sprinkled over top.

Continue cooking the cabbage until it has softened, most of the liquid in the skillet has evaporated, and the edges of the cabbage begin to brown. Once the cabbage is soft, add 1 Tbsp butter and stir until it has melted and coated the cabbage. Turn the heat off and season with the seasoning salt, starting with ¼ tsp and adding more to taste (we used about ½ tsp).

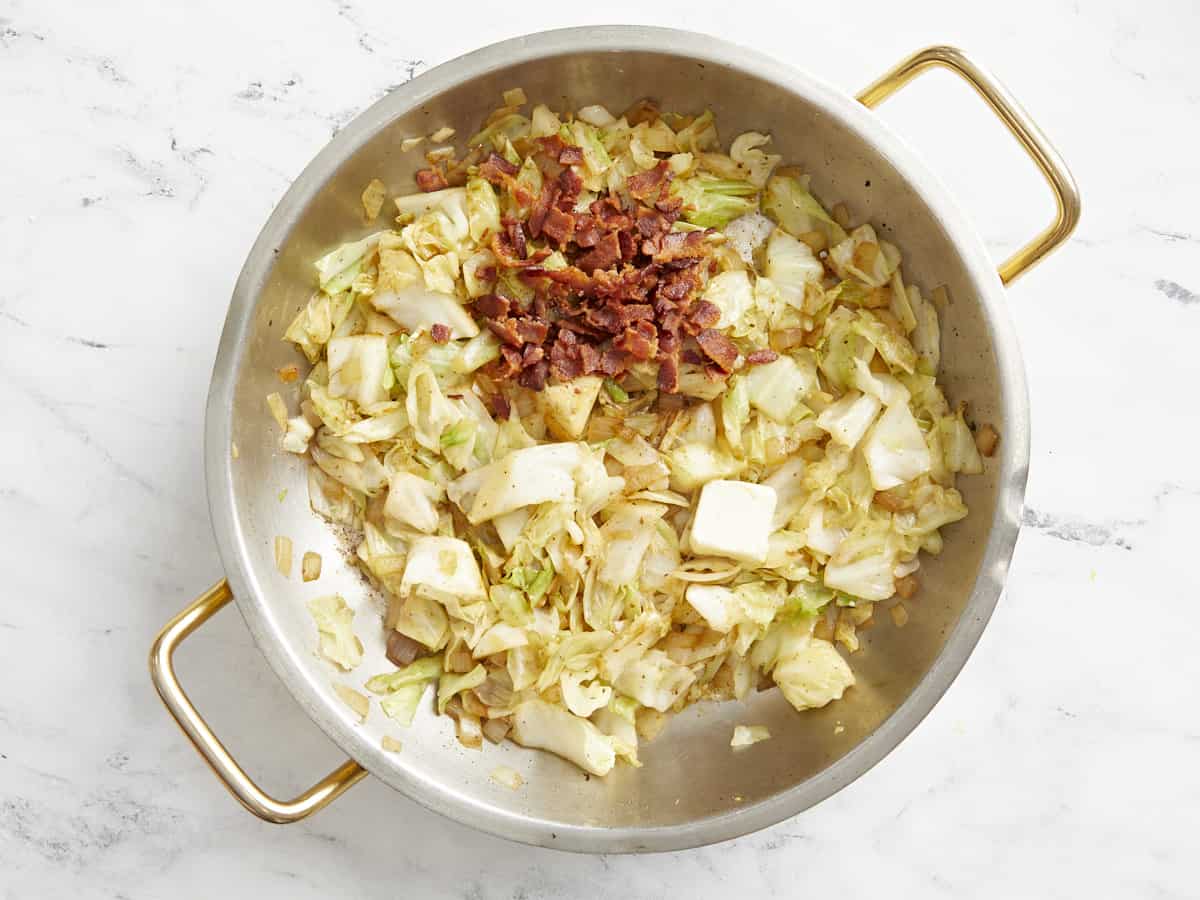
Crumbled bacon added to the cabbage.

Finally, crumble the cooked bacon and stir it into the cabbage.

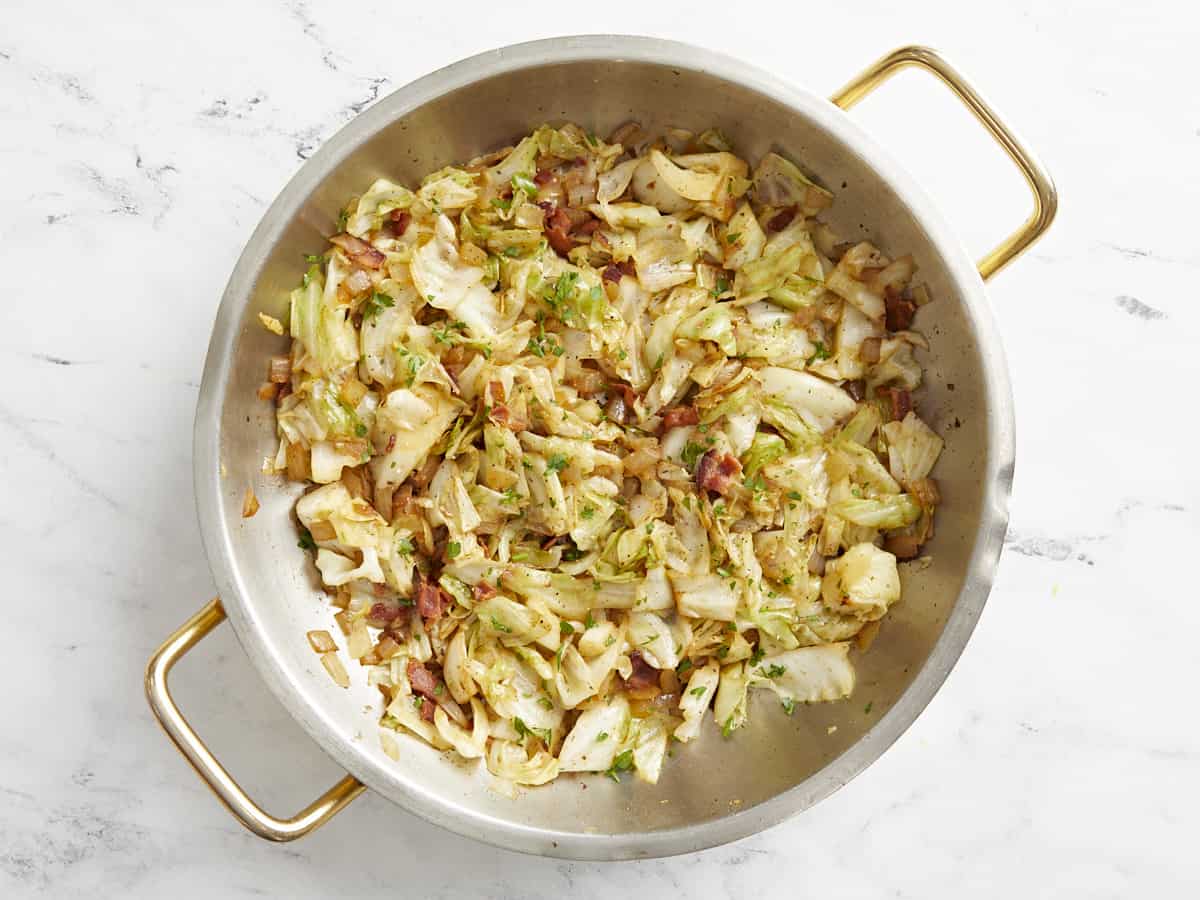
Finished fried cabbage in the skillet.

Taste the cabbage and adjust to your liking. You can garnish with chopped parsley, if desired, and freshly cracked pepper.

Close up overhead view of fried cabbage in a bowl.

The post Fried Cabbage appeared first on Budget Bytes.

Chicken Cordon Bleu

Chicken Cordon Bleu is one of those recipes that feels super fancy but is ready in under an hour! It’s so saucy, cheesy, and delicious!

The post Chicken Cordon Bleu appeared first on Budget Bytes.

Chicken Cordon Bleu is one of those recipes that feels super fancy but doesn’t actually take a ton of effort. It can be pricey if ordering at a restaurant, but we have developed a budget conscious recipe that can be made at home. With some simple technique and a little bit of patience, you can make this savory, cheesy, saucy dinner recipe in under an hour!

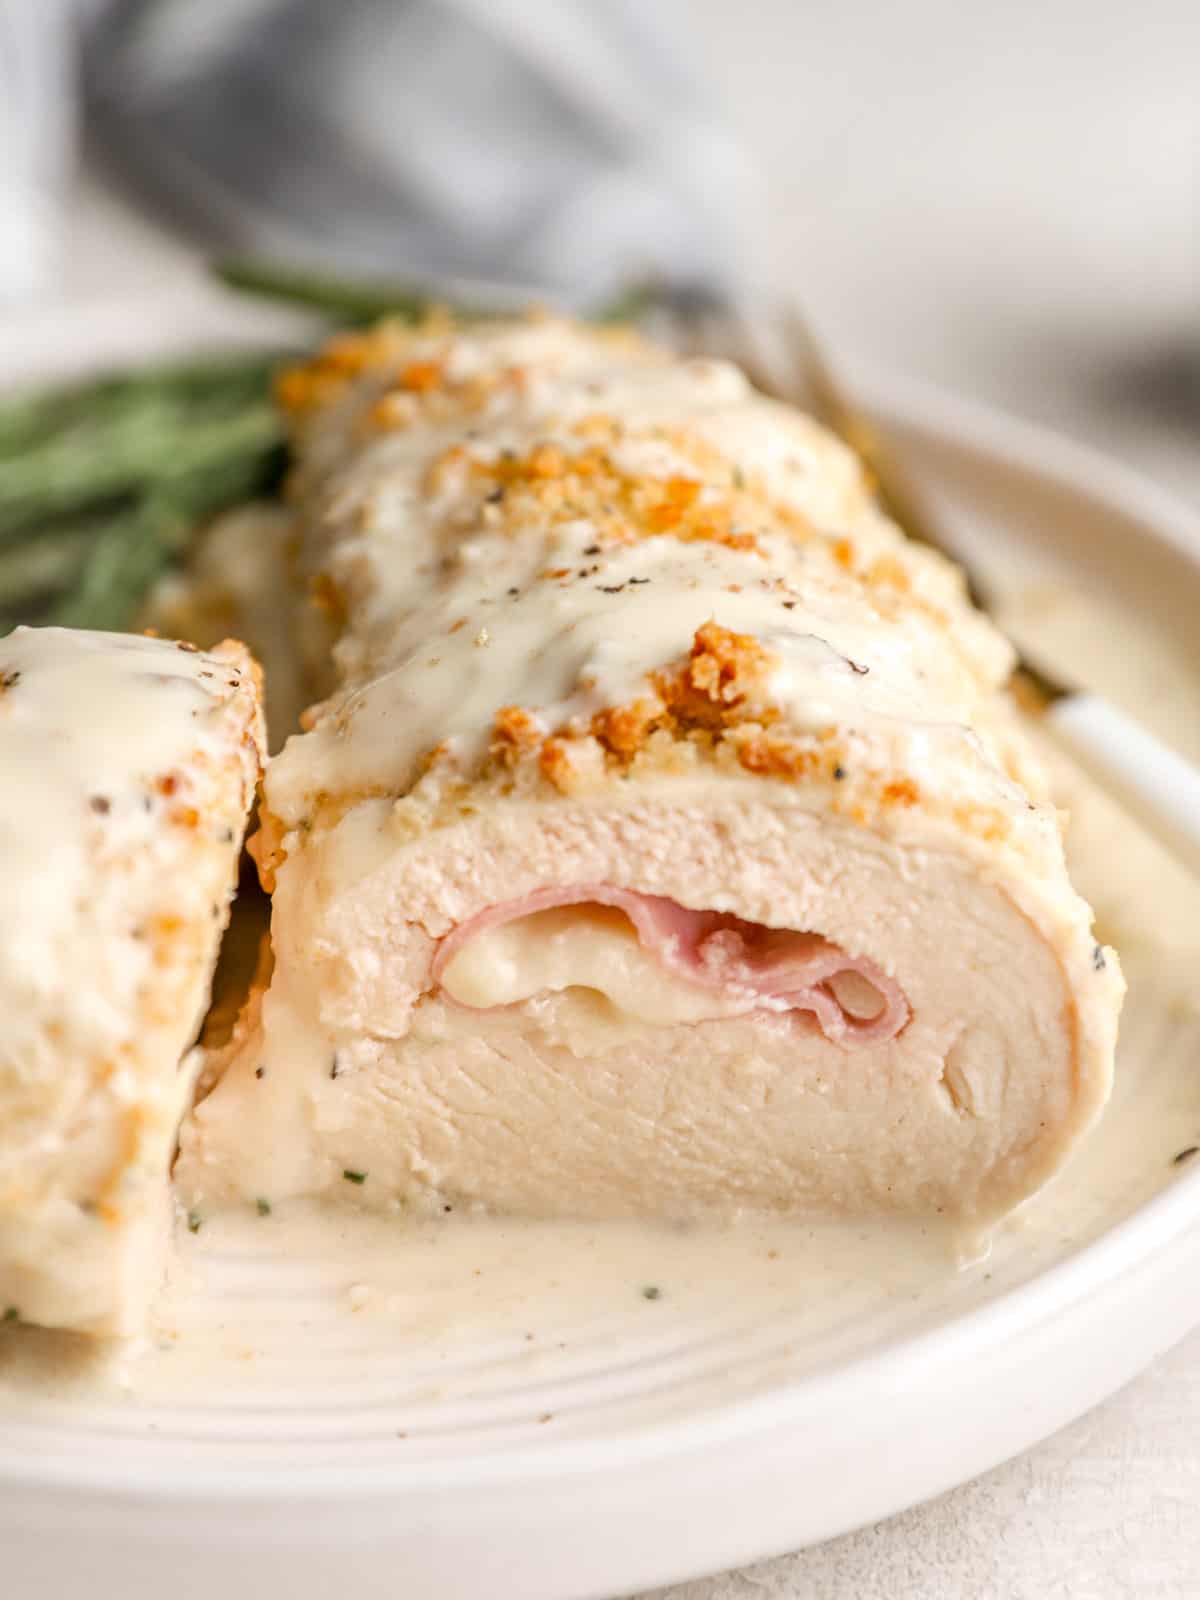
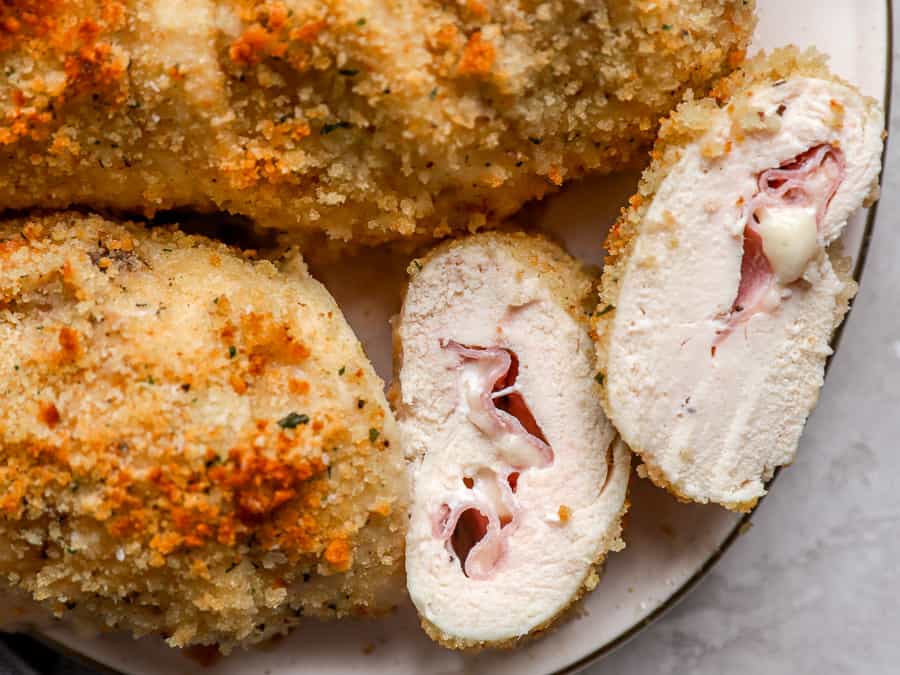
close-up view of a sliced chicken cordon bleu breast.

What is Chicken Cordon Bleu?

Chicken cordon bleu is made by butterflying a chicken breast and stuffing it with slices of creamy, melty Swiss cheese and salty deli ham. The whole thing gets rolled up, dipped in breadcrumbs, and doused in a creamy sauce for the ultimate decadent dinner. While it can be expensive when ordering out, our version is more cost effective but equally as delicious.
Ingredients For Chicken Cordon Bleu

  • Boneless Skinless Chicken Breasts: You’ll need 4 large chicken breasts for this recipe so there’s plenty of room to stuff them. Look for ones that are about 7-8 ounces each.
  • Ham: Any flavor of deli ham works well.
  • Swiss Cheese: You can also use provolone or cheddar.
  • Panko Breadcrumbs: Create a crunchy coating on the chicken. Regular or Italian-seasoned breadcrumbs are also a good choice.
  • Seasonings: Italian seasoning, onion powder, garlic powder, salt, and freshly cracked black pepper season the chicken. Salt also enhances the flavor of the sauce.
  • Butter: Unsalted butter helps the seasonings and breadcrumbs stick to the chicken, and it also forms the base of the sauce.
  • All-Purpose Flour: A bit of flour helps to thicken the sauce.
  • Milk: Milk adds richness and moisture to the sauce. Any kind works, including non-dairy.
  • Dijon Mustard: A touch of mustard adds just a bit of warmth to the sauce.
  • Worcestershire Sauce: This umami sauce adds incredible depth of flavor.

How to Butterfly a Chicken Breast

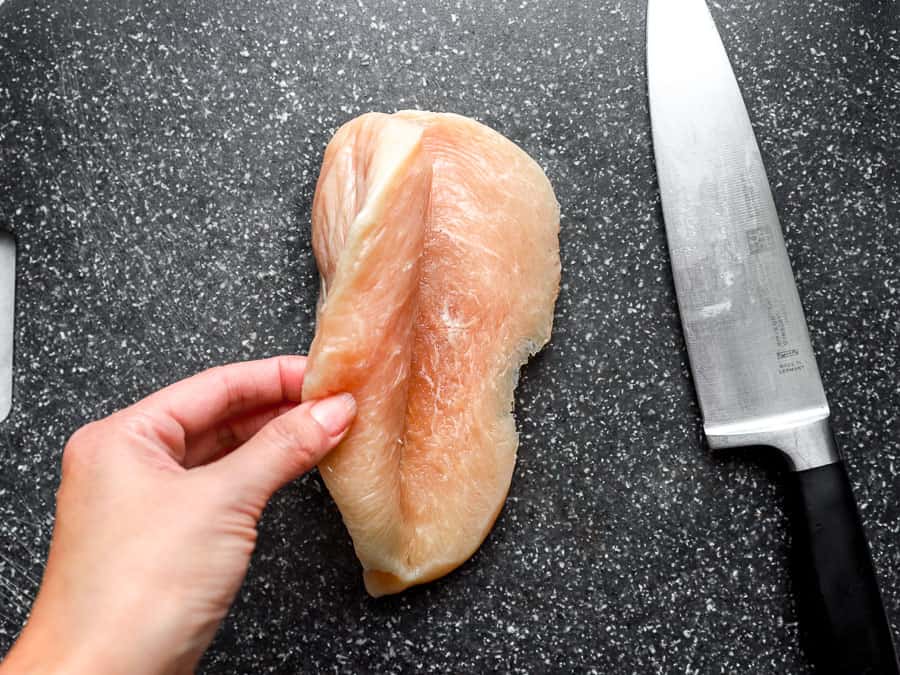
  1. Place the chicken breast flat on a cutting board and hold your knife horizontally to the cutting board.
  2. Place one hand on the chicken breast to keep it steady, then insert your knife into the center of the chicken breast and begin to cut horizontally until you have almost reached the other side.
  3. Open the chicken breast like a book.

What To Serve With Chicken Cordon Bleu

Chicken cordon bleu is rich and saucy, so it pairs beautifully with simple veggies, like Steamed Green Beans or Oven Roasted Broccoli. Soak up that beautiful sauce with Mashed Potatoes, Rice, or Garlic Herb Mashed Cauliflower.

How to Store Leftovers

Once cooked and cooled, store chicken cordon bleu in an air-tight container in the refrigerator for up to 3 days. If you plan to freeze this dish, I recommend doing so before baking it for the crispiest results. It will keep well for up to 3 months. Simply thaw overnight in the refrigerator, then bake as directed.

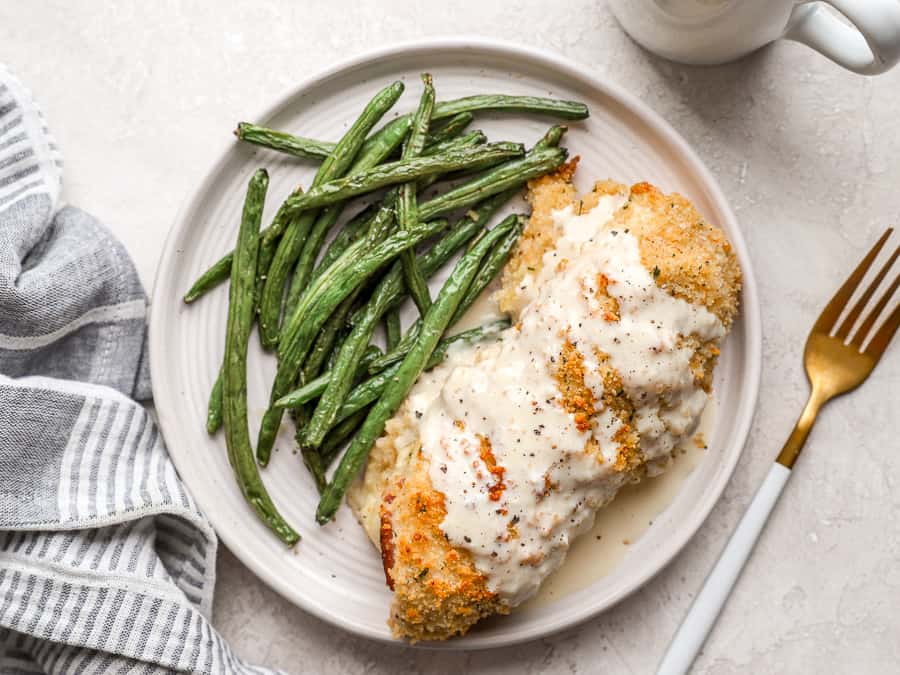
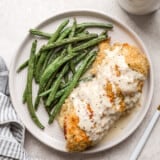
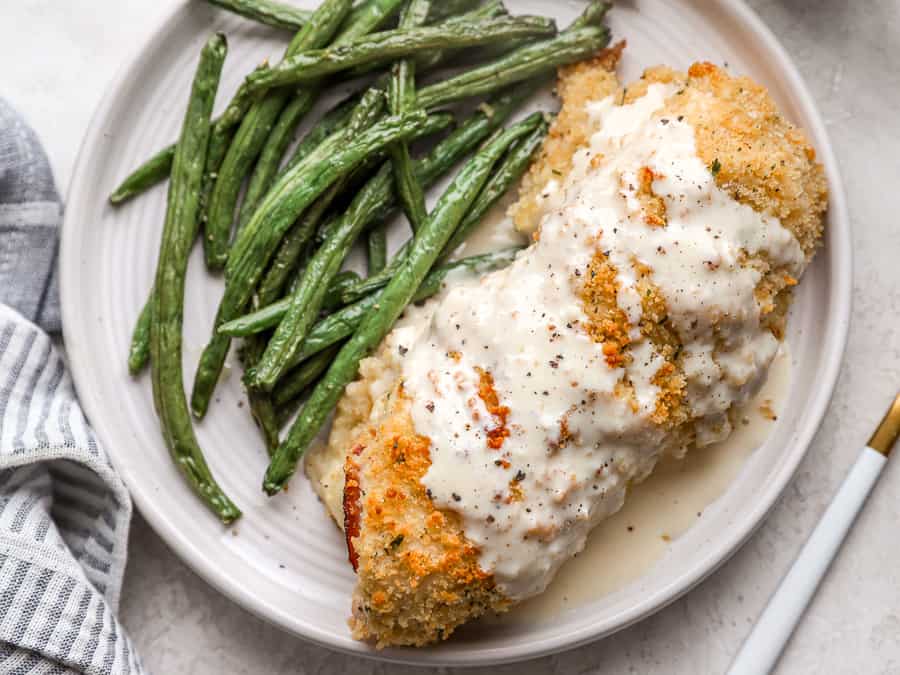
overhead view of chicken cordon bleu covered with sauce on a plate with green beans.
Print

Chicken Cordon Bleu

Chicken Cordon Bleu is one of those recipes that feels super fancy but is ready in under an hour! It's so saucy, cheesy, and delicious!
Course Dinner, Main Course
Cuisine French
Total Cost $17.22 recipe / $4.30 serving
Prep Time 20 minutes
Cook Time 35 minutes
Total Time 55 minutes
Servings 4
Calories 889kcal

Ingredients

Chicken:

Sauce:

  • 1/4 cup butter $0.53
  • 2 Tbsp all-purpose flour $0.05
  • 3/4 cup milk $0.40
  • 1/2 Tbsp Dijon mustard $0.04
  • 1 tsp Worcestershire $0.05
  • 1/2 tsp salt $0.02

Instructions

  • Preheat the oven to 350°F.
  • Butterfly each chicken breast by slicing horizontally through the middle of the breast, taking care to not cut all the way through. Open the chicken breast up like a book.
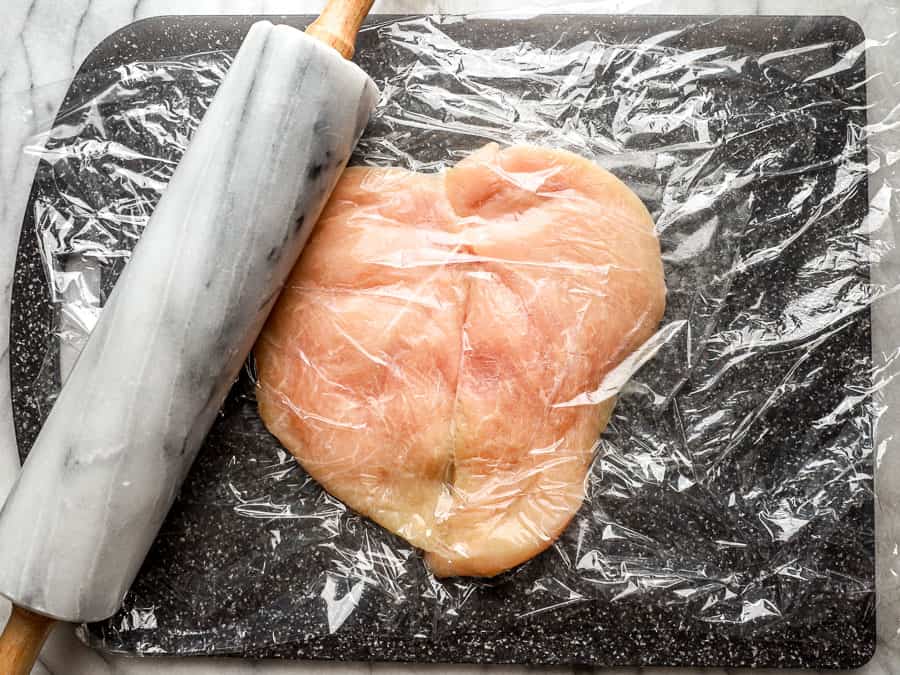
  • Lay the breast flat between 2 pieces of plastic wrap. Use a meat mallet or rolling pin to pound the chicken breasts into a thin, even layer.
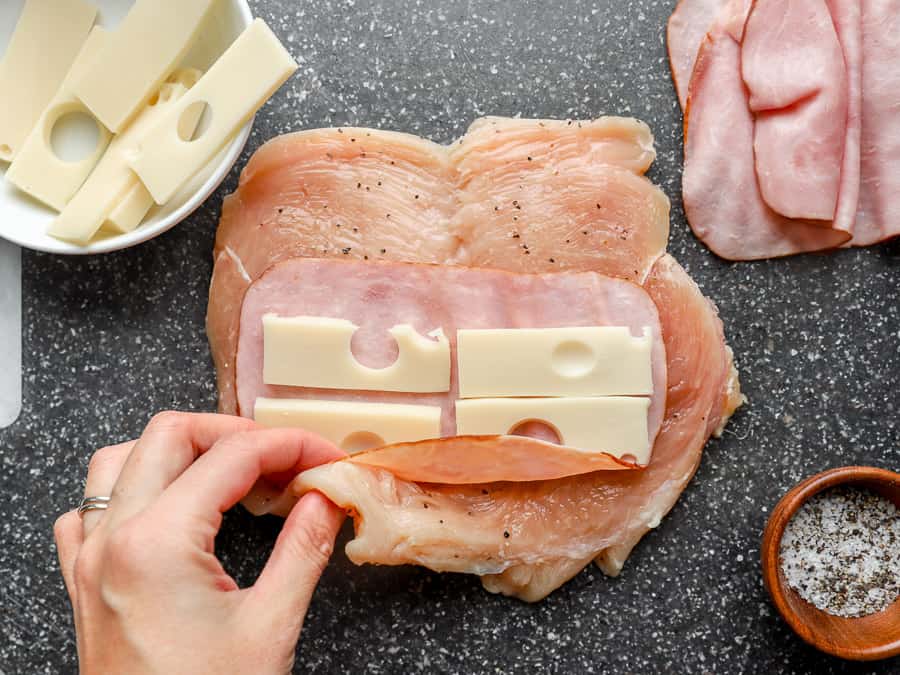
  • Sprinkle the chicken breasts with salt and pepper. Place a slice of ham and slice of Swiss cheese on each chicken breast.
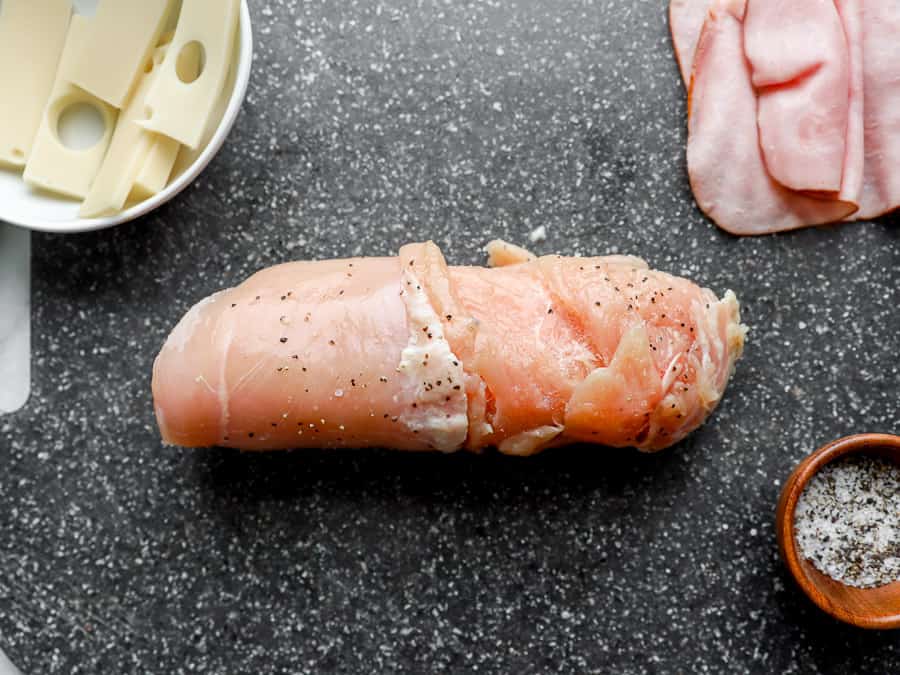
  • Gently roll up the chicken breast.
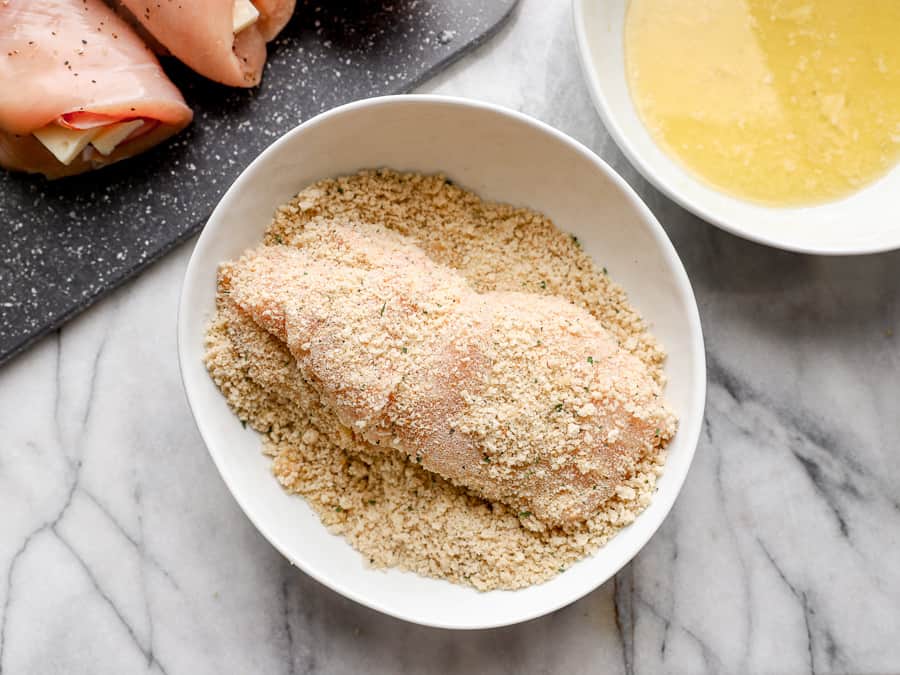
  • In a shallow bowl, combine the breadcrumbs, Italian seasoning, onion powder, garlic, powder, salt, and pepper. Set up a breading station with 2 shallow bowls; one of melted butter and one for the breading.
  • Dip the chicken rolls in the melted butter, and roll in the breadcrumbs until completely coated. Transfer to a parchment linked baking sheet.
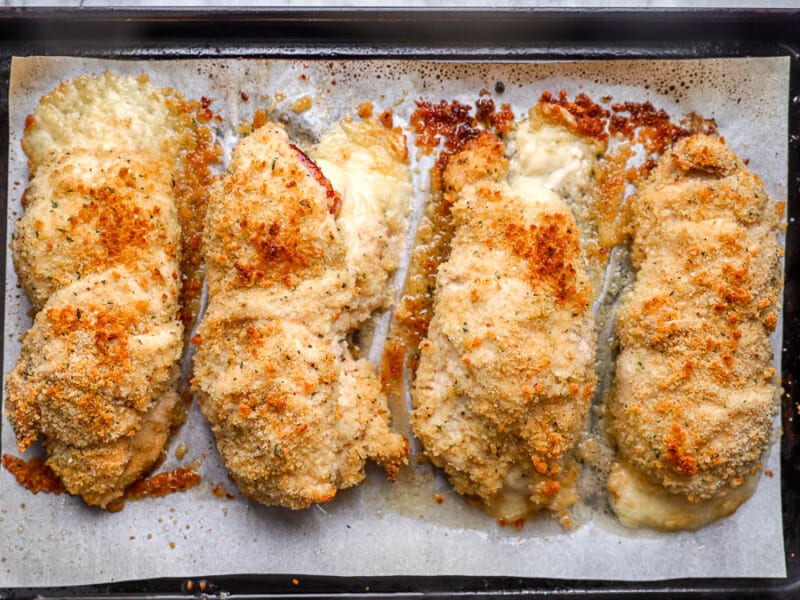
  • Bake the chicken for 35-40 minutes or until it reaches an internal temperature of 165°F.
  • To make the sauce, melt the butter in a saucepan over medium heat. Stir in the flour. Then, slowly pour in the milk while whisking to incorporate.
  • Add in the Dijon mustard and Worcestershire sauce. Season with salt. Spoon the sauce over the chicken.

See how we calculate recipe costs here.

Nutrition

Serving: 1serving | Calories: 889kcal | Carbohydrates: 23g | Protein: 69g | Fat: 57g | Sodium: 2027mg | Fiber: 1g
overhead view of slices of chicken cordon bleu on a plate.

how to make Chicken Cordon Bleu – step by step photos

a hand opening a butterflied chicken breast next to a knife.

Preheat the oven to 350°F. Butterfly each of 4 chicken breasts by slicing horizontally through the middle of the breast, taking care to not cut all the way through. Open the chicken breast up like a book.

a butterflied chicken breast under plastic wrap with a rolling pin.

Lay the breast flat between 2 pieces of plastic wrap. Use a meat mallet or rolling pin to pound the chicken breasts into a thin, even layer.

a butterflied chicken breast with a slice of ham and swiss cheese on top.

Sprinkle the chicken breasts with salt and pepper. Place a slice of ham and 1 ounce of Swiss cheese on each chicken breast.

a rolled-up stuffed chicken breast.

Gently roll up the chicken breast.

a rolled-up chicken breast dipped in breadcrumbs.

In a shallow bowl, combine 1 1/2 cups Panko breadcrumbs, 1/2 tsp Italian seasoning, 1/2 tsp onion powder, 1/2 tsp garlic powder, 1 tsp salt, and 1/4 tsp pepper. Set up a breading station with a shallow bowl of 1/2 cup melted butter and the breading. Dip the chicken rolls in the melted butter, and roll in the breadcrumbs until completely coated. Transfer to a greased casserole dish.

4 breaded and baked rolled-up chicken breasts on a baking sheet.

Bake the chicken for 35-40 minutes or until it reaches an internal temperature of 165°F.

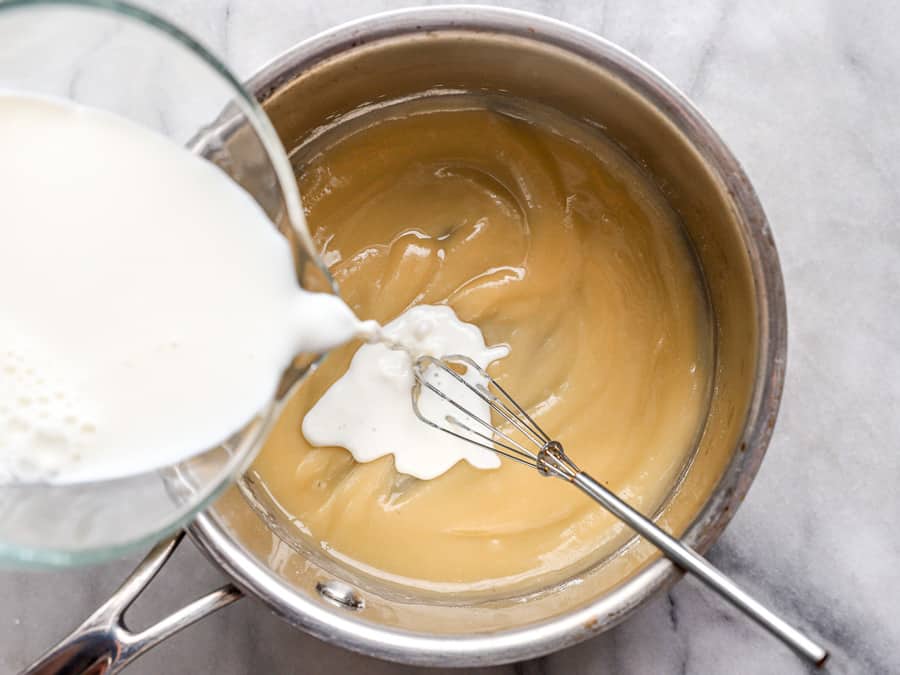
milk added to a thick roux in a saucepan with a whisk.

To make the sauce, melt 1/4 cup butter in a saucepan over medium heat. Stir in the 2 Tbsp flour. Then, slowly pour in 3/4 cup milk while whisking to incorporate.

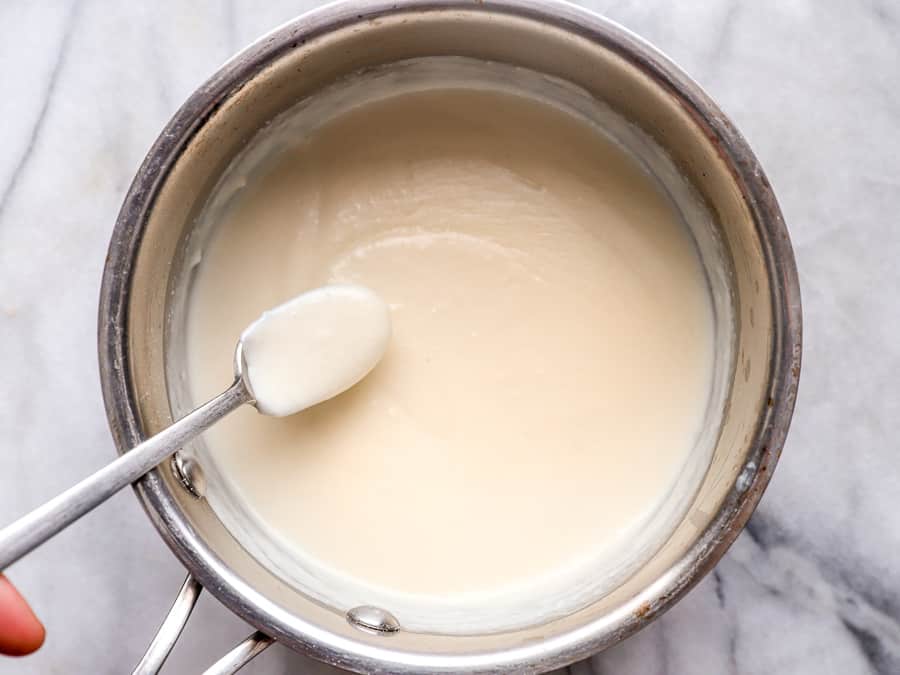
thick and creamy white sauce in a saucepan with a spoon.

Add in 1/2 Tbsp Dijon mustard and 1 tsp Worcestershire sauce. Season with 1/2 tsp salt. Spoon the sauce over the chicken.

overhead view of chicken cordon bleu covered with sauce on a plate with green beans.

This crispy, cheesy, salty, and creamy chicken cordon bleu is the ultimate comfort food!

The post Chicken Cordon Bleu appeared first on Budget Bytes.