Philly Cheesesteak Recipe

This easy Philly Cheesesteak recipe is made with tender, thinly sliced beef, sautéed peppers, onions and mushrooms and gooey, melted cheese on a toasted hoagie roll!

The post Philly Cheesesteak Recipe appeared first on Budget Bytes.

Philly cheesesteaks are one of my favorite comfort foods. I usually don’t purchase steak often because of the cost, but was recently surprised to find thinly sliced pre-packaged steak at my local grocery store for a very reasonable price. So of course I had to give it a try! I added sautéed bell peppers, onions and mushrooms to bulk up the sandwiches, melted provolone cheese on top, and placed it all inside a big hoagie roll. These were so good and very filling. Five large Philly cheesesteak sandwiches for just a little over $3 a sandwich…I’ll take that all day long!
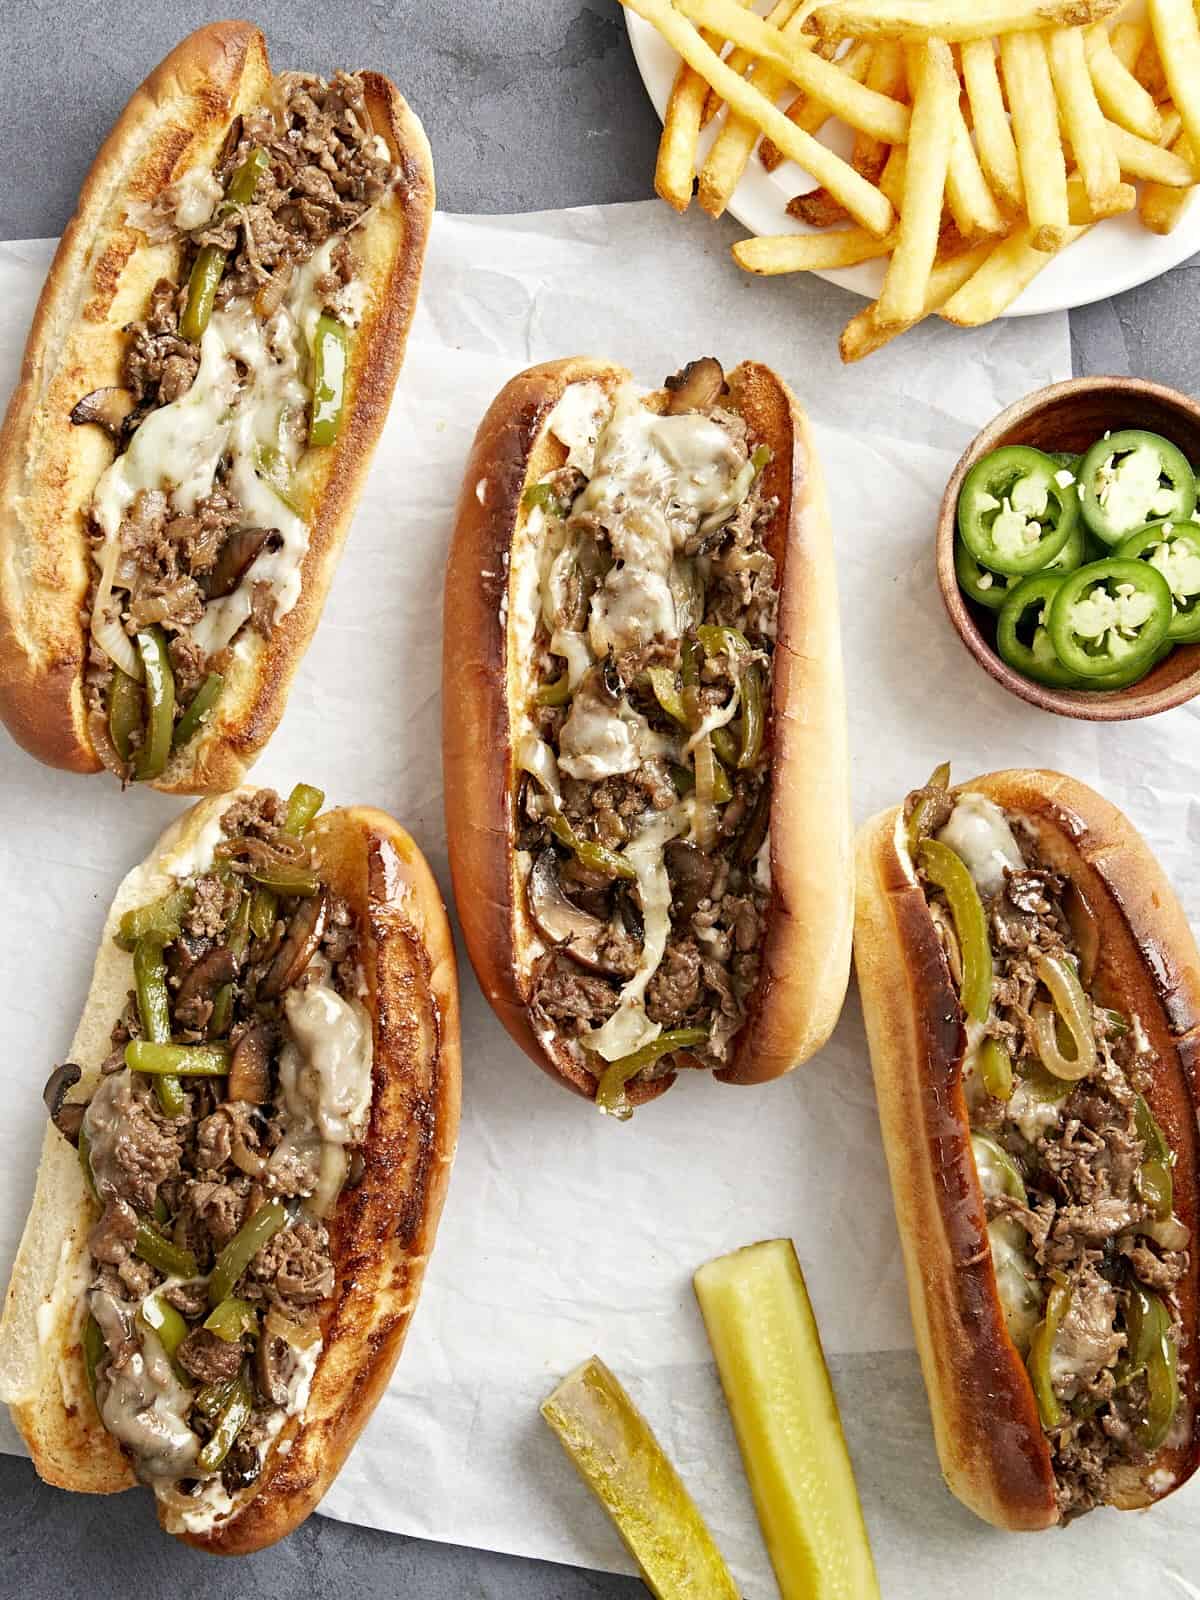
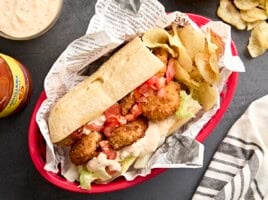
Overhead view of four philly cheesesteaks on parchment paper with fries and pickles on the side.

Growing up, whenever we ate at the food court in the mall, my #1 favorite place to eat was the Philly cheesesteak restaurant. I would skip over the pizza and burgers and go straight for those cheesy, tender, steak sandwiches. So today I’m excited to recreate and put my own spin on an American classic for a party of 5 on a budget!!😉

What are Philly Cheesesteaks?

Philly Cheesesteaks are sandwiches made with thinly sliced steak and cheese and served on a long hoagie roll. Although its origins are sometimes debated, the Philly Cheesesteak is mostly known for being created in Philadelphia, Pennsylvania in the early 1900’s. Common variations throughout the years have included sautéed onions, bell peppers, and mushrooms. Regardless of how you like to eat your cheesesteak, this popular recipe has been well-loved by many!

Ingredients Needed

Here’s everything you need to make this easy Philly Cheesesteak recipe:

  • Steak: To keep things budget-friendly and to save on time, we used thinly pre-shaved beef steak. You can usually find it in the ground meat section of your grocery store. I did notice and test a couple different types of shaved beef, so I’ll go into more details below.
  • Mushrooms: Sliced baby bella mushrooms are included to add more flavor to the cheesesteaks and to bulk up the servings.
  • Peppers and Onion: Sautéed bell peppers and onion add lots of great flavor and texture to this cheesesteak recipe.
  • Cheese: Provolone cheese is my favorite with cheesesteaks, but you can substitute with white American, Swiss or even Cheez Whiz if you’re really going for that classic Philly cheesesteak taste!
  • Rolls: Hoagie rolls are traditional and a perfect vessel for holding all of that cheesesteak goodness. You can find them packaged in the bread aisle, but if you want to splurge a little, try getting the fresh hoagies in the bakery section.
  • Seasoning: A mix of salt, pepper, garlic powder, and Worcestershire sauce is used to season the beef and vegetables. The Worcestershire sauce is my secret ingredient and adds so much flavor, so I wouldn’t skip it!

Let’s Talk Steak!

A lot of Philly cheesesteak recipes use ribeye or sirloin as their meat of choice, but both of those can be quite pricey. It also takes a little extra time to thinly slice all of that meat. But if you didn’t already know, you can actually find pre-packed thinly sliced steak in the meat section of the grocery store. 

During testing I tried two different types – one that’s listed as “Beef shaved steak” and another that’s listed as “Ribeye shaved steak.” The ribeye shaved steak was a much better quality and tasted a lot better than just the “beef shaved steak. The ribeye shaved steak is a little more expensive than just the beef shaved steak, but feel free to use either one based on your budget.

These shaved steak packages primarily come in 12-14oz. sizes, which is only enough to make roughly 3-4 large sandwiches. This is why the mushrooms, peppers and onions are added in this recipe to help bulk up the servings.

Recipe Tips and Variations

  • This recipe makes 5 huge sandwiches, but you can cut each of these in half to make 10 servings if you’re trying to serve them at a tailgate party or potluck!
  • Not a mushroom fan? No worries, I really only added them to bulk up the filling and stretch the servings to five. But you can totally leave them off and just include the sautéed peppers and onions. You may only be able to make four large sandwiches without the mushrooms.
  • You can add more cheese to your sandwiches if you really want to make them extra cheesy. I used enough cheese to cover most of the cheesesteak in the skillet, but feel free to add 1-3 more slices over the top of the skillet or on each individual sandwich.

Serving Suggestions

We paired these Philly cheesesteaks with some quick air fryer french fries, but you can also serve them with our popular oven baked steak fries or make a quick batch of air fryer sweet potato fries

As for toppings, you can certainly keep it simple and leave it as is with just the peppers, onions and mushrooms. Or try adding some shredded lettuce, tomato, pickled jalapeños, or even slow-cooked caramelized onions would taste really good!!
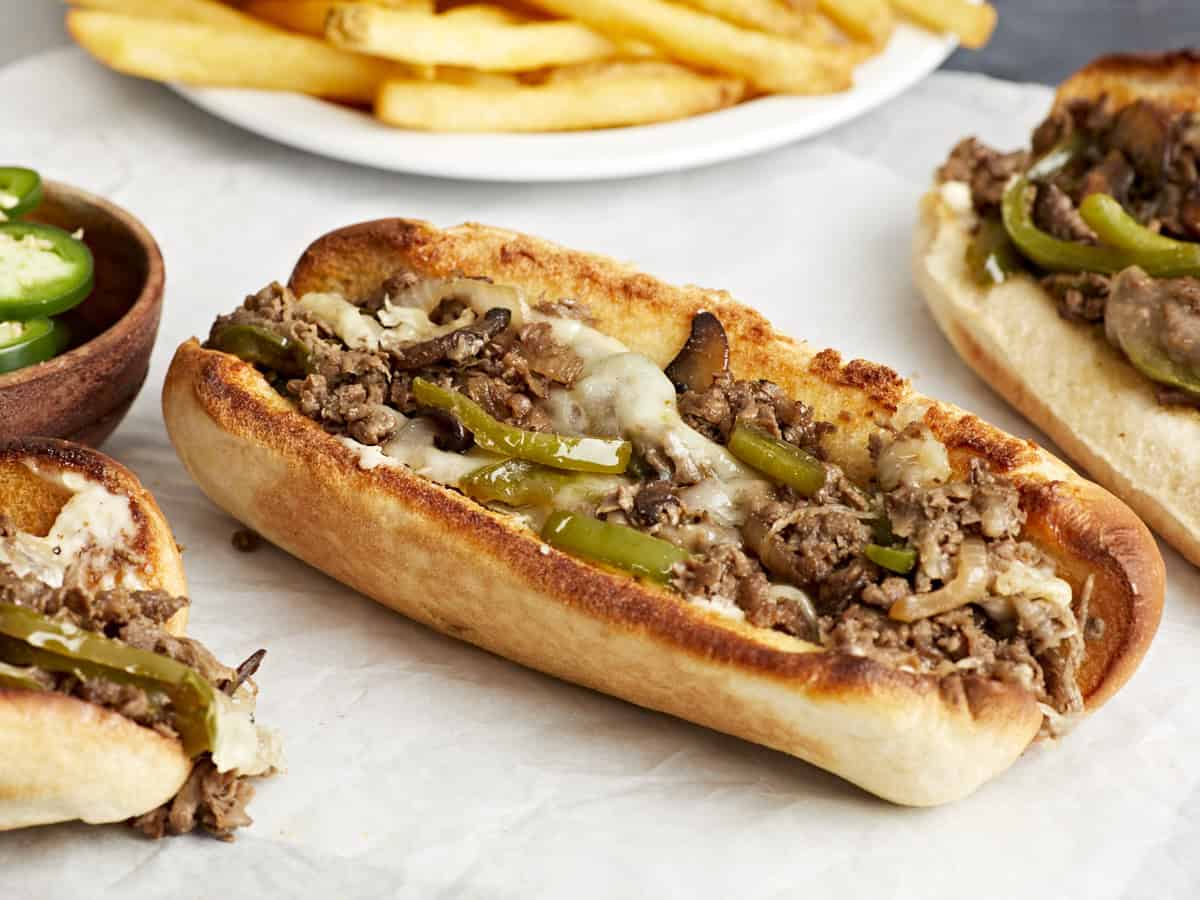
Side close up view of a philly cheesesteak on parchment paper.
Overhead view of philly cheesesteak sandwiches on parchment paper with fries on the side.
Print

Philly Cheesesteak Recipe

This easy Philly Cheesesteak recipe is made with tender, thinly sliced beef, sautéed peppers, onions and mushrooms and gooey, melted cheese on a toasted hoagie roll!
Course Dinner, Lunch
Cuisine American
Total Cost $16.27 recipe / $3.25 serving
Prep Time 10 minutes
Cook Time 20 minutes
Total Time 30 minutes
Servings 5 (1 sandwich each)
Calories 535kcal

Ingredients

  • 8 oz. baby bella mushrooms, sliced $2.69
  • 1 green bell pepper $0.89
  • 1 yellow onion $0.42
  • 4 Tbsp butter, divided $0.53
  • 2 Tbsp cooking oil, divided $0.08
  • 12-14 oz. shaved beef steak $6.00
  • 3/4 tsp salt $0.03
  • 1/2 tsp garlic powder $0.05
  • 1/2 tsp freshly cracked black pepper $0.02
  • 2 tsp Worcestershire sauce $0.10
  • 5 hoagie rolls $3.82
  • 6 slices provolone $1.64

Instructions

  • Start by prepping the vegetables. Slice the green bell pepper, onion, and mushrooms.
  • Heat a large skillet over medium heat and add 1 Tbsp of butter and 1 Tbsp cooking oil. Once the skillet is hot add in the sliced mushrooms. Stir and cook for 2-3 minutes or until the mushrooms start to soften.
  • Next add in the sliced onions and bell pepper to the skillet. Stir and cook for another 3 minutes or until the veggies have softened. Remove all the vegetables from the skillet to a separate plate and set aside.
  • In the same skillet add 1 Tbsp butter and 1 Tbsp cooking oil. Add the shaved beef steak to the skillet and cook until browned and cooked through.
  • Now add the sautéed peppers, onions, and mushrooms back to the skillet with the steak, then add in the salt, garlic powder, black pepper, and worcestershire sauce. Stir and cook for 1-2 minute to allow the vegetables to heat back up.
  • Spread the provolone cheese slices on top of the beef and vegetables in the skillet. Turn the heat off. Allow the residual heat to melt the cheese.
  • While the steak is cooking or while the cheese is melting, go ahead and toast the hoagie rolls. Preheat the oven to 350°F. Place 5 rolls on a baking sheet, spread the remaining 2 Tbsp of softened butter inside the hoagie rolls, and toast in the oven for a few minutes until golden brown. Make sure to keep an eye on them. Once toasted, remove the sheet pan from the oven and set the rolls to the side.
  • Fill each hoagie roll evenly with the steak and cheese mixture. Serve these Philly cheesesteaks with your favorite spreads and toppings like mayo, shredded lettuce, tomato, or sliced jalapeños. Enjoy!

See how we calculate recipe costs here.

Nutrition

Serving: 1sandwich | Calories: 535kcal | Carbohydrates: 39g | Protein: 29g | Fat: 30g | Sodium: 920mg | Fiber: 2g
Overhead view of philly cheesesteaks on parchment paper with a hand picking one up.

How to Make Philly Cheesesteaks – Step by Step Photos
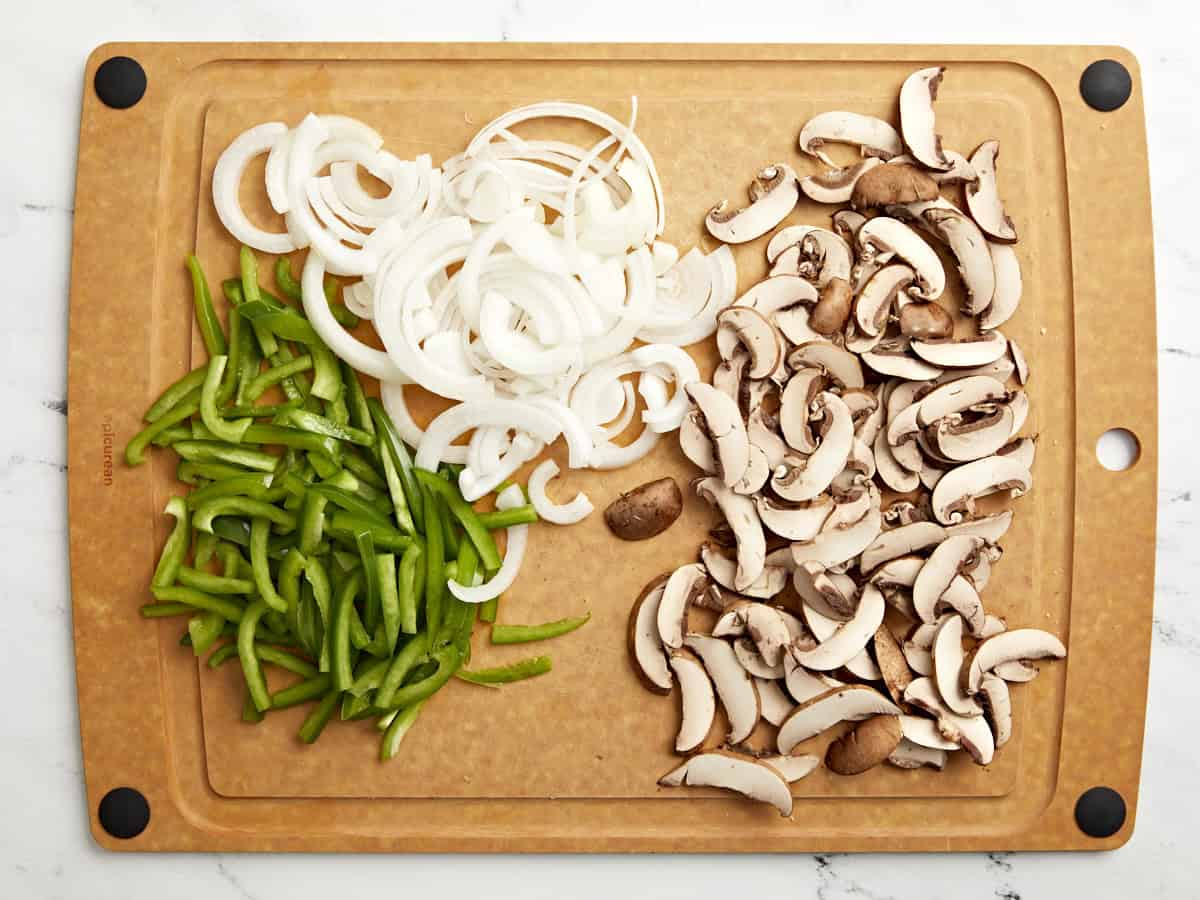
Peppers, onion and sliced mushrooms on a cutting board.

Start by prepping the vegetables. Slice 1 green bell pepper, 1 onion, and 8 oz. baby bella mushrooms.
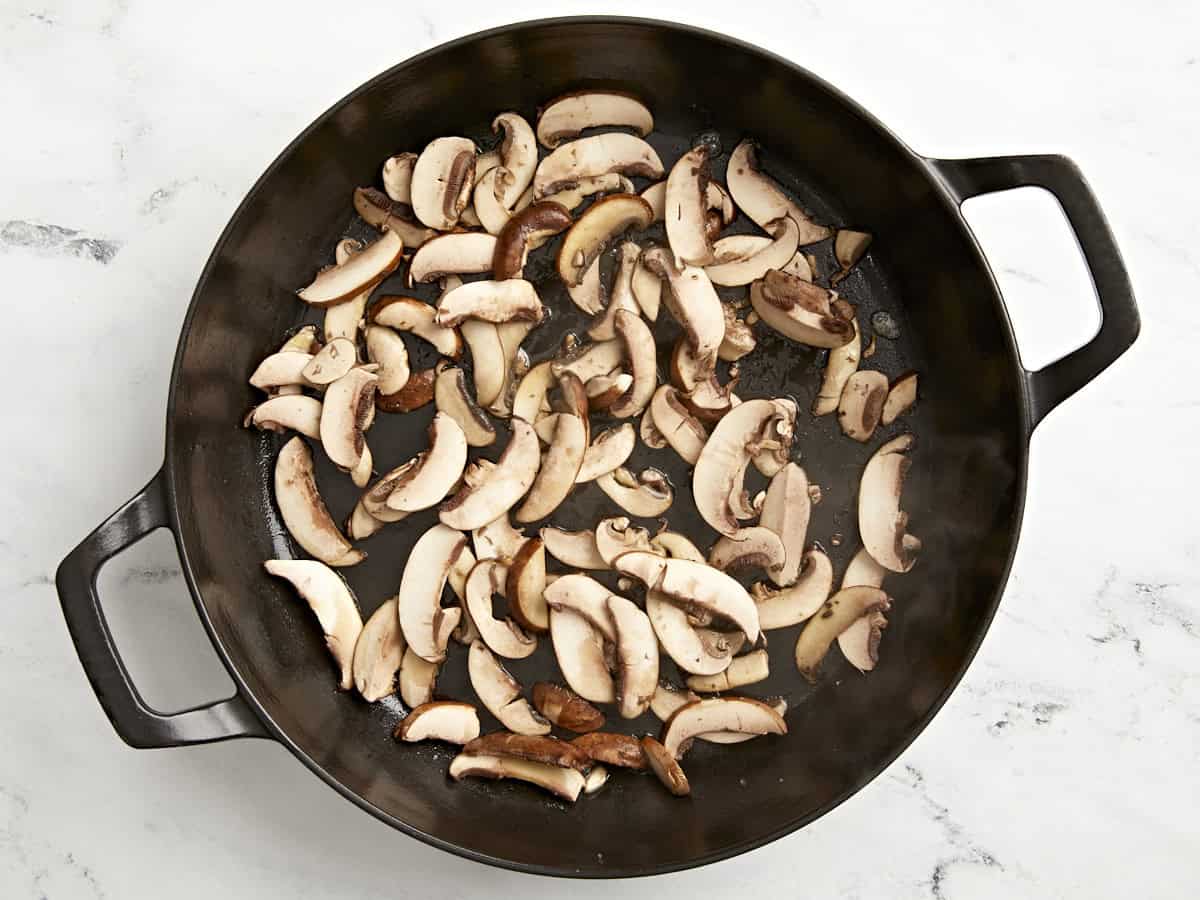
Mushrooms added to skillet.

Heat a large skillet over medium heat and add 1 Tbsp of butter and 1 Tbsp cooking oil. Once the skillet is hot add in the sliced mushrooms. Stir and cook for 2-3 minutes or until the mushrooms start to soften.
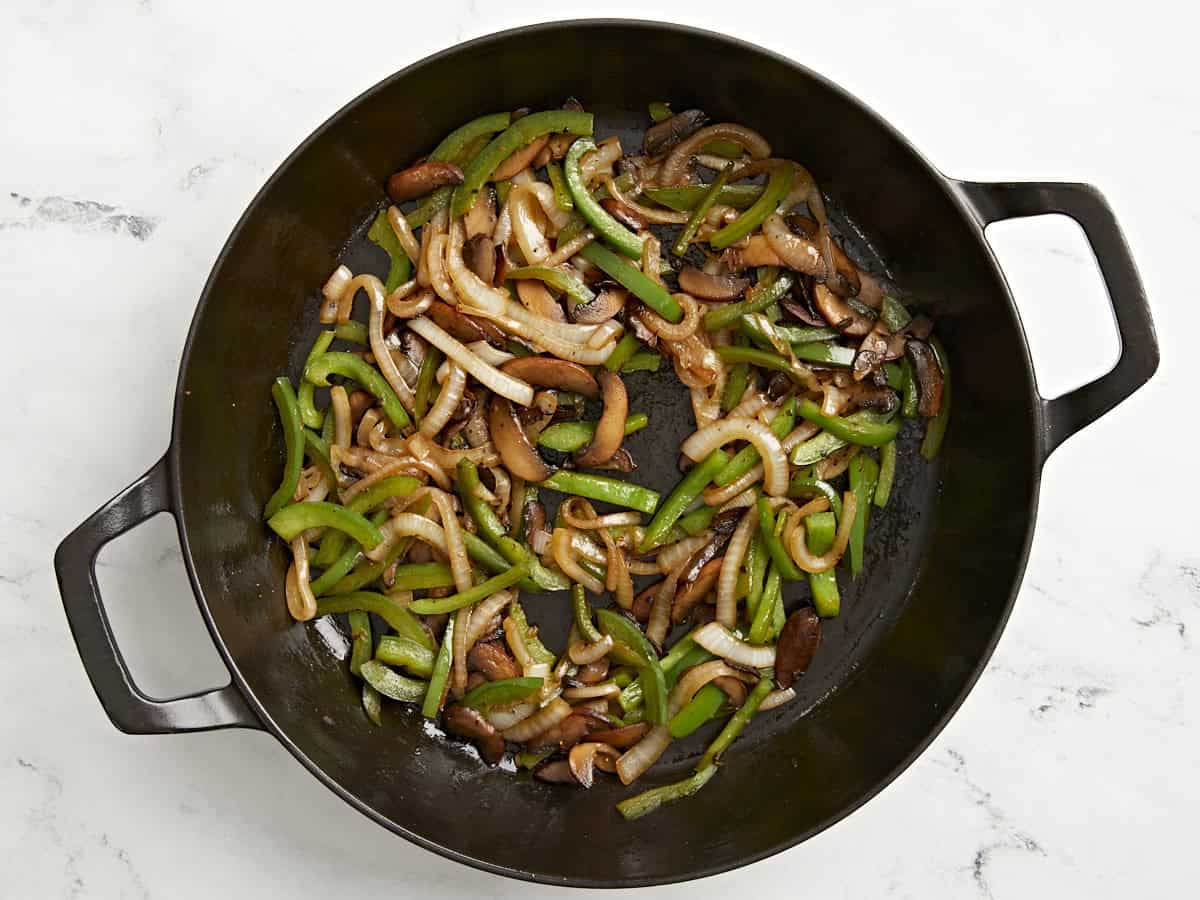
Peppers and Onions added to skillet

Next add in the sliced onions and bell pepper. Stir and cook for another 3 minutes or until the peppers and onions have softened. Remove all the vegetables from the skillet to a separate plate and set aside.
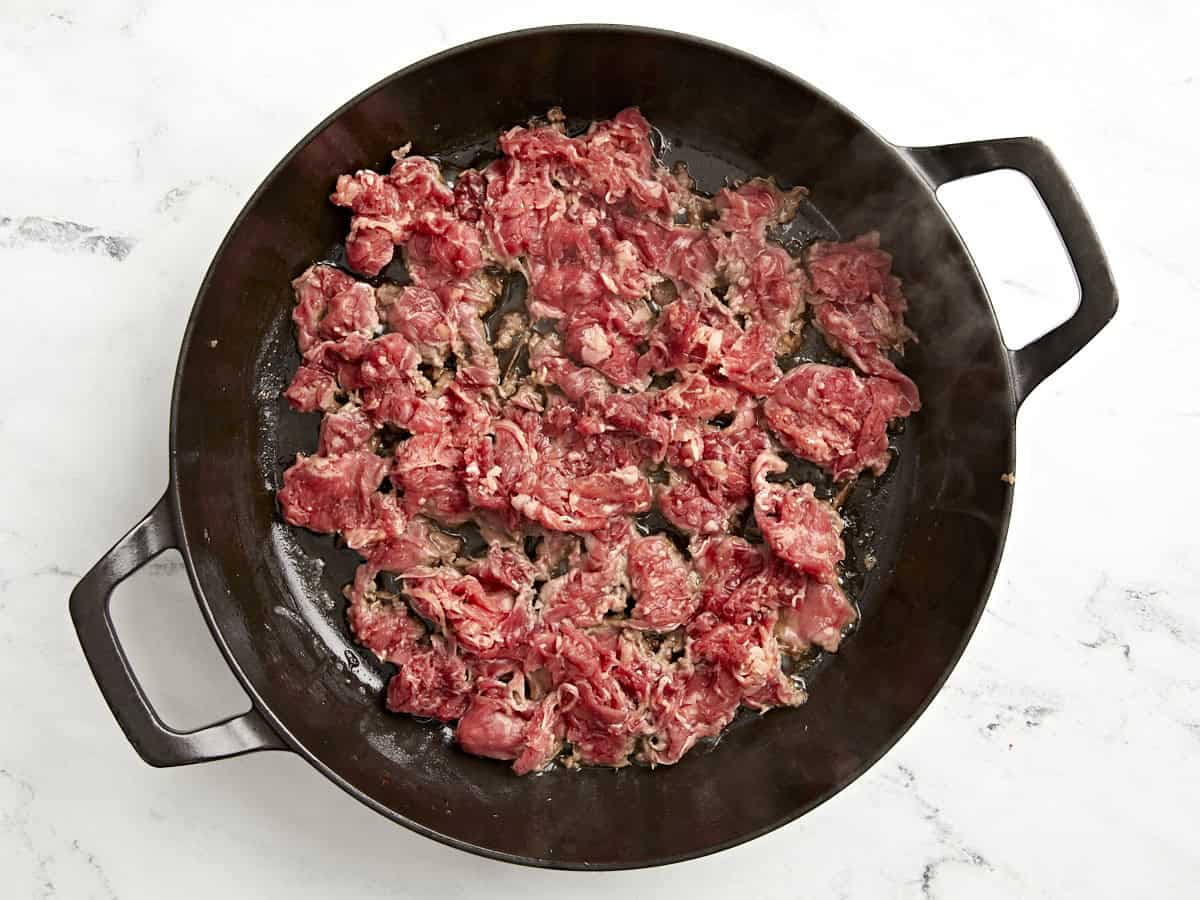
Shaved beef added to skillet

In the same skillet add another 1 Tbsp butter and 1 Tbsp cooking oil. Add 12-14oz. of shaved beef steak to the skillet and cook until browned and cooked through.
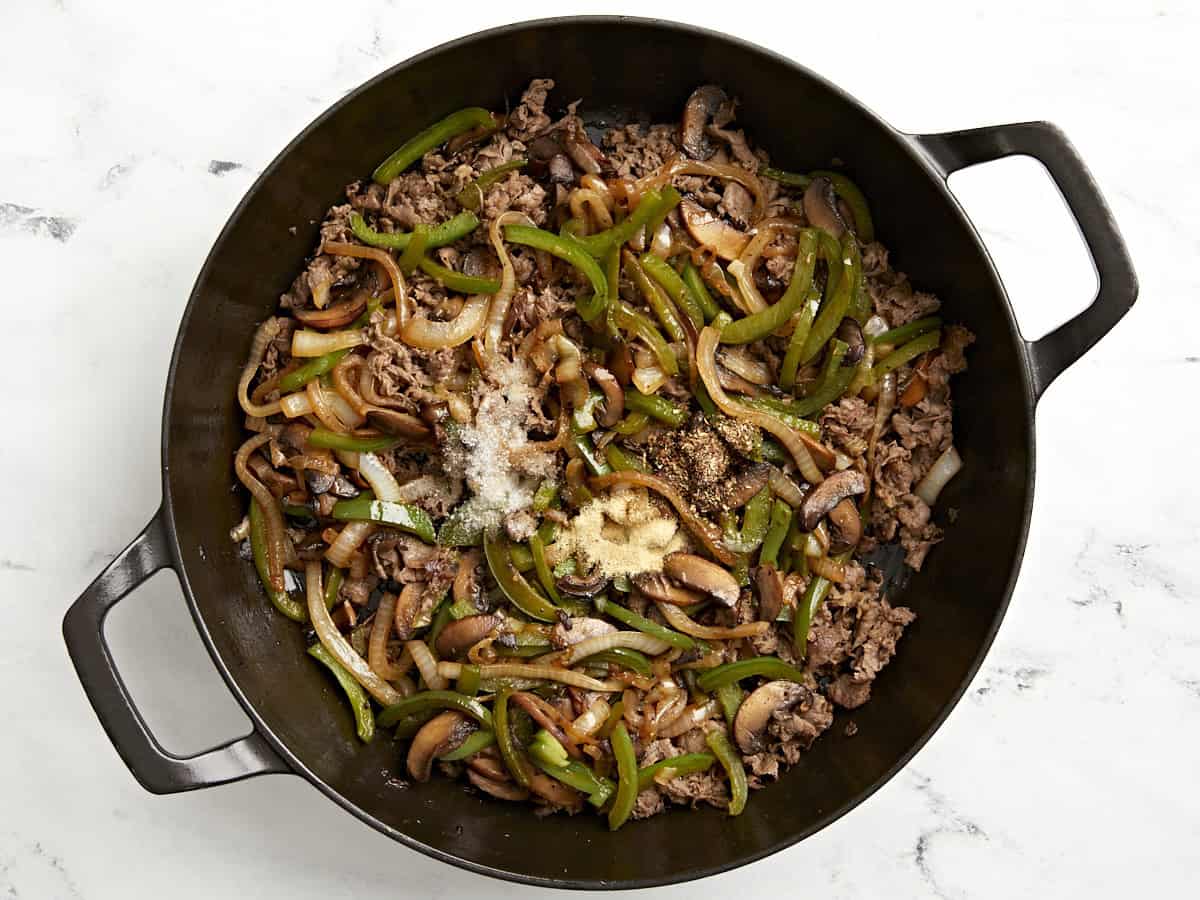
Peppers and onions added to cooked beef in the skillet.

Now add the sautéed peppers, onions, and mushrooms back to the skillet with the cooked steak along with 3/4 tsp salt, 1/2 tsp garlic powder, 1/2 tsp freshly cracked black pepper, and 2 tsp Worcestershire sauce. Stir and cook for 1-2 minutes to allow the vegetables to heat back up.
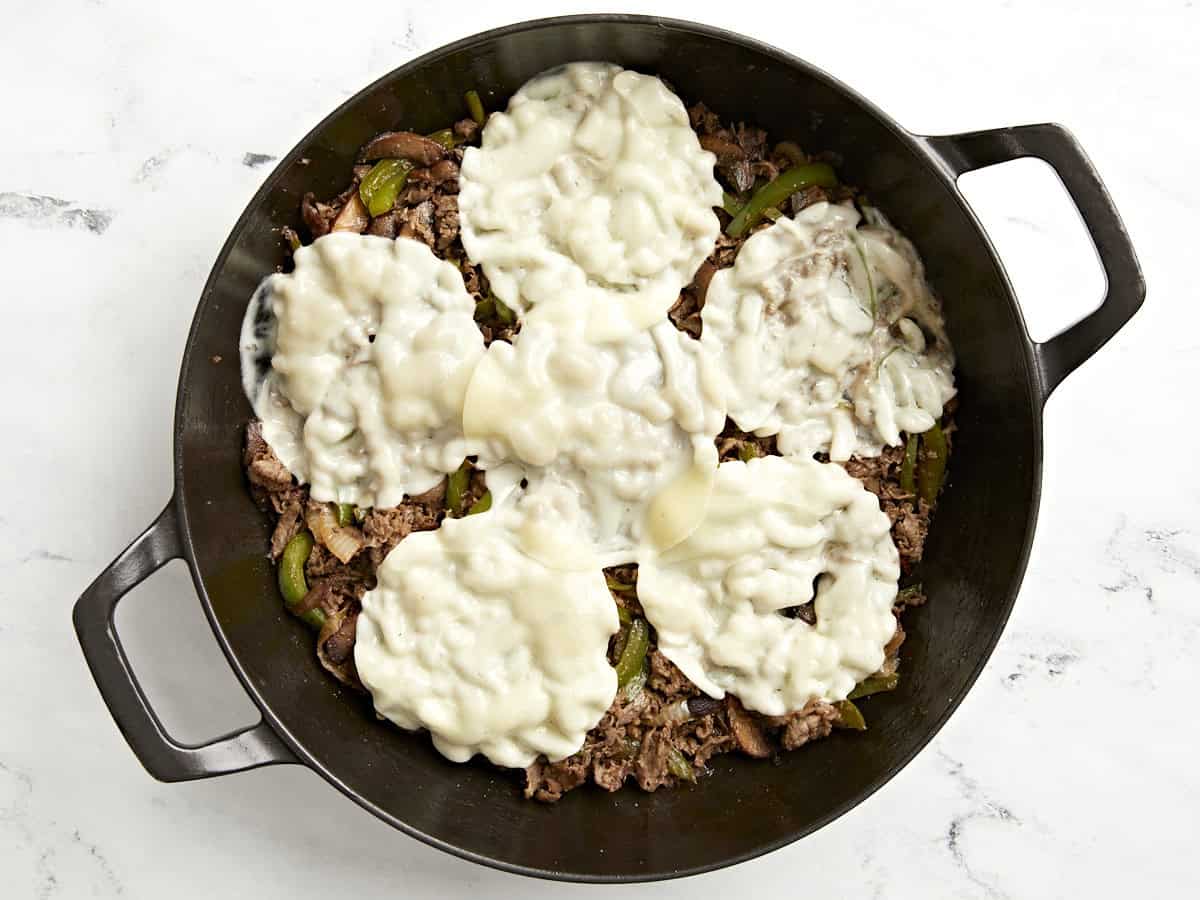
Provolone cheese added on top of cooked cheesesteak in skillet.

Spread 6 slices of provolone cheese on top of the steak in the skillet. Turn the heat off. Allow the residual heat to melt the cheese.
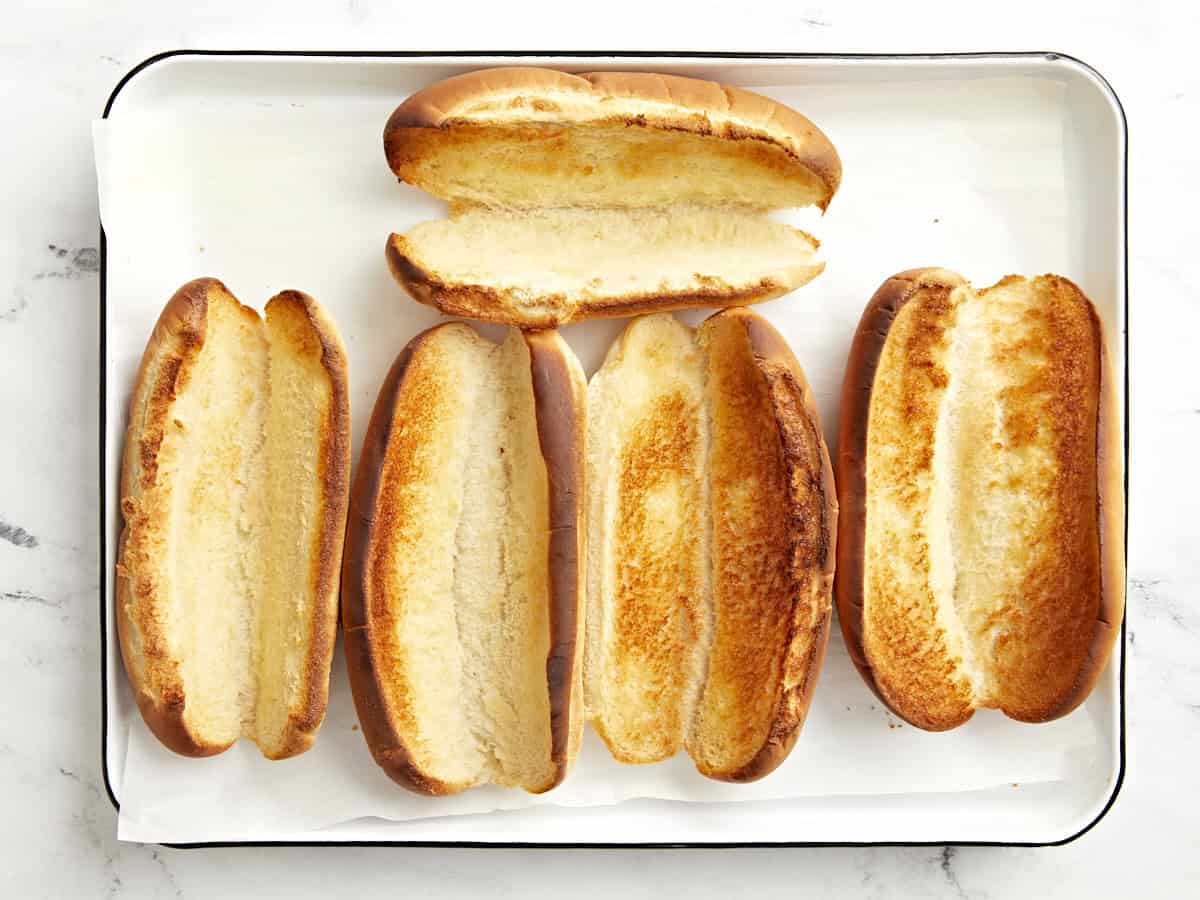
Toasted hoagie rolls

While the steak is cooking or while the cheese is melting, go ahead and toast the hoagie rolls. Preheat the oven to 350°F. Place 5 rolls on a baking sheet, spread the remaining 2 Tbsp of softened butter inside the hoagie rolls, and toast in the oven for a few minutes until golden brown. Make sure to keep an eye on them. Once toasted, remove the sheet pan from the oven and set aside.
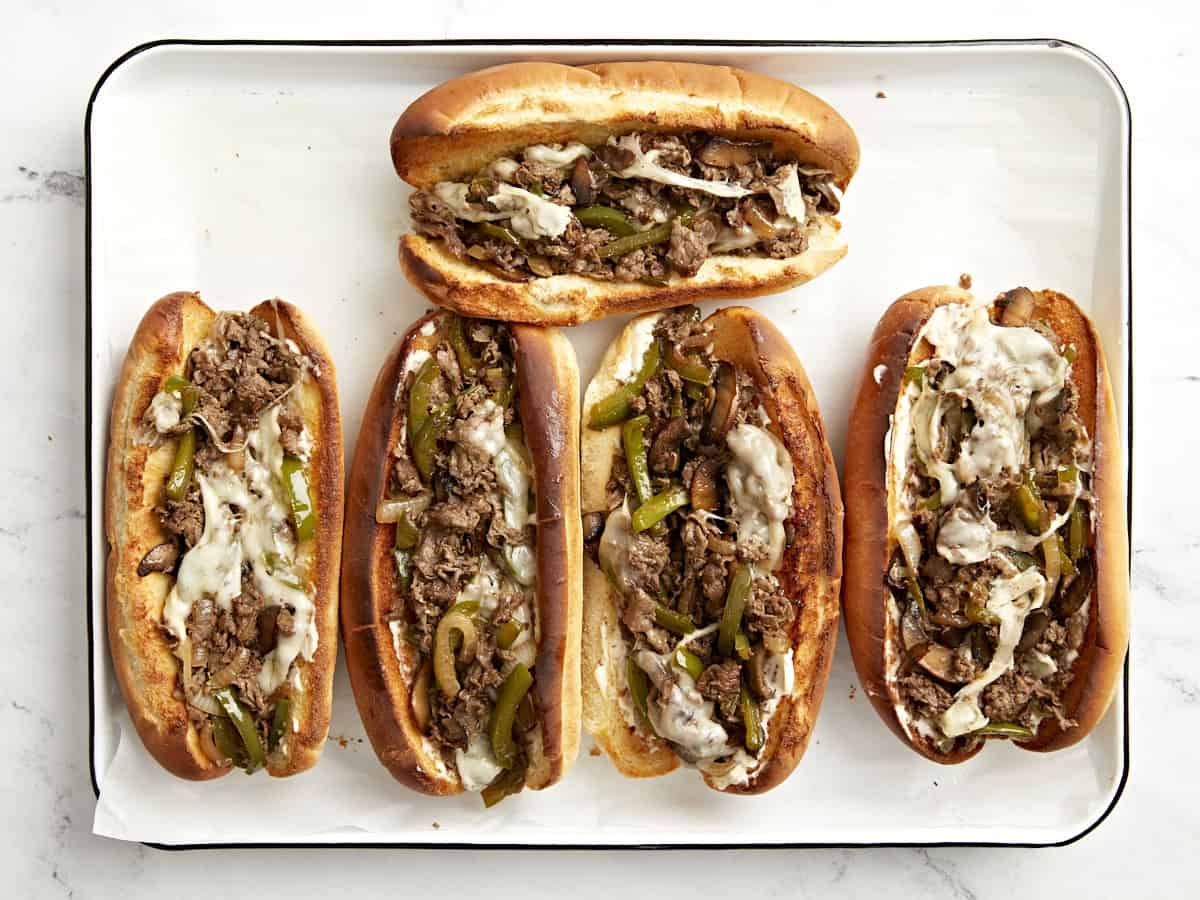
Finished philly cheesesteak sandwiches.

Now all that’s left to do is fill each hoagie roll evenly with the steak and cheese mixture. You can also spread some mayo on the inside of each roll if you prefer.
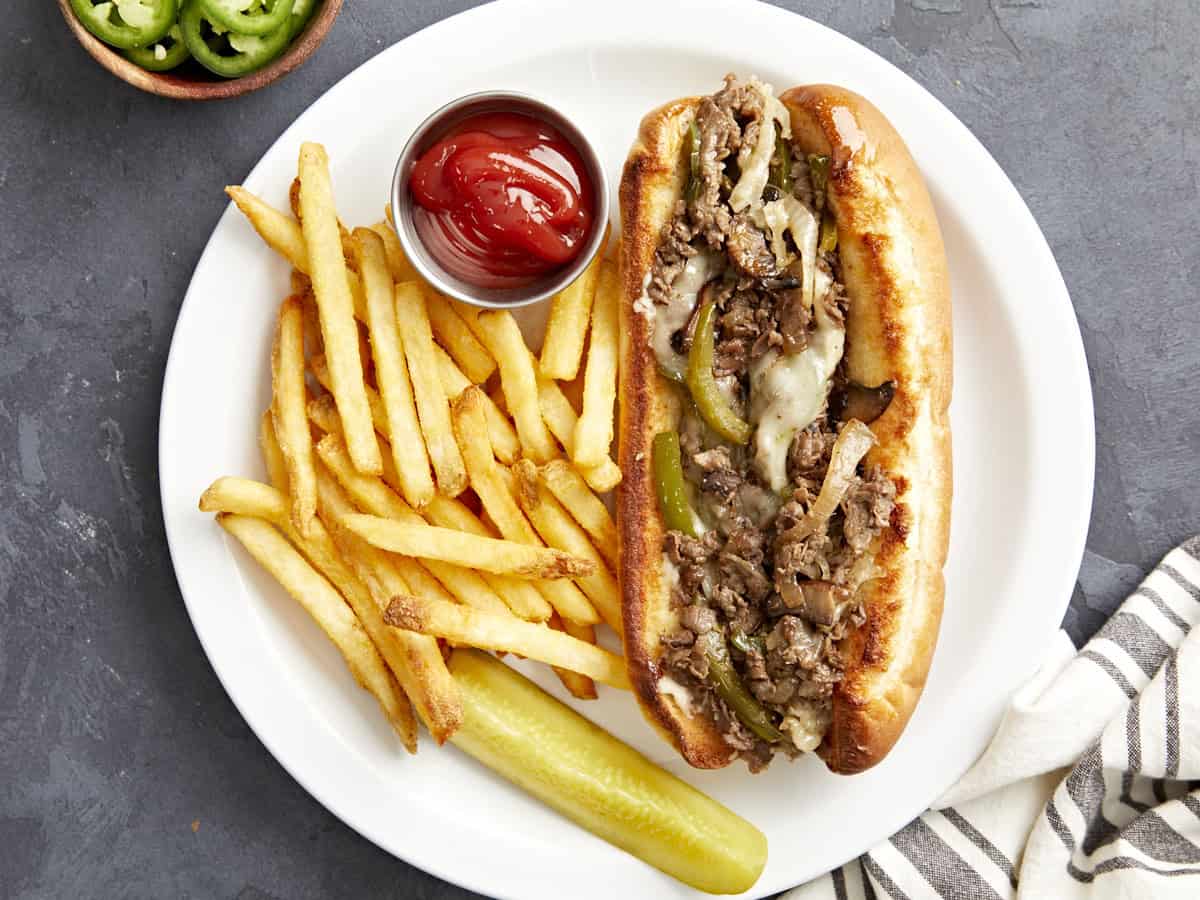
One Philly cheesesteak on a white plate with fries, ketchup, and a pickle on the side.

Serve these Philly cheesesteaks with your favorite spreads and toppings like mayo, shredded lettuce, tomato, or sliced jalapeños. And of course you have to have some crispy fries or chips on the side. Yum!! Tell me, what’s your favorite Philly cheesesteak toppings?

The post Philly Cheesesteak Recipe appeared first on Budget Bytes.

Summer Toast

Good bread slathered with a veggie-packed garlic yogurt and finished with a few high impact toppings. If you keep the yogurt on hand, it’s an excellent five minute lunch.

Continue reading Summer Toast on 101 Cookbooks

I call this summer toast. It’s the result of a couple things in my life colliding into a really good lunch option. Here’s what we’re looking at. Slices of homemade sourdough bread rubbed with olive oil are broiled until golden and toasted. Each slice is smeared with Greek yogurt that has been absolutely loaded with grated zucchini and carrots, toasted walnuts, smashed garlic, and herbs. Tons of good stuff. The finishing touch comes from a scan of my late-summer refrigerator which always has roasted cherry tomatoes, olives, and basil. It’s the perfect easy lunch.
toasted sourdough topped with Greek yogurt and shredded vegetables

The Inspiration: Summer Toast

There have been some amazing cookbook releases this year and I’ve been cooking regularly from a short stack of them. One of my absolute favorites has been Sebze: Vegetarian Recipes from My Turkish Kitchen by Ozlem Warren. I checked it out from the library, then immediately bought my own copy. There’s a yogurt-based meze she shares on page 102, where she loads yogurt with sautéed vegetables, herbs and nuts. It is fantastic, no notes. But as the temperature kept climbing here in LA, I started doing a version of it with raw, shredded zucchini and carrots (or whatever else I need to use up).
grated carrots and zucchini mixed with greek yogurt to make a toast topping
I make it on the weekend, and use it smeared on, in, and under all sorts of things all week. It dovetails with my baking a couple loaves of sourdough each week (even when it’s hot omg) for the A+ combo you see here. For the sourdough geeks, the bread pictured is 20% whole wheat flour, 30% high-extraction flour, 50% bread flour with wild rice, toasted walnuts, and lots of lemon zest folded in.
homemade sourdough bread, sliced and toasted on a baking sheet

Pro-tip

The one piece of advice I have here is to use a box grater, or something similar. Skip the microplanes for grating the zucchini and carrots. Old school for the win here because you end up with hearty, well defined flecks of vegetables. I have a flat, wooden Japanese grater that is a dream to use, so keep your eyes peeled for one of those. 
toasted sourdough topped with Greek yogurt and shredded vegetables, olives and roasted tomatoes

An Alternative to Avocado Toast

As much as I love avocado toast, this is a nice, substantial alternative. For the vegans out there, use a dairy-free yogurt. Or, for a brunch, you could set up a toast bar with this and avocado, and a few other spreads and compound butters.

More Summer Recipes

Continue reading Summer Toast on 101 Cookbooks

Creamy Dijon Chicken

Take dinner to the next level with this Creamy Dijon Chicken recipe! Made with an insanely delicious sauce and simple ingredients!

The post Creamy Dijon Chicken appeared first on Budget Bytes.

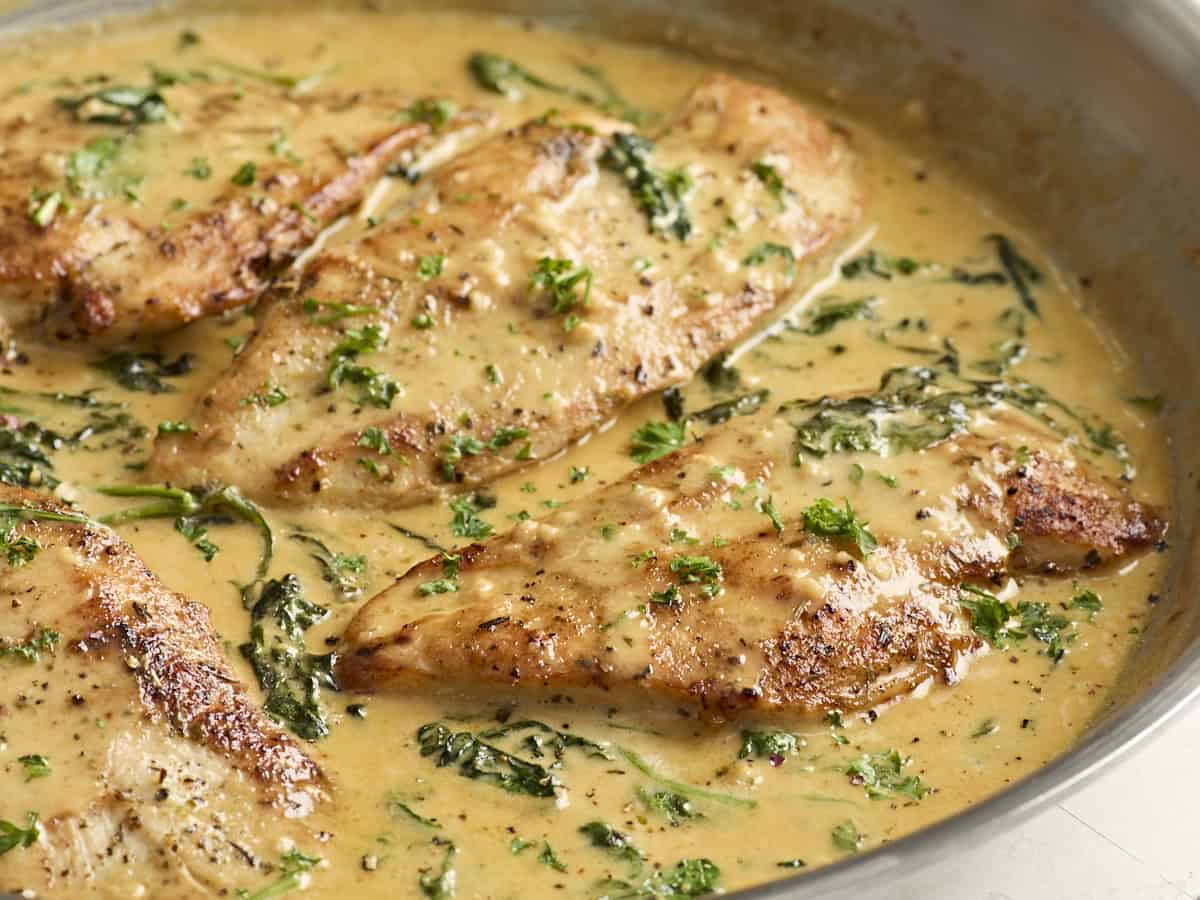
Get ready friends, because Dijon is having a moment! This Creamy Dijon Chicken starts with quick pan-seared chicken breasts that get covered with a creamy, luscious, Dijon mustard sauce. It’s one of those recipes that feels luxurious and expensive, but is really made with simple inexpensive ingredients. And my secret ingredient to making it extra special…just a hint of Worcestershire sauce. This Dijon chicken recipe is so delicious and guaranteed to be one the whole family enjoys!

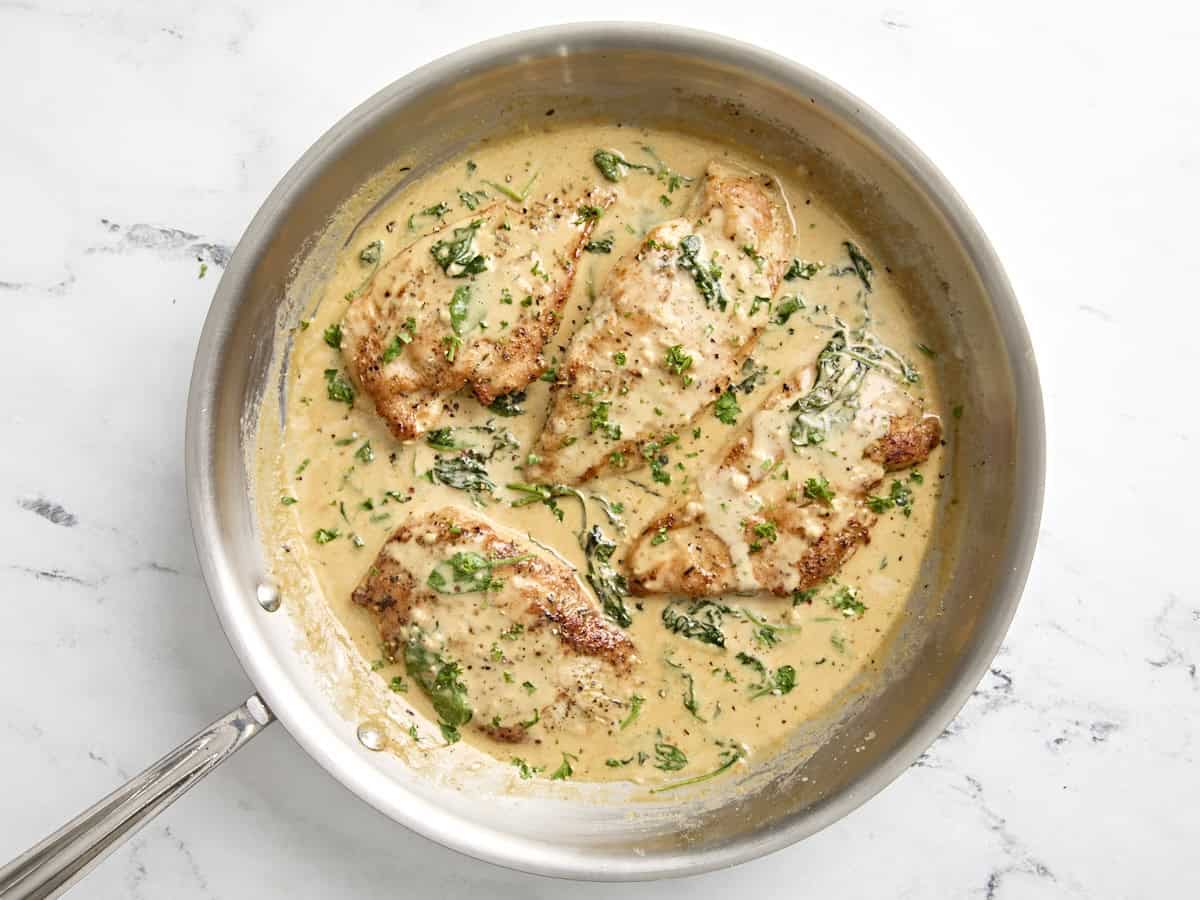
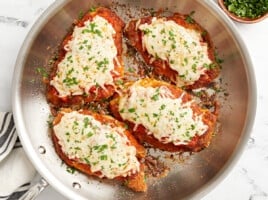
Overhead view of creamy dijon chicken in a skillet.

Ingredients For Creamy Dijon Chicken

This recipe uses one of my favorite ingredient combinations: Dijon mustard and Worcestershire sauce. And when they’re combined with a little bit of heavy cream and parmesan cheese, it creates the most delicious sauce! So here’s everything that you’ll need:

  • Chicken Breasts: Chicken breasts are my usual go-to for recipes like these, but you can certainly use boneless, skinless chicken thighs instead.
  • Garlic: Just a couple of garlic cloves infuses the sauce with lots of flavor. 
  • Olive Oil and Butter: Olive oil is used to cook the chicken breasts and a little butter is used to sauté the garlic.
  • Dijon Mustard and Worcestershire: Dijon mustard is of course the star of the show. Both Dijon mustard and Worcestershire sauce give the sauce the bulk of its flavor. The tanginess from the Dijon mixed with the savory umami flavor of the Worcestershire is a match made in heaven!
  • Chicken Broth: Chicken broth is used to help deglaze the pan, scrape up all of those flavorful brown bits, and is the base for the sauce.
  • Heavy Cream and Parmesan Cheese: Just a little bit of heavy cream and parmesan cheese thickens the sauce and adds a luscious, creamy, rich flavor.
  • Spinach: I added some spinach for extra greens and a little bit of color.
  • Seasoning: The chicken breasts are seasoned with a blend of salt, pepper, Italian seasoning, garlic powder and onion powder. This way every component of this dish is packed with flavor!

Can I Substitute Yellow Mustard For Dijon Mustard?

I don’t recommend substituting Dijon mustard with yellow mustard. Dijon mustard has a more intense, sharp flavor that goes well with sauces compared to yellow mustard that has a milder, less complex flavor.

Not A Mustard Fan?

I get it. But trust me this recipe is not super mustard-y and the flavors are balanced nicely. I tested this recipe a few times with different amounts of Dijon mustard. And I ended up with what I feel is the perfect combination. It’s just enough to taste the tangy, warm flavors of the Dijon, but not too much to where it overpowers the dish. You can always taste the sauce and add a little more mustard if you want a stronger Dijon taste.

Serving Suggestions

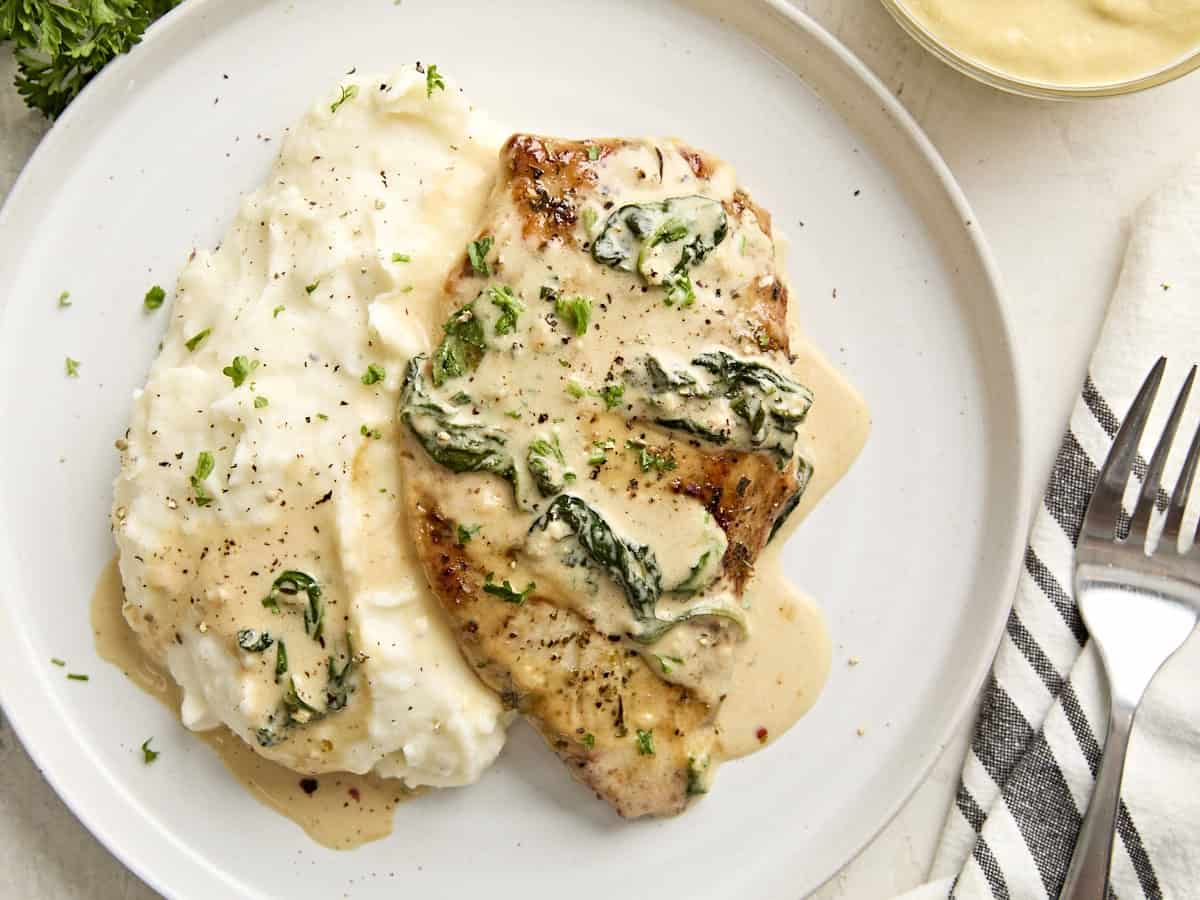
We served this creamy dijon chicken over some fluffy mashed potatoes to soak up all of that delicious sauce. But you can also serve it with some buttered noodles, pasta, or over rice. A simple side salad or Caesar salad would also taste great. And you can never go wrong with a side of quick sautéed vegetables like this easy sautéed asparagus recipe.

Side close up view of creamy dijon chicken in a skillet.
Overhead close up view of creamy dijon chicken in a skillet.
Print

Creamy Dijon Chicken

Take dinner to the next level with this Creamy Dijon Chicken recipe! Made with an insanely delicious sauce and simple ingredients!
Course Dinner
Cuisine American
Total Cost $9.35 recipe / $2.33 serving
Prep Time 10 minutes
Cook Time 20 minutes
Total Time 30 minutes
Servings 4
Calories 271kcal

Equipment

Ingredients

  • 1 tsp Italian seasoning $0.10
  • 1/2 tsp garlic powder $0.05
  • 1/2 tsp onion powder $0.05
  • 1/2 tsp salt $0.02
  • 1/2 tsp freshly cracked black pepper $0.02
  • 2 boneless, skinless chicken breast (about 1.3 lb.) $6.49
  • 2 Tbsp olive oil $0.32
  • 2 Tbsp butter $0.27
  • 2 cloves of garlic, minced $0.16
  • 1 cup chicken broth $0.17
  • 1 Tbsp Dijon mustard $0.04
  • 1 tsp Worcestershire sauce $0.05
  • 1/3 cup heavy cream $0.65
  • 2 Tbsp grated parmesan cheese $0.20
  • 2 cups spinach $0.76

Instructions

  • In a small bowl mix together the seasoning for the chicken: Italian seasoning, garlic powder, onion powder, salt and freshly cracked black pepper.
  • Using a sharp knife, carefully fillet each chicken breast into two thinner cutlets. Season each breast with the seasoning mix on both sides.
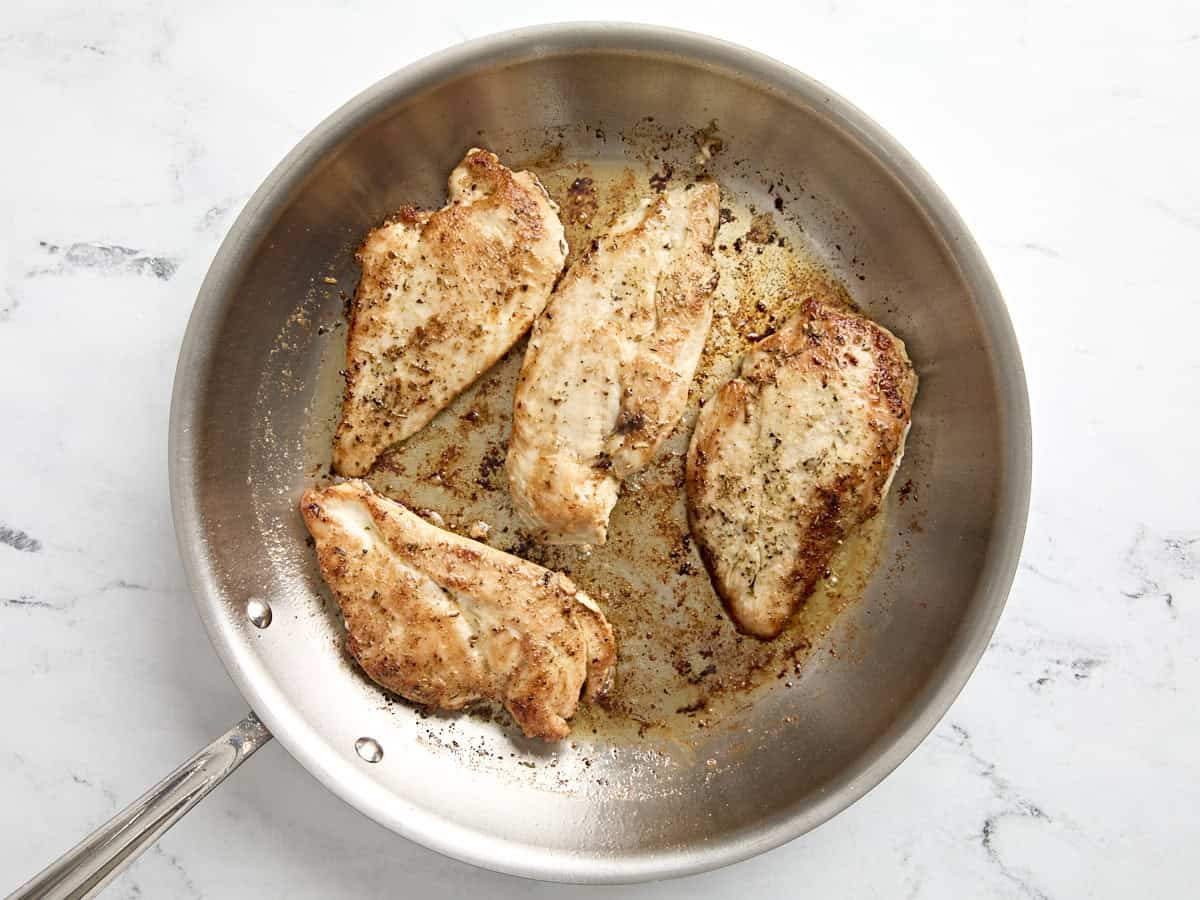
  • Heat a large skillet over medium heat and add the olive oil. Once the skillet is hot, add the chicken and cook on each side until golden brown and cooked through (about 4 minutes per side). Remove the cooked chicken to a clean plate and cover to keep warm.
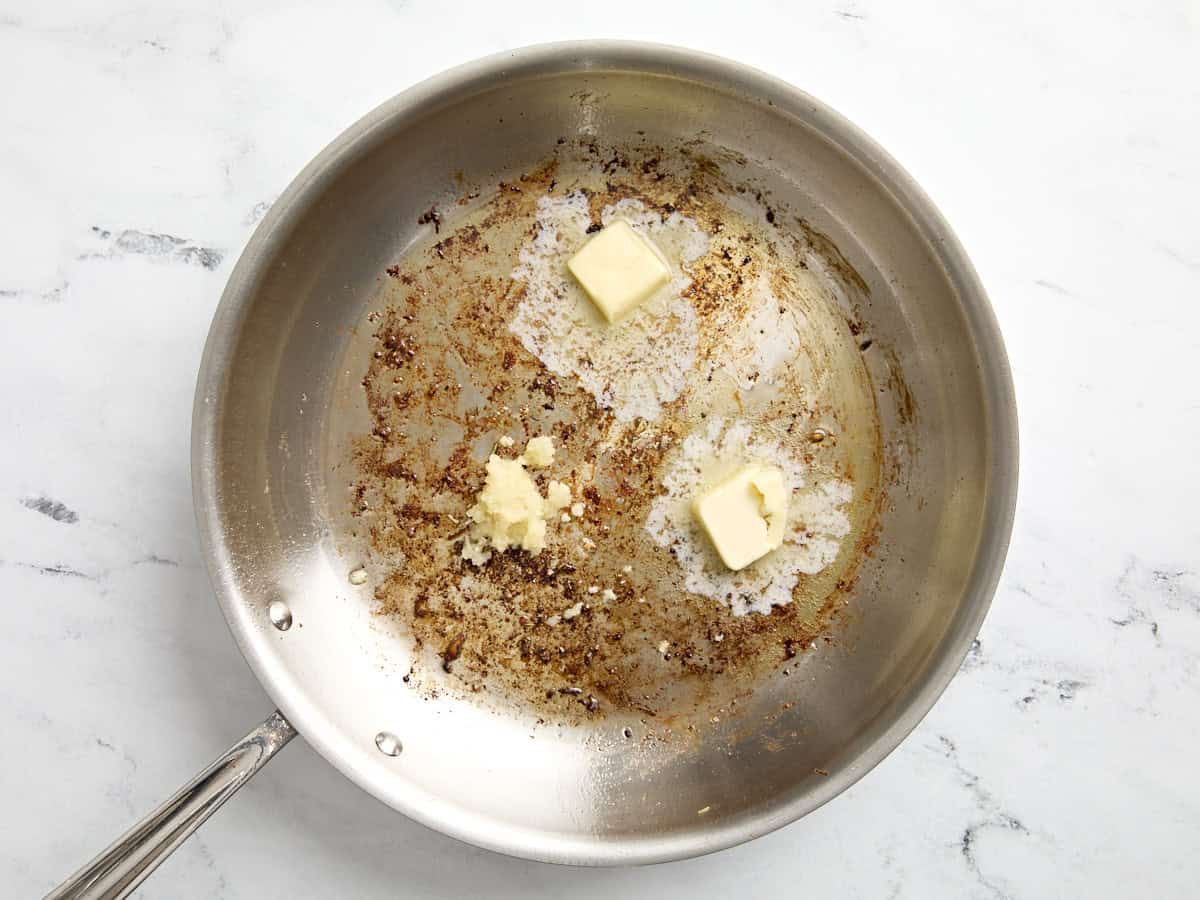
  • To the same skillet add the butter and minced garlic cloves. Turn the heat down to medium-low and sauté the garlic for one minute until fragrant.
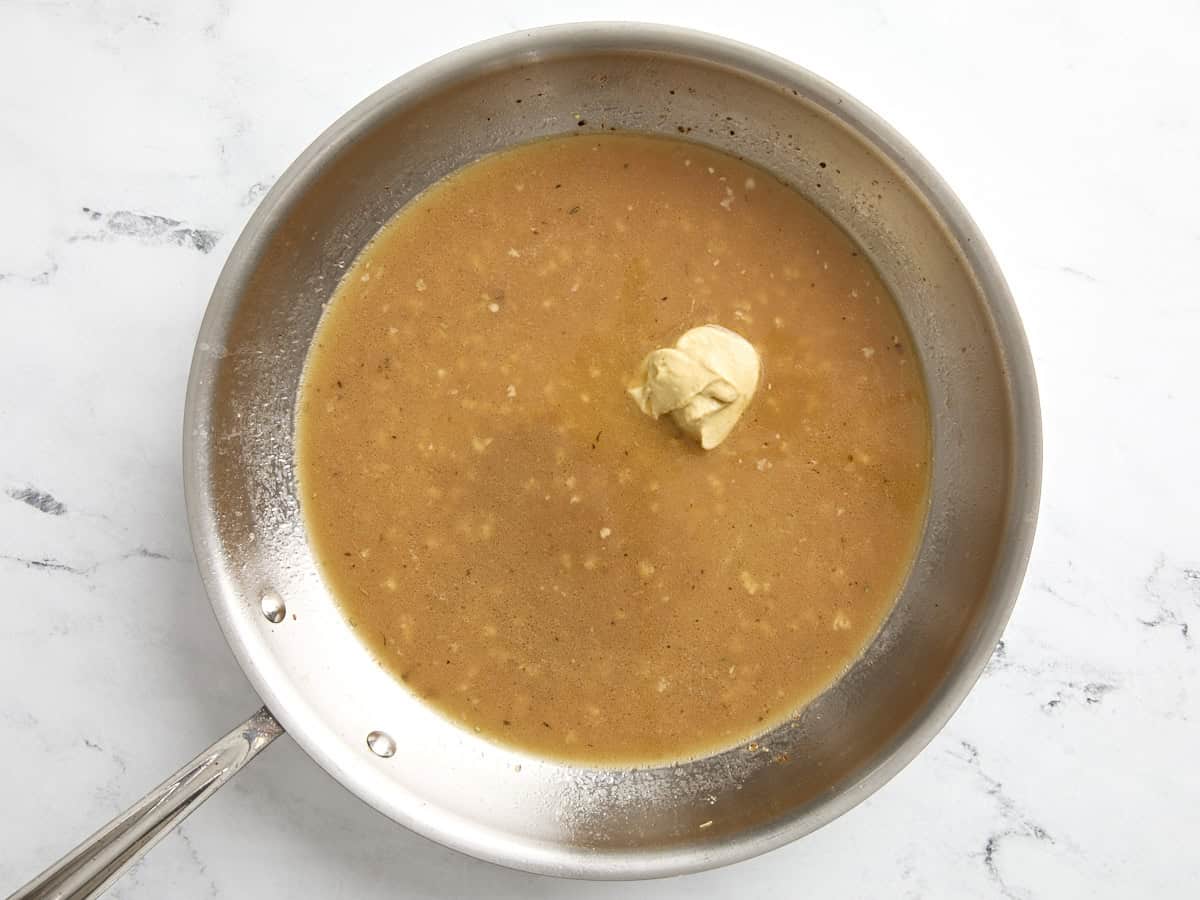
  • Next pour the chicken broth into the skillet and add the Dijon mustard and worcestershire sauce. Stir together and scrape up any brown bits that may be stuck to the bottom of the pan.
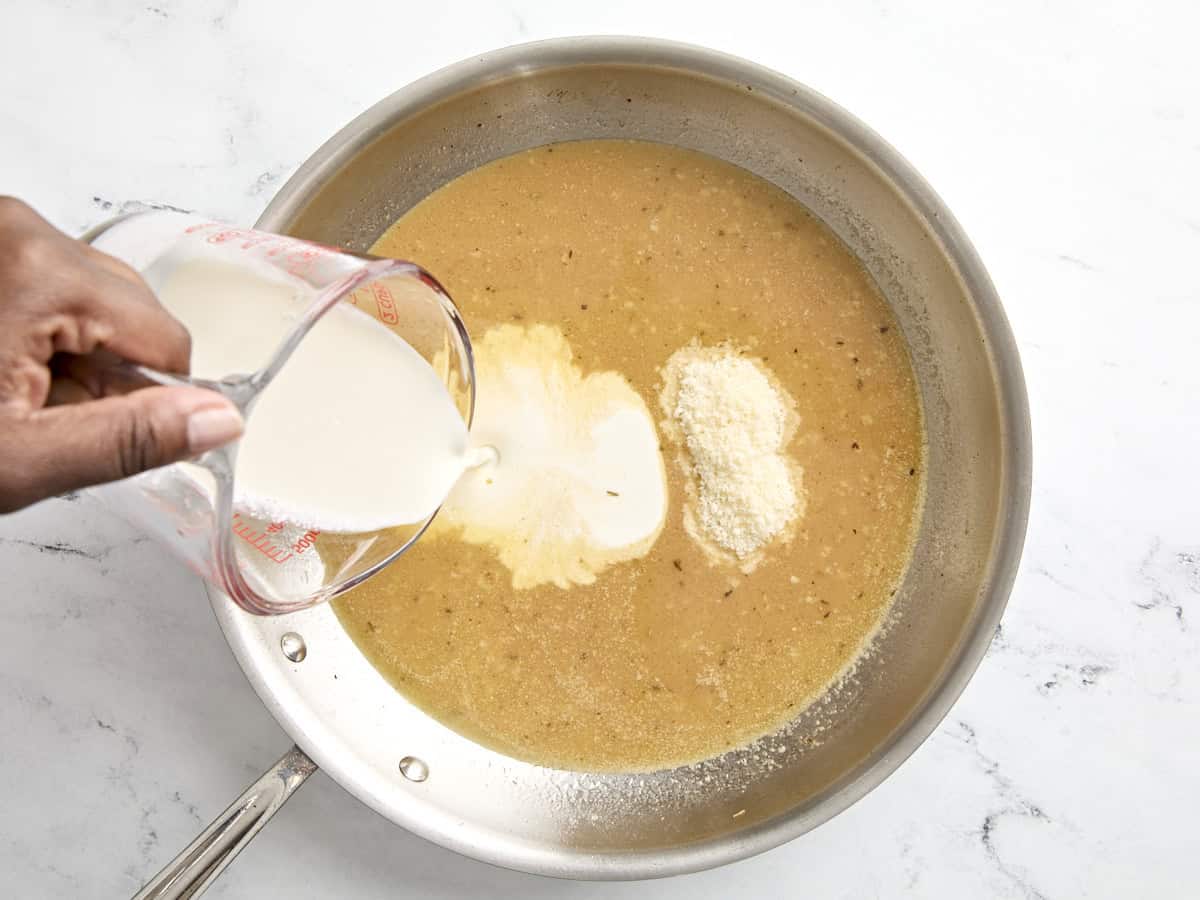
  • Now add in the heavy cream and parmesan cheese and stir well. Allow the sauce to simmer in the skillet for 5 minutes. Taste the sauce at this point and add salt and pepper if desired.
  • Add in the fresh spinach and stir it into the sauce allowing the heat to wilt the spinach.
  • Finally, return the cooked chicken breasts to the skillet and spoon the Dijon sauce over top. Allow the chicken to heat through. Serve hot with your favorite side and enjoy!

See how we calculate recipe costs here.

Nutrition

Serving: 1serving | Calories: 271kcal | Carbohydrates: 4g | Protein: 15g | Fat: 22g | Sodium: 742mg | Fiber: 1g
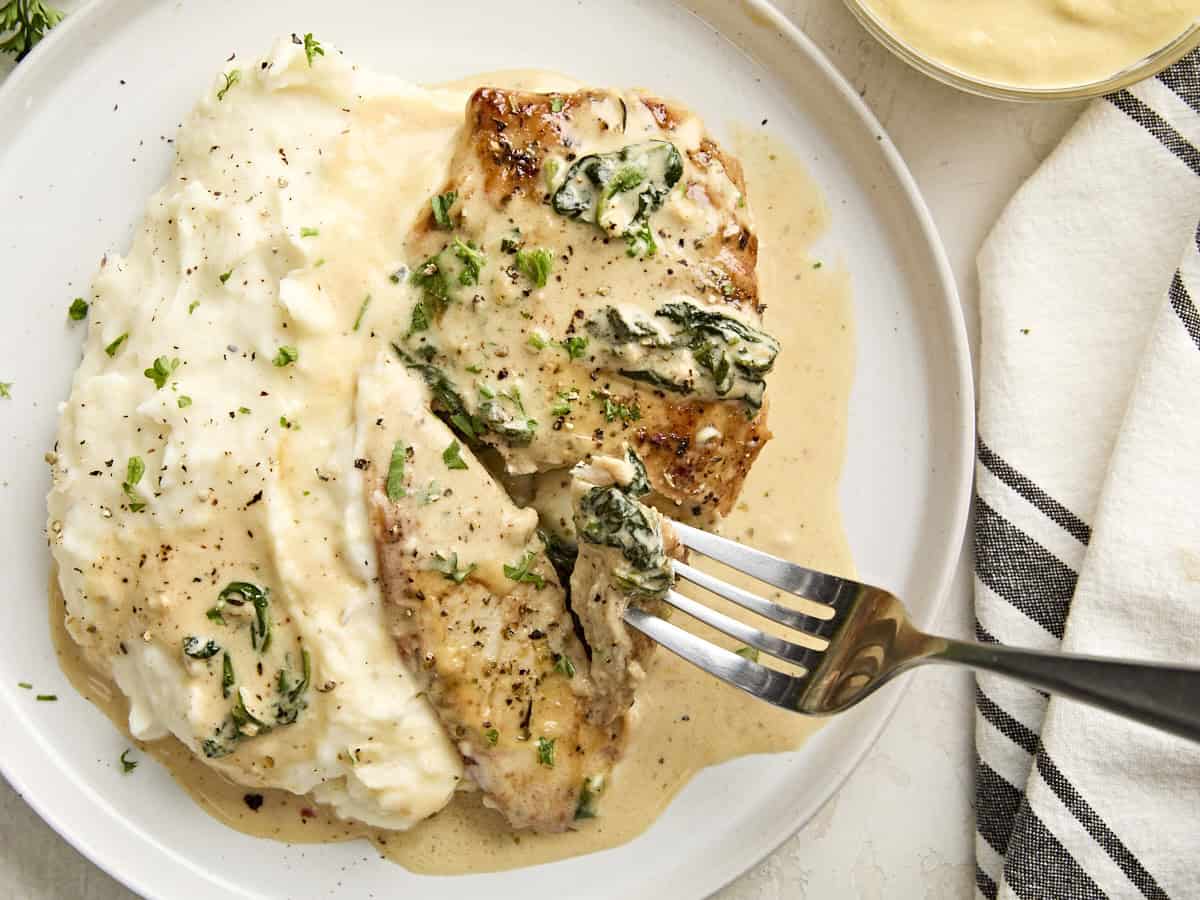
Creamy dijon chicken on a plate with mashed potatoes.

How to Make Creamy Dijon Chicken – Step by Step Photos

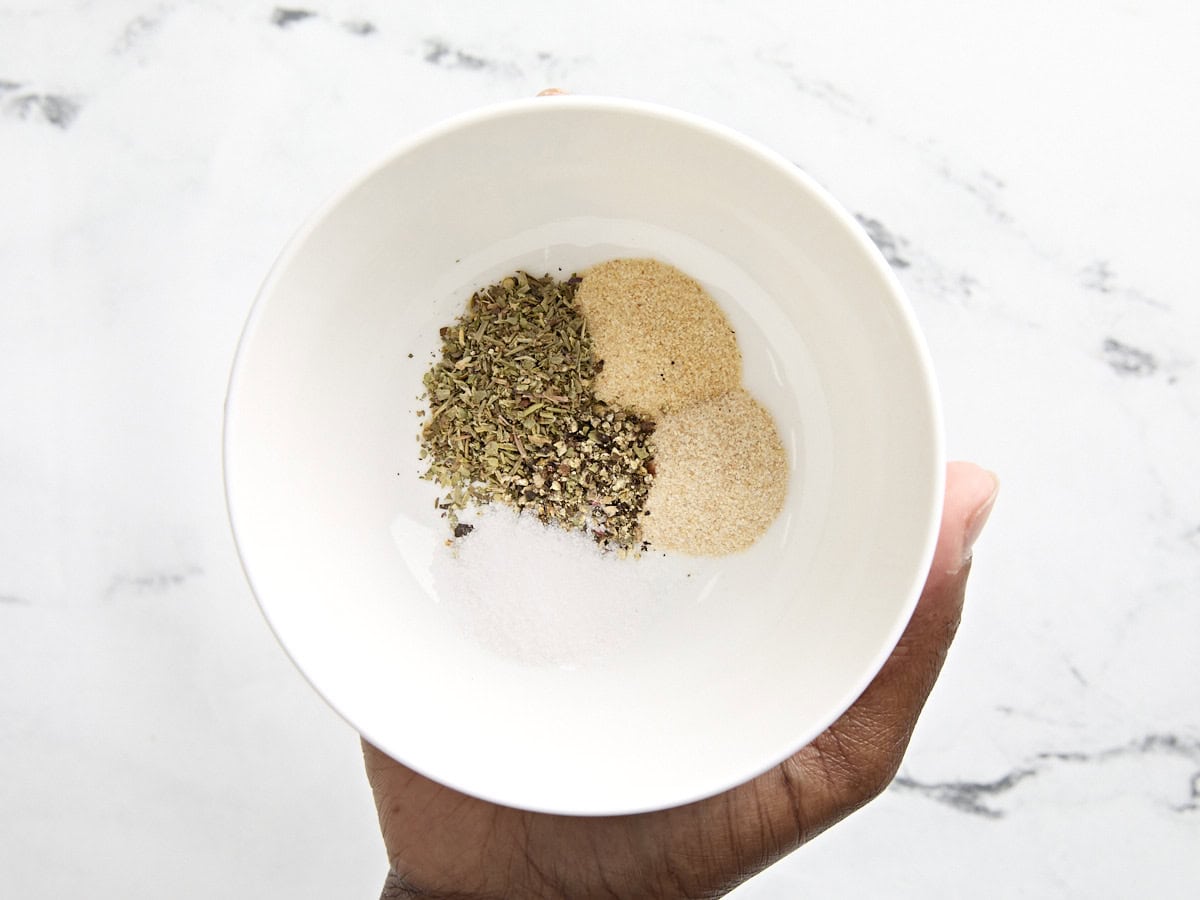
Seasoning mix in a bowl.

In a small bowl mix together 1 tsp Italian seasoning, 1/2 tsp garlic powder, 1/2 tsp onion powder, 1/2 tsp salt and 1/2 tsp freshly cracked black pepper.

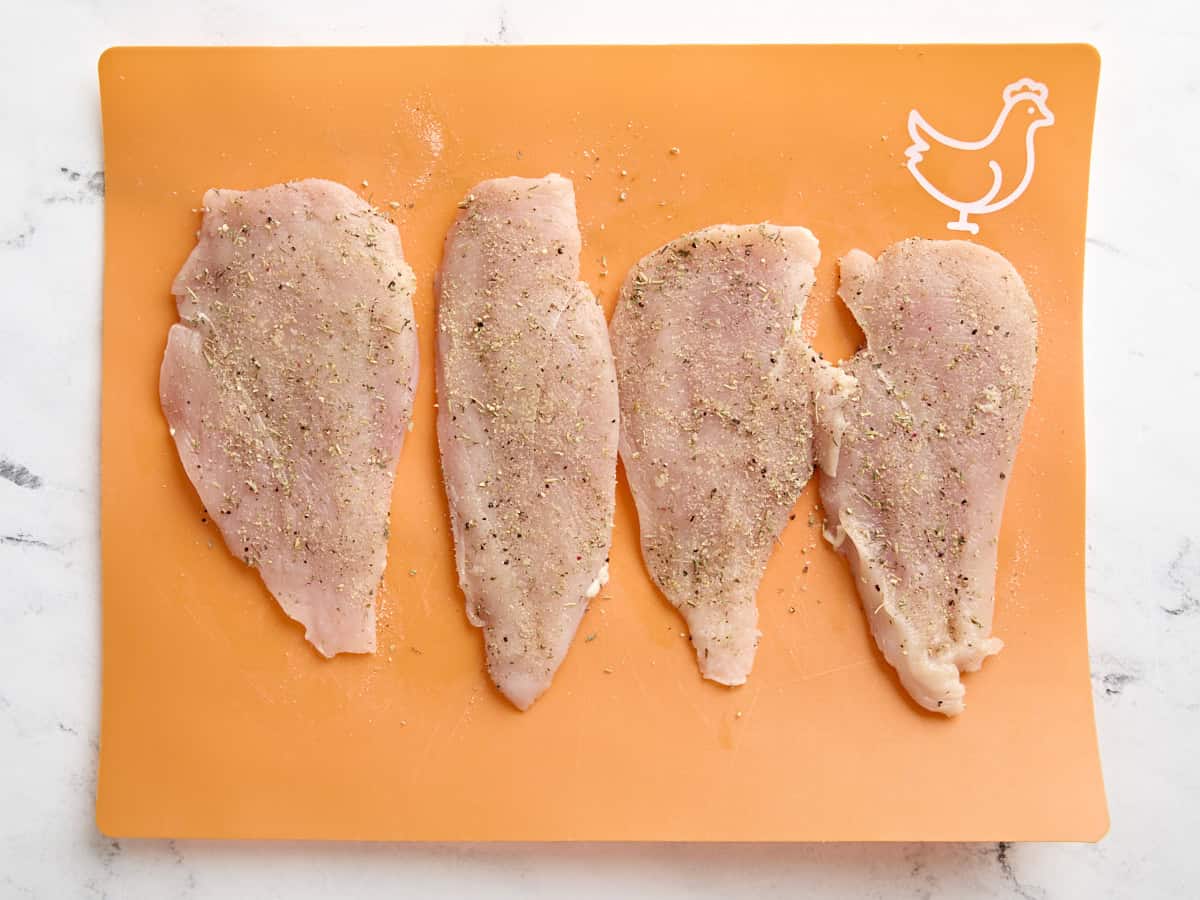
Seasoned chicken breasts on a cutting board.

Using a sharp knife, carefully fillet each chicken breast into two thinner cutlets. Season each breast with the seasoning mix on both sides.

Cooked chicken breasts in a large skillet.

Heat a large skillet over medium heat and add 2 Tbsp olive oil. Once the skillet is hot, add the chicken and cook on each side until golden brown and cooked through (about 4 minutes per side). Remove the cooked chicken to a clean plate and cover to keep warm.

Butter and garlic added to large skillet.

To the same skillet add 2 Tbsp butter and 2 minced garlic cloves. Turn the heat down to medium-low and sauté the garlic for one minute until fragrant.

Chicken broth, dijon mustard and Worcestershire sauce added to skillet.

Next pour 1 cup chicken broth into the skillet and add 1 Tbsp Dijon mustard and 1 tsp Worcestershire sauce. Stir together and scrape up any brown bits that may be stuck to the bottom of the pan.

Cream and parmesan cheese added to skillet.

Now add in 1/3 cup heavy cream and 2 Tbsp parmesan cheese and stir well. Allow the sauce to simmer in the skillet for 5 minutes. Taste the sauce at this point and add a pinch of salt and pepper if desired.

Spinach added to skillet.

Add in 2 cups of fresh spinach and stir it into the sauce allowing the heat to wilt the spinach.

Finished creamy dijon chicken in skillet.

Finally, return the cooked chicken breasts to the skillet and spoon the Dijon sauce over top. Allow the chicken to heat through.

Creamy dijon chicken on a plate with mashed potatoes and a fork lifting some chicken off the plate.

Now all that’s left to do is serve this delicious Dijon chicken with some creamy mashed potatoes, pasta, or your favorite side. And don’t forget to spoon some of that yummy sauce over the top! ;)

The post Creamy Dijon Chicken appeared first on Budget Bytes.
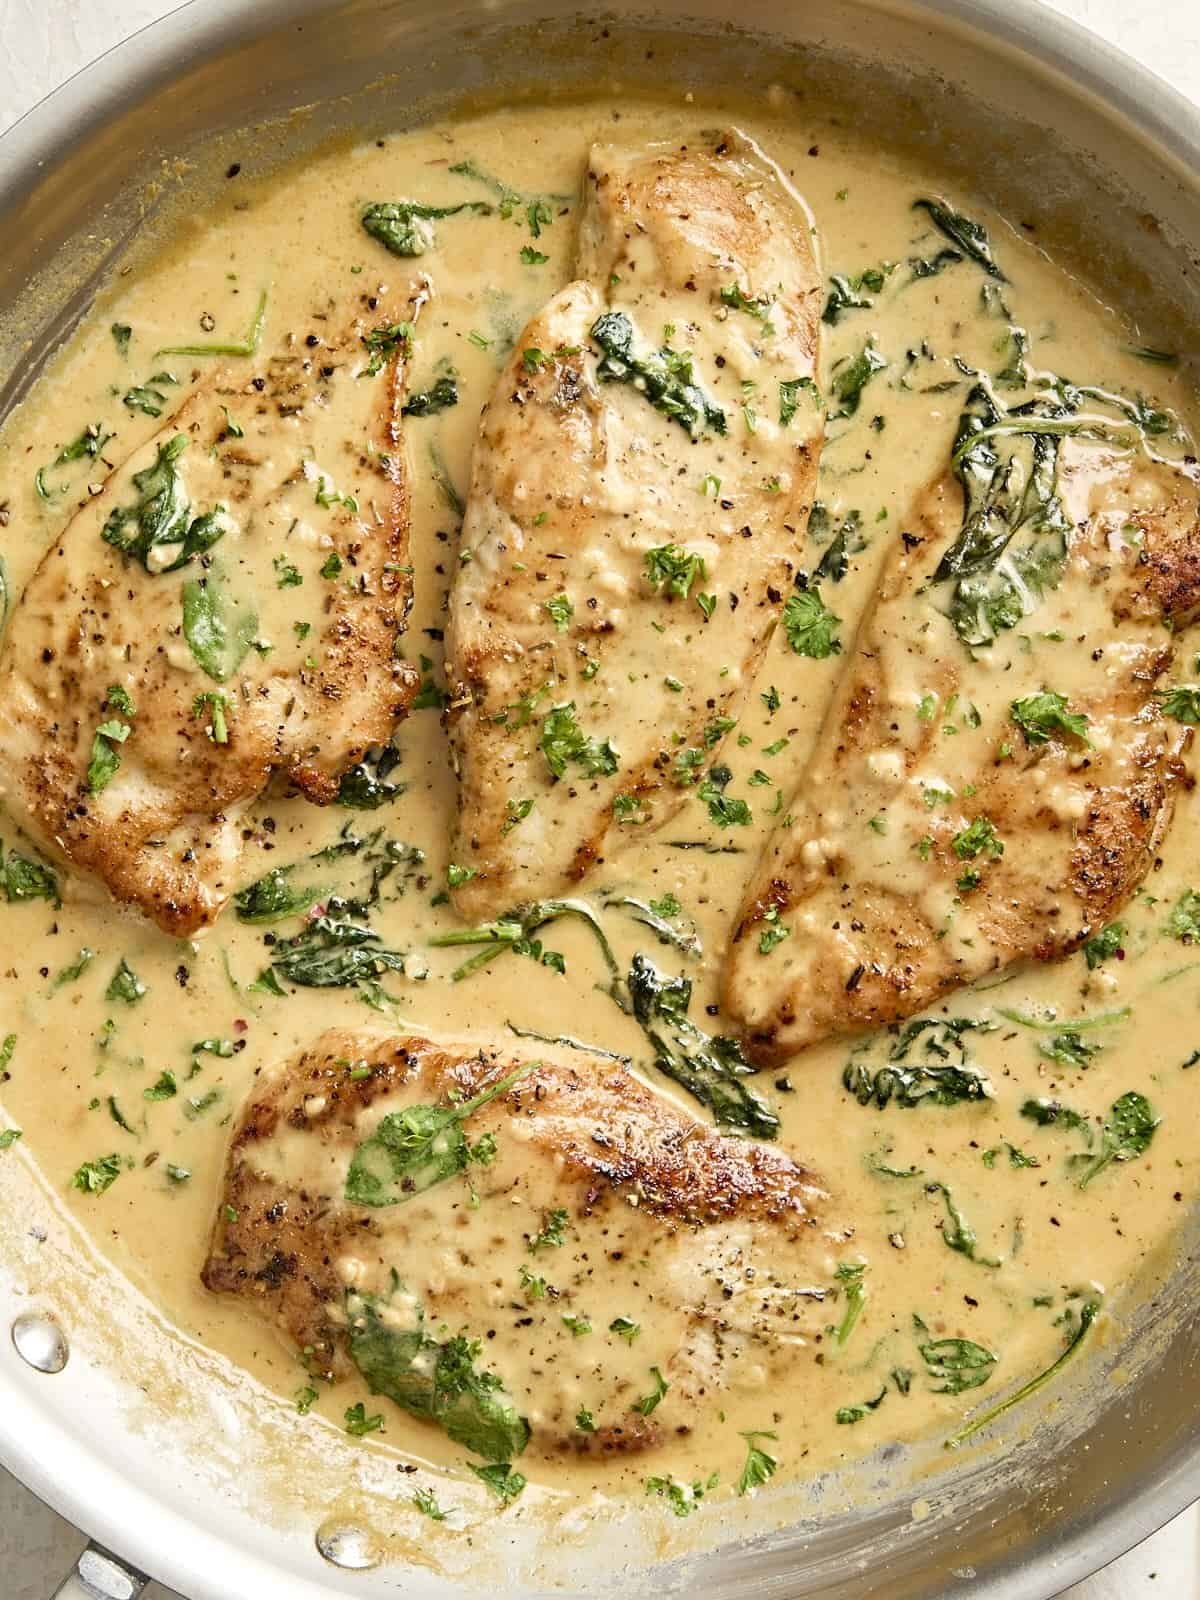
Air Fryer Salmon

This Air Fryer Salmon is quick, easy, and super flavorful! Ready in just 20 minutes, this sweet and savory salmon is sure to be a hit.

The post Air Fryer Salmon appeared first on Budget Bytes.
Salmon on a budget may sound like an oxymoron, but I’m here to tell you it can be done! This Air Fryer Salmon is quick, easy, and super flavorful. I seasoned Atlantic salmon filets with soy sauce, brown sugar, and spices and tossed them in the air fryer for a super easy weeknight meal. Ready in just 20 minutes, this salmon recipe is sure to be in regular rotation at your house!

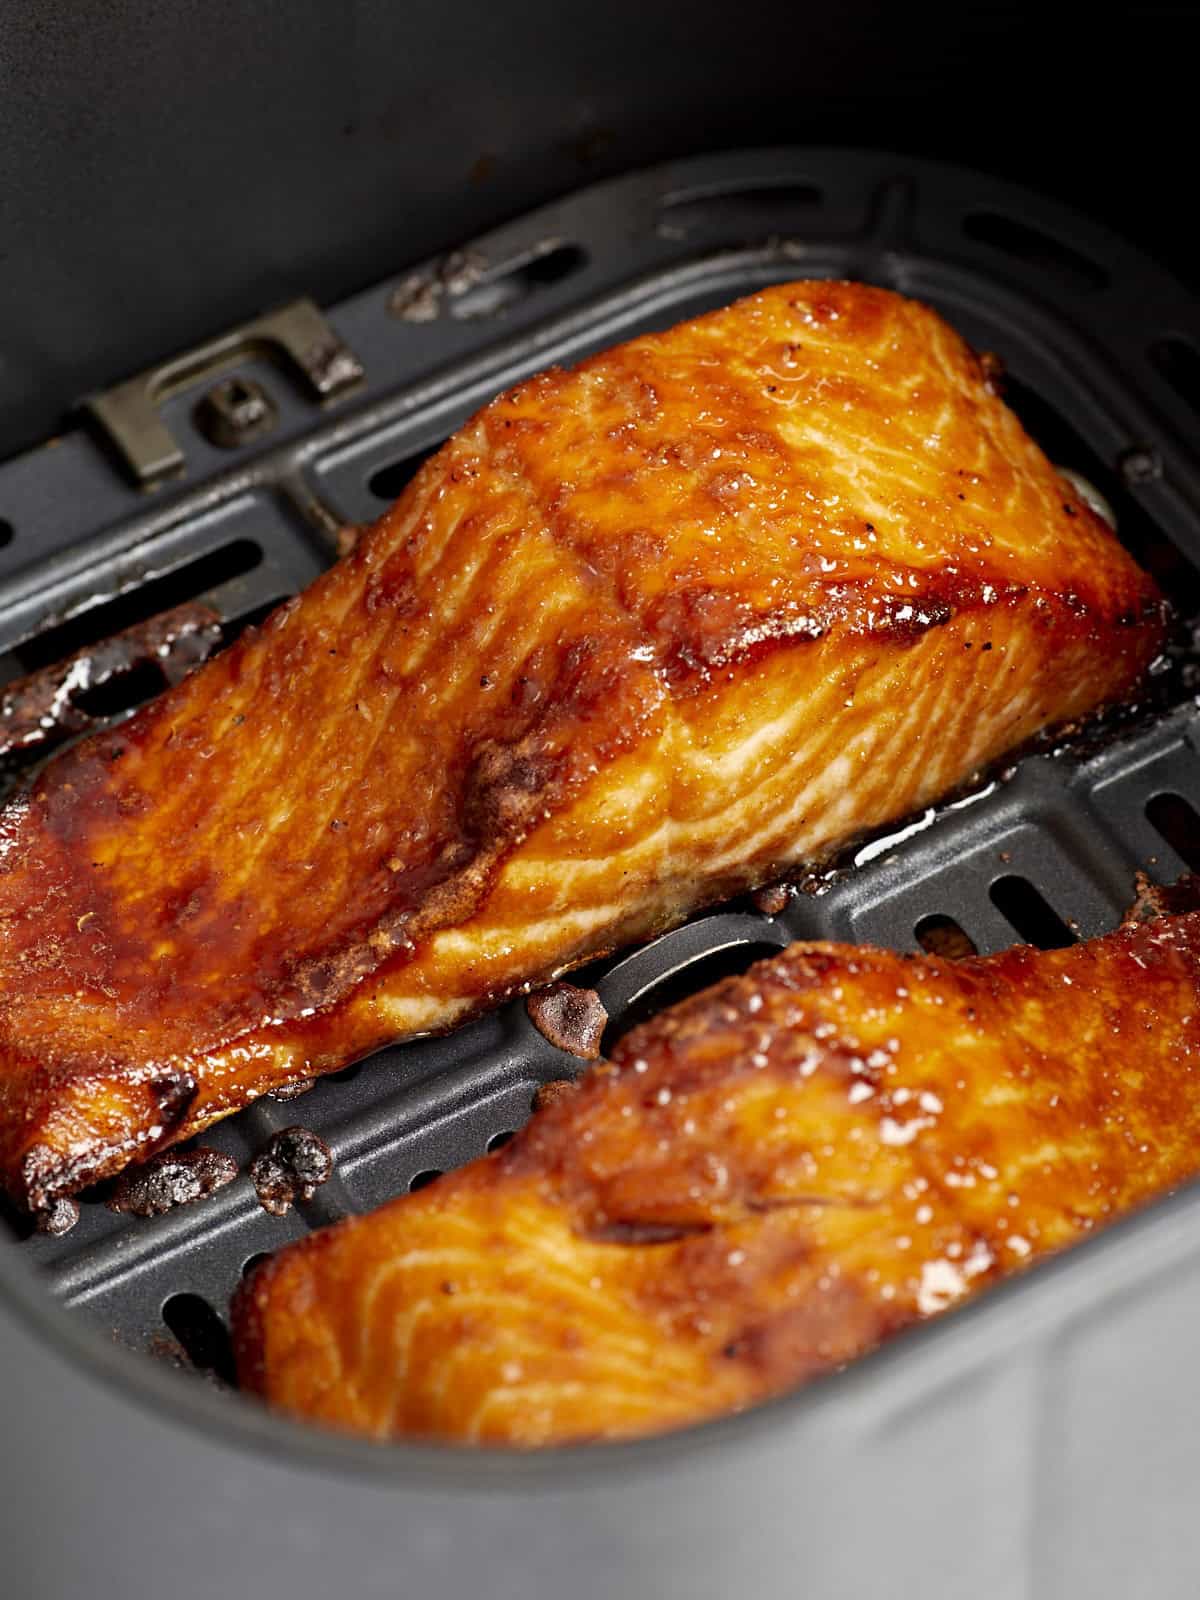
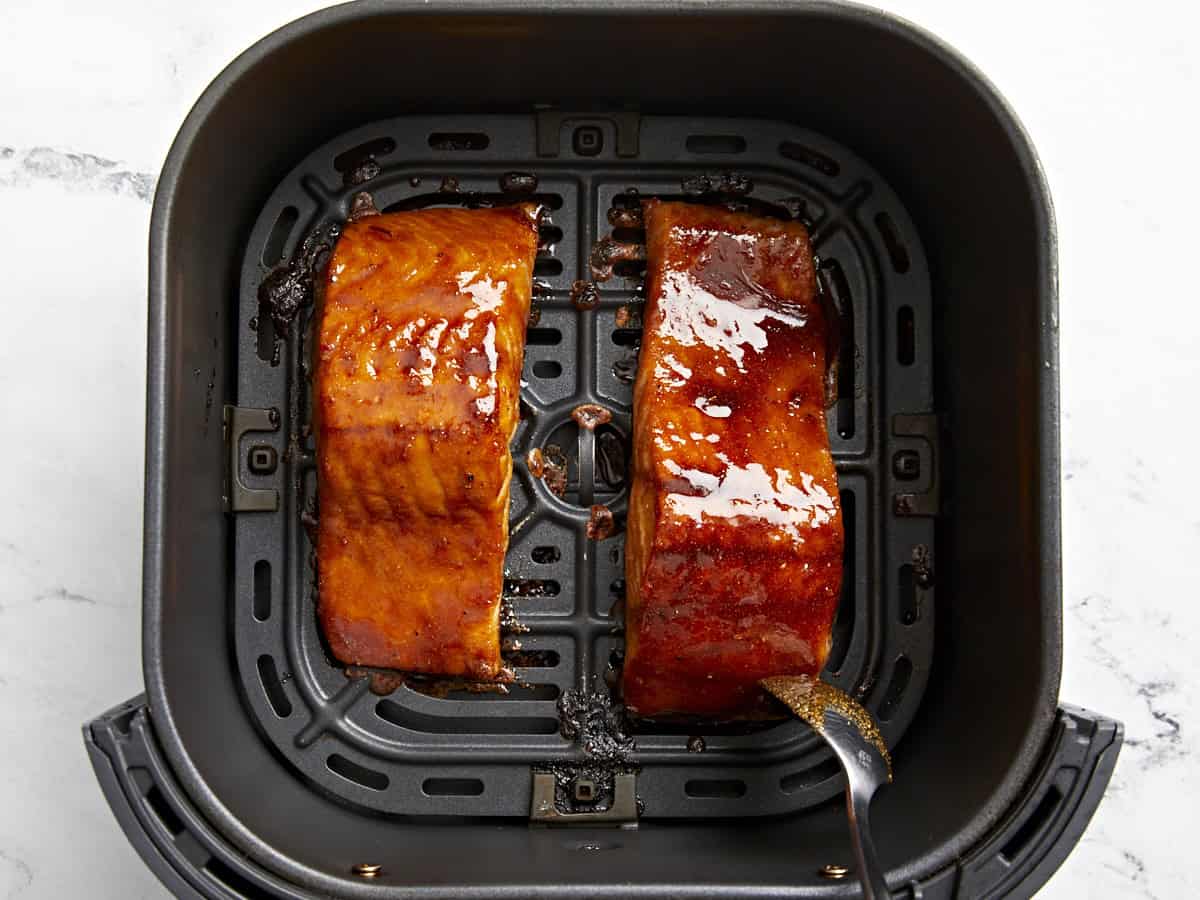
close up of air fryer salmon filets in an air fryer basket.

My favorite people to cook for are my daughter (almost 3 years old) and my stepdaughter (15). They are both a little picky; they know what they like and don’t like and they aren’t afraid to tell me! If anyone reading this has toddlers or teenagers, I know you understand! If you want to win culinary praise from the most opinionated members of your family, this sweet and savory Air Fryer Salmon is the recipe for you! With its milder flavor and meaty texture, this salmon can turn any fish hater into a seafood enthusiast.

Ingredients

Here’s what you’ll need to make air fryer salmon:

  • Salmon: I found fresh Atlantic salmon on a good sale, so that’s what I used. I often find frozen salmon to be cheaper– just thaw before using.
  • Cooking Spray: Helps the salmon brown and crisp in the air fryer.
  • Soy Sauce: Adds salty umami flavor to the salmon.
  • Brown Sugar: Adds rich sweetness to the salmon.
  • Spices: Freshly cracked black pepper and garlic powder enhance the salty-sweet flavor of this salmon.

What’s the Best Way To Thaw Frozen Salmon?

There are three ways to safely defrost salmon: in the refrigerator, in cold water, and in the microwave. I recommend thawing salmon overnight in the refrigerator whenever possible since it gives you a few extra days of storage before you need to cook the meat.

Day of, I recommend thawing in cold water. Leave the tap streaming just enough to keep the water moving, or change out the water every 15 minutes or so, until the fish is fully thawed. Fish thawed this way must be cooked immediately. I do not generally recommend thawing anything in the microwave, as it can negatively impact the texture of the food, although it is technically safe.

Serving Suggestions

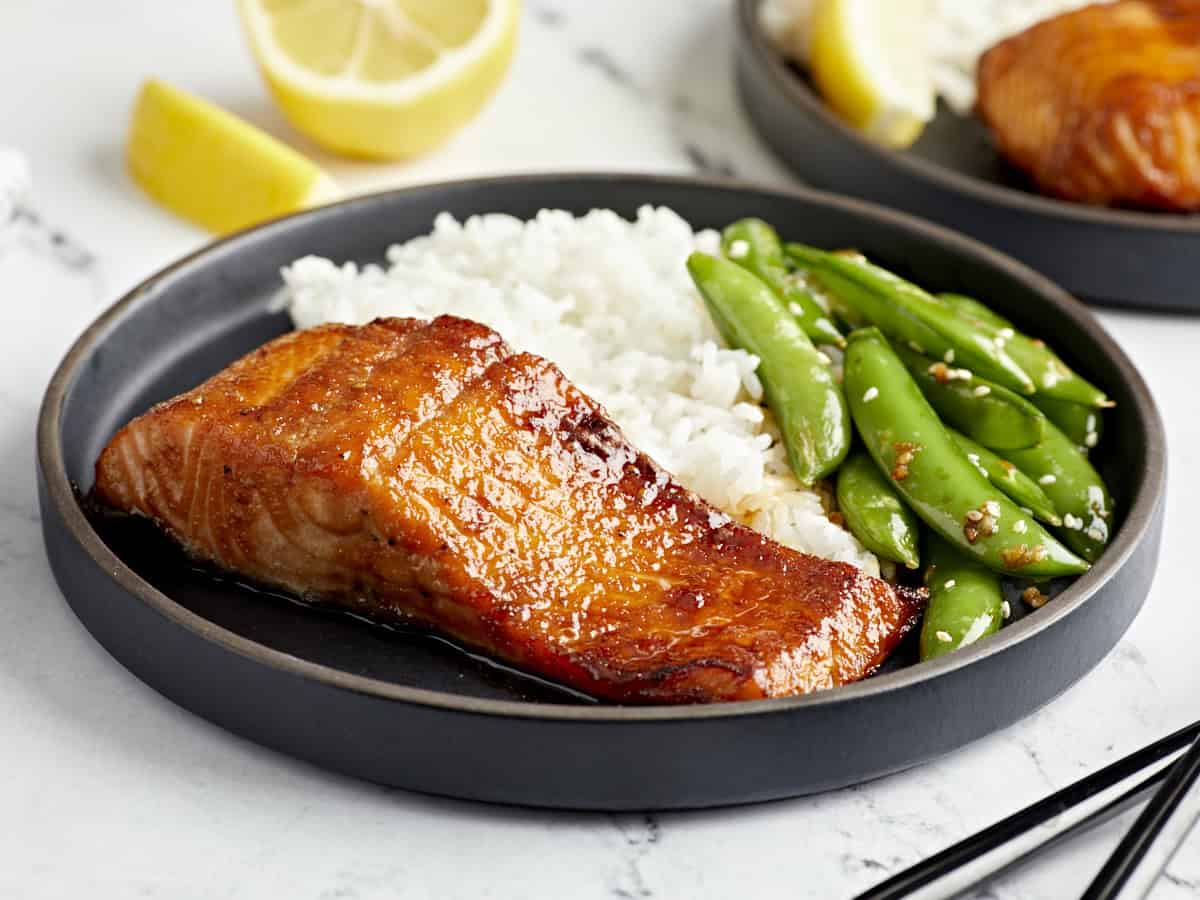
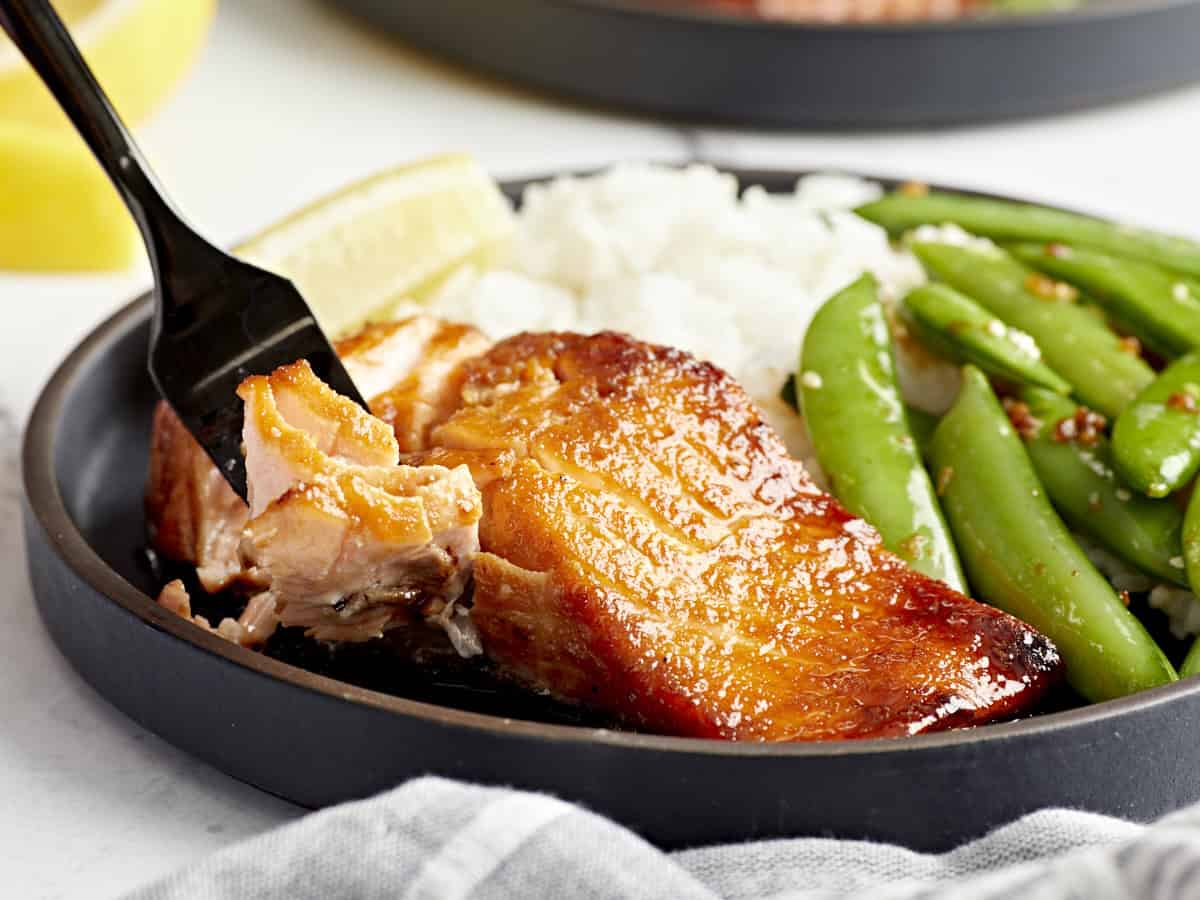
I love to serve salmon with a side of fluffy steamed rice and simple sauteed snow peas. It’s also excellent paired with sautéed asparagus and goes great with our lemony cucumber couscous salad or strawberry spinach salad. Salmon also elevates an already decadent Niçoise Salad from “oh, yum” to “woah, fancy!”

side view of a serving of air fryer salmon on a black plate with rice and peas.
close up of air fryer salmon filets in an air fryer basket.
Print

Air Fryer Salmon

This Air Fryer Salmon is quick, easy, and super flavorful! Ready in just 20 minutes, this sweet and savory salmon is sure to be a hit.
Course Dinner, Main Course
Cuisine American
Total Cost $8.86 recipe / $2.22 serving
Prep Time 10 minutes
Cook Time 10 minutes
Total Time 20 minutes
Servings 4 (3.5 ounces each)
Calories 199kcal

Equipment

Ingredients

  • 2 7-oz. pieces Atlantic salmon, skin on; thawed if frozen $8.41
  • Cooking Spray $0.05
  • 1 Tbsp soy sauce $0.06
  • ¼ cup brown sugar $0.17
  • ½ tsp freshly cracked black pepper $0.03
  • ½ tsp garlic powder $0.07

Instructions

  • Preheat your air fryer to 400°F. If using frozen salmon, allow it to thaw in the refrigerator before cooking. We are cooking salmon from a fresh or fully thawed state in this recipe.
  • Gather marinade ingredients: soy sauce, brown sugar, pepper, and garlic powder.
  • Whisk together soy sauce, brown sugar, pepper, and garlic powder.
  • Spoon the marinade mixture over the salmon filets, gently rubbing it onto the salmon until it’s fully coated. A little extra on top is great! The brown sugar will melt during cooking and caramelize, giving your salmon a beautiful color and sweetness.
  • Spray your salmon and your air fryer crisper plate with your cooking oil of choice and position the salmon skin side down in your air fryer. Depending on the size of your air fryer, you may have to do this in batches. If you are dividing bigger salmon filets into smaller portions, it’s easiest to do so once it’s fully cooked unless you have a sharp knife that can get through the skin with ease when they are raw.
  • Air fry for 7-8 minutes to start. At the halfway mark, baste your salmon with more marinade and then continue cooking.*

See how we calculate recipe costs here.

Notes

*The cook time for your salmon will vary depending on the thickness of each piece. For a thinner piece of salmon, plan on 7-8 minutes. For a thicker piece of fish, you will probably need to air fry for 9-10 minutes. Fork test your salmon to make sure it’s done to your liking (flaky and delicious!) If it needs more time, you can put it back in for 1-2 minutes.
When I chose the salmon for this recipe, I knew I wanted between a 3 oz serving size and 4 oz serving size per person, so when I found this cut and weight I bought it knowing I could portion it out easily amongst 4 people after cooking. 

Nutrition

Serving: 3.5ounces | Calories: 199kcal | Carbohydrates: 14g | Protein: 20g | Fat: 6g | Sodium: 299mg | Fiber: 0.2g
overhead view of a serving of air fryer salmon on a black plate with rice and peas.

how to make Air Fryer Salmon – step by step photos

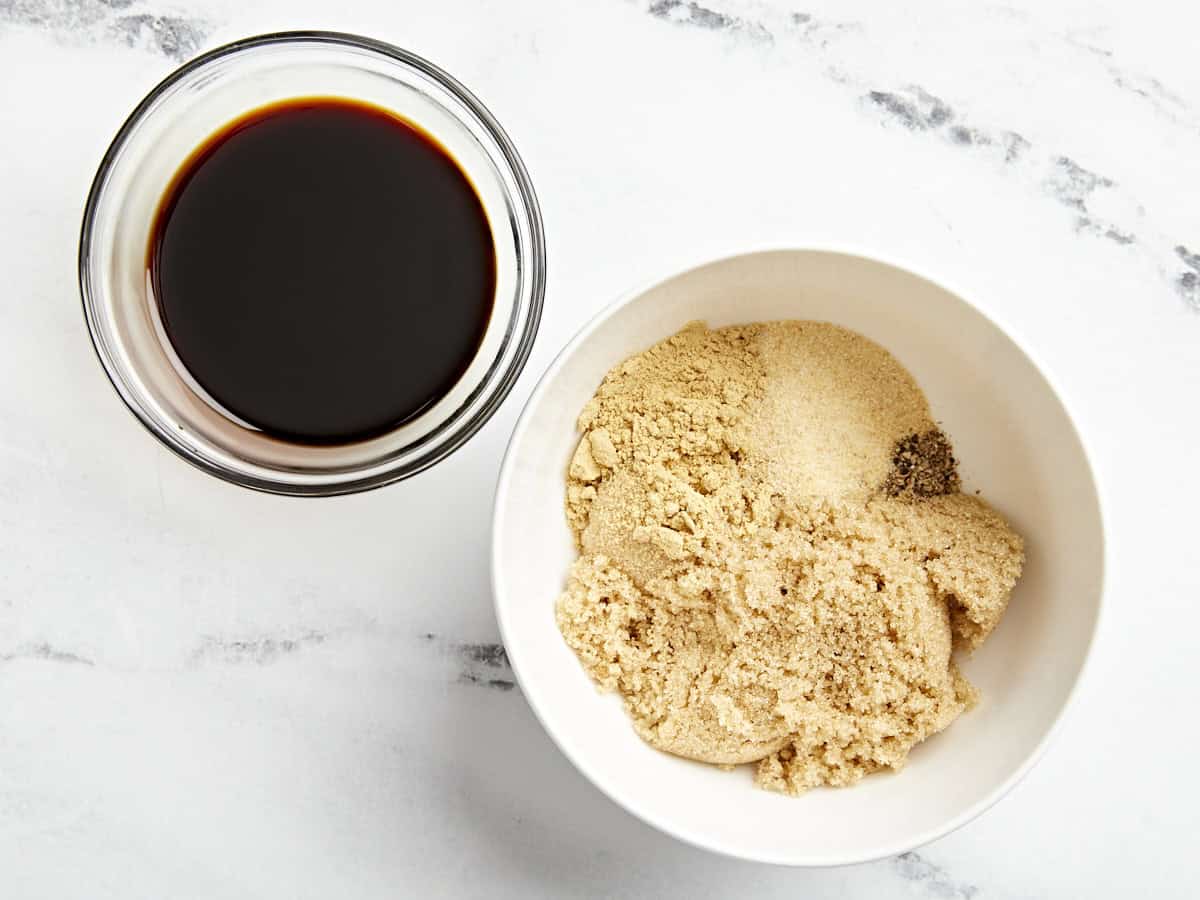
brown sugar and seasonings in a white bowl next to a glass dish of soy sauce.

Preheat your air fryer to 400°F. If using frozen salmon (2 7-oz. pieces), allow it to thaw in the refrigerator before cooking. We are cooking salmon from a fresh or fully thawed state in this recipe. Gather marinade ingredients: 1 Tbsp soy sauce, 1/4 cup brown sugar, 1/2 tsp pepper, and 1/2 tsp garlic powder.

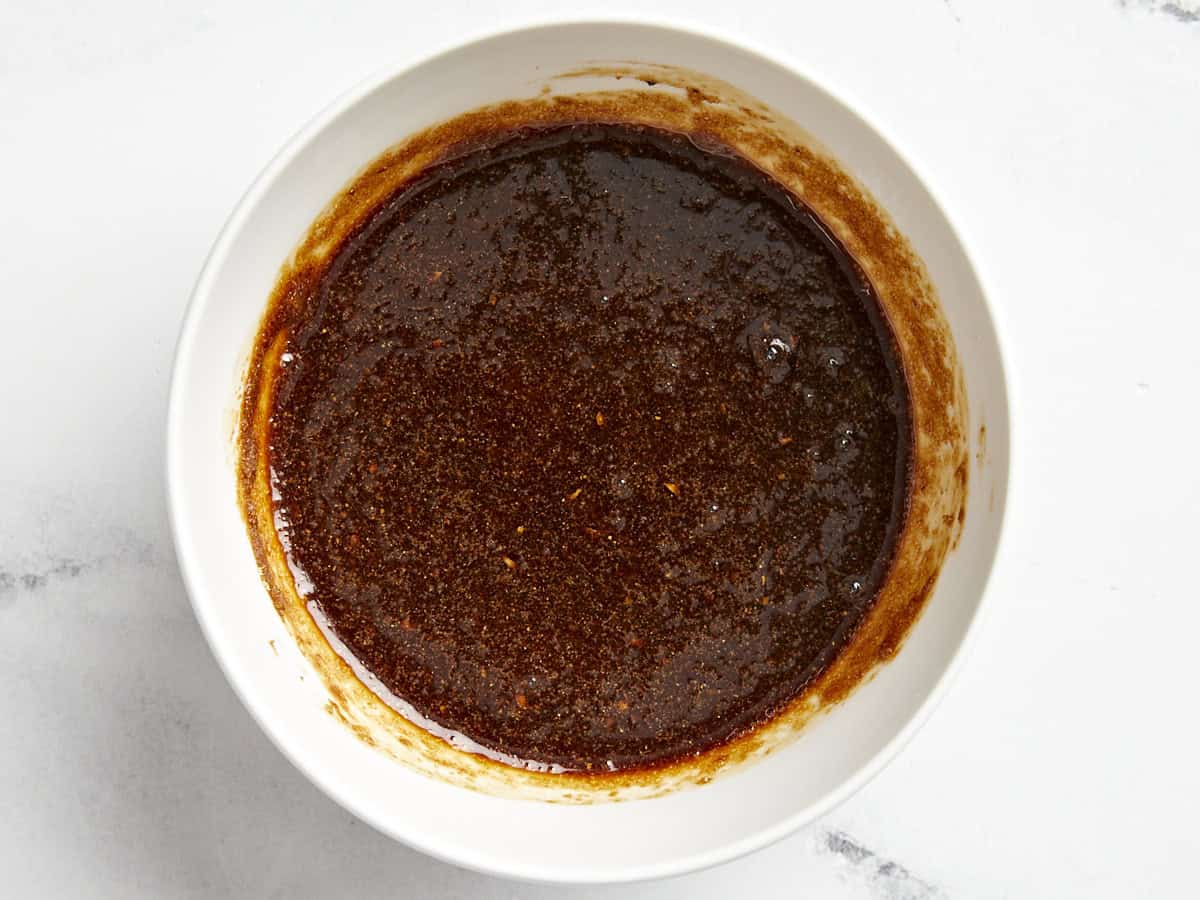
soy and brown sugar marinade in a white bowl.

Whisk together soy sauce, brown sugar, pepper, and garlic powder.

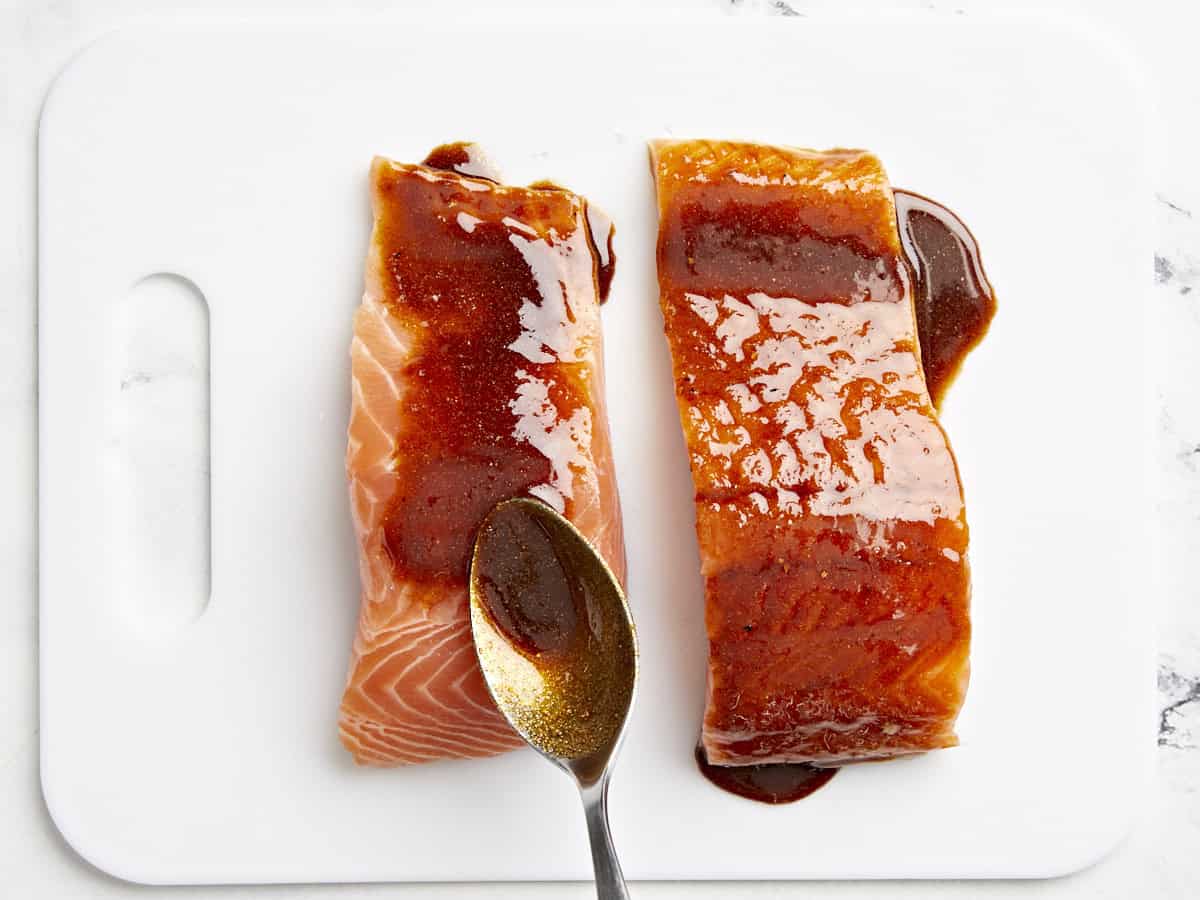
spooning marinade over salmon filets.

Spoon the marinade mixture over the salmon filets, gently rubbing it onto the salmon until it’s fully coated. A little extra on top is great! The brown sugar will melt during cooking and caramelize, giving your salmon a beautiful color and sweetness.

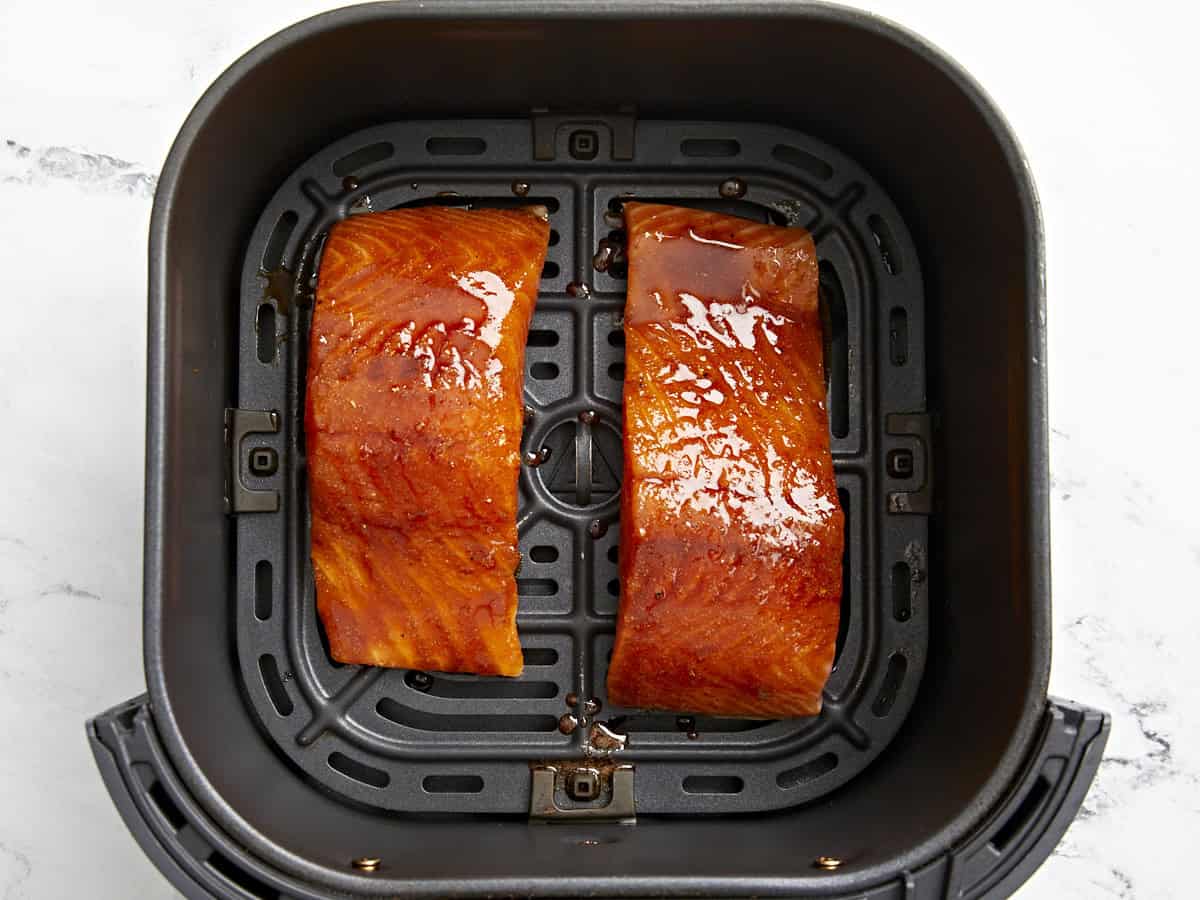
marinated salmon filets in an air fryer basket.

Spray your salmon and your air fryer crisper plate with your cooking oil of choice and position the salmon skin side down in your air fryer. Depending on the size of your air fryer, you may have to do this in batches. If you are dividing bigger salmon filets into smaller portions, it’s easiest to do so once it’s fully cooked unless you have a sharp knife that can get through the skin with ease when they are raw.

spooning marinade over partially cooked salmon filets in an air fryer basket.

Air fry for 7-8 minutes to start. At the halfway mark, baste your salmon with more marinade and then continue cooking.*

a forkful of air fryer salmon in front of a serving on a plate with rice and peas.

This Air Fryer Salmon is quick, easy, and so delicious!

The post Air Fryer Salmon appeared first on Budget Bytes.

Chicken Sausage White Bean Skillet

This Chicken Sausage White Bean Skillet is a quick & easy one-skillet meal that’s filling, budget-friendly and delicious!

The post Chicken Sausage White Bean Skillet appeared first on Budget Bytes.
I think it’s time I told you about my love for chicken sausage. I don’t know when it started, but it definitely runs deep. This Chicken Sausage White Bean Skillet is made with pre-cooked smoky chicken sausage to save you time and creamy white canned beans to save you money!! And I’m always excited to share a one-pan dinner meal with you, so this is one you’ll want to keep in your back pocket!

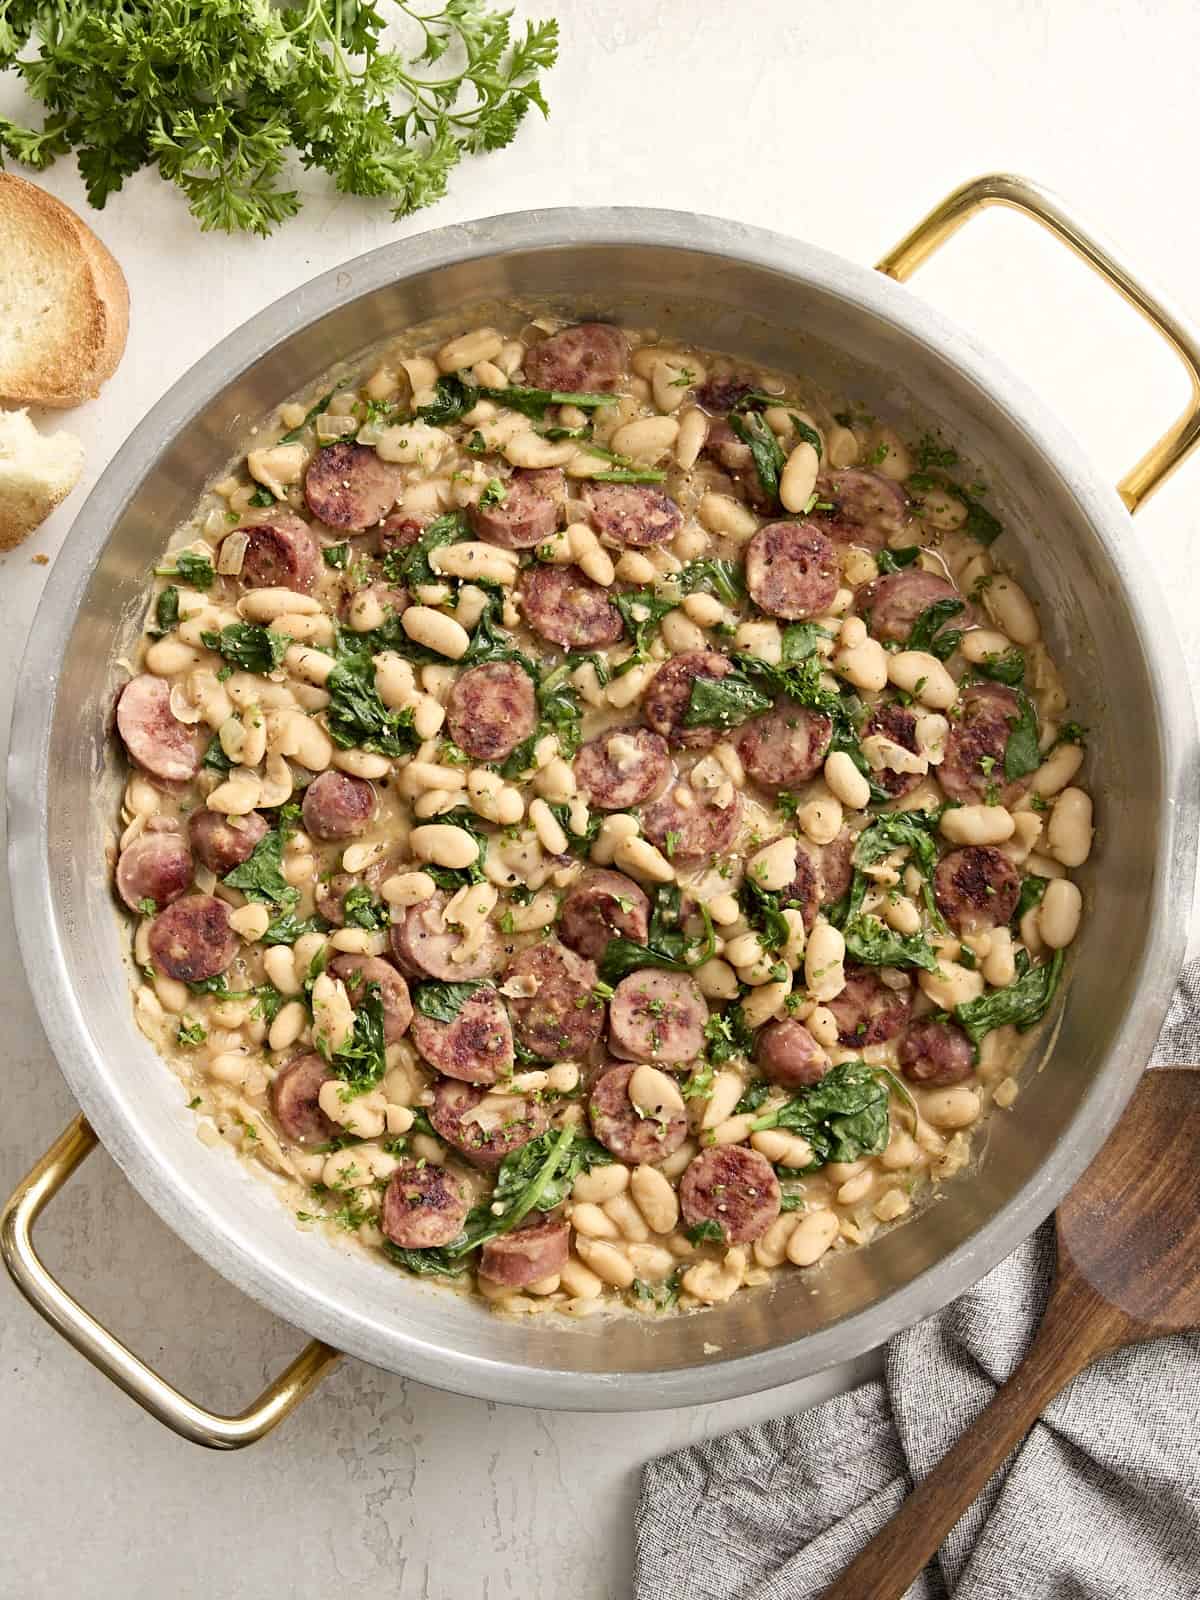
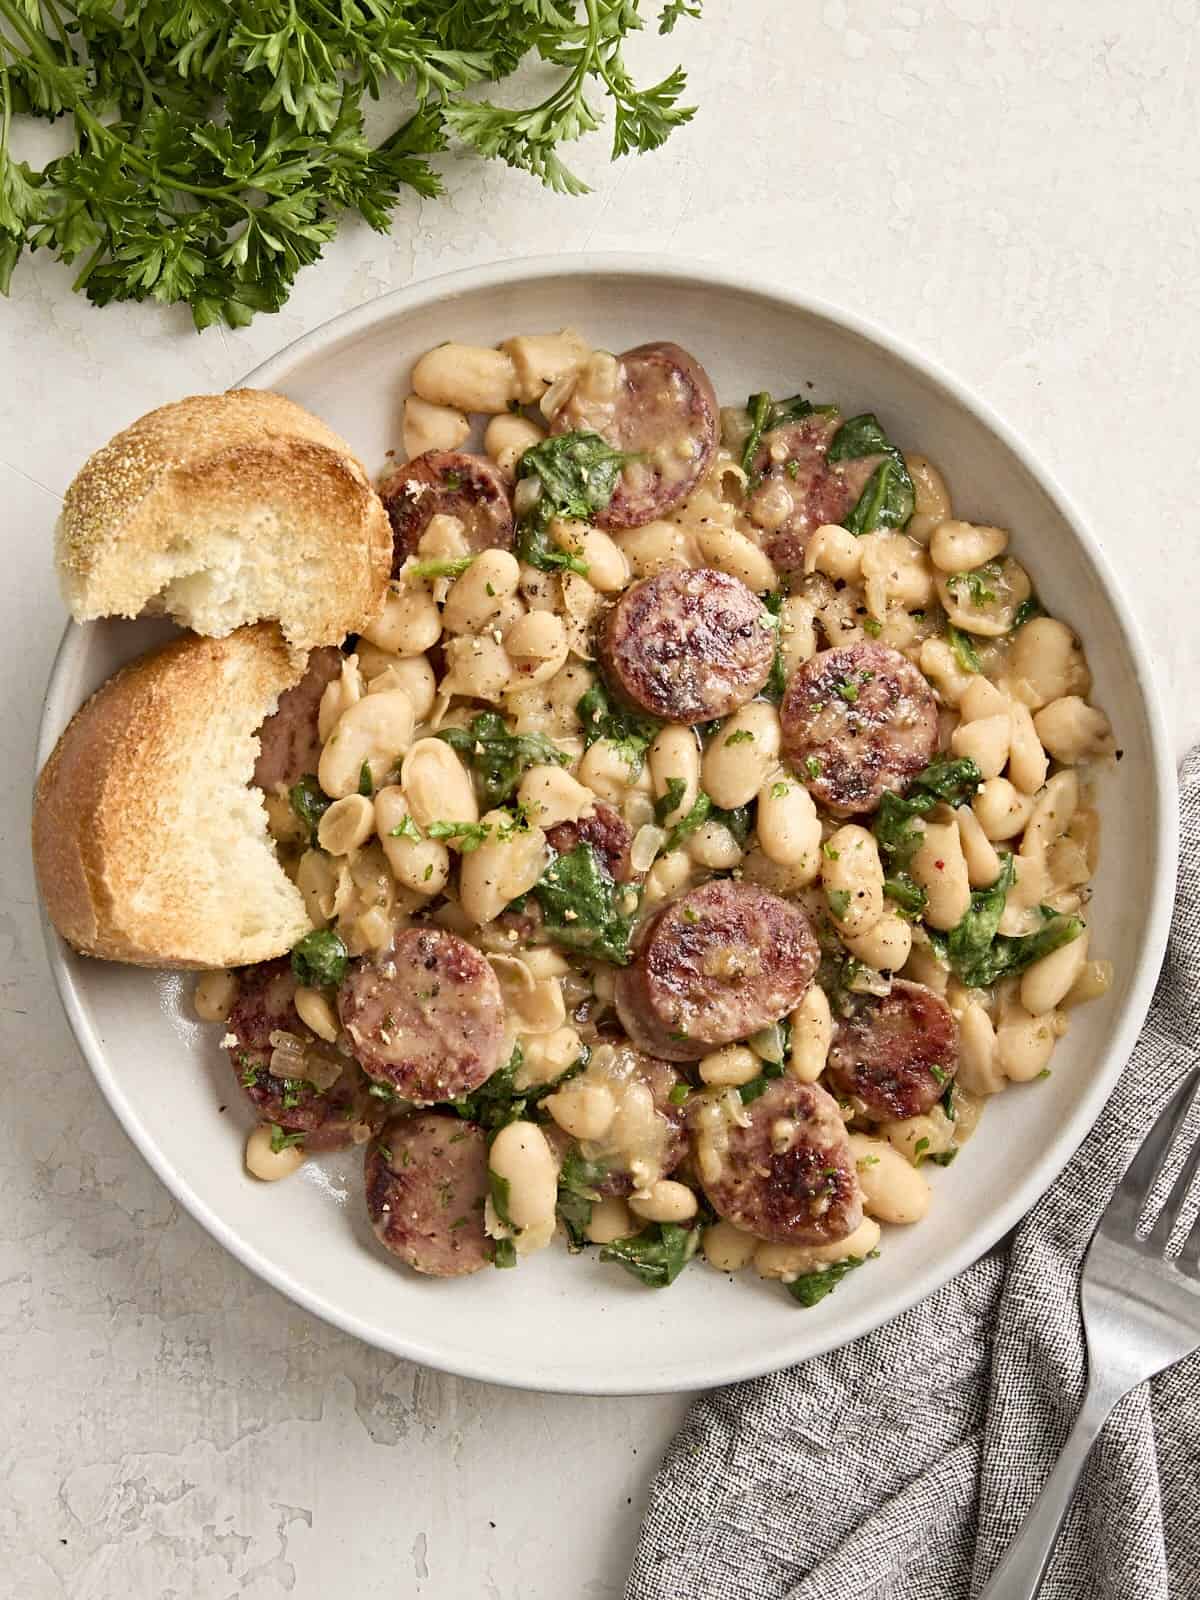
Overhead view of chicken sausage and white beans in a large skillet with a napkin and wooden spoon on the side.

Ingredients for Chicken Sausage White Bean Skillet

My goal was to create a quick skillet meal that reminded me of slow-cooked beans and ham. You know the beans that cook for hours in a big pot and soaks up all that delicious flavor from a smoky ham hock bone? Yes, that was the goal. And I think I got pretty close! ;) Here’s what you’ll need:

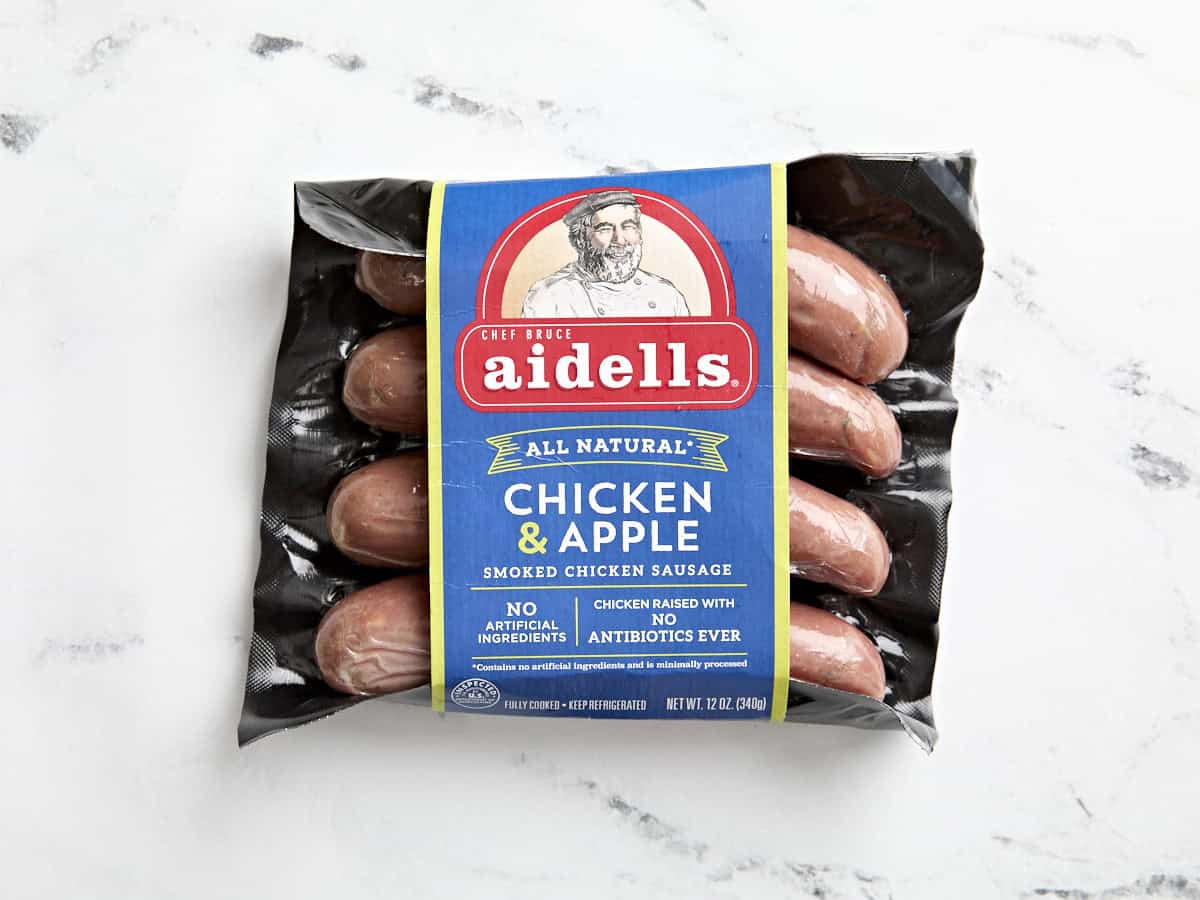
  • Chicken Sausage: You’ll need 4-5 fully cooked chicken sausage links. Currently my favorite brand is Aidells smoked chicken sausage, but you can use whichever brand you like. I’ve heard great things about Trader Joe’s chicken sausage too!
  • Onion and Garlic: Diced onion and garlic cooks in the residual fat from the chicken sausage and adds lots of aromatics and flavor to the dish.
  • White Beans: I love creamy cannellini beans which is what I used, but you can certainly use a different canned white bean like great northern beans or navy beans.
  • Chicken Broth: A little chicken broth helps warm the beans through and creates a light sauce.
  • Spinach: I had a half bag of baby spinach leftover from my cheese tortellini and sausage skillet so I decided to add it here to reduce food waste and it gives the dish more color.
  • Seasoning: Smoked paprika to help achieve that smoky bean flavor, a little bit of salt, black pepper, and dried oregano. That’s all you’ll need!

Recipe Tips!

  1. Keep an eye on the chicken sausage as it browns in the skillet. It only takes 1-2 minutes on each side. So make sure to remove it promptly after it browns to keep it from burning.
  2. I like to use a very large 12-inch skillet when making this recipe so I can quickly brown all of the chicken sausage at one time in an even layer.
  3. Drain the canned beans but DON’T rinse them. The extra starchy liquid that’s stuck to the beans will help create a light sauce.
  4. You can replace the spinach with chopped kale if that’s what you have on hand.
  5. Top this easy one-skillet meal with some freshly grated parmesan cheese or a pinch of red pepper flakes for extra flavor!

CAN I USE A DIFFERENT TYPE OF SAUSAGE?

Yes! You can use any type of smoked sausage for this recipe. I just so happen to love chicken sausage, but beef, pork, turkey, or even kielbasa sausage would work just fine. Just make sure you are getting fully-cooked sausage links.

Storing Leftovers

Although the beans will thicken quite a bit after storing in the refrigerator, it will still taste great the next day. So feel free to store any leftovers in an airtight container in the fridge for 3 to 4 days. Reheat easily in the microwave until warmed through.

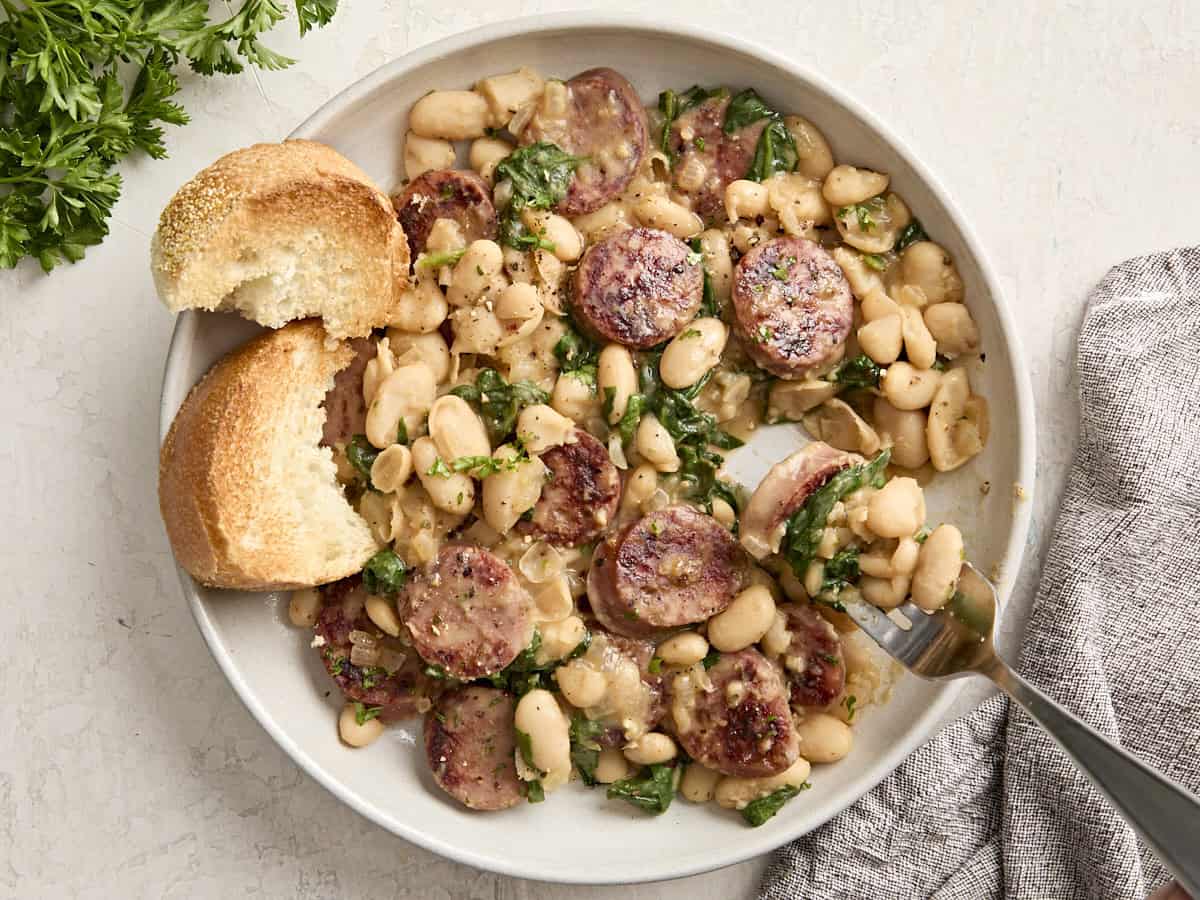
Overhead view of chicken sausage and white beans on a serving dish with toasted bread on the side.
Overhead view of chicken sausage and white beans on a serving dish with toasted bread on the side and a fork lifting some out.
Print

Chicken Sausage White Bean Skillet

This Chicken Sausage White Bean Skillet is a quick & easy one-skillet meal that’s filling, budget-friendly and delicious!
Course Dinner, Lunch
Cuisine American
Total Cost $8.69 recipe / $2.17 serving
Prep Time 10 minutes
Cook Time 15 minutes
Total Time 25 minutes
Servings 4 (about 1.25 cups each)
Calories 254kcal

Ingredients

  • 4 fully-cooked chicken sausage links (about 12 oz.) $4.99
  • 2 Tbsp cooking oil, divided $0.08
  • 1 small yellow onion, diced $0.42
  • 2 cloves of garlic, minced $0.16
  • 2 15oz. cans cannellini beans, drained $2.00
  • 1/2 tsp salt $0.02
  • 1/2 tsp dried oregano $0.05
  • 1/4 tsp smoked paprika $0.02
  • 1/4 tsp freshly cracked black pepper $0.02
  • 1 cup chicken broth $0.17
  • 2 cups spinach, roughly chopped $0.76

Instructions

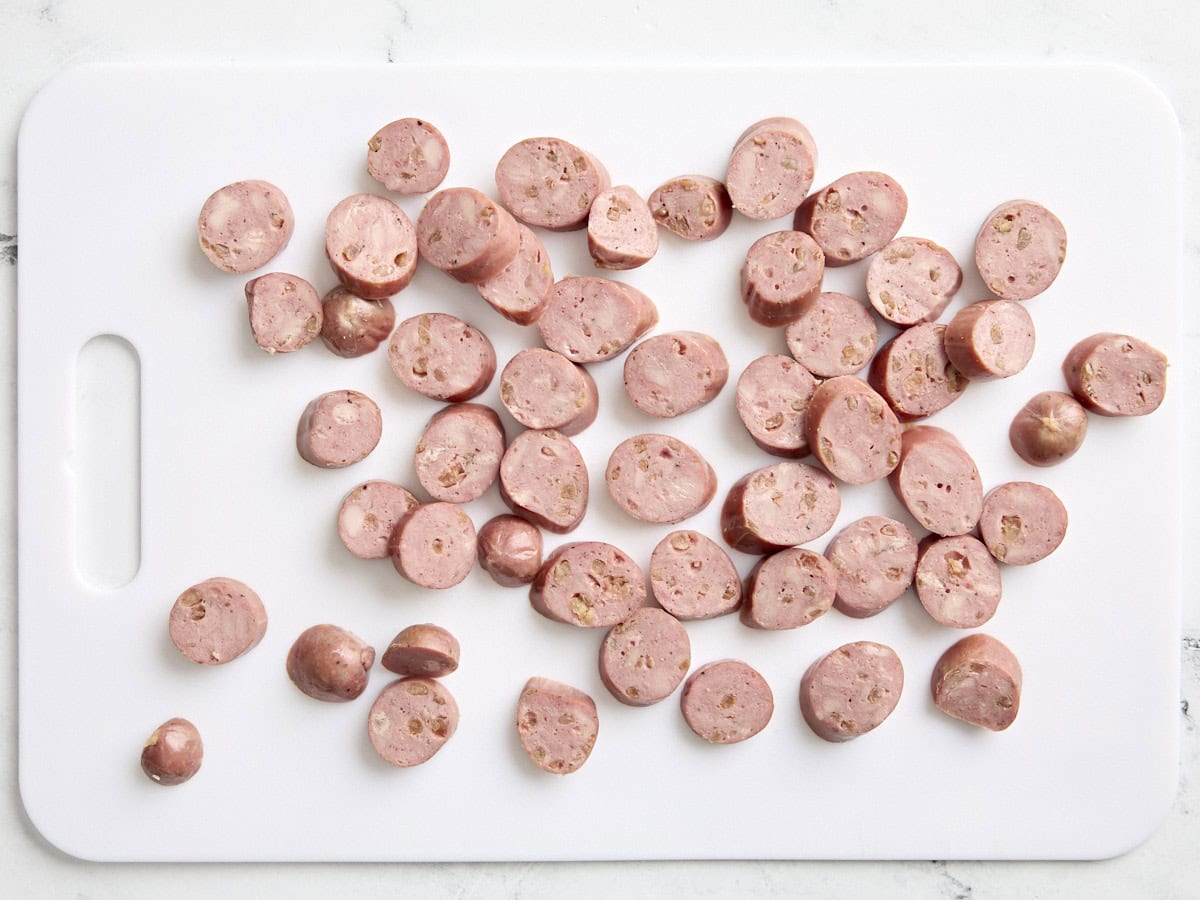
  • Slice the chicken sausage into round medallions about ¼ – ½ inch thick.
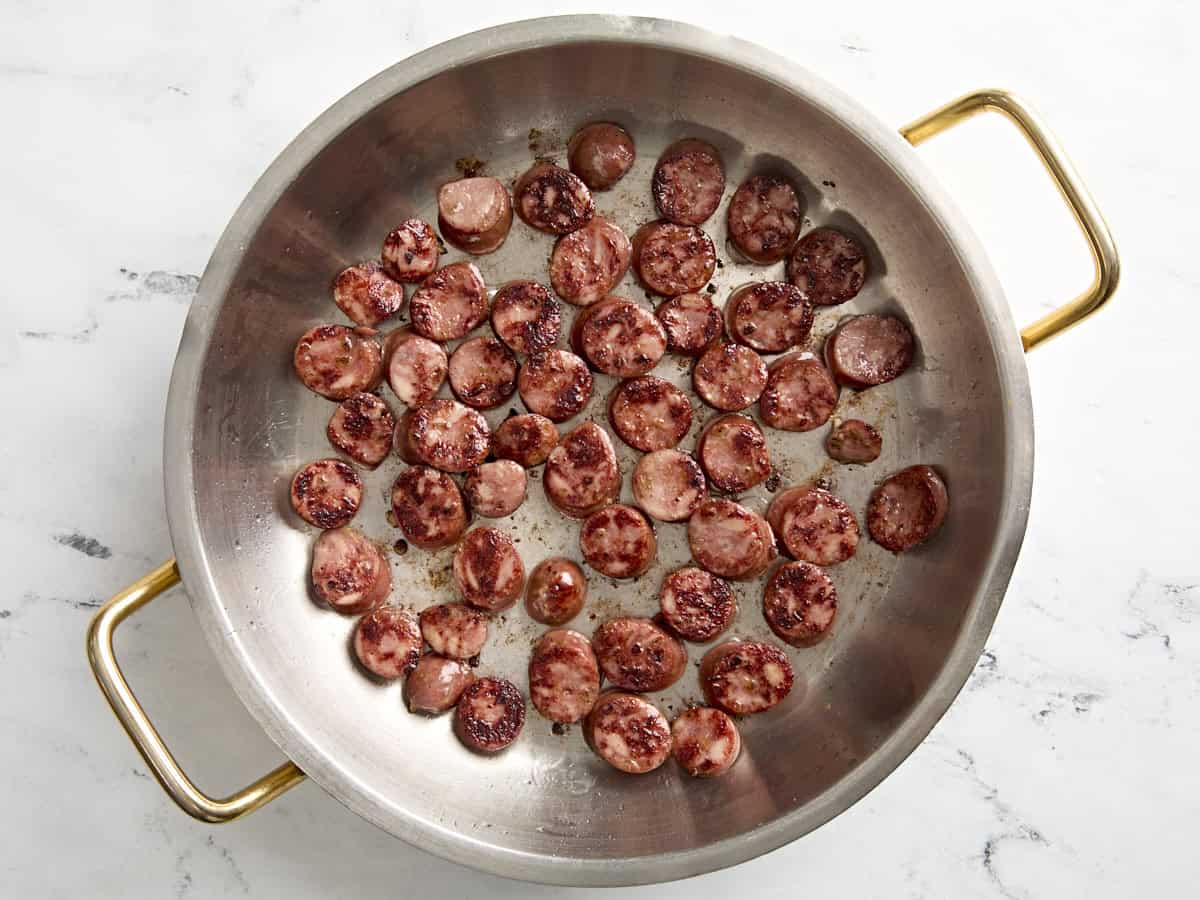
  • Heat a large skillet over medium heat and add 1 Tbsp of oil. Add the sliced chicken sausage to the skillet and brown on both sides. It will only take about 1-2 minutes on each side. So be careful not to burn the sausage. Once the chicken sausage is browned, remove it from the skillet onto a separate plate and set aside.
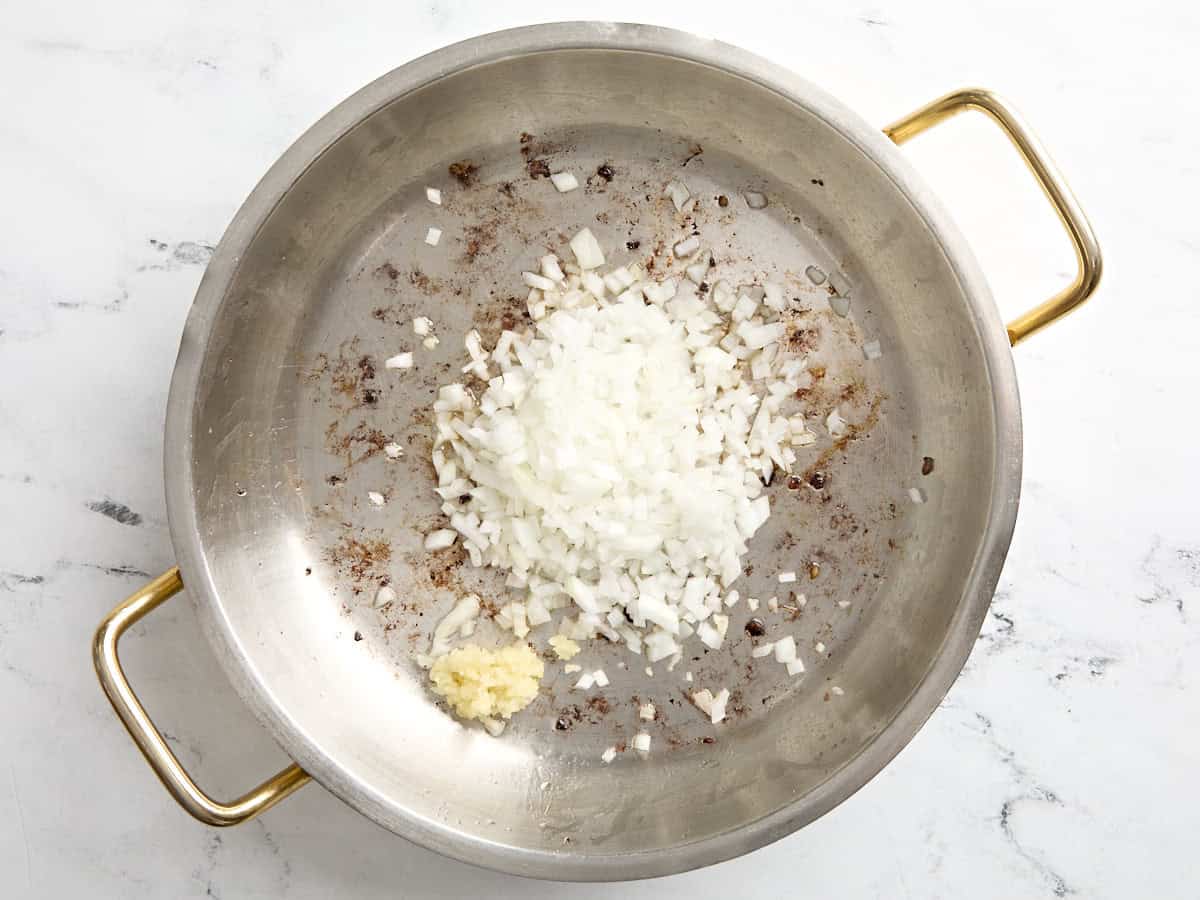
  • In the same skillet, add the remaining 1 Tbsp of oil along with the diced onion and minced garlic. Sauté for about 3 minutes or until the onion is translucent and the garlic is fragrant.
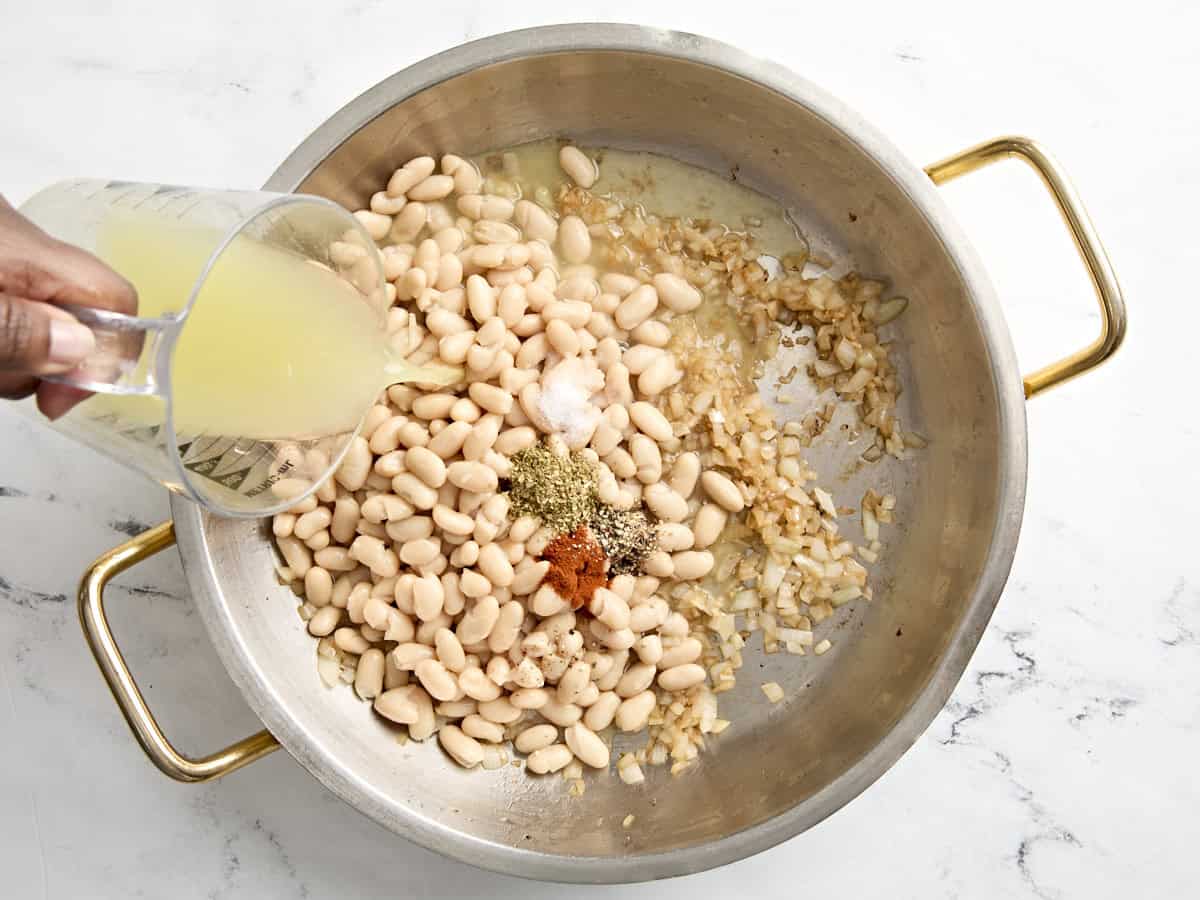
  • Add the drained canned beans to the skillet (do not rinse the beans, the residual starchy liquid helps create the sauce), along with the salt, dried oregano, smoked paprika, and cracked black pepper. Then pour in the chicken broth.
  • Gently stir everything together and bring the skillet up to a simmer. Simmer for 4-5 minutes.
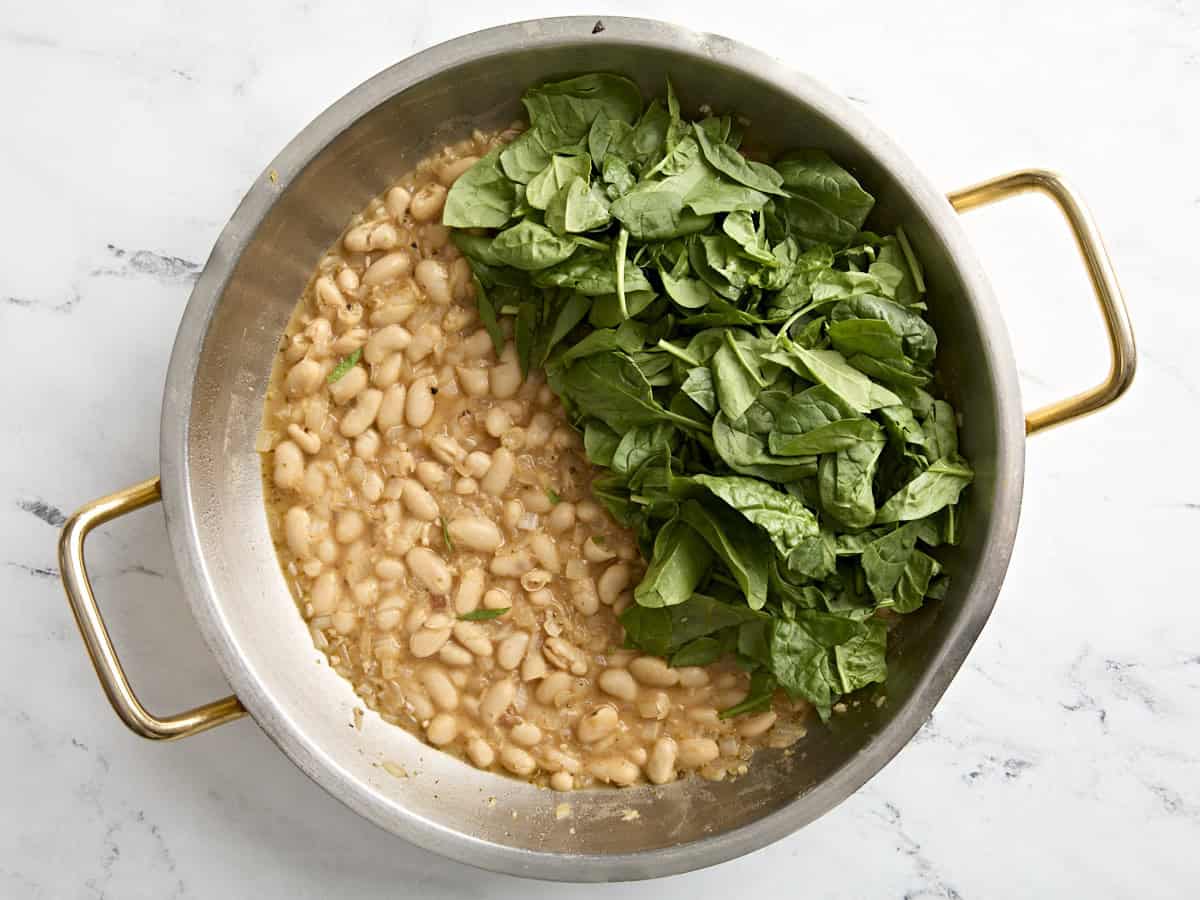
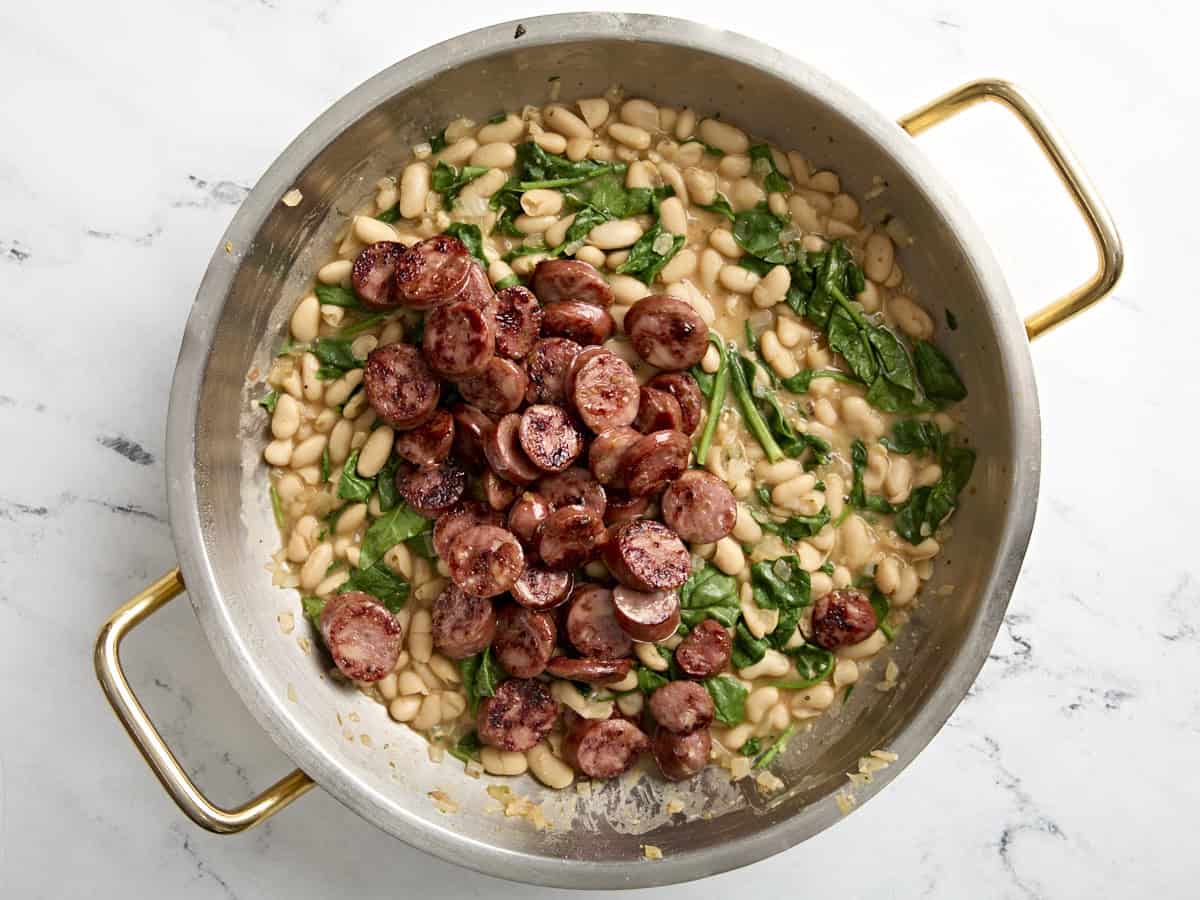
  • Add the chopped spinach to the skillet, allowing the heat to wilt the spinach, then add the browned chicken sausage. Gently stir with the beans to combine.
  • Serve hot with crusty bread and some freshly cracked black pepper or red pepper flakes on top. Enjoy!

See how we calculate recipe costs here.

Notes

If your bean mixture gets a little too thick, feel free to stir in 2 Tbsp of water at the same time when you add the spinach.

Nutrition

Serving: 1serving | Calories: 254kcal | Carbohydrates: 8g | Protein: 14g | Fat: 19g | Sodium: 1392mg | Fiber: 1g
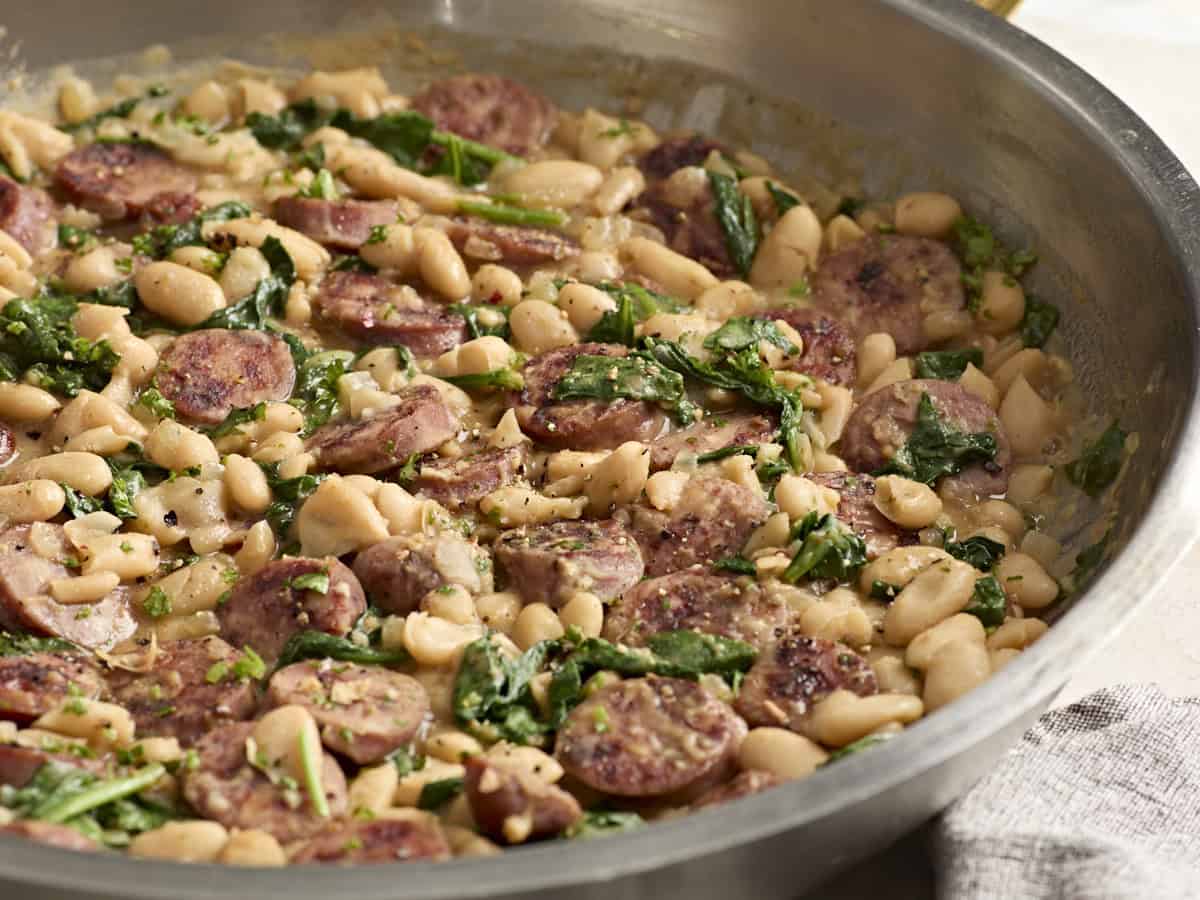
close up front view of chicken sausage white bean skillet.

How to Make Chicken Sausage White Bean Skillet – Step by Step Photos

Aidells chicken sausage on a marble counter.

Currently this is my favorite brand of smoked chicken sausage, but you can use whichever brand you like.

Chicken sausage cut into rounds on a cutting board.

Slice 4 fully-cooked chicken sausage links into round medallions about ¼ – ½ inch thick.

Browned chicken sausage

Heat a large skillet over medium heat and add 1 Tbsp of oil. Add the sliced chicken sausage to the skillet and brown on both sides. It will only take about 1-2 minutes on each side. So be careful not to burn the sausage. Once the chicken sausage is browned, remove it from the skillet onto a separate plate and set aside.

Diced onion and minced garlic added to skillet.

In the same skillet, add the remaining 1 Tbsp of oil along with 1 small diced yellow onion and 2 minced garlic cloves. Sauté for about 3 minutes or until the onion is translucent and the garlic is fragrant.

White beans, spices, and chicken broth added to skillet.

Add 2 15oz. cans of drained cannellini beans to the skillet (do not rinse the beans, the residual starchy liquid helps create the sauce), along with 1/2 tsp salt, 1/2 tsp dried oregano, 1/4 tsp smoked paprika, and 1/4 tsp freshly cracked black pepper. Then pour in 1 cup chicken broth. Gently stir everything together and bring the skillet up to a simmer. Simmer for 4-5 minutes.

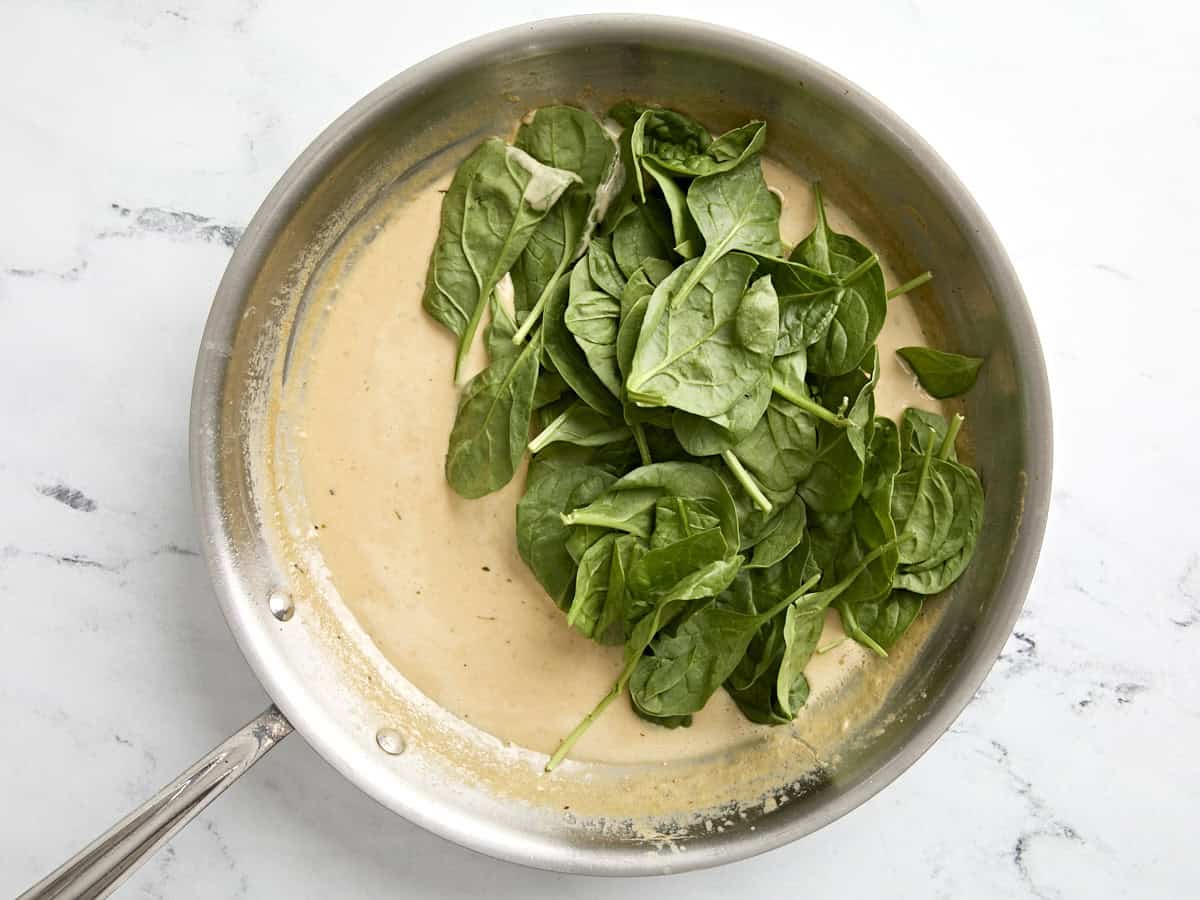
Spinach added to skillet.

Add 2 cups chopped spinach to the skillet, allowing the heat to wilt the spinach. If your bean mixture has gotten a little too thick feel free to add 2 Tbsp of water at this point.

Chicken sausage added back to skillet with white beans and spinach.

Now add the browned chicken sausage to the skillet. Gently stir with the beans to combine.

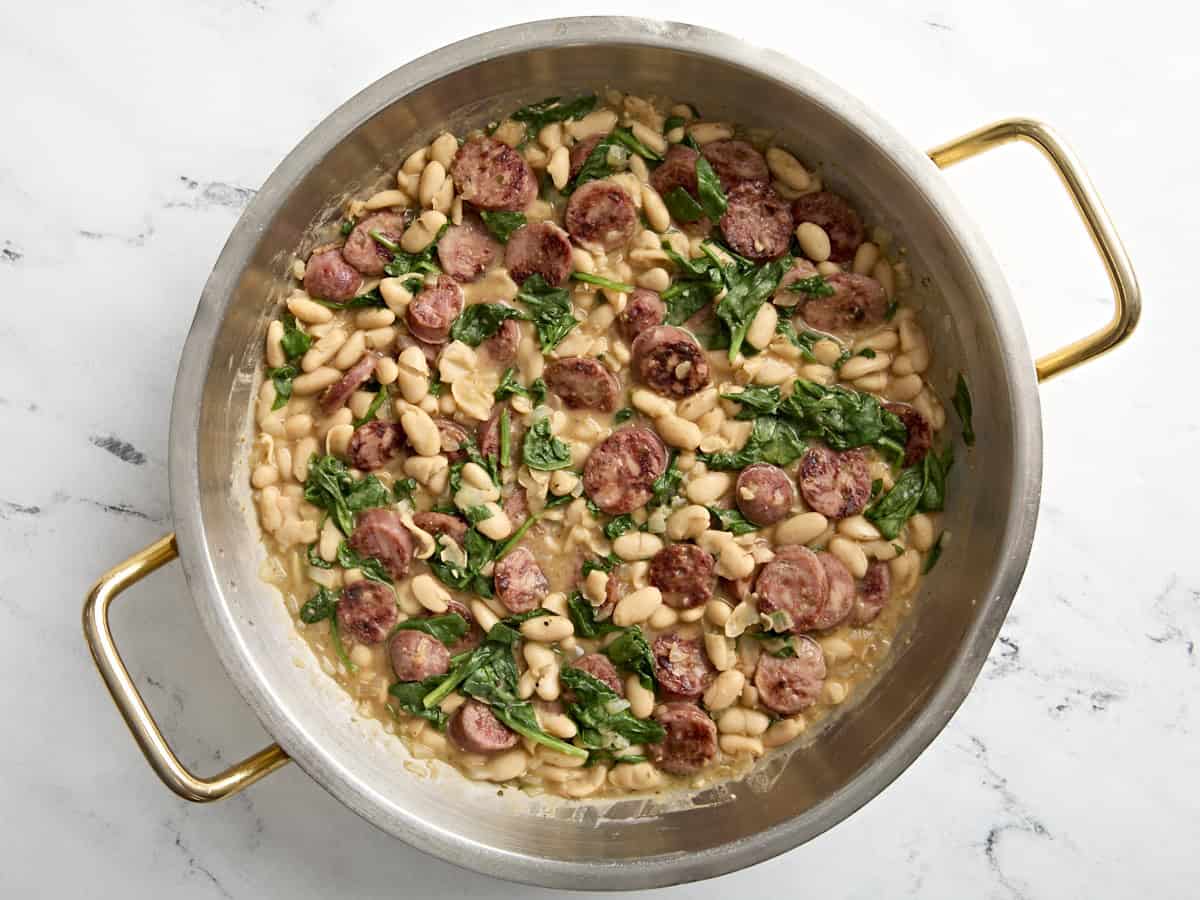
Finished chicken sausage white bean skillet.

Now all that’s left to do is enjoy with some crusty bread and maybe a quick side salad. A simple one-skillet meal for the win!!🙌

Overhead view of chicken sausage and white beans on a serving dish with toasted bread on the side.

The post Chicken Sausage White Bean Skillet appeared first on Budget Bytes.
S’Mores Dip

This oven baked S’mores Dip recipe is the cleanest, mess-free way to serve s’mores at home year-round! Zero fuss with just 4 ingredients.

The post S’Mores Dip appeared first on Budget Bytes.
Camping is one of my favorite budget-friendly activities. Whether it’s a girl’s trip or a family affair, count me in! You know what goes hand in hand with camping? S’MORES! And boy, do I have the easiest version of that camping menu classic for you. This skillet S’mores Dip recipe is the cleanest, mess-free way to serve s’mores! Zero mess, zero fuss. All you need is just 3 ingredients and a box of graham crackers; this is the easiest dessert ever! 

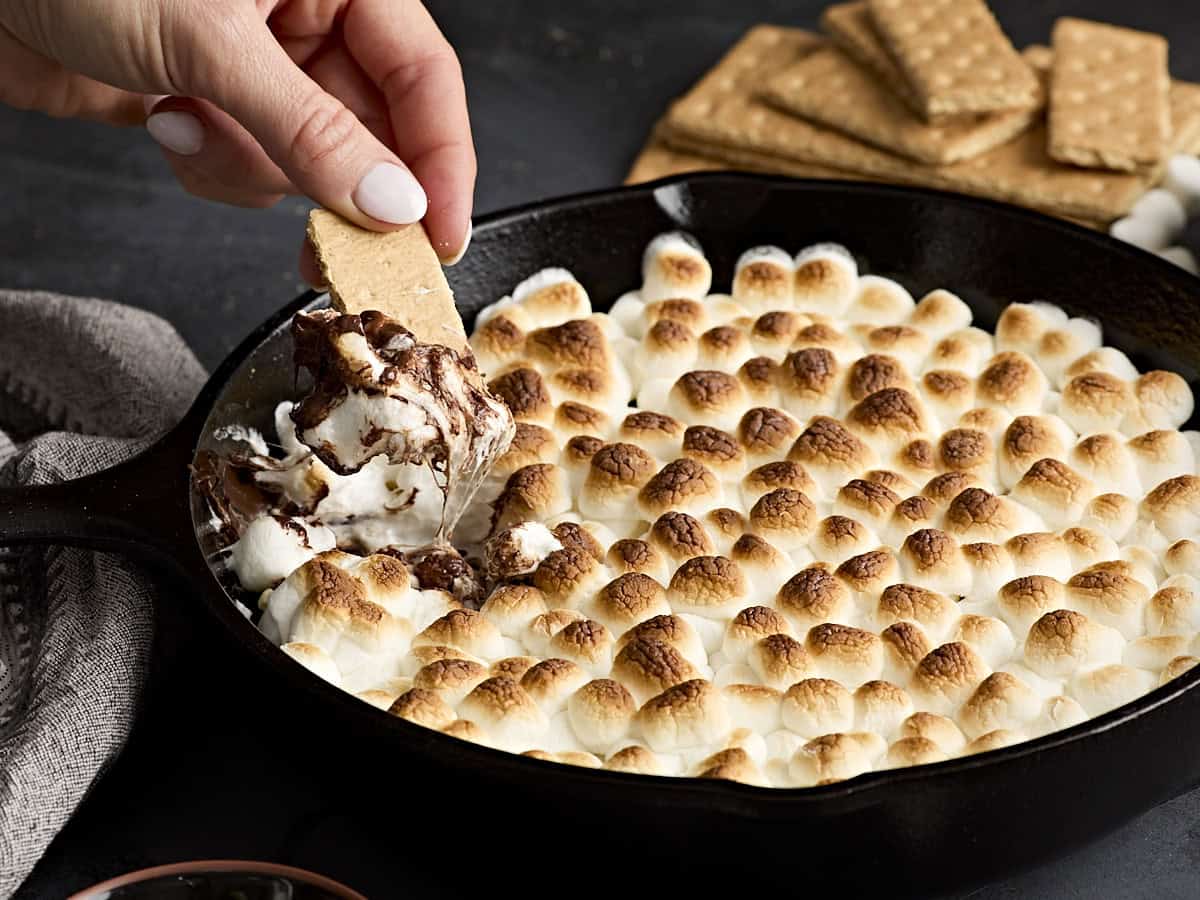
Overhead view of s'mores dip in a skillet

Here in Tennessee, the weather stays hot until October, so I always associate camping with early autumn. It’s something I look forward to sharing with my daughter now that she’s 3 and a little more adaptable. You already know this s’mores dip will be on the menu for our next camping trip! It gives us all the flavors and fun of s’mores with minimal cleanup. Plus, it’s perfect for little hands (and big hands, too!) to dip and enjoy. Just be careful to not touch the skillet—she’s hot!

What is S’mores Dip?

I think most of us are familiar with traditional s’mores: graham crackers sandwiched with a layer of chocolate and a big toasted marshmallow. Well, with my s’mores dip recipe, we’re ditching the roasting stick and building our s’mores right in a cast iron skillet! I layer semi-sweet chocolate chips AND white chocolate chips for the ultimate indulgence (but on a budget, of course), then top it all off with mini marshmallows. Everything melts together in the oven (or on a hot grill or over a campfire if you have the right set up), and voila! You have a delicious, ooey-gooey s’mores dip to scoop up with graham crackers.

Ingredients for S’mores Dip

Here’s what you’ll need to make this easy s’mores dip recipe:

  • Semi-Sweet Chocolate Chips: The base of this dip is made with a layer of semi-sweet chocolate chips. You can also use milk chocolate or dark chocolate chips, or even a chocolate bar broken into small pieces. 
  • White Chocolate Chips: Adds a creamy, sweeter contrast to the semi-sweet chocolate chips. 
  • Mini Marshmallows: I prefer using mini marshmallows as they melt quickly and evenly. You can also use regular-sized marshmallows or jumbo marshmallows cut in half.
  • Graham Crackers: Honey or cinnamon-flavored graham crackers both work well as dippers—choose your favorite!

What Else Can I Add?

This is one recipe you really can’t mess up! Feel free to get creative and add your own twist. Some fun ideas include:

  • Peanut butter or butterscotch chips
  • A drizzle of caramel sauce on top
  • Dollops of peanut butter between the chocolate and marshmallow layers
  • Chopped nuts (peanuts, almonds, pecans) mixed in with the chocolate chips
  • Instead of graham crackers, try dipping with cookies, fruit, or pretzels/Ritz crackers (salty and sweet is always a winning combo!)

Do I Need a Cast Iron Skillet?

Cast iron heats up evenly and stays hot for a long time, making it the perfect vessel for this s’mores dip. The chocolate melts quickly and stays melted for longer in a cast iron skillet. However, you can make this recipe in any oven-safe dish or pan. Just keep an eye on the dip, as it may cook a bit faster or slower, depending on your dish.

Top Tip

Chocolate can burn and become grainy if heated for too long. Evenly layer the chocolate chips and marshmallows, and switch to broil very briefly once the marshmallows start to puff up. The chocolate will continue melting from the residual heat without overcooking! If you’re doing this over a campfire or on a grill, you won’t get the toasty marshmallow appearance but they will still become gooey and warm. Yum!

Storage and Reheating Instructions

One of my favorite things about this s’mores skillet dip is how it can be reheated multiple times so nothing goes to waste. Just pop it back in the oven until warmed through and melty. You can also store any leftover dip in the fridge for 3-4 days in a microwave-safe container and reheat as needed.

A hand dipping a graham cracker into s'mores dip
Close up of s'mores dip in a skillet
Print

S’mores Dip

This oven baked S'mores Dip recipe is the cleanest, mess-free way to serve s'mores year-round! Zero fuss with just 4 ingredients.
Course Dessert
Cuisine Amercian
Total Cost ($5.59 recipe / $0.69 serving)
Prep Time 5 minutes
Cook Time 10 minutes
Total Time 15 minutes
Servings 8 servings, 6 crackers dipped per person
Calories 384kcal

Equipment

  • 9'' Cast Iron Skillet

Ingredients

  • 1 ½ cups semi-sweet chocolate chips $2.22
  • ½ cup white chocolate chips $1.42
  • 1 cup mini marshmallows $0.84
  • ½ box Graham crackers $1.11

Instructions

  • Preheat oven to 350 degrees. Spread semi-sweet chocolate chips on the bottom of your cast iron skillet.
  • Then, spread white chocolate chips across the top of the semi sweet chocolate chips.
  • Top with mini marshmallows.
  • Bake at 350 degrees until marshmallows on top have puffed up and are starting to brown, about 8 minutes.
  • Turn oven on broil for 2 minutes, or until the marshmallows on top are toasted to your liking.
  • Remove from oven and serve hot with graham crackers! Be careful, the cast iron skillet stays hot for a while. Scoop with care.

See how we calculate recipe costs here.

Nutrition

Serving: 1serving | Calories: 384kcal | Carbohydrates: 49g | Protein: 5g | Fat: 19g | Sodium: 187mg | Fiber: 4g
Half eaten s'mores dip with a graham cracker scooping more out

how to make S’mores Dip – step by step photos

Semi-sweet chocolate chips in a skillet.

Preheat oven to 350 degrees. Spread 1 ½ cups semi-sweet chocolate chips on the bottom of your cast iron skillet.

Semi-sweet and white chocolate chips in a skillet.

Then, spread ½ cup white chocolate chips across the top of the semi sweet chocolate chips.

Chocolate chips and mini marshmallows in a skillet for s'mores dip

Top with 1 cup mini marshmallows. Bake at 350 degrees until marshmallows on top have puffed up and are starting to brown, about 8 minutes.

Broiled s'mores dip in a skillet

Turn oven on broil for 2 minutes, or until the marshmallows on top are toasted to your liking. Remove from oven and serve hot with ½ a box of graham crackers! Be careful, the cast iron skillet stays hot for a while. Scoop with care.

A hand dipping a graham cracker into s'mores dip

No camping trip or bonfire necessary; this easy skillet s’mores dip is a year-round treat I’ll be making on repeat!

The post S’Mores Dip appeared first on Budget Bytes.
Cheese Tortellini And Sausage Skillet

This one-pot Cheese Tortellini and Sausage Skillet is hearty and packed with flavor. A quick & easy one skillet meal? Count me in!

The post Cheese Tortellini And Sausage Skillet appeared first on Budget Bytes.
Well school is back in session for my kiddos and I’m back on the quick & easy weeknight meals train. This one pot cheese tortellini and sausage skillet was a huge hit with my family and now they have requested it two weeks in a row! It’s full of cheese tortellini pasta, Italian sausage, lots of herbs and spices, and a super flavorful sauce. A full meal all in one pan. Dinner doesn’t get any better than this!

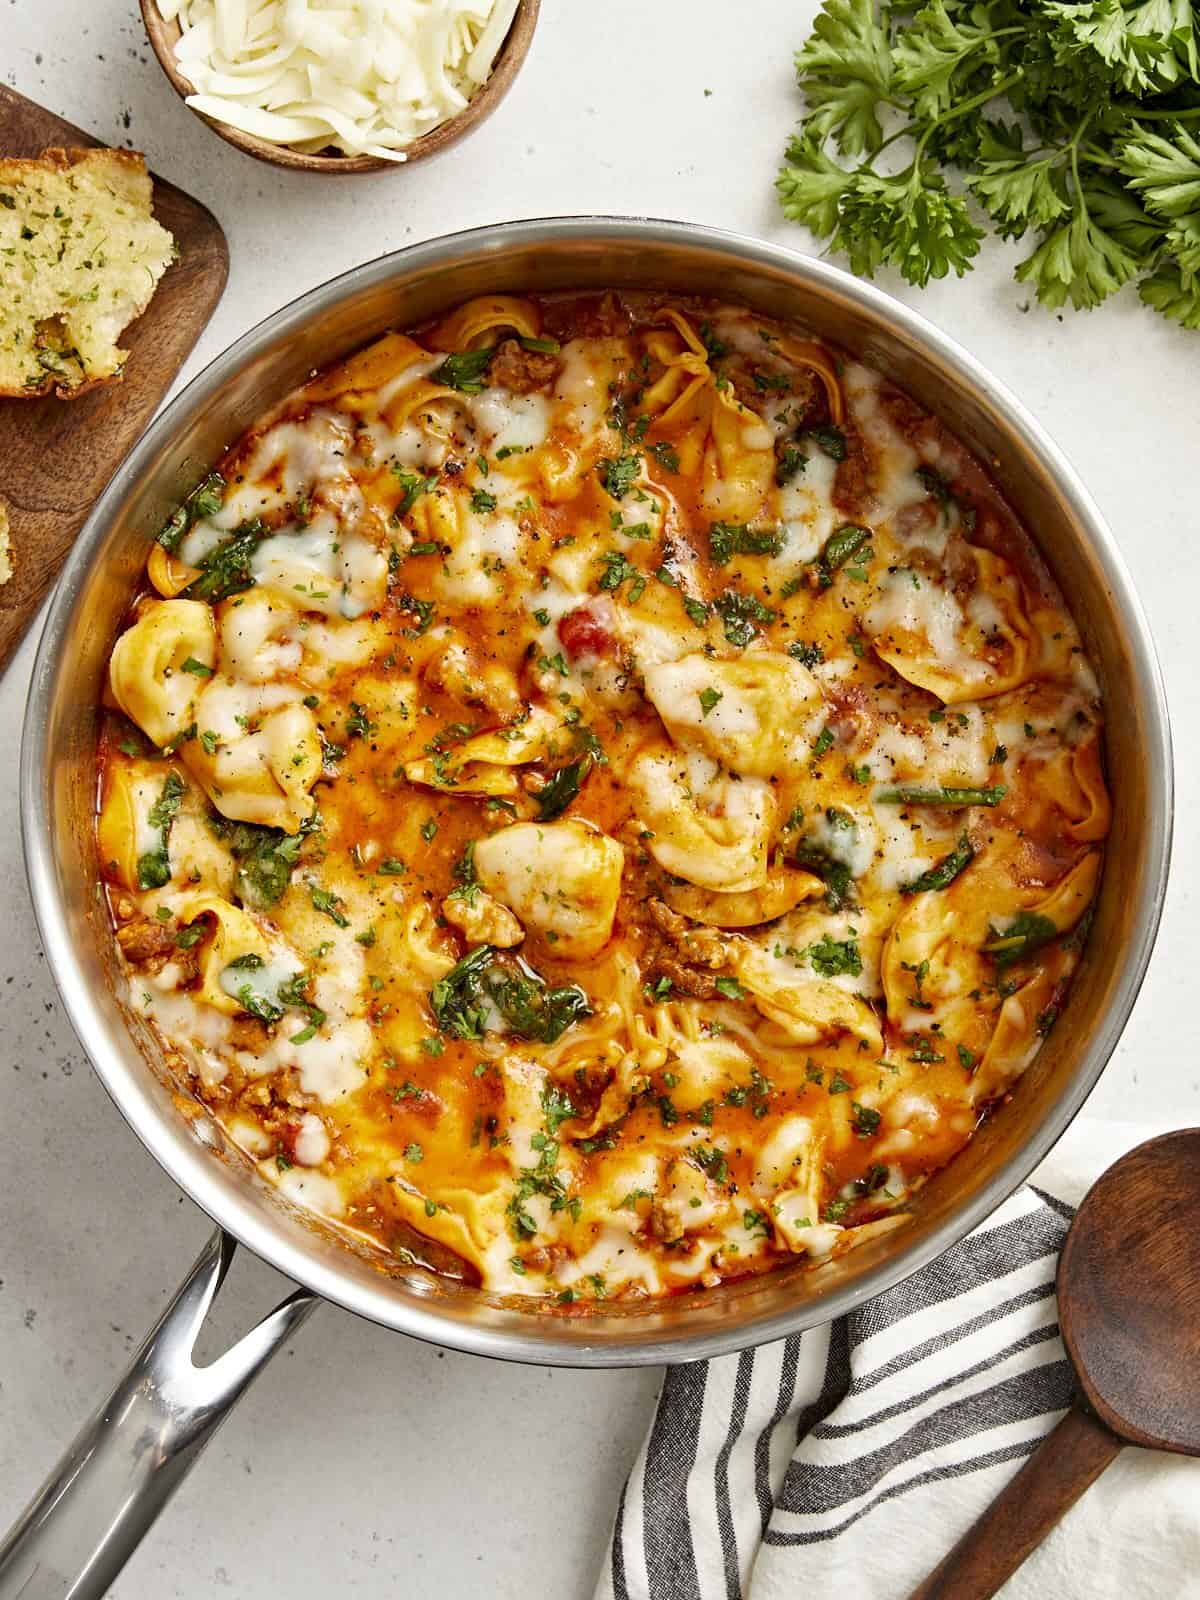
Overhead view of cheese tortellini and sausage skillet with garlic bread and parsley on the side.

What You’ll Need

Here are the ingredients that you’ll need to make this hearty tortellini and sausage recipe:

  • Italian Sausage: I chose mild Italian sausage for this recipe as it’s already pre-seasoned with lots of herbs and spices. You can also use ground beef or ground turkey, however you may need to add a little more seasoning if you do choose ground beef or turkey.
  • Onion and Garlic: Diced onion and garlic adds lots of aromatics and flavor to this dish.
  • Cheese Tortellini: I like using refrigerated tortellini because you can quickly cook it in the sauce, but you can also use frozen tortellini if you prefer. You may need to boil the frozen tortellini first according to the package instructions. 
  • Marinara Sauce: Marinara helps create the sauce for this recipe. It includes crushed tomatoes and lots of extra herbs and spices.
  • Chicken Broth: The cheese tortellini cooks in the chicken broth and marinara sauce, making this a one pot meal!
  • Spinach: A couple handfuls of spinach adds color and extra vegetables to the dish.
  • Seasoning: A simple mix of salt, pepper, garlic powder, and dried oregano add a little more flavor to the jarred marinara sauce and the rest of the dish.
  • Mozzarella Cheese: And I topped everything off with some gooey mozzarella cheese because…why not?!

Budget Saving Tips!

  1. You can often find refrigerated cheese tortellini in two sizes, a small 9-10oz. bag and a larger 20oz. family size bag. Most of the time the family size is the better deal and will save you some money. So grab the bigger bag! You’ll only need 10oz. of tortellini for this recipe and you can freeze the rest and save for later.🙌
  2. If you happen to have a can of tomatoes in your pantry, you can switch out the marinara sauce for one 14oz. can of diced tomatoes.
  3. And if you really want to save even more money, use just ½ lb. of Italian sausage for this recipe and freeze the rest for later. This dish will still be very filling and you can cook the rest of the sausage with the rest of the cheese tortellini that you saved. You may also still have half a jar of marinara, some spinach, and more mozzarella cheese leftover. Now look at what we just did. We’ve easily just created another meal! #winning

Serving Suggestions & Variations

  • This dish is perfect to serve with a side of crusty garlic bread and a simple side salad or Caesar salad.
  • Wanna make it creamy? Add about ½ cup of heavy cream at the same time as the chicken broth for a creamy tortellini skillet meal.
  • And if you want to add some spice, add a pinch or two of red pepper flakes at the end for a little kick!

Storing Leftovers

Got leftovers? You can store them in an airtight container in the refrigerator for 3-4 days. The sauce mixture will thicken a little bit with time, but you can easily reheat it in the microwave until warmed through for a delicious lunch or dinner.

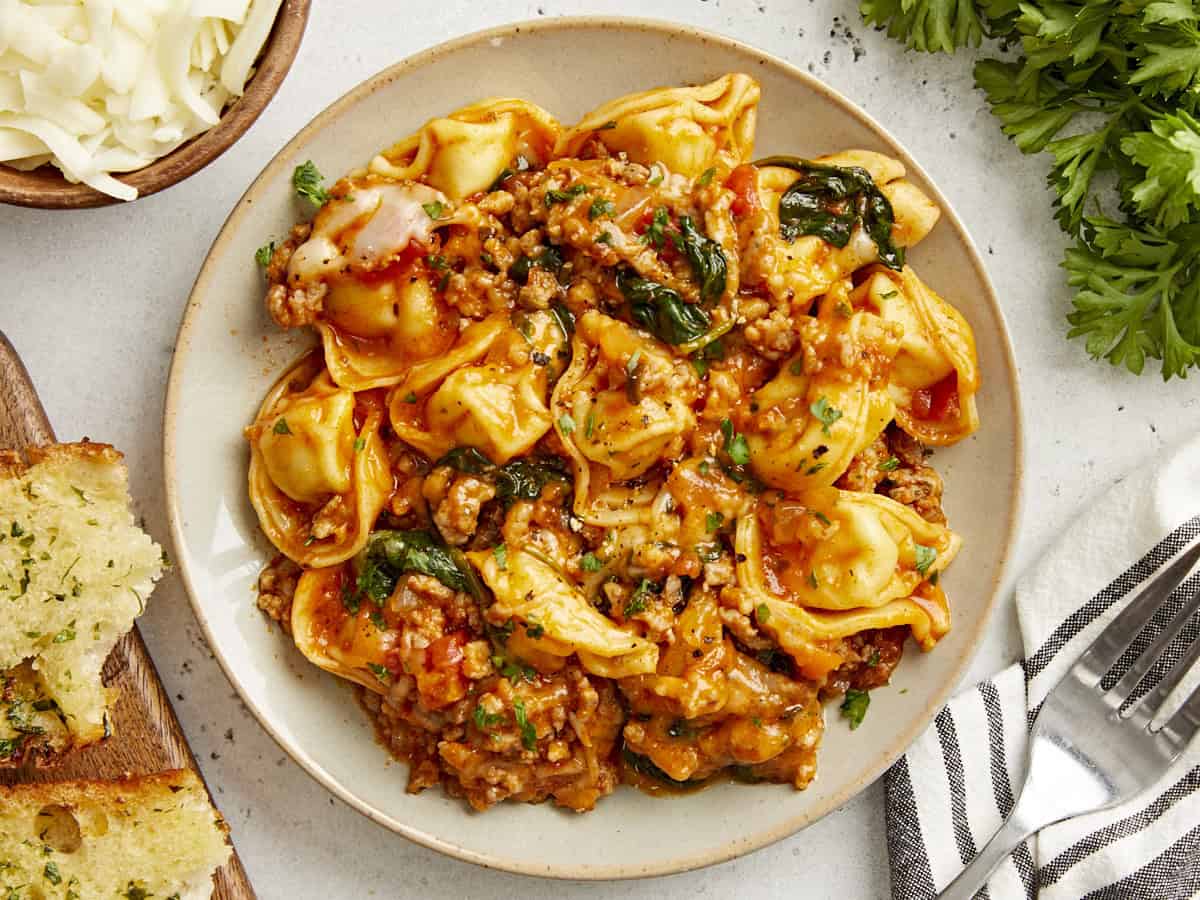
Overhead view of cheese tortellini and sausage on a plate with garlic bread, fork, and napkin on the side.
Overhead view of cheese tortellini and sausage skillet with garlic bread and parsley on the side.
Print

Cheese Tortellini And Sausage Skillet

This one-pot Cheese Tortellini and Sausage Skillet is hearty and packed with flavor. A quick & easy one skillet meal? Count me in!
Course Dinner
Cuisine American
Total Cost $12.95 recipe / $3.24 serving
Prep Time 5 minutes
Cook Time 20 minutes
Total Time 25 minutes
Servings 4
Calories 730kcal

Ingredients

  • 1 Tbsp cooking oil $0.05
  • 1 lb. Italian sausage $4.99
  • 1 small yellow onion, diced $0.42
  • 2 cloves of garlic, minced $0.16
  • 1/2 tsp salt $0.02
  • 1/2 tsp garlic powder $0.05
  • 1/2 tsp dried oregano $0.05
  • 1/4 tsp freshly cracked black pepper $0.02
  • 1 1/2 cups marinara sauce $1.50
  • 1 cup chicken broth $0.17
  • 10 oz. refrigerated cheese tortellini $3.75
  • 2 cups spinach $1.15
  • 1/2 cup mozzarella cheese $0.62

Instructions

  • Heat a large skillet over medium heat and add the oil. Brown the Italian sausage.
  • Once the sausage has browned, add the diced onion and minced garlic to the skillet. Continue to sauté over medium heat until the onion is translucent and the garlic is fragrant.
  • Next add the salt, garlic powder, oregano, black pepper, marinara sauce, and chicken broth to the skillet. Stir to combine.
  • Bring the skillet up to a simmer and add the cheese tortellini. Stir the tortellini into the sauce and cook for 5-6 minutes until the tortellini is tender.
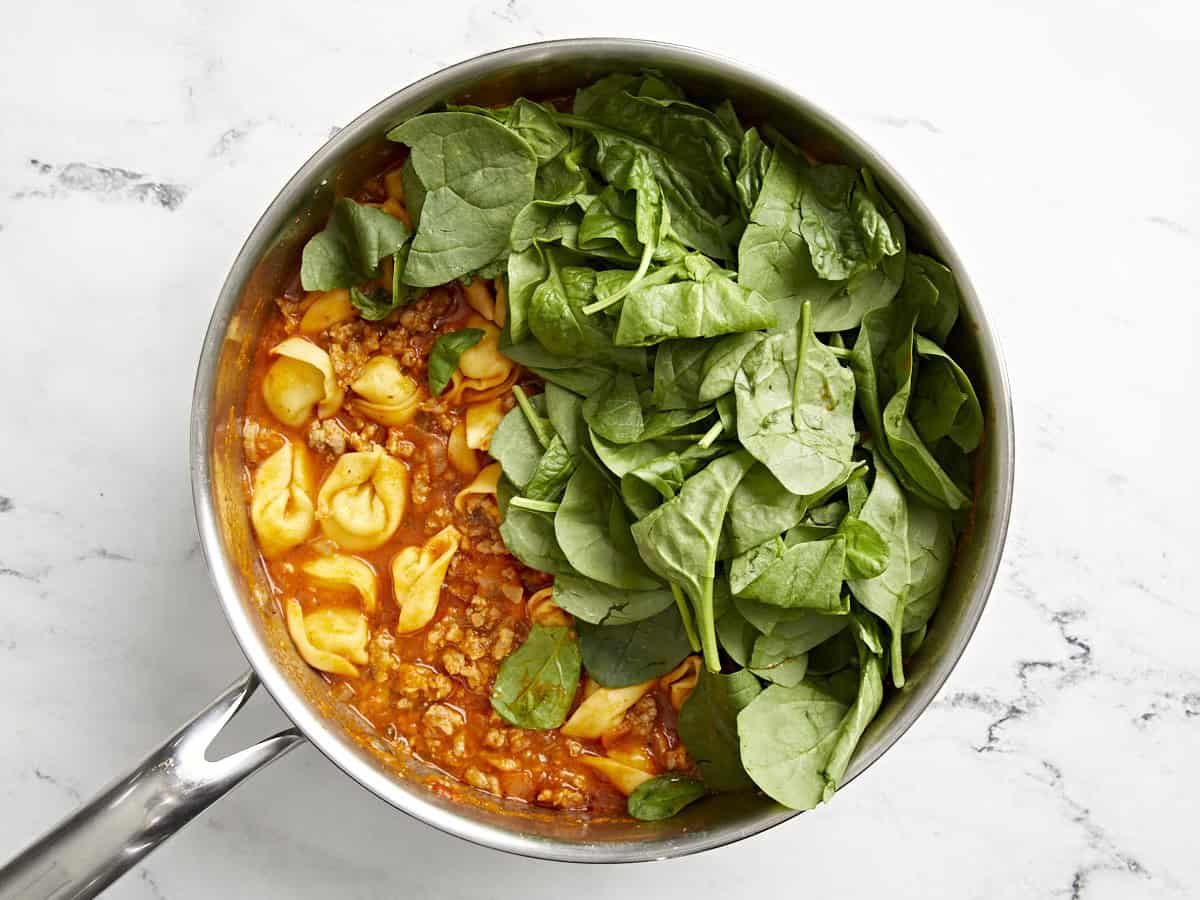
  • Add the spinach to the skillet and stir to combine, allowing the heat to wilt the spinach.
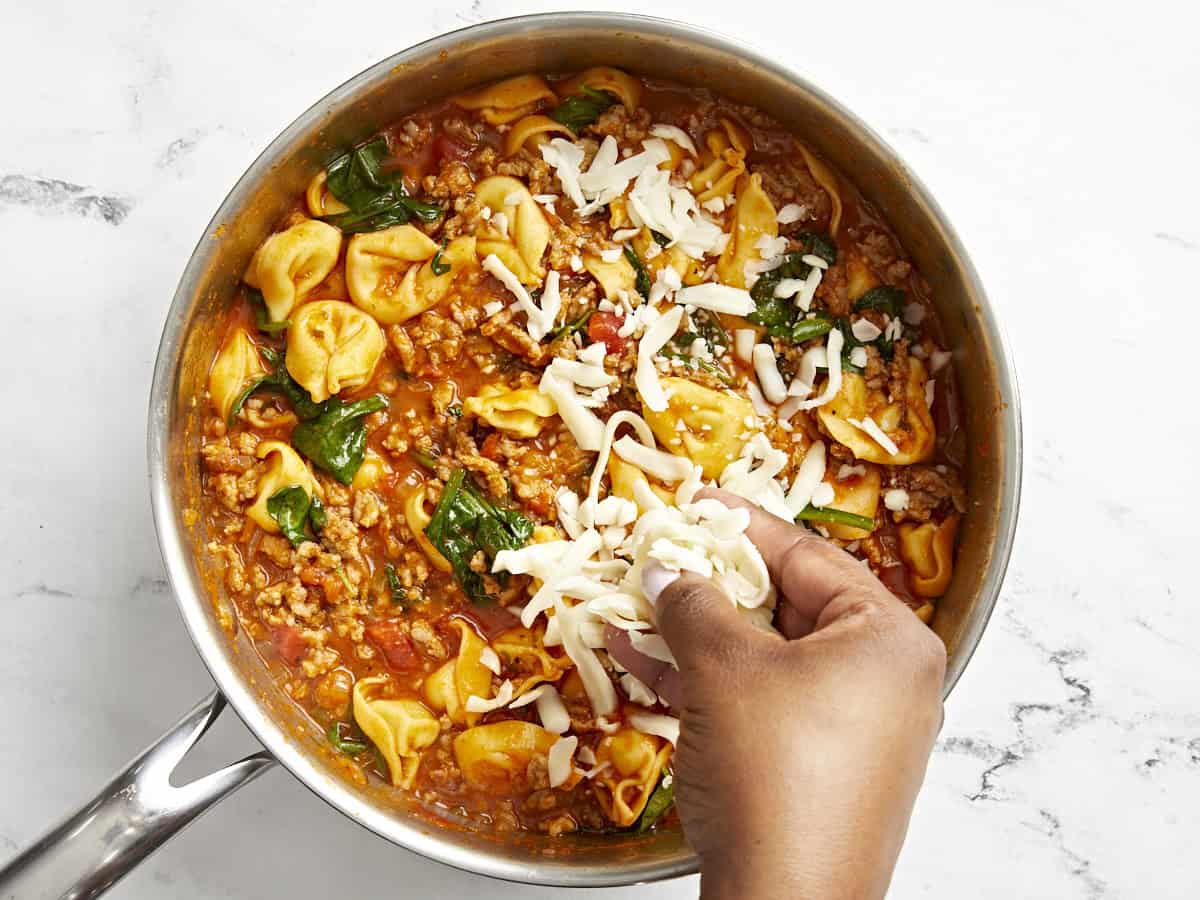
  • Now top the skillet with the shredded mozzarella cheese and allow the heat to melt the cheese.
  • Serve hot with fresh garlic bread and some freshly cracked black pepper or red pepper flakes on top. Enjoy!

See how we calculate recipe costs here.

Nutrition

Serving: 1serving | Calories: 730kcal | Carbohydrates: 41g | Protein: 32g | Fat: 49g | Sodium: 2182mg | Fiber: 5g
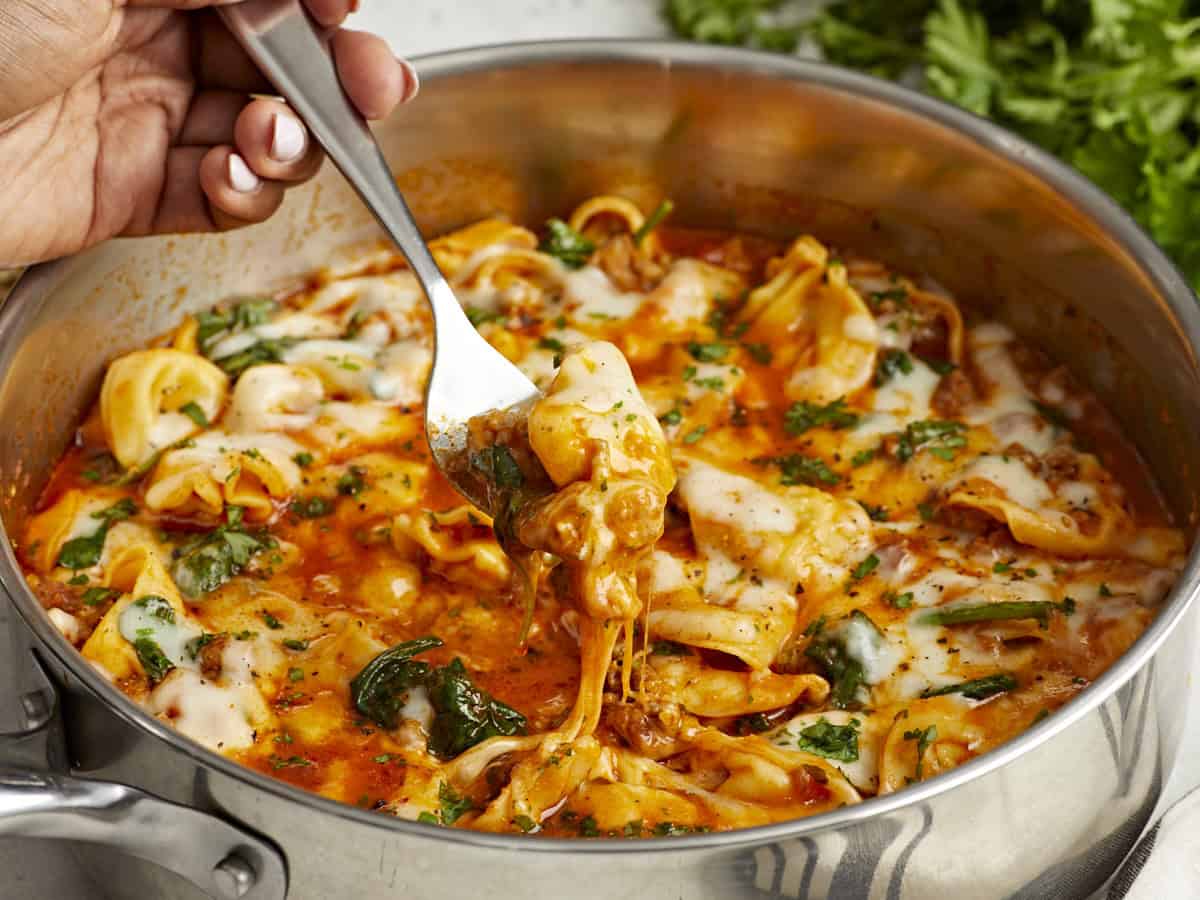
Side close up view of cheese tortellini and sausage skillet with a fork lifting some out.

How to Make Cheese Tortellini And Sausage Skillet – Step by Step Photos

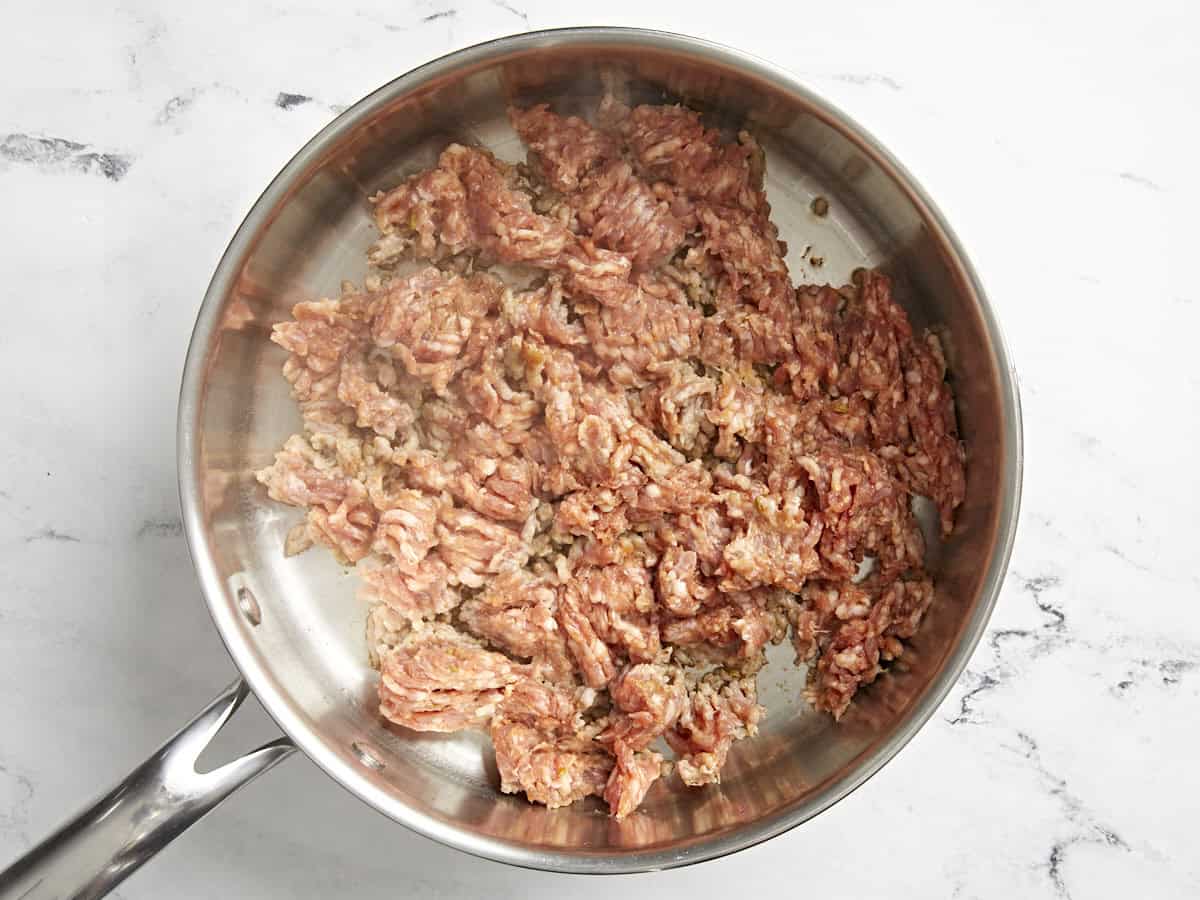
Italian sausage being cooked in a skillet.

Heat a large deep skillet over medium heat and add 1 Tbsp oil. Brown 1 lb. Italian sausage.

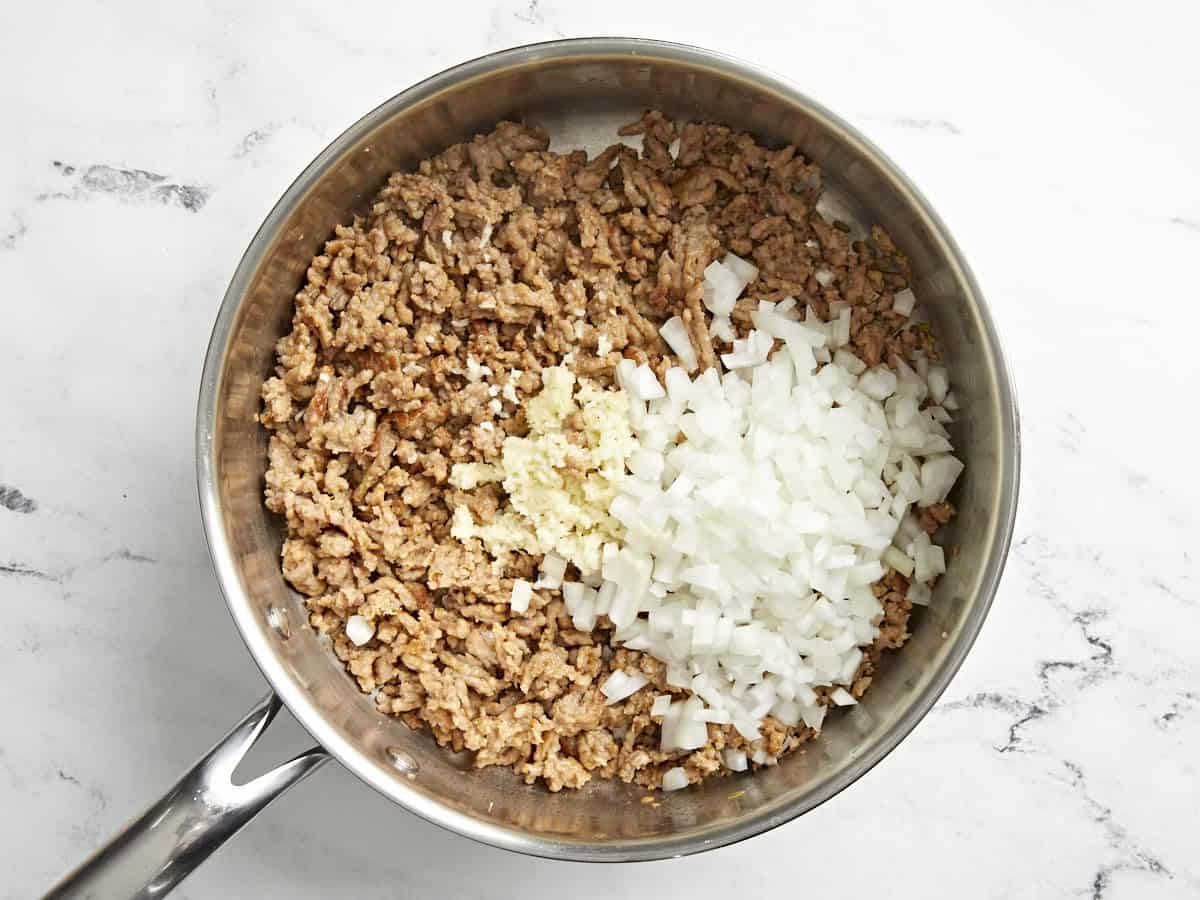
Onion and garlic added to sausage in a skillet.

Once the sausage has browned, add 1 diced yellow onion and 2 minced garlic to the skillet. Continue to sauté over medium heat until the onion is translucent and the garlic is fragrant.

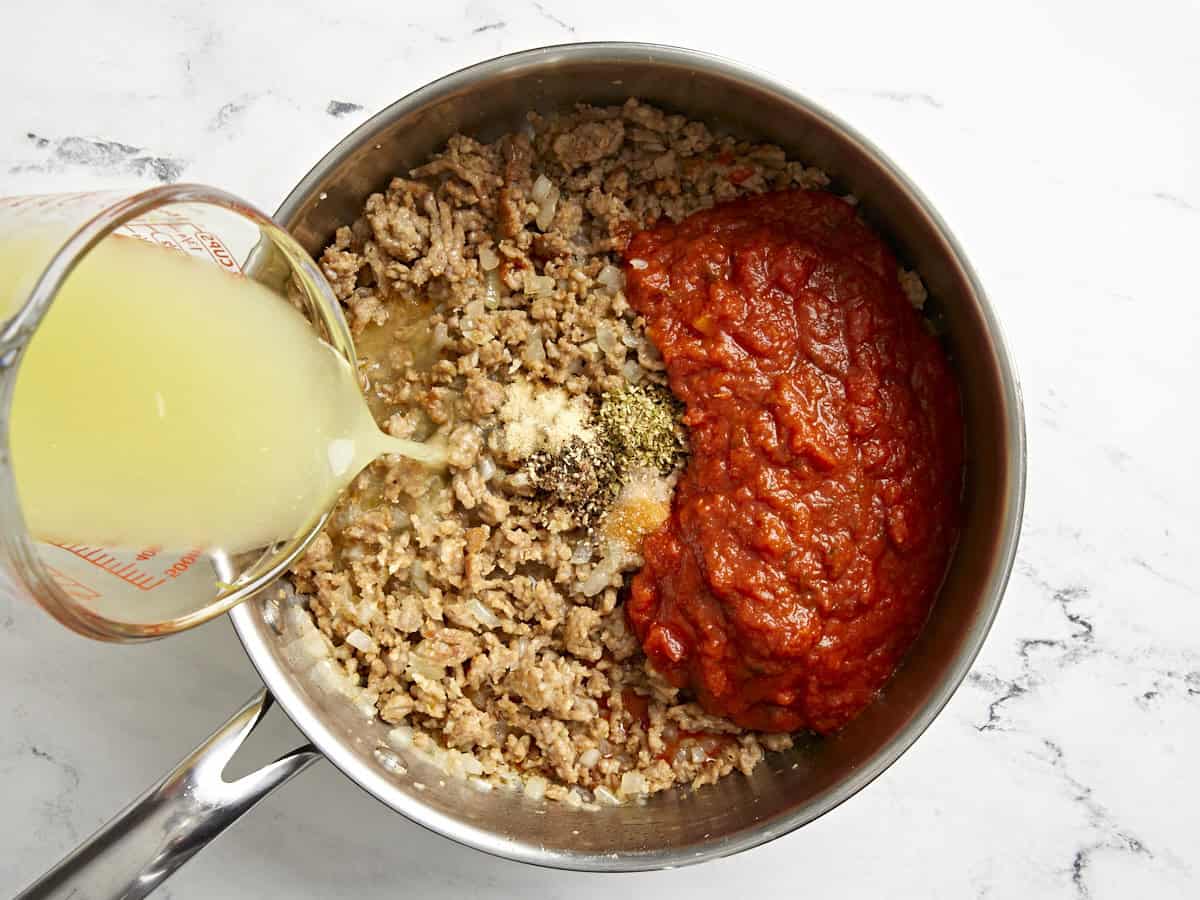
Marinara sauce, spices, and chicken broth added to a skillet.

Next add 1/2 tsp salt, 1/2 tsp garlic powder, 1/2 tsp dried oregano, 1/4 tsp freshly cracked black pepper, 1 1/2 cups marinara sauce, and 1 cup chicken broth to the skillet. Stir to combine.

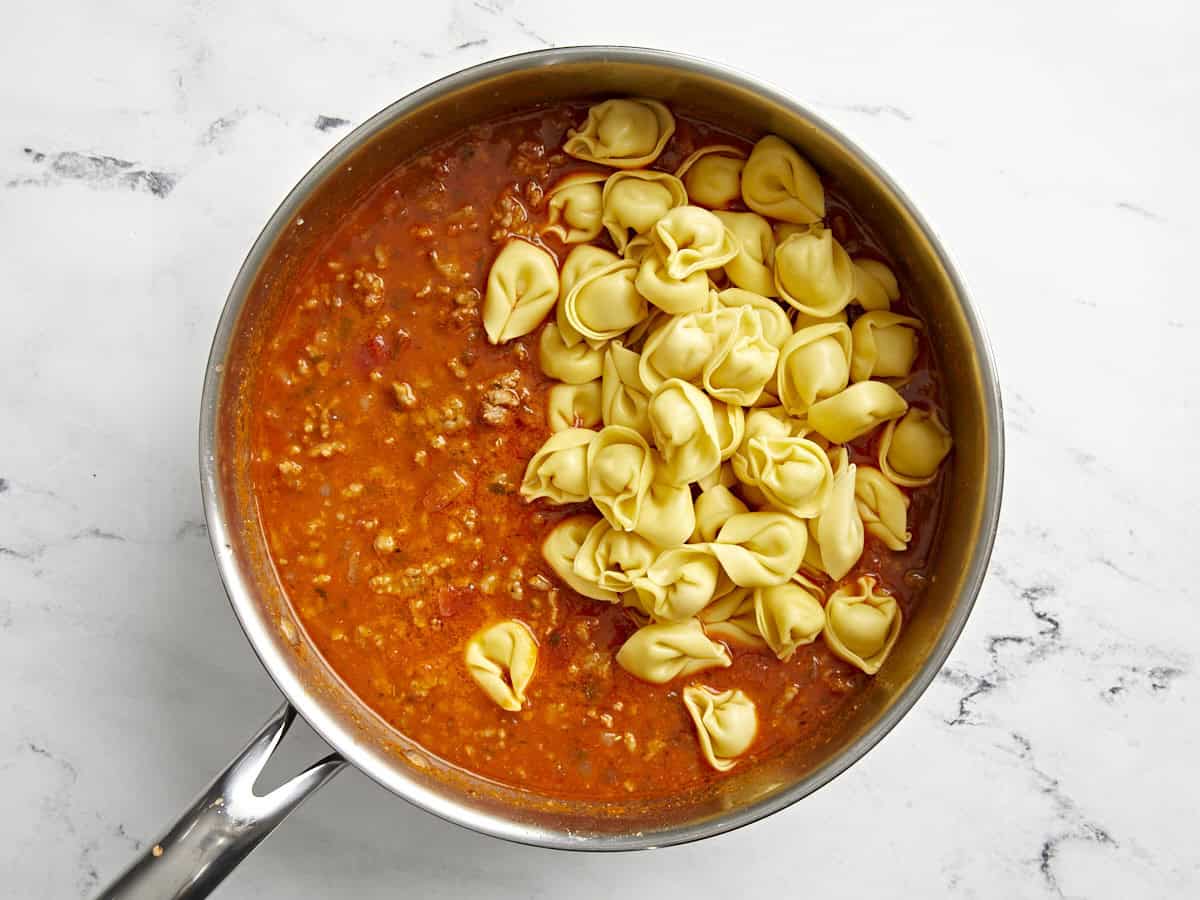
Cheese tortellini pasta added to sausage mixture in a skillet.

Bring the skillet up to a simmer and add 10 oz. refrigerated cheese tortellini. Stir the tortellini into the sauce and cook for 5-6 minutes until the tortellini is tender.

Spinach added to tortellini and sausage mixture in a skillet.

Add 2 cups spinach to the skillet and stir to combine, allowing the heat to wilt the spinach.

Mozzarella cheese added on top of tortellini and sausage skillet.

Now top the skillet with 1/2 cup shredded mozzarella cheese.

Cooked tortellini and sausage skillet.

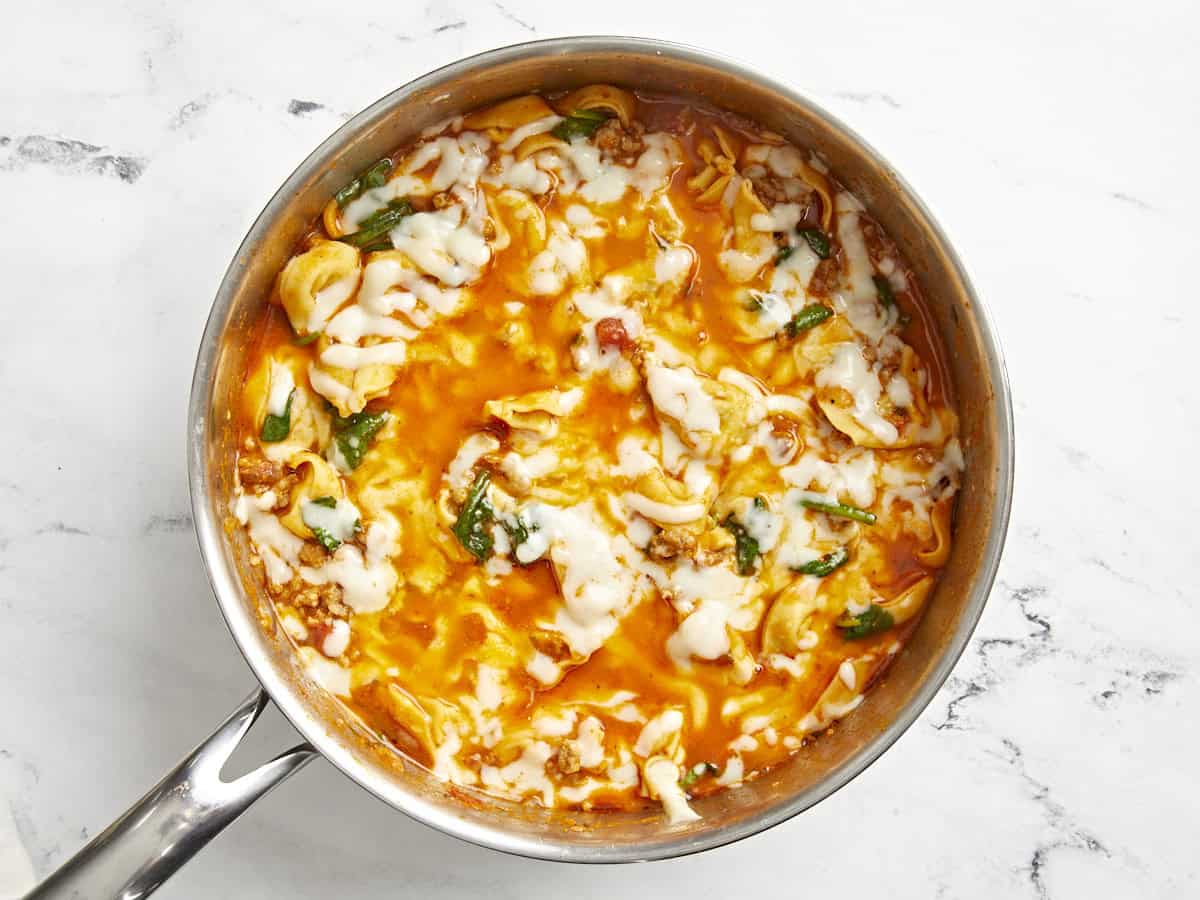
Allow the heat from the skillet to melt the cheese.

Overhead view of cheese tortellini and sausage on a plate with garlic bread, fork, and napkin on the side.

Serve hot with fresh garlic bread and some freshly cracked black pepper on top. Now get ready to enjoy a super hearty and delicious dinner meal!

The post Cheese Tortellini And Sausage Skillet appeared first on Budget Bytes.
Honey Garlic Chicken

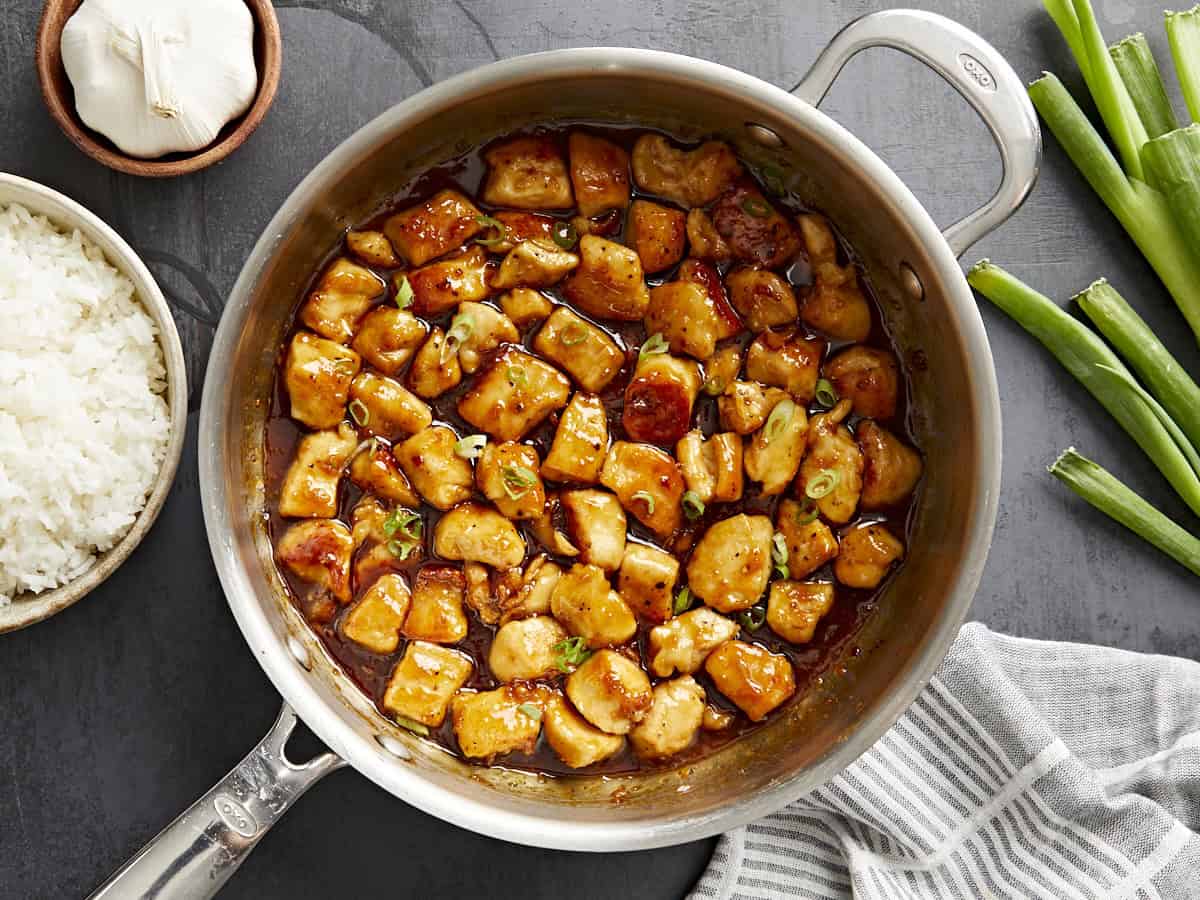
This saucy Honey Garlic Chicken is a quick & easy recipe with lots of chicken and an irresistible sweet & tangy honey garlic sauce.

The post Honey Garlic Chicken appeared first on Budget Bytes.
After a busy day I love being able to whip up a quick dinner meal like this Honey Garlic Chicken recipe. I almost always have all of the ingredients at home and saucy chicken recipes happen to be my family’s favorite! This dish includes lots of tender chicken that gets covered in a super delicious sweet & tangy honey garlic sauce. It’s simple enough to make for lunch or dinner, and is so good you might get a special request to make it every week!

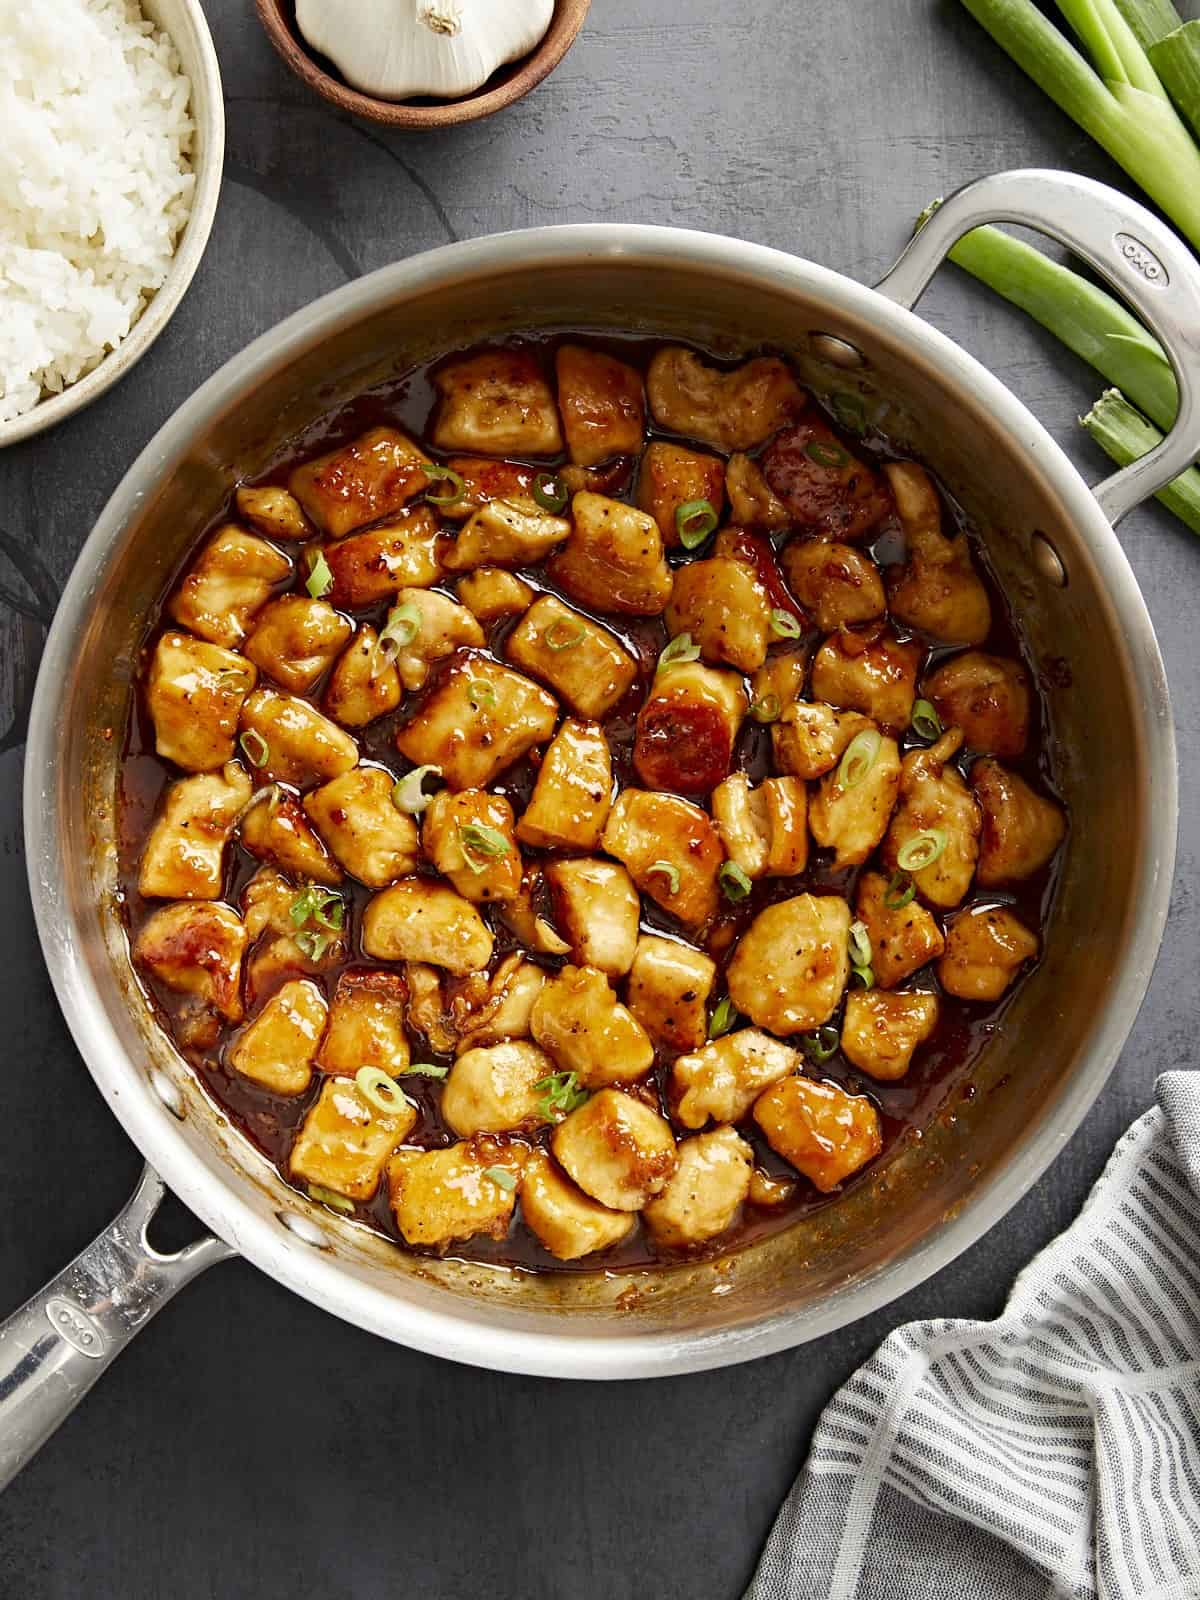
Overhead view of honey garlic chicken in a skillet.

Ingredients For Honey Garlic Chicken

It doesn’t take much to make this easy honey garlic chicken recipe. Here’s what you’ll need:

  • Chicken Breast: I used boneless, skinless chicken breasts for this recipe, but if your budget is tight, you can also use boneless, skinless chicken thighs instead.
  • All-Purpose Flour: A light coating of flour adds a little bit of texture to the chicken.
  • Butter and Garlic: A good amount of garlic is sautéed in butter which infuses the sauce with lots of garlicky flavor.
  • The Sauce: This yummy honey garlic sauce is what brings the entire dish together. It includes honey for sweetness, soy sauce for some umami flavor, rice vinegar to balance the sweetness of the honey, sriracha for a little kick, toasted sesame oil, and a little cornstarch to thicken the sauce.

Recipe Tips!

  1. Make the sauce first. This recipe cooks pretty fast, so you want the sauce to be ready when it’s time to add it to the skillet.
  2. Don’t overcook the chicken. Since the chicken is being cut into smaller bite-sized pieces, it won’t take them long to cook. 
  3. Don’t crowd the skillet. Cook the chicken in 2 separate batches if you need to.

Serving Suggestions

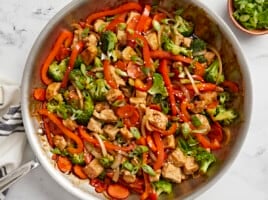
I served this honey garlic chicken with a side of white rice and some sliced green onions on top. But you can also enjoy it with brown rice, vegetable fried rice or even cauliflower rice. Sautéed green beans or a side of this sesame cucumber salad would also taste great!

Overhead view of honey garlic chicken on a plate with white rice and a black fork.
Print

Honey Garlic Chicken

This saucy Honey Garlic Chicken is a quick & easy recipe with lots of chicken and an irresistible sweet & tangy honey garlic sauce.
Course Dinner, Lunch
Cuisine American
Total Cost $9.58 recipe / $2.39 serving
Prep Time 10 minutes
Cook Time 18 minutes
Total Time 28 minutes
Servings 4
Calories 347kcal

Ingredients

Sauce

  • 1/3 cup honey $1.08
  • 2 Tbsp soy sauce $0.14
  • 1 Tbsp rice vinegar $0.10
  • 1 tsp sriracha $0.05
  • 2 tsp toasted sesame oil $0.20
  • 1 Tbsp cornstarch $0.05

Chicken

  • 2 boneless, skinless chicken breasts $6.49
  • 1 tsp salt $0.05
  • 1/2 tsp black pepper $0.02
  • 1/2 tsp garlic powder $0.05
  • 2 Tbsp all-purpose flour $0.04
  • 3 Tbsp olive oil $0.48
  • 2 Tbsp butter $0.27
  • 4 cloves of garlic, minced $0.32
  • 2 green onions, sliced $0.24

Instructions

  • Start by making the sauce. Combine the honey, soy sauce, rice vinegar, sriracha, toasted sesame oil, and cornstarch together in a small bowl. Set the sauce aside.
  • Cut the chicken breasts into small 1/2 inch sized pieces. Season with salt, black pepper and garlic powder. Then toss the chicken pieces in the flour until each piece is evenly coated.
  • Heat a large skillet over medium-high heat and add 2 Tbsp of oil. Swirl to coat the surface of the skillet. Once the skillet is hot, add half of the chicken and cook until browned on all sides and cooked through. Remove the chicken from the skillet onto a separate plate and set aside. Add the remaining 1 Tbsp of oil and repeat with cooking the 2nd batch of chicken until cooked through. Set all of the chicken aside.
  • In the same skillet add the butter and lower the heat down to medium-low heat. Add the minced garlic cloves and saute for 30-60 seconds until fragrant.
  • Next give the sauce another brief stir, then pour the sauce into the skillet with the garlic. Stir the sauce and scrape up any browned bits that are stuck at the bottom of the skillet. Let the sauce simmer for about 2 minutes to allow the cornstarch to activate and thicken the sauce.
  • Now add the cooked chicken back to the skillet and stir with the sauce until all of the pieces are evenly coated. Continue to cook for 1-2 more minutes to allow the chicken to heat through.
  • Remove the skillet from the heat, top with sliced green onions, and enjoy!

See how we calculate recipe costs here.

Nutrition

Serving: 1serving | Calories: 347kcal | Carbohydrates: 30g | Protein: 14g | Fat: 20g | Sodium: 1225mg | Fiber: 1g
Side close up view of honey garlic chicken in a skillet.

How to Make Honey Garlic Chicken – Step by Step Photos

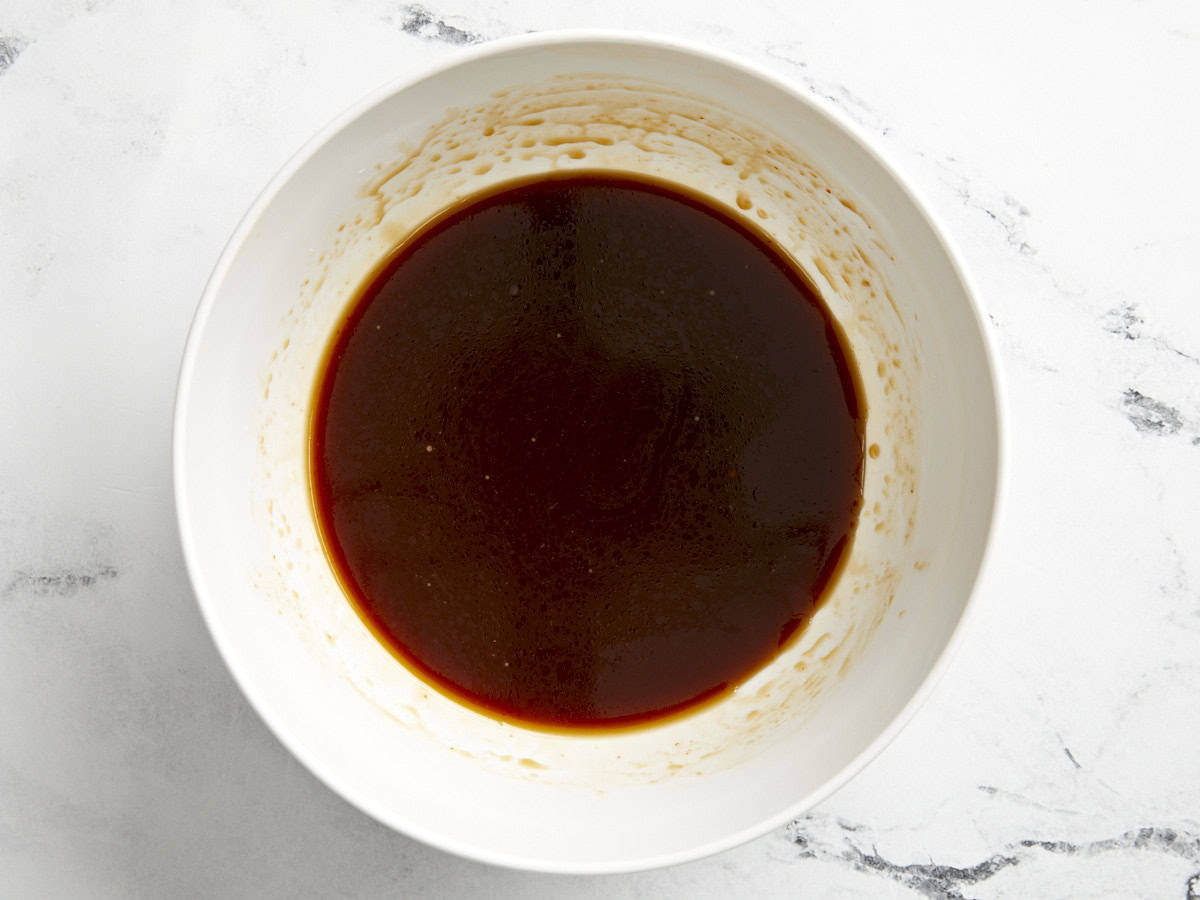
The sauce for honey garlic chicken.

Start by making the sauce. Combine the 1/3 cup honey, 2 Tbsp soy sauce, 1 Tbsp rice vinegar, 1 tsp sriracha, 2 tsp toasted sesame oil, and 1 Tbsp cornstarch together in a small bowl. Set the sauce aside.

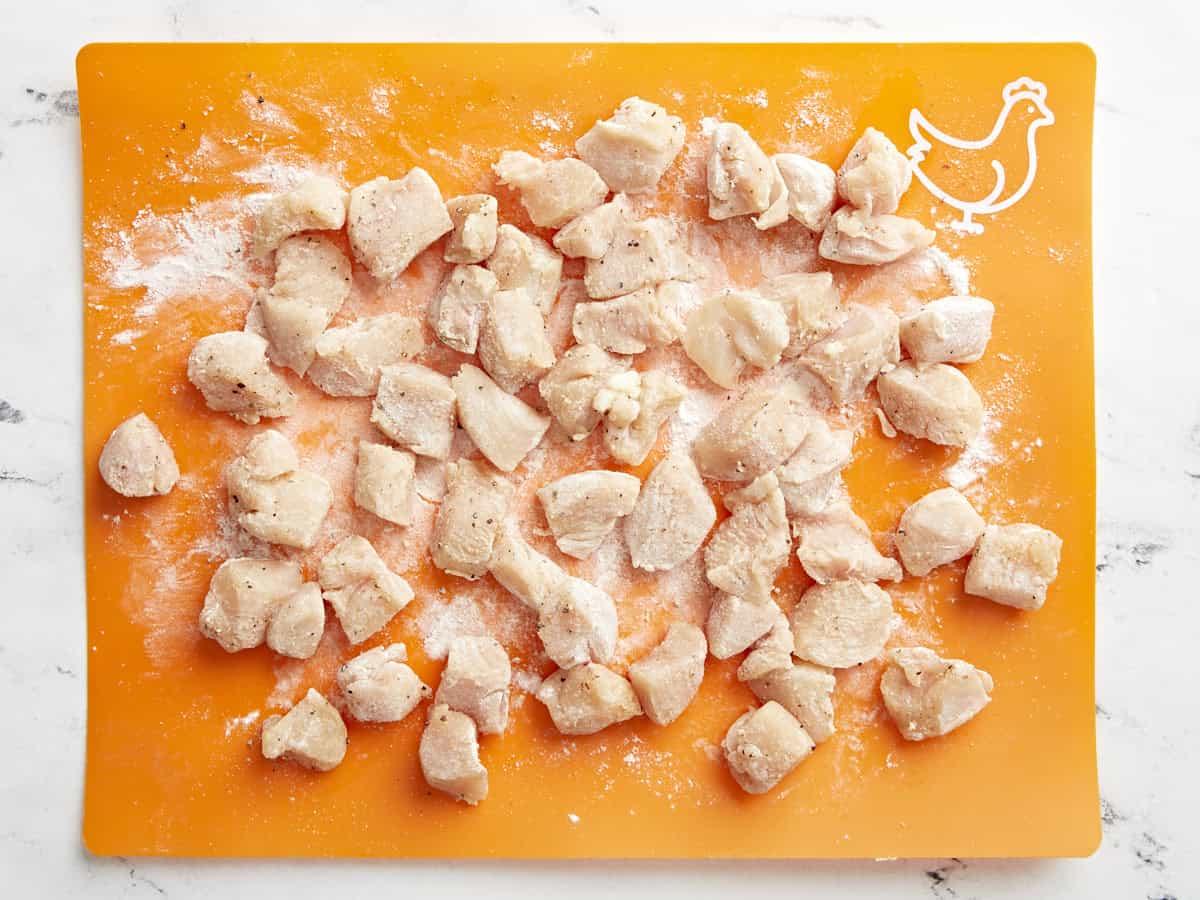
Chicken pieces lightly tossed in flour.

Cut 2 boneless, skinless chicken breasts into 1/2 inch sized pieces. Season with 1 tsp salt, 1/2 tsp black pepper and 1/2 tsp garlic powder. Then toss the chicken pieces in 2 Tbsp all-purpose flour until each piece is evenly coated.

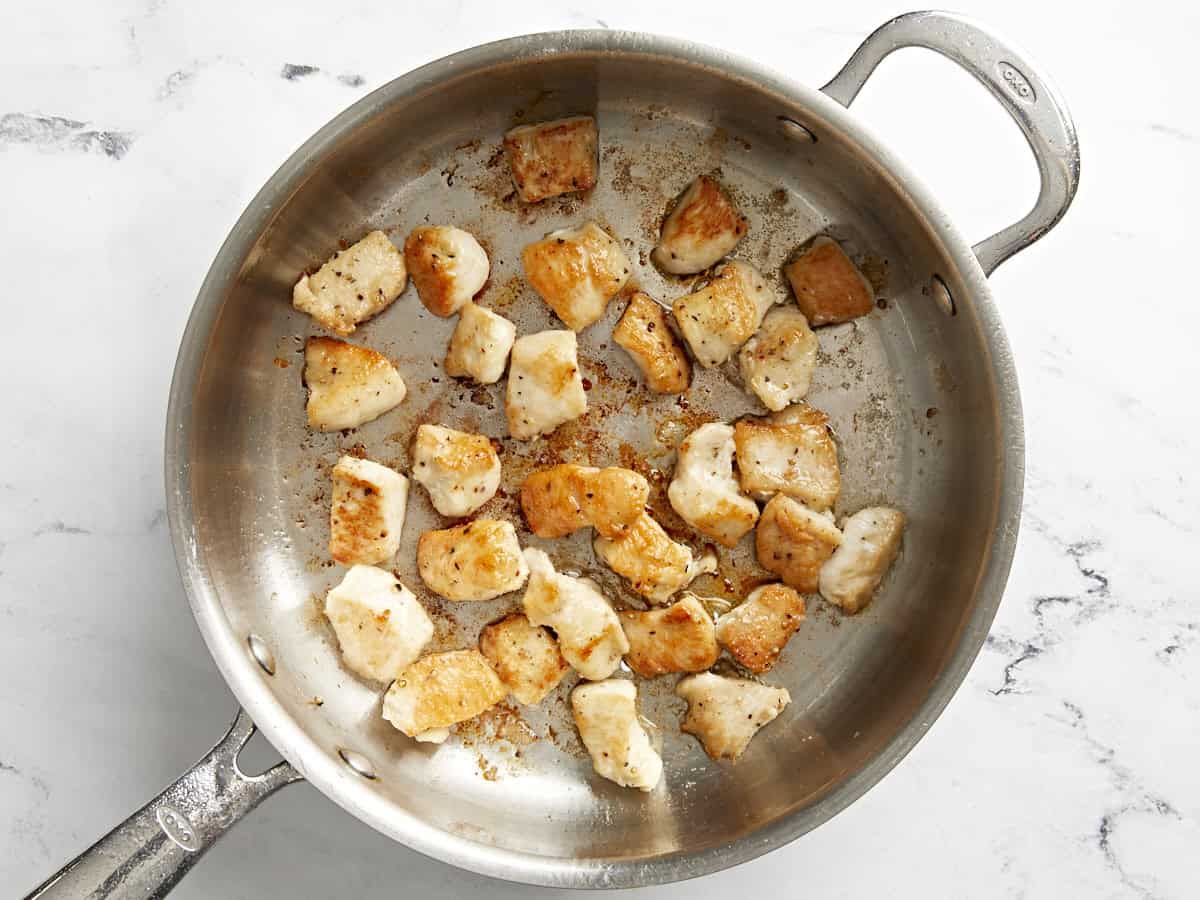
Cooked chicken pieces in a skillet.

Heat a large skillet over medium-high heat and add 2 Tbsp of oil. Swirl to coat the surface of the skillet. Once the skillet is hot, add half of the chicken and cook until browned on all sides and cooked through. Remove the chicken from the skillet onto a separate plate and set aside. Add the remaining 1 Tbsp of oil and repeat with cooking the 2nd batch of chicken until cooked through. Set all of the chicken aside.

Butter and garlic in a skillet

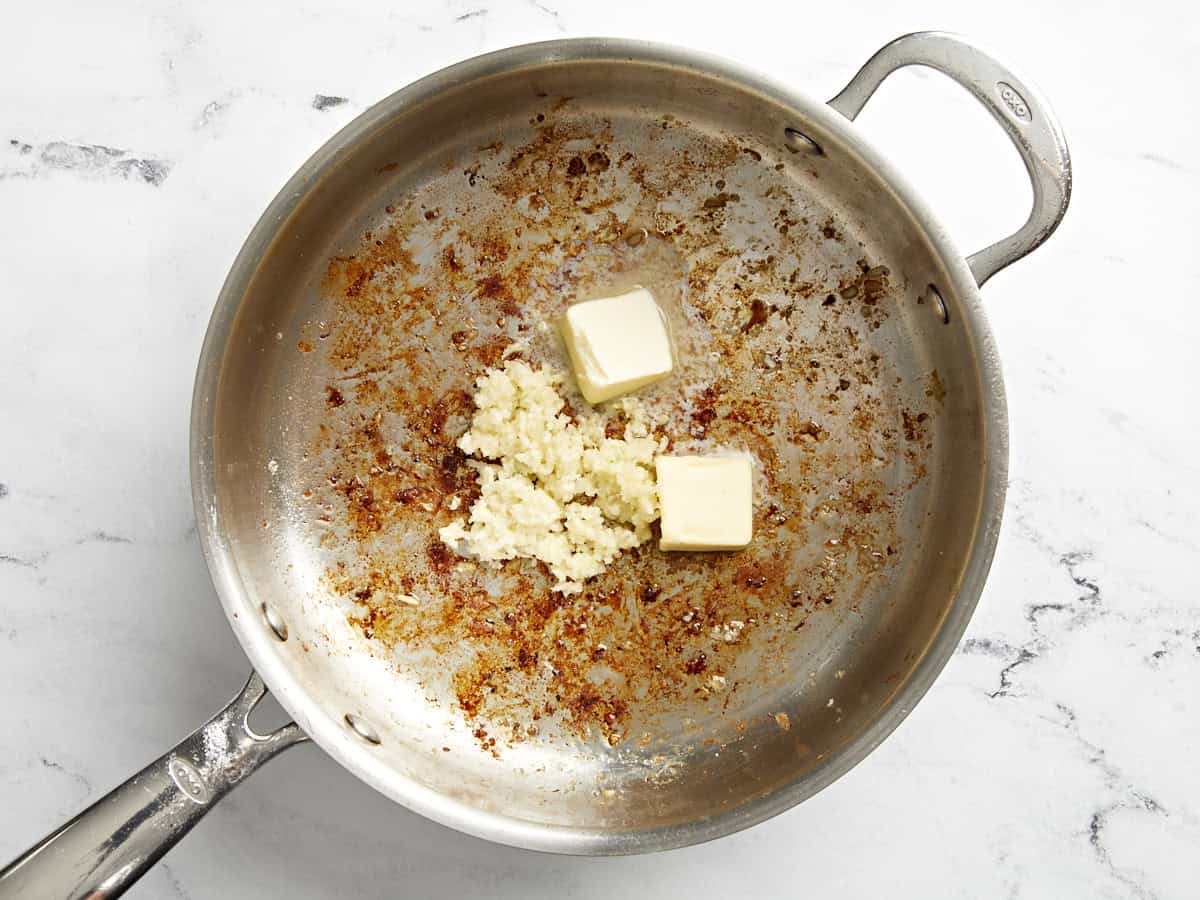
In the same skillet add 2 Tbsp of butter and lower the heat down to medium-low heat. Add four minced garlic cloves and sauté for 30-60 seconds until fragrant.

Honey garlic chicken sauce being added to skillet

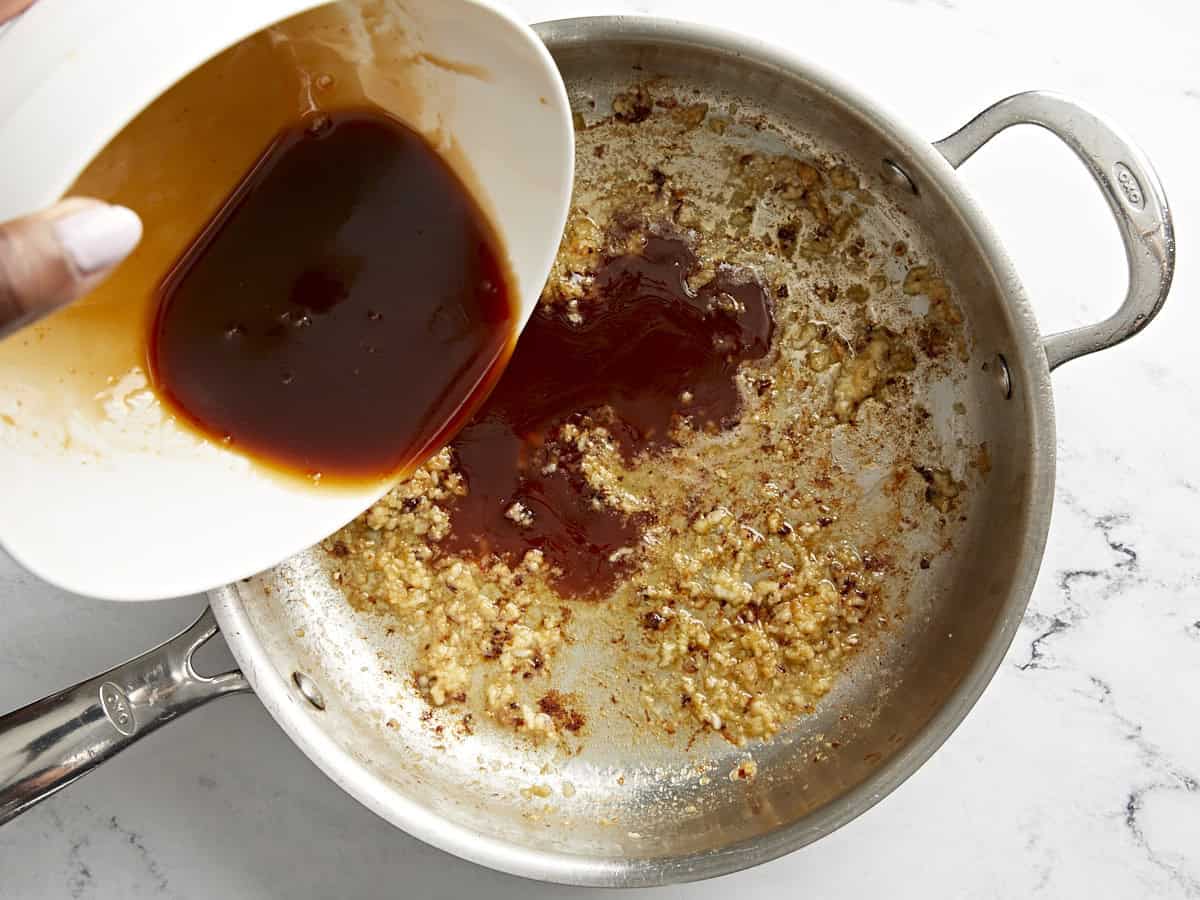
Next give the sauce another brief stir, then pour the sauce into the skillet with the garlic. Stir the sauce and scrape up any browned bits that are stuck at the bottom of the skillet.

Sauce reduced in a skillet.

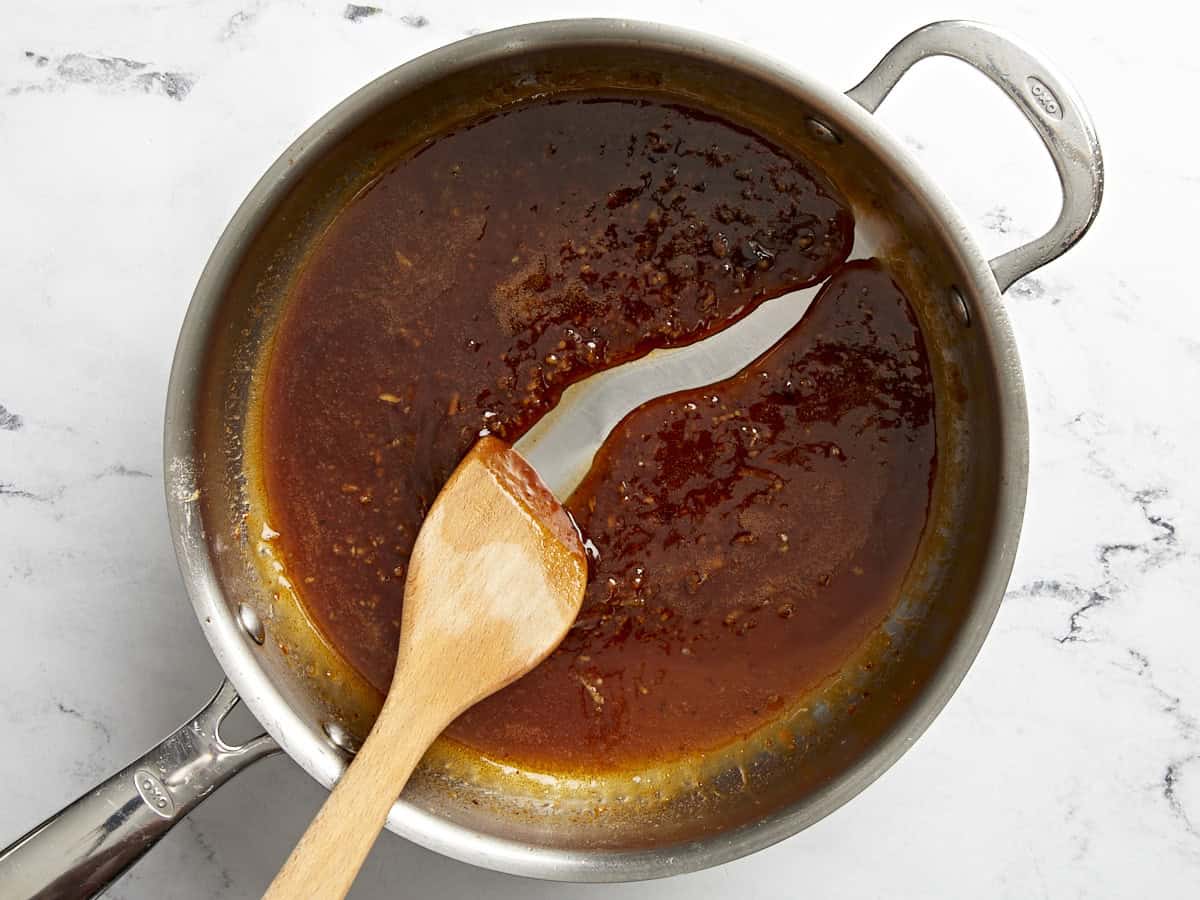
Let the sauce simmer for about 2 minutes to allow the cornstarch to activate and thicken the sauce.

Cooked chicken added to the sauce in the skillet.

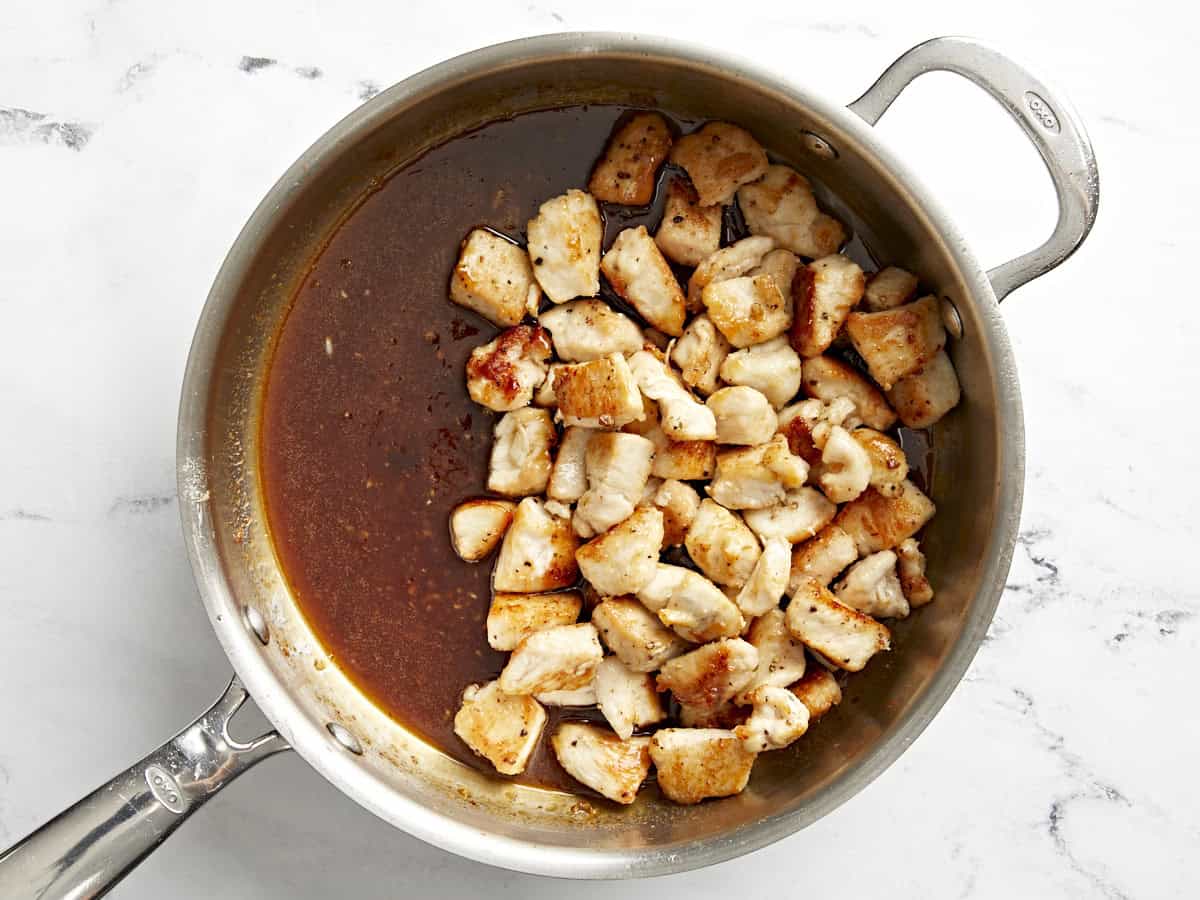
Now add the cooked chicken back to the skillet and stir with the honey garlic sauce until all of the pieces are evenly coated. Continue to cook for 1-2 more minutes to allow the chicken to heat through.

Overhead view of honey garlic chicken in a skillet.

Remove the skillet from the heat and top with sliced green onions. Enjoy with fluffy white or brown rice!

Overhead view of honey garlic chicken on a plate with white rice and a black fork.

The post Honey Garlic Chicken appeared first on Budget Bytes.
Frozen Yogurt

The frozen yogurt recipe you’re looking for. Easy, wonderfully tangy, not-too-sweet, creamy white cloud of perfect frozen yogurt deliciousness.

Continue reading Frozen Yogurt on 101 Cookbooks

When I first wrote about this frozen yogurt recipe in 2007, I started by saying, “Pinkberry Frozen Yogurt has nothing on the recipe in David Lebovitz’s cookbook The Perfect Scoop.” It was peak fro-yo era and in front of me was a book brimming with both wildly creative and classic ice cream flavors. While it might seem a bit peculiar to choose to go the frozen yogurt route over ice cream, Wayne loves yogurt. He had been traveling all week, I chipped the freezer burn off the ice cream maker and churned up the creamiest frozen yogurt for him to enjoy when he arrived home. You should absolutely make some too.
frozen yogurt

David’s simple, three ingredient recipe delivers a wonderfully tangy, not-too-sweet, creamy white cloud of perfect frozen deliciousness. And, believe me, as a California native, I know good fro-yo when I taste it. It is actually rare thing. You might be tempted to add sweet swirls, crushed fruit, or chocolate  chunks. For the first go-around, don’t. Restrain yourself. Use good yogurt and enjoy it straight the first time around. Decide on twists for the future.

Which Ice Cream Maker?

For a long time I used a little Krups Ice Cream Maker, one of the ones you leave in your freezer. It served me well for years, delivering batch after creamy batch. I eventually invested in a Breville Smart Scoop. David has ice cream maker recommendations on his site as well. Spoiler alert,  he also has a Smart Scoop but also highlights others at a range of price points.
frozen yogurt

Frozen Yogurt Variations:

  • Plain Whole-Milk Yogurt: David noted in the comments below, “I’m glad many of you’ve been enjoying the frozen yogurt and thanks to Heidi for sharing the recipe. To those of you who’ve asked about reducing the fat in the recipe, I often make this with plain whole-milk yogurt which I don’t strain. Simply substitute equal quantities: 1 cup whole-milk yogurt per 1 cup strained yogurt. In the book, I give instructions for making frozen yogurts both ways with plenty of fresh-fruit variations, including strawberry, peach, cherry, and berry. The version Heidi made has a nice tangy yogurt flavor and is creamier than one made with unstrained yogurt. Low-fat yogurt can be used but the frozen yogurt will have a relatively firm texture once it’s deep-chilled in your freezer. Happy churning!”
  • Almond Saffron: Infuse a pinch of saffron into a couple teaspoons of almond extract for an almond-saffron twist.
  • With Granola: This frozen yogurt is really great topped with this crunch Peanut Butter Granola

More Sorbet and Ice Cream Recipes

Continue reading Frozen Yogurt on 101 Cookbooks

How to Make a Great Vegetarian Poke Bowl

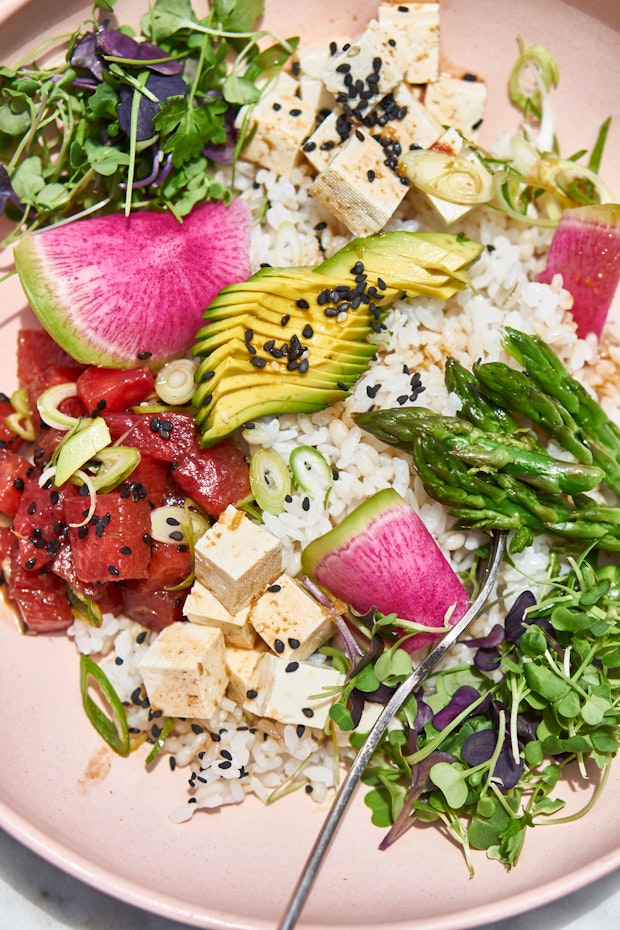
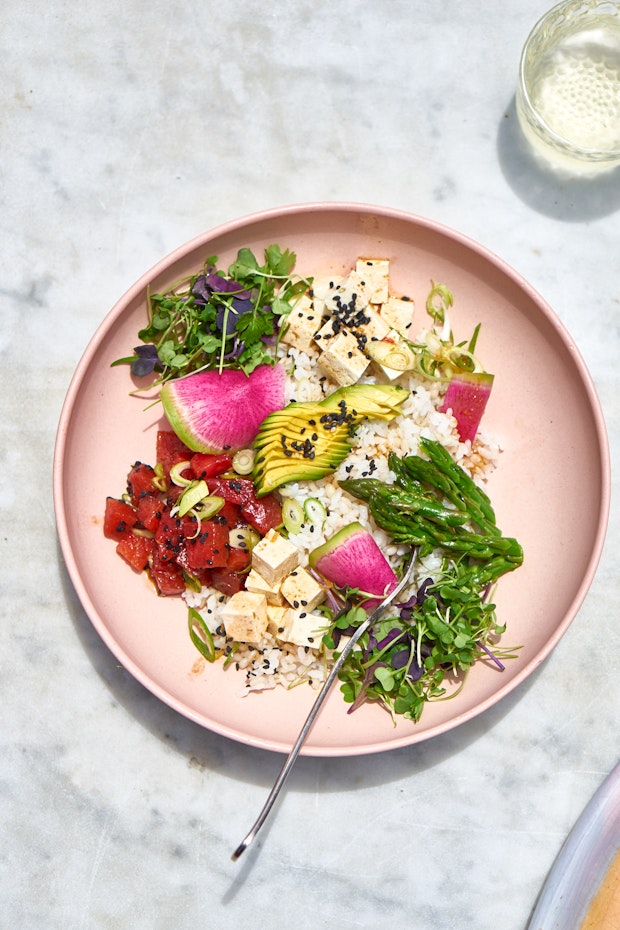
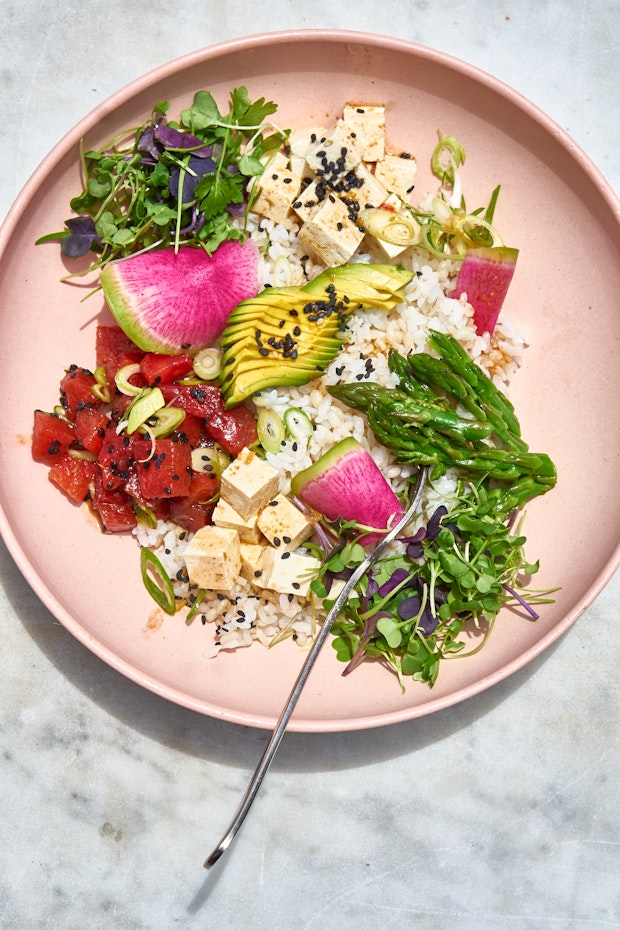
Let’s make a vegetarian poke bowl! They’re fantastic this time of year because they’re light, clean, filling but not heavy. Made with watermelon poke.

Continue reading How to Make a Great Vegetarian Poke Bowl on 101 Cookbooks

Let’s talk about how to make a great vegetarian poke bowl. Poke is a much-loved, traditional, raw fish preparation, long popular in Hawaii. Fishermen would season bits of their catch, and snack on it while working. Poke (pronounced poh-kay) has exploded in popularity, well beyond Hawaii, in recent years. The version I’m posting today is for any of you who love the idea of poke or poke bowls, but don’t eat fish for whatever reason. Vegetarian poke bowls are particularly fantastic this time of year because they’re light, clean, filling but not heavy, you know?

How to Make a Great Vegetarian Poke Bowl

Vegetarian Poke Bowl: The Components

I typically use a watermelon poke, a version of this sushi rice (but any favorite sushi rice / blend will do), and a host of other vibrant toppings. Here you see firm, organic tofu, sliced avocado, blanched asparagus, shaved watermelon radish, and micro sprouts. If you have guacamole on hand, use a dollop of that! The bowl is drizzled, simply, with good soy sauce. And there’s a sprinkling of sesame seeds and scallions. The other topping I really crave, not pictured here, is a showering of crispy, fried shallots. 

How to Make a Great Vegetarian Poke Bowl

Seasonal Variations

When it comes to toppings, what you see here is just a jumping off point. And I encourage you to play around with all the components. For example, you might trade in roasted squash cubes for the watermelon later in the year. Or, perhaps, a different melon varietal. And you could do roasted onions in place of scallions. Or, play around with the drizzle on top. For a quick poke bowl, I just do a soy sauce drizzle, but you could whip up something more complex. Have fun with it!

How to Make a Great Vegetarian Poke Bowl
Although, it can be argued, a vegetarian poke bowl isn’t a real poke bowl, it’s a great meal just the same. Keep your eyes peeled for other inspiration as well. I love seeing the creative vegetarian versions on menus at poke spots all over. Lots of ideas there that you might replicate in your own kitchens!

More Vegetarian Recipes

Continue reading How to Make a Great Vegetarian Poke Bowl on 101 Cookbooks