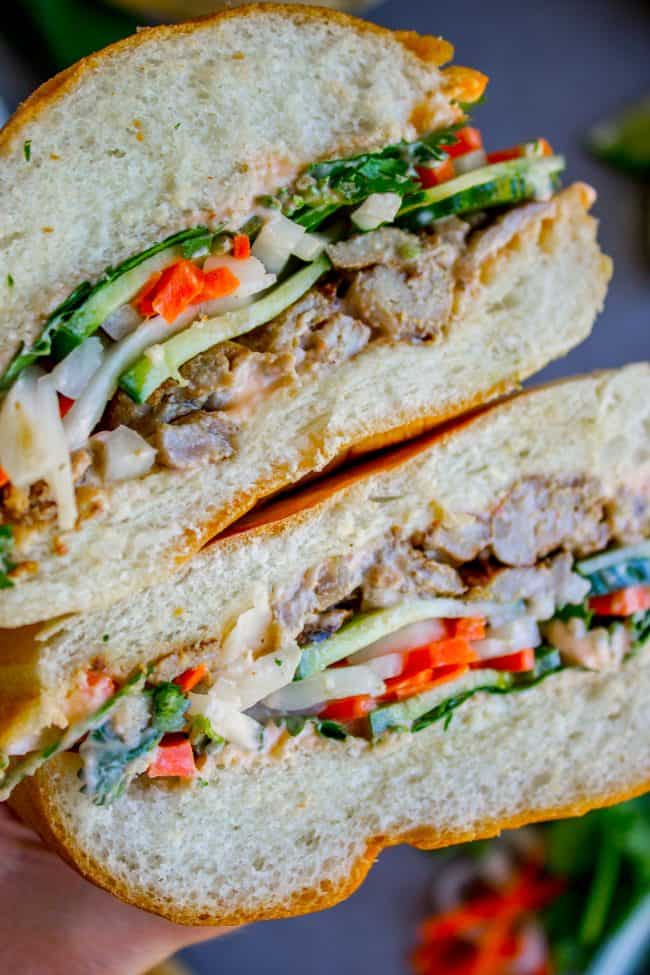
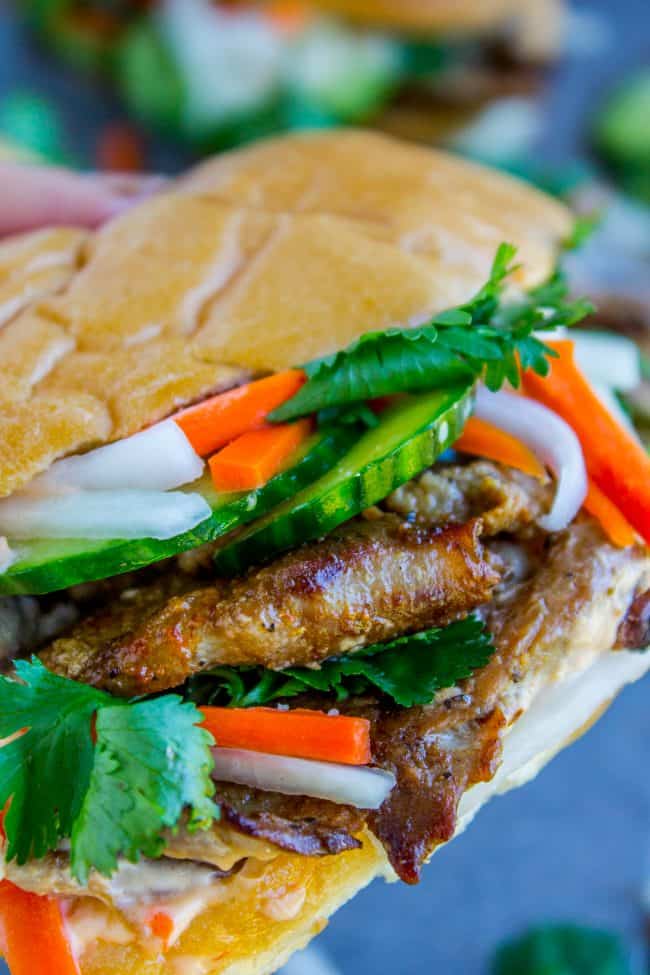
Beef and Broccoli

Beef and Broccoli can be so hit and miss, right? Sometimes it’s transcendent, other times it’s gloopy and chewy. I’ve figured out the secrets! If you’re a Chinese food lover, make this easy homemade Beef and Broccoli recipe for a healthy dinner that’s faster (and cheaper) than takeout. A few Asian pantry staples are all…

Beef and Broccoli can be so hit and miss, right? Sometimes it’s transcendent, other times it’s gloopy and chewy. I’ve figured out the secrets! If you’re a Chinese food lover, make this easy homemade Beef and Broccoli recipe for a healthy dinner that’s faster (and cheaper) than takeout. A few Asian pantry staples are all you need to make this stir fry that is seriously SO GOOD. Healthy (check) one-pan meal (check) done in less than an hour (check!) Make it with 20 minute Rice or Cauliflower Rice!
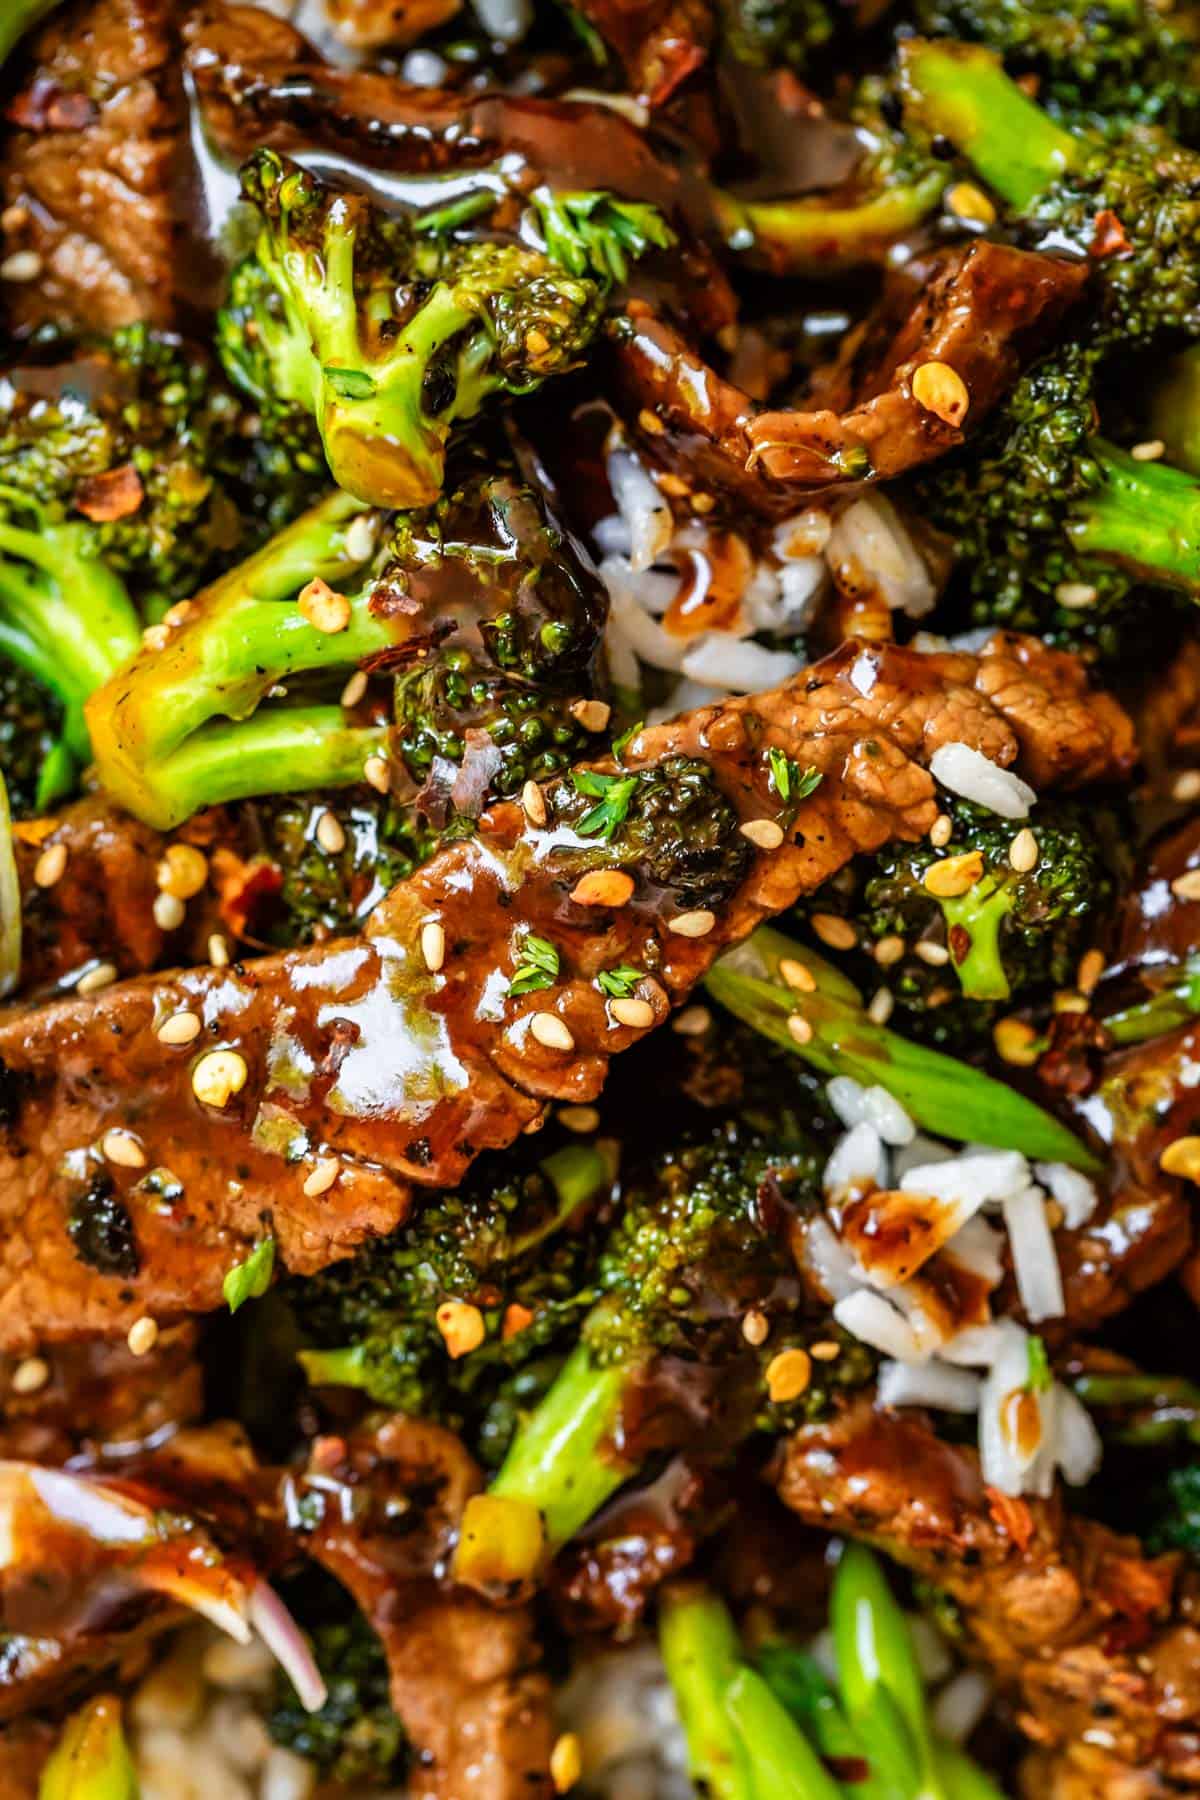
Close up of Chinese food beef and broccoli, with sauce and sesame seeds and rice.
Table of Contents
  1. Beef and broccoli stir fry
  2. Beef and broccoli recipe ingredients
  3. How to make beef and broccoli
  4. What to serve with beef broccoli stir fry
  5. How to store beef and broccoli
  6. Can you freeze beef and broccoli?
  7. Beef and broccoli frequently asked questions
  8. Easy beef recipes
  9. Beef and Broccoli Recipe

I went out of state to visit my brother last weekend, who just bought a meth house. Kidding! Kind of. He was halfway through the purchase when he randomly (or maybe inspired!) thought to pay extra for a meth inspection and it came back positive. Gah!!

It’s all cleaned out now. The previous owners took care of decontamination (a tenant was the culprit.) The house was condemned by the state right away after the test came back. I was worried they would raze it to the ground! I’m so glad they were able to get it scrubbed, because the house is so cool!
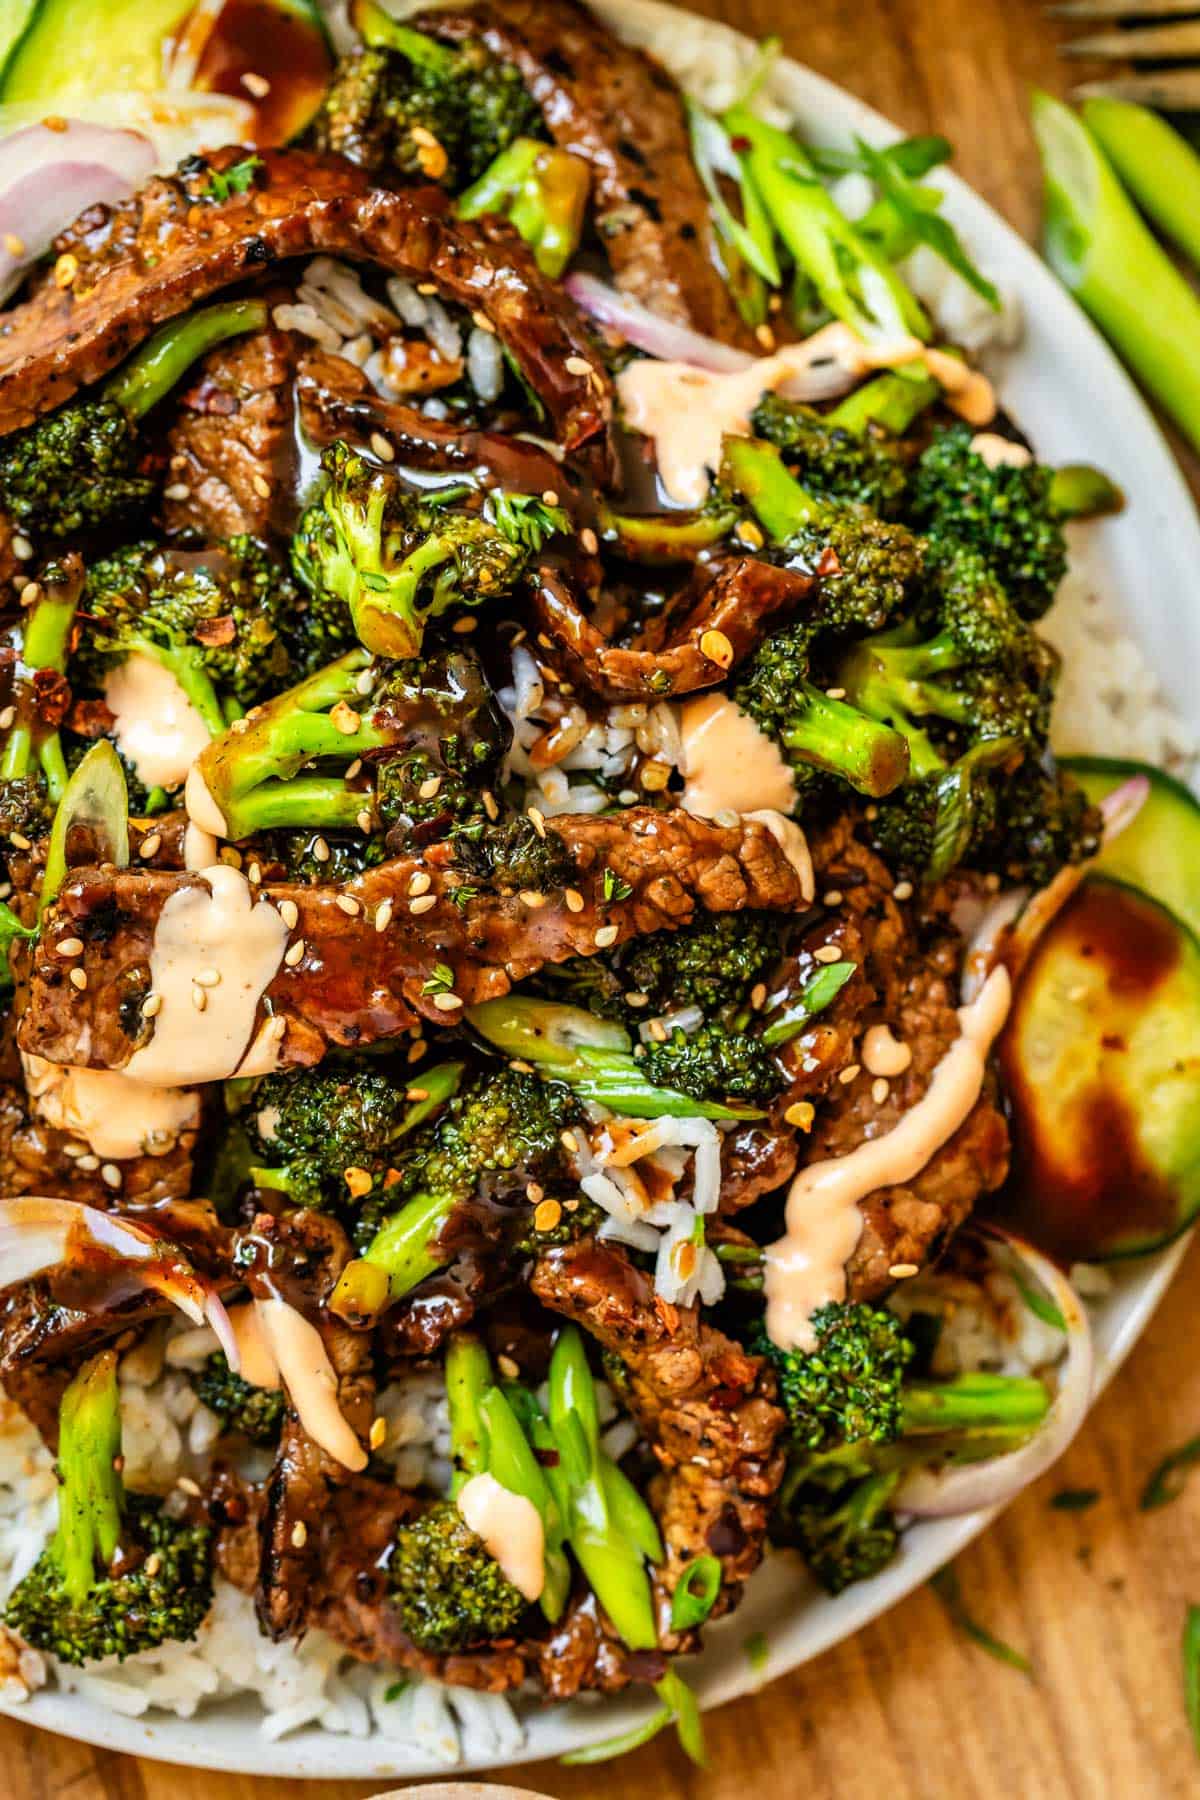
plate of beef strips with sauce and broccoli and cucumbers.

It was built in 1923, and is sooo beautiful. One hundred year old houses have such a vibe, but they are a lot of work. We spent the weekend deep cleaning his kitchen cupboards and rummaging local antique shops for furniture that will fit the energy of a 1920s bungalow.

It was such a nice change of pace! It’s always so much more fun to clean someone else’s house than to clean your own, you know?? Why is that? If I had half that amount of energy for organizing my own house, we would be eating off the floor over here.

But alas, my 4 children conspire against me daily. Just yesterday I found a baggie of goldfish smashed all over the carpet upstairs, exactly 30 seconds before I had to be in a zoom meeting. You better believe I just left that nonsense right there. Hi, welcome to my house, would you like to clean it? Because I REFUSE.
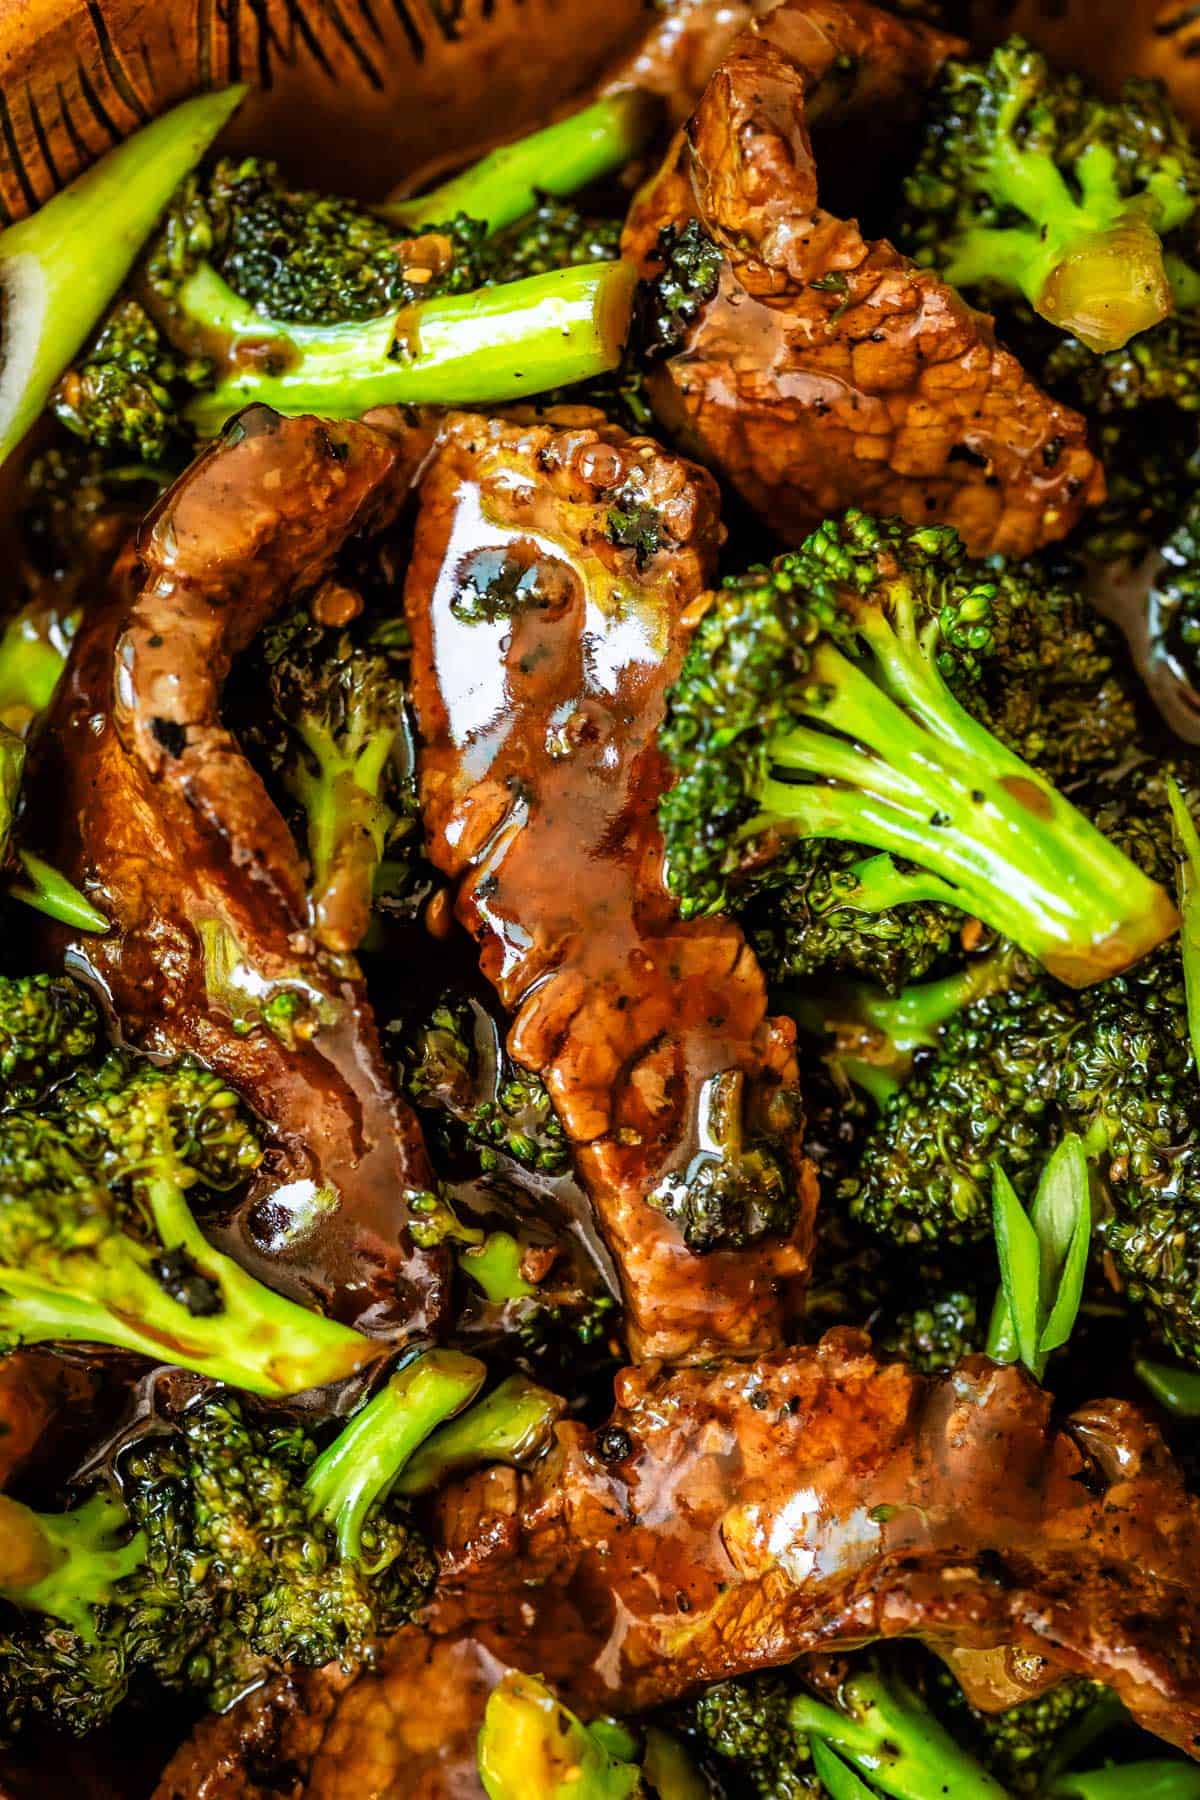
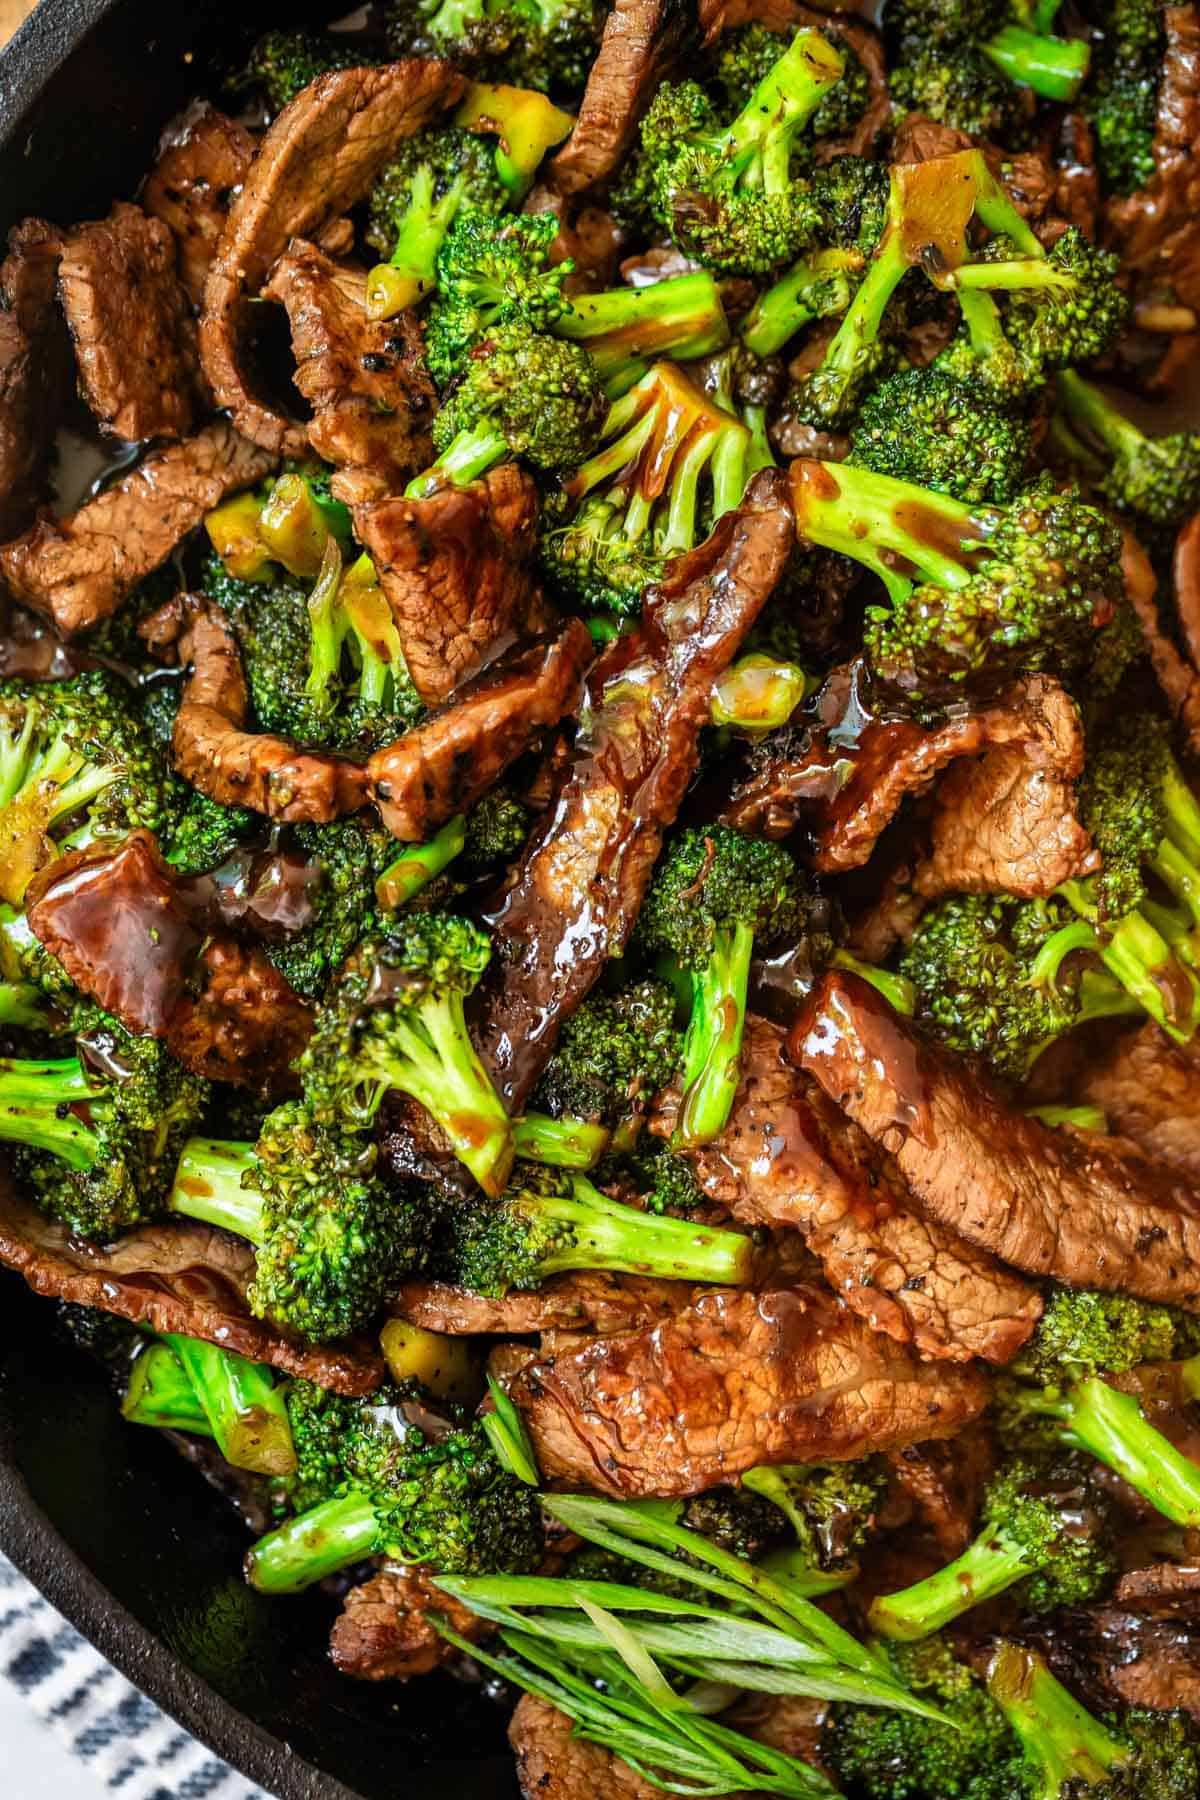
saucy beef strips and broccoli florets close up

Beef and broccoli stir fry

I’m so excited to tell you about today’s recipe for Beef and Broccoli, and how it blows away any takeout Chinese I’ve ever had.

Honestly guys, I’ve never been a huge Beef and Broccoli fan. I love beef, and I love broccoli, so what’s my deal?? Turns out it’s the sauce I wasn’t in love with, which can sometimes be overwhelmingly sweet, cloyingly thick, or overly…fishy?
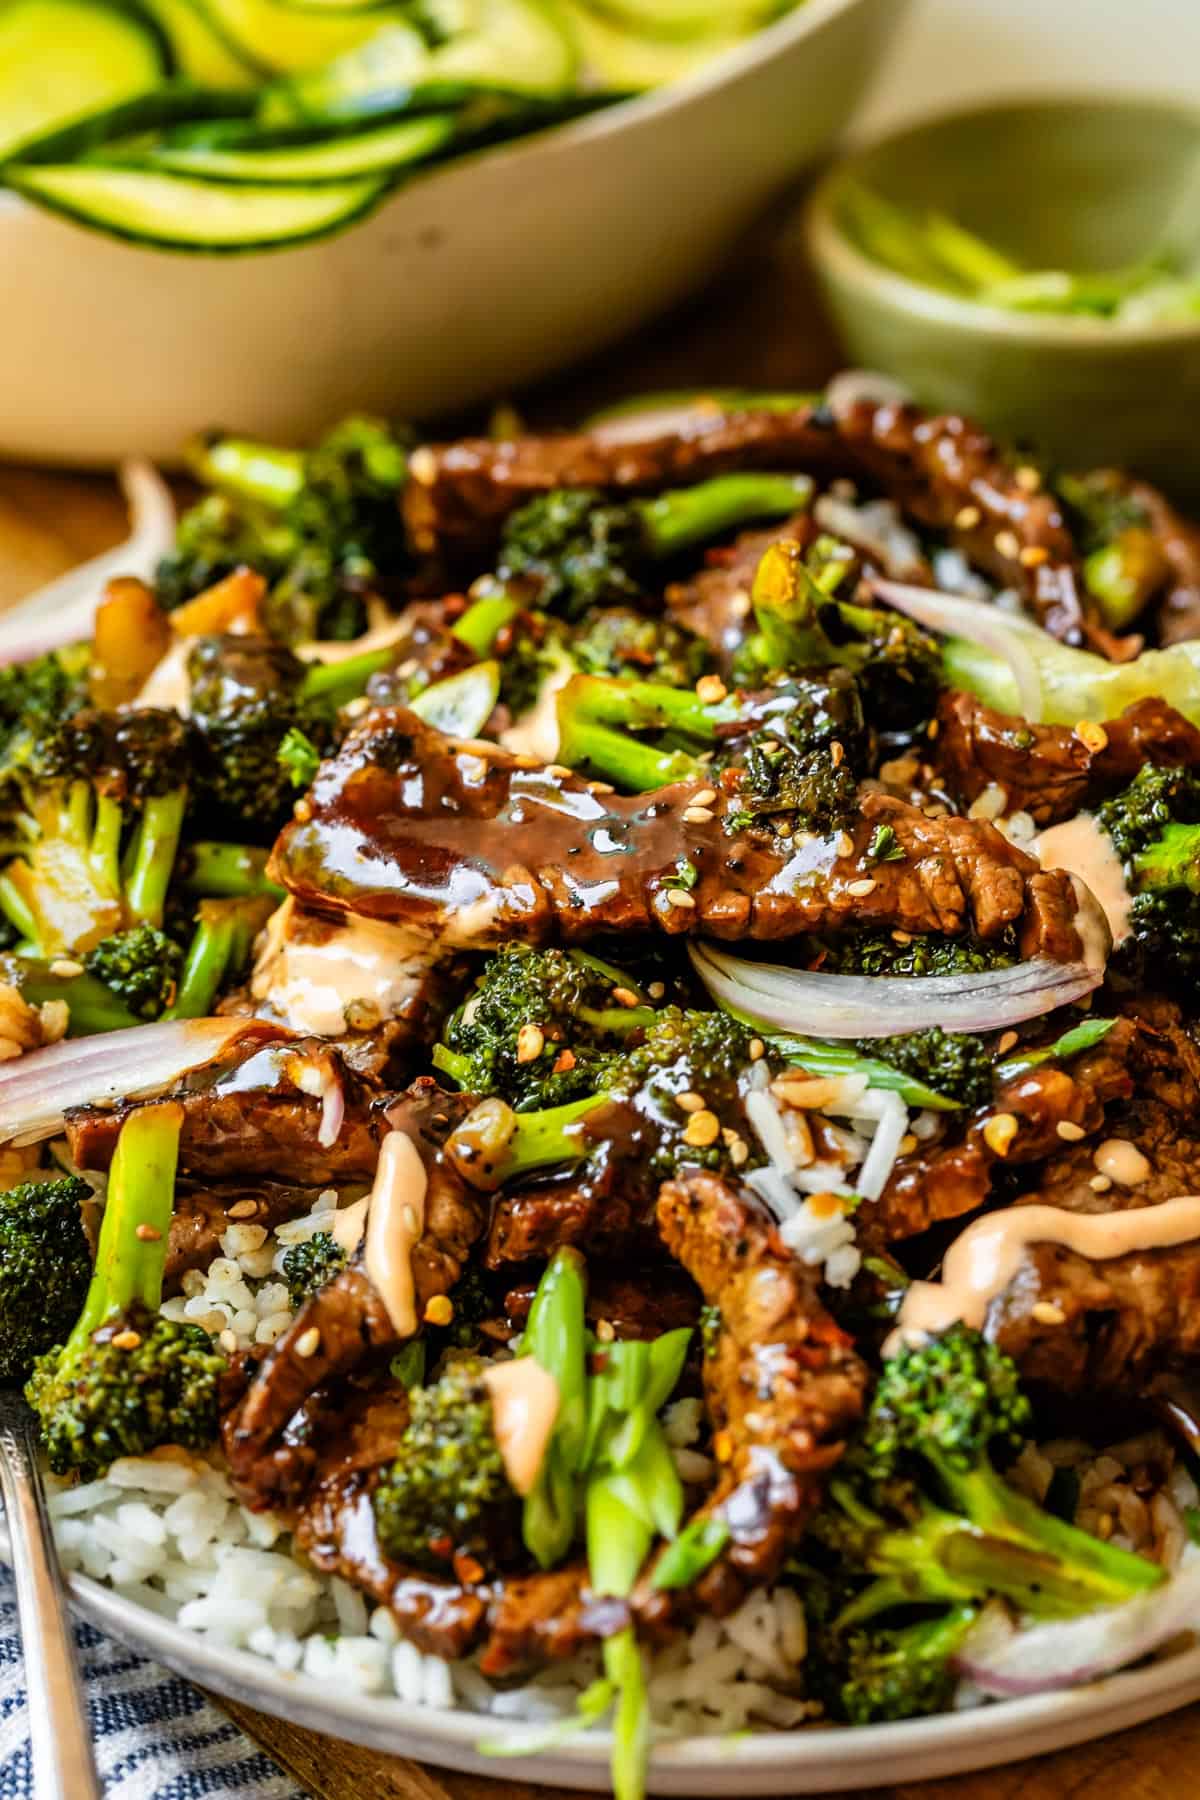
side angle shot of beef with broccoli on a plate with rice.

My BFF Sarah helps me with recipe development, and she discovered in testing that it’s the high amount of Oyster Sauce I find a little overwhelming when it comes to some recipes for Beef and Broccoli.

Oyster sauce is pretty magical stuff, and an absolutely essential ingredient for classic Beef and Broccoli. It adds amazing umami flavor, so I didn’t want to leave it out. I love this article all about Oyster Sauce, and reading about how it was made accidentally back in 1888 when someone left Oyster soup on to cook for too long 😂 .

It’s a very concentrated sauce that really amps up the flavor of Beef and Broccoli, I just wanted it to be less of a highlight and more of an accent, if that makes sense. Sarah adjusted the final recipe to have a little less Oyster sauce, and I was absolutely astonished by how much I loved it the next time I made it. The final dish is well balanced; not too sweet, not too salty, but just a perfect blend of rich flavors that is so uniquely Chinese, you will feel like you’re sitting in the restaurant. (Where are my fortune cookies??)

Beef and broccoli recipe ingredients

Is your pantry stocked for Asian cooking? If not, you will need to visit the Asian aisle at your grocery store, but won’t need to make a special trip to an international store. This is an overview, the recipe is at the bottom of the post!
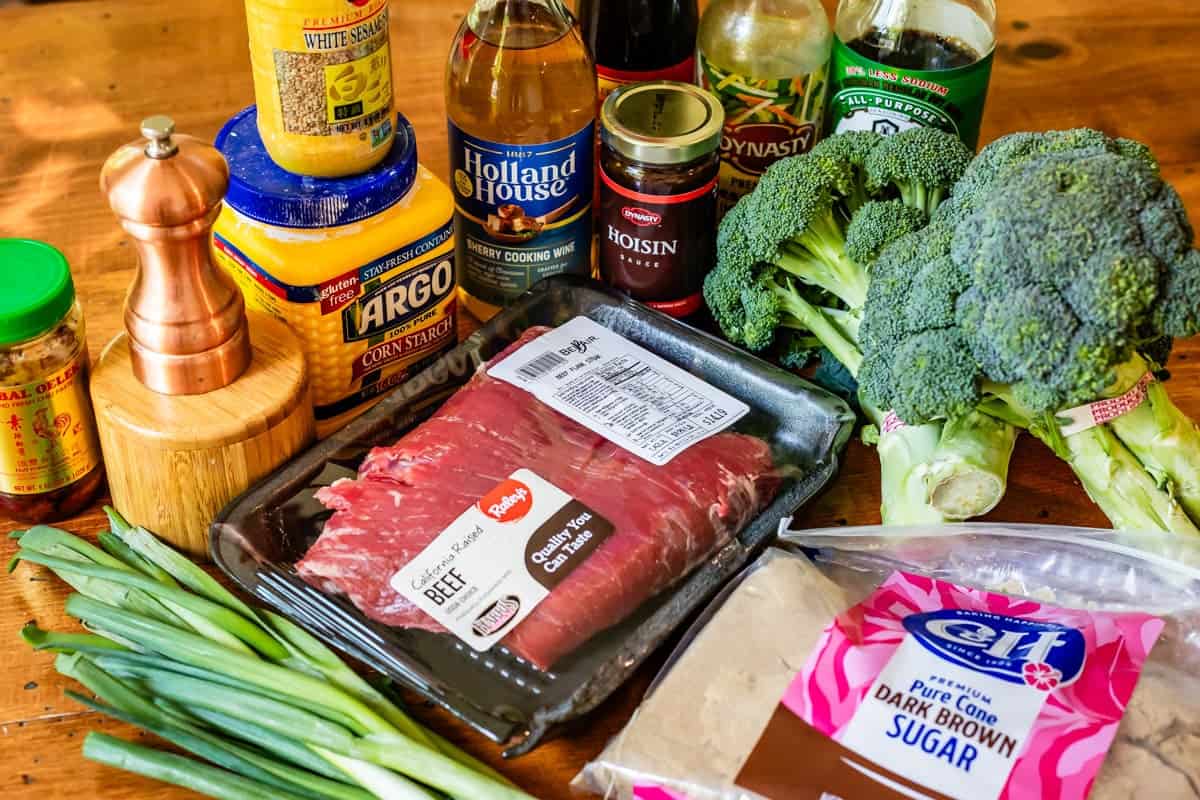
ingredients laid out on a table, including flank steak, brown sugar, broccoli, hoison sauce, salt, sherry wine.
  • 1 pound beef (flank steak, skirt steak, flat iron steak, or ribeye if you’re really treating yourself!)
  • fresh broccoli
  • Shaoxing wine (or sherry cooking wine)
  • low-sodium soy sauce
  • oil
  • oyster sauce
  • hoisin sauce
  • chili paste (like sambal oelek)
  • brown sugar
  • sesame oil
  • cornstarch
  • rice, for serving

How to make beef and broccoli

First things first: pop your beef in the freezer for a few minutes so it gets partially frozen on the edges. This makes it 1000x easier to slice it as thin as we need it for this recipe.

Then we are breaking the cardinal rule of meat butchering: we’re going to slice this baby WITH THE GRAIN. Just once, like this.
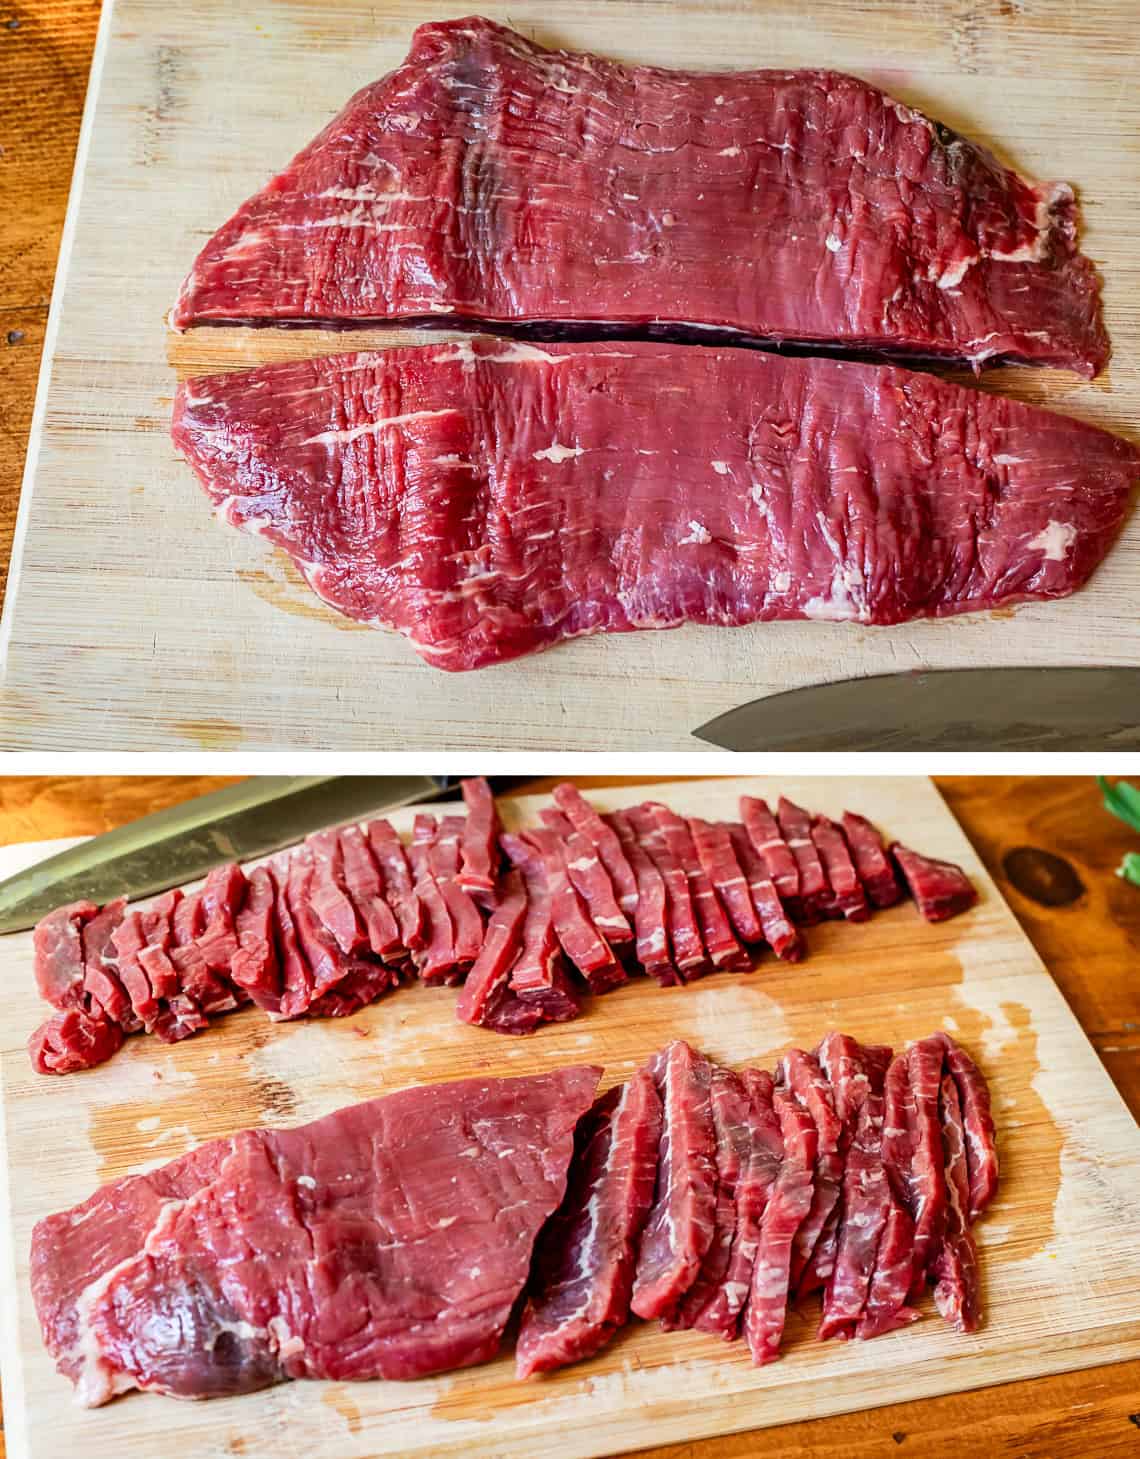
flank steak sliced in half with the grain, then sliced into strips against the grain.

THEN we slice against the grain. The first long cut was so that we don’t have like 10 inch long strips of beef. Cutting against the grain means that your knife is perpendicular to where the lines of the meat are running. Can you see it in the photo above?

Meat is made up of long strands, and cutting against the grain means that our KNIFE is doing a lot of the cutting work, instead of relying only on our poor omnivorous teeth. Cutting a fantastic piece of meat very poorly will result in meat that has a chewy, tough texture no matter how much it cost, or how well you cooked it.
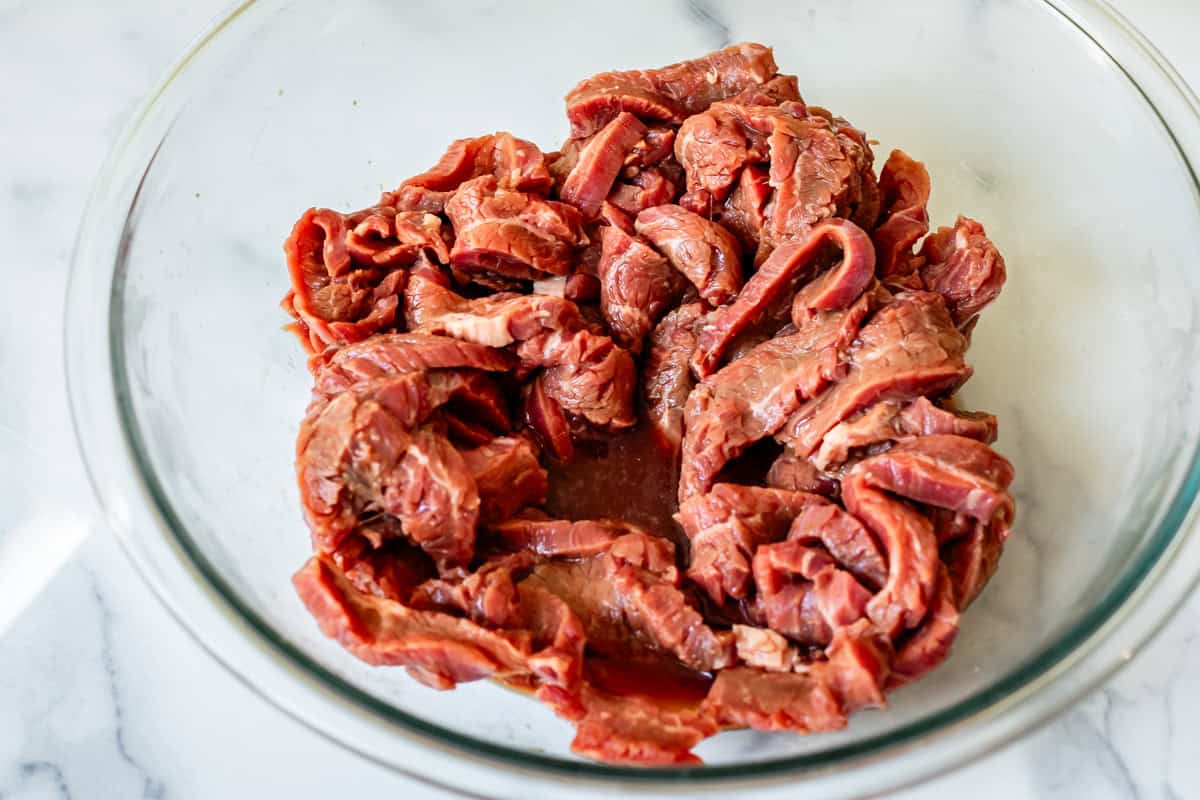
strips of beef marinating in shaoxing wine.

Toss your beef into the marinade for a few minutes. This marinade is so stupid easy, it’s just 3 ingredients: cornstarch, low sodium soy sauce, and Shaoxing wine. I had never heard of this wine before! It’s a classic ingredient in Chinese cooking. I had a heck of a time finding it! You can buy it online here, or an international market is probably your best bet. Shaoxing wine is of course traditional and brings the most authentic flavor, but I subbed Sherry cooking wine, and thought it tasted amazing.

Also, have you heard about cornstarch marinades in Chinese cooking? It’s a technique called “velveting” because the cornstarch reacts with the meat and basically acts as a meat tenderizer. It makes the beef so, so tender and perfect.

how to chop broccoli into florets.

Take a hot minute to chop up your broccoli, before things get real over on the stove. If at this point you decide “I want more vegetables!” you could totally slice up some mushrooms, carrots, or peppers to cook along with the broccoli. It’s your thing, do what you wanna do.

Don’t forget the rice. Start the rice now, before we cook the beef, so it has time to steam. Did you catch my last post all about how I make rice for my family? It’s so easy. I usually make white rice for the kids and Cauliflower Rice (or Asian Cauliflower Rice) for me and Eric, because we like to eat low-carb dinners most nights. I often buy the pre-riced frozen cauliflower, because it’s so easy, just heat it up in a pan with some oil and salt.

Now it’s time to sear!
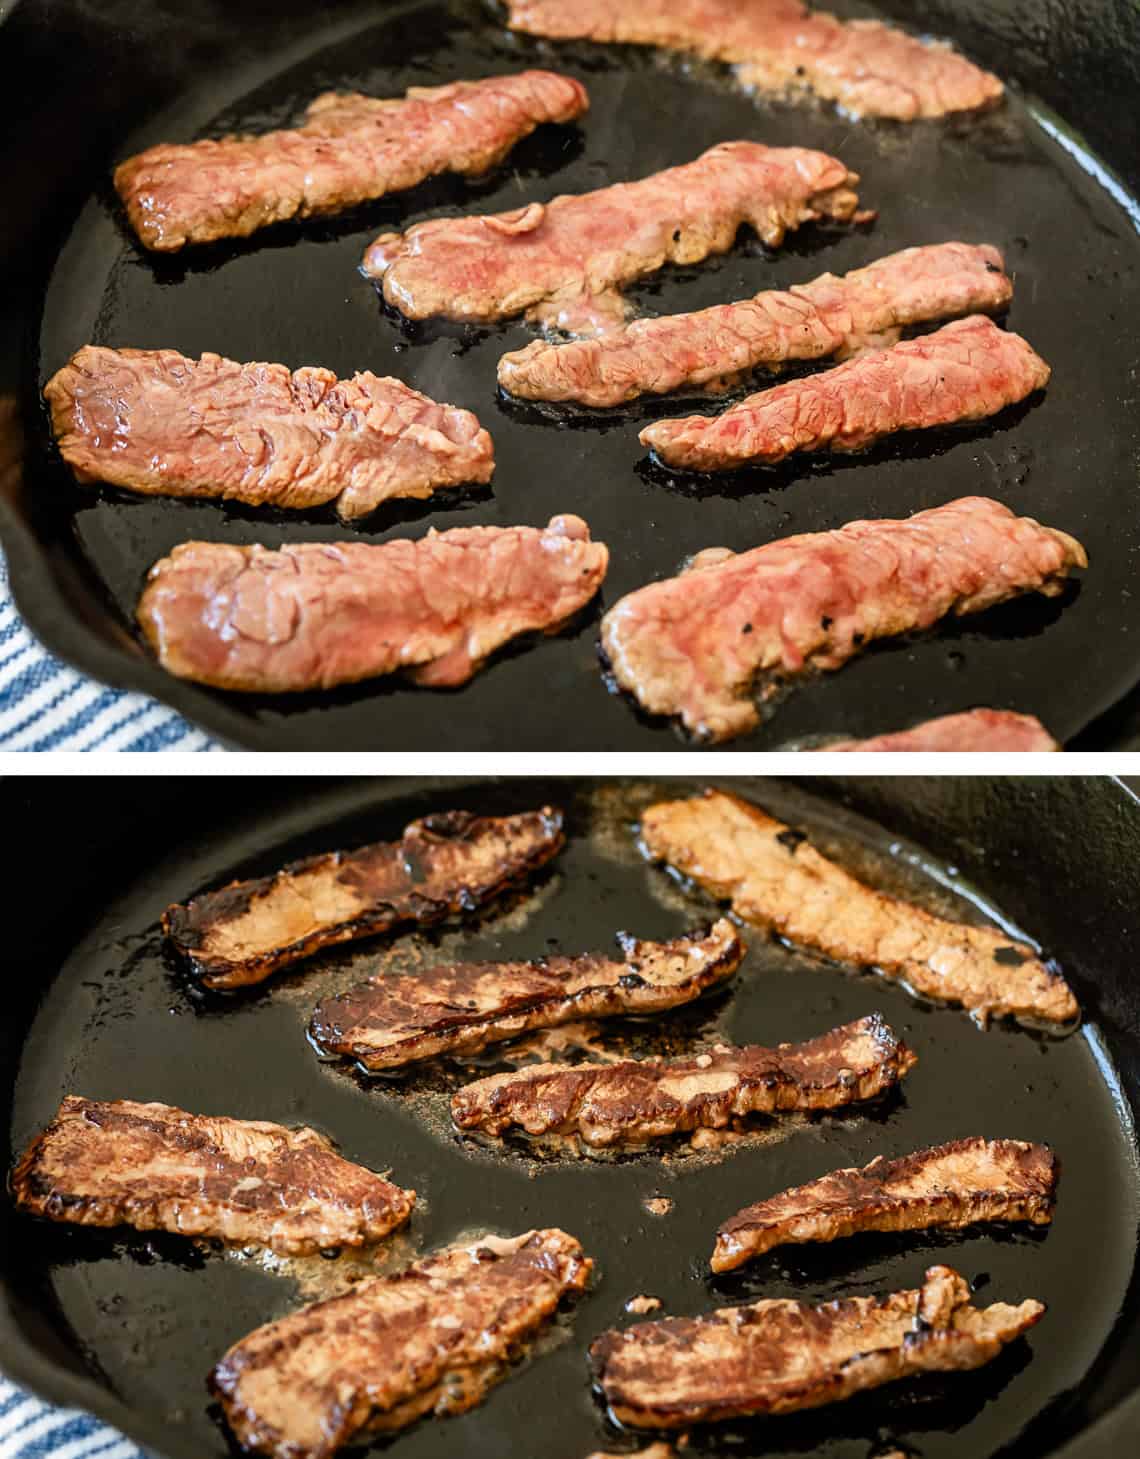
searing strips of beef in a black skillet.

I love to sear my beef in half veggie oil, half sesame oil. Sesame oil is strong but I love love love the flavor. You can skip it and use regular oil if you like.

Whichever way you sear it, just make sure you are leaving enough space in the pan! The meat strips should not be touching each other. If you crowd them all in at once, it will cook but it will not get brown, and you miss out on tons of flavor. It’s so tragic. Don’t do it. Sear in batches and be patient.

You don’t even have to be that patient, this meat is so thin that it cooks in about 1 minute for each side! Remove it all to a plate and make way for some broccoli.
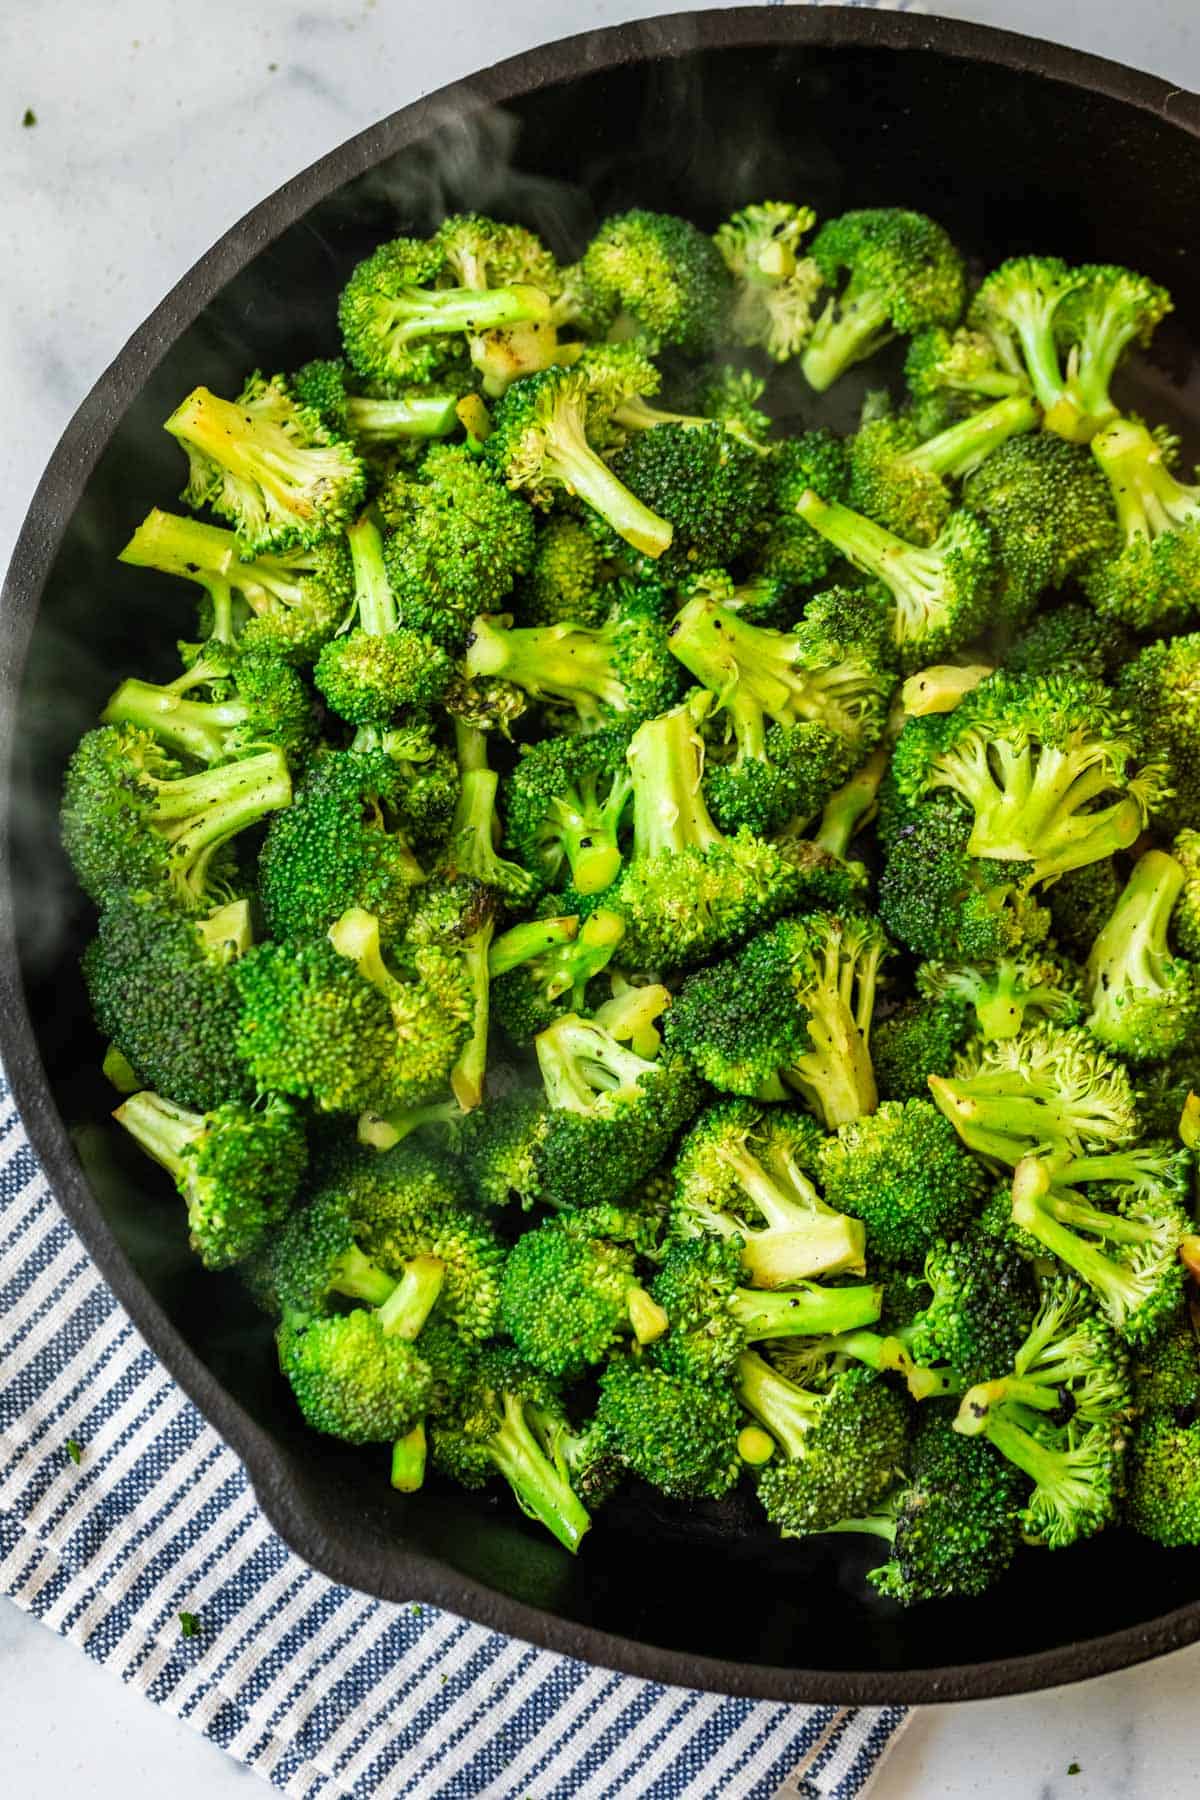
overhead shot of stir frying broccoli in a cast iron skillet.

I also saute my broccoli in half sesame oil, half veggie oil. It’s so good! The other tip for doing the broccoli is to stir the pan constantly, and add water 1 tablespoon at a time. The pan is so hot by this point that the broccoli may start to scorch before it’s cooked all the way through. If you add water, a little bit at a time, it will sizzle and evaporate right away, creating steam that helps cook the broccoli. Keep going 2-3 minutes until you see the florets change color to a darker green. We want crisp-tender, not mushy!

Here are all the ingredients for the final sauce. It’s oyster sauce, hoisin sauce, chili garlic paste, brown sugar, sesame oil, cornstarch, and salt and black pepper It’s sooo good.
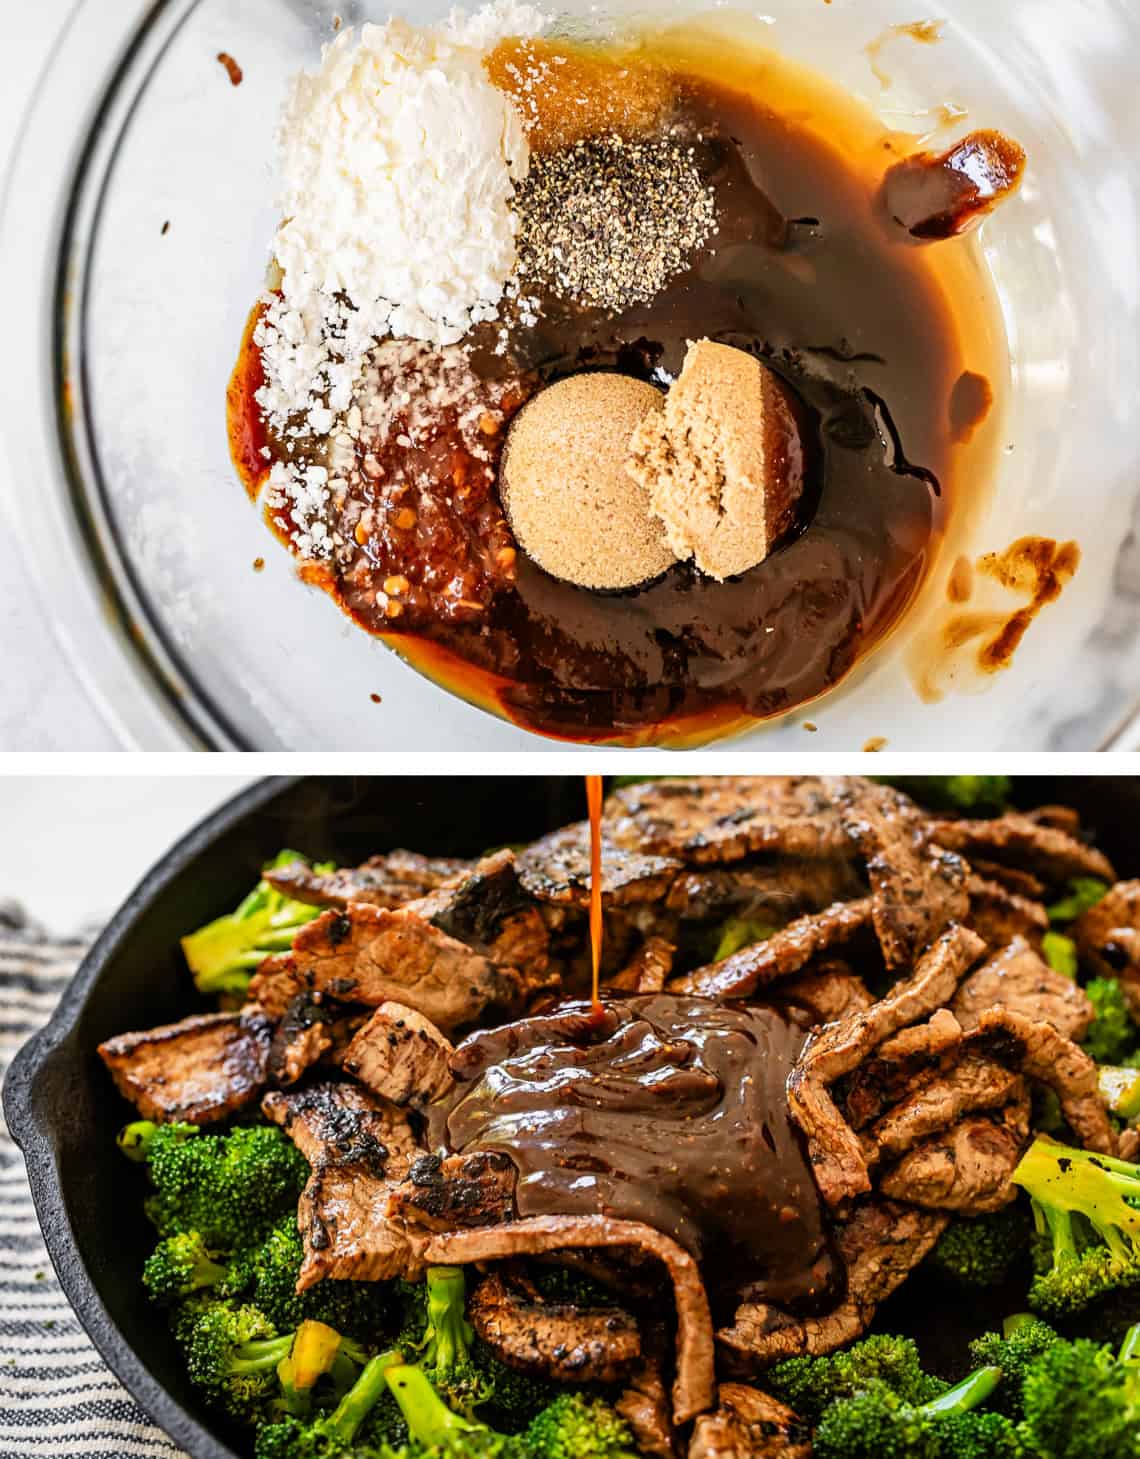
sauce ingredients in a bowl, adding sauce to beef and broccoli in black pan.

Add the meat back to the pan, douse the whole thing in sauce, stir it up, let’s goooooo
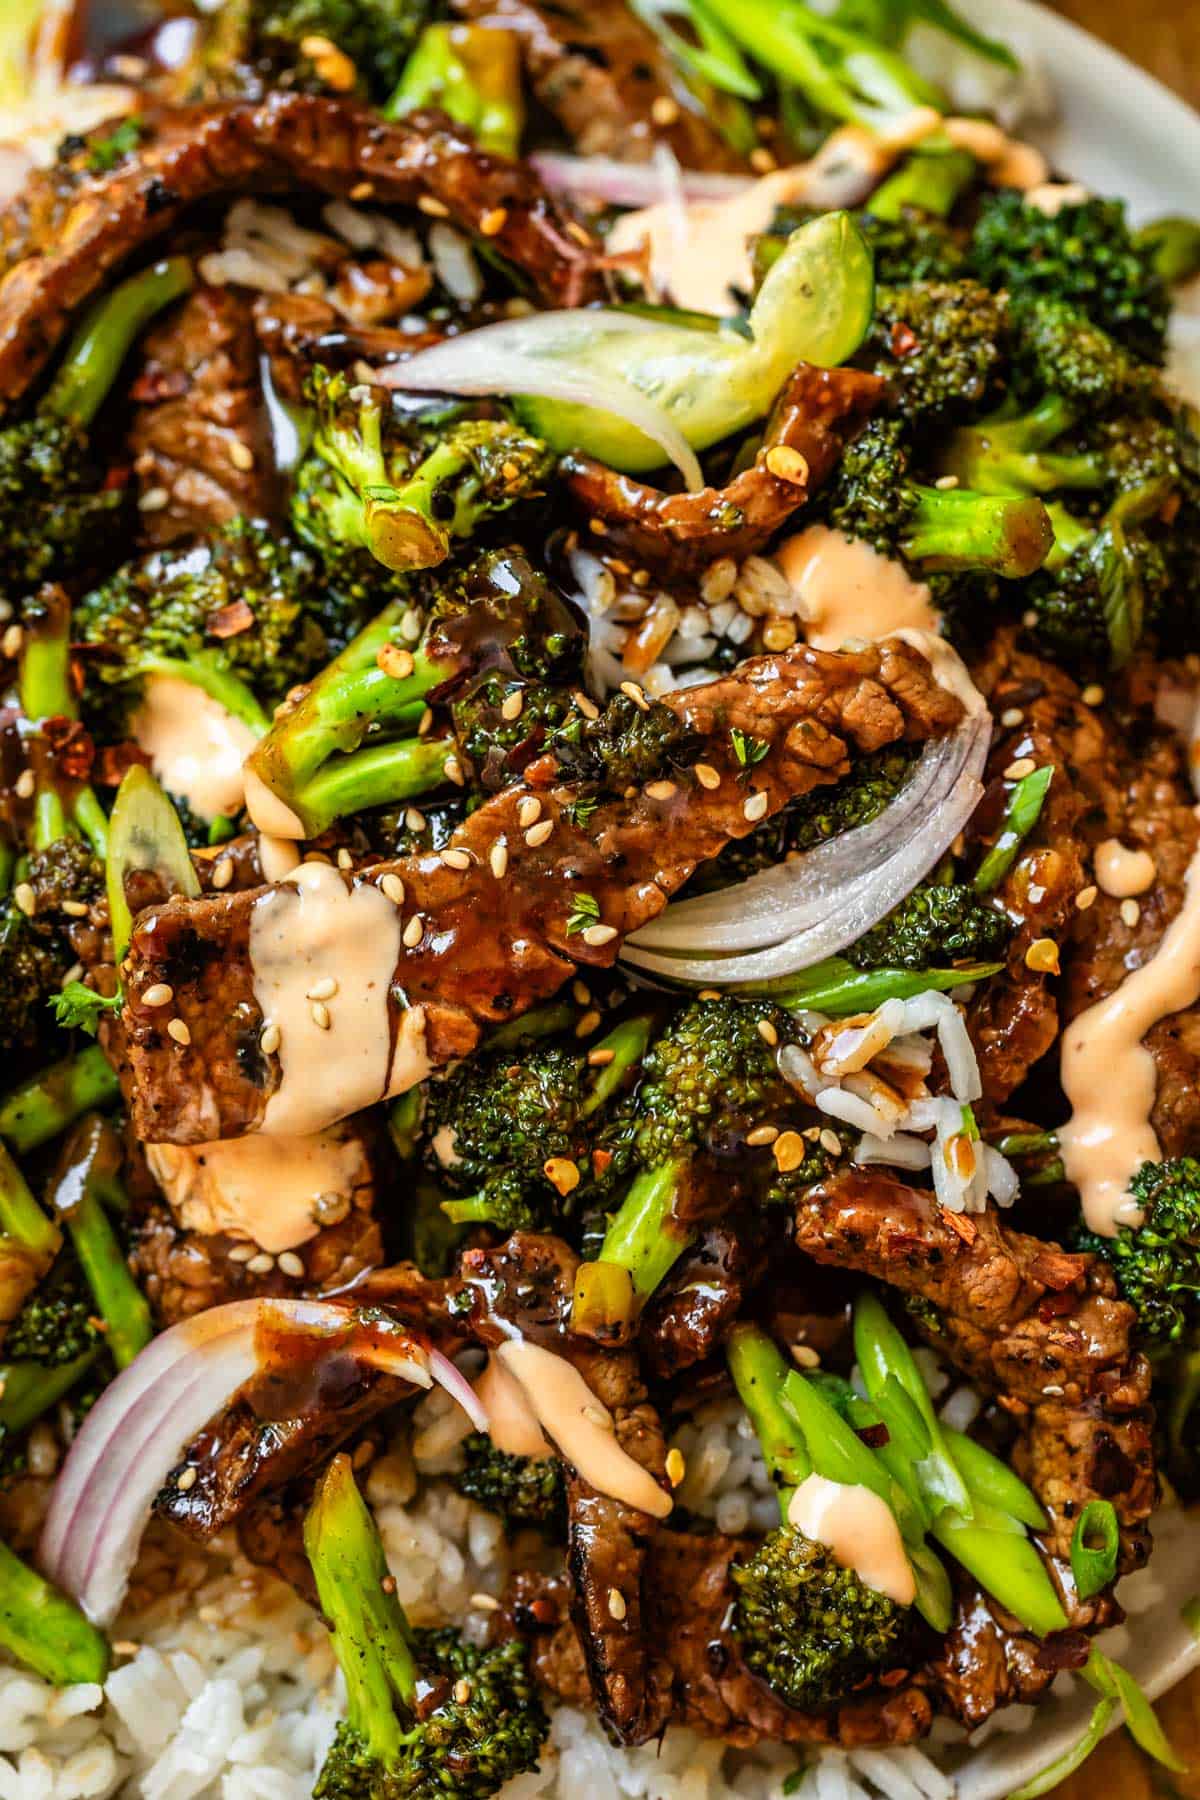
close up overhead of white plate with stripc of beef, sliced shallot, broccoli florets, and sesame seed.

Don’t forget all the goods! Green onions, sesame seeds, Asian Marinated Cucumber Salad, and some sriracha mayo to round it all out. I’m tellin you guys.

What to serve with beef broccoli stir fry

Beef and broccoli is such a classic takeout pick. I love serving it with White Rice or Cauliflower Rice and calling dinner done. But I also love doing sides or making it a “fakeout” night (get it? fake takeout, cause you’re making it at home) and doing more of my Chinese restaurant favorites. Here are some ideas:

overhead shot of beef with broccoli in a black cast iron skillet.

How to store beef and broccoli

If eating leftover Chinese food straight from the container in the fridge is your thing (raises hand), this recipe is perfect for meal prep. Store it in sectioned containers with rice and you’re done. Make sure your tupperwares are airtight so your lunch doesn’t dry out. It’ll last for 4-5 days in the fridge. Reheat in the microwave for about a minute, depending on your portion size and microwave strength.

Sometimes leftover rice can be dry, but if you heat it up in the microwave along with the beef and broccoli, the moisture from your main dish will help freshen up the rice. You can also sprinkle a teaspoon or so of water on the rice and it helps a ton. Read more about reheating rice here.
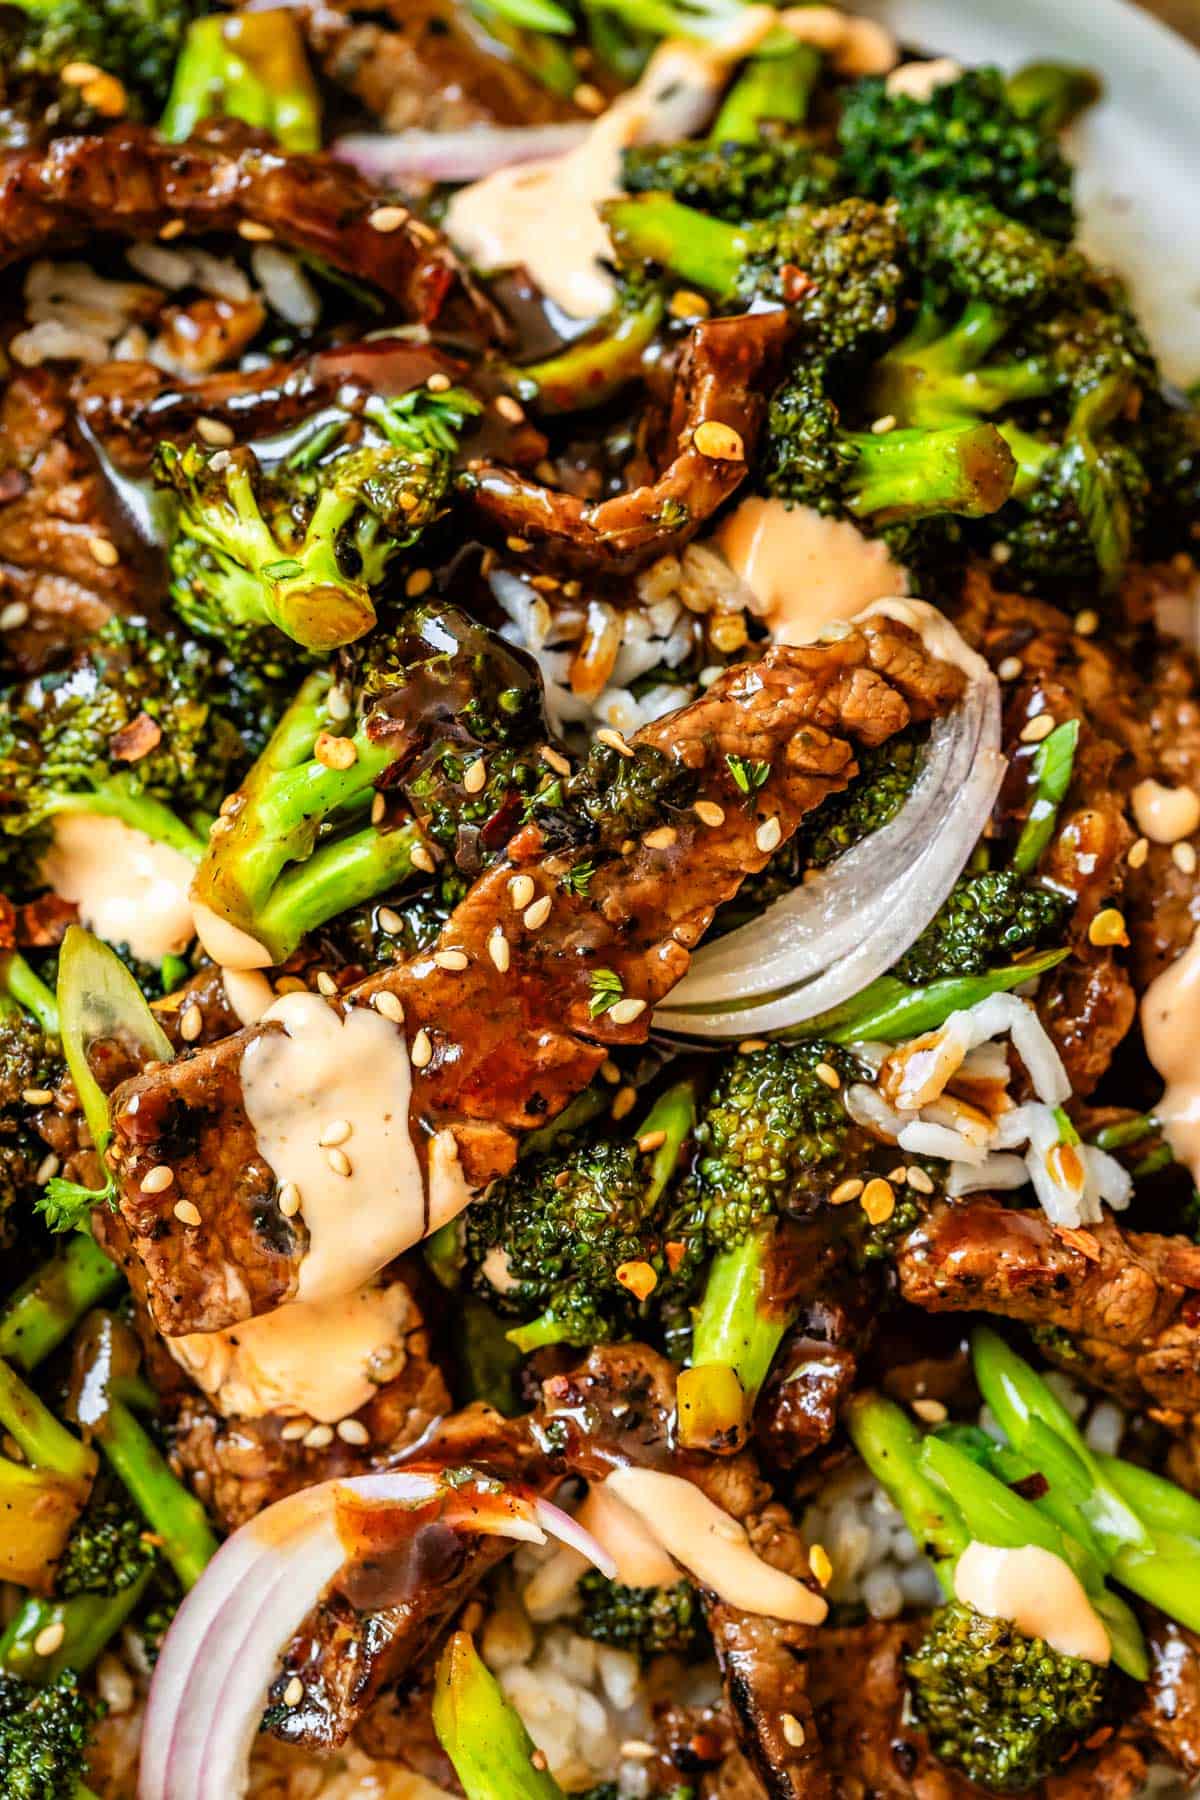
Beef and broccoli close-up with rice, onions, and sriracha mayo.

Can you freeze beef and broccoli?

I’m going to say hard pass this time, guys. I don’t recommend freezing your leftovers. The texture of the broccoli is going to be pretty weird after defrosting, so just don’t go there. The reason we love Beef Broccoli is because of the crispy-tenderness of the whole situation. Don’t mess with it.

Beef and broccoli frequently asked questions

What is beef and broccoli sauce made of?

Beef and broccoli sauce is made from Shaoxing wine, oyster sauce, soy sauce, and cornstarch. Sometimes ginger, garlic, hoisin sauce, and chili garlic sauce are added. If you know you love one of these ingredients you can add a little more (or, if it’s not your favorite, a little less.)

What kind of beef for beef and broccoli?

Flank steak is my favorite. Sometimes the best cut of meat is the one you already have, though, or what you can afford. If you’re at the store, decide how fancy you want to go. Ribeye makes an incredible beef and broccoli. All that beautiful marbling means the meat is super melt in your mouth and tender. Cheaper options (but still excellent ones) are flank steak, skirt steak, or flat iron steak. I tried London Broil but didn’t love it for this recipe. Another good choice, although a leaner one, is sirloin.

How do you thicken beef and broccoli?

Cornstarch is the perfect thickener for beef and broccoli sauce. Just a couple teaspoons added transforms the sauce to have a phenomenal creamy texture!

How TO MAKE BEEF TENder for stir fry?

To tenderize the beef we’re using a traditional Chinese method called “velveting.” Meat is marinated in an easy cornstarch slurry for 20 minutes or so, and the cornstarch makes it so incredibly tender.

is beef and broccoli healthy?

Heck yes! All that protein AND the veggies, in one pan?? Yes please. I’d definitely call this a healthy dinner, especially served with Cauliflower Rice, but even with regular white rice it’s still a pretty healthy option!
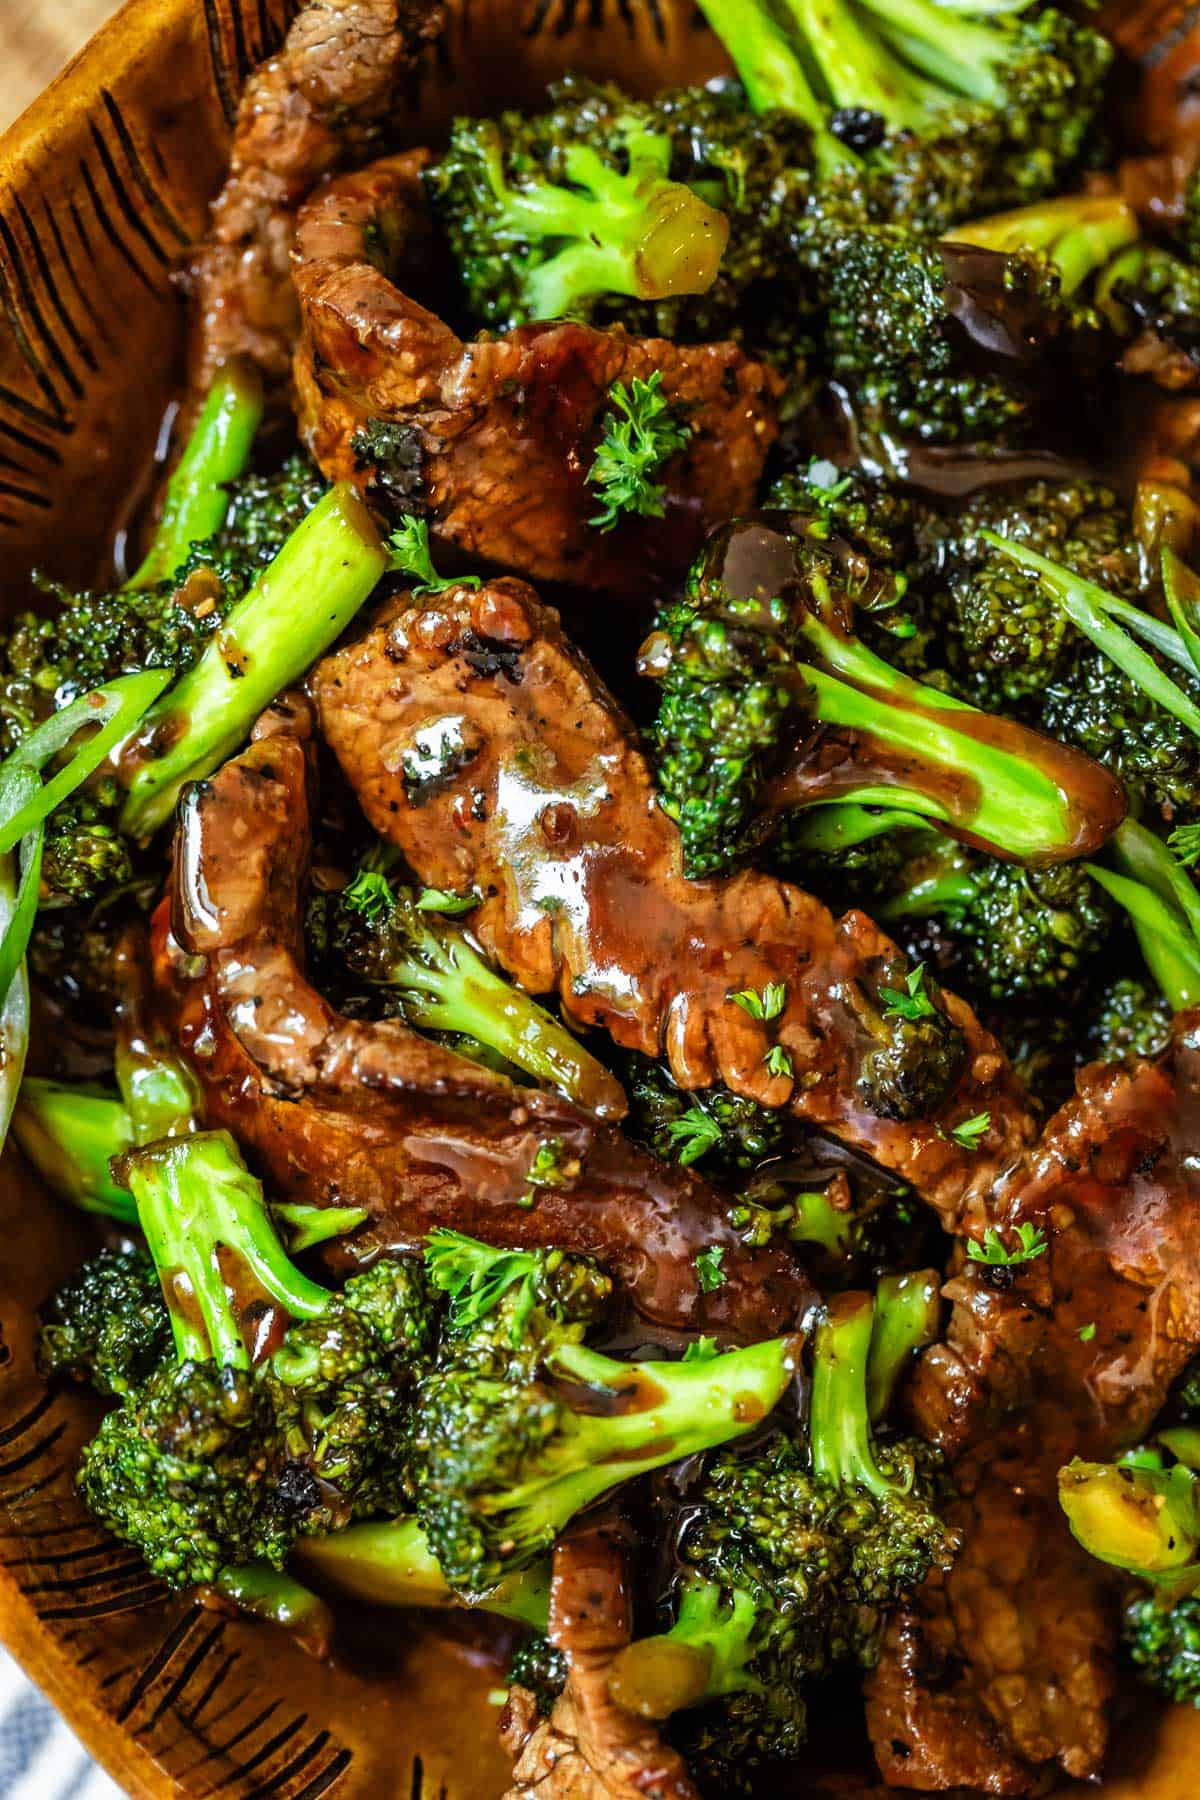
beef and broccoli stir fry in an orange clay bowl.

Easy beef recipes

Steak might be a special occasion dinner, but cheaper cuts of beef can make a weeknight meal feel just as fancy without the fancy price. Here are some of my favorites meals using high-protein, juicy beef!

Facebook | Pinterest | Instagram

Close up of Chinese food beef and broccoli, with sauce and sesame seeds and rice.
Print

Beef and Broccoli

Beef and Broccoli can be so hit and miss, right? Sometimes it's transcendent, other times it's gloopy and chewy. I've figured out the secrets! If you're a Chinese food lover, make this easy homemade Beef and Broccoli recipe for a healthy dinner that's faster (and cheaper) than takeout! A few Asian pantry staples are all you need to make this stir fry that is seriously SO GOOD. Healthy (check) one-pan meal (check) done in less than an hour (check!) Make it with 20 minute Rice or Cauliflower Rice!
Course Main Course
Cuisine Chinese
Prep Time 50 minutes
Cook Time 10 minutes
Total Time 1 hour
Servings 4 people
Calories 313kcal

Ingredients

  • 1 pound flank steak* (or flat iron, skirt, sirloin, or ribeye steak)
  • 1 pound broccoli florets 2 heads broccoli

For the marinade:

  • 1 and 1/2 tablespoons cornstarch for the marinade
  • 4 and 1/2 tablespoons low-sodium soy sauce**
  • 1/2 cup + 1 tablespoon Shaoxing cooking wine*** or substitute sherry wine

For the sauce:

For searing

  • vegetable oil
  • sesame oil

For serving:

Instructions

  • Freeze your beef: Put your beef in the freezer so it's easier to slice. 30 minutes is just about perfect.
  • Prep your broccoli. Separate the florets from stems. I like using just the florets, but feel free to cut the stems into small pieces and use them too. You need about a pound of broccoli once it's chopped, about 2 medium heads.
  • Prepare the marinade: Add 1 and 1/2 tablespoons cornstarch, 4 and 1/2 tablespoons soy sauce, and 1/2 cup + 1 tablespoon Shaoxing wine* to a medium bowl.
  • Slice the beef: We want thin strips or beef that are cut against the grain. If you are using a flank steak or other long cut of beef, make one long vertical cut WITH the grain before you start slicing, so that the strips are not like 8 inches long. See photos.
    Slice the beef against the grain very thin, no more than 1/4 inch for each piece. Each piece should be about 4 inches long. Add the beef strips to the marinade, stir, and set a timer for 20 minutes.
  • Prepare the sauce: While the beef is marinating, prep the sauce in another small bowl. Whisk together 3 tablespoons brown sugar, 1 tablespoon cornstarch, 3 tablespoons oyster sauce, 1/3 cup Hoisin sauce, 2 teaspoons sesame oil, 1 and 1/2 teaspoons chili garlic sauce, 3/4 teaspoon black pepper, and 3/4 teaspoon kosher salt. (Use less salt if all you have is table salt.)
  • Rice: If you plan to serve this with rice, start making it now so it can simmer and steam while you sear the beef. Here's How to make Rice.
  • Stir fry the beef: Heat a cast iron skillet (or the largest heaviest skillet or wok you have) over medium high heat. Add 1 tablespoon vegetable oil and 1 tablespoon sesame oil oil and swirl it around to coat the bottom.
  • Lift the slices of marinated beef one at a time, letting the marinade drip off. Add the beef to the pan in a single layer, with 1-2 inches of space in between each strip of beef. (We will be cooking this in several batches) Be very careful not to drop the pieces, this oil is hot and you don't want to splatter yourself.
  • Let the strips cook for 60-90 seconds, until they are browning on the bottom. Use tongs to flip each piece individually. As soon as the second side is browned, remove the beef to a plate. The slices are thin, so they only need a minute or so on each side, and remember, this is steak, so it doesn't exactly need to be well done.
  • Continue to sear the rest of the beef. Add more vegetable and sesame oil as necessary in between batches. If you add too much beef at once, there will be too much liquid being released from the beef. This prevents the browning process. The beef needs space to allow that liquid to evaporate; the liquid evaporating is the only way the beef gets in contact with the oil, which is what does the browning. Science!
  • Stir fry the broccoli: Once all the beef is seared and removed, add 1 tablespoons vegetable oil and 1 tablespoon sesame oil to the skillet, still set over medium high heat. Add the chopped broccoli florets all at once. Stir with a wooden spoon until you see the florets change color to a darker green, about 2 minutes. We want crisp-tender broccoli, not mushy, so keep an eye on it and don't overdo it.
  • Add water to the broccoli, 1 tablespoon at a time once you notice that the bottom of the pan is drying out. The water will evaporate right away and this will help the broccoli to steam. I usually add several tablespoons of water, at least 3-5. Don't let the liquid pool. It should be hot enough that it evaporates immediately.
  • Finish the dish: As soon as the broccoli is cooked (and, let me say it again, NOT MUSHY) add the beef back to the skillet, followed by all sauce. Scrape it all in there. It will immediately begin to bubble. Give everything a quick stir so the beef and broccoli is coated with the sauce, then turn off the burner and remove the pan from the heat so the cooking process stops.
  • Serve hot with the rice. Garnish with sliced green onions and toasted sesame seeds. Serve with a garnish of Asian Marinated Cucumbers, it's so good! You can also serve this with Sriracha mayo (1/2 cup mayo stirred with 1 tablespoon sriracha, or to taste.)
  • If you really want to go all out, crisp up some frozen egg rolls in the oven while you're cooking the beef and broccoli, buy some fortune cookies, and it's a whole takeout feast.
  • Storage: Store leftovers in the fridge for up to 5 days. Don't freeze!
Notes

*I tested this with flank steak, skirt steak, and ribeye and they were all amazing. Of course ribeye was the most amazing but if this is just a weeknight, no need to splurge! I also tested it with London Broil but I can’t recommend it. It’s just too lean. Sirloin might be the right choice for you if you prefer your beef on the leaner side. 
**If you use regular soy sauce, cut the salt from the recipe.
***If you can’t find Shaoxing wine (it’s tough to find if you’re not at an international market) then you can use a dry sherry wine instead. Cooking sherry wine is also a good substitute!)
****Not a big fan of oyster sauce? Me neither. Just leave it out and add an extra tablespoon or two of hoisin sauce. Your beef and broccoli will still have great flavor. I included it in the recipe because it’s just so classic and people who are already beef and broccoli fans-for-life would miss it too much if I left it out. 

Nutrition

Serving: 1serving | Calories: 313kcal | Carbohydrates: 27g | Protein: 29g | Fat: 8g | Saturated Fat: 3g | Polyunsaturated Fat: 1g | Monounsaturated Fat: 3g | Cholesterol: 68mg | Sodium: 1180mg | Potassium: 809mg | Fiber: 4g | Sugar: 11g | Vitamin A: 709IU | Vitamin C: 101mg | Calcium: 94mg | Iron: 3mg

How to Cook Rice on the Stove

Do you know how to cook rice on the stove? It’s actually SO easy to make rice in a pot. I promise you don’t need a fancy rice cooker appliance! If you’re tired of burned, mushy, bland rice, we are going to fix that today! I will show you step by step exactly how I…

Do you know how to cook rice on the stove? It’s actually SO easy to make rice in a pot. I promise you don’t need a fancy rice cooker appliance! If you’re tired of burned, mushy, bland rice, we are going to fix that today! I will show you step by step exactly how I make rice for my family, something I do weekly. Rice done right is fluffy and flavorful. No gumminess, no scorching, no crying over burnt rice. Serve it with dinner, or meal prep it with protein and veggies for the week!

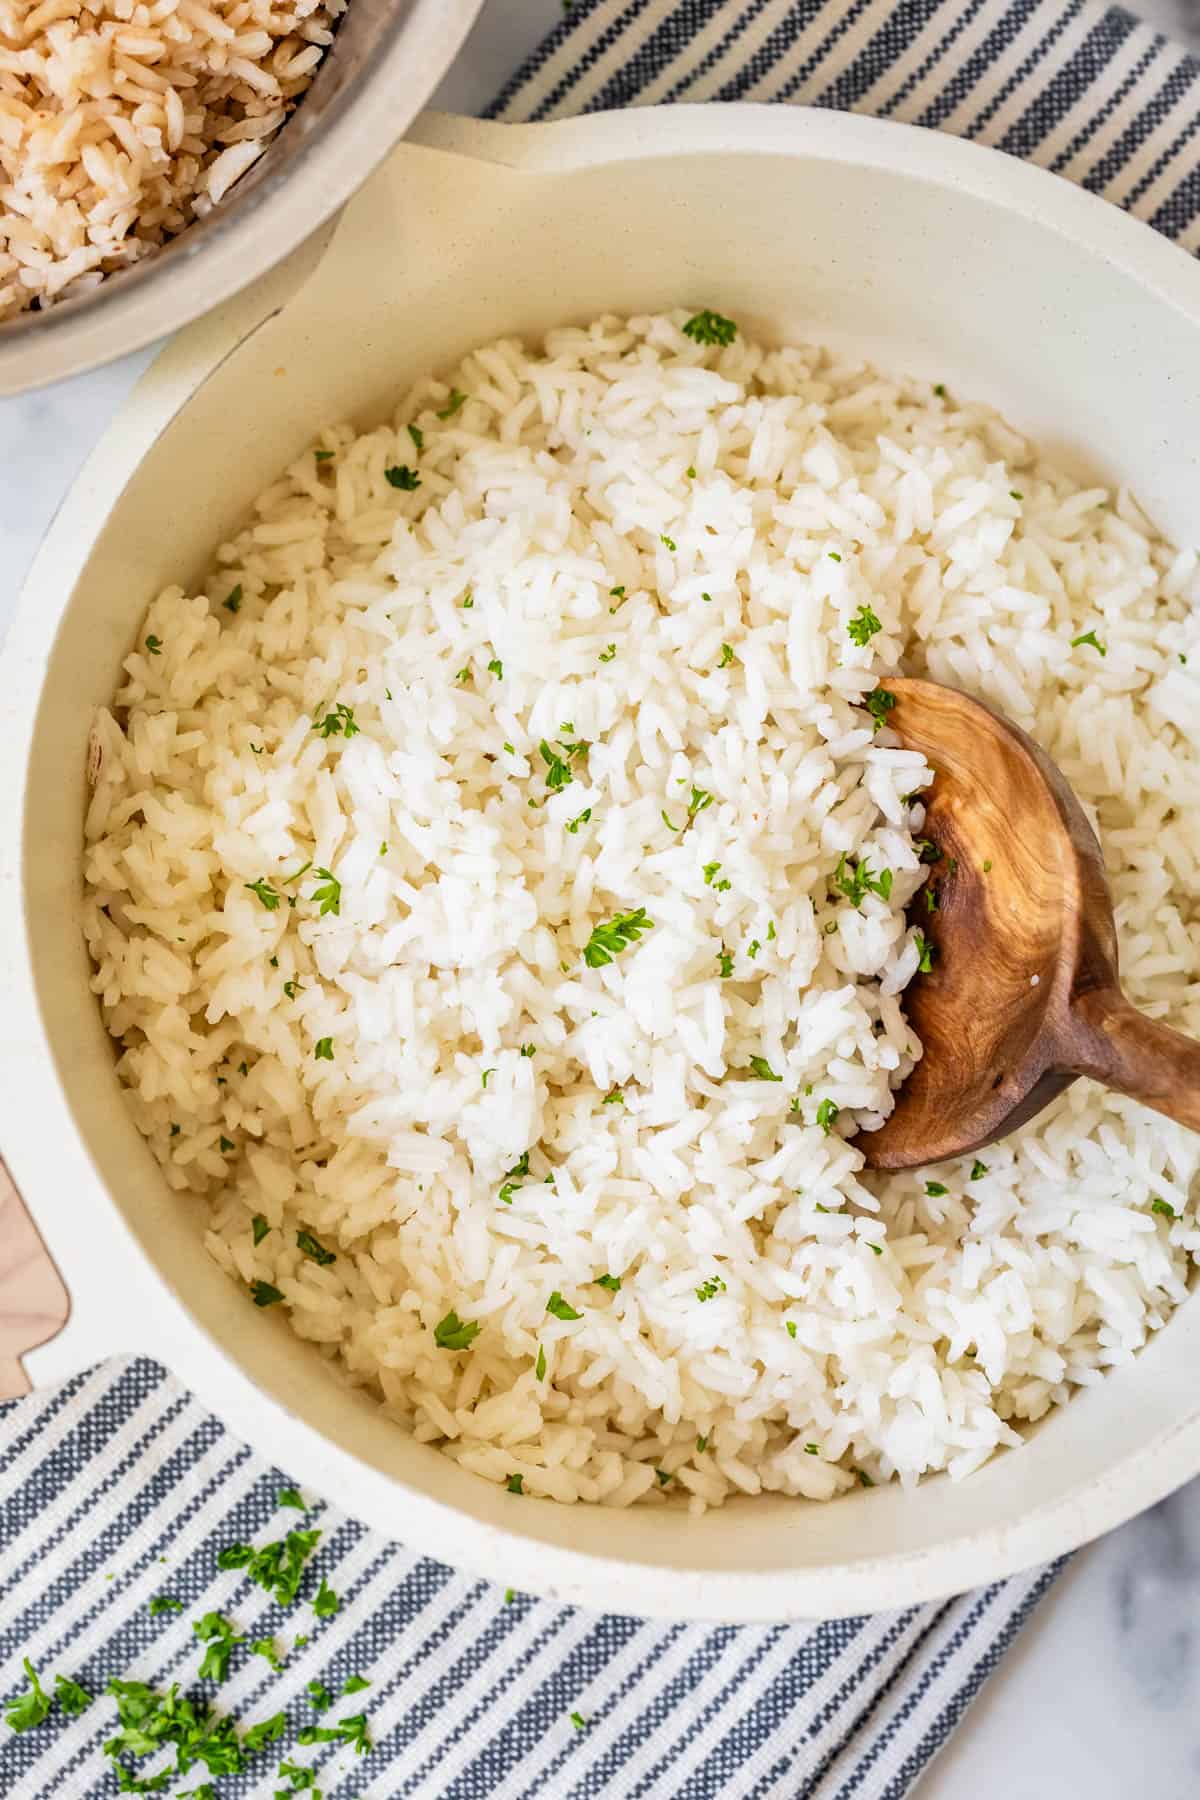
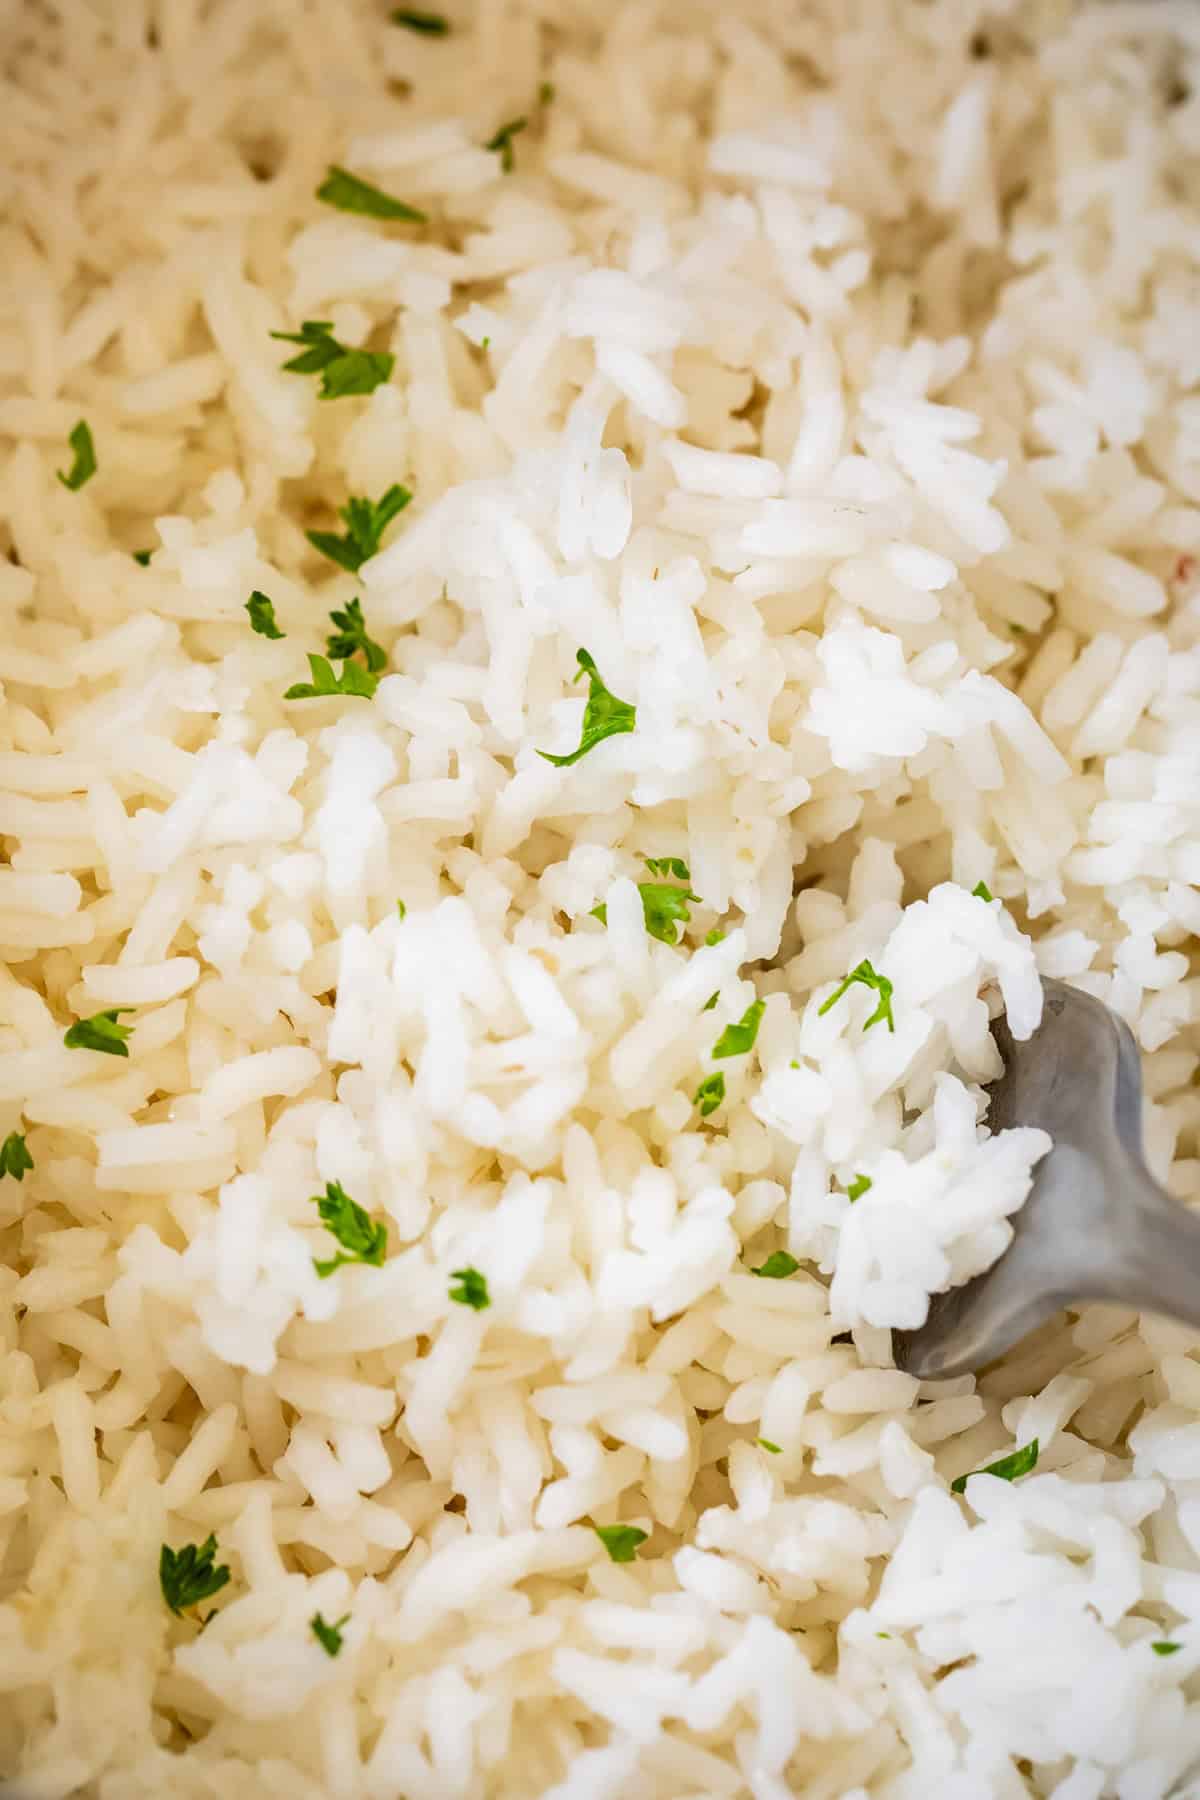
Close up of cooked white rice with parsley and a fork.
Table of Contents
  1. Rice, minus the stress and judgment
  2. Should you rinse your rice?
  3. How to cook rice on the stove
  4. Rice rules
  5. What you need to make rice
  6. What is the right ratio of rice to water on the stove?
  7. How to make rice
  8. Toast the rice
  9. What to serve with rice
  10. What to do with leftover rice
  11. How to store rice
  12. How to reheat rice
  13. Cooking rice frequently asked questions
  14. How to Cook Rice on the Stove Recipe

It’s the end of the school year, and summer is in the air! I helped out in my son’s 5th grade class this morning for their “Olympic events.” I was in charge of running a game that was supposed to involve the kids tossing an enormous beach ball back and forth to each other.

This ball was so huge, like bigger than some of the kids’ actual bodies, and it was a super windy day, so this of course resulted in absolute mayhem. Gleeful, delighted mayhem; every kid had a grin on their face a mile wide. What could be better than school ending, no classwork, and the promise of popsicles? (Bouncing a giant beach ball off of your head, that’s what.)

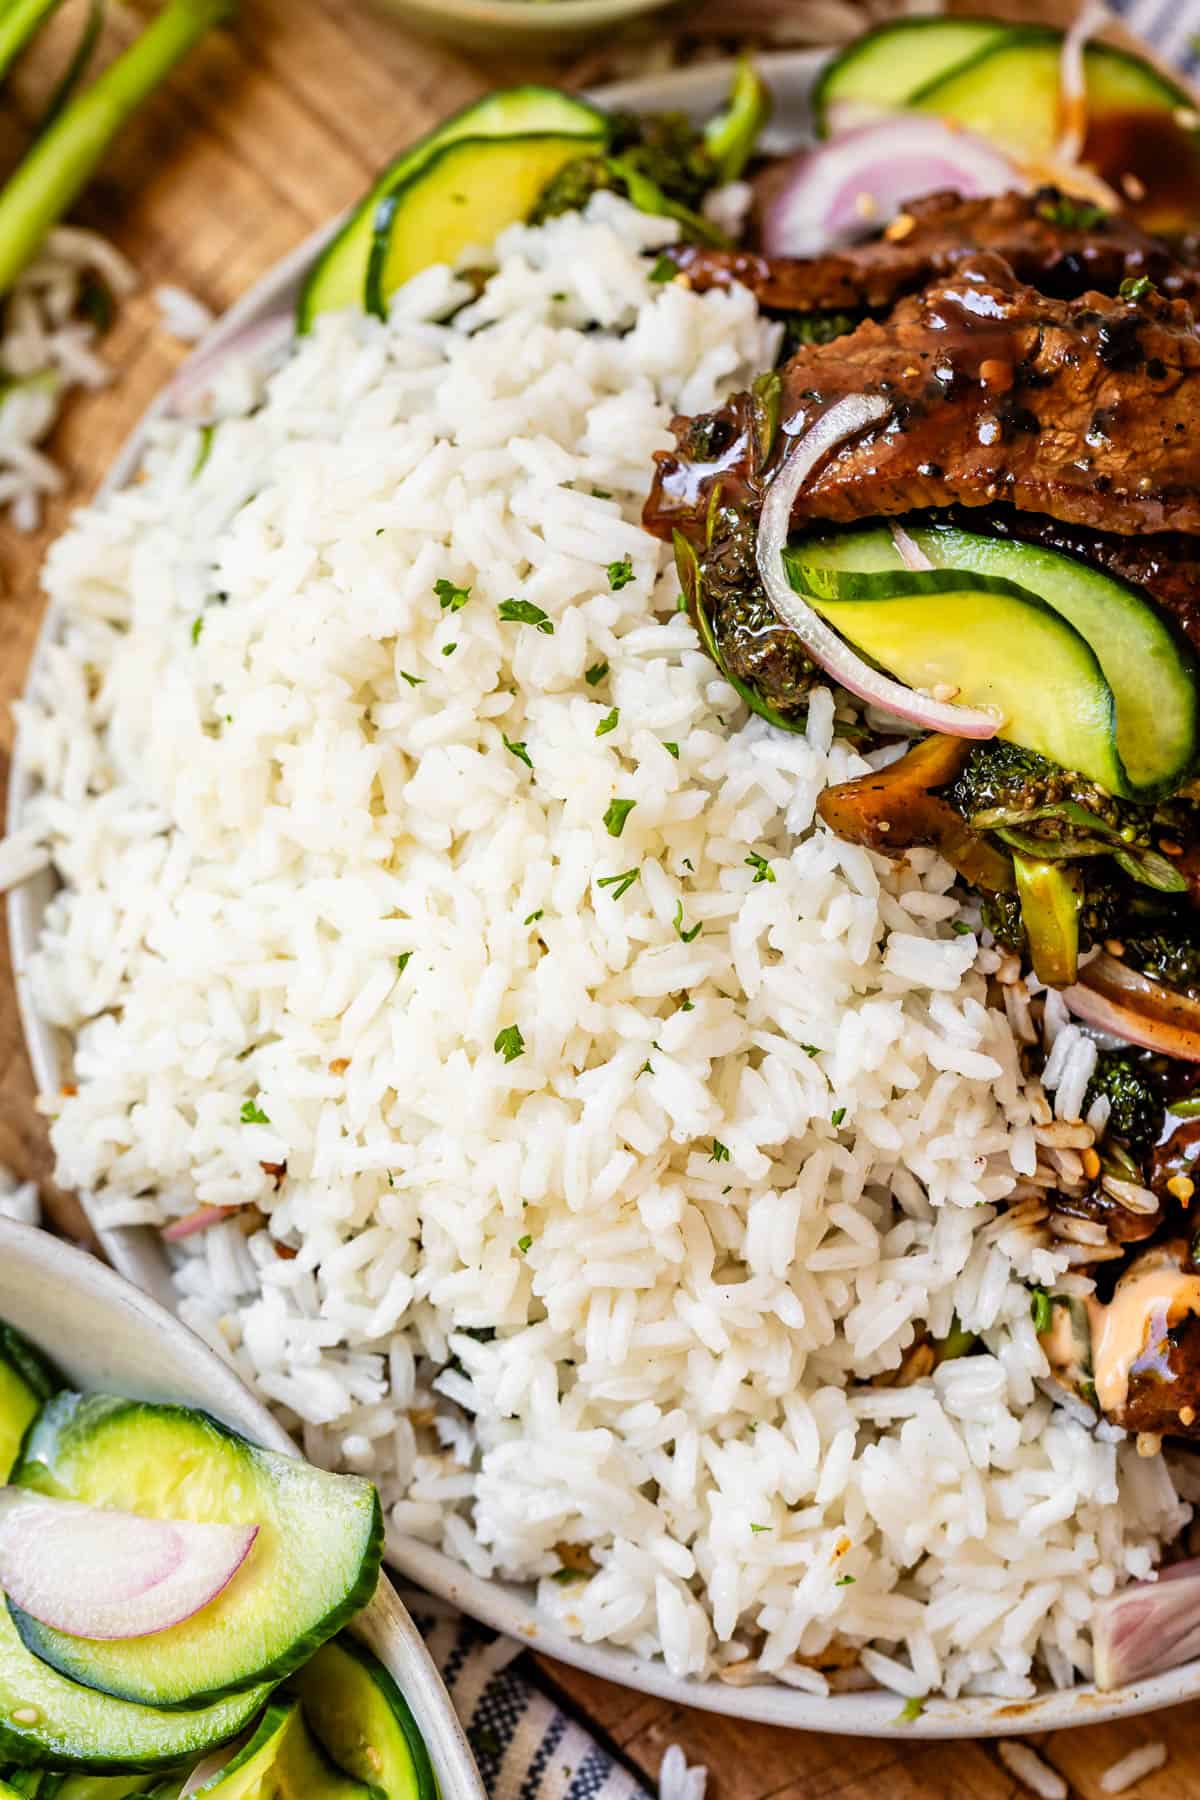
Cooked rice on plate with beef and broccoli and cucumbers.
(That’s Beef Broccoli on the plate, recipe coming stat, it’s so good yall)

Eventually, after us hollering at the kids 100 times to get away from the fence, the ball sailed over it into the street beyond, to championship-level cheering from the kids, and panic-stricken dismay from all the teachers. Another volunteer and I sprinted around the gate and managed to save the ball, which had thankfully gotten stuck in the bushes of the street partition.

If it hadn’t been stopped, the larger-than-life beach ball would have bounded down the steep hill that also happens to be a 45 mph traffic lane. Can you imagine that car accident report? “Driver reports swerving into oncoming traffic after a beach ball the size of Mt. Olympus fell out of the sky onto the hood of his car.” 😳 Whew! Ending the school year with a bang over here??

On to today’s recipe! I’ve wanted to do a basic rice post for years and years but it always felt soooo boring. Doesn’t everyone know how to do this? NO, no they do not, I have found. I rely so much on this tried and true method, it seems unfair that I haven’t shared with you. It’s an important recipe to have in your back pocket, for weeknights and impressive dinners alike.

Rice is the perfect blank page for your stir-fry or curry, but things can go south quickly if you don’t know the rules. We make rice at least 1-2 times a weeks, and both my pre-teens can whip up a pot by themselves. Time to record how to cook rice step by step on the stovetop, for posterity!

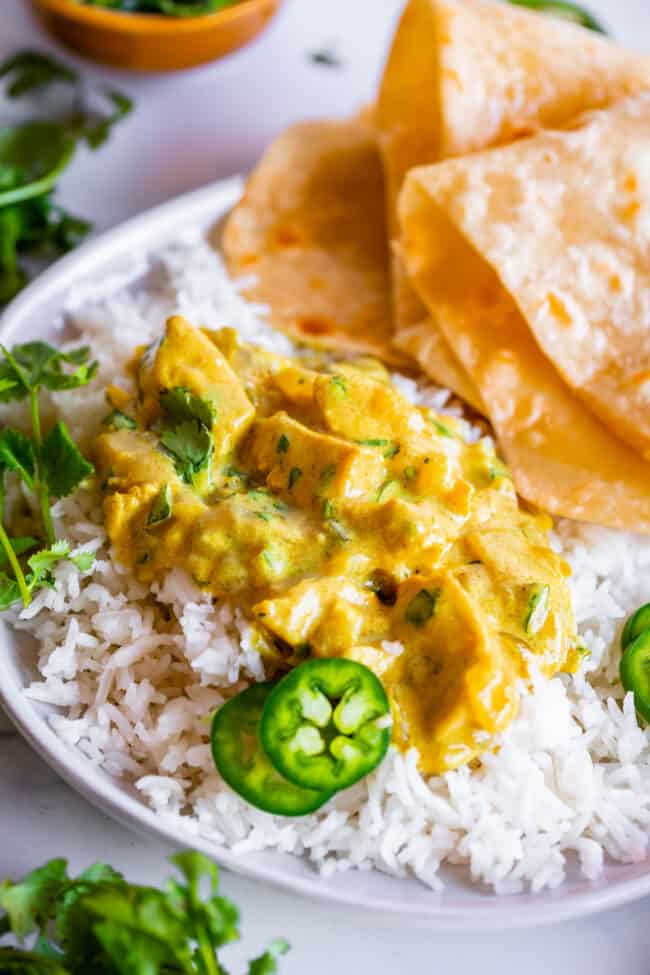
indian curry recipe on a white plate with rice, roti, and garnishes
Easy Chicken Curry, my favvv.

Rice, minus the stress and judgment

Rice, rice, baby. Are you one of 99.9% of Americans who gets stressed out about making rice?? Somehow we’ve been conned into thinking that we need a fancy appliance for this no-brainer job that you can do in 10 minutes.

Guys, I’m not kidding. Don’t listen to the rice maker industry. Don’t listen to the folks telling you you are going to screw this up. And please, for the love, don’t listen to the folks telling you to rinse your rice 8 times.

(Seriously, my friend Sarah had a friend when she lived in Japan who rinsed EIGHT TIMES. Actually, the story goes that this particular Japanese woman married an American dude, and the first time he made rice for her she took one bite and said, “How many times did you rinse this?” because she could tell it was three times and not eight times.🤯)

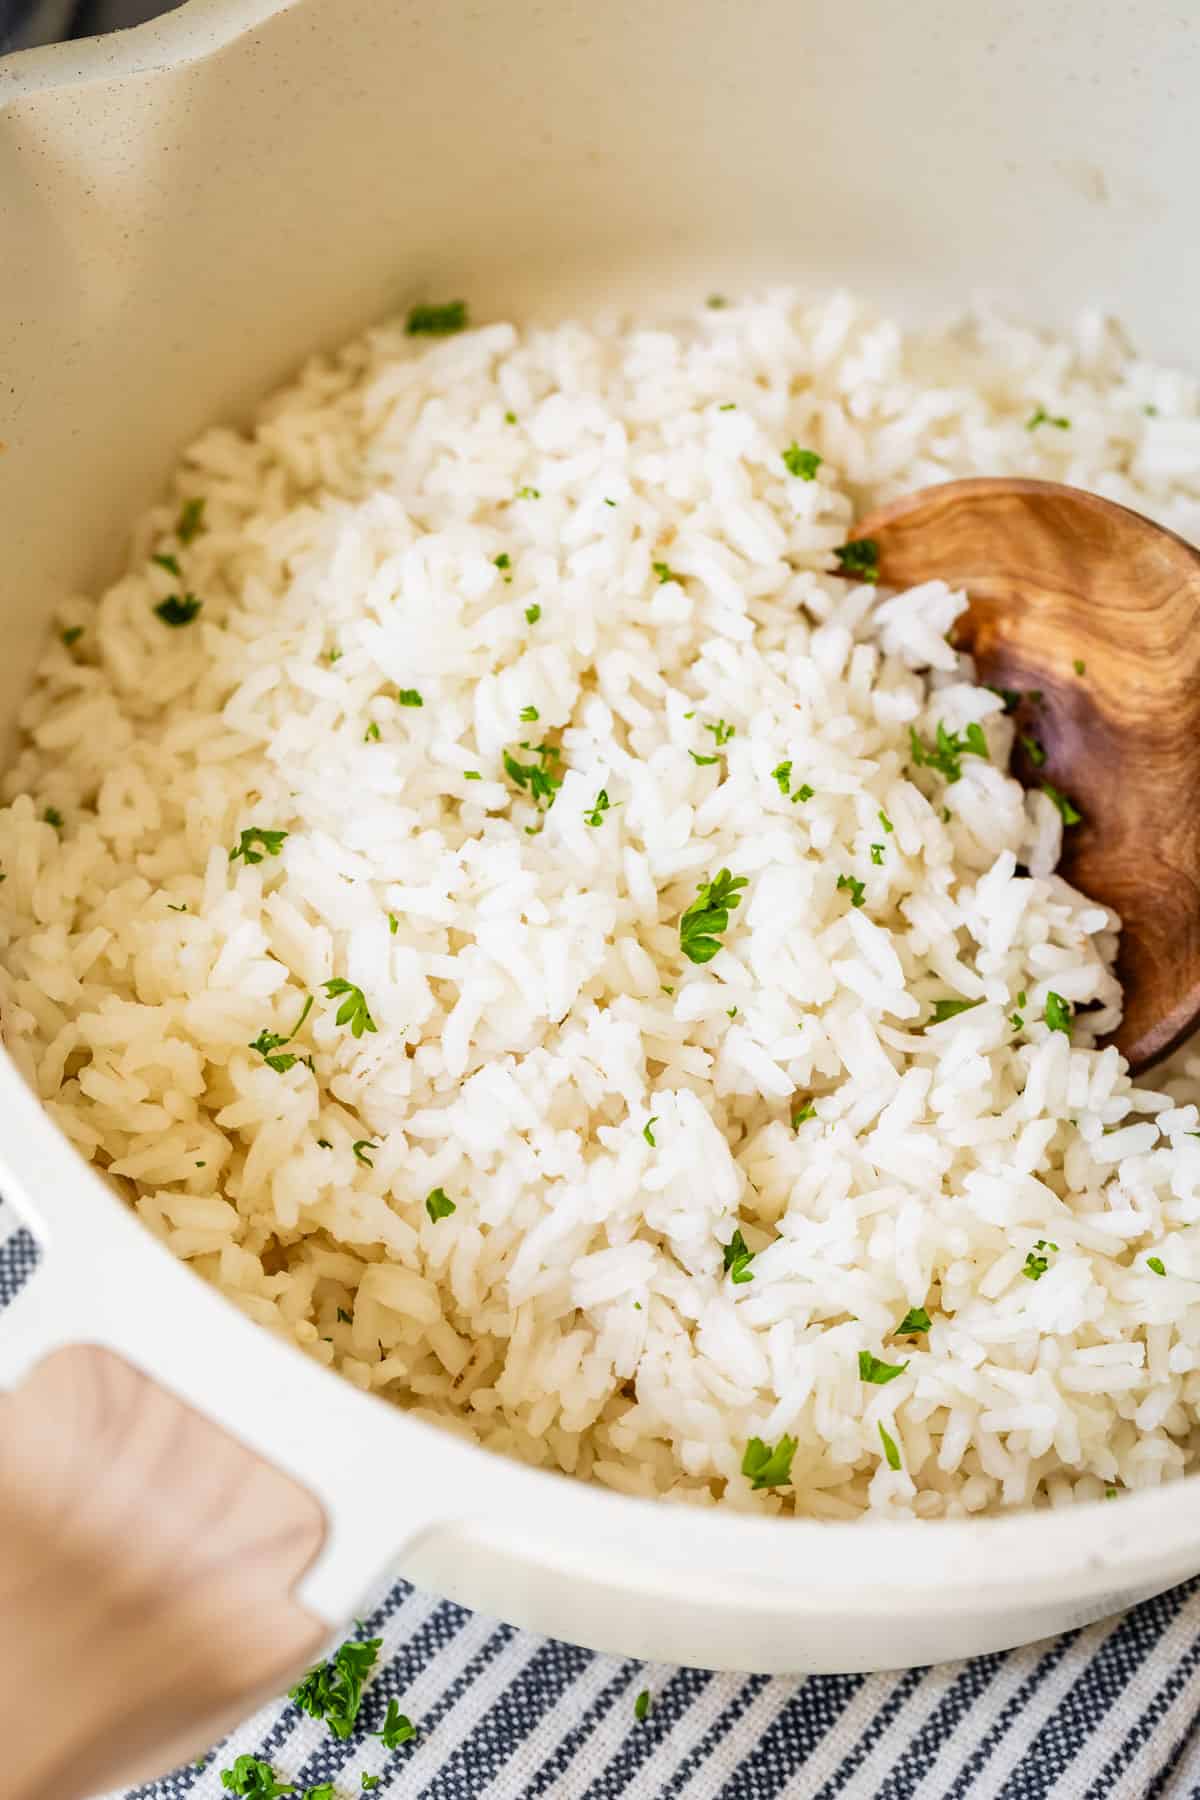
Cooked rice in white pot with wooden spoon and parsley.

Should you rinse your rice?

This story befuddled me, because I’ve tried rinsing rice (3 times! 8 times!) and not rinsing rice and CANNOT tell the difference, at all. (Where is my fine palate now??)

Turns out, this rinsing rule used to be super important, but is a little outdated, at least in the United States.

Rice is a big deal in Asia. Kind of like how the Inuits have 20 different words for snow, the Japanese in particular have gone deeeep into the world of rice. And indeed, if you are cooking some rice you bought overseas, you should follow all the rinsing rules you’ve heard about. Wash and clean that rice like you’re about to sell it on E-bay.

But here in the states? Nah. Rice grown and processed in Japan is not the same as rice in the United States. The reason the Japanese rinse so much is because the rice still has a sticky coating on it called hada nuka (“skin bran”), and if you cook your rice without getting that sticky stuff off, if will turn out gummy and mushy. You can buy “pre-rinsed” rice in Japan, but nobody does, because rinsing is such a cultural thing now.

Cooked rice in a pot with wooden spoon and parsley.

About 30 years ago, rice factories in the United States changed their process to include the removal of the sticky coating. Any rice you are buying here has already been “rinsed.” (You can read all about Japanese rice rinsing and the fascinating impact on the environment over at the Japanese Food Guide.)

If you hand-rinse rice that was already “rinsed” at the factory, you are not only doing a job that has already been done (trying to remove a “skin bran” that is not there), but you actually risk washing off some of the nutrients that are in the rice, sending them straight down the drain. Crazy, right, that it’s taken 30 years to get the memo out about this?? Raise your hand if your mama taught you to rinse the rice?

How to cook rice on the stove

Okay, so now that we’ve cleared up the rinsing situation, how do we make rice that doesn’t burn and scorch on the bottom, that isn’t crunchy when you serve it, and that isn’t a soggy bland mess?

It’s all about the water to rice ratio, and timing.

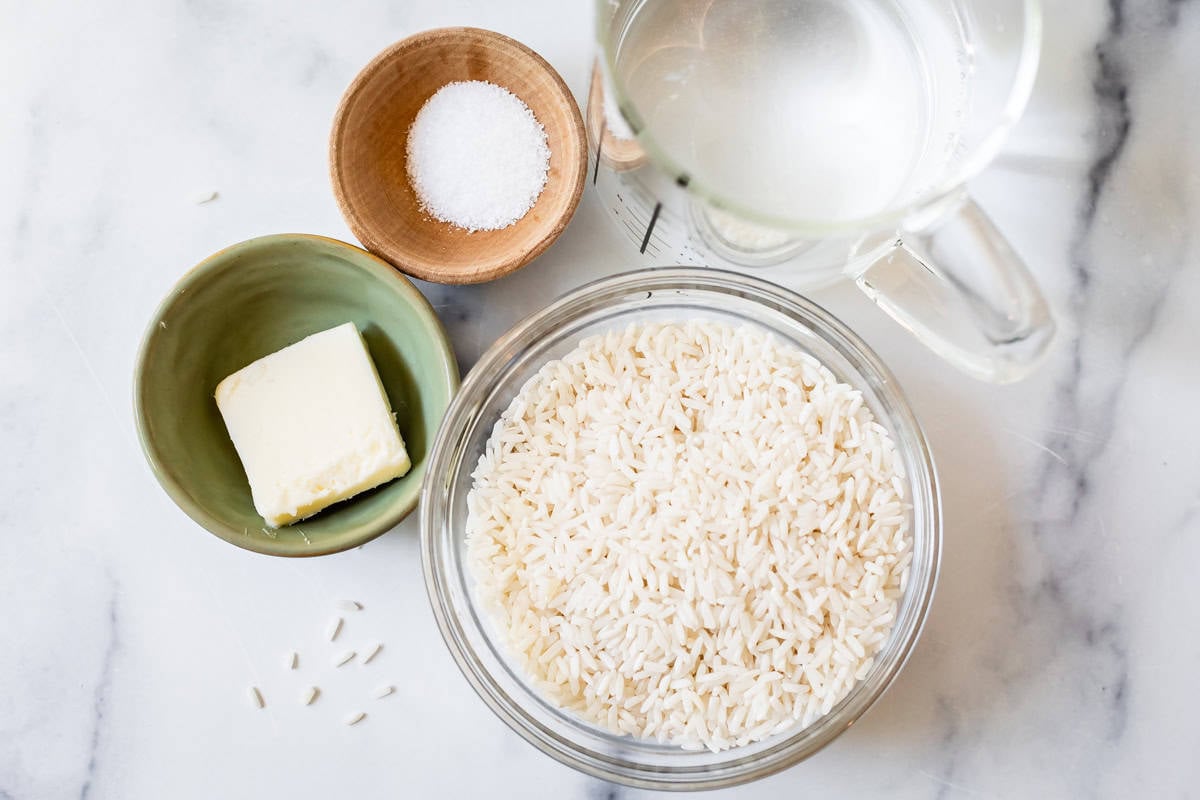
Measured ingredients for cooking rice in a pot including salt, butter, dry white rice, and water.

It’s not hard. But sometimes, it’s the simplest things that are the easiest to mess up.

Rice rules

  • Don’t rinse the rice. Your mama might have taught you that you need to rinse your rice to remove starch. Rinsing rice removes a tiny amount of starch, but not enough to make a difference. Also, rinsing rice can make it soggy! Even if you drain rinsed rice, it still retains some of the water. If you do insist on rinsing your rice, add 2 fewer tablespoons water when you cook it.
  • ADD SALT, FOR THE LOVE OF ALL YOU HOLD DEAR. Salt doesn’t make your rice taste salty; it makes your rice taste more like rice. This “hold the salt” attitude comes straight from Asian cooking, where those eating it have plans to douse their rice in a saucy and salty main dish (You know how salty soy sauce is, right?) It’s a very traditional choice, but I do not have a Korean grandmother snapping her fingers at me. Even when I make stir fry, I still salt my rice. And rice for Mexican food definitely needs salt. I cannot stress this enough! Salt is the magic ingredient for rice.
  • Remember to turn the heat down once it boils. If you don’t, you can burn the rice onto the bottom of the pan and cleaning it is going to be a pain. Plus, burned rice. Low heat is what you want.
  • Don’t peek at the rice. It’s not putting on a show for you in there! Taking off the lid lets steam escape. If the rice can’t steam, it will cook unevenly and some of it will be hard and crunchy. NOOO crunchy rice is so sad!
  • Don’t use an enormous pot. If you use a pot that’s too large, your rice won’t cook evenly. A pot that is 2 or 3 quart capacity is good for 1 cup of rice, or even doubling it. Only go for a big pot if you’re cooking at least 3 cups of uncooked rice.

What you need to make rice

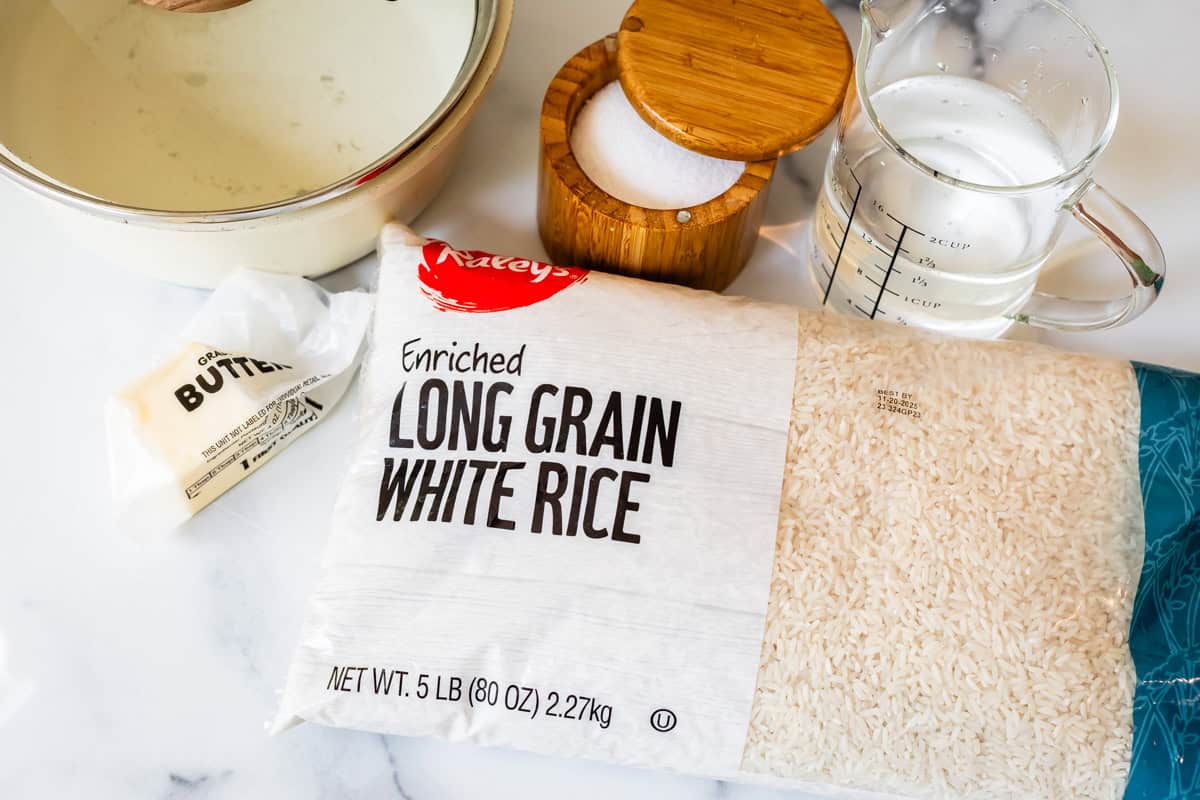
Ingredients for how to cook rice on the stove with long grain white rice, butter, salt, and water.

You probably have this stuff in your house right now. Scroll down to the recipe card at the bottom of the post for all the details!

  • rice: any kind of white rice, short-grain rice, medium grain rice, long grain rice, basmati rice, or sushi rice (don’t sub jasmine rice, it needs less water!)
  • kosher salt
  • butter or oil, any kind (optional!)

What is the right ratio of rice to water on the stove?

The right ratio for fluffy, perfect rice every time is 1 part rice to 1.5 parts water. You can scale up as much as you want, as long as your pot is big enough to contain it without spilling over. Here is a handy chart I made, mostly for myself, because I’m always trying to figure this out last minute at 5pm, squeezing my fists against my eyeballs, and it’s a disaster 😂 Math: not my strong suit.

DRY White Rice+ Water+ Kosher Salt+ Butter or Oil= COOKED Rice
1 cup1 and 1/2 cups3/4 teaspoon1 tablespoon3 cups
1 and 1/2 cups2 and 1/4 cups1 and 1/8 teaspoon1.5 tablespoons4 and 1/4 cups
2 cups3 cups1 and 1/2 teaspoons2 tablespoons6 cups
3 cups4 and 1/2 cups2 and 1/4 teaspoons3 tablespoons9 cups
4 cups6 cups1 tablespoon1/4 cup12 cups

Remember that we’re talking about the rice to water ratio for short, medium, or long grain white rice, basmati rice, or sushi rice! If you use some other kind of rice for this recipe, it might not turn out. Check the recipe notes for ratios for Jasmine rice, Jasmine is a little diva and needs her own special ratio 🙄 just kidding I love you Jas.

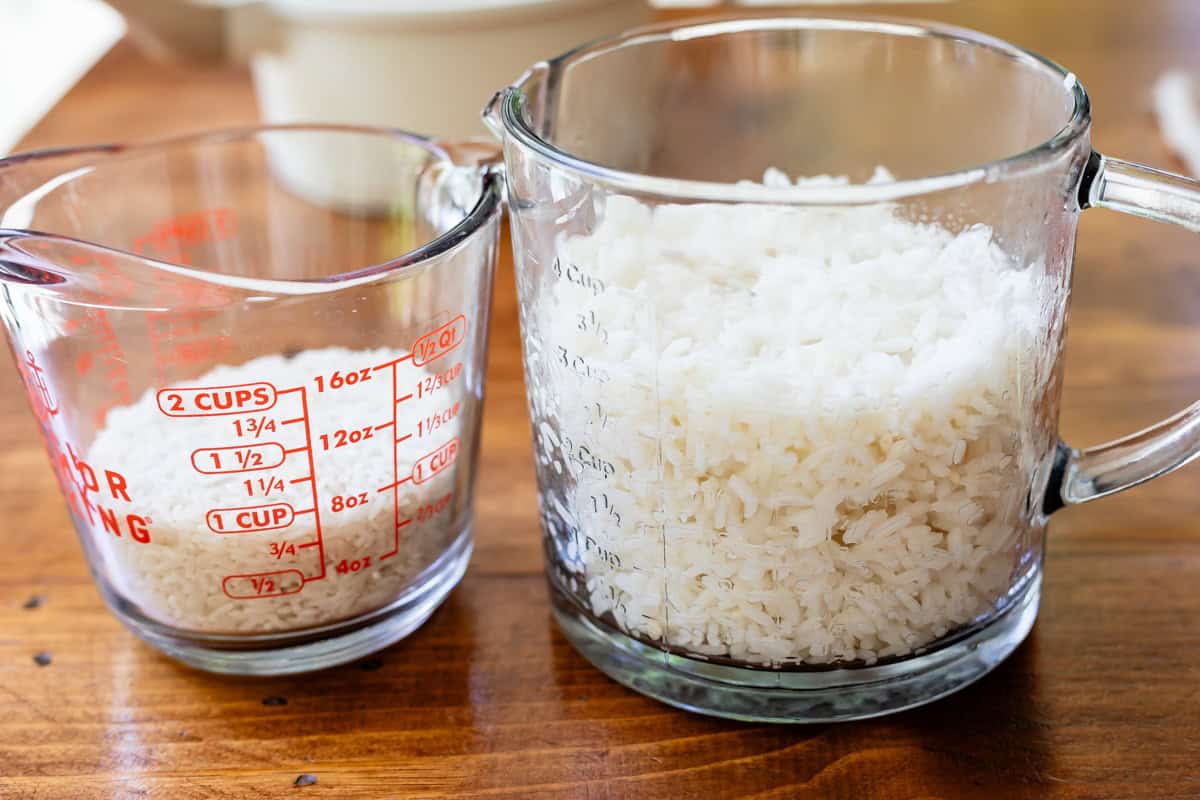
For every cup of uncooked rice, you’ll get about three cups of cooked rice (see the photo below). Generally when you’re serving a group you want 1/2 to 1 cup rice for each person, depending on what you’re serving with the rice. Of course, if you make many more cups of rice than you end up needing you can always freeze it for later (more on that later!)

glass measuring cups showing 1 cup of dry rice and 3 cups of cooked rice.

How to make rice

It’s so easy guys. Toss all the ingredients in a pot. Not too big of a pot, we’re not making soup. The rice won’t cook evenly. Just a medium or small pot is fine. (1, 2, or 3-quart capacity is great.)

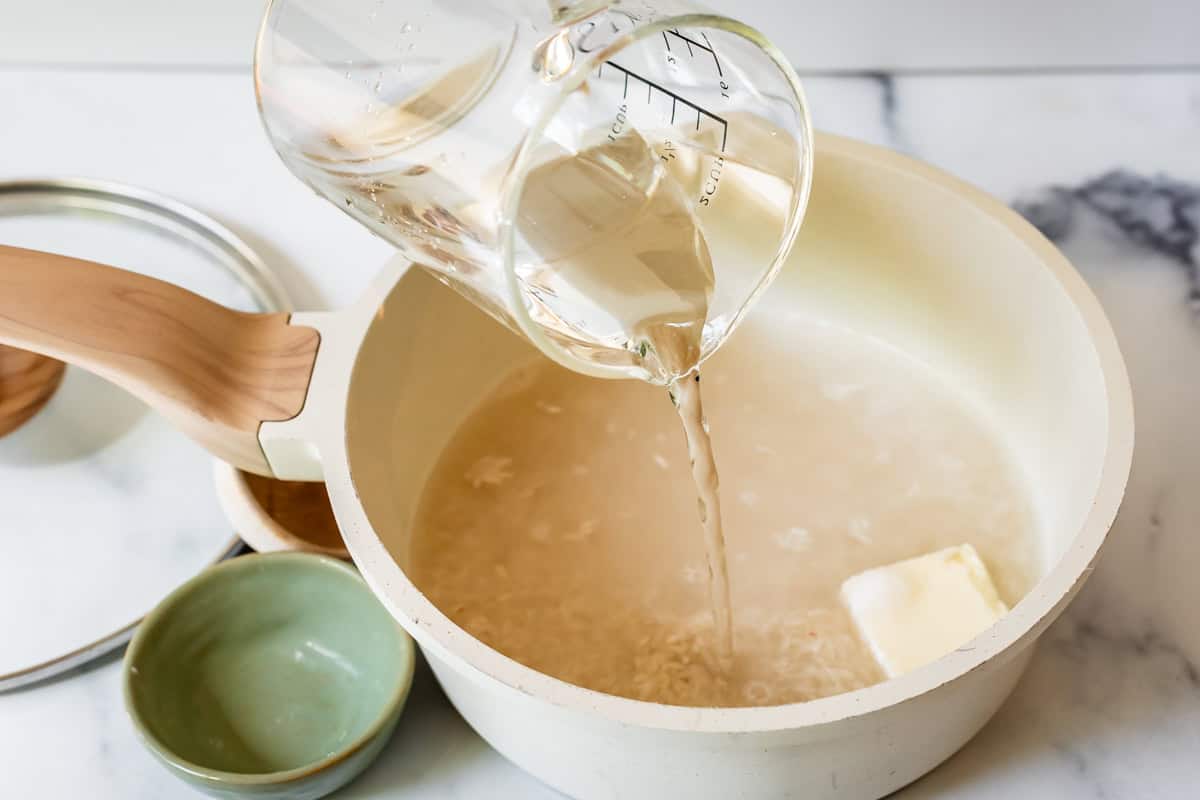
Preparing rice to cook on the stove by pouring water into pot with dry rice and butter.

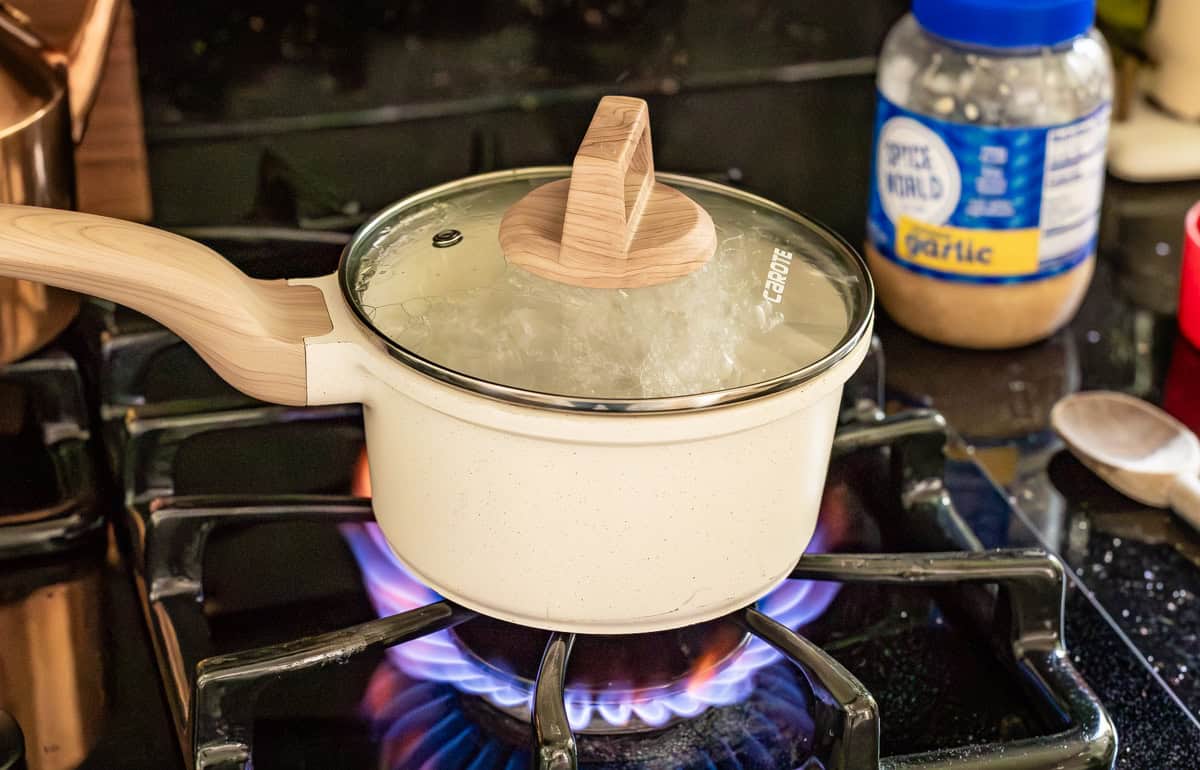
Put the lid on your saucepan and turn the heat to high. As soon as the water starts bubbling (steam will escape from the lid), turn the heat down. I am always bustling around my kitchen doing other stuff while I wait for the rice to boil, and it boils over I swear about half the time. Don’t be like me. Stick around and keep an eye on it. (DON’T give up and buy a rice cooker now. If you can manage to boil pasta, you can stick around to boil rice too. Don’t be a wuss.)

white pot of rice boiling on the stove with lid on.

Once it’s boiling, you are going to be tempted to take off that lid, especially if it boils over. Don’t do it! Just turn the heat down and walk away for 10 minutes.

Here’s the next big step. After 10 minutes, turn off the heat. That’s it. Don’t take off the lid. Don’t move the pot off the stove. Don’t do anything except set a 15 minute timer. We’re letting the rice rest so it can continue steaming just a little, absorbing any extra liquid so it’s nice and fluffy.

After this strenuous waiting period, you are done! You can finally take off the lid, I promise I won’t yell at you this time.

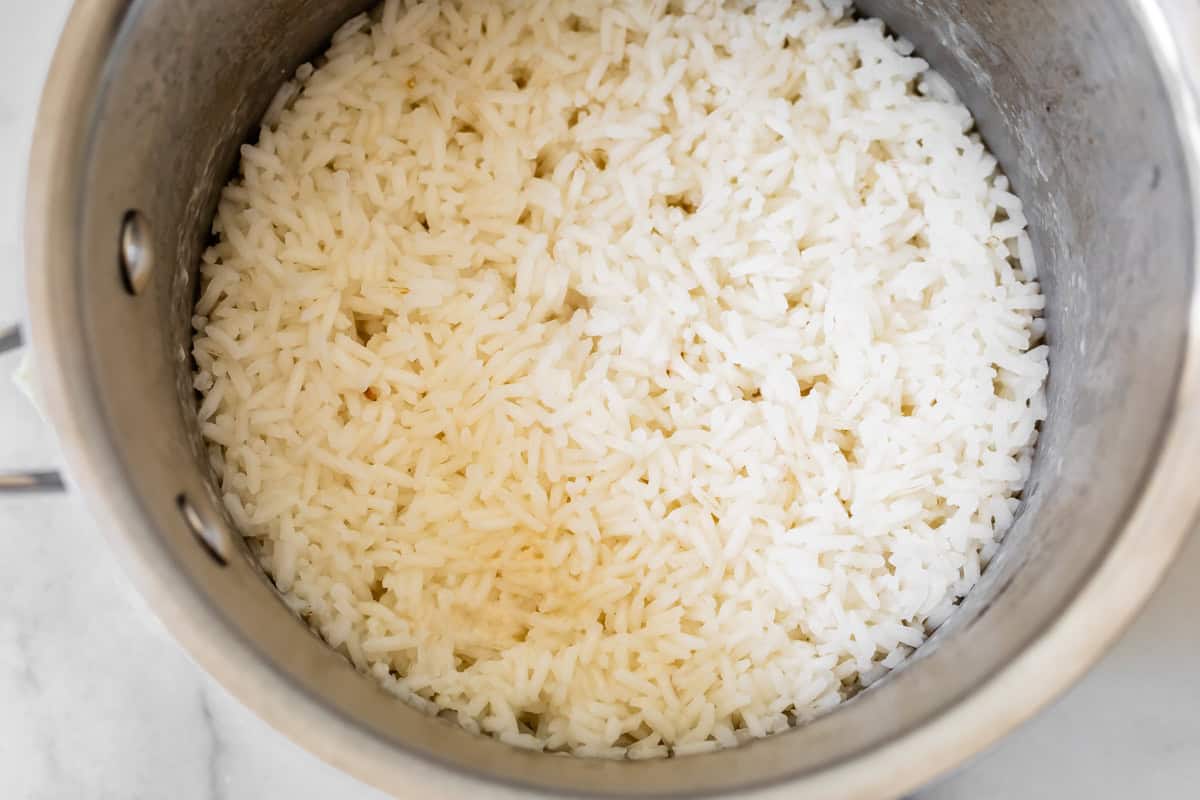
Cooked rice unfluffed in a pot after sitting from cooking on the stove.

Now it’s time to fluff!

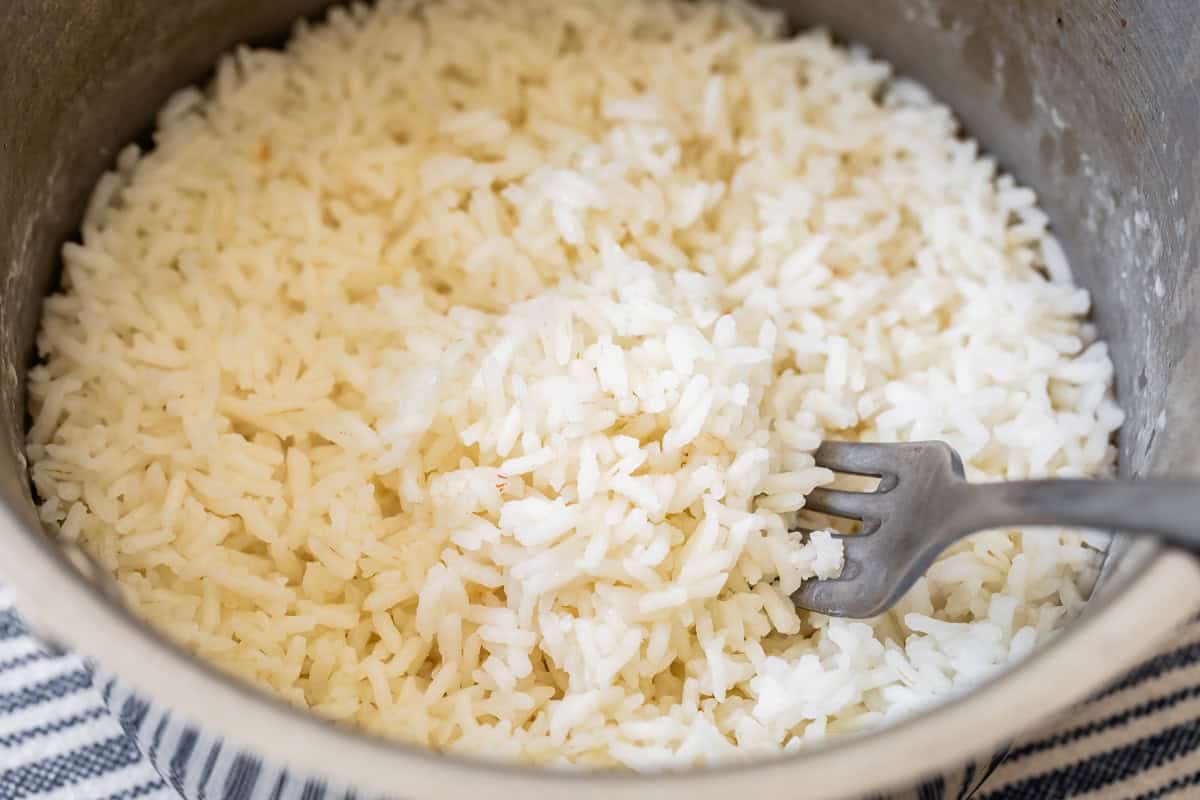
Fluffing cooked rice in a pot with a fork.

They always say to fluff the rice with a fork, but any utensil will do. The goal here is to not smoosh the rice. So don’t jam a spoon in and stir. Instead, insert your fork or spoon underneath the rice and gently lift. Do this over and over until your rice looks big and fluffy and maybe like a little cloud that you might just float away on.

Cooked rice in a pot with wooden spoon and parsley.

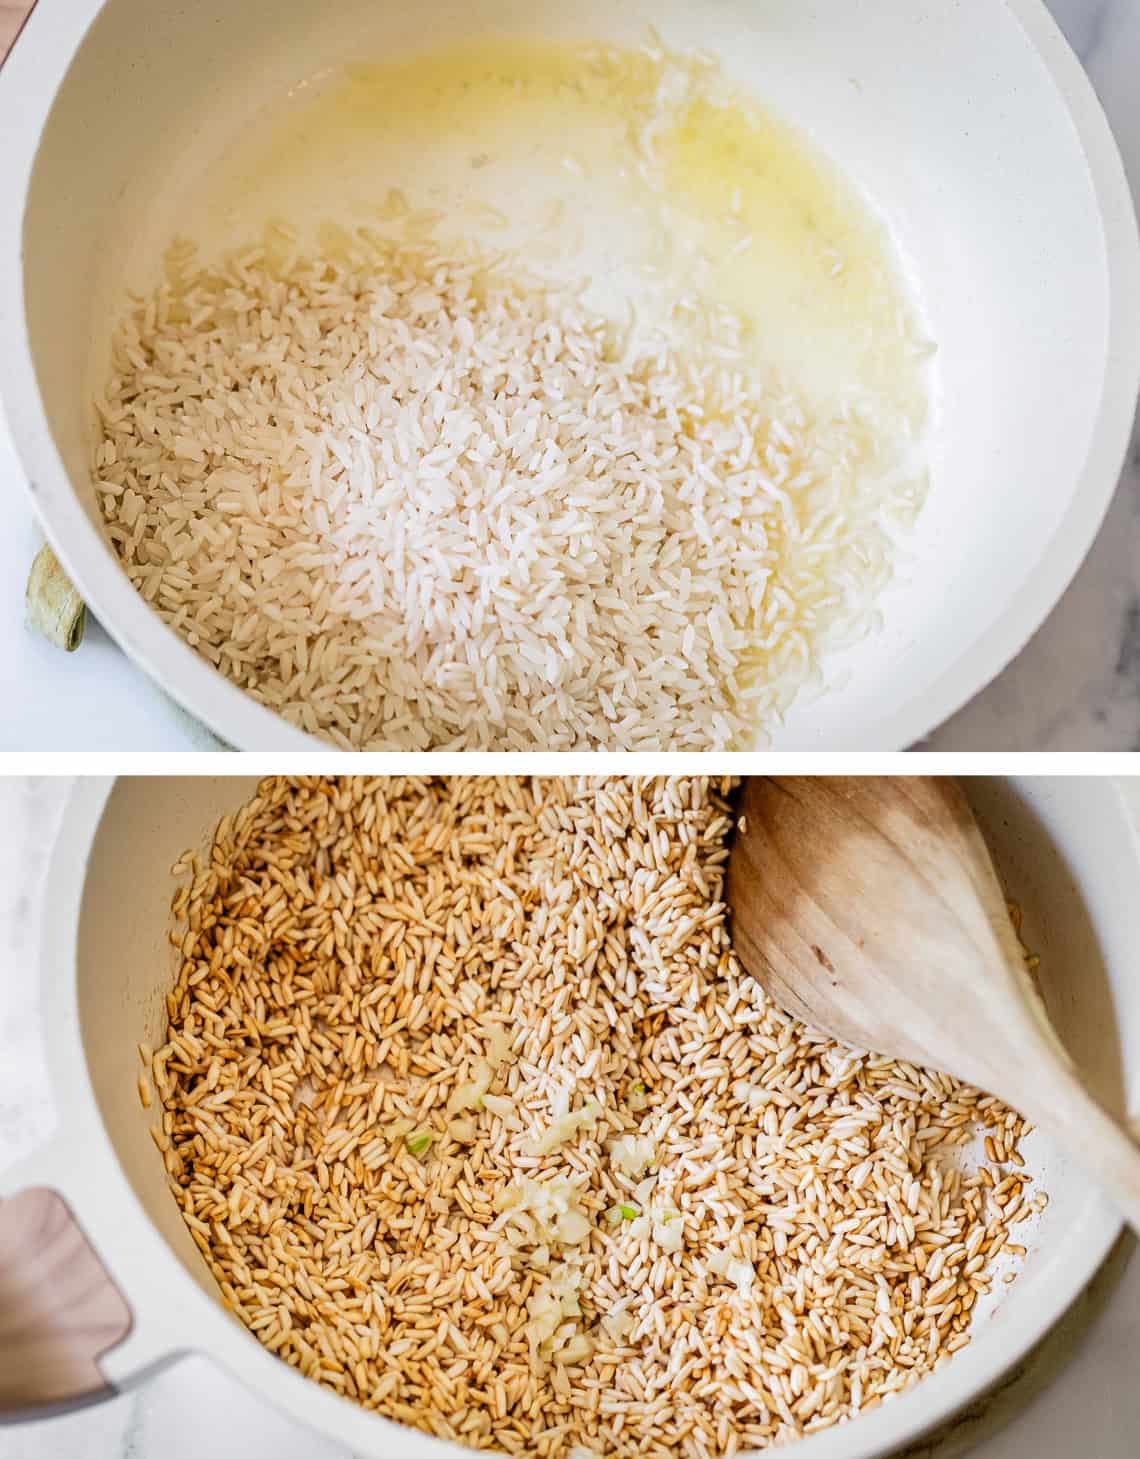
Toast the rice

There is one easy thing you can do to amp up the flavor of your rice, and that is toasting the dry rice in fat before adding the water. FATTTT yes please.

Cooking rice on the stove with browned butter before and after.

Oh and we’re adding some garlic this time, because garlic is the best. I’m a garlic lover and almost always add this to my rice. Totally optional. (I usually just add a spoonful of jarred garlic.)

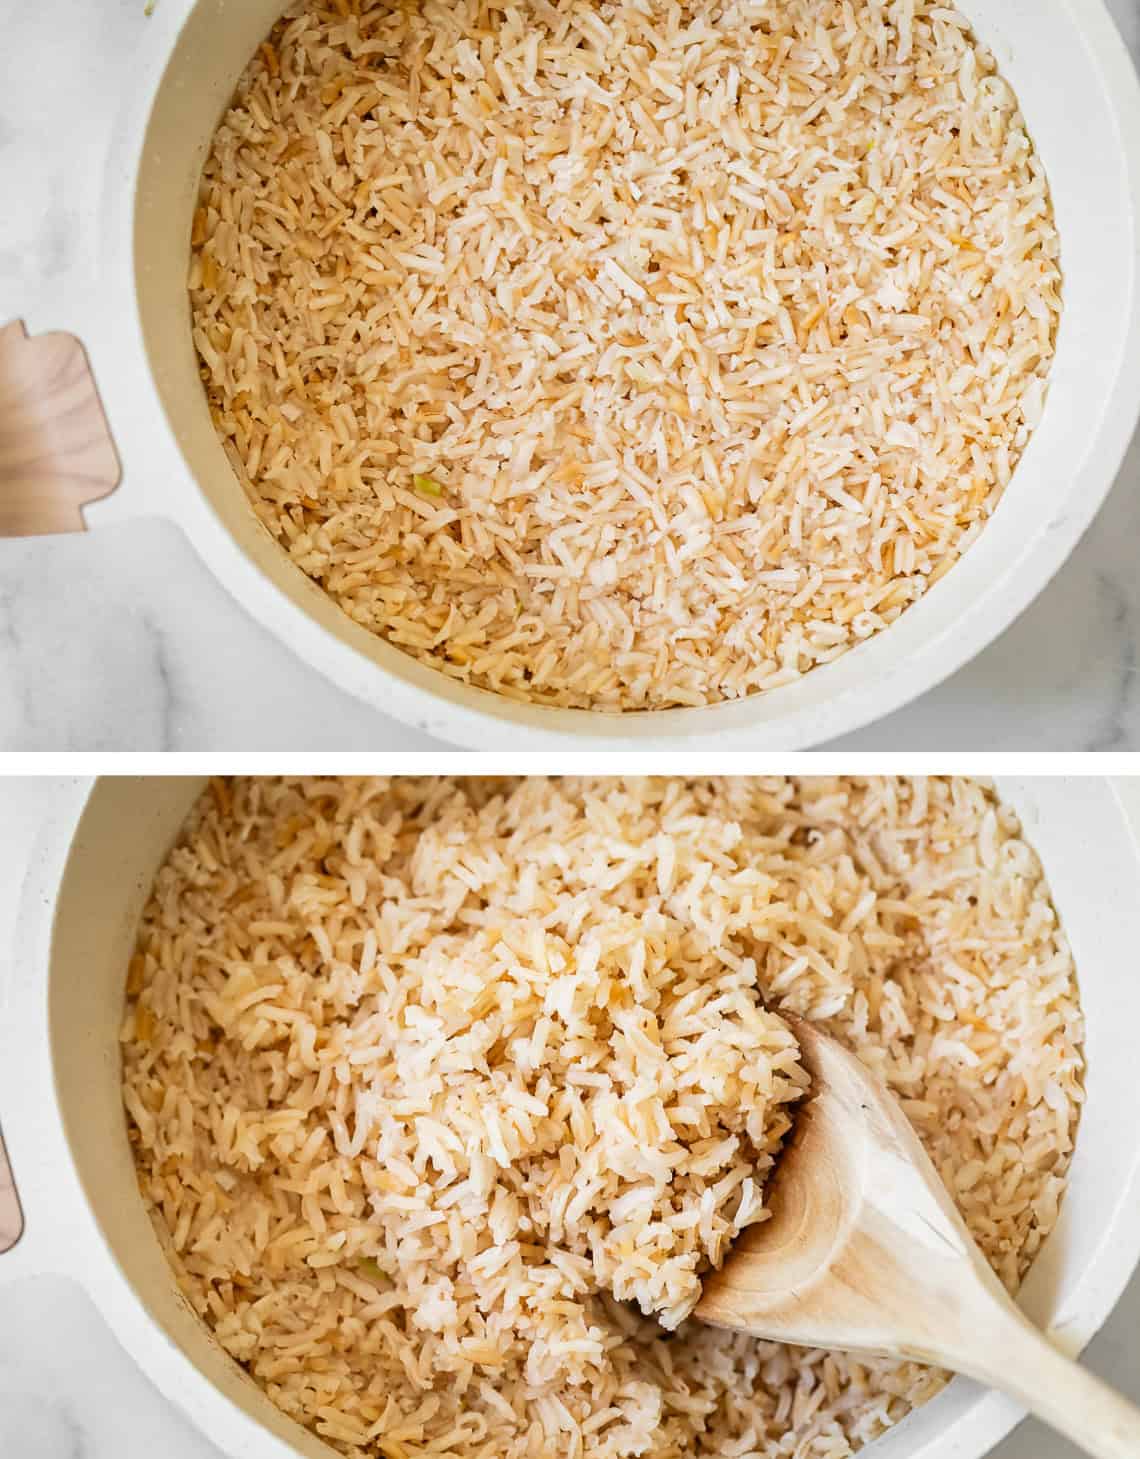
Cooked rice using browned butter in a stove just after finishing and with wooden spoon.

Can you see how brown it gets? That’s because the butter gets browned as you cook. This is just regular white rice, plus browned butter – it is not brown rice. If you use oil, it won’t get as brown like this.

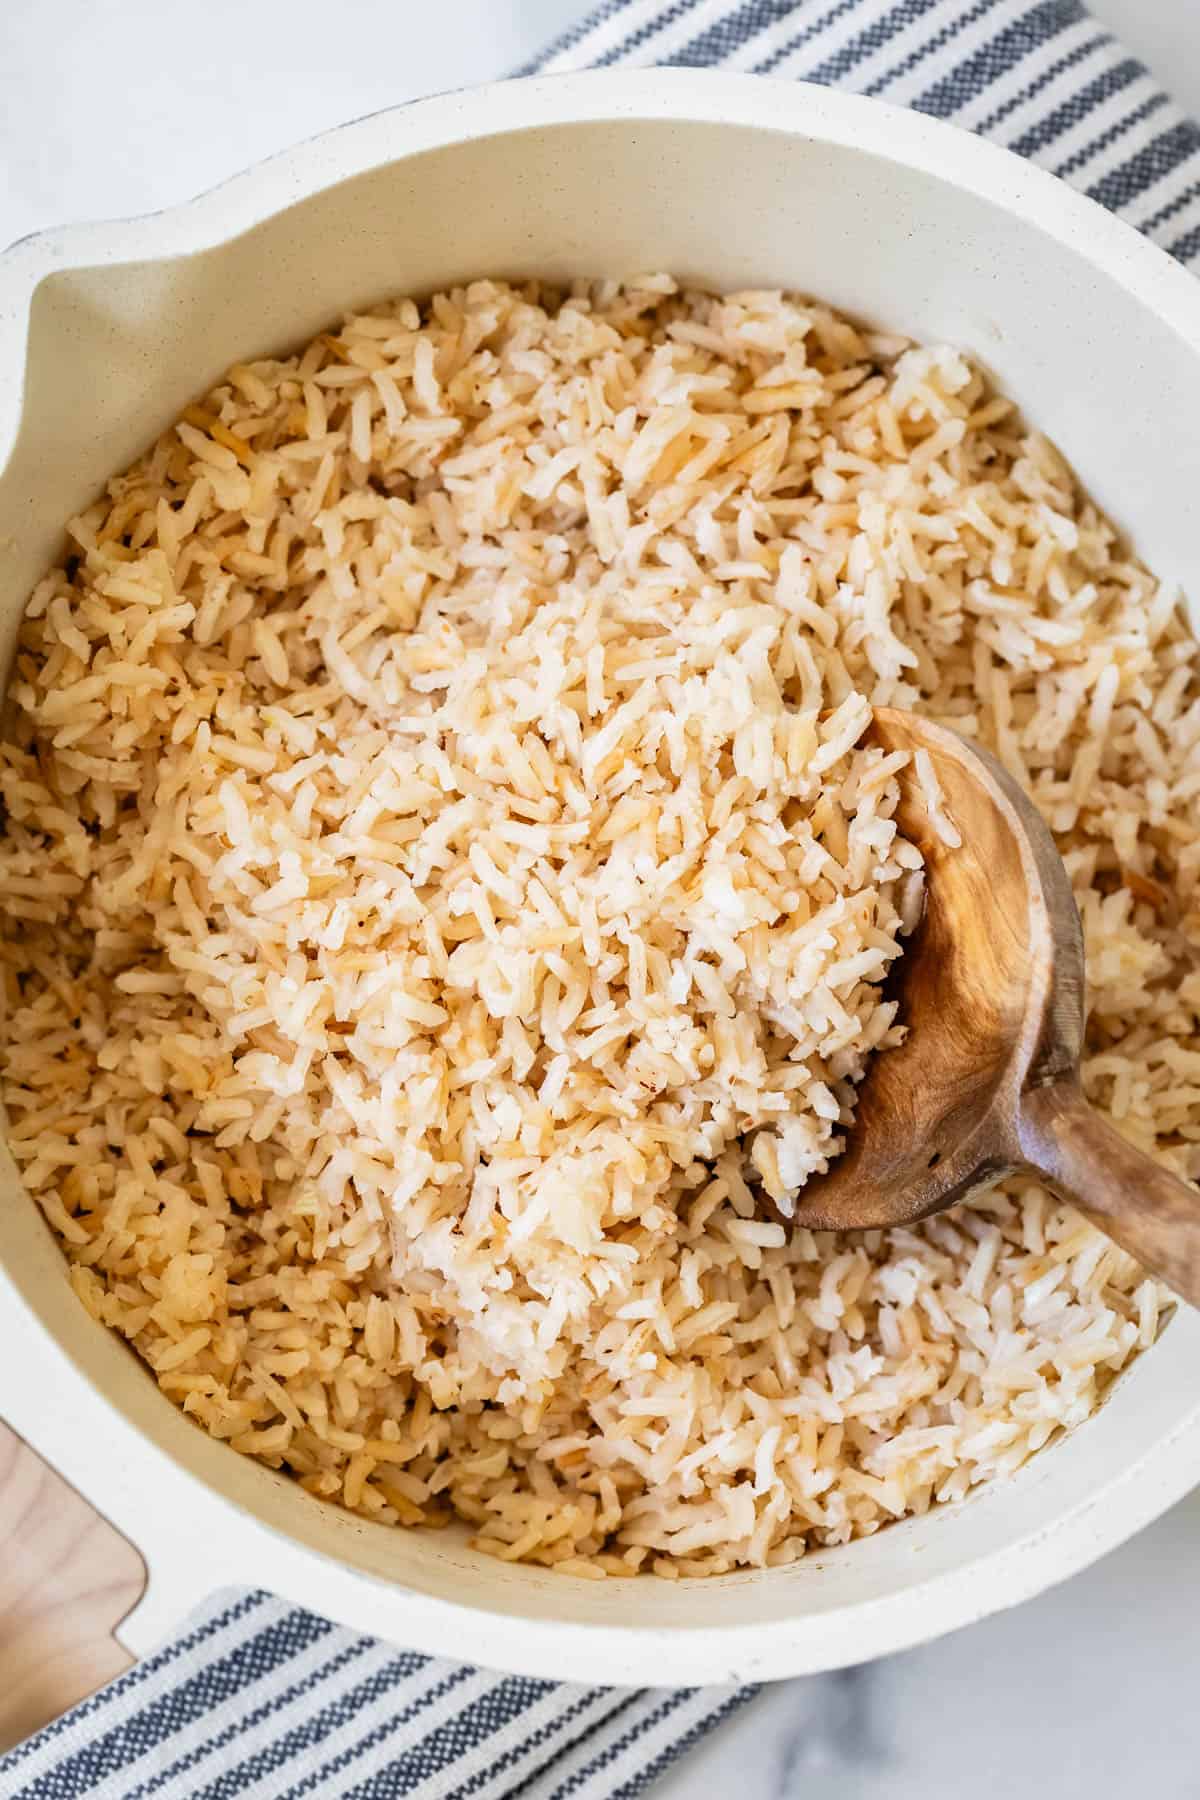
Rice cooked with browned butter in a white pot with a wooden spoon.

I mean look at this toasty goodness.

What to serve with rice

Like, you can pretty much serve anything with a pot of hot fresh rice and it’s going to be amazing. But these are some of my all time favorite meals that go perfectly with a side dish of rice.

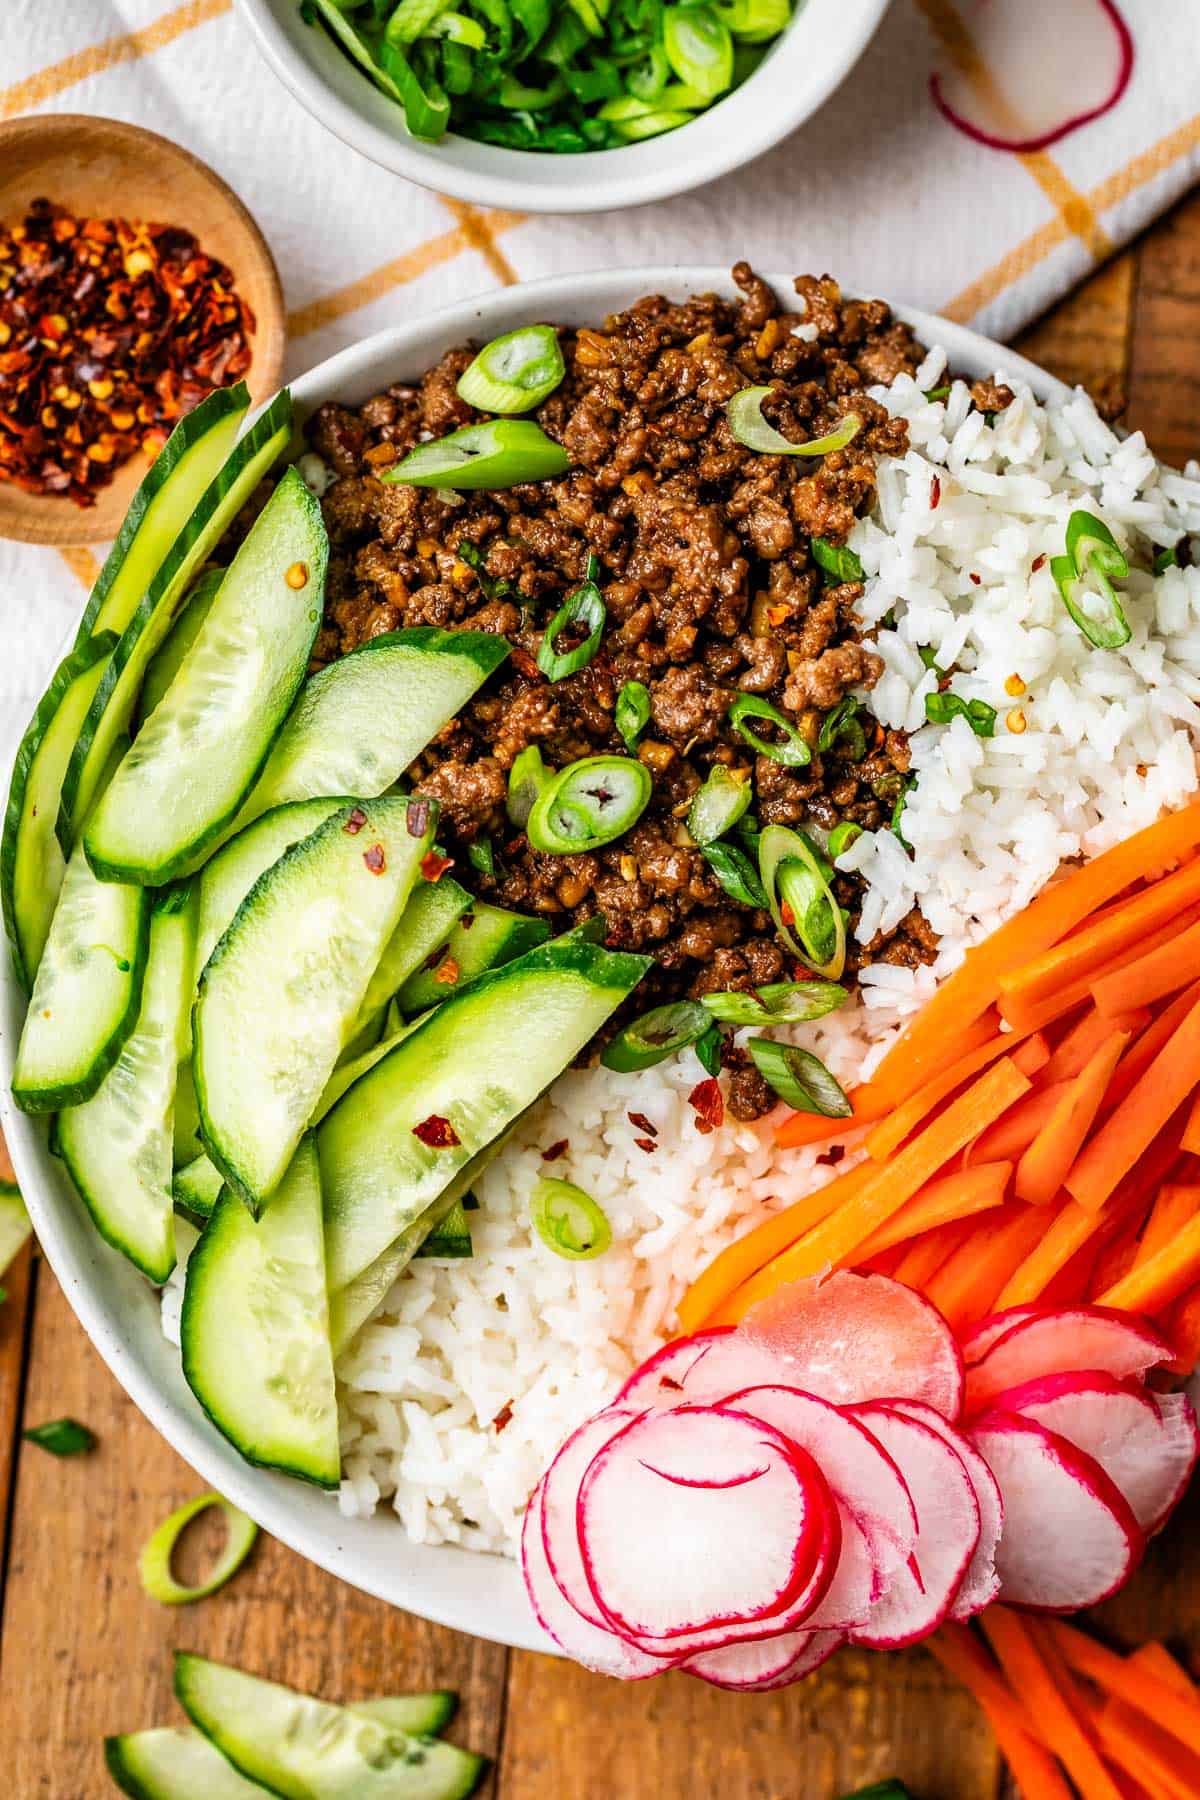
Korean beef bowl with rice and veggies on a wooden table with bowl of red pepper flakes.
Korean Beef for the winnnnn

What to do with leftover rice

You can warm up leftover rice and serve it with almost anything at all. If you want to incorporate it into your next meal, here are some ideas!

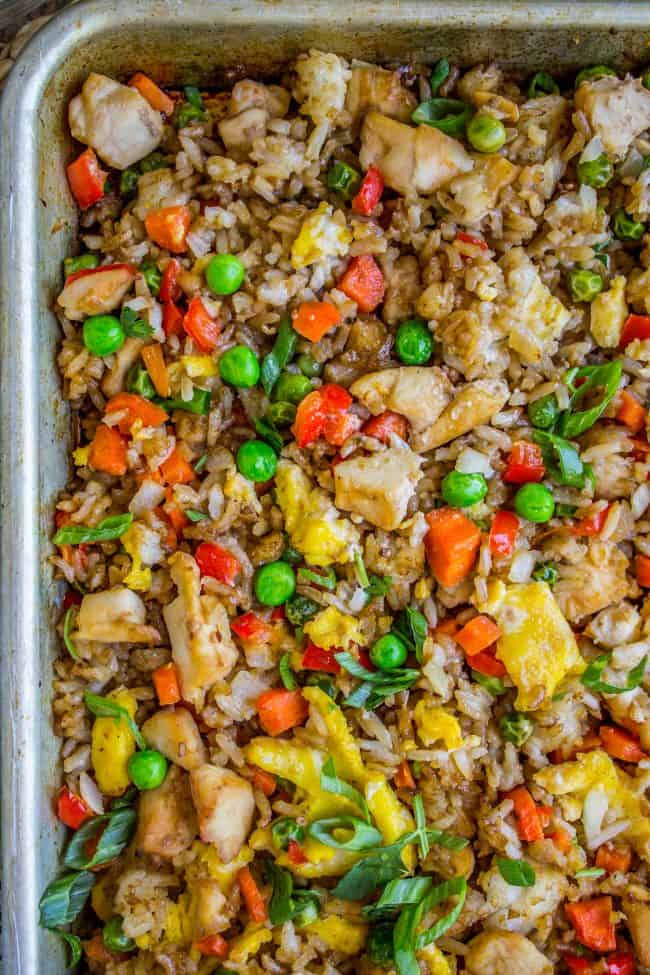
Sheet pan fried rice cooked and ready to eat.
Sheet Pan Chicken Fried Rice is so great for when you seriously misjudged a meal and have a tonnnn of rice leftover 😂

How to store rice

Storing leftover rice is easy. Once it’s cooled, toss it in a ziplock or Tupperware and pop it in the fridge. Make sure it’s tightly sealed. It shouldn’t be on the counter at room temperature for more than 2 hours before you refrigerate or freeze it.

How long does rice keep in the fridge?

Rice will keep in the fridge for up to 4 days. After that, you’re living dangerously, and by dangerously I mean risking food poisoning. I’m actually pretty lax when it comes to food that might be suspect from my fridge, to be honest (doesn’t this make you want to come over for dinner?? 😅) But I don’t mess around with rice. It’s so cheap, it’s so fast and easy to make, that if I’m not sure about it, I toss the leftovers and just make more. You can get soooo super sick from bad rice.

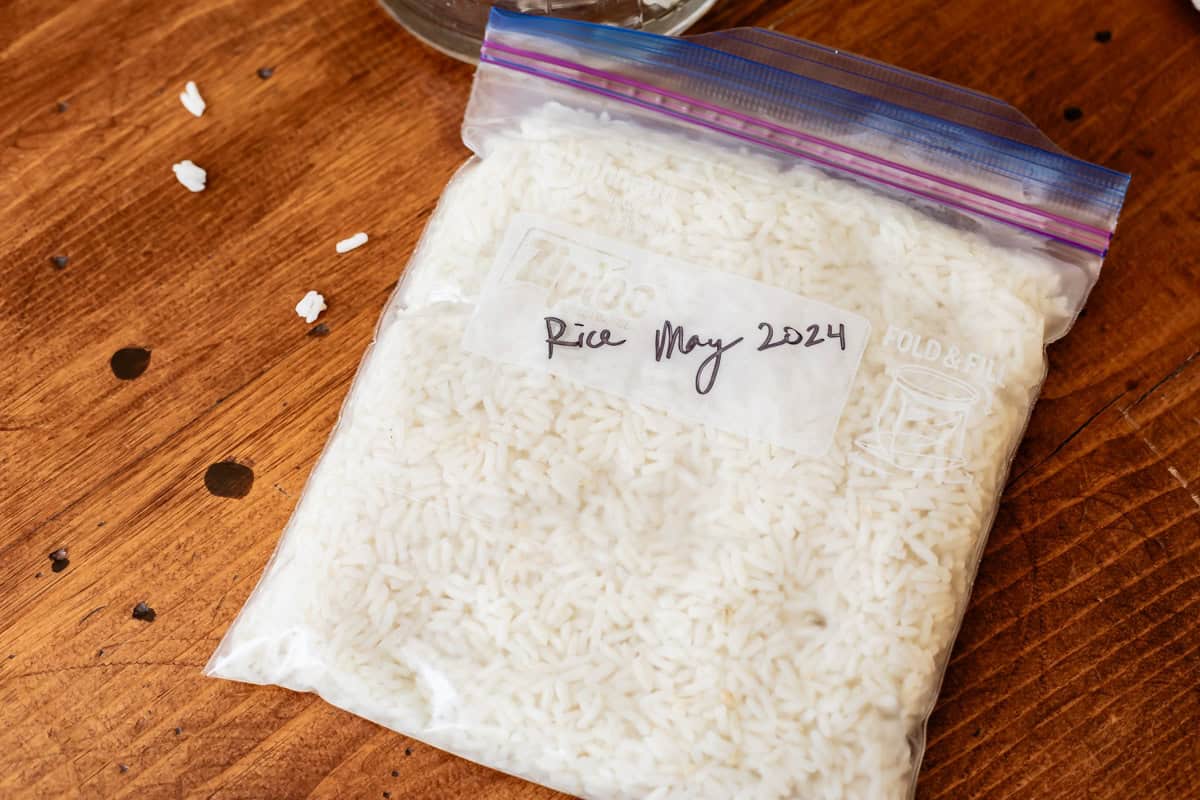
ziplock full of cooked rice, labeled with the date.

Can you freeze cooked rice?

Yes you can, and it’s awesome!! As soon as your rice is cool, just put it in a ziplock bag and pop it in the freezer. It will stay fresh for up to six months, and you can add it to other recipes or reheat some to go with dinner whenever you want. Make sure you sprinkle with water before reheating! Read on:

How to reheat rice

The best way to reheat rice is in the microwave with a little water, covered with a plate or microwave cover. For every cup of cooked rice, you’ll want to sprinkle on about 2 teaspoons of water. Rice stored in the fridge dries out, and a little moisture added back in makes the difference between “ugh, leftover rice” and “oh yeah! leftover rice!!” Make sure the rice is covered when you reheat, so that it can steam. If you’ve never reheated rice this way you’re going to be impressed by how much of a difference covereing and adding a bit of water makes. It’s like fresh rice on day 2. Use this method even if you’re reheating from frozen. It might take a little longer, but otherwise it’s the same.

Cooking rice frequently asked questions

WHY RINSE rice?

The purpose of rinsing rice is to remove excess starch, but it’s actually totally unnecessary if you are cooking with rice processed in the United States, since that step was taken care of in processing. (If you want to rinse your rice, go ahead! Just remember to add 2 fewer tablespoons of water per cup of rice.) If you bought your rice in bulk from a market and are concerned about dirt or debris, that’s a totally different (and valid) reason to want to rinse your rice. Just remember to reduce the amount of water.

how do i fix undercooked rice?

Your timer rang, but you can see that there’s still lots of liquid in the pot. Maybe you added too much water, maybe you lifted the lid halfway through and released all the steam, maybe your stove is just acting up. You can still fix your rice! Let the rice continue to simmer for another 3-5 minutes, then leave the lid on and let steam as directed.

how long does rice take to cook?

If you’re cooking sushi rice, basmati rice, short-grain, medium-grain, or long-grain white rice, it takes about 10 minutes to cook on the stovetop and another 10 to continue steaming, with the lid on. Jasmine rice takes the same time, but requires less liquid than the other types mentioned.

Facebook | Pinterest | Instagram

Close of up basmati white rice in a metal pot.
Print

How to Cook Rice on the Stove

Do you know how to cook rice on the stove? It's actually SO easy to make rice in a pot. I promise you don't need a fancy rice cooker appliance! If you're tired of burned, mushy, bland rice, we are going to fix that today! I will show you step by step exactly how I make rice for my family, something I do weekly. Rice done right is fluffy and flavorful. No gumminess, no scorching, no crying over burnt rice. Serve it with dinner, or meal prep it with protein and veggies for the week!
Course Side Dish
Cuisine Asian, Mexican
Prep Time 3 minutes
Cook Time 10 minutes
Steam Time 15 minutes
Total Time 28 minutes
Servings 4 people
Calories 194kcal

Ingredients

  • 1 cup white rice sushi, short, medium, or long grain
  • 1 and 1/2 cups water*
  • 1 tablespoons butter** or oil
  • 3/4 teaspoon kosher salt or sea salt use 1/4 teaspoon table salt
  • 1 clove garlic optional

Instructions

  • Add 1 cup dry rice, 1 and 1/2 cups water, 1 tablespoon butter or oil,** and 3/4 teaspoon kosher salt to a medium saucepan. Add 1 clove minced garlic if you like! It's optional! I love the flavor.
  • Boil. Place a lid on the saucepan and turn the heat to HIGH. Stick around until the rice comes to a boil, this only takes a few minutes. Don't walk away, or it will boil over. My rice boils over probably 9 out of 10 times that I make rice, 😆 so don't panic if it happens, you will just have to clean it up. (Actually, my toxic trait is not cleaning up my boiled over rice mess. Welcome to my house, I'm disgusting.)
  • Bring the temperature down to low. As soon as you see steam escaping from beneath the lid, it's boiling. Don't you dare lift that lid. Turn the heat down to LOW. Cook on LOW for 10 minutes.
  • Steam. When the 10-minute timer rings, turn off the heat but don't remove the pot from the stove, leave it right where it is. DON'T peek, don't take off the lid. Set another timer for 15 minutes so that it can steam.
  • Fluff. When the 15-minute timer rings for the steam, you can finally take that lid off. They always say to fluff the rice with a fork; the goal here is to aerate the rice by lifting it gently. Use whatever utensil you want, but "stirring" is not the best method here, you don't want to smoosh your rice. Insert your fork or spatula underneath the rice and lift, over and over, until the rice is fluffy and big and hot and ready for a pat of butter. Yum.
  • Serve hot! Store leftovers covered in the fridge for about 4 days.
  • Freezing Instructions: As soon as your rice is cool, just put it in a ziplock bag and pop it in the freezer. It will stay fresh for up to six months. Reheat in a bowl in the microwave, sprinkled with 2 teaspoons water and covered well so the rice can steam.

Notes

*JASMINE RICE: Jasmine rice is very soft and needs less water. Keep everything the same for the recipe, but use 1 and 1/4 cups water for every 1 cup dry rice. 
**TOASTY: If you like your rice toasted, add the butter or oil to the saucepan by itself and warm it up on medium heat. Add the rice (and garlic, if you are into that) and stir it with a wooden spoon for 3-5 minutes, until the rice has a lovely light toasted aroma and some of the grains are turning a very light golden brown. Add the remaining ingredients and do everything else the same. (The photo of brown-looking rice in the post is actually white rice toasted in butter which had browned. If you use oil, it won’t get as brown.)
Double the recipe: You can double, triple, quadruple this recipe, no problem. See the chart in the blog post for ratios. You may need to let the rice steam at the end for more like 15-30 minutes, instead of the 10 minute steam called for. 
 

Nutrition

Serving: 1serving | Calories: 194kcal | Carbohydrates: 37g | Protein: 3g | Fat: 3g | Saturated Fat: 2g | Polyunsaturated Fat: 0.2g | Monounsaturated Fat: 1g | Trans Fat: 0.1g | Cholesterol: 8mg | Sodium: 175mg | Potassium: 54mg | Fiber: 1g | Sugar: 0.1g | Vitamin A: 87IU | Calcium: 17mg | Iron: 0.4mg

Mexican Street Corn Dip Recipe

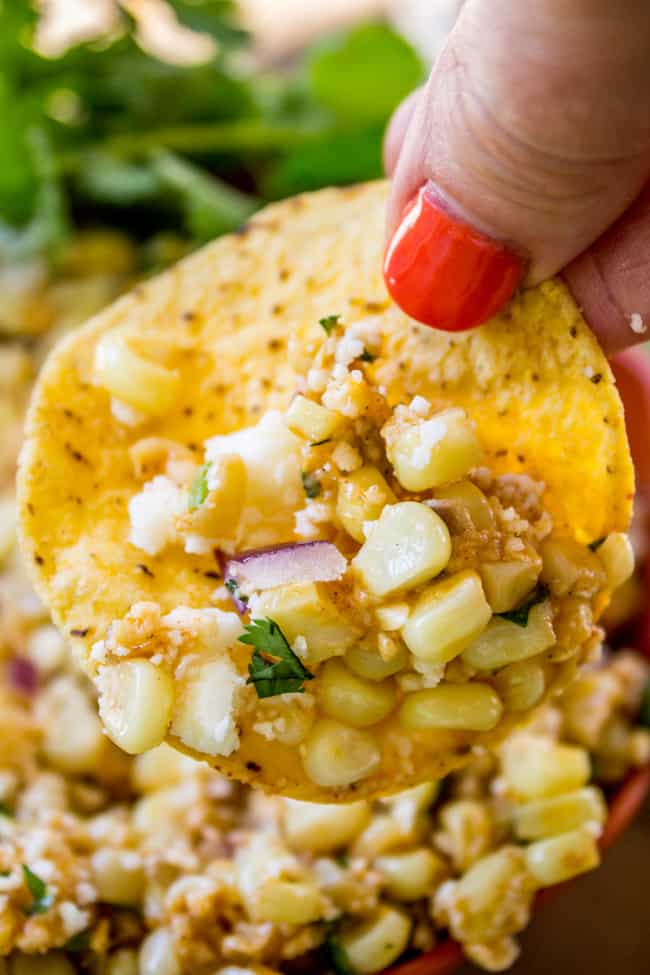
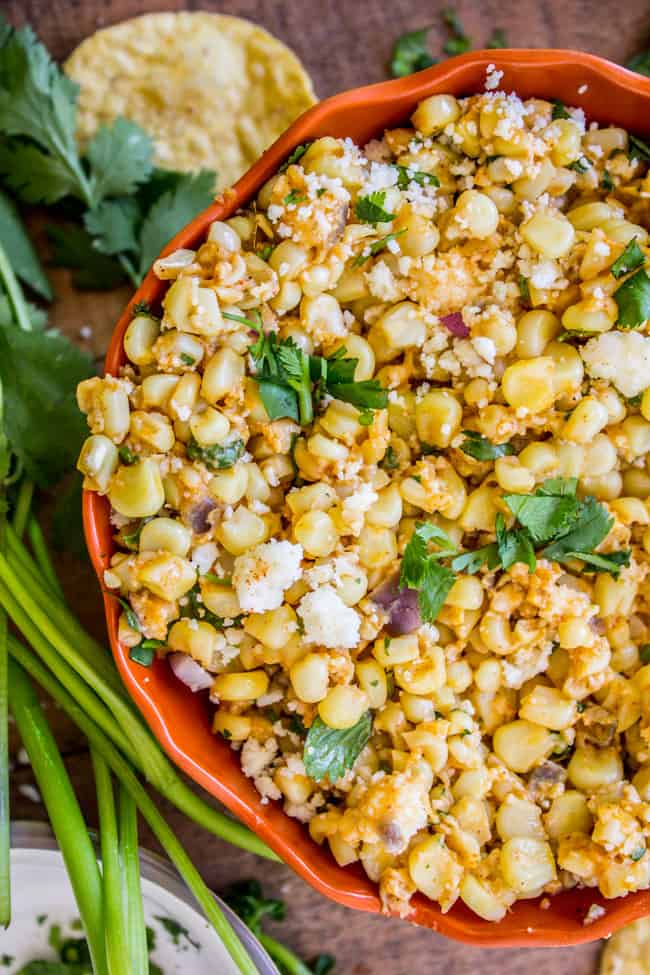
This corn dip recipe tastes just like an elote (Mexican street corn). It is the perfect combo of sweet corn and savory tart cheese. Plus it’s a lot easier to eat AND you get tortilla chips. Win! Originally published June 16, 2017. My cousin Lani has been making this corn dip for every family get-together…

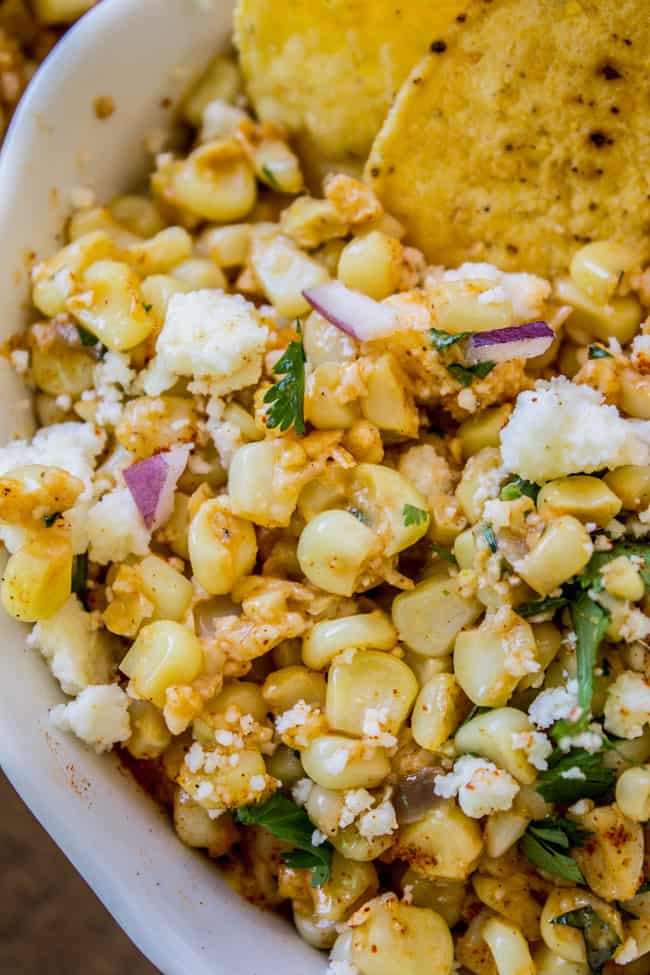
This corn dip recipe tastes just like an elote (Mexican street corn). It is the perfect combo of sweet corn and savory tart cheese. Plus it’s a lot easier to eat AND you get tortilla chips. Win! Originally published June 16, 2017.

Mexican Street Corn Dip
Table of Contents
  1. What is street corn dip?
  2. Mexican Street Corn Dip Recipe Ingredients
  3. How to make Elote Dip
  4. What to Eat with this Street Corn Dip Recipe
  5. More dips you’ll love
  6. Some of my favorite Mexican recipes
  7. Elote Dip Recipe Recipe

My cousin Lani has been making this corn dip for every family get-together in the summer for years, and every time it disappears so fast. I make a point to eat at least 3x my share of it before even bothering to grab a hot dog from the grill (sorry family, I’m the reason you didn’t get any amazing dip…I’m in it for the win.)

Elote Corn Dip

My niece Ella requested this Mexican corn dip for her graduation party a few weeks ago. I volunteered to make it because then I knew I would be able to pin Lani down for the recipe. Lani is one of those amazing cooks who makes amazing food with seemingly no effort. I know it looks all fun and games here on the blog, but if you actually saw me working in my kitchen, I’m sweatin’. (“Wait, was is 1/4 of salt or 1/2 teaspoon??”) Lani just freestyles it and everything comes out incredible.

Mexican Corn Dip Recipe

But she’s REALLY bad at translating her “recipes” for the average lay person (me). “Lani, can I have your recipe for ___ ?” “Oh yeah, it’s so easy, you just take a little__ and a little__ and add it until it’s like ___, you know?”

Sure Lani. Thanks for NOTHING. (One of the top recipes on my site was me trying to recreate a random side dish she made for dinner one time. Obviously that one turned out okay.)

Elote Dip

I called her to get the corn dip and she started explaining how she makes it before I could find a pen. I finally found one and wrote down corn, butter, garlic, red onion, salt, pepper, paprika, mayo, cotija, cilantro. That’s all I could remember from what she said.

But she tried the dip at the party and said it’s even better than when she makes it. She’s probably just buttering me up, but I’ll take it.

Next I want to get her guacamole recipe, but I know she’ll be like Karen, just get some avocados and smash them up with lime juice and add some–and I’ll be like, BUT HOW MANY AVOCADOS LANI and she’ll be like CALM DOWN IT’S JUST GUACAMOLE. #charlatan (Update: it really is kind of embarrassingly easy, and it is my favorite guacamole ever.)

What is street corn dip?

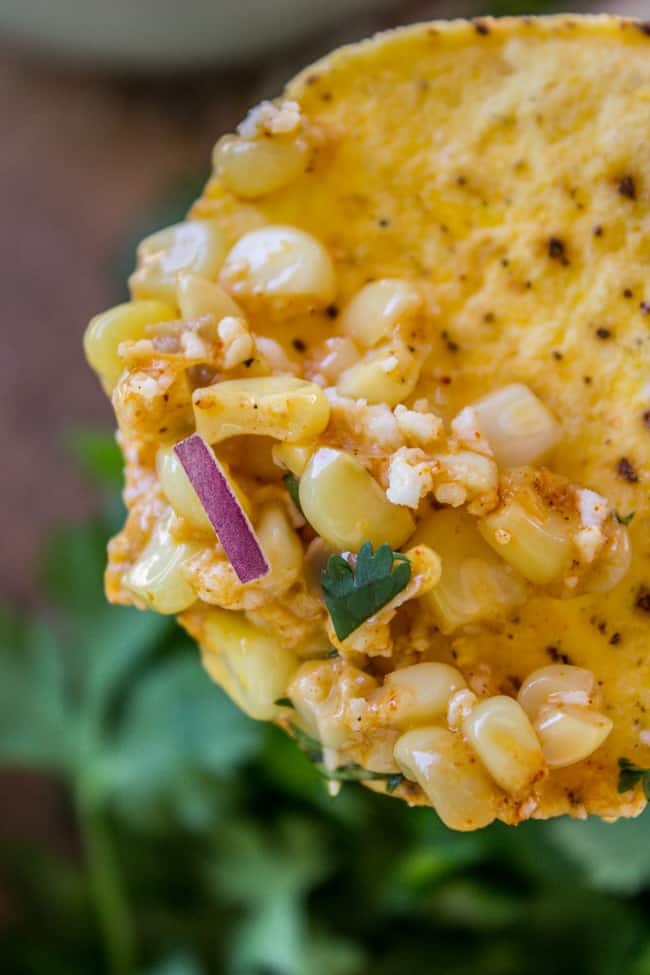
If you’ve ever had elote, you already know you’re going to love this. If you haven’t had it, think of corn on the cob, but with classic Mexican toppings: mayo, crumbly cheese, cilantro, and chili powder. Now imagine it all chopped up in dippable form, so you can serve it with chips at a party. Are you drooling yet?? Let’s make it!

Mexican Street Corn Dip Recipe Ingredients

Here’s a quick list of what you need to make street corn dip. Scroll down to the recipe card at the bottom of the post for more details!

  • Fresh corn on the cob (10 cobs)
  • Red onion
  • Salted butter
  • Garlic
  • Paprika
  • Chili powder
  • Kosher salt
  • Freshly ground black pepper
  • Mayonnaise
  • Cotija cheese
  • Cilantro
  • Tortilla chips (for serving)

How to make Elote Dip

Prepping corn on the cob

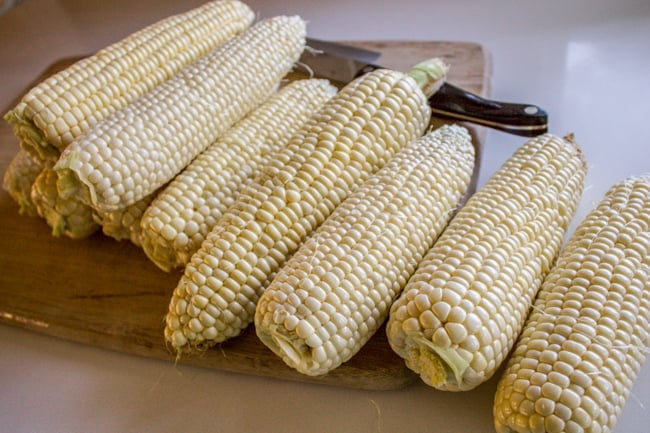
Lani said to get more corn than you think you need, like 10 cobs for one bowl of dip. It sounds like overkill, I know. But do it. Later one when you can’t stop eating it, bite after bite, you’ll be glad you made the full recipe!

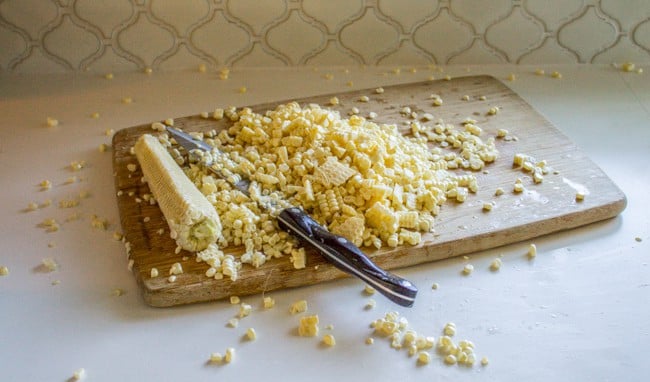
Cutting the corn off of each job

Lop off all that corn. It makes a big ol’ mess on your counter. It’s worth it to get that freshness! Don’t forget to sharpen your knife blade. It makes a big difference when you can easily and quickly shave the kernels off.

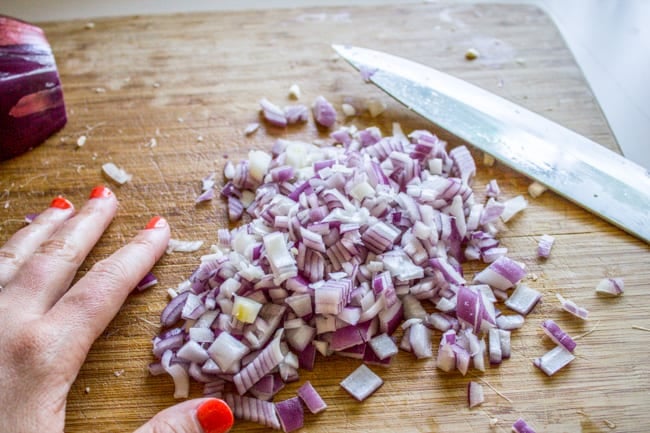
Dicing onions for the dip
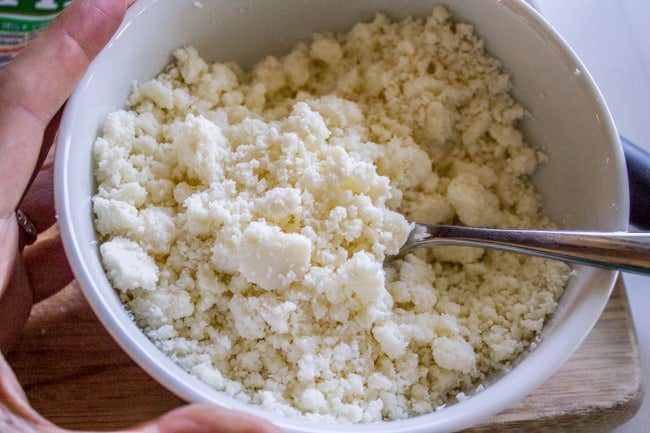
Crumbled up cotija cheese

Have you ever had Cotija? It’s a dry Mexican cheese. It’s so good on salads, barbacoa, tacos, burrito bowls. It is a flavor you must have when making this elote dip. It usually comes in a round block. You can find it either in the cheese aisle or over with the deli cheese. You simply put a chunk in a bowl and use a fork to break it up.

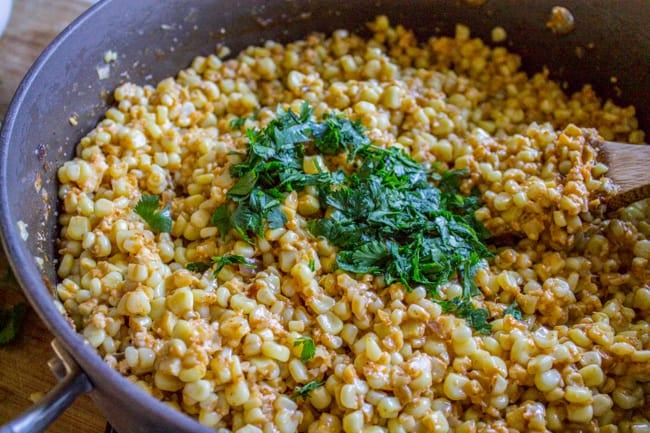
Adding cilantro to the Mexican Corn Dip

Finally, you add the cilantro and mix it all together. If you’re a cilantro hater you can leave it out. But do try to convert yourself, hater. You’re missing out. Plus it adds a nice color pop.

What to Eat with this Street Corn Dip Recipe

I love serving this dip at BBQs, potlucks, when my family and friends come over, or anytime that I need to impress someone with food. It’s simple to make but so delicious. I am also fine with grabbing the tortilla chips out of the cupboard and making this my lunch.

This would be the perfect summer appetizer to bring to your 4th of July parties coming up!

If you make this recipe, share it on Instagram using the hashtag #TheFoodCharlatan so I can see it! I love that.

More dips you’ll love

Snowy Chili Cheese Dip << To die for!

Sausage Cream Cheese Dip Recipe (Slow Cooker) << this one is perfect for a fall game day

Carol’s Legendary 7 Layer Dip << I don’t know anyone who can resist this stuff (me included)!

Pimiento Cheese Dip << if you don’t know this southern classic, it’s time to try it!

Fresh Bruschetta Lentil Dip << Sounds weird, but it’ a favorite of mine!

Cheesy Buffalo Chicken Dip << always a crowd pleaser!

Whipped Ricotta Dip from Ahead of Thyme

Chaat Dip (Indian Party Dip) from Yellow Thyme

Some of my favorite Mexican recipes

Chicken Fajitas << you guys have been loving these lately!

How to Make Carne Asada << watch out because once you make this at home, the stuff you get at restaurants will pale in comparison

Better than Chipotle Cilantro Lime Rice << gorgeous green color and tons of flavor

The Best Chicken Tacos << make these in the crockpot or on the stovetop

Traditional Tejano Carne Guisada (Braised Beef for Tacos) << I love how saucy this is

Cilantro-Lime Cucumber Salad << so refreshing with any Mexican meal

The Best Tres Leches Cake << literally the best end to ANY taco, enchilada, or burrito dinner

Nopales (Cactus Sauteed with Onion) from Adan Medrano

Sopes de Pollo from Beyond Mere Sustenance

Facebook | Pinterest | Instagram

Mexican Street Corn Dip (Elote) from The Food Charlatan
Print

Elote Dip Recipe

This corn dip recipe is just like an elote (Mexican street corn). It is the perfect combo of sweet corn and savory tart cheese. Plus it's a lot easier to eat AND you get tortilla chips. Win!
Course Side Dish
Cuisine Mexican
Prep Time 5 minutes
Cook Time 10 minutes
Total Time 15 minutes
Servings 8
Calories 313kcal

Ingredients

  • 10 cobs corn fresh
  • 1/4 red onion
  • 1/2 cup salted butter (1 stick)
  • 2 cloves garlic smashed and minced
  • 3/4 teaspoon paprika
  • 3/4 teaspoon chili powder
  • 1 & 1/2 teaspoons kosher salt
  • cracked black pepper to taste
  • 3 tablespoons mayonnaise
  • 5-6 ounces Cotija cheese
  • 2-3 tablespoons cilantro chopped
  • tortilla chips for serving

Instructions

  • Husk the corn and use a sharp knife to chop the corn off of the cob. Chop up 1/4 of a red onion.
  • Heat a large skillet over medium heat. Add the butter and let it melt. Add the corn and onion.
  • Let the corn and onion cook for about 8-10 minutes, until the corn is starting to brown and stick to the pan.
  • Add the garlic, paprika, chili powder, salt, and pepper. Cook for 1 minute, then remove from heat.
  • Let the mixture cool slightly.
  • Chop the cilantro. Put the cheese in a bowl and use a spoon or fork to crumble it.
  • Add mayonnaise, Cotija, and cilantro and stir to combine.
  • You can serve this dip warm, room temperature, or cold, though I love it best when it is slightly warm.

Nutrition

Serving: 1g | Calories: 313kcal | Carbohydrates: 29g | Protein: 7g | Fat: 21g | Saturated Fat: 11g | Polyunsaturated Fat: 4g | Monounsaturated Fat: 5g | Trans Fat: 1g | Cholesterol: 48mg | Sodium: 773mg | Potassium: 318mg | Fiber: 3g | Sugar: 7g | Vitamin A: 926IU | Vitamin C: 8mg | Calcium: 99mg | Iron: 1mg

Chicken Tikka Masala Slow Cooker Recipe

I’ve been making this Chicken Tikka Masala recipe for years, but recently adapted it for the slow cooker. It is SO GOOD. I may never go back! Tikka Masala is the one dish that I never get tired of ordering at Indian restaurants and this version is super easy and tastes restaurant quality. Originally posted…

I’ve been making this Chicken Tikka Masala recipe for years, but recently adapted it for the slow cooker. It is SO GOOD. I may never go back! Tikka Masala is the one dish that I never get tired of ordering at Indian restaurants and this version is super easy and tastes restaurant quality. Originally posted January 25, 2017.

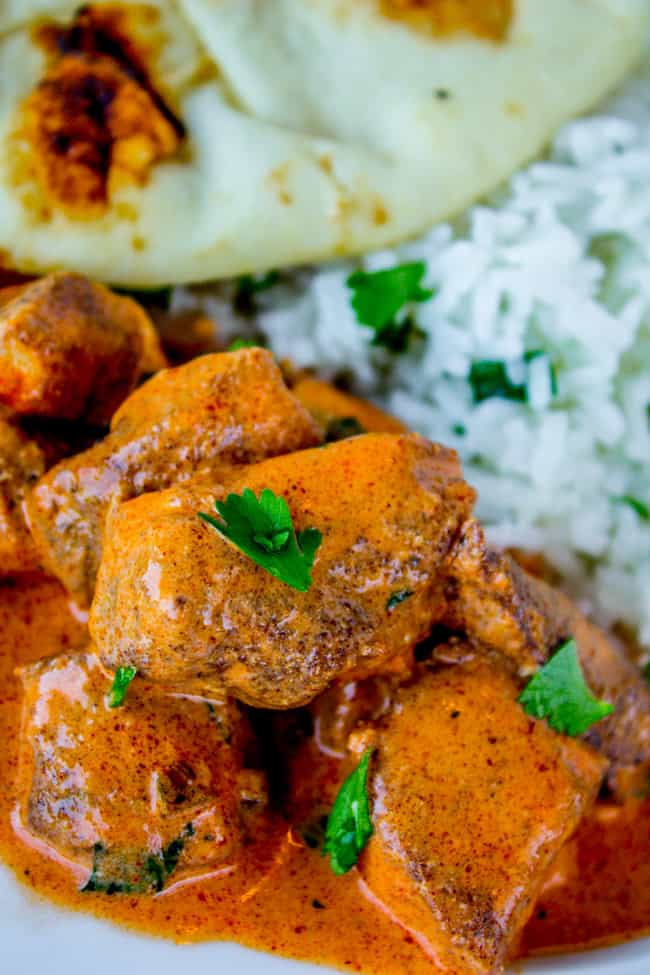
chicken tikka masala with rice, naan, and cilantro.
Table of Contents
  1. Why make Slow Cooker Chicken Tikka Masala
  2. Crockpot Chicken Tikka Masala Ingredients 
  3. How to make Chicken Tikka Masala (Crockpot Recipe)
  4. How to serve Slow Cooker Tikka Masala
  5. How to store Slow Cooker Chicken Tikka Masala
  6. Crock Pot Chicken Tikka Masala FAQs
  7. Crockpot Chicken Tikka Masala Recipe

Do you guys have rules for how late you can text people? I mean of course it depends on who you’re texting. When I was growing up we didn’t make calls after 9pm. Is there texting etiquette these days? I’m always worried I’m going to wake someone up.

Eric and I are night owls and sometimes forget that people go to bed at normal times. One time my brother called me at midnight just to see if I really always stay up like I claim I do. I answered right away of course.

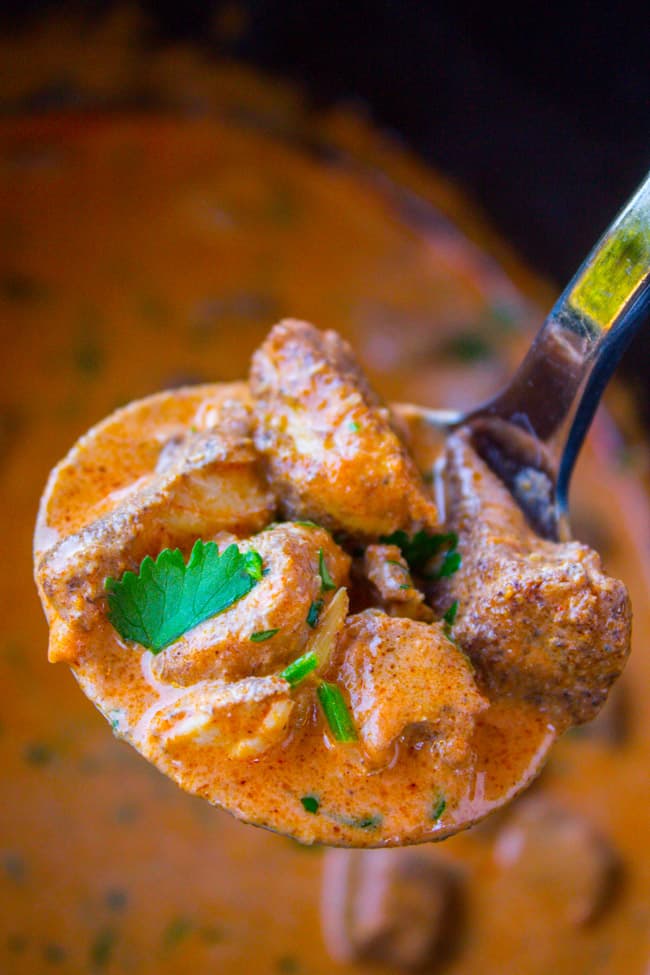
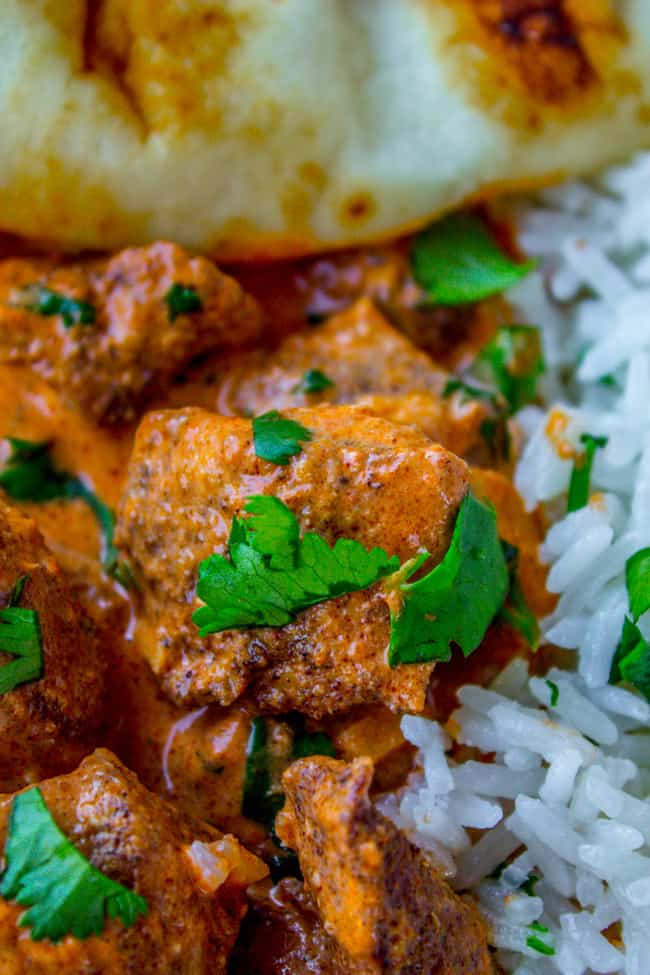
a spoonful of chicken tikka masala.

That same brother (who is also named Eric) went to college out of state in the same town that our uncle lives in. Our Uncle Ron had a habit of calling Eric waaaay too early in the morning. This was before cell phones, so when you call your nephew’s apartment at 6am on a Saturday, you definitely wake all the roommates up. Eric asked him not to call so early. So next time he called at 7am and still woke up the entire apartment.

Eric realized that if Uncle Ron was getting up so early, that meant he was getting to bed early. So he calls him up at 11:30pm the next night, wakes up Ron, and says all chipper, “Hey Ron! I was just calling to let you know that I’m planning on sleeping in tomorrow!”

I would worry that someone might call me super early to get me back for texting them too late at night, but it wouldn’t even work because I would sleep right through it.

Why make Slow Cooker Chicken Tikka Masala

I LOVE chicken tikka masala. The tender chicken, the creamy sauce, the delicious spices! I know I could totally branch out when we go out for Indian…but chicken tikka masala has my heart.

The thing about Chicken Tikka is that the chicken is supposed to be grilled, or broiled on high, or something that gives you that roasted-on-the-outside, tender-in-in-the-center flavor. But cooking chicken in liquid all day in a slow cooker isn’t going to give you that.

So I basically just removed the liquid; chicken, spices, and a little butter is all that goes in the crock pot until the end when you add the sauce. The result is golden brown chicken that has that roasted flavor. (I’m really loving this method and want to try it with some other recipes!).

Crockpot Chicken Tikka Masala Ingredients 

Here’s a quick shopping list to help you gather your ingredients. See the recipe card below for the full ingredients and instructions!

  • Chicken breasts
  • Cumin
  • Cinnamon 
  • Cayenne pepper
  • Butter
  • Tomato sauce
  • Heavy cream
  • Garlic
  • Jalapeno pepper
  • Paprika
  • Lemon juice
  • Fresh ginger
  • Plain Greek yogurt
  • Cilantro

Chicken Tikka Masala Slow Cooker substitutions

Next time I try this I’m replacing the cream with coconut milk, or perhaps coconut cream. It will make the final flavor a lot sweeter but would make this recipe dairy free, (if you used olive oil instead of butter) which is one reason people like the Slow Cooker Basil Chicken in Coconut Curry Sauce. They’re always tagging in #whole30, and and I’m over here like don’t look at me, I’m just here for the carbs.

How to make Chicken Tikka Masala (Crockpot Recipe)

This Chicken Tikka Masala is an old stove top recipe that I’ve been making for years. It’s a killer recipe. One time I made it for my friend Mir, who’s from Hyderabad, and he said it tasted authentic. He was probably just feeding my ego, but I don’t even care. This stuff is delicious.

I decided to see how it would work in the slow cooker and after a few trials I’m loving how it turned out. (I did the same with this stovetop Basil Chicken in Coconut Curry Sauce; here’s a link to the slow cooker version. It’s one of the top recipes on my site now. I actually decided to start working on a slow cooker Chicken Tikka recipe at the suggestion of one of the commenters on that post. Thanks for the idea Bethany!)

  • Here’s a quick overview of how to make this slow cooker chicken tikka masala. For complete instructions, scroll down to the recipe card below!
  • Chop the chicken into bite size chunks. Add the chicken to the slow cooker.
  • In a small bowl combine cumin, cinnamon, cayenne pepper, black pepper, and salt.
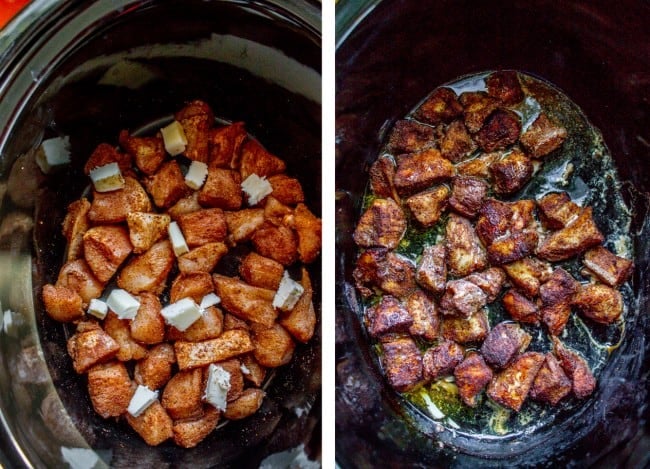
  • Sprinkle the spices over the chicken and use your hands to coat the chicken well. Sprinkle butter chunks over the chicken.
  • Put the lid on and cook on high for 2-3 hours, or on low for about 5 hours.
adding marinated chicken and butter to a crockpot.
    • When the chicken is cooked, remove the lid and add the tomato sauce and cream (turn the crock pot up to high at this point if it’s not already.)
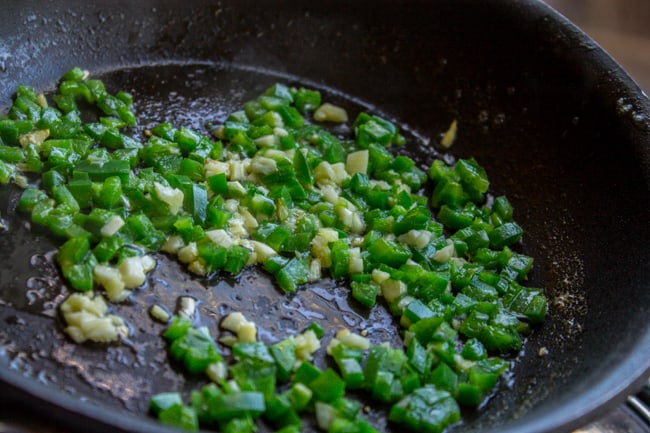
    • Add butter to a small frying pan. Add the garlic and jalapeno and sauté until fragrant.
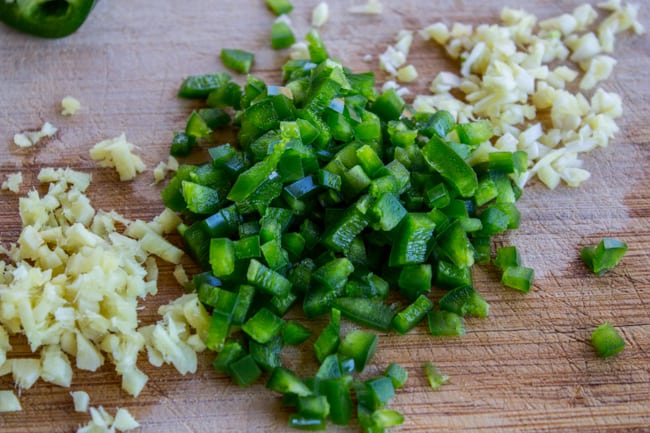
    chopped garlic and jalapeno on a wooden cutting board.
    sautéed garlic and jalapeno in a skillet.
    • In a small bowl combine ground cumin, paprika, and salt. Add the spices to the frying pan and continue sautéing for one minute.
    • Add lemon juice to the pan, stir it in and then remove from heat. Add this mixture to the crock pot. Add the minced ginger as well.
    spices, garlic, and jalapeno sautéed in a pan.
    • Replace the lid and let cook on high for another 20-30 minutes or until thickened and bubbly on the edges. Taste it and stir in some plain yogurt and the fresh cilantro.
    chicken tikka masala with rice and naan.
    • This recipe is pretty darn spicy as written. Feel free to reduce the cayenne pepper; there are 2 teaspoons total, which is quite a lot. (I wouldn’t omit the jalapeno though, it adds great flavor. Most of the heat comes from the seeds anyway, and we’re not using those.)
    chicken tikka masala with rice and naan.

    How to serve Slow Cooker Tikka Masala

    Chicken tikka masala is great with a side of jasmine rice, or you can fancy it up by adding other sides. Don’t overthink it, slow cooker meals are supposed to be easy! Here are some of my favorite Indian-inspired recipes. 

    Coconut Jasmine Rice with Cilantro << oh yeah baby, this is rice. Once you try jasmine rice you can never go back. 

    Homemade Naan Bread << there’s nothing more delicious than fluffy, puffy naan to scoop up all that tikka masala sauce with. 

    Roti – the Best Buttery Indian Flatbread << ok, I know I just talked naan up. They’re both so good, I cannot possibly choose.

    Indian-Spiced Cauliflower Rice << no, it’s not rice. Yes, it is delicious, and the perfect veggie side when you’re low-carbing it. 

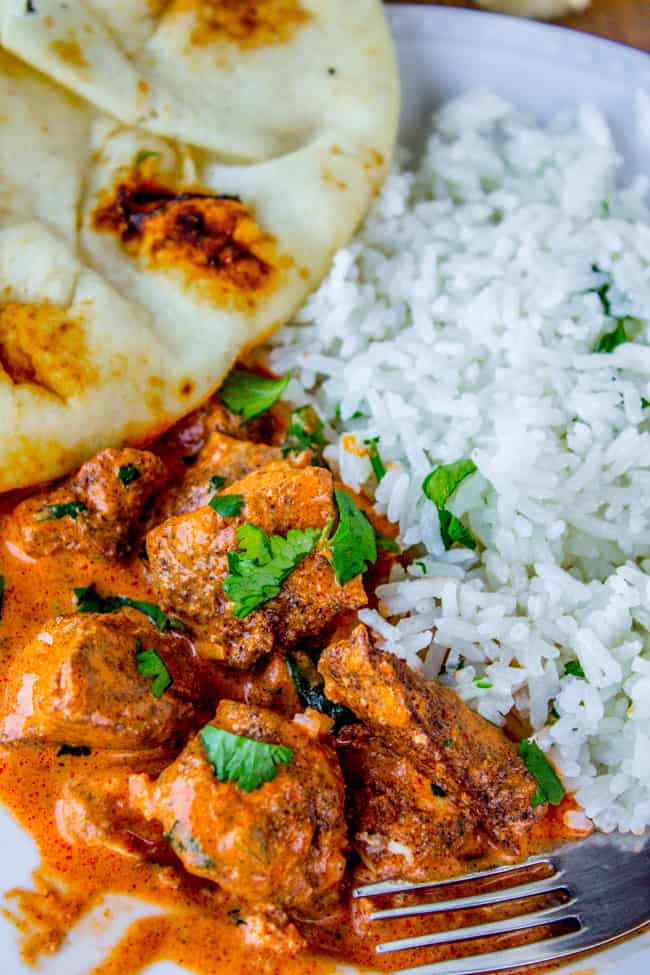
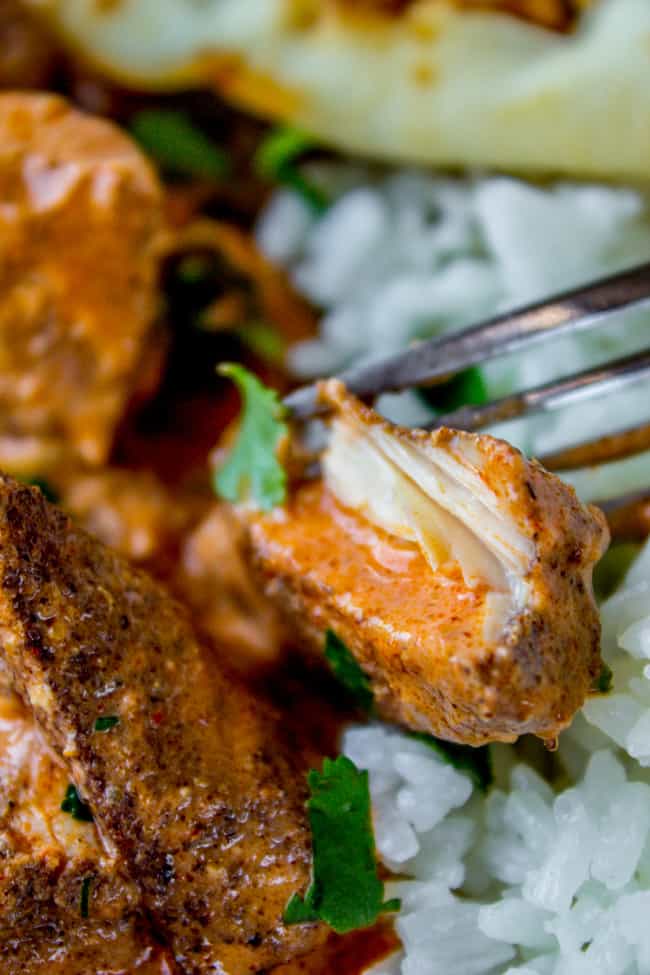
    a fork tearing a bite of chicken tikka masala on a bed of rice.

    How to store Slow Cooker Chicken Tikka Masala

    Chicken tikka masala will keep in the fridge for about 5 days. If you don’t eat it all before then, you can freeze it. I like to put it into a labeled gallon (or quart) ziplock, then lay it flat so it’s easier to defrost. It will keep for 2-3 months and makes a great last minute meal, since all you have to do is defrost it and make some rice.

    Crock Pot Chicken Tikka Masala FAQs

    What is the difference between chicken tikka masala and butter masala?

    Chicken tikka masala has its origins in Great Britain (surprise!). The sauce is tomato based, and is tangy and spicy. Some cream is added, but the focus is on the tomato. In butter masala (also known as butter chicken), the sauce includes tomato but is creamier and richer. Its origins are in India. Both dishes usually involve marinating the chicken in yogurt and spices (we’re skipping the marinade here since the chicken will be soaking up amazing flavor in the slow cooker all day long). 

    Is chicken tikka masala white or dark meat?

    It depends on where you’re eating it. Chicken tikka masala is usually made with white meat–boneless, skinless chicken breasts. This is how you’ll often have it at Indian restaurants in the United States. You can absolutely substitute boneless, skinless chicken thigh meat, and yes, it will be absolutely delicious. Dark meat is often more tender and is less prone to dry out. You should use what you and your family usually prefer in this recipe.

    chicken tikka masala with rice and naan.

    Here are some other recipes you will love!

    Roti (Buttery Indian Flatbread) << one of my most popular recipes and is a perfect complement with this tikka masala.

    Chicken Tikka Masala Meatballs << made with ground chicken and the same sauce. Can you tell I’m obsessed with this dish??

    Slow Cooker Basil Chicken with Coconut Curry Sauce << one of the top recipes on my blog!

    Coconut Jasmine Rice with Cilantro << once you try jasmine rice, regular rice is just NOT the same.

    Homemade Naan Bread Recipe << nothing better than a buttery stack of naan with your curry.

    Indian Spiced Cauliflower Rice << I love gettin’ my veggies in this way.

    Indian Spiced Braised Chicken from A Dash of Sanity

    Slow Cooker Indian Spiced Chickpeas and Potatoes from Oh My Veggies

    Tandoori Chicken from Simply Recipes

    Facebook | Pinterest | Instagram

    Slow Cooker Chicken Tikka Masala from The Food Charlatan
    Print

    Crockpot Chicken Tikka Masala

    Slow Cooker Chicken Tikka Masala from The Food Charlatan. I've been making this Chicken Tikka Masala recipe for years, but recently adapted it for the slow cooker. It is SO GOOD. I may never go back! Tikka Masala is the one dish that I never get tired of ordering at Indian restaurants and this version is super easy and tastes restaurant quality.
    Course Main Course
    Cuisine Indian
    Prep Time 10 minutes
    Cook Time 2 hours 30 minutes
    Total Time 2 hours 40 minutes
    Servings 4
    Calories 395kcal

    Ingredients

    For the chicken:

    • 1 pound chicken breasts about 3, cut into bite-size pieces
    • 2 teaspoons ground cumin
    • 1 teaspoon ground cinnamon
    • 1 teaspoon cayenne pepper
    • 1 teaspoon black pepper freshly ground
    • 1 teaspoon kosher salt
    • 1 & 1/2 tablespoons butter cut into chunks

    For the sauce:

    • 1 (8-oz) can tomato sauce
    • 1 cup heavy cream
    • 1/2 tablespoon butter
    • 1 clove garlic minced
    • 1 jalapeno pepper seeded and finely chopped
    • 2 teaspoons ground cumin
    • 2 teaspoons paprika
    • 1 teaspoon kosher salt
    • 1 tablespoon lemon juice
    • 1 tablespoon ginger minced fresh
    • 1/2 to 1 cup plain Greek yogurt as desired
    • 1/4 cup cilantro fresh, chopped

    Instructions

    • Chop the chicken into bite size chunks. Add the chicken to the slow cooker.
    • In a small bowl combine 2 teaspoons cumin, 1 teaspoon cinnamon, 1 teaspoon cayenne pepper, 1 teaspoon black pepper, and 1 teaspoon kosher salt.
    • Sprinkle the spices over the chicken and use your hands to coat the chicken well. Sprinkle 1 and 1/2 tablespoons butter chunks over the chicken.
    • Put the lid on and cook on high for 2-3 hours, or on low for about 5 hours.
    • When the chicken is cooked, remove the lid and add the tomato sauce and cream (turn the crock pot up to high at this point if it’s not already.)
    • Add 1/2 tablespoon butter to a small frying pan. Add the garlic and jalapeno and sauté for 1 minute, or until fragrant.
    • In a small bowl combine 2 teaspoons ground cumin, 2 teaspoons paprika, and 1 teaspoon kosher salt.
    • Add the spices to the frying pan and continue sautéing for one minute.
    • Add 1 tablespoon lemon juice to the pan, stir it in and then remove from heat. Add this mixture to the crock pot. Add the minced ginger as well.
    • Replace the lid and let cook on high for another 20-30 minutes or until thickened and bubbly on the edges.
    • Taste it and stir in some plain yogurt. The amount is up to you. This makes it a little more creamy and also tempers the heat. Sometimes I don’t add any, if I’m feeding kids I add more.
    • Stir in the fresh cilantro.
    • Serve with hot rice and naan.

    Notes

    Source: adapted from this stovetop Chicken Tikka Masala; original recipe adapted from Allrecipes.com

    Nutrition

    Serving: 1serving | Calories: 395kcal | Carbohydrates: 9g | Protein: 22g | Fat: 31g | Saturated Fat: 18g | Polyunsaturated Fat: 2g | Monounsaturated Fat: 9g | Trans Fat: 1g | Cholesterol: 146mg | Sodium: 1636mg | Potassium: 617mg | Fiber: 2g | Sugar: 4g | Vitamin A: 2170IU | Vitamin C: 12mg | Calcium: 117mg | Iron: 3mg

    Source: adapted from this stovetop Chicken Tikka Masala; original recipe adapted from Allrecipes.com

    Banh Mi Sandwich Recipe

    This traditional Vietnamese Banh Mi Sandwich will blow your mind! A mini soft baguette, smeared with sriracha mayo, topped with thinly sliced marinated pork, pickled vegetables, and tons of cilantro. It’s heaven! Originally published July 19, 2018. This is the Best Banh Mi Sandwich Recipe This morning I went to Safeway at 6:45am. Never in my…

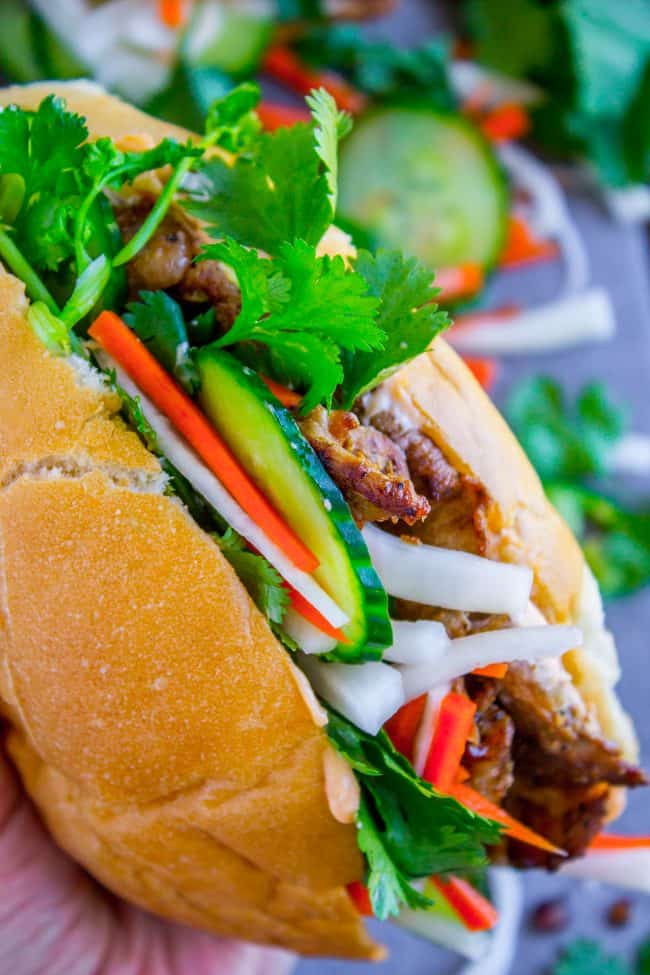
    This traditional Vietnamese Banh Mi Sandwich will blow your mind! A mini soft baguette, smeared with sriracha mayo, topped with thinly sliced marinated pork, pickled vegetables, and tons of cilantro. It’s heaven! Originally published July 19, 2018.

    banh mi sandwich.
    Table of Contents
    1. This is the Best Banh Mi Sandwich Recipe
    2. What is a Banh Mi Sandwich?
    3. Homemade Banh Mi Sandwich ingredients
    4. How to make a Banh Mi sandwich
    5. Banh Mi Recipe variations
    6. How to serve Banh Mi Sandwiches
    7. How to store a Homemade Banh Mi
    8. More Asian dishes you will love!
    9. Banh Mi Recipe Recipe

    This is the Best Banh Mi Sandwich Recipe

    This morning I went to Safeway at 6:45am. Never in my life have I set foot in a grocery store so early, but it was kind of nice! No crowds, and employees everywhere asking me if they could help me find anything. YES! please help me, where is the daikon because I’m making BANH MIIIII!!

    (I forgot to mention that my pleasant early morning Safeway jaunt ended with me driving halfway home before realizing that I didn’t have my phone. I drove all the way back and found it in the cart right where I left it. Doh! Maybe it was a little TOO early in the morning.)

    But back to the Banh Mi’s. Have you heard of them? Have you had one? The time is now! Just look at this!

    banh mi recipe.

    What is a Banh Mi Sandwich?

    A banh mi is a Vietnamese sandwich with an amazing combo of flavors and textures. Every banh mi starts with a delicious mini baguette: crispy crust on the outside, soft tenderness on the inside. You stuff it with meat (pork, chicken, ham, pâté, it varies!) and veggies (carrots, daikon radish, cucumbers). Mayo is a must. In my book cilantro is a must too, but I know some of you out there can’t stand it and that’s FINE. Seriously though, it won’t ruin your banh mi to leave it out.

    Homemade Banh Mi Sandwich ingredients

    Here’s a quick list of everything you’ll need to make a banh mi. Scroll down to the recipe card at the bottom of the post for more!

    • pork tenderloin
    • shallot
    • garlic
    • sugar
    • honey
    • fish sauce
    • sesame oil
    • Kosher salt
    • black pepper
    • carrots
    • daikon radish
    • white vinegar
    • mayonnaise
    • Sriracha
    • bolillo rolls, mini soft baguettes, or hero rolls
    • English cucumber
    • jalapeno pepper (optional) 
    • cilantro
    banh mi sandwich held in a hand.

    How to make a Banh Mi sandwich

    Start with a soft (not crunchy!) mini french baguette. Hero/hoagie rolls will work but it’s even better if you can find Bolilo rolls. They are Mexican rolls used to make tortas, and I found them in the bakery section at Safeway. Whatever roll you use, make sure it’s not so crunchy that it will scrape the roof of your mouth, who wants that?

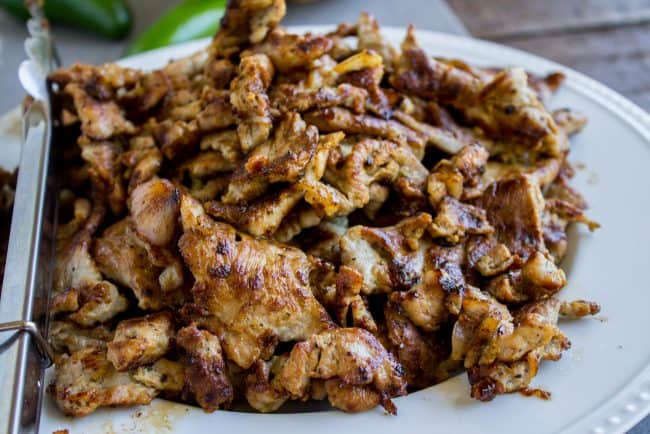
    I asked the butcher behind the counter if she would slice the pork tenderloin for me. SOOO much easier than doing it at home. Grab a pork tenderloin from the shelf and ask the butcher to do the hard work for you! It will be hard to get it this thin at home. On the right are all the ingredients you need for the marinade. I just tossed it all in the blender because I’m lazy!

    thinly sliced pork, vegetables and oil for making a marinade.

    There should be a 2:1 ratio of veggies to meat on a traditional Banh Mi sandwich, but if you cheat and add more pork I won’t tell anyone. Besides the cilantro leaves and pickles, the thinly sliced and marinated pork is what MAKES this sandwich. It is so tender and flavorful.

    pork marinated and cooked for banh mi.

    The pickled daikon and carrots are KEY to a great banh mi sandwich. Daikon is a kind of radish commonly used in Vietnam and Asian cuisine generally, and if you can’t find any, just swap them out for radishes (radishes are stronger so maybe don’t use as much). The pickling process only takes about an hour. They last for months in the fridge, so if you have any leftover (I always make extra!) then you will have a ready to go sandwich topping in your fridge! Or burger topping! Or pulled pork topping! I’m telling you it’s so good!

    Here’s what a daikon looks like. And how I chopped it to get matchsticks. Lay flat and slice again after this step, they will look like this:

    daikon radish and carrots on a cutting board, then thinly sliced.

    Here are the carrots and daikon after 15 minutes of sitting in a bit of salt and sugar. It makes them flexible. They will still be crunchy, but will be able to bend without snapping.

    carrots and daikon radish thinly cut for pickling.

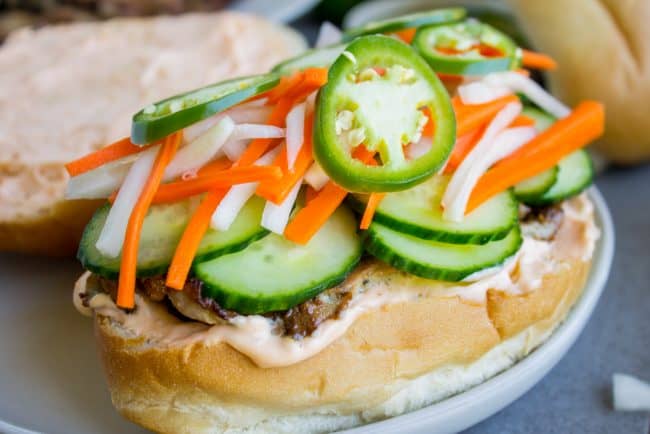
    Oh yeah baby. Pile those jalapeños on.

    pork banh mi with the top bun open.

    I made these Banh Mi’s several hours ago now and am learning just how much I rub my eyes. Because after slicing those jalapeños my eyes are burning! Gah! Be careful! Or buy latex gloves for the kitchen. Why do I not do this??

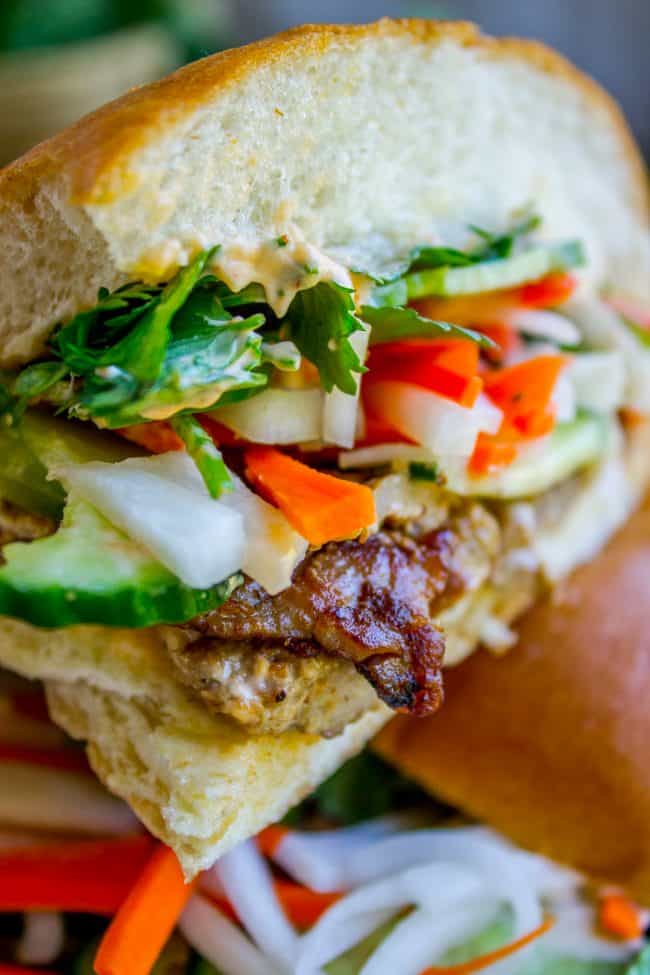
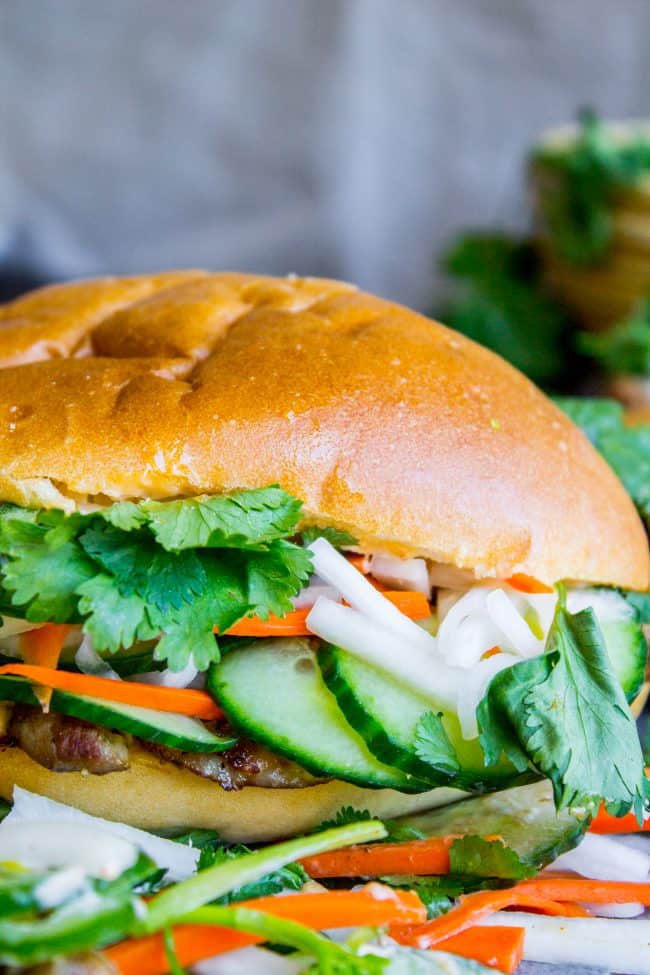
    banh mi sandwich with lots of fresh veggies.

    Banh Mi Recipe variations

    Here are some ideas for adding new flavors and textures to your banh mi. Try them out and comment below the recipe to tell us how you liked them!

    • Add Maggi seasoning sauce. This is a classic flavor to add to Asian food. Just sprinkle a little on the mayo for more umami!
    • Put a fried egg in it. For a while there it seemed like people were putting fried eggs on everything! But a fried egg really is amazing in a banh mi.
    • Switch out your protein. If you don’t want to use pork, substitute thinly sliced chicken or pork belly. You could totally just use thinly sliced chicken breast from the deli in a pinch! Obviously if you go this route, just use it cold and skip the marinating and cooking.
    • Leave out (or replace) the cilantro. In my opinion, Banh Mi sandwiches are just an excuse to eat fistfuls of cilantro. Could there be anything better?? I know all the cilantro haters out there are gagging right now. But wait come baaack! You can replace the cilantro with another herb if you want! I think it would be good with basil (ooh! Thai basil if you can find it!) or even mint. Or maybe dill??
    banh mi sandwich cut in half.

    How to serve Banh Mi Sandwiches

    For me a banh mi sandwich is a complete meal. You could totally serve any side you want of course, from fries to potato chips to fruit salad. It’s also great with a cold soda or juice, like orange or pineapple. 

    How to store a Homemade Banh Mi

    It’s best to store the ingredients for a homemade banh mi separately. That way your bread won’t get soggy and your veggies will stay crisp. Everything except the bread should be stored in the fridge. I don’t recommend freezing anything. A banh mi is meant to be made fresh. 

    banh mi sandwich.

    More Asian dishes you will love!

    Asian Pork Tenderloin with Ginger Glaze (Slow Cooker) << this pork would also be delicious on a Banh Mi Sandwich!

    Grilled Pork Tenderloin with Peanut Lime Sauce << this is soo good. Grilled pork tenderloin is amazing.

    Leftover Turkey Banh Mi << this is a much more simplified version of today’s recipe. Use any protein you like!

    Banh Mi Hot Dogs from Lemons for Lulu

    Lemongrass Beef Banh Mi with a Fried Egg on Top from The Little Kitchen

    Cheesy Shrimp and Grits Banh Mi in a Waffle Cone from FoodieCrush

    Facebook | Pinterest | Instagram

    Print

    Banh Mi Recipe

    These traditional Vietnamese Banh Mi Sandwiches will blow your mind! A mini soft baguette, smeared with sriracha mayo, topped with thinly sliced marinated pork, pickled veggies, and tons of cilantro. It’s heaven! 
    Course Main Course
    Cuisine vietnamese
    Prep Time 20 minutes
    Cook Time 20 minutes
    Total Time 3 hours 40 minutes
    Servings 6 Servings
    Calories 1106kcal

    Ingredients

    • 2 pounds Open Nature Pork Tenderloin
    • 1 shallot
    • 3 cloves garlic
    • 1 tablespoon sugar
    • 1 tablespoon honey
    • 2 tablespoons fish sauce
    • 2 teaspoons sesame oil
    • 1 teaspoon salt
    • 1 teaspoon pepper
    • 4 medium carrots
    • 1 large daikon or 2 small
    • 1 & 1/2 tablespoons sugar to release water
    • 1 & 1/2 tablespoons salt to release water
    • 1/2 cup sugar
    • 1 cup water warm
    • 1 cup white vinegar
    • oil for searing pork
    • 1 cup mayonnaise
    • 1 tablespoon Sriracha sauce
    • 6-8 bolilo rolls mini soft baguettes, or hero rolls
    • 1 to 2 English cucumbers sliced into rounds
    • 2 jalapenos optional, sliced into rounds
    • 2 bunches cilantro

    Instructions

    • Begin by slicing the pork tenderloin very thin. Or better yet, ask your butcher to do this for you! They can do it in about 2 minutes and it will save you tons of time. And they will get it much thinner than you can get it at home. 
    • In a blender or food processor, add the shallot, garlic, sugar, honey, fish sauce, sesame oil, salt and pepper. Pulse until combined. It’s okay if there are chunks of onion or garlic. You can also just chop the shallot and garlic by hand and mix it all together in a bowl, I’m just lazy. 
    • Add the marinade and thinly sliced pork to a medium bowl, cover, and refrigerate for at least an hour, or up to 24 hours. 
    • Make the picked veggies: Chop the carrots and daikon into matchsticks. See photos. You want them to be about the length of a matchstick and the thickness of your average chop stick. It doesn’t have to be perfect! Don’t stress about it. Just chop them up thin-ish and your sandwich is going to taste amazing. 
    • Add the chopped veggies to a large bowl and sprinkle with 1 and 1/2 tablespoons salt and 1 and 1/2 tablespoons sugar. Use your hands to massage the sugar and salt into the veggies. We’re doing this to get the carrots and daikon to release water, so that they will be flexible but still crunchy. After 15 minutes of sitting in the salt and sugar, you should be able to bend a carrot without it snapping (see photo). 
    • Pour the veggies into a colander and rinse them under water until all the salt and sugar is washed off.
    • Rinse out the bowl and make the brine: combine 1/2 sugar and 1 cup warm water, and stir to dissolve. Add the vinegar and a few shakes of salt. Stir it all together.
    • Add the rinsed carrots and daikon to the vinegar mixture, make sure all the veggies are covered, and stick it in the fridge for 45 minutes. (They will keep for months in the fridge!) 
    • When the pork has marinated, heat a large skillet over medium high heat. Add about a tablespoon of oil to the pan. Make sure it is shimmering. 
    • Add the pork strips in batches. If you add it all at once, it will not brown. Make sure there is about an inch of space in between each piece of pork.
    • Sear the pork for about 1-2 minutes, then flip and sear for another minute or so. If you sliced the pork yourself, you will probably have to cook it longer because it will be thicker. Adjust the heat as necessary, you want to keep it as high as possible without the pan scorching. 
    • Continue searing until all the pork is cooked. Add more oil as necessary. Set aside on a plate, or put it in the oven on a pan on the “keep warm” setting (170 degrees F). 
    • In a small bowl, combine 1 cup mayonnaise and 1 tablespoon Sriracha (more or less Sriracha to taste). 
    • To assemble: Slice a roll in half lengthwise. Spread both sides with Sriracha mayo. 
    • Top one side with pork, sliced cucumber, sliced jalapeno, lots of pickled carrots and daikon, and fistfuls of cilantro (you can chop it if you want, I just tore it from the top of the bunch.)
    • Top with the other half of the roll and eat! Serve with more Sriracha mayo if you want. 

    Nutrition

    Serving: 1sandwich | Calories: 1106kcal | Carbohydrates: 163g | Protein: 55g | Fat: 24g | Saturated Fat: 5g | Polyunsaturated Fat: 10g | Monounsaturated Fat: 7g | Trans Fat: 1g | Cholesterol: 104mg | Sodium: 4596mg | Potassium: 1286mg | Fiber: 10g | Sugar: 33g | Vitamin A: 7112IU | Vitamin C: 25mg | Calcium: 259mg | Iron: 10mg