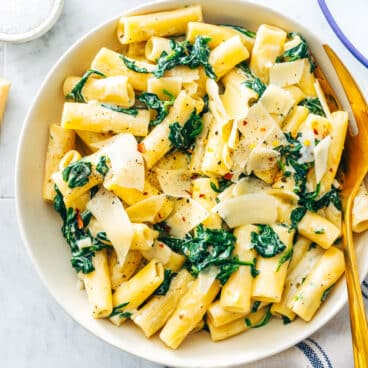
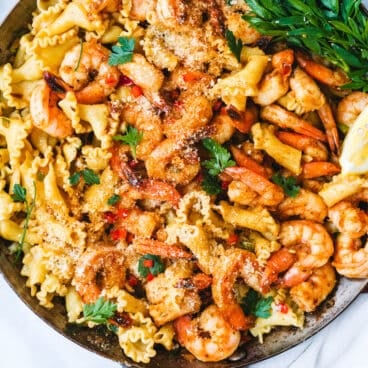
This shrimp primavera is packed with fresh veggies and juicy shrimp, all tossed in a light and delicious sauce! Ready in 30 minutes, it’s a fun and flavorful weeknight dinner idea.

As two cookbook authors and Mediterranean diet enthusiasts, we’ve cooked shrimp every which way. We’ve made family favorite recipes like sauteed shrimp, grilled shrimp, shrimp scampi, and even shrimp burgers! But one of our new favorites is pairing the seafood with pasta and fresh vegetables in this shrimp primavera. It’s like a classic pasta primavera with shrimp added, and smothered in a light creamy sauce, it makes a simple satisfying dinner in just 30 minutes.
Why we love shrimp primavera
With thousands of shrimp recipe ideas, why make this one? It takes a little longer than our popular 5-minute sauteed shrimp, but this one is worth it because it provides a complete meal loaded with colorful veggies. We love it most in the springtime, since primavera means spring in Italian. But you can eat it in any season! Here’s why we love this shrimp primavera:
- It has a high veggie-to-pasta ratio so you’re getting lots of colorful veggies in your meal
- It features a lean protein, making it more filling than classic pasta primavera
- The cream sauce is light and made with milk, not heavy cream
- It’s a delicious way to enjoy seasonal ingredients.
Key ingredients

For pasta primavera with shrimp, you’ll simply toss in sauteed shrimp to your mix of favorite fresh vegetables, pasta and cream sauce. Here are the ingredients you’ll need with some notes on substitutions:
- Pasta: We like using penne or another short pasta with shrimp, since they are similar in size. Other types of noodles that work well are rigatoni, linguine, and spaghetti. Use whole wheat pasta for Mediterranean diet, or gluten-free or legume pasta for gluten-free.
- Shrimp: Use deveined medium shrimp for the best size for this recipe. They can be either shelled or tail on. Prioritize wild caught shrimp if possible.
- Vegetables: Our favorite mix for primavera is asparagus, broccoli, shallot, carrot, and peas. Though it’s not a spring vegetable, we added red bell pepper since it is easy to find in any season and adds a pop of color.
- Olive oil: Olive oil is our cooking oil of choice.
- Butter, flour, milk, and grated Parmesan cheese: These ingredients make our favorite Parmesan cream sauce, and you’ll notice there’s no heavy cream at all.
- Garlic powder, dill, and salt: These seasonings round out the ingredient list with a robust, savory flavor.
How to make shrimp pasta primavera: step by step
Shrimp primavera comes together simply: though we do recommend cooking with a partner if you can! There are four elements that have to come together: pasta, shrimp, veggies, and sauce.
First, bring a salted pot of water to a boil and cook the pasta to al dente, taste testing a minute or two before the package instructions indicate.
In a large skillet, heat the olive oil. Add the asparagus, shallot, broccoli, red bell pepper, carrot, and ½ teaspoon kosher salt and cook 4 to 5 minutes until asparagus is tender and bright green.

Toss the shrimp in a bowl with salt and garlic powder. Add the shrimp and peas and continue cooking until the shrimp are cooked, about 1 to 2 minutes. Remove from the heat. Pour the shrimp and vegetables into a bowl (or if the pasta is cooked, drained, and tossed with a drizzle of olive oil you can add them right to the pasta pot).

In the same skillet (wiped out) over medium heat, melt butter. Add grated garlic and flour and whisk constantly for 1 minute, until golden. Constantly whisking, add the milk and whisk until smooth. Reduce the heat and whisk until the sauce thickens, about 4 to 5 minutes. Stir in kosher salt, dill, and the Parmesan cheese, whisking until the cheese melts, then remove from the heat.

Once the sauce is done, add the vegetables and shrimp to the pasta. Add more salt to taste and garnish with additional Parmesan cheese, if desired.
Where did pasta primavera come from, anyway?
You might be wondering: what’s the background of this dish? While it sounds traditionally Italian, turns out pasta primavera is an American pasta dish featuring fresh vegetables that was invented in the 1970’s. It was created by a New York chef named Sirio Maccioni at the home of an Italian businessman in Nova Scotia, of all places!
Since then, Pasta Primavera has popped up on restaurant menus across the globe, most popularly at Italian American chains like Olive Garden. There are really no requirements around the “right” way to make it. Primavera means spring in Italian, so often you’ll see it with spring vegetables like asparagus and carrot. But many spins use summer vegetables like zucchini and tomatoes as well.

Leftovers and make ahead tips
Shrimp primavera is best served the day it is made. You can store leftovers up to 2 days refrigerated. However, around here we’re not huge fans of next day shrimp (just our personal preference). We find pasta with shrimp typically tastes best the day of making!
To speed up prep, it’s easy to chop all the vegetables and measure out the ingredients in advance. You can even boil the pasta in advance, cooking it to 1 minute before al dente. Then simply stir it into the warm sauce and vegetables before serving.
More shrimp recipes
We’ve got loads of fun shrimp recipes for you to try that are perfect for dinner or any occasion. Here are a few more shrimp recipes you might enjoy:


Shrimp Primavera
-
 Prep Time: 15 minutes
 -
Cook Time: 15 minutes
-
Total Time: 30 minutes
-
 Yield: 4
Description
This shrimp primavera is packed with fresh veggies and juicy shrimp, all tossed in a light and delicious sauce! Ready in 30 minutes, it’s a fun and flavorful weeknight dinner idea.
Ingredients
- 8 ounces penne pasta
- 1 pound shrimp, deveined and shelled or tail on, wild caught if possible
- 1 ½ teaspoons kosher salt, divided
- ½ teaspoon garlic powder
- 3 tablespoons olive oil
- 1 bunch (1 pound) asparagus, tough ends removed, sliced into 3-inch pieces
- 1 shallot, thinly sliced
- 1 head broccoli, chopped into florets
- 1 red bell pepper, thinly sliced
- 1 carrot, peeled and julienned
- 1 cup frozen peas, thawed under warm water
- 1 ½ tablespoons salted butter
- ½ teaspoon dried dill
- 2 small garlic cloves, grated
- 2 tablespoons all purpose flour
- 1 ½ cups 2% milk
- ½ cup grated Parmesan cheese, plus more to garnish
Instructions
- Bring a salted pot of water to a boil and cook the pasta to al dente (taste testing a minute or two before the package instructions indicate). Drain and toss the pasta with a bit of olive oil once it is done.
- Pat the shrimp dry. Place it in a bowl and sprinkle it with ½ teaspoon kosher salt and the garlic powder.
- In a large skillet, heat the olive oil over medium high heat. Add the asparagus, shallot, broccoli, red pepper, carrot, and ½ teaspoon kosher salt and cook 4 to 5 minutes until asparagus is tender and bright green. Add the shrimp and peas and continue cooking, tossing occasionally, until the shrimp are cooked, about 1 to 2 minutes. Remove from the heat. Remove the shrimp and vegetables to a bowl (or if the pasta is cooked, drained, and tossed with a drizzle of olive oil you can add them right to the pasta pot). Wipe out the skillet.
- In the same skillet over medium heat, melt the butter. Add the grated garlic and flour and whisk constantly for 1 minute, until golden. Add a splash of milk and whisk it in: the sauce will instantly turn chunky. Constantly whisking, continue to gradually add the milk. Reduce the heat and cook, whisking often until the sauce thickens, about 4 to 5 minutes. Stir in ½ teaspoon kosher salt, dill, and the Parmesan cheese, stirring until the cheese melts, then remove from the heat.
- Add the drained pasta, vegetables, and shrimp back into the warm sauce and toss to combine. Taste and add more salt, if desired. Serve warm, garnished with fresh ground black pepper and more Parmesan cheese. Leftovers store well refrigerated for up to 2 days.
 Category: Main dish
 Method: Stovetop
 Cuisine: Pasta
Keywords: Shrimp primavera, shrimp pasta primavera, pasta primavera with shrimp