Southern Fried Apples (Cracker Barrel Copycat)
Despite the name, the apples are not deep-fried. They cook slowly in a skillet with butter, brown sugar, and warm spices.
Despite the name, the apples are not deep-fried. They cook slowly in a skillet with butter, brown sugar, and warm spices.
The post Apple Desserts appeared first on Princess Pinky Girl.
Apple desserts are my favorite thing to bake once the weather turns, from warm crisps and pies to easy caramel apple treats. They are cozy and sweet, with soft baked apples, crunchy cinnamo…
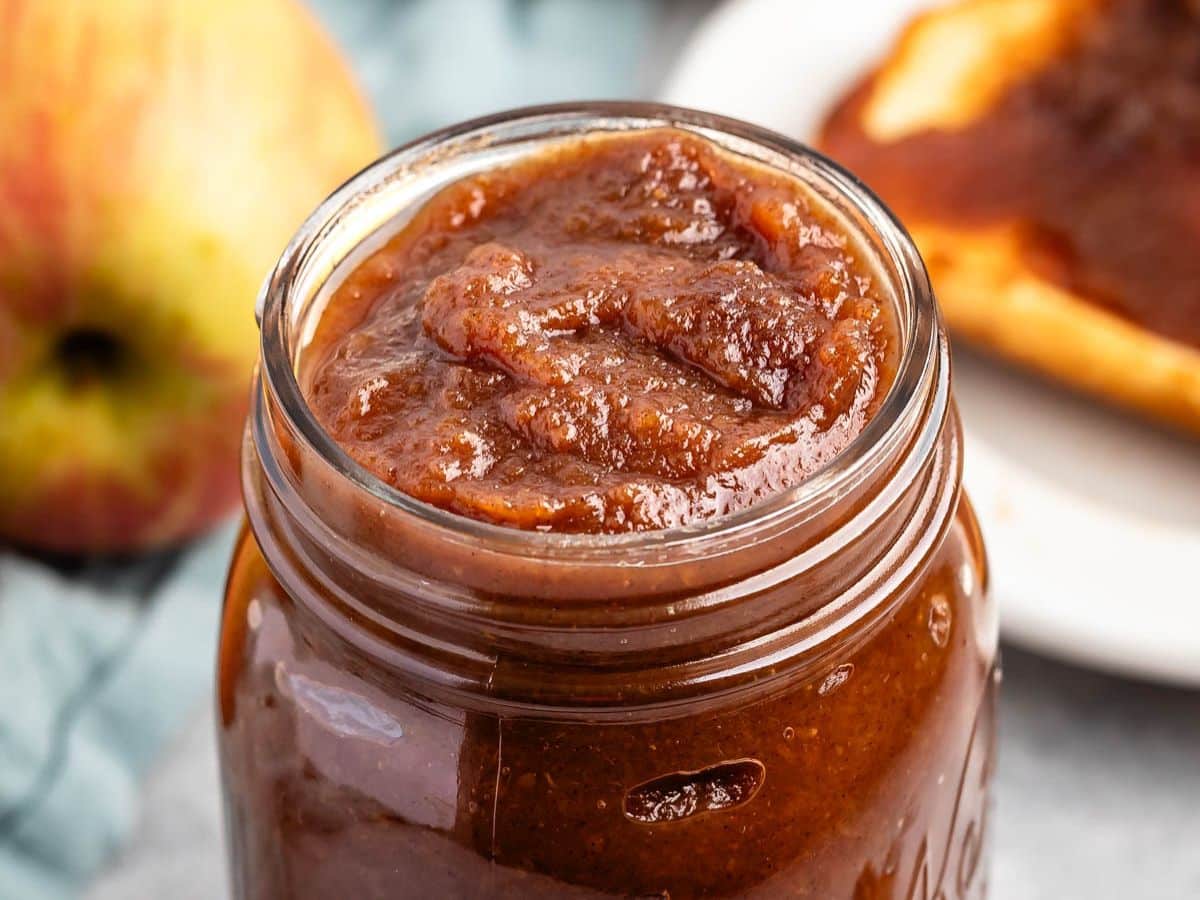 Crockpot Apple Butter is so easy to make with just a few ingredients. It’s a thick applesauce with more condensed flavor and is perfect on toast or in recipes during apple season and homemade is so much better than what you get in the store. Apple Butter is expensive and it’s so easy to make…
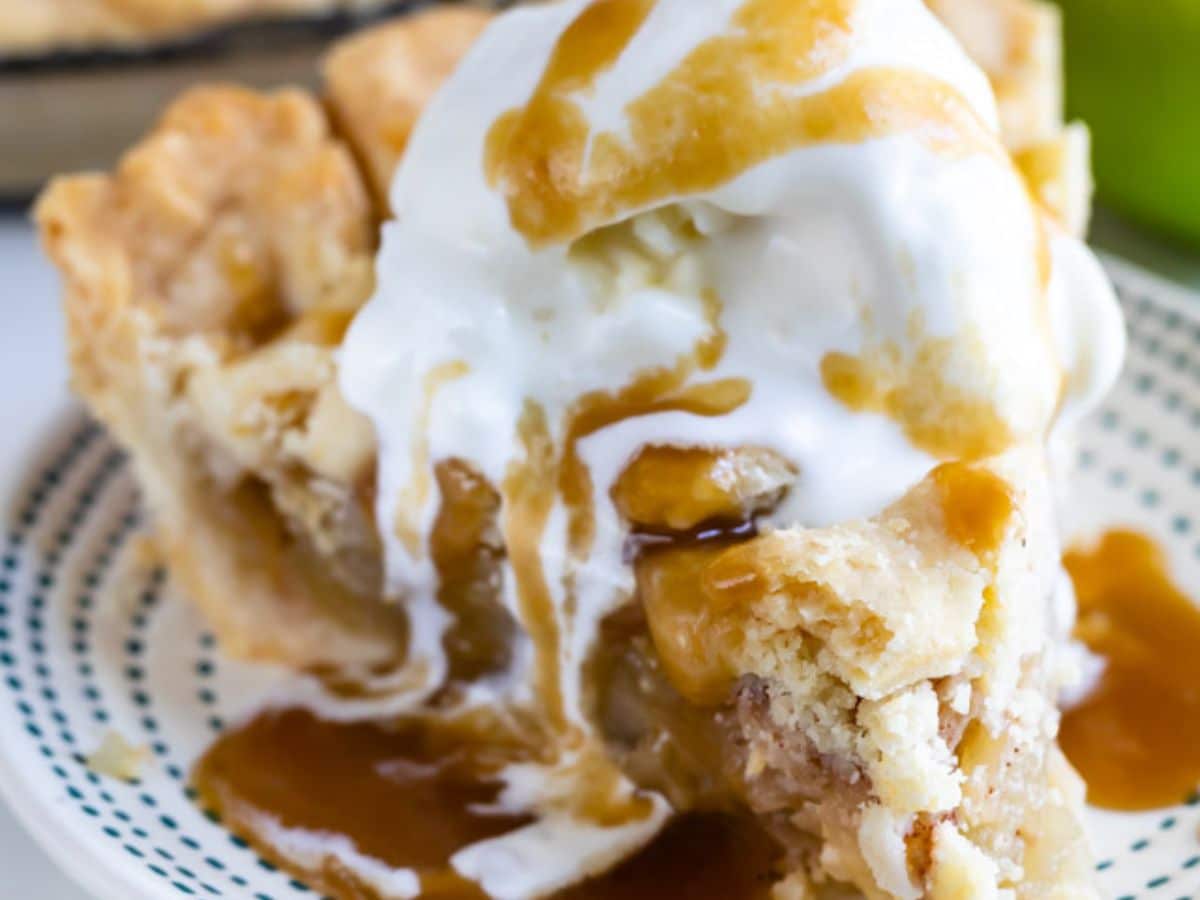 Salted Caramel Apple Pie is the best apple pie recipe – perfectly cooked apples baked with salted caramel sauce in a homemade pie crust! It’s one of my favorite Thanksgiving pie recipes – but it’s perfect all fall or all year long! This caramel apple pie takes a classic apple pie recipe and gives it…
The post No-Bake Caramel Apple Eclair Cake appeared first on Princess Pinky Girl.
Every fall I make this caramel apple eclair cake for parties and get-togethers, and it’s always the first thing gone. It’s a make-ahead dessert that travels w…
This applesauce bread is moist, spiced, and comes together with a simple mixing method using pantry staples. Ready in about an hour!
The post Apple Cinnamon Baked Oatmeal Cups appeared first on Princess Pinky Girl.
These Apple Cinnamon Baked Oatmeal Cups are one of those recipes I keep coming back to week after week. Made in one bowl with simple pantry ingredients, they bake up dens…
This Brussels sprout salad stars shaved raw sprouts tossed with crisp apple, dried cherries, and almonds in a zingy Dijon…
While we all love a classic pie, sometimes it’s fun to switch things up. These 9 stunning desserts, from rich cheesecakes to festive bundt cakes, will bring the perfect sweet finish to your Thanksgiving feast. Looking to expand your Thanksgiving …
Crispy Chicken Cutlets with Fresh Apple Slaw: A True Dinner Winner Chicken cutlets are one of my forever favorites for busy weeknights, but this version is truly something special. The chicken fries up perfectly crispy and golden on the outside while s…
An easy Apple Dump cake recipe with fresh apples, cake mix, and butter. Just dump, bake, and enjoy warm with ice cream!
The post Apple Dump Cake appeared first on Budget Bytes.
These Apple Pie Turnovers are fall perfection! Easy to make and fun for little hands, they’re a fantastic way to use all those fresh apples you’ve been picking. It’s like having a handheld slice of classic apple pie all to yourself! Why I Love This Recipe The Ingredients How to Make Apple Pie Turnovers Storage/Freezing…
The post Apple Pie Turnovers appeared first on Weelicious.
Deliciously moist and loaded with chunks of apples, this apple fritter bread will be the perfect fall addition to your breakfast table.
These no-bake mini apple cheesecakes are sweet, spiced, and made with clean ingredients—no oven required!
Warm up with this easy crockpot apple cider recipe made with fresh apples, oranges, brown sugar, and cozy spices for the perfect fall drink for holidays or chilly nights.
If you’re looking for a scrumptious apple pie recipe that will make everyone at your table gasp with delight- this is it!
The post Apple Pie appeared first on Budget Bytes.
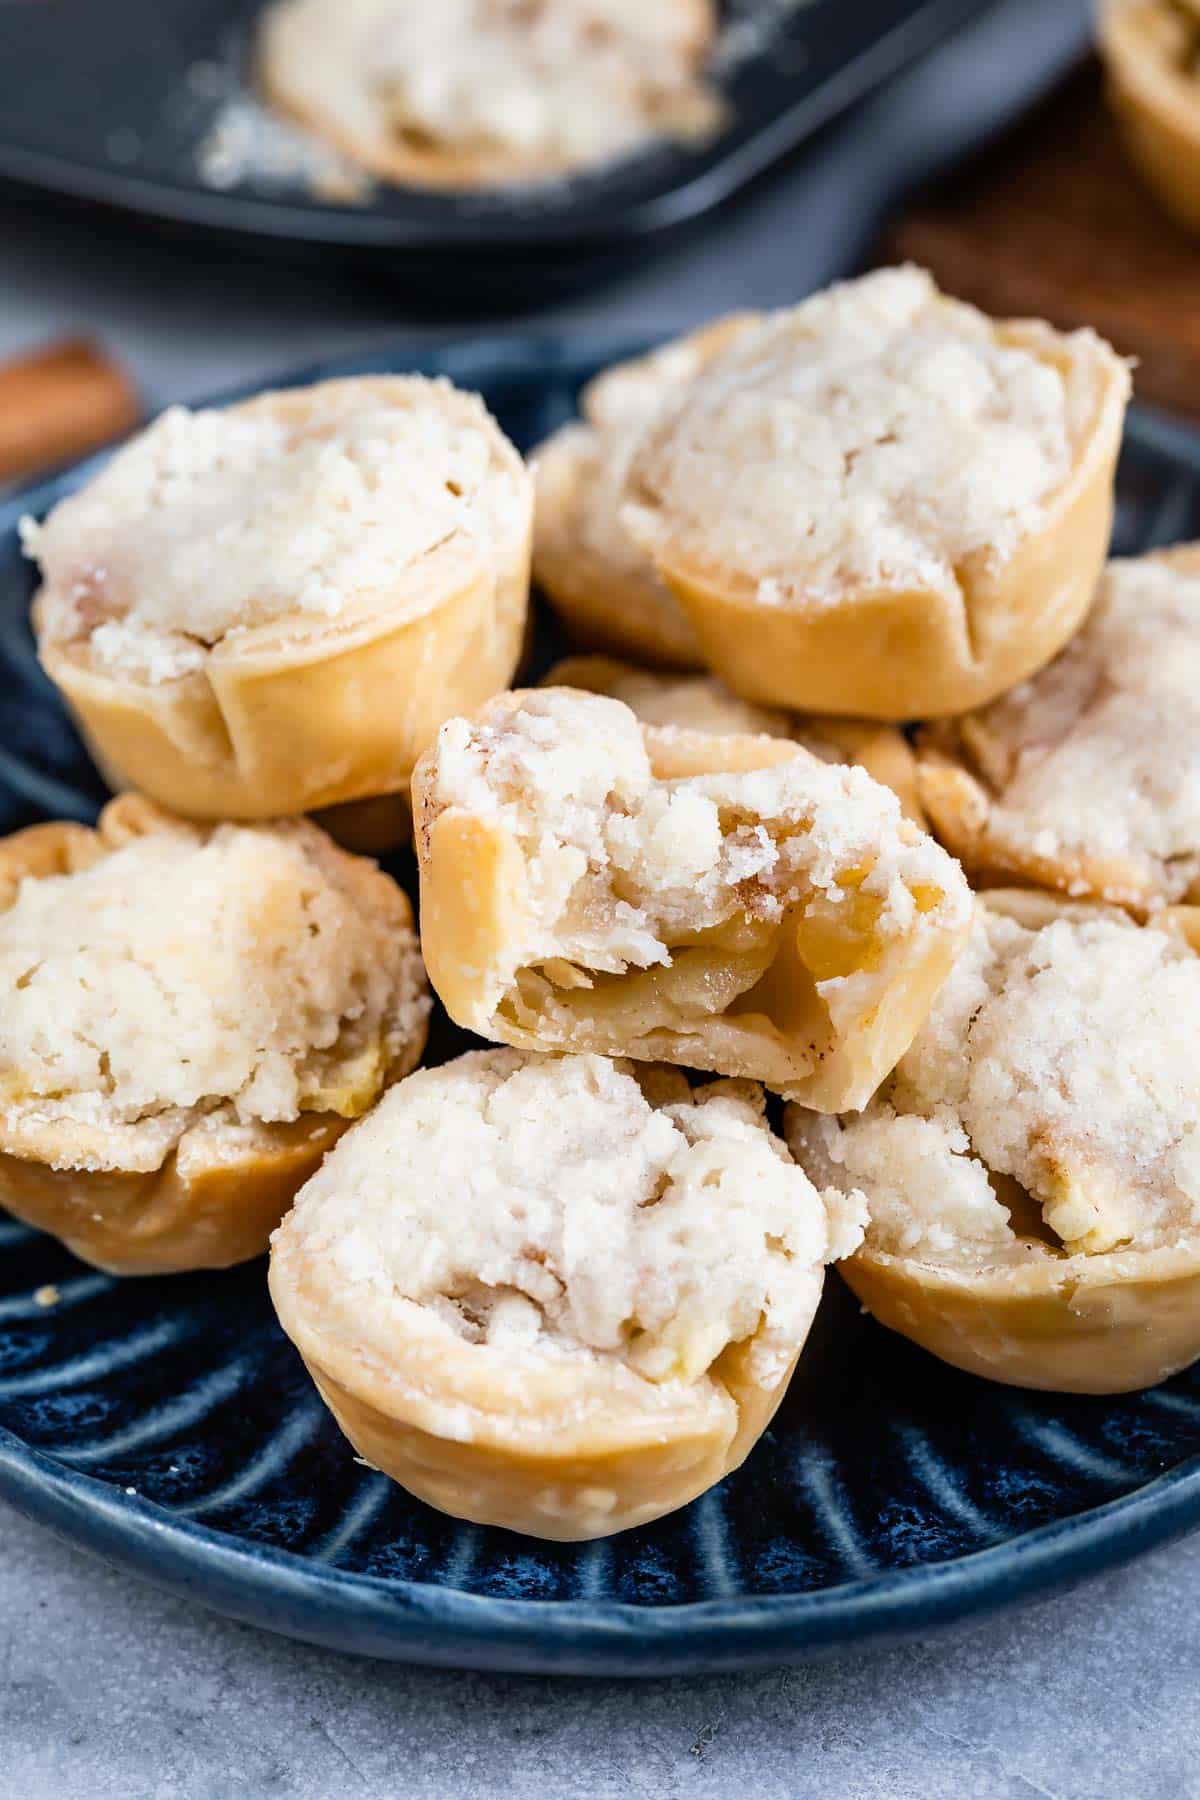 These Mini Apple Pies are bite sized apple pies with crumb topping – they’re so easy to make from scratch and so good. With a buttery crust, perfectly cooked apples, and crumble topping, they’re the perfect apple pie recipe. I love making mini food because they’re easier to serve (no messy cutting) and they’re easier…
You’ll Fall in Love with These Healthy Apple Muffins When apple season rolls around, I can’t resist baking something warm and cozy and these Healthy Apple Muffins are one of my favorites. They’re everything you want in a fall muffin: …
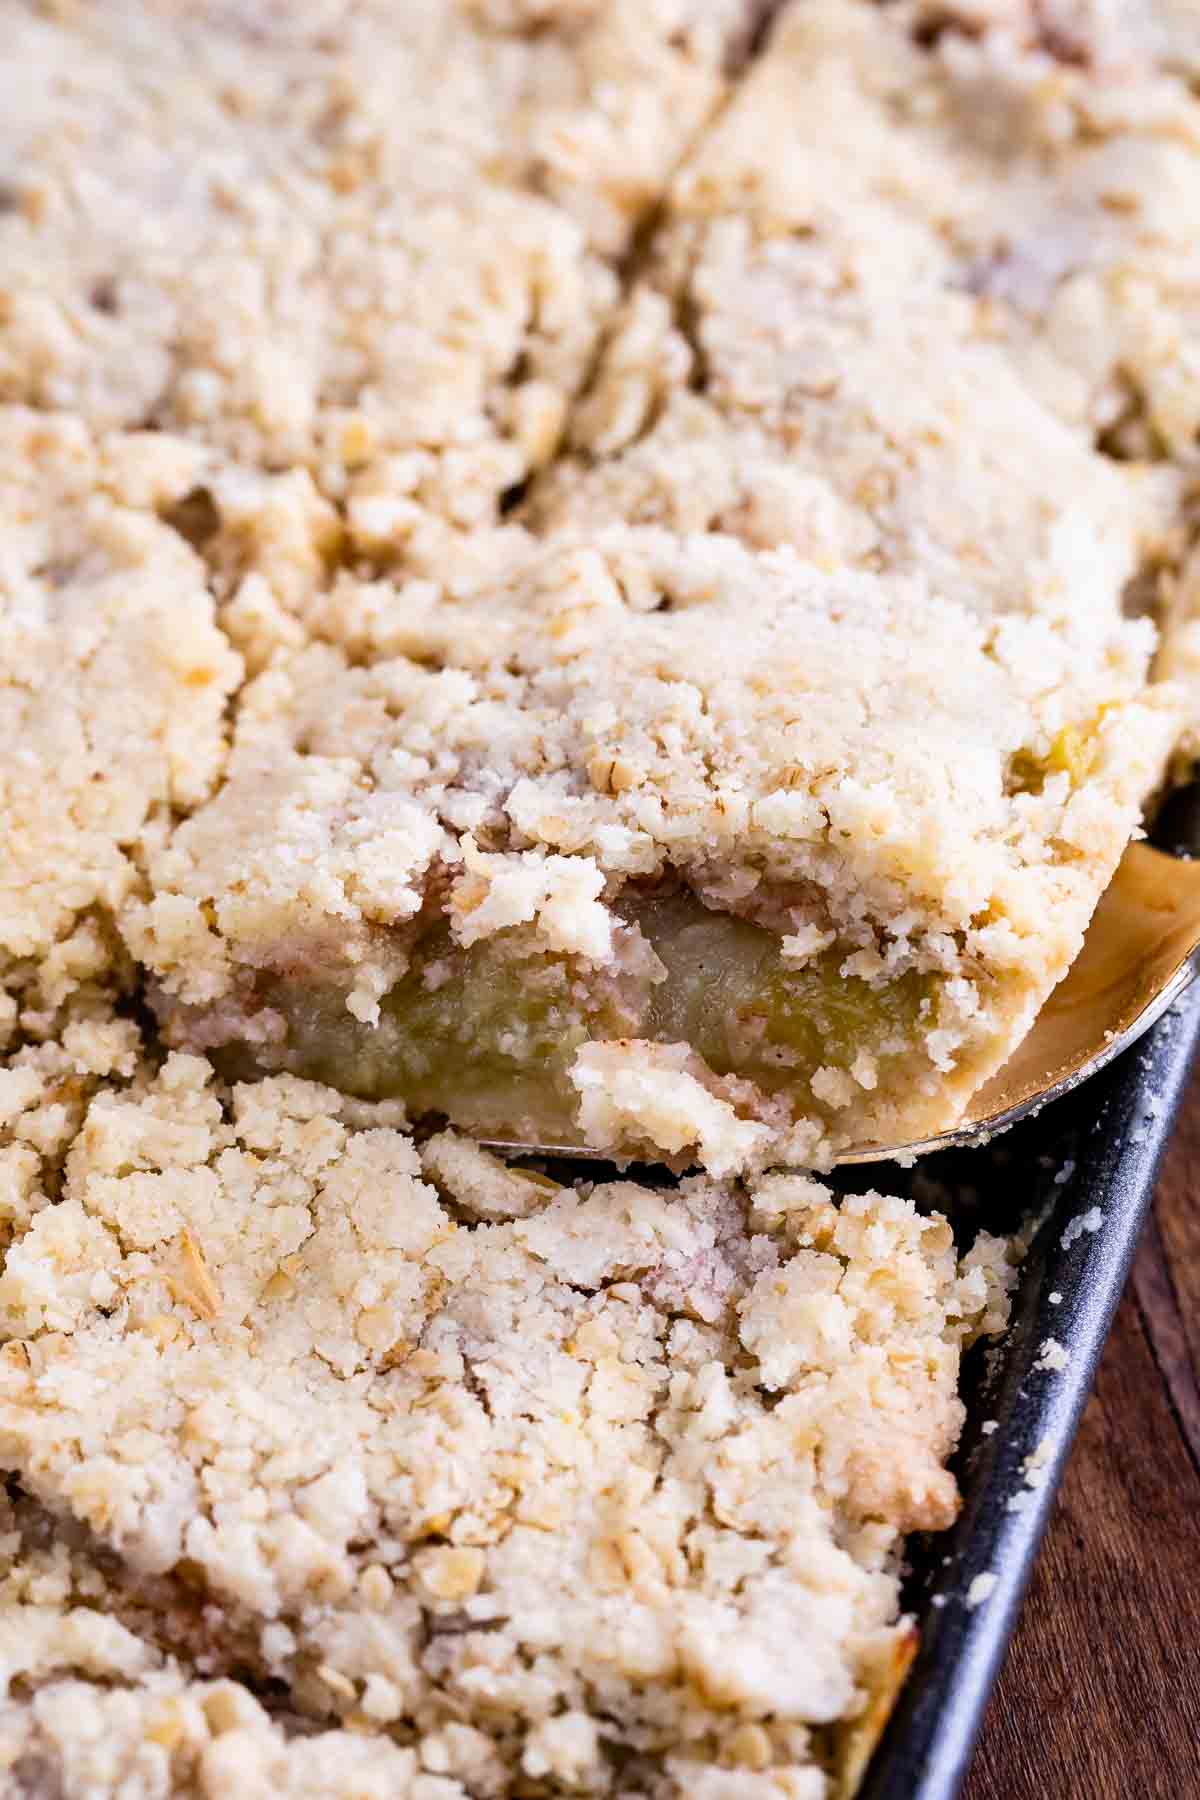 Apple Slab Pie is my favorite kind of pie: it’s baked in a sheet pan so there is more crust and crumble ratio to apples. This recipe is completely from scratch – I’ve done all the math for you to convert my favorite dutch apple pie to a slab pie! Do you love pie? I…
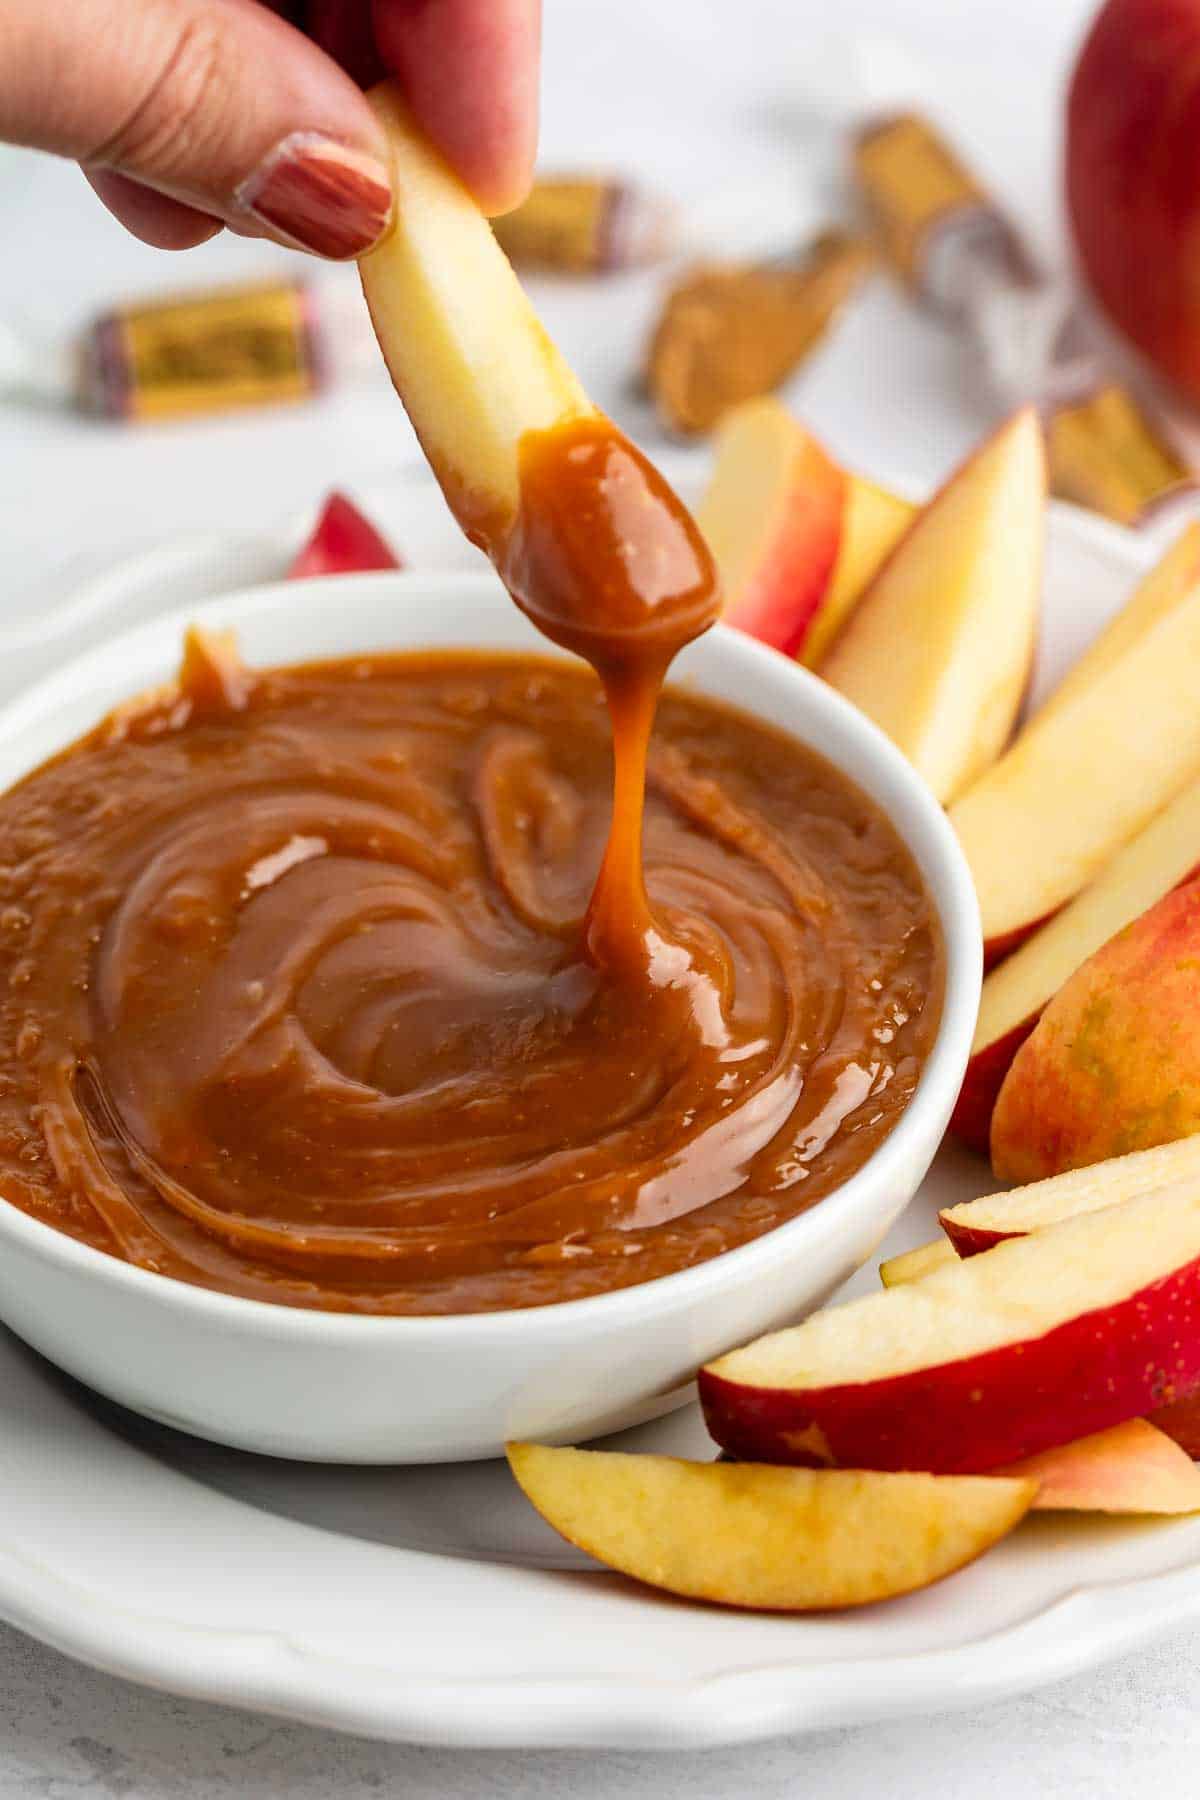 This Peanut Butter Caramel Dip for apples has only three ingredients and is perfect for after school snacks or a lunchbox treat! It takes no time at all to make and is the perfect sweet dip for sliced apples. Also – PEANUT BUTTER. Enough said, right? Have you ever bought those little packs of caramel…
A Hearty, Healthy, and Flavorful Fall Salad This sweet potato kale salad is the kind of salad that makes you excited to eat your greens. It’s hearty, colorful, and bursting with flavor and texture. It starts with roasted sweet potatoes and crispy…
When the leaves start to change and there’s a crisp chill in the air, I love turning on the oven and filling my kitchen with the comforting scents of fall. Baking feels like the perfect way to slow down and savor the season. Over the years, IR…
These chewy apple pie cookies are made with a soft brown sugar cookie filled with homemade apple pie filling and topped with a crumble!
11 best caramel apple recipes, including dump cake, muffins, pull-apart bread, cheesecake bars, and more fall favorites. If you’re looking for easy fall desserts, caramel apple recipes are a solid choice. The combination of tart apples and sweet …
Layers of pound cake, fried cinnamon apples, creamy cheesecake, caramel & pecans make this trifle a stunning fall dessert perfect for parties. This no bake Caramel Apple Cheesecake Trifle is sure to wow all of your family and friends this…