The Best Chipotle Cashew Cheddar Cheese Sauce

This Cashew Cheddar Cheese Sauce is made with just a few simple ingredients (no tapioca starch!), yet is decadent, creamy, cheesy, and packed with the perfect amount of spice! All you need is 30 minutes to make this easy recipe.

The post The Best Chipotle Cashew Cheddar Cheese Sauce appeared first on Sweet Simple Vegan.

This Cashew Cheddar Cheese Sauce is made with just a few simple ingredients (no tapioca starch!), yet is decadent, creamy, cheesy, and packed with the perfect spice! All you need is 30 minutes to make this easy recipe.

a bowl of chipotle cashew cheddar cheese sauce surrounded by crackers and veggies

Get ready for vegan gold my friends. Really – you’re going to want to put this Vegan Chipotle Cashew Cheddar Cheese sauce on EVERYTHING. 

animated image of a cracker being dipped into the chipotle cashew cheddar cheese sauce

It’s made using whole foods and is just as versatile as our wildly popular Vegan Nacho Cheese Sauce, but kicked up a notch with the heat of chipotle in adobo. Pair it with your favorite Crispy PotatoesBaked PotatoesTortilla Chips, or anything that needs a drizzle of creamy cheese sauce. 

You won’t regret having this vegan sauce waiting for you in the fridge!

potatoes, carrots, garlic powder, onion powder, salt, black pepper, non-dairy milk, nutritional yeast, chipotle pepper in adobo sauce, cashews, lemon juice

Key Ingredients You’ll Need 

  • Yukon gold potatoes: The creaminess of Yukon gold potatoes makes the best vegan cheese sauce consistency. Don’t worry, you won’t taste the potatoes at all! 
  • Carrots: Adds color, a hint of sweetness, and additional creaminess to the sauce. 
  • Raw cashews: Adds richness, creaminess, and a velvety mouthfeel that mimics the smooth texture of dairy cheese sauces. Just make sure to use raw cashews with no additives. 
  • Almond milk: We like to use our Homemade Almond Milk because we find it to be more creamy than store-bought varieties, but feel free to opt for your favorite unsweetened store-bought version. 
  • Nutritional yeast: Adds a cheesy, umami flavor and healthy dose of B vitamins without any dairy! If you’re shopping for nutritional yeast flakes for the first time, look near the spices. Our favorite brand is Bragg’s.
  • Chipotle pepper in adobo: Many cashew cheddar cheese sauces are plain, but we love the added kick of a chipotle pepper! Depending on your spice preference, you may prefer more or less chipotle in adobo. Don’t be afraid to experiment!
  • Fresh lemon juice: Adds a bright acidity that balances the creaminess and fats. Apple cider vinegar is a good alternative if needed.
  • Spices: A simple blend of salt, black pepper, garlic powder, and onion powder tie all the flavors together!

Full measurements are listed down below in the complete recipe card. 

Equipment Needed

pouring the chipotle cheddar cheese sauce over roasted potatoes

How to Make Chipotle Cashew Cheddar Cheese Sauce

  1. Boil the potatoes, carrots, and cashews. Bring a medium pot of water to a boil. Once boiling, add the potatoes, carrots, and carrots. Simmer for 20 minutes over medium heat or until the potatoes and carrots are fork-tender and the cashew nuts are softened. 
  2. Transfer to a high-speed blender. Once the potatoes and carrots are easily pierced with a fork, drain the excess water and transfer the potato medley to a high-speed blender. 
  3. Add remaining ingredients. Add in the unsweetened almond milk, nutritional yeast, chipotle pepper in adobo, lemon juice, sea salt, garlic powder, onion powder, and black pepper. Blend on high until completely smooth.
  4. Serve. Enjoy this vegan cheese sauce while warm or at room temperature, as desired.

Serving Suggestions 

What can’t you serve this cheese sauce with?! Add it to any meal that needs a savory, cheesy boost of flavor, or simply enjoy it as an easy appetizer or afternoon snack. If you need ideas, here are our favorite ways to use this creamy sauce:

Make The Best Vegan Chipotle Cheddar Cheese Sauce that is Healthy & Oil-free! #vegancheese #vegancheddar #healthycheese #cheesesauce #superbowl #cheddarcheese #oilfree #lowfat #healthy

Recipe FAQs

Can I make this vegan cheese sauce recipe nut-free?

Yes! Swap the raw cashews with 1/2 cup of Great Northern white beans or cannellini beans and use nut-free plant-based milk. Unsweetened soy milk is a great alternative.

Will any potato work in place of the Yukon gold potatoes?

If you’re out of gold potatoes, swap in another peeled white potato, such as russet. 

I don’t have a high-powered blender. Can I make this cheese sauce in a food processor?

A blender is best for making velvety smooth sauces and dips from scratch, but if all you have is a food processor, give it a go! It won’t be as smooth as a blender, but it will be close. 

How long will leftover cheddar cheese sauce keep?

Transfer any leftovers to an airtight container, such as a mason jar or glass Tupperware. 

Can I freeze this cheese sauce?

We haven’t tested it, but it would likely work well. If you’d like to give it a try, make the cheese sauce as instructed, then allow it to cool completely to room temperature. Transfer to a freezer-safe container, such as a wide-mouth mason jar, and freeze for up to 3 months.
Defrost overnight in the refrigerator, then reheat in the microwave or stovetop.

Quick Tips

  • Blend until just smooth! Because this cheese sauce contains potatoes, you don’t want to over-blend. Overdoing it will break down the starch in the potatoes and make the creamy texture more gluey and gummy.
  • Keep it in a condiment bottle. If you plan on using this vegan cheddar cheese sauce as a drizzle for all your favorite savory recipes, invest in a reusable condiment bottle. It will make it real quick and easy to drizzle it on top of everything!
  • Make sure your milk is unsweetened! ​Unfortunately, many plant-based milks sold in stores are labeled as unsweetened but still have an oddly sweet, perfume-like flavor. We recommend tasting your milk before adding it to the cheese sauce. If it has that artificially sweet flavor, it will ruin the savory flavor of your sauce. 
Make The Best Vegan Chipotle Cheddar Cheese Sauce that is Healthy & Oil-free! #vegancheese #vegancheddar #healthycheese #cheesesauce #superbowl #cheddarcheese #oilfree #lowfat #healthy

More Vegan Cheese Recipes You May Enjoy:

Make sure you tag us on Instagram @sweetsimplevegan and @consciouschris and hashtag #sweetsimplevegan if you make this recipe. We love to see your photos! 

Print
a spoonful of chipotle cashew cheddar cheese sauce being drizzled into the bowl

The Best Chipotle Cashew Cheddar Cheese Sauce Recipe


5 Stars 4 Stars 3 Stars 2 Stars 1 Star

5 from 7 reviews

  • Author: Jasmine @ Sweet Simple Vegan
  • Total Time: 30 minutes
  • Yield: 8 servings

Description

This Cashew Cheddar Cheese Sauce is made with just a few simple ingredients (no tapioca starch!), yet is decadent, creamy, cheesy, and packed with the perfect amount of spice! All you need is 30 minutes to make this easy recipe.


Ingredients

  • 2 cups peeled and chopped Yukon gold potatoes
  • 1 cup peeled and chopped carrots
  • 1/2 cup raw cashews
  • 1 cup unsweetened almond milk (or non-dairy milk of choice)
  • 1/2 cup nutritional yeast
  • 1 chipotle pepper in adobo
  • 3 tablespoons fresh lemon juice
  • 1 teaspoon salt
  • 1 teaspoon garlic powder
  • 1 teaspoon onion powder
  • Black pepper to taste, if desired

Instructions

  1. Bring a medium pot of water to a boil, and place the potatoes, carrots, and cashews in once boiling. Simmer for about 20 minutes, or until fork-tender. Drain and transfer to a high-speed blender.
  2. Add the remaining ingredients into the blender and blend until completely smooth.
  3. Serve with your favorite crackers and veggies as a dip or use it as a cheese sauce over baked potatoes, french fries, steamed broccoli, etc.!

Notes

  • If you have leftovers, store them in a sealed, airtight container in the refrigerator for up to 4 days.
  • To make this recipe nut-free,  you can use 1/2 cup of great northern white beans or cannellini beans in place of the cashews, and a nut-free plant-based milk of your choice.
  • Prep Time: 10 minutes
  • Cook Time: 20 minutes

Nutrition facts label provided by Nutri Fox.

Disclaimer: The nutritional information shown is an estimate provided by an online calculator. It should not be considered a substitute for a professional’s advice. This page may contain affiliate links, which simply means that we earn a commission if you purchase through those links, but your price remains the same. Thank you for supporting Sweet Simple Vegan!

The post The Best Chipotle Cashew Cheddar Cheese Sauce appeared first on Sweet Simple Vegan.

Southwest Lentils And Rice Skillet

This Southwest Lentils and Rice Skillet is packed with veggies and bold flavors for a super filling, budget-friendly, and easy to make one pot skillet meal!

The post Southwest Lentils And Rice Skillet appeared first on Budget Bytes.

I don’t know about you all, but I love one pot skillet meals! This simple Southwest Lentils and Rice Skillet was inspired by a protein meal bag that I used to buy in the grocery freezer section. I loved the flavors and combination of ingredients, but I realized that I could make 3 times as much and save more money by making it at home. But the best part about this dish is that it’s a “pantry cleaning” recipe. Meaning most of the ingredients are pantry staples like canned beans and tomatoes, lentils, rice, corn, herbs and spices. It’s truly budget-friendly, super filling, easy to make, and probably your new favorite meal prep recipe! :)
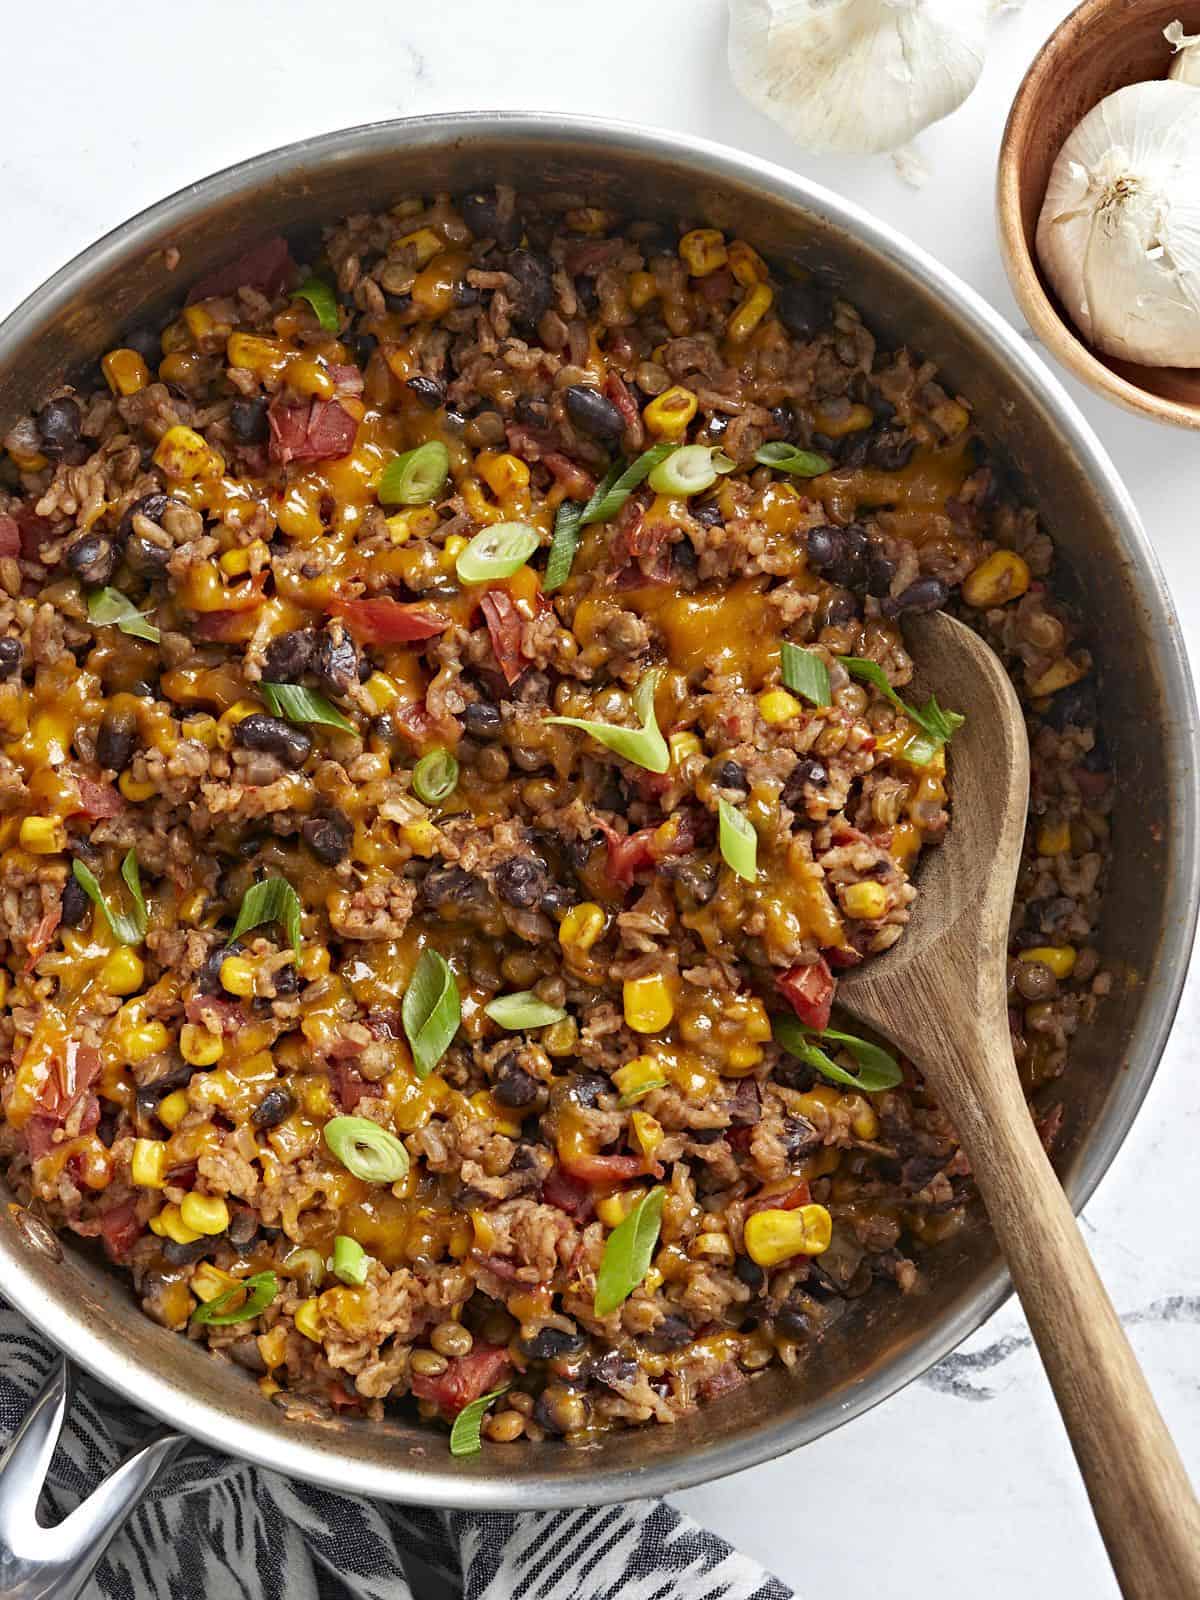
Overhead shot of southwest lentils and rice skillet garnished with green onions and a wooden spoon placed inside the skillet.

What’s in Southwest Lentils and Rice Skillet?

The good news is you probably already have most of these ingredients for this tasty skillet meal in your pantry right now! So here’s a brief rundown of what you’ll need:

  • Lentils & Rice – Lentils and rice are the base components of this recipe and a great combination for a filling meal. There are several different types of lentils, but we used brown lentils and long-grain white rice for this recipe. I’ll provide more details about lentils in the section below.
  • Vegetables – I used a simple combination of black beans, fire-roasted tomatoes, and frozen corn for this recipe. Feel free to use canned corn (drained) or regular diced tomatoes if that’s what you have on hand. Just know you’ll be missing out on the smoky flavor you would get from using fire-roasted tomatoes.
  • Red Onion and Garlic – Both of these aromatics add depth and great flavor to the dish. You can certainly substitute yellow onion instead of red onion if you prefer.
  • Vegetable Broth – Vegetable broth to cook the lentils and rice and to keep this recipe vegetarian. Feel free to use chicken broth if that’s what you have on hand.
  • Spices – Spices like cumin, chili powder, adobo seasoning, and oregano create a bold Southwest-inspired flavor base for this skillet meal.
  • Cheddar Cheese & Green Onions – We topped things off with some fresh shredded cheddar cheese and sliced green onions for extra flavor and color.

What Type of Lentils To Use?

There’s usually a wide variety of lentils sold in grocery stores these days including brown, red, yellow, black and french-style lentils. For this recipe you’ll want to use brown or brownish-green lentils which cook with about 20 minutes of simmering and do not require soaking. I don’t suggest using red or yellow lentils for this recipe because they break down quickly when cooked and they don’t hold their shape as well as brown lentils.

Can I use Brown Rice?

This recipe would be a little tricky to substitute brown rice in because brown rice takes much longer to cook than white rice, and it requires more liquid. The longer cook time would also cause the lentils to become mushy. So I recommend just sticking with the white rice for this recipe.

Topping Ideas

One of the best parts about this Southwest Lentils & Rice skillet is being able to customize it with all your favorite taco-style toppings! You can top it with some cilantro, your favorite cheese, and even a few diced tomatoes.

Or get really fancy with some diced avocado, pickled jalapeños, or a drizzle of lime crema. My personal favorite is to just serve it with shredded cheese, green onions, a side of salsa, and some tortilla chips. Sooo good!! :)

Storing & Reheating

This lentils and rice meal holds up great in the fridge. Store any leftovers in an airtight container in the fridge for up to 4 days. And it’s perfect for meal prep! I’ve meal-prepped this recipe quite a few times in separate storage containers, reheated in the microwave until warm, and boom…a quick and easy lunch or dinner any day of the week!
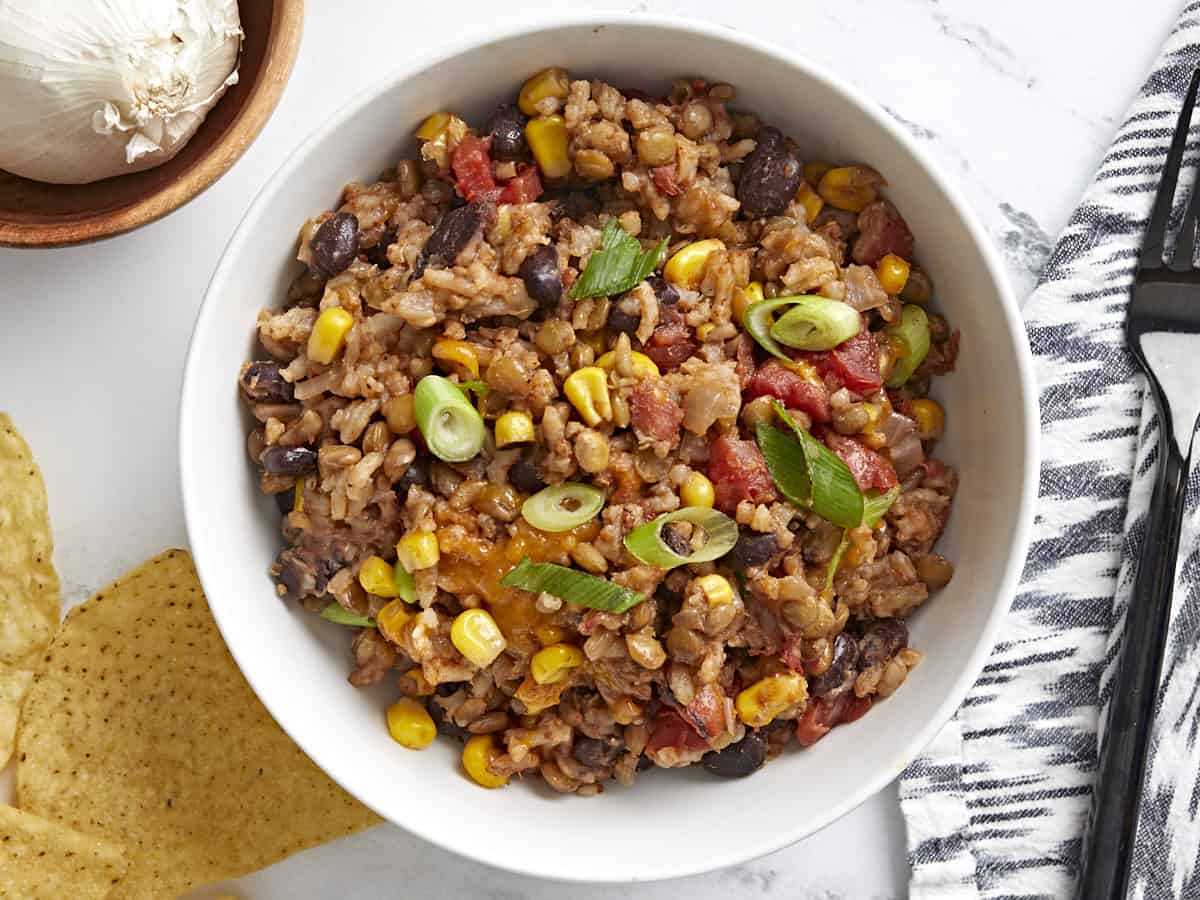
Overhead view of a white bowl full of southwest lentils and rice with tortilla chips, a napkin, and black fork on the side.
Overhead shot of southwest lentils and rice skillet garnished with green onions and a wooden spoon placed inside the skillet.
Print

Southwest Lentils and Rice Skillet

This Southwest Lentils and Rice Skillet is packed with veggies and bold flavors for a super filling, budget-friendly, and easy to make one pot skillet meal!
Course Dinner, Lunch
Cuisine Mexican
Total Cost $5.65 recipe / $1.41 serving
Prep Time 10 minutes
Cook Time 35 minutes
Total Time 45 minutes
Servings 4 (1.5 cups each)
Calories 369kcal

Ingredients

  • 1 Tbsp olive oil $0.11
  • 1 small red onion $0.42
  • 2 cloves garlic $0.16
  • 1.5 tsp cumin $0.15
  • 1 tsp chili powder $0.10
  • 1 tsp adobo seasoning $0.10
  • 1/2 tsp dried oregano $0.05
  • 1/2 tsp salt $0.04
  • 1/4 tsp freshly cracked black pepper $0.02
  • 1/2 cup brown lentils, rinsed $0.38
  • 1 15oz. can black beans, drained & rinsed $0.79
  • 1 14.5oz. can fire roasted tomatoes $1.25
  • 1 cup frozen corn $0.60
  • 2 cups vegetable broth $0.34
  • 3/4 cup long grain white rice, rinsed $0.32
  • 1/2 cup shredded cheddar cheese $0.58
  • 2 green onions, sliced $0.24

Instructions

  • Dice the red onion and mince the garlic. Add olive oil and onion to a large deep skillet over medium heat and sauté until onions are translucent, approximately 2-3 minutes. Add minced garlic and sauté an additional 30 seconds or until garlic is fragrant.
  • Add the cumin, chili powder, adobo, oregano, salt, and pepper to the skillet, stir and toast spices for about 30 seconds.
  • Next add in the lentils, black beans, fire roasted tomatoes (with juices), corn, and vegetable broth. Stir everything to combine. Place a lid on the skillet, turn the heat up to medium-high, and allow the mixture to come to a full boil. Once boiling, immediately reduce the heat to medium-low and simmer for 5 minutes. This will allow the lentils to start cooking first before adding the rice.
  • After 5 minutes, remove the lid and add the rice. Stir briefly just to evenly distribute the rice, cover with a lid, bring the skillet back to a boil, then reduce the heat again and simmer for 20 minutes.
  • While the mixture is cooking, grate the cheddar cheese and slice the green onions.
  • After 20 minutes, remove the skillet from the heat and let it rest, with the lid on, for 5 minutes. After it has rested, remove the lid, fluff the rice and gently stir to redistribute the veggies.
  • Top the lentils and rice mixture with shredded cheese and sliced green onions. Serve with more of your favorite toppings and enjoy!

See how we calculate recipe costs here.

Nutrition
Serving: 1.5cups | Calories: 369kcal | Carbohydrates: 59g | Protein: 14g | Fat: 9g | Sodium: 872mg | Fiber: 10g
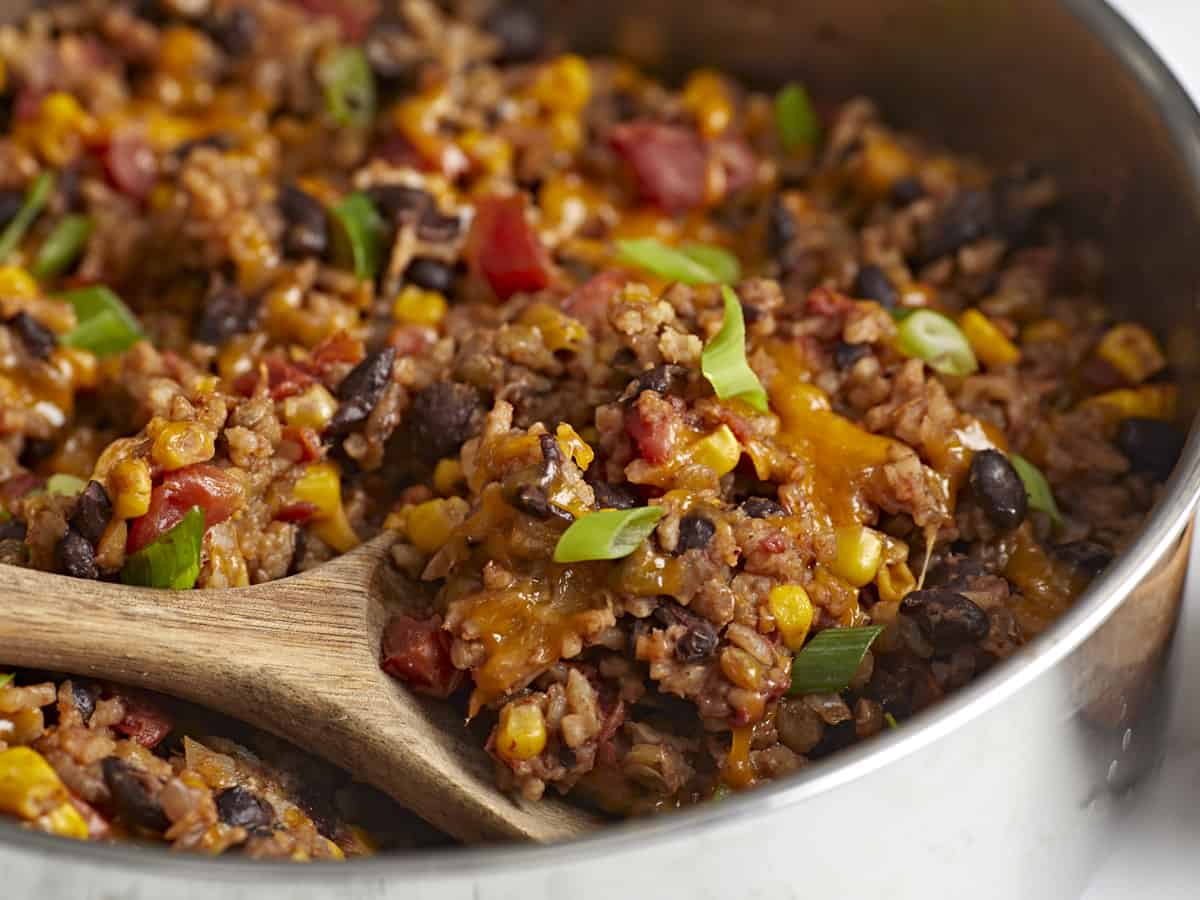
Side front view of southwest lentils and rice skillet with a wooden spoon scooping some out.

How to Make Southwest Lentils And Rice Skillet – Step by Step Photos
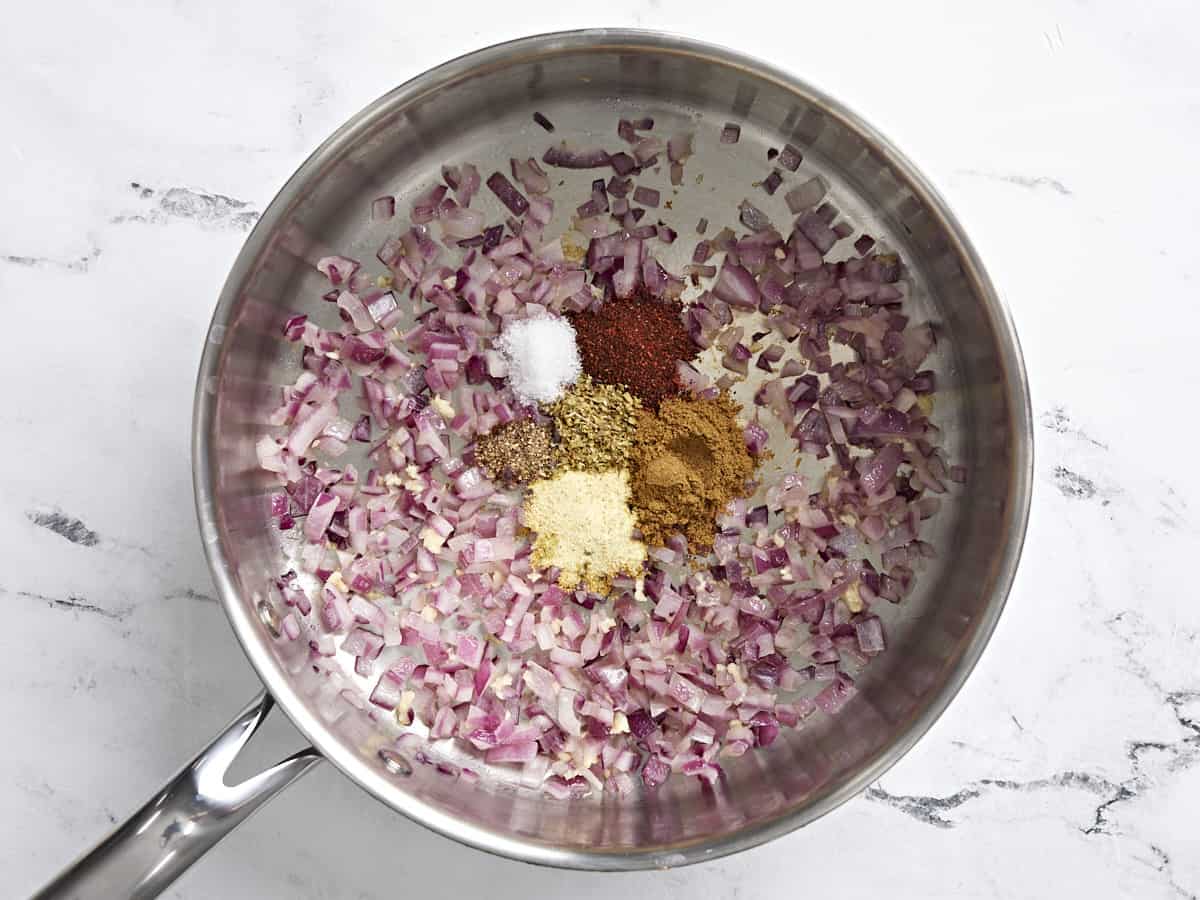
Diced red onion, garlic, and spices in a skillet.

In a large deep skillet, add 1 Tbsp olive oil and 1 small red onion, diced. Sauté over medium heat until onions are translucent, approximately 2-3 minutes. Add 2 minced garlic cloves and sauté an additional 30 seconds. Now add 1 1/2 tsp cumin, 1 tsp chili powder, 1 tsp adobo seasoning, 1/2 tsp dried oregano, 1/2 tsp salt, and 1/4 tsp cracked black pepper. Stir and toast the spices for about 30 seconds.
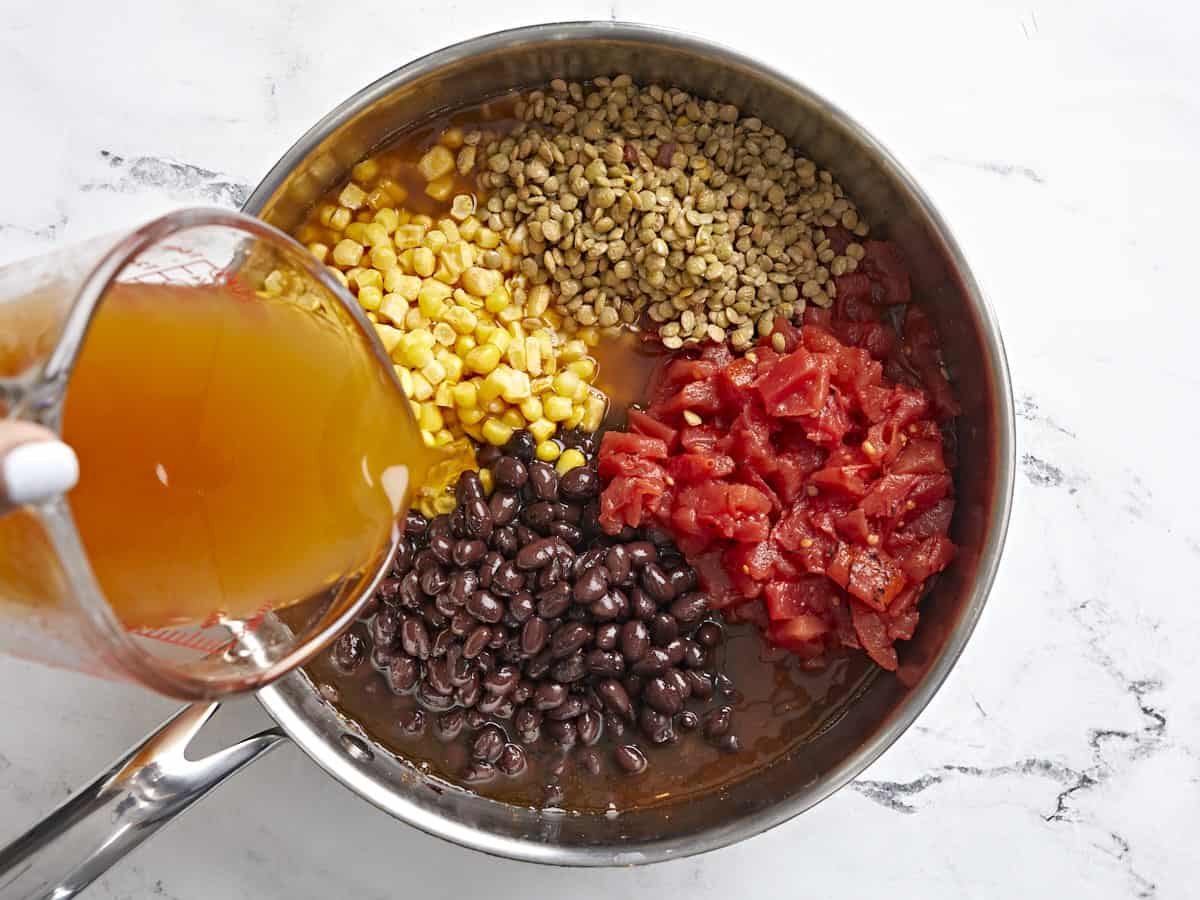
Lentils, fire-roasted tomatoes, black beans, corn, and vegetable broth added to the skillet.

Add 1/2 cup brown lentils, one 15oz. can black beans (drained & rinsed), one 14.5oz. can fire roasted tomatoes (with juices), 1 cup frozen corn, and 2 cups of vegetable broth to the skillet. Stir everything to combine. Place a lid on the skillet, turn the heat up to medium-high, and allow the mixture to come to a full boil. Once boiling, immediately reduce the heat to medium-low and simmer for 5 minutes. This will allow the lentils to start cooking first before adding the rice.
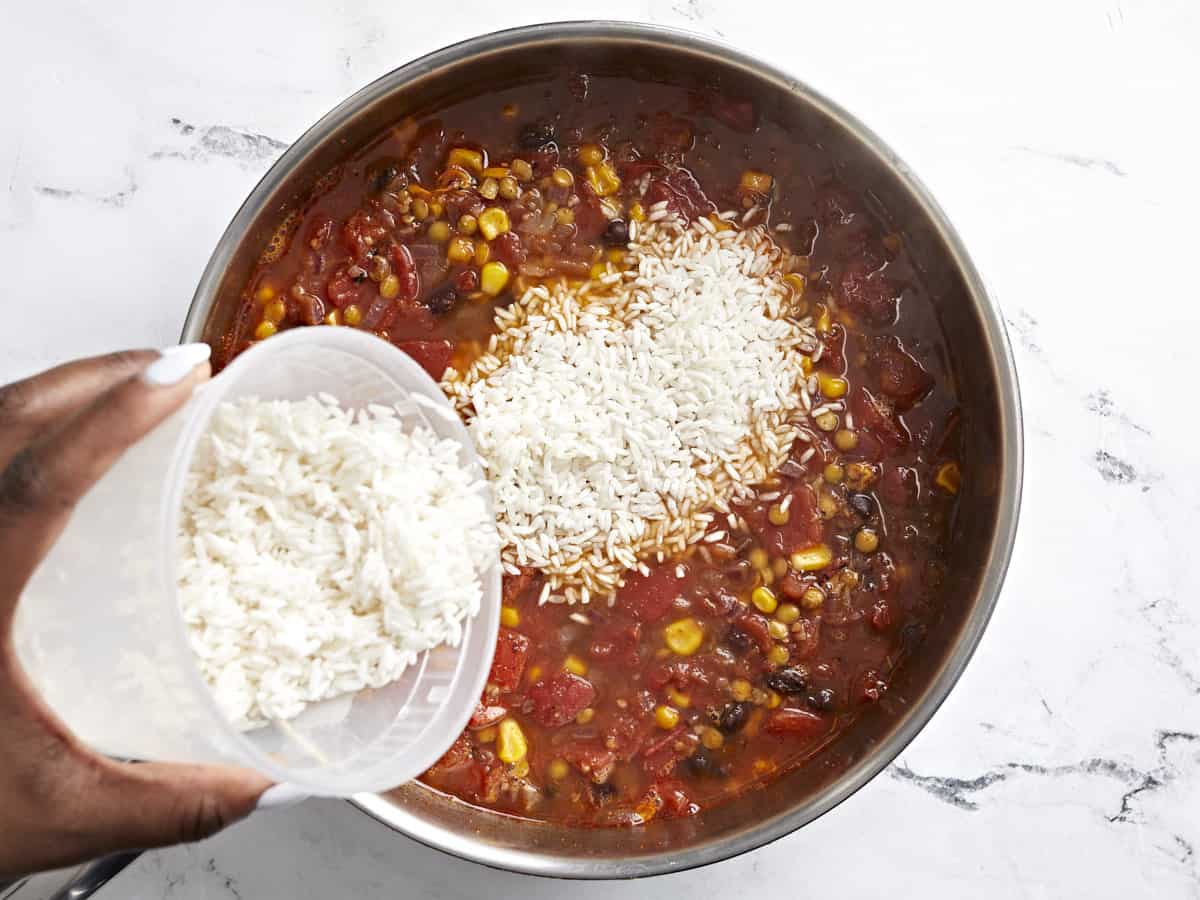
Long grain white rice being added to the skillet.

After 5 minutes, remove the lid and add 3/4 cups long grain white rice (rinsed). Stir briefly just to evenly distribute the rice, cover with a lid, bring the skillet back to a full boil, then reduce the heat again and simmer for 20 minutes. While the mixture is cooking, grate 1/2 cup cheddar cheese and slice two green onions.
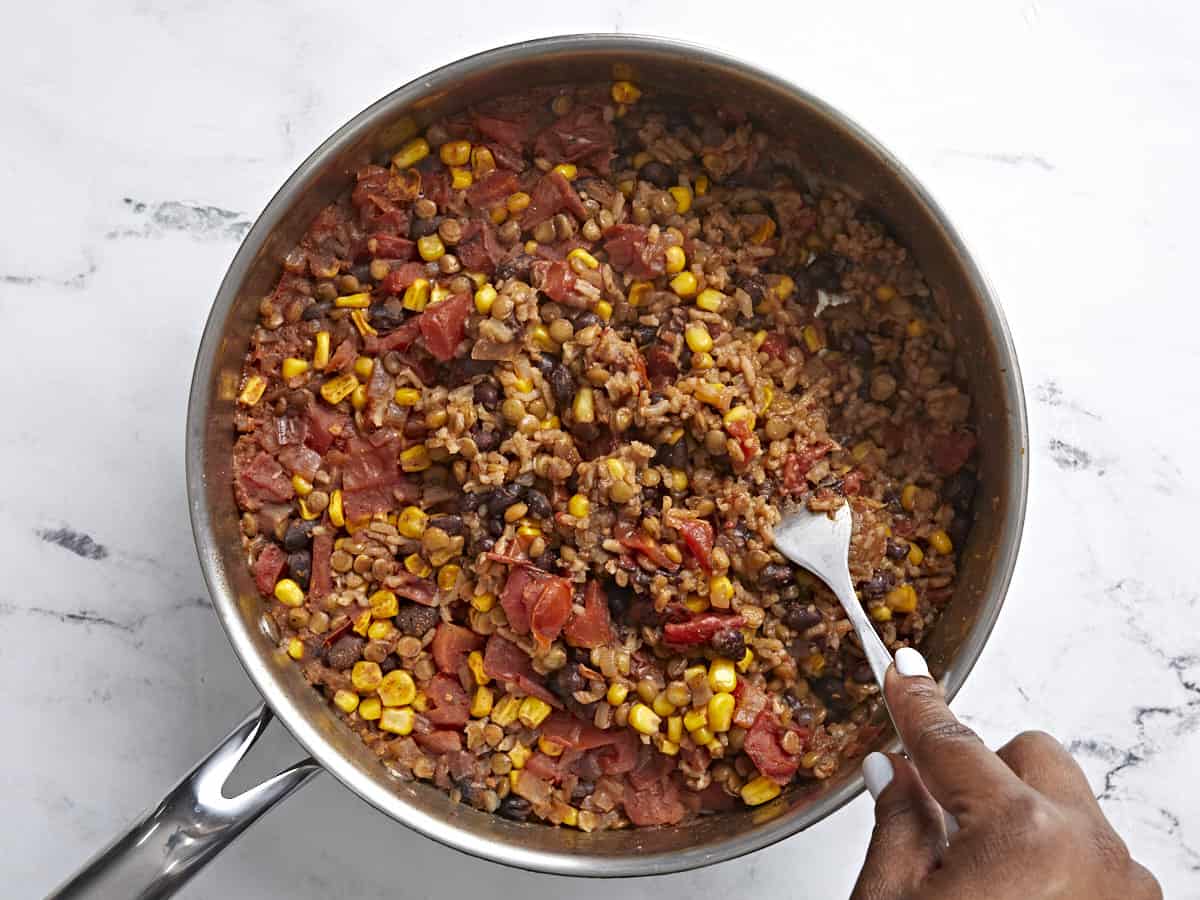
Cooked southwest lentils and rice skillet with rice being fluffed with a fork.

After 20 minutes, remove the skillet from the heat and let it rest, with the lid on, for 5 minutes. After it has rested, remove the lid, fluff the rice and gently stir to redistribute the veggies.
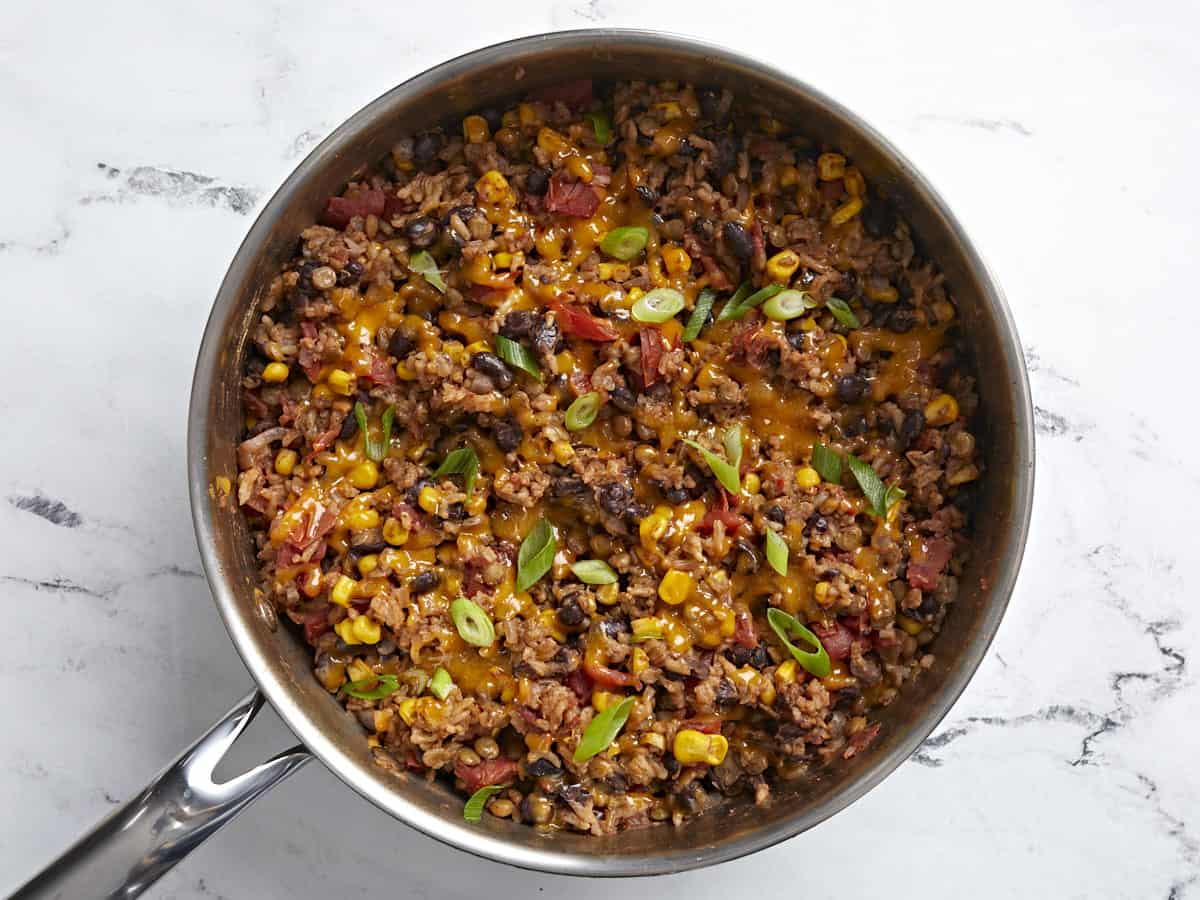
Finished Southwest Lentils and Rice Skillet with shredded cheddar cheese and sliced green onions on top.

Top the lentils and rice mixture with the shredded cheese and sliced green onions.
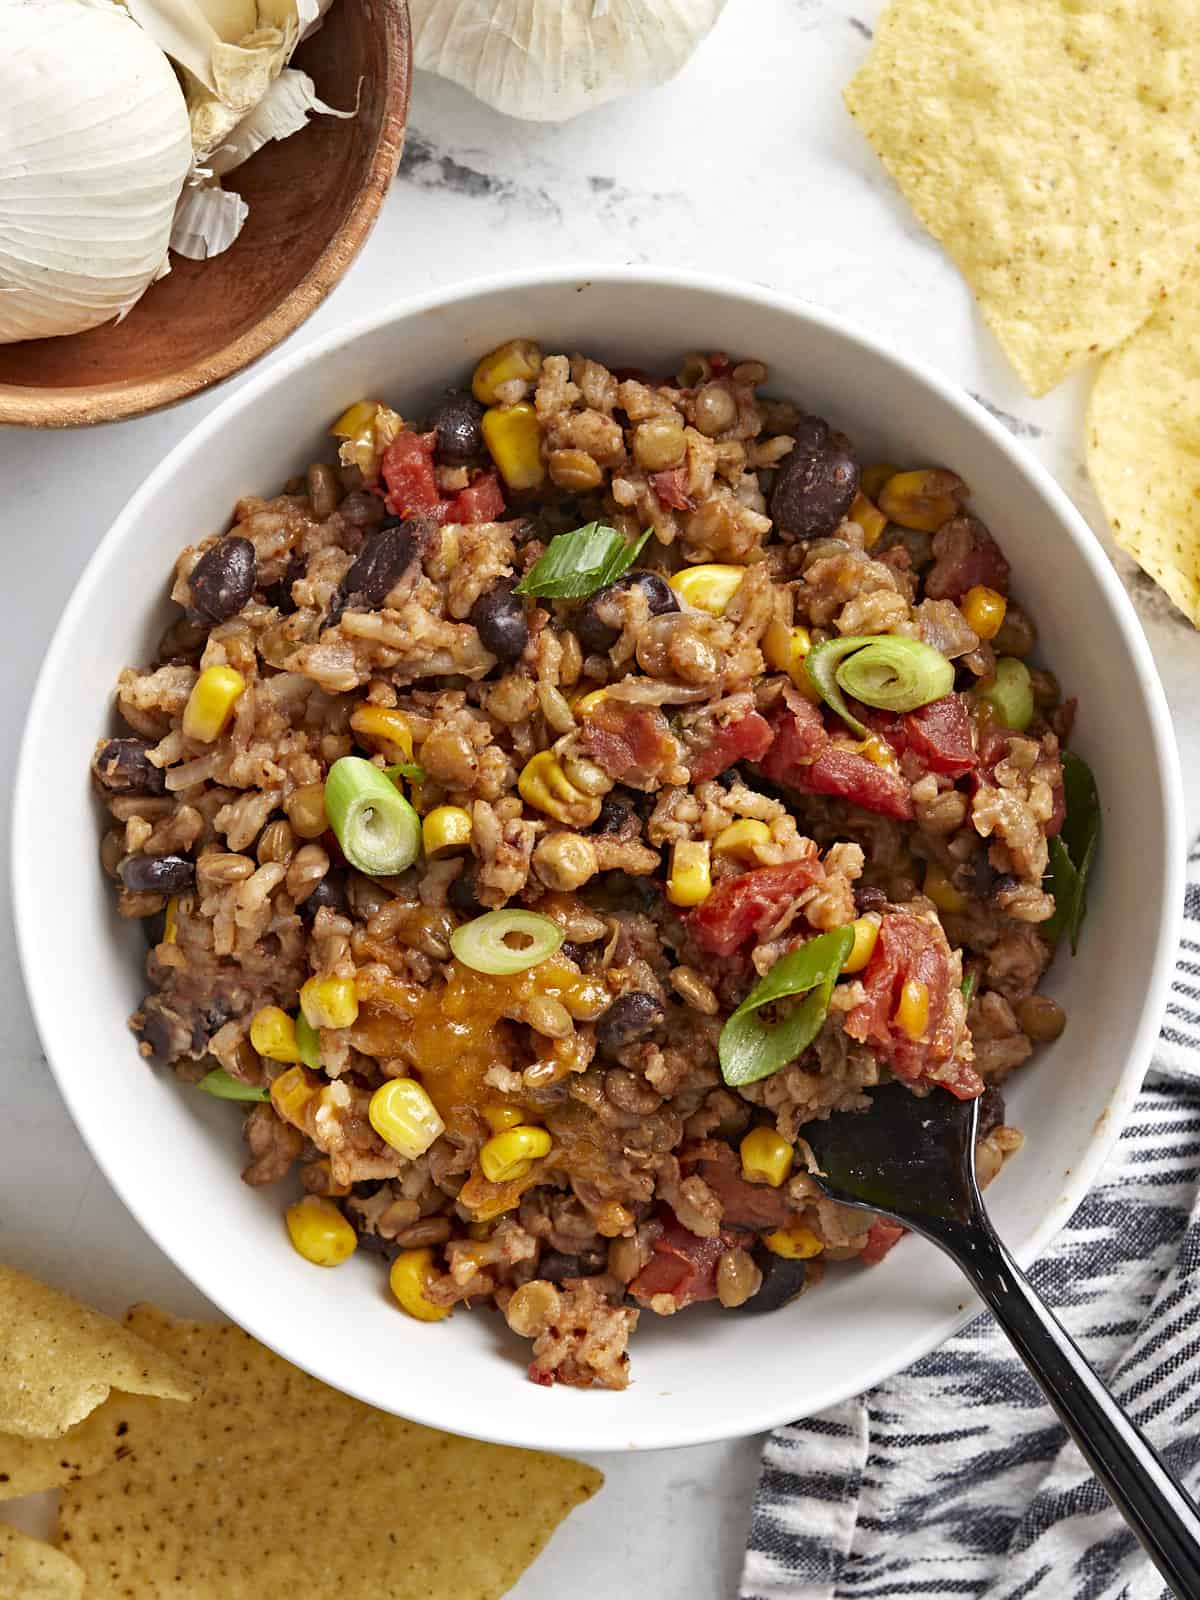
Overhead view of a white bowl full of southwest lentils and rice with tortilla chips, a napkin, and black fork on the side.

Serve with more of your favorite toppings and enjoy!

The post Southwest Lentils And Rice Skillet appeared first on Budget Bytes.

Pinchos De Pollo (Puerto Rican Chicken Skewers)

Smoky, mouth-watering Pinchos De Pollo, AKA Puerto Rican Chicken Skewers, are a beloved island street food that’s easy to make at home!

The post Pinchos De Pollo (Puerto Rican Chicken Skewers) appeared first on Budget Bytes.

If you’re looking for an easy, budget-friendly treat everyone at the BBQ will love (especially your Boricua friends), you have to make smoky, mouth-watering Pinchos De Pollo, AKA Puerto Rican Chicken Skewers! This beloved island street food is easy to recreate at home, even if you don’t have a grill!

Overhead shot of Pinchos de Pollo on a black grill plate.

What Are Pinchos?

Pinchos is Spanish for “spikes” and refers to Puerto Rican meat skewers, one of the island’s most famous street foods. They are a late-night favorite of folks who’ve spent a little too much time at the bar and need to eat their way back to reality. Boricuas make Pinchos with many different types of meat (and sometimes veggies), but the most popular choices are chicken and pork. The meat is chopped, marinated, skewered, grilled over charcoal, and topped with a piece of bread or Tostones, AKA fried green plantain.

Ingredients For Pinchos De Pollo

Grilling Pinchos De Pollo over charcoal is traditional. However, I’m an avid indoors person and don’t like being exposed to the elements, so I made these on a grill plate. You should def open all of the windows or plan on explaining to the fire department that you’re grilling inside. (This happened to me a few days ago when I couldn’t get my smoke alarm to turn off and my security system automatically summoned my local firefighters… during a live virtual cooking demo. Not mortifying at all.) Here’s what you’ll need to make Pinchos De Pollo:

  • Chicken Thighs– have enough fat in them to withstand heavy grilling without drying out. You can, of course, substitute chicken thighs with whatever meat your heart desires. Bits of chopped marinated pork and beef are popular choices, as are shrimp. If you’re a veg head, try this recipe with whole baby bella mushrooms. Cooking times are different for different cuts of meat and veggies, so if you choose to change up the star of the show, use a thermometer to help you know when things are cooked through.
  • Adobo and Sazón– these Puerto Rican spice blends are heavy-duty flavor bombs and work quickly to infuse your chicken with earthy, tangy, notes. If you don’t have Adobo or Sazón, I’ve included recipes for you in the recipe card below.
  • BBQ Sauce– glazes the chicken, adds deep flavor, and helps create char marks. Use your favorite brand, though I’d steer clear of anything too sweet, as it will change the flavor profile and accelerate the charring. You can always make our easy recipe for Homemade BBQ Sauce, which is perfect for Pinchos De Pollo.
Over head shot of hand lifting Pinchos De Side shot of hand lifting Pinchos de Pollo on a black grill plate.

What Can You Serve With Pinchos De Pollo?

These Pinchos de Pollo pair beautifully with Arroz Con Habichuelas (Puerto Rican Rice And Beans) and Tostones (Fried Green Plantain). You can also serve them with Ensalada De Aguacate (Avocado Salad) and Yuca En Escabeche (Pickled Yuca Root).

How To Store Pinchos

When it comes to chicken left at room temperature, you should eat it or store it within 2 hours before harmful bacteria start to form. That time frame reduces to 1 hour if temperatures are above 90°F. Store leftover Pinchos De Pollo in an air-tight container with as much air removed as possible. Refrigerate for up to 3 days. Freeze for up to 3 months. Reheat in a 350°F oven or a microwave until steaming.

Over head shot of hand lifting Pinchos de Pollo on a black grill plate.
Overhead shot of Pinchos De Pollo on a black grill plate.
Print

Pinchos De Pollo

Smoky, mouth-watering Pinchos De Pollo, AKA Puerto Rican Chicken Skewers, are a beloved island street food that's easy to make at home! Get ready for a little piece of heaven!
Course Appetizer
Cuisine Latin, Puerto Rican
Total Cost ($7.67 recipe / $1.28 serving)
Prep Time 15 minutes
Cook Time 20 minutes
Marinating Time 1 hour
Total Time 1 hour 35 minutes
Servings 6 skewers
Calories 623kcal

Ingredients

  • 3 lbs boneless and skinless chicken thighs, about 5 to 6 $5.97
  • 2 tsp adobo* $0.10
  • 1 1/2 tsp sazón** $0.19
  • 2 tsp salt $0.16
  • 2 Tbsp cooking oil, plus a touch more for greasing $0.09
  • 1 cup BBQ Sauce $1.16

Instructions

  • Pat chicken thighs dry with a paper towel. Then chop the chicken into bite-size pieces (about 5 to 6 pieces per thigh).
  • Add the adobo, sazón, and salt to a large bowl and mix.
  • Add the chopped chicken thighs to the bowl along with the cooking oil and mix until the chicken is thoroughly covered. Cover with plastic wrap or parchment directly on the surface of the chicken and marinate for at least an hour, but preferably overnight.
  • Half an hour before you pull the chicken, soak at least 6 wood skewers in water so they don't burn. It's best to soak a few extra skewers just in case one of them breaks.
  • When you're ready to cook, preheat a grill pan on high. Then thread a thigh's worth of chicken pieces on each skewer, about 5 or 6 chunks. You want the chicken chunks close but not pressed tightly against each other. Brush both sides of each skewer with BBQ sauce, about 1/2 cup total.
  • When the grill pan is smoking hot, brush it with a touch of cooking oil. Then, place the skewers on the grill pan, making sure not to crowd the pan or place the skewers too close to each other.
  • After 5 minutes, brush 1/4 cup of BBQ sauce on the top surface of the chicken. Next, flip the chicken, and brush another 1/4 cup of BBQ sauce on the top layer. Cook for 5 more minutes, until char develops and the internal temperature of the chicken registers at 160°F. Now all you have left to do is eat! Buen provecho!

See how we calculate recipe costs here.

Notes

*If you cannot source adobo, mix your own and then use the amount called for in the recipe. Store the rest in an airtight container.
2 Tbsp salt
1 Tbsp garlic powder
1 tsp ground oregano
1 tsp onion powder
1 tsp black pepper
1 tsp ground cumin
1/2 tsp turmeric
**A packet of sazón contains about 1.5 teaspoons of sazón. If you cannot source sazón, use the following:
1/4 teaspoon onion powder
1/4 teaspoon garlic powder
1/4 teaspoon ground cumin
1/4 teaspoon ground coriander
1/3 teaspoon ground annatto
1/8 teaspoon turmeric
1/8 teaspoon ground oregano
Sazón and adobo share a lot of similar ingredients but are used at different points in the cooking process and will develop slightly different colors and flavors.

Nutrition

Serving: 1skewer | Calories: 623kcal | Carbohydrates: 21g | Protein: 37g | Fat: 43g | Sodium: 1531mg | Fiber: 1g
Overhead shot of Pinchos De Pollo on a black grill plate.

How to Make Pinchos De Pollo – Step by Step Photos

Overhead shot of cut chicken thighs on a wood cutting board.

Pat 3 pounds of chicken thighs (about 5 to 6 thighs) dry with a paper towel. Then chop the chicken into bite-size pieces (about 5 to 6 pieces per thigh). You don’t have to line up your chicken obsessively as I did. For the record, I’m jealous of your freewheeling ways.

Overhead shot of spices to make Pinchos de Pollo in a white bowl.

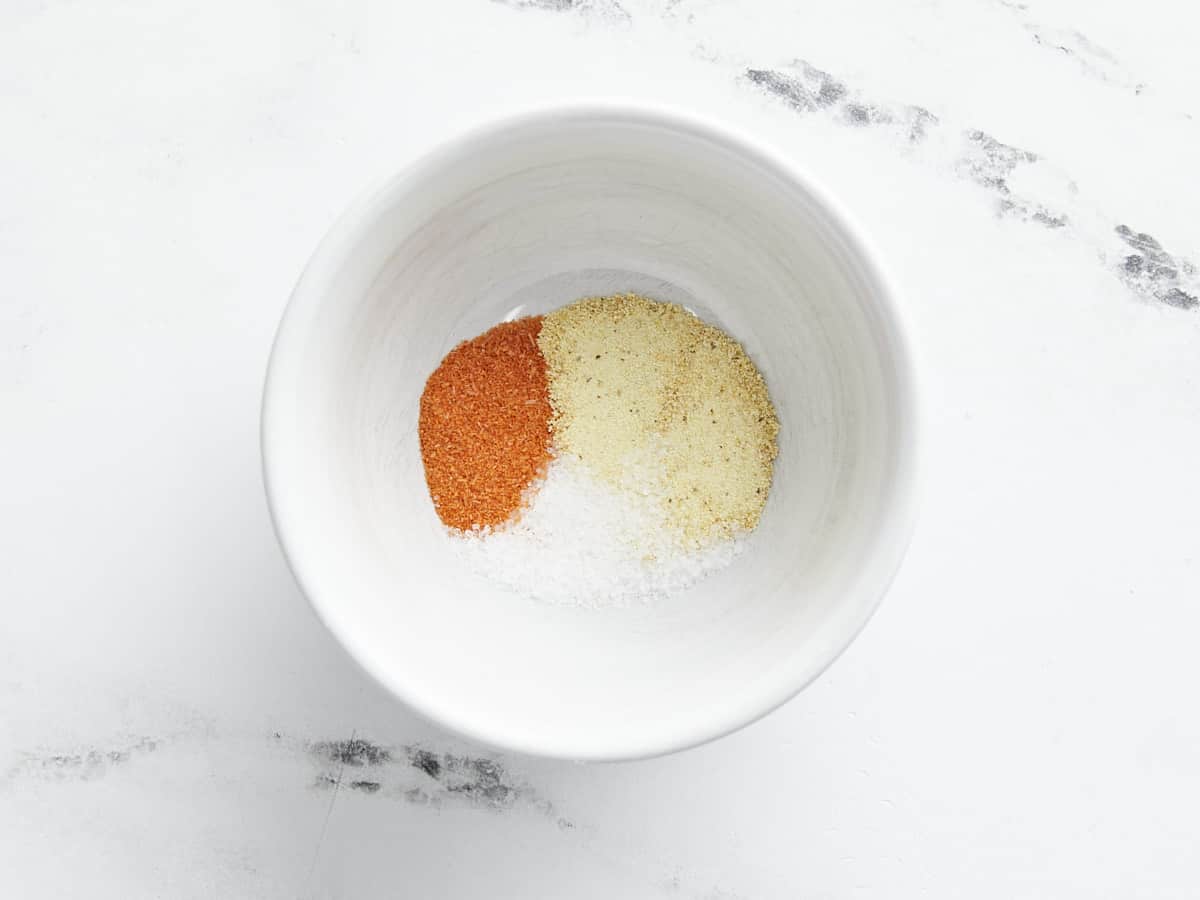
Add 1 1/2 teaspoons adobo, 2 teaspoons sazón, and 2 teaspoons salt to a large bowl and mix.

Overhead shot of cut chicken marinating in a white bowl.

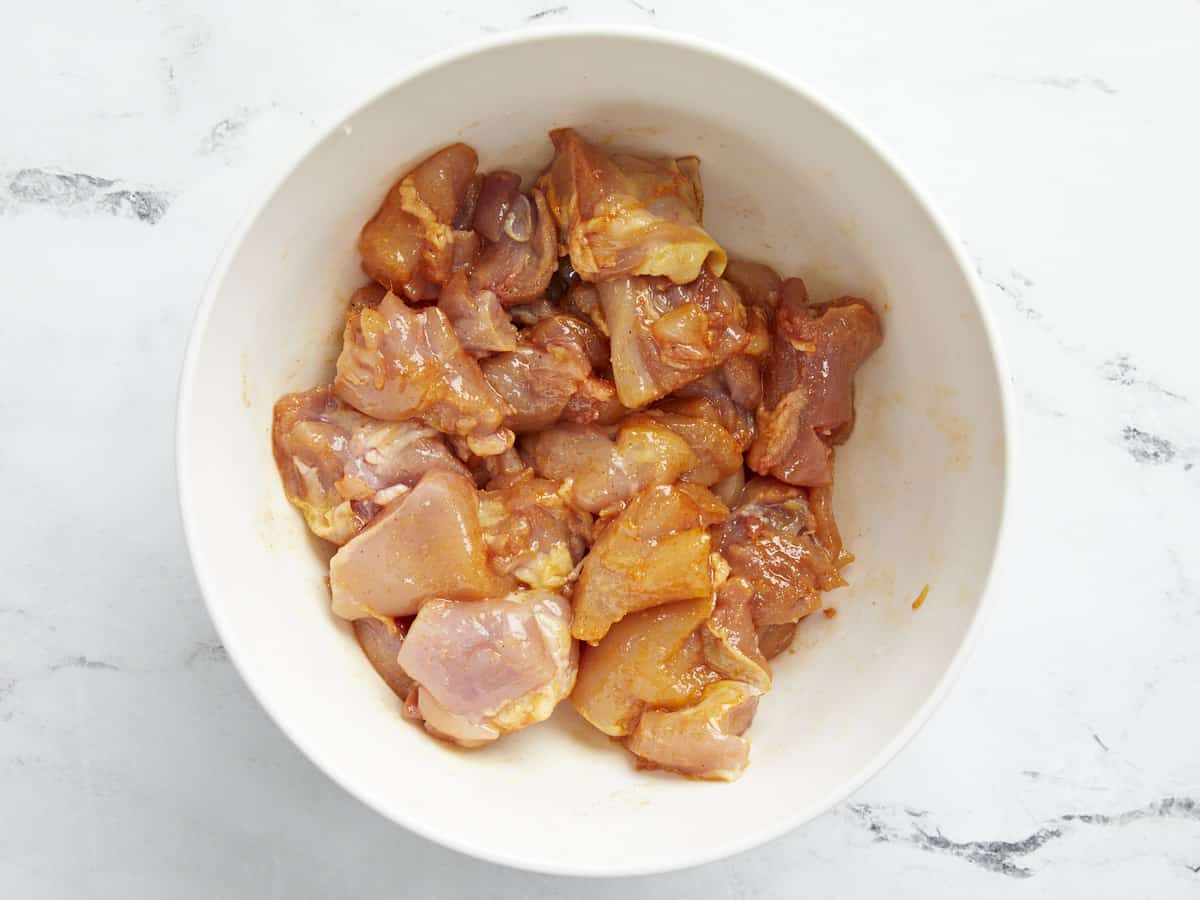
Add the chopped chicken thighs to the bowl along with the 2 tablespoons of cooking oil and mix until the chicken is thoroughly covered. Cover with plastic wrap or parchment directly on the surface of the chicken and marinate for at least an hour, but preferably overnight.

Overhead shot of wood skewers soaking in water in a white sheet pan.

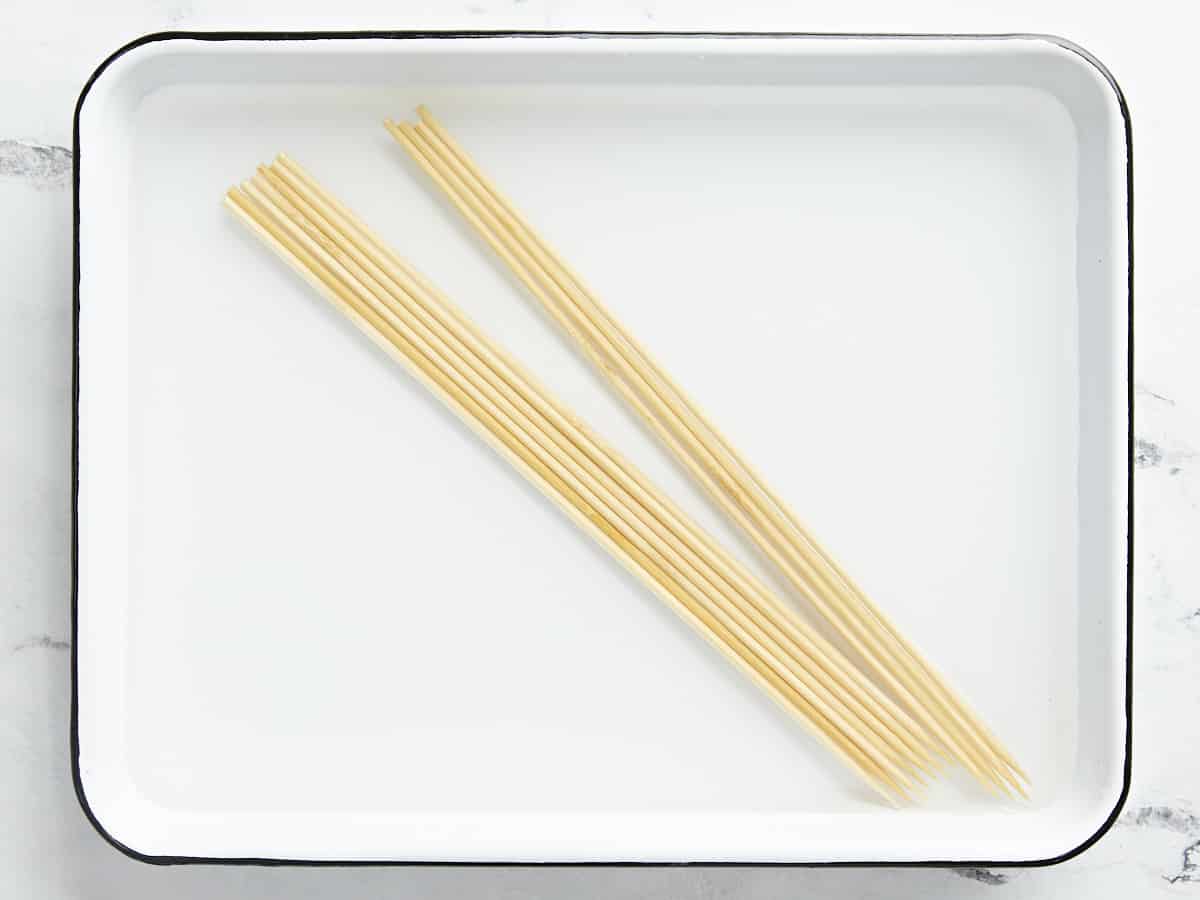
Half an hour before you pull the chicken, soak at least 6 wood skewers in water so they don’t burn. Soak a few extra skewers just in case the skewer gods decide to bless you with weak wood.

Overhead shot of Pinchos De Pollo being brushed with BBQ sauce.

When you’re ready to cook, preheat a grill pan on high. Then carefully thread a thigh’s worth of chicken pieces on each skewer, about 5 or 6 chunks. You want the chicken chunks close but not pressed tightly against each other, so leave room for Jesus. Otherwise, the chicken won’t cook evenly. Brush both sides of each skewer with BBQ sauce, about 1/2 cup total.

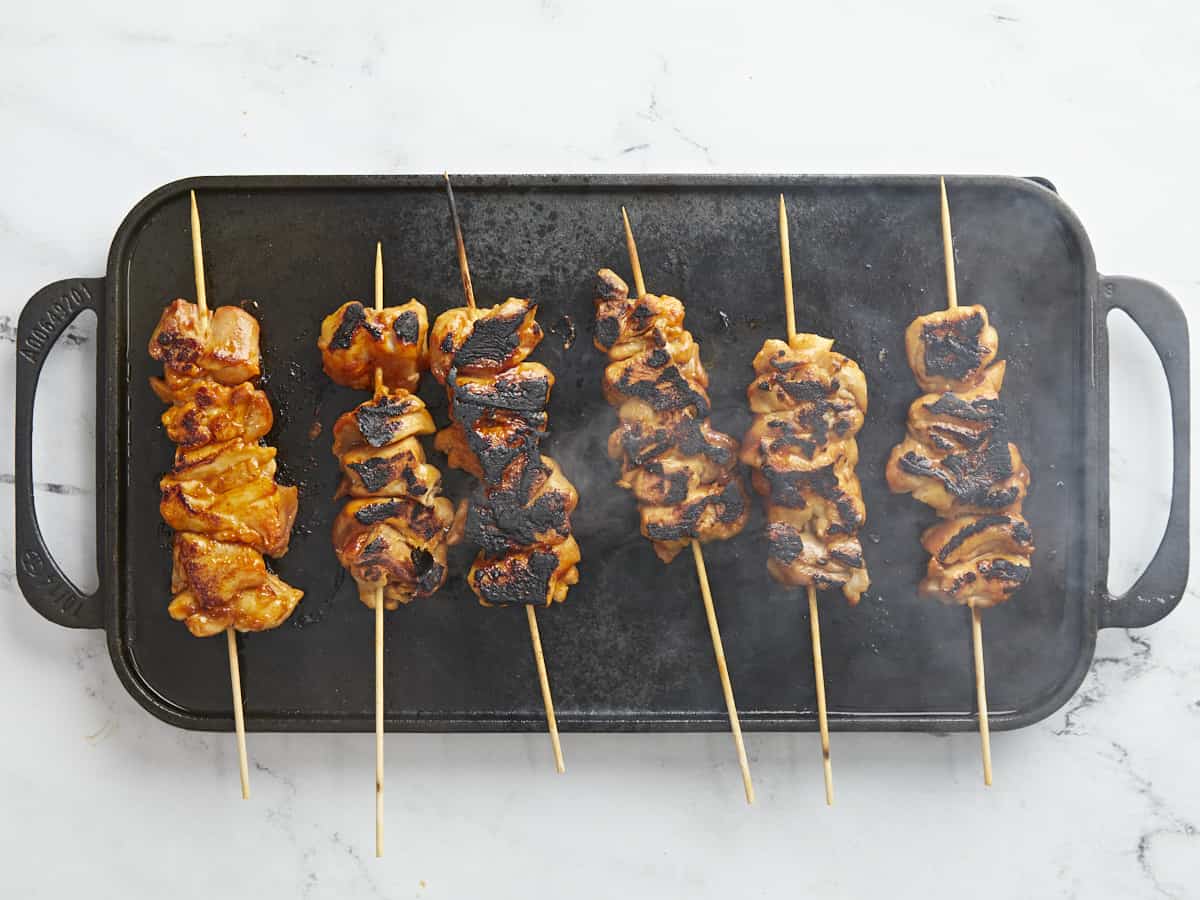
Overhead shot of Pinchos De Pollo cooking on a black grill plate.

When the grill pan is smoking hot, and I mean LITERAL smoke is billowing from it, brush it with a touch of cooking oil. Then, place the skewers on the grill pan, making sure not to crowd the pan or place the skewers too close to each other. (Did you open those windows???)

Overhead shot of Pinchos De Pollo cooking on a black grill plate.

After 5 minutes, brush 1/4 cup of BBQ sauce on the top surface of the chicken. Next, flip the chicken and brush another 1/4 cup of BBQ sauce on the top layer. Cook for 5 more minutes, until char develops and the internal temperature of the chicken registers at 160°F. Now all you have left to do is eat! Buen provecho!

Side shot of hand lifting Pinchos de Pollo on a black grill plate with a loaf of bread in the back ground.

Will you look at that savory, succulent, meaty, mouth-watering goodness?! Sigh. I want some right now!!!! Serve the Pinchos De Pollo as is. Or go the traditional route and top the skewers with slices of bread or Tostones (AKA fried green plantains). PS If you want my easy recipe for Tostones, let me know in the comments!

More Easy Puerto Rican Recipes

The post Pinchos De Pollo (Puerto Rican Chicken Skewers) appeared first on Budget Bytes.

Arroz Con Salchichas (Puerto Rican Rice With Sausage)

This Puerto Rican Arroz Con Salchichas recipe is a budget-friendly quick weeknight meal of rice and sausage that’s filling and flavorful!

The post Arroz Con Salchichas (Puerto Rican Rice With Sausage) appeared first on Budget Bytes.

Arroz Con Salchichas, or Puerto Rican Rice and Sausage, is one of my favorite pantry meals because it’s comforting, easy to make, and packed with flavor. As Beth would say, just put an egg on it and then eat until you hate yourself. (OK… that last part is all me.) PS It comes in under a dollar per serving and can be made in under an hour!

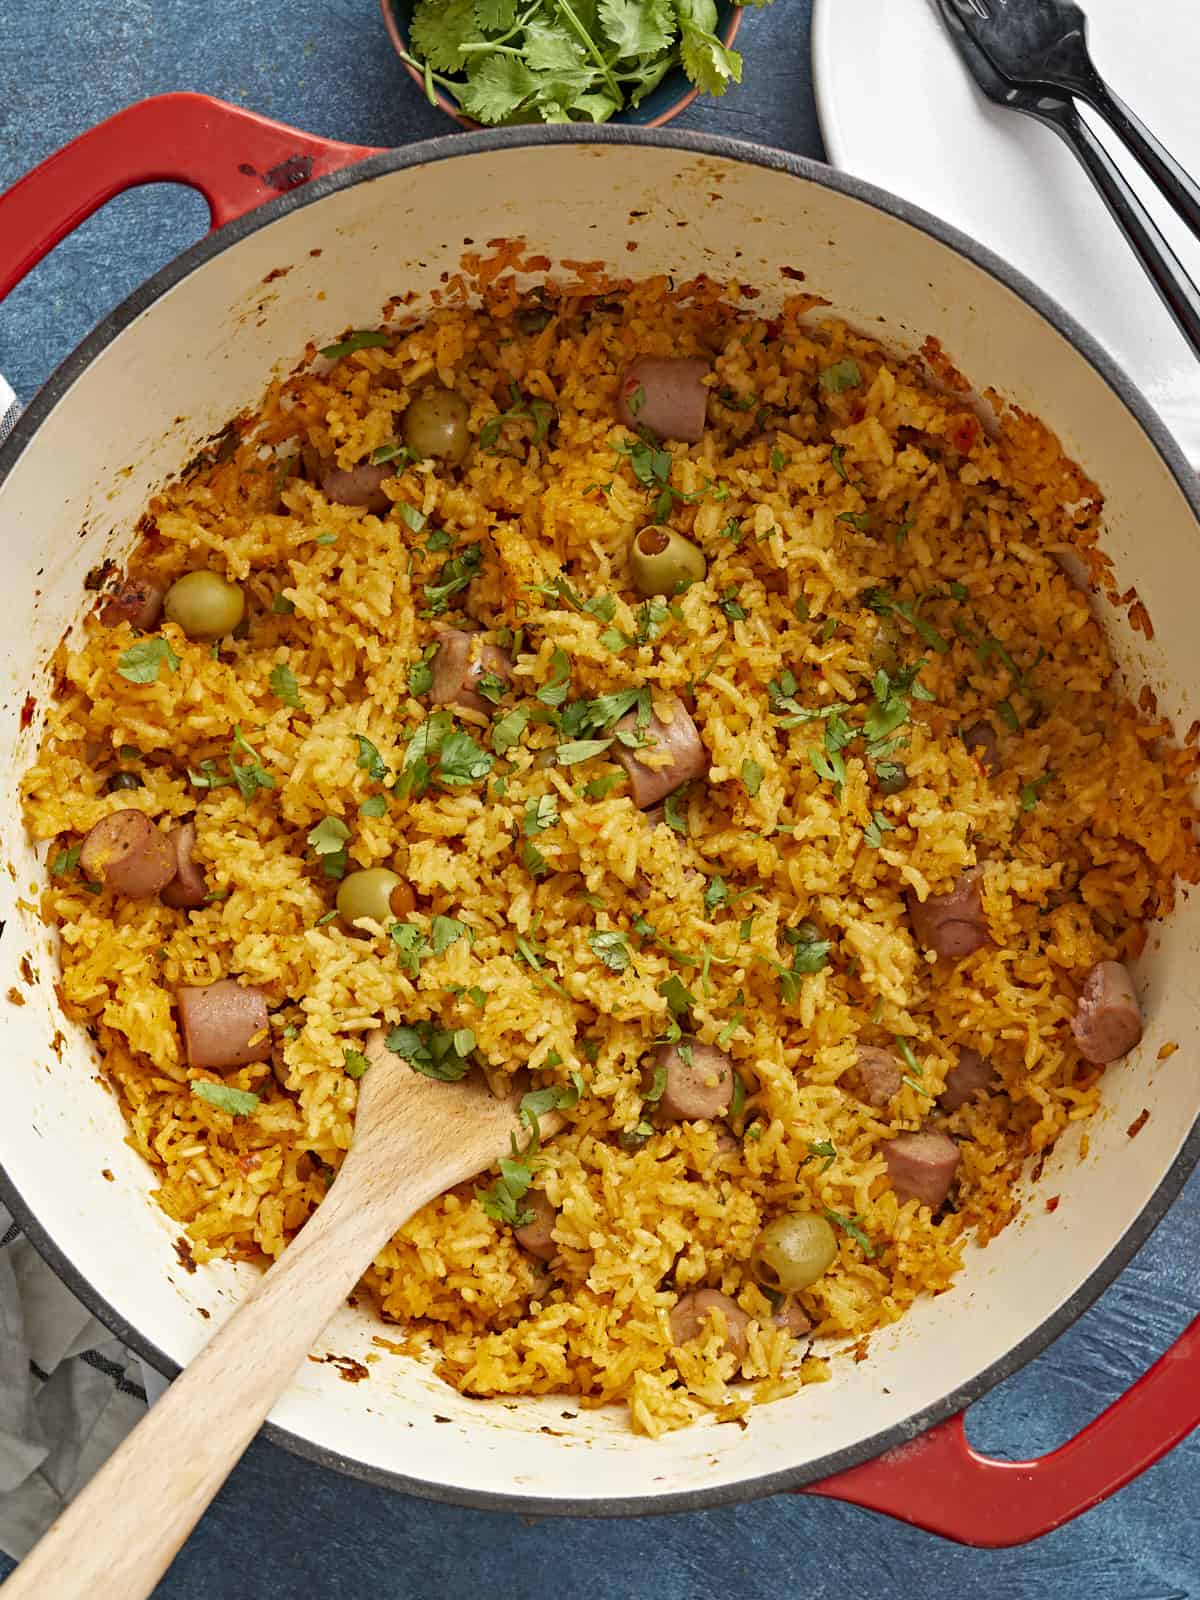
Overhead shot of wooden spoon in a red Dutch oven full of Arroz Con Salchichas.

A Note On Authenticity

This is not a historically authentic recipe. We strive to create recipes that are accessible to everyone, which means ingredients need to be available at a mainstream budget grocery store. We test recipes using the least amount of steps, tools, and ingredients while still honoring the spirit of the recipe. I was born and raised in Puerto Rico and look forward to a time when our ingredients are available in mainstream markets. Until then, buen provecho!

What Is Arroz Con Salchichas?

Arroz con salchichas, or rice with sausage, is a classic comfort food in many Latin American cultures. In Puerto Rico, it’s a staple weeknight meal traditionally made with canned Vienna sausages cooked in a flavorful sofrito sauce and yellow rice studded with briny olives and capers. Sometimes corn is added as well.

Ingredients for Arroz Con Salchichas

My recipe for Arroz Con Salchichas is pretty traditional. I keep it budget friendly by skipping the corn and the salt pork that’s present in many of my little island’s rice dishes. But if you’d like to add them in, fry about a 1/4 cup of diced salt pork before the sofrito hits the pan, and add about 1 1/2 cups of frozen, fresh, or drained canned corn when you add the olives. Here’s what you’ll need to make my easy Arroz Con Salchichas.

  • Sofrito – this powerful Puerto Rican blend of aromatics is the flavor base of many of our savory dishes. Canned sofrito is available, but fresh will always be better. Check out my simple recipe for a basic Puerto Rican Sofrito.
  • Adobo and Sazón– these spice blends give the rice a beautiful golden color and add earthy notes to the dish. If you can’t find adobo and sazón in your neck of the woods, I’ve included basic recipes in the notes section of the recipe card.
  • Tomato Sauce– helps add acidity and color to the dish.
  • Onion, Garlic, and Cilantro – these aromatics add earthy notes to the dish. Substitute the onion with 1 tablespoon of onion powder and the garlic with 1/4 teaspoon of garlic powder. If you don’t have cilantro, substitute it with fresh Italian parsley or just skip it.
  • Vienna Sausages– these small open-ended canned sausages taste a little like hot dogs, though they are softer in texture. They bulk up the rice and add deep meaty flavors. Substitute them with any sausage or hot dog.
  • Rice – traditionally, in Puerto Rico, medium-grain white rice is used. But in the Budget Bytes kitchen, we use long-grain Jasmine Rice. Feel free to use whatever rice you prefer, just follow the package directions for cooking times and cooking liquid amounts.
  • Olives and Capers– this mixture is known as Alcaparrado and delivers a pop of acidic brininess to every bite! If you don’t have olives or capers, just skip them and add two tablespoons of distilled white vinegar instead.
Overhead shot of wooden spoon serving rice out of a red Dutch oven onto a white plate.

Arroz Con Salchichas Variations

One of my favorite things about Arroz con Salchichas is how easy it is to customize. You can use brown rice or wild rice. Just follow the package directions for cook time and adjust your liquid. Add corn or other veggies you have on hand to bulk it up. Though it’s not traditional, I sometimes add peas, carrots, or diced tomatoes. If you don’t have Vienna sausages try:

  • Hot Dogs
  • Chorizo
  • Kielbasa
  • Spam
  • Chicken Sausage

What To Serve with Arroz Con Salchichas

Arroz Con Salchichas pairs beautifully with Ensalada de Aguacate (Avocado Salad), Yuca En Escabeche (Pickled Yuca), or the beans in this easy Puerto Rican Rice and Beans recipe. It’s also fantastic with Fried Eggs.

How To Store Leftovers

Refrigerate any leftover Arroz Con Salchichas in an airtight container for up to 5 days. You can also portion the rice and freeze it in a freezer-safe container for up to 6 months. Reheat in a microwave until steaming.

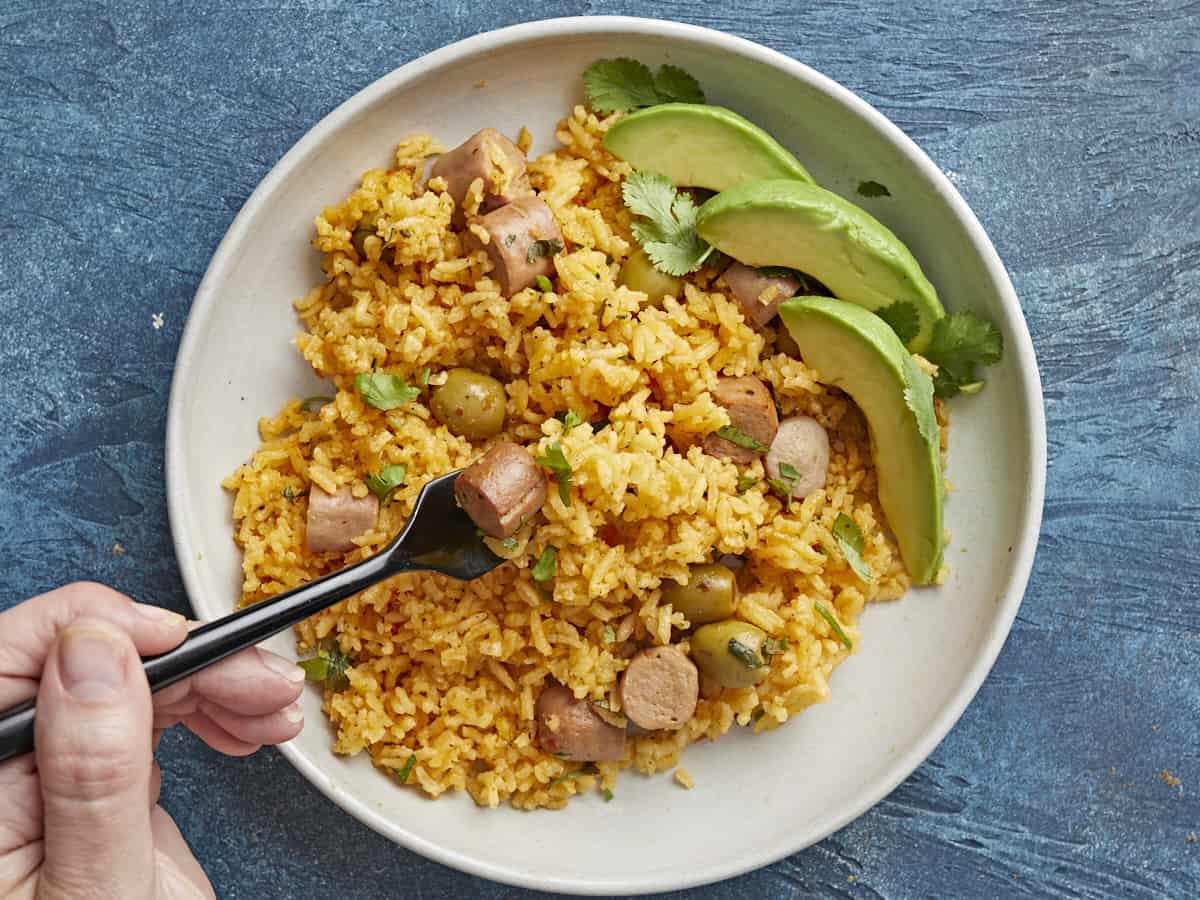
Overhead shot of Arroz Con Salchichas on a plate with a hand holding a forkful.
Overhead shot of wooden spoon in a red Dutch oven full of Arroz Con Salchichas.
Print

Arroz Con Salchichas

This Puerto Rican Arroz Con Salchichas recipe is a budget-friendly quick weeknight meal of rice and sausage that's both filling and flavorful. Make it once and you'll put it in heavy rotation!
Course Dinner, Lunch
Cuisine Latin
Total Cost $5.39 recipe / $0.90 serving
Prep Time 5 minutes
Cook Time 30 minutes
Resting Time 10 minutes
Total Time 45 minutes
Servings 6 about 1.5 cups each
Calories 376kcal

Equipment

Ingredients

  • 1 Tbsp cooking oil $0.04
  • 1 Tbsp adobo* $0.30
  • 1 packet sazón** $0.19
  • 1/4 cup diced yellow onion $0.19
  • 1 Tbsp minced garlic $0.24
  • 1/4 cup sofrito $0.36
  • 2 Tbsp tomato sauce $0.06
  • 2 Tbsp pimiento stuffed Spanish olives $0.29
  • 2 tsp capers $0.21
  • 2 5oz. cans Vienna sausages $1.50
  • 2 cups long-grain white rice $0.74
  • 2 1/2 cups chicken broth, boiling $1.12
  • 1 tsp salt $0.04
  • 1/4 cup chopped cilantro leaves for garnish $0.11

Instructions

  • Add the cooking oil to a large heavy-bottomed pot set over medium-high heat. Add the adobo and sazón and cook until fragrant, about 30 seconds. Add the diced yellow onion and cook until translucent, about 2 minutes. Add the minced garlic and cook until fragrant, about 30 seconds.
  • Add the sofrito, tomato sauce, green olives, and capers to the pot, and cook until fragrant, about 2 minutes. In the meantime, slice the Vienna sausages into 1/2-inch-thick rounds and rinse the rice until the water runs clear, making sure to drain off all excess water after rinsing.
  • Add the sliced Vienna sausages to the pot and sauté until browned. Finally, add the rinsed rice, salt, and boiling chicken broth to the pot. Stir and bring to a hard boil, with large bubbles breaking through the surface of the rice. Stir once more, turn the heat to low, and cover the pot.
  • Simmer the rice over low until the rice is tender, about 15 minutes. Take the pot off the heat, but leave it covered. Let it rest, covered, for 10 minutes. Uncover, stir the rice, taste, and adjust the seasoning to your liking. Stir in cilantro leaves then serve yourself a big bowl full and prepare to chow!

See how we calculate recipe costs here.

Notes

*If you cannot source adobo, mix your own and then use the amount called for in the recipe. Store the rest in an airtight container.
  • 2 Tbsp salt
  • 1 Tbsp garlic powder
  • 1 tsp ground oregano
  • 1 tsp onion powder
  • 1 tsp black pepper
  • 1 tsp ground cumin
  • 1/2 tsp turmeric
**A packet of sazón contains about 1.5 teaspoons of sazón. If you cannot source sazón, use the following:
1/4 teaspoon garlic powder
  • 1/4 teaspoon garlic powder
  • 1/4 teaspoon ground cumin
  • 1/4 teaspoon ground coriander
  • 1/3 teaspoon ground annatto
  • 1/8 teaspoon turmeric
  • 1/8 teaspoon ground oregano
  •  
 Sazón and adobo share a lot of similar ingredients but are used at different points in the cooking process and will develop slightly different colors and flavors.

Nutrition

Serving: 1serving | Calories: 376kcal | Carbohydrates: 54g | Protein: 11g | Fat: 13g | Sodium: 1328mg | Fiber: 1g

How to Make Arroz Con Salchichas – Step by Step Photos

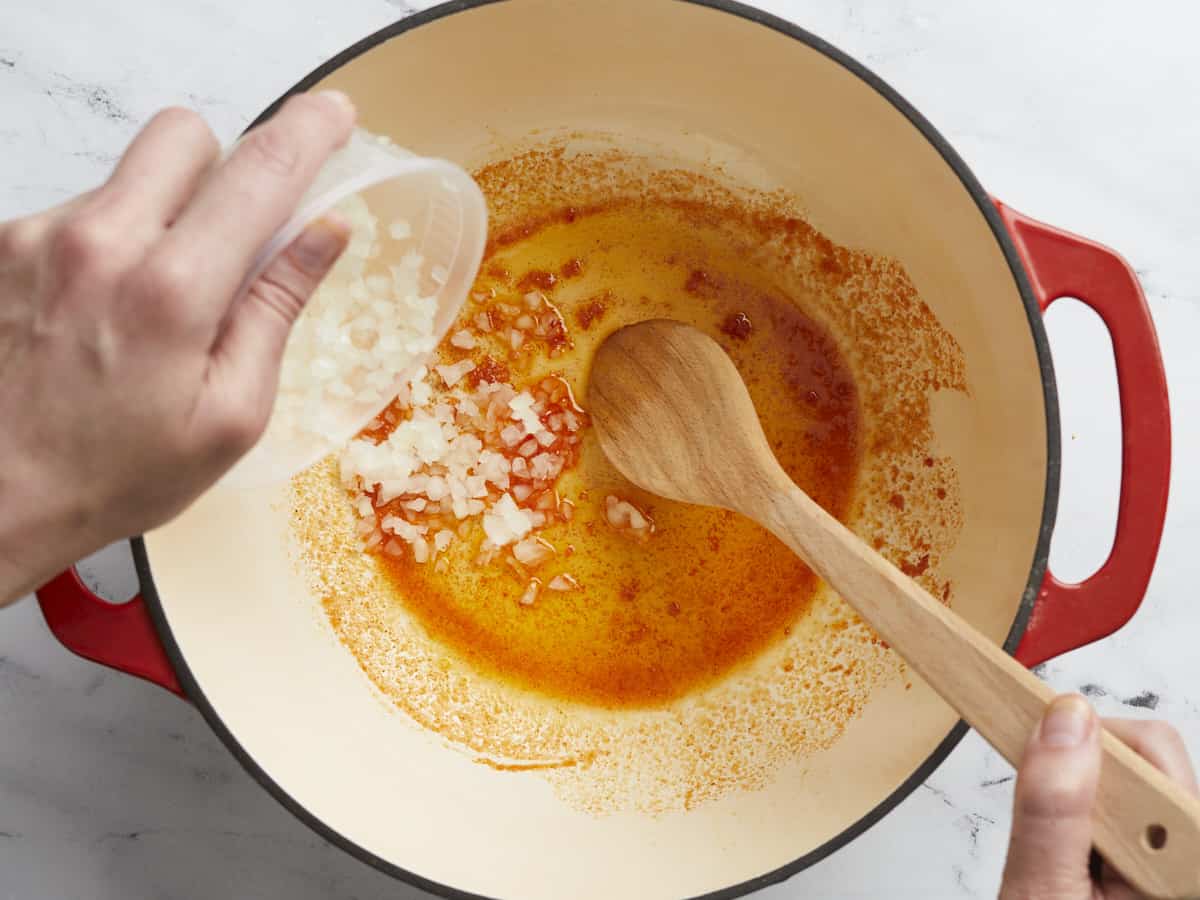
Overhead shot of a hand adding onion to a red Dutch oven while a second hand stirs with a wooden spoon.

Add 1 tablespoon of cooking oil to a large heavy-bottomed pot set over medium-high heat. Add the 1 tablespoon adobo and 1 packet of sazón and cook until fragrant (about 30 seconds). Then, add the 1/4 cup of diced yellow onion and cook until translucent, about 2 minutes. Next, add 1 tablespoon of minced garlic and cook until fragrant, about 30 seconds.

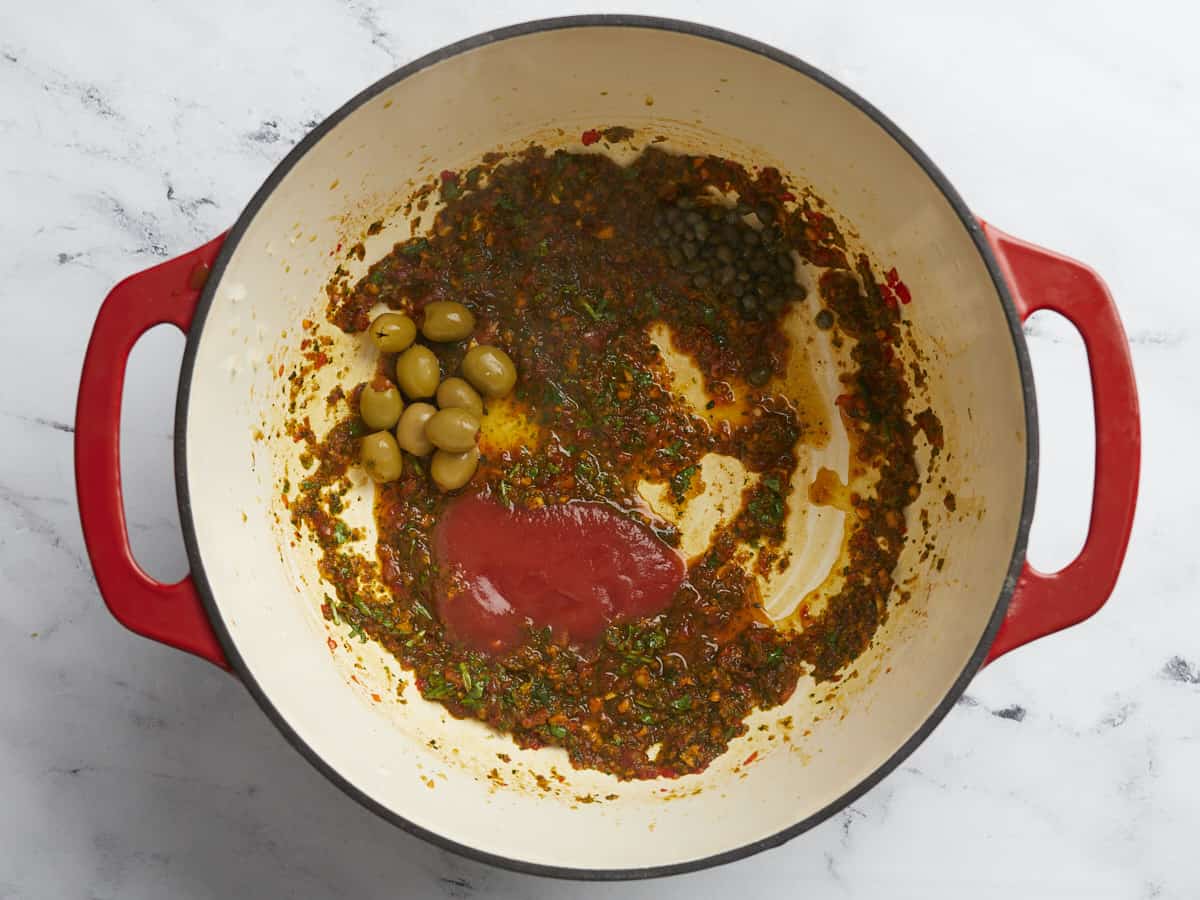
Overhead shot of sofrito, tomato sauce, olives and capers in a red Dutch oven.

Add the 1/4 cup of sofrito, 2 tablespoons of tomato sauce, 2 tablespoons of green olives, and 2 teaspoons of capers, and cook until fragrant, about 2 minutes. If you are planning to add corn or other veggies, put them in the pot now as well.

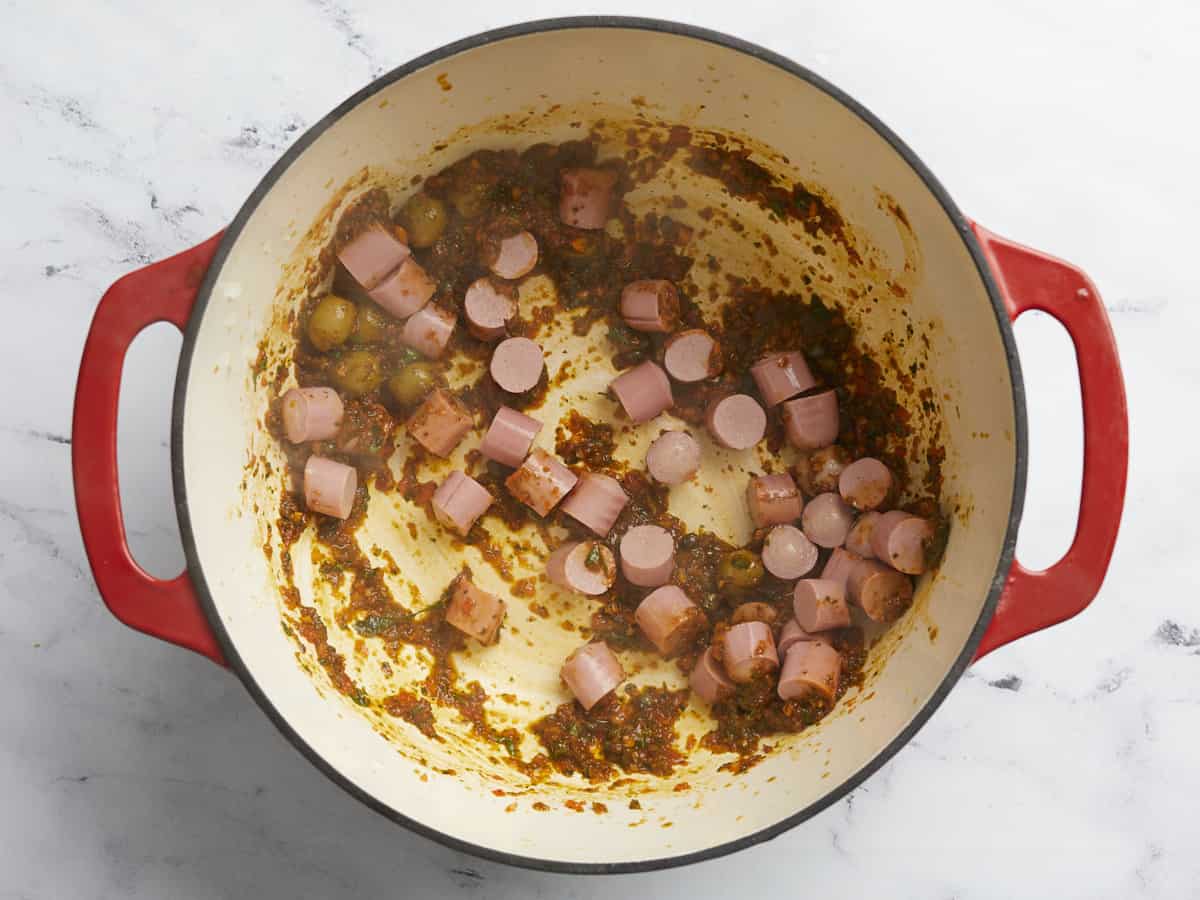
Overhead shot of salchichas added to sofrito, tomato sauce, olives and capers in a red Dutch ov

Add two 5-ounce cans of drained and sliced Vienna sausages and saute until browned. Finally, add 2 cups of rice, 1 teaspoon of salt, and 2 1/2 cups of boiling chicken broth. Stir and bring to a hard boil, with large bubbles breaking through the surface of the rice. Stir once more, turn the heat to low, and cover the pot.

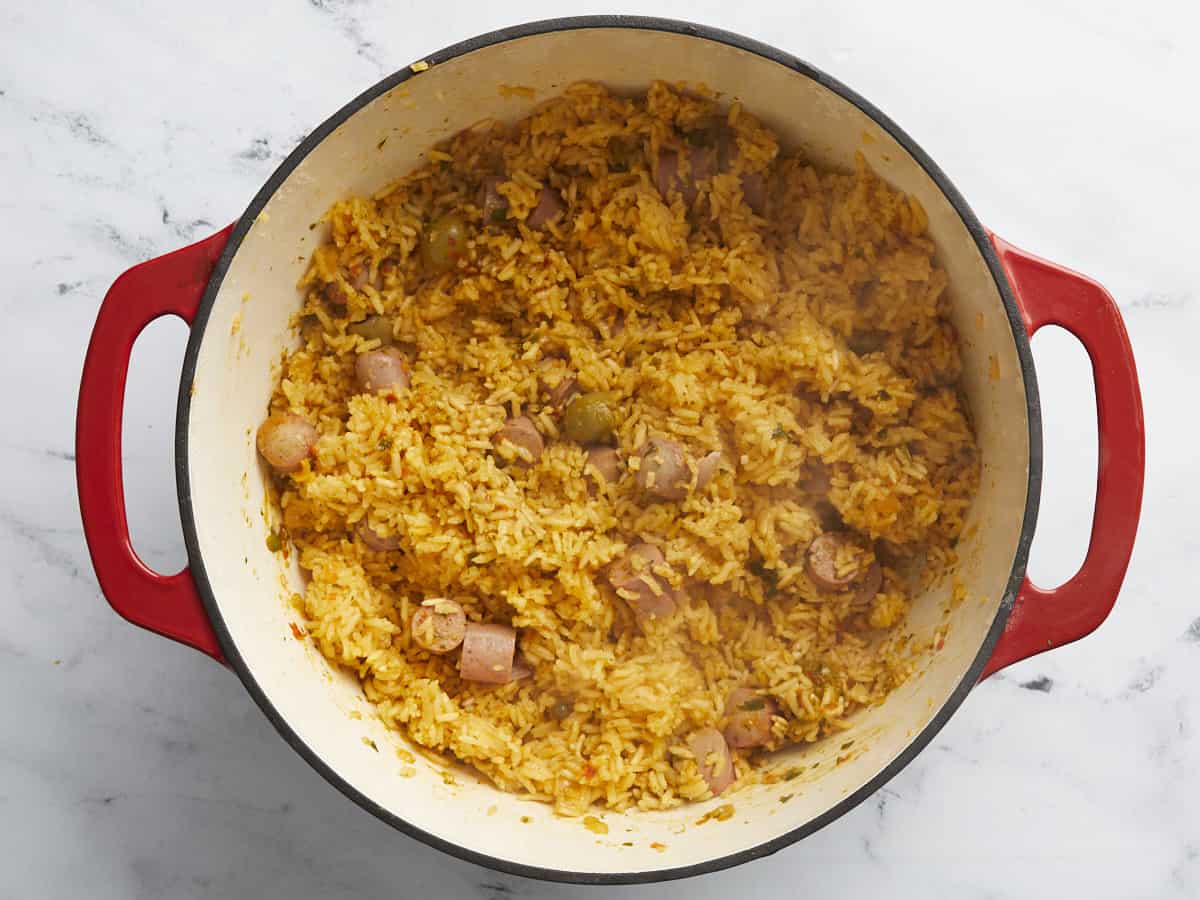
Overhead shot of Arroz Con Salchichas in a red Dutch Oven.

Simmer the rice over low heat until the rice is tender, about 15 minutes. Take the pot off the heat, but leave it covered. Let it rest, covered, for 10 minutes. Uncover, stir the rice, taste, and adjust the seasoning to your liking, if needed. Stir in 1/4 cup chopped cilantro leaves.

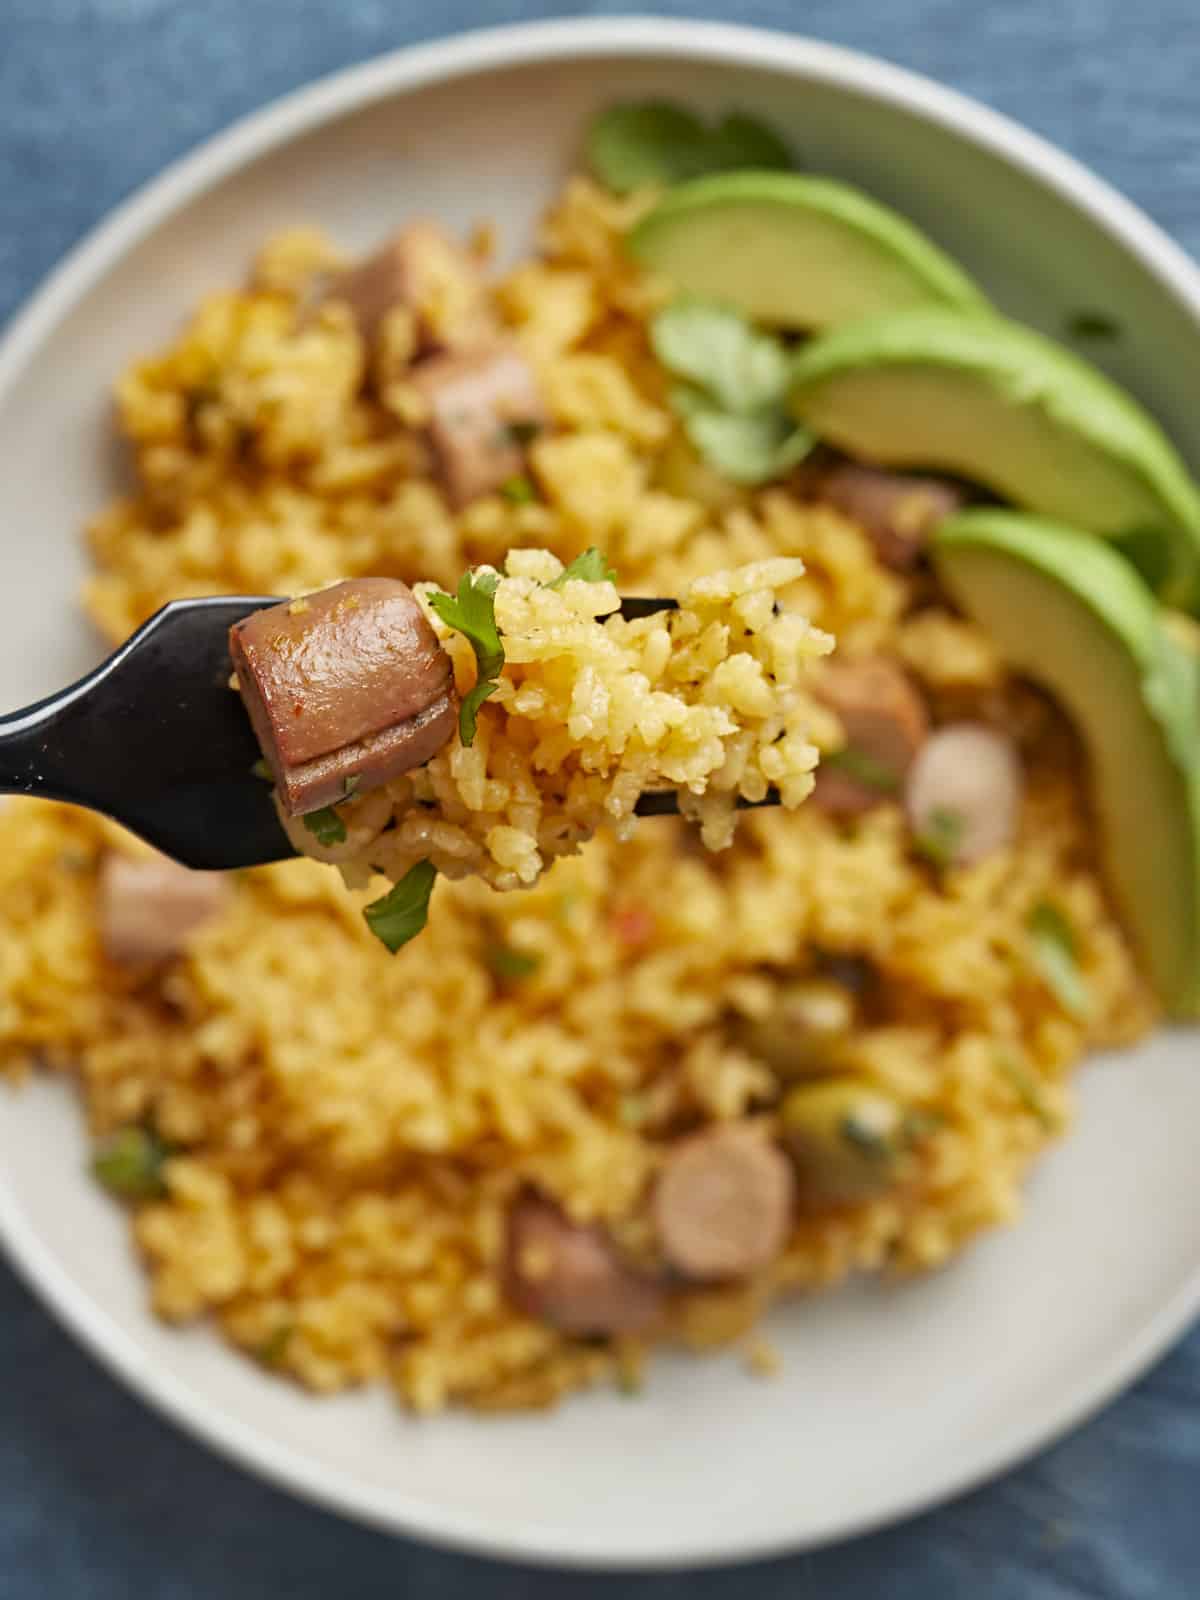
Overhead shot of Arroz Con Salchichas on a plate in the background with a fork holding some in the foreground.

Then serve yourself a big bowl full! You can garnish, like I did, with freshly sliced avocado. I also prepare for a happy belly, by undoing the top button of my jeans, but you do you. As we say in Puerto Rico, “Buen provecho!”

More Easy Puerto Rican Recipes

The post Arroz Con Salchichas (Puerto Rican Rice With Sausage) appeared first on Budget Bytes.
Yuca En Escabeche

Yuca En Escabeche is a traditional Puerto Rican dish of pickled cassava, olives, and onions. It’s delicious, vibrant, easy, and versatile!

The post Yuca En Escabeche appeared first on Budget Bytes.
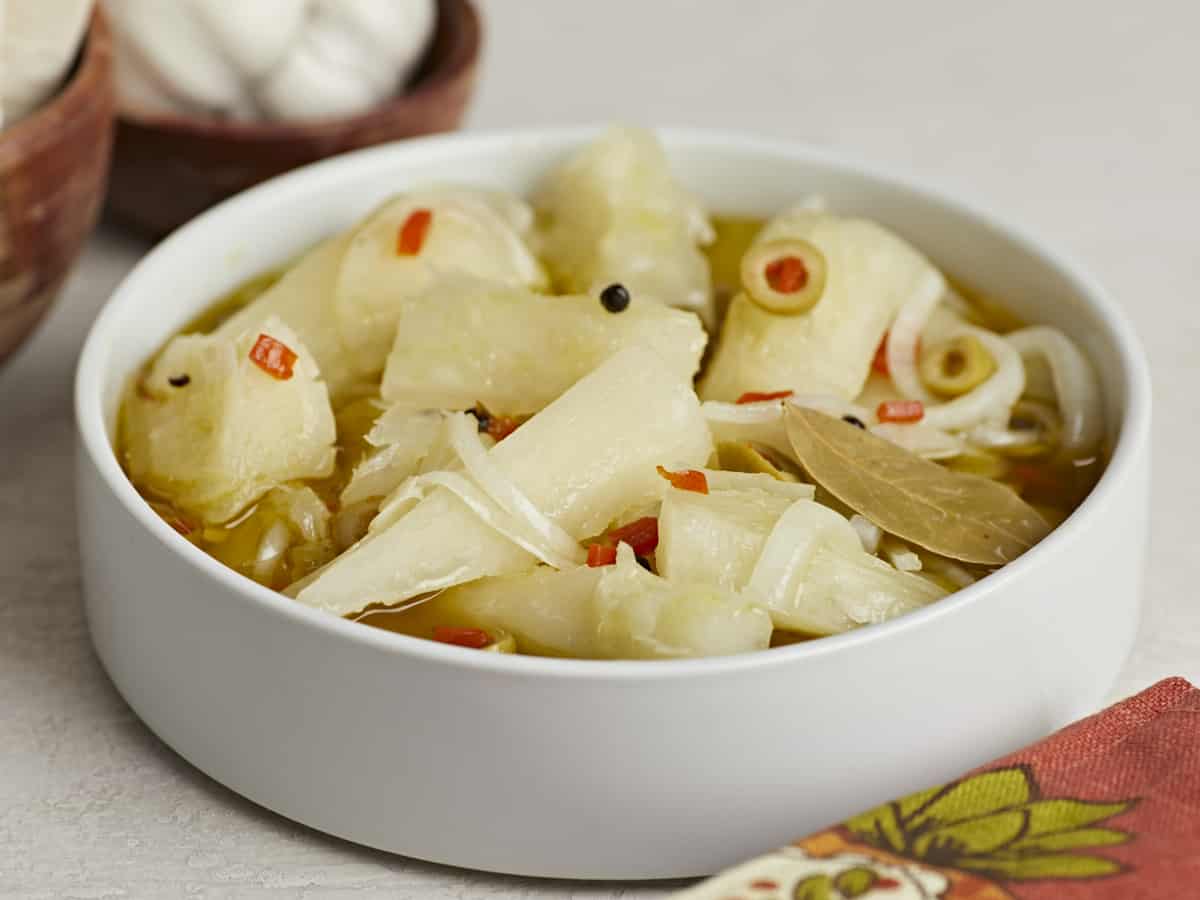
My mouth waters every time I think about Yuca En Escabeche, a traditional Puerto Rican pickled cassava dish that’s as delicious and vibrant as it is versatile. It’s a bit like a punchy vinegar-based potato salad but with olives, onions, and yuca. It holds exceptionally well and makes a perfect appetizer or side for a backyard BBQ or beach picnic.

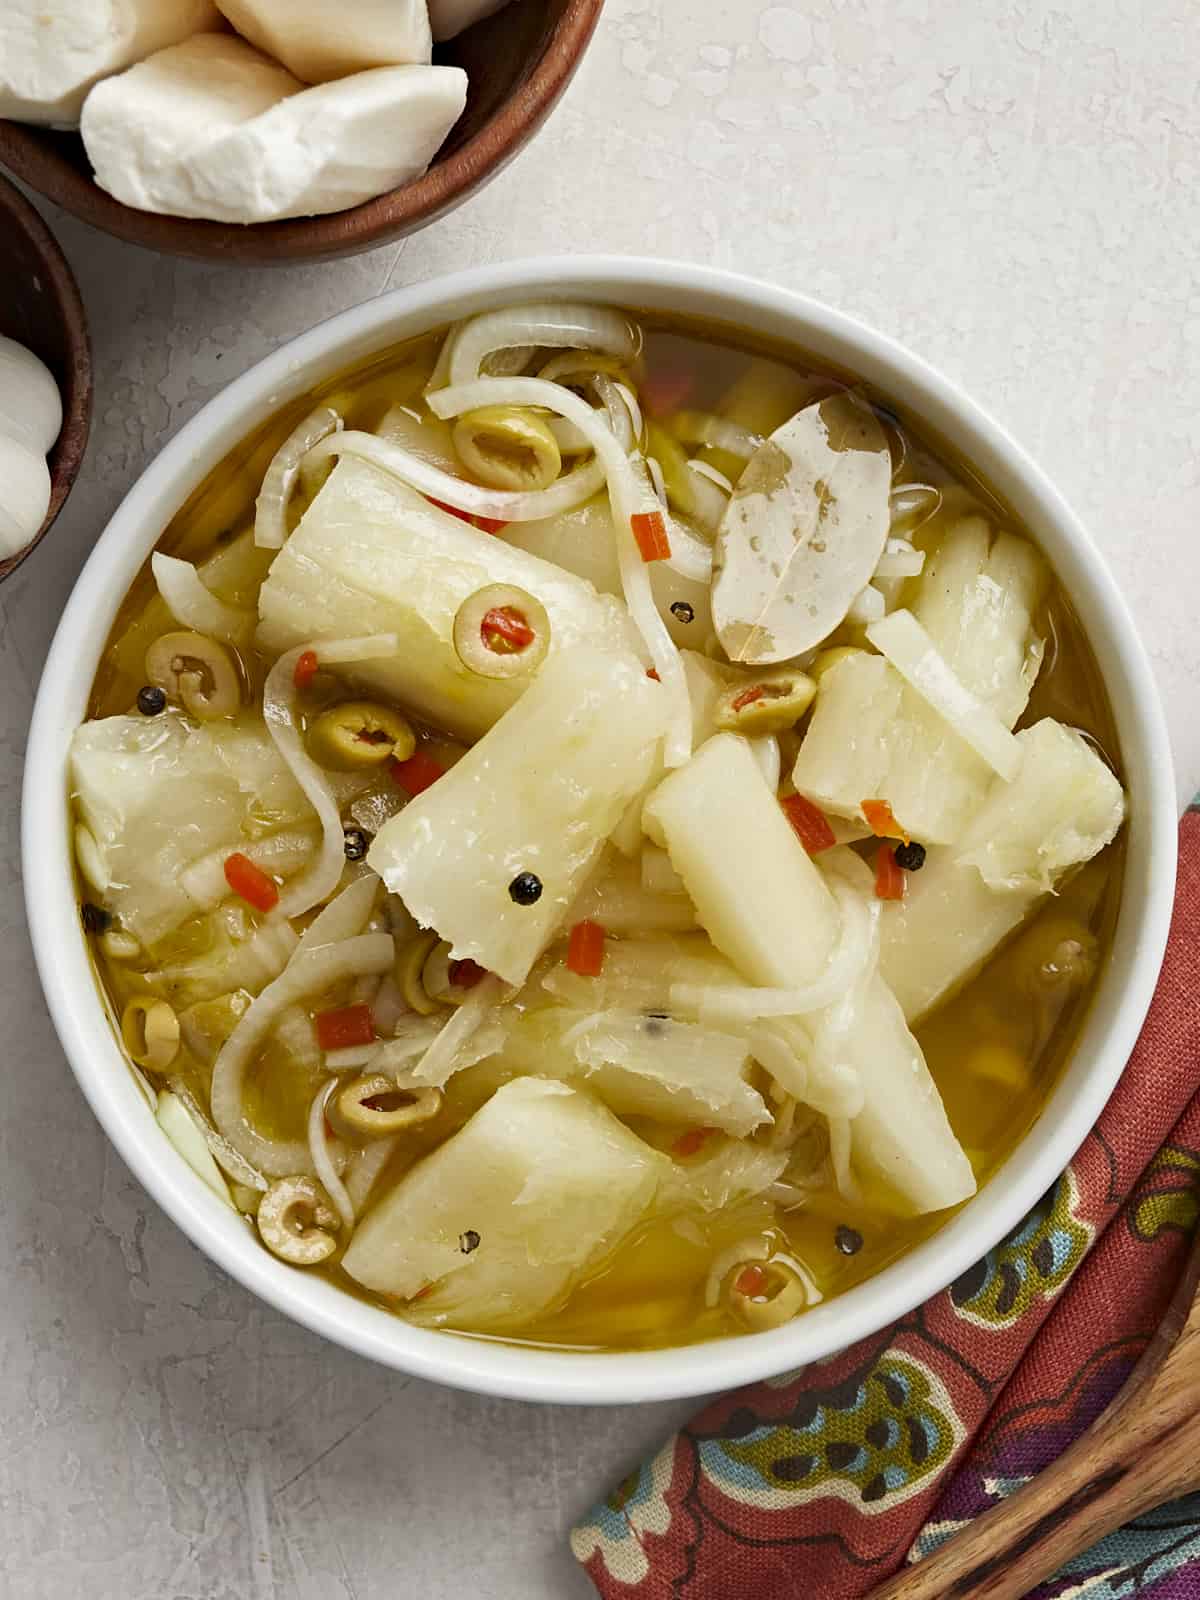
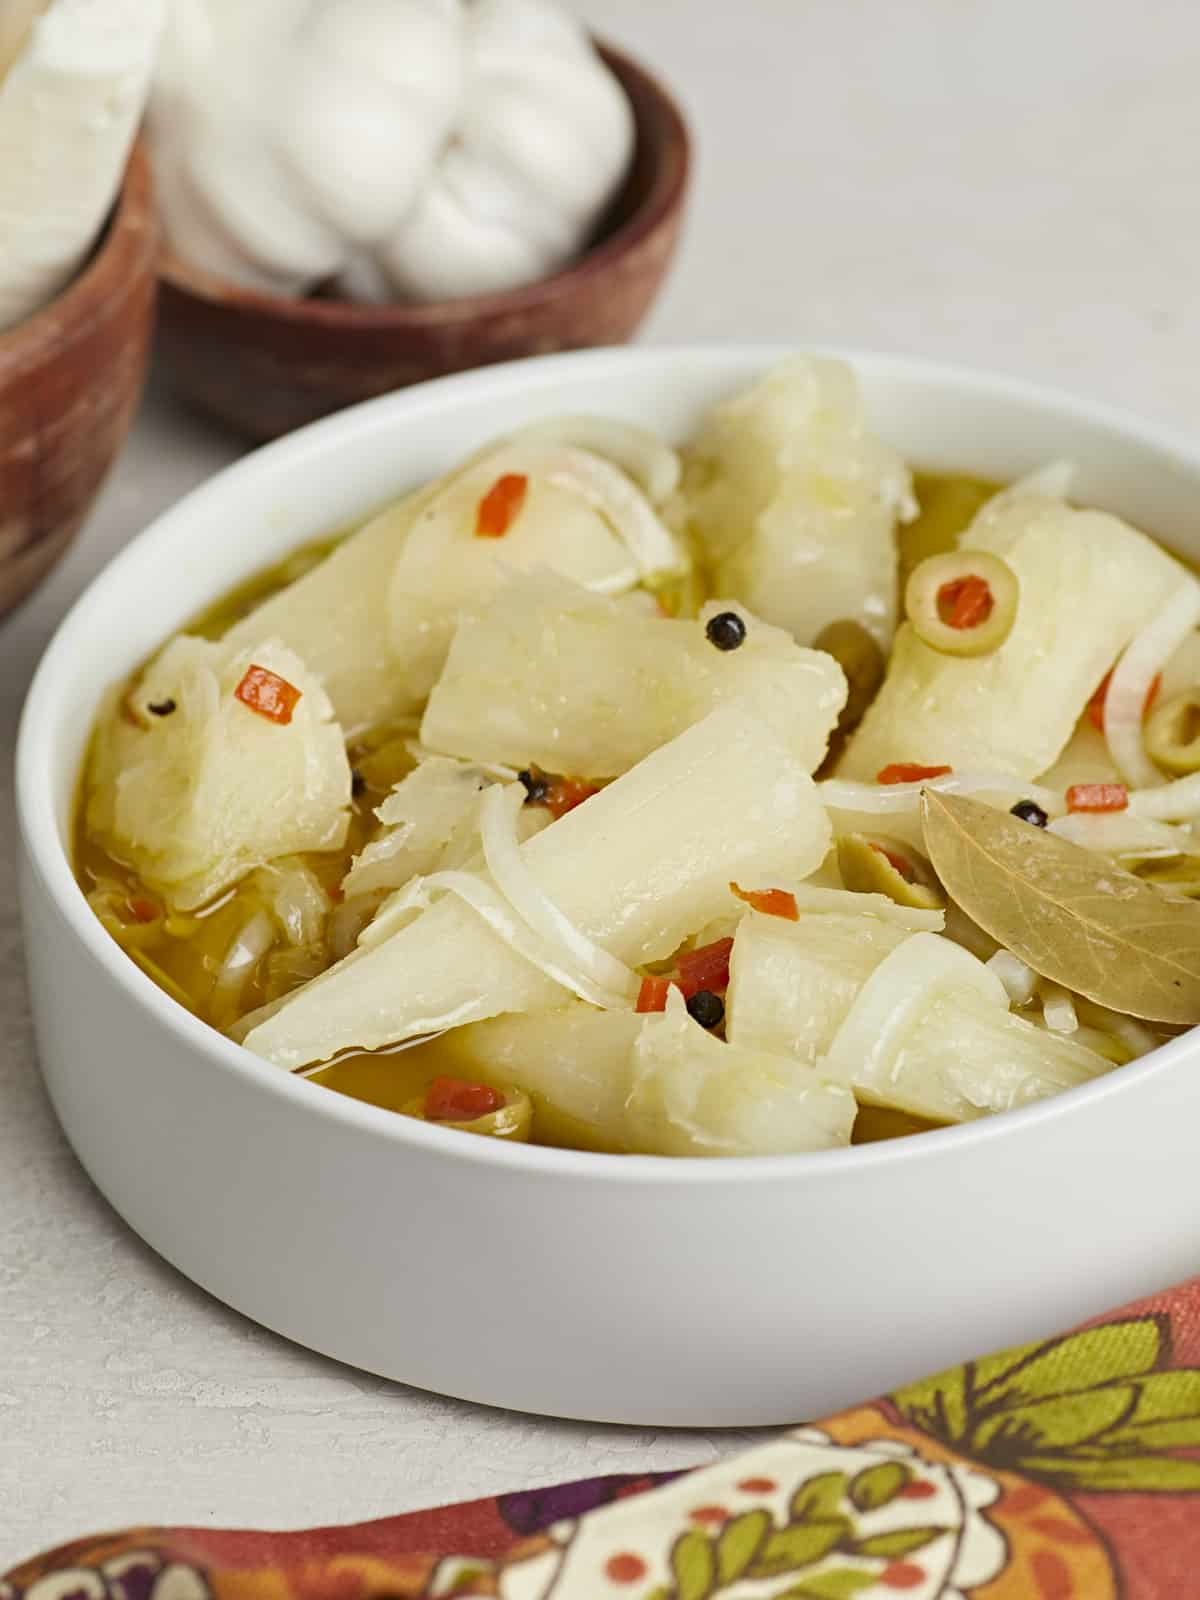
Overhead shot of Yuca En Escabeche in a white bowl.

What is Yuca?

Yuca is a root vegetable like potato or taro. It is shaped like a large yam with a dark brown bark-like exterior and bright white flesh. It has a woody core that looks like a white root running through the middle of it lengthwise. You can find yuca fresh, frozen, and canned in most Latin grocery stores. It’s also often stocked in the freezer section at mainstream grocers.

What Is Escabeche?

Escabeche is a preserving technique that’s very popular all over Latin America. You warm a simple mix of oil and vinegar with a few aromatics and use it to pickle cooked vegetables, fruits (like green bananas), or fish. Because of the high acidity of the sauce, the pickled food stays fresh for a week, developing deeper flavors as it ages. Yuca En Escabeche is boiled cassava root smothered in escabeche sauce and served hot, cold, or at room temperature.

Ingredients

Get ready for your new summer favorite! It’s cooling on a hot day, comes together in just a few minutes, and you can easily double, triple, or quadruple the recipe. It’s one of those dishes I’ll make a big batch of and eat nonstop, paired with absolutely everything until it’s all gone. Here’s what you need to make Yuca En Escabeche:

  • Yuca– You can purchase yuca fresh or frozen. Fresh requires a lot of prep as you must peel off its woody bark and quarter it to remove the woody core. Frozen is my preference, as it’s already peeled and chopped. However, you should thaw it and make sure the woody core is removed, as sometimes it isn’t. Canned yuca is already prepped and cooked. You can simply drain it and add it to the escabeche sauce.
  • Olive Oil and Distilled White Vinegar– are the base of the escabeche sauce. Use an olive oil that has a flavor you enjoy. Though distilled vinegar is traditional, feel free to use apple cider vinegar or rice wine vinegar. This recipe is a 2 to 1 ratio of oil to vinegar. If you want something less acidic, use a 3 to 1 ratio. I prefer an aggressively acidic escabeche and use a 1 to 1 ratio of oil to vinegar. You do you!
  • Bay Leaves, Peppercorns, Salt, and Adobo – these spices add much-needed complexity to the simple escabeche sauce. If you don’t have adobo, omit it and up your salt game by a 1/4 teaspoon. Also add 1/4 teaspoon of garlic powder, 1/4 teaspoon of onion powder, and 1/4 teaspoon of ground cumin. Bay leaves are a must for me, but try subbing them with a pinch or two of dry oregano if you’re out.
  • Onions and Garlic– are an integral part of the escabeche. They add deep earthy flavors and texture to the dish. You can substitute yellow onion with white or red onion. Sometimes garlic will turn a blue-green color when exposed to a highly acidic sauce. Don’t fret. It isn’t mold. If blueish-hued garlic slices make you uncomfortable, remove them.
  • Spanish Olives and Olive Brine – these roasted red pepper-stuffed olives (AKA Manzanilla or green olives) add a pop of tart and fruity notes to the dish, while their brine rounds out the acidity of the escabeche and creates complexity.
Side shot of Yuca En Escabeche in a white bowl.

Variations on Yuca en Escabeche

Make this dish your own with additional veggies, spices, and proteins.

  • Strips of roasted red pepper make a beautiful and tasty addition. So do thin slices of fresh green and red bell peppers.
  • Mix different kinds of vinegar to add complexity. Just makes sure to use white or light-colored vinegar to preserve the color of the yuca.
  • Make a heartier version by topping the yuca with slices of hard-boiled egg, cooked shrimp, or chopped chicken.
  • Add different vegetables, such as chopped zucchini, squash, or tomatoes. Though not traditional choices, they are delicious.
  • Try using different spices, such as cumin, oregano, or cilantro.

What Do I Serve With Yuca En Escabeche?

This dish is excellent on its own, but I love it even more as a side. I pair it with Roasted Chicken, Chuletas Guisadas, or Puerto Rican Rice and Beans.

How To Store Leftovers

Store the yuca in an airtight container with plastic film over the surface. If at all possible, use a glass container, as the vinegar and garlic odors will cling to plastic. Refrigerate for up to a week. Freeze for up to 3 months. When ready to serve, thaw frozen yuca overnight in the fridge. Yuca can be served cold or at room temperature. If you prefer to serve it hot, warm it in a microwave until steaming.

Overhead shot of Yuca En Escabeche in a white bowl.
Side shot of Yuca En Escabeche in a white bowl with a wood spoon in it.
Print

Yuca En Escabeche

Yuca En Escabeche is a traditional Puerto Rican dish of pickled cassava, olives, and onions. It's delicious, vibrant, easy, and versatile!
Course Appetizer, Side Dish
Cuisine Latin
Total Cost ($4.53 recipe / $0.57 serving)
Prep Time 10 minutes
Cook Time 30 minutes
Resting Time 30 minutes
Total Time 1 hour 10 minutes
Servings 8 cups
Calories 270kcal

Ingredients

  • 1 lb yuca (fresh or frozen) $1.55
  • 4 tsp kosher salt, divided $0.16
  • 2/3 cup olive oil $0.84
  • 1/3 cup distilled white vinegar $0.41
  • 3 bay leaves $0.30
  • 1/2 tsp black peppercorns $0.05
  • 1 tsp adobo seasoning $0.04
  • 1 yellow onion, sliced in half moons $0.42
  • 8 cloves garlic, thinly sliced $0.34
  • 1/4 cup sliced Spanish olives (AKA Manzanilla olives ) $0.33
  • 1/8 cup olive brine $0.09

Instructions

  • If the yuca is fresh, peel and split it into 4-inch long quarters. Remove the woody center root. If the yuca is frozen, split it into 4-inch halves. Make sure the woody center has been removed and then cut each half in half.
  • Add yuca to a Dutch oven or other large heavy-bottomed pot. Add water until you cover the yuca by two inches. Add 2 teaspoons of salt. Boil until the yuca is fork-tender but not mushy, about 25 to 30 minutes. Then drain the yuca and cool.
  • While the yuca cooks, set a small pot over medium-low heat. Add the olive oil and warm. Add the vinegar, peppercorns, bay leaf, remaining 2 teaspoons salt, adobo, onions, garlic, olives, and olive brine to the warm oil. Cook for 10 minutes, stirring occasionally, then remove from the heat.
  • Add the yuca to a large bowl. Cover the drained yuca with escabeche. Let it sit at room temperature for at least 30 minutes to develop the flavors, then serve.

See how we calculate recipe costs here.

Nutrition

Calories: 270kcal | Carbohydrates: 24g | Protein: 1g | Fat: 19g | Sodium: 1346mg | Fiber: 2g
Side shot of Yuca En Escabeche in a white bowl.

How to Make Yuca En Escabeche – Step by Step Photos

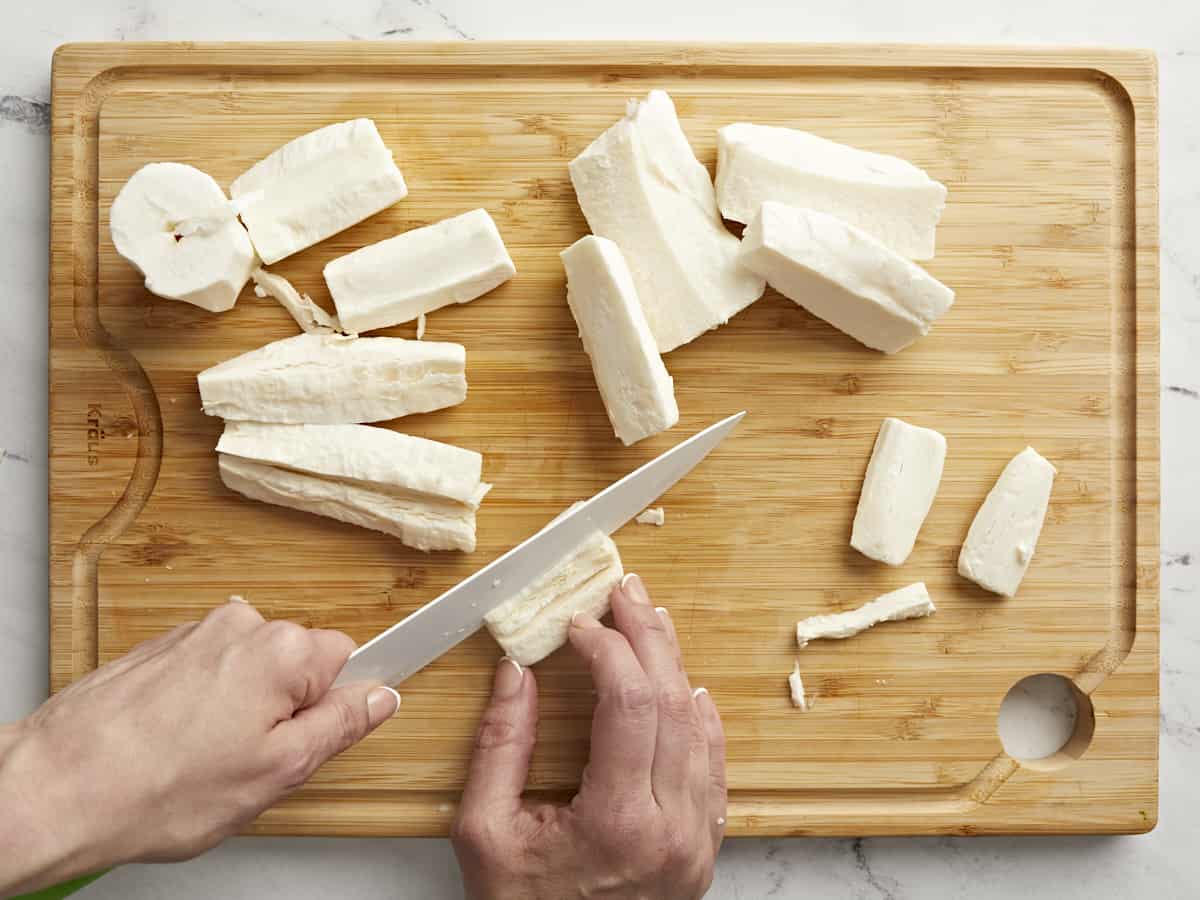
Overhead shot of yuca on a cutting board with a knife removing the woody core.

Prepare 1 pound of yuca. If the yuca is fresh, peel and split it into 4-inch long quarters. Remove the woody center root. If the yuca is frozen, split it into 4-inch halves. Make sure the woody center has been removed and then cut each half in half.

Overhead shot of yuca in a large cream-colored pot with salt being added to it.

Add the yuca to a Dutch oven or other large heavy-bottomed pot. Add water until you cover the yuca by two inches. Add 2 teaspoons of salt. Boil until the yuca is fork-tender but not mushy, about 25 to 30 minutes. Then drain the yuca and cool.

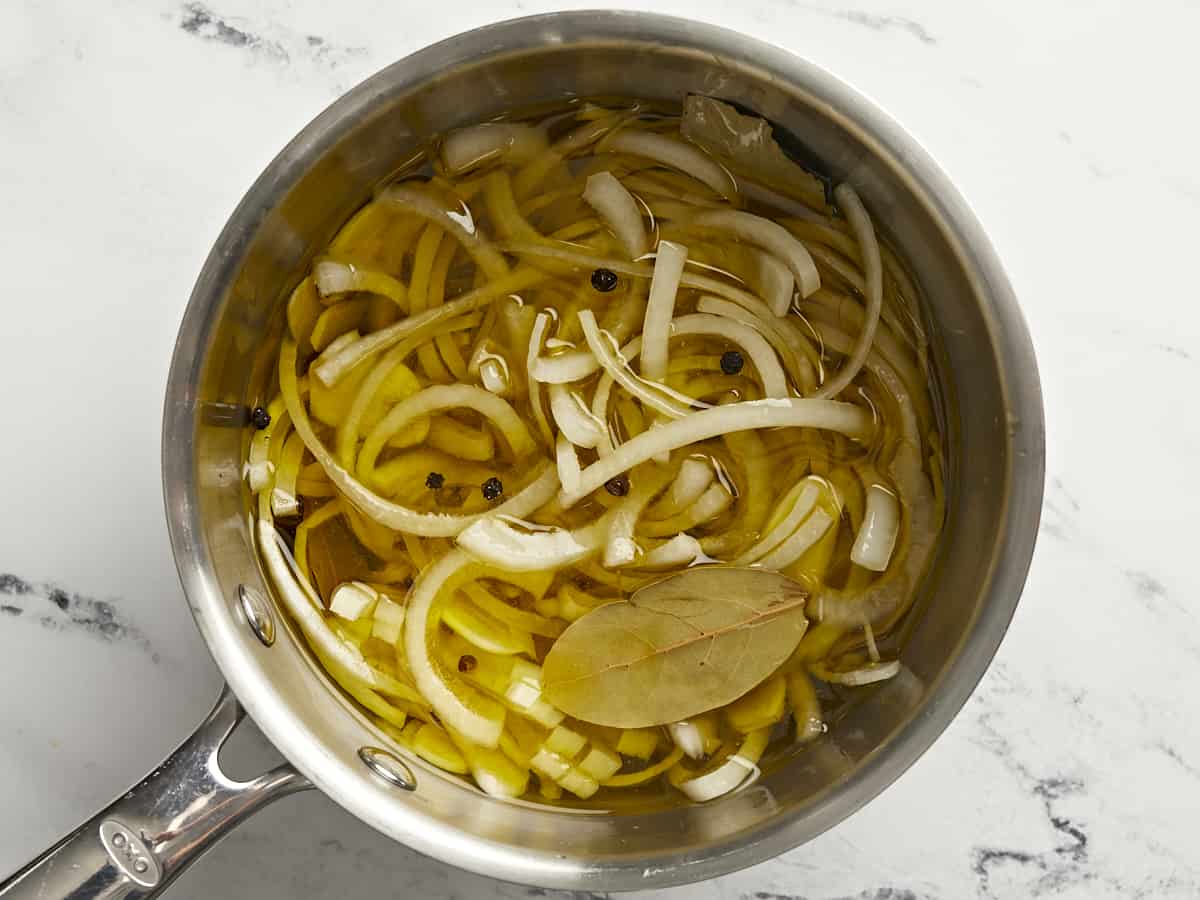
Overhead shot of Yuca En Escabeche in a silver pot.

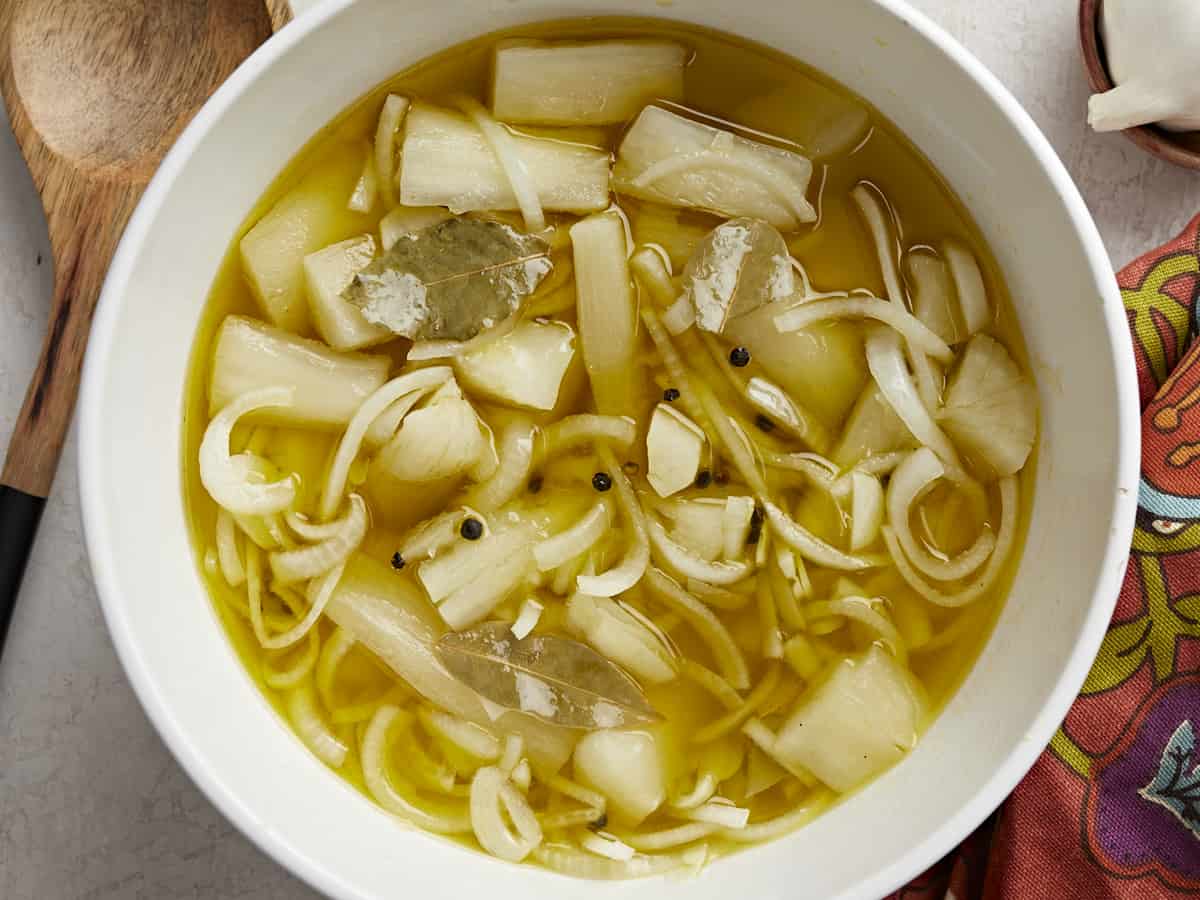
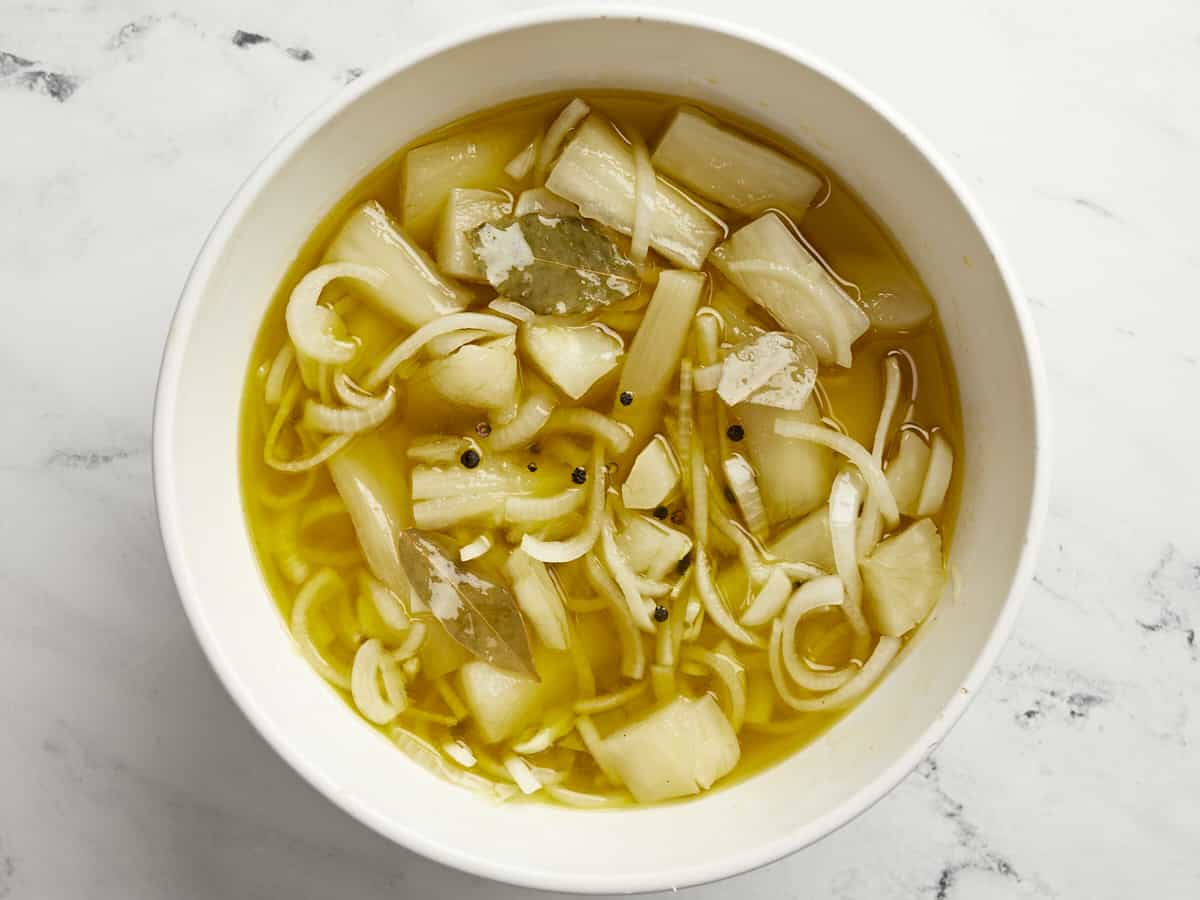
While the yuca cooks set a small stainless steel or enameled pot over medium-low heat. Avoid aluminum pots as highly acidic ingredients, like vinegar, can cause aluminum to leach into food, which leaves the food with a metallic taste. Add 2/3 cup of olive oil and warm. You don’t want the oil hot, just warm. Add the 1/3 cup of vinegar, 1/2 teaspoon peppercorns, 3 bay leaves, remaining 2 teaspoons salt, 1 teaspoon adobo, 1 medium onion sliced in half moons, 8 thinly sliced garlic cloves, 1/4 cup Spanish olives, and 1/8 cup of olive brine to the warm oil. Cook for 10 minutes, stirring occasionally. The onions should remain white but will wilt. Once wilted, remove from the heat.

Overhead shot of Yuca En Escabeche in a white bowl.

Add the boiled yuca to a large boil and cover with the warm escabeche sauce. Allow the yuca to pickle for a minimum of 30 minutes before serving. To develop deeper flavors, cover the bowl with plastic wrap directly on the surface of the yuca and refrigerate overnight. Serve cold, at room temperature, or heat in a microwave until steaming. Enjoy this incredible dish as is or serve it with Roasted Chicken, Chuletas Guisadas, or Puerto Rican Rice and Beans!

Side shot of Yuca En Escabeche in a white bowl.

More Puerto Rican Dishes

The post Yuca En Escabeche appeared first on Budget Bytes.
Chuletas Guisadas (Puerto Rican Stewed Pork Chops)

If you’re looking for a hearty family meal that’s mouthwateringly delicious and a breeze to put together, make these savory Chuletas Guisadas!

The post Chuletas Guisadas (Puerto Rican Stewed Pork Chops) appeared first on Budget Bytes.

If you’re looking for a hearty family meal that’s mouthwateringly delicious and a breeze to put together, you need to make these savory Chuletas Guisadas! I grew up eating this dish of unctuous stewed pork chops in Puerto Rico, where my Abuela would serve it at least once a week. It comes together in under thirty minutes, and as it stews, the fragrance is so overwhelmingly good everyone in your home will ask what’s cooking! (For real.)

Overhead shot of Chuletas Guisadas in a silver saucepan.

What Are Chuletas Guisadas?

Chuletas Guisadas is a popular Latin American dish of pork chops, onions, and peppers stewed in a flavorful tomato-based sauce. Every region has its own take on the dish, and this is the recipe my grandmother would make at least once a week. Some people don’t put olives in their Chuletas Guisadas, but my Abuela did, so that’s how I make it. I love mine served over Puerto Rican Rice And Beans with slices of ripe plantain. You can also pair it with a side salad or slices of ripe avocado.

What Are The Ingredients For Chuletas Guisadas?

My favorite thing about this dish is that the end result is much greater than its parts. But, of course, every Latin family has their version, and the ingredients vary by where you grew up. With that being said, this is what you need to make my version of Chuletas Guisadas:

  • Pork chops – How quickly the dish cooks depends on the thickness of your pork chops. I prefer thinly cut chops because they’re cheaper and cook faster. But you do you.
  • Sofrito – This robust flavor base adds complexity to every dish.
  • Tomato Sauce and Chicken Broth – are the foundation of your sauce.
  • Onions, Peppers, and Garlic – Add bulk to your dish and help flavor the sauce.
  • Vinegar and Olives– Add a briny brightness that helps cut through the fattiness of the pork.
  • Adobo, Sazon, Oregano, and Bay Leaf – these spices quickly build layers of flavor in your sauce and pork chops.
Side shot of Chuletas Guisadas in a silver saucepan.

Tips For Making Chuletas Guisadas

  1. Cut the vegetables the same size so that they cook evenly. If the vegetables are sliced in different sizes, some will be overcooked, and some undercooked.
  2. Keep the pan covered. It traps the moisture, which helps cook the meat evenly and keeps it moist and tender.
  3. Don’t overcook the pork chops. Even though they are in a sauce, they will end up tough and dry. The general rule is 7 minutes per 1/2 inch of thickness.

What Sides Go Well With Chuletas Guisadas?

I love gobbling this dish down with Puerto Rican Rice And Beans and fried slices of sweet plantain. Of course, you can always serve it with a Simple Side Salad or slices of ripe avocado. And you can even try it layered over Garlic Herb Mashed Potatoes. OMG. I want that right now!!!

How To Store Leftovers

Store leftovers in an airtight container in the refrigerator for up to 3 days or freeze for up to three months. To reheat frozen Chuletas Guisadas, thaw them in the fridge overnight. Then, warm them in a skillet over medium heat until steaming. When you reheat the pork chops, add a little chicken broth to the skillet to prevent them from drying out.

Print

Chuletas Guisadas (Puerto Rican Stewed Pork Chops)

If you're looking for a hearty family meal that's mouthwateringly delicious and a breeze to put together, make these savory Chuletas Guisadas! These stewed pork chops come together in under thirty minutes.
Course Dinner, Lunch
Cuisine Latin
Total Cost ($15.35 recipe / $3.84 serving)
Prep Time 5 minutes
Cook Time 20 minutes
Total Time 25 minutes
Servings 4 servings
Calories 516kcal

Equipment

  • 3 qt. Covered Sauté Pan

Ingredients

  • 3 Tbsp olive oil, divided $0.12
  • 2 lbs thinly cut pork chops, bone-in $9.98
  • 2 tsp adobo* $0.08
  • 6 Tbsp sofrito $1.08
  • 1 Tbsp minced garlic $0.14
  • 8 oz tomato sauce $0.59
  • 1 Tbsp white distilled vinegar $0.04
  • 1 1/2 tsp sazón* (1 packet) $0.17
  • 2 cups chicken broth $0.24
  • 1/4 cup Pimento-stuffed green olives, sliced* $0.33
  • 2 tsp oregano $0.20
  • 1 bay leaf $0.10
  • 1 onion, sliced in 1/4 inch half moons $0.42
  • 1 bell pepper, sliced into 1/4-inch strips $1.59
  • 1/4 cup fresh cilantro leaves $0.27

Instructions

  • Add 2 tablespoons of oil to a large saute pan and set it over medium-high heat. Mix adobo with the remaining 1 tablespoon of oil and rub the pork chops with the mixture. Sear pork chops in batches. Sear on both sides, about 2 minutes on each side.
  • Remove the pork chops from the pan, and set aside. Add the sofrito and garlic and saute until fragrant, about 2 minutes.
  • Add the tomato sauce, vinegar, and sazón and saute until the mixture thickens, about 4 minutes.
  • Add chicken broth, olives, oregano, and bay leaf, and stir well. Bring the sauce to a boil and reduce by one-quarter.
  • Add the pork chops back to the pan, cover, and lower the heat to medium-low. Cook until pork chops are tender, about 7 minutes for each 1/2 inch of thickness.
  • Add onion and bell pepper, cover, and cook until softened, about 5 minutes.
  • Take the pan off the heat and stir in cilantro leaves. Taste the sauce and add salt and pepper if necessary. Serve over white rice and enjoy your new favorite weeknight dish!

See how we calculate recipe costs here.

Notes

*If you cannot source Adobo, mix your own and then use the amount called for in the recipe. Store the rest in an airtight container.
2 Tbsp salt
1 Tbsp garlic powder
1 tsp ground oregano
1 tsp onion powder
1 tsp black pepper
1 tsp ground cumin
1/2 tsp turmeric
 
*A packet of sazón contains about 1.5 teaspoons of sazón. If you cannot source sazón use the following:
1/4 teaspoon of garlic powder
1/4 teaspoon ground cumin
1/4 teaspoon ground coriander
1/3 teaspoon ground annatto
1/8 teaspoon turmeric
1/8 teaspoon ground oregano
 
*Pimento-stuffed green olives are also known as  or Manzanilla Olives.

Nutrition

Serving: 1serving | Calories: 516kcal | Carbohydrates: 11g | Protein: 52g | Fat: 29g | Sodium: 1121mg | Fiber: 3g
Overhead shot of Chuletas Guisadas over rice in a white bowl with a black fork and knife in it.

How to Make Chuletas Guisadas – Step by Step Photos

Overhead shot of pork chops searing in a silver saucepan.

Add 2 tablespoons of oil to a large saute pan and set it over medium-high heat. Mix 2 teaspoons of adobo with the remaining 1 tablespoon of oil and rub the pork chops with the mixture. Sear the 2 pounds of pork chops in batches. Sear on both sides, about 2 minutes on each side.

Overhead shot of sofrito and garlic being added to a silver saucepan.

Remove the pork chops from the pan, and set aside. Add 1/3 cup of sofrito and 1 tablespoon of minced garlic to the pork chop drippings and saute until fragrant, about 2 minutes.

Overhead shot of tomato sauce being added to a sofrito in a silver saucepan.

Add the 8 ounces of tomato sauce, 1 tablespoon of white vinegar, and 1 1/2 teaspoon of sazón to the pan. Sauté until the mixture thickens, about 4 minutes.

Overhead shot of spices and olives being added to a sauce in a silver saucepan.

Add 2 cups of chicken broth, 1/4 cup of pimento-stuffed olives, 2 teaspoons of oregano, and 1 bay leaf to the pan and stir well. Bring the sauce to a boil and reduce by one-quarter.

Overhead shot of pork chops being added to a sauce in a silver saucepan.

Add the pork chops back to the pan, cover, and lower the heat to medium-low. Cook until pork chops are tender, about 7 minutes for each 1/2 inch of thickness.

Overhead shot of Chuletas Guisadas in a silver saucepan with raw slices of onions and red peppers on top.

Add 1 onion (sliced in 1/4 inch half moons) and 1 bell pepper (sliced into 1/4-inch strips) to the pan. Cover, and cook until softened, about 5 minutes.

Overhead shot of Chuletas Guisadas in a silver saucepan with a hand sprinkling cilantro into it.

Take the pan off the heat and stir in 1/4 cup of cilantro leaves. Taste the sauce and add salt and pepper if necessary. Serve over white rice and enjoy your new favorite weeknight dish!

Overhead shot of Chuletas Guisadas over rice in a white bowl with a black fork in it.

More Easy Latin Dishes

The post Chuletas Guisadas (Puerto Rican Stewed Pork Chops) appeared first on Budget Bytes.

Picadillo

Sweet, savory Puerto Rican-style Picadillo is a tomato-based ground beef stew that’s ridiculously delicious, versatile, and ready in thirty.

The post Picadillo appeared first on Budget Bytes.
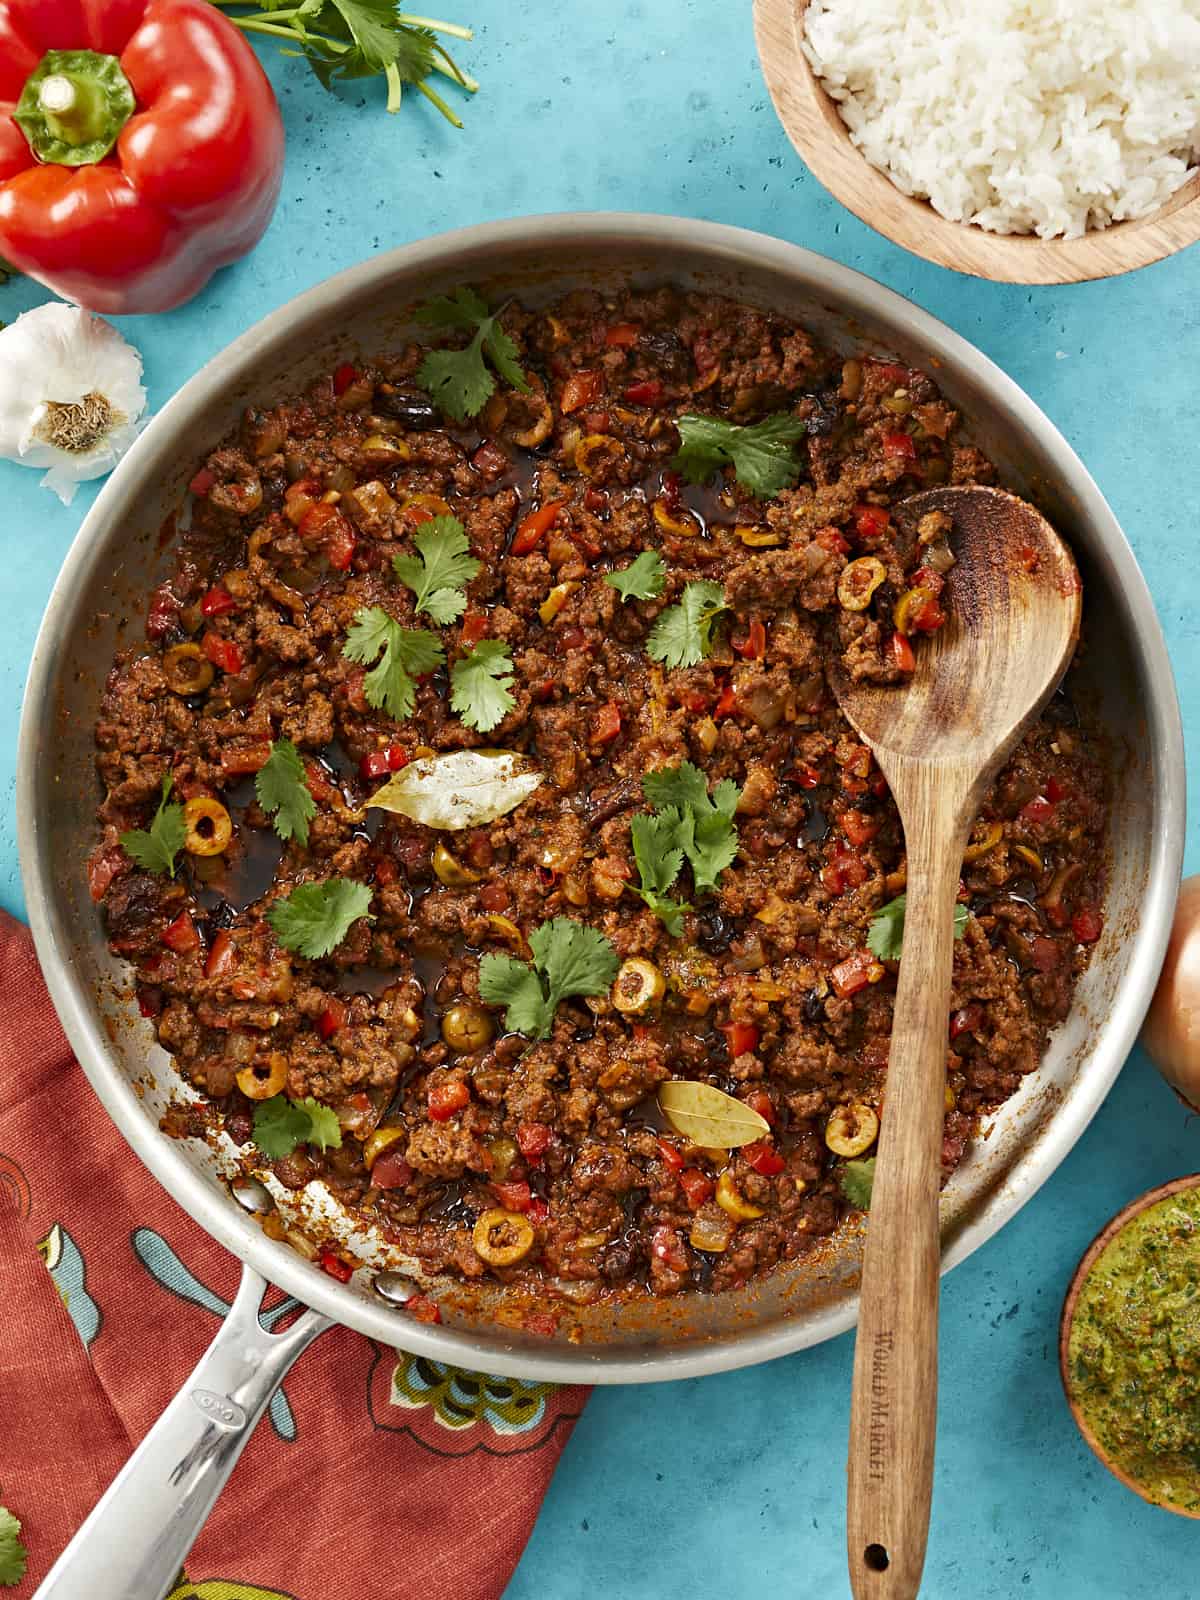
Sweet and savory Puerto Rican-Style Picadillo is a ground beef stew that’s so ridiculously delicious it brings table talk to a complete stop because everyone’s too busy stuffing their face. This beef picadillo recipe is budget-friendly, comes together quickly, and is incredibly versatile. I don’t know any other way to say it: You. Need. To. Make. Picadillo.

A NOTE ON AUTHENTICITY

This is not a historically authentic recipe. We strive to create recipes that are accessible to everyone, which means ingredients need to be available at a mainstream budget grocery store. We test recipes using the least amount of steps, tools, and ingredients while still honoring the spirit of the recipe. I was born and raised in Puerto Rico and look forward to a time when our ingredients are available in mainstream markets. Until then, buen provecho!

What Is Picadillo?

Picadillo is a traditional sweet and savory Latin dish usually made with ground beef stewed in tomato sauce. In Puerto Rico, we cook it in a hearty tomato-based sauce with sofrito, adobo, olives, raisins, and sometimes diced potatoes. To the uninitiated, pairing raisins with beef sounds like blasphemy. But I promise you, IT WORKS.

What You’ll Need

Picadillo comes together in one pan in under 30 minutes. There’s a little chopping involved, and it takes about 7 minutes to assemble the recipe, but the rest of the time it simmers on the stovetop. I love a one-pot hands-off recipe! Don’t you?
  • Onion, Garlic, and Bell Pepper – this combination creates an aromatic and intensely flavored base
  • Sofrito – this is the flavor base of many Puerto Rican dishes. I have a simple recipe for you here, though you can definitely take it further if you have access to traditional ingredients like aji dulce and recao.
  • Sazón and Adobo – these seasoning blends go hand in hand to develop deep, earthy notes. The annatto in the sazón also deepens the color of the sauce. If these are hard to source, I have included recipes for both in the notes section of the recipe card.
  • Ground Beef – 80/20 is best as the fat adds flavor, but use what you have. You can also make this recipe with ground pork, chicken, lamb, or turkey. If you’re vegetarian or vegan, you can substitute ground beef with a plant-based alternative, chopped mushrooms, or black beans.
  • Green Olives – I prefer to use the sliced kind with pimento because it’s less work, but feel free to slice whole ones. If you can’t find Green Olives with Pimento (AKA Manzanilla or Spanish Olives), get pitted green olives and add a tablespoon of chopped roasted red pepper to the mix.
  • Raisins – though dark raisins are traditional, you can also use golden. I sometimes sub raisins with chopped prunes.
  • White Distilled Vinegar – helps cut through the fattiness of the ground beef and adds a sharp top note. Sub it with Apple Cider Vinegar.
  • Bay Leaves – have a mild tea-like flavor that sits in the background and helps enhance bolder flavors. Sub with a teaspoon of oregano.
  • Tomato Sauce – creates a liquid for the ground beef to stew in and adds acidic, fruity brightness.
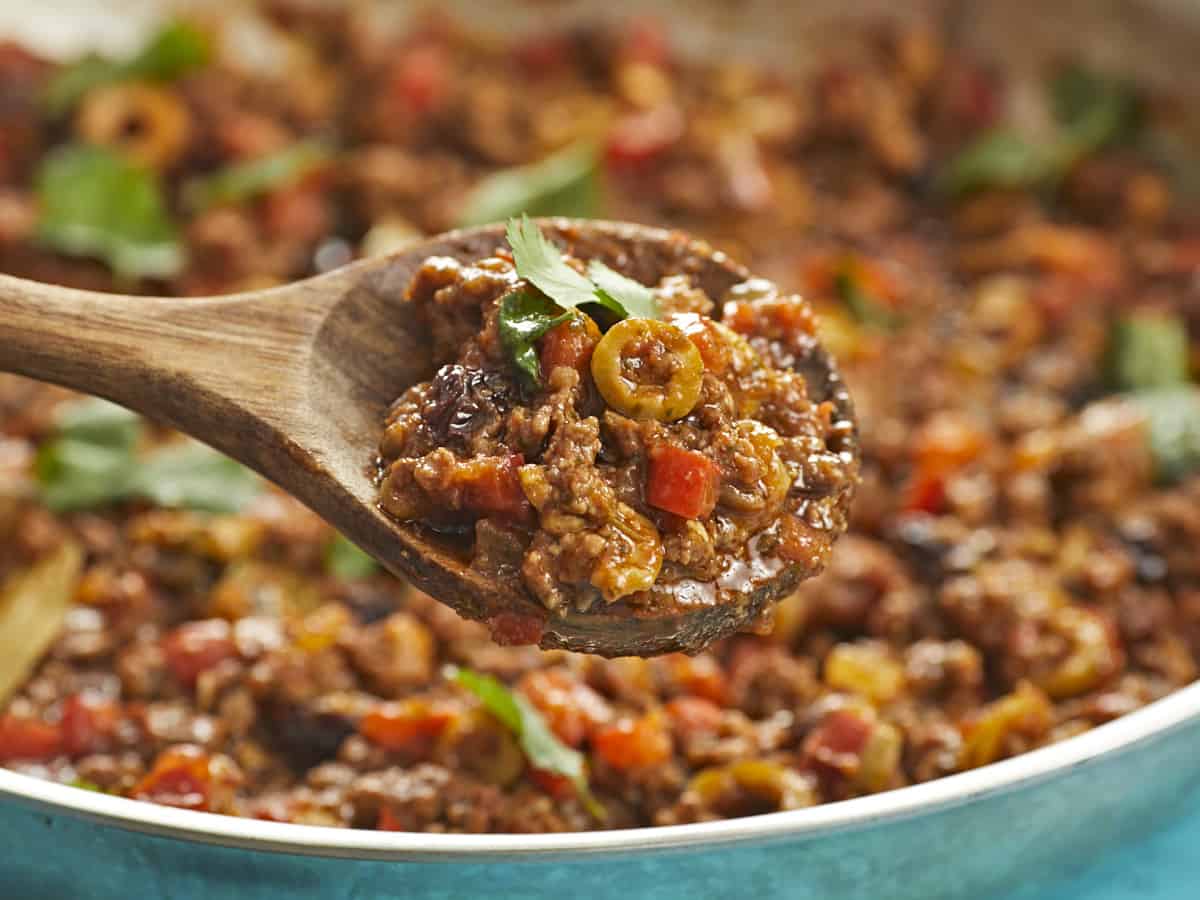
Wooden spoon full og picadillo in the foreground with picadillo in a silver skillet in the background.

What TO Serve With Picadillo

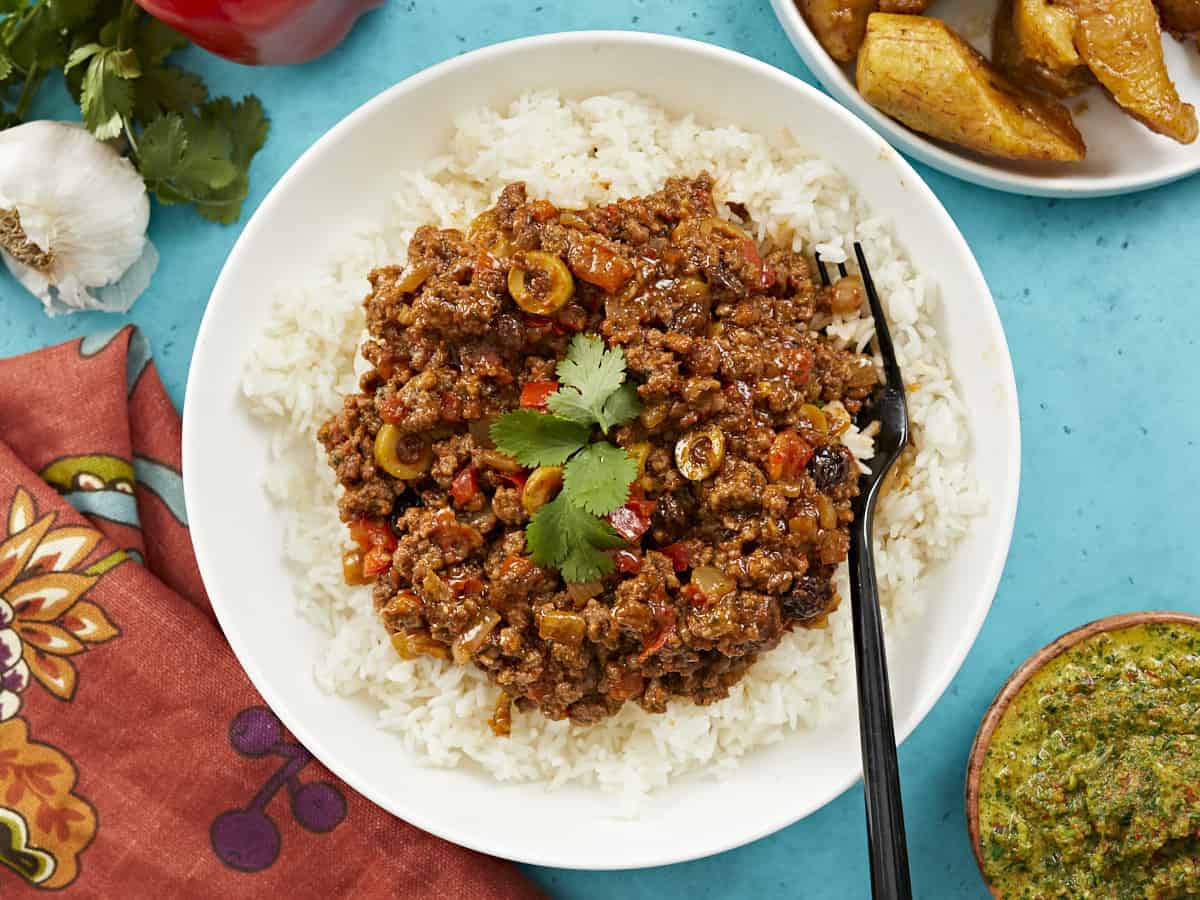
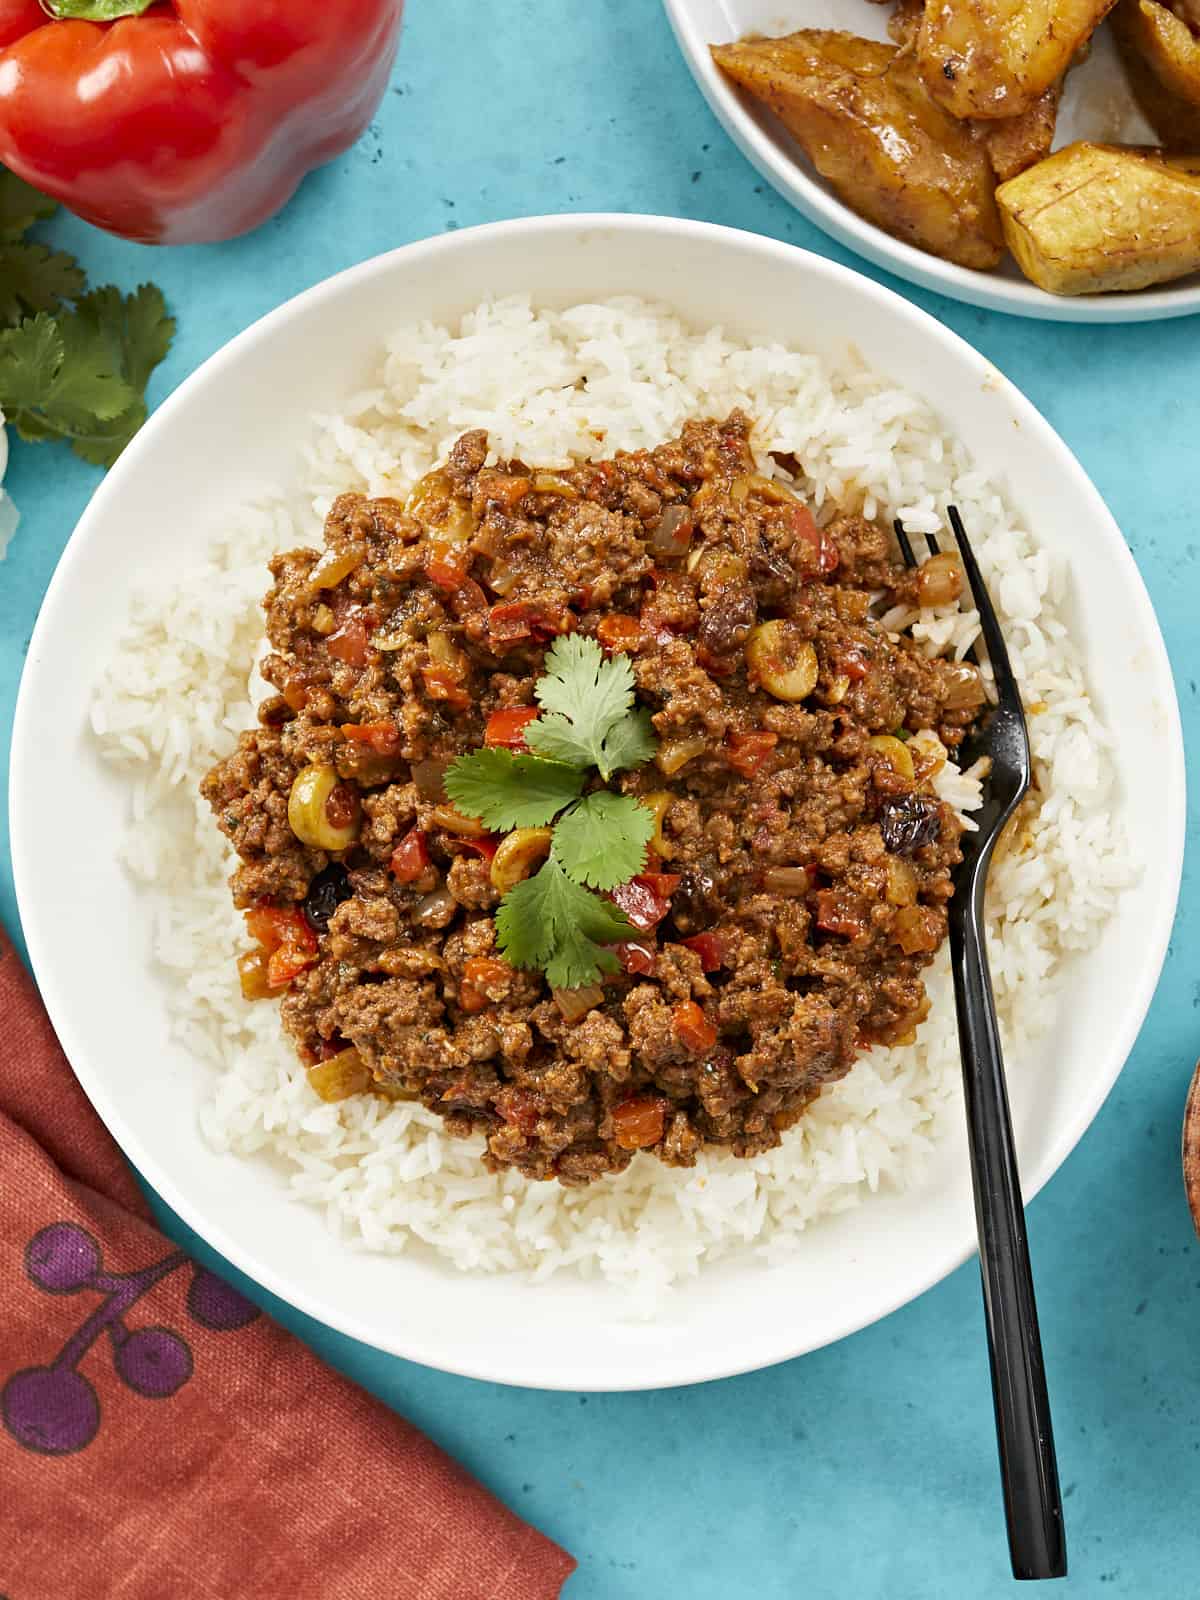
This sweet and savory ground-beef stew is a weeknight staple at my house because I can eat it as is, or served over rice and mashed potatoes. I can also stuff it into an empanada, a burrito, or a lettuce wrap. I’ve even added it to marinara for Puerto Rican-style spaghetti. Picadillo is all-purpose!

How To Store Picadillo

This is one of those recipes that tastes even better the next day. (I love those recipes.) Store cooled Picadillo in an airtight container with plastic film or wax paper directly on the surface. It keeps in the fridge for up to 5 days and in the freezer for up to 3 months. Thaw frozen Picadillo overnight in the refrigerator, then warm it in a pan set over medium heat or microwave it until steaming.

Picadillo served over white rice in a white bowl.
Overhead shot of picadillo in a silver skillet with a wooden spoon in it.
Print

Picadillo

Sweet, savory Puerto Rican-style Picadillo is a tomato-based ground beef stew that's ridiculously delicious, versatile, and ready in thirty.
Course Dinner, Lunch
Cuisine Latin, Puerto Rican
Total Cost ($11.44 recipe / $1.43 serving)
Prep Time 5 minutes
Cook Time 25 minutes
Total Time 30 minutes
Servings 8 cups
Calories 212kcal

Ingredients

  • 1 1/2 Tbsp olive oil $0.06
  • 1 yellow onion, small dice $0.42
  • 1 red bell pepper, small dice $1.59
  • 1 Tbsp tablespoon garlic, minced $0.14
  • 1 lb ground beef (80/20) $5.49
  • 1 tsp coarse salt* $0.04
  • 1 1/2 tsp sazón* (1 packet) $0.17
  • 1 tsp adobo* $0.04
  • 1/2 cup sofrito $0.72
  • 1/2 cup sliced pimento-stuffed green olives * $0.66
  • 1/4 cup raisins $0.87
  • 1/2 Tbsp white vinegar $0.04
  • 15 oz tomato sauce $1.00
  • 2 bay leaves $0.20
  • 1/4 cup water $0.00

Instructions

  • Place a large skillet over medium-high heat and add the olive oil. When the oil is hot, add the onions and peppers to the pan and cook until the onions are transparent.
  • Add the garlic to the pan and cook until fragrant.
  • Add the beef to the pan and sprinkle with salt, sazón, and adobo. As the beef browns, break up big chunks with your spoon.
  • When the beef has browned, add the sofrito and cook, stirring constantly, until fragrant, about 2 minutes.
  • Add the olives, raisins, white vinegar, tomato sauce, bay leaves, and water. Continue to cook, occasionally stirring, for 10 minutes. Take the pan off the heat and allow it cool.

See how we calculate recipe costs here.

Notes

*If using fine salt, lower to 1/2 teaspoon.
*A packet of sazón contains about 1.5 teaspoons of sazón. If you cannot source sazón use the following:
1/4 teaspoon of garlic powder
1/4 teaspoon ground cumin
1/4 teaspoon ground coriander
1/3 teaspoon ground annatto
1/8 teaspoon turmeric
1/8 teaspoon ground oregano
*If you cannot source Adobo, mix your own and then use the amount called for in the recipe. Store the rest in an airtight container.
2 Tbsp salt
1 Tbsp garlic powder
1 tsp ground oregano
1 tsp onion powder
1 tsp black pepper
1 tsp ground cumin
1/2 tsp turmeric
*Pimento-stuffed green olives are also known as Spanish Olives or Manzanilla Olives.

Nutrition

Serving: 1cup | Calories: 212kcal | Carbohydrates: 7g | Protein: 11g | Fat: 16g | Sodium: 491mg | Fiber: 1g
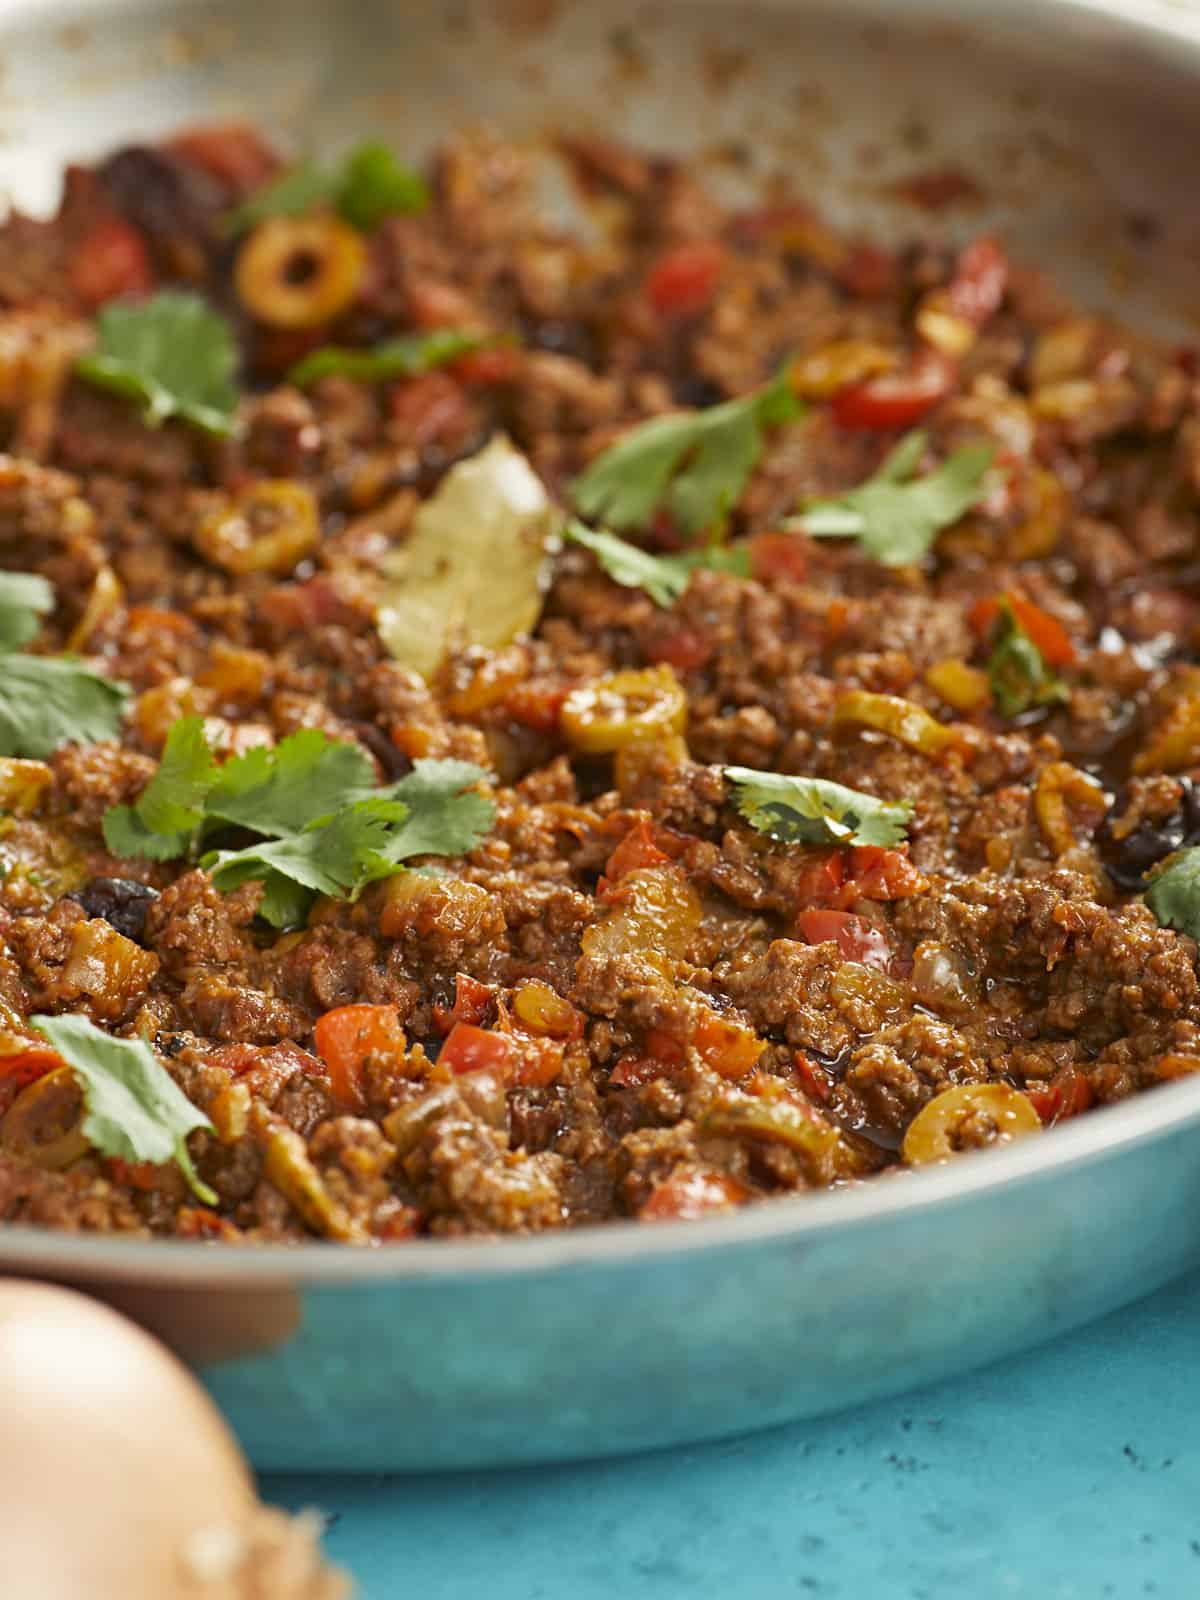
Side shot of picadillo in a silver skillet.

How to Make Picadillo – Step by Step Photos

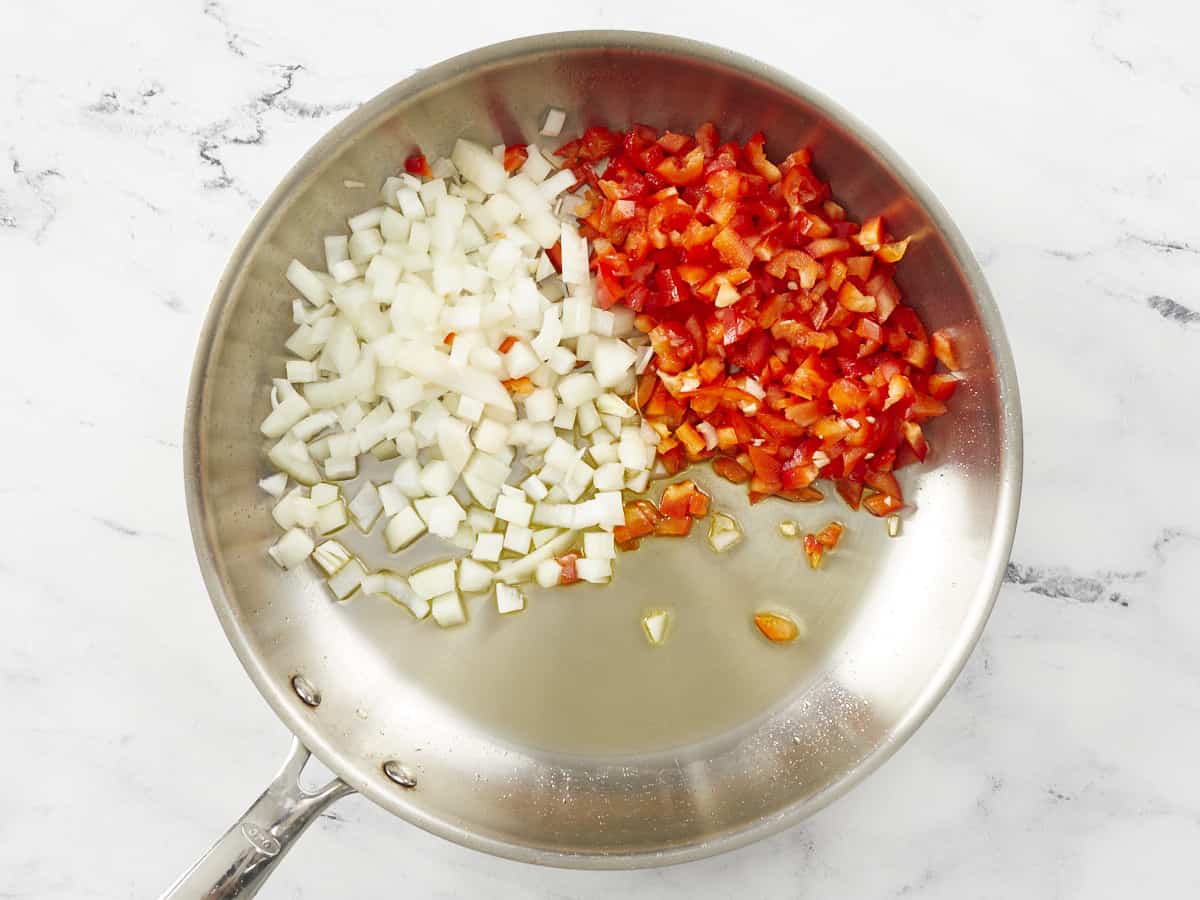
Onions and peppers in a silver pan.

Place a large saute pan over medium-high heat and add 1 1/2 tablespoons of olive oil. When the oil is hot, add 1 diced onion and 1 diced red bell pepper to the pan and cook until the onions are transparent.

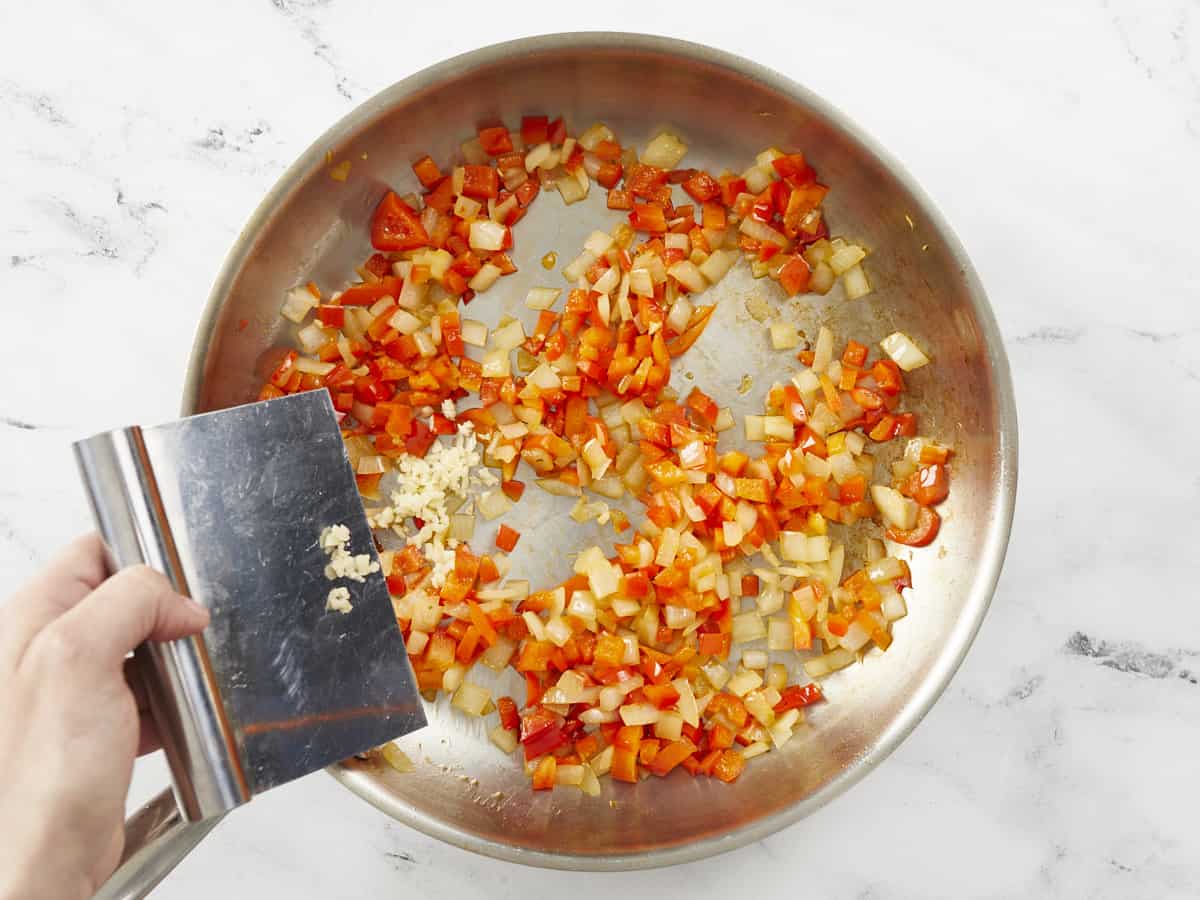
Overhead shot of garlic being added to a pan of onions and peppers.

Add 1 tablespoon of minced garlic to the pan and cook until fragrant.

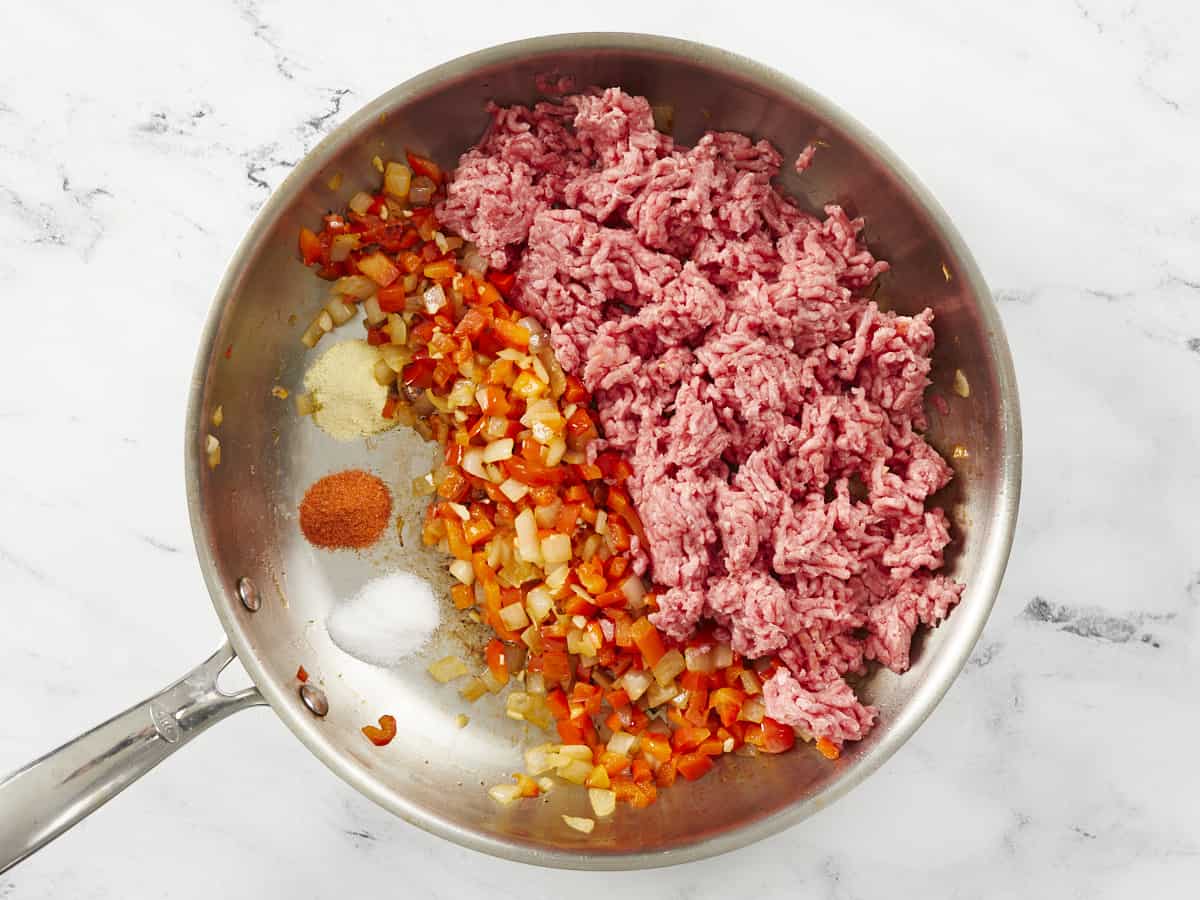
Meat being added to a pan of garlic, onions, and peppers.

Add the pound of ground beef to the pan and sprinkle with 1 teaspoon coarse salt, 1 and 1/2 teaspoons sazón, and 1 teaspoon adobo. As the beef browns, break up big chunks with your spoon.

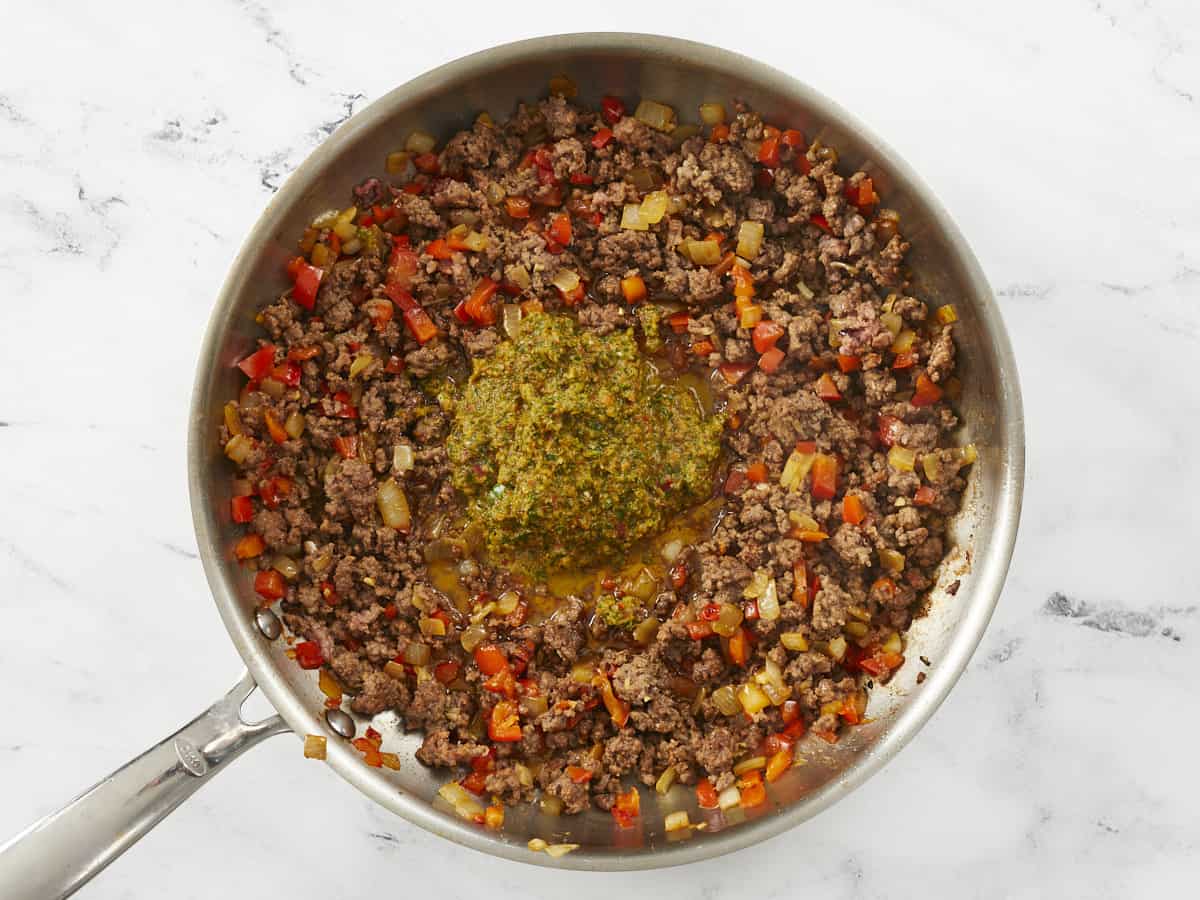
Sofrito being added to a pan with browned meat in it.

When the beef has browned, add the 1/2 cup sofrito and cook, stirring constantly, until fragrant, about 2 minutes. Break up any remaining chunks of ground beef.

Tomato sauce, olives, and raisins added to a pan of browned meat and sofrito.

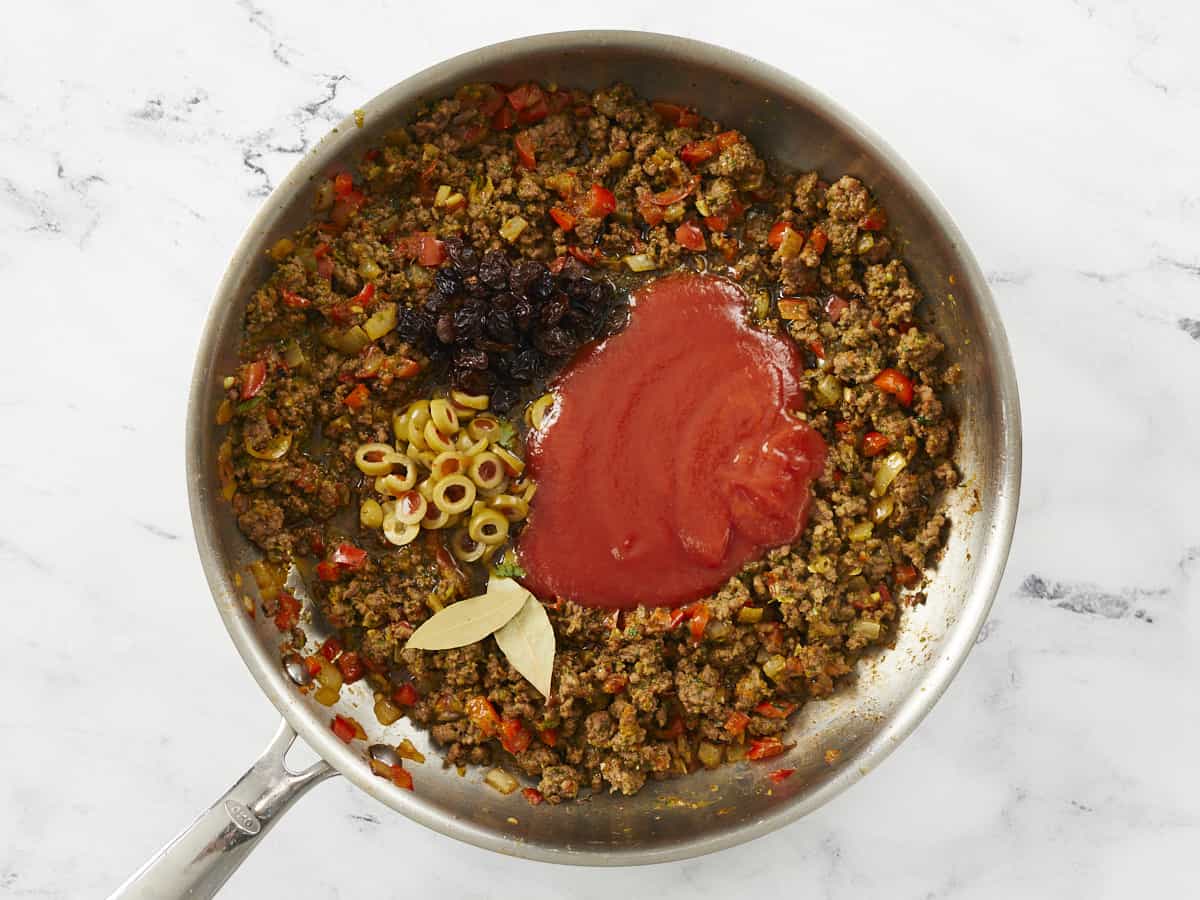
Add the 1/2 cup olives, 1/4 cup raisins, 1/2 tablespoon white vinegar, 15 ounces tomato sauce, 2 bay leaves, and 1/4 cup water.

Finished pan of picadillo.

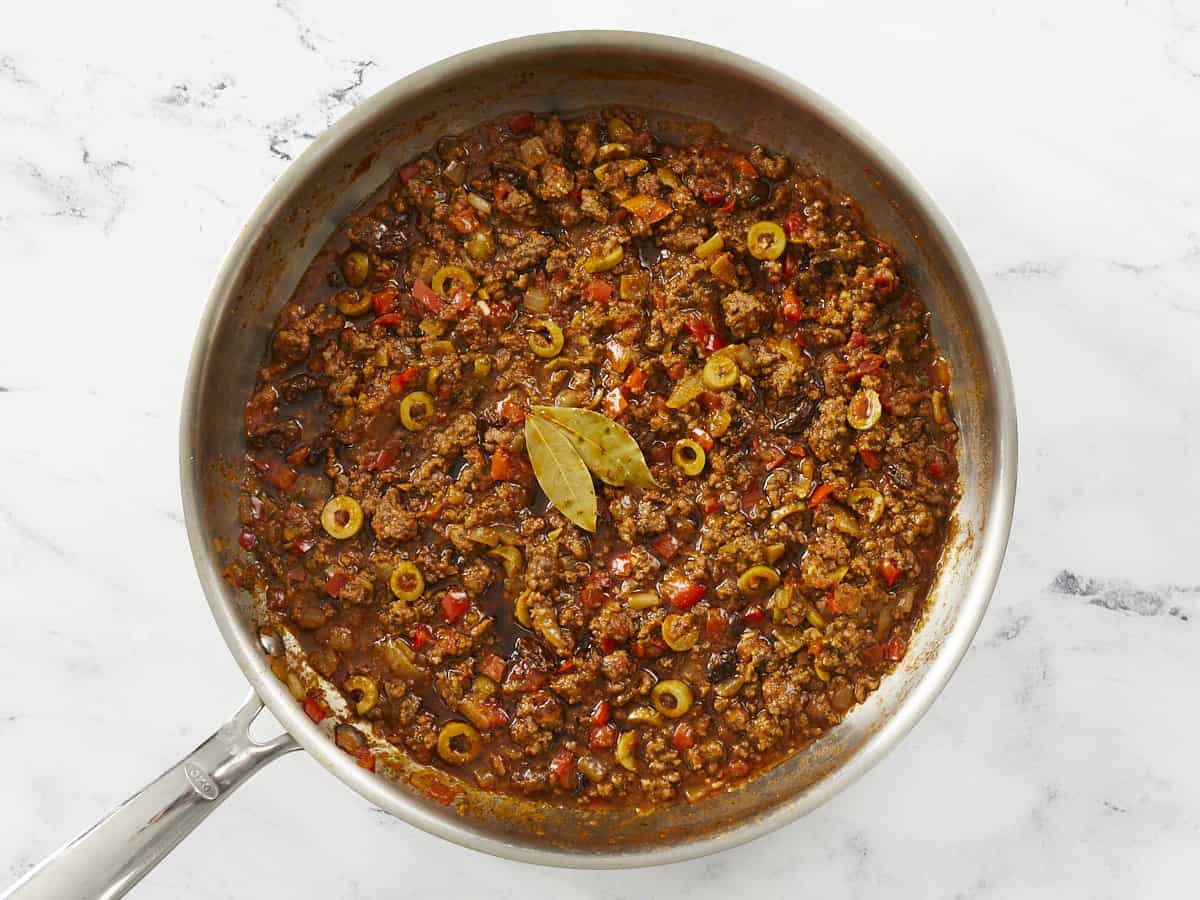
Continue to cook, occasionally stirring, for 10 minutes. Take the pan off the heat and allow the Picadillo to cool slightly before serving. Tell me how long it takes for everyone to start talking again!

Picadillo served over white rice in a white bowl.

More Easy One-Pot Recipes

The post Picadillo appeared first on Budget Bytes.