15 Best Sauces for Salmon
These sauces for salmon make this simple fish into a delicious dinner! From creamy dill to zesty chimichurri, use these…
These sauces for salmon make this simple fish into a delicious dinner! From creamy dill to zesty chimichurri, use these…
These easy salmon recipes perfect for busy weeknights and special occasions, from baked and grilled to tacos and bowls. My…
This comforting seafood lasagna delivers creamy layers filled with noodles, shrimp, scallops, and cod for a rich, flavorful meal. It bakes into a bubbly golden casserole that is perfect for festive entertaining or special weeknight meals.
You can learn how to cook Lobster Tails perfectly at home with our easy, foolproof recipe that delivers restaurant-quality results in just 15 minutes. How to Butterfly a Lobster Tail: Cut Shell: With sharp kitchen shears, gently cut a line down the top of the shell, stopping at the fin. Loosen Meat: Carefully loosen the…
These easy seafood dishes are recipes that are perfect for weeknight meals or special dinners! From quick shrimp recipes to…
This baked cod recipe features tender white fish in a zesty lemon garlic sauce that comes together in just 30…
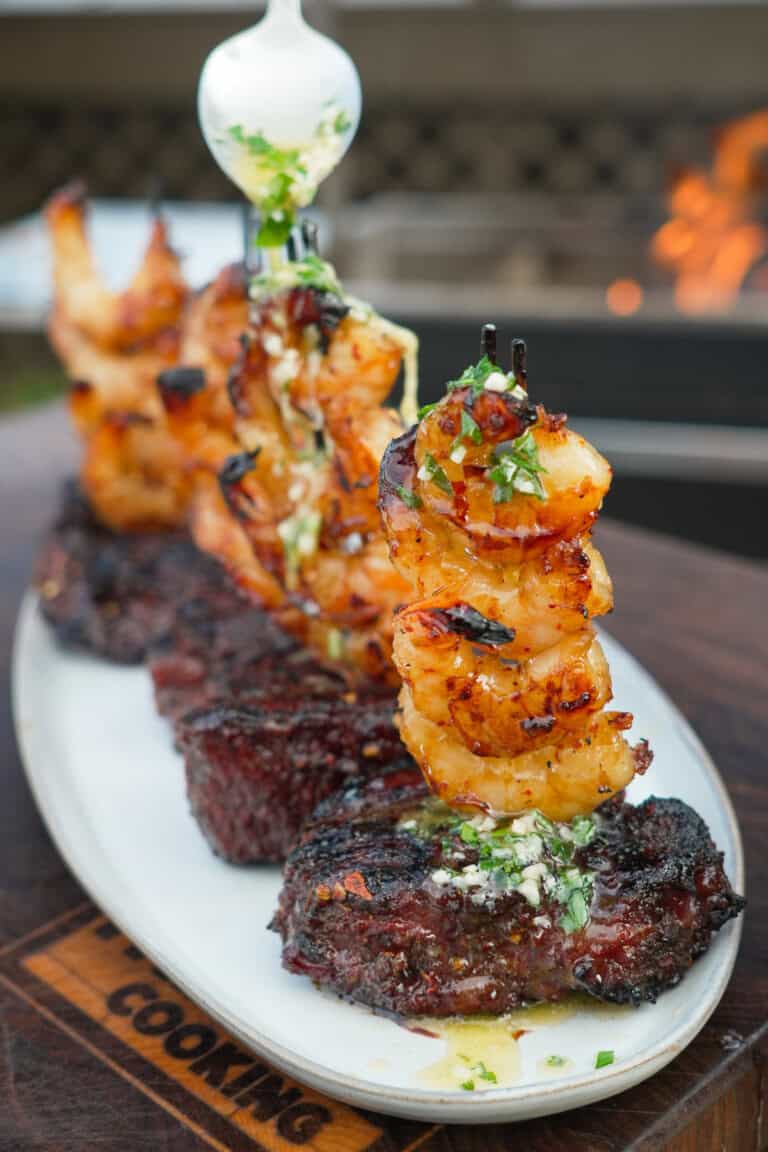
My current hot honey obsession has come for surf and turf! This hot honey steak and shrimp is so freakin’…
The post Hot Honey Steak and Shrimp appeared first on Over The Fire Cooking.
Pan-seared halibut without the stick-to-the-pan disaster. Exact temp, exact timing, crust that proves you know what you’re doing. 22 minutes.
The post Pan-Seared Halibut with Wilted Spinach and Lemon Butter Sauce appeared first on Girl Carnivore.
This magic salmon seasoning blend transforms any salmon into super flavorful fish in minutes. Made with smoked paprika, garlic powder,…
This honey garlic salmon recipe is an easy weeknight dinner with a sweet and savory glaze. It’s simple, delicious, and…
Our classic Shrimp Cocktail recipe is the easiest fun and festive appetizer. Juicy, tender shrimp paired with a zesty homemade cocktail sauce that’s so much better than store-bought. How to make Shrimp Cocktail: Mix Ingredients: It’s as easy as mixing together ketchup, lemon juice, and prepared horseradish. Stir well, then be sure to taste it…
Hot lobster dip with four cheeses—buttery, luxe, and done in 40 minutes. The appetizer that gets people talking
The post Four Cheese Hot Lobster Dip appeared first on Girl Carnivore.
My garlic butter-baked pollock recipe promises buttery-soft, flaky fish, served with tender potatoes and tomatoes for a hearty, healthy dish. All you need is 20 minutes and pantry staples. My partner and I are on a bit of a seafood kick at home lately…
These easy shrimp tacos are loaded with juicy spiced shrimp, crisp cabbage, and a creamy cilantro sauce for a fresh,…
The cod recipe that finally works. No sticking, no falling apart, just golden crust and jammy tomatoes. Your cast iron + this method = dinner confidence.
The post Pan-Seared Cod with Blistered Cherry Tomato Sauce appeared first on Girl Carnivore.
Make restaurant-quality roasted branzino at home in under 40 minutes. Crispy skin, tender flaky fish, and a bright lemon caper sauce – perfect for date night or weeknight dinners.
The post Roasted Branzino with Lemon Caper Sauce appeared first on Girl …
Clams casino gets butchered more than any appetizer on the planet. Soggy breadcrumbs, rubbery clams, zero seasoning – restaurants treat it like an afterthought. The real deal has a crispy, golden top that shatters when you bite down, revealing sw…
My air fryer halibut recipe makes a simple dinnertime protein that pairs with many sides. It’s crispy on the outside, flaky inside, and doesn’t need any breading at all. We try to enjoy fish weekly, and this air fryer halibut is the one eve…
Looking for a lobster roll where you actually taste lobster? This is it: garlicky herb butter, toasted buns, and perfectly cooked lobster are calling your name.
The post Mini Tarragon Butter Lobster Rolls (Connecticut Style) appeared first on Girl Car…
Crispy fried seafood & veggies with lemon dill tartar sauce. This Italian-style fritto misto beats any seafood platter—crunchy, golden, addictive.
The post Crispy Fritto Misto with Lemon Dill Tartar Sauce appeared first on Girl Carnivore.
This Italian hot dip combines garlic, anchovies, olive oil, and butter into a silky sauce for vegetables and bread. It’s gone fast.
The post Bagna Cauda (Italian Garlic–Anchovy Dip) appeared first on Girl Carnivore.
My baked whiting recipe is deceptively simple, and the results are fresh, lightly seasoned fillets dressed in melted butter and fresh dill. I make fish at least once a week for my family- it’s a lean source of protein and nutrients, includi…
This shrimp scampi recipe is simple and full of flavor. Ready in under 20 minutes, it’s perfect to pair with pasta, garlic bread, and a fresh salad for a dinner everyone will enjoy.
This salmon aglio olio is so delicious! The seasoning is garlicky with a hint of heat. Served with lemon parmesan orzo, it’s such a lovely weeknight meal and one that we all love. I have the best weeknight dinner for you! This salmon aglio e olio is so satisfying and delicious, filled with garlicky, herby […]
The post Salmon Aglio e Olio with Lemon Parmesan Orzo. appeared first on How Sweet Eats.
Make the perfect tuna wrap with creamy tuna salad and fresh crunchy vegetables! This easy, healthy, protein-packed lunch recipe takes…