Sheet Pan Pancakes

These sheet pan pancakes make breakfast on weekends a breeze! They’re easy to whip up and they’re freezer-friendly. Perfect for breakfast meal prep!

The post Sheet Pan Pancakes appeared first on Budget Bytes.

I’m always looking for ways to get breakfast and dinner on the table faster and these Sheet Pan Pancakes might just be my new best friend! Not only are they easy to whip up, but they’re super convenient. You can pour the entire pancake batter on one baking sheet and top it with your favorite toppings, or leave it plain and let everyone add their own toppings after it bakes. What I love most about these sheet pan pancakes are that they’re perfect for breakfast meal prep. They freeze perfectly and whenever I need a quick breakfast, I just pop 2 pancakes in my toaster and breakfast is done!🙌
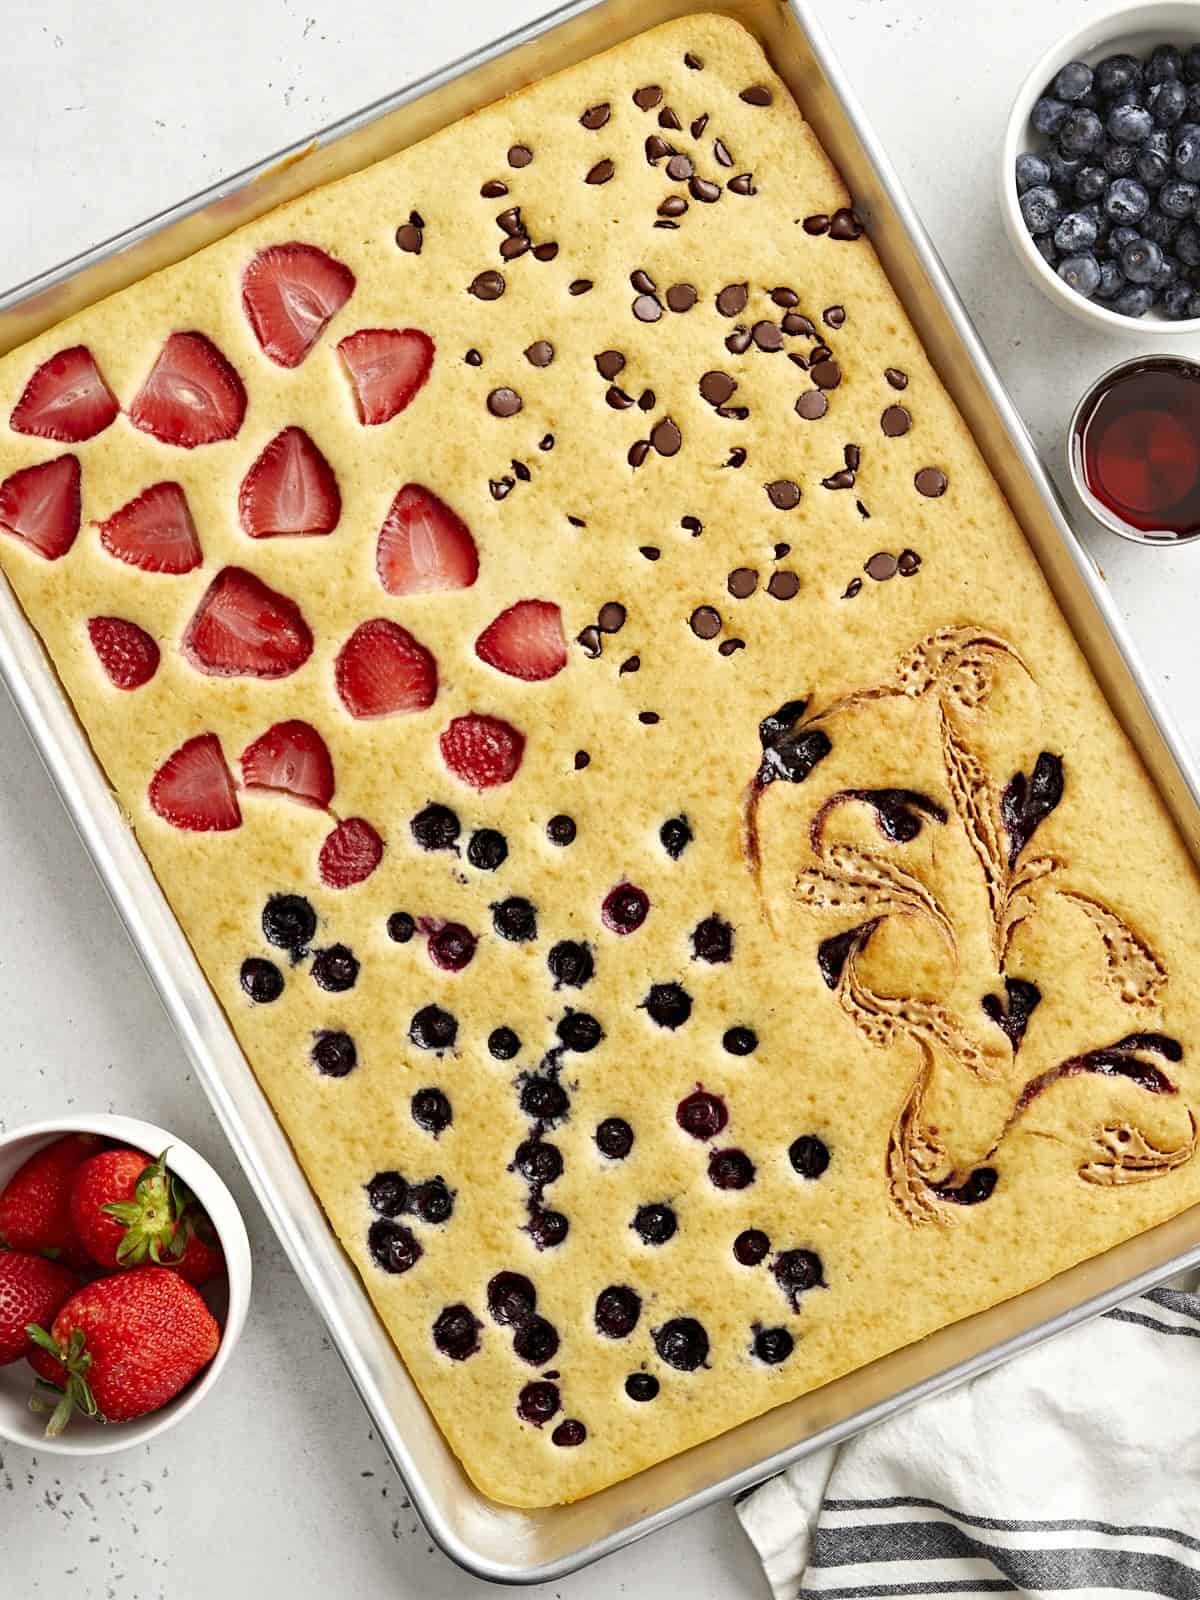
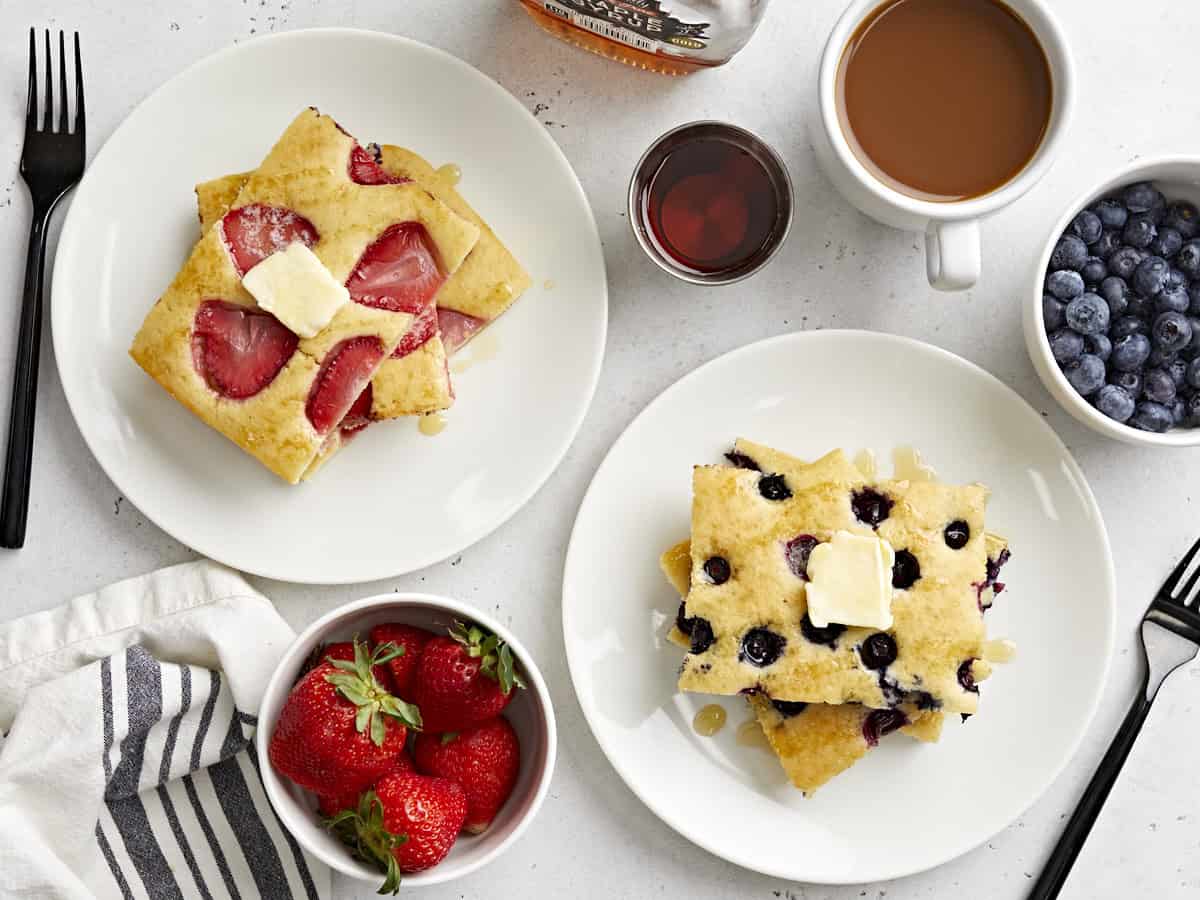
Overhead view of sheet pan pancakes with fresh fruit and maple syrup on the side.

Why Sheet Pan Pancakes?

I’m not sure if your family loves pancakes as much as mine, but it has now turned into our Saturday morning routine. But flipping and making several batches of regular pancakes takes quite a while. And I have to try and keep the first few batches warm in the oven, while I make the rest of the pancakes. Sheet Pan Pancakes keeps you from having to do that back and forth dance. You can make pancakes for the whole family in one big batch, all on one baking sheet, and customize it with their favorite mix-ins and toppings. It’s honestly genius!

Ingredients For Sheet Pan Pancakes

To make these sheet pan pancakes, I used our homemade pancakes recipe as a base foundation and adjusted the measurements to accommodate a larger portion size. Here’s what you’ll need:

  • All-Purpose Flour: Flour adds structure and is the foundation of the pancakes.
  • Baking Powder: Baking powder is what makes the pancakes light and fluffy instead of dense and gummy.
  • Sugar: A little bit of sugar adds the perfect amount of sweetness to the pancakes.
  • Milk: Milk combines with the flour to add moisture and helps create the batter.
  • Egg: Eggs help hold the pancakes together and also helps leaven the pancakes.
  • Butter: Butter adds flavor and richness to the pancakes.
  • Vanilla Extract: A small amount of vanilla extract adds a wonderful flavor and depth to the pancake.
  • Salt: A little bit of salt helps enhance the flavor of the pancakes.
  • Toppings: This is where you can really have fun! I used a combination of my favorite fruits like strawberries and blueberries. And for some variety I added some chocolate chips and peanut butter & raspberry jam.

More Toppings and Mix-in Ideas

My favorite part about making sheet pan pancakes is adding different mix-ins and toppings. I personally love adding fresh fruit, but here are some more topping ideas for you to try:

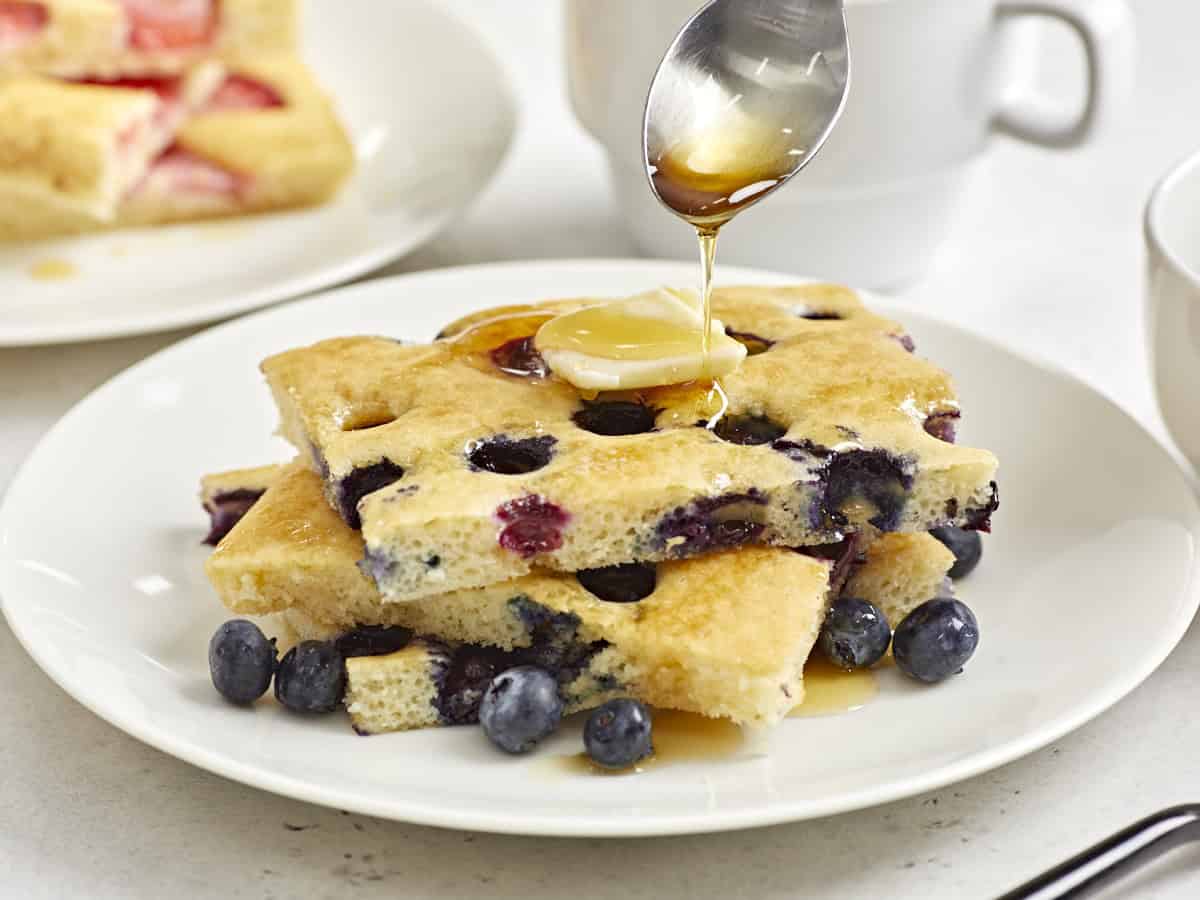
Close up side view of sheet pan pancakes on a serving plate with maple syrup being drizzled over the top.

Recipe Tips!

  1. Don’t overmix the batter. Stir the dry and wet ingredients together until they are just combined and there are no traces of dry flour left in the bowl. Over-mixing the batter will develop the gluten in the flour and make the pancakes rubbery rather than soft and fluffy.
  2. Grease your sheet pan well. Make sure to generously coat your sheet pan well with cooking spray to keep the pancakes from sticking.
  3. Dry your fruit well. If you’re adding fresh fruit, make sure to wash and dry your fruit well with paper towels to prevent any excess water or fruit juices from bleeding into the pancake batter.
  4. If necessary, use some parchment paper. Sheet pan pancakes seem to work better with baking sheets that aren’t too old. So if your baking sheet is older or a little beat up, you may want to line it with some parchment paper first.

How To Store & Freeze Sheet Pan Pancakes

What I love most about making sheet pan pancakes is that they’re extremely easy to store and freeze for later when you need a quick & easy breakfast. To store, let the pancakes cool completely, then transfer them to an airtight container and refrigerate for up to 3 days.

To freeze, place the cooled pancakes in a freezer safe storage bag, in single layers with parchment paper between the layers to prevent sticking. Freeze for up to 3 months. You can easily reheat frozen pancakes in a toaster or in the microwave until hot.
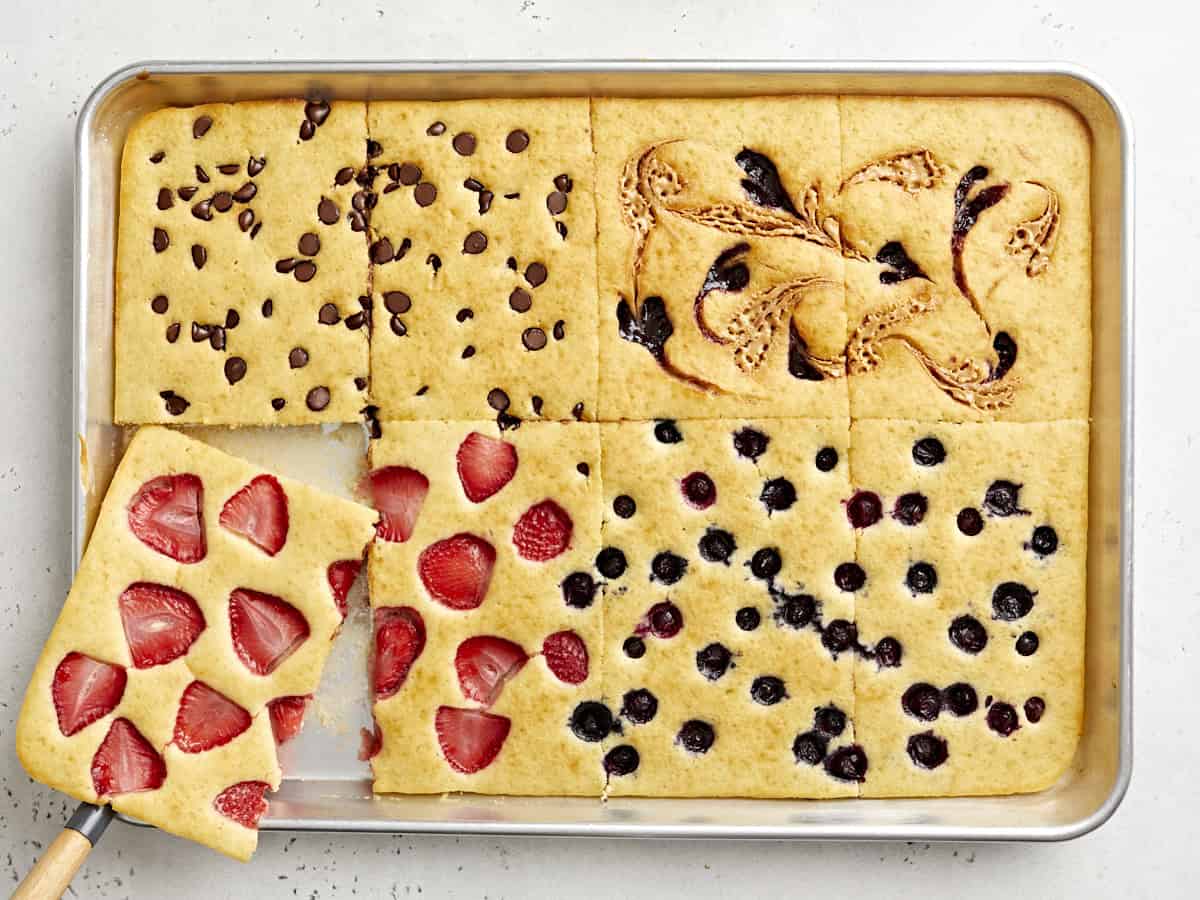
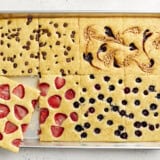
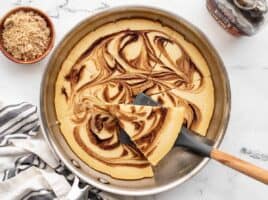
Overhead view of sheet pan pancakes cut into squares with one slice being lifted out.
Print

Sheet Pan Pancakes

These sheet pan pancakes make breakfast on weekends a breeze! They’re easy to whip up and they’re freezer-friendly. Perfect for breakfast meal prep!
Course Breakfast, Brunch
Cuisine American
Total Cost $2.22 recipe / $0.55 serving
Prep Time 10 minutes
Cook Time 20 minutes
Total Time 30 minutes
Servings 4 (2 pancakes each)
Calories 467kcal

Equipment

Ingredients

  • 2 cups all-purpose flour $0.40
  • 1/4 cup granulated sugar $0.10
  • 1 Tbsp baking powder $0.18
  • 3/4 tsp salt $0.08
  • 1 1/2 cup milk $0.30
  • 2 large eggs $0.33
  • 4 Tbsp butter, melted $0.53
  • 1 tsp vanilla extract $0.30
  • cooking spray

Optional Toppings*

  • fresh strawberries, sliced
  • blueberries
  • chocolate chips
  • peanut butter and fruit jam

Instructions

  • Preheat the oven to 425°F. In a large bowl whisk together the flour, sugar, baking powder, and salt.
  • In the same bowl, add in the milk, eggs, melted butter, and vanilla extract. Whisk the wet ingredients together with the dry ingredients until just combined. Be careful not to over mix.
  • Generously coat a 11×17-inch rimmed baking sheet with cooking spray. Pour the pancake batter onto the baking sheet. Spread the batter evenly around the baking sheet with a rubber spatula or tap the pan a few times on the counter to even out the batter.
  • Visually divide the pancake batter into four equal sections and add your desired toppings on top into each section. I used a combination of sliced strawberries, blueberries, chocolate chips, and a peanut butter and raspberry jam swirl. To make the pb&j swirl, I simply added dollops of natural peanut butter and jam, then swirled the two together using a toothpick.
  • Place the sheet pan in the oven and bake for 18-20 minutes or until golden brown.
  • Allow the pan to cool slightly, then slice the sheet pan pancake into 8 equal portions. Feel free to make smaller slices if you want to make more servings. Serve warm with syrup and extra toppings if you like. Enjoy!

See how we calculate recipe costs here.

Notes

*I added about 1/4 cup of chocolate chips and blueberries. For the strawberries and PB&J swirl, I simply eyeballed it until I filled up each section.

Nutrition

Serving: 2pancakes | Calories: 467kcal | Carbohydrates: 66g | Protein: 12g | Fat: 17g | Sodium: 912mg | Fiber: 2g
Overhead view of sliced sheet pan pancakes on two serving dishes with fruit and syrup on the side.

How to Make Sheet Pan Pancakes – Step by Step Photos
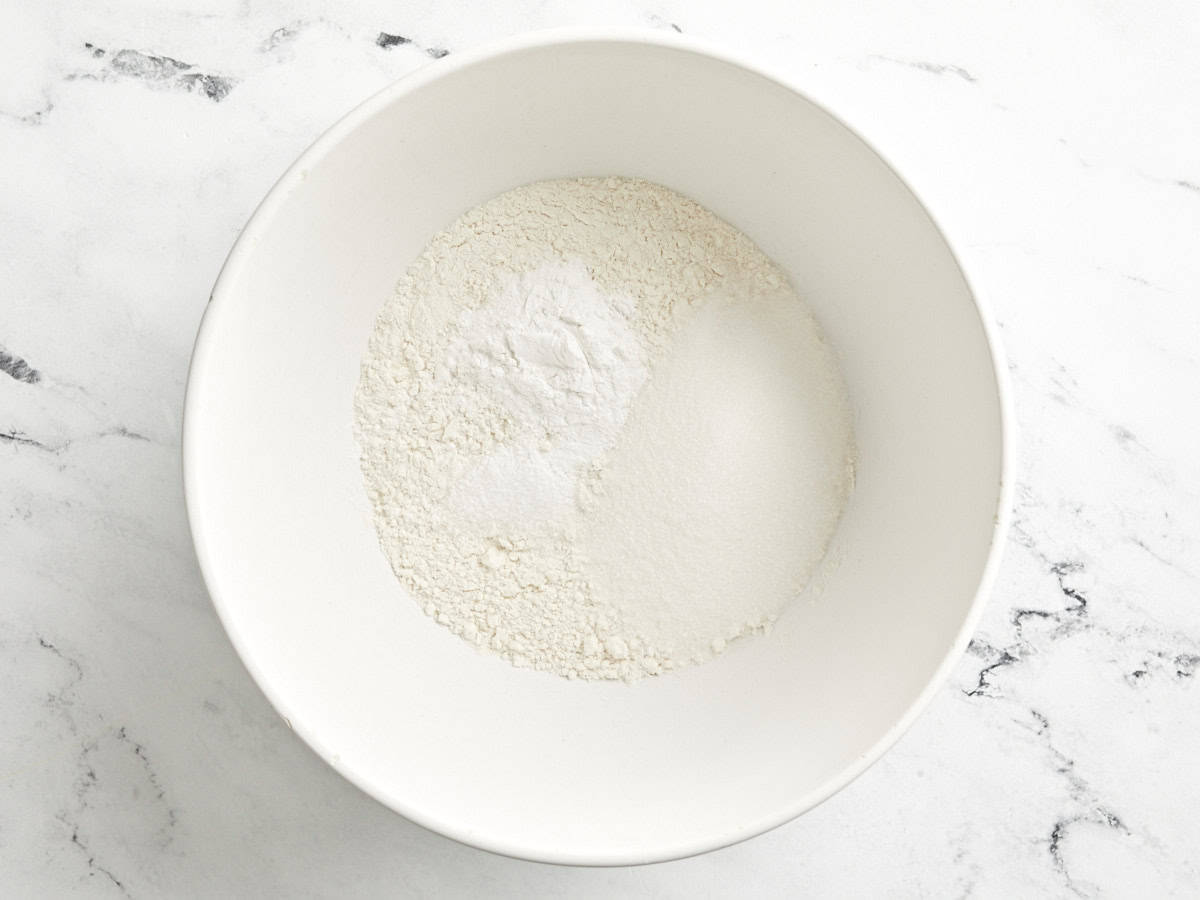
Dry ingredients in a bowl for sheet pan pancakes.

Preheat the oven to 425°F. In a large bowl whisk together 2 cups all-purpose flour, 1/4 cup granulated sugar, 1 Tbsp baking powder, and 3/4 tsp salt.
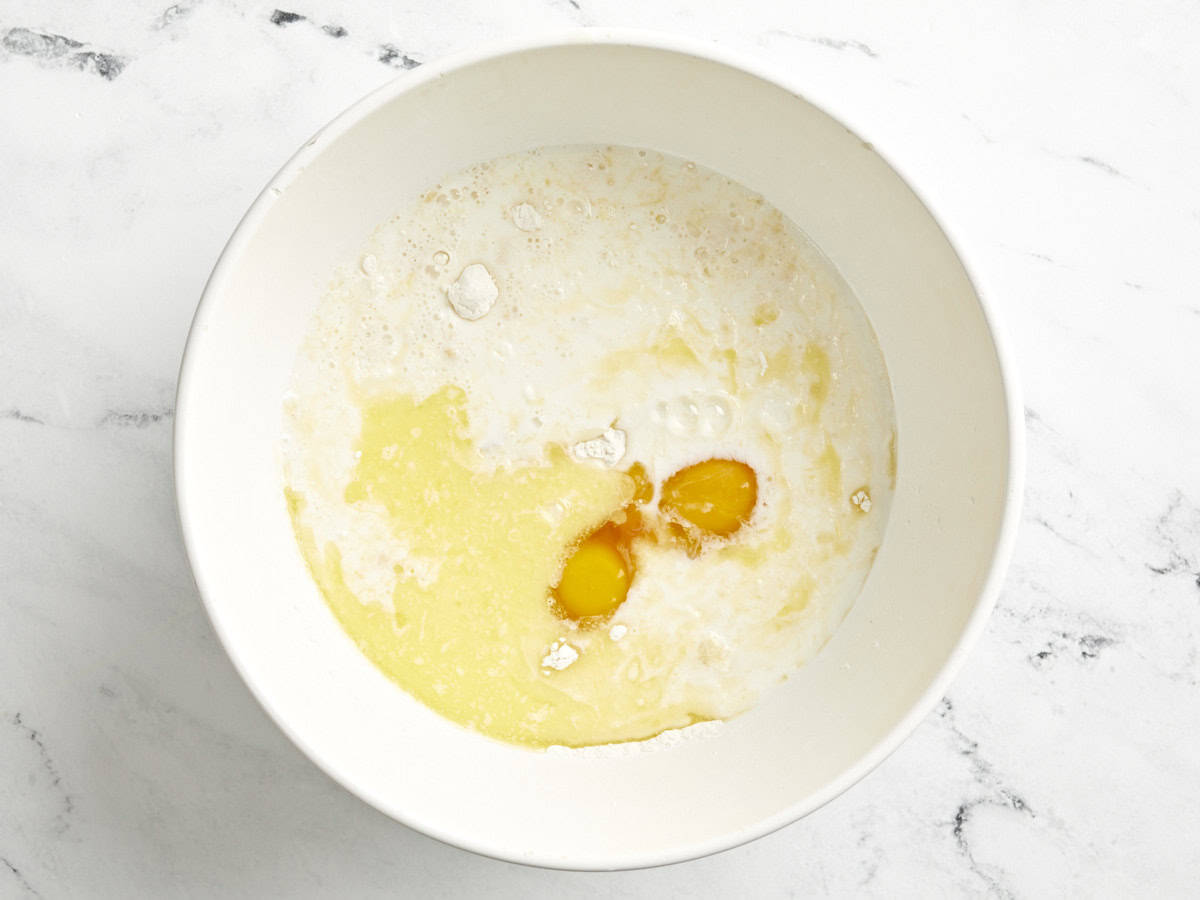
Dry and wet ingredients in a bowl for sheet pan pancakes.

In the same bowl, add in 1 1/2 cups milk, 2 large eggs, 4 Tbsp melted butter, and 1 tsp vanilla extract.
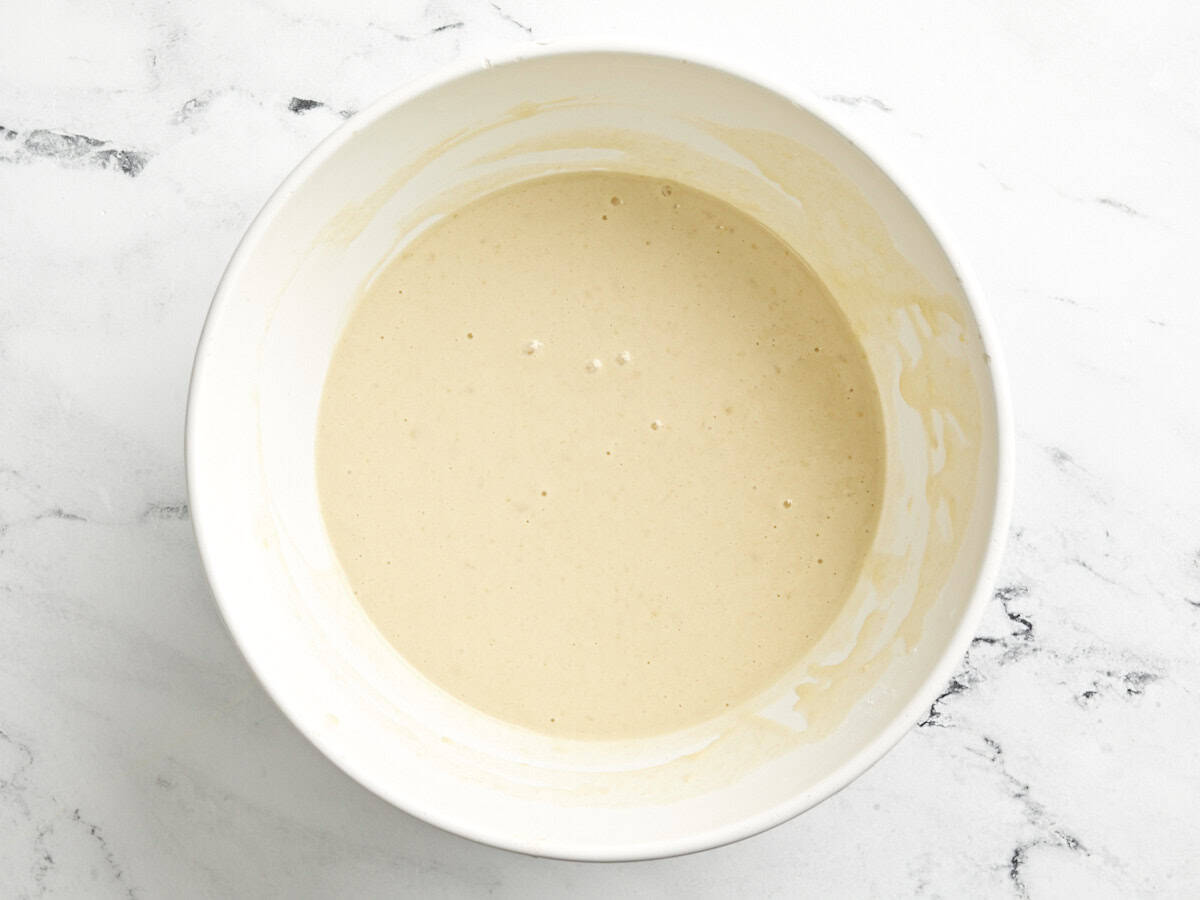
Sheet pan pancake ingredients mixed in a bowl.

Whisk the wet ingredients together with the dry ingredients until just combined. Be careful not to over mix at this point.
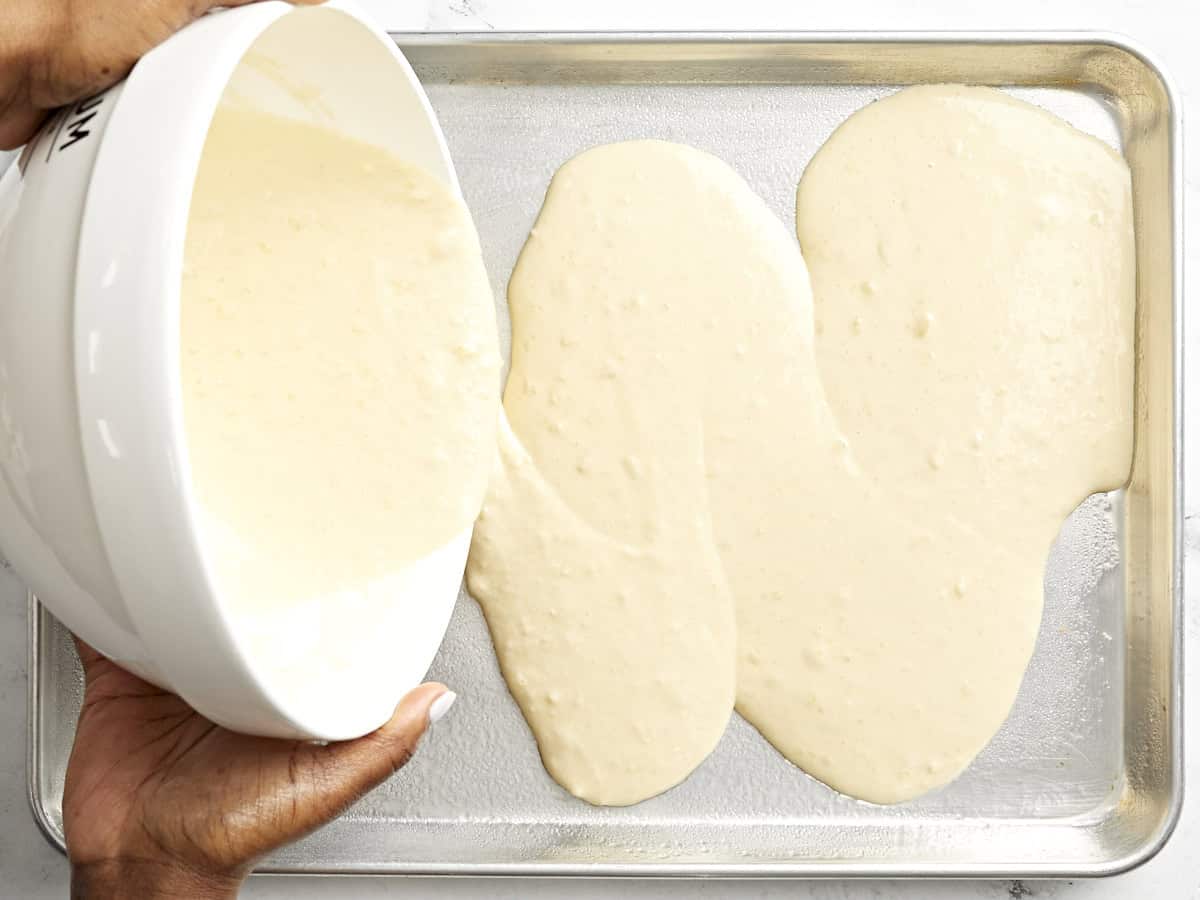
Sheet pan pancake batter poured onto a sheet pan.

Generously coat an 11×17-inch rimmed baking sheet with cooking spray. Pour the pancake batter onto the baking sheet. Spread the batter evenly around the baking sheet with a rubber spatula or tap the pan a few times on the counter to even out the batter.
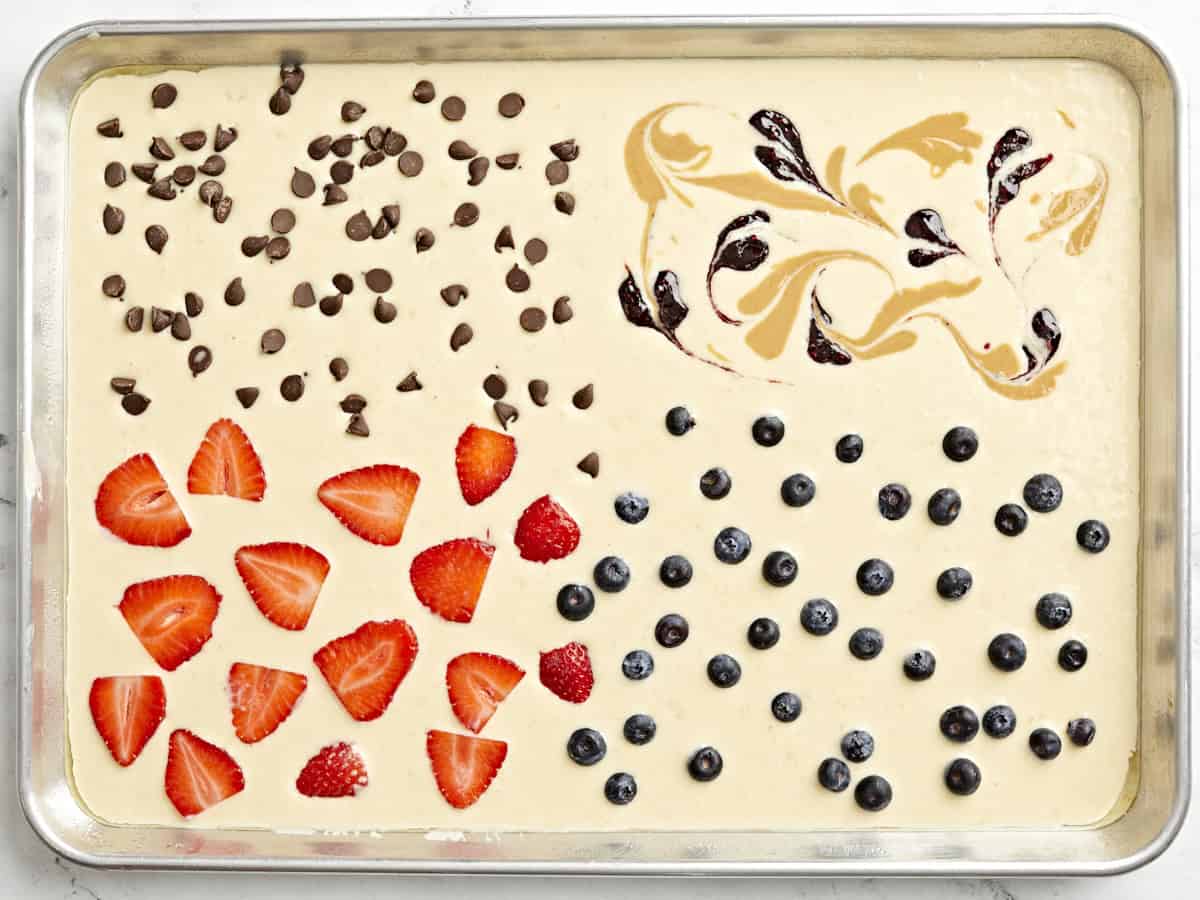
Sheet pan pancake batter with fruit added on top poured onto a sheet pan.

Visually divide the pancake batter into four equal sections and add your desired toppings on top into each section. I used a combination of sliced strawberries, blueberries, chocolate chips, and a peanut butter and raspberry jam swirl. To make the pb&j swirl, I simply added dollops of natural peanut butter and jam, then swirled the two together using a toothpick.
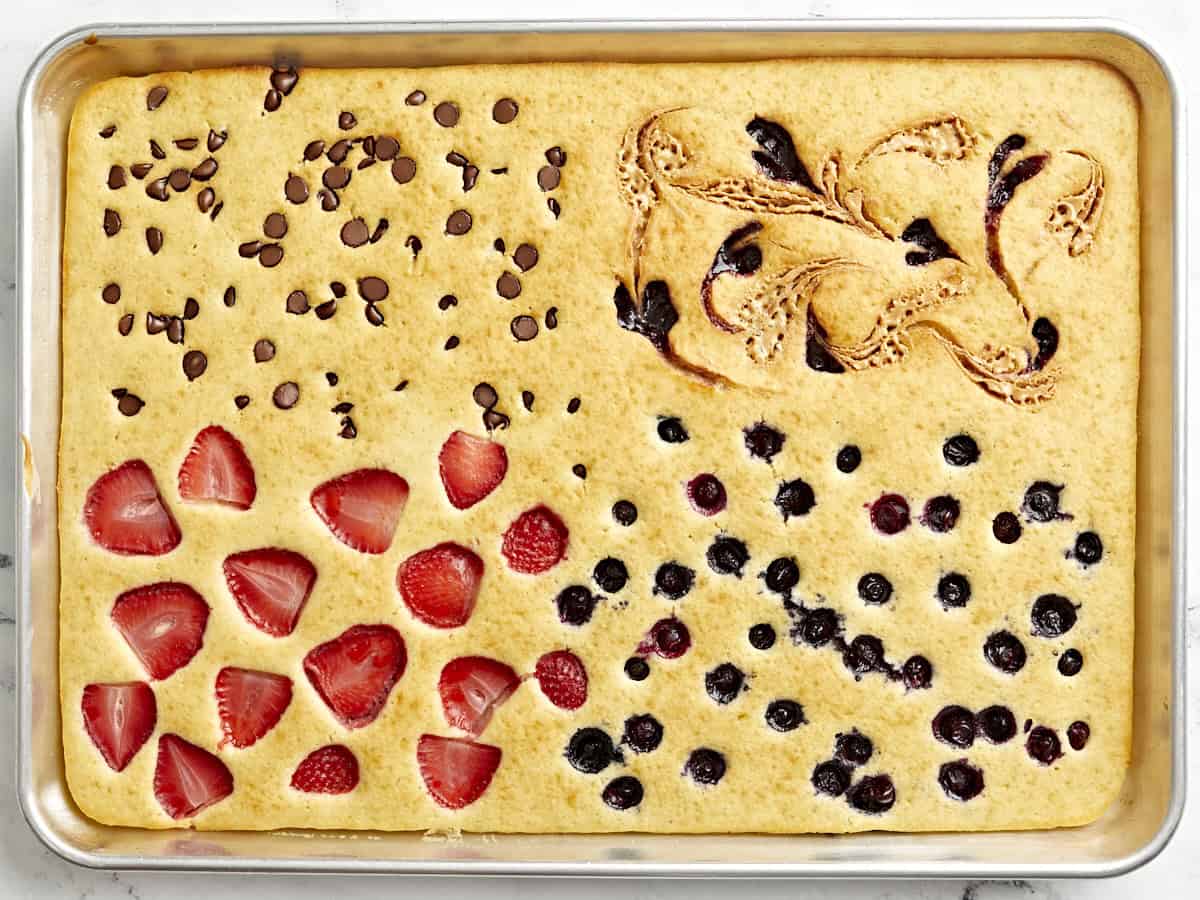
Finished sheet pan pancakes with four different toppings on top.

Place the sheet pan in the pre-heated oven and bake for 18-20 minutes or until golden brown.

Overhead view of sheet pan pancakes cut into squares with one slice being lifted out.

Allow the pan to cool slightly, then slice the sheet pan pancake into 8 equal portions. Feel free to make smaller slices if you want to make more servings. Serve warm with syrup and extra toppings if you like!
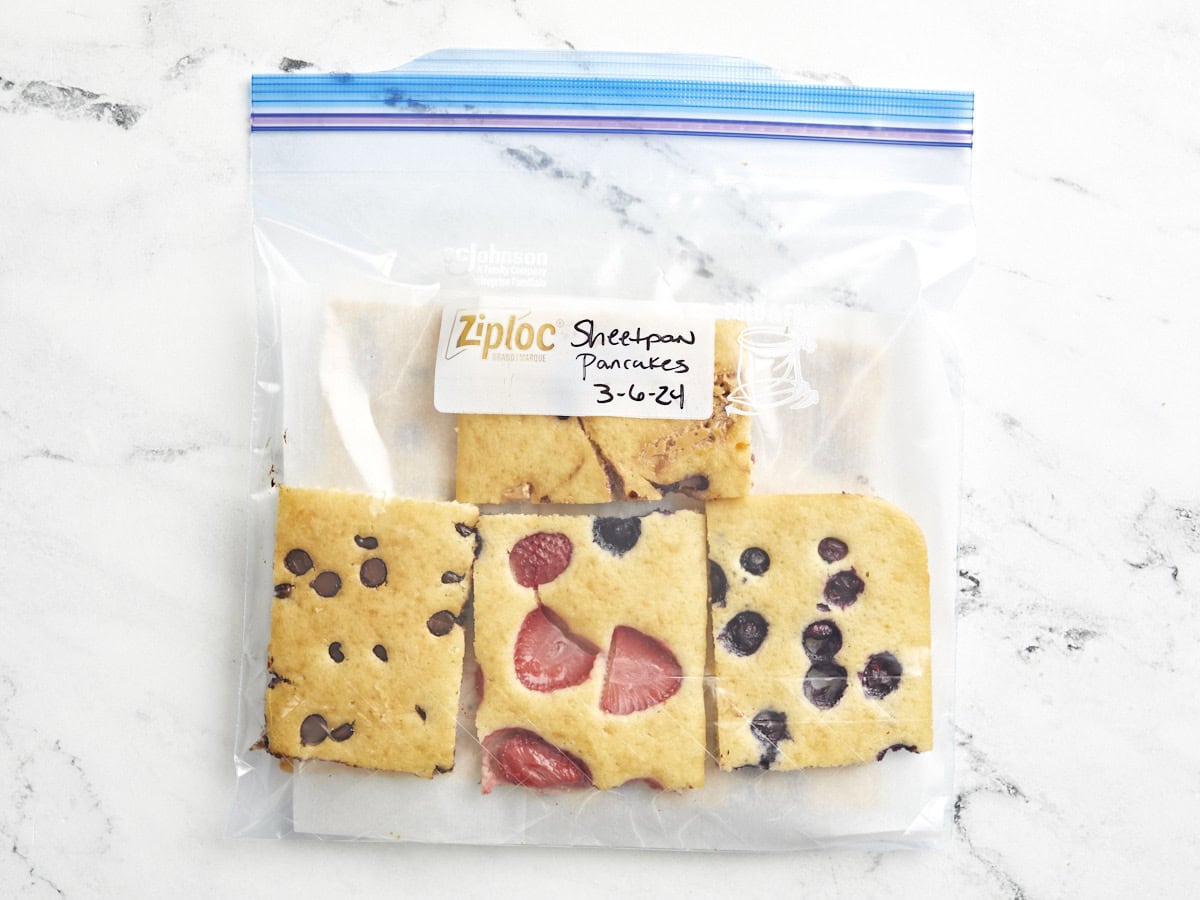
Sheet pan pancakes in a freezer bag.

These pancakes are super easy to freeze! Just place the cooled pancakes in a freezer safe storage bag, in single layers with parchment paper between the layers to prevent sticking. Freeze for up to 3 months.
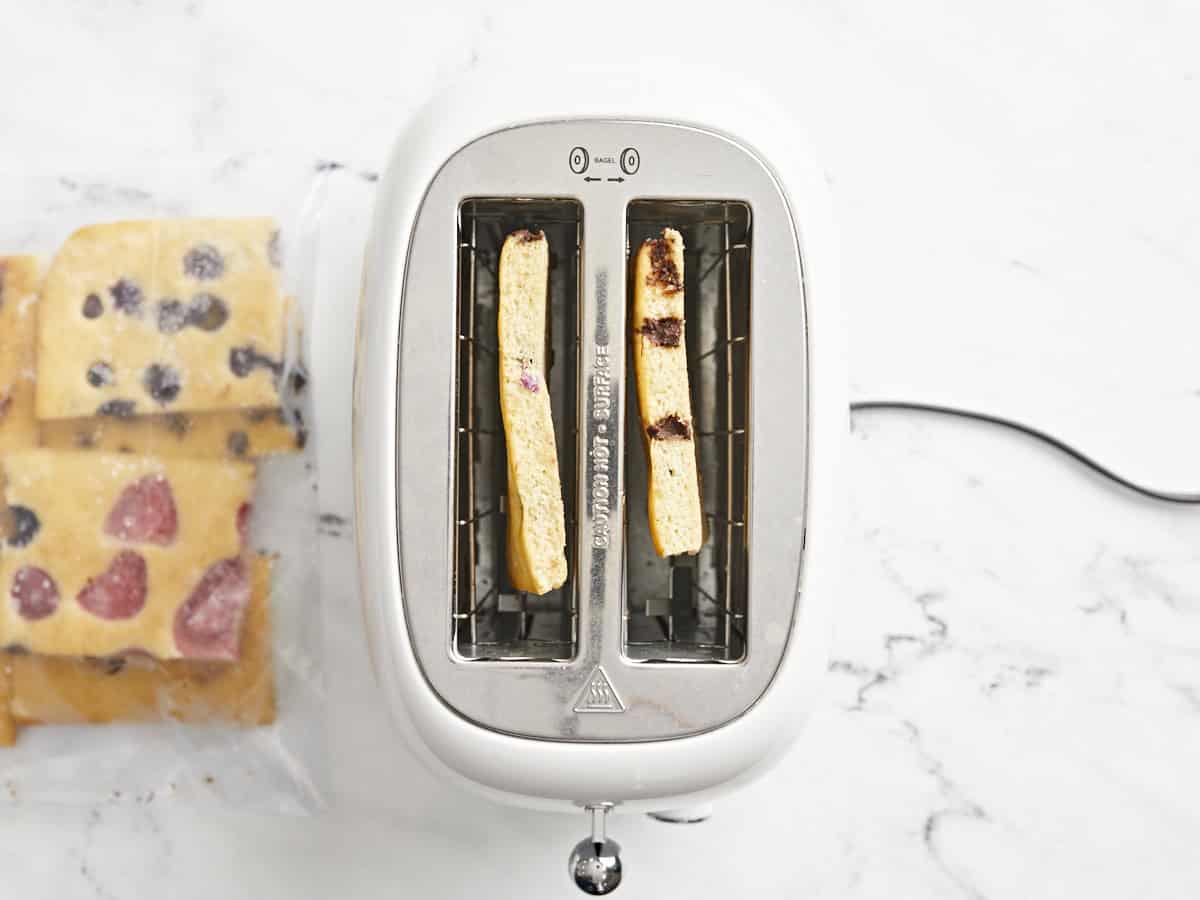
Frozen sheet pan pancakes in a toaster.

You can easily reheat frozen pancakes in a toaster or in the microwave until hot.
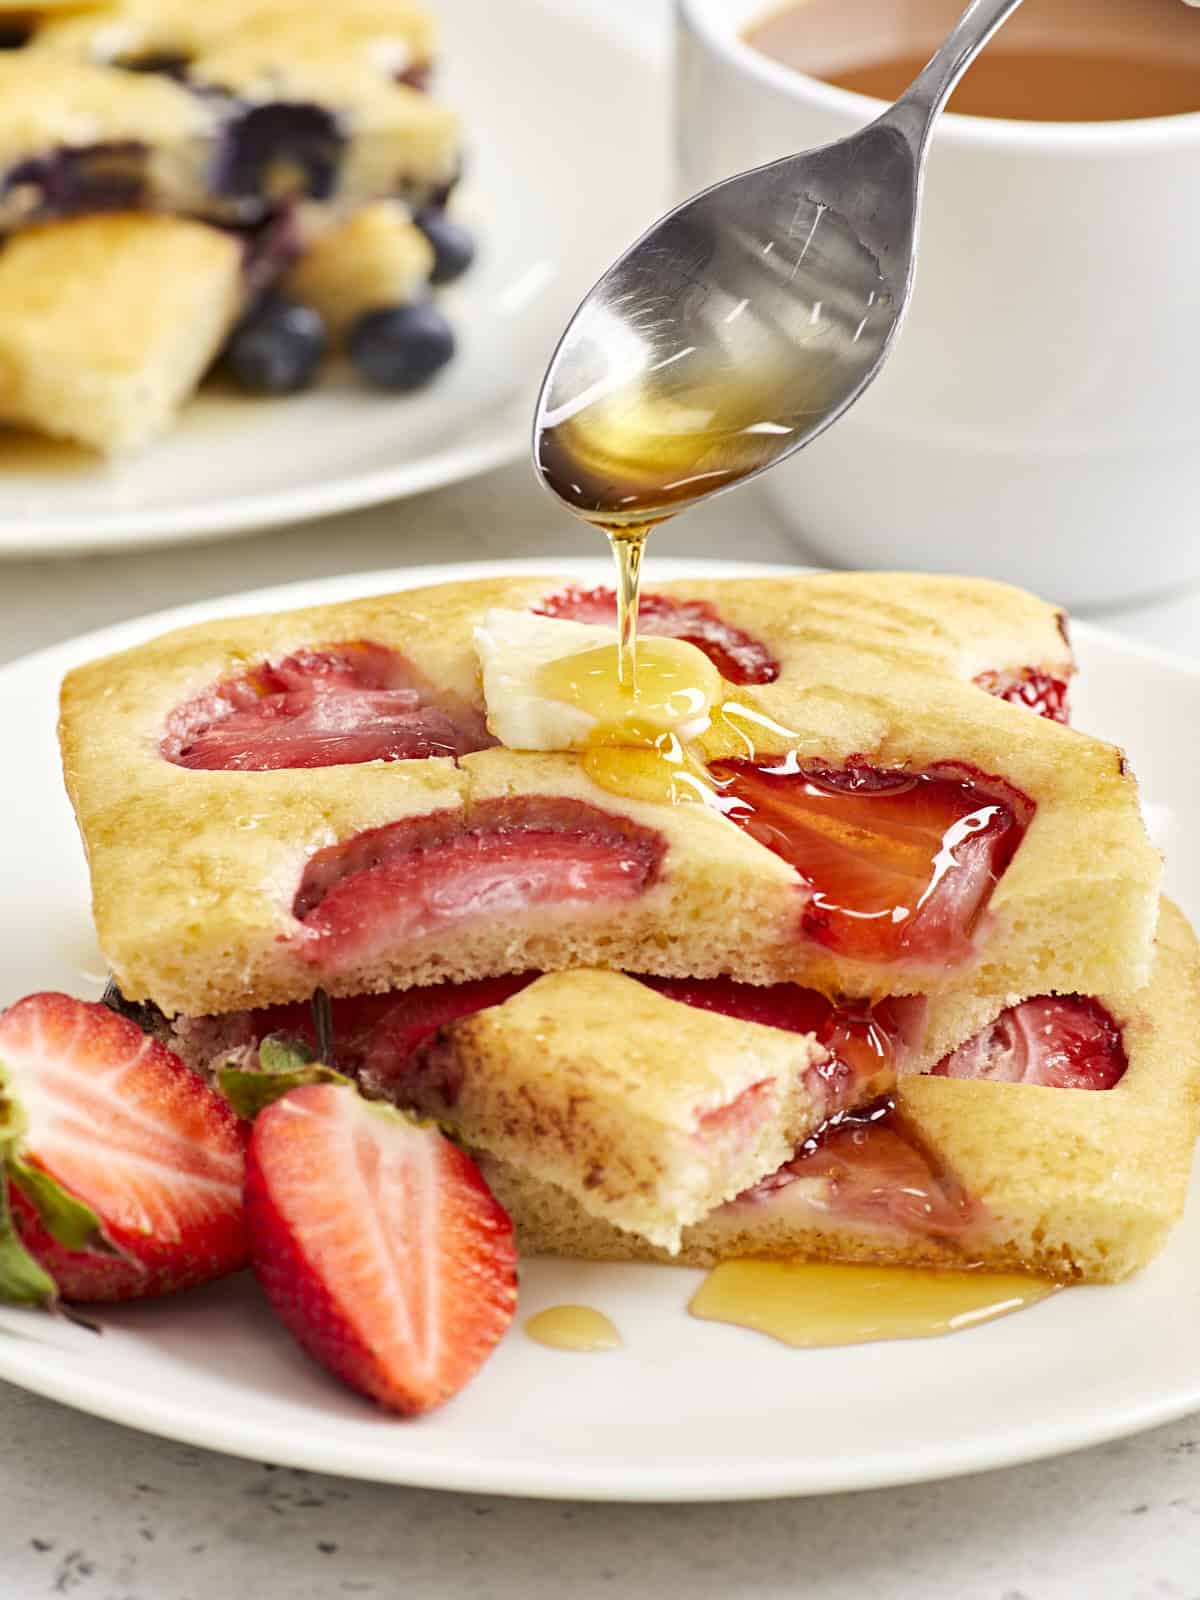
Close up side view of strawberry sheet pan pancakes on a serving plate with maple syrup being drizzled over the top.

The post Sheet Pan Pancakes appeared first on Budget Bytes.
The BEST Gluten-Free Vanilla Cake (1 Bowl!)

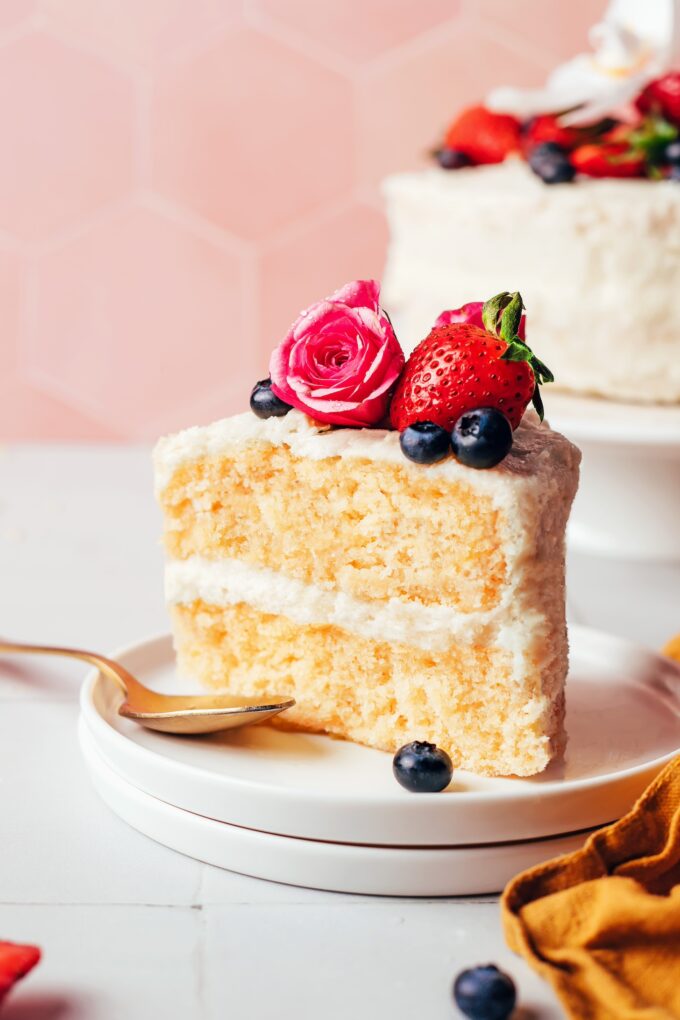
Friends, meet the vanilla cake of your DREAMS! It’s super fluffy, perfectly moist, undetectably gluten-free (& dairy-free), and seriously…the BEST. It’s impressive enough for a birthday or even a wedding!
Bonus? It’s also SO easy …

The BEST Gluten-Free Vanilla Cake (1 Bowl!)

Friends, meet the vanilla cake of your DREAMS! It’s super fluffy, perfectly moist, undetectably gluten-free (& dairy-free), and seriously…the BEST. It’s impressive enough for a birthday or even a wedding!

Bonus? It’s also SO easy to make, with simple methods, 1 bowl, and 9 ingredients. Preheat your oven. Let them eat cake!

This cake could not be easier to make! Simply whisk, pour, bake, and enjoy your cake, for goodness sake!

The BEST Gluten-Free Vanilla Cake (1 Bowl!) from Minimalist Baker →

Blueberry Cake

This blueberry cake recipe is easy to make and bursting with fresh blueberries. Blueberry season calls for my favorite blueberry cake! ♡ I first shared this blueberry cake recipe here ten years ago. And now, over a decade later, it still continues to be a favorite tradition of ours each spring when blueberry season rolls […]

This blueberry cake recipe is easy to make and bursting with fresh blueberries.

Blueberry season calls for my favorite blueberry cake! ♡

I first shared this blueberry cake recipe here ten years ago. And now, over a decade later, it still continues to be a favorite tradition of ours each spring when blueberry season rolls back around. It’s loaded up with a full two pints of fresh blueberries, which add a burst of vibrant sweetness to each bite. Then when mixed with a simple vanilla white cake batter, baked up in a bundt pan, and drizzled lightly with a sweet glaze, this cake is downright lovely through and through. Always such a beautiful cake for springtime!

In the years since I first shared this recipe, I’ve come to love adding a hint of lemon to brighten up the cake batter and glaze. And while I love this cake with fresh blueberries, I’ve also updated the notes below with instructions on how to make it using frozen blueberries too if that’s what you have on hand.

This recipe is always a winner in our house, so I hope you enjoy it as much as we do!

(more…)

Carrot Cake Muffins

These soft, fluffy, and super-moist carrot cake muffins are full of delicious carrot cake flavor and the perfect sweet treat any time of the day!

The post Carrot Cake Muffins appeared first on Budget Bytes.

Carrot cake is one of those recipes where some people love it and others strongly dislike it. Well today, these Carrot Cake Muffins deserve to be in a class of their own. They’re soft, fluffy, and perfectly moist with all the wonderful flavors of carrot cake, but in a convenient, easy to share muffin size. And spoiler alert, I’m a carrot cake lover, so I’ll be enjoying these muffins all season long! Have fun adding your favorite carrot cake mix-ins like sweet raisins and walnuts, or you can keep things simple and save a little bit on your budget. Either way you’re guaranteed to love these delicious carrot cake muffins.

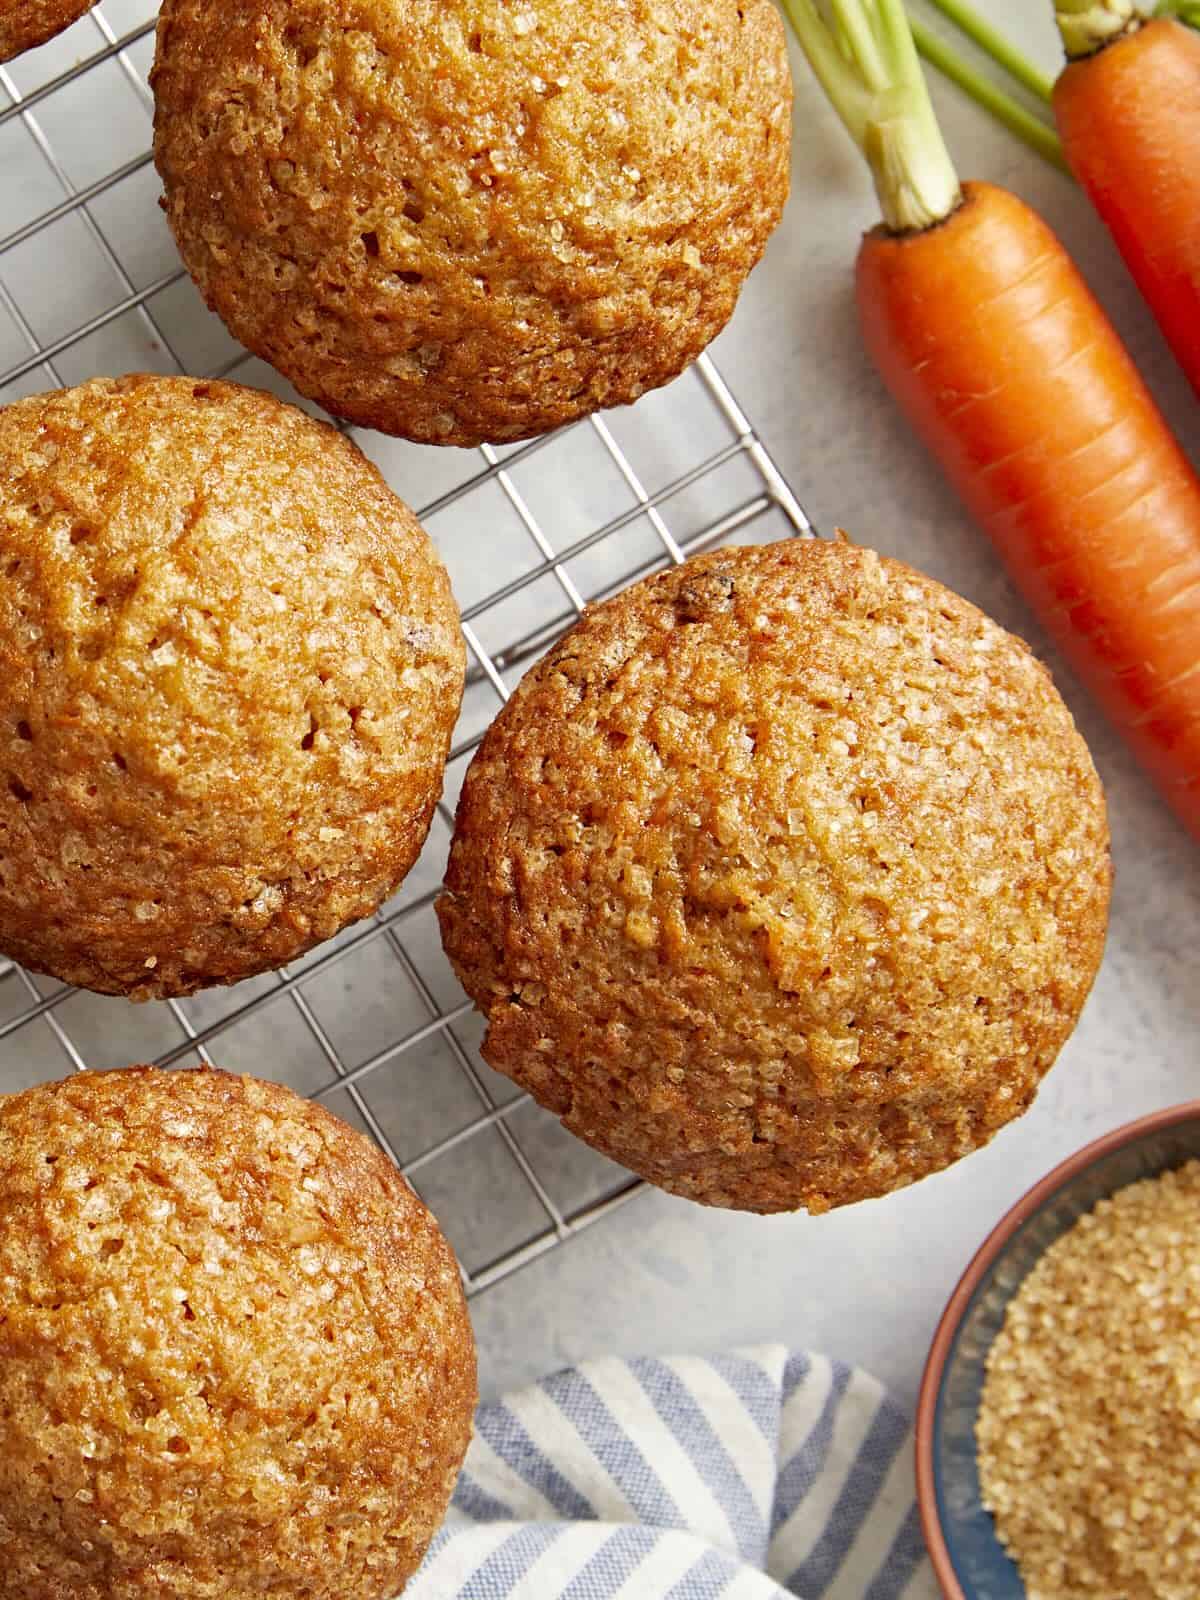
Close up side view of carrot cake muffins on a cooling rack.

Ingredients For Carrot Cake Muffins

I used my zucchini muffins recipe, that I absolutely love, as inspiration for these muffins. I adjusted the measurements and added a few extra spices to fit the flavor profile of carrot cake. The results were absolutely ahhmazing! Here’s everything you need:

  • Carrots: Carrots are of course the star of the show, so you’ll need about 3-4 large whole carrots, finely grated for this recipe. 
  • All-Purpose Flour:  All-purpose flour gives the muffins structure. You can safely substitute up to half of the flour for whole wheat flour without affecting the flavor or texture too much.
  • Baking Powder & Baking Soda: These are both leavening agents to help the muffins rise. I use both due to the extra acidity from the applesauce.
  • Eggs: Eggs to help bind all of the muffin ingredients together.
  • White Granulated Sugar & Dark Brown Sugar: The combination of both sugars help balance the sweetness, moisture and texture of the muffins.
  • Applesauce & Oil: The combination of both cooking oil and applesauce keeps the muffins moist, but not too oily, and you gain more flavor and moisture by incorporating the applesauce.
  • Cinnamon, Nutmeg & Ginger: These are classic spices that are often found in carrot cake. We use the right amount of each one to give these carrot cake muffins a wonderful flavor!  
  • Vanilla: A touch of vanilla extract adds more rich flavor to the carrot muffins.
  • Golden Raisins: The added raisins were honestly my favorite part of the muffins. They added a subtle sweetness and more texture to the muffins. Feel free to use regular raisins instead of golden raisins if that’s what you have on hand.
  • Turbinado Sugar (optional): Adding a sprinkle of turbinado sugar on top of each muffin is totally optional, but such a special treat. It gives each muffin a sweet and light crunch on the top. If you don’t have turbinado sugar, no worries, these muffins are still delicious without it.

How To Grate Your Carrots

As I mentioned above, you definitely want to grate fresh whole carrots for this recipe. Although its tempting to buy pre-shredded matchstick carrots at the grocery store, they simply are not moist enough for these muffins. They also aren’t grated fine enough and won’t mix well with the batter. Grating fresh carrots yourself is the way to go!

Also, most box graters come with a coarse, medium, and fine grating side. I tested these muffins using both medium and finely grated carrots. The finely grated carrots were the winner! They blended better in the batter and provided a bit more moisture compared to the medium-size grated carrots.

Recipe Tips & Add-Ins

  1. Don’t over mix the batter! Over-mixing will cause the muffins to become dense instead of light and fluffy. Mix the dry and wet ingredients together until they are just barely combined and there are no traces of dry flour left in the bowl.
  2. Oil your muffin pan really well. Even if you are using a nonstick muffin pan, make sure to oil it well or use cupcake liners to prevent your muffins from sticking to the pan.
  3. You can easily stretch this batter and get 12 regular size muffins. I wanted larger, bakery style muffins, so I divided the batter into ten muffin wells.
  4. If you want even more of a carrot cake taste, try adding some chopped walnuts, pecans, or shredded coconut to the batter. And if you really want to take these carrot muffins over the top, add some cream cheese frosting on top! ;)

How To STore Carrot Cake Muffins

Allow the muffins to cool completely at room temperature before storing. You can store leftover carrot cake muffins in an airtight container or a food storage bag in the fridge for 4-5 days. For longer storage, store in a freezer-safe storage bag for up to 3 months. Thaw frozen muffins at room temperature or microwave for about 30 seconds until warm.

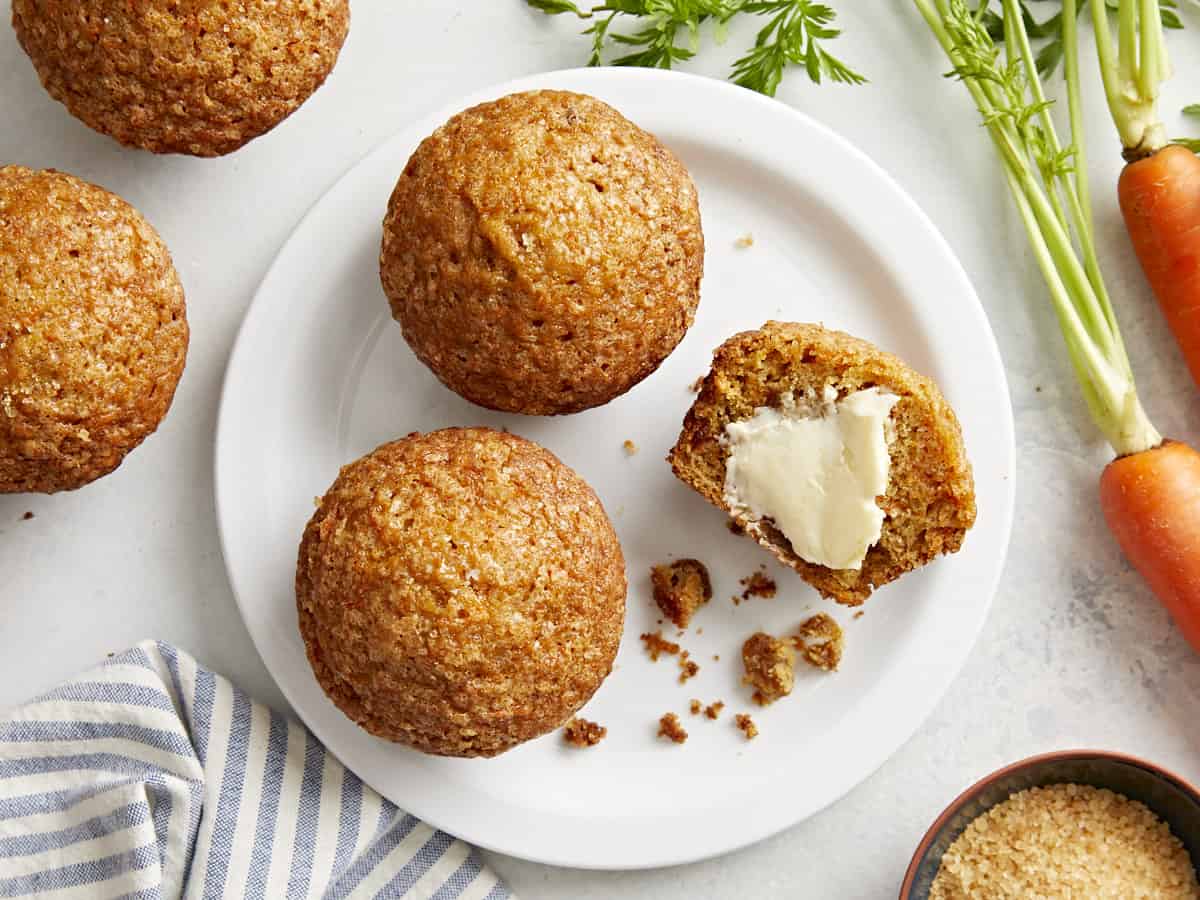
Overhead view of 3 carrot cake muffins on a white plate and 2 carrot cake muffins sitting beside the plate.
Close up side view of carrot cake muffins on a cooling rack.
Print

Carrot Cake Muffins

These soft, fluffy, and moist carrot cake muffins are full of delicious carrot cake flavor and the perfect sweet treat any time of the day!
Course Breakfast
Cuisine American
Total Cost $4.55 recipe / $0.45 serving
Prep Time 20 minutes
Cook Time 22 minutes
Total Time 42 minutes
Servings 10 muffins
Calories 314kcal

Ingredients

  • 2 cups finely grated carrots (3-4 large carrots) $0.57
  • 2 large eggs $0.33
  • 1/2 cup dark brown sugar $0.28
  • 1/2 cup granulated sugar $0.20
  • 1/3 cup sweetened applesauce $0.18
  • 1/2 cup cooking oil $0.32
  • 1 tsp vanilla extract $0.50
  • 1 1/2 cups all-purpose flour $0.30
  • 1 tsp baking powder $0.06
  • 1/2 tsp baking soda $0.02
  • 1/2 tsp salt $0.04
  • 1 tsp cinnamon $0.10
  • 1/4 tsp ground nutmeg $0.05
  • 1/2 tsp ground ginger $0.05
  • 3/4 cup golden raisins $1.49
  • 1 Tbsp turbinado sugar* $0.06

Instructions

  • Preheat the oven to 350°F. Wash, peel and grate the carrots using the small/fine holes on a box grater. Set the grated carrots to the side.
  • In a large bowl, whisk together the wet ingredients (eggs, dark brown sugar, granulated sugar, applesauce, oil and vanilla extract) until well combined.
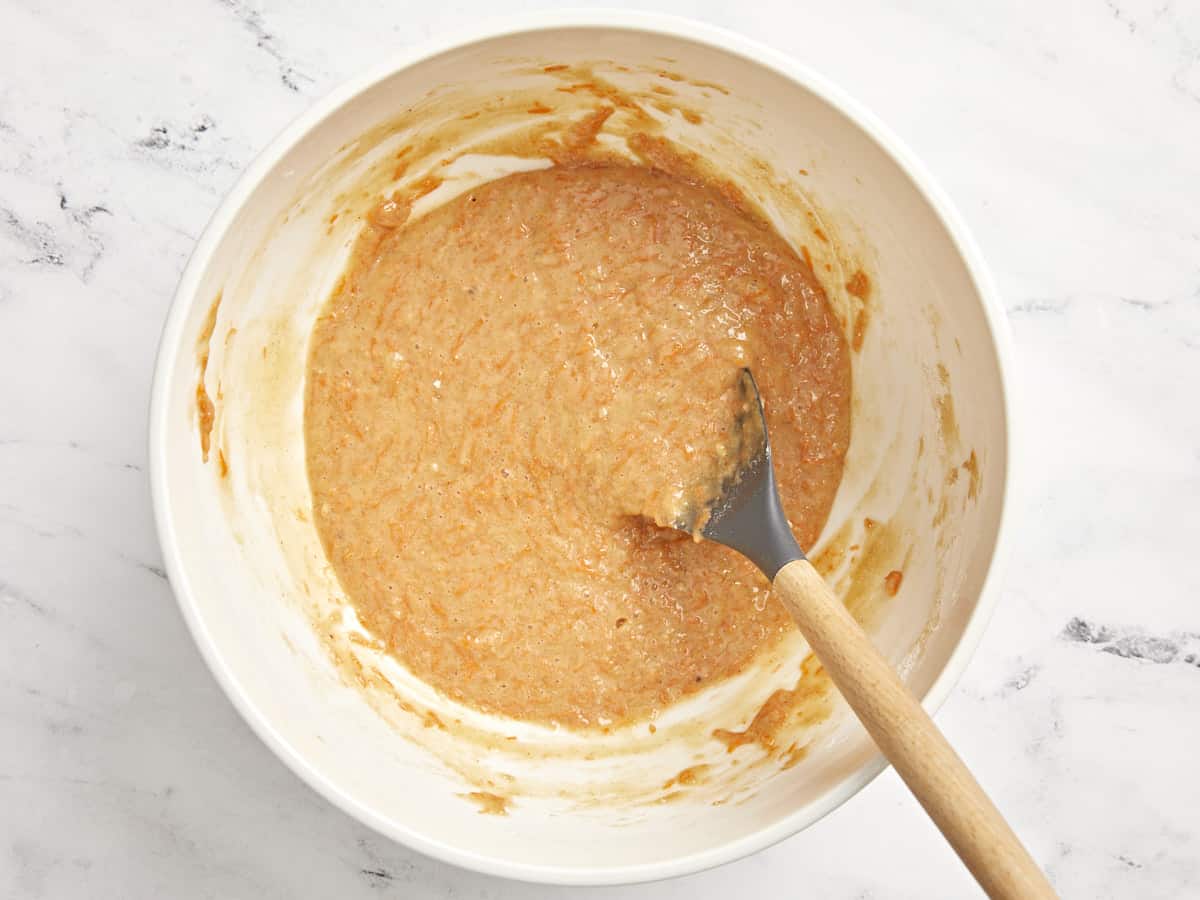
  • Add the grated carrots to the bowl with the wet ingredients. Stir until combined.
  • In a separate bowl, whisk together the dry ingredients (flour, baking powder, baking soda, salt, cinnamon, ground nutmeg, and ground ginger) until well combined.
  • Add the dry ingredients to the same bowl as the wet ingredients. Stir together until just combined. Be careful not to overmix at this point.
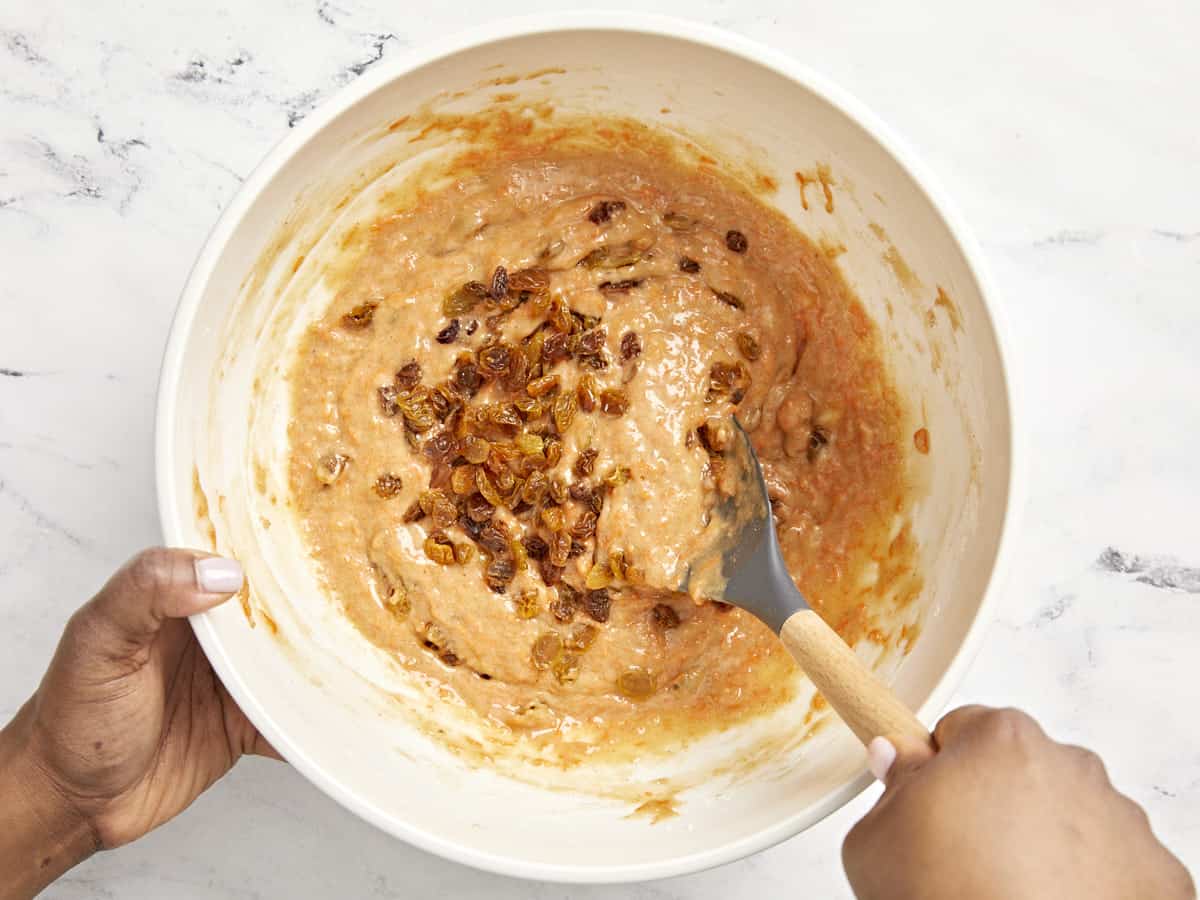
  • Add the raisins to the bowl and fold them into the batter until just combined.
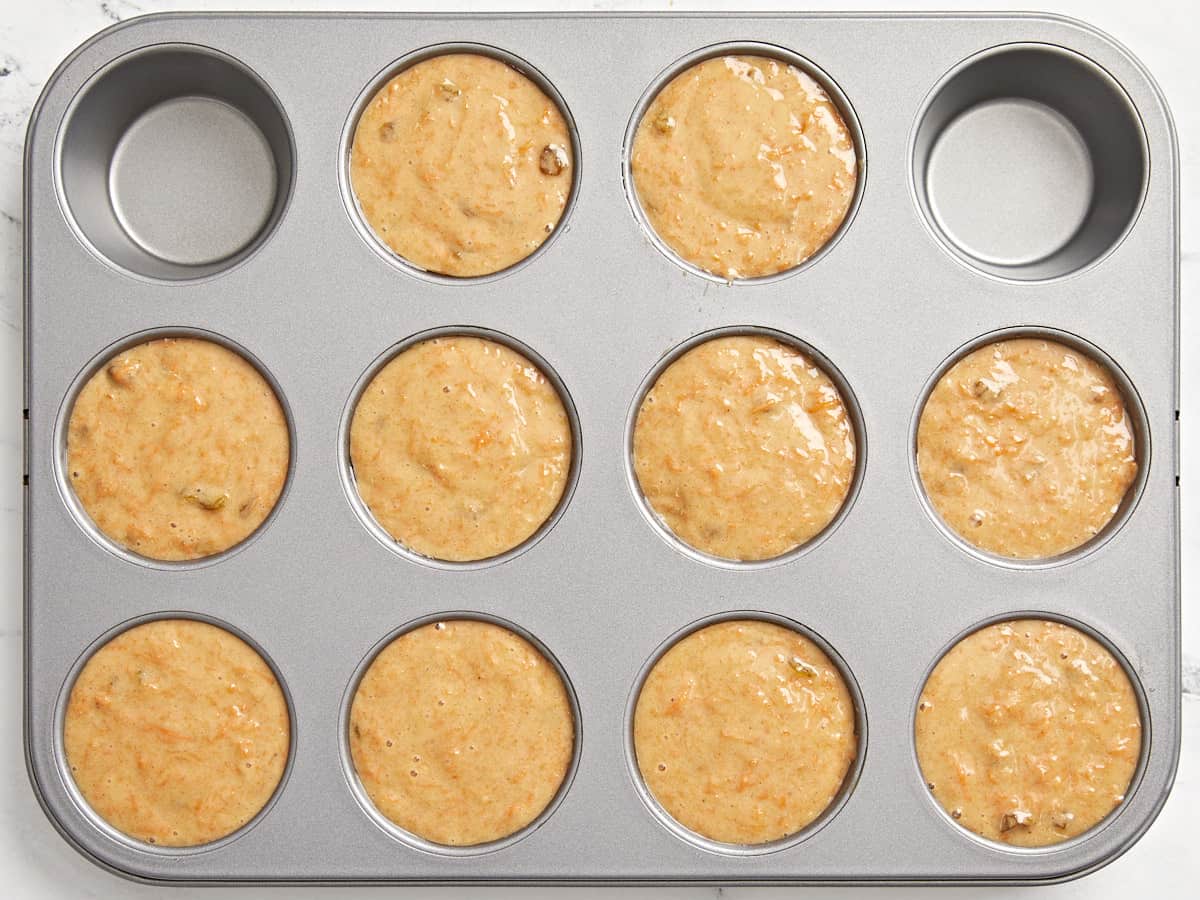
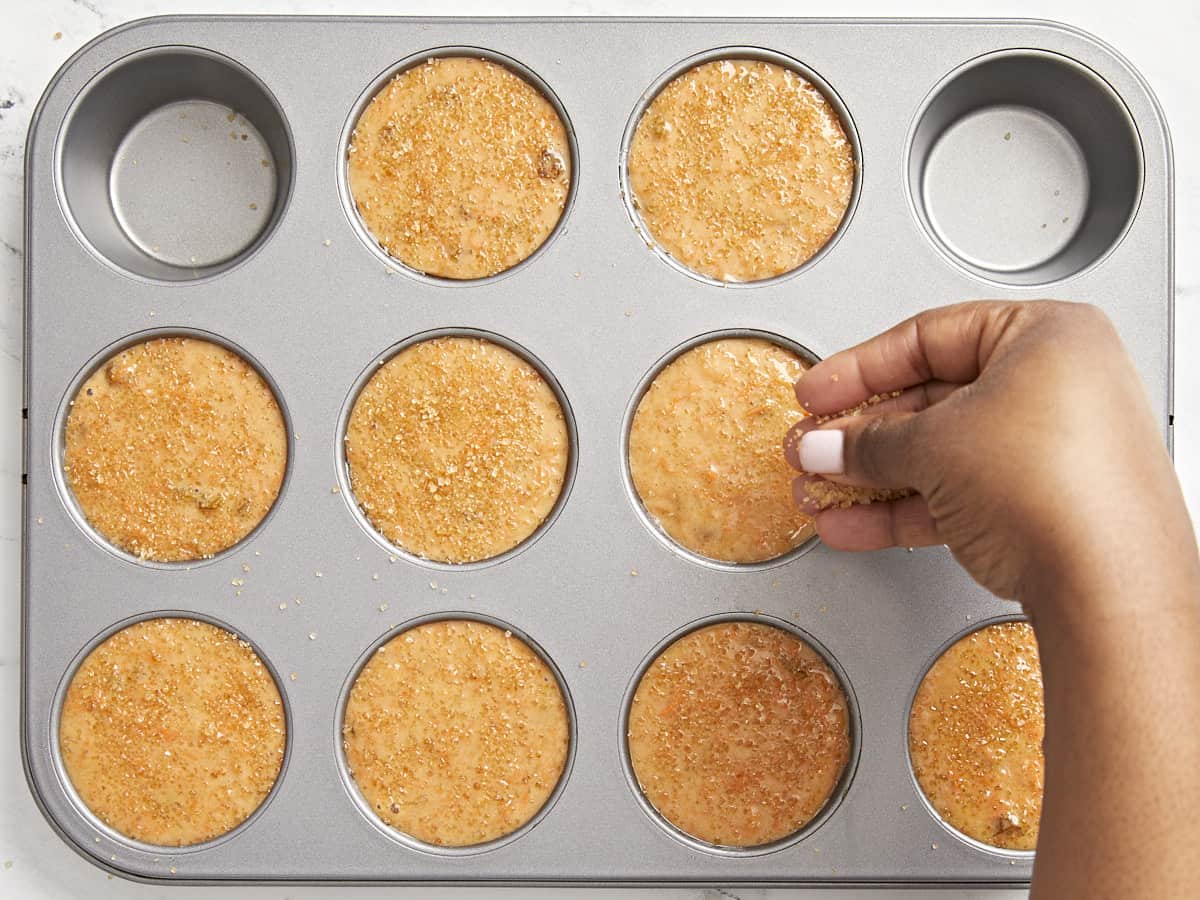
  • Divide the batter between ten greased or lined muffin wells. Sprinkle a little turbinado sugar on top of each muffin, optional.
  • Bake the muffins for 20-22 minutes or until golden brown and puffed in the center. Allow the muffins to cool for about 5 minutes, then carefully loosen the edges with a knife and transfer the muffins to a wire rack to finish cooling. Enjoy!

See how we calculate recipe costs here.

Notes

*Adding a sprinkle of turbinado sugar on top of each muffin is optional, but it does add a special sweet crunch to the muffins.

Nutrition

Serving: 1muffin | Calories: 314kcal | Carbohydrates: 49g | Protein: 4g | Fat: 12g | Sodium: 249mg | Fiber: 2g
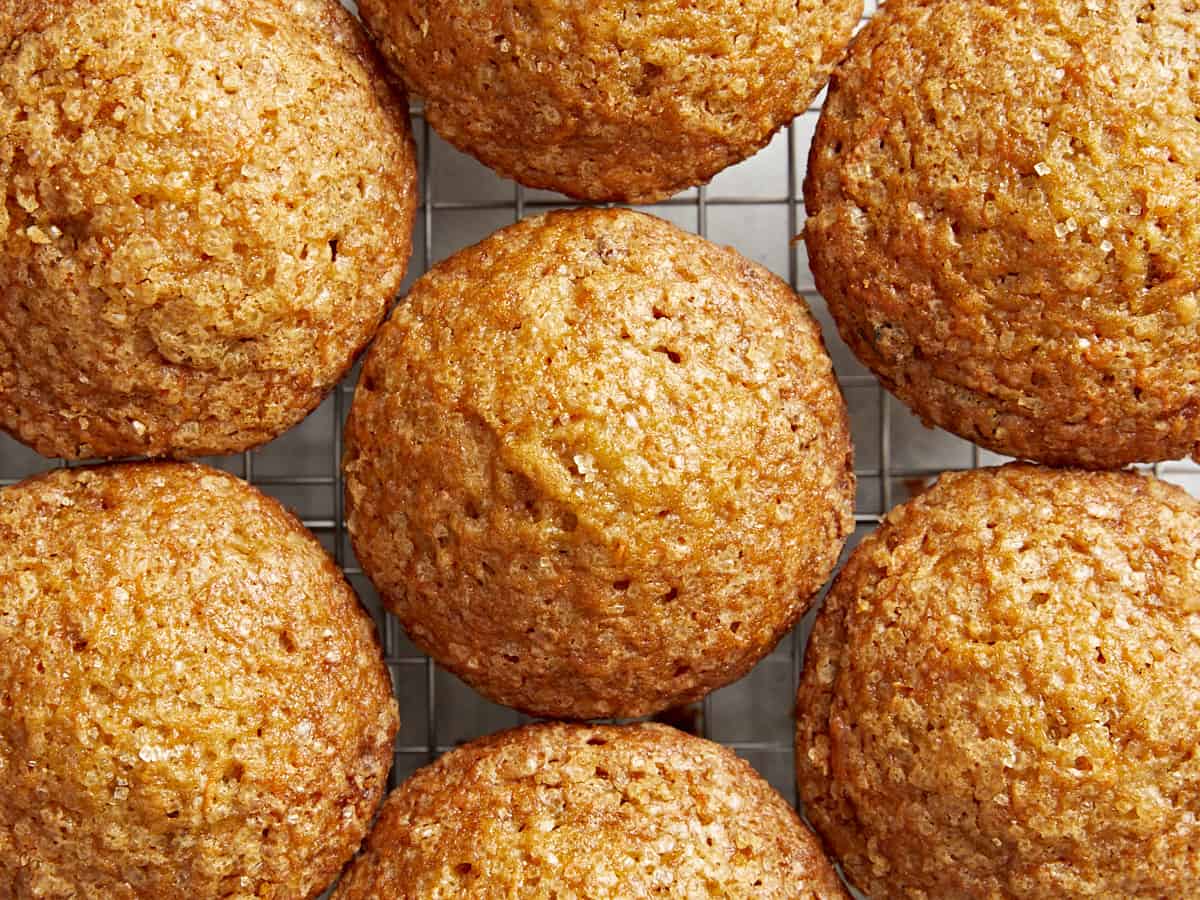
Overhead view of carrot cake muffins close together on a cooling rack.

How to Make Carrot Cake Muffins – Step by Step Photos

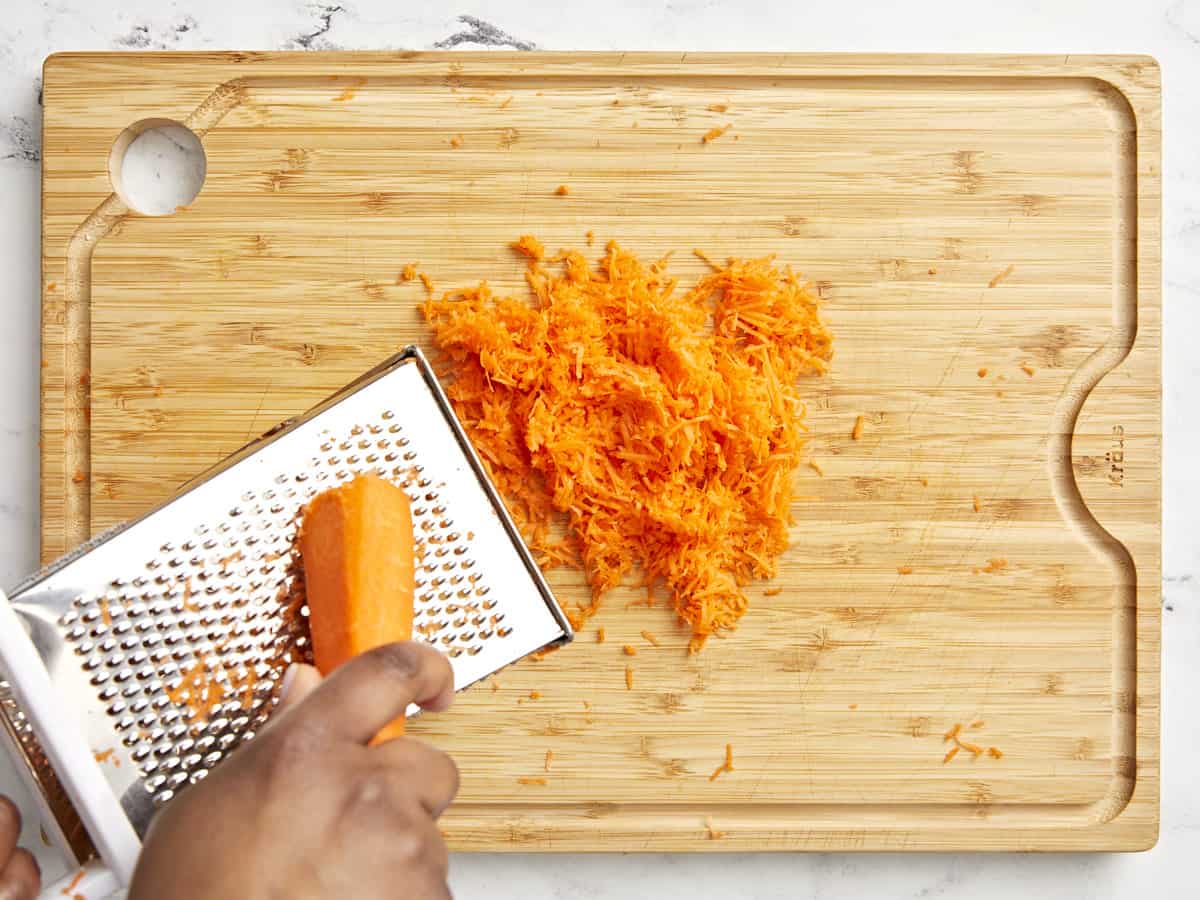
A carrot being grated on a wood cutting board.

Preheat the oven to 350°F. Wash, peel and grate 2 cups of finely grated carrots using the small/fine holes on a box grater. Set the grated carrots to the side.

Wet ingredients for carrot cake muffins added to a large bowl.

In a large bowl, whisk together 2 eggs, 1/2 cup dark brown sugar, 1/2 cup granulated sugar, 1/3 cup applesauce, 1/2 cup cooking oil and 1 tsp vanilla extract until well combined.

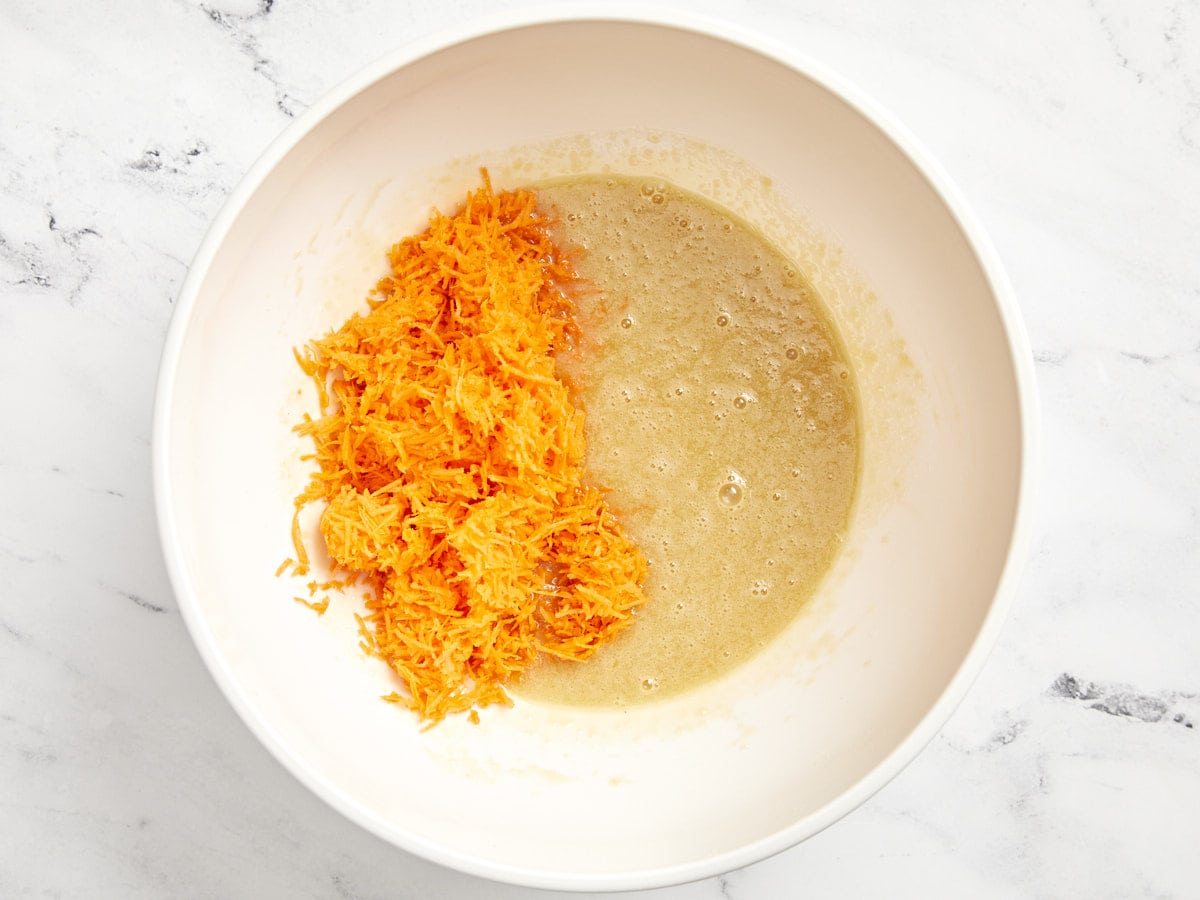
Grated carrots added to mixed wet ingredients.

Add the grated carrots to the bowl with the wet ingredients. Stir until combined.

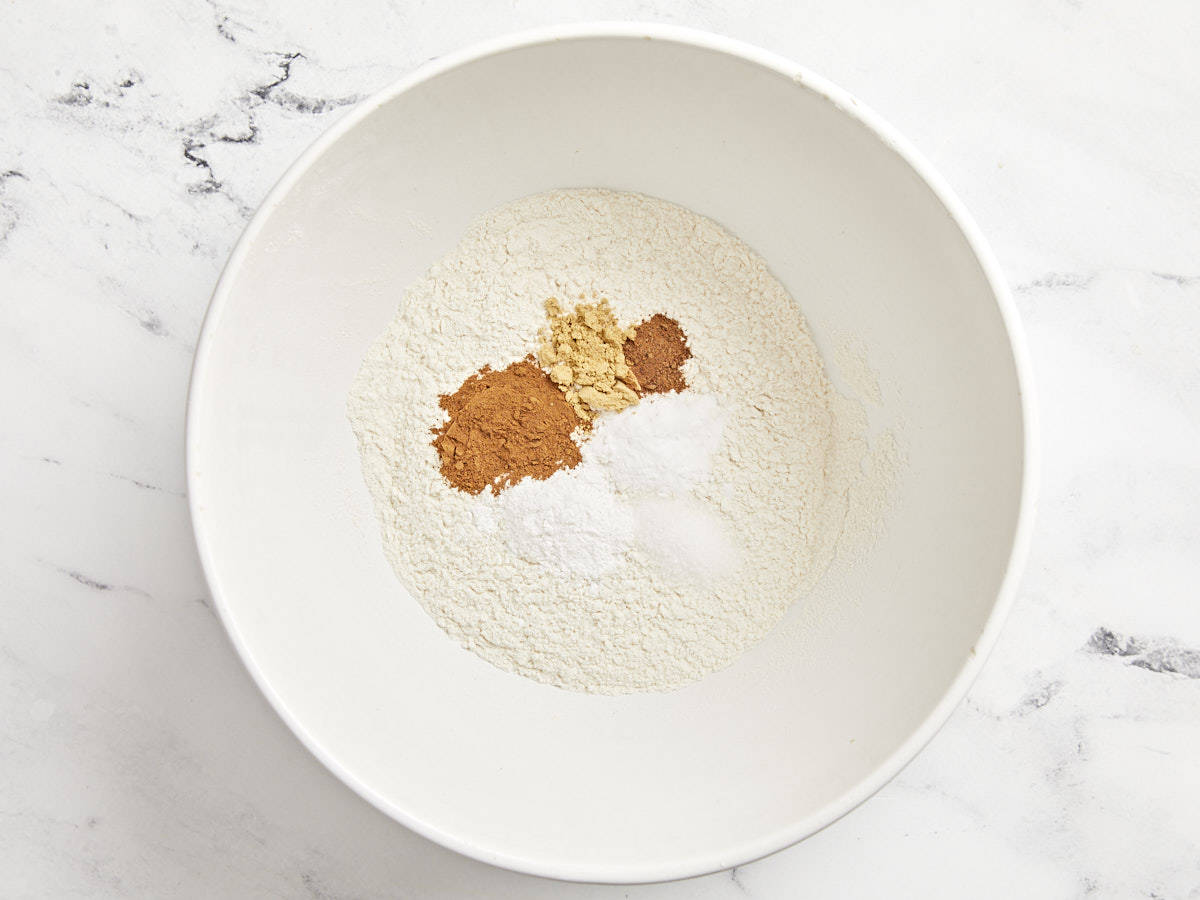
Dry ingredients for carrot cake muffins

In a separate bowl, whisk together 1 1/2 cups all-purpose flour, 1 tsp baking powder, 1/2 tsp baking soda, 1/2 tsp salt, 1 tsp cinnamon, 1/4 tsp ground nutmeg, and 1/2 tsp ground ginger until well combined.

Wet ingredients and dry ingredients combined in a large bowl.

Add the dry ingredients to the same bowl as the wet ingredients. Stir together until just combined. Be careful not to overmix at this point.

Golden raisins being added to carrot cake muffin batter.

Add 3/4 cup golden raisins to the bowl and fold them into the batter until just combined.

Carrot cake muffin batter added to muffin tins

Divide the batter between ten well-greased or lined muffin wells.

Turbinado sugar being added to Carrot Cake Muffins

Optional: Divide 1 Tbsp turbinado sugar and sprinkle a little on top of each muffin.

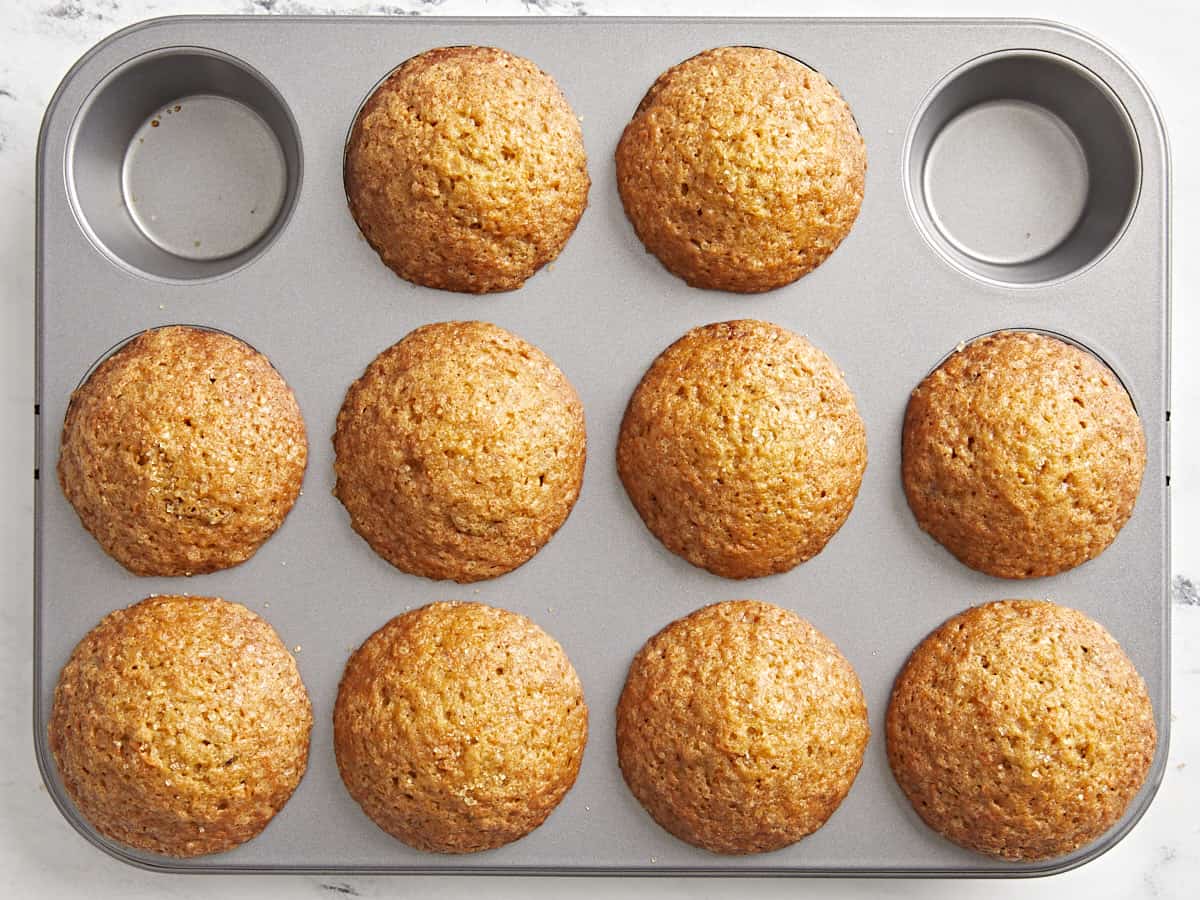
Overhead view of cooked Carrot Cake muffins in a muffin tin.

Bake the muffins for 20-22 minutes or until golden brown and puffed in the center. Allow the muffins to cool for about 5 minutes, then carefully loosen the edges with a knife and transfer the muffins to a wire rack to finish cooling. Enjoy!

Overhead view of Carrot Cake Muffins on a cooling rack.

The post Carrot Cake Muffins appeared first on Budget Bytes.

Gluten-Free Chocolate Chip Cookie Bars (Vegan)

Your favorite chocolate chip cookies, but easier? We had to do it, friends! These vegan, gluten-free chocolate chip cookie BARS have all the flavor, but there’s no chilling, no scooping, and no hand mixer involved! Just stir, spread, and bake.
Plus, ju…

Gluten-Free Chocolate Chip Cookie Bars (Vegan)

Your favorite chocolate chip cookies, but easier? We had to do it, friends! These vegan, gluten-free chocolate chip cookie BARS have all the flavor, but there’s no chilling, no scooping, and no hand mixer involved! Just stir, spread, and bake.

Plus, just 8 ingredients and 1 bowl required! They’re so easy it almost seems wrong…but they’re so right: perfectly sweet, chewy, buttery, and studded with melty chocolate chunks.

Gluten-Free Chocolate Chip Cookie Bars (Vegan) from Minimalist Baker →

Blondies

These rich, chewy, and buttery Blondies are every bit as delicious as they look and so easy to make! The perfect sweet dessert!

The post Blondies appeared first on Budget Bytes.

Every now and then I get a taste for something sweet and decadent like homemade cookies, brownies, or carrot cake from my favorite restaurant. But buying pre-made desserts from a store or restaurant can be so expensive. Today, I have a much better option for you! Say hello to these rich, chewy, and buttery Blondies! They’re every bit as delicious as they look and they’re so easy to make. No mixer needed. So if you’re in the mood for baking this weekend or maybe you want to make a sweet treat for Valentine’s Day, these Blondies are sure to be a hit and probably your new favorite dessert!

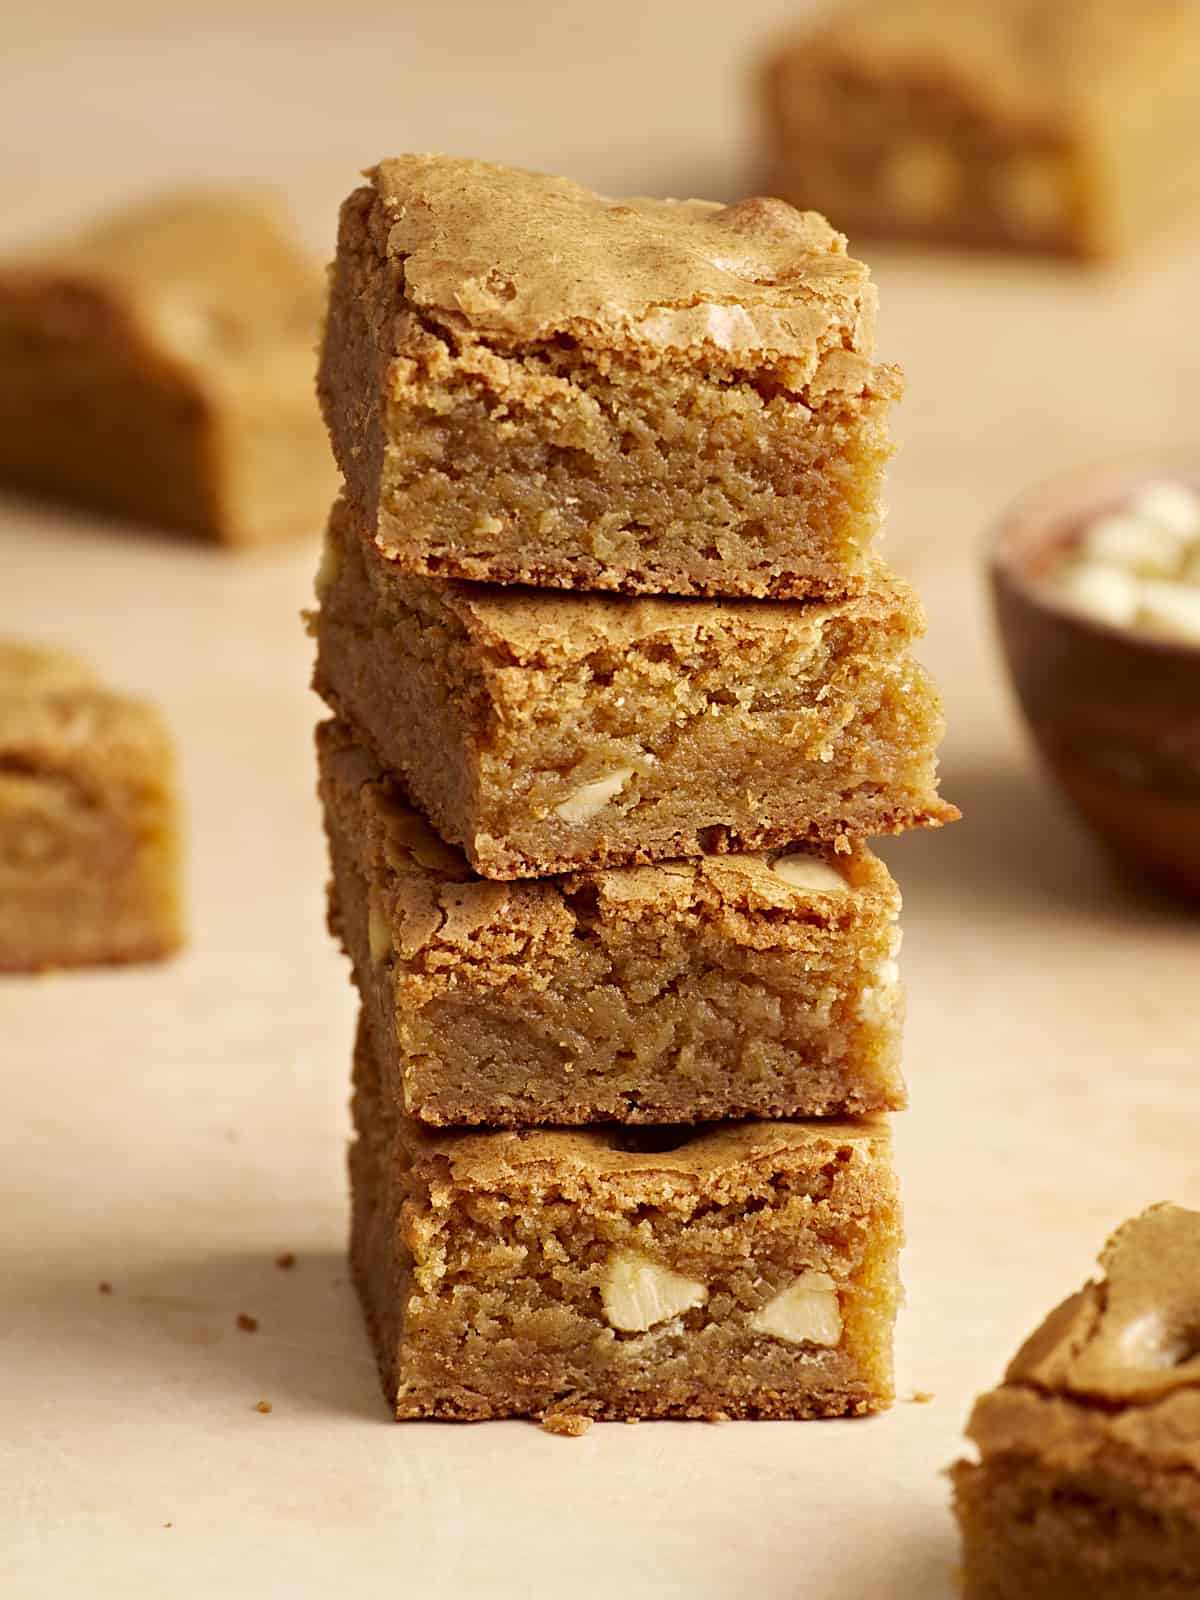
Side close up view of four blondie bars stacked on top of each other.

What Are Blondies?

I like to call these sweet little treats the cousin to our favorite Fudgy Homemade Brownies. Blondies are similar to brownies except they are made without the chocolate flavor of cocoa powder. Instead blondies get their rich flavor from a good amount of brown sugar and vanilla extract. And to make these blondies even more special, we used brown butter, which enhances the flavor and all together gives them a slight caramel, butterscotch taste.

Ingredients For Blondies

Here’s everything you need to make these irresistible Blondie bars:

  • Brown Butter: We used browned butter to add a rich, nutty, caramel flavor to the blondies. It not only gives it double the flavor, but also adds a beautiful golden brown color to these bars.
  • Brown sugar & Granulated white sugar: Brown sugar is one of the key ingredients and adds sweetness and lots of moisture to the blondies. We tested this recipe with just brown sugar and also using a combination of brown & white sugar. The use of brown & white sugar was the perfect balance and definitely the winner!
  • Eggs: Eggs give the blondies strength and helps them bake into a sliceable texture.
  • Vanilla extract: Vanilla extract adds even more rich flavor to the blondies.
  • All-purpose flour: Flour provides structure and body to the blondies.
  • Baking Powder: Baking powder helps the blondies rise.
  • Salt: A little bit of salt helps the flavors pop.
  • White chocolate chips: Just a few white chocolate chips added a nice contrast and chocolate flavor to the blondies. We only used a small amount because we didn’t want to take away from the deliciousness of the blondie, but feel free to add more if you want!

Blondie Variations

You can easily swap out the white chocolate chips in this recipe for other candies or nuts based on your own personal preference. Here are a few ideas for you:

  • Butterscotch chips
  • Dark or Semi-sweet chocolate chips
  • Peanut butter chips
  • M&Ms – use festive colored m&ms for special holidays like pastel colors for Easter, red & pink for Valentine’s Day or green & red for Christmas!
  • Chopped walnuts or pecans
  • Dried cherries or dried cranberries
  • A drizzle of Caramel sauce on top of the batter right before baking
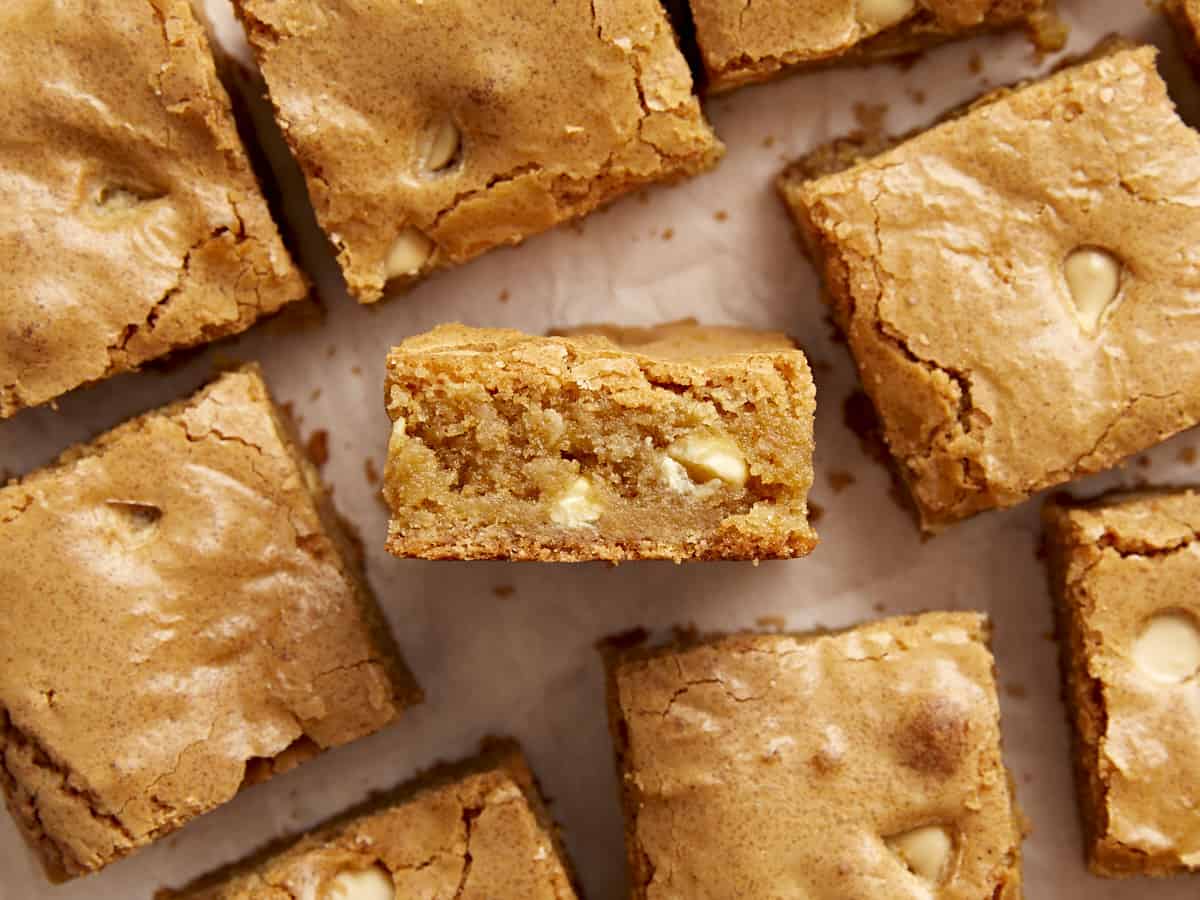
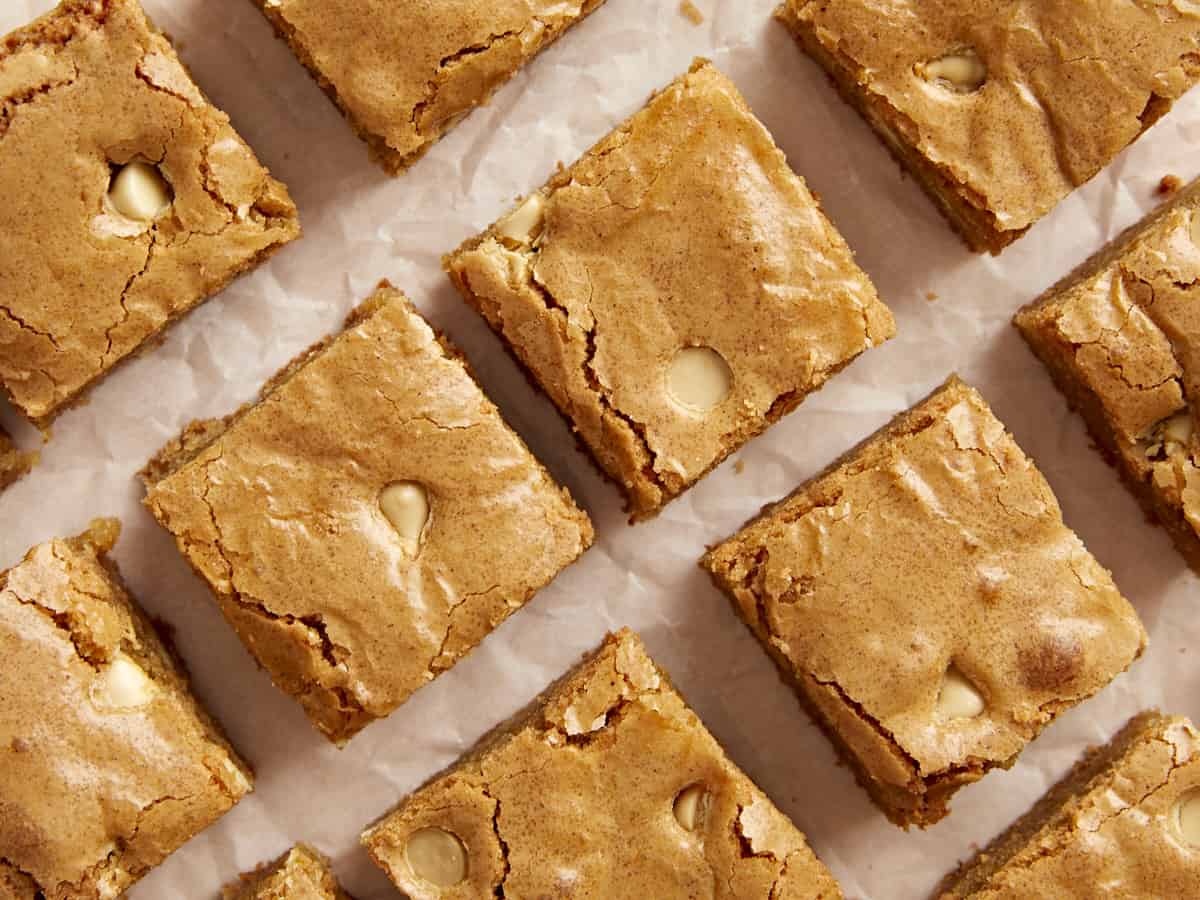
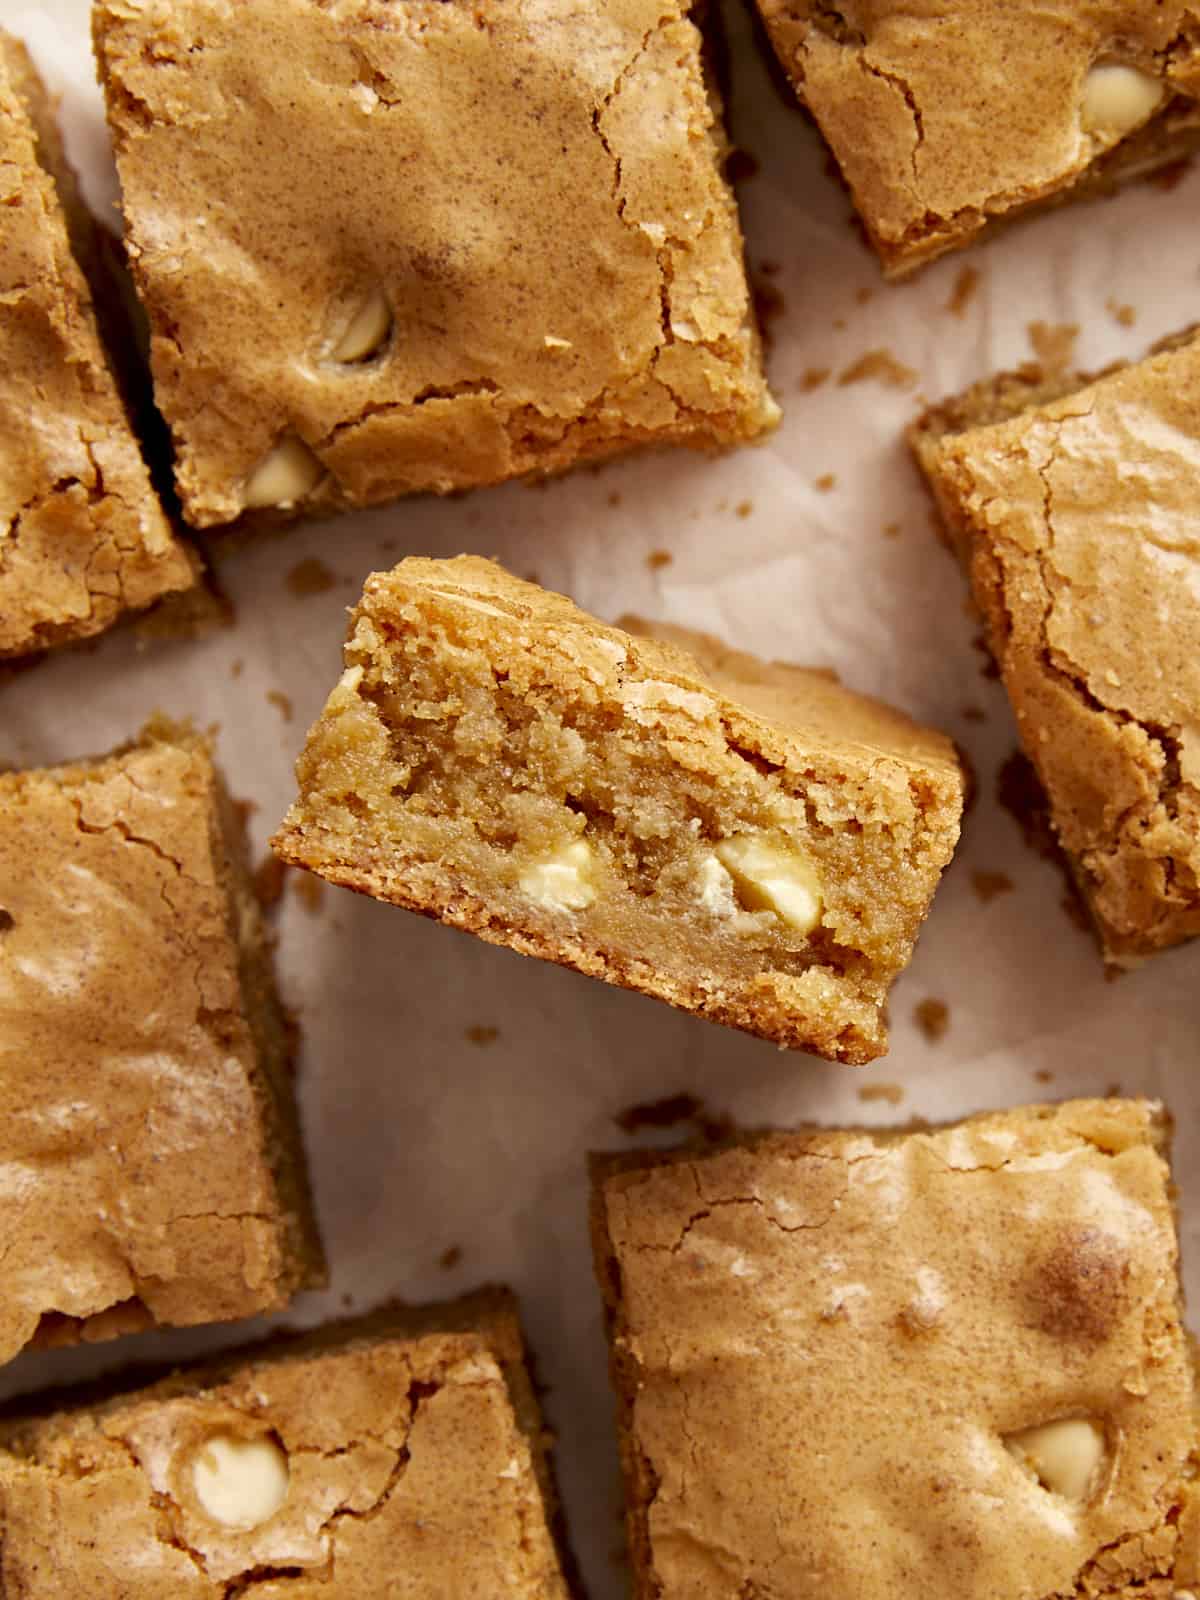
Close up overhead view of blondies on parchment paper with one blondie turned on it's side.
Side close up view of four blondie bars stacked on top of each other.
Print

Blondies

These rich, chewy, and buttery Blondies are every bit as delicious as they look and so easy to make! The perfect sweet dessert!
Course Dessert
Cuisine American
Total Cost $3.98 recipe / $0.33 serving
Prep Time 15 minutes
Cook Time 35 minutes
Total Time 50 minutes
Servings 12
Calories 293kcal

Ingredients

  • 3/4 cup salted butter (12 Tbsp) $1.60
  • 1 cup brown sugar $0.52
  • 1/2 cup granulated sugar $0.17
  • 2 large eggs $0.33
  • 2 tsp vanilla extract $0.50
  • 1 1/2 cup all-purpose flour $0.30
  • 1/2 tsp baking powder $0.03
  • 1/4 tsp salt $0.02
  • 1/4 cup white chocolate chips $0.51

Instructions

  • Preheat the oven to 350°F. Cut the butter into several tablespoon-sized chunks and add it to a small light-colored skillet. Heat the butter over medium heat, stirring constantly, until the butter solids turn deep brown and develop a nutty aroma (it will first become foamy, then the solids will sink to the bottom and turn brown).
  • While the butter is browning, add the brown sugar and granulated white sugar to a large mixing bowl.
  • Once the butter has browned, remove it from the heat immediately to prevent burning, and carefully pour it into the mixing bowl with the sugars. Whisk the brown butter and both sugars together until smooth.
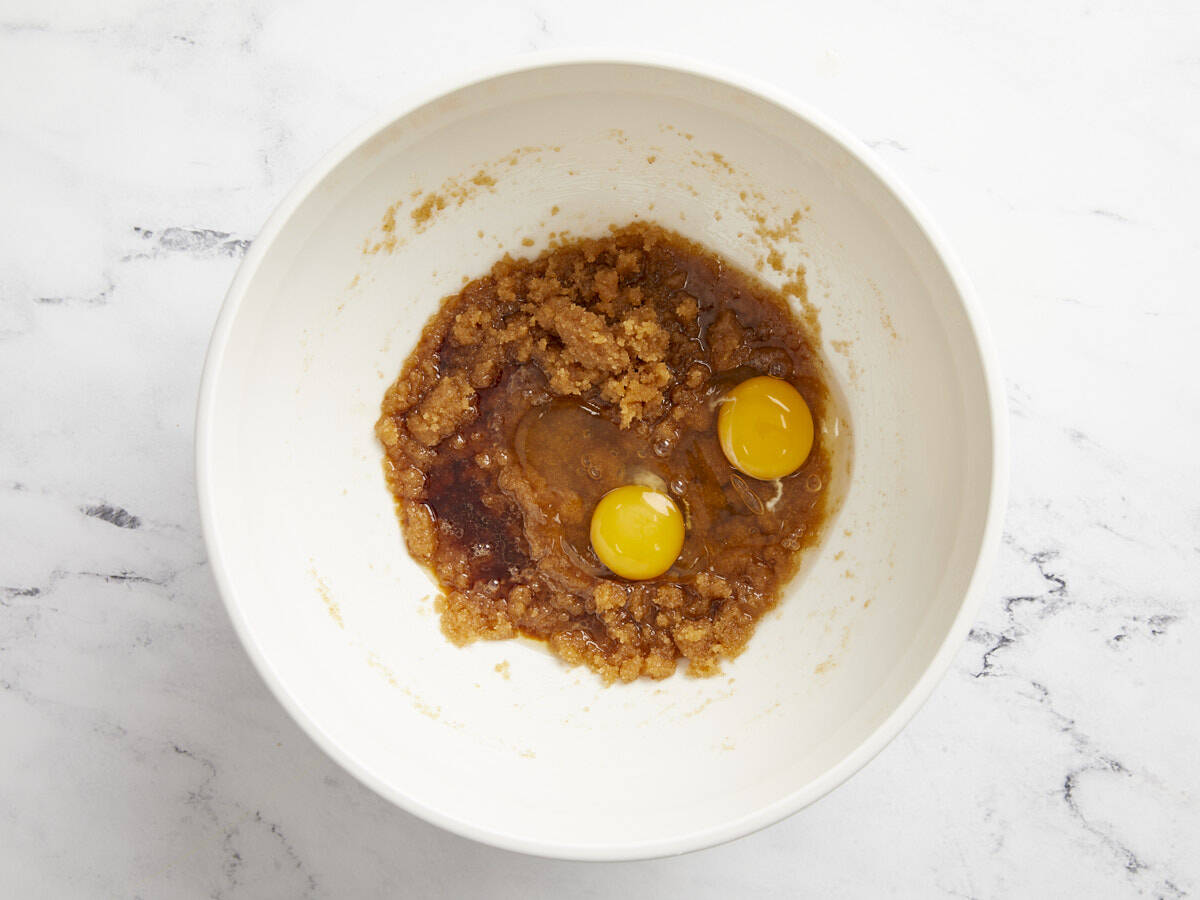
  • Add the eggs and vanilla extract to the bowl and whisk until smooth.
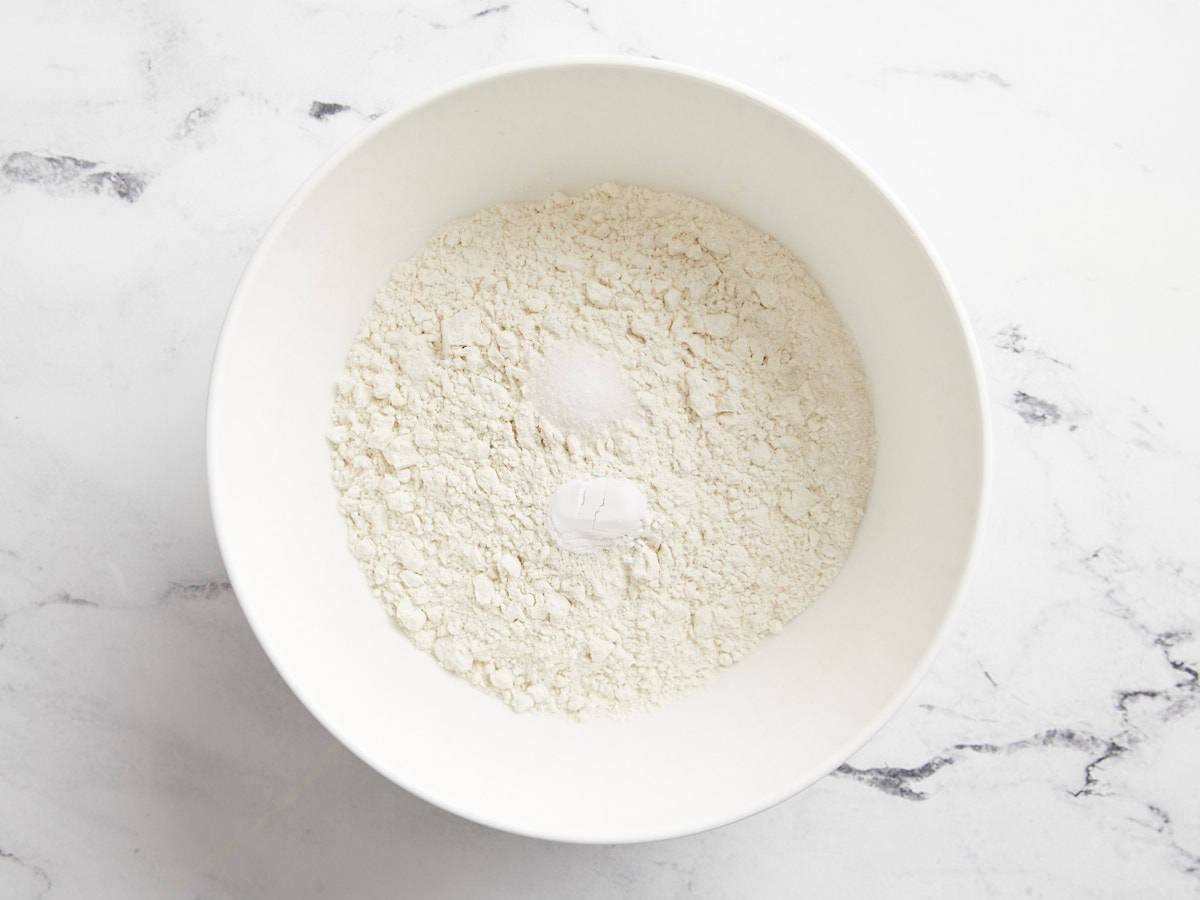
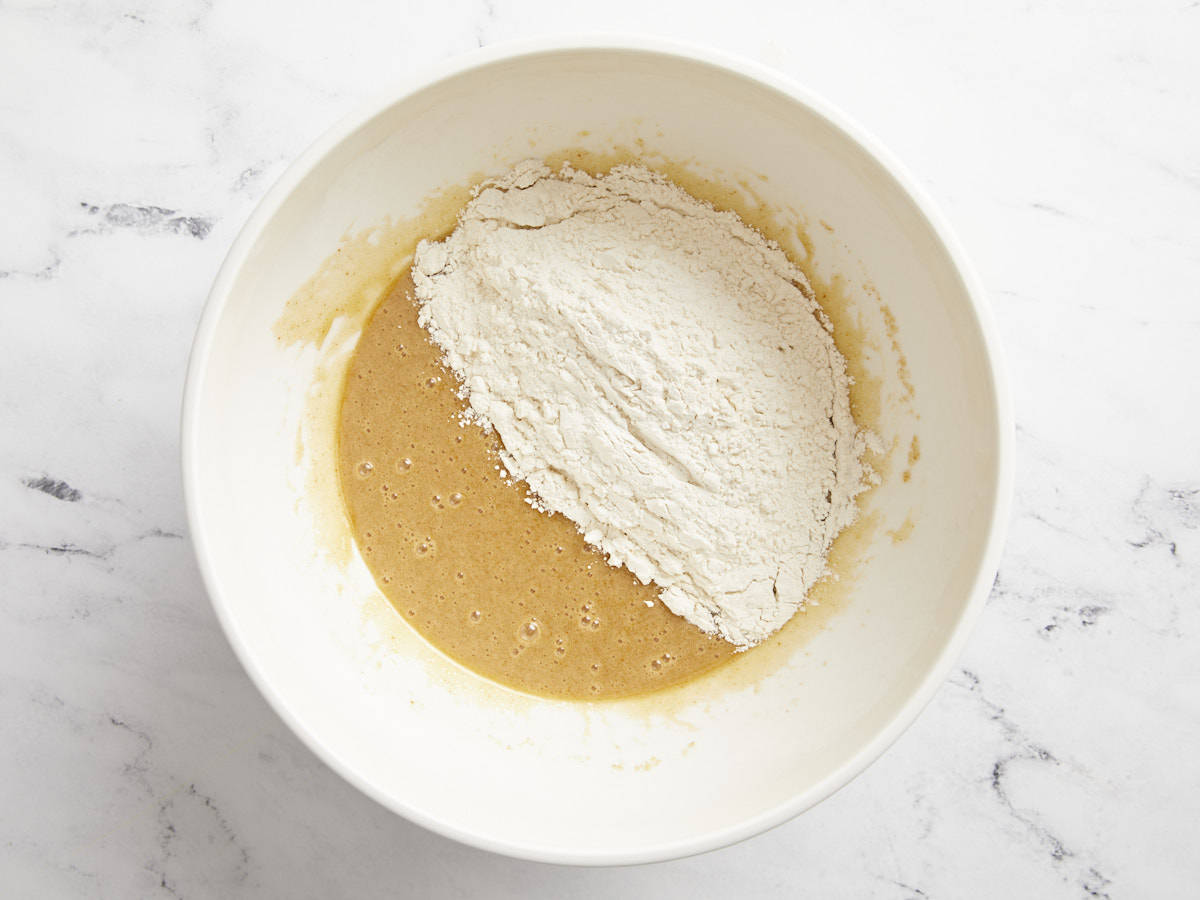
  • In a separate bowl, stir together the all-purpose flour, baking powder, and salt until well combined. Add the flour mixture to the bowl with the wet ingredients. Use a rubber spatula to stir the flour into the batter until evenly combined.
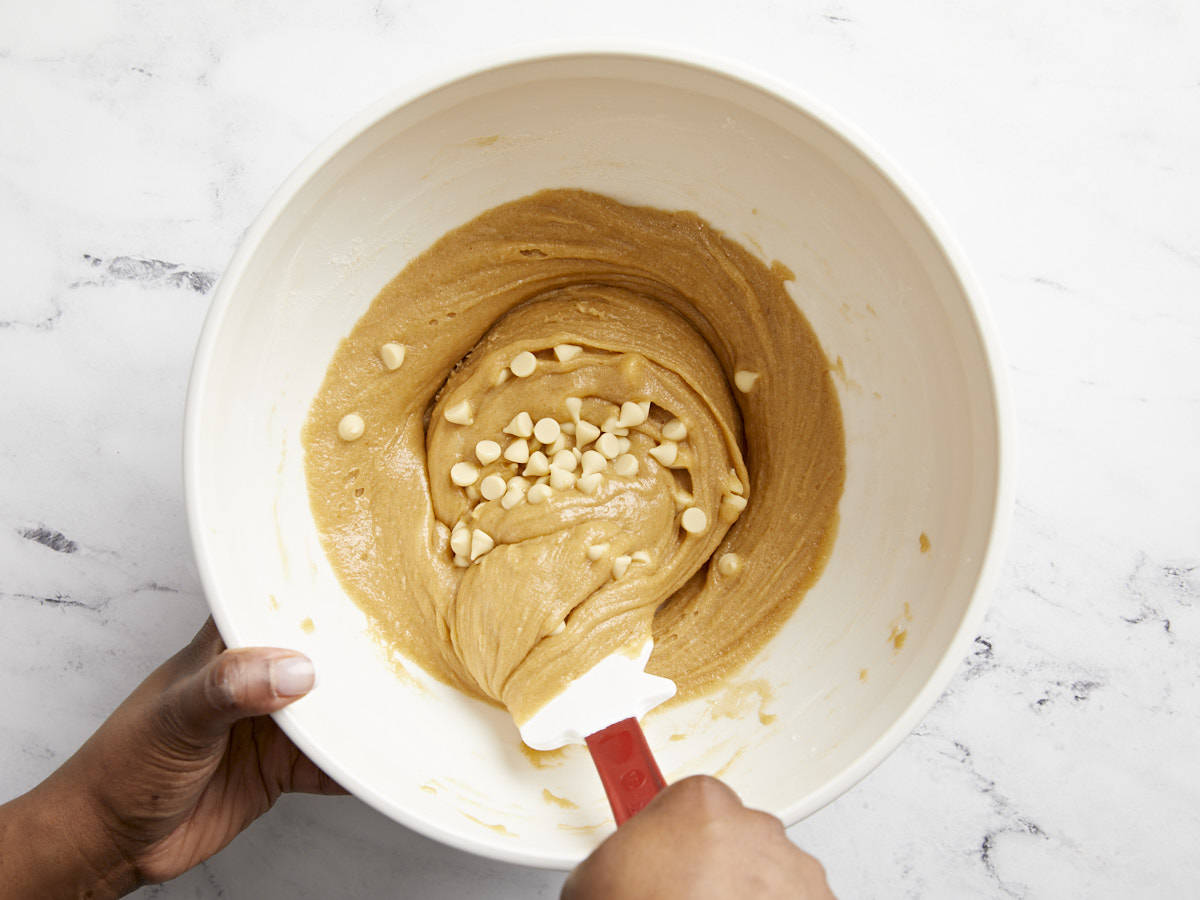
  • Finally add the white chocolate chips to the batter and fold them in until just combined.
  • Line an 8×8 baking dish with parchment paper. Add the blondie batter to the baking dish and spread it out evenly. Feel free to add a few more white chocolate chips on top of the batter.
  • Bake the blondies in the preheated oven for 33-35 minutes or until a toothpick inserted comes out clean.
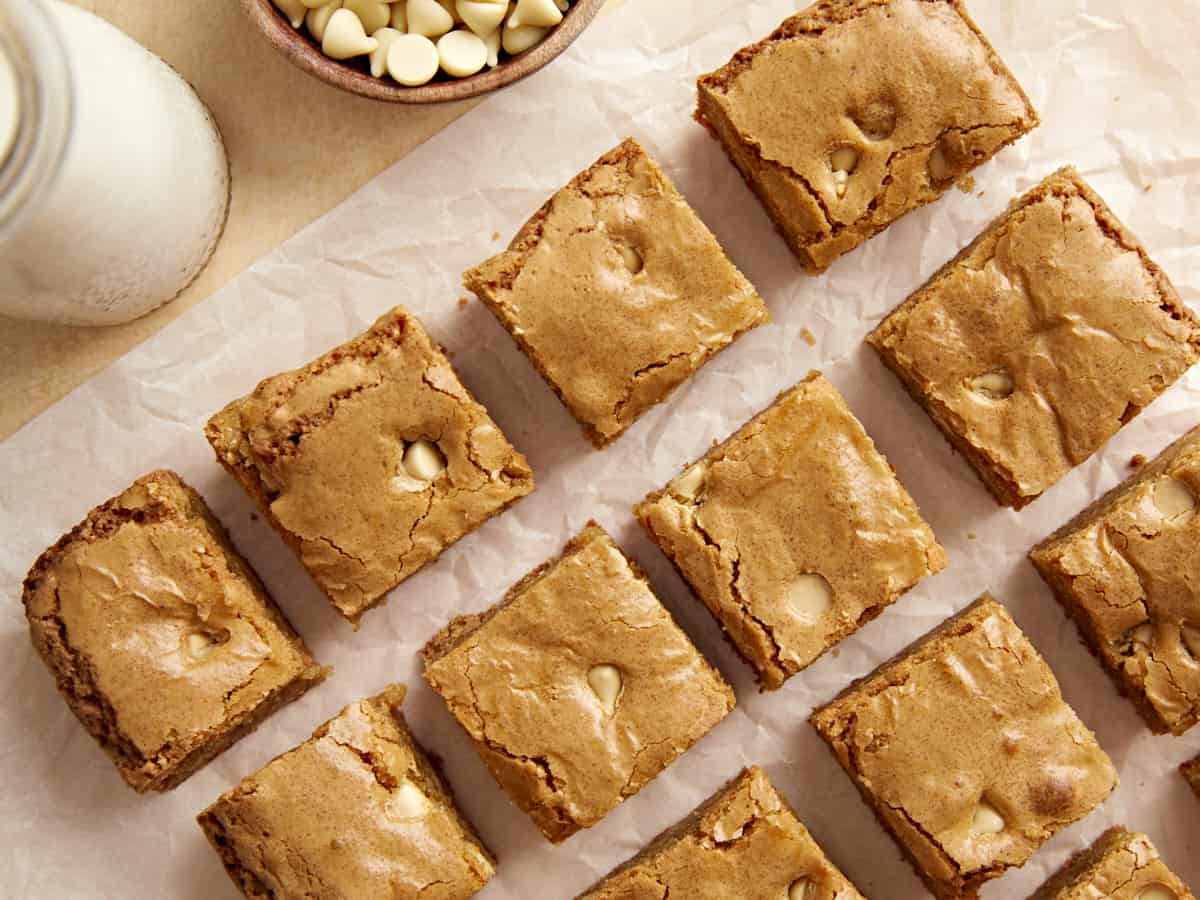
  • Remove the blondies from the oven and let them cool for 10-15 minutes before lifting the parchment paper out of the baking dish. Slice into 12 bars and serve.

See how we calculate recipe costs here.

Nutrition

Serving: 1blondie | Calories: 293kcal | Carbohydrates: 41g | Protein: 3g | Fat: 14g | Sodium: 177mg | Fiber: 0.4g
Close overhead view of blondies laying flat on parchment paper.

How to Make Blondies – Step by Step Photos

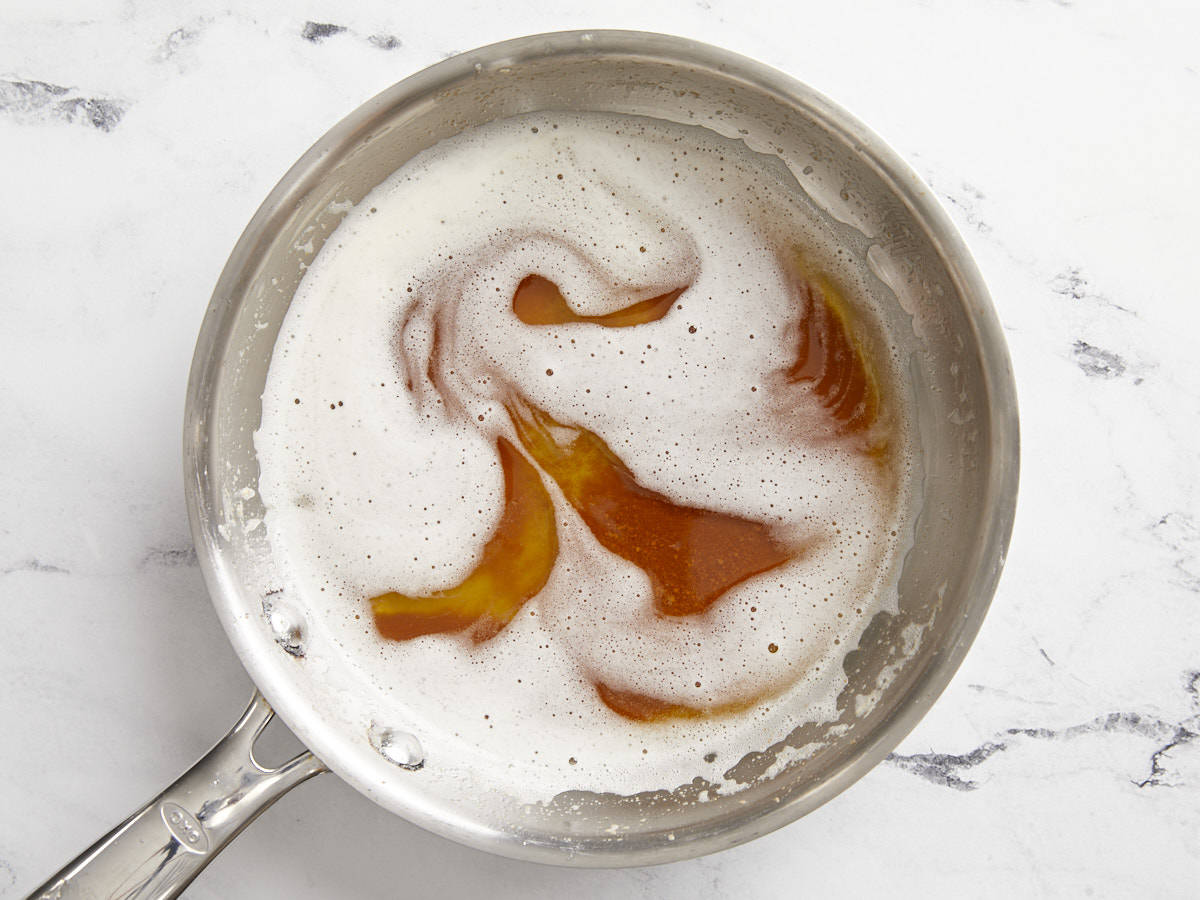
Overhead view of browned butter in a saucepan.

Preheat the oven to 350°F. Cut 12 Tbsps of butter into several tablespoon-sized chunks and add it to a small light-colored skillet. Heat the butter over medium heat, stirring constantly, until the butter solids turn deep brown and develop a nutty aroma (it will first become foamy, then the solids will sink to the bottom and turn brown).

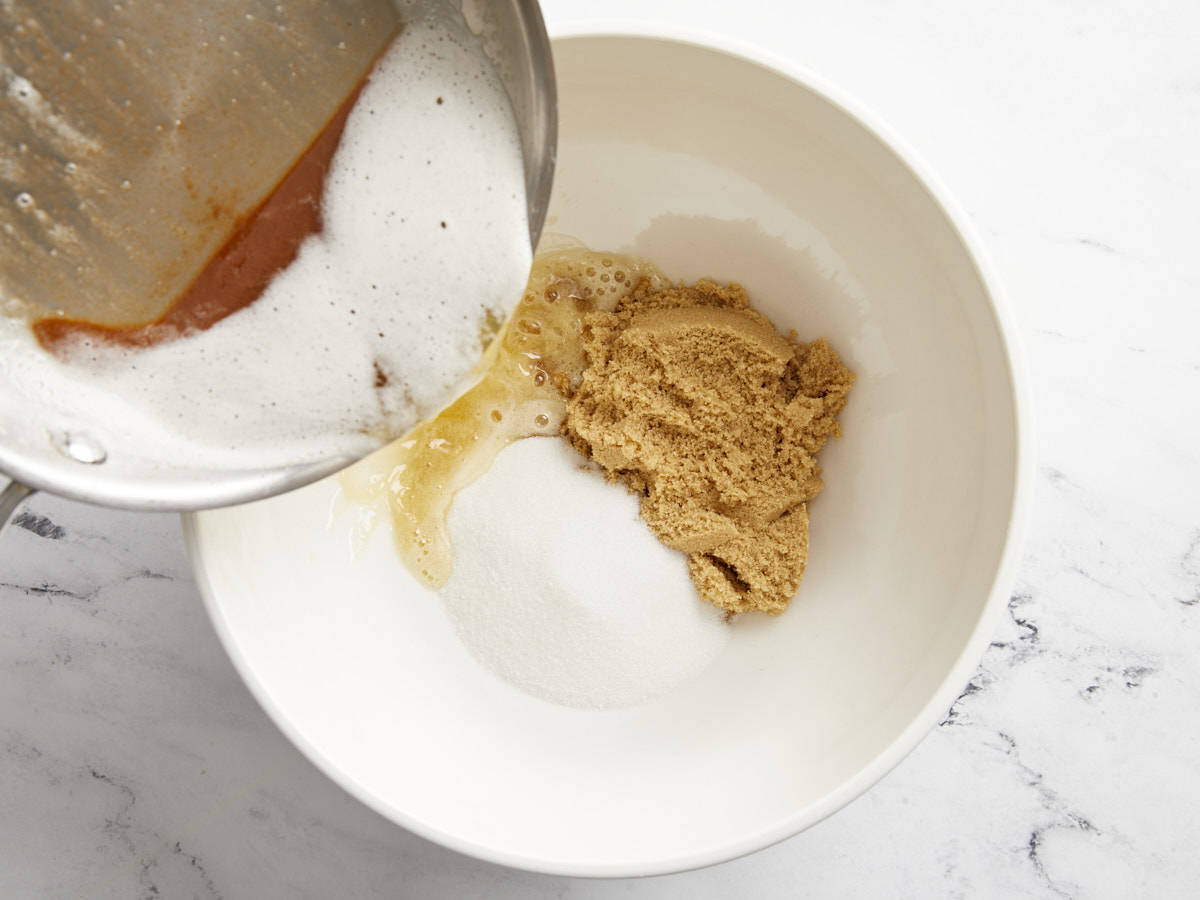
Brown butter being added to white and brown sugar.

While the butter is browning, add 1 cup brown sugar and 1/2 cup granulated white sugar to a large mixing bowl. Once the butter has browned, remove it from the heat immediately to prevent burning, and carefully pour it into the mixing bowl with the sugars. Whisk the brown butter and both sugars together until smooth.

Eggs and vanilla added to bowl with sugar mixture.

Add 2 large eggs and 2 tsp vanilla extract to the bowl and whisk until smooth.

Dry ingredients whisked in a bowl.

In a separate bowl, stir together 1 1/2 cups all-purpose flour, 1/2 tsp baking powder, and 1/4 tsp salt until well combined.

Dry ingredients added to wet ingredients in a bowl.

Add the flour mixture to the bowl with the wet ingredients. Use a rubber spatula to stir the flour into the batter until evenly combined.

White chocolate chips added to batter.

Finally add 1/4 cup white chocolate chips to the batter and fold until just combined.

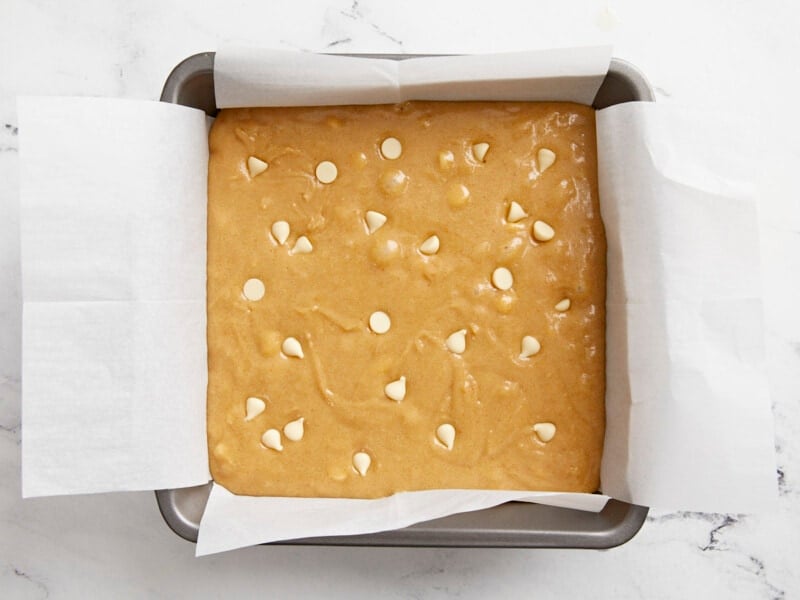
Blondie batter added to a parchment lined baking dish.

Line an 8×8 baking dish with parchment paper. Add the blondie batter to the baking dish and spread it out evenly. Feel free to add a few more white chocolate chips on top of the batter.

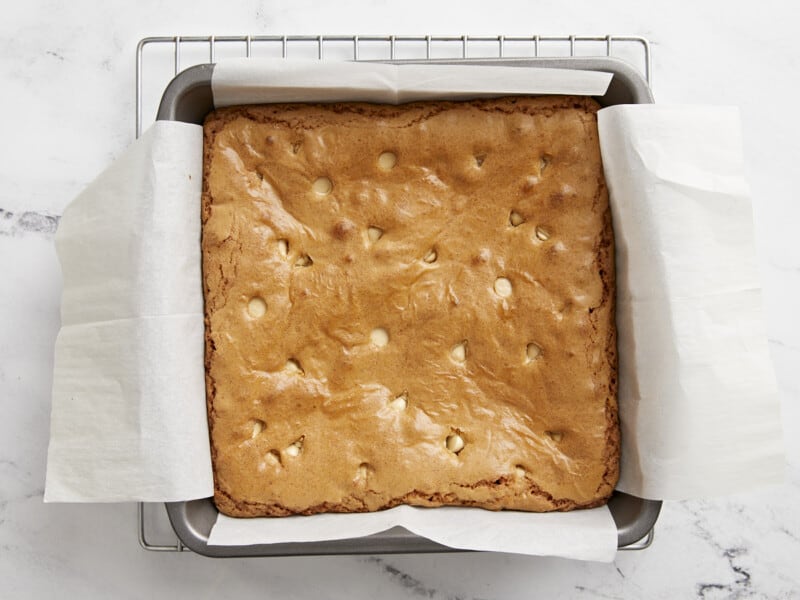
Cooked blondies in a baking dish.

Bake the blondies in the preheated oven for 33-35 minutes or until a toothpick inserted comes out clean.

Overhead photo of blondies on a parchment lined baking sheet.

Remove the blondies from the oven and let them cool for 10-15 minutes before lifting the parchment paper out of the baking dish. Slice into 12 bars and enjoy!

Close up overhead view of blondies on parchment paper with one blondie turned on it's side.

The post Blondies appeared first on Budget Bytes.
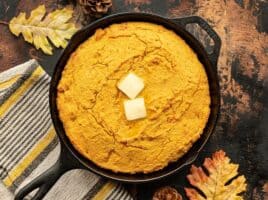
Homestyle Cornbread

This super moist and rich cornbread has crispy golden edges and a rich buttery flavor, perfect for chili or with honey butter for breakfast.

The post Homestyle Cornbread appeared first on Budget Bytes.
Our Easy Homemade Cornbread, which is like the classic Jiffy cornbread mix, has been a reader favorite on Budget Bytes for years, but I was craving a richer, more decadent cornbread to go with my Black-Eyed Peas this year. So, I crafted this super rich cornbread that is less on the sweet side and full of golden buttery goodness. It’s the perfect compliment to a bowl of chili, to serve with your Thanksgiving feast, or drenched in honey and butter for breakfast.

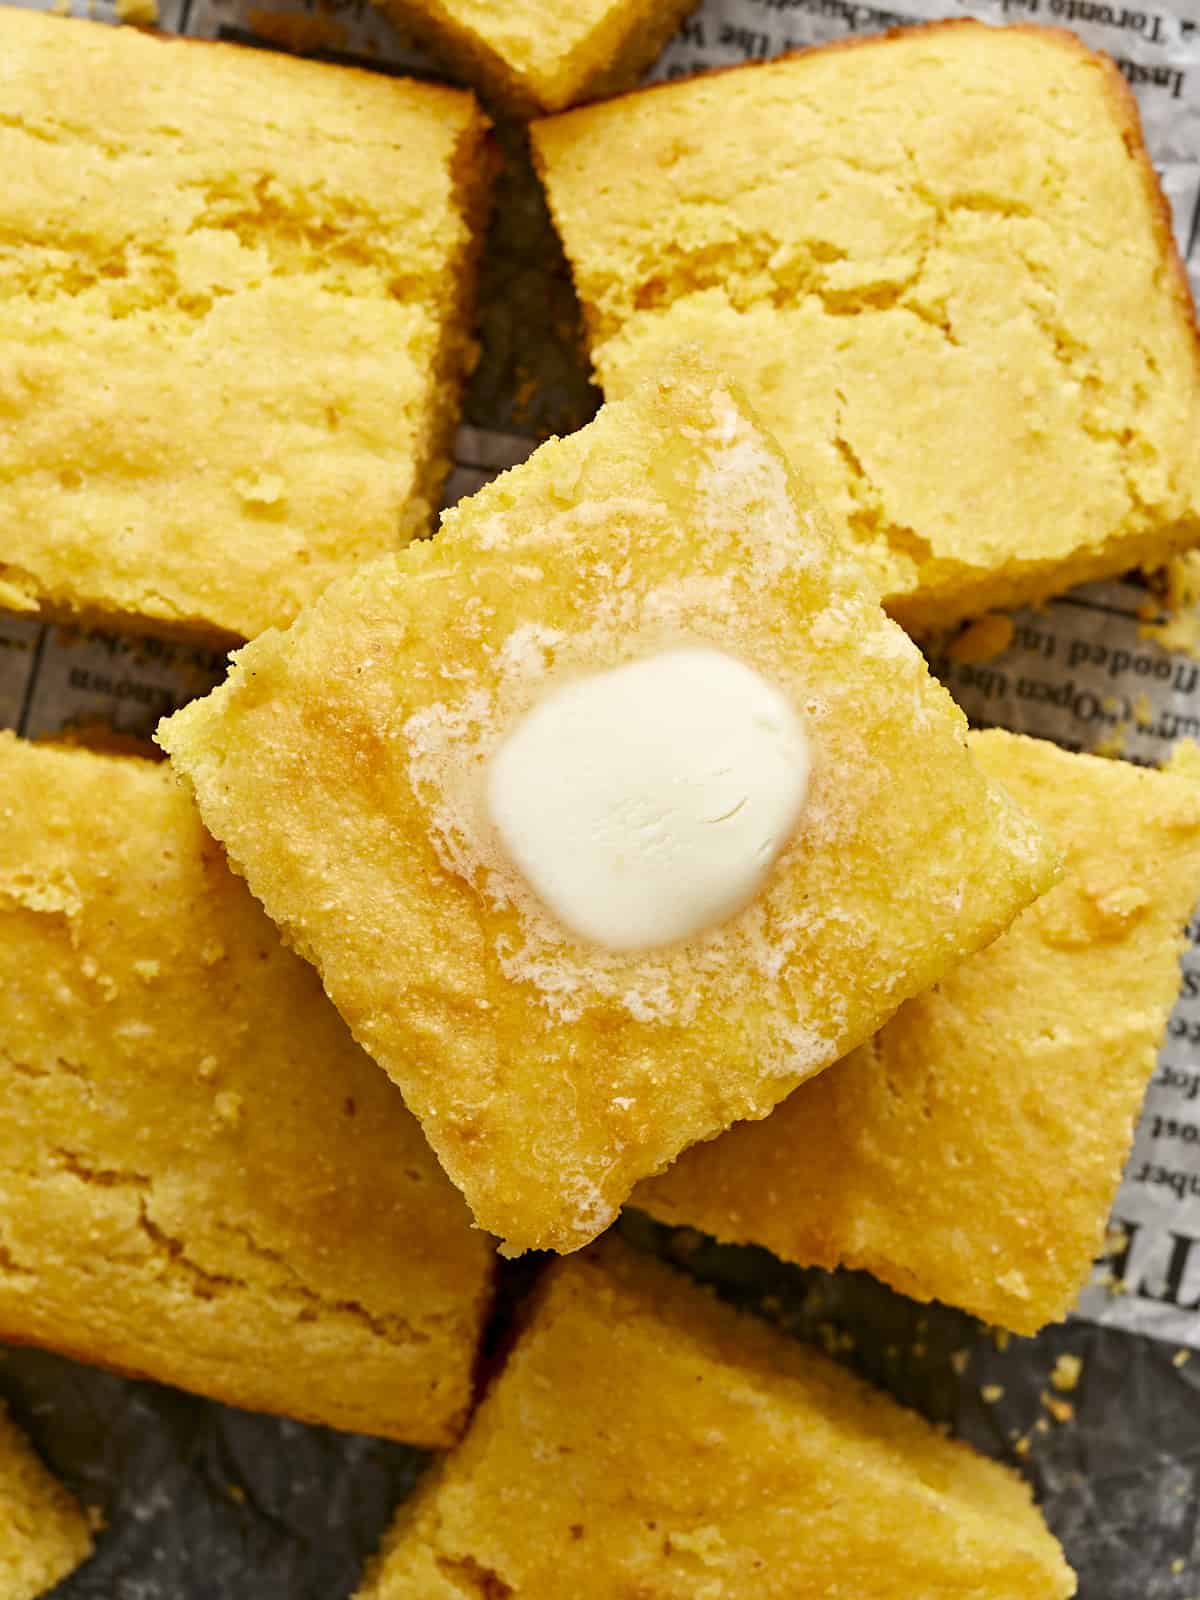
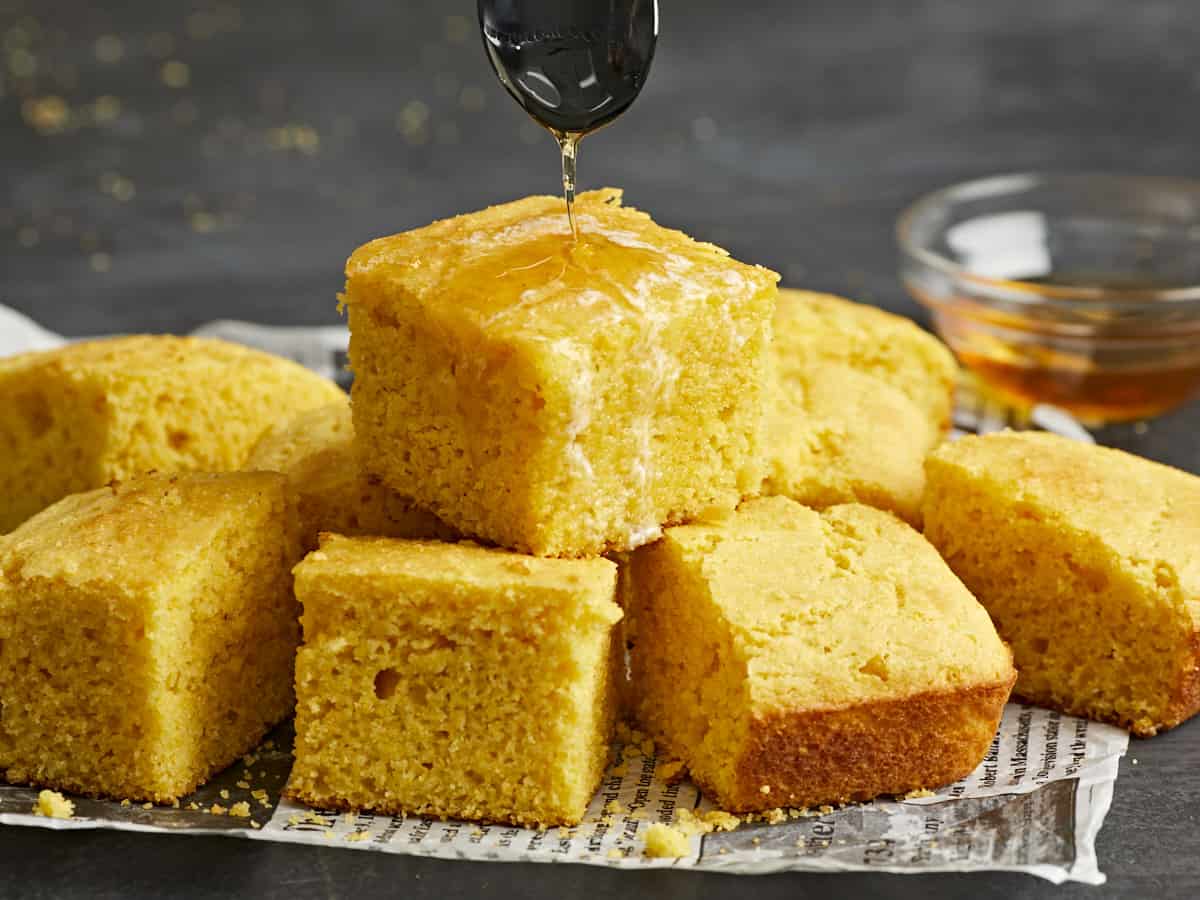
Close up overhead view of a stack of cornbread squares with melting butter on top.

Ingredients for Super Moist Cornbread

Here’s what you’ll need to make this super rich, moist, and buttery homestyle cornbread:

  • Yellow Cornmeal: This is the base for the cornbread. For this recipe, we use slightly more cornmeal than flour to give the bread even more corn flavor.
  • All-Purpose Flour: Mixing just a bit of flour into the cornmeal helps keep the cornbread soft, moist, and not too crumbly.
  • Salt: Salt is very important in cornbread, which can otherwise be a little bit bland. The salt helps the flavor of the corn pop!
  • Baking Powder and Baking Soda: Baking powder and baking soda keep this rich cornbread from being too heavy and dense by adding just the right amount of leavening. We use a mix of baking soda and powder because of the acidic pH of the sour cream.
  • Milk & Sour Cream: I used a mix of whole milk and sour cream to moisten the cornbread and give it tons of rich flavor. Sour cream adds flavor similar to buttermilk, but is an ingredient we’re much more likely to already have in our fridge!
  • Egg: Egg helps give the cornbread strength so it doesn’t fall apart, and it adds just a little bit of fluff to the texture.
  • Butter: Instead of just using cooking oil for this cornbread, I used melted butter for extra rich flavor.
  • Oil: Butter gives the cornbread tons of flavor, but just a little bit of oil helps keep the bread super moist after baking in a way that butter alone does not. You can use any neutral cooking oil like canola oil, vegetable oil, avocado oil, or corn oil.
  • Sugar: I tested this recipe both with and without sugar since sugar is a VERY controversial ingredient in cornbread. I will say that I prefer just a little sugar in my cornbread, but you can leave it out if you prefer.

What Bakeware to Use

You have a few options when it comes to what to use to bake this cornbread. I used a simple 8×8 metal baking dish, but if you prefer super crispy edges you can bake the cornbread in a preheated cast iron skillet. You can also bake it in a 9-inch round pie plate, if preferred. It all depends on what shape you want the pieces (square or wedges) and if you like those super crispy edges!

What to Serve with Cornbread

Cornbread is a staple recipe that goes with just about any meal, and because it’s so easy to make it is definitely one of my go-to side dishes for dinner. That being said, cornbread is a must with Thanksgiving dinner, a hearty bowl of chili, bean soup, vegetable soup, or black-eyed peas on New Year’s Day. I also love cornbread with butter and honey as a side to my fried eggs for breakfast!

How to Store Leftovers

Make sure to let the cornbread cool completely to room temperature before packing to prevent condensation, then place it in an air-tight container for storage. Cornbread can be kept at room temperature for about three days, or refrigerated for about five days. You can rewarm cornbread in the microwave briefly to make it steaming hot and ready to melt a pat of butter!

You can also freeze cornbread for longer storage. Make sure to wrap the cornbread tightly in plastic or waxed paper, then place it in a freezer-friendly container (like a freezer bag). Frozen cornbread will stay good for about three months. It can be thawed at room temperature.

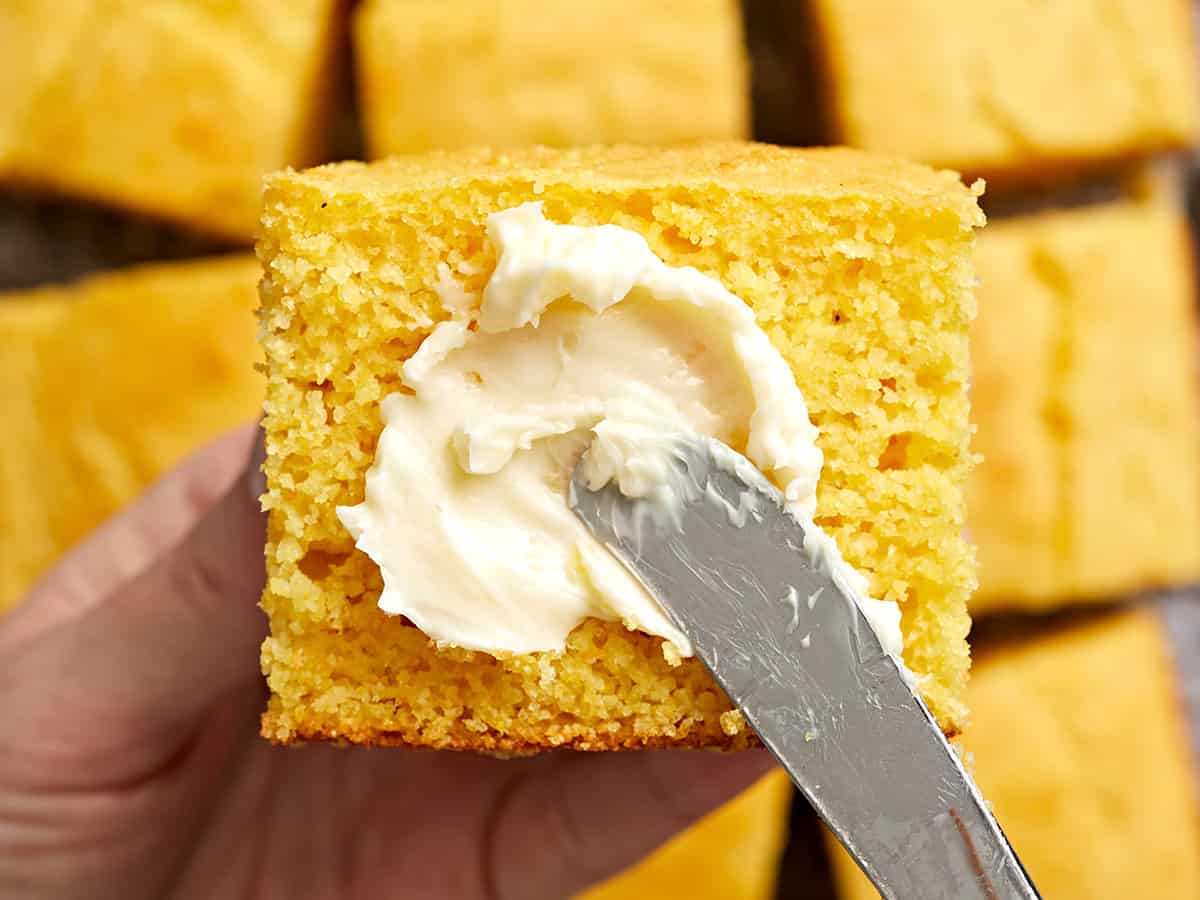
Close up of butter being spread onto a piece of cornbread.
Close up overhead view of squares of cornbread with butter melting top.
Print

Homestyle Cornbread

This super moist and rich cornbread has crispy golden edges and a rich buttery flavor, perfect for chili or with honey butter for breakfast.
Course Bread, Breakfast, Side Dish
Cuisine American
Total Cost $2.97 recipe / $0.33 serving
Prep Time 15 minutes
Cook Time 20 minutes
Total Time 35 minutes
Servings 9 pieces
Calories 276kcal

Ingredients

  • 1.5 cups yellow cornmeal $0.73
  • 1/2 cup all-purpose flour $0.10
  • 1 tsp salt $0.05
  • 1 tsp baking powder $0.06
  • 1/2 tsp baking soda $0.02
  • 2 Tbsp sugar (optional) $0.04
  • 1 cup sour cream $1.06
  • 1/2 cup whole milk $0.24
  • 4 Tbsp salted butter, melted $0.50
  • 2 Tbsp cooking oil $0.08
  • 1 large egg $0.09

Instructions

  • Preheat the oven to 400ºF. In a large bowl, stir together the cornmeal, flour, salt, baking powder, baking soda, and sugar until well combined.
  • In a separate bowl, whisk together the sour cream, milk, melted butter cooking oil, and egg.
  • Pour the dry ingredients into the bowl of wet ingredients and stir just until everything is evenly combined. Avoid over-stirring the batter.
  • Pour the batter into a greased 8×8-inch baking dish. Transfer to the oven and bake for 20 minutes, or until the top is golden brown.
  • Allow the cornbread to cool in the baking dish, then slice into nine pieces and serve.

See how we calculate recipe costs here.

Nutrition

Serving: 1slice | Calories: 276kcal | Carbohydrates: 29g | Protein: 5g | Fat: 16g | Sodium: 428mg | Fiber: 3g
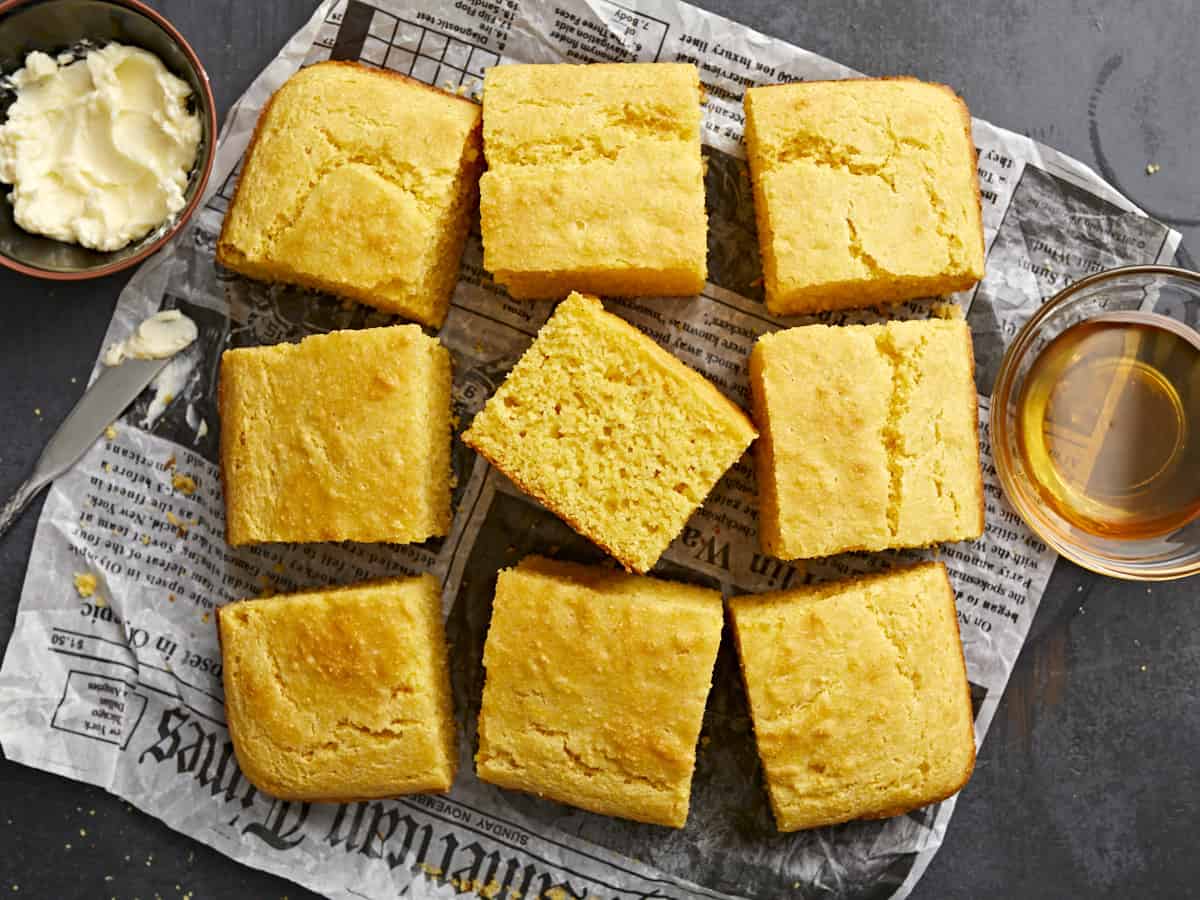
Squares of cornbread on parchment with honey and butter on the sides.

How to Make Cornbread – Step by Step Photos

Cornbread dry ingredients in a bowl.

Preheat the oven to 400ºF. Add 1.5 cups yellow cornmeal, ½ cup all-purpose flour, 1 tsp salt, 1 tsp baking powder, ½ tsp baking soda, and 2 Tbsp sugar (optional) in a bowl. Stir until the dry ingredients are really well combined.

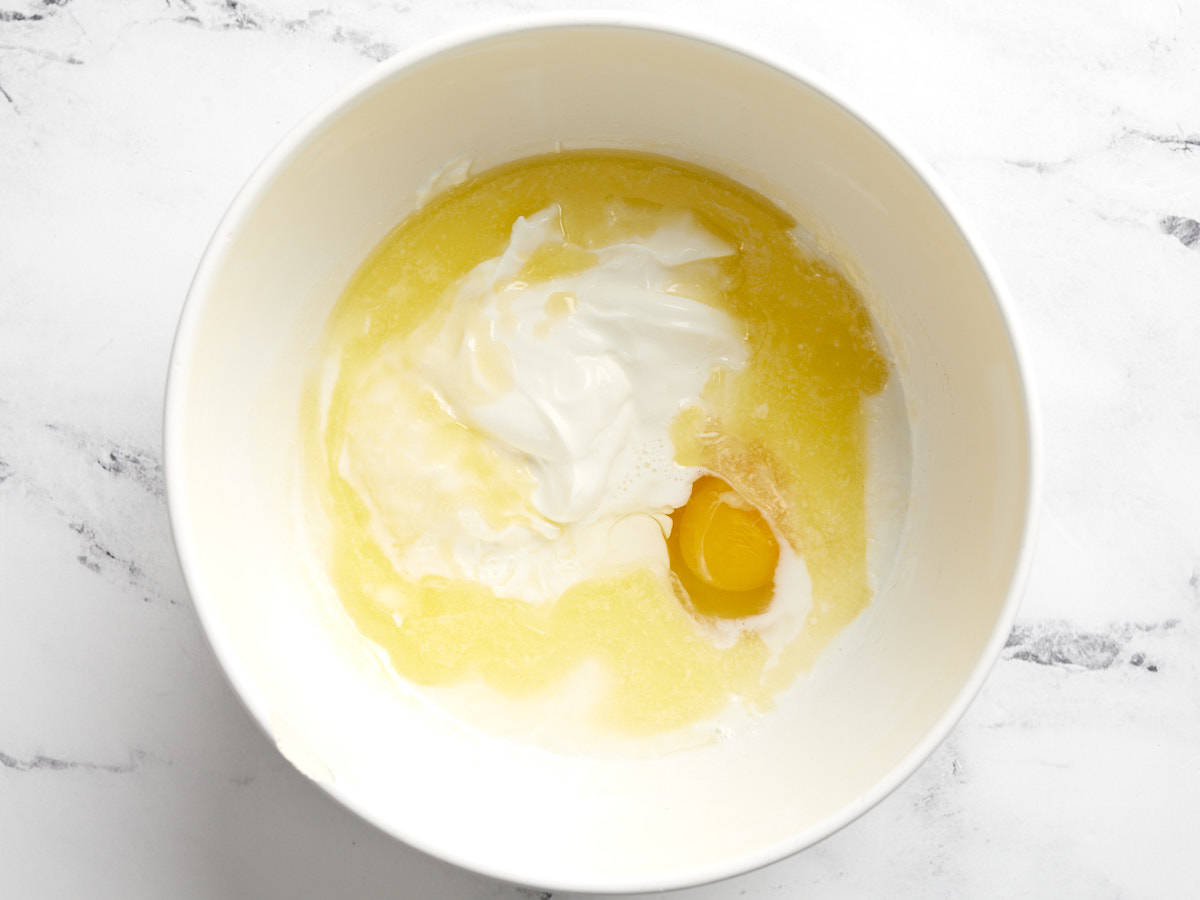
Wet ingredients for cornbread in a bowl.

In a separate bowl, whisk together 1 cup sour cream, ½ cup whole milk, 4 Tbsp melted salted butter, one large egg, and 2 Tbsp cooking oil until smooth.

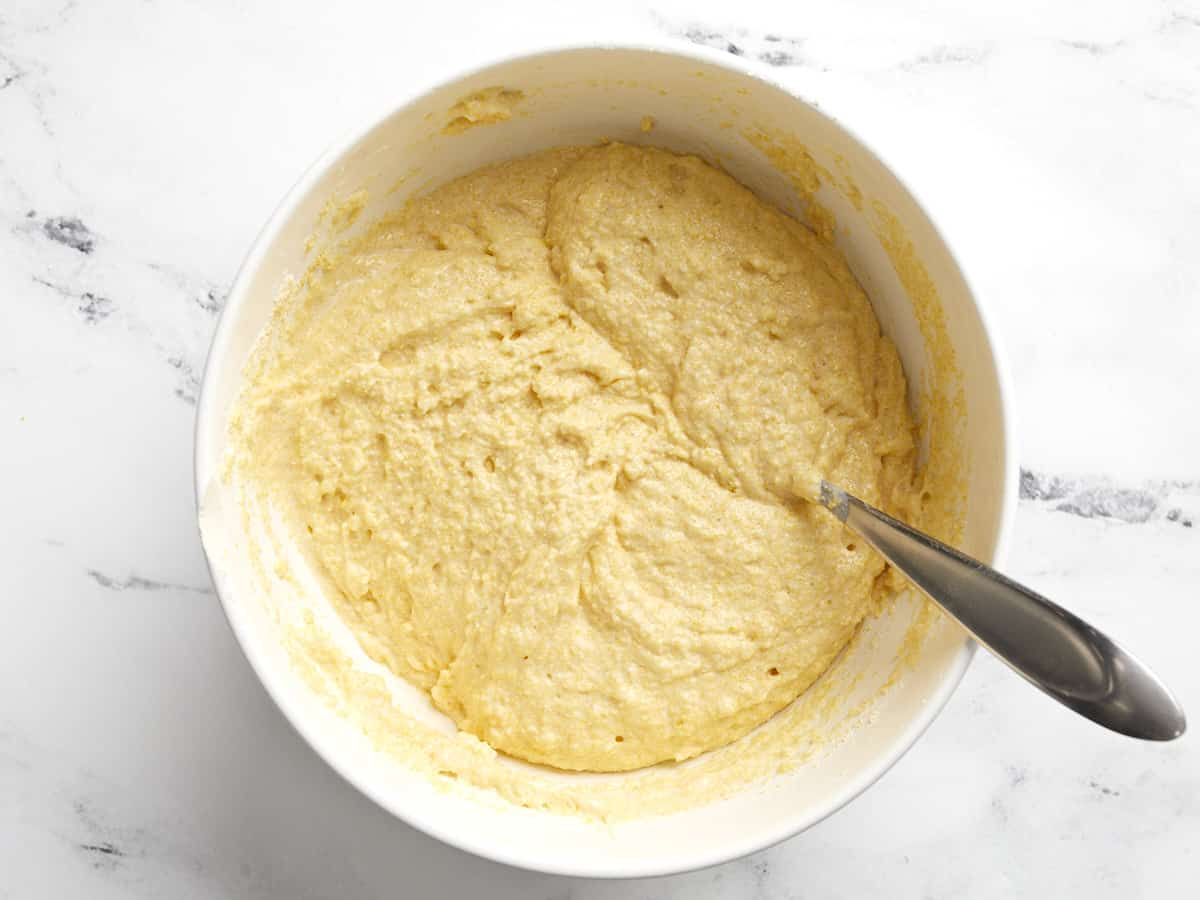
Wet and dry ingredients combined to make cornbread batter.

Pour the dry ingredients into the bowl of wet ingredients and stir just until they are combined. Try not to over-stir the batter.

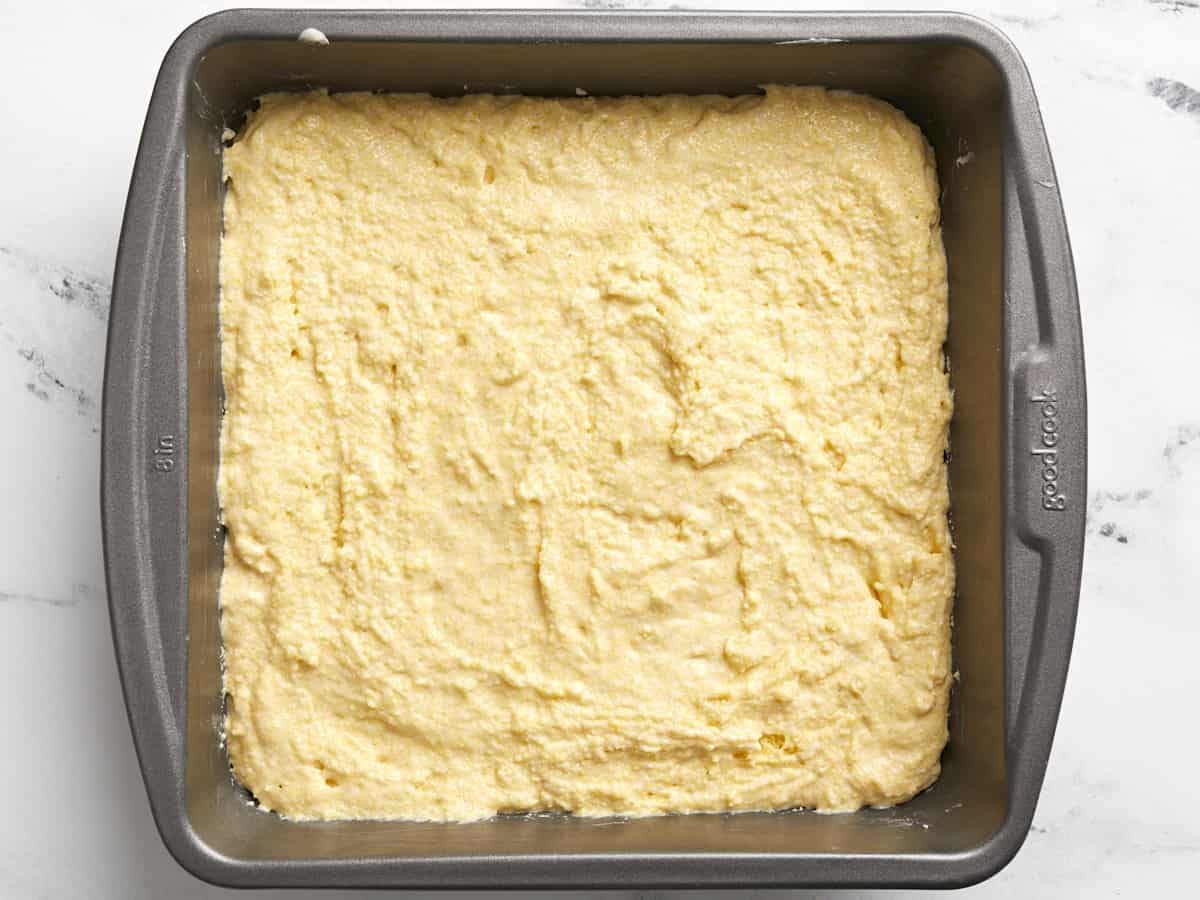
Cornbread batter in a square metal baking dish.

Spread the cornbread batter into a greased 8×8-inch baking dish.

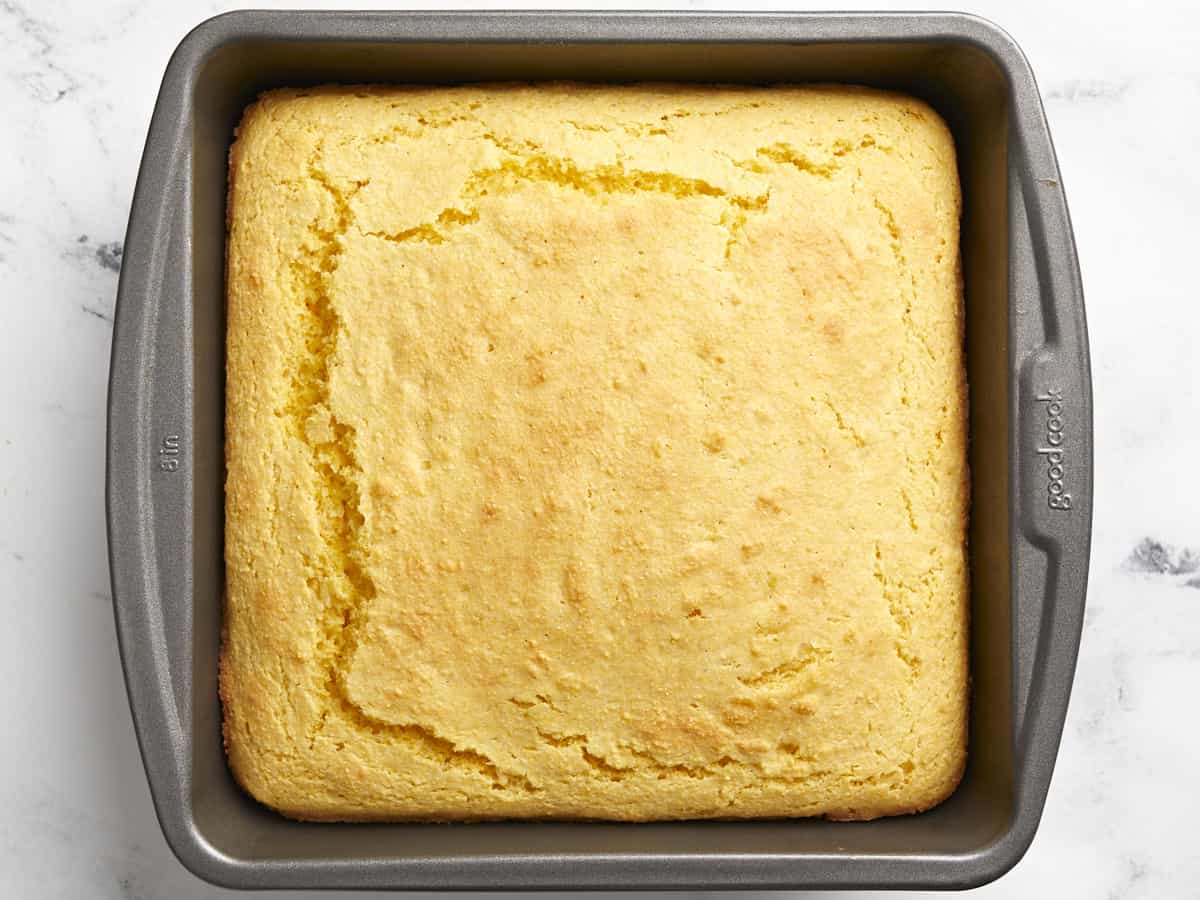
Baked cornbread in the baking dish.

Bake the cornbread in the preheated 400ºF oven for about 20 minutes or until it’s golden brown on top.

Squares of cornbread on parchment with honey and butter on the sides.

Let the cornbread cool in the pan, then slice into nine squares and serve.

A stack of cornbread squares with honey being drizzled over top.

I love cornbread with butter and honey, but it goes with a variety of savory meals as well!

The post Homestyle Cornbread appeared first on Budget Bytes.
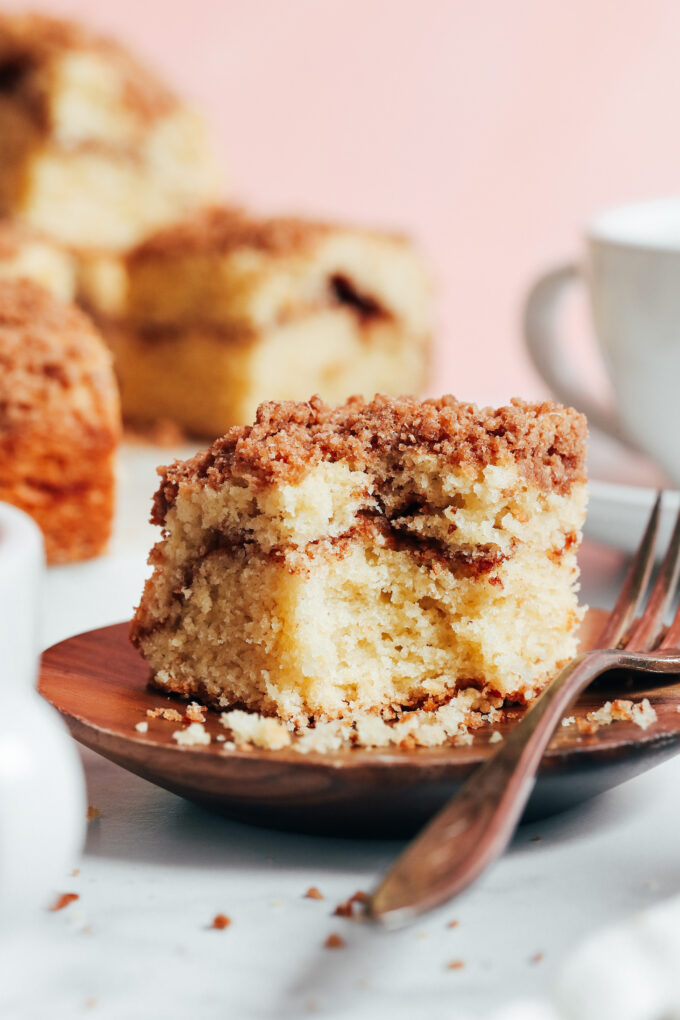
The BEST Gluten-Free Coffee Cake (1 Bowl!)

Brunch lovers, REJOICE! We set out to make a coffee cake even your gluten-loving, dairy-obsessed friends would adore, and we think we’ve done it. This coffee cake is ultra FLUFFY, perfectly sweet, packed with cinnamon, undetectably gluten-free, and jus…

The BEST Gluten-Free Coffee Cake (1 Bowl!)

Brunch lovers, REJOICE! We set out to make a coffee cake even your gluten-loving, dairy-obsessed friends would adore, and we think we’ve done it. This coffee cake is ultra FLUFFY, perfectly sweet, packed with cinnamon, undetectably gluten-free, and just SO delicious!

It’s the ideal cake to serve at brunch, with your morning coffee or afternoon tea, or really for any occasion. Made in just 1 bowl for easy cleanup, we have a feeling it’ll be your new go-to!

The BEST Gluten-Free Coffee Cake (1 Bowl!) from Minimalist Baker →

Chocolate Crinkle Cookies

These chocolate crinkle cookies are a must-have Christmas cookie and the perfect companion to a cup of coffee or hot cocoa!

The post Chocolate Crinkle Cookies appeared first on Budget Bytes.
It wouldn’t be Christmastime without cookies, and these Chocolate Crinkle Cookies are one of the best. Their fluffy, melt-in-your-mouth texture is to die for and the powdered sugar coating really gives them that snowy, wintry feel. Chocolate Crinkle Cookies are an absolute must on any Christmas cookie platter!

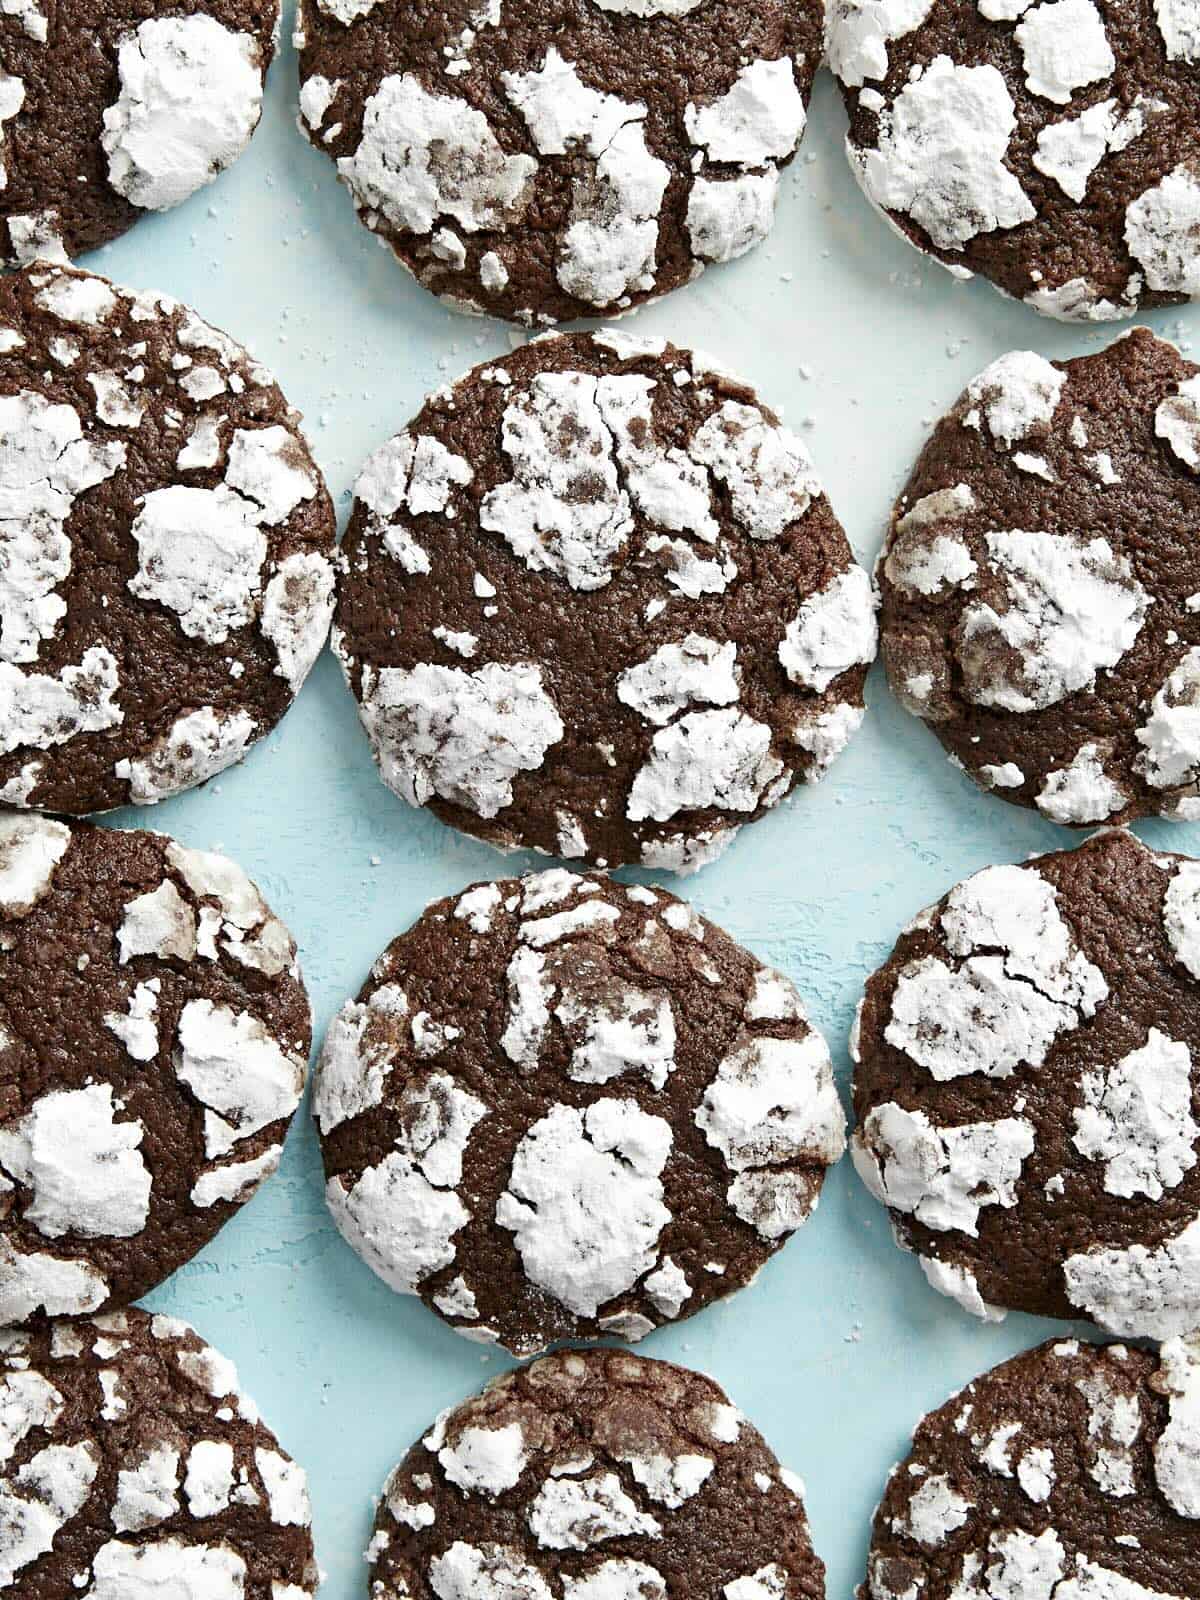
Overhead view of chocolate crinkle cookies lined up on an aqua background.

What Are Chocolate Crinkle Cookies Like?

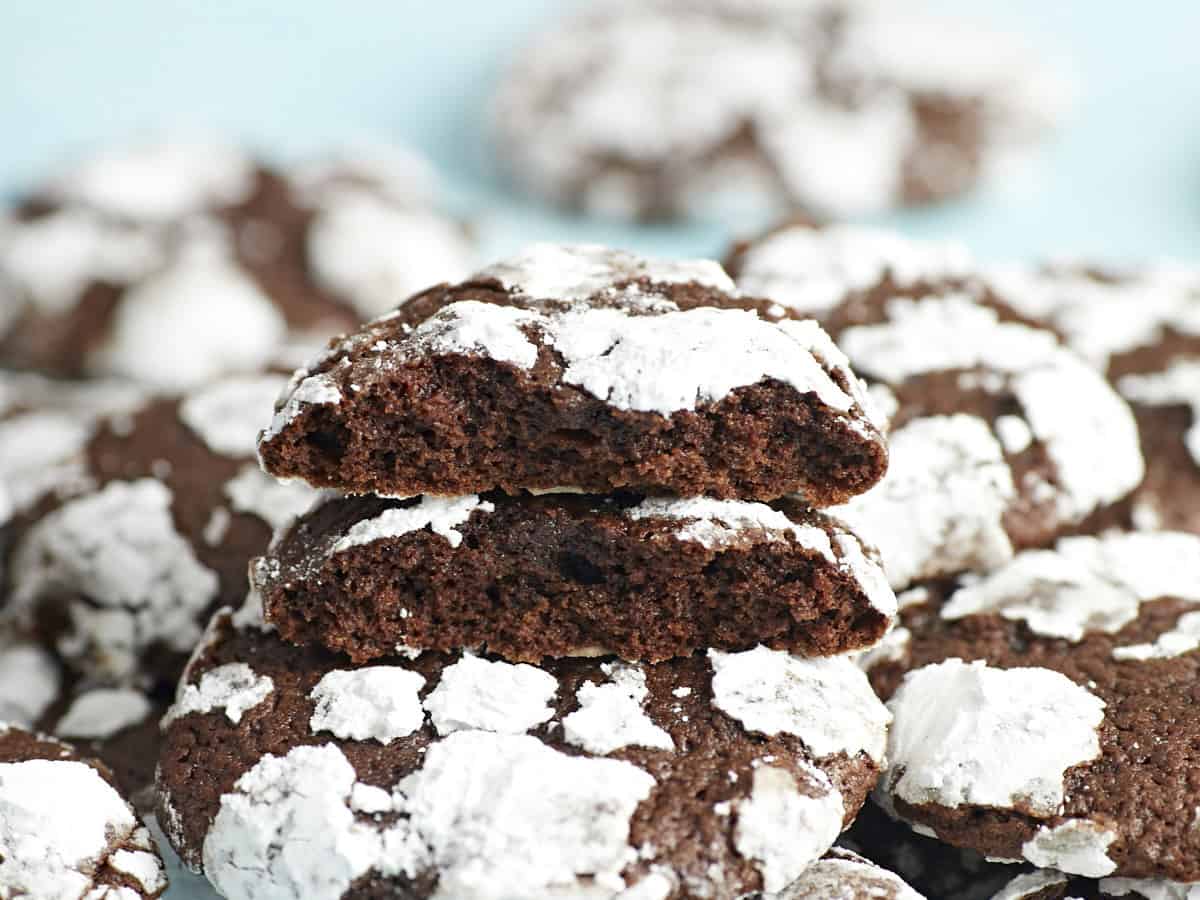
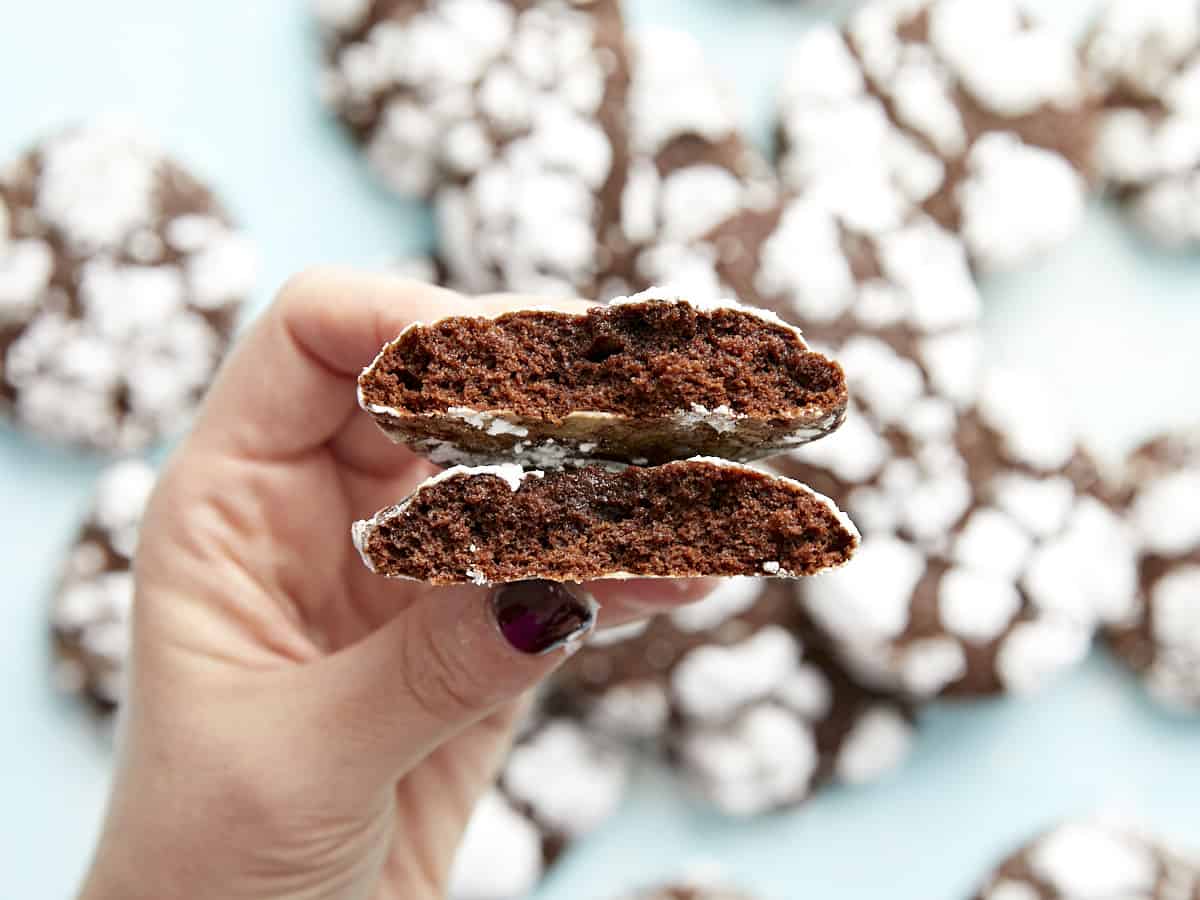
I love chocolate crinkle cookies because they have a fairly unique texture. They’re light and cakey, but they kind of melt into a rich and fudgy texture in your mouth. The powdered sugar instantly dissolves on your tongue, giving them an almost cooling wintry effect. They’re SO GOOD!

Ingredients for Chocolate Crinkle Cookies

The ingredients for these cookies are super basic, making them really easy to make without much planning. Here’s what you’ll need to make chocolate crinkle cookies:

  • Butter: All cookies need a good dose of butter for that rich, dessert-like finish! A lot of chocolate crinkle cookie recipes use oil, but I wanted that all-butter flavor. We use salted butter because we always have that on hand.
  • Sugar: The combination of butter and sugar is what makes cookies so irresistible. You’ll need granulated sugar for the batter and some powdered sugar to get that cool crinkle effect.
  • Eggs: Eggs help the cookies puff up in the oven and give them strength to stay that way once baked.
  • Vanilla: Vanilla extract always helps chocolate taste much richer.
  • All-Purpose Flour: Flour gives the cookies body and strength to hold their shape.
  • Baking Powder: A little baking powder gives the cookies extra power to puff up in the oven, giving them that nice airy, cakey texture.
  • Cocoa Powder: Unsweetened cocoa powder gives these cookies all the chocolatey goodness they need.
  • Salt: A little salt helps the individual flavors in the cookies stand out so every bite is delicious!

What Else Can I Add?

This chocolate crinkle cookie recipe can be modified in several different ways. Try adding a ½ tsp peppermint extract to make a chocolate peppermint cookie, or rolling the cookies in some crushed candy canes after rolling in powdered sugar. You can also stir some mini chocolate chips into the batter for a double-chocolate crinkle! Or, add a Tablespoon or two of instant coffee to the batter to make cafe mocha-flavored crinkles!

Make them Ahead

You can make the dough for these chocolate crinkle cookies and refrigerate up to 2 days before portioning, shaping, and baking, making them a great option if you have several types of cookies you want to bake for Christmas!

How to Store Chocolate Crinkle Cookies

Allow the cookies to cool to room temperature, then store them in an air-tight food storage container at room temperature for about 5 days, or you can freeze them for up to three months.

A stack of chocolate crinkle cookies with the one on top broken in half exposing the inside.
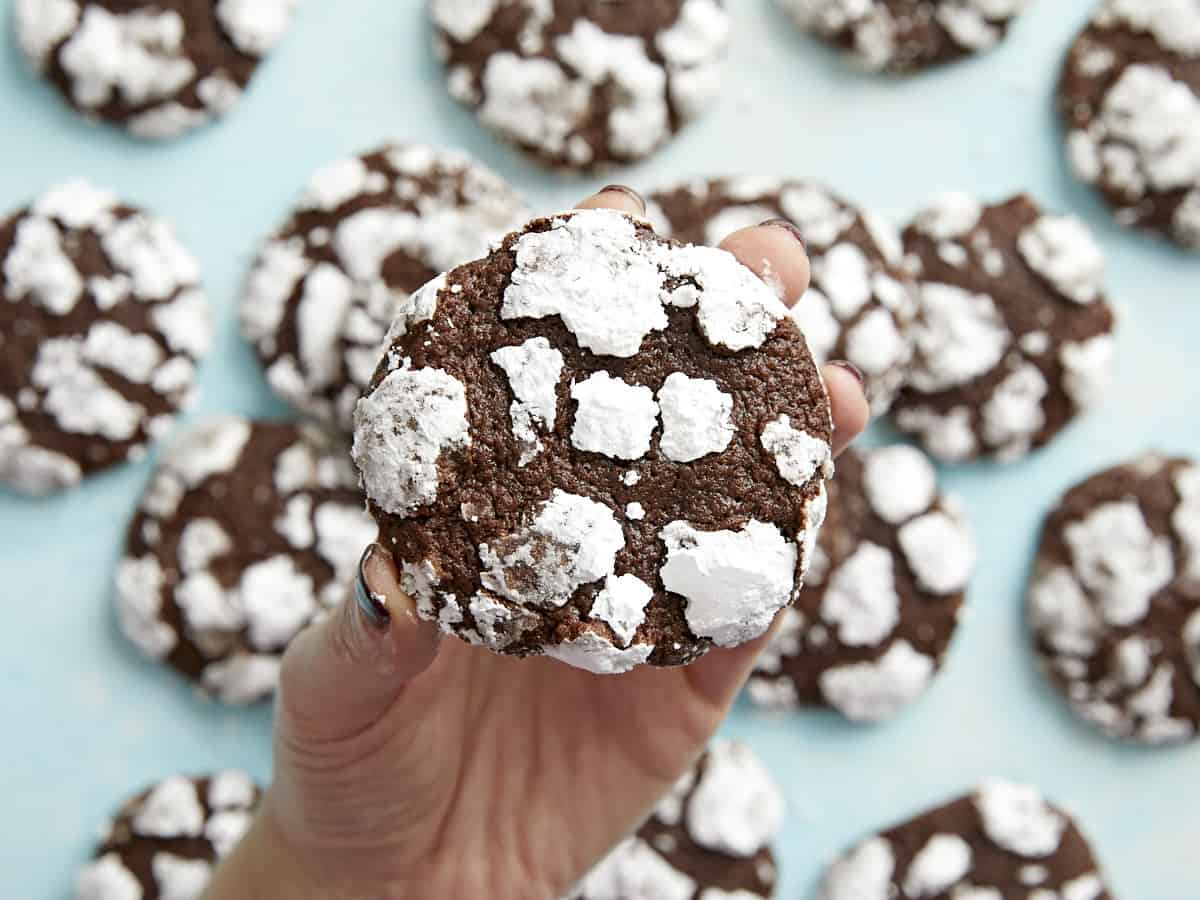
A hand holding a chocolate crinkle cookie close to the camera with others in the background
Print

Chocolate Crinkle Cookies

These chocolate crinkle cookies are a must-have Christmas cookie and the perfect companion to a cup of coffee or hot cocoa!
Course Dessert
Cuisine American
Total Cost $2.67 recipe / $0.13 each
Prep Time 20 minutes
Cook Time 24 minutes
Chill Time 2 hours
Total Time 2 hours 44 minutes
Servings 20 cookies
Calories 126kcal

Ingredients

  • 8 Tbsp salted butter, room temperature $1.00
  • 1 cup granulated sugar $0.36
  • 2 large eggs $0.18
  • 1 tsp vanilla extract $0.25
  • 1.25 cups all-purpose flour $0.19
  • 1/2 cup unsweetened cocoa powder $0.44
  • 1 tsp baking powder $0.06
  • 1/4 tsp salt $0.02
  • 1/2 cup powdered sugar $0.17

Instructions

  • Beat the butter an granulated sugar together on high until light and fluffy (2-3 minutes). Add the eggs and vanilla extract and beat on high again until the mixture is light and creamy (another 2 minutes).
  • In a separate bowl, whisk together the flour, cocoa powder, baking powder, and salt until evenly combined.
  • Pour half of the flour mixture into the butter mixture and beat on low until incorporated. Add the remaining flour mixture and beat or stir until incorporated again. The dough should be very thick.
  • Cover the bowl of cookie dough with plastic and refrigerate for two hours or up to two days.
  • Once ready to bake, preheat the oven to 350ºF. Place the powdered sugar in a bowl for rolling and line a baking sheet with parchment paper. Scoop the cookie dough in 2 Tbsp portions, roll into a ball, then roll to coat in powdered sguar. Place the rolled and coated cookies on the baking sheet 2-3 inches apart. You'll likely need to cook in batches, so keep the remaining dough chilled until ready to roll and bake. Avoid coating the cookies in powdered sugar until just before they go into the oven.
  • Bake the cookies for 10-12 minutes, or until they're puffed and the powdered sugar is cracked on top. Allow the cookies to cool, then enjoy!

See how we calculate recipe costs here.

Nutrition

Serving: 1cookie | Calories: 126kcal | Carbohydrates: 19g | Protein: 2g | Fat: 5g | Sodium: 94mg | Fiber: 1g
A hand holding a chocolate crinkle cookie that has been broken in half.

How to Make Chocolate Crinkle Cookies – Step by Step Photos

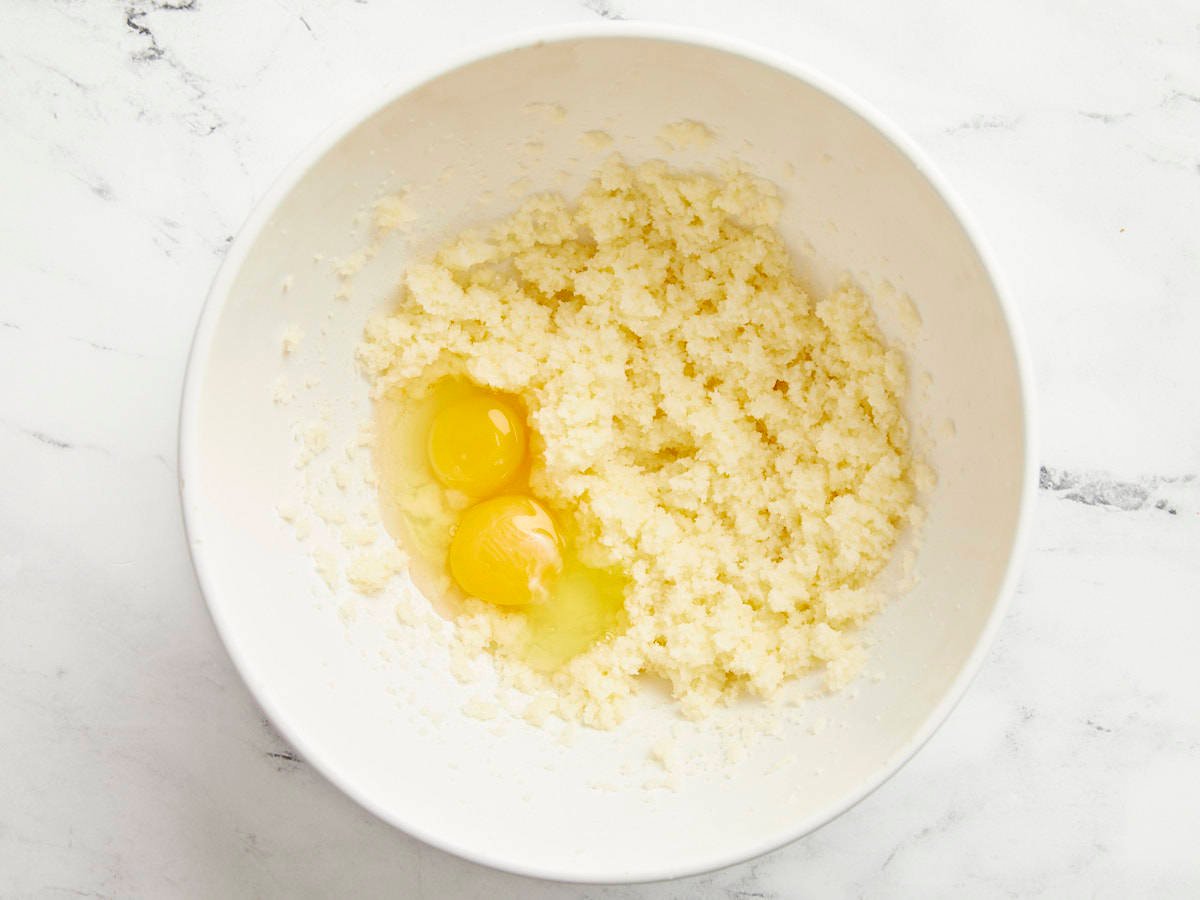
Creamed butter and sugar with two eggs added.

In a large bowl, cream together 8 Tbsp salted butter and 1 cup granulated sugar with a mixer until light and fluffy. Add two large eggs and 1 tsp vanilla, and beat together again until the mixture is light and creamy.

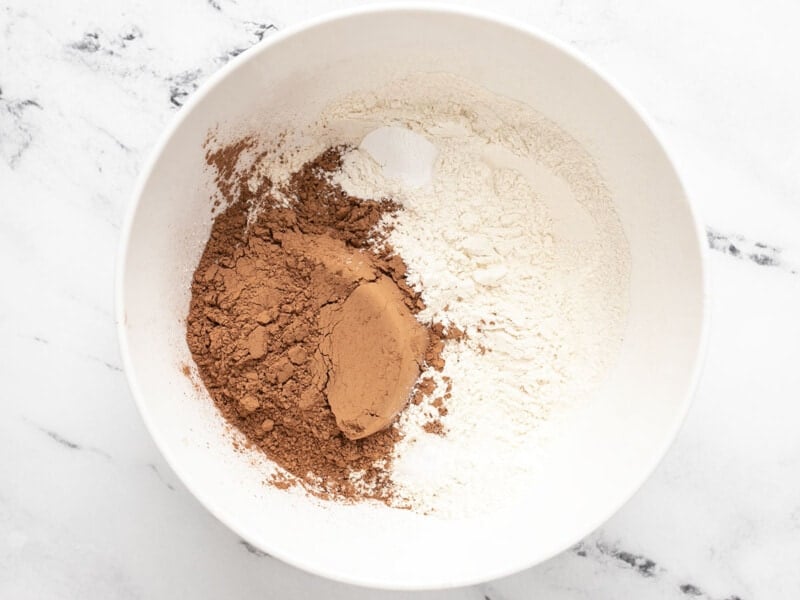
Dry ingredients for crinkle cookies in a white bowl.

In a separate large bowl, whisk together 1 1/4 cups all-purpose flour, 1 tsp baking powder, ¼ tsp salt, and ½ cup unsweetened cocoa powder.

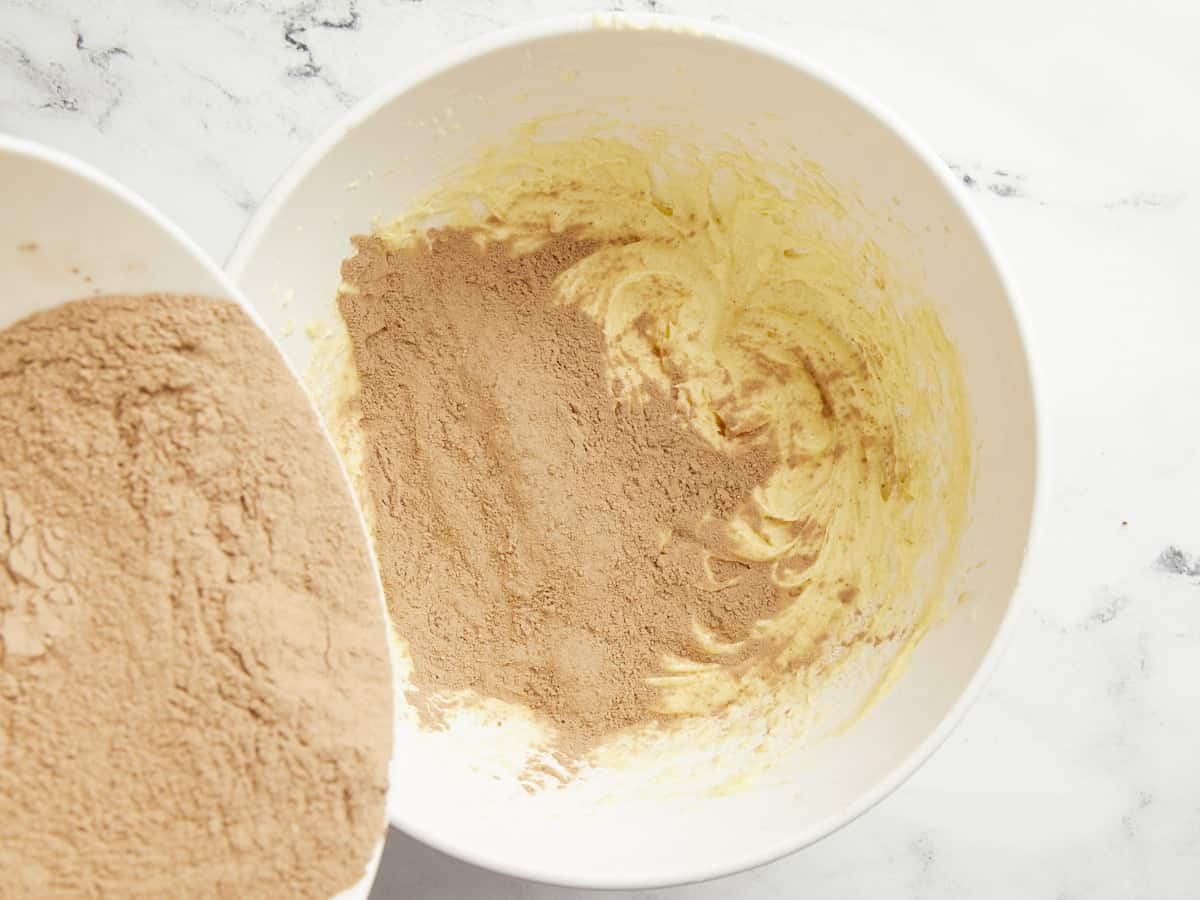
Dry ingredients being poured into the bowl with the butter and eggs.

Add half of the dry ingredients to the butter mixture and beat on low speed until combined, then add the remaining half and beat again over low until a batter forms.

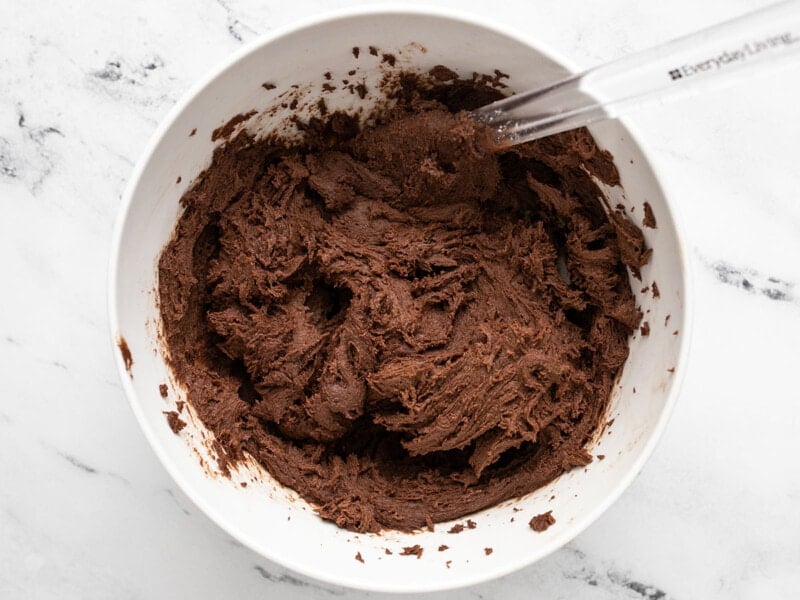
Finished cookie batter in the bowl with a spatula.

The batter should be very thick and fairly stiff. Cover the bowl with plastic and refrigerate for 2 hours. This will stiffen the batter even further, making it much easier to shape and it will help the cookies bake without flattening out so much.

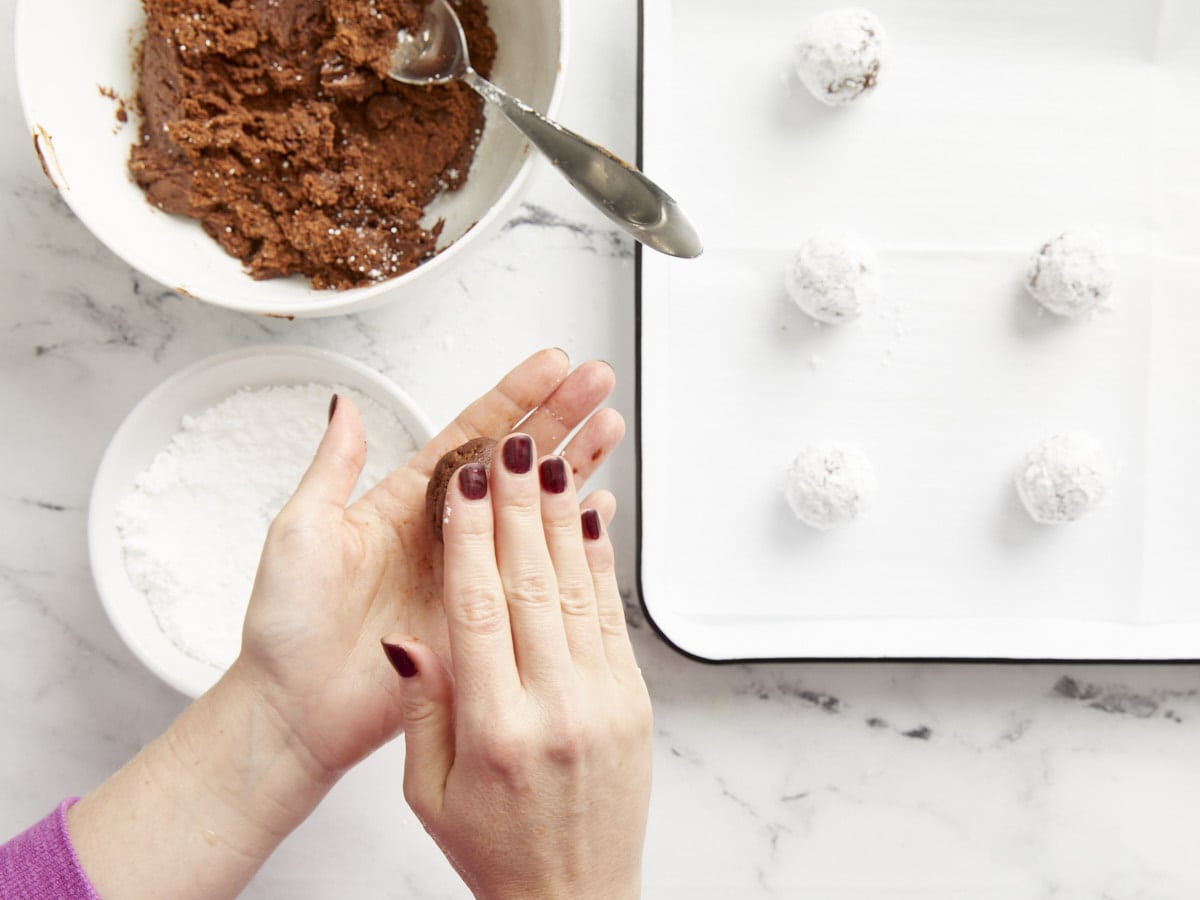
Chocolate crinkle cookies being shaped and rolled in powdered sugar.

When ready to bake, preheat the oven to 350ºF and place ½ cup powdered sugar in a bowl. Take the chilled dough out of the refrigerator and, working quickly, scoop it up in 2 Tbsp portions rolling each portion into a ball, then rolling in the powdered sugar.

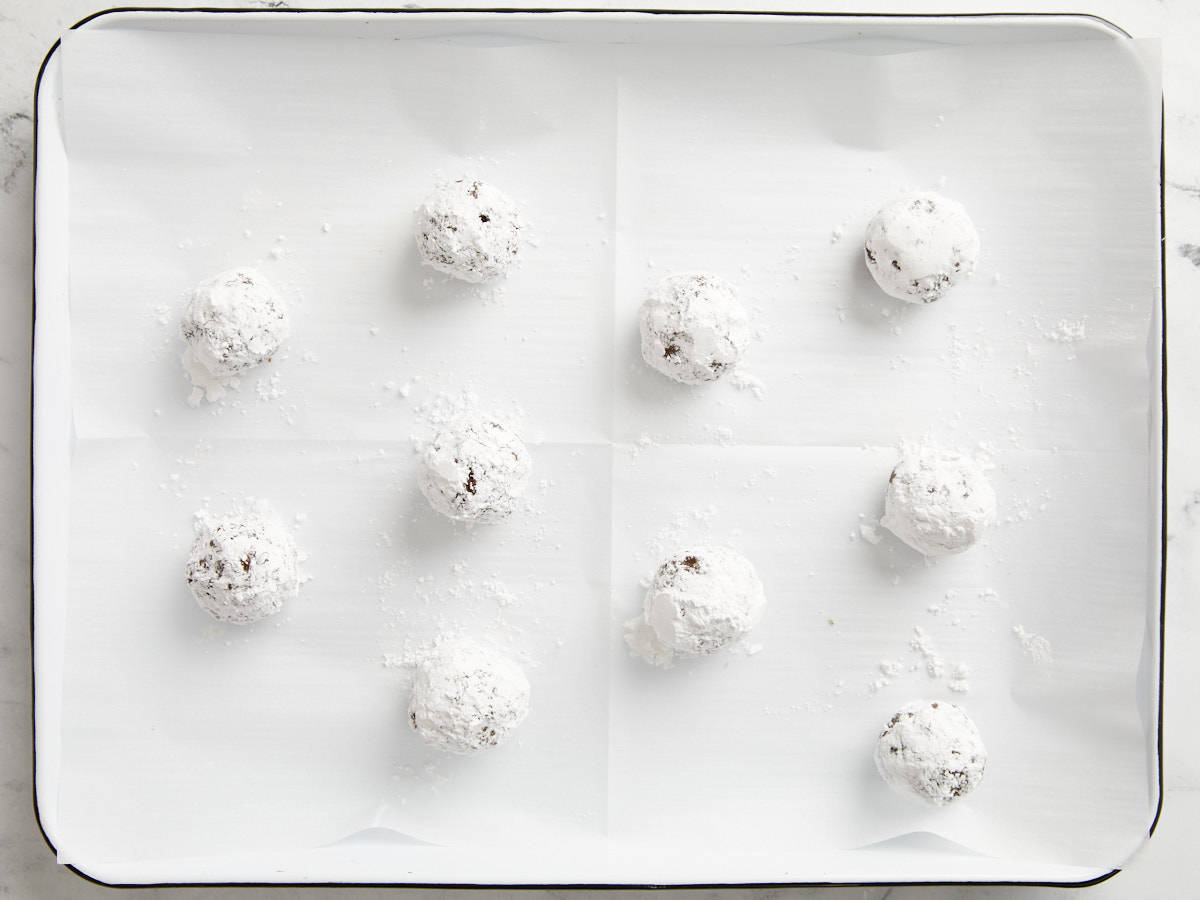
Chocolate crinkle cookies ready to bake on a parchment lined baking sheet.

Place the rolled sugar-coated cookies on a parchment-lined baking sheet with 2-3 inches between each (they will spread quite a bit when baked). You’ll likely need to bake them in two batches, so keep the dough chilled between each batch. Do not roll the cookies in powdered sugar until just before they go into the oven

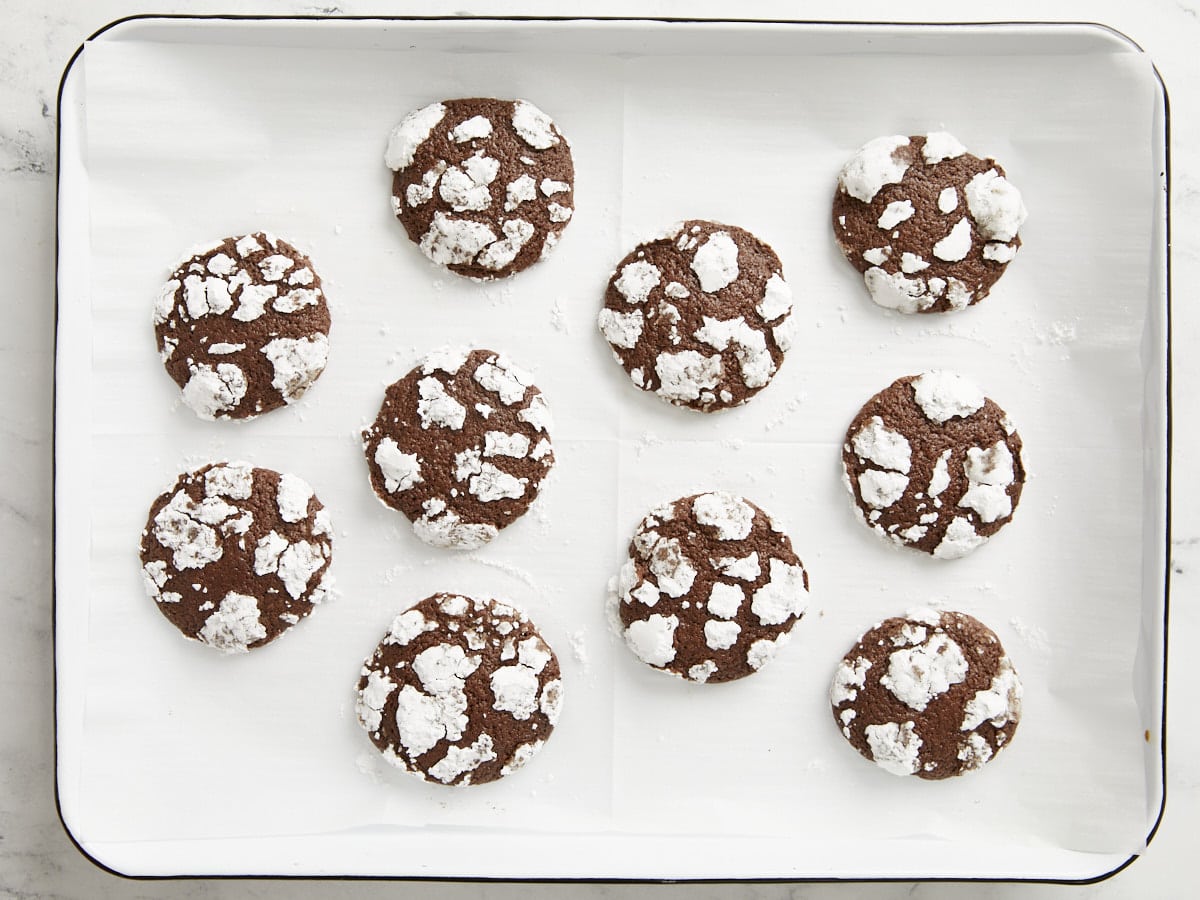
Baked chocolate crinkle cookies on the baking sheet.

Bake the chocolate crinkle cookies for 10-12 minutes, or until they’re puffed and the powdered sugar has “cracked” all over their surface. Allow the cookies to cool before serving and enjoying.

A hand holding a chocolate crinkle cookie close to the camera with others in the background

The post Chocolate Crinkle Cookies appeared first on Budget Bytes.
Cranberry Orange Bread

This Cranberry Orange Bread recipe is a sweet dessert loaf featuring tart cranberries, sweet orange, and a citrus zest glaze.

The post Cranberry Orange Bread appeared first on Budget Bytes.

Cranberry Orange Bread is a wintertime classic. The tart cranberries and sweet citrus are both in season and they offer such a bright and welcome contrast to the usually heavy foods of winter. In our house, this was a staple every Thanksgiving and Christmas morning, but it’s great to have a slice with coffee any day of the year. And since this Cranberry Orange Bread freezes beautifully, you can take a slice out and warm it up whenever you need a little taste of sunshine. :)

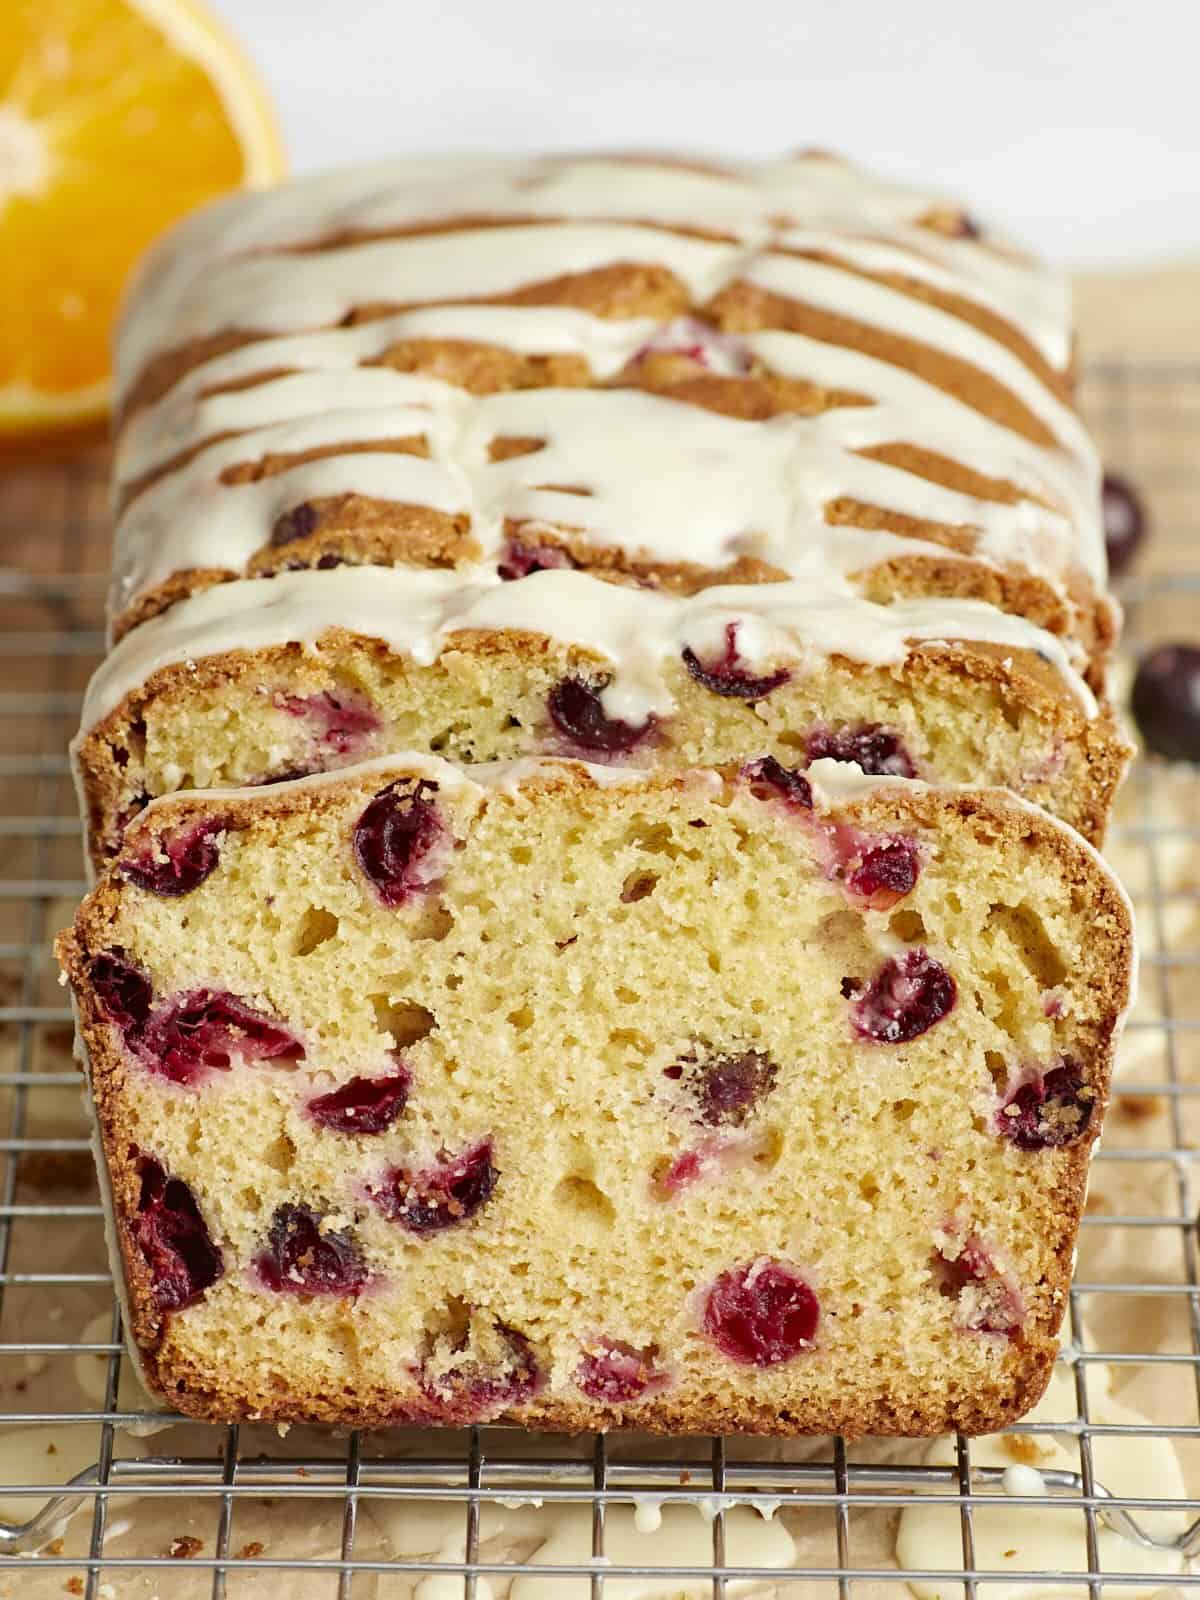
Front view of a sliced loaf of cranberry orange bread.

If you love to have a little sweet baked treat along with your homemade cup of coffee, this cranberry orange bread recipe is going to be your new fav. The loaf is sweet, rich, filled with orange essence, and dotted with fresh tart cranberries. The sweet glaze on top makes the perfect juxtaposition to the tart cranberries and the whole thing is absolutely addictive!

Ingredients for Cranberry Orange Bread

Here’s what you’ll need to make a loaf of this delicious cranberry orange bread:

  • Butter: Butter keeps the loaf rich, moist, and dessert-like. We use salted butter because it’s easier to keep just one kind of butter in your fridge!
  • Sugar: This recipe uses granulated sugar in the bread to sweeten everything up, and powdered sugar to create the thick orange glaze on top.
  • Eggs: Eggs help leaven the loaf and give it strength so it doesn’t collapse after baking.
  • Sour Cream: Sour cream is added to give the loaf moisture, richness, and even more flavor.
  • Orange: We use both the orange juice and zest in this bread, in the batter and in the icing that is drizzled over top.
  • All-Purpose Flour: Would it be “bread” without flour? Regular all-purpose flour is used to give the loaf body and strength.
  • Baking Powder & Baking Soda: Because of the acidic ingredients in the batter (sour cream, orange juice, and cranberries), we use a combination of both baking powder AND baking soda to leaven the bread.
  • Salt: A little salt always helps make the individual flavors pop and allows you to taste every element.
  • Cranberries: You can use fresh or frozen cranberries for this bread. If using frozen, allow them to thaw before folding into the batter.

How to Store Leftovers

This cranberry orange bread will stay good in the refrigerator for about five days, or you can freeze it for longer storage. To freeze, slice the bread and then stack the slices with parchment between each slice. Place the stacked bread in an air-tight container, like a freezer bag, and then store it in the freezer. You can take out one or as many slices as needed and thaw at room temperature for about 30 minutes before serving or microwave until warm.

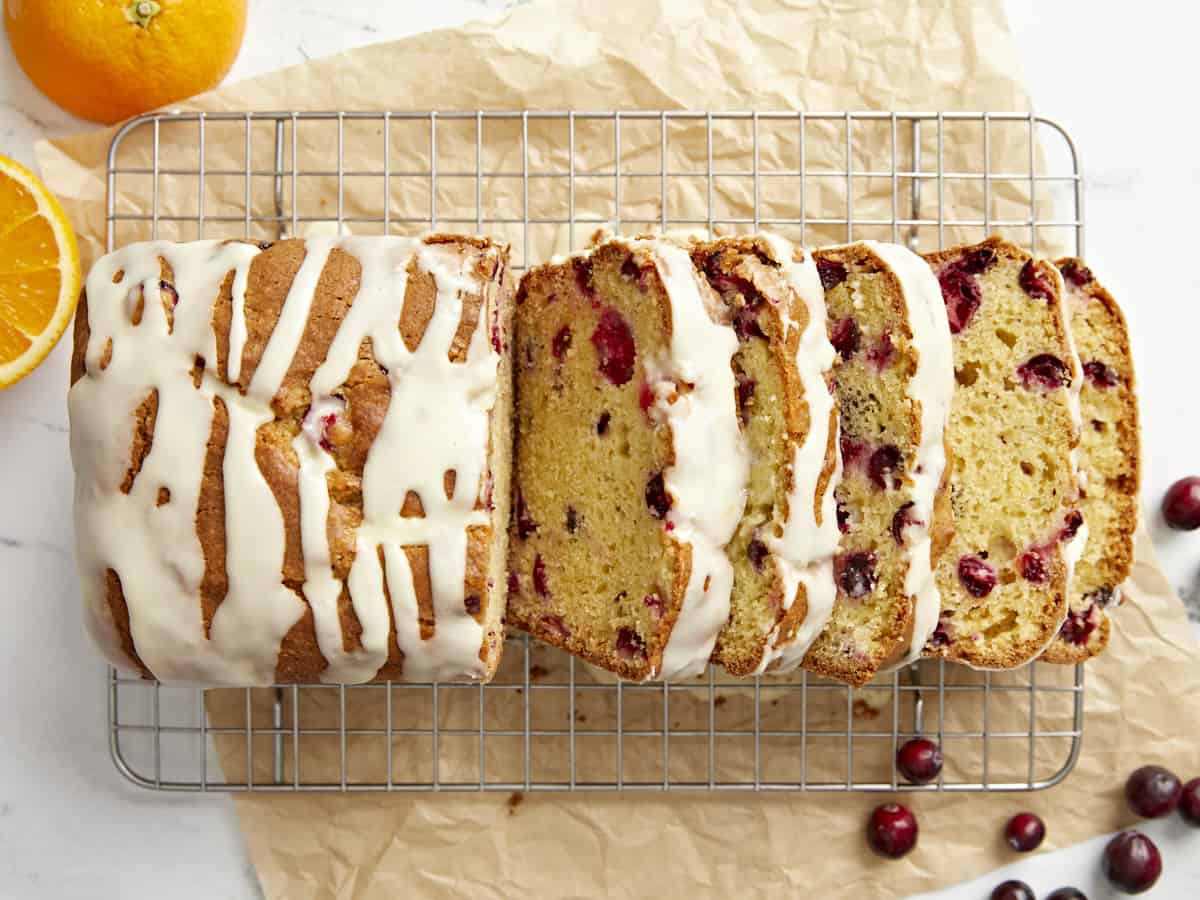
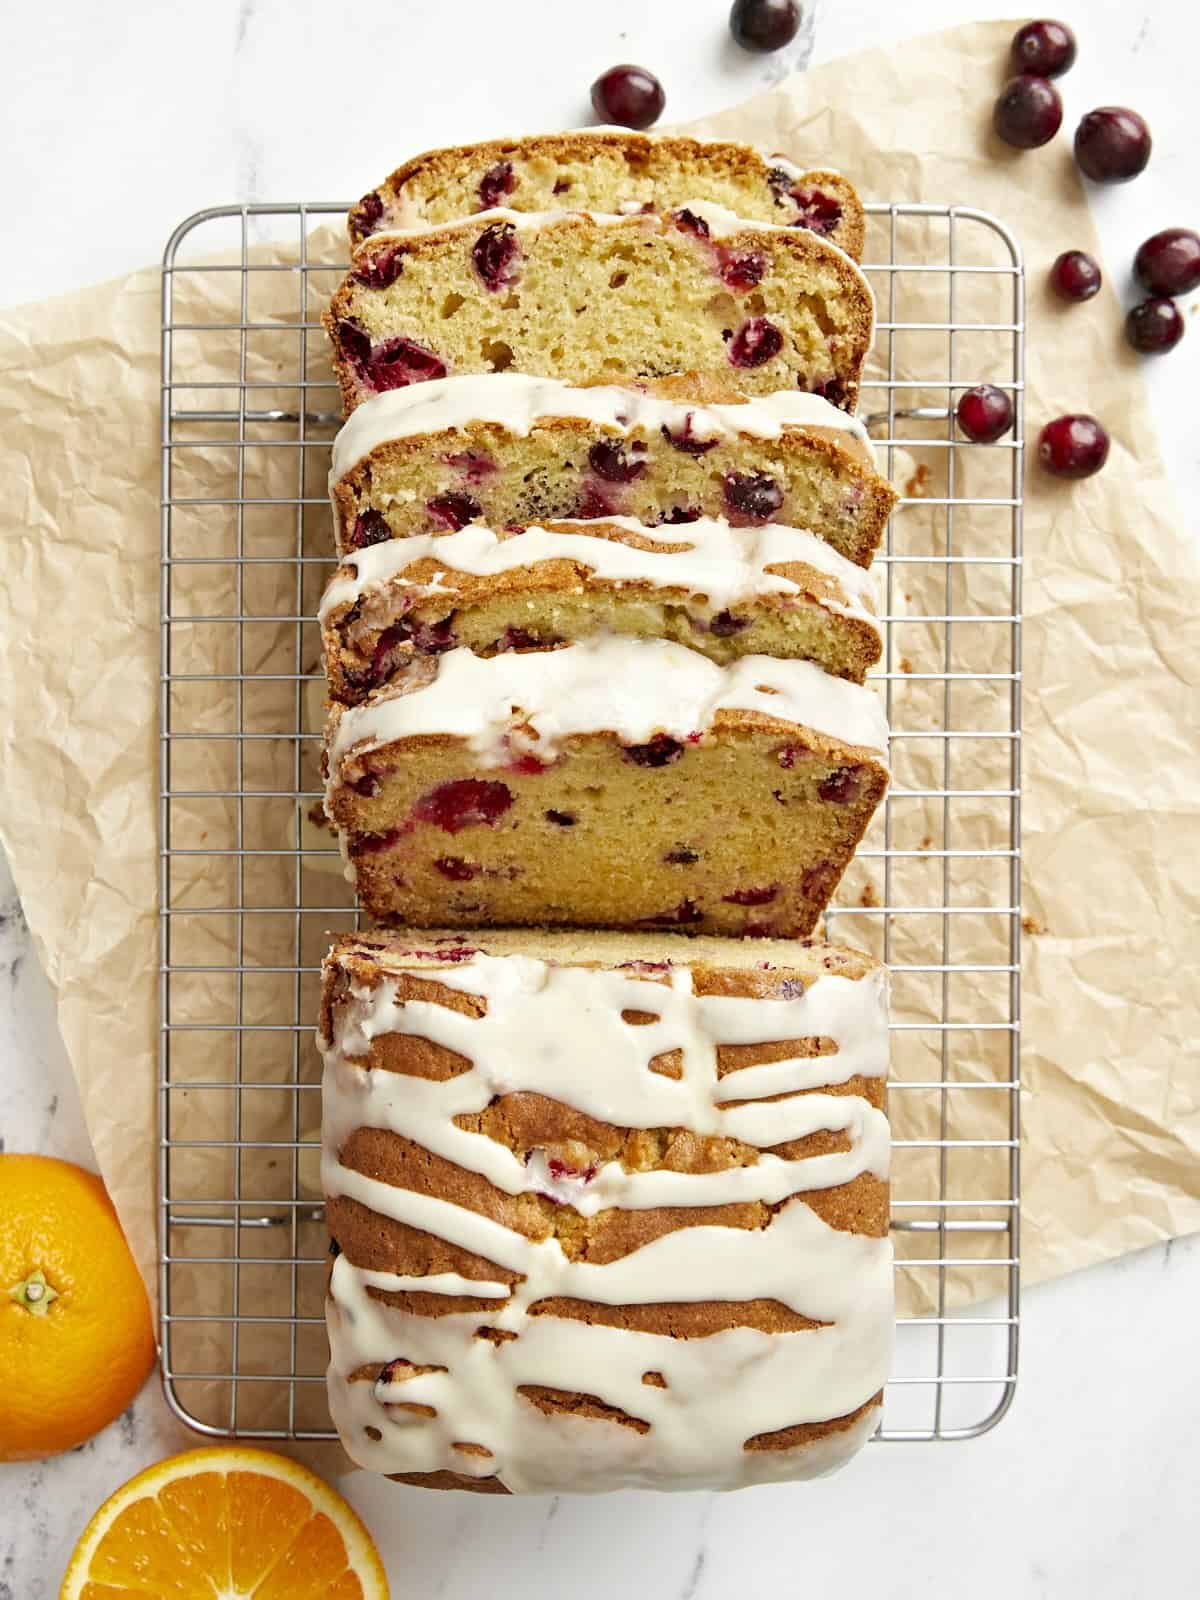
Overhead view of sliced cranberry orange bread on a cooling rack.
Front view of a sliced loaf of orange cranberry bread.
Print

Cranberry Orange Bread

This Cranberry Orange Bread recipe is a sweet dessert loaf featuring tart cranberries, sweet orange, and a citrus zest glaze.
Course Breakfast, Dessert
Cuisine American
Total Cost $5.91 recipe / $0.59 serving
Prep Time 15 minutes
Cook Time 1 hour
Total Time 1 hour 15 minutes
Servings 10 (1 slice each)
Calories 315kcal

Ingredients

  • 1 orange $0.99
  • 8 Tbsp salted butter, room temperature $1.00
  • 1 cup granulated sugar $0.36
  • 1 large egg $0.09
  • 1/2 cup sour cream 0.63
  • 2 cups all-purpose flour $0.38
  • 1 tsp baking powder $0.06
  • 1/2 tsp baking soda $0.02
  • 1/2 tsp salt $0.03
  • 2 cups fresh cranberries $1.33
  • 1 cup powdered sugar $1.02

Instructions

  • Preheat the oven to 350ºF. Zest and juice the orange. You'll need about ⅓ cup juice (divided) and a ¼ tsp zest for this recipe. Wash and slice the cranberries in half.
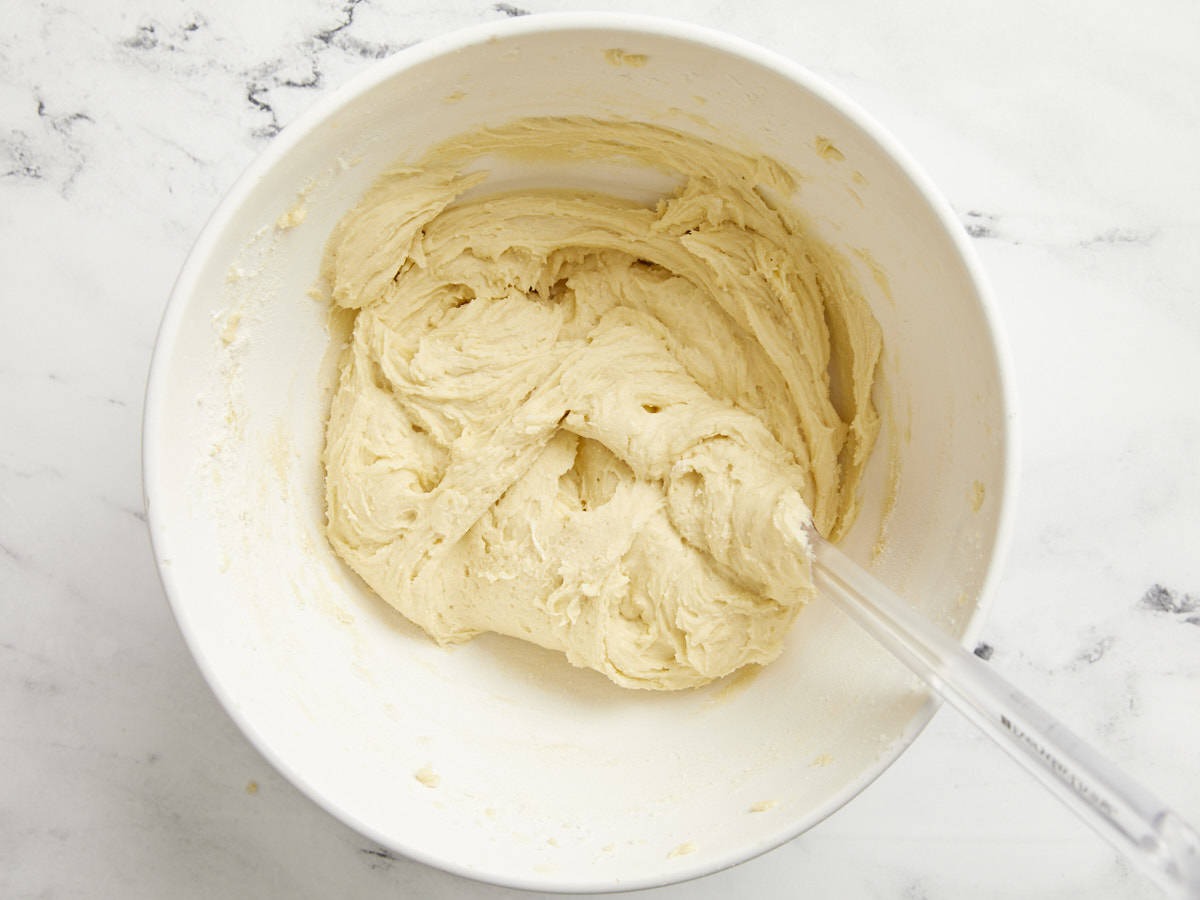
  • In a large bowl beat together the butter, sugar, and ¼ tsp orange zest with a hand mixer or stand mixer on high until the mixture is soft and fluffy (2-3 minutes). Add the egg and beat until the mixture is smooth and creamy (about 2 minutes).
  • Add the sour cream and ¼ cup of the orange juice to the batter and beat again for about 2 minutes. Save the remainder of the orange juice to make the glaze later.
  • In a separate bowl, stir together the flour, salt, baking powder, and baking soda.
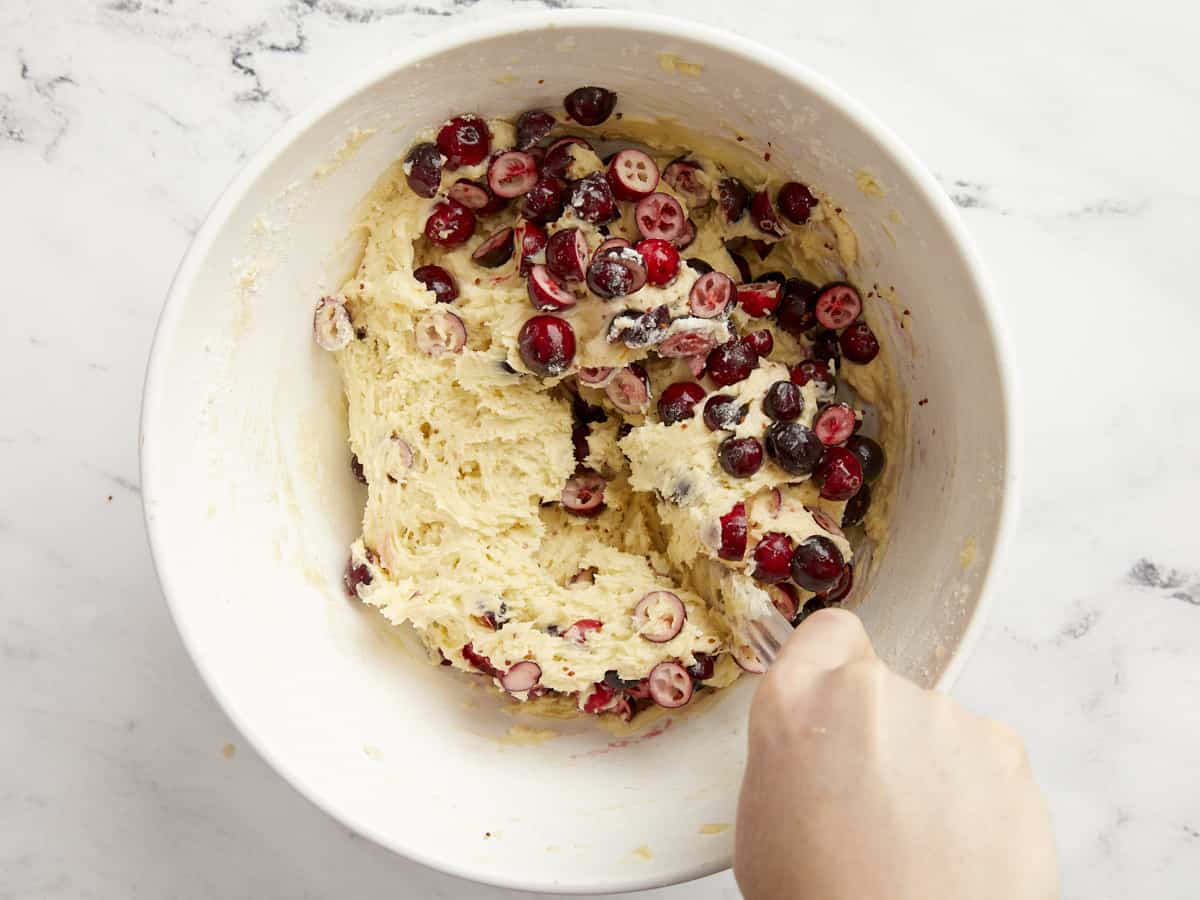
  • Add about half of the flour mixture to the butter mixture and beat with low speed until combined. Add the rest and beat until combined again. Finally, fold the sliced cranberries into the batter.
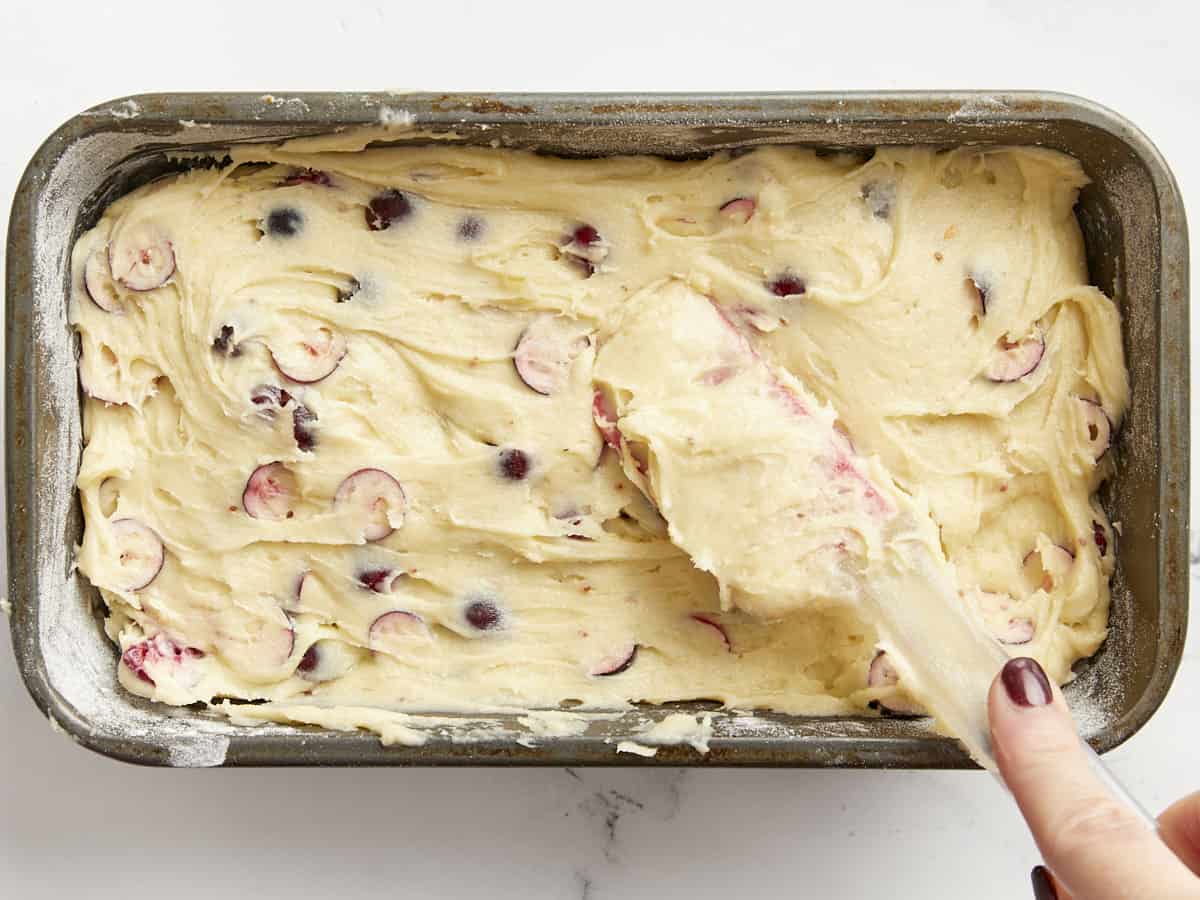
  • Grease an 8.5 x 4.5-inch bread pan and then dust lightly with flour. Spread the cranberry bread batter into the bread pan and smooth out the surface.
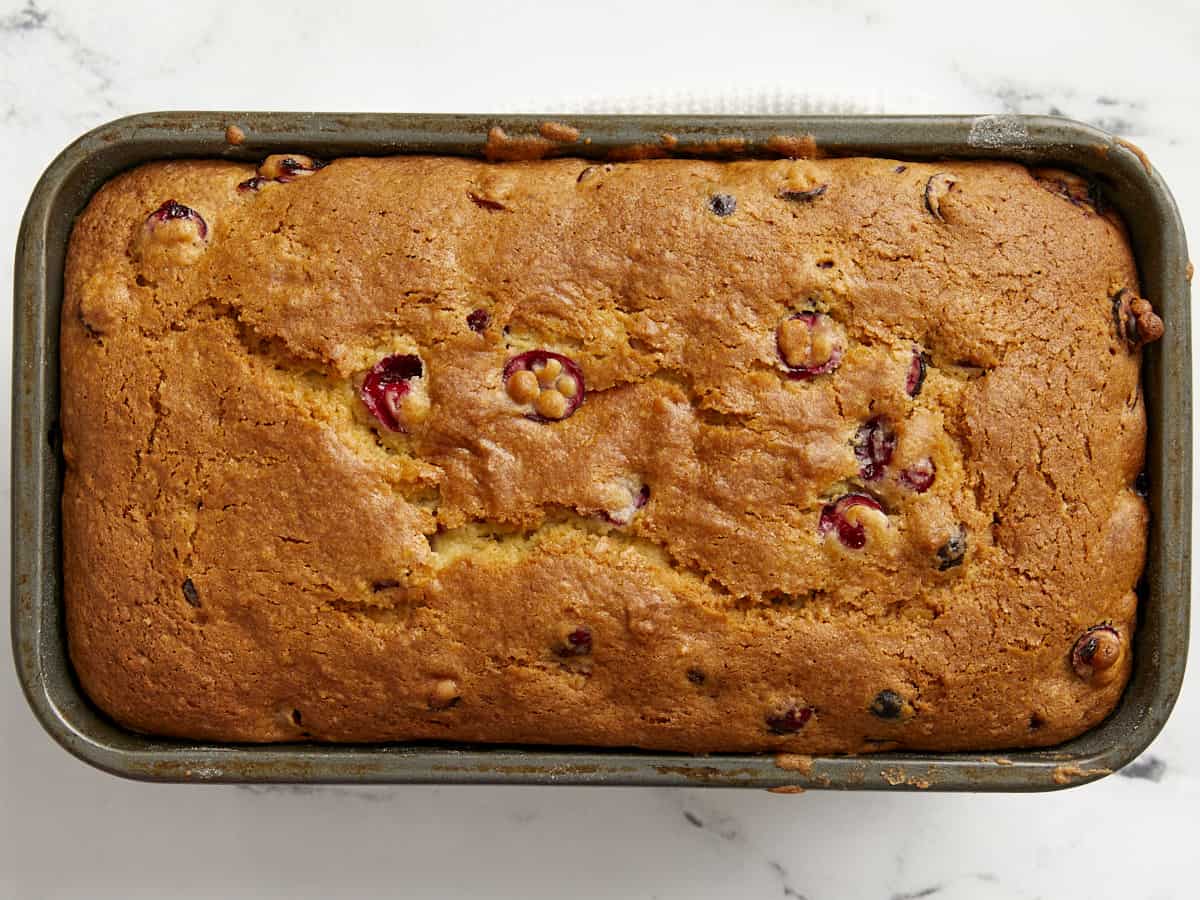
  • Bake the cranberry orange bread for 60 minutes in the preheated 350ºF oven, or until it is browned on top and a toothpick inserted into the center comes out clean (a few crumbs are okay, just no wet batter).
  • Allow the bread to cool in the bread pan while you make the glaze. Combine the powdered sugar with just enough orange juice to create a thick glaze (about 1.5 to 2 Tbsp). You can add a pinch of orange zest to the glaze, if desired.
  • When the bread has mostly cooled, use a knife to loosen the edges, then remove it from the bread pan. Drizzle the glaze over top, then slice and serve.

See how we calculate recipe costs here.

Nutrition

Serving: 1slice | Calories: 315kcal | Carbohydrates: 54g | Protein: 3g | Fat: 10g | Sodium: 294mg | Fiber: 1g
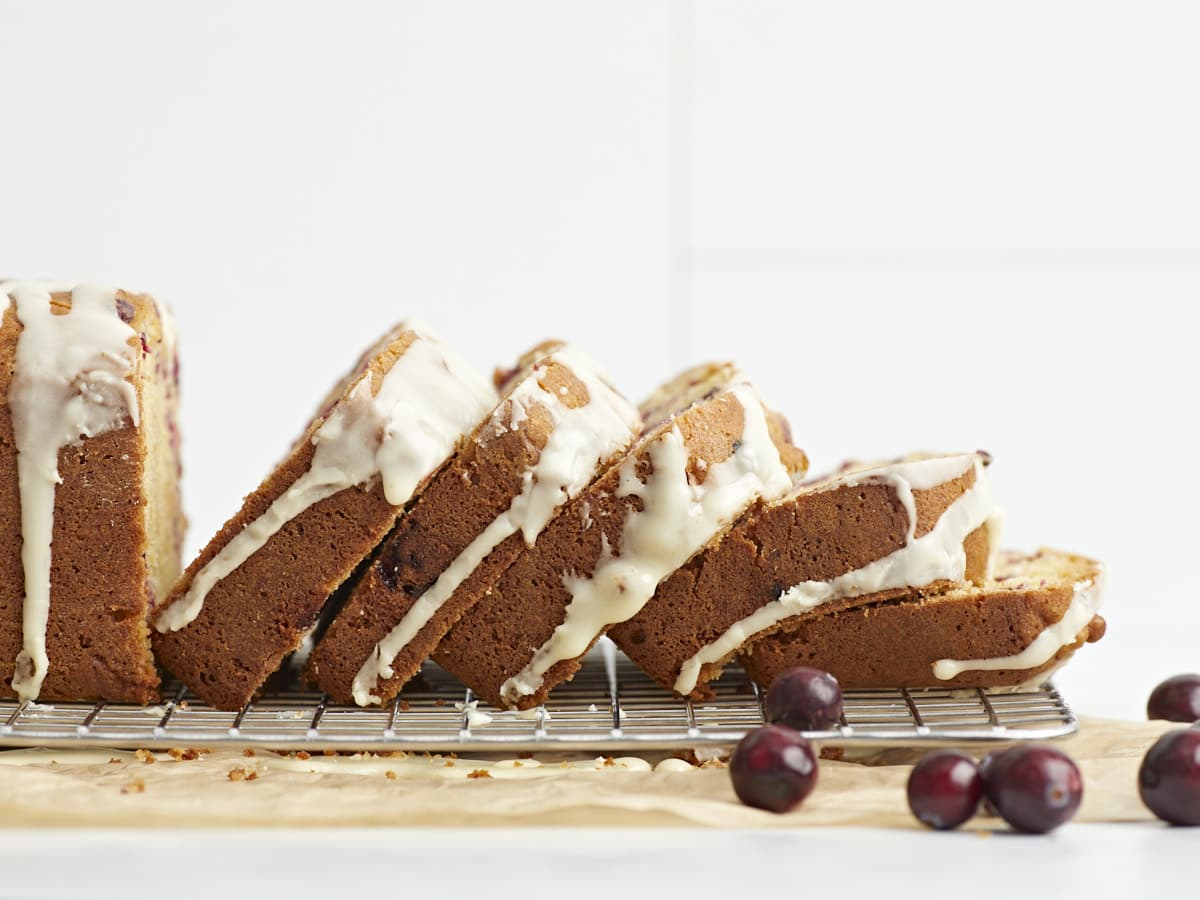
Side view of slices of cranberry orange bread fallen like dominos.
How to Make Cranberry Orange Bread – Step by Step Photos

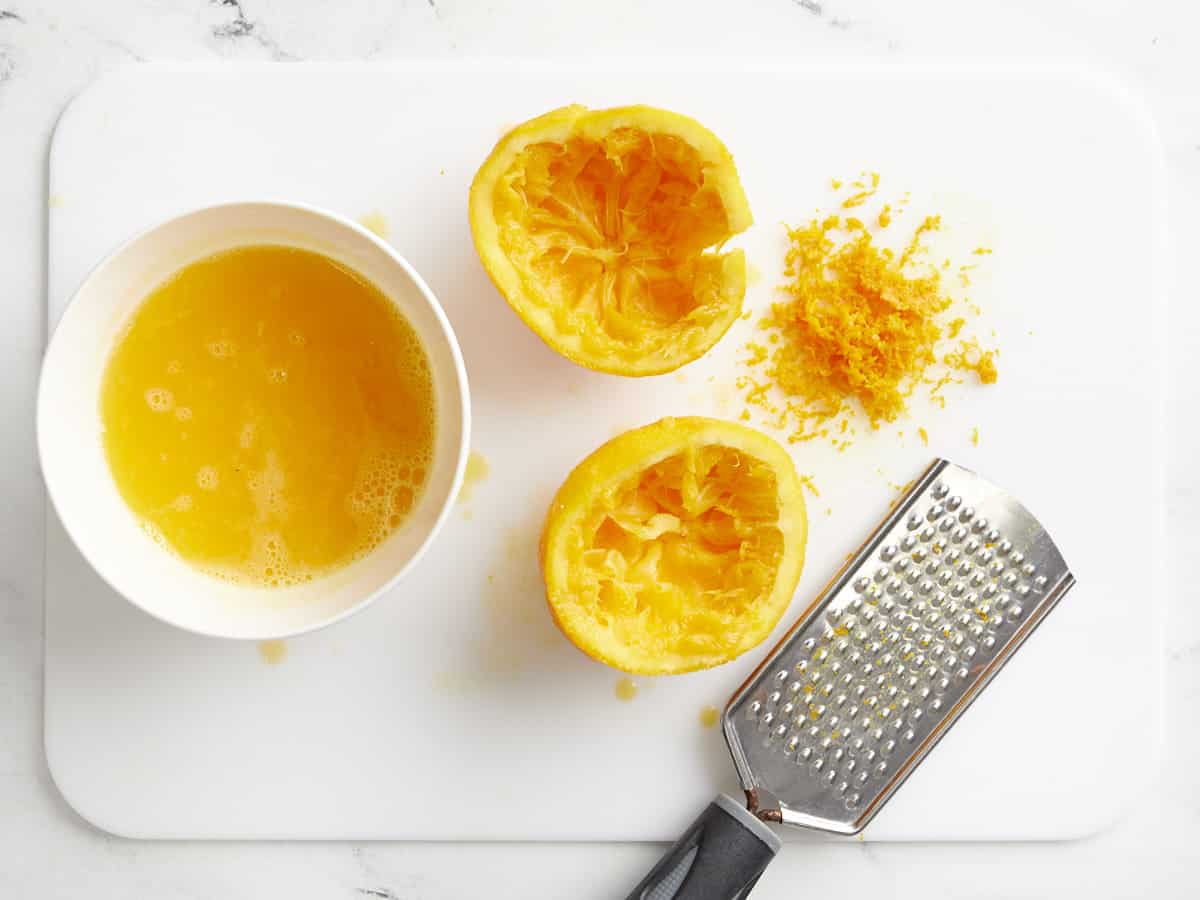
One orange zested and juiced on a cutting board.
Preheat the oven to 350ºF. Zest and juice one orange. For the bread batter and icing you’ll need about ⅓ cup juice (divided) and about ¼ tsp zest (or more if desired). Wash and slice 2 cups of fresh cranberries in half.

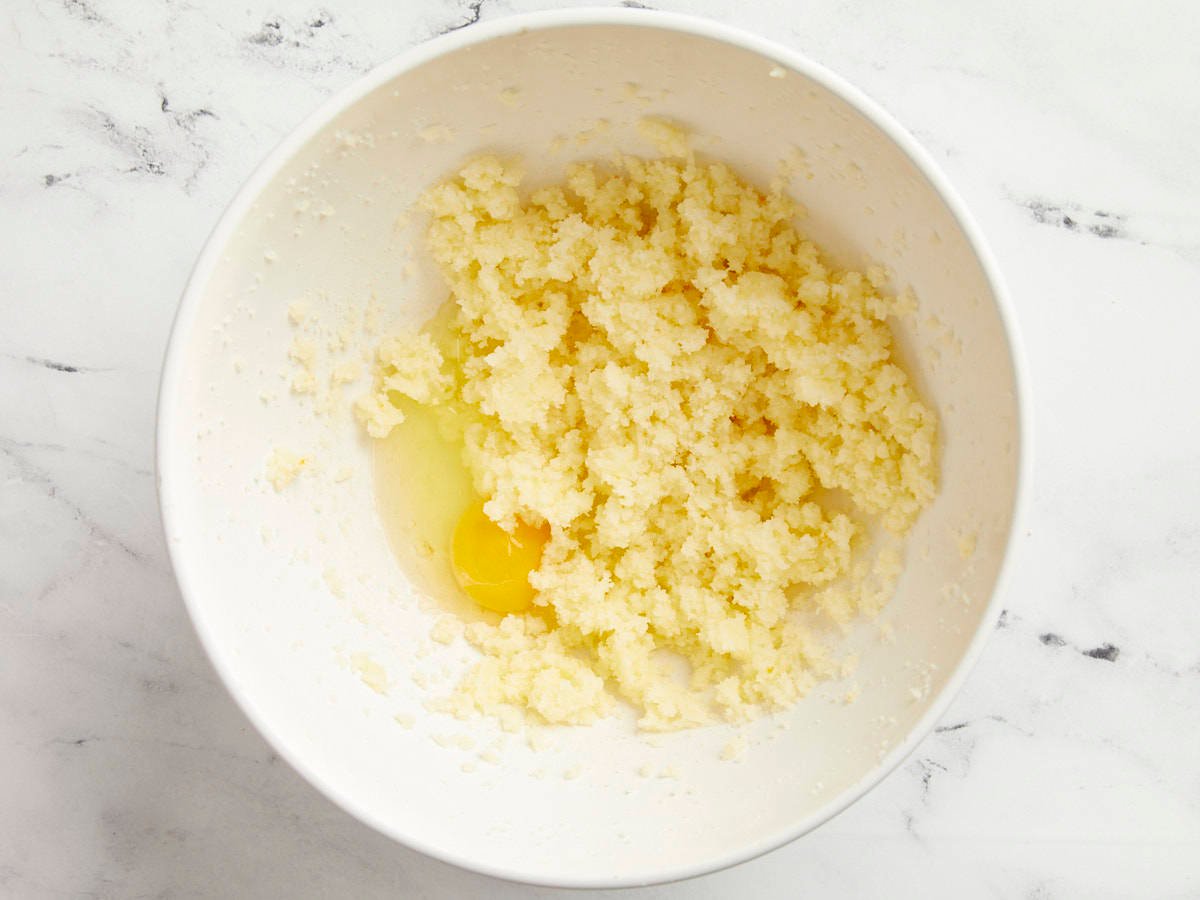
Creamed butter and sugar in a bowl with eggs added.

Use a hand mixer or stand mixer to beat together 8 Tbsp room-temperature salted butter, 1 cup granulated sugar, and ¼ tsp orange zest on high until soft and fluffy (2-3 minutes). Add one large egg and beat together until smooth and creamy (another 2 minutes).

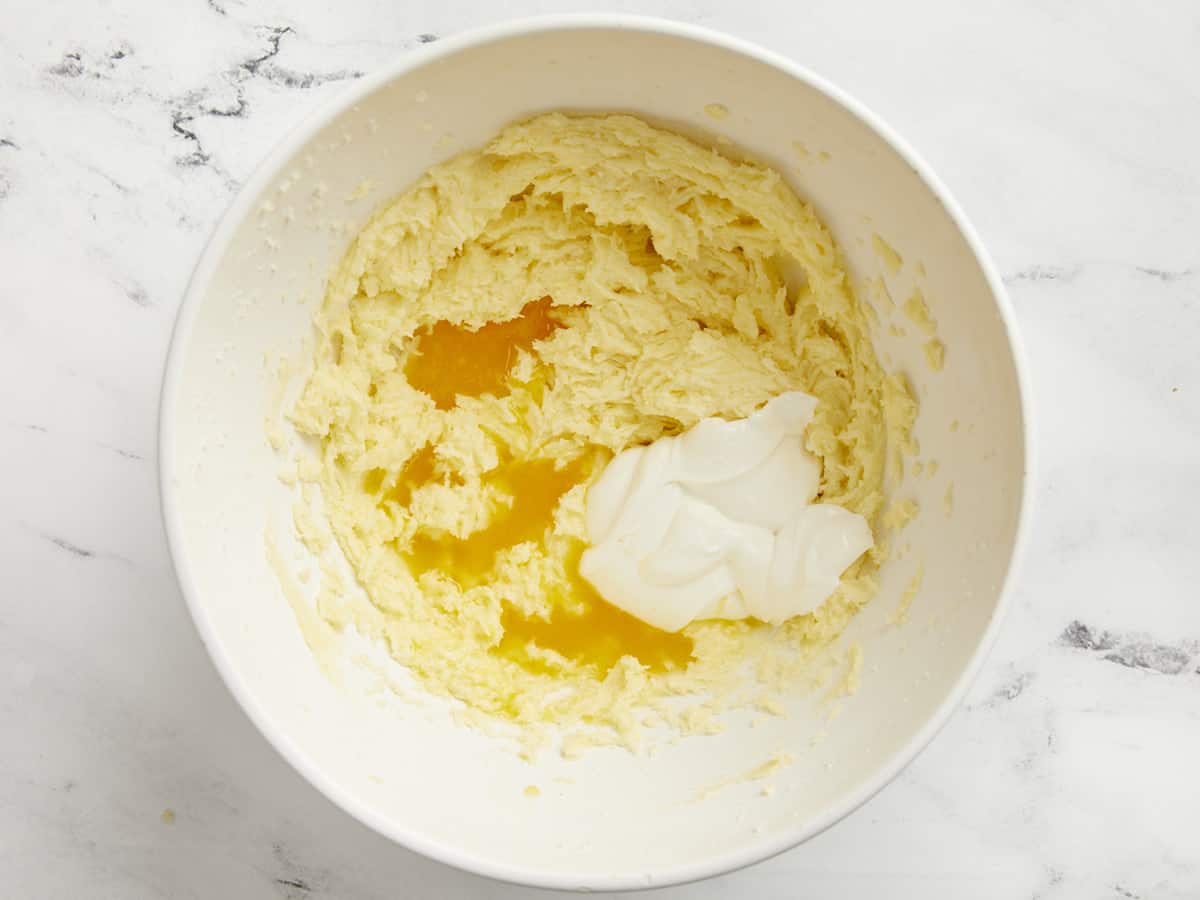
Orange juice and sour cream added to egg, sugar, and butter.

Add ¼ cup orange juice and ½ cup sour cream, then beat together until smooth and creamy once again.

Dry ingredients for cranberry orange bread in a bowl.

In a separate bowl, whisk together 2 cups of all-purpose flour, 1 tsp baking powder, ½ tsp baking soda, and ½ tsp salt.

Dry ingredients folded into batter.

Add about half of the dry ingredients to the wet ingredients and beat them together on low speed until incorporated. Add the remaining dry ingredients and beat on low speed until a smooth batter forms. Do not overmix.

Sliced cranberries being folded into the bread.

Fold the sliced cranberries into the batter.

Cranberry bread batter being smoothed into a bread pan.

Grease an 8.5 x 4.5 inch loaf pan, then dust it lightly with flour. Spread the bread batter into the loaf pan.

baked cranberry orange bread in the bread pan.

Bake the bread in the preheated 350ºF oven for 60 minutes or until it is golden brown on top and a toothpick inserted into the center comes out clean (it may have a few crumbs but should not have wet batter coating it). Allow the cranberry bread to cool in the pan.

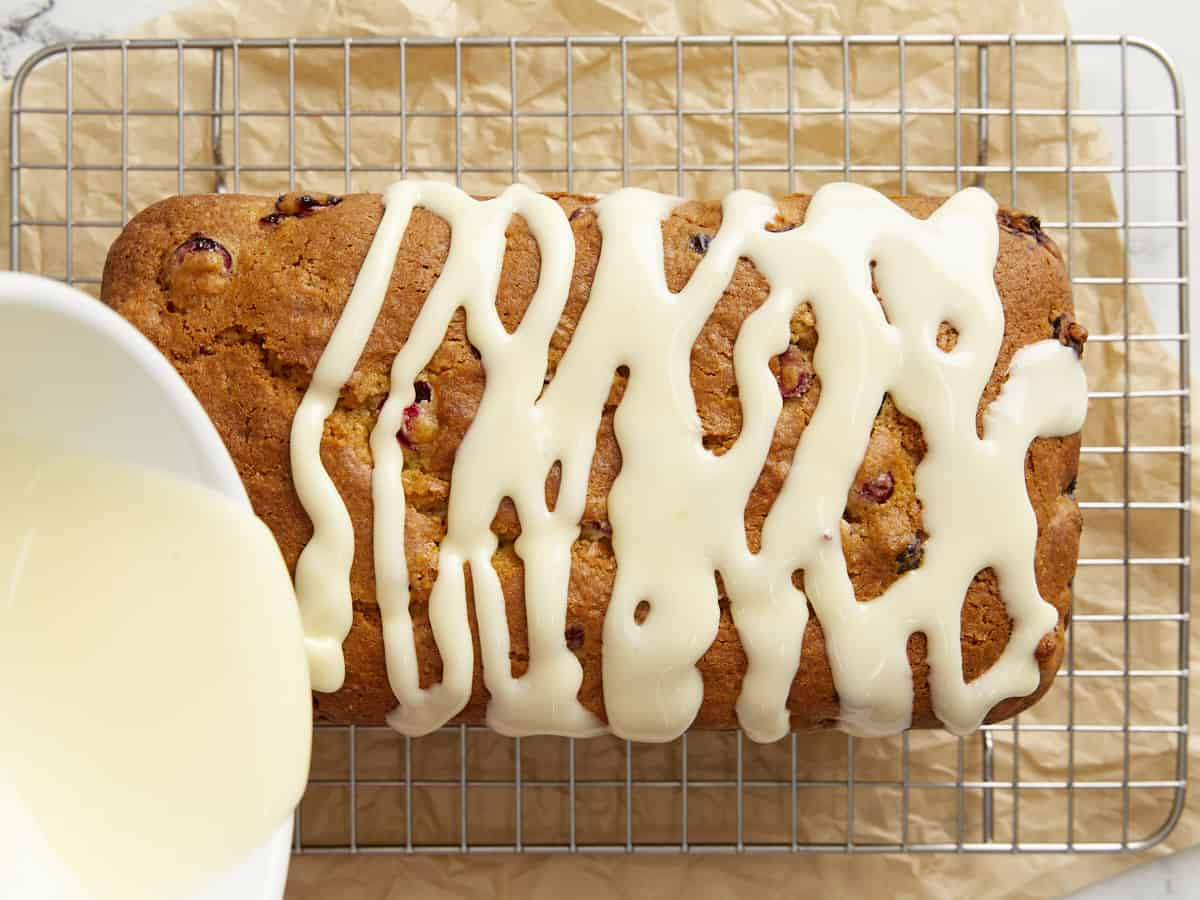
Icing being poured over the cranberry orange bread.

When the bread is mostly cool, prepare the icing. Stir together 1 cup powdered sugar with 1.5-2 Tbsp orange juice, and a pinch of orange zest if desired. Add just enough orange juice to create a thick glaze. Remove the bread from the pan, then drizzle the glaze over top.

Overhead view of a sliced loaf of cranberry orange bread on a cooling rack.

Slice, serve, and enjoy!

The post Cranberry Orange Bread appeared first on Budget Bytes.