Veggie Pot Pie

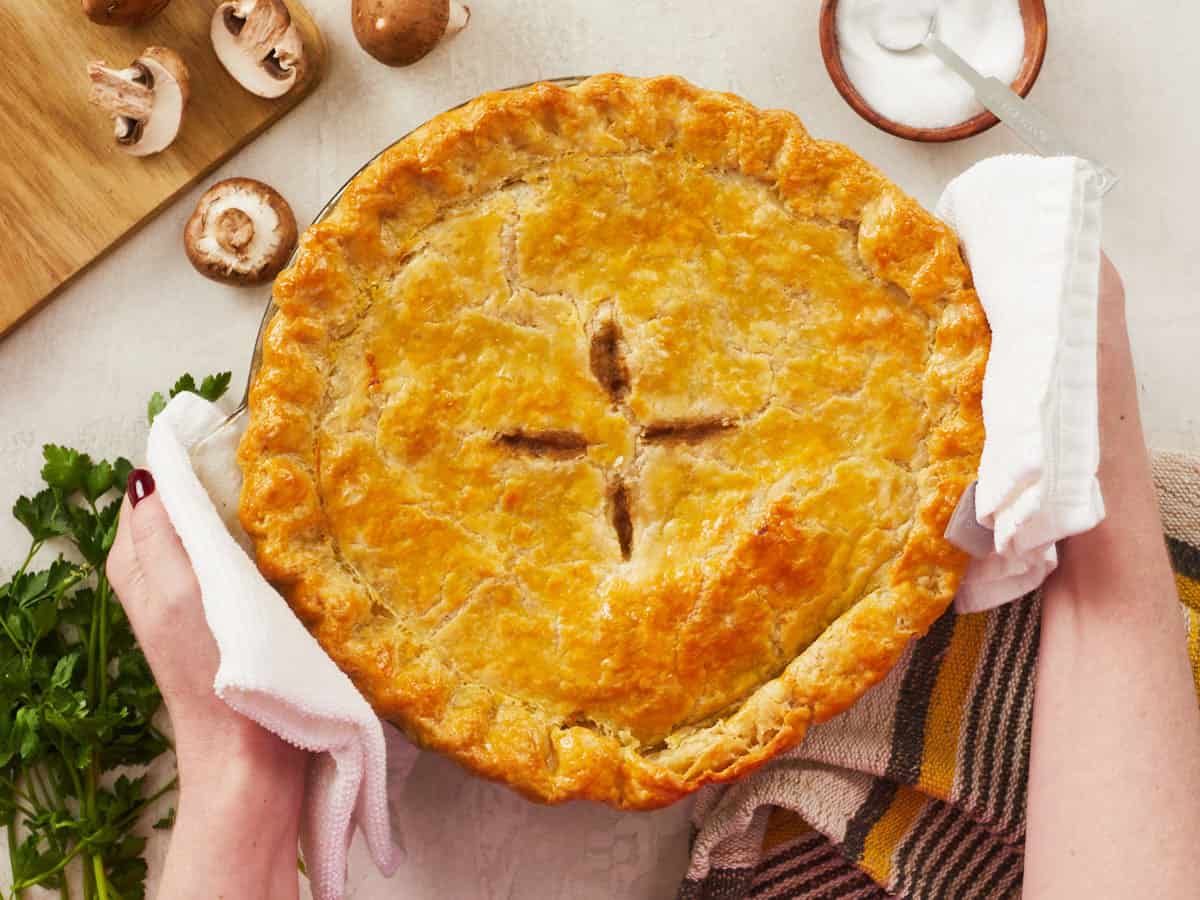
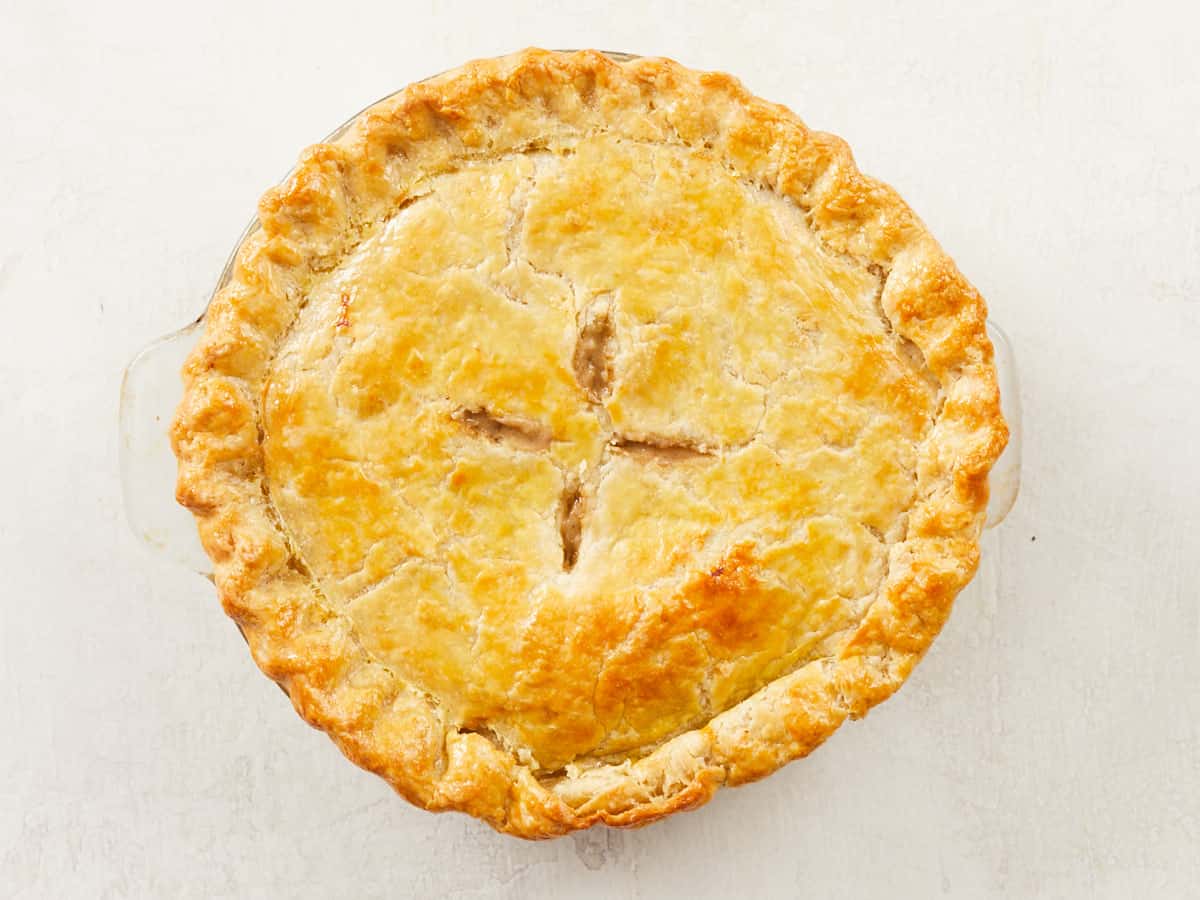
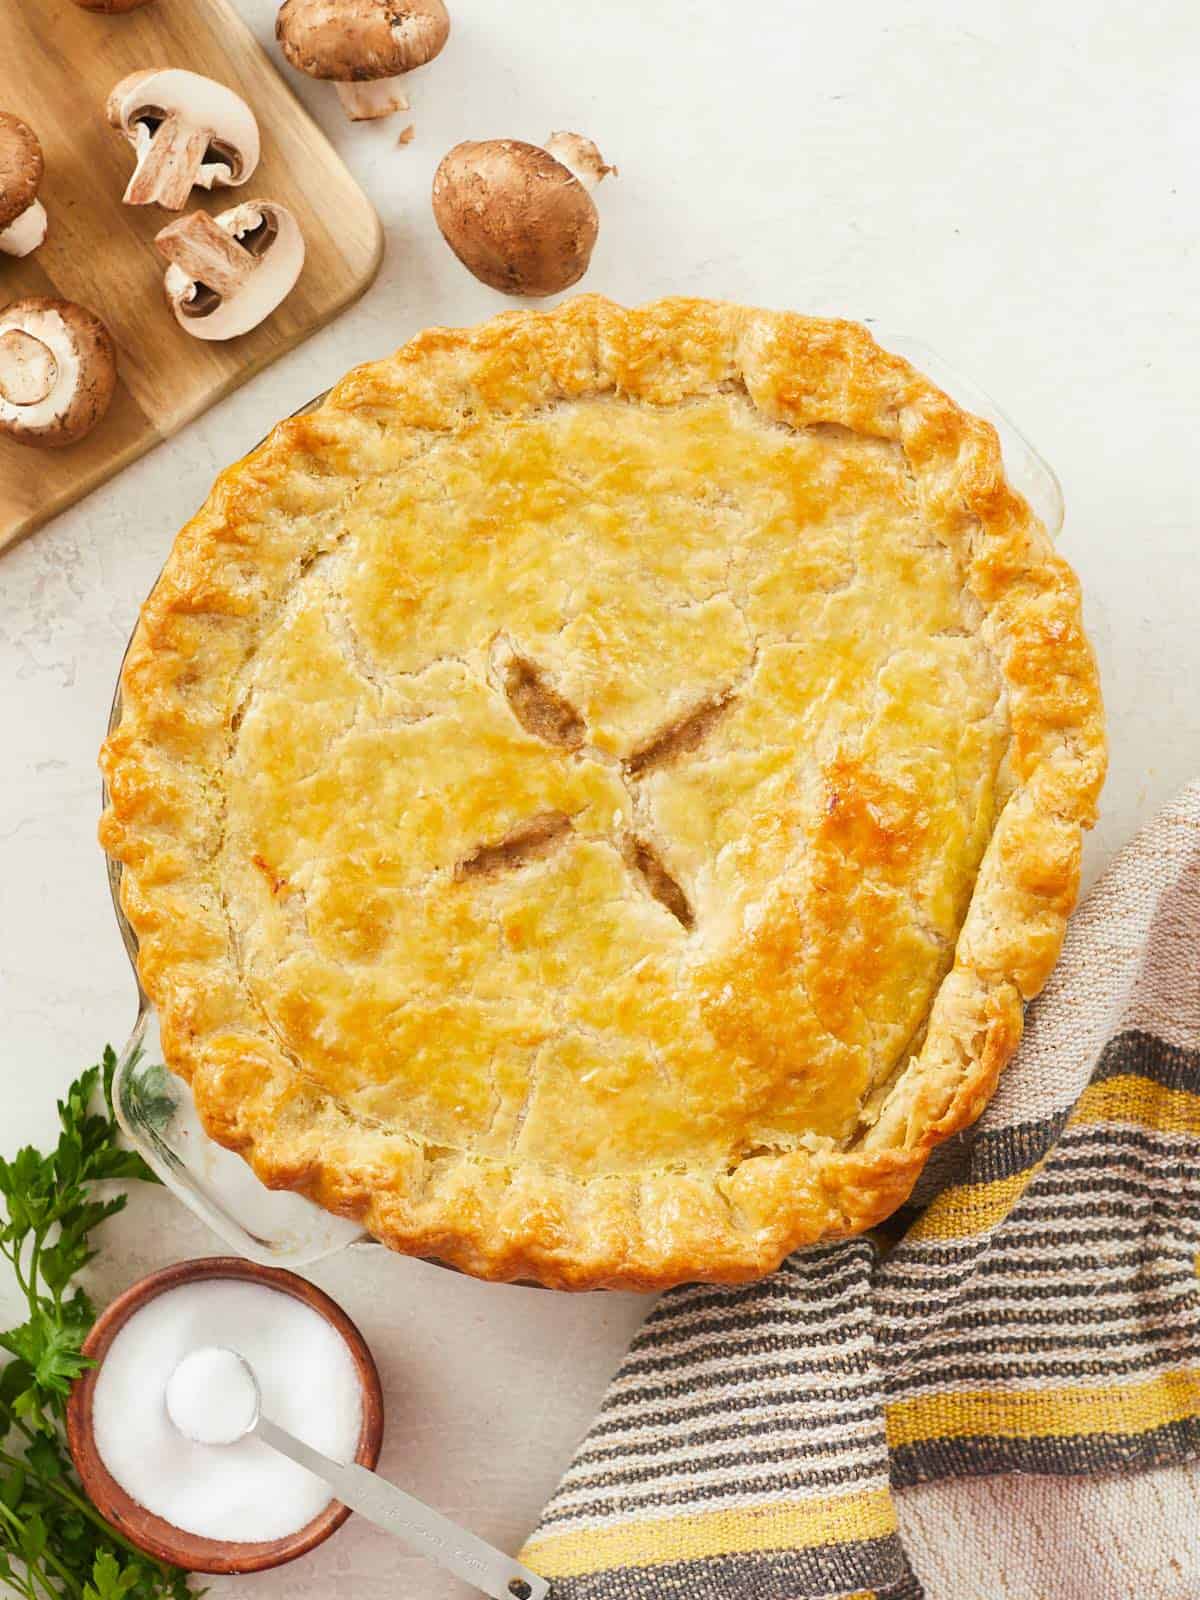
Creamy, savory, hearty, flaky, crispy- this Veggie Pot Pie is All. Of. The. Things! You can even make this veggie pot pie recipe vegan.

The post Veggie Pot Pie appeared first on Budget Bytes.

If you want your whole family clamoring around the dinner table with a dish everyone will love, this Veggie Pot Pie is All. Of. The. Things! Creamy, savory, hearty, crispy- you can even make this Veggie Pot Pie recipe vegan! It’s all cooked in a velvety sauce and encased in a flaky, buttery pie crust. Are you ready to make the ultimate comfort food? (Say yes!!!)

What Is Veggie Pot Pie?

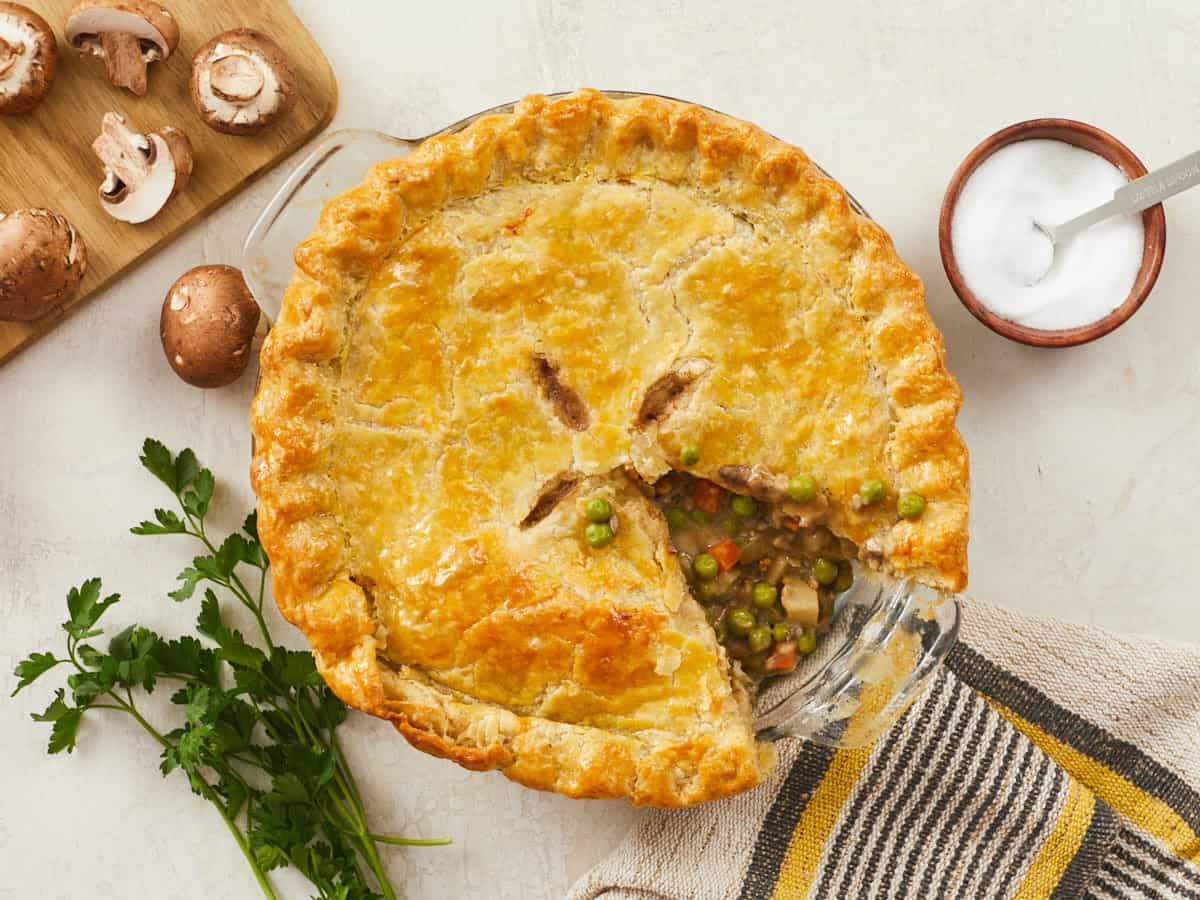
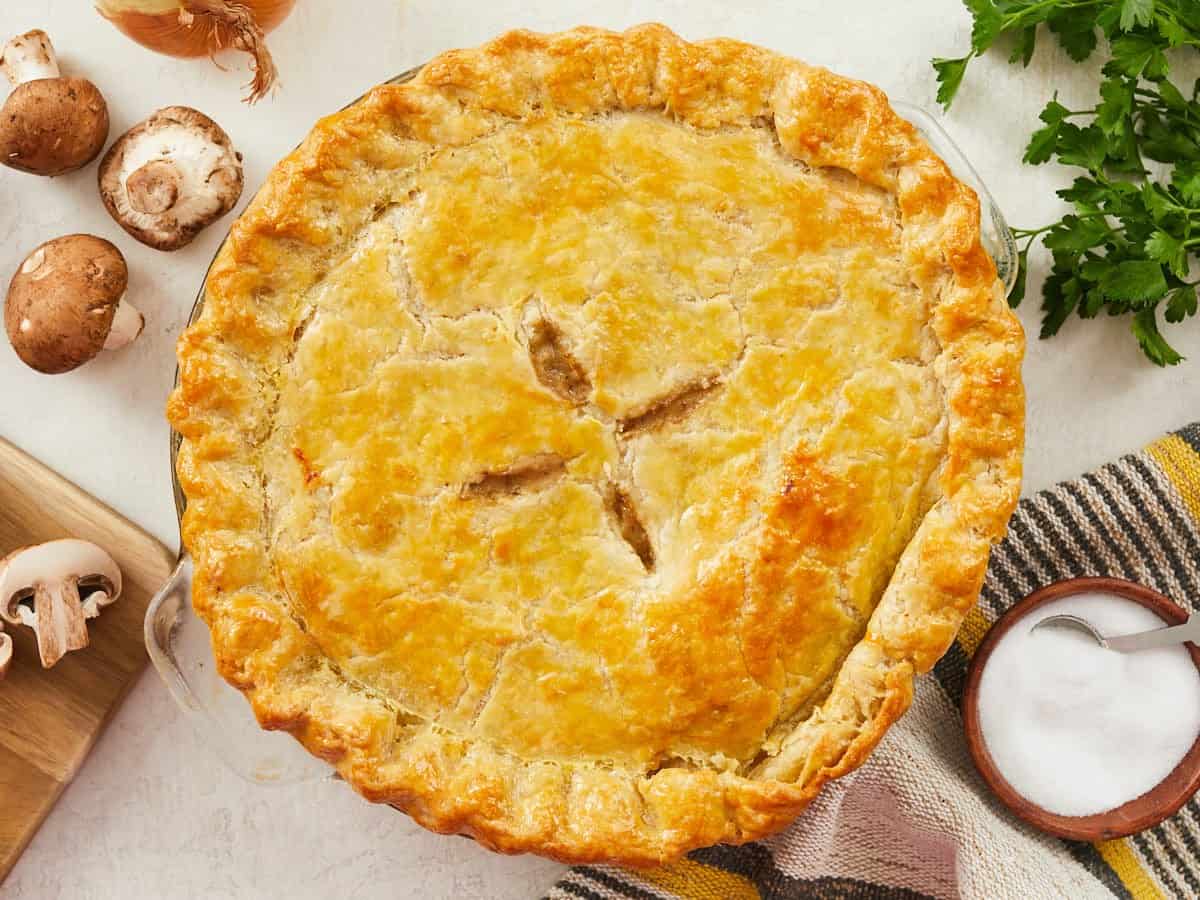
A pot pie is just like a regular pie, except it’s usually savory and made in a creamy sauce. Pot pies can be made with a bottom and top crust or just a top crust. This pot pie recipe is a mix of colorful vegetables drenched in a savory gravy and cooked in a deliciously flakey double crust. Feel free to use just a top crust if you prefer it that way. I’m a crust person, so the more, the better!

What You’ll Need

For The Filling
  • Butter and Flour– with their powers combined, you’ll make a roux, and that blend of fat and flour will thicken your sauce.
  • Milk and Vegetable Broth– this is the base of your creamy sauce. You can substitute the milk with plant-based milk if you want to keep this bad boy dairy free. Alternatively, if you want to add more depth, try using chicken broth.
  • Mushrooms, Onions, Potatoes, and Mixed Veggies– these are the stars of your veggie filling. To minimize chopping, I use frozen mixed veggies. But any combination of veggies you have on hand will work. Just make sure to chop everything the same size and par-cook root veggies in the broth first.
  • Rosemary, Thyme, Bay Leaf, and Sage– add flavor and depth to the sauce. You can substitute them with your favorite spice blend.
  • Soy Sauce– adds umami, AKA savoriness, which anything vegetable-based will need loads of. You can also use a teaspoon of any Miso you have on hand or Worcestershire Sauce.
For The Crust
  • Double Pie Crust– encases everything in a buttery dream and adds incredible texture. You can use a store-bought crust, but I use my 3-Ingredient Pie Crust. You can also use puff pastry, but par-bake it before filling.
  • Egg– the white seals the bottom crust, so it doesn’t absorb liquid, and the yolk lacquers the top crust, giving you a golden finish. If you want to skip the egg, par-bake the bottom crust and use milk, cream, or plant-based milk to lacquer the top crust.

Make It Vegan

You can tweak this recipe to create an outstanding Vegan Pot Pie! Sub the butter with vegan butter or oil. Opt for a store-bought vegan pie crust, or make my Easy 3-Ingredient Pie Crust with Vegan Butter or Vegetable Shortening. Sub the milk with any plant-based milk. As far as the egg wash is concerned, you can brush your pie crust with water, aquafaba, or plant-based milk. Par-bake the bottom crust before filling.

Prevent A Soggy Bottom Crust

Brushing the bottom crust with egg white helps create a barrier that prevents the dreaded soggy bottom. You should also preheat the oven with a sheet pan in it. When you place the pie on it, the heat from the sheet pan melts the fat in the bottom pastry, creating a layer that prevents liquid from permeating the pie. You can also place an overturned cast iron skillet in your sheet pan and preheat them both. Bake your pie on the bottom of the overturned skillet. Cast iron holds heat and helps crisp up that bottom crust.

How To Store The Leftovers

You can store leftovers in an airtight container in the fridge for up to 4 days, though reheating is easier if you just store them in the pie plate and cover them tightly with foil. You can freeze a veggie pot pie for up to 2 months, tightly wrapped in plastic, then foil, and kept in an airtight container. Cover the top crust with foil to prevent burning, and reheat in a 350ºF oven until it has warmed throughout.

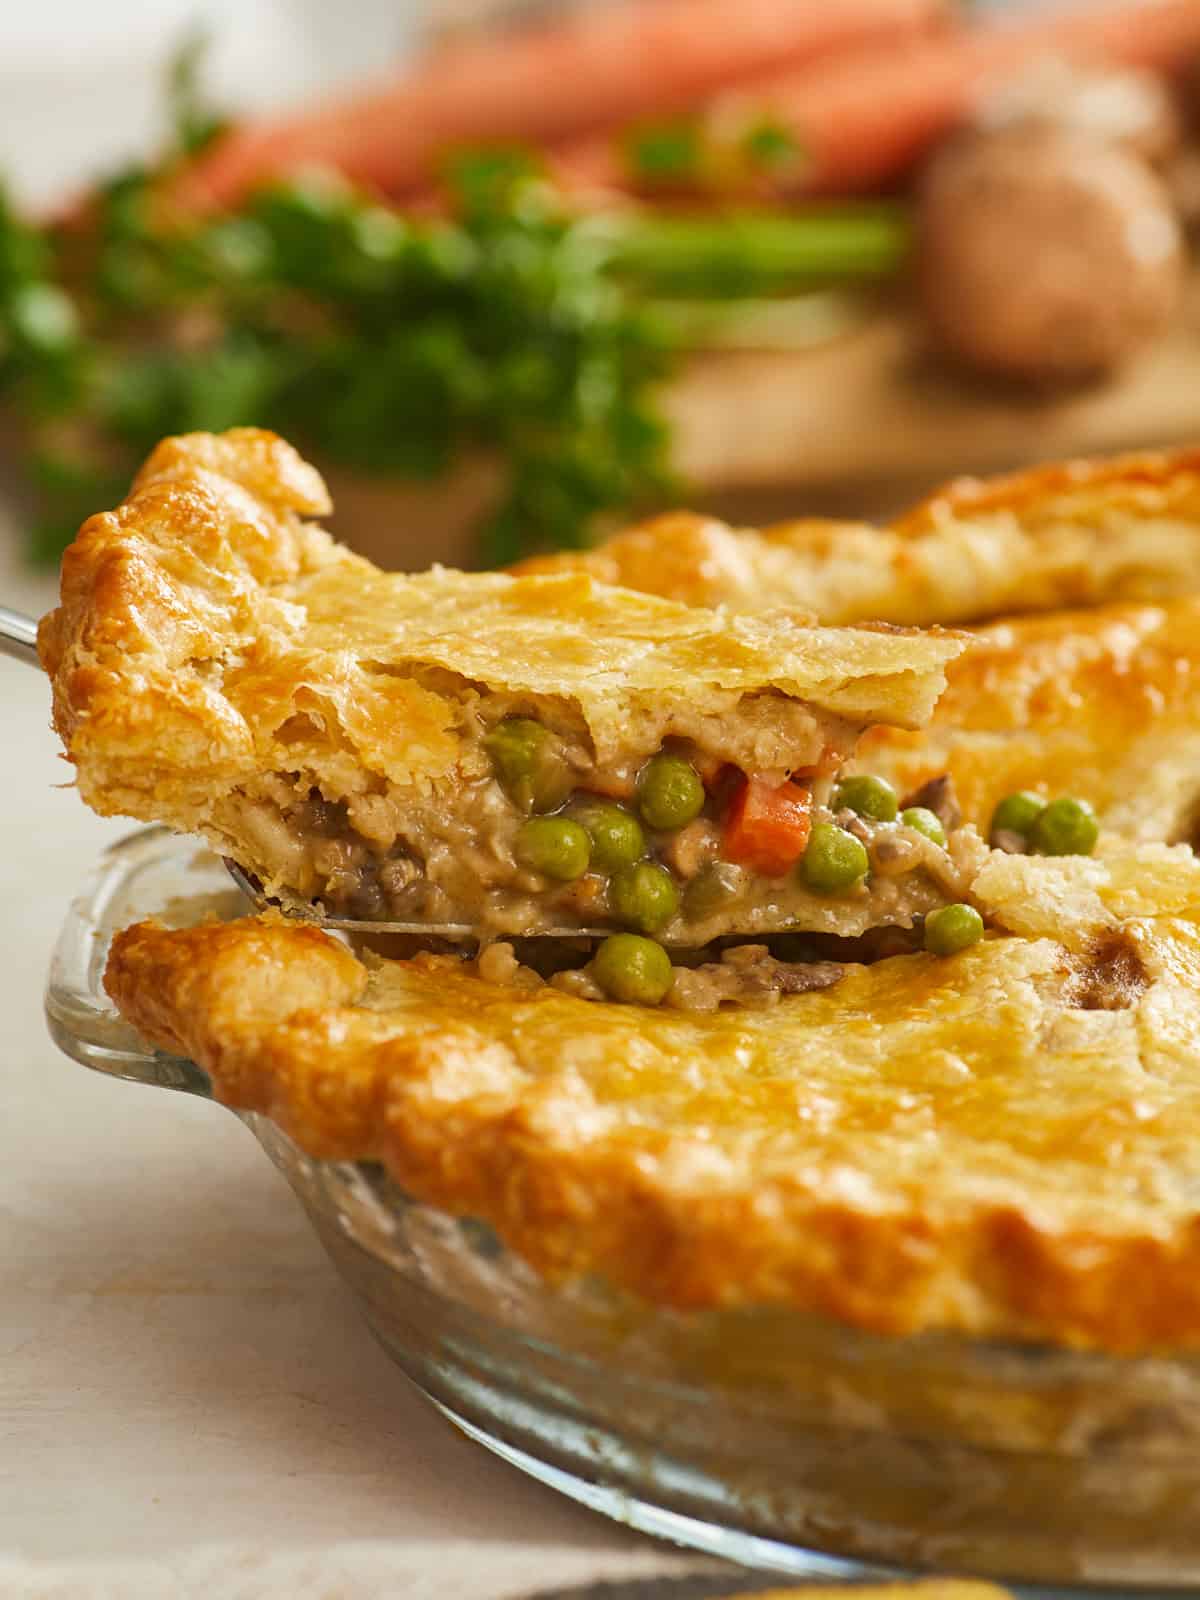
Side shot of a slice of veggie pot pie being removed from the pie dish.
Print

Veggie Pot Pie

If you want your whole family clamoring around the dinner table with a dish everyone will love, this Veggie Pot Pie is All. Of. The. Things! Creamy, savory, hearty, crispy- you can even make this recipe vegan!
Course Brunch, Dinner, Lunch
Cuisine American
Total Cost ($9.61 recipe / $1.20 serving)
Prep Time 20 minutes
Cook Time 1 hour 10 minutes
Total Time 1 hour 30 minutes
Servings 8 slices
Calories 281kcal

Ingredients

  • 1 3-Ingredient Pie Crust* $2.34
  • 7 Tbsp salted butter, divided $1.12
  • 1 yellow onion, small dice (about 1 cup) $0.41
  • 2 garlic cloves, minced (about 1 teaspoon) $0.24
  • 4 Tbsp flour $0.04
  • 1 cup veggie broth $0.13
  • 1/2 cup whole milk $0.13
  • 3/4 tsp salt $0.05
  • 1 bay leaf $0.15
  • 1/4 tsp ground rosemary $0.03
  • 1/4 tsp dried thyme $0.03
  • 1/4 tsp rubbed sage $0.03
  • 1/4 tsp black pepper $0.02
  • 1 tsp soy sauce $0.02
  • 1 Yukon gold potato, small dice* (about 1 cup) $0.27
  • 1 pint baby bellas, small dice $2.89
  • 12 oz frozen mixed vegetables $1.25
  • 1 egg, separated $0.46

Instructions

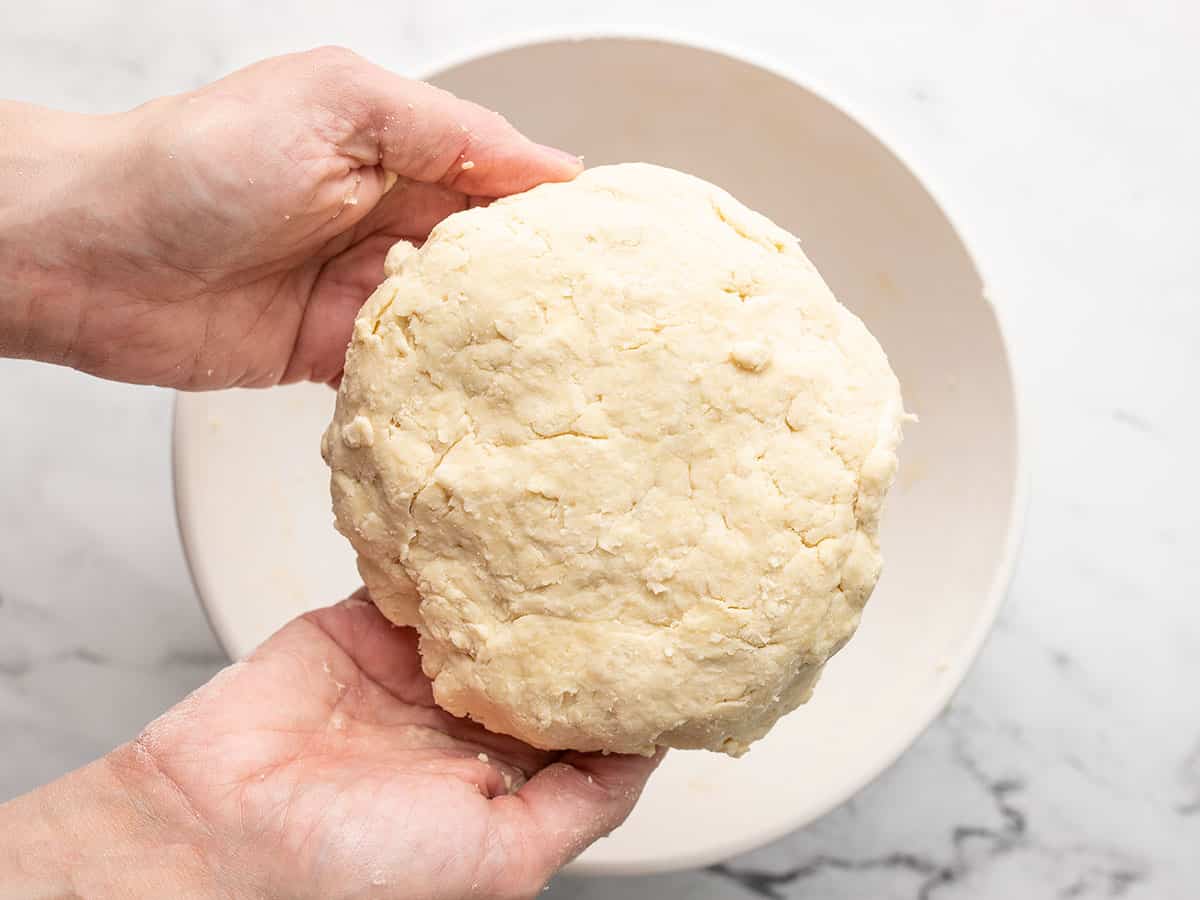
  • Grease a pie pan with 1 tablespoon of butter. If you're using store-bought dough, place the bottom crust in the pie pan. If you made 3-Ingredient Pie Crust, cut 1/3 of the dough off to be used as the top crust, wrap it in plastic, and refrigerate until you're ready to use it later.
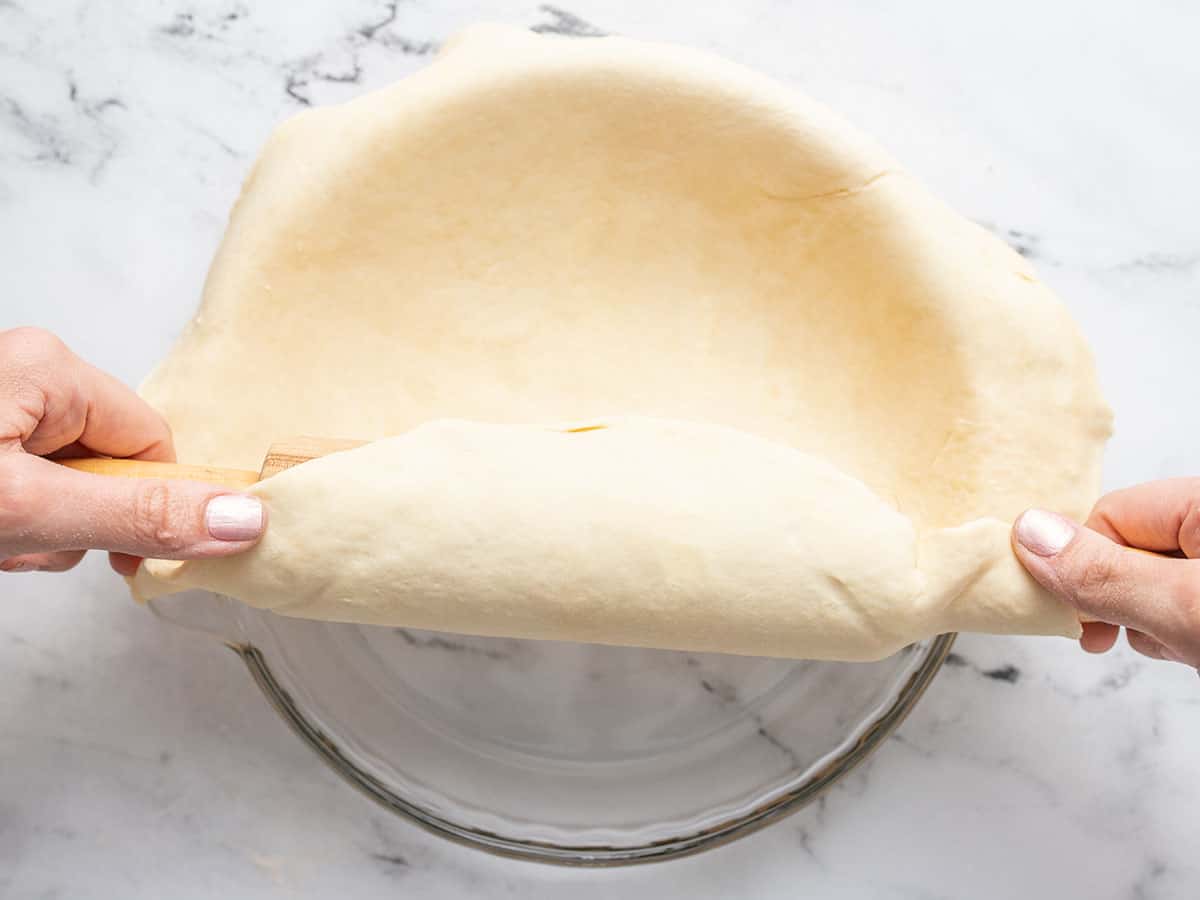
  • Dust your work surface with flour and roll out the bigger 2/3 piece of dough into a circle that is 16 inches in diameter and about 1/4 inch thick. Line the pie pan with it.
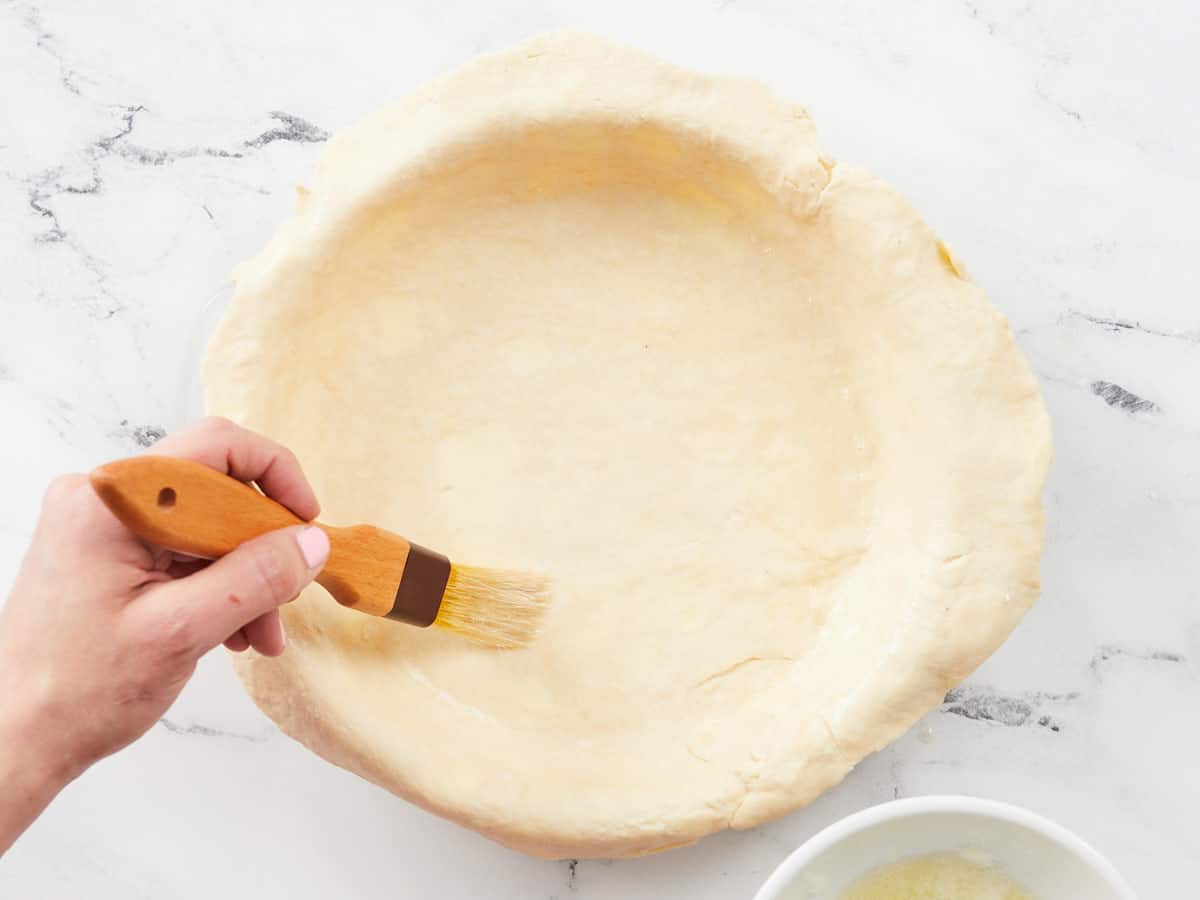
  • Beat the egg white until frothy, then brush the bottom crust with it. Let the crust rest in the fridge.
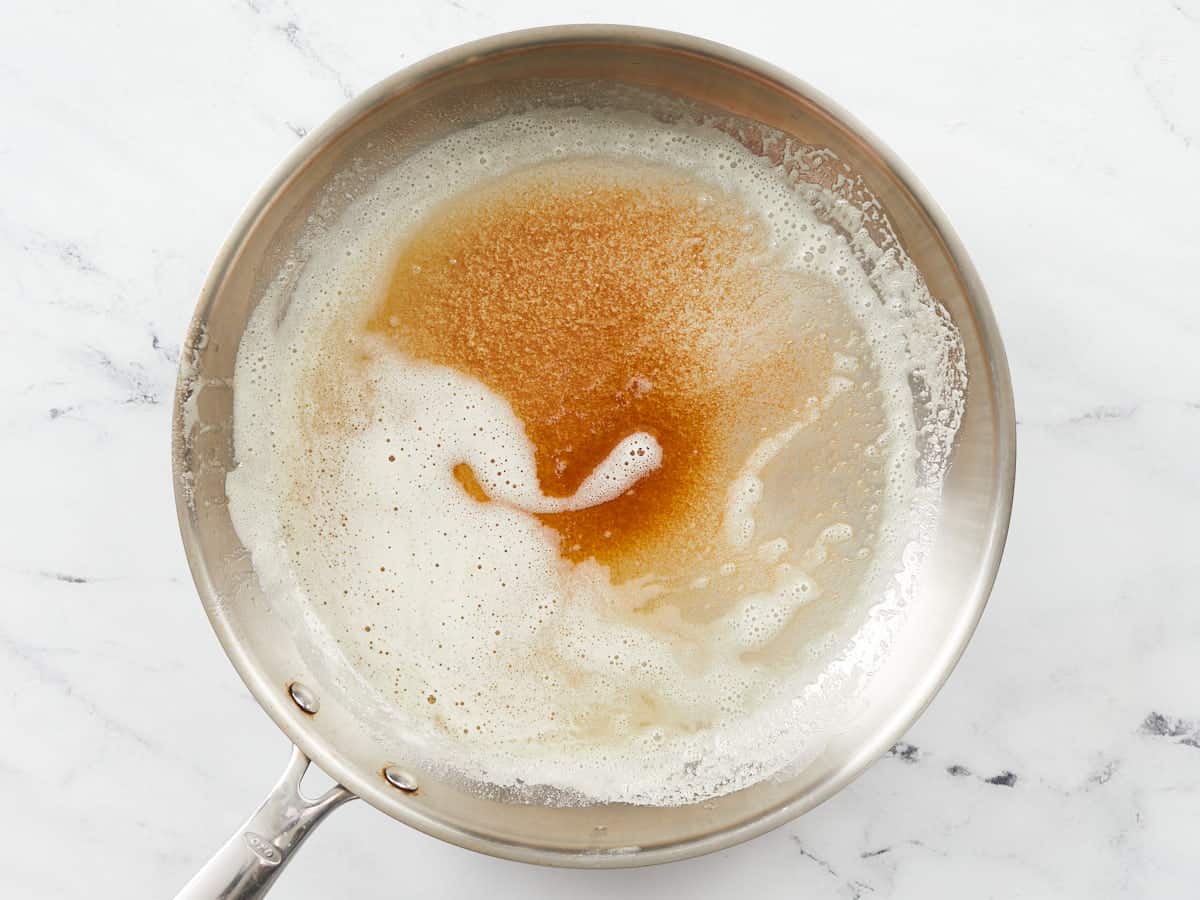
  • Place a rack in the center of your oven along with a sheet pan and preheat it to 350ºF. Place a deep skillet over medium heat and add 5 tablespoons of salted butter to the pan. Once the butter foams, swish it around the pan until it turns an amber color and smells of hazelnuts.
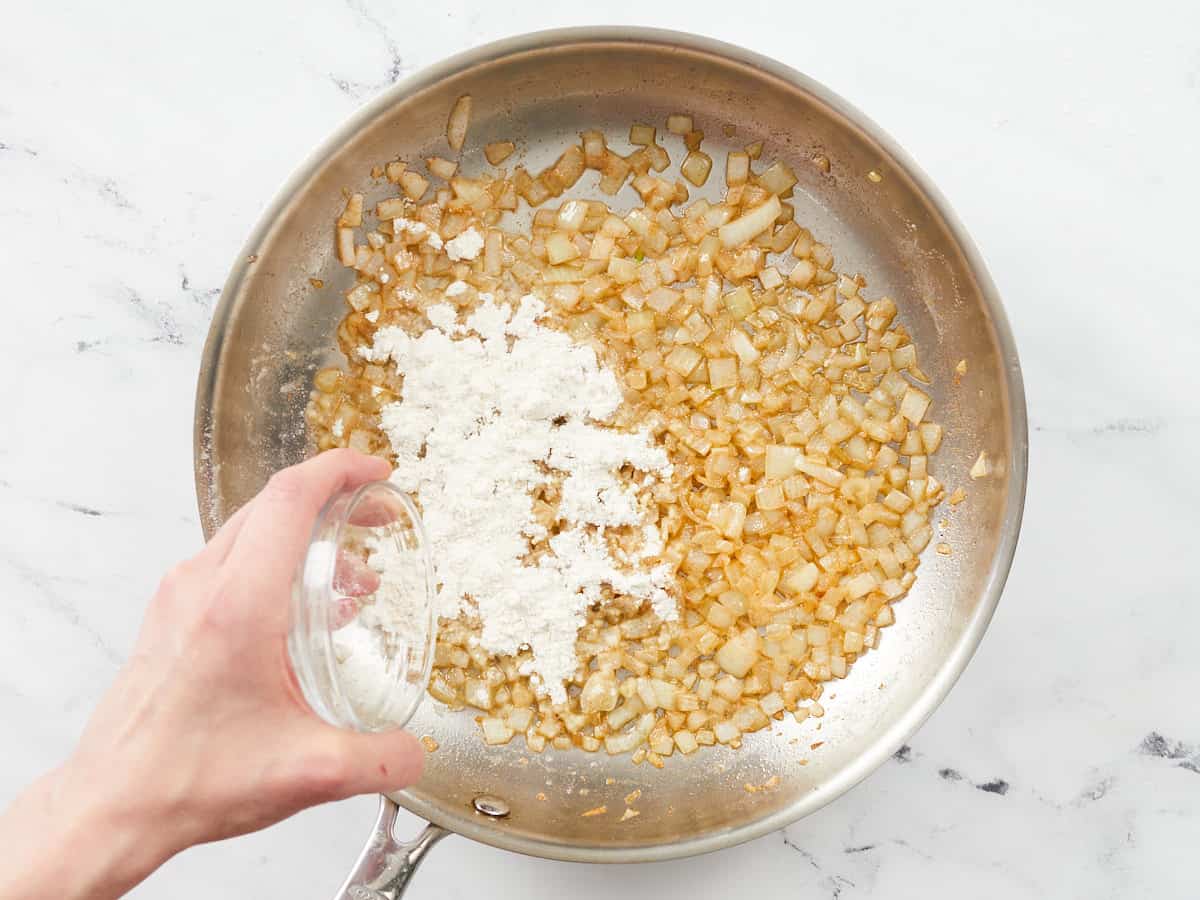
  • Add the diced onions to the brown butter. Cook until the onions are translucent, about 5 minutes. Add the garlic, and cook for one minute. Sprinkle the flour over the onions and garlic in the skillet and continue to cook and stir for two minutes more.
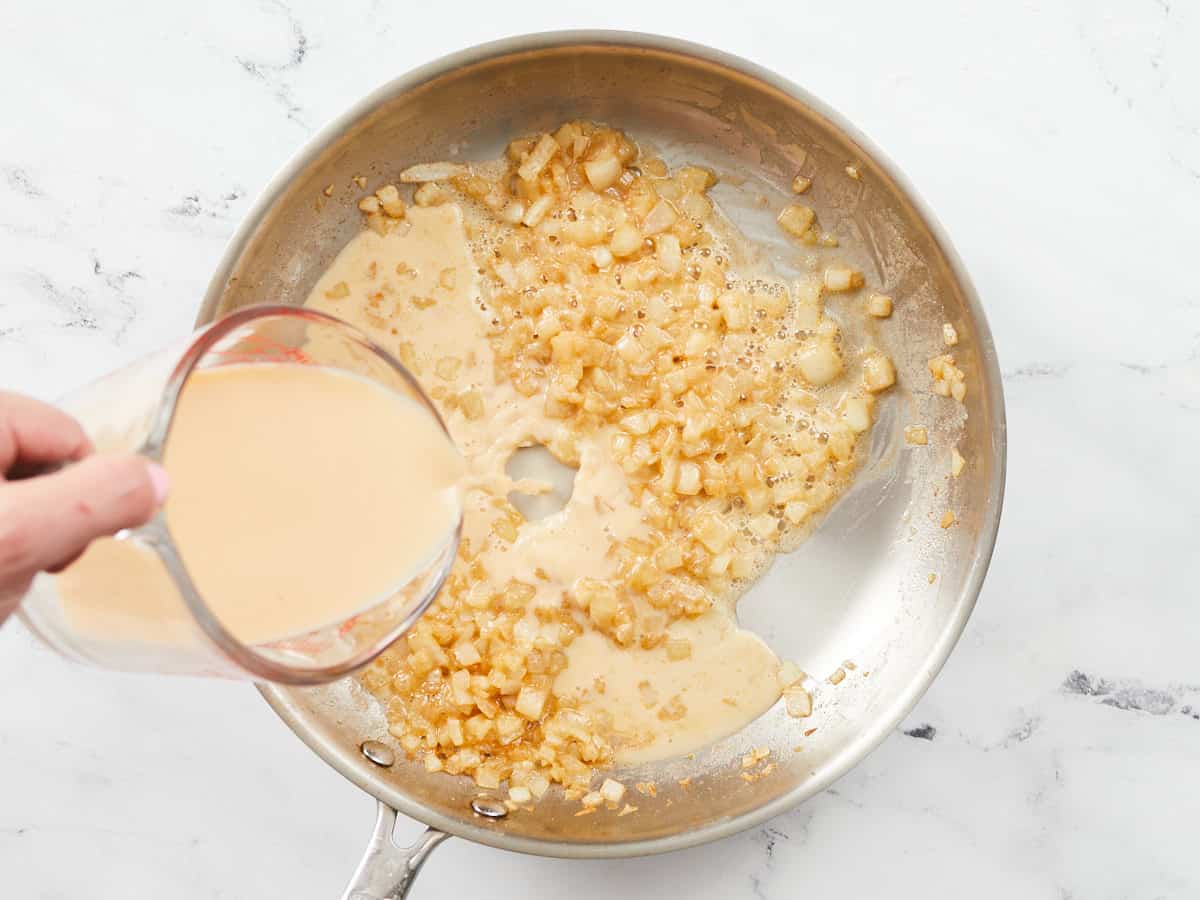
  • To the pan, add veggie broth, milk, and salt. Whisk to combine and dissolve any flour off the bottom of the skillet. Then add the bay leaf, rosemary, thyme, sage, pepper, and soy sauce. Whisk occasionally as the liquid simmers and thickens.
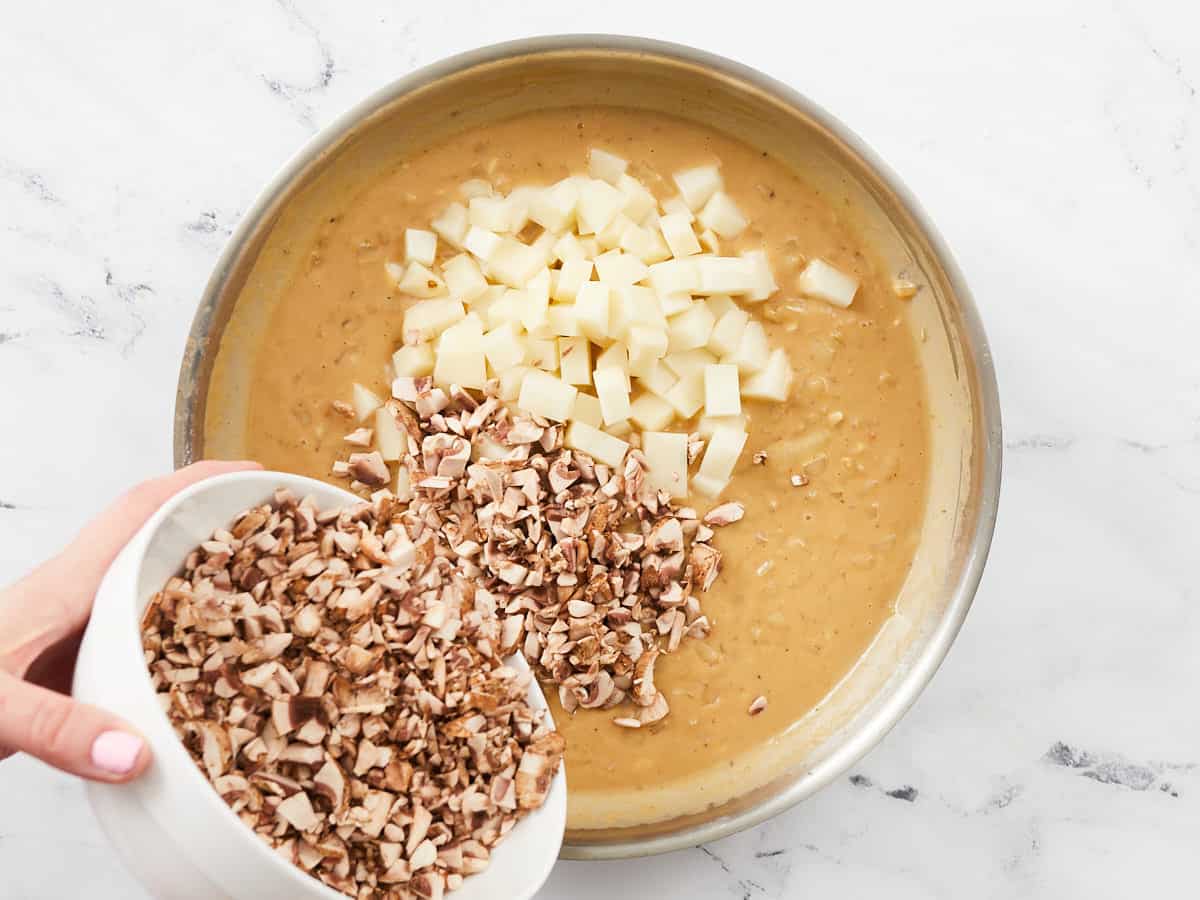
  • Add the pint of diced mushrooms and the diced potato to the pan. Stir to combine and cook until the gravy has thickened more and reduced some, about 5 minutes.
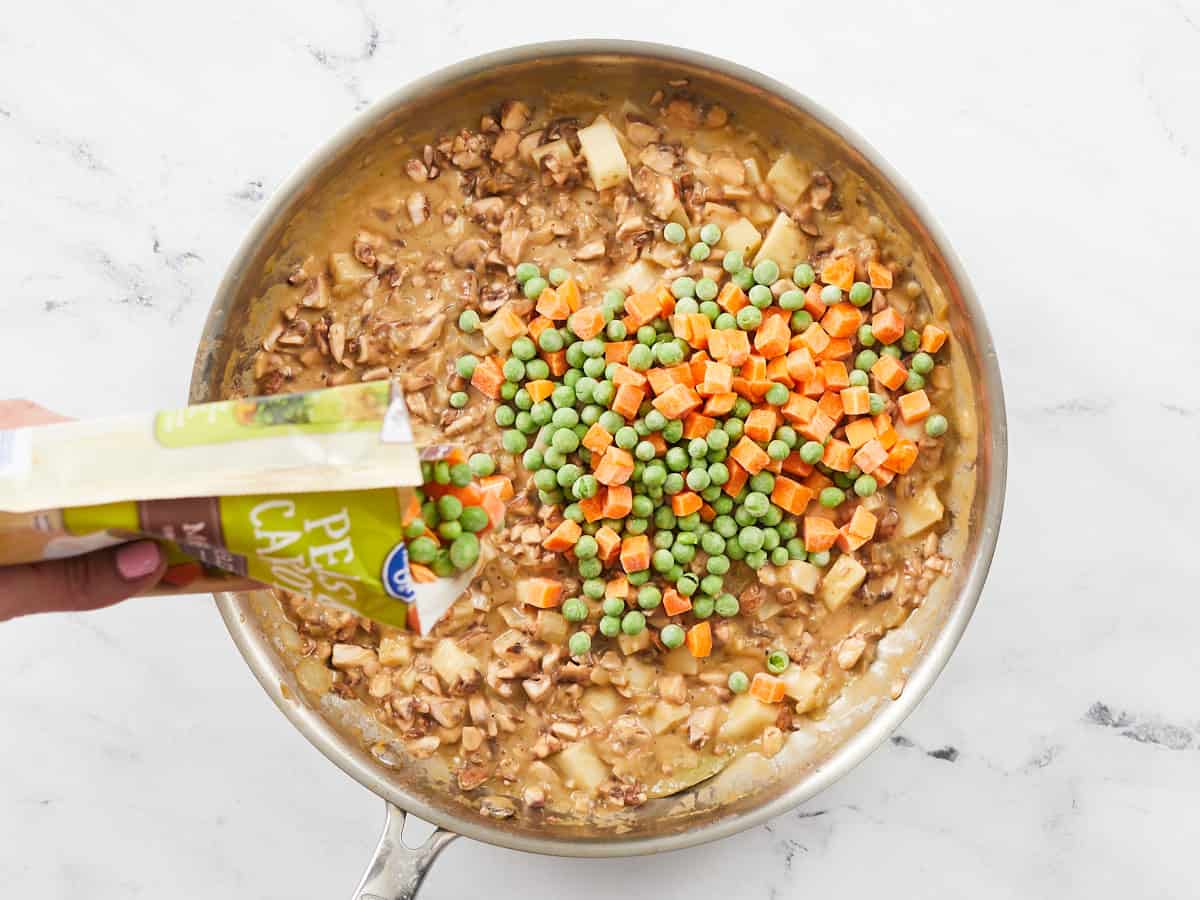
  • Remove the skillet from the heat. Finally, add the frozen mixed vegetables and allow them to cool the ingredients in the pan.
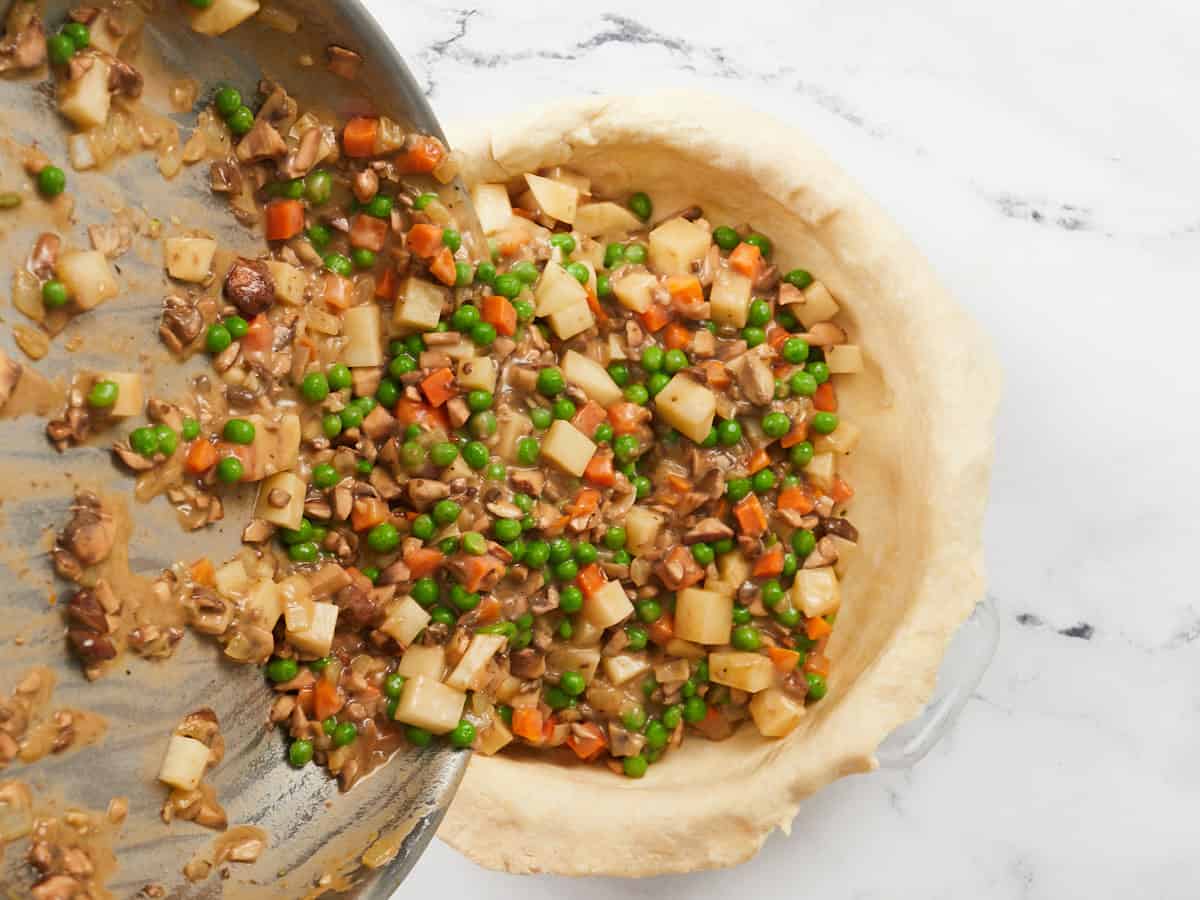
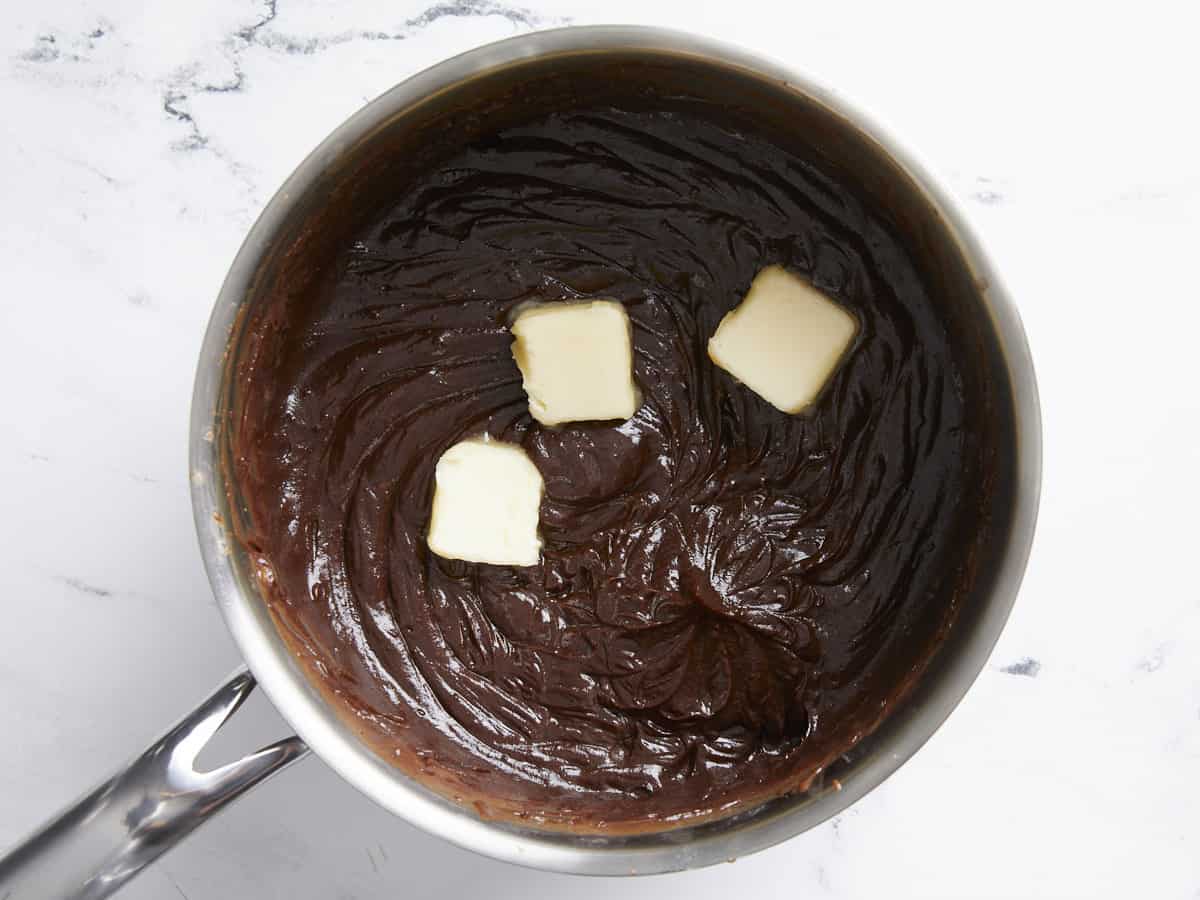
  • Take the pie pan out of the fridge, prick the bottom crust a few times with a fork, and add the cooled filling to the pie pan. Dice the last tablespoon of butter and sprinkle it over the filling.
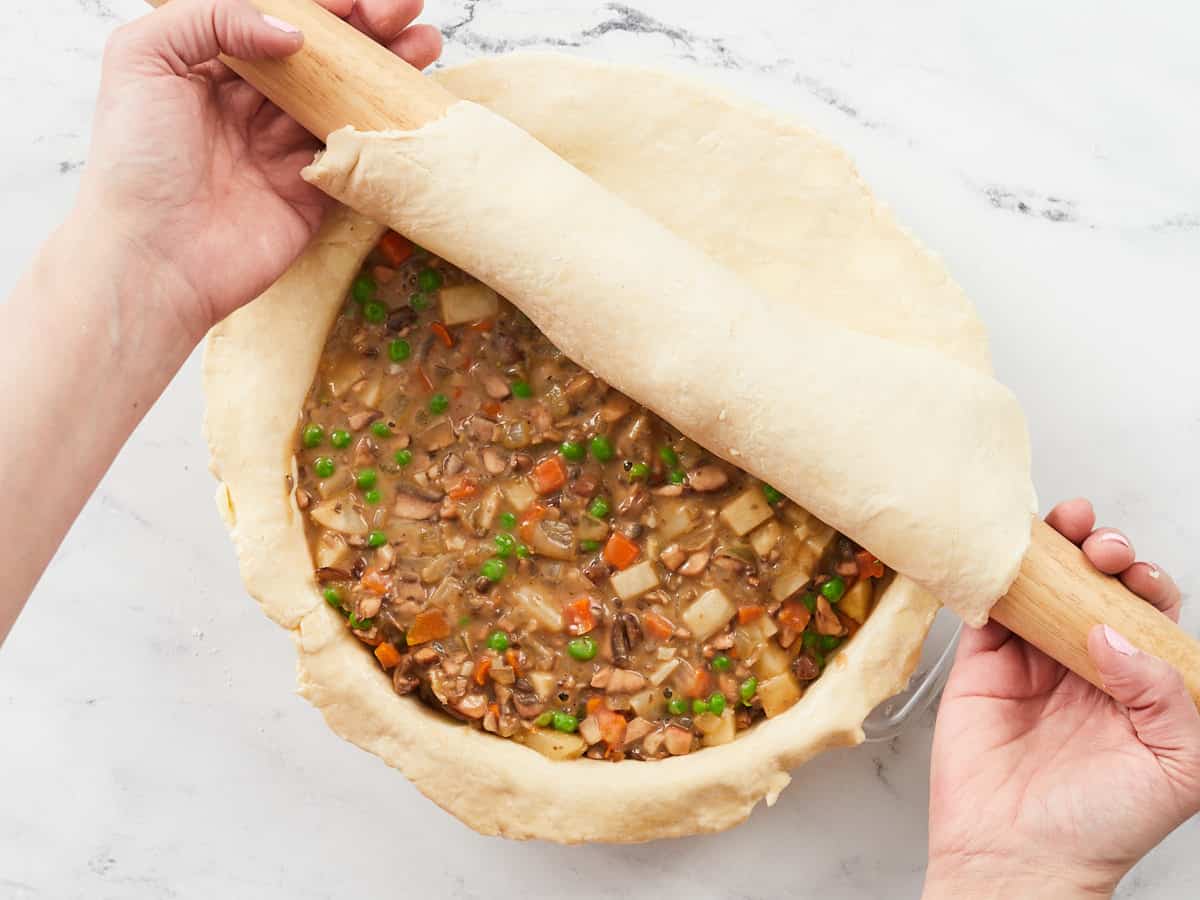
  • Roll the smaller piece of dough into a circle, about 10 inches wide and 1/4 inch thick. Cover the pie with it.
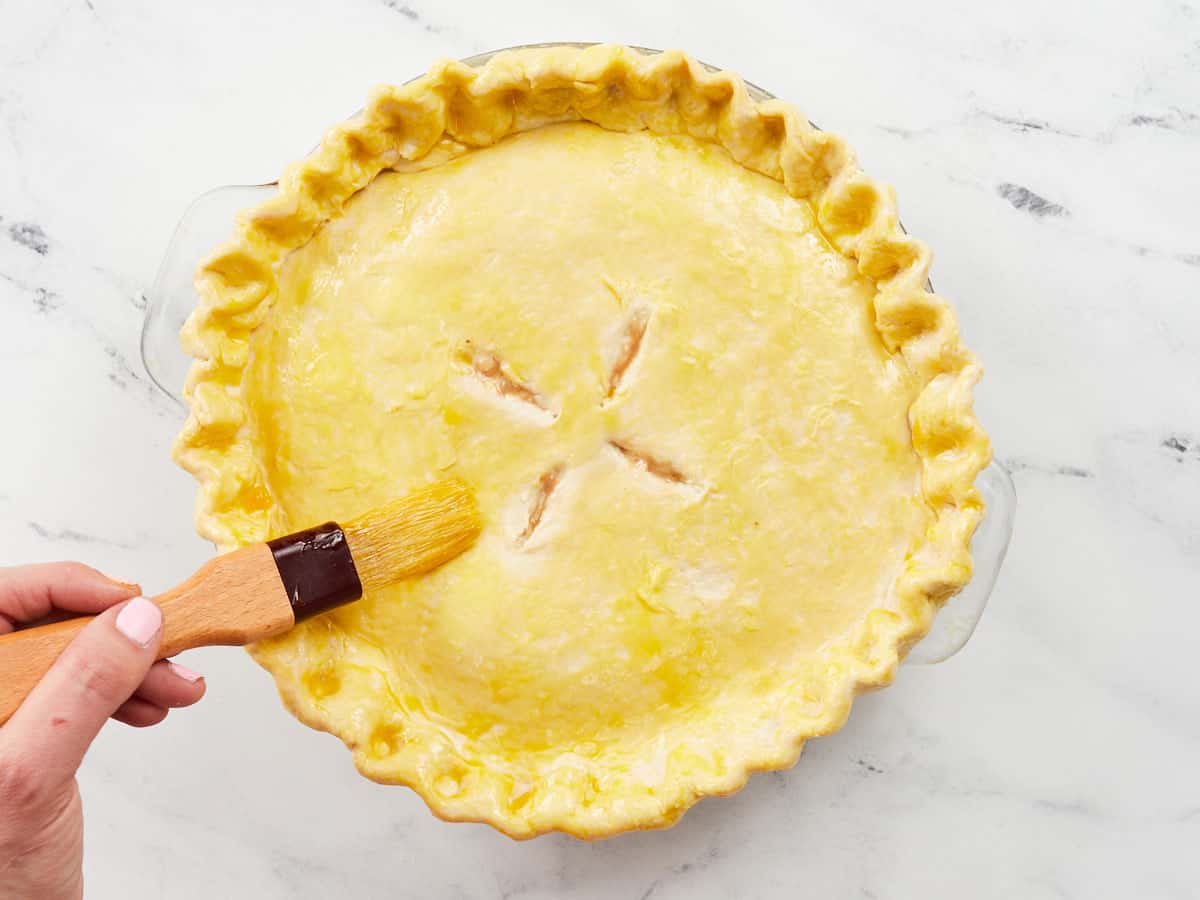
  • Beat the egg yolk. Trace a bit of yolk along the top edge of the bottom and top crusts. Fold the bottom crust over the top crust and crimp the edges shut. Cut vents into your top crust. Brush egg yolk in a light layer over the top crust.
  • Bake for 45 to 50 minutes, or until the pie dough is golden and flaky. Allow the Veggie Pot Pie to cool for ten minutes before serving.

See how we calculate recipe costs here.

Notes

*You can also use a store-bought double crust or puff pastry. 
*To prevent the diced potato from turning gray, place it in salted water and cover it with a wet paper towel, so it stays submerged. Drain before using in the recipe.

Nutrition

Serving: 1slice | Calories: 281kcal | Carbohydrates: 28g | Protein: 7g | Fat: 17g | Sodium: 465mg | Fiber: 4g

How to Make Veggie Pot Pie – Step by Step Photos

Grease a pie pan with 1 tablespoon of butter. If you’re using store-bought dough, place the bottom crust in the pie pan. If you are making 3-Ingredient Pie Crust, roll it into a large disc about 6 inches wide and two inches thick. Then cut 1/3 of it off to use as the top crust later on. Wrap it in plastic, and refrigerate.

Dust your work surface with flour and roll out the bigger 2/3 piece into a circle that is 16 inches in diameter and about 1/4 inch thick. Drape it over the pie pan and press down gently, gently pushing it into the bottom crease and sides of the pan.

Beat the egg white til frothy and then brush the bottom crust with it. Let the crust rest in the fridge.

Place a rack in the center of your oven along with a sheet pan and preheat it to 350ºF. Place a deep skillet over medium heat, add 5 tablespoons of salted butter to the pan, and brown it. The butter will melt, then foam, and finally, the solids will separate from the fat and turn a golden brown. The air will smell of hazelnuts.

Add the diced onion to the brown butter. Cook until translucent, about 5 minutes. Then add the 2 minced cloves of garlic and cook for 1 minute, until fragrant. Finally, sprinkle 4 tablespoons of flour over the onions and garlic in the skillet and continue to cook and stir for 2 minutes more.

Add 1 cup of veggie stock, 1/2 cup of milk, and 3/4 teaspoon salt. Then whisk to combine and dissolve any flour off the bottom of the skillet. Finally, add the bay leaf, 1/4 teaspoon rosemary, 1/4 teaspoon thyme, 1/4 teaspoon sage, 1/4 teaspoon black pepper, and 1 teaspoon soy sauce. Whisk occasionally as the liquid comes up to a simmer and thickens into gravy.

Next, add the pint of diced mushrooms and the diced potato to the pan. Stir to combine and cook until the gravy has thickened more and reduced some, about 5 minutes. You want to cook the potatoes a touch, to ensure they cook fully in the oven.

Next, remove the skillet from the heat. Finally, add the 12 ounces of frozen mixed vegetables to the filling, where they will quickly cool the other ingredients in the pan. Your filling is done!

Next, take the pie pan out of the fridge, prick the bottom crust a few times with a fork, and add the cooled filling to the pie pan. Then dice the last tablespoon of butter and sprinkle it over the filling.

Roll the smaller piece of dough into a circle, about 10 inches wide and 1/4 inch thick. Cover the pie with it.

Beat the egg yolk. Then trace a bit of yolk along the top edge of the bottom and top crusts. Fold the bottom crust over the top crust and crimp the edges shut. Cut vents into your top crust. Finally, brush the egg yolk in a light layer over the entire top crust.

Bake for 45 to 50 minutes, or until the pie dough is golden and flaky. Allow the Veggie Pot Pie to cool for ten minutes before serving. I gobbled up three slices of this in one sitting! I hope you do the same!

Other Great Savory Pie Recipes

The post Veggie Pot Pie appeared first on Budget Bytes.

Gluten-Free Quiche with Leeks & Mushrooms (Dairy-Free)

Brunch is saved! Gluten-free, dairy-free friends, how often do you wish you could join in on the Sunday quiche trend but find yourself eating the same old scramble? Your wish is our command! 
A buttery, flaky gluten-free pie crust is packed with c…

Gluten-Free Quiche with Leeks & Mushrooms (Dairy-Free)

Brunch is saved! Gluten-free, dairy-free friends, how often do you wish you could join in on the Sunday quiche trend but find yourself eating the same old scramble? Your wish is our command! 

A buttery, flaky gluten-free pie crust is packed with creamy leeks, savory mushrooms, and fluffy eggs. It’s satisfying, undetectably dairy-free, and made with just 9 ingredients. Let’s get brunching!

How to make a gluten-free dairy-free quiche

This simple, flavorful, veggie-packed quiche begins with par-baking your favorite crust.

Gluten-Free Quiche with Leeks & Mushrooms (Dairy-Free) from Minimalist Baker →

How to Use Rice as a Pie Weight

How to Use Rice as a Pie Weight

The crust is the foundation of most pie recipes and many of those recipes call for the crusts to be blind baked. Blind baking is when you partially bake (or sometimes fully bake) the crust before adding the filling, which helps ensure that the finished pie and crust combination …

The post How to Use Rice as a Pie Weight appeared first on Baking Bites.

How to Use Rice as a Pie Weight

The crust is the foundation of most pie recipes and many of those recipes call for the crusts to be blind baked. Blind baking is when you partially bake (or sometimes fully bake) the crust before adding the filling, which helps ensure that the finished pie and crust combination will both be completely cooked through.

Most pastry doughs have layers of butter or other fats that are intended to make the baked pastries tender and flaky. They also tend to puff up during baking if they aren’t weighed down – so bakers tend to use pie weights to keep the crust in place while its in the oven. You can buy pie weights at most baking stores, but dried beans are a commonly recommended substitute. But what if you don’t have beans to use as pie weights? Learn how to use rice as a pie weight instead!

How to Use Rice as a Pie Weight

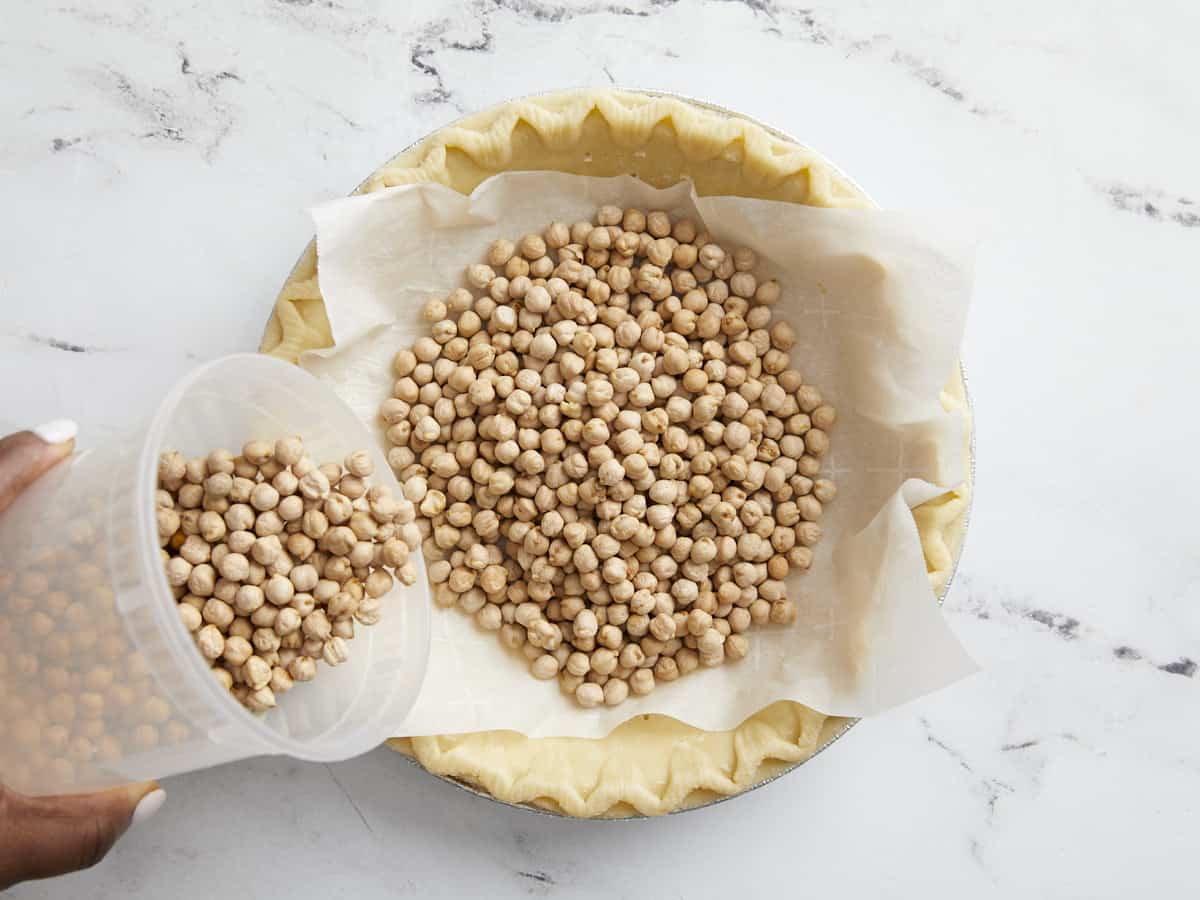
Rice is extremely easy to use as a pie weight and it is my go-to when it comes to baking pie crusts. You will need 1-2 cups of uncooked rice to weight down your pastry for an average 9-inch pie. To use the rice as a pie weight, roll out your pie crust and shape it into your pie dish. Gently press a piece of aluminum foil over the top of the unbaked crust, then fill the foil with the uncooked rice. Bake the crust as directed by your recipe.

When the crust is baked – either partially or fully – lift out the aluminum foil and pour the uncooked rice into a plastic bag or small storage container to use for the next time. You can use parchment paper in place of foil, but the foil is a bit easier to press into the corners of the pie and will often give you better coverage. There is no need to grease the foil, since there is plenty of butter or other fat in your pastry crust already.

How to Use Rice as a Pie Weight

Rice works beautifully here for a few reasons. First, even more people have rice on hand than uncooked beans. Second, the rice really fills the pie crusts evenly, getting into small corners where beans and other pie weights find it difficult to fit. Finally. uncooked rice has very little moisture, so it doesn’t change shape and cools down easily after baking.

The post How to Use Rice as a Pie Weight appeared first on Baking Bites.

Pumpkin Pie

This pumpkin pie recipe is simple but decadent. With a few of my favorite tricks, you can produce the silkiest pie with the most profound flavors.

The post Pumpkin Pie appeared first on Budget Bytes.

If you’re thinking about making your pumpkin pie this year, this recipe is simple but decadent. With a few of my favorite tricks, you can produce a silky pie with the most profound flavors. And it’s so much better than store-bought! PS I even convinced Beth that the extra steps I take are worth it, and you know how no-nonsense she is!

The Trick To Silky Pumpkin Pie 

Yes, you can buy the cheapest pumpkin puree you can find, mix it with a few ingredients, throw it in a pie shell, and call it a day. But with a little extra work and about a dollar more, you can take your pumpkin pie to the next level. I even convinced Beth, who was totally against taking additional steps and spending extra money UNTIL she tasted my pie. If changing the mind of the Queen of Budgets and Practicality isn’t a mic-drop moment, I don’t know what is. What are the tricks for silky pumpkin pie?

  1. Use high-quality pumpkin puree instead of generic (we used Libby’s).
  2. Cook the filling to bloom the spices and intensify the flavor.
  3. Blend the filling to make it extra silky smooth.

The Best Puree For Pumpkin Pie

The type of puree you use matters. Many pumpkin purees are watery because filling a can with watered-down pumpkin is cheaper than filling it with 100% pumpkin. Many purees blend field pumpkins and squashes that are bitter and bland because they also cost less to produce. The best puree for your money’s worth will always be Libby’s. This is not an ad; it’s just the truth. Libby’s has low water content and is made with a pumpkin variety bred for deep flavor. It’s the only thing they put in the can. If you can’t spring for Libby’s, that’s OK. The following two steps will help make even the cheapest pumpkin puree taste amazing.

Cook Your Pumpkin Pie Filling

Pumpkins are watery beasts. Cooking down their puree eliminates excess liquid and deepens the pumpkin flavor. When you add spices to the pot, the spices bloom. To understand the importance of blooming, think of the moment you add garlic to a hot pan, and the smell goes from sharp to amazing. It’s the same thing with spices. If you add the spices to the puree, you might as well add the sugar. Heat develops deep caramel notes and dissolves the granules, so you don’t end up with a grainy, one-note filling. As you heat it, the puree will start to bubble and burp, and then it will transform into a glossy, fragrant mixture.

Blend Your Pumpkin Pie Filling

To get incredibly velvety pumpkin pie filling, you need to blend it. I know. I know. Nowhere on the back of the can does it mention cooking puree, much less blending it. Just trust me. Pumpkin puree isn’t silky; all you have to do is look at it. Even after cooking it down, it looks coarse. Let it cool for a few minutes, then blend until it lightens. Add the rest of your ingredients, and blend again. One taste, and I promise you’ll never go back to the traditional mix-and-dump method.

Keep The Pie Crust From Getting Soggy

Loads of folks will tell you that you must blind-bake or pre-bake your pie crust so it stays crispy when filling it with pumpkin puree. Feel free to do that if you wish, but I never do, and as you can see from the picture of the crispy, golden, flaky bottom crust above, I get great results.

My trick is to place a rack on the lowest part of the oven. Then I put a sheet pan on the rack and place a cast iron pan in it, bottom side up. (If your cast iron pan does not lay flat, just bake the pie in the pan.) I preheat for an hour. The bottom heating element supercharges the cast iron pan, which holds on to heat like you did your first hundred-dollar bill. Then I bake the pie on top of the over-turned cast iron. That heat focuses on the bottom of the pie, creating the crispiest of crusts. In addition, the sheet pan will collect any run-off juices so the oven doesn’t start to smoke.

Keep A Pumpkin Pie From Burning

The most important step you can take is to use an oven thermometer. Most ovens (I don’t care how fancy they are) aren’t calibrated. A cheap $5 oven thermometer will tell you exactly what temperature it is. If you notice that the crust or the top of the pie is browning early on, tent it with aluminum to prevent it from burning. Tenting is when you loosely place a sheet of aluminum that’s folded in half over the pie like a tent.

Overhead shot of a pumpkin pie.

Keep Pumpkin Pie From Cracking

You need to eliminate sudden temperature changes to prevent your pie from cracking. Leave the oven door closed as much as possible. Opening an oven door even for 15 seconds can change the temperature in your oven by up to 50°.

You also want to pull your pie out of the oven before it looks done. The magic of carry-over cooking will take it to the finish line. Just because the pie isn’t in direct heat doesn’t mean it stops cooking. That heat takes time to dissipate; while it dissipates, it keeps cooking your pie.

Pull the pie when the crust looks golden, and the outer ring of the pie has dulled and looks solid. The middle should still be jiggly. Not wet, but it should move like jello. Allow the pie to cool in a warm place so there’s no sudden temperature change. If your kitchen runs cold, turn the oven off and crack your oven door about 6 inches. Let the pie cool in the oven.

What To Do If Your Pumpkin Pie Cracks

Sometimes, no matter how hard you try, the pie gods deliver a cracked pumpkin pie. You have three choices at this point. First, you can use leftover pie dough and bake a few ornamental leaves to top the pie with. You can also top it with a few dollops of whipped cream. Or you can leave it as is. like we did. If someone dares to complain about a crack in homemade pumpkin pie, they don’t get a slice. 😉

Here’s an easy recipe for pie crust cookies: 

  • Preheat your oven to 350° and line a sheet pan with parchment paper or a silicone mat.
  • Dust your work surface lightly with flour and roll out the leftover pie dough (or the store-bought pie dough) to about 1/4-inch thickness. 
  • Use a cookie cutter or a knife to cut out pieces shaped like leaves. Place the cookie on the sheet pan. 
  • Whisk an egg with a tablespoon of milk and brush the cookies lightly with the egg wash. Sprinkle the cookies lightly with sugar.
  • Bake until they are light golden brown, about 10 minutes. Allow them to cool before topping your pie with them.
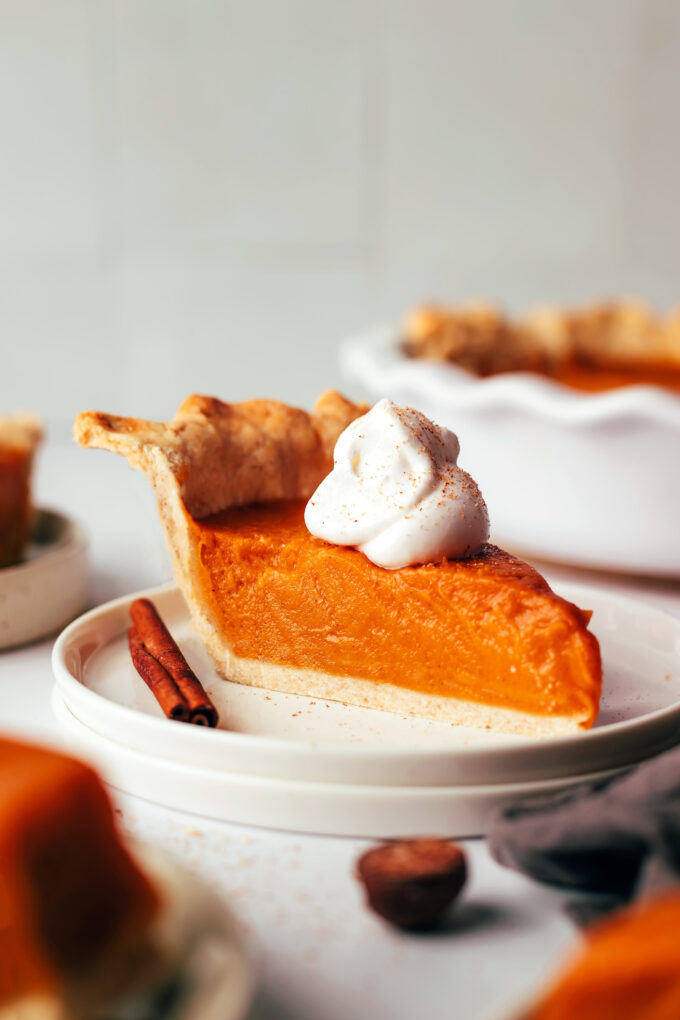
Side shot of a slice of pumpkin pie with a dollop of whipped cream on top of it.
Print

Pumpkin Pie

This pumpkin pie recipe is simple but decadent. With a few of my favorite tricks, you can produce the silkiest pie with the most profound flavors.
Course Dessert
Cuisine American
Total Cost ($7.49 recipe / $0.62 serving)
Prep Time 1 hour 10 minutes
Cook Time 50 minutes
Resting Time 2 hours
Total Time 4 hours
Servings 12 slices
Calories 152kcal

Ingredients

  • 1/2 recipe 3-Ingredient Pie Crust* $1.17
  • 1 3/4 cup pumpkin puree (15 oz can) $2.79
  • 1/2 cup brown sugar $0.22
  • 1 1/2 tsp cinnamon $0.12
  • 1/2 tsp nutmeg $0.04
  • 1 1/2 tsp ground ginger $0.03
  • 1/2 tsp salt $0.04
  • 1 cup sour cream $1.25
  • 1/2 cup whole milk $0.25
  • 1 tsp vanilla $0.58
  • 3 large eggs, room temperature $0.87
  • 1/4 tsp butter, for greasing $0.04
  • 1/4 tsp flour for dusting $0.06
  • 1 tsp heavy cream $0.03

Instructions

  • Place a rack on the lowest part of your oven. Top it with a sheet pan. Place a cast iron pan, bottom side up, in the sheet pan. Preheat your oven to 400°F. Grease a pie dish with butter, dust it with flour, and place it in your freezer. Dust your work surface and roll your pie dough into a 9 x 3-inch rectangle about 1 1/2 inches thick. 
  • Place the long side of the rectangle vertically on your work surface. Fold the top short side towards the center of the rectangle so that the short edge touches the center point. Fold the bottom short side over the center so that it touches the outer edge of the top short side. Roll the dough into a 9×3 rectangle and repeat the folding process a second and a third time. Then chill your pie dough.
  • Set a medium heavy-bottomed pot over medium heat. Add the pumpkin puree, brown sugar, cinnamon, nutmeg, ground ginger, and salt to the pot. 
  • Stir the puree constantly until it begins to thicken and sputter and becomes glossy. Remove from the heat and cool for about 10 minutes.
  • Once the filling has cooled, add it to a blender with the sour cream and milk. Process until it has lightened.
  • Add the vanilla and the eggs to the blender. Mix until the puree is velvety.
  • Dust your work surface with flour and roll out the pie dough into a circle that is 16 inches in diameter. Press the crust into the pie plate. Fold the overhanging edges of the dough under to create a thick lip. Dock the pie crust with a fork by puncturing it about 9 to 10 times. Chill the dough for 10 minutes in the freezer.
  • Crimp the edges of the pie. Add the pumpkin pie filling. Lightly brush the edges of the crust with cream.
  • Place the pie in the preheated 400° oven on top of the overturned cast iron pan—lower the temperature to 350°F. Bake until the outer edges have solidified, but the middle of the pie still has some jiggle, about 50 minutes. Remove the pie from the oven and allow it to cool in a warm spot for at least two hours before serving, so it has time to set.

See how we calculate recipe costs here.

Notes

*Make your pie crust the day before you plan on making your pie. You can also use a store-bought pie crust.

Nutrition

Serving: 1slice | Calories: 152kcal | Carbohydrates: 18g | Protein: 3g | Fat: 8g | Sodium: 164mg | Fiber: 1g

How to Make Pumpkin Pie – Step by Step Photos

Place a rack on the lowest part of your oven. Top it with a sheet pan. Place a cast iron pan, bottom side up, in the sheet pan. Preheat your oven to 400°F. Grease a pie dish with 1/4 tsp butter, dust it with 1/4 tsp flour, and place it in your freezer. Dust your work surface and roll your 1/2 portion of 3-Ingredient Pie Crust into a 9 x 3-inch rectangle about 1 1/2 inches thick. If you are using a store-bought crust, use a single crust, and mash it into a 9×3-inch rectangle.

Place the long side of the rectangle vertically on your work surface. Fold the top short side towards the center of the rectangle so that the short edge touches the center point. Fold the bottom short side over the center so that it touches the outer edge of the top short side. Roll the dough into a 9×3 rectangle and repeat the folding process a second and a third time. Then chill your pie dough.

Set a medium heavy-bottomed pot over medium heat. Add 1 3/4 cups of pumpkin puree, 1/2 cup brown sugar, 1 1/2 tsp cinnamon, 1/2 tsp nutmeg, 1 1/2 tsp ground ginger, and 1/2 tsp salt to the pot. 

Stir the puree constantly until it begins to thicken and sputter and becomes glossy. Remove from the heat and cool for about 10 minutes.

Once the filling has cooled, add it to a blender with the 1 cup sour cream and 1/2 cup milk. Process until it has lightened.

Add the 1 tsp vanilla and the 3 large eggs to the blender. Mix until the puree is velvety.

Dust your work surface with flour and roll out the pie dough into a circle that is 16 inches in diameter. Roll the dough circle onto your rolling pin and unfurl it into the greased and floured pie plate. Press the dough into the pie plate. Fold the overhanging edges of the dough under to create a thick lip. Dock the pie crust with a fork by puncturing it about 9 to 10 times. Chill the dough for 10 minutes in the freezer.

Pour the filling into the pie crust. To ensure there are no bubbles in the puree, allow it to settle for a minute, and then gently pick the pie plate about an inch off the counter and drop it. Continue picking it up and dropping it gently until no more air bubbles come to the surface of the puree.
Crimp the edges of the pie. Add the pumpkin pie filling. Lightly brush the edges of the crust with 1 tsp cream.

Place the pie in the preheated 400° oven on top of the overturned cast iron pan—lower the temperature to 350°F. Bake until the outer edges have solidified, but the middle of the pie still has some jiggle, about 50 minutes. Remove the pie from the oven and allow it to cool in a warm spot for at least two hours before serving, so it has time to set. Slice it up, and enjoy!

More Easy Dessert Pies

The post Pumpkin Pie appeared first on Budget Bytes.

Mixed Berry Crumble Pie (Vegan + GF)

When everyone says “Mmm!” and “Wow…” after every bite, you know it’s a winner! From the crust to the filling to the crumble topping, this vegan and gluten-free mixed berry pie is perfection.
The crust is FLAKY and buttery (without dairy) and the fillin…

Mixed Berry Crumble Pie (Vegan + GF)

When everyone says “Mmm!” and “Wow…” after every bite, you know it’s a winner! From the crust to the filling to the crumble topping, this vegan and gluten-free mixed berry pie is perfection.

The crust is FLAKY and buttery (without dairy) and the filling is perfectly sweet and bursting with flavorful berries. Two words: absolutely delicious!

And with a scoop of ice cream?

Mixed Berry Crumble Pie (Vegan + GF) from Minimalist Baker →

Apple Pie

If you’re looking for a scrumptious apple pie recipe that will make everyone at your table gasp with delight- this is it!

The post Apple Pie appeared first on Budget Bytes.

If you’re looking for an apple pie recipe that will make everyone at your table gasp with delight- this is it! The filling is effortless and ridiculously tasty. Pair it with my buttery 3 Ingredient Pie Crust, and you’ll never go back to store-bought apple pie again. #forserious

How Many Apples Will I Need?

This recipe is for a standard pie pan with a volume of 4 cups. However, since apples lose up to 30% of their volume as they bake, you can’t just fill a pie pan with 4 cups of apples and call it a day. You’ll end up with a pie with a crater in the middle. You’ll need about 6 cups of sliced apples or 6 to 8 apples, depending on the size of your fruit.

How Thick Should I Slice My Apples?

It’s best if you slice apples about 1/4 – 1/2 inch thick. Any thicker, and they won’t cook through by the time your crust does. Any thinner, and they’ll dissolve and leave you with a soggy bottom crust. The most important thing to keep in mind is that your apples should all be about the same thickness so they cook uniformly.

The Best Apples For Apple Pie

I divide the apple display at my grocery into two sections: great for pie and awful for pie. Apples that are great for pie hold their shape during a bake and have complex flavors. Try a combination of these for apple pie supremacy:

  • Honey Crisp
  • Granny Smith
  • Pink Lady
  • Golden Delicious

Apples that are awful for pie taste one-dimensional and fall apart faster than a reality show housewife. While great for apple sauce or apple butter, avoid the following for pie:

  • McIntosh
  • Fuji
  • Gala
  • Red Delicious

What’s The Best Crust For Apple Pie?

Apples are juicy, so you need a bottom crust that can hold up to a whole lot of liquid, i.e., a mealy pie dough. This is what it’s called because the pieces of fat in the flour are tiny and look like coarse cornmeal. They create a tight crumb that repels liquids, so you don’t have to worry about a soggy bottom.

Of course, you also want a flaky top crust, which is created with larger pieces of fat. These bigger pieces of fat take up space, and as they melt during baking, they leave behind crispy layers, perfect for a decadent first bite. Lucky for you, my 3 Ingredient Pie Crust is a hybrid between a mealy and flaky crust, so you only have to make one crust.

How To Avoid A Soggy Bottom

Avoiding a soggy bottom takes more than using the proper crust. Check out these tips for the crispiest bottom crust ever:

  • Draw out your apples’ natural juices by sprinkling them with sugar and spices. Then cook the juices until they transform into a caramel.
  • Cook the apple slices in the caramel for a few minutes, further reducing the liquids and concentrating the flavors.
  • Seal your bottom pie crust by brushing it with a small amount of beaten egg white.
  • Bake your pie on a pizza stone or baking steel. These tools trap heat and help cook your bottom crust faster, sealing it, so the juices don’t have time to soak in.

If you don’t own a baking steel or pizza stone, bake your pie on a double layer of sheet pans or in a large cast iron pan. Baking your pie in a second pan also has the added benefit of trapping any overflow of juices, so your oven doesn’t start to smoke and set off your alarms.

Overhead shot of an apple pie.
Overhead shot of a slice of apple pie on a white plate with two scoops of vanilla ice cream and drizzled with caramel sauce.
Print

Apple Pie

This is the easiest apple pie recipe ever! The cinnamon-scented filling and buttery crust are scrumptious and ridiculously simple to make!
Course Dessert
Cuisine American
Total Cost ($6.94 recipe / $0.87 serving)
Prep Time 1 hour 30 minutes
Cook Time 45 minutes
Resting Time 1 hour
Total Time 2 hours 45 minutes
Servings 8 slices
Calories 383kcal

Ingredients

  • 1 double pie crust* $2.34
  • 1/2 cup sugar $0.13
  • 1 tsp cinnamon $0.10
  • 3 Tbsp flour $0.02
  • 1 pinch nutmeg $0.01
  • 2 Tbsp lemon juice $0.09
  • 6 cups sliced apples (6-8 apples) $3.90
  • 1 large egg, white and yolk separated $0.26
  • 1 Tbsp heavy cream $0.09

Instructions

  • Place a rack in the center of your oven, and top it with a pizza stone*. Preheat the oven to 375°F. Roll out your bottom and top pie crusts to 1/4 inch thickness. Refrigerate the top crust.
  • Line your pie pan with the rolled out bottom crust. Beat the egg white and brush the bottom crust lightly with it. Use a fork to puncture the bottom crust 9 to 10 times. Refrigerate the crust-lined pie pan.
  • Slice the 6 to 8 apples into 1/4 inch thick slices until you have 6 cups. Then place them in a colander and dress them with the lemon juice.
  • Place the colander in a large sauce pan. Mix the sugar, cinnamon, salt, flour, and nutmeg. Sprinkle the apples with the sugar mixture and incorporate thoroughly.
  • Allow the apples to marinate in the sugar and spices for a half hour. They will release their juices into the sauce pan.
  • After the apples have released their juices, remove the colander and the apples and place the pan with the juices over medium heat. Cook down the apple juices until a caramel forms.
  • Add the sliced apples to the pan and cook with the caramel until slightly softened, about five minutes. Let them cool for about 10 minutes.
  • Once the the apples have cooled, remove the pie pan and the top crust from the refrigerator. Add the apple slices to the crust-lined pie pan.
  • Cover the apples with the top crust. Fold the top crust under the edges of the bottom crust and pinch the crusts together. Flute the crusts. Beat the egg yolk and the cream together and brush the top crust with the egg wash.
  • Slice steam vents into the top crust. Place the pie pan on top of your pizza stone and bake for 45 minutes, or until the top crust is golden brown and the pie's juices are bubbling.
  • Cool the apple pie for at least 30 minutes before slicing, but preferably for an hour to allow the filling to solidify.

See how we calculate recipe costs here.

Notes

*You can purchase a premade double crust or for best results, use our easy 3-Ingredient Pie Crust, divided in two for a top and bottom crust.
*If you do not own a pizza stone, use a large cast iron pan or stack two sheet pans together.

Nutrition

Serving: 1slice | Calories: 383kcal | Carbohydrates: 53g | Protein: 4g | Fat: 18g | Sodium: 210mg | Fiber: 3g
Overhead shot of a slice of apple pie on a white plate with two scoops of vanilla ice cream and drizzled with caramel sauce.

How to Make Apple Pie – Step by Step Photos

Place a rack in the center of your oven, and top it with a pizza stone*. Preheat the oven to 375°F. Roll out your bottom and top pie crusts to 1/4 inch thickness. Refrigerate the top crust.
Overhead shot of hand using a fork to dock pie dough.

Line your pie pan with the rolled out bottom crust. Beat the egg white and brush the bottom crust with a very thin layer. Use a fork to puncture the bottom crust 9 to 10 times. Refrigerate the crust-lined pie pan.

Overhead shot of apple in a colander.

Slice the 6 to 8 apples into 1/4 inch thick slices, until you have 6 cups. Then place them in a colander and dress the apple slices with the 2 tablespoons of lemon juice.

Overhead shot of apples macerating in a colander placed inside a pan.

Place the colander in a large sauce pan. Mix the 1/2 cup of sugar, 1 teaspoon of cinnamon, 1/8 teaspoon of salt, 3 tablespoons of flour, and a pinch of nutmeg. Sprinkle the apples with the sugar mixture and incorporate thoroughly. Allow the apples to marinate in the sugar and spices for a half hour. They will release their juices into the sauce pan.

Overhead shot of apple caramel.

After the apples have released their juices, remove the colander and the apples and place the pan with the juices over medium heat. Cook down the apple juices until a caramel forms.

Overhead shot of apples cooking with caramel.

Add the sliced apples to the pan and cook with the caramel until slightly softened, about five minutes. Let them cool for about 10 minutes.

Overhead shot of sliced apples in pie shell.

Once the apples have cooled, remove the pie pan and the top crust from the refrigerator. Add the apple slices to the crust-lined pie pan.

Overhead shot of brushing egg wash on a pie.

Cover the apples with the top crust. Fold the top crust under the edges of the bottom crust and pinch the crusts together. Flute the crusts. Beat the egg yolk and the cream together and brush the top crust lightly with the egg wash.

Overhead of raw pie with steam vents on it.

Slice steam vents into the top crust. Place the pie pan on top of your pizza stone and bake for 45 minutes, or until the top crust is golden brown and the apple juices are bubbling.

Overhead shot of a finished apple pie.

Cool the apple pie for at least thirty minutes before slicing, but preferably an hour to allow the filling to solidify.

Overhead shot of a slice of apple pie on a white plate with two scoops of vanilla ice cream and drizzled with caramel sauce.

The post Apple Pie appeared first on Budget Bytes.

Chicken Pot Pie

Chicken pot pie is a cozy and classic comfort food made with a flakey crust and a rich sauce full of tender chicken and vegetables.

The post Chicken Pot Pie appeared first on Budget Bytes.

I could eat this chicken pot pie every day for the rest of my life. Okay, maybe I’m being a little hyperbolic, but it’s definitely one of those recipes that I can eat for days in a row and I’ll still be sad once the leftovers are gone. Because when a food makes you feel this cozy and good, how can you not want it in your life every day? Either way, I guarantee this scrumptious homemade chicken pot pie is going to be made on REPEAT in my house all through the fall and winter.

Chicken Pot Pie with a slice removed.

What’s in a Chicken Pot Pie?

Chicken pot pie starts with a deliciously flakey pie crust and is filled with a rich and saucy chicken gravy, chunks of tender chicken, and a medley of colorful vegetables. It’s everything you want in a meal on one plate!

This recipe is pretty flexible, allowing you to take some shortcuts if you need to make the prep easier, or you can do everything from scratch to make this pie an ✨EVENT✨!

Pie Crust Options

It’s no secret that the crust is one of the best parts of a chicken pot pie, so we chose not to skimp on the crust. We used our simple 3-ingredient pie crust recipe, which is super buttery and deliciously flakey. If you want to use a store-bought crust, just make sure to buy a double crust (top and bottom crusts) and follow the baking instructions on the box.

You could also bake this “pie” in skillet without a bottom crust and then top it with your favorite biscuits. The filling is fully cooked before it goes into the pie, so simply top with biscuits and then bake until the biscuits are browned and cooked through.

Can I Use Pre-Cooked Chicken for Chicken Pot Pie?

Yes! Chicken pot pie is a great way to use up leftover rotisserie chicken, or even leftover turkey from Thanksgiving! Just skip the first step in the recipe below (cooking the raw chicken) and add your pre-cooked chicken to the filling when the cooked chicken is added back to the gravy with the herbs and spices.

Use Fresh or Frozen Vegetables

To make this chicken pot pie super simple, we used a frozen vegetable medley. Using a frozen veggie mix means less chopping and you won’t have any leftover vegetables to try to use up later. If you do want to slice and chop your own vegetables, use 1-2 carrots, about ½ cup corn kernels, ½ cup chopped green beans, and ½ cup peas. You could also other vegetables, like mushrooms or celery.

Do I Need to Blind Bake the Crust?

When using our 3-ingredient pie crust recipe and a glass pie plate, our chicken pot pie baked to perfection with a golden brown flakey bottom crust without having to pre-bake the bottom crust. That being said, using different crust recipes or store-bought crusts with different types of pie plates may yield different results.

A slice of chicken pot pie being lifted out of the pie pan from the side.
A slice of chicken pot pie taken out of the pie dish.

Chicken Pot Pie

Chicken pot pie is a cozy classic comfort food made with a flakey crust and a rich sauce full of tender chicken and vegetables.
Course Dinner, Main Course
Cuisine American
Total Cost $8.44 recipe / $1.06 serving
Prep Time 20 minutes
Cook Time 1 hour 10 minutes
Total Time 1 hour 30 minutes
Servings 8
Calories 361kcal
Author Beth – Budget Bytes

Ingredients

  • 1 boneless, skinless chicken breast (about ⅔ lb.) $3.33
  • 1 Tbsp cooking oil $0.04
  • 1 yellow onion $0.38
  • 4 Tbsp butter $0.50
  • 4 Tbsp flour $0.04
  • 1 cup chicken broth $0.13
  • 1/2 cup whole milk $0.10
  • 1/4 tsp dried thyme $0.03
  • 1/4 tsp rubbed sage $0.03
  • 1/4 tsp black pepper $0.02
  • 3/4 tsp salt $0.05
  • 12 oz. frozen mixed vegetables $1.25
  • 1 double pie crust $2.34
  • l egg (optional) $0.20

Instructions

  • Preheat the oven to 350ºF. Cut the chicken breast into ½-inch pieces.
  • Heat a deep skillet or Dutch oven over medium heat. Once hot, add the cooking oil and diced chicken. Cook just until the chicken is cooked through. Remove the chicken from the skillet.
  • While the chicken is cooking, dice the onion. After removing the chicken from the skillet, add the diced onion and butter. Sauté the onions in the butter until softened.
  • Sprinkle the flour over the onions in the skillet and continue to cook and stir for two minutes more. It's okay if the flour begins to coat the surface of the skillet, but don't let it burn.
  • Add the chicken broth and milk to the skillet. Whisk to combine and dissolve any flour off the bottom of the skillet. Let the liquid come up to a simmer, at which point it will thicken into a gravy.
  • Add the cooked chicken back to the skillet along with the thyme, sage, salt, and pepper. Stir to combine.
  • Finally, add the frozen mixed vegetables and allow them to heat through in the gravy, stirring occasionally, just until the gravy begins to simmer again. Remove the skillet from the heat.
  • Place your bottom crust in a 9-inch pie plate. Prick the bottom several times with a fork. Transfer the chicken, vegetable, and gravy mixture into the pie crust.
  • Add the top crust and crimp the edges closed. Brush a light layer of whisked egg over the surface of the pie crust (optional). Use a knife to cut large vents in the top of the crust.
  • Bake the chicken pot pie for 45-50 minutes, or until the crust is golden brown and flakey. The baking time may vary depending on the type of crust and pie plate used.

Nutrition

Serving: 1slice | Calories: 361kcal | Carbohydrates: 31g | Protein: 13g | Fat: 20g | Sodium: 616mg | Fiber: 3g
Close up overhead view of a chicken pot pie with a slice cut into it.

How to Make Chicken Pot Pie – Step by Step Photos

Cooked diced chicken in a skillet.

Preheat the oven to 350ºF. Dice one boneless skinless chicken breast into ½-inch pieces and season with a pinch of salt and pepper. Heat a deep skillet or Dutch oven over medium. Once hot, add 1 Tbsp cooking oil and the diced chicken breast. Cook the chicken pieces just until cooked through (do not over cook).

Diced onion and butter in a deep skillet.

While the chicken is cooking, dice one yellow onion. Remove the cooked chicken from the skillet and add the diced onion and 4 Tbsp butter. Sauté the onions in the butter over medium heat until softened.

Flour being added to the skillet.

Once the onions are soft, sprinkle in 4 Tbsp of all-purpose flour. Continue to cook and stir for about two minutes more. It’s okay for the flour to begin to coat the bottom of the skillet, just make sure it doesn’t begin to burn.

Milk and broth being added to the skillet.

Add one cup of chicken broth and one cup of whole milk to the skillet. Whisk to combine and dissolve any flour off the bottom of the skillet.

Thickened gravy being whisked.

Allow the liquid to come up to a simmer, at which point it will thicken into a nice gravy.

Chicken and seasoning added back to the gravy.

Add the cooked chicken back to the skillet along with ¼ tsp dried thyme, ¼ tsp rubbed sage, ¼ tsp black pepper, and ¾ tsp salt. Stir to combine.

frozen vegetables stirred into the gravy.

Stir in one 12oz. bag of frozen mixed vegetables. Allow the gravy mixture to heat through and come back up to a simmer, stirring occasionally. Once fully heated through and simmering, remove it from the heat.

Pie filling being added to a pie crust.

Place the bottom crust into a pie plate and prick it several times over the bottom with a fork. Fill the pie crust with the chicken pot pie filling.

Vents being cut into the top pie crust.

Add the top crust and crimp the edges closed. Brush the top of the pie with a thin layer of whisked egg. Use a knife to cut large vents into the top of the pie crust.

Baked Chicken Pot Pie.

Bake the chicken pot pie for 45-50 minutes, or until the pie crust is golden brown and flakey and the filling is bubbling up slightly through the vents. Total cooking time may vary depending on the type of crust and pie dish used. The filling is fully cooked before going into the pie, so adjust the baking time based on the crust.

Chicken pot pie on a blue background with plates and parsley on the sides.

Let the pie cool for about 10 minutes before slicing and serving.

A slice of chicken pot pie taken out of the pie dish.

Try these other savory pie recipes:

The post Chicken Pot Pie appeared first on Budget Bytes.

Peach Galette

This stunning peach galette is stupid-easy to make. It’s my favorite way to showcase succulent summer peaches. You can use my simple three-ingredient pie dough recipe for the crust or opt for store-bought pie dough to get this luscious dessert on the table in under an hour.

The post Peach Galette appeared first on Budget Bytes.

This stunning peach galette is stupid-easy to make. It’s my favorite way to showcase succulent summer peaches. You can use my simple three-ingredient pie dough recipe for the crust or opt for store-bought pie dough to get this luscious dessert on the table in under an hour.

Overhead shot of peach galette surrounded by fresh peaches.

What is a galette?

Galette is French for a free-form pastry with a sweet or savory filling. It’s baked on a sheet pan, not a pie pan. It’s the perfect way to use a bounty of juicy, ripe peaches. It’s an absolute cinch to put together and looks gorgeous on your table for the three seconds it takes before it gets gobbled up.

How to pick a ripe peach

Skip pale yellow peaches and opt for fruit that has a deep golden color. It should feel heavy for its size, and the flesh should be firm but still have a bit of a give. The skin around the stem should be slightly wrinkled, and the fruit should have a robust honey-like aroma.

Can I use frozen, canned, or jarred peaches?

If prepping fresh peaches seems like too much work, or if you simply don’t have access to them, opt for two pounds of frozen. You can use canned or jarred but opt for ones without added sugar. Drain them and pat them dry. If all you have are peaches packed in syrup, rinse them off, pat them dry, and lower the sugar in the recipe to ¼ cup. 

Overhead shot of slice of peach galette on a wood plate with a dollop of whipped cream.

How do I serve a peach galette?

With pride! You can serve it warm or cold, though warm is so much better. I love finishing a peach galette with a pinch of flaky salt. Then I serve the slices with a dollop of homemade whipped cream and a drizzle of honey. It also goes well with a scoop of no-churn strawberry ice cream and chopped pistachios. If you want to get real fancy with it, serve it with a chilled glass of rosé. OH, YOU’RE WELCOME.

How to store leftovers

A galette is best enjoyed the day it’s made, but if you manage some sort of self-control, first email me your secret. Then wrap any leftovers in parchment or wax paper and store them in an air-tight container at room temperature for up to two days. There is NO WAY they will last any longer than that, so stop showing off your superior craving control and don’t even bother asking me about freezing.

Side view shot of slice of peach galette being lifted by a pie spatula.
Overhead shot of peach galette with one slice being removed.

Peach Galette

This stunning peach galette is stupid-easy to make. With the help of a pre-made pie crust, you can get it on the table in about an hour.
Course Dessert
Cuisine American
Total Cost ($8.16 recipe / $1.02 serving)
Prep Time 30 minutes
Cook Time 40 minutes
Total Time 1 hour 10 minutes
Servings 8 slices
Calories 320kcal
Author Monti – Budget Bytes

Ingredients

  • 1 double pie crust* $1.34
  • 8 peaches $6.24
  • 1/2 tsp vanilla extract $0.26
  • 1/2 cup granulated sugar $0.19
  • 2 tbsp corn starch $0.02
  • 1 tbsp heavy cream $0.09

Instructions

  • Place a rack in the middle of your oven and preheat to 400°F. Moisten your countertop and place a 15×15-inch sheet of parchment paper on it. Dust the parchment paper lightly with flour.
  • Place the pie dough on the parchment paper and roll it out to 14 inches in diameter. Use a fork to poke a few holes in the center of the dough.
  • Transfer the pie dough on the parchment paper to a sheet pan and chill it in the freezer while you prepare the peaches.
  • Slice the peaches, skin on, into 1/2 inch thick slices. Place the slices in a large bowl and drizzle with vanilla. Mix the sugar and cornstarch, then sprinkle over the peaches.
  • Toss the peaches gently to cover them in the sugar mixture, then place them in a mesh sieve set over the large bowl. Macerate the peaches until they release their juices, about fifteen minutes.
  • Add the juices to a small pot set over medium heat and bring to a simmer. Do not stir. Swirl the juices. Once the juices thicken, remove them from the heat.
  • Remove the chilled pie dough from the freezer and layer it with the peach slices, working from the center out. Leave a four-inch border. Top the peaches with the cooled caramel.
  • Fold the outer lip of the dough over the peaches, pleating it where necessary. Lightly brush a thin layer of heavy cream onto the top of the galette.
  • Bake for 40 minutes, or until the crust is crispy and golden.
  • Cool the galette on the sheet pan for fifteen minutes before serving. Use the edges of the parchment paper to help you lift it off the sheet pan.

Notes

*You can substitute with store-bought pie dough, the kind that comes with two crusts.
If using store-bought pie dough:
  • Roll out two smaller rounds on separate pieces of parchment, each about 9 inches in diameter.
  • Use a fork to poke holes in the center of each crust, leaving a three-inch border.
  • Divide the peaches between the two chilled crusts. Leave a three-inch border.

Nutrition

Serving: 1slice | Calories: 320kcal | Carbohydrates: 50g | Protein: 4g | Fat: 12g | Sodium: 194mg | Fiber: 3g
Overhead shot of peach galette with one slice being removed.

How to Make Peach Galette – Step by Step Photos

Overhead shot of rolled out pie dough.

Place a rack in the middle of your oven and preheat to 400°F. Moisten your countertop with a sprinkle of water, place a 15×15-inch sheet of parchment paper on it, dust it with flour, and place the pie dough on top. Roll the dough into a 14-inch circle, about 1/4 inch thick, and use a fork to poke a few holes in the center. Transfer the pie dough on the parchment paper to a sheet pan and chill it in the freezer.

Overhead shot of sugar cornstarch mixture being sprinkled onto peaches with a tablespoon measure.

Cut the peaches with their skin on into 1/2 inch thick slices. Place the slices in a large bowl and drizzle with vanilla. Mix the sugar with the cornstarch, then sprinkle the sugar mixture over the peaches.

Overhead shot of wo hands tossing peaches with sugar mixture in a white bowl.

Toss the peaches gently to cover them in the sugar mixture. Place the peaches in a mesh sieve and place it over the large bowl. Macerate the peaches for about fifteen minutes until they release their juices.

Overhead shot of peach juice being strained into a pot.

Take the juices (not the peaches) and simmer them in a small pot. Do not stir, as this will crystallize the caramel. Occasionally pick up the pan to swirl the juices. Once the juices thicken and turn a golden brown, remove them from the heat.

Overhead shot of peach juice caramel being drizzled onto sliced peaches arranged on pie dough.

Remove the chilled pie dough from the freezer. Layer the peach slices on the dough, working from the center out. Leave a four-inch border. Top the peaches with the cooled caramel.

Overhead shot of pie dough edges being folded over peaches.

Fold the outer lip of the dough over the peaches, pleating it where necessary. You’re not looking for perfection here; that’s the beauty of a galette. Lightly brush a thin layer of heavy cream onto the top of the galette.

Overhead shot of baked peach galette.

Bake for 40 minutes, or until the crust is crispy and golden. Cool the galette on the sheet pan for fifteen minutes before serving. Use the edges of the parchment paper to help you lift it off the sheet pan.

Side shot of slice of peach galette on a pie spatula.

I mean, is this the prettiest thing you’ve seen all day or what?!?!?!? Eight servings for under $10 and JUST SIX INGREDIENTS. This one’s gonna be on repeat for a while.

The post Peach Galette appeared first on Budget Bytes.

Spinach Quiche

This Spinach Quiche recipe is one of my favorite things to make when I am having friends and family over for breakfast or brunch. Everyone loves quiche and this one is exceptional. It has a flaky crust, silky custard egg filling, hearty spinach, garlic…

This Spinach Quiche recipe is one of my favorite things to make when I am having friends and family over for breakfast or brunch. Everyone loves quiche and this one is exceptional. It has a flaky crust, silky custard egg filling, hearty spinach, garlic, onion, and melty Gruyere cheese. A few shortcuts, like using store…

Vegan Pumpkin Pie

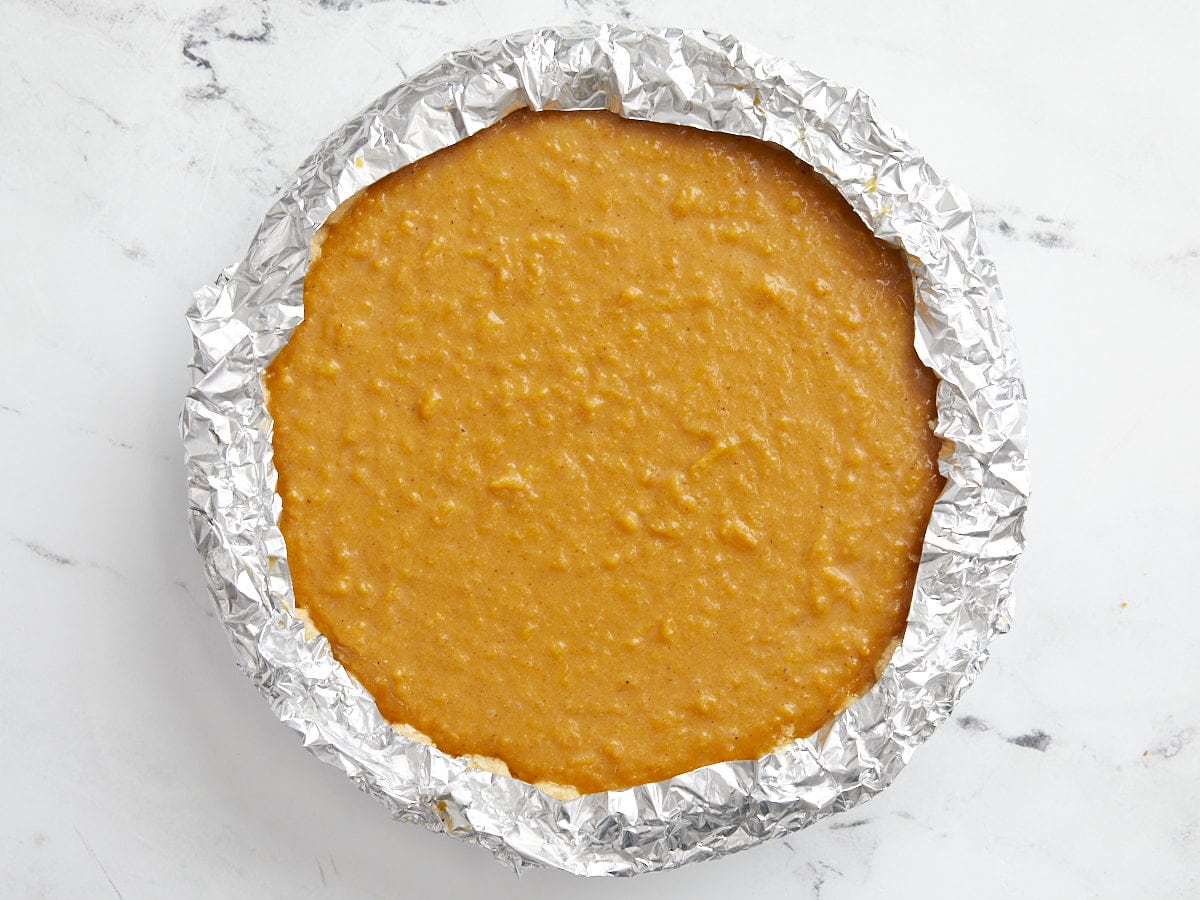
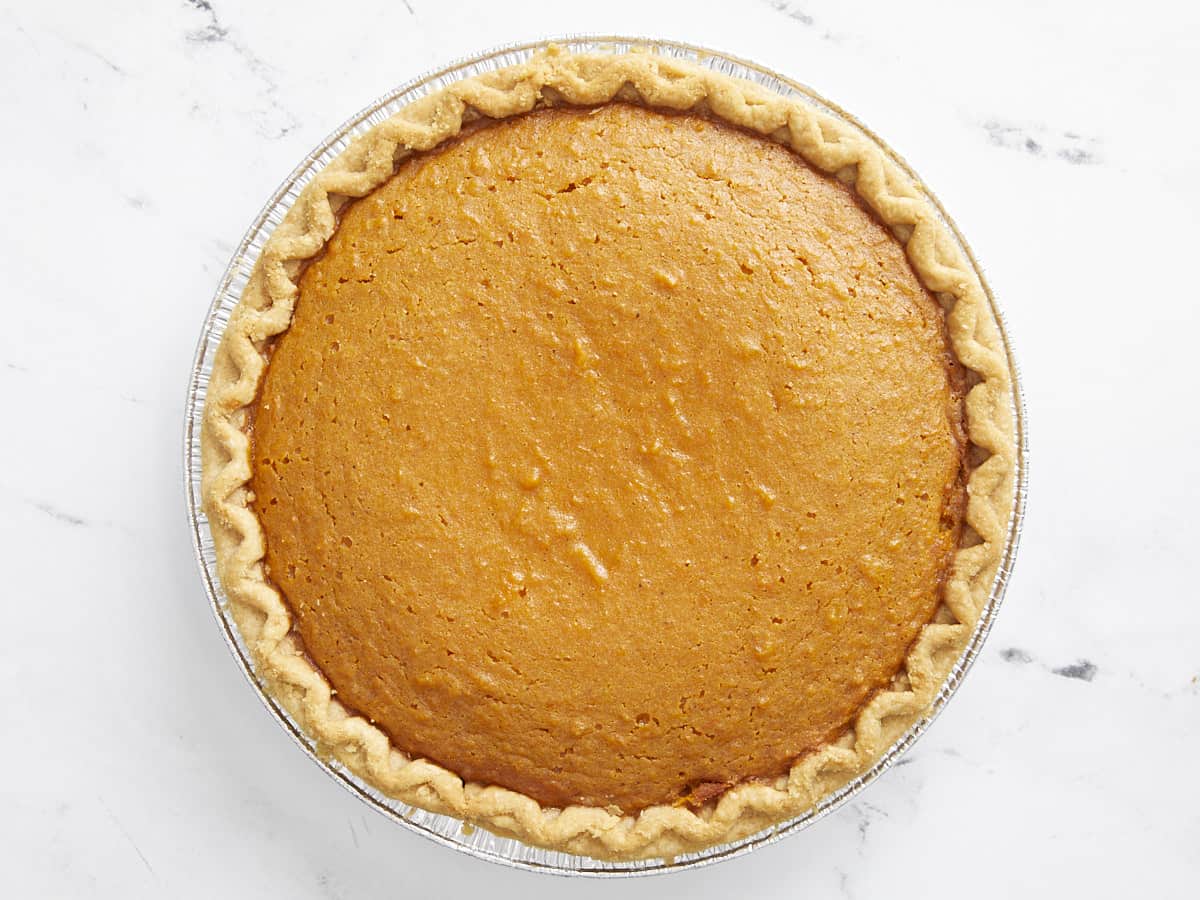
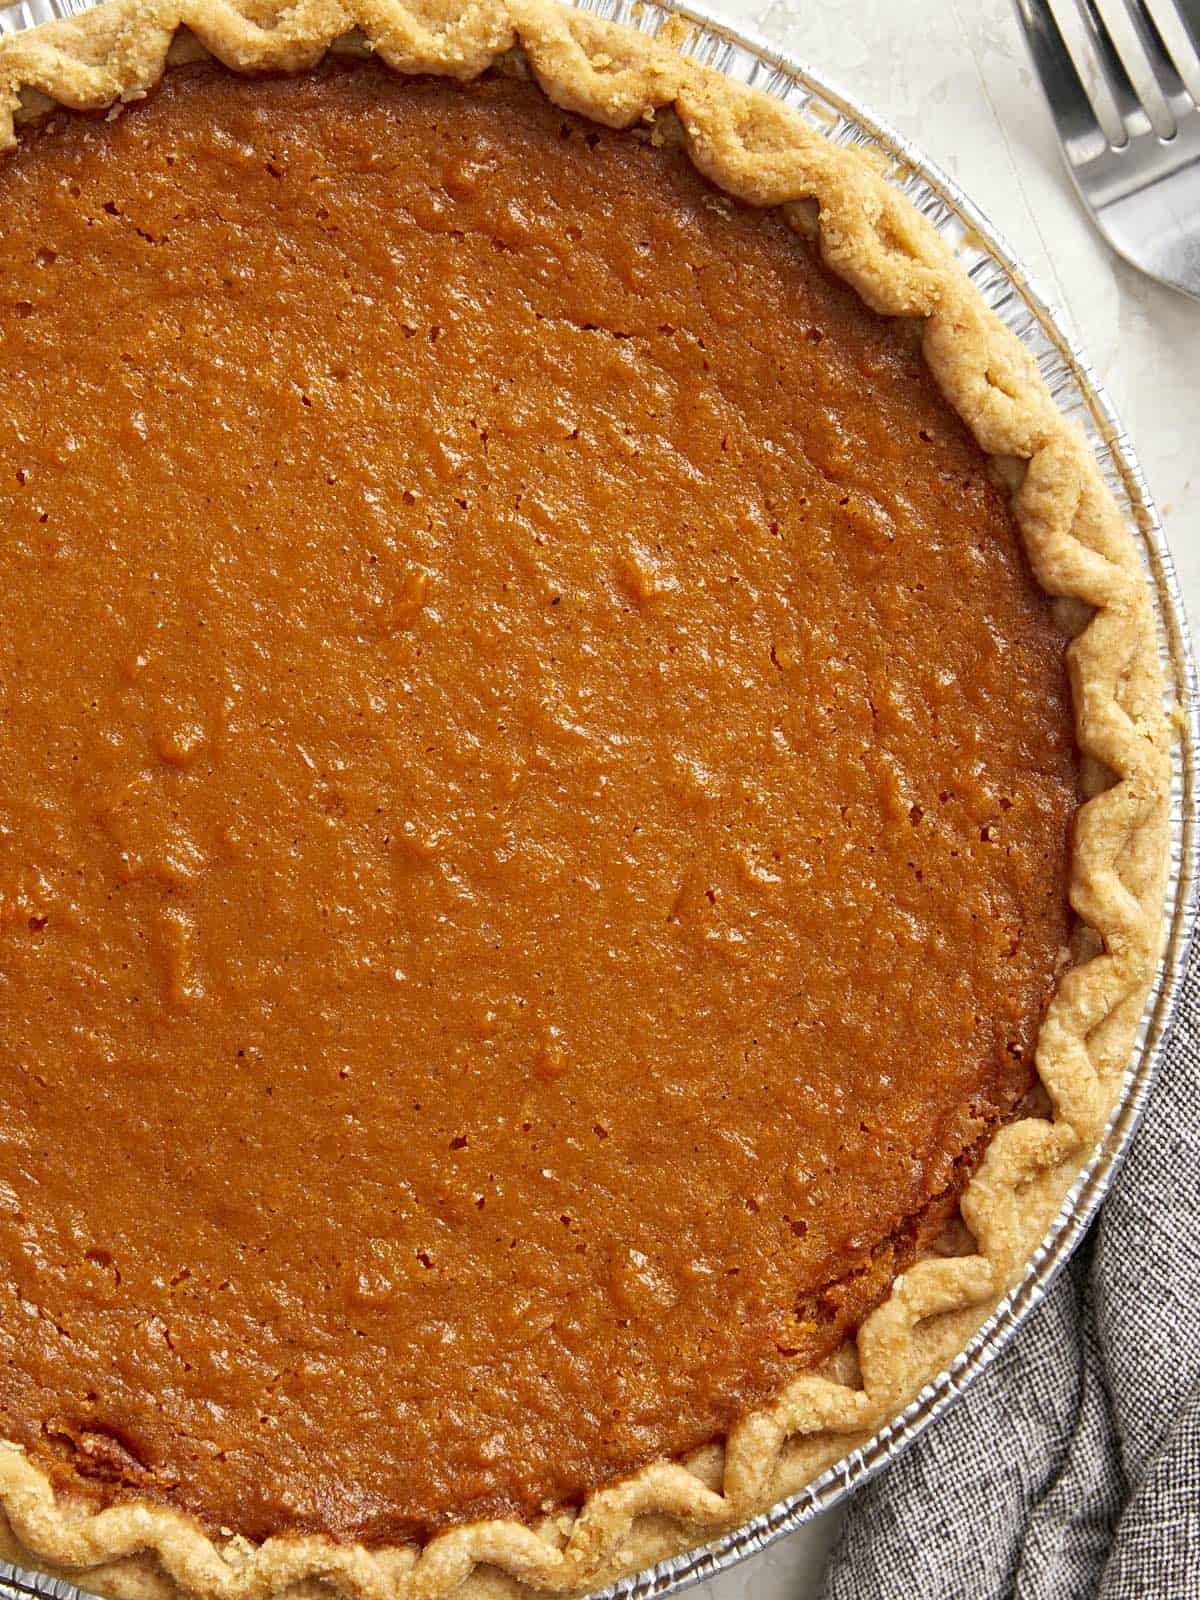
Here’s your perfect vegan pumpkin pie recipe! This plant based spin on the standard is (dare we say it) even more delicious than the original. What makes this pie incredible? Let us count the ways. Pumpkin pie has always been a favorite of mine: and of course, my grandma’s pie is the absolute best. So when we whipped up this Vegan Pumpkin Pie recipe, Alex and I weren’t expecting to love it more than the original. But this vegan pie is so full of pumpkin-spiced sweetness and the flavors are so delightfully elevated, no one will guess it’s plant-based! We’re solidly in camp vegan pumpkin pie, so much so that we’ll be making this recipe for years to come. Here are all our secrets! What makes this the best vegan pumpkin pie? Oddly enough, coconut milk does wonders in a vegan pumpkin pie. Something about the light fruitiness of the milk goes hand in hand with bright orange pumpkin! There’s no need for evaporated milk, which is what’s used in a standard pumpkin pie. We’re happy to kick it to the curb for a more whole food plant based option! Here’s what you need for the filling of a killer […]

A Couple Cooks – Healthy, Whole Food, & Vegetarian Recipes

Here’s your perfect vegan pumpkin pie recipe! This plant based spin on the standard is (dare we say it) even more delicious than the original.

Vegan pumpkin pie

What makes this pie incredible? Let us count the ways. Pumpkin pie has always been a favorite of mine: and of course, my grandma’s pie is the absolute best. So when we whipped up this Vegan Pumpkin Pie recipe, Alex and I weren’t expecting to love it more than the original. But this vegan pie is so full of pumpkin-spiced sweetness and the flavors are so delightfully elevated, no one will guess it’s plant-based! We’re solidly in camp vegan pumpkin pie, so much so that we’ll be making this recipe for years to come. Here are all our secrets!

What makes this the best vegan pumpkin pie?

Oddly enough, coconut milk does wonders in a vegan pumpkin pie. Something about the light fruitiness of the milk goes hand in hand with bright orange pumpkin! There’s no need for evaporated milk, which is what’s used in a standard pumpkin pie. We’re happy to kick it to the curb for a more whole food plant based option! Here’s what you need for the filling of a killer vegan pumpkin pie:

  • Pumpkin puree: Don’t use pumpkin pie filling: it’s pre-flavored! You’ll want the blank slate of a plain puree
  • Full fat coconut milk: The richness of a full-fat milk is absolutely necessary here; don’t substitute light coconut milk
  • Vanilla extract
  • Light brown sugar
  • Granulated sugar
  • Cornstarch or arrowroot powder
  • Kosher salt
  • Pumpkin pie spice blend

All you have to do is mix all of the ingredients above in a blender, then pour it into the crust and bake. The filling comes out creamy and beautifully flavorful: like a larger than life version of your grandma’s pie! Does it taste like coconut? Not really! It’s difficult to even detect a coconut flavor: you mainly just taste silky, pumpkin-spiced goodness.

Vegan pumpkin pie

Making the vegan pie crust: a few tips!

The part of a vegan pumpkin pie with the most technique is the pie crust! We have a whole separate article about Vegan Pie Crust with all of our tips and tricks. But here’s a brief overview of the process you’ll follow:

  • You can us either coconut oil or vegan butter. Both of these plant-based butter substitutes yield excellent results. You might wonder whether the flavor is too heavy on the coconut when using coconut oil. But if you use refined coconut oil, you can barely detect that flavor.
  • Chill for 30 minutes while making the filling. Chilling the pie crust dough makes it easier to work with, no matter which butter substitute you’re using.
  • Roll it out in an even circle: a pastry cloth can be helpful. It’s not required, but a pastry cloth is helpful for rolling out the pie crust because it helps to reduce sticking.
  • Use a standard 9-inch pie plate: not deep dish! This vegan pumpkin pie recipe is for a standard pie: not deep dish! You won’t have enough filling for a deep dish plate.
How to make vegan pumpkin pie

How to make a pie crust shield

For this vegan pumpkin pie recipe, you’ll need to use a pie crust shield. What is it? A pie crust shield is a shield that prevents pie crust from burning in the oven. It covers just the crust, so it allows the filling to bake as normal. Here’s what to know about using a pie crust shield:

  • It’s easy to make a pie crust shield with aluminum foil! All you have to do is cut a hole in the center of a large sheet of foil that’s the diameter of your pie plate. The foil will rest on the crust but let the pie filling be uncovered. Here’s a video with instructions for more details. (We just used a knife to cut the right sized hole in our foil.)
  • You can also buy a metal pie crust shield. If you bake a lot, you might already have one! Here’s a link to buy a pie crust shield online.

Pumpkin pie spices: use storebought or homemade

The easiest way to season the filling for this vegan pumpkin pie is using store-bought pumpkin pie spices! But did you know you can also make them at home? If you don’t have pumpkin pie spice but have a stocked spice collection, it’s easy to make. Here are the spices you’ll need:

  • 2 tablespoons cinnamon
  • 2 teaspoons ground ginger
  • 2 teaspoons ground allspice
  • 1 teaspoon ground cloves
  • 1 teaspoon ground nutmeg

Add these together and it makes 1/4 cup pumpkin pie spice! Store it in a sealed jar and it lasts for up to 1 year, though of course it’s best at its freshest.

Vegan pumpkin pie

Topping for vegan pumpkin pie

What’s the best topping for vegan pumpkin pie? Most people are used to a dollop of whipped cream: which certainly makes the entire experience complete. This pie is actually very delicious without whipped cream. But if you’d like the full experience, here’s what to do:

  • Make a batch of vegan whipped cream. This Vegan Whipped Cream recipe is light and fluffy, made with…you guessed it, coconut milk!
  • Consider using vegan butter for the crust. If you’re planning to top with vegan whipped cream and you’re worried about too much coconut flavor, consider using vegan butter in the crust. Personally we don’t mind the extra fruity finish of the coconut flavor in this dessert, but it’s an option for mixing up the flavor.
Vegan pumpkin pie

More vegan Thanksgiving recipes

This vegan pumpkin pie is the crown jewel in our list of vegan Thanksgiving recipes! Here are some more favorites for the holiday:

This vegan pumpkin pie recipe is…
Vegetarian, vegan, and plant-based.

Print
Vegan pumpkin pie

Incredible Vegan Pumpkin Pie


1 Star2 Stars3 Stars4 Stars5 Stars (5 votes, average: 5.00 out of 5)

  • Author: Sonja Overhiser
  • Prep Time: 45 minutes
  • Cook Time: 1 hour
  • Total Time: 1 hour 45 minutes
  • Yield: 8
  • Diet: Vegan

Description

Here’s your perfect vegan pumpkin pie recipe! This plant based spin on the standard is (dare we say it) even more delicious than the original.


Ingredients

  • 1 Vegan Pie Crust
  • 2 1/4 cups pumpkin puree (not pumpkin pie filling; you’ll need 2 15-ounce cans)
  • 1/2 cup full fat coconut milk
  • 2 teaspoons vanilla extract
  • 3/4 cup packed light brown sugar
  • 1/4 cup granulated sugar
  • 3 tablespoons cornstarch
  • 1/2 teaspoon kosher salt
  • 1 tablespoon pumpkin pie spice blend (store-bought or homemade)
  • For serving: vegan whipped cream

Instructions

  1. Make the Vegan Pie Crust Step 1 and 2, then refrigerate it while you make the filling. 
  2. Preheat an oven to 350 degrees Fahrenheit. 
  3. Place the pumpkin puree, coconut milk, vanilla, light brown sugar, granulated sugar, cornstarch, and kosher salt in a blender and blend until smooth.
  4. Make a pie crust shield using aluminum foil: cut a hole in the center of a large square of aluminum foil that’s the diameter of your pie plate. The foil will rest on the crust but let the pie filling be uncovered. (It will look like this.)
  5. Roll out the pie crust and add it to a standard pie plate (not deep dish), following the instructions in Vegan Pie Crust.
  6. Pour the filling into the pie crust. Fill it all the way to the rim, but don’t overfill the pie plate: you’ll have about 1/4 cup leftover that you can discard (or taste!). 
  7. Bake the pie for 55 minutes total until set, adding the foil shield for the curst at the 30 minute mark. Cool 1 hour on counter, then refrigerate at least 2 hours before serving.
  • Category: Dessert
  • Method: Baked
  • Cuisine: Pie

Keywords: Vegan pumpkin pie, vegan pumpkin pie recipe
A Couple Cooks - Healthy, Whole Food, & Vegetarian Recipes