Santa Fe Salad

This Santa Fe salad is the ultimate Southwestern salad. It’s loaded with tender, juicy chicken, fresh veggies, and creamy black beans.

The post Santa Fe Salad appeared first on Budget Bytes.

I have a major weakness for Southwestern flavors, and this Santa Fe salad is the ultimate combination. It’s loaded with tender, juicy chicken, fresh veggies, and creamy black beans. I love it tossed in our creamy avocado dressing. It’s a great hearty entrée-sized salad that’ll keep you full for hours. If you are plant-baseed, this flavor bomb of a salad still packs the same punch without the chicken. This salad is a true crowd pleaser.
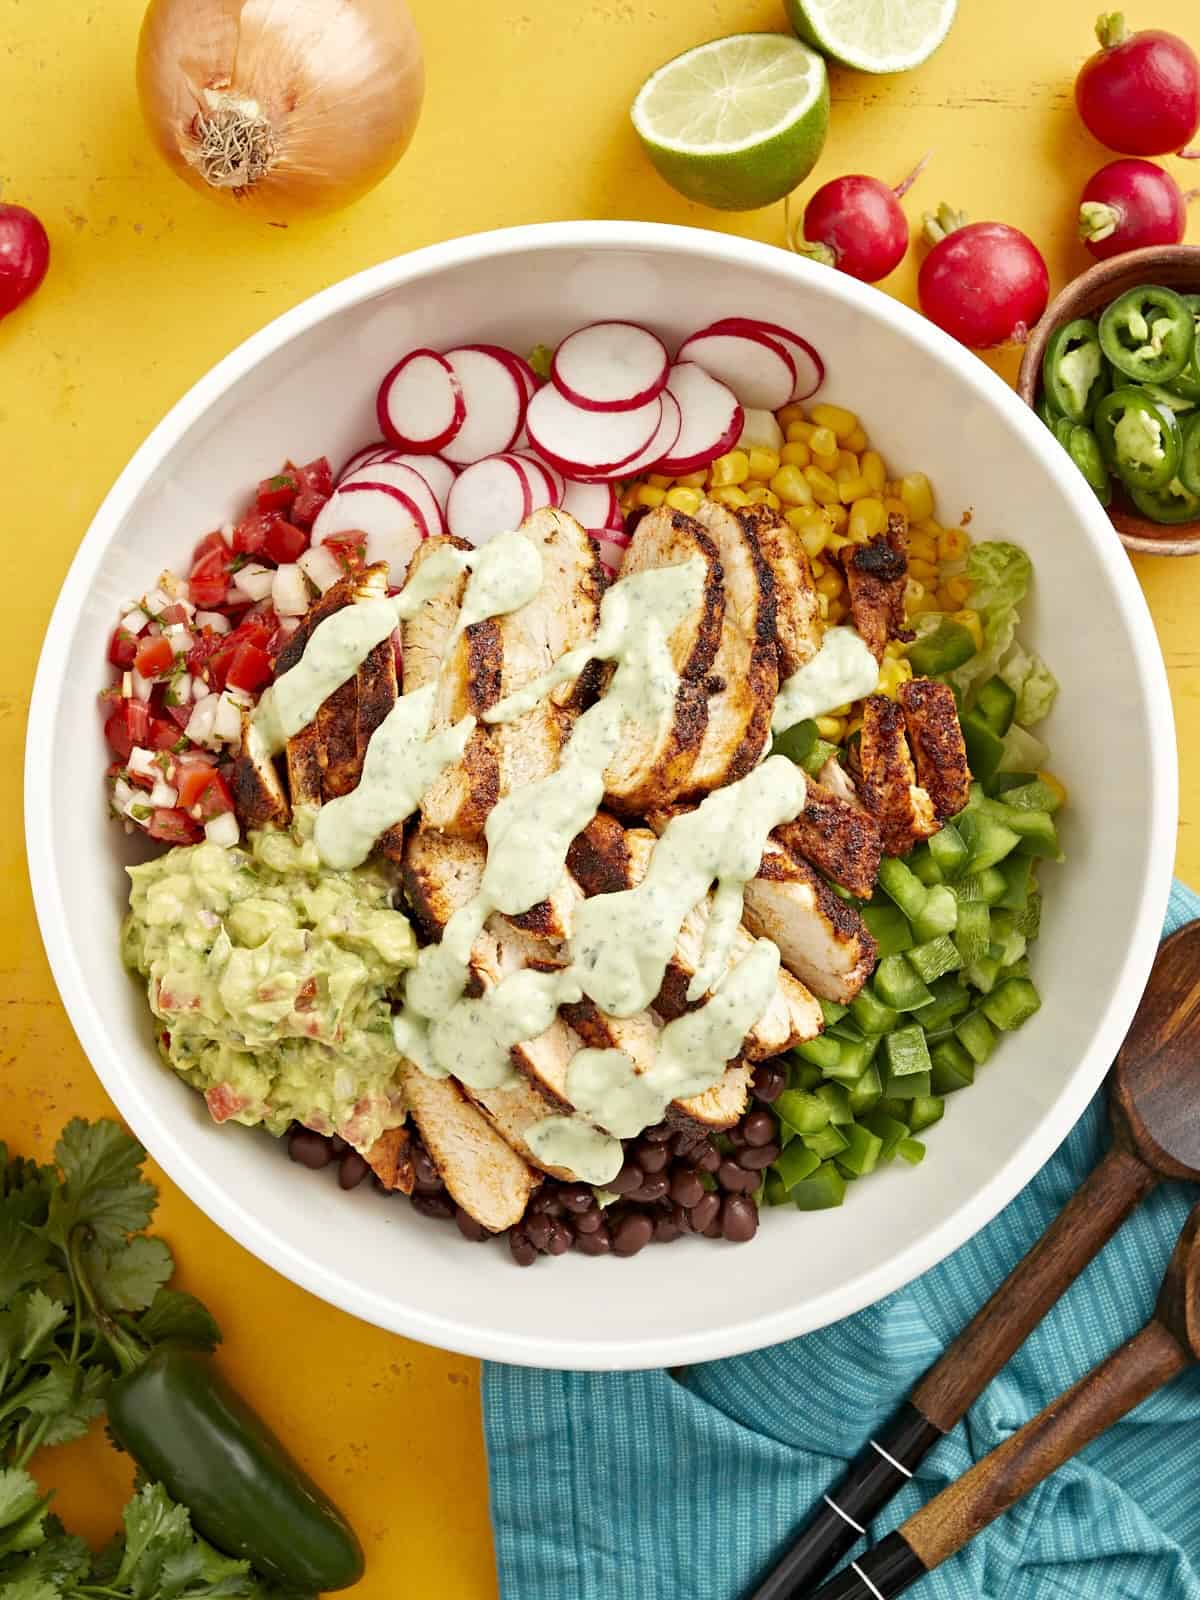
creamy avocado dressing drizzled over santa fe salad in a large white bowl.

What Is A Santa Fe Salad?

This tasty Santa Fe salad recipe starts with a bed of romaine lettuce topped with Southwestern favorites, like corn, black beans, bell pepper, cheese, and tortilla chips. Top it off with our favorite creamy avocado dressing, some fresh pico de gallo, and a dollop of homemade guacamole for a filling salad that’s bursting with flavor!

Ingredients

Here’s what you’ll need to make a Santa Fe salad:

  • Chicken Breasts: Tender, juicy chicken breasts are a great source of protein on this hearty salad. For a budget-saving option, chicken thighs work well. If you’re vegetarian or vegan, substitute the chicken with extra-firm tofu (seasonings and all) or go heavier on the black beans. Mmm!
  • Olive Oil: Helps the spices stick to the chicken and helps the chicken sear in the pan.
  • Seasonings: Chili powder, paprika, cayenne pepper, ground cumin, garlic powder, onion powder, salt, and pepper add Southwestern flair to the chicken.
  • Romaine Lettuce: The perfect crunchy base for this salad. Buy whole heads rather than the pre-chopped bagged stuff to save money.
  • Bell Pepper: I like to use a green bell pepper, but any color works well to add some crunch!
  • Frozen Corn: You can also use fresh or canned corn– just be sure to drain and rinse first if you use canned.
  • Canned Black Beans: Add creaminess and extra protein to this salad.
  • Cheddar Cheese: Adds a hint of saltiness. Mexican blend also works well.
  • Tortilla Chips: I like to crumble some on top for extra crunch.
  • Creamy Avocado Dressing: Pulls the whole salad together. If you’re short on time, use a store-bought chipotle or Southwest ranch dressing.
  • Pico de Gallo: Adds a hit of freshness and acidity.
  • Guacamole: This is totally optional but ups the creaminess of this salad!

What Else Can I Add?

This Southwestern salad is a great fridge clean-out recipe. Here are some other things I love to add when I have them on hand:

How To Store Leftovers

As with most salads, I recommend storing the veggie components separately from the chicken and dressing and tossing everything together just before serving. This helps protect the lettuce from wilting. Stored correctly, this salad should keep well in the refrigerator for up to 3 days, making it great for meal prep!
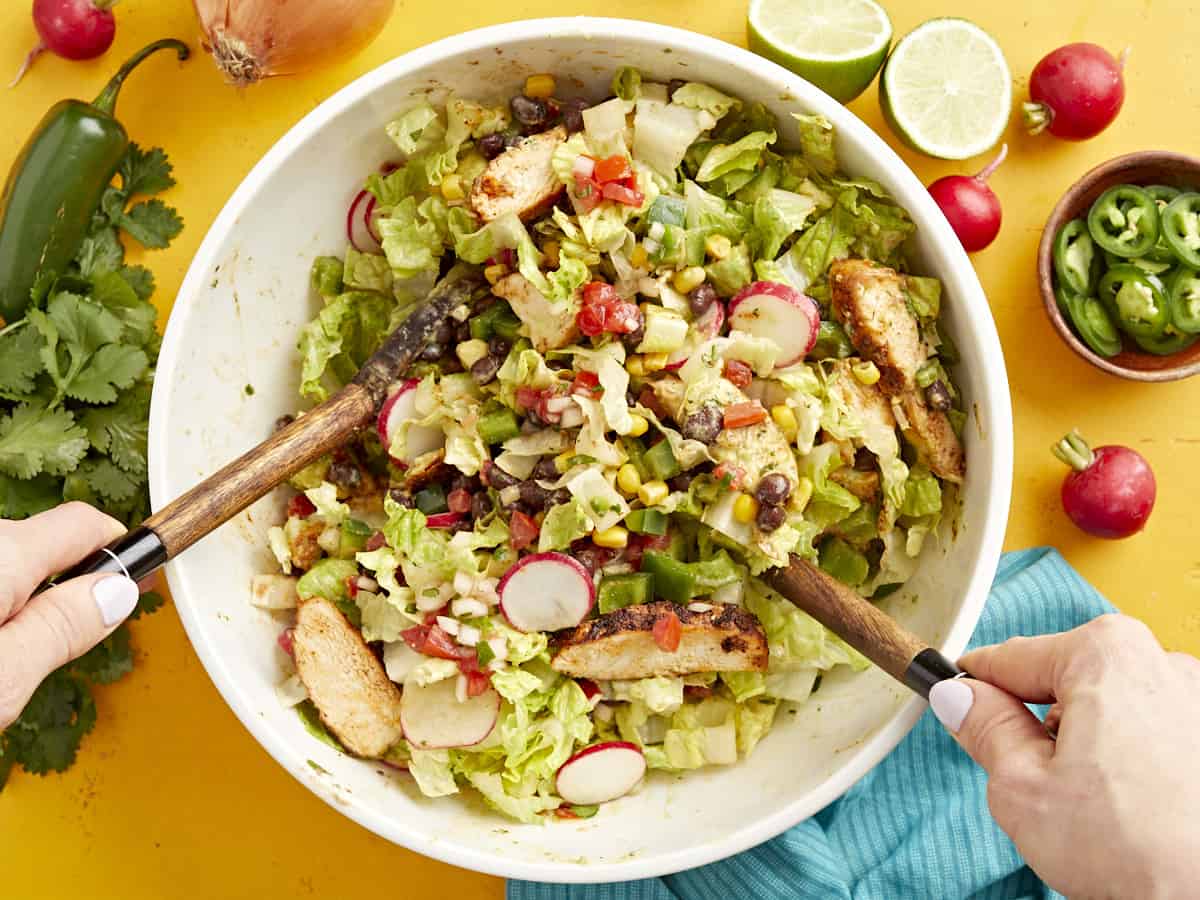
tossing santa fe salad in a large white bowl with wooden spoons.
creamy avocado dressing drizzled over santa fe salad in a large white bowl.
Print

Santa Fe Salad

This Santa Fe salad is the ultimate Southwestern salad. It's loaded with tender, juicy chicken, fresh veggies, and creamy black beans.
Course Salad
Cuisine American, texmex
Total Cost ($17.21 recipe / $2.95 serving)
Prep Time 30 minutes
Cook Time 10 minutes
Total Time 40 minutes
Servings 6
Calories 516kcal

Ingredients

For the Dressing

  • 1 avocado $0.89
  • 1/2 cup sour cream $0.24
  • 1 clove garlic, minced $0.08
  • 1/4 tsp salt $0.02
  • 2 tbsp lime juice $0.50
  • 1/4 bunch fresh cilantro $0.20
  • 1/4 cup water $0.00

For the Salad

  • 2 heads romaine lettuce, chopped into bite-size pieces $2.98
  • 1 green bell pepper, diced $0.89
  • 5 radishes, sliced thin $0.49
  • 1 cup frozen corn, thawed and rinsed $0.47
  • 1 15oz. can black beans, rinsed and drained $0.89
  • 1/4 cup shredded cheddar cheese $0.83
  • 1/2 cup pico de gallo $0.44
  • 1 cup crushed tortilla chips $0.50

For the Chicken

  • 2 boneless, skinless chicken breasts $5.69
  • 2 Tbsp olive oil, divided $0.08
  • 1 Tbsp chili powder $0.30
  • 2 tsp paprika $0.20
  • 1/2 tsp cayenne pepper $0.06
  • 1 tsp ground cumin $0.10
  • 1 tsp garlic powder $0.05
  • 1 tsp onion powder $0.05
  • 1 tsp salt $0.05
  • 1 tsp freshly ground black pepper $0.05

Instructions

  • Add the avocado, sour cream, minced garlic, salt, lime juice, and cilantro to a food processor or blender. Puré until smooth. Cover and set aside in the refrigerator.
  • Chop romaine lettuce into bite-sized pieces and transfer to a large salad bowl.
  • Dice bell peppers, slice radishes, thaw frozen corn, and rinse and strain canned black beans. Add this and 1/2 cup of pico de gallo to the large salad bowl on top of chopped romaine lettuce. Cover and keep in the refrigerator while you prepare the chicken.
  • Place the chicken breasts inside a heavy duty food storage bag and flatten with a rolling pin or a tenderizing mallet until the breasts are consistently about 3/4 inch thick. Start in the middle at the thickest part of each breast for more even cooking. This step helps the chicken cook more evenly.
  • Prepare the Santa Fe Chicken seasoning blend by combining chili, paprika, cayenne, cumin, garlic powder, onion powder, salt, and black pepper.
  • Rub chicken breasts with 1 Tbsp olive oil and divide the seasoning blend between the them, making sure to thoroughly coat the entire surface of each chicken breast with seasoning.
  • In a large skillet, add 1 Tbsp olive oil over medium-high heat. When the oil is glistening and hot, add the chicken breasts. Cook your chicken for a total of 10-12 minutes, flipping halfway. While the chicken cooks, do not wiggle or disturb it except for flipping. Remove the chicken from the heat when it reaches an internal temperature of 160°F. Allow chicken to rest on a cutting board for 5-10 minutes before slicing into strips. After resting, the chicken should reach an internal temperature of 165°F. 
  • Fan out the sliced chicken on top of the salad and drizzle creamy avocado dressing over the top. Toss and serve!

See how we calculate recipe costs here.

Notes

Nutritional information does not include the guacamole. Click the recipe link to view nutritional information.

Nutrition

Serving: 1bowl | Calories: 516kcal | Carbohydrates: 61g | Protein: 29g | Fat: 21g | Sodium: 1791mg | Fiber: 14g
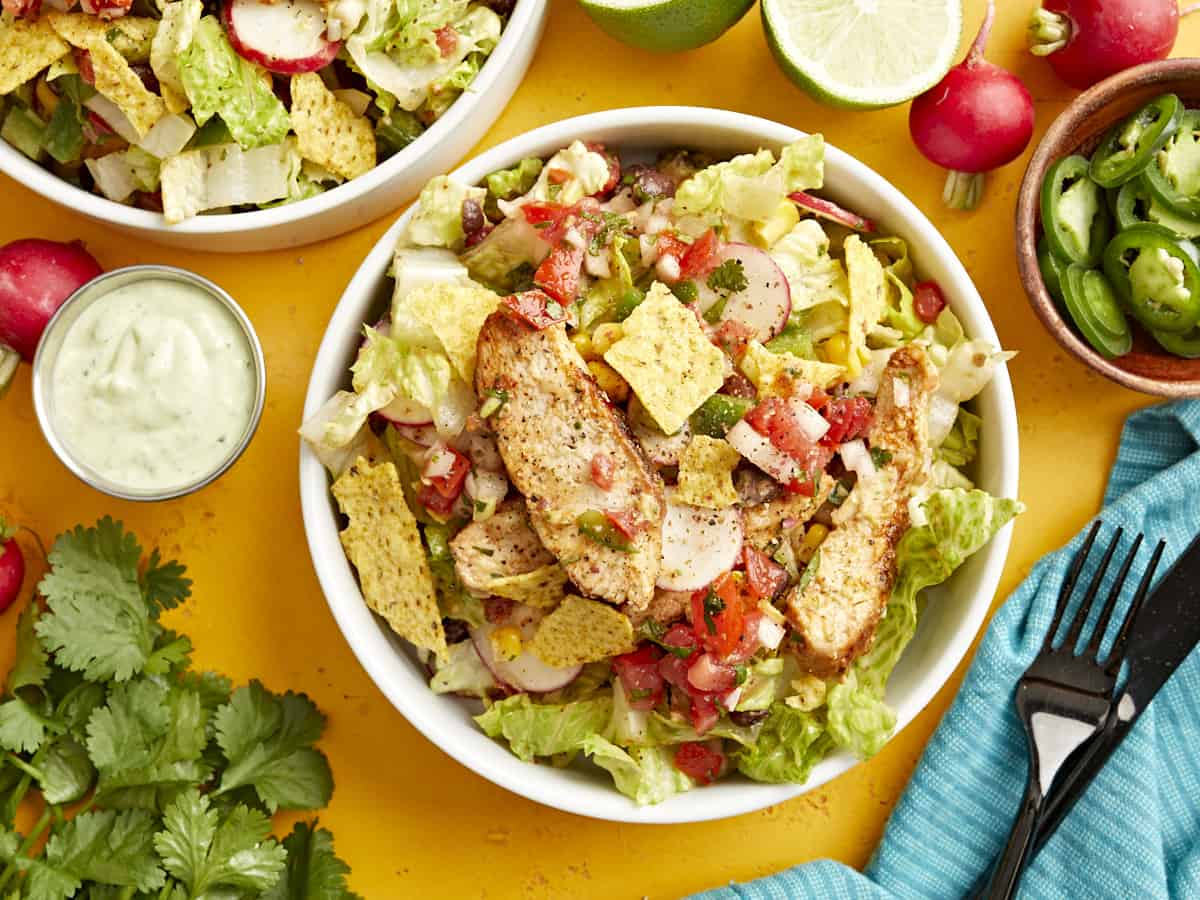
overhead view of a santa fe salad in a white bowl.

how to make a Santa Fe Salad – step by step photos
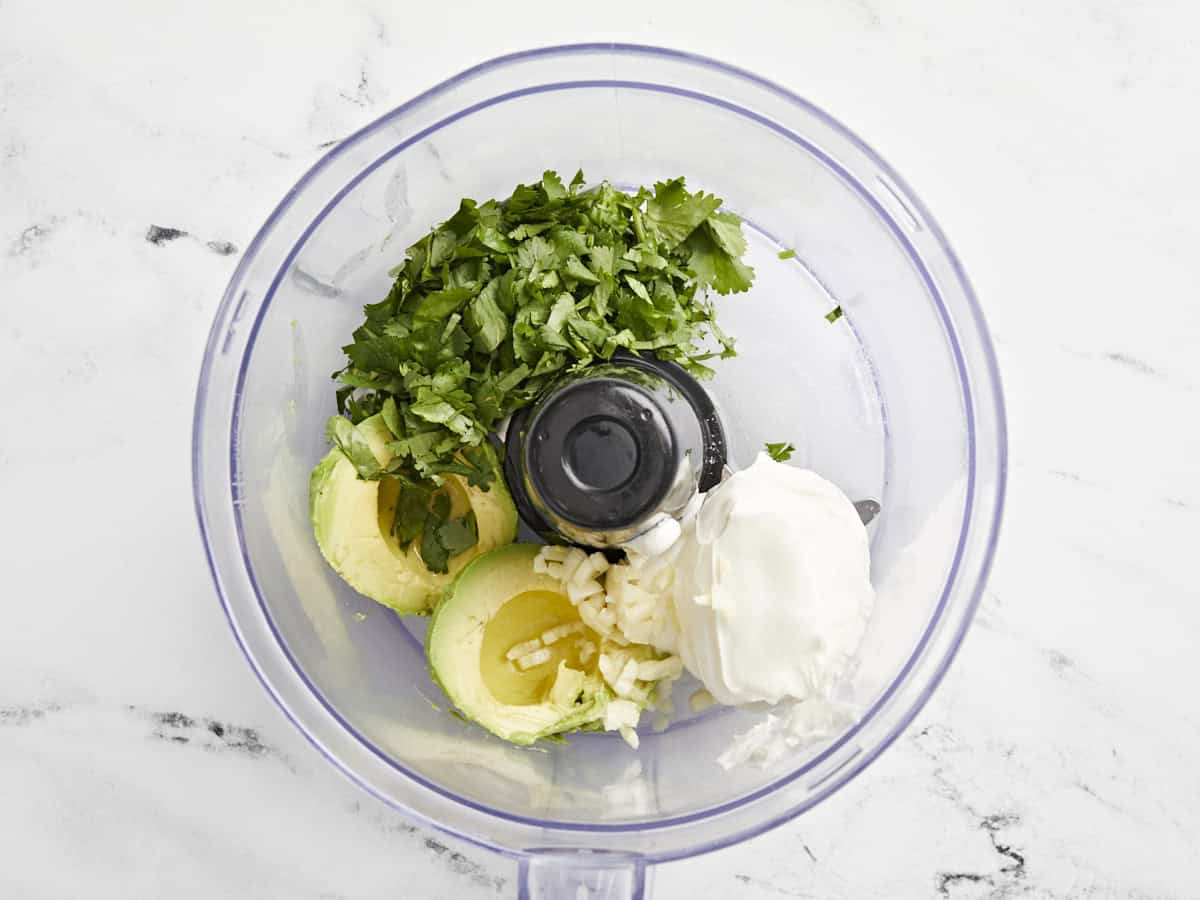
ingredients for avocado dressing in food processor

Add 1 avocado, ½ cup sour cream, 1 clove of garlic (minced), ¼ tsp salt, 2 Tbsp lime juice, and ¼ bunch cilantro to a food processor or blender.
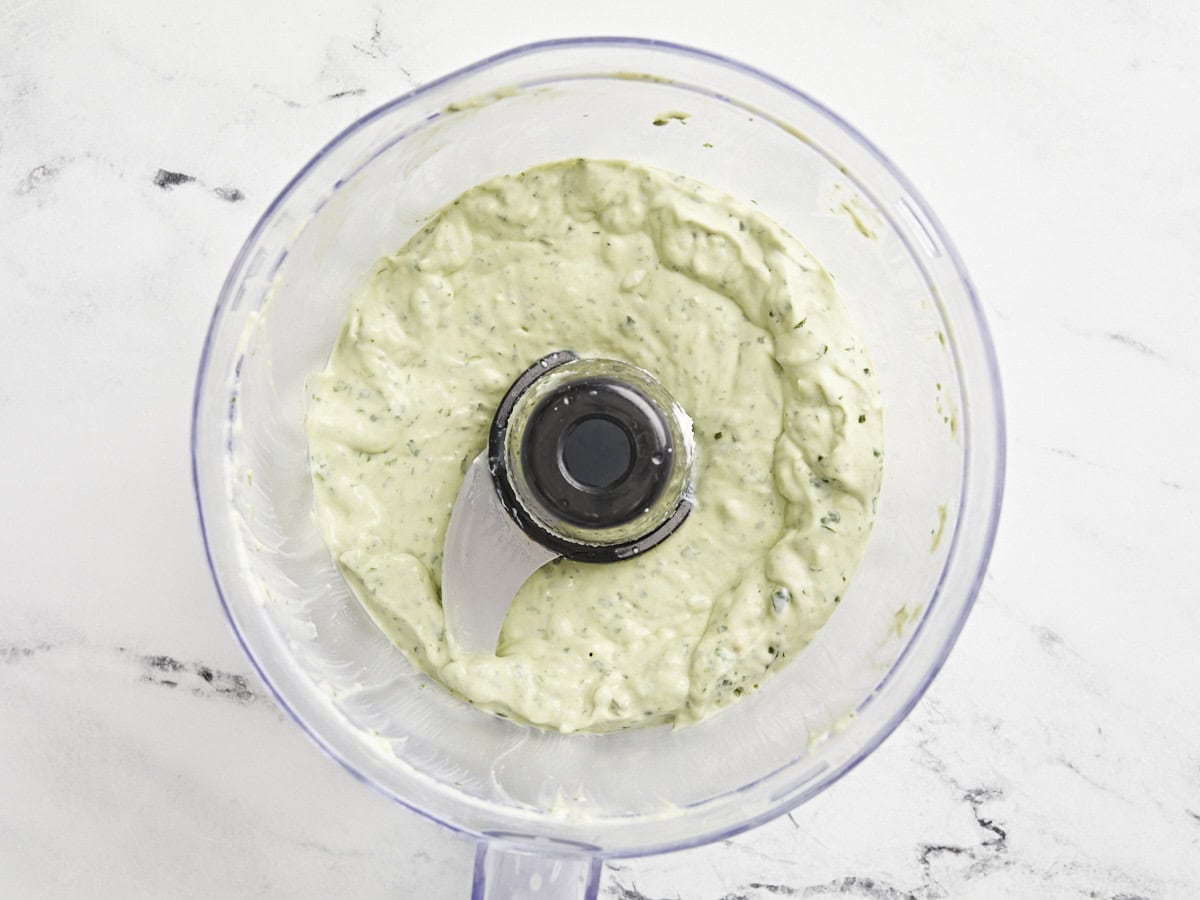
creamy avocado dressing in food processor

Puré until smooth. Cover and set aside in the refrigerator.
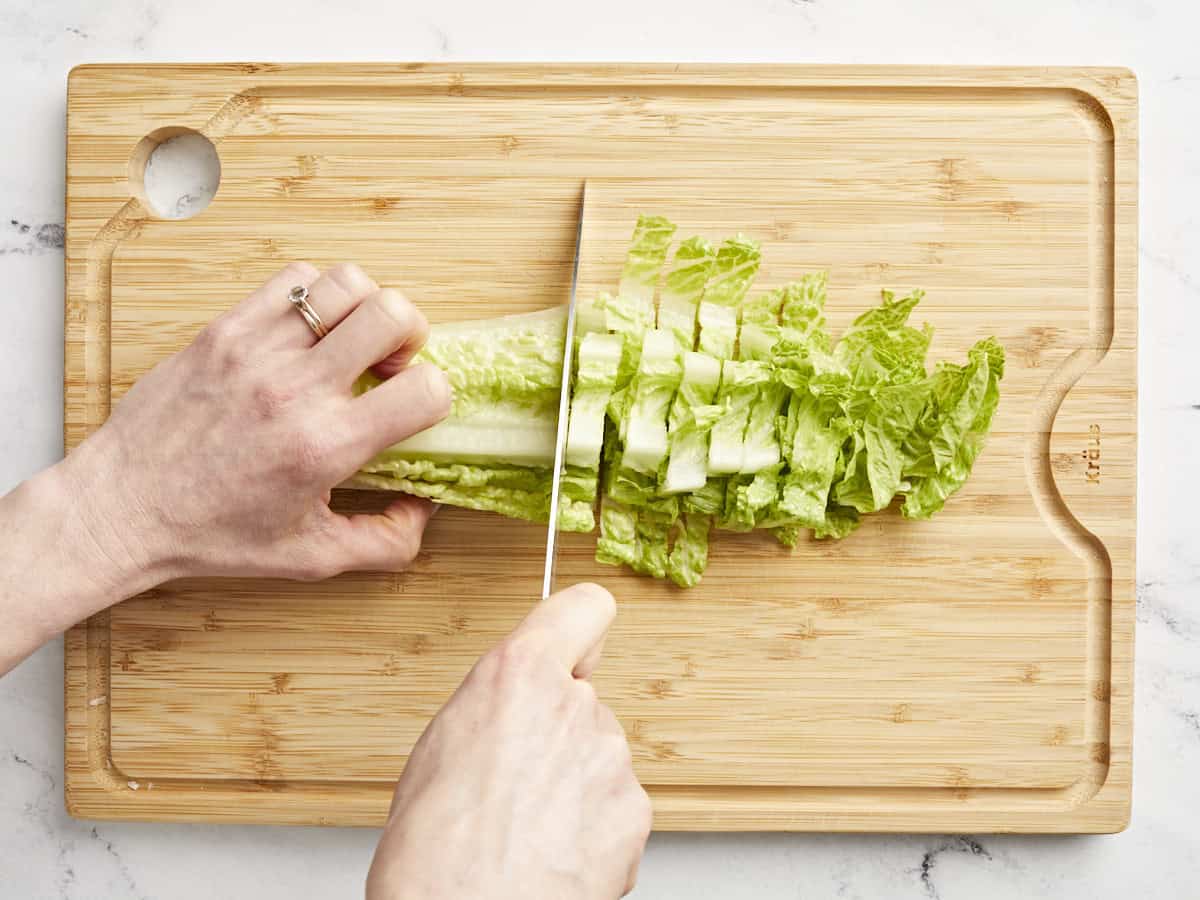
chopping lettuce

Chop 2 heads of romaine lettuce into bite-sized pieces and transfer to a large salad bowl.
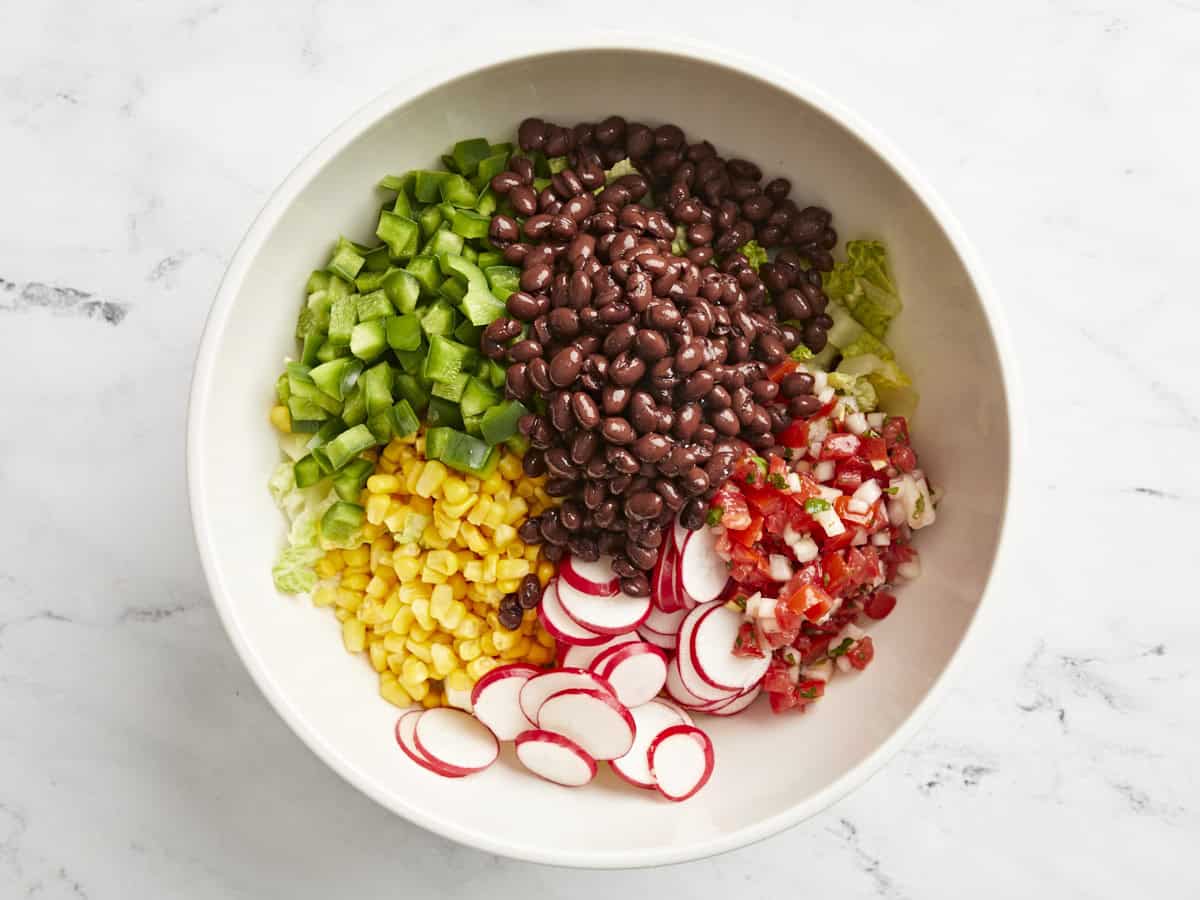
ingredients for santa fe salad in a white bowl

Dice 1 bell pepper, slice 5 radishes, thaw 1 cup frozen corn, and rinse and strain 1 can of black beans. Add this and 1/2 cup of pico de gallo to the large salad bowl on top of chopped romaine lettuce. Cover and keep in the refrigerator while you prepare the chicken.
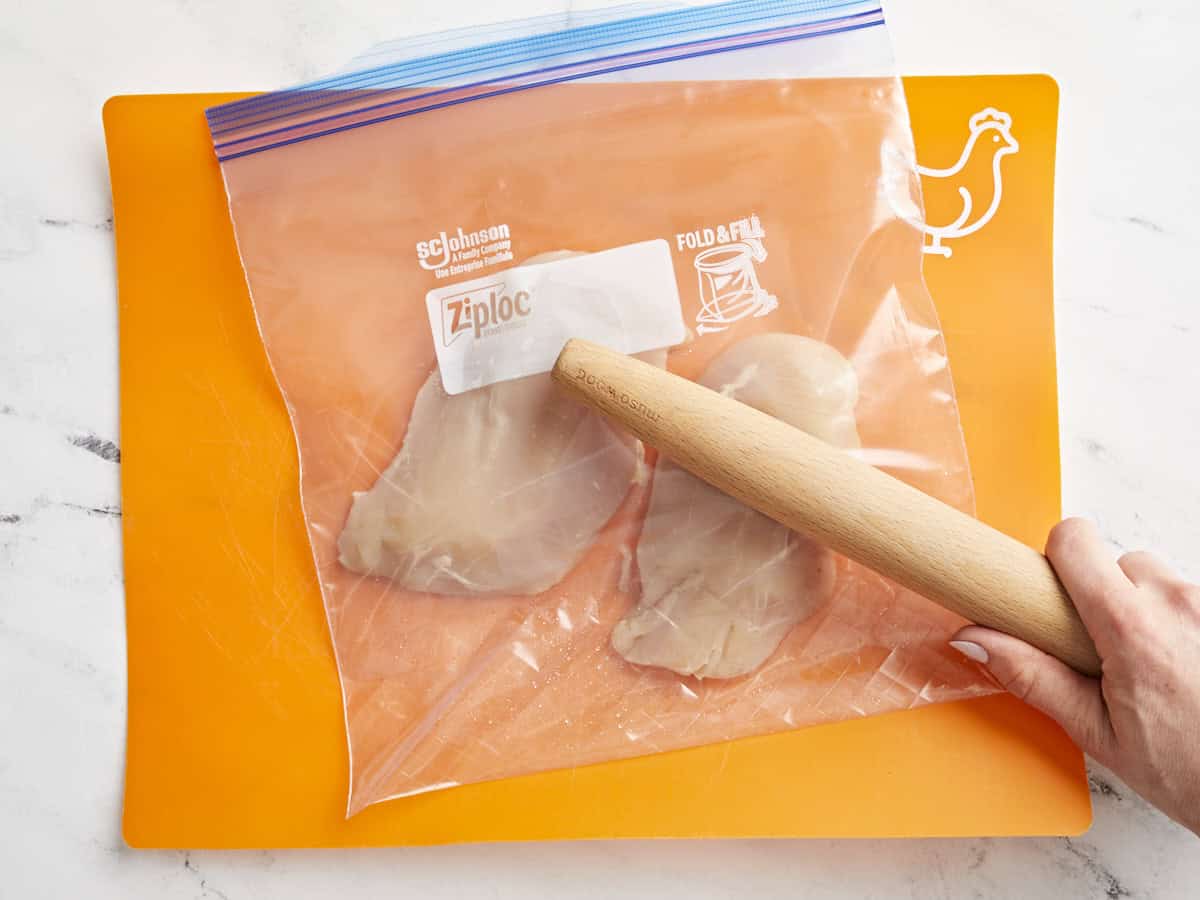
pounding chicken

Place the chicken breasts inside a heavy duty food storage bag and flatten with a rolling pin or a tenderizing mallet until the breasts are consistently about 3/4 inch thick. Start in the middle at the thickest part of each breast for more even cooking. This step helps the chicken cook more evenly.
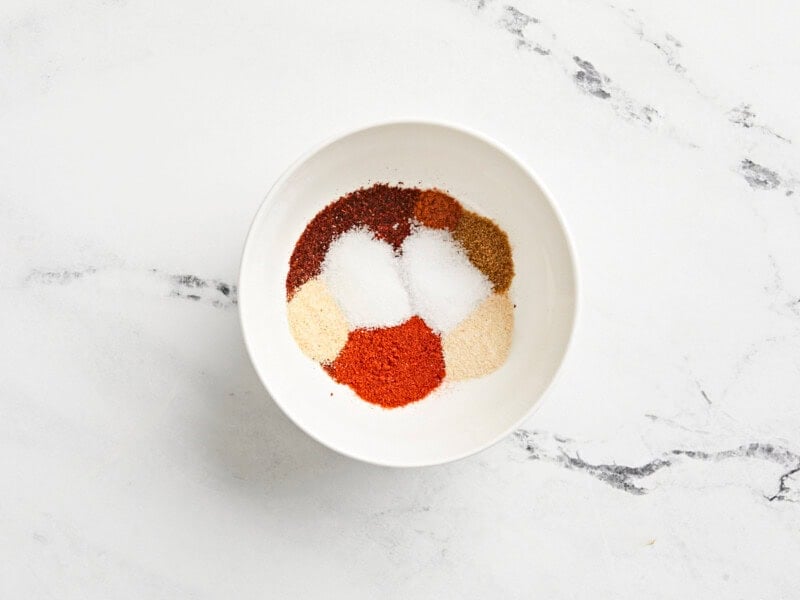
spice rub for chicken

Prepare the Santa Fe Chicken seasoning blend by combining 1 Tbsp chili, 2 tsp paprika, 1/2 tsp cayenne, 1 tsp cumin, 1 tsp garlic powder, 1 tsp onion powder, 1 tsp salt and 1 tsp black pepper together.
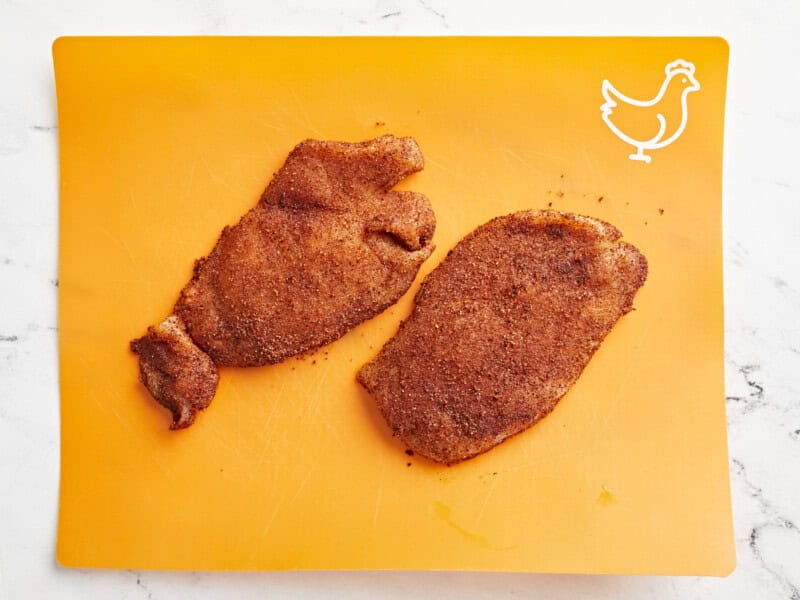
chicken coated with spice rub

Rub chicken breasts with 1 Tbsp olive oil and divide the seasoning blend between the them, making sure to thoroughly coat the entire surface of each chicken breast with seasoning.
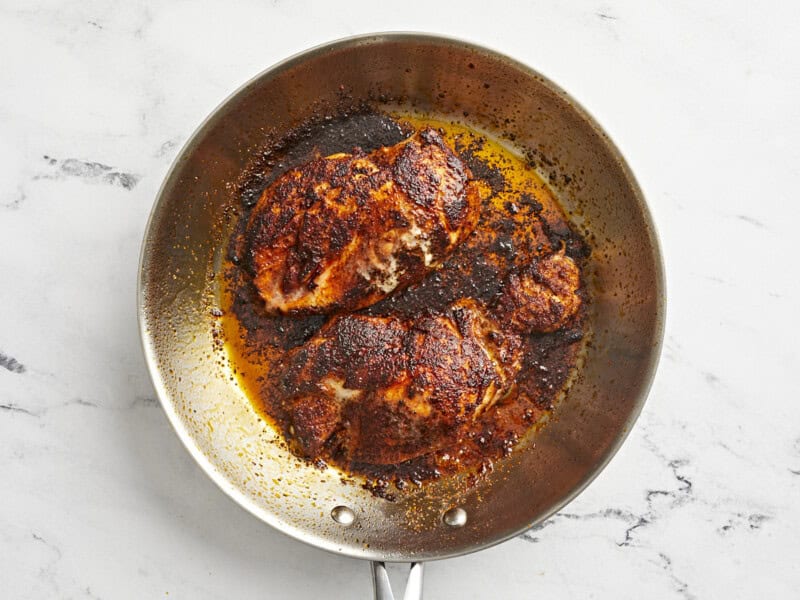
chicken in skillet

In a large skillet, add 1 Tbsp olive oil over medium-high heat. When the oil is glistening and hot, add the chicken breasts. Cook your chicken for a total of 10-12 minutes, flipping halfway. While the chicken cooks, do not wiggle or disturb it except for flipping. Remove the chicken from the heat when it reaches an internal temperature of 160°F. Allow chicken to rest on a cutting board for 5-10 minutes before slicing into strips. After resting, the chicken should reach an internal temperature of 165°F. 
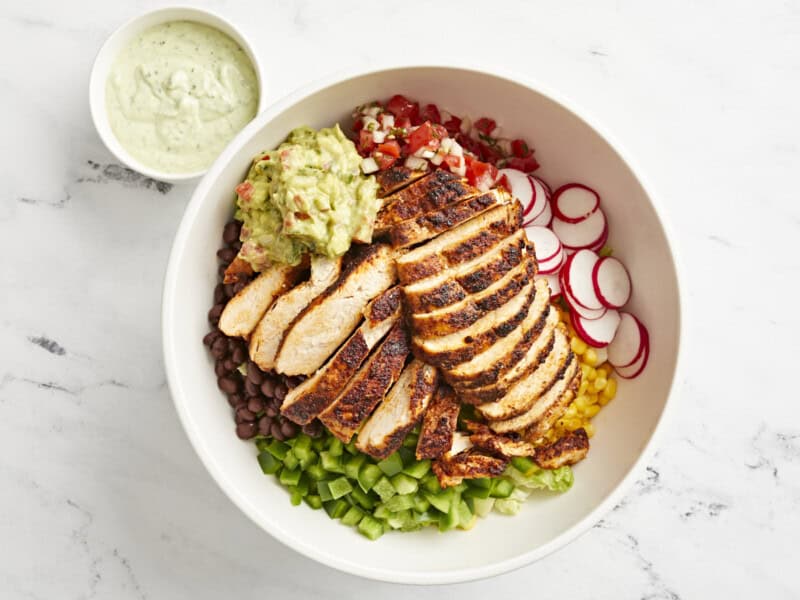
completed santa fe salad

Fan out the sliced chicken on top of the salad and drizzle Creamy Avocado Dressing over the top. Toss and serve!

The post Santa Fe Salad appeared first on Budget Bytes.

Mediterranean Lentil Soup

This vegan Mediterranean Lentil Soup is bright and refreshing. Finished with a squeeze of lemon, it’s the perfect meal for rainy spring days.

The post Mediterranean Lentil Soup appeared first on Budget Bytes.
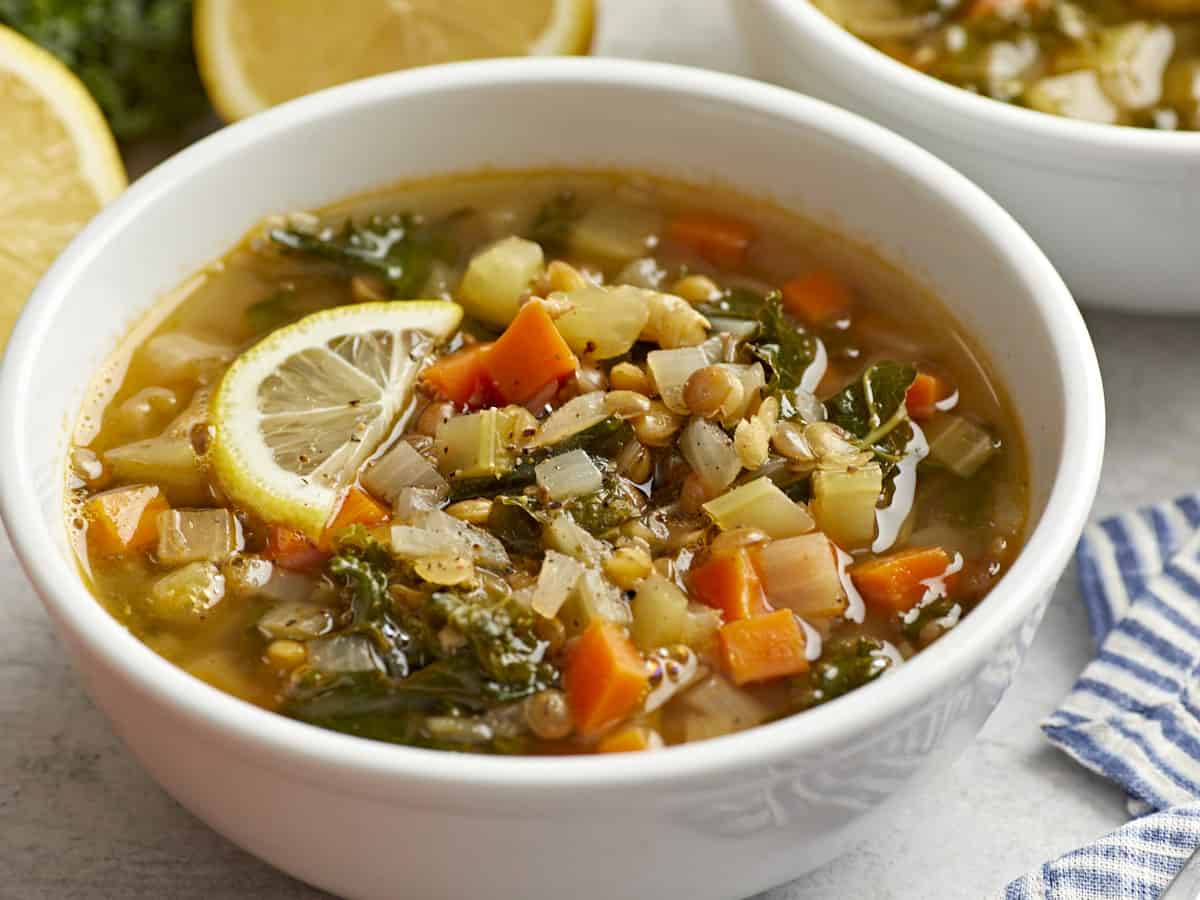
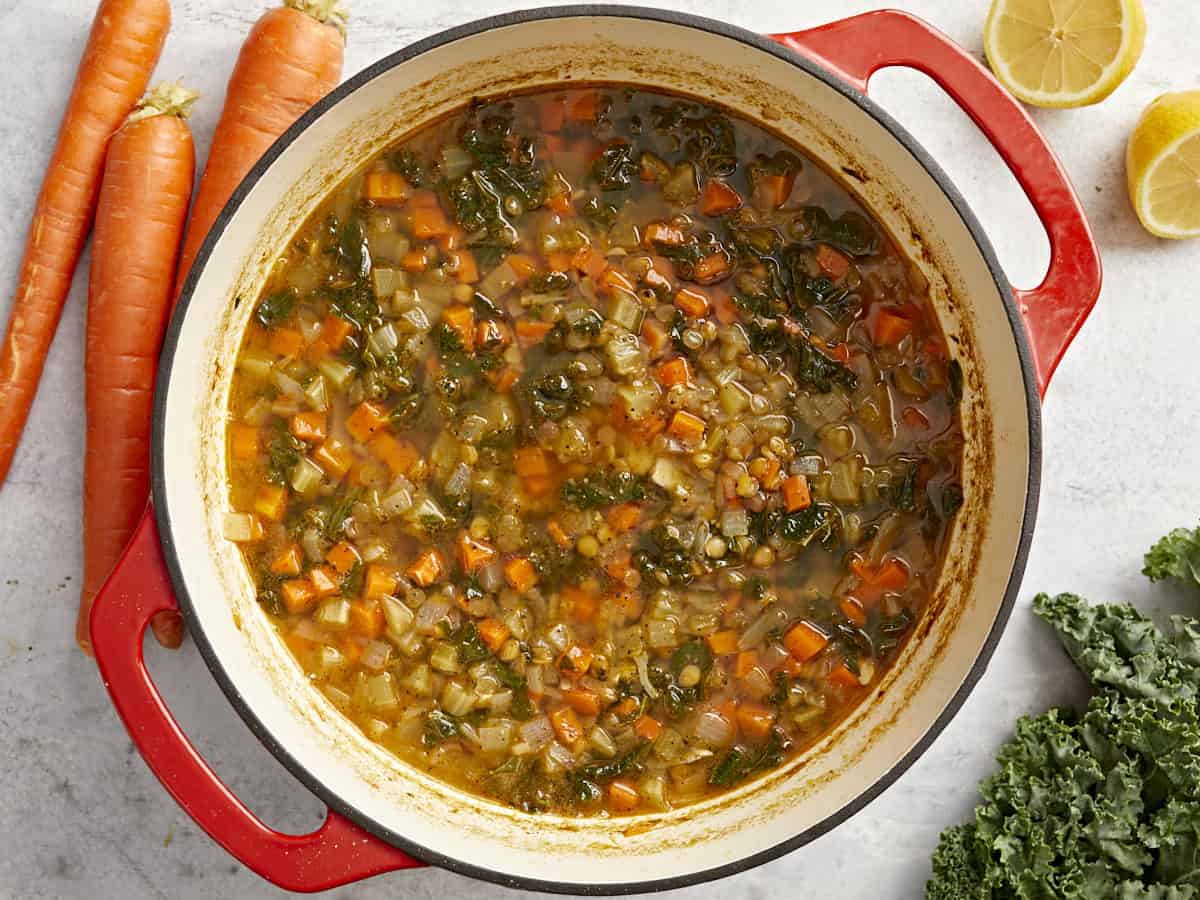
In my opinion, a bright and refreshing soup is the perfect way to welcome spring, and this vegan Mediterranean Lentil Soup is the perfect comforting meal for the rainy days to come. A rich and flavorful broth loaded with veggies, lentils, and kale will fill you up for pennies and is a great recipe for fridge clean out day. Finish it off with a squeeze of lemon juice for a delicious and easy weeknight meal.

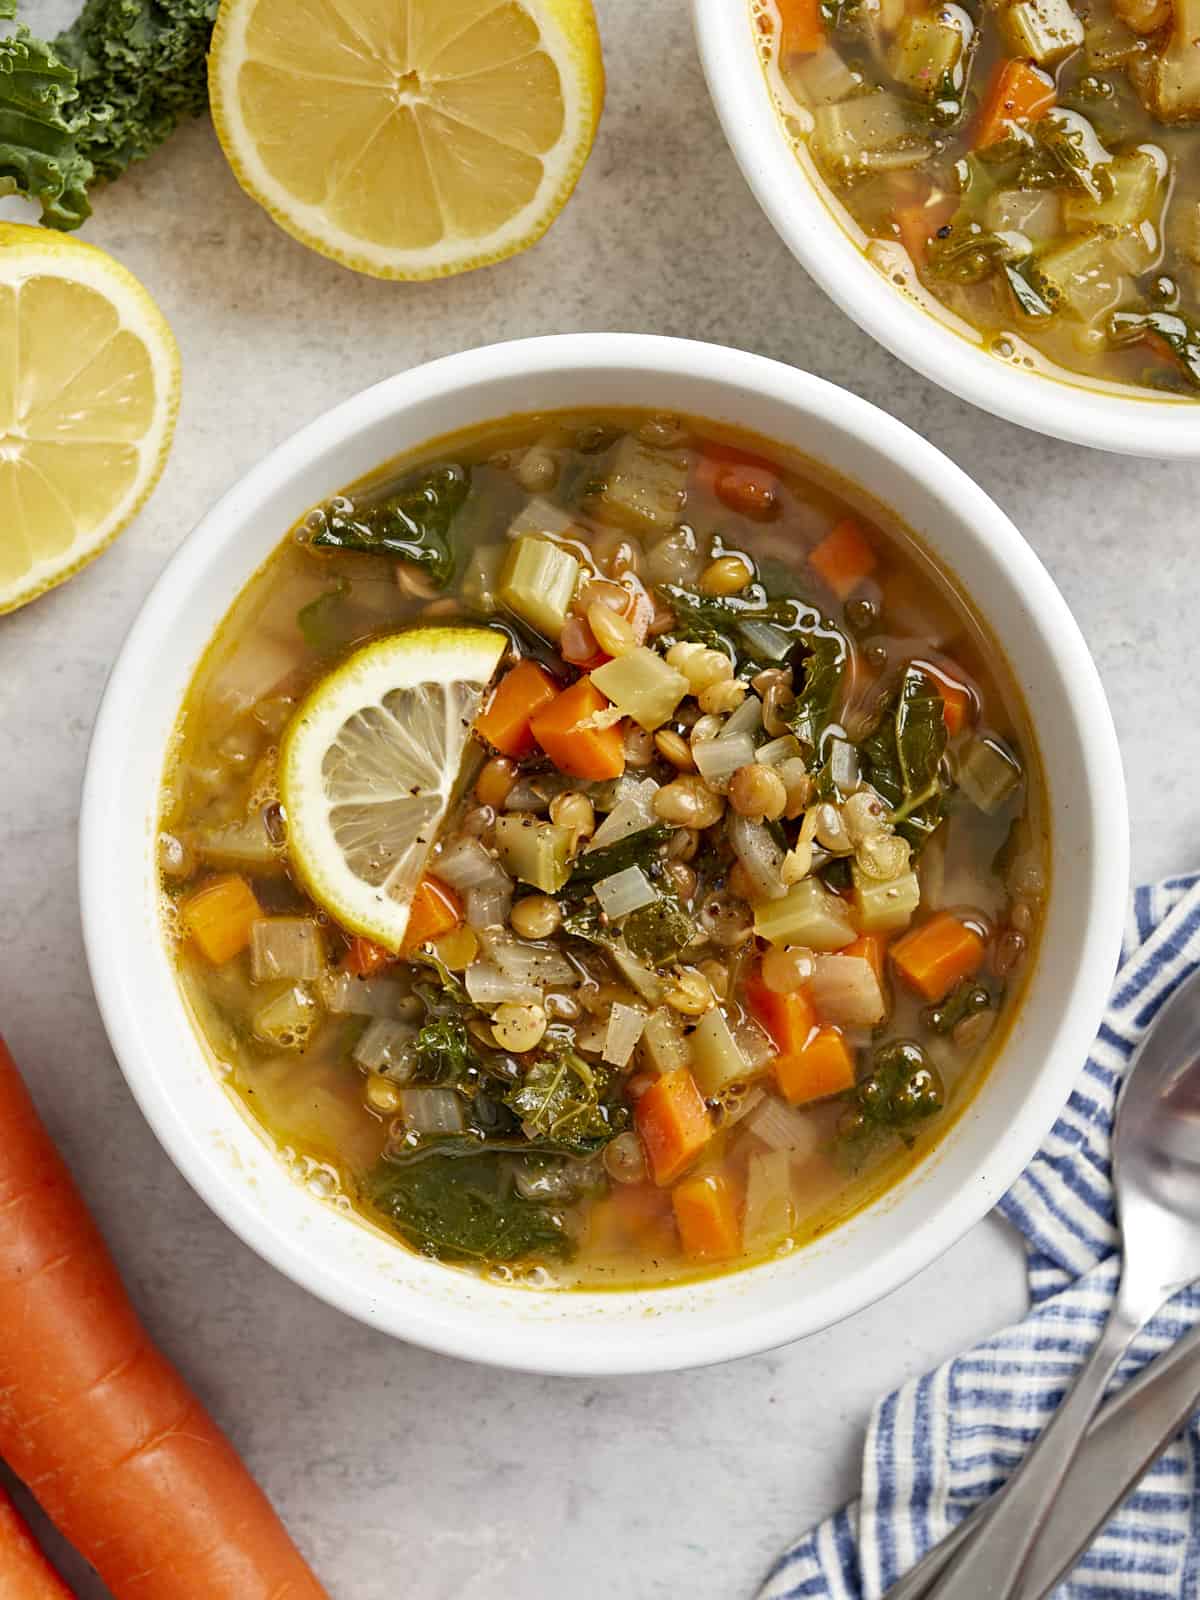
overhead view of a bowl of mediterranean lentil soup with lemon slices.

Why Make Mediterranean Lentil Soup?

The first time I experienced cinnamon in a savory dish was while cooking at a Lebanese restaurant and it was life changing! This Mediterranean Lentil Soup is the perfect introduction to the savory use of cinnamon. This clean and flavorful lentil soup is a vegan flavor explosion. It’s loaded with protein and fiber, naturally gluten-free, and super versatile. You can toss in just about any veggie or green, so raid the fridge and get cooking!

Ingredients for Mediterranean Lentil Soup

Here’s what you’ll need to make Mediterranean lentil soup:

  • Oil: Olive oil is our preferred choice in this recipe for its Mediterranean flavor profile, but vegetable or canola oil will work in a pinch.
  • Mirepoix: A combination of small diced yellow onion, carrots, and celery creates an earthy and sweet base of flavor for this soup.
  • Garlic: The large pieces of crushed garlic versus mincing it fine is intentional to bring out the natural sweetness and flavor of cooked garlic instead of the sometimes-overwhelming bite it has when minced.
  • Cumin: Adds a savory and nutty Mediterranean flavor to this soup.
  • Cinnamon: A great savory application of the spice! It will warm you up from the inside out and make your house smell fantastic.
  • Lentils: We used brown lentils for their firm texture.
  • Vegetable Broth: We used Vegetable flavored Better Than Bouillon in this recipe. If using another brand, make sure salt is not the first ingredient or it’s a waste of money!
  • Lemon Juice: Gives the soup a brightness that is seriously addictive. You can use fresh-squeezed lemon juice and save half of your lemon for garnishing each bowl, or you can use a bottled lemon juice. I always have lemons in the kitchen, so we had some to garnish with, too!
  • Kale: Swiss chard, rainbow chard, spinach, escarole, and all varieties of kale work great, too.
  • Salt and Pepper: Enhance the natural flavors of the soup.

Which color lentils are best for soup?

Brown or green lentils work best for this soup, as they will keep their shape after cooking, which is what we’re looking for texture-wise. Red lentils are not recommended because they cook quicker and will dissolve into the soup as they cook, creating a thick and mushy texture.

How to Store Leftovers

Store leftover Mediterranean lentil soup in an air-tight container in the refrigerator for up to 4 days. This soup also freezes super well for up to 3 months when stored properly in an air-tight container. Let thaw overnight in the refrigerator before reheating in a pot set over medium-low heat until warmed through.

overhead view of mediterranean lentil soup in a red dutch oven.
overhead view of 2 bowls of mediterranean lentil soup with lemon slices.
Print

Mediterranean Lentil Soup

This vegan Mediterranean Lentil Soup is bright and refreshing. Finished with a squeeze of lemon, it's the perfect meal for rainy spring days.
Course Main Course, Soup
Cuisine Mediterranean
Total Cost $7.59 recipe / $1.08 serving
Prep Time 15 minutes
Cook Time 55 minutes
Total Time 1 hour 10 minutes
Servings 7 (about 1.5 cups each)
Calories 185kcal

Equipment

Ingredients

  • 2 Tbsp olive oil $0.32
  • 1 large yellow onion, diced small $0.78
  • 2 medium carrots, diced small $0.24
  • 3 stalks celery, diced small $0.36
  • 5 cloves garlic, crushed $0.30
  • 2 tsp ground cumin $0.20
  • 1 tsp cinnamon $0.16
  • 1 cup uncooked brown or green lentils $0.68
  • 8 cups vegetable broth $1.44
  • 4 oz. lemon juice $0.48
  • 3 cups kale, chopped and lightly packed $2.48
  • 1 tsp salt $0.05
  • 2 tsp freshly cracked black pepper $0.10

Instructions

  • Rinse the lentils in a strainer under cold water until the water runs clear.
  • Heat the oil in a large soup pot set over medium-high heat. Add in the onions, carrots, and celery and cook until they become tender, about 6-7 minutes, stirring frequently. Season with salt and pepper.
  • Stir in the garlic, cumin, and cinnamon. Heat until fragrant, about 60 seconds. Add the lentils to the pan and heat for 1-2 minutes to slightly toast.
  • Pour in the vegetable broth, water, and lemon juice, then bring the pot to a boil. Reduce heat to low and simmer until the lentils are tender, about 30-45 minutes.
  • Stir in the greens, season with additional salt, pepper, and lemon juice to taste before serving.

See how we calculate recipe costs here.

Nutrition

Serving: 1.5cups | Calories: 185kcal | Carbohydrates: 28g | Protein: 9g | Fat: 5g | Sodium: 1452mg | Fiber: 11g
three-quarters view of mediterranean lentil soup in a white bowl with a lemon slice.

how to make Mediterranean Lentil Soup – step by step photos

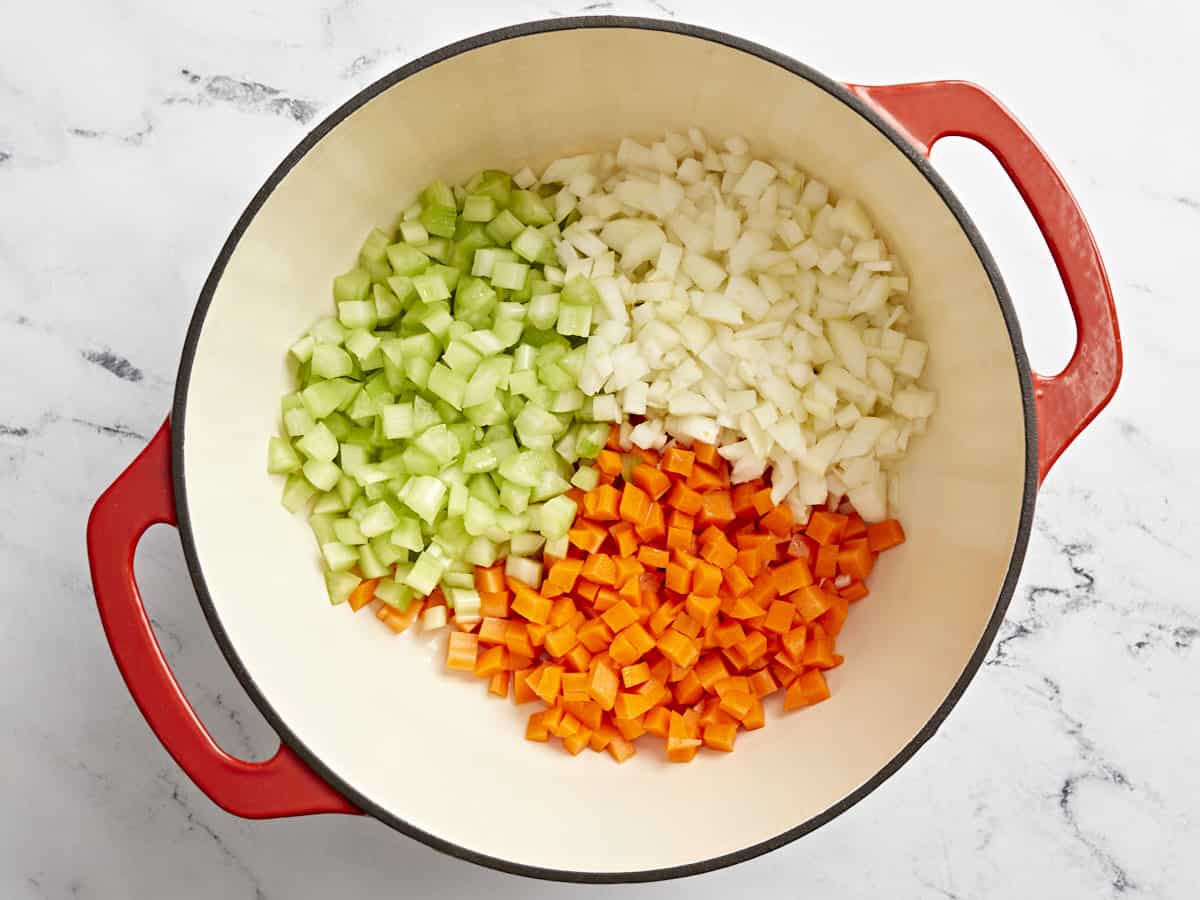
mirepoix in a red dutch oven.

Rinse 1 cup brown or green lentils in a strainer under cold water until the water runs clear. Heat 2 Tbsp olive oil in a large soup pot set over medium-high heat. Add in 1 diced yellow onion, 2 diced medium carrots, and 3 diced stalks celery and cook until they become tender, about 6-7 minutes, stirring frequently. Season with 1 tsp salt and 2 tsp pepper.

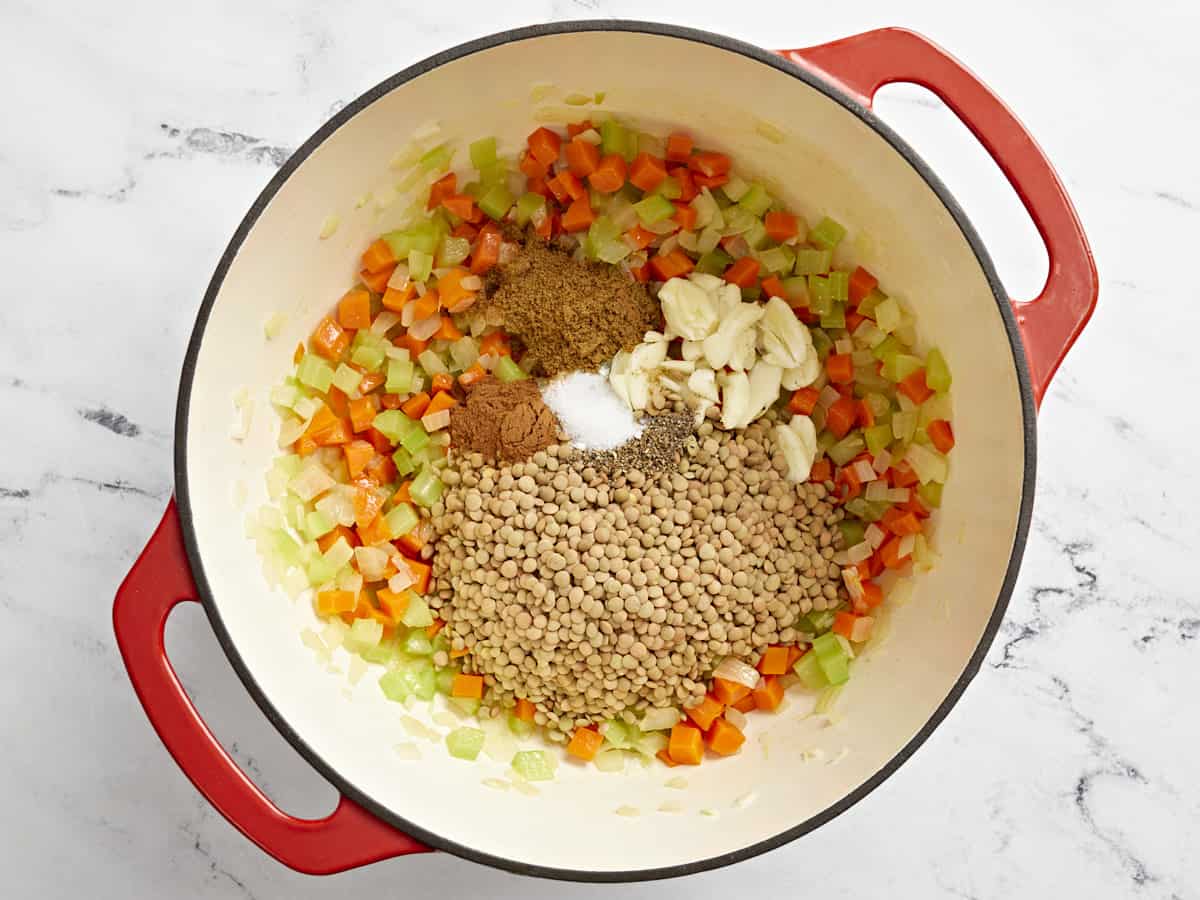
mirepoix, spices, and lentils in a red dutch oven.

Stir in 5 crushed cloves garlic, 2 tsp ground cumin, and 1 tsp cinnamon. Heat until fragrant, about 60 seconds. Add the lentils to the pan and heat for 1-2 minutes to slightly toast.

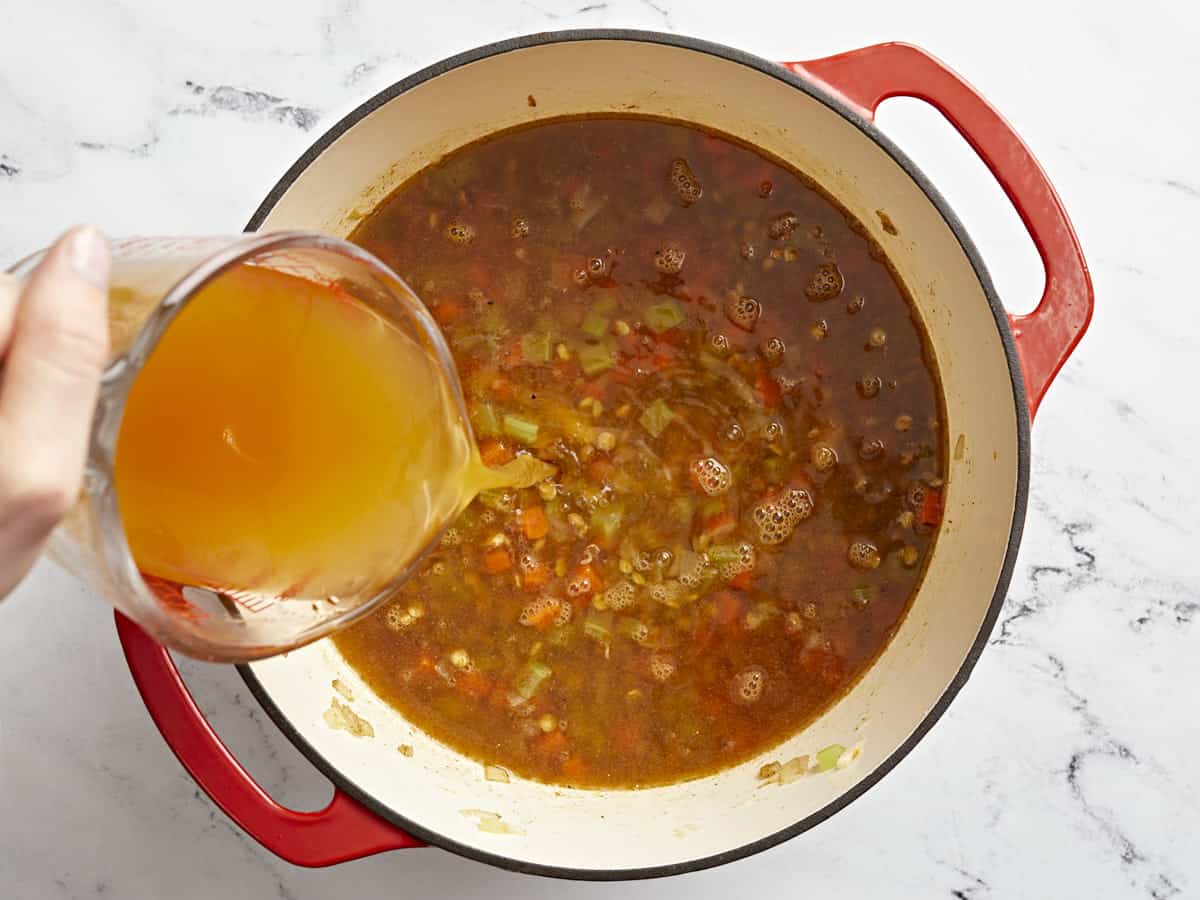
broth added to lentil soup in a red dutch oven.

Pour in 8 cups vegetable broth and 4 oz. lemon juice, then bring the pot to a boil. Reduce heat to low and simmer until the lentils are tender, about 30-45 minutes.

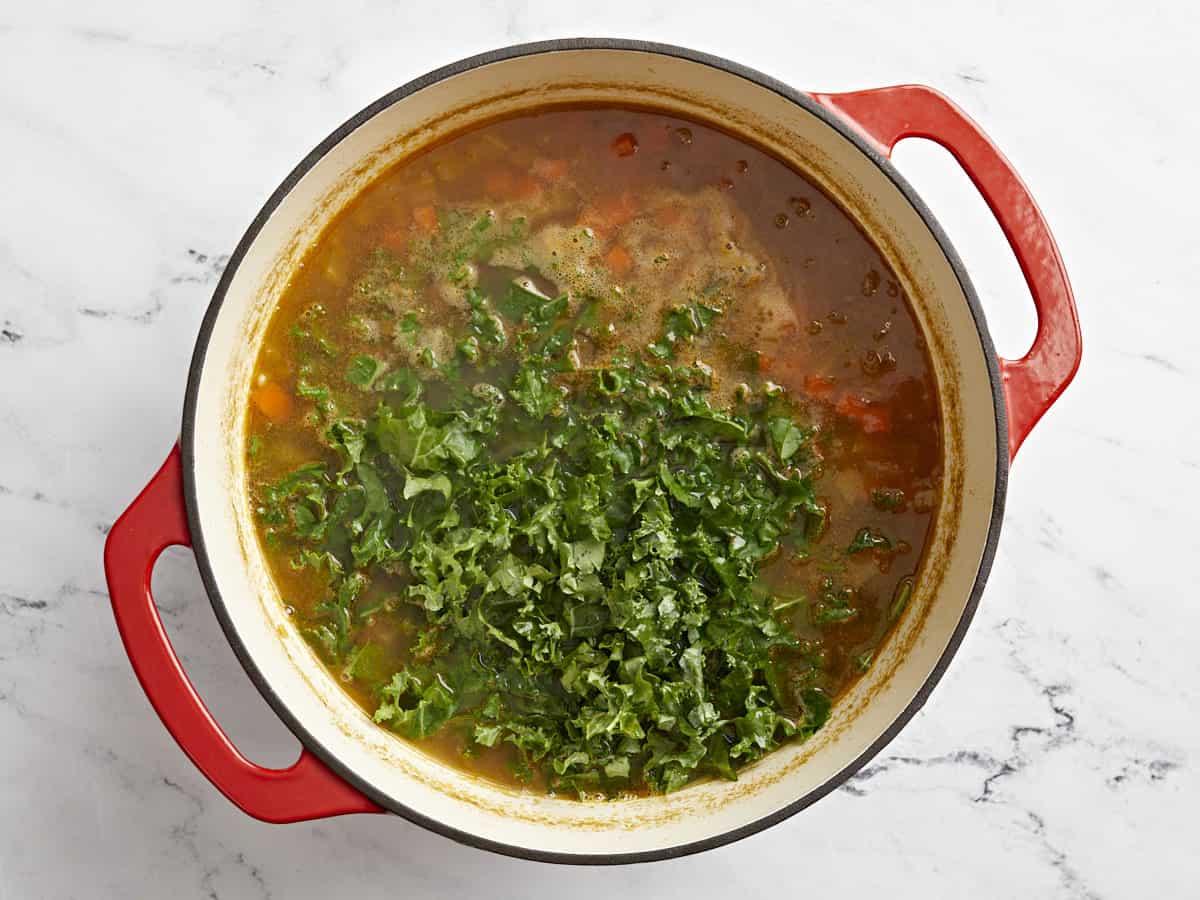
kale added to lentil soup in a red dutch oven.

Stir in 3 cups chopped kale, season with additional salt, pepper, and lemon juice to taste before serving.

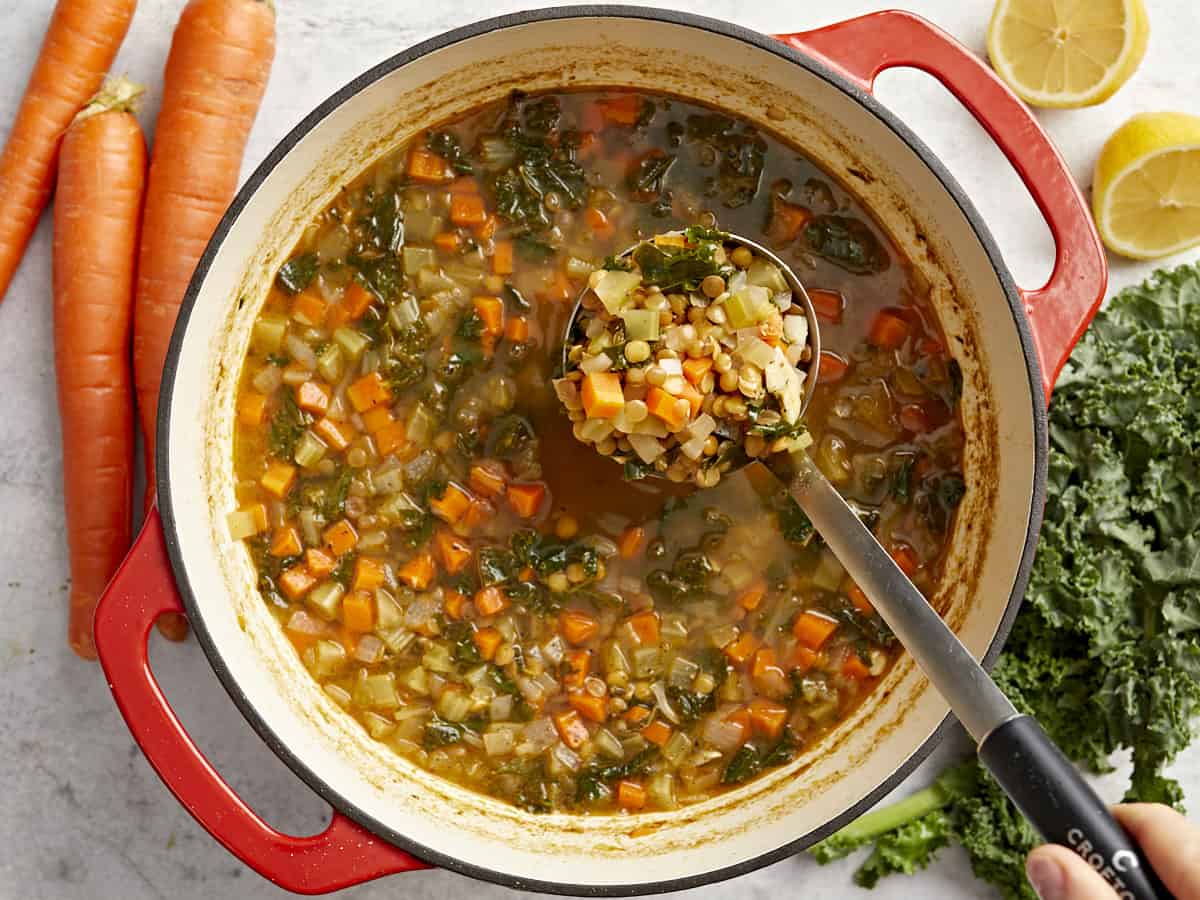
overhead view of a spoon lifting a scoop of mediterranean lentil soup from a red dutch oven.

This Mediterranean lentil soup is going to be your new favorite!

The post Mediterranean Lentil Soup appeared first on Budget Bytes.
Chorizo Stuffed Bell Peppers

These Chorizo Stuffed Bell Peppers are packed with southwest flavor, perfectly portioned for meal prep, and freezer-friendly!

The post Chorizo Stuffed Bell Peppers appeared first on Budget Bytes.
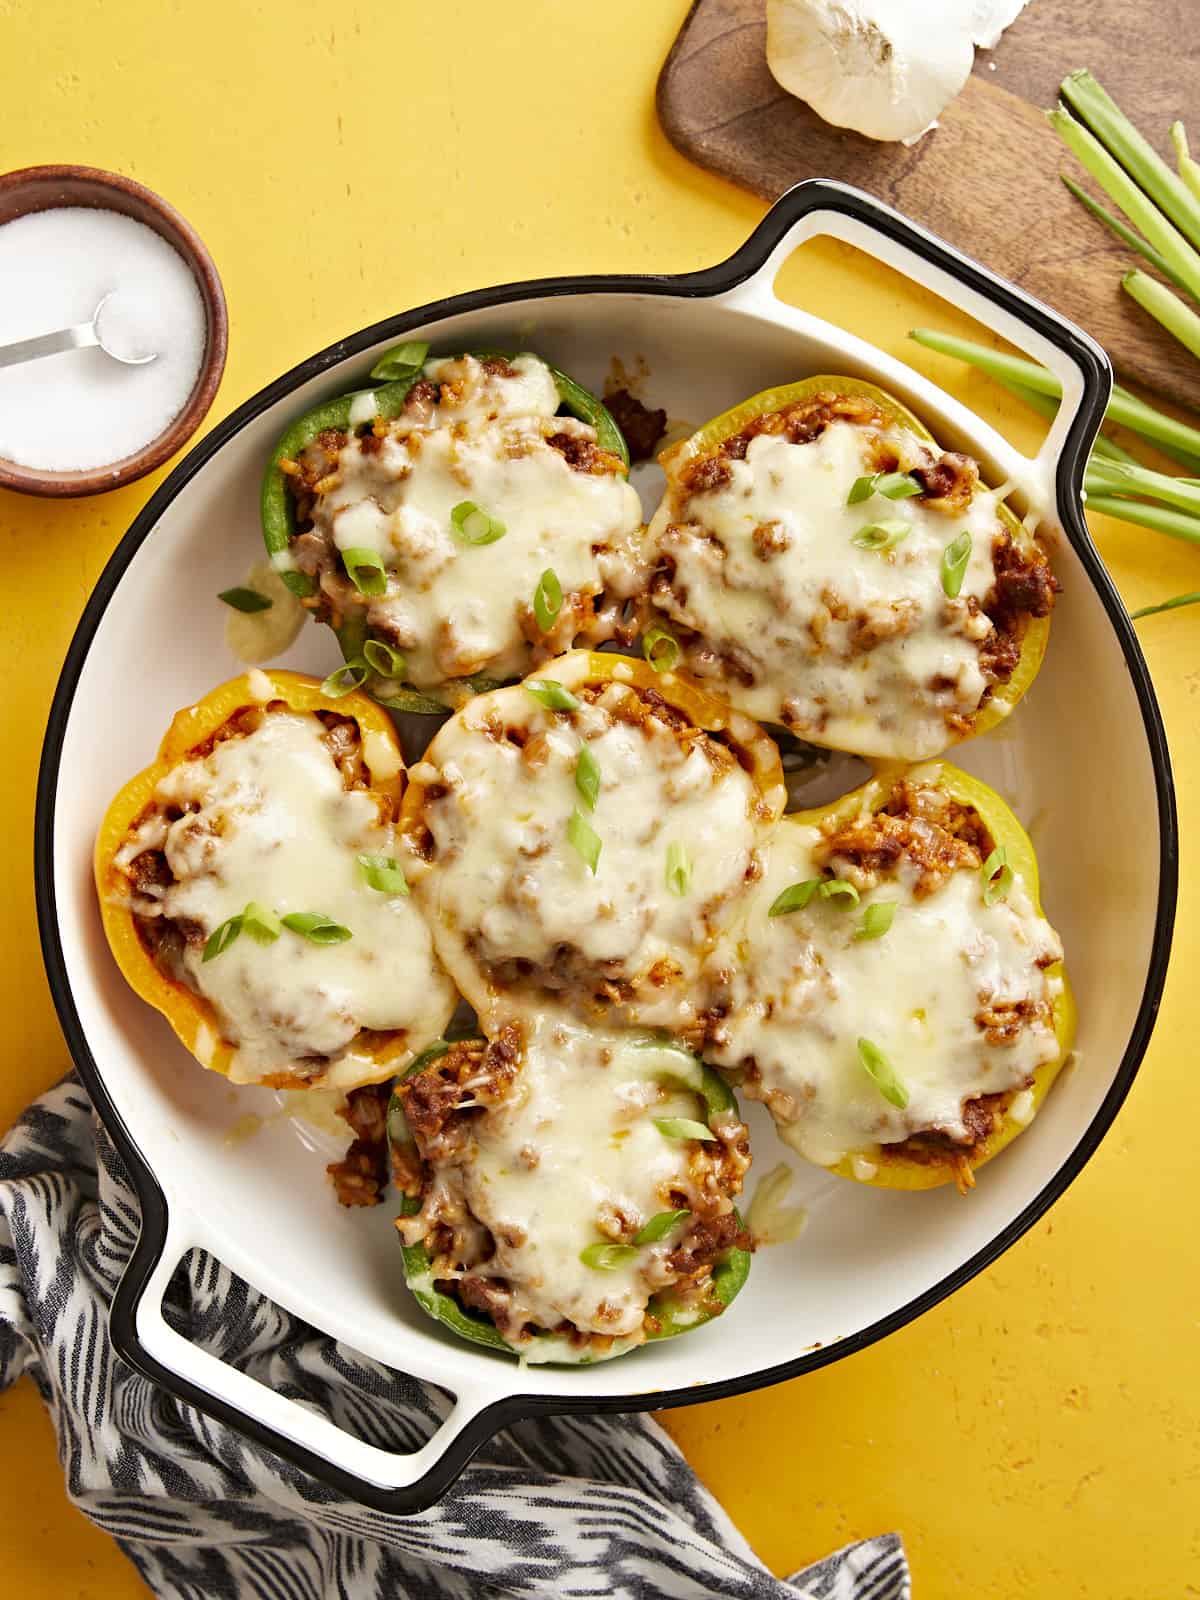
We’re in love with stuffed bell peppers here at the Budget Bytes kitchen, so I decided to make a new variation just so I could have an excuse to eat stuffed bell peppers again. These Chorizo Stuffed Bell Peppers are full of super flavorful Mexican chorizo, hearty rice, and a rich sauce, then topped with melty mozzarella cheese. They’re SO filling, perfectly portioned for meal prep or freezer cooking, and quite flexible if you want to change up the ingredients to make them even more budget-friendly! Put this one one your to-cook list because I know you’re going to love them!

Overhead view of chorizo stuffed bell peppers in a baking dish on a yellow background.

Ingredients for Chorizo Stuffed Bell Peppers

These stuffed bell peppers are packed with flavorful herbs and spices and a rich tomato-y sauce so that every bite is deee-licious. Here are the ingredients for chorizo stuffed bell peppers:

  • Bell Peppers: You’ll need three bell peppers to make six servings for this recipe. We used a mix of colors to make it more festive, but you can use any color pepper that fits your budget.
  • Mexican Chorizo: Mexican chorizo is a fresh (not cured) sausage that is packed with spices. You can usually either buy this loose or in links. If you buy them in links, simply squeeze the meat out of the casing into the skillet. I like Johnsonville brand, but many larger grocery stores also make their own generic version.
  • Garlic & Onion: A little fresh onion and garlic add flavor and texture to the bell pepper stuffing.
  • Rice: Long grain white rice bulks up this meal to make it filling while keeping the cost low. We cook the rice right in the pot with the chorizo, spices, and broth for maximum flavor.
  • Chicken Broth: The rice is cooked in chicken broth to ensure that every bite is super flavorful. We use Better Than Bouillon to make our broth because it’s budget-friendly and has great flavor.
  • Tomato Paste: Tomato paste is added to the broth to help create an enchilada sauce-like flavor in the rice mixture.
  • Diced Green Chiles: Green chiles add even more flavor, color, and texture to the filling. If you prefer a milder stuffed pepper, you can leave out the green chiles or look for a mild green chile.
  • Spices: We packed this bell pepper stuffing with even more spices including chili powder, cumin, garlic powder, cayenne pepper, and salt.
  • Mozzarella: The stuffed bell peppers are topped with mozzarella cheese for a rich finish, but you can substitute with a different type of cheese if preferred, like Monterey jack, pepper jack, cheddar, or a Mexican blend.
  • Green Onion: A few sliced green onions sprinkled over top of the stuffed bell peppers add a fresh finish, but are entirely optional!

What Else Can I Add?

This recipe is pretty flexible, so if you want to change it up or make it more budget-friendly, here are some other ingredients you can add:

  • Beans: Try swapping half of the chorizo with a can of black beans or pinto beans for more fiber and less cost.
  • Diced Tomatoes: If you want more color and texture in your bell pepper filling, try adding a drained can of petite diced tomatoes, or diced tomatoes with chiles (Rotel).
  • Sweet Potato: Chorizo and sweet potato are a perfect flavor pair. Replace half of the chorizo with one small finely diced sweet potato for a spicy-sweet flavor profile (add it with the rice so it can simmer and soften with the rice).

Mexican Chorizo vs. Spanish Chorizo

It’s really important to use the correct type of chorizo for this recipe. You’ll need Mexican chorizo, which is a fresh (uncooked & uncured) sausage. You’ll find Mexican chorizo in the fresh meat department, usually near bratwurst and other fresh sausages. Spanish chorizo is a cured, sliceable sausage that you’ll usually find near cheese, pepperoni, or other charcuterie-type foods.

What to Serve with Chorizo Stuffed Bell Peppers

These southwest-inspired peppers are really filling on their own, but if you want to serve something on the side they pair really well with Cumin Lime Roasted Sweet Potatoes, Cowboy Caviar, Sweet Potato Cornbread, or Warm Corn and Avocado Salad.

How To Store Leftovers

I love making stuffed bell peppers for meal prep, so this is how I store and reheat them. The cooked bell peppers can be stored in the refrigerator for 4-5 days. I like to reheat them quickly in the microwave (about 2 minutes each).

Or, once chilled in the refrigerator, you can transfer them to the freezer. I suggest packaging them individually in a freezer-safe, air-tight container, so you can reheat one at a time as needed. Frozen stuffed bell peppers can be thawed in the refrigerator overnight and then reheated the next day in the microwave, or thawed straight from the freezer in the microwave using the defrost function, then heated through on full power.

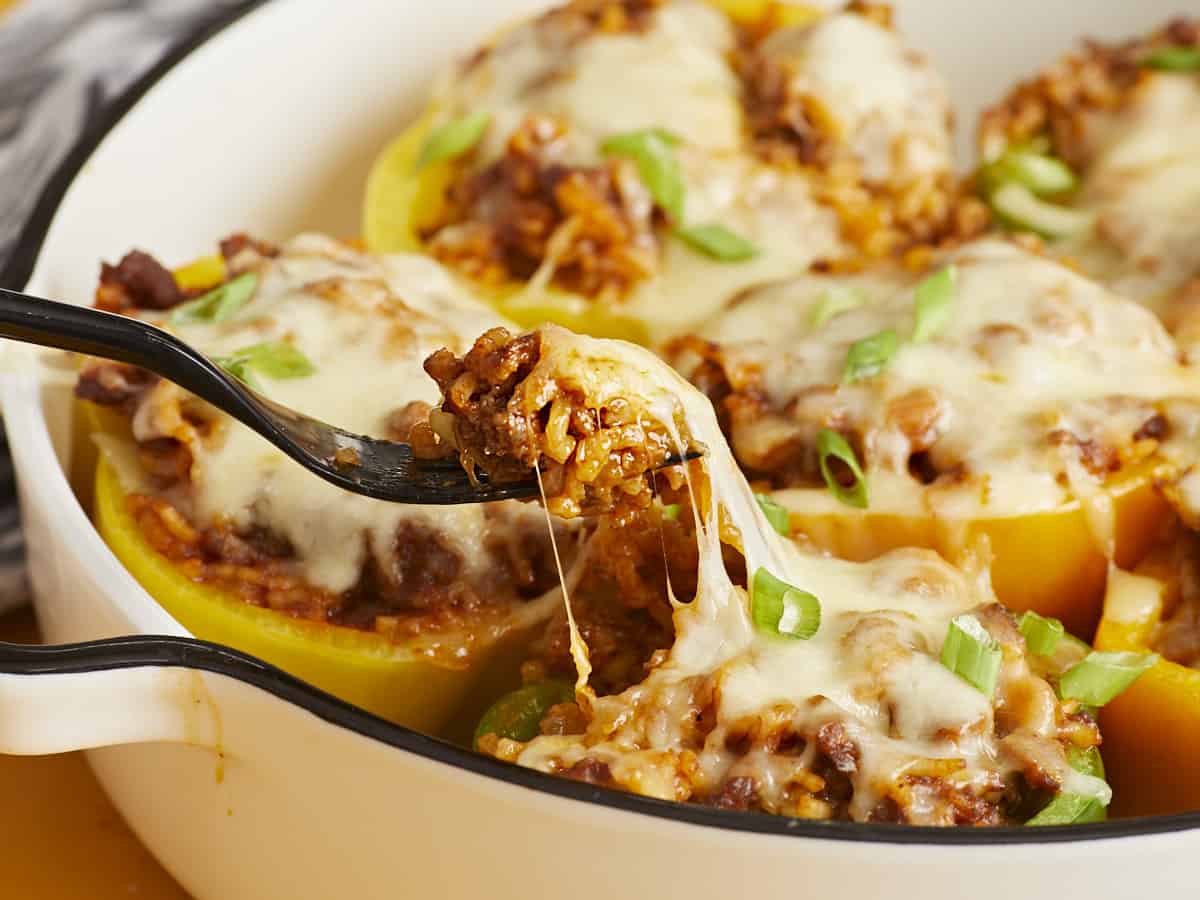
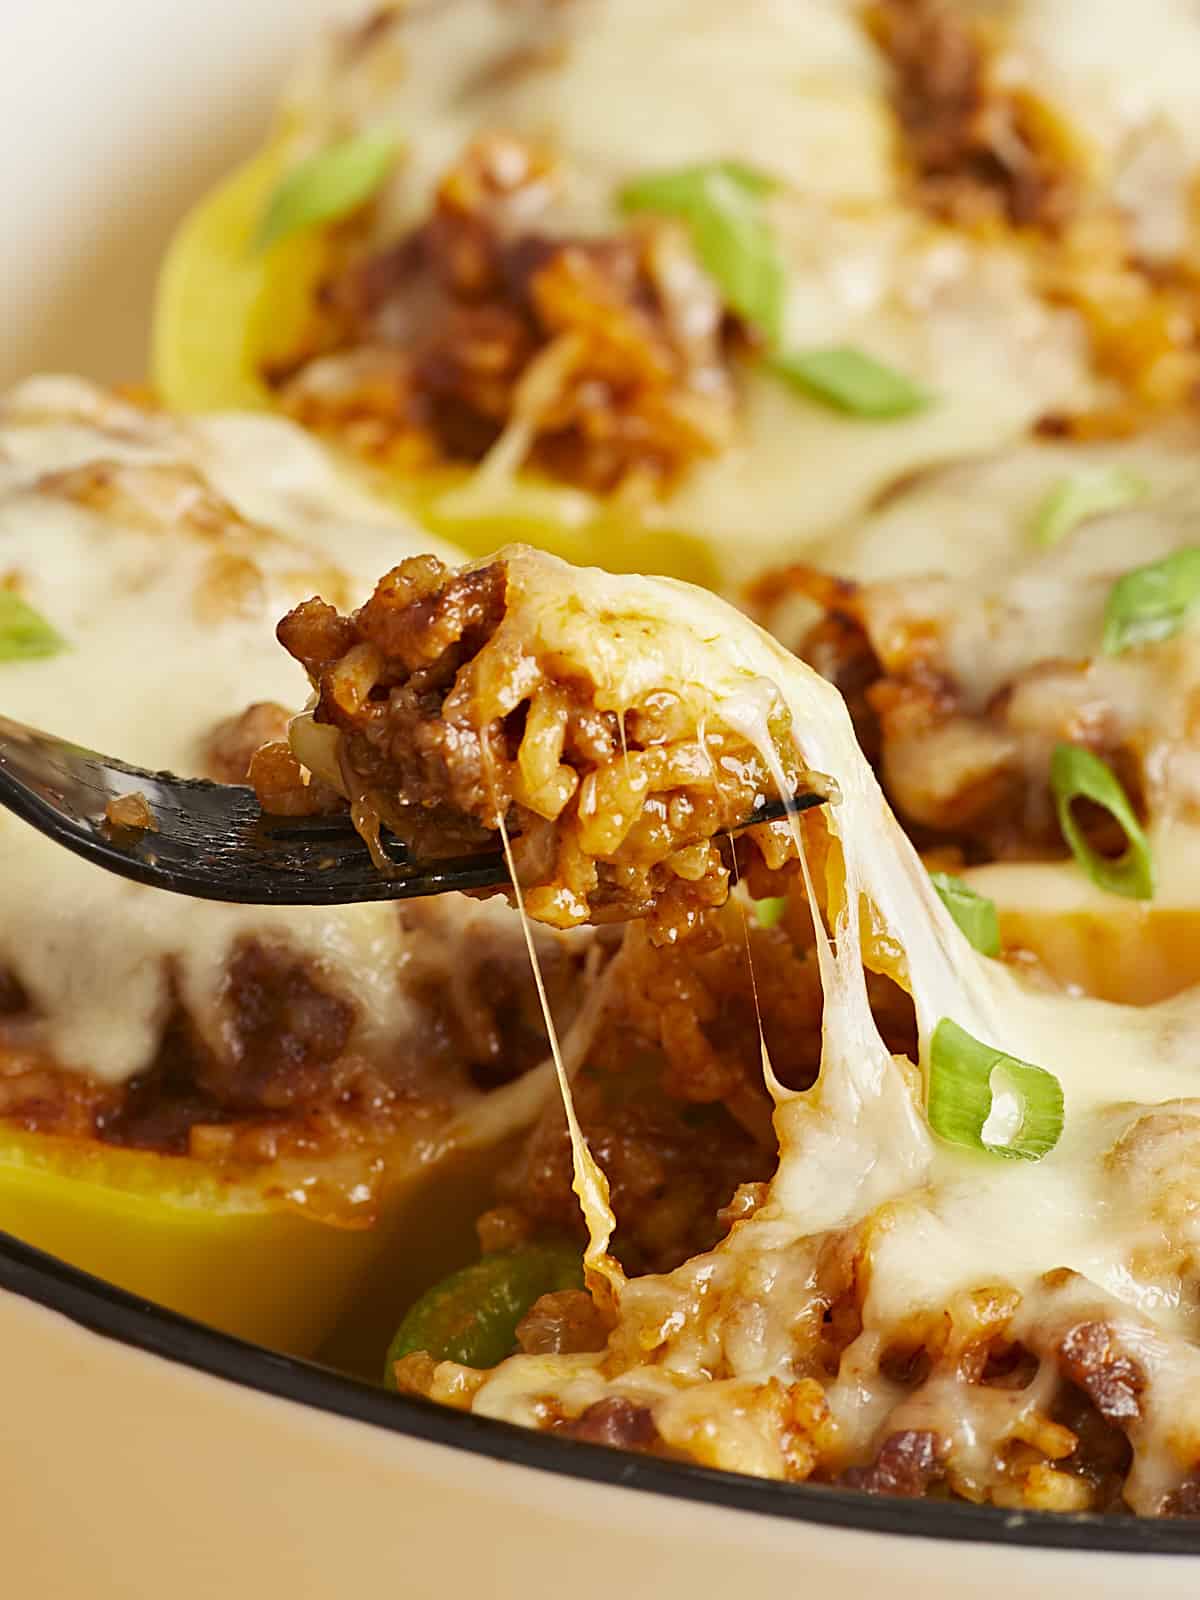
Side view of a fork lifting some stuffing out of the bell pepper with the cheese pulling.
Overhead view of chorizo stuffed bell peppers in a round baking dish.
Print

Chorizo Stuffed Bell Peppers

These Chorizo Stuffed Bell Peppers are packed with southwest flavor, perfectly portioned for meal prep, and freezer-friendly!
Course Dinner, Main Course
Cuisine Amercian, Mexican
Total Cost $12.91 recipe / $2.15 serving
Prep Time 5 minutes
Cook Time 1 hour
Total Time 1 hour 5 minutes
Servings 6
Calories 380kcal

Ingredients

  • 3 bell peppers $4.07
  • 1 lb. Mexican chorizo $4.99
  • 1 yellow onion $0.37
  • 2 cloves garlic $0.16
  • 1 4oz. can diced green chiles $0.99
  • 2 Tbsp tomato paste $0.20
  • 2 tsp chili powder $0.20
  • 1/2 tsp cumin $0.05
  • 1/2 tsp garlic powder $0.05
  • 1/4 tsp cayenne pepper $0.02
  • 1/4 tsp salt $0.02
  • 1/2 cup long grain white rice (uncooked) $0.13
  • 1 cup chicken broth $0.19
  • 1 cup shredded mozzarella $1.25

Instructions

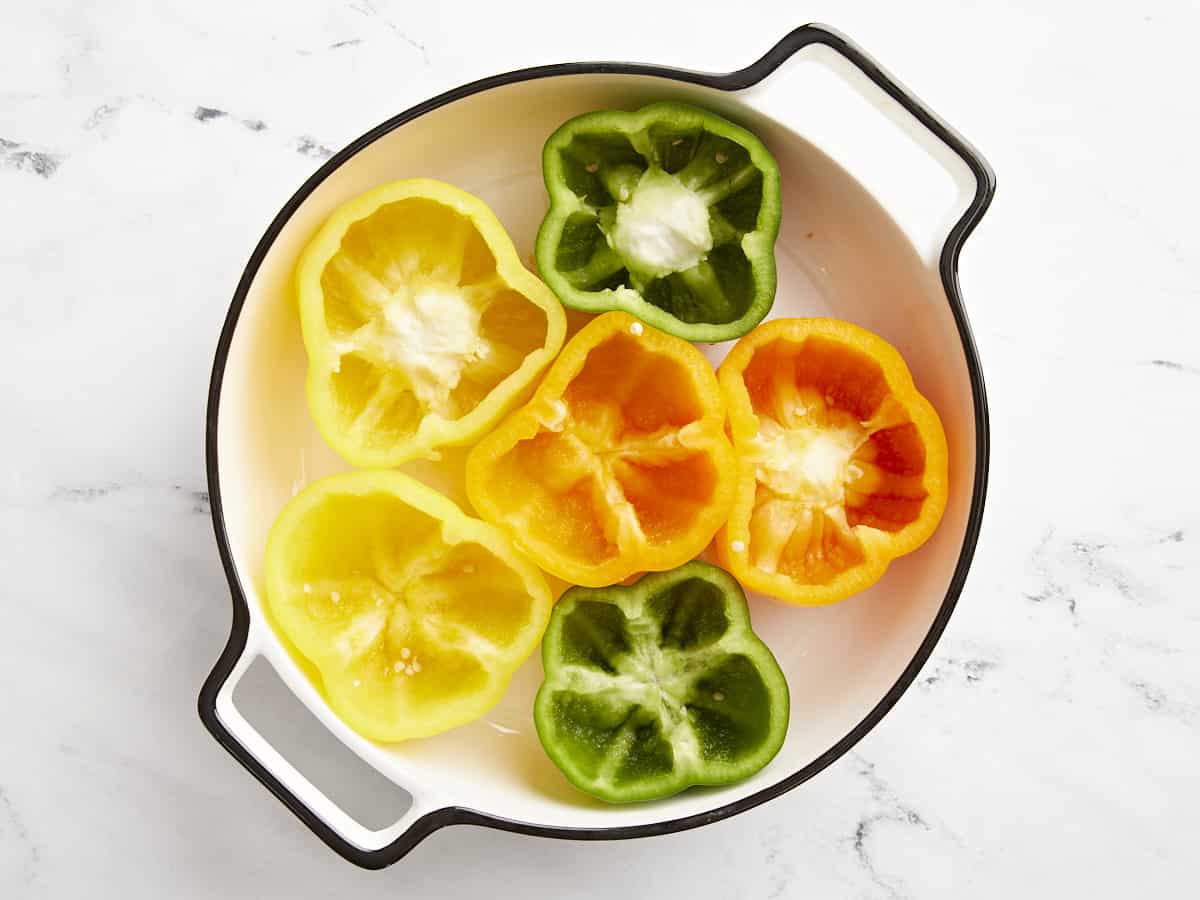
  • Preheat the oven to 350ºF. Cut each bell pepper in half so there is a top and bottom portion, then remove the seeds and ribs. You can either carefully cut the stem out of the center of the top half, or eat around it later. Place the halved bell peppers in a baking dish, cut sides up. Par-bake in the preheated oven for 15 minutes.
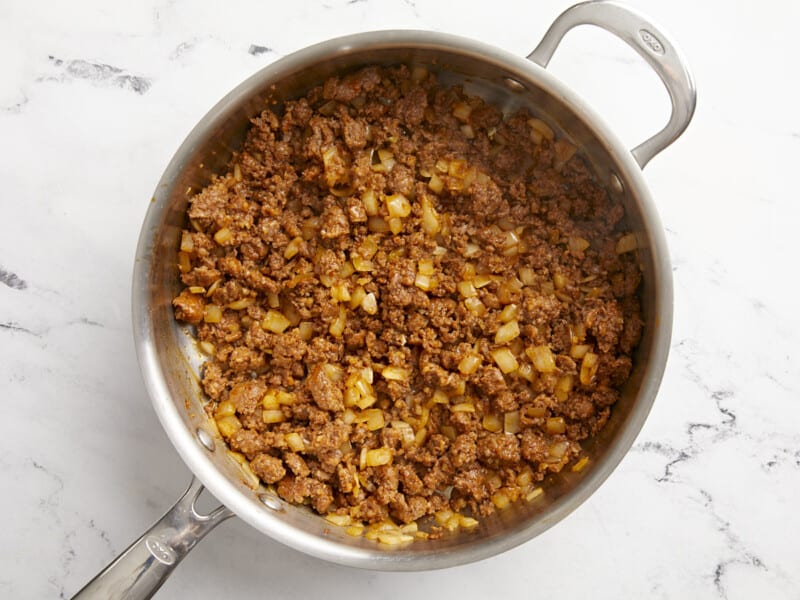
  • Add the chorizo to a large deep skillet and cook over medium heat until browned. While the chorizo is cooking, dice the onion and mince the garlic. Add the onion and garlic to the chorizo and continue to cook until the onions are softened.
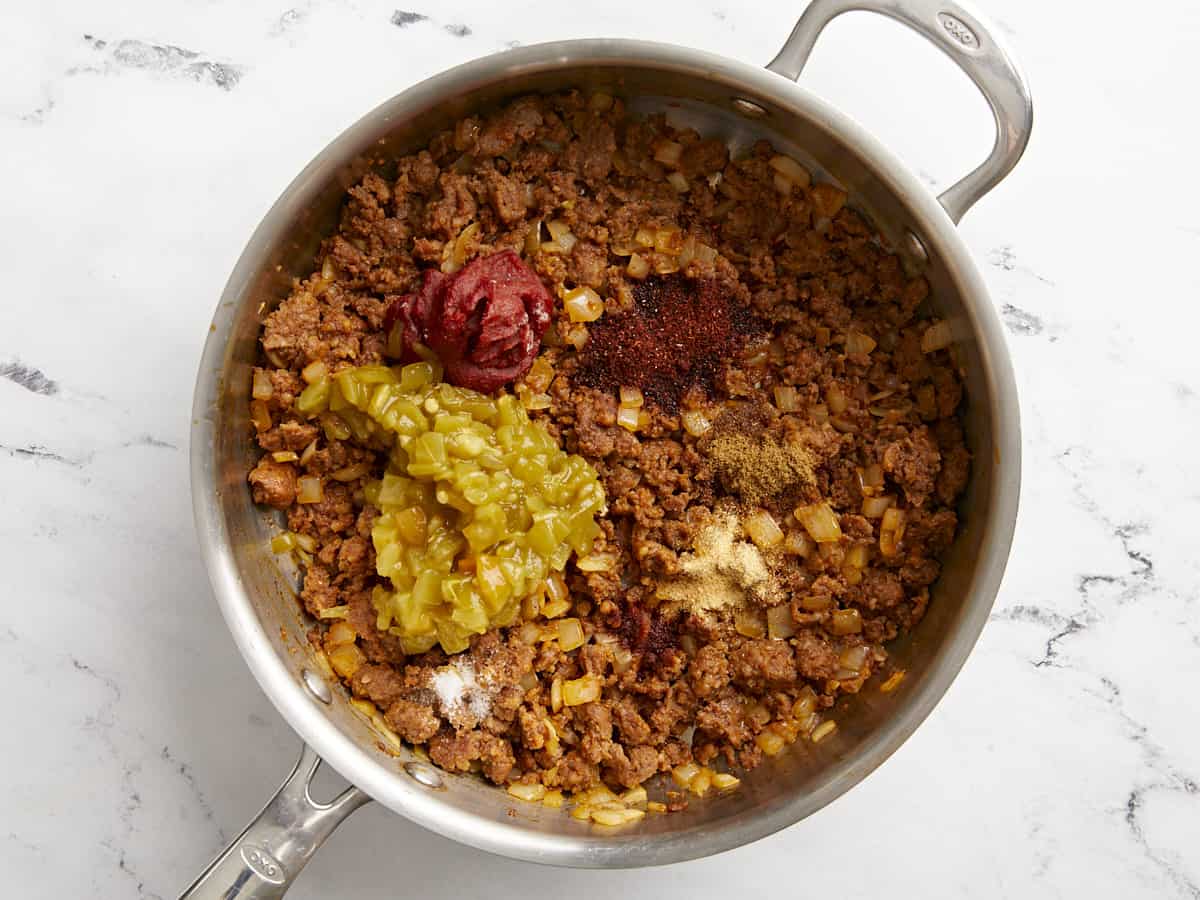
  • Add the diced green chiles, tomato paste, chili powder, cumin, garlic powder, cayenne pepper, and salt to the skillet and stir until combined.
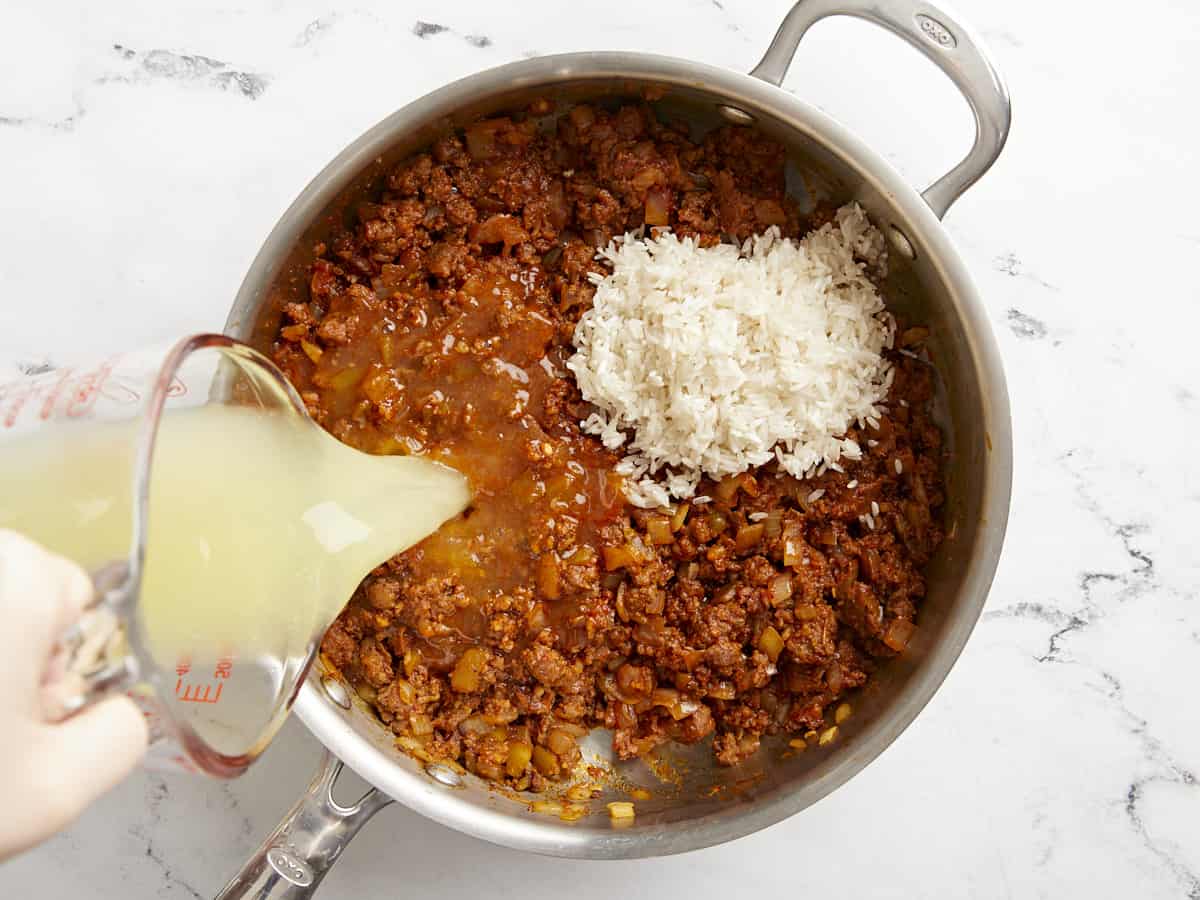
  • Add the uncooked rice and chicken broth to the skillet and stir until combined again. Place a lid on the skillet, turn the heat up to medium-high, and allow the broth to come up to a boil.
  • As soon as the broth begins to boil, turn the heat down to low and let the rice simmer over, low without lifting the lid or stirring, for 20 minutes. After 20 minutes, turn off the heat and let it rest for five more minutes.
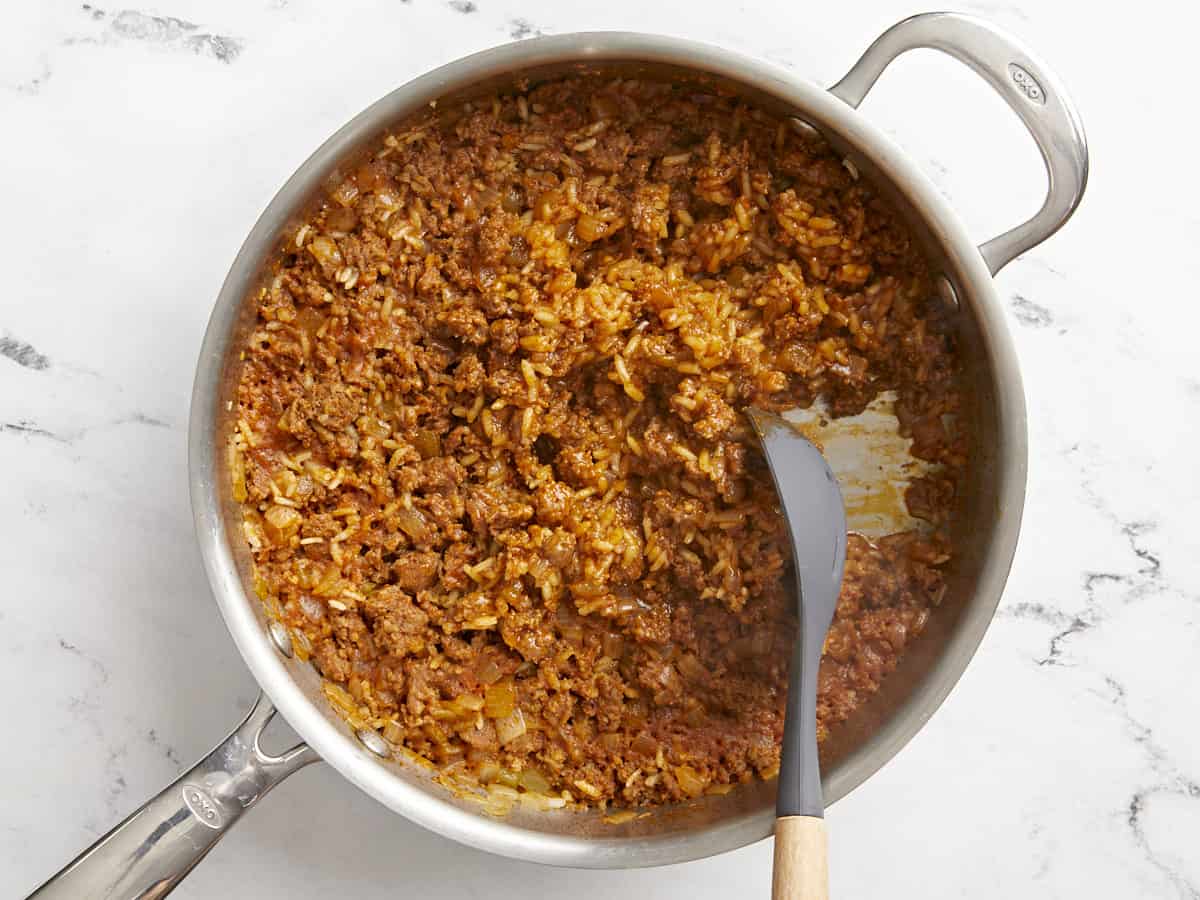
  • Finally, remove the lid and gently stir the rice and chorizo mixture. All of the broth should be absorbed and the rice tender.
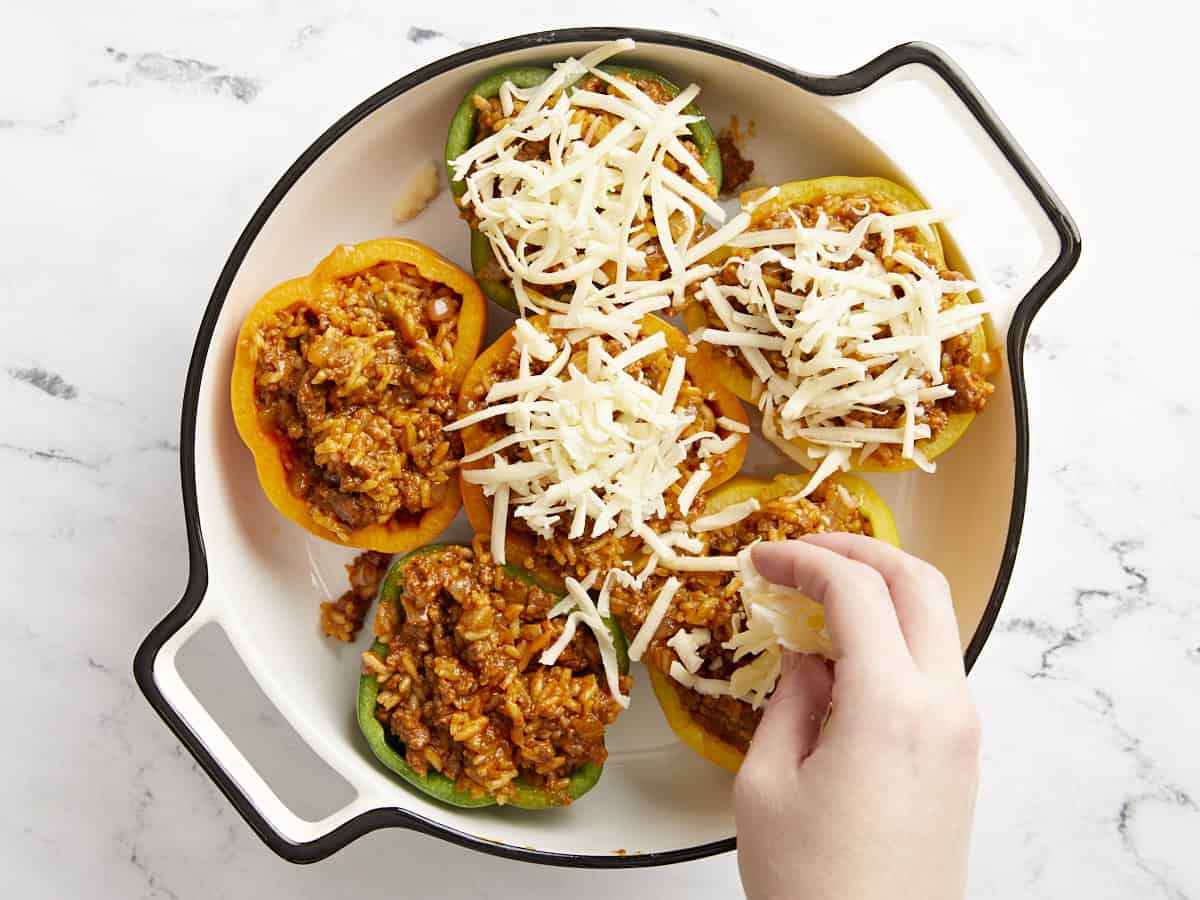
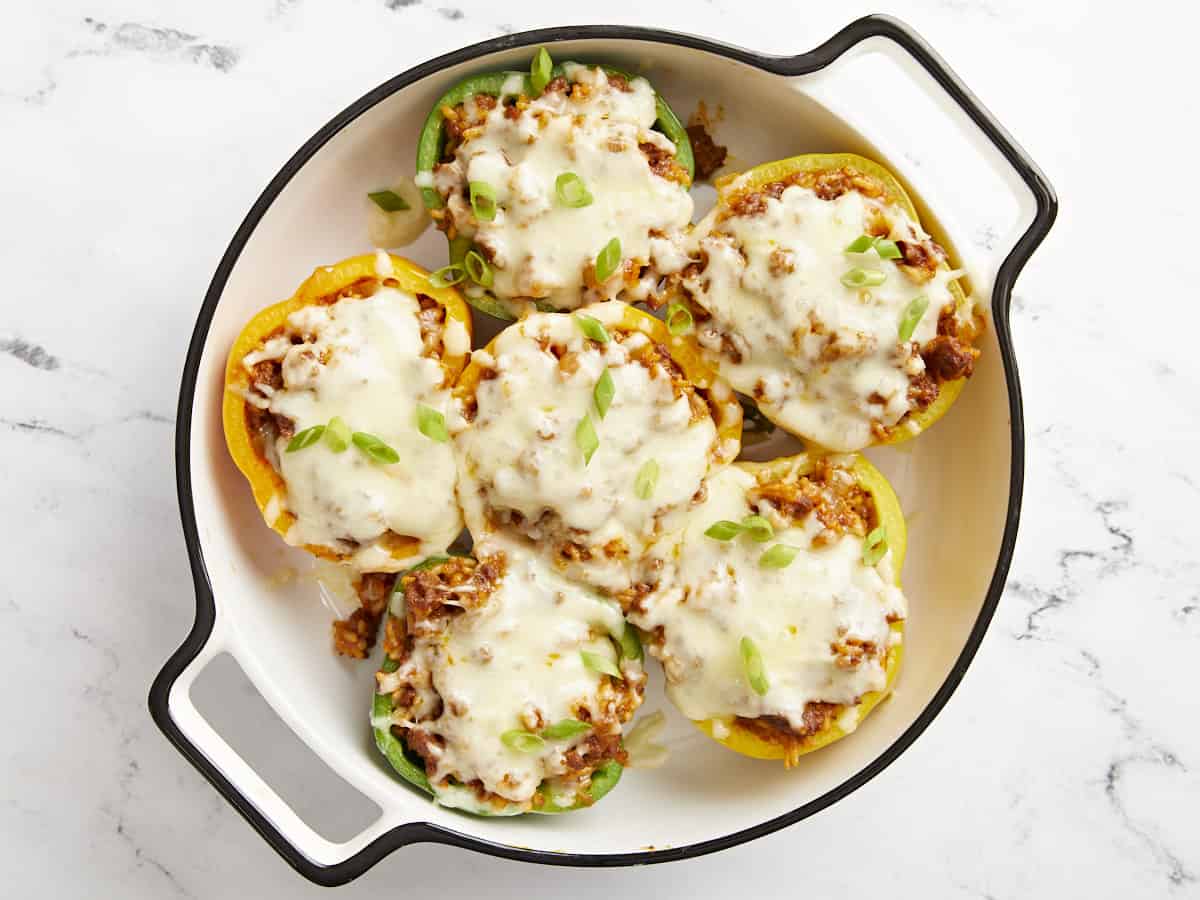
  • Divide the rice and chorizo mixture between the six bell pepper halves, then top with shredded cheese. Cover the baking dish and return it to the 350ºF oven and bake for 20 minutes more. Finally, top with sliced green onions and serve!

See how we calculate recipe costs here.

Nutrition

Serving: 1pepper | Calories: 380kcal | Carbohydrates: 24g | Protein: 18g | Fat: 24g | Sodium: 1032mg | Fiber: 3g
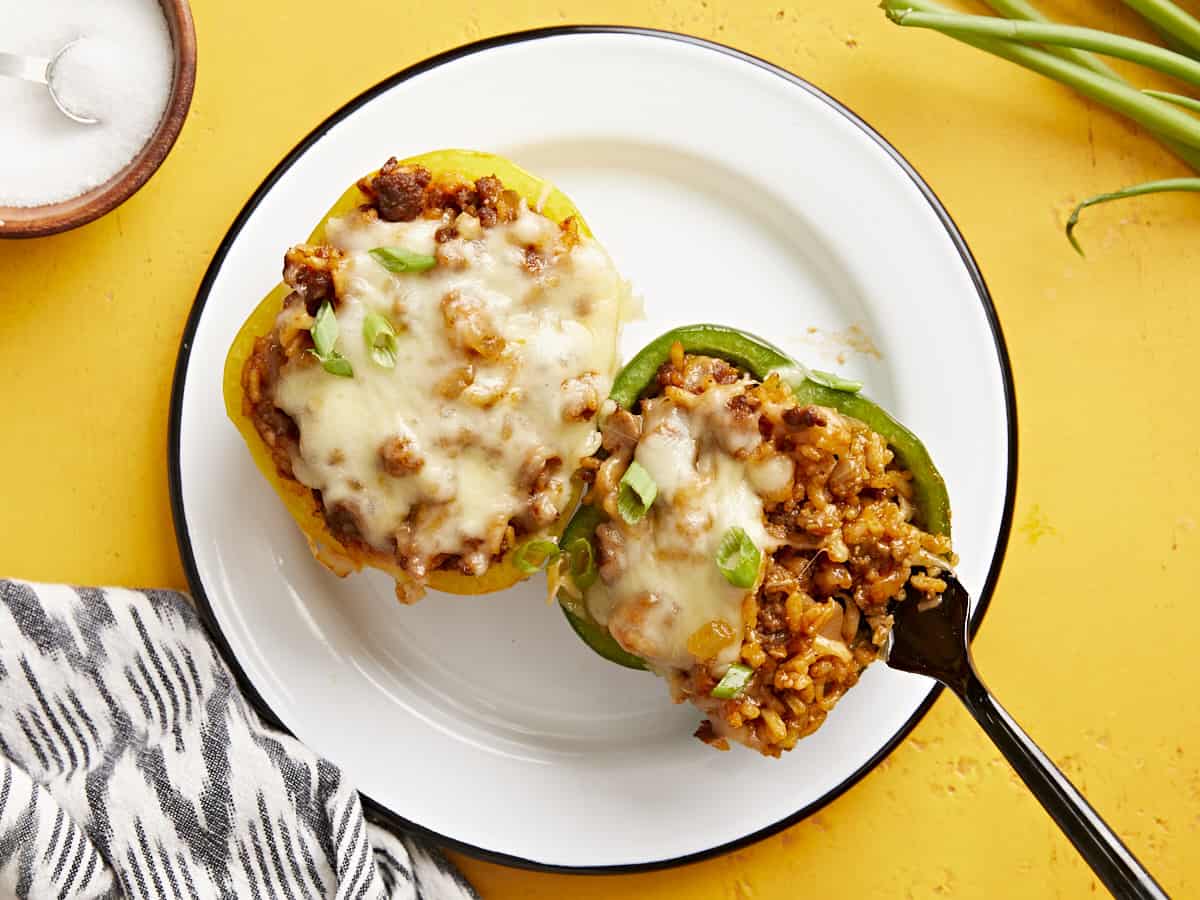
Overhead view of two stuffed bell peppers on a plate with a fork digging into one.

How to Make Chorizo Stuffed Bell Peppers – Step by Step Photos

Prepped bell peppers in a baking dish.

Begin by preheating the oven to 350ºF. Cut three bell peppers in half to create a top and bottom piece for each pepper. Scoop out the seeds and ribs. You can either cut out the stem from the top half of the peppers, or eat around them later. Place the halved peppers in a baking dish and par-bake them for 15 minutes in the fully preheated 350ºF oven.

Cooked chorizo and onion in a skillet.

Meanwhile, cook 1 lb. of Mexican chorizo in a large deep skillet over medium heat until browned. The chorizo has plenty of fat, so you likely won’t need to add any additional to the skillet. Dice one yellow onion and mince 2 cloves of garlic. Add the onion and garlic to the skillet with the chorizo, and continue to cook until the onions are softened.

Green chiles, tomato paste, and spices added to the skillet.

Add one 4oz. can of diced green chiles, 2 Tbsp tomato paste, 2 tsp chili powder, ½ tsp cumin, ½ tsp garlic powder, ¼ tsp cayenne pepper, and ¼ tsp salt to the meat and onions. Stir to combine.

Rice added to the skillet, broth being poured in the side.

Add ½ cup of uncooked long grain white rice and 1 cup of chicken broth to the skillet. Stir well to combine, then place a lid on top, and turn the heat up to medium-high. When the broth reaches a full boil, turn the heat down to low and allow it to continue to simmer over low (without removing the lid or stirring) for 20 minutes. After 20 minutes, turn the heat off and let it rest for 5 more minutes.

Cooked chorizo and rice in the skillet being scooped to the side with a spoon.

After simmering for 20 minutes the broth should be absorbed and the rice should be tender. Gently stir the rice and chorizo mixture with a spoon.

Filled bell peppers in a baking dish being topped with shredded cheese.

Divide the rice and chorizo mixture between the six par-baked bell pepper halves, then top with shredded mozzarella cheese (about 1 cup). Cover the dish and bake in the 350ºF oven for 20 minutes.

Finished stuffed bell peppers topped with sliced green onion.

Top the chorizo stuffed bell peppers with sliced green onions and serve!

Close up side view of a fork lifting some of the filling out of a stuffed bell pepper.

Enjoy the cheesy chorizo-y goodness!!

The post Chorizo Stuffed Bell Peppers appeared first on Budget Bytes.
Easy Egg Tacos

You won’t believe the flavor in these fast and easy egg tacos! The vegetarian “taco meat” filling works for any…

You won’t believe the flavor in these fast and easy egg tacos! The vegetarian “taco meat” filling works for any meal of the day.

Egg tacos

Looking for a 5-minute breakfast idea, an easy lunch, or a fast and easy dinner? Well, here’s a recipe that’s all three at once. (Audible gasp.) Meet these amazing egg tacos! This is one of our favorite kitchen tricks of all time. We created it as a dare from my sister to create a dinner recipe that can be made in 5 minutes. Sounds impossible, but it works!

Did you know that eggs can taste like taco meat? Yes, somehow the spiced scrambled eggs filling channels the flavor of taco meat. Alex and I have used this trick over and over to get fast dinners on the table, and our kids love it! It works for easy breakfasts or lunch ideas, too. This one’s in our arsenal of recipes every cook should know.

The key ingredients for egg tacos

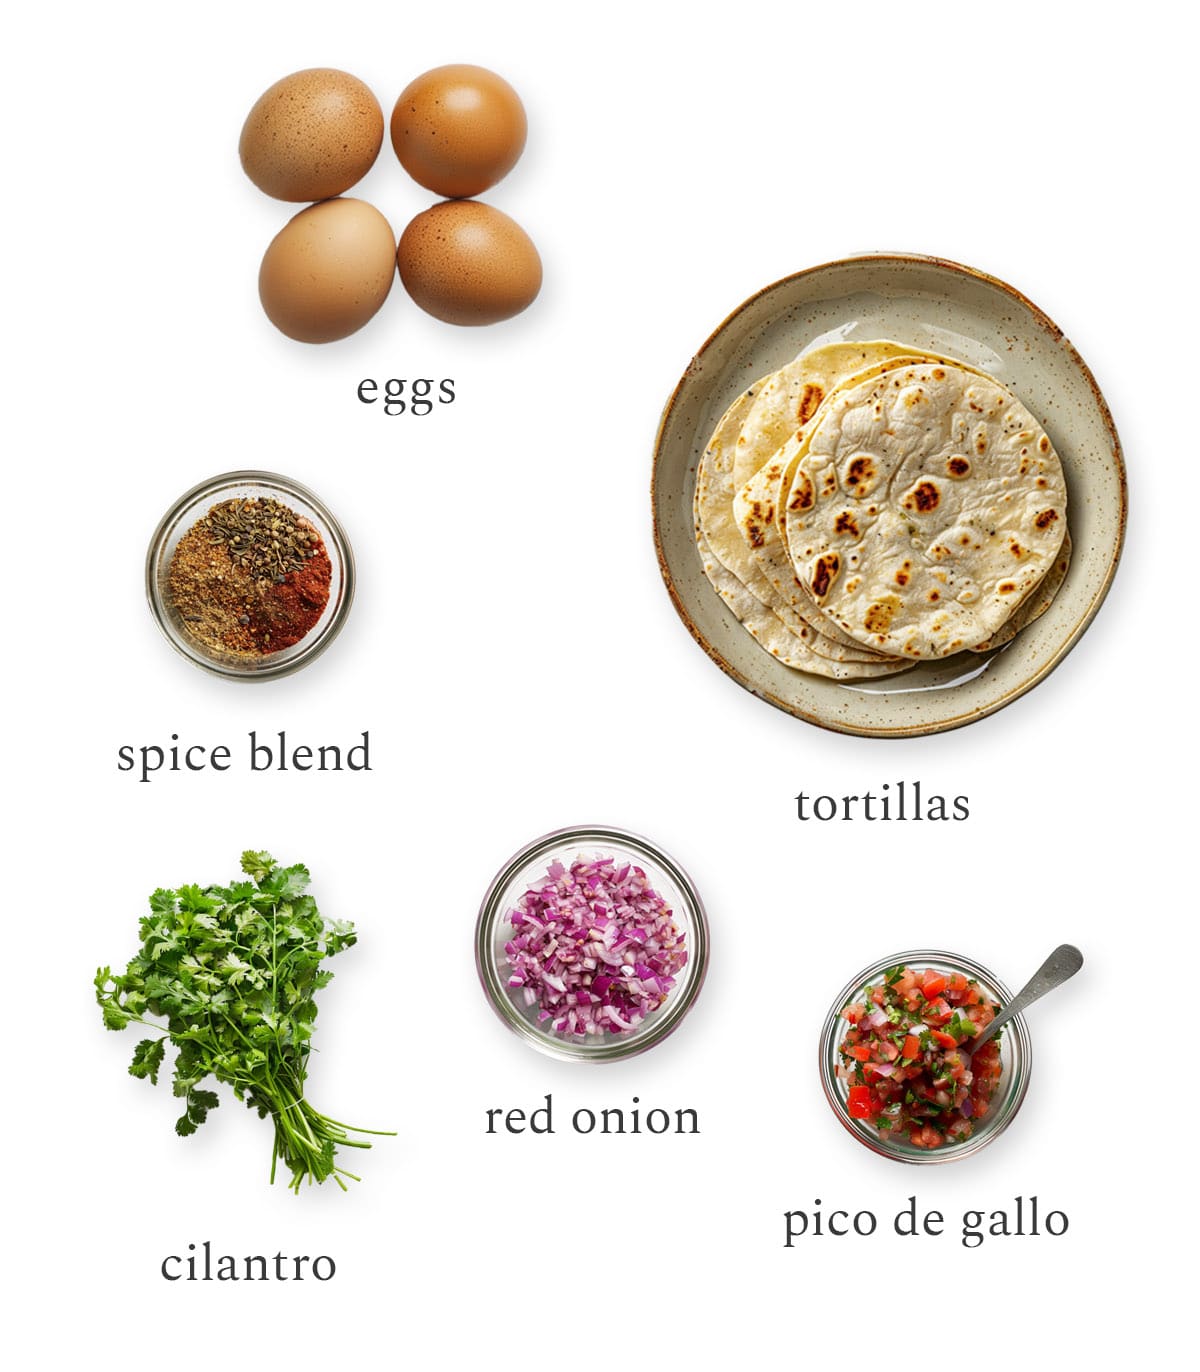
Wait a minute: egg tacos that taste like they have meat? Yes, this trick is like kitchen magic. These scrambled eggs are perfectly seasoned and they take only 5 minutes to make. Here are the ingredients you need for the filling:

  • Eggs: Buy organic eggs if you can, and local eggs if possible.
  • Chili powder, garlic powder, cumin, and salt: You’ll notice it’s a heavy amount of seasoning: ½ tablespoon each for the chili powder, garlic powder and cumin. But trust us: this is what brings the meaty flavor!
  • Tortillas: Flour tortillas are our preference, but as a gluten free recipe this works with corn tortillas or grain free tortillas.
  • Toppings: We like pico de gallo, red onion, and cilantro, but you can use any toppings you like.
Egg Tacos Ingredients

How to cook the eggs: a few tips!

The key to these egg tacos is the special method for cooking the eggs. Many people over cook scrambled eggs, and break them into too small of pieces. This method makes luscious folds of eggs, so the filling texture holds up in the tacos. Here’s what to know:

  • Cook over medium low heat. Don’t have the heat too high: you’ll want it just above low heat.
  • Scrape with a spatula as the eggs solidify, for 3 to 4 minutes. They’ll start to form together into a meat-like texture.
  • Don’t stir too much! You don’t want tiny bits of eggs, you’ll want it to hold together into a cohesive texture.

Toppings for egg tacos

Once you’ve cooked the eggs (in just 5 minutes!), all you have to do is top the tacos! For this egg tacos recipe, we tried to keep it as simple as possible. But if you have more time, the sky’s the limit! Here’s what we added to these tacos, then a few more ideas to get your wheels turning:

  • Salsa fresca or pico de gallo: We used store-bought to keep it quick, but you can also use homemade.
  • Jarred salsa: Or go traditional with a jar of red salsa or salsa verde.
  • Red onion: Use thinly sliced fresh onion (rinse and drain it a few times to remove the bite, if you like!). Pickled red onion adds a tangy flair.
  • Cilantro: Quickly tear off a few leaves for a great garnish
  • Lettuce: Crunchy romaine lettuce adds another nice texture
  • Sour cream: Use standard or dairy free sour cream.
  • Jalapeno: Add a kick! Try thin sliced fresh or pickled jalapenos.
  • Crema or sauce: Try Cilantro Lime Crema, Cilantro Lime Sauce or Creamy Cilantro Sauce.
Egg tacos recipe

Tip: how to warm tortillas

You absolutely must warm your tortillas for egg tacos: it gives them just the right supple texture. No one likes a tough, cold tortilla! While you’re at it, place them in a tortilla warmer to keep them toasty while you’re eating (here’s the tortilla warmer we use). Here are two ways for how to warm tortillas:

  • Stovetop: Char the tortillas by placing them on an open gas flame on medium for a few seconds per side, flipping with tongs, until they are slightly blackened and warm (this also infuses a charred flavor).
  • Oven: Wrap a few tortillas (in packets of no more than 5) in aluminum foil and place on the oven grates to 350°F for 15 to 20 minutes.

Sides to serve with egg tacos

Want to make these egg tacos into a full-blown meal? They work as a fast breakfast, healthy lunch or easy dinner. If we only have 5 minutes, we just whip these up and scarf them down. But if we have a few extra minutes, here are some sides we like to pair:

More egg recipes

These egg tacos are one of our favorite tricks that we make again and again! Egg recipes are always saving us for quick weeknight meals. Here are some of our other ways to make eggs into a meal:

Dietary notes

This egg tacos recipe is vegetarian and gluten-free.

Print
Egg tacos

Easy Egg Tacos (5 Minutes!)


  • Author: Sonja Overhiser
  • Prep Time: 2 minutes
  • Cook Time: 3 minutes
  • Total Time: 5 minutes
  • Yield: 2 servings (4 tacos)

Description

You won’t believe the flavor in these fast and easy egg tacos! The vegetarian “taco meat” filling works for any meal of the day.


Ingredients

  • 4 eggs
  • ½ tablespoon chili powder
  • ½ tablespoon garlic powder
  • ½ tablespoon cumin
  • ¼ teaspoon kosher salt
  • ½ tablespoon olive oil
  • 4 taco-sized flour tortillas or corn tortillas
  • Pico de gallo or salsa fresca
  • 1 handful thinly sliced red onion
  • Torn cilantro leaves
  • Hot sauce

Instructions

  1. In a medium bowl, whisk together the 4 eggs. Add the chili powder, garlic powder, cumin, and kosher salt, and whisk until combined.
  2. In a skillet, heat the olive oil. Add the eggs and cook over medium low heat, scraping as the eggs solidify, about 3 to 4 minutes total. As you scrape, they’ll start to form together into a meat-like texture. Don’t scrape too much or you’ll make too small of pieces: just enough for that it comes together! 
  3. If time, warm and char the tortillas by placing them on an open gas flame on medium for a few seconds per side, flipping with tongs, until they are slightly blackened and warm. (See How to Warm Tortillas.)
  4. Top with salsa fresca (drain extra liquid before serving), thin sliced red onions, torn cilantro leaves, and hot sauce.
  • Category: Main Dish
  • Method: Stovetop
  • Cuisine: Mexican Inspired
  • Diet: Vegetarian

Keywords: Egg tacos

Perfect Sauteed Shrimp

This sauteed shrimp recipe comes out juicy and seasoned to perfection in less than 10 minutes! Here are the secrets…

This sauteed shrimp recipe comes out juicy and seasoned to perfection in less than 10 minutes! Here are the secrets to how to saute shrimp.

Sauteed shrimp in pan.

Here’s a recipe that knocks us off our feet every time. This really is the perfect sauteed shrimp! This basic kitchen skill is something that many home cooks have yet to master. It’s easy once you know a few tricks on how long to cook shrimp and how to season it.

What we love about this recipe: Turns out, it tastes even better than good: it’s truly great! The tender, juicy savory flavor is so remarkable, you won’t be able to stop taking bites. We can’t, and it’s always a hit with our kids. Here’s our secret seasoning blend and exactly how to make what we think is the best sauteed shrimp.

What type of shrimp to buy for sauteed shrimp?

There are lots of options for shrimp at the store, which can be overwhelming (frozen, fresh, tail on, shell on, size, and more). Here’s what to look at for this sauteed shrimp recipe:

  • Find medium or large shrimp. Medium shrimp may be labeled 41 to 50 count, and large is labeled as 31 to 40 count, indicating how many shrimp per pound.
  • Use tail on or peeled. The best shrimp for this recipe is tail on or peeled. Tail on looks nice, but you do have to pull them off when eating. If you accidentally buy shell on shrimp, don’t worry: you can remove the shell with your fingers before cooking, leaving the tail on.
  • Fresh or frozen. Both are essentially the same freshness since most shrimp are immediately flash frozen after they are caught. Just make sure to thaw the shrimp in advance.
  • Wild caught. Fish that is wild caught in your country is usually a sustainable choice. There are also quality options in well-regulated farms; see Seafood Watch Consumer Guide.

How to sauté shrimp: step by step

Shrimp is so easy to cook on the stove, you’ll find yourself whipping up sauteed shrimp on the regular! Here are the basic steps for how to sauté shrimp:

Shrimp in bowl

Step 1: Toss the shrimp with seasonings in a bowl. Use our secret seasoning blend (below), or you can simply use salt and pepper. Do this first so the shrimp are evenly coated in spices.

Sauteed Shrimp Step 2

Step 2: Heat butter or olive oil in an aluminum or cast iron skillet over medium high heat. Add the shrimp.

Sauteed Shrimp Step 3

Step 3: Cook 1 to 2 minutes per side until the shrimp are just opaque and cooked through: not longer. The biggest mistake people make with shrimp is overcooking it, which makes it tough. Cook it just enough so it’s tender and juicy.

💡Pro tip: The best skillet for sauteing is aluminum, copper, or cast iron, which gets the best sear and caramelization on the outside of the shrimp. Non-stick works too: there will be less browning, but it will still taste delicious.

Best seasoning for shrimp

The shrimp seasoning in this recipe is simple but ultra effective. We based the recipe on our Magic Seafood Seasoning, which we’ve been using for years and always gets great reviews. People take one bite and say, “What’s in this?” For this sauteed shrimp, we used a pared down version of that blend so you only need 4 spices. Here’s what you’ll need:

  • Smoked paprika
  • Garlic powder
  • Onion powder
  • Cumin
Sauteed shrimp recipe

Other seasoning variations

Of course, the sky’s the limit when it comes to sauteed shrimp! You don’t have to make our perfect seasoning blend: though of course we hope you do! This shrimp comes out fantastically with just a little S&P. Or, you can mix it up with other sauces and seasonings. Here are a few other shrimp seasoning ideas:

How to saute shrimp

How to thaw shrimp

Frozen shrimp is so convenient: you can pull it out of the freezer at moment’s notice for a quick meal! The only problem is…it’s easiest if you remember the day before. But if not: we’ve got a quick fix for you! Here’s the best way to thaw shrimp for this sauteed shrimp recipe:

  • Day before: Place the frozen shrimp in the refrigerator overnight.
  • Day of: Place the frozen shrimp in a large bowl with very cold water. Stir the bowl every 5 minutes to break up clumps of shrimp that freeze together. The shrimp should defrost in about 15 minutes. Make sure to pat it dry before using!

Make it a meal!

Sauteed shrimp is ready in 10 minutes, and you only need a side to make it a meal! Here are a few quick healthy side dish recipes to make it into a tasty, filling easy dinner:

Dietary notes

This sauteed shrimp recipe is pescatarian, gluten-free and dairy free (with olive oil).

Fresh or frozen shrimp?

Both work! Buy fresh if you can, but frozen is just as delicious. If using frozen, thaw the shrimp completely and pat dry before cooking for even browning.

What kind of pan should I use?

A large skillet or sauté pan with a heavy bottom is ideal for even heat distribution. Aluminum, copper, or cast iron are excellent choices.

What’s the secret to perfectly seared shrimp?

Medium high heat is key! Get your pan nice and hot with a drizzle of oil before adding the shrimp. Don’t overcrowd the pan – cook the shrimp in batches to avoid them steaming instead of searing.

How long does it take to cook shrimp?

Shrimp cook very quickly! Depending on the size, they typically only need 1 to 2 minutes per side, until they turn opaque and pink. Overcooked shrimp become rubbery, so watch them closely.

Print
Sauteed shrimp

Perfect Sauteed Shrimp (Really!)


  • Author: Sonja Overhiser
  • Prep Time: 5 minutes
  • Cook Time: 5 minutes
  • Total Time: 10 minutes
  • Yield: 4

Description

This sauteed shrimp recipe comes out juicy and seasoned to perfection in less than 10 minutes! Here are the secrets to how to saute shrimp.


Ingredients

  • 1 1/2 pounds medium shrimp, deveined (tail on or peeled)
  • ¾ teaspoon kosher salt
  • ¾ teaspoon smoked paprika (or substitute standard paprika)
  • ¾ teaspoon garlic powder
  • ¾ teaspoon onion powder
  • ¾ teaspoon cumin
  • 3 tablespoons butter or olive oil
  • 3 lemon wedges
  • Fresh cilantro or parsley, for garnish

Instructions

  1. Thaw the shrimp, if frozen. Pat the shrimp dry. In a medium bowl, mix the shrimp with the salt, smoked paprika, garlic powder, onion powder, and cumin.
  2. In a large skillet, heat the butter on medium high heat. Add the shrimp and cook for 1 to 2 minutes per side until just opaque and cooked through, turning them with tongs.
  3. Spritz with juice of the lemon wedges and serve immediately.
  • Category: Main Dish
  • Method: Sauteed
  • Cuisine: Seafood
  • Diet: Gluten Free

Keywords: Sauteed shrimp, sauteed shrimp recipe, how to saute shrimp

More great shrimp recipes

Shrimp is one of our favorite ways to a fast and healthy meal! Here are a few more great shrimp recipes we make on the regular:

7 Layer Dip

This easy 7 Layer Dip is the perfect appetizer for parties, football games, and gatherings. No cooking needed and it feeds a large crowd!

The post 7 Layer Dip appeared first on Budget Bytes.
When you need a quick party appetizer that tastes good, is easy to make, and feeds a large crowd…this 7 Layer Dip is the one to make! It has all of my favorite Tex-Mex flavors in one dish and it’s perfect for serving at potlucks, football parties, and family gatherings. I’m always down for any type of chips and dip, but this 7 layer dip takes dips to a whole new level! I’m not sure which part I love the most, the fact that I don’t have to cook anything over a stove to make this recipe or that it comes in at just over $1 per serving. Either way, I highly recommend adding this 7 layer dip recipe to your Super Bowl menu this weekend.😉

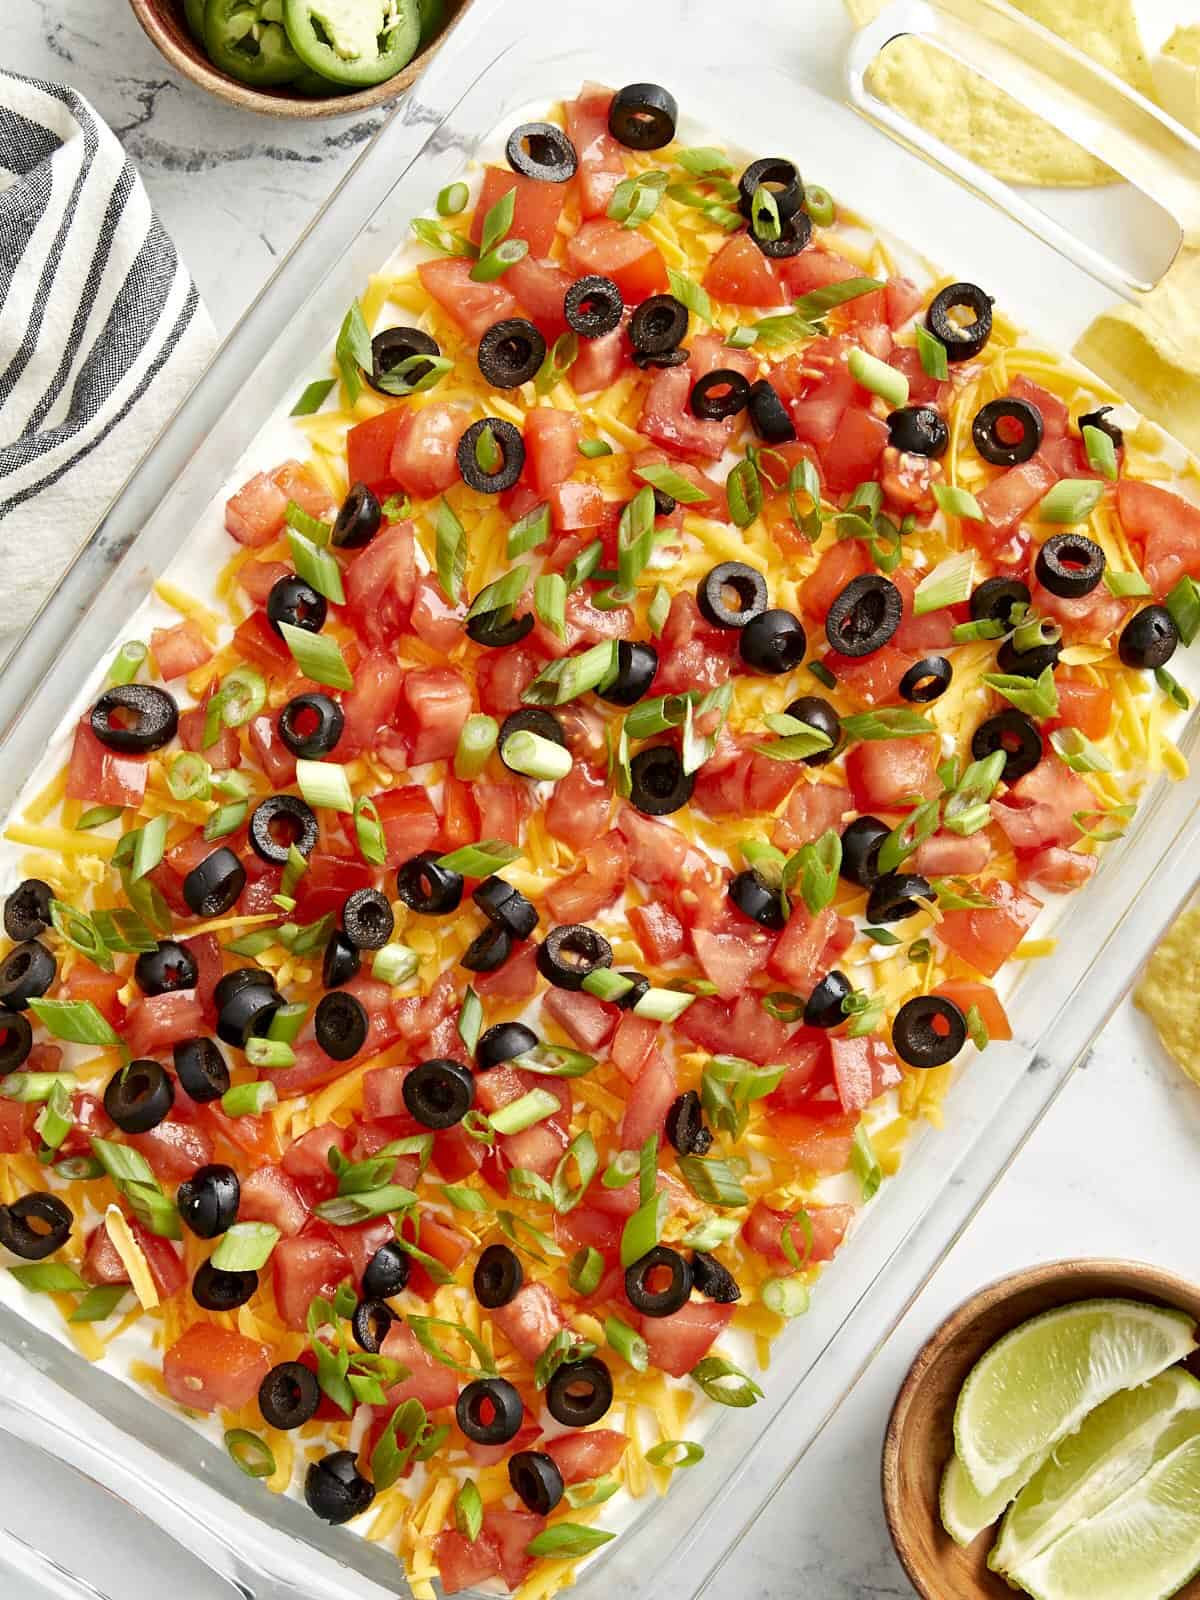
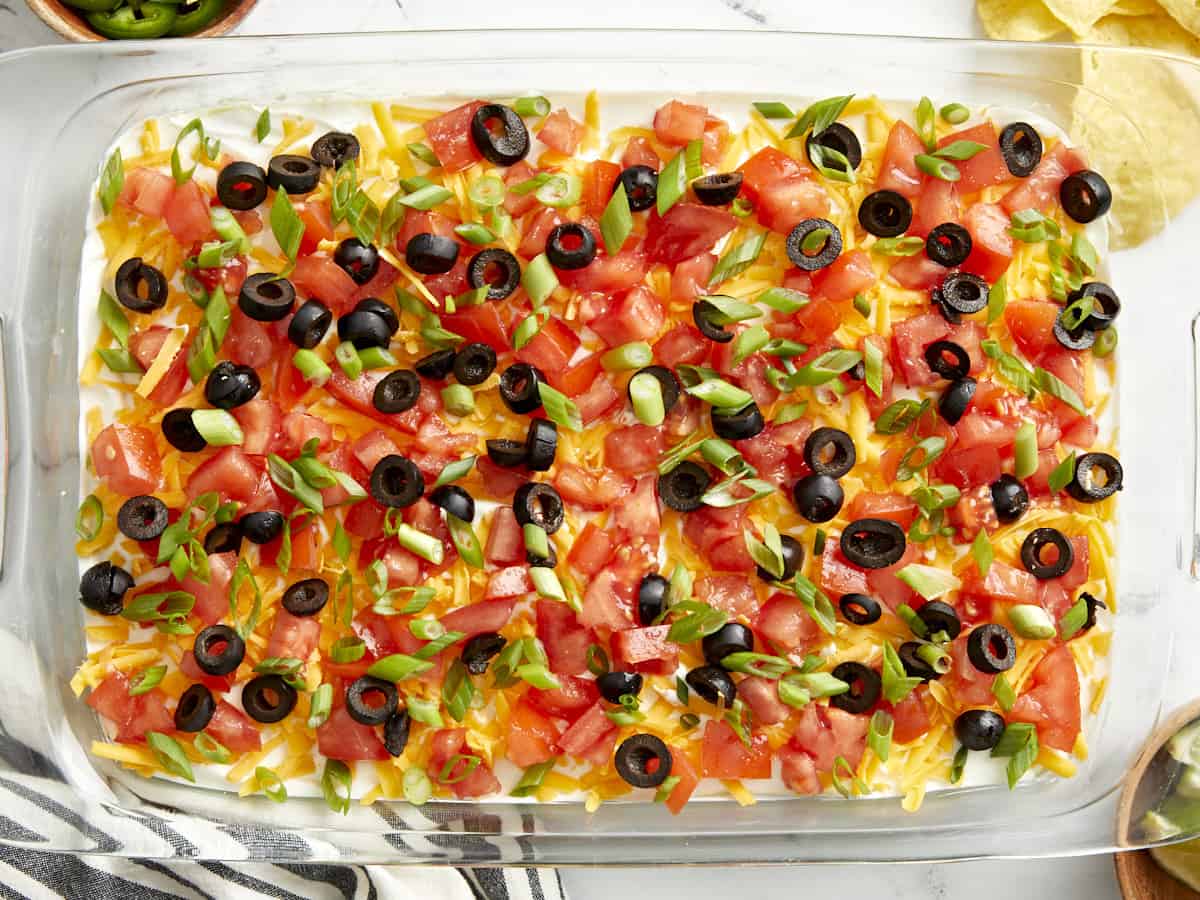
Overhead view of 7 layer dip in a glass casserole dish with a napkin, chips, and lime wedges on the side.

What Is 7 Layer Dip?

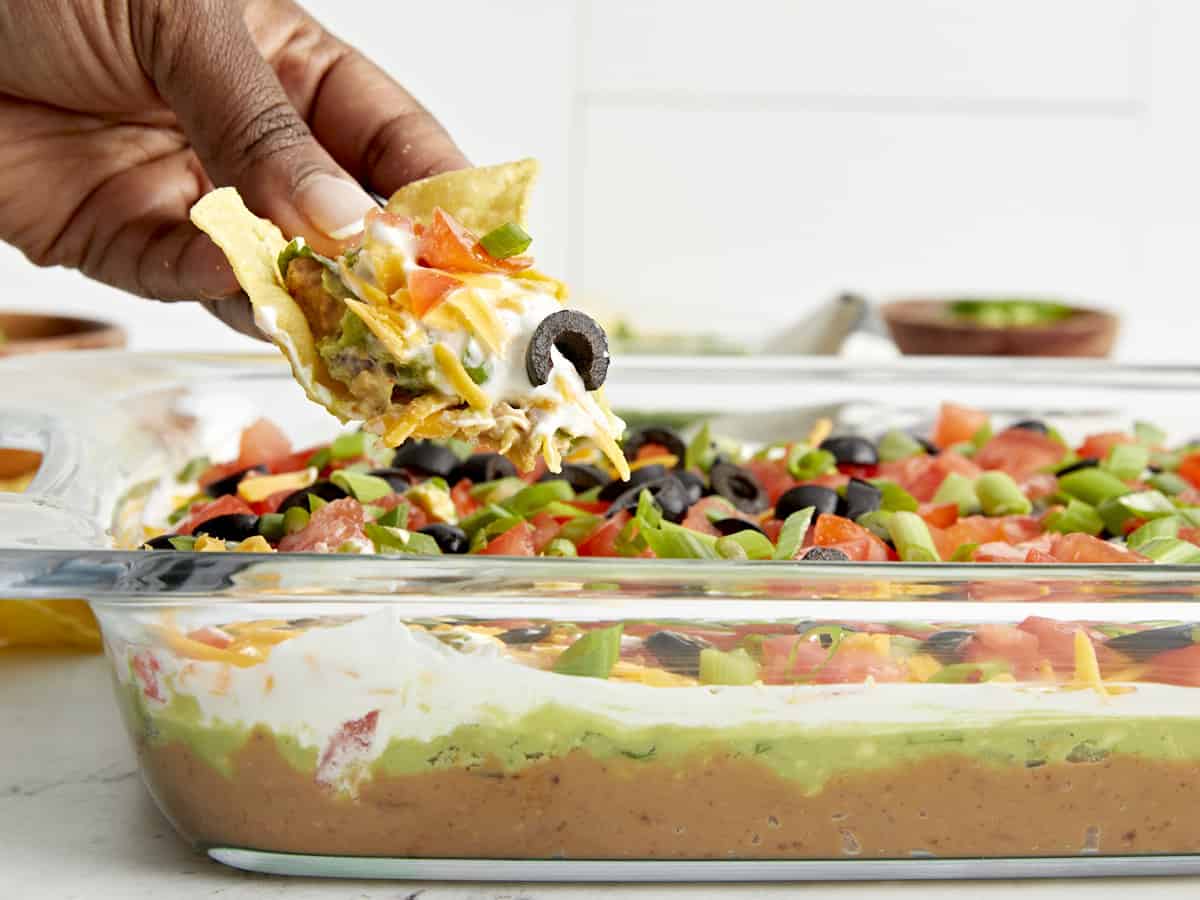
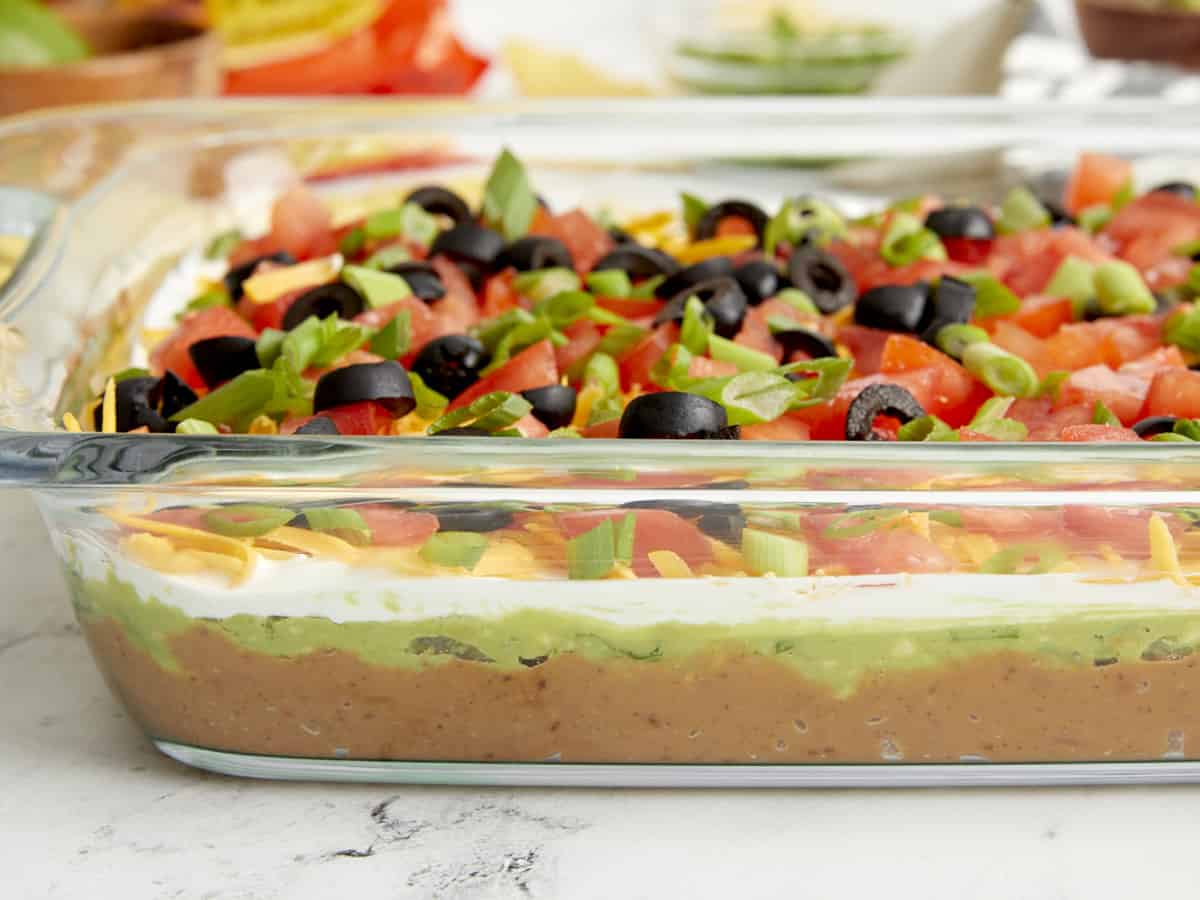
7 layer dip is an easy party appetizer that’s made by building layers of creamy, flavorful, ingredients like refried beans and guacamole into a 9×13” dish. It’s fun to serve at football parties and family gatherings, there’s no need to heat up a stove, and it’s perfect for feeding a crowd!

Ingredients For 7 Layer Dip

Here’s everything you need to make this easy 7 Layer Dip:

  • Refried Beans: You can certainly make your own refried beans, but to make things easy we used canned refried beans and seasoned it with a few spices.
  • Guacamole: We made a quick batch of our homemade guacamole recipe, but to save time you can easily substitute with your favorite store-bought guacamole.
  • Sour Cream: No need to overthink this layer, just grab a tub of regular sour cream to spread on top of the guacamole. It adds the perfect creamy and tasty flavor to balance the beans and guacamole.
  • Cheddar Cheese: We used medium cheddar cheese but you can certainly use mild or a different flavor cheese if you prefer. And we highly recommend buying the cheese in block form and shredding it yourself for this recipe.
  • Tomatoes: Diced Roma tomatoes or vine-ripe tomatoes both work well and are added on top of the cheese layer.
  • Black Olives: Black olives add wonderful color, texture, and flavor to the dip. Because olives tend to be salty and tangy with bold flavors, you’ll only need a few of them for this 7 layer dip.
  • Green Onions: The final layer is a sprinkle of sliced green onions which add not only great flavor, but also a beautiful vibrant color to the dip!

Recipe Variations

  1. Use taco seasoning – If you happen to have a batch of taco seasoning in your panty, use 1 ½ tablespoons of it instead of the chili powder, cumin, and salt to season your refried beans. This will give the beans even more flavor! You can also mix a little bit in to your sour cream to give it an extra boost of flavor.
  2. Add seasoned ground meat – You can make this 7 layer dip even more filling by adding a layer of taco seasoned ground beef or ground turkey. I would add it right after the refried beans layer.
  3. Add salsa – Your favorite thick salsa also works really well with this dip recipe. If you want to add it as a layer, just make sure to drain any excess liquid from the salsa to keep the dip from getting too soggy.

Storing LEftovers

This dip is definitely best served and eaten the same day it’s made, but if you happen to have leftovers, just store any leftovers covered tightly in the refrigerator for 3-4 days. The guacamole may start to brown slightly and the dip may get a bit watery around the edges, but it will still taste delicious!

Side view of 7 layer dip with a hand holding a chip and scooping some out.
Overhead view of 7 layer dip in a glass casserole dish with a napkin, chips, and lime wedges on the side.
Print

7 Layer Dip

This easy 7 Layer Dip is the perfect appetizer for parties, football games, and gatherings. No cooking needed and it feeds a large crowd!
Course Appetizer, Side Dish
Cuisine Mexican, Southwest
Total Cost $16.72 recipe / $1.11 serving
Prep Time 20 minutes
Total Time 20 minutes
Servings 15 (1/2 cup each)
Calories 170kcal

Ingredients

  • 2 tomatoes $1.46
  • 1 1/2 cups shredded cheddar cheese $1.87
  • 1/2 cup sliced black olives $2.19
  • 3 green onions $0.45
  • 2 16oz. cans refried beans $2.38
  • 1 Tbsp chili powder $0.30
  • 1/2 tsp cumin $0.05
  • 1/4 tsp salt $0.02
  • 2 Tbsp water $0.00
  • 2 1/2 cups guacamole $6.25
  • 1 1/2 cups sour cream $1.75

Instructions

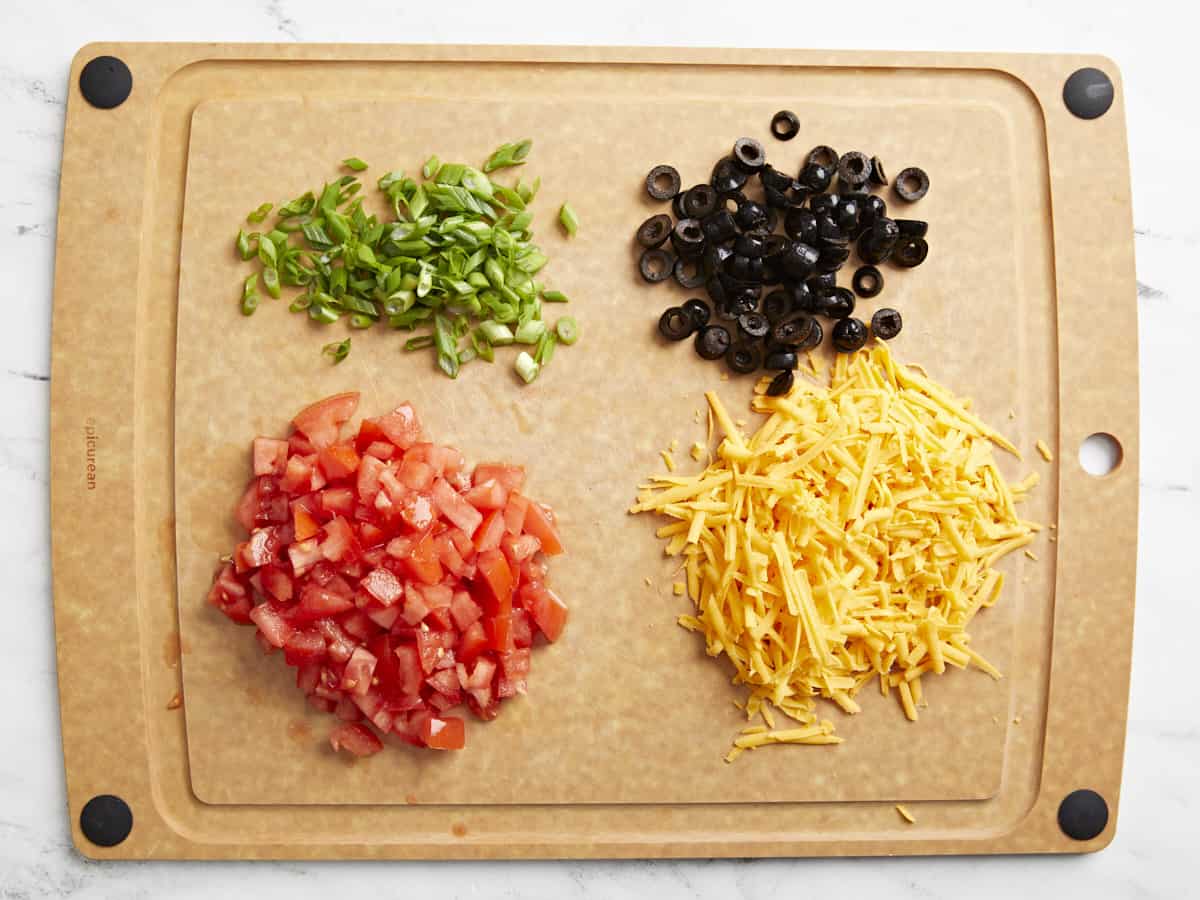
  • Dice the tomatoes, shred the cheddar cheese, drain the black olives, and slice the green onions. Set these ingredients to the side.
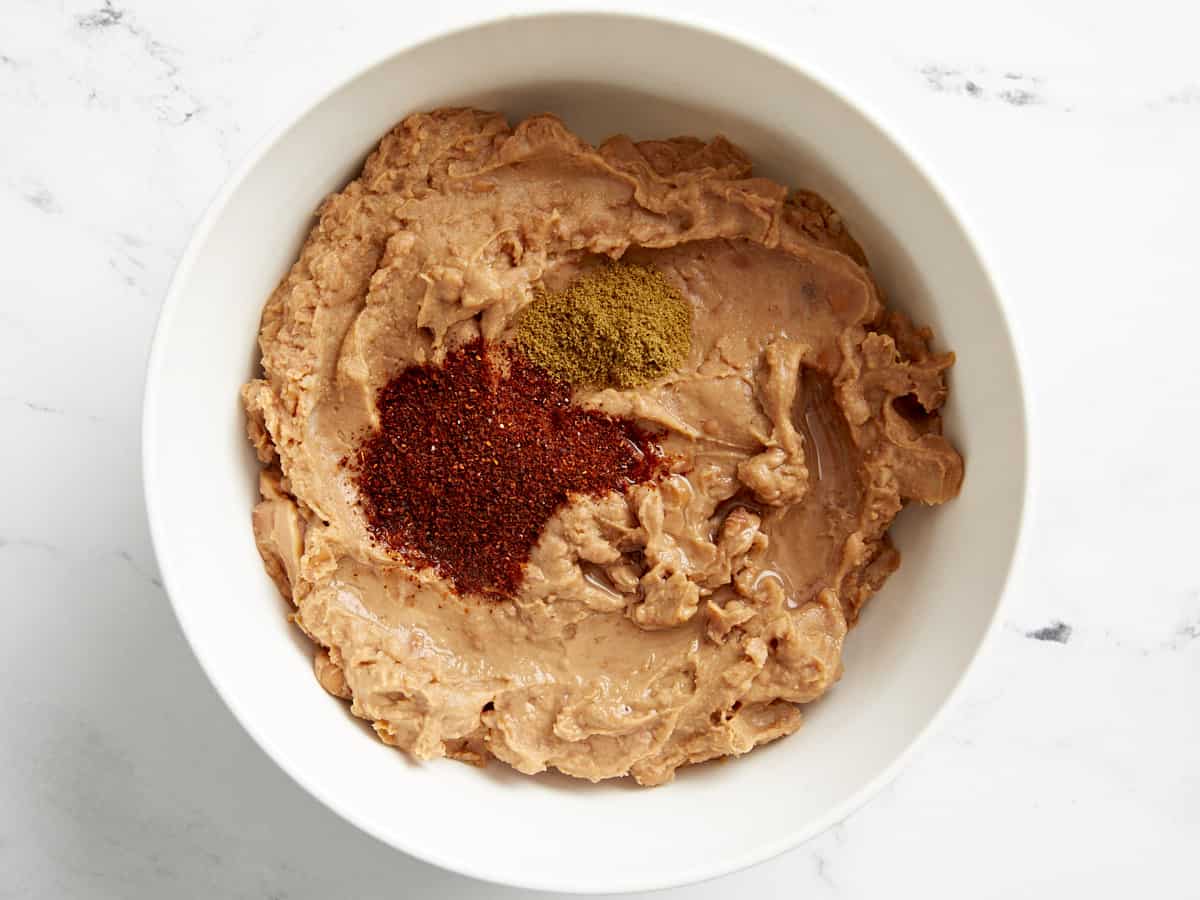
  • In a medium bowl add the refried beans along with the chili powder, cumin, salt, and water. Mix these ingredients together until well combined.
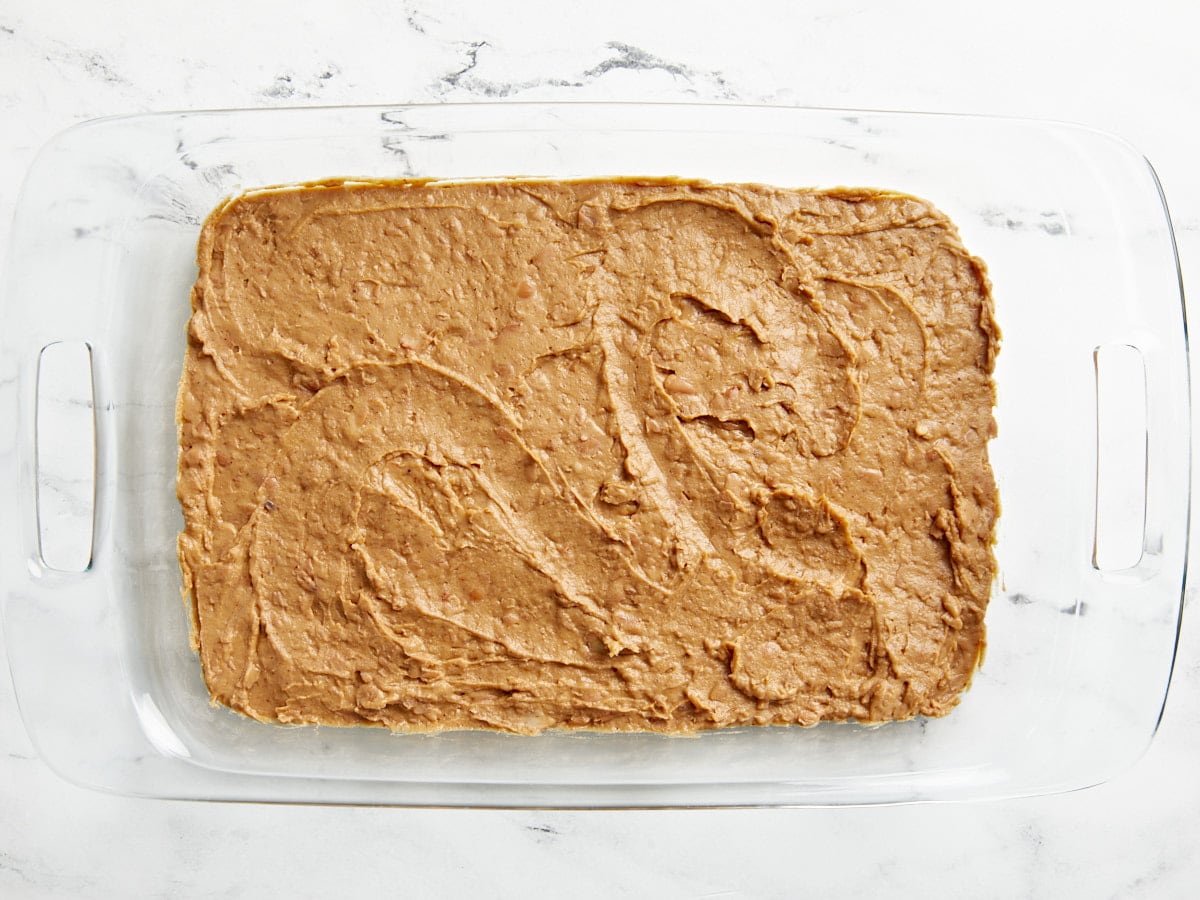
  • Spread the seasoned refried beans into the bottom of a 9×13” casserole dish.
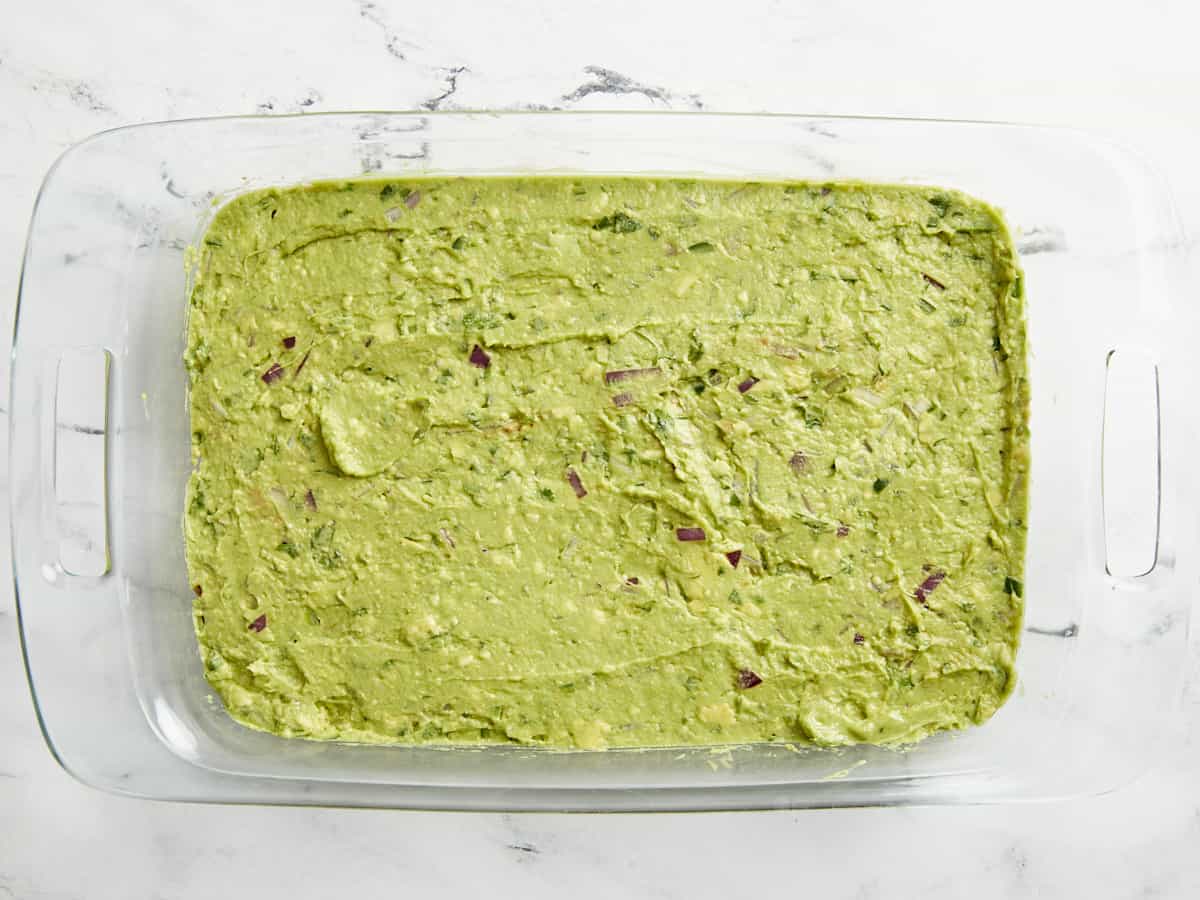
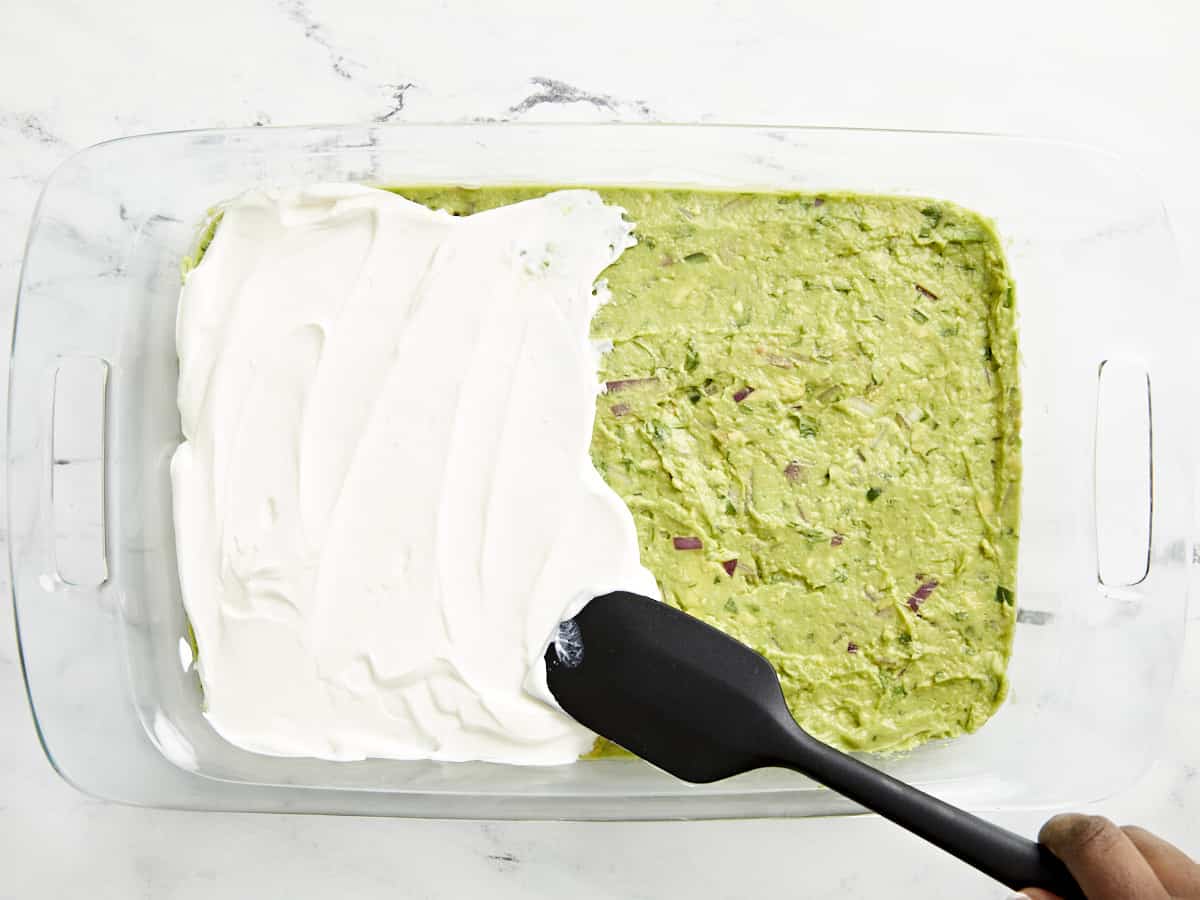
  • Next spread the guacamole evenly on top of the refried beans. Then spread the sour cream evenly on top of the guacamole mixture.
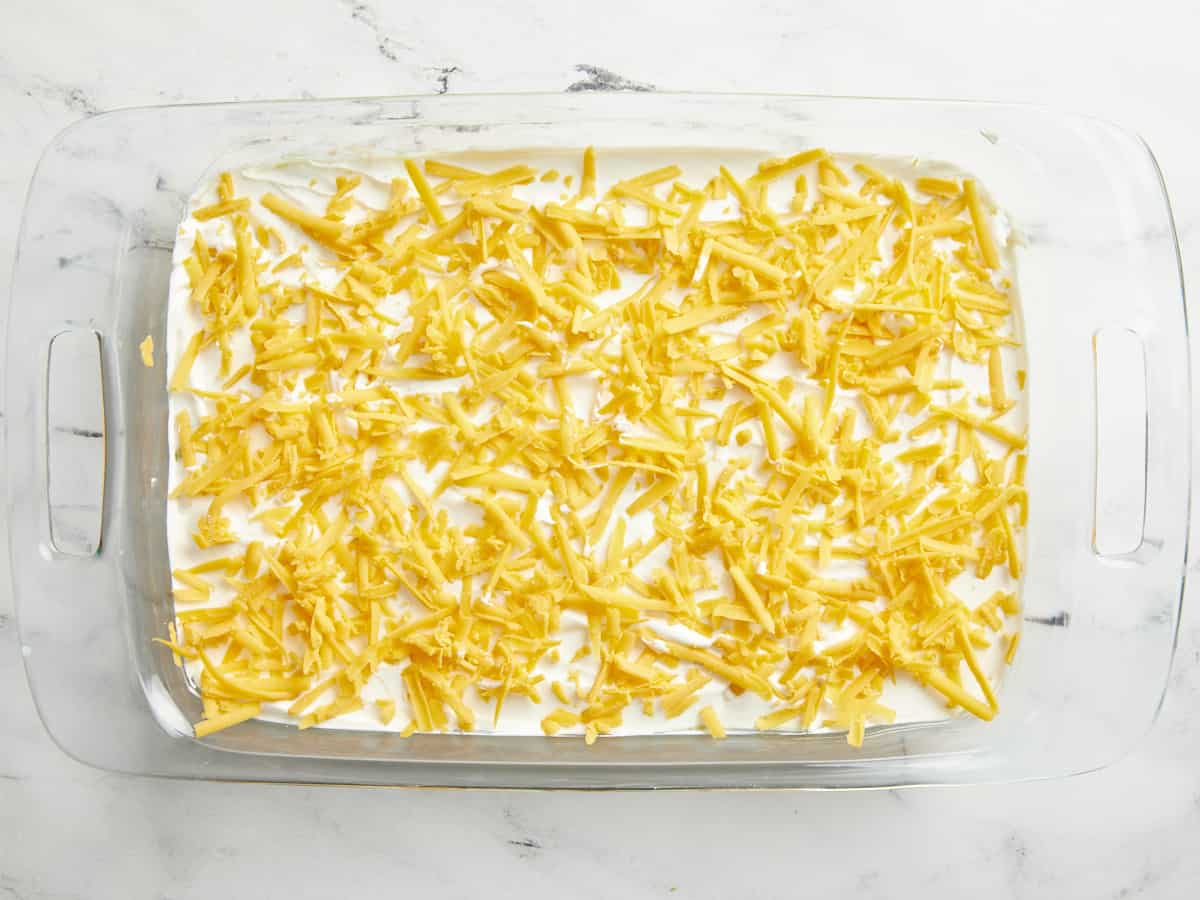
  • Sprinkle the shredded cheese evenly on top of the sour cream.
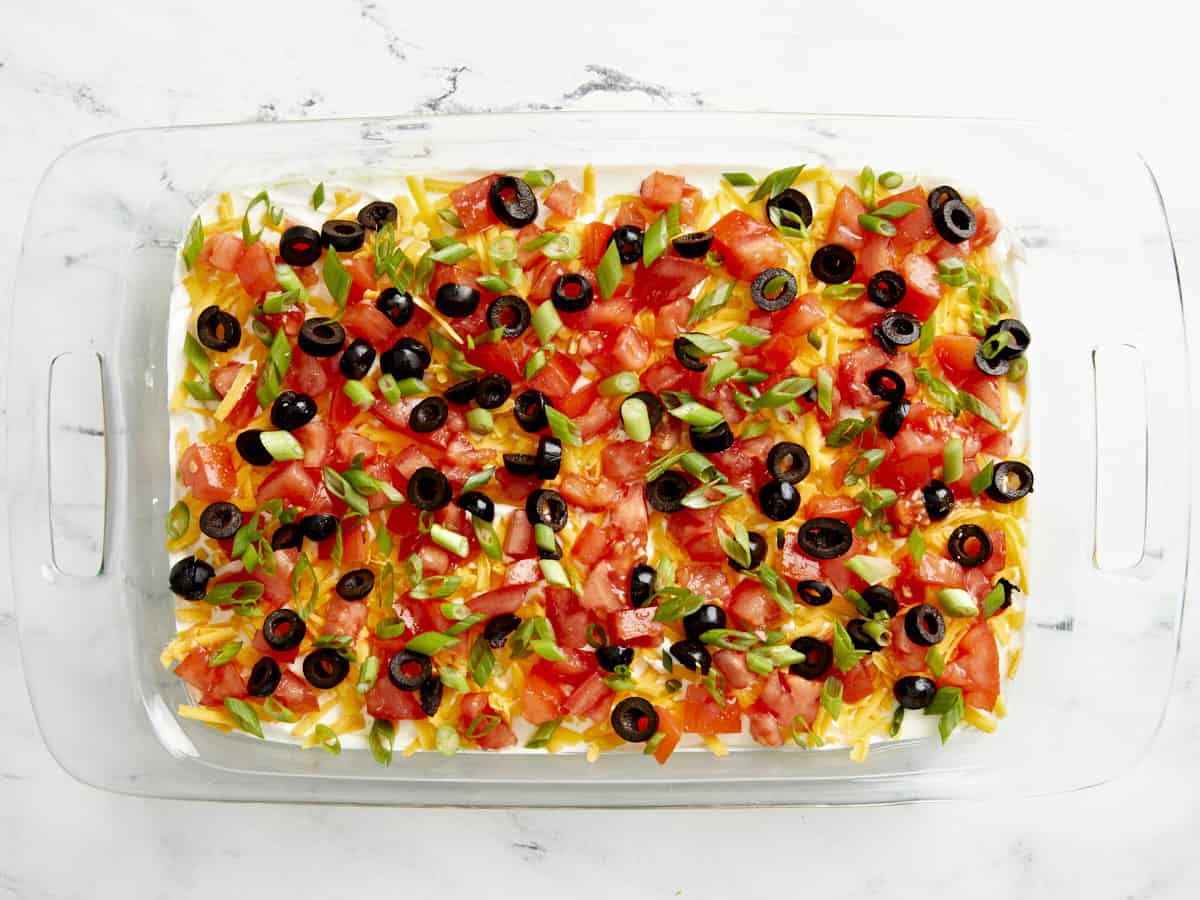
  • Now add the diced tomatoes, black olives, and green onions on top. Make sure everything is spread as evenly as possible.
  • Serve immediately with tortilla chips or cover and place in the refrigerator until ready to serve.

See how we calculate recipe costs here.

Nutrition

Serving: 1serving | Calories: 170kcal | Carbohydrates: 6g | Protein: 4g | Fat: 15g | Sodium: 204mg | Fiber: 3g
Side close up view of 7 layer dip in a glass casserole dish.

How to Make 7 Layer Dip – Step by Step Photos

7 layer dip ingredients on a cutting board.

Dice 2 tomatoes, shred 1 1/2 cups of cheddar cheese, drain 1/2 cup black olives, and slice 3 green onions. Set these ingredients to the side.

Refried beans in a white mixing bowl with seasoning on top.

In a medium bowl add 2-16oz. cans of refried beans along with 1 Tbsp chili powder, 1/2 tsp cumin, 1/4 tsp salt, and 2 Tbsp water. Mix these ingredients together until well combined.

Refried beans spread evenly in a glass casserole dish.

Spread the seasoned refried beans into the bottom of a 9×13” casserole dish.

Guacamole spread evenly on top of refried beans in glass casserole dish.

Next spread 2 1/2 cups of guacamole evenly on top of the refried beans.

Sour cream being spread on top of guacamole with a black spatula.

Then spread 1 1/2 cups of sour cream evenly on top of the guacamole mixture.

Shredded cheese added evenly on top of sour cream layer.

Sprinkle the shredded cheese evenly on top of the sour cream.

Chopped tomatoes, black olives, and sliced green onions added and spread out evenly on top of shredded cheese layer.

Now add the diced tomatoes, black olives, and green onions on top. Make sure everything is spread as evenly as possible.

Overhead view of 7 layer dip in a glass casserole dish with a napkin, chips, and lime wedges on the side.

Enjoy this tasty appetizer dip immediately with tortilla chips or cover and place in the refrigerator until ready to serve.

The post 7 Layer Dip appeared first on Budget Bytes.
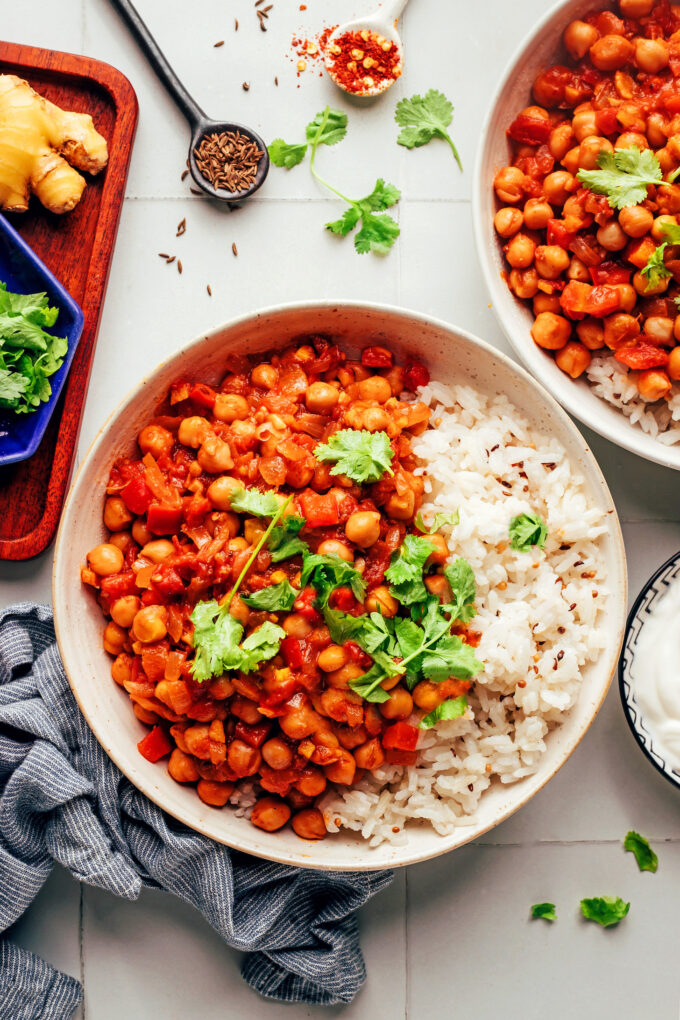
Warming 1-Pot Chickpea Curry (Vindaloo-Inspired)

An EASY vegan version of vindaloo has evaded us for a while. Recreating the rich, spicy, warming flavors of this Indian curry while staying true to our commitment to simplicity is a challenge. The quest continues, but through our trials and tribulation…

Warming 1-Pot Chickpea Curry (Vindaloo-Inspired)

An EASY vegan version of vindaloo has evaded us for a while. Recreating the rich, spicy, warming flavors of this Indian curry while staying true to our commitment to simplicity is a challenge. The quest continues, but through our trials and tribulations, we landed on a super comforting, warming chickpea curry that was too good not to share!

Made in 1 pot with easy-to-find ingredients, this curry is fuss-free and SO flavorful.

Warming 1-Pot Chickpea Curry (Vindaloo-Inspired) from Minimalist Baker →

Chicken Enchilada Soup

This super flavorful Chicken Enchilada Soup is made with tender chicken breast, lots of spices, and a simple homemade enchilada sauce.

The post Chicken Enchilada Soup appeared first on Budget Bytes.

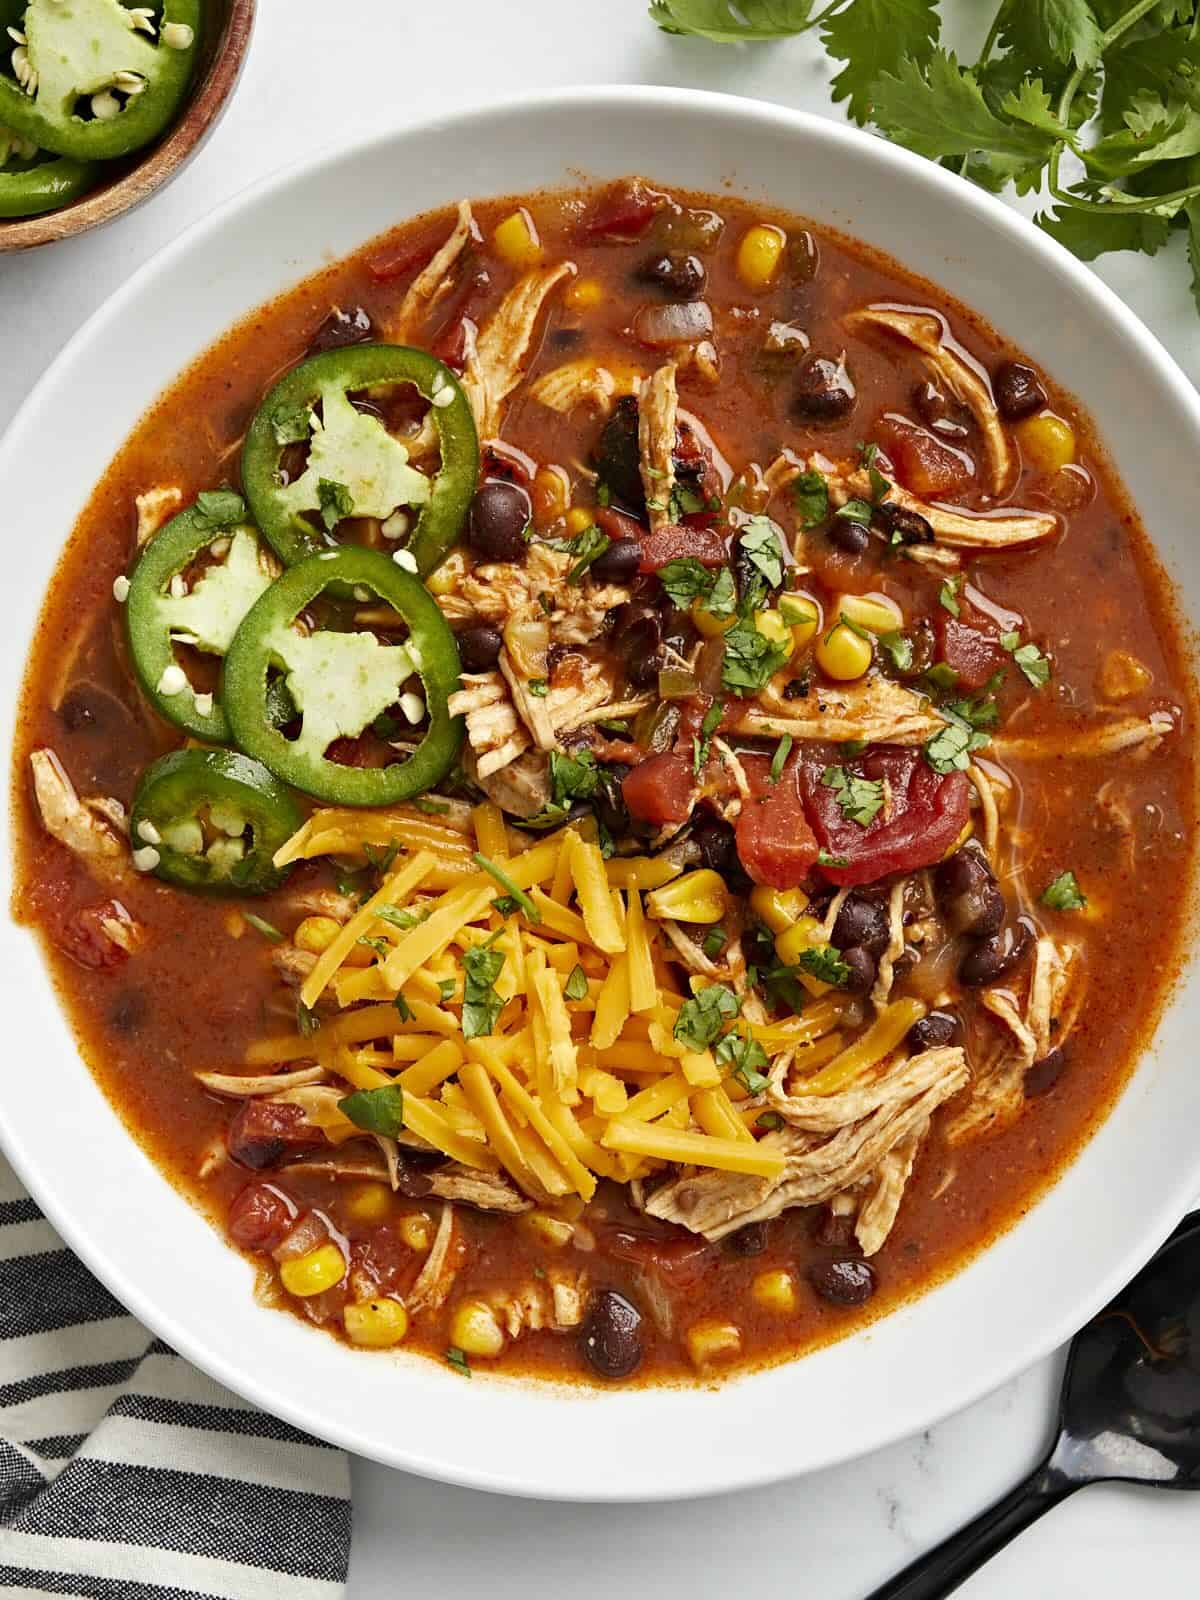
We are still in the middle of soup season and if you’re looking for a new soup recipe to make this month, then friend you’re in luck! Today we’re making Chicken Enchilada Soup! It’s made with tender chicken breast and lots of bold flavors. Dare I say, it might just be your new favorite soup this year! And the secret ingredient…our homemade enchilada sauce. Keep on reading to find out just how easy it is to make this hearty and satisfying, chicken enchilada soup!

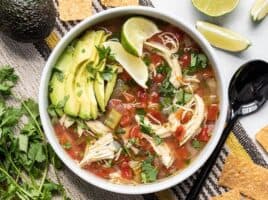
Overhead view of Chicken Enchilada Soup in a white bowl with a black spoon on the side.

What Is Chicken Enchilada Soup?

Chicken Enchilada Soup is everything you love about regular chicken enchiladas, but it’s conveniently made in one pot! It reminds me of chicken tortilla soup, with tender chicken meat and bold flavors, except it’s made with an easy homemade enchilada sauce. The enchilada sauce is cooked directly in the soup pot with the rest of the ingredients and gives this soup TONS of flavor!

Ingredients For Chicken Enchilada Soup

Here is everything you need to make this chicken enchilada soup recipe:

  • Chicken Breasts: Boneless, skinless chicken breasts are used for this recipe, but you could also substitute with boneless, skinless chicken thighs instead. The cook time may vary slightly when using chicken thighs.
  • Onion, Garlic, and Jalapeño: Sautéed onion, garlic, and jalapeño sets the base foundation and adds great flavor to the soup.
  • Enchilada Sauce: You can certainly use store-bought enchilada sauce, but we used a batch of our Easy Enchilada Sauce recipe for this soup. Instead of making the sauce separately in a different pot, it’s made directly in the same pot that the soup cooks in. The homemade enchilada sauce makes it easy to control the spices and the heat level of this soup and it tastes SO much better than store-bought sauce!
  • Beans & Corn: Beans and corn add more color, flavor, and texture to the soup!
  • Tomatoes: A combination of fire-roasted tomatoes, diced tomatoes with green chiles, and tomato paste adds even more flavor and texture to the soup. The tomato paste is used to make the enchilada sauce and it helps thicken the soup, so I wouldn’t skip it.
  • Chicken Broth: Using a good quality chicken broth will give the soup extra flavor. We use Better than Bouillon to make our broth.

How Spicy Is This SOup?

This chicken enchilada soup definitely has a kick to it. It has jalapeño, chili powder, and cayenne pepper added to it. The brand of chili powder we use is completely mild, but other brands can sometimes carry some heat. If you are using a spicy chili powder, simply reduce or eliminate the cayenne powder from this recipe to compensate. I would say the heat level of this soup is medium spicy, like a medium salsa.

What To Serve WIth Chicken Enchilada Soup

The same day we made this soup at the studio, Beth just happened to also be making some Homestyle Cornbread. So we drizzled a little bit of honey on top of the cornbread to eat with the soup, and OMG…a match made in heaven! The combination of the sweetness from the honey with the spicy and smoky flavors of the enchilada soup were perfect and absolutely delicious. In addition to cornbread, you can also pair this soup with Cilantro Lime Rice or even our Sweet Corn Salsa. And don’t forget the toppings! Some cheddar cheese, a little bit of cilantro, sliced avocado, a dollop of sour cream, or a few more sliced jalapeños (if you like the extra heat) would all be great!

Storing Leftovers

This soup stores very well in the fridge and the freezer. We always suggest dividing the soup into single portions just after cooking so it cools down more quickly in the refrigerator, which will give you more longevity with the leftovers. You can store any leftovers in an airtight container in the refrigerator for about 4-5 days, or you can freeze it for longer storage (about 3 months).

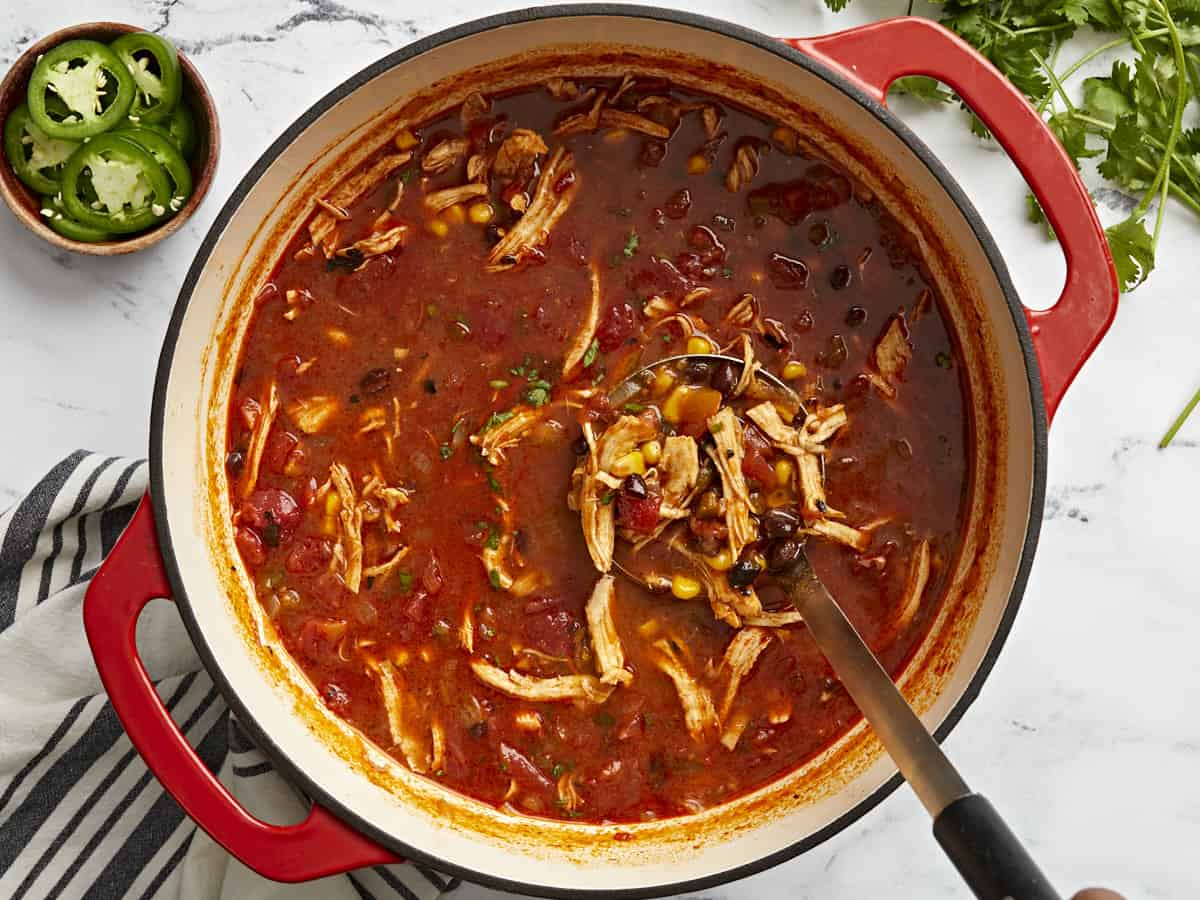
Overhead view of chicken enchilada soup in a dutch oven with a ladle scooping some soup out.
Overhead view of Chicken Enchilada Soup in a white bowl with a black spoon on the side.
Print

Chicken Enchilada Soup

This super flavorful Chicken Enchilada Soup is made with tender chicken breast, lots of spices, and a simple homemade enchilada sauce.
Course Dinner, Lunch
Cuisine American, Southwest
Total Cost $11.52 recipe / $1.92 serving
Prep Time 10 minutes
Cook Time 1 hour
Total Time 1 hour 10 minutes
Servings 6 (about 1.5 cups each)
Calories 181kcal

Equipment

Ingredients

  • 3 Tbsp cooking oil, divided $0.12
  • 1 yellow onion, diced $0.32
  • 1 jalapeno, seeded & diced $0.25
  • 2 cloves garlic, minced $0.16
  • 2 Tbsp all-purpose flour $0.04
  • 2 Tbsp chili powder $0.60
  • 1/2 tsp ground cumin $0.05
  • 1/2 tsp garlic powder $0.05
  • 1/4 tsp cayenne pepper $0.02
  • 3/4 tsp salt $0.05
  • 3 oz. tomato paste $0.50
  • 1 15oz. can black beans, drained $0.89
  • 1 15oz. can fire roasted diced tomatoes $1.33
  • 1 10oz. can diced tomatoes with green chiles $1.00
  • 1 cup frozen corn $0.47
  • 4 cups chicken broth $0.42
  • 2 boneless, skinless chicken breasts (about 1.5 lb. total) $5.25

Instructions

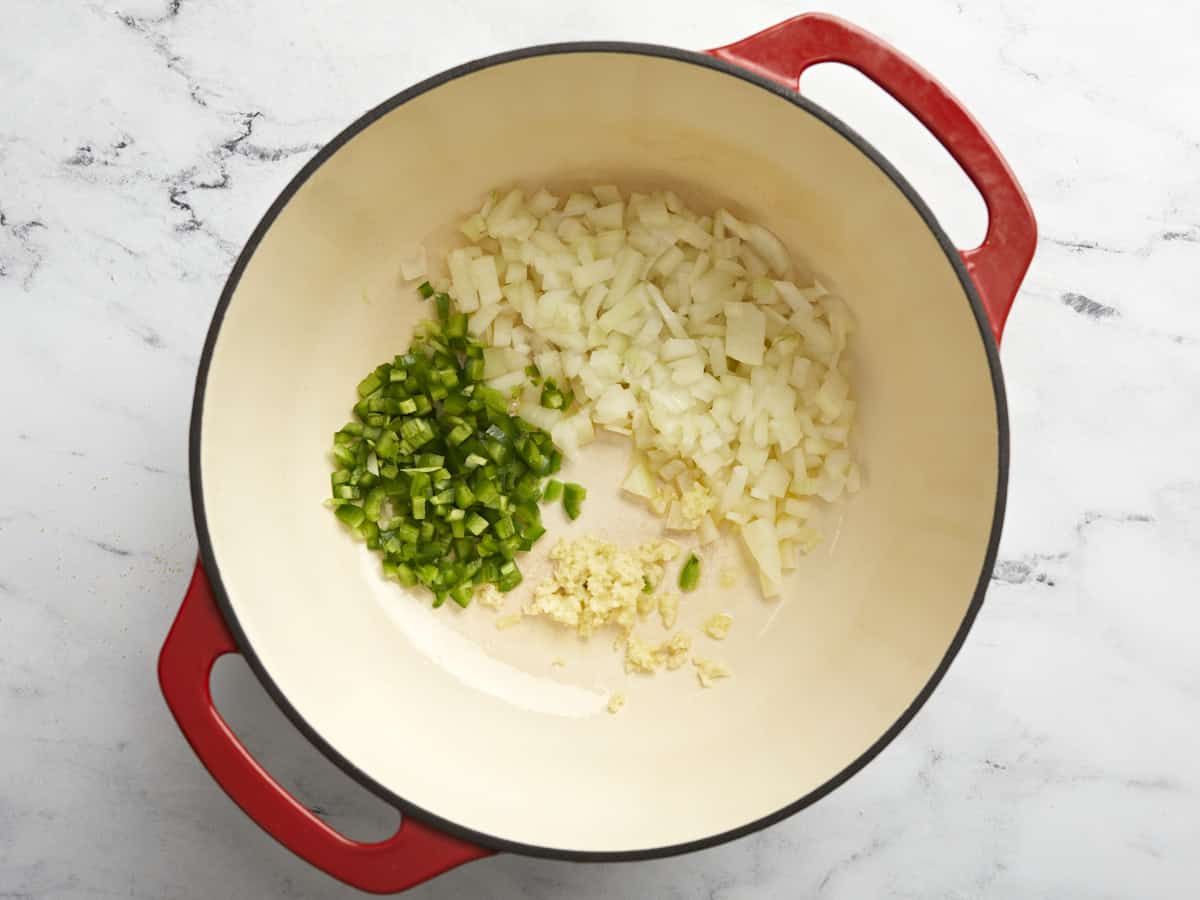
  • Add 1 Tbsp of cooking oil along with the diced onion, finely diced jalapeño and minced garlic cloves to a large dutch oven or soup pot over medium heat. Sauté for 2-3 minutes or until onions are soft and translucent.
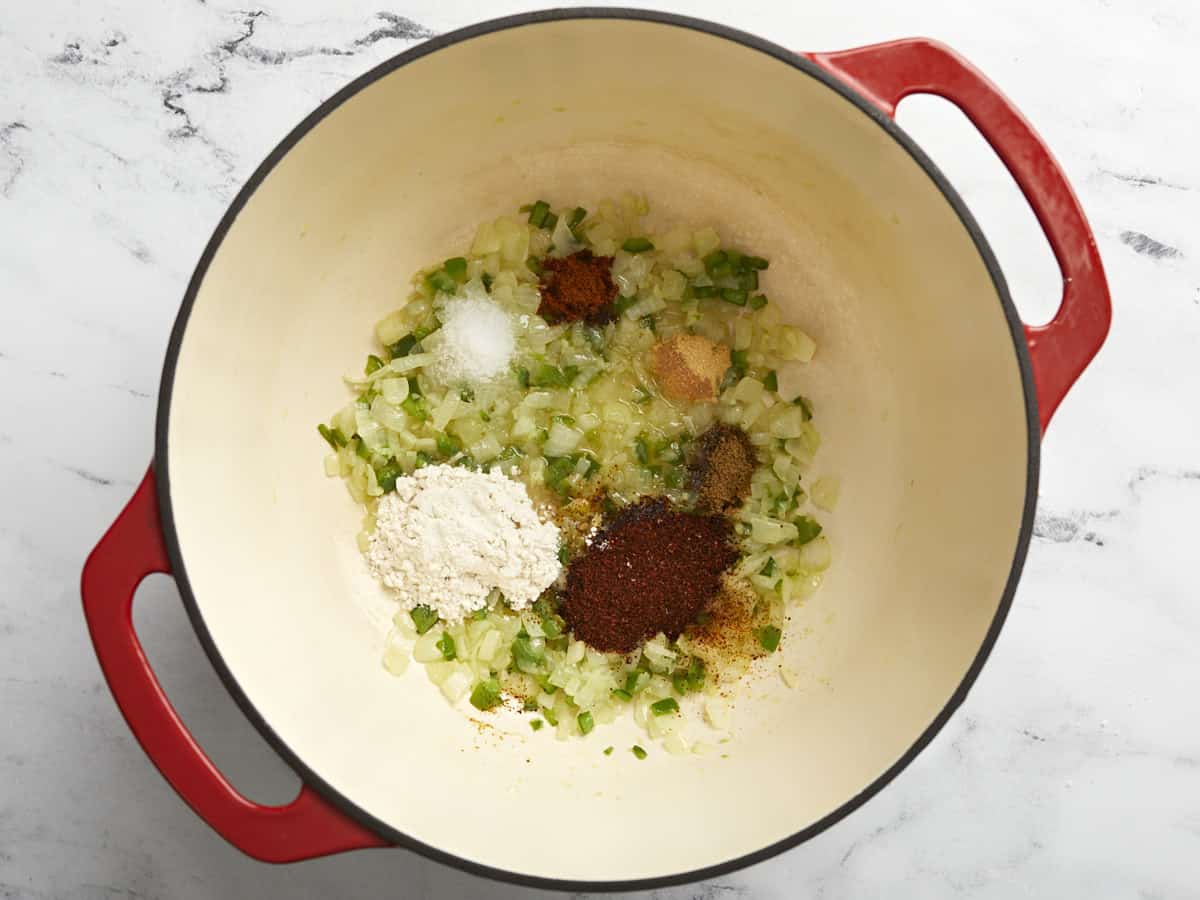
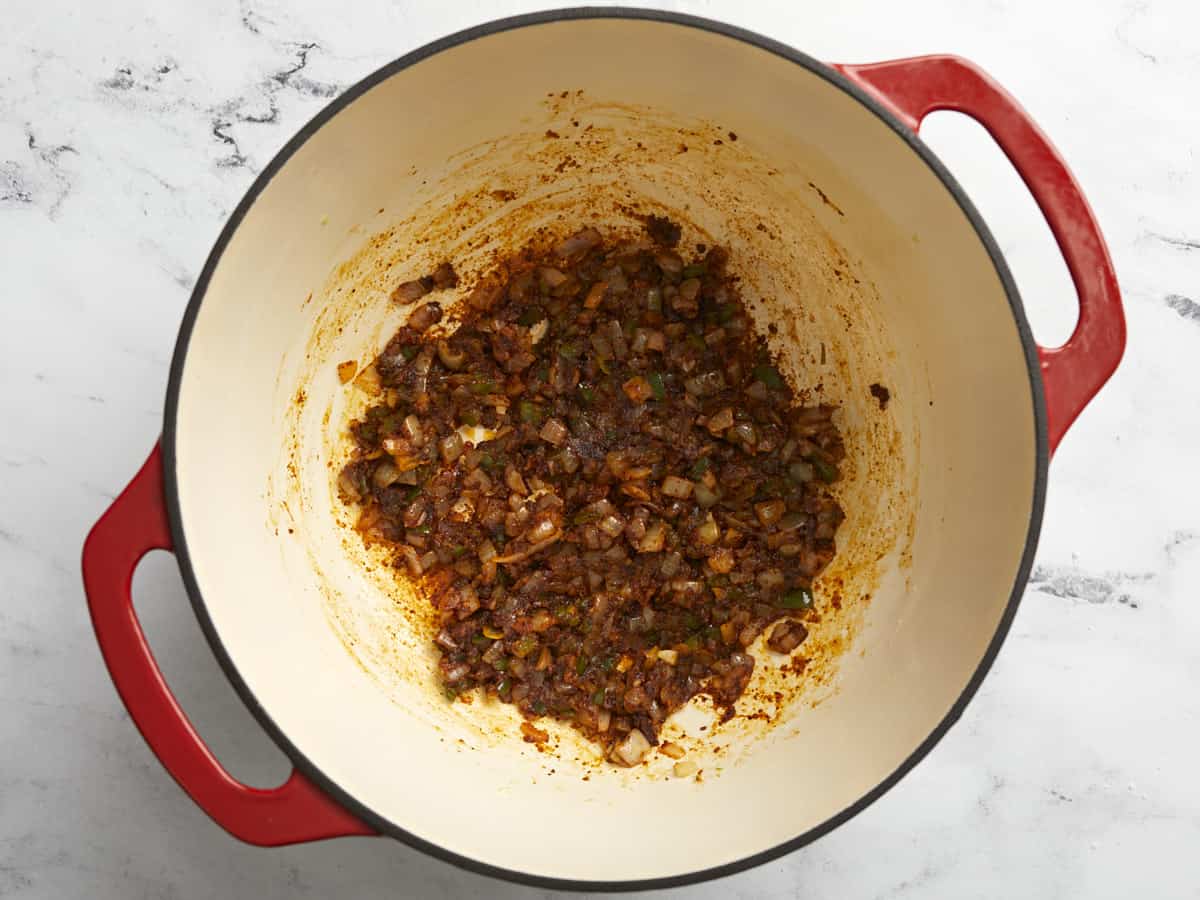
  • Next add the all-purpose flour, chili powder, ground cumin, garlic powder, cayenne pepper, salt, and the remaining 2 Tbsp of cooking oil to the pot. Stir well and cook the flour and spices with the vegetables for 2 minutes.
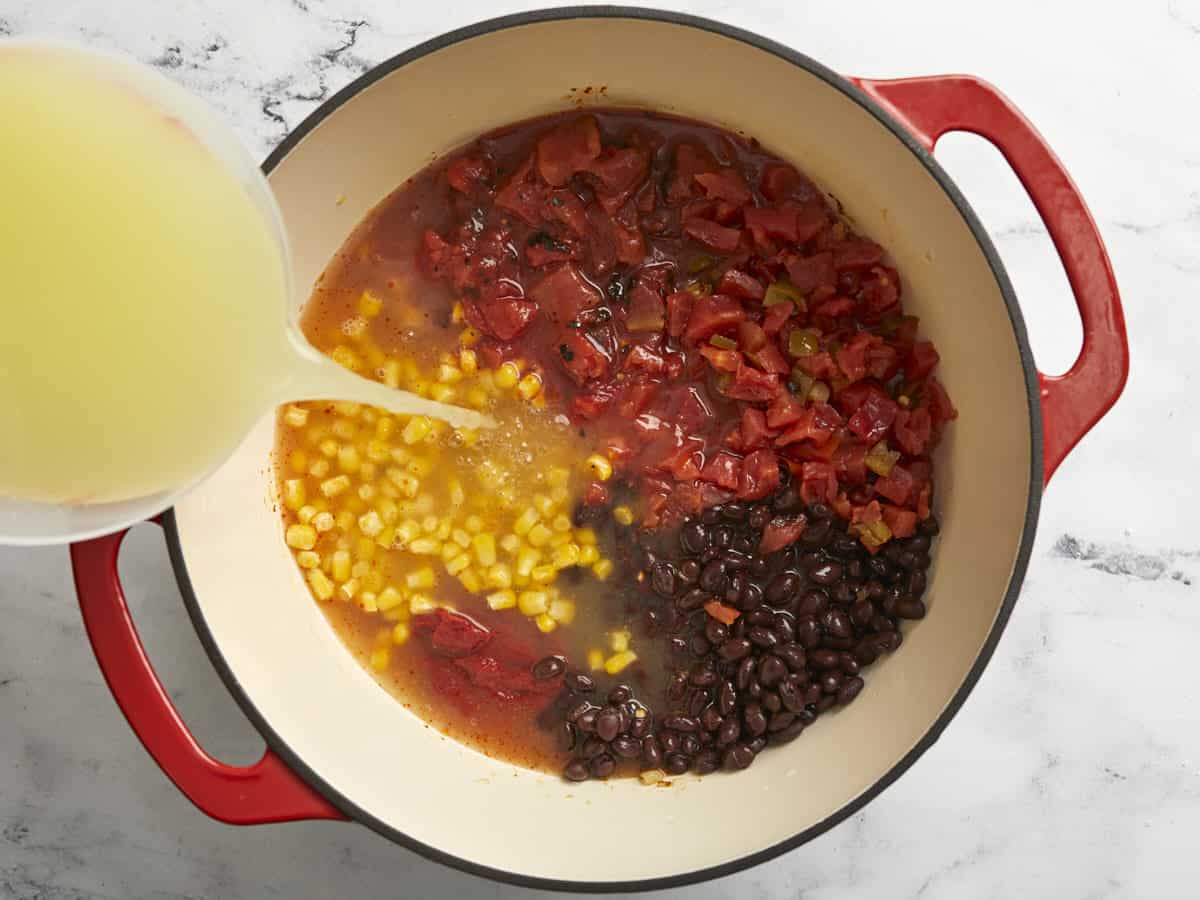
  • Add the tomato paste, drained black beans, fire roasted tomatoes, diced tomatoes with green chiles, frozen corn, and chicken broth to the pot. Stir all the ingredients together making sure to dissolve the tomato paste and scrape up any spices that may be stuck at the bottom of the pot.
  • Now add the chicken breasts directly inside the pot on top of the rest of the ingredients. Place a lid on the pot and bring the soup up to a boil. Once boiling, reduce the heat to medium-low and allow the soup to simmer for 45 minutes. Make sure the soup is just at a steady simmer at this point, as this will help to create tender chicken breast meat.
  • After the soup has simmered for 45 minutes, remove the chicken breasts and place them on a clean cutting board. Once cool enough to touch, shred the chicken breasts with a fork.
  • Add the shredded chicken meat back to the soup pot and stir until the chicken is evenly distributed throughout the soup.
  • Serve this soup with your favorite toppings like shredded cheese, cilantro, sliced avocado, a dollop of sour cream, or even some more sliced jalapeño. Enjoy!

See how we calculate recipe costs here.

Nutrition

Serving: 1serving | Calories: 181kcal | Carbohydrates: 16g | Protein: 12g | Fat: 9g | Sodium: 1075mg | Fiber: 3g
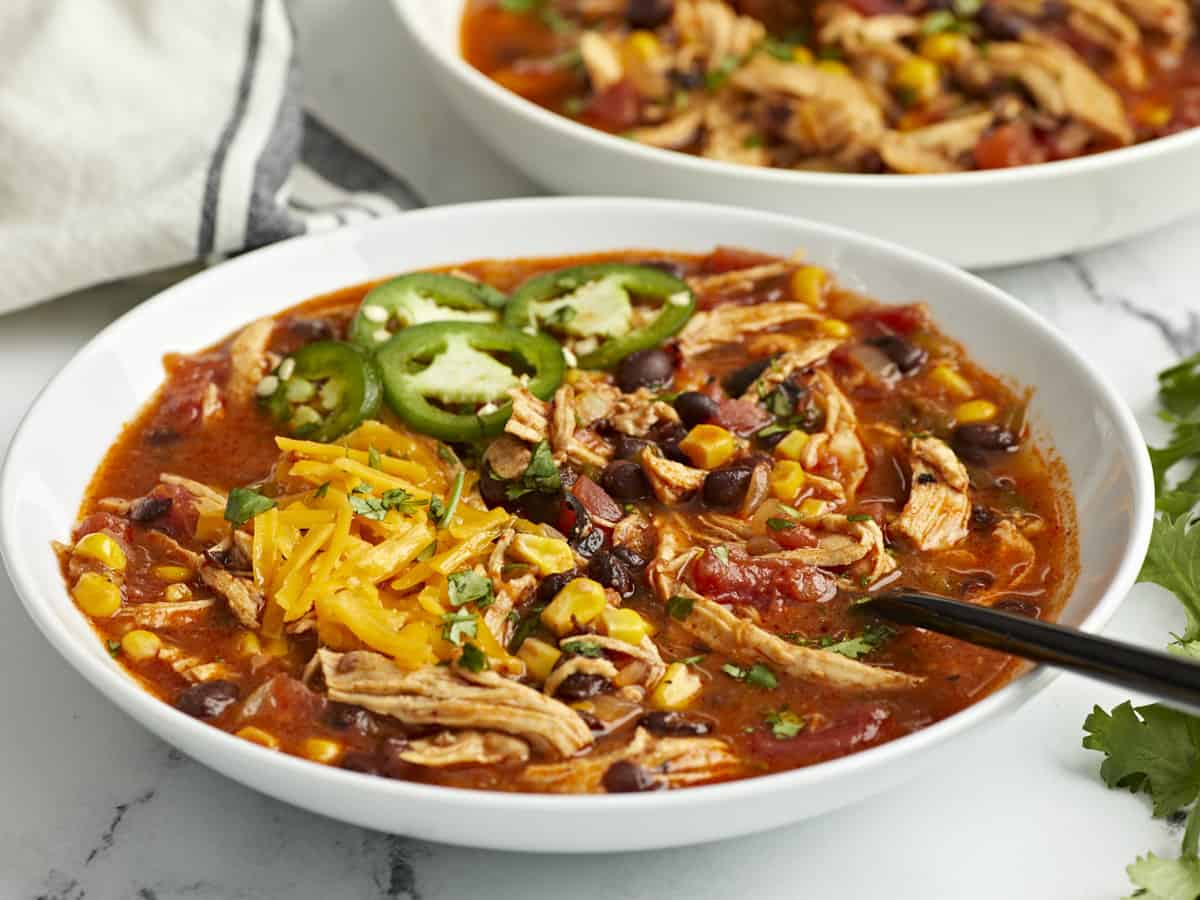
Side view of two bowls of chicken enchilada soup with a black spoon inside the soup.

How to Make Chicken Enchilada Soup – Step by Step Photos

Diced onion, jalapeno, and garlic in a dutch oven.

Add 1 Tbsp of cooking oil, one diced onion, one finely diced jalapeño and two minced garlic cloves to a dutch oven or large pot over medium heat. Sauté for 2-3 minutes or until onions are soft and translucent.

Spices added to sautéed vegetables in a dutch oven.

Next add 2 Tbsp all-purpose flour, 2 Tbsp chili powder, 1/2 tsp ground cumin, 1/2 tsp garlic powder, 1/4 tsp cayenne pepper, 3/4 tsp salt, and the remaining 2 Tbsp of cooking oil to the pot.

Spices mixed and sautéed in dutch oven.

Stir well and cook the flour and spices with the vegetables for 2 minutes.

Tomatoes, black beans, corn, tomato paste, and chicken broth added to the dutch oven.

Add 3oz. of tomato paste, one 15oz. can of black beans (drained), one 15oz. can of fire roasted tomatoes (with juices), one 10oz. can of diced tomatoes with green chiles (with juices), one cup of frozen corn, and 4 cups of chicken broth to the pot. Stir all the ingredients together making sure to dissolve the tomato paste and scrape up any spices that may be stuck at the bottom of the pot.

Two chicken breasts being placed in the dutch oven on top of the soup ingredients.

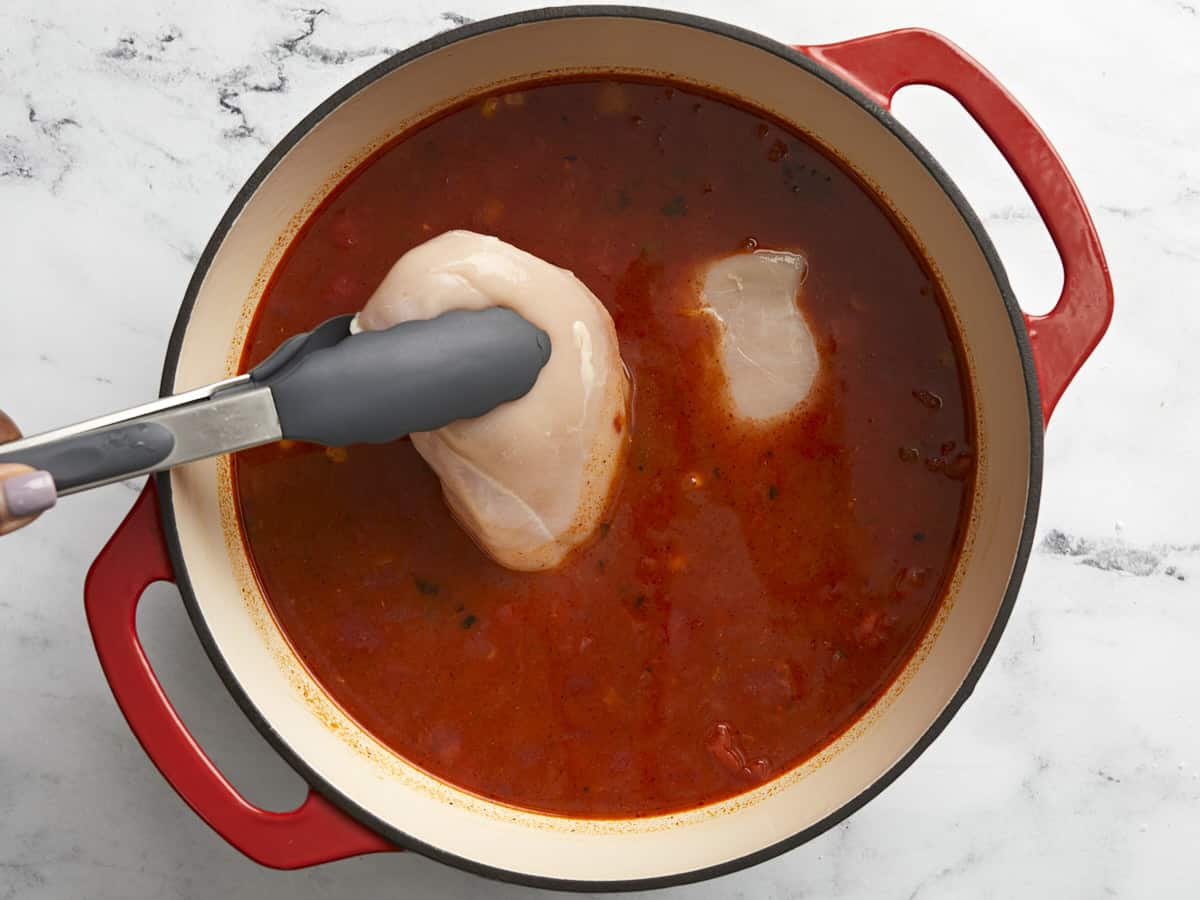
Now add two chicken breasts directly inside the pot on top of the rest of the ingredients. Place a lid on the pot and bring the soup up to a boil. Once boiling, reduce the heat to medium-low and allow the soup to simmer for 45 minutes. Make sure the soup is just at a steady simmer at this point, as this will help to create tender chicken breast meat.

Cooked chicken breasts being shredded on a clean cutting board.

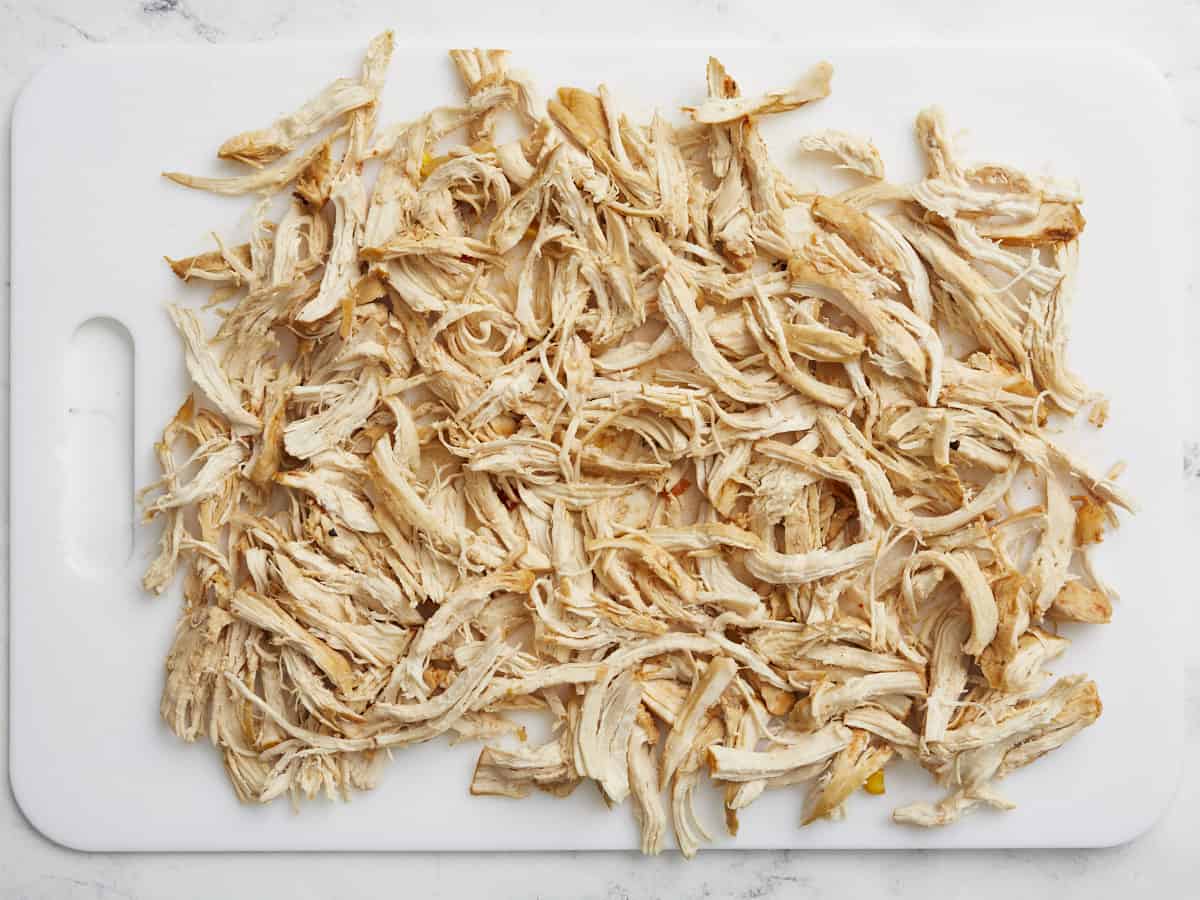
After the soup has simmered for 45 minutes, remove the chicken breasts and place them on a clean cutting board. Once cool enough to touch, shred the chicken breasts with a fork.

Overhead view of finished Chicken Enchilada Soup with a large silicone spoon inside the soup pot.

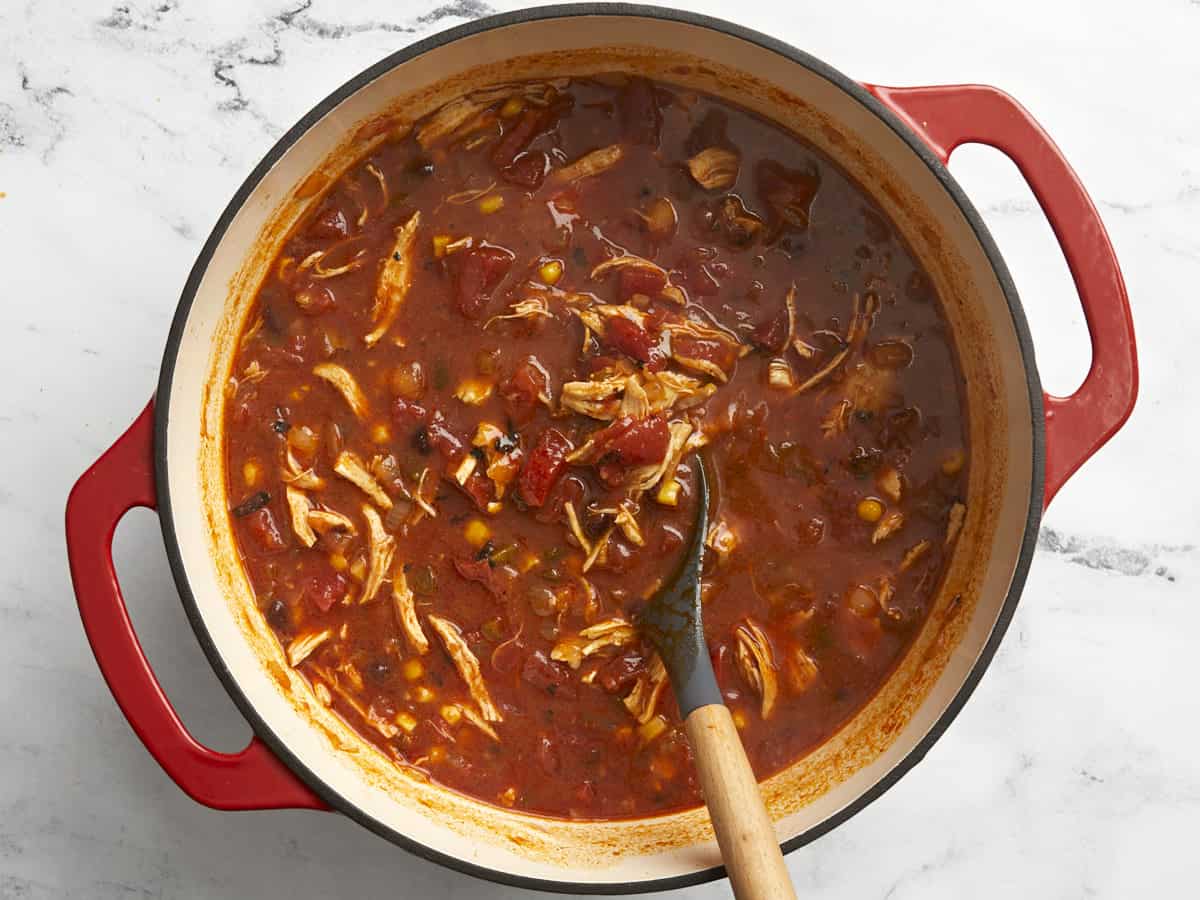
Add the shredded chicken meat back to the soup pot and stir until the chicken is evenly distributed throughout the soup.

Overhead view of chicken enchilada soup in a dutch oven with a ladle scooping some soup out.

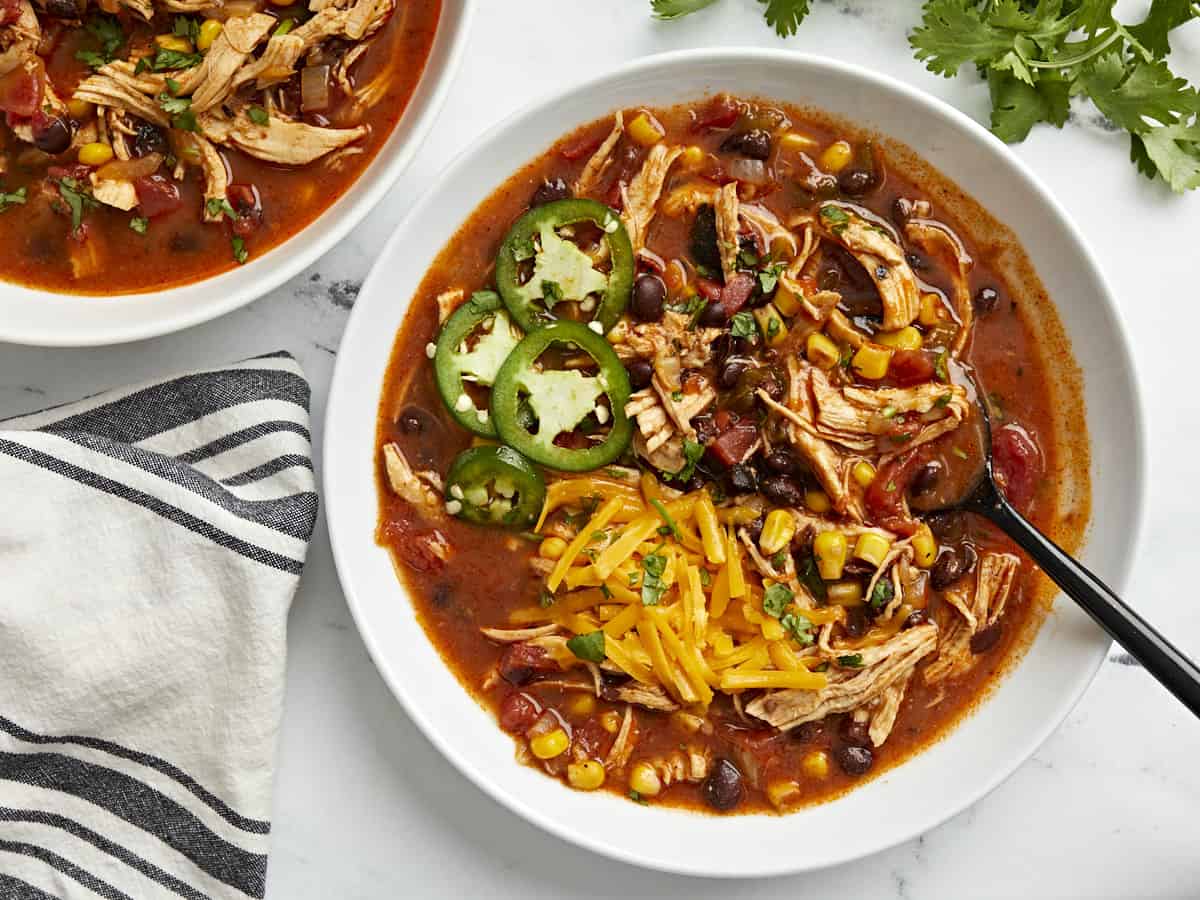
Serve this soup with your favorite toppings like shredded cheese, cilantro, sliced avocado, sour cream, or even some more sliced jalapeño and enjoy!

Overhead view of two bowls of chicken enchilada soup with jalapeno and shredded cheese on top.

The post Chicken Enchilada Soup appeared first on Budget Bytes.

Easy Jeera Rice (Instant Pot or Stovetop)

If (like us) you’re a fan of Indian cuisine and find yourself ordering it regularly, then you’ve probably enjoyed jeera rice: the perfectly spiced rice that sometimes accompanies your curry.
While developing a new recipe (coming soon!), we were cravin…

Easy Jeera Rice (Instant Pot or Stovetop)

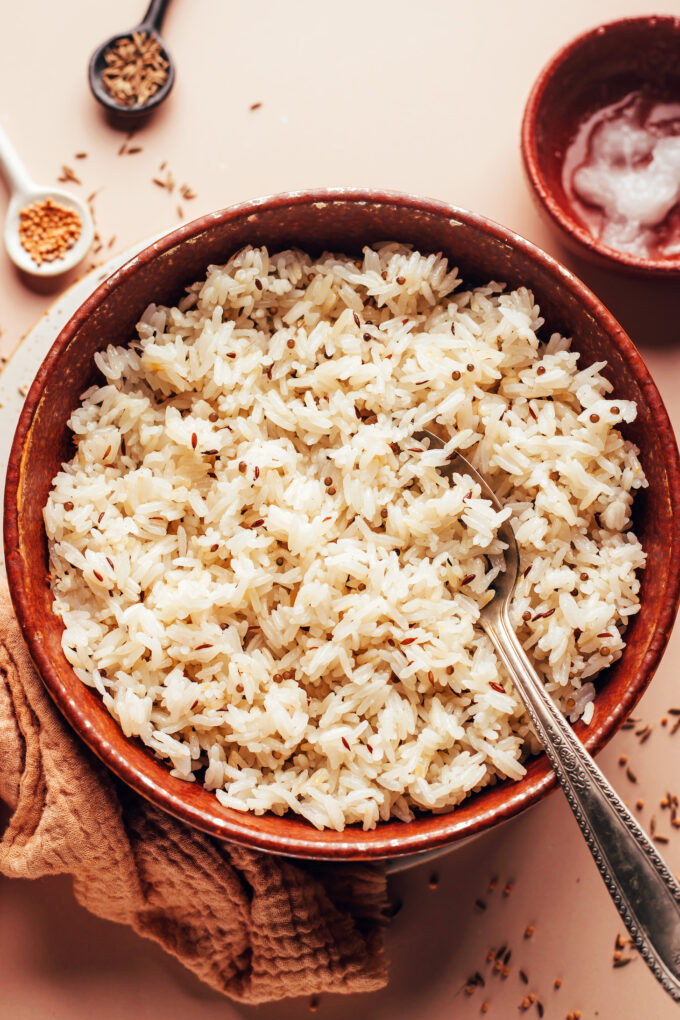
If (like us) you’re a fan of Indian cuisine and find yourself ordering it regularly, then you’ve probably enjoyed jeera rice: the perfectly spiced rice that sometimes accompanies your curry.

While developing a new recipe (coming soon!), we were craving that fluffy, restaurant-style rice and got to testing! The result is our EASY, inspired version of jeera rice made with just 4 ingredients. Let us show you how it’s done!

Easy Jeera Rice (Instant Pot or Stovetop) from Minimalist Baker →

Black Beans with Eggs

Eggs poached in seasoned black beans served over a bed of rice with fresh onion and cilantro makes a fast, filling, and budget-friendly meal!

The post Black Beans with Eggs appeared first on Budget Bytes.

What are two of my favorite budget-friendly ingredients? Beans and eggs! And they come together perfectly to create a really simple and filling meal that’s great for breakfast, brunch, or just any time of the day (eggs all day every day, please!). And you really can’t beat the cost of this dish. Even with a few fancier toppings, my price per serving came in just over a dollar. 🙌

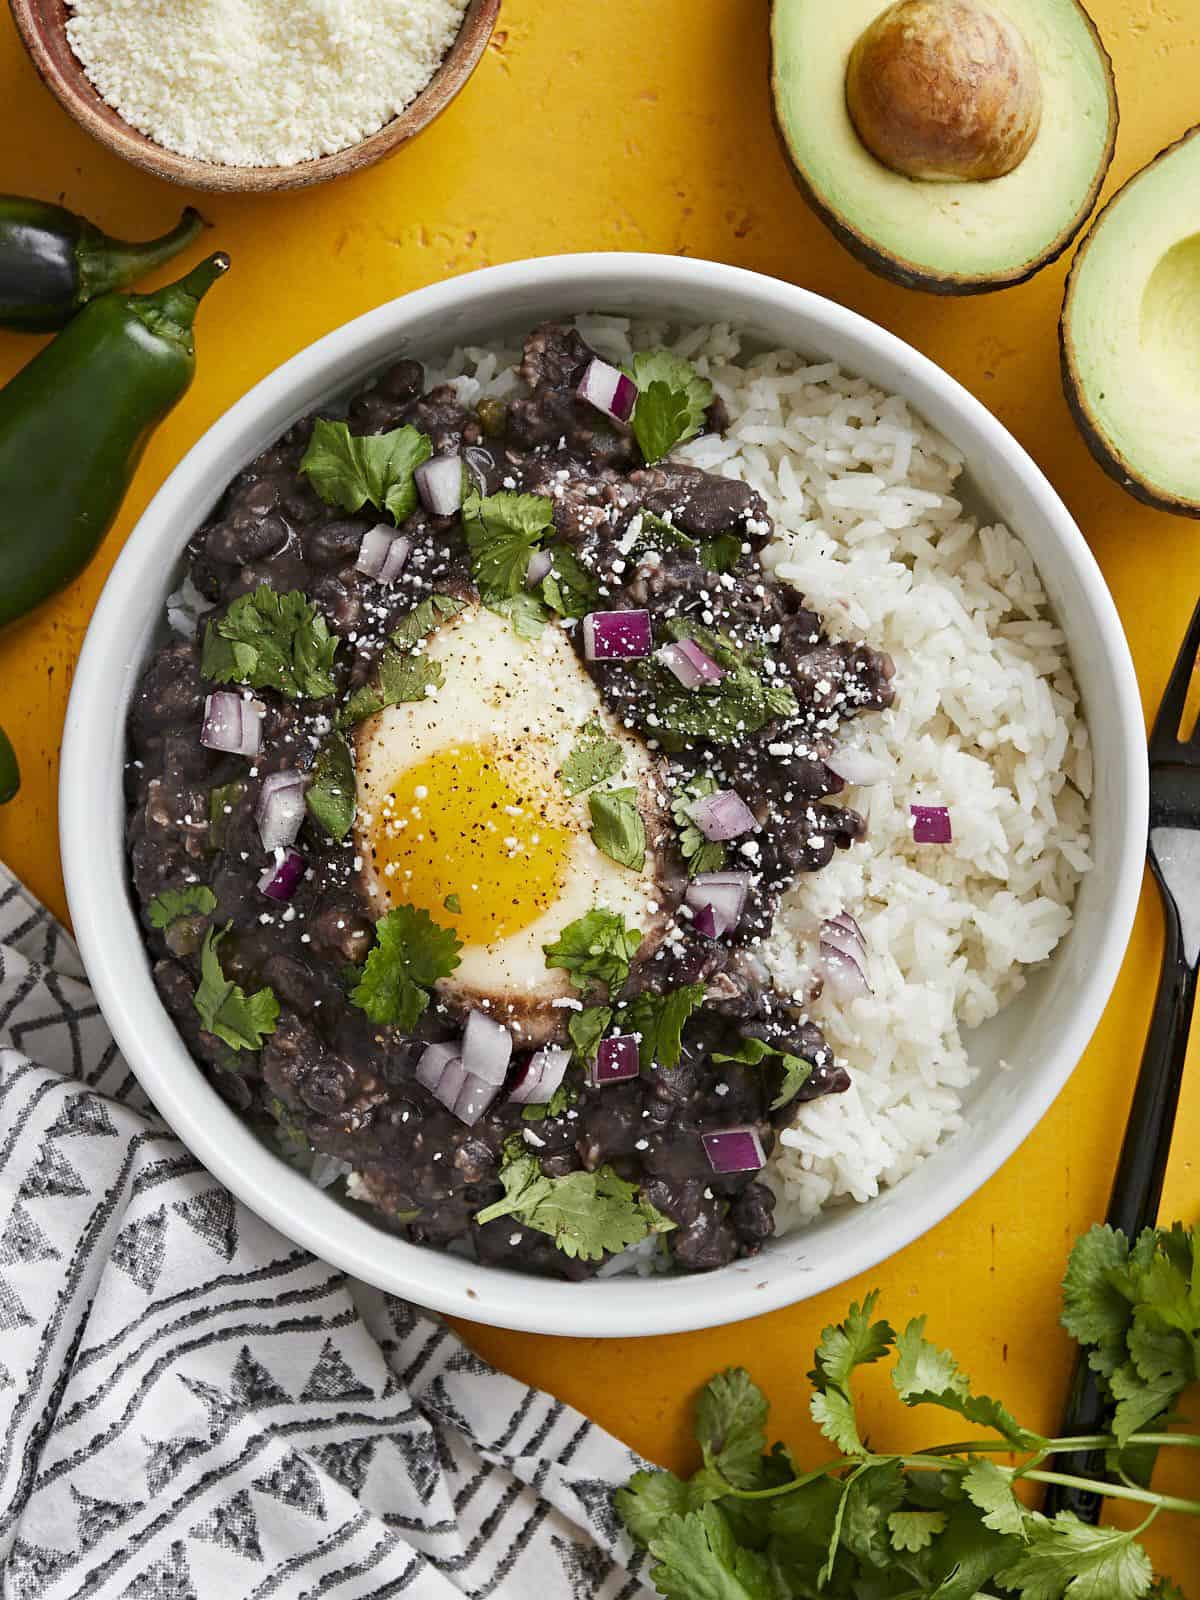
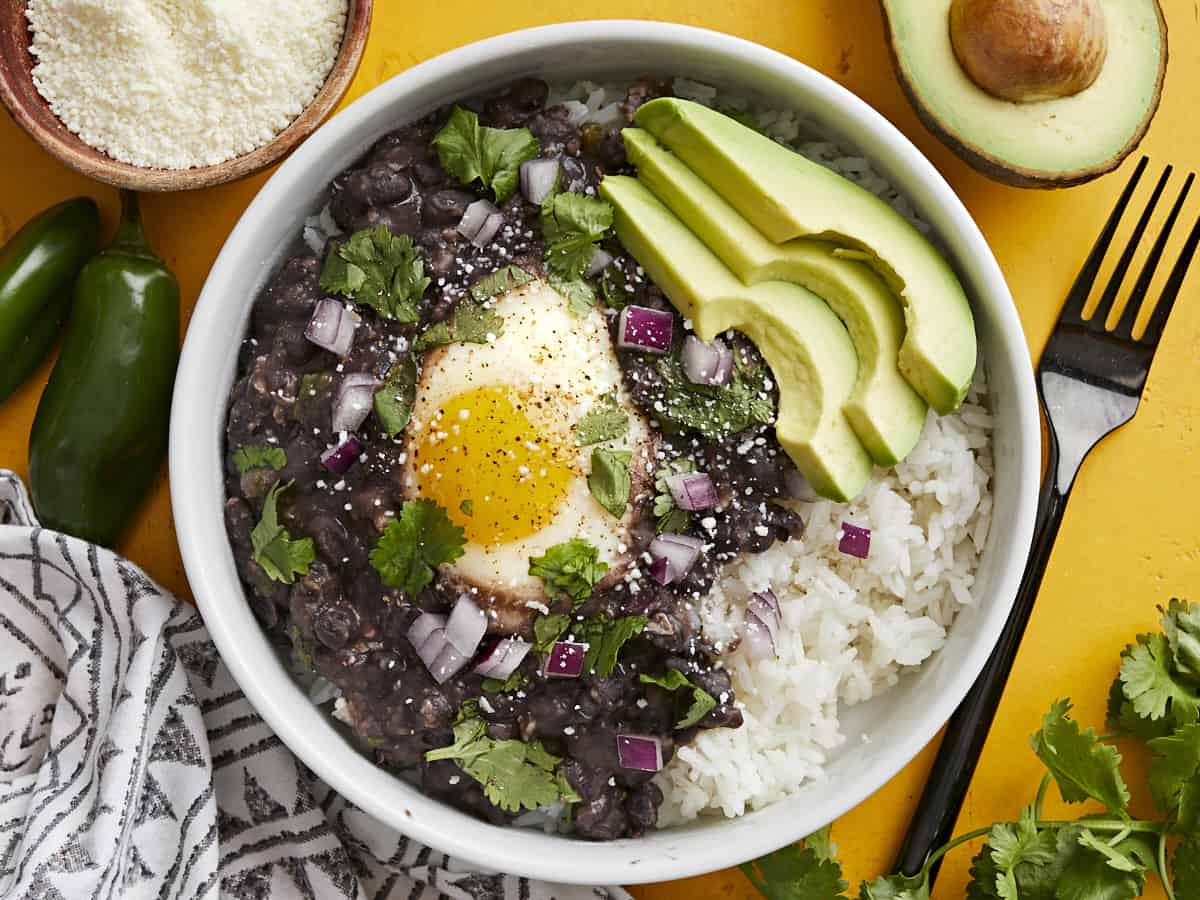
Overhead view of a bowl full of rice, black beans and eggs garnished with onion and cilantro.

I love turning an inexpensive can of beans into a delicious meal, so the other day I was thinking, “Hey, I wonder if you could cook eggs in some saucy beans like you do shakshuka?” So I tried it out and it worked! This recipe is super simple, satisfying, and you can make it as simple or as extravagant as you’d like, depending on how you top it.

Ingredients for Black Beans with Eggs

Here’s all you’ll need to make this super budget-friendly meal:

  • Garlic and Jalapeño: Sautéed fresh garlic and jalapeño create a super flavorful base for the beans, adding depth and a little spicy kick. If you don’t like spicy, you can skip the jalapeño. And you can totally “measure with your heart” for the garlic. ;)
  • Black Beans: Beans provide the bulk for this recipe, making it super filling while staying super cheap, AND adding tons of fiber and nutrients. Win! While you could potentially use any bean for this recipe, black beans definitely fit this flavor profile the best and have the best visual appeal.
  • Eggs: I used four large eggs, but you could certainly add more if you prefer. I chose to cook the eggs so the yolks were still a bit runny, but you can cook them longer if you prefer a solid yolk. Or, you could even scramble them separately and simply top your bowl of beans and rice after the fact!
  • Toppings: The toppings are totally customizable and can make this recipe super fancy or very simple. We used a combination of onion, cilantro, avocado, and Cotija cheese. See our list of other topping ideas below for more inspo!
  • Rice: I served the black beans and eggs over a bed of cooked rice, but you could also scoop them into a tortilla and enjoy them like an enchilada or burrito.

How to Store Leftovers

If you plan to eat your black beans and eggs over the course of a few days, do not pre-poach the eggs in the beans. Simply cook the seasoned beans and store the beans, rice, and toppings separately. Then cook a fresh egg each day to top the beans and rice. You can cook the egg using any method: scrambled, fried, soft-boiled, or hard-boiled.

Topping Ideas

This recipe is just asking for all sorts of fun toppings. You can really dress it up with tons of flavor and color, or keep it super simple and budget-friendly by drizzling some store-bought salsa over top. Here are some ideas for toppings other than what we used below:

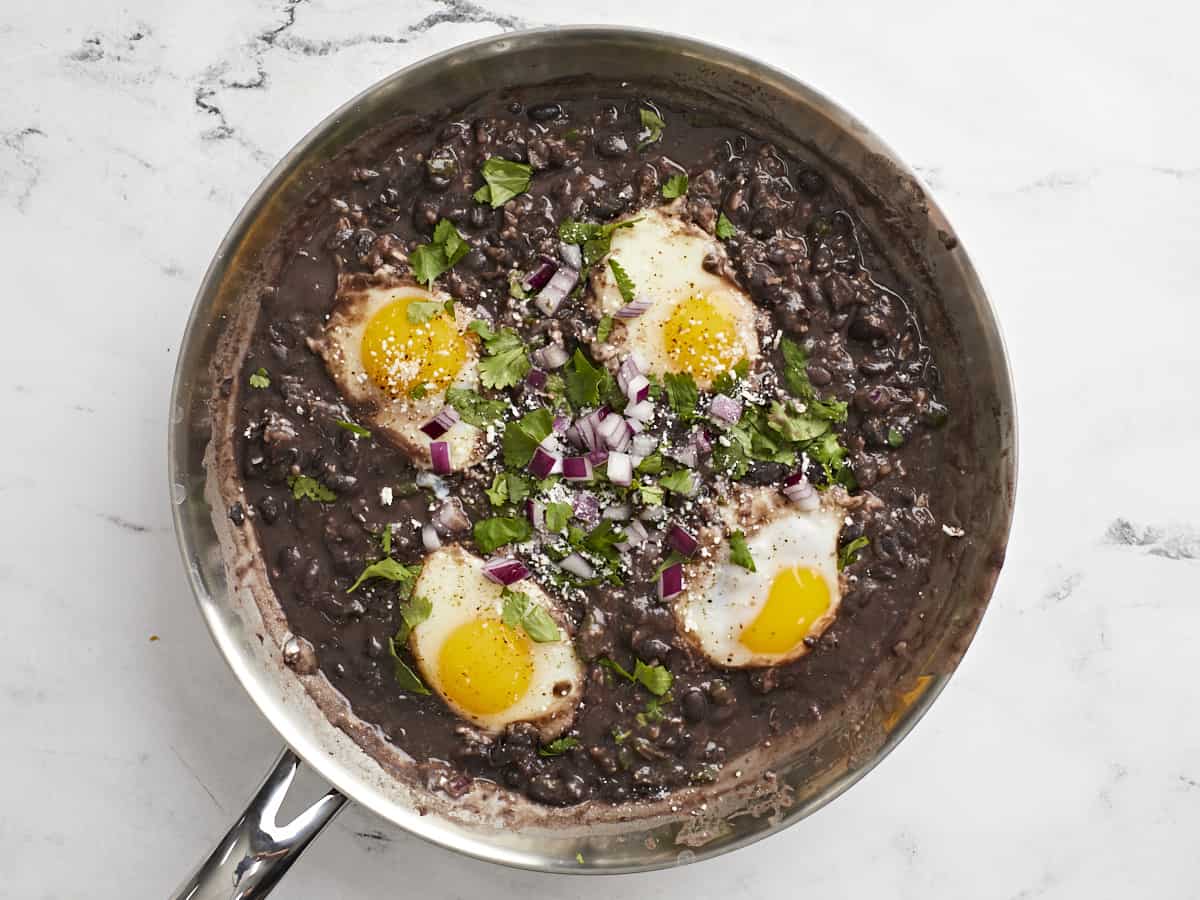
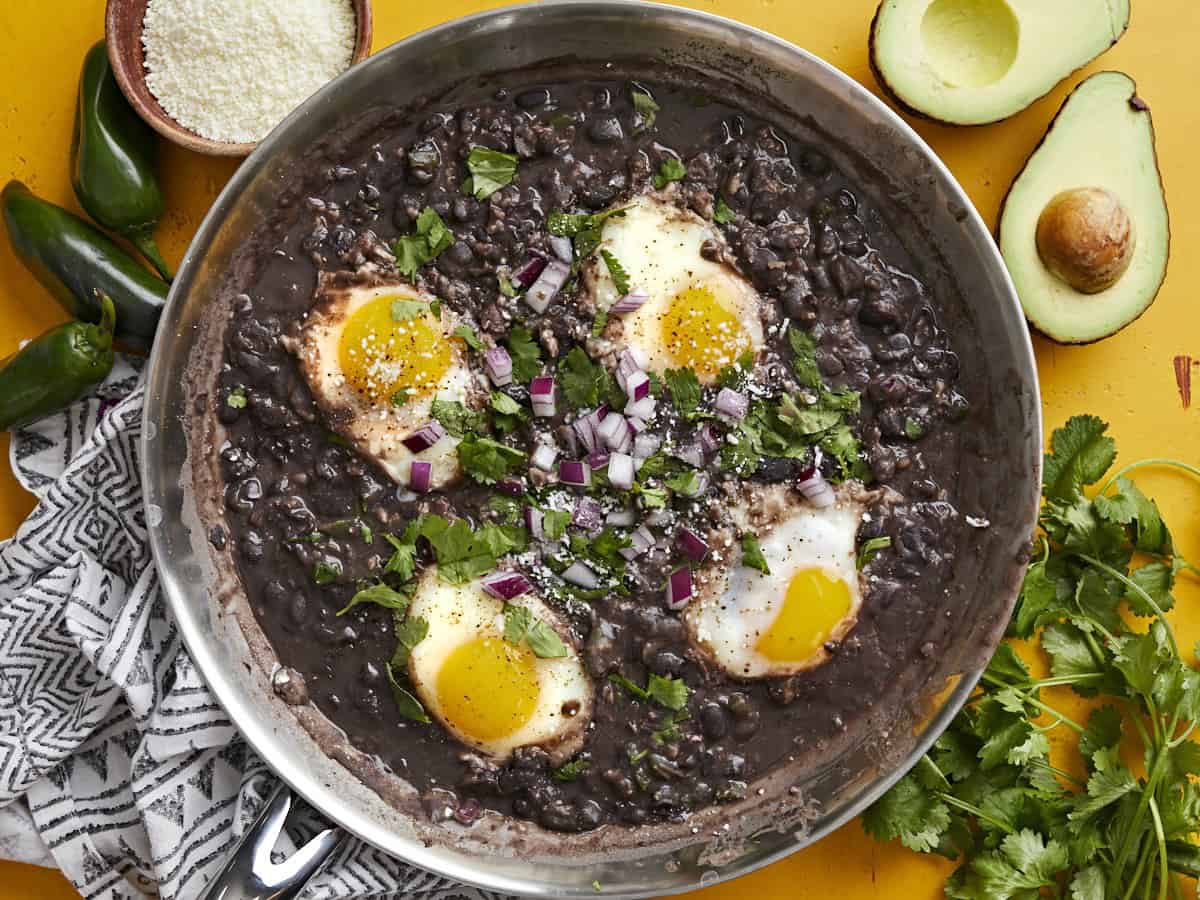
Overhead view of eggs poached in a skillet full of black beans garnished with cilantro and red onion.
Overhead view of a bowl of black beans with eggs over rice with sliced avocado on the side.
Print

Black Beans with Eggs

Eggs poached in seasoned black beans served over a bed of rice with fresh onion and cilantro make a fast, filling, and budget-friendly meal!
Course Breakfast, Brunch, Dinner, Lunch
Cuisine Mexican, Southwest
Total Cost $4.72 recipe / $1.18 serving
Prep Time 5 minutes
Cook Time 15 minutes
Total Time 20 minutes
Servings 4
Calories 529kcal

Ingredients

  • 2 cloves garlic $0.16
  • 1 jalapeño $0.25
  • 1 Tbsp olive oil $0.12
  • 2 15oz. cans black beans $1.58
  • 1 tsp cumin $0.10
  • 1/4 cup water $0.00
  • 4 large eggs $0.42

For Serving (optional)

  • 3 cups cooked rice $0.32
  • 1/4 red onion, diced $0.12
  • 1/4 cup chopped cilantro $0.20
  • 1 avocado, sliced $0.99
  • 1 oz. cotija, crumbled $0.46

Instructions

  • Mince the garlic and dice the jalapeño (seeds removed). Add the garlic and jalapeño to a large skillet with the olive oil and sauté over medium heat for about one minute, or just until the garlic softens a bit and becomes fragrant.
  • Add the canned beans (without draining) to the skillet along with the water and cumin. Stir to combine, then allow the beans to come up to a simmer.
  • Let the beans simmer, stirring often, for about five minutes. After the beans have softened slightly from simmering, use the back of a large spoon to smash some of the beans to thicken.
  • Turn the heat down to medium-low. Crack the eggs onto the beans. Partially cover the skillet with a lid and allow the eggs to simmer in the beans for 7-10 minutes, or until the eggs are cooked to your liking.
  • Top the skillet with your favorite ingredients (we used onion, cilantro, avocado, and cotija), and serve over a bed of warm rice. Enjoy!

See how we calculate recipe costs here.

Nutrition

Serving: 1serving | Calories: 529kcal | Carbohydrates: 70g | Protein: 23g | Fat: 18g | Sodium: 160mg | Fiber: 15g

How to Make Black Beans with Eggs – Step by Step Photos

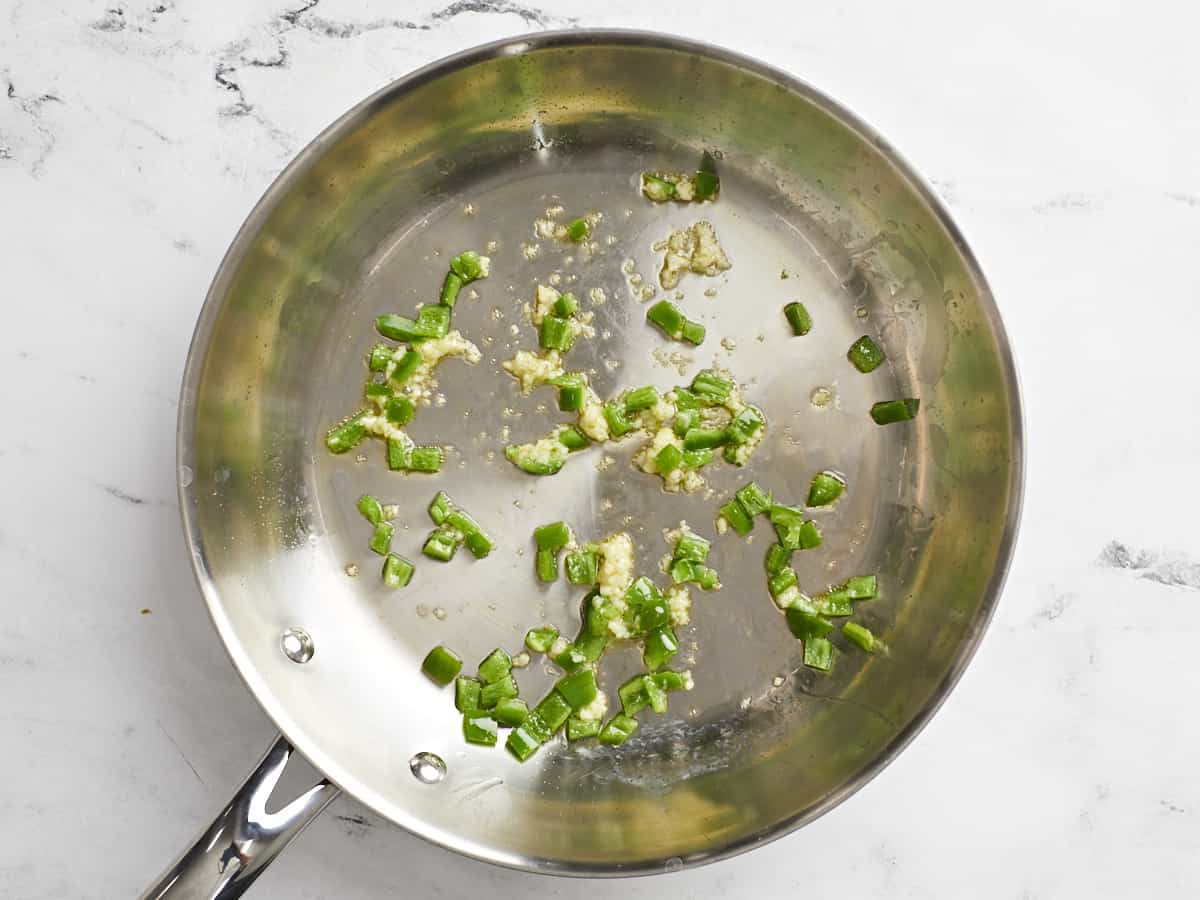
Sautéed garlic and jalapeño in a skillet.

Mince two cloves of garlic (or more, if you’d like!) and one jalapeño (seeds removed). Add the garlic and jalapeño to a large skillet with 1 Tbsp olive oil and sauté over medium heat for 1-2 minutes, or just until the garlic softens a bit and becomes very fragrant. Don’t let the garlic brown.

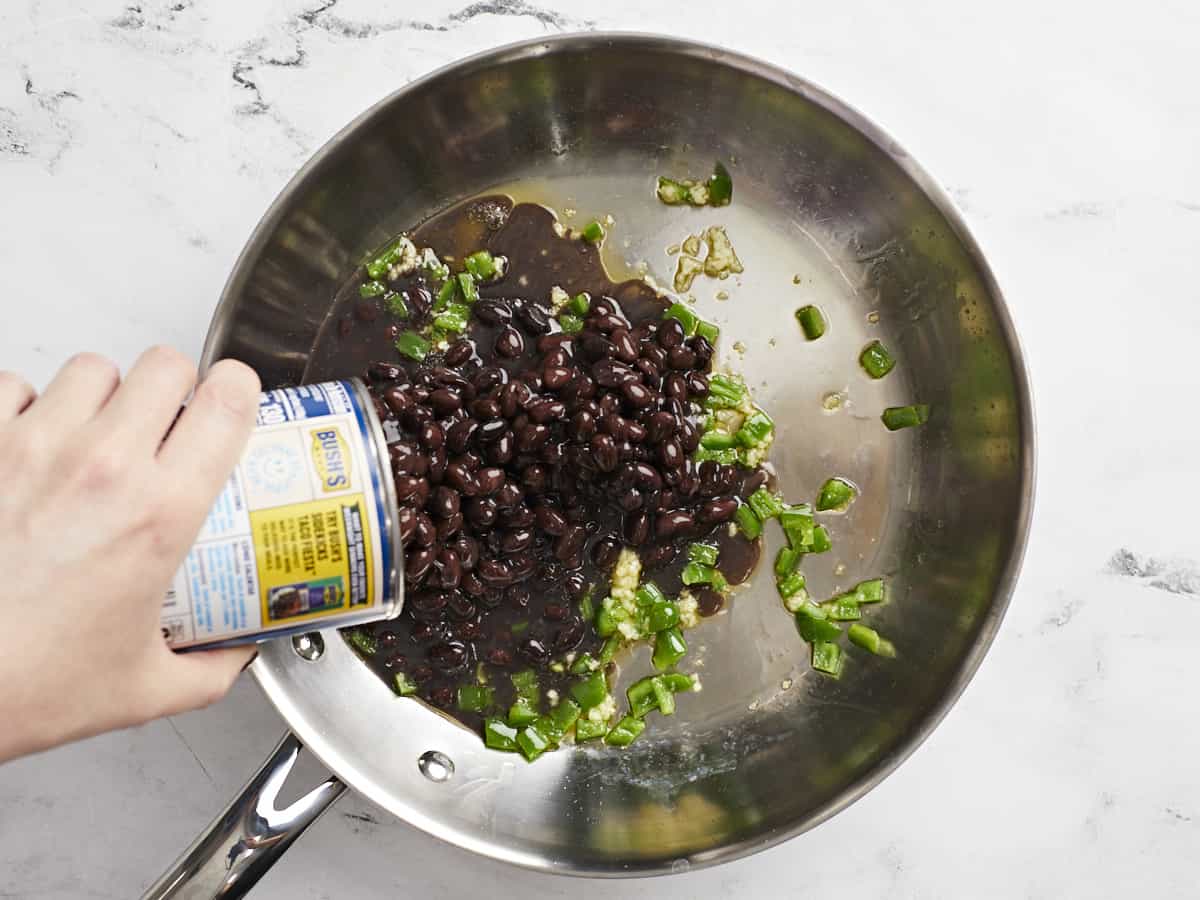
Black beans being poured into the skillet.

Add two undrained cans of black beans to the skillet along with ¼ cup water and 1 tsp cumin.

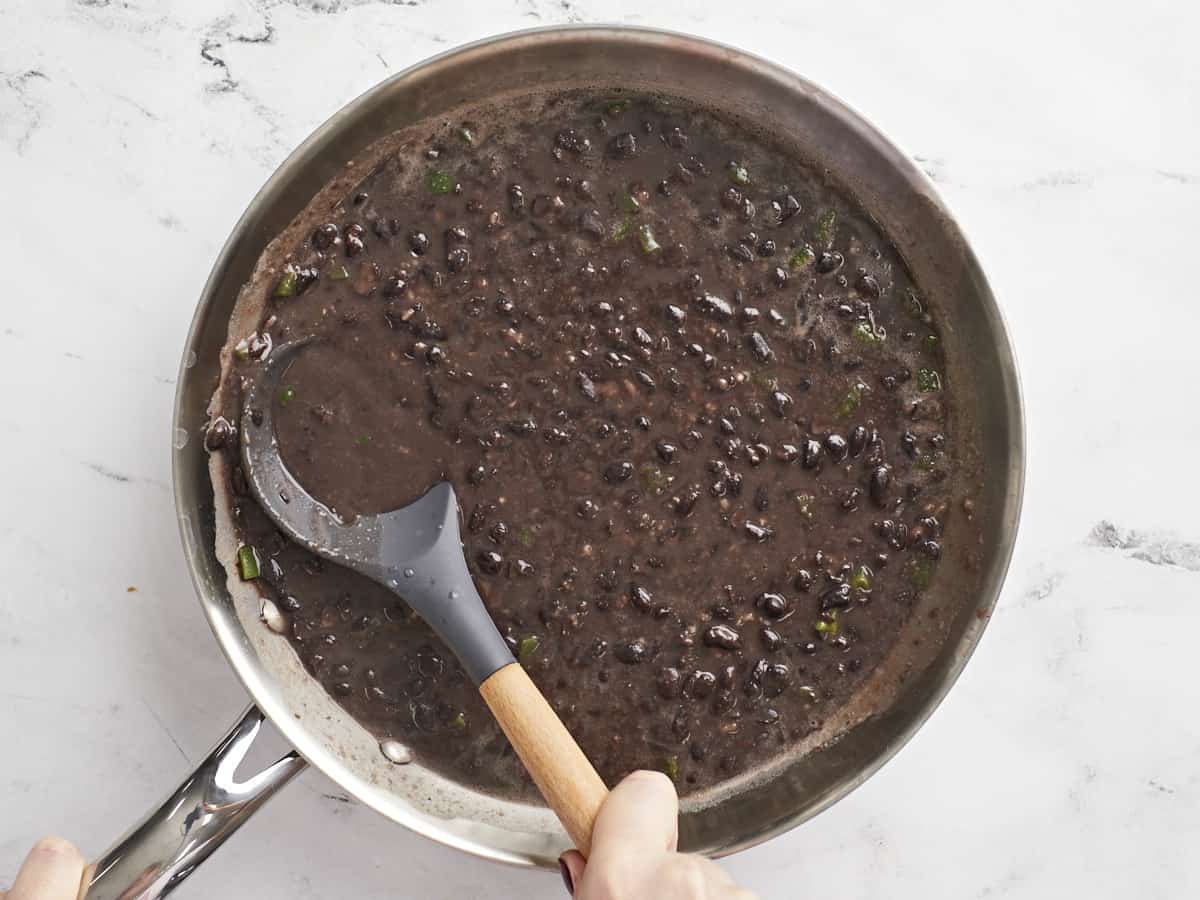
Simmered black beans in the skillet being smashed with the back of a spoon.

Stir everything to combine, then let the beans simmer over medium for about 5 minutes, stirring often to prevent the beans from sticking to the bottom of the skillet. After simmering for five minutes, use the back of a large spoon to smash some of the beans and thicken the sauce.

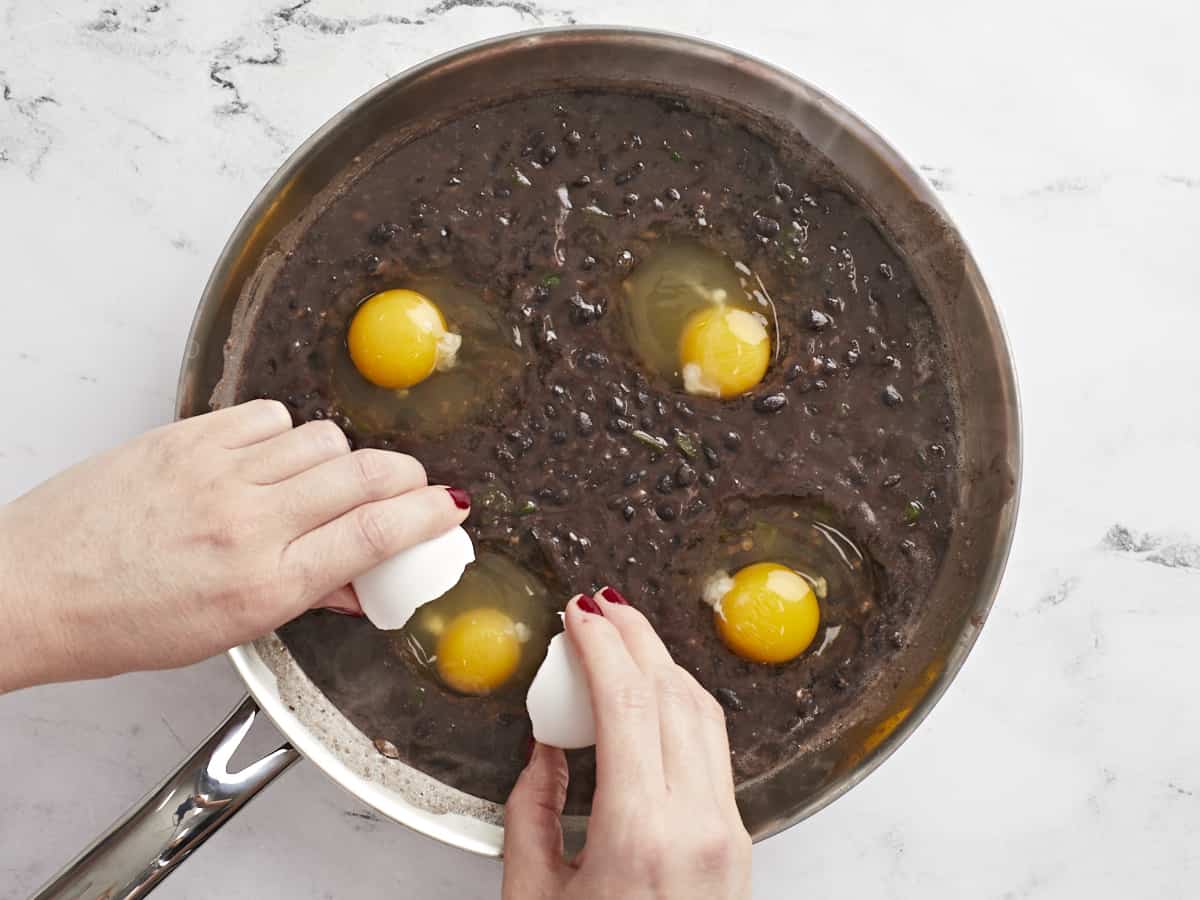
Eggs being cracked into the skillet of black beans.
Turn the heat down to medium-low and crack four large eggs onto the surface of the black beans.

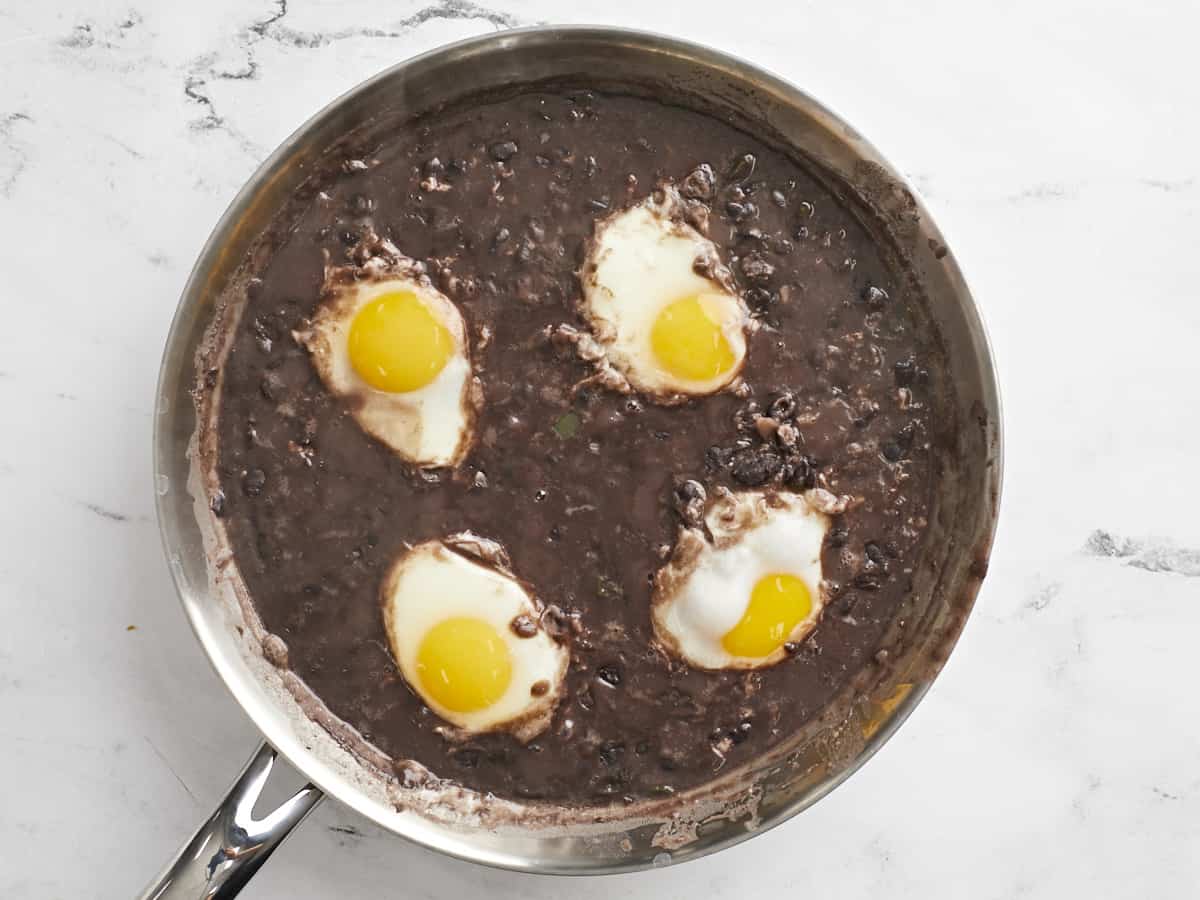
Cooked eggs in the black beans.

Partially cover the skillet with a lid and allow the eggs to simmer in the beans for 7-10 minutes, or until they are cooked to your liking (less time for runny yolks, more time for solid yolks). Cook time can vary depending on how hot the beans are and how cold the eggs are, so watch them closely.

Eggs and beans topped with cilantro and onion.

Top the eggs and black beans with chopped cilantro, diced red onion, and crumbled cotija cheese, or the toppings of your choice.

Overhead view of a bowl of black beans with eggs over rice with sliced avocado on the side.

Serve over cooked rice and enjoy!

The post Black Beans with Eggs appeared first on Budget Bytes.