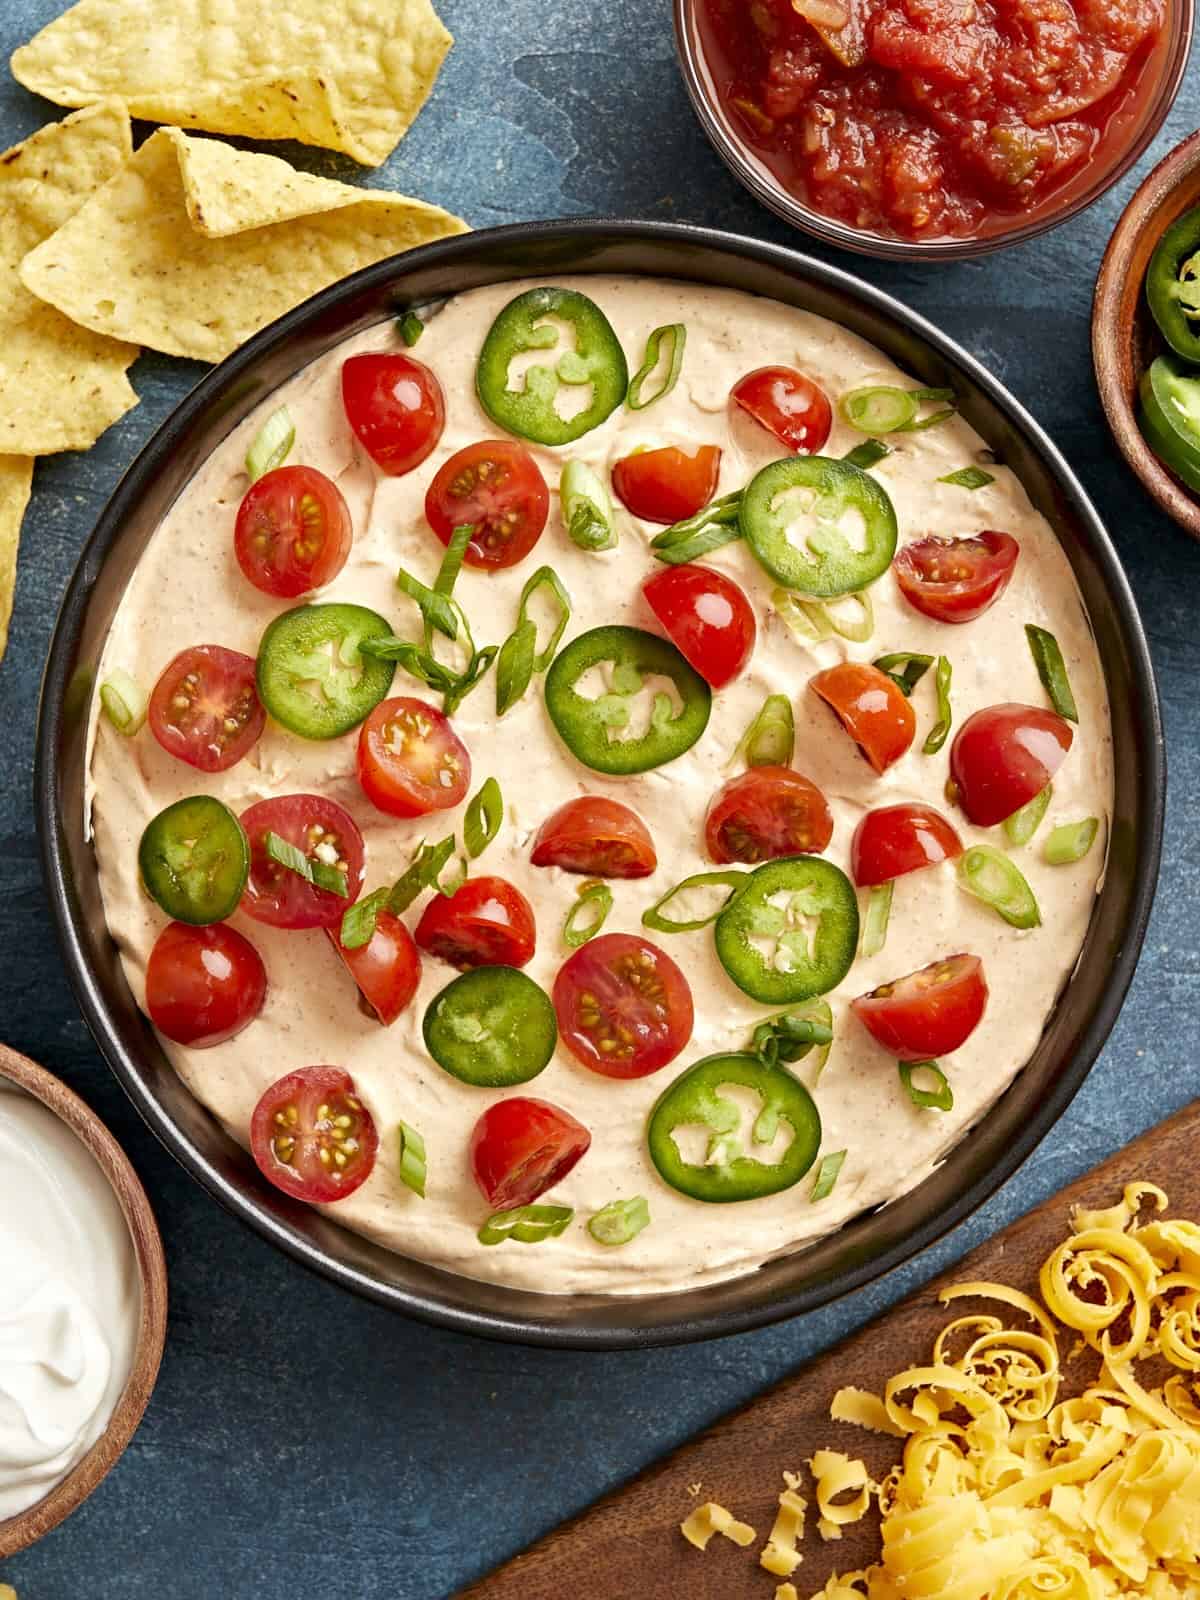
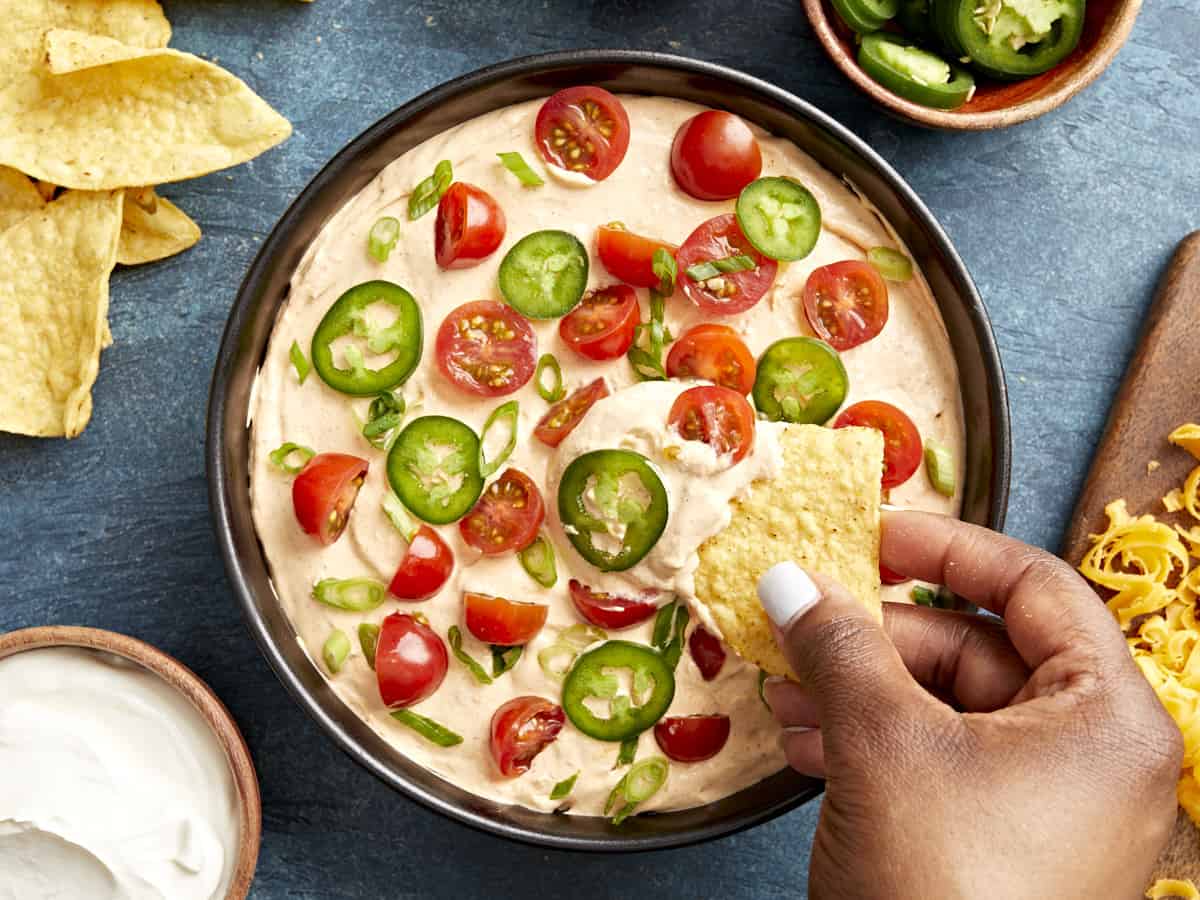
I’m that person who always chooses queso or spinach dip when I go out to my favorite restaurants. Dips are my absolute favorite appetizer and they’re perfect for sharing at parties and family gatherings. This 4-ingredient Taco Dip is creamy, super easy to make, and has the perfect amount of spice. Toppings are optional but I loved adding some tomatoes, jalapeños and sliced green onions on top of mine. And you don’t have to wait until the next big event to make this taco dip recipe…treat yourself this weekend to some chips & dip, you deserve it!😉
What’s In Taco Dip?
When I say this dip recipe is super easy, I really mean it. It’s one of those recipes you can memorize after making it one time and it’s easy to keep all the ingredients on hand for whenever you want to whip up a quick batch. For this taco dip we simply used cream cheese, sour cream, taco seasoning, and a little bit of salsa. That’s it! You can customize it by adding your favorite toppings or keep it simple and enjoy with lots of tortilla chips!
Can I Add Meat?
Oftentimes you may see taco dip made similar to our 7 layer dip recipe with ground beef added and layered with lots of veggies. I opted for a simpler version that can be made quickly with fewer ingredients, but still packs in lots of those Mexican-inspired flavors that I love. With that being said, you can definitely add some seasoned taco meat if you want to make this dip more filling. I suggest adding ½ lb. of seasoned ground beef on top of the cream cheese layer, then finish with your favorite toppings.
Topping Ideas
I love adding my favorite nacho-style toppings to this creamy dip. You can keep things simple like we did with a few tomatoes, sliced jalapeños, and sliced green onions or have fun adding any of these toppings listed below:
You can easily make this taco dip ahead of time and just wait to add on any extra toppings. Follow the recipe listed below then cover the dip tightly with plastic wrap or in an airtight container and place it in the refrigerator until you’re ready to serve. Store any leftovers covered tightly in the refrigerator for up to 3 days.
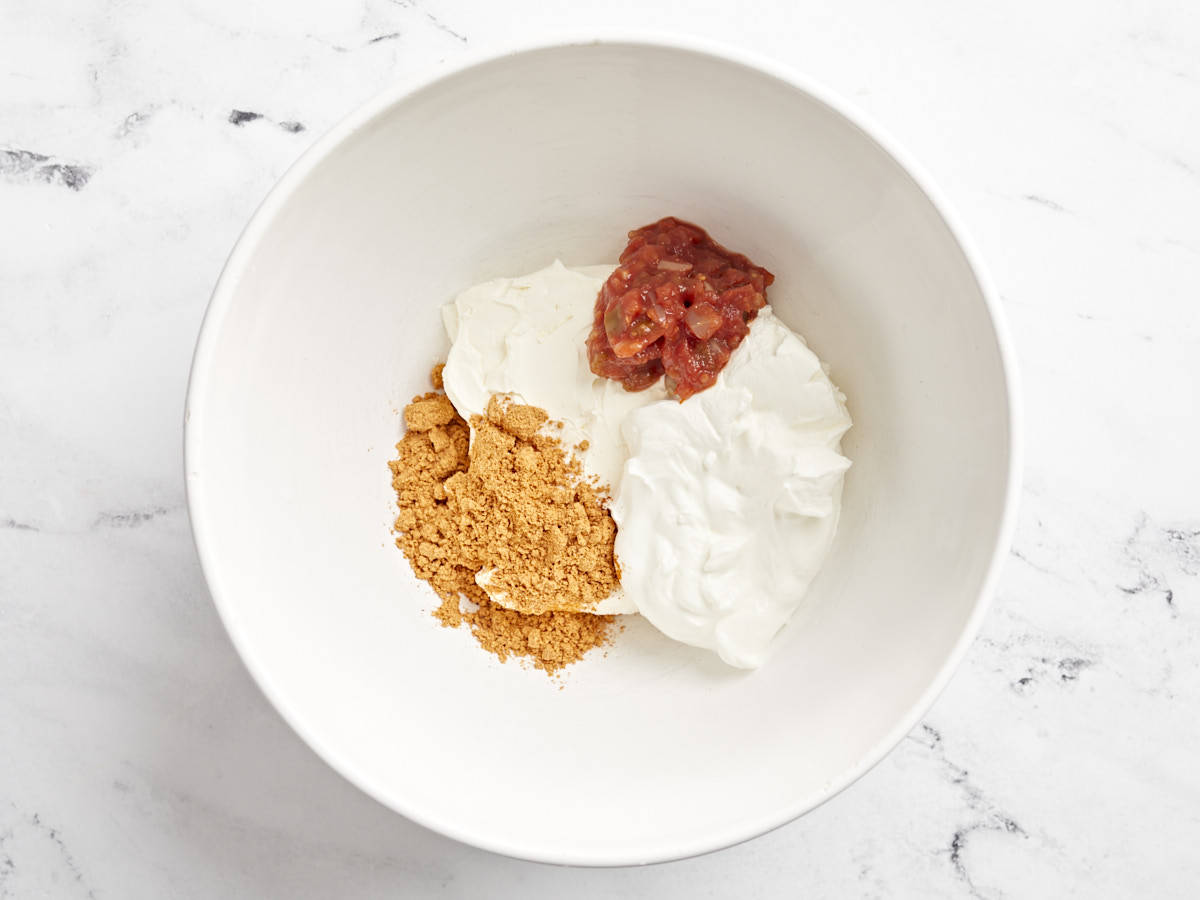
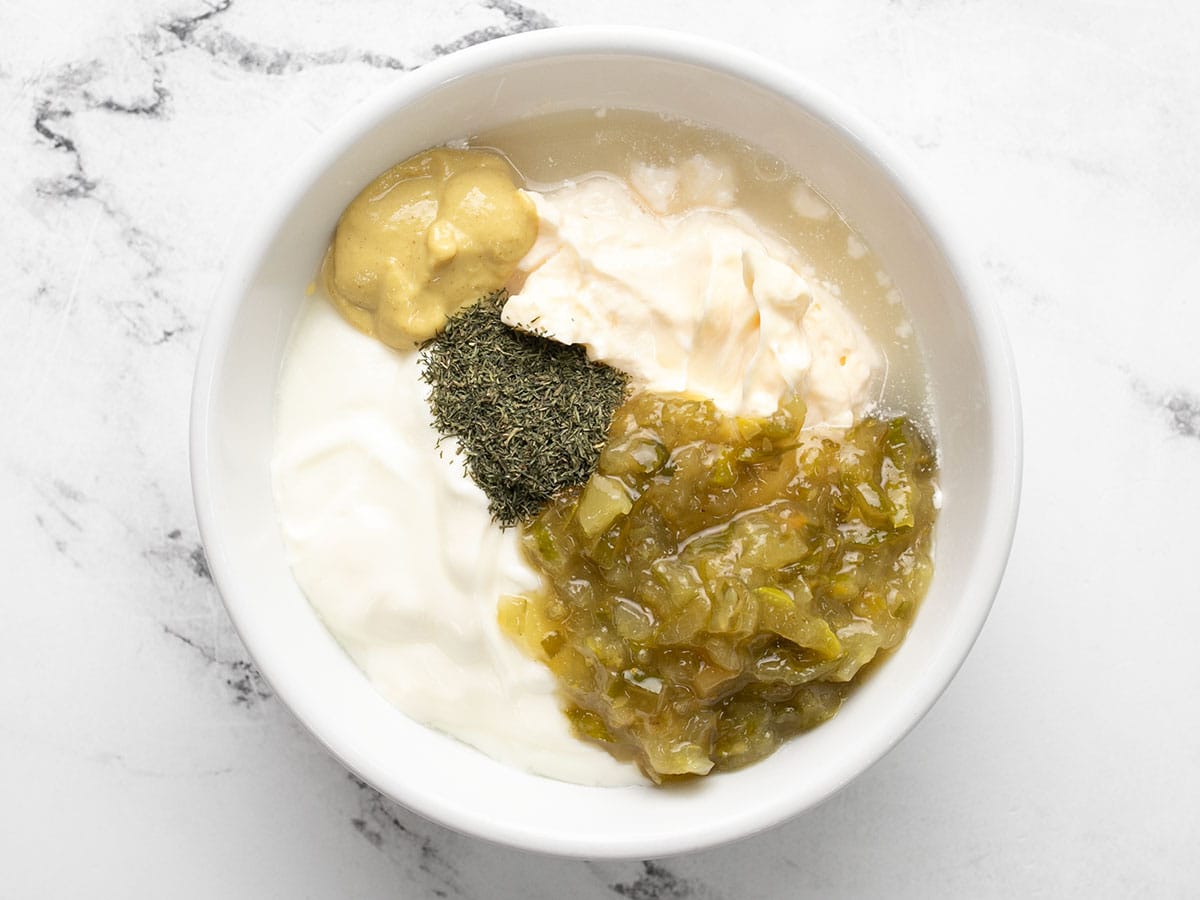
In a large bowl combine the softened cream cheese, sour cream, taco seasoning, and salsa.
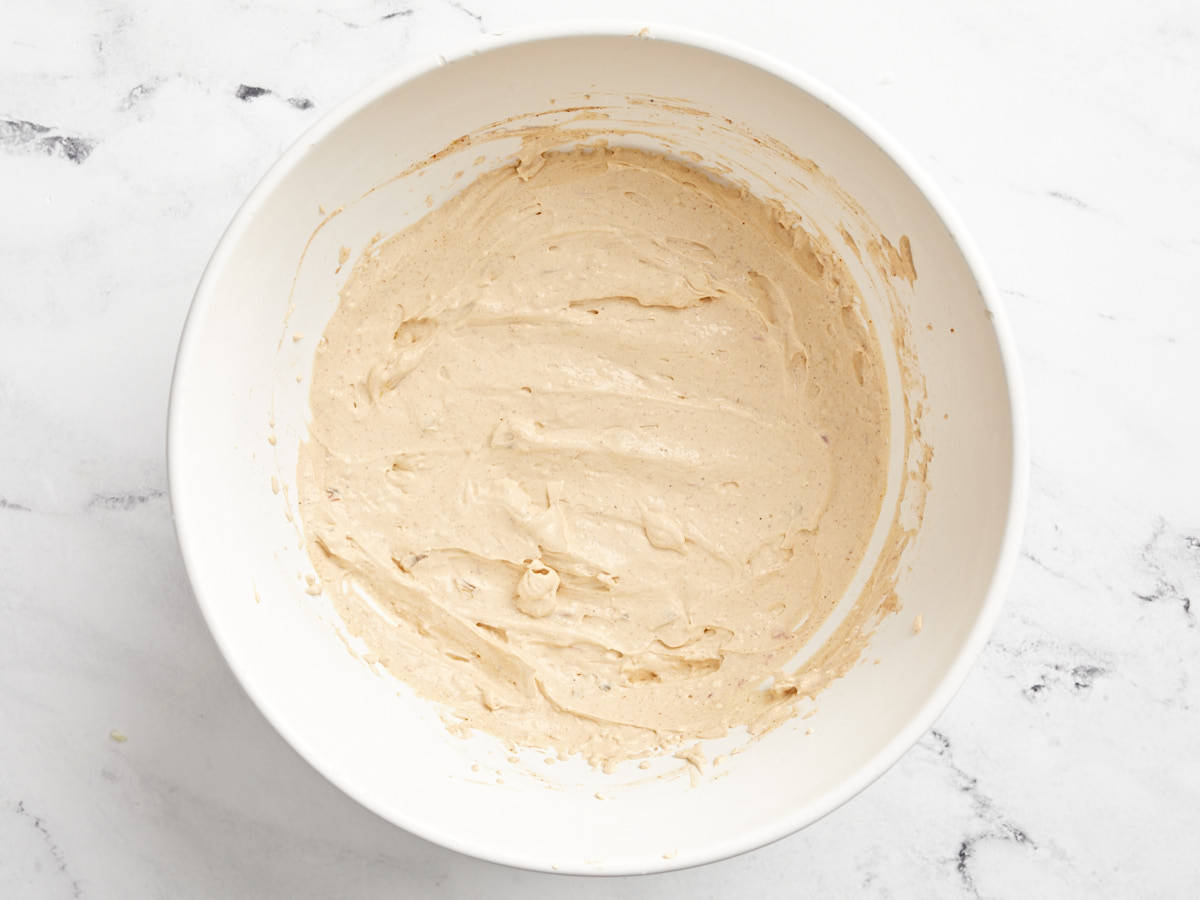
Using a hand mixer blend all the ingredients together until completely smooth and the cream cheese is fully incorporated.
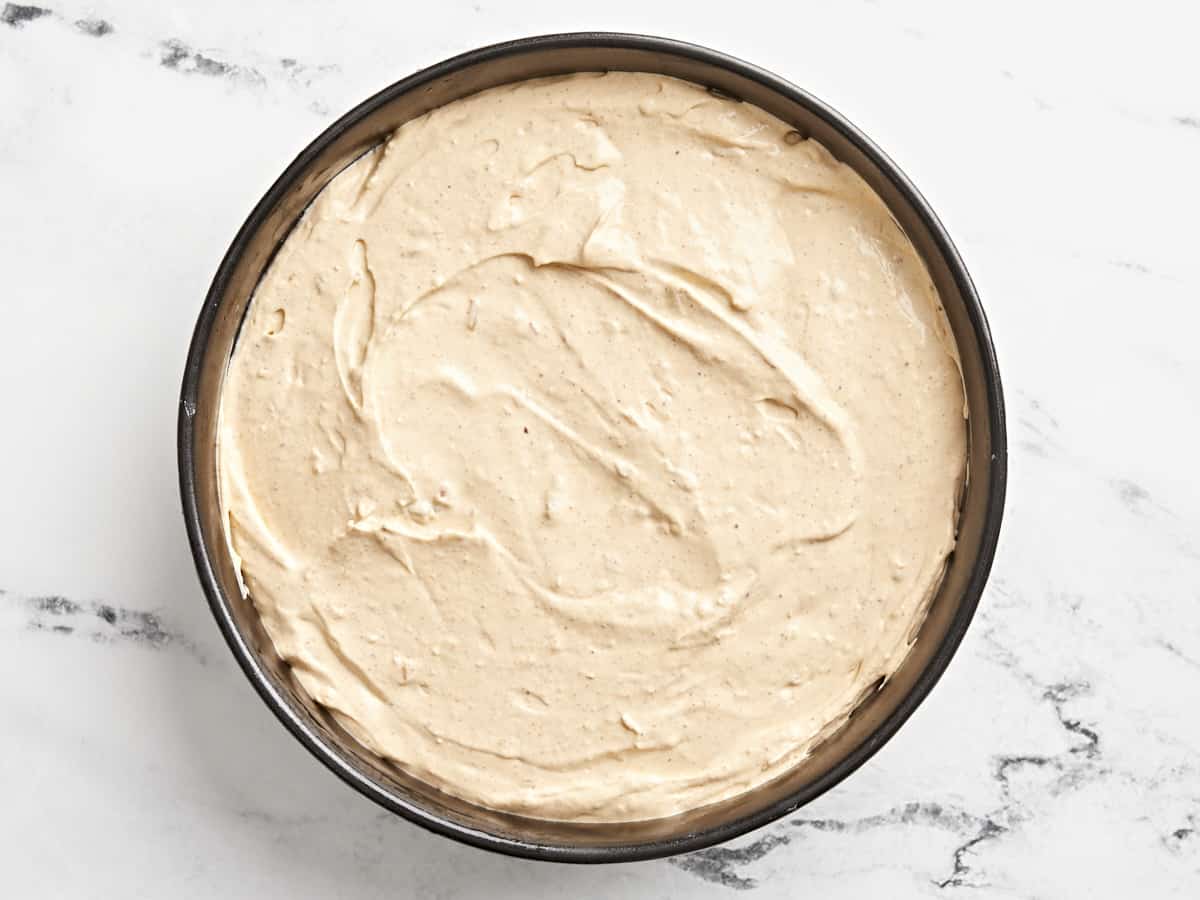
Add the taco dip to a serving dish and top with your favorite toppings. I topped mine with some grape tomatoes, sliced jalapeño, and sliced green onions. Enjoy!
*Make sure your cream cheese is softened so the ingredients can blend easily and smoothly.**You can use our homemade taco seasoning recipe or a store-bought taco seasoning packet. The store-bought packets are about 3 Tbsp of seasoning mix. You can use the entire packet for a more intense flavor or measure out 2 Tbsps and save the rest for later. I tested this recipe with 2 Tbsp of seasoning mix vs. the entire seasoning packet, and 2 Tbsp was definitely the way to go!
In a large bowl combine 8 oz. softened cream cheese, 1 cup sour cream, 2 Tbsp taco seasoning, and 1/4 cup salsa. I like using chunky mild salsa.
Using a hand mixer blend all the ingredients together until completely smooth and the cream cheese is fully incorporated.
Transfer the taco dip to a serving dish or bowl and top with your favorite toppings. I topped mine with some grape tomatoes, sliced jalapeño, and sliced green onions.
Now just grab a bag or tortilla chips and enjoy by yourself or with your family and friends!
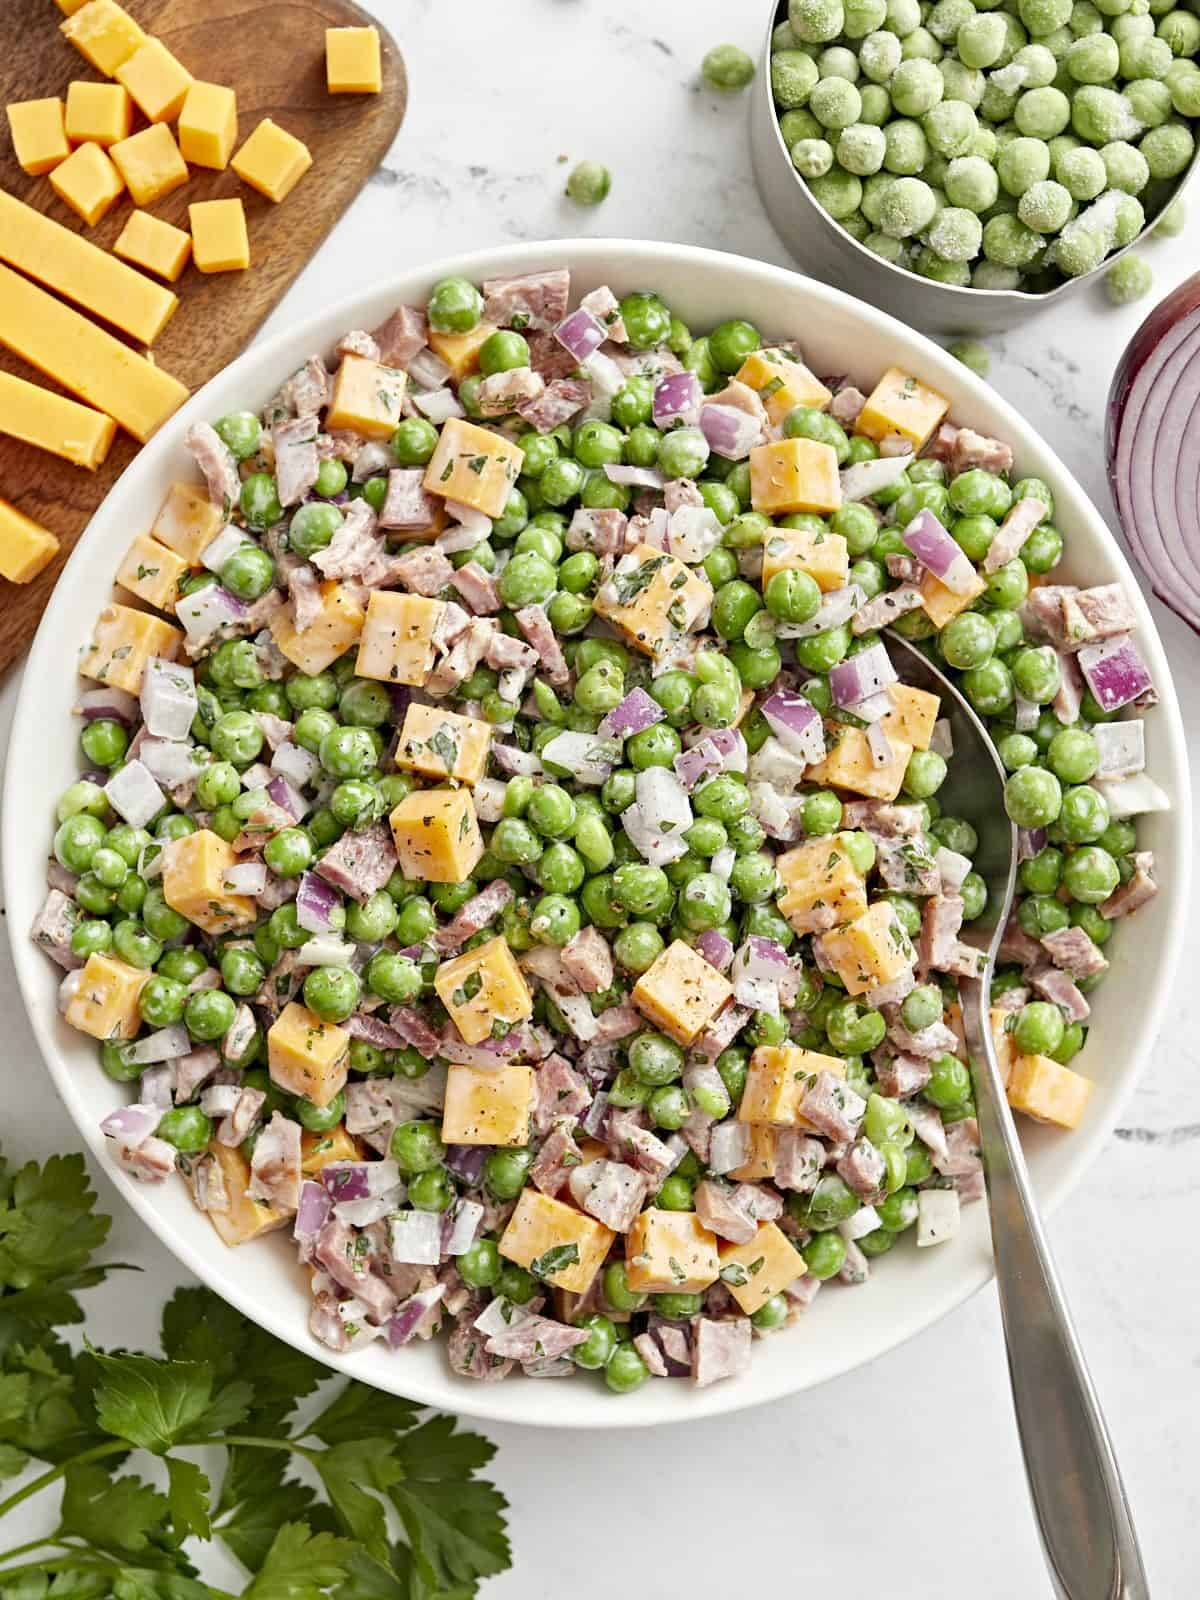
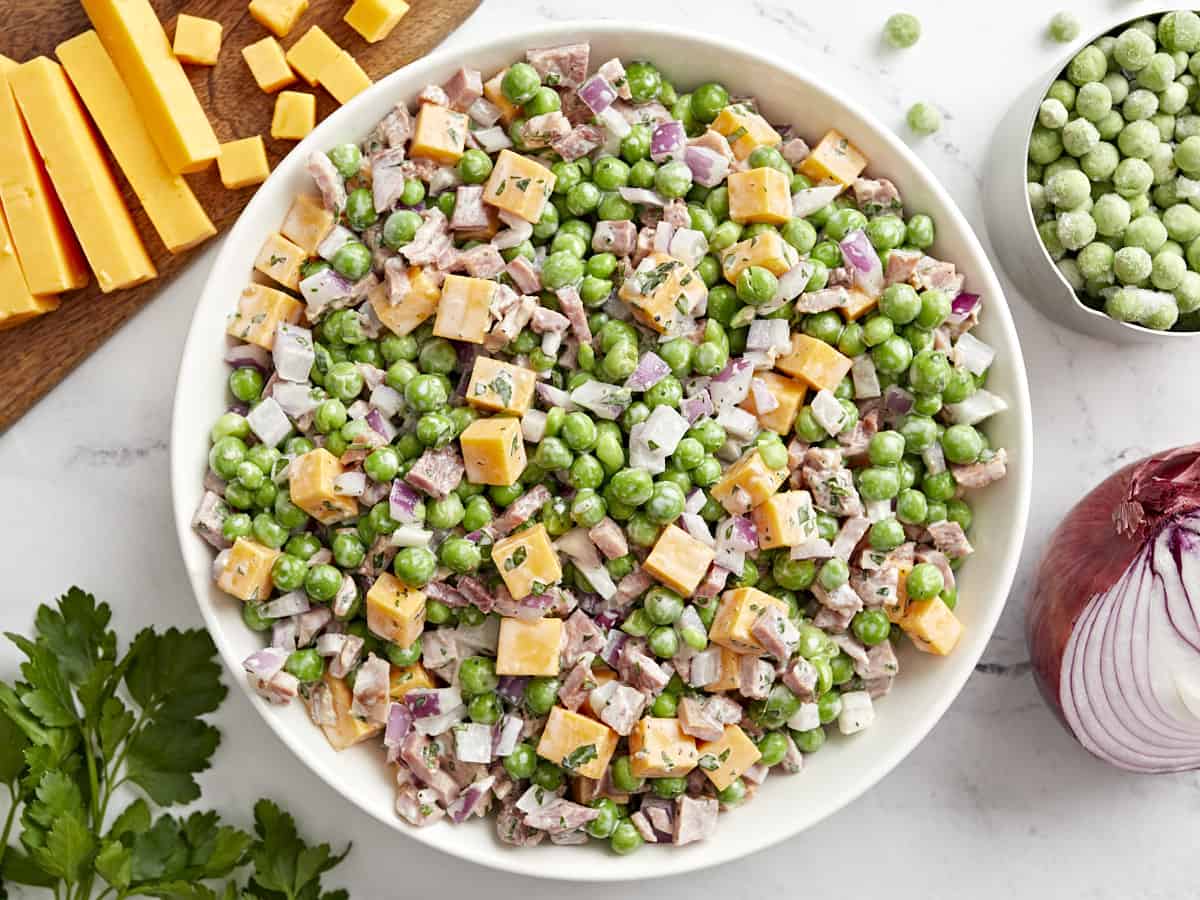
Super simple and inexpensive, this creamy pea salad is the perfect side dish for your next family get-together. We coat sweet peas, salty ham, and savory cheddar cheese in a creamy dressing, creating the perfect balance of sweet and savory flavors. It makes a huge batch and comes together in just minutes, no cooking required!
What is Pea Salad?
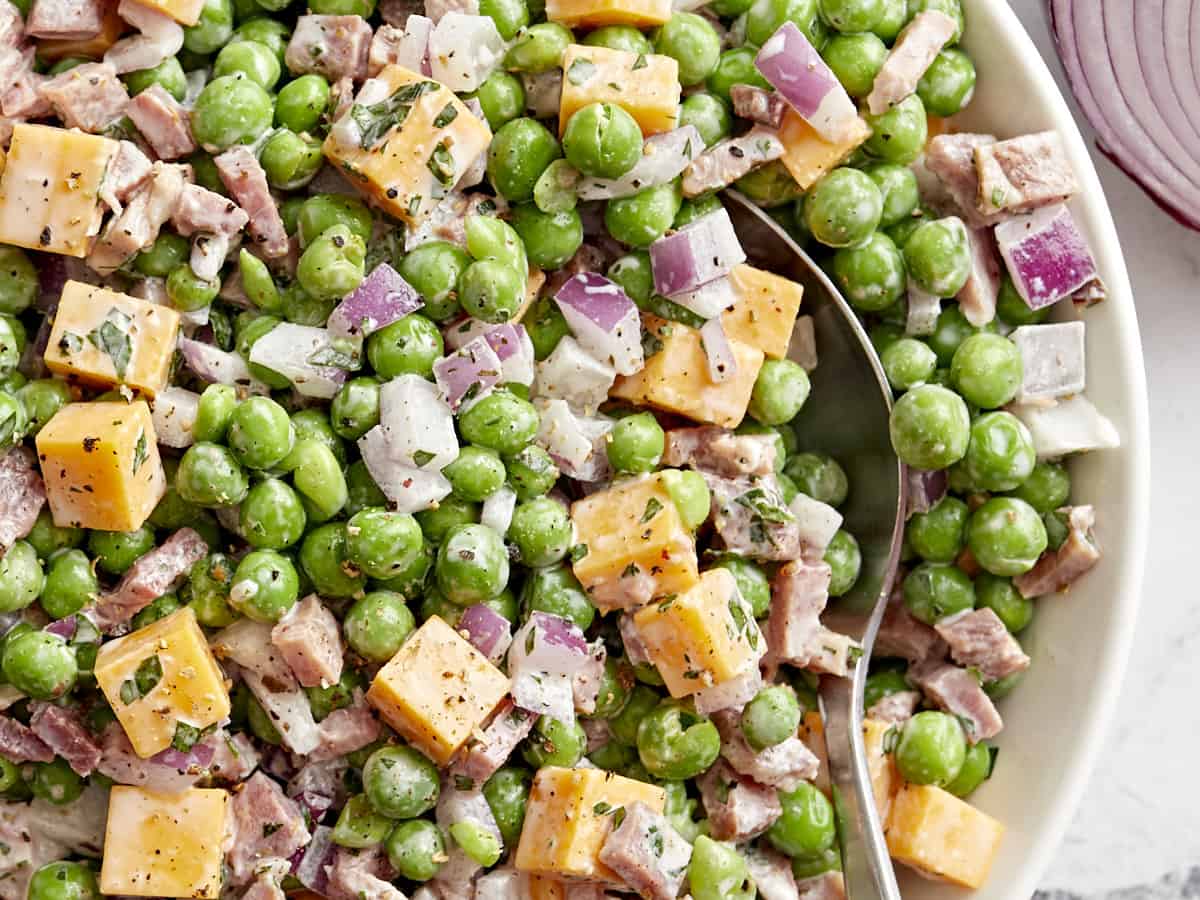
Pea salad is a classic side dish made from sweet peas tossed with ham, cheddar cheese, and red onion, and coated in a creamy and tangy dressing. This salad has a beautiful balance of flavors and is so versatile!
Ingredients for Pea Salad
Here’s what you’ll need to make pea salad:
Greek Yogurt: Makes the dressing creamy and tangy with fewer calories and fat than sour cream. We highly recommend Greek yogurt over plain yogurt or sour cream for its thicker texture.
Mayonnaise: Adds richness and creaminess to the dressing.
White Vinegar: Adds a refreshing tanginess to the dressing to balance the creaminess.
Parsley: Adds a pop of freshness.
Frozen Peas: Just as bright and flavorful as fresh, these are a great budget option for this salad.
Ham Steak: You’ll need a 12 oz. ham steak, or you can use leftover ham or cooked bacon. Vegetarian? No problem! If you leave out the ham, this pea salad is still flavorful and fresh.
Red Onion: Adds a bit of bite to the recipe and a wonderful crunchy texture, creating a great contrast to the sweet peas.
Cheddar Cheese: Adds a creamy and salty component to this delicious salad.
Salt and Pepper: Enhance the overall flavor of the salad.
What Else Can I Add to Pea Salad?
This creamy salad is a great recipe to add leftovers to. We like to add:
Leftover short noodles, like macaroni or bowties
Finely diced carrots
Chopped broccoli florets
Raisins or other dried fruits
Vegetarian meat substitutes also work well.
Budget-Saving Tip!
If you want to make your money stretch a little bit further, then this is a great recipe to use up any leftover ham that you might have from the holidays. It will help reduce waste and make the recipe cheaper. That’s a win-win!😊
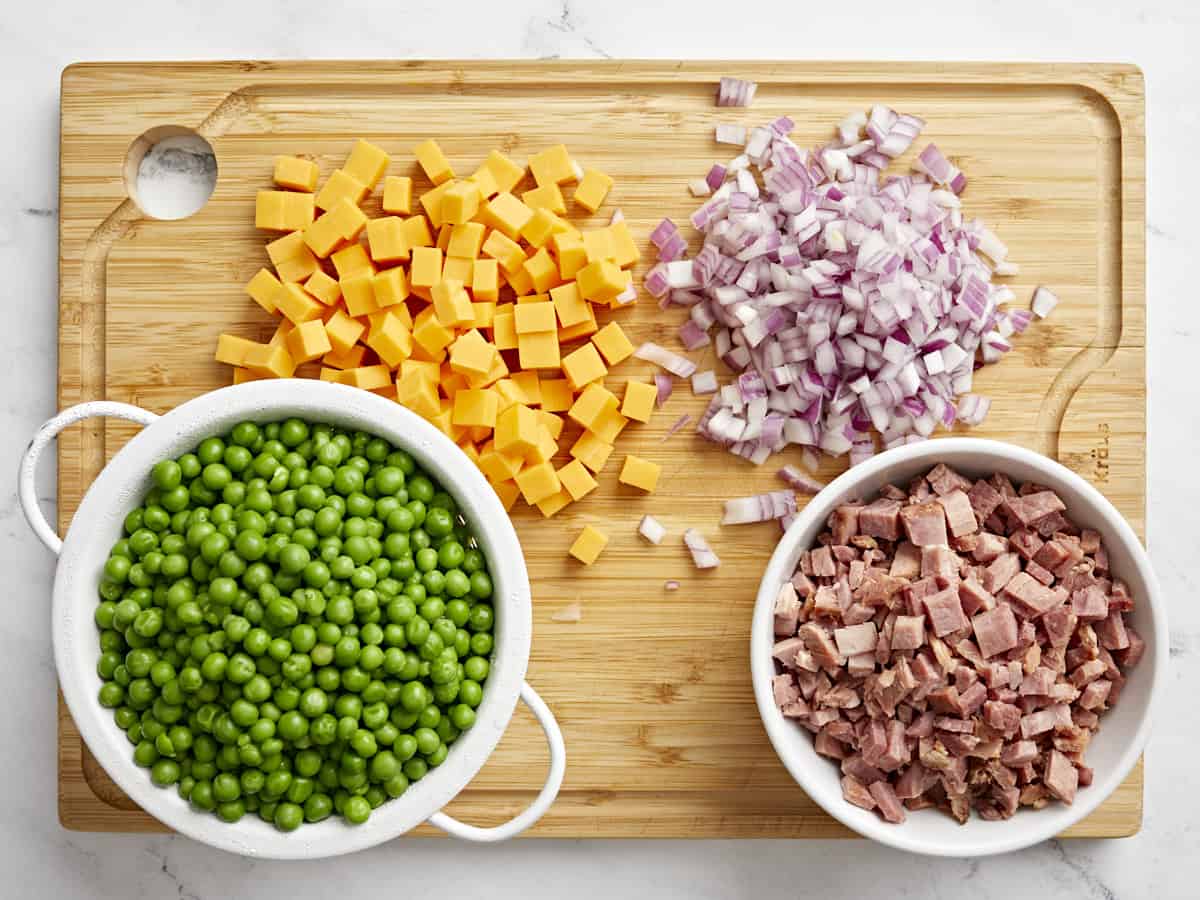
Rinse the frozen peas in cool water. Strain and leave out at room temperature. Meanwhile, cut the ham into small dice cubes and prep the red onion, cheddar cheese, and parsley.
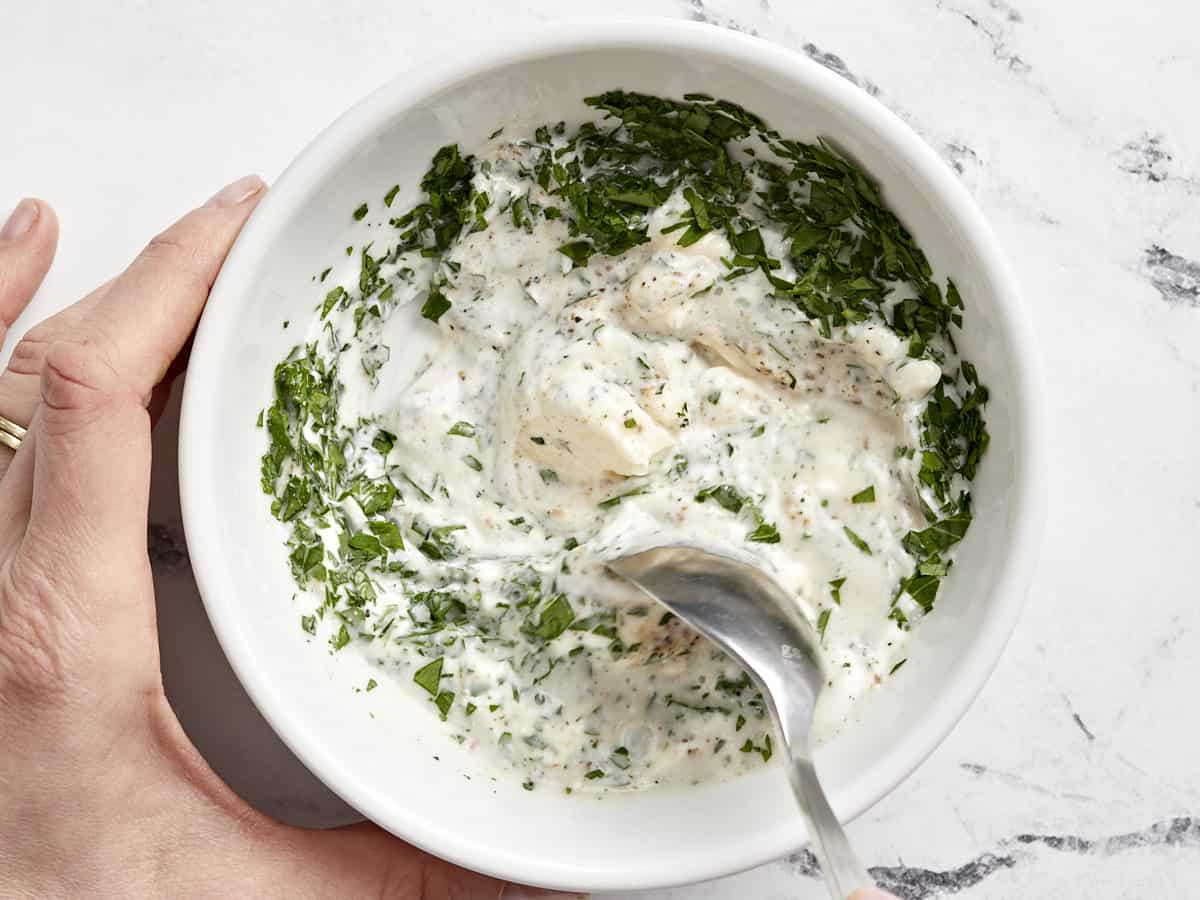
In a small mixing bowl, whisk together Greek yogurt, mayonnaise, white vinegar, minced parsley, and salt and pepper.
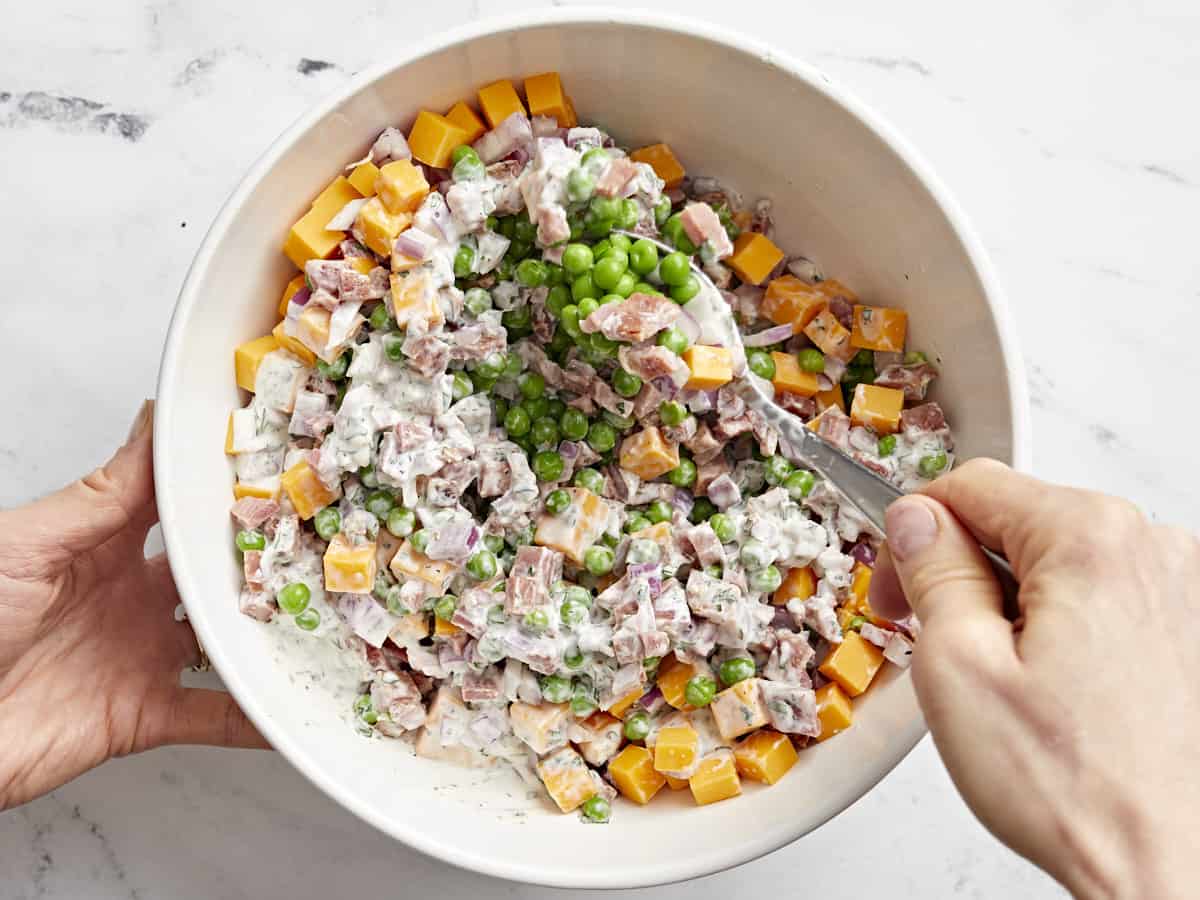
Toss all ingredients together in a large bowl. Serve immediately or enjoy all week!
Rinse 4 cups frozen peas in cool water. Strain and leave out at room temperature. Meanwhile, cut 2 cups ham into small dice cubes, dice 1/2 small red onion, cube 8 oz. cheddar cheese, and mince 1 Tbsp fresh parsley.
In a small mixing bowl, whisk together 1/3 cup Greek yogurt, 1 Tbsp mayonnaise, 1 Tbsp white vinegar, the minced parsley, and 1 tsp each salt and pepper.
Toss all ingredients together in a large bowl. Serve immediately or enjoy all week!
This pea salad is such a beautiful centerpiece to any table!
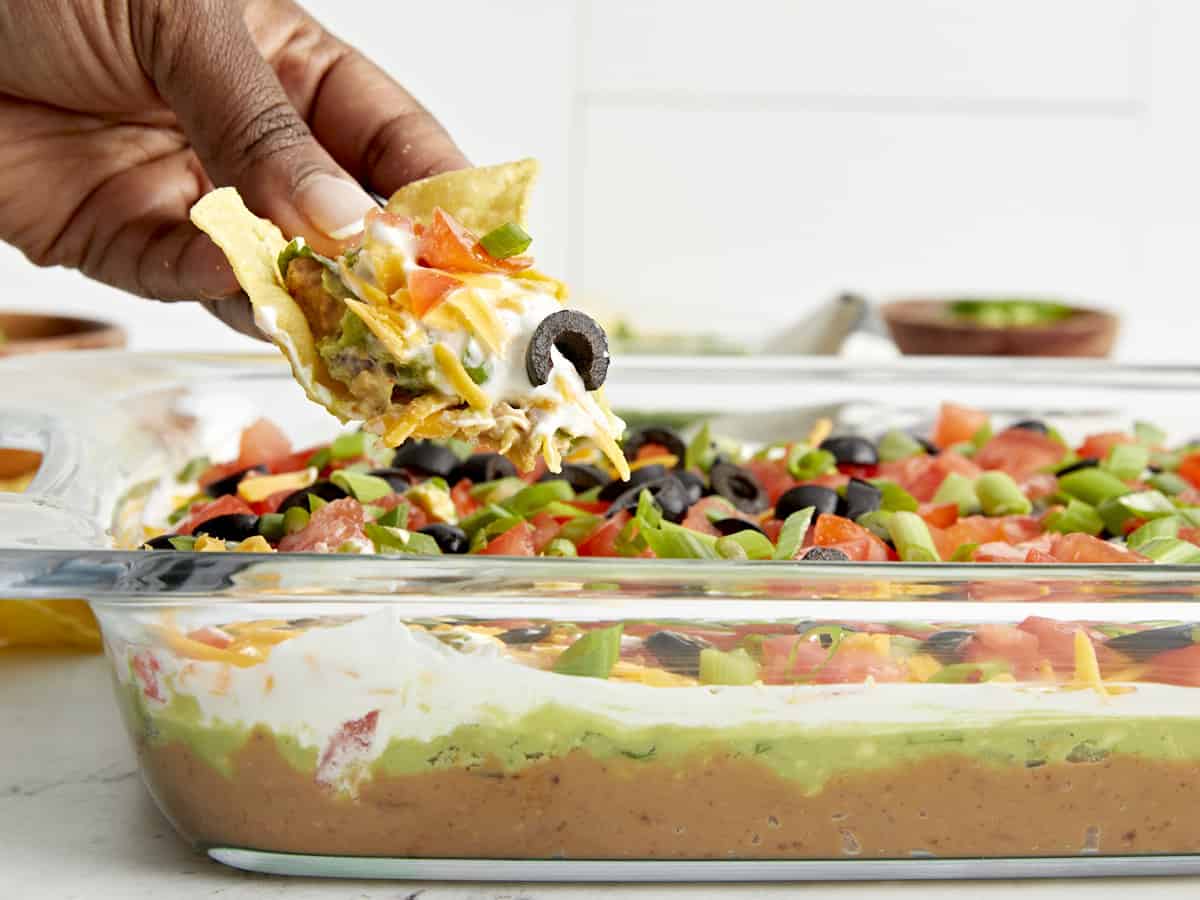
When you need a quick party appetizer that tastes good, is easy to make, and feeds a large crowd…this 7 Layer Dip is the one to make! It has all of my favorite Tex-Mex flavors in one dish and it’s perfect for serving at potlucks, football parties, and family gatherings. I’m always down for any type of chips and dip, but this 7 layer dip takes dips to a whole new level! I’m not sure which part I love the most, the fact that I don’t have to cook anything over a stove to make this recipe or that it comes in at just over $1 per serving. Either way, I highly recommend adding this 7 layer dip recipe to your Super Bowl menu this weekend.😉
What Is 7 Layer Dip?
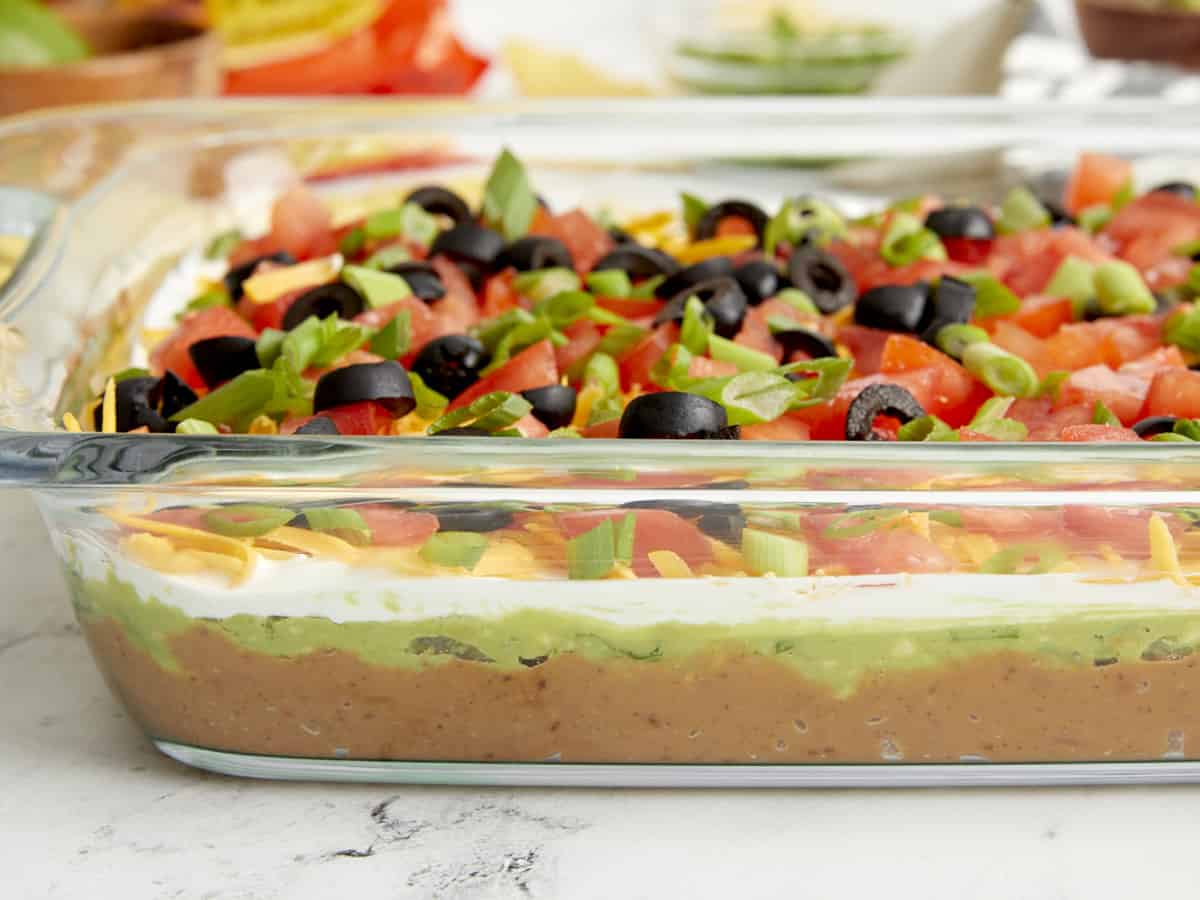
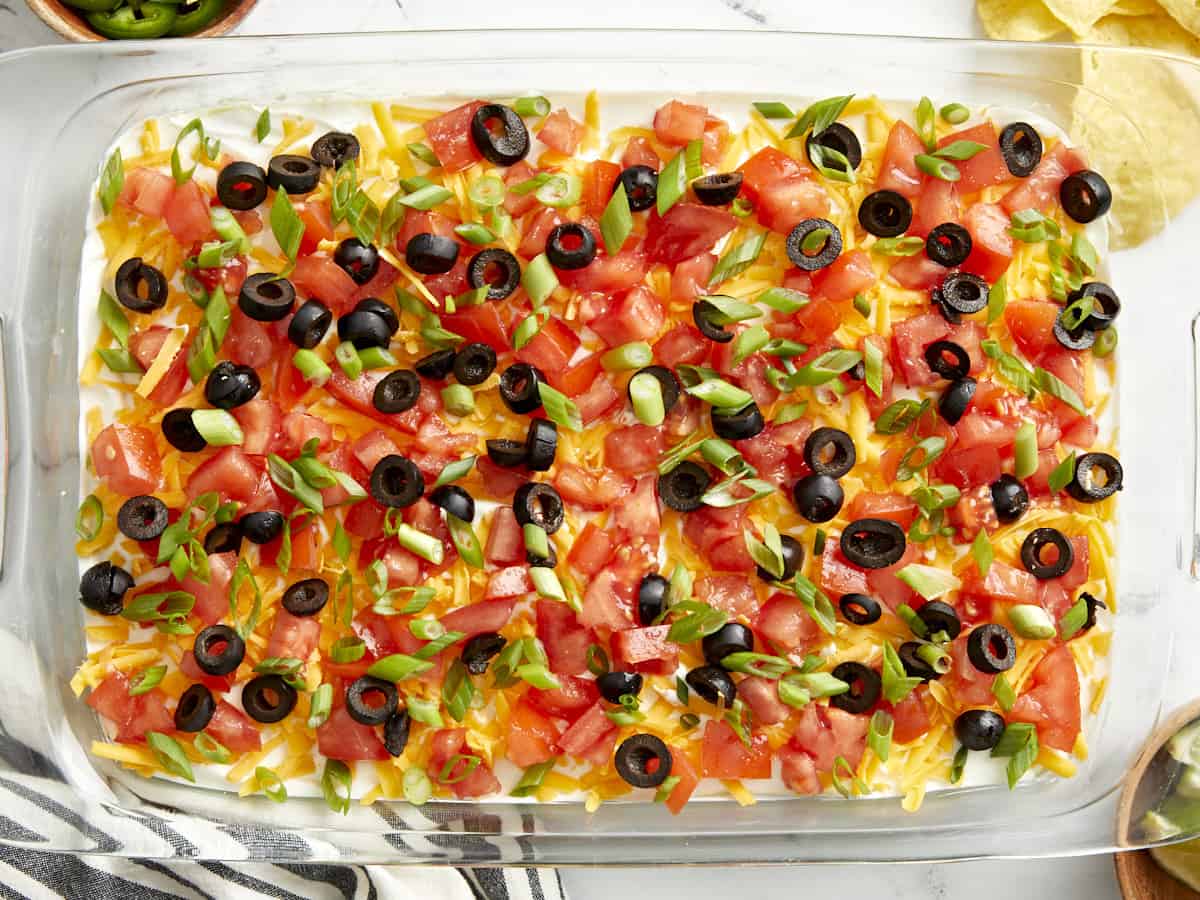
7 layer dip is an easy party appetizer that’s made by building layers of creamy, flavorful, ingredients like refried beans and guacamole into a 9×13” dish. It’s fun to serve at football parties and family gatherings, there’s no need to heat up a stove, and it’s perfect for feeding a crowd!
Ingredients For 7 Layer Dip
Here’s everything you need to make this easy 7 Layer Dip:
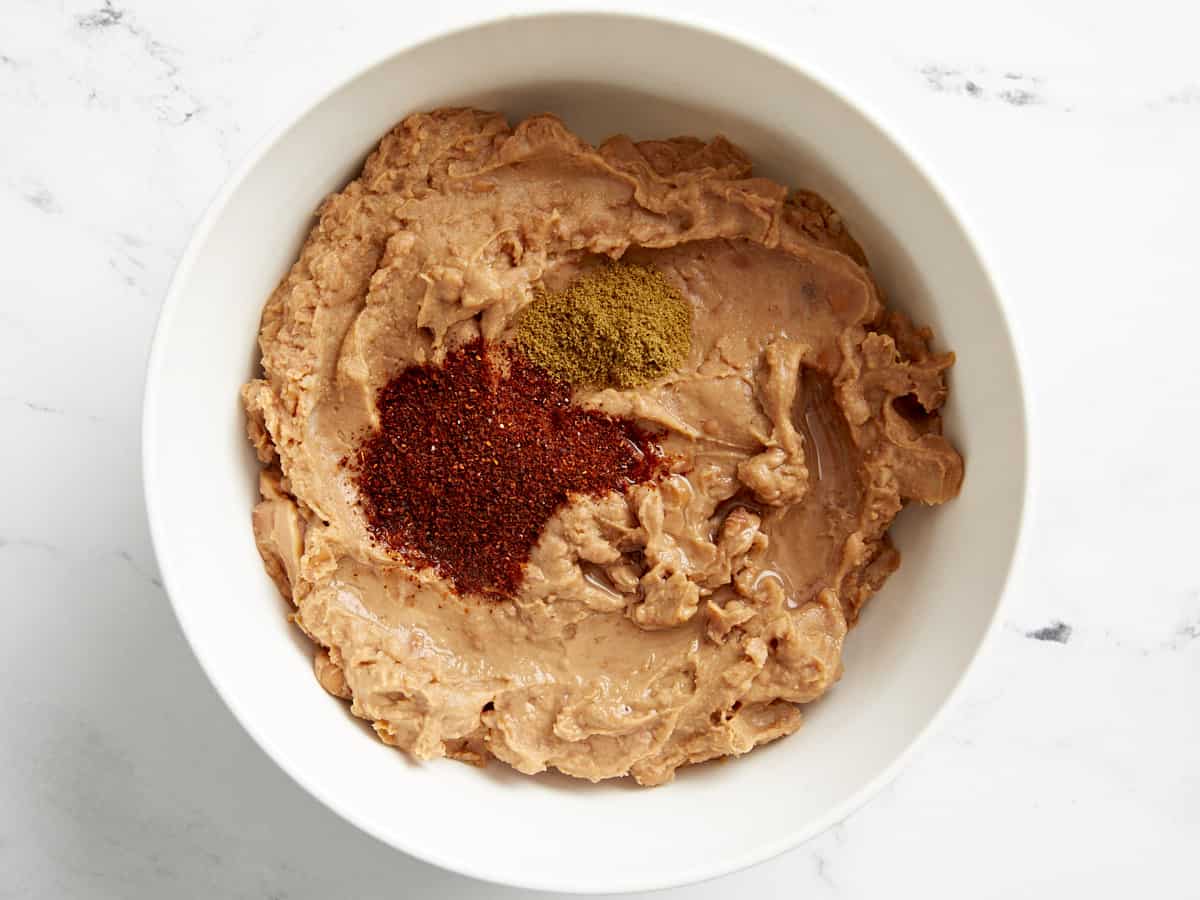
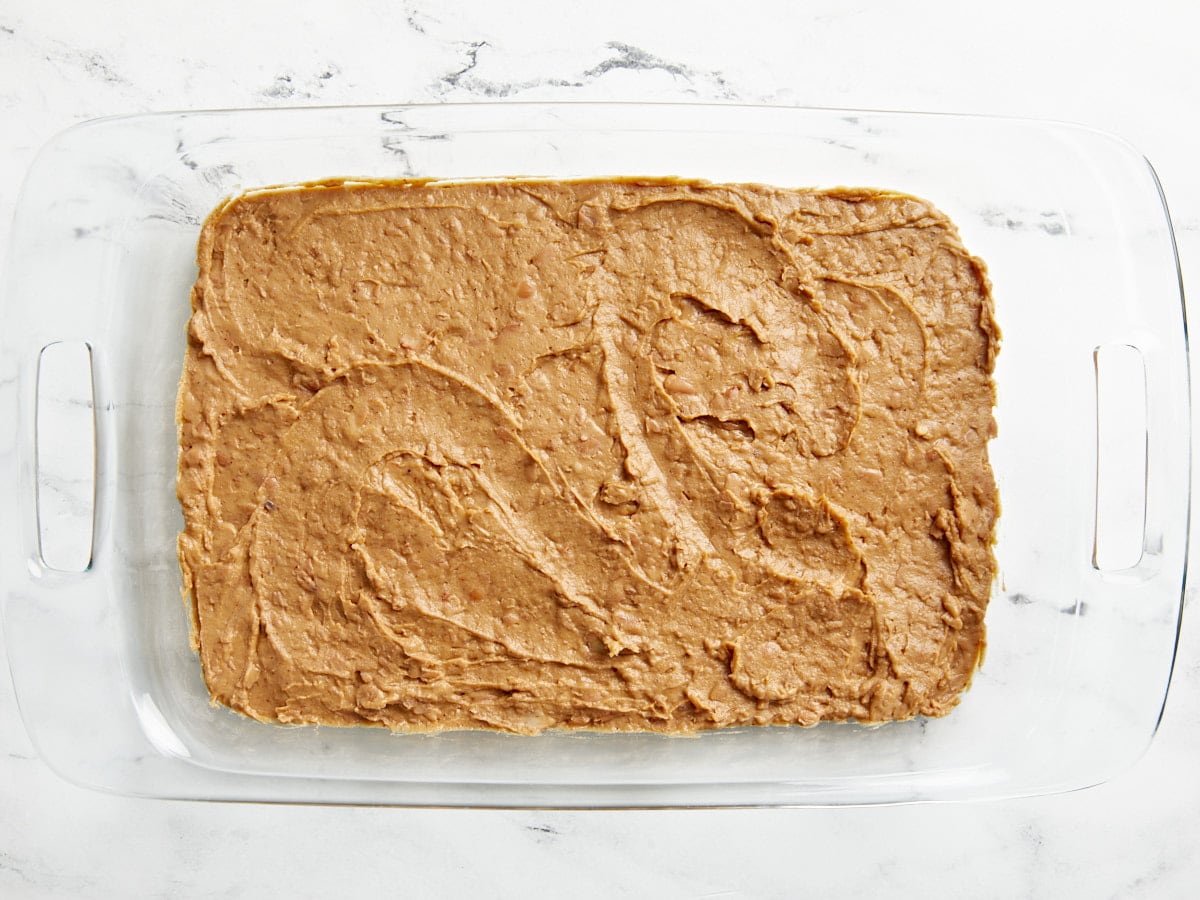
Refried Beans: You can certainly make your own refried beans, but to make things easy we used canned refried beans and seasoned it with a few spices.
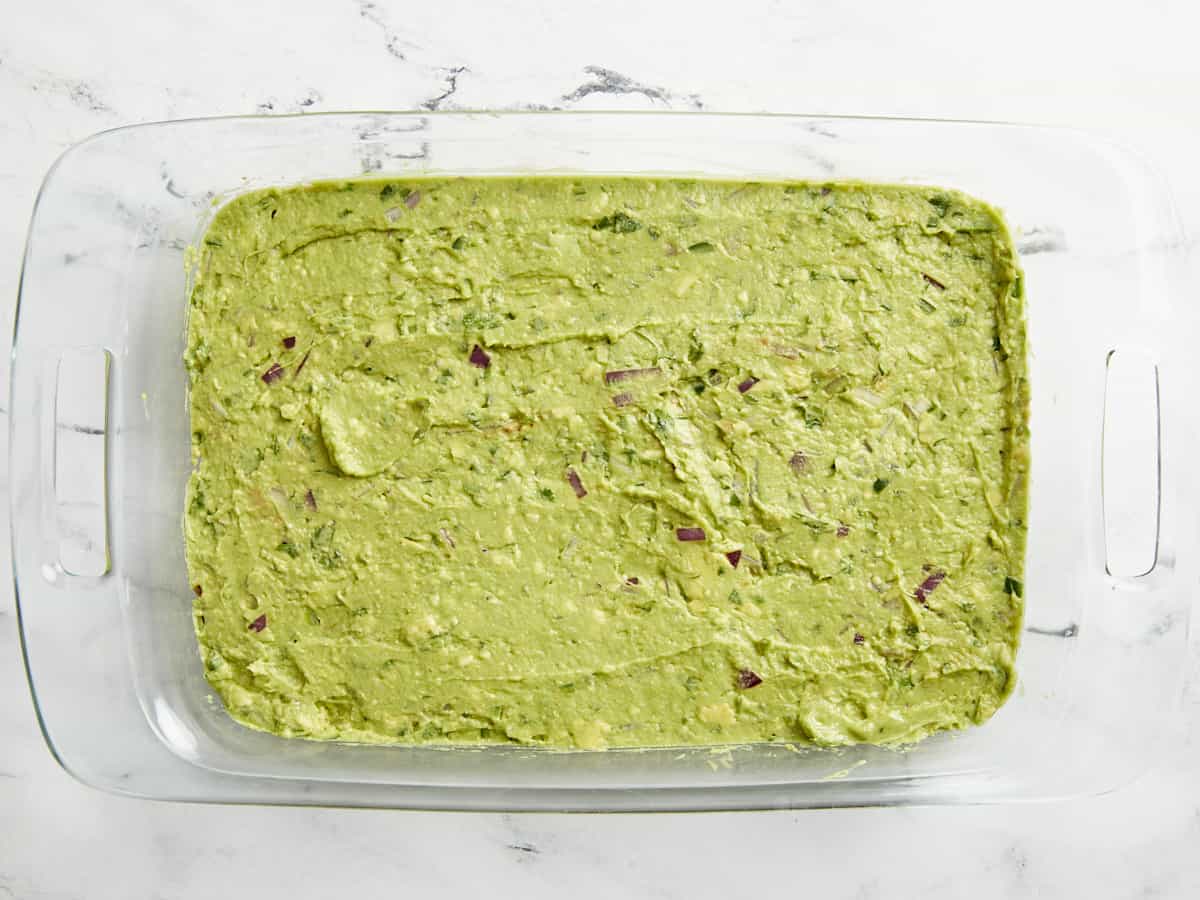
Guacamole: We made a quick batch of our homemade guacamole recipe, but to save time you can easily substitute with your favorite store-bought guacamole.
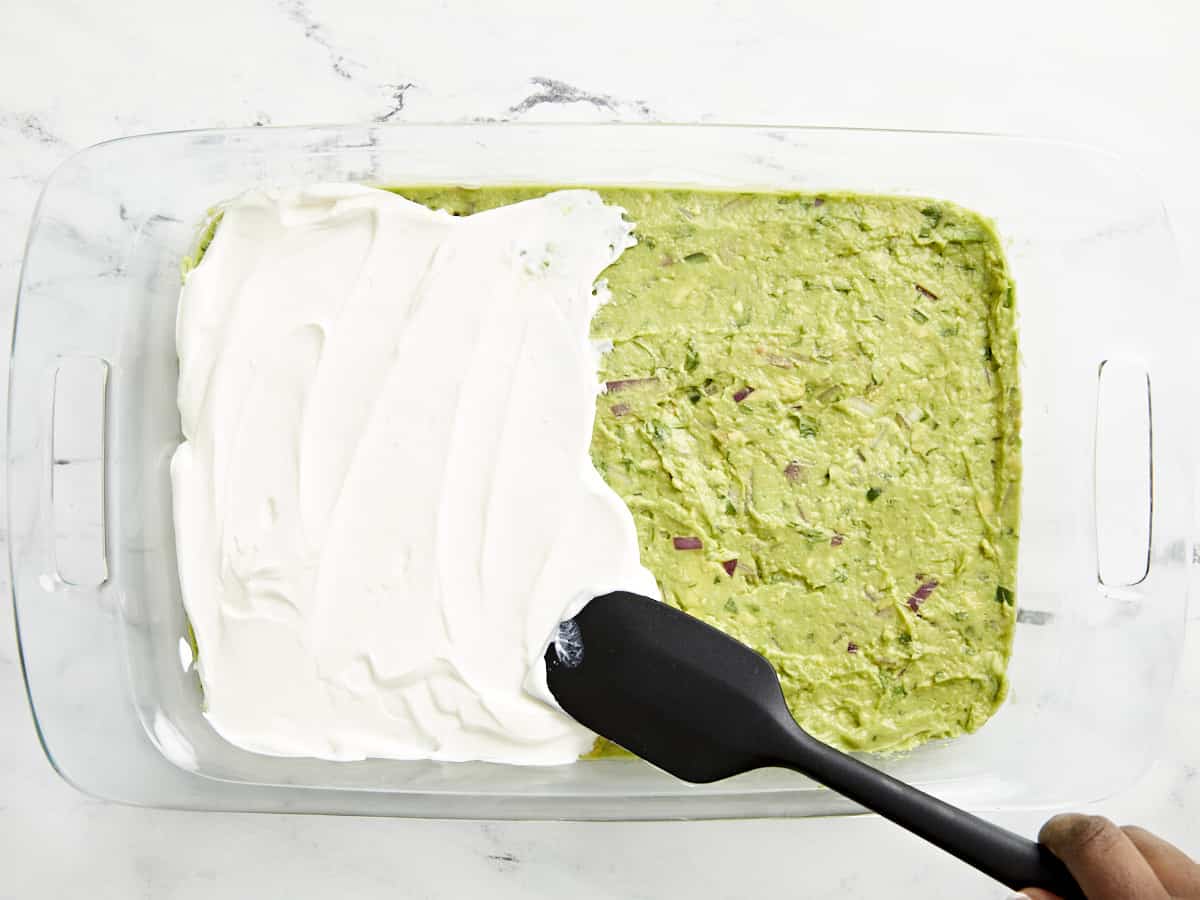
Sour Cream: No need to overthink this layer, just grab a tub of regular sour cream to spread on top of the guacamole. It adds the perfect creamy and tasty flavor to balance the beans and guacamole.
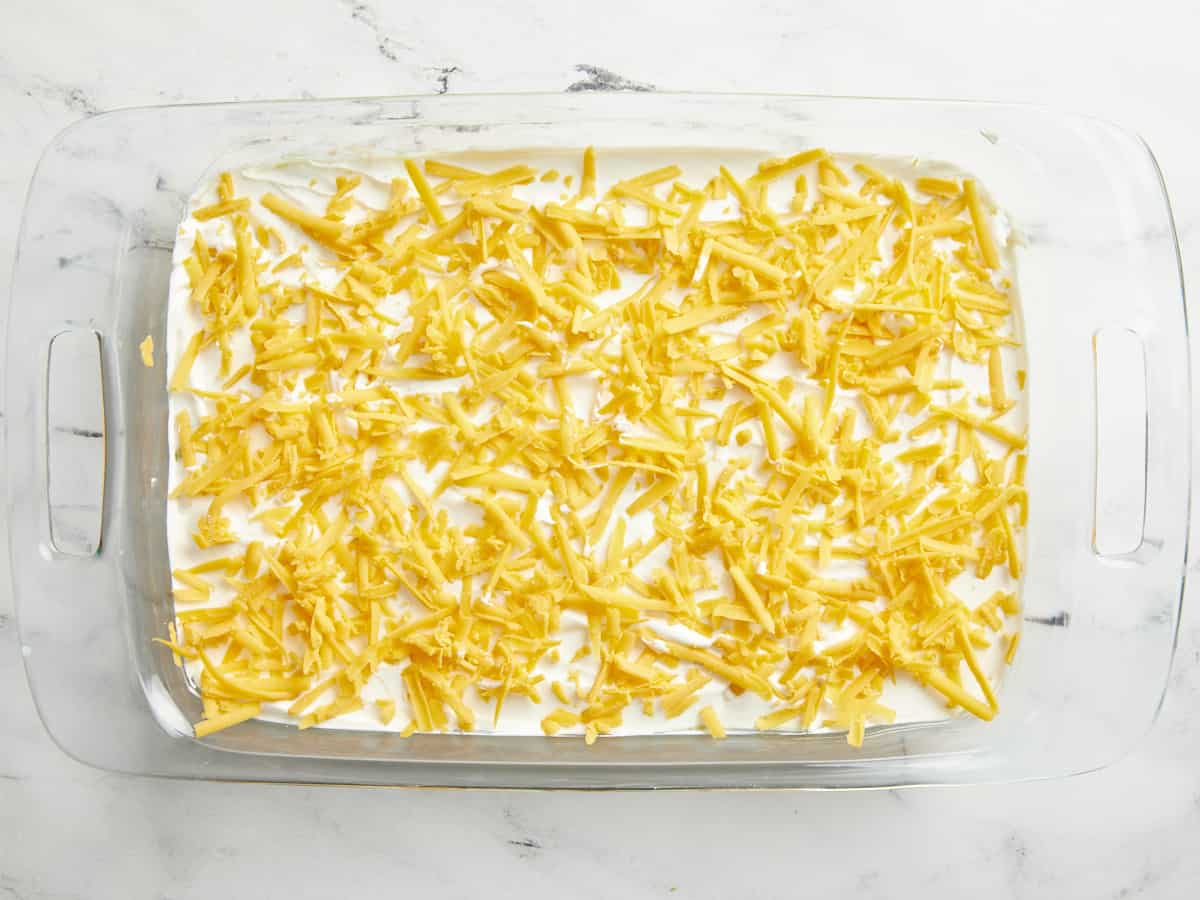
Cheddar Cheese: We used medium cheddar cheese but you can certainly use mild or a different flavor cheese if you prefer. And we highly recommend buying the cheese in block form and shredding it yourself for this recipe.
Tomatoes: Diced Roma tomatoes or vine-ripe tomatoes both work well and are added on top of the cheese layer.
Black Olives: Black olives add wonderful color, texture, and flavor to the dip. Because olives tend to be salty and tangy with bold flavors, you’ll only need a few of them for this 7 layer dip.
Green Onions: The final layer is a sprinkle of sliced green onions which add not only great flavor, but also a beautiful vibrant color to the dip!
Recipe Variations
Use taco seasoning – If you happen to have a batch of taco seasoning in your panty, use 1 ½ tablespoons of it instead of the chili powder, cumin, and salt to season your refried beans. This will give the beans even more flavor! You can also mix a little bit in to your sour cream to give it an extra boost of flavor.
Add seasoned ground meat – You can make this 7 layer dip even more filling by adding a layer of taco seasoned ground beef or ground turkey. I would add it right after the refried beans layer.
Add salsa – Your favorite thick salsa also works really well with this dip recipe. If you want to add it as a layer, just make sure to drain any excess liquid from the salsa to keep the dip from getting too soggy.
Storing LEftovers
This dip is definitely best served and eaten the same day it’s made, but if you happen to have leftovers, just store any leftovers covered tightly in the refrigerator for 3-4 days. The guacamole may start to brown slightly and the dip may get a bit watery around the edges, but it will still taste delicious!
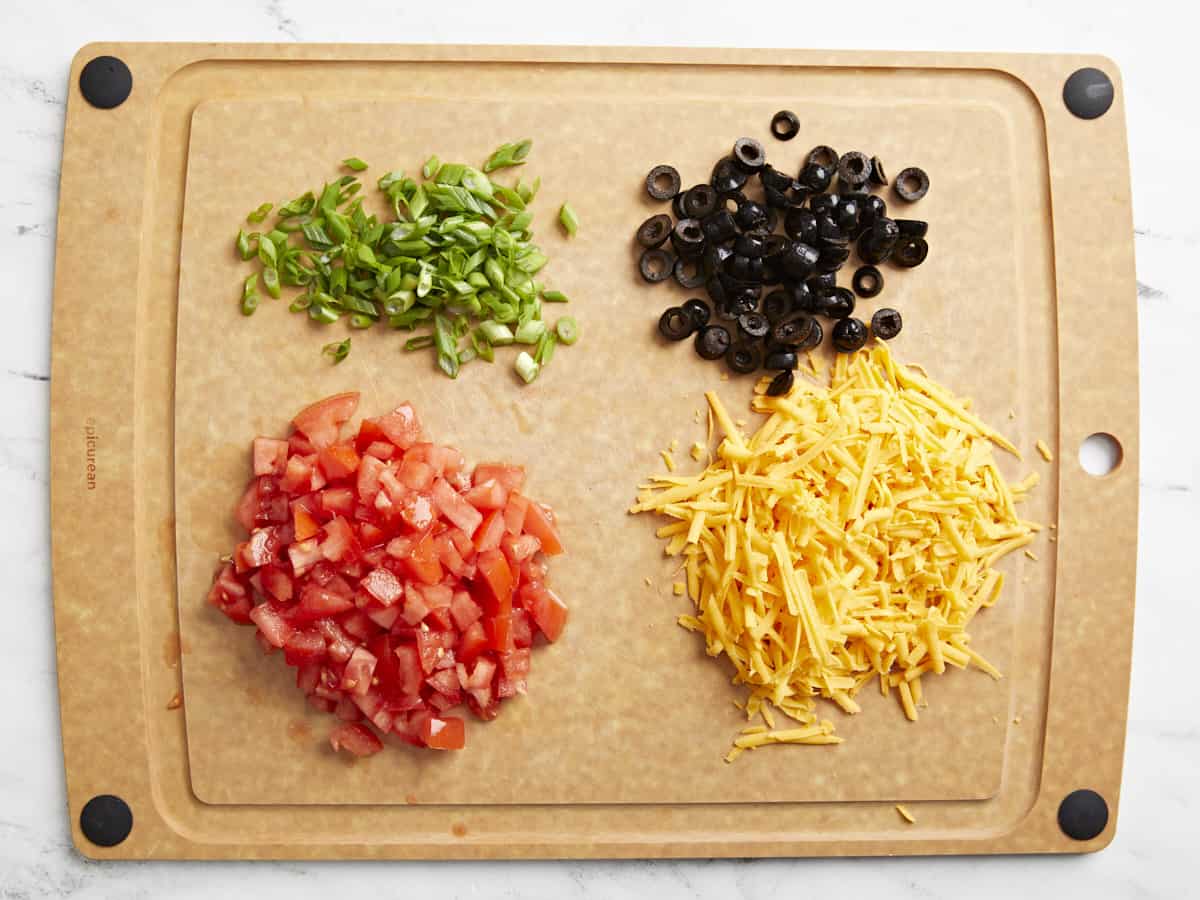
Dice 2 tomatoes, shred 1 1/2 cups of cheddar cheese, drain 1/2 cup black olives, and slice 3 green onions. Set these ingredients to the side.
In a medium bowl add 2-16oz. cans of refried beans along with 1 Tbsp chili powder, 1/2 tsp cumin, 1/4 tsp salt, and 2 Tbsp water. Mix these ingredients together until well combined.
Spread the seasoned refried beans into the bottom of a 9×13” casserole dish.
Next spread 2 1/2 cups of guacamole evenly on top of the refried beans.
Then spread 1 1/2 cups of sour cream evenly on top of the guacamole mixture.
Sprinkle the shredded cheese evenly on top of the sour cream.
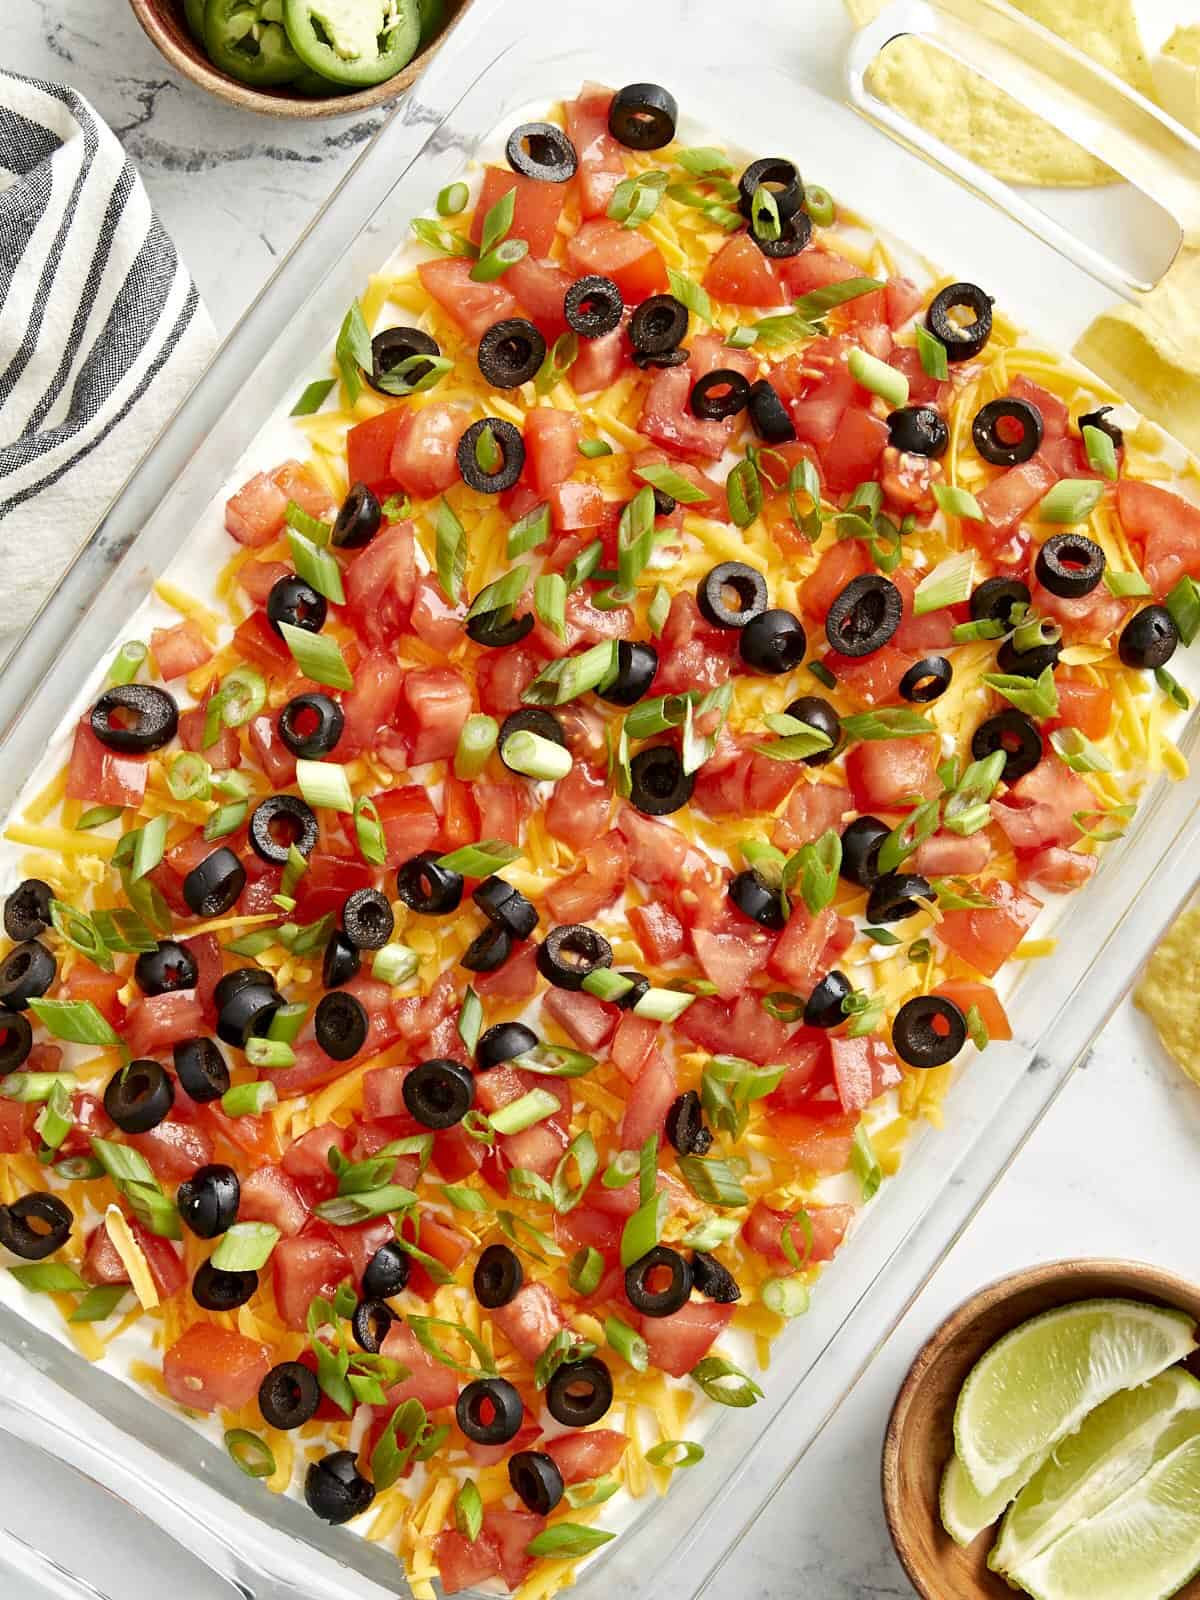
Now add the diced tomatoes, black olives, and green onions on top. Make sure everything is spread as evenly as possible.
Enjoy this tasty appetizer dip immediately with tortilla chips or cover and place in the refrigerator until ready to serve.
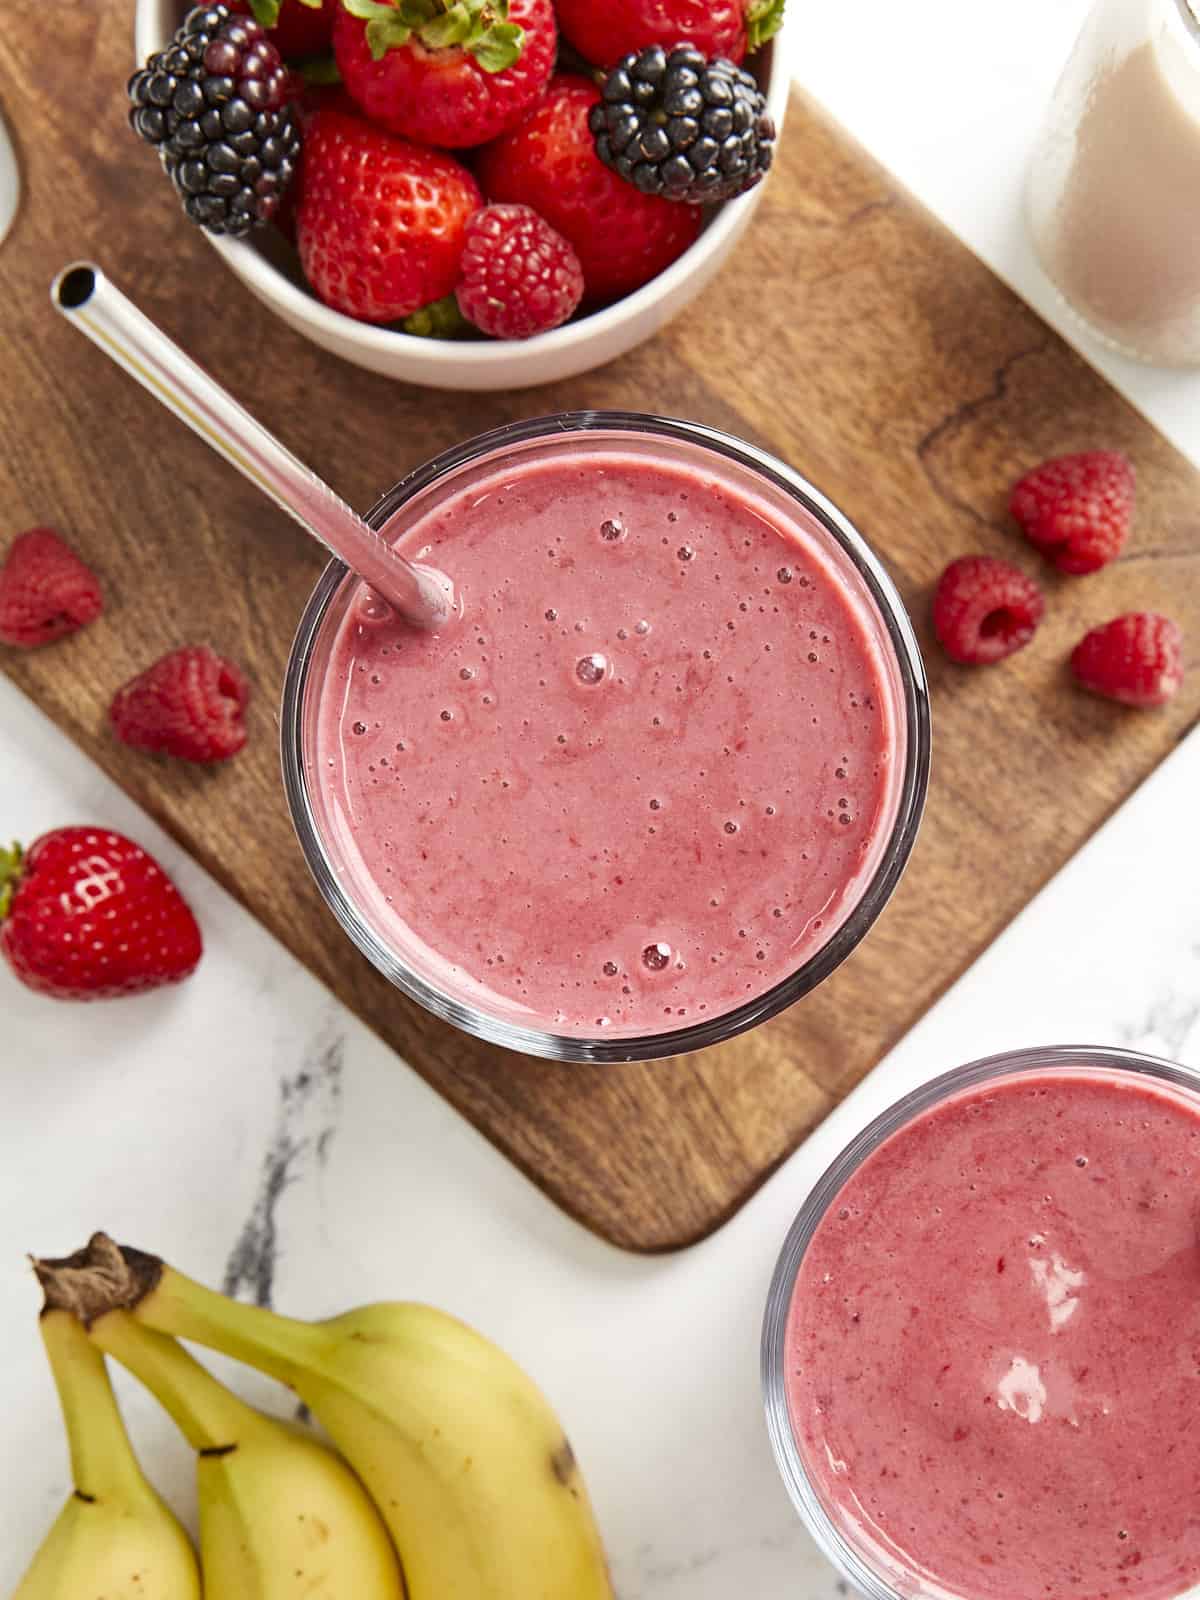
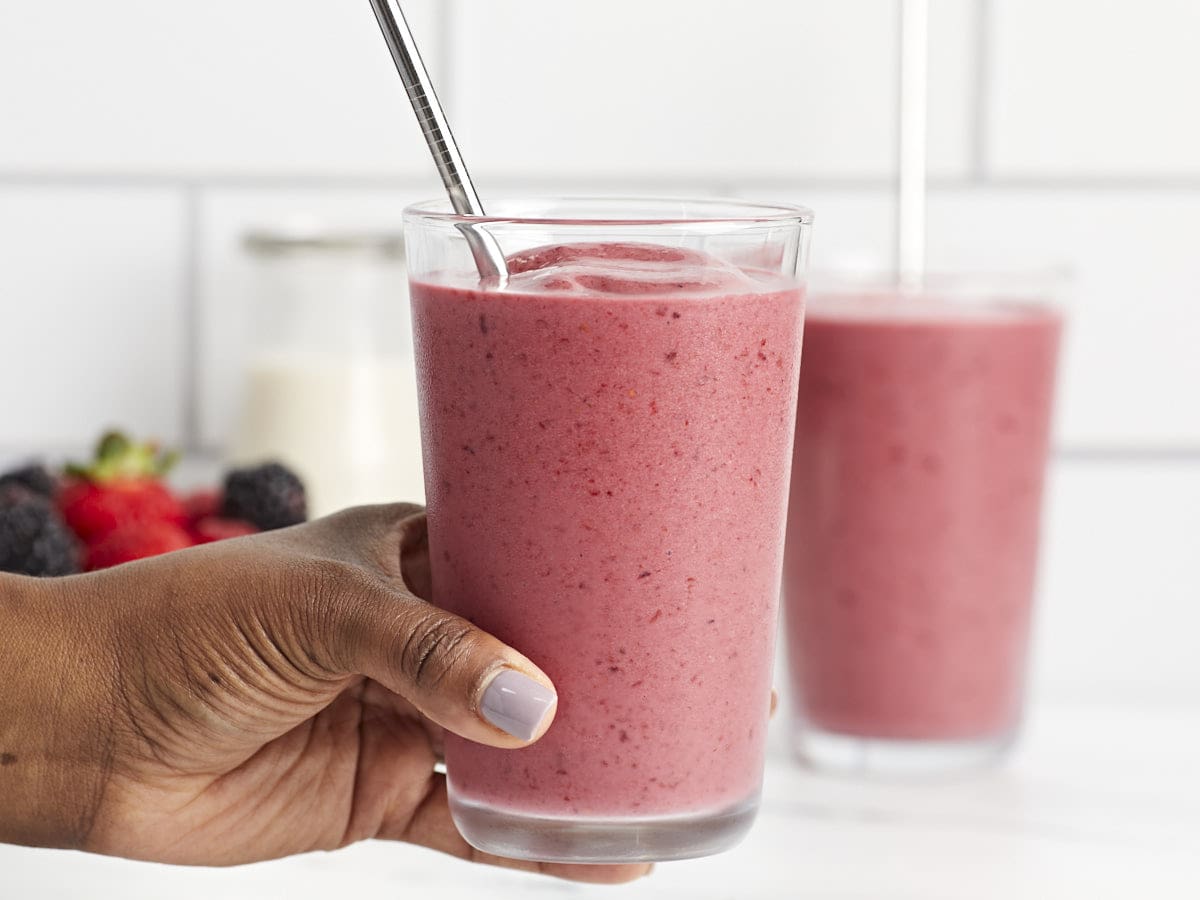
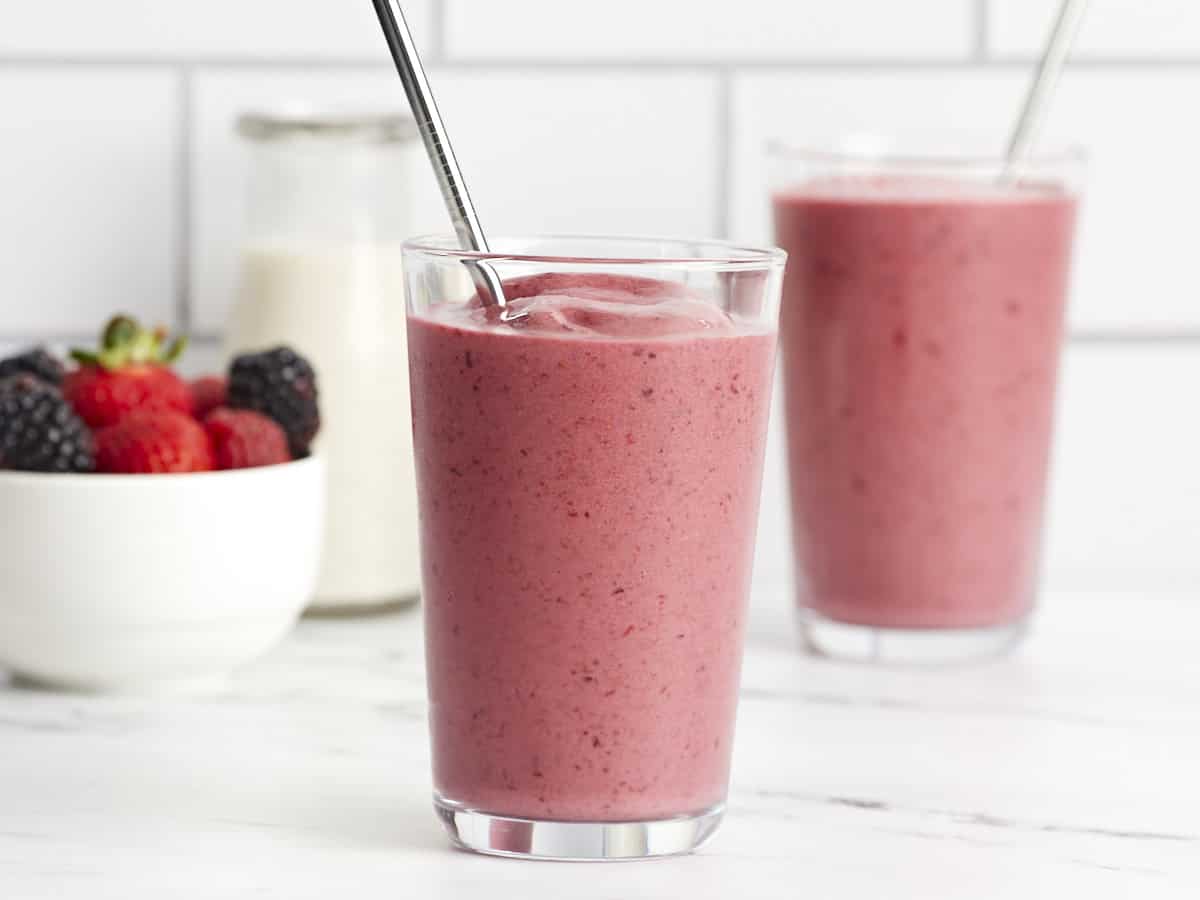
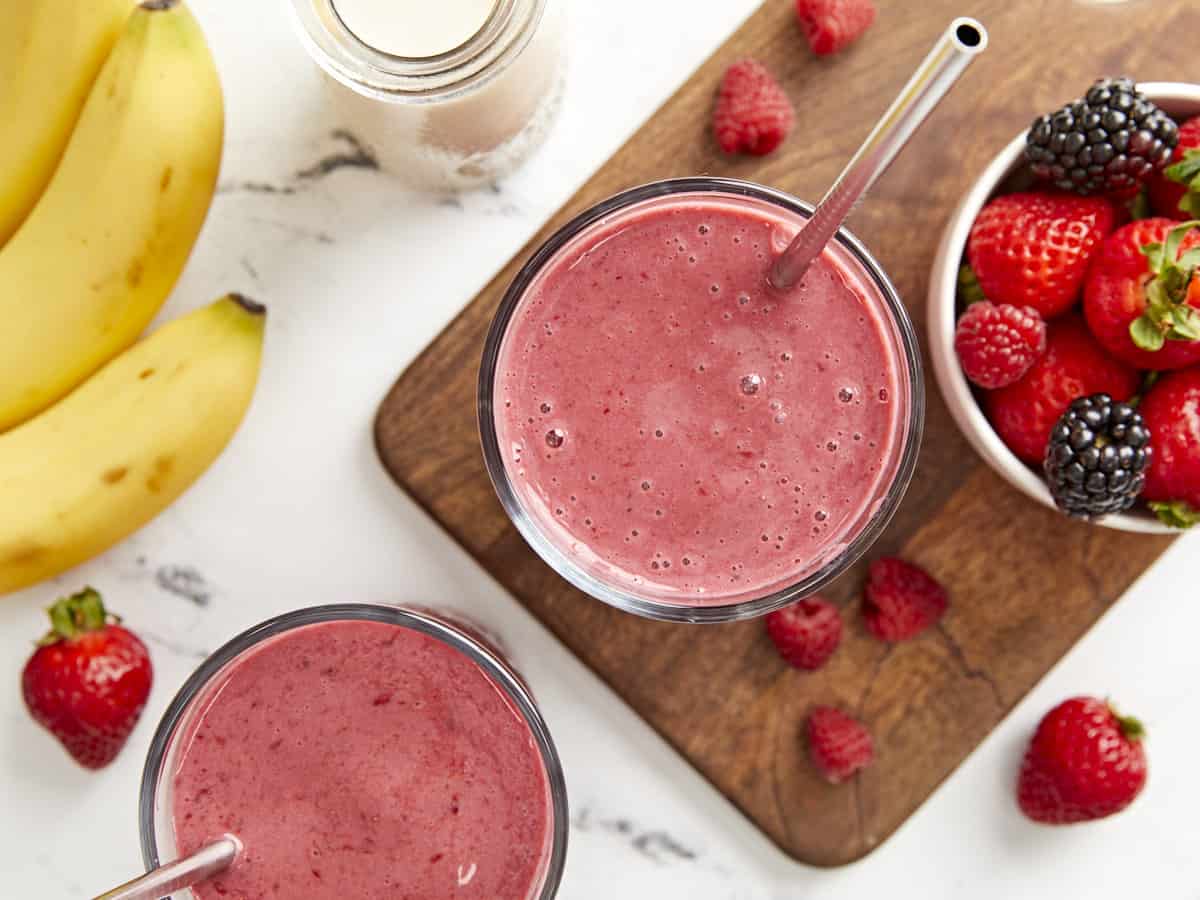
When I don’t have time to make a big breakfast, one of my favorite ways to start the day has always been with a quick smoothie. They’re refreshing, satisfying, easy to make, and perfect for a simple breakfast or a sweet midday snack! I’ve been making smoothies for quite some time and one smoothie that I always find myself coming back to is this Mixed Berry Smoothie recipe. It’s rich, creamy, packed with lots of fruit, and way cheaper than Smoothie King!😄 So no matter if you’re new to smoothies or a smoothie pro, you’ll definitely want to add this one to your smoothie rotation!
Ingredients For Mixed Berry Smoothie
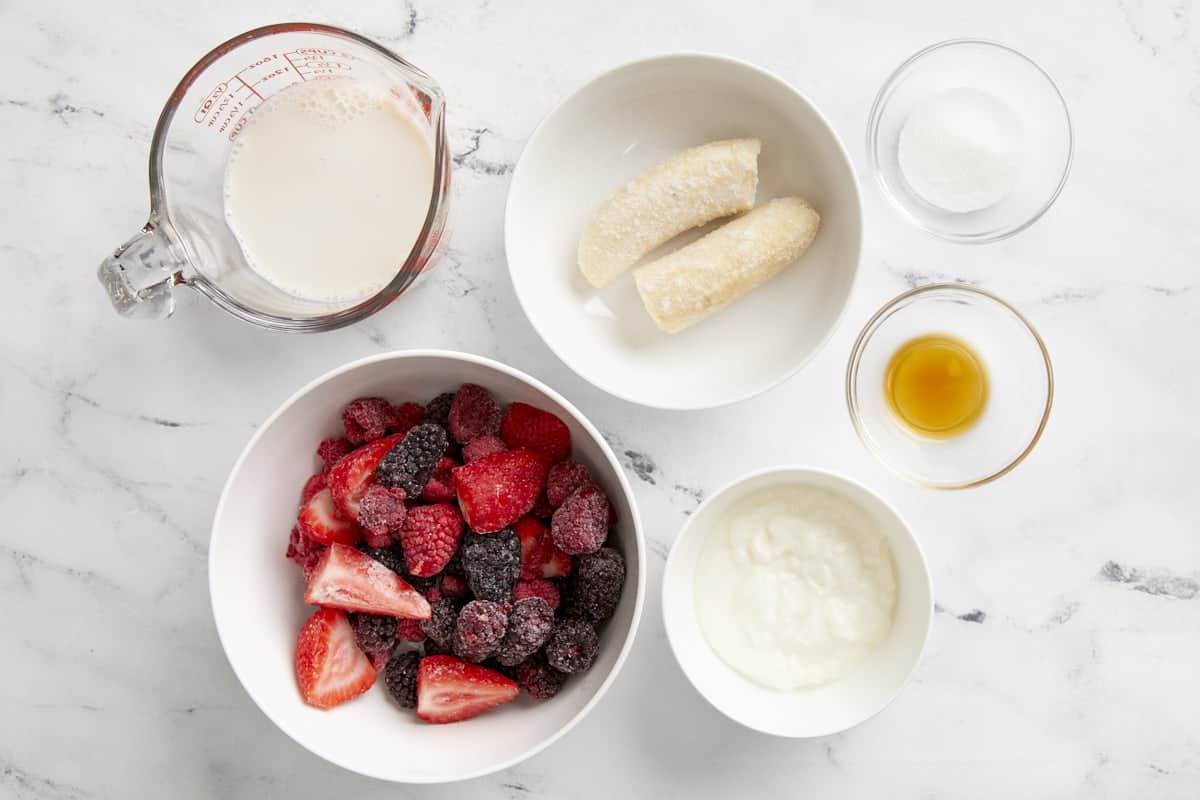
This mixed berry smoothie recipe is made with simple ingredients and is also very flexible. Here’s what we used:
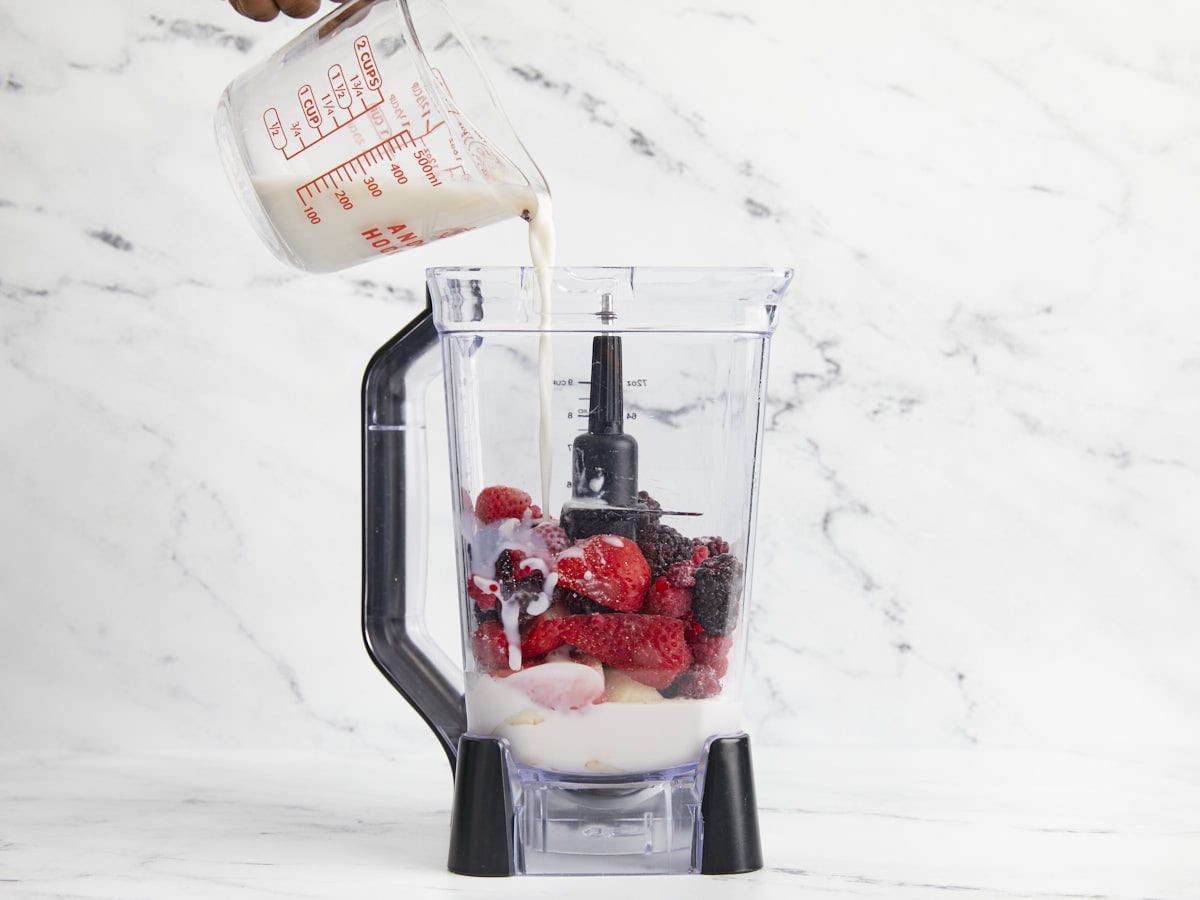
Frozen Mixed Berries: Frozen fruit is the key to getting a super creamy and thick smoothie consistency, without having to use any ice. For the berries we used a mix of frozen strawberries, raspberries, and blackberries. But feel free to use any combination of frozen berries that you like. Frozen berries are also a lot more economical than fresh berries because they don’t go bad quickly in your fridge!
Banana: You can either use a fresh or frozen banana in this smoothie recipe. I opted for a frozen banana to make my smoothie extra thick and keep it from melting too fast.
Almond Milk: We used plain, unsweetened almond milk for our smoothie, but you can use any type of dairy or non-dairy milk that you like.
Yogurt: A little bit of yogurt gives the smoothie a wonderful creamy texture. We used plain yogurt, but a vanilla flavored yogurt would also taste great.
Sugar & Vanilla Extract: A little bit of sugar and vanilla provide sweetness and added flavor. Feel free to substitute with honey in place of the sugar. And if you’re using a vanilla-flavored yogurt or vanilla almond milk, then you can omit the vanilla extract.
What Else Can I Add In My Smoothie?
There are lots of different ingredients you can add to this mixed berry smoothie for extra nutrients and to make it more filling. Here are a few ideas:
Quick oats
Ground flaxseeds
Chia seeds
Hemp seeds
Spinach
Kale
Honey (in place of the sugar)
Make a Smoothie Bowl!
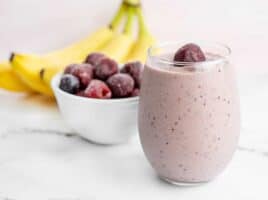
I love using this mixed berry smoothie recipe to make delicious smoothie bowls! The smoothie itself becomes the base foundation of the bowl, then just top the smoothie with yummy toppings like fresh fruit, seeds, granola, and maybe a drizzle of honey. Smoothie bowls are super versatile and easy to customize based on what you currently have in your fridge and pantry. They’re also super filling and just a fun way to turn this breakfast smoothie into a refreshing sweet treat! ;)
Money-Saving Tip!
You can often find great deals on fresh berries when they are in season. Berries are mostly in season during the Summer and early Fall months. Use this time to grab your favorite berries when they are on sale and freeze them for later! Sometimes I even go strawberry picking with my little ones in the month of May, then freeze some of the strawberries to use the rest of the year.
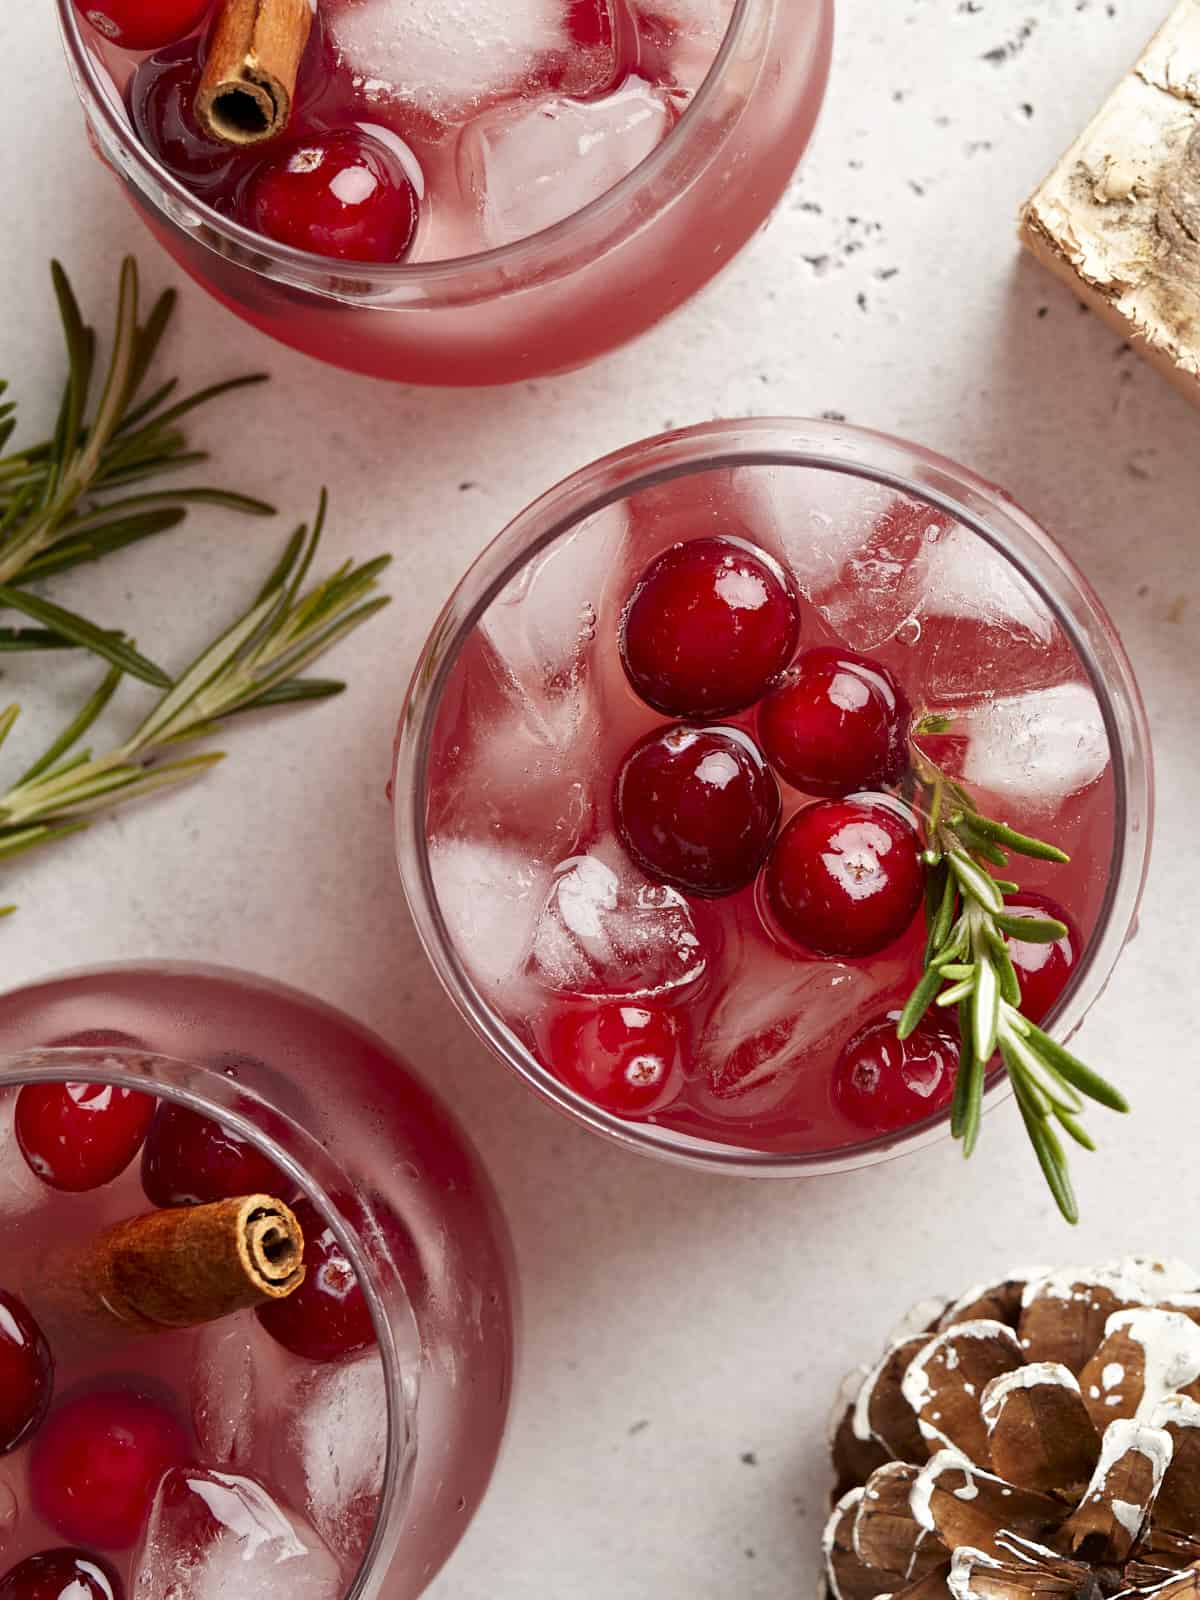
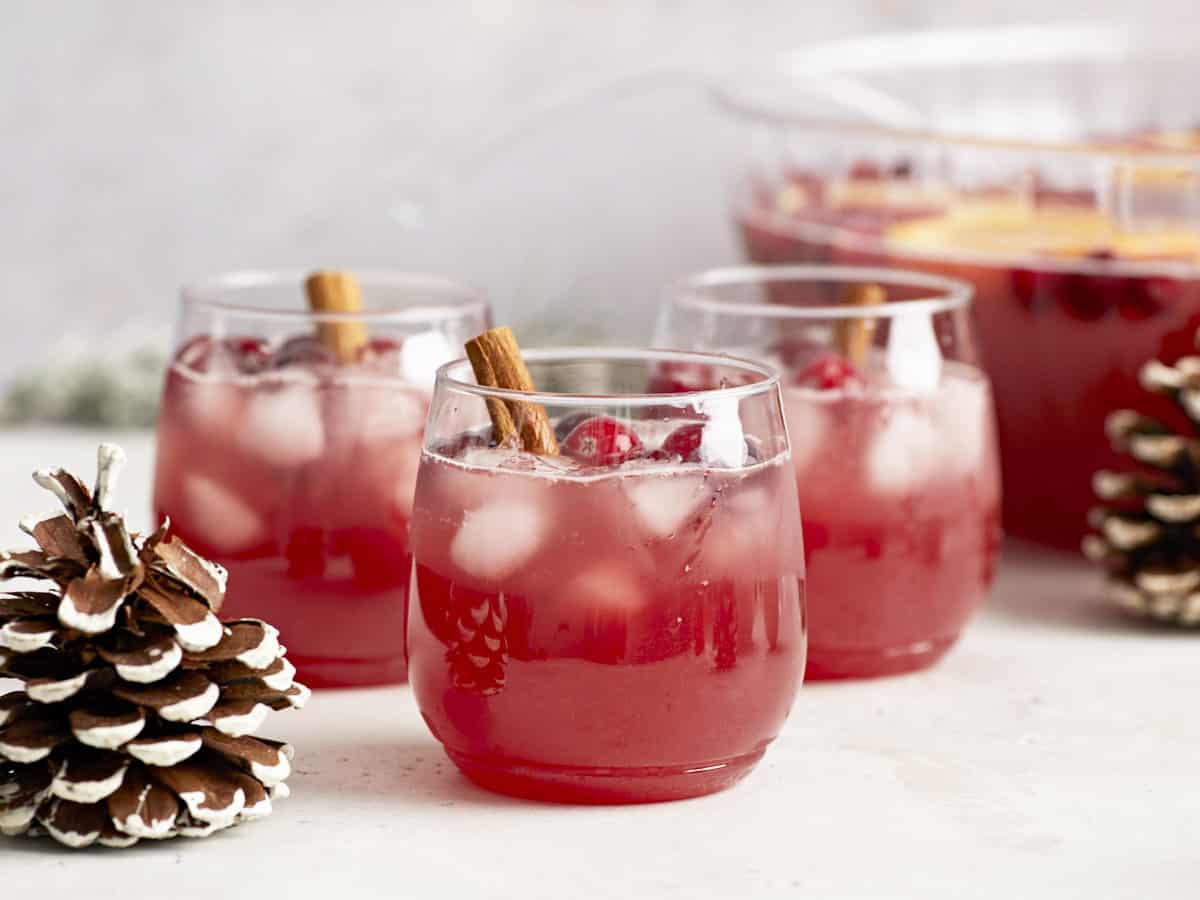
Whether you’re hosting a big Christmas party this year or plan to spend the chilly evenings of December cozy at home, this easy Christmas Punch recipe will put you in a festive mood. This apple-cranberry-ginger drink can be made in a large batch to share with friends, or you can mix it up one glass at a time to enjoy solo anytime you need a sparkly refreshment. …And you can spike it too, if that’s your vibe. ;)
Ingredients for Christmas Punch
This incredibly simple holiday drink has only three main ingredients:
Apple Cider: You can use either apple cider or unfiltered apple juice for this recipe, but do not use regular clear apple juice.
Cranberry Juice: It’s important to use a 100% cranberry juice cocktail for this punch, not unsweetened cranberry juice. Do not get a cranberry juice cocktail that contains a mix of fruit juices. Check the juice ingredients to be sure it only contains cranberry juice, water, and sugar (and maybe a preservative like vitamin C or ascorbic acid, etc.), no grape juice, apple juice, or any other fruit juices.
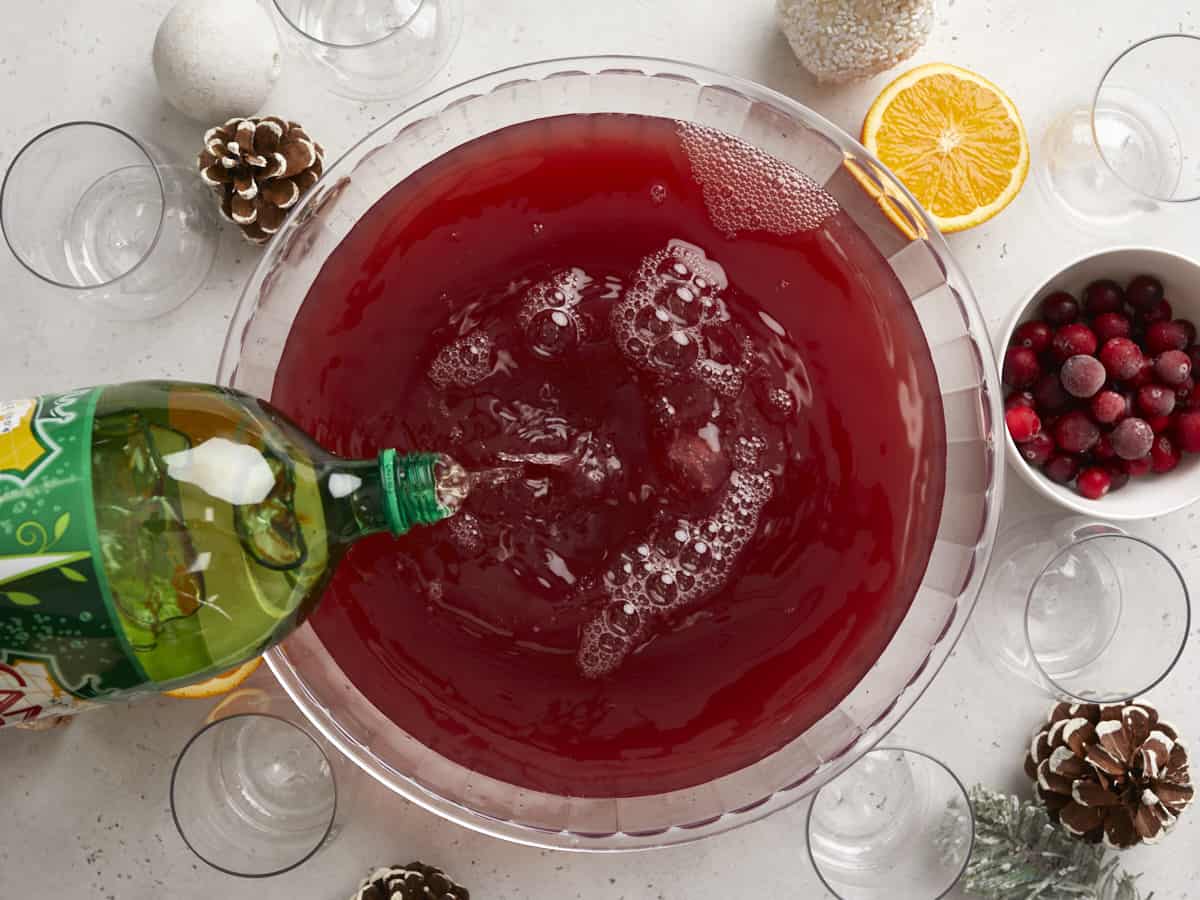
Ginger Ale: Ginger ale brings sweetness, a peppery bite, and a festive fizz to the punch.
Optional Garnishes
In addition to the three ingredients for the punch itself, you can garnish the punch with several ingredients, some of which can provide additional flavor to the punch. Here are some garnish ideas:
Fresh Cranberries: Having cranberries float in the punch is visually stunning, but they will not provide additional flavor to the punch.
Orange Slices: Orange slices will add a nice subtle citrus flavor to the punch, and they are a beautiful contrast to the red color of the punch.
Cinnamon Sticks: Placing a cinnamon stick in each glass adds a slight cinnamon aroma every time you sip the punch, which I found to be absolutely delicious. You can also float a few sticks in the bowl of punch if adding one stick per glass is too expensive. You can find cinnamon sticks for a good price at Latin grocery stores or in major grocery store chains in the international food aisle. Badia is a good affordable brand to look for.
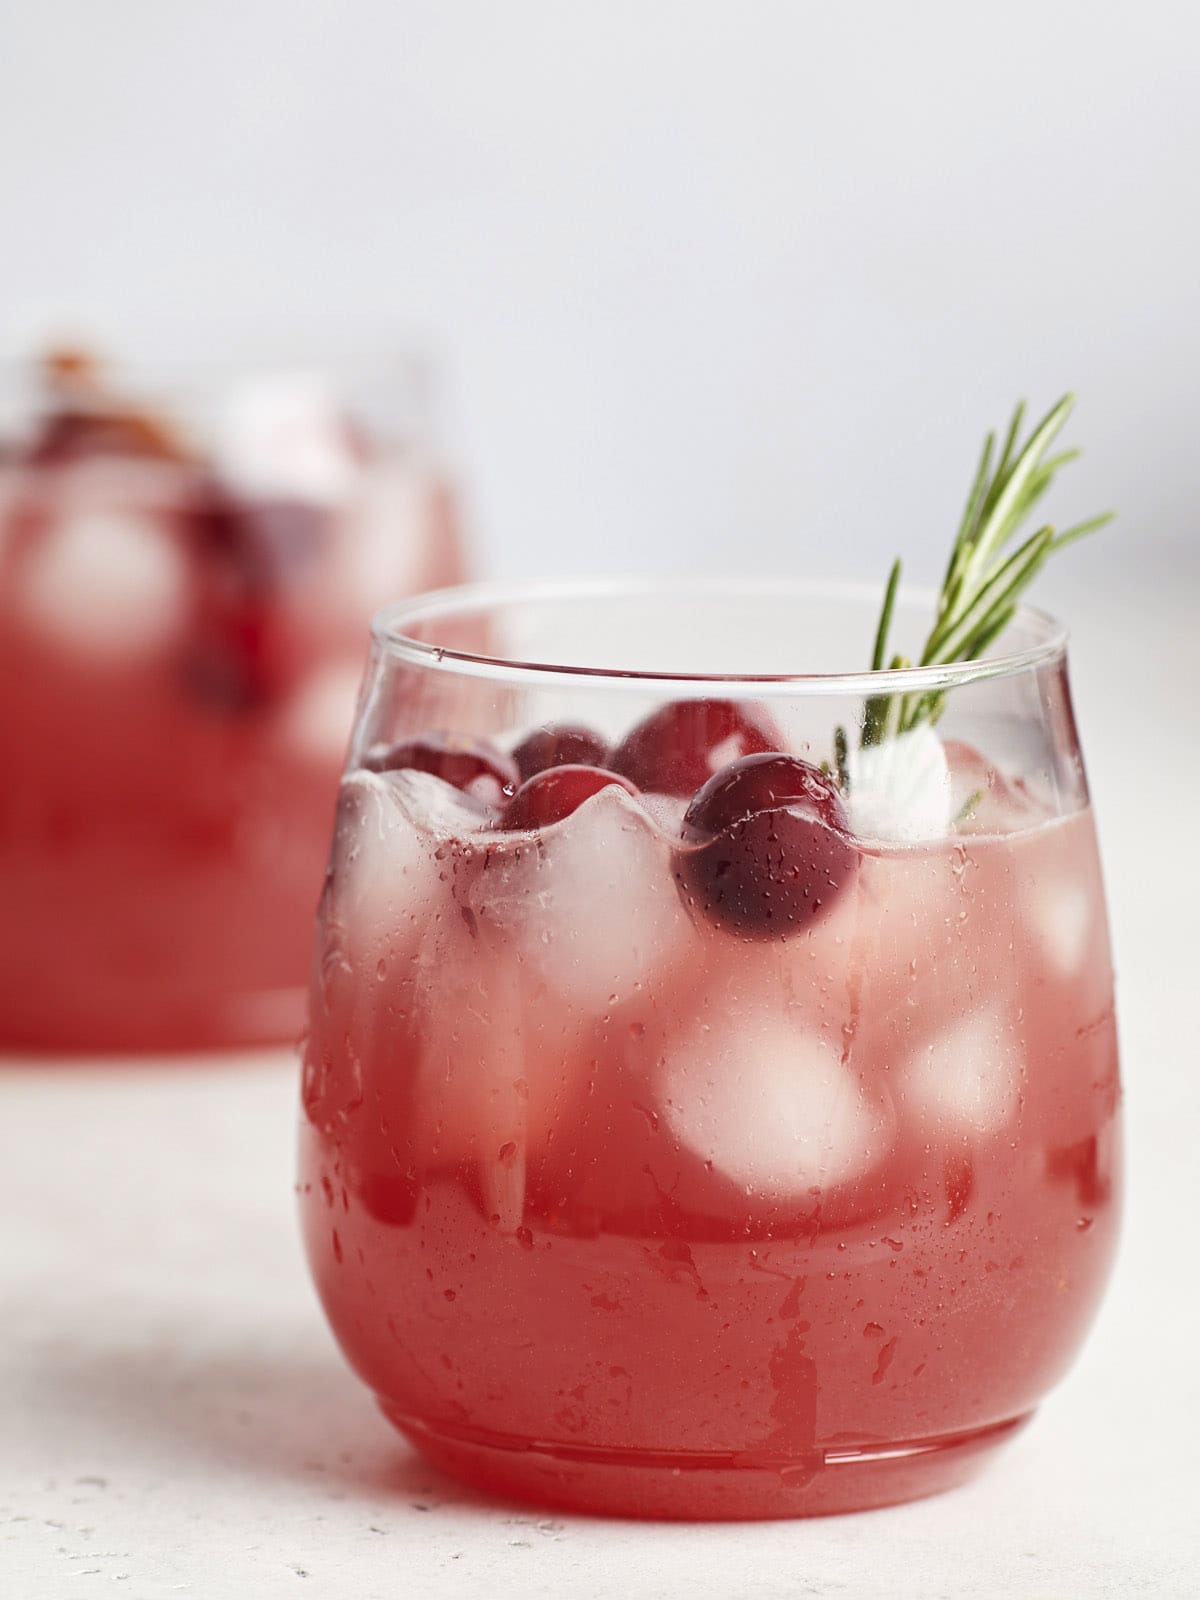
Fresh Rosemary: If you grow your own rosemary, I would highly suggest adding this beautiful garnish to each glass. It doesn’t add flavor, but the extra greenery is so pretty and festive with the red punch.
Tip: Kill two birds with one stone by using frozen cranberries as a garnish AND to help keep the punch cold!
Christmas Punch by the Glass
To make this Christmas Punch recipe in smaller quantities, you can adjust the number of servings in the recipe card below to have the ingredient amounts auto-adjust, or, follow the simple ratio of 2 parts cranberry juice + 2 parts ginger ale + 1 part apple cider. So if you wanted to make one glass you’d use 4 oz. cranberry juice, 4 oz. ginger ale, and 2 oz. apple cider. Easy!
Spike It!
The recipe below is for a non-alcoholic Christmas Punch, but it’s super easy to add alcohol either by the glass or to the entire punch bowl! Simply add 1 to 2oz. of vodka, white rum, or gin to each glass or 20-40oz. to the punch bowl.
Keep it Chilled
To avoid letting the Christmas punch get watered down, I suggest starting with chilled ingredients and adding ice to each glass rather than to the punch bowl itself. Another option is to make a double batch of punch, freezing half in ice cube trays, and using that to chill the punch in the bowl bowl.
Make sure the cranberry juice cocktail, apple cider, and ginger ale are fully chilled beforehand.
Add the cranberry juice cocktail, apple cider, and ginger ale to a large punch bowl or drink dispenser.
Add optional garnishes: orange slices, frozen cranberries, cinnamon sticks (cinnamon is nice to add per glass). To enjoy, ladle the punch over a glass full of ice, with or without your favorite alcoholic spirit.
This recipe is written using 100% cranberry juice cocktail. The labeling of cranberry juice can be very confusing, so make sure to check the ingredient list. What you’re looking for is sweetened cranberry juice, not a mix of cranberry and other fruit juices. Do not buy unsweetened cranberry juice because it is far too tart for the ingredient ratios listed here. …And it’s super expensive.
Combine 64oz. chilled cranberry juice cocktail (100% cranberry), 32oz. chilled apple cider or unfiltered apple juice, and 2 liters of chilled ginger ale.
Add any optional garnishes. I love adding some sliced oranges because they give just the slightest hint of citrus flavor to the punch. Frozen cranberries help keep the punch cold, but will not add any additional flavor. I also love adding a cinnamon stick to every glass because it gives just a hint of cinnamon flavor as you sip, but you could also float a few sticks in the punch bowl.
Fresh rosemary is super pretty in the glass, but I don’t find that it offers any additional flavor. And don’t forget, you can spike each glass of punch with 1-2oz. of your favorite vodka, white rum, or gin! ;)
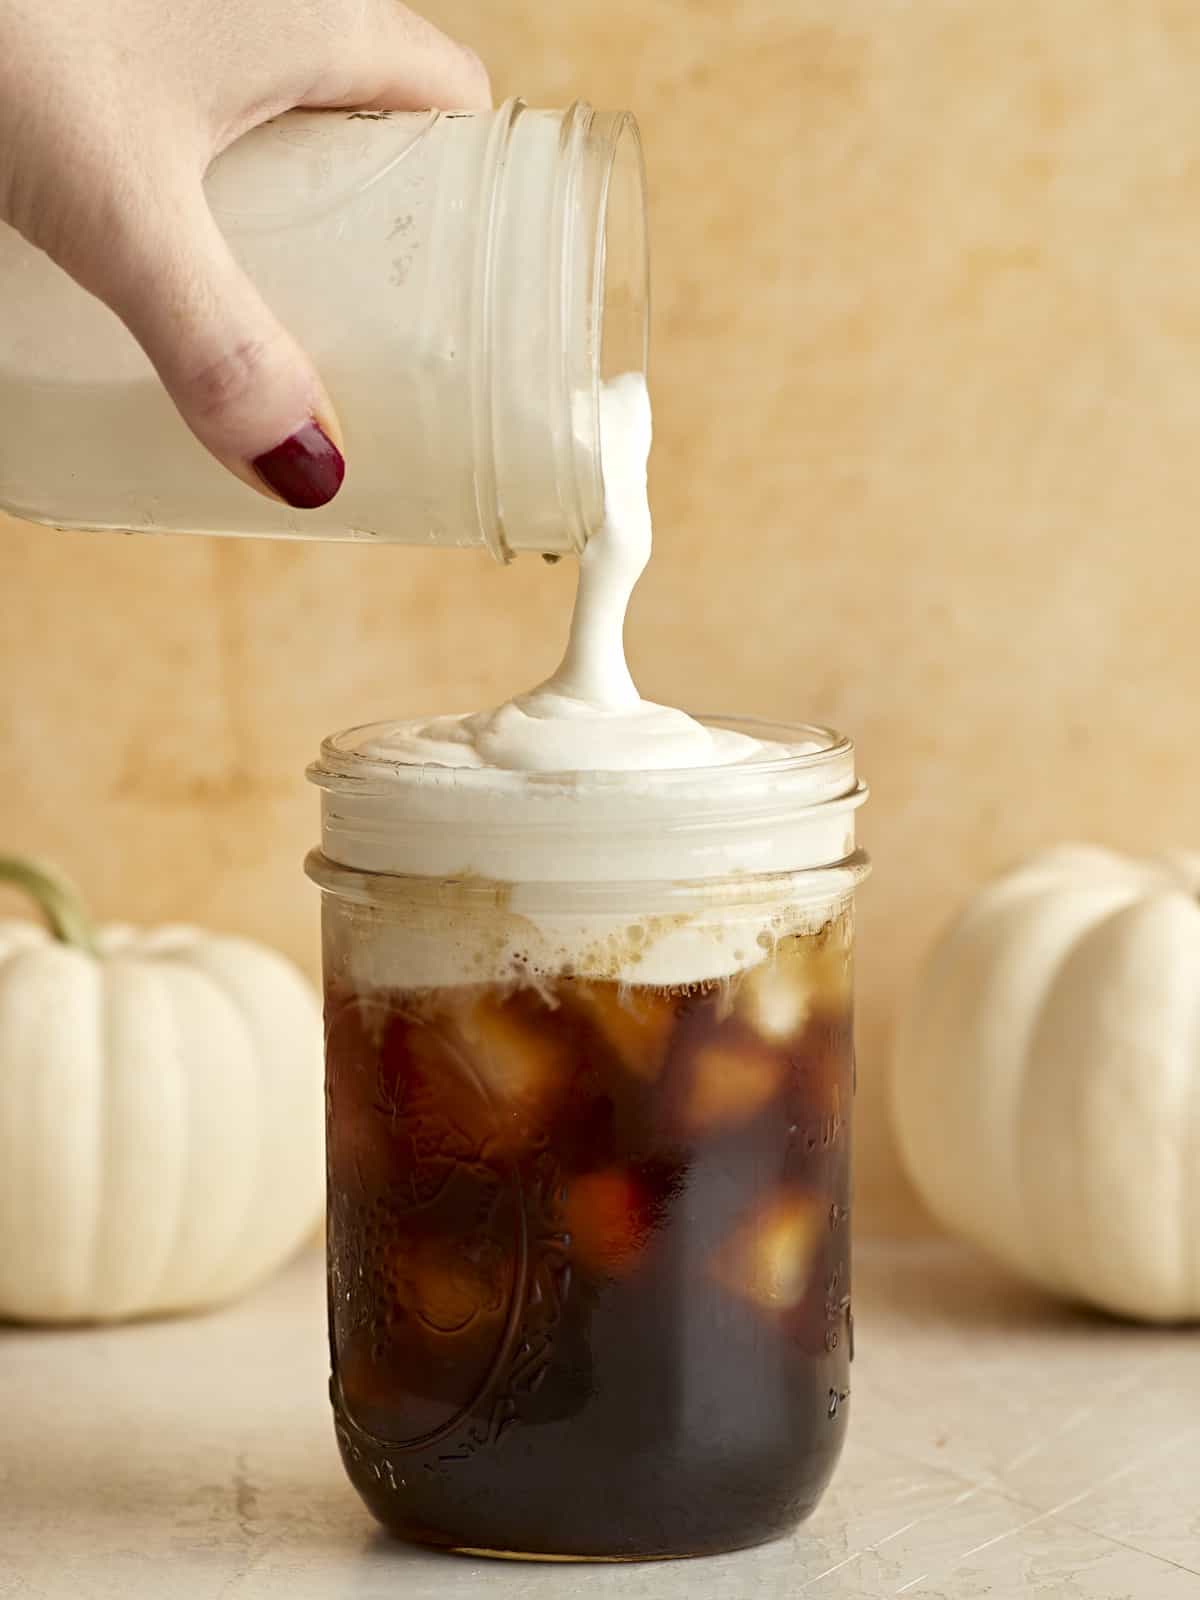
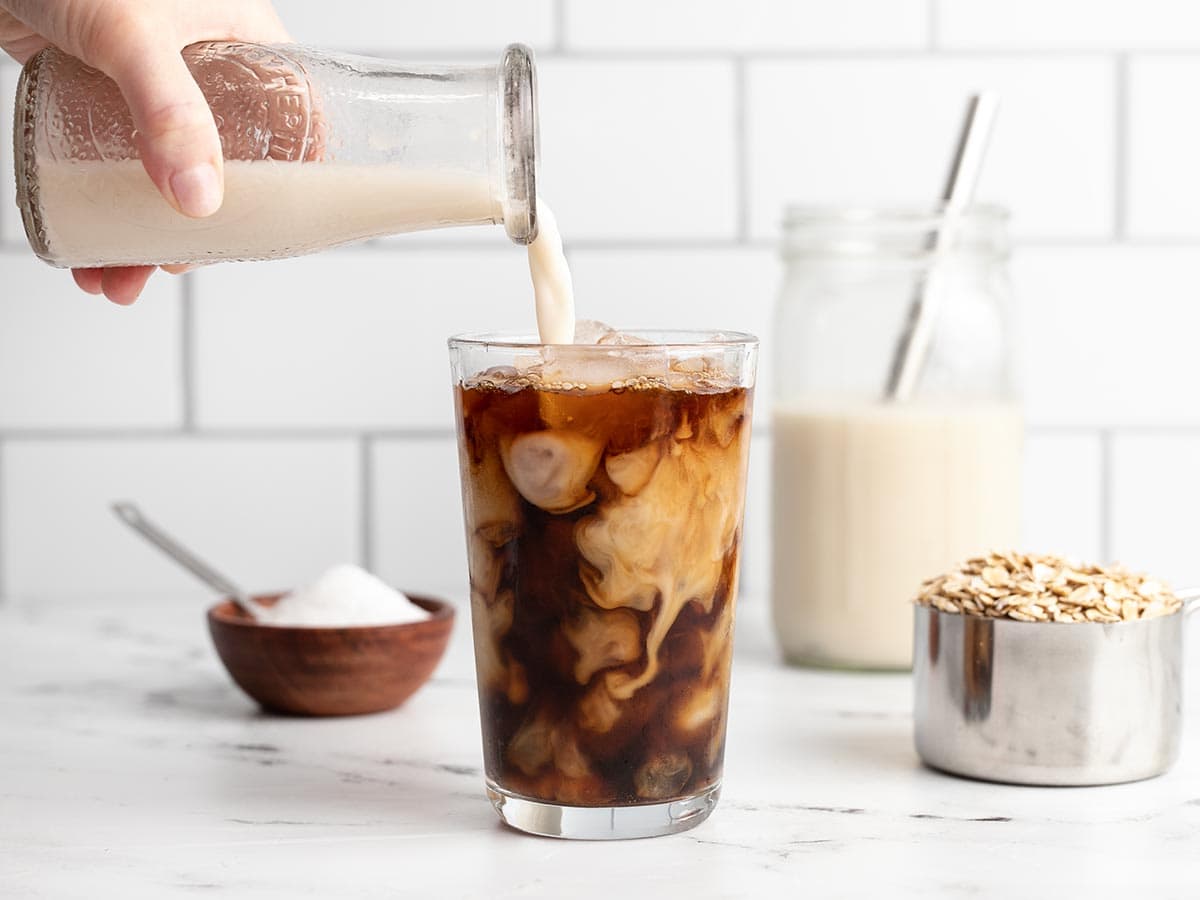
Making your coffee at home probably won’t make you suddenly afford to buy a house, but it could help you buy more groceries every week especially when Starbucks is charging $1.25 just to add sweet cream cold foam on top of your drink. 🤨 I’m going to show you just how fast and easy it is to make sweet cream cold foam so you can make yourself a special drink at home and save that $5 for groceries. It adds up fast!
What is Sweet Cream Cold Foam?
Sweet cream cold foam is a lot like whipped cream, except not as stiff. It’s smooth and pourable, but still light, airy, and sweet. You can use it to top both hot and iced coffee drinks and it stirs into the drinks easily to make every sip extra creamy.
Ingredients for Sweet Cream Cold Foam
Making sweet cream cold foam only takes a few ingredients and about 30 seconds. Here’s what you’ll need to make sweet cream cold foam:
Milk: Make sure to use whole milk to keep the cold foam rich and thick. The milk helps thin the heavy cream just enough to make it pourable once whipped.
Heavy Cream: Heavy cream whips up into a light and airy foam while staying super creamy.
Vanilla Extract: A splash of vanilla extract adds to the extra creamy flavor.
Powdered Sugar: Powdered sugar dissolves quickly and easily into the thick dairy so you aren’t left with a grainy foam.
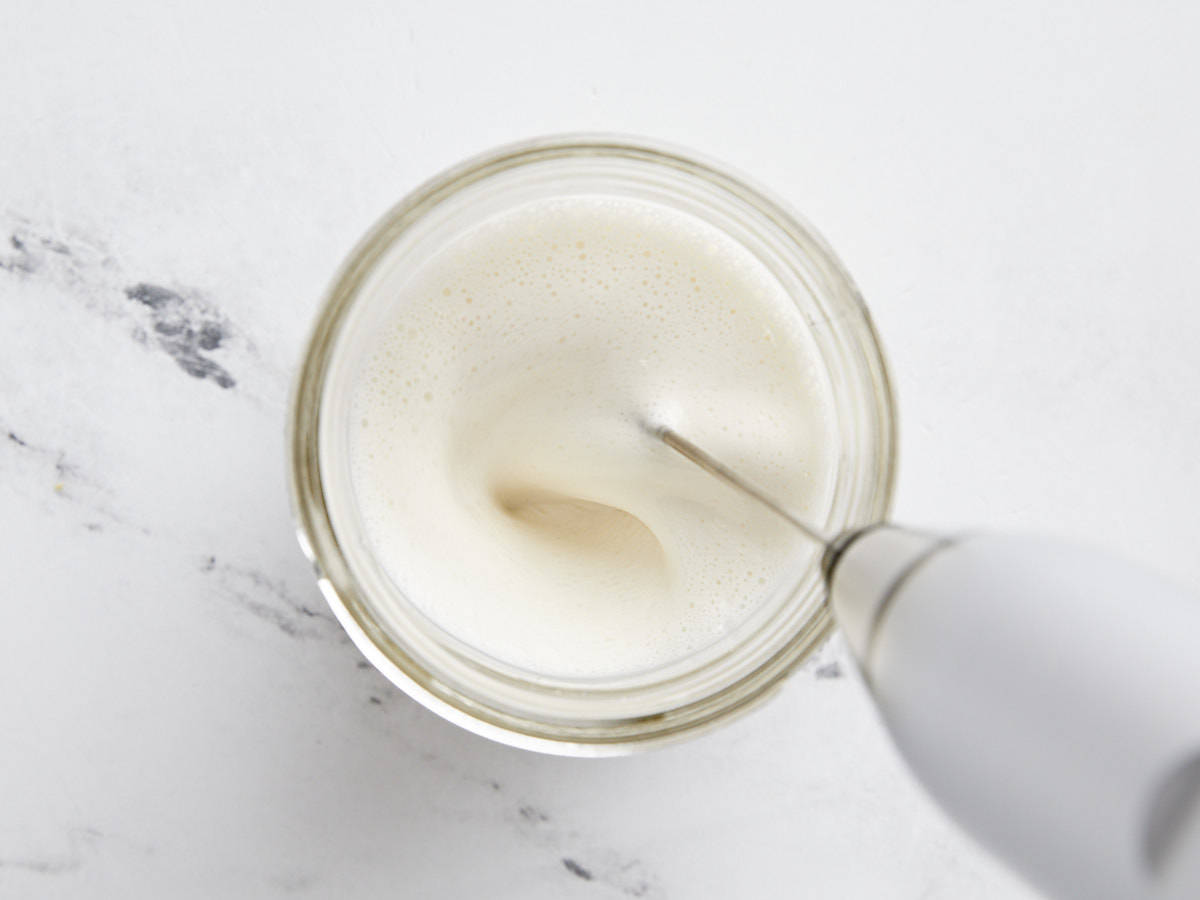
What Kind of Frother is Best?
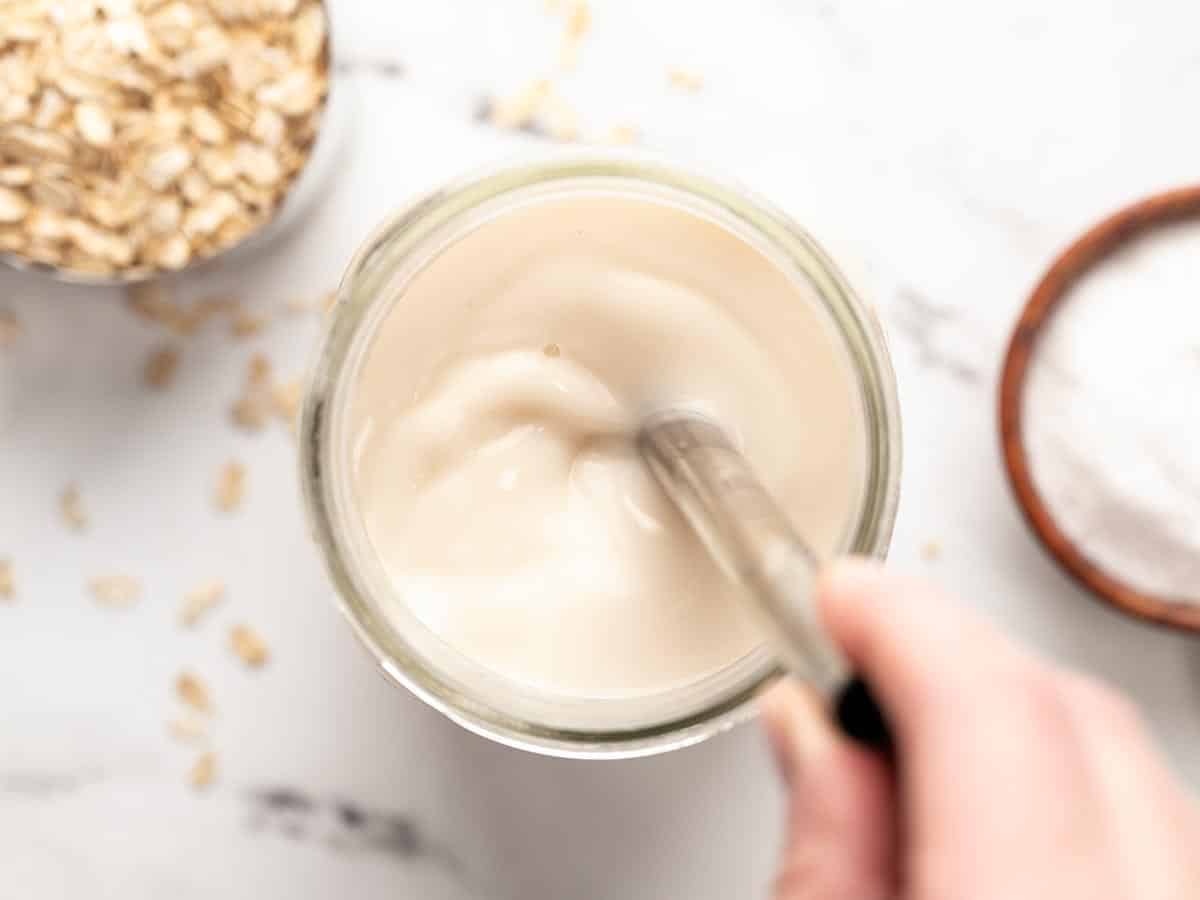
If you make a lot of beverages at home, I highly suggest getting one of these little handheld frothers because it will pay for itself in no time. I find myself using it all the time. It whips up this sweet cream cold foam in seconds. You can also whisk by hand or vigorously shake the mixture in a tightly closed mason jar. Make sure the mason jar is at least double the volume of the liquid ingredients to give it room to aerate.
Can you Store the Leftovers?
This sweet cream cold foam is best when used immediately after making, so it’s best to make it in small batches like the recipe below. If the cold foam sits for a while before you pour it onto the drink, it will begin to separate into a stiffer foam layer on top and a fluid milk layer below. If it does separate, you can easily whisk it back together before pouring.
My Favorite Iced Coffee Recipe:
Here’s my favorite way to use the sweet cream cold foam at home. It makes the most delicious fall-flavored iced coffee drink!
Stir 1 Tbsp maple syrup and a pinch of cinnamon into 8oz. strong hot coffee.
Add all of the ingredients to a glass or 8oz. jar. Use a milk frother or close the jar tightly and shake the mixture vigorously until it turns into a smooth foam.
Pour the sweet cream cold foam over a hot or cold beverage immediately, and enjoy.
How to Make Sweet Cream Cold Foam – Step by Step Photos
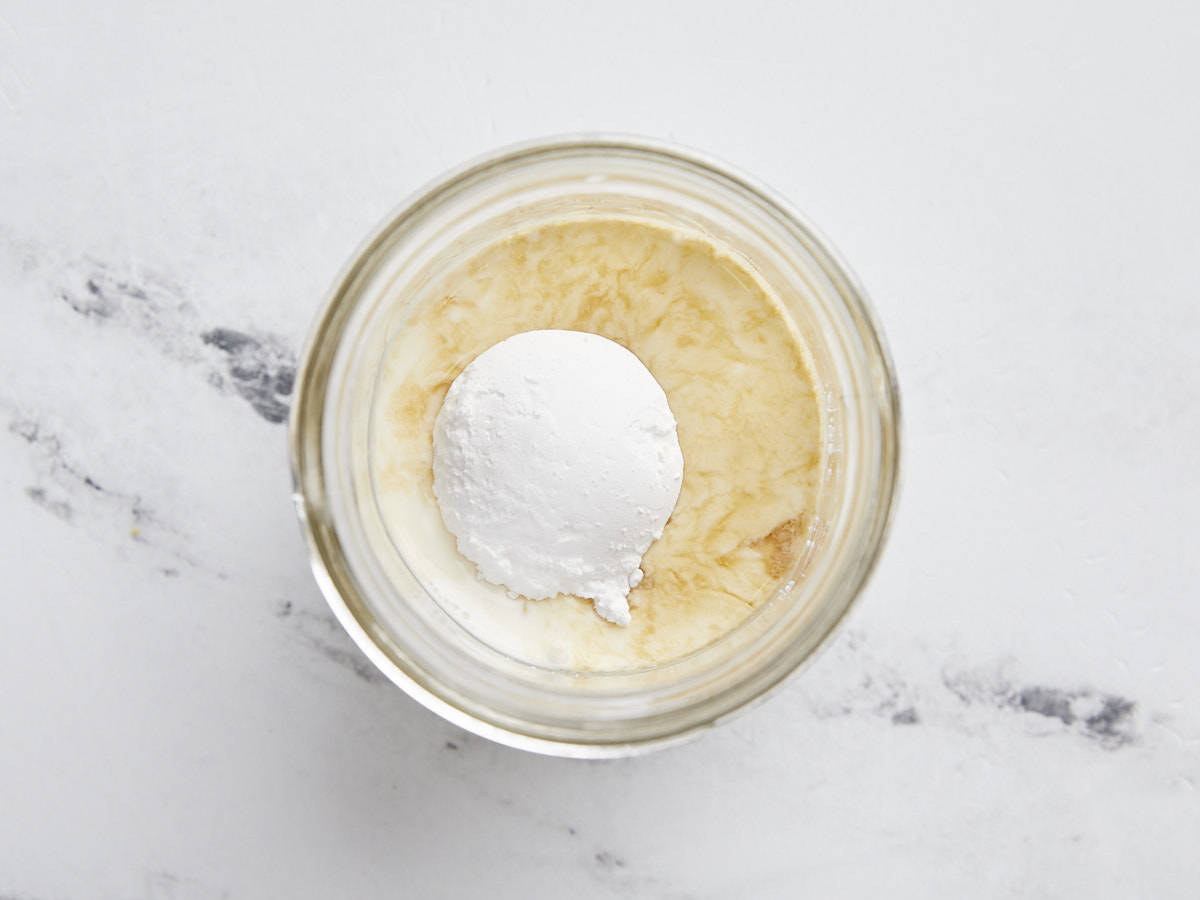
Add ¼ cup whole milk, 2 Tbsp heavy cream, ¼ tsp vanilla extract, and 1 Tbsp powdered sugar to a glass or an 8oz. jar.
Use a handheld frother to whip the mixture into a smooth foam, or close the jar and shake vigorously until it’s a thick, foamy consistency.
Pour the sweet cream cold foam over your favorite coffee drink (hot or cold) and enjoy immediately! If the cold foam sits a few minutes before you’re ready to pour, make sure to whisk it up again briefly before pouring.
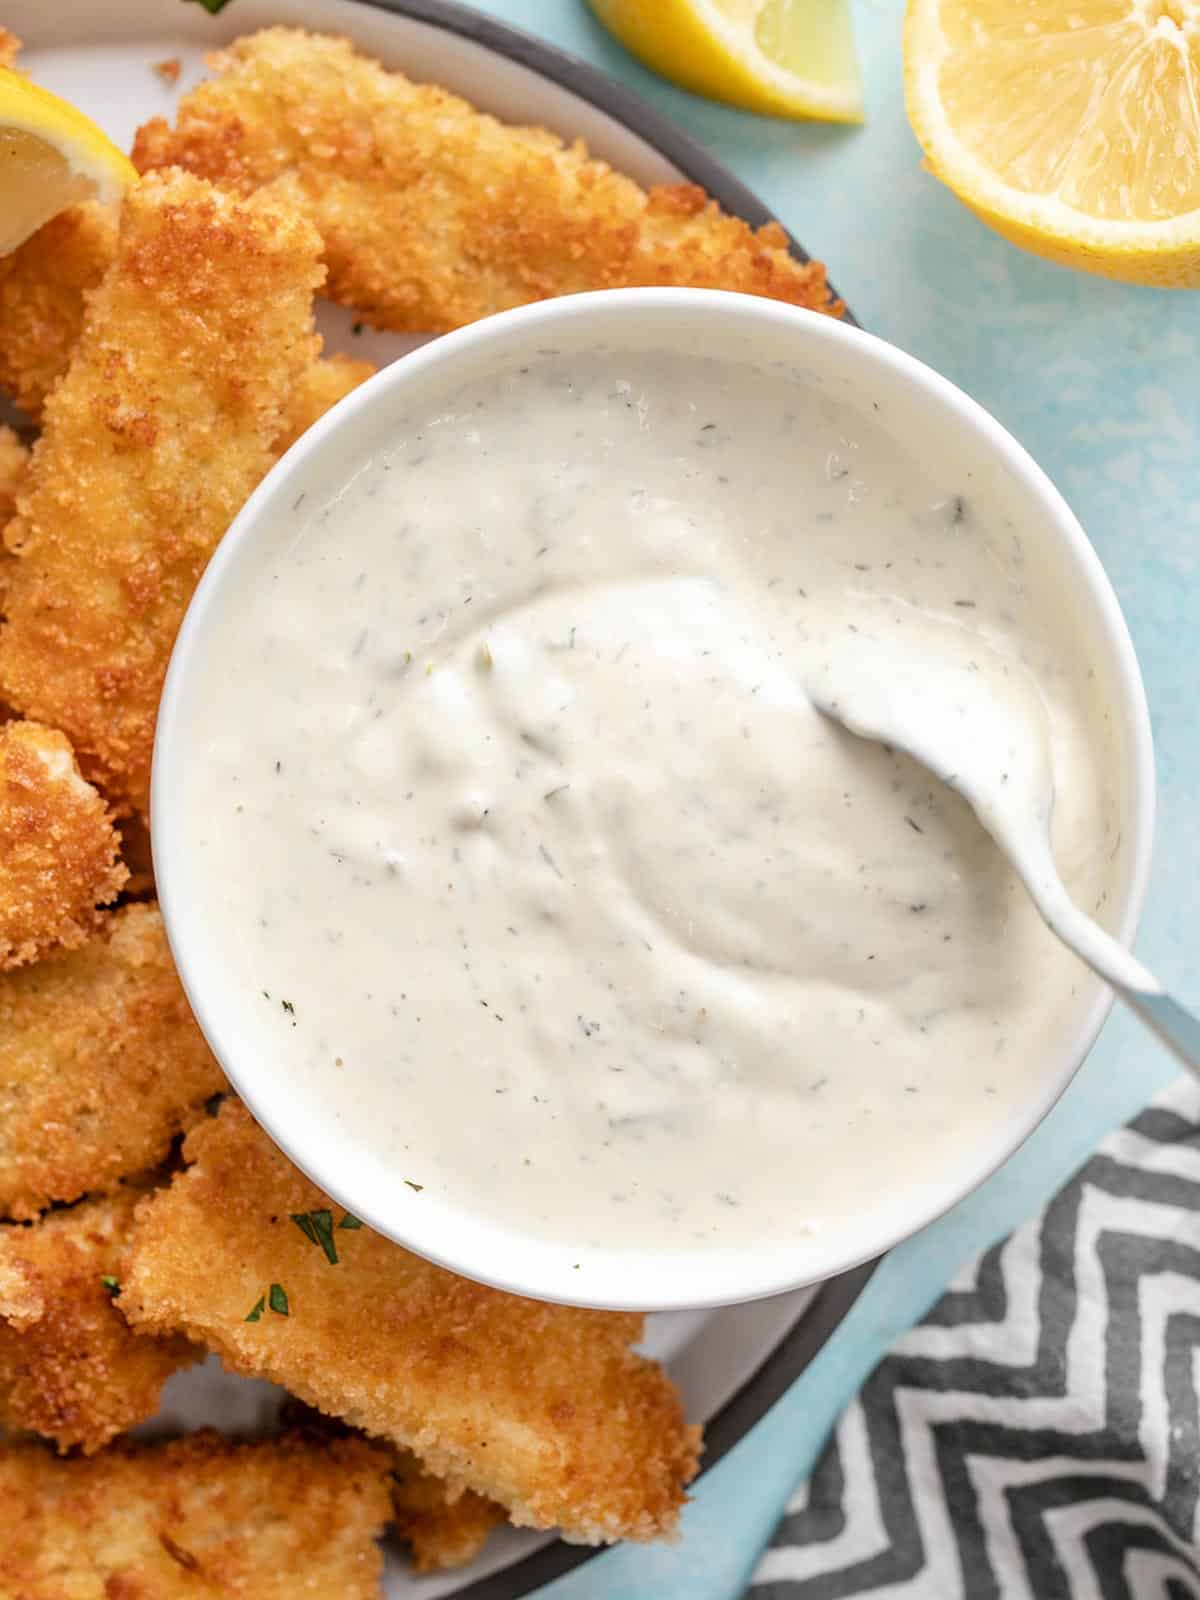
I’m always on a quest to reduce the number of half-used bottles of sauce in my fridge (the struggle is real…) Instead of buying every single sauce under the sun, I keep a few basic condiments on hand so I can make any other homemade sauce whenever I want and in whatever quantity I need. This Homemade Tartar Sauce is the perfect example. I don’t eat tartar sauce often, but when enjoying homemade fish sticks it’s an absolute must! It takes just a few minutes to whip up, uses only six (or less!) pantry and fridge staples, and I can make any amount that I need with NO leftovers. #win
What is Tartar Sauce?
Tartar sauce is a rich and tangy mayonnaise-based sauce that is perfect for serving with any type of fish or seafood. It’s incredibly simple to make, and you might just have all of the ingredients on hand!
Ingredients for Tartar Sauce
Here are the ingredients for our super easy homemade tartar sauce recipe:
Mayonnaise: This is the rich and creamy base for tartar sauce. You can use your favorite brand, but I usually lean towards Hellmann’s or Dukes.
Plain Yogurt (optional): I like to do a half-and-half mix of mayonnaise and yogurt because the yogurt lightens up the sauce just a bit and makes the flavor slightly brighter. You can use all mayo if you prefer a richer sauce. You can use regular-style yogurt for a thinner tartar sauce, or Greek-style yogurt for a thicker tartar sauce.
Dijon Mustard: Dijon adds a nice tanginess to the tartar sauce, plus a little complexity to the flavor.
Lemon Juice: Lemon and fish are BFF’s, so a little lemon juice in the mix helps the tartar sauce pair perfectly with the seafood and it helps cut the heaviness of the mayo.
Dill Relish: Relish gives the sauce some much-needed texture and the dill flavor goes perfectly with lemon.
Dried Dill: We’re doubling down on the dill flavor with a little more dried dill. It amps up the flavor and adds a little more color to the sauce.
What Else Can I add?
This easy tartar sauce recipe is a great base that can then be modified to fit your taste buds or other ingredients you may have on hand. Try adding these ingredients to customize your tartar sauce:
Try adding a dash or two of hot sauce or a small spoonful of horseradish for some kick!
Got leftover capers? Stir them in for some extra briney flavor.
Finely diced red onion would add even more crunch and savory flavor.
Add a dash of Worcestershire sauce for some more umami.
Add a tablespoon of freshly chopped parsley for more freshness.
*You can use regular style yogurt for a thinner sauce, or Greek style yogurt for a thicker sauce. Or, substitute with more mayonnaise for an ultra rich and thick tartar sauce.
All you have to do to make tartar sauce is stir together ½ cup mayonnaise, ½ cup plain yogurt (or just do 1 cup total mayonnaise), ¼ cup dill relish, 1 Tbsp Dijon mustard, 1 Tbsp lemon juice, and ½ tsp dried dill.
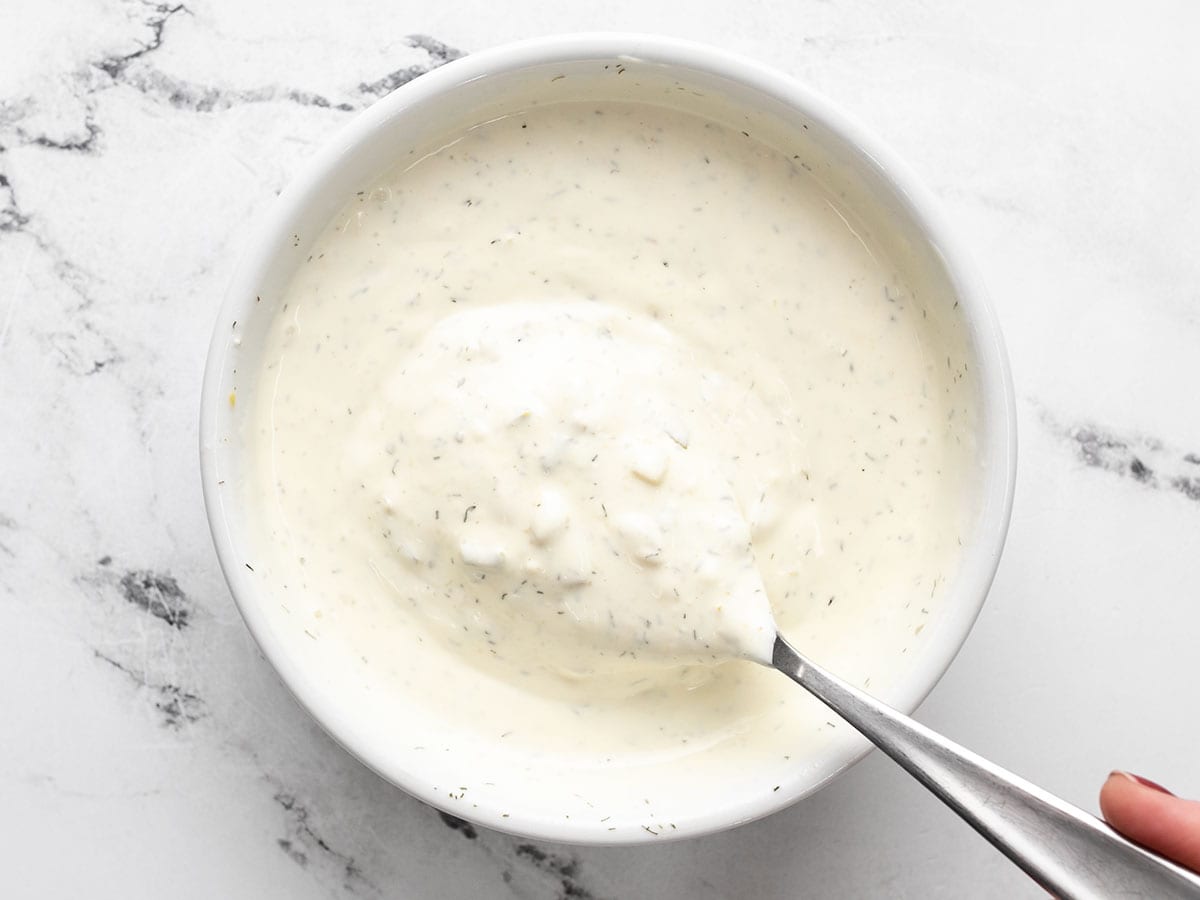
Stir it all together and you’re good to go! You can store this sauce in the fridge for up to five days. If you prefer a thicker tartar sauce, use Greek-style yogurt, or skip the yogurt and use all mayonnaise.
Serve with your favorite seafood, roasted vegetables, or even as a sandwich spread!
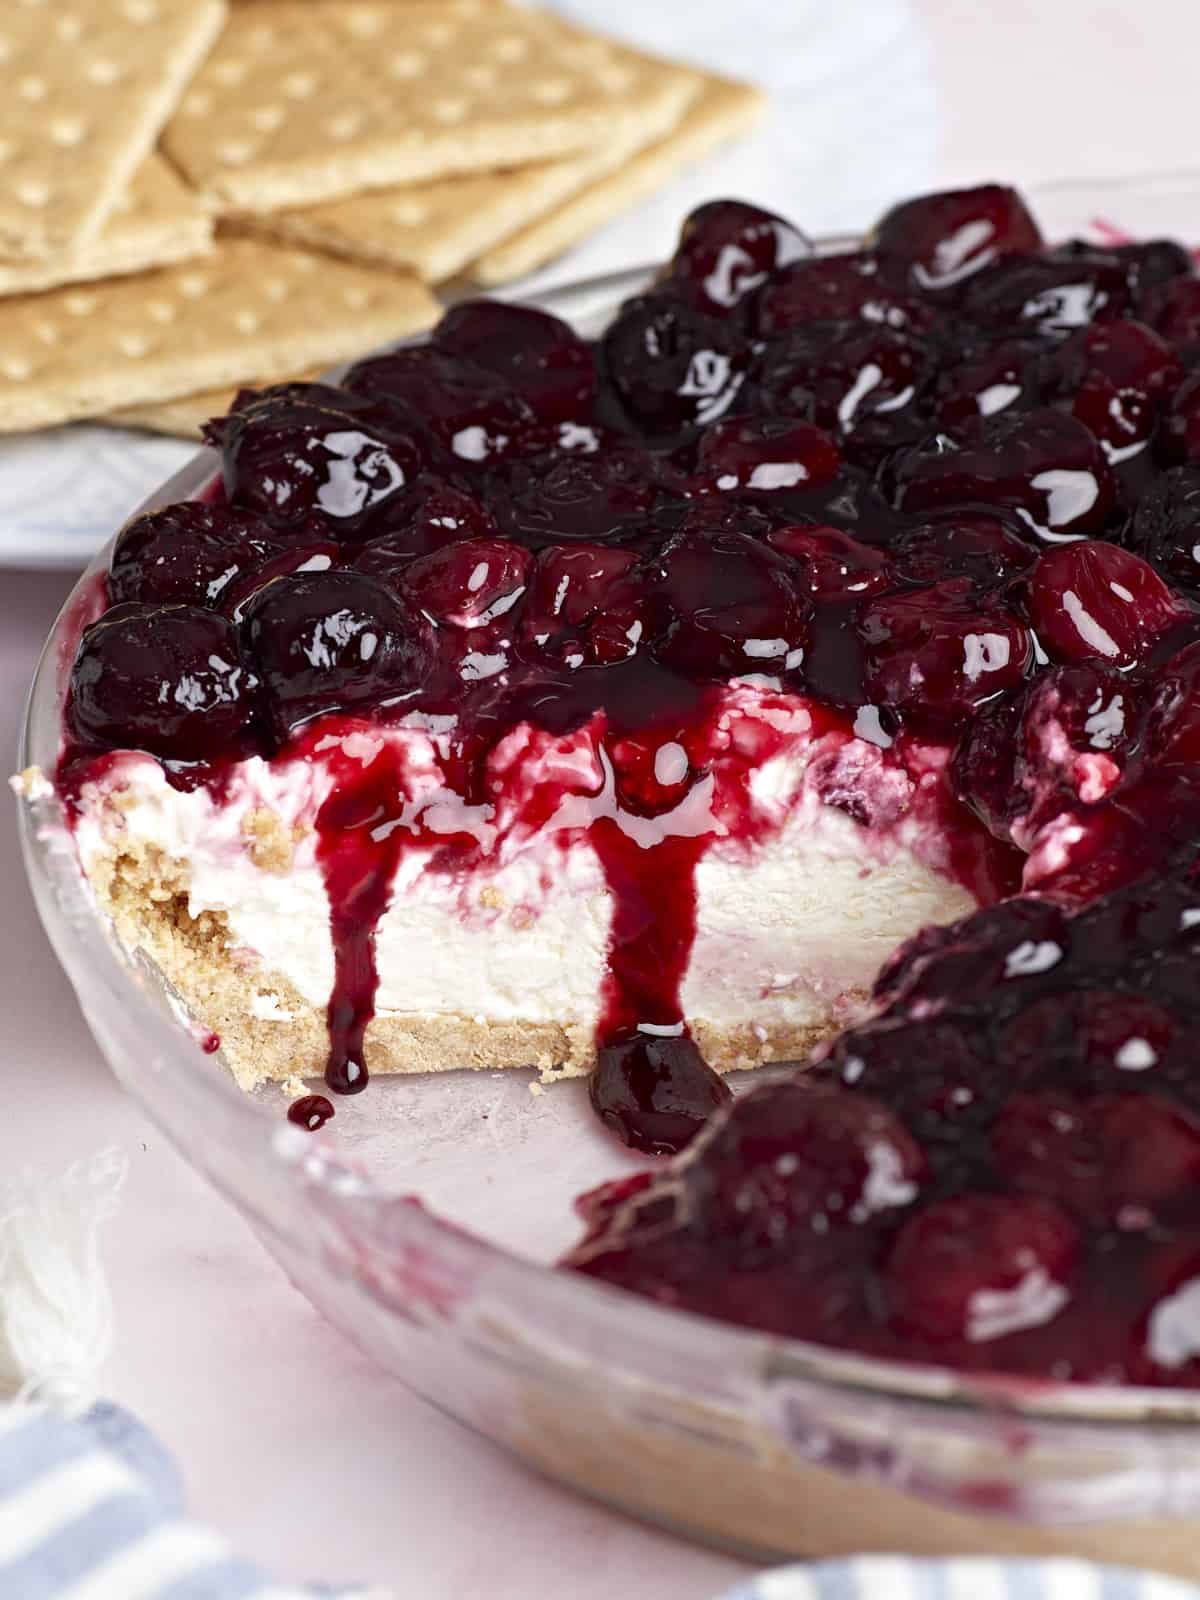
This mouth-wateringly creamy No-Bake Cheesecake is the perfect dessert for when you’re craving something sweet but don’t want to spend much time in the kitchen. It truly doesn’t get much easier when it comes to creating a dessert that feels so extravagant; you’re just crushing cookies and mixing a few ingredients. That’s it! PS You can make this up to 4 days ahead!
What Is a No-Bake Cheesecake?
Most cheesecakes (like New York, Philadelphia, or Basque) are made with eggs and baked, which gives them a rich, velvety mouthfeel and firm texture. Making traditional cheesecake is a WHOLE THING. Which is why I love No-Bake Cheesecake! It’s regular cheesecake’s less fussy younger cousin. You don’t use eggs. Instead, you use whipped cream to create a much lighter texture than a traditionally baked cheesecake. It’s also really easy to go plant-based when you make a No-Bake Cheesecake!
Ingredients For No-Bake Cheesecake
This easy-to-make No-Bake Cheesecake comes together in fifteen minutes with just a handful of ingredients. My favorite kind of dessert! The hardest part is waiting for it to set. Here’s what you’ll need to get this No-Bake Cheesecake on your table:
Honey-Graham Crackers: These cookies are the base of our crust. If you don’t like graham crackers, use your favorite cookie here. Oreos (minus the filling) and Shortbread Cookies are great substitutions.
Salted Butter: Helps pull the crust together. If you don’t have salted butter, use unsalted, and add 1/8th teaspoon salt to the crust mixture. If you’re dairy-free, substitute with plant-based butter.
Brown Sugar: Helps sweeten the crust. Since cheesecake is served chilled, you won’t be able to taste the sugar as much as if it were a room-temperature dessert. So, we add a touch of sugar to the crumbled cookies to make sure the sweetness shows up. However, if you’re watching your sugar intake and want to leave it out, go for it. The crust will work without it.
Heavy Whipping Cream: Will be whipped to stiff peaks to lighten the cream cheese filling. If you’re plant-based, sub with unsweetened coconut cream.
Cream Cheese: Because what would a cheesecake be without it? You can use plant-based cream cheese as well.
Greek Yogurt: Adds a tanginess to the filling that helps develop a more intricate flavor profile without complicating things. You can substitute it with sour cream. For my dairy-free friends, use a plant-based sour cream or yogurt.
Powdered Sugar: Is the best option for sweetening, as it will dissolve immediately into the filling. Make your own by blending 1/2 cup granulated sugar with 1/2 tablespoon cornstarch until the mixture is powdery. You can also sweeten the filling with 1/3 cup of honey.
Vanilla: scents the filling and adds depth.
What To Serve With No-Bake Cheesecake
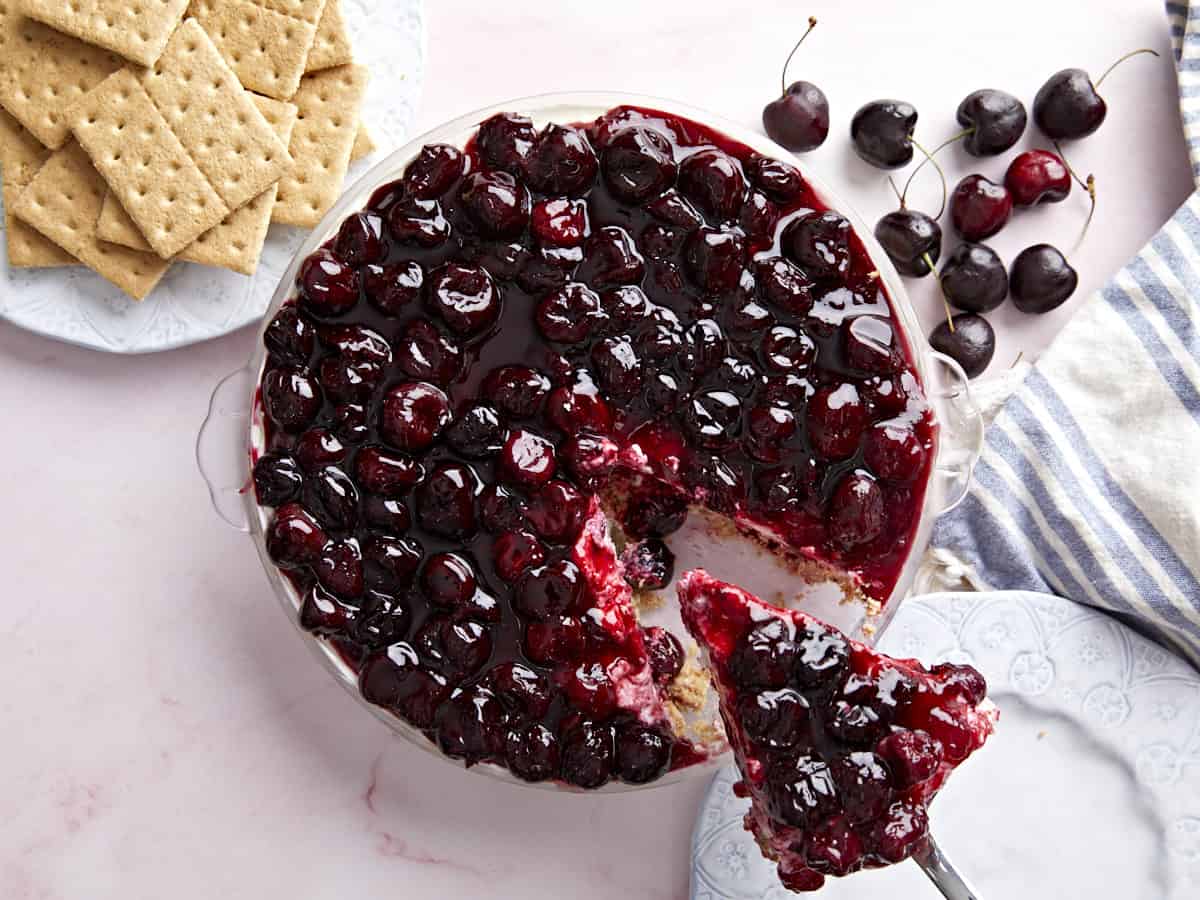
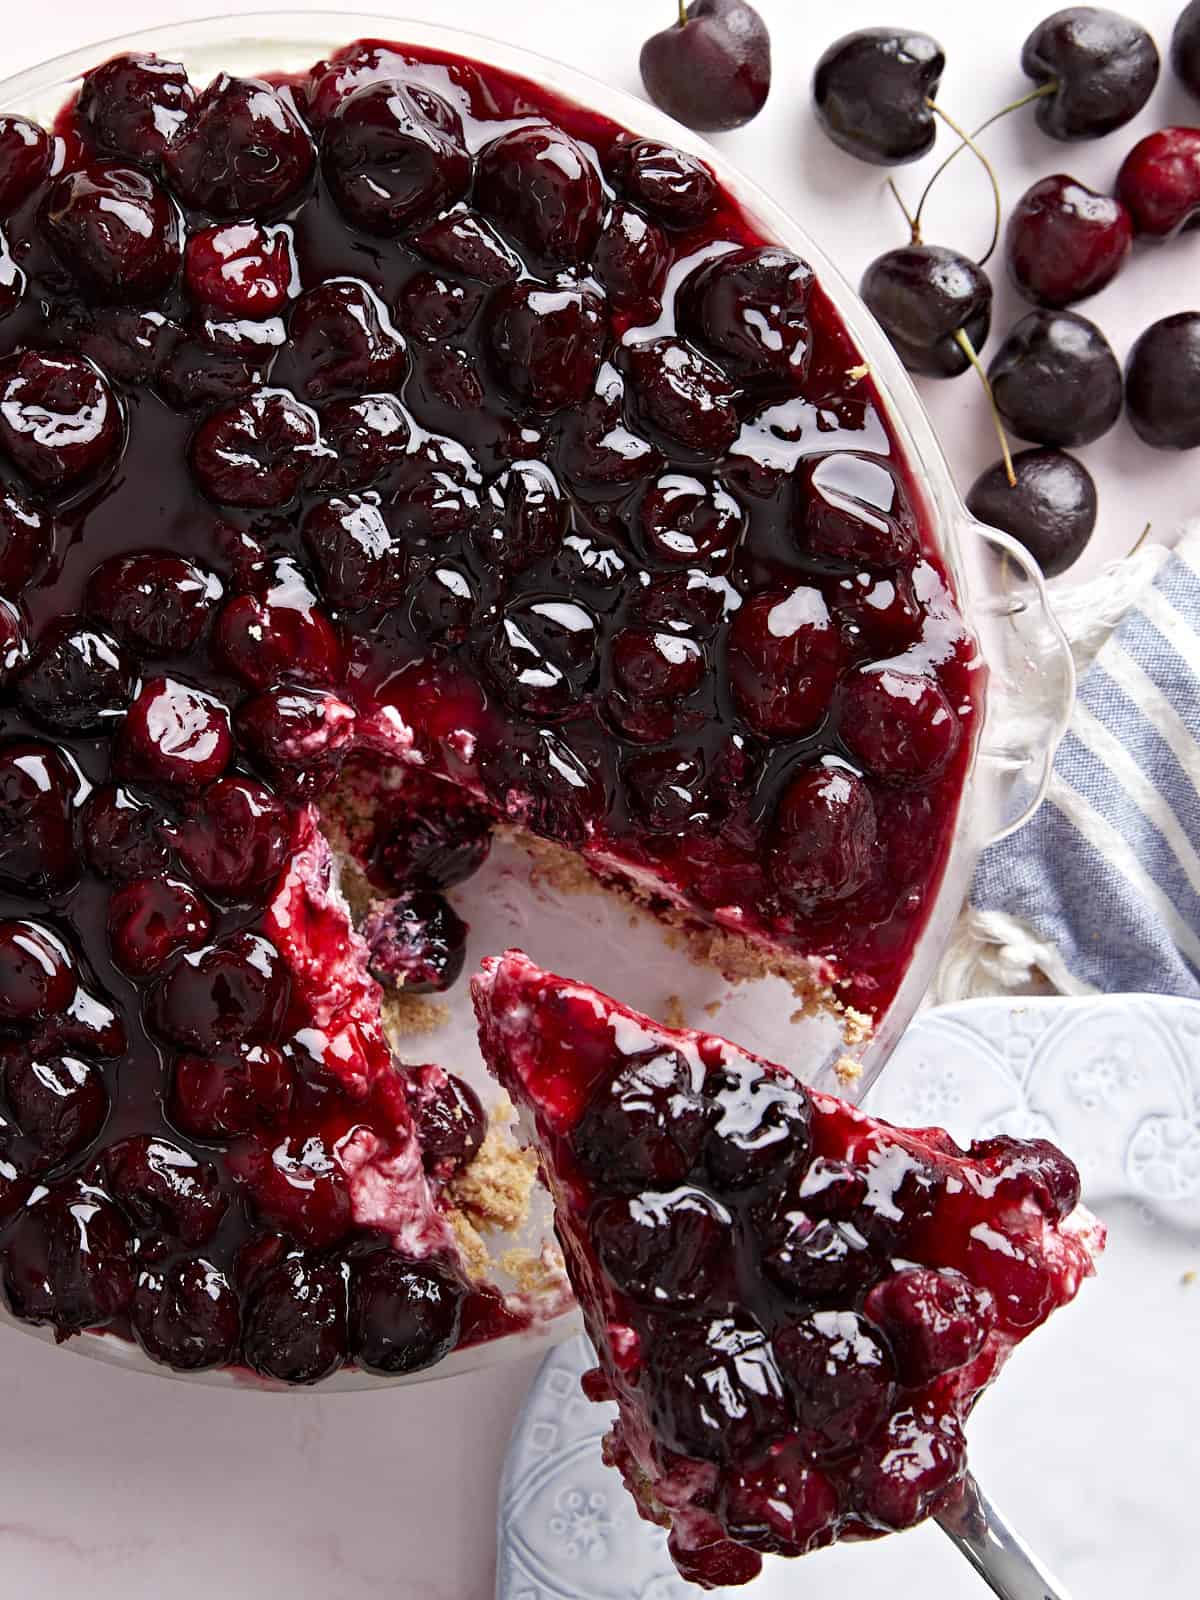
This easy breezy dessert is perfect topped with our Strawberry Syrup, Lemon Curd, Cherry Sauce, or Blueberry Sauce. If you want to garnish with fruit, frozen and thawed blueberries or cherries are an easy and economical option. You can, of course, top this easy cheesecake with sliced fresh strawberries.
How To Store No-Bake Cheesecake
This luscious cheesecake can be made up to four days ahead. If you have any leftovers (highly doubtful), wrap them well and store them in an air-tight container for up to five days in the fridge and three months in the freezer.
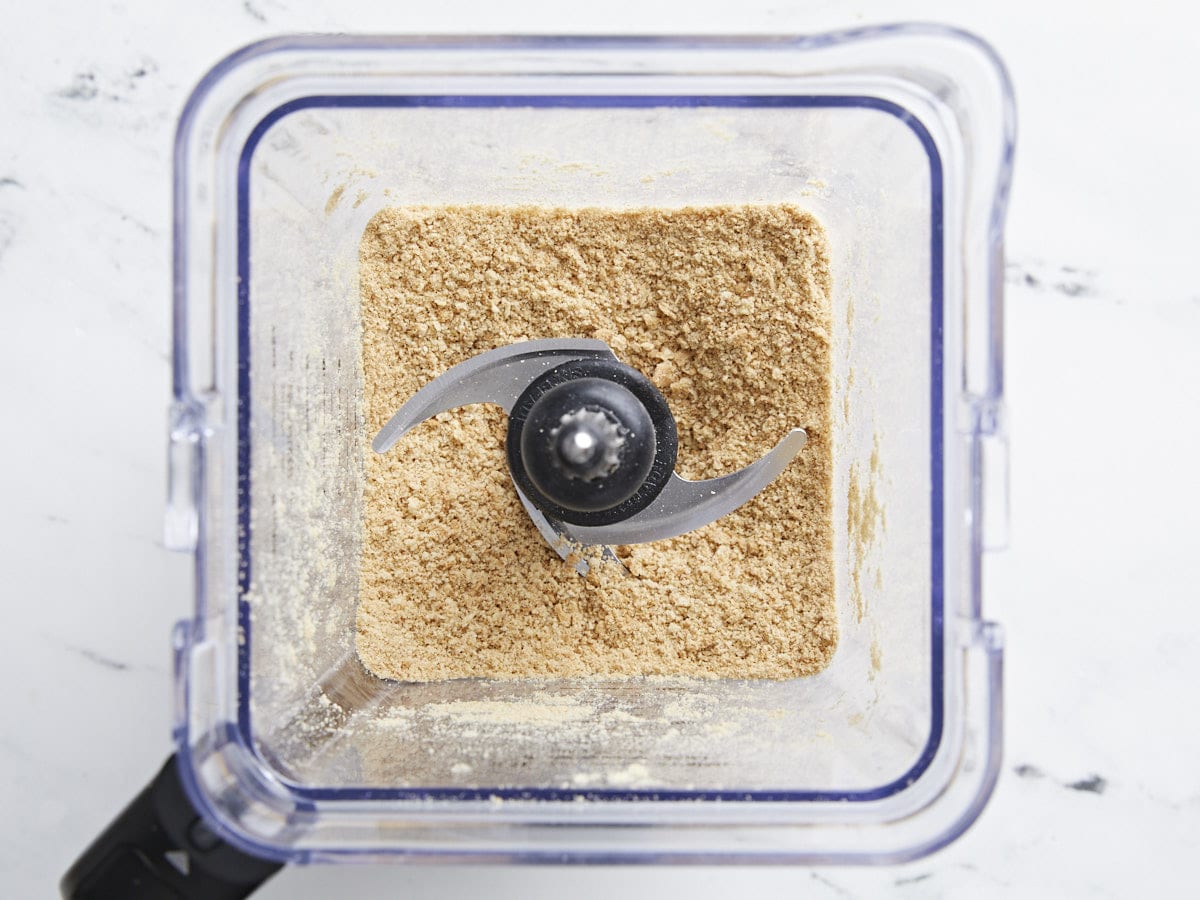
Crush the graham crackers to a fine powder in a blender or food processor and add to a medium bowl.
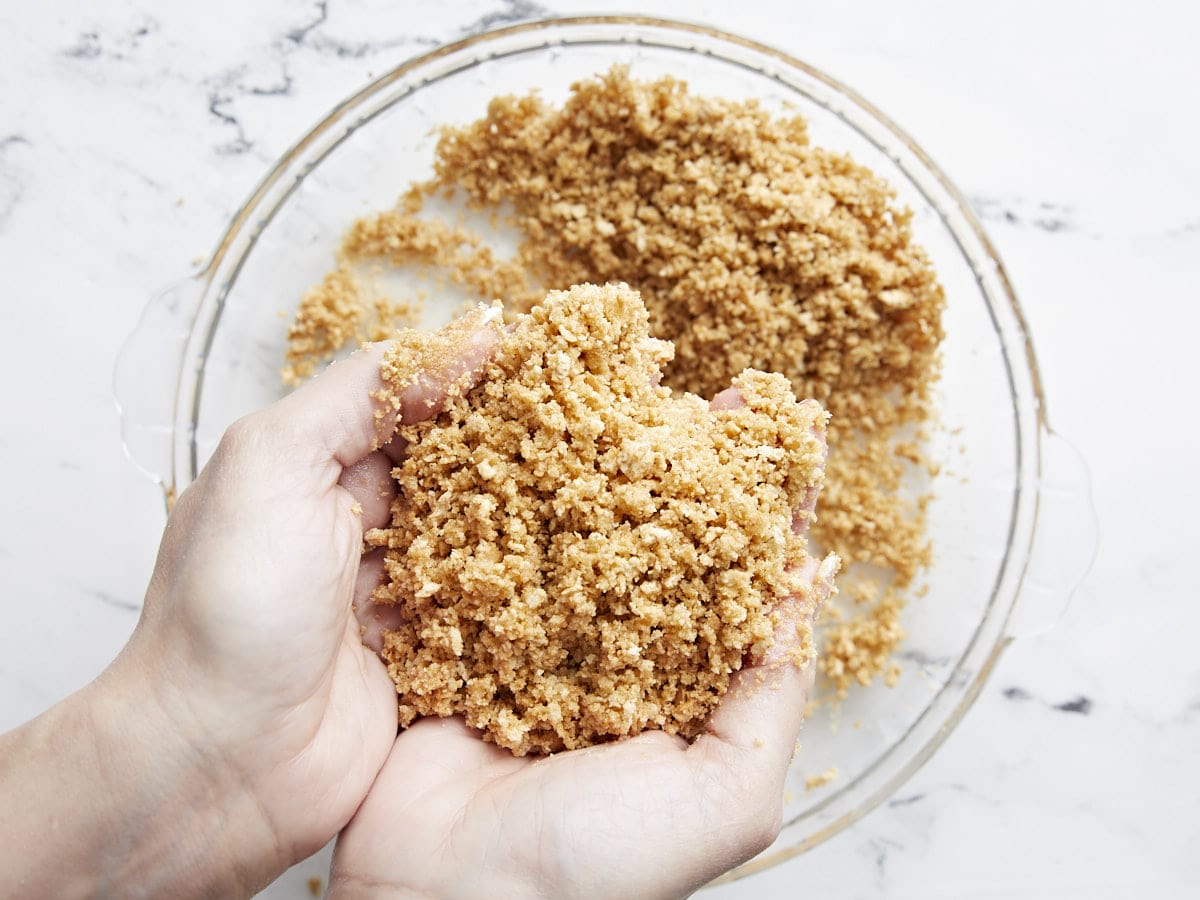
Mix the brown sugar into the graham cracker crumbs and then add the melted butter. Use your hands to mix the butter into the crumbs until a sand-like consistency is created.
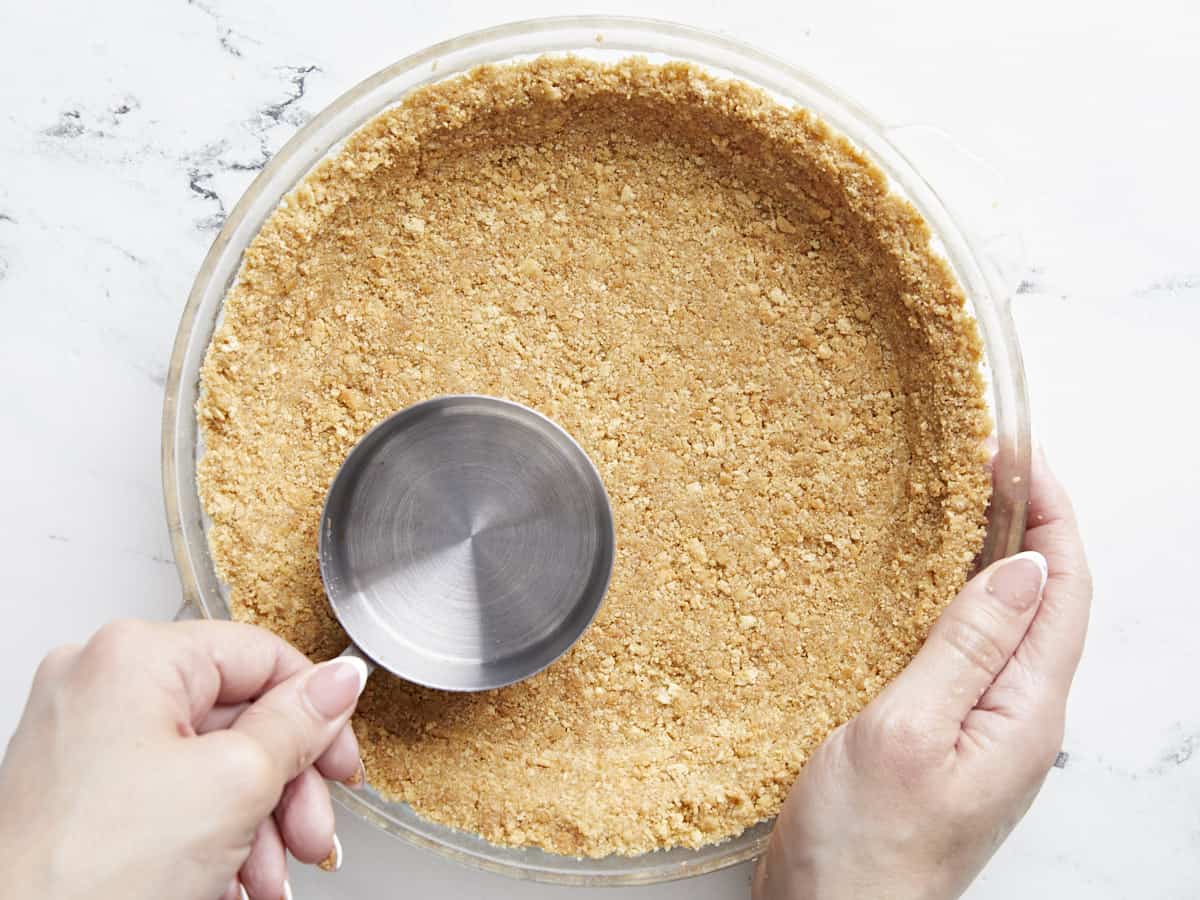
Pack the cookie crumb mixture into a 9.5-inch pie plate using the bottom of a measuring cup to press it in well and smooth it out. Press the crumbs from the center, out, and all the way up the sides. Place the pie plate in the freezer while you make the filling.
Filling
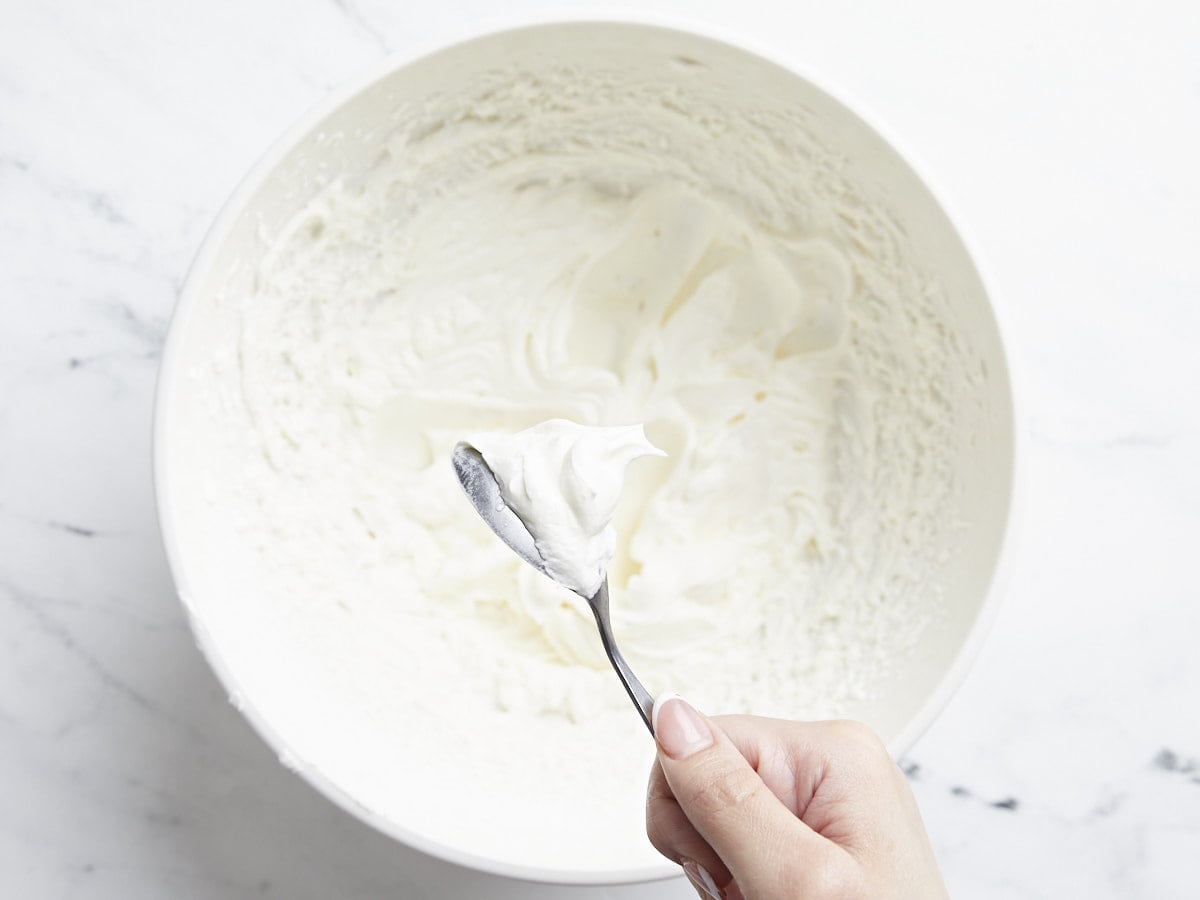
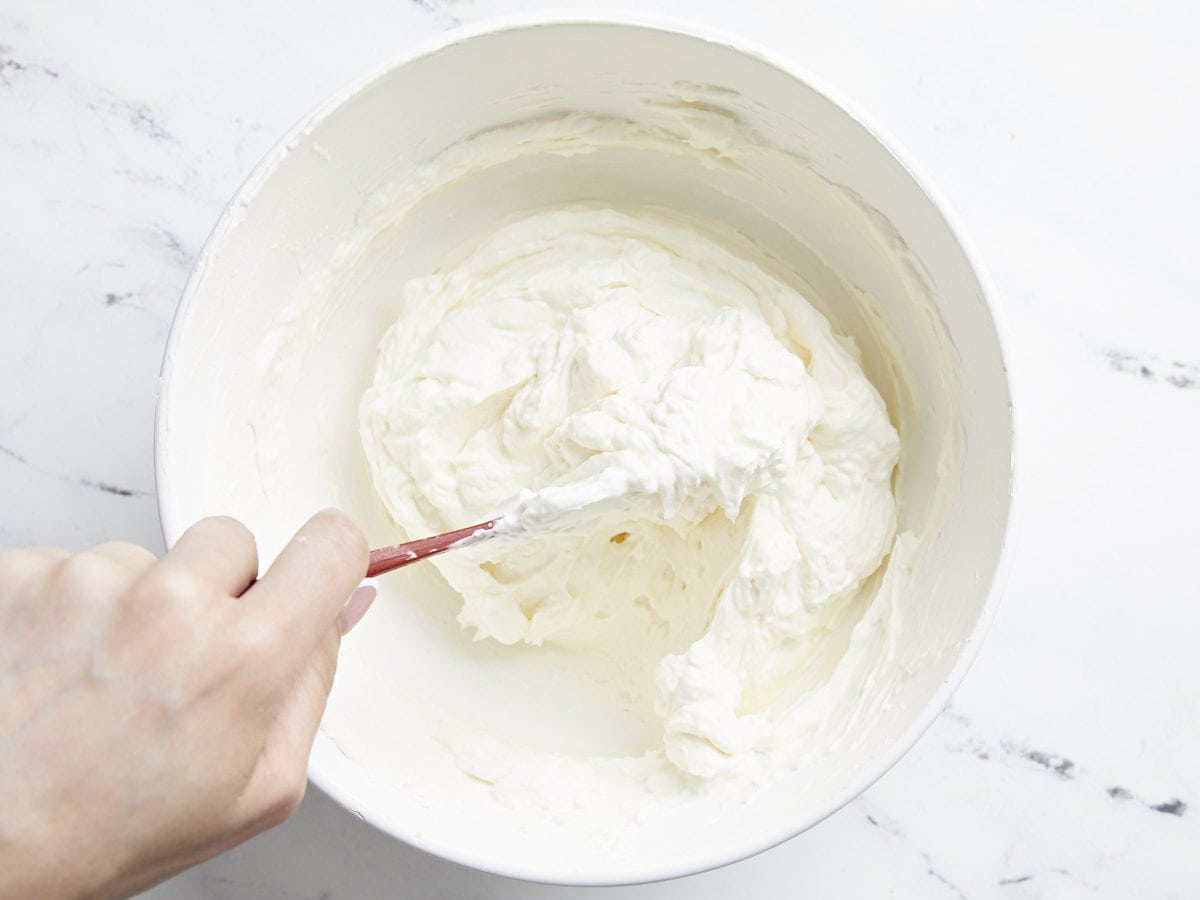
Whip the heavy whipping cream and powdered sugar to stiff peaks.
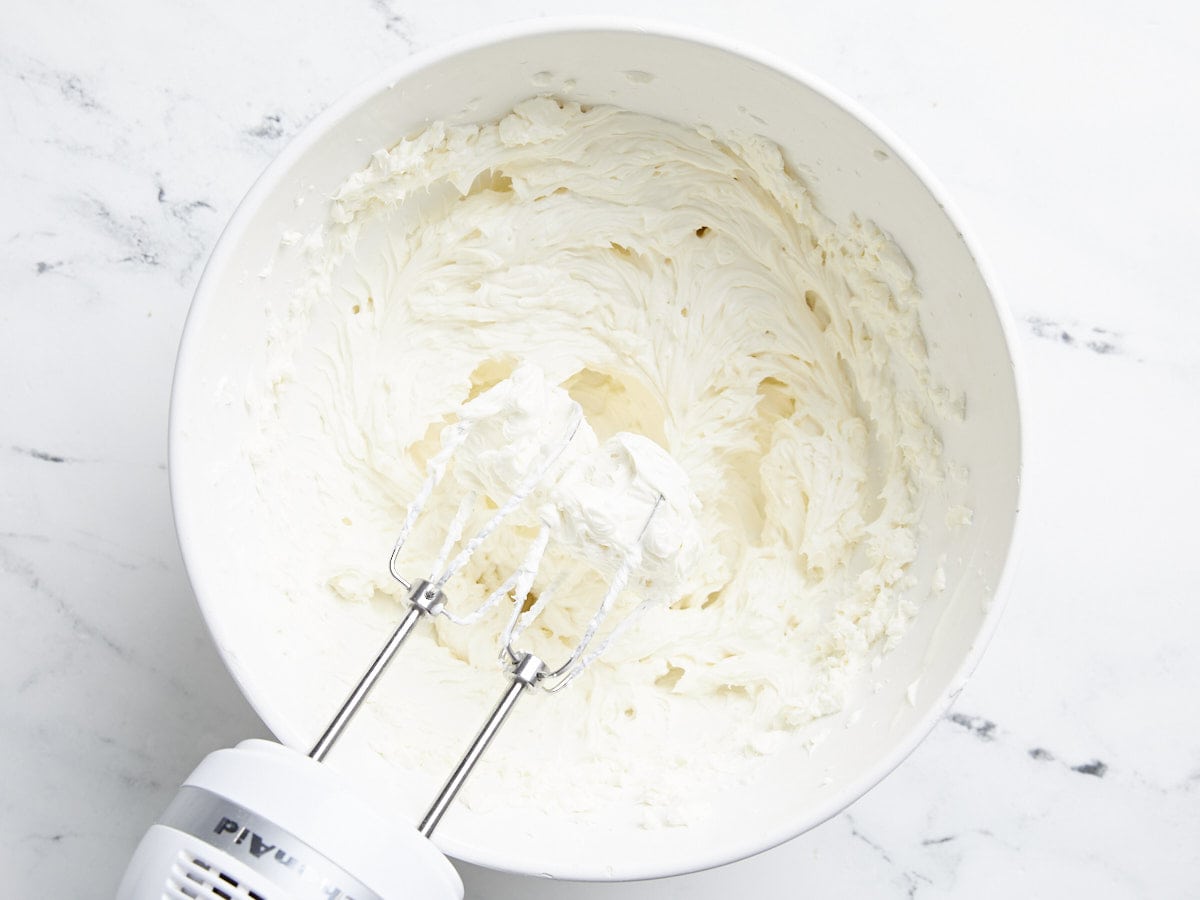
In a separate bowl, whip the softened room-temperature cream cheese, Greek yogurt, and vanilla until smooth and creamy.
Gently fold one-half of the whipped cream into the cream cheese mixture until fully incorporated. Repeat with the remaining whipped cream.
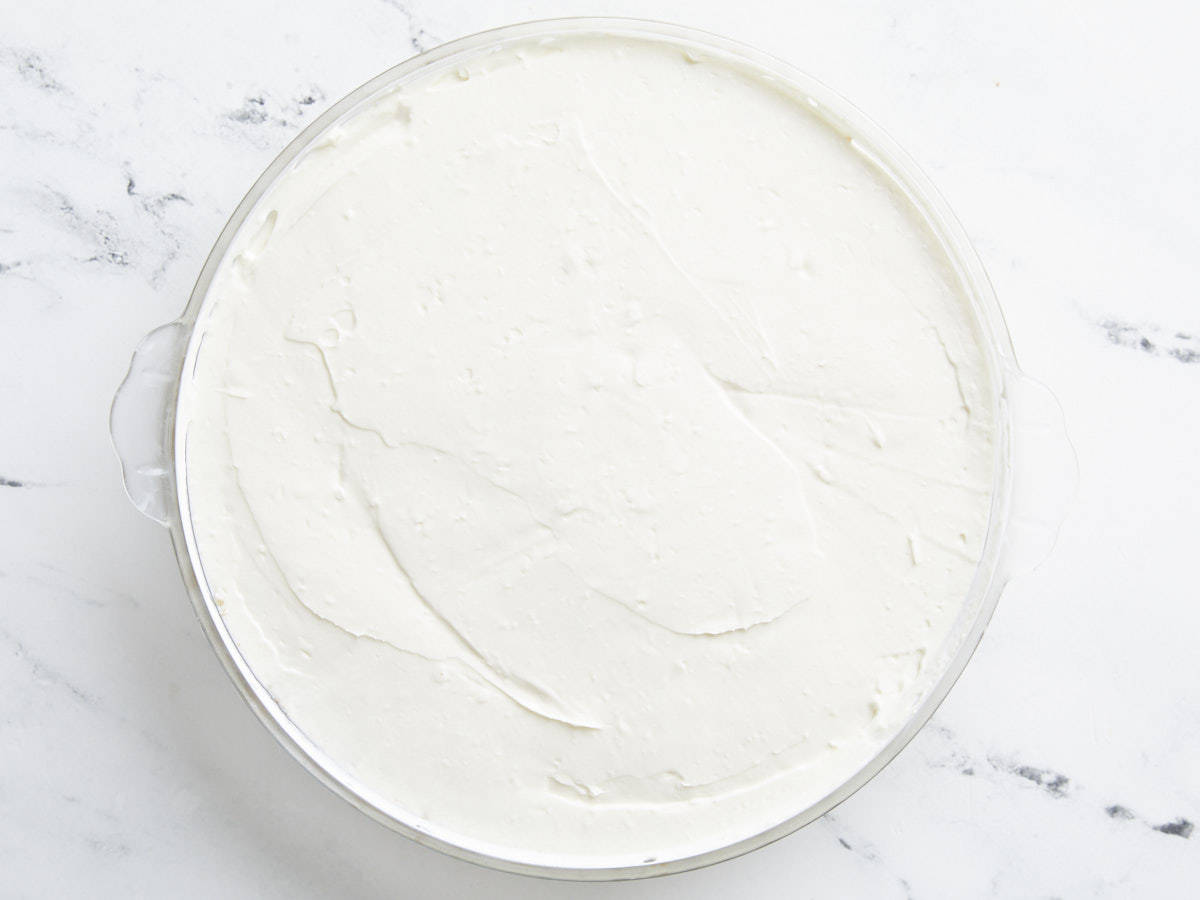
Add the filling to your frozen crust gently. Lift the pie plate off the counter a 1/4 inch and gently drop it a few times to remove large air bubbles. Use a spatula or large spoon to smooth out the top.
Cover the cheesecake with a sheet of plastic or parchment directly on the surface and then cover it in aluminum foil. Refrigerate for at least 6 hours or until the cheesecake sets and is firm to the touch.
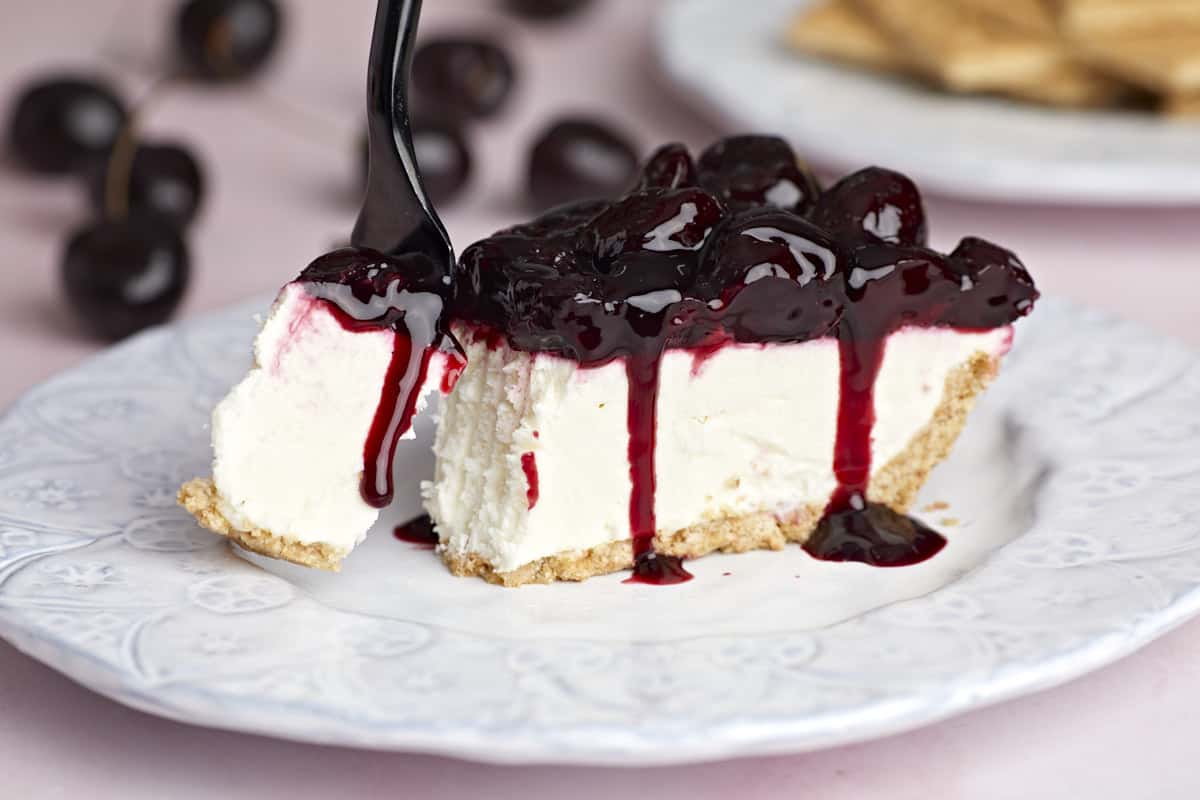
Serve the cheesecake as is, or spoon a fruit sauce topping over it before serving. If the crust sticks to the pie plate, wet a dish towel with hot water, squeeze out the excess water, and place the pie plate on top of the towel for a minute to warm and loosen the crust. Enjoy the beauty of this incredible no-fuss dessert before it gets devoured!
How to Make No-Bake Cheesecake – Step by Step Photos
Crush 10 ounces of graham crackers (about 18 crackers) to a fine powder in a blender and add to a medium bowl. You’ll need 2 cups once crushed.
Mix two tablespoons of brown sugar into the cookie crumbs and then add 10 tablespoons of melted butter. Use your hands to mix the butter into crumbs until a sand-like consistency is created.
Pack the cookie crumb mixture into a 9.5-inch pie plate using the bottom of a measuring cup to press it in well and smooth it out. Press the crumbs from the center, out, and all the way up the sides. Place the pie plate in the freezer while you make the filling.
Whip 1 cup of heavy whipping cream and 1 cup of powdered sugar to stiff peaks.
In a separate bowl, whip the two 8-ounce blocks of softened room-temperature cream cheese, 5 ounces of Greek yogurt, and 1 teaspoon of vanilla until smooth and creamy.
Gently fold one-half of the whipped cream into the cream cheese mixture until fully incorporated. Repeat with the remaining whipped cream.
Add the filling to your frozen crust gently. Pick the pie plate up a 1/4 inch and gently drop it on the counter a few times to remove large air bubbles. Use a spatula or large spoon to smooth out the top. Cover the cheesecake with a sheet of plastic or parchment directly on the surface and then cover it in aluminum foil. Refrigerate for at least 6 hours or until the cheesecake sets and is firm to the touch.
Serve the cheesecake as is, or spoon a fruit sauce topping over it before serving. Try our Cherry Sauce, Blueberry Sauce, Lemon Curd, or Strawberry Sauce. If the crust sticks to the pie plate, wet a dish towel with hot water, squeeze out the excess water, and place the pie plate on top of the towel for a minute to warm and loosen the crust. Enjoy the beauty of this incredible no-fuss dessert before it gets devoured!
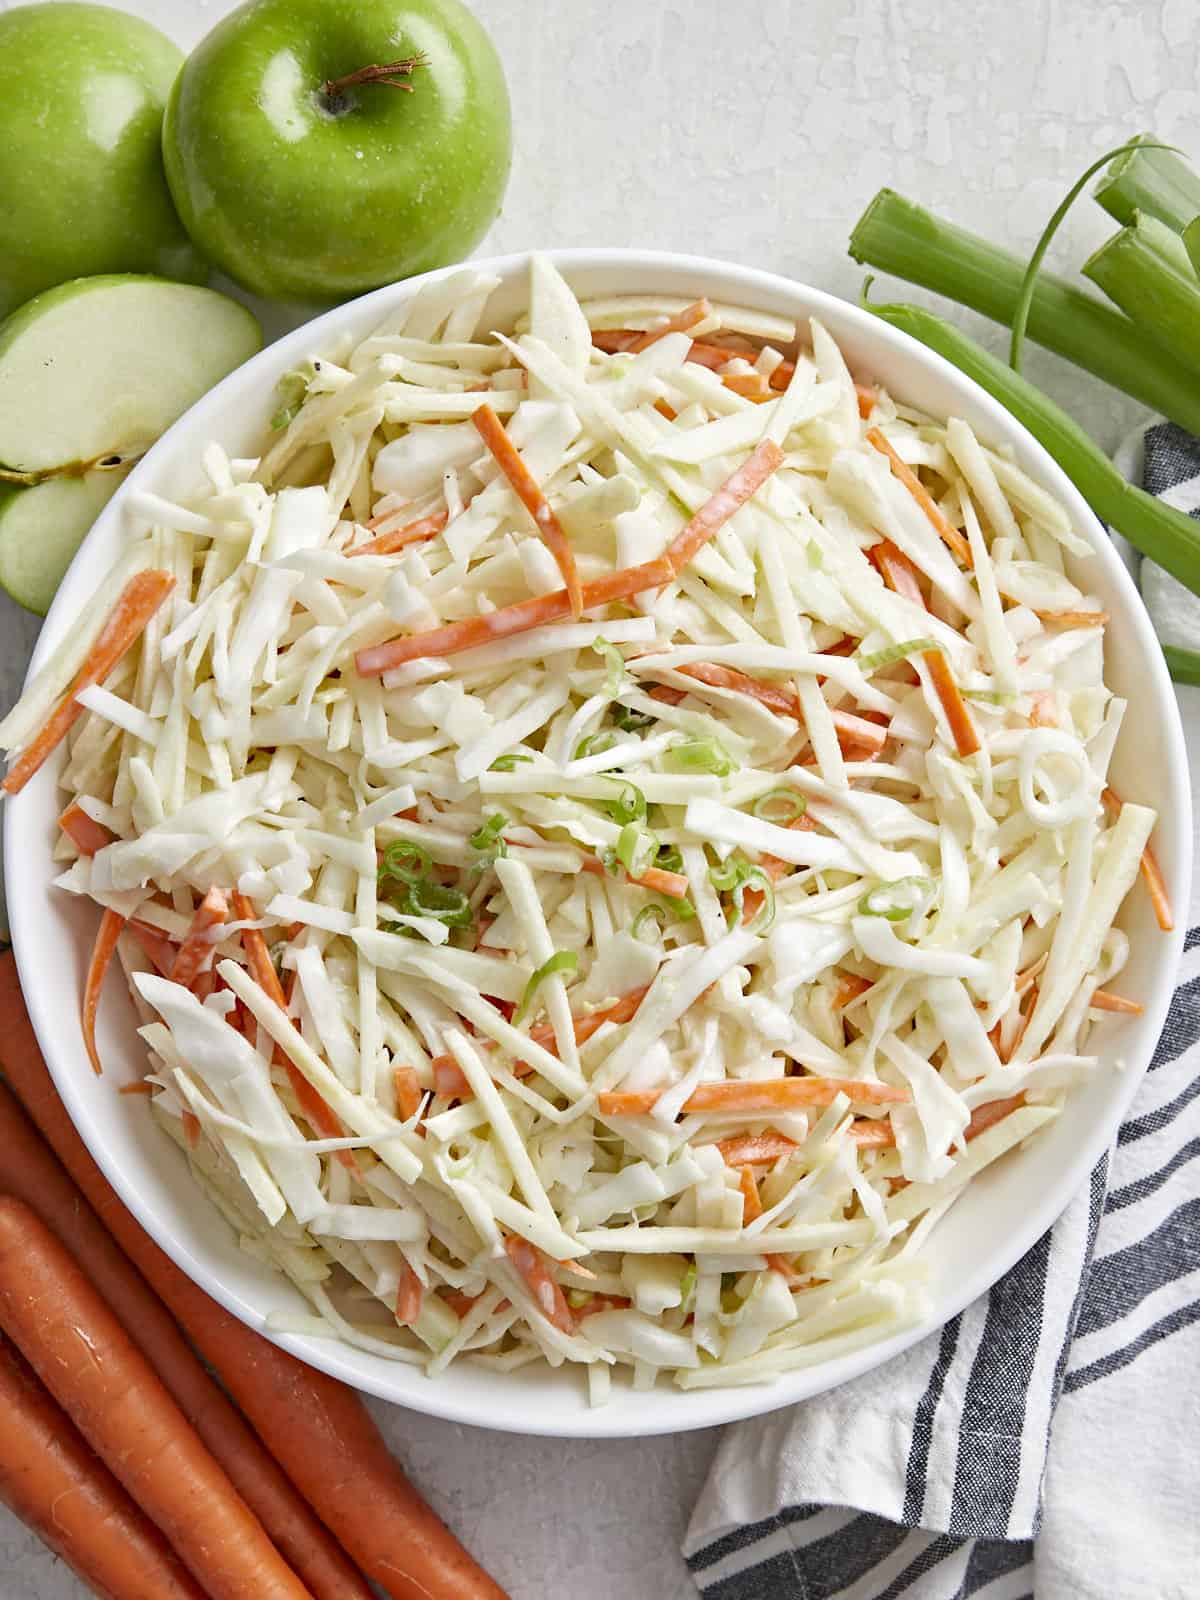
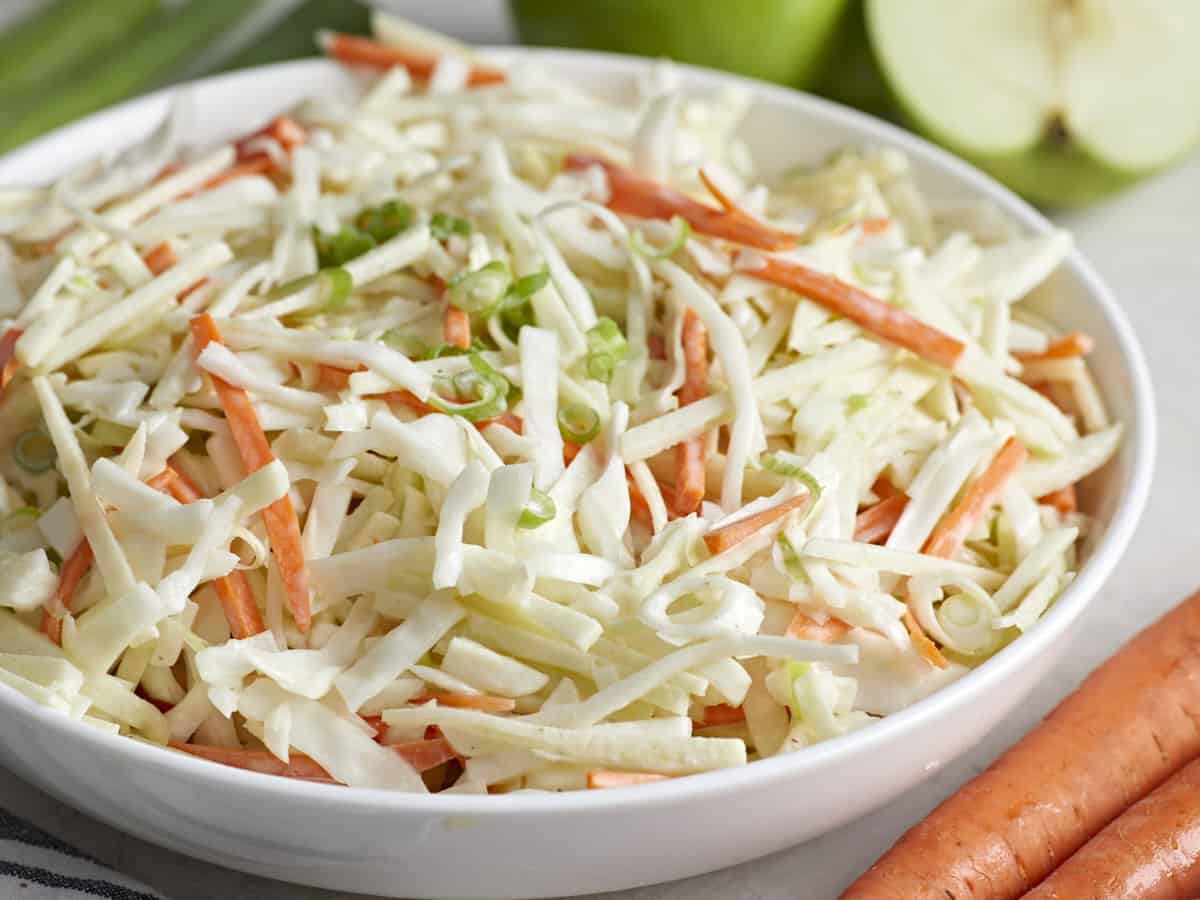
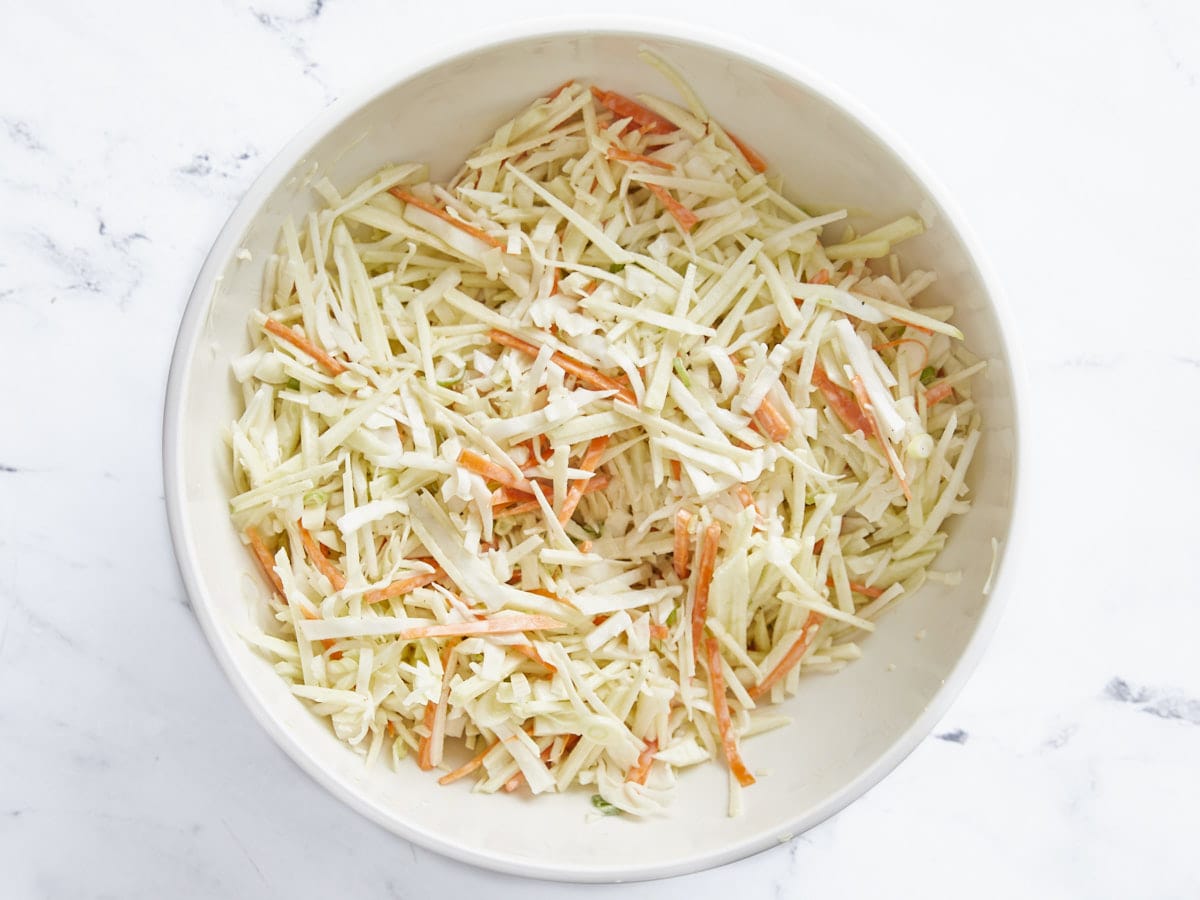
This light, crunchy, and refreshing Apple Slaw recipe takes just a few minutes to put together and makes a huge amount of slaw for well under a dollar a serving. It’s one of my favorite slaw recipes because it’s incredibly versatile and can be served as a main dish (I love it topped with Roasted Chicken) or as a side dish for a quick weeknight meal. It also travels really well, so it’s an excellent option for your next potluck. The best part? It holds up beautifully throughout the week.
What Is Apple Slaw?
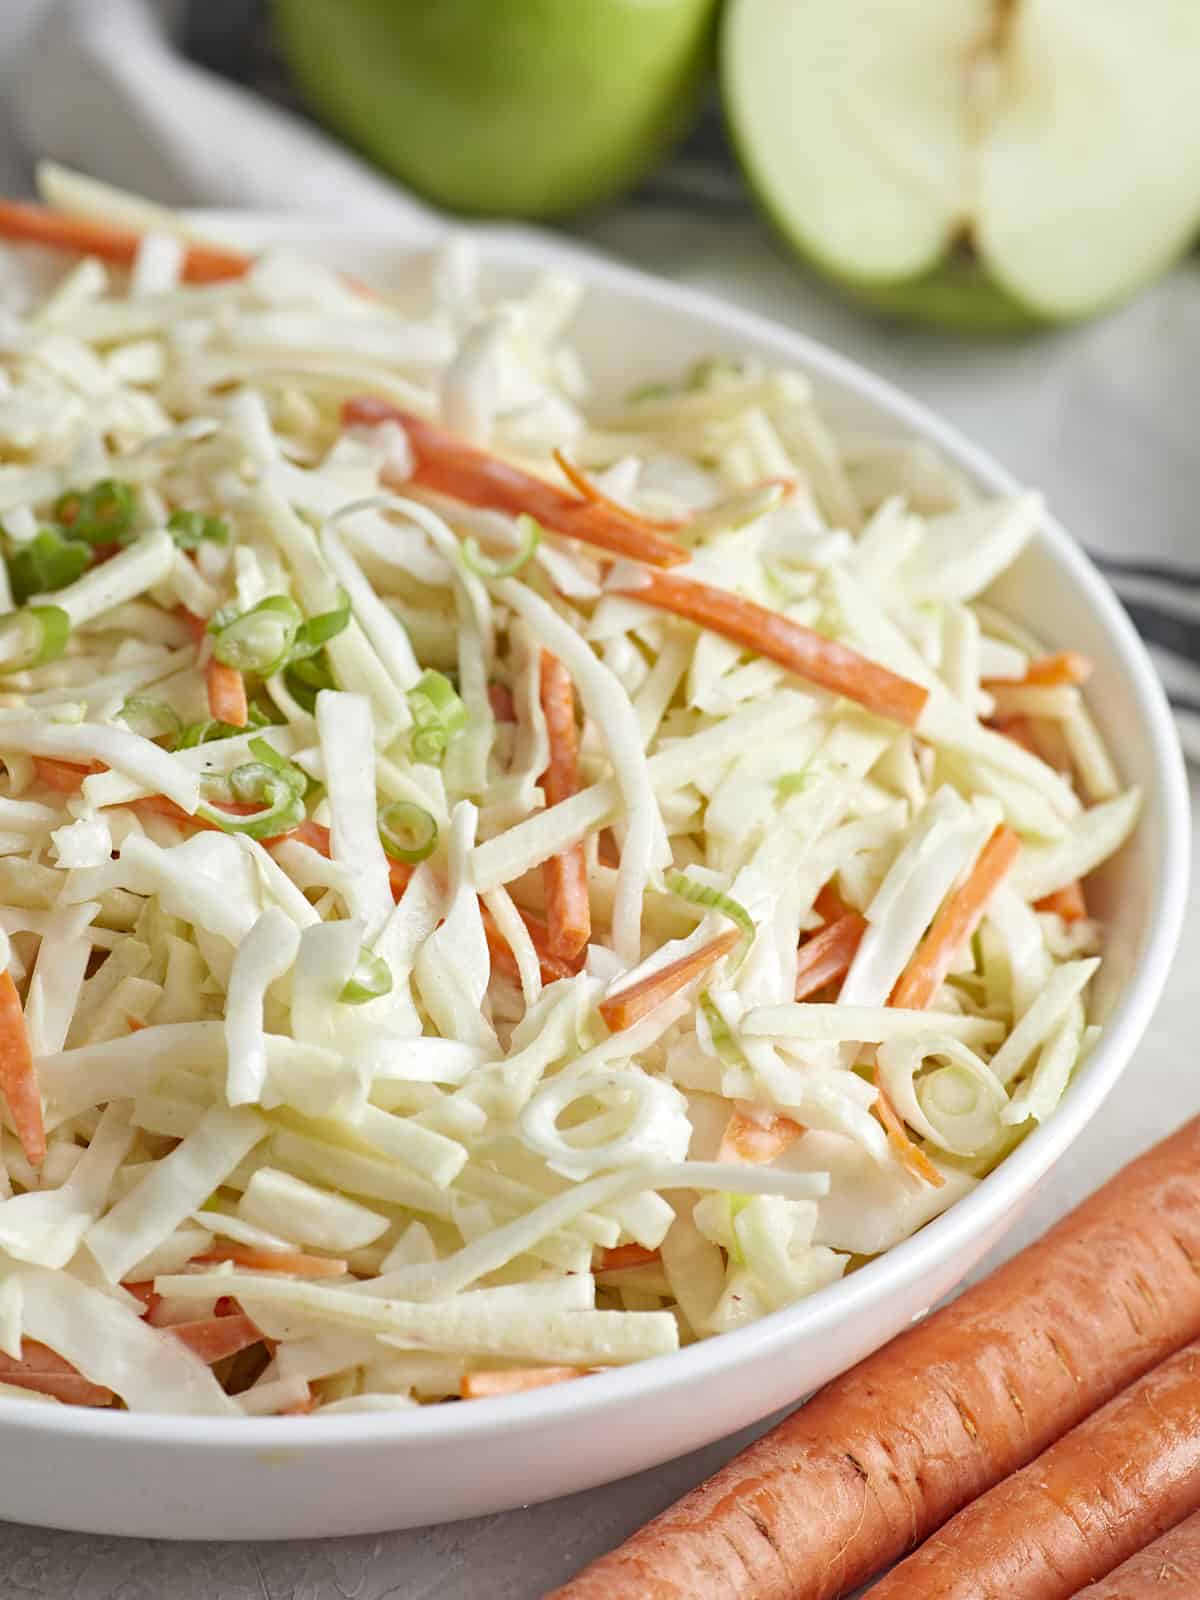
Apple Slaw is a cold chopped salad. Crunchy sliced apples, carrots, green onions, and shredded cabbage are tossed in a creamy dressing, creating the perfect addition to any weeknight meal or backyard BBQ.
Ingredients For Apple Slaw
Green Cabbage: Is the foundation of this slaw. Cabbage is hearty but loaded with water, so always taste your slaw before serving it and adjust the seasoning accordingly. You can substitute green cabbage with red cabbage or even kale.
Apples: I use Granny Smith, but if you really want to have fun with it, use a mixture of apples. My favorites to throw in are Fuji, Gala, and Honeycrisp (they’re affordable when they’re in season). Keep apples from turning brown by submerging them in water that has an acid added to it. For every cup of water, use 2 teaspoons of lemon juice or 1 teaspoon of distilled or apple cider vinegar.
Carrots: Bring sweetness and crunch to the salad and a pop of color. If you don’t have carrots, substitute with raw butternut squash, parsnips, or add an extra cup of cabbage to the mix.
Green Onions: Lends a mild onion flavor to the salad. You can substitute them with chives or sweet onions. If you only have white or red onions, soak them in water for a minute or two to help decrease their pungency.
Mayonnaise: Is the backbone of the dressing and adds a tangy creaminess. Substitute it with Greek Yogurt or Sour Cream.
Dijon Mustard: Adds a peppery kick and a touch of color to the dressing. If you don’t have Dijon mustard, use brown or yellow mustard.
Honey: Creates a touch of sweetness in the dressing. If you don’t have honey, substitute it with one teaspoon of brown sugar. Just dissolve it well before adding the dressing to the salad.
Apple Cider Vinegar: Adds a tangy note to the dressing and keeps the apples from browning.
What To Serve With Apple Slaw
Serve this tangy slaw topped with roasted chicken for a light lunch. Or use it as topping on a Pulled Pork or Pulled Chicken sandwich. I also love it served as a side for BBQ Ribs paired with Corn On The Cobb.
How To Store Leftovers
Store Apple Slaw in an airtight container and refrigerate up to 5 days. Do not freeze, as it will change the texture of the cabbage. Always mix the slaw a few times and taste for salt before serving.
3Granny Smith apples, julienned (about 2 cups)*$2.55
2carrots, julienned (about 2 cups)*$0.42
3green onions, sliced (about 1 cup)*$0.36
Instructions
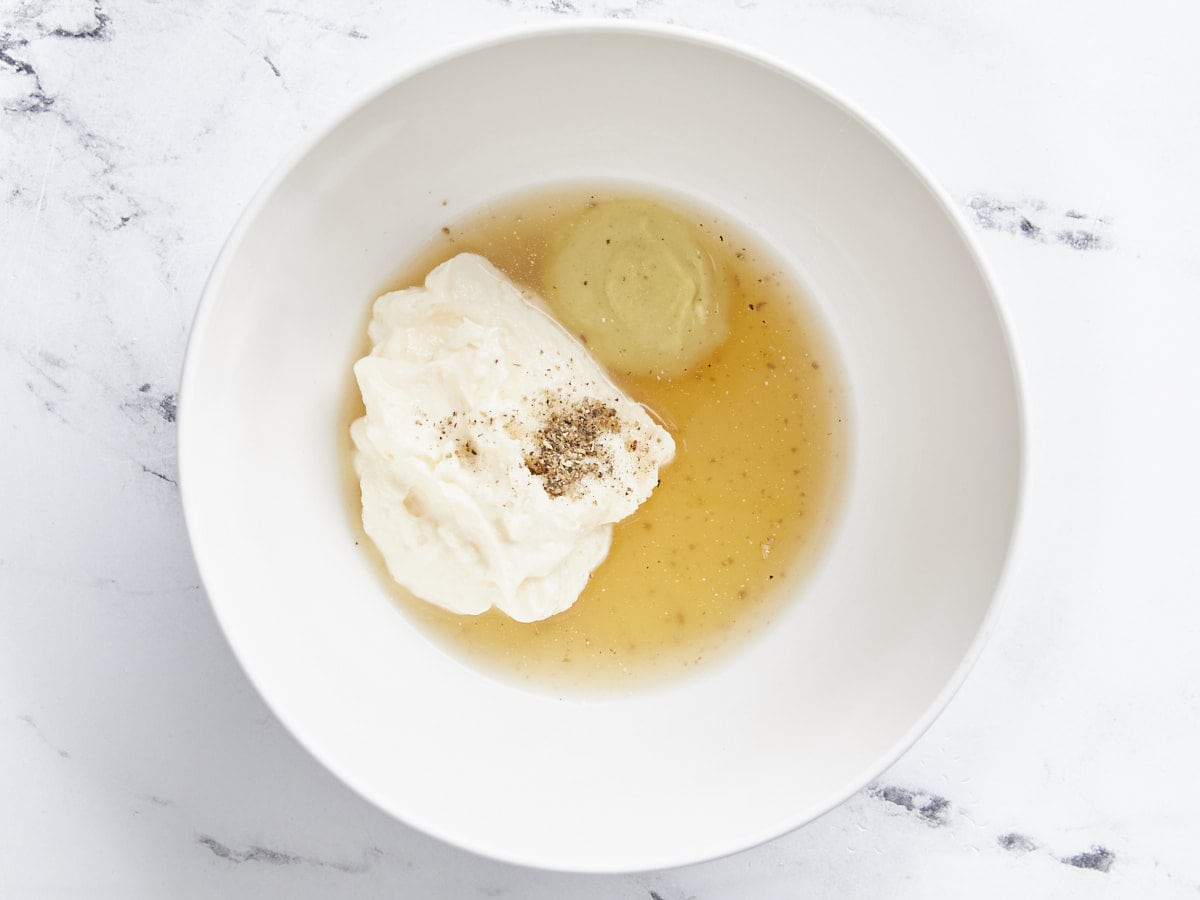
Mix the mayonnaise, Dijon, honey, vinegar, salt, and pepper to make a dressing.
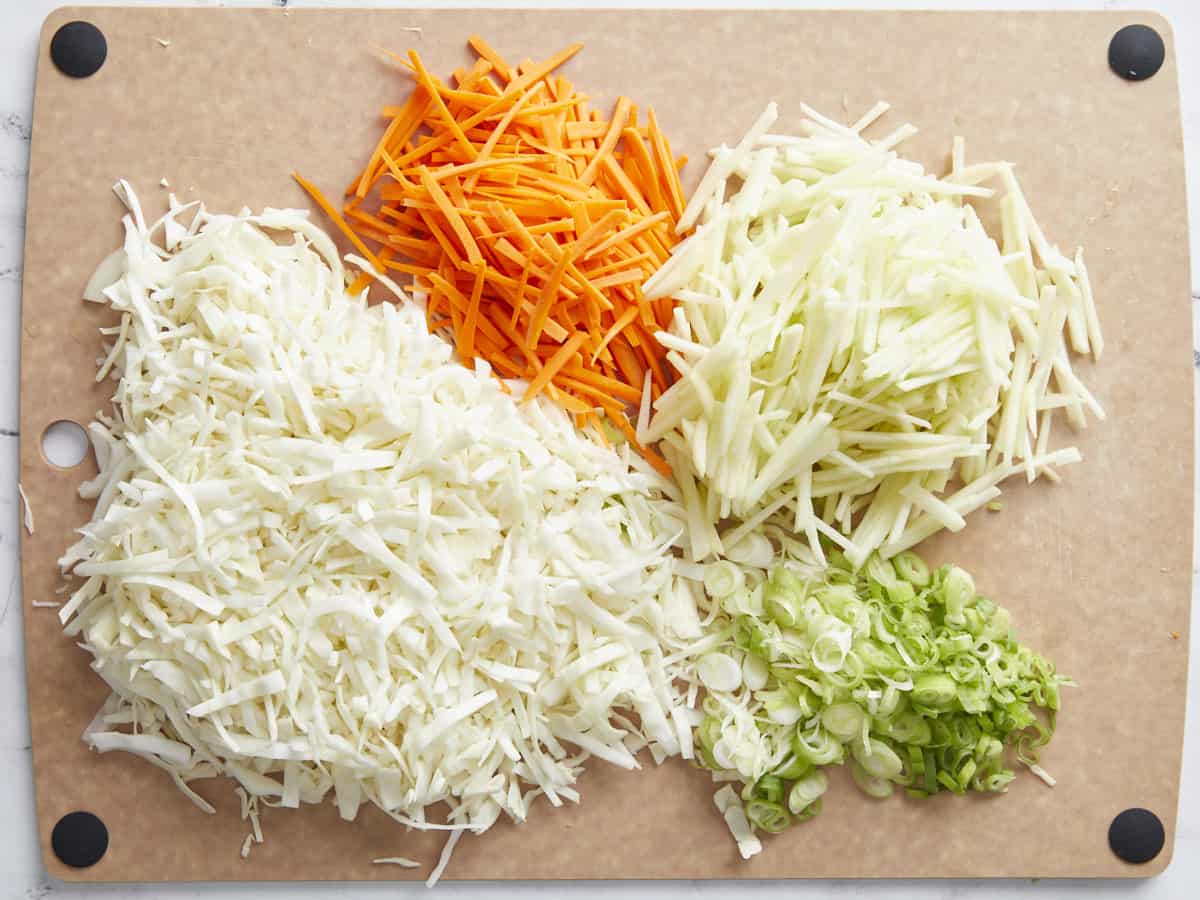
Shred or thinly slice the cabbage into 2-inch by ¼-inch strips. Shred or slice the carrots into 2-inch by ⅛-inch strips. Peel and core the apples. Shred or slice them into 2-inch by ⅛-inch strips and keep them in water with lemon juice or vinegar added, so they don't brown.** Cut the green onions on the diagonal into 1/8-inch thick slices.
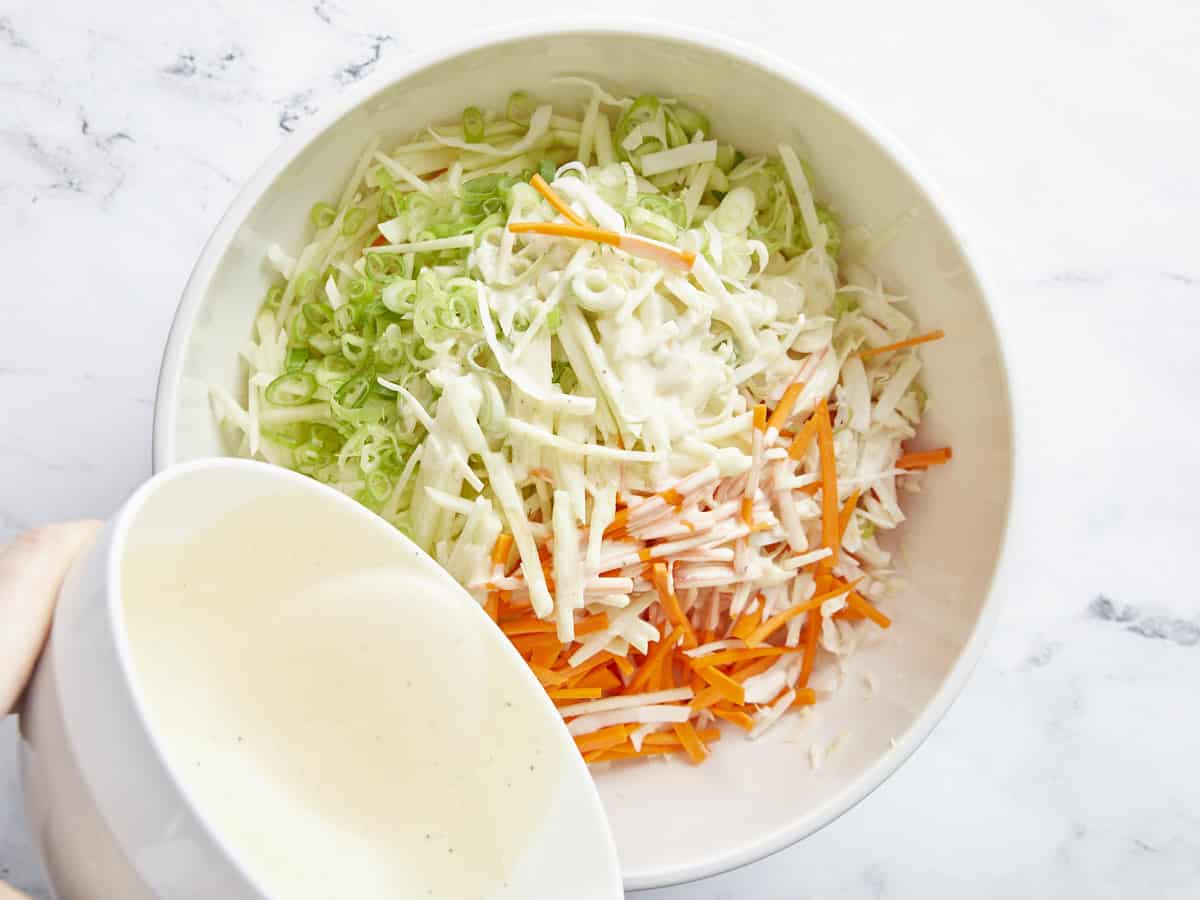
Mix the apples and vegetables with the dressing in a large bowl. If necessary, add more salt to taste.
Keep the salad refrigerated until ready to serve. Mix before serving, and add more salt to taste.
*If finely slicing vegetables is difficult for you, use the slicing or shredding attachment on a food processor, a mandoline, or a large-holed cheese grater.**For every one cup of water add 2 tsp lemon juice or 1 tsp distilled or apple cider vinegar.
Mix 1/3 cup mayonnaise, 2 tsp Dijon mustard, 2 tsp honey, 2 Tbsp apple cider vinegar, 1/4 tsp salt, and 1/8 tsp pepper to make a dressing.
Shred or slice one small cabbage into 2 by ⅛-inch strips. Shred or slice two carrots into 2 by ¼-inch strips. Peel and core two apples, then shred or slice them into 2 by ⅛-inch strips and keep them in water with lemon juice or vinegar added, so they don’t brown. Cut three green onions on the diagonal into 1/8-inch thick slices.
Mix the apples and vegetables with the dressing in a large bowl. If necessary, add more salt to taste.
Keep the apple slaw refrigerated until ready to serve. Mix before serving, and add more salt to taste.
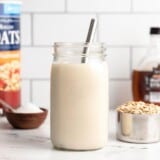
This one goes out to all of my lactose-intolerant friends out there! If you’re not already making your own homemade oat milk, promise me you’ll try this recipe. Because they’re charging waaaaay too much for it at the store, considering how simple it is to make. It literally takes about five minutes and it tastes SO GOOD. Like, I usually feel kind of “meh” about oat milk, but I wanted to guzzle the entire batch because it was so cool, creamy, and refreshing. So promise me you’ll bookmark this page and give it a try this weekend, K?
What’s in Oat milk?
When I tell you how simple this oat milk is, you might have a little heart attack when you realize how much you’ve been paying for it at the store. Oat milk is literally just oats, water, salt, vanilla (optional), and a sweetener (optional). That’s it. Five simple ingredients! Here’s a little more detail about what I used to make my homemade oat milk:
Oats – I tested both old-fashioned rolled oats and quick oats for this recipe and old-fashioned oats were the clear winner. Old-fashioned rolled oats break down just enough when blended to yield a creamy milk that is not too thick or slimy. Quick oats are so powdery to begin with that they completely disintegrated in the water and make a thick, sludge-like oat milk. #nothanks
Water – Make sure to use cold water to make your homemade oat milk so the starches in the oats don’t get too hydrated. That will lead to thick and slimy oat milk.
Salt – Just a pinch will do! Salt helps our tongues differentiate between flavors so you can taste the full dimensions of vanilla, sweet, and creamy.
Vanilla – I think adding a little vanilla really rounds out the flavor of the oat milk so it’s more interesting and enjoyable. You can skip it, but I really feel like the vanilla takes the oat milk from good to GREAT.
Sweetener – A little bit of sweetness goes a long way with oat milk. I used brown sugar because it offered a good balance between being budget-friendly and adding a slight caramel flavor from the molasses, but maple syrup is even more delicious (just more expensive). Other options are white sugar, honey, agave, stevia, monk fruit, or any other sweetener that dissolves easily in water.
What kind of Strainer to Use
Straining is one of the most important steps in the oat milk-making process because it can change the texture of the oat milk quite a bit. I tested a few different methods for straining so I could give you some options. Here’s what I found:
Nut Bags or Cheesecloth: These are great options if you plan to make a lot of oat milk because they’re inexpensive and most can be laundered and re-used (check the package for the cheesecloth because depending on the quality, some are not reusable). The key to using nut bags and cheesecloth is to NOT squeeze the liquid through the cloth. Squeezing allows too many starches through, making the oat milk thick and slimy.
Metal Strainers or Sieves: Metal strainers have quite a large weave and they allow a lot of the oat particulate through, which can result in a thick and powdery-flavored milk. Stacking two strainers on top of each other does help a lot, if this is your only option.
Lint-Free Dishcloth: The weave on a dishcloth is pretty tight, which makes it hard for the oat milk to flow through. I found this method to be pretty messy and I had to squeeze the oats to get the milk to pass through, which can lead to a slimy oat milk.
Metal Coffee Filter: Metal coffee filters were my favorite strainer for oat milk! It created just the right texture for the milk and was easy to clean and reuse. So if you happen to have one of these on hand, or want to make an investment for oat milk-making, this is the best option!
Can you Froth Homemade Oat milk?
I tried frothing this homemade oat milk with a handheld frother, and, unfortunately, it does not create a nice foam. Oats do not contain a lot of fat or protein, which is needed to create a stable foam, so store-bought oat milk usually has to have thickeners or stabilizers added to help it foam.
How to Enjoy Oat Milk
I’m not kidding when I say this oat milk was so good that I wanted to chug it straight from the jar. But keep in mind that homemade oat milk does not contain emulsifiers or stabilizers like store-bought oat milk, so you will need to shake it very well before you pour, every time.
Oat milk is great added to coffee or poured over a bowl of cereal (or maybe even oatmeal – how meta). I haven’t tested baking with this oat milk or using it as a substitute for dairy milk in recipes, so proceed with caution. Remember that oat milk does not contain as much fat or protein as dairy milk, which may cause it to react differently in recipes.
Tips for Making Homemade Oat Milk
Use rolled oats, not quick oats, for a creamy yet light and refreshing oat milk
Use cold water to prevent a slimy texture
Strain the oat milk well to keep the texture light, but DO NOT squeeze it through your strainer
For maximum deliciousness, let the oat milk chill completely in the refrigerator before serving
Shake the oat milk very well each time before enjoying
Stir the vanilla and brown sugar into the cold water until dissolved.
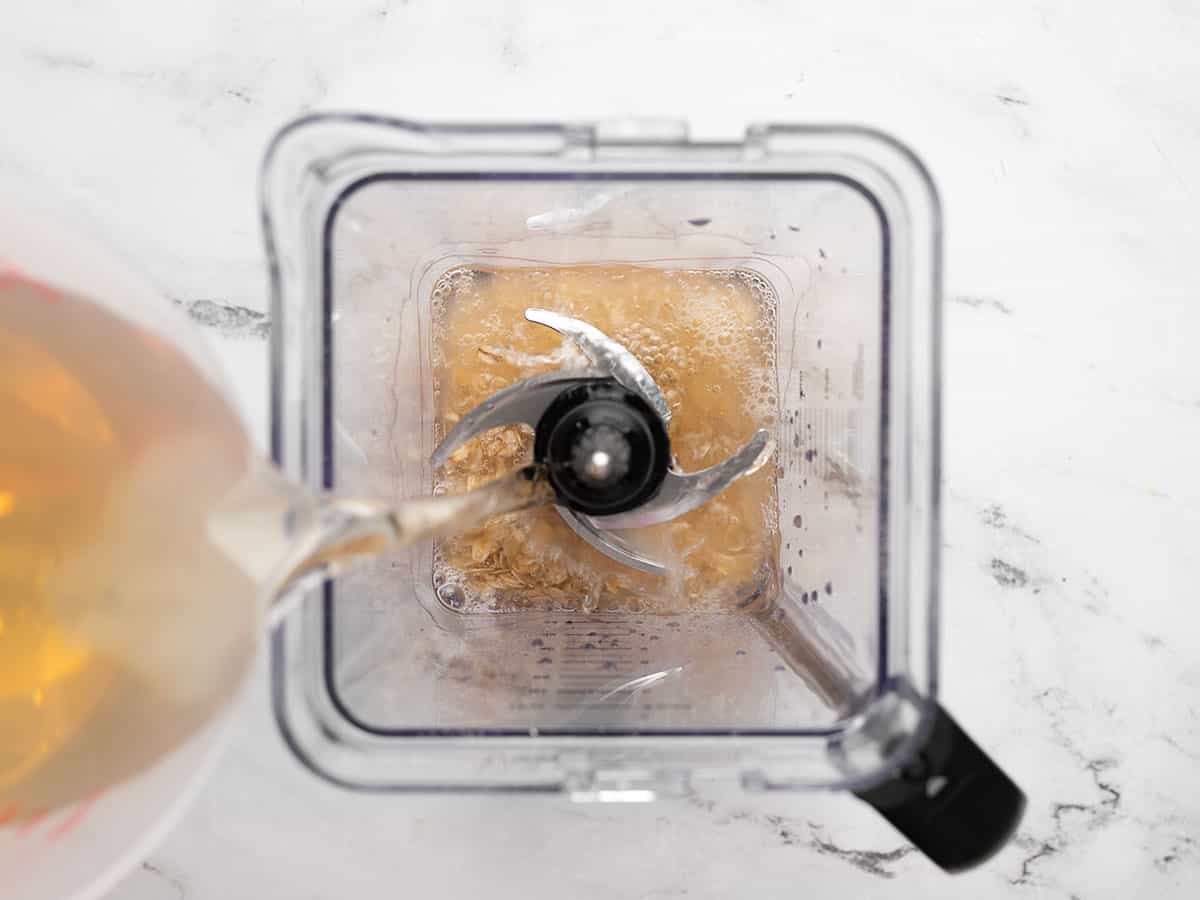
Add the oats, salt, and water mixture to a blender. Blend on high for 30 seconds.
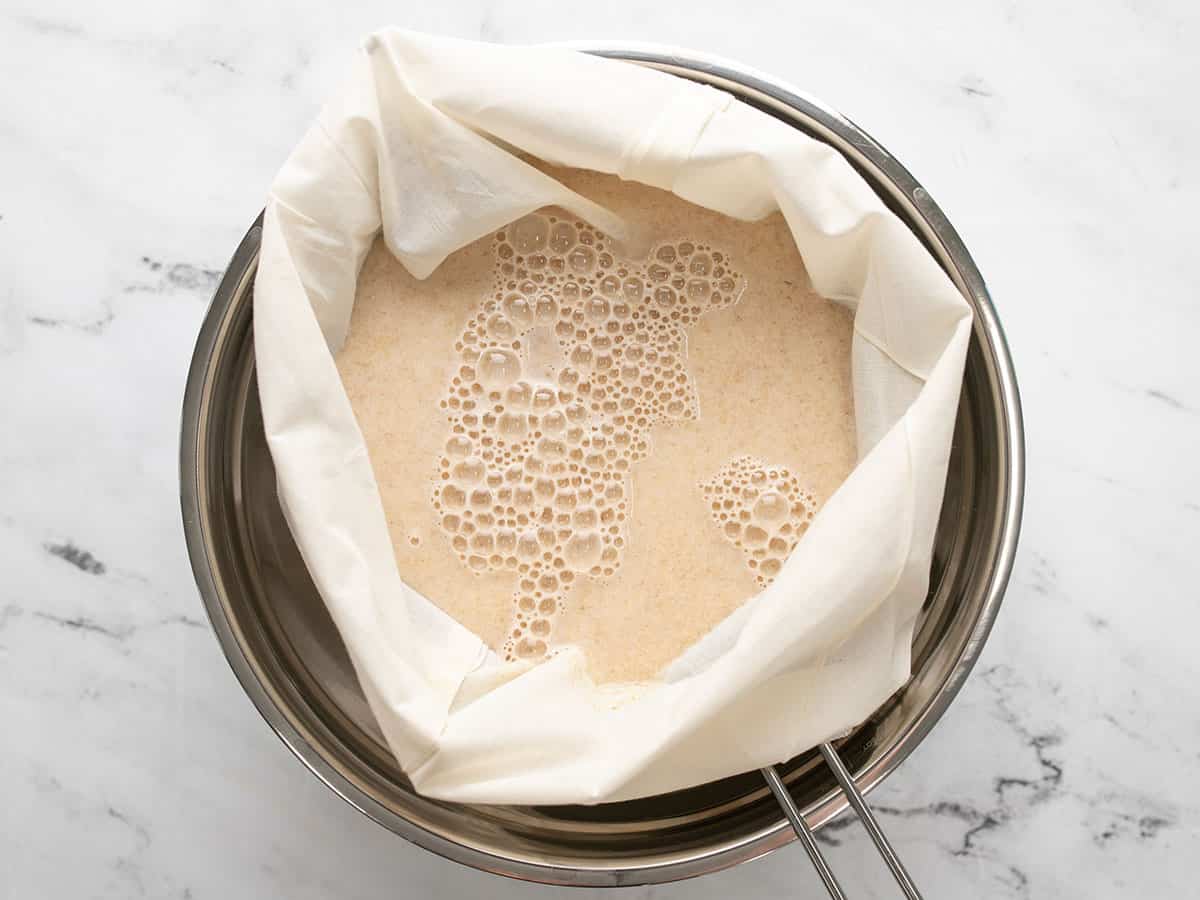
Pour the blended oat mixture through a strainer like a nut bag, cheese cloth, metal coffee filter, or a double layer of metal sieves to filter out the oat pieces.
Chill the oat milk completely (preferably overnight), then shake very well before serving. Keep the oat milk refrigerated for up to four days.
*You can use any type of sweetener that dissolves easily in cold water.**There is no nutritional information for this recipe because nutritional calculators can not account for the oats that are discarded in the straining process.
How to Make Oat Milk – Step by Step Photos
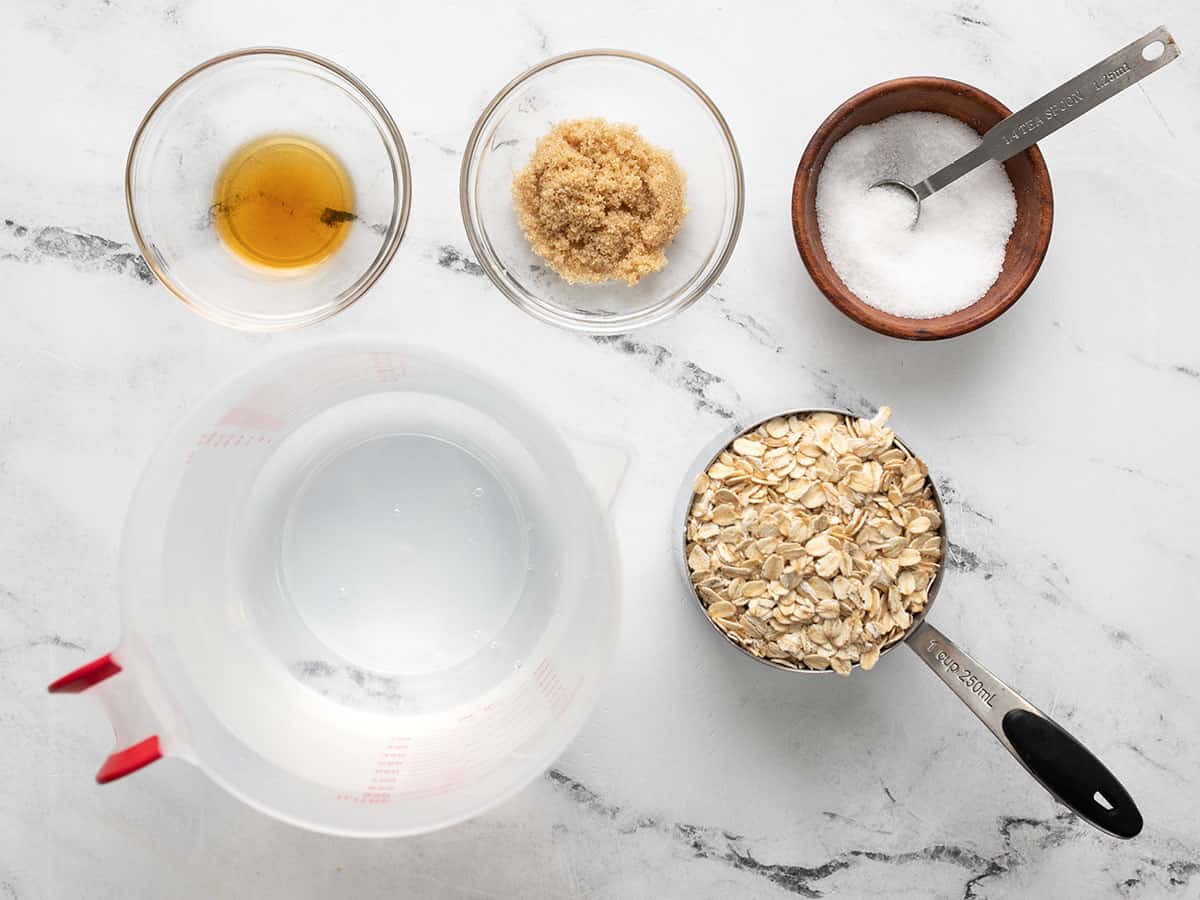
All you need to make your own oat milk is 4 cups cold water, 1 cup rolled oats (NOT quick oats), 1/4 tsp salt, 1/2 tsp vanilla extract, and sweetener (I used 2 Tbsp brown sugar).
Add 2 Tbsp brown sugar and ½ tsp vanilla to 4 cups cold water and stir until the sugar is dissolved. Add the rolled oats, salt, and water mixture to a blender. I used our big blender for a four-cup batch, but I also tested a half-cup batch in our mini blender and it worked fine.
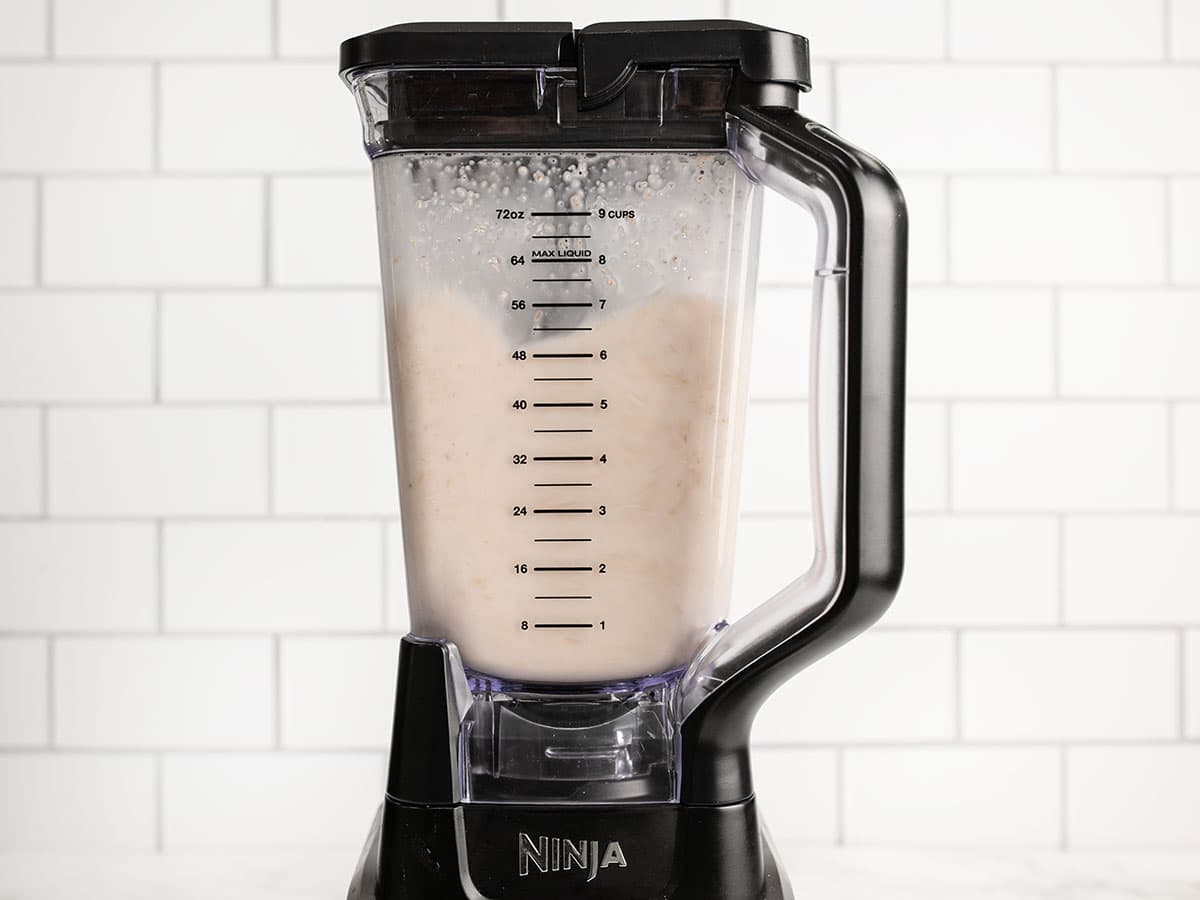
Blend the oats and water for 30 seconds, no more! It’s a good idea to time this on your watch or phone so you don’t accidentally count too fast or too slow. Over-blending the mixture can make the oat milk too thick or slimy.
Immediately pour the mixture through a strainer into a bowl. I’m showing the oat milk poured into a nut bag supported by a metal strainer over the bowl, but you can also use cheesecloth or metal coffee filters (see blog text above the recipe for details on each method).
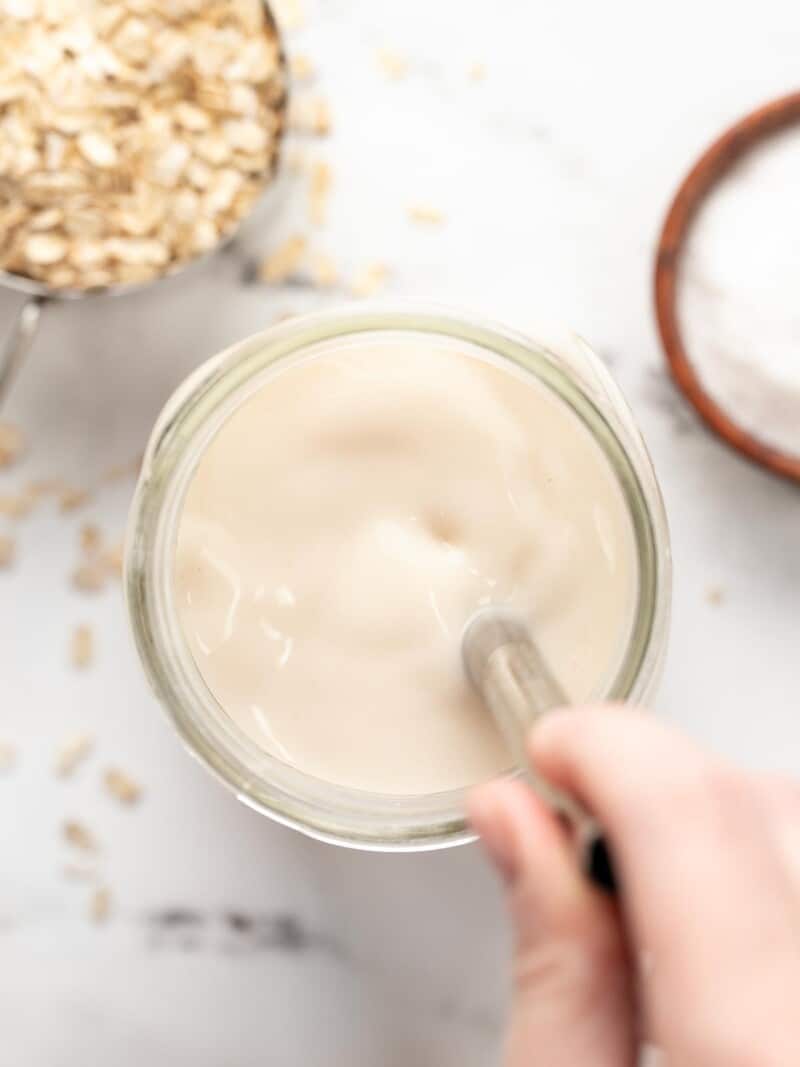
Make sure to chill the oat milk completely (like, overnight) for the best flavor. Because this is homemade and doesn’t have added emulsifiers or stabilizers, it will separate like in the photo above. Just give it a good shake shake shake before enjoying it each time and it will be as right as rain!
The oat milk will keep in the refrigerator for about four days, so make a half batch if needed to make sure none goes to waste!