If you’re looking for a simple yet flavorful pork recipe, these Air Fryer Pork Chops are it! Coated in a sweet and savory spice blend and cooked to crispy perfection, this air fryer pork chops recipe is a far cry from the leathery chops you may have experienced in the past. We’re raiding the pantry for this one, utilizing staples that really pack in the flavor for not a lot of added cost. With this easy dinner recipe, you’ll have tender, juicy pork chops in 30 minutes!
The spice rub for these air fryer pork chops is the real star of the show. Classic onion and garlic powder combine with smoked paprika for a smokey, savory flavor, while brown sugar adds a balancing sweetness and delightful texture to the crust. A little bit of ground mustard adds pleasant bitter notes and tanginess. This rub is super versatile and also works great on extra firm tofu and chicken!
Ingredients for Air Fryer Pork Chops
Here’s what you’ll need to make Air Fryer Pork Chops:
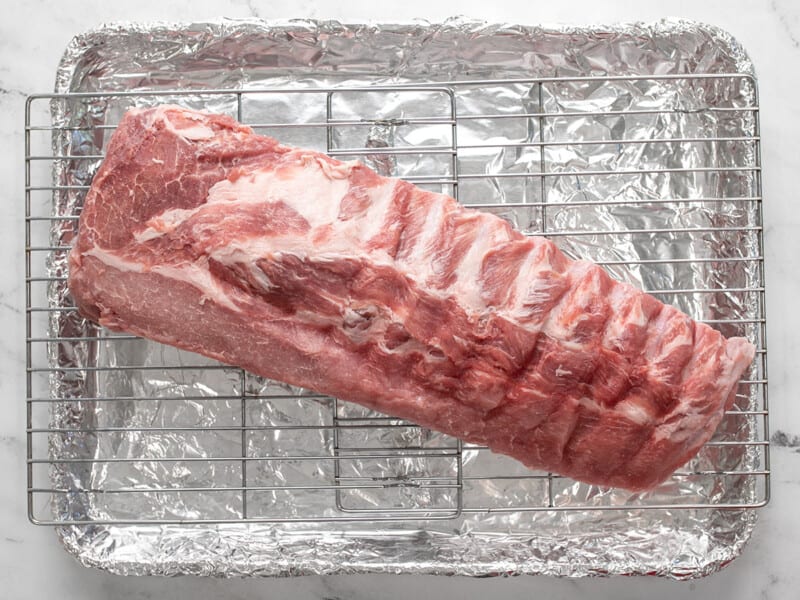
- Pork Chops: We were able to fit two boneless center-cut pork chops in our air fryer basket. You’ll want chops that are 1-1 1/2 inches thick to ensure they stay nice and juicy.
- Seasoning: Smoked paprika, garlic powder, onion powder, salt, pepper, ground mustard, and dark brown sugar create a smoky, sweet, savory, and tangy spice rub. Make sure to save extra for dusting on top when you flip the chops– this helps them crisp up beautifully.
- Cooking Oil: We like budget options like canola or vegetable oil, but olive oil will also work.
MORE SEASONING IDEAS
If you want to switch things up, here are some other ways you can season your air fryer pork chops:
- Taco Seasoning
- Cajun Seasoning
- Lemon Pepper Seasoning
- Creole Seasoning like Tony Chachere’s
- Chili Seasoning
- Greek Seasoning
- Jerk Seasoning
Tips For Making Air Fryer Pork Chops
- Seasoning the chops with the seasoning rub 20-30 minutes before cooking and letting them sit on the counter at room temp will ensure 1. the flavor is as maximized as possible and 2. the outside doesn’t overcook while the inside gets to the proper temperature. Giving your chops a little extra time on the counter before they hit your air fryer ensures that they will have a nice crust on the outside while remaining juicy on the inside!
- There should be about 1 Tbsp of the seasoning leftover. Save it and sprinkle it over the chops after flipping them. This will help to ensure they stay nice and crispy.
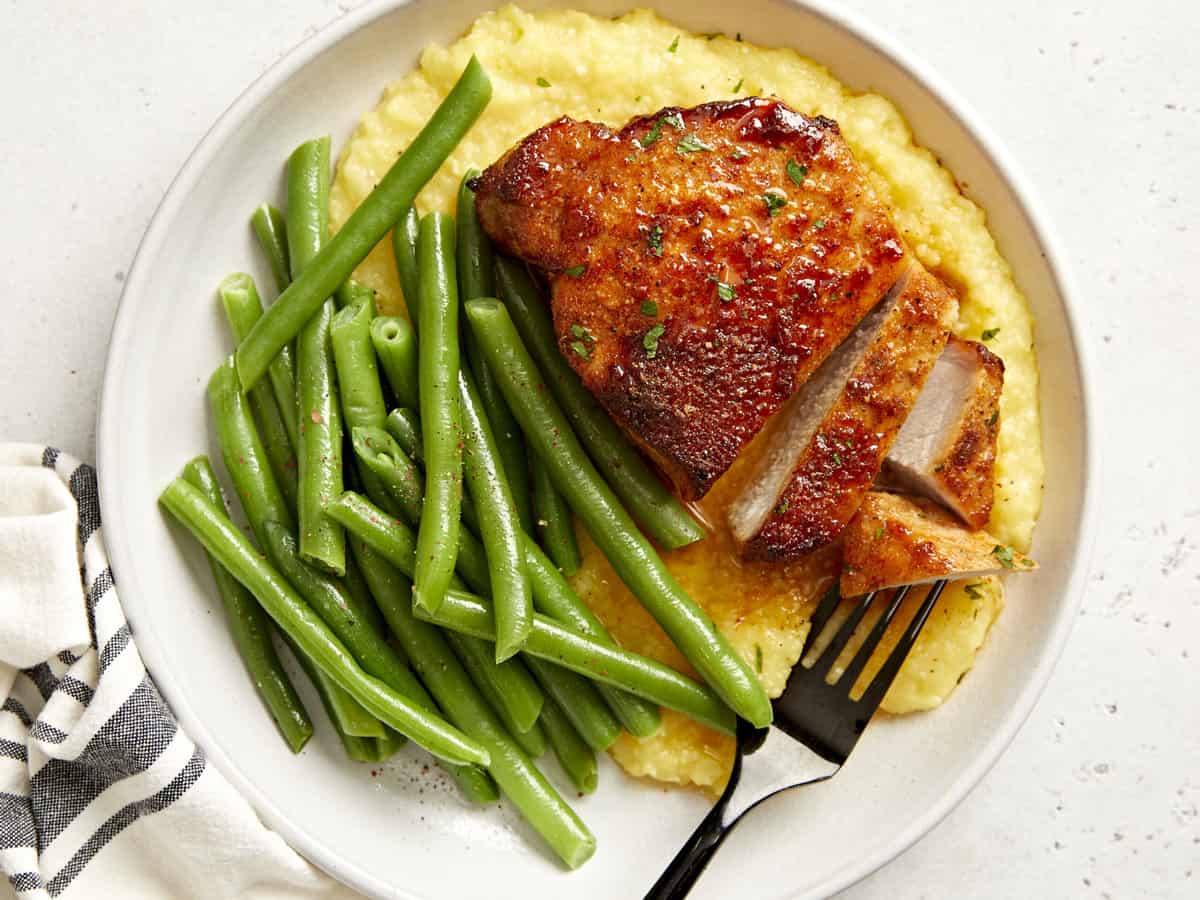
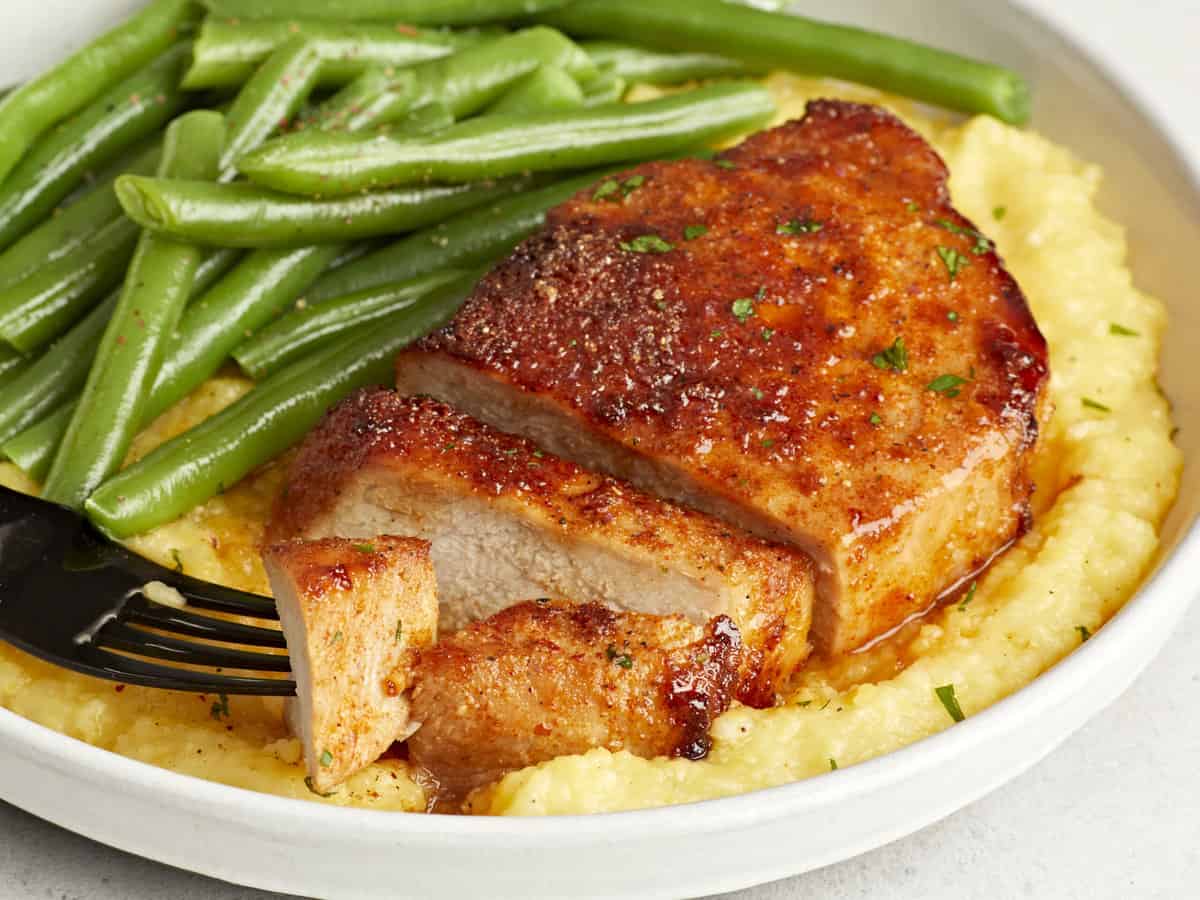
- Remove your pork chops from the air fryer as soon as they reach 145°F and let them rest for at least 3 minutes before slicing to lock in the juices.
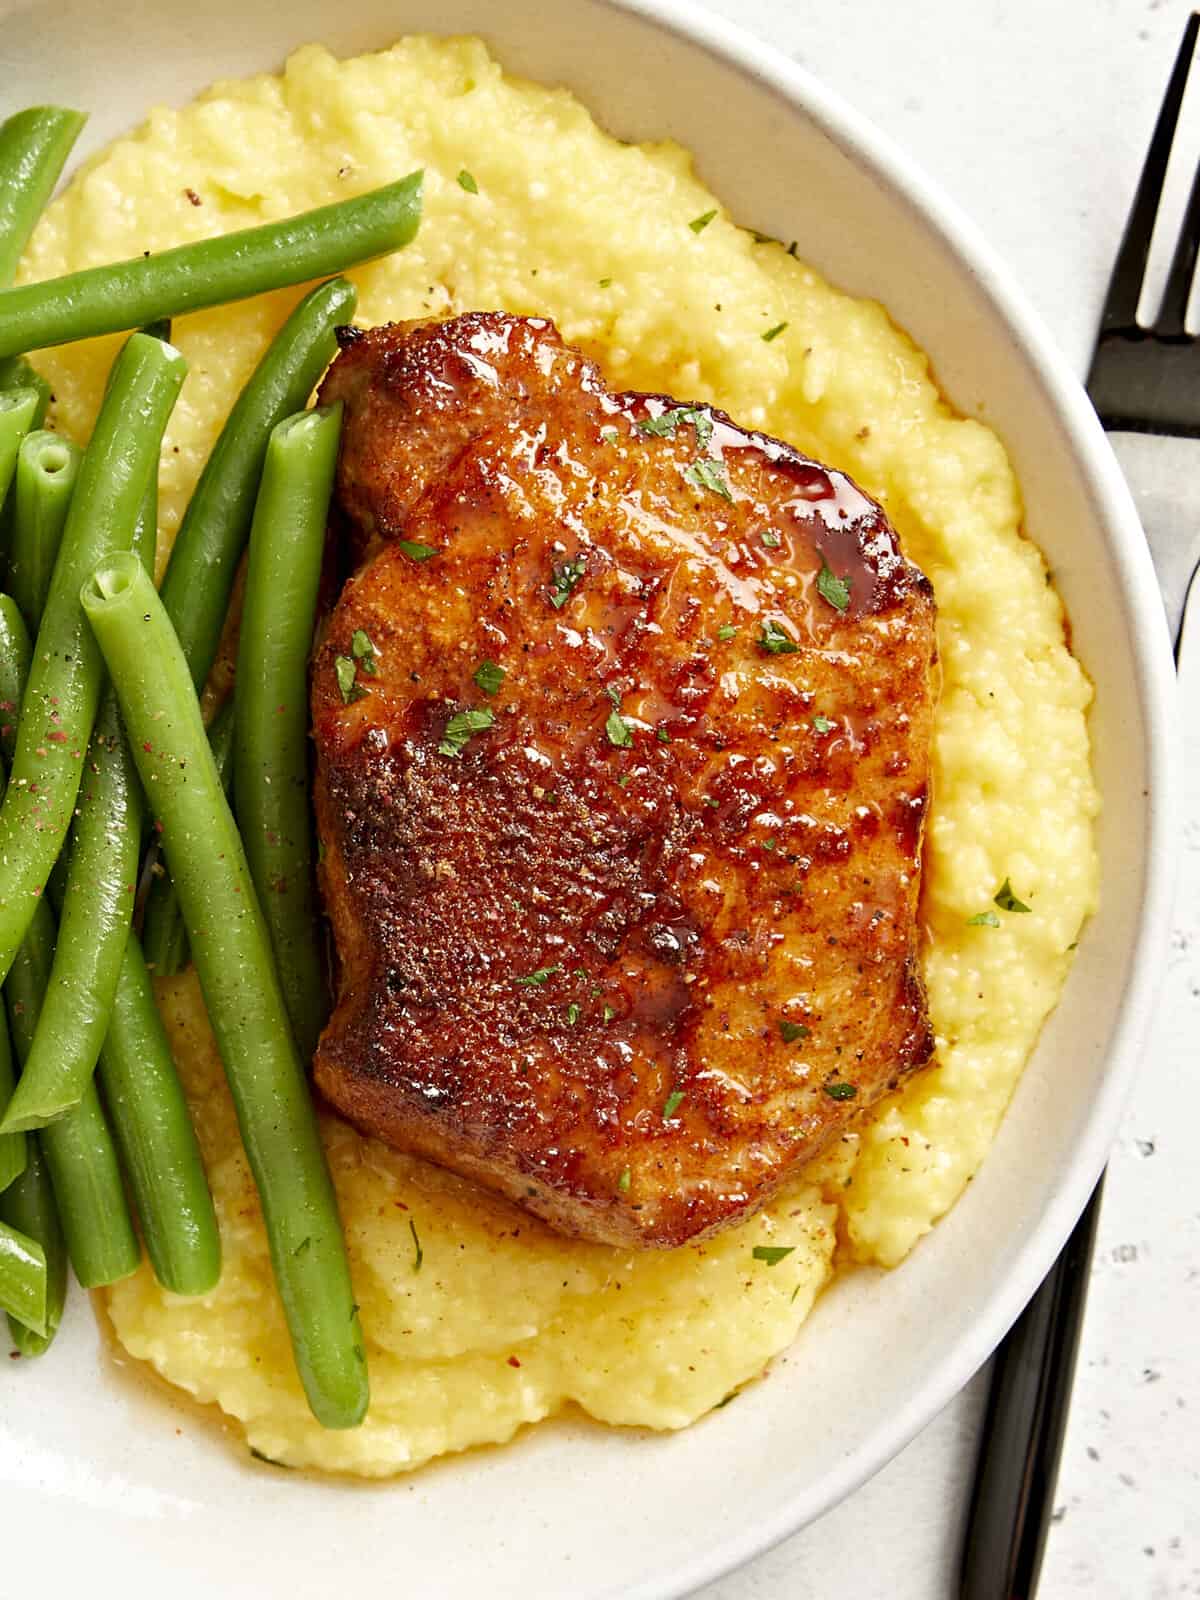
What to Serve with Air Fryer Pork Chops
These air fryer pork chops are so versatile and pair well with just about anything you can imagine. You could make a simple side salad, steamed green beans, or creamy polenta. Or use your air fryer to quickly whip up some air fryer Brussels sprouts!

Air Fryer Pork Chops
Equipment
Ingredients
- 2 boneless center-cut pork chops, 1-1 1/2 inches thick $3.00
- 1 1/2 tsp smoked paprika $0.24
- 1 tsp garlic powder $0.10
- 1/4 tsp onion powder $0.02
- 1 tsp ground mustard $0.24
- 4 Tbsp dark brown sugar $0.20
- 1 1/2 tsp salt $0.06
- 1/4 tsp Freshly cracked black pepper $0.02
- 1 Tbsp cooking oil $0.04
Instructions
- In a small bowl, combine the smoked paprika, garlic powder, ground mustard, onion powder, brown sugar, salt, and pepper.
- Preheat the air fryer to 420ºF for at least 5 minutes. Pat pork chops dry with a paper towel.
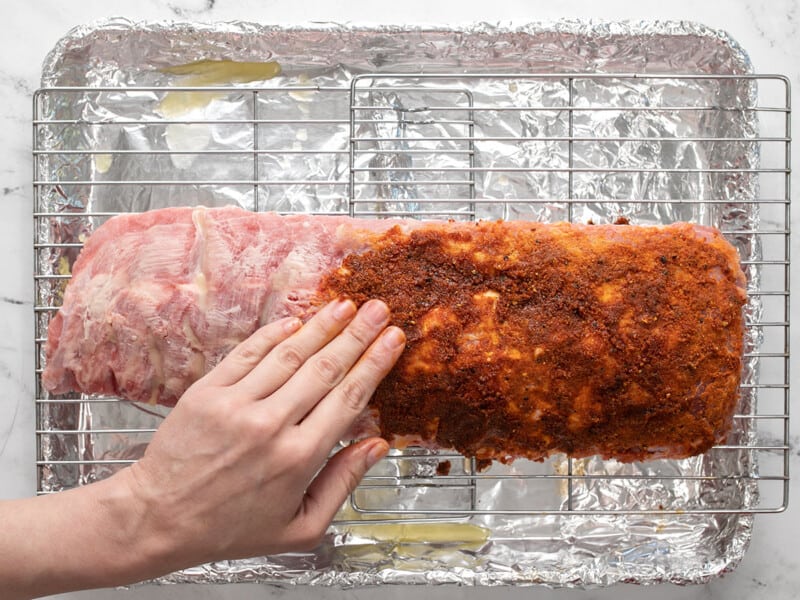
- Drizzle the cooking oil over top of pork chops on cutting board, then add the seasoning mixture. Rub the pork chops until they are well coated in oil and spices. The brown sugar will caramelize in the air fryer and make the texture of the pork chops perfect! Reserve at least 1 Tablespoon of the sugar seasoning mixture to rub on top when you flip half way through!
- Place the pork chops in the air fryer basket and cook for 7 minutes. Flip, sprinkling reserved seasoning mixture evenly over top and cook for 8 minutes more.
- Use a meat thermometer to make sure the internal temperature has reached 145ºF, and if not, cook for 1-2 minutes longer.
- Remove from heat and let the pork chops rest for 3 minutes and then serve with your favorite simple sides!
See how we calculate recipe costs here.
Nutrition
how to make Air Fryer Pork Chops – step by step photos
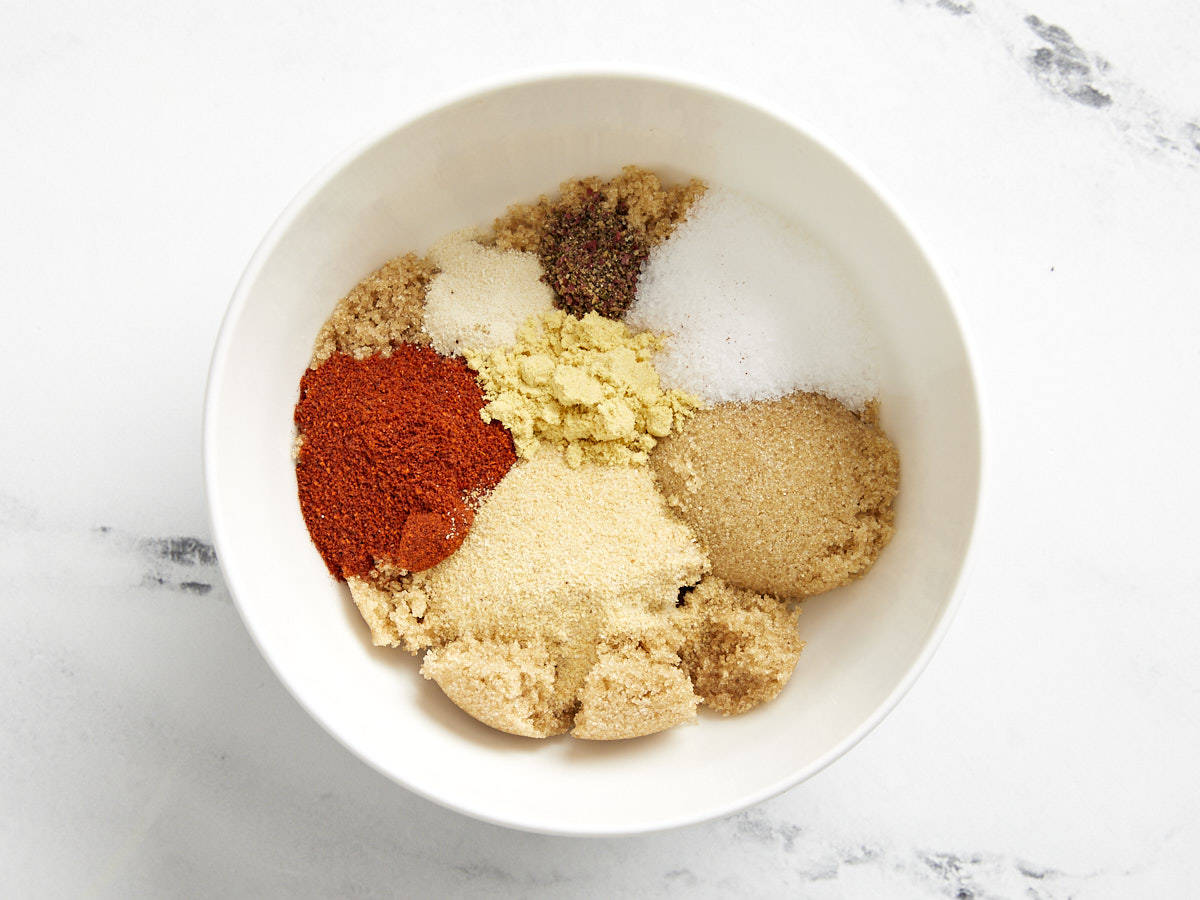
In a small bowl, combine 1 1/2 tsp smoked paprika, 1 tsp garlic powder, 1 tsp ground mustard, 1/4 tsp onion powder, 4 Tbsp dark brown sugar, 1 1/2 tsp salt, and 1/4 tsp pepper. Preheat the air fryer to 420ºF for at least 5 minutes. Pat 2 boneless center-cut pork chops dry with a paper towel.
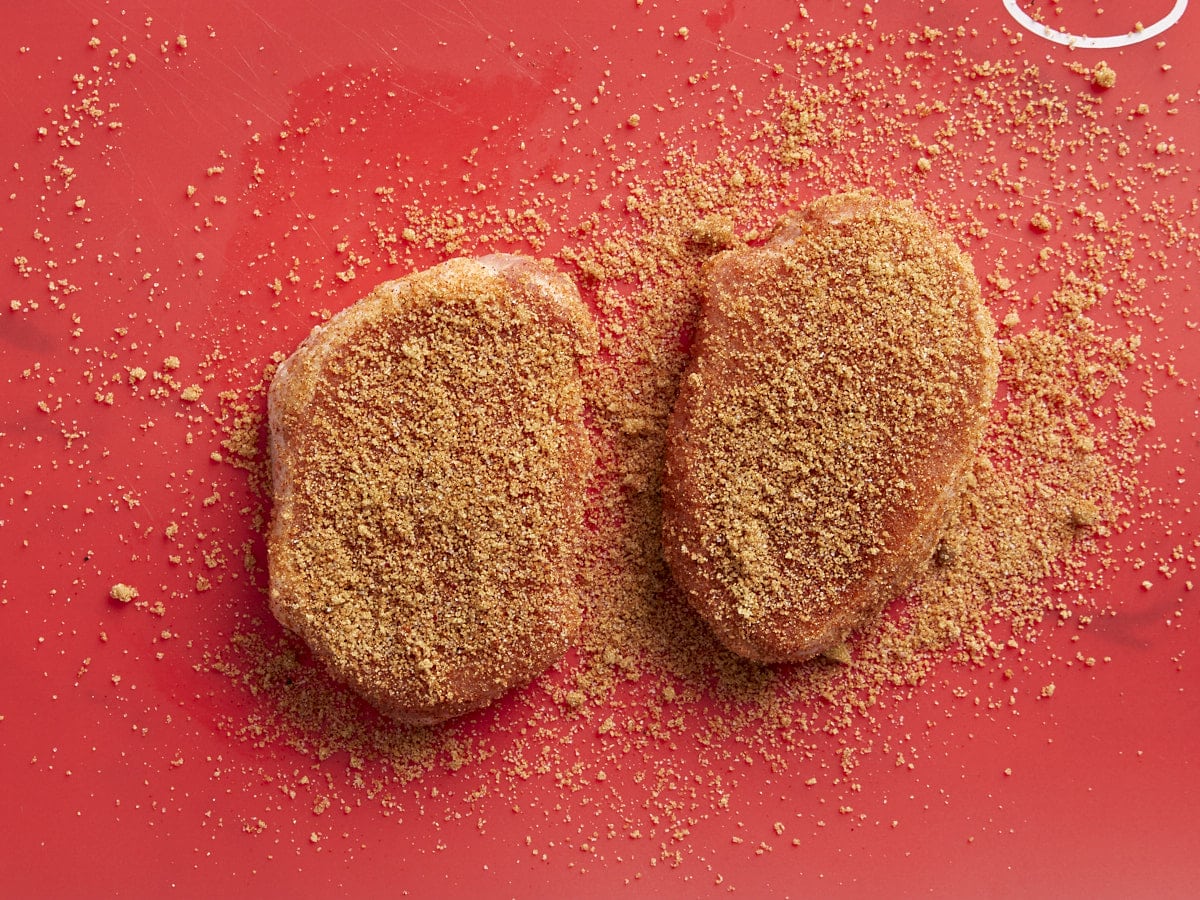
Drizzle 1 Tbsp cooking oil over the top of the pork chops on a cutting board, then add the seasoning mixture. Rub the pork chops until they are well coated in oil and spices. The brown sugar will caramelize in the air fryer and make the texture of the pork chops perfect! Reserve at least 1 Tablespoon of the sugar seasoning mixture to rub on top when you flip halfway through!
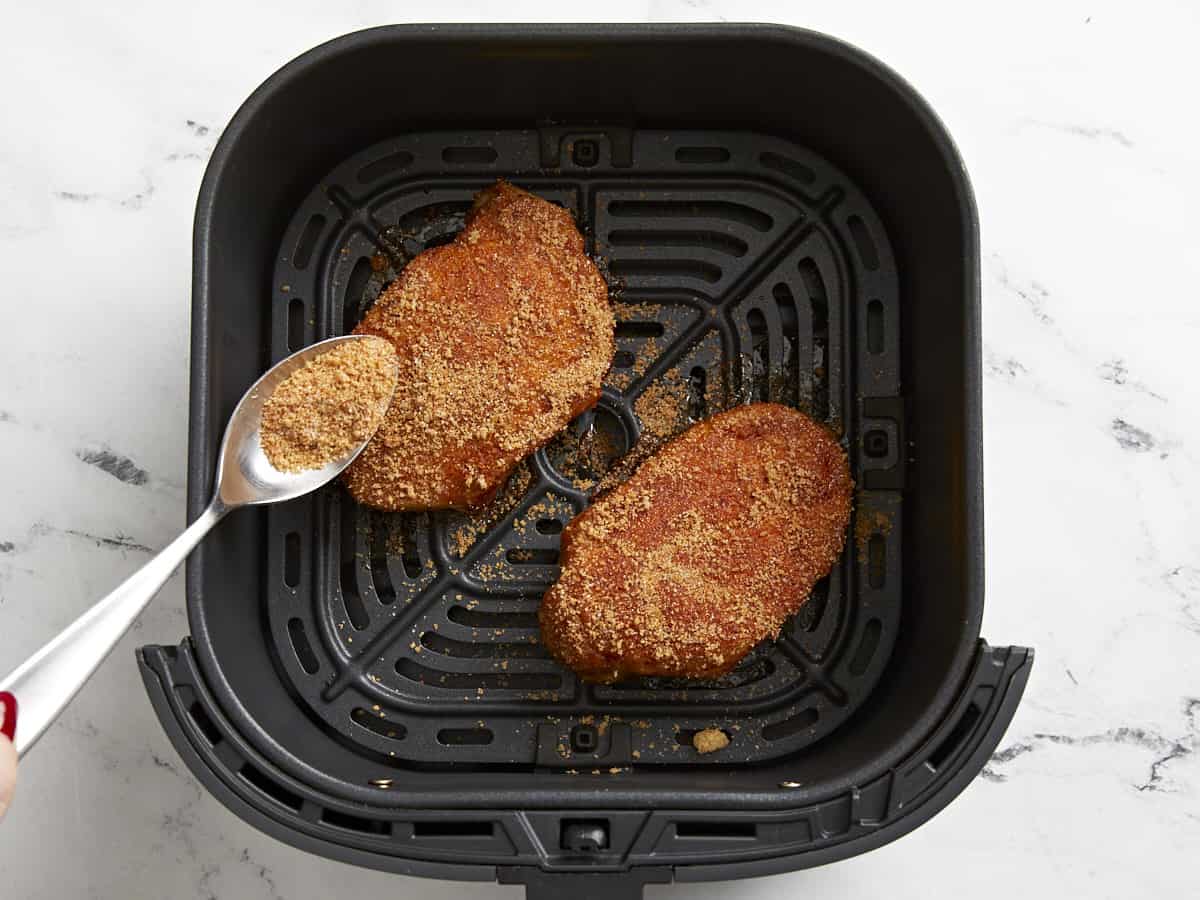
Place the pork chops in the air fryer basket and cook for 7 minutes. Flip, sprinkling the reserved seasoning mixture evenly over top, and cook for 8 minutes more.
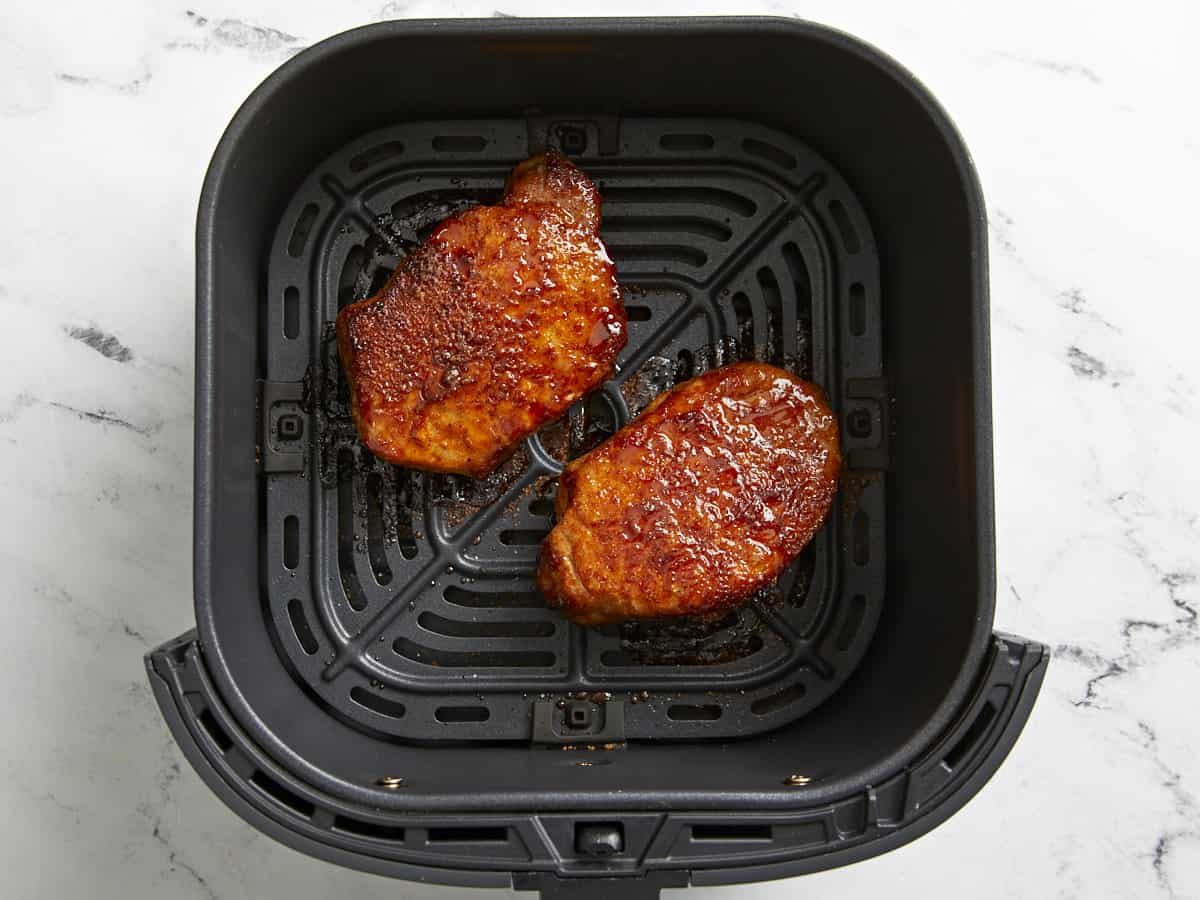
Use a meat thermometer to make sure the internal temperature has reached 145ºF, and if not, cook for 1-2 minutes longer. Remove from heat and let the pork chops rest for 3 minutes and then serve with your favorite simple sides!
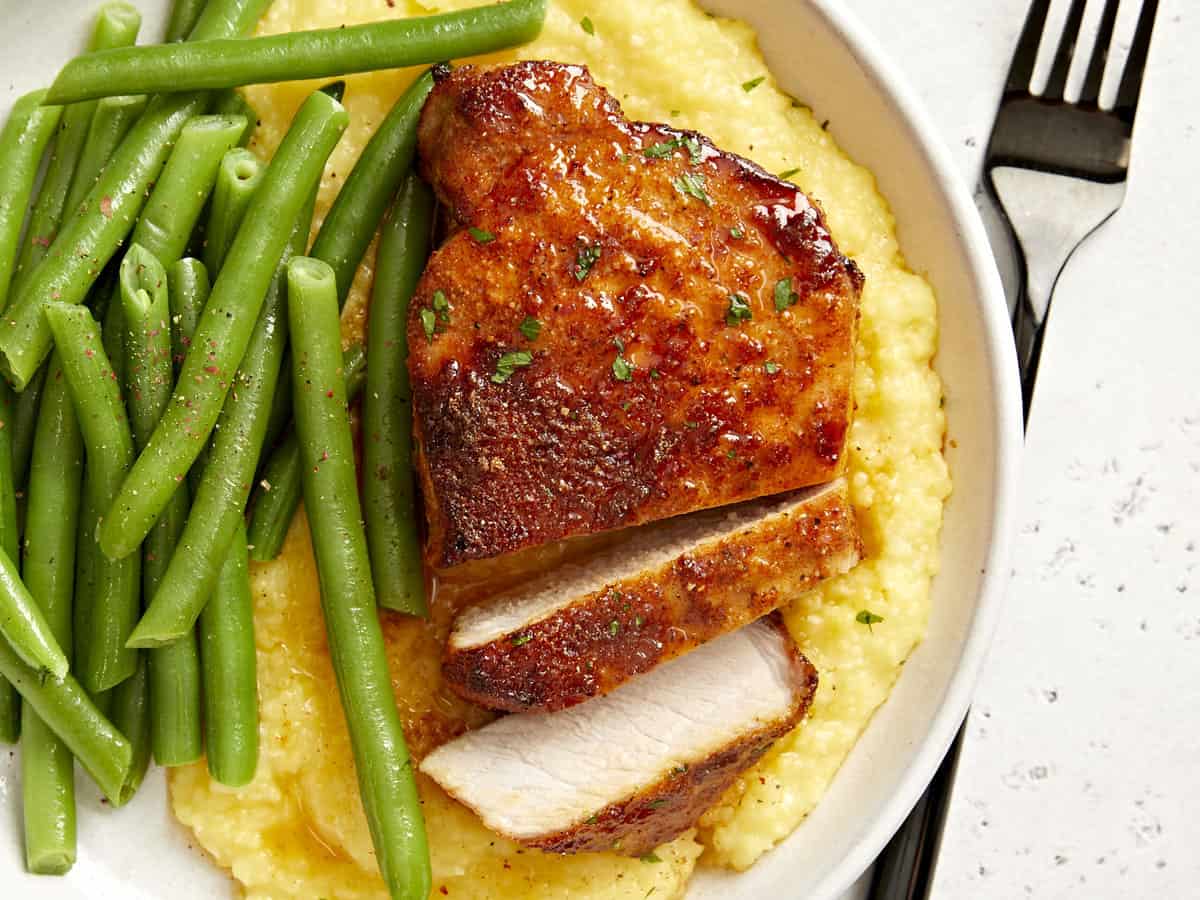
These juicy, crispy air fryer pork chops are the perfect weeknight meal!
More Air Fryer Recipes


The post Air Fryer Pork Chops appeared first on Budget Bytes.