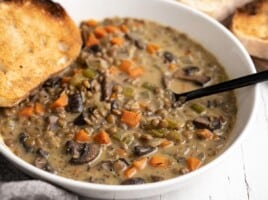
Mediterranean Lentil Soup

This vegan Mediterranean Lentil Soup is bright and refreshing. Finished with a squeeze of lemon, it’s the perfect meal for rainy spring days.

The post Mediterranean Lentil Soup appeared first on Budget Bytes.

In my opinion, a bright and refreshing soup is the perfect way to welcome spring, and this vegan Mediterranean Lentil Soup is the perfect comforting meal for the rainy days to come. A rich and flavorful broth loaded with veggies, lentils, and kale will fill you up for pennies and is a great recipe for fridge clean out day. Finish it off with a squeeze of lemon juice for a delicious and easy weeknight meal.
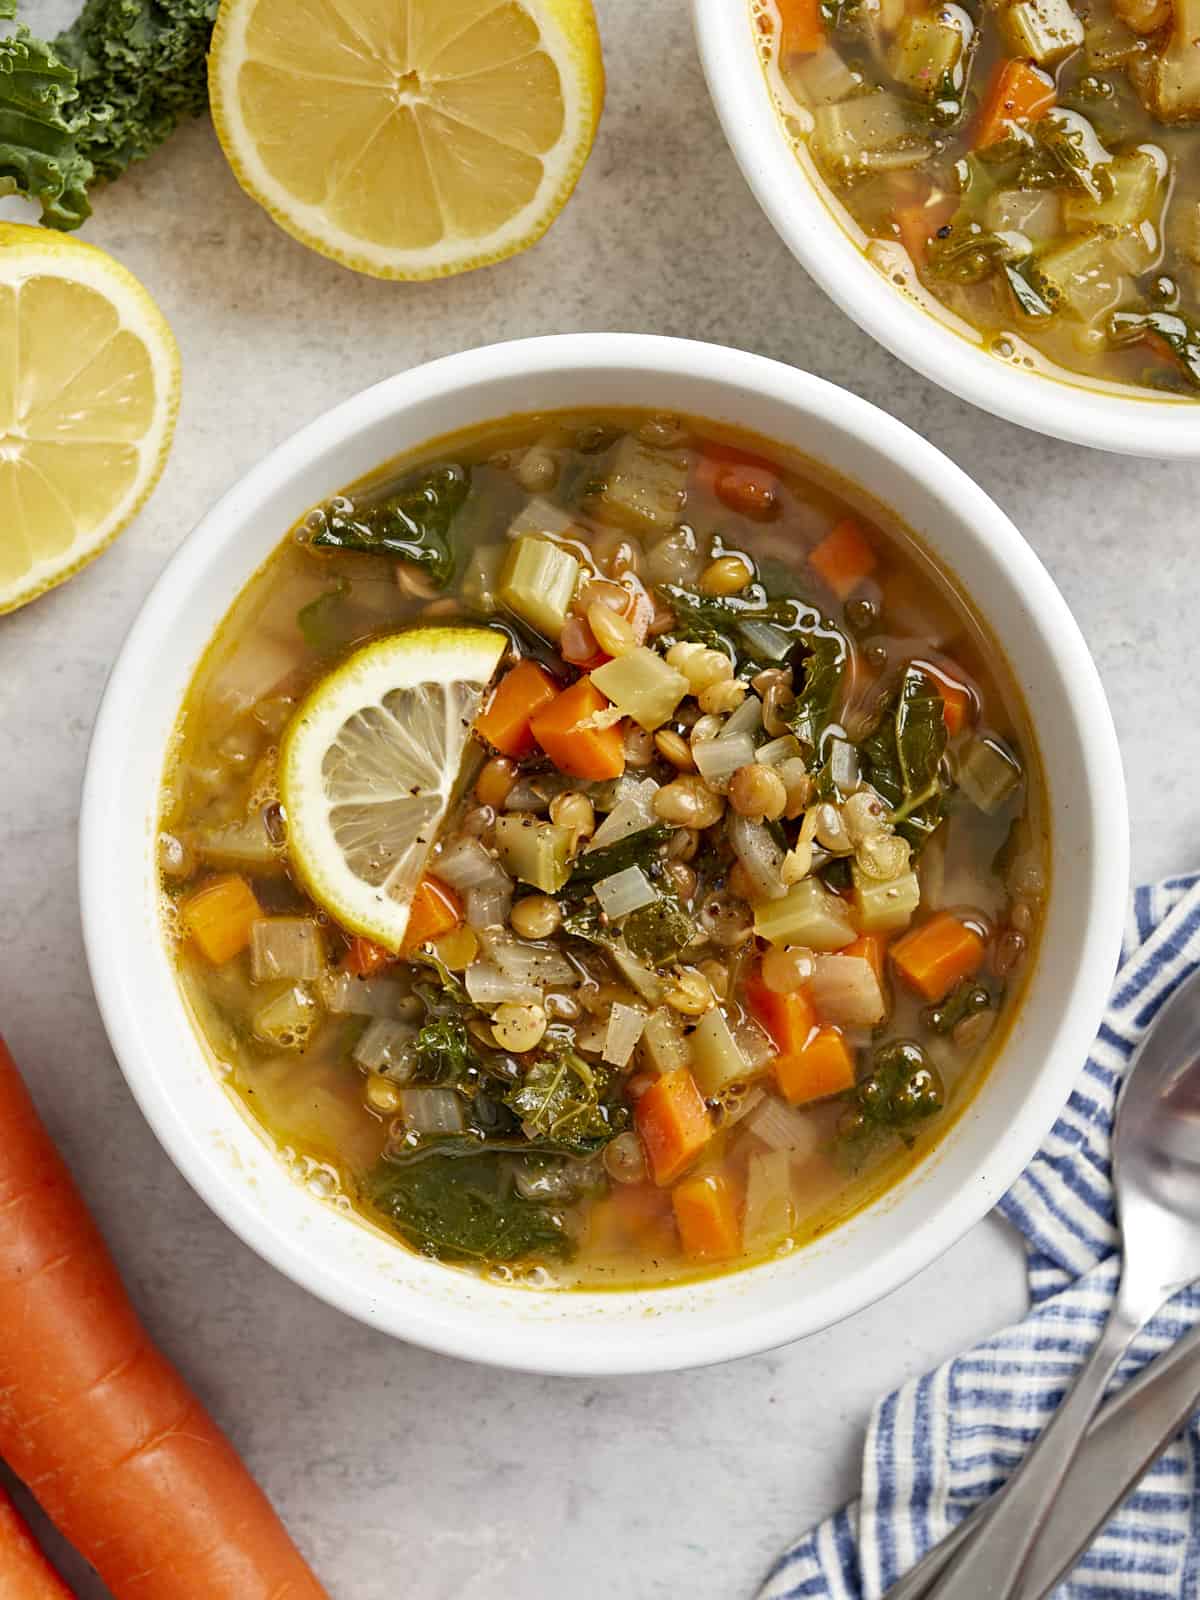
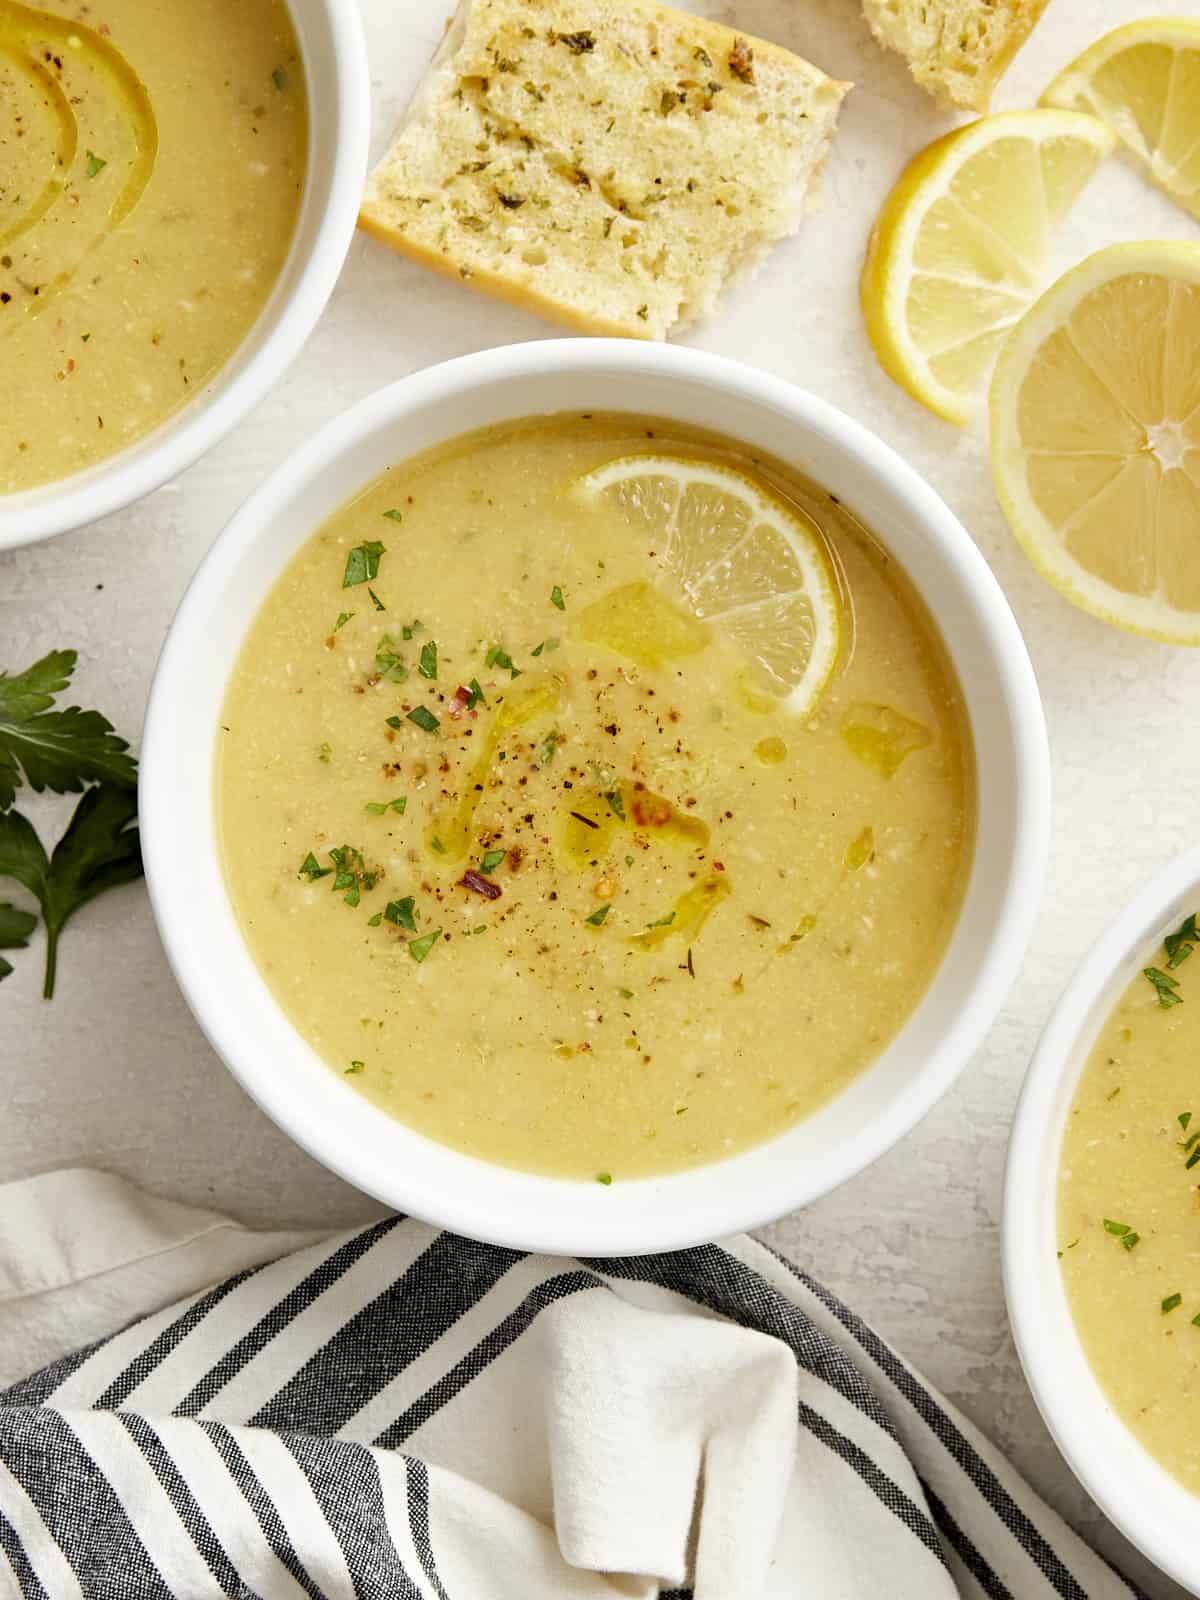
overhead view of a bowl of mediterranean lentil soup with lemon slices.

Why Make Mediterranean Lentil Soup?

The first time I experienced cinnamon in a savory dish was while cooking at a Lebanese restaurant and it was life changing! This Mediterranean Lentil Soup is the perfect introduction to the savory use of cinnamon. This clean and flavorful lentil soup is a vegan flavor explosion. It’s loaded with protein and fiber, naturally gluten-free, and super versatile. You can toss in just about any veggie or green, so raid the fridge and get cooking!

Ingredients for Mediterranean Lentil Soup

Here’s what you’ll need to make Mediterranean lentil soup:

  • Oil: Olive oil is our preferred choice in this recipe for its Mediterranean flavor profile, but vegetable or canola oil will work in a pinch.
  • Mirepoix: A combination of small diced yellow onion, carrots, and celery creates an earthy and sweet base of flavor for this soup.
  • Garlic: The large pieces of crushed garlic versus mincing it fine is intentional to bring out the natural sweetness and flavor of cooked garlic instead of the sometimes-overwhelming bite it has when minced.
  • Cumin: Adds a savory and nutty Mediterranean flavor to this soup.
  • Cinnamon: A great savory application of the spice! It will warm you up from the inside out and make your house smell fantastic.
  • Lentils: We used brown lentils for their firm texture.
  • Vegetable Broth: We used Vegetable flavored Better Than Bouillon in this recipe. If using another brand, make sure salt is not the first ingredient or it’s a waste of money!
  • Lemon Juice: Gives the soup a brightness that is seriously addictive. You can use fresh-squeezed lemon juice and save half of your lemon for garnishing each bowl, or you can use a bottled lemon juice. I always have lemons in the kitchen, so we had some to garnish with, too!
  • Kale: Swiss chard, rainbow chard, spinach, escarole, and all varieties of kale work great, too.
  • Salt and Pepper: Enhance the natural flavors of the soup.

Which color lentils are best for soup?

Brown or green lentils work best for this soup, as they will keep their shape after cooking, which is what we’re looking for texture-wise. Red lentils are not recommended because they cook quicker and will dissolve into the soup as they cook, creating a thick and mushy texture.

How to Store Leftovers

Store leftover Mediterranean lentil soup in an air-tight container in the refrigerator for up to 4 days. This soup also freezes super well for up to 3 months when stored properly in an air-tight container. Let thaw overnight in the refrigerator before reheating in a pot set over medium-low heat until warmed through.
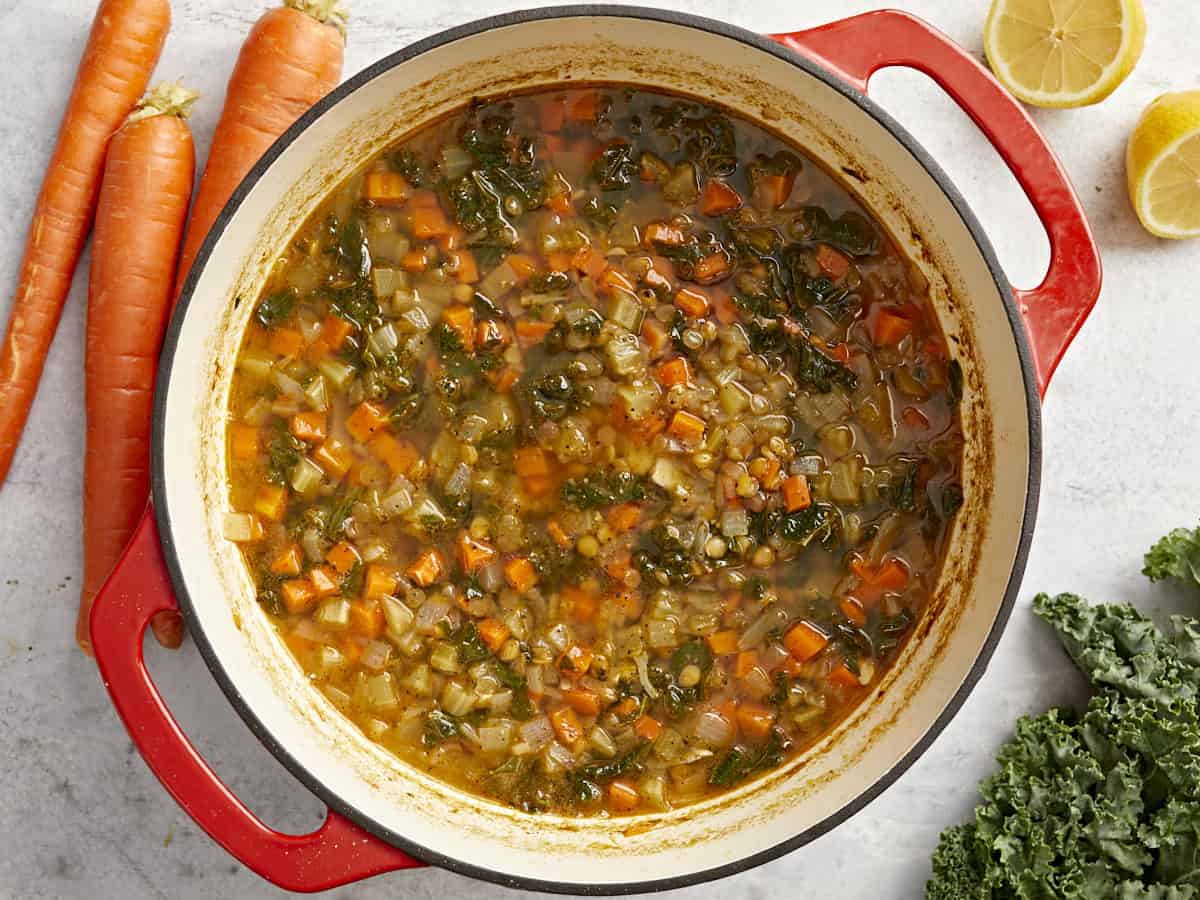
overhead view of mediterranean lentil soup in a red dutch oven.
overhead view of 2 bowls of mediterranean lentil soup with lemon slices.
Print

Mediterranean Lentil Soup

This vegan Mediterranean Lentil Soup is bright and refreshing. Finished with a squeeze of lemon, it's the perfect meal for rainy spring days.
Course Main Course, Soup
Cuisine Mediterranean
Total Cost $7.59 recipe / $1.08 serving
Prep Time 15 minutes
Cook Time 55 minutes
Total Time 1 hour 10 minutes
Servings 7 (about 1.5 cups each)
Calories 185kcal

Equipment

Ingredients

  • 2 Tbsp olive oil $0.32
  • 1 large yellow onion, diced small $0.78
  • 2 medium carrots, diced small $0.24
  • 3 stalks celery, diced small $0.36
  • 5 cloves garlic, crushed $0.30
  • 2 tsp ground cumin $0.20
  • 1 tsp cinnamon $0.16
  • 1 cup uncooked brown or green lentils $0.68
  • 8 cups vegetable broth $1.44
  • 4 oz. lemon juice $0.48
  • 3 cups kale, chopped and lightly packed $2.48
  • 1 tsp salt $0.05
  • 2 tsp freshly cracked black pepper $0.10

Instructions

  • Rinse the lentils in a strainer under cold water until the water runs clear.
  • Heat the oil in a large soup pot set over medium-high heat. Add in the onions, carrots, and celery and cook until they become tender, about 6-7 minutes, stirring frequently. Season with salt and pepper.
  • Stir in the garlic, cumin, and cinnamon. Heat until fragrant, about 60 seconds. Add the lentils to the pan and heat for 1-2 minutes to slightly toast.
  • Pour in the vegetable broth, water, and lemon juice, then bring the pot to a boil. Reduce heat to low and simmer until the lentils are tender, about 30-45 minutes.
  • Stir in the greens, season with additional salt, pepper, and lemon juice to taste before serving.

See how we calculate recipe costs here.

Nutrition
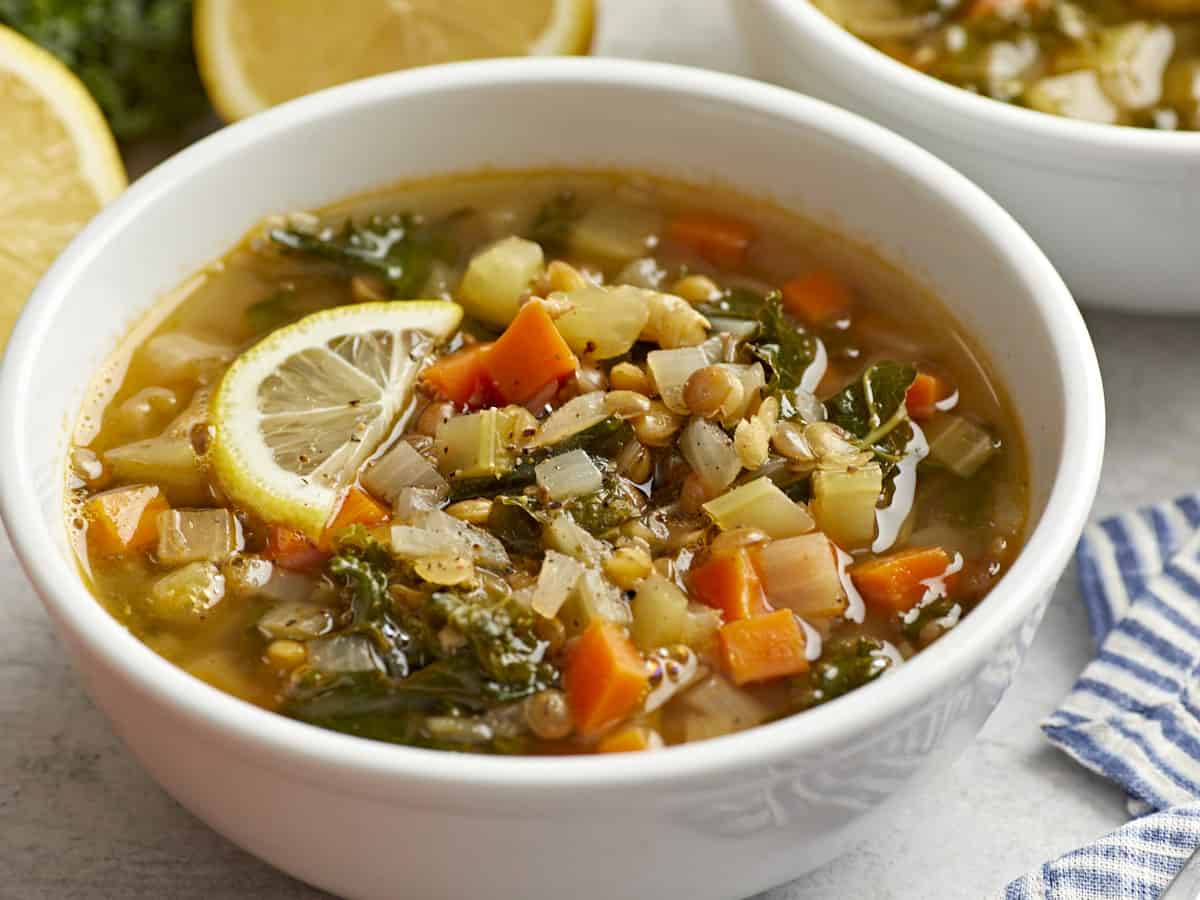
Serving: 1.5cups | Calories: 185kcal | Carbohydrates: 28g | Protein: 9g | Fat: 5g | Sodium: 1452mg | Fiber: 11g
three-quarters view of mediterranean lentil soup in a white bowl with a lemon slice.

how to make Mediterranean Lentil Soup – step by step photos
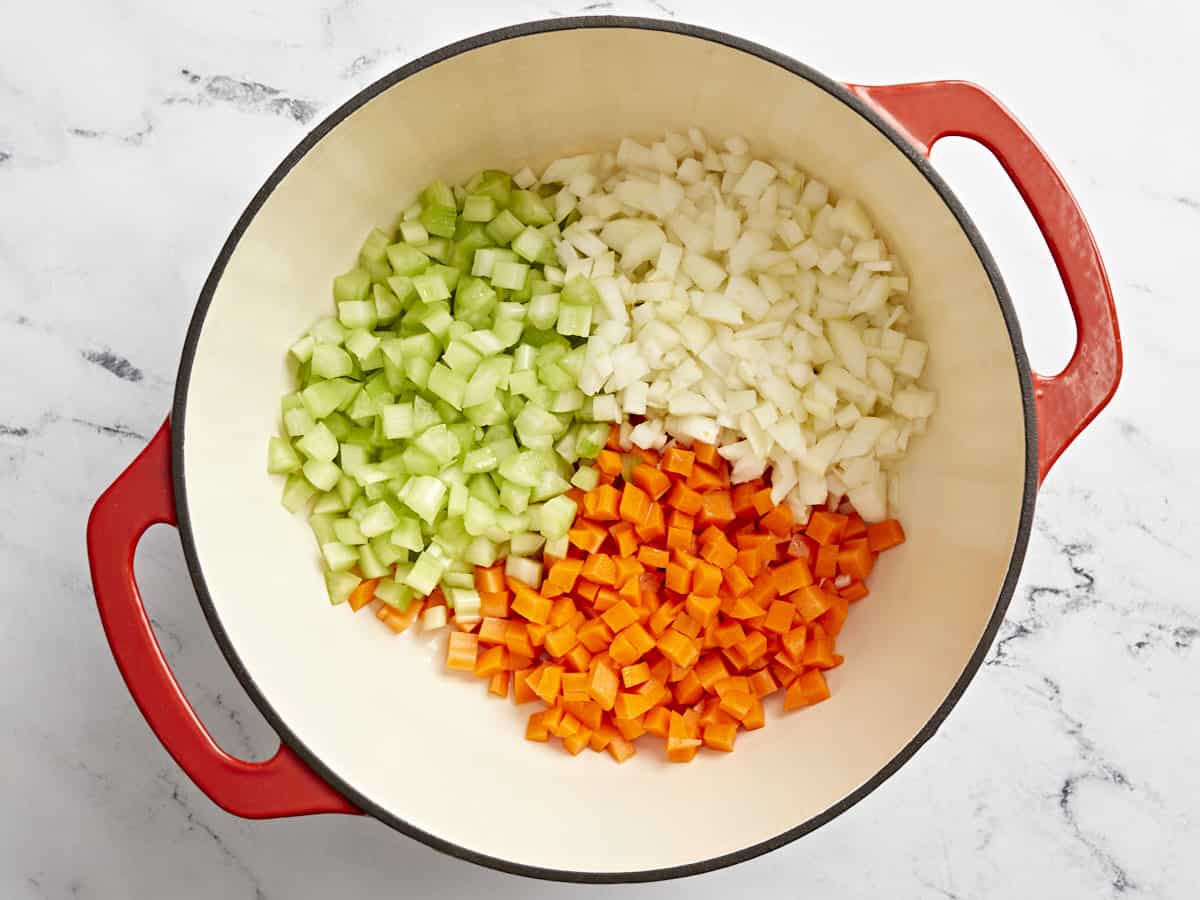
mirepoix in a red dutch oven.

Rinse 1 cup brown or green lentils in a strainer under cold water until the water runs clear. Heat 2 Tbsp olive oil in a large soup pot set over medium-high heat. Add in 1 diced yellow onion, 2 diced medium carrots, and 3 diced stalks celery and cook until they become tender, about 6-7 minutes, stirring frequently. Season with 1 tsp salt and 2 tsp pepper.
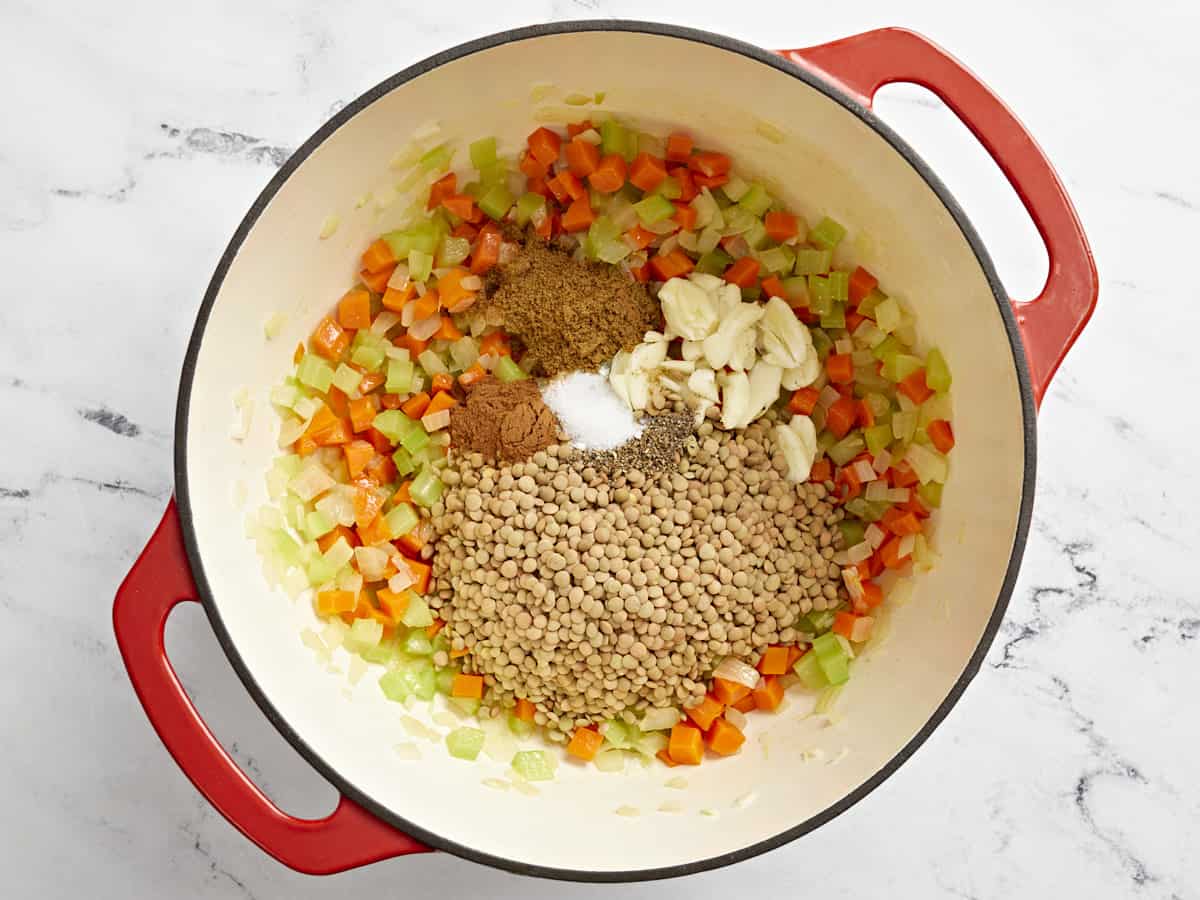
mirepoix, spices, and lentils in a red dutch oven.

Stir in 5 crushed cloves garlic, 2 tsp ground cumin, and 1 tsp cinnamon. Heat until fragrant, about 60 seconds. Add the lentils to the pan and heat for 1-2 minutes to slightly toast.
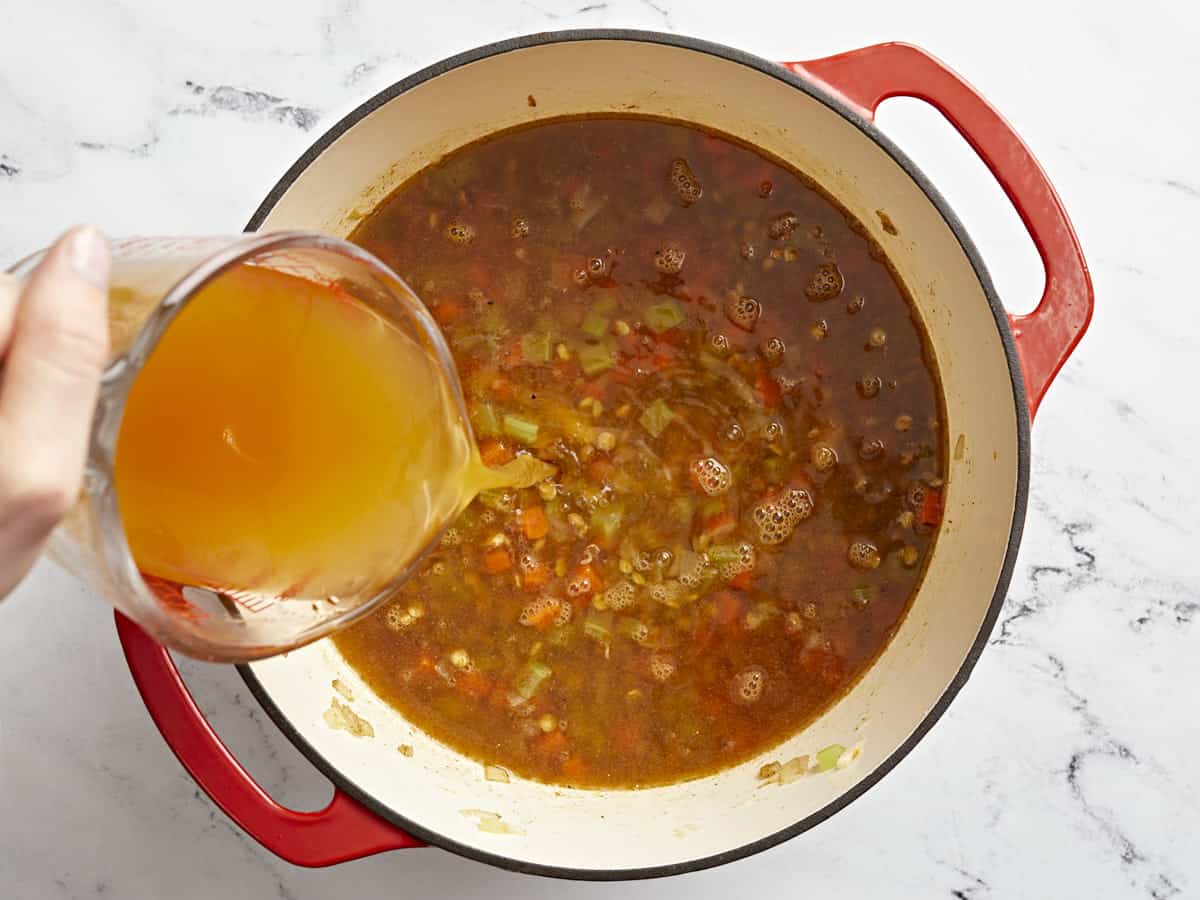
broth added to lentil soup in a red dutch oven.

Pour in 8 cups vegetable broth and 4 oz. lemon juice, then bring the pot to a boil. Reduce heat to low and simmer until the lentils are tender, about 30-45 minutes.
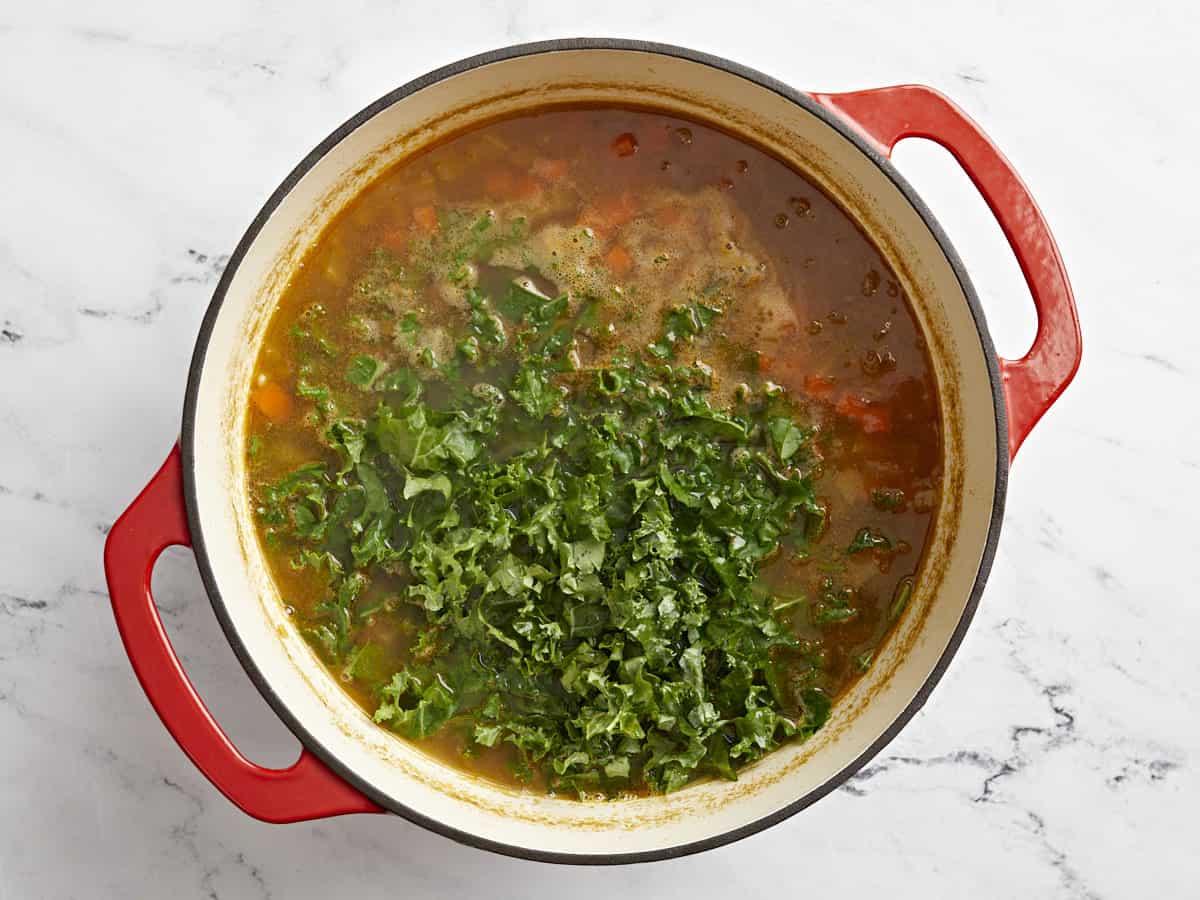
kale added to lentil soup in a red dutch oven.

Stir in 3 cups chopped kale, season with additional salt, pepper, and lemon juice to taste before serving.
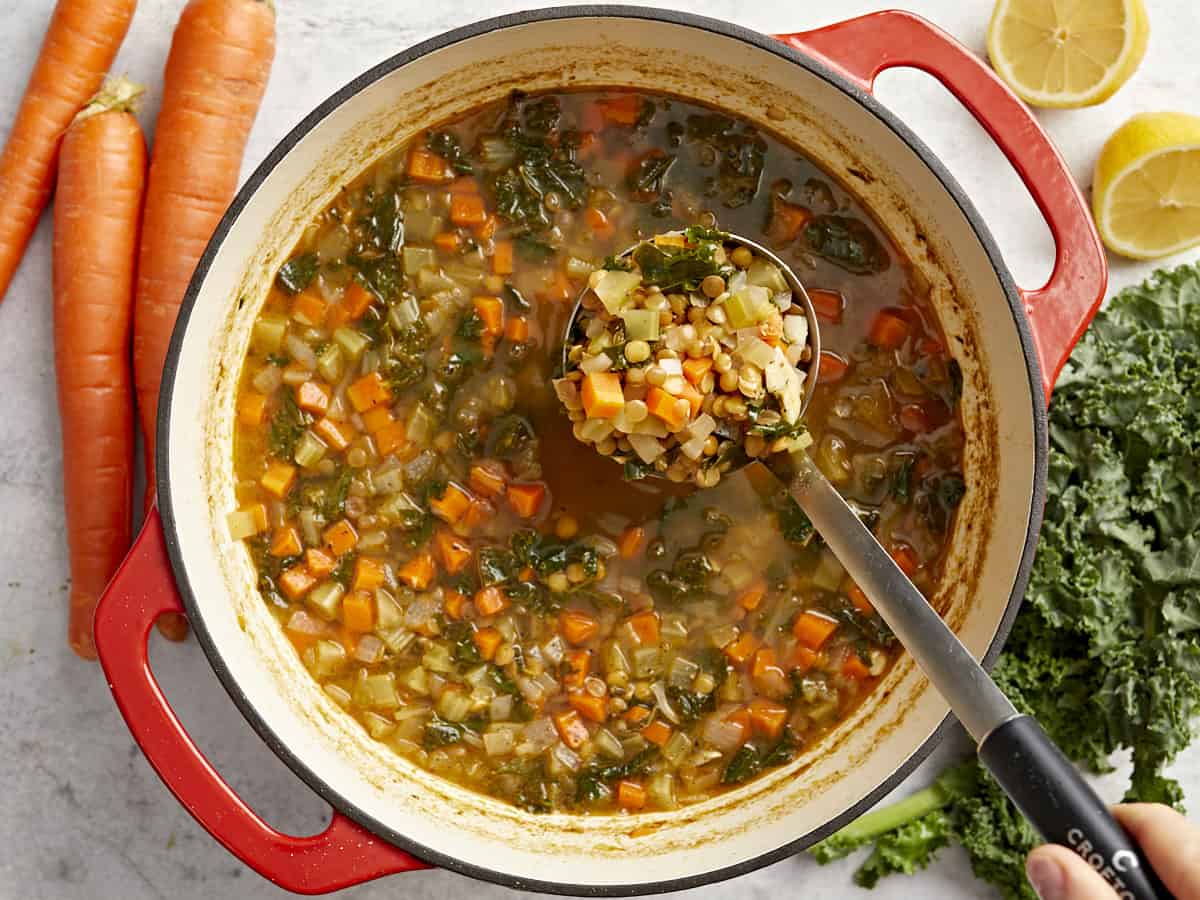
overhead view of a spoon lifting a scoop of mediterranean lentil soup from a red dutch oven.

This Mediterranean lentil soup is going to be your new favorite!

The post Mediterranean Lentil Soup appeared first on Budget Bytes.
Chorizo Stuffed Bell Peppers

These Chorizo Stuffed Bell Peppers are packed with southwest flavor, perfectly portioned for meal prep, and freezer-friendly!

The post Chorizo Stuffed Bell Peppers appeared first on Budget Bytes.

We’re in love with stuffed bell peppers here at the Budget Bytes kitchen, so I decided to make a new variation just so I could have an excuse to eat stuffed bell peppers again. These Chorizo Stuffed Bell Peppers are full of super flavorful Mexican chorizo, hearty rice, and a rich sauce, then topped with melty mozzarella cheese. They’re SO filling, perfectly portioned for meal prep or freezer cooking, and quite flexible if you want to change up the ingredients to make them even more budget-friendly! Put this one one your to-cook list because I know you’re going to love them!

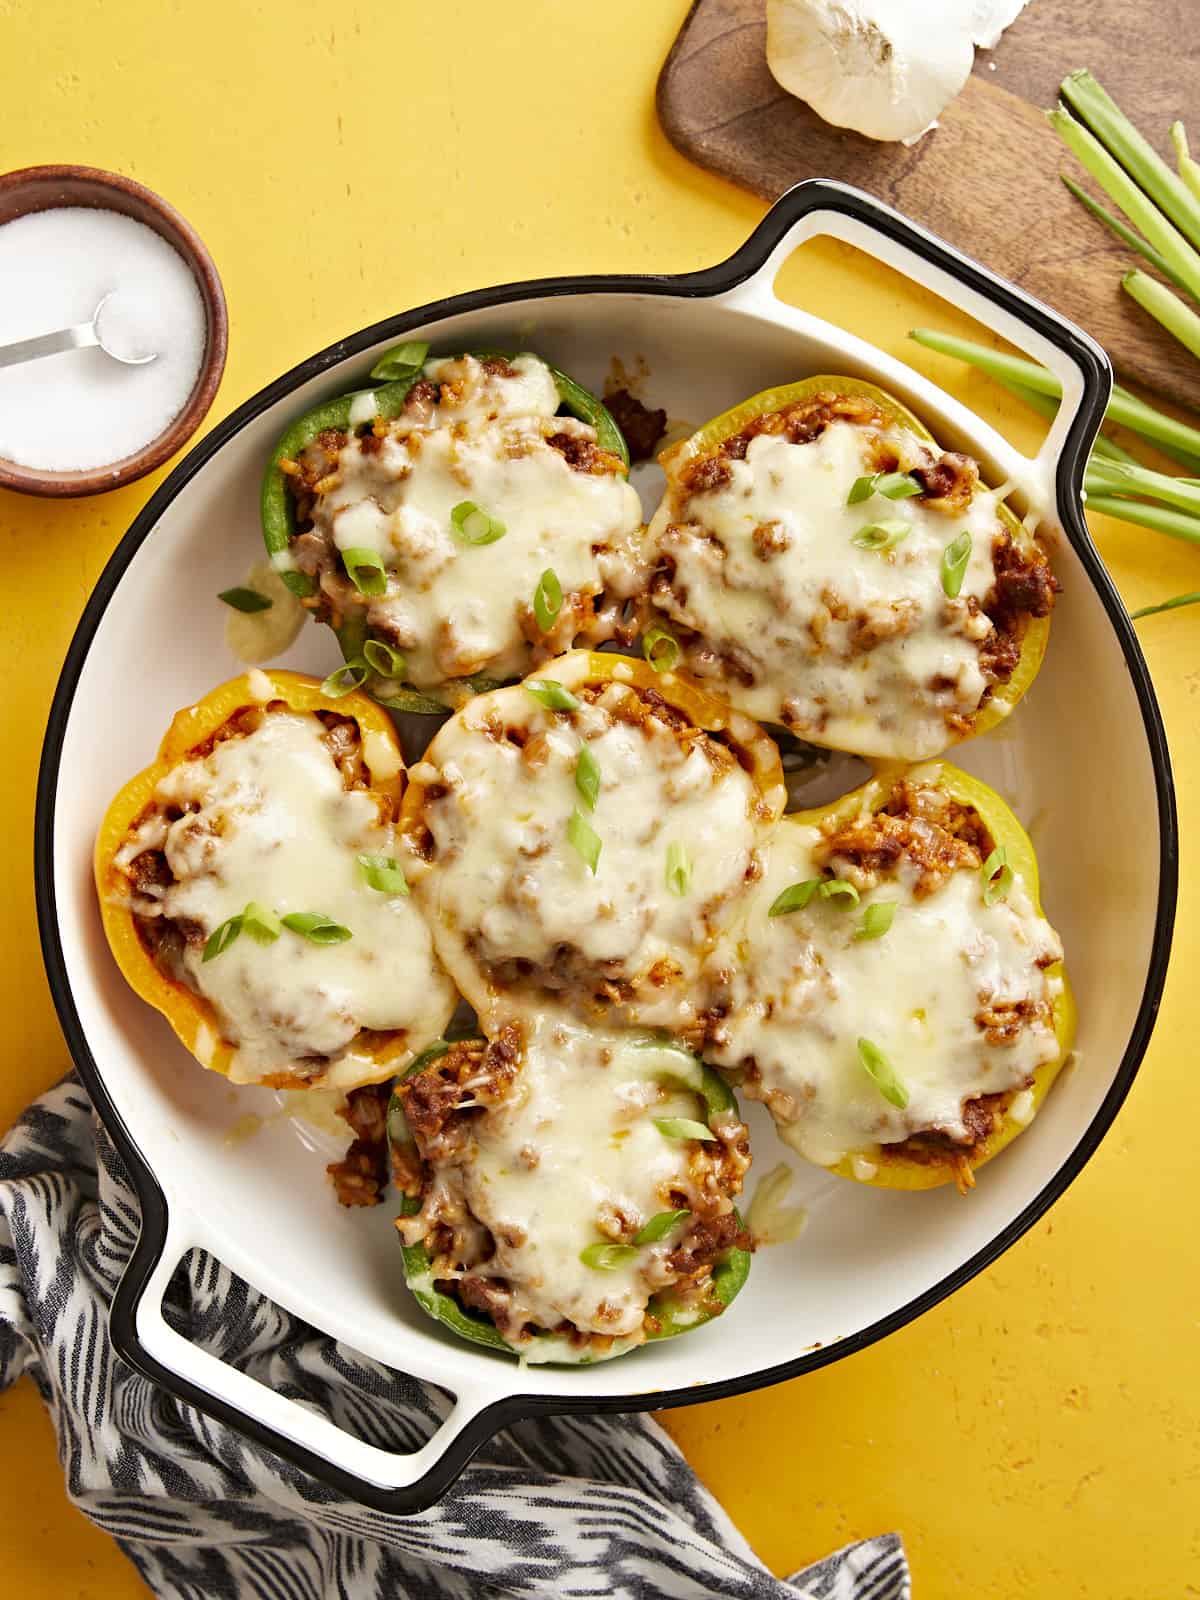
Overhead view of chorizo stuffed bell peppers in a baking dish on a yellow background.

Ingredients for Chorizo Stuffed Bell Peppers

These stuffed bell peppers are packed with flavorful herbs and spices and a rich tomato-y sauce so that every bite is deee-licious. Here are the ingredients for chorizo stuffed bell peppers:

  • Bell Peppers: You’ll need three bell peppers to make six servings for this recipe. We used a mix of colors to make it more festive, but you can use any color pepper that fits your budget.
  • Mexican Chorizo: Mexican chorizo is a fresh (not cured) sausage that is packed with spices. You can usually either buy this loose or in links. If you buy them in links, simply squeeze the meat out of the casing into the skillet. I like Johnsonville brand, but many larger grocery stores also make their own generic version.
  • Garlic & Onion: A little fresh onion and garlic add flavor and texture to the bell pepper stuffing.
  • Rice: Long grain white rice bulks up this meal to make it filling while keeping the cost low. We cook the rice right in the pot with the chorizo, spices, and broth for maximum flavor.
  • Chicken Broth: The rice is cooked in chicken broth to ensure that every bite is super flavorful. We use Better Than Bouillon to make our broth because it’s budget-friendly and has great flavor.
  • Tomato Paste: Tomato paste is added to the broth to help create an enchilada sauce-like flavor in the rice mixture.
  • Diced Green Chiles: Green chiles add even more flavor, color, and texture to the filling. If you prefer a milder stuffed pepper, you can leave out the green chiles or look for a mild green chile.
  • Spices: We packed this bell pepper stuffing with even more spices including chili powder, cumin, garlic powder, cayenne pepper, and salt.
  • Mozzarella: The stuffed bell peppers are topped with mozzarella cheese for a rich finish, but you can substitute with a different type of cheese if preferred, like Monterey jack, pepper jack, cheddar, or a Mexican blend.
  • Green Onion: A few sliced green onions sprinkled over top of the stuffed bell peppers add a fresh finish, but are entirely optional!

What Else Can I Add?

This recipe is pretty flexible, so if you want to change it up or make it more budget-friendly, here are some other ingredients you can add:

  • Beans: Try swapping half of the chorizo with a can of black beans or pinto beans for more fiber and less cost.
  • Diced Tomatoes: If you want more color and texture in your bell pepper filling, try adding a drained can of petite diced tomatoes, or diced tomatoes with chiles (Rotel).
  • Sweet Potato: Chorizo and sweet potato are a perfect flavor pair. Replace half of the chorizo with one small finely diced sweet potato for a spicy-sweet flavor profile (add it with the rice so it can simmer and soften with the rice).

Mexican Chorizo vs. Spanish Chorizo

It’s really important to use the correct type of chorizo for this recipe. You’ll need Mexican chorizo, which is a fresh (uncooked & uncured) sausage. You’ll find Mexican chorizo in the fresh meat department, usually near bratwurst and other fresh sausages. Spanish chorizo is a cured, sliceable sausage that you’ll usually find near cheese, pepperoni, or other charcuterie-type foods.

What to Serve with Chorizo Stuffed Bell Peppers

These southwest-inspired peppers are really filling on their own, but if you want to serve something on the side they pair really well with Cumin Lime Roasted Sweet Potatoes, Cowboy Caviar, Sweet Potato Cornbread, or Warm Corn and Avocado Salad.

How To Store Leftovers

I love making stuffed bell peppers for meal prep, so this is how I store and reheat them. The cooked bell peppers can be stored in the refrigerator for 4-5 days. I like to reheat them quickly in the microwave (about 2 minutes each).

Or, once chilled in the refrigerator, you can transfer them to the freezer. I suggest packaging them individually in a freezer-safe, air-tight container, so you can reheat one at a time as needed. Frozen stuffed bell peppers can be thawed in the refrigerator overnight and then reheated the next day in the microwave, or thawed straight from the freezer in the microwave using the defrost function, then heated through on full power.

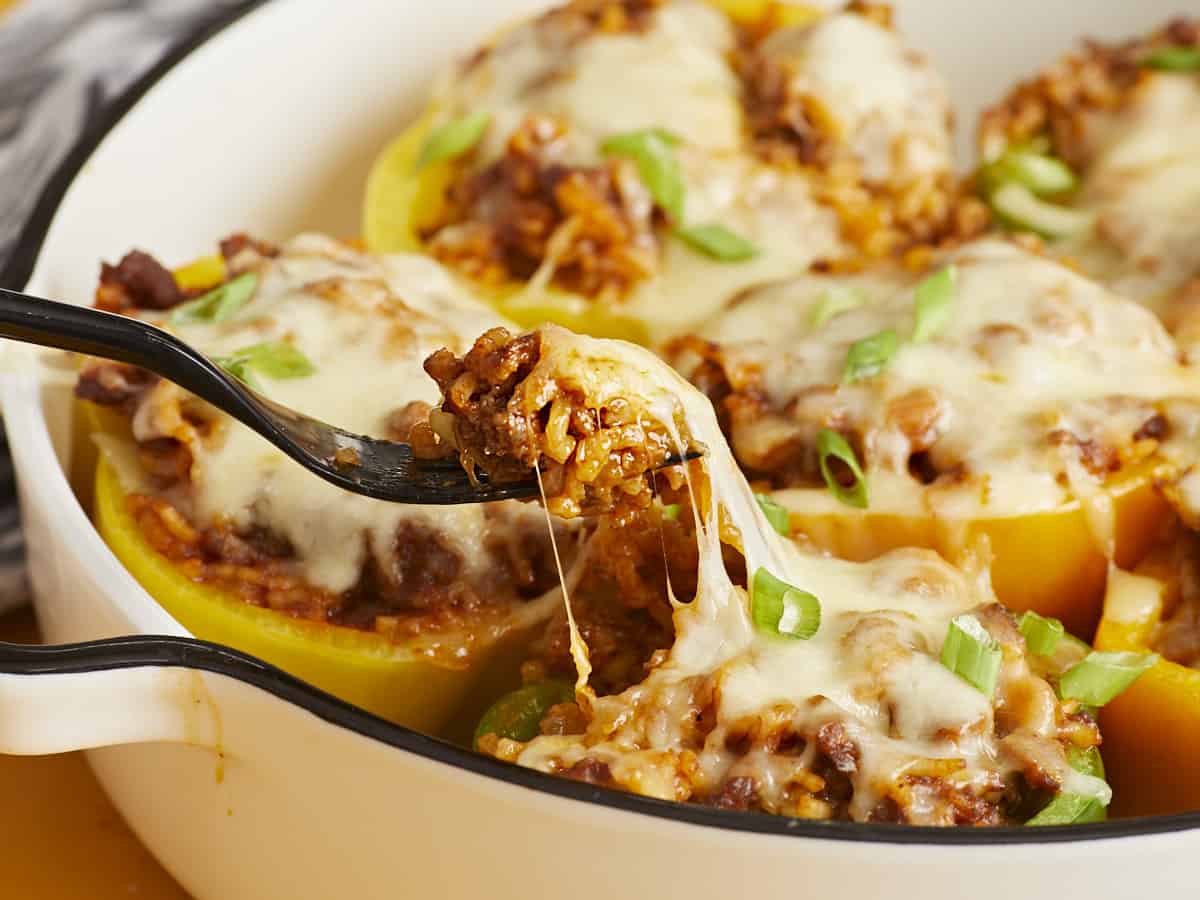
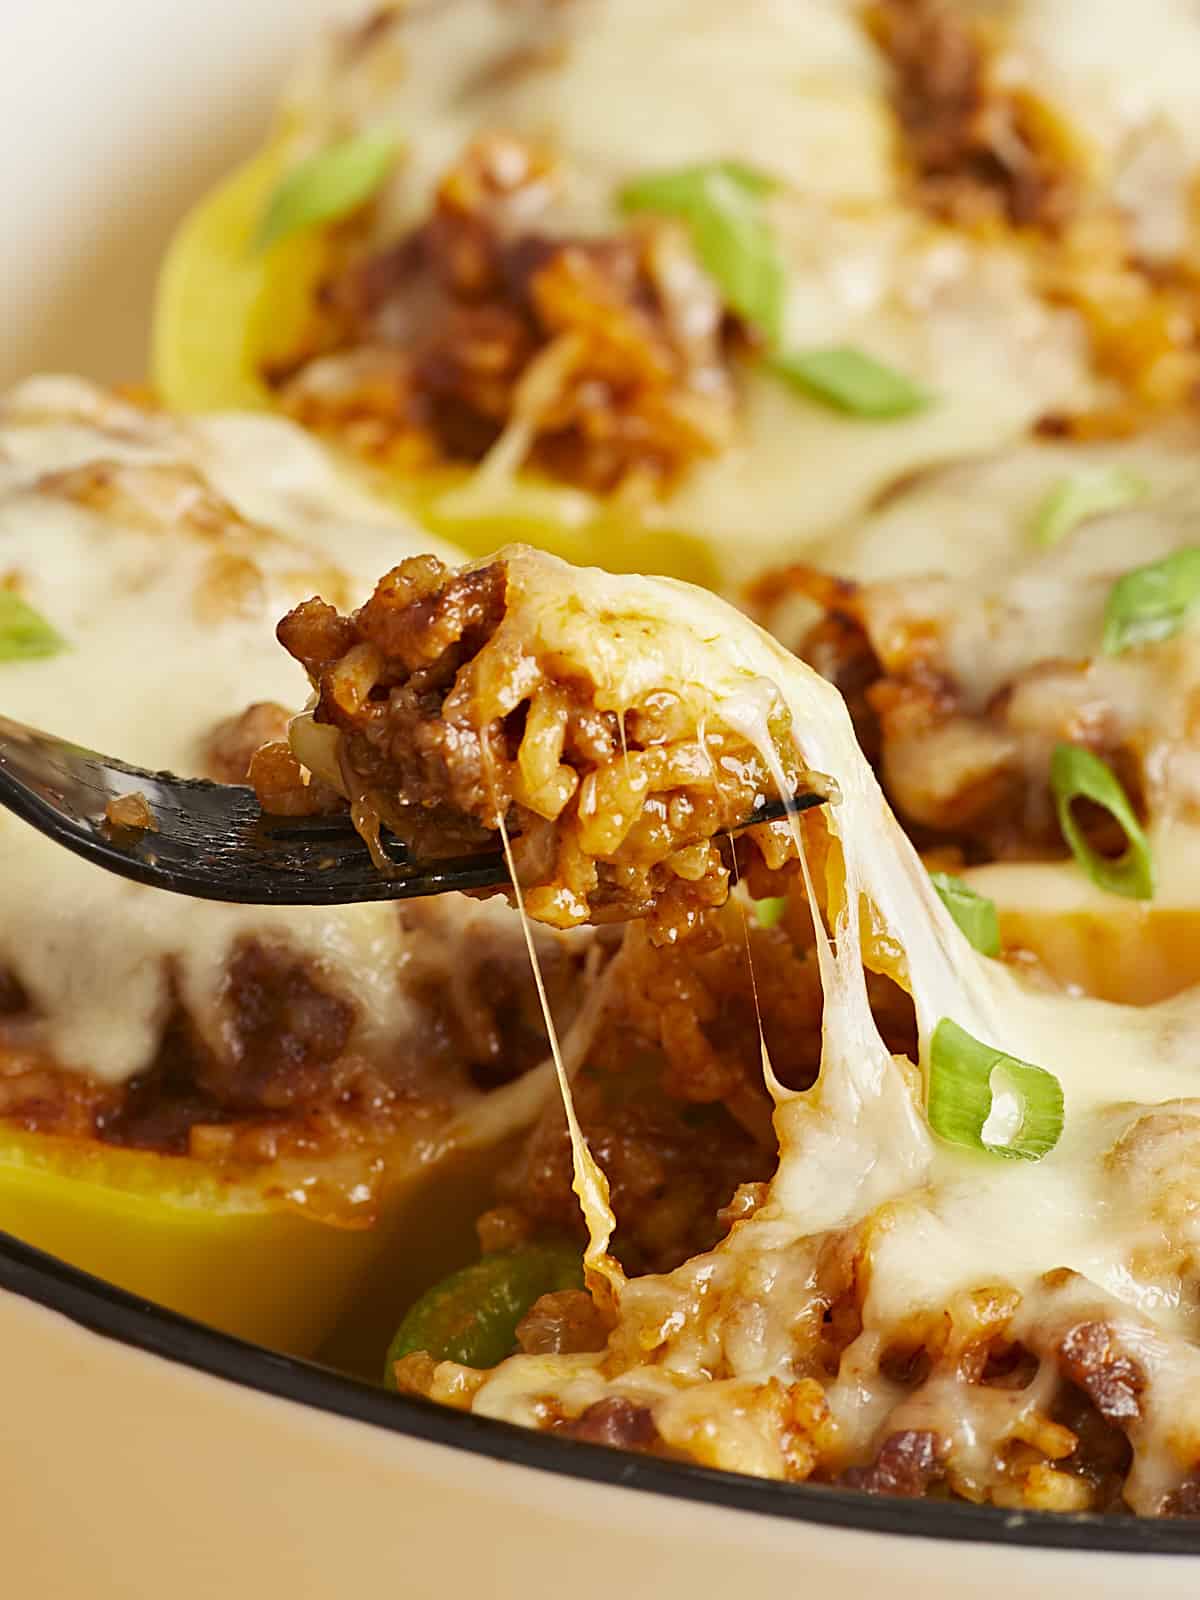
Side view of a fork lifting some stuffing out of the bell pepper with the cheese pulling.
Overhead view of chorizo stuffed bell peppers in a round baking dish.
Print

Chorizo Stuffed Bell Peppers

These Chorizo Stuffed Bell Peppers are packed with southwest flavor, perfectly portioned for meal prep, and freezer-friendly!
Course Dinner, Main Course
Cuisine Amercian, Mexican
Total Cost $12.91 recipe / $2.15 serving
Prep Time 5 minutes
Cook Time 1 hour
Total Time 1 hour 5 minutes
Servings 6
Calories 380kcal

Ingredients

  • 3 bell peppers $4.07
  • 1 lb. Mexican chorizo $4.99
  • 1 yellow onion $0.37
  • 2 cloves garlic $0.16
  • 1 4oz. can diced green chiles $0.99
  • 2 Tbsp tomato paste $0.20
  • 2 tsp chili powder $0.20
  • 1/2 tsp cumin $0.05
  • 1/2 tsp garlic powder $0.05
  • 1/4 tsp cayenne pepper $0.02
  • 1/4 tsp salt $0.02
  • 1/2 cup long grain white rice (uncooked) $0.13
  • 1 cup chicken broth $0.19
  • 1 cup shredded mozzarella $1.25

Instructions

  • Preheat the oven to 350ºF. Cut each bell pepper in half so there is a top and bottom portion, then remove the seeds and ribs. You can either carefully cut the stem out of the center of the top half, or eat around it later. Place the halved bell peppers in a baking dish, cut sides up. Par-bake in the preheated oven for 15 minutes.
  • Add the chorizo to a large deep skillet and cook over medium heat until browned. While the chorizo is cooking, dice the onion and mince the garlic. Add the onion and garlic to the chorizo and continue to cook until the onions are softened.
  • Add the diced green chiles, tomato paste, chili powder, cumin, garlic powder, cayenne pepper, and salt to the skillet and stir until combined.
  • Add the uncooked rice and chicken broth to the skillet and stir until combined again. Place a lid on the skillet, turn the heat up to medium-high, and allow the broth to come up to a boil.
  • As soon as the broth begins to boil, turn the heat down to low and let the rice simmer over, low without lifting the lid or stirring, for 20 minutes. After 20 minutes, turn off the heat and let it rest for five more minutes.
  • Finally, remove the lid and gently stir the rice and chorizo mixture. All of the broth should be absorbed and the rice tender.
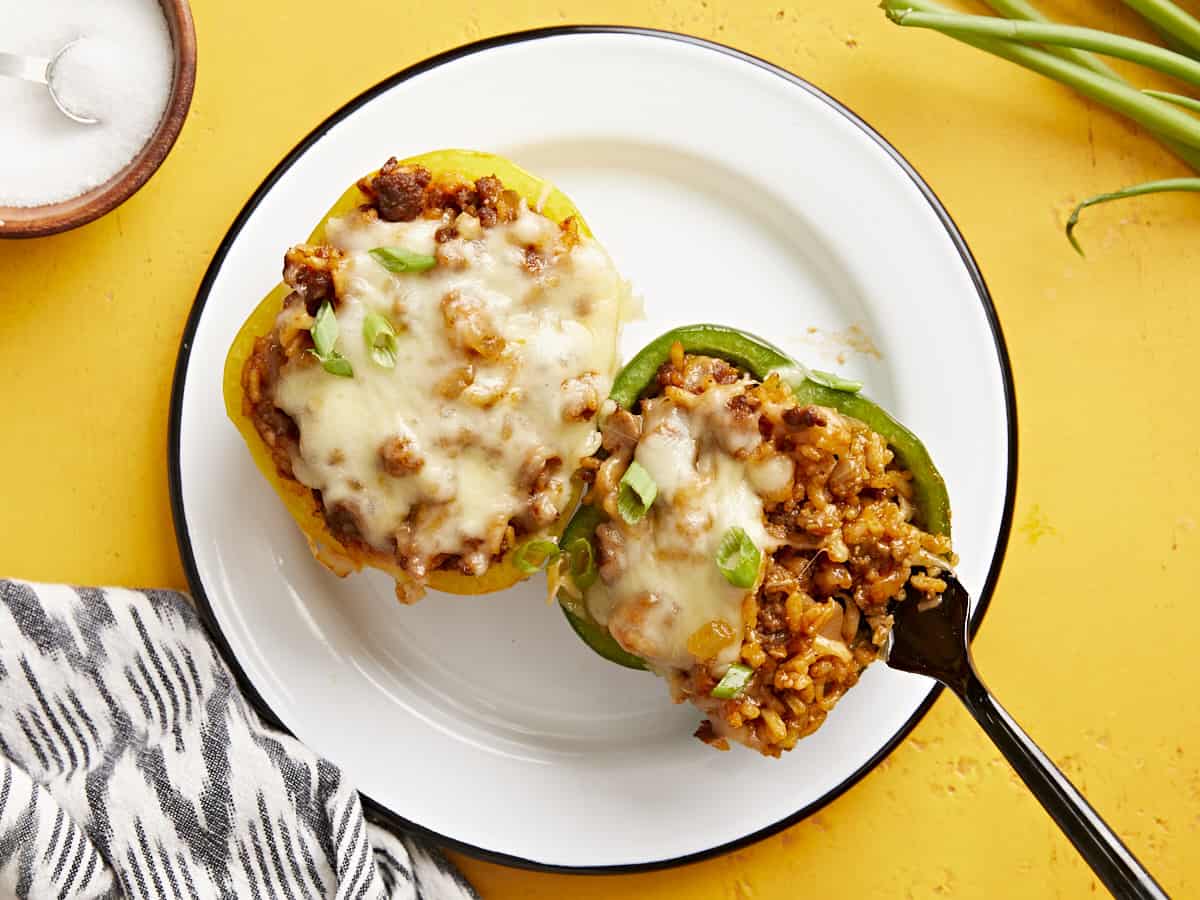
  • Divide the rice and chorizo mixture between the six bell pepper halves, then top with shredded cheese. Cover the baking dish and return it to the 350ºF oven and bake for 20 minutes more. Finally, top with sliced green onions and serve!

See how we calculate recipe costs here.

Nutrition

Serving: 1pepper | Calories: 380kcal | Carbohydrates: 24g | Protein: 18g | Fat: 24g | Sodium: 1032mg | Fiber: 3g
Overhead view of two stuffed bell peppers on a plate with a fork digging into one.

How to Make Chorizo Stuffed Bell Peppers – Step by Step Photos

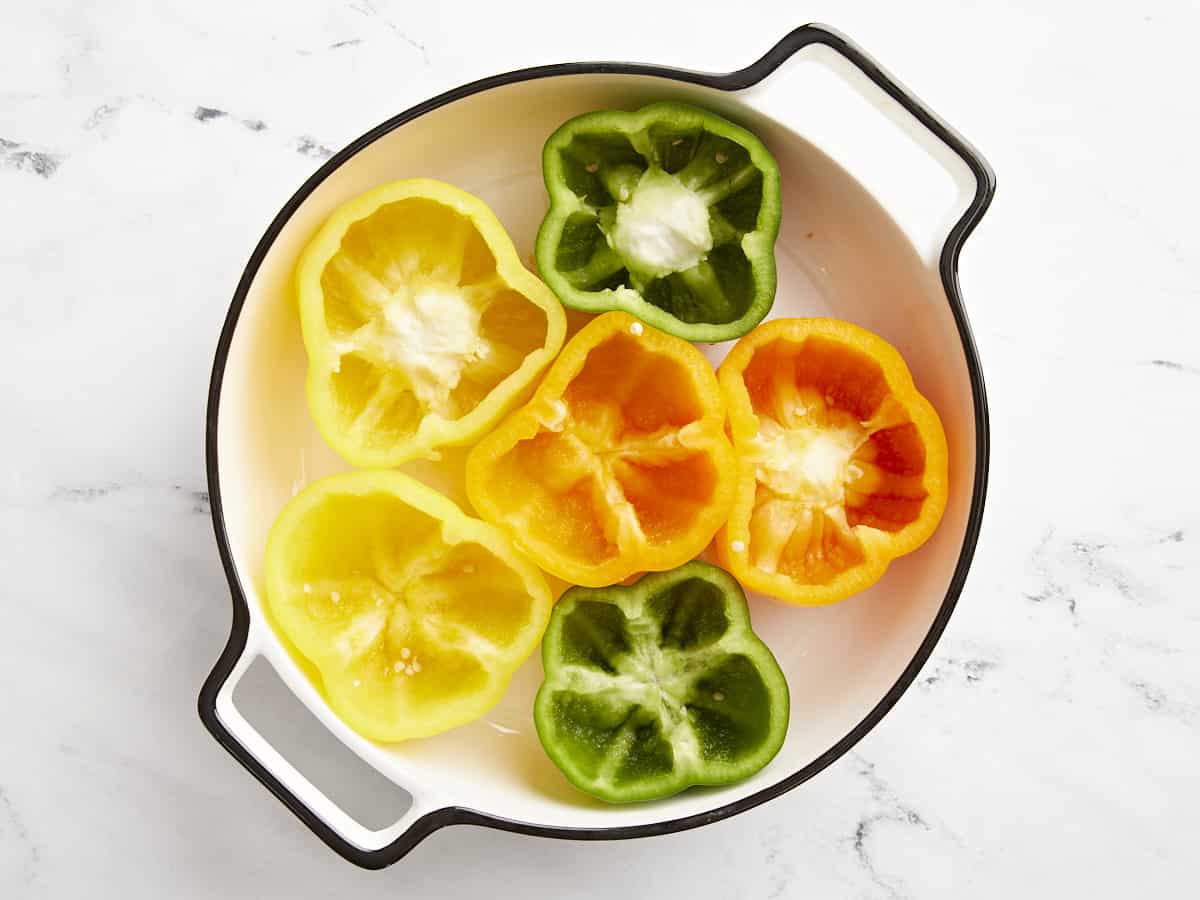
Prepped bell peppers in a baking dish.

Begin by preheating the oven to 350ºF. Cut three bell peppers in half to create a top and bottom piece for each pepper. Scoop out the seeds and ribs. You can either cut out the stem from the top half of the peppers, or eat around them later. Place the halved peppers in a baking dish and par-bake them for 15 minutes in the fully preheated 350ºF oven.

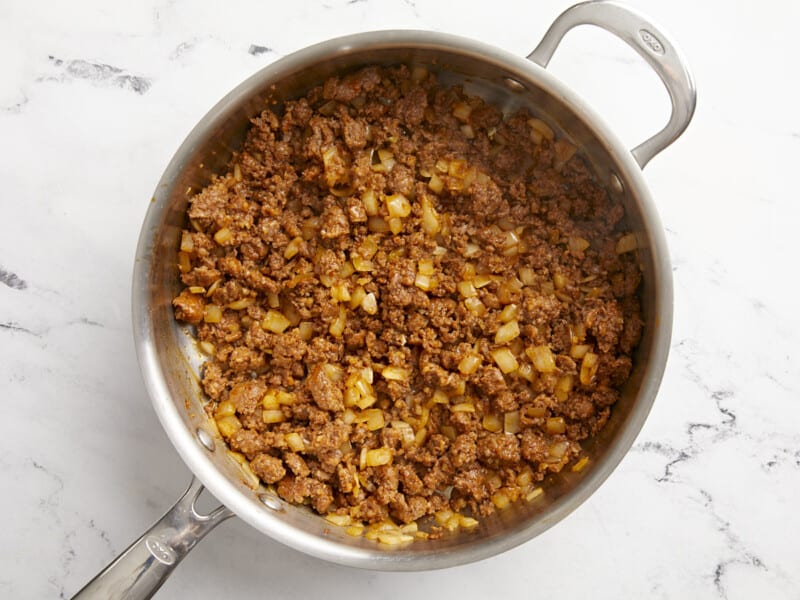
Cooked chorizo and onion in a skillet.

Meanwhile, cook 1 lb. of Mexican chorizo in a large deep skillet over medium heat until browned. The chorizo has plenty of fat, so you likely won’t need to add any additional to the skillet. Dice one yellow onion and mince 2 cloves of garlic. Add the onion and garlic to the skillet with the chorizo, and continue to cook until the onions are softened.

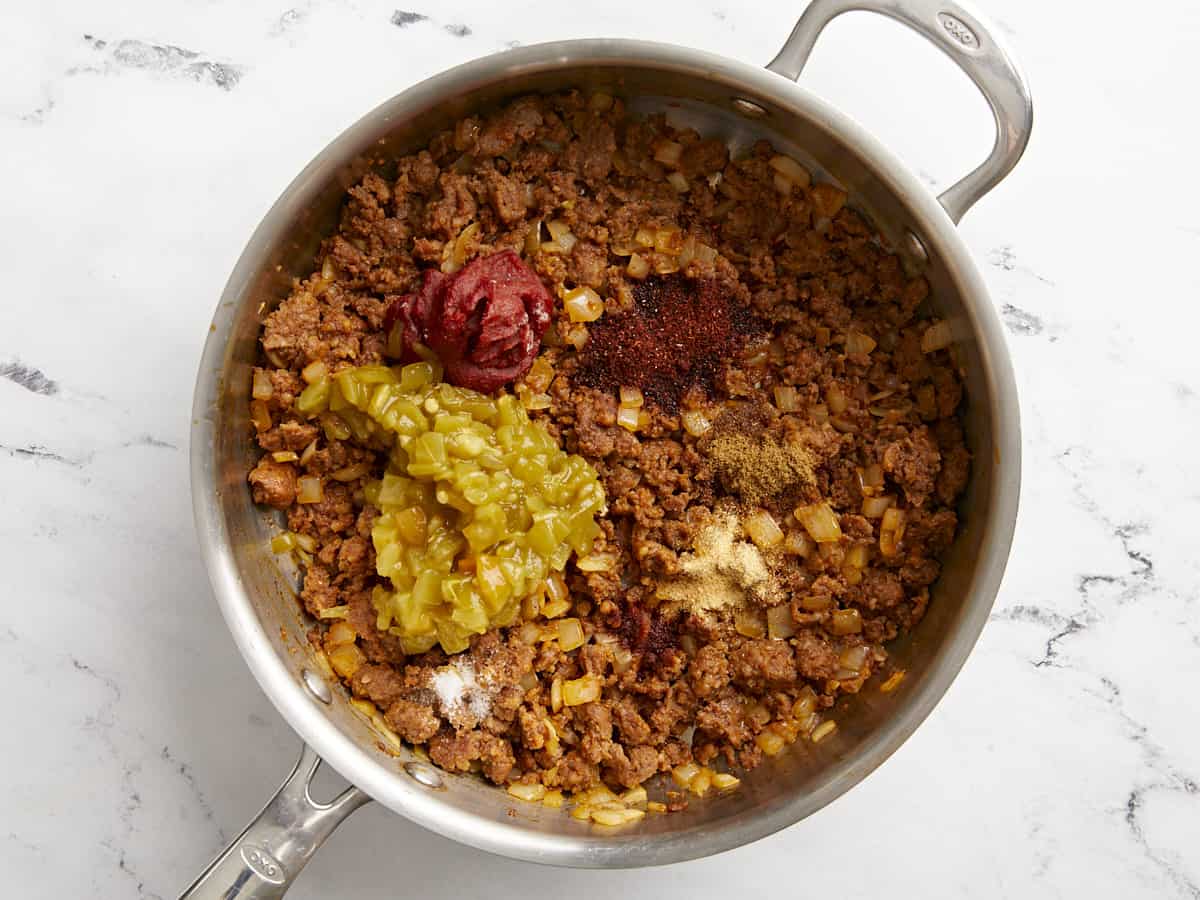
Green chiles, tomato paste, and spices added to the skillet.

Add one 4oz. can of diced green chiles, 2 Tbsp tomato paste, 2 tsp chili powder, ½ tsp cumin, ½ tsp garlic powder, ¼ tsp cayenne pepper, and ¼ tsp salt to the meat and onions. Stir to combine.

Rice added to the skillet, broth being poured in the side.

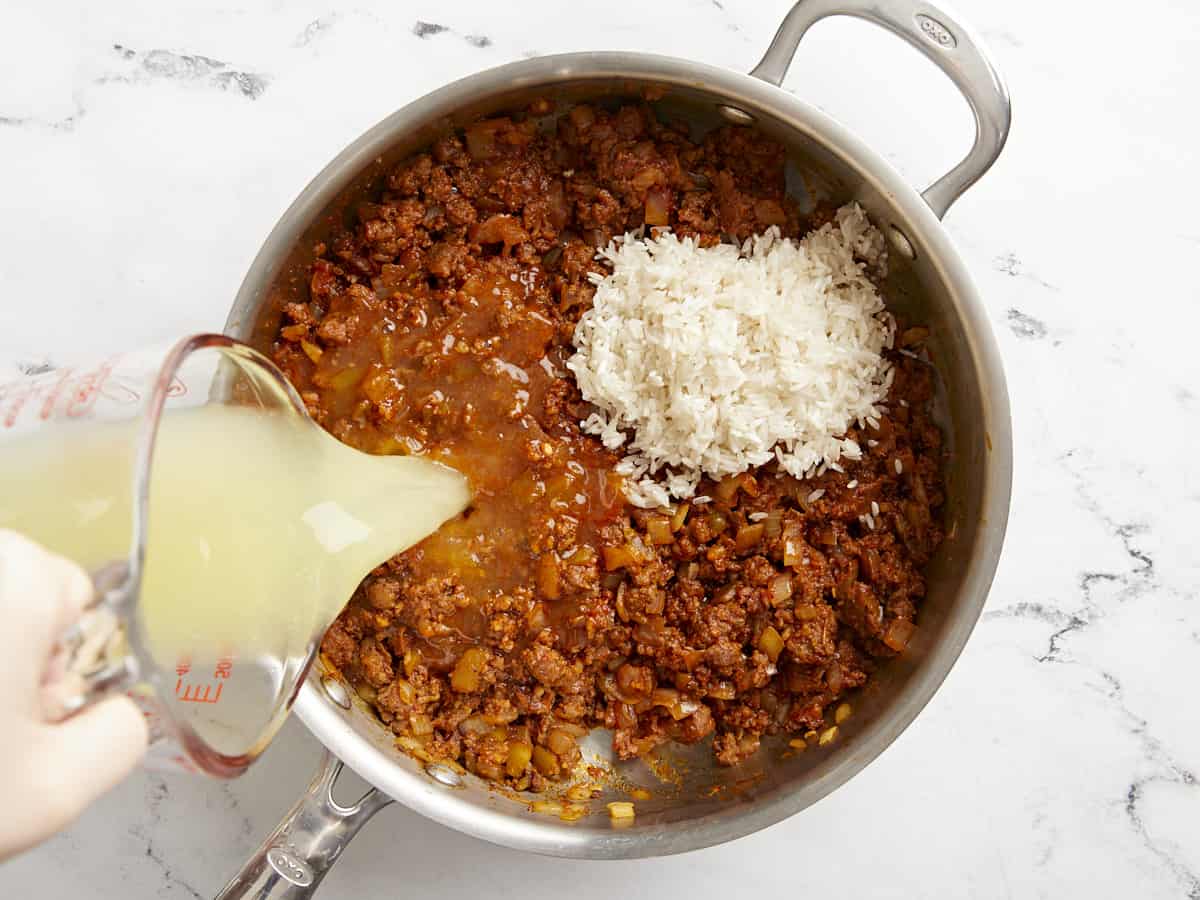
Add ½ cup of uncooked long grain white rice and 1 cup of chicken broth to the skillet. Stir well to combine, then place a lid on top, and turn the heat up to medium-high. When the broth reaches a full boil, turn the heat down to low and allow it to continue to simmer over low (without removing the lid or stirring) for 20 minutes. After 20 minutes, turn the heat off and let it rest for 5 more minutes.

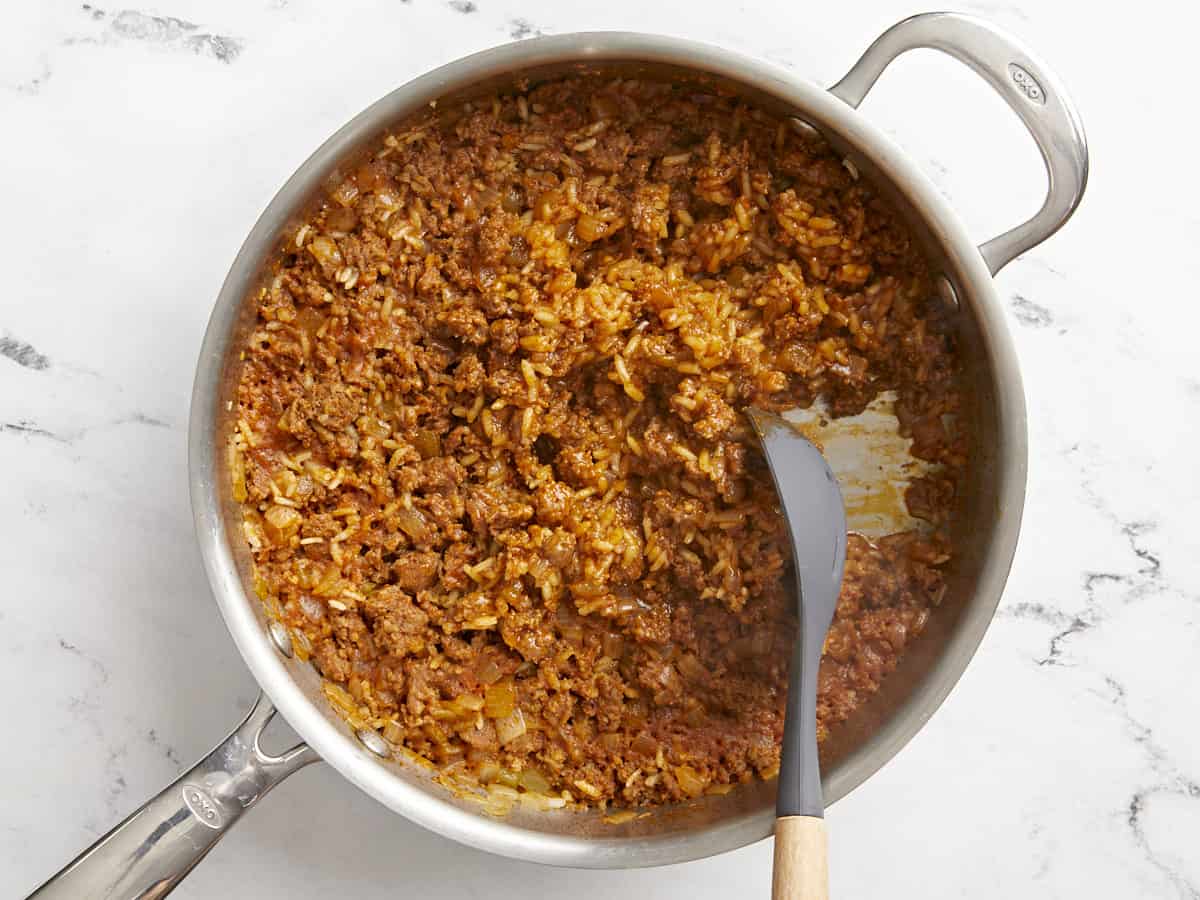
Cooked chorizo and rice in the skillet being scooped to the side with a spoon.

After simmering for 20 minutes the broth should be absorbed and the rice should be tender. Gently stir the rice and chorizo mixture with a spoon.

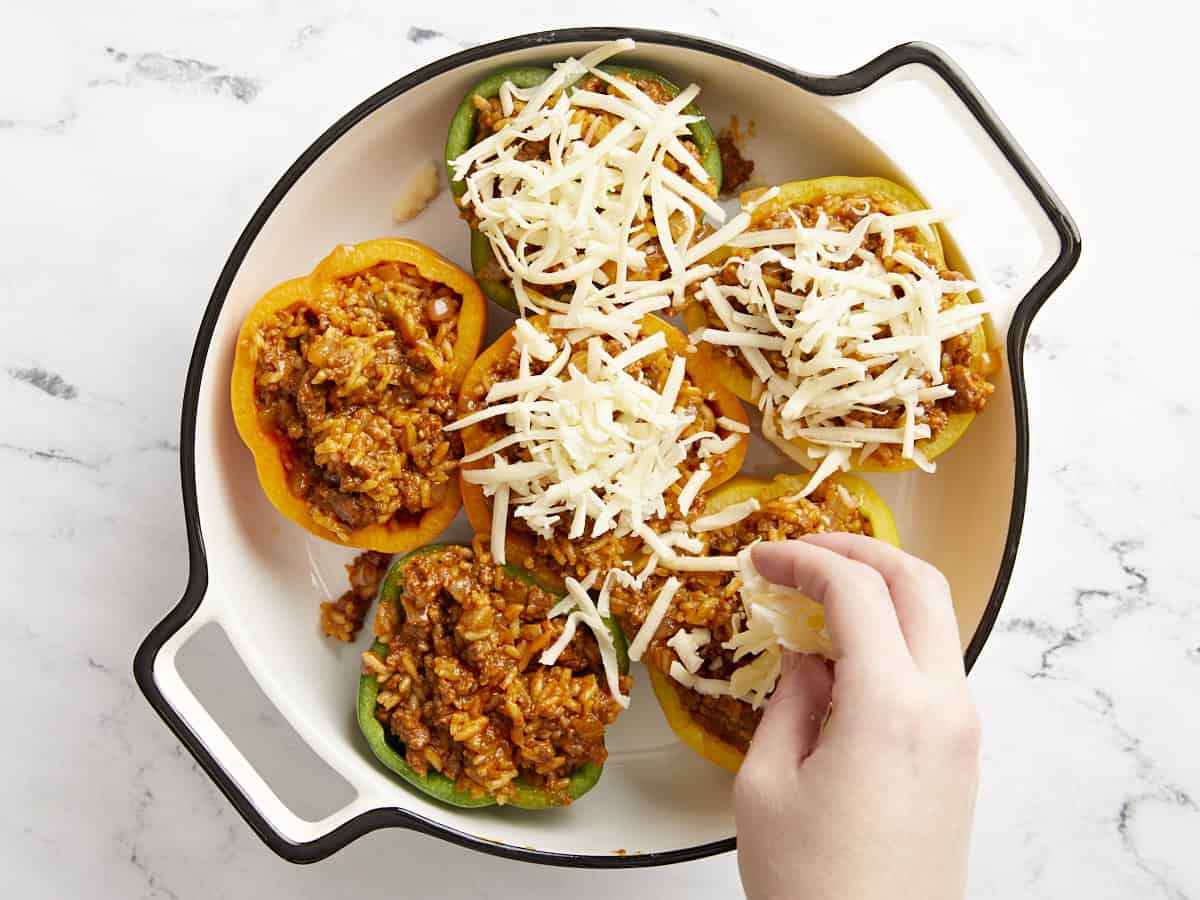
Filled bell peppers in a baking dish being topped with shredded cheese.

Divide the rice and chorizo mixture between the six par-baked bell pepper halves, then top with shredded mozzarella cheese (about 1 cup). Cover the dish and bake in the 350ºF oven for 20 minutes.

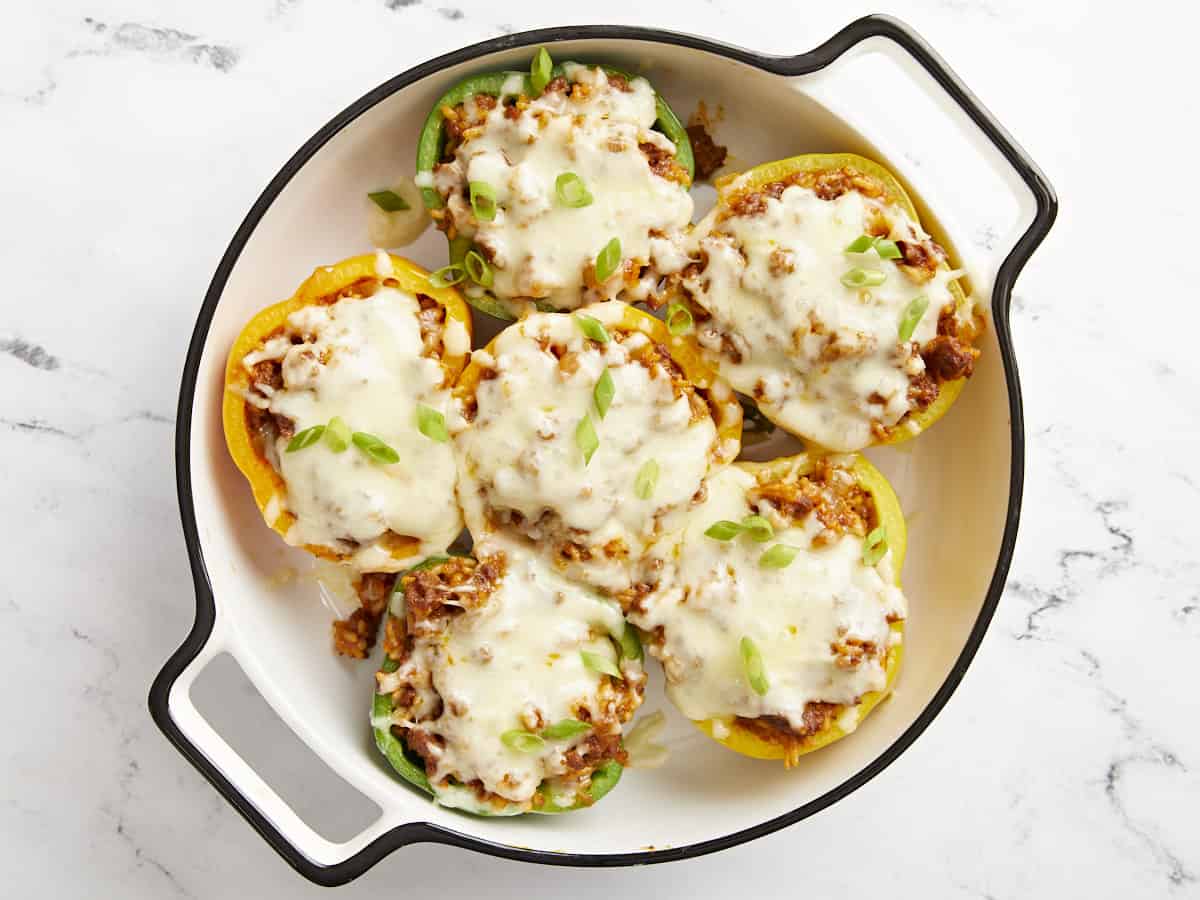
Finished stuffed bell peppers topped with sliced green onion.

Top the chorizo stuffed bell peppers with sliced green onions and serve!

Close up side view of a fork lifting some of the filling out of a stuffed bell pepper.

Enjoy the cheesy chorizo-y goodness!!

The post Chorizo Stuffed Bell Peppers appeared first on Budget Bytes.

Avocado Toast

A classic avocado toast recipe with 3 easy variations. Perfect for a quick breakfast, lunch or midday snack!

The post Avocado Toast appeared first on Budget Bytes.

Avocado toast was all the rage just a few years ago, but I have good news…this easy 5-10 minute meal never goes out of style. It only requires a few simple ingredients, but you can always spice things up with extra toppings to make it a super filling meal. Today I’m sharing my favorite basic avocado toast recipe along with helpful tips and 3 easy recipe variations. It’s quick and easy which makes it perfect to whip up for breakfast, lunch or a midday snack. And for those of you who are avocado toast experts, like my colleague Jess, then I’m sure you have a few favorite combinations as well. Wanna share? Let’s meet in the comments!😉

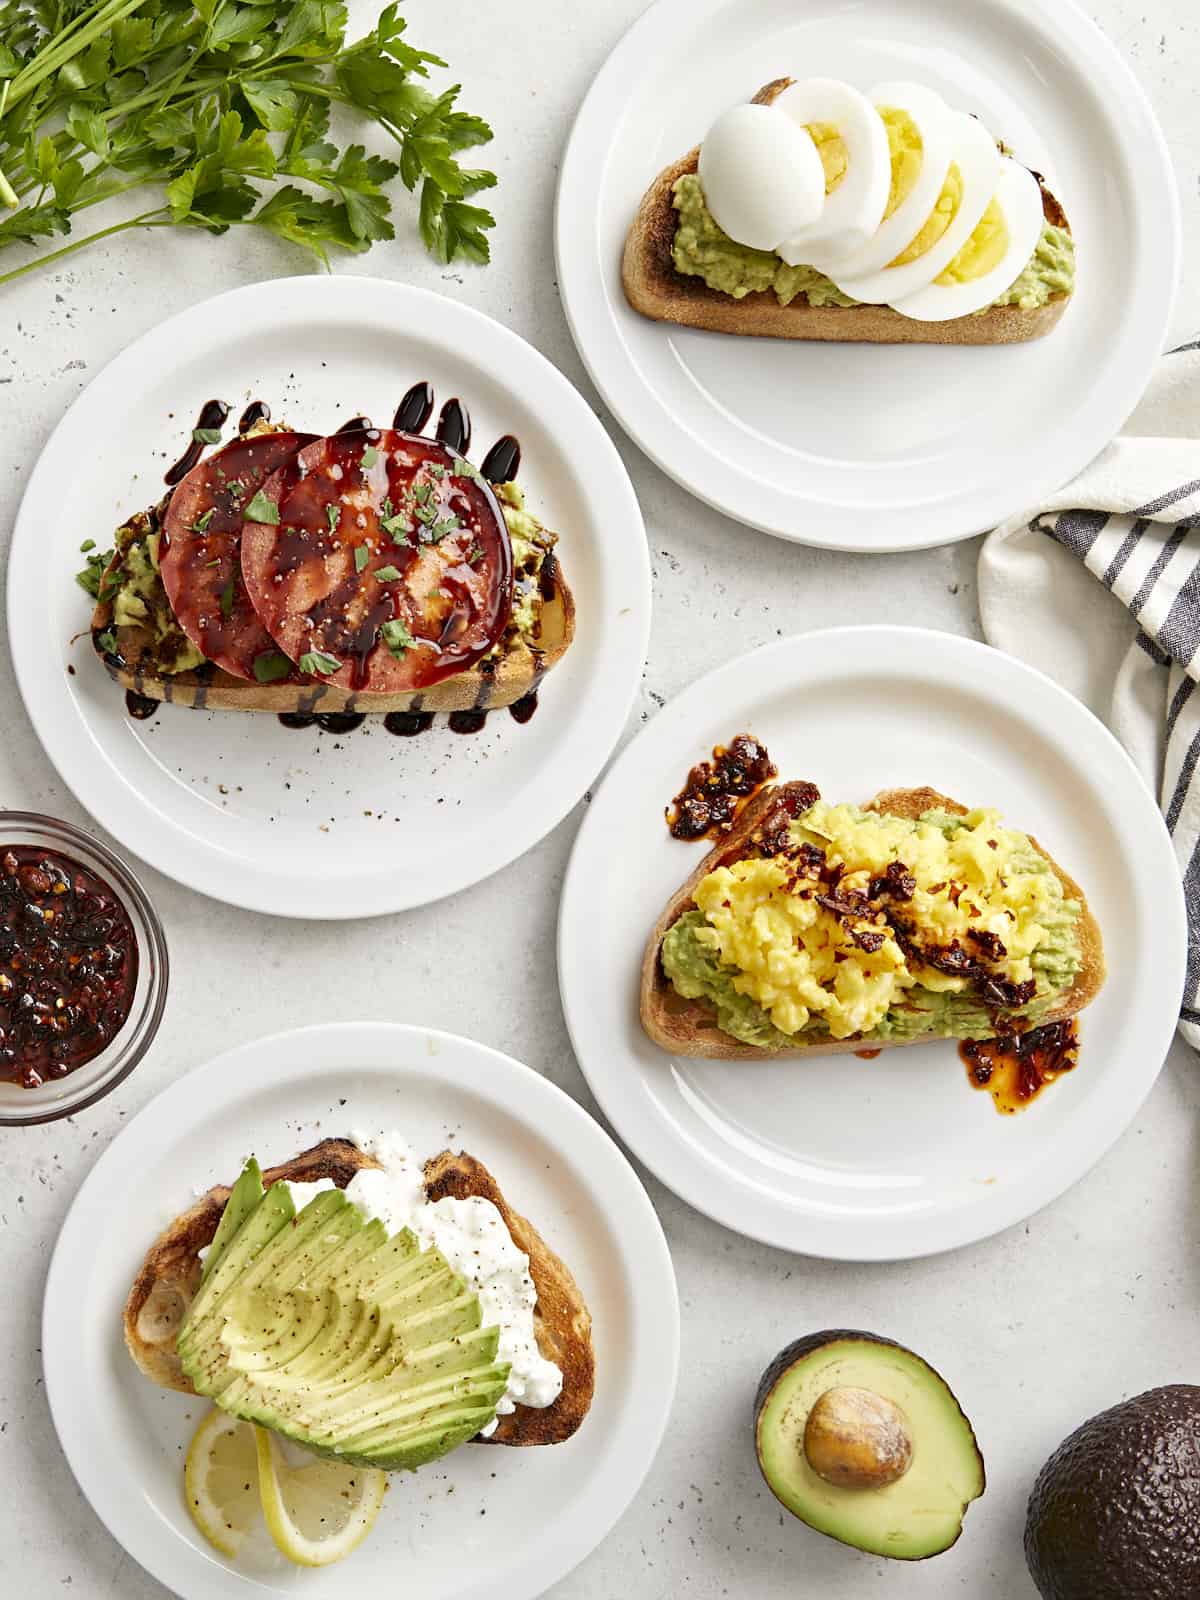
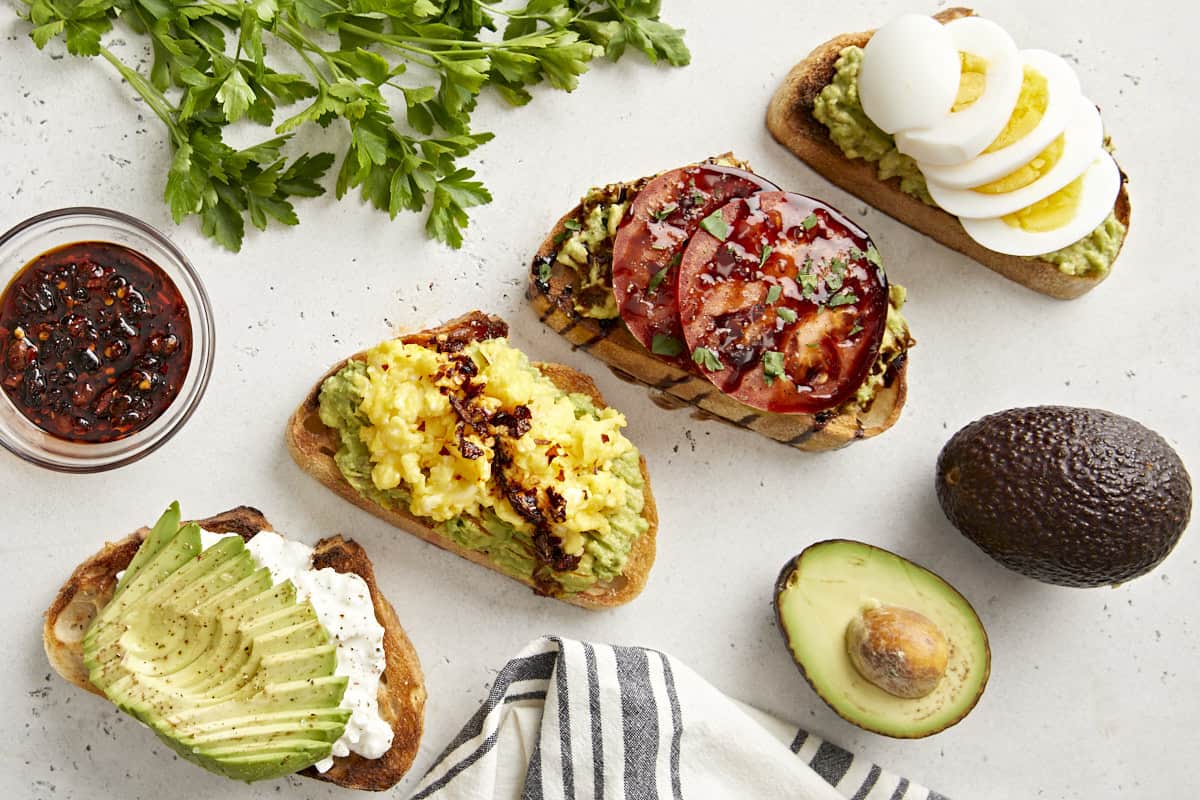
Overhead view of avocado toast made 4 different ways.

Ingredients For Avocado Toast

You only need a few simple ingredients to make a classic avocado toast. Here’s what I used:

  • Avocado: Avocado is one of the main ingredients, so you’ll want to choose it wisely. Look for avocados that have a slight give when squeezed, but are not mushy.
  • Bread: You’ll want to choose a good quality, sturdy bread. I like using sourdough or whole grain bread.
  • Garlic: Rubbing a little bit of fresh garlic over toasted bread while it’s still warm adds incredible flavor.
  • Lemon: A small squeeze of fresh lemon juice adds a pop of brightness and keeps the avocado from browning.
  • Salt & Pepper: Don’t skip the salt! Just a pinch of salt and pepper enhances the flavor of the avocado toast.
  • Red pepper flakes (optional): This is optional but it adds a kick and a little bit of extra heat to the avocado toast.

Tips For Making The Best Avocado Toast

  1. Choose your bread wisely: Use a good quality, sturdy bread for the base of your avocado toast like sourdough, multigrain or whole grain bread. Toasted, sturdy bread holds the mashed avocado and any extra toppings a lot better than white sandwich bread.
  2. Picking the perfect avocado: When picking your avocado, look for blackish, dark-green skin, which indicates the avocado has ripened. Also give the avocado a gentle press with your finger, the flesh should give slightly under pressure. If it’s mushy, its time has passed.
  3. Don’t skip the extras! Yes, rubbing your toast with a fresh garlic clove may seem like an unnecessary step, but it adds SO much flavor and compliments this simple meal perfectly. Also the small squeeze of lemon juice gives just the right about of brightness and the pinch of salt makes all the flavors pop!

Topping Ideas

There are lots of fun ways to enjoy your avocado toast! In addition to the recipe variations listed in the step-by-step photos below, here are a few more ingredients and topping ideas for you to try:

Overhead view of avocado toast made 4 different ways with parsley, avocado, and a napkin on the side.
Print

Avocado Toast

A classic avocado toast recipe with 3 easy variations. Perfect for a quick breakfast, lunch or midday snack!
Course Breakfast, Lunch, Snack
Cuisine American
Total Cost $2.61 recipe / $1.30 serving
Prep Time 10 minutes
Total Time 10 minutes
Servings 2 slices
Calories 338kcal

Ingredients

  • 2 slices sturdy bread $1.00
  • 1 clove of garlic, peeled $0.08
  • 1 medium avocado $1.33
  • 1 tsp fresh lemon juice $0.14
  • 1/8 tsp salt $0.02
  • 1/8 tsp freshly cracked black pepper $0.02
  • pinch of red pepper flakes $0.02

Instructions

  • Cut 2 slices of sturdy bread. Toast the bread in a toaster or in a skillet on the stovetop until golden brown.
  • Rub the peeled garlic clove over the top of the warm toasted bread, making sure to fully cover the entire surface area.
  • Next, halve the avocado and remove the pit. Scoop out the avocado flesh from both halves and place it in a bowl. Add a small squeeze of fresh lemon juice (about 1 tsp), salt and pepper to the bowl and mash the avocado with a fork. I recommend leaving it just a little chunky.
  • Divide the avocado mixture and spread it on top of each slice of toast. Top with a pinch of red pepper flakes and a pinch of sea salt (optional).

See how we calculate recipe costs here.

Nutrition

Serving: 1slice | Calories: 338kcal | Carbohydrates: 43g | Protein: 9g | Fat: 16g | Sodium: 539mg | Fiber: 8g
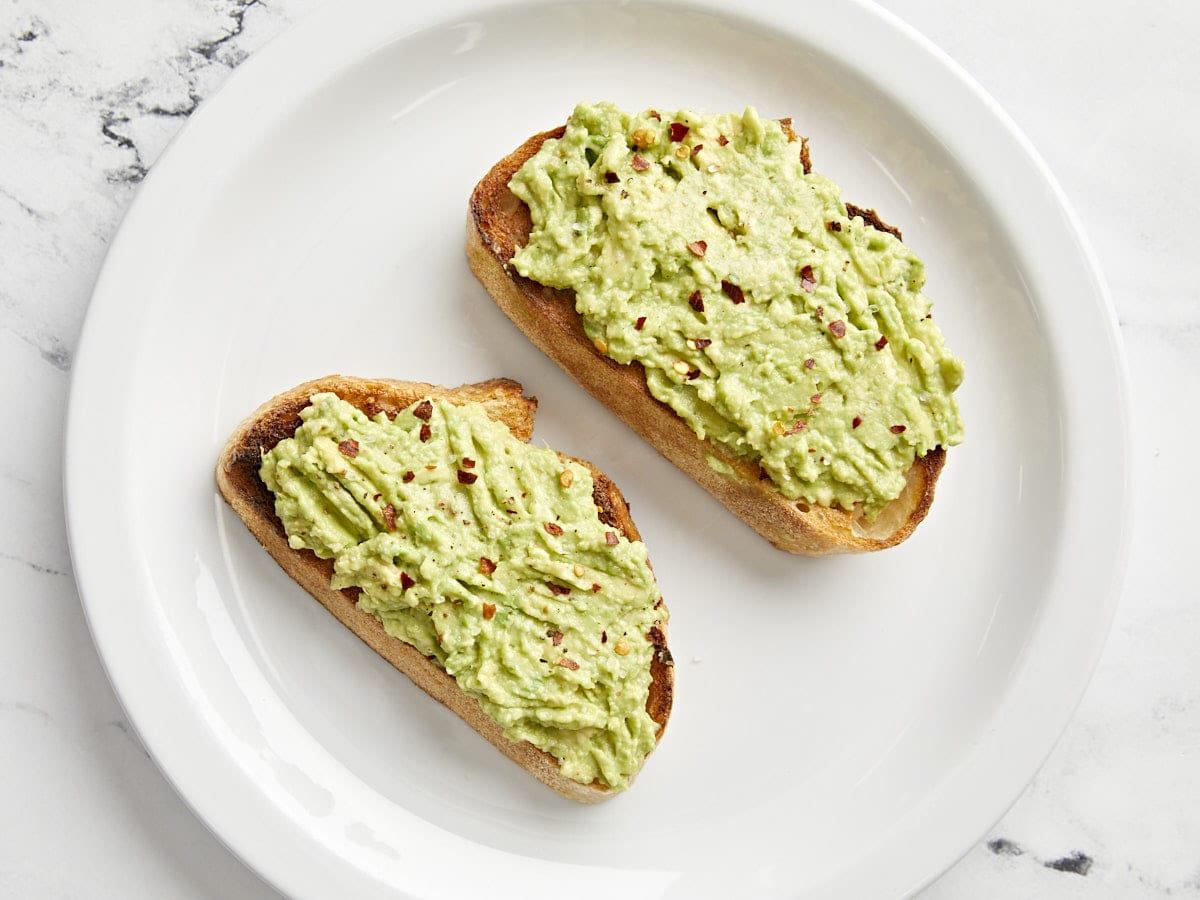
Overhead view of 2 pieces of plain avocado toast on a white plate.

How to Make Avocado Toast – Step by Step Photos

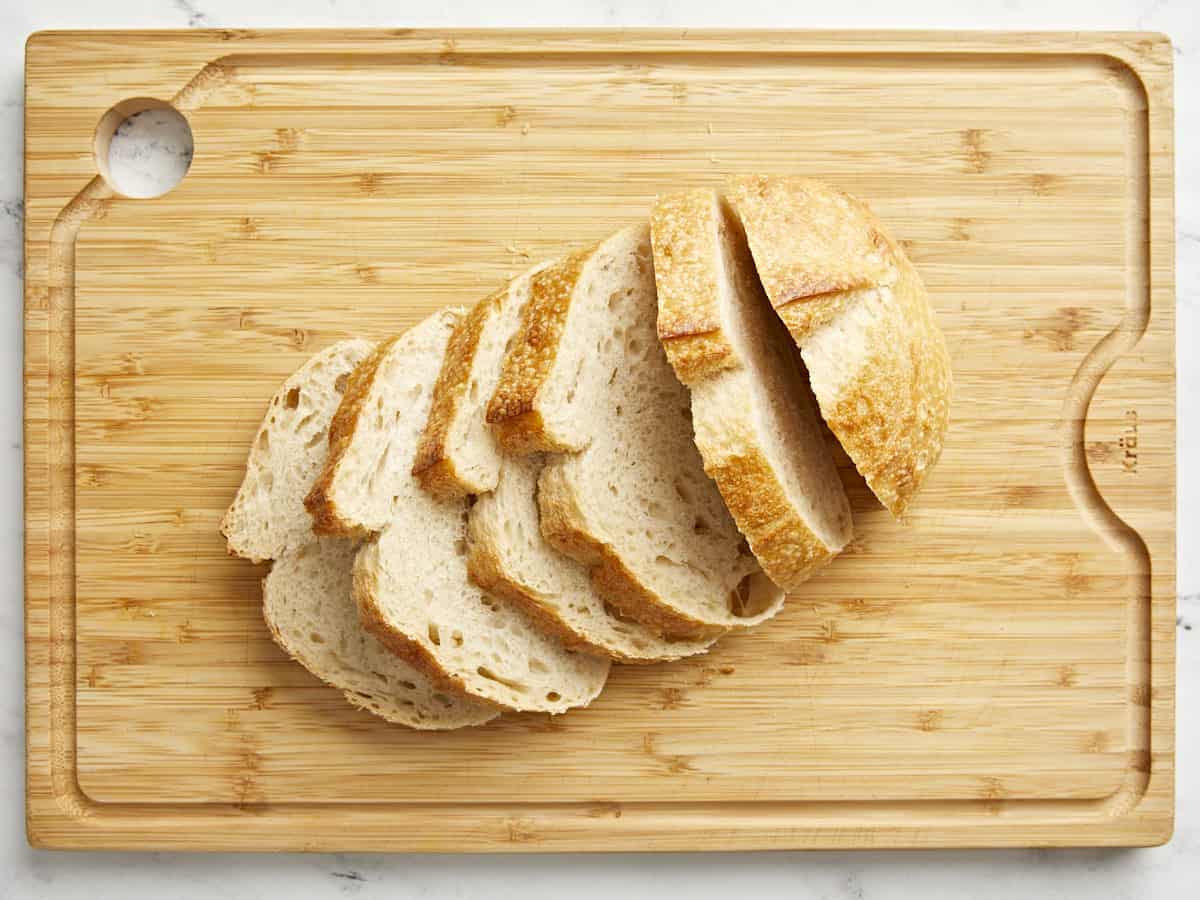
Overhead view of sourdough bread sliced on a cutting board.

Cut 2 slices of sturdy bread. Toast the bread in a toaster or on the stovetop until golden brown.

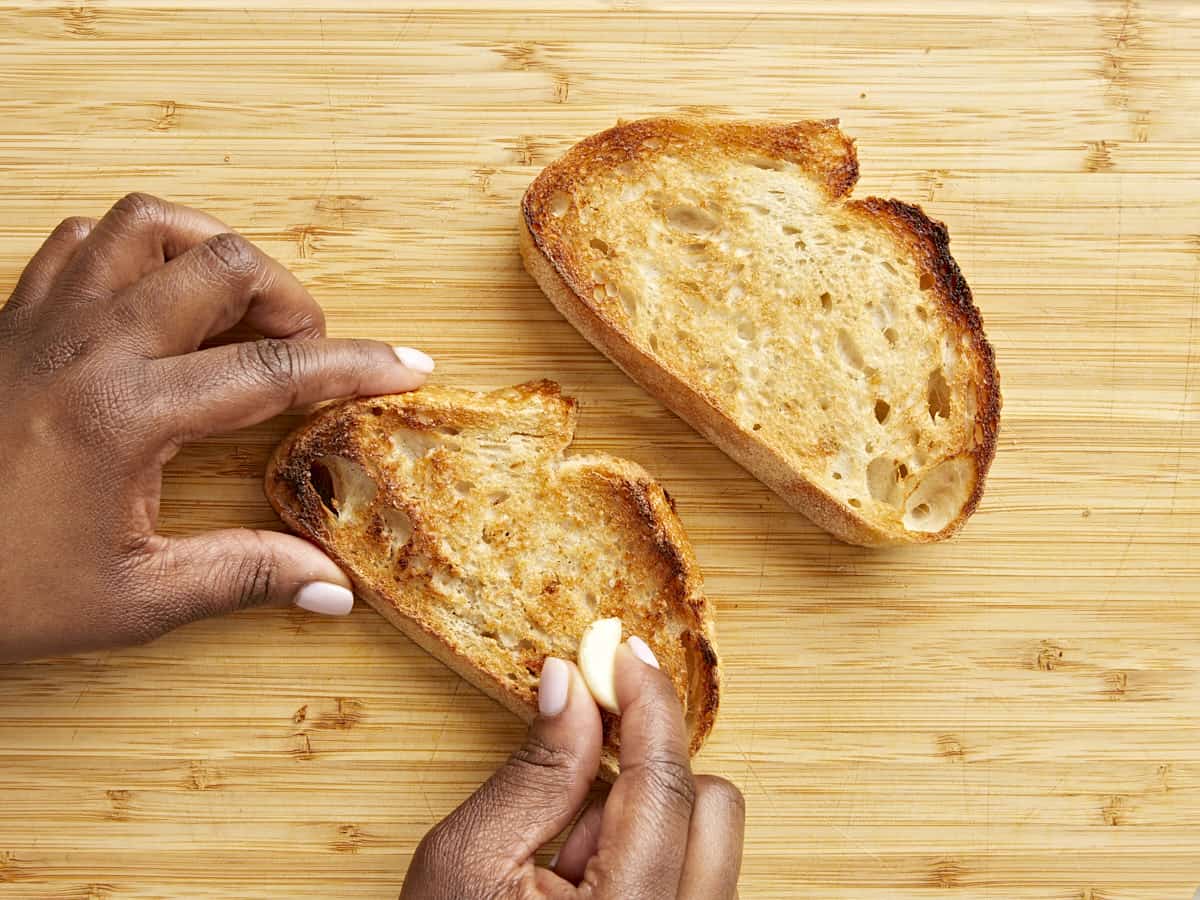
Toasted sourdough bread with a garlic clove being rubbed over the top.

Rub 1 peeled garlic clove over the top of the warm toasted bread, making sure to fully cover the entire surface area.

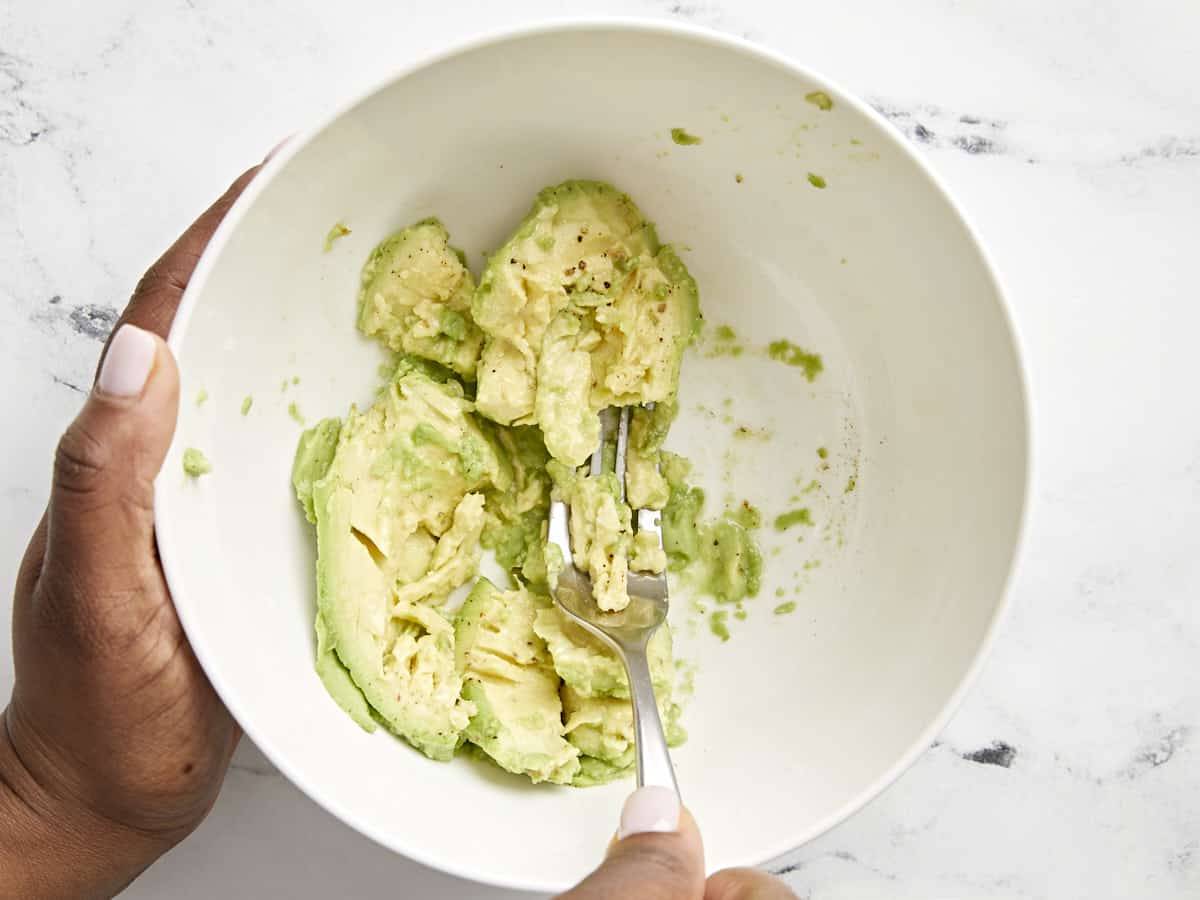
A hand holding a fork and mashing avocado in a white bowl.

Next, halve 1 avocado and remove the pit. Scoop out the avocado flesh from both halves and place it in a medium bowl. Add a small squeeze of lemon juice (about 1 tsp), 1/8 tsp salt and 1/8 tsp freshly cracked black pepper to the bowl and mash the avocado with a fork. I recommend leaving it just a little chunky, but you can certainly mash until it’s completely smooth. It’s up to you!

Overhead view of 2 pieces of plain avocado toast on a white plate.

Divide the avocado mixture and spread on top of each slice of toast. Top with a pinch of red pepper flakes and a pinch of sea salt (optional). Enjoy as is or try out one of the recipe variations listed below.😉

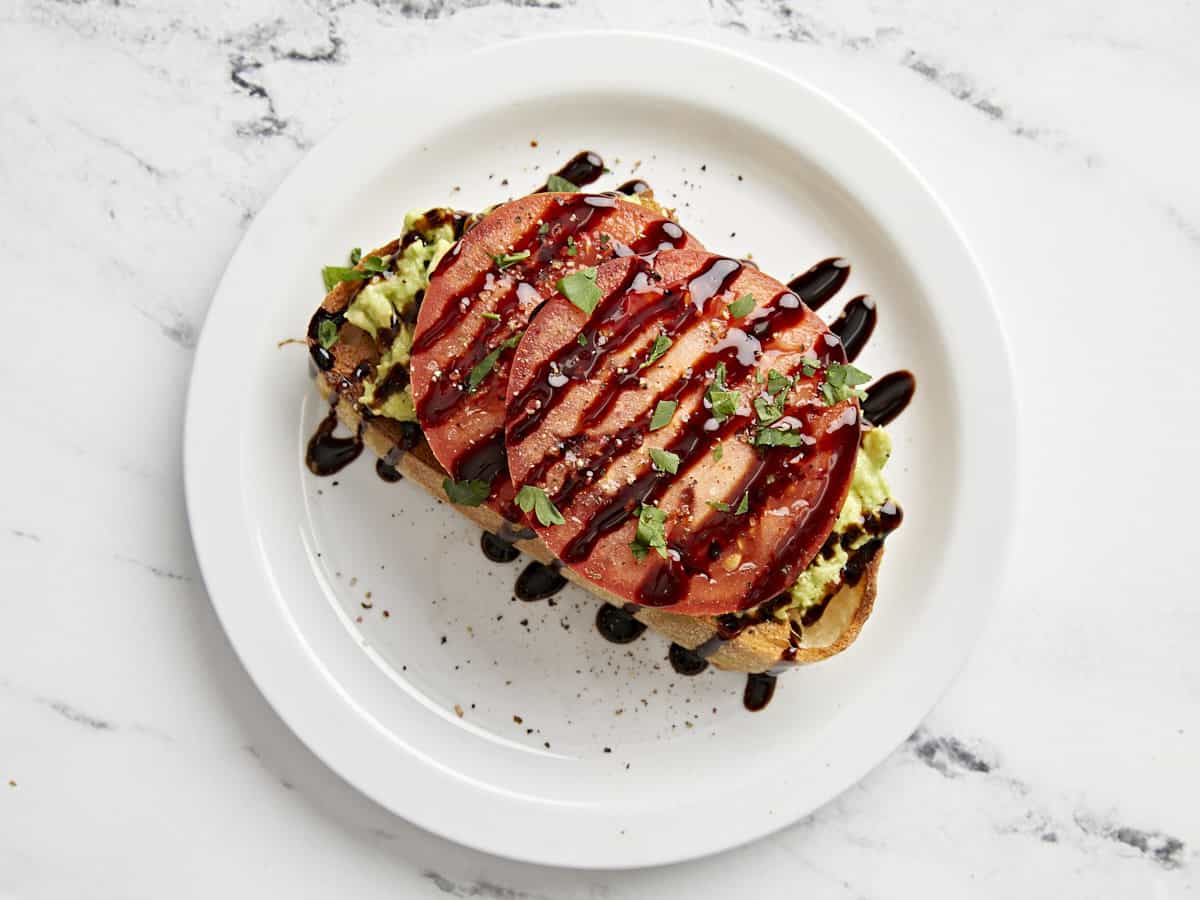
Avocado toast with sliced tomatoes and balsamic glaze drizzled on top.

Recipe Variation 1: If you love juicy, ripe tomatoes then this variation is just for you! Top your avocado toast with two slices of tomatoes, a drizzle of balsamic glaze, and freshly cracked black pepper. This combo is perfect for the summer when tomatoes are in their peak season. So delicious!

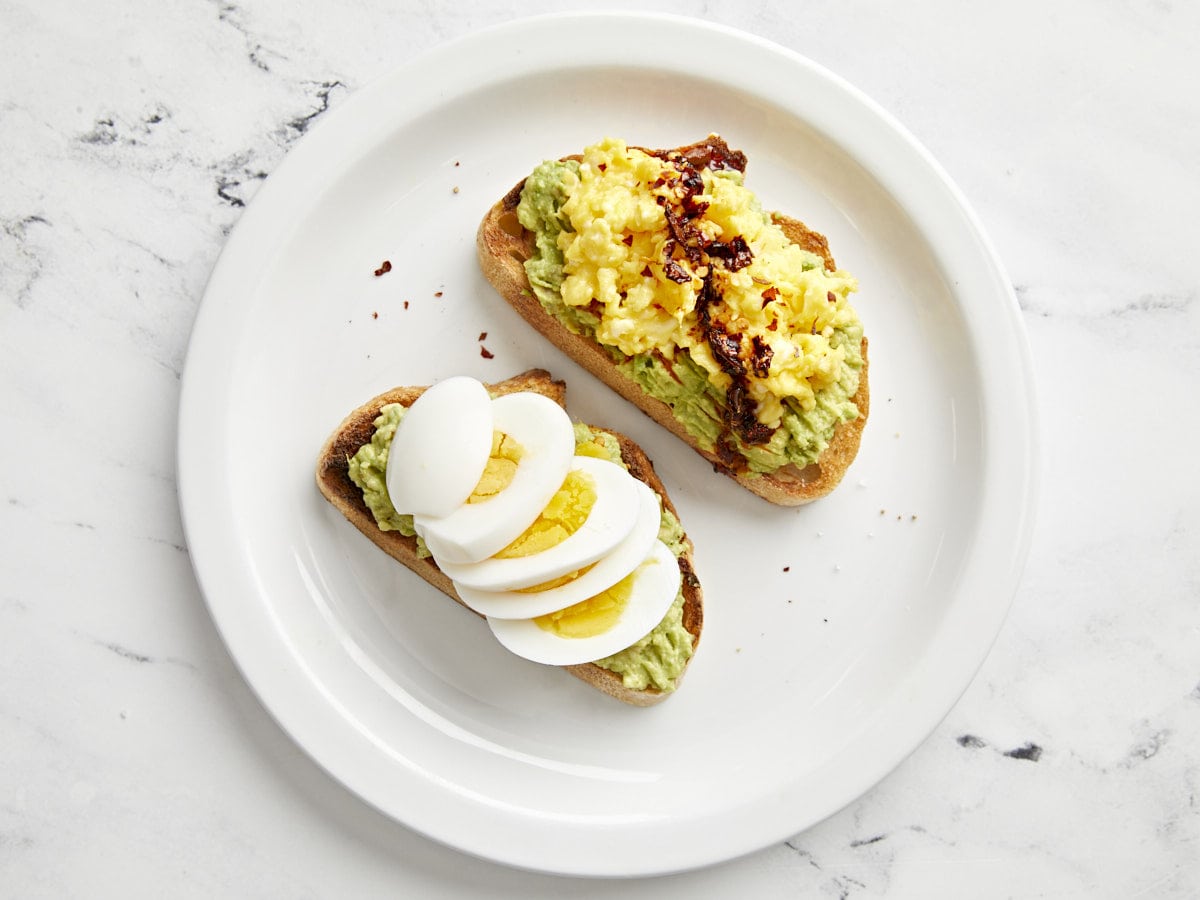
Two slices of avocado toast with a hard boiled egg and soft scrambled egg on top.

Recipe Variation 2: My absolute favorite way to enjoy avocado toast is by adding some scrambled eggs, a fried egg, or hard boiled egg on top. You can even take it a step further and add a little chili crisp on top too!

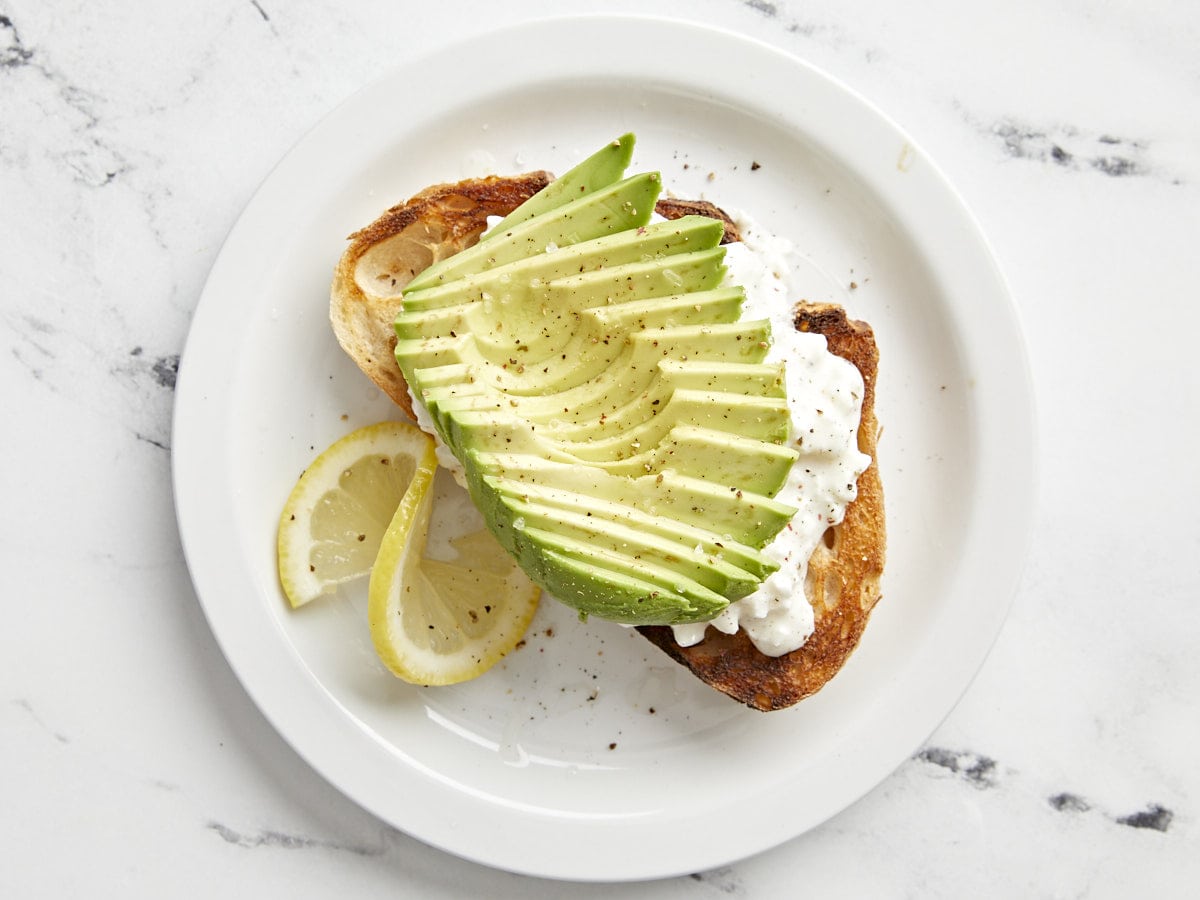
Avocado toast with cottage cheese on top.

Recipe Variation 3: And for all of my cottage cheese lovers out there, try topping your thick crusty bread with a spoonful or two of small curd cottage cheese, 1/2 avocado sliced, salt, freshly cracked black pepper, and a squeeze of fresh lemon juice. Enjoy!

Overhead view of avocado toast made 4 different ways with parsley, avocado, and a napkin on the side.

The post Avocado Toast appeared first on Budget Bytes.

Chicken Fried Rice

Make delicious, ultra-flavorful chicken fried rice that tastes even better than takeout– and costs less too.

The post Chicken Fried Rice appeared first on Budget Bytes.

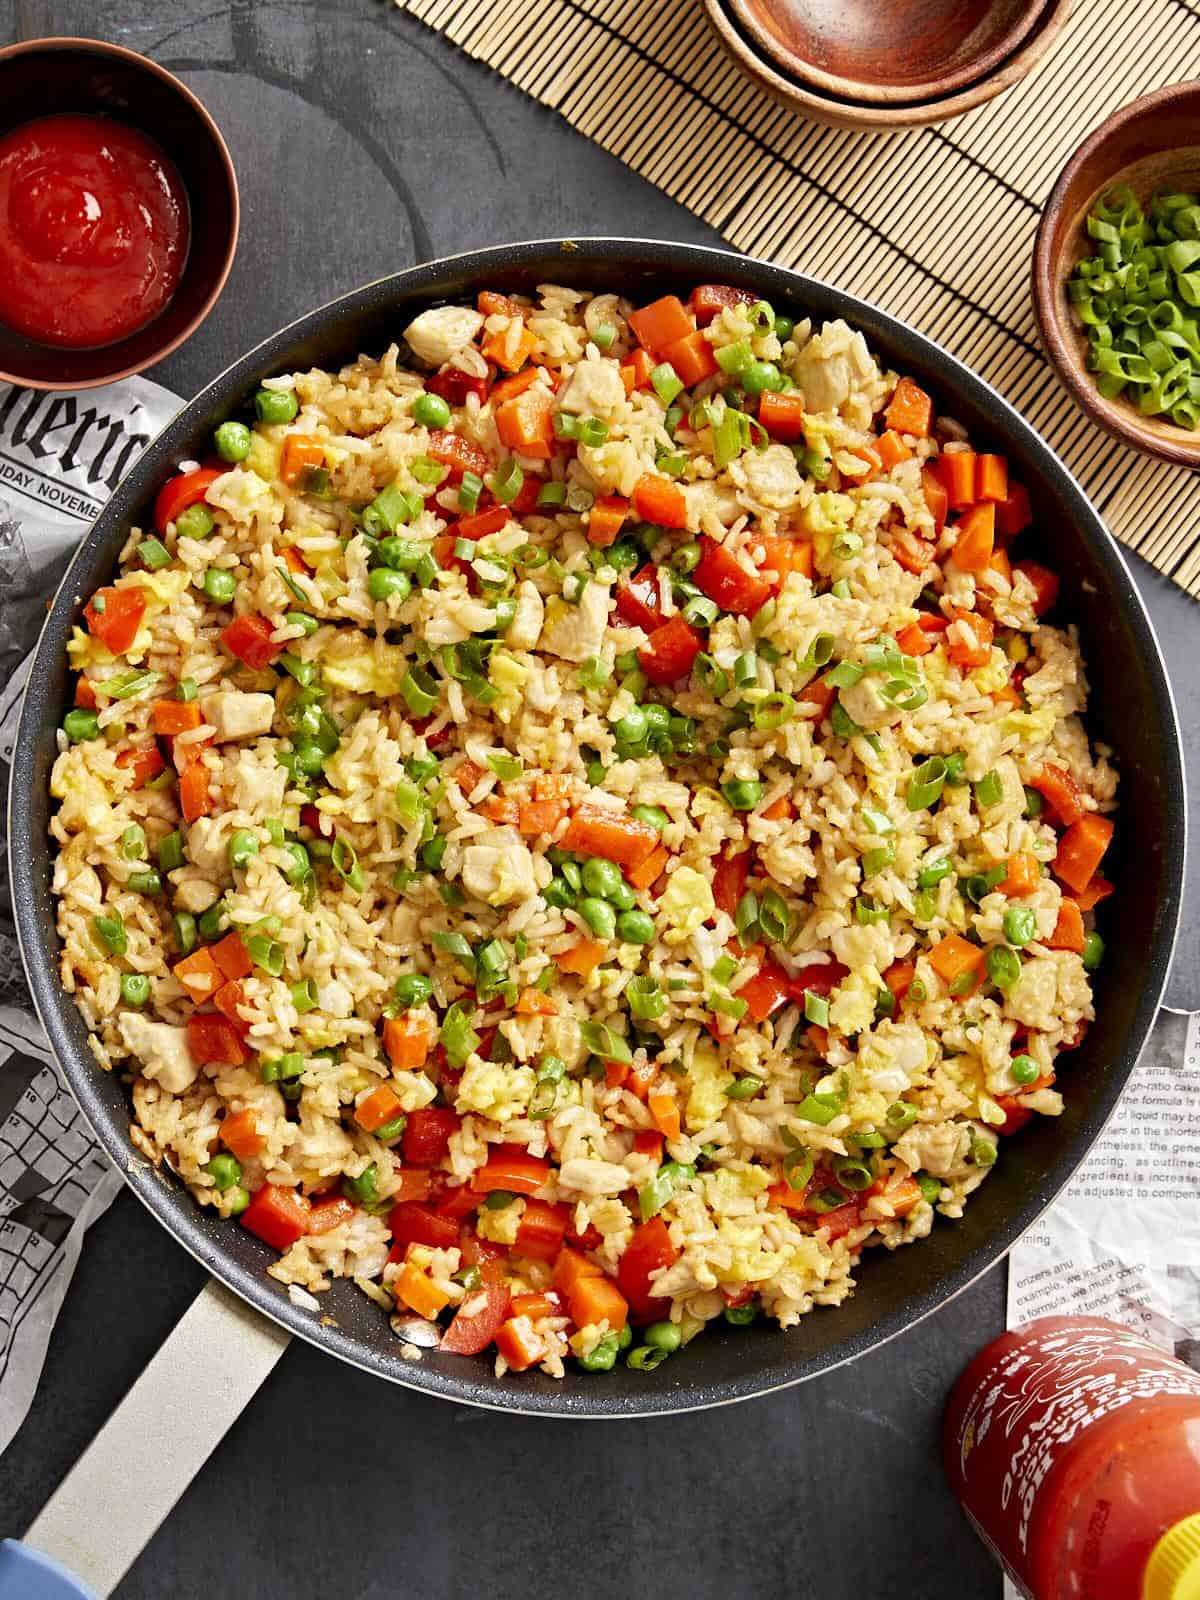
We’re all guilty of ordering Chinese takeout on a desperate night. But with this Chicken Fried Rice recipe, you won’t have to resort to that any longer! Make delicious, ultra-flavorful chicken fried rice that tastes even better than takeout– and costs less too. Easily stretch leftover rice and a single chicken breast into a budget-friendly and satisfying meal the whole family will love!

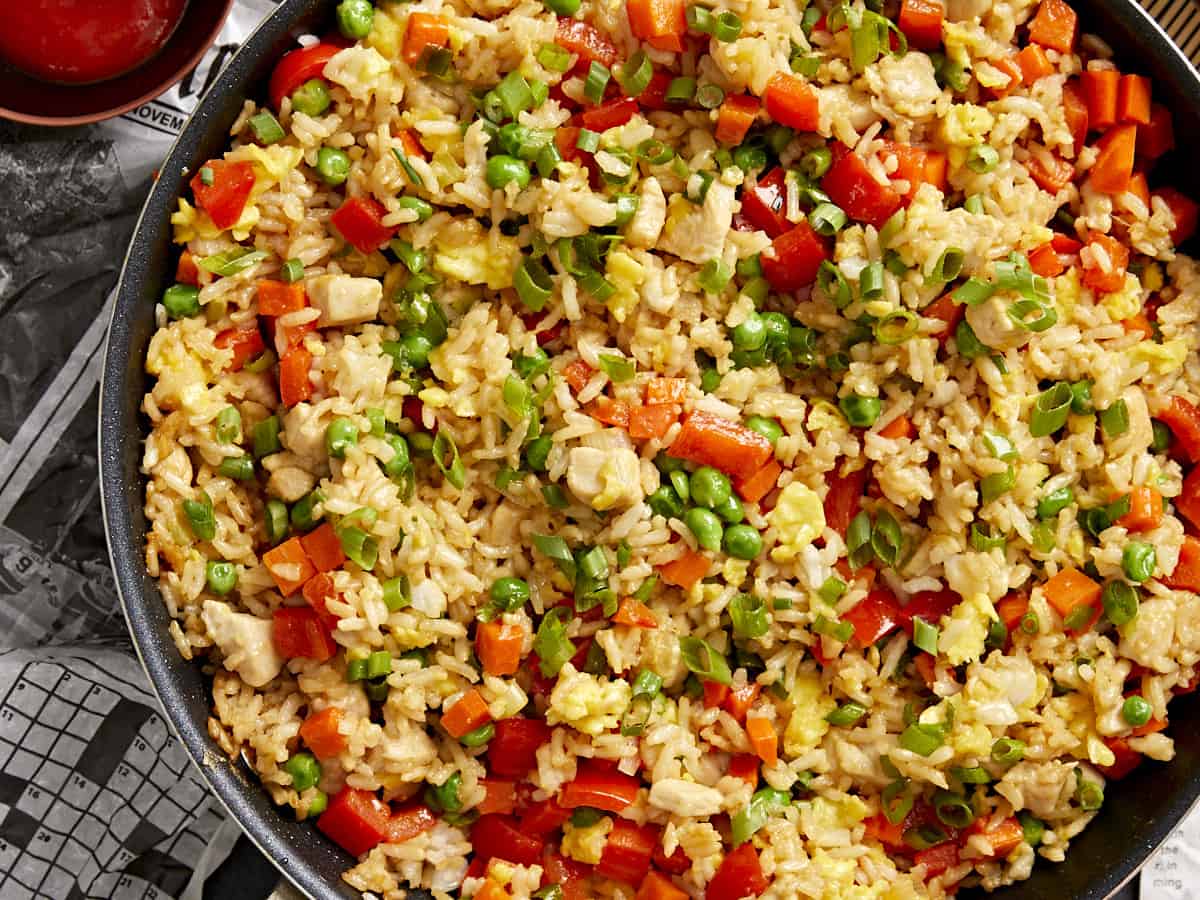
overhead view of chicken fried rice in a frying pan.

What is Chicken Fried Rice?

Chicken fried rice is a Chinese dish made with cooked rice that is stir-fried in a wok with chicken, vegetables, and eggs, and seasoned with a savory sauce. It’s extremely flexible and budget-friendly, which is why we love this dish! The recipe below is an American adaptation, using a skillet instead of a wok and ingredients that are easily sourced in most American grocery stores. If you are vegetarian, you can make this without the chicken, or try our Vegetable Fried Rice recipe!

Do I Need a Wok?

This recipe is designed to be made easily in a regular pan; however, we highly recommend using a nonstick pan over stainless steel. We found in testing that some of the eggs stuck to the bottom of the stainless steel pan and burned, adding an unpleasant flavor to the whole dish.

Ingredients for Chicken Fried Rice

Here’s what you’ll need to make chicken fried rice:

  • Chicken Breast: You’ll need 1 large boneless skinless chicken breast (about 2/3 lb.) for this recipe.
  • Oil: Toasted sesame oil adds a warm and nutty flavor, while cooking oil (we like canola or vegetable) helps everything cook without burning.
  • Soy Sauce: Adds rich, salty, umami flavor. If you’re gluten-free, you can use tamari or coconut aminos instead.
  • Garlic: Creates a savory and earthy base of flavor.
  • Ginger: Fresh ginger will create the best flavor, but paste or powder will also work.
  • Vegetables: We used green onions, carrot, red bell pepper, and frozen peas.
  • Eggs: Scrambled eggs help stretch this recipe, adding extra protein and healthy fats.
  • Cooked and Cooled Rice: To avoid clumpy or gummy fried rice, use rice that has been previously cooked and completely cooled.

What Else Can I Put In Chicken Fried Rice?

If you have any leftover veggies from previous dinners, you can chop them up and toss them in this tasty chicken fried rice. It’s also easy to grab a bag of frozen mixed vegetables (carrots, peas, corn, and green beans) to save on prep time!

How To Store Leftovers

Store leftover chicken fried rice in an airtight container in the refrigerator for up to 3 days. Reheat in a pot set over medium-low heat with a little bit of water added to rehydrate the rice. You can also sprinkle some water over individual portions and microwave in 30-second increments until warmed through.

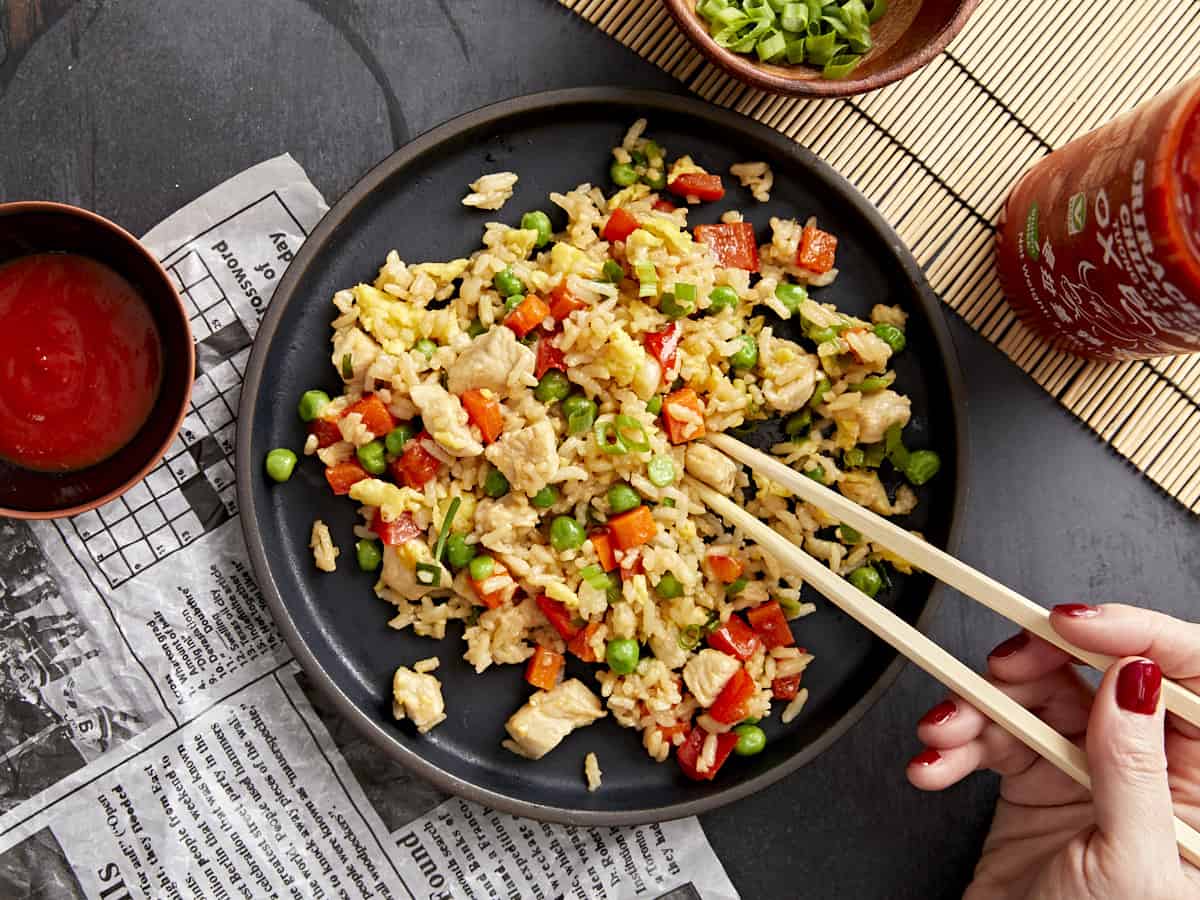
chopsticks grabbing chicken fried rice from a black plate.
chopsticks grabbing a bite of chicken fried rice from a black plate.
Print

Chicken Fried Rice

Make delicious, ultra-flavorful chicken fried rice that tastes even better than takeout– and costs less too.
Course Dinner, Main Course
Cuisine Chinese
Total Cost ($4.74 recipe / $1.19 serving)
Prep Time 15 minutes
Cook Time 20 minutes
Total Time 35 minutes
Servings 4
Calories 500kcal
Author Jess Rice

Ingredients

  • 2 cloves garlic, minced $0.16
  • 1 tsp grated fresh ginger $0.10
  • 3 green onions, sliced $0.30
  • 1 carrot, diced small $0.16
  • 1 red bell pepper, diced $1.50
  • 1 cup frozen peas $0.50
  • 1 large boneless skinless chicken breast $2.62
  • 2 large eggs $0.46
  • 3 Tbsp cooking oil, divided $0.13
  • 3 Tbsp toasted sesame oil $0.96
  • 3 Tbsp soy sauce $0.15
  • 3 cups cooked and cooled rice $0.62

Instructions

  • Prepare the vegetables beforehand so they’re ready to go when needed. Mince the garlic, grate the ginger, dice the carrot and bell pepper, slice the green onions (separate the green ends from the white ends), and measure the frozen peas.
  • On a separate, clean cutting board, cut your chicken into ½ inch pieces so you get a little in every bite. Set aside (and wash your hands!)
  • Lightly whisk the eggs in a small bowl. Heat a large skillet over medium heat. Once hot, add 2 Tbsp of cooking oil and swirl to coat the surface. Add the eggs and gently scramble until cooked through. Transfer the cooked eggs to a clean bowl or plate off to the side.
  • Turn the heat up to medium-high. Add the diced carrots, stir, and cook for about two minutes. Next, add the bell pepper and the white firm ends of the green onions. Cook and stir for one minute more. Finally, add the frozen peas and stir and cook until heated through. Transfer the vegetables to a clean bowl or plate.
  • Add the remaining 1 Tbsp cooking oil to the skillet and swirl to coat the surface. Add the ½ inch pieces of chicken and completely cook through, about 4 minutes. Once the chicken is about ½ of the way cooked through (2-3 minutes), add the garlic and ginger and cook for an additional 2-3 minutes.
  • Then, add the cooked and cooled rice to the skillet. Stir and cook the chicken and rice together for about 2 minutes, or until the rice is heated through. Pour the soy sauce and toasted sesame oil over the rice. Stir the rice and sauce together until evenly combined. Turn the heat off.
  • Add the eggs and vegetables back to the skillet with the chicken and rice and stir to combine. Allow the residual heat to heat everything through. Top with the remaining green ends of the sliced green onions. Taste and adjust the soy sauce or sesame oil to your liking.

See how we calculate recipe costs here.

Nutrition

Serving: 1serving | Calories: 500kcal | Carbohydrates: 44g | Protein: 23g | Fat: 26g | Sodium: 875mg | Fiber: 4g
close-up overhead view of chicken fried rice in a frying pan.

how to make Chicken Fried Rice – step by step photos

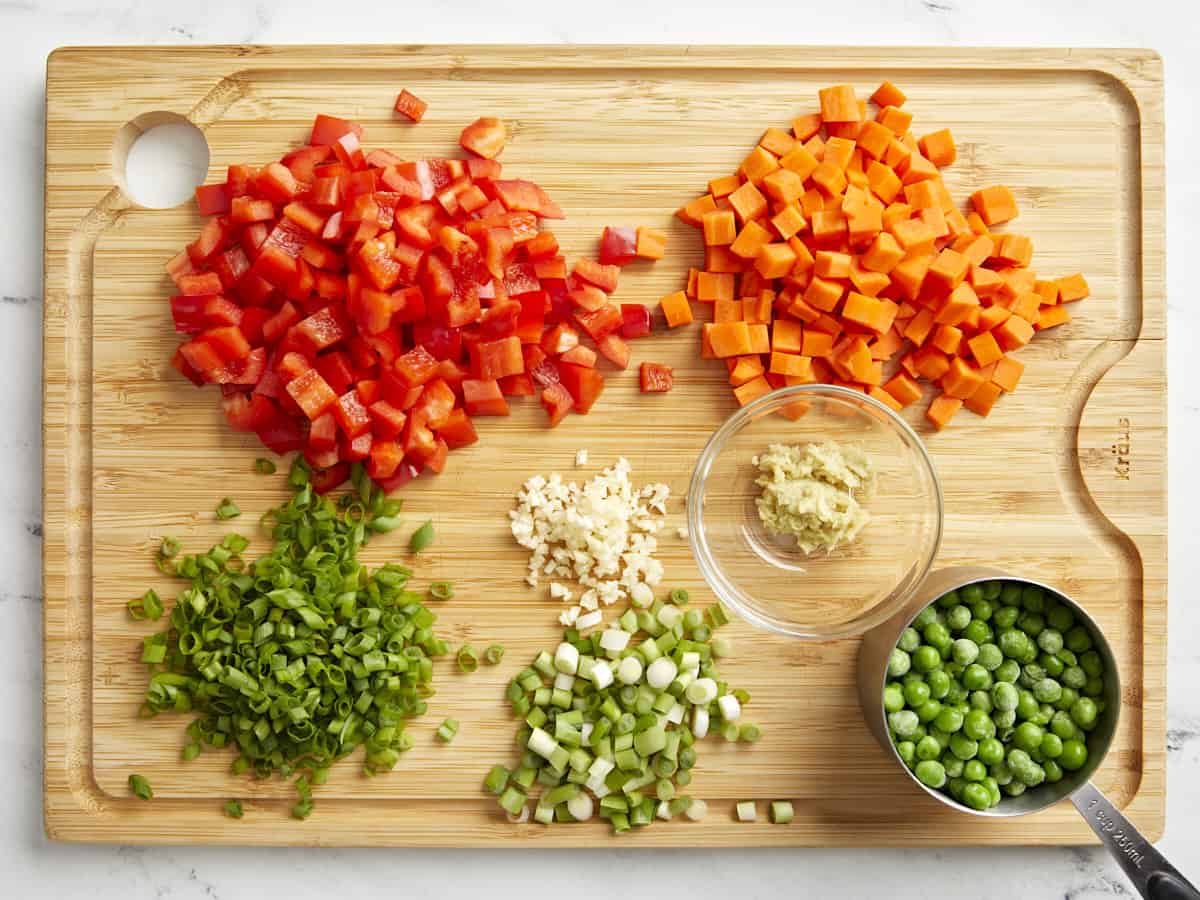
chopped vegetables for chicken fried rice on a cutting board.

Prepare the vegetables beforehand so they’re ready to go when needed. Mince the garlic, grate the ginger, dice the carrot and bell pepper, slice the green onions (separate the green ends from the white ends), and measure the frozen peas.

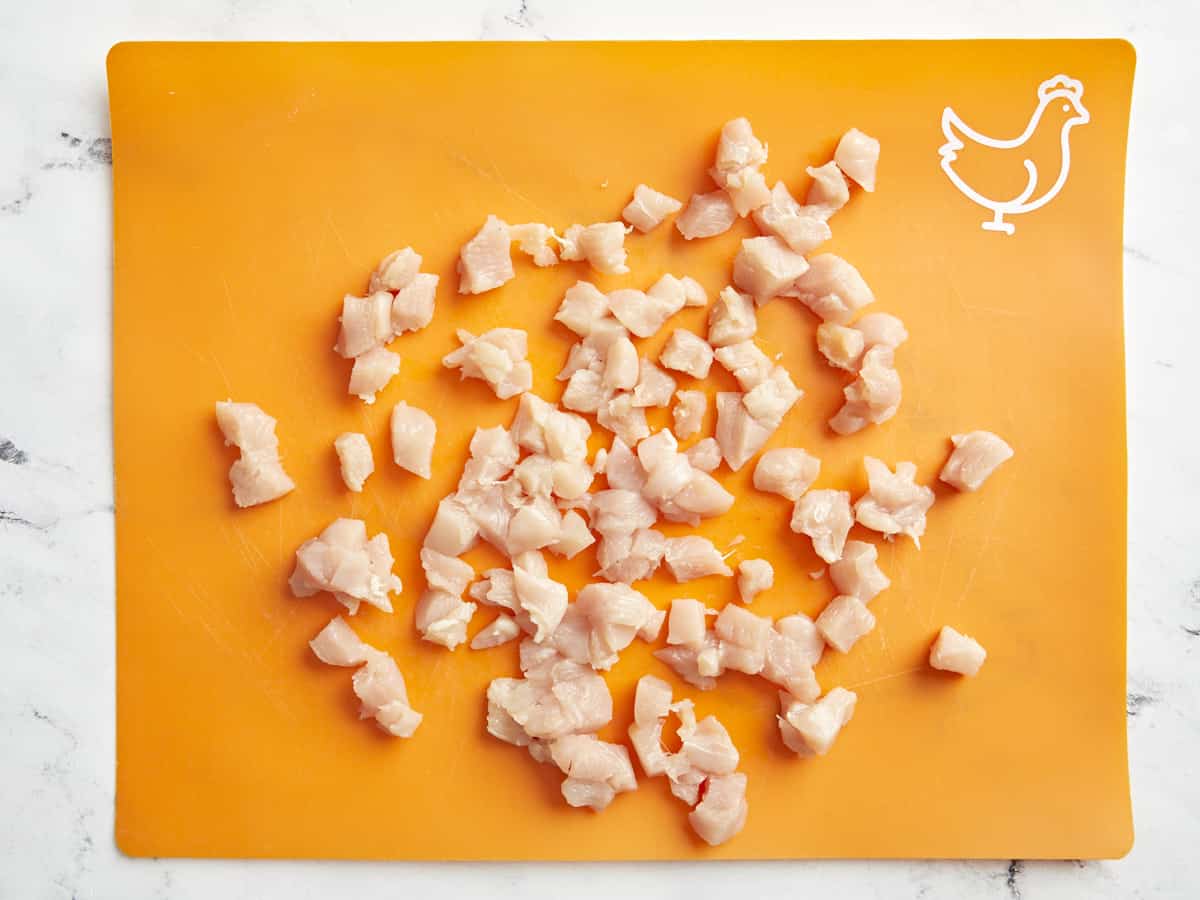
cubed chicken on an orange cutting board.

On a separate, clean cutting board, cut your chicken into ½ inch pieces so you get a little in every bite. Set aside (and wash your hands!)

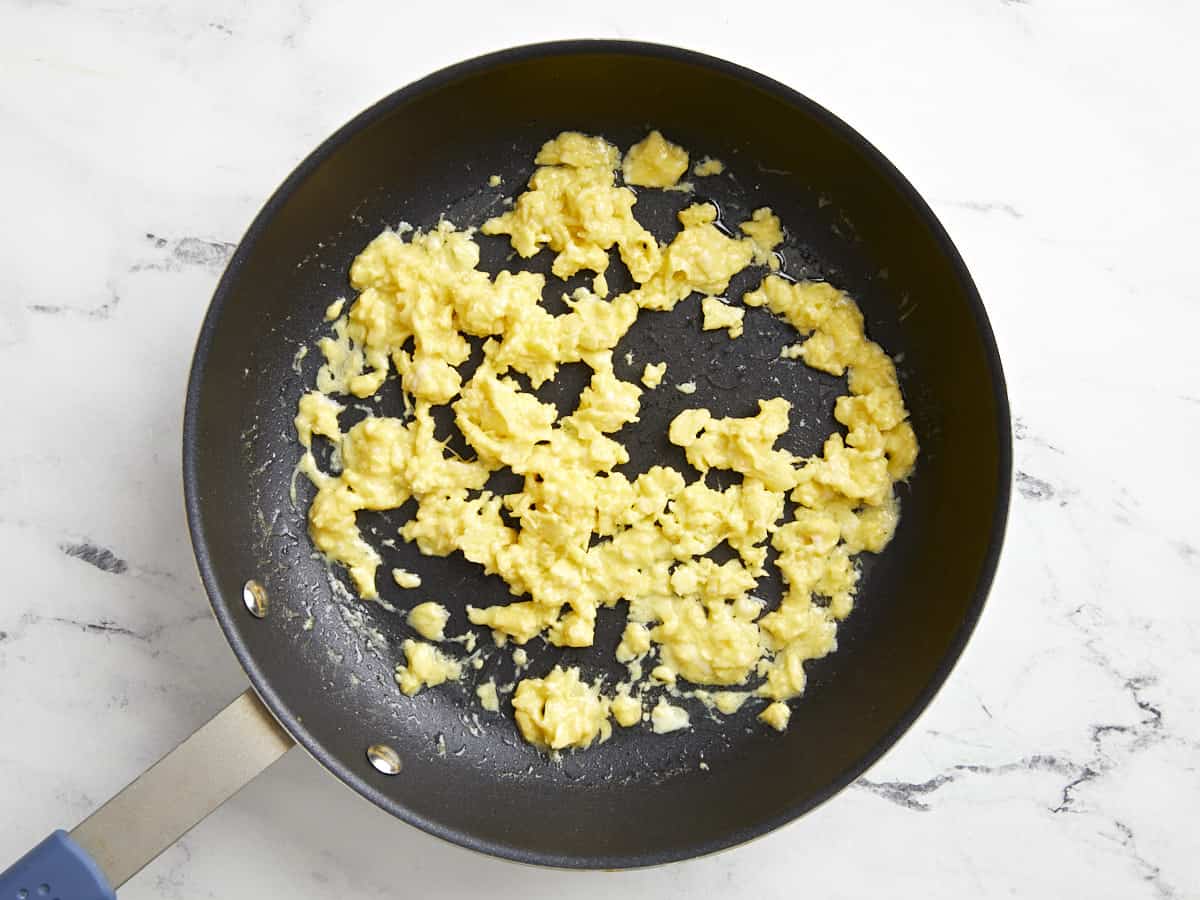
cooked scrambled eggs in a frying pan.

Lightly whisk the eggs in a small bowl. Heat a large skillet over medium heat. Once hot, add 2 Tbsp of cooking oil and swirl to coat the surface. Add the eggs and gently scramble until cooked through. Transfer the cooked eggs to a clean bowl or plate off to the side.

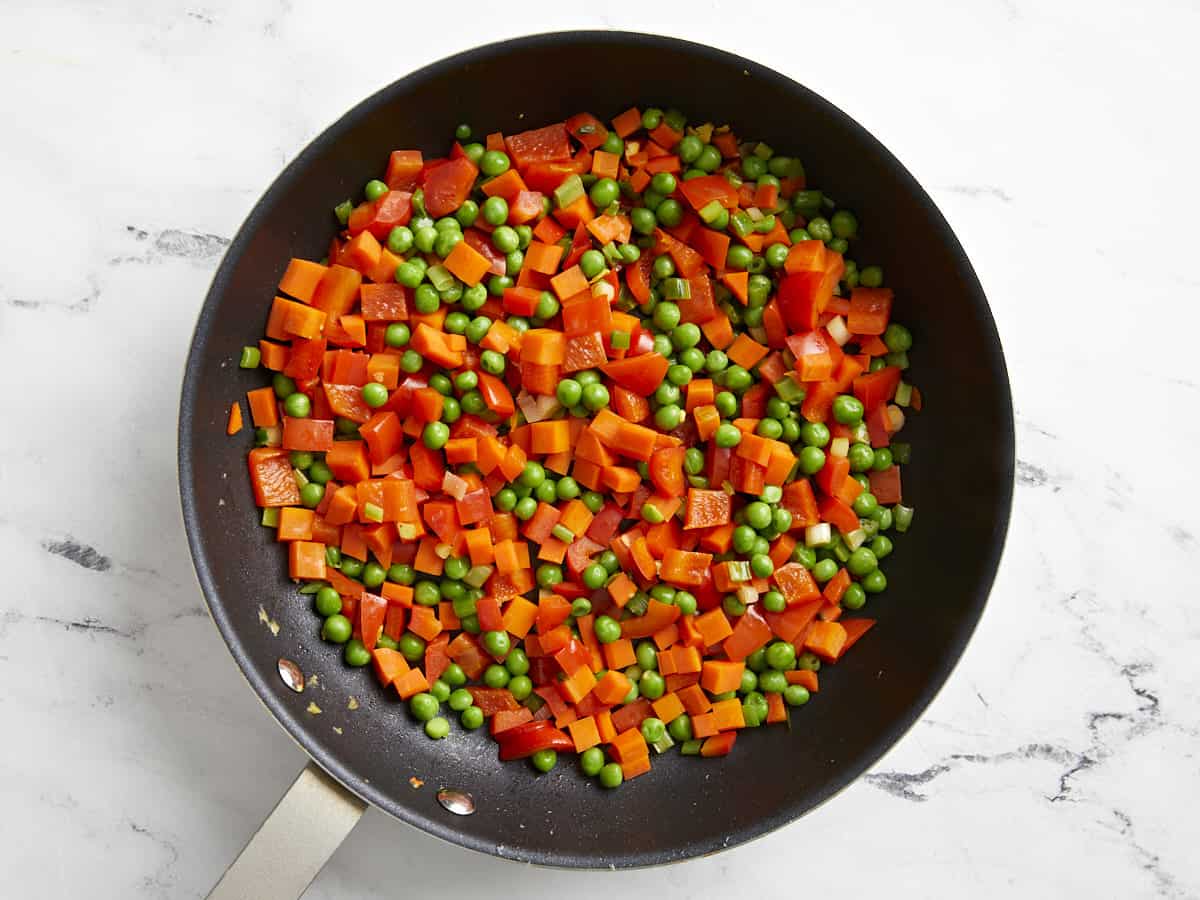
diced vegetables in a frying pan.

Turn the heat up to medium-high. Add the diced carrots, stir, and cook for about two minutes. Next, add the bell pepper and the white firm ends of the green onions. Cook and stir for one minute more. Finally, add the frozen peas and stir and cook until heated through. Transfer the vegetables to a clean bowl or plate.

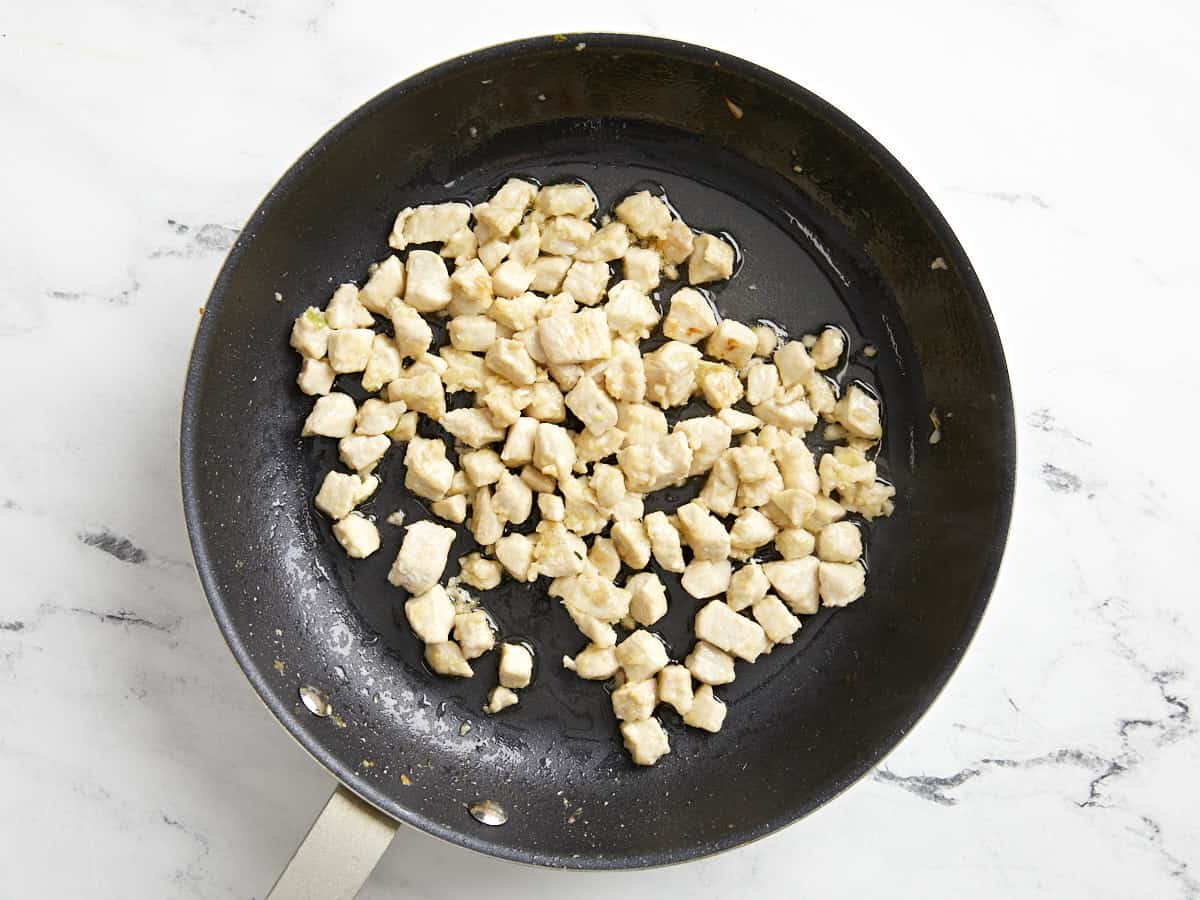
cooked cubed chicken in a frying pan.

Add the remaining 1 Tbsp cooking oil to the skillet and swirl to coat the surface. Add the ½ inch pieces of chicken and completely cook through, about 4 minutes. Once the chicken is about ½ of the way cooked through (2-3 minutes), add the 2 cloves of garlic and 1 tsp ginger and cook for an additional 2-3 minutes.

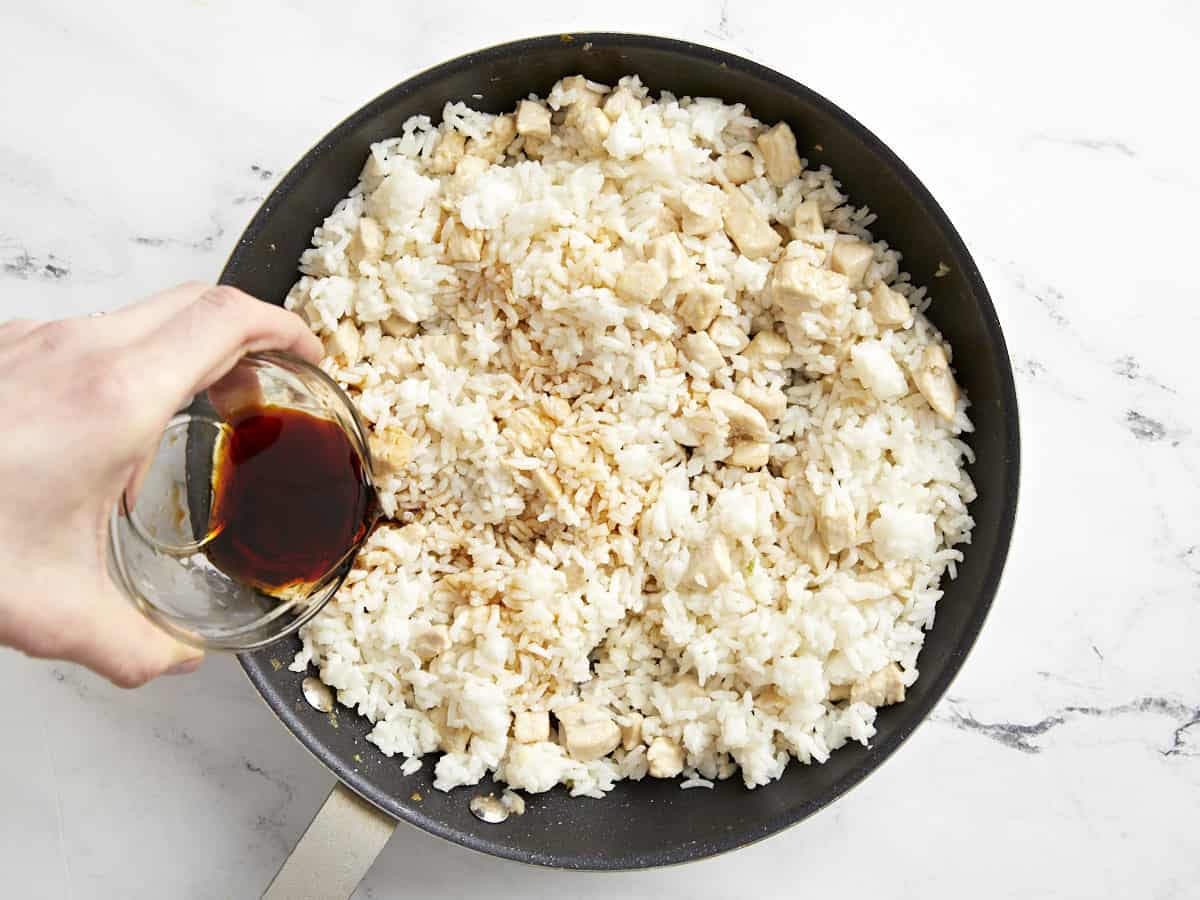
pouring soy sauce over cooked rice in a frying pan.

Then, add the cooked and cooled rice to the skillet. Stir and cook the chicken and rice together for about 2 minutes, or until the rice is heated through. Pour the 3 Tbsp soy sauce and 3 Tbsp toasted sesame oil over the rice. Stir the rice and sauce together until evenly combined. Turn the heat off.

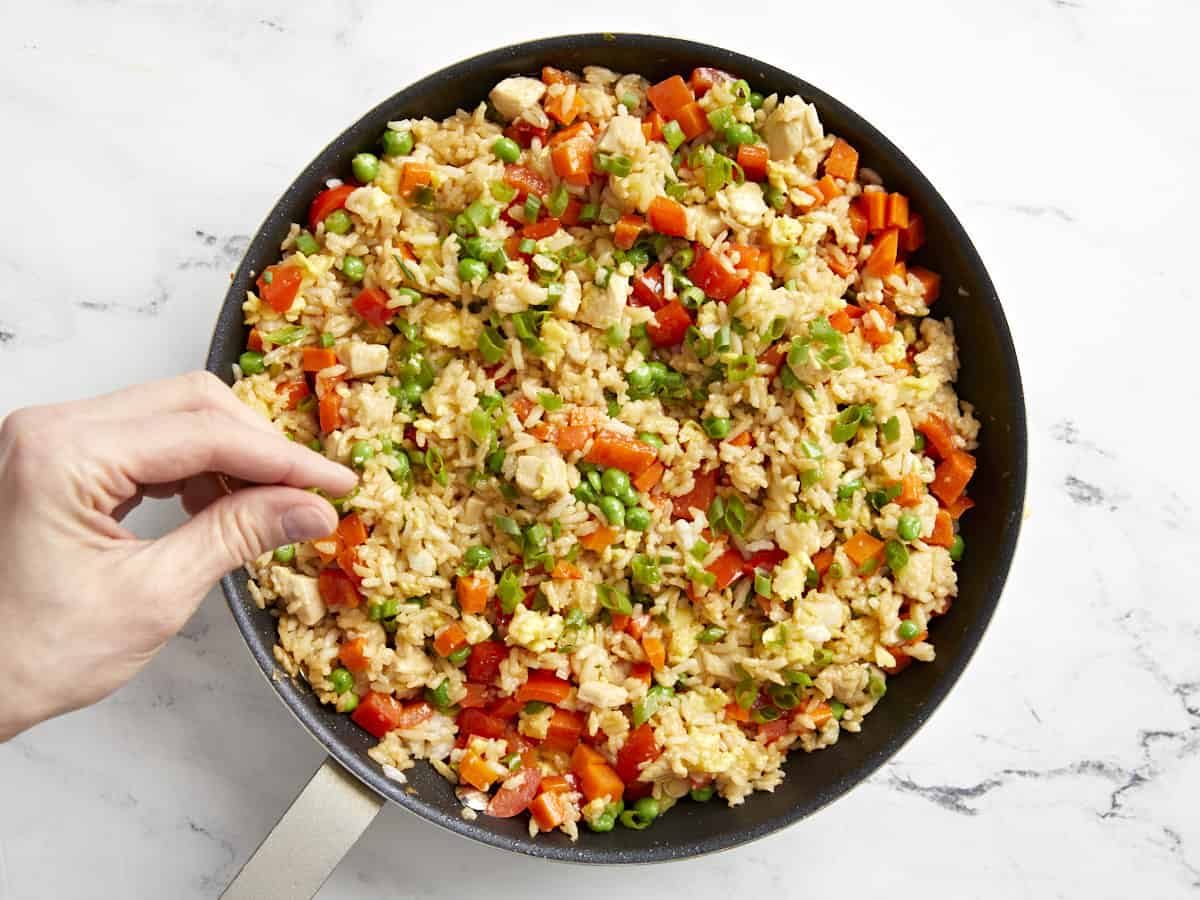
sprinkling salt over chicken fried rice in a frying pan.

Add the eggs and vegetables back to the skillet with the chicken and rice and stir to combine. Allow the residual heat to heat everything through. Top with the remaining green ends of the sliced green onions. Taste and adjust the soy sauce or sesame oil to your liking.

chopsticks grabbing a bite of chicken fried rice from a black plate.

This flavorful chicken fried rice is so much better than takeout!

The post Chicken Fried Rice appeared first on Budget Bytes.

Sauteed Asparagus

This sauteed asparagus is crunchy, flavorful, and delightfully easy to make. It’s the perfect side for any meal.

The post Sauteed Asparagus appeared first on Budget Bytes.

Making an impressive main dish is hard work, so we’re partial to simple sides that pack a punch with little effort. This sauteed asparagus is crunchy, flavorful, and delightfully easy to make. All you need is a bunch of asparagus, oil, garlic, salt, and pepper. It’s almost too easy!

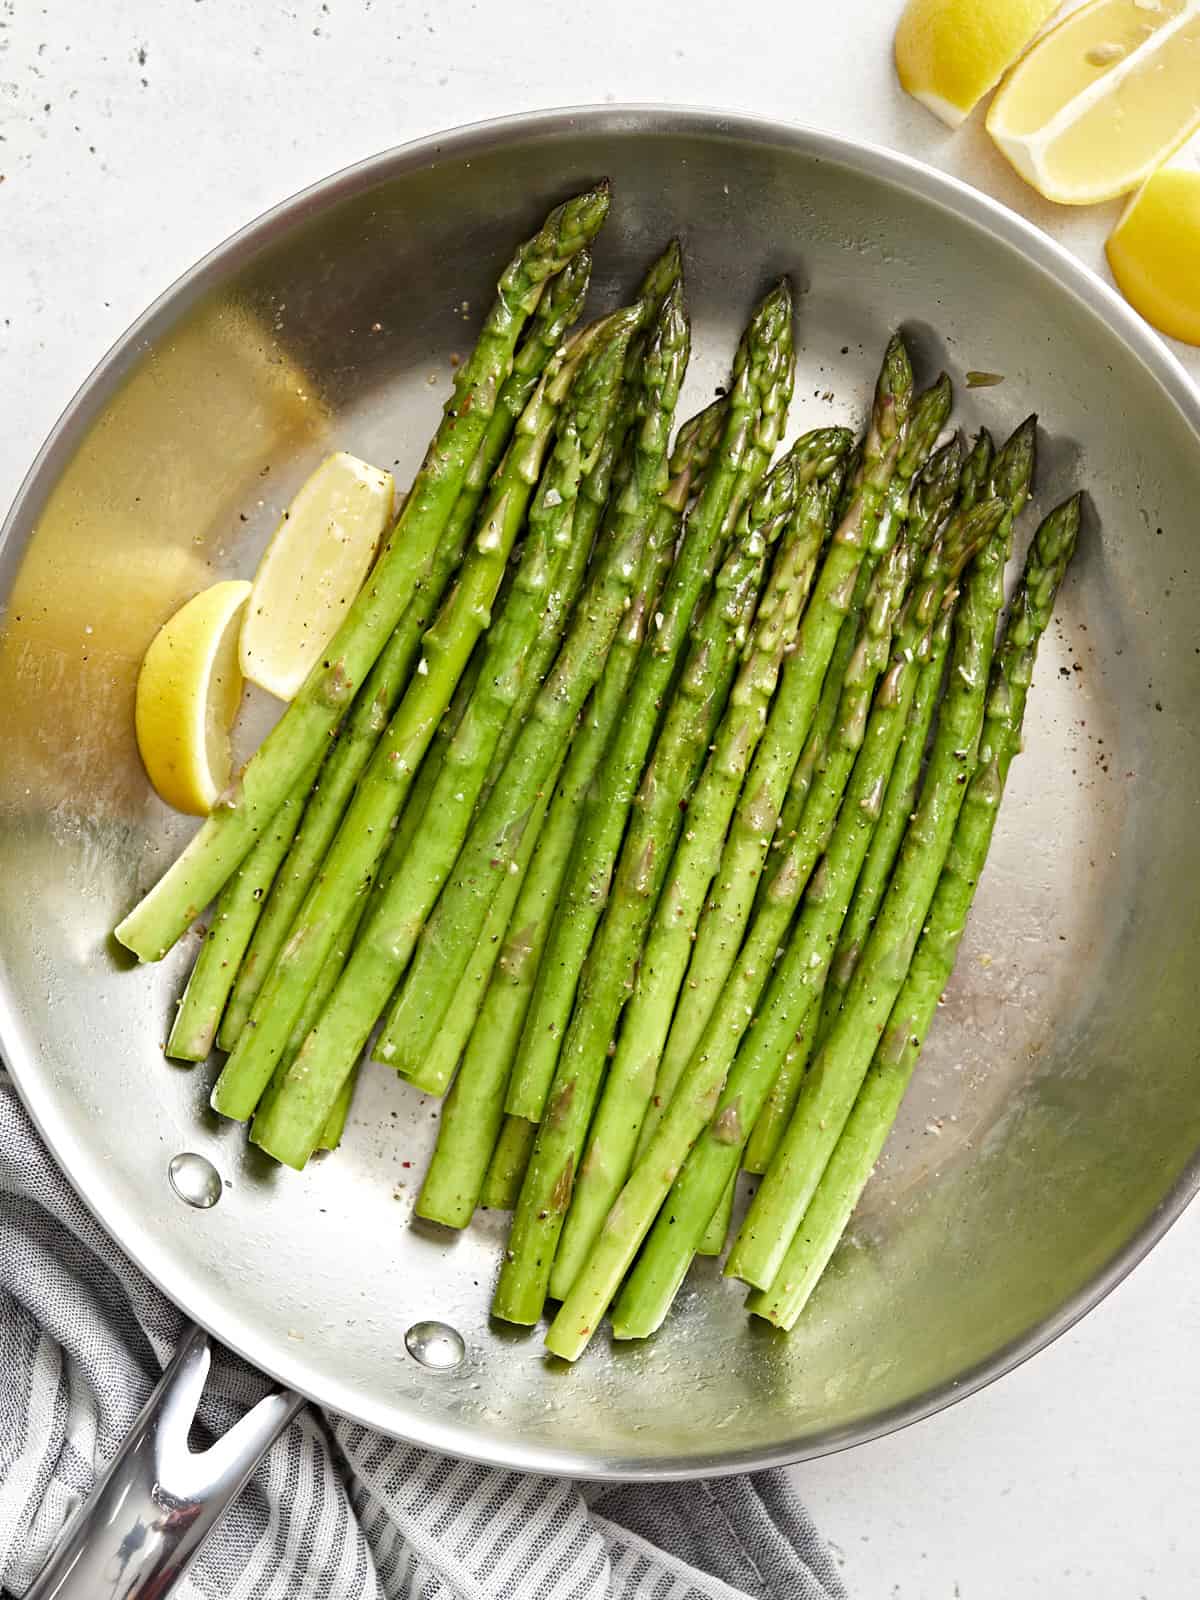
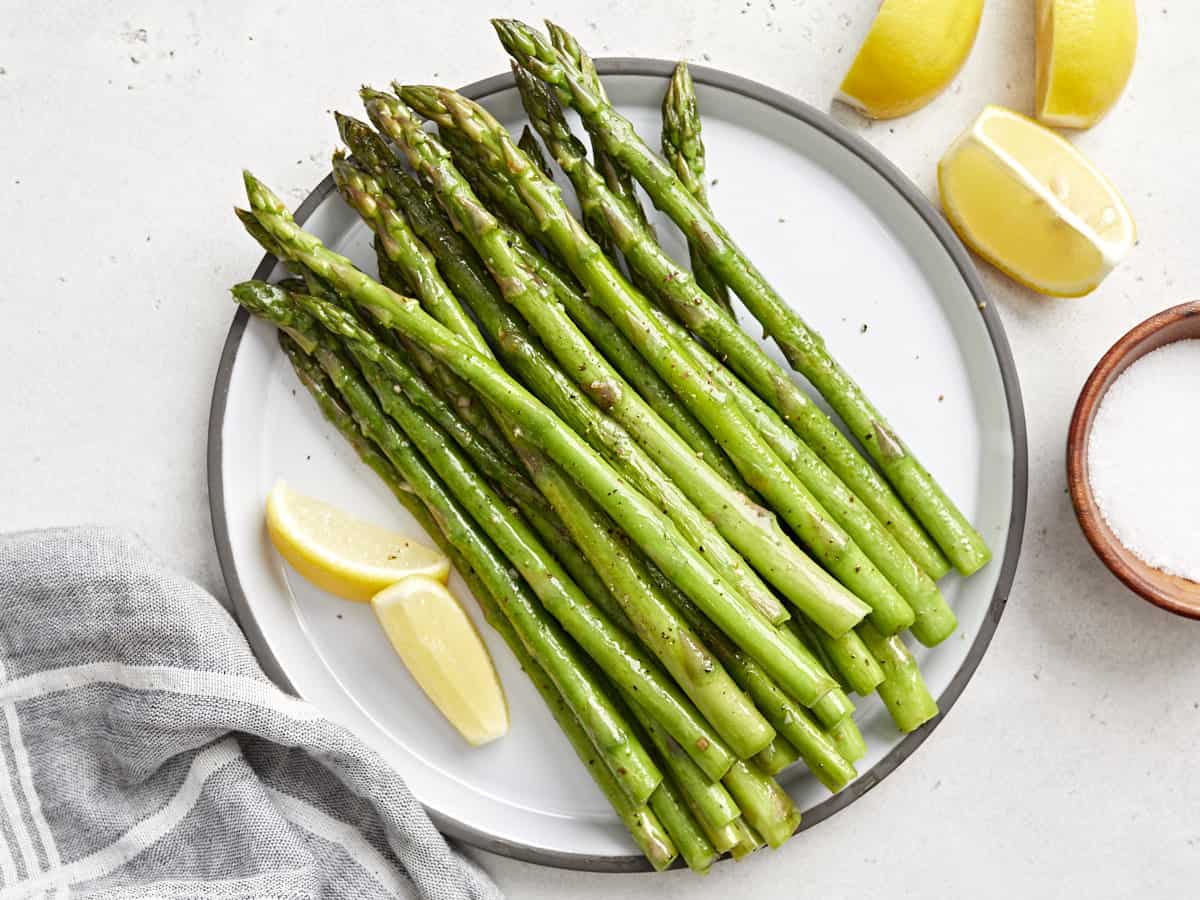
overhead view of sauteed asparagus in a frying pan with lemon wedges.

Ingredients for Sauteed Asparagus

Here’s what you’ll need to make sauteed asparagus (psst: there are only 6 ingredients!):

  • Asparagus: Choose stalks that are firm to the touch and do not appear limp or wilted. The tips should be closed tightly.
  • Oil: Coats the asparagus to help it brown in the pan without burning. We like olive oil for the rich taste it imparts, but canola or vegetable will also work well.
  • Garlic: Adds a subtle earthy and savory flavor.
  • Salt and Pepper: Enhance the natural flavor of the asparagus.
  • Lemon: Adds a pop of brightness and freshness to the cooked asparagus.

What Else Can I Add?

This is a great recipe for playing with different seasoning blends. Try: nmn nbgy

Tip for Sauteed Asparagus

Asparagus does not need to be cooked for long. Once it turns bright green from end to end, it’s done! In fact, it’s even better a little underdone. It should not be mushy or floppy in texture and appearance, it should hold its “spear” shape when cooked correctly.

WHat To Serve with Sauteed ASparagus

This sautéed asparagus is such a versatile side dish. It truly goes with everything! We love it served with Chicken Cordon Bleu, Garlic Butter Baked Cod, Glazed Pork Chops, or BBQ Ribs. Drizzle them with a little bit of Balsamic Glaze to really take them to the next level.

I served this asparagus with our Parmesan Risotto, and it made the ultimate fresh and delicious meal for my family.

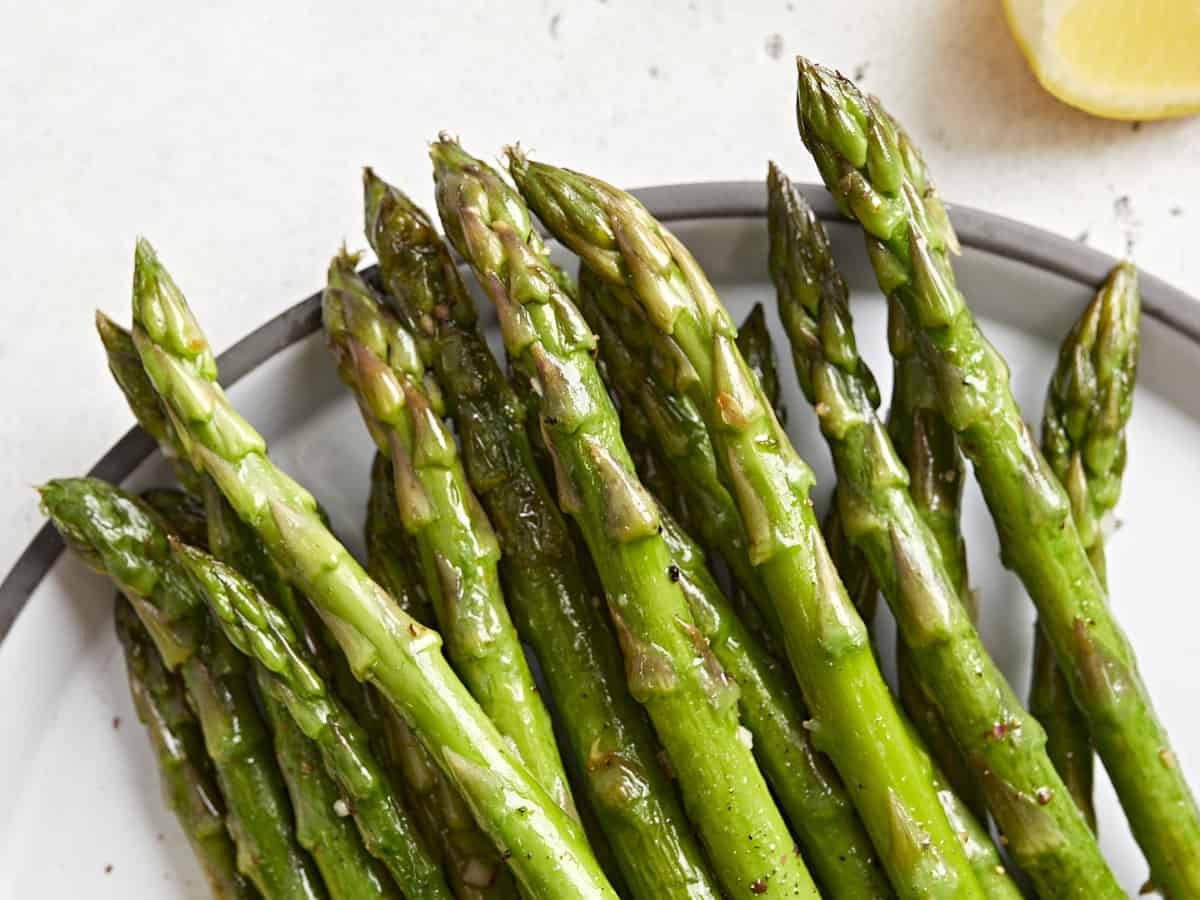
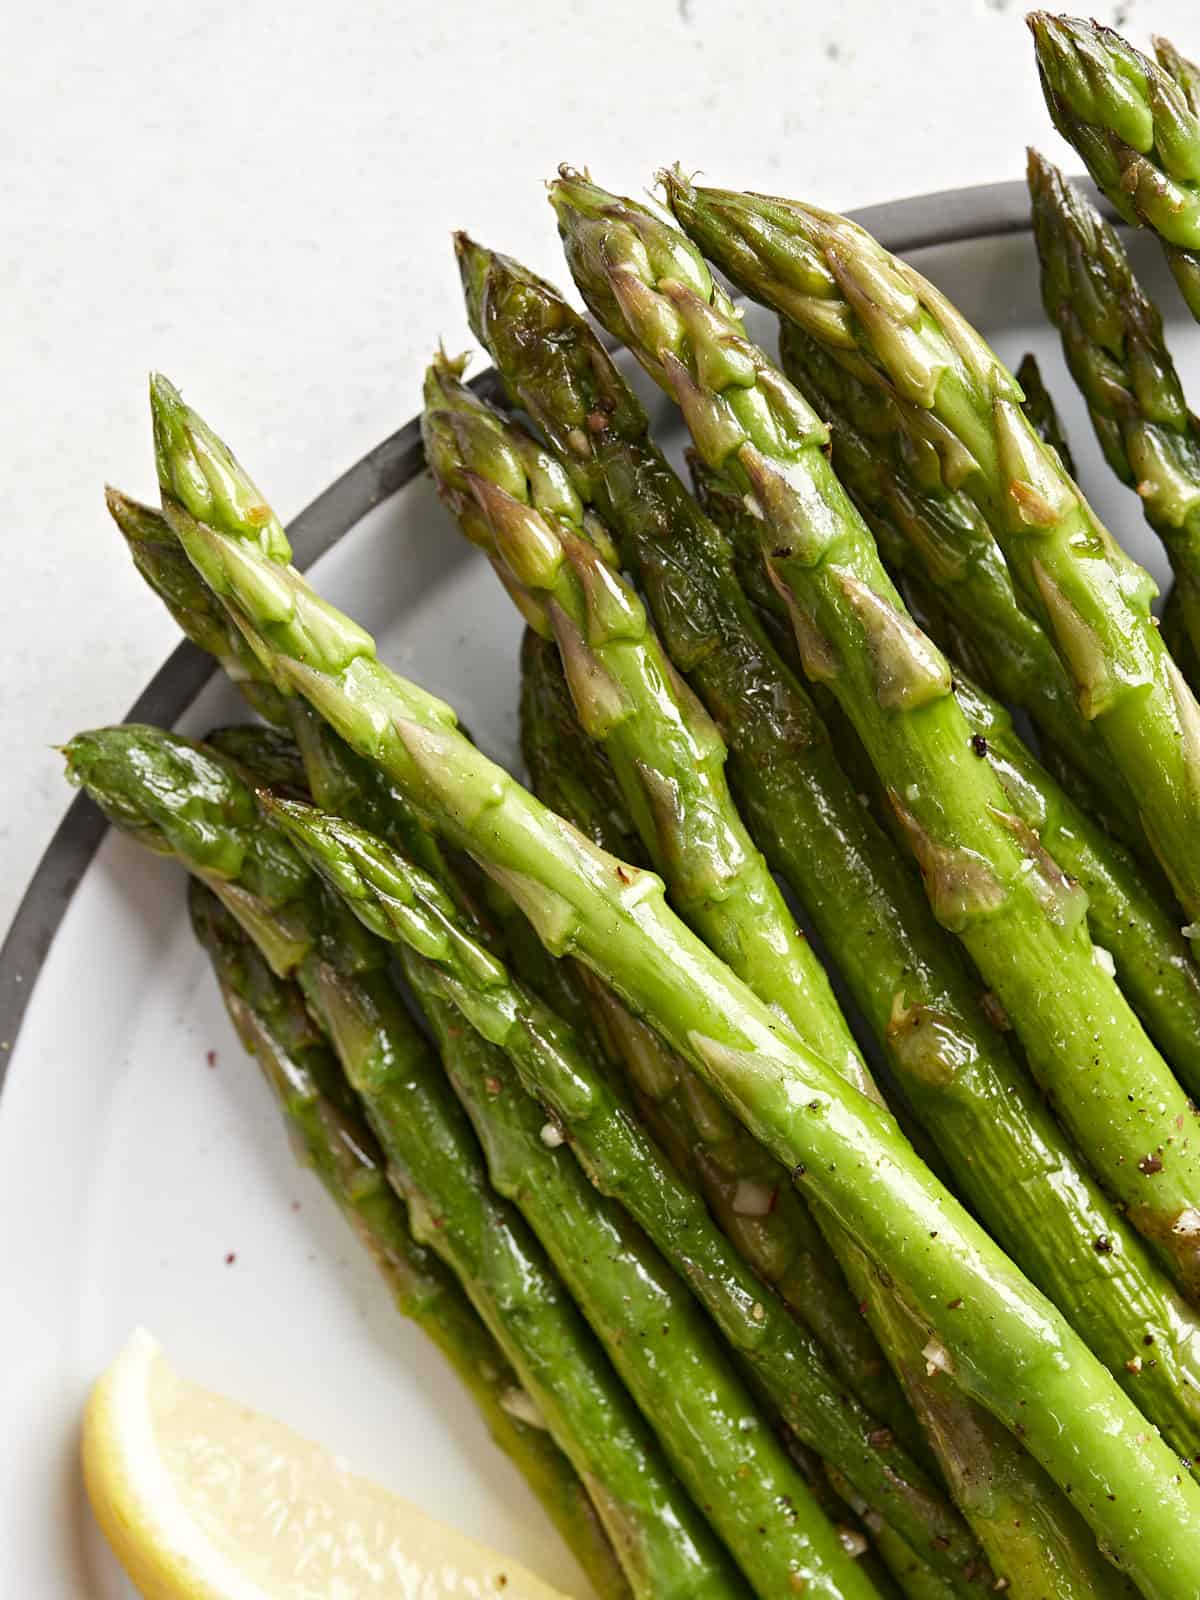
close up of sauteed asparagus tips on a plate.
overhead view of sauteed asparagus in a frying pan with lemon wedges.
Print

Sauteed Asparagus

This Sautéed Asparagus is crunchy, flavorful, and delightfully easy to make. It's the perfect side for any meal.
Course Side Dish
Cuisine American
Total Cost $4.74 recipe / $1.18 serving
Prep Time 5 minutes
Cook Time 10 minutes
Total Time 15 minutes
Servings 4
Calories 60kcal
Author Jess Rice

Ingredients

Instructions

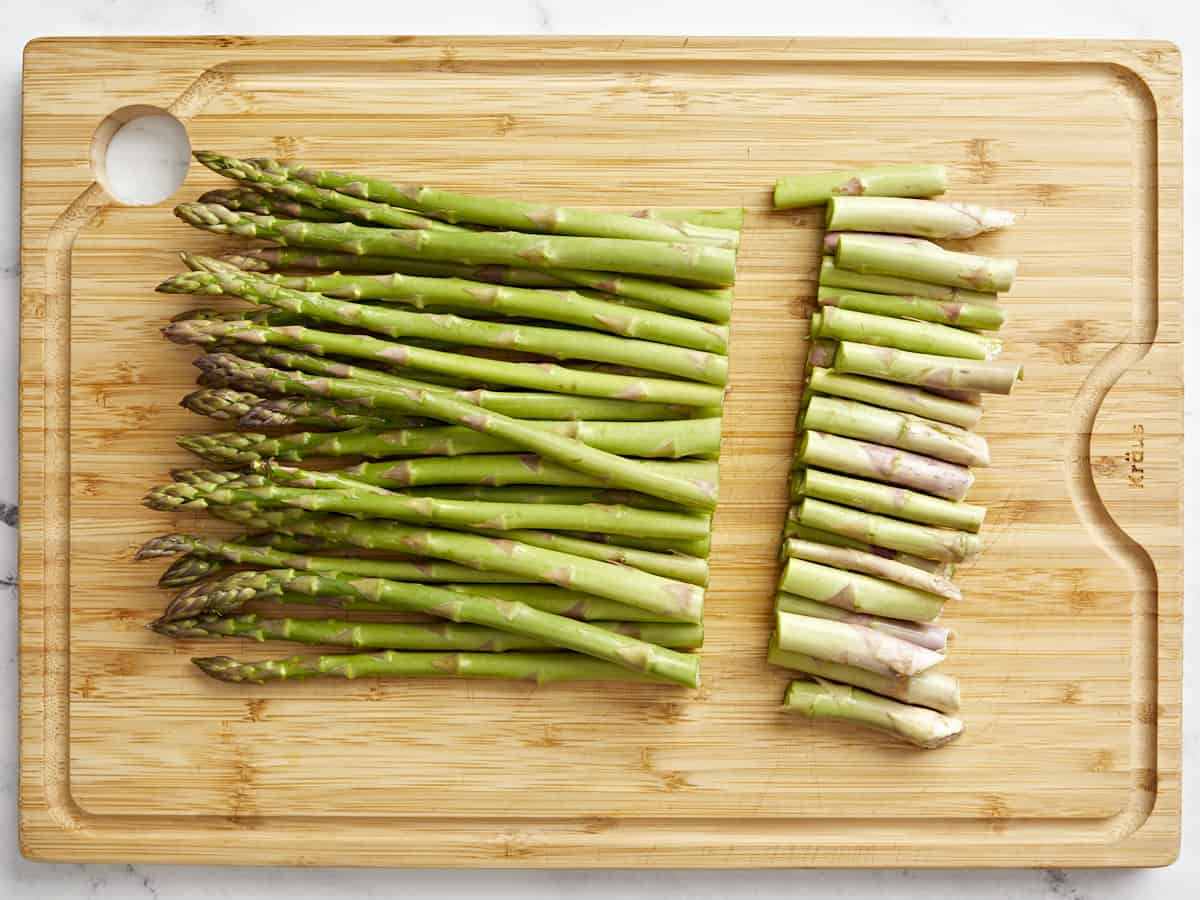
  • Cut off the woody ends of the asparagus.
  • Add oil to a large frying pan on medium high heat. Add asparagus and gently shake to cover each spear with oil. Add the salt and pepper and cook, shaking every so often, until asparagus turns bright green, about 5 minutes.
  • Add the minced garlic to pan and cook for another 1-2 minutes until fragrant.
  • Remove the asparagus and spritz with a squeeze of lemon juice. Adjust salt and pepper to your liking.

See how we calculate recipe costs here.

Nutrition

Serving: 1serving | Calories: 60kcal | Carbohydrates: 6g | Protein: 3g | Fat: 4g | Sodium: 584mg | Fiber: 3g
overhead view of sauteed asparagus on a plate with lemon wedges.

how to make Sautéed Asparagus – step by step photos

a bunch of asparagus with the ends trimmed off on a bamboo cutting board.

Cut off the woody ends of 1 bunch asparagus.

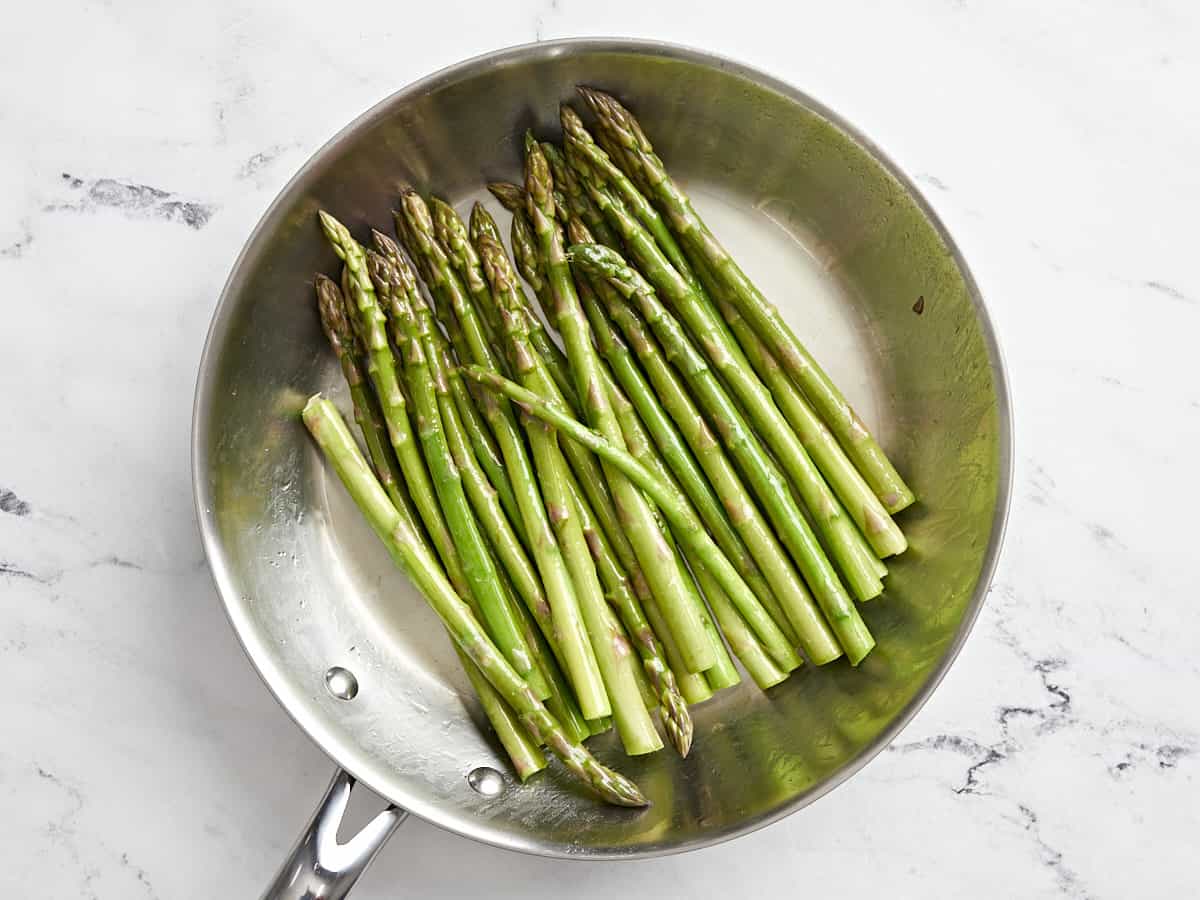
asparagus in a frying pan.

Add 1 Tbsp olive oil to a large frying pan on medium-high heat, then add the asparagus and gently shake to cover each spear with oil. Shake every so often, until asparagus turns bright green, about 5 minutes.

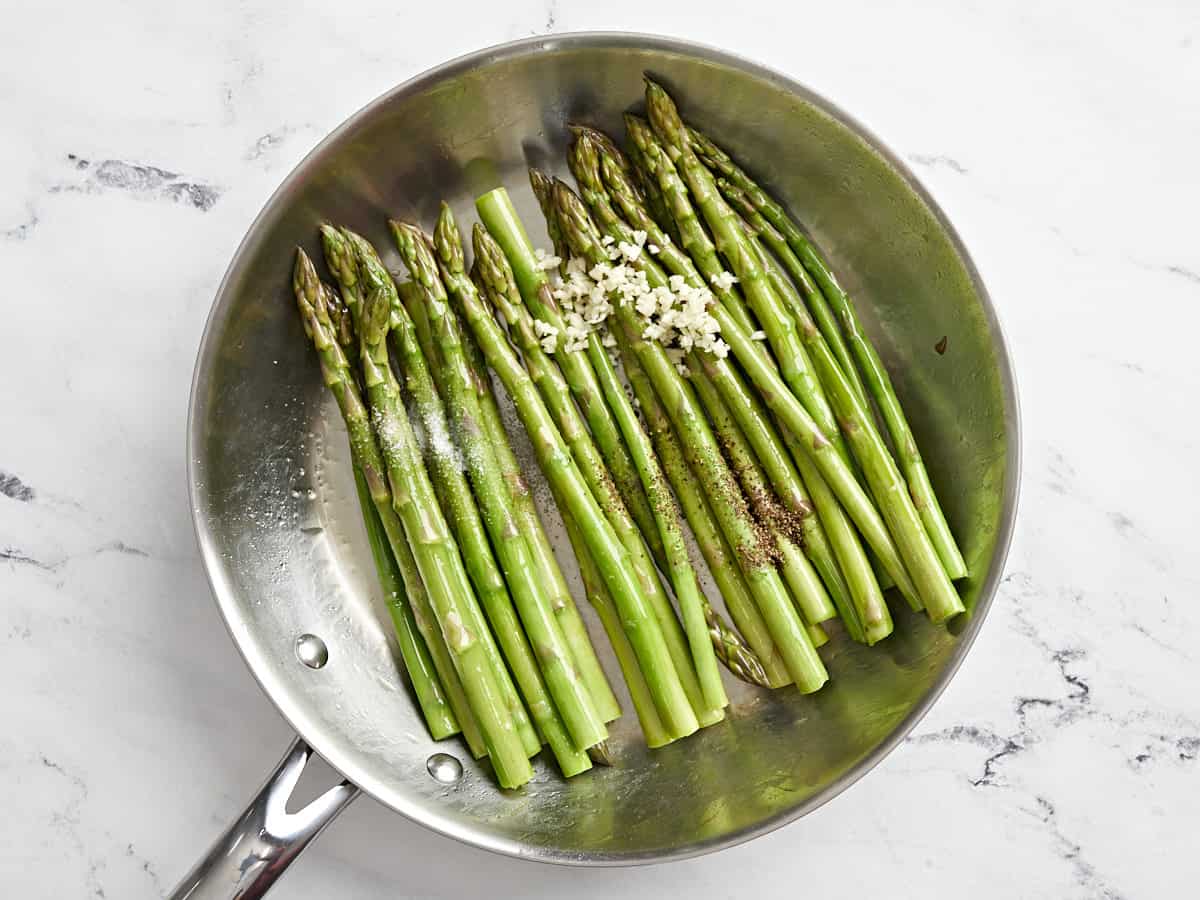
minced garlic on top of asparagus in a frying pan.

Sprinkle over 1 tsp salt and 1 tsp pepper and add 1 clove minced garlic to the pan and cook for another 1-2 minutes until fragrant.

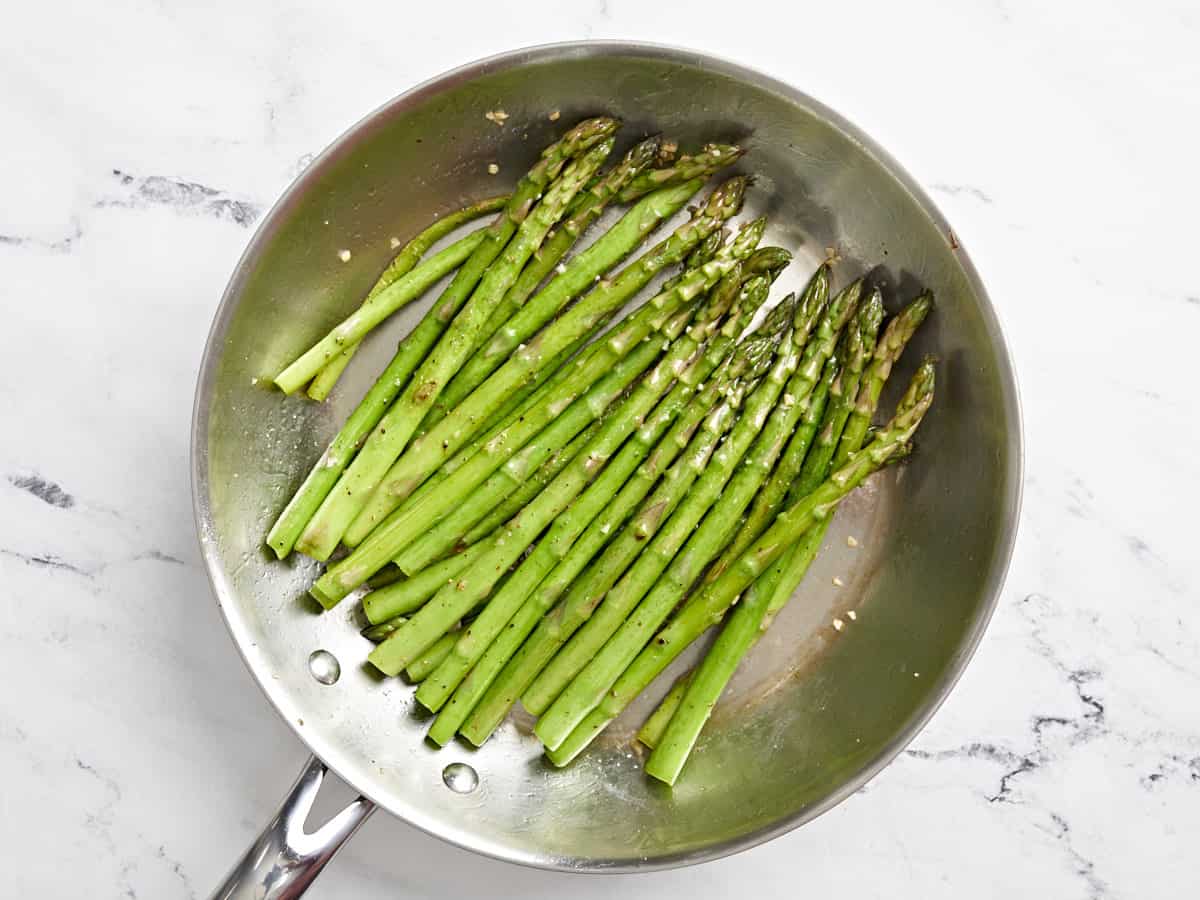
sauteed asparagus in a frying pan.

Remove asparagus and spritz with a squeeze of lemon juice from 1 whole lemon. Adjust salt and pepper to your liking.

close up of sauteed asparagus tips on a plate with a lemon wedge.

This sautéed asparagus is so simple and delicious!

The post Sauteed Asparagus appeared first on Budget Bytes.

Caesar Salad

This easy Caesar Salad recipe is made with homemade croutons and a rich & flavorful Caesar salad dressing. It’s simple enough to make any day of the week!

The post Caesar Salad appeared first on Budget Bytes.

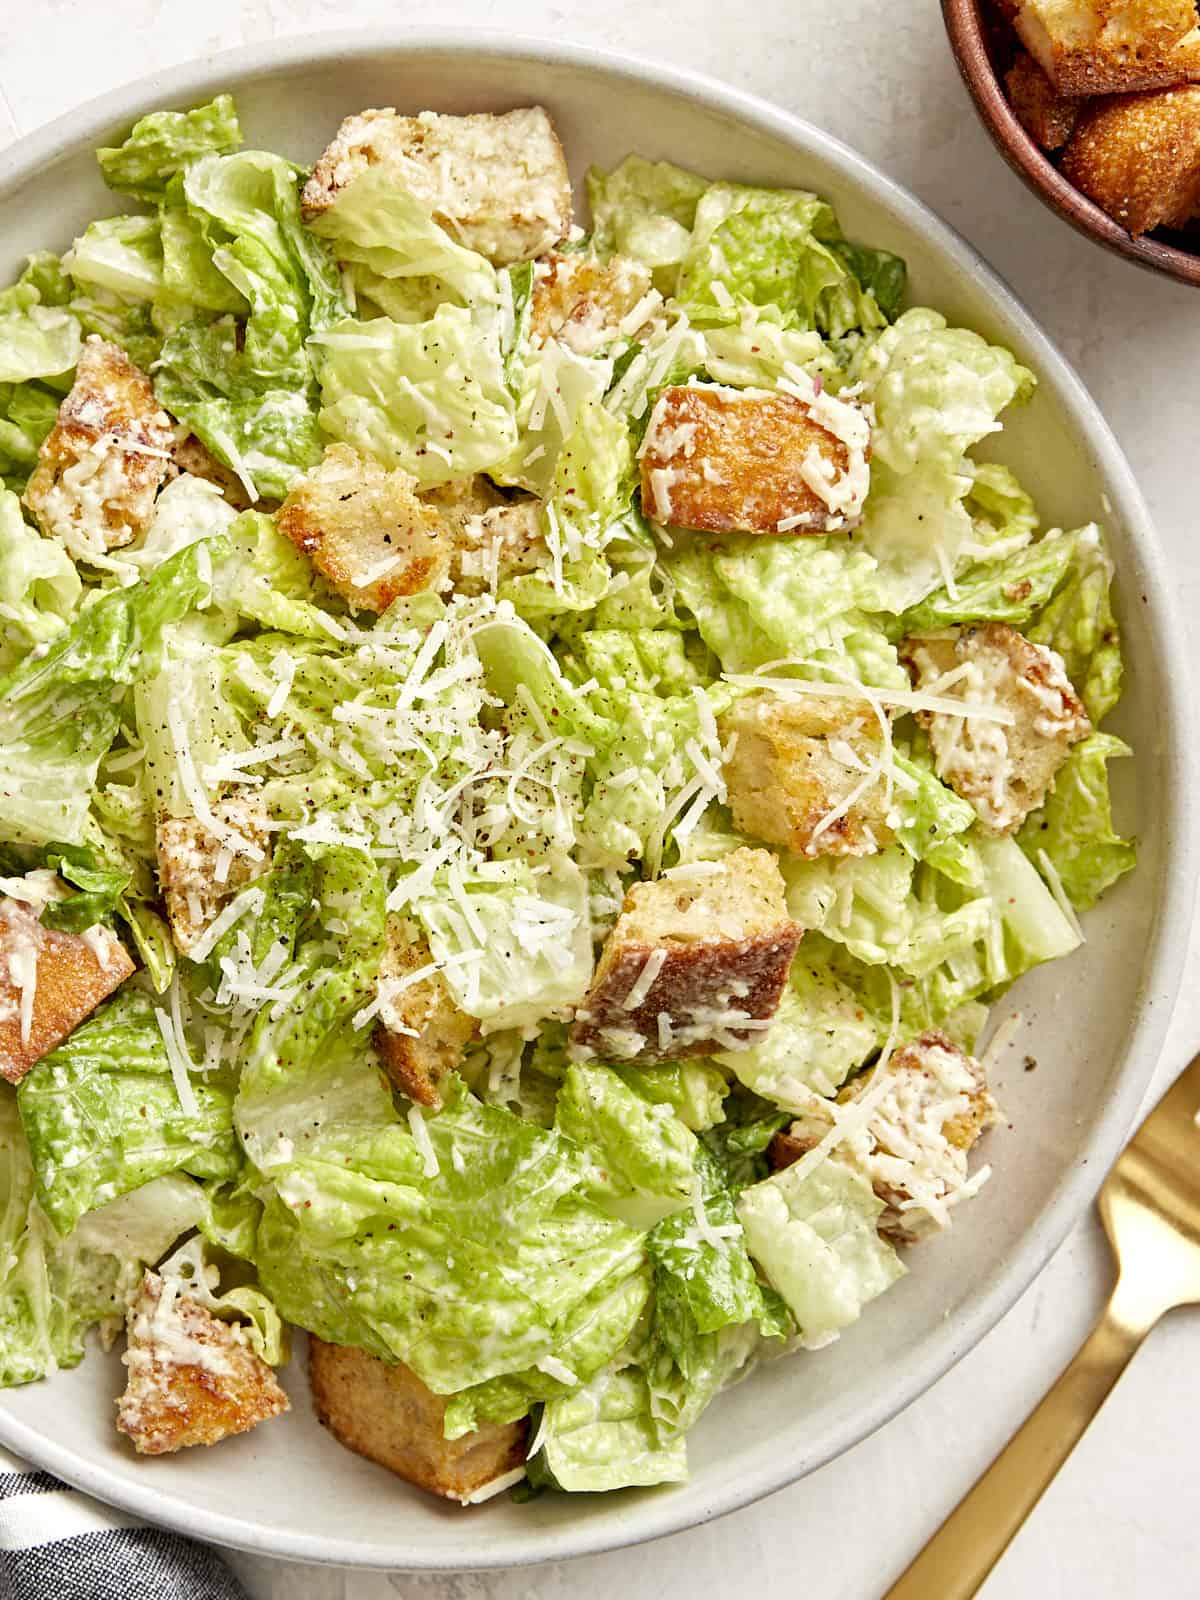
If you’ve never made a homemade Caesar salad, then you might be surprised by just how easy it is to whip up. Our version includes fresh homemade croutons and a rich and tangy homemade Caesar salad dressing. The simplicity of a Caesar salad is unmatched. It’s simple enough to make during the week and pairs well with lots of main dishes. It’s always my go-to whenever I’m eating out at a nice restaurant, but the truth is…this homemade Caesar salad recipe is wayyy better than any restaurant version. Let me show you just how easy it is to make!

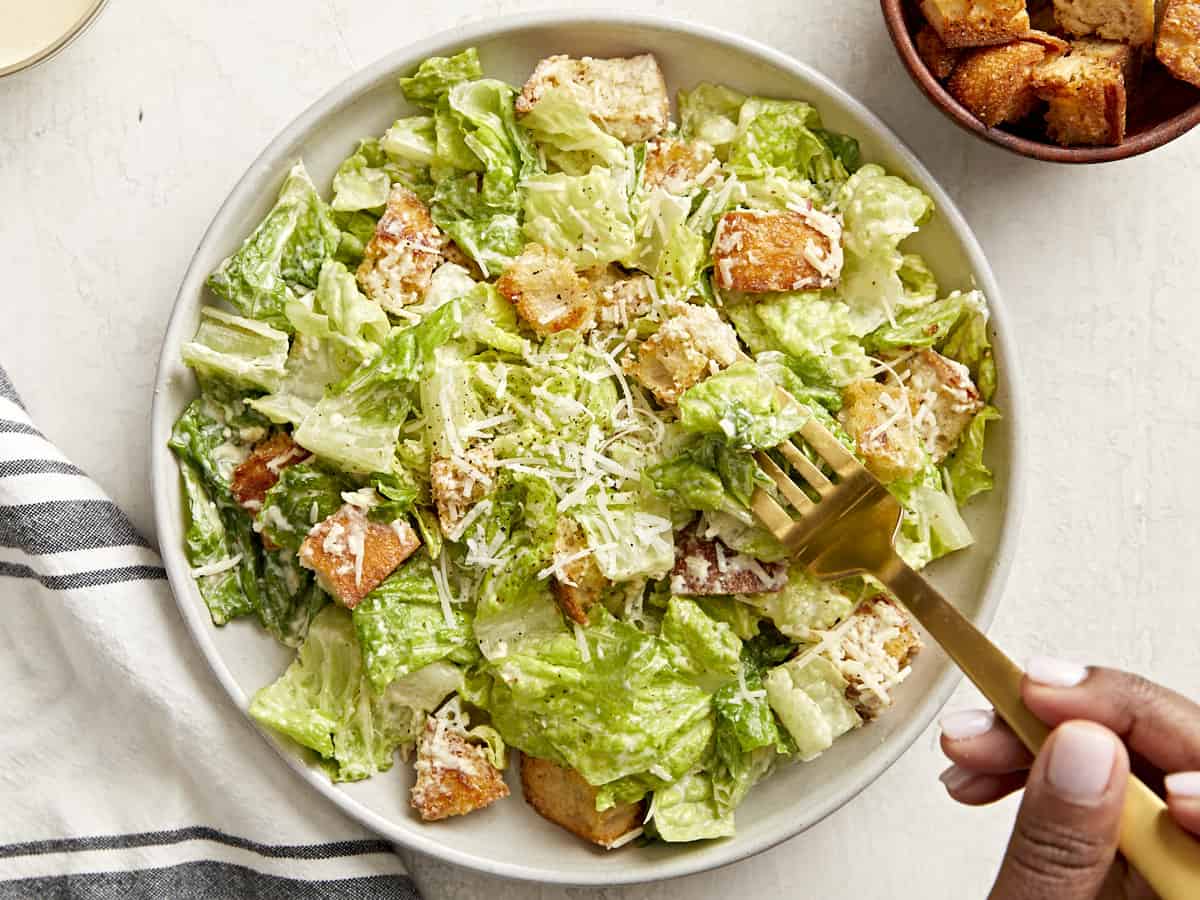
Overhead view of a plate of caesar salad with a gold fork on the side.

Ingredients For Caesar Salad

All it takes are a few simple ingredients to make this fresh Caesar Salad recipe:

  • Romaine Lettuce: Fresh, crisp romaine lettuce is the base of this salad.
  • Parmesan Cheese: Since this salad is relatively simple to make with simple ingredients, we spent extra using fresh Parmesan from a Parmesan cheese wedge.
  • Homemade Croutons: Homemade croutons are a must friends! They are so easy to make and taste way better than those store-bought ones. Trust me!
  • Caesar Salad Dressing: A fresh batch of homemade Caesar salad dressing can be made in hardly no time. But if you are really short on time, you can also use store-bought dressing instead.

Caesar Salad Dressing

Our creamy homemade caesar salad dressing is rich, tangy, super flavorful, and really easy to whip up! And our version is simple thanks to the use of mayonnaise instead of making your own egg and oil emulsion. It includes a combination of lemon, garlic, anchovy filets, Dijon mustard, mayonnaise, Parmesan, and freshly cracked black pepper. It has lots of complex flavors and tastes absolutely delicious with this Caesar salad!

Easy Homemade Croutons

The real key to any great Caesar salad, imo, are homemade croutons! Ok, second to the dressing of course :) They’re crispy, crunchy, and oh-so-flavorful! And the best part is…they’re super easy to make! We made a quick batch of our Easy Homemade Croutons recipe with some crusty bread, olive oil, and seasoning. That’s it! Trust me, it will take your salad to the next level, so don’t skip it!

What To SErve with Caesar Salad?

One of the best ways to enjoy this simple caesar salad is by adding some grilled chicken, Pan Seared Chicken, or Air Fryer Chicken on top for a quick and easy chicken caesar salad. Salmon and shrimp also taste great with this salad! Or simply add this salad as a side dish along side your favorite dinner recipes like Homemade Lasagna or Creamy Garlic Chicken.

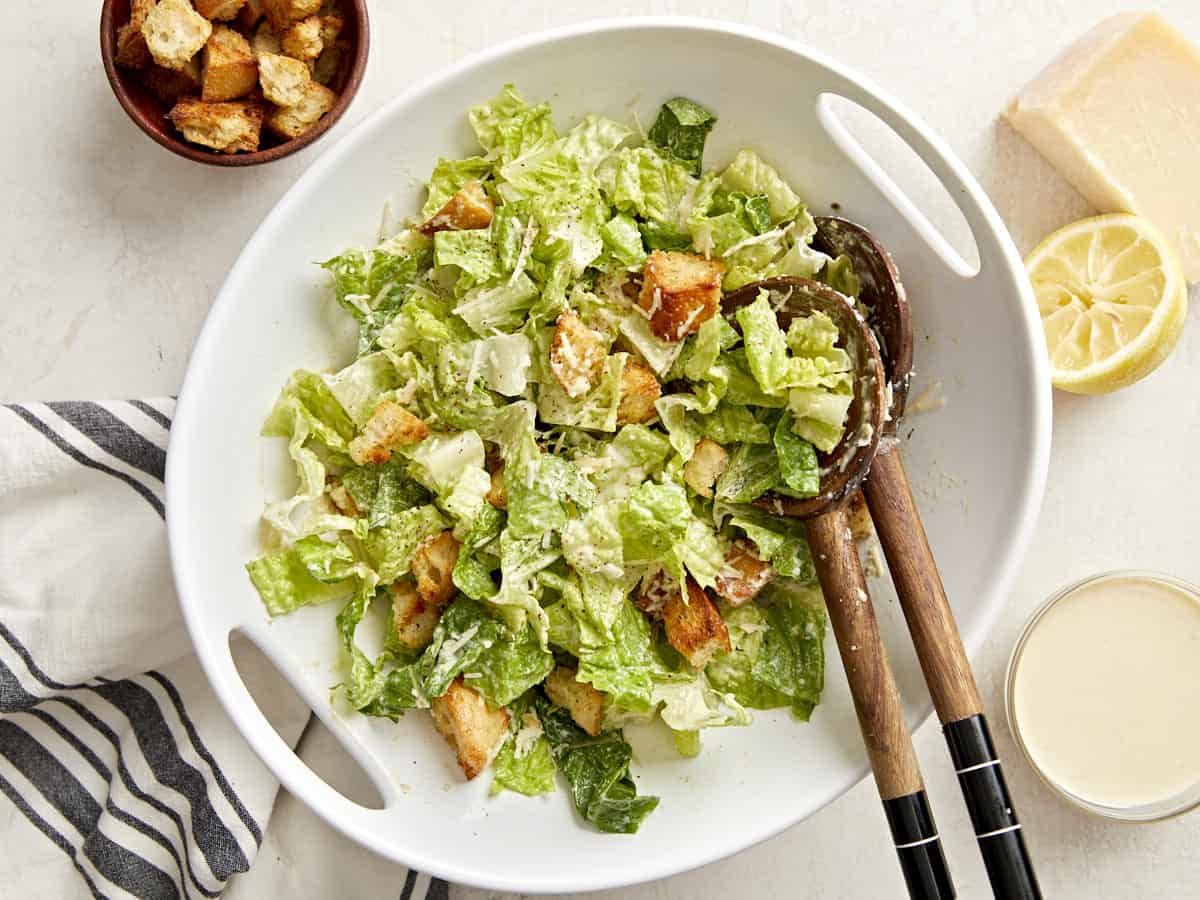
Overhead view of a serving bowl of caesar salad with a napkin, croutons, caesar dressing, and parmesan cheese on the side.
Overhead view of a plate of caesar salad with a gold fork on the side.
Print

Caesar Salad

This easy Caesar Salad recipe is made with homemade croutons and a rich & flavorful Caesar salad dressing. It’s simple enough to make any day of the week!
Course Salad, Side Dish
Cuisine American
Total Cost $8.50 recipe / $1.42 serving
Prep Time 20 minutes
Total Time 20 minutes
Servings 6
Calories 240kcal

Ingredients

Caesar Salad Dressing

Salad

  • 8 cups chopped romaine lettuce $3.73
  • 2 cups croutons $0.71
  • 1/2 cup shredded Parmesan $0.89

Instructions

  • Start by making the Caesar salad dressing. Zest and juice the lemon. You'll need about 3 Tbsp juice and 1 tsp lemon zest. Finely mince the garlic and anchovy filets. Reserve about ½ tsp of the oil from the anchovy container.
  • In a medium bowl add the lemon juice, zest, minced garlic, minced anchovies, anchovy oil, and pepper. Whisk to combine.
  • Add the Dijon mustard, mayonnaise, and grated Parmesan to the bowl and whisk to combine again. Taste the dressing and adjust the ingredients to your liking.
  • Next chop, wash, and dry the Romaine lettuce. Add the lettuce to a large bowl.
  • Top the lettuce with the croutons, shredded Parmesan, and half of the Caesar salad dressing (start with half the dressing and add more as needed). Toss the salad until everything is coated in the dressing. Serve with extra Parmesan cheese and freshly cracked black pepper on top. Enjoy!

See how we calculate recipe costs here.

Nutrition

Serving: 1serving | Calories: 240kcal | Carbohydrates: 12g | Protein: 7g | Fat: 19g | Sodium: 529mg | Fiber: 2g
Overhead view of a plate of Caesar salad with a hand holding a fork eating a bite on the side.

How to Make A Caesar Salad – Step by Step Photos

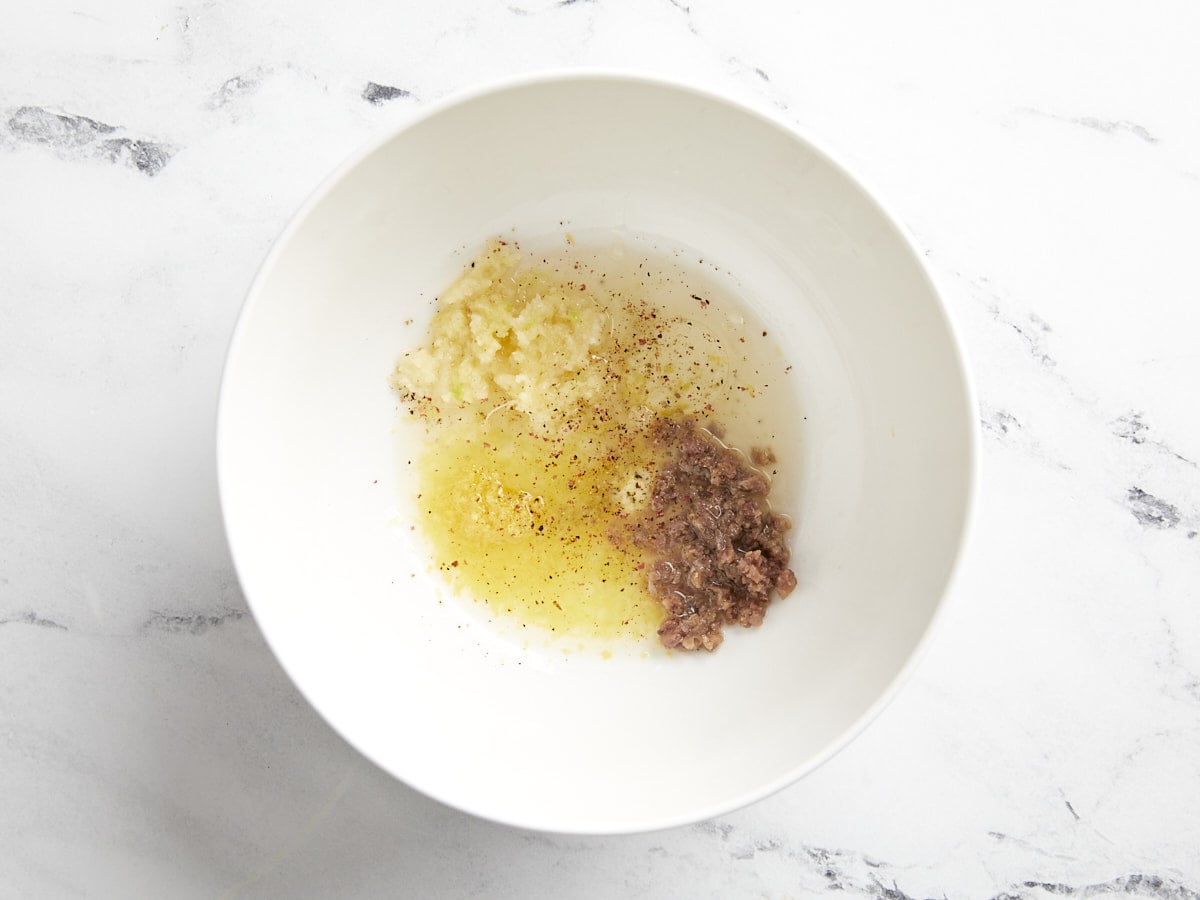
Caesar dressing ingredients in a bowl.

Start by making the Caesar salad dressing. Zest and juice 1 lemon. You’ll need about 3 Tbsp juice and 1 tsp lemon zest. Finely mince 3 cloves of garlic and 3 anchovy filets. Reserve about ½ tsp of the oil from the anchovy container.

In a medium bowl add the lemon juice, zest, minced garlic, minced anchovies, anchovy oil, and 1/4 tsp pepper. Whisk to combine.

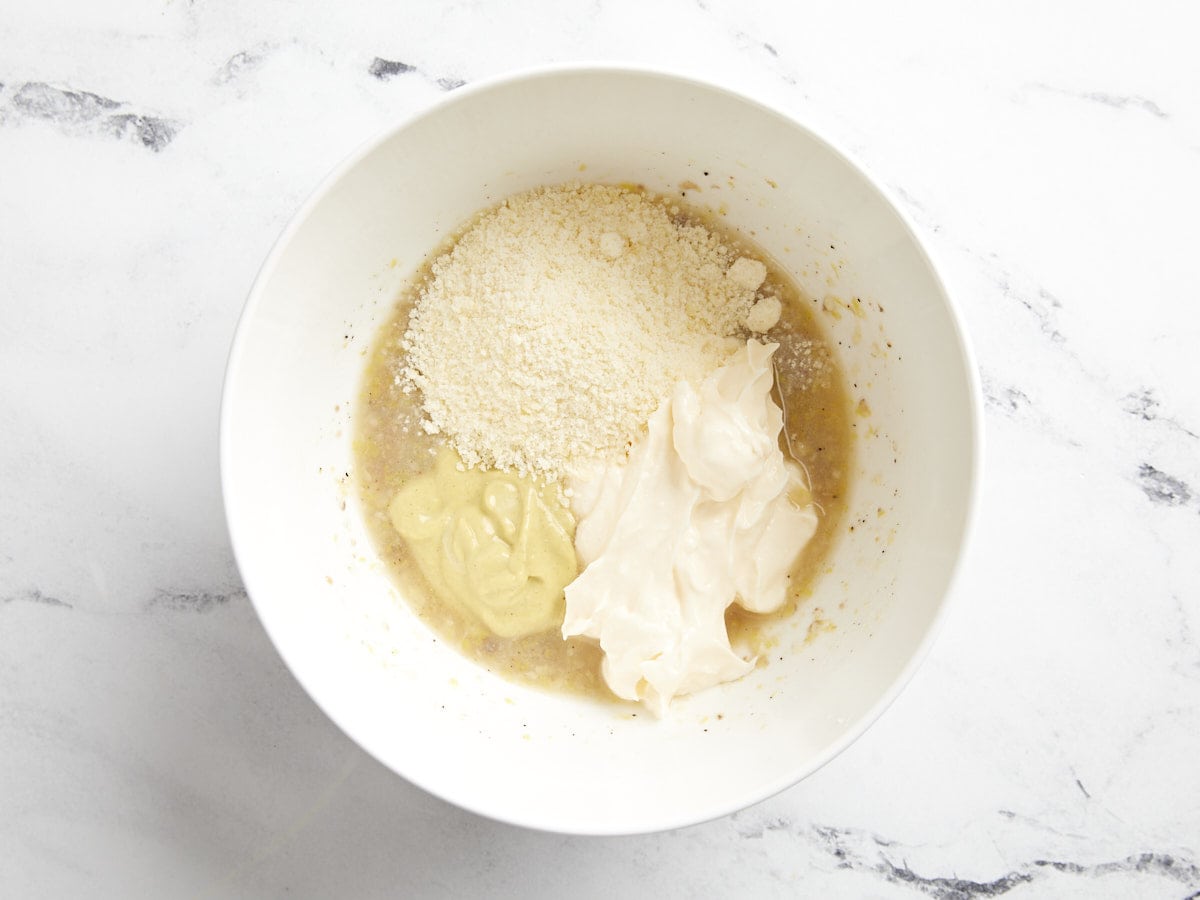
Parmesan and mayo added to Caesar dressing in a bowl.

Add 2 Tbsp Dijon mustard, 1/2 cup mayonnaise, and 1/4 cup grated Parmesan and whisk to combine again.

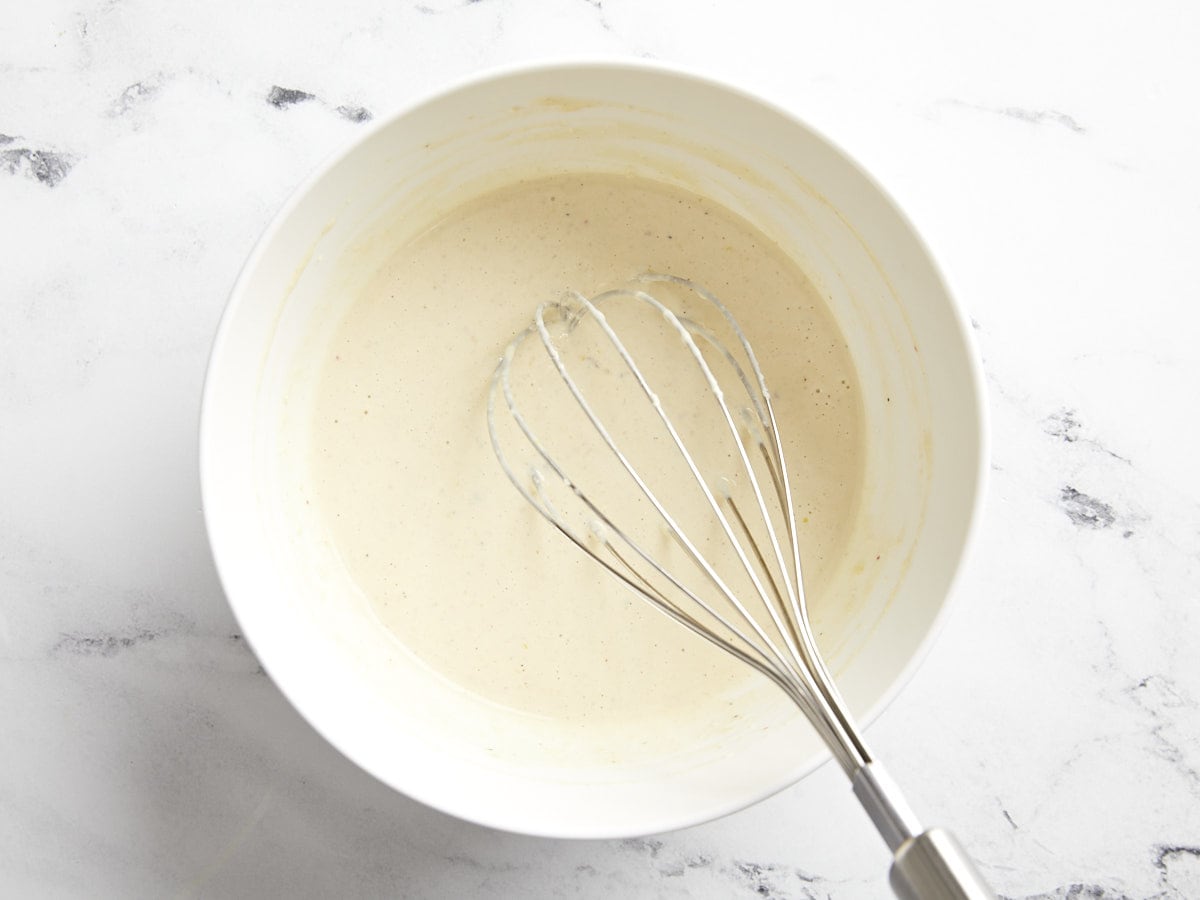
Fully mixed Caesar dressing in a bowl.

Taste the dressing and adjust the ingredients to your liking.

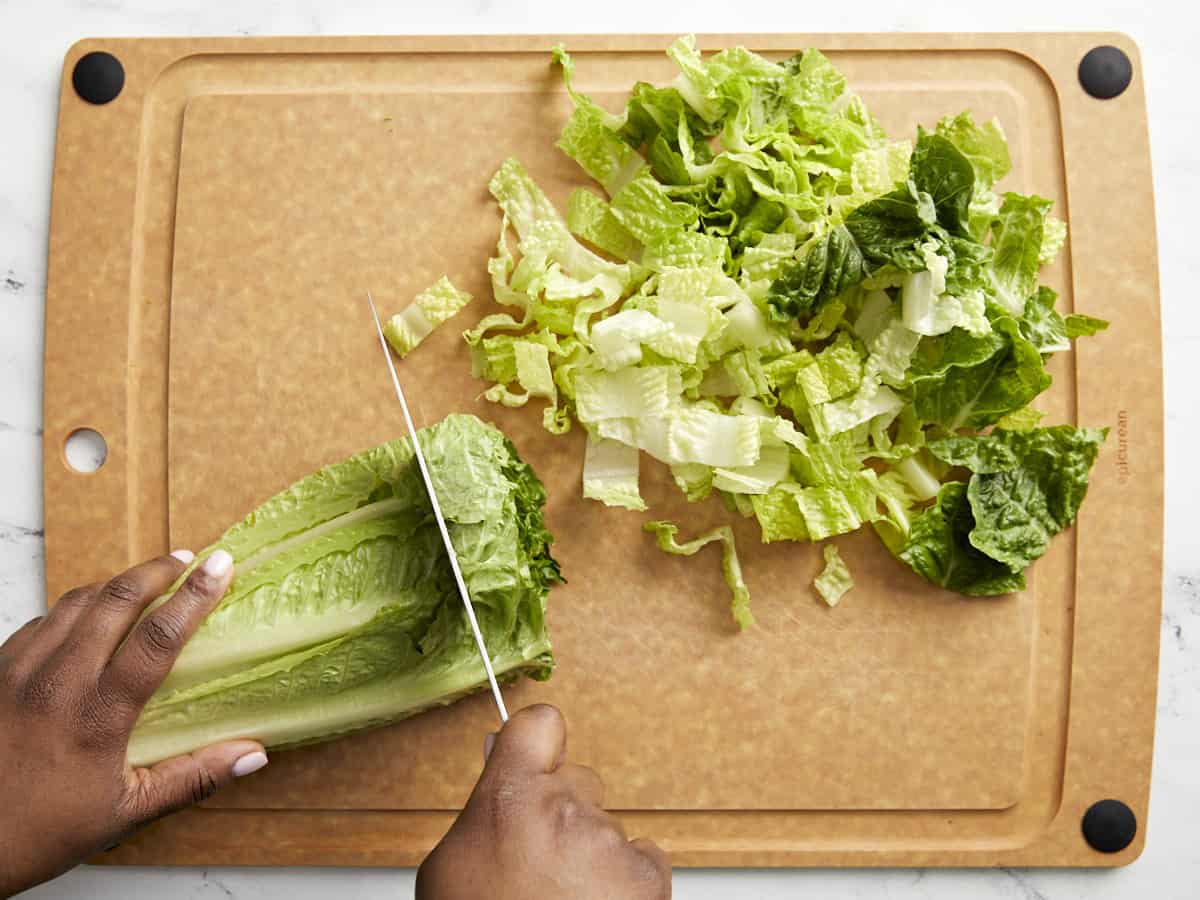
Chopped romaine lettuce on a cutting board.

Next chop, wash, and dry 8 cups of Romaine lettuce. Add the lettuce to a large bowl.

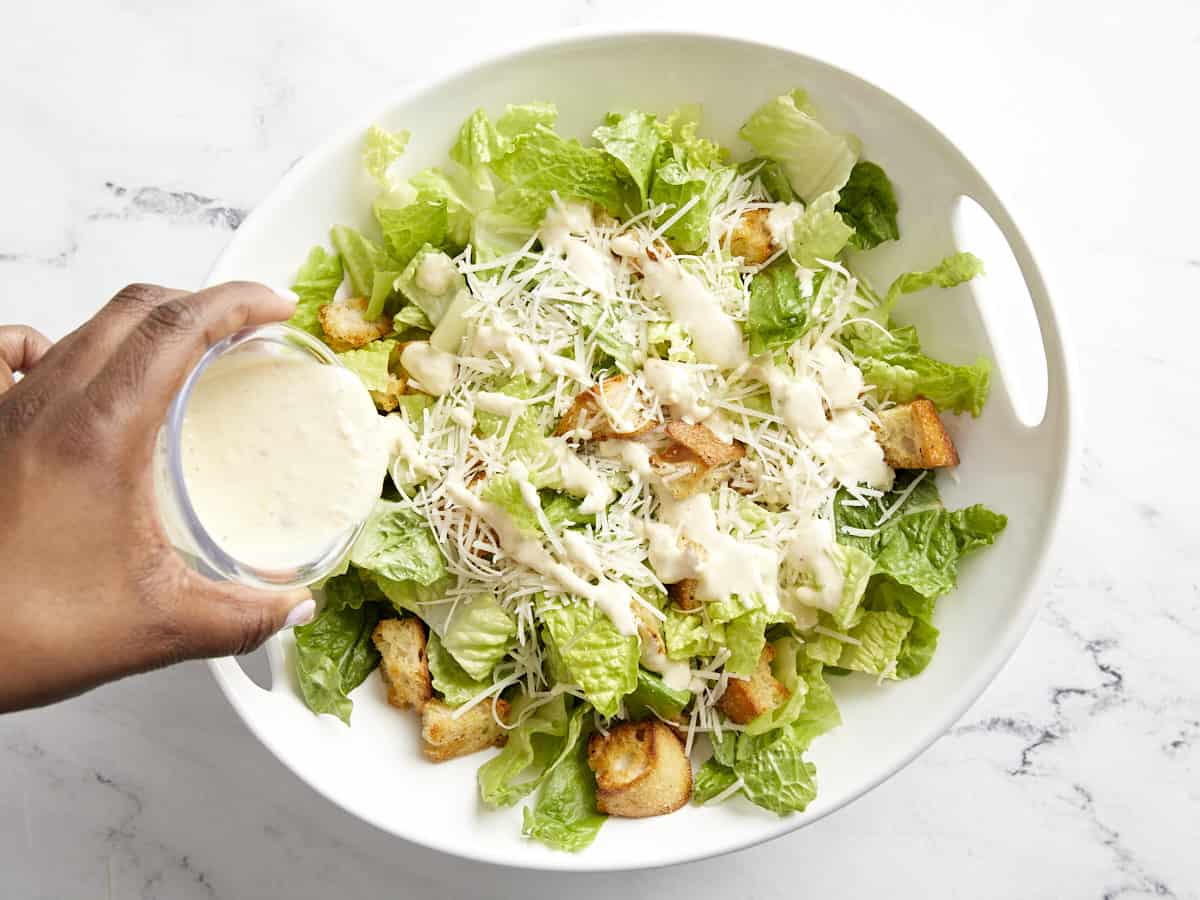
Romaine lettuce, parmesan cheese, croutons, and Caesar dressing added to a serving bowl.

Top the lettuce with 2 cups croutons, 1/2 cup shredded Parmesan, and half of the Caesar salad dressing (start with half the dressing and add more as needed).

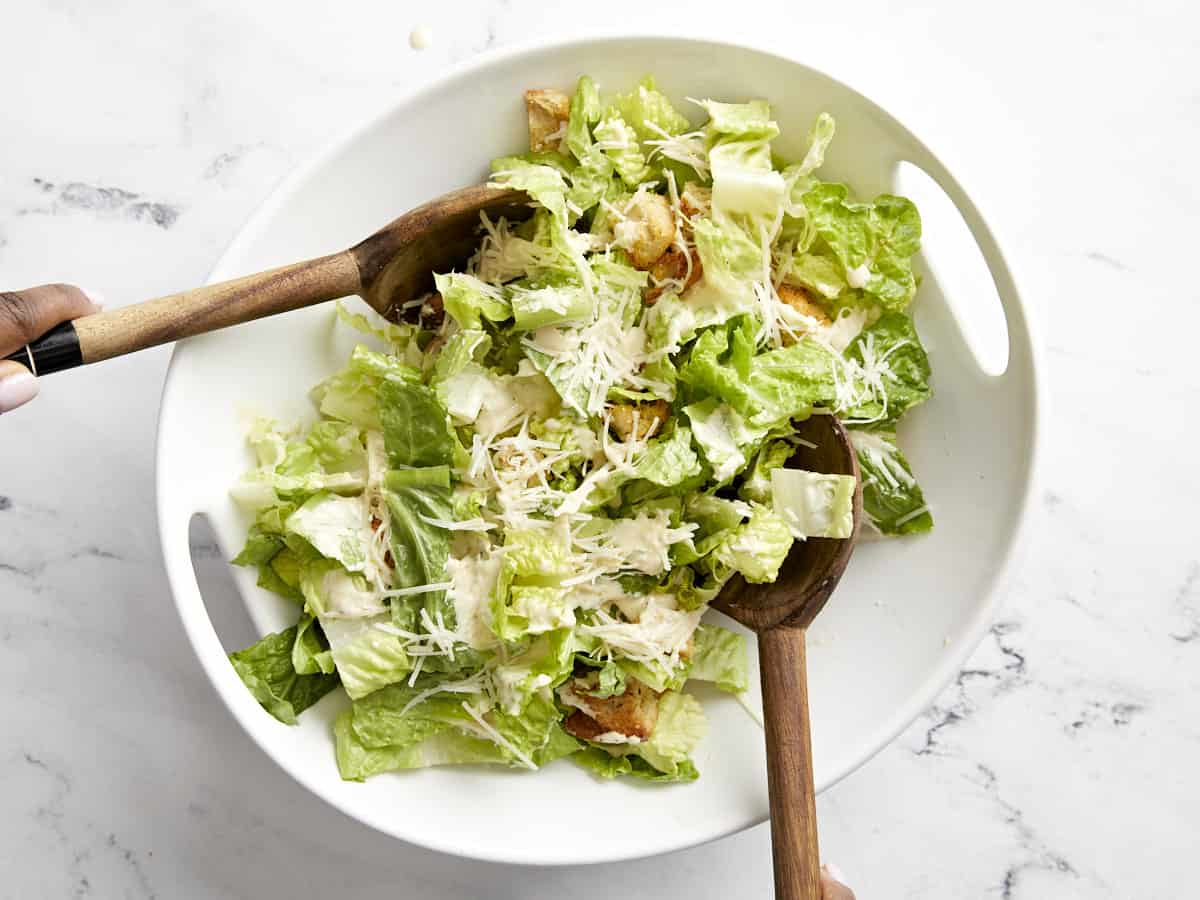
Caesar salad being tossed in a serving bowl.

Toss the salad until everything is coated in the dressing.

Overhead view of a serving bowl of caesar salad with a napkin, croutons, caesar dressing, and parmesan cheese on the side.

Serve with extra Parmesan cheese and freshly cracked black pepper on top. Enjoy!

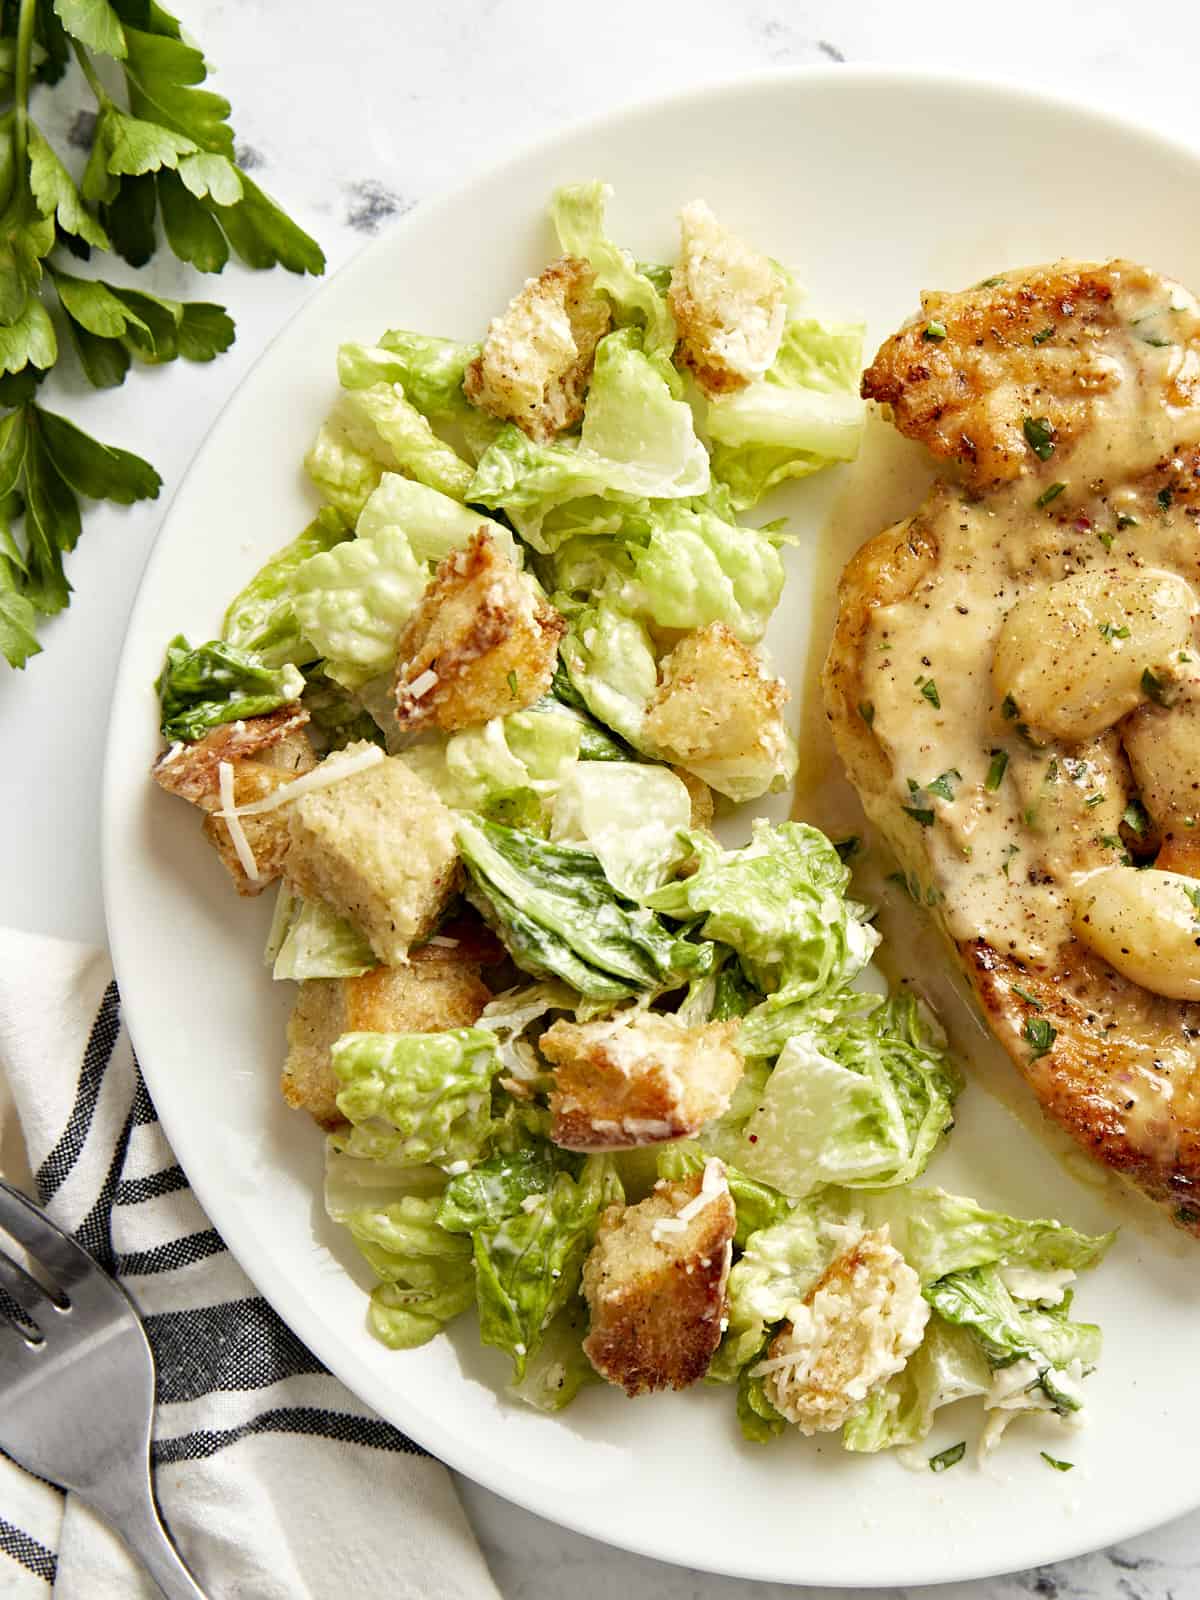
Overhead view of Caesar salad plated with creamy garlic chicken.

*Pictured with our Creamy Garlic Chicken

The post Caesar Salad appeared first on Budget Bytes.

Lemony Chickpea Soup

This Lemony Chickpea Soup recipe is simple, budget-friendly, and delicious. It’s the perfect comforting low-effort meal for busy nights.

The post Lemony Chickpea Soup appeared first on Budget Bytes.

Quick and easy soups made with canned beans have become my favorite go-to easy meal when I’m too tired to cook and too broke to eat out. I’ve made several variations of this soup over the years, including the viral Rosemary Garlic White Bean Soup, but this week I made a Mediterranean-inspired Lemony Chickpea Soup. It’s fast, easy, has bright flavors, and pairs perfectly with some crusty bread for a simple no-fuss meal.

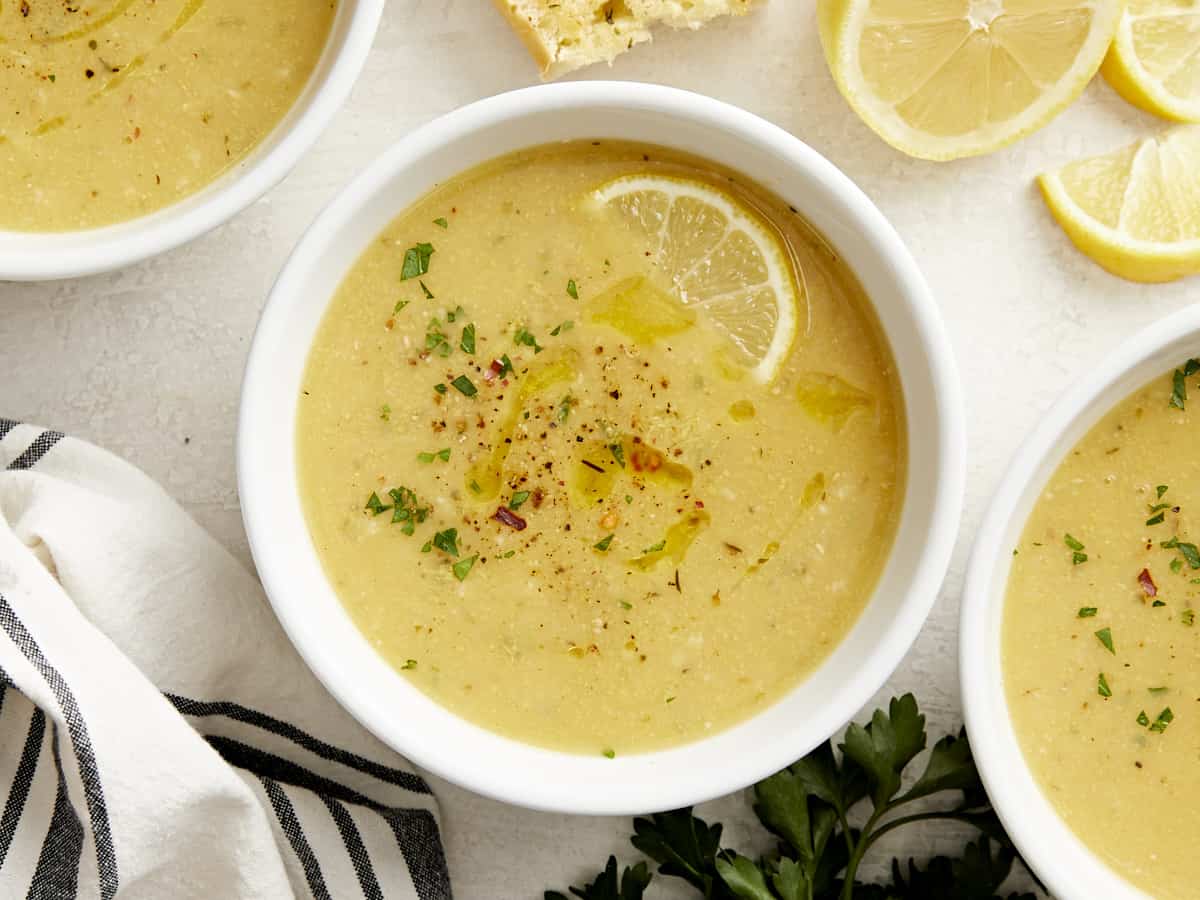
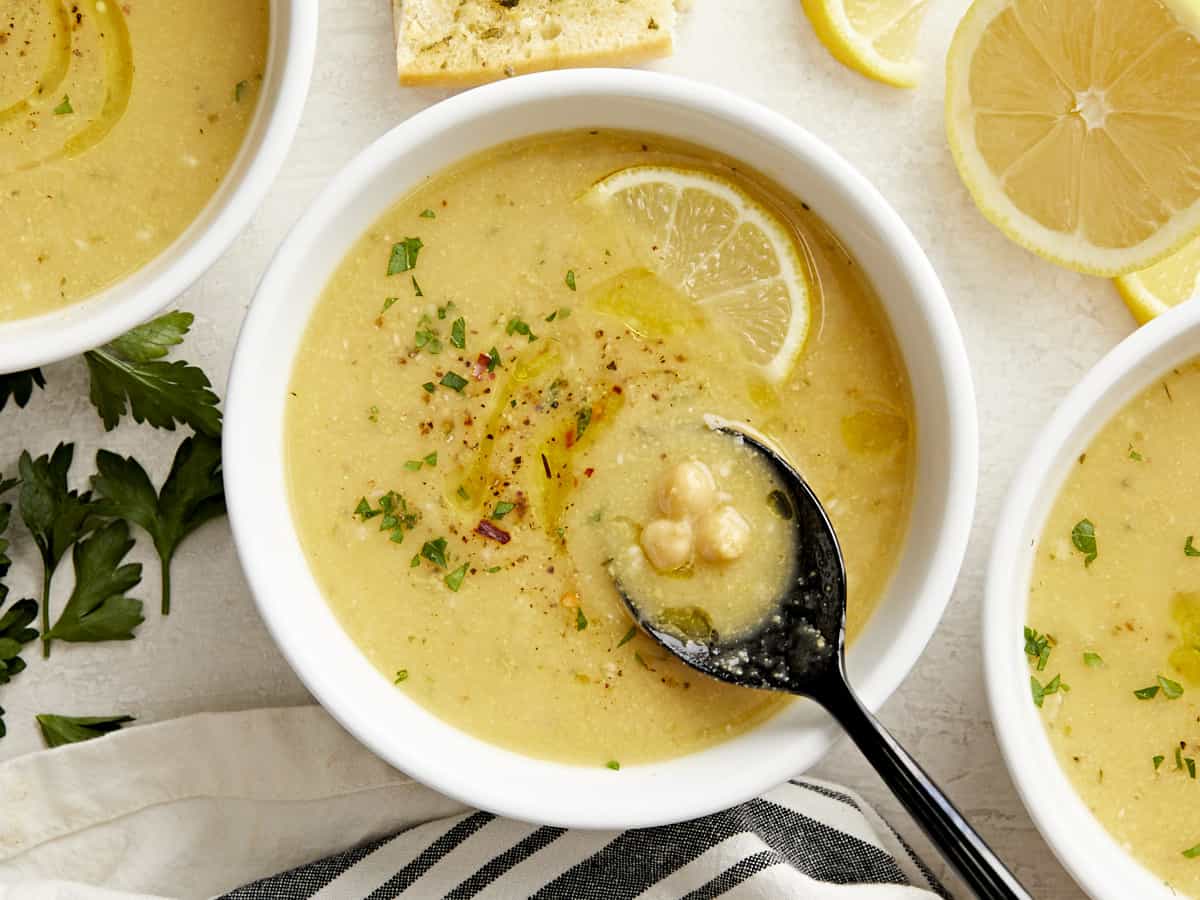
Overhead view of three bowls of lemony chickpea soup garnished with a lemon slice.

This incredibly simple Lemony Chickpea soup combines puréed chickpeas, broth, and some seasoning to create a perfectly comforting and flavorful bowl of soup. And since most of these ingredients are shelf-stable, this is a pantry meal you can make any time with no planning head.

Ingredients for Lemony Chickpea Soup

Here’s all you’ll need to make this deliciously easy chickpea soup:

  • Garlic: A hefty dose of garlic gives this soup a deep savory flavor and perfectly balances the bright lemon.
  • Olive Oil: Olive oil is used to sauté the garlic and give the soup a little bit of richness in the mouthfeel.
  • Chickpeas: This recipe uses canned chickpeas to make the entire preparation fast and easy. If you prefer to use chickpeas cooked from dry, you’ll need about 4-5 cups of cooked chickpeas.
  • Chicken Broth: Broth adds a lot of savory depth to the soup as well as the salt needed to make each flavor pop.
  • Lemon: A splash of lemon juice brightens up the flavors in the soup, provides a nice contrast to the savory garlic flavor, and gives the soup a fresh Mediterranean flavor.
  • Seasoning: The seasoning profile for the soup is fairly simple with just a little bit of thyme, oregano, red pepper, and black pepper. Keeping the seasoning light gives the soup a bright and fresh flavor.

What to Serve with Lemony Chickpea Soup

This chickpea soup is just begging for some crusty bread for dipping, so I highly suggest making a loaf of our easy no-knead bread or focaccia rolls. Or, if you need something a little faster, homemade garlic bread would also be amazing with this soup. And, if you want some veggies on the side, a simple side salad would be awesome, or you could go with something a little heftier, like tortellini salad.

Tips for Smooth Chickpea Soup

Canned chickpeas can often be a bit on the firm side, so to make sure your chickpea soup is extra smooth you may need to pre-boil the chickpeas, but it depends largely on the brand of chickpeas. Some canned chickpeas are quite soft, while others are very firm or borderline undercooked.

If your chickpeas are very firm, simply empty the can and liquid into a small saucepot and simmer them for about 10 minutes. Let the chickpeas cool before transferring to the blender to purée.

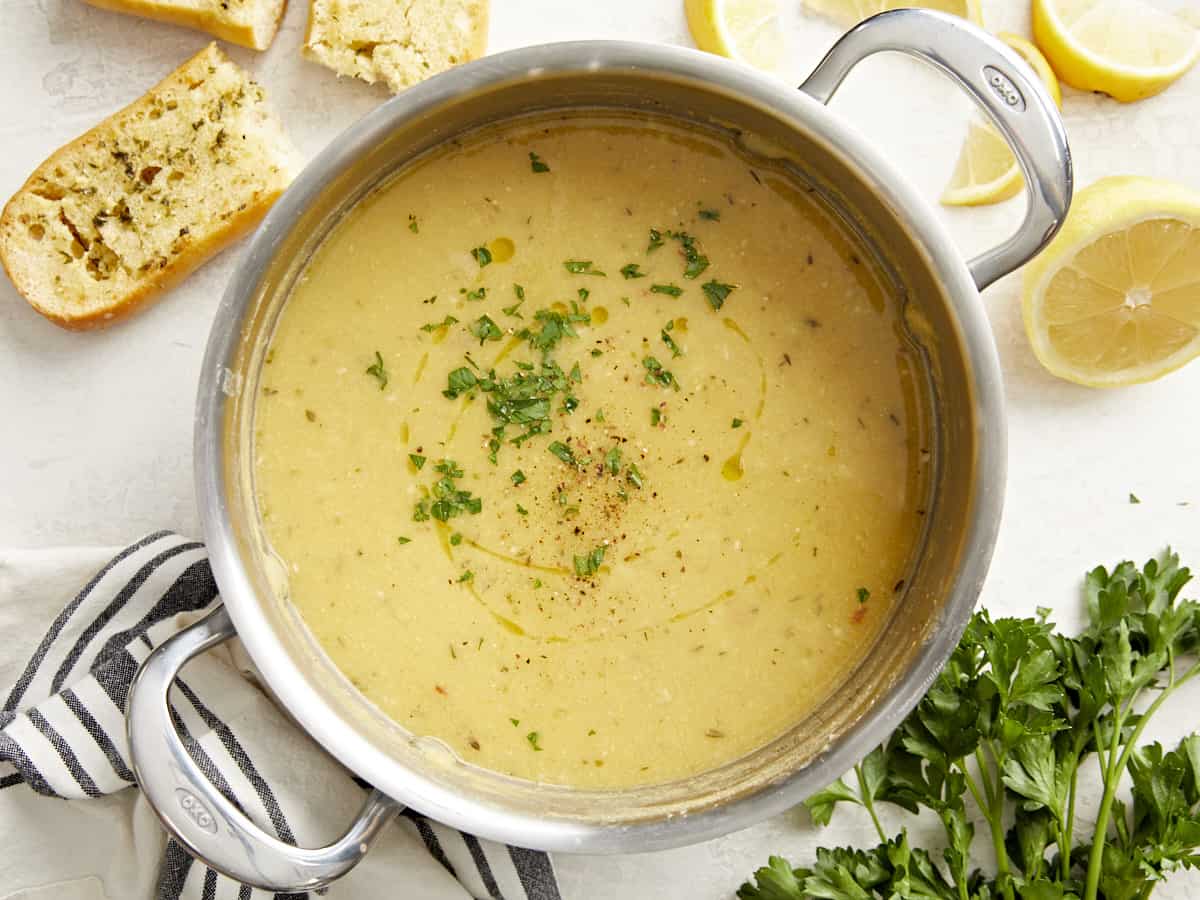
Overhead view of a pot full of lemony chickpea soup with garlic bread on the side.
Overhead view of a bowl of lemony chickpea soup with a spoon in the middle.
Print

Lemony Chickpea Soup

This Lemony Chickpea Soup recipe is simple, budget-friendly, and delicious. It's the perfect comforting low-effort meal for busy nights.
Course Dinner, Lunch, Soup
Cuisine American, Mediterranean
Total Cost $4.52 recipe $1.13 serving
Prep Time 5 minutes
Cook Time 18 minutes
Total Time 23 minutes
Servings 4 (1.25 cups each)
Calories 375kcal

Ingredients

  • 3 15oz. cans chickpeas, divided $2.67
  • 4 cloves garlic $0.32
  • 2 Tbsp olive oil $0.32
  • 2 cups chicken broth $0.26
  • 1/2 tsp dried thyme $0.05
  • 1/2 tsp dried oregano $0.05
  • 1 pinch crushed red pepper $0.02
  • 1 lemon $0.79
  • 1/4 tsp salt (or to taste) $0.02
  • 1/4 tsp Freshly cracked black pepper $0.02

Instructions

  • Add 2 of the cans of chickpeas to a blender with the liquid in the can and purée until smooth.* Drain the third can of chickpeas and set aside.
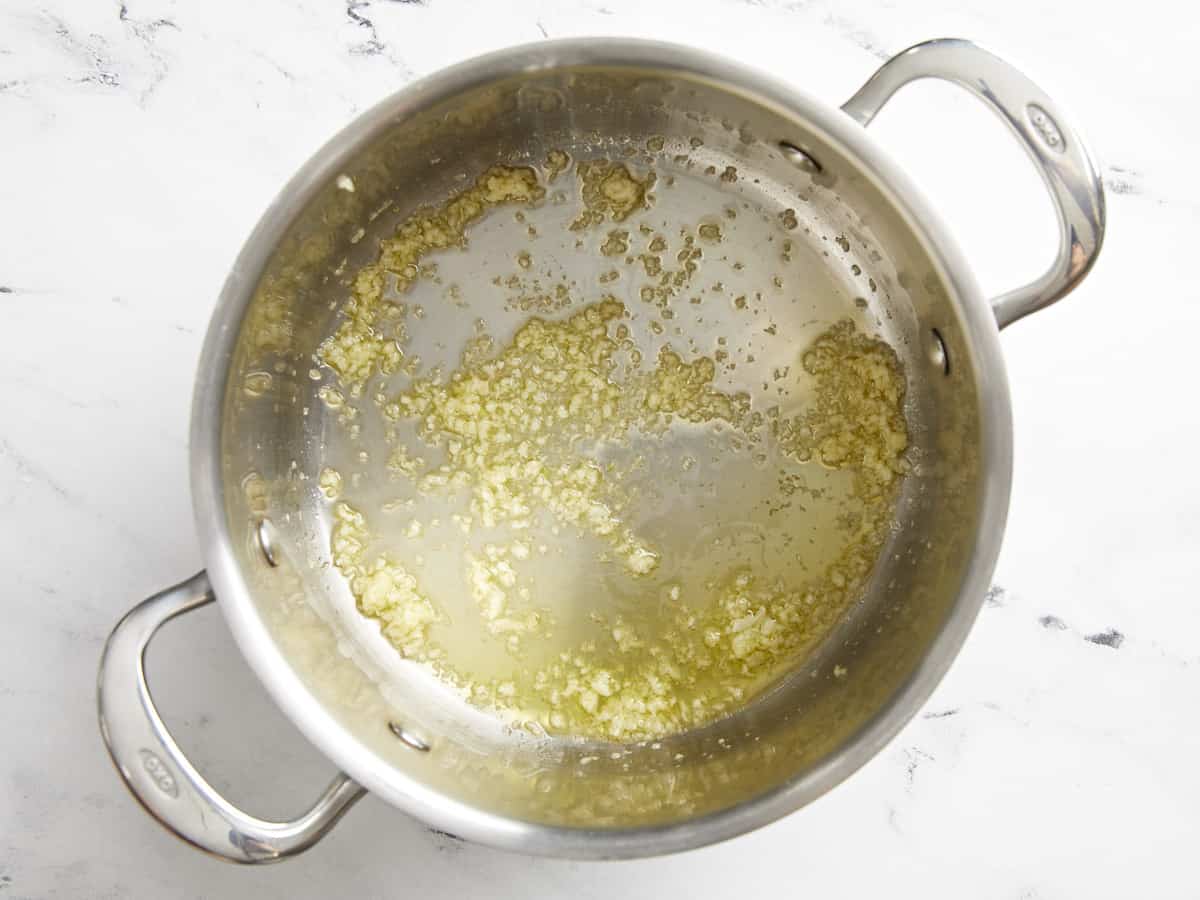
  • Mince the garlic and add it to a saucepot with the olive oil. Sauté the garlic over medium heat for about one minute, or just until the garlic becomes very fragrant.
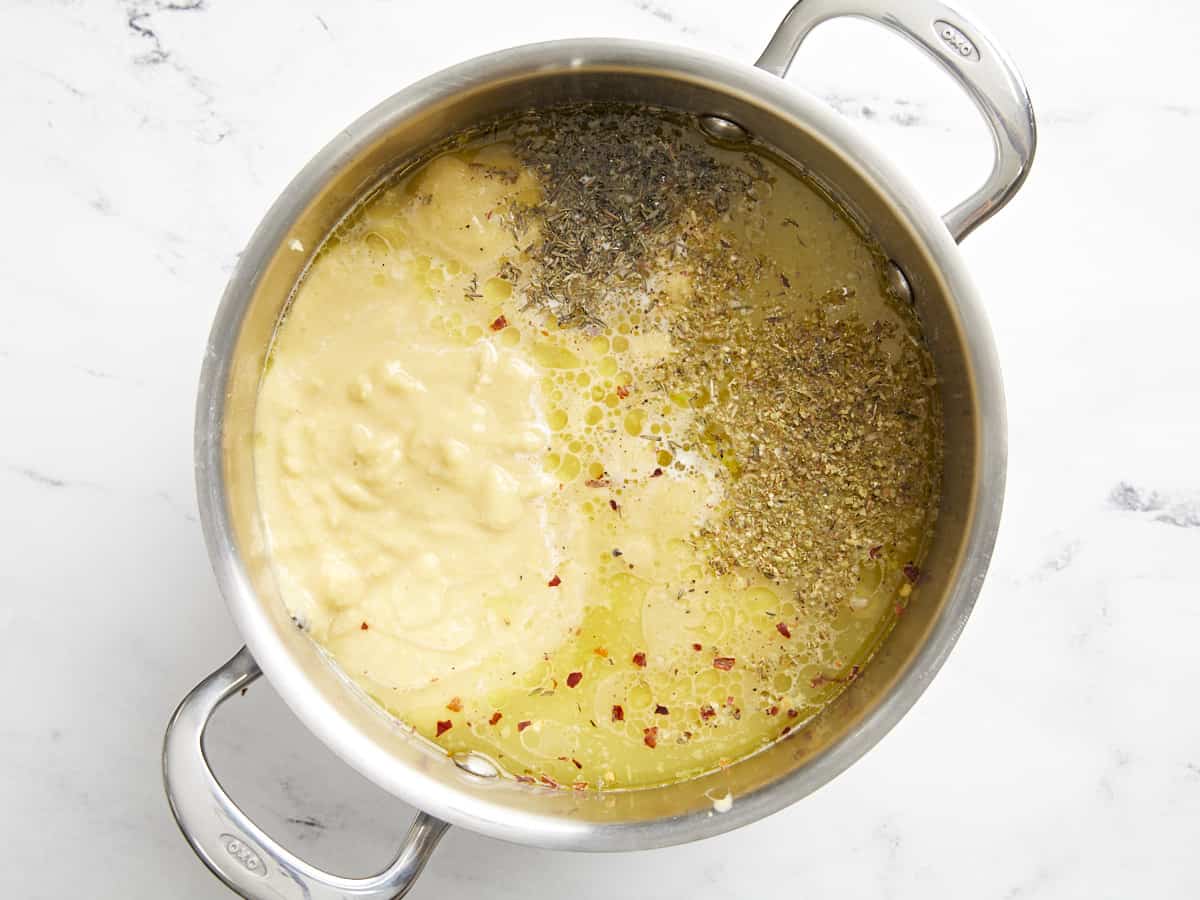
  • Add the puréed chickpeas, drained chickpeas, chicken broth, thyme, oregano, red pepper, salt, and pepper to the soup pot with the garlic. Stir to combine.
  • Allow the soup to come up to a simmer, then simmer for 10 minutes, stirring occasionally.
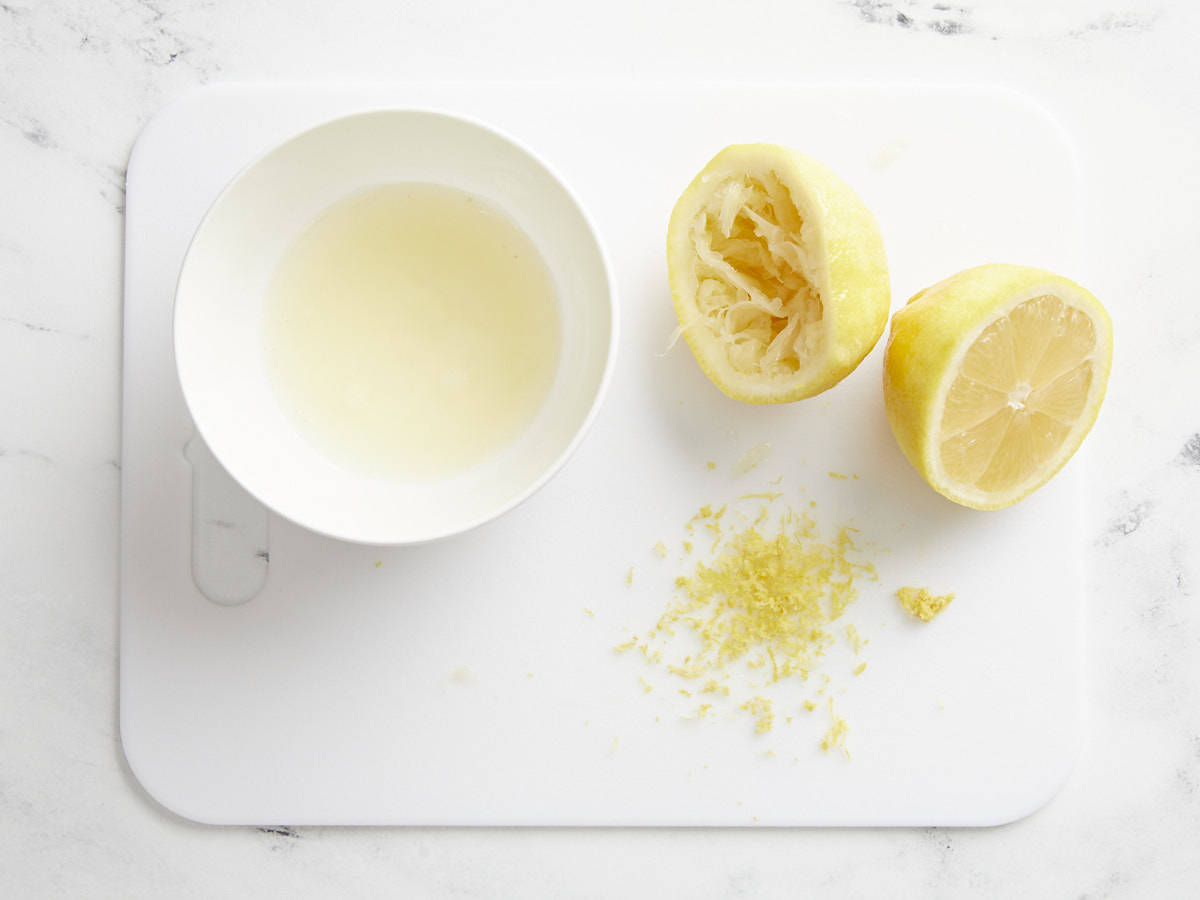
  • While the soup simmers, zest and juice half of the lemon (you'll need about 2 Tbsp juice and ½ tsp zest). Slice the remaining lemon for garnish.
  • After the soup has simmered, add 2 Tbsp juice and a pinch of lemon zest, then stir to combine.
  • Taste the soup and adjust the salt, lemon juice, pepper, or other herbs to your liking. The amount of salt needed to properly flavor the soup will depend on the salt content of your broth, so make sure to salt to taste at the end.
  • Garnish the soup with the remaining lemon slices and zest, a drizzle of olive oil, and more pepper if desired, then serve with crusty bread and enjoy!

See how we calculate recipe costs here.

Notes

*Some brands of canned chickpeas are quite firm. To make the soup really smooth you may need to pre-simmer the beans for about 10 minutes to make them softer before blending. 

Nutrition

Serving: 1.25cup | Calories: 375kcal | Carbohydrates: 48g | Protein: 18g | Fat: 14g | Sodium: 1527mg | Fiber: 15g
Overhead view of three bowls of lemony chickpea soup garnished with slices of lemon.

How to Make Lemony Chickpea Soup – Step by Step Photos

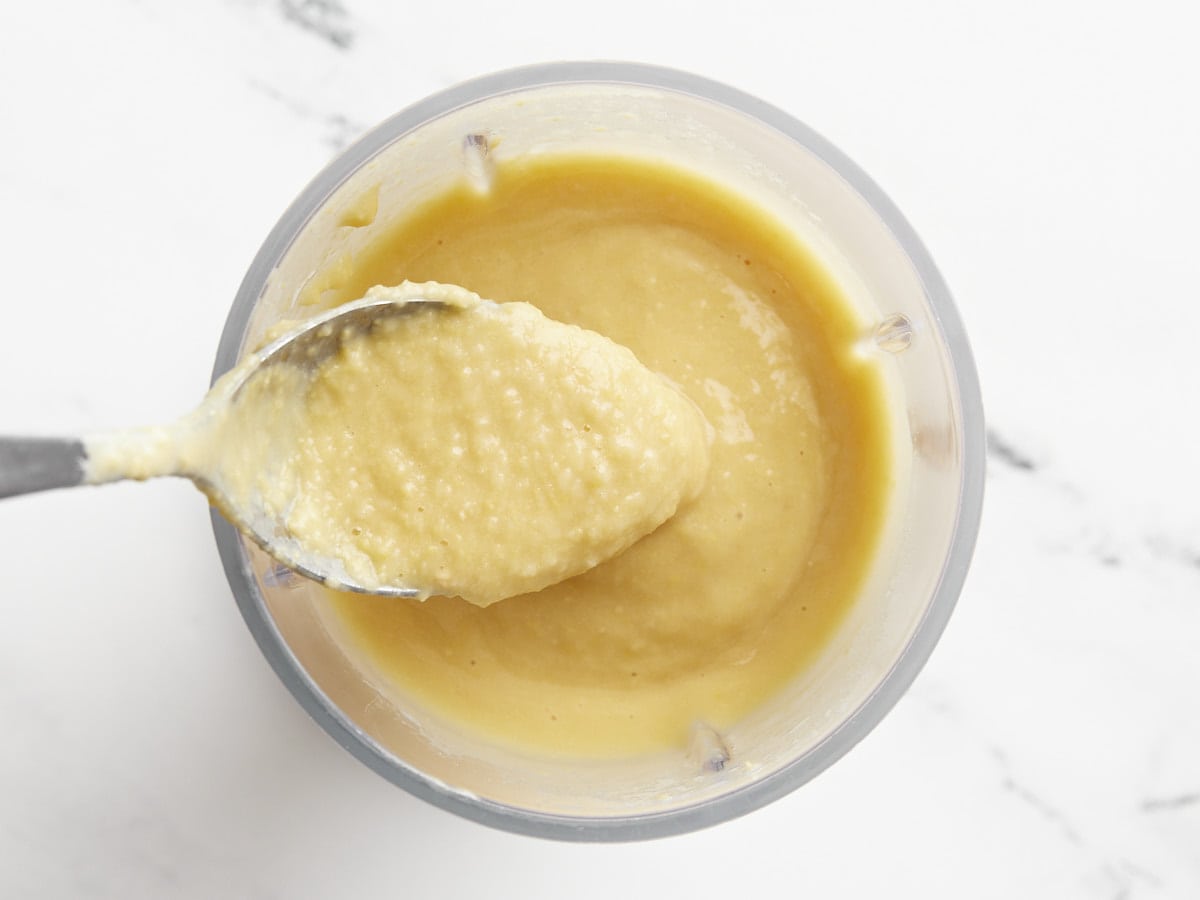
Blended chickpeas in a blender with a spoon.

Add two 15oz. cans of chickpeas to a blender, with the liquid in the can, and purée until smooth. If the brand of chickpeas you’re using are extra firm, you may want to simmer the chickpeas in the liquid for about 10 minutes before blending to soften them more. Let the simmered chickpeas cool slightly before blending, as blending hot liquids can be dangerous.

Minced garlic in a soup pot with olive oil.

Mince four cloves of garlic (or more, if you’d like!) and add them to a saucepot with 2 Tbsp olive oil. Sauté the minced garlic over medium heat for about one minute, or just until the garlic becomes very fragrant.

Beans, broth, and herbs in the soup pot.

Add the puréed beans, one can of drained chickpeas, 2 cups of chicken broth, ½ tsp dried thyme, ½ tsp dried oregano, 1 pinch of crushed red pepper, ¼ tsp salt, and ¼ tsp pepper to the pot. Stir to combine and bring the soup up to a simmer over medium heat.

Zested and juiced lemon.

Let the soup simmer for about 10 minutes, stirring occasionally. Meanwhile, zest and juice half of a lemon (you’ll need 2 Tbsp juice and about ½ tsp zest). Slice the other half of the lemon to use as a garnish.

Lemon juice being added to the soup.

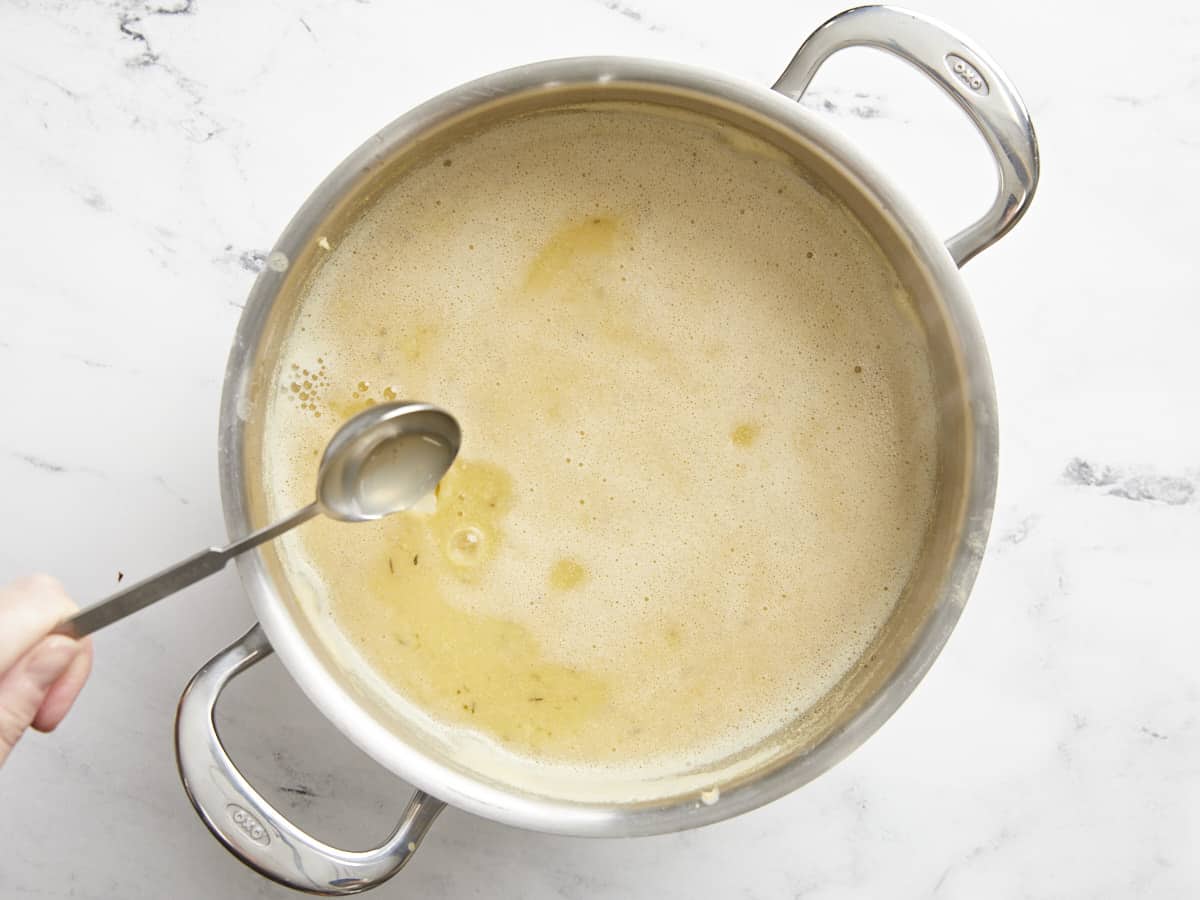
After the soup has simmered for about 10 minutes, add 2 Tbsp lemon juice to the soup along with a pinch of lemon zest.

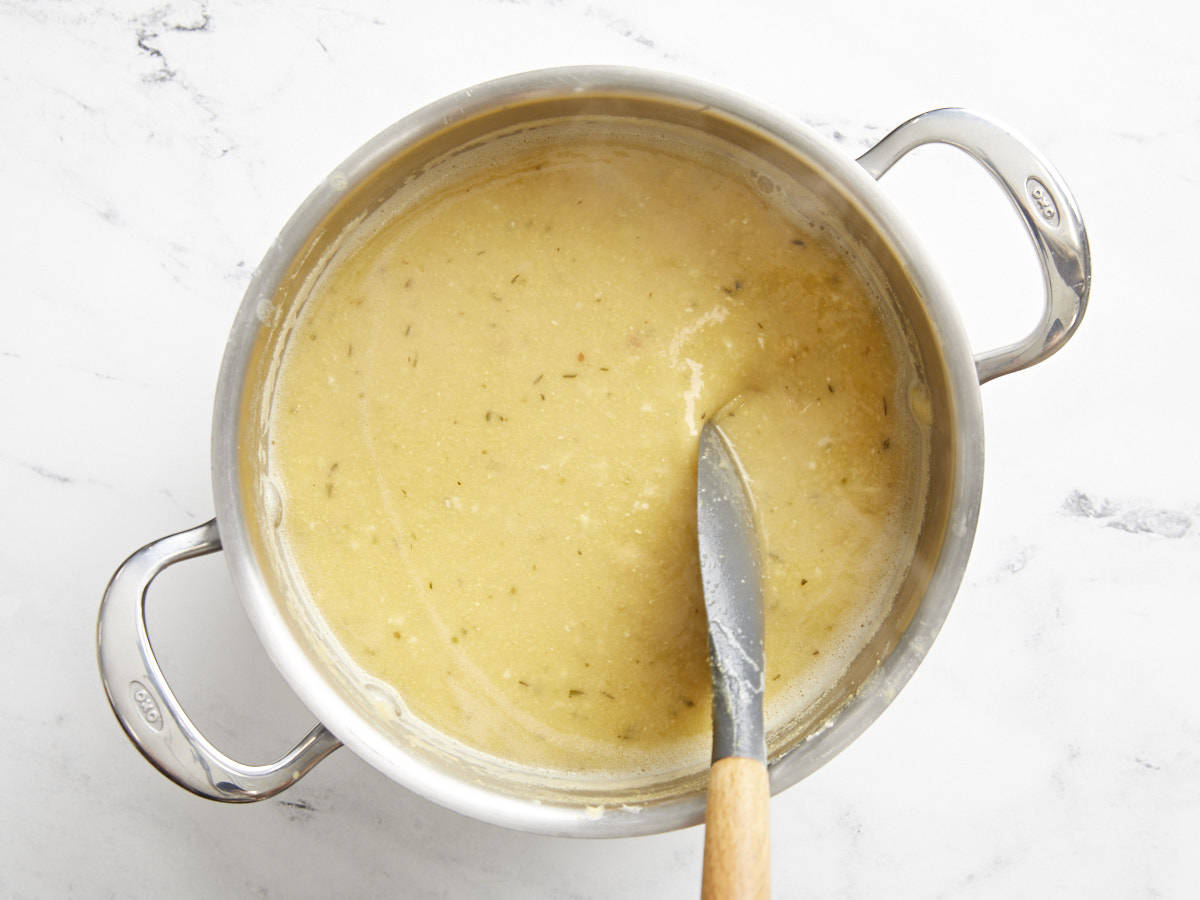
Finished soup being stirred in the pot.

Taste the soup and adjust the salt, lemon juice, zest, or other herbs to your liking. The amount of salt needed will depend on the salt content of the broth used and it can really help the flavors pop, so make sure to salt to taste at the end.

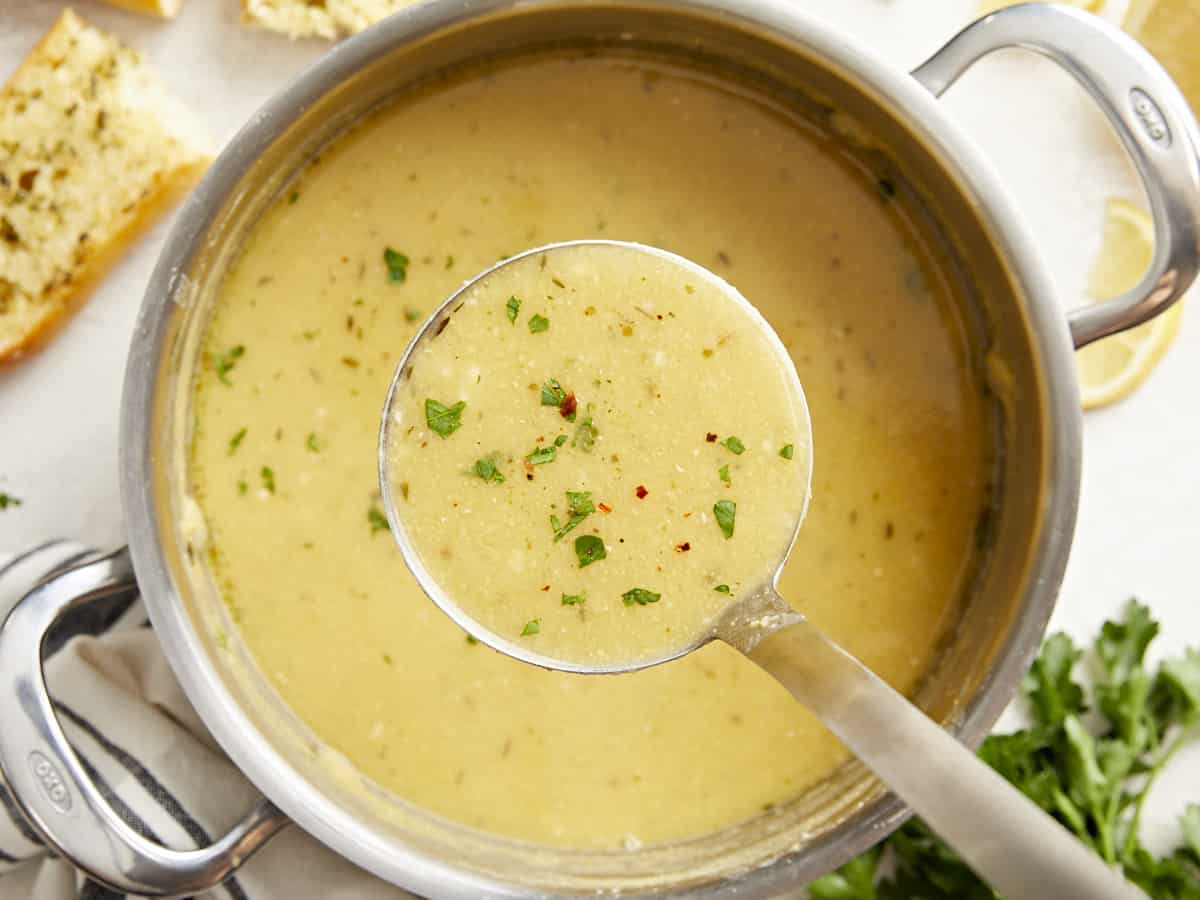
A ladle full of lemony chickpea soup held close to the camera over the pot of soup.

Garnish the soup with the remaining slices of lemon and lemon zest, extra pepper, and a drizzle of olive oil. We also had some parsley in the fridge, so we added some of that for color.

Overhead view of a bowl of lemony chickpea soup with a spoon in the middle.

The post Lemony Chickpea Soup appeared first on Budget Bytes.

Air Fryer Chicken Breast

This juicy, tender, Air Fryer Chicken Breast is super flavorful and ready in less than 20 minutes. Perfect for meal prepping!

The post Air Fryer Chicken Breast appeared first on Budget Bytes.
I’m sure by now we all know that the air fryer makes life just a little bit easier, so if you’re looking for a simple way to cook chicken breasts, then you can’t miss with this easy Air Fryer Chicken Breast recipe. I happen to love chicken breasts and I cook them quite often, so being able to cook juicy, tender, and super flavorful chicken breasts in less than 20 minutes is a huge win for me! These air fryer chicken breasts are also great for meal prep. You can cook them at the beginning of the week, slice them up, then store them in meal prep containers along with your favorite sides. Because chicken breasts are so versatile, this is simply a great recipe to keep in your back pocket!

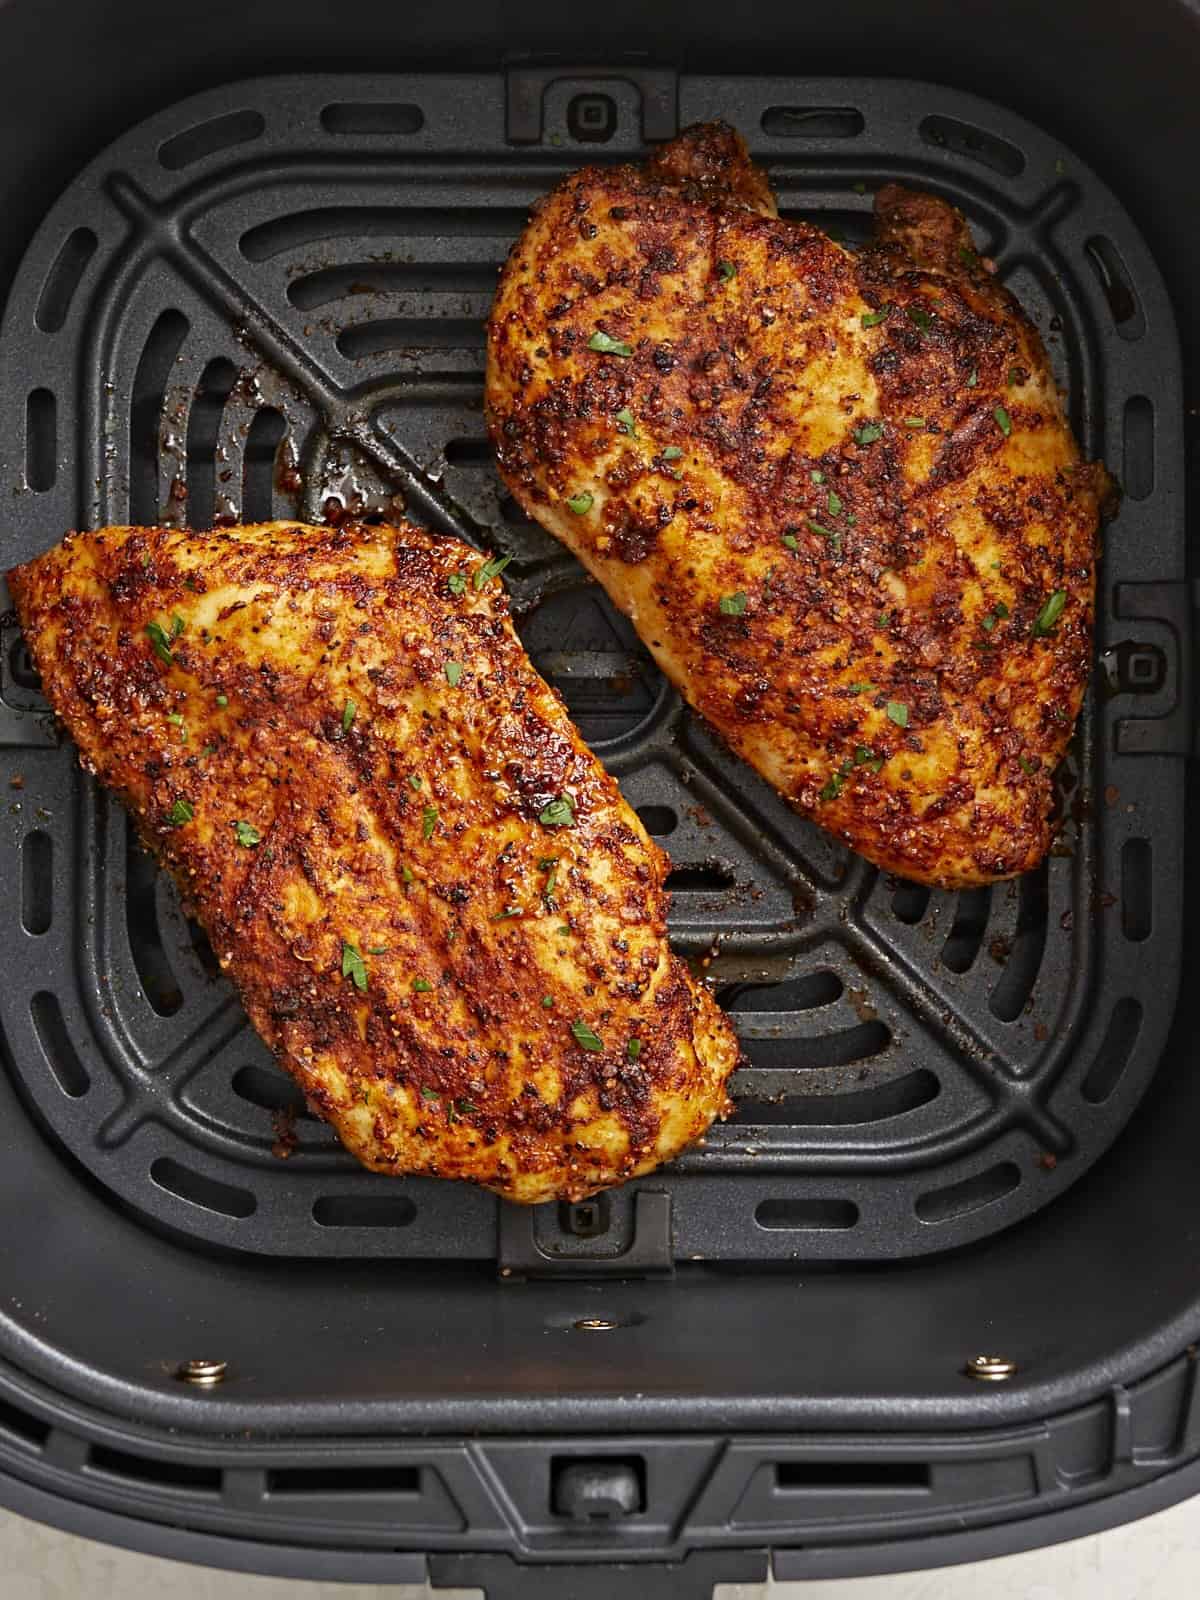
Cooked overhead view of Air Fryer Chicken Breasts in an air fryer basket.

Ingredients For Air Fryer Chicken Breast

Here are the ingredients we used to make these flavorful air fryer chicken breasts:

  • Boneless, Skinless Chicken Breast: We were able to fit two boneless, skinless chicken breasts that were roughly 2/3 lb. each into our 5-quart air fryer with plenty of room on the sides for air to circulate. If chicken thighs are more your style, then you’ll love our Air Fryer Chicken Thighs recipe!
  • Olive Oil: Olive oil helps the seasoning adhere to the chicken breasts and gives the chicken breasts a nice golden brown color.
  • Seasoning: We went with a simple spice blend using steak seasoning, paprika, and freshly cracked black pepper. Steak seasoning usually includes a good amount of salt, so no extra salt was needed for this recipe. You can also mix things up and try different seasoning mixes. I’ll list a few different options below.

More Seasoning Ideas

If you want to switch things up, here are some other ways you can season your air fryer chicken breasts:

Tips For Making Air Fryer Chicken Breasts

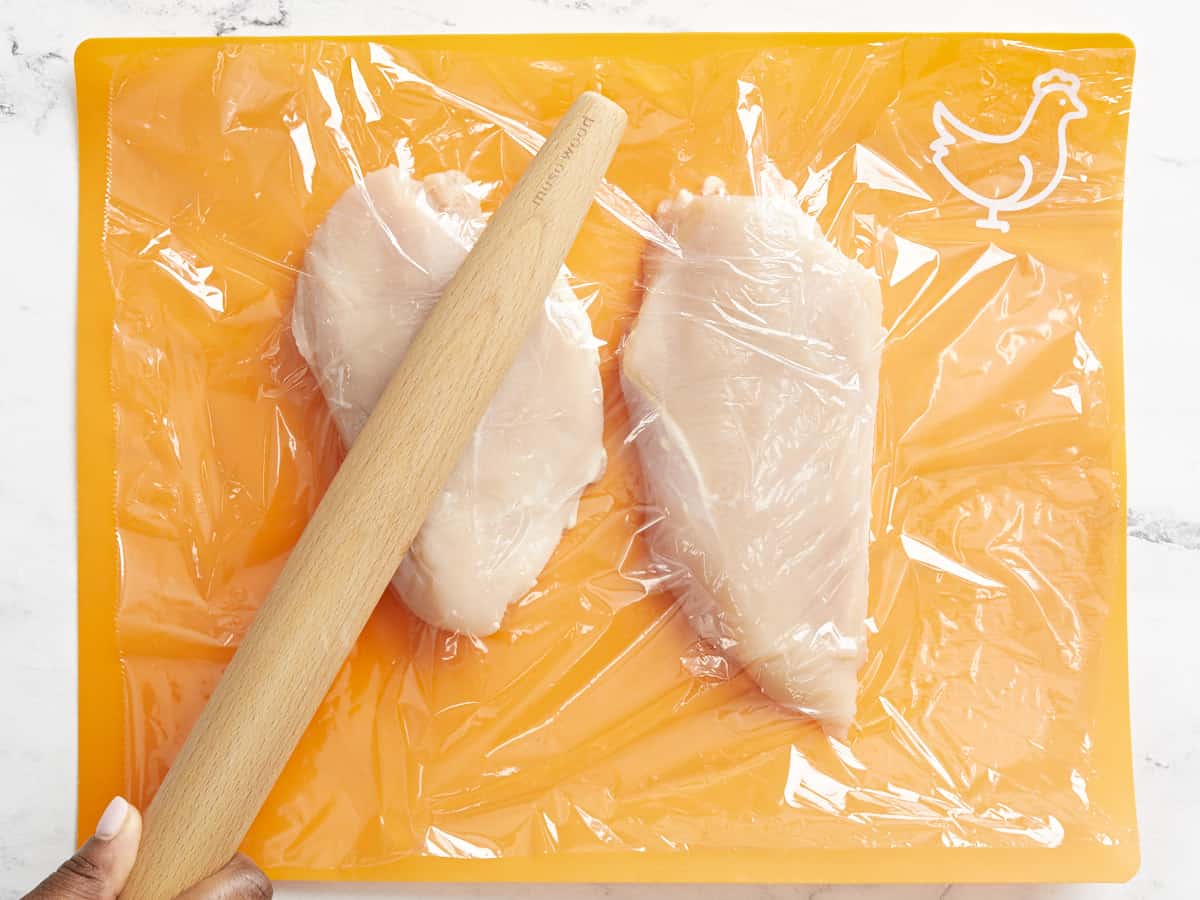
  1. Thick chicken breasts take longer to cook in the air fryer. In order to make sure the chicken breasts cook evenly, use a rolling pin or the flat side of a meat tenderizer to gently pound the thicker side of the chicken breast until the breast is an even thickness from one end to the other (about 1/2 to 3/4 inch thick).
  2. Once the chicken breasts are cooked, remove them promptly from the air fryer to stop the cooking process. This will help prevent the chicken breast from overcooking and drying out.  
  3. Allow the chicken breasts to rest for 5 minutes on a cutting board before slicing and serving. This helps the chicken breast retain all of those yummy juices.

Serving Suggestions

There are so many options to choose from when picking a side to serve with your air fryer chicken breasts. You could make a simple side salad, mashed potatoes, homemade mac and cheese, or a side of steamed green beans. And if you have a few extra minutes you can always add a side of roasted vegetables like our roasted broccoli or our oven baked steak fries!

Meal Prep Ideas

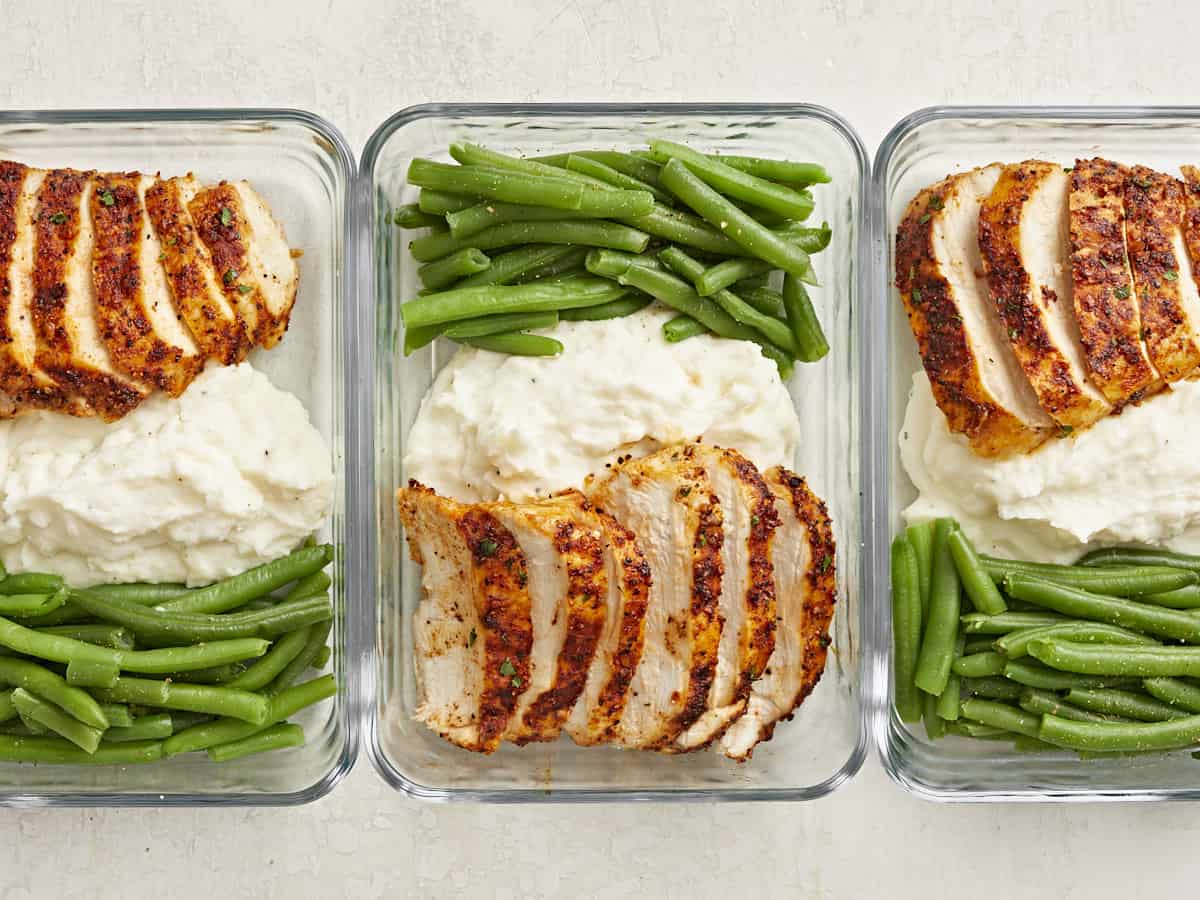
Meal prepping is a great way to save time, money, and reduce waste in the kitchen. And these Air Fryer Chicken Breasts are absolutely perfect for meal prep! You can easily slice them into equal portions for your meal prep containers, then just add in your favorite sides and vegetables.

Chicken breasts are also great to meal prep with salads, sandwiches, wraps, and even chicken burrito bowls! And if you love meal prepping as much as we do, then make sure to check out our full list of budget-friendly meal prep ideas.

Air Fryer Chicken Breast sliced in meal prep containers with green beans and mashed potatoes on the side.
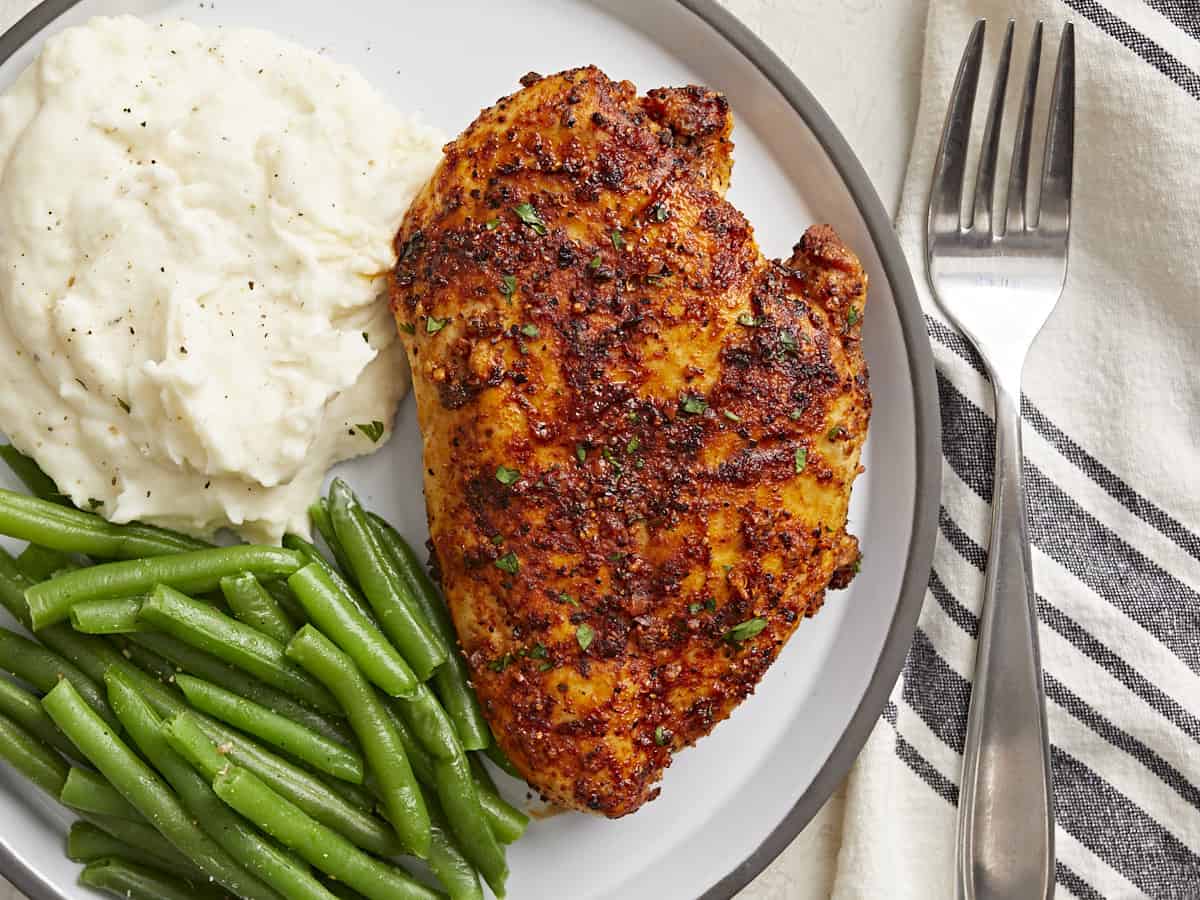
Overhead view of Air Fryer Chicken Breast on a plate with a side of mashed potatoes and green beans.
Print

Air Fryer Chicken Breast

This juicy, tender, Air Fryer Chicken Breast is super flavorful and ready in less than 20 minutes. Perfect for meal prepping!
Course Dinner, Lunch
Cuisine American
Total Cost $5.74 recipe / $1.43 serving
Prep Time 5 minutes
Cook Time 13 minutes
Total Time 18 minutes
Servings 4
Calories 204kcal

Ingredients

Instructions

  • In a small bowl mix the steak seasoning, sweet paprika, smoked paprika, and black pepper together.
  • Place both chicken breasts on a cutting board, cover them with plastic wrap or parchment paper, then use a rolling pin or the flat side of a meat tenderizer to gently pound the thicker side of the chicken breast until the entire breast is an even thickness from one end to the other (about 1/2 to 3/4 inch thick).
  • Preheat the air fryer to 400°F. Brush the olive oil over both sides of each chicken breast.
  • Generously coat both sides of each chicken breast with the seasoning blend. Rub the seasoning into the breasts with your hands making sure the entire chicken breast is evenly coated with spices.
  • Place both chicken breasts inside the air fryer basket and cook for 7 minutes. Then flip the chicken breasts and cook for 6 more minutes. After a total of 13 minutes, use a meat thermometer to check the chicken breasts and make sure the internal temperature has reached 165°F, and if not, cook for 1-2 minutes longer.
  • Promptly remove the chicken breasts from the air fryer basket and rest on a clean cutting board for 5 minutes before slicing. Serve the chicken breasts with your favorite sides and enjoy.

See how we calculate recipe costs here.

Nutrition

Serving: 1serving | Calories: 204kcal | Carbohydrates: 1g | Protein: 32g | Fat: 7g | Sodium: 172mg | Fiber: 0.4g
Overhead view of Air Fryer Chicken Breast on a plate with a side of mashed potatoes and green beans.

How to Make Air Fryer Chicken Breasts – Step by Step Photos

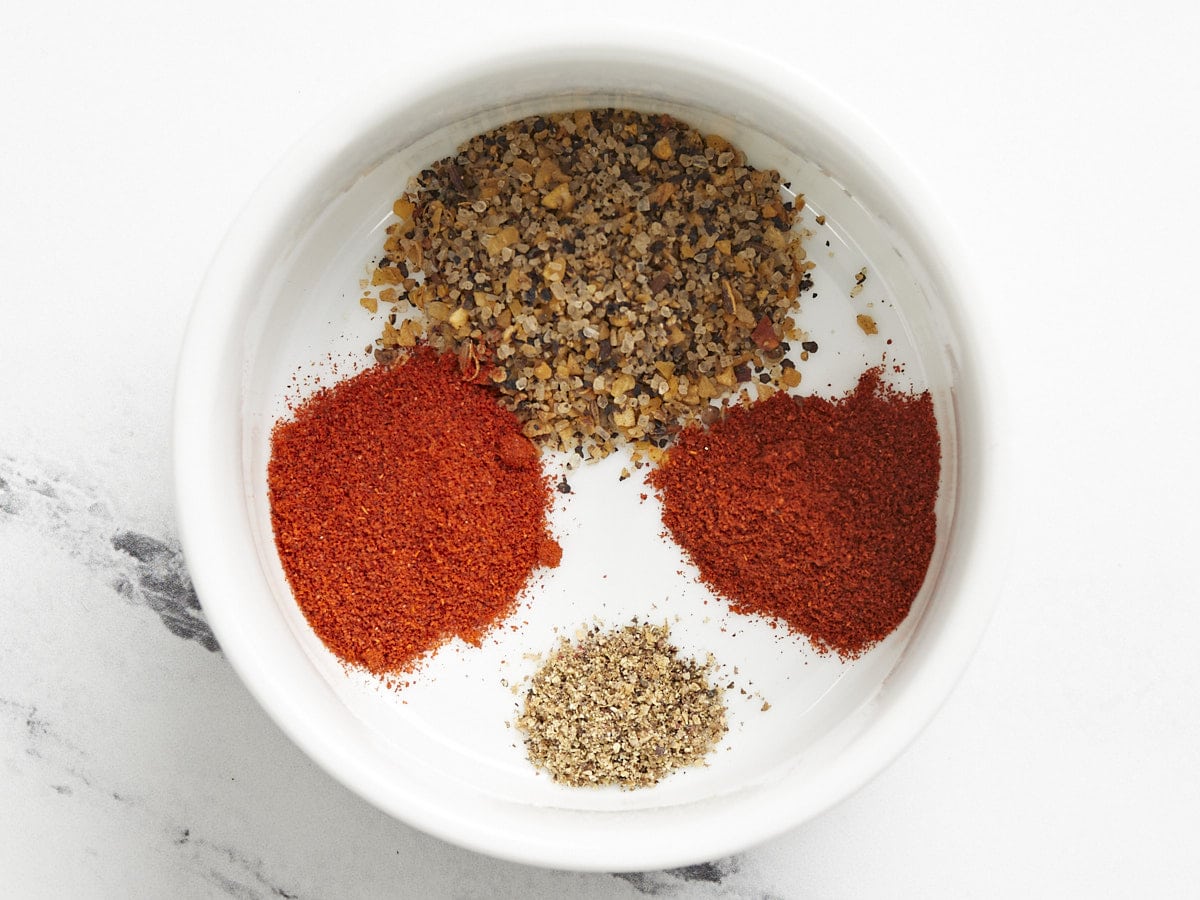
Spices for air fryer chicken breast in a small bowl.

In a small bowl mix together 2 tsp steak seasoning, 1 tsp sweet paprika, 1/2 tsp smoked paprika, and 1/4 tsp freshly cracked black pepper together. Set the seasoning mix to the side.

chicken breasts on a cutting board being pounded with a rolling pin.

Place 2 chicken breasts on a cutting board, cover them with plastic wrap or parchment paper, then use a rolling pin or the flat side of a meat tenderizer to gently pound the thicker side of the chicken breast until the entire breast is an even thickness from one end to the other (about 1/2 to 3/4 inch thick).

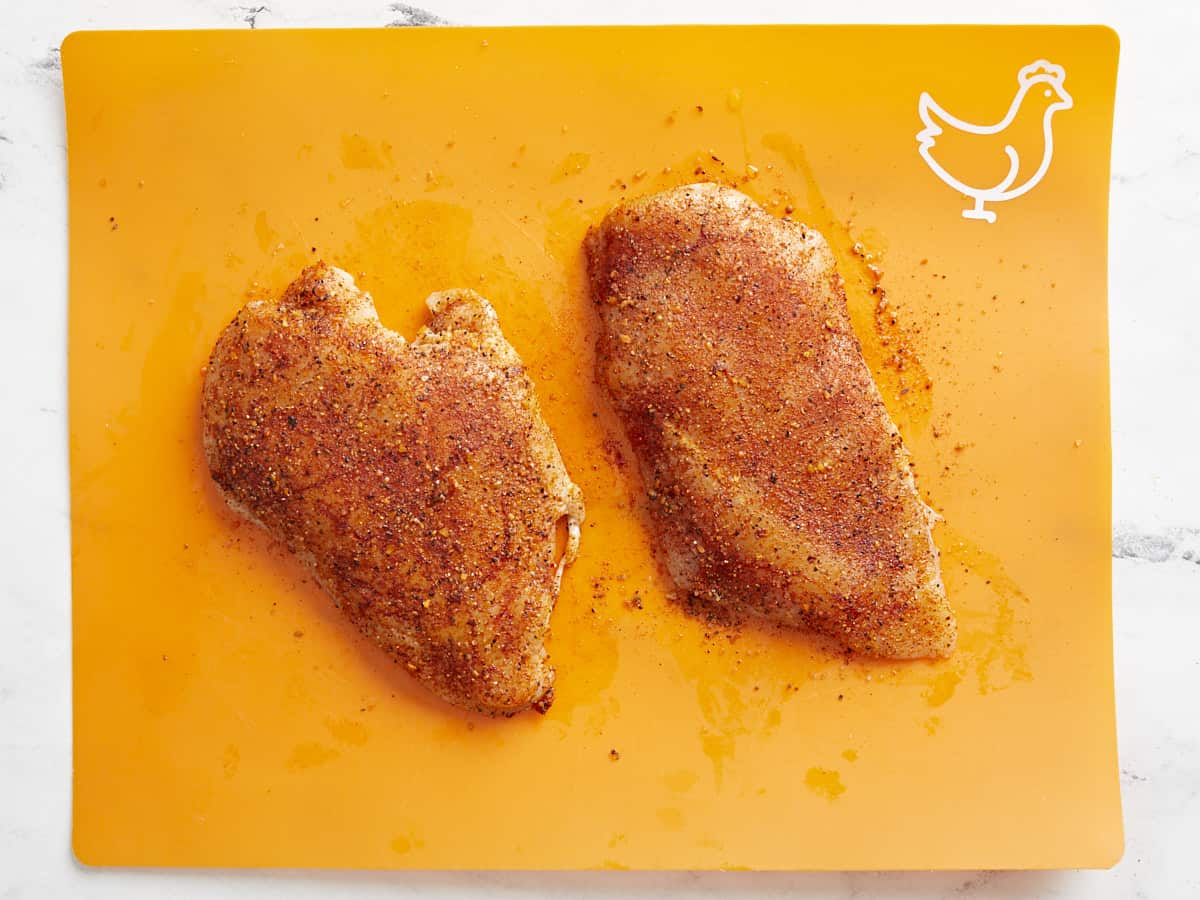
Seasoned chicken breasts on a cutting board.

Preheat the air fryer to 400°F. Brush 1 Tbsp of olive oil over both sides of each chicken breast. Then generously coat both sides of each chicken breast with the seasoning mix. Rub the seasoning into the breasts with your hands making sure the entire chicken breast is evenly coated with spices.

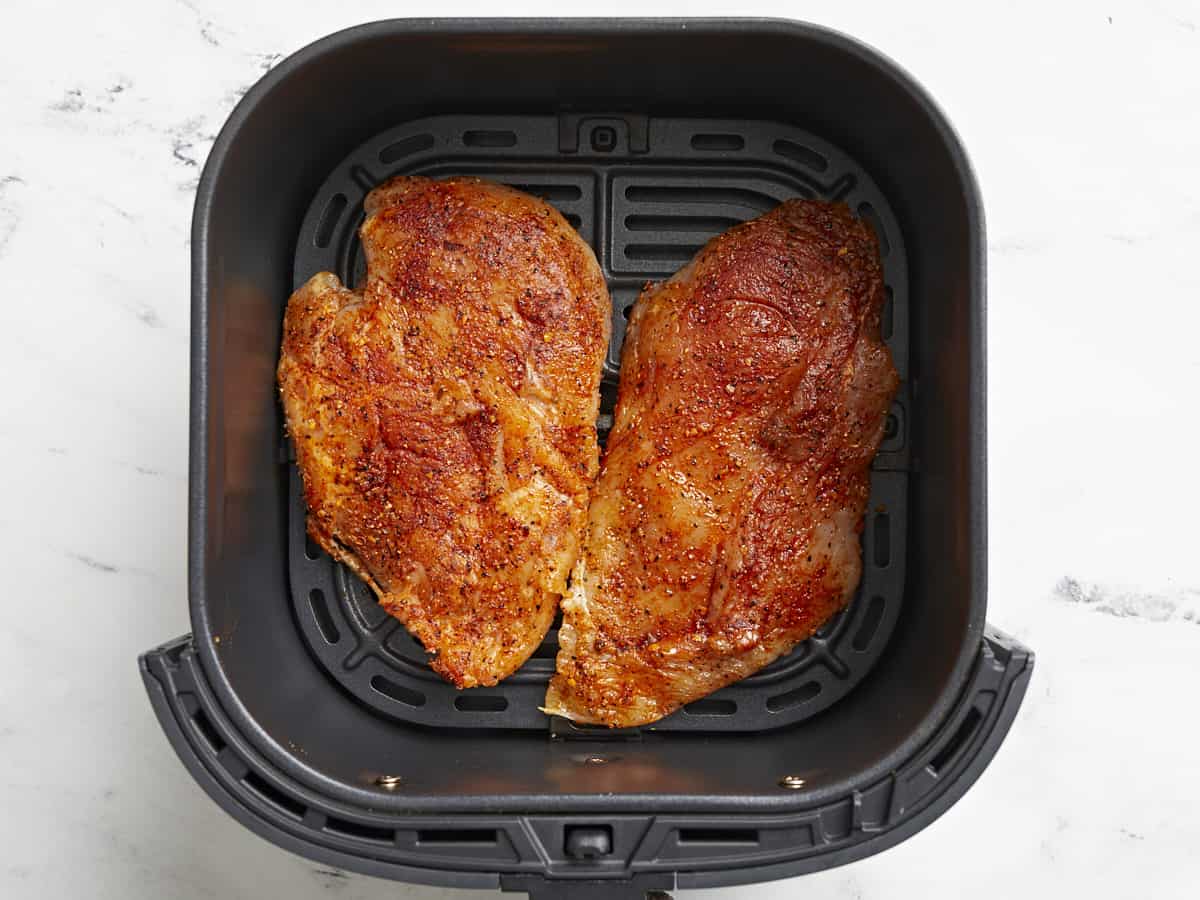
Uncooked chicken breasts added to an air fryer basket.

Place both chicken breasts inside the air fryer basket and cook for 7 minutes. Then flip the chicken breasts and cook for 6 more minutes. After a total of 13 minutes, use a meat thermometer to check the chicken breasts and make sure the internal temperature has reached 165°F, and if not, cook for 1-2 minutes longer.

Cooked chicken breasts inside an air fryer basket.

Promptly remove the chicken breasts from the air fryer basket and rest on a clean cutting board for 5 minutes before slicing. Enjoy these juicy, flavorful air fryer chicken breasts with your favorite sides for dinner, in a salad or sandwich for lunch, or for an easy meal prep protein!

Sliced Air Fryer Chicken Breasts on a wood cutting board.

The post Air Fryer Chicken Breast appeared first on Budget Bytes.
Black-Eyed Peas

Black Eyed Peas are a flavorful, budget-friendly, and nutrient packed meal for New Year’s Day or any day of the year!

The post Black-Eyed Peas appeared first on Budget Bytes.
It may be tradition to eat black-eyed peas on New Year’s Day, but I’m here to say that you need to be making these delicious and budget-friendly beans year-round! This big ol’ pot of peas is hearty, delicious, freezer-friendly, and about as budget-friendly as it gets. So try them out this New Year’s Day and then add them to your regular rotation for the coming year. Your wallet and taste buds will thank you. ;)

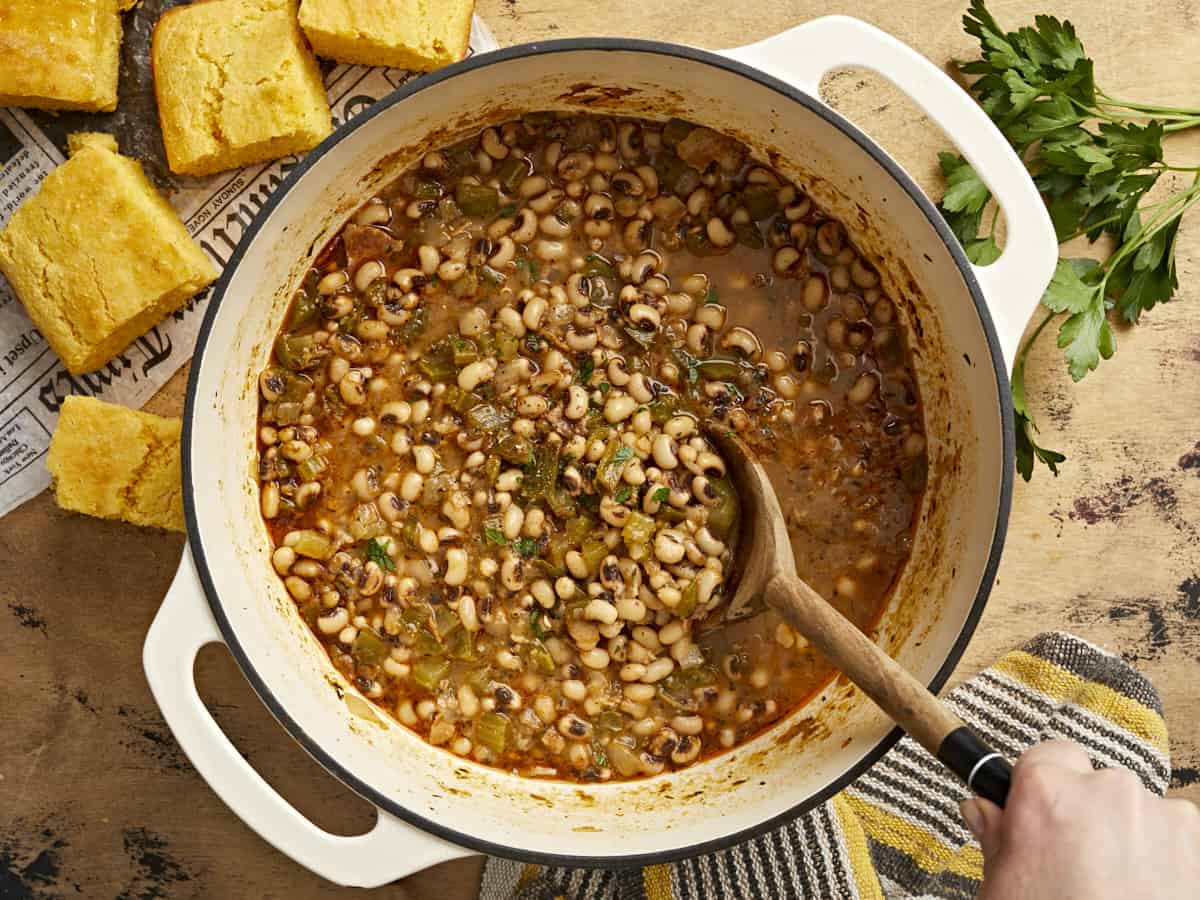
Overhead view of a pot of black-eyed peas being stirred with a wooden spoon.

What Are Black-Eyed Peas?

Black-eyed peas are a small white legume with a black dot, or “eye”, in the center. They’re traditionally served on New Year’s Day in the United States alongside collard greens (or mustard or turnip greens) to bring wealth in the new year. The black-eyed peas represent coins, while the greens signify paper dollars. Some even believe you must consume 365 black-eyed peas to bring the wealth, so make sure to dish yourself up an extra large bowl!

Ingredients for Black-Eyed Peas

Here’s what you’ll need to make this incredibly delicious pot of black-eyed peas:

  • Black-Eyed Peas: You’ll need one pound of dry black-eyed peas. You can find these near the other dry beans in the grocery store, or on a special display if you’re buying near the New Year!
  • Bacon: Bacon gives the black-eyed peas a deliciously smoky flavor and the fat gives the peas body and a wonderful mouthfeel. You can substitute by adding a ham hock or smoked turkey wing to the peas before simmering and using a bit of oil to sauté the vegetables in the beginning.
  • Vegetables: The black-eyed peas are flavored with a medley of vegetables like onion, garlic, bell pepper, and celery. The vegetables add flavor, color, and texture to the dish.
  • Spices: The pot of peas is seasoned with a savory mix of smoked paprika, oregano, thyme, cayenne pepper, and black pepper.
  • Chicken Broth: The black-eyed peas cook in chicken broth for maximum flavor. Make sure to use a good broth to ensure the peas are very flavorful. We like to use Better Than Bouillon because it’s cost-effective and has great flavor
  • Salt: As with any bean, it’s very important to add salt to taste at the end of cooking. Salt doesn’t just make food “salty” but it amplifies all of the flavors so you can taste each and every ingredient.

Recipe Variations

Vegetarian or Vegan: To make these black-eyed peas vegetarian, simply skip the bacon and use a few tablespoons of coconut oil to sauté the vegetables. The coconut oil has a similar mouthfeel to pork fat, making the peas extra hearty. You’ll also want to increase the smoked paprika slightly to make up for the smokiness of the bacon and swap vegetable broth for chicken broth.

Slow Cooker: To make black-eyed peas in the slow cooker, simply add all of the ingredients (including the pre-soaked peas) to a slow cooker and cook on high for about four hours, or until the peas are tender.

Canned Black-Eyed Peas: If you’re in a rush or forgot to soak your peas, canned black-eyed peas are a great shortcut. Simply follow our recipe for Quickie Black-Eyed Peas with Greens.

The Quick Soak Method

If you don’t have time to soak your beans overnight (or you just forgot), you can use the quick soak method to get the beans ready for cooking in about an hour. Here’s how to quick soak beans:

  1. Rinse the beans with cold water, then add them to a large pot. Add enough fresh water to cover the beans by 2-3 inches.
  2. Place a lid on the pot, turn the heat on to high, and bring the beans up to a boil. Allow the beans to boil for two minutes.
  3. Remove the beans from the heat and let them sit in the hot water, with the lid in place, for one hour.
  4. Rinse the soaked beans and continue to use them in place of the beans soaked overnight.

How to Store Leftover Black-Eyed Peas

This recipe is great for meal prep because the leftovers are amazing. Store the cooked black-eyed peas in the refrigerator for up to five days, or, once they’re chilled, transfer single portions to the freezer for longer storage. They can be kept in the freezer for about three months and easily reheated in the microwave or on the stovetop over medium-low heat, stirring often.

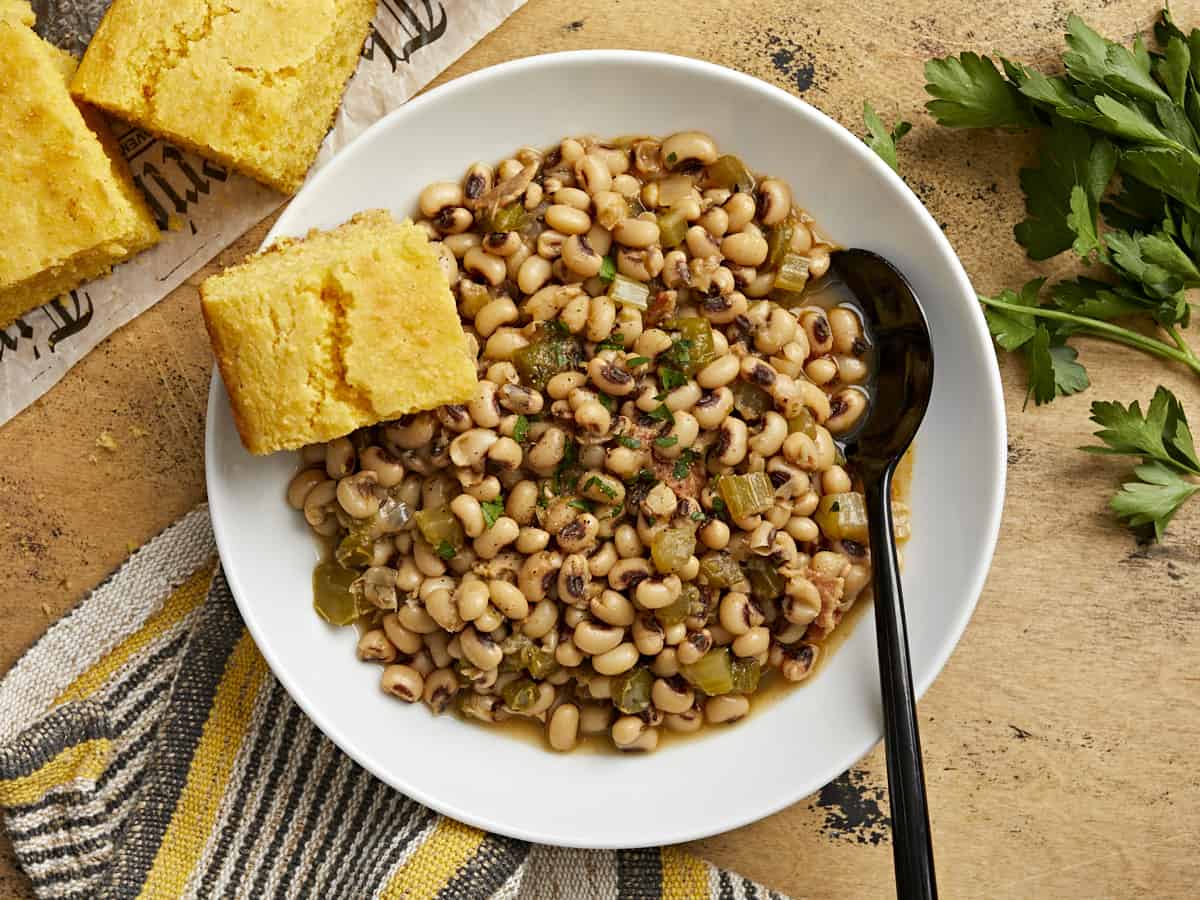
Overhead view of a bowl of black-eyed peas with a piece of cornbread on the side.
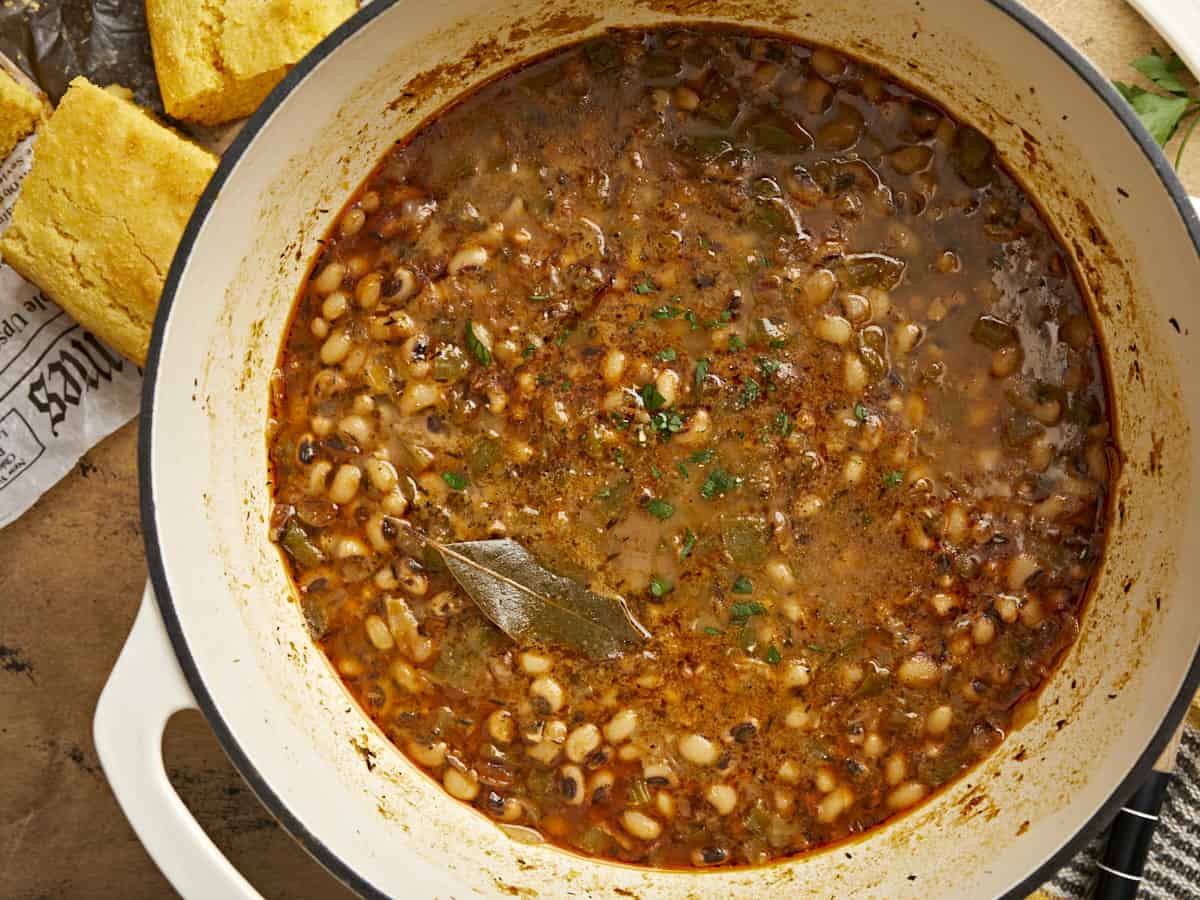
Overhead view of a pot of black-eyed peas with a wooden spoon.
Print

Black-Eyed Peas

Black Eyed Peas are a flavorful, budget-friendly, and nutrient packed meal for New Year's Day or any day of the year!
Course Dinner, Main Course
Cuisine American
Total Cost $6.36 recipe / $1.06 serving
Prep Time 15 minutes
Cook Time 1 hour 15 minutes
Soak Time 8 hours
Total Time 9 hours 30 minutes
Servings 6 (1.3 cups each)
Calories 362kcal

Equipment

Ingredients

  • 1 lb. dry black-eyed peas $1.99
  • 4 oz. bacon $1.33
  • 1 yellow onion $0.32
  • 4 cloves garlic $0.32
  • 1 bell pepper $0.99
  • 2 stalks celery $0.45
  • 1 tsp smoked paprika $0.10
  • 1 tsp dried oregano $0.10
  • 1 tsp dried thyme $0.10
  • 1/4 tsp cayenne pepper $0.02
  • 1/4 tsp black pepper $0.02
  • 1 bay leaf $0.15
  • 4 cups chicken broth $0.42
  • 1 tsp salt (or to taste) $0.05

Instructions

  • The day before, rinse the peas with cool water then place them in a large bowl and cover with 2-3 inches of cold water. Soak the peas in the refrigerator for eight hours or overnight.
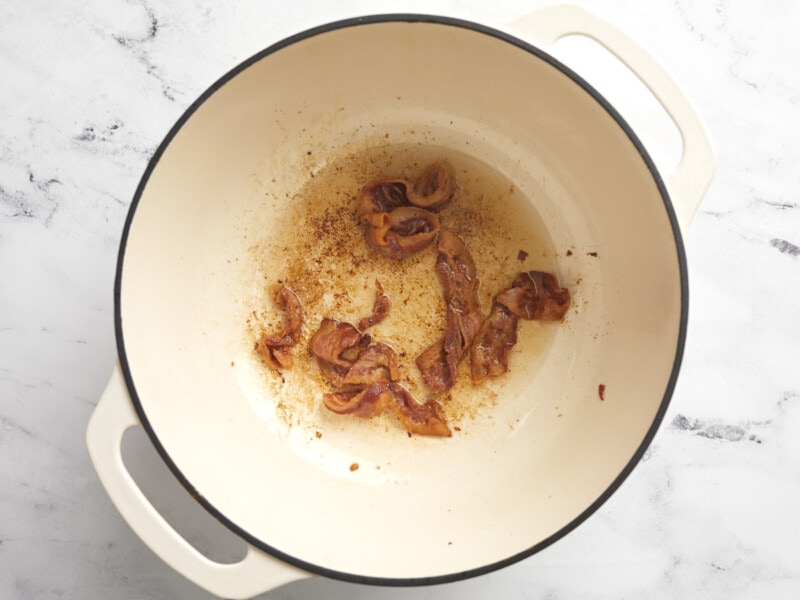
  • When you're ready to cook the peas, add the bacon to a large pot and cook over medium heat until the bacon is brown and crispy. Remove the bacon, saving it for later, and leave all of the bacon grease in the pot.
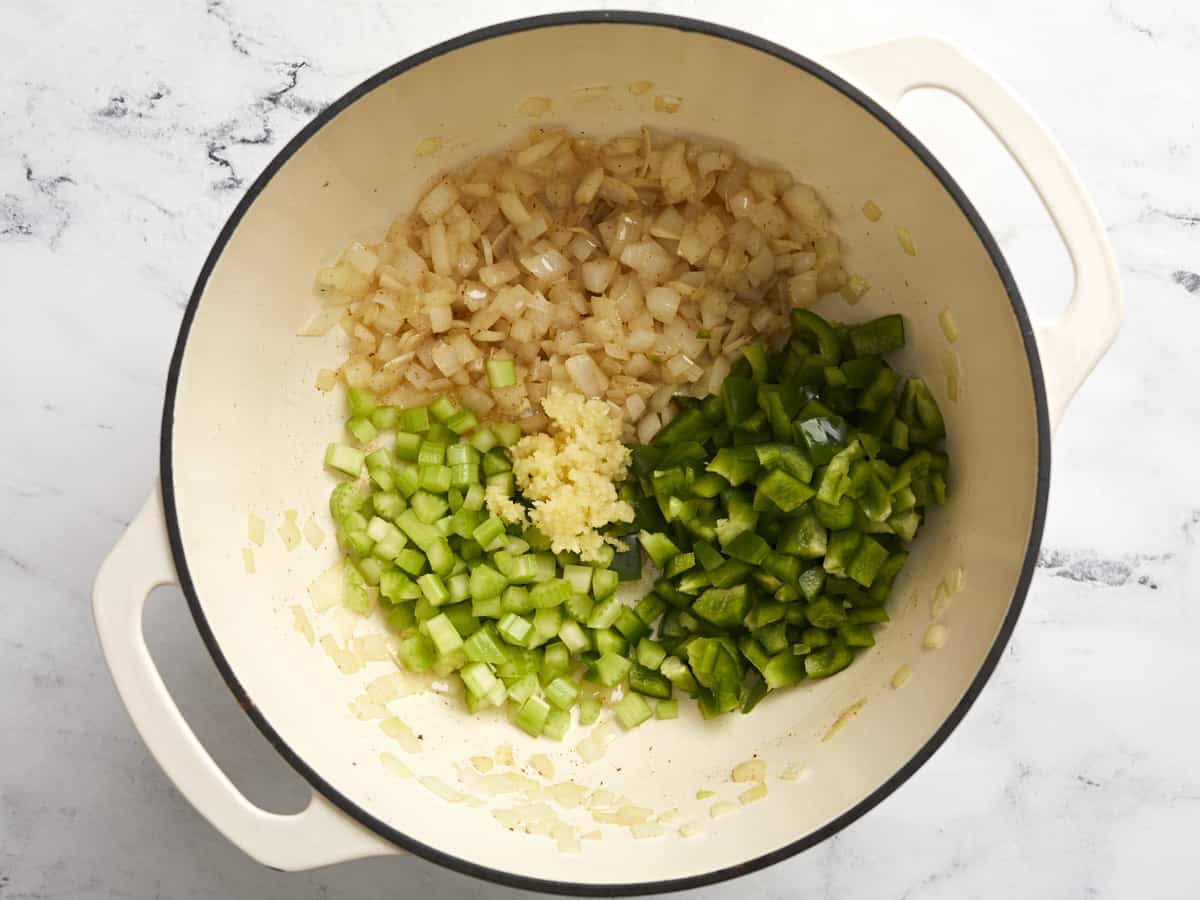
  • Dice the onion, bell pepper, and celery, and mince the garlic. Add the onion to the pot with the bacon grease and cook over medium until the onion is tender.
  • Add the bell pepper, celery, and garlic to the pot and continue to cook for about five minutes more.
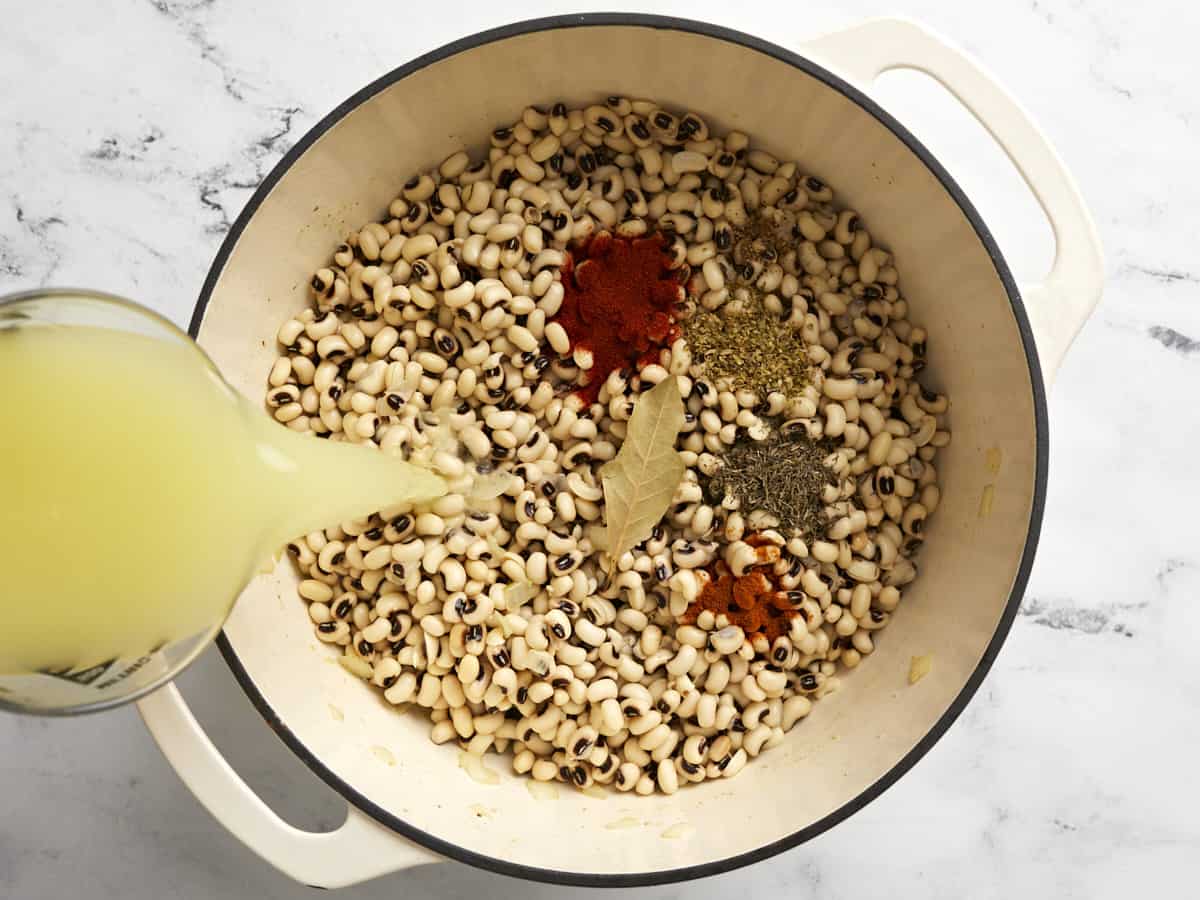
  • Drain the peas and give them a brief rinse. Add the peas to the pot along with the smoked paprika, oregano, thyme, cayenne pepper, black pepper, bay leaf, and chicken broth. Stir everything to combine, then place a lid on the pot.
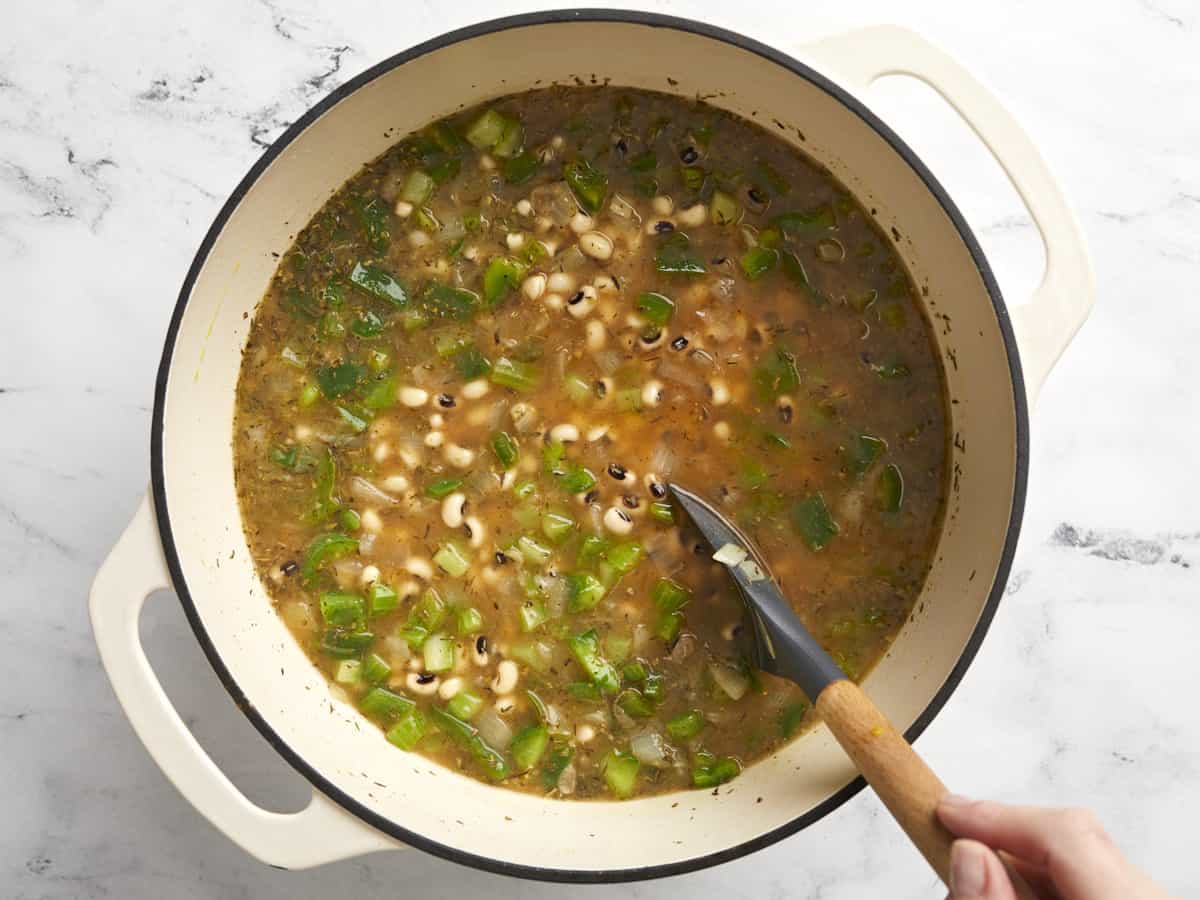
  • Turn the heat up to medium-high and allow the pot to come to a boil. Once it reaches a full boil, turn the heat down to medium-low and let the peas simmer for one hour, stirring occasionally, or until the peas are tender.
  • Once the peas have softened, crumble the bacon and stir it back into the pot. Season the peas with salt to taste, starting with ½ tsp and adding more until the flavors of the pot pop.
  • Remove the bay leaf from the pot and serve the peas with a side of collard greens and cornbread, or over a bowl of rice.

See how we calculate recipe costs here.

Nutrition

Serving: 1.3cups | Calories: 362kcal | Carbohydrates: 51g | Protein: 22g | Fat: 9g | Sodium: 1119mg | Fiber: 9g
Close up overhead view of a pot of black eyed peas with a bay leaf.

How to Make Black-Eyed Peas – Step By Step Photos

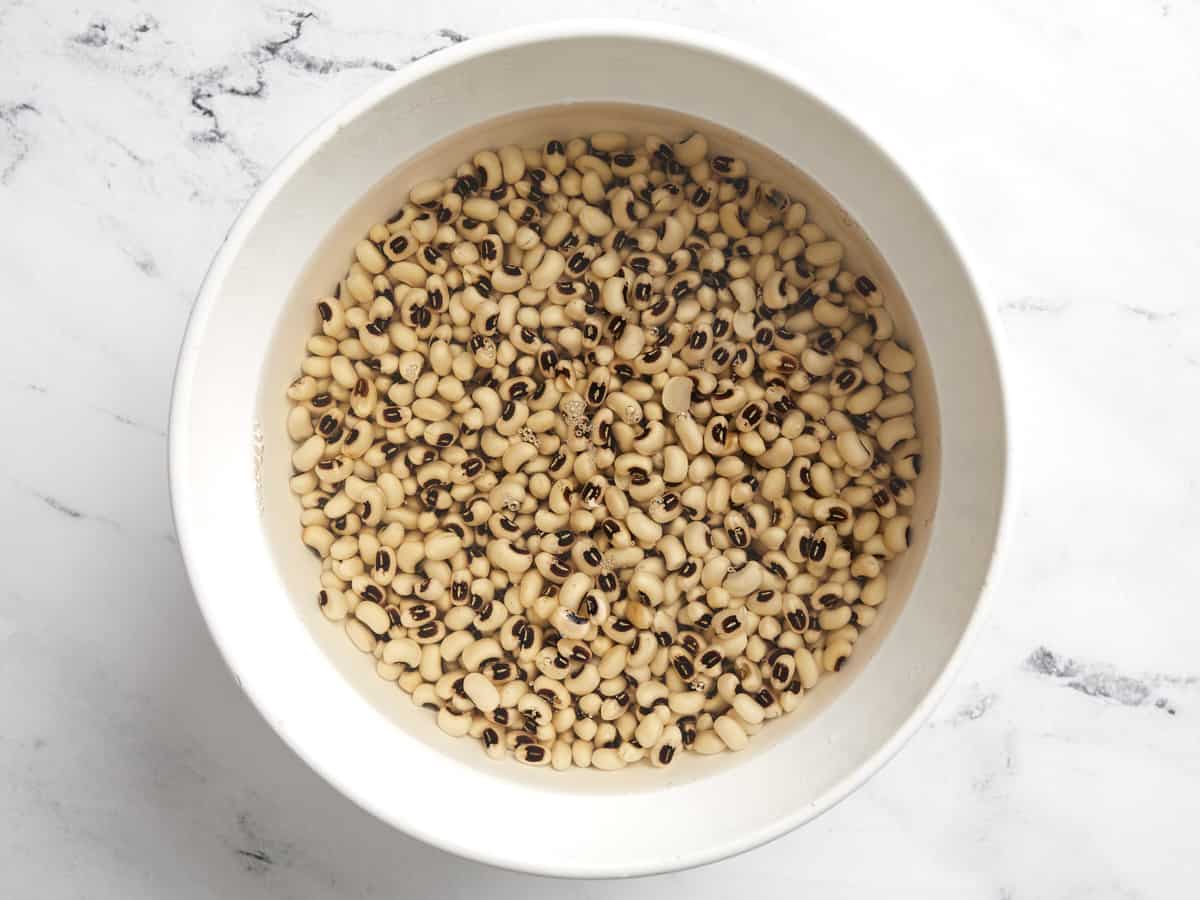
Soaked black-eyed peas in a bowl.

The night before, begin soaking the black-eyed peas. Rinse the peas well with cool water, then place them in a large bowl and cover with at least three inches of water. Soak the peas for at least eight hours in the refrigerator.

Browned bacon in a Dutch oven.

When you’re ready to cook the peas, add 4oz. bacon to a large pot and cook over medium heat until the bacon is brown and crispy. Remove the bacon and set it aside for later, leaving all of the bacon grease in the pot.

Diced bell pepper and celery added to the pot with sautéed onion and garlic.

Dice one yellow onion, one green bell pepper, and two stalks of celery. Mince four cloves of garlic. Add the diced onion to the pot with the bacon grease and sauté over medium heat until the onions are soft, then add the bell pepper, celery, and garlic. Continue to sauté for about five minutes more.

Beans, spices, and chicken broth added to the pot.

Add the drained black-eyed peas to the pot along with 1 teaspoon smoked paprika, 1 teaspoon dried oregano, 1 teaspoon dried thyme, ¼ teaspoon cayenne pepper, ¼ tsp black pepper, one bay leaf, and four cups of chicken broth.

Ingredients being stirred in the pot before cooking.

Stir all of the ingredients together, place a lid on the pot, and turn the heat up to medium-high. Allow the pot to come to a boil. Once it reaches a full boil, turn the heat down to medium-low and let the peas simmer, stirring occasionally, for one hour or until the peas are tender.

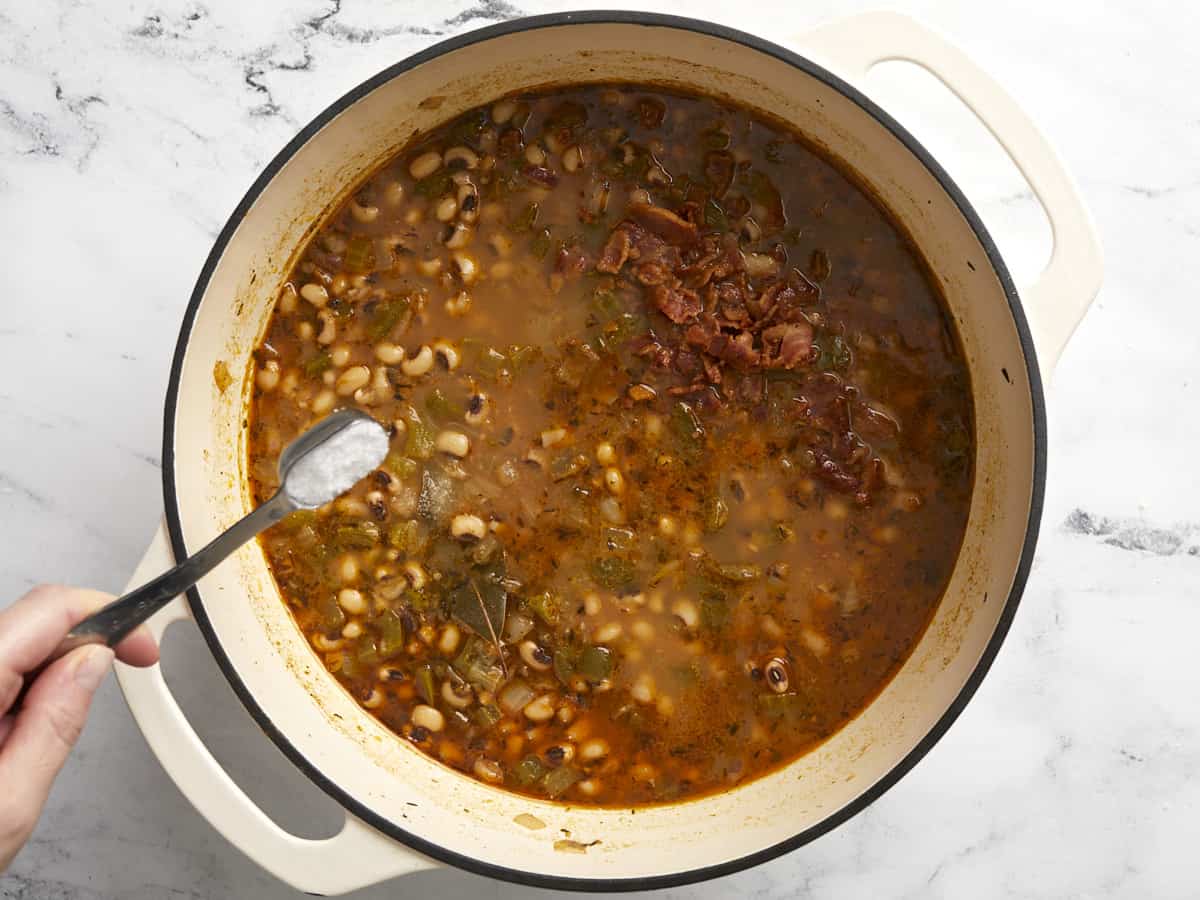
Salt being added to the pot of beans.

Once the peas are soft, crumble the bacon and stir it into the pot. Season the pot of peas with salt, starting with ½ teaspoon, and then add more to taste. The total amount needed will vary depending on how much salt is in the chicken broth used, but we used one teaspoon total.

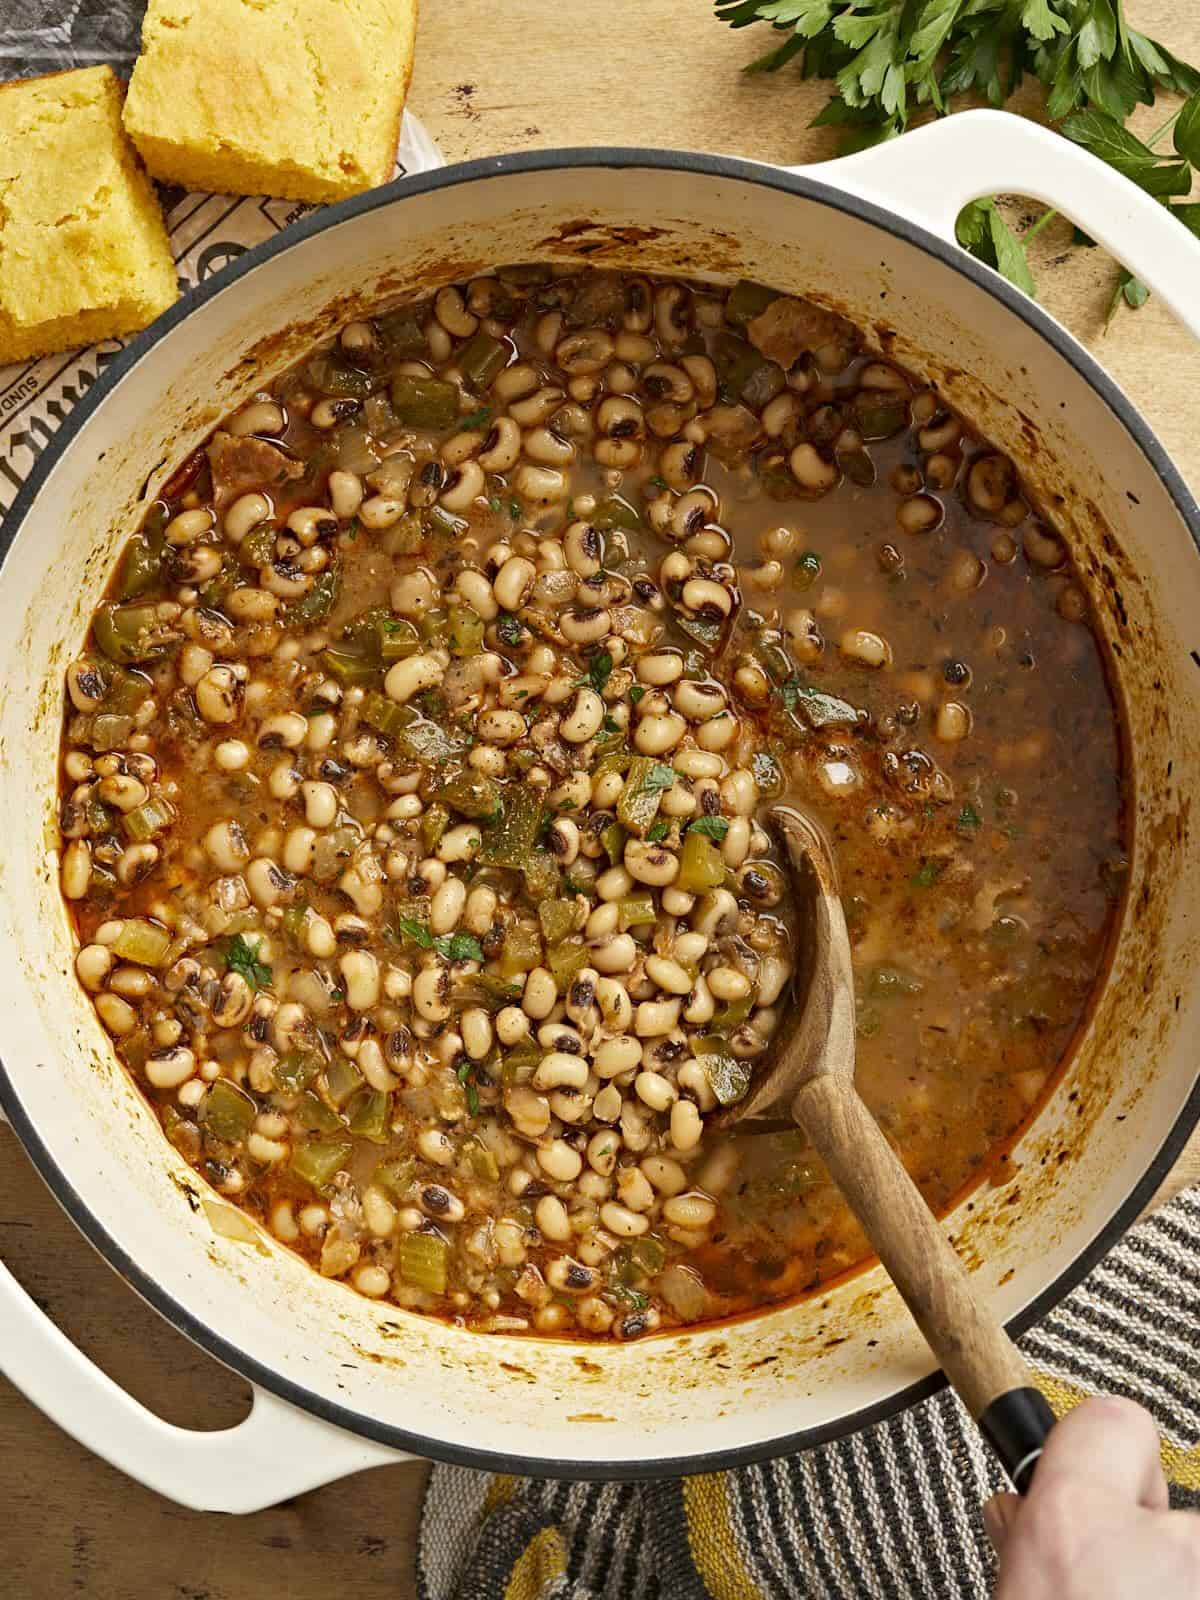
Overhead view of a pot of black-eyed peas with a wooden spoon.

Remove the bay leaf then serve with a side of collard greens and cornbread, or over a bed of rice. Enjoy!

The post Black-Eyed Peas appeared first on Budget Bytes.
Pasta with Peas and Ham

This recipe for pasta with peas and ham is a super fast and easy meal that will keep you full and satisfied on busy days!

The post Pasta with Peas and Ham appeared first on Budget Bytes.
Fast and easy meals are the only thing helping me survive this time of year (…or any time of year for that matter), and this super quick and creamy pasta with peas and ham was a total winner for me. It’s inspired by a classic Italian dish, Pasta alla Papalina, and follows my favorite “formula” for easy meals: pasta + butter + Parmesan + vegetable. This variation on that formula has a few extra ingredients to give it a rich finish, but it’s still just as fast and easy (hello, one pot)!

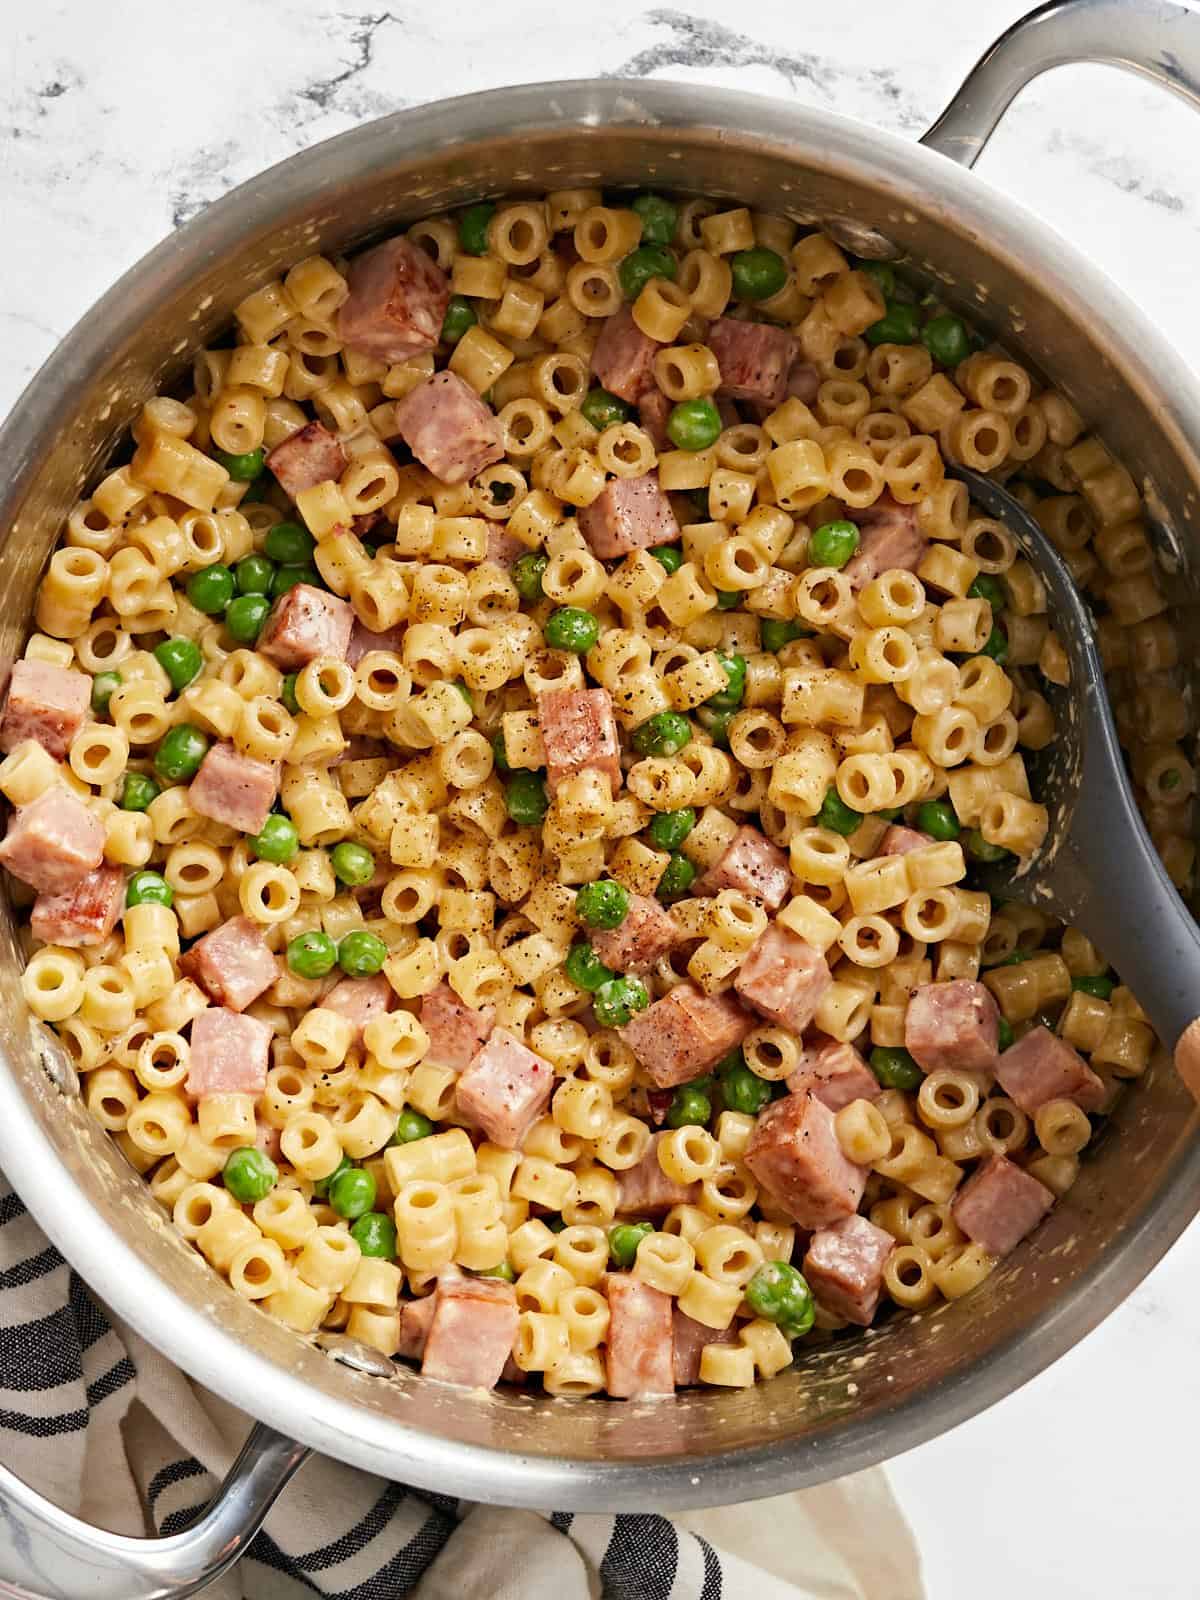
Overhead view of a pot full of pasta with peas and ham, a spoon in the side.

What is Pasta with Peas and Ham?

This super simple dish is based on a classic Italian dish, Pasta alla Papalina, which features fettuccine, cured ham, peas, and onions in a rich sauce made with cream and either Pecorino Romano or Parmesan cheese. For this budget interpretation, I used a diced ham steak, heavy cream, and grated Parmesan. It may not be as fancy, but it’s EASY (read no chopping!) and still super delicious.

Ingredients for Pasta with Peas and Ham

This recipe is super flexible, so here’s what I used to make my pasta with peas and ham with some possible substitutions listed for each item:

  • Pasta: I used ditalini (small short tubes) because we had it on hand and I thought the shape would be a good match for the green peas, but you can make this dish with literally any type of pasta you might have in your kitchen. It’s a great way to use up the odds and ends of boxes of pasta!
  • Sweet Peas: I used frozen sweet peas, but you can use fresh peas if you have them. Simply add the fresh peas to the boiling pasta water a few minutes earlier so they can cook with the pasta. You can also substitute the peas with another green vegetable like broccoli or spinach.
  • Ham: I used a simple ham steak from the grocery store that I diced up and browned in the pot for extra flavor. Ham steaks can usually be found in the refrigerated packaged meat section of the grocery store, near bacon. You could also use bacon, pancetta, or even a cured sausage for this dish.
  • Butter and Heavy Cream: Full-fat dairy is what makes this dish so scrumptious. I’ve made plenty of pasta dishes similar to this one with just butter, so that is an option if you don’t have the heavy cream, but I love the rich sauce that the cream creates.
  • Parmesan: Parmesan coats the pasta for a nice boost of nutty umami flavor. You can also use Pecorino Romano or another hard-aged cheese.
  • Salt and Pepper: I love the way salt and pepper sprinkled over the pasta at the end adds small pops of flavor to every bite. You can also add a pinch of red pepper flakes if you want a little kick.

How Are the Leftovers?

Quick pasta dishes like this are definitely best when made fresh, and luckily they are easy enough to whip up even when you’re short on time. The creamy sauce will tend to absorb into the pasta as it refrigerated, so if you do reheat your leftovers you might want to add an extra splash of cream or milk to add some moisture back in.

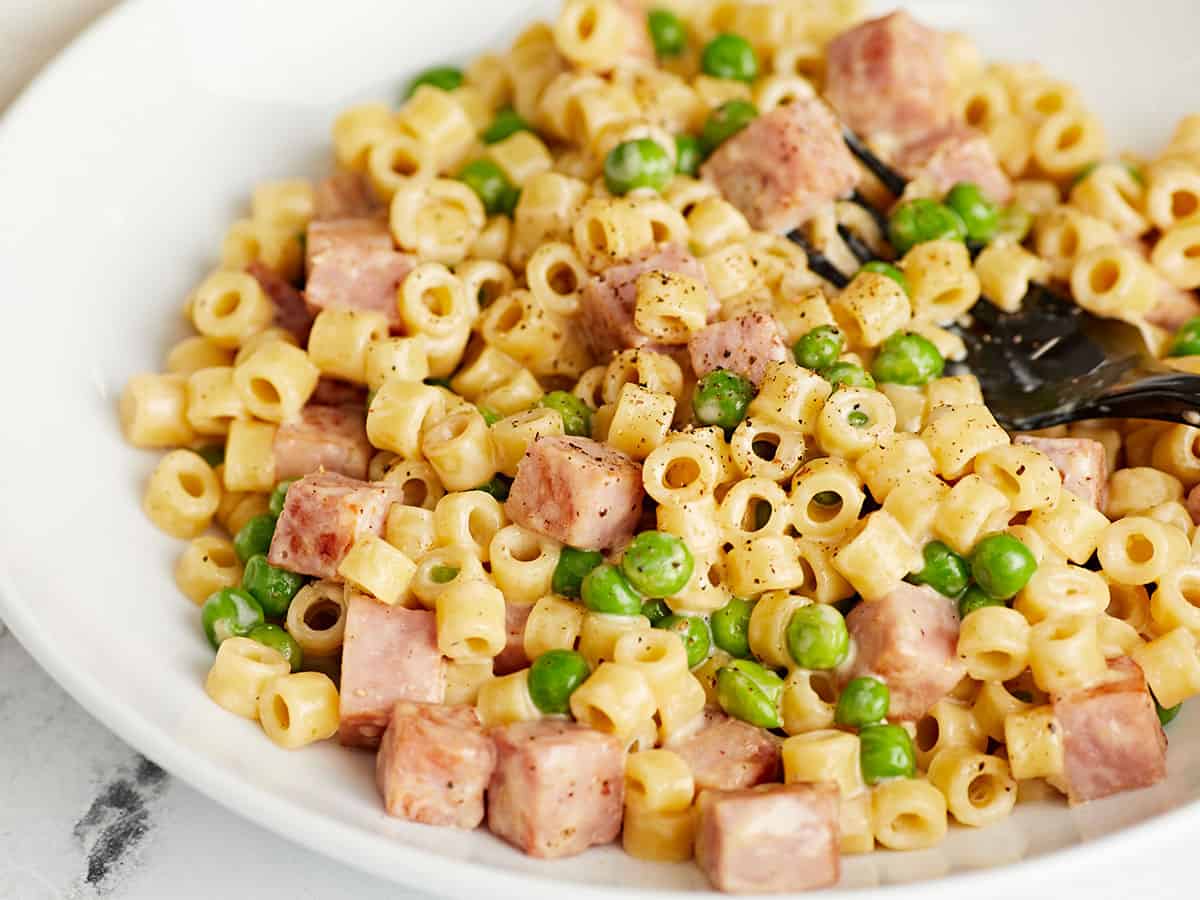
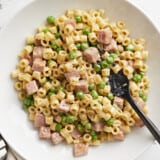
Close up side view of a bowl of pasta with peas and ham.
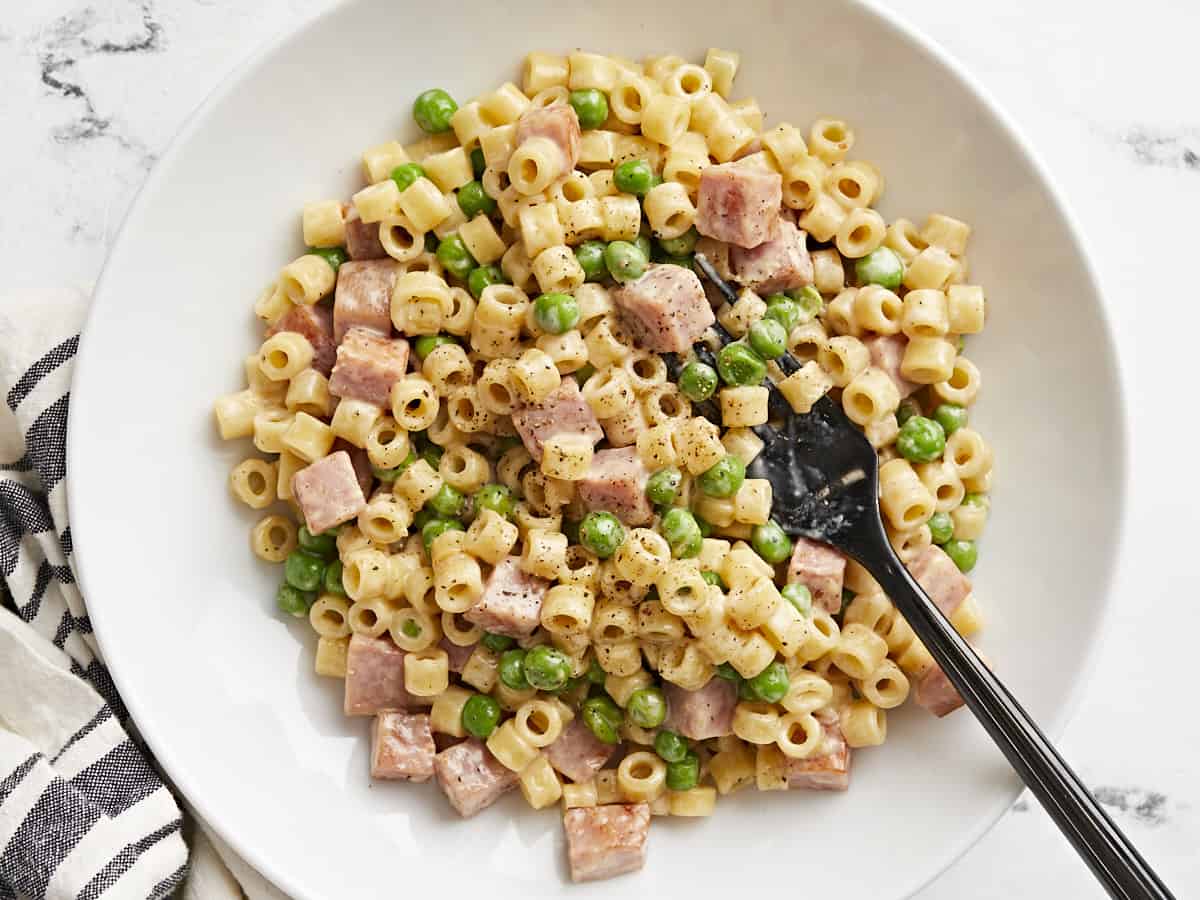
Overhead view of a bowl full of pasta with peas and ham and a fork.
Print

Pasta with Peas and Ham

This recipe for pasta with peas and ham is a super fast and easy meal that will keep you full and satisfied on busy days!
Course Dinner, Lunch
Cuisine American, Italian
Total Cost $4.81 recipe / $1.20 serving
Prep Time 10 minutes
Cook Time 15 minutes
Total Time 25 minutes
Servings 4 (about 1.5 cups each)
Calories 462kcal

Ingredients

  • 8 oz. ditalini pasta* $0.63
  • 1 cup frozen sweet peas $0.38
  • 8 oz. ham steak $2.50
  • 1 Tbsp salted butter $0.11
  • 1/2 cup heavy cream $0.75
  • 1/4 cup grated Parmesan $0.40
  • 1/4 tsp freshly cracked pepper $0.02
  • 1/4 tsp salt $0.02

Instructions

  • Bring a large pot of water to a boil for the pasta. Once boiling, add the pasta and cook just until tender. Add the frozen peas and continue to cook for one minute, then drain the pasta and peas in a colander.
  • While the pasta is cooking, dice the ham into small pieces. After draining the pasta and peas, add the diced ham and butter to the pot. Cook over medium, stirring often, until the ham has browned.
  • Add the drained pasta and peas back to the pot along with the heavy cream. Stir and heat over medium until the cream is hot, dissolving the browned bits off the bottom of the pot as you stir.
  • Remove the pot from the heat, sprinkle the grated Parmesan over the pasta, and stir to combine. Season to taste with salt and pepper, then serve.

See how we calculate recipe costs here.

Notes

*You can use any type of pasta you prefer.

Nutrition

Serving: 1.25cups | Calories: 462kcal | Carbohydrates: 49g | Protein: 23g | Fat: 19g | Sodium: 1010mg | Fiber: 4g

How to Make Pasta with Peas and Ham – Step by Step Photos

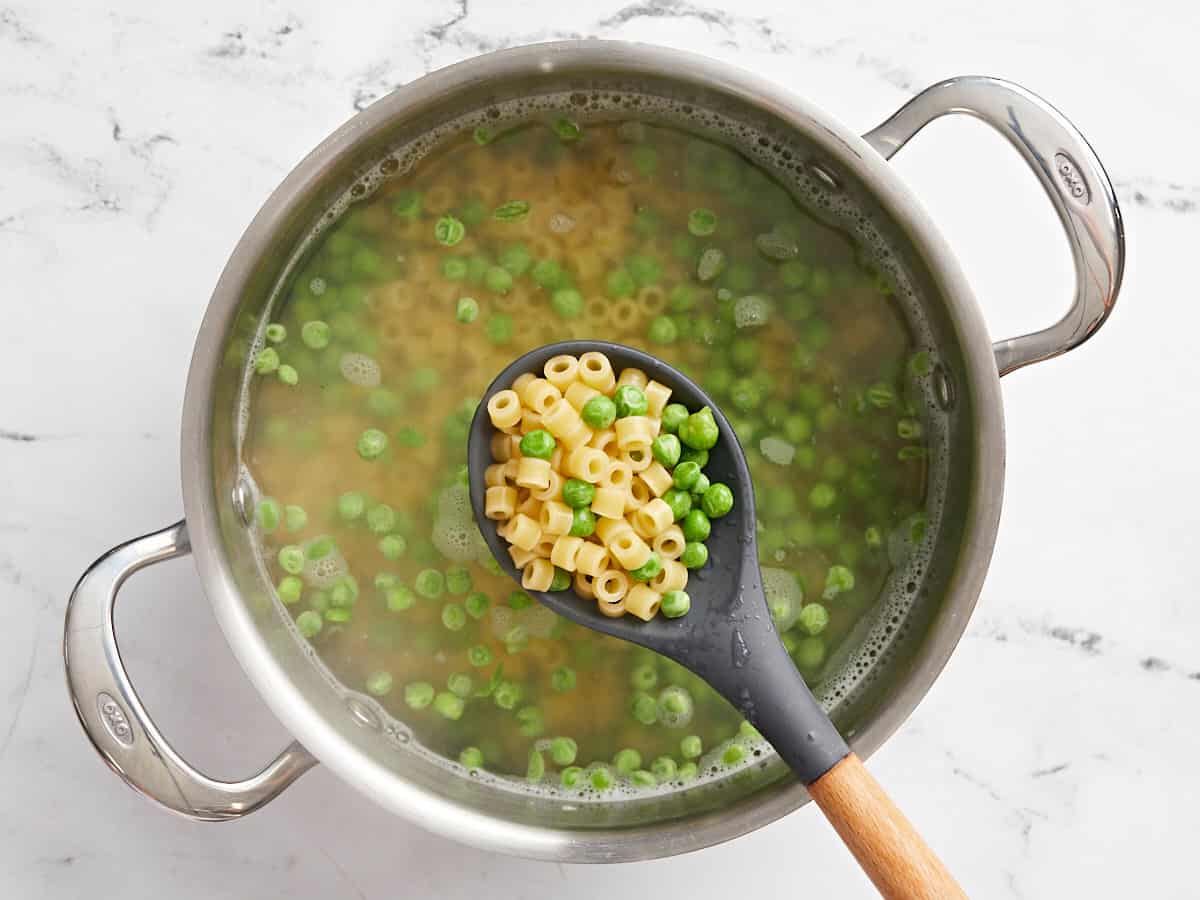
Cooked pasta and peas in a pot with a spoon lifting some out of the water.

Bring a large pot of water to a boil, then add 2 cups of ditalini pasta (or 8oz. of your favorite pasta shape) to the water and boil just until tender. Add 1 cup of frozen sweet peas to the water and continue to cook for one minute. Drain the pasta and peas in a colander.

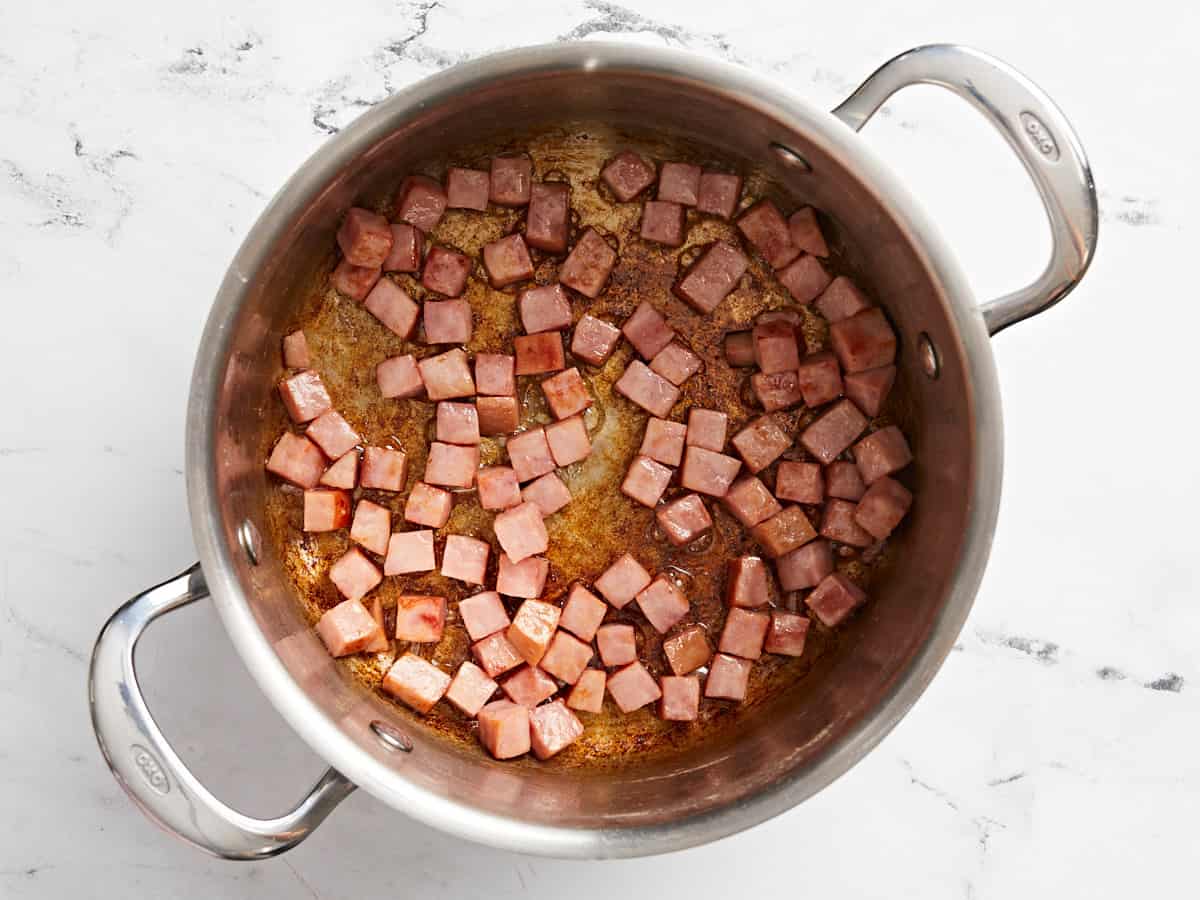
Diced ham browned in the pot.

While the pasta is cooking, dice one 8oz. ham steak into small pieces. After draining the pasta and peas, add the diced ham to the pot along with 1 Tbsp butter. Cook the ham over medium heat until it is browned (3-5 minutes).
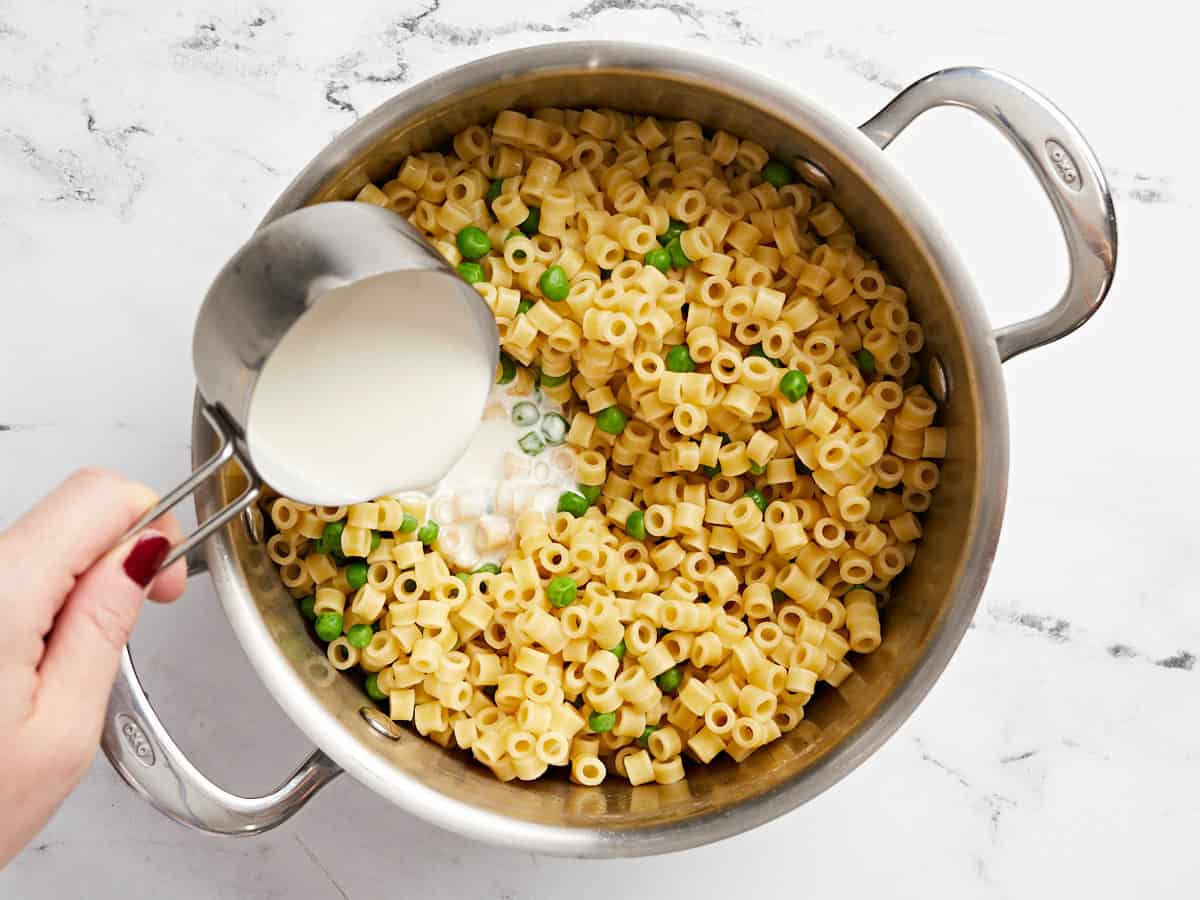
Pasta and cream added to the pot with the ham.

Add the drained pasta and peas to the pot with the ham, along with ½ cup heavy cream. Stir and heat the pasta and cream over medium, dissolving the browned bits off the bottom of the pot as you stir. Heat and stir just until the cream is hot.

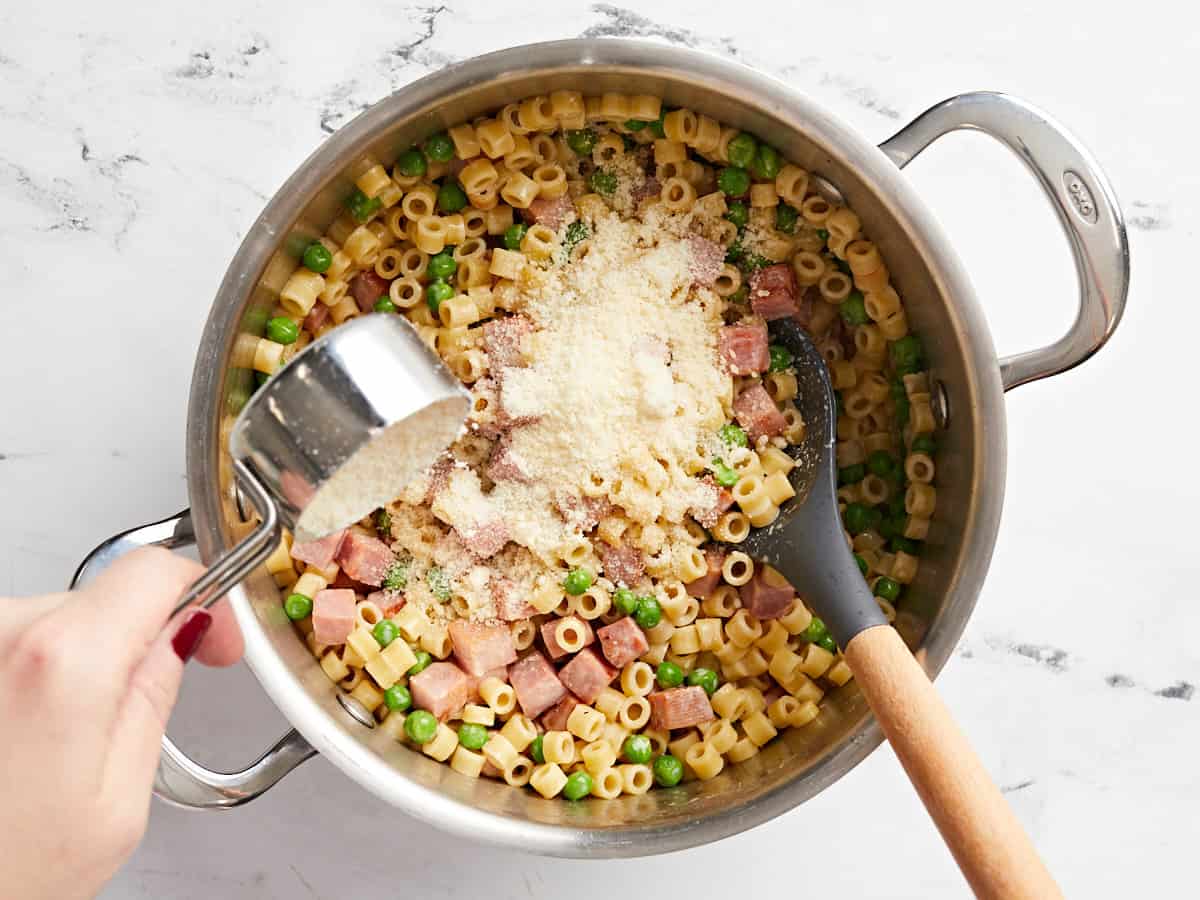
Parmesan being sprinkled over the pasta.

Remove the pot from the heat and sprinkle ¼ cup grated Parmesan over top. Stir to combine.

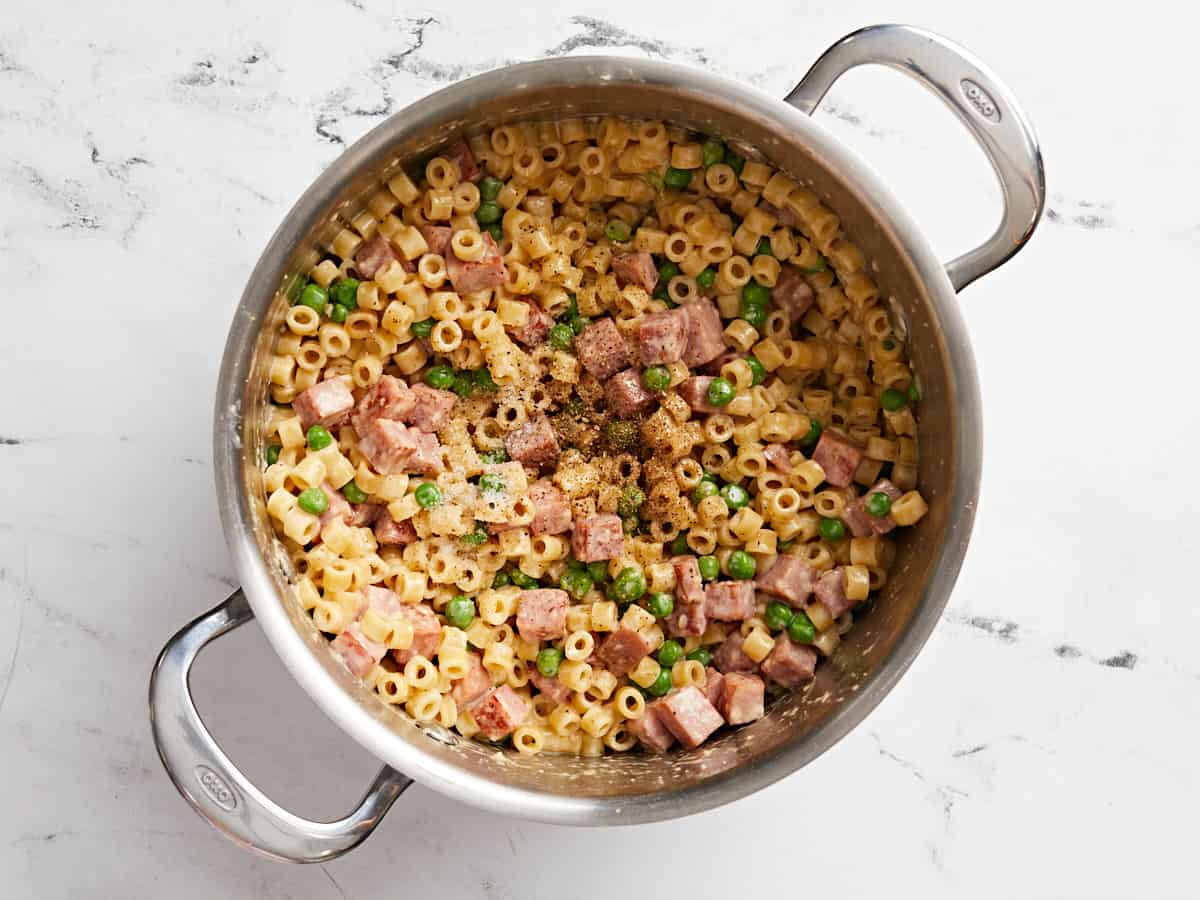
Salt and pepper added to the pasta.

Season the pasta with salt and pepper to taste (I used about ¼ tsp of each).

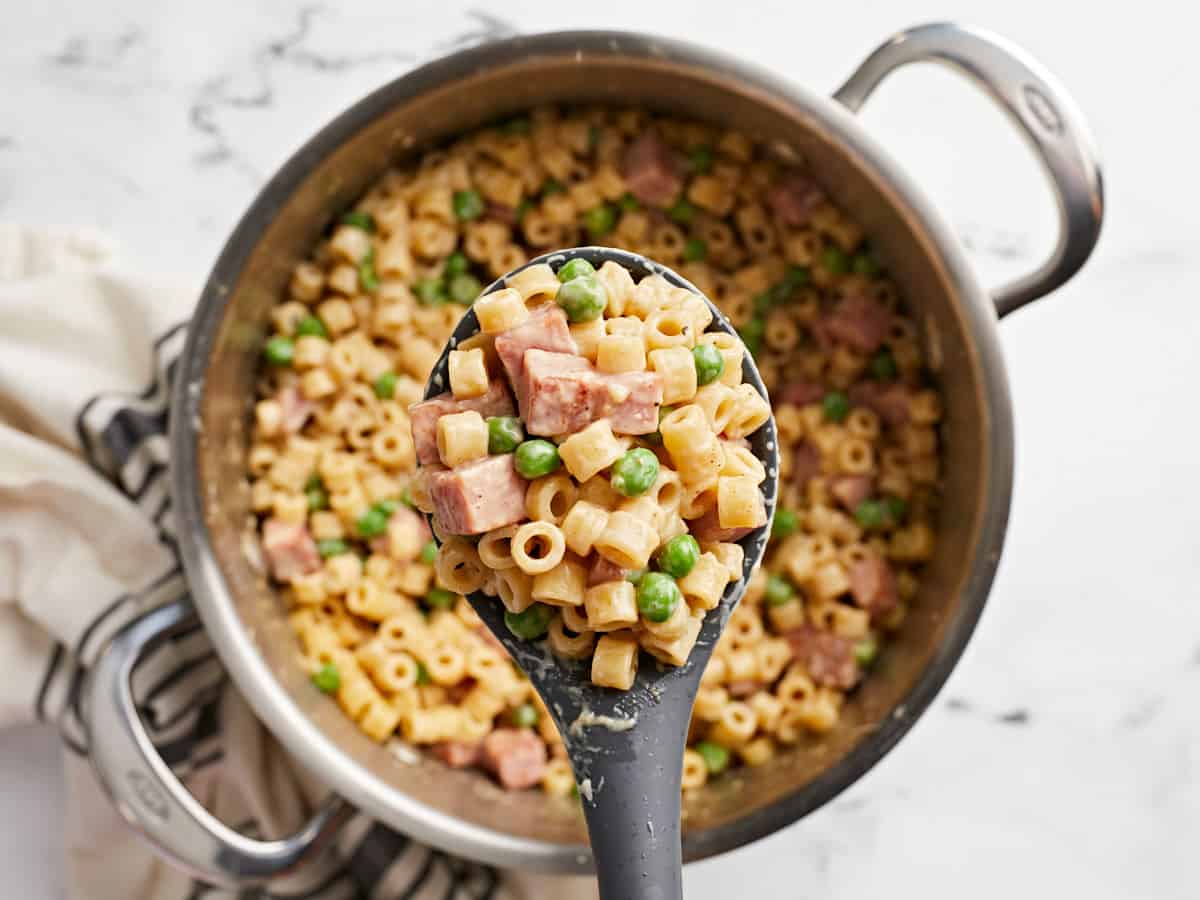
Close up of pasta with ham and peas in a spoon held over the pot.

And that’s it! Super easy peasy (pun intended) and delicious! Enjoy!

Overhead view of a bowl full of pasta with peas and ham and a fork.

The post Pasta with Peas and Ham appeared first on Budget Bytes.