Romesco Sauce with Rigatoni

The key to any delicious pasta meal is the sauce, and this romesco sauce is soon to be your favorite – right up there with our homemade vodka sauce and bolognese sauce. Our creamy romesco sauce is made from blended roasted red peppers, almonds, tomato paste, and herbs, creating a rich and flavorful dish that’s only made better by the buttery parmesan herb breadcrumbs sprinkled on top! This entire recipe takes less than 30 minutes…

Read More

The post Romesco Sauce with Rigatoni appeared first on Spoon Fork Bacon.

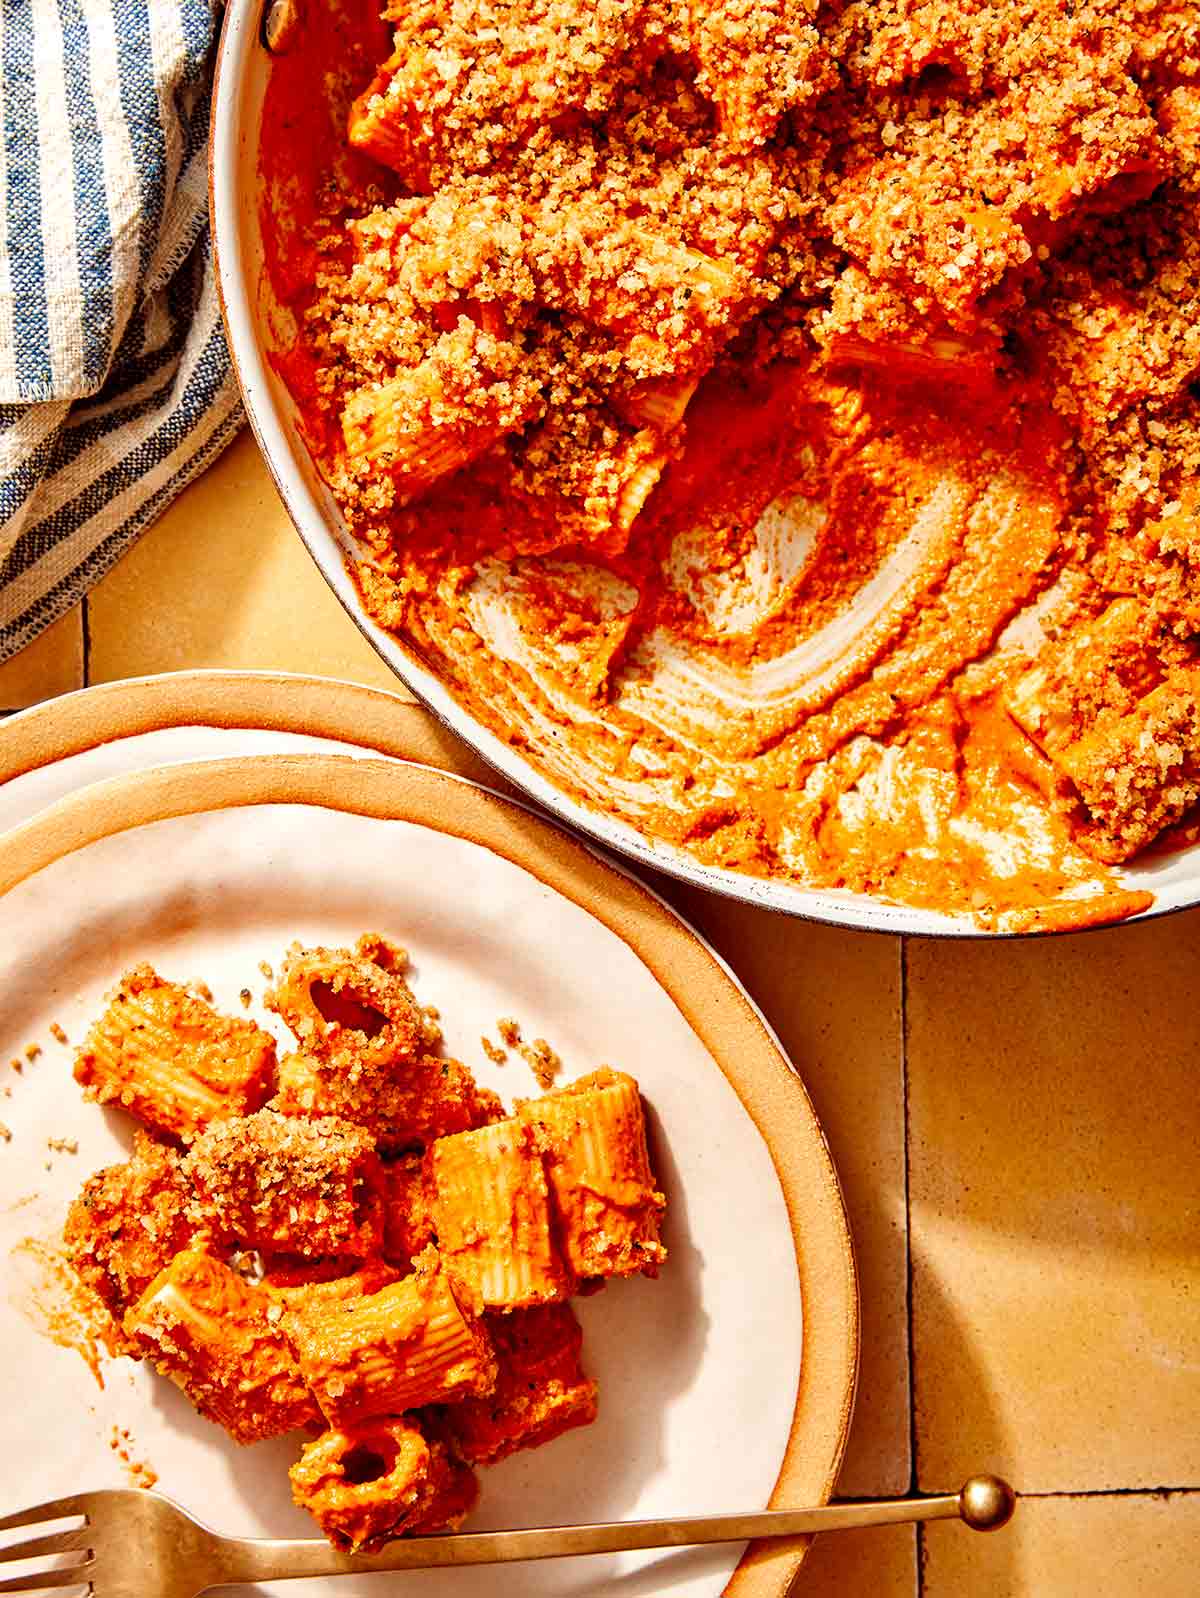
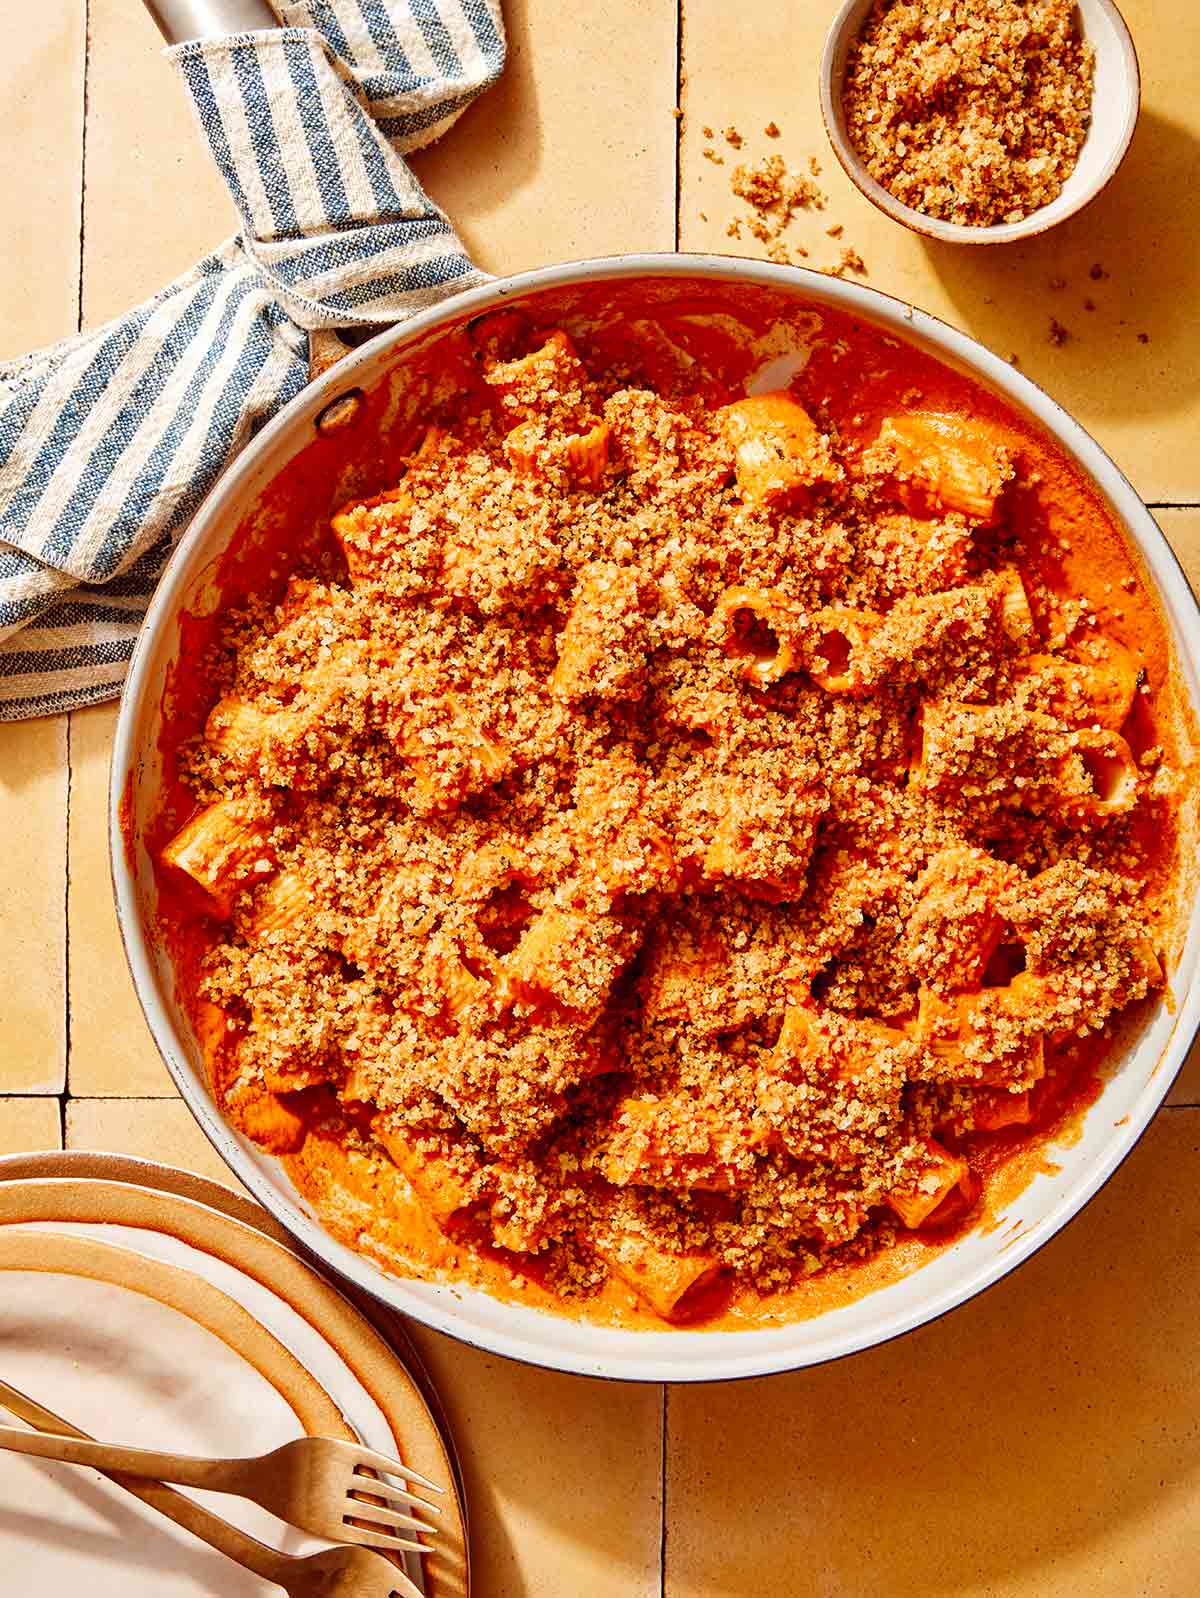
Romesco sauce pasta in a skillet ready to be served.

The key to any delicious pasta meal is the sauce, and this romesco sauce is soon to be your favorite – right up there with our homemade vodka sauce and bolognese sauce. Our creamy romesco sauce is made from blended roasted red peppers, almonds, tomato paste, and herbs, creating a rich and flavorful dish that’s only made better by the buttery parmesan herb breadcrumbs sprinkled on top!

This entire recipe takes less than 30 minutes and is easily customizable to add protein and vegetables or be eaten just as it is. It’s the perfect weeknight meal and can even be made days or months ahead to enjoy anytime the craving strikes (and we know it will!).

What is Romesco Sauce?

While it’s a perfect pairing for pasta, romesco sauce can be used for so much more. Originally from the Catalonia region of Spain, romesco sauce is a blend of roasted red peppers, tomatoes, garlic, and almonds, with a little wiggle room for bonus ingredients like lemon, parsley, basil, or other spices and seasonings to make it your own.

When blended, the ingredients create a vibrant, rich, and slightly smoky sauce – almost like a cross between pesto and salsa. While it was traditionally served with fish, we love it tossed with pasta or dipped, spread, and drizzled over just about everything else!

How to Make Romesco Sauce with Rigatoni

Ingredients
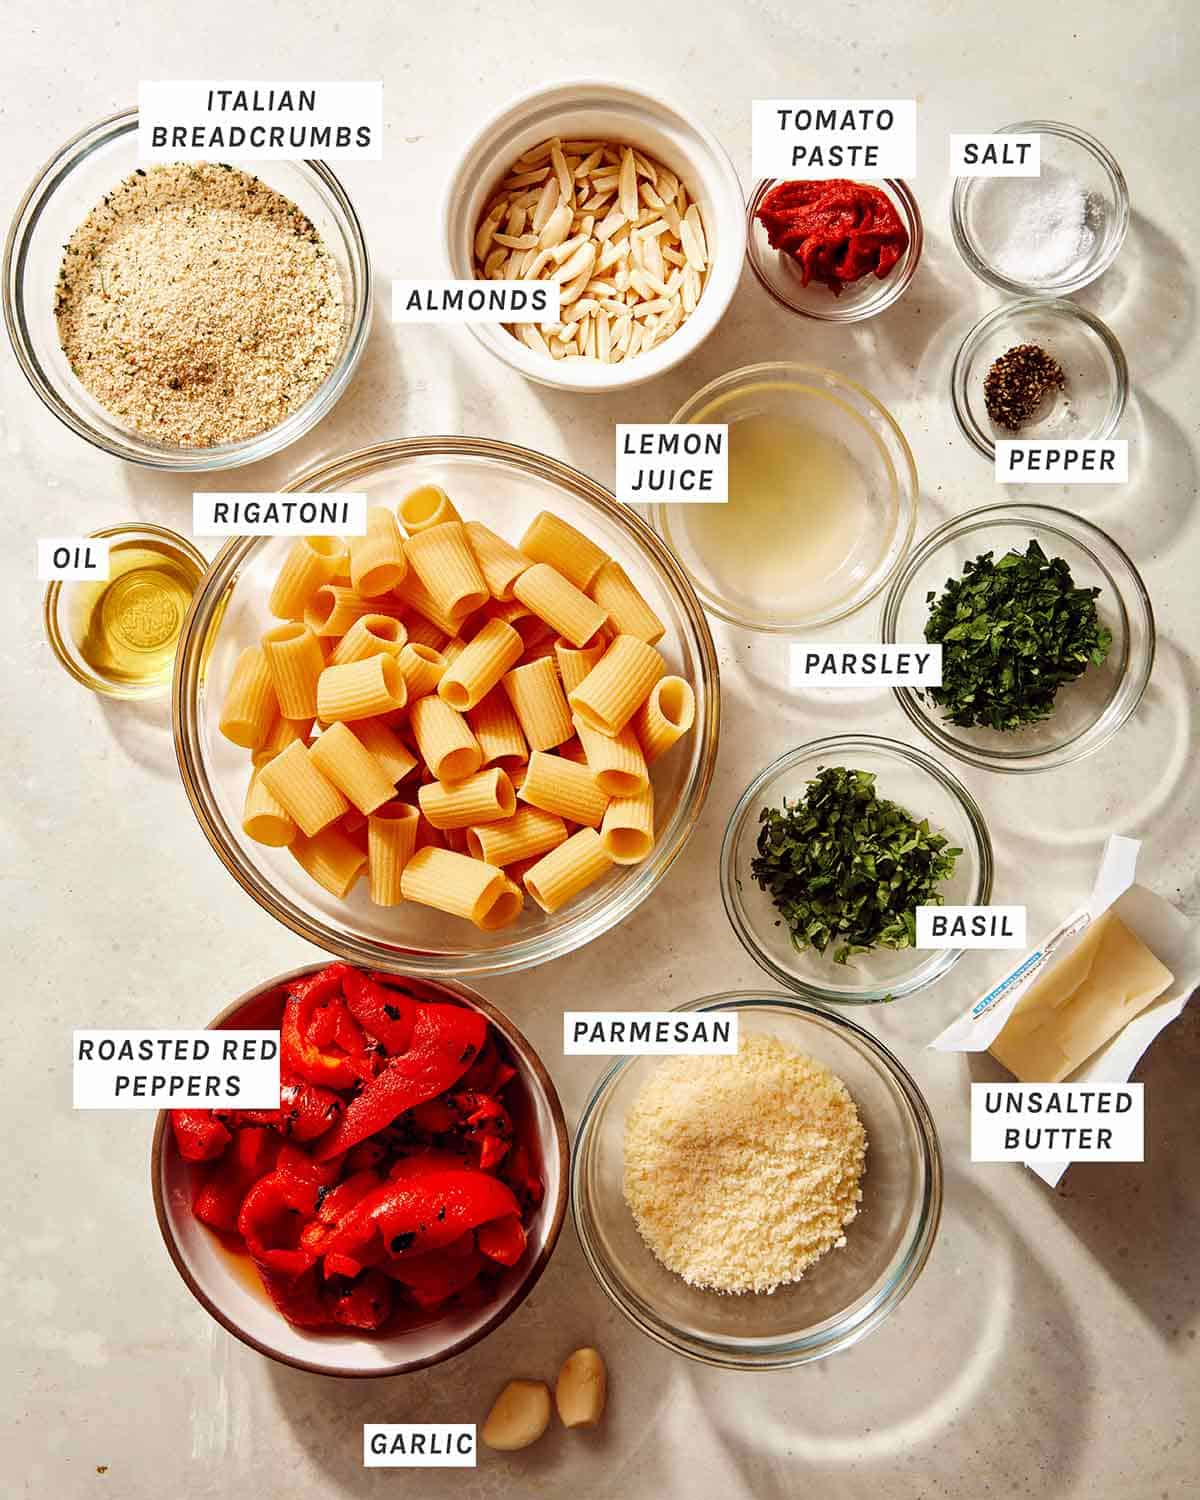
Ingredients to make romesco sauce pasta.

Process

  1. Fill a pot with water, place it over high heat, and bring it to a boil. Add a small handful of salt and rigatoni and boil, stirring occasionally, until al dente, 6 to 7 minutes. Drain the pasta into a colander, reserving 2/3 cup of pasta water. Set aside.
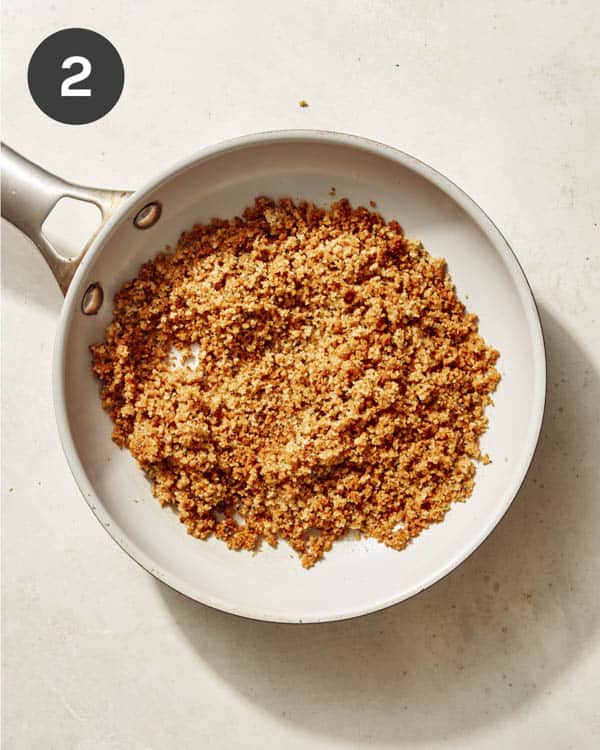
  2. Melt butter in a skillet over medium heat, then add breadcrumbs. Stir and toast the breadcrumbs for 3 to 4 minutes, then remove from heat.
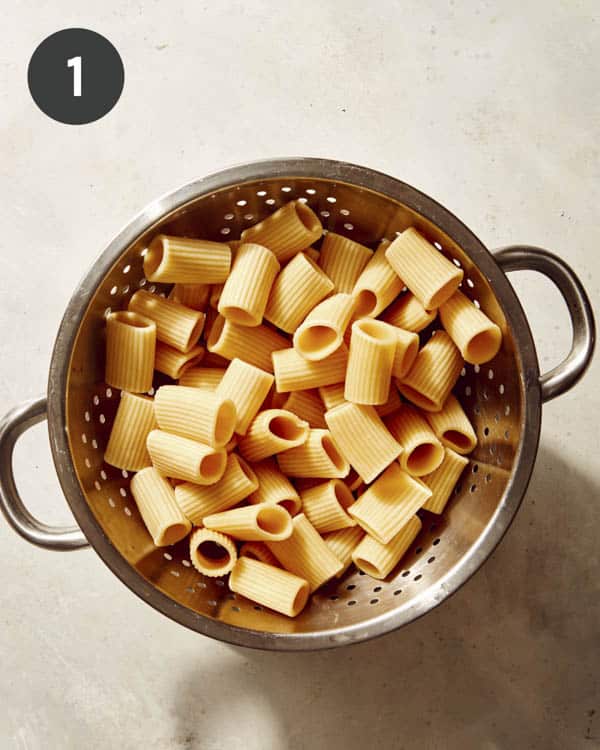
Cooked pasta in a colander.
Breadcrumbs toasting in a skillet.
  1. Once the mixture has cooled, stir in Parmesan. Set aside.
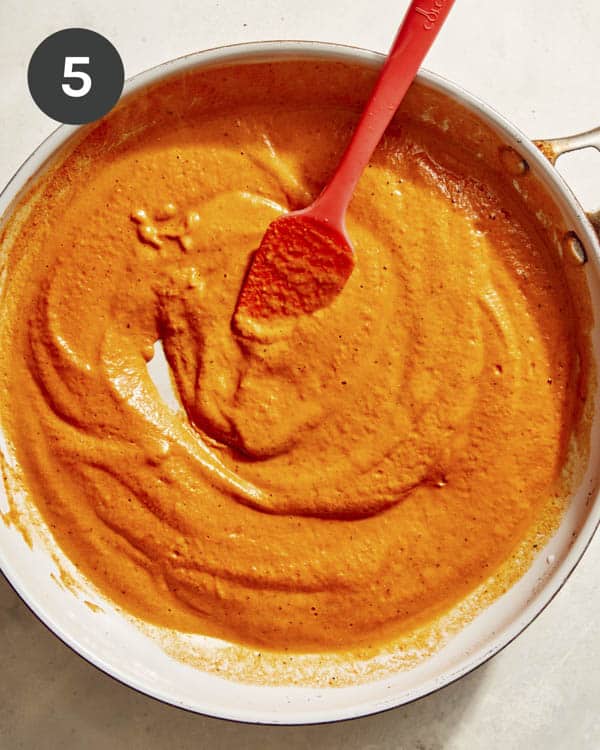
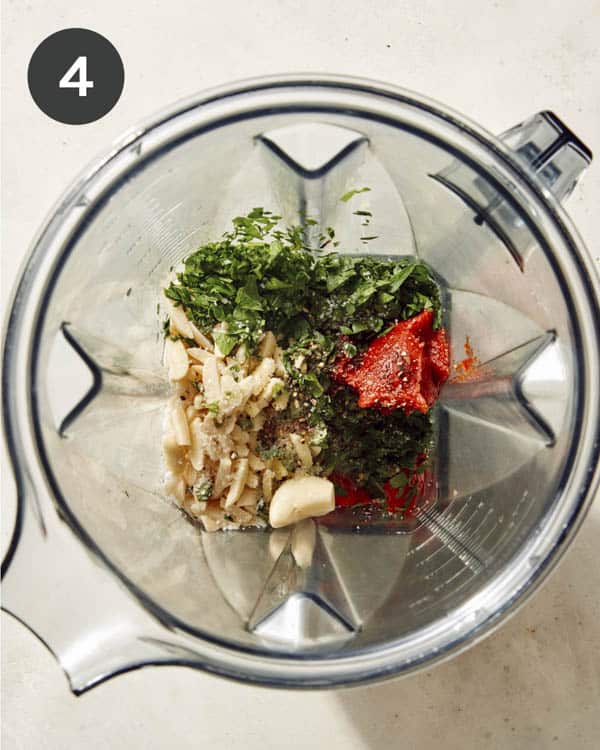
  2. Place all sauce ingredients into a blender and puree until smooth.
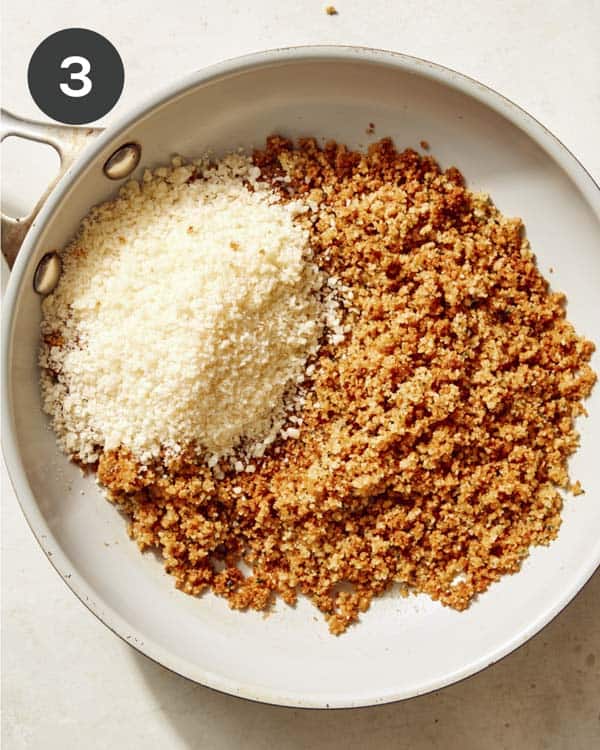
Breadcrumbs mixed with parmesan in a skillet.
Romesco sauce pasta ingredients in a blender.
  1. Pour mixture into skillet and place over medium-low heat. Stir in reserved pasta water and simmer for 2 to 3 minutes.
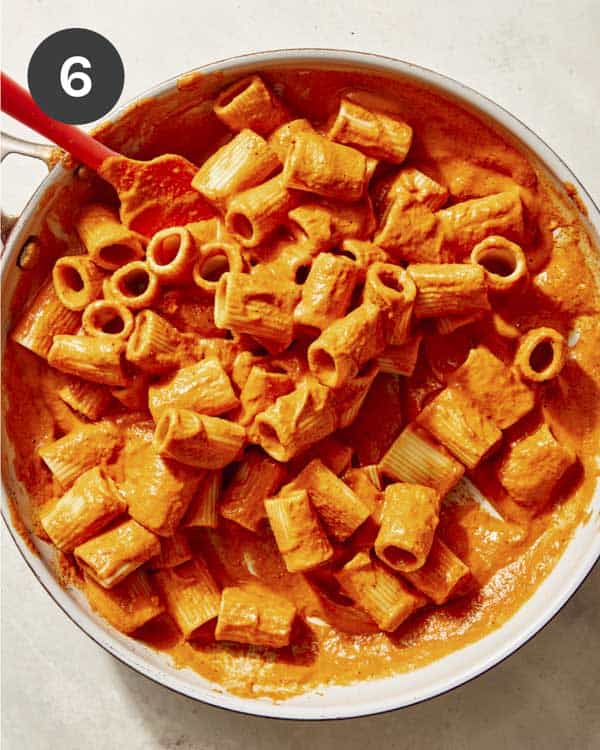
  2. Add pasta into the sauce and toss together until the pasta is fully coated—season with salt and pepper.
Romesco sauce pasta in a skillet simmering.
Rigatoni pasta being mixed with romesco sauce in a skillet.
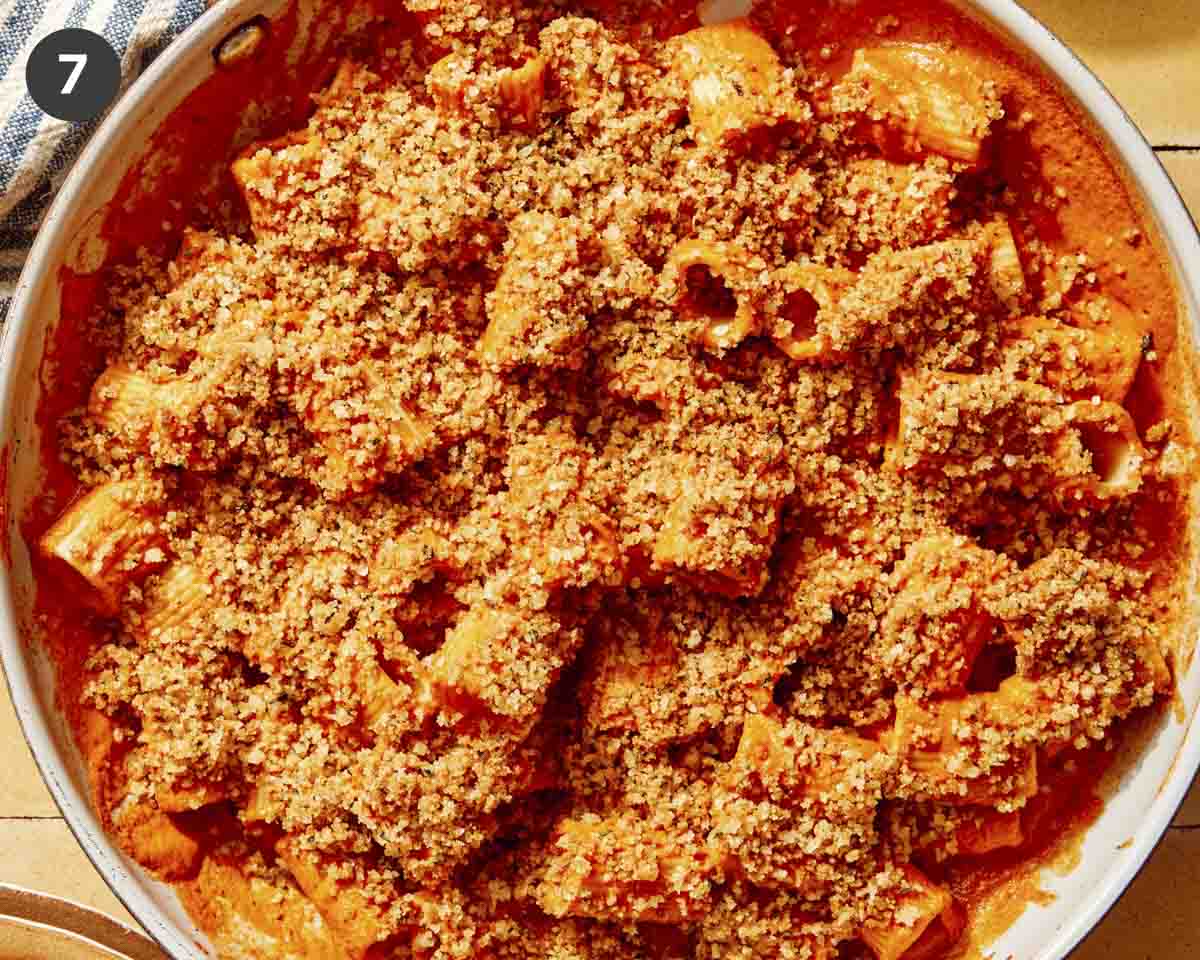
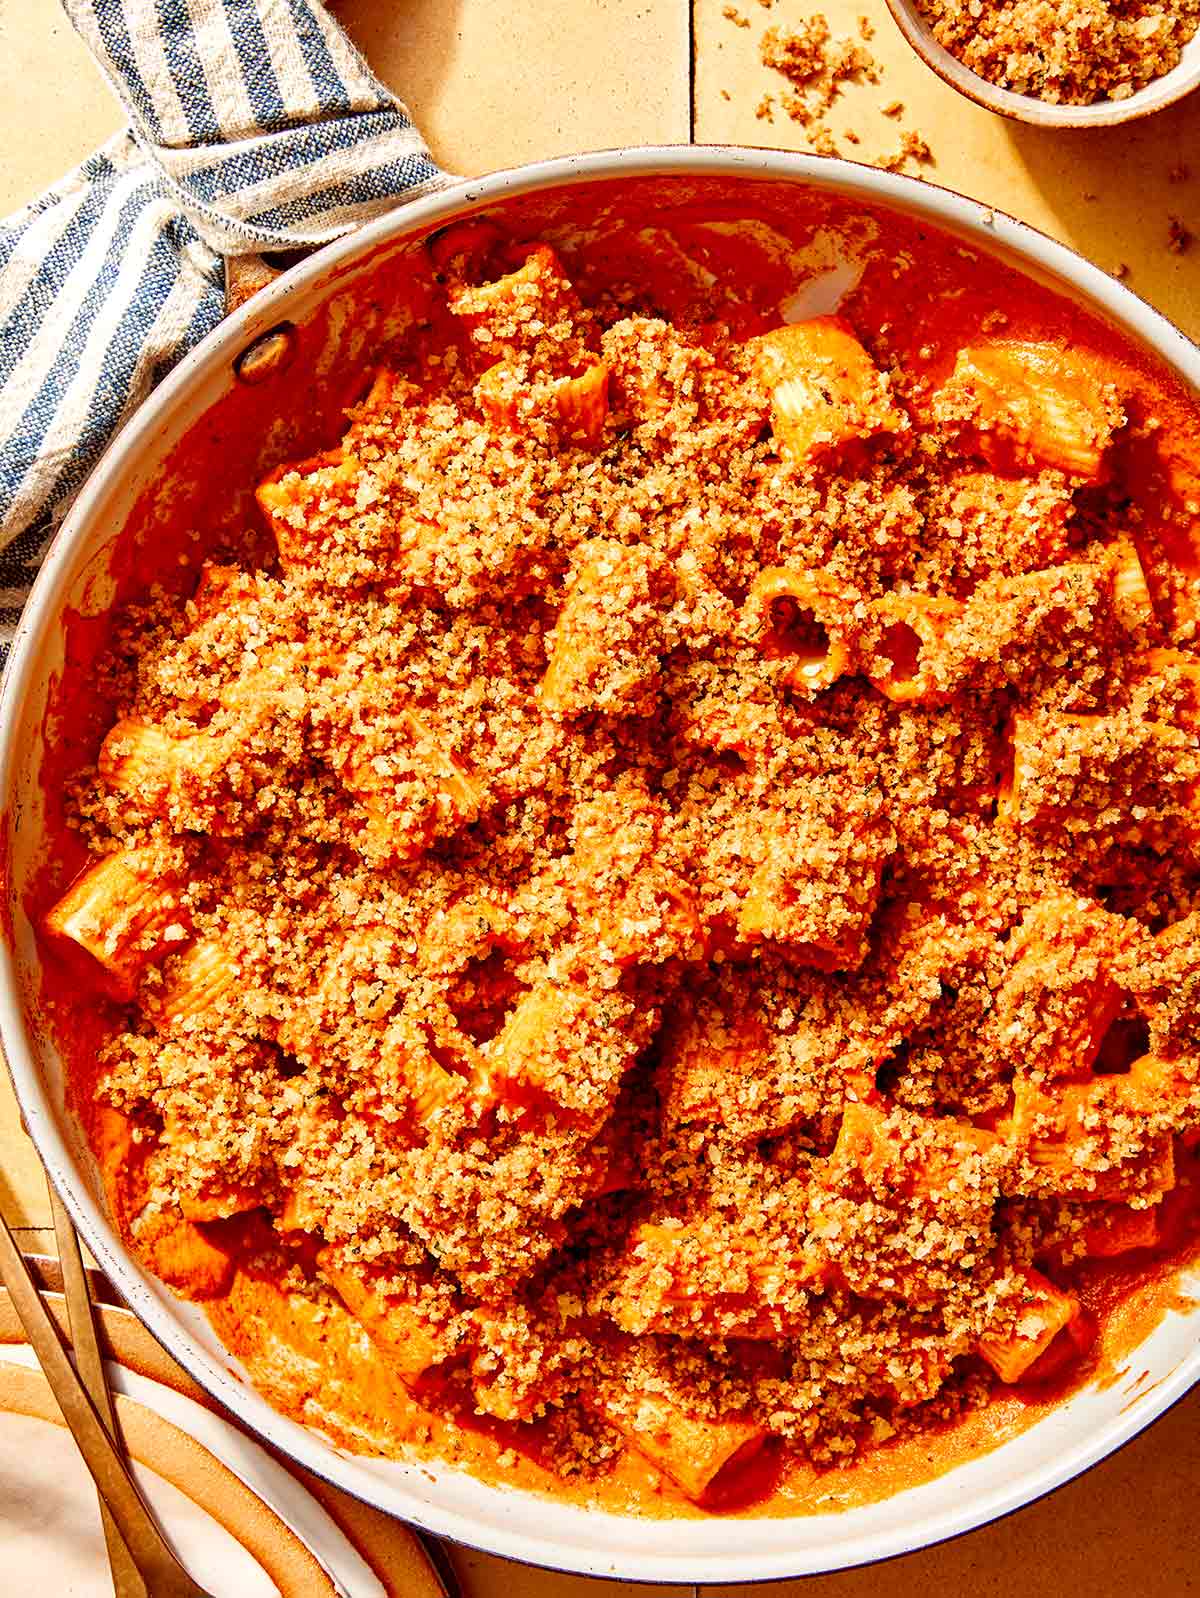
  1. Pour coated pasta onto a serving platter, top with buttered parmesan-herb breadcrumbs, and serve.
Close up in a skillet of romesco sauce with breadcrumbs on top.

Is Romesco Sauce Only for Pasta?

While it’s mouthwatering on pasta, there are many more romesco sauce uses you need to try!

Romesco sauce pasta being served onto a plate with a fork.

Make Ahead, Freezing, and Reheating Instructions

Make Ahead

To make this meal even easier, you can make the romesco sauce ahead of time, so all you have to do the night of is boil your pasta and quickly make your breadcrumbs.

In our opinion, romesco sauce that’s sat in the refrigerator for a day or two is even better than fresh sauce, as the flavors become richer and they have time to meld together. Just make the recipe for the sauce as directed, let it cool, and store it in an airtight container in the refrigerator for up to 5 days.

To make the pasta ahead, boil it until slightly al dente, drain, toss with a little olive oil, then let it cool completely. Store it in the refrigerator for up to 2-3 days.

Freezing

Romesco sauce is perfect for freezing as the texture and flavor stay the same. This makes it a great sauce to prepare in double or triple batches, freezing the rest for later! Portion the sauce into freezer bags, lay them flat, and freeze for up to 3 months.

You can also freeze the entire pasta dish (minus the breadcrumb mixture) to reheat and enjoy at a later date. Make the sauce and the pasta and combine as directed. Once cooled, store in an airtight container in the freezer for up to three months. Do not freeze with the breadcrumb topping, as this will become soggy as they thaw.

Reheating

  • To reheat refrigerated romesco sauce, add it to a pot over the stove on low heat. Stir gently until warmed through.
  • To reheat refrigerated pasta, add it to a pot over the stove on low heat. Stir gently until warmed through, adding a little water if needed.
  • To reheat frozen romesco and rigatoni, let the pasta thaw in the refrigerator overnight, then add it to a pot over low to medium heat. Warm through, adding a small amount of water if the sauce and pasta seem dry.
Romesco sauce pasta close up in a skillet.

Variations

We love this recipe as is, but here are some easy ways you can change up the dish to make it your own!

  • Make it vegan. The romesco sauce and rigatoni are already naturally vegan, so just use dairy-free butter for the breadcrumbs, and the entire dish will be vegan and dairy-free!
  • Add protein. To make this dish a little more filling and balanced, add diced chicken or steak, ground turkey or burger, or shrimp.
  • Add veggies. Steam, roast, or saute broccoli, peppers, zucchini, eggplant, mushrooms, or cauliflower (or any combination of veggies) and serve them mixed into the pasta or on the side.
  • Make it extra creamy. This sauce already has a rich texture, but you can make it even more decadent and creamy by adding a splash of half and half or a dollop of sour cream or Greek yogurt.
  • Make it spicy. Add a sprinkle of crushed red pepper flakes or minced jalapeno peppers to the sauce for a spicy kick.
  • Swap the nuts. Instead of slivered almonds, use crushed walnuts or pine nuts in the romesco sauce.
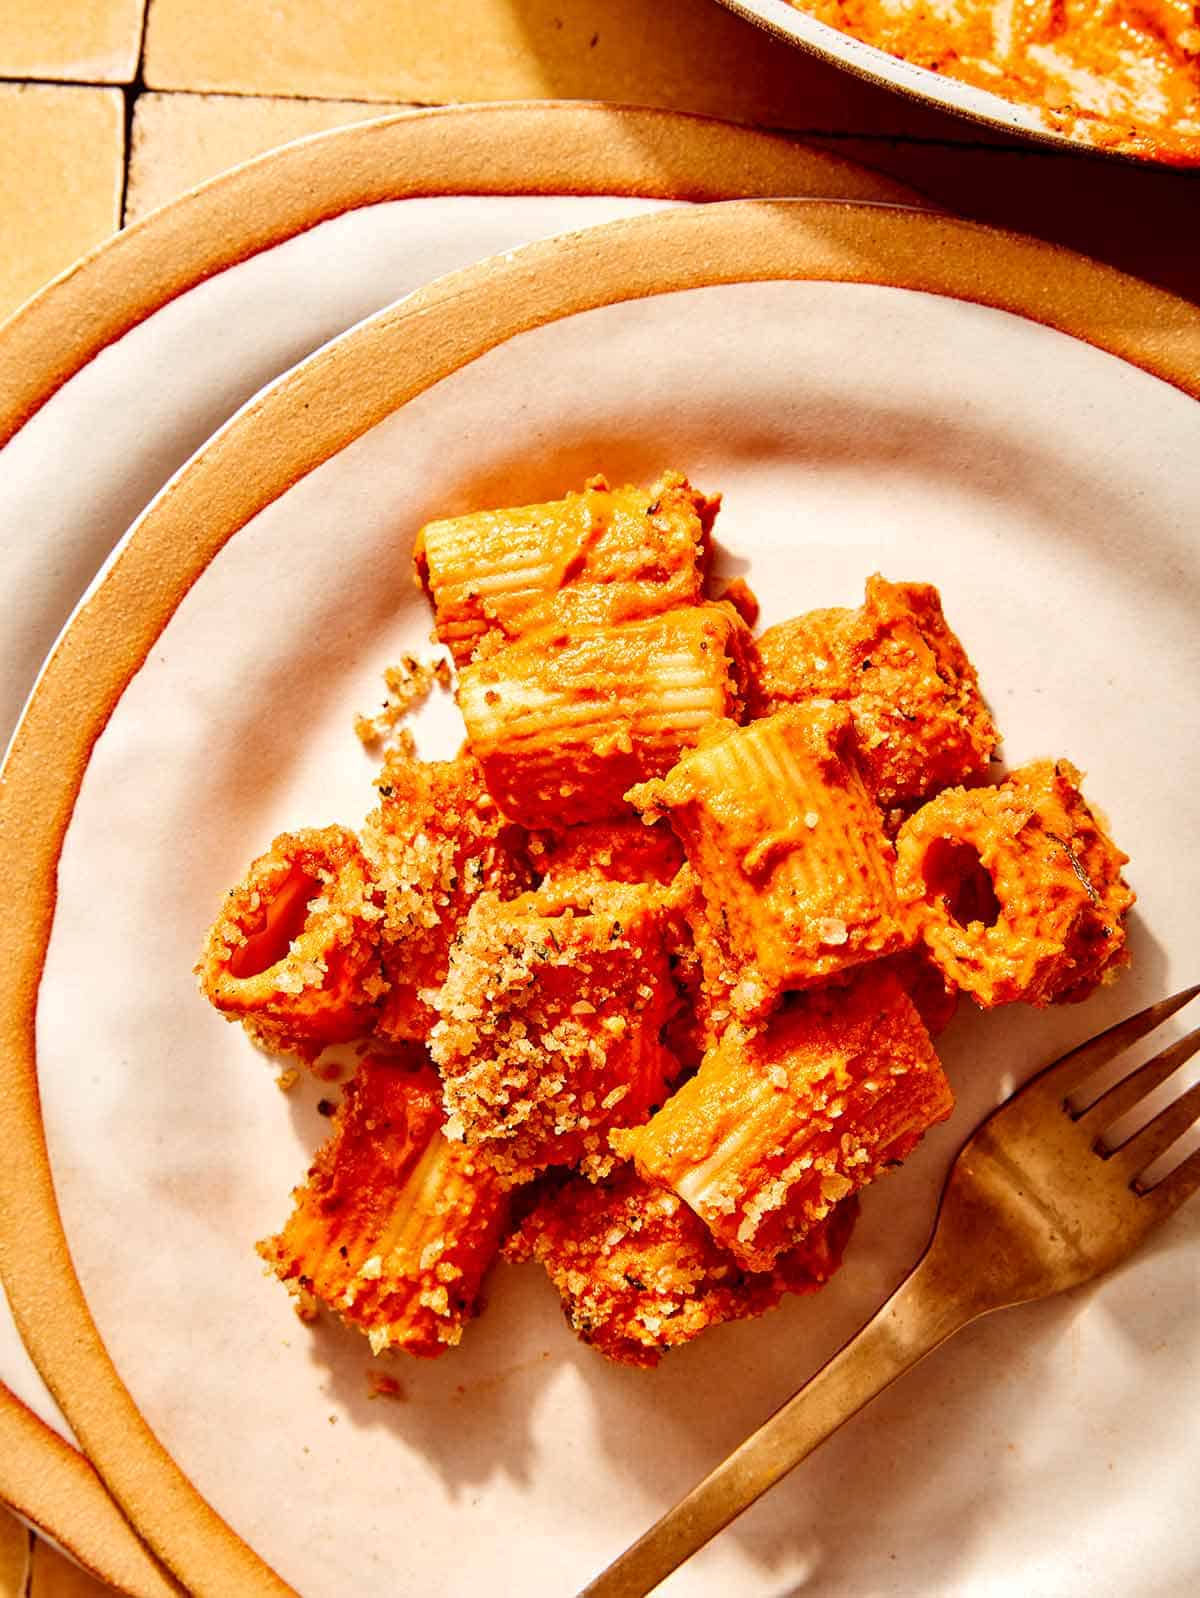
A plate of romesco sauce pasta.

What to Serve with Romesco Sauce with Rigatoni

To make this into a complete meal, serve your rigatoni with romesco sauce alongside:

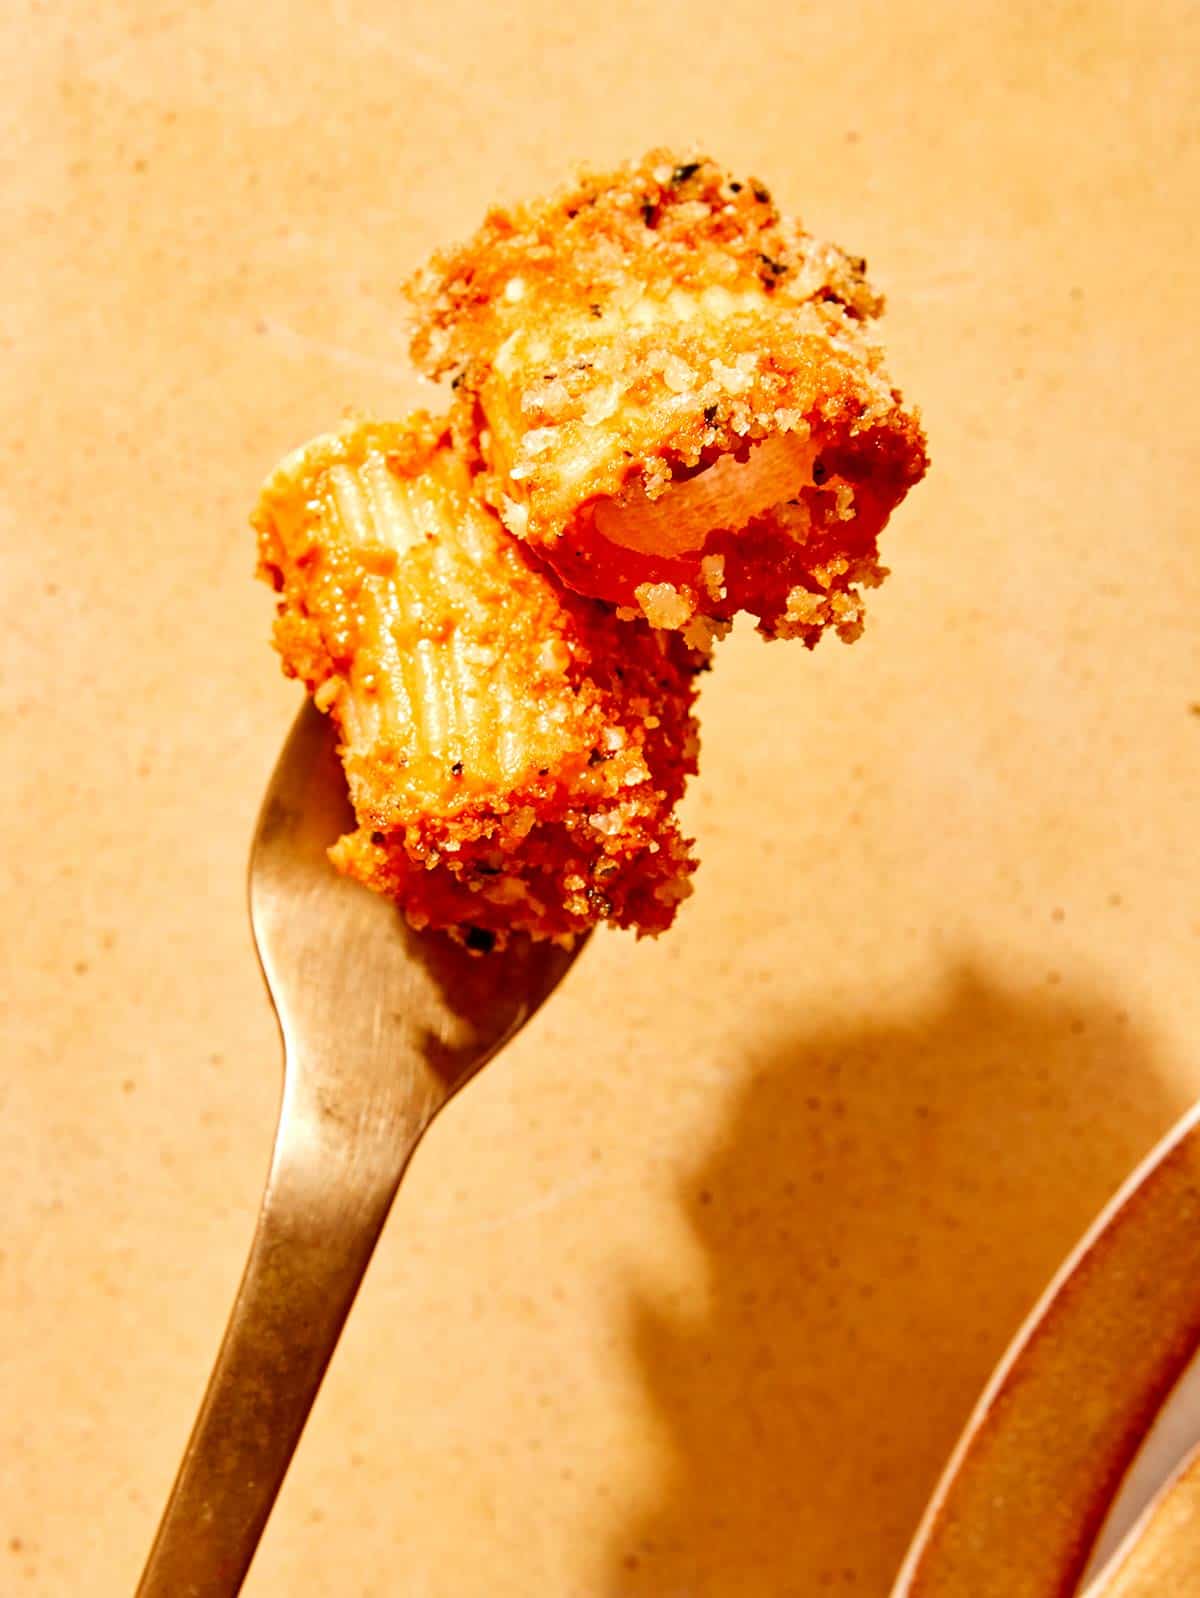
Romesco sauce pasta speared on a fork.

More Delicious Recipes You Will Love

Romesco sauce pasta in a skillet ready to be served.
Print

Romesco Sauce with Rigatoni

Our bright and robust Romesco Sauce Rigatoni is topped with buttered parmesan and herb breadcrumbs for the perfect pasta dish!
Course dinner, lunch, Main Course
Cuisine spanish
Prep Time 10 minutes
Cook Time 15 minutes
Total Time 25 minutes
Servings 3
Calories 642kcal

Ingredients

  • 1/2 pound rigatoni

buttered parmesan-herb breadcrumbs

  • 2 1/2 tablespoons unsalted butter
  • 2/3 cup Italian Style breadcrumbs
  • 1/3 cup grated Parmesan

romesco sauce

  • 1 (16 ounce) jar roasted red bell peppers, drained
  • 1/3 cup slivered almonds
  • 1 1/2 tablespoons tomato paste
  • 1 tablespoon extra-virgin olive oil
  • 2 garlic cloves
  • 1/2 lemon, juiced
  • 3 tablespoons minced parsley
  • 2 tablespoons minced basil leaves
  • salt and pepper to taste

Instructions

pasta

  • Fill a pot with water, place over high heat and bring to a boil. Add a small handful of salt and rigatoni and boil, stirring occasionally, until al dente, 6 to 7 minutes.
  • Drain pasta into a colander, reserving 2/3 cup pasta water. Set aside.

breadcrumbs

  • Melt butter in a skillet over medium heat and add breadcrumbs. Stir and toast breadcrumbs for 3 to 4 minute, and remove from heat. Once mixture has cooled, stir in Parmesan. Set aside.

romesco sauce

  • Place all ingredients into a blender and puree until smooth. Pour mixture into skillet and place over medium-low heat. Stir in reserved pasta water and simmer for 2 to 3 minutes.
assembly

  • Add pasta into sauce and toss together until pasta is fully coated. Season with salt and pepper.
  • Pour coated pasta onto a serving platter, top with buttered, Parmesan-herb breadcrumbs and serve.

Notes

Make Ahead
  • To make this meal even easier, you can make the romesco sauce ahead of time, so all you have to do the night of is boil your pasta and quickly make your breadcrumbs.
  • In our opinion, romesco sauce that’s sat in the refrigerator for a day or two is even better than fresh sauce, as the flavors become richer and they have time to meld together. Just make the recipe for the sauce as directed, let it cool, and store it in an airtight container in the refrigerator for up to 5 days.
  • To make the pasta ahead, boil it until slightly al dente, drain, toss with a little olive oil, then let it cool completely. Store it in the refrigerator for up to 2-3 days.
Freezing
  • Romesco sauce is perfect for freezing as the texture and flavor stay the same. This makes it a great sauce to prepare in double or triple batches, freezing the rest for later! Portion the sauce into freezer bags, lay them flat, and freeze for up to 3 months.
  • You can also freeze the entire pasta dish (minus the breadcrumb mixture) to reheat and enjoy at a later date. Make the sauce and the pasta and combine as directed. Once cooled, store in an airtight container in the freezer for up to three months. Do not freeze with the breadcrumb topping, as this will become soggy as they thaw.
Reheating
  • To reheat refrigerated romesco sauce, add it to a pot over the stove on low heat. Stir gently until warmed through.
  • To reheat refrigerated pasta, add it to a pot over the stove on low heat. Stir gently until warmed through, adding a little water if needed.
  • To reheat frozen romesco and rigatoni, let the pasta thaw in the refrigerator overnight, then add it to a pot over low to medium heat. Warm through, adding a small amount of water if the sauce and pasta seem dry.
Nutrition

Calories: 642kcal | Carbohydrates: 83g | Protein: 20g | Fat: 26g | Saturated Fat: 9g | Polyunsaturated Fat: 4g | Monounsaturated Fat: 11g | Trans Fat: 0.4g | Cholesterol: 35mg | Sodium: 1955mg | Potassium: 500mg | Fiber: 6g | Sugar: 6g | Vitamin A: 1037IU | Vitamin C: 24mg | Calcium: 223mg | Iron: 4mg

The post Romesco Sauce with Rigatoni appeared first on Spoon Fork Bacon.
Taco Salad Recipe

Tacos aren’t reserved for Tuesdays, although we love a good mid-week crunchy taco or taco dip. This hearty taco salad recipe is perfect any day of the week. Whether you’re enjoying dinner at home or need a passing dish, we know you’ll love this recipe. Crisp romaine and seasoned beef are all topped with corn, tomatoes, black beans, shredded cheese, sliced jalapeno, and avocado. Then just to take this salad over the top, add a…

Read More

The post Taco Salad Recipe appeared first on Spoon Fork Bacon.

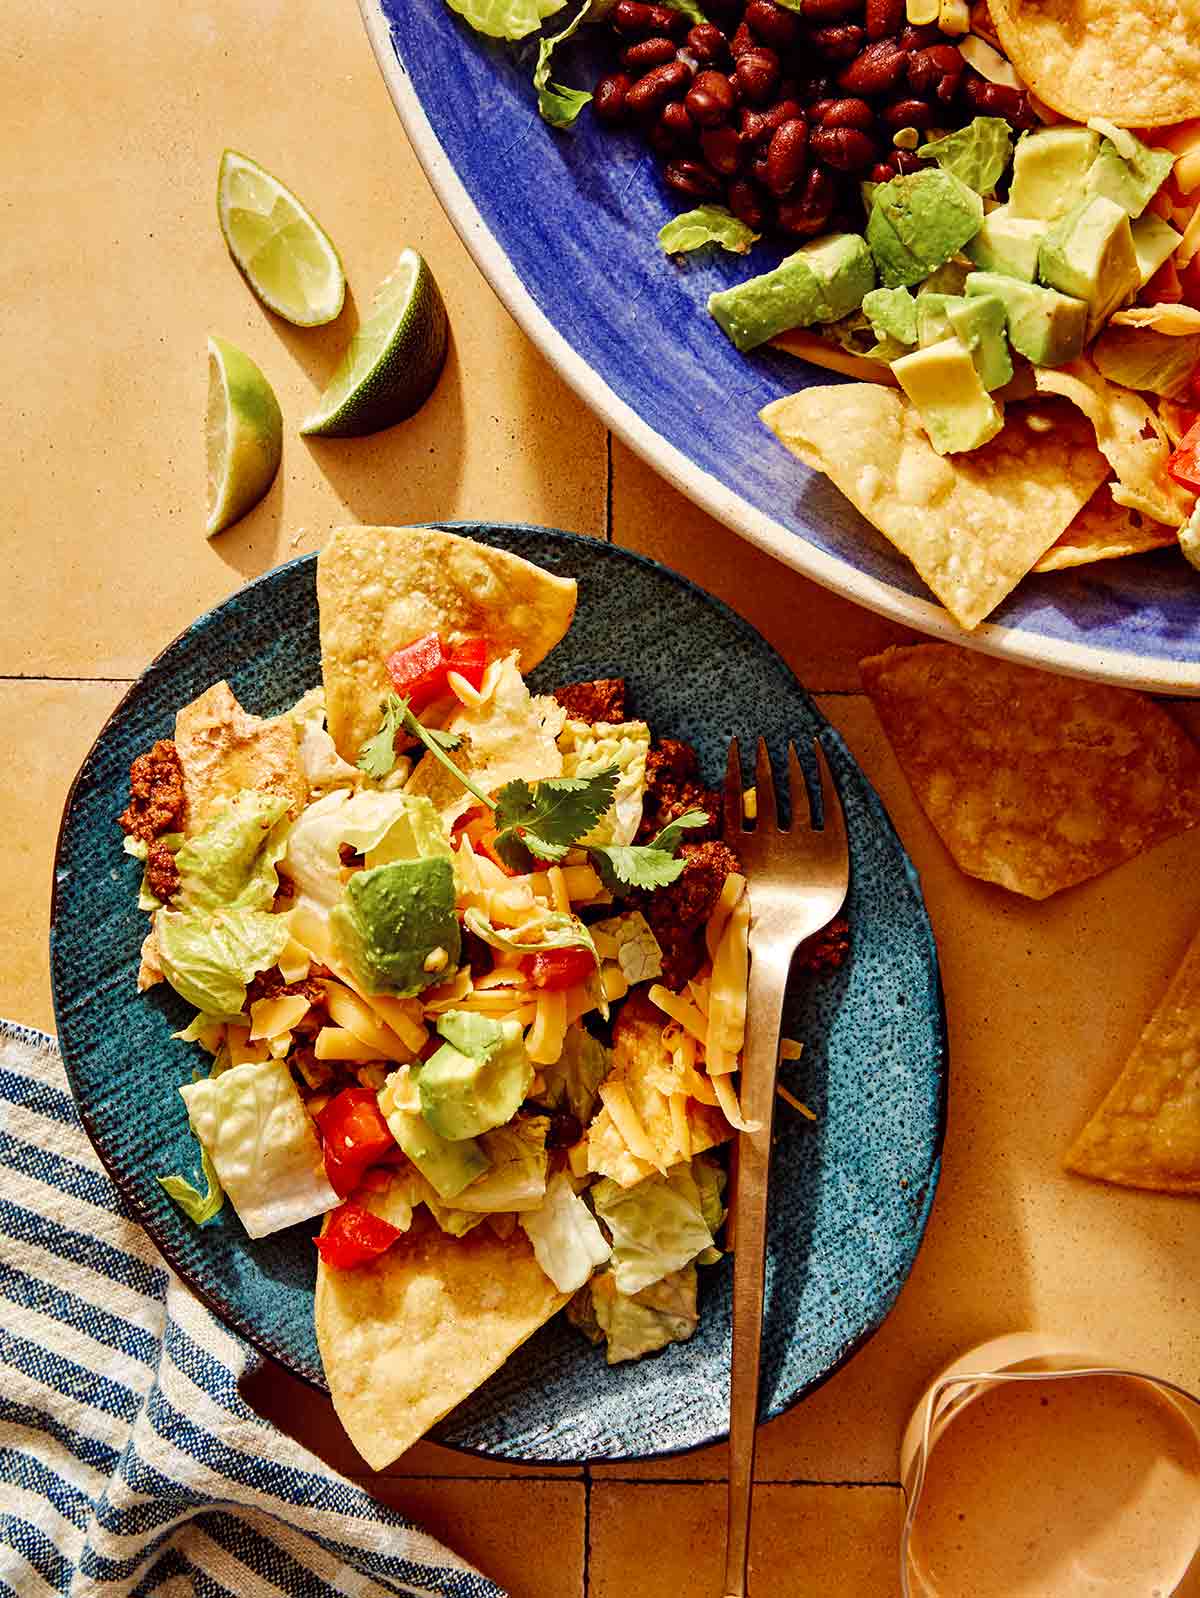
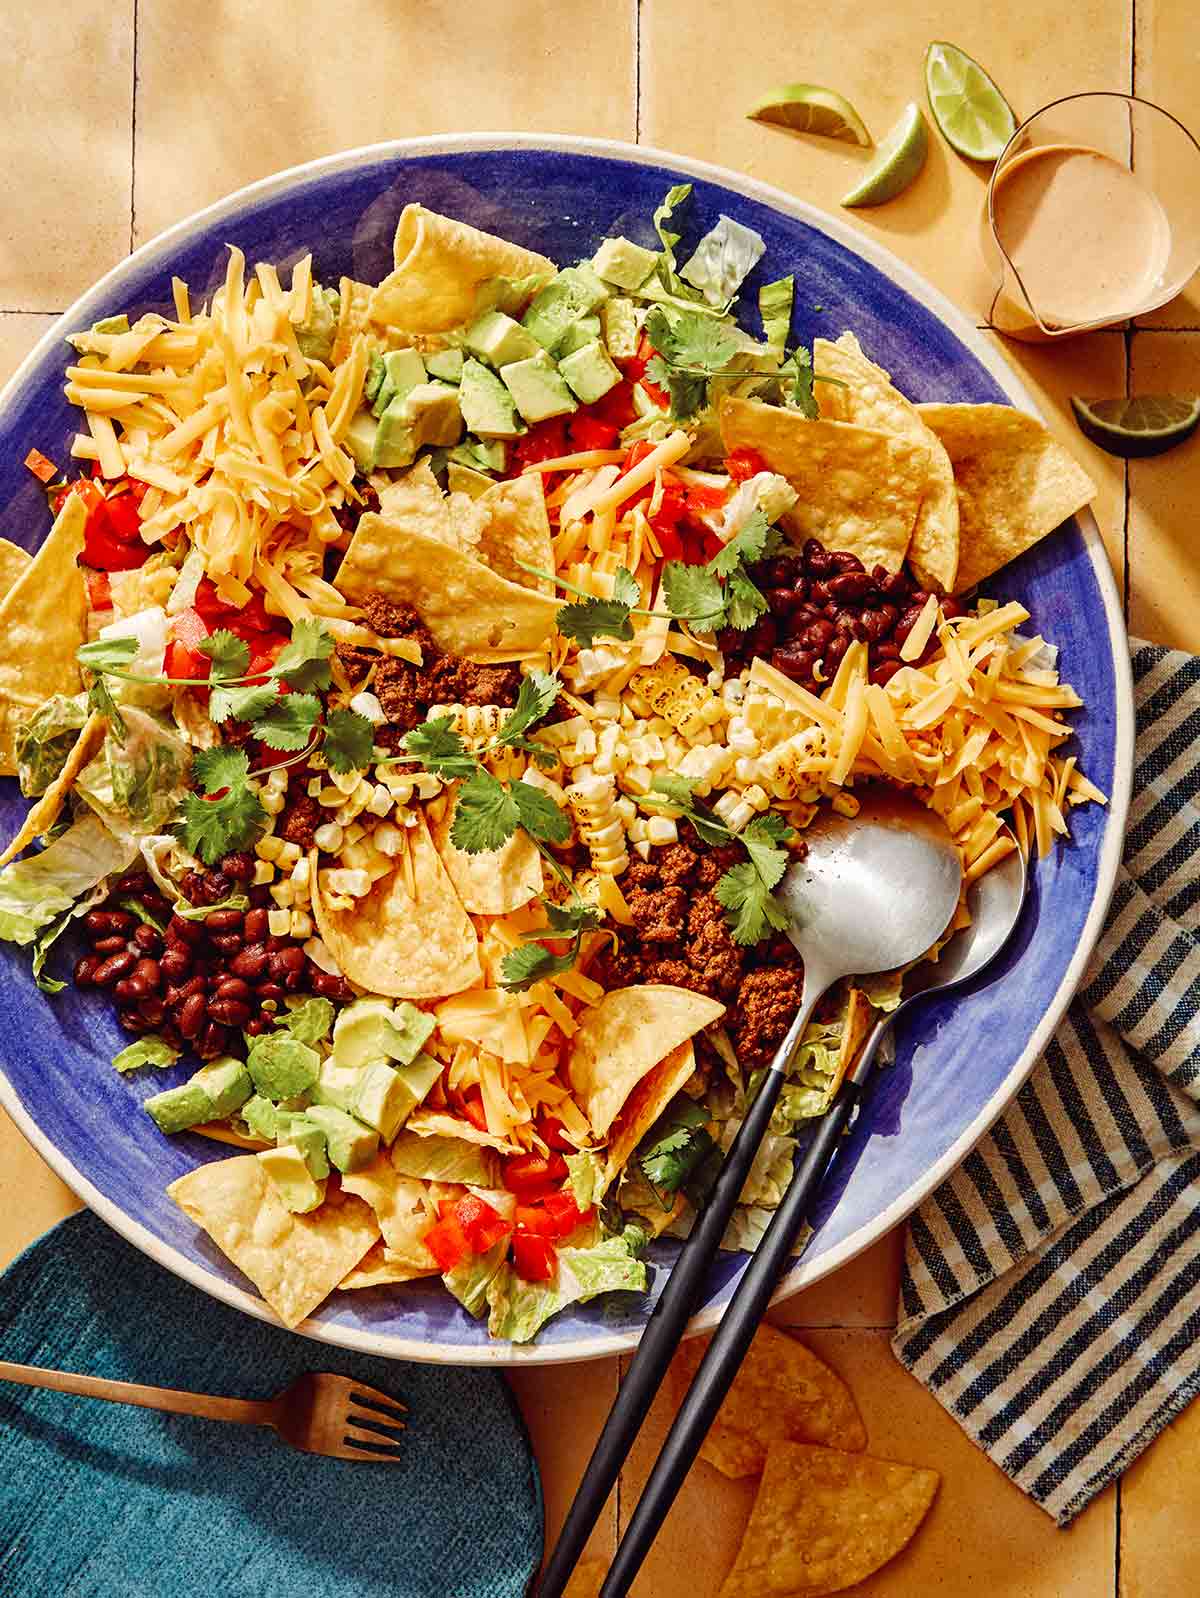
Taco salad in a big bowl with a plate on the side.

Tacos aren’t reserved for Tuesdays, although we love a good mid-week crunchy taco or taco dip. This hearty taco salad recipe is perfect any day of the week. Whether you’re enjoying dinner at home or need a passing dish, we know you’ll love this recipe. Crisp romaine and seasoned beef are all topped with corn, tomatoes, black beans, shredded cheese, sliced jalapeno, and avocado.

Then just to take this salad over the top, add a generous drizzle of creamy chipotle dressing. It’s cool and spicy, bringing all the flavors together. Bring this taco salad to your next potluck or picnic, or serve as a main course with appetizers of chips, guacamole, and homemade mango salsa.

How to Make Our Taco Salad Recipe

Ingredients

Beef

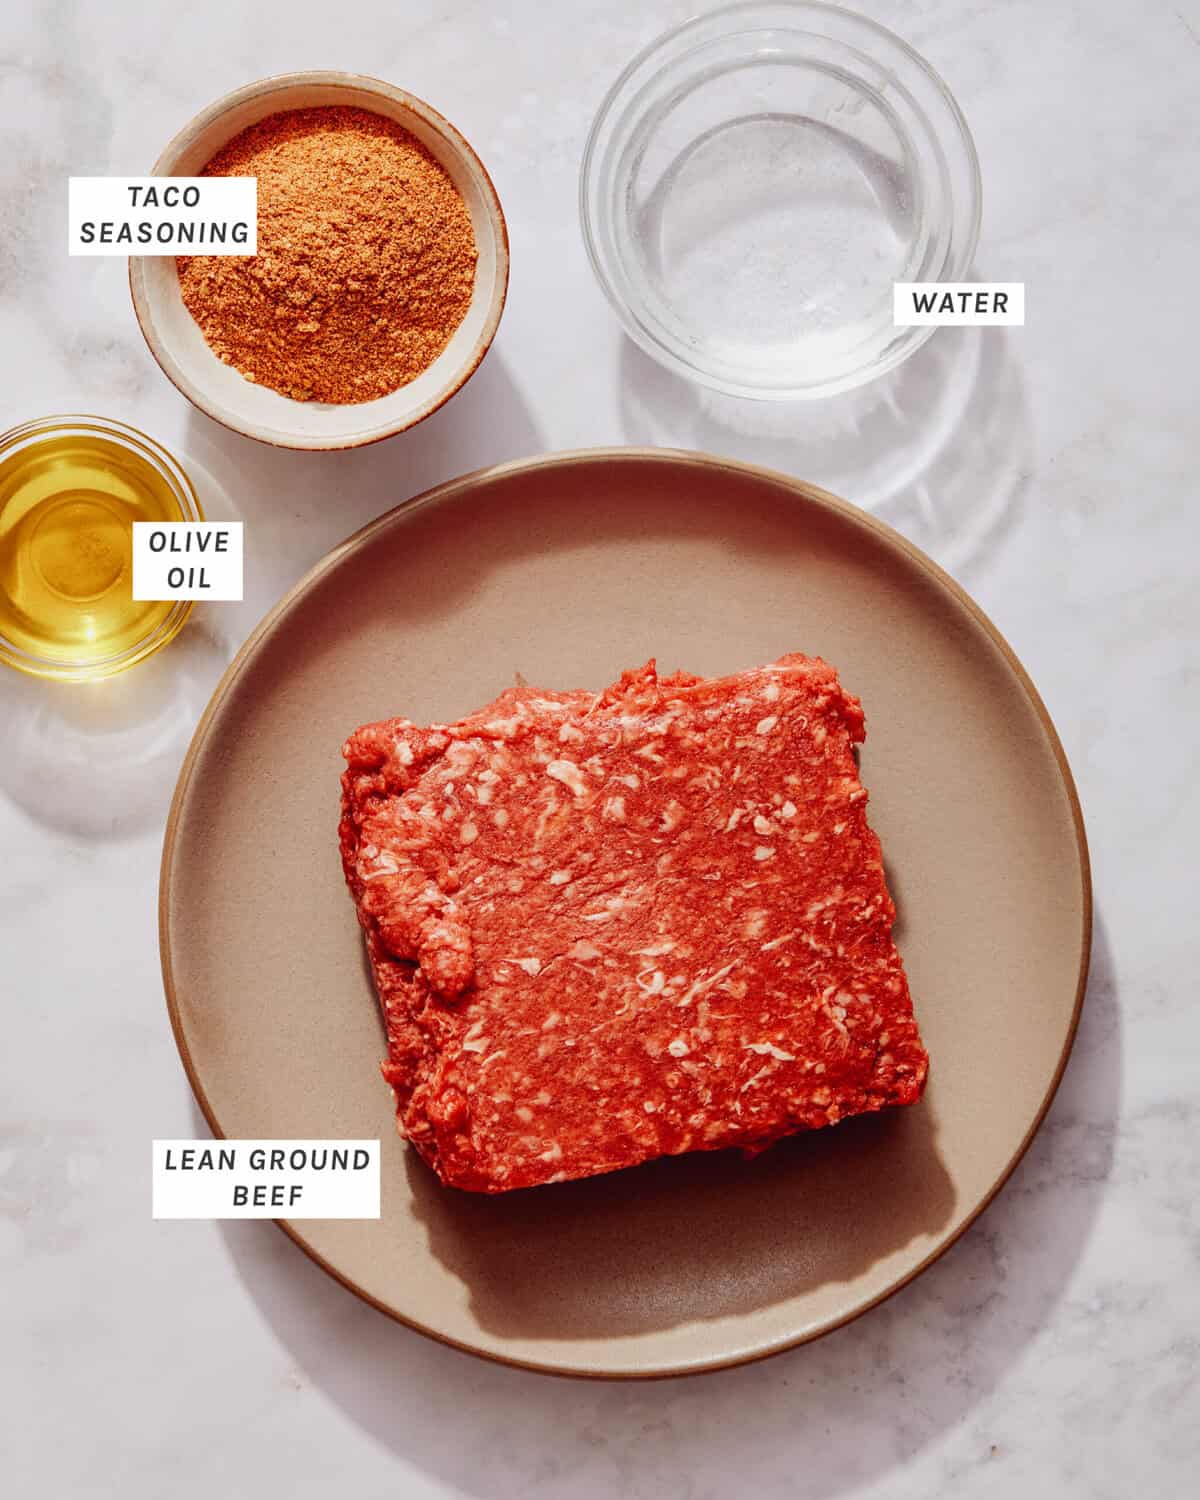
Beef ingredients to make a taco salad.

Dressing

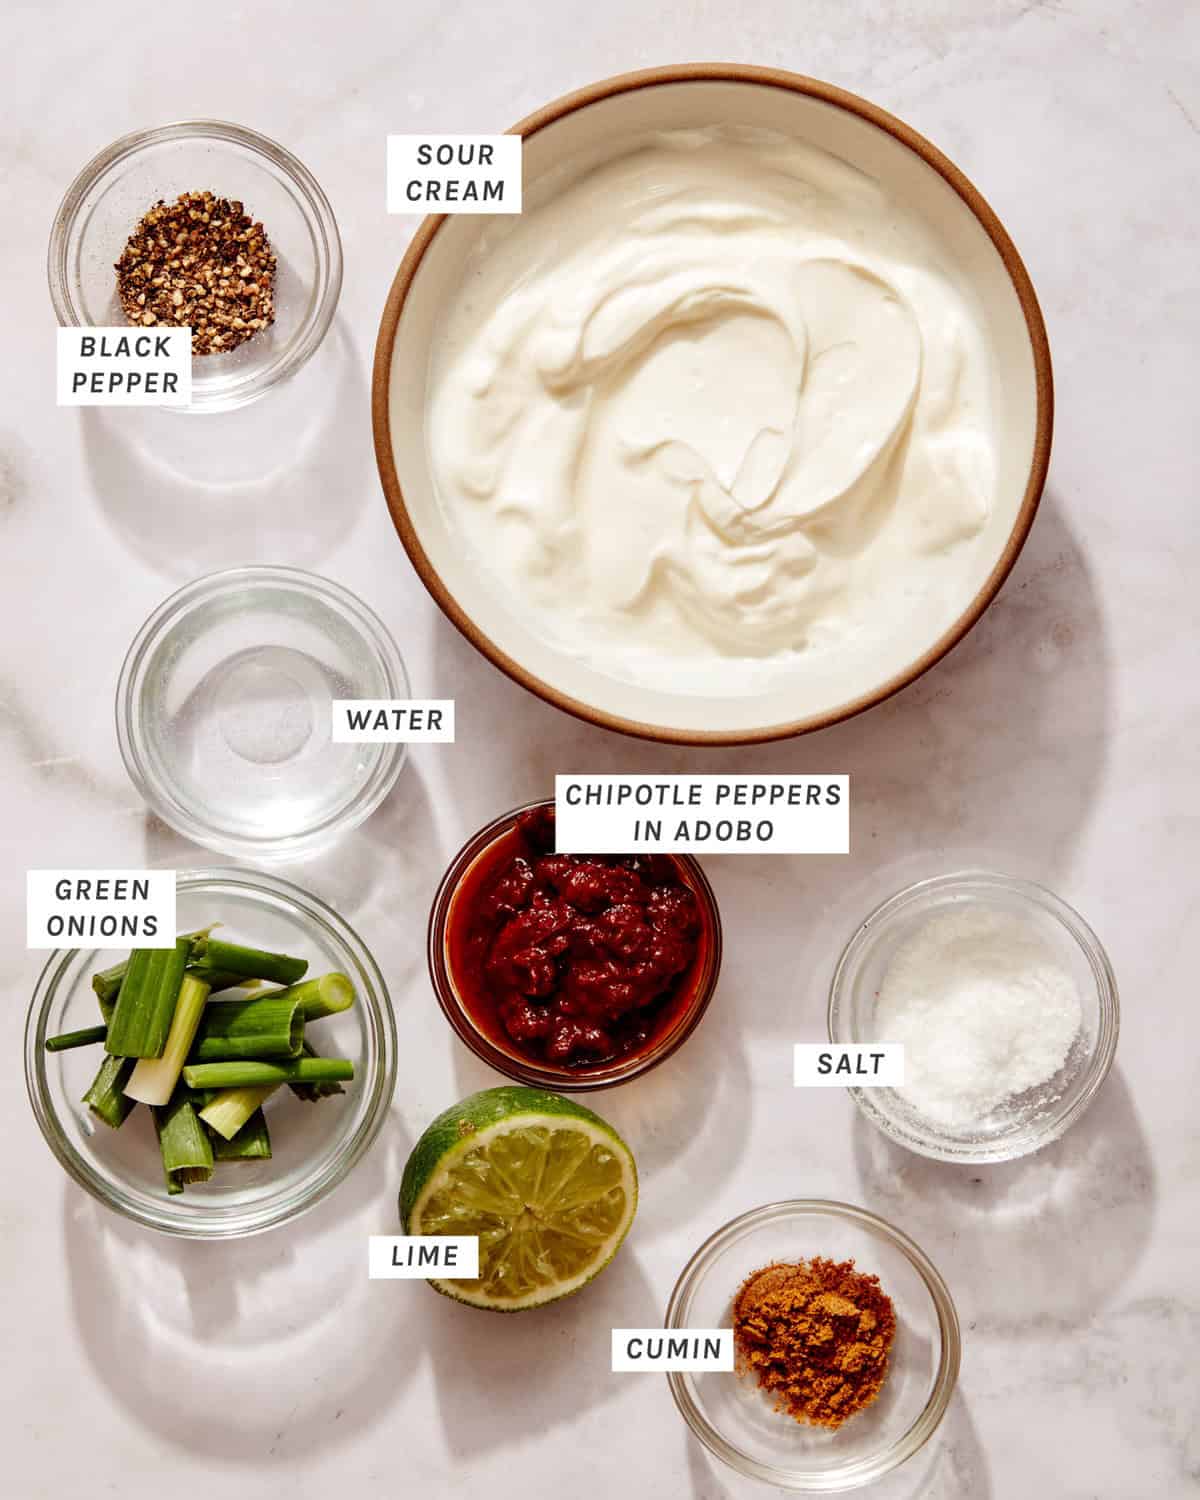
Taco salad dressing ingredients to make a creamy chipotle dressing.

Assembly

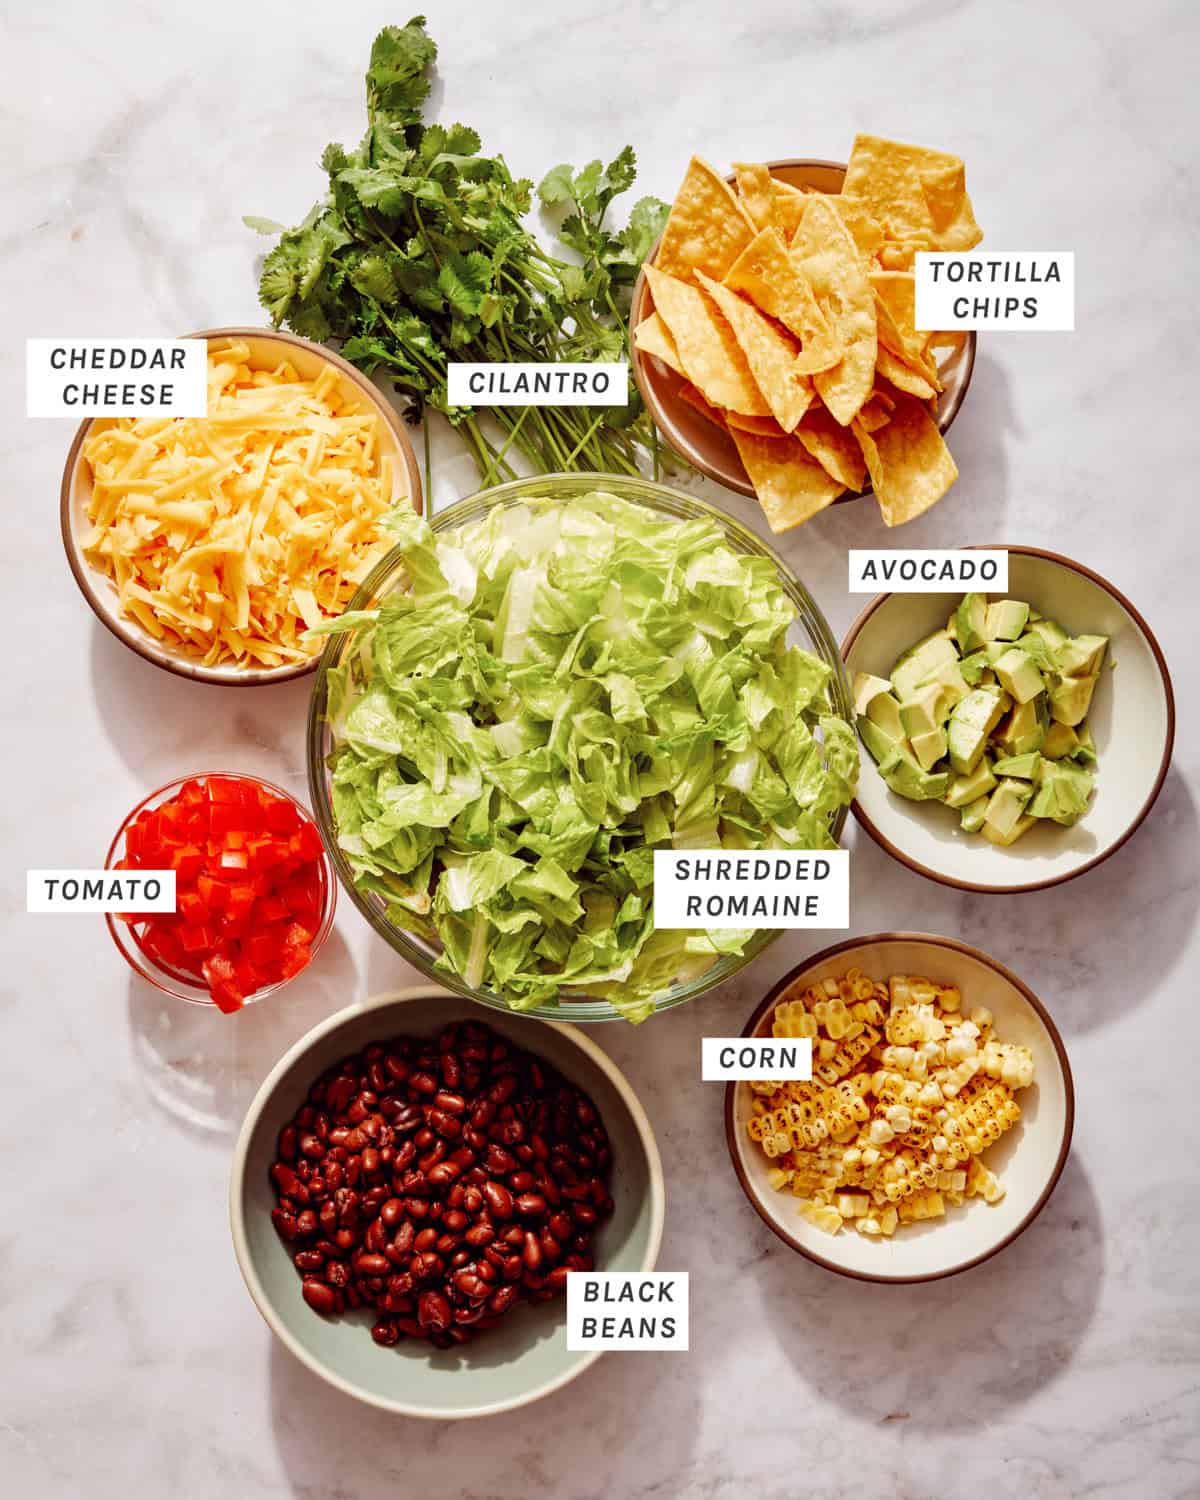
Taco salad ingredients in bowls.

Process

  1. In a small bowl, stir together taco seasoning and water to form a paste.
  2. Place a large pan over medium-high heat. Add oil and ground beef, using a wooden spoon to break the beef up into small pieces. Cook until beef has just browned, 2 to 3 minutes. Pour the paste into the pan and stir into beef. Continue to stir until beef is evenly seasoned and cooked through, 2 to 3 minutes. Remove from heat and set aside to slightly cool.
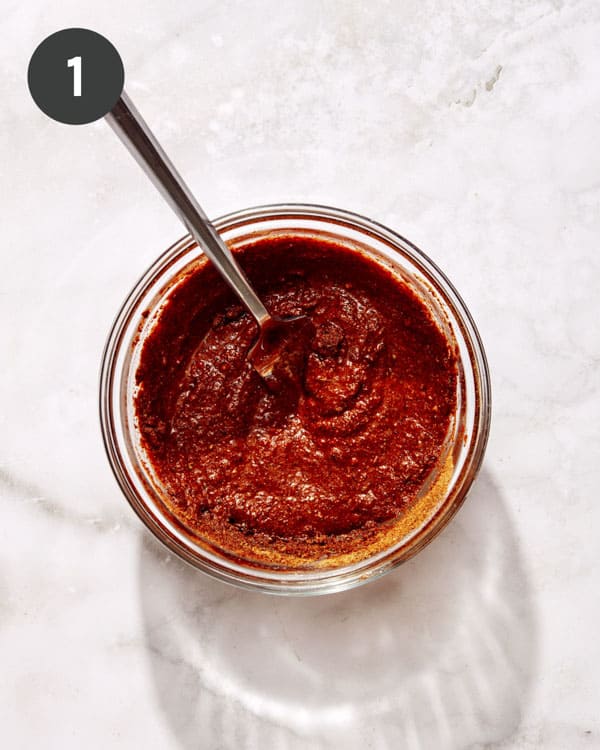
Taco seasoning mixed with water to make paste in a bowl with a spoon.
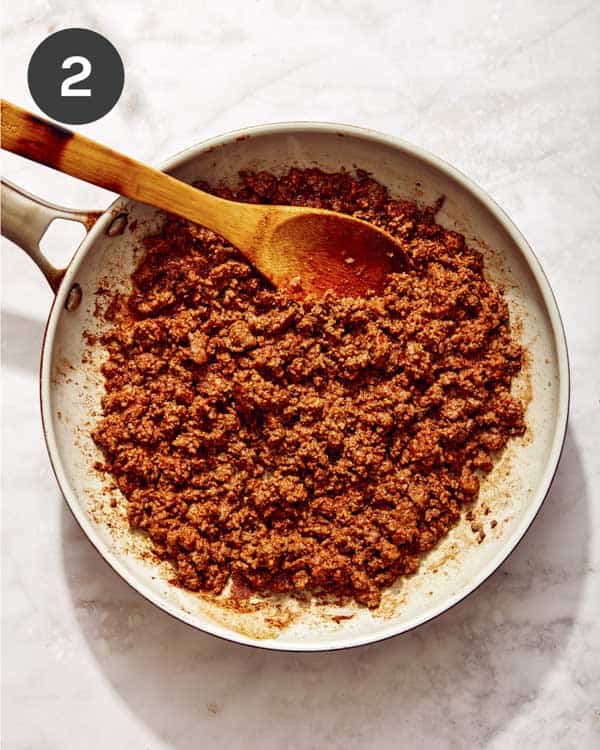
Ground beef in a skillet with taco seasoning cooking.
  1. In a food processor, combine all dressing ingredients and blend until smooth. Adjust salt and pepper to taste as needed.
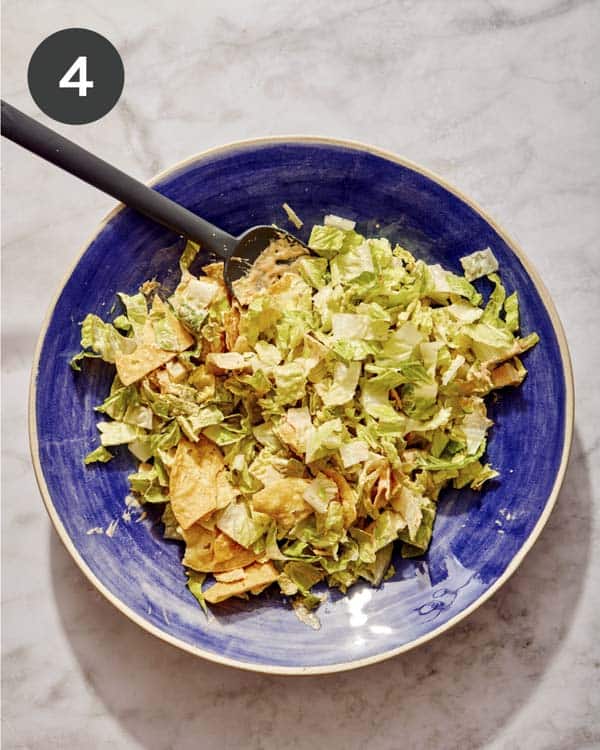
  2. In a large salad bowl, combine romaine, chips, and 1/2 dressing. Toss together until evenly coated.
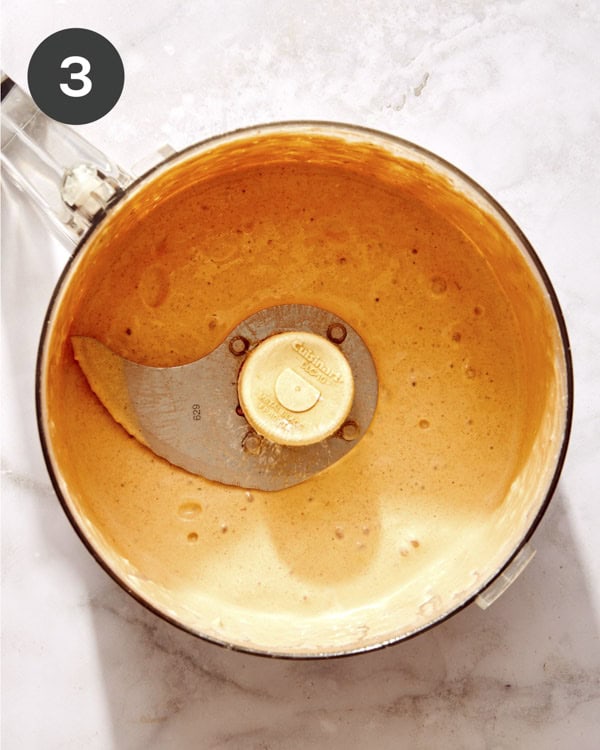
Creamy chipotle dressing in a food processor.
Taco salad tossed with dressing in a big bowl.
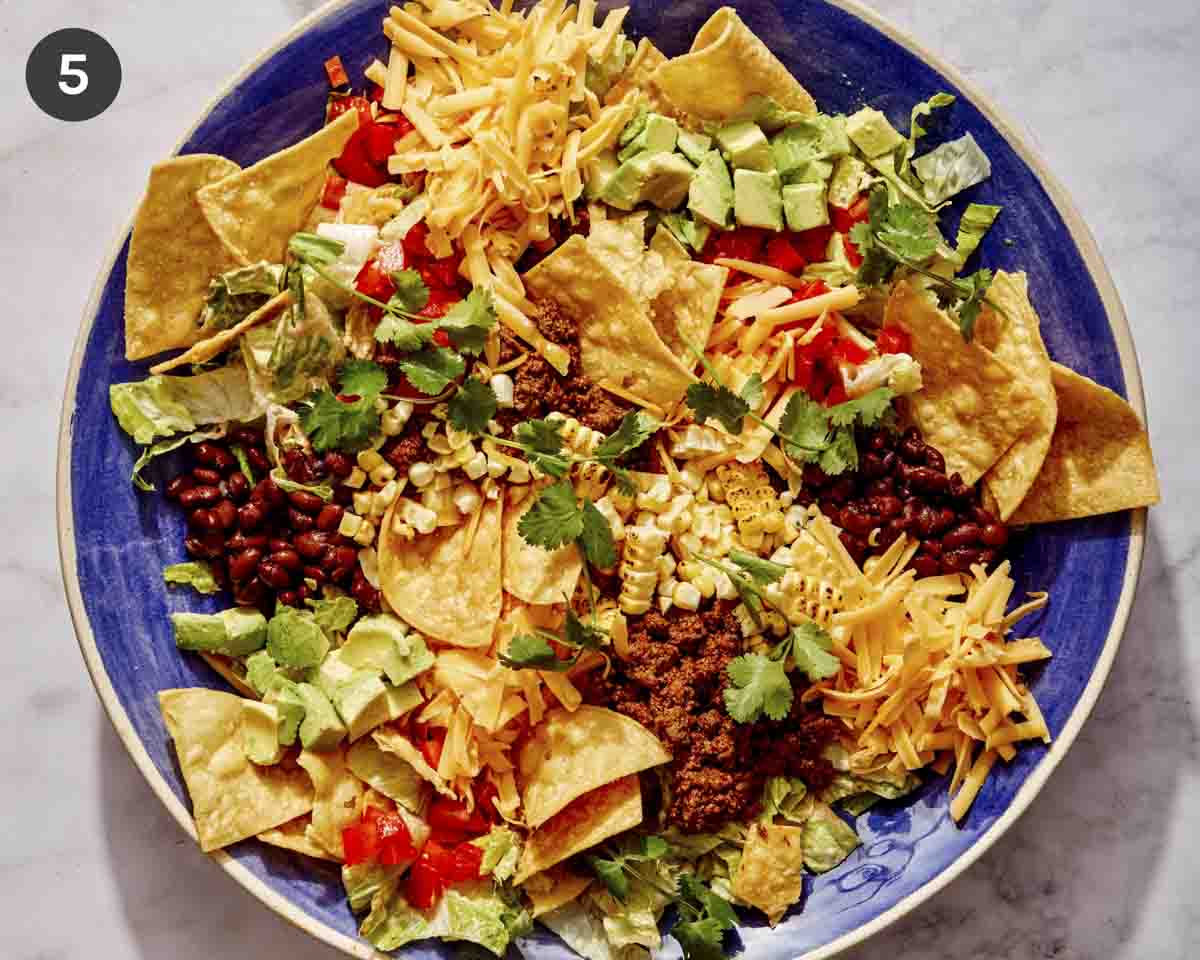
  1. Add corn, tomatoes, black beans, shredded cheese, sliced jalapeno, and avocado. Drizzle with remaining dressing and toss together. Serve.
Taco salad up close in a big bowl.

Why Romaine Lettuce is Our Pick for Taco Salad

Romaine is our favorite lettuce for taco salad (and any salad that has a lot of hearty ingredients added to it). The crisp crunch and heavy-duty texture help it stand up to add-ins like beef, beans, tomatoes, and avocado. It also has a higher nutritional value being a leafy green.

Iceberg lettuce is most commonly used in taco salad recipes, and while it works, the lack of flavor and nutrients make it our second choice.

More Great Lettuce/Cabbage Options for Our Taco Salad Recipe

If you want to try other lettuce options for your taco salad, feel free to swap half or all of the romaine with any of the following:

  • Spinach: adds more tenderness to the salad while increasing the nutrients like vitamin C and magnesium.
  • Kale: chopped kale leaves add a heartier and chewier texture while also adding some bitterness that goes well with the chipotle dressing.
  • Cabbage: add a handful of shredded green or purple cabbage for some extra crunch and a burst of peppery flavor.
  • Butter lettuce: we love butter lettuce for our chicken lettuce wraps, but they also add a nice soft texture and mild taste to taco salad!

Tips for the BEST Taco Salad!

  • Make it easier! Use prewashed and chopped lettuce, swap avocado for premade guac (that’s always fresh), use store-bought dressing, and swap the diced tomatoes for packaged pico de gallo to save time and effort making this taco salad.
  • Crumble the beef as you cook it. Small pieces of ground beef help make sure each bite has a little bit of flavorful, tender taco meat!
  • If you’re making this for a potluck or crowd, double the recipe and keep the dressing, avocado, and tortilla chips separate until just before serving! You can also serve this “taco bar style” with all the toppings on the side.
Taco salad in a bowl with spoons on the side.

Substitutions and Variations

  • Swap the ground beef. Use ground turkey, ground chicken, or even tofu in place of the ground beef.
  • Swap the dressing. If you don’t want to make the creamy chipotle dressing, you could also use a storebought ranch, southwest ranch, or even a dollop of sour cream and salsa.
  • Make the dressing dairy-free. Instead of sour cream, use a dairy-free plain yogurt for the creamy chipotle dressing. (And skip the cheese or use vegan cheese for a completely non-dairy taco salad).
  • Make it vegan: Use tofu or vegan beef crumbles instead of ground beef, skip the cheese, and use a dairy-free dressing or the substitute above for dairy-free creamy chipotle dressing.
  • Make a layered salad. Instead of mixing everything into a large bowl, layer all of the ingredients into a glass mixing bowl, giving it a fun presentation!
  • Swap the cheese. We use shredded cheddar cheese, but feel free to swap this with cotija, queso fresco, Pepperjack, Monterrey Jack,
  • Add some crunch. For an extra texture boost, top the salad with pepitas, corn nuts, or diced jicama.
Close up on a taco salad in a big bowl.

Prep Ahead and Storing Instructions

To make meal assembly as easy as possible, go ahead and prep the beef, romaine, and dressing ahead of time.

  • Beef. Cook and season the beef, then let cool. Store in an airtight container in the refrigerator for up to 3 days before assembling.
  • Romaine. Wash, dry, and chop the romaine leaves. Store in an airtight container with a paper towel to help absorb moisture for 1-3 days before assembling.
  • Dressing. Make the dressing as directed. Store in the refrigerator for up to 1 week.

If you want to store leftovers of this salad, only add the dressing to the salad that’s being eaten, as it will cause the lettuce to become soggy if it’s stored together. Store the dressing and salad separately in the refrigerator.

More Hearty Salad Recipes You Will Love

Taco salad served on a plate with a fork on the plate.
Close up on a taco salad in a big bowl.
Print

Taco Salad Recipe

Crispy romaine, seasoned beef, and a flavorful, creamy chipotle ranch dressing bring this Taco Salad Recipe to life, perfect for a summer potluck or an easy weeknight meal!
Course dinner, lunch, Main Course, main dish, Salad
Cuisine American, tex-mex
Prep Time 20 minutes
Cook Time 10 minutes
Total Time 30 minutes
Servings 4
Calories 612kcal

Ingredients

beef

  • 1 ounce taco seasoning of choice (about 1 package)
  • 1/4 cup water
  • 2 tablespoons olive oil
  • 1 pound lean ground beef

creamy chipotle dressing

  • 1/2 cup sour cream
  • 2 to 3 tablespoons water
  • 1 1/2 tablespoons diced chipotle peppers in adobe (about 1 large chipotle pepper)
  • 1 green onion cut into 1 inch pieces
  • 1/2 teaspoon cumin
  • 1/2 lime juiced
  • salt and pepper to taste

assembly

  • 5 cups shredded romaine
  • 2/3 cup blistered corn kernels (from about 1 corn on cob)
  • 1/2 cup canned black beans drained and rinsed
  • 4 ounces shredded cheddar cheese
  • 2 roma tomatoes seeded and diced
  • 1 avocado diced
  • 3 handfuls for tortilla chips (about 2 ounces)
  • cilantro sprigs garnish

Instructions

beef

  •   In a small bowl stir together taco seasoning and water to form a paste.
  • Place a large pan over medium-high heat. Add oil and ground beef, using a wooden spoon to break the beef up into small pieces. Cook until beef has just browned, 2 to 3 minutes. Pour paste into pan and stir into beef. Continue to stir until beef is evenly seasoned beef has cooked through, 2 to 3 minutes. Remove from heat and set aside to slightly cool.

dressing

  • In a food processor combine all dressing ingredients and blend together until smooth. Adjust salt and pepper to taste as needed.

assembly

  • In a large salad bowl combine romaine, chips and 1/2 dressing. Toss together until evenly coated.
  • Add corn, tomatoes, black beans, shredded cheese, sliced jalapeno, and avocado. Drizzle with remaining dressing and toss together. Serve.

Notes

Tips for the BEST Taco Salad!
  • Make it easier! Use prewashed and chopped lettuce, swap avocado for premade guac (that’s always fresh), use store-bought dressing, and swap the diced tomatoes for packaged pico de gallo to save time and effort making this taco salad.
  • Crumble the beef as you cook it. Small pieces of ground beef help make sure each bite has a little bit of flavorful, tender taco meat!
  • If you’re making this for a potluck or crowd, double the recipe and keep the dressing, avocado, and tortilla chips separate until just before serving! You can also serve this “taco bar style” with all the toppings on the side.

Nutrition

Calories: 612kcal | Carbohydrates: 33g | Protein: 37g | Fat: 39g | Saturated Fat: 13g | Polyunsaturated Fat: 4g | Monounsaturated Fat: 17g | Trans Fat: 0.4g | Cholesterol: 116mg | Sodium: 1910mg | Potassium: 1062mg | Fiber: 10g | Sugar: 6g | Vitamin A: 6628IU | Vitamin C: 19mg | Calcium: 300mg | Iron: 5mg

The post Taco Salad Recipe appeared first on Spoon Fork Bacon.

Spicy Tuna Onigiri

Our Spicy Tuna Onigiri has had me in a total choke hold lately! I’ve been eating them for lunch all week long! I love this super quick, easy, and tasty hand-held meal. It’s a great lunch to take with you on the go too! There are so many variations and fillings for this little snack, that it’s difficult to get sick of them! What is Onigiri? Onigiri is a Japanese stuffed rice ball (also known…

Read More

The post Spicy Tuna Onigiri appeared first on Spoon Fork Bacon.

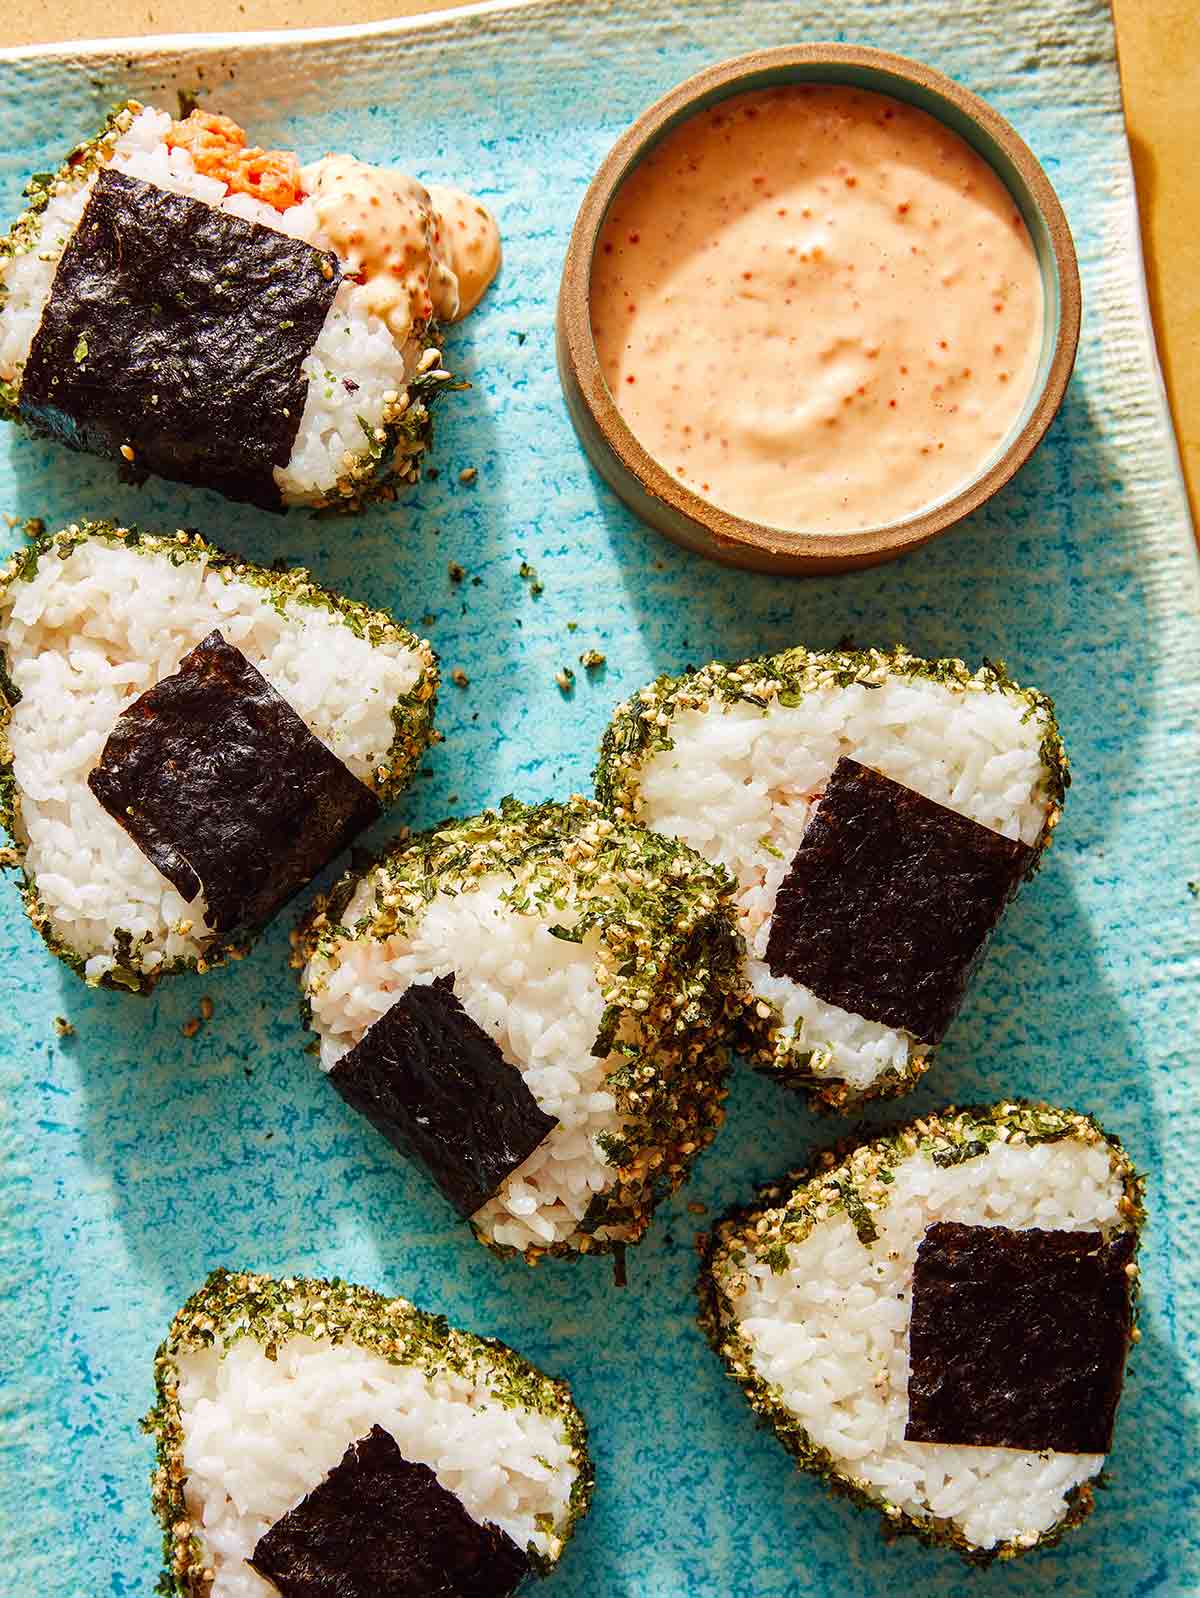
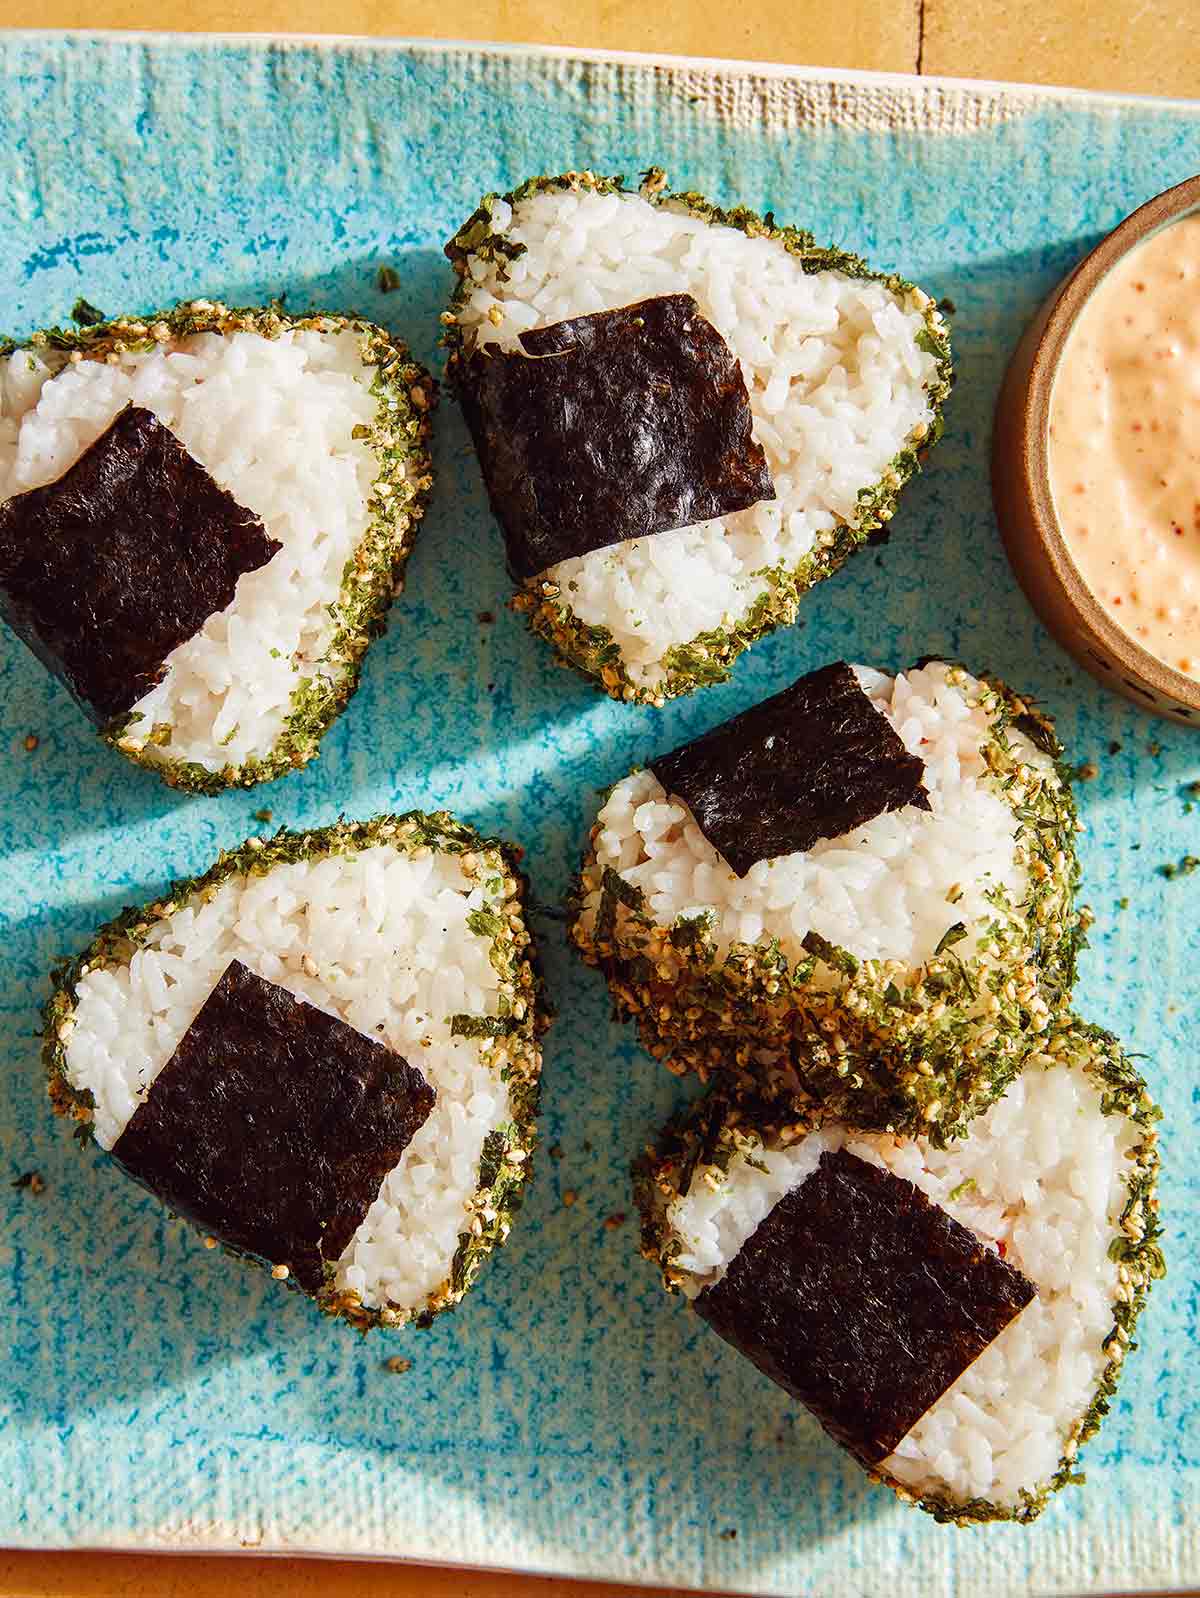
Spicy Tuna Onigiri recipe on a plate with masago sauce.

Our Spicy Tuna Onigiri has had me in a total choke hold lately! I’ve been eating them for lunch all week long! I love this super quick, easy, and tasty hand-held meal. It’s a great lunch to take with you on the go too! There are so many variations and fillings for this little snack, that it’s difficult to get sick of them!

What is Onigiri?

Onigiri is a Japanese stuffed rice ball (also known as omusubi and nigirimeshi). It is a popular snack or meal on the go. They’re generally triangular or circular in shape. Some traditional fillings are short ribs, tempura, umeboshi (pickled plums), canned tuna, pickled vegetables, but you can really stuff rice balls with whatever you want!

How to Make Spicy Tuna Onigiri

Ingredients

Masago Sauce

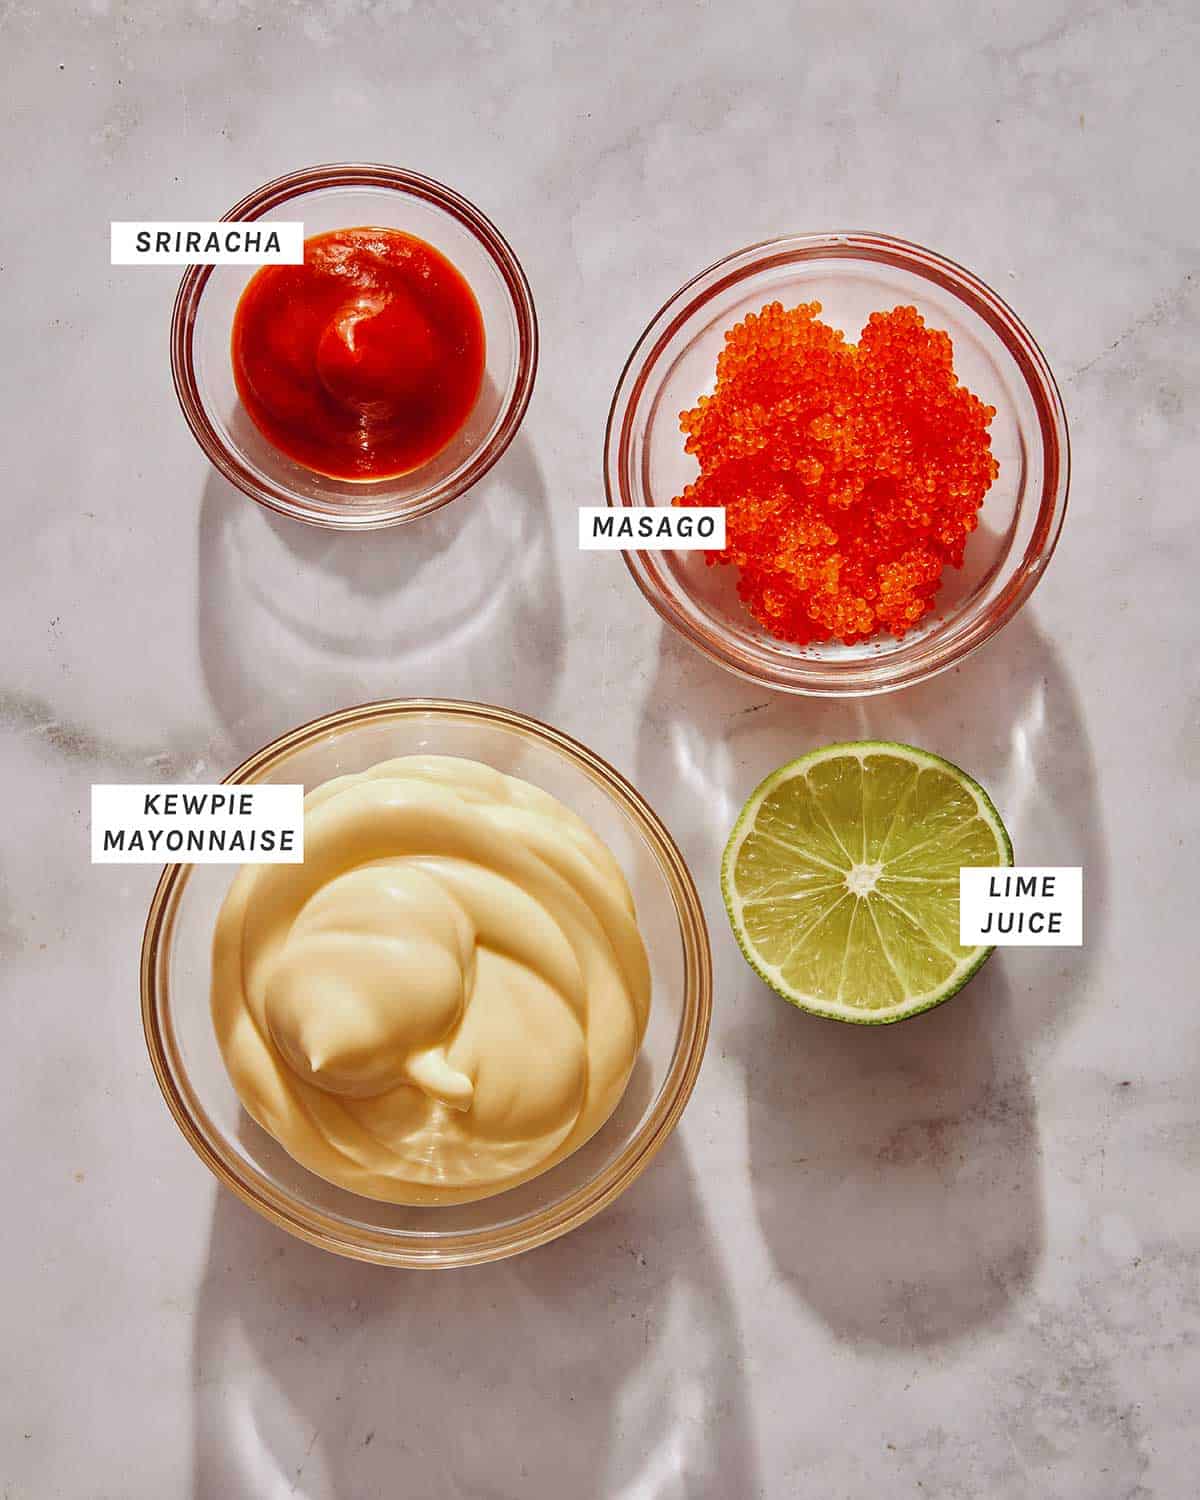
Masago sauce ingredients on a kitchen table.

Spicy Tuna Onigiri

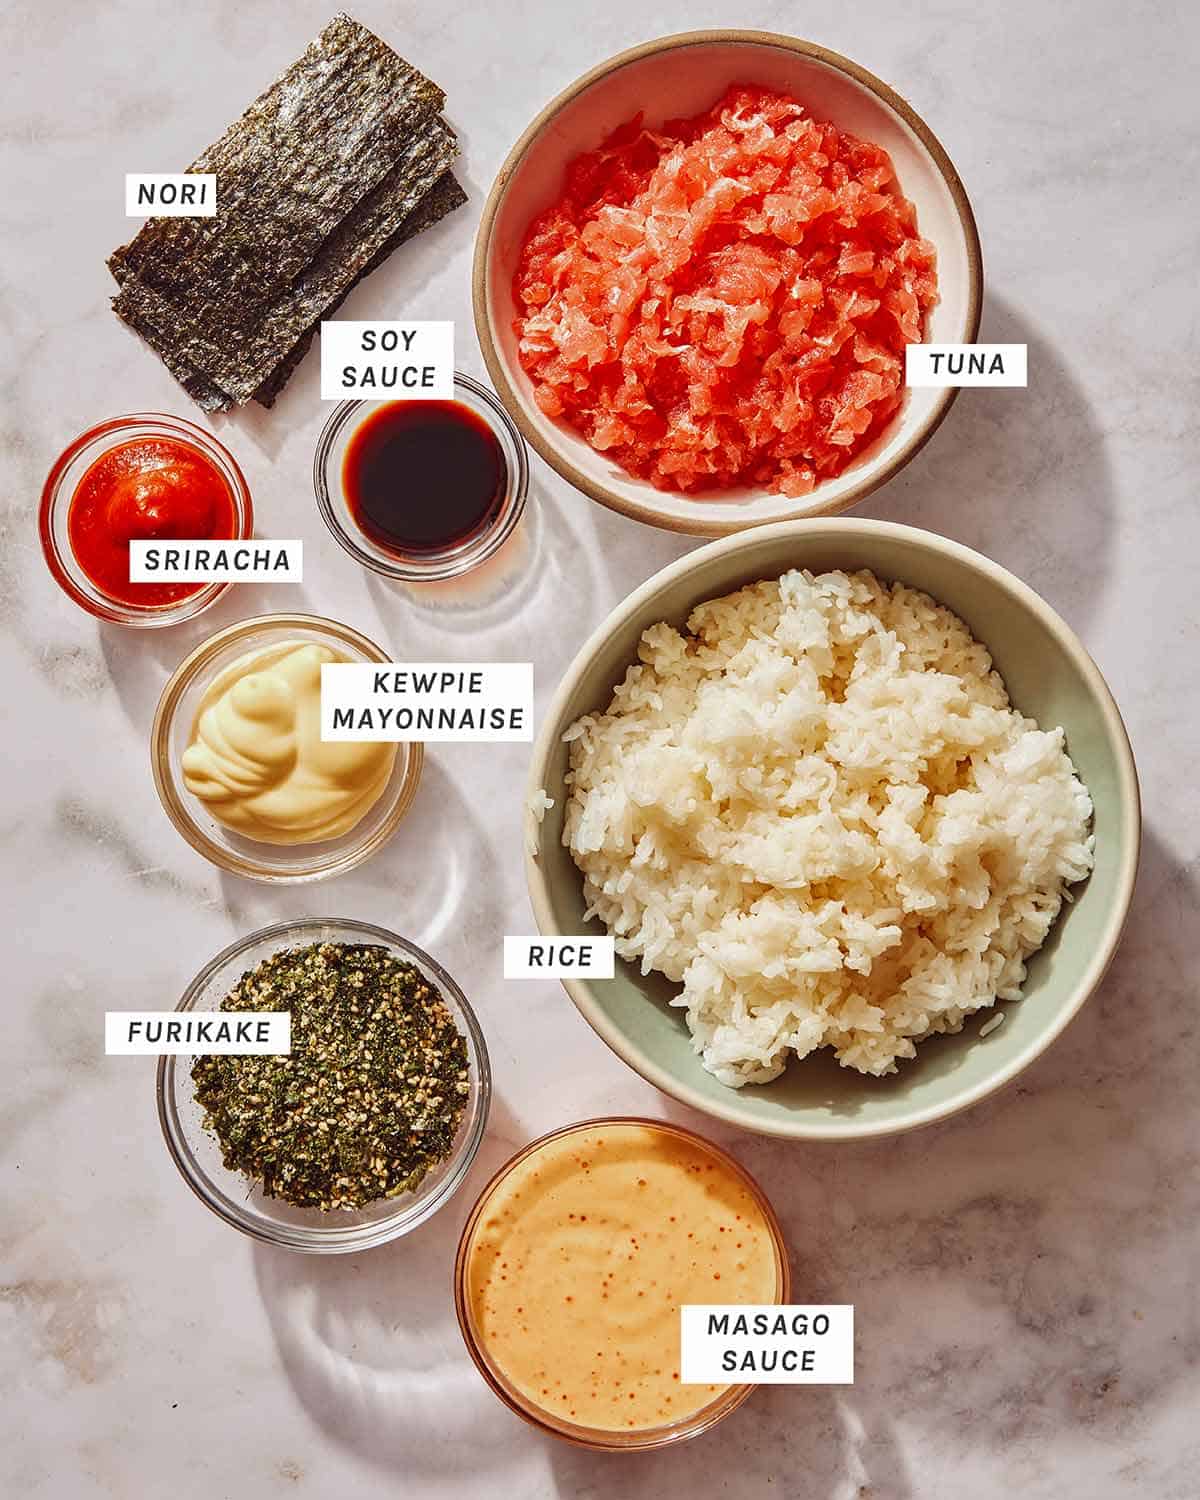
Spicy tuna onigiri ingredients on a kitchen counter.

Process

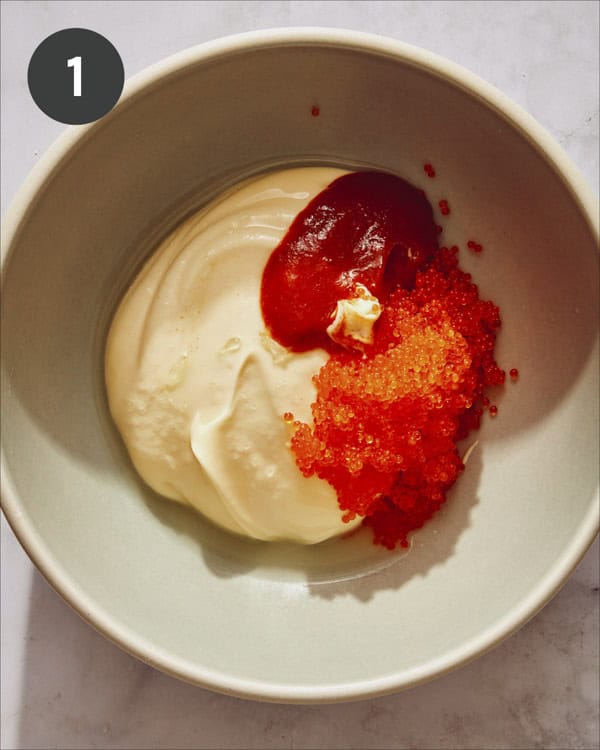
  1. Place all ingredients into a mixing bowl.
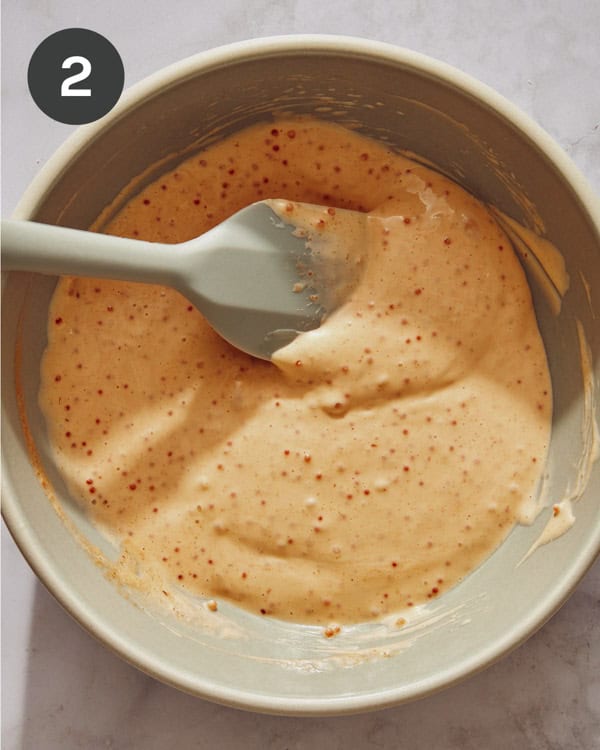
  2. Stir together. Set aside.
Masago sauce ingredients in a bowl.
Masago sauce in a bowl mixed together.
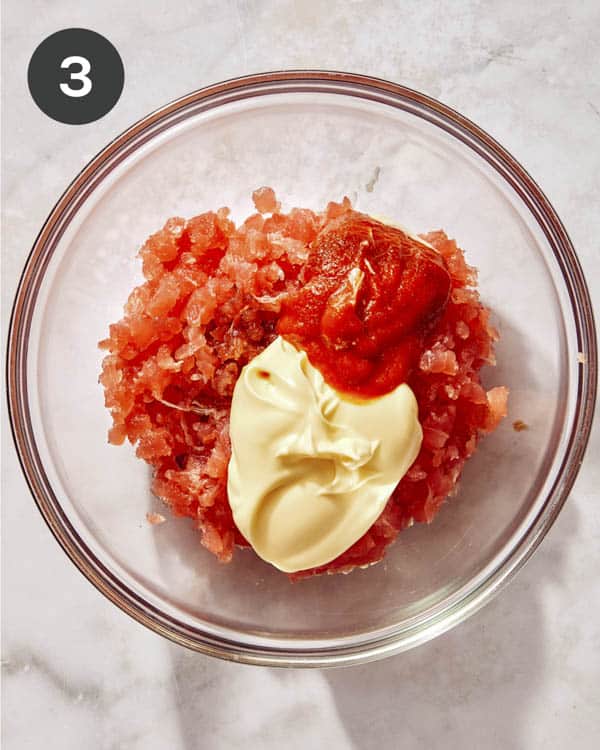
  1. Place all filling ingredients into a mixing bowl.
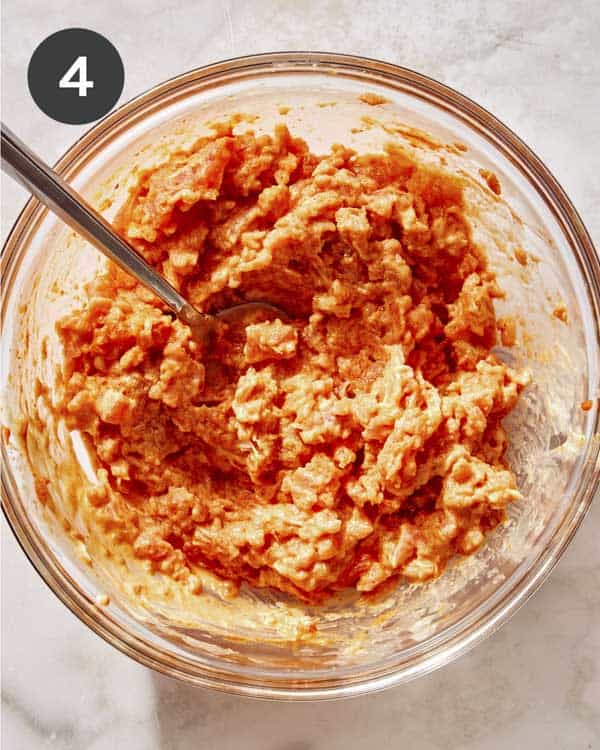
  2. Mix together until everything is completely combined.
Tuna and sriracha, with kewpie in a bowl being mixed together.
Spicy tuna in a bowl mixed together.
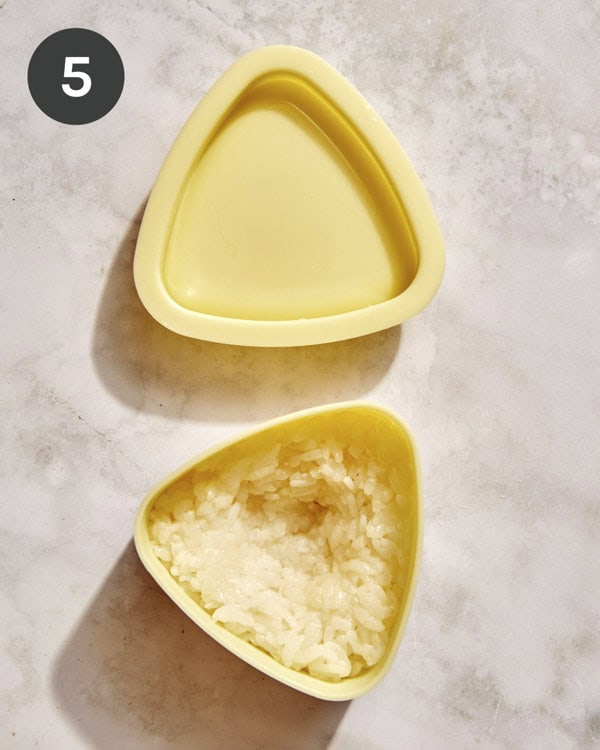
  1. Press 1/4 cup rice into the bottom of an onigiri mold.
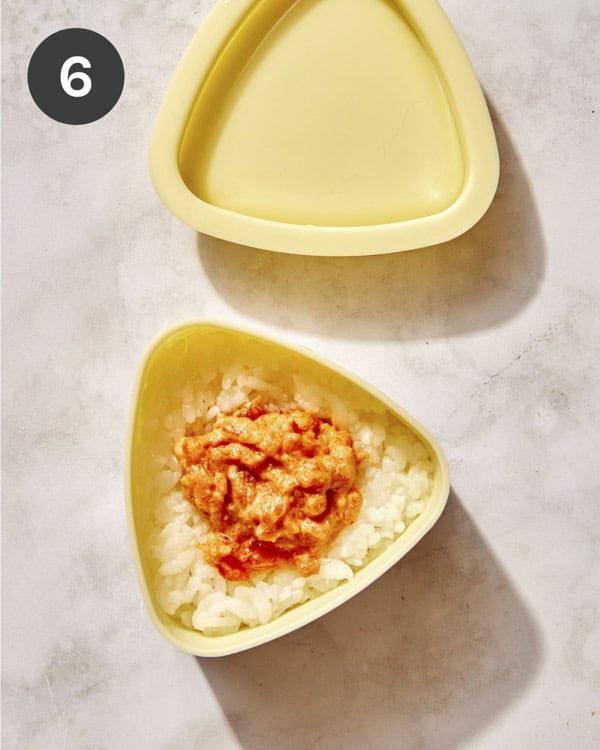
  2. Create a tablespoon sized divet in the center of the rice and fill with a scoop of tuna filling.
Rice in an onigiri mold.
Spicy tuna onigiri being put into an onigiri mold.
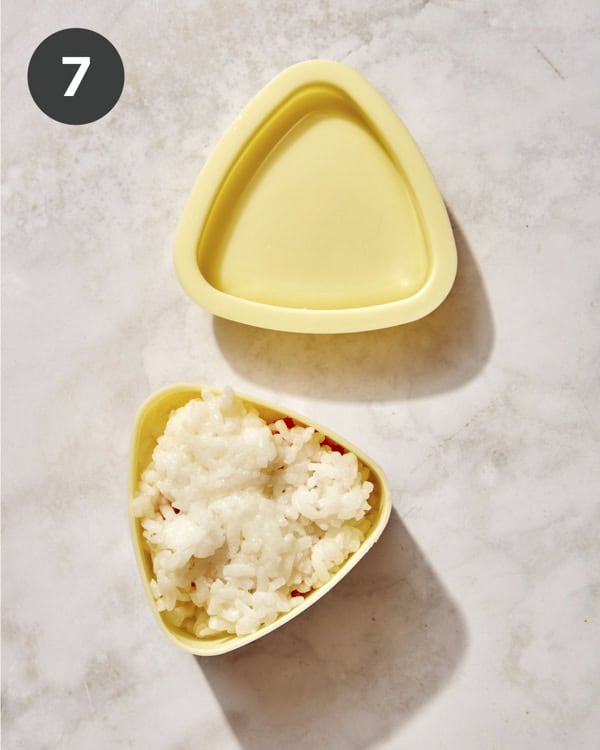
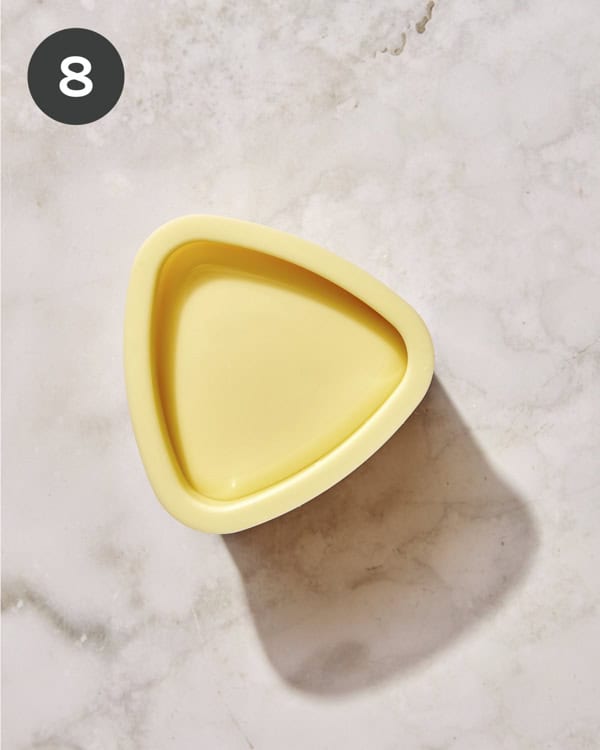
  1. Top the tuna and rice with an additional 2 to 3 tablespoons rice.
  2. Firmly press with the onigiri mold top.
Tuna onigiri in a mold about to be pressed.
Tuna onigiri being pressed in a mold.
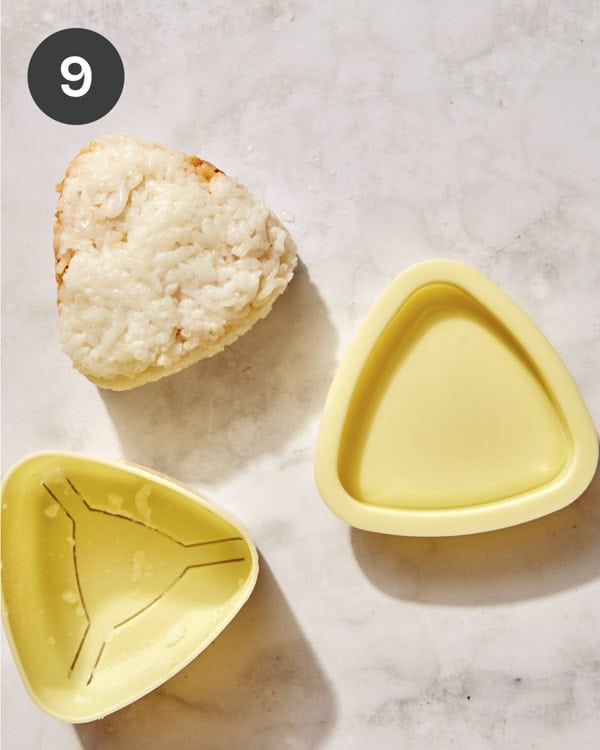
  1. Unmold the onigiri.
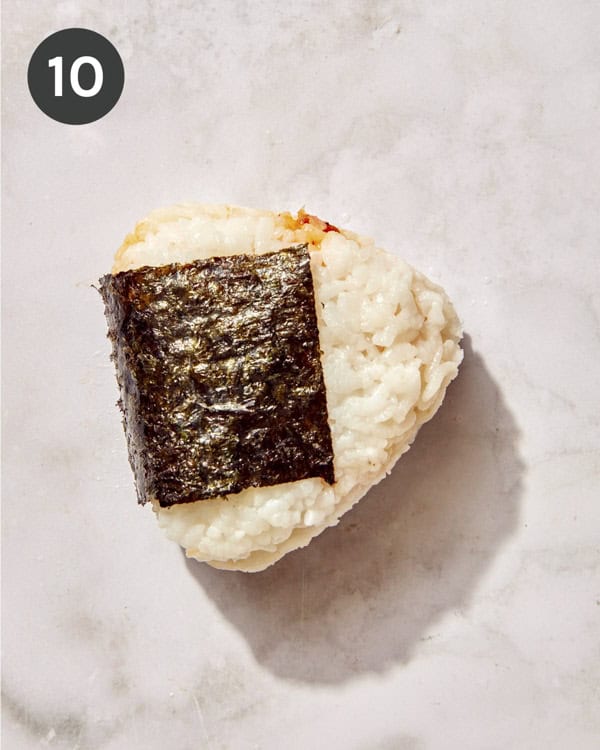
  2. Wrap a piece of nori around the bottom center side of the triangle.
Tuna onigiri right out of a mold.
Tuna onigri with a piece of nori on the outside.
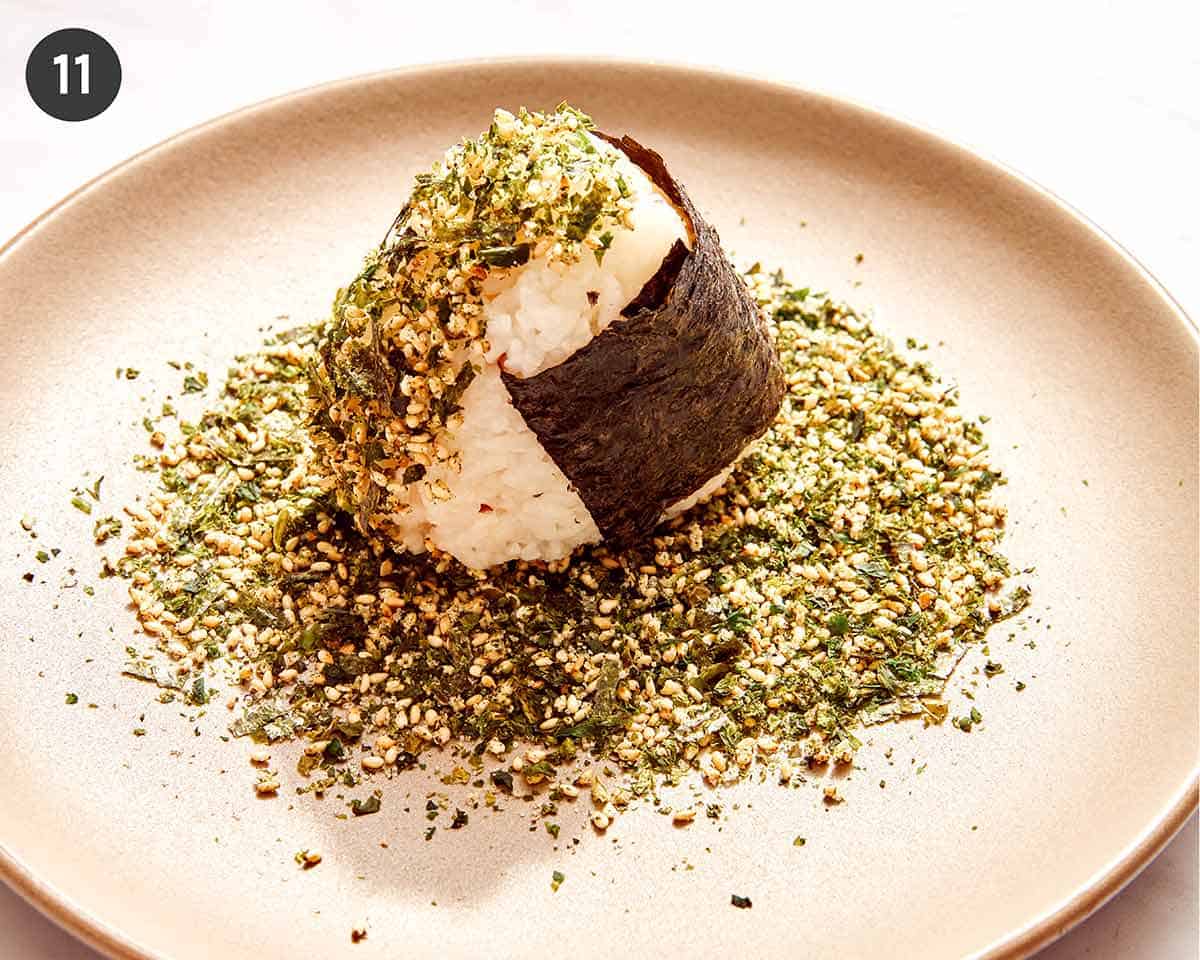
  1. Press the sides of the onigiri into the furikake seasoning. Repeat with remaining ingredients. Serve.
Spicy tuna onigiri being dredged in furikake.

Why We Love This Onigiri Recipe

  • It’s so simple and takes no time at all to put together!
  • They’re so comforting and satisfying every single time!
  • They make a great meal OR snack!
  • You can easily make them ahead of time and take them on the go!
  • There are an infinite amount of filling ideas you can stuff them with, depending on your cravings!
Spicy tuna onigiri on plate.

Tips and Tricks for Onigiri Success

  • Use a short or medium grain sticky rice to ensure your rice balls will stick together.
  • Don’t skip out on the sauce! – Most of the time you do not get a sauce for onigiri, but we think this simple masaho sauce pairs perfectly with the rice balls and make our recipe just a little bit special.
  • Don’t overfill the rice balls! It may be tempting to maximize the filling for these rice balls, but if you overstuff them they will easily fall apart!
  • Alternatively, don’t use too much rice, so there’s still enough room for filling (it’s a balancing act between rice and filling)!

Do I Need an Onigiri Mold?

Absolutely not! We love using an onigiri mold because it does make it easier to form them (plus the ones we use, make smaller, snack-sized onigiri which we love), but you can form them by hand!

If you do form them by hand, just make sure you tightly wrap them in plastic wrap until you’re ready to enjoy them, so they maintain their shape and hold the filling together.

Spicy tuna onigiri close up on a plate.

Variations

  • Use short or medium grain sticky brown rice instead of white.
  • Use canned tuna or canned salmon instead of raw tuna for the filling. Or use raw salmon, scallops, or yellowtail!
  • Stuff the rice balls with sautéed vegetables or marinated tofu cubes for a vegetarian alternative.
  • Pan-fry the onigiri (and skip the nori wrapper) for a crispy rice texture!
  • Chop and sauté some kimchi in some butter and sesame oil for a spicy, buttery kimchi filling!
  • Wrap the entire triangle in nori or press the entire rice ball in furikake seasoning!

Make Ahead Instructions

Onigiri can be made ahead of time, but should be made the same day they will be consumed. This is because the rice should not be refrigerated or it will get too hard to enjoy (and reheating them will make them fall apart, and possibly ruin the filling).

Also, depending on the filling the onigiri should be consumed within 1-4 hours after preparing them (within 1 hour if using raw seafood and up to 8 hours if using something like umeboshi).

A hand holding a piece of onigri dipped in sauce.

More Delicious Asian Inspired Recipes You Will Love

Spicy Tuna Onigiri recipe on a plate with masago sauce.
Print

Spicy Tuna Onigiri

A Simple and delicious recipe for Spicy Tuna Onigiri! This tasty handheld delight can be eaten as a quick snack or grab and go lunch for busy days!
Course Appetizer, lunch, main dish, Snack
Cuisine Japanese
Diet Gluten Free
Prep Time 15 minutes
Total Time 15 minutes
Servings 4
Calories 541kcal

Equipment

Ingredients

masago sauce

  • 1/2 cup Kewpie (or American mayonnaise)
  • 2 tablespoons masago
  • 1 tablespoon Sriracha
  • 1/2 lime juiced

filling

  • 8 ounces high quality raw tuna minced
  • 3 tablespoons kewpie (or American Mayonnaise)
  • 1 1/2 tablespoons Sriracha
  • 1 tablespoon soy sauce

rice and assembly

  • 3 cups steamed short grain rice warm
  • 2/3 cup furikake seasoning
  • 8 1.5"x 3" pieces nori

Instructions

masago sauce

  • Place all ingredients into a mixing bowl and stir together. Set aside.

filling

  • Place all filling ingredients into a mixing bowl and mix together until everything is completely combined.

assembly

  • Press 1/4 cup rice into the bottom of an onigiri mold.
  • Create a tablespoon sized divet in the center of the rice and fill with a scoop of tuna filling.
  • Top the tuna and rice with an additional 2 to 3 tablespoons rice and firmly press with the onigiri mold top.
  • Unmold the onigiri and wrap a piece of nori around the bottom center side of the triangle.
  • Press the sides of the onigiri into the furikake seasoning. Repeat with remaining ingredients. Serve.

Notes

**Recipe Makes 8 Small Onigiri – Each Serving Size is 2 Onigiri**
Tips and Tricks for Onigiri Success
  • Use a short or medium grain sticky rice to ensure your rice balls will stick together.
  • Don’t skip out on the sauce! – Most of the time you do not get a sauce for onigiri, but we think this simple masaho sauce pairs perfectly with the rice balls and make our recipe just a little bit special.
  • Don’t overfill the rice balls! It may be tempting to maximize the filling for these rice balls, but if you overstuff them they will easily fall apart!
  • Alternatively, don’t use too much rice, so there’s still enough room for filling (it’s a balancing act between rice and filling)!

Nutrition

Calories: 541kcal | Carbohydrates: 42g | Protein: 19g | Fat: 32g | Saturated Fat: 5g | Polyunsaturated Fat: 18g | Monounsaturated Fat: 8g | Trans Fat: 0.1g | Cholesterol: 64mg | Sodium: 740mg | Potassium: 234mg | Fiber: 0.3g | Sugar: 1g | Vitamin A: 1334IU | Vitamin C: 10mg | Calcium: 15mg | Iron: 3mg

The post Spicy Tuna Onigiri appeared first on Spoon Fork Bacon.

Spicy Ramen Noodles

It’s no secret we love our noodles. Dishes like Garlic Noodles, Jajangmyeon, and Red Curry Noodles are quick, simple, and pack a lot of flavor. And these Spicy Ramen Noodles are no exception. Quick-cooking ramen noodles are coated in a spicy, creamy sauce for incredible flavor and satisfying meal or side in under 10 minutes. These spicy ramen noodles can be eaten on their own, with a protein like chicken or tofu, or served alongside…

Read More

The post Spicy Ramen Noodles appeared first on Spoon Fork Bacon.
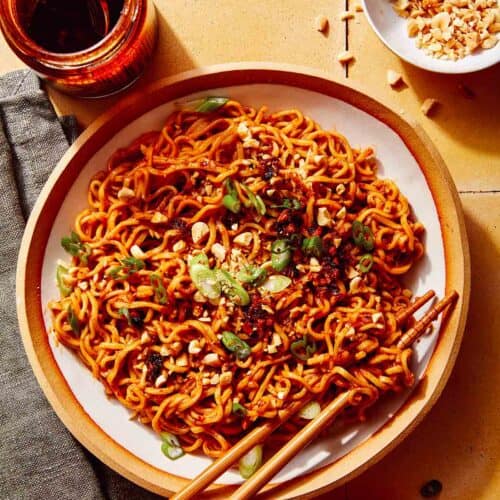
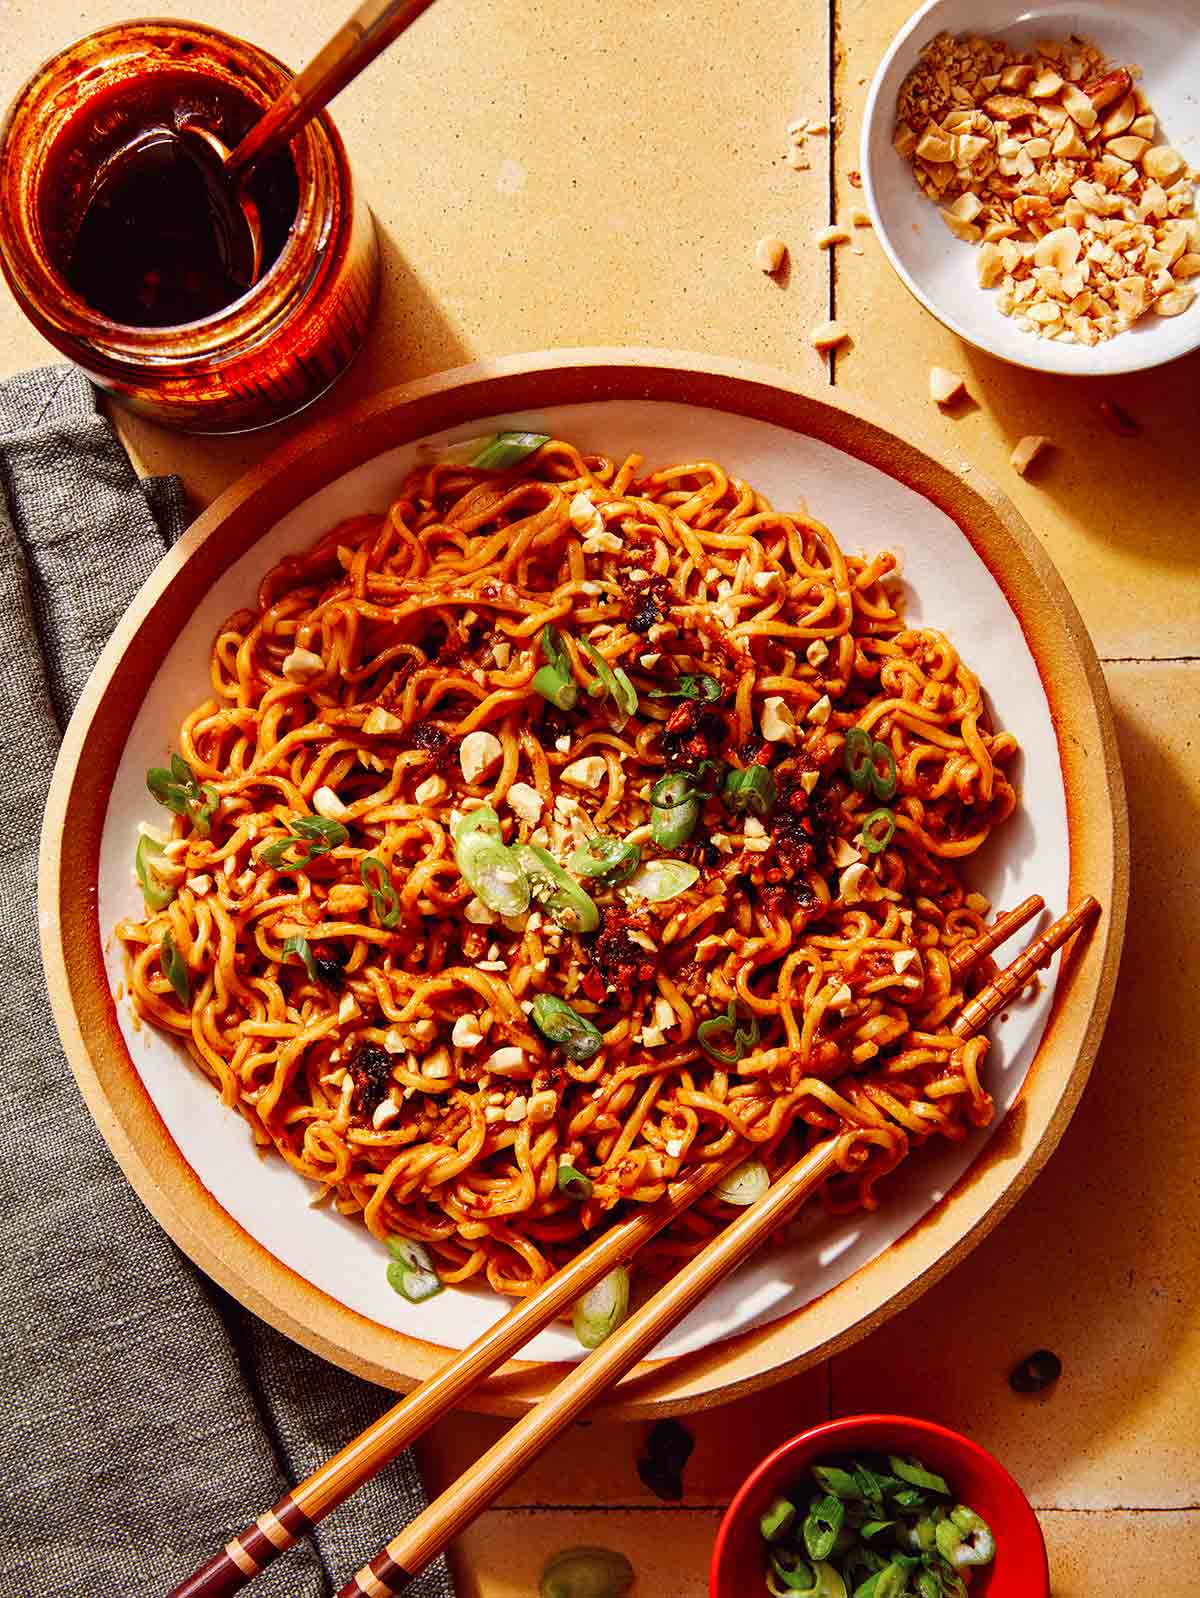
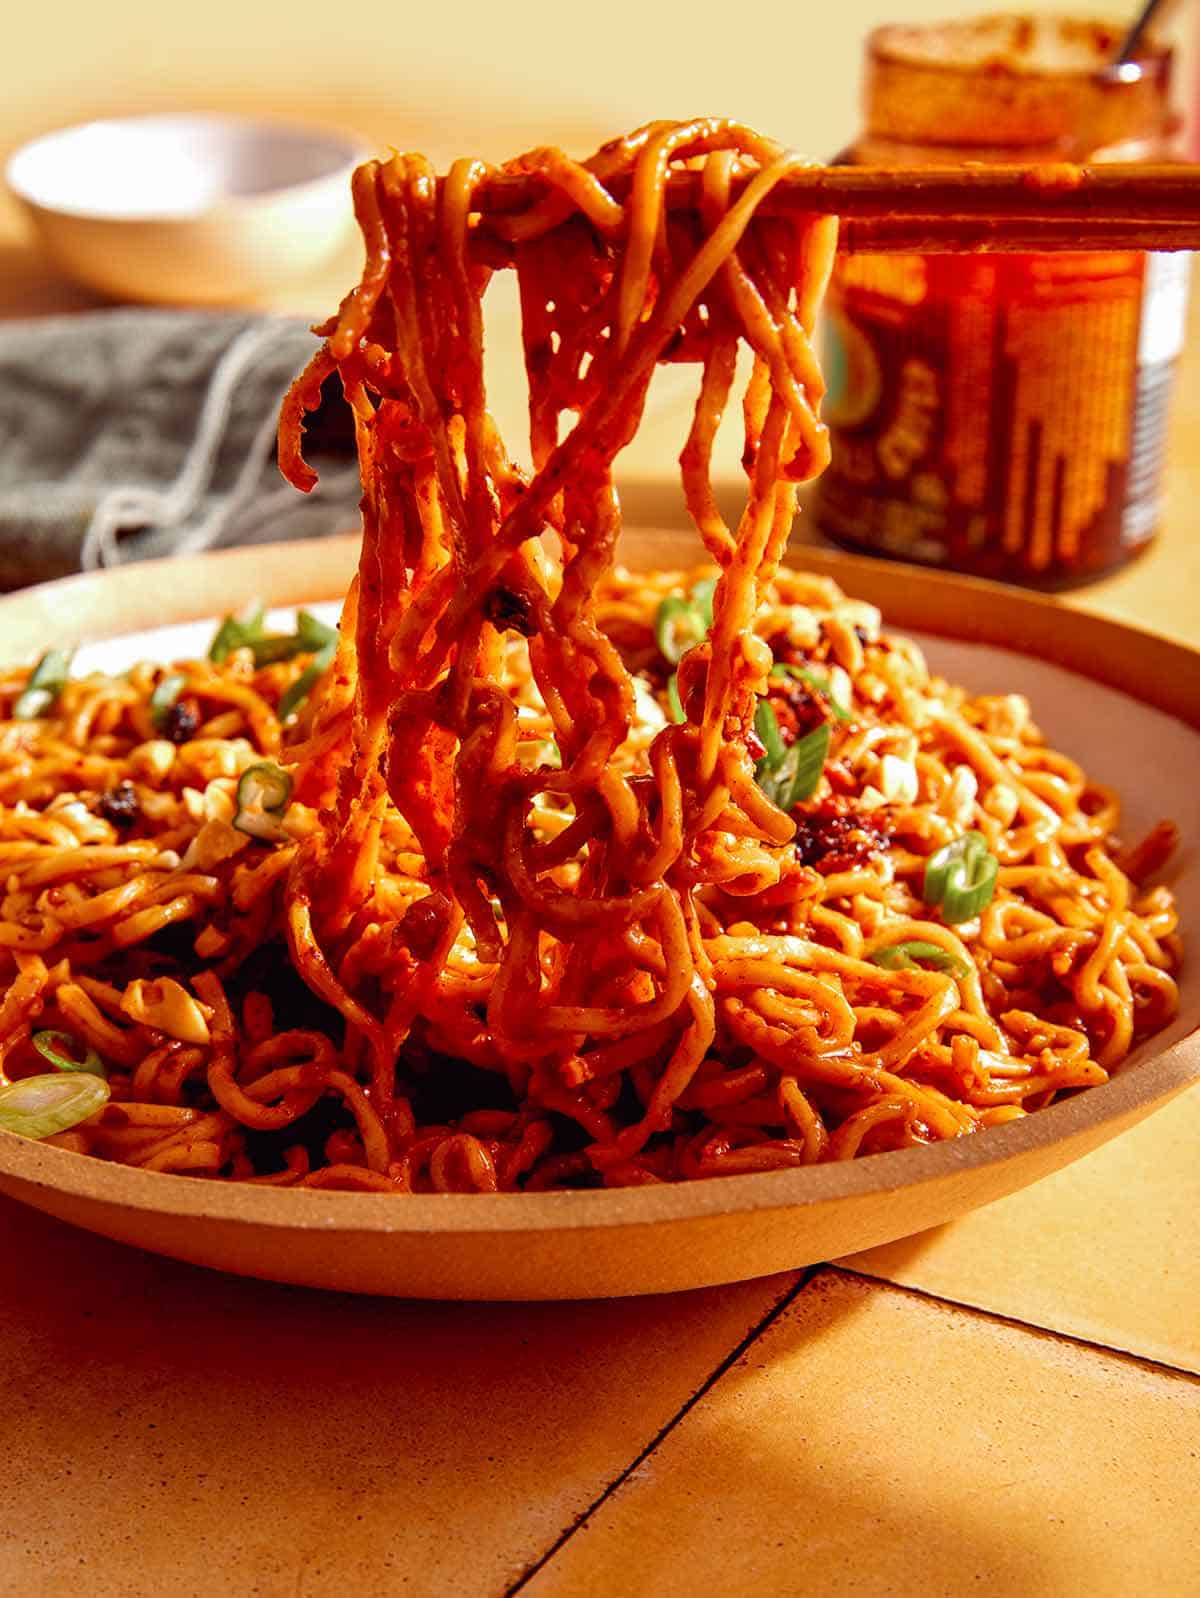
Spicy ramen noodles in a bowl with peanuts and green onions on top.

It’s no secret we love our noodles. Dishes like Garlic Noodles, Jajangmyeon, and Red Curry Noodles are quick, simple, and pack a lot of flavor. And these Spicy Ramen Noodles are no exception. Quick-cooking ramen noodles are coated in a spicy, creamy sauce for incredible flavor and satisfying meal or side in under 10 minutes.

These spicy ramen noodles can be eaten on their own, with a protein like chicken or tofu, or served alongside chicken satay or beef and broccoli. However you eat them, don’t wait. This recipe is soon to be your favorite quick and easy comfort food!

How to Make Spicy Ramen Noodles

Ingredients

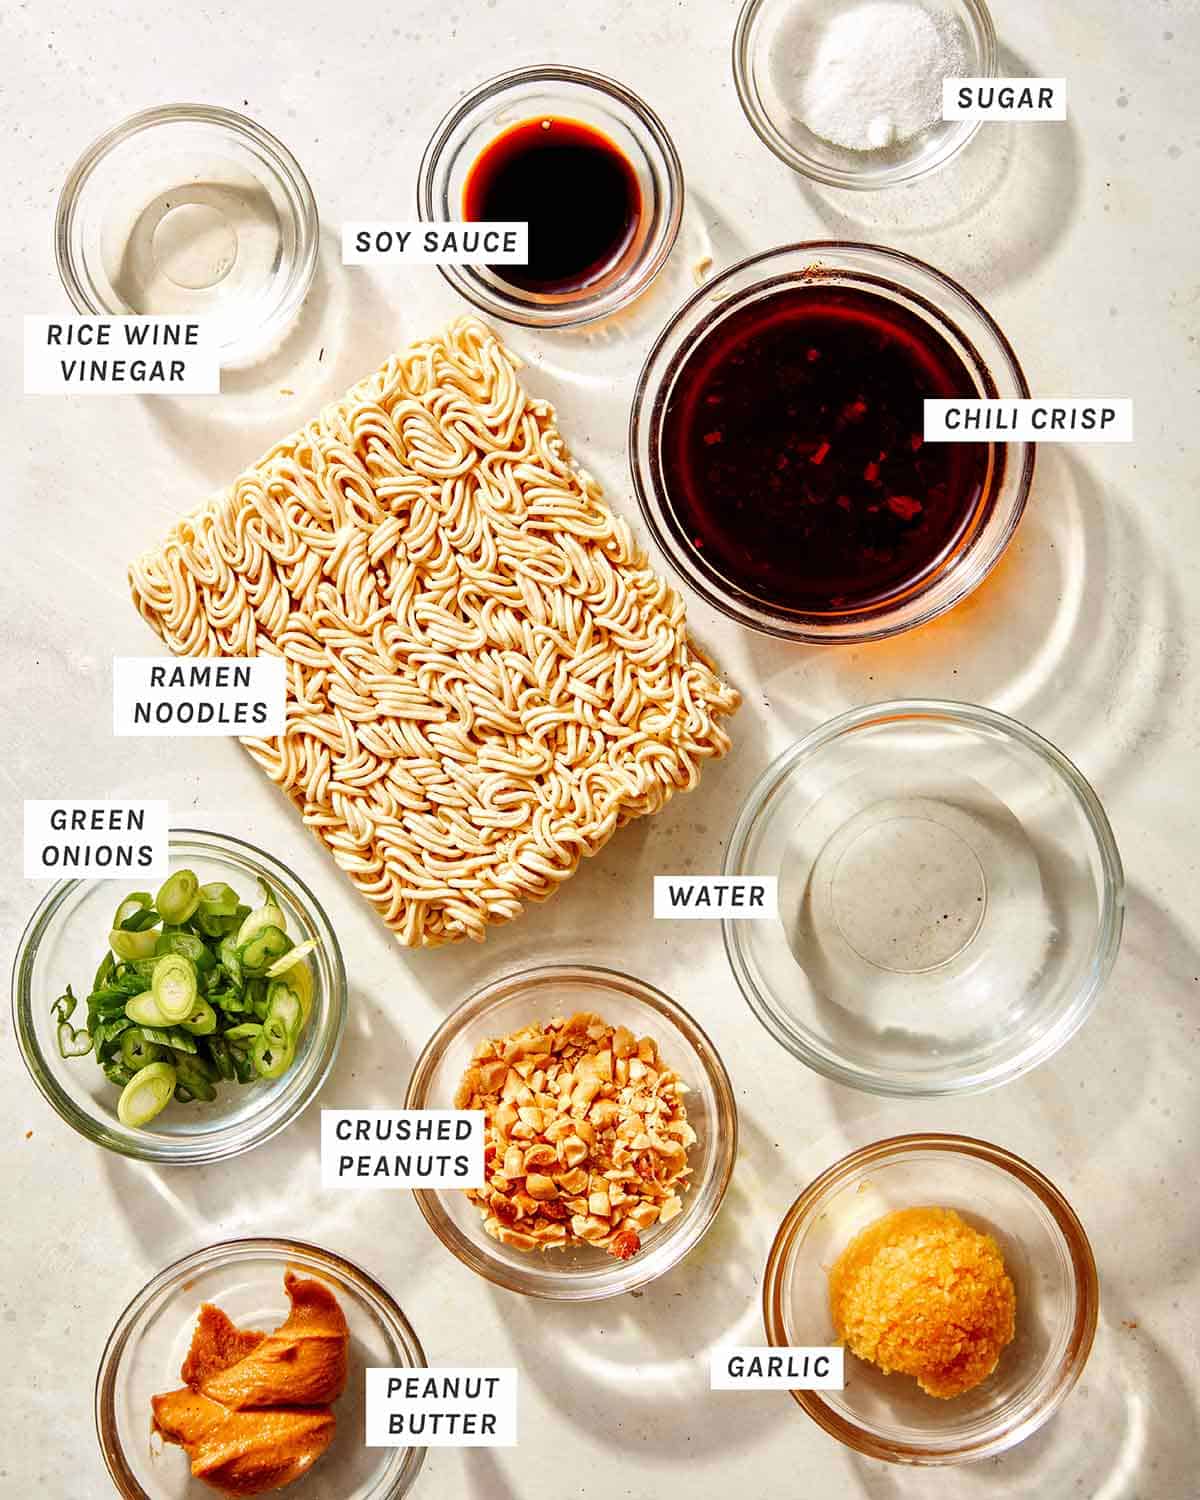
Spicy ramen noodles ingredients in a kitchen.

Process

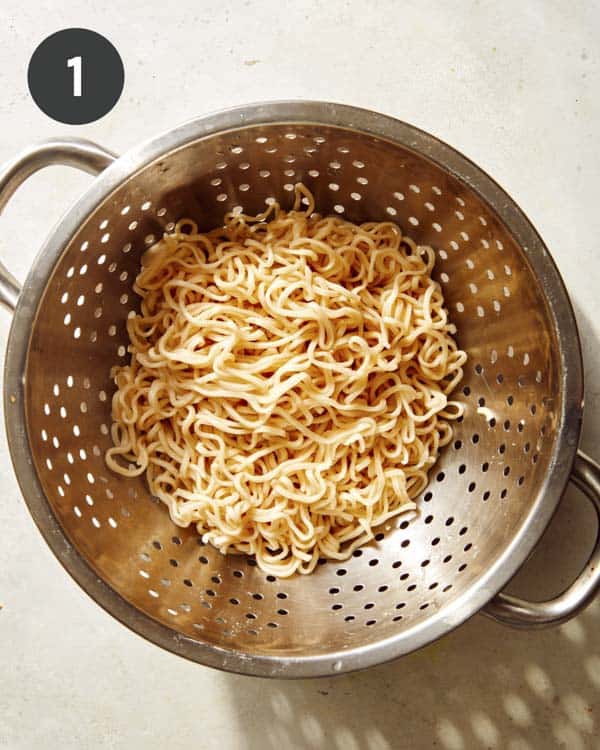
  1. Cook noodles in boiling water according to pack directions. Drain, rinse in a colander under cool water, and set aside.  
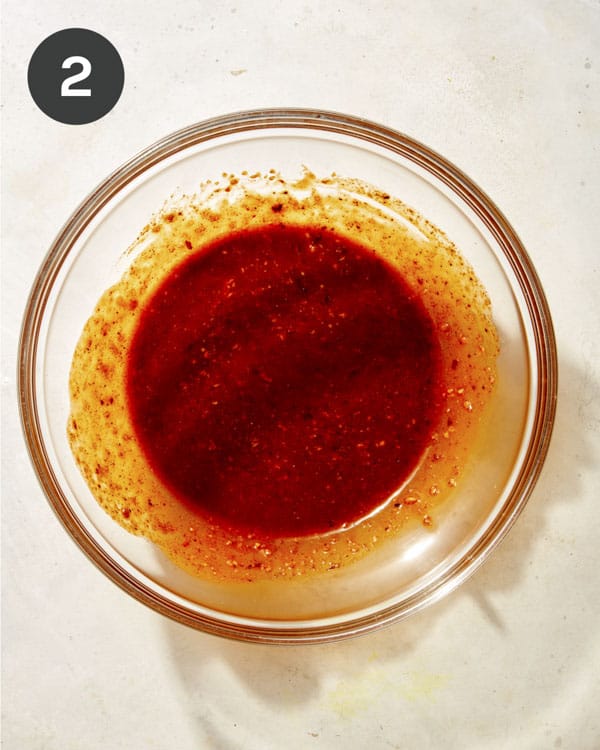
  2. In a mixing bowl, whisk together chili crisp, water, peanut butter, rice wine vinegar, soy sauce, sugar, and garlic. Set aside.
Cooked ramen noodles in a colander.
Spicy sauce for ramen noodles in a bowl.
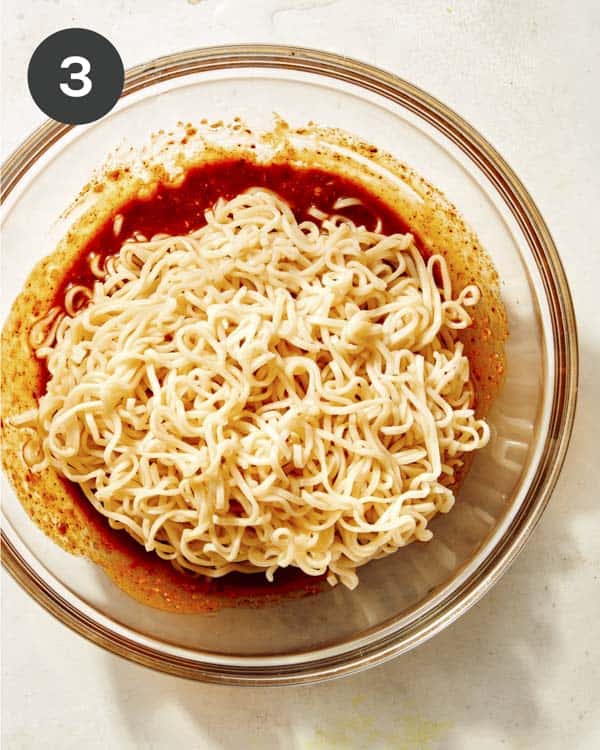
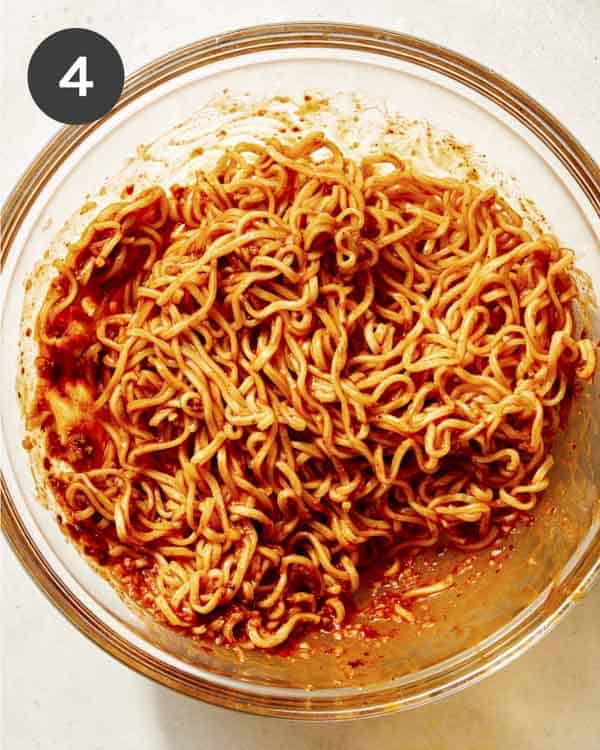
  1. Add noodles to a mixing bowl and toss together with sauce until evenly coated.
  2. Transfer noodles to a serving bowl and top with crushed peanuts, green onions and more chili crisp.
Ramen noodles in a glass bowl with spicy toss about to be tossed.
Spicy ramen noodles tossed together in a bowl.
Spicy ramen noodles in a bowl.

Why We Love Spicy Ramen Noodles

  • They’re quick and easy. You only need 10 minutes and a handful of pantry ingredients to toss this recipe together. It’s perfect for a weeknight dinner or a last-minute meal.
  • It’s easy to customize. Like a lot of spice? Just add more chili crisp. Want it creamier? Increase the peanut butter. There are so many ways to customize this recipe’s flavor and texture, including adding various proteins and vegetables to make it a whole meal in one! Look at the variations below for some ideas!
  • So. much. flavor. Noodles and sauce make this recipe sound basic, but the amount of flavor in every bite is phenomenal. The chili crisp, peanut butter, soy sauce, and vinegar (and a little sugar) make the sauce pop with a savory, spicy flavor you’ll love.
  • Impressive without the fuss. If you need a meal with visual appeal – this is it! Saucy noodles topped with a handful of crushed peanuts and freshly sliced green onions make this dish look amazing with almost no effort on your part.
Spicy ramen noodles being eaten with chopsticks.

Tips and Tricks for Success

  • For perfectly springy noodles, make sure you only boil them as long as directed and as soon as you drain them, rinse them under cold water. This stops the cooking process and helps the noodles hold their texture.
  • If the sauce is too thick, add half a teaspoon of water at a time until you get your desired thickness. You want it thick enough to coat the noodles but thin enough that it’s able to stir into and coat the noodles easily.
  • Give the sauce a taste before coating the noodles. Here are some simple ways to troubleshoot your sauce:
    • It’s too thick. Add water.
    • It’s too spicy. Add more peanut butter and soy sauce to mellow it out.
    • It’s too tangy. Add more peanut butter.
    • It’s too sweet. Add more soy sauce.

Best Instant Ramen Noodles to Choose

We love to use Ichiban ramen noodles for this recipe since they’re easy to find at most grocery stores and online and have a thinner noodle than some other brands, but any of these ramen noodle brands will work with this recipe:

  • Shin
  • Buldak
  • Maruchan
  • Nissin
  • Paldo
Spicy ramen noodle recipe prepared in a bowl.

Substitutions and Variations for Our Spicy Ramen Noodles

  • Add vegetables. Stir fry or roast broccoli, onions, mushrooms, or peppers. Add chopped water chestnuts or bamboo to add nutrients, flavor, and texture variety to your spicy ramen.
  • Include a protein. Add grilled or sauted beef, chicken, or shrimp to your noodles. for a high-protein and filling meal.
  • Swap the peanut butter. If you don’t like peanut butter or you have an allergy, feel free to swap it with unflavored almond butter or sunflower butter.
  • Chili crisps. While these really bring a lot of amazing flavor and texture, if you don’t have chili crisps, you can swap it with some hot chili oil and crunched-up crispy fried onions or sesame seeds.
  • Rice wine vinegar. If you don’t have rice wine vinegar, apple cider vinegar will also work, it will just add a bit more tanginess.
  • Swap the noodles. While we love the thinness and texture of ramen, you can use various other noodles like soba, udon, rice noodles or pappardelle pasta.
  • Adjust the spice level. If you like a lot of heat, add more chili crisps or even some sliced chili peppers or extra red chili pepper flakes. If you want a more mild noodle, reduce the amount of chili crisps.

More Delicious Noodle Recipes You Will Love

Spicy ramen noodles in a bowl with chopsticks.
Spicy ramen noodles in a bowl with peanuts and green onions on top.
Print

Spicy Ramen Noodles

Quick-cooking ramen noodles coated in a spicy, savory sauce make our Spicy Ramen Noodles the best weeknight dinner! It's ready in just 10 minutes, uses common pantry ingredients, and has endless variations for the perfect comfort meal!
Course dinner, lunch, Main Course, main dish
Cuisine asian, Japanese, japanese-american
Prep Time 5 minutes
Cook Time 5 minutes
Total Time 10 minutes
Servings 1
Calories 895kcal

Ingredients

  • 1 package instant ramen noodles (about 3.5 ounces) flavor packet discarded or saved for another use
  • 3 tablespoons chili crisp plus more for garnish
  • 2 tablespoons water
  • 1 tablespoon peanut butter
  • 1 tablespoon rice wine vinegar
  • 2 teaspoons soy sauce
  • 1 teaspoon sugar
  • 1 tablespoon minced garlic (from 2 to 3 cloves)

garnish

  • 1 1/2 tablespoons crushed dry roasted peanuts
  • 1 thinly sliced green onion

Instructions

  • Cook noodles in boiling water according to pack directions. Drain, rinse in colander under cool water and set aside.  
  • In a mixing bowl whisk together chili crisp, water, peanut butter, mirin, soy sauce, sugar, and garlic. Set aside.
  • Add noodles to mixing bowl and toss together with sauce until evenly coated.
  • Transfer noodles to a serving bowl and top with crushed peanuts, green onions and more chili crisp.

Notes

**Nutritional information does not include additional chili crisp drizzled on for garnish**
Tips and Tricks for Success
  • For perfectly springy noodles, make sure you only boil them as long as directed and as soon as you drain them, rinse them under cold water. This stops the cooking process and helps the noodles hold their texture.
  • If the sauce is too thick, add half a teaspoon of water at a time until you get your desired thickness. You want it thick enough to coat the noodles but thin enough that it’s able to stir into and coat the noodles easily.
  • Give the sauce a taste before coating the noodles. Here are some simple ways to troubleshoot your sauce:
    • It’s too thick. Add water.
    • It’s too spicy. Add more peanut butter and soy sauce to mellow it out.
    • It’s too tangy. Add more peanut butter.
    • It’s too sweet. Add more soy sauce.

Nutrition

Calories: 895kcal | Carbohydrates: 69g | Protein: 18g | Fat: 59g | Saturated Fat: 9g | Polyunsaturated Fat: 5g | Monounsaturated Fat: 14g | Sodium: 3256mg | Potassium: 429mg | Fiber: 5g | Sugar: 8g | Vitamin A: 131IU | Vitamin C: 5mg | Calcium: 69mg | Iron: 5mg

The post Spicy Ramen Noodles appeared first on Spoon Fork Bacon.
Mongolian Beef Recipe

We’re so excited to share our Mongolian Beef Recipe with you all! The first time I had the dish was P.F. Changs Mongolian Beef and I immediately fell in love. The tender beef coated in a sweet and savory sauce was absolutely delicious! Our version is very similar in flavor and texture to their version in the best way! This Chinese takeout inspired dish also couldn’t be easier (and a bit healthier) to make at…

Read More

The post Mongolian Beef Recipe appeared first on Spoon Fork Bacon.
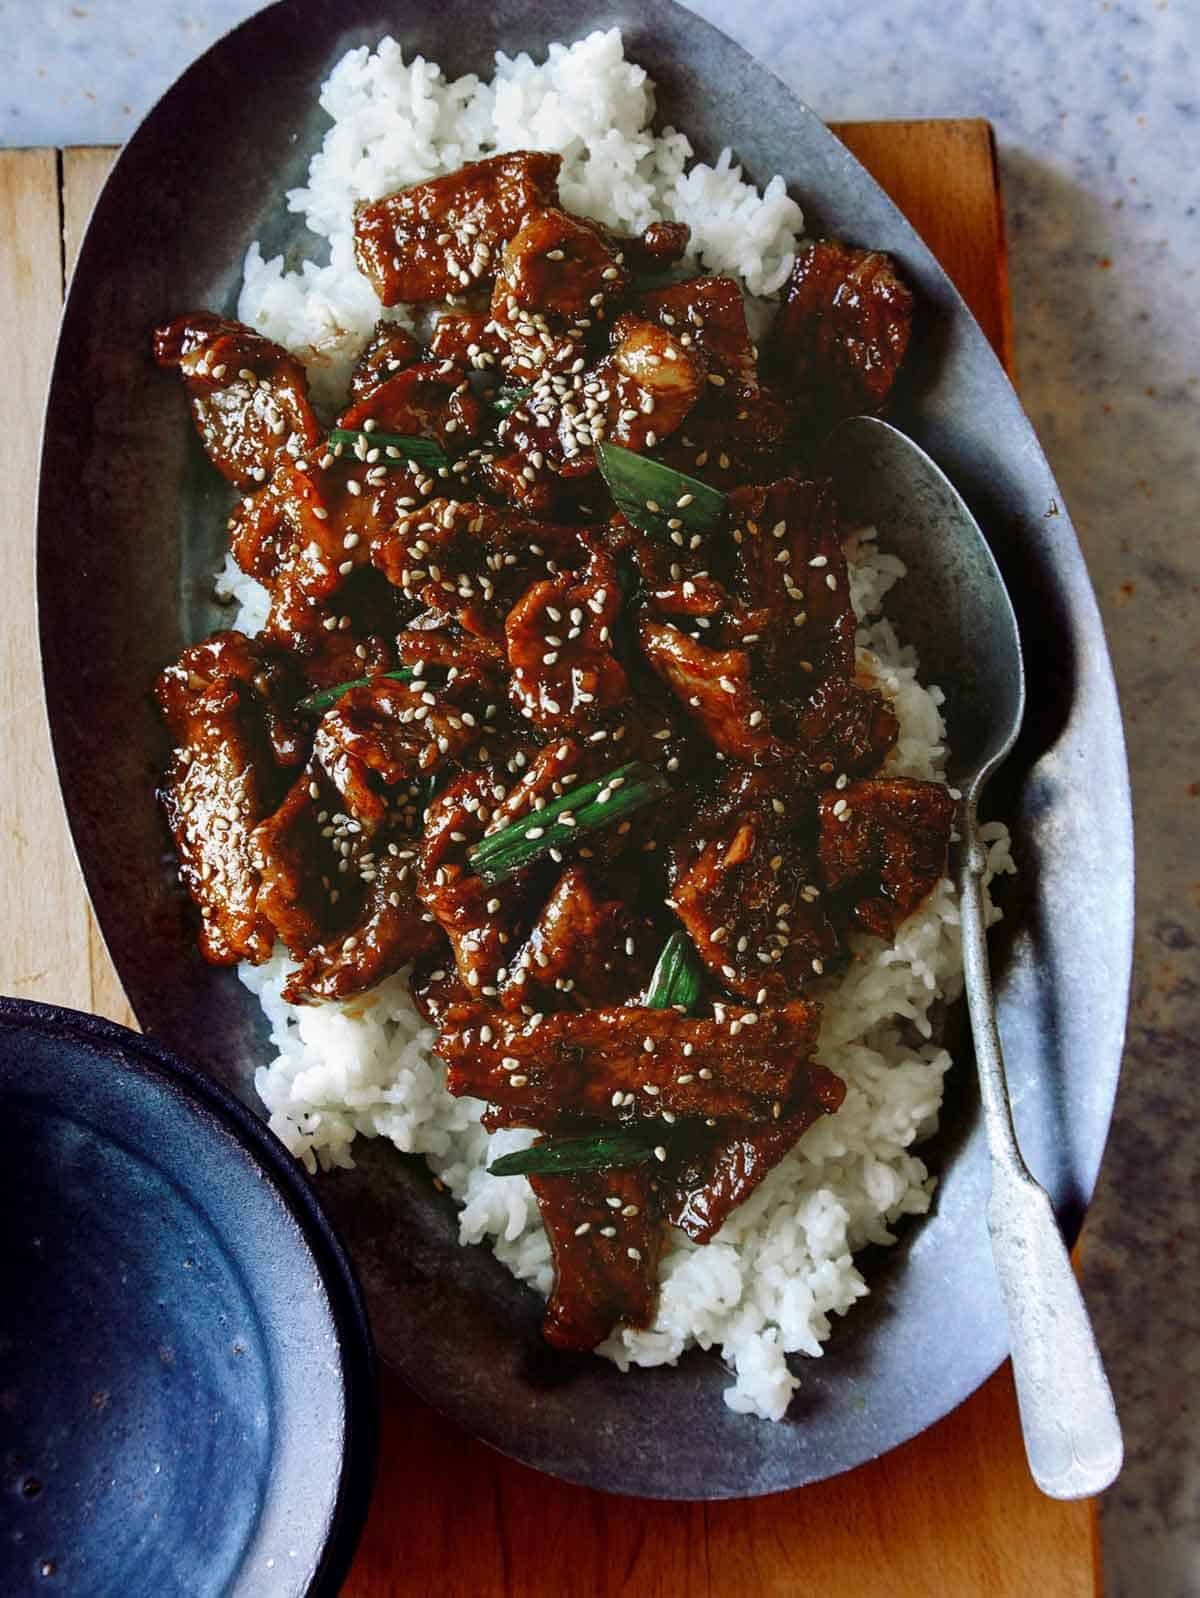
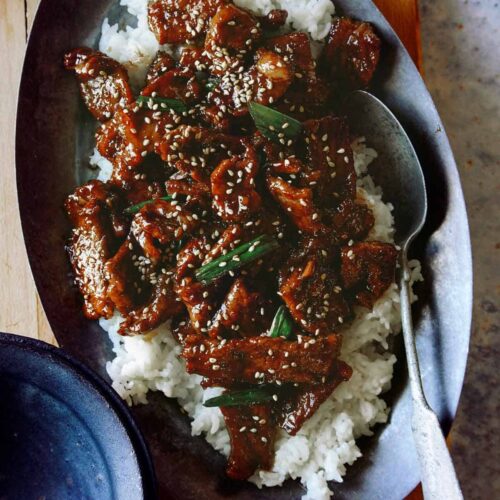
Mongolian Beef recipe in a platter ready to be served.

We’re so excited to share our Mongolian Beef Recipe with you all! The first time I had the dish was P.F. Changs Mongolian Beef and I immediately fell in love. The tender beef coated in a sweet and savory sauce was absolutely delicious! Our version is very similar in flavor and texture to their version in the best way! This Chinese takeout inspired dish also couldn’t be easier (and a bit healthier) to make at home and is one of our top, family loved recipes on our entire site!

Our Mongolian beef is incredibly quick and easy to make. In fact, it can be made in under 30 minutes making it a perfect weeknight dinner! Serve it with a little steamed rice and broccoli and you have a quick, delicious and flavor packed complete meal! We love making a double batch so we have plenty of leftovers to enjoy the next day.

What is Mongolian Beef?

Mongolian beef is a popular stir-fry beef dish, made in a wok, served in Chinese restaurants. It was created in Taiwan, during the 1950’s, when Chinese BBQ was becoming a trendy cuisine. Its most notable trait is the tenderized slices of beef simmered together in a sweet and savory sauce.

The name of the dish refers to Mongolian barbecue style of cooking, which is quick and over high heat. The dish itself isn’t actually associated with Mongolian cuisine.

How to Make Our Mongolian Beef Recipe

Ingredients

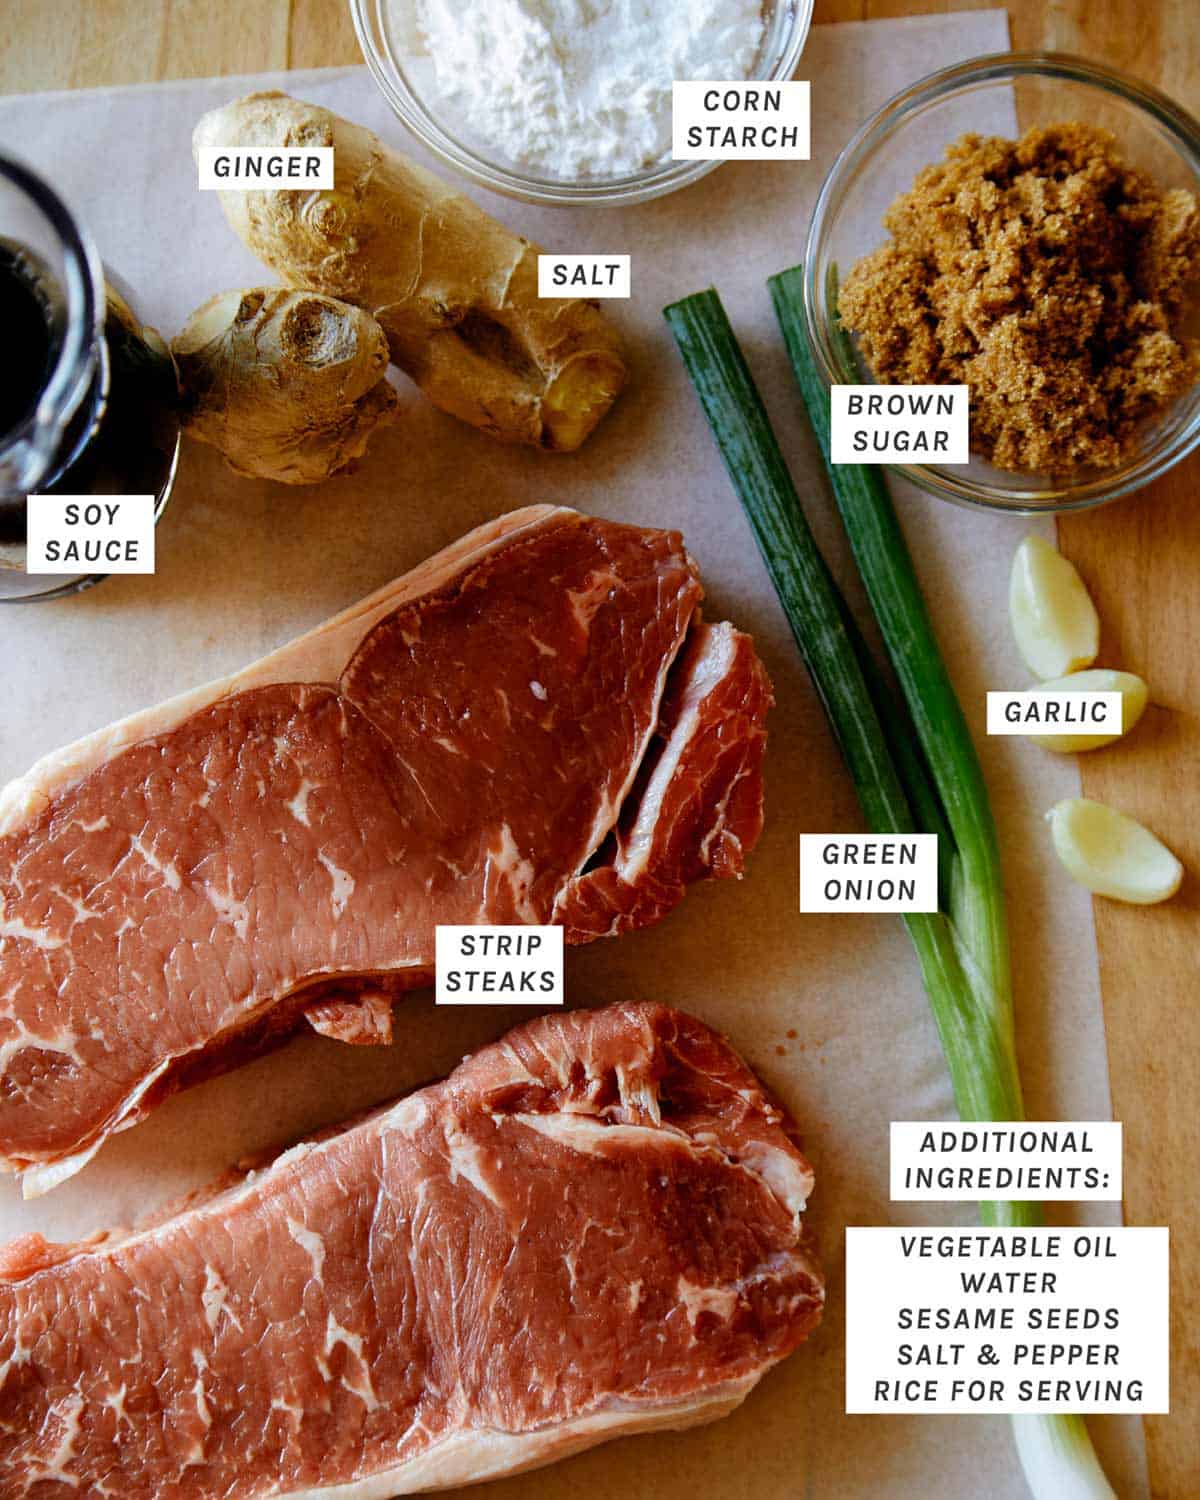
Ingredients for making our Mongolian Beef recipe laid out.

Process

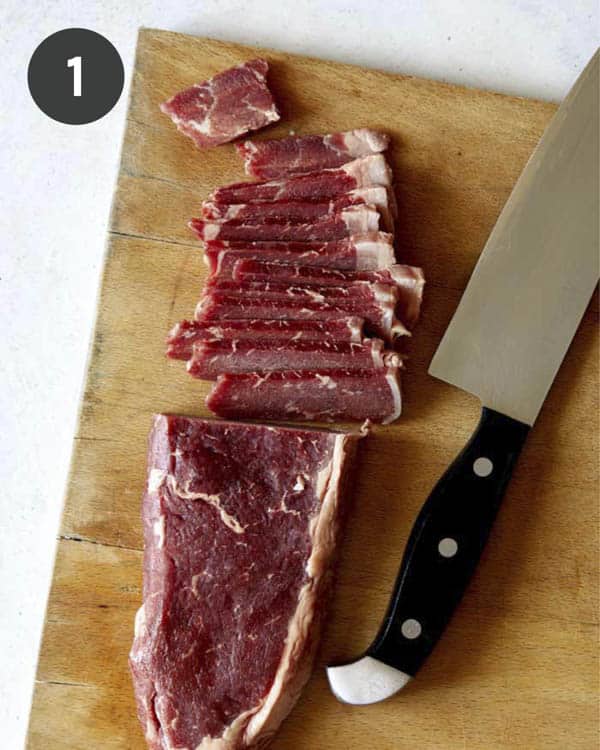
  1. Slice steak into 1/4″ thick piece, against the grain and season with salt and pepper.
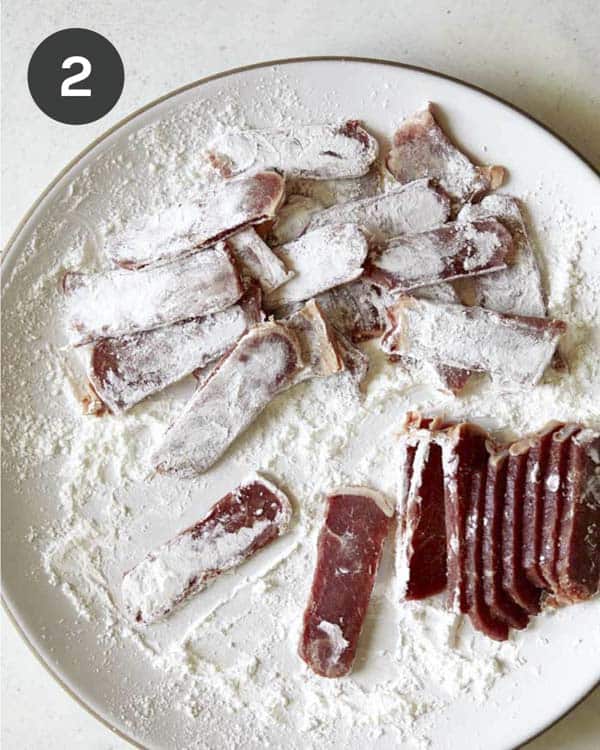
  2. Toss steak pieces in cornstarch until fully and evenly coated. Set aside.
Slicing strip steak on a cutting board for Mongolian Beef.
Tossing seasoned strip steak in cornstarch to make Mongolian Beef.
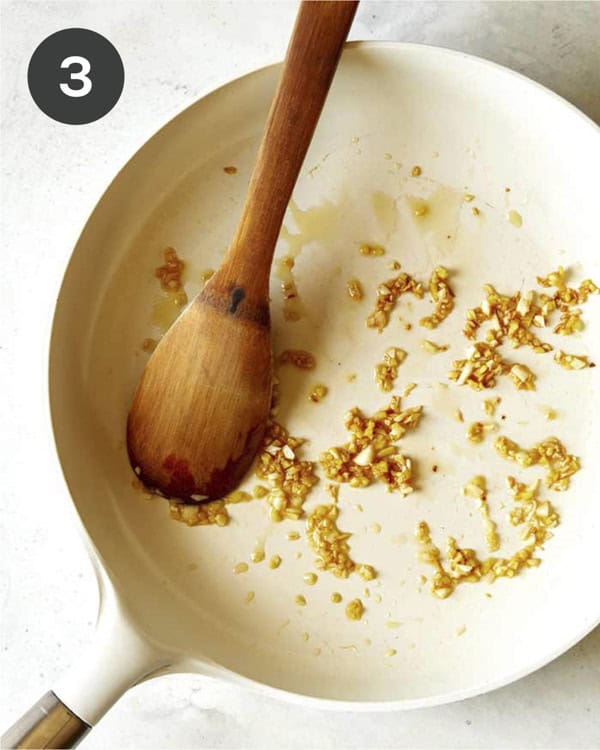
  1. Heat a skillet over medium-high heat and add some oil. Sauté the ginger and garlic until fragrant.
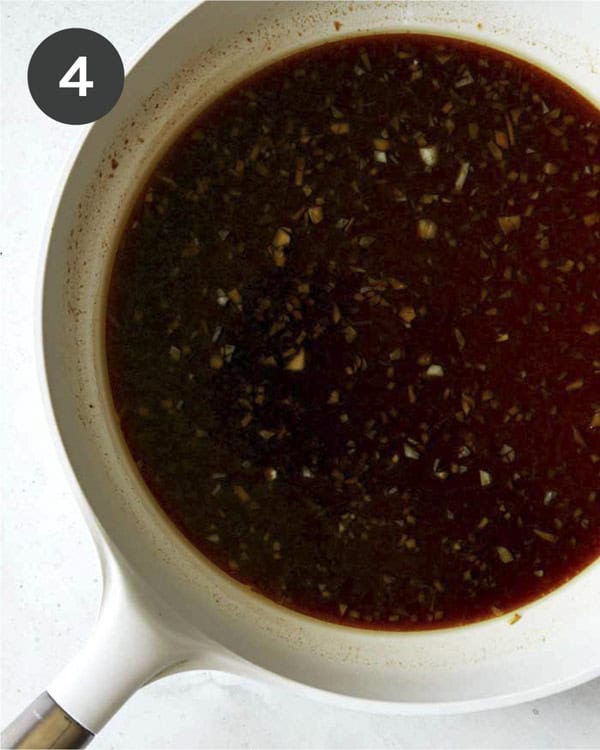
  2. Add soy sauce, water and sugar and bring to a boil until sugar dissolves. Pour sauce into a measuring cup and set aside.
Saute garlic and ginger in a skiller to start making the Mongolian Beef sauce.
Cooking Mongolian beef sauce in a skillet.
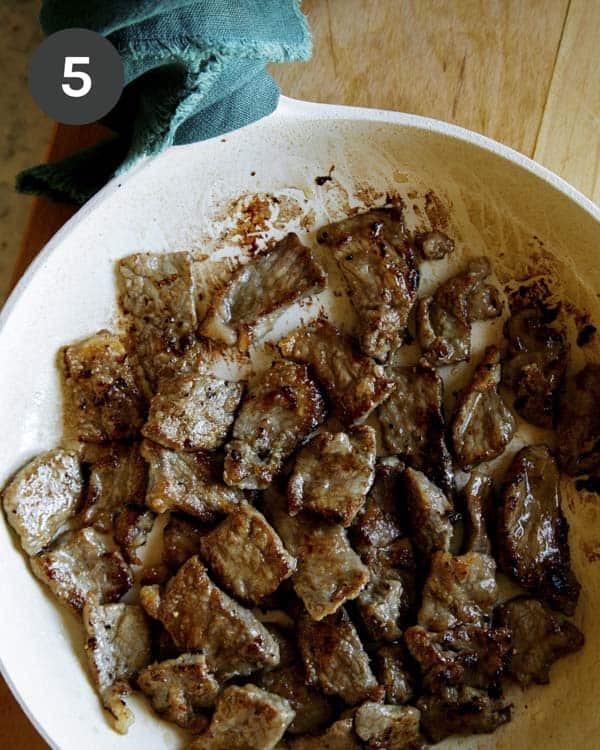
  1. Place skillet back over heat and add more oil. Add steak and sear until evenly browned on both sides.
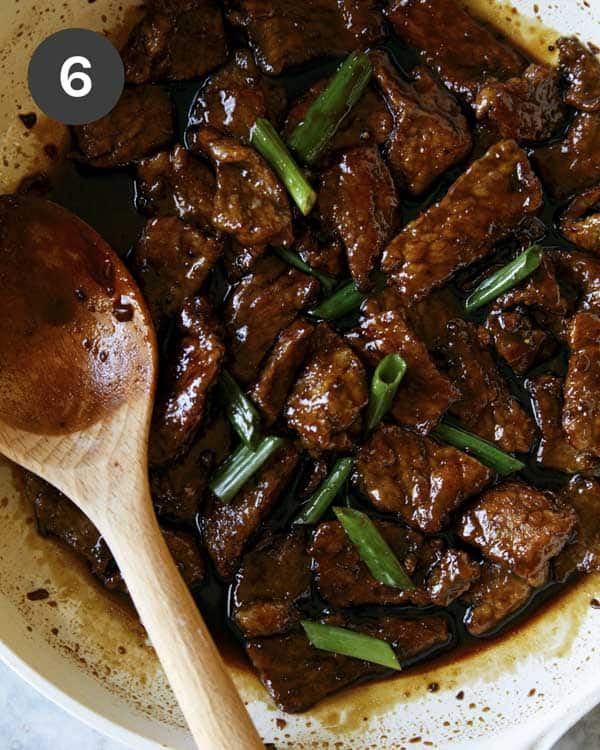
  2. Pour sauce back into skillet and stir together with meat. Allow sauce to thicken. Add green onion and continue to simmer until sauce is thick enough to coat the back of a wooden spoon. Serve Mongolian beef over steamed rice. So easy!
Cooking strip steak in a skillet to make Mongolian Beef.
Mongolian beef in a skillet with green onions.

Best Cut of Beef to Use for Mongolian Beef

Flank steak is the most traditional cut used for Mongolian beef and a cut we often used to use. It has great flavor, cooks quickly and can get incredibly tender. It’s still a great option to use today!

The reason we use NY strip steaks for our recipe is because NY strip steaks have similar qualities in flavor and cooking speed, but it’s a naturally tender cut and with flank steak getting increasingly popular and pricey, the price per pound are comparable these days.

Prep, Make Ahead and Freezing Instructions

Prep Ahead

To make sauce ahead, cool sauce and pour into an airtight container and store in the refrigerator for up to 5 days. To make steak ahead, slice steak and store in an airtight container in the refrigerator for up to 1 day.

When ready to cook, toss beef in salt, pepper and cornstarch.  Sear coated steak in skillet as written in recipe. Warm the sauce in a saucepan for a few minutes before adding it to the seared meat. This will help to avoid the temperature dropping in the skillet, not allowing for quick and even cooking.

Fully Make Ahead

Make recipe as written and cool completely. Transfer to an airtight container and store in the refrigerator for up to 3 days. When ready to serve, pour entire mixture into a large skillet and simmer over medium-low heat until warmed through, about 5 to 6 minutes.

Freezing

To freeze, cool Mongolian beef completely before transferring into a freezer friendly container. Store in freezer for up to 3 months. To reheat, transfer freezer bag to refrigerator and thaw overnight. Pour thawed mixture into a skillet and simmer over medium-low heat until sauce has thickened up and beef has just heated through.

Variations for Our Mongolian Beef Stir Fry

  • Incorporate some veggies into the dish! We love adding some bite sized broccoli florets into the mix. Mongolian beef and broccoli is SO good! We also love throwing in a handful of spinach to the dish for added fiber or sliced red peppers for crunch!
  • Add some heat with some dried thai chiles, crushed red pepper flakes or a spoonful of chile sauce ( like sriracha or sambal).
  • Use chicken instead of beef! Yes, this recipe is called Mongolian beef, but subbing in chicken is such an easy and equally delicious substitute!
  • Make it vegetarian friendly by swapping the beef out for cubes of firm tofu or strips of seitan. Gently press excess liquid from the tofu before cutting it into pieces and continue on with the recipe as written!
Close up shot of Mongolian Beef over rice.

Tips and Tricks for Mongolian Beef Success

  • Coating beef in cornstarch is important because it helps to tenderize the beef. It also helps to thicken the sauce, allowing it to fully coat the beef.
  • Flank steak (sliced against the grain) is most commonly used to make Mongolian beef, although any quick cooking beef works great. New York strip steaks are our cut of beef of choice, as flank steak isn’t always found at all grocery stores and New York strip steak generally is readily available Flank steak has also gotten quite expensive in the last 5 years or so and prices are now similar between cuts. Both flank steak and NY strip steaks work really well for this recipe and we recommending whichever you’re able to find and prefer.
  • Sear the sliced beef in batches to avoid overcrowding in the pan. This will allow the beef to sear properly and prevent the slices from steaming.

Can This be Made in an Instant Pot or Slow Cooker?

Yes, you can definitely make Instant Pot Mongolian Beef, but we really don’t think there’s a need to do so unless you don’t have access to a stovetop. Our recipe is so quick and easy that it will actually take longer setting up your instant pot, cooking it and waiting for the steam function to complete, then it will be just making on the stove in a pan!

We do not recommend making this dish in a slow cooker. As we mentioned above, this recipe is too quick and easy to need extra equipment (that’s meant to make things easier). The texture of the beef can easily go from perfectly tender to mush or very dried out using an instant pot and we don’t think it’s worth the effort of using a slow cooker.

What to Serve with Our Easy Mongolian Beef Recipe

This dish is commonly served with a side steamed rice. We usually like to serve ours over a bed of steamed rice so some of the sauce absorbs into the rice. It’s so good! We also love serving this dish with garlic noodles, chow mein and a side of lightly roasted green beans.

In the U.S. Mongolian beef is also commonly served over a bed of fried cellophane noodles, which adds a light, crisp texture to the overall dish. We opted out of the fried noodle version since frying the noodles would add an extra step and more clean-up in the end, but it is a delicious alternative!

A platter of Mongolian BBQ beef on a bed of rice with sesame seeds and green onions.

Other Delicious Asian Inspired Recipes You Will Love

A close up of Mongolian beef on white rice with a spoon.
Print

Mongolian Beef Recipe

The BEST Mongolian Beef Recipe you will ever taste! A quick, easy and ridiculously delicious stir fry dish of tender beef coated in a slightly sweet and savory sauce, Inspired by P.F. Changs Mongolian beef recipe. Serve it over steamed rice and a side of sautéed or steamed veggies for a complete meal everyone will love!
Course dinner, main dish
Cuisine asian, Chinese
Prep Time 5 minutes
Cook Time 10 minutes
Total Time 15 minutes
Servings 4
Calories 456kcal

Ingredients

Mongolian beef

  • 2 thinly sliced New York Strip Steaks about 1 1/2 pounds
  • 3 tablespoons cornstarch
  • 2 tablespoons vegetable oil divided
  • 3 minced garlic cloves
  • 1 tablespoon minced ginger
  • 1/3 cup low sodium soy sauce
  • 1/4 cup water
  • 1/4 cup light brown sugar
  • 2 green onions sliced into 1 inch pieces
  • salt and pepper to taste

Garnish

  • 1 teaspoon toasted sesame seeds optional

Serving suggestion

  • steamed rice for serving

Instructions

  • Season sliced steak with salt and pepper. Toss steak in cornstarch until fully and evenly coated. Set aside.
  • Place a large skillet over medium-high heat and add 1 tablespoon oil. Add garlic and ginger and sauté for 1 minute. Add soy sauce, water and sugar and bring to a boil until sugar dissolves, about 2 minutes.
  • Pour sauce into a liquid measuring cup and set aside.
  • Place skillet back over heat and add remaining oil. Add steak and sear until evenly browned on both sides, 1 to 2 minutes per side.
  • Pour sauce back into skillet and stir together with beef. Simmer and allow sauce to thicken, 1 to 2 minutes.
  • Toss in green onion and continue to cook for 1 more minute until sauce is thick enough to coat the back of a wooden spoon.
  • Pour Mongolian beef over steamed rice and serve.

Video

Notes

**Nutritional information does not include steamed rice**
Tips and Tricks for Success
  • Coating the sliced beef in cornstarch is important because it helps to tenderize the beef. It also helps to thicken the sauce, allowing it to fully coat the beef.
  • Flank steak (sliced against the grain) is most commonly used to make Mongolian beef, although any quick cooking beef works great. We use New York strip steaks in our version, as flank steak isn’t always found at all grocery stores and New York strip steaks generally are. Both flank steak and NY strip steaks work really well for this recipe and we recommending whichever you’re able to find and prefer.
  • Sear the sliced beef in batches to avoid overcrowding in the pan. This will allow the beef to sear properly and prevent the slices from steaming.

Nutrition

Calories: 456kcal | Carbohydrates: 22g | Protein: 35g | Fat: 25g | Saturated Fat: 8g | Polyunsaturated Fat: 5g | Monounsaturated Fat: 9g | Trans Fat: 1g | Cholesterol: 112mg | Sodium: 2085mg | Potassium: 620mg | Fiber: 1g | Sugar: 14g | Vitamin A: 60IU | Vitamin C: 2mg | Calcium: 40mg | Iron: 5mg

The post Mongolian Beef Recipe appeared first on Spoon Fork Bacon.
Warm Spring Salad

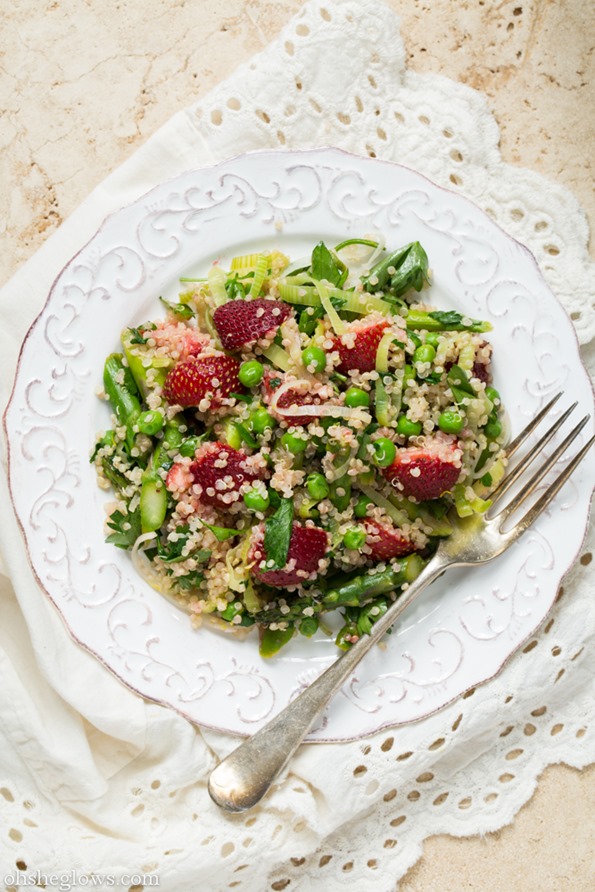
I’m celebrating spring with this warm spring salad featuring asparagus, leek, peas, strawberries, and parsley all tossed in a simple lemon olive oil dressing. It’s very light and veggie-packed with some protein provided by quinoa. If you’d like to add even more protein I’m sure it would be nice with some white beans, chickpeas, or…

Read More

The post Warm Spring Salad appeared first on Oh She Glows.

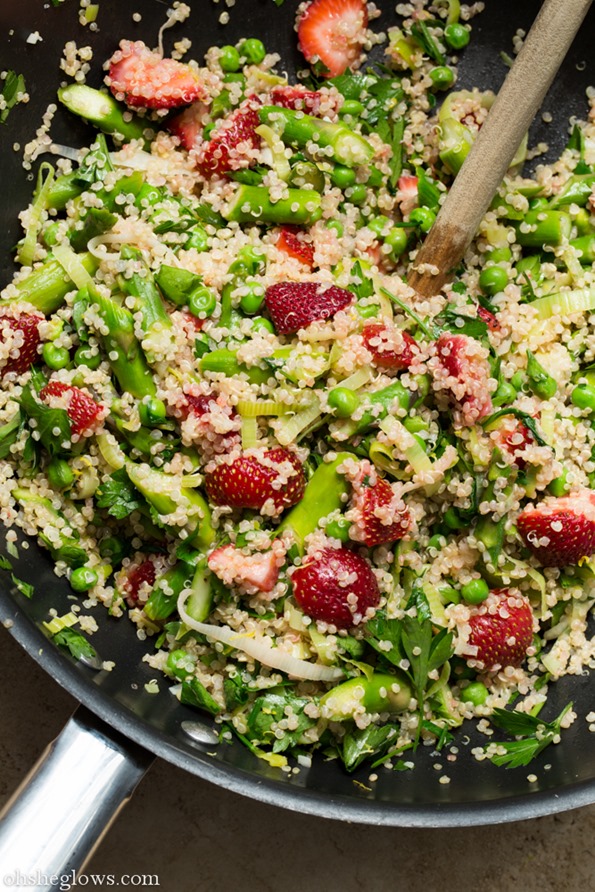
I’m celebrating spring with this warm spring salad featuring asparagus, leek, peas, strawberries, and parsley all tossed in a simple lemon olive oil dressing. It’s very light and veggie-packed with some protein provided by quinoa. If you’d like to add even more protein I’m sure it would be nice with some white beans, chickpeas, or French lentils thrown in too.

Warm Spring Salad

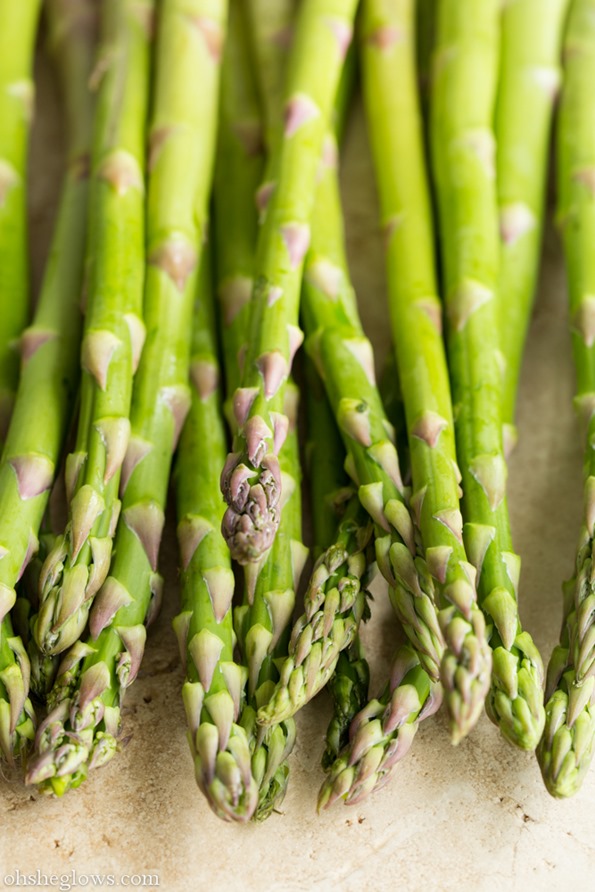
Behold, non-wimpy asparagus!

Close up picture of Asparagus

Normally I don’t consider asparagus to be one of the most exciting vegetables, but it always surprises me every time I make it. I enjoy it way more than I think I do. A simple, light sauté leaves it tender, but still crisp and fresh. I find it turns out best when I cook it a bit less time than I think I should. Less is more with this guy! I’ve made the mistake of cooking the hell out of it in the past and it’s something I try not to repeat.

Nutrition Facts about Asparagus

  • Look for firm spears that don’t bend easily. Asparagus doesn’t tend to last very long, so it’s best consumed within 48 hours of purchasing. When you bring it home, wrap the stems in a damp paper towel to extend freshness.
  • Asparagus may aid in digestion thanks to its inulin content which is said to function as a “prebiotic”
  • In 1 cup of raw asparagus you’ll receive Vitamin K (69.6% Daily Value), Vitamin A (20.2% DV), Folate (17.4% DV), Iron (15.7% DV), Vitamin B1 (12.6% DV), Vitamin C (12.5% DV), 3 grams protein, 2.75 grams fibre, and more.
  • It can act as a diuretic causing you to lose more fluid than normal. Be sure to get enough water throughout the day.
  • Asparagus is anti-inflammatory thanks to its large composition of anti-inflammatory nutrients.
  • Source: World’s Healthiest Foods

Since spring produce seems to be picking up speed around here, I’m celebrating my first spring recipe of the season today – a warm spring salad featuring asparagus, leek, peas, strawberries, and lots of parsley all tossed in a simple lemon olive oil dressing. Easy, light, and super refreshing. If you’d like to add even more protein than what the quinoa + veggies provide I’m sure it would be nice with some white beans, chickpeas, or French lentils thrown in too. Eric also suggested we sprinkle some seeds on top – pumpkin and hemp – and that was a very nice addition!

Keep in mind that the strawberries will turn the quinoa a pinkish hue once tossed. If this is a concern or if you are making this in advance, I suggest adding the strawberries on just before serving.

Cheers to crunchy, fresh spring salads!

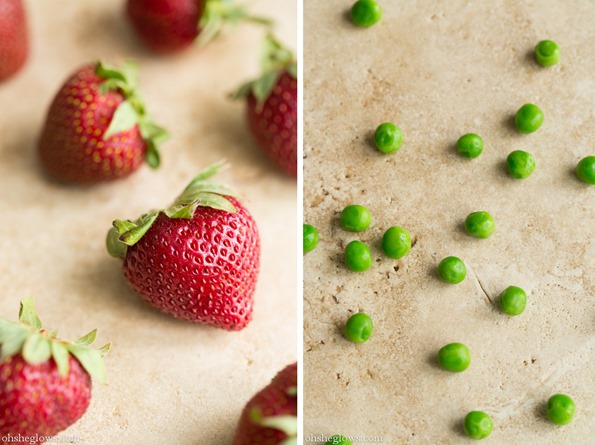
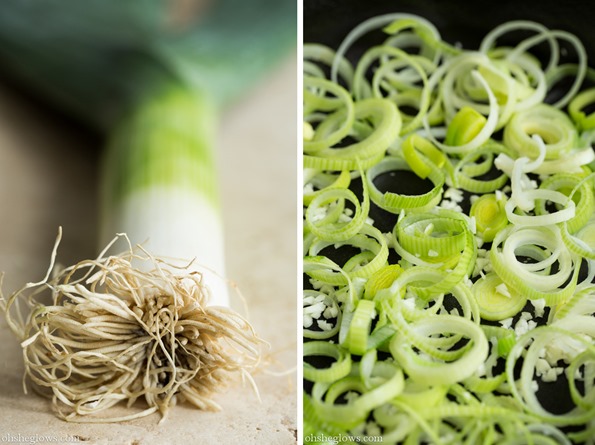
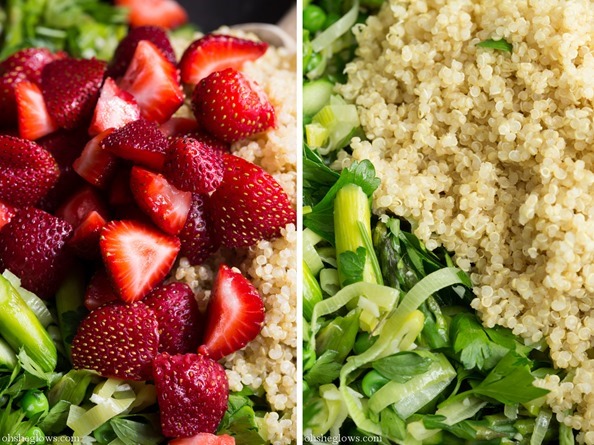
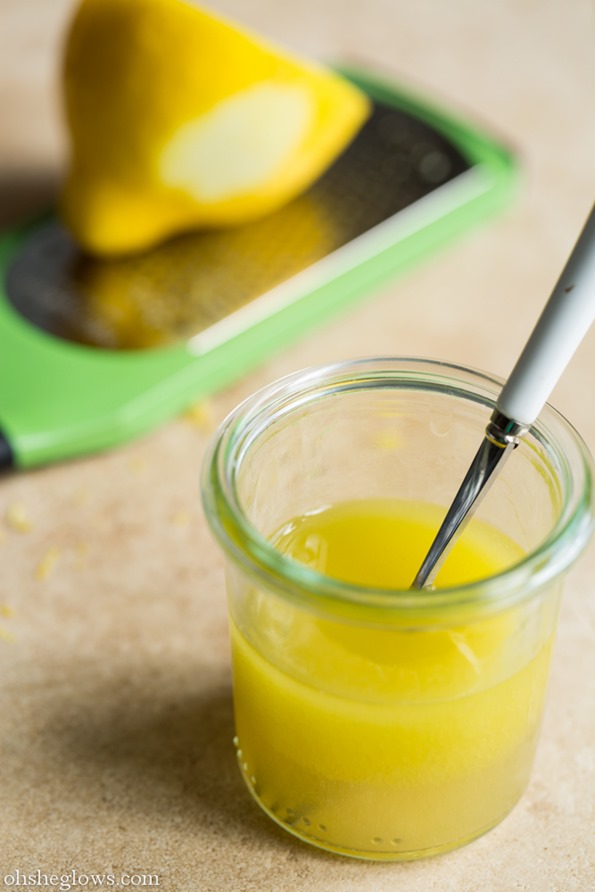
 Leeks Strawberries Mixed with Asparagus, leeks, and Quinoa Lemon Olive Oil DressingWarm Spring Salad in a Skillet

If you like the look of this salad be sure to check out some of my other great Spring salads:

Warm Spring Salad

Vegan, gluten-free, nut-free, soy-free
Yield
4 Servings
Prep time
30 minutes
Cook time
25 minutes

I’m celebrating my first spring recipe of the season with this warm spring salad featuring asparagus, leek, peas, strawberries, and parsley all tossed in a simple lemon olive oil dressing. It’s very light and veggie-packed with some protein provided by quinoa. If you’d like to add even more protein I’m sure it would be nice with some white beans, chickpeas, or French lentils thrown in too. Keep in mind that the strawberries will bleed pink juices into the salad and turn the quinoa a light pink hue once tossed. If this is a concern or if you are making this in advance, I suggest adding the strawberries on just before serving.

Ingredients

  • 1 cup uncooked quinoa (or try speltberries)
  • 1/2 tbsp extra virgin olive oil
  • 1 leek, sliced into rounds or half moons
  • 2 garlic cloves, minced
  • 1 bunch asparagus, ends broken off and chopped into 1-inch pieces
  • 1 cup diced strawberries (optional)
  • 3/4 cup fresh or frozen peas
  • 1 cup fresh parsley, roughly chopped
  • 2-3 tbsp extra virgin olive oil, to taste
  • 3 tbsp fresh lemon juice
  • 1/2 tbsp pure maple syrup (or other sweetener)
  • 1/4 tsp fine grain sea salt & lots of pepper, to taste
  • lemon zest, for garnish (optional)

Directions

  1. Rinse quinoa in a fine mesh strainer and place into a medium pot. Add 1.5 cups vegetable broth (or water) and bring to a low boil. Reduce heat to low-medium, cover with tight-fitting lid, and cook for 15-17 minutes, or until fluffy and all the water is absorbed. Fluff with fork, remove from heat, and let sit covered for 5 minutes.
  2. Meanwhile, grab a very large skillet or wok. Sauté the leek and garlic in the oil for about 5 minutes over medium heat. Season generously with salt and pepper. Add in the asparagus and sauté for another 5-10 minutes or until the asparagus is just tender, but still a bit crisp. Stir in the strawberries (optional), peas, and parsley. Heat for a few minutes and then remove from heat.
  3. Whisk together the dressing ingredients (olive oil, lemon juice, maple syrup, and 1/4 tsp fine grain sea salt) to taste. Pour dressing onto skillet mixture and stir in the cooked quinoa. Season to taste with salt and pepper & enjoy! This would also be lovely with nuts or seeds sprinkled on top.

Tip:

Oh, I forgot to mention – this is also fantastic served cold too!

Nutrition Information

(click to expand)
Serving Size 1 of 4 salads | Calories 313 calories | Total Fat 11.7 grams
Saturated Fat 1.6 grams | Sodium 214 milligrams | Total Carbohydrates 44.1 grams
Fiber 7.9 grams | Sugar 7.9 grams | Protein 10.6 grams
* Nutrition data is approximate and is for informational purposes only.

Oh, I forgot to mention – this is also fantastic served cold too!

The post Warm Spring Salad appeared first on Oh She Glows.

Caesar Salad Recipe

We’ve finally updated our Caesar Salad Recipe and I couldn’t be more excited! I don’t think there’s a more iconic salad than caesar salad! It’s such a perfect, simple salad that goes well with SO many dishes! We love it in our household and it’s the only salad my 4 year old will eat! We think it’s totally worth it to put in just a little bit of effort to make some of the components…

Read More

The post Caesar Salad Recipe appeared first on Spoon Fork Bacon.
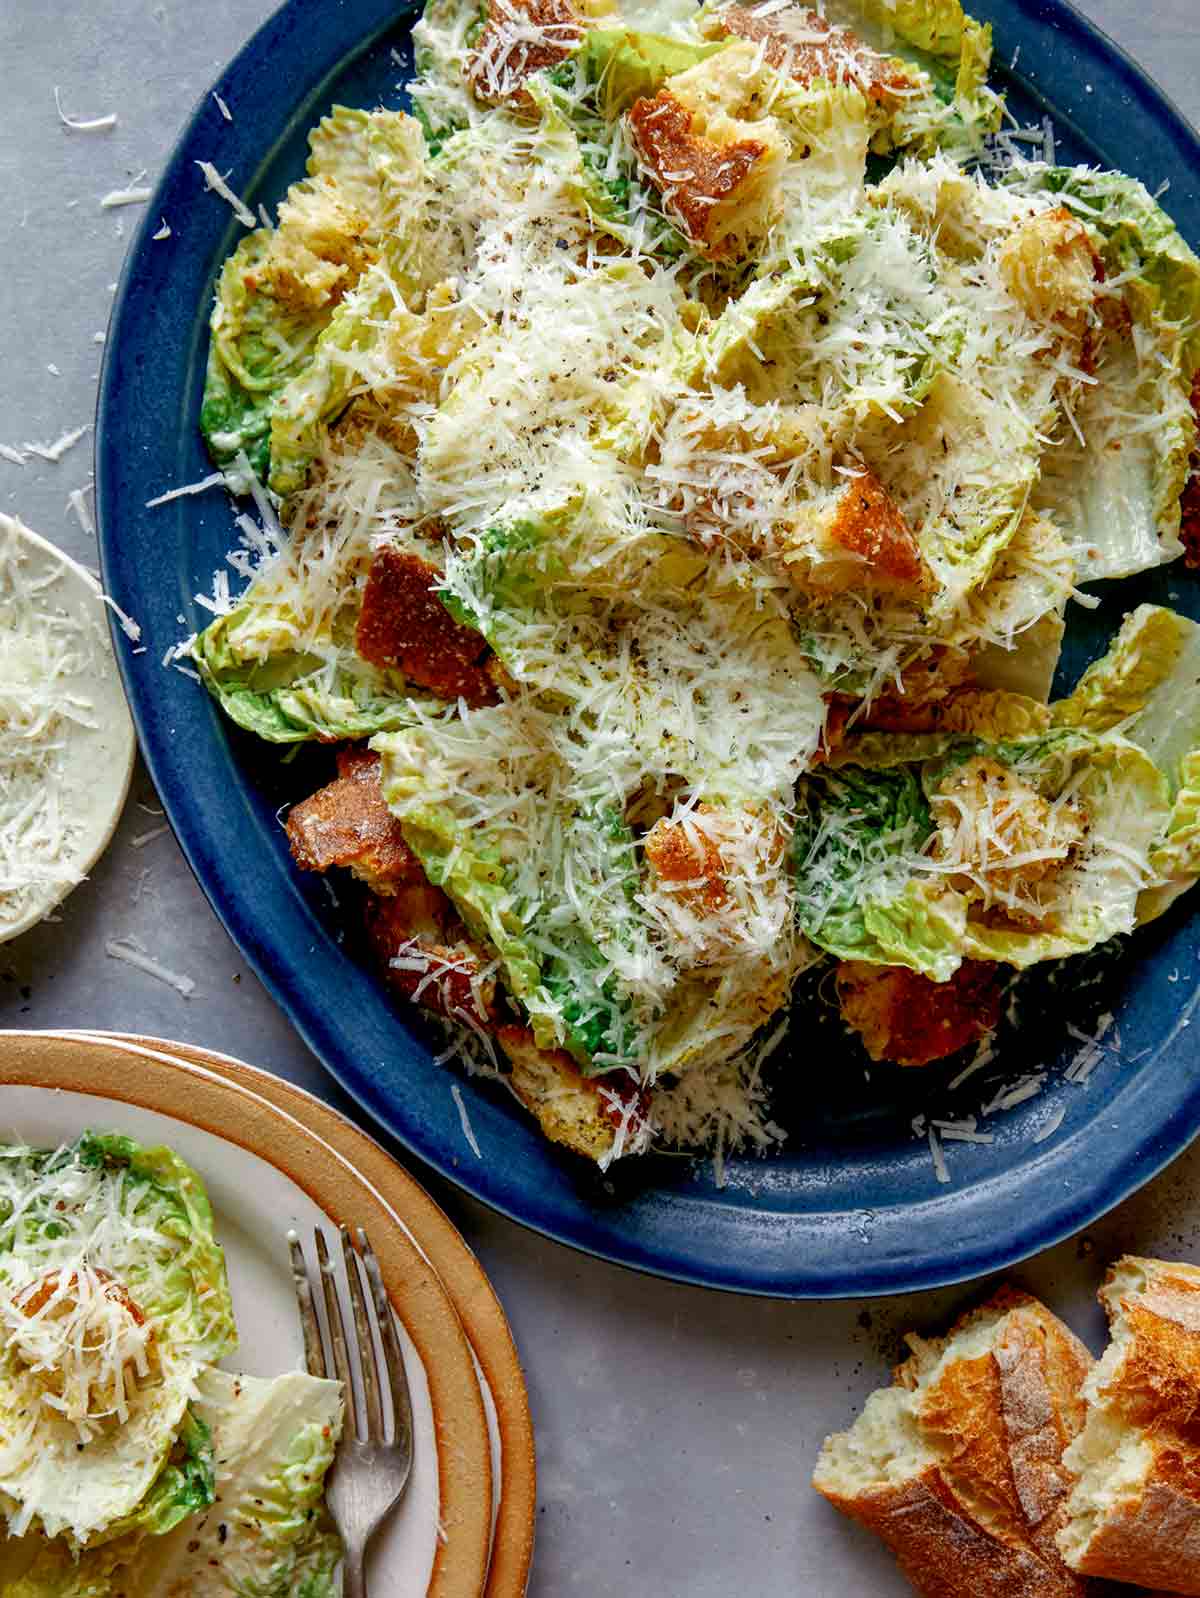
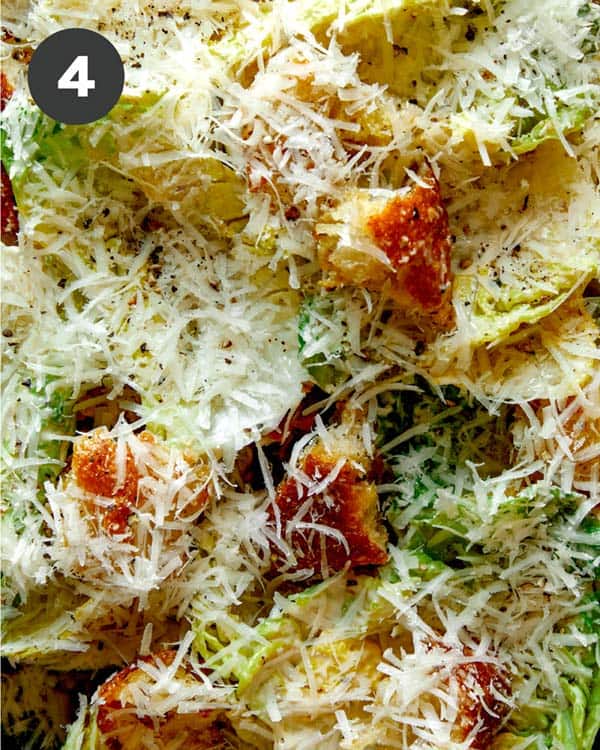
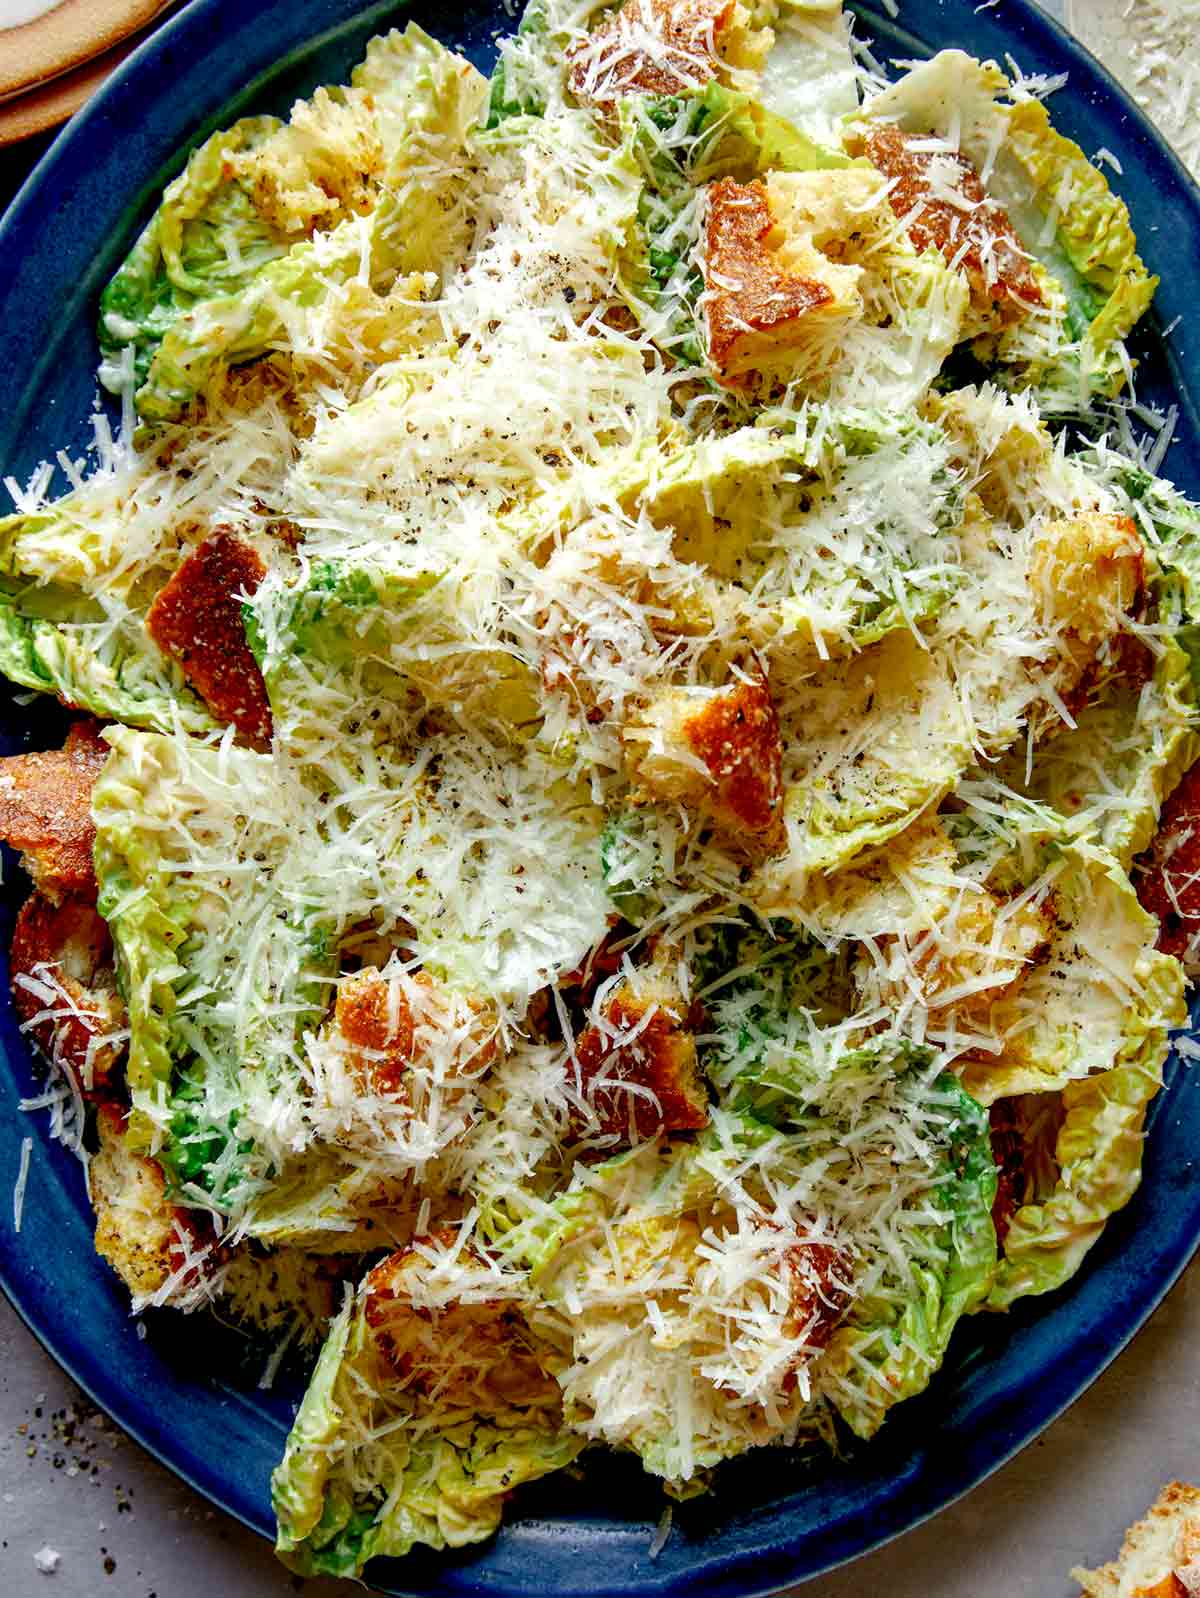
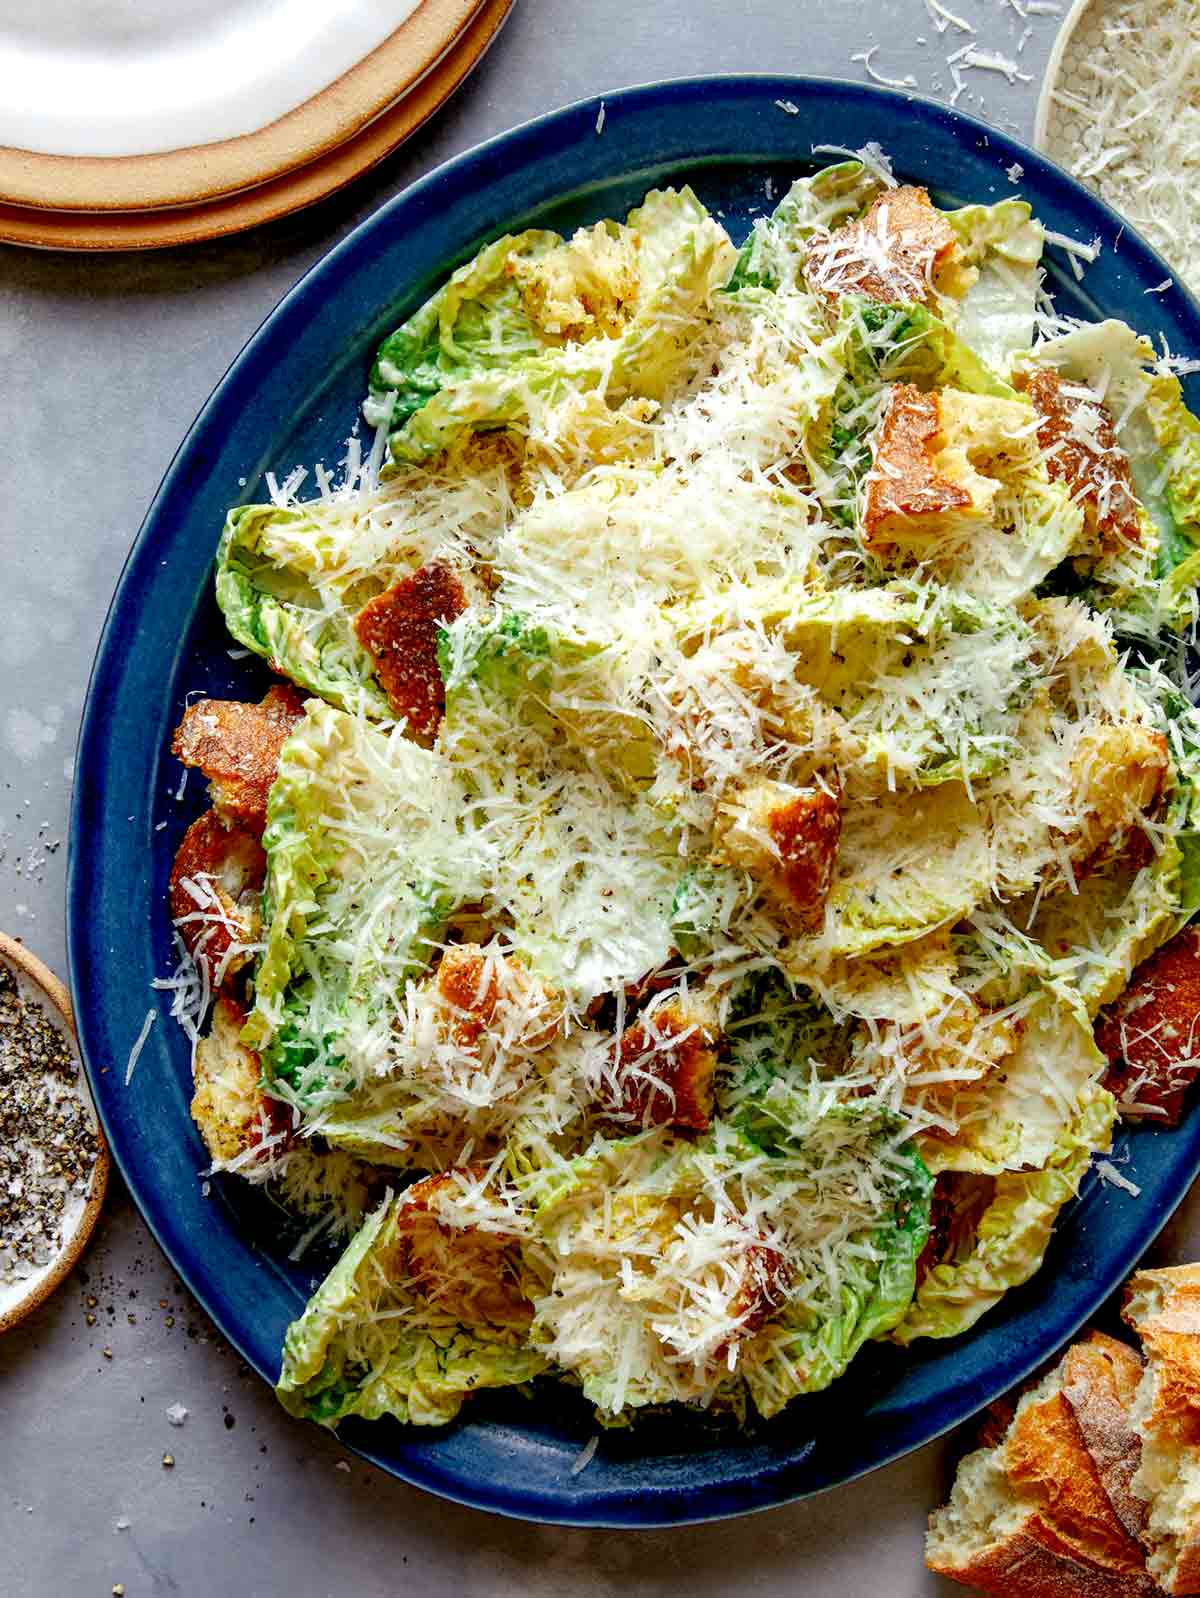
Caesar salad on a platter.

We’ve finally updated our Caesar Salad Recipe and I couldn’t be more excited! I don’t think there’s a more iconic salad than caesar salad! It’s such a perfect, simple salad that goes well with SO many dishes!

We love it in our household and it’s the only salad my 4 year old will eat! We think it’s totally worth it to put in just a little bit of effort to make some of the components (like the croutons and dressing) from scratch for an ultimate caesar salad experience!

How to Make Our Caesar Salad Recipe

Ingredients

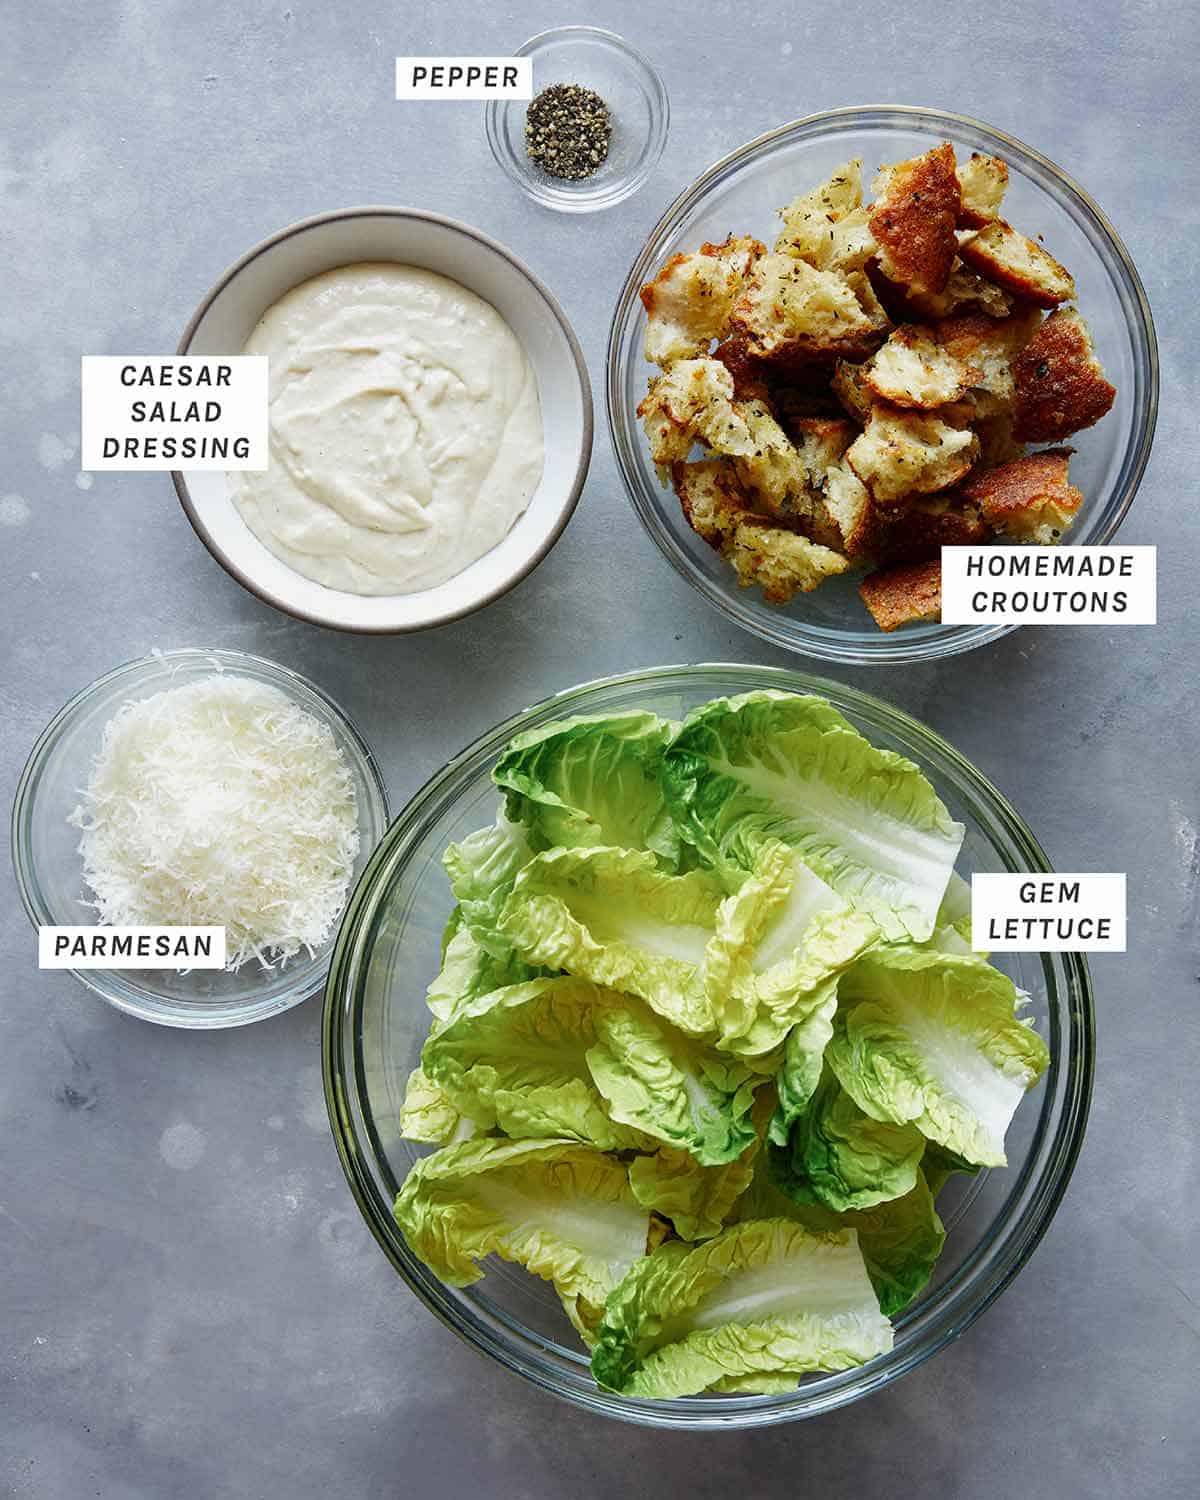
Caesar salad ingredients on a kitchen table.

Process

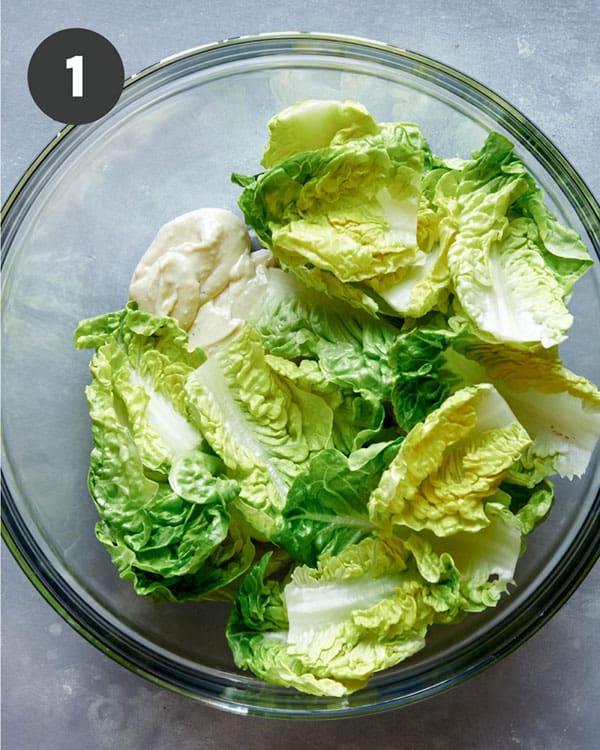
  1. Pour dressing into a large mixing bowl and top with lettuce .
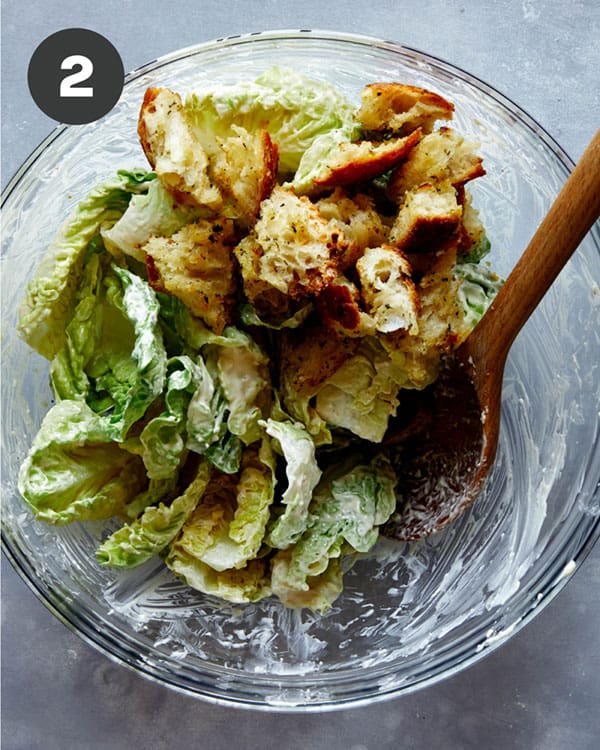
  2. Toss together until lettuce is evenly coated. Add croutons.
Caesar salad ingredients in a bowl.
Caesar salad ingredients with homemade croutons on top.
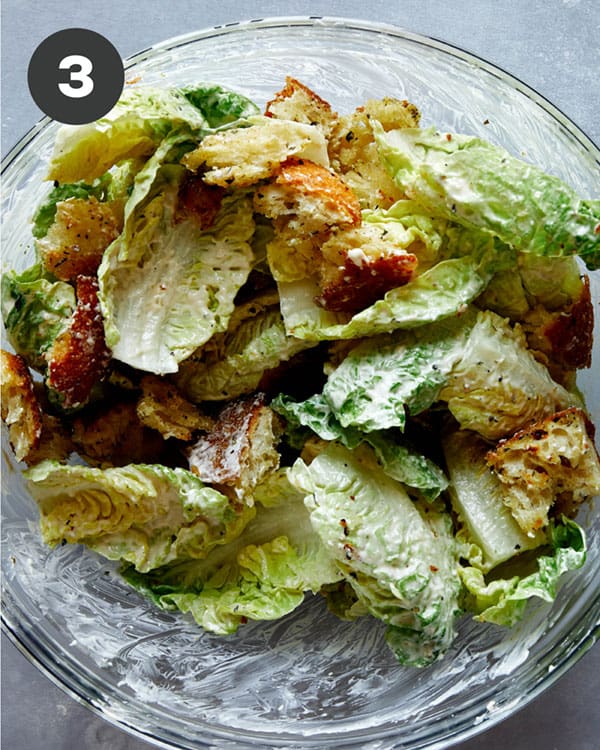
  1. Toss together with tongs, until croutons are evenly coated and distributed.
  2. Top salad with remaining Parmesan and some black pepper. Serve.
Caesar salad freshly mixed in a bowl.
Caesar salad on a platter with parmesan on top.

Best Lettuce to Use for Caesar Salad

Romaine lettuce is the most used lettuce for classic caesar salad, and for good reason! It provides the perfect, bright crunch you want with the creamy, acidic dressing.

Personally we prefer using gem lettuce leaves (which is a miniature variety of romaine), just a teensy tiny bit more. The reason we love using gem lettuce leaves more is because you still get the bright, crisp texture from gem lettuce, but you also get the tenderness you find in butter lettuce. It’s the perfect balance of crispy, sweet and tender!

Close up on a platter full of caesar salad.

Anchovy Substitute for Caesar Salad

I think anchovies in caesar dressing is key to giving caesar salad its distinct, unique and delicious flavor. I do understand that not everything enjoys it, nor can everyone eat anchovies. If that’s the case the best substitute is Worcestershire sauce. You can replace 2 teaspoons of Worcestershire to our classic dressing recipe and increase the amount to 2 1/2 teaspoons for our quick and easy version!

Variations

  • Use shaved Parmesan cheese instead of grated Parmesan for the garnish. I like to do this when I’m using the classic dressing (which is less creamy), for an extra nutty, cheesy kick!
  • Although purists may disagree, I love adding thinly sliced radishes or jicama for a bit of extra crunch! I also love adding cherry tomatoes, grilled asparagus and avocados on occasion, when I want to bulk it up!
  • Add some grilled chicken, steak, crumbled bacon or even some chickpeas or edamame to the mix to add some protein to the caesar salad!
  • Lightly grill the lettuce leaves before serving! When I say lightly, I really mean for just a few seconds. By doing this, you keep the integrity of the lettuce, but add a slight char flavor that tastes amazing!
  • If you can’t be bothered to use a knife to eat your salad, no problem, we get it! Just shred the heads of gem lettuce into bite sized pieces, instead of keeping the whole leaves intact.

Tips and Tricks for Success

  • Make sure your lettuce is clean and crisp! The best way to do this is to rinse your lettuce in cold water and to use a salad spinner to rid the leaves of excess water!
  • Don’t dress the salad until a few minutes before serving. This will ensure the lettuce and croutons remain crisp!
  • Make the caesar salad dressing and croutons yourself! Although it may take a little more work, it’s totally worth it to make your own croutons and caesar dressing. They will definitely elevate your salad!
  • Add veggies and protein to bulk it up (using some of our suggestions from above!).

What to Serve with Our Caesar Salad Recipe

Caesar salad recipe on a platter.

More Delicious Salad Recipes You Will Love

Caesar salad recipe on a platter.
Print

Caesar Salad Recipe

A simple and delicious Caesar Salad Recipe that will thoroughly impress guests! Our recipe uses gem lettuce so you still get the crunch you would from romaine, but also the tenderness (similar to butter lettuce). We love this truly iconic and classic salad that's delicious enough to be eaten on its own, but versatile enough to be paired with tons of different dishes!
Course dinner, lunch
Cuisine Mexican
Prep Time 30 minutes
Cook Time 10 minutes
Total Time 40 minutes
Servings 4
Calories 493kcal

Ingredients

  • 1 recipe homemade croutons
  • 1/2 recipe caesar salad dressing
  • 3 heads gem lettuce, trimmed and leaves separated (or 5 cups sliced romaine hearts)
  • 3 tablespoons freshly grated Parmesan cheese
  • black pepper to taste

Instructions

  • Pour dressing into a large mixing bowl .
  • Add croutons and lettuce leaves.
  • Toss together with tongs, until lettuce leaves and croutons are well and evenly coated.
  • Top salad with remaining Parmesan and some black pepper. Serve.

Notes

Tips and Tricks for Success
  • Make sure your lettuce is clean and crisp! The best way to do this is to rinse your lettuce in cold water and to use a salad spinner to rid the leaves of excess water!
  • Don’t dress the salad until a few minutes before serving. This will ensure the lettuce and croutons remain crisp!
  • Make the caesar salad dressing and croutons yourself! Although it may take a little more work, it’s totally worth it to make your own croutons and caesar dressing. They will definitely elevate your salad!
  • Add veggies and protein to bulk it up (using some of our suggestions from above!).

Nutrition

Calories: 493kcal | Carbohydrates: 7g | Protein: 11g | Fat: 48g | Saturated Fat: 10g | Cholesterol: 57mg | Sodium: 832mg | Potassium: 235mg | Fiber: 2g | Sugar: 2g | Vitamin A: 5170IU | Vitamin C: 18mg | Calcium: 293mg | Iron: 2mg

The post Caesar Salad Recipe appeared first on Spoon Fork Bacon.
Sushi Bake

Love sushi but don’t have the time or confidence to roll your own at home? This sushi bake is the easiest and most flavorful way to enjoy your favorite sushi flavors anytime the craving strikes. Like our Korean Style Spicy Sashimi Salad and Poke Burrito, you can make sushi-inspired meals at home without all the fuss. Baking the steamed rice creates a crispy texture that contrasts the creamy salmon filling in the most amazing way….

Read More

The post Sushi Bake appeared first on Spoon Fork Bacon.
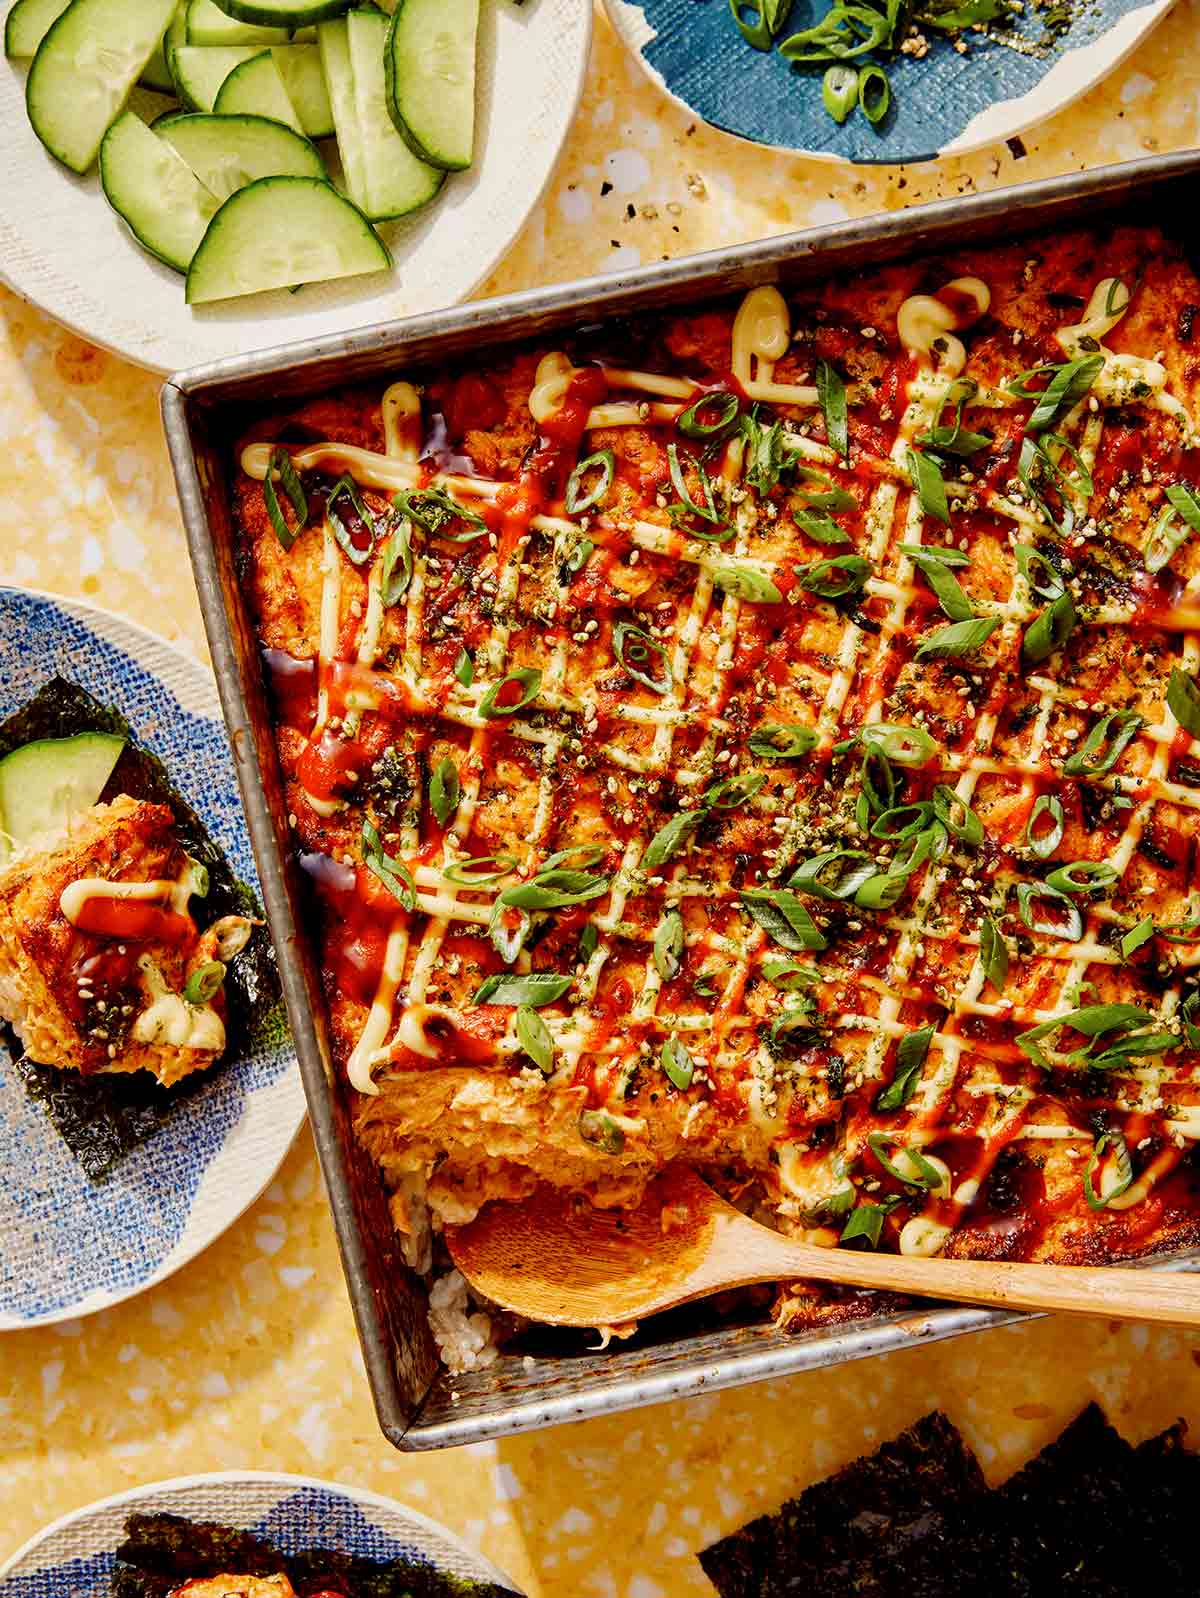
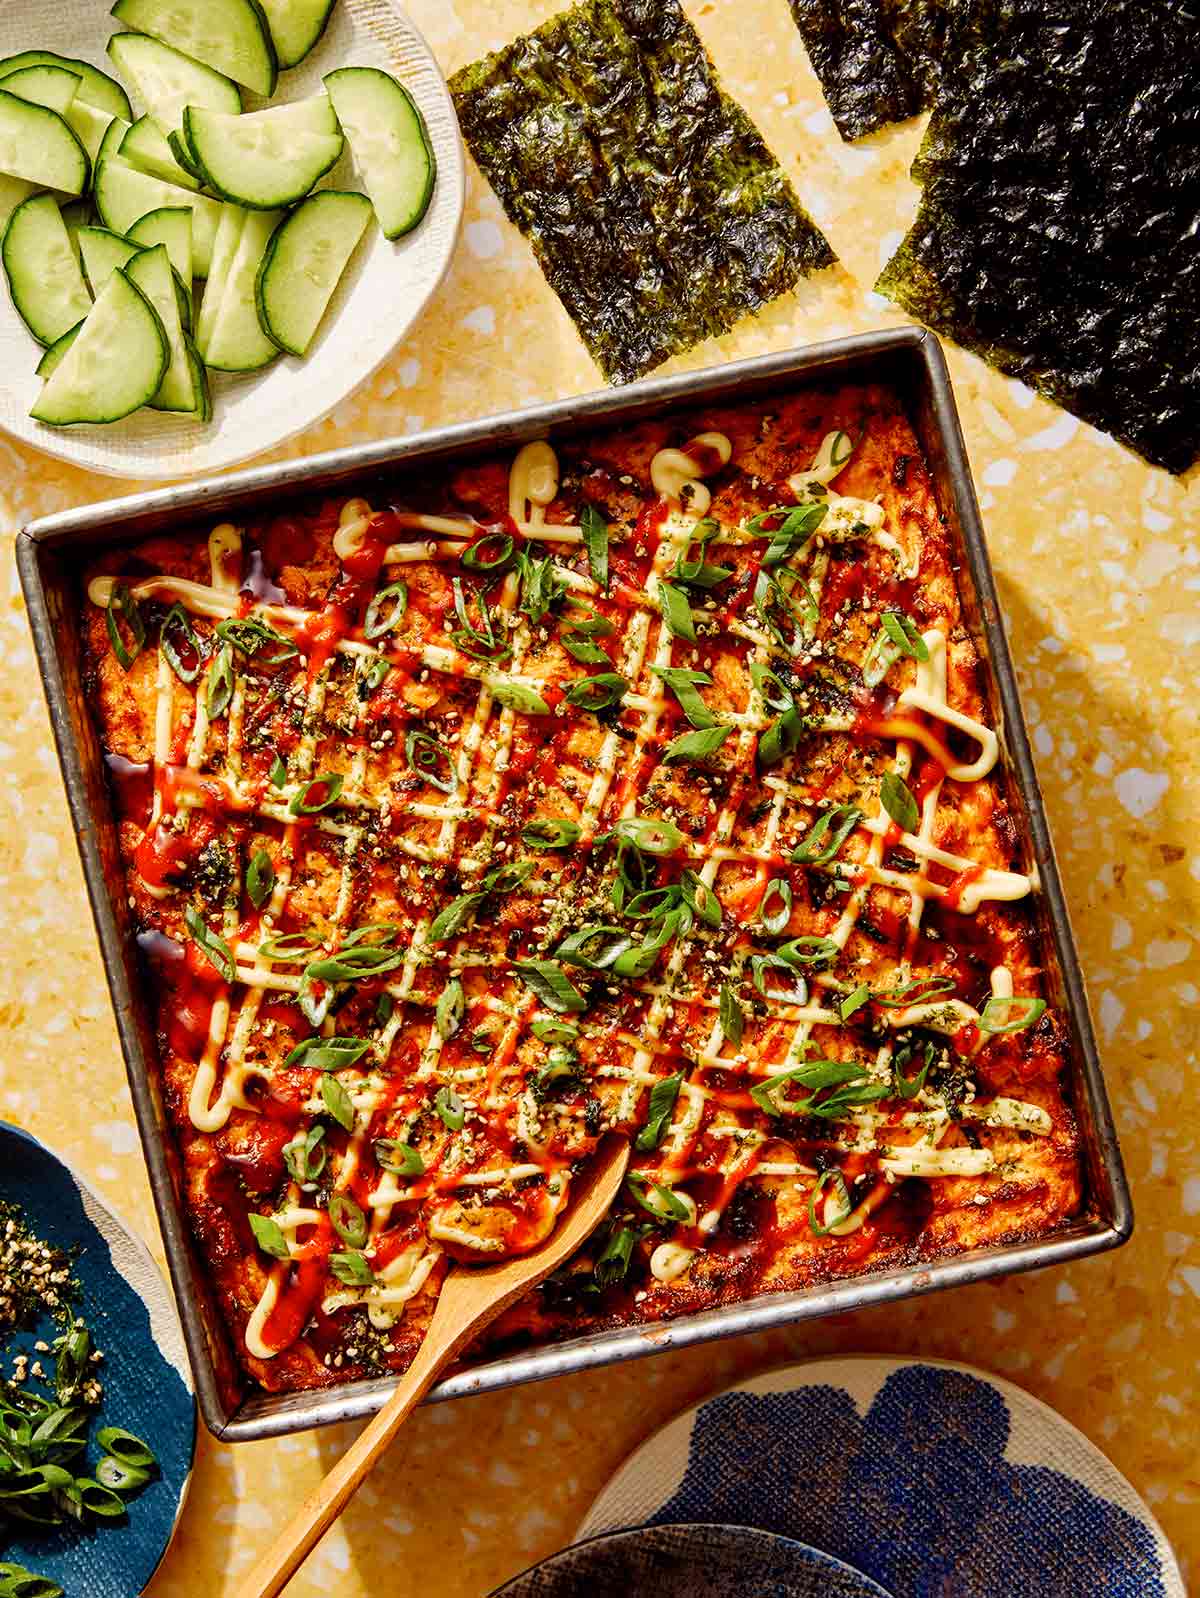
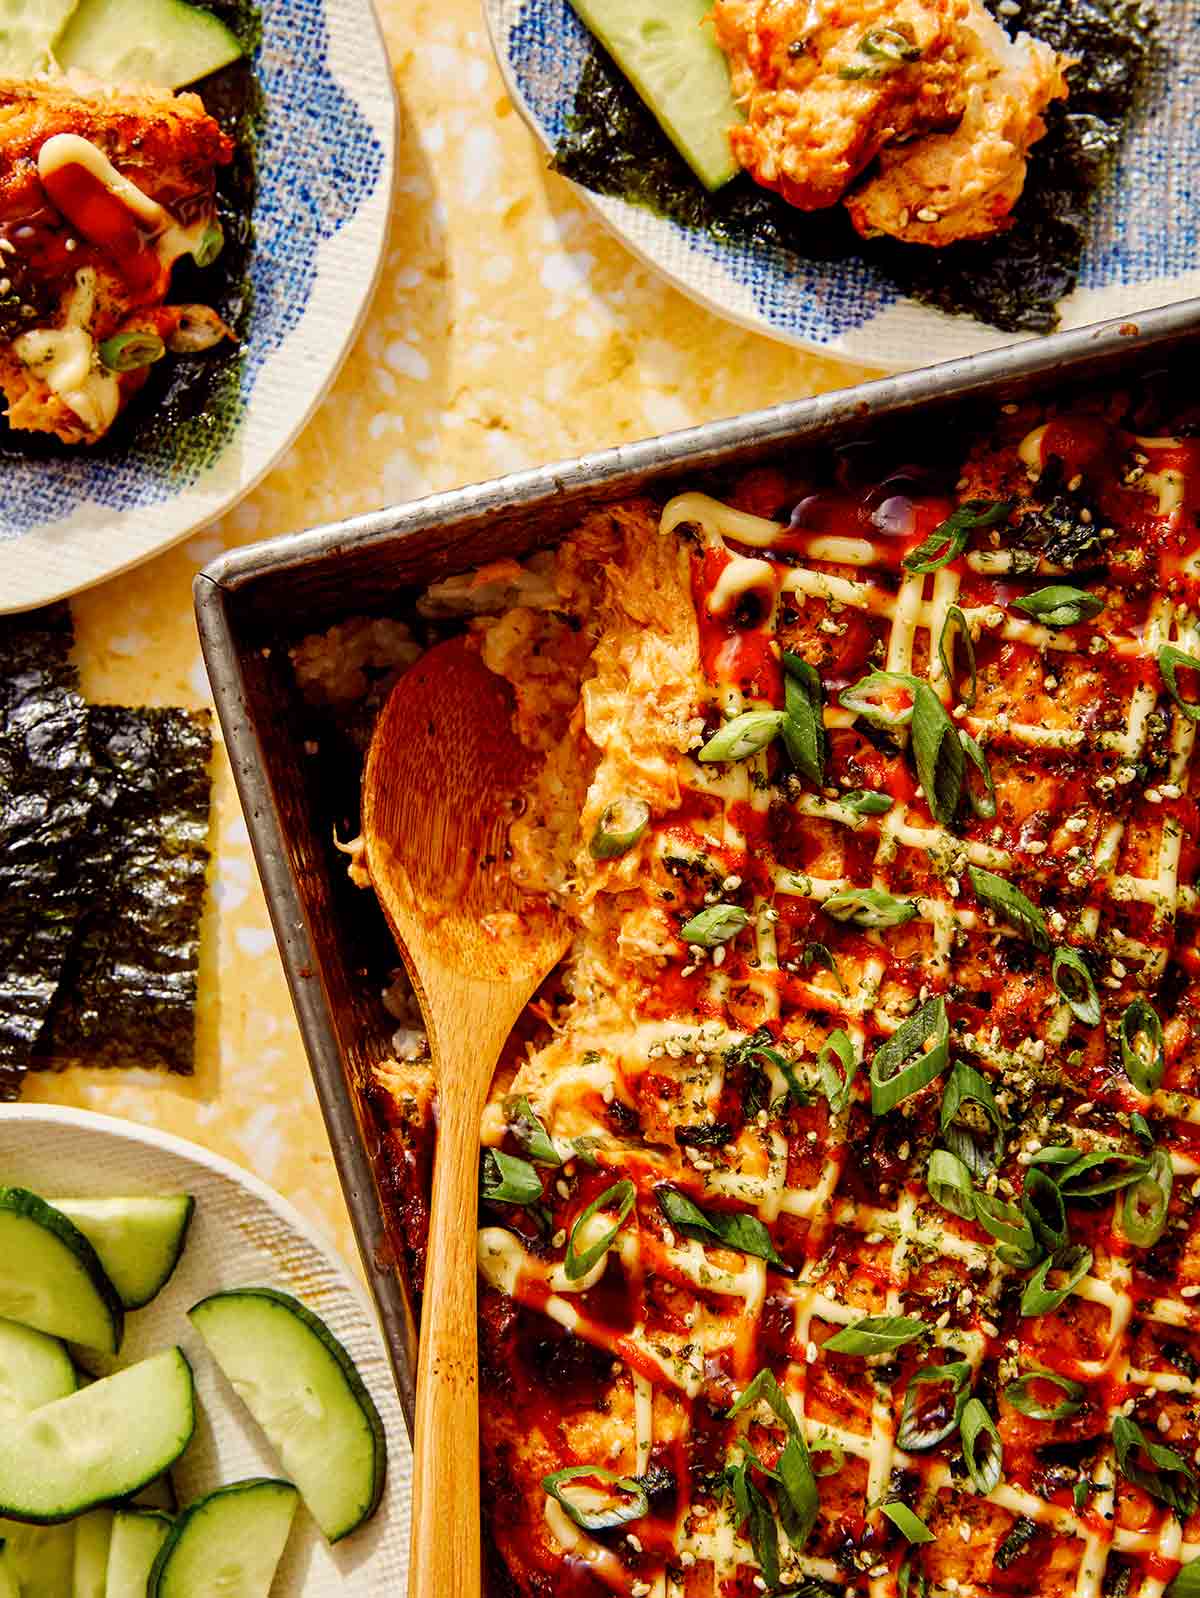
Salmon sushi bake in a baking dish with cucumbers and nori.

Love sushi but don’t have the time or confidence to roll your own at home? This sushi bake is the easiest and most flavorful way to enjoy your favorite sushi flavors anytime the craving strikes. Like our Korean Style Spicy Sashimi Salad and Poke Burrito, you can make sushi-inspired meals at home without all the fuss.

Baking the steamed rice creates a crispy texture that contrasts the creamy salmon filling in the most amazing way. Topping it all off with a sauce of kewie pie, eel sauce, sriracha, and furikake adds the spicy umami flavor you love. All you need is an 8 x 8-inch baking dish, no special tools, to make a baked sushi casserole that just might rival your favorite takeout spot.

What is Sushi Bake?

A sushi bake is a casserole with all your favorite sushi ingredients and flavors. Steamed rice bakes at the bottom of a greased pan and is topped with a mixture of cream cheese, mayo, salmon, sriracha, soy sauce, green onions, and furikake. The entire pan is baked and then broiled for a golden, browned, and crispy texture. And with a spicy mayo drizzled on top, you can serve it with any of your other favorite sushi ingredients like avocado, cucumbers, and nori.

How to Make Our Spicy Salmon Sushi Bake

Ingredients

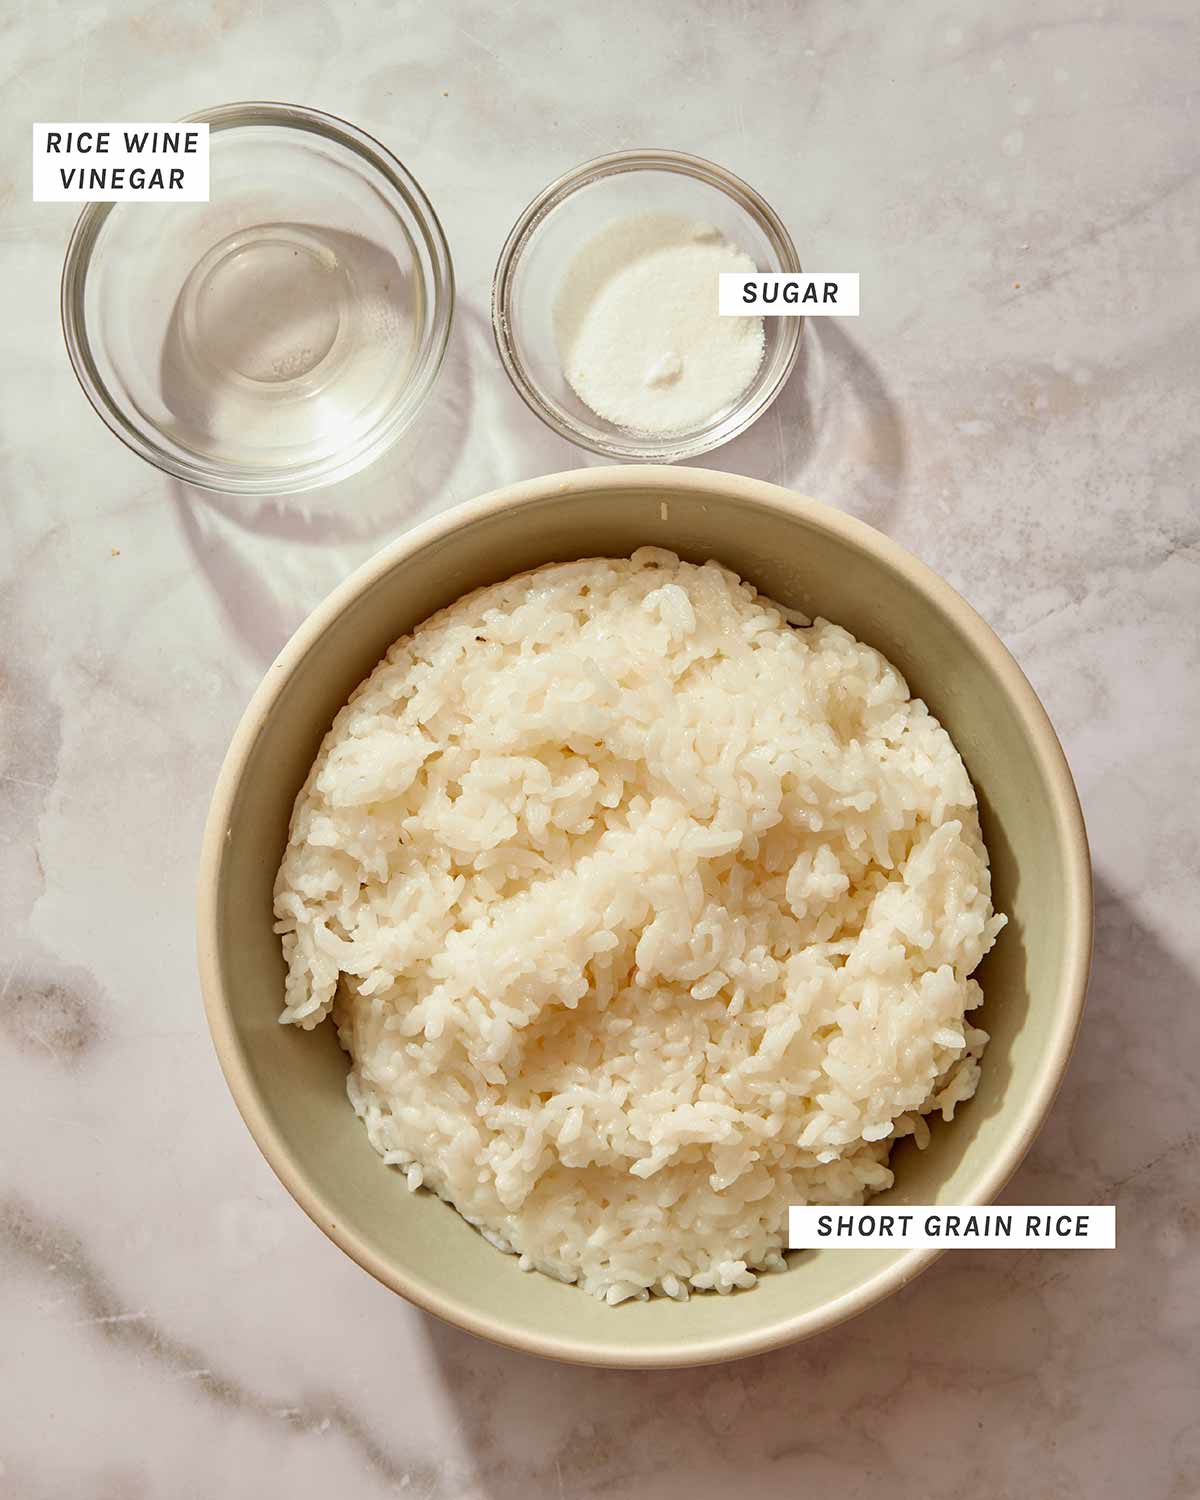
Making sushi rice as the base for salmon sushi rice.
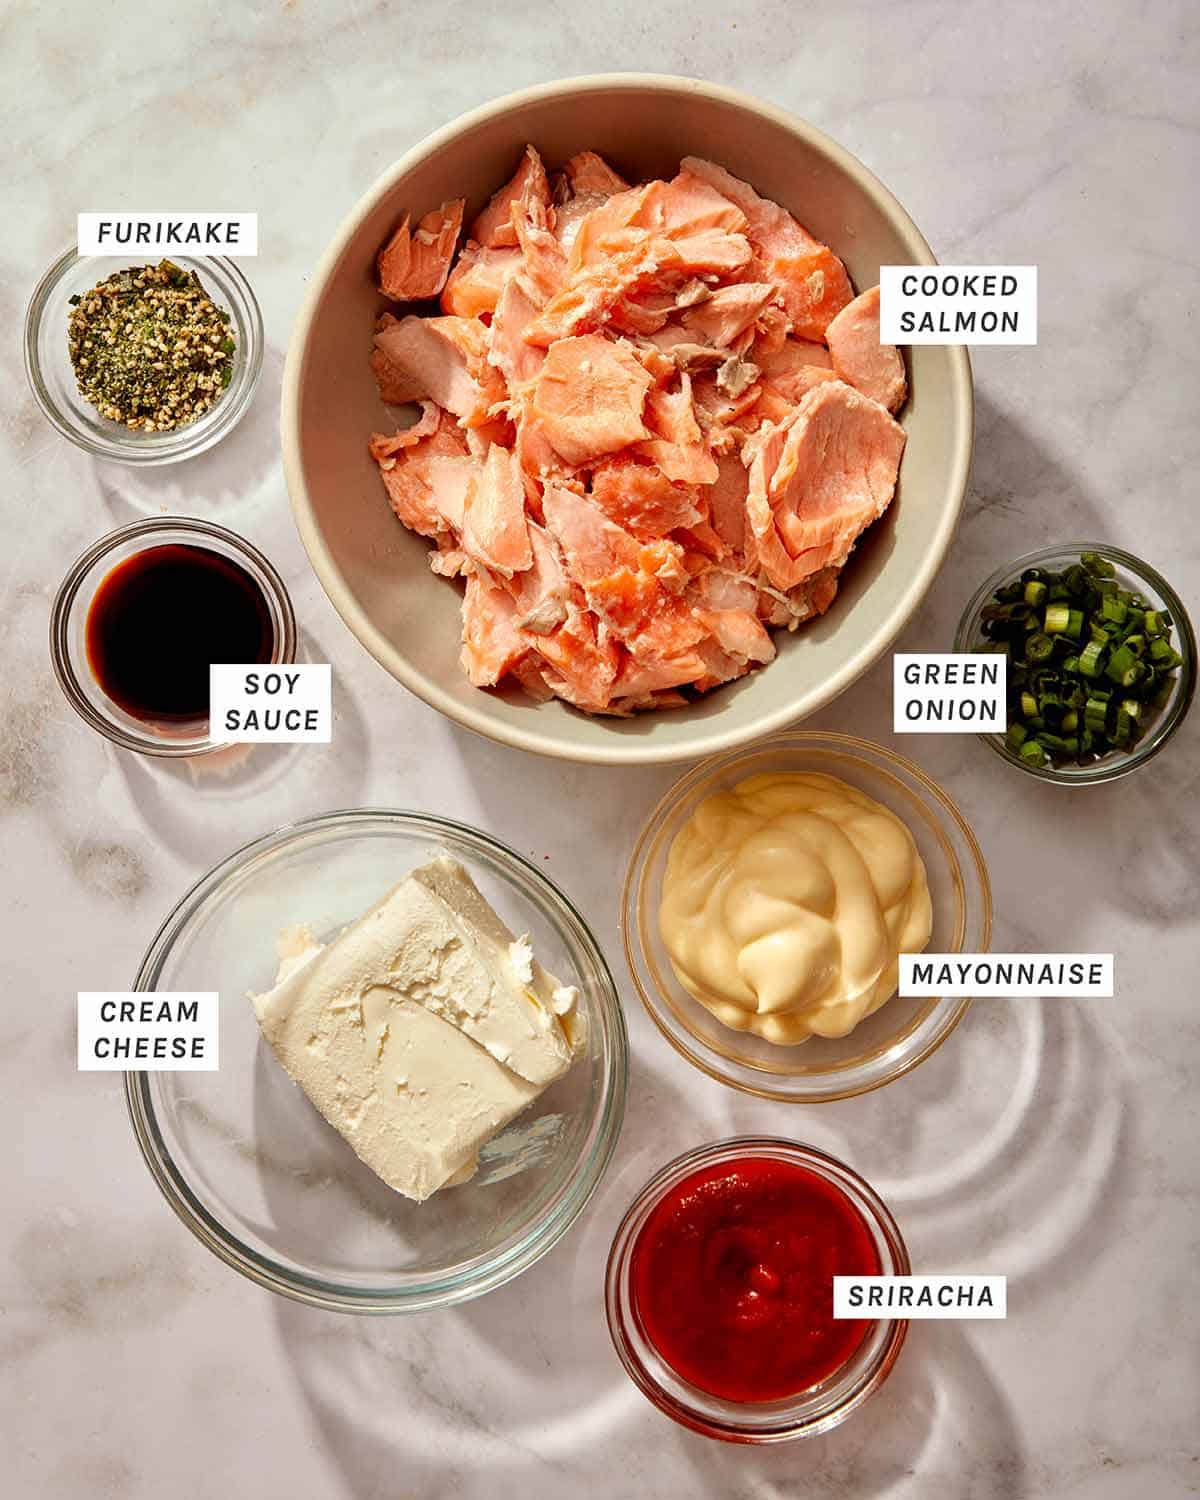
Ingredients for a salmon sushi bake .
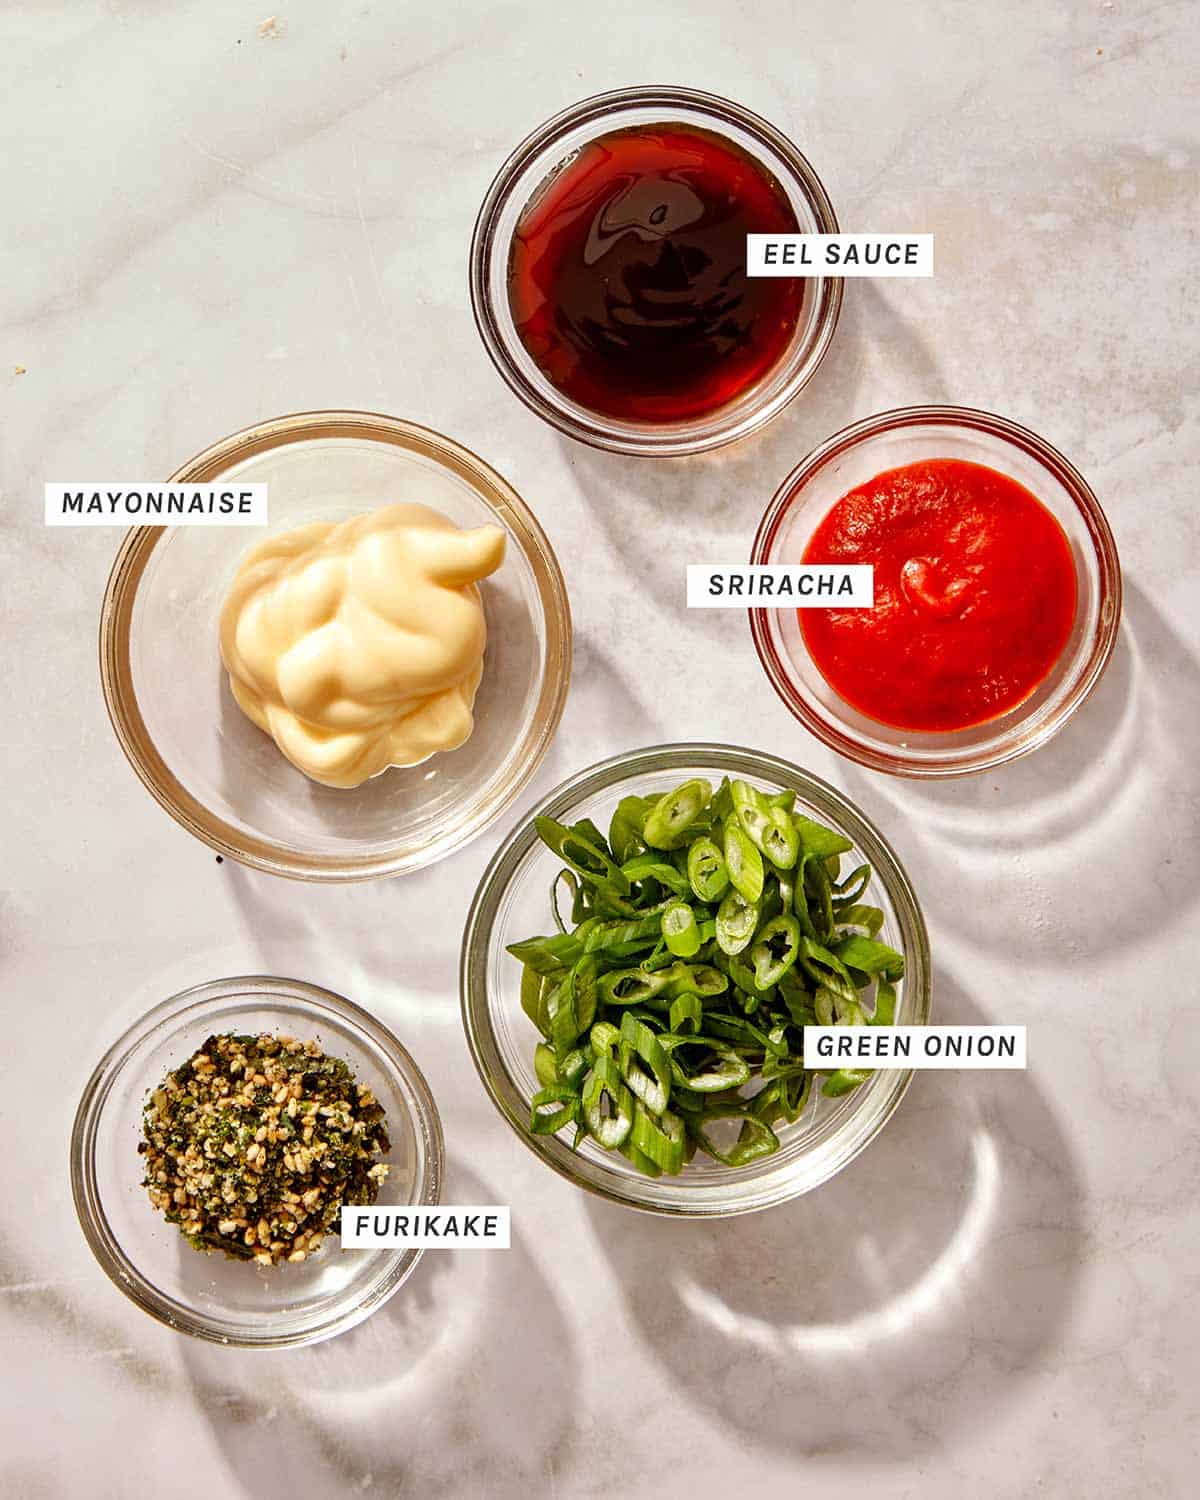
Toppings for our salmon sushi bake recipe.

Process

  1. Preheat oven to 425˚F. In a bowl, combine all rice ingredients and gently fold them together.
  2. Press mixture into a lightly greased 8”x8” baking dish.
A glass bowl with sushi rice in it for salmon sushi bake.
Cooked salmon mixed with mayo and sriracha in a glass bowl.
  1. Combine all salmon ingredients into a bowl, except furikake, and mix together.
  2. Top rice with an even layer of furikake.
Rice being pressed into a baking dish to make a sushi bake.
Rice with furikake sprinkled on top.
  1. Then top with an even layer of salmon mixture.
  2. Bake in the oven for about 15 minutes. Then broil for 1 to 2 minutes to lightly brown top. Remove from heat and cool for 5 to 8 minutes.
Salmon sushi bake in a baking dish ready to go into the oven.
Salmon sushi bake out of the oven ready for toppings.
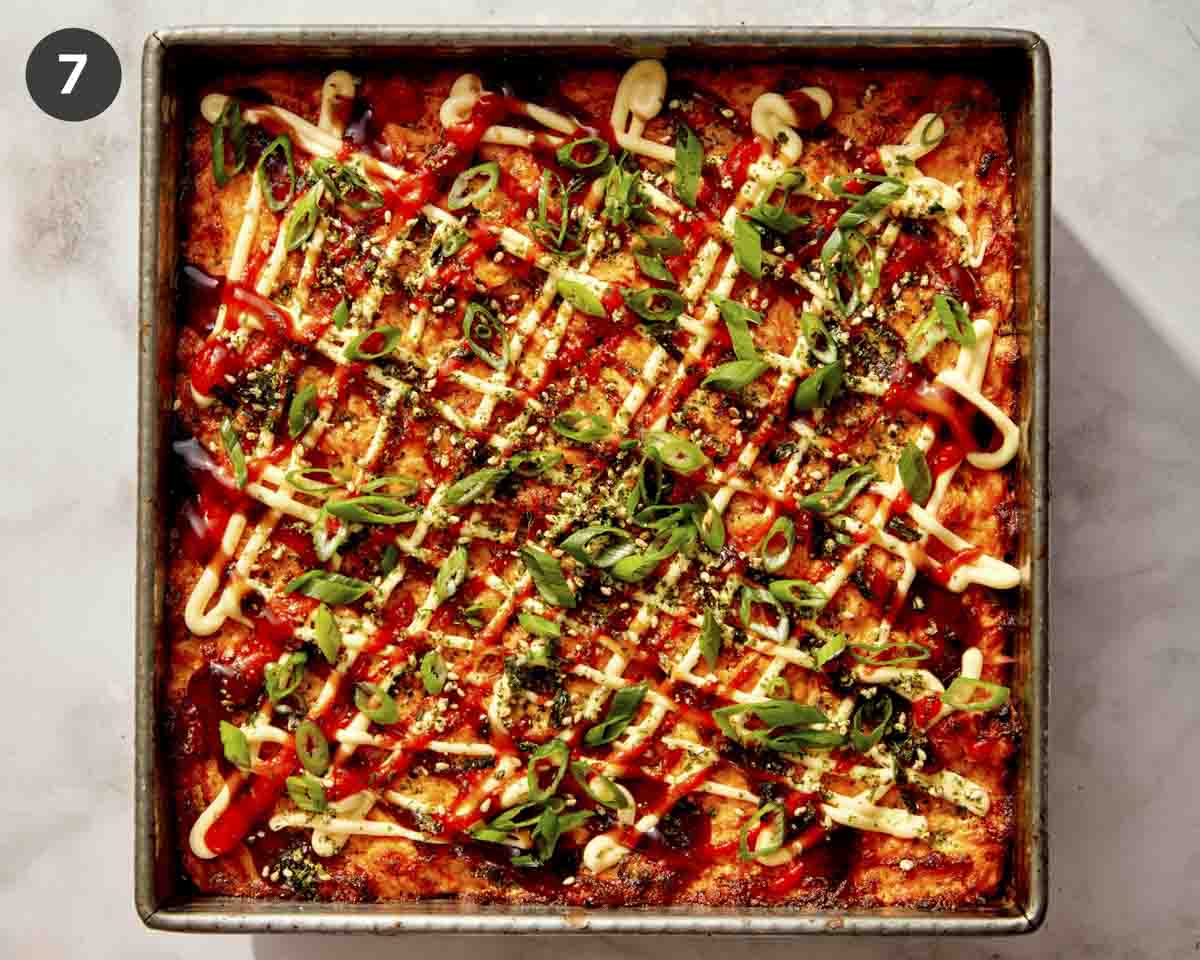
  1. Top sushi bake with a drizzle of kewie pie, eel sauce, and sriracha, and finish with a sprinkle of furikake and green onions. Serve with toasted nori, avocado, and cucumber.
Salmon sushi bake in a baking dish ready to be served.

Substitutions and Variations

Here are some ways to make this sushi bake your own or switch it up to enjoy a new variation each time you make it!

  • Swap the rice. Instead of short-grain rice, use cauliflower rice, brown rice, or quinoa for a different flavor and nutrient profile.
  • Swap the Salmon. Instead of cooked salmon, you can use cooked tuna, canned salmon or tuna, cooked shrimp, imitation crab meat, or real crab meat for a bit of a fancier spin.
  • Make it dairy-free. Use a dairy-free cream cheese in the salmon mixture.
  • Top with more veggies. Cucumber and avocado are classic, but you can also top this sushi bake with sliced carrots, radishes
  • Swap the furikake. You can create a similar flavor and texture with sesame seeds, seaweed flakes, and sea salt if you don’t have furikake on hand.
  • Swap the kewpie mayo. We love using kewpie mayo (a Japanese mayo that’s made with just the egg yolks, not the whole egg, for a richer flavor and texture), but if you can’t get your hands on it, regular mayo can work in a pinch.
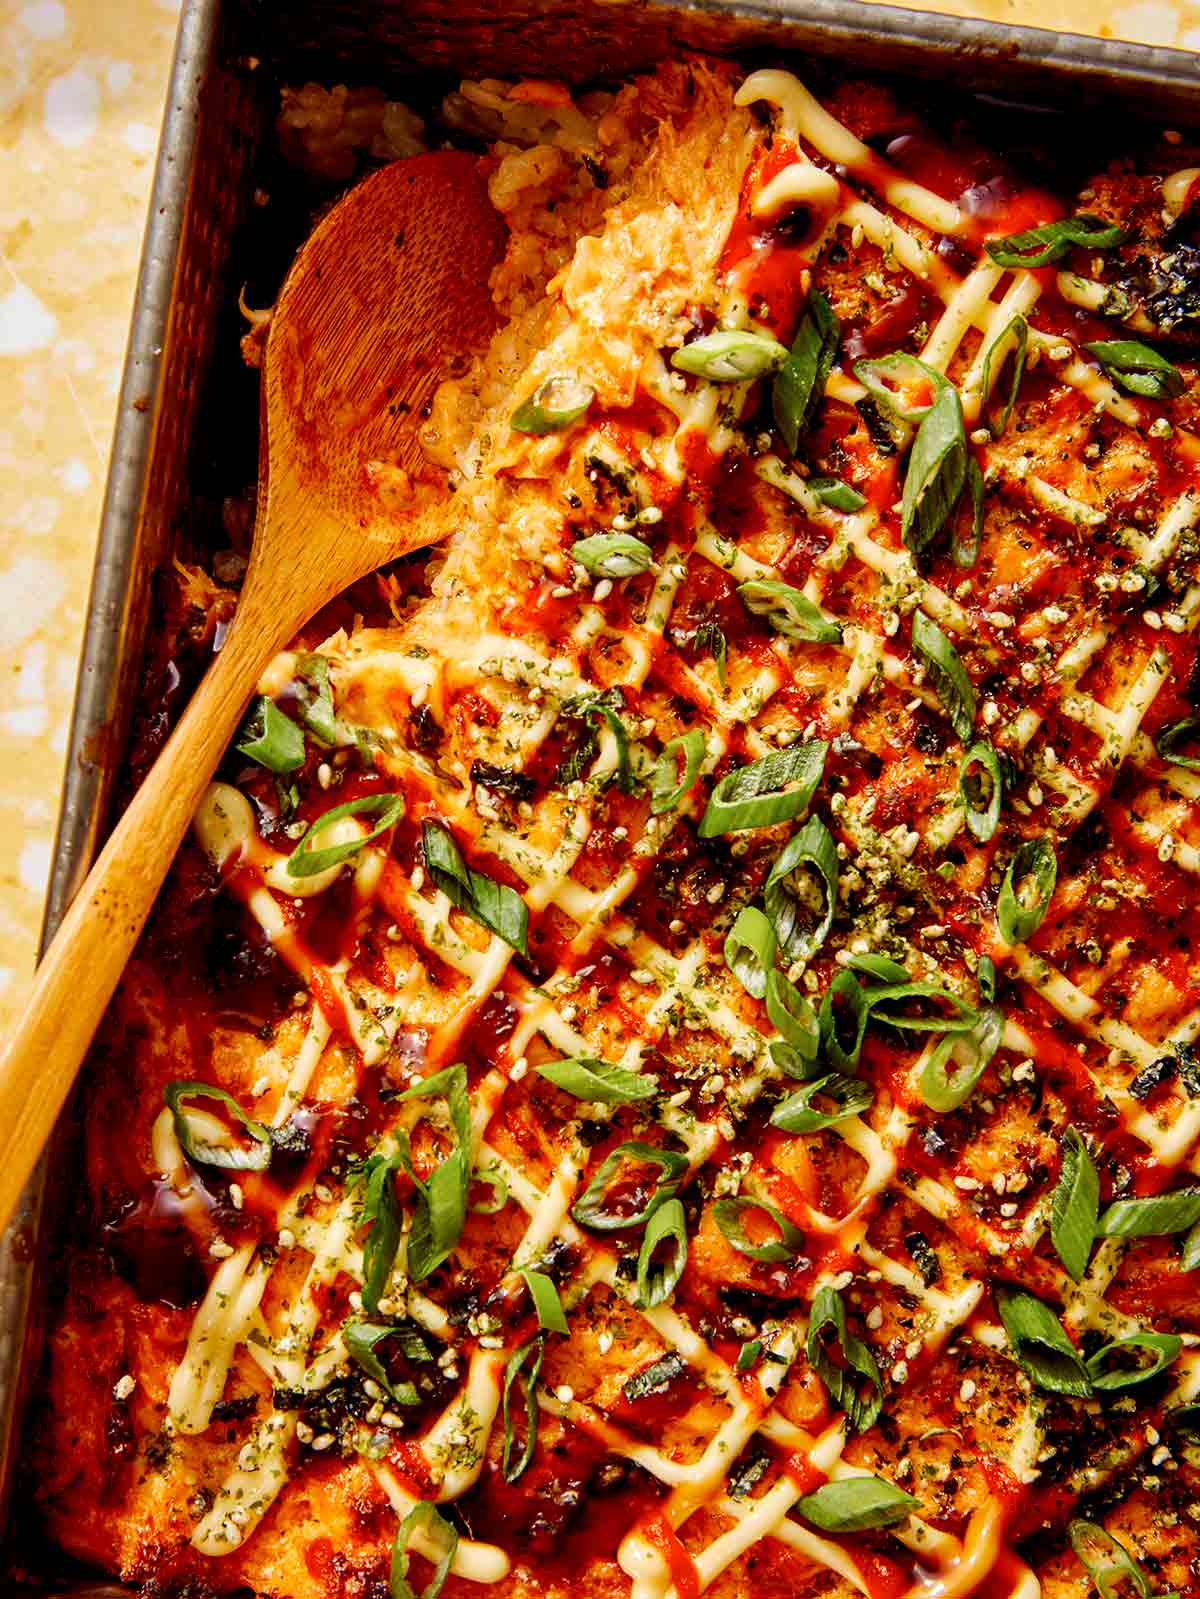
Close up on a baking dish of sushi bake recipe with a spoon in it.

How to Serve Sushi Bake

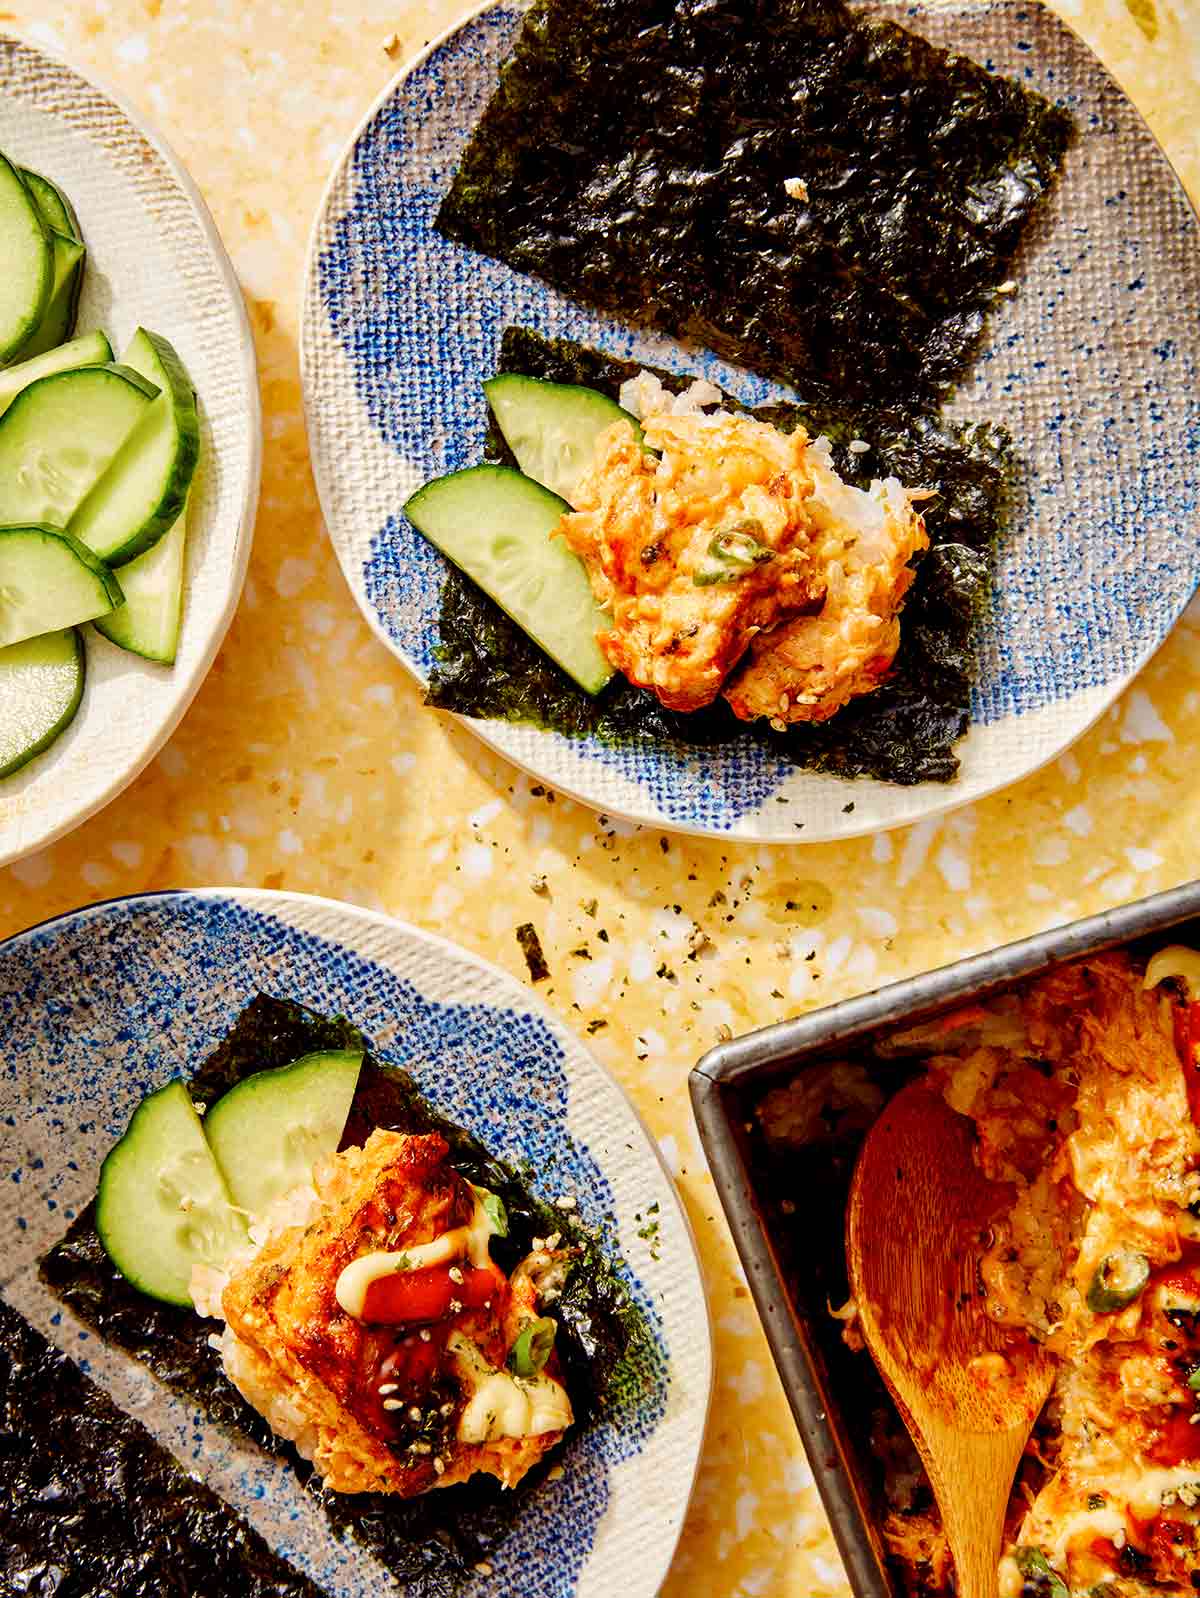
Serve the sushi bake with seaweed snacks or nori sheets. You can cut small pieces of the sushi bake and wrap them into the seaweed sheets like a little taco – much easier than rolling! Inside the nori or on top of the sushi bake, you can include julienned cucumber, carrots, radishes, pickled ginger, or slices of avocado.

Sushi bake being served with cucumber slices.

Tips and Tricks for the BEST Sushi Bake Experience

  • Avoid overcooking the rice. Because the rice is steamed and then baked, you’ll want to make sure the rice isn’t initially overcooked. Letting it cool after it’s steamed can also help the rice bake with more of a crispy texture and avoid becoming mushy.
  • Use soft cream cheese. Let the cream cheese get to room temperature before making the salmon mixture. This will help the texture be creamy and not lumpy.
  • For the best flavor, use fresh, quality seafood.
  • Don’t skip the furikake. Adding a light layer of furikake between the rice and salmon mixture helps infuse the rice with flavor as it cooks.
  • Don’t skip the broil. While it only needs a minute or two, broiling the sushi bake at the end helps add a crispy texture and deeper flavor to the entire dish.
  • Serve warm or cold. We like this dish served warm, but it’s also great straight from the refrigerator, enjoyed cold.
  • Cut nori sheets into manageable sizes. If you’re using sheets of nori instead of pre-cut seaweed snacks, cut them into squares or rectangles that can easily hold 2-3 inch squares of the casserole.

Can This Recipe Be Made Ahead of Time?

This recipe is best when eaten fresh while still warm, but it can be made ahead of time or even enjoyed cold right out of the refrigerator.

To make cooking easier, feel free to prep these parts ahead of time:

  • Steam the rice up to three days ahead of time, letting it cool, and store it in the refrigerator until ready to use.
  • Cook the salmon or make the salmon mixture up to 24 hours ahead of time, then store it in the refrigerator in an airtight container until ready to use.
  • Preslice your veggies.

To store leftovers, place them in an airtight container and store them in the refrigerator for up to 3 days. Enjoy the cold sushi casserole or reheat it by covering a pan in foil and baking at 350˚F until warmed. You can also reheat in the microwave in 30-second increments until the dish is warmed through.

Salmon sushi bake recipe being served.

More Delicious Recipes You Will Love

Salmon sushi bake in a baking dish with a spoon in it.
Salmon sushi bake in a baking dish with cucumbers and nori.
Print

Sushi Bake

This sushi bake combines creamy, spicy salmon and sticky rice with a flavorful spicy sauce for a twist on traditional sushi that you can easily make at home!
Course dinner, Main Course, main dish
Prep Time 15 minutes
Cook Time 15 minutes
Total Time 30 minutes
Servings 6
Calories 363kcal

Ingredients

sushi rice

  • 3 cups steamed short grain rice warm
  • 1 1/2 tablespoons rice wine vinegar
  • 2 teaspoons sugar

salmon

  • 8 ounces cooked boneless, skinless salmon fillet flaked
  • 4 ounces softened cream cheese
  • 1/4 cup kewpie mayonnaise (American mayo is fine too)
  • 2 tablespoons Sriracha
  • 1 tablespoon soy sauce
  • 2 thinly sliced green onions
  • 2 tablespoons furikake seasoning

topping

  • 3 tablespoons kewpie mayonnaise
  • 3 tablespoons eel sauce
  • 2 tablespoons Sriracha
  • 2 tablespoons furikake seasoning
  • 2 thinly sliced green onion

serving suggestions

  • toasted and seasoned nori sheets
  • sliced avocado
  • sliced cucumber

Instructions

  • Preheat oven to 425˚F. In a bowl combine all rice ingredients and gently fold together.
  • Press mixture into a lightly greased 8”x8” baking dish.
  • Combine all salmon ingredients into a bowl, except furikake, and mix together.
  • Top rice with an even layer of furikake.
  • Then top with an even layer of salmon mixture.
  • Bake in the oven for about 15 minutes. Then broil for 1 to 2 minutes to lightly brown top. Remove from heat and cool for 5 to 8 minutes.
  • Top sushi bake with a drizzle of kewie pie, eel sauce, and sriracha and finish with a sprinkle of furikake and green onions. Serve with toasted nori, avocado, and cucumber.

Notes

**Nutritional information does not include “serving suggestion” items such as sliced cucumber, sliced avocado, and toasted/seasoned nori sheets**
 

Nutrition

Calories: 363kcal | Carbohydrates: 30g | Protein: 12g | Fat: 21g | Saturated Fat: 6g | Polyunsaturated Fat: 9g | Monounsaturated Fat: 5g | Trans Fat: 0.03g | Cholesterol: 47mg | Sodium: 578mg | Potassium: 279mg | Fiber: 0.3g | Sugar: 2g | Vitamin A: 373IU | Vitamin C: 8mg | Calcium: 32mg | Iron: 2mg

The post Sushi Bake appeared first on Spoon Fork Bacon.
Shrimp Toast

Is it just us or is Shrimp Toast highly underrated? Seriously. Why isn’t everyone screaming about the deliciousness of Chinese Shrimp Toast?? It’s probably one of our favorite appetizers and snacks. We know we say that a lot, but you guys, these little bites are truly IT! A delicious shrimp paste is smeared over some soft bread and pan-fried to perfection! Pair the little triangles with a sweet-chile sauce and you have yourself a flavor…

Read More

The post Shrimp Toast appeared first on Spoon Fork Bacon.
Shrimp toast recipe on a platter with a sweet chili dipping sauce.

Is it just us or is Shrimp Toast highly underrated? Seriously. Why isn’t everyone screaming about the deliciousness of Chinese Shrimp Toast?? It’s probably one of our favorite appetizers and snacks. We know we say that a lot, but you guys, these little bites are truly IT!

A delicious shrimp paste is smeared over some soft bread and pan-fried to perfection! Pair the little triangles with a sweet-chile sauce and you have yourself a flavor party in your mouth! Our easy shrimp toast recipe highlights the delicious sweet flavor of shrimp and is very addicting!!

Where Does Shrimp Toast Come From?

The exact origins of shrimp toast (also called prawn toast) is a little up for debate. Some say it comes from the city of Guangzhou while others say Hong Kong. Throughout the years it has become a staple in Hong Kong as well as western Chinese cuisine, most notably the United States, United Kingdom and Australia.

How to Make Our Recipe for Shrimp Toast

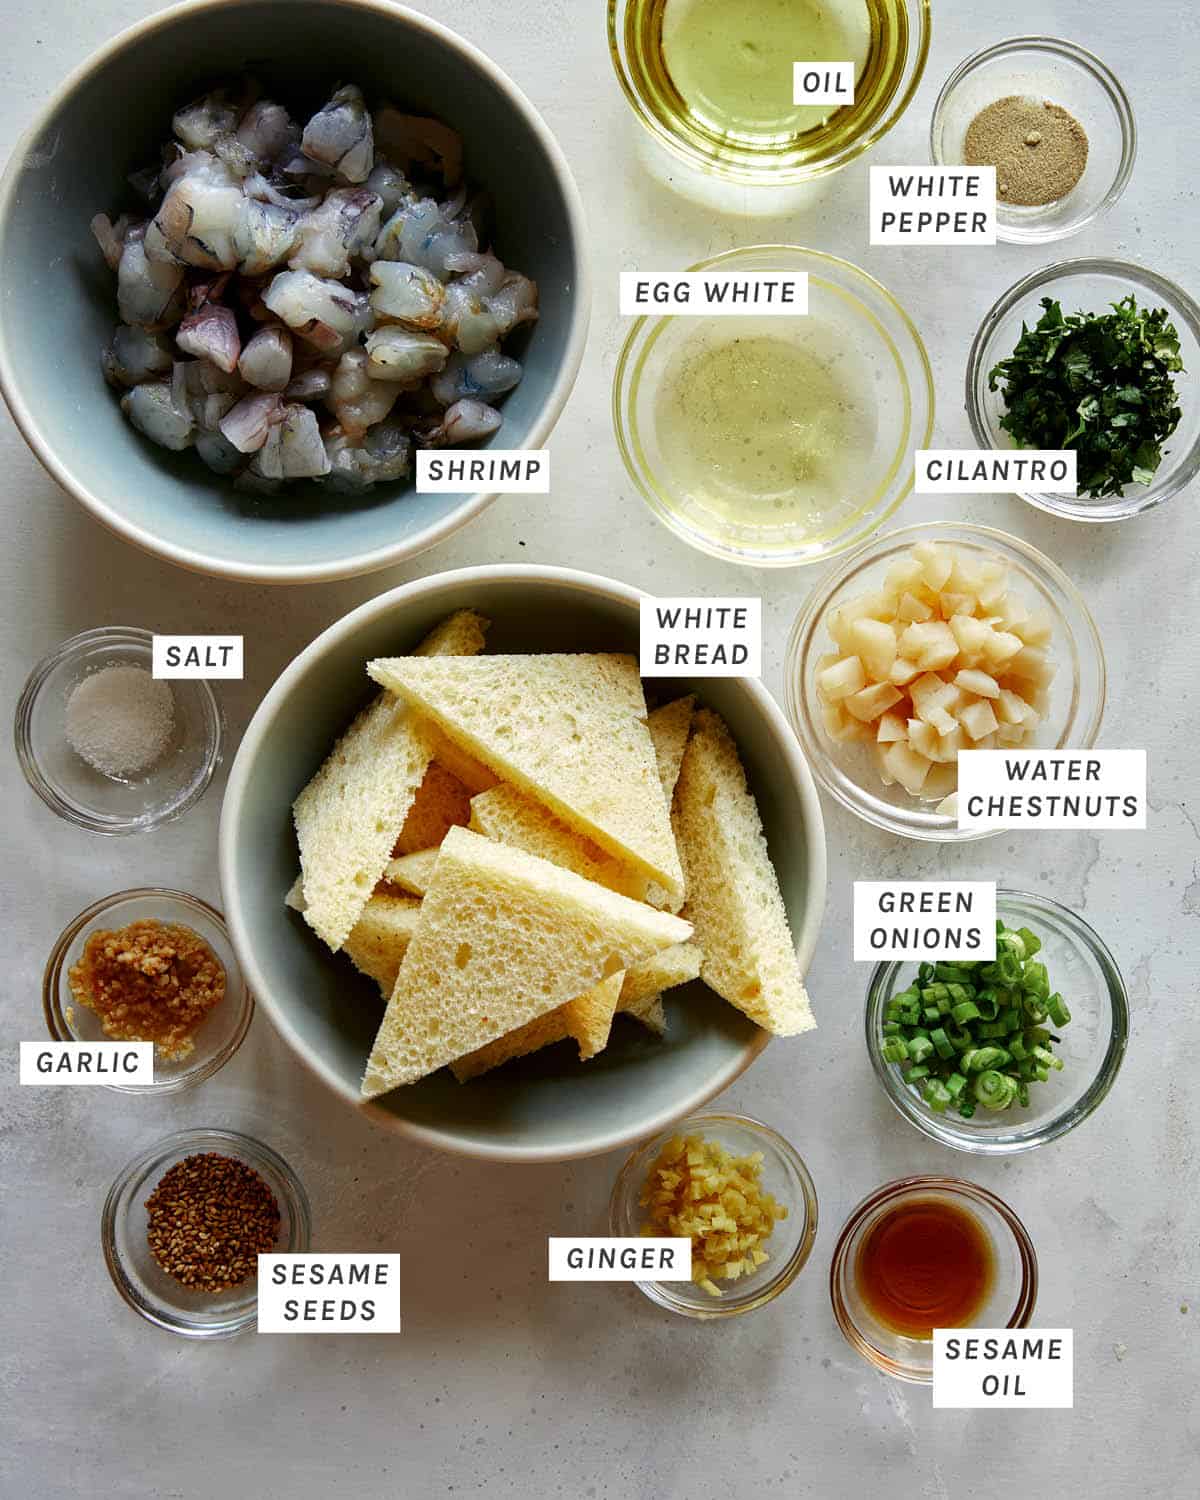
Ingredients

Shrimp toast ingredients on a kitchen counter.
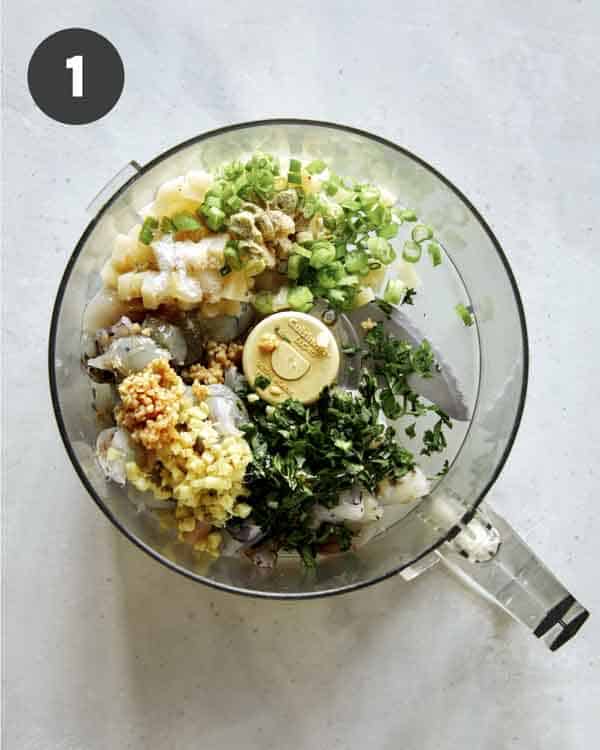
  1. Add shrimp paste ingredients into the well of a food processor.
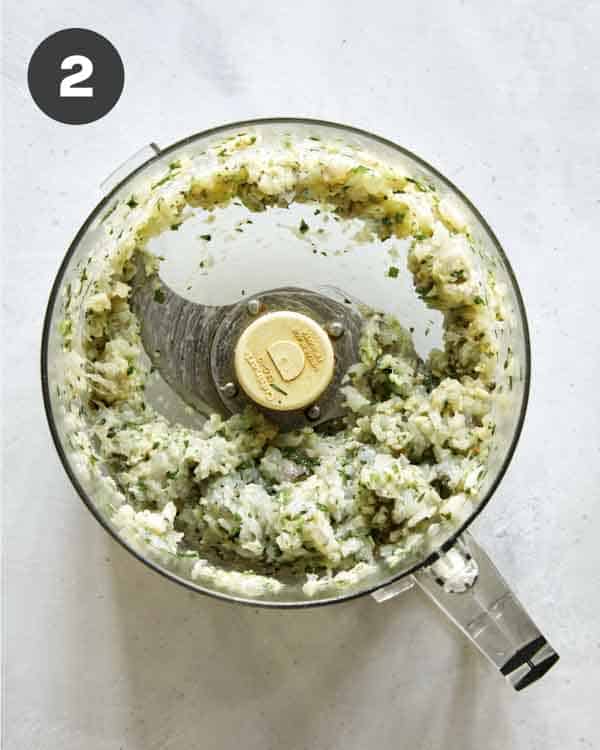
  2. Pulse 6 to 8 times. Scrape down sides of the bowl and blend for about 30 seconds. Until a coarse paste has formed.
Ingredients for shrimp toast in a food processor.
Shrimp toast paste in a food processor to make shrimp toast.
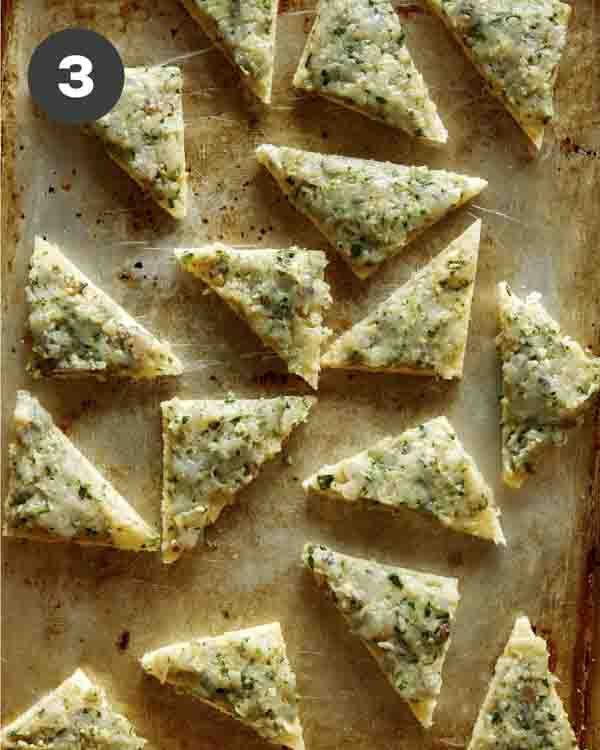
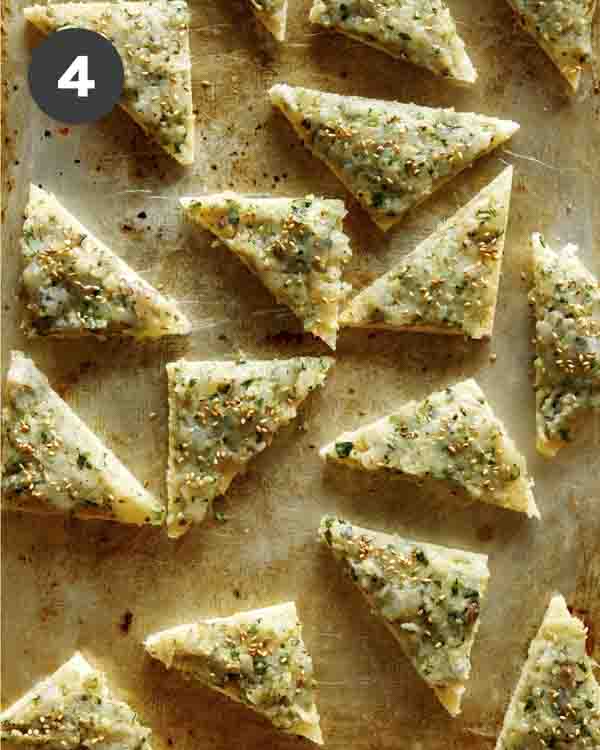
  1. Spread 1 1/2 tablespoons of mixture onto each triangle of bread and sprinkle with sesame seeds.
  2. Repeat until all bread squares have been smeared with shrimp paste.
Shrimp paste on toast points.
Shrimp toast ready to be pan fried.
  1. Pour oil into a large pan and place over medium heat. Carefully place half of the triangles of bread, shrimp-side down, and fry for 3 to 4 minutes.
  2. Flip toasts over and fry for an additional 2 minutes.
Shrimp toast in a skillet pan frying.
Shrimp toast in a skillet.
  1. Drain on cooling rack or paper towels, before transferring to a platter and serving with sweet-chili sauce.
Shrimp toast triangles on a drying rack.

Watch how easy it is to make our Shrimp Toast Recipe!

Best Texture for the Shrimp Paste

The topping is called shrimp paste for a reason, as it should really be a paste. This will help the paste spread and adhere onto the bread nicely. We love using our food processor for speed and ease. You can definitely make the paste by hand, simply mince the shrimp using a sharp knife, then scrape and mash the minced shrimp with the side of your knife to create a paste.

Our version uses a shrimp paste, but with a bit of texture. I like biting into the little triangles and feeling some of the shrimp texture. This is also why I like adding water chestnuts to the paste mixture. I really like the tiny bits of crunch you get from the water chestnuts as well as some texture from the bits of shrimp.

If you’re more of a purest you can definitely blitz the shrimp mixture in the food processor until it is indeed a smooth paste!

Should the Crust be On or Off?

Many recipes call for the crust to be removed from the bread before adding the paste, including ours! I really like the evenness of the bread with the crusts removed when toasted and often find leaving the crust on, makes the dish slightly more about the bread than the shrimp, which I don’t like.

This mostly comes down to personal preference though, so you can either remove the crust or leave them on. It doesn’t make much of a difference, but we all have our preferences. Some people leave it on because it’s a waste of bread to cut it off, but I always turn the crust scraps into homemade breadcrumbs for a lager use – so problem solved there!

Shrimp toast recipe on a platter with green onions and sesame seeds.

Common Cooking Methods

Shrimp Toast is usually deep fried or baked. I don’t love either options and think pan-frying (almost shallow frying) is the way to go. You still get the cooking evenness from pan-frying that you would with deep frying, but with less oil!

You can also definitely use the air fryer for these with delicious, crispy results! Just set your air fryer to 350˚F, generously spray the bottom of the fryer basket with cooking spray, as well as the top and bottom of each piece of shrimp toast, and air-fry for 4 to 5 minutes or until bread has toasted and shrimp mixture has just cooked through. **If your bread is very soft, leave slices out to air dry for 1 to 3 hours before spreading with shrimp mixture.**

Should You Use Shrimp or Prawns?

As I mentioned above shrimp toast is also called prawn toast and was originally made with prawns. They are totally interchangeable in this recipe, so use whichever is more ready available at your local market.

Also, if you’re curious about the differences between shrimp and prawns I found this great article that breaks down the differences.

Best Dipping Sauce

I love our shrimp toast recipe with sweet-chili sauce. I think the sauce perfectly compliments the sweetness of the shrimp, while providing a slight bit of heat that balances all the flavors out. You can easily also serve the shrimp toast with a ponzu sauce or even just some soy sauce on the side. You can also enjoy the shrimp toast with no sauce and it’s still very good. Enjoy!

Shrimp toast being served as an appetizer.

More Delicious Shrimp Recipes You Will Love

Shrimp toast close up on the platter.
Print

Shrimp Toast

The BEST Shrimp Toast recipe you'll ever taste! Our simple, savory shrimp paste mixture is smeared over slices of bread and pan-fried until soft on top and crisp on the bottom! We serve ours with a sweet-chile sauce for absolute shrimp toast perfection!
Course Appetizer, Snack
Cuisine Chinese
Prep Time 15 minutes
Cook Time 25 minutes
Total Time 30 minutes
Servings 5
Calories 405kcal

Ingredients

  • 2 teaspoons peeled and minced ginger
  • 2 minced garlic cloves
  • 1/2 pound shrimp, peeled, deveined and roughly chopped
  • 2 tablespoons minced cilantro
  • 1/3 cup diced water chestnuts
  • 1 egg white
  • 1 thinly sliced green onion
  • 1/2 teaspoon sesame oil
  • 1/2 teaspoon salt
  • 1/4 teaspoon white pepper
  • 10 slices milk bread (or white bread) crusts removed and each piece cut into 2 triangles
  • 2 tablespoons toasted sesame seeds
  • 1/2 cup neutral oil

Instructions

  • Add shrimp paste ingredients into the well of a food processor.Pulse 6 to 8 times. Scrape down sides of the bowl and blend for about 30 seconds. Until a coarse paste has formed.
  • Pulse 6 to 8 times. Scrape down sides of the bowl and blend for about 30 seconds. Until a coarse paste has formed.
  • Spread 1 1/2 tablespoons of mixture onto each triangle of bread and sprinkle with sesame seeds.
  • Repeat until all bread squares have been smeared with shrimp paste.
  • Pour oil into a large pan and place over medium heat. Carefully place half of the triangles of bread, shrimp-side down, and fry for 3 to 4 minutes.Flip toasts over and fry for an additional 2 minutes.
  • Flip toasts over and fry for an additional 2 minutes.
  • Drain on cooling rack or paper towels, before transferring to a platter and serving with sweet-chili sauce.

Video

Notes

**4 pieces = 1 serving**
**Nutritional Information Does Not Include Sauce**
Best Texture for the Shrimp Paste
The topping is called shrimp paste for a reason, as it should really be a paste. This will help the paste spread and adhere onto the bread nicely. Our version uses a shrimp paste, but with a bit of texture. I like biting into the little triangles and feeling some of the shrimp texture. This is also why I like adding water chestnuts to the paste mixture. I really like the tiny bits of texture you get from the water chestnuts as well as the bits of shrimp. If you’re more of a purest you can definitely blitz the shrimp mixture in the food processor until it is indeed a smooth paste!
Common Cooking Methods
Shrimp Toast is usually deep fried or baked. I don’t love either options and think pan-frying (almost shallow frying) is the way to go. You still get the cooking evenness from pan-frying that you would with deep frying, but with less oil!
You can also definitely use the air fryer for these with delicious, crispy results! Just set your air fryer to 350˚F, generously spray the bottom of the fryer basket with cooking spray, as well as the top and bottom of each piece of shrimp toast, and air-fry for 4 to 5 minutes or until bread has toasted and shrimp mixture has just cooked through. **If your bread is very soft, leave slices out to air dry for 1 to 3 hours before spreading with shrimp mixture.**
 

Nutrition

Calories: 405kcal | Carbohydrates: 29g | Protein: 12g | Fat: 27g | Saturated Fat: 2g | Polyunsaturated Fat: 8g | Monounsaturated Fat: 15g | Trans Fat: 1g | Cholesterol: 57mg | Sodium: 741mg | Potassium: 178mg | Fiber: 2g | Sugar: 3g | Vitamin A: 117IU | Vitamin C: 1mg | Calcium: 167mg | Iron: 3mg

The post Shrimp Toast appeared first on Spoon Fork Bacon.

Orange Chicken Recipe

I’m not sure why its taken us so long to get an Orange Chicken Recipe up on our site, but that changes today! Orange chicken is something my friends and I ate quite a bit in jr. high. We would hang out at the mall on the weekends and head over to the food court when we got hungry. Our go to quick meal would usually be Panda Express orange chicken with some fried rice…

Read More

The post Orange Chicken Recipe appeared first on Spoon Fork Bacon.
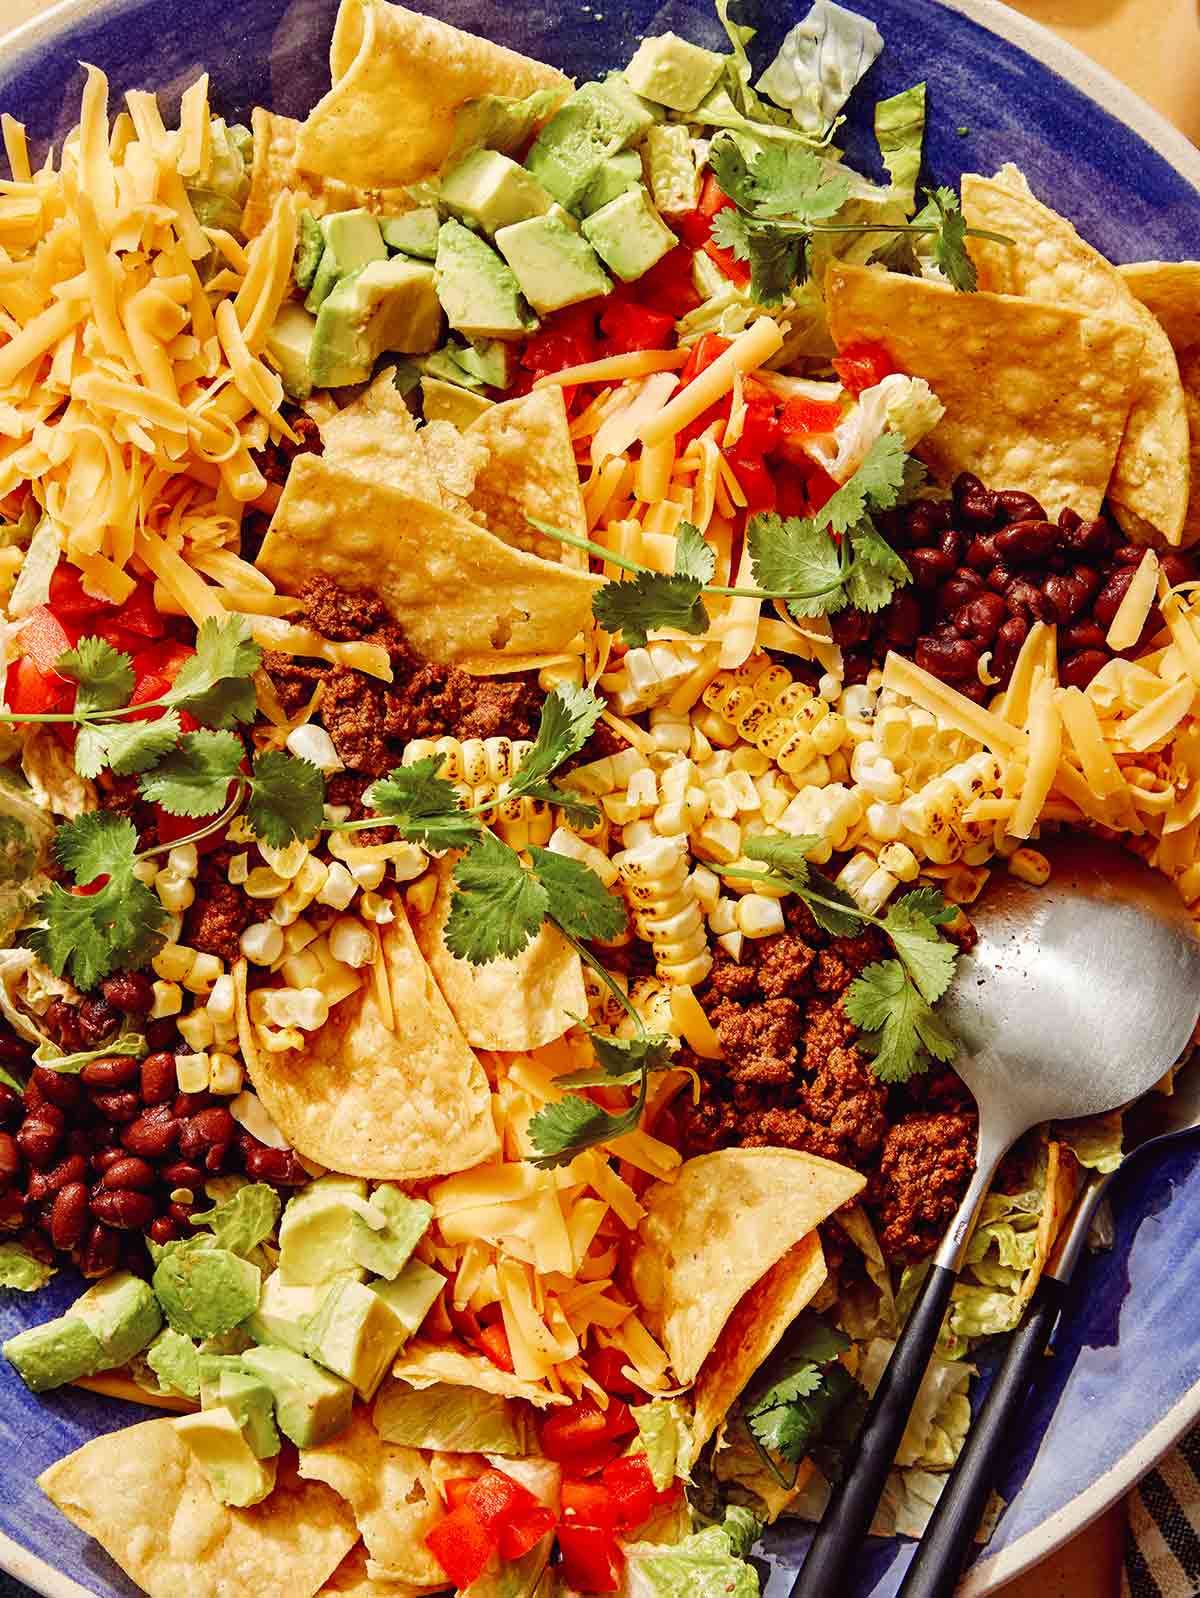
Orange chicken recipe in a bowl with rice on the side.

I’m not sure why its taken us so long to get an Orange Chicken Recipe up on our site, but that changes today! Orange chicken is something my friends and I ate quite a bit in jr. high. We would hang out at the mall on the weekends and head over to the food court when we got hungry. Our go to quick meal would usually be Panda Express orange chicken with some fried rice on the side, and it would hit the spot every time.

Our recipe today is so simple, delicious and satisfying. I think it tastes just like Chinese takeout versions, but even just a little bit better! Our orange chicken recipe is also a little healthier because we don’t use a thick batter to coat our chicken, we use fresh squeezed orange juice as well as less sugar overall. We’ve also added alternate instructions that don’t involve shallow frying, but pan frying instead making it an even healthier option.
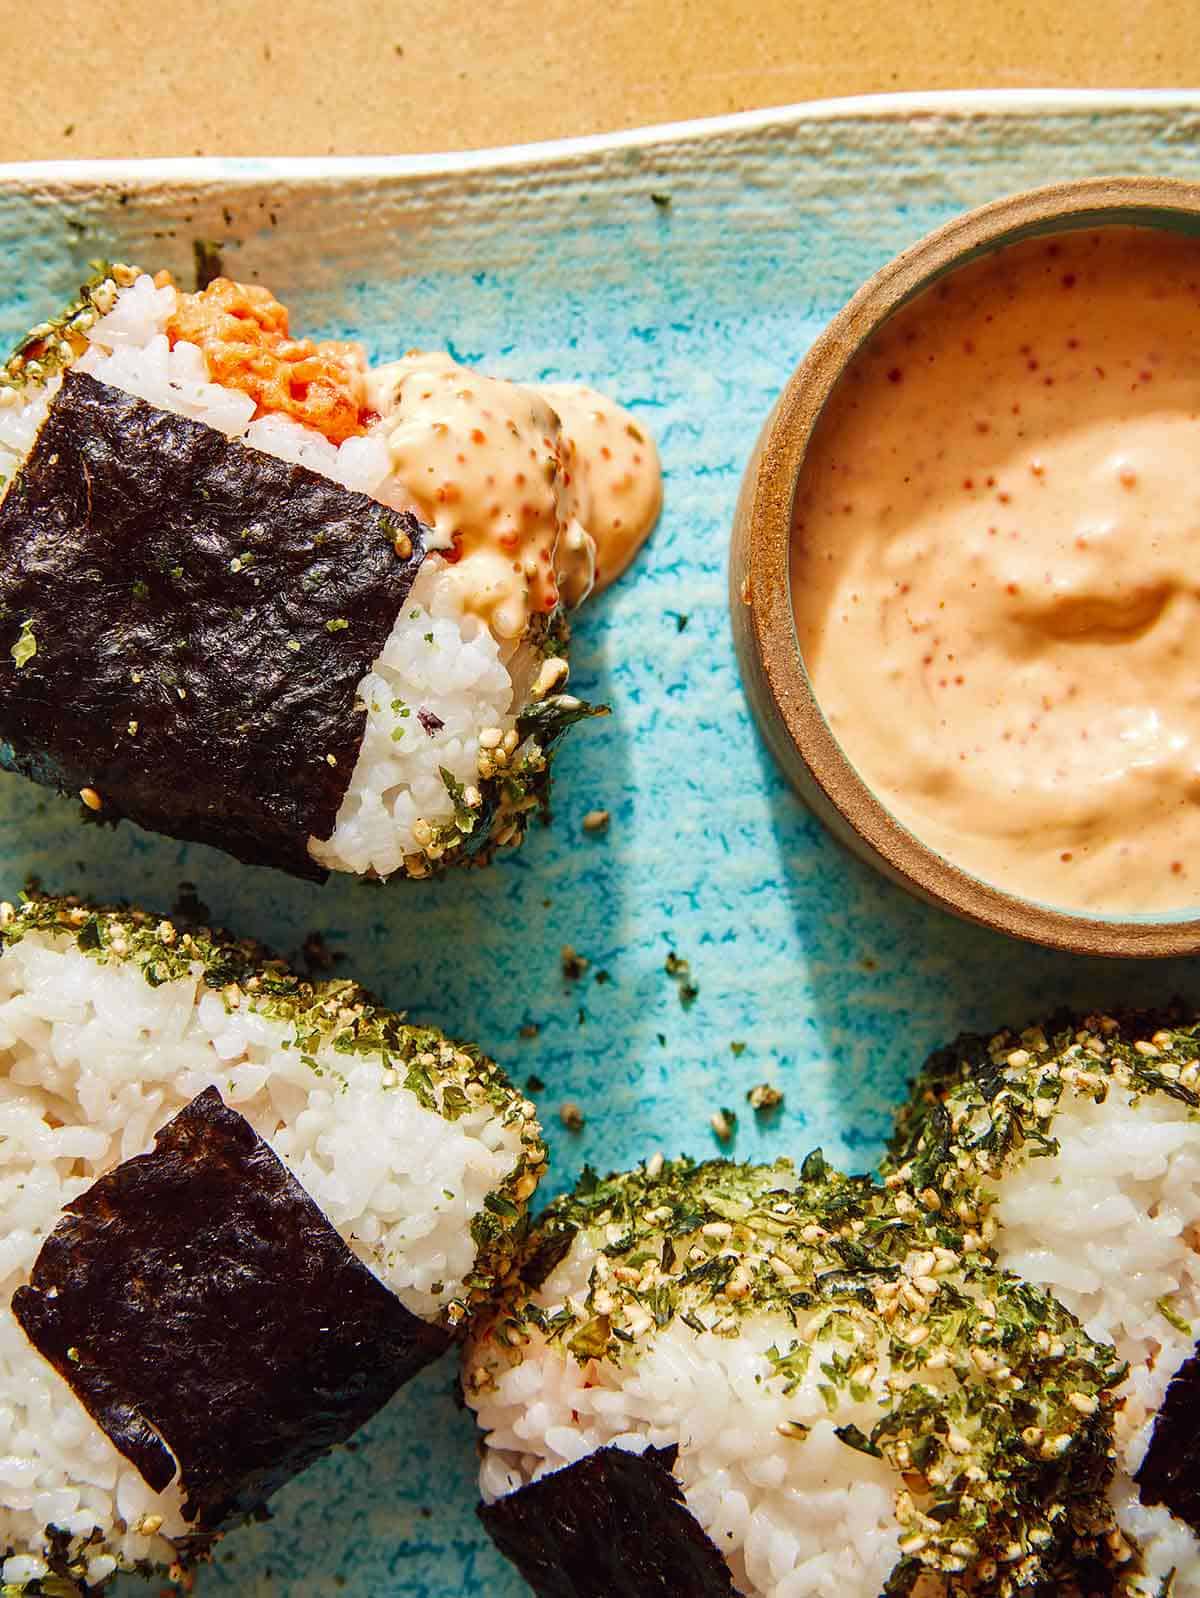
Is Orange Chicken and Authentic Chinese Dish?

Not exactly. Orange chicken was created by Chef Andy Kao back in the ’80s in the U.S. He was the executive chef for Panda Express at the time and developed it as a variation of General Tso Chicken, which is an authentic Chinese dish.

While you may not see orange chicken on menus around China, it’s one of the most popular Chinese takeout dishes in the states.

How to Make Easy Orange Chicken

Orange Sauce Ingredients

Orange chicken sauce ingredients on a kitchen table.

Orange Sauce Process

  1. Pour all orange chicken sauce ingredients into a mixing bowl and whisk together. Set aside.
Orange sauce for orange chicken in a glass bowl whisked together.

Chicken Ingredients

Ingredients to make our Orange Chicken recipe.

Chicken Process

  1. Place chicken in a mixing bowl and toss together with salt and pepper. 
  2. Sprinkle cornstarch over chicken.
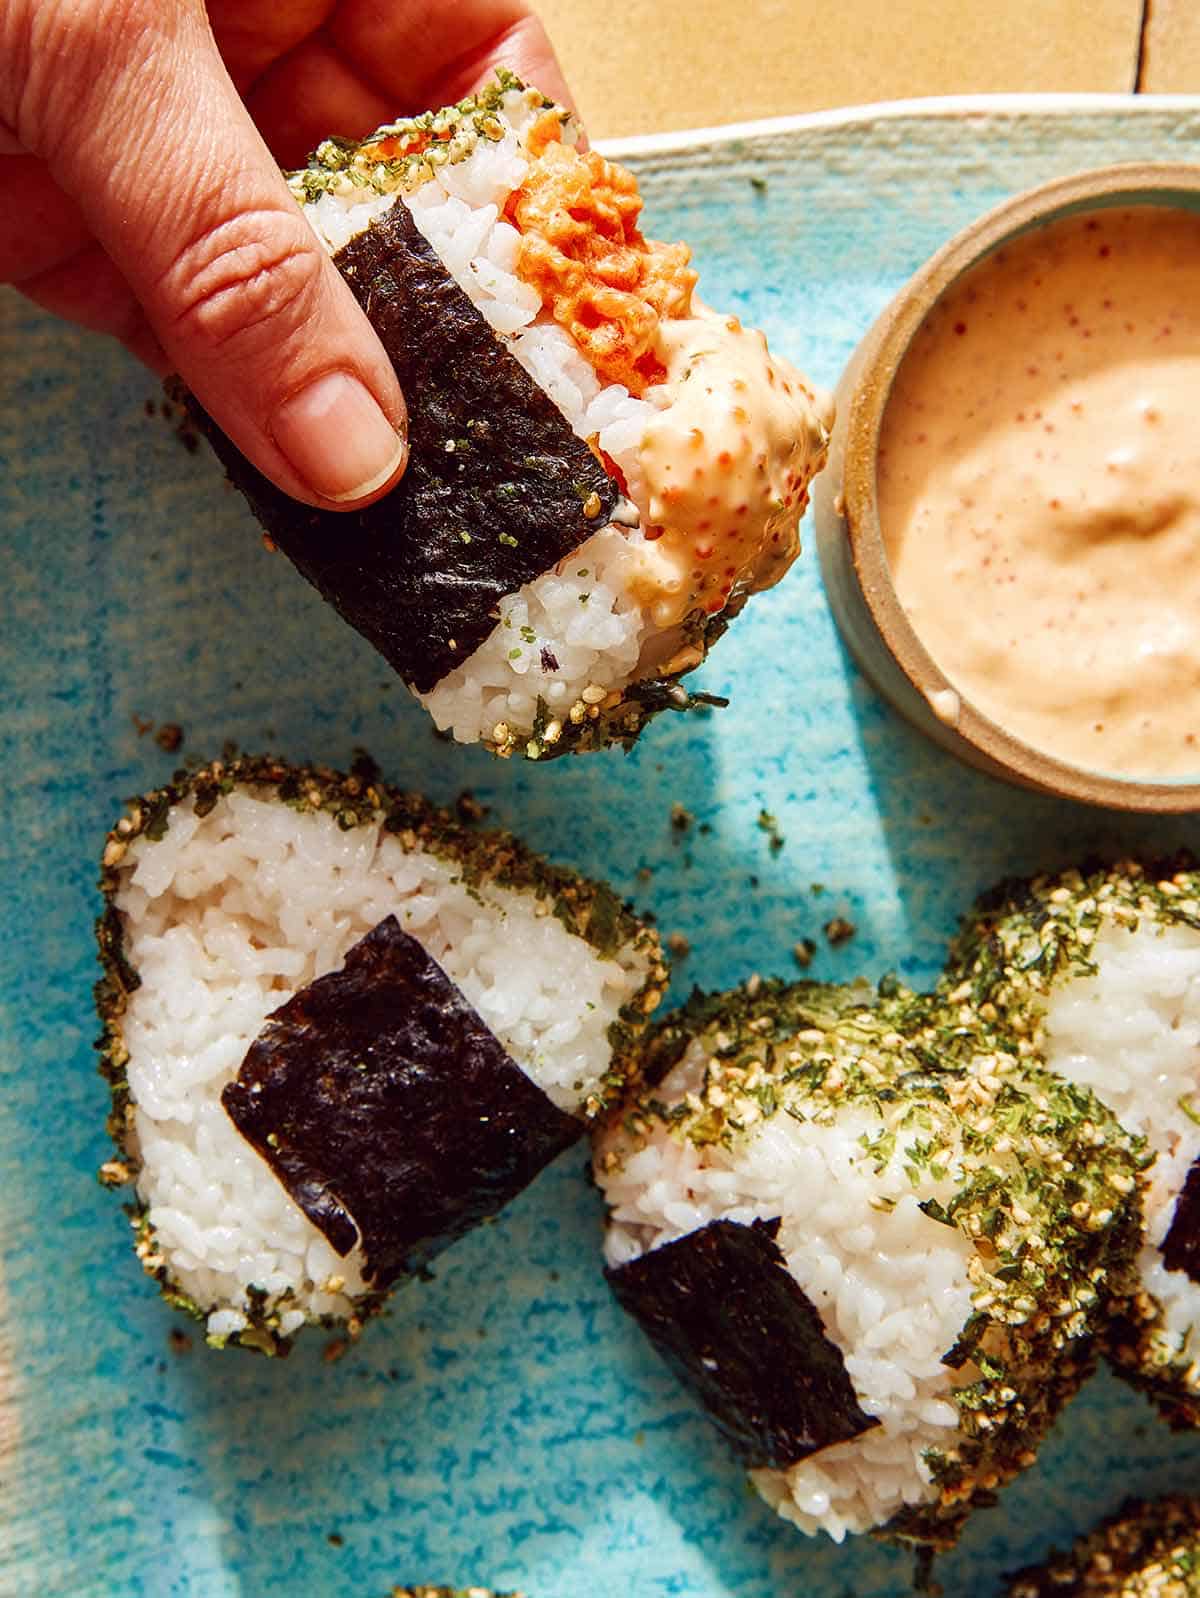
Chicken thighs seasoned with salt and pepper.
Chicken thighs in a glass bowl with cornstarch.
  1. Continue to toss together until chicken is fully and evenly coated.
  2. Preheat oil in a skillet to 350˚F. Carefully add chicken (in batches, if needed) to hot oil and shallow fry for 6 to 7minutes. Turn and continue to fry for an additional 4 to 5 minutes. Using a slotted spoon, remove chicken and transfer to a cooling rack lined with a baking sheet.
Chicken thighs tossed in cornstarch in a glass bowl.
Freshly fried orange chicken on a baking sheet.

Assembly

  1. Drain oil from skillet and place back over medium heat. Pour sauce mixture into skillet and simmer until mixture has thickened, 2 to 3 minutes.
  2. Add chicken to sauce and toss together until chicken is fully and evenly coated.
Orange sauce in a saucepan cooking.
Orange sauce with fried chicken in a saucepan.
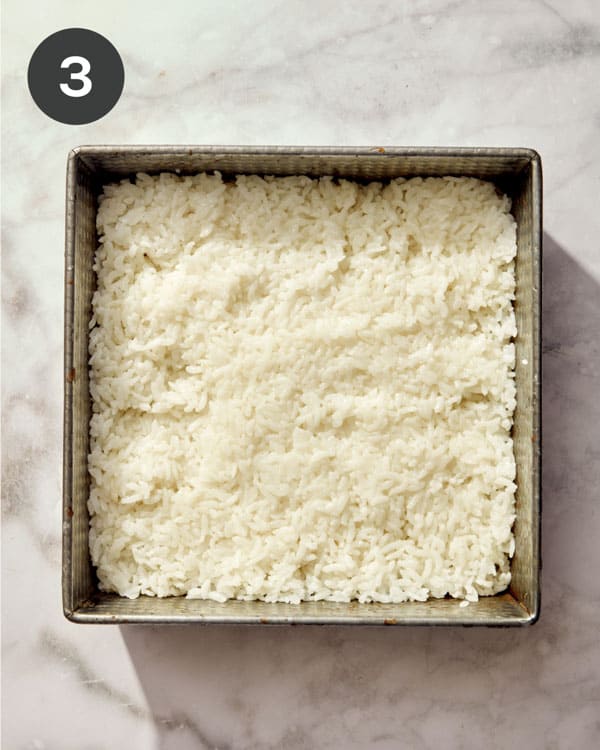
  1. Transfer orange chicken to a platter and top with green onions. Serve with a side of steamed brown or white rice.
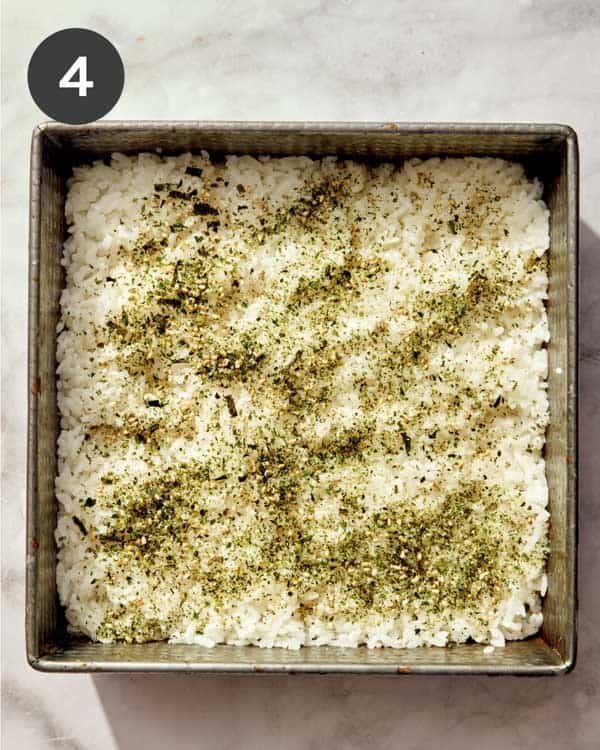
Orange chicken tossed in a saucepan.

White or Dark Meat for Orange Chicken?

We 100% recommend dark meat for our orange chicken recipe. One thing I can’t stand is dry chicken. Not only is dark meat more tender and juicy then white meat, but it’s also more forgiving to cook with, making it perfect for lightly dredging and frying. You don’t run the risk of the the chicken pieces drying out nearly as easily as with boneless skinless chicken breast.

If you absolutely must use white meat, make sure to adjust the cooking time to ensure your chicken is still juicy and delicious.

Why This is the BEST Orange Chicken Recipe

We know there are hundreds, if not thousands of recipes out there but we truly think our recipe is one of the best ones around!

  • We don’t use a thick/heavy batter like most recipes. We simply dredge our chicken in some cornstarch ensuring you still get that crispy outer texture, while maximizing delicious chicken in every bite!
  • Our recipe comes together in under 30 minutes! You read that right! Our recipe is not only super simple, but also comes together quickly, making it a great weeknight meal!
  • We shallow fry our chicken instead of deep frying. This uses much less oil, making cleanup way easier!
  • The recipe itself doesn’t require an hard to find ingredients and the ingredient list itself is fairly short.
  • Our sauce is jam packed with sweet and tangy orange flavor, which is what we’re lookin for in a delicious orange chicken recipe!
  • We don’t use any egg to coat our chicken, which is a plus for anyone with egg allergies!
  • We also don’t use any flour in our recipe, so if you just replace the soy sauce with tamari, you have a great gluten-free dish!
Close up on a plate of orange chicken.

Tips and Tricks for Success

  • Use dark meat chicken! I really can’t stress this enough. It’s way more forgiving and you’re almost always guaranteed to have tender, juicy chicken in the end!
  • Apply a thin, but even coating of cornstarch to the chicken. Don’t skip on this! the cornstarch will add a thin, crispy texture around the chicken as well as help hold onto the delicious sauce! Without a little bit of coating around the chicken the sauce will slip right off.
  • Shallow fry the chicken to make clean up mush easier.
  • Use Use fresh orange juice (from freshly squeezed oranges). I really think it makes a huge difference in the fresh, clean flavor of the dish!
  • We highly recommend using a spider strainer to remove the chicken from the oil and then transfer it to a cooling rack lined with a rimmed baking sheet. This type of strainer allows you to lift a lot of chicken up at once and drains the oil very well. Using a cooling rack, lined with a baking dish is also much more efficient at draining even more excess oil from the chicken pieces, without making them soggy (like when drained on a paper towel).
  • Boost the orange flavor even more by grating some orange zest into the sauce.
  • Want spicy kick in this dish? Just stir 1-2 teaspoons Sambal (chili paste), Sriracha or crushed red pepper flakes into the sauce!
Orange chicken in a bowl with rice on the side.

Want to Make A Healthier Orange Chicken Recipe?

Our orange chicken recipe can be made a little healthier by pan frying the chicken in a few tablespoons of oil instead of shallowing frying. You will still end up with a delicious dish where sauce nicely coats the chicken. The only thing you’ll be missing out on by doing this is the crispy outer texture you would get from shallow frying.

You can also scale down on the brown sugar by about half or even replace it with honey or agave. The sauce itself can also be halved. This will give the chicken a very light coating of sauce, that’s still packed with great flavor!

Some of Our Favorite Veggies to Serve with This Dish

Orange chicken recipe on a plate with rice on the side.

More Delicious Homemade Chinese Takeout Recipes You Will Love

Orange chicken recipe up close with rice on the side.
Print

Orange Chicken Recipe

A quick, easy and mouthwatering Orange Chicken Recipe that can be made in under 30 minutes! We guarantee the whole family will love this sweet and savory version of one of the most popular Chinese takeout dishes in the states! You'll be asked to make it over and over again.
Course dinner, lunch, Main Course
Cuisine Chinese-American
Prep Time 10 minutes
Cook Time 15 minutes
Total Time 25 minutes
Servings 4
Calories 469kcal

Ingredients

orange sauce

  • 1 cup freshly squeezed orange juice
  • 1/3 cup light brown sugar
  • 2 tablespoons soy sauce
  • 1 1/2 tablespoons rice wine vinegar
  • 1 tablespoon cornstarch
  • 1/4 teaspoon mince ginger
  • 2 minced garlic cloves
  • pinch white pepper optional

chicken

  • 1 1/2 pounds boneless skinless chicken thighs
  • 1 teaspoon salt
  • 1/2 teaspoon black pepper
  • 1/4 cup cornstarch
  • 3/4 cup vegetable oil

garnish

  • 1 thinly sliced green onion

Instructions

Sauce

  • Pour all orange chicken sauce ingredients into a mixing bowl and whisk together. Set aside.

Chicken

  • Place chicken in a mixing bowl and toss together with salt and pepper. 
  • Sprinkle cornstarch over chicken and continue to toss together until chicken is fully and evenly coated.
  • Preheat oil in a skillet to 350˚F.
  • Carefully add chicken (in batches, if needed) to hot oil and shallow fry for 6 to 7minutes. Turn and continue to fry for an additional 4 to 5 minutes.
  • Using a slotted spoon, remove chicken and transfer to a cooling rack lined with a baking sheet.
  • Drain oil from skillet and place back over medium heat.
  • Pour sauce mixture into skillet and simmer until mixture has thickened, 2 to 3 minutes.
  • Add chicken to sauce and toss together until chicken is fully and evenly coated.

Assembly

  • Transfer orange chicken chicken to a platter and top with green onions.
  • Serve with a side of steamed rice.

Notes

Tips and Tricks for Orange Chicken Success
  • Use dark meat chicken! I really can’t stress this enough. It’s way more forgiving and you’re almost always guaranteed to have tender, juicy chicken in the end!
  • Apply a thin, but even coating of cornstarch to the chicken. Don’t skip on this! the cornstarch will add a thin, crispy texture around the chicken as well as help hold onto the delicious sauce! Without a little bit of coating around the chicken the sauce will slip right off.
  • Shallow fry the chicken to make clean up mush easier.
  • Use freeze squeezed orange juice. I really think it makes a huge difference in the fresh flavor of the dish!
  • We highly recommend using a spider strainer to remove the chicken from the oil and then transfer it to a cooling rack lined with a rimmed baking sheet. This type of strainer allows you to lift a lot of chicken up at once and drains the oil very well. Using a cooling rack, lined with a baking dish is also much more efficient at draining even more excess oil from the chicken pieces, without making them soggy (like when drained on a paper towel).
  • Boost the orange flavor even more by grating some orange zest into the sauce.
  • Want spicy kick in this dish? Just stir 1-2 teaspoons Sambal (chili paste), Sriracha or crushed red pepper flakes into the sauce!
Want to Make Our Dish Healthier? – You Got It!
Our orange chicken recipe can be made a little healthier by pan frying the chicken in a few tablespoons of oil instead of shallowing frying. You will still end up with a delicious dish where sauce nicely coats the chicken.
The only thing you’ll be missing out on by doing this is the crispy outer texture you would get from shallow frying.

Nutrition

Calories: 469kcal | Carbohydrates: 35g | Protein: 34g | Fat: 21g | Saturated Fat: 4g | Polyunsaturated Fat: 9g | Monounsaturated Fat: 6g | Trans Fat: 0.1g | Cholesterol: 162mg | Sodium: 1243mg | Potassium: 603mg | Fiber: 0.5g | Sugar: 23g | Vitamin A: 196IU | Vitamin C: 32mg | Calcium: 46mg | Iron: 2mg

The post Orange Chicken Recipe appeared first on Spoon Fork Bacon.