Easy Broccoli Cheddar Soup

I love Broccoli Cheddar Soup (and soup season in general). It’s such a classic soup and it reminds me of childhood. I remember when I was in junior high going to Panera Bread for a quick dinner after tennis practice and the broccoli cheddar soup (in a bread bowl) always hit the spot! Our broccoli cheddar soup recipe is simple and can be made in just 30 minutes. It’s super flavorful and has the perfect…

Read More

The post Easy Broccoli Cheddar Soup appeared first on Spoon Fork Bacon.

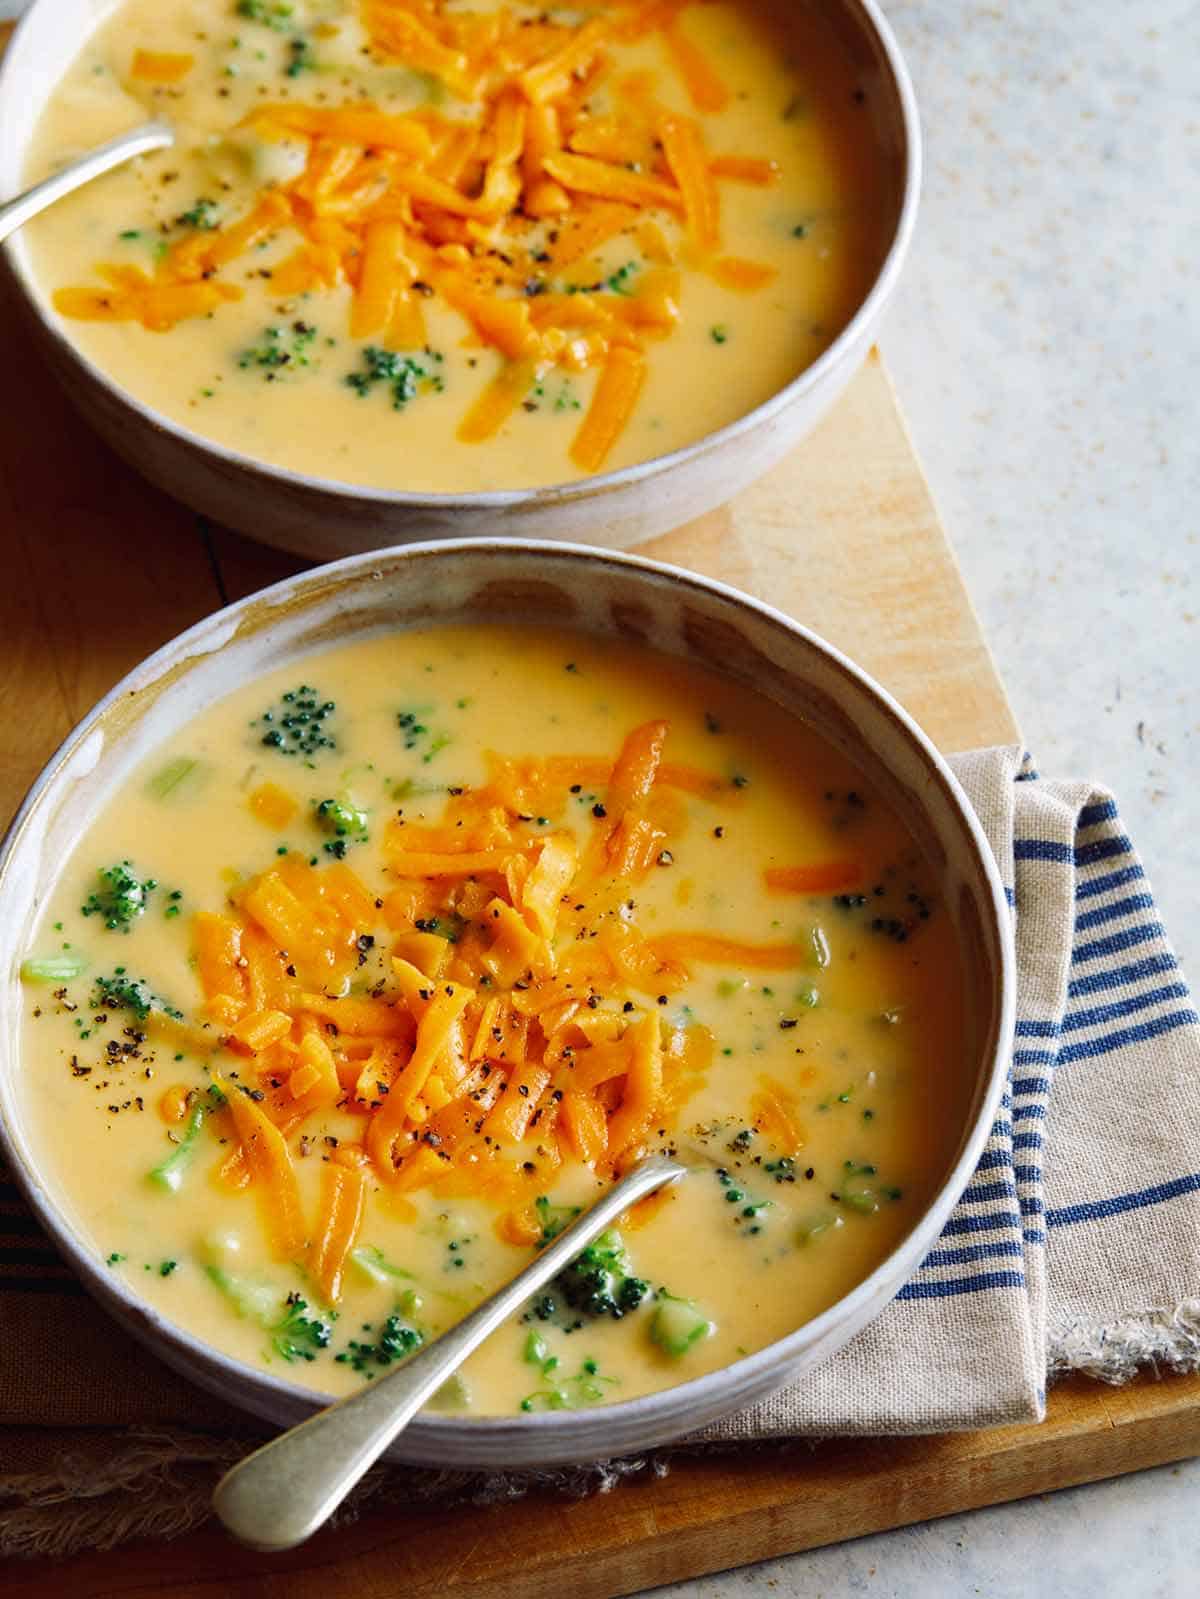
Two bowls of cheddar broccoli soup topped with some more shredded cheese.

I love Broccoli Cheddar Soup (and soup season in general). It’s such a classic soup and it reminds me of childhood. I remember when I was in junior high going to Panera Bread for a quick dinner after tennis practice and the broccoli cheddar soup (in a bread bowl) always hit the spot!

Our broccoli cheddar soup recipe is simple and can be made in just 30 minutes. It’s super flavorful and has the perfect balance of a salty, cheesy soup base with loads of perfectly cooked broccoli goodness!

How to Make Our Broccoli Cheddar Soup

Ingredients
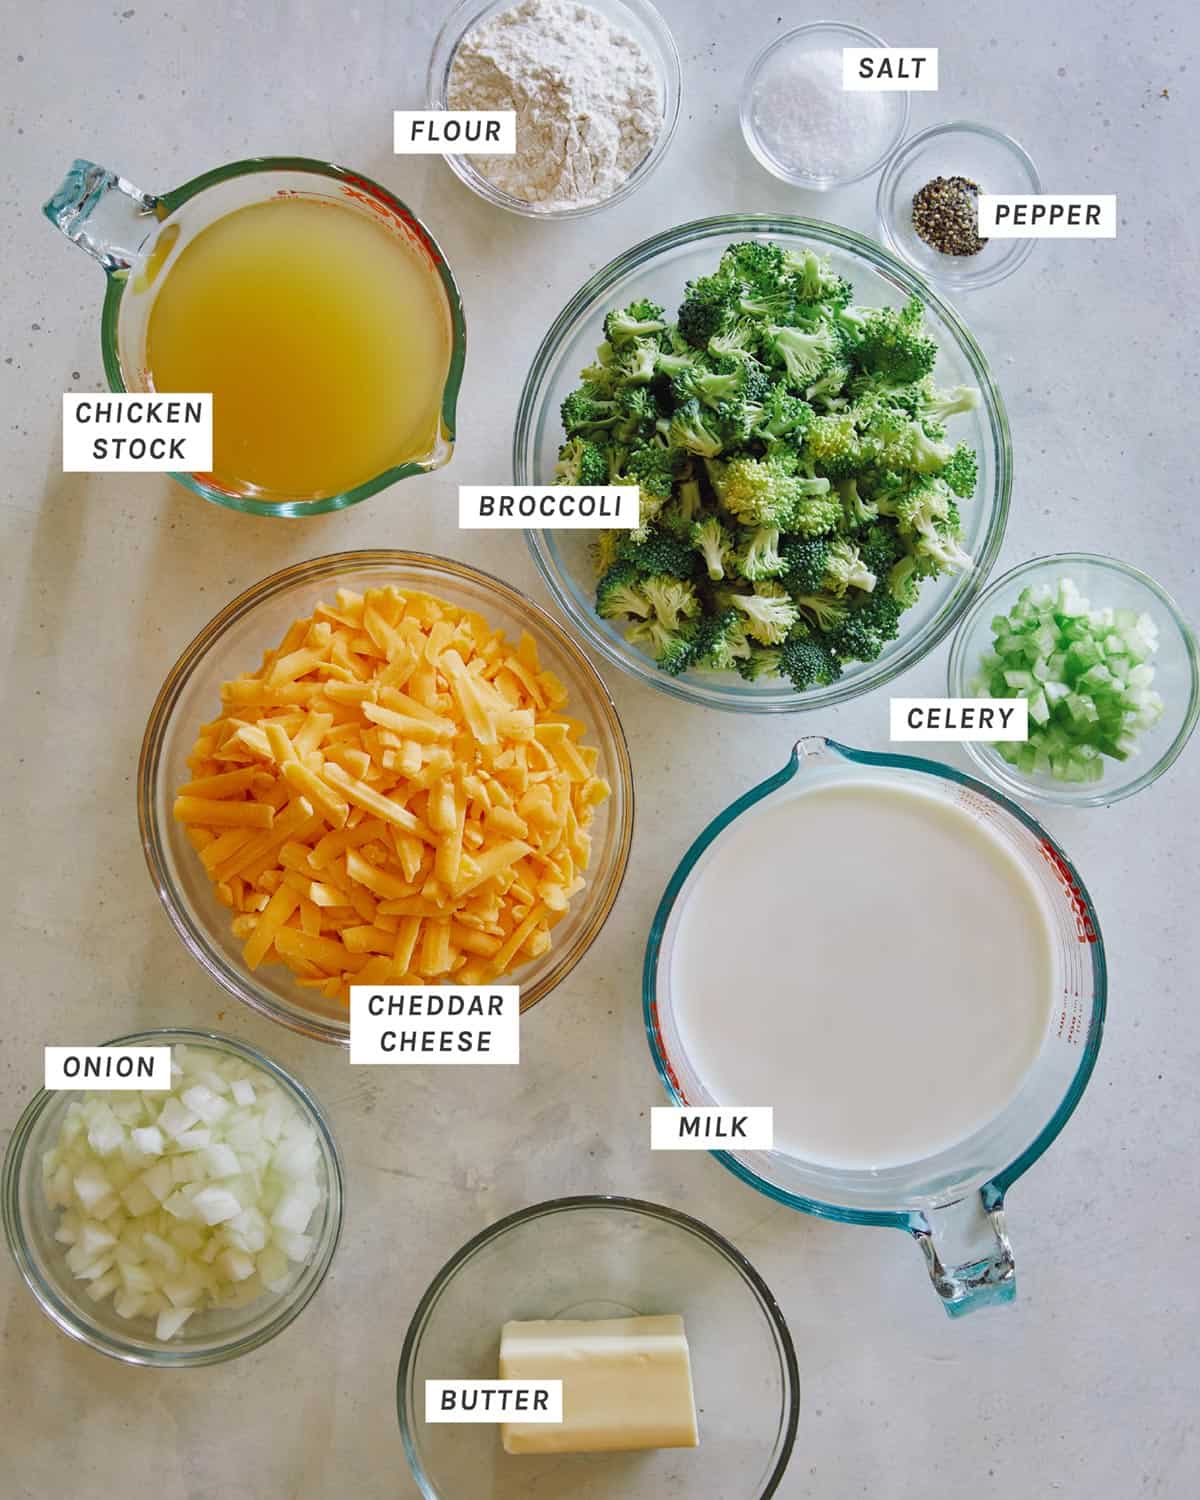
Ingredients for Broccoli Cheddar Soup laid out in bowls.
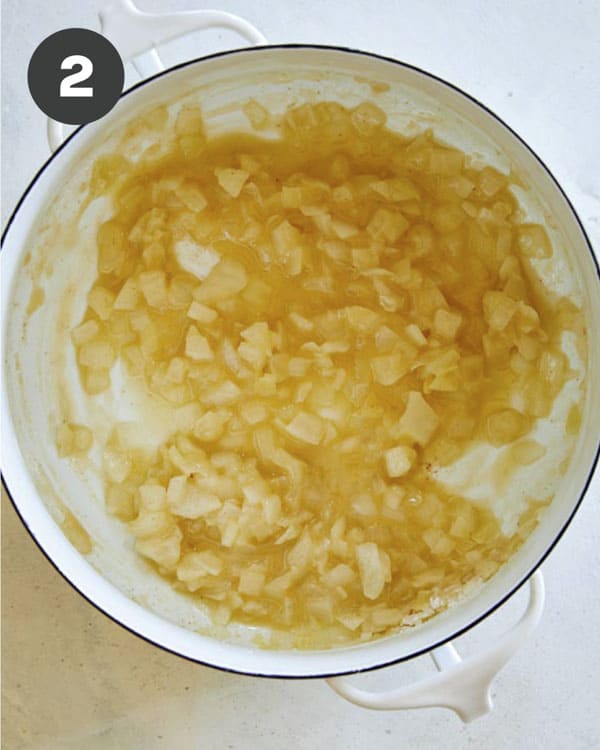
  1. Place large pot over medium heat and melt butter. Add onion and sweat, about 5 minutes.
  2. Add flour to butter and onion mixture.Stir together and cook for about 2 minutes. This will remove the raw flour flavor.
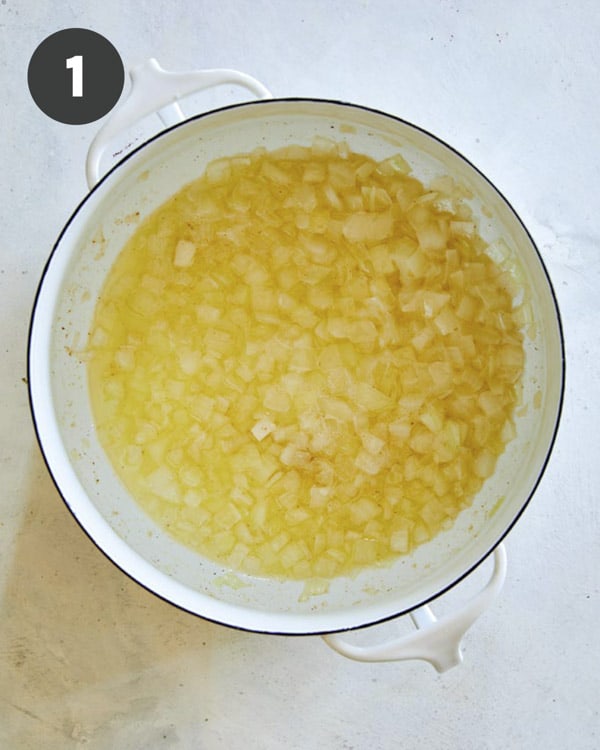
Onions and butter melted in a stock pot.
Combined melted butter and flour in a stock pot to make broccoli cheddar soup.
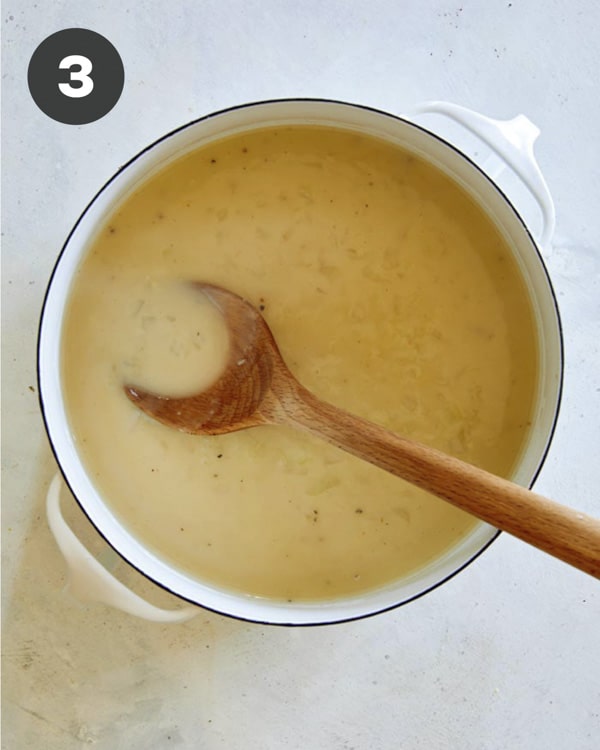
  1. Stir in chicken stock and season generously with salt and pepper. You want to make sure that no flour lumps are left after adding the stock.
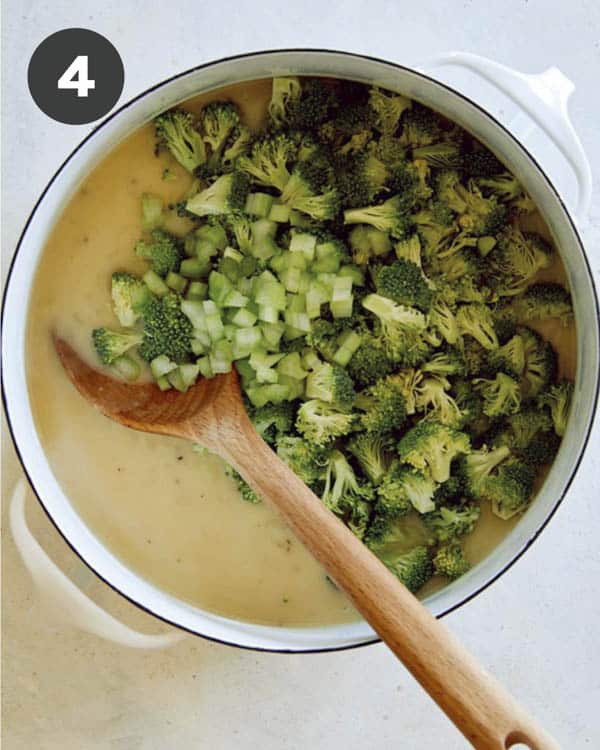
  2. Add celery and broccoli.
The beginning to making broccoli cheddar soup.
Broccoli and celery combined with a stock to make the start of broccoli cheddar soup.
  1. Stir together and bring to a boil. Reduce heat to medium-low. Let simmer until vegetables are tender, about 15 minutes.
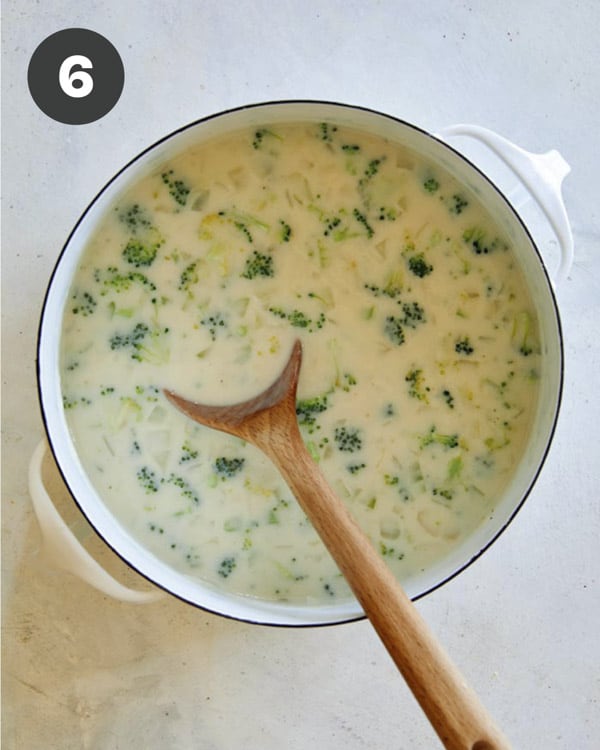
  2. Stir in milk and continue to simmer until soup is thick enough to just coat the back of a wooden spoon, 2 to 3 minutes. The soup should still have a thinner, ‘soupy’ texture.
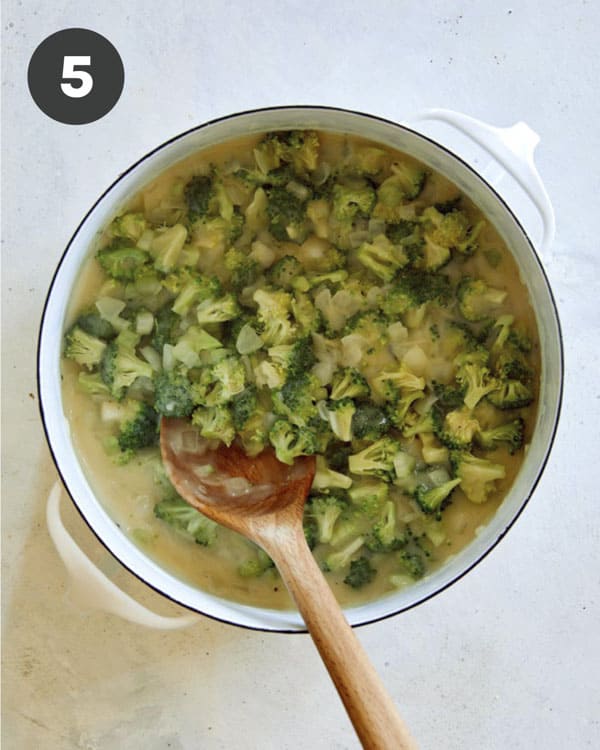
Broccoli cheddar soup with celery soup made in a stock pot.
Milk added into a stock pot with broccoli cheddar soup.
  1. Remove pot from heat and stir in cheddar in small handfuls, waiting until cheese melts to add more cheese. Adding the cheese slowly will help to create a smooth soup in the end.
  2. Continue to add more cheese to the soup until the soup has thickened and has a smooth velvety texture. Season with salt and pepper and top with more cheddar. Serve.
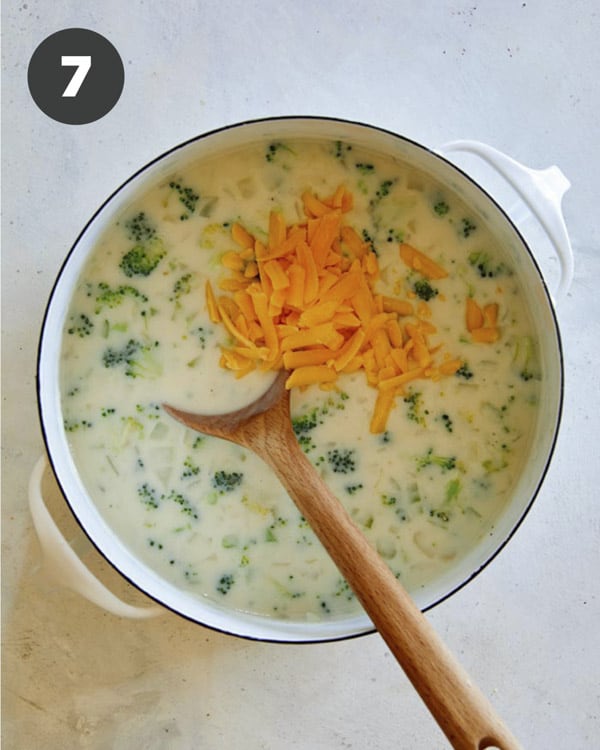
Hand fulls of cheese added into a stock pot to make broccoli cheddar soup.
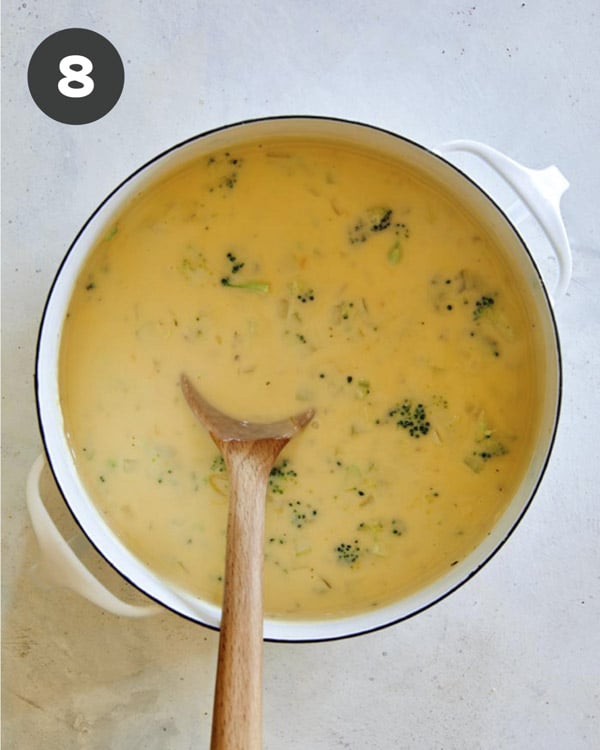
Broccoli cheddar soup in a stock pot.

Tools You Will Need

Tips to Make the BEST Broccoli Cheddar Soup

Our broccoli cheddar soup recipe is very easy to make but there are a couple important factors to make it successfully.

  • Make sure you’re grating your own cheese and not using pre-shredded cheese! Pre-shredded cheeses have anti-caking agents in them for preservation and causes the end product to be gritty!
  • It’s important to remember that low and slow for adding the cheese is key. Remove the pot from the heat and add the cheese in small handfuls. Removing the pot from the heat will ensure your soup doesn’t separate, while still maintaining enough heat to melt the cheese.
  • Also make sure the added shredded cheese fully incorporates and melts into the soup before adding more. This will guarantee the soup stays creamy and smooth. If the cheese is added too quickly you run the risk of your soup becoming gritty.

Does this Taste Just Like the Version at Panera Bread?

Yes and no! Our version is VERY similar to the one they serve at Panera, but we omitted the carrots. Why? Because we really wanted the focus to be on the broccoli and the cheddar…that’s why it’s called broccoli cheddar soup! It’s such a delicious and classic combination of flavors we didn’t want anything “fighting” the flavors if that makes sense.

If you want carrots in your soup, no problem! Just add 1 peeled and diced carrot to the onion and celery (making a mirepoix) OR peel and cut 1 carrot into julienne strips and add them to your soup when you add the broccoli!

Make Ahead Instructions for Our Broccoli Cheddar Soup

Make Ahead

Our soup can be made up to 3 days ahead of time, stored in an airtight container in the refrigerator.

Reheating Leftovers

To reheat, pour soup into a pot and place over medium-low to low heat. Stir soup occasionally to ensure it heats back up evenly. It’s important that the soup comes back up to temperature slowly so that it stays thick, creamy and smooth. Reheating the soup too quickly can make the soup gritty and lose its body.

If you find that your soup still gets too thin after its been heated scoop 1/2 cup of the warm soup into a small bowl and whisk together with 1 1/2 teaspoons cornstarch until smooth. Pour mixture back into the pot, stir together and simmer until soup slightly thickens.

Can I Freeze This Soup?

We really don’t recommend freezing this recipe because the consistency will be very thin and the texture will be off (gritty) once it’s thawed and heated back up. The cornstarch slurry trick also doesn’t work nearly as well for when the soup has been frozen.

Best Way to Serve Our Broccoli Cheddar Soup

Our favorite way to serve this soup is to ladle it into a crusty, sourdough bread bowl! The last bits of the soup absorb into the inner crust of the bowl and it’s so satisfying to tear away pieces of the soup soaked bread bowl and scarf them down as you finish up the soup.

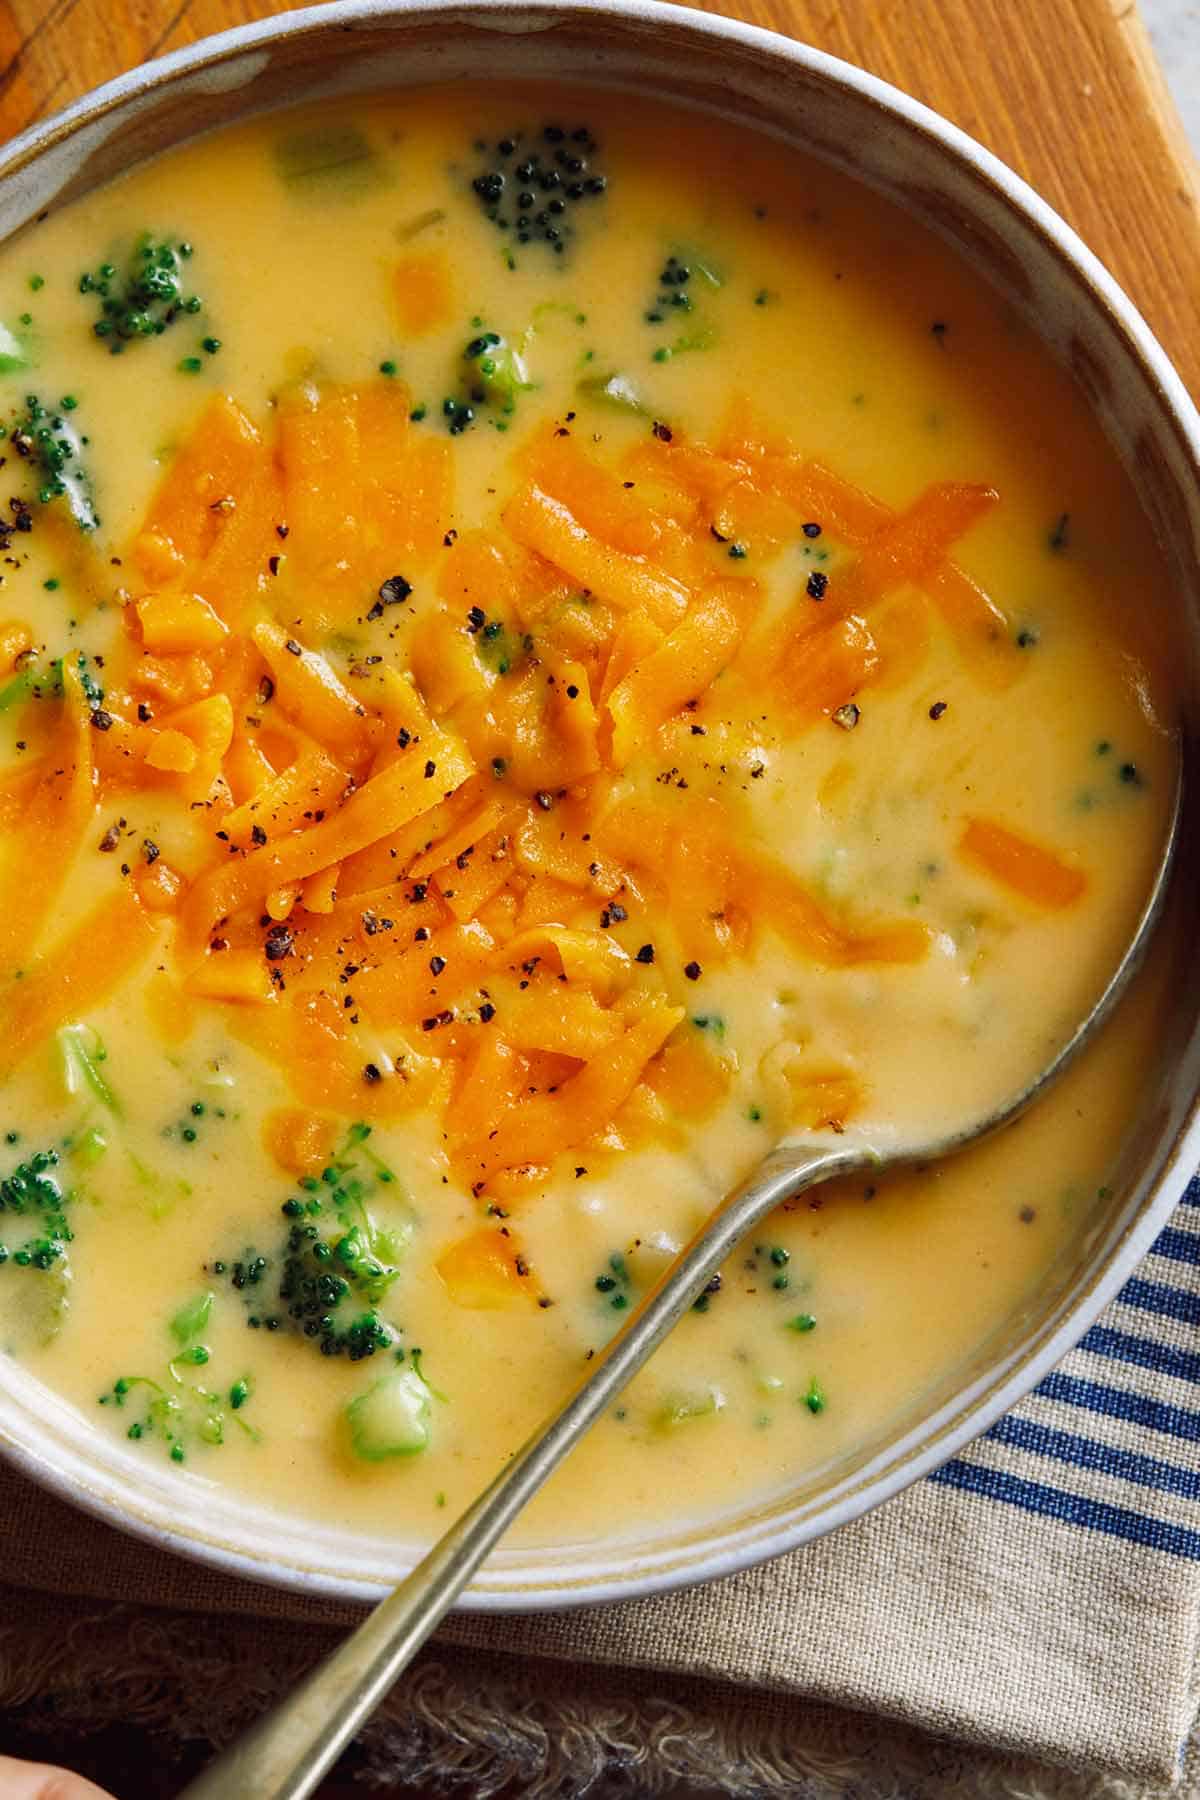
Broccoli cheddar soup in a bowl up close with shredded cheddar cheese on top.

More Delicious Soup Recipes You Will Love

A close up of a bowl of broccoli cheddar soup with a spoon.
Print

Easy Broccoli Cheddar Soup

A deliciously cozy recipe for Easy Broccoli Cheddar Soup. We love serving it in a sourdough bread bowl or with a side of crusty bread for dipping. This soup is the ultimate comfort food!
Course dinner, lunch, Soup
Cuisine American
Prep Time 5 minutes
Cook Time 25 minutes
Total Time 30 minutes
Servings 6 people
Calories 445kcal

Ingredients

soup

  • 5 tbsp unsalted butter
  • ½ onion chopped
  • cups all purpose flour
  • 2 cups chicken stock
  • 1 celery stalk finely diced
  • cup broccoli chopped into bite sized pieces
  • 2 cups whole milk
  • 2 cups shredded cheddar
  • salt and pepper to taste

garnish

  • 1 cup shredded cheddar

Instructions

  • Place large pot over medium heat and melt butter. Add onion and sweat, about 5 minutes.
  • Whisk in flour and cook for about 2 minutes.
  • Stir in chicken stock and season generously with salt and pepper.
  • Stir in celery and broccoli and bring to a boil, then reduce heat to medium-low. Let simmer until vegetables are tender, about 15 minutes.
  • Stir in milk and continue to simmer until soup is thick enough to just coat the back of a wooden spoon, 2 to 3 minutes. (soup should still have a 'soupy' texture)
  • Remove pot from heat and stir in cheddar in small handfuls, waiting until cheese melts to add more cheese.
  • Season with salt and pepper and top with more cheddar. Serve.
Video

Notes

Makes: ~1 1/2 quarts
Tips and Tricks for Broccoli Cheddar Soup Success
This Broccoli Cheddar Soup recipe is really simple but there are a couple important factors in making it successfully.
  • It’s important to remember that low and slow for adding the cheese is key. Remove the pot from the heat and add the cheese in small handfuls. Removing the pot from the heat will ensure your soup doesn’t separate, while still maintaining enough heat to melt the cheese.
  • Also make sure the added shredded cheese fully incorporates and melts into the soup before adding more. This will guarantee the soup stays creamy and smooth. If the cheese is added too quickly you run the risk of your soup becoming gritty.
Make Ahead Instructions for Our Broccoli Cheddar Soup
Our soup can be made up to 3 days ahead of time, stored in an airtight container in the refrigerator.
To reheat, pour soup into a pot and place over medium-low to low heat. Stir soup occasionally to ensure it heats back up evenly. It’s important that the soup comes back up to temperature slowly so that it stays thick, creamy and smooth. Reheating the soup too quickly can make the soup gritty and lose its body.
If you find that your soup still gets too thin after its been heated scoop 1/2 cup of the warm soup into a small bowl and whisk together with 1 1/2 teaspoons cornstarch until smooth. Pour mixture back into the pot, stir together and simmer until soup slightly thickens.

Nutrition

Calories: 445kcal | Carbohydrates: 17g | Protein: 21g | Fat: 33g | Saturated Fat: 20g | Cholesterol: 97mg | Sodium: 524mg | Potassium: 414mg | Fiber: 1g | Sugar: 8g | Vitamin A: 1263IU | Vitamin C: 35mg | Calcium: 547mg | Iron: 1mg

The post Easy Broccoli Cheddar Soup appeared first on Spoon Fork Bacon.

Tomato Soup Recipe

I get so excited to make our Tomato Soup Recipe every year! My favorite time to make it is the very end of summer leading into fall. I’m able to find the best, super ripe and sweet roma tomatoes this time of year, which makes the best tasting tomato soup. Our homemade tomato soup takes a little bit of time to make, but it’s totally worth it and very easy to make! My mouth waters…

Read More

The post Tomato Soup Recipe appeared first on Spoon Fork Bacon.

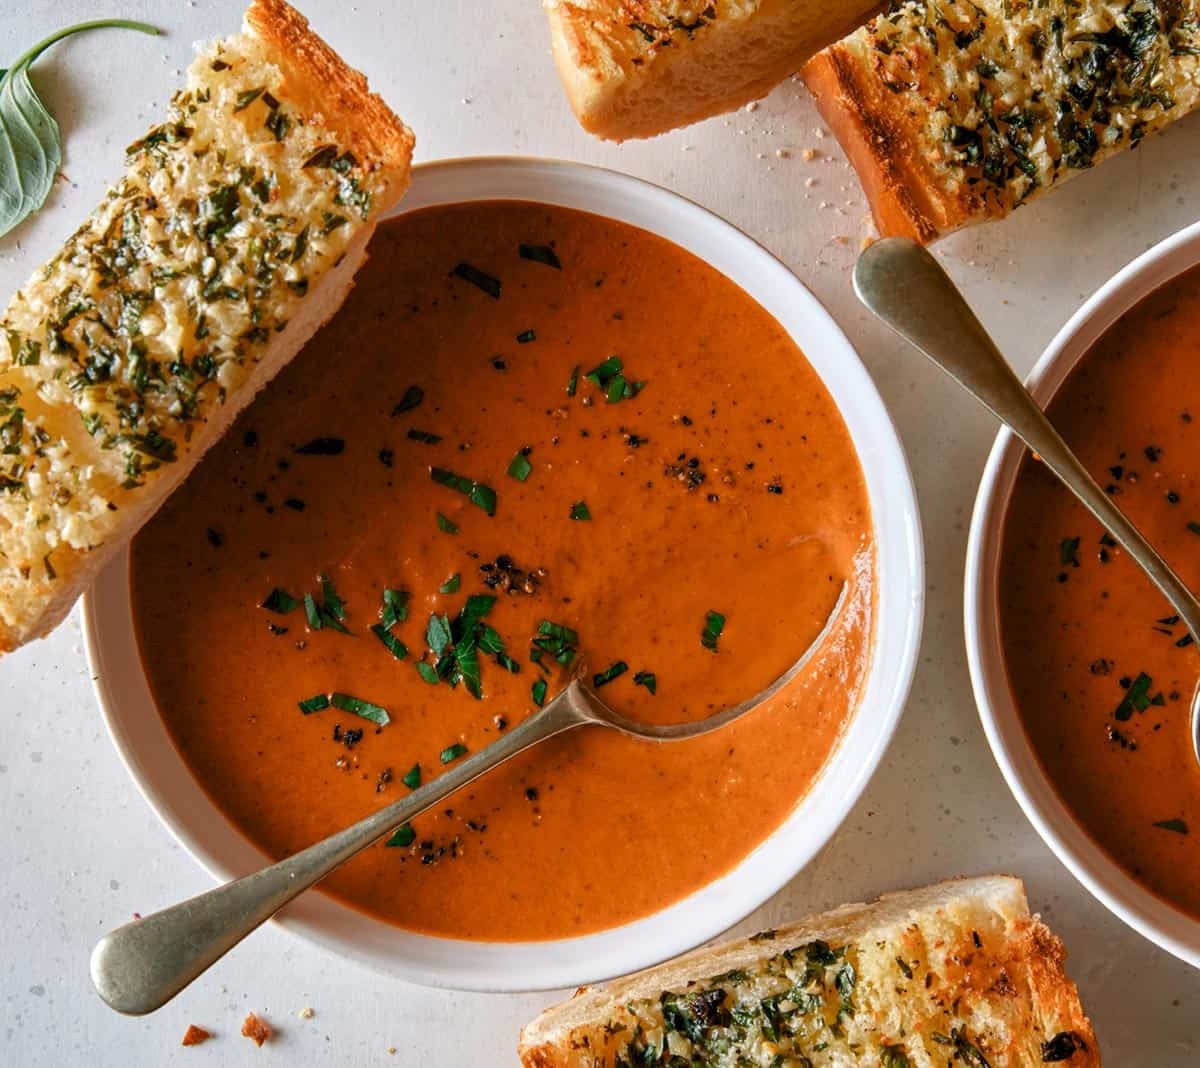
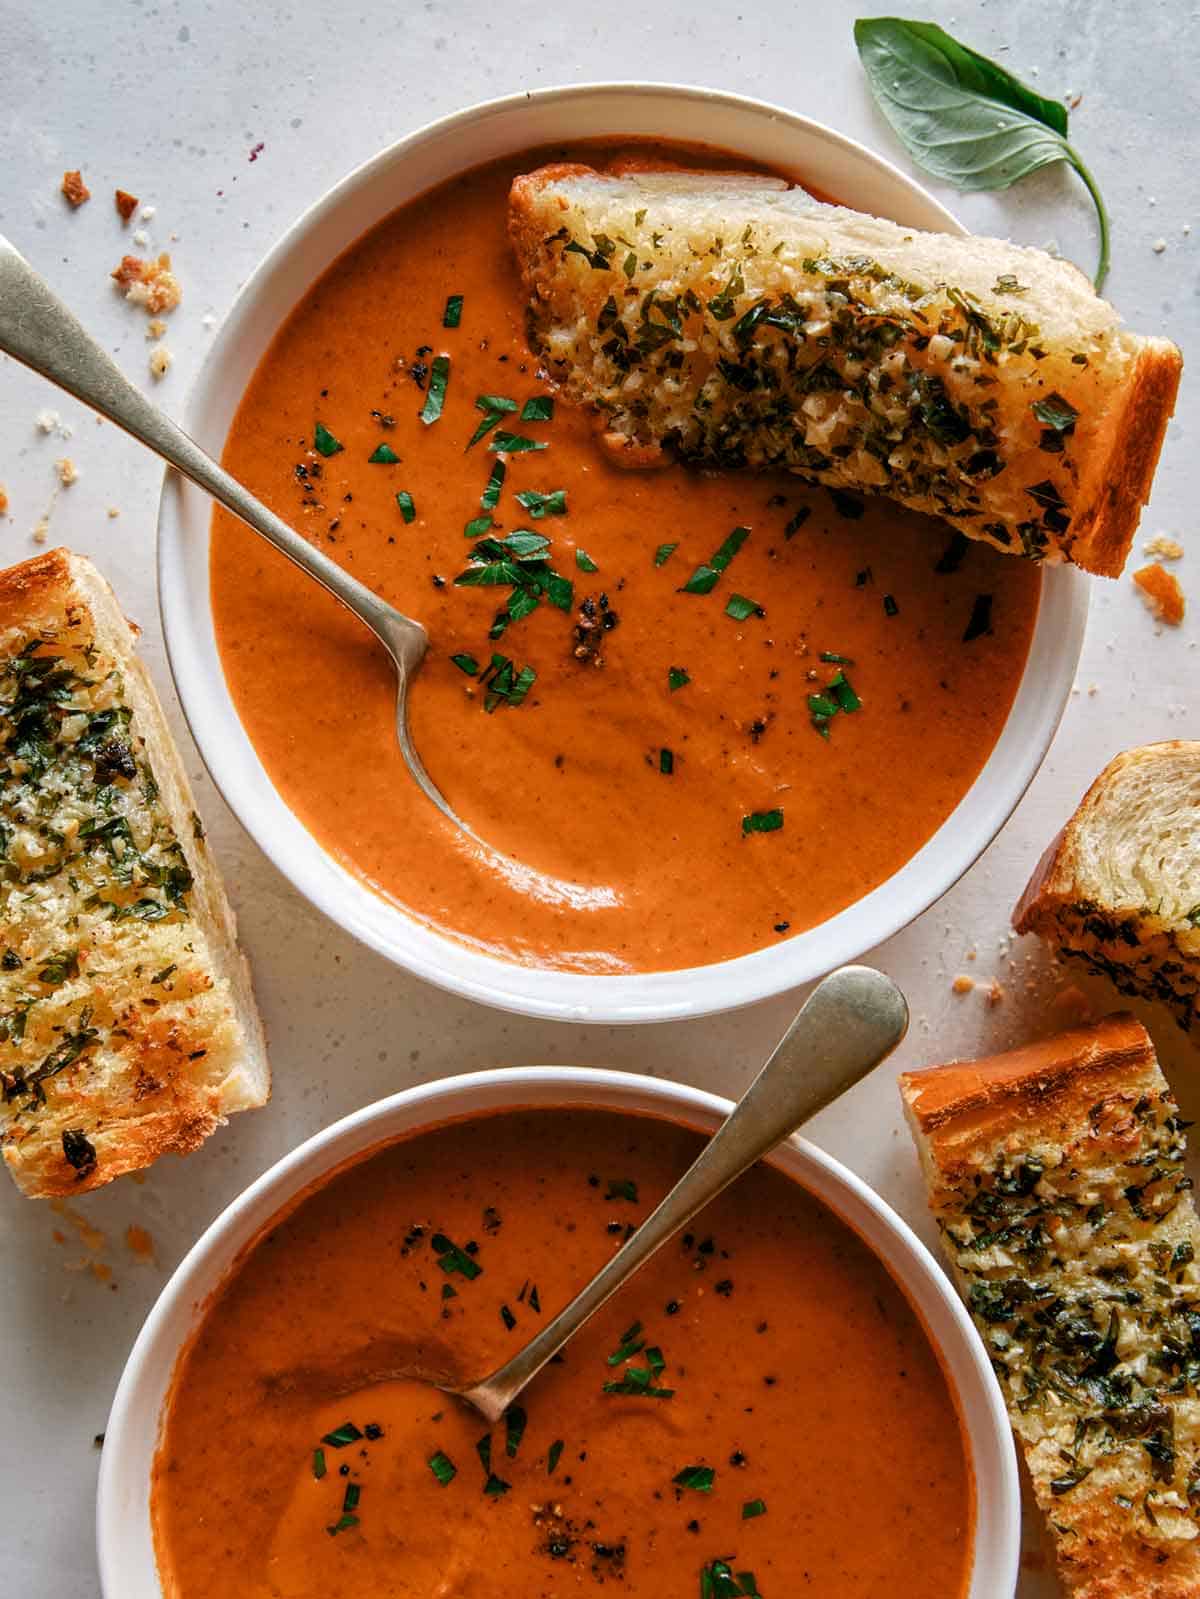
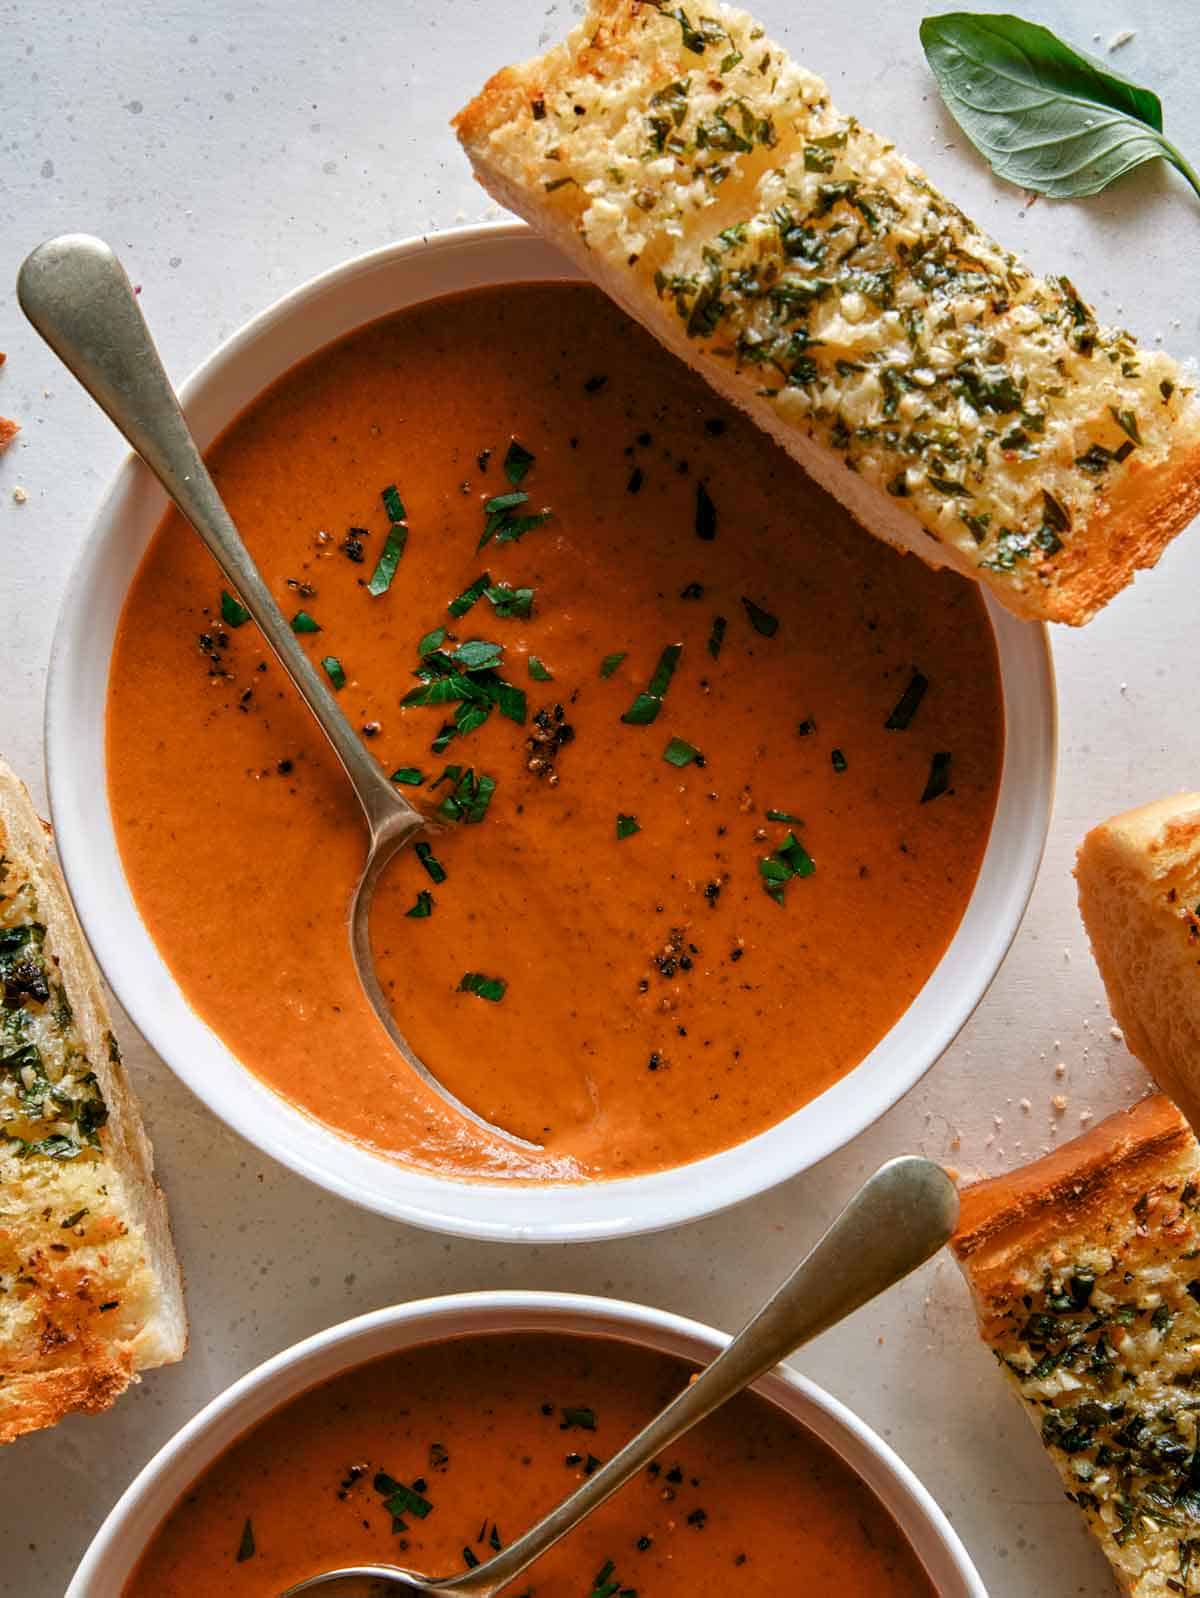
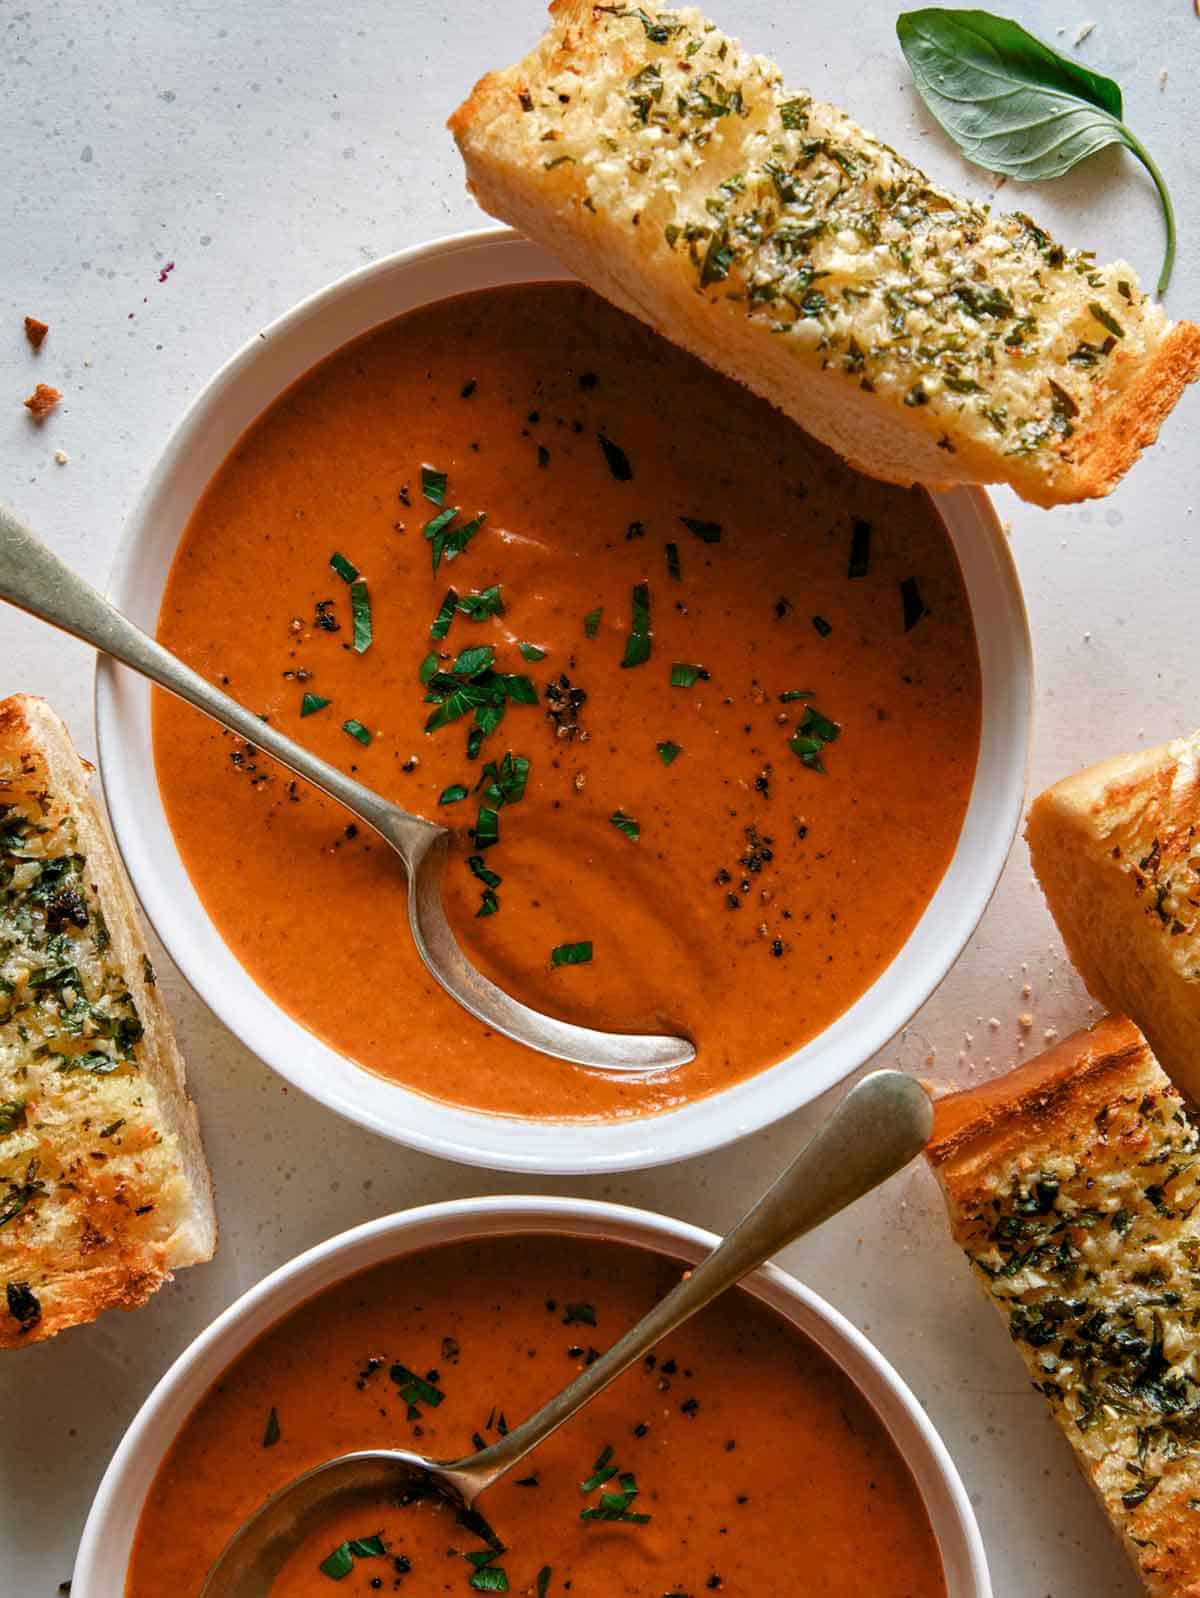
Tomato soup recipe in two bowls with garlic bread on the side.

I get so excited to make our Tomato Soup Recipe every year! My favorite time to make it is the very end of summer leading into fall. I’m able to find the best, super ripe and sweet roma tomatoes this time of year, which makes the best tasting tomato soup.

Our homemade tomato soup takes a little bit of time to make, but it’s totally worth it and very easy to make! My mouth waters every time I think about this soup! It’s incredible on its own, with a gooey grilled cheese (classic!) or with our buttery garlic bread!

How to Make the BEST Tomato Soup Recipe

Ingredients

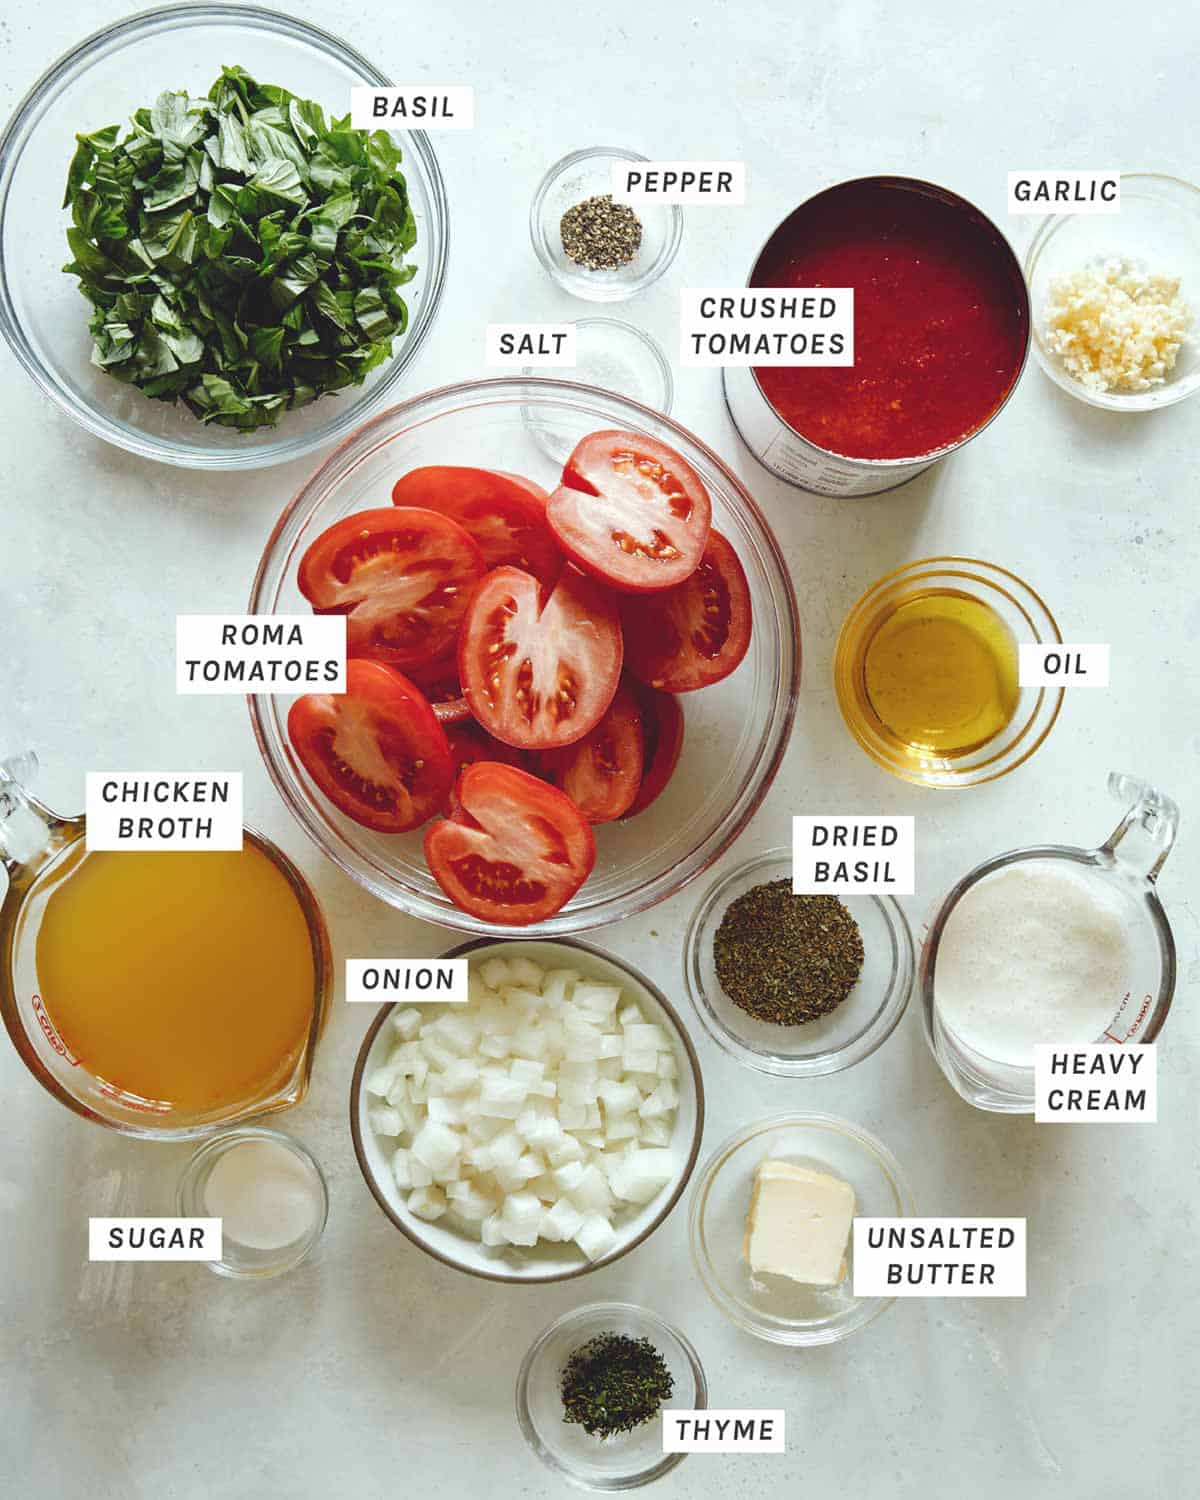
Ingredients for tomato soup.

Process

  1. Preheat oven to 375°F. Spread tomato halves onto a baking sheet and drizzle with olive oil. Season with salt and pepper.
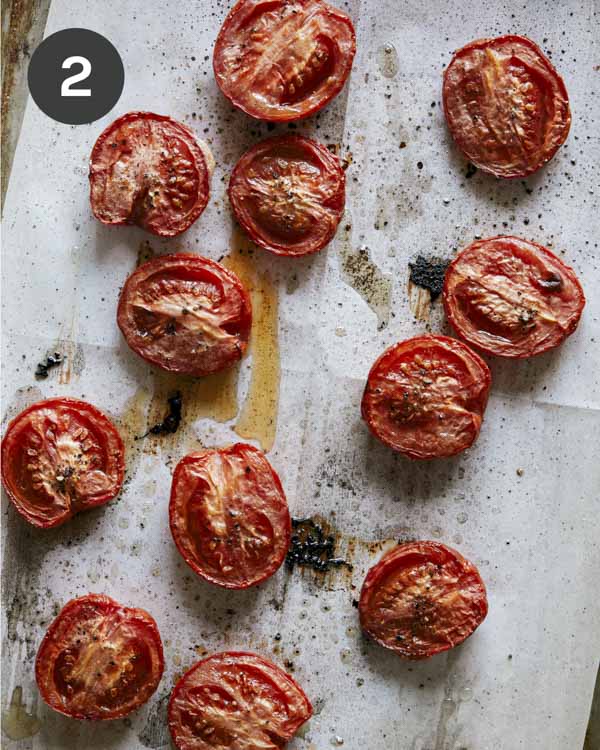
  2. Roast tomatoes.
Tomatoes on a baking sheet about to be roasted to make tomato soup.
Roasted roma tomatoes on a baking sheet.
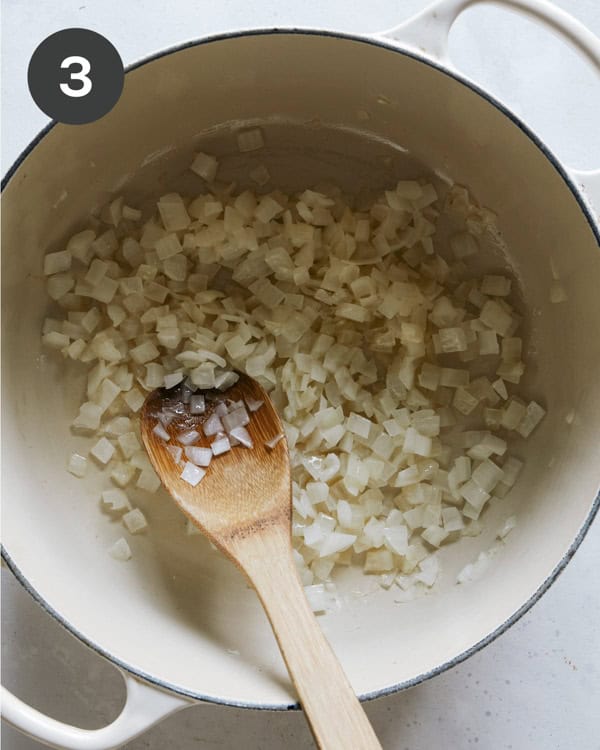
  1. While tomatoes are in the oven, melt the butter in a large pot. Add onion and sauté.
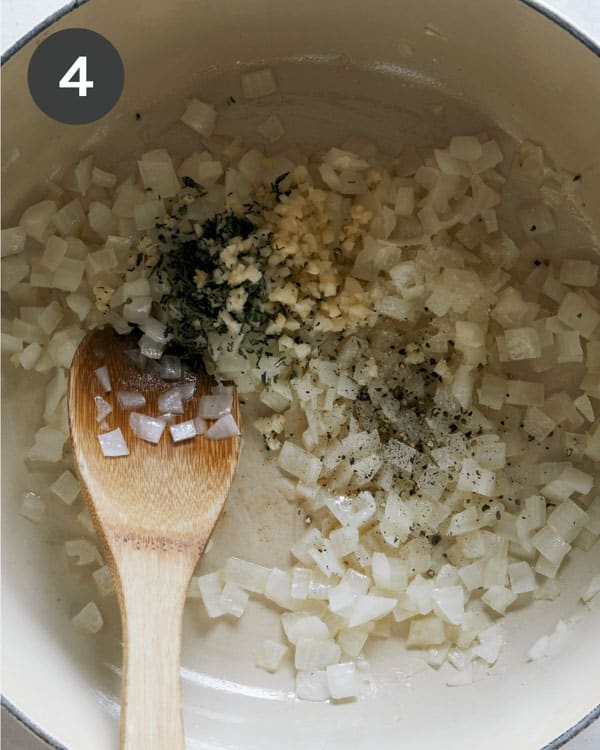
  2. Stir in the garlic and thyme and sauté.
Onions cooking in a pot to make tomato soup.
Cooking onions with garlic and thyme.
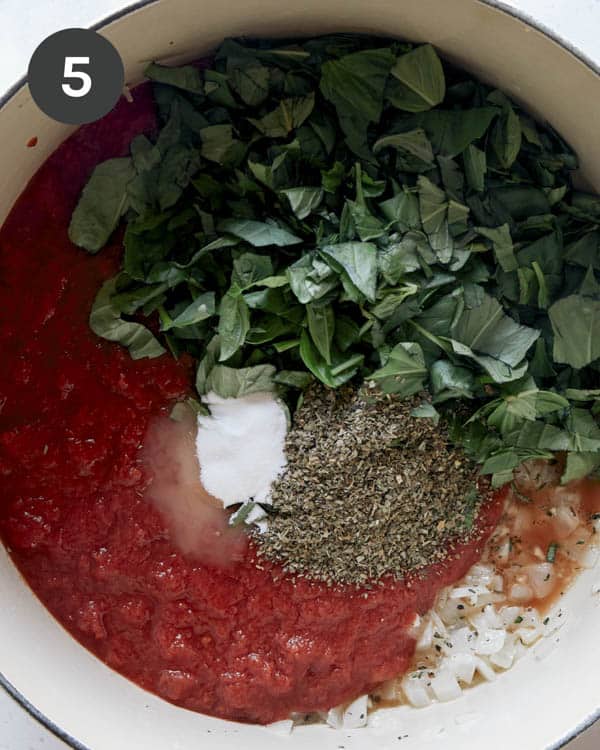
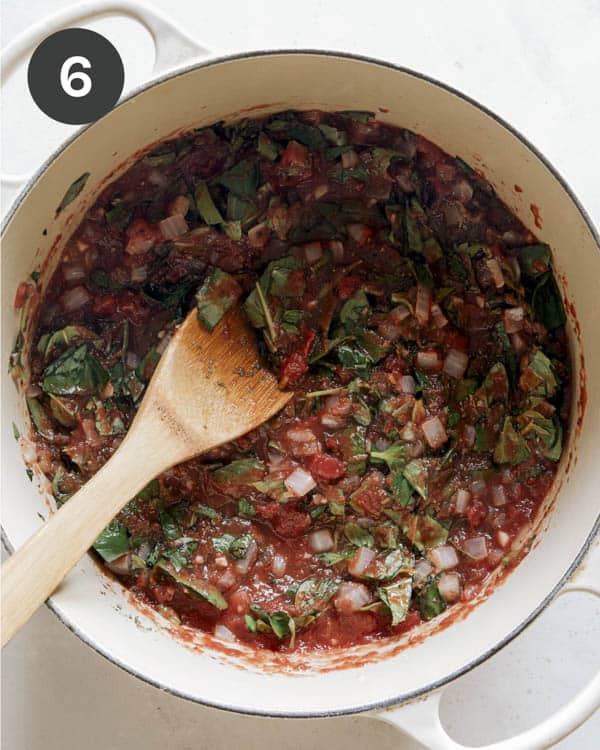
  1. Add crushed tomatoes, basil leaves, dried basil, and sugar. Season with salt and pepper.
  2. Stir the mixture and reduce the heat to medium or medium-low and simmer.
Tomato soup with basil in a pot.
Simmering tomato soup in a stock pot.
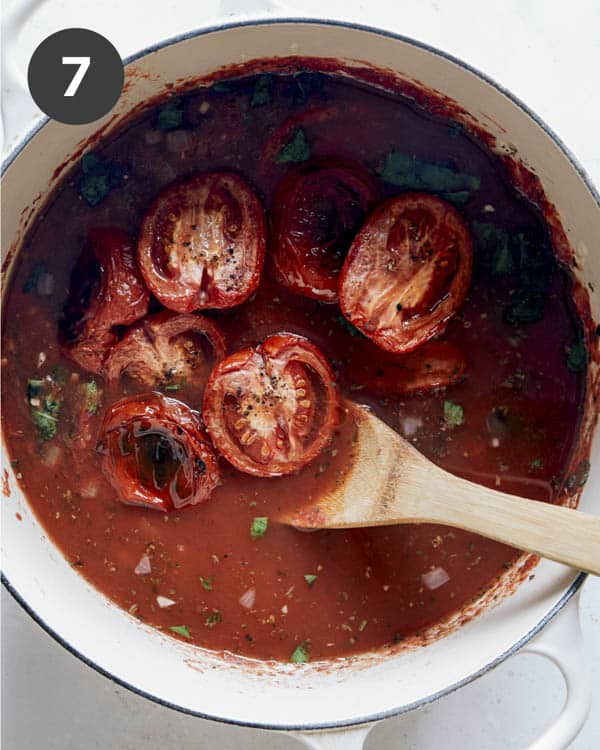
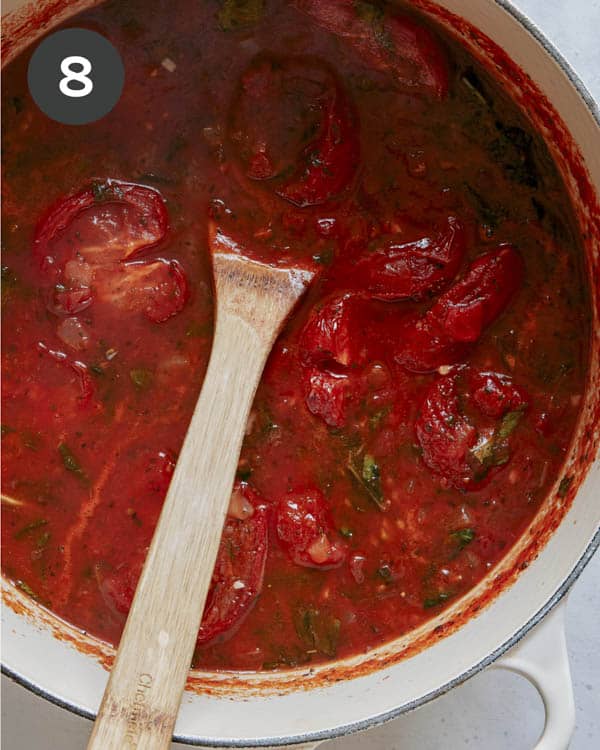
  1. Pour broth and roasted tomatoes into the pot. Season with salt and pepper.
  2. Continue to simmer soup, stirring occasionally.
Tomato soup base with roasted tomatoes and broth added.
Tomato soup simmering in a stock pot.
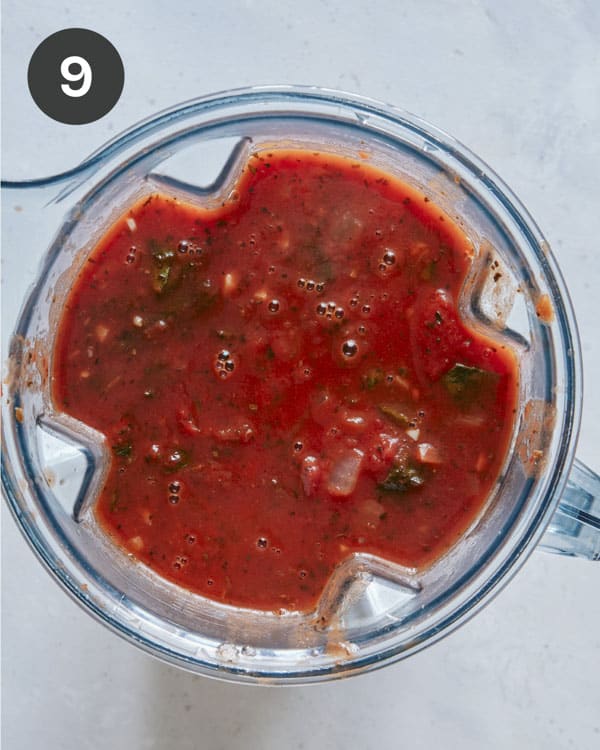
  1. Carefully pour hot soup into a blender.
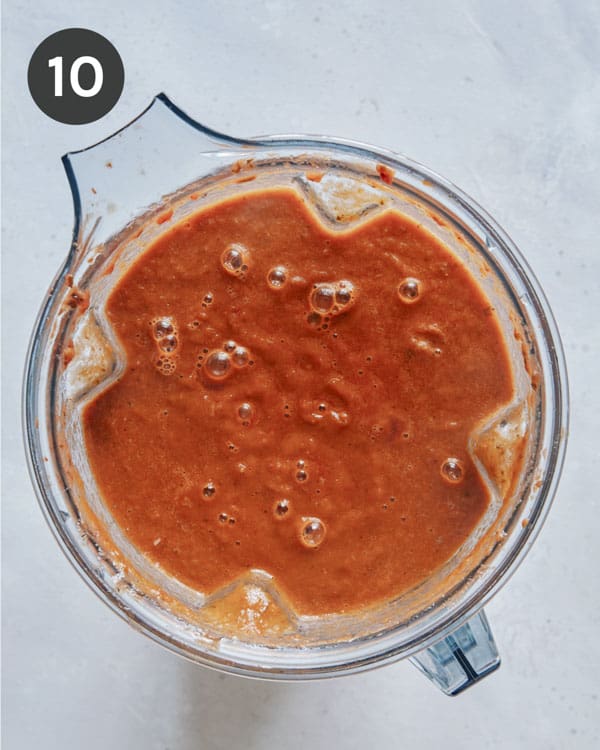
  2. Place a clean dish towel over the closed lid and blend until smooth.
Tomato soup in a blender about to be blended.
Freshly blended tomato soup in a blender.
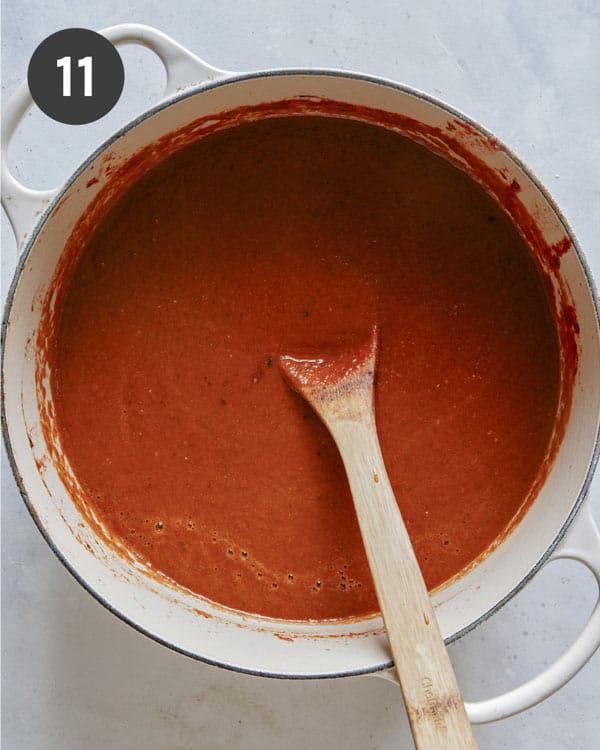
  1. Pour soup back into the pot.
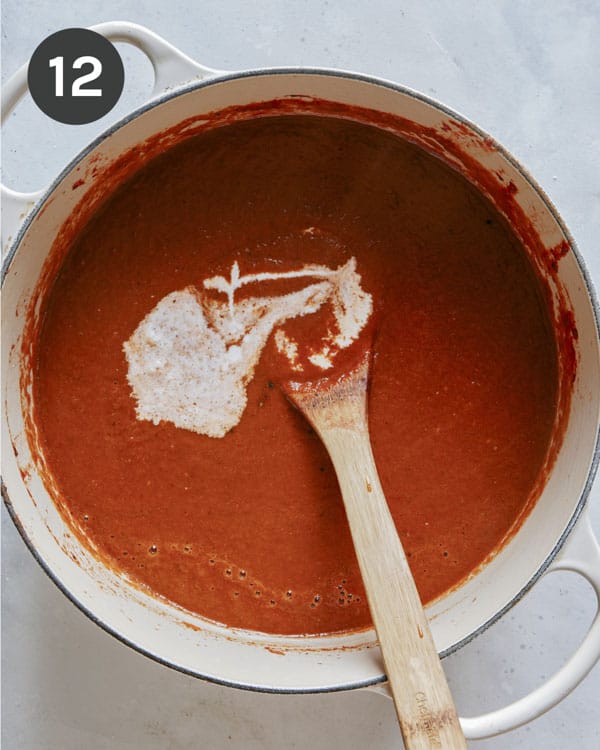
  2. Stir in the cream until fully incorporated.
Tomato soup simmering in a stock pot.
Heavy cream added into a stock pot full of tomato soup.
  1. Simmer tomato basil soup for 2 to 3 minutes before ladling into bowls. Top each serving of tomato soup with fresh basil leaves. Serve.
Tomato soup recipe in two bowls with garlic bread on the side.

Tools You Will Need

Fresh vs Canned Tomatoes for Our Tomato Soup Recipe

I mentioned earlier that I love using fresh roma tomatoes at their peak ripeness for our recipe and it’s true! Fresh roma tomatoes are my first preference because they have amazing flavor (that become even more concentrated and delicious once they’re roasted).

That doesn’t mean you can’t get amazing results with whole canned tomatoes. I love that high quality canned tomatoes are so readily available. The flavors are also already nicely concentrated, so the roasting step can be skipped all together (which will save you about 45 minutes!). Just add a 28 ounce can of whole peeled tomatoes to the pot, as you would with the roasted tomatoes.

Overall, the most important aspect of out tomato soup recipe is to use high quality tomatoes that have great flavor!

Why This is the BEST Tomato Soup Recipe!

  • We roast our tomatoes, which really concentrates the delicious, sweet and acidic tomato flavor!
  • We add basil (both fresh and dry…just trust us on this one) to our soup and it’s hard to find a better combo than tomato and basil!
  • We add a touch of cream which adds a subtle, rich and creamy flavor to this extra cozy tomato basil soup recipe.
  • The our homemade tomato soup truly has the best tomato forward flavor that’s super smooth, creamy, well balanced with the basil, and will warm you right up!
Tomato soup with bread dipped in.

Make Ahead and Freezing Instructions

Make Ahead

Our tomato soup recipe can be made up to 5 days in advance. Cool the finished soup, transfer to an airtight container and refrigerate until ready to use. To reheat, pour soup into a pot and simmer over medium-low to medium heat, stirring occasionally, until heated through.

Freezing

Our soup can be frozen for up to 3 months. Cool the finished soup (leaving out the cream) transfer to an airtight container and freeze until ready to use. To thaw and reheat, transfer container of soup to refrigerator and thaw overnight. Once soup has thawed (a little frozen is okay), pour it into a post and simmer over medium-low to medium heat, stirring occasionally, until heated through. Once heated through, stir in cream simmer for a few minutes and serve.

Variations

  • As I mentioned earlier, you can totally swap the fresh tomatoes our for canned ones.
  • We love the tomato-basil combination of flavors, but if you’re more of a purist, you can omit the fresh and dried basils from the recipe, for more of a classic tomato soup.
  • If you want a slightly healthier version, you can omit the cream and replace it with whole milk or plain yogurt.
  • If you have an immersion blender, you can use that to puree the soup instead of a blender.
Tomato soup recipe in two bowls with garlic bread.

More Delicious Soup Recipes You Will Love

Tomato soup recipe in two bowls with garlic bread on the side.
Print

Tomato Soup Recipe

The best Tomato Soup Recipe you'll ever taste! Our soup is rich, smooth, creamy, and filled with bright tomato and basil flavor. It's the perfect soup for a chilly night in! Serve with a buttery grilled cheese, garlic bread or just on its own!
Course dinner, lunch
Cuisine American
Diet Vegetarian
Prep Time 10 minutes
Cook Time 1 hour 20 minutes
Total Time 1 hour 30 minutes
Servings 4
Calories 364kcal

Ingredients

  • 1 ½ pounds Roma tomatoes, sliced lengthwise
  • 3 tablespoons extra virgin olive oil
  • 2 tablespoons unsalted butter
  • 1 medium yellow onion, diced
  • 4 garlic cloves, minced
  • 1 tablespoon fresh thyme, minced
  • 1 (28 ounce) can crushed tomatoes
  • 2 cups basil leaves, roughly chopped
  • 2 tablespoons dried basil
  • 1 tablespoon sugar
  • 2 cups low sodium chicken broth
  • salt and pepper to taste
  • cup heavy cream

Instructions

  • Preheat oven to 375°F.
  • Spread tomato halves onto a baking sheet and drizzle with olive oil. Season with salt and pepper.
  • Roast tomatoes for about 45 minutes.
  • While tomatoes are in the oven, melt the butter in a large pot over medium-high heat.
  • Add onion and sauté for 5 minutes.
  • Stir in the garlic and thyme and sauté for another 5 minutes.
  • Add crushed tomatoes, basils and sugar. Season with salt and pepper.
  • Stir the mixture and reduce the heat to medium or medium-low and simmer for 10 minutes.
  • Pour broth and roasted tomatoes into the pot. Season with salt and pepper.
  • Continue to simmer soup, for about 15 minutes, stirring occasionally.
  • Carefully pour soup into a blender and blend until smooth.
  • Pour soup back into the pot and stir in the cream until fully incorporated.
  • Simmer the soup for 2 to 3 minutes before ladling into bowls.
  • Top each soup with fresh basil leaves. Serve.

Video

Notes

**Makes about 1 3/4 quarts, each serving is about 1 1/4 cups**
Make Ahead and Freezing Instructions
Make Ahead
Our tomato soup recipe can be made up to 5 days in advance. Cool the finished soup, transfer to an airtight container and refrigerate until ready to use. To reheat, pour soup into a pot and simmer over medium-low to medium heat, stirring occasionally, until heated through.
Freezing
Our soup can be frozen for up to 3 months. Cool the finished soup (leaving out the cream) transfer to an airtight container and freeze until ready to use. To thaw and reheat, transfer container of soup to refrigerator and thaw overnight. Once soup has thawed (a little frozen is okay), pour it into a post and simmer over medium-low to medium heat, stirring occasionally, until heated through. Once heated through, stir in cream simmer for a few minutes and serve.
Variations
  • As I mentioned earlier, you can totally swap the fresh tomatoes our for canned ones.
  • We love the tomato-basil combination of flavors, but if you’re more of a purist, you can omit the fresh and dried basils from the recipe, for more of a classic tomato soup.
  • If you want a slightly healthier version, you can omit the cream and replace it with whole milk or plain yogurt.
  • If you have an immersion blender, you can use that to puree the soup instead of a blender.

Nutrition

Calories: 364kcal | Carbohydrates: 17g | Protein: 6g | Fat: 32g | Saturated Fat: 14g | Polyunsaturated Fat: 2g | Monounsaturated Fat: 13g | Trans Fat: 0.2g | Cholesterol: 60mg | Sodium: 60mg | Potassium: 696mg | Fiber: 4g | Sugar: 10g | Vitamin A: 2907IU | Vitamin C: 32mg | Calcium: 135mg | Iron: 3mg

The post Tomato Soup Recipe appeared first on Spoon Fork Bacon.

Loco Moco

The first time I ever tried Loco Moco was in Hawaii. I was on vacation with my family and we were ordering breakfast. I had never heard of Loco Moco, but the name made me smile and all the components sounded delicious. Little did I know I was about to enjoy one of the biggest breakfasts of my life! I instantly became a huge fan – the rich and juicy burger patty, fried egg, and…

Read More

The post Loco Moco appeared first on Spoon Fork Bacon.

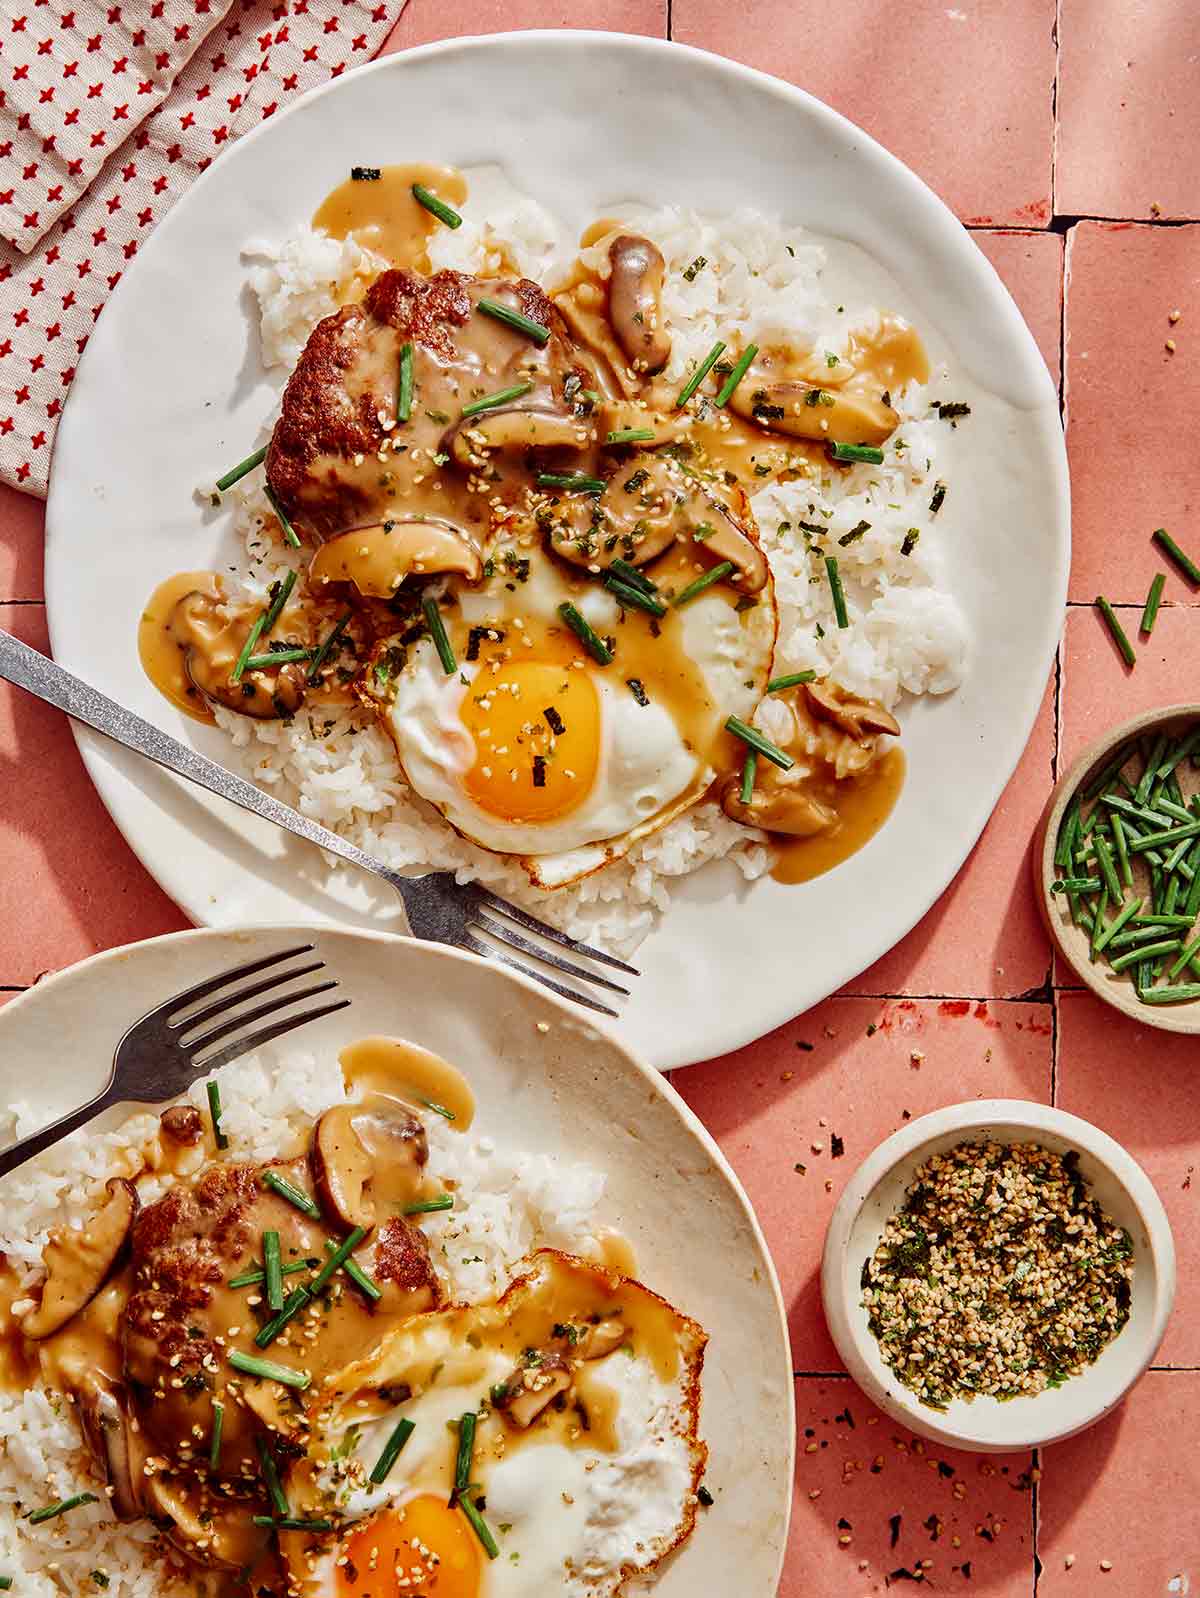
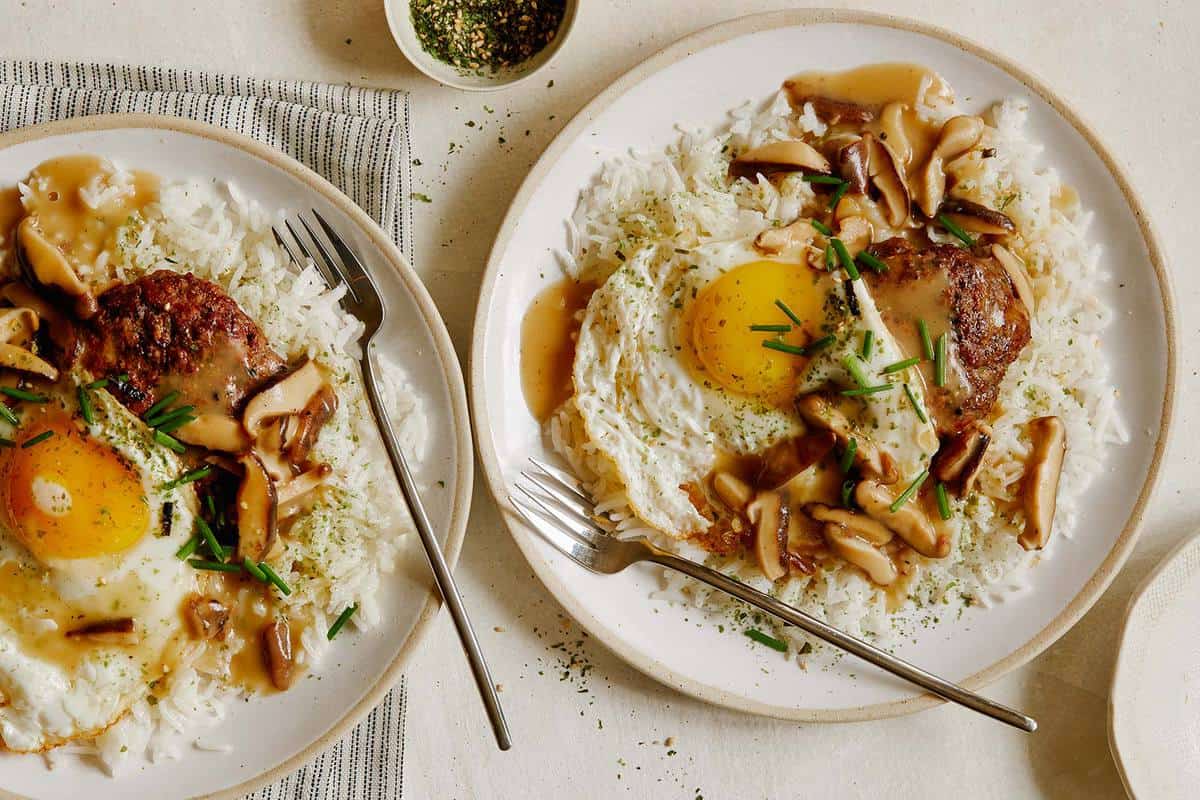
Loco moco on plates to serve to two people.

The first time I ever tried Loco Moco was in Hawaii. I was on vacation with my family and we were ordering breakfast. I had never heard of Loco Moco, but the name made me smile and all the components sounded delicious. Little did I know I was about to enjoy one of the biggest breakfasts of my life!

I instantly became a huge fan – the rich and juicy burger patty, fried egg, and creamy gravy were balanced nicely with the bed of white rice. It was definitely the type of meal that made me want to take a nap, but it was also so delicious and memorable. Our version is based off the first one I ever had which came with a mushroom gravy!

What is Loco Moco?

Loco Moco is a local Hawaiian comfort food dish consisting of steamed rice topped with a hamburger patty, fried egg and finished with gravy.

Origins of the Dish

The origins of the dish is up for debate, but most can agree that it was invented in 1949 at either the Lincoln Grill restaurant, or Cafe 100, both in Hilo, Hawaii. The story goes that the dish was created for local teens that had come in for breakfast. They requested something unique from a typical sandwich and not as time consuming as asian food to prepare.

Why is it called ‘Loco Moco’?

Another question asked a lot is “What does Loco Moco mean?” The name of the dish came from the nickname of one of the teens ‘Loco’ and ‘Moco’ was simply added because it sounded good together. It became a popular staple of the restaurant and slowly spread throughout the islands.

How to Make Our Loco Moco Recipe

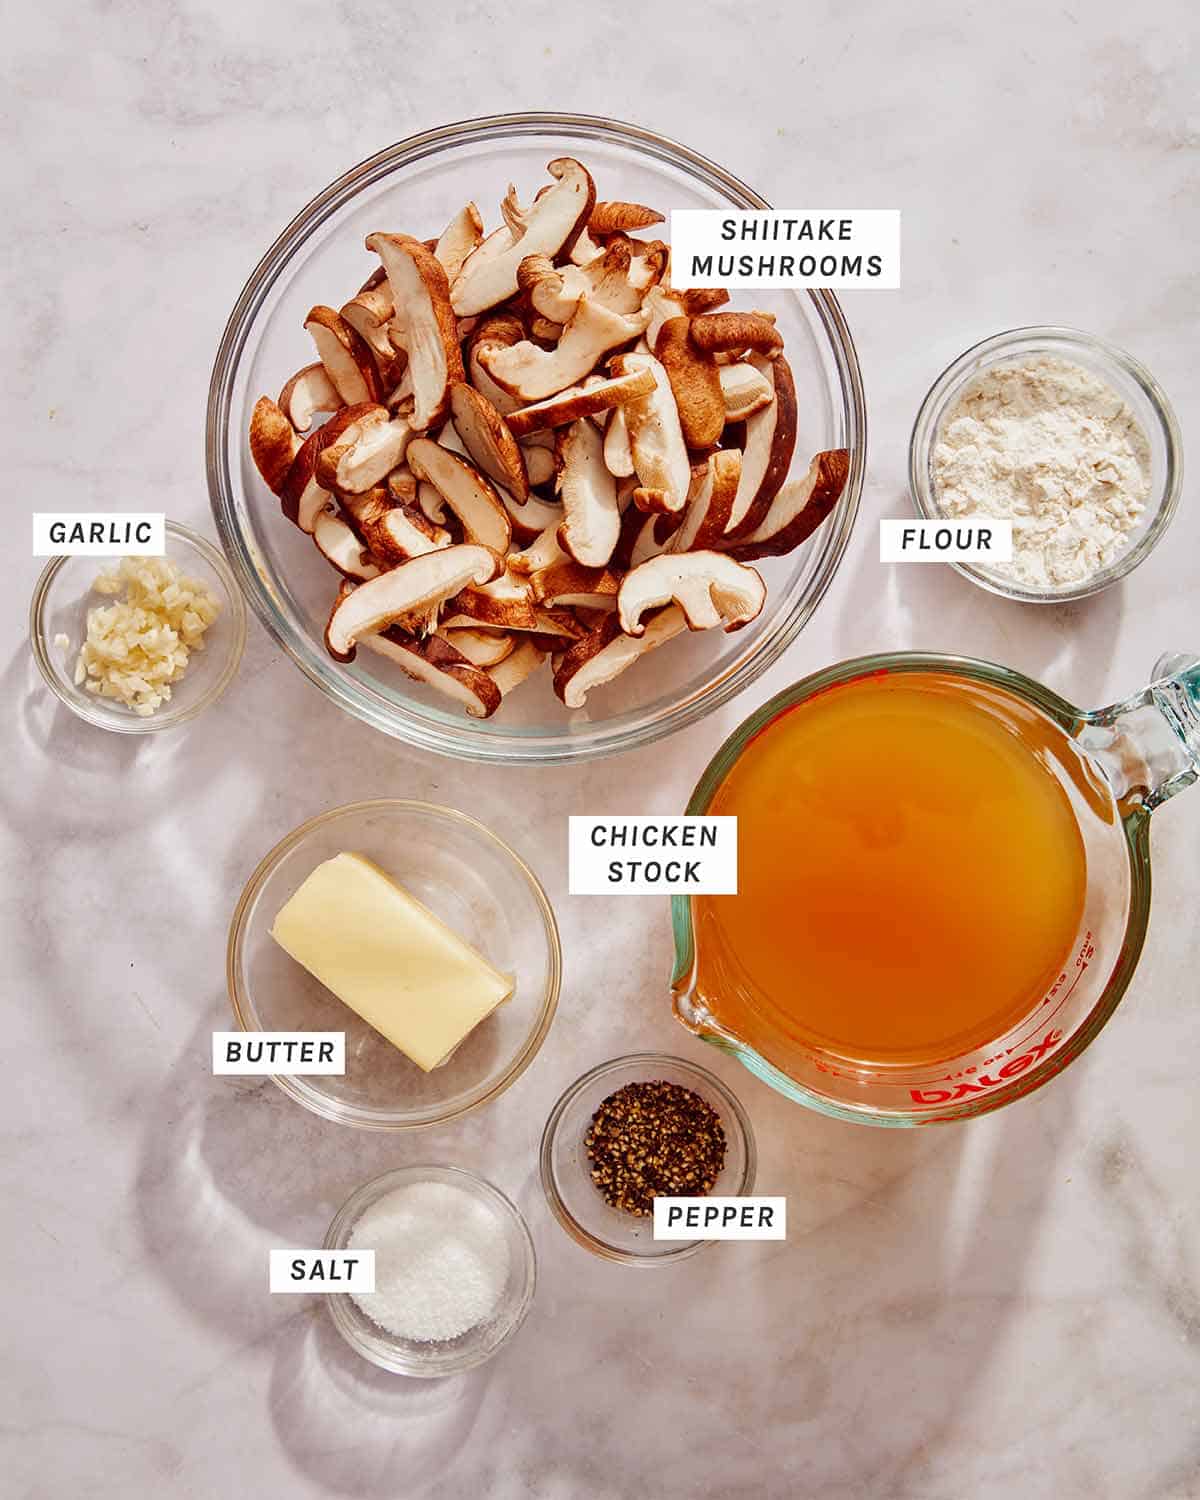
Mushroom Gravy Ingredients

Mushroom gravy ingredients on a kitchen counter.

Mushroom Gravy Process

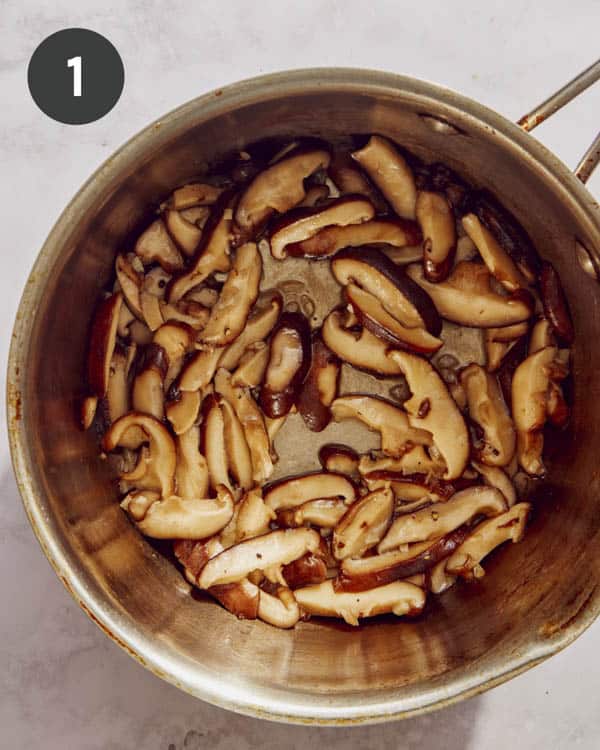
  1. Add 2 tablespoons butter to a saucepan and place over medium-high heat. Add garlic and mushrooms and sauté for about 3 minutes or until mushrooms are lightly caramelized. Season with salt and pepper.
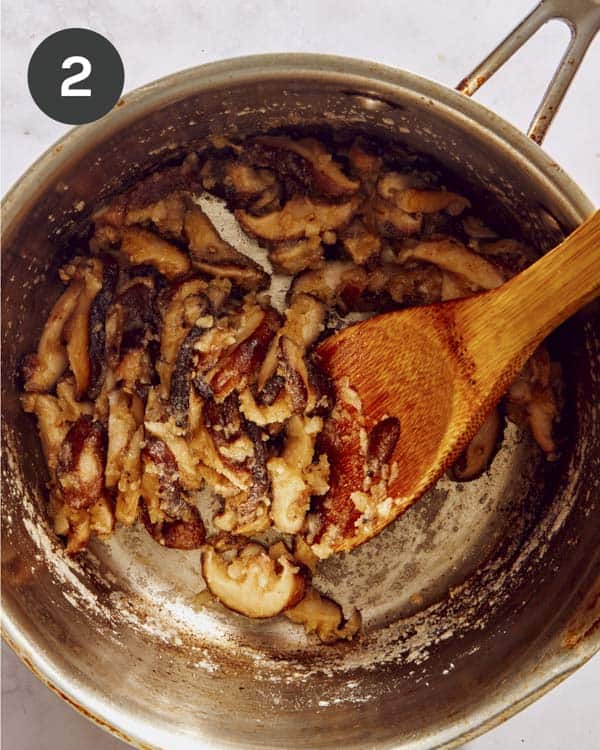
  2. Melt remaining butter into the mixture. Sprinkle with flour and whisk together.
Mushroom gravy with flour in a pot.
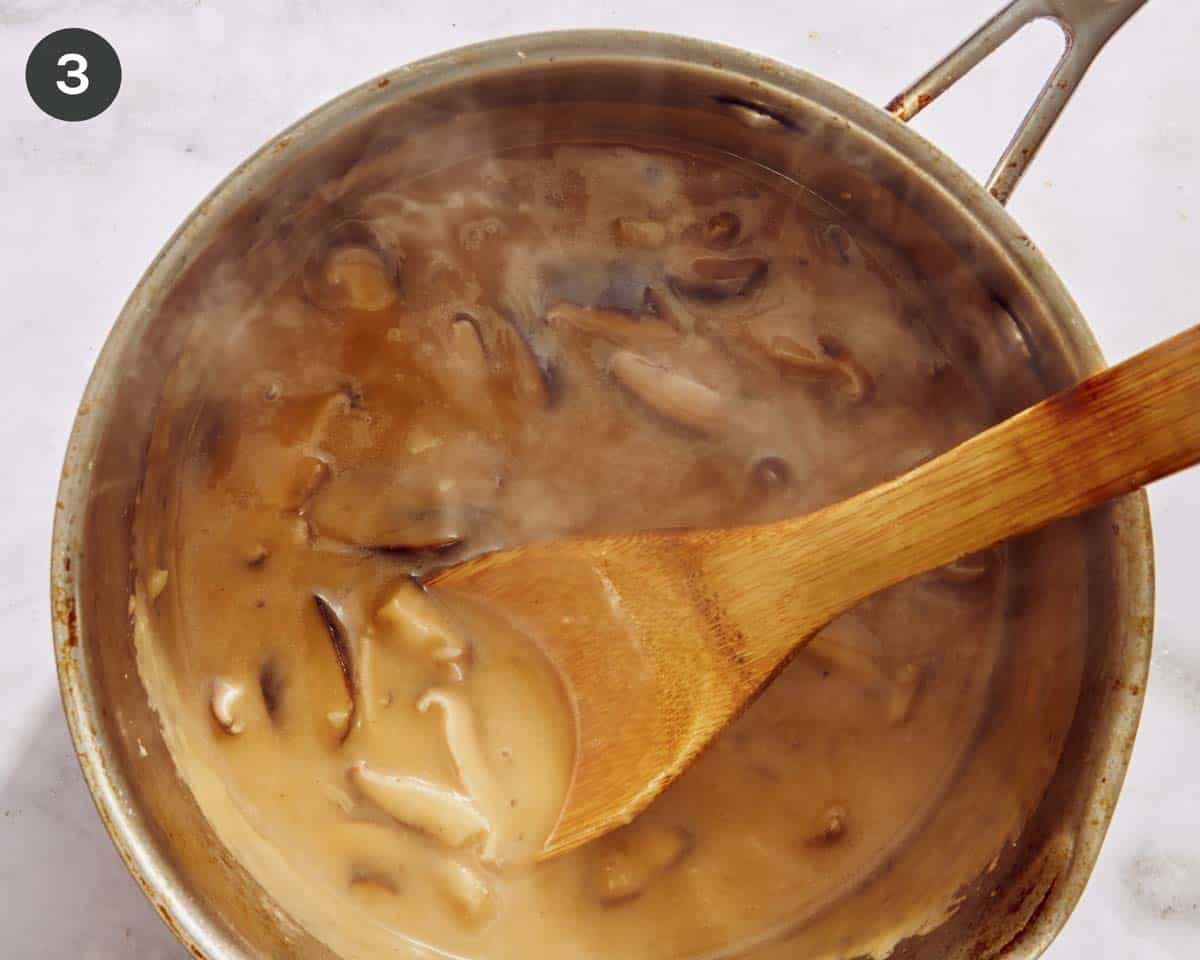
  1. Lower heat to medium and stir in stock. Continue to stir until no lumps remain and gravy has thickened enough to coat the back of a wooden spoon, about 5 minutes. Season with salt and pepper. Cover and set aside while preparing the rest of the loco moco dish.
Gravy being simmered in a pot with a wooden spoon.

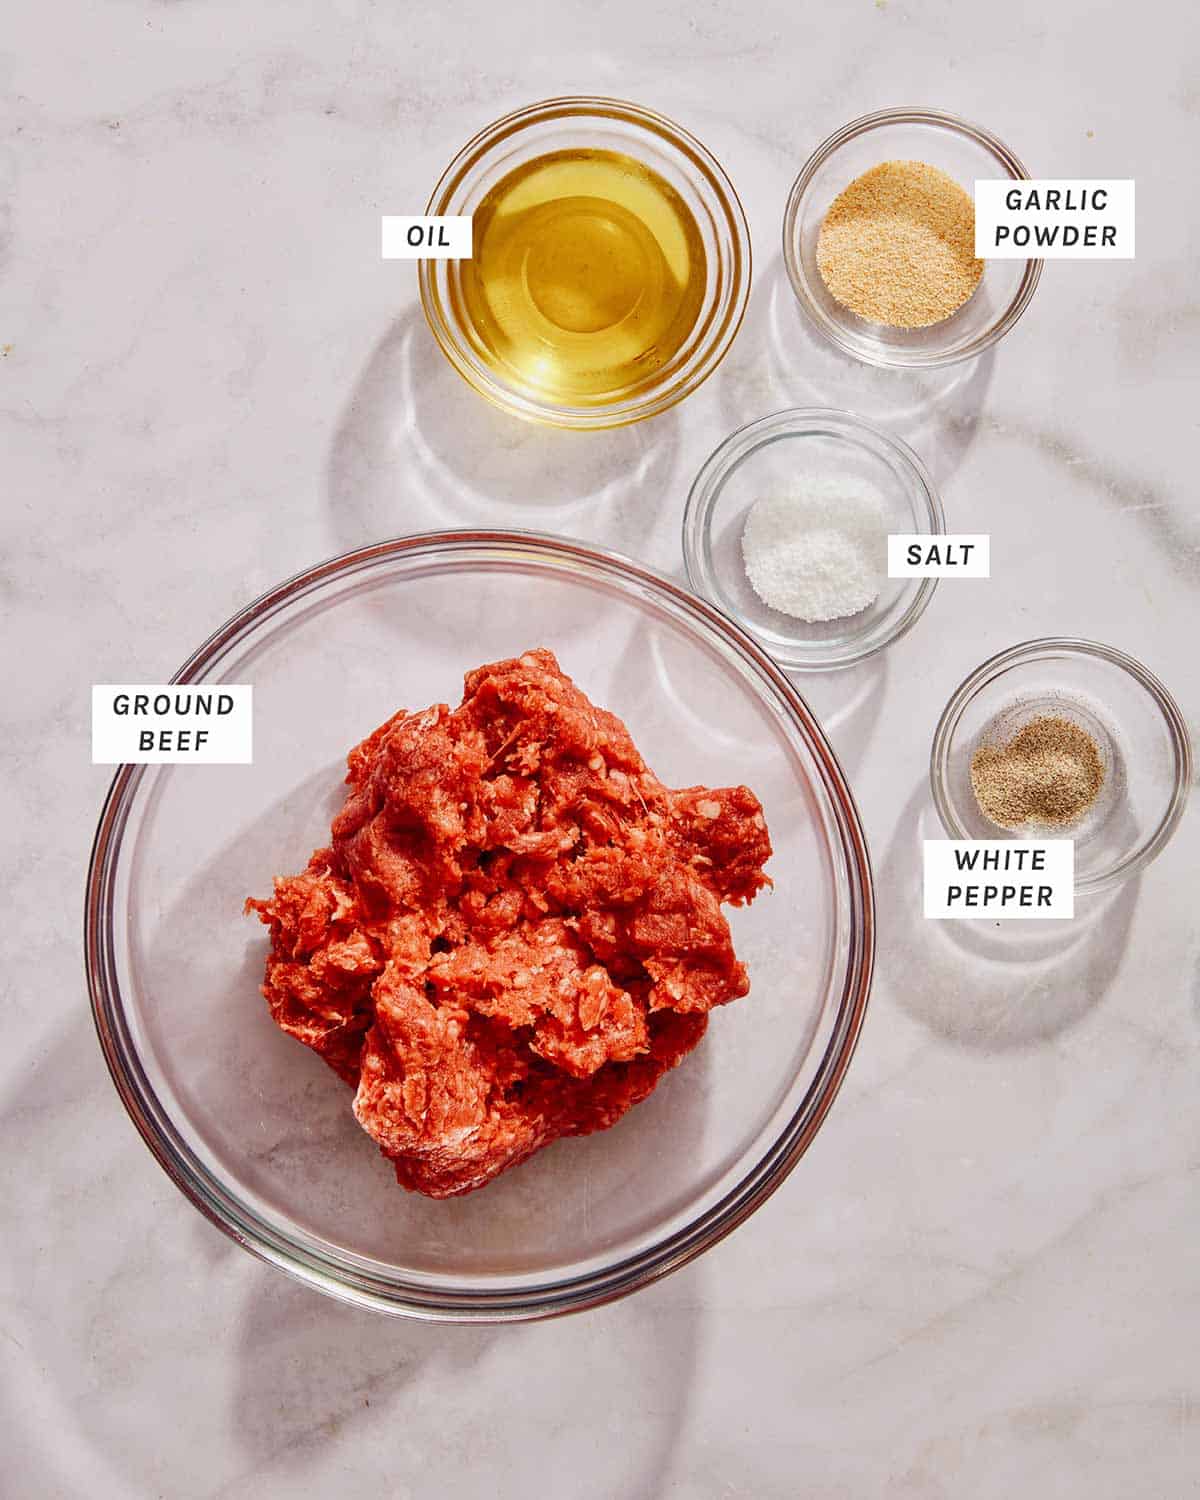
Hamburger Patties Ingredients

Hamburger Patties Process

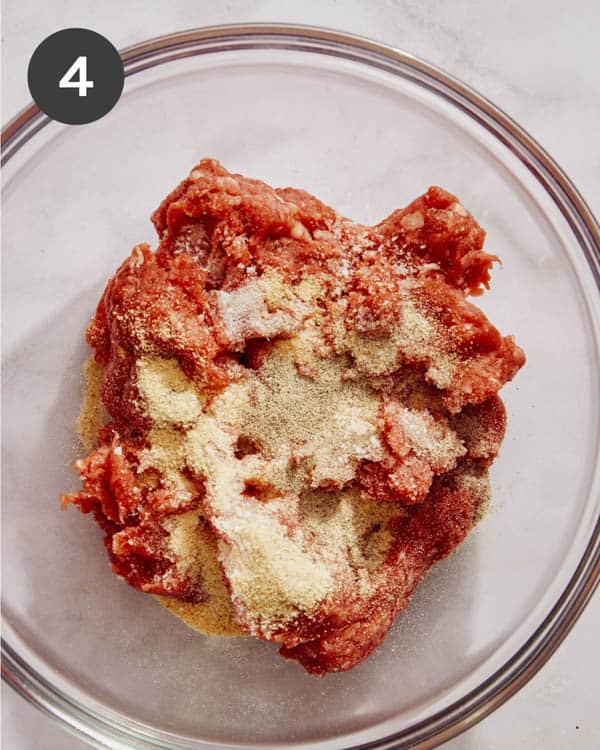
  1. Place ground beef, salt, garlic powder, and black pepper into a mixing bowl.
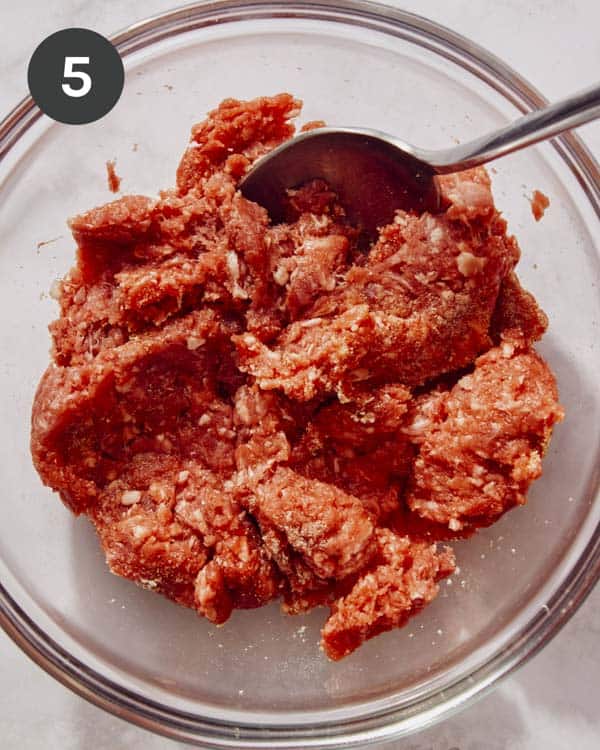
  2. Mix together.
Hamburger meat with spices poured on top in a glass bowl.
Meat being mixed together in a bowl.
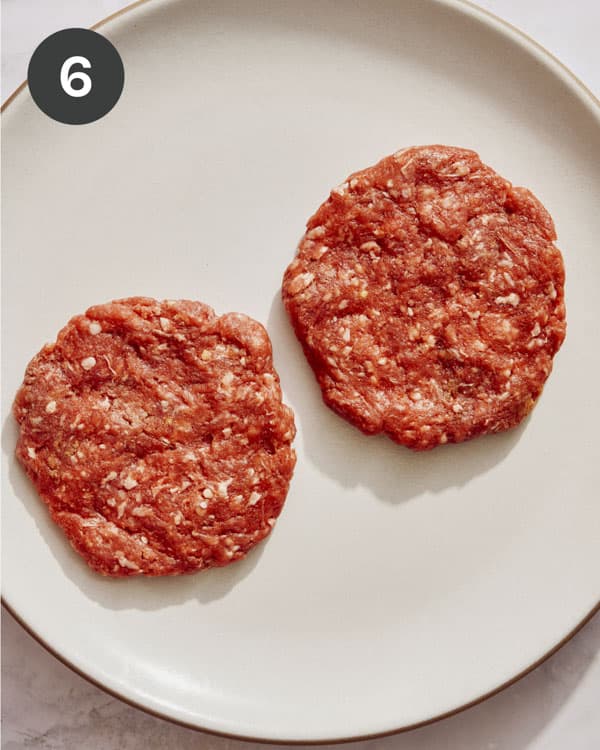
  1. Form 2 even (4 ounce) patties.
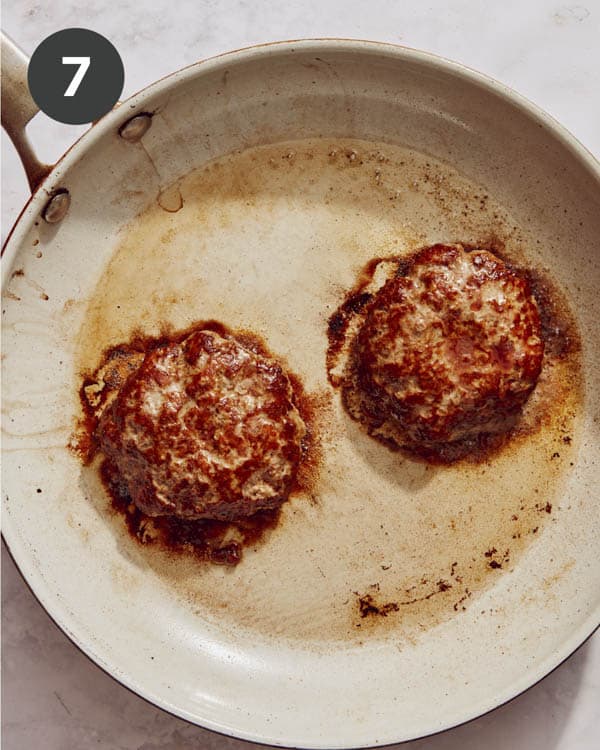
  2. Pour oil into a large skillet and place over medium-high heat. Once skillet is hot, add burger patties and sear for 3 to 4 minutes on each side. Reduce heat to medium and continue to cook burgers until medium doneness, an additional 3 to 4 minutes.
Hamburger patties formed and placed on a plate.
Hamburger patties being cooked in a skillet with oil.

Fried Eggs and Assembly Ingredients

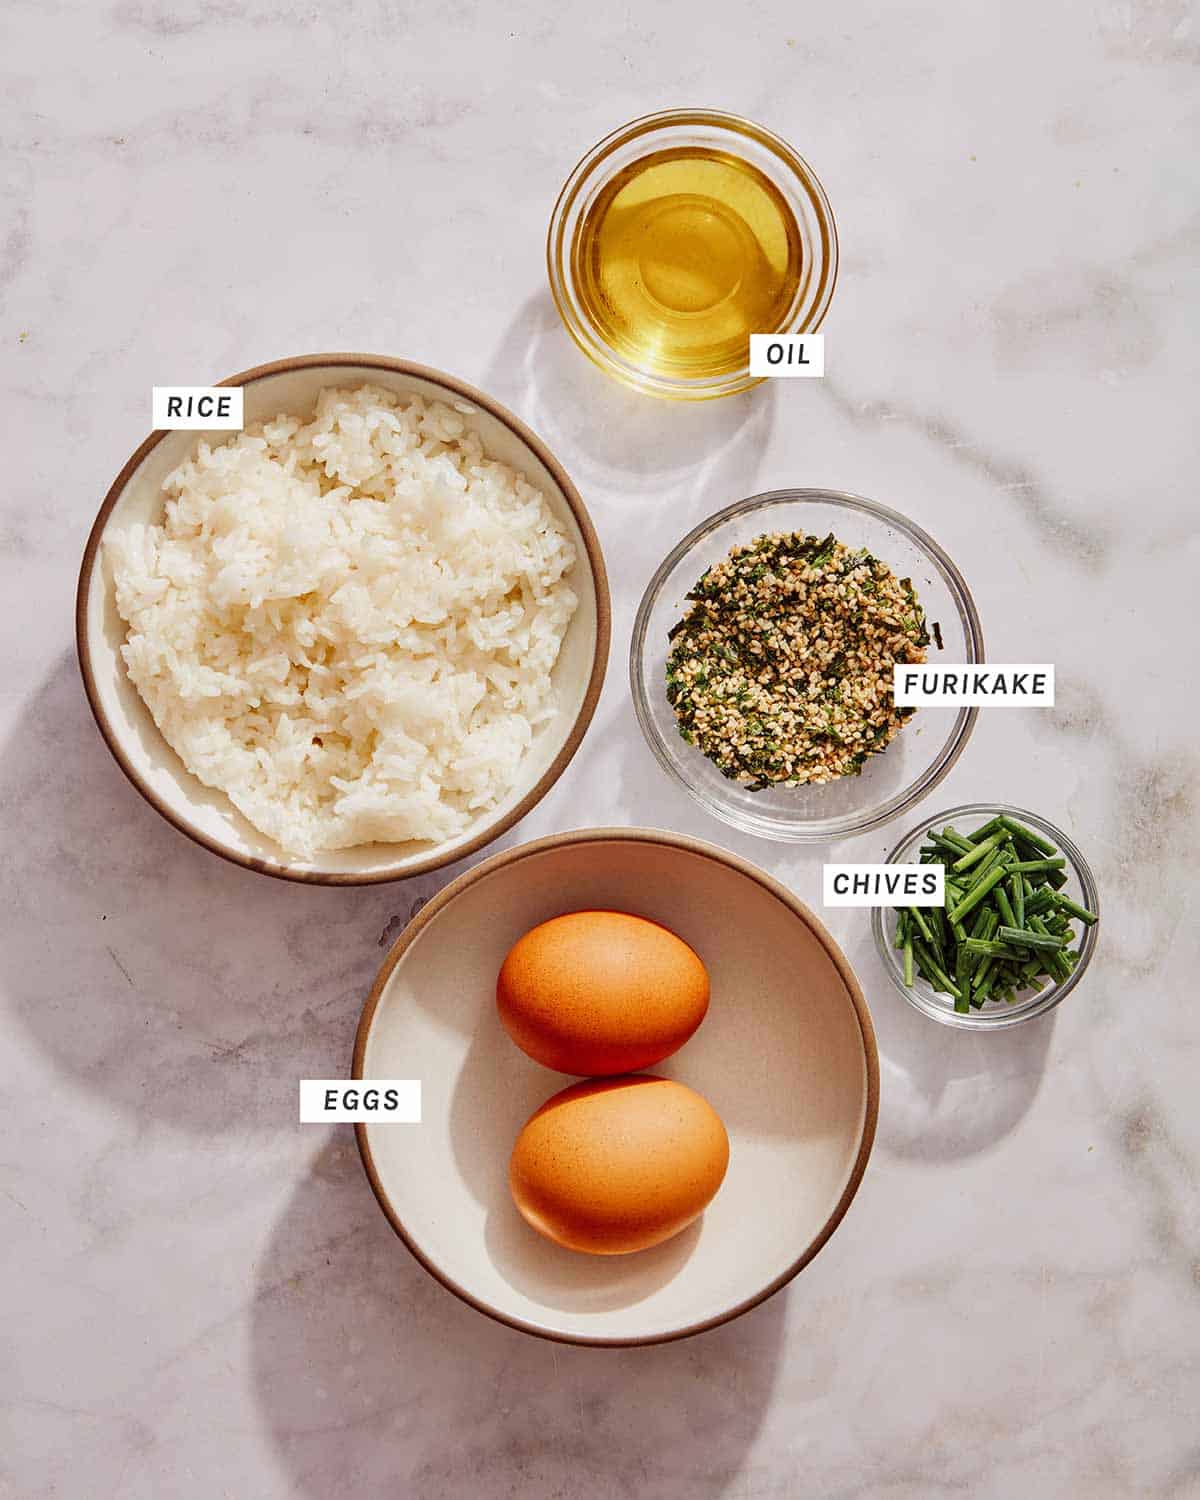
Ingredients to top Loco Moco.

Fried Eggs Process

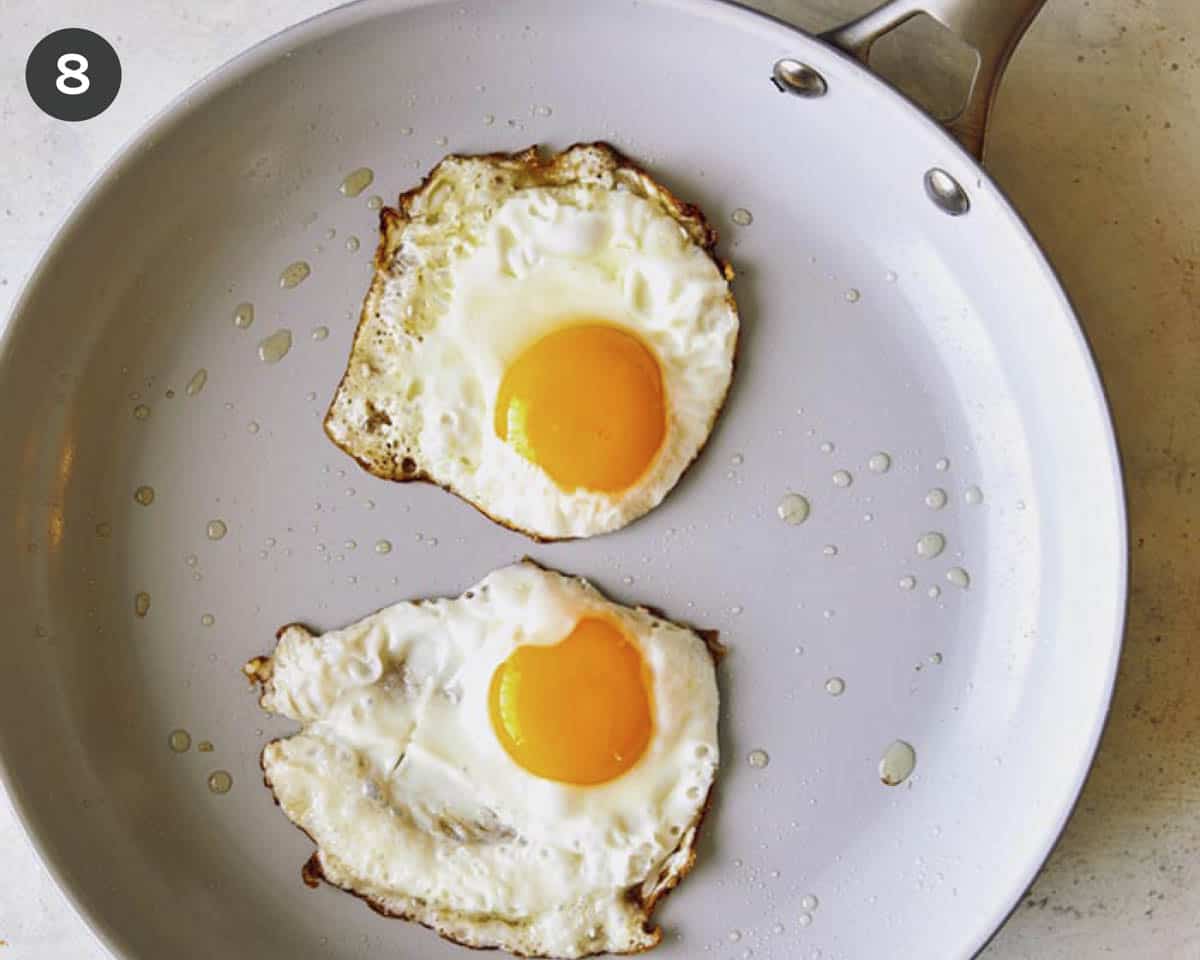
  1. Melt butter in a skillet over medium-high heat. Crack eggs over melted butter. Fry eggs until edges are crisp, whites have set, but the yolk is runny.
Fried eggs in a skillet.

Assembly Process

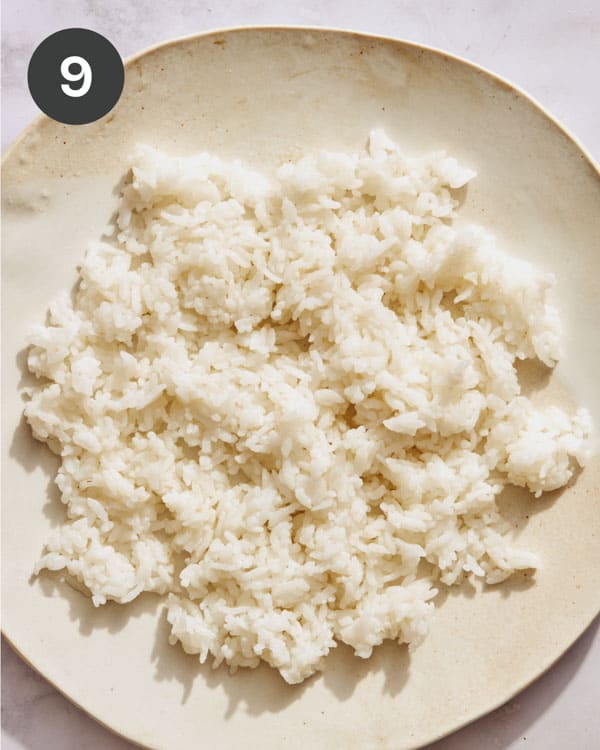
  1. Divide rice between two plates.
  2. Top each with a burger patty, followed by a ladle of gravy.
Rice on a plate, the base for Loco Moco.
A hamburger patty with mushroom gravy on top.
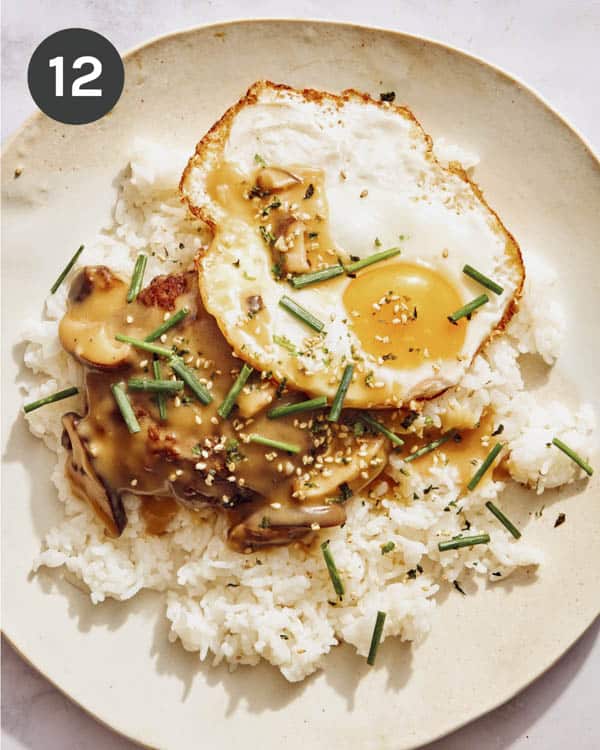
  1. Top with a fried egg, and another ladle of gravy.
  2. Finish each dish with a sprinkle of furikake seasoning and sliced chives. Serve.
Building a plate of Loco Moco with a fried egg on top.
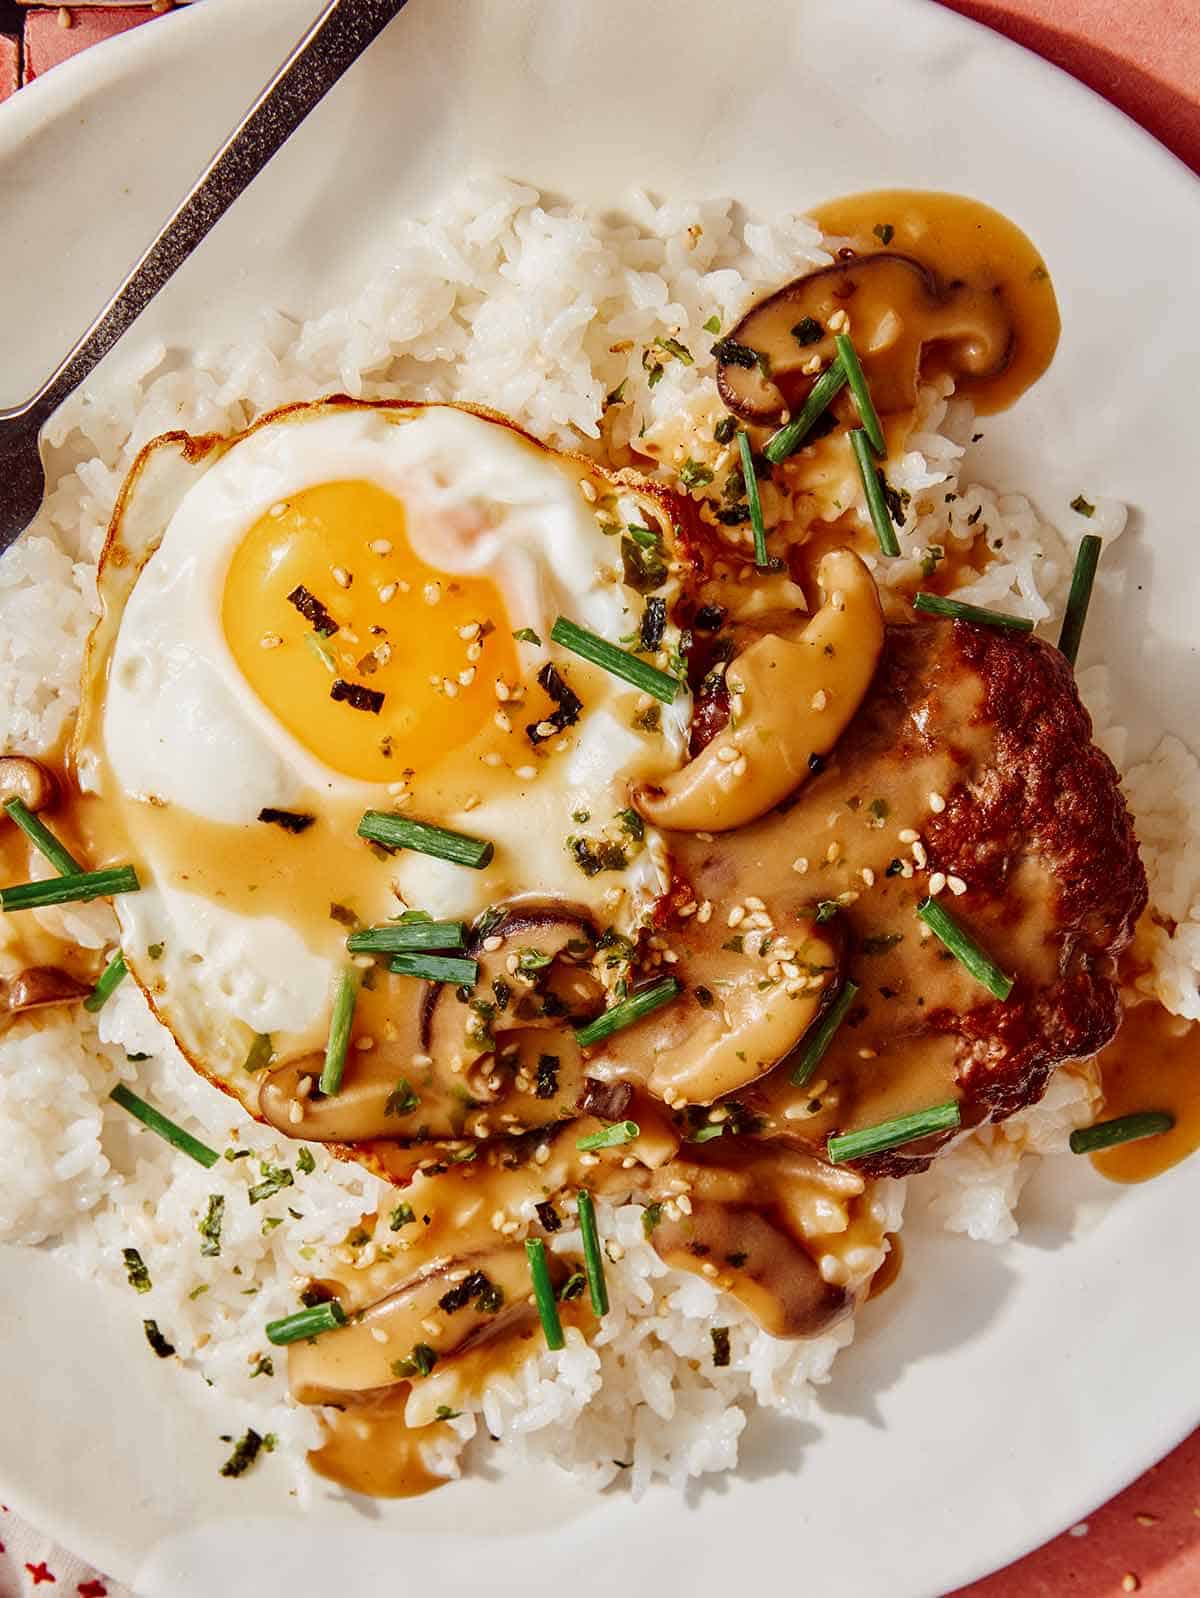
Loco Moco on a plate with chives and furikake on top.

Variations

  • Ground turkey can be used in place of the ground beef to make turkey patties.
  • Slices of spam can be fried up and served in place of the hamburger patties as well!
  • We use shiitake mushrooms for our gravy, but you can use any mushrooms of your choice, based on personal preference!
  • Caramelized onions can take the place of the mushrooms for a caramelized onion gravy.
  • Brown rice can be swapped in for the white rice.
  • Green onions can be used to garnish the dish, instead of chives.
Loco moco served on two plates.

Is This a Traditional Version of the Dish?

Our recipe has all the components of a traditional loco moco (like rice, hamburger patties, sunny-side up eggs, and gravy), but the specifics are a little bit different.

The traditional dish uses short grain white rice, but we use basmati rice, because I just love the fragrance and flavor! The traditional dish also has a much richer brown gravy, primarily consisting of beef broth, beef patty drippings, flour, and a teaspoon or two of soy sauce (and/or a teaspoon Worcestershire sauce). We make a mushroom gravy with chicken stock and no burger patty juices, for a lighter gravy overall.

Loco Moco is traditionally garnished with sliced green onions or no garnish at all. We added a sprinkle of furikake seasoning and sliced chives to finish our dish off!

Tips and Tricks for Success

  • Prep ingredients ahead of time to save on time when cooking. I always try to prep as much ahead of time as I can, when I cook. For this recipe you can slice the mushrooms and mince the garlic up to 2 days ahead of time and form the burger patties up to 12 hours ahead of time.
  • Use beef stock instead of chicken stock if you want a richer, more traditional gravy.
  • Add the egg to a hot pan to get a nice, crispy crust around the edge and to set the whites while maintaining a runny yolk.
Loco moco up close on a plate with a fork next to it.

More Delicious Recipes You Will Love

Loco moco recipe card on two plates.
Print

Loco Moco

Our Loco Moco recipe is a delicious, 'stick to your ribs' Hawaiian dish that can be eaten for breakfast, lunch or dinner. Our recipes uses a simple mushroom gravy for an extra savory, umami touch!
Course Breakfast, brunch, dinner, lunch, Main Course
Cuisine hawaiian
Prep Time 10 minutes
Cook Time 25 minutes
Total Time 35 minutes
Servings 2
Calories 923kcal

Ingredients

mushroom gravy

  • 4 tablespoons unsalted butter divided
  • 2 garlic cloves minced
  • 4 ounces shiitake mushrooms stems removed and thinly sliced
  • 1 2/3 cups chicken stock
  • 3 tablespoons all purpose flour
  • salt and pepper to taste

hamburger patties

  • 8 ounces lean ground beef
  • 1 teaspoons salt
  • 1 teaspoon garlic powder
  • 1/4 teaspoon ground white pepper optional
  • 2 tablespoons neutral oil

fried eggs

  • 2 tablespoon neutral oil
  • 2 large eggs

to serve

  • 1 1/2 cups cooked basmati rice
  • 1 tablespoon furikake seasoning
  • 1 tablespoon sliced chives

Instructions

mushroom gravy

  • Add 2 tablespoons butter to a saucepan and place over medium-high heat. Add garlic and mushrooms and sauté for about 3 minutes or until mushrooms are lightly caramelized. Season with salt and pepper.
  • Melt remaining butter into the mixture. Sprinkle with flour and whisk together.
  • Lower heat to medium and stir in stock. Continue to stir until no lumps remain and gravy has thickened enough to coat the back of a wooden spoon, about 5 minutes. Season with salt and pepper. Cover and set aside.

hamburger patties

  • Place ground beef, salt, garlic powder, and black pepper into a mixing bowl.
  • Mix together.
  • Form 2 even (4 ounce) patties.
  • Pour oil into a large skillet and place over medium-high heat. Once skillet is hot, add burger patties and sear for 3 to 4 minutes on each side. Reduce heat to medium and continue to cook burgers until medium doneness, an additional 3 to 4 minutes.

fried eggs

  • In another skillet, add oil and place over medium-high heat. Once skillet is hot, add eggs and fry for 3 to 4 minutes or until whites have set and edges are crisp. Remove from heat.

assembly

  • Divide rice between two plates and top each with a burger patty. Top with a ladle of gravy, a fried egg, and another ladle of gravy.
  • Finish each dish with a sprinkle of furikake seasoning and sliced chives. Serve.

Notes

Tips and Tricks for Success
  • Prep ingredients ahead of time to save on time when cooking. I always try to prep as much ahead of time as I can, when I cook. For this recipe you can slice the mushrooms and mince the garlic up to 2 days ahead of time and form the burger patties up to 12 hours ahead of time.
  • Use beef stock instead of chicken stock if you want a richer, more traditional gravy.
  • Add the egg to a hot pan to get a nice, crispy crust around the edge and to set the whites while maintaining a runny yolk.

Nutrition

Calories: 923kcal | Carbohydrates: 51g | Protein: 40g | Fat: 63g | Saturated Fat: 21g | Polyunsaturated Fat: 10g | Monounsaturated Fat: 28g | Trans Fat: 1g | Cholesterol: 294mg | Sodium: 3114mg | Potassium: 890mg | Fiber: 3g | Sugar: 2g | Vitamin A: 1003IU | Vitamin C: 2mg | Calcium: 75mg | Iron: 5mg

The post Loco Moco appeared first on Spoon Fork Bacon.

Pumpkin Risotto with Seared Scallops

We’re all about getting in the spirit of pumpkin season with our Pumpkin Risotto with Seared Scallops. Risotto is one of my favorite foods EVER. I love it so much because it’s easy to make, extra comforting and so tasty. I also love that there are hundreds of flavor variations for risotto, like our pumpkin version today. We topped our pumpkin risotto off with some buttery seared scallops and some simple (and highly addictive) candied…

Read More

The post Pumpkin Risotto with Seared Scallops appeared first on Spoon Fork Bacon.

Pumpkin risotto with seared scallops.

We’re all about getting in the spirit of pumpkin season with our Pumpkin Risotto with Seared Scallops. Risotto is one of my favorite foods EVER. I love it so much because it’s easy to make, extra comforting and so tasty. I also love that there are hundreds of flavor variations for risotto, like our pumpkin version today.

We topped our pumpkin risotto off with some buttery seared scallops and some simple (and highly addictive) candied pancetta. The flavor of the scallops and candied pancetta pair really nicely with the mild and creamy flavor of the pumpkin risotto.

How to Make Our Pumpkin Risotto

Ingredients

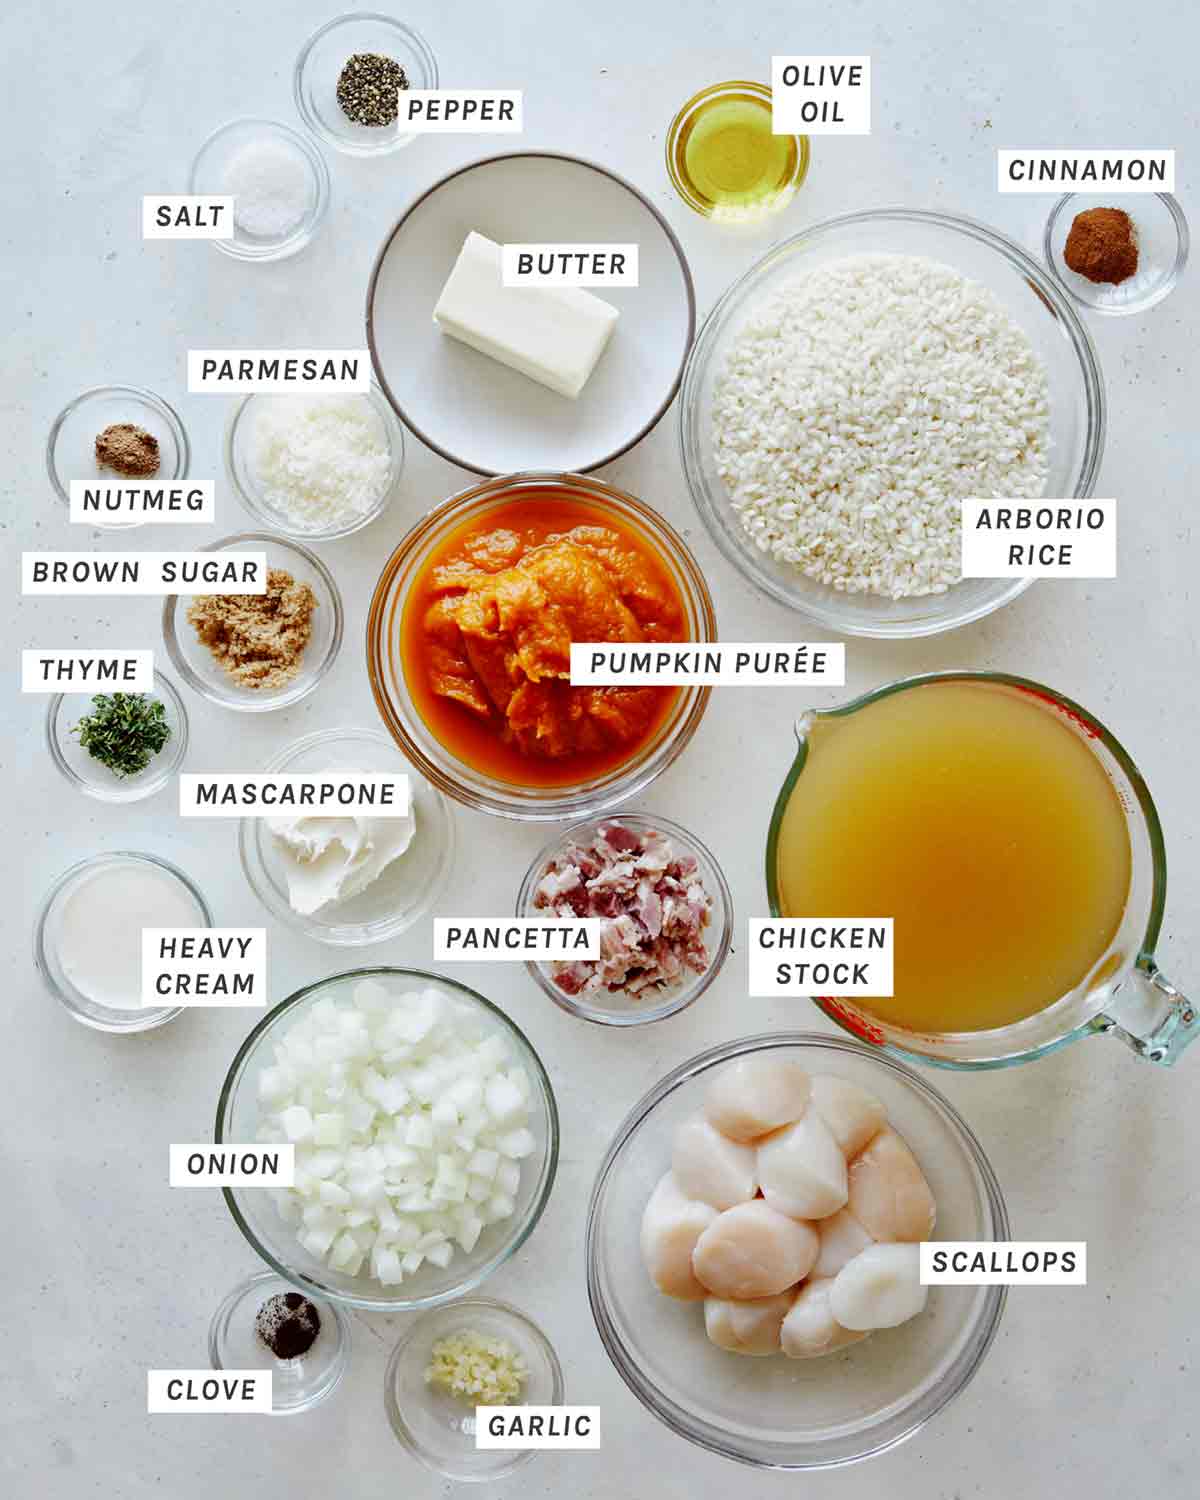
There are a few of components for this recipe, the risotto, seared scallops, and the candied pancetta. All combined, this recipe is incredible.

Ingredients for Pumpkin Risotto with scallops recipe on a kitchen counter.

Process

Pumpkin Risotto

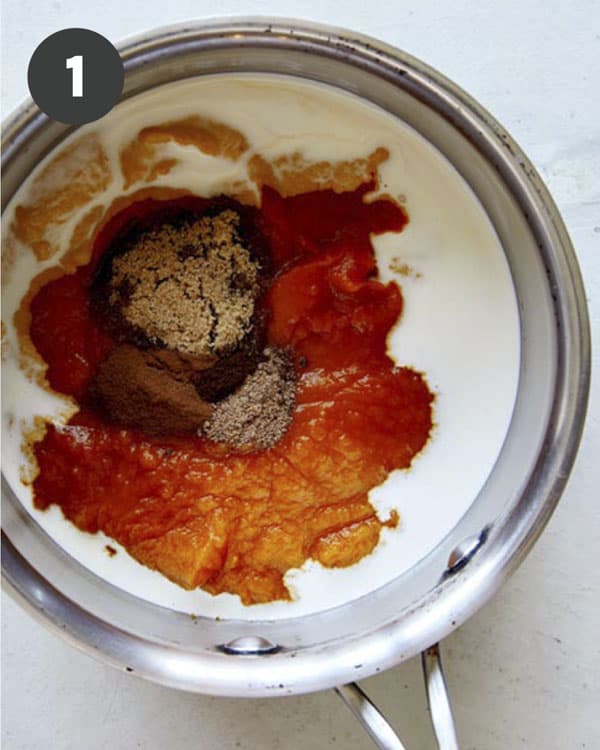
  1. Combine pumpkin purée, heavy cream, light brown sugar, cinnamon, nutmeg, and clove into a small pot.
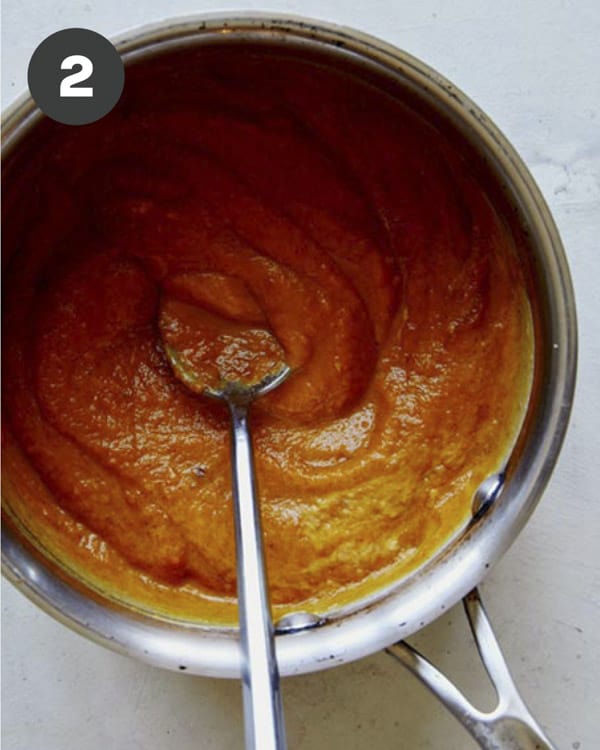
  2. Stir together and bring to a simmer over medium-low heat for about 5 minutes.
Ingredients for pumpkin risotto in a pot.
The base for pumpkin risotto cooking in a pot.
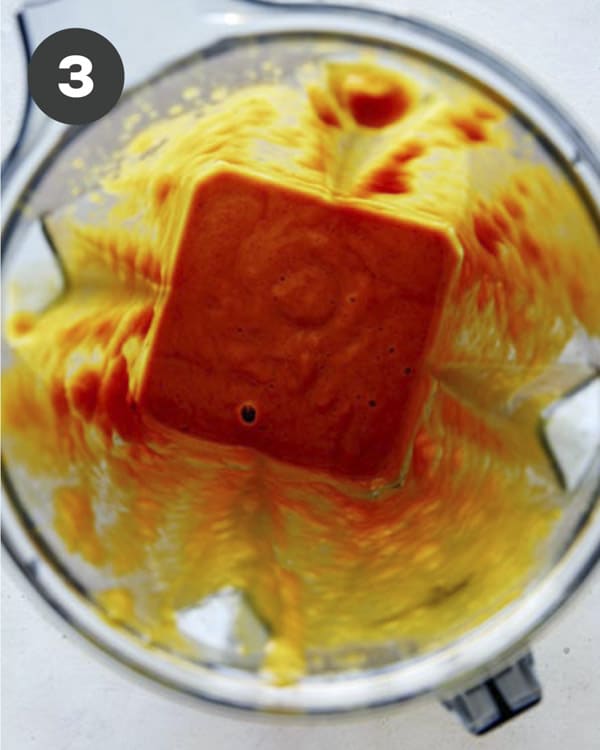
  1. Remove mixture from the heat and pour into a blender with 1/4 cup stock, season with salt and pepper and blend.
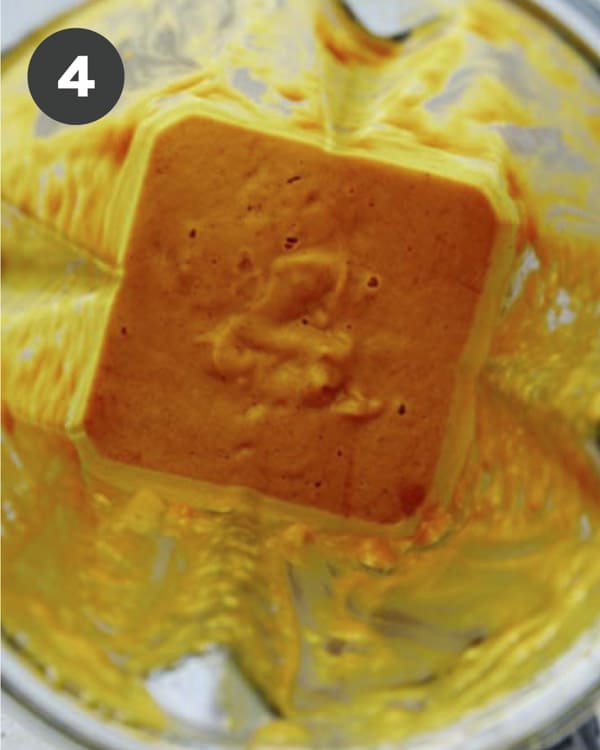
  2. With the motor running, add ¼ cup of butter into the blender, 1 tablespoon at a time. Blend until smooth, about 3 minutes.
Blending pumpkin with stock to make a base for risotto.
Pumpkin risotto base in a blender for pumpkin risotto recipe.
  1. Place a large pan over medium heat and melt the remaining butter and olive oil. Add the onion and garlic and sauté for about 3 minutes.
  2. Add the rice and sauté for 3 to 5 minute or until each grain of rice is coated in oil and there is a white dot in the center of each grain.
Sautéd onion and garlic in a pot.
To make risotto add rice to the onion and garlic.
  1. Begin adding warm broth to the rice, one ladle full at a time, stirring frequently. Each time the liquid evaporates, add another ladle of broth and continue to stir.
  2. Continue to add liquid and stir until the rice is al dente, 20-25 minutes.
Making risotto with stock and rice in a pot.
Add all of the broth into the pot until the rice has soaked it all up.
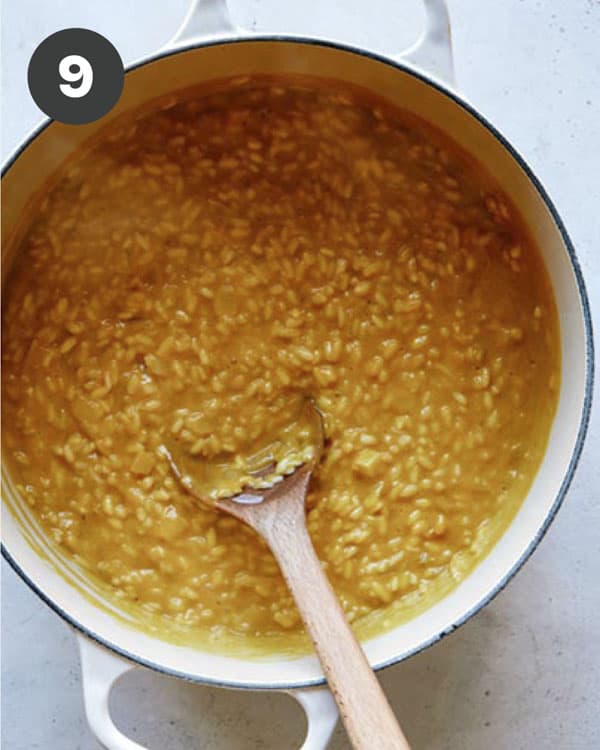
  1. Stir in the pumpkin puree until completely combined.
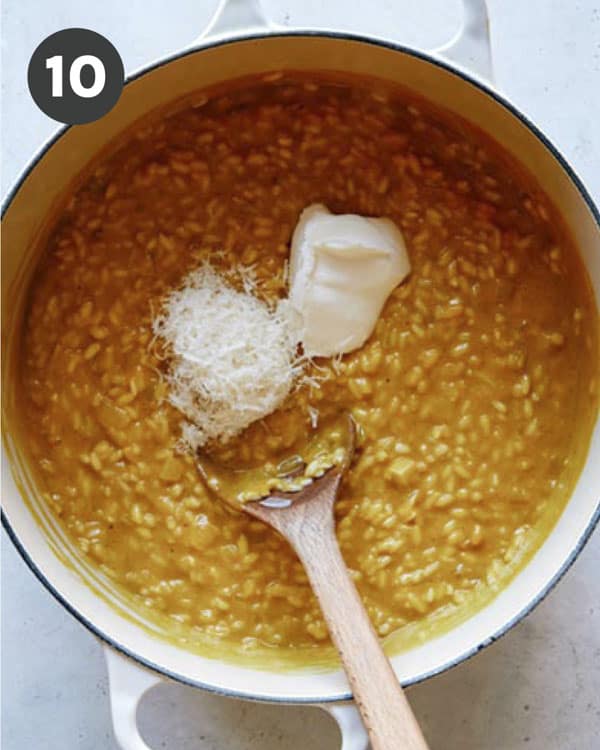
  2. Stir in the mascarpone and parmesan until smooth.
Pumpkin risotto in a pot.
Adding some ingredients to pumpkin risotto.
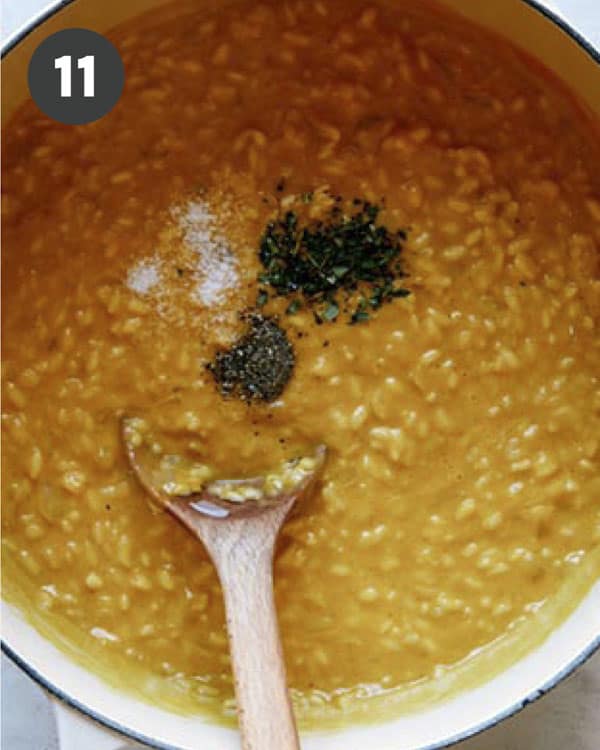
  1. Add thyme and season with salt and pepper.
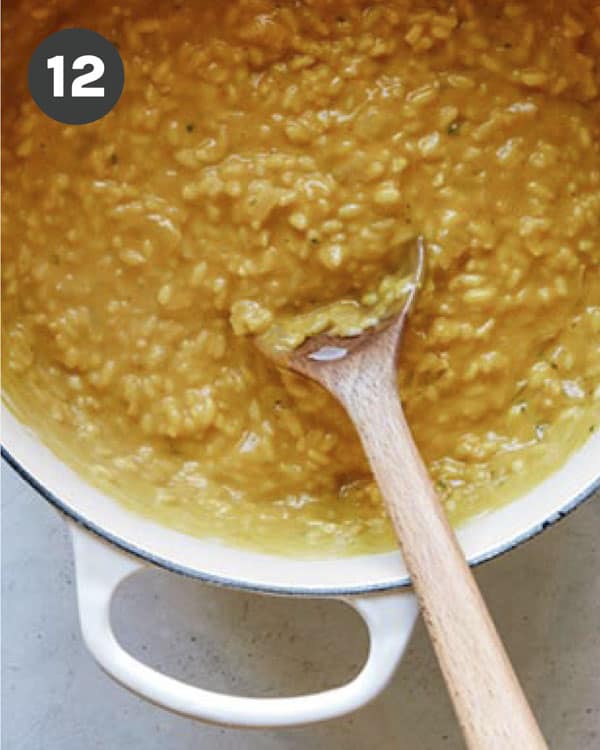
  2. Gently stir together until evenly mixed together.
Seasoning pumpkin risotto in a stock pot.
A finished batch of pumpkin risotto in a bit stock pot.

Seared Scallops

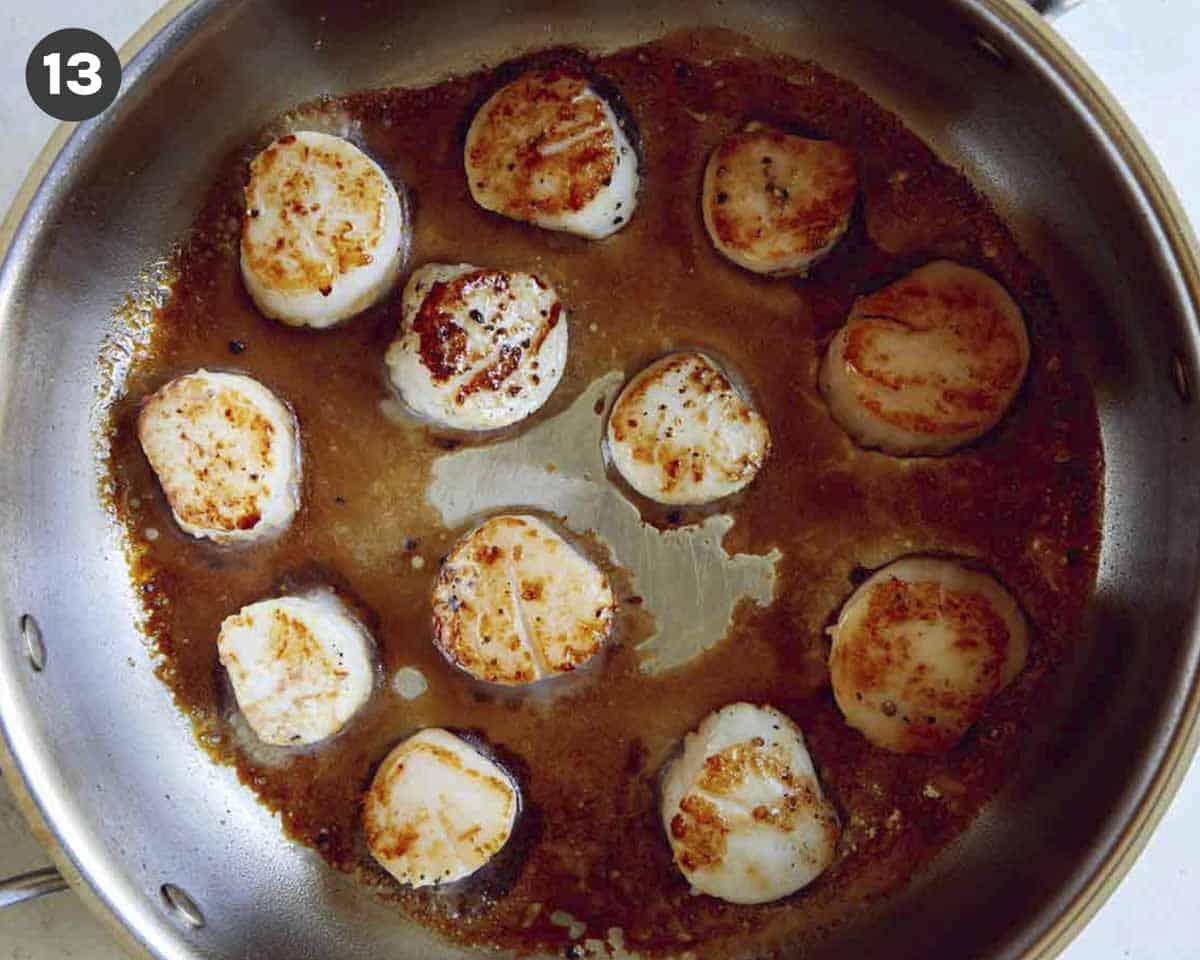
  1. Heat the oil in a heavy bottom skillet, over medium-high heat. Season each scallop with salt and pepper. Sear the scallops, in batches, for 3-4 minutes on each side.
Seared scallops in a skillet.

Candied Pancetta

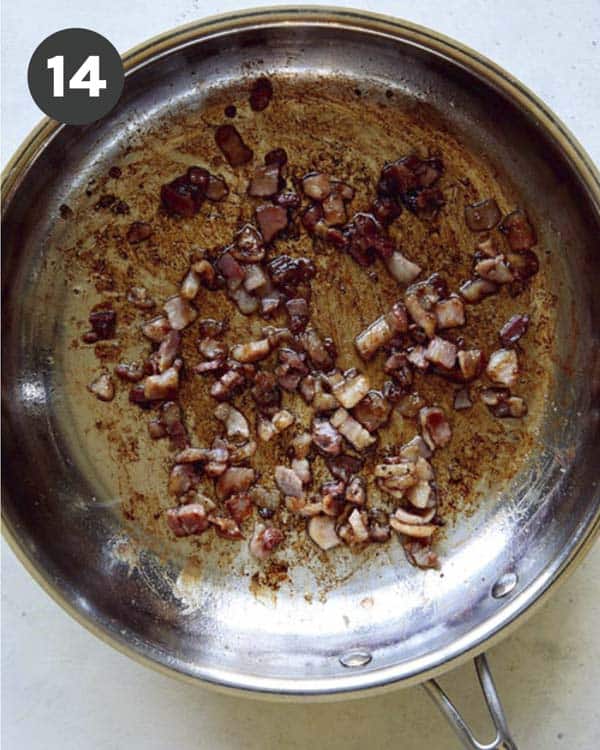
  1. Heat the oil in a skillet, over medium-high heat. Add the pancetta to the pan and cook until the fat has rendered off and the pancetta has become crispy. Drain all but 1 teaspoon of grease from the pan and return to the stove, over medium heat. Sprinkle sugar over the pancetta and stir until the sugar melts and had coated the pancetta.
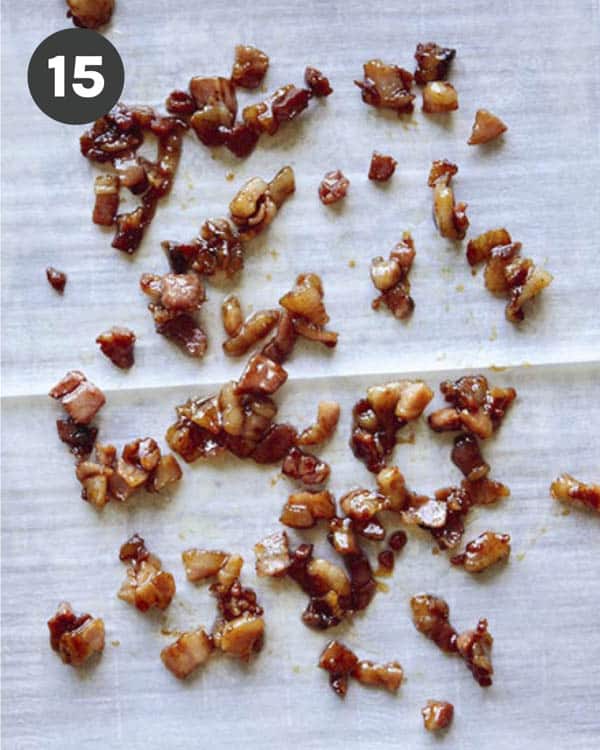
  2. Spread the candied confetti-pancetta onto a sheet pan lined with parchment and allow to cool and slightly harden.
Pancetta cooking in a skillet.
Candied pancetta hardening on a baking sheet.

Assembly

  1. Scoop the pumpkin risotto into bowls then top with freshly seared scallops, a sprinkle of candied pancetta and some fresh thyme.
A close up of a bowl of pumpkin risotto with seared scallops and a spoon.

Tools You Will Need

What Kind of Rice is Used to Make Risotto?

Arborio rice, a starchy, short-grain Italian rice is the most commonly known, widely used and available rice used for risotto. Carnaroli and vialone nano are two other varieties of short-grain Italian rice used to make risotto.

Make Ahead Instructions for Pumpkin Risotto and Candied Pancetta

Make Ahead Pumpkin Risotto

The risotto can be made and stored in an airtight container, in the refrigerator, for up to 3 days.

To reheat, melt a couple tablespoons but into a pot over medium-low heat. Add risotto. Stir in 2 tablespoons stock (per cup of risotto) to risotto to loosen. Cook until risotto has heated through completely. Stir in 1/2 tablespoon mascarpone (per cup of risotto) and adjust salt and pepper as needed.

Make Ahead Candied Pancetta

Candied pancetta can be stored in an airtight container, in the refrigerator or up to 3 days. When ready to use, place pancetta in a skillet over medium-low heat and cook until heated through.

Variations for Our Pumpkin Risotto Recipe

  • The pumpkin puree can be replaced with equal amounts butternut squash puree.
  • The spices in the pumpkin puree can be increased for a deeper pumpkin spice flavor or decreased for a more overall pure pumpkin flavor.
  • The seared scallops can be replaced by sautéed shrimp.
  • Leftover roast chicken makes a great substitution for the scallops, for a non-seafood alternative.
  • Seared shiitake or trumpet mushrooms make a delicious vegetarian option from scallops as well.
  • The candied pancetta can also be replaced with chopped candied pecans, but a couple sprinkles of salt should be added so you don’t miss out on the salty contrast the pancetta adds to the candied coating.
A close up shot of Pumpkin Risotto with seared scallops.

More Delicious Savory Pumpkin Recipes You Will Love

Pumpkin risotto with scallops and pancetta in a bowl.
Print

Pumpkin Risotto with Seared Scallops

A cozy and delicious recipe for creamy Pumpkin Risotto with Seared Scallops! This meal is perfect for a special night in or a fun, indulgent weekend meal. It's a fall favorite for sure!
Course dinner, Main Course
Cuisine Italian
Prep Time 20 minutes
Cook Time 50 minutes
Total Time 1 hour 10 minutes
Servings 4
Calories 979kcal

Ingredients

pumpkin risotto

  • 15 ounces canned pumpkin purée
  • 2 tablespoons heavy cream
  • 2 tablespoons light brown sugar
  • 3/4 teaspoon ground cinnamon
  • 1/4 teaspoon ground nutmeg
  • pinch ground clove
  • 1/4 cup chicken stock (vegetable stock is fine)
  • 6 tablespoons (3/4 stick) unsalted butter divided
  • 4 1/2 cups low sodium chicken broth
  • 2 tablespoons extra virgin olive oil
  • 1/2 diced yellow onion
  • 1 minced garlic clove
  • 2 cups Arborio rice
  • 1/4 cup softened mascarpone cheese
  • 1/4 cup grated parmesan cheese
  • 1 tablespoon minced thyme
  • salt and pepper to taste

seared scallops

  • 2 tablespoons extra virgin olive oil
  • 12 large scallops cleaned and beards removed
  • salt and pepper to taste

confetti candied pancetta

  • 1/2 teaspoon extra virgin olive oil
  • 2 ounces very finely diced pancetta
  • 2 tablespoons light brown sugar

Instructions

risotto

  • Stir together the first six ingredients for the risotto into a small pot and bring to a simmer.
  • Simmer for about 5 minutes. Remove mixture from the heat and pour into a blender with the broth, season with salt and pepper and blend.
  • With the motor running, add ¼ cup of butter into the blender, 1 tablespoon at a time. Blend until smooth, about 3 minutes.
  • Pour the mixture into a bowl and set aside until ready to use.
  • Pour the chicken broth into a medium pot and warm over low heat.
  • Place a large pan over medium heat and melt the remaining butter and olive oil.
  • Add the onion and garlic and sauté for about 3 minutes.
  • Add the rice and sauté for 3 to 5 minute or until each grain of rice is coated in oil and there is a white dot in the center of each grain.
  • Begin adding the warm broth to the rice, one ladle full at a time, stirring frequently.
  • Each time the liquid evaporates, add another ladle of broth and continue to stir.
  • Continue to add liquid and stir until the rice is al dente, 20-25 minutes.
  • Stir in the pumpkin puree until completely combined.
  • Stir in the mascarpone and parmesan until smooth. Fold in the thyme and season with salt and pepper.

scallops

  • Heat the oil in a heavy bottom skillet, over medium-high heat.
  • Season each scallop with salt and pepper.
  • Sear the scallops, in batches, for 3-4 minutes on each side.

candied pancetta

  • Heat the oil in a heavy bottom skillet, over medium-high heat.
  • Add the pancetta to the pan and cook until the fat has rendered off and the pancetta has become crispy, 3 to 4 minutes.
  • Drain all but 2 teaspoons of grease from the pan and return to the stove, over medium heat.
  • Sprinkle sugar over the pancetta and stir until the sugar melts and had coated the pancetta, about 2 minutes.
  • Spread the candied confetti-pancetta onto a sheet pan lined with parchment and allow to cool and slightly harden.

assemble and serve

  • Fill 4 bowls with risotto and top each with three scallops; finish each bowl with a sprinkle of candied pancetta. Serve immediately.

Notes

Variations for Our Pumpkin Risotto Recipe
  • The pumpkin puree can be replaced with equal amounts butternut squash puree.
  • The spices in the pumpkin puree can be increased for a deeper pumpkin spice flavor or decreased for a more overall pure pumpkin flavor.
  • The seared scallops can be replaced by sautéed shrimp.
  • Leftover roast chicken makes a great substitution for the scallops, for a non-seafood alternative.
  • Seared shiitake or trumpet mushrooms make a delicious vegetarian option from scallops as well.
  • The candied pancetta can also be replaced with chopped candied pecans, but a couple sprinkles of salt should be added so you don’t miss out on the salty contrast the pancetta adds to the candied coating.

Nutrition

Calories: 979kcal | Carbohydrates: 108g | Protein: 24g | Fat: 51g | Saturated Fat: 22g | Polyunsaturated Fat: 4g | Monounsaturated Fat: 20g | Trans Fat: 1g | Cholesterol: 93mg | Sodium: 2231mg | Potassium: 732mg | Fiber: 7g | Sugar: 16g | Vitamin A: 17522IU | Vitamin C: 9mg | Calcium: 157mg | Iron: 7mg

The post Pumpkin Risotto with Seared Scallops appeared first on Spoon Fork Bacon.

Carbonara Recipe

Our authentic carbonara recipe is rich, indulgent, and surprisingly simple, making it one of our favorite pasta recipes. If you’ve never tried making your own carbonara at home, this is the perfect recipe for you. Our carbonara is made with just four ingredients–pasta, guanciale, eggs, and Pecorino Romano cheese. The result is so rich and creamy that you’d never guess there’s no cream in the entire recipe! Egg yolks add extra richness that is cooked…

Read More

The post Carbonara Recipe appeared first on Spoon Fork Bacon.

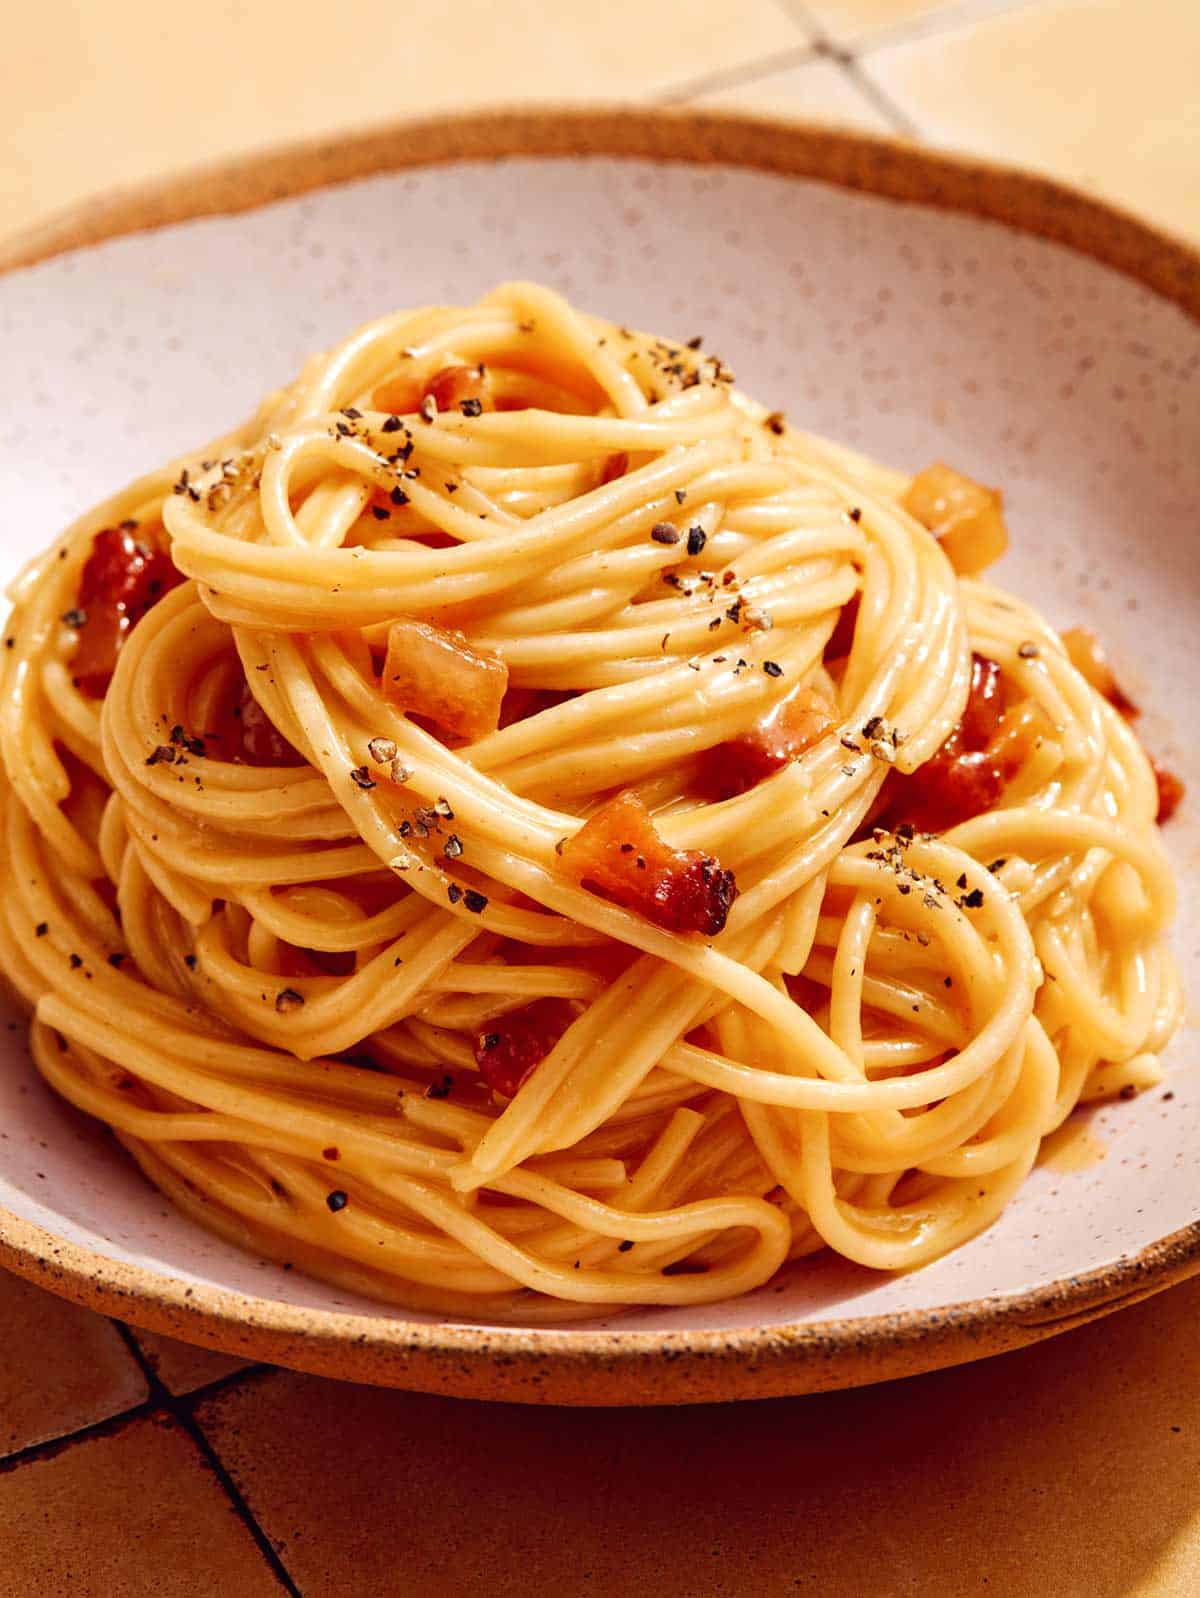
Basic carbonara recipe in a bowl.

Our authentic carbonara recipe is rich, indulgent, and surprisingly simple, making it one of our favorite pasta recipes. If you’ve never tried making your own carbonara at home, this is the perfect recipe for you. Our carbonara is made with just four ingredients–pasta, guanciale, eggs, and Pecorino Romano cheese. The result is so rich and creamy that you’d never guess there’s no cream in the entire recipe!

Egg yolks add extra richness that is cooked by the heat of the pasta, creating an authentic Italian sauce with no cream needed. And while it’s traditionally made with guanciale and Pecorino Romano, you can always substitute them with more readily available options if needed.

This recipe takes just 20 minutes from start to finish, leaving you plenty of time to try homemade pasta (or keep it simple with dried spaghetti noodles!). With a simple side salad and a loaf of crusty garlic bread, you’ll have an authentic Italian dish that rivals any restaurant, any night of the week!

What is Carbonara?

Carbonara is a classic Italian recipe that holds a spot as one of the four classic Roman pasta dishes, along with amatriciana, cacio e pepe, and alla Gricia.

Carbonara combines hot al dente spaghetti pasta with raw eggs, Pecorino Romano cheese, and a splash of hot pasta water to create a luscious sauce, coating every noodle. It’s then tossed with diced guanciale for a burst of salty, savory flavor.

How to Make Carbonara

Ingredients

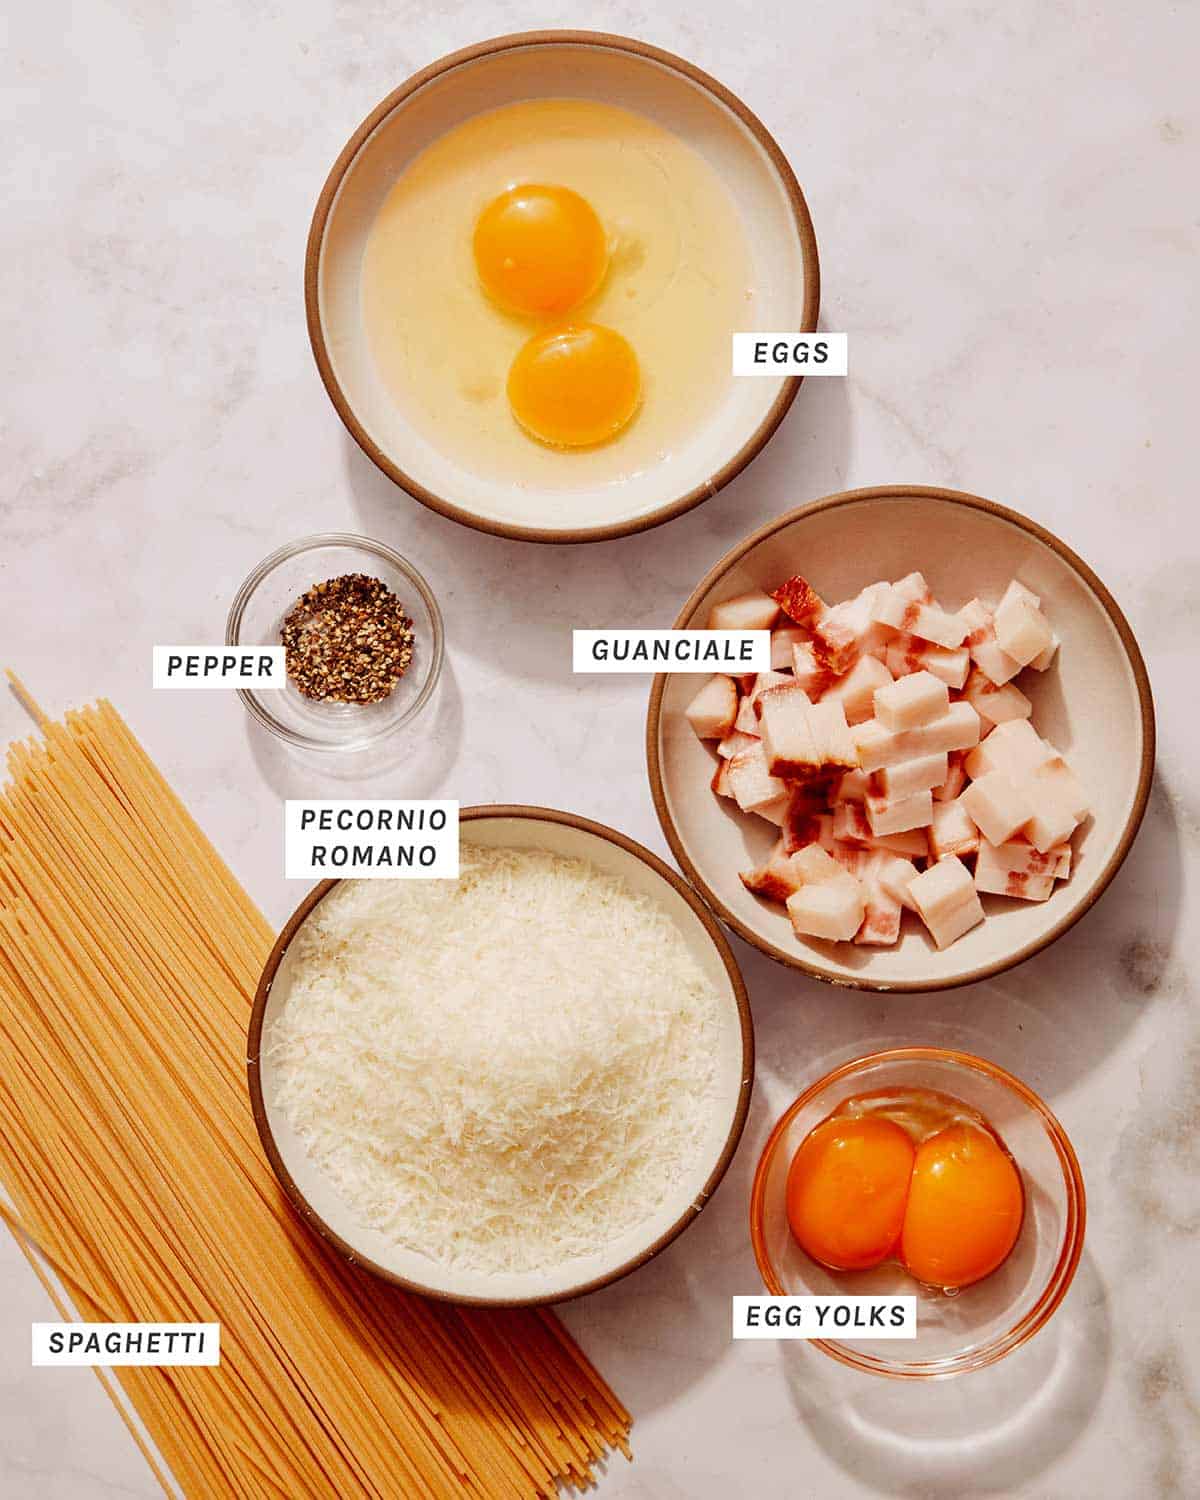
Basic carbonara recipe ingredients on a kitchen counter.

Process

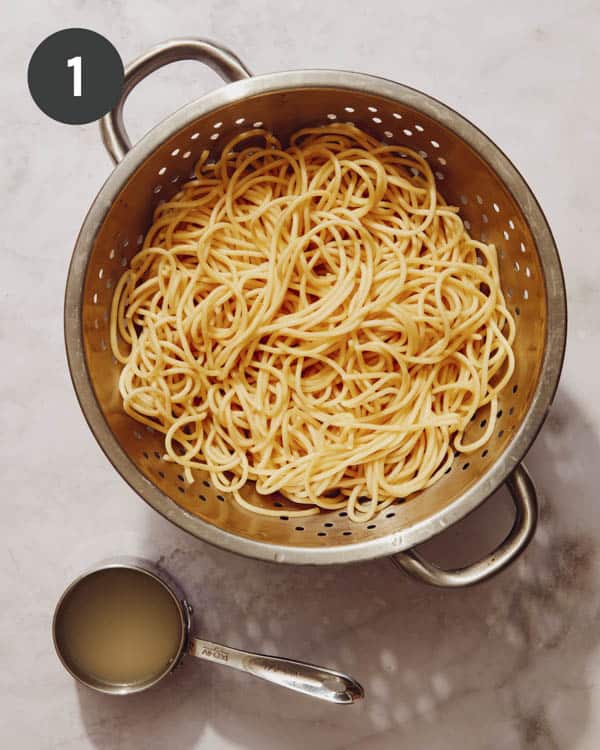
  1. Fill a large pot with water and bring to a boil. Add pasta, season well with salt and stir. Cook pasta until al dente, 7 to 8 minutes. Drain, reserving 1/2 cup pasta water.
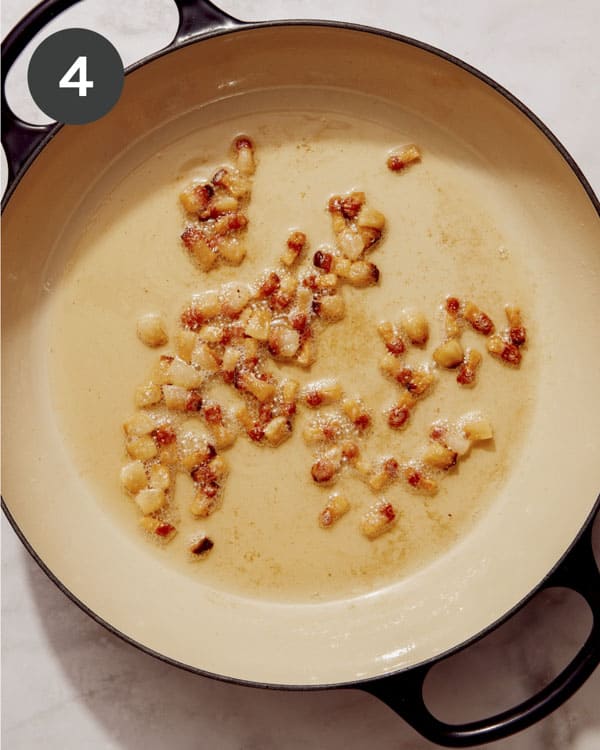
  2. Place diced guanciale in a cold pan and place over medium heat. As the fat begins to render, stir bits around until evenly browned and cooked.
Pasta drained with some pasta reserved on the side.
Ingredients for carbonara pasta in a bowl ready to be mixed together.
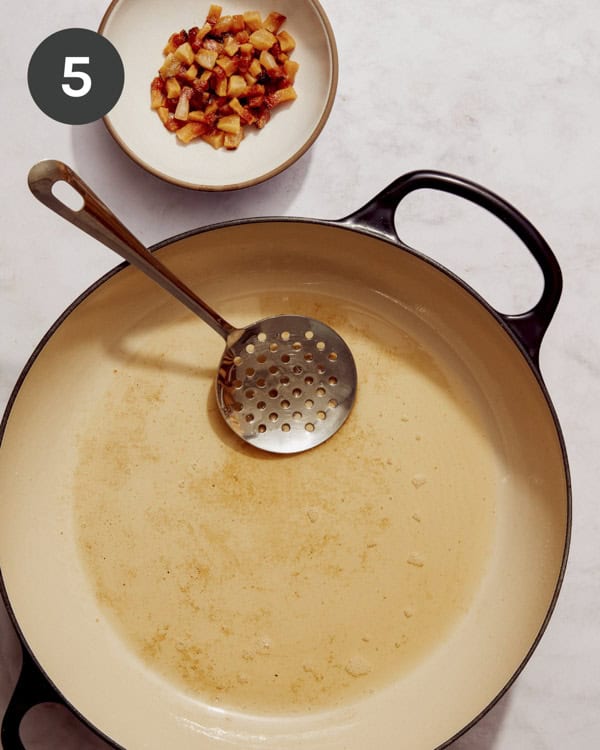
  1. Using a slotted spoon, remove the guanciale, reserving the grease.
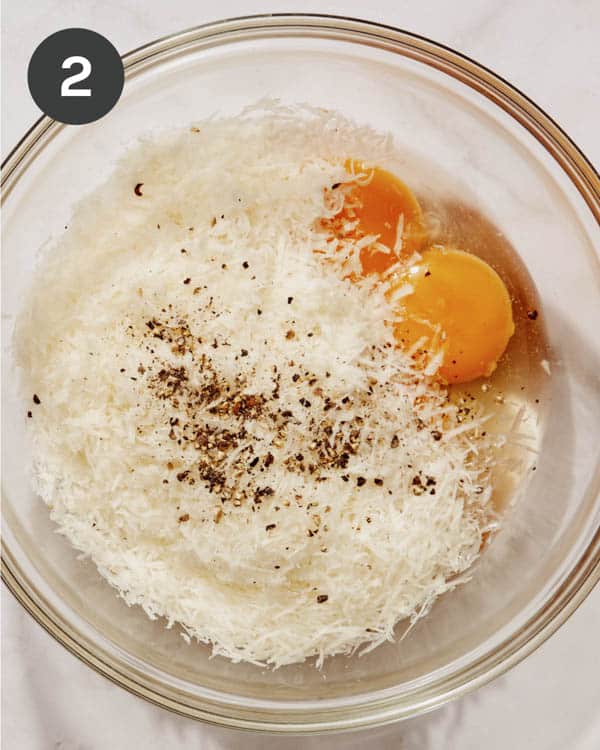
  2. In a small mixing bowl, combine eggs, egg yolks, grated cheese, and a generous pinch of black pepper until it is fully combined.
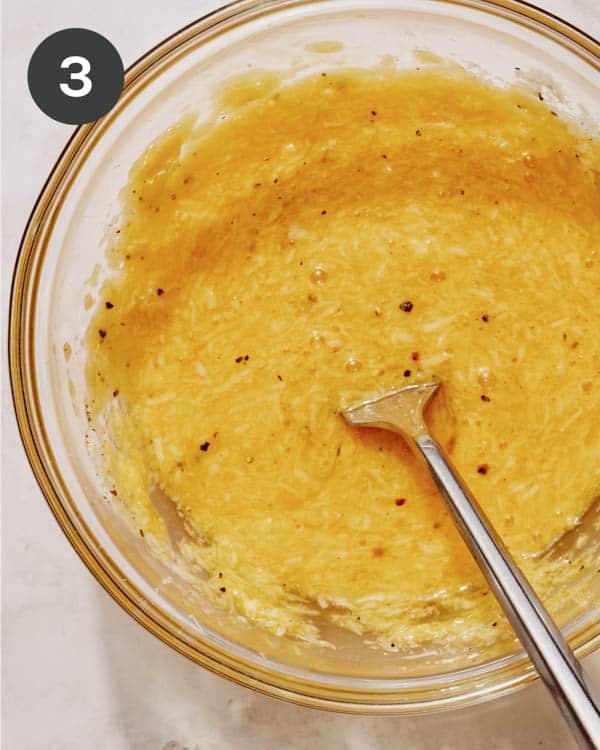
Egg yolk and cheese mixture in a bowl mixed together.
Guanciale being cooked in a skillet.
  1. Whisk together.
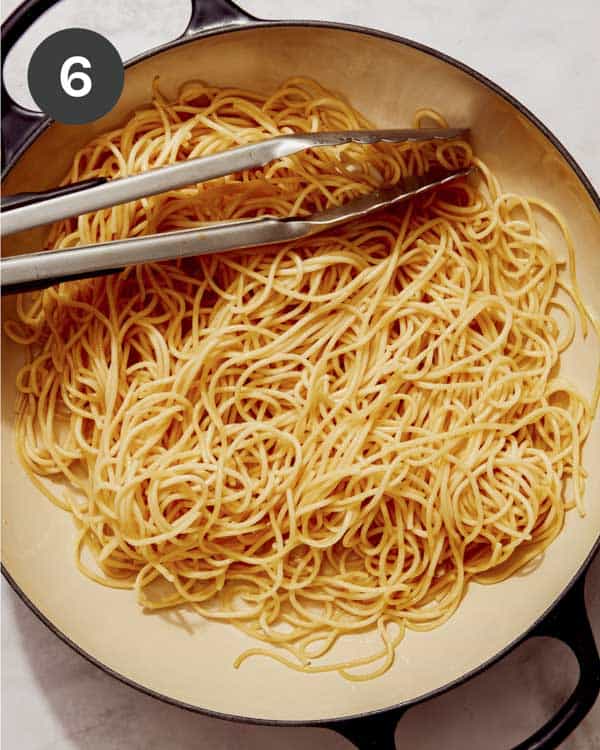
  2. Place pan with grease over medium-high heat and add pasta. Toss to evenly coat.
Guanciale being take out of a skillet and set aside.
Pasta being tossed in pork fat in a skillet.
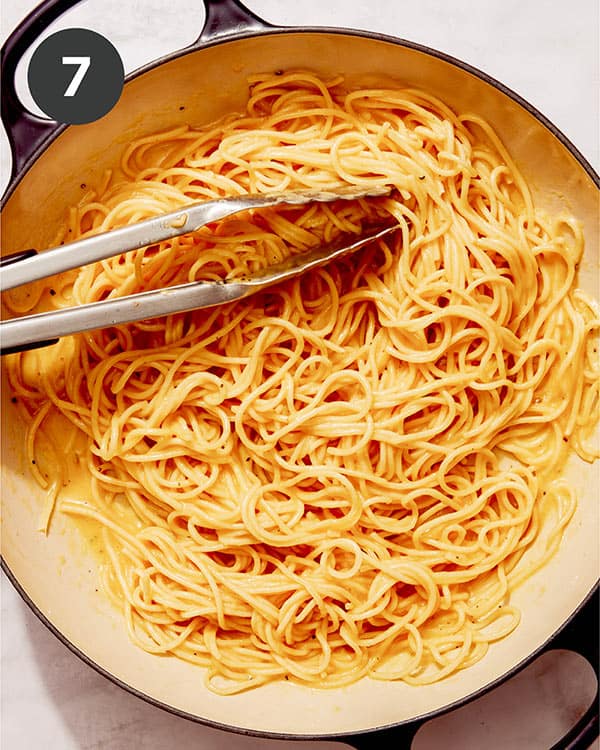
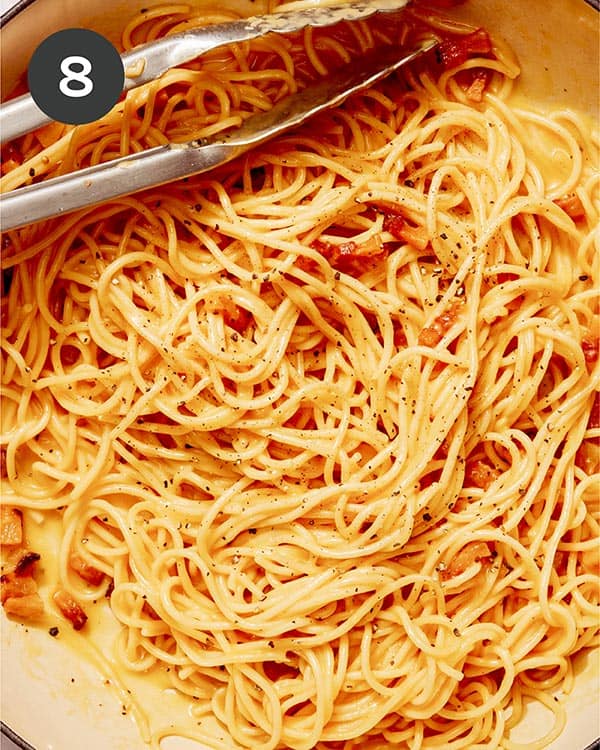
  1. Remove pasta from heat and pour cheesy mixture over pasta and toss together until fully incorporated and sauce begins to form and thicken with the residual heat, 2 to 3 minutes. Stir in 1-2 tablespoons of pasta water at a time, only as needed, to make the sauce more fluid.
  2. Toss guanciale into pasta until evenly incorporated.
Pasta being tossed with a carbonara mixture in a skillet.
Carbonara in a skillet being tossed.
  1. Divide pasta between bowls and top each serving with more freshly ground black pepper and freshly grated Pecorino Romano.
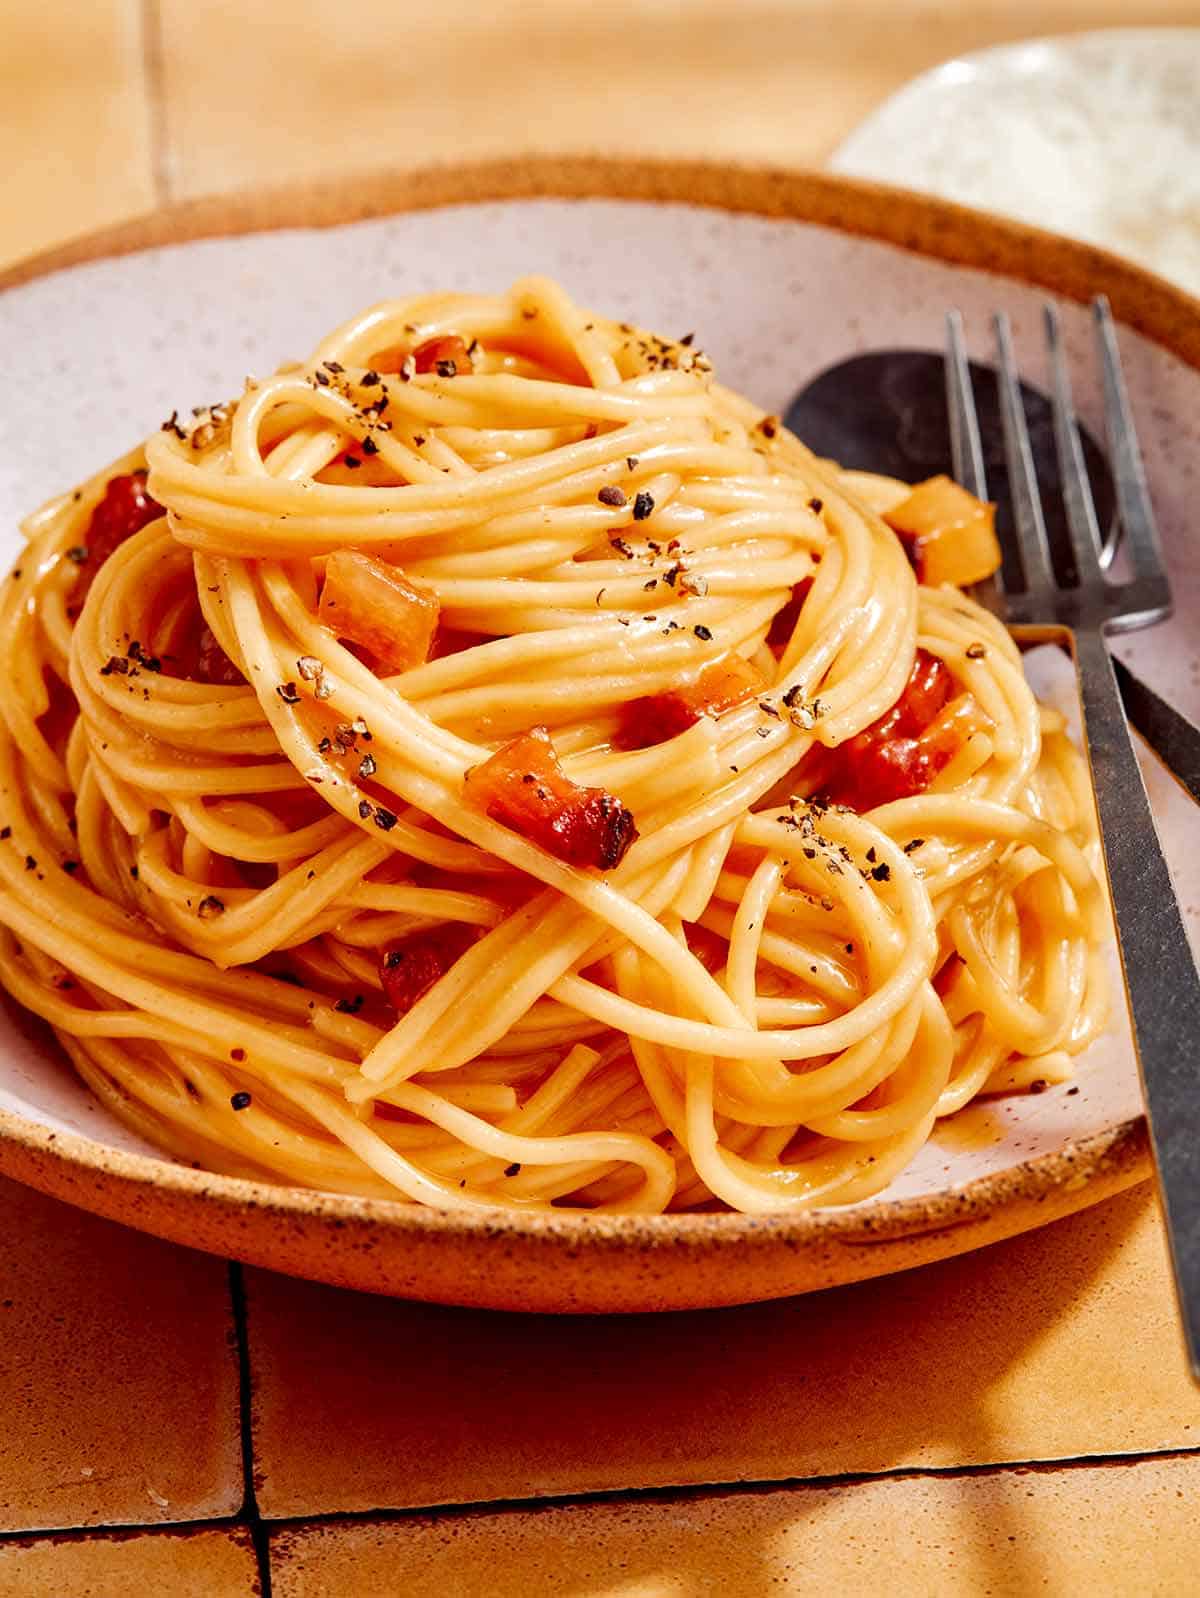
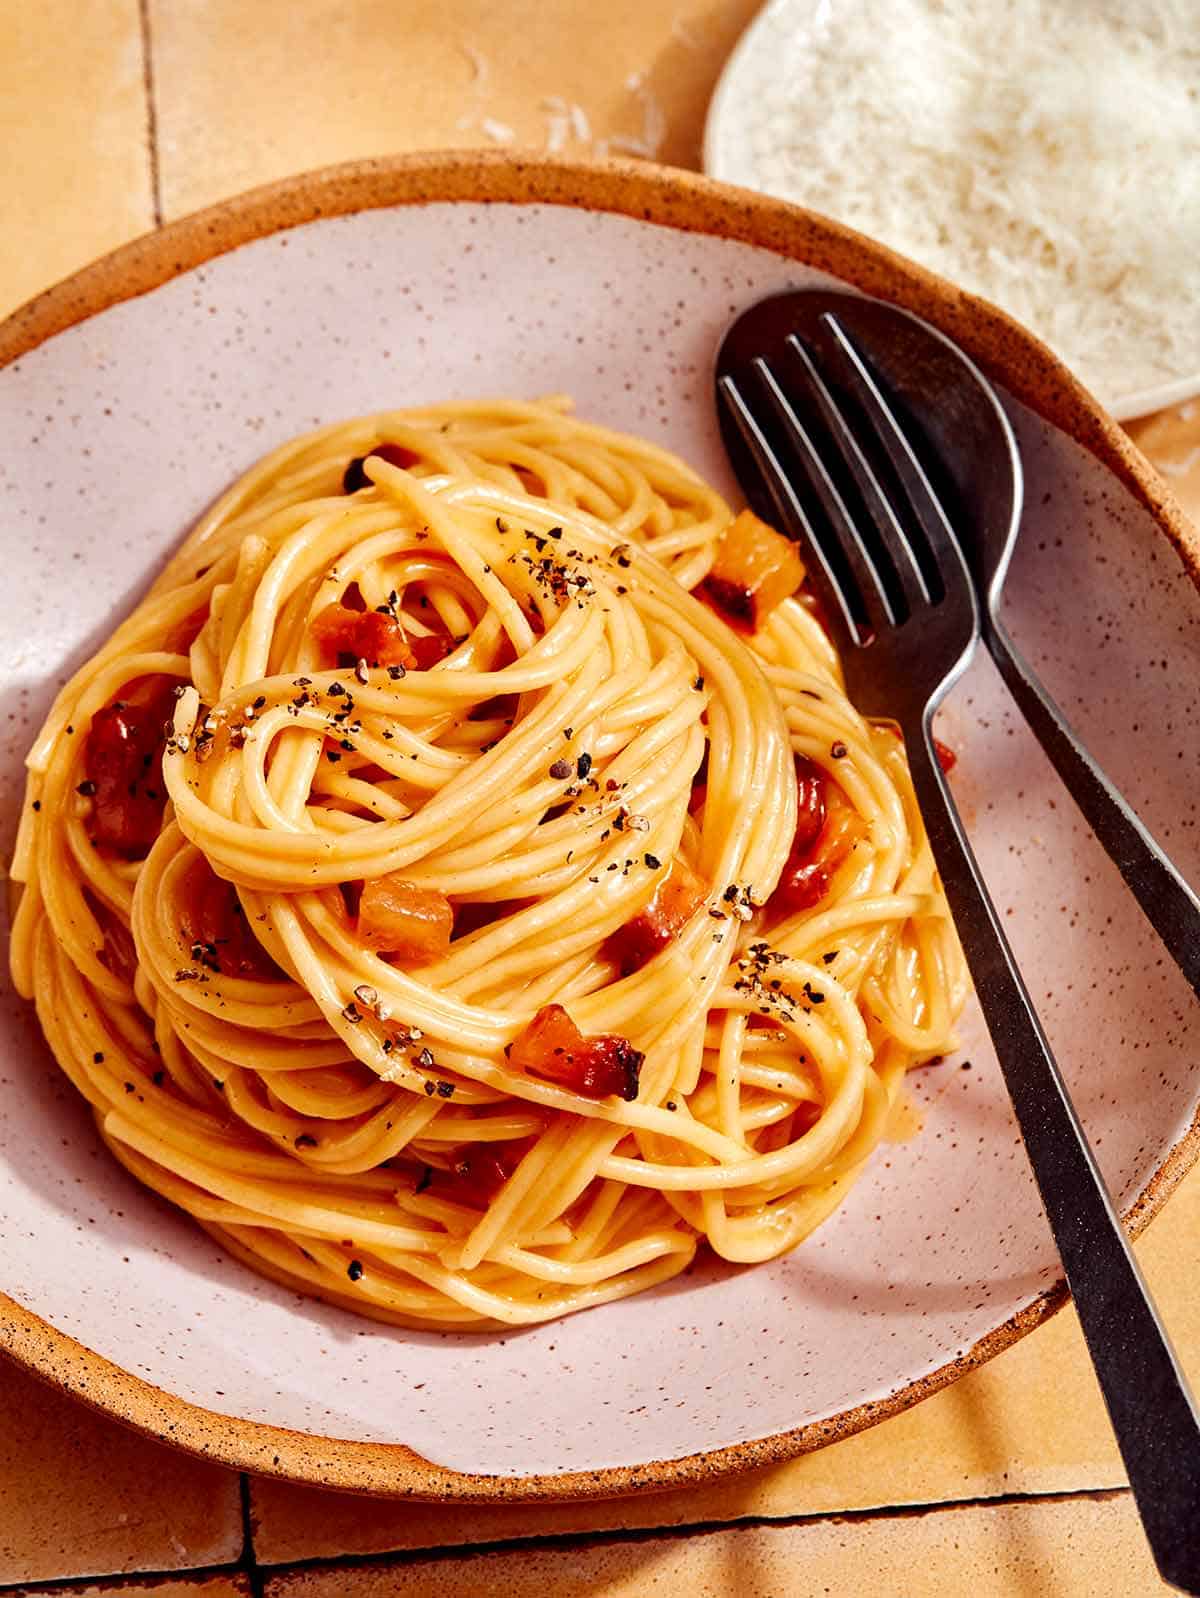
Carbonara in a bowl with a spoon and fork next to it.

What is Guanciale?

Guanciale is a cured meat made from pork cheek. It’s typically heavily seasoned with herbs and salt, then cured for a savory, salty, incredibly flavorful addition to pasta. You’ll find guanciale used in many traditional Italian recipes.

What if I can’t find Guanciale for Carbonara?

While Guanciale is popular in European countries, it may not be as readily available in local stores, depending on where you live. The rich, savory, and nutty undertones of guanciale are similar to pancetta or bacon, so you can substitute with either of those if you need to.

If you’re able to get your hands on guanciale, though, we recommend giving it a try. It’s typically cured with herbs like sage, garlic, and rosemary, giving it a really robust and unique flavor that you don’t necessarily get with pancetta or bacon, as those cuts of pork are typically only cured with salt.

Carbonara in a skillet being tossed.

Tips and Tricks for Success

  • Don’t overcook the pasta! You want your pasta to be al dente with a little bit of bite that will absorb the sauce. Overcooked pasta may become mushy when it absorbs the sauce.
  • Make sure you reserve some of the pasta water to help thin out the sauce. It’s easy to get moving and forget this step, so keep a cup handy to grab some water before you strain the pasta.
  • Serve immediately in a warm bowl to help the pasta sauce stay creamy as you enjoy your meal. As the carbonara sits, the sauce may begin to thicken and lose some of its silky texture.
  • If the sauce seems too thick, just keep adding pasta water a spoonful at a time and continue to toss the noodles in the sauce.
Carbonara pasta in a bowl.

What to Serve with Carbonara Pasta?

For a complete meal indulgent enough for a weekend but easy enough for any night of the week, serve this carbonara recipe with a simple side:

More Delicious Pasta Recipes You Will Love

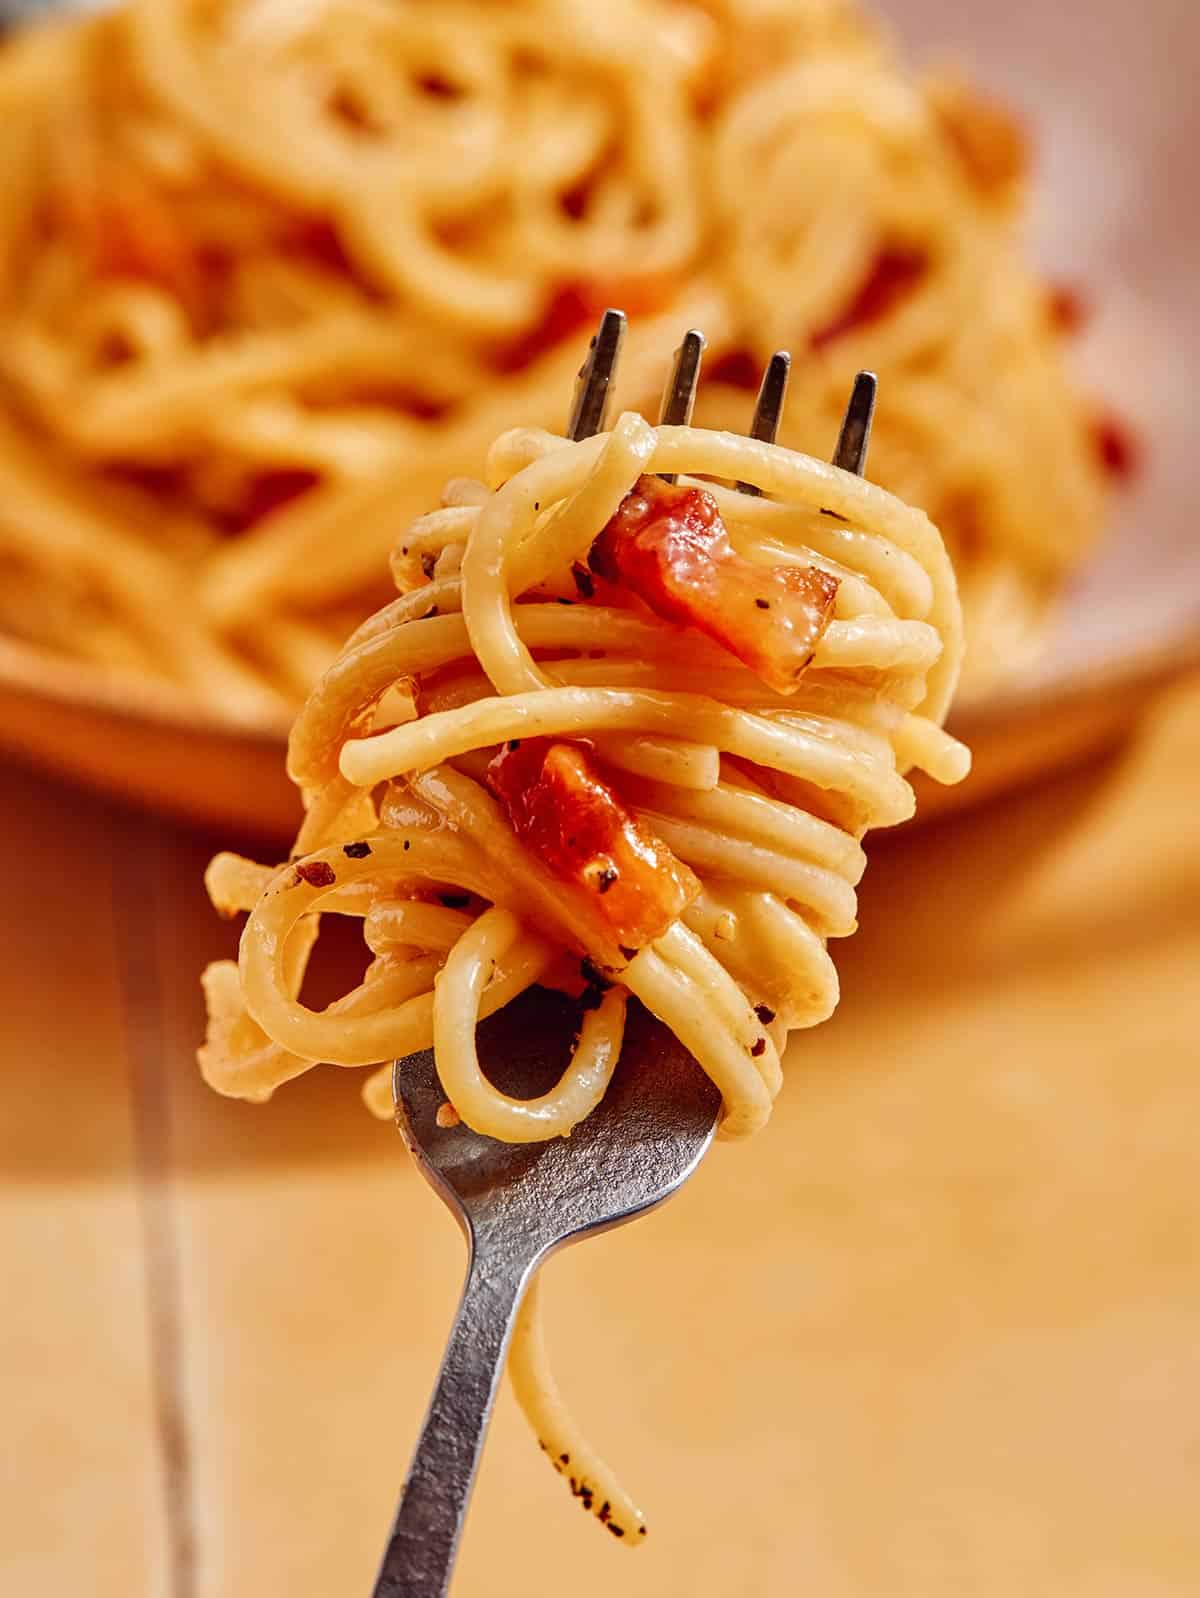
Carbonara wound onto a fork.
Basic carbonara recipe in a bowl.
Print

Carbonara Recipe

A delicious and authentic Carbonara Recipe for all the rich and decadent pasta lovers out there! If you're looking for a very quick, minimal ingredient and delicious pasta recipe – this one's for you!!
Course dinner, Main Course
Cuisine Italian
Prep Time 10 minutes
Cook Time 10 minutes
Total Time 20 minutes
Servings 3
Calories 863kcal

Ingredients

  • 8 ounces spaghetti
  • 6 ounces guanciale diced (lardons)
  • 2.5 ounces grated pecorino romano
  • 2 large eggs
  • 2 egg yolks
  • freshly cracked black pepper to taste

Instructions

  • Fill a large pot with water and bring to a boil. Add pasta, season well with salt and stir. Cook pasta until al dente, 7 to 8 minutes. Drain, reserving 1/2 cup pasta water.
  • Place diced guanciale in a cold pan and place over medium heat. As the fat begins to render, stir bits around until evenly browned and cooked.
  • Using a slotted spoon, remove guanciale, reserving the grease.
  • In a small mixing bowl combine eggs, egg yolks, grated cheese, and a generous pinch of black pepper until fully combined.
  • Whisk together.
  • Place pan with grease over medium-high heat and add pasta. Toss to evenly coat.
  • Remove pasta from heat and pour cheesy mixture over pasta and toss together until fully incorporated and sauce begins to form and thicken with the residual heat, 2 to 3 minutes. Stir in 1-2tablespoons pasta water at a time, only as needed, to make the sauce more fluid.
  • Toss guanciale into pasta until evenly incorporated.
  • Divide pasta between bowls and top each serving with more freshly ground black pepper and freshly grated Pecorino Romano.

Nutrition

Calories: 863kcal | Carbohydrates: 58g | Protein: 30g | Fat: 56g | Saturated Fat: 23g | Polyunsaturated Fat: 2g | Monounsaturated Fat: 5g | Trans Fat: 0.01g | Cholesterol: 339mg | Sodium: 827mg | Potassium: 248mg | Fiber: 2g | Sugar: 2g | Vitamin A: 451IU | Calcium: 301mg | Iron: 2mg

The post Carbonara Recipe appeared first on Spoon Fork Bacon.

Masago Sauce

Sometimes one of my favorite recipes to post is a recipe like today’s super simple (and very delicious) Masago Sauce! I love condiment recipes and the overall versatility. This one in particular is creamy, tangy, bright, and briny. Our recipe only requires 4 ingredients. It can be minute in just 2 minutes. We love using this sauce for dipping, drizzling and spreading. It’s creamy, slightly briny, and tangy, and has a fun texture from the…

Read More

The post Masago Sauce appeared first on Spoon Fork Bacon.

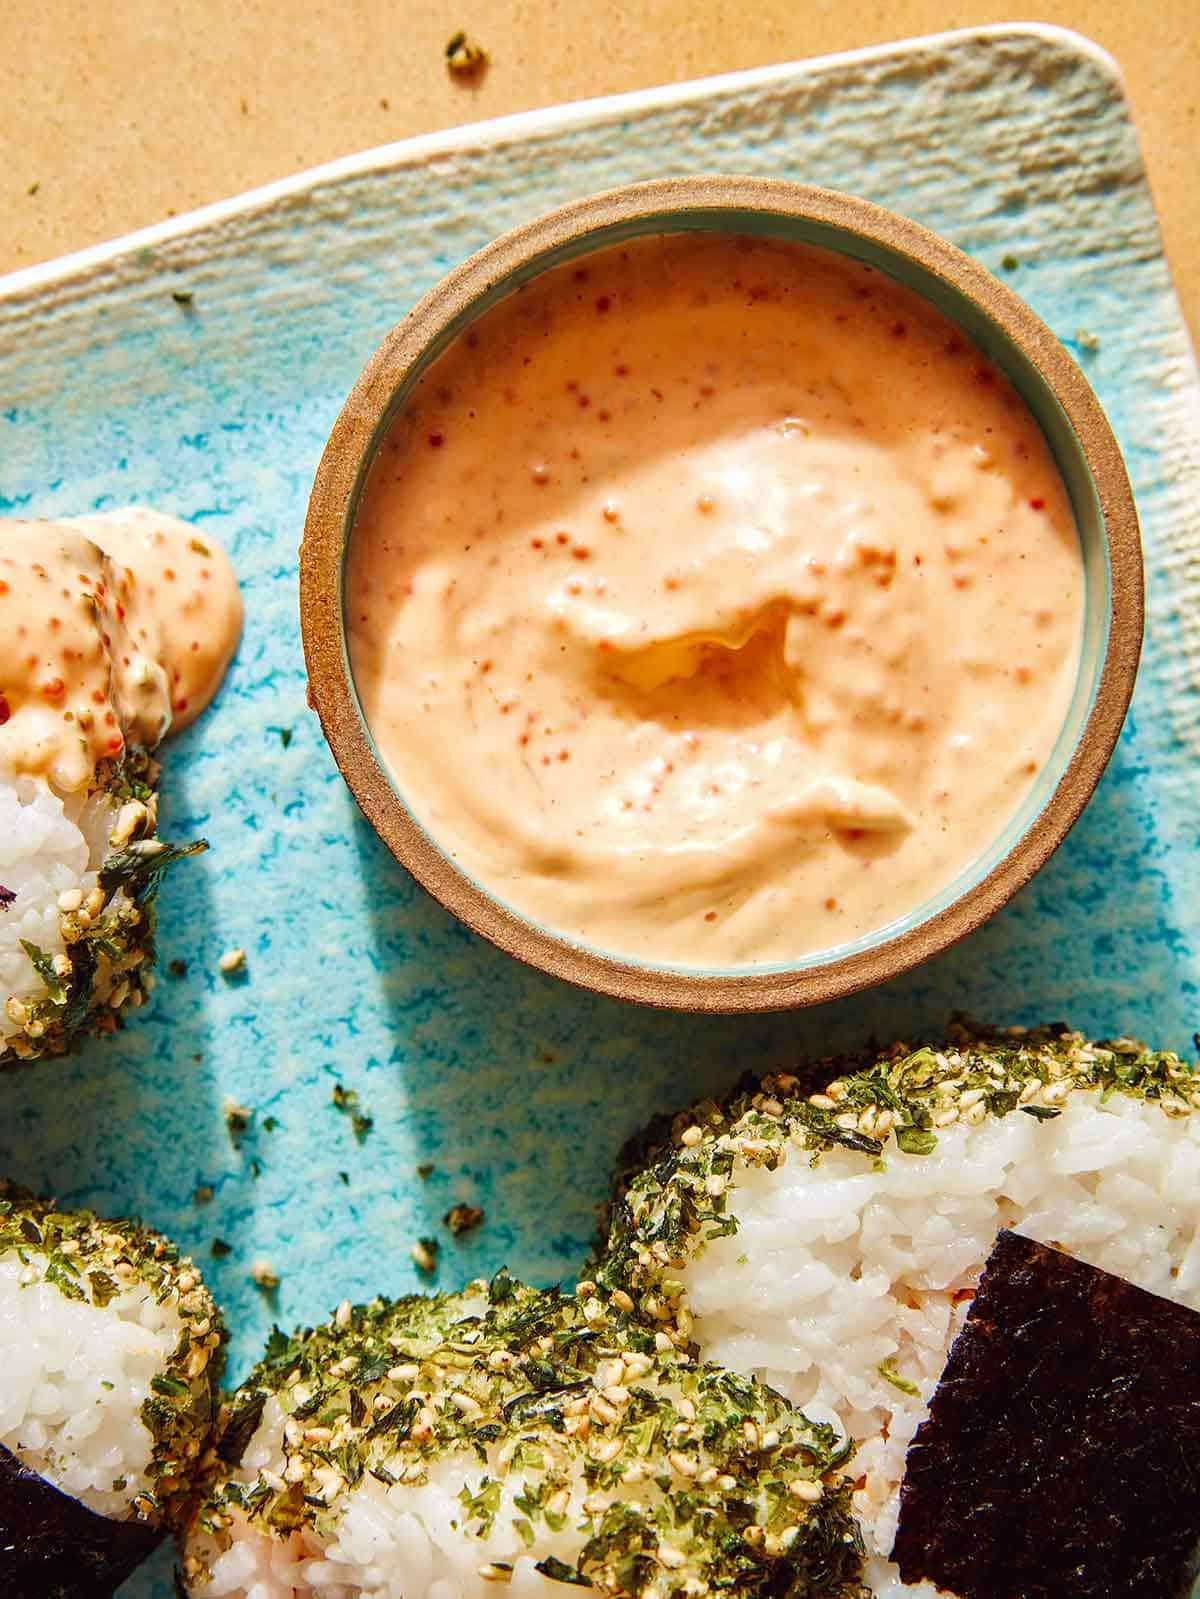
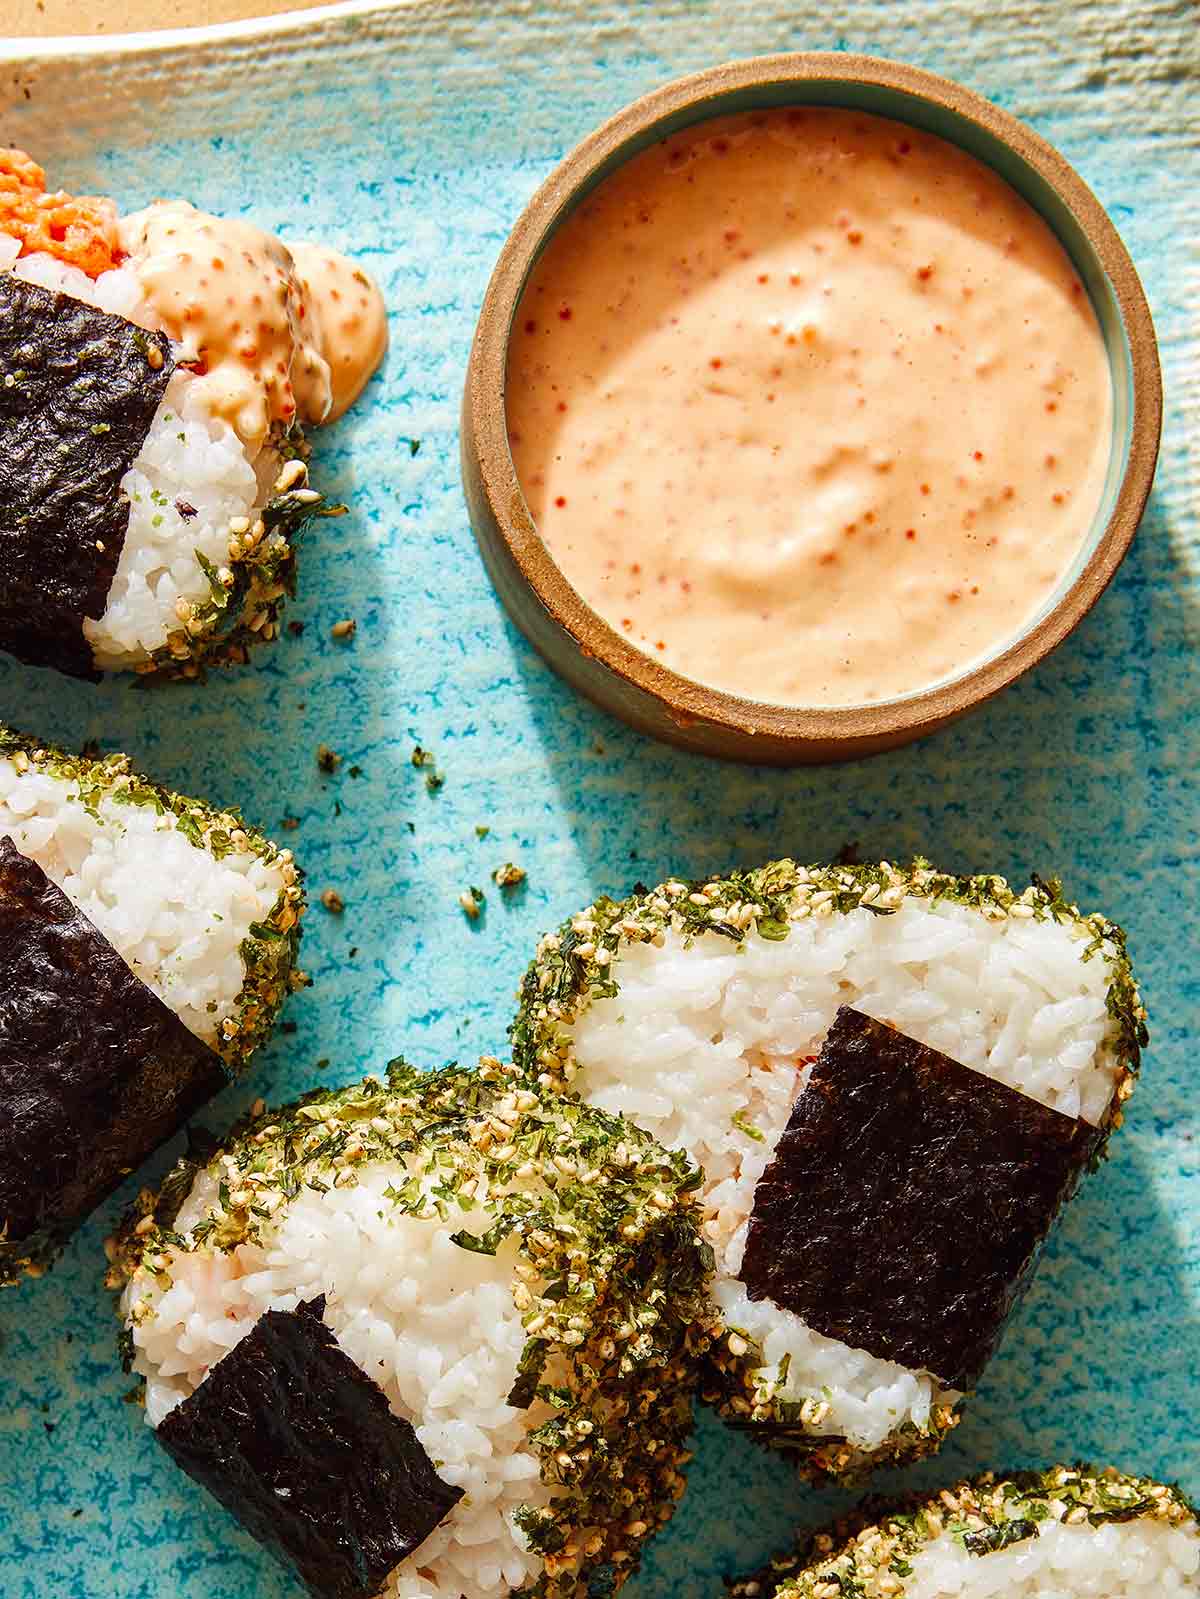
Masago sauce in a ramekin with onigiri on the side.

Sometimes one of my favorite recipes to post is a recipe like today’s super simple (and very delicious) Masago Sauce! I love condiment recipes and the overall versatility. This one in particular is creamy, tangy, bright, and briny.

Our recipe only requires 4 ingredients. It can be minute in just 2 minutes. We love using this sauce for dipping, drizzling and spreading. It’s creamy, slightly briny, and tangy, and has a fun texture from the masago (fish eggs).

How to Make Masago Sauce

Ingredients

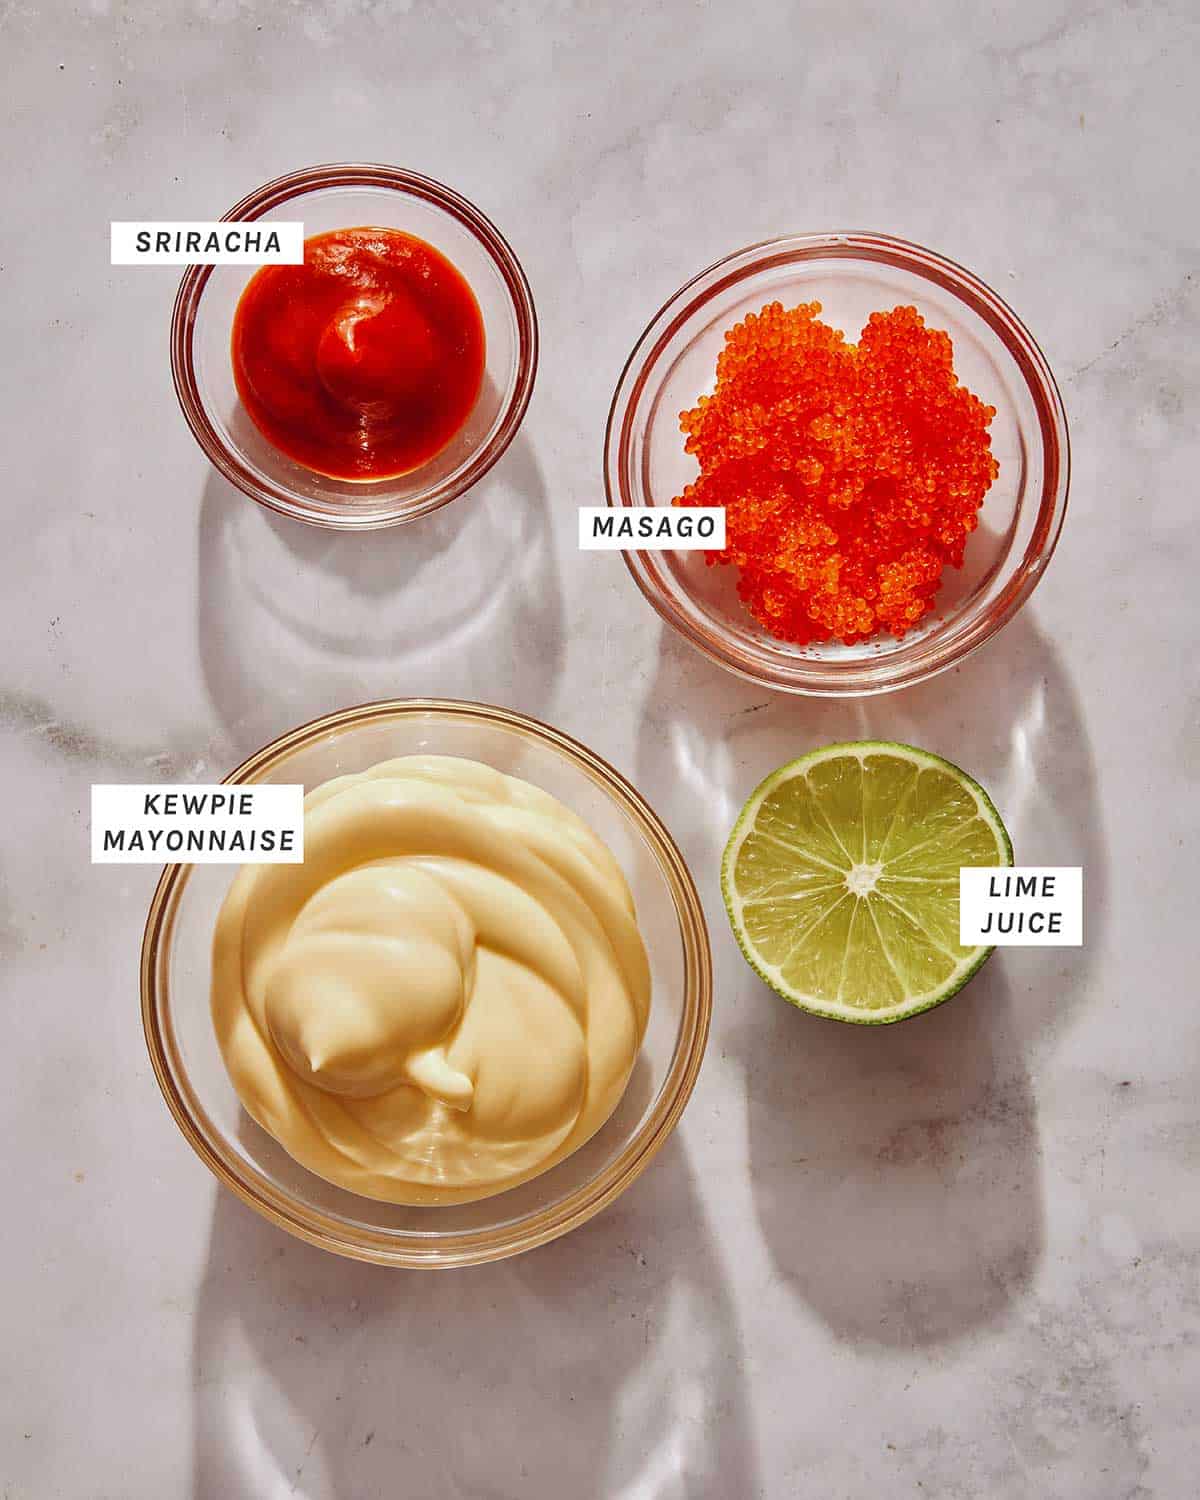
Masago sauce ingredients ready to be mixed together.

Process

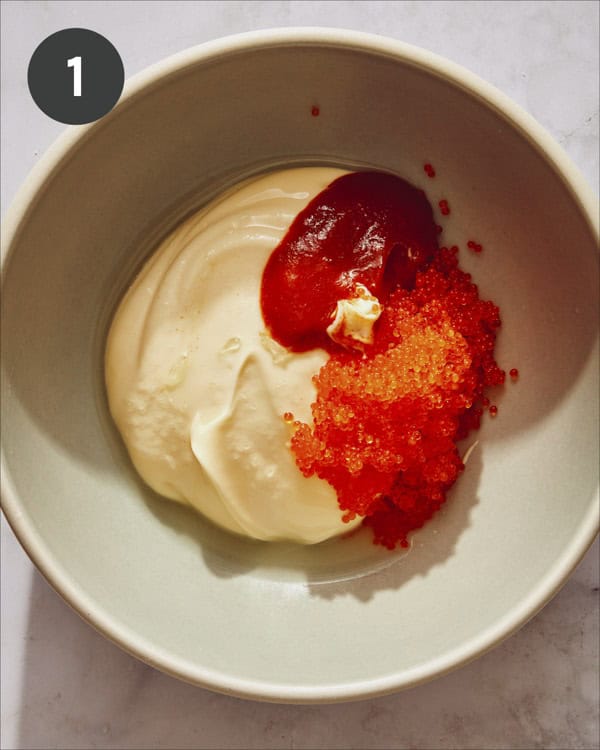
  1. Place all ingredients into a mixing bowl.
  2. Stir together and serve as dipping or drizzling sauce, or spread.
Masago sauce ingredients in a bowl.
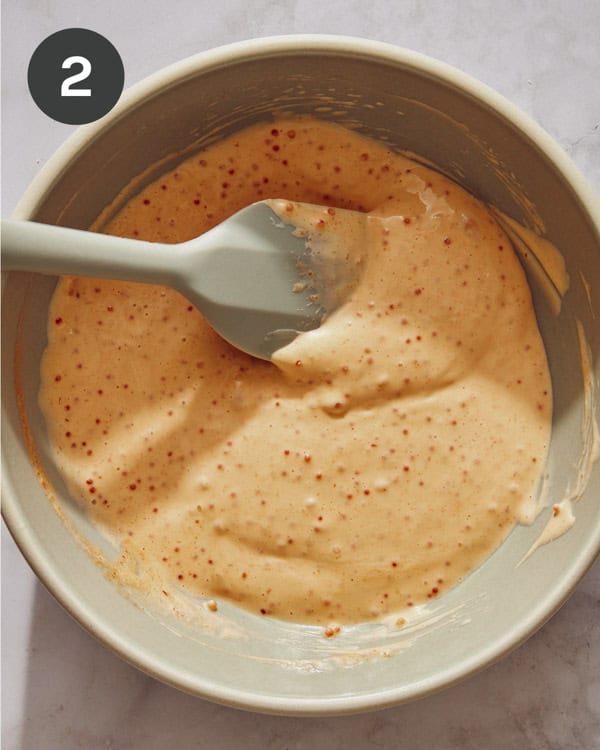
Masago sauce ingredients mixed together in a bowl.

Storing Instructions

For the Sauce

Store the masago sauce in an airtight container, in the refrigerator. Store it for 2 to 3 days.

For Masago

Store unopened masago for up to 2 weeks or frozen for up to 6 months. Once masago is opened, use it within 2 days.

What to Serve with Masago Sauce

Some of our favorite things to serve with this sauce are:

  • It makes a delicious dipping sauce for our Spicy Tuna Onigiri
  • Drizzle it over our addictive Sushi Bake
  • Slather our Poke Burritos up with some, or use it as a dipping sauce
  • Add a dollop onto our Korean Style Sashimi Salads
Masage sauce recipe with onigiri.

More Delicious Recipes you Will Love

Masago sauce in a ramekin with onigiri on the side.
Print

Masago Sauce

A very simple and delicious recipe for Masago Sauce! The perfect dipping or drizzle sauce for a variety of dishes like onigiri, poke, hand rolls, and much more!! This tasty sauce has the ability to turn an okay dish into an great one and a great dish into an outstanding one!
Course condiment
Cuisine Japanese
Diet Gluten Free
Prep Time 5 minutes
Total Time 5 minutes
Servings 6
Calories 136kcal

Ingredients

masago sauce

  • 1/2 cup Kewpie (or American mayonnaise)
  • 2 tablespoons masago
  • 1 tablespoon Sriracha
  • 1/2 lime juiced

Instructions

  • Place all ingredients into a mixing bowl.
  • Stir together and serve as dipping or drizzling sauce, or spread.

Notes

**Recipe Makes about 3/4 cup – Each Serving Size is 1 tablespoon**
 

Nutrition

Calories: 136kcal | Carbohydrates: 1g | Protein: 1g | Fat: 14g | Saturated Fat: 2g | Polyunsaturated Fat: 8g | Monounsaturated Fat: 3g | Trans Fat: 0.03g | Cholesterol: 25mg | Sodium: 180mg | Potassium: 23mg | Fiber: 0.2g | Sugar: 0.2g | Vitamin A: 32IU | Vitamin C: 4mg | Calcium: 5mg | Iron: 0.1mg

The post Masago Sauce appeared first on Spoon Fork Bacon.

Honey Toast

If you’ve never had Honey Toast before, you’re in luck! We have a super simple and ridiculously delicious recipe for you all today!! It’s similar to a funnel cake in that you pile the base with lots of toppings of choice! We promise this dessert will be a hit every single time! What is Honey Toast? Honey Toast (also known as, honey brick toast, brick toast, shibuya toast, and hanito) is a Japanese dessert consisting…

Read More

The post Honey Toast appeared first on Spoon Fork Bacon.

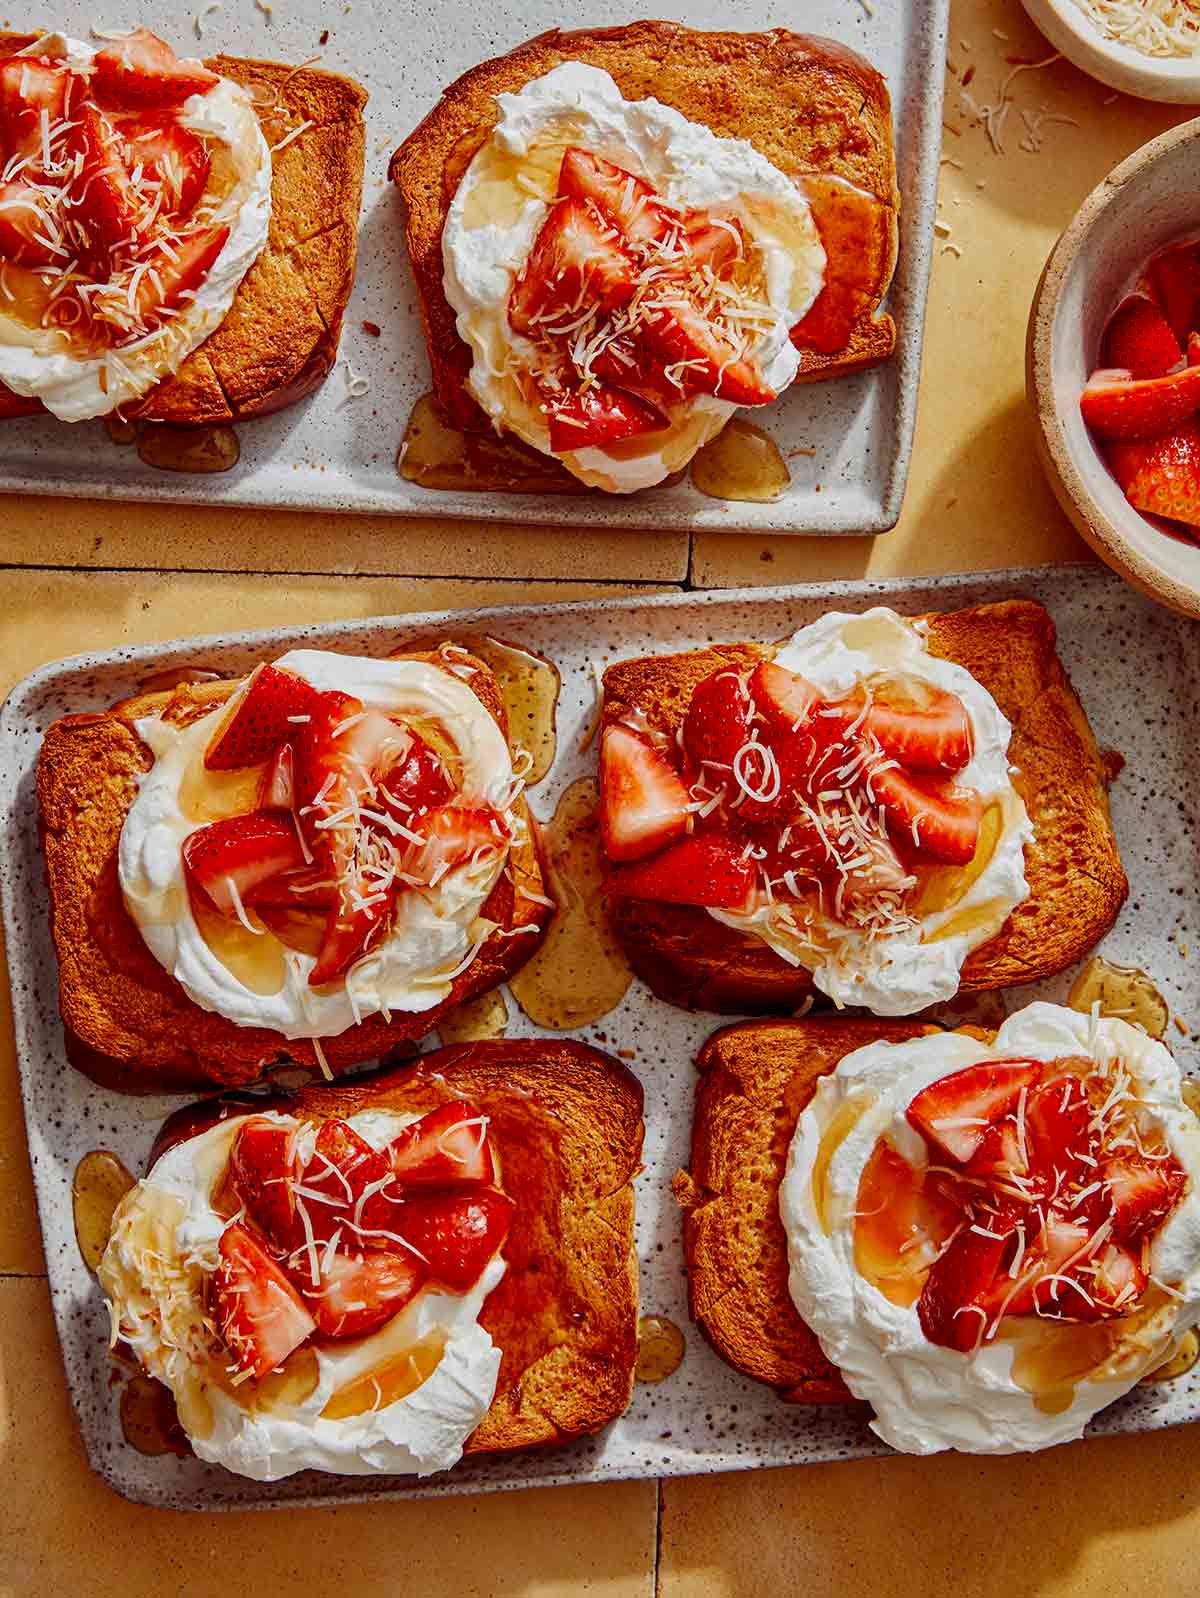
Honey brick toast recipe on platters.

If you’ve never had Honey Toast before, you’re in luck! We have a super simple and ridiculously delicious recipe for you all today!! It’s similar to a funnel cake in that you pile the base with lots of toppings of choice! We promise this dessert will be a hit every single time!

What is Honey Toast?

Honey Toast (also known as, honey brick toast, brick toast, shibuya toast, and hanito) is a Japanese dessert consisting of a thick slice of hollowed out bread (or half loaf), usually a sturdy but soft bread like pain de mie . The shell of the bread is then caramelized and filled with a variety of things like nuts, macerated fruit, whipped cream, and ice cream.

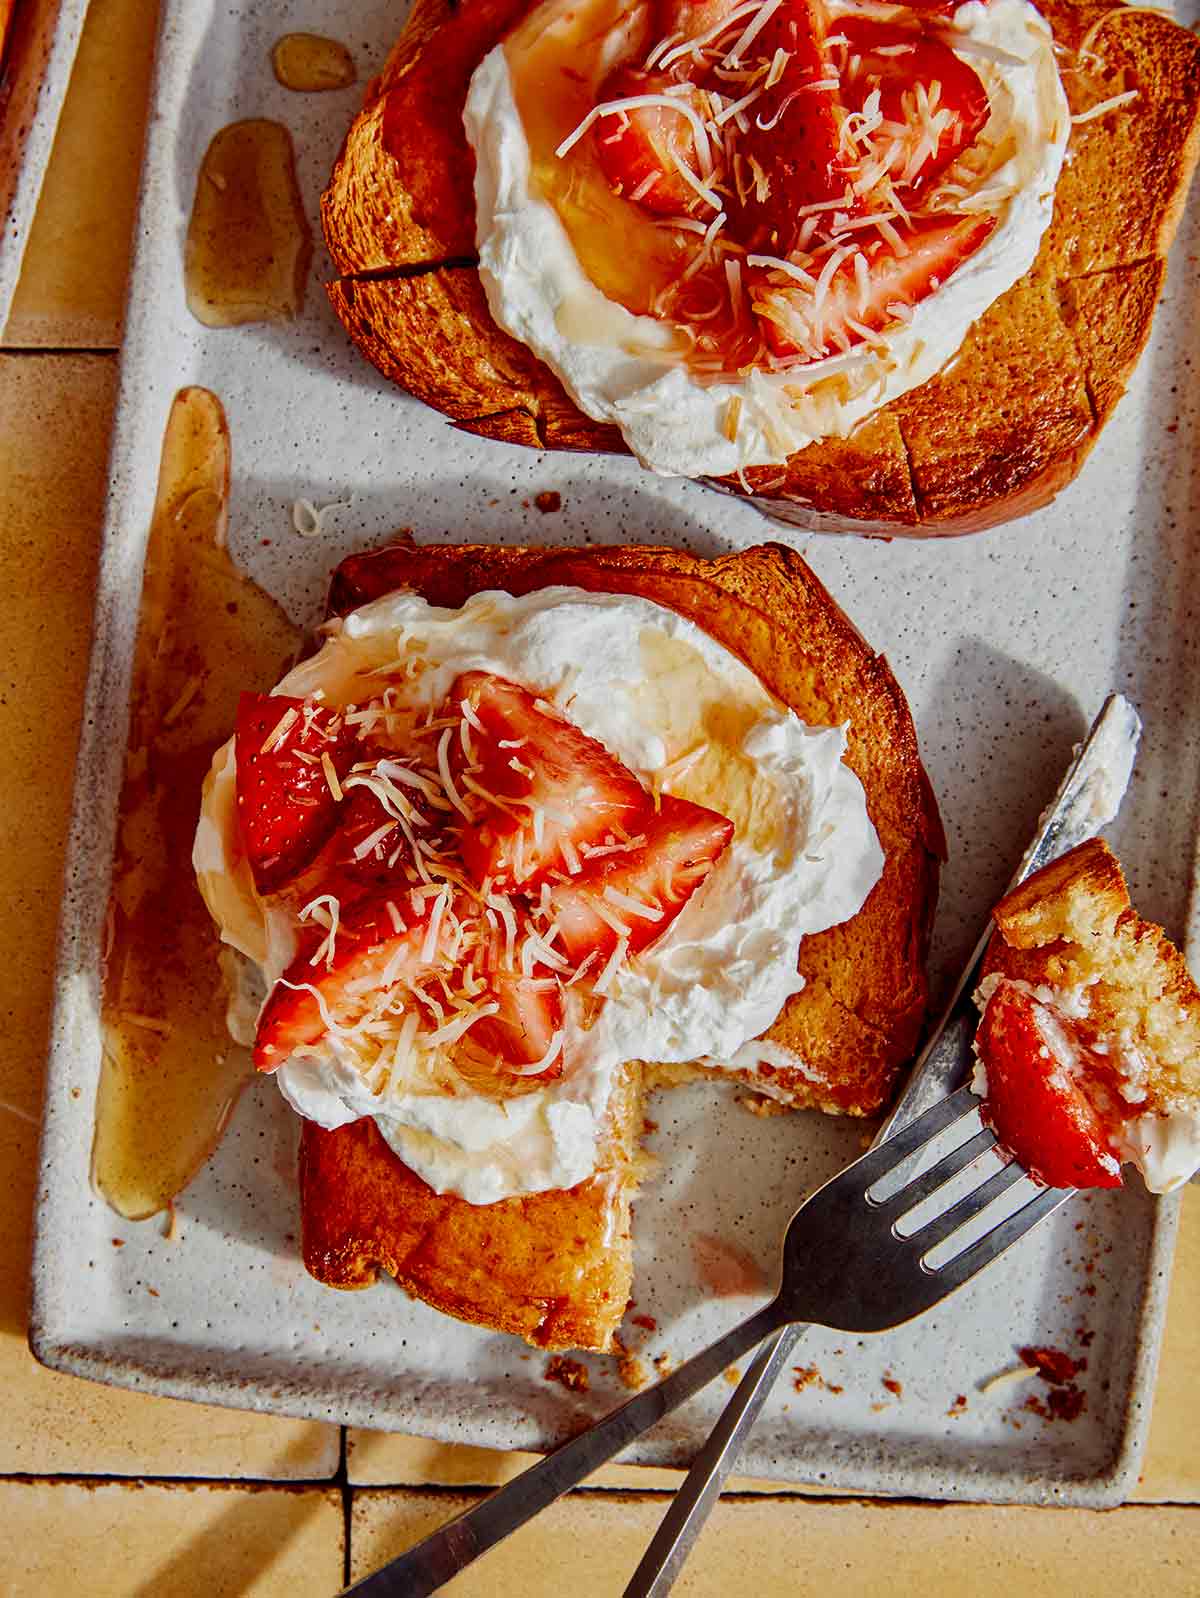
Our version today is a smaller, more “individual” sized version made with crosshatched slices of thick-cut bread that is caramelized with a custard mixture and simply topped with whipped cream, macerated strawberries, lightly toasted coconut, and a drizzle of honey!

How to Make Honey Toast

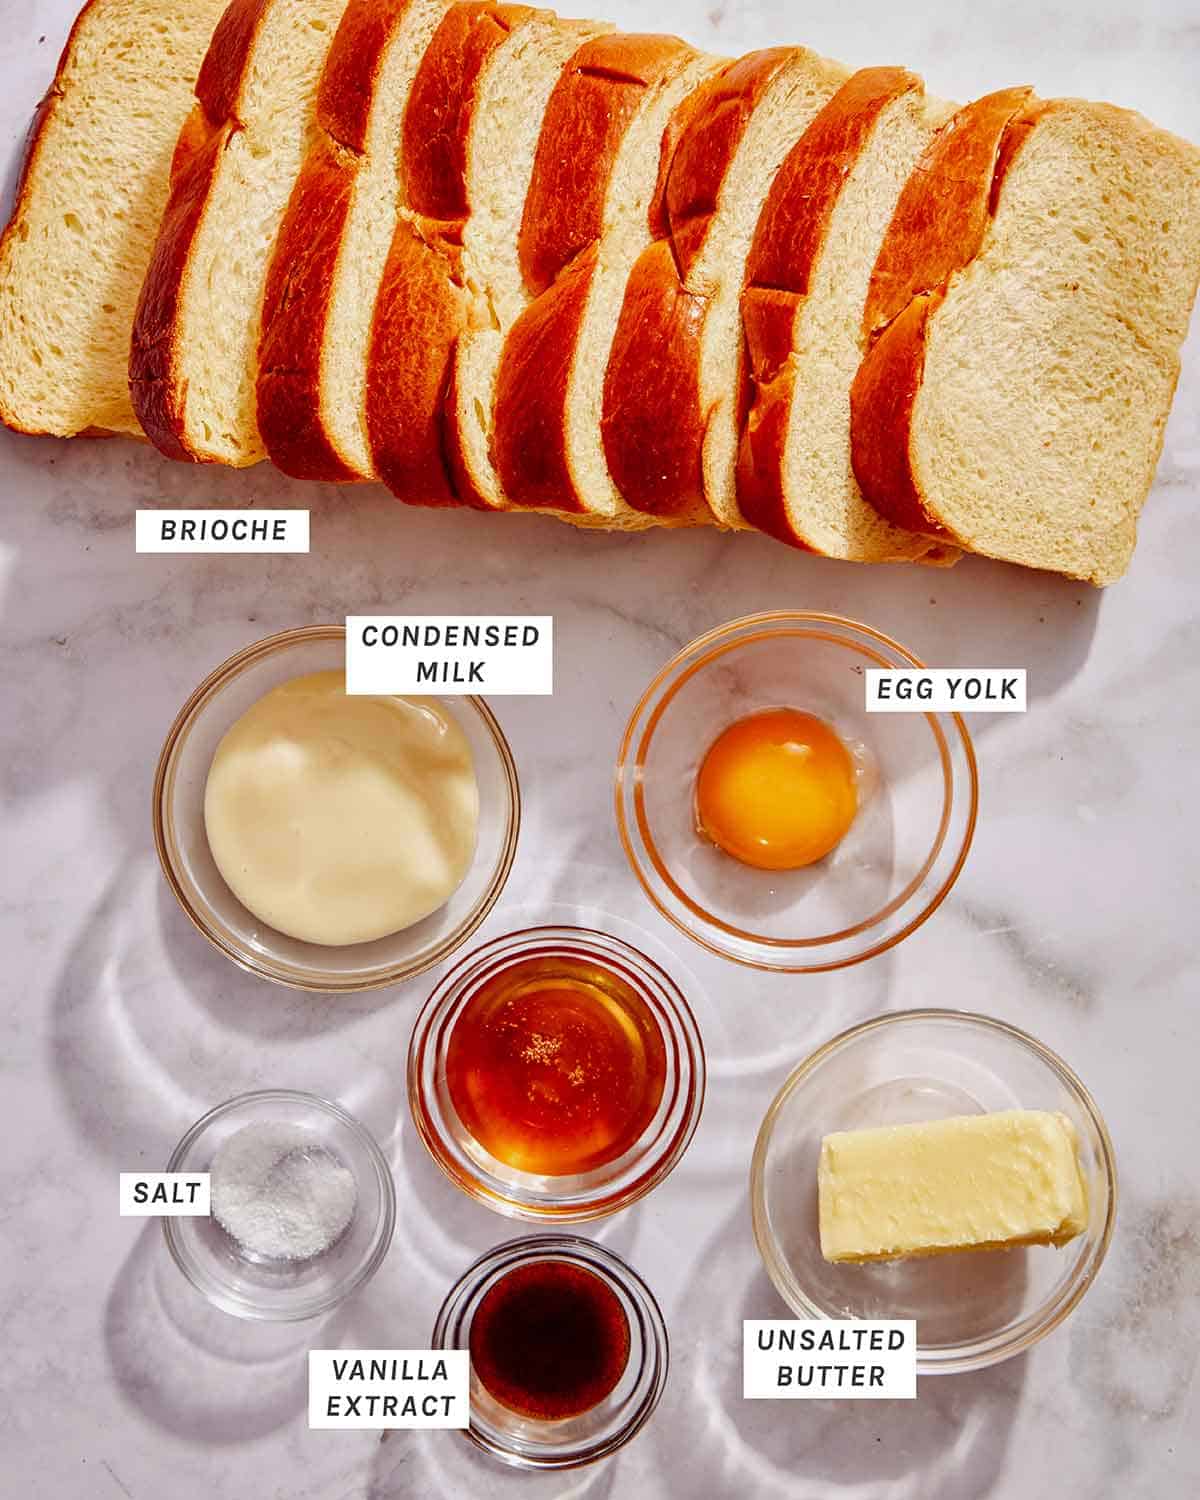
Honey Toast Ingredients

Ingredients to make honey toast on a kitchen counter.

Honey Toast Process

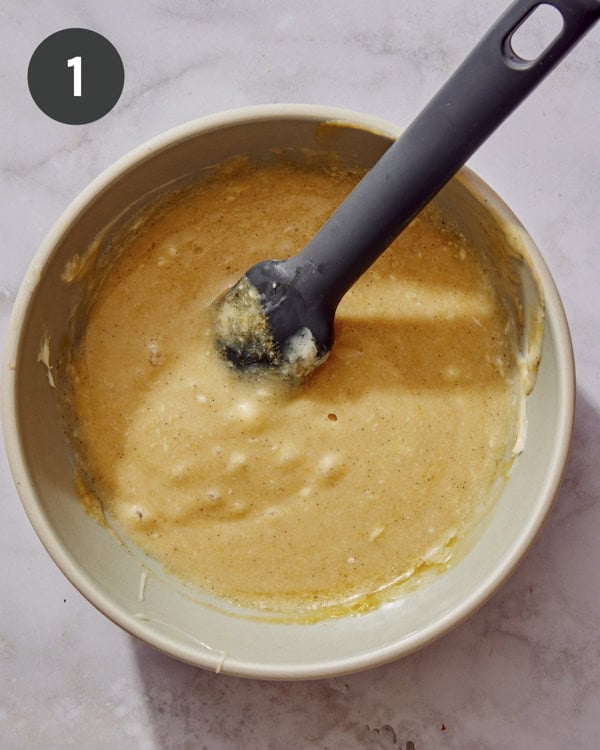
  1. Preheat oven to 350˚F. Place butter, condensed milk and honey into mixing bowl and whisk together until fully combined. Add egg yolk, vanilla and salt and continue to whisk together. Set aside.
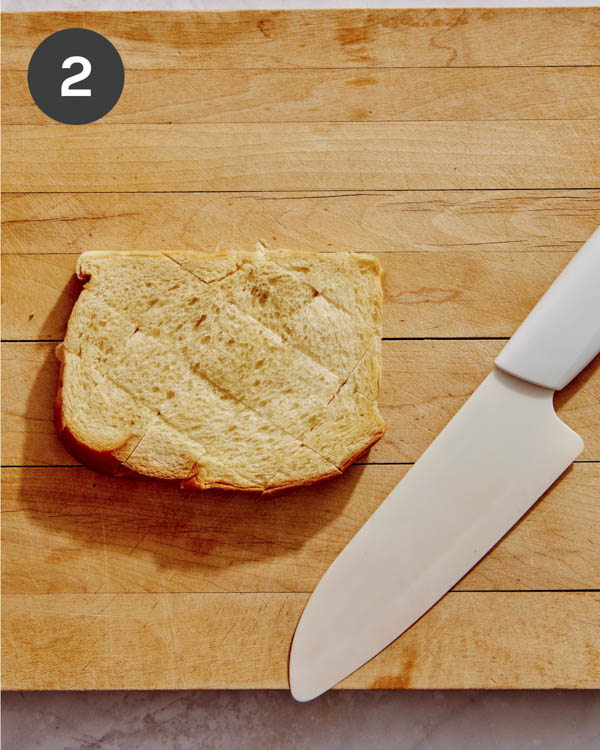
  2. Make crosshatch patterned diagonal cuts through each slice of bread (3/4-1 inch apart), making sure not to slice completely through to the bottoms.
Honey toast custard mixed in a bowl.
Brioche bread cut into sections partway down.
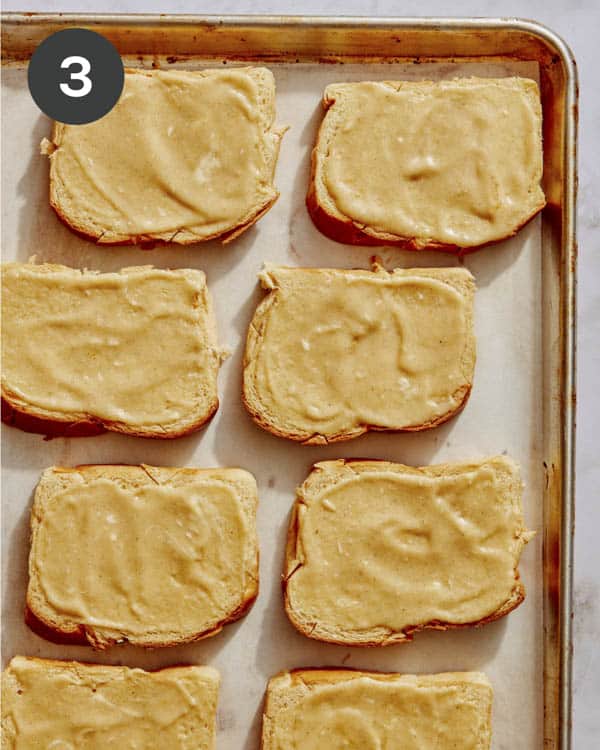
  1. Transfer sliced bread onto a parchment lined baking sheet about 1/2 inch apart (may need 2 baking sheets). Spread 2 to 3 tablespoons honey batter over each slice of bread until fully covered. Allow brioche to sit for about 10 minutes.
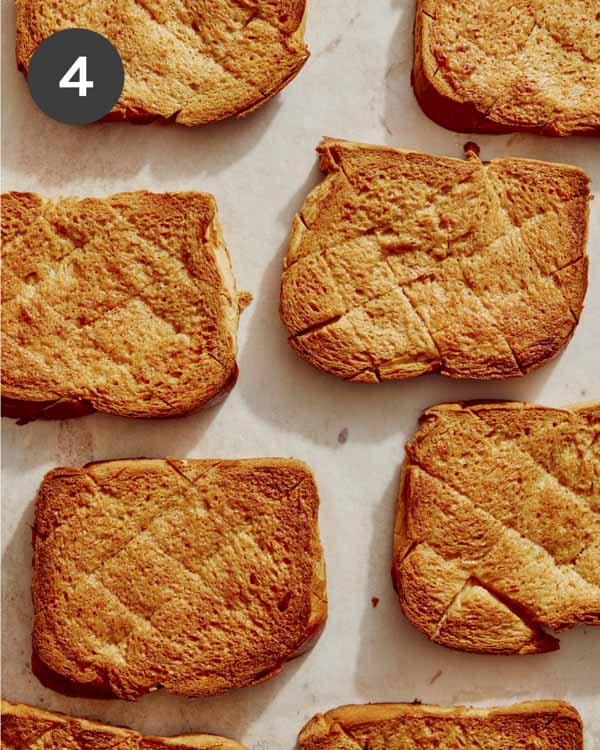
  2. Transfer to the oven and bake for 14 to 16 minutes or until brioche has to a golden brown. Remove toasts from oven and cool, about 10 minutes.
Custard smeared on top of the brioche bread.
Toasted honey toast on a baking sheet.

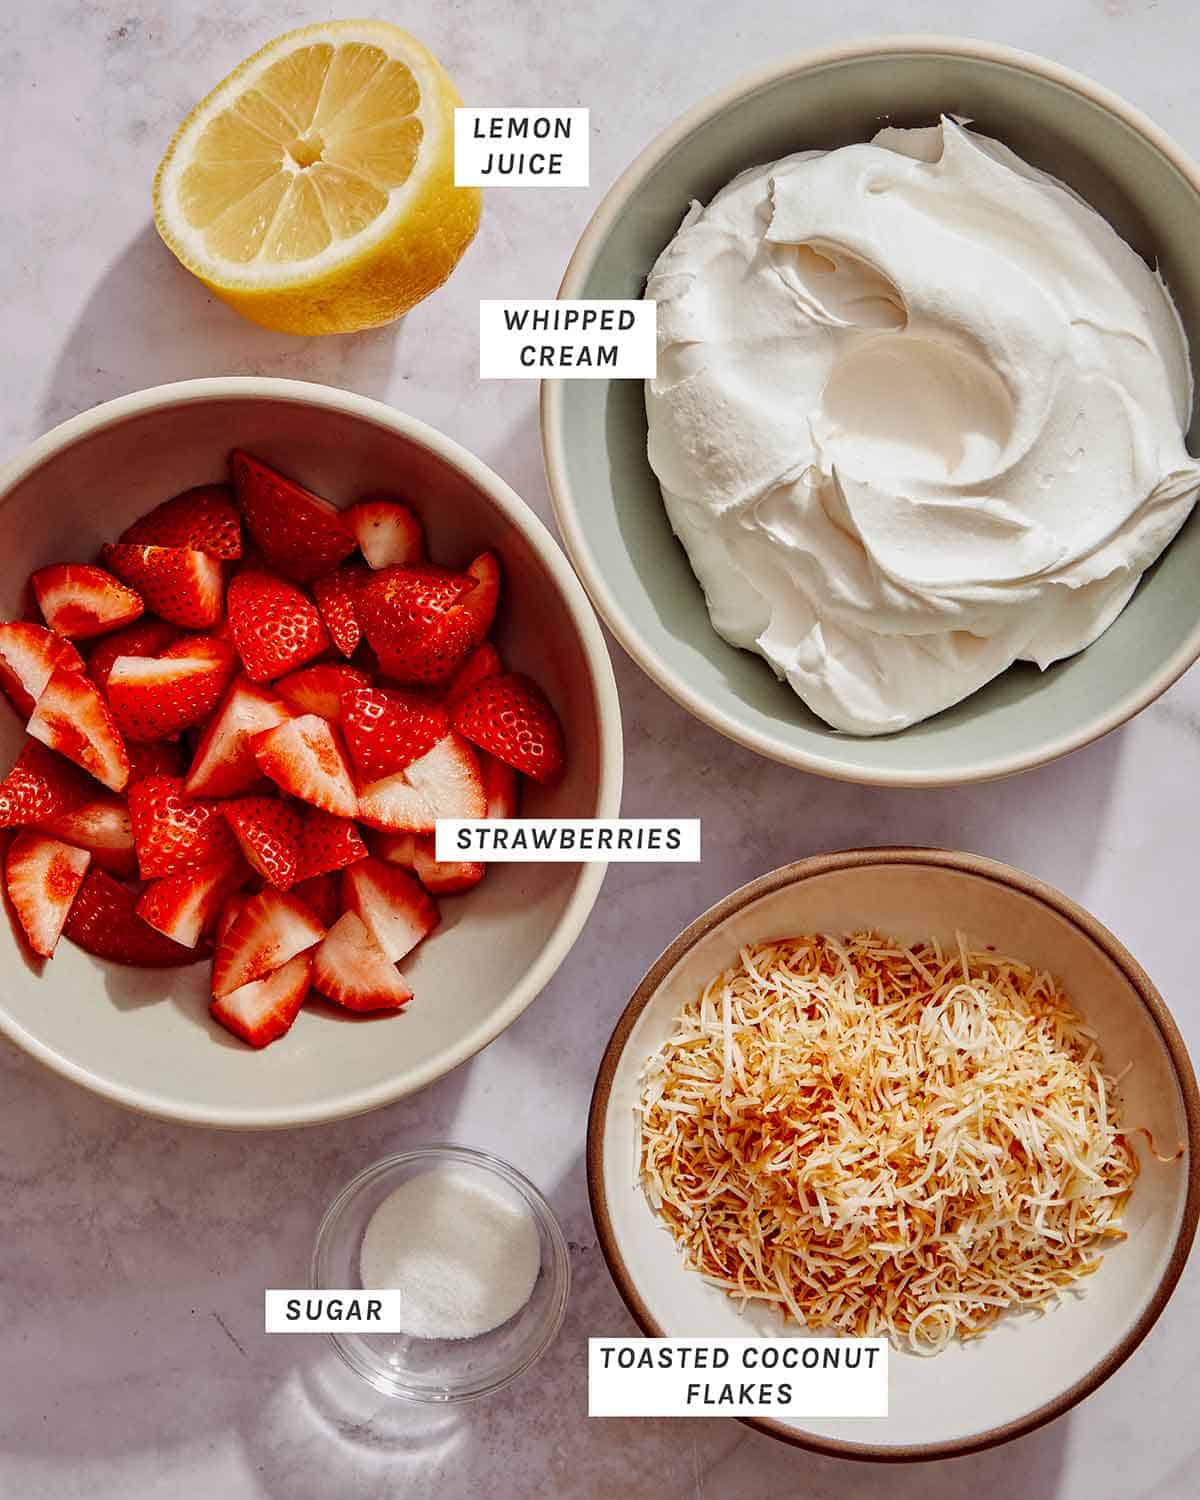
Topping Ingredients

Toppings for honey toast.

Topping Process/Assembly

  1. Combine strawberries, lemon juice and sugar into another mixing bowl and toss together.
  2. Top brick toast with about ¼ cup of whipped cream a couple spoonfuls of strawberries, a sprinkle of coconut flakes, and a drizzle of honey. Serve immediately.
Strawberry topping for honey toast in a bowl.
Honey toast with toppings on it.

Tips and Tricks for Honey Toast Success

  • If you’re worried about slicing through the bottom of the bread, place 2 wooden spoons on either side of the bread slice. Then slice just until you hit the spoons. This will ensure even depth cuts every time, without having to worry about slicing through the bottom!
  • Once the custard mixture is spread onto the bread slices, gently open the slits up to ensure the custard seeps in between every nook for maximum caramelization, crunch and flavor!
  • Allow the toast to cool for several minutes before topping and serving. This will give the toasts time to cool and the sugars to harden, creating the crisp and crackling crust!
Honey toast with various toppings on a platter.

Prep Ahead Instructions

Prep Ahead

The custard mixture for honey toast can be made up to 2 days ahead of time. Store it in the refrigerator in an airtight container until ready to use. When ready to use, remove mixture from refrigerator about 15 minutes before using. Stir mixture until smooth before spreading.

Honey Toast Topping Suggestions

For this recipe we top our toasts with a big dollop of whipped cream, macerated strawberries, lightly toasted coconut flakes, and a generous drizzle of honey! There are SO many things to top your honey toasts with, including but not limited to:

  • ice cream
  • sprinkles
  • crushed cookies
  • a drizzle of condensed milk
  • your favorite sugary cereal
  • chocolate sauce
  • fruit syrup sauce
  • other (macerated) fruit
  • crushed freeze dried fruit (to be served immediately if using)
Honey toast being cut into with a fork and knife on a plate.

More Delicious Dessert Recipes You Will Love

Brick toast up close on a platter.
Print

Honey Toast

Honey Toast is an easy to make, very delicious treat! The sugar-custard topping creates a sweet crust right onto the surface of the soft milk bread (or brioche). There are a large variety of toppings that can be used, but we keeps ours simple with some fluffy whipped cream, macerated strawberries, a drizzle of honey, and some toasted coconut!
Course Dessert
Cuisine Japanese
Prep Time 10 minutes
Cook Time 16 minutes
resting time 10 minutes
Total Time 36 minutes
Servings 12
Calories 268kcal

Ingredients

honey brick toast

  • ¼ cup unsalted butter, softened
  • 3 tablespoons sweetened condensed milk
  • 2 tablespoons honey plus extra for drizzling
  • 1 large egg yolk
  • 1 teaspoon vanilla extract or paste
  • ¼ teaspoon salt
  • 12 slices thick cut brioche

toppings

  • 1 pound fresh strawberries, hulled and chopped
  • juice of 1/2 lemon
  • 1 teaspoon sugar
  • 3 cups soft to medium whipped cream
  • coconut flakes toasted, optional

Instructions

  • Preheat oven to 350˚F.
  • Place butter, condensed milk and honey into mixing bowl and whisk together until fully combined. Add egg yolk, vanilla and salt and continue to whisk together. Set aside.
  • Make diamond patterned diagonal cuts through each slice of bread (about 1 inch apart), making sure not to slice completely through to the bottoms.
  • Spread 2 to 3 tablespoons honey batter over each slice of bread until fully covered.
  • Transfer brioche onto a parchment lined baking sheet about 1/2 inch apart (may need 2 baking sheets).
  • Allow brioche to sit for about 10 minutes, then transfer to the oven and bake for 14 to 16 minutes or until brioche has to a golden brown.
  • While brioche is toasting, combine strawberries, lemon juice and sugar into another mixing bowl and toss together.
  • Remove from oven and cool, about 10 minutes.
  • Top brick toast with about ¼ cup of whipped cream a couple spoonfuls of strawberries, a sprinkle of coconut flakes, and a drizzle of honey. Serve immediately.

Notes

Tips and Tricks for Honey Toast Success
    • If you’re worried about slicing through the bottom of the bread, place 2 wooden spoons on either side of the bread slice. Then slice just until you hit the spoons. This will ensure even depth cuts every time, without having to worry about slicing through the bottom!
    • Once the custard mixture is spread onto the bread slices, gently open the slits up to ensure the custard seeps in between every nook for maximum caramelization, crunch and flavor!
    • Allow the toast to cool for several minutes before topping and serving. This will give the toasts time to cool and the sugars to harden, creating the crisp and crackling crust!
Prep Ahead Instructions
The custard mixture for honey toast can be made up to 2 days ahead of time. Store it in the refrigerator in an airtight container until ready to use. When ready to use, remove mixture from refrigerator about 15 minutes before using. Stir mixture until smooth before spreading.

Nutrition

Calories: 268kcal | Carbohydrates: 27g | Protein: 5g | Fat: 16g | Saturated Fat: 9g | Cholesterol: 98mg | Sodium: 218mg | Potassium: 98mg | Fiber: 1g | Sugar: 9g | Vitamin A: 559IU | Vitamin C: 22mg | Calcium: 58mg | Iron: 1mg

The post Honey Toast appeared first on Spoon Fork Bacon.

Smoked Salmon Dip

Smoked salmon dip is an easy appetizer that takes just 10 minutes to make, using just a handful of ingredients. It’s our favorite for those last-minute get-togethers or summer nights when no one feels like cooking. But don’t let the simplicity fool you– this dip is absolutely bursting with fresh flavor from dill, chives, and tarragon, flaked, salty salmon, and a hint of bright citrus flavor to round everything out. While we have plenty of…

Read More

The post Smoked Salmon Dip appeared first on Spoon Fork Bacon.
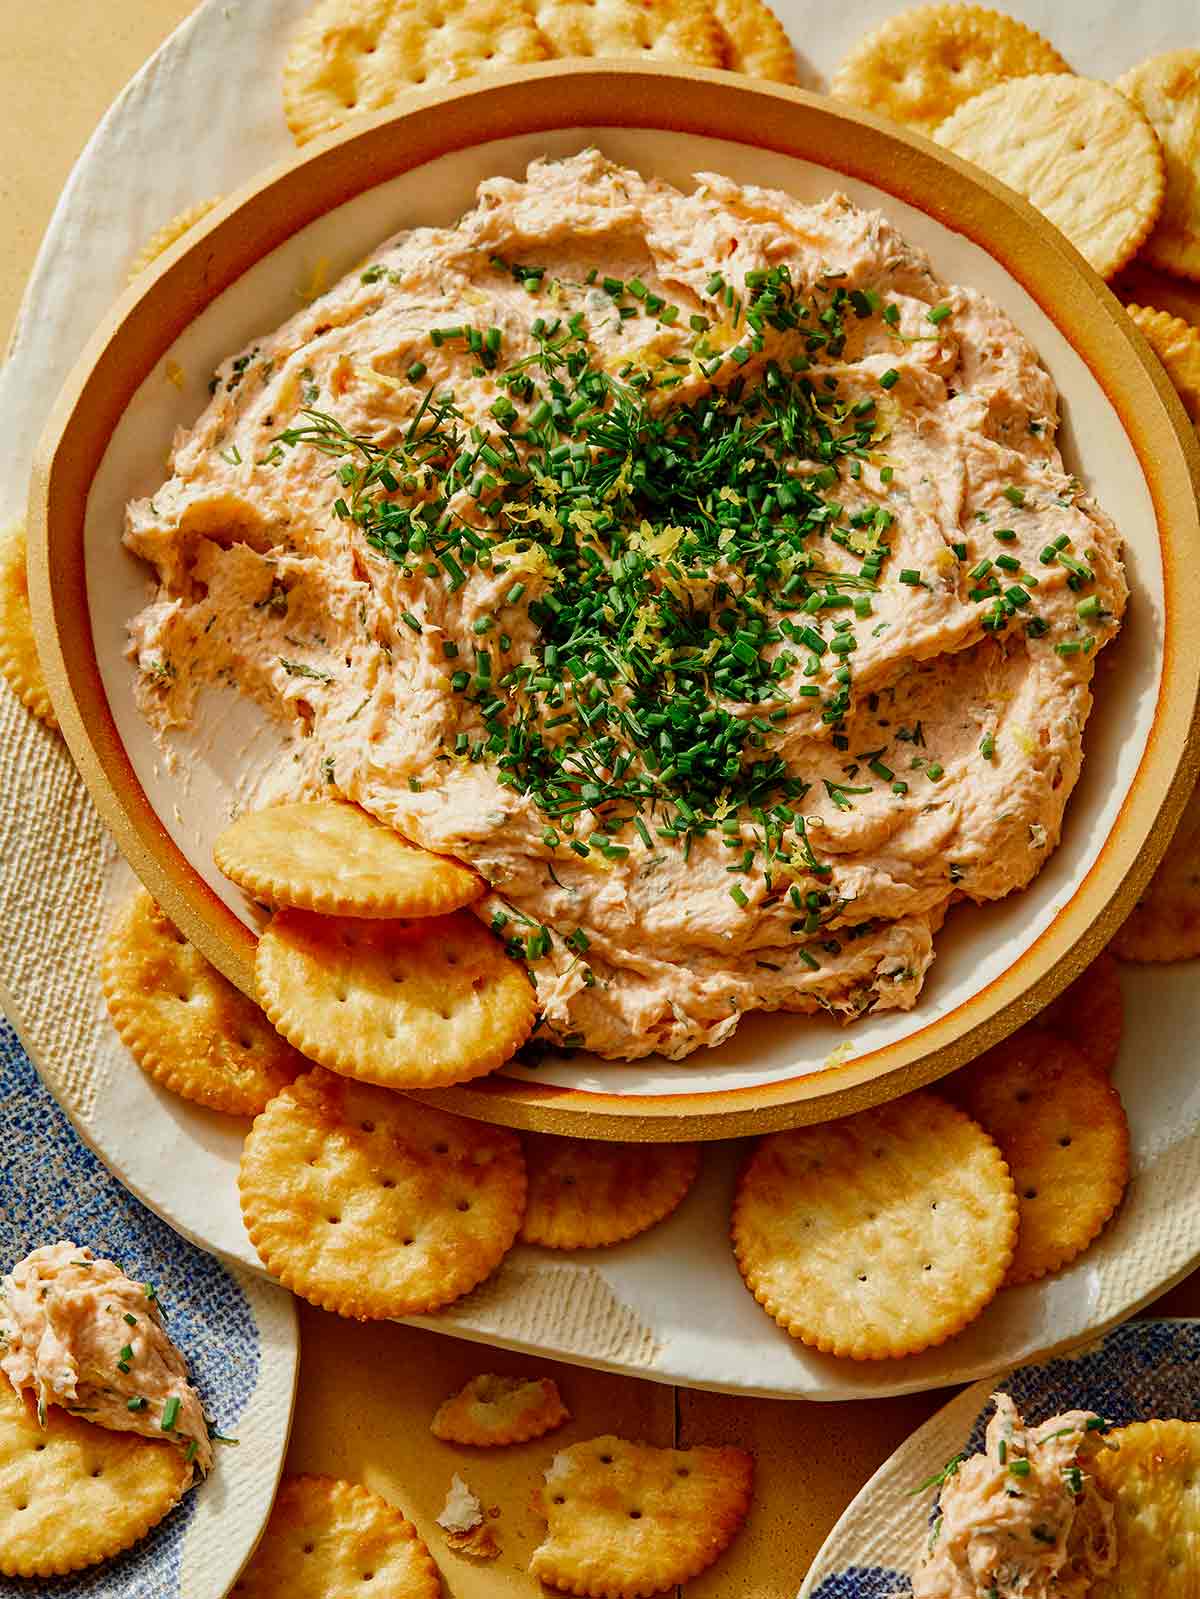
Smoked Salmon Dip recipe in a bowl with crackers on the side.

Smoked salmon dip is an easy appetizer that takes just 10 minutes to make, using just a handful of ingredients. It’s our favorite for those last-minute get-togethers or summer nights when no one feels like cooking. But don’t let the simplicity fool you– this dip is absolutely bursting with fresh flavor from dill, chives, and tarragon, flaked, salty salmon, and a hint of bright citrus flavor to round everything out.

While we have plenty of dip recipes, none are quite as versatile and insanely delicious as our Smoked Salmon Dip. You can serve it with brunch, right next to the savory breakfast rolls and sausage strata, or on a plate with crackers or crostini as an evening appetizer, along with bruschetta and prosciutto-topped cucumbers. It’s simple enough for a summer evening app for two and elegant enough to bring as a passing dish for a dinner party or holiday brunch. This salmon dip really does it all.

How to Make Smoked Salmon Dip

Ingredients

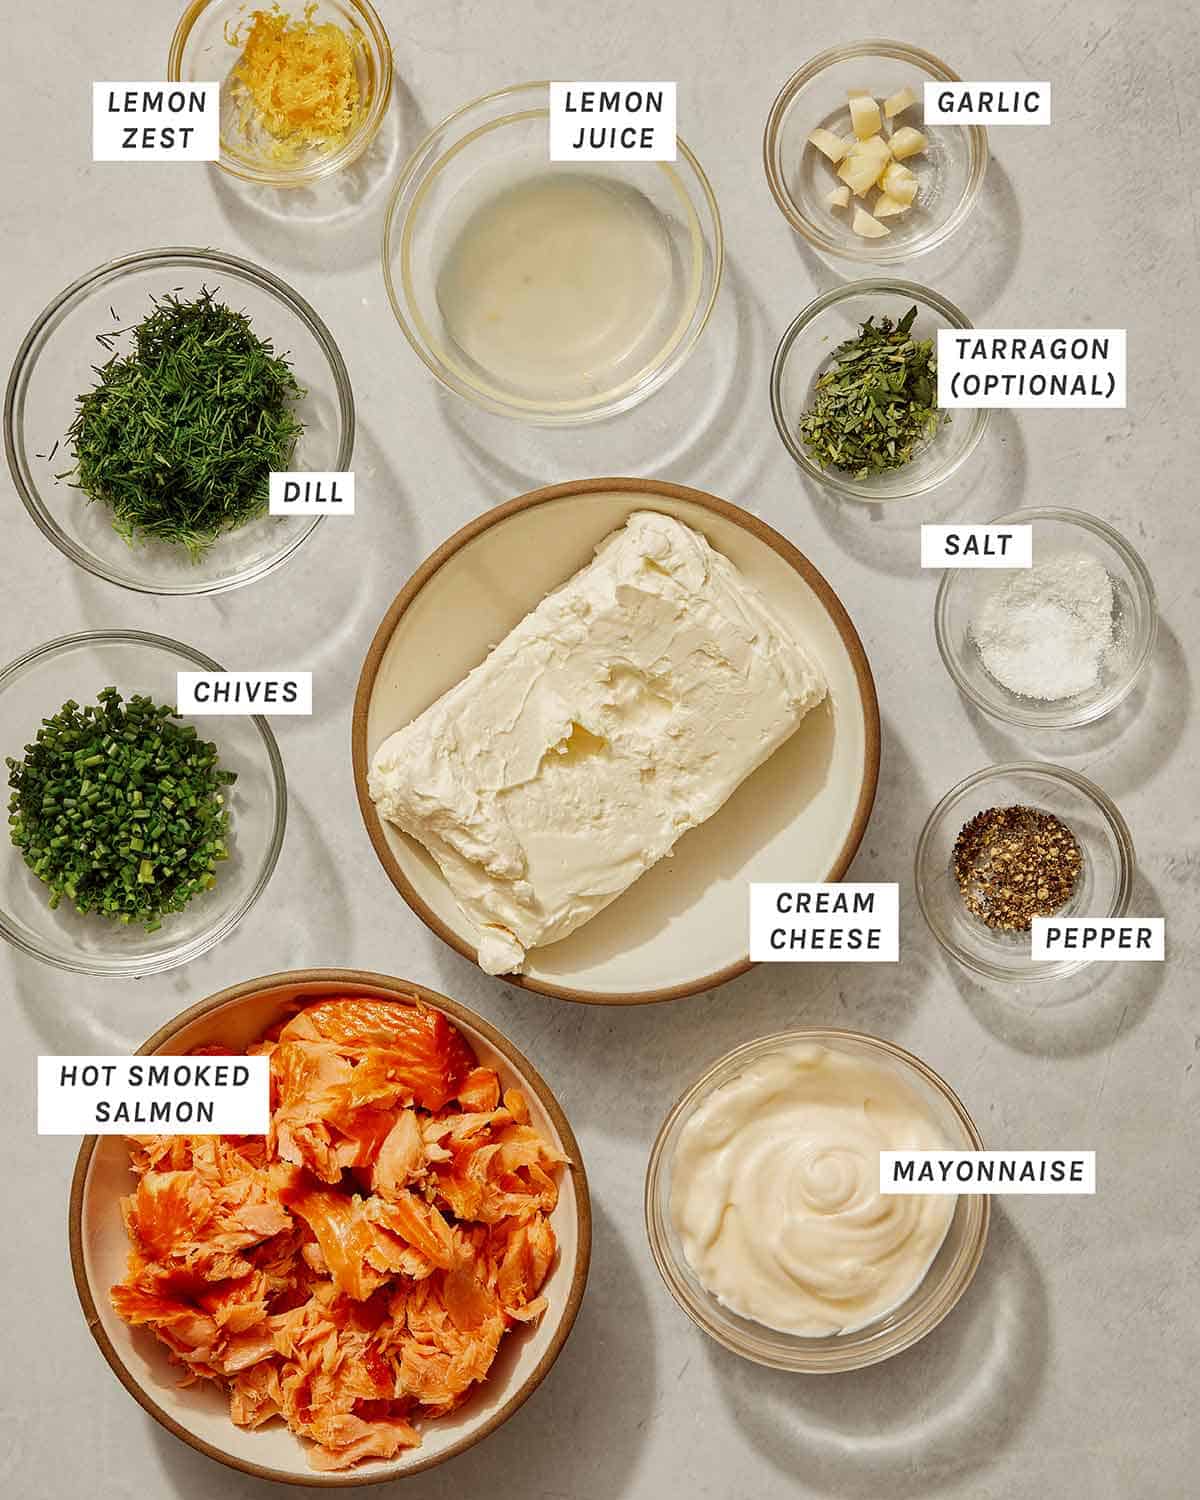
Smoked salmon dip ingredients all laid out.

Process

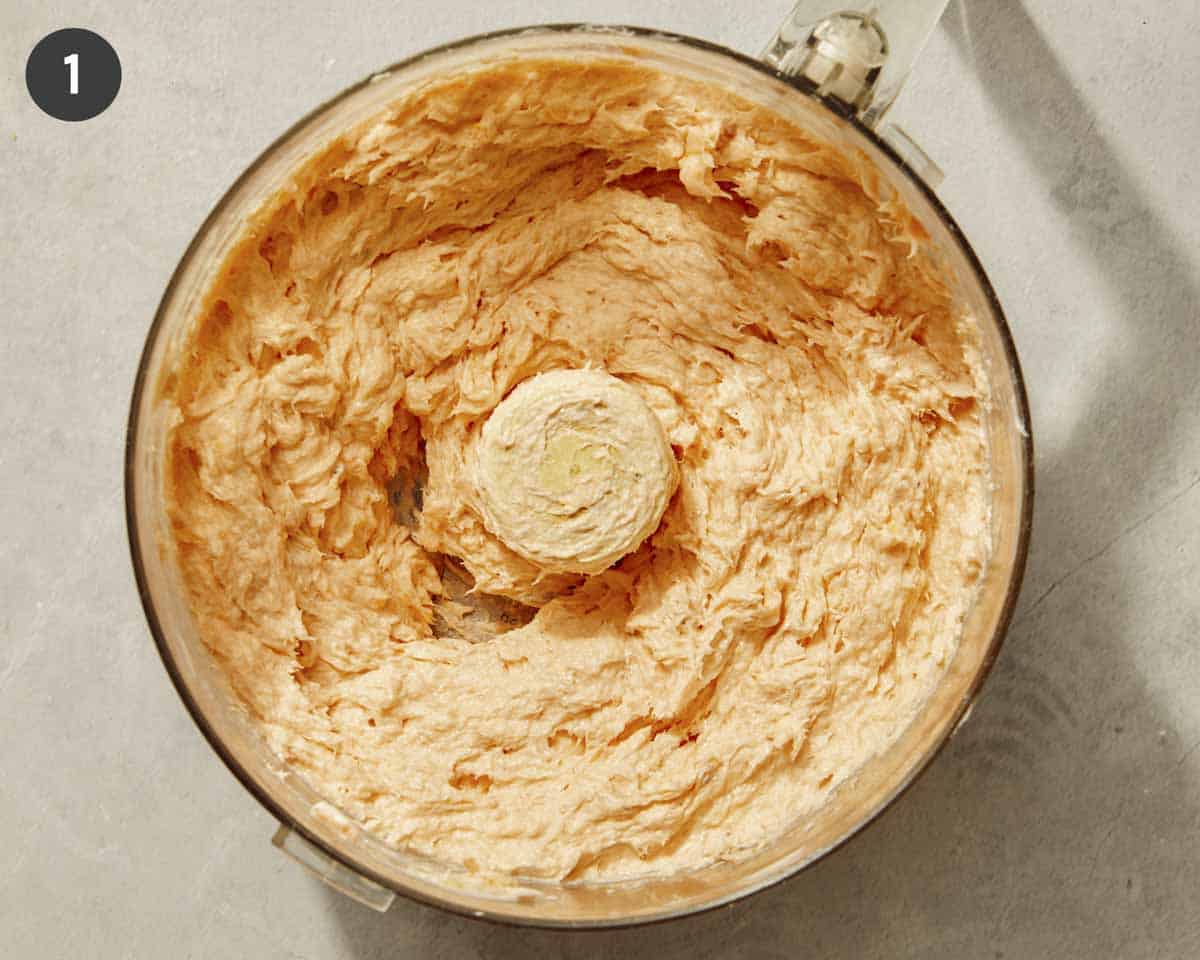
  1. Place smoked salmon, cream cheese, mayo, garlic, lemon zest, and lemon juice into a food processor. Process until smooth.
Smoked salmon dip ingredients in a food processor all blended up.
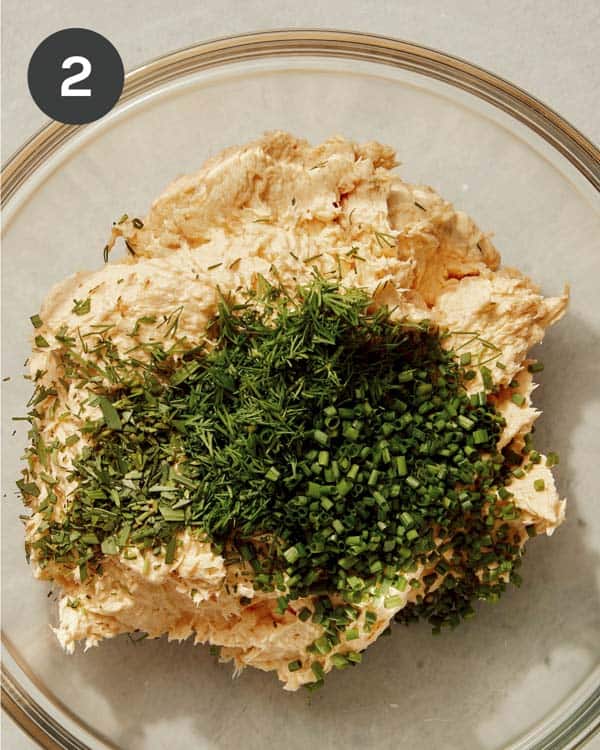
  1. Transfer the salmon mixture to a bowl and add dill, chives, and tarragon (if using). Season with pepper.
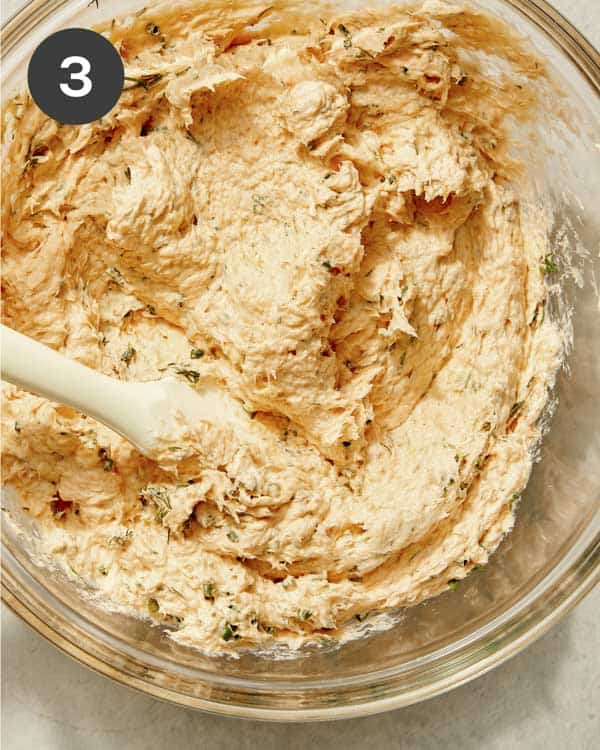
  2. Fold together until fully incorporated.
Smoked salmon dip ingredients in a bowl about to mixed.
Smoked salmon ingredients in a bowl mixed together.
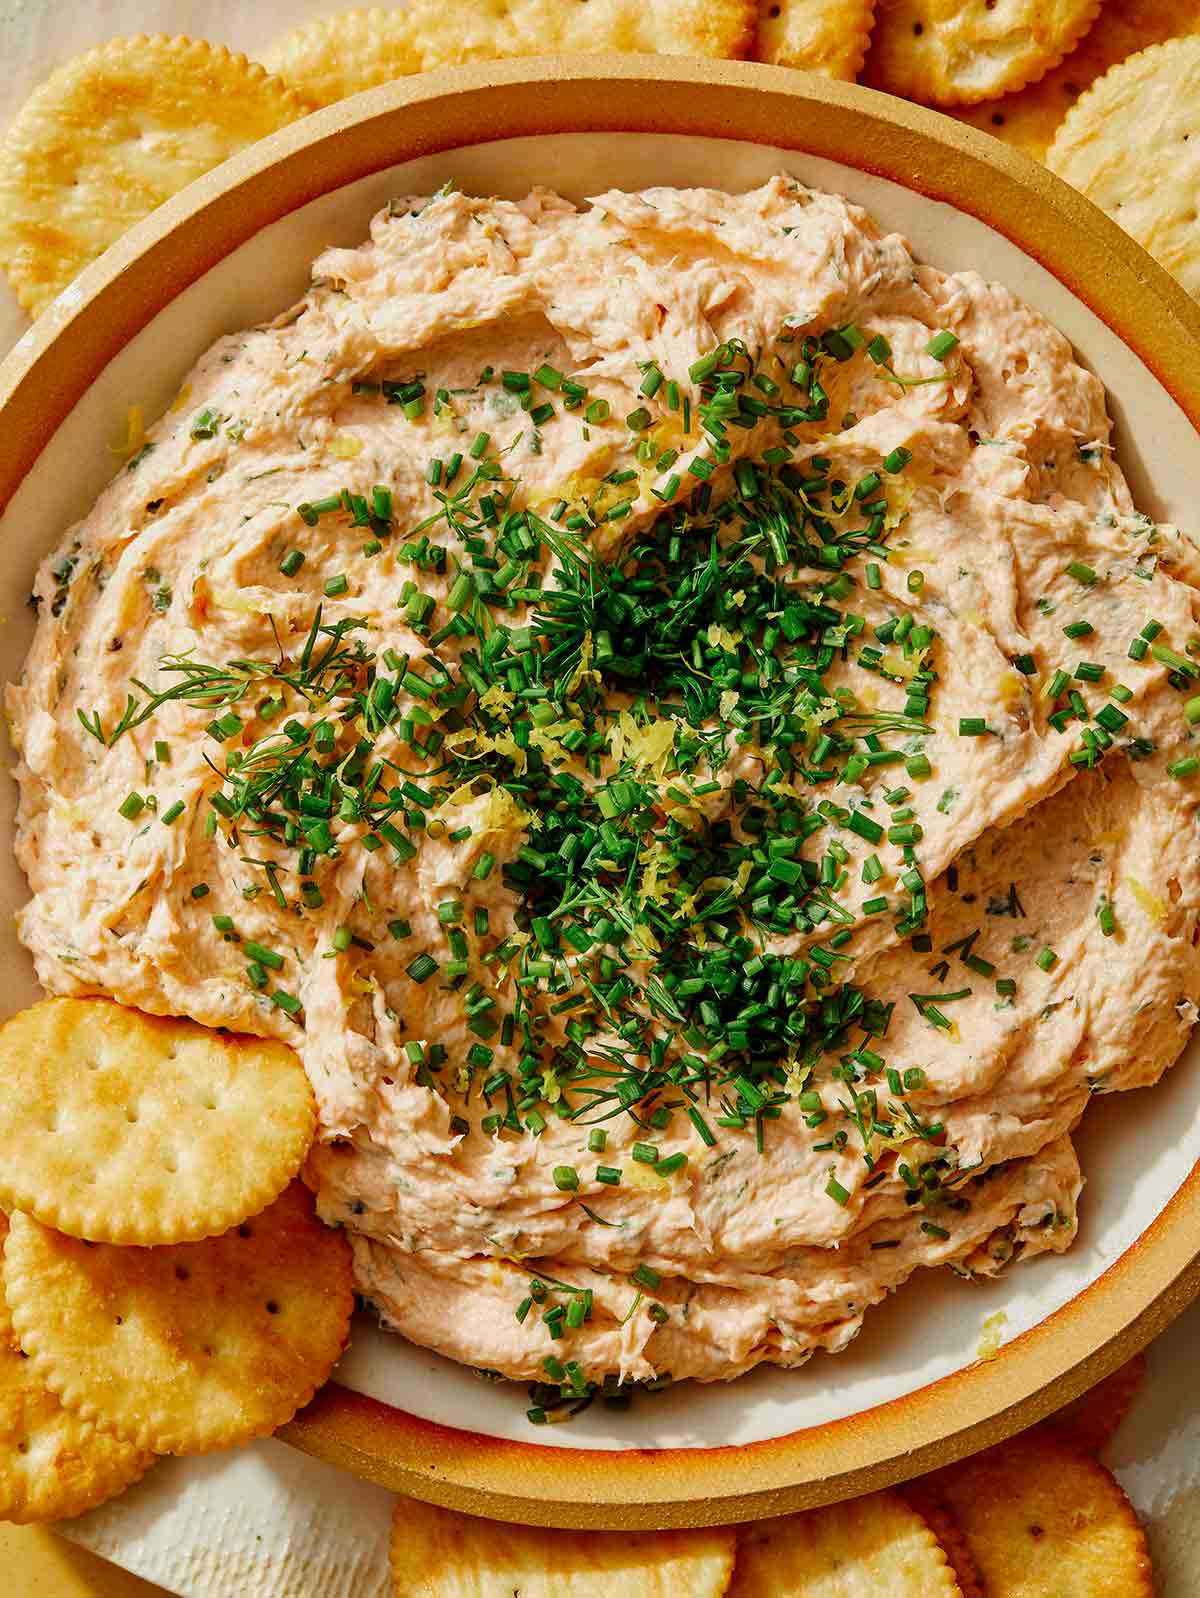
  1. Transfer to a serving bowl, top with herbs, and serve with crackers of choice.
Smoked salmon dip served in a bowl with crackers on the side.

Cold Smoked Salmon vs Hot Smoked Salmon

We like using hot smoked salmon in this salmon dip because it has a more intense smoky flavor and a firmer texture than cold smoked salmon.

If you’re wondering what the difference between the two is, it’s not the actual temperature of the salmon—we add “hot” smoked salmon that’s cold straight from the fridge! The difference between the two comes from the temperature used in the smoking process.

Cold-smoked salmon is smoked at lower temperatures, which gives it a smoother, almost silky texture and more mild flavor. This type of smoked salmon is good for piling on bagels. Hot smoked salmon is smoked at higher temperatures, giving it more of a “cooked” texture and a deeper flavor. It flakes well and adds a richer flavor to the dip.

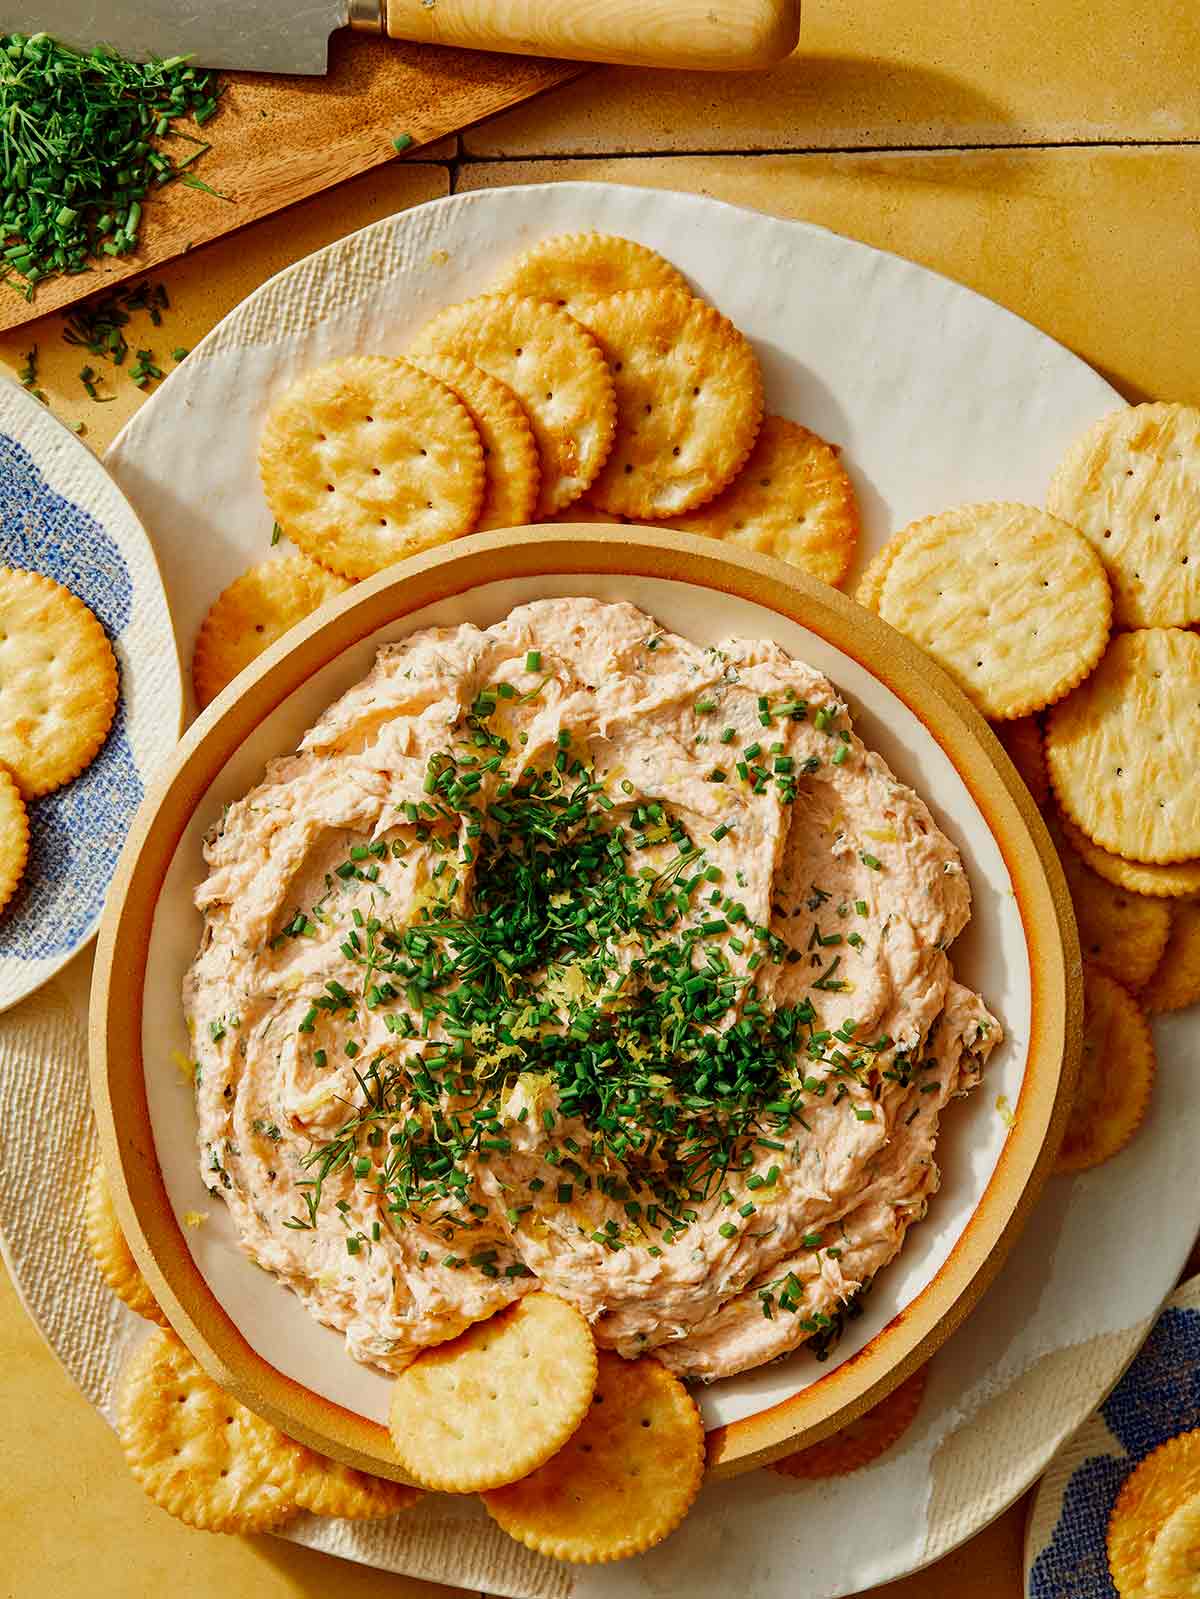
Smoked salmon dip being served with crackers and fresh herbs being chopped on the side.

How Long Will Smoked Salmon Dip Stay Fresh and Storing Instructions

You can enjoy this smoked salmon dip straight away, but we think it tastes best when it’s had the chance to sit for a bit, letting the flavors really meld together for at least a few hours. If you’re not serving it immediately, add it to an airtight container and store it in the refrigerator for 3 to 4 days.

Simple Variations

  • Make it lighter and higher in protein by swapping the mayonnaise with plain Greek yogurt. This adds a bit of a tangier flavor without taking away any of the creaminess.
  • Add a little spice with a dash of hot sauce, a teaspoon of horseradish, or a sprinkle of cayenne pepper or red pepper flakes.
  • Switch up the herbs to change the tone of this smoked salmon dip. The tarragon, dill, and chives add a nice, herby flavor with just a hint of sweetness to this dish. Try swapping this combination for basil and parsley, mint and cilantro, rosemary and thyme, or oregano and dill for a new and unique flavor.
  • Add a tablespoon or capers to the mix for a briney, tangier flavor.

What to Serve with Smoked Salmon Dip

Try serving this smoked salmon dip with:

More Delicious Dip Recipes You Will Love

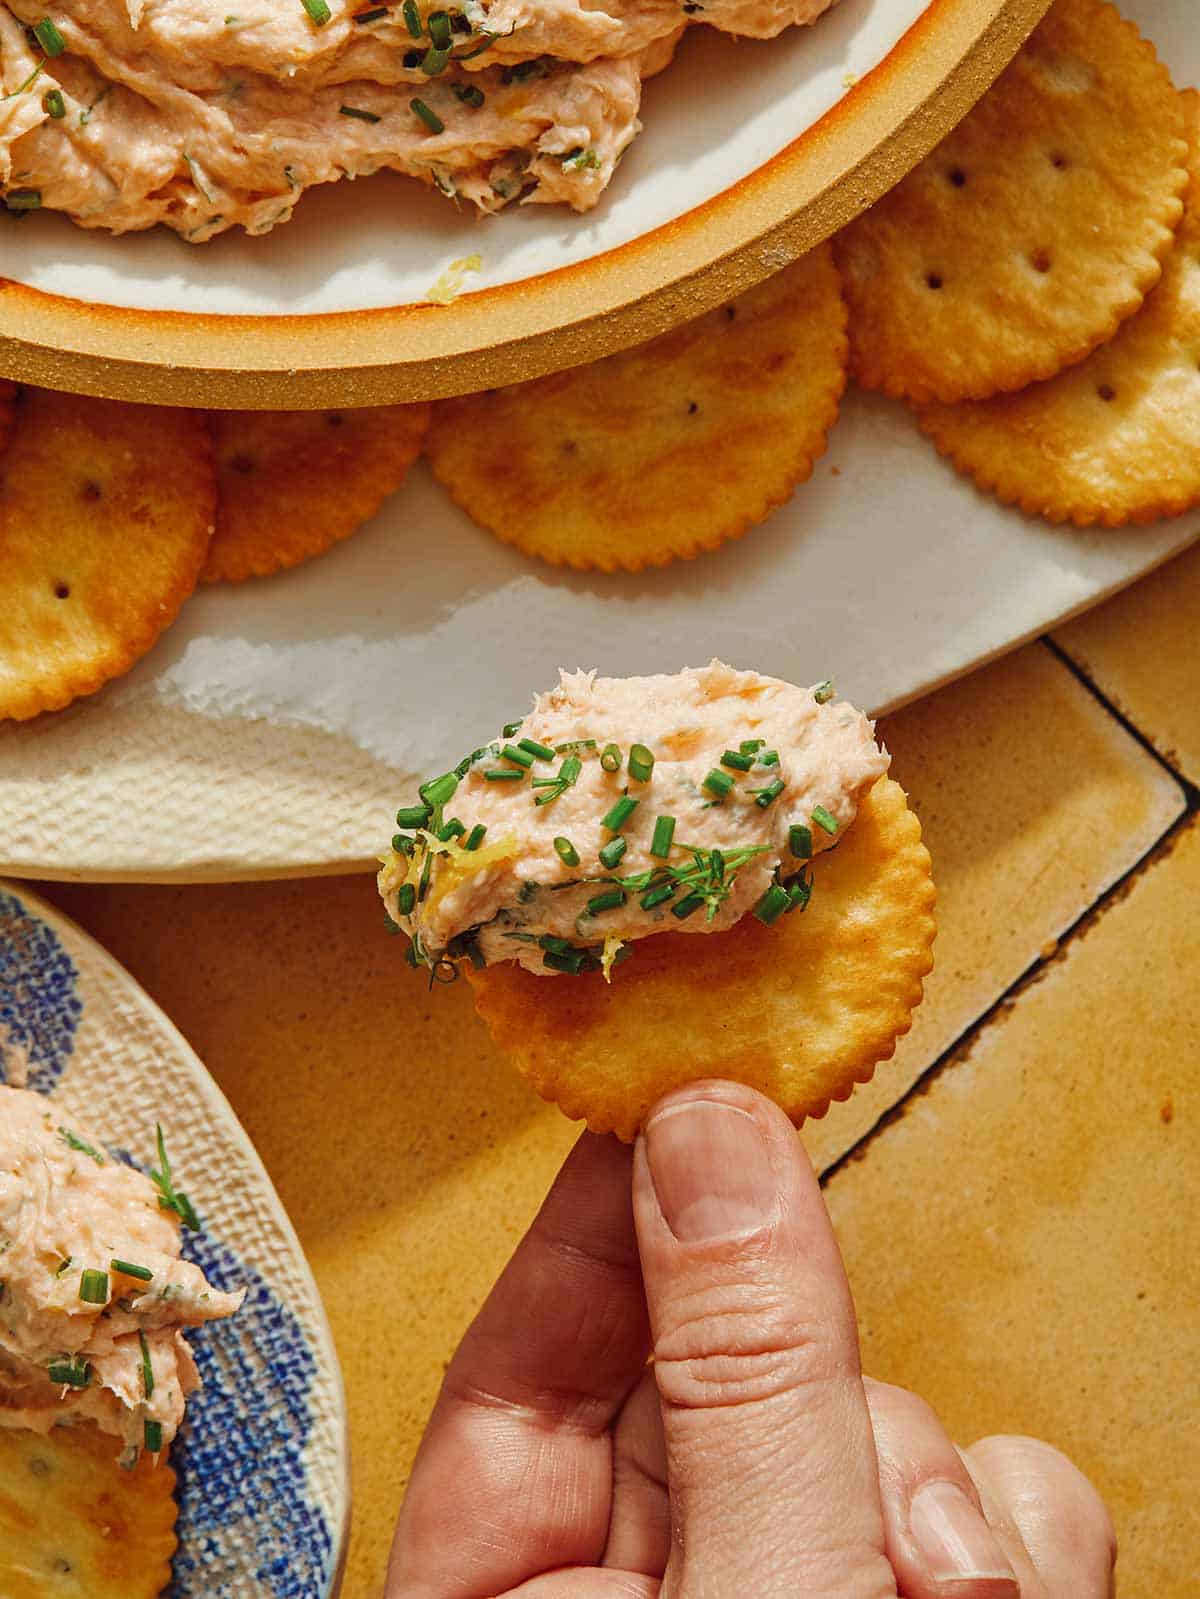
Smoked salmon dip on a cracker with a hand holding it.
Smoked salmon dip recipe in a bowl with crackers.
Print

Smoked Salmon Dip

Our Smoked Salmon Dip is bursting with flavor from fresh herbs, a hint of lemon, and salty flaked salmon with a creamy, cool mayonnaise and cream cheese base.
Course Appetizer, Snack
Cuisine American
Prep Time 10 minutes
Total Time 10 minutes
Servings 8
Calories 200kcal

Ingredients

  • 8 ounces hot smoked salmon roughly flaked
  • 8 ounces cream cheese softened
  • 1/3 cup mayonnaise
  • 1 roughly chopped garlic clove
  • 1 teaspoon lemon zest
  • 2 tablespoons fresh lemon juice
  • 2 tablespoons minced dill plus more for garnish
  • 2 tablespoons thinly sliced chives plus more for garnish
  • 1 tablespoon minced tarragon optional
  • salt and pepper to taste (only as needed for salt, as smoked salmon is very salty!!)

Instructions

  • Place smoked salmon, cream cheese, mayo, garlic, lemon zest, and lemon juice into a food processor and process until smooth.
  • Transfer salmon mixture to a bowl.
  • Fold in dill, chives, and tarragon (if using). Season with pepper. Season with salt only if needed (start with a tiny pinch since the smoked salmon is salty).
  • Transfer to a serving bowl, top with herbs, and serve with crackers of choice.

Nutrition

Calories: 200kcal | Carbohydrates: 3g | Protein: 7g | Fat: 18g | Saturated Fat: 7g | Polyunsaturated Fat: 5g | Monounsaturated Fat: 5g | Trans Fat: 0.02g | Cholesterol: 39mg | Sodium: 807mg | Potassium: 124mg | Fiber: 0.1g | Sugar: 1g | Vitamin A: 489IU | Vitamin C: 3mg | Calcium: 44mg | Iron: 1mg

The post Smoked Salmon Dip appeared first on Spoon Fork Bacon.

Lamb Kofta

This Lamb Kofta recipe is so good! I love making this dish because it packs a TON of flavor. I always double the recipe because the leftover lamb kofta is my favorite to eat the next day – cold over a simple salad, but it also reheats really well! We love pairing our lamb kofta over a bed of fragrant basmati rice and serving it with shredded lettuce with tomatoes and cucumbers for a bit…

Read More

The post Lamb Kofta appeared first on Spoon Fork Bacon.
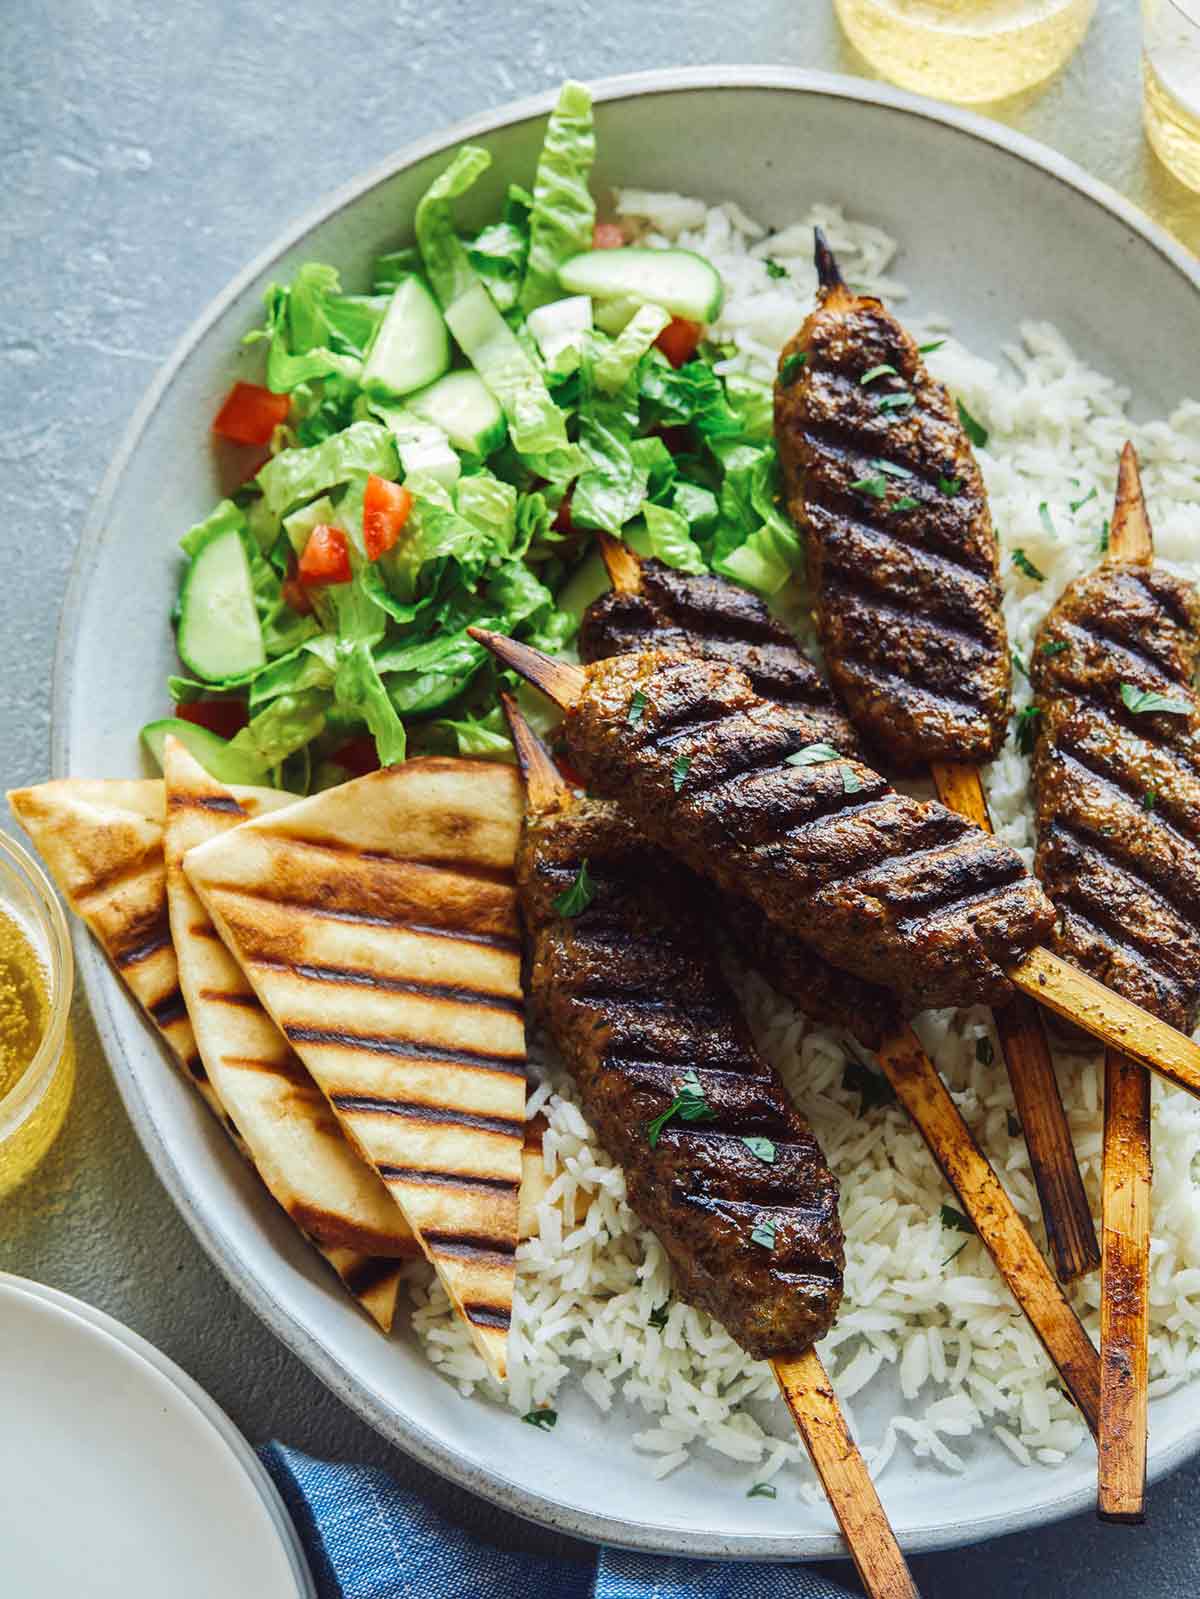
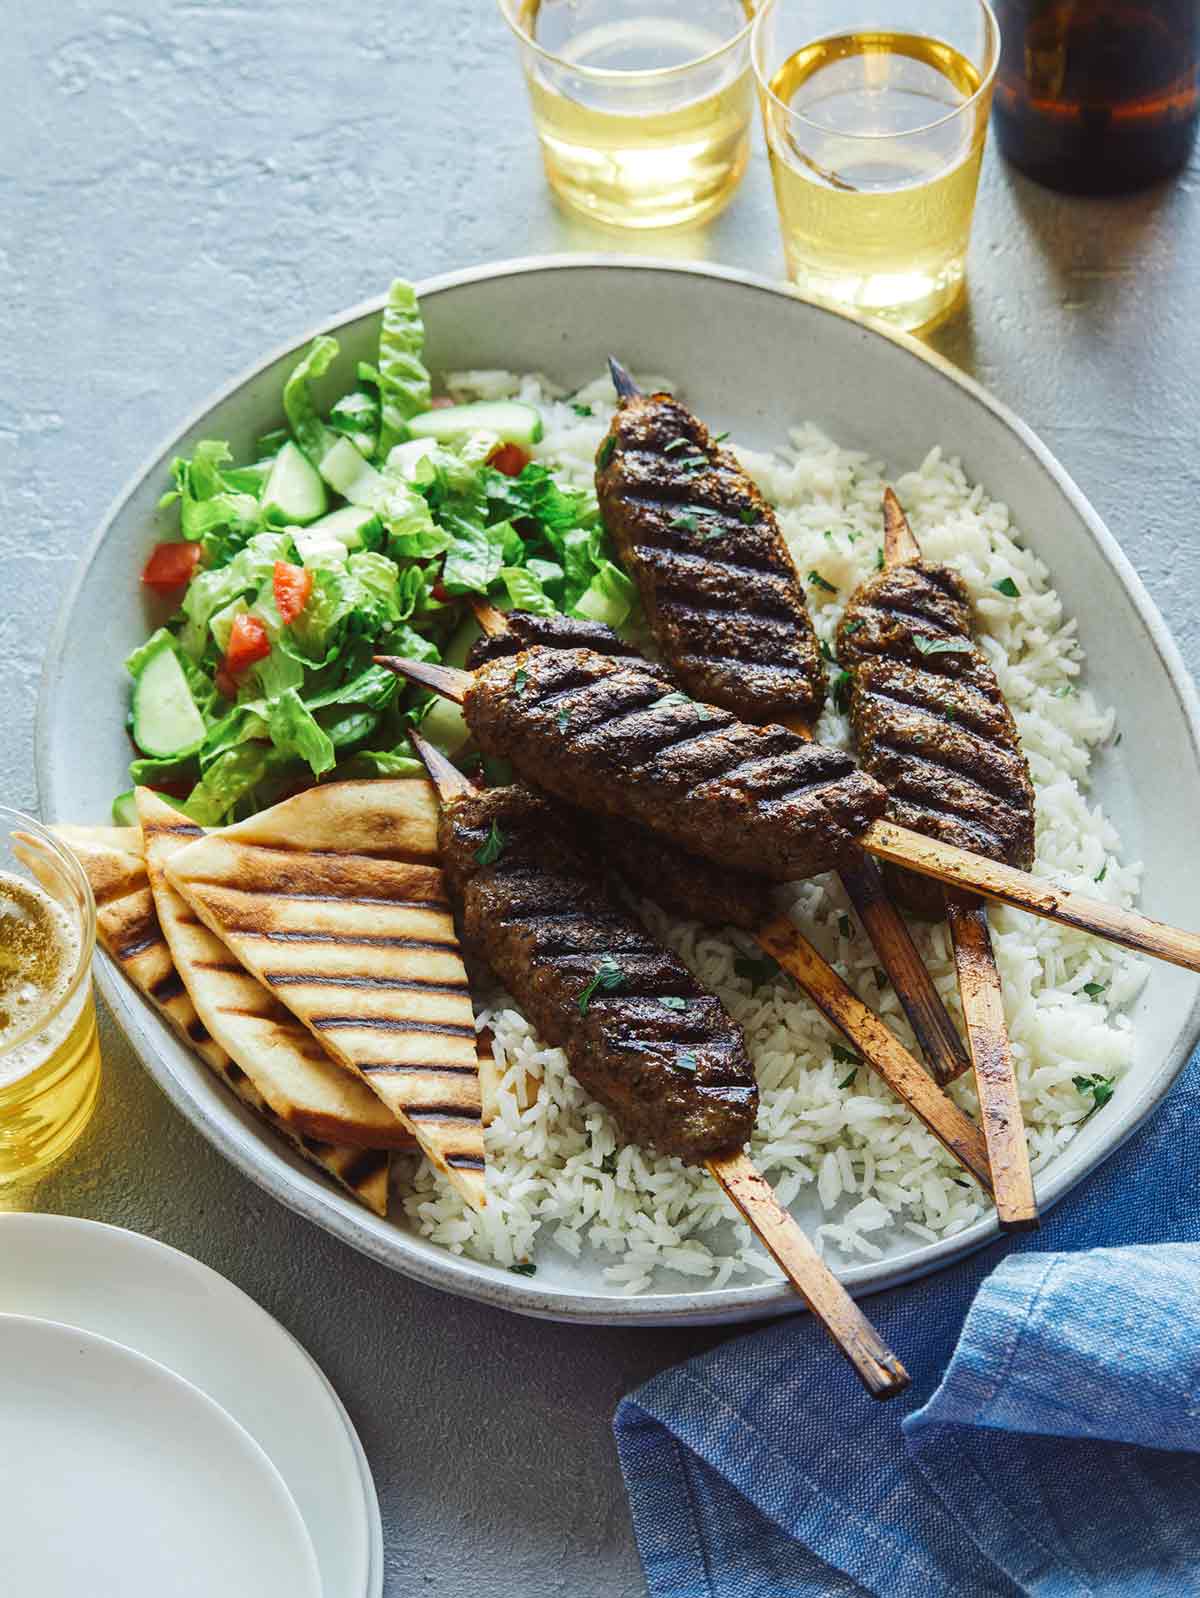
Lamb kofta on rice with pita triangles and salad.

This Lamb Kofta recipe is so good! I love making this dish because it packs a TON of flavor. I always double the recipe because the leftover lamb kofta is my favorite to eat the next day – cold over a simple salad, but it also reheats really well!

We love pairing our lamb kofta over a bed of fragrant basmati rice and serving it with shredded lettuce with tomatoes and cucumbers for a bit of crunch and freshness. A side of tzatziki (cucumber yogurt sauce) and hummus, if you have it, are also really nice additions to this meal!

What is Lamb Kofta?

Lamb kofta is a Middle Eastern dish made up of ground lamb, onion, garlic, a variety of spices, formed into a log, balls or patties and grilled. The dish is often found both skewered, kabob style, and not skewered, depending on cooking style and preference.

Our version uses shallots instead of onion and lightly sautés the shallot, garlic and spices before adding it to the ground lamb for a less acidic and more melt in your mouth flavor and texture.

Where is Lamb Kofta From?

Lamb Kofta is mostly associated with Middle Eastern cuisine, but the dish is actually found in a lot of different places. It’s not clear where Lamb Kofta specifically originated from. India, and Central Asia are among some of them. The dish varies depending on where it is from. Middle Easters koftas are usually made from lamb.

A lot of people ask if Lamb Koftas are Greek? There is a Greek version of Lamb Kofta. Greek or Balkin versions typically use beef, pork, and lamb together, or just one variety. In India, there are vegetarian versions of kofta prepared with ingredients like potatoes, banana, paneer, or calabash, and most often served with a curry or gravy.

How to Make Our Lamb Kofta Recipe

Ingredients

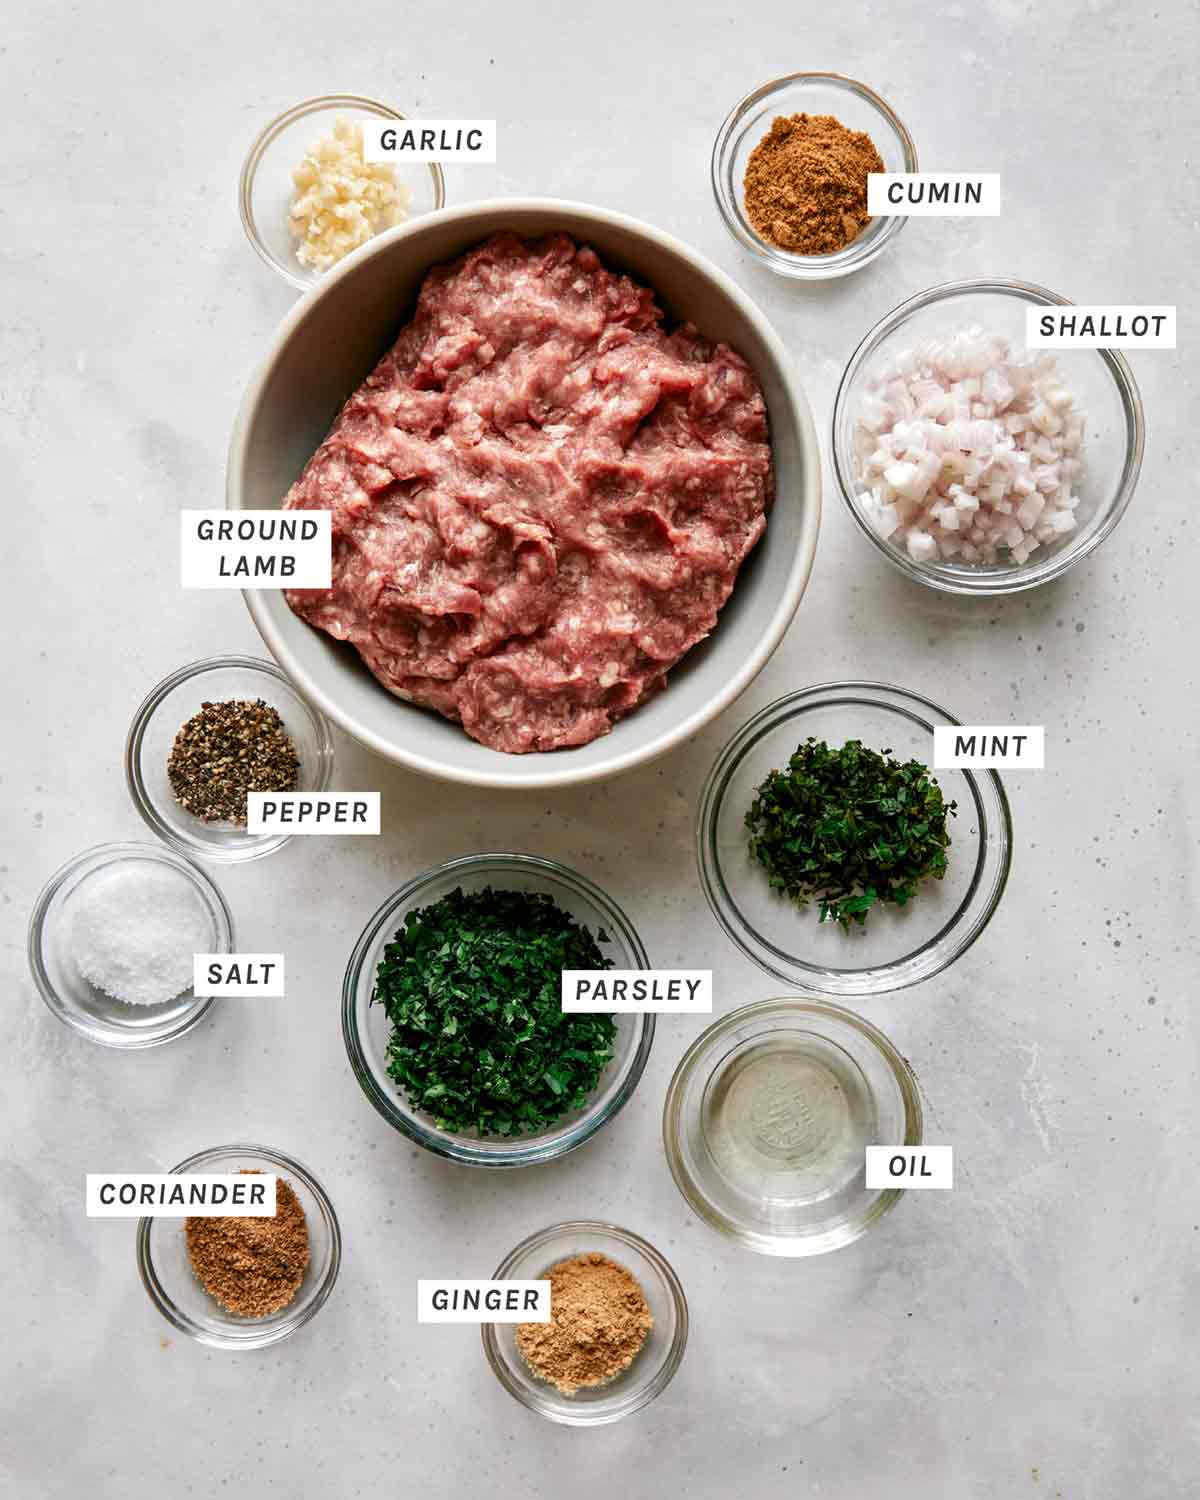
Lamb Kofta ingredients laid out on a kitchen counter.

Process

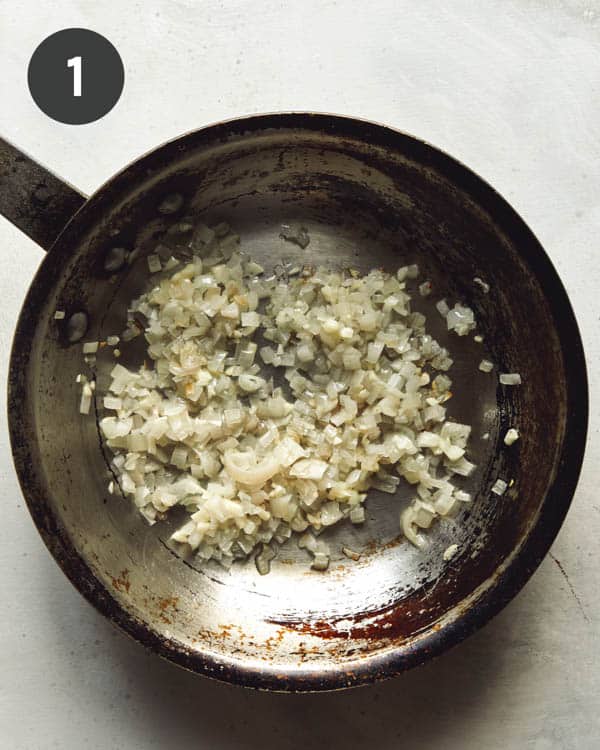
  1. Place a skillet over medium-high heat. Once skillet is hot, add some oil. Add shallot, garlic and ginger (if using fresh minced) to skillet and sauté.
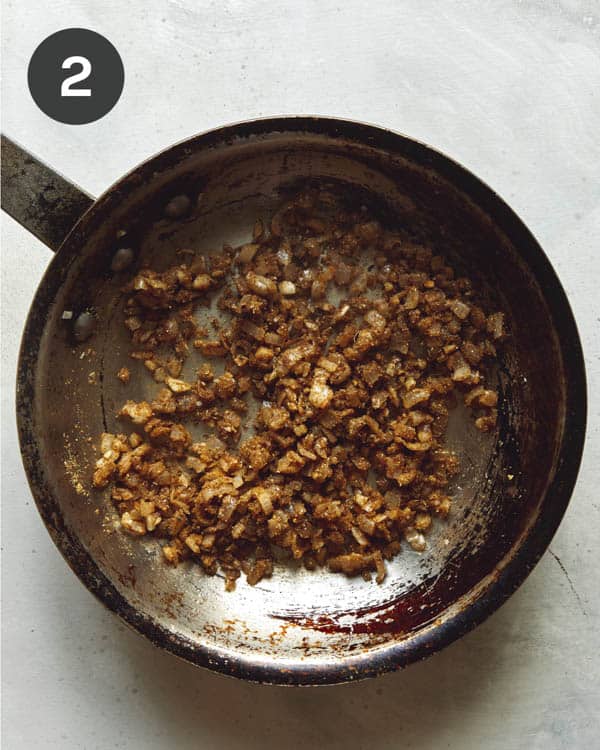
  2. Add cumin and coriander (and ginger, if using ground dry) and continue to sauté. Lightly season with salt and pepper. Remove shallot mixture from heat and slightly cool.
Sauté shallots and garlic in a skillet.
Spices mixed with shallots and garlic in a skillet.
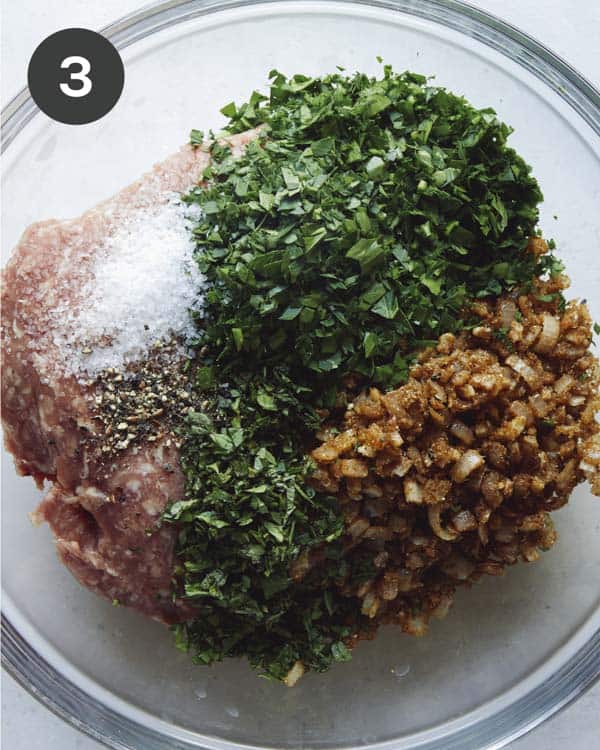
  1. In a mixing bowl combine ground lamb, shallot mixture, parsley, and mint. Season with salt and cracked black pepper.
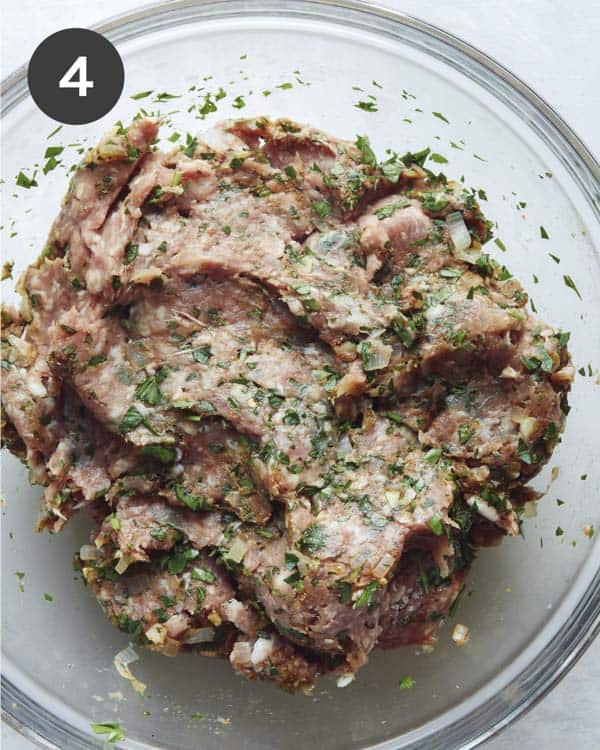
  2. Mix together until fully combined.
Ground lamb with seasoning in a glass bowl.
Ground lamb for Lamb Kofta combined in a glass bowl.
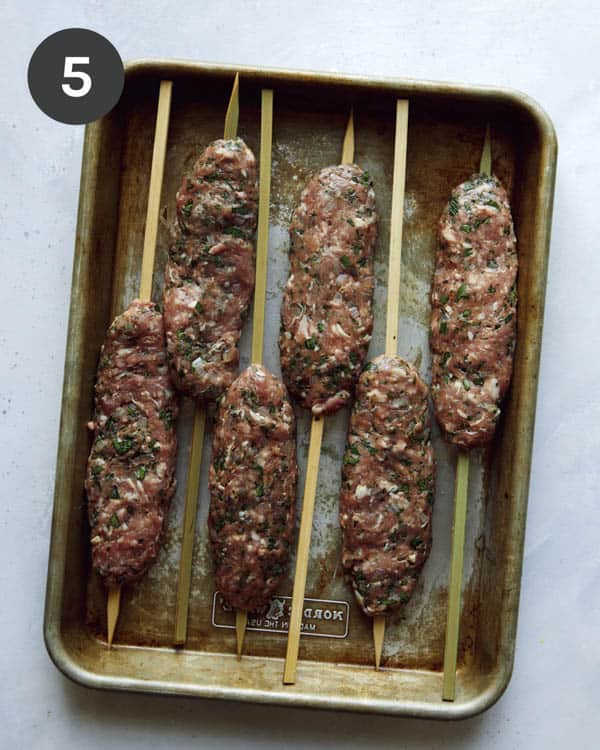
  1. Divide mixture into 6 equal portions and with wet hands form each portion of lamb into a log shape. Press a skewer into the center of each lamb log and form the meat around the skewer until secure.
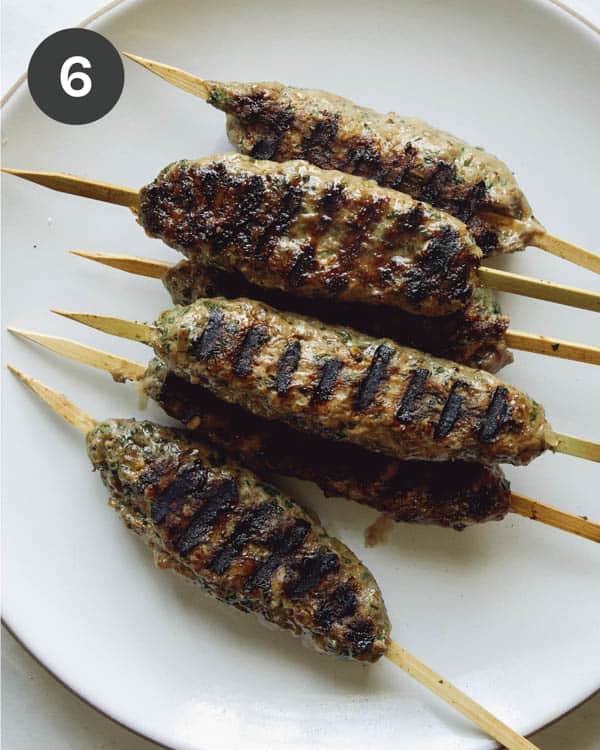
  2. Place large grill pan over medium-high heat. Once pan is hot, brush with remaining oil and add skewers. Grill skewers on each side until just cooked through with nice grill marks. Remove from heat, transfer to a platter.
Ground lamb formed onto skewers to be grilled to make Lamb Kofta.
Lamb kofta freshly grilled on a plate.

Tools You Will Need

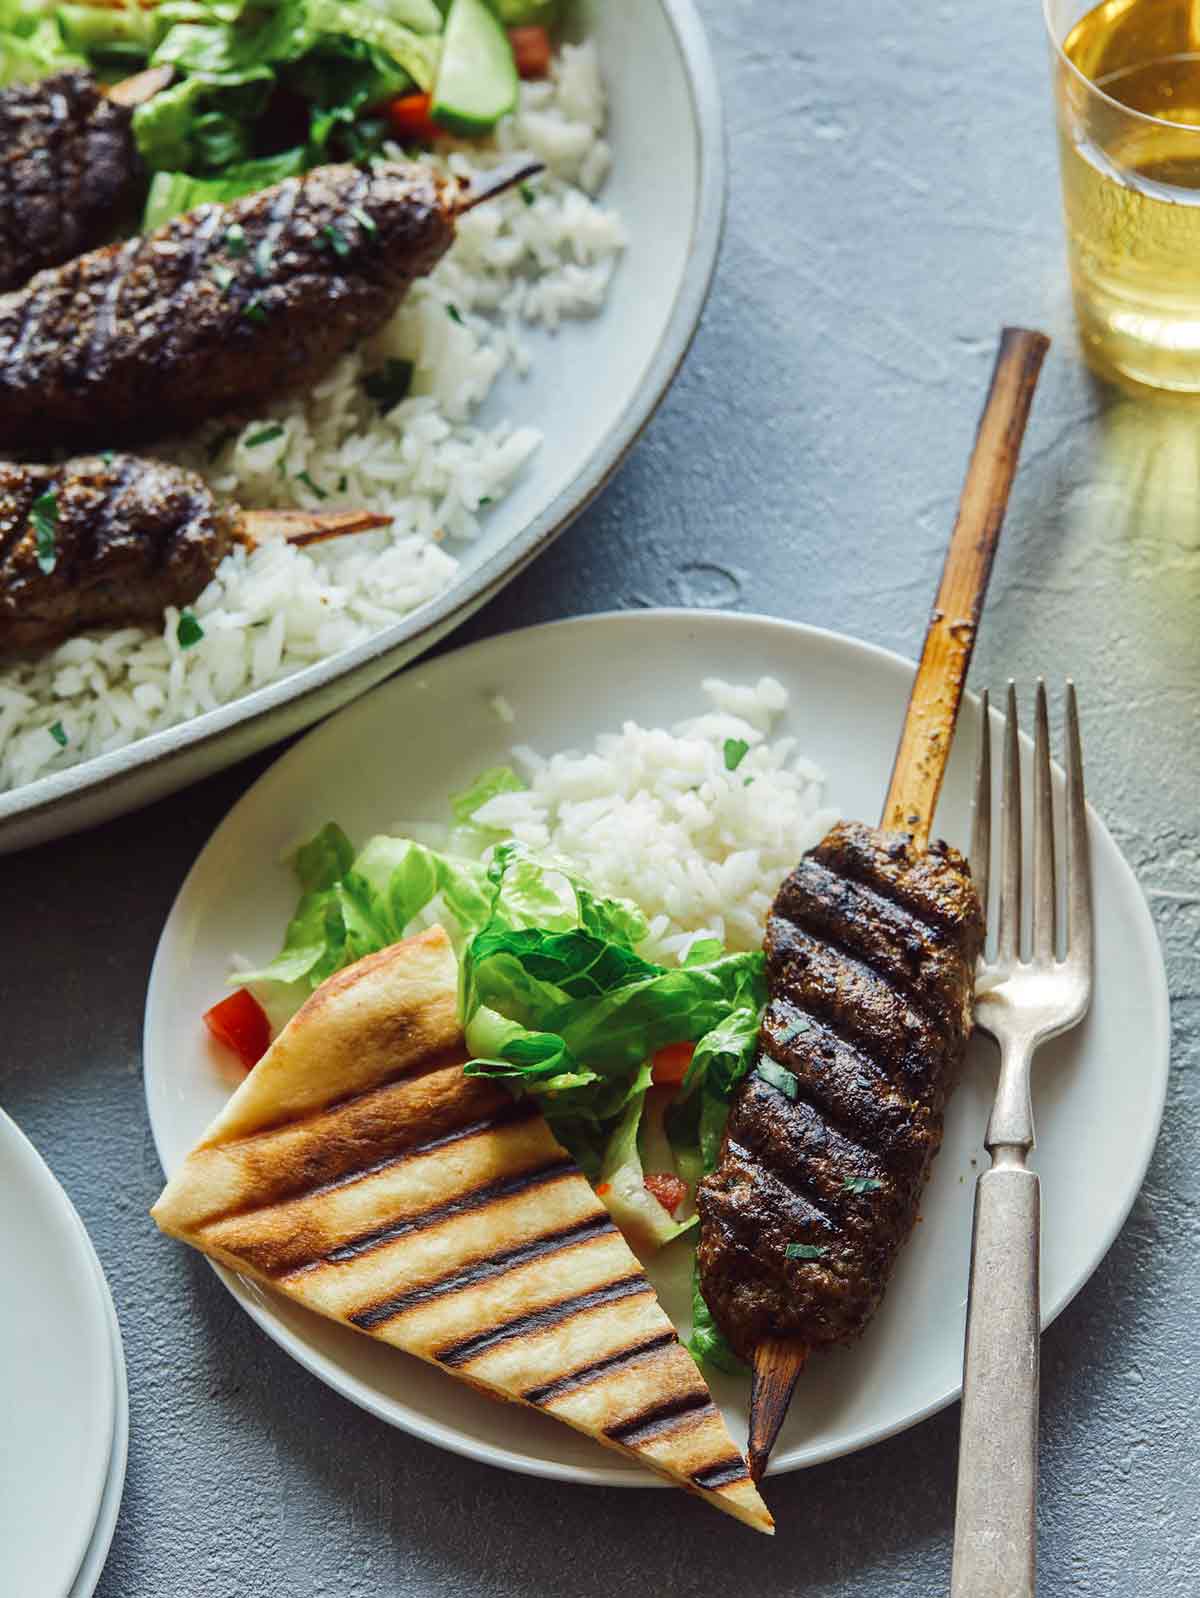
Lamb kofta recipe on a plate with rice and pita.

What to Serve with Lamb Kofta

The best part of lamb kofta are all the accompaniments. We love the fact you can pick and choose from a big plate of delicious sides. Our favorite thing to do is to make a Lamb Kofta taco. We love wrapping the kofta in pita and smothering it with tzatziki, before topping it will lettuce, cucumbers and tomatoes.  Here is a list of really delicious pairing suggestions:

  • tzatziki – the creamy sauce goes so well with the lamb
  • sliced cucumbers – we love the crunch of the cucumber and bright flavor
  • basmati rice – the aroma of basmati rice is a favorite of ours
  • lettuce – shredded romaine lettuce! Just like from the cucumber, we love the crunchy texture and fresh, mild flavor, but you can use any lettuce of your choice!
  • sliced/diced tomatoes or halved cherry tomatoes – the sweet acidity creates a nice balance from the lamb
  • pita bread – we love stuffing everything into a nice piece of pita for the perfect bite. If you grill it, even better!
  • hummus
  • fresh lemon wedges or halves to squeeze on top of everything
  • chopped parsley – to garnish everything
  • mint leaves
  • cilantro leaves
  • sliced red onion

Variations for Our Lamb Kofta Recipe

  • If you don’t have skewers, or don’t want to fuss with skewers you can make these into meatballs or patties.
  • Use other kinds of lean ground meat – if you don’t like lamb, you can substitute for ground chicken, pork, or beef.
  • If you don’t have shallots, you can substitute with diced sweet onion.

Tips and Tricks for Lamb Kofta Success

  • Make sure to pre-soak your skewers if you are using wood or bamboo. You don’t want them to catch on fire!
  • Be sure to not over mix the ground lamb mixture when you are combining all of the ingredients together to avoid the lamb getting tough when grilled.
  • When you form the skewers, we find it easiest to have a bowl of water next to you so you can dip your hands in it while forming the skewers or meatballs. This will prevent the meat mixture from sticking to your hands.
  • If you are nervous about cooking meat, we get it! It’s always such a bummer to under cook or over cook your meat. We suggest you invest in a nice instant read thermometer. The thermapen we linked to is expensive, but so so worth it! For ground lamb, you want an internal temperature of 160°F
Lamb kofta skewers on a platter with pita and rice.

More Delicious Lamb Recipes You Will Love

:amb Kofta with rice and lettuce on a platter.
Print

Lamb Kofta

This Lamb Kofta recipe packs a ton of flavor. The ground lamb is seasoned with a mixture of dried spices and fresh herbs, then grilled to perfection. Serve these Lamb Koftas with basmati rice, or get yourself a spread going and add tomatoes, cucumbers, lettuce, hummus and tzatziki.
Course dinner, Main Course
Cuisine Middle Eastern
Prep Time 15 minutes
Cook Time 21 minutes
Total Time 36 minutes
Servings 6
Calories 243kcal

Equipment

  • 6 bamboo skewers (12” long and 1/2” wide), soaked in water (~30 minutes)

Ingredients

  • 1 tablespoon neutral oil divided
  • 1 small minced shallot (about 3 tablespoons)
  • 2 minced garlic cloves
  • 1 teaspoon minced (or ground) ginger
  • 2 teaspoons cumin
  • 1 teaspoon coriander
  • 1 pound ground lamb
  • ½ bunch finely chopped parsley (about 1/4 cup)
  • 1/4 bunch finely chopped mint leaves (about 2 tablespoons)
  • salt and cracked black pepper to taste

Instructions

  • Place small skillet over medium-high heat. Once skillet is hot, add 1 teaspoon oil. Add shallot, garlic and ginger (if using fresh minced) to skillet and sauté for 4 to 5 minutes.
  • Add cumin and coriander (and ginger, if using dry ground) and continue to sauté for 1 minute. Lightly season with salt and pepper. Remove shallot mixture from heat and slightly cool, about 10 minutes.
  • In a large mixing bowl combine ground lamb, shallot mixture, parsley, and mint. Season with salt and cracked black pepper.
  • Mix together until fully combined.
  • Divide mixture into 6 equal portions and with wet hands form each portion of lamb into a 1 ½” by 7” log. Press a skewer into the center of each lamb log and form the meat around the skewer until secure, leaving about a 4” handle on the bottom and a 1” handle on top.
  • Place large grill pan over medium-high heat. Once pan is hot, brush with remaining oil and add skewers, about 1” apart. Grill skewers on each side, for 6 to 8 minutes or until just cooked through, with nice grill marks. Remove from heat, transfer to a platter
  • Serve with a bed of basmati rice and a romaine, cucumber and tomato side salad and hummus of choice. Serve.

Video

Notes

*Makes 6 (7” each) Kebabs*
Tips and Tricks for Lamb Kofta Success
  • Make sure to pre-soak your skewers if you are using wood or bamboo. You don’t want them to catch on fire!
  • Be sure to not over mix the ground lamb mixture when you are combining all of the ingredients together to avoid the lamb getting tough when grilled.
  • When you form the skewers, we find it easiest to have a bowl of water next to you so you can dip your hands in it while forming the skewers or meatballs. This will prevent the meat mixture from sticking to your hands.
  • If you are nervous about cooking meat, we get it! It’s always such a bummer to under cook or over cook your meat. We suggest you invest in a nice instant read thermometer. The thermapen we linked to is expensive, but so so worth it! For ground lamb, you want an internal temperature of 160°F

Nutrition

Calories: 243kcal | Carbohydrates: 2g | Protein: 13g | Fat: 20g | Saturated Fat: 8g | Polyunsaturated Fat: 2g | Monounsaturated Fat: 9g | Trans Fat: 0.01g | Cholesterol: 55mg | Sodium: 630mg | Potassium: 223mg | Fiber: 0.5g | Sugar: 0.4g | Vitamin A: 291IU | Vitamin C: 5mg | Calcium: 30mg | Iron: 2mg

The post Lamb Kofta appeared first on Spoon Fork Bacon.
Baked Gnocchi (with Sausage and Kale)

Our Baked Gnocchi with Sausage and Kale is a cozy, comforting one-dish meal, brimming with rich and savory flavors. It looks and tastes good enough for date night but is easy enough to make at the end of a busy workday. While the ingredients are simple, they combine for a decadent and filling pasta dinner you’ll love. You can make homemade gnocchi using our Simple Homemade Gnocchi Recipe or store-bought; either will do the trick….

Read More

The post Baked Gnocchi (with Sausage and Kale) appeared first on Spoon Fork Bacon.
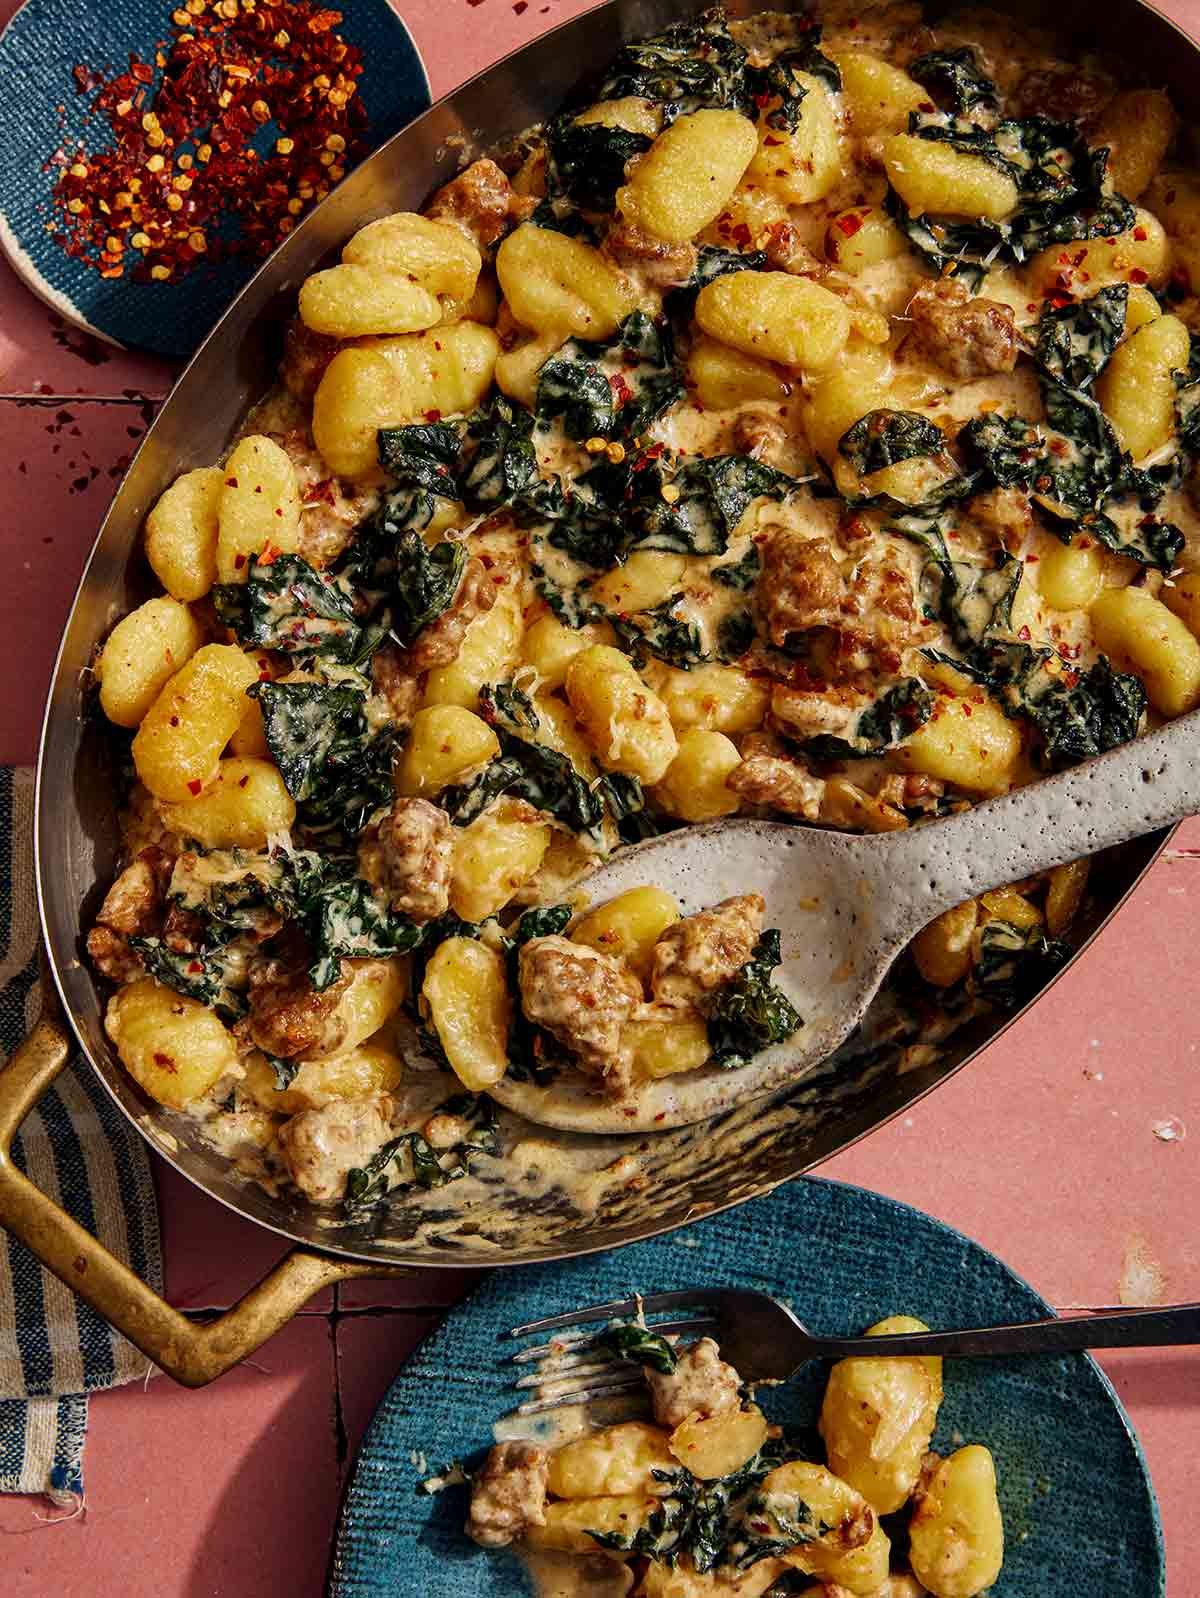
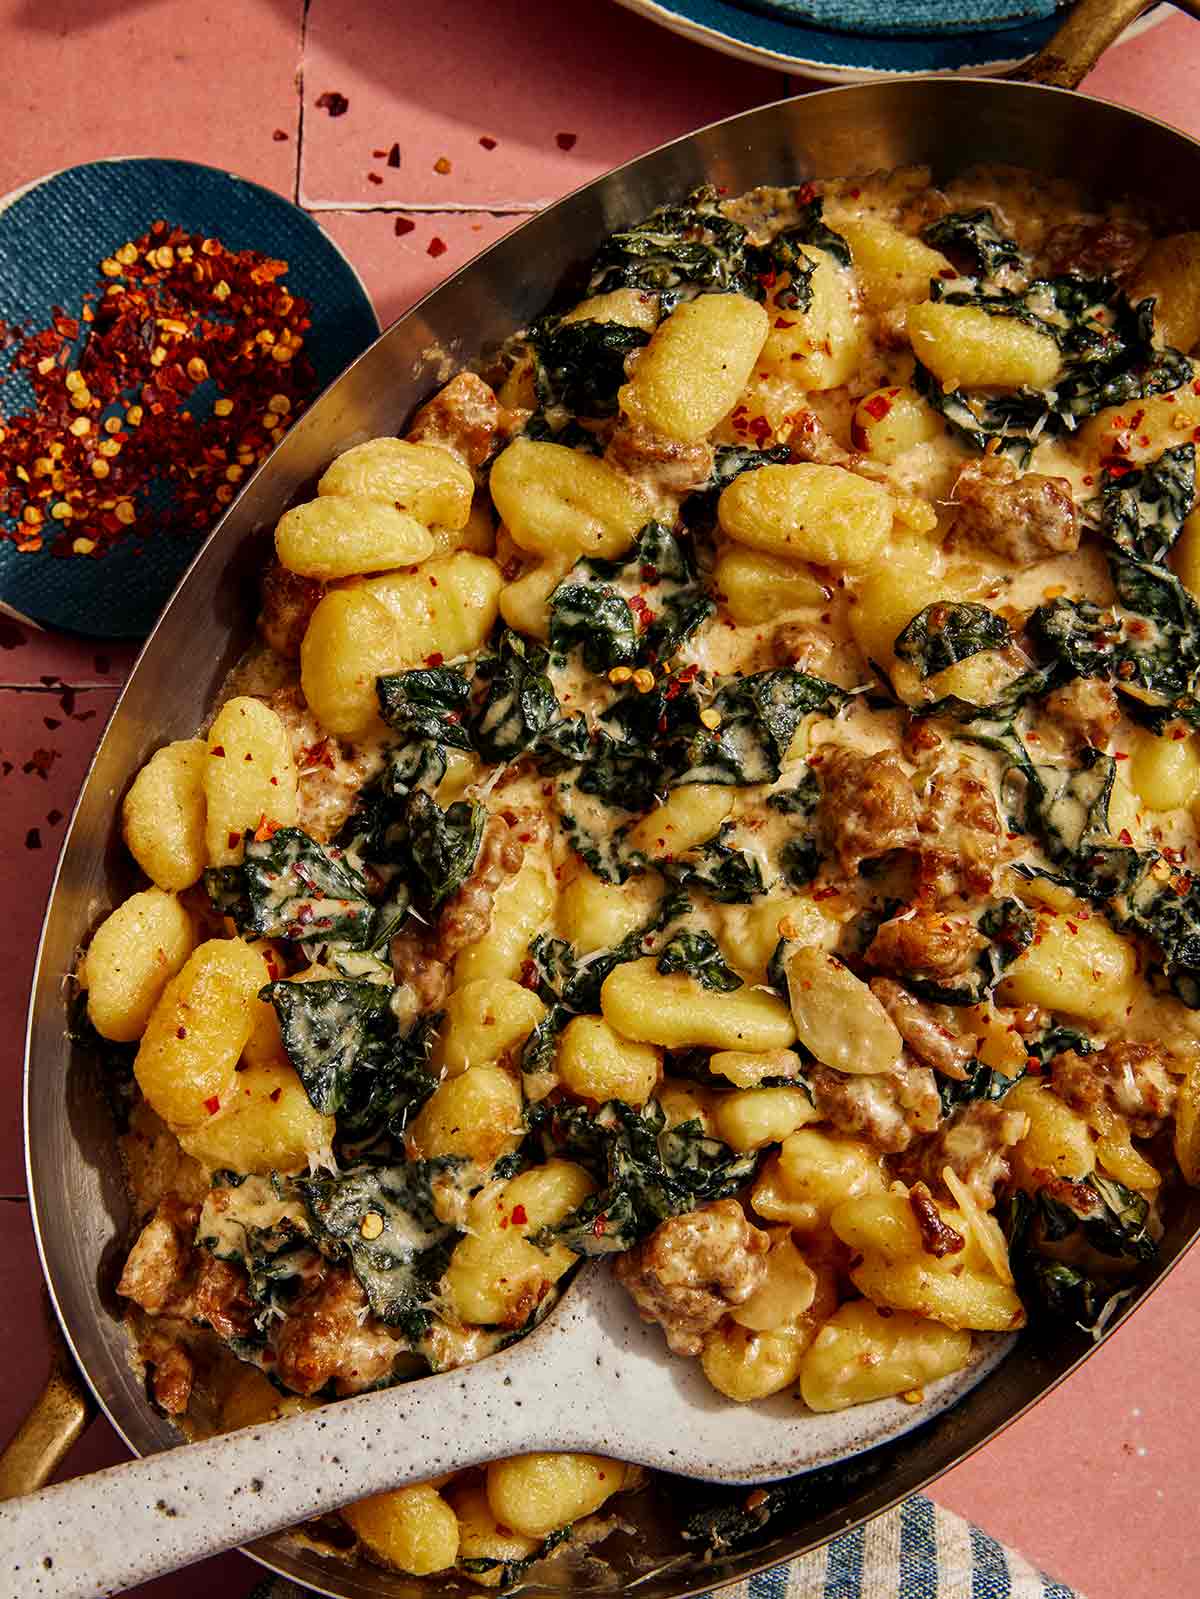
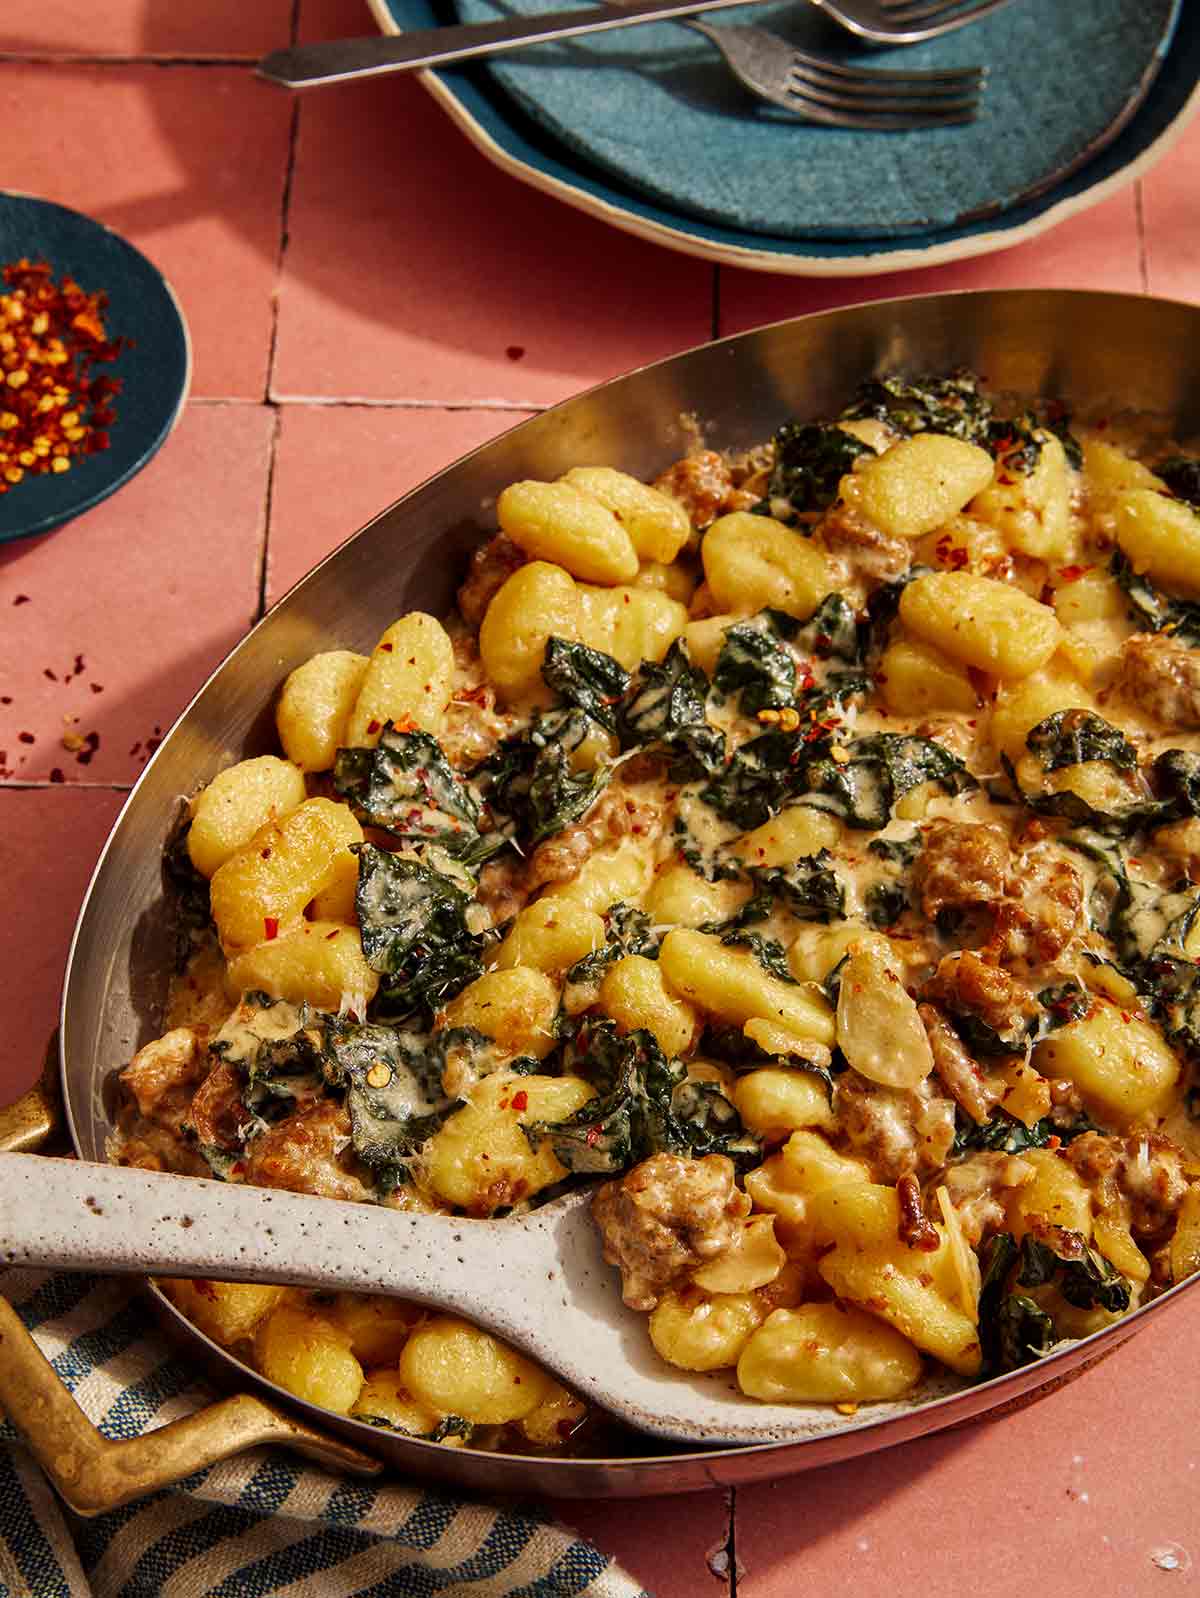
Baked gnocchi being scooped out onto a plate.

Our Baked Gnocchi with Sausage and Kale is a cozy, comforting one-dish meal, brimming with rich and savory flavors. It looks and tastes good enough for date night but is easy enough to make at the end of a busy workday. While the ingredients are simple, they combine for a decadent and filling pasta dinner you’ll love.

You can make homemade gnocchi using our Simple Homemade Gnocchi Recipe or store-bought; either will do the trick. You could even try our Sweet Potato Gnocchi for a fun and colorful twist! Whichever kind you choose, these soft, doughy potato dumplings pair perfectly with rich sausage and hearty kale. Once you love gnocchi as much as we do, you can even substitute it for noodles like we do in our favorite Chicken and Gnocchi Soup!

How to Make Baked Gnocchi

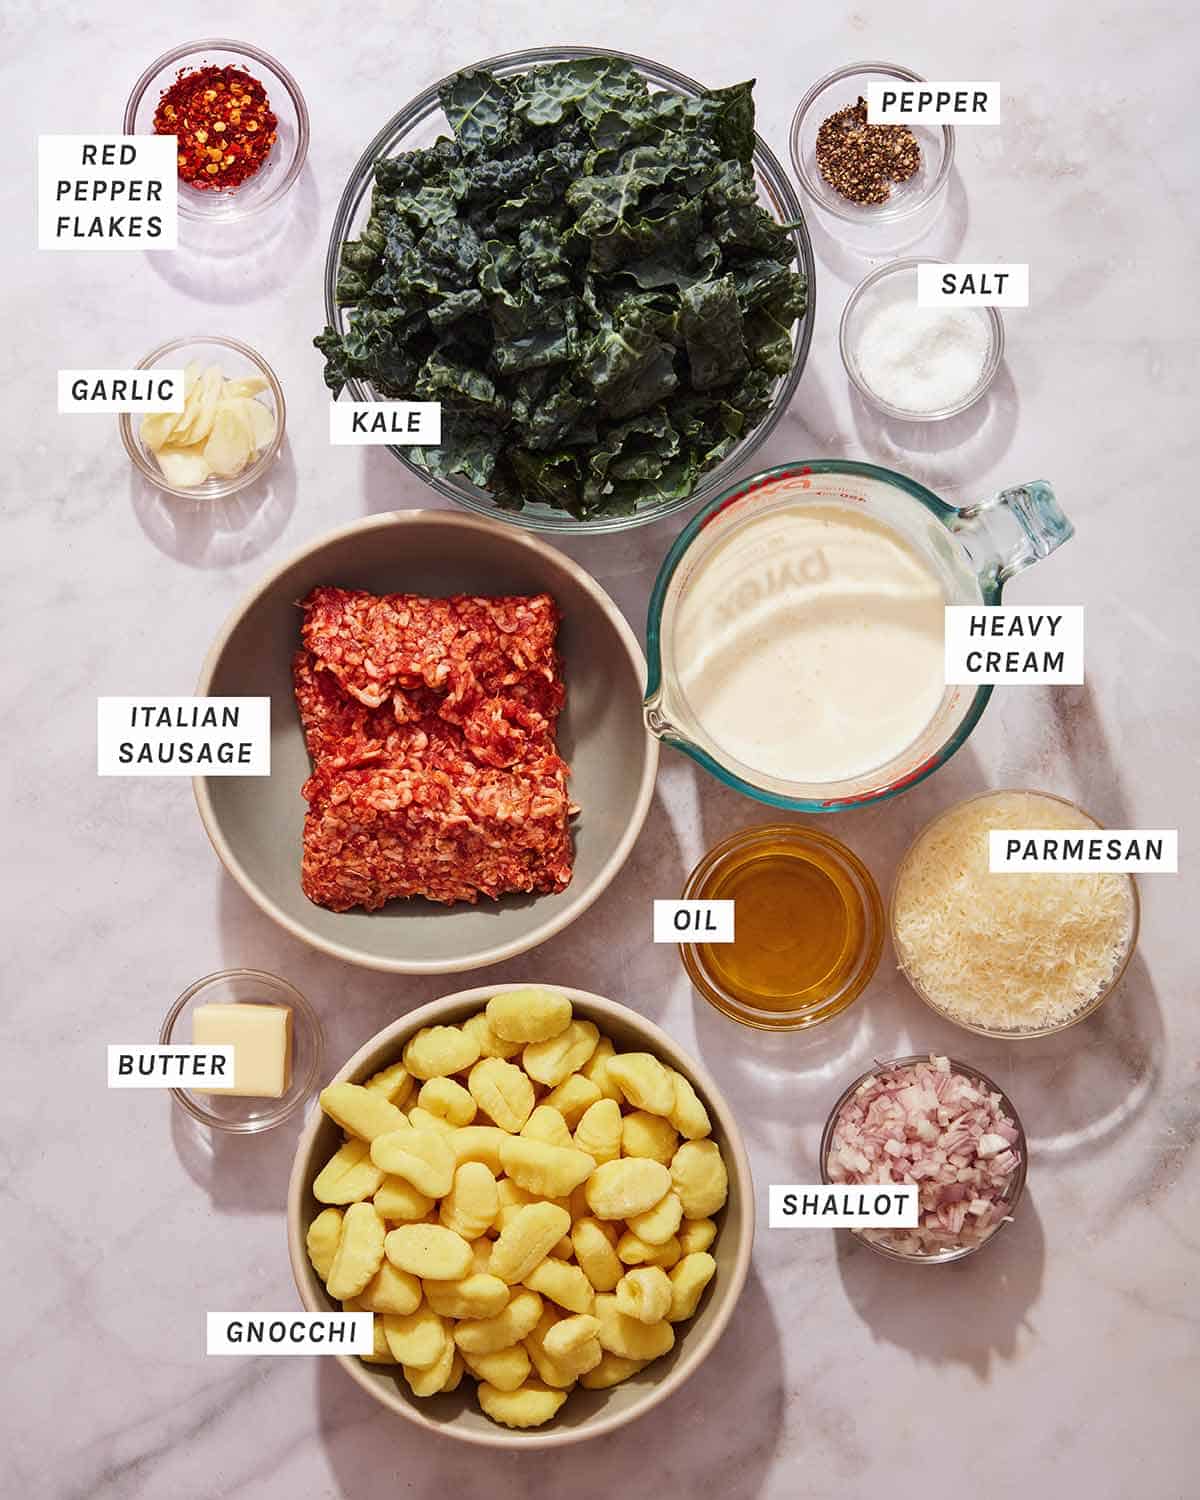
Ingredients

Baked gnocchi ingredients.

Process

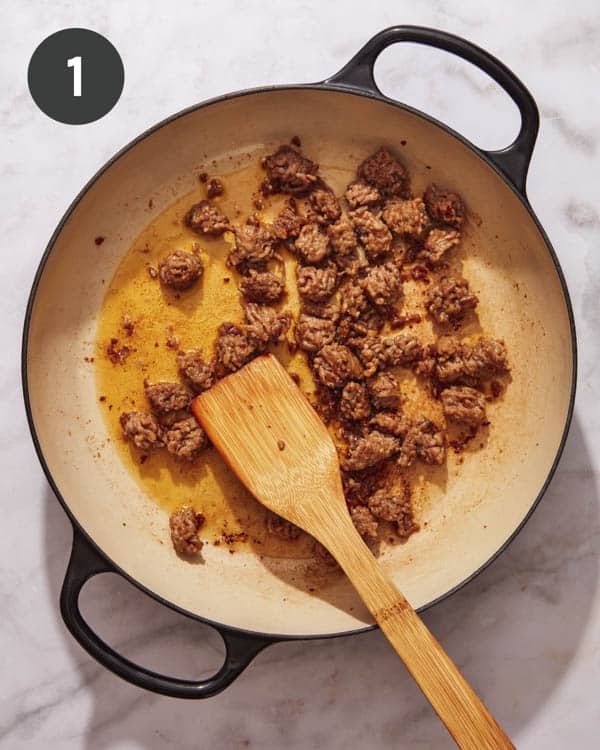
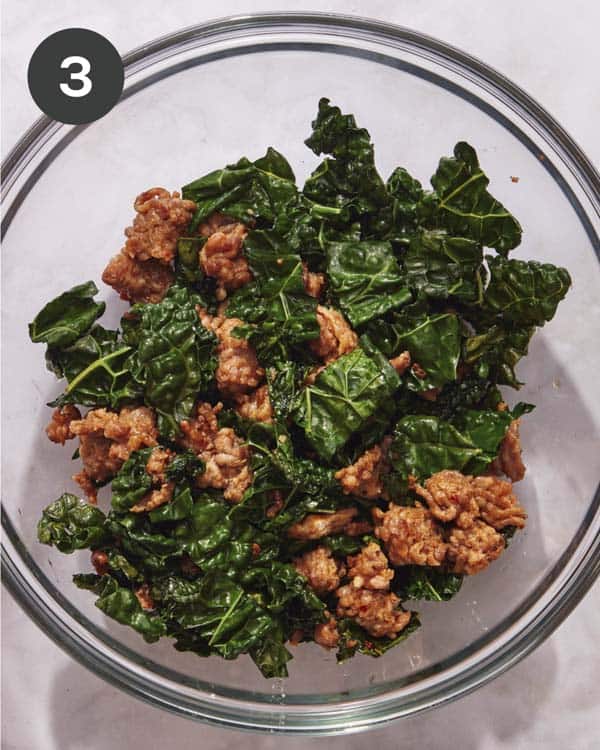
  1. Preheat oven to 375˚F. In a large pan, add oil and place over medium-high heat. Add sausage and brown for 3 to 4 minutes, breaking up into bite-sized pieces.
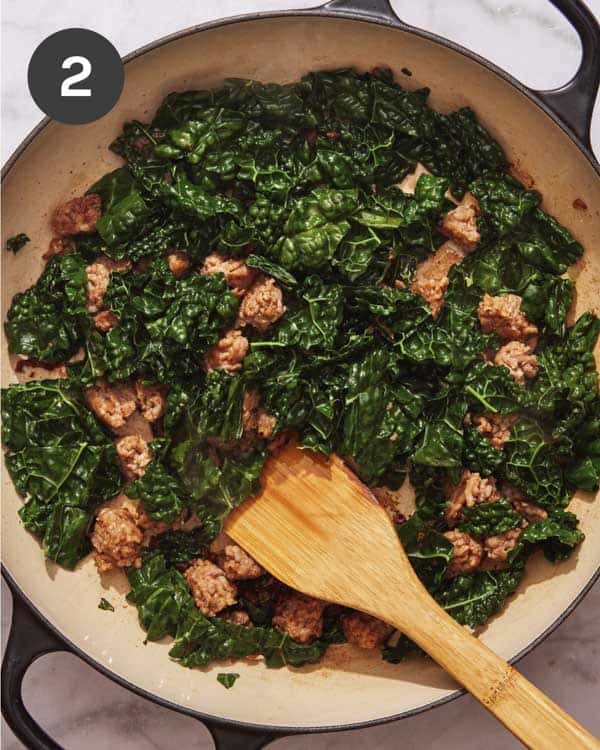
  2. Add kale and continue to sauté for an additional 3 to 4 minutes.
Sausage cooking in a skillet.
Sausage and kale cooking in a skillet.
  1. Transfer mixture into a mixing bowl and set aside.
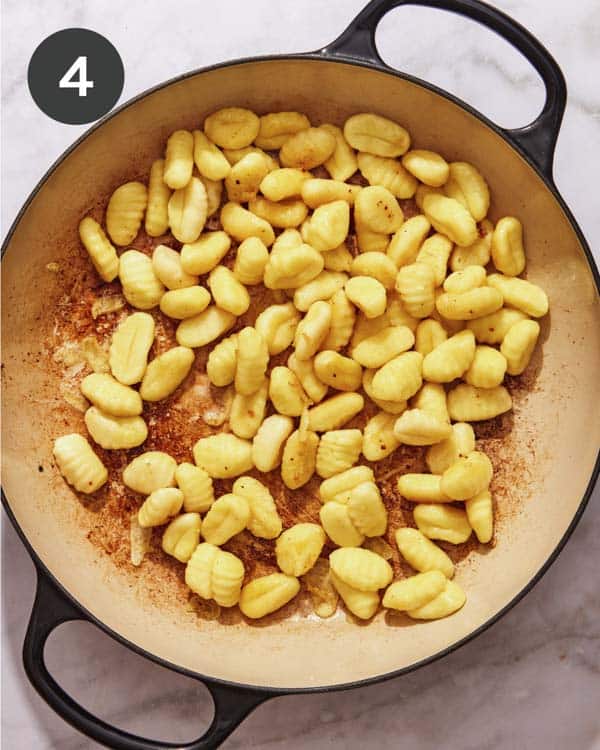
  2. Melt 2 tablespoons butter into pan and add gnocchi to the pan. Lightly brown for 2 to 3 minutes.
Sausage and kale in a bowl.
Gnocchi searing in a skillet.
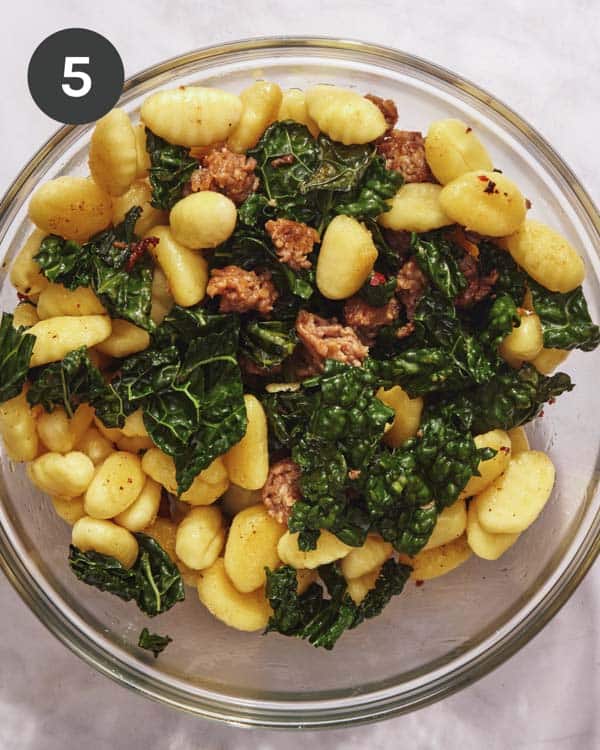
  1. Transfer gnocchi into the same bowl as the sausage and kale.
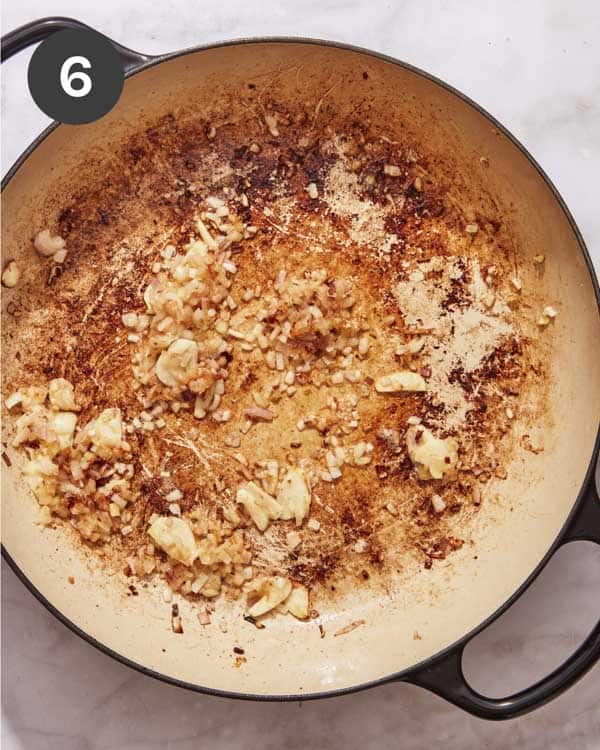
  2. Add shallots, garlic, and cream to the skillet and simmer over medium heat.
Gnocchi added to a bowl with sausage and kale.
Shallots and garlic cooking in a skillet.
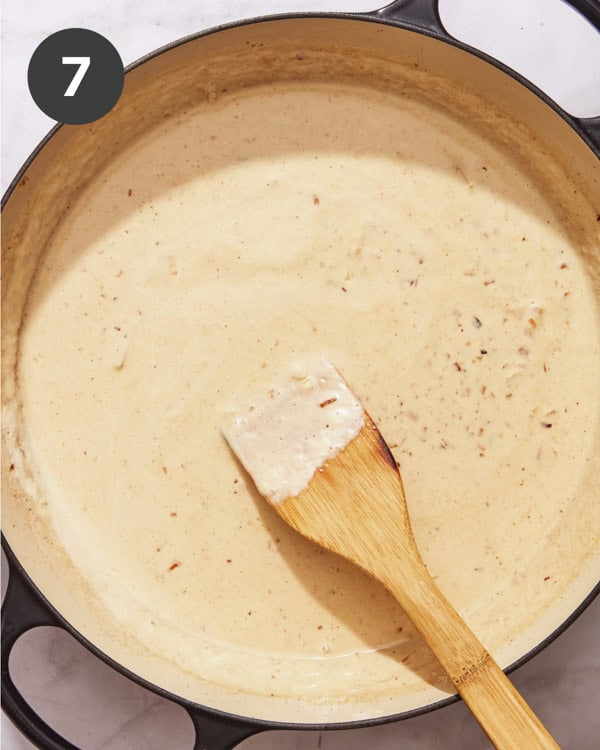
  1. Once the mixture has reduced by ⅓, add the Parmesan and stir. Season with salt and pepper.
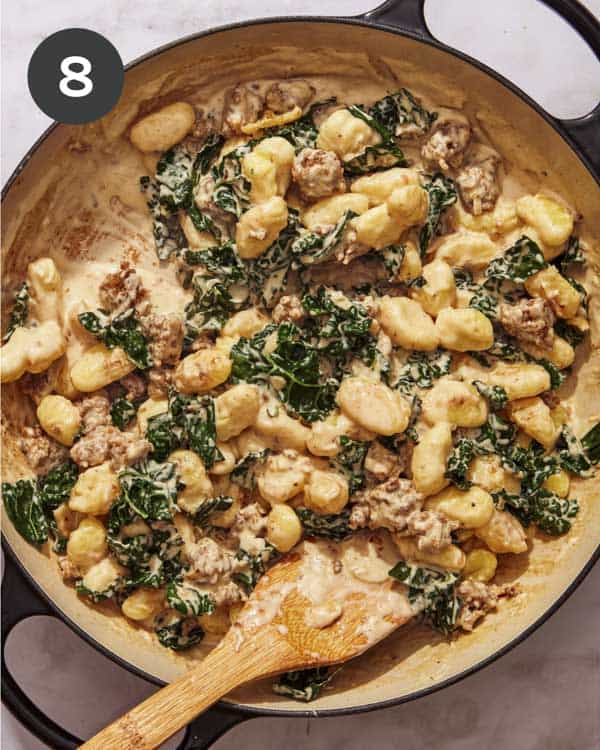
  2. Add the gnocchi mixture and continue to simmer over low heat for 1 to 2 minutes.
Cream sauce simmering to make baked gnocchi.
Gnocchi, kale, and sausage in a skillet being tossed with a cream sauce.
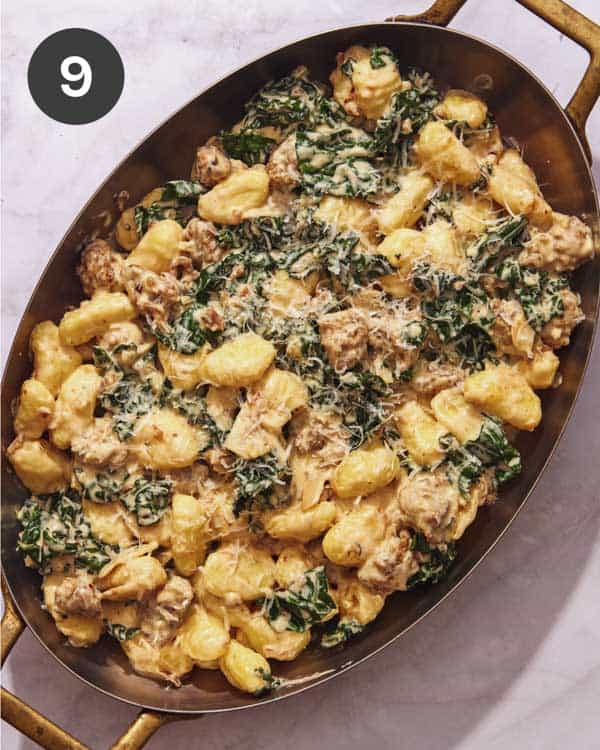
  1. Transfer the mixture to a shallow baking dish and bake for 15 to 20 minutes until the sauce has thickened.
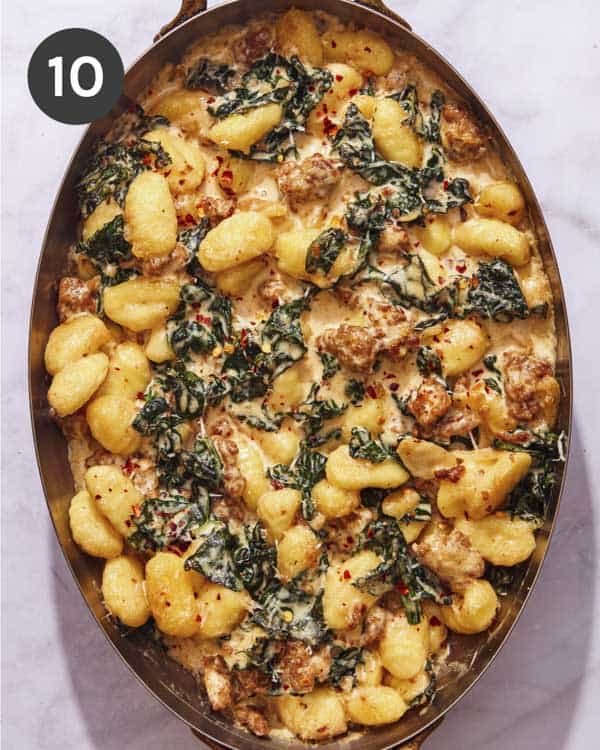
  2. Remove from heat, top with crushed pepper flakes, and serve.
Gnocchi mixture in a pan about to go into the oven.
Baked gnocchi fresh out of the oven.

Important Tools You Will Need

Variations

  • Replace the heavy cream with a tomato sauce or marinara for a lighter, tangy flavor. For a ‘rosé style sauce, swap half the cream for marinara.
  • Add a tablespoon or two of pesto to the cream sauce for a light, herby flavor.
  • Add a scoop of Calabrian chili paste for heat.
  • Swap plain potato gnocchi for sweet potato, cauliflower, or whole wheat gnocchi.
  • Swap all or some cheese with mozzarella, fontina, or gouda cheese.
  • Use spinach or Swiss chard in place of the kale.
  • Add a handful of sun-dried tomatoes, roasted red peppers, or mushrooms for a unique burst of flavor to the dish.

Instructions for Using Frozen Gnocchi

You can use frozen gnocchi instead of fresh or dried gnocchi for this recipe.

To use frozen gnocchi, add them to the pan straight from the freezer (no thawing required), exactly as you would with fresh gnocchi. Just add a few minutes to the cooking time as you sauté. Frozen gnocchi will take closer to 5-6 minutes to thaw through and brown on the outside, as opposed to 2-3 minutes for fresh.

Tips and Tricks for Baked Gnocchi Success

  • To avoid overcooked and mushy gnocchi, do not boil them ahead of time or let them boil in the sauce. All they need is a few minutes to brown and a couple of minutes to simmer in the sauce before adding them to the pan to bake.
  • When sauteeing the kale, give it enough time to wilt. This helps the kale become tender as it bakes, so you won’t be stuck with tough, chewy pieces in your baked gnocchi.
  • Use fresh ingredients if you can. There isn’t much to this recipe, so quality is extremely important. Freshly grated parmesan cheese, quality sausage, and fresh garlic and shallots will shine through in this dish.
  • Be careful not to reduce the sauce too much as it’s simmering on the stove. It will continue to thicken as it bakes in the oven.
Baked gnocchi with some red pepper flakes on the side.

Make Ahead, Freezing and Reheating Instructions

Make Ahead

You can easily make this baked gnocchi dish up to 24 hours ahead of time by assembling the entire thing right up to the point of putting it in the oven or meal-prepping a couple of ingredients to shave time off of cooking during the week.

To meal prep the entire dish, follow the directions as written, and once you’ve added everything to the baking dish, let it cool before covering it with plastic wrap and a lid or aluminum foil. Refrigerate it for up to 24 hours. When you’re ready to bake it, remove the dish from the fridge and let it sit at room temperature for about 30 minutes, then bake as directed. If it’s still cold when you put it in the oven, it may need an extra 5 minutes in the oven.

Or you can shave time off this meal by preparing separate components ahead of time and then assembling and baking when you’re ready. Brown the sausage, gnocchi, and kale let them cool and store the mixture in an airtight container in the refrigerator for up to 2 days. Then, when you’re ready to bake it, proceed with the recipe as written.

Baked gnocchi in a pan being scooped out to serve.

Freezing

Freezing dishes with cream sauces isn’t recommended, as the texture tends to be off when reheating. However, you can still freeze the entire prepared dish or leftovers by adding them to a freezer-safe dish and closing it tightly, removing as much air as possible. Freeze for up to 3 months.

To reheat, let it thaw in the refrigerator overnight, then follow reheating instructions for leftovers or bake as directed.

Reheating

For the best results, we love reheating baked gnocchi in the oven. Just add your leftovers to an oven-safe container and cover with aluminum foil. Bake in an oven preheated to 350˚F for 10 minutes or until warmed through. You can remove the foil in the last couple of minutes as long as the gnocchi isn’t dried out. (If it does seem dry, just add a splash of cream and stir.)

You could also place any leftovers in a microwave-safe dish and microwave (covered) for 60-90 seconds or until warmed through.

More Delicious Baked Pasta Recipes You Will Love

Close up on baked gnocchi being scooped out.
Baked gnocchi recipe card.
Print

Baked Gnocchi (with Sausage and Kale)

Our Baked Gnocchi with Sausage and Kale is a cozy, creamy dish with pillowy gnocchi, savory sausage, and tender kale, all baked in a rich Parmesan cream sauce.
Course dinner, lunch
Cuisine Italian-american
Prep Time 10 minutes
Cook Time 30 minutes
Total Time 40 minutes
Servings 6
Calories 674kcal

Ingredients

  • 1 pound gnocchi (or store-bought)
  • 2 tablespoons olive oil
  • ½ pound mild Italian sausage
  • 1 bunch tuscan kale ribs removed and torn into bite sized pieces
  • 3 tablespoons unsalted butter divided
  • 1 minced shallot about 1/3 cup
  • 2 thinly sliced garlic cloves
  • 2 cups heavy cream
  • 2 ounces freshly grated Parmesan
  • salt and pepper to taste

garnish

  • crushed red pepper flakes optional

Instructions

  • Preheat oven to 375˚F. In a large pan, add oil and place over medium-high heat. Add sausage and brown for 3 to 4 minutes, breaking up into bite-sized pieces.
  • Add kale and continue to sauté for an additional 3 to 4 minutes.
  • Transfer mixture into a mixing bowl and set aside.
  • Melt 2 tablespoons butter into pan and add gnocchi to the pan. Lightly brown for 2 to 3 minutes.
  • Transfer gnocchi into the same bowl as the sausage and kale.
  • Add shallots, garlic and cream into the skillet and simmer over medium heat.
  • Once the mixture has reduced by ⅓ add the Parmesan and stir. Season with salt and pepper.
  • Add the gnocchi mixture and continue to simmer over low heat for 1 to 2 minutes.
  • Transfer mixture to a shallow baking dish and bake for 15 to 20 minutes, until sauce has thickened.
  • Remove from heat, top with crushed pepper flakes, and serve.

Nutrition

Calories: 674kcal | Carbohydrates: 34g | Protein: 15g | Fat: 55g | Saturated Fat: 29g | Polyunsaturated Fat: 4g | Monounsaturated Fat: 18g | Trans Fat: 0.2g | Cholesterol: 142mg | Sodium: 1326mg | Potassium: 365mg | Fiber: 4g | Sugar: 3g | Vitamin A: 5919IU | Vitamin C: 44mg | Calcium: 278mg | Iron: 4mg

The post Baked Gnocchi (with Sausage and Kale) appeared first on Spoon Fork Bacon.