Caramelized French Onion Dip

I have your dip recipe for the summer guys!! This French Onion Dip features caramelized onions in all their sweet and savory glory, rounded out with some tangy cream cheese and sour cream. Your potato chips have never known such bliss! I honestly thought I didn’t like onion dip, (it’s so…oily?) but homemade French Onion…

I have your dip recipe for the summer guys!! This French Onion Dip features caramelized onions in all their sweet and savory glory, rounded out with some tangy cream cheese and sour cream. Your potato chips have never known such bliss! I honestly thought I didn’t like onion dip, (it’s so…oily?) but homemade French Onion Dip is a whole nother level of creamy, cheesy caramelized perfection.
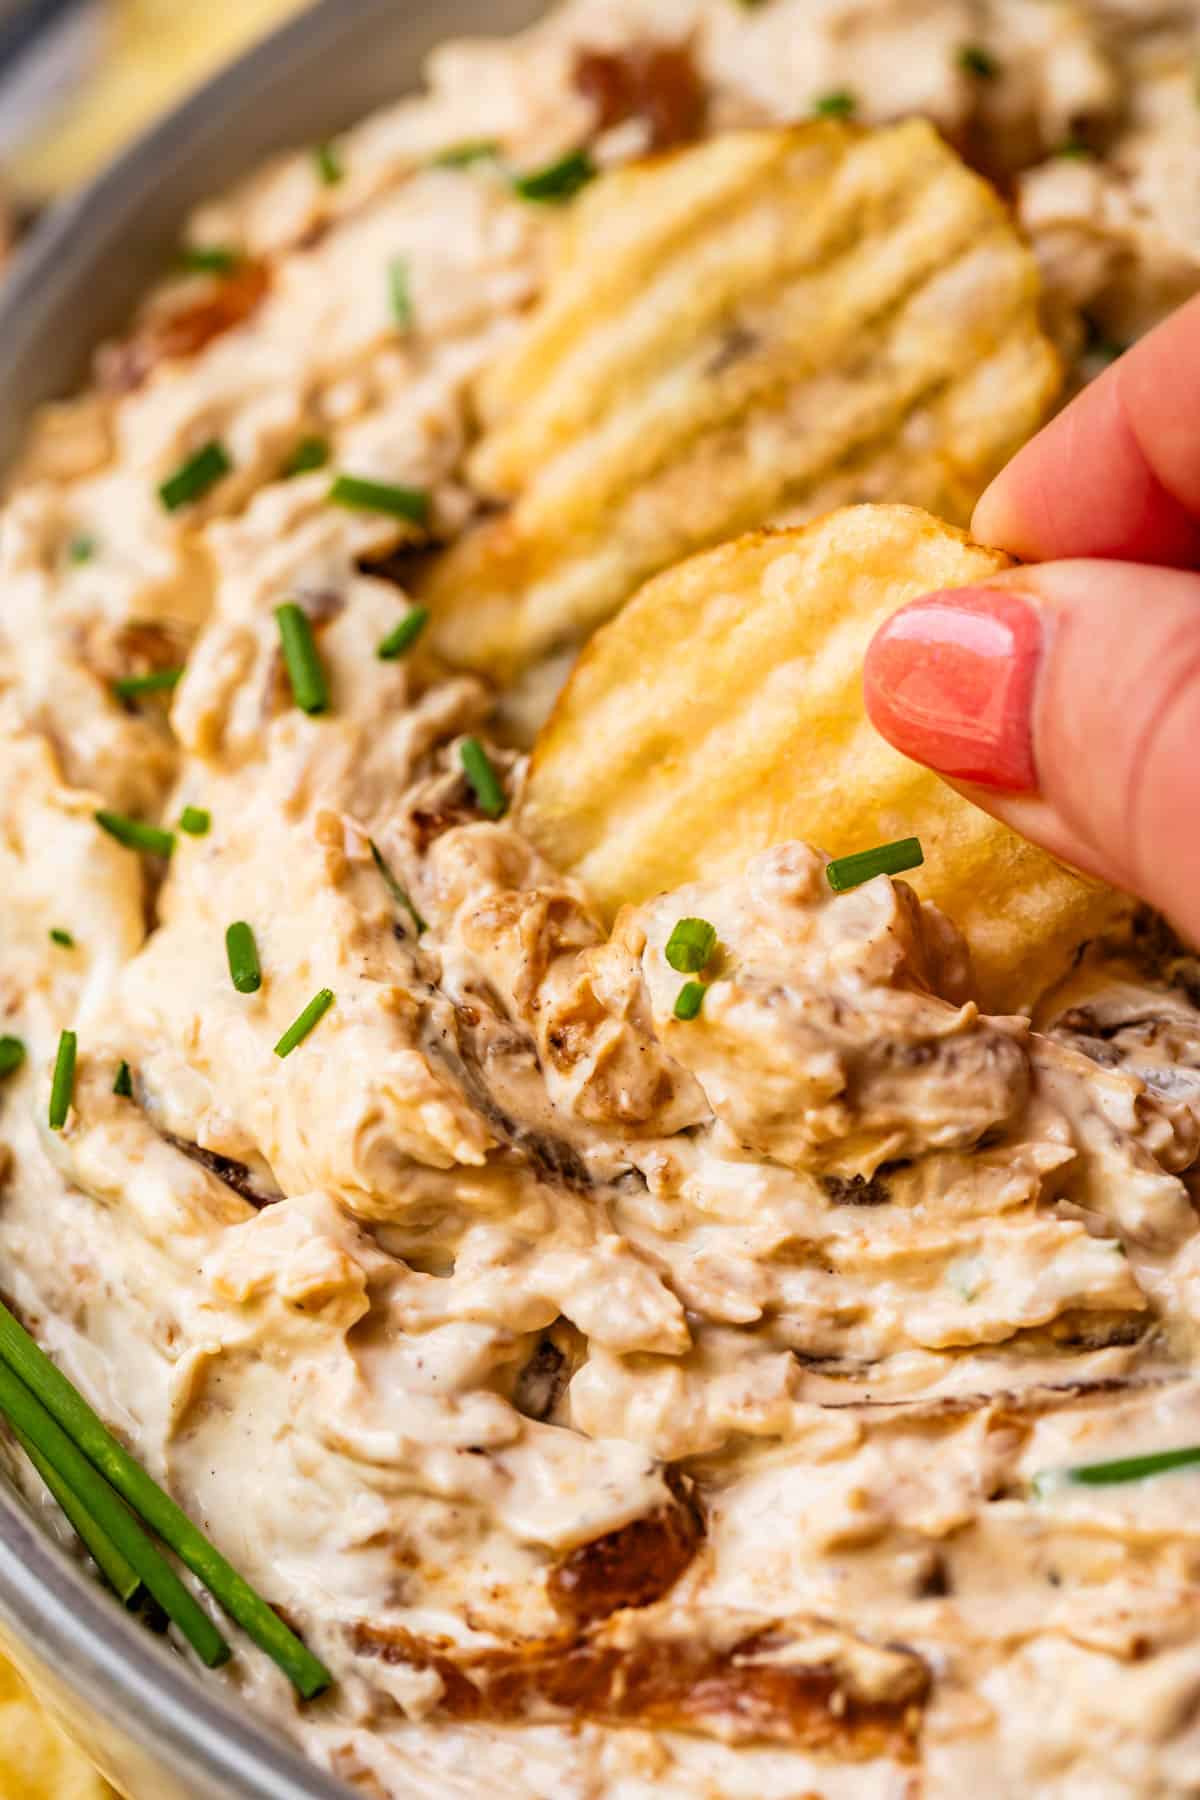
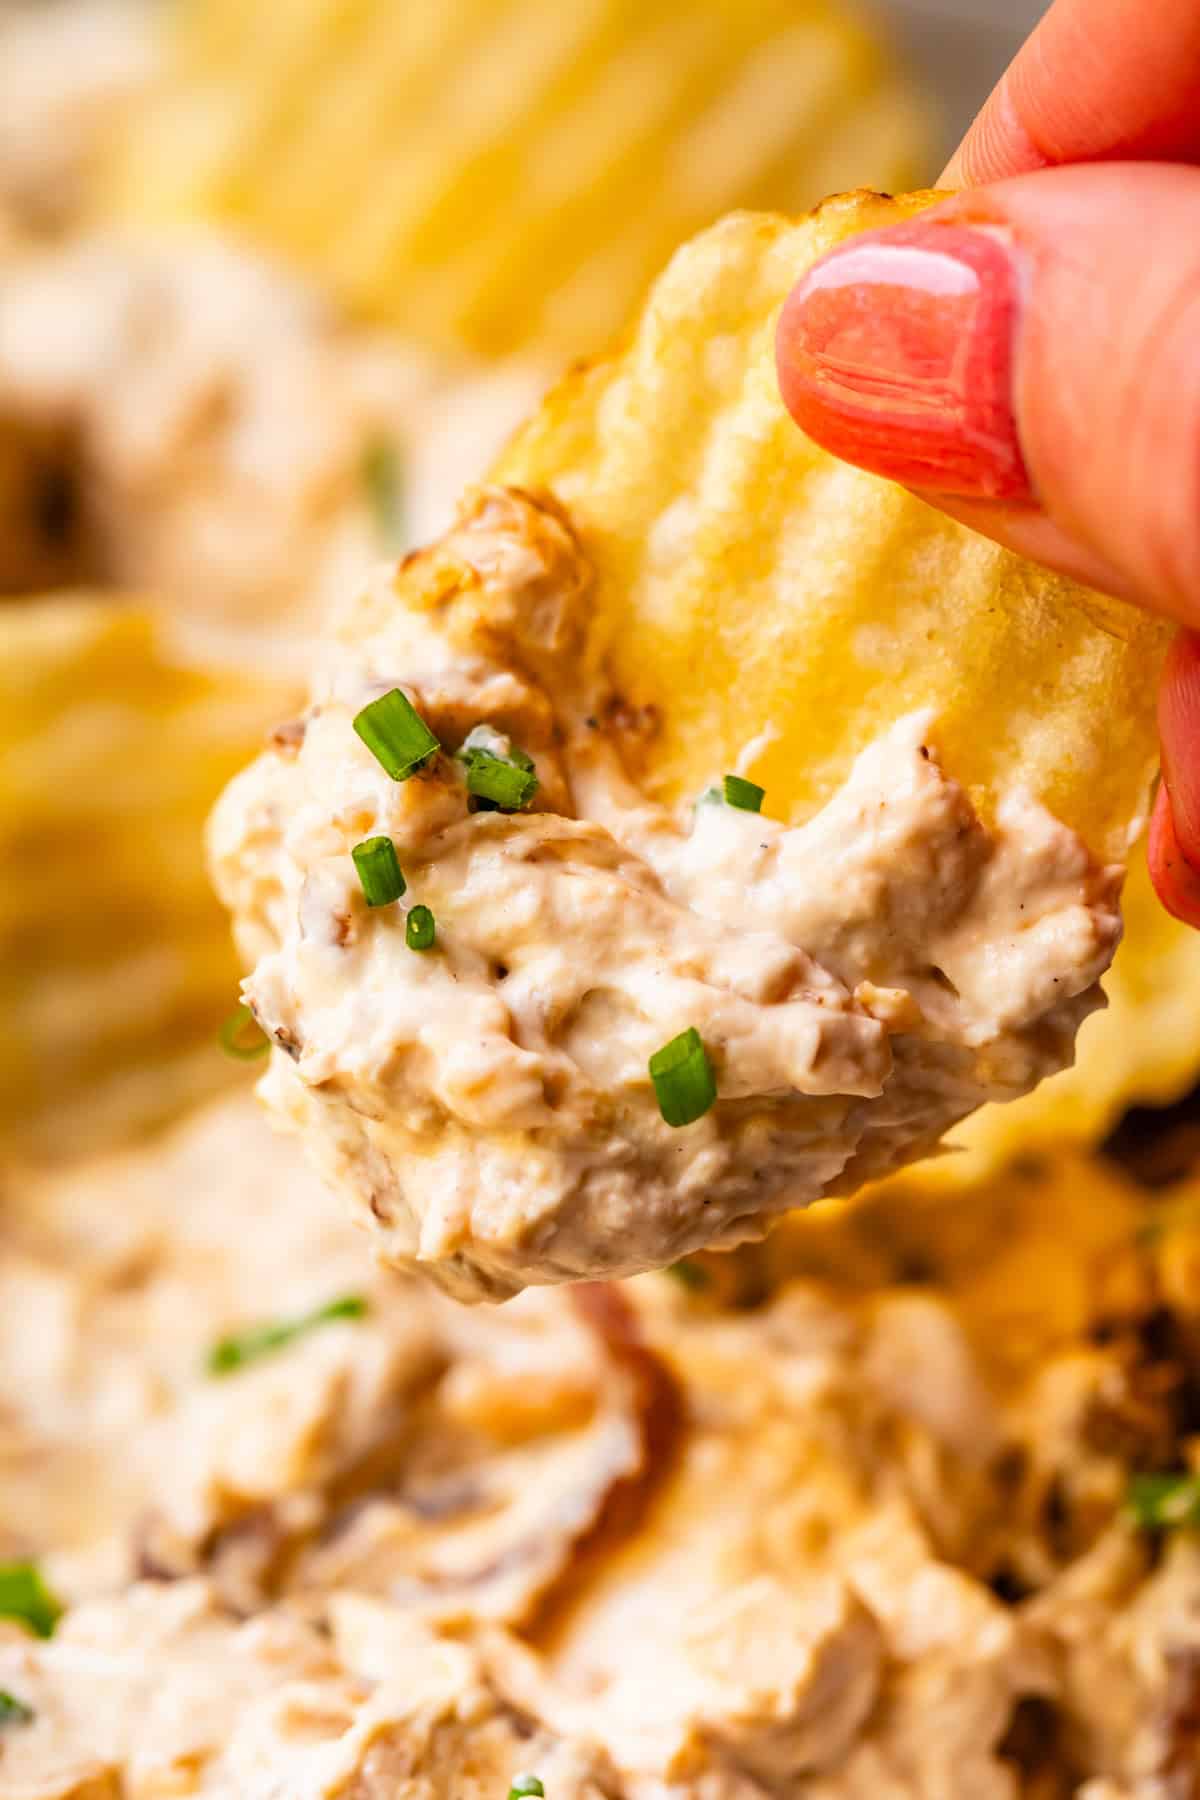
hand pulling crinkle cut potato chip scooping up french onion dip.
Table of Contents
  1. The best recipe for French onion dip
  2. What is French onion dip?
  3. French onion dip recipe ingredients
  4. How to make French onion dip
  5. What do you eat with French onion dip?
  6. How long does French onion dip last?
  7. Can you freeze French onion dip?
  8. French onion dip frequently asked questions
  9. More incredible dips and sauces you’ll love!
  10. French Onion Dip Recipe

Growing up, our house backed up to an intersection. Kitty corner from us was our church, where I attended seminary every morning in high school at 6:05am (!!!), and across the street was the high school. I always joked with my friends that my entire life was encapsulated in one intersection.

We were literally 50 yards from everything, but you had to walk down the entire block and then back again to get there. If you wanted to stick with those conventional sidewalks, that is.

Hopping the 6 foot cement fence in the backyard was the obvious solution, but how? My dad came up with the idea of using a ladder, the kind with a shepherd’s hook at the top, that people use for above-ground swimming pools. Voila!

little girl on a ladder on a cement fence with purple tree.
Valentine learning to hop the fence 💕

The whole neighborhood started using the ladder to skip the extra block to school, and it was used for years. My dad still hops the fence to get to church every week. He likes to race my mom, who drives the two blocks (ain’t no way she’s hopping the fence in a skirt), and sometimes he beats her.

When you hop a 6-foot fence several times every single day, you get pretty casual about it, or at least I did in high school. One morning on the way to seminary, when it as still dark outside, I jumped without looking, and landed directly in front of this woman out for her morning jog. She screamed sooo loud and was clearly terrified that a random teenager had literally fallen out of nowhere into her path. We didn’t collide, thank goodness, but it was very close! 16-year-old-me felt so bad, but not so bad that I don’t still kind of laugh about it to this day. (I wonder what HER story is 😅)

I asked my family for more fence hopping stories:

I think you can guess which messages are from my brothers, always keepin it classy 😅

One day, my dad was making scrambled eggs. He went outside, knelt down by the weeds that grew out of the landscape edging we all stepped over every single day on the way to to hop the fence, snipped said weeds with scissors, and sprinkled them over his eggs. Because they were CHIVES. My mind was absolutely blown. Yer a wizard, Dad! I had NO idea we had edible weeds in our yard 😂

I always think of this when I buy chives, like for today’s recipe, which I am SOOO excited about!!
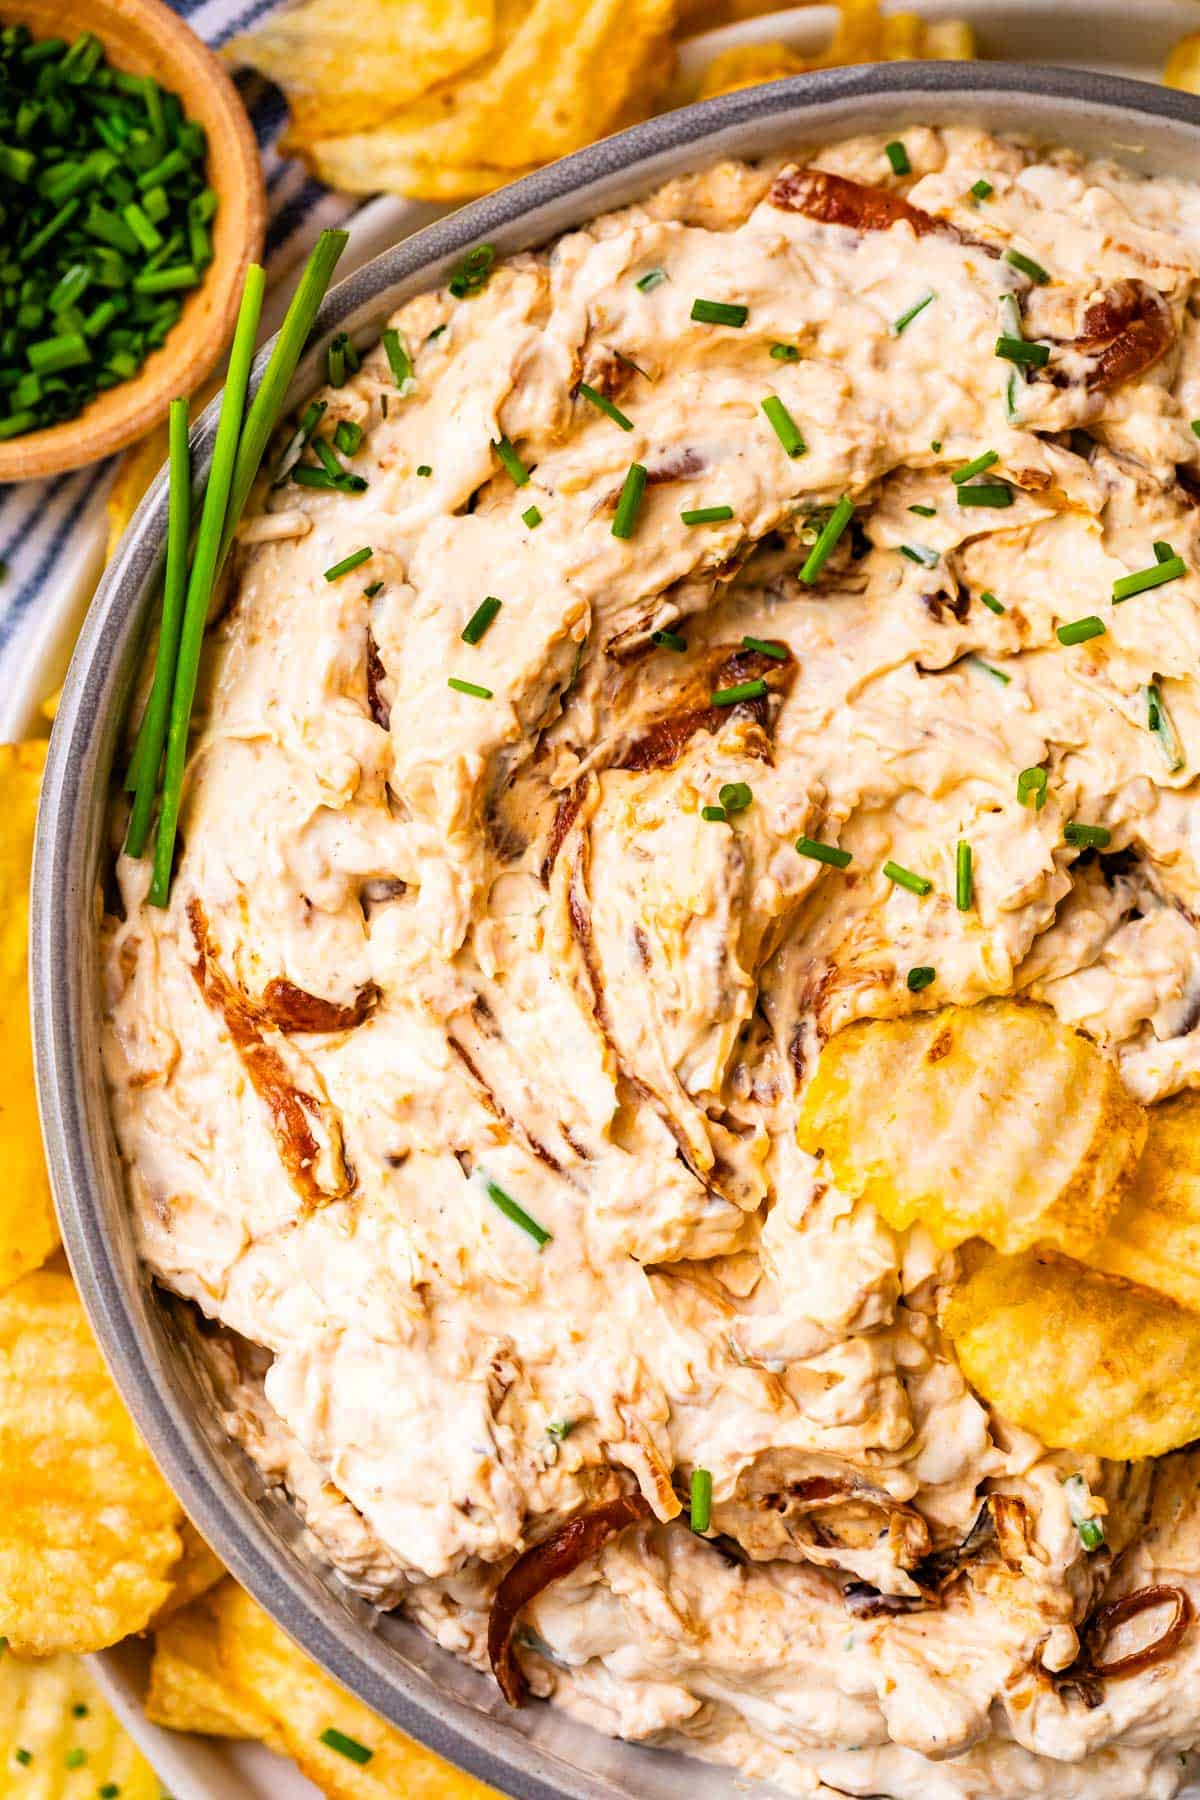
ceramic bowl filled with French onion dip and garnished with snipped chives and potato chips.

The best recipe for French onion dip

I never thought I could adore a dip the way I adore this dip. I love me some caramelized onions, but go ahead and add a ton of creamy cheese and chips? Stop itttt.

This will be the only thing I’m snacking on poolside this summer. If you invite me to your summer BBQ, I’m showing up toting this dip. I might even still be stuck on it come Thanksgiving, where it actually makes a perfect centerpiece to a Charcuterie Board. (I would know, this dip with charcuterie is what I served last November! I’ve been holding out on you for months with this recipe!!)
glass bowl of French onion dip with a few crinkle cut potato chips stuck in the top.

What is French onion dip?

Have you ever had French Onion Soup? If not, please go make that right now, then we can talk.

Just kidding. (Also, did you click over? Those pictures are sooo old but I promise the soup is legit.)

French Onion Dip is just the cheesy, dip-able version of the glorious soup.

The soup starts out with a ton of onions, which we slowly caramelize with the patience of turning coal into diamonds. (Trust me, worth it). Once finished, we immerse them in a rich beef broth. THEN we top it with crusty bread and cheese, which is broiled to perfection. I know, RIGHT??

The dip version takes the flavors and adds a ton more cheese, minus all the liquid, plus potato chips. I mean how can we go wrong here?

French onion dip is specifically made with beef broth flavors. If it doesn’t have the beef component, then it’s just onion dip. I have some BEEF with today’s sneaky snack makers, because there are so many store-bought ready-to-eat dips out there claiming to be French onion, that are really just plain ol’ onion dip. NOT SO, SIR! Give me my beef or give me death. Or something like that.

Onion dip is mostly sour cream with dried minced onion and a few other seasonings, almost like a super oniony ranch. I mean, don’t get me wrong. I can get down with a good onion dip as much as the next guy, but it is not the same!! No beef, no caramelized onions, and doesn’t come close to the deep, savory, almost sweet flavor of French onion dip!
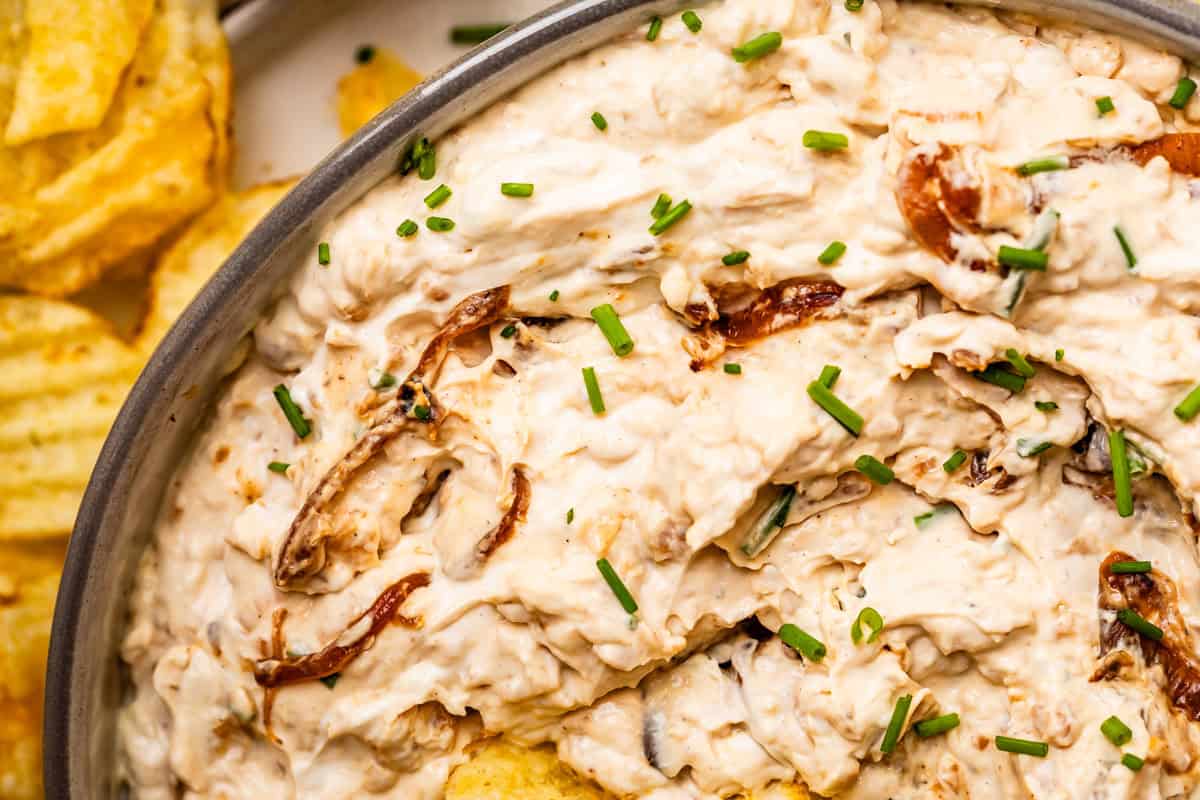
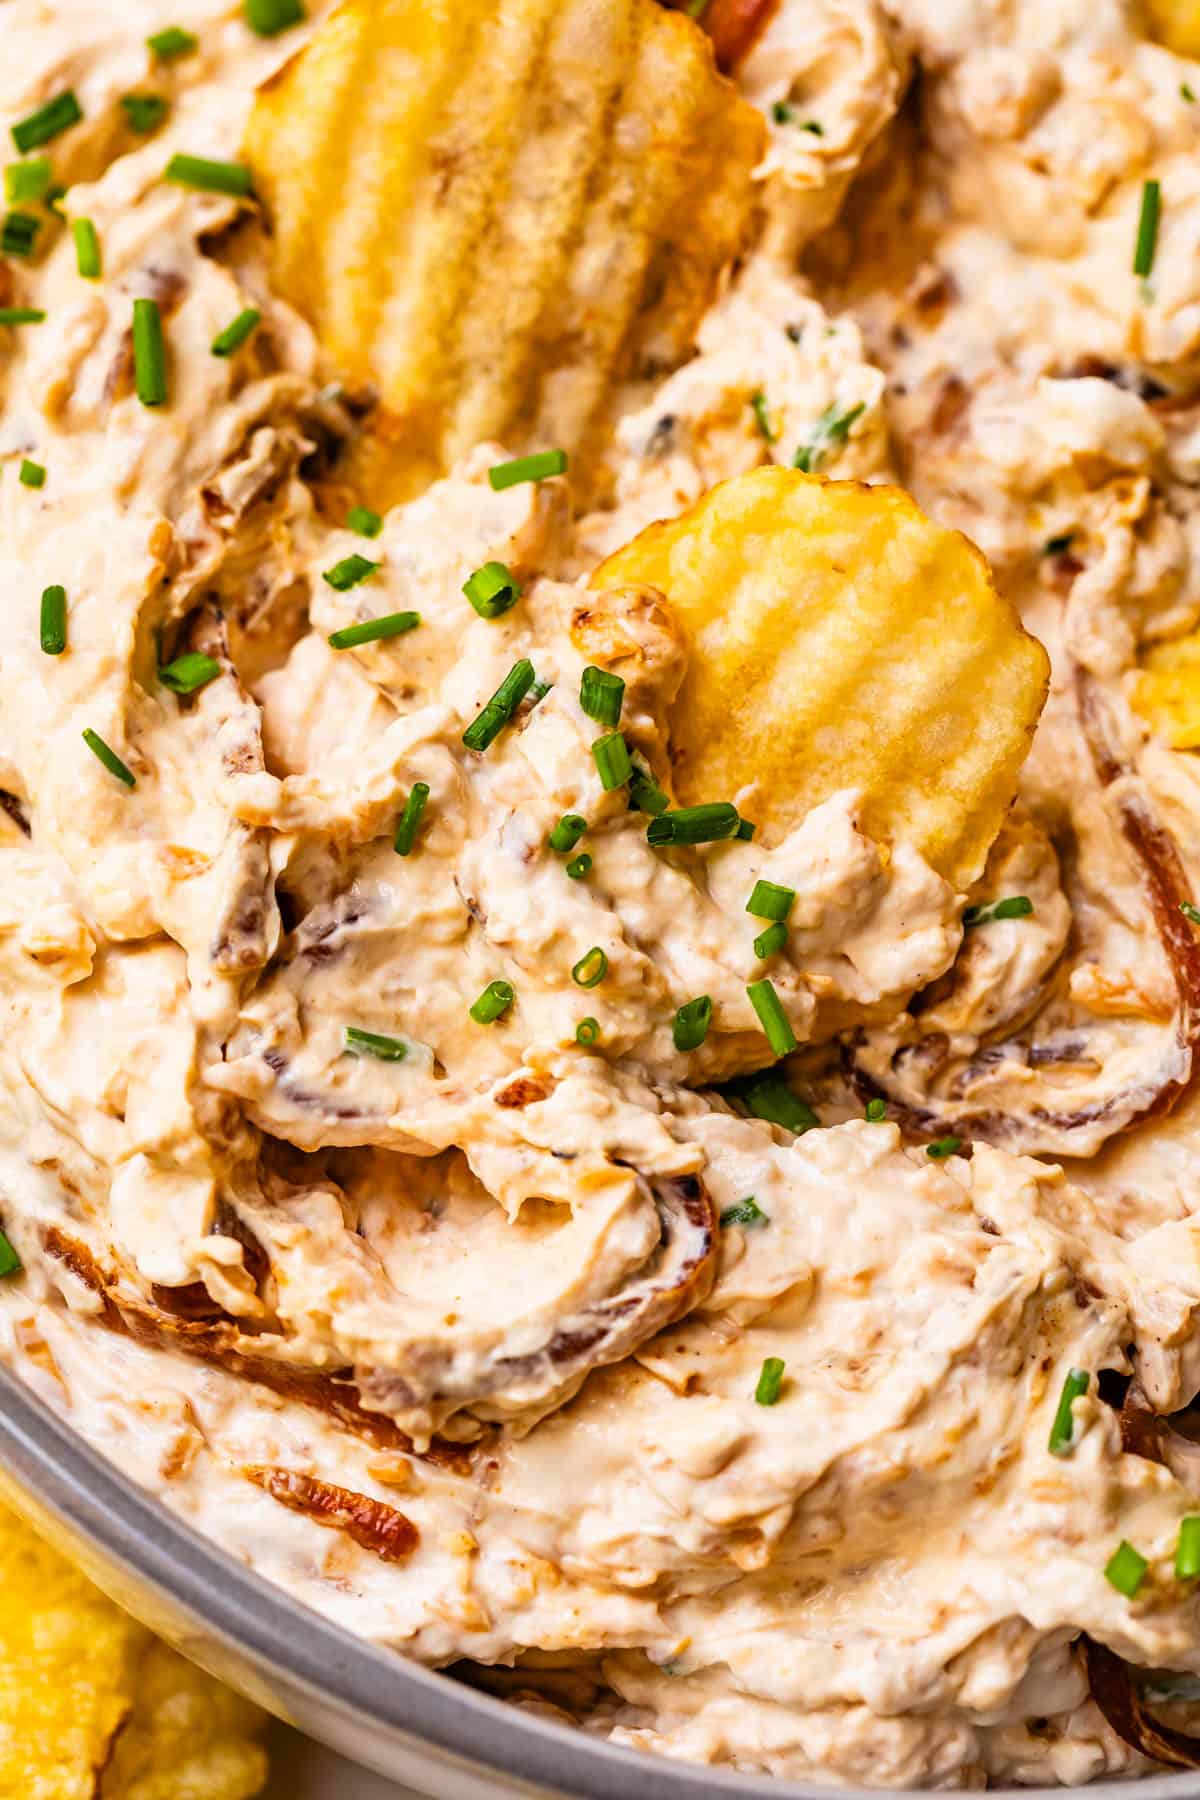
close up of French onion dip showing the creaminess as well as the bits of real, caramelized onions.

French onion dip recipe ingredients

Here’s a quick overview of the ingredients you’ll need to make this dip. Nothing special, the magic happens when we caramelize! Check out the recipe card for exact amounts!
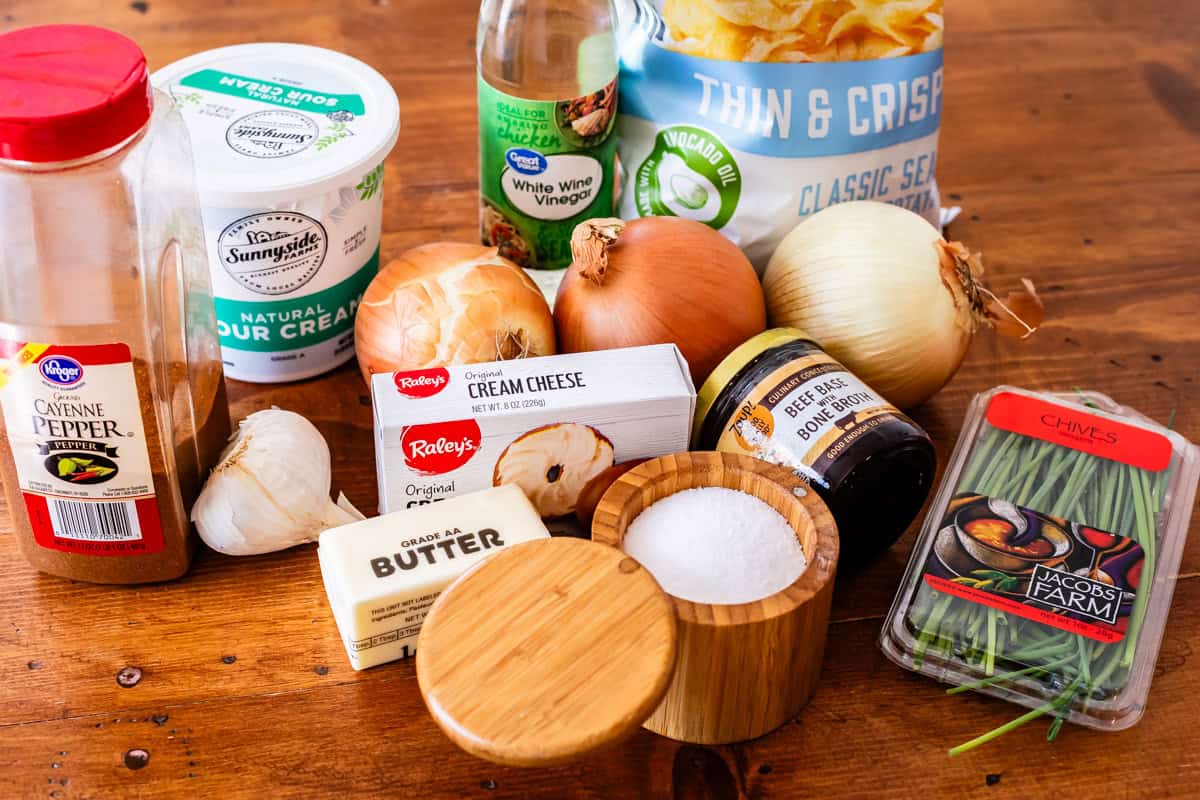
ingredients for french onion dip - cream cheese, onions, beef base, sour cream, and more.
  • yellow onions
  • butter
  • kosher salt
  • granulated sugar
  • cayenne pepper
  • Beef base
  • white wine vinegar
  • cream cheese
  • sour cream
  • garlic
  • Worcestershire sauce
  • lemon juice
  • chives, optional
  • crinkle cut potato chips

How to make French onion dip

This dip takes an hour to make, but only because caramelized onions refuse to be rushed. They are drama queens like that. Caramelizing is not hard work, it just takes a while. The toughest part is actually chopping them up!!
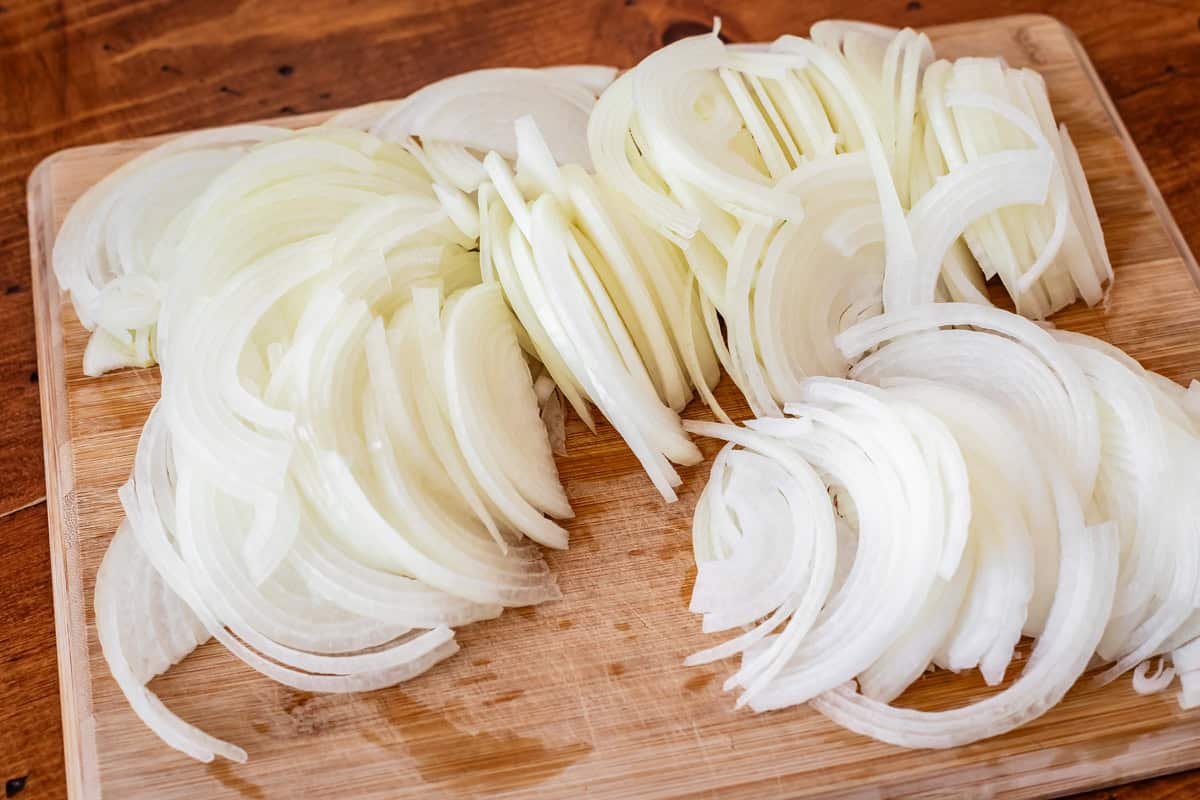
super thinly sliced onions on a wooden cutting board, all ready to be caramelized.

The fact that I was willing to cry my way through these onions is testament to how much I LOVE THIS DIP. One onion I can handle, but three? So many tears. I busted out the onion goggles for sure (they actually work. I use regular swim goggles! They seal to your face better than marketed “onion goggles“. The only downside is that I have raccoon eyes for an hour afterward.)

woman wearing goggles in kitchen

Onion time 😂

My other tip I learned from my mom: when the tears come, run your wrists under cold water from the tap. It works every time! Bodies are weird guys. What do your wrists have to do with your eyeballs?? Just thinking about this makes me want to go try acupuncture.

Toss all your hard-earned onions in a skillet with a couple tablespoons butter. Heat over medium for a few minutes to get them going, then turn the heat down to medium low.
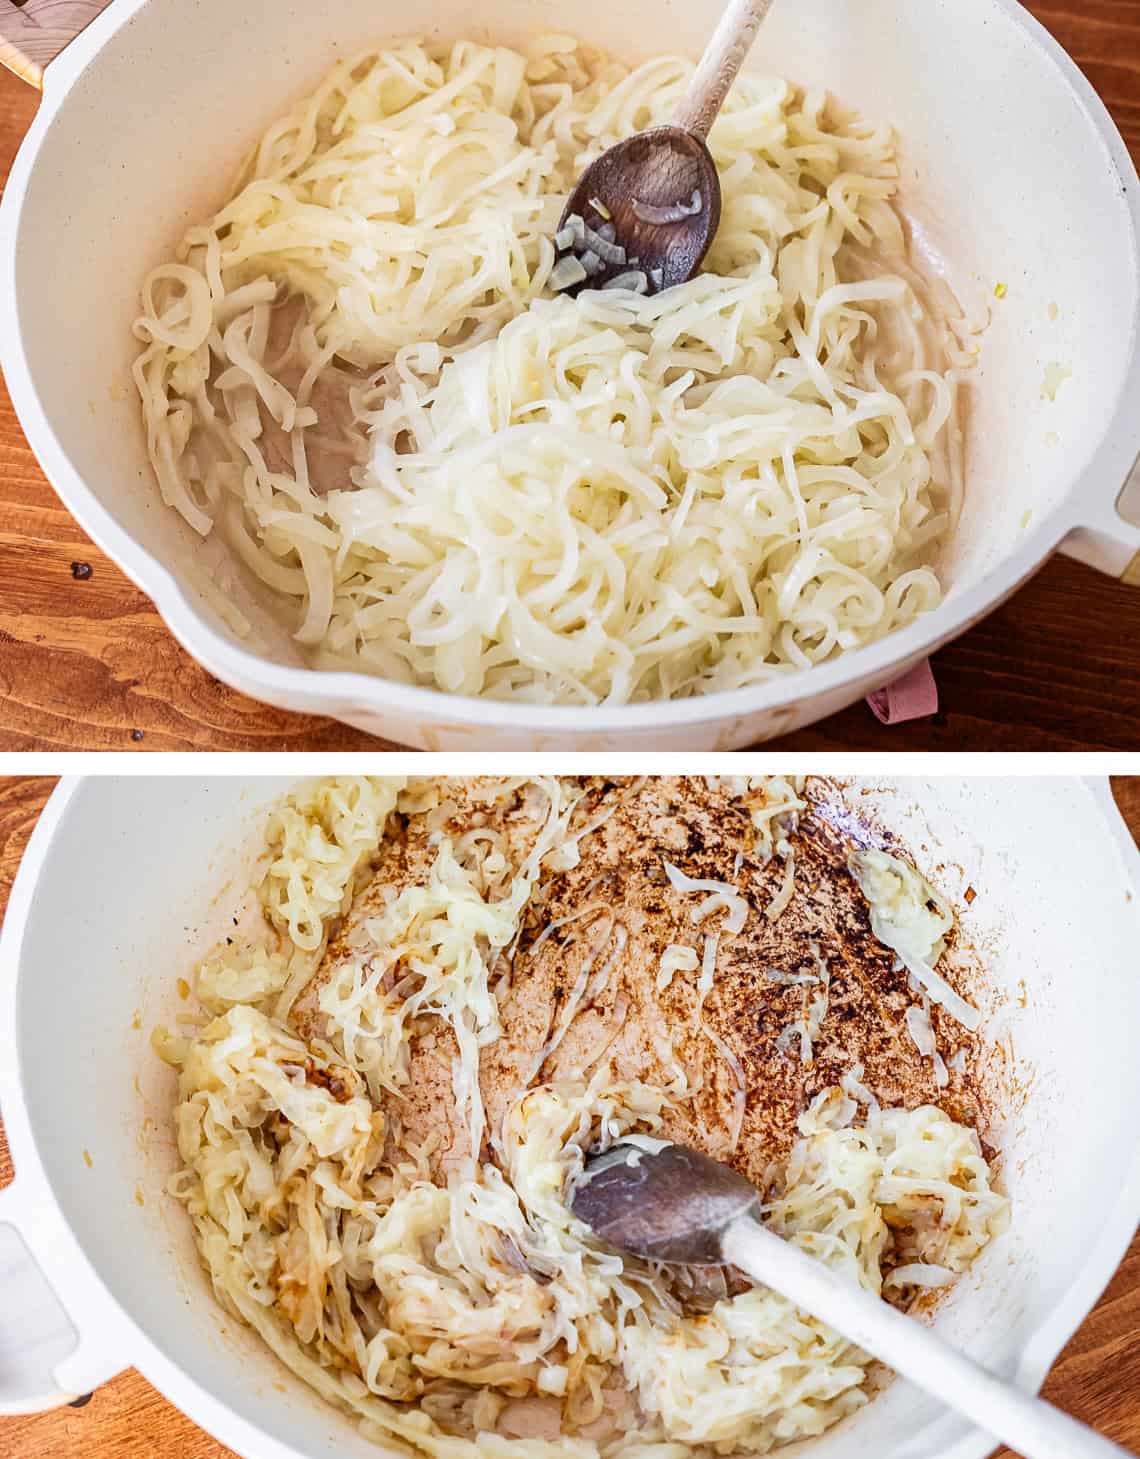
top pic: onions in pan, bottom, onions starting to brown and scorch.

When the pan dries out and the onions start to stick to the pan (and even, eep, start to blacken, yikes) it’s time to add the white wine vinegar. Deglaze the pan, stirring up all the brown bits and glorying in all the flavor you are working up! Then add in some beef base. This addition of beefy flavor is what distinguishes this dip as “French onion.” Without the beef flavor, it would just be onion dip. I love the deep umami it adds!
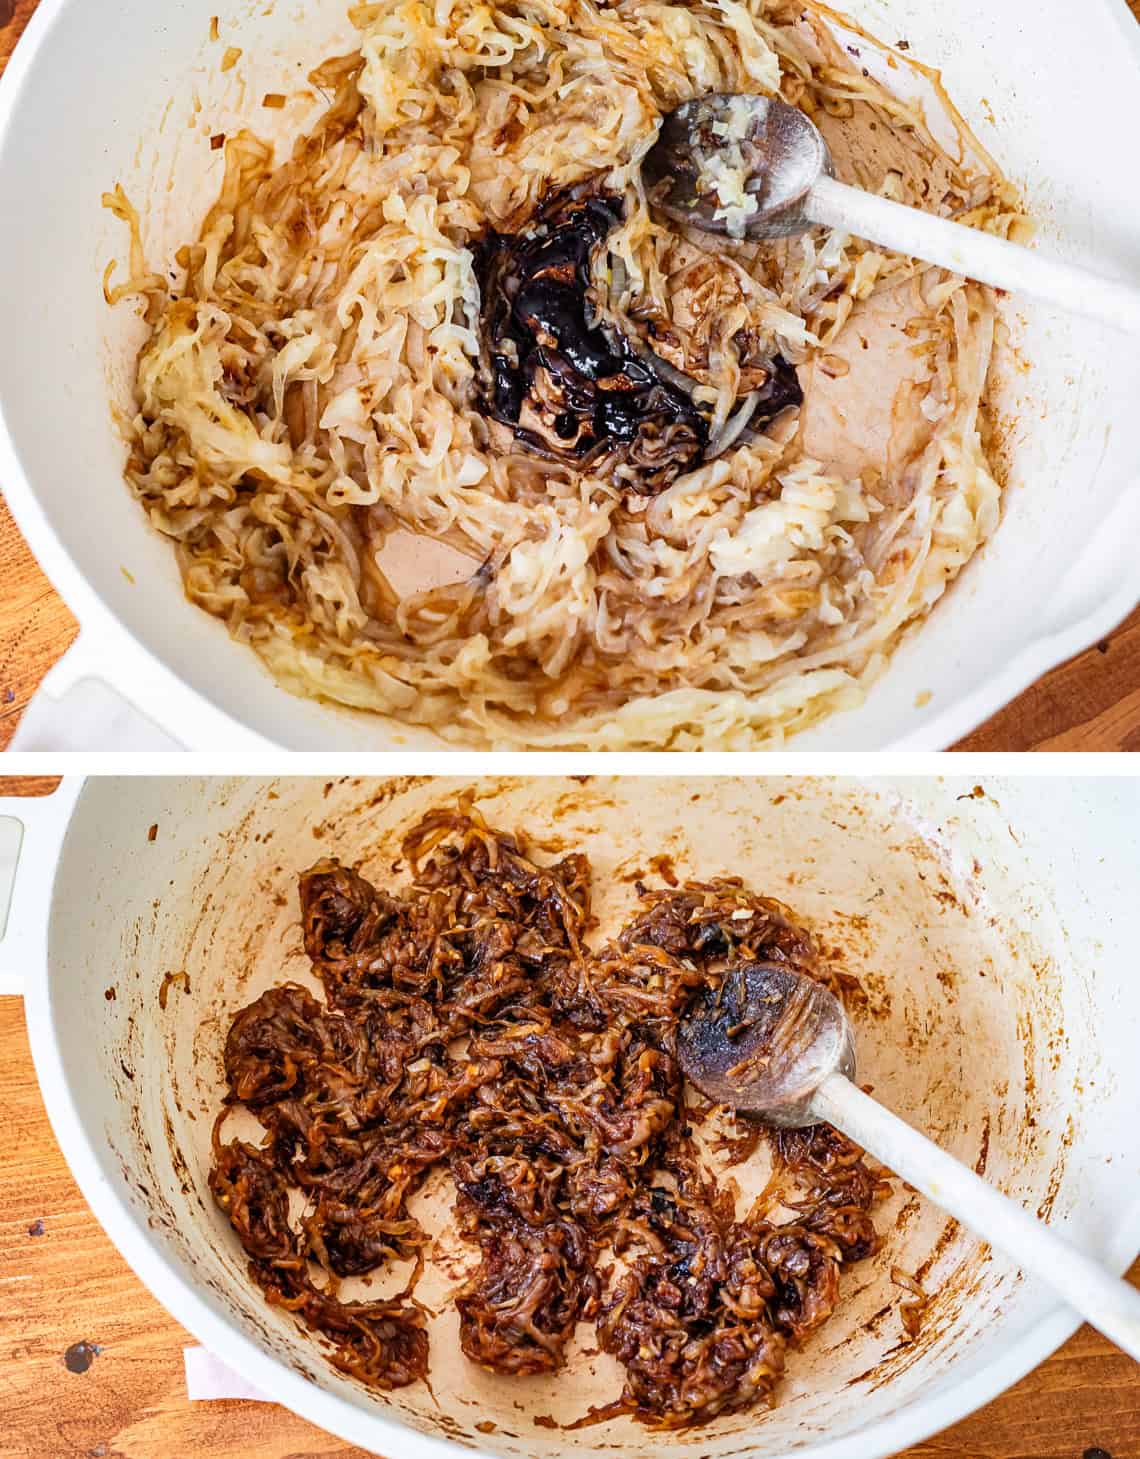
top pic: beef base in pan with browned onions, bottom pic wooden spoon mixing them together.

And voila, 40-50 minutes later, your onions are caramelized! Don’t they look so good?? Give them a taste. MARVELOUS.

Chop them up now if you didn’t do it before caramelizing. (You can totally chop the onions into a dice before caramelizing. I’m just always crying a river at that point, so I chop after when it’s easier 🤣)
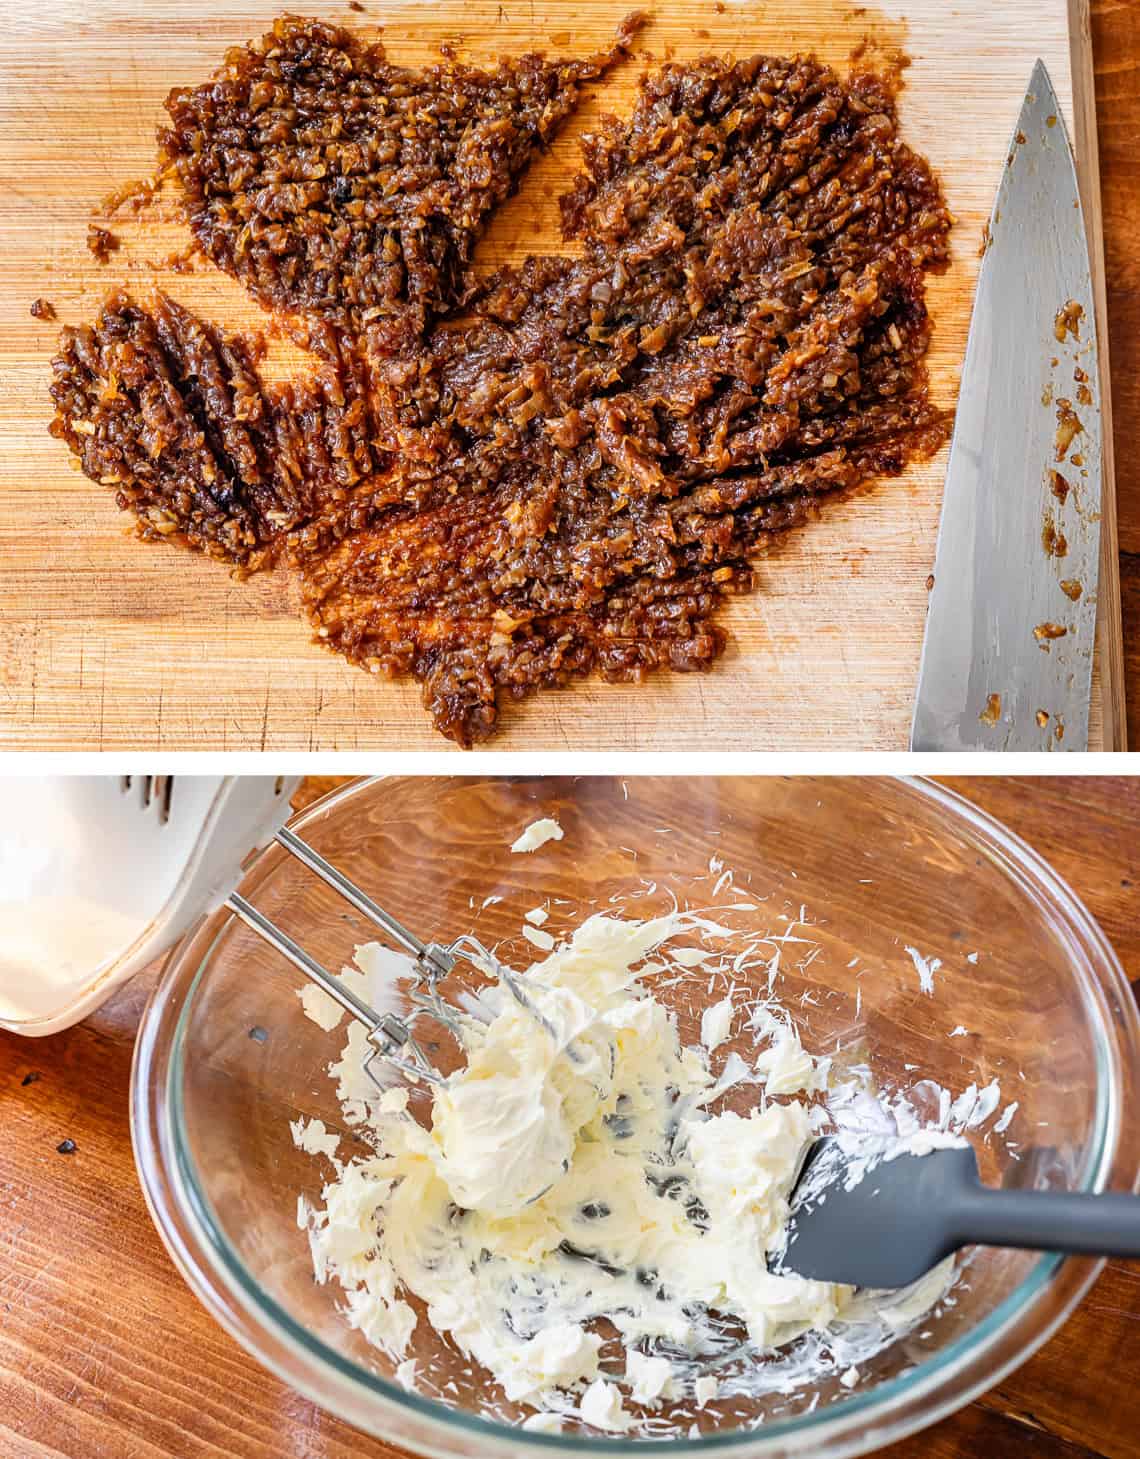
top pic: chefs knife chopping browned onions smaller, bottom pic hand mixer beating cream cheese.

Beat up your softened cream cheese and sour cream.
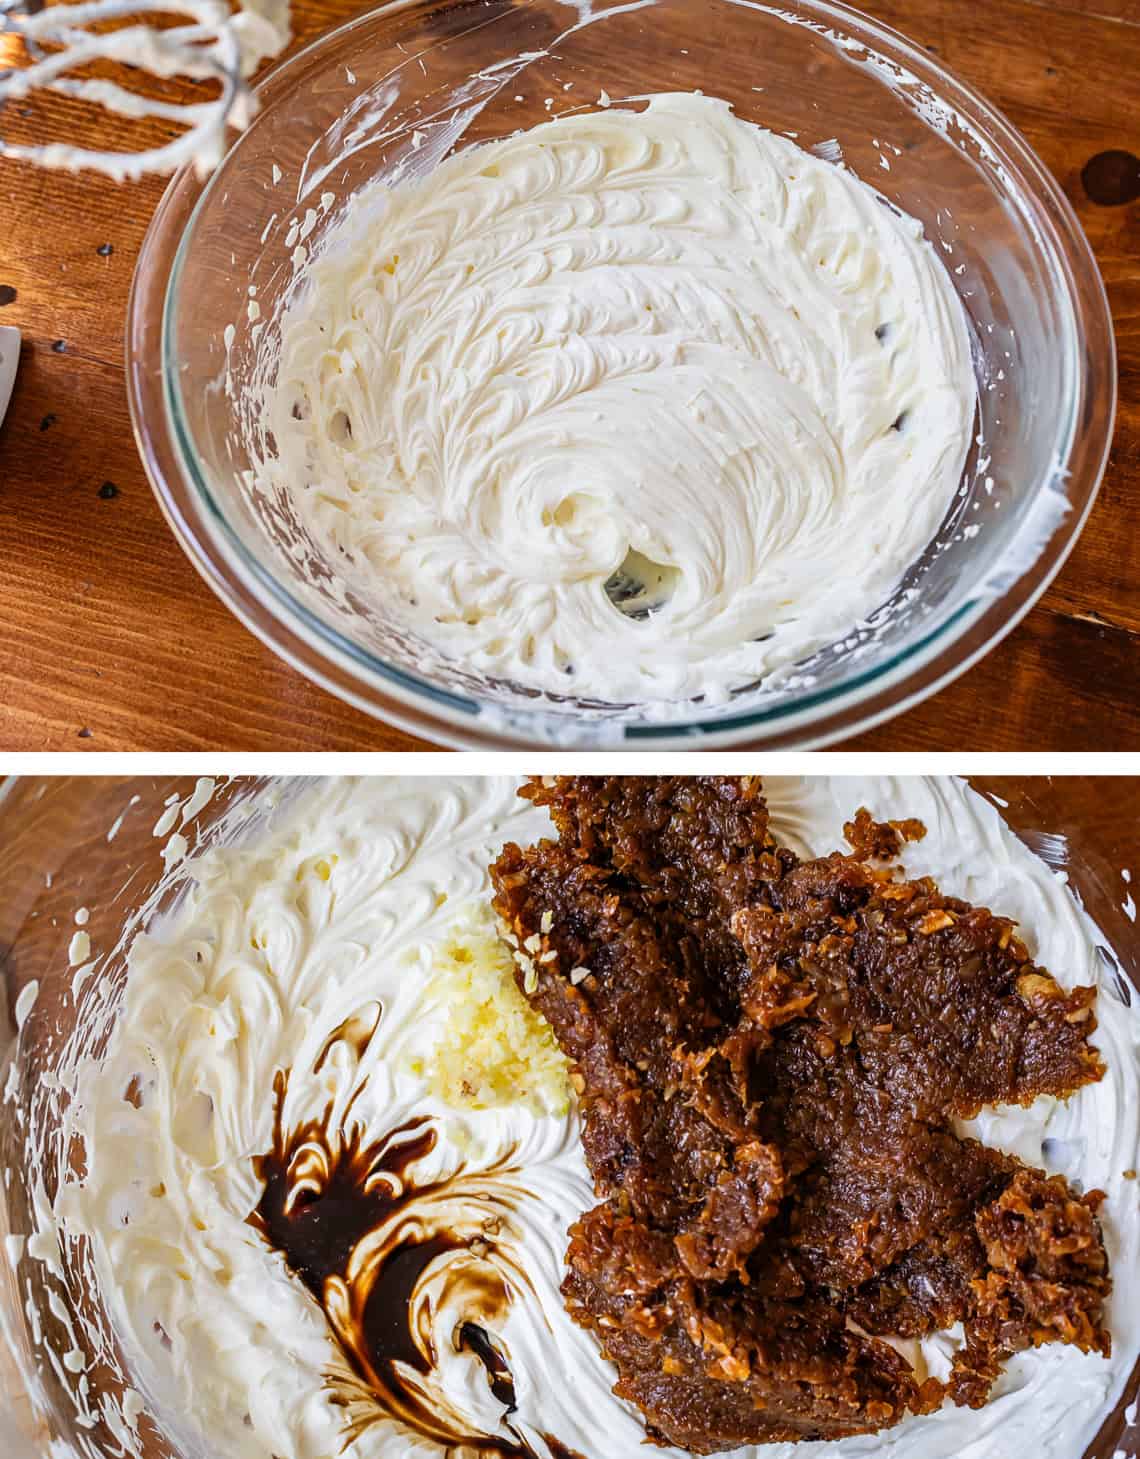
top pic: beaten cream cheese in glass bowl, bottom pic chopped onion and other ingredients added.

Add in the garlic, Worcestershire, and lemon juice, and of course the onions. Don’t add them hot! Let them cool a little bit so you don’t melt your cream cheese. Fold it all together.

Guys, that’s it!! Dig in! Sprinkle with some chopped fresh chives that you have snipped from the weeds in your yard 😂, or some green onions that you have chopped more finely than usual.
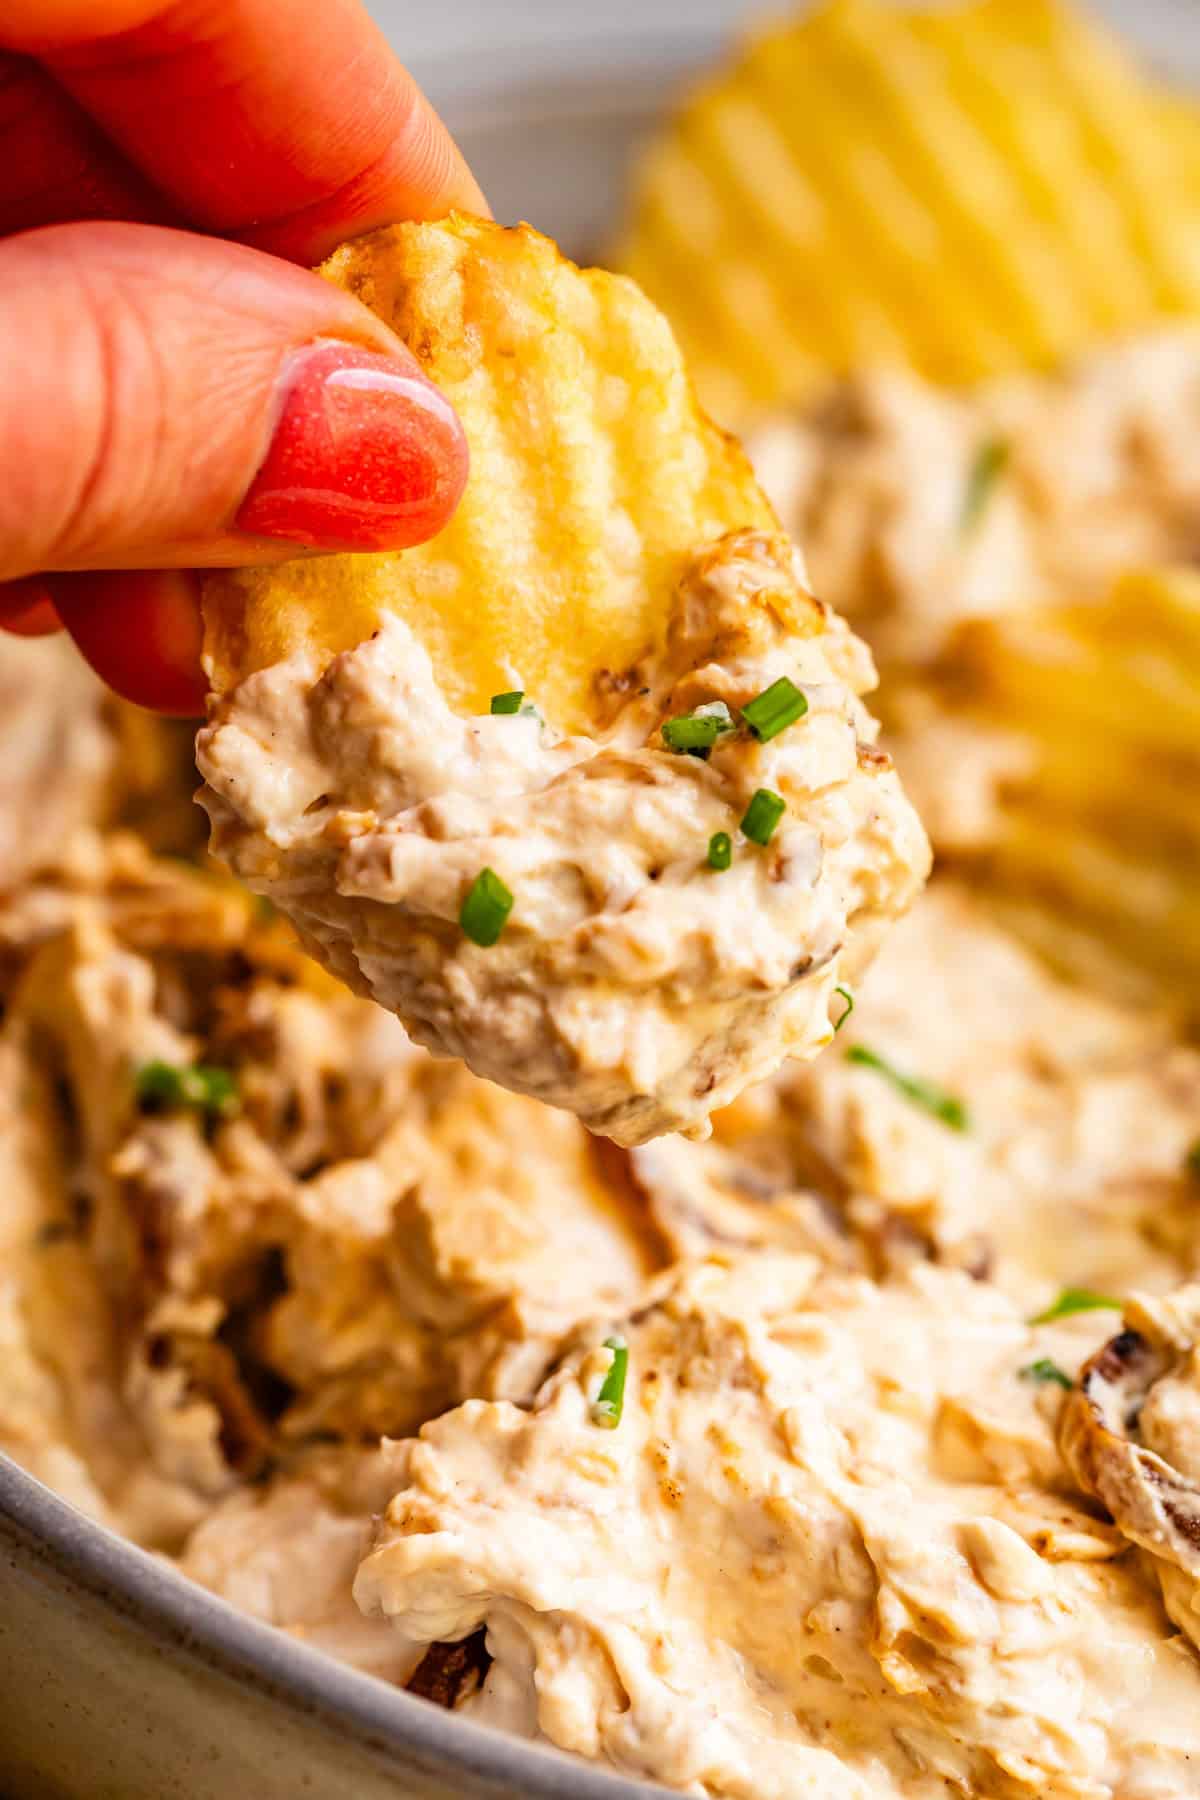
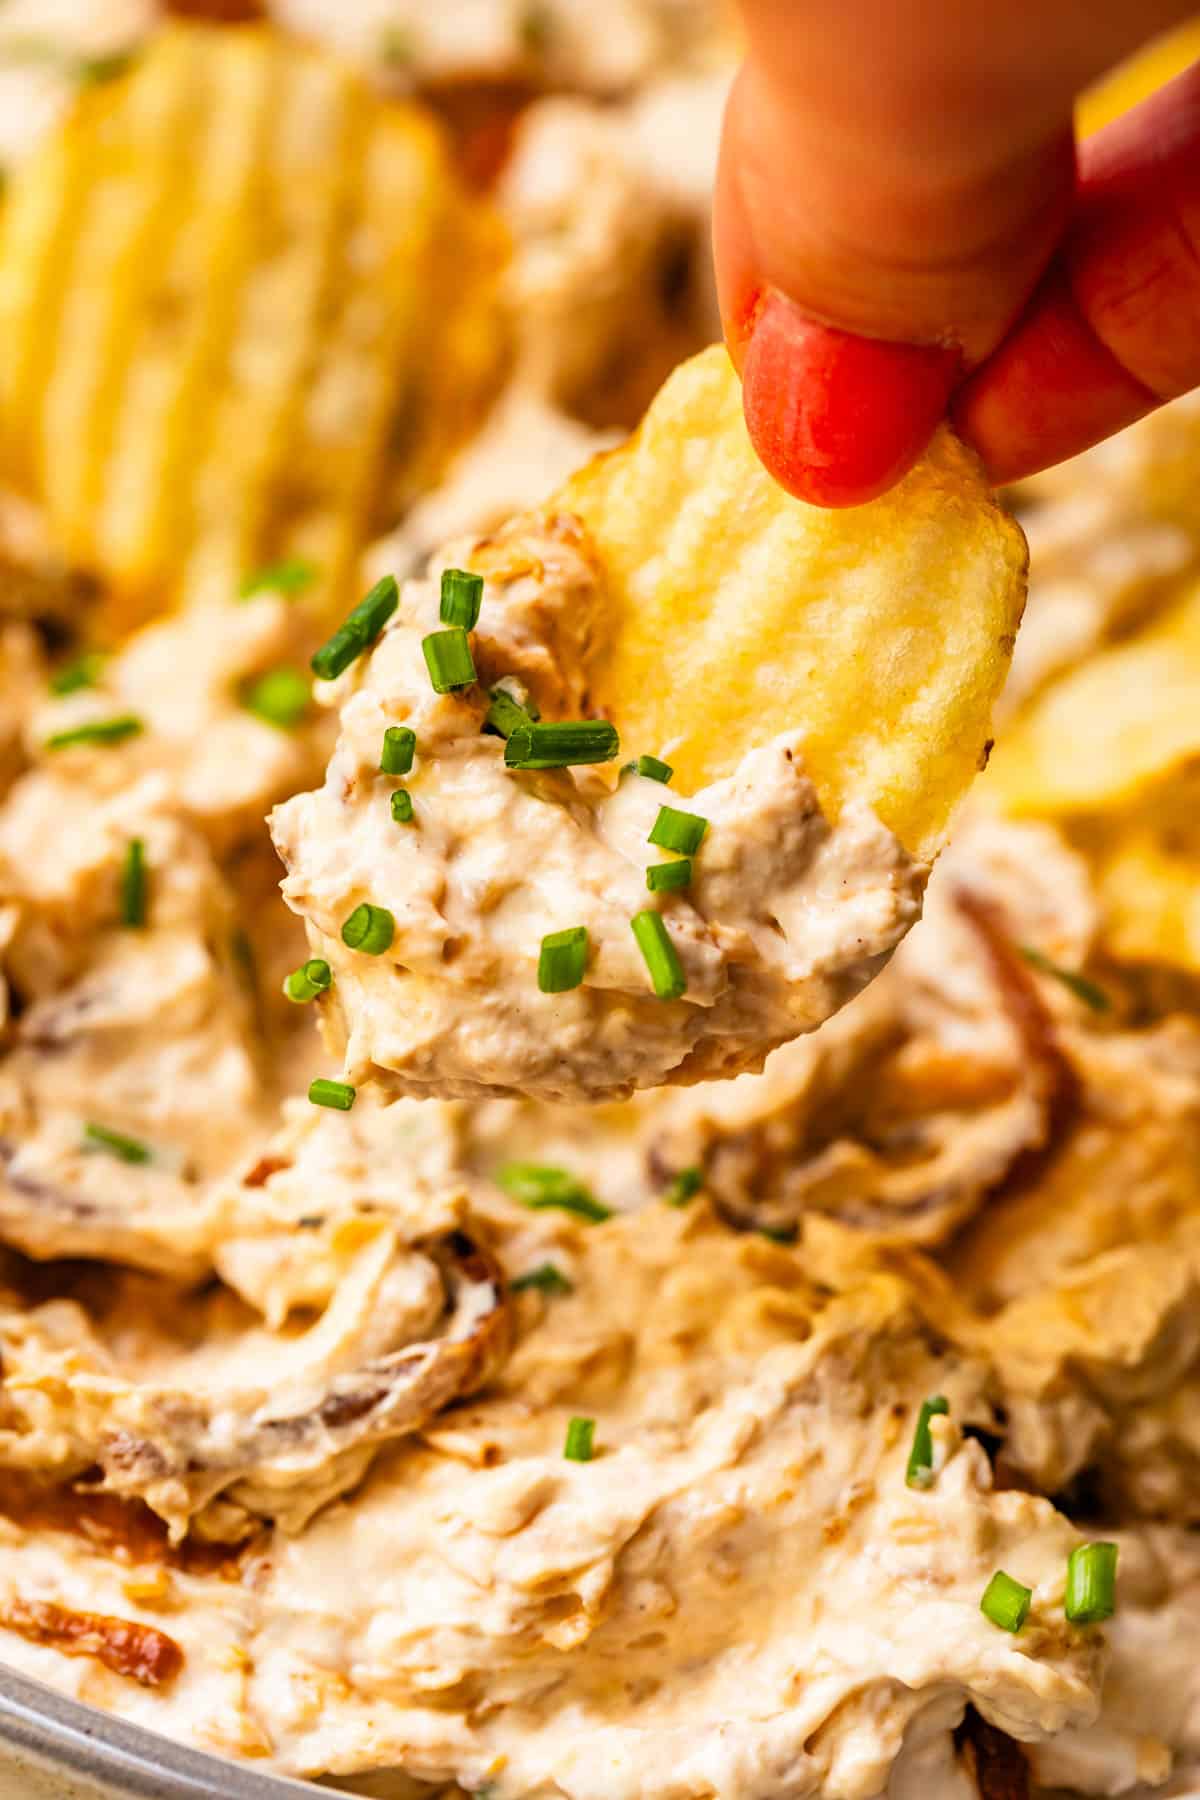
hand holding a crinkle cut potato chip loaded with French onion dip and chive garnish.

What do you eat with French onion dip?

Well if you’re like me, you could eat this stuff straight up with a spoon. But there are a few particular items that I particularly love that work as dippers at parties!

  • crinkle cut potato chips are BY FAR the best potato chip option, with that classic potato chip taste to complement the flavor of the dip and strong enough to scoop inappropriate amounts of it without breaking
  • I love this dip with veggies: carrots especially, but also cucumbers, bell pepper, celery, jicama, snap peas, etc.
  • try other crinkle cut chip flavors: I absolutely love this dip with Salt & Vinegar Chips. Or try different vegetable crinkle cut chips (like sweet potato, tomato, spinach, etc)
  • french fries! hello!
  • pita chips, pretzels, or any kind of cracker
  • slices of good bread like French or sourdough, or crostini (toasted baguettes). Bread would make it feel a little like Spinach Artichoke Dip, hello yum.

You can also use your dip as a condiment to elevate so many foods! Check ’em out:

a crinkle cut potato chip laden with French onion dip hovering over the bowl of dip.

How long does French onion dip last?

First, make sure it’s in an airtight container. Then store it in the refrigerator where it should last for 5-7 days. French onion dip IS PERFECT for making ahead to save you time the day of serving. I’m thinking Thanksgiving, New Years Eve, any potluck ever. It can be served chilled, so it will be ready to pull out and use right away. But don’t limit yourself if you have travel time. This dip is killer when served room temperature. (I actually prefer room temp.)

Can you freeze French onion dip?

I do not recommend it. Dairy, in particular the sour cream in this case, does not do well in the freezing and thawing process. It tends to separate and get watery or grainy. No thank youuuu. Stick to keeping this dip in the fridge for storage. If you don’t think you can eat the whole batch in 5-7 days ((or honestly, you didn’t hear it from me, but it lasts longer than this if well sealed), I recommend either making a half recipe or planning to gift some to friends or neighbors.
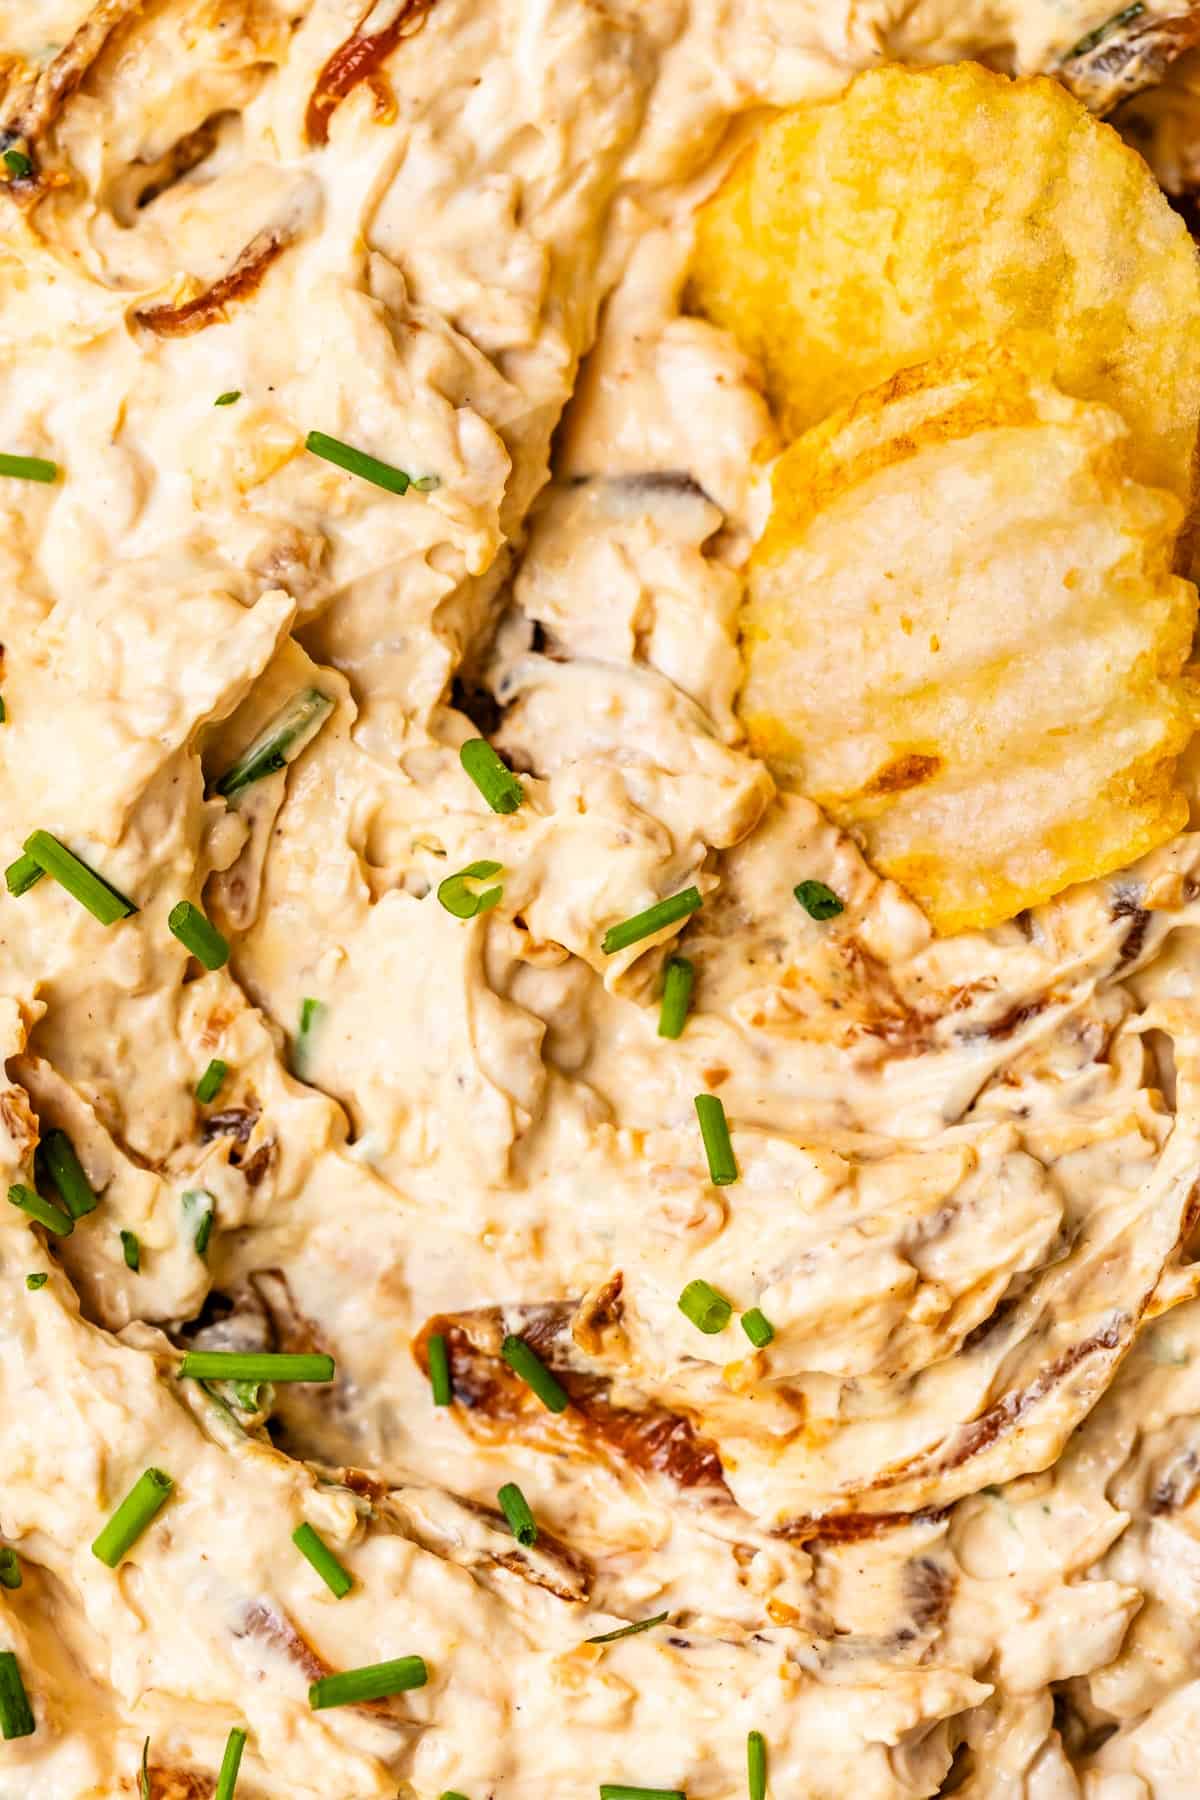
two crinkle cut potato chips nestled into french onion dip with snipped chive garnish.

French onion dip frequently asked questions

What is french onion dip made of?

French onion dip starts with a creamy base made up of cream cheese and sour cream. Then we’re adding perfectly golden caramelized onions and rich beef broth flavors are mixed in. That’s it! It does take some time to cook down the onions, but please ditch the onion soup mix because I promise: the knock-your-socks-off flavor is 100% worth it!!

What’s the difference between French onion dip and onion dip?

French onion soup is derived from the flavors of French onions soup. Sweet caramelized onions and savory beef broth are the backbone of the soup, and those same flavors are mixed with a smooth cream cheese and sour cream base to make a dip. The end result is deeply flavored, savory but sweet deliciousness. Onion dip, on the other hand, has no beef influence. It’s just the cheese and the onion. It’s kinda like ranch dip’s more oniony cousin, and is a lighter dip option than French onion.

what is the best chip to eat with French onion dip?

This girl enjoys a quite high dip to chip ratio, so I’m all about the crinkle cut potato chips!! Buy a high quality brand like like Kettle or Boulder Canyon, but really any kind will do ya fine. Basic potato flavor is best, so you get the salt and crunch, but nothing else to compete with the flavors of the dip. And as far as classic thin potato chips, only buy them if you enjoy a frustrating, chip-breaking dip session. They’re just too thin to hold up!

If you can’t find regular crinkle cut potato chips, stick with crinkle cut style, and choose something like a veggie chip (I know some brands have sweet potato chips, or more exotic roots like taro). The next best option is probably a good plain pita chip, or toasty baguettes!
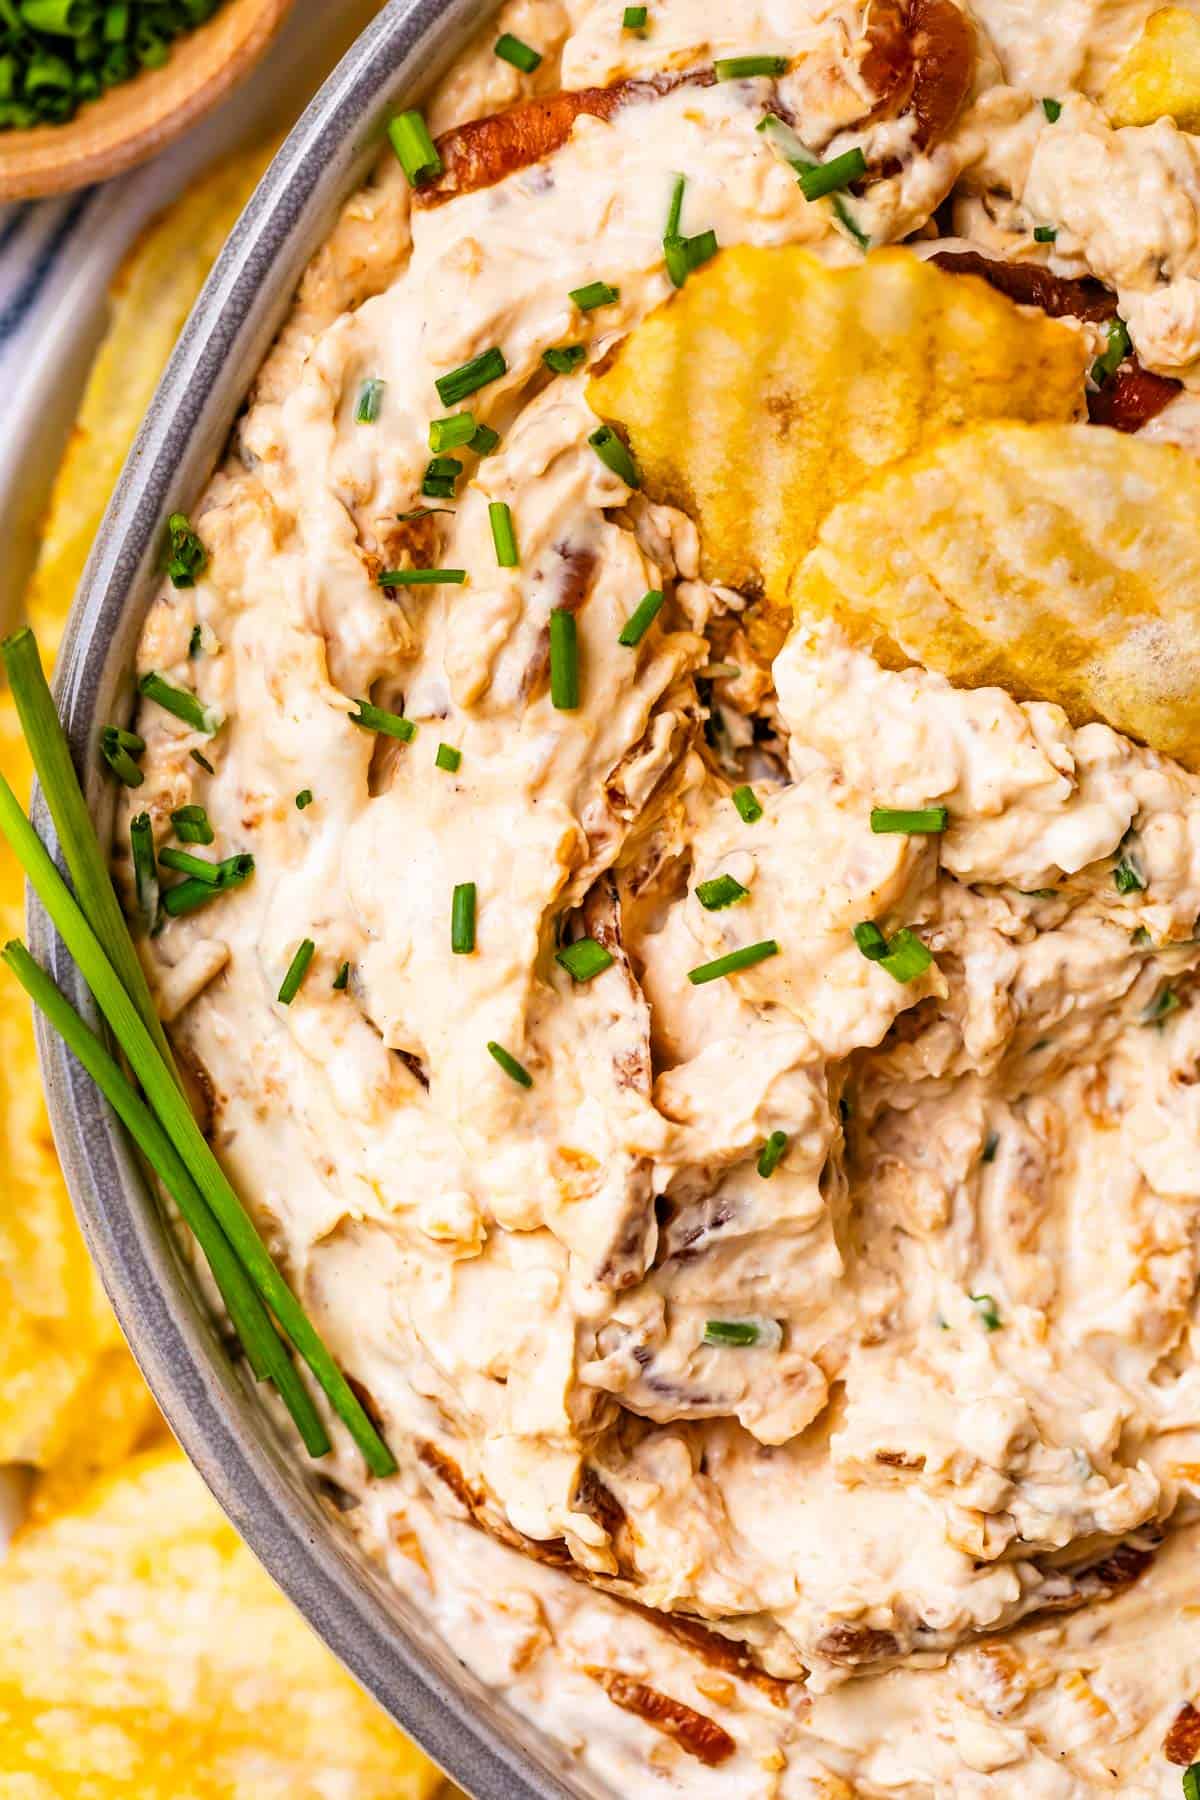
close up showing half a bowl filled with caramelized French onion dip with chive garnish and chips.

More incredible dips and sauces you’ll love!

I’m a sucker for a good condiment. It can totally make a whole meal or even event to have just the right sauce or dipper!! Look through these recipes for your favorite dip recipes and more!

finger and thumb holding a crinkle cut potato chip loaded with French onion dip with chive garnish.

Facebook | Pinterest | Instagram

hand pulling crinkle cut potato chip scooping up french onion dip.
Print

French Onion Dip

Course Appetizer, Snack
Cuisine American
Prep Time 15 minutes
Cook Time 40 minutes
Total Time 55 minutes
Servings 10
Calories 203kcal

Ingredients

  • 3 large yellow onions
  • 3 tablespoons butter
  • 2 teaspoons kosher salt
  • 1 tablespoon granulated sugar
  • 1/8 teaspoon cayenne pepper
  • 3 tablespoons white wine vinegar
  • 1 teaspoon Beef base
  • 1 tablespoon water if needed
  • 8 ounces cream cheese softened
  • 1 and 1/2 cups sour cream
  • 1 small clove garlic smashed and minced
  • 1 teaspoon Worcestershire sauce
  • 1 teaspoon lemon juice
  • chives chopped, to garnish
  • 1 large bag high quality potato chips for serving

Instructions

  • Set out your block of cream cheese so that it is soft when you need to beat it later.
  • Caramelize the onions: Thinly slice the 3 onions. Thin slices caramelize more evenly than big ol pieces!*
  • Set a 12-inch high sided pan over medium heat. Melt 3 tablespoons butter, then add all the onions. Sprinkle with 2 teaspoons kosher salt, 1 tablespoon sugar, and 1/8 teaspoon cayenne pepper. The cayenne is for flavor and not heat, if you like things a lil spicy, add 1/4 teaspoon!
  • Saute the onions over medium heat for about 5 minutes, stirring occasionally. Lower the heat to medium low, and settle in for the long haul. Onions take about 40-50 minutes to caramelize fully.
  • Eventually, after 10-15 minutes, the bottom of the pan will get dry and the onions will start sticking to the pan. At this point, deglaze the pan by adding 3 tablespoons white wine vinegar and using a wooden spoon to scrape up all the browned bits on the bottom of the pan.
  • Add 1 teaspoon beef base and stir it all together. Keep sauteing until you have reached the 40-50 minute mark. If the pan gets very dry and the onions start to blacken on the edges, add 1 tablespoon water and stir. Repeat this process as often as necessary. At the end, your onions should be a deep brown caramel color, with no white parts, and not blackened. (not too much, anyway.)
  • Remove the onions from the heat and let cool for a while. When you can handle them, scrape them onto a cutting board and chop into bite-size pieces.*
  • Make the dip: Meanwhile, in a medium bowl, add 8 ounces softened cream cheese. Beat with a hand mixer until it is smooth and creamy, and there are no lumps.
  • Add 1 and 1/2 cups sour cream, 1 small clove of minced garlic (about 1 teaspoon), 1 teaspoon Worcestershire sauce, and 1 teaspoon lemon juice. Continue beating until it's all mixed together. Give it a taste and add salt and pepper to taste!
  • Use a rubber spatula to fold in the cooled and chopped caramelized onions. Transfer to a serving dish and sprinkle with chopped chives (or green onions are good too, thinly sliced).
  • Serve right away with potato chips! I like the crinkle cut potato chips, I feel like they are sturdier and hold up better for dipping.
  • Store the dip in a covered container in the fridge. It will keep for a couple weeks! (Ask me how I know 😂) This is a GREAT make ahead appetizer, the flavors just get better with time.


Notes

*You can chop your onions into a normal dice before cooking, if you wish. I’m always crying a thousand tears by this point and want to get them in the pan as fast as possible, so I just slice and go! We don’t want long stringy onions in our dip; I always take the step to chop up the onions after they have caramelized. But if you are not a crier, you can do the full dice before cooking, if that’s more convenient! 

Nutrition

Calories: 203kcal | Carbohydrates: 9g | Protein: 3g | Fat: 18g | Saturated Fat: 10g | Polyunsaturated Fat: 1g | Monounsaturated Fat: 4g | Trans Fat: 0.1g | Cholesterol: 52mg | Sodium: 632mg | Potassium: 149mg | Fiber: 1g | Sugar: 5g | Vitamin A: 636IU | Vitamin C: 4mg | Calcium: 70mg | Iron: 0.2mg

Easy Cheesy Ravioli Lasagna

This easy ravioli lasagna bake is a hearty no-brainer dinner to make on busy back-to-school nights. You don’t even have to cook the ravioli, just throw it in frozen. It’s a total crowd-pleaser! And a great make-ahead meal too. Originally published August 13, 2015. Today I went to Charlotte’s preschool registration. The teacher had emailed…

This easy ravioli lasagna bake is a hearty no-brainer dinner to make on busy back-to-school nights. You don’t even have to cook the ravioli, just throw it in frozen. It’s a total crowd-pleaser! And a great make-ahead meal too. Originally published August 13, 2015.

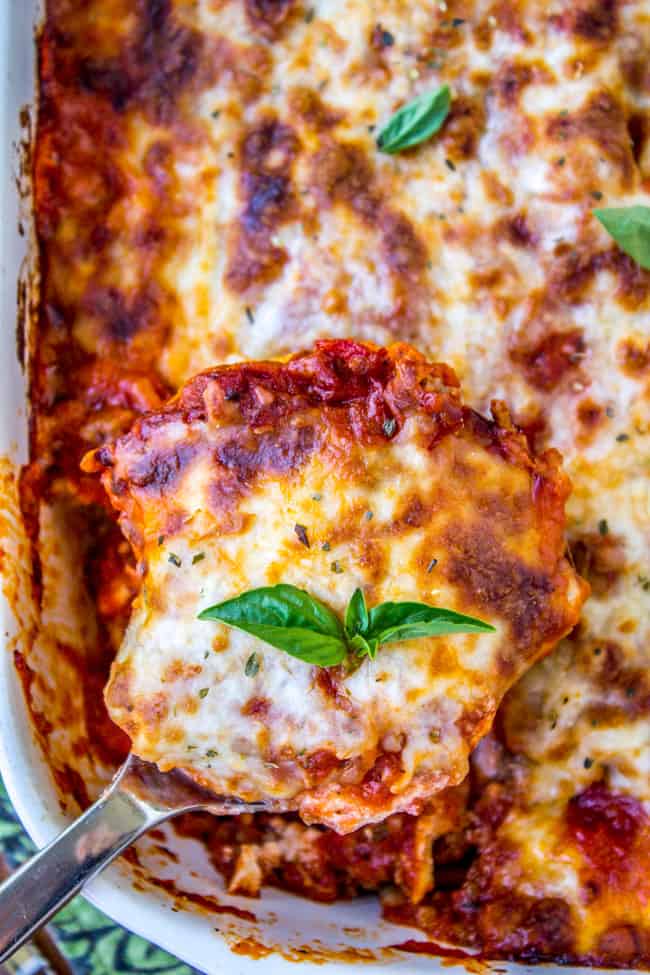
a piece of ravioli lasagna.
Table of Contents
  1. This Ravioli Lasagna Bake is a Family Staple
  2. How to Make Lasagna With Ravioli
  3. Tips For Making Easy Ravioli Lasagna
  4. Ravioli Lasagna Recipe variations
  5. Storing Lasagna Made With Ravioli
  6. What to Serve With Ravioli Lasagna
  7. More great school-night dinners!
  8. Easy Ravioli Lasagna Recipe

Today I went to Charlotte’s preschool registration. The teacher had emailed us requesting that we bring 2 photos of Charlotte, I assume to put up on the wall in their classroom.

So last night I carefully went through all of the lovely family photos we had taken last year, and picked the two where Charlotte looked the most adorable. I sent them off to Eric, and he was in charge of ordering the pictures at Walgreens. But when I went to pick them up this morning, this is what I found:

a child making meatballs.

MEATBALLS. Raw meatballs. Eric apparently thought that this picture had a lot more character than the professional ones. Well it certainly does, along with a blurry face and a hairdo that makes Charlotte looks like a street urchin. Oh, and don’t worry that half the photo is RAW MEATBALLS. Handing this picture to the teacher is like handing them a guarantee that this one will be The Problem Child, because their parents are freaky weird.

Also, her first nickname will be Meatball Girl. Every preschooler’s dream.

a piece of ravioli lasagna.

Well even if Charlotte’s earliest school years are now haunted with meatball memories, at least she will get this for dinner. It’s not so bad having freaky weird parents when you get Ravioli Lasagna. Kind of rounds things out.

This Ravioli Lasagna Bake is a Family Staple

two metal spoons in a large pan of ravioli lasagna.

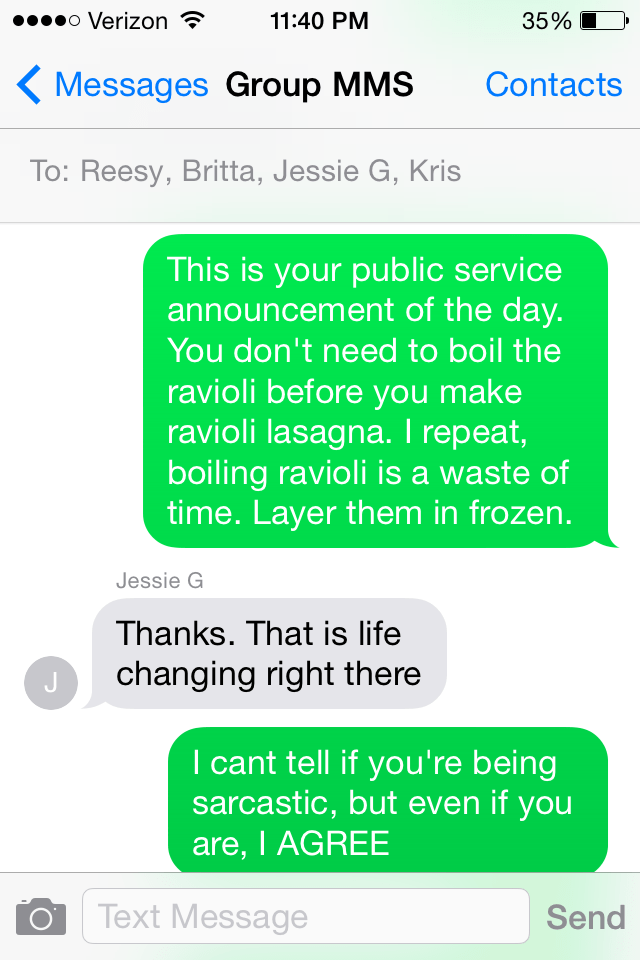
This recipe is a classic in Eric’s family, his mom made it all the time growing up. It has 4 parts: sauce, frozen ravioli, ricotta, and cheese. It’s super easy to put together. I decided to skip boiling the ravioli, just to see what would happen. Here’s the text I sent my mother- and sisters-law:

a text message thread about making ravioli lasagna.

And for the record, Jessie wasn’t being sarcastic. It really is that life-changing. Boiling ravioli adds at least 10 minutes to your dinner prep, and that is 10 minutes that you could be vacuuming, or filing your nails, or Pinteresting. (I’ll take option 3 please.)

How to Make Lasagna With Ravioli

Start by making your sauce. The sausage makes this soooo good. I know we’re about to grab a bag fo frozen lasagna, but making homemade sauce is the secret to love at first bite.

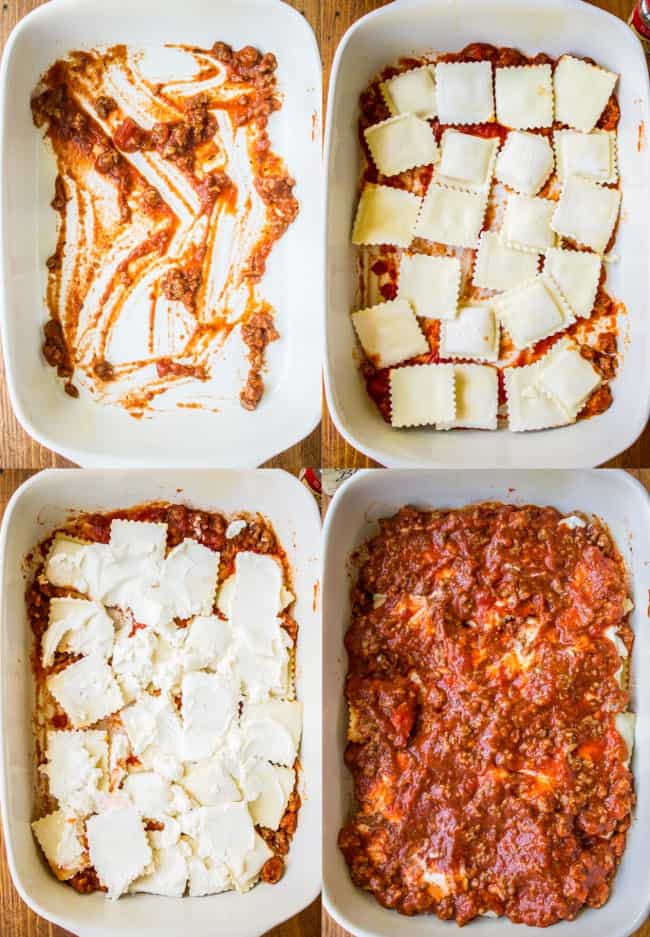
Spread some sauce in the pan, then start layering up the lasagna. No need to boil!!

layering sauce, ravioli, and ricotta cheese in a baking pan.

Then ricotta, more sauce, mozzarella. Repeat.

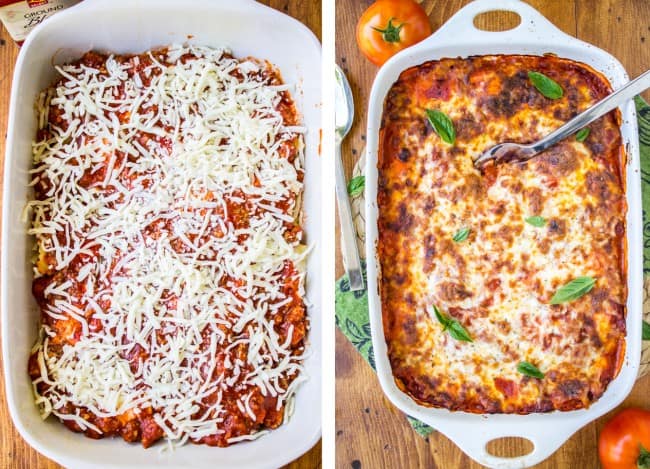
adding shredded mozzarella to an unbaked lasagna, a baked lasagna.

It’s hard to go back to frozen lasagna…when you could just grab the frozen ravioli and make this instead.

Tips For Making Easy Ravioli Lasagna

  • I said it before and I’ll say it again: don’t. boil. the. ravioli. You’re welcome
  • Don’t feel like you have to stick with sausage! You could do ground beef instead, vegetarian crumbles, or just skip the meat altogether.
  • Start keeping a bag of frozen ravioli in your freezer at all times for those “noooo how is it 5PM” kinda nights (this happens a lot at my house).

Ravioli Lasagna Recipe variations

You can make this lasagna as easy or extensive as you want it to be. You can add sausage to the sauce, or leave it out. You can layer sliced zucchini or other squash, if you have it around. You can jazz up the ricotta with an egg or spices. Pretty much any way you make it, it’s going to be amazing! I love no-fail recipes like this.

This recipe has just enough cooking prep-work to impress family or guests! I always get compliments with it. You start by doctoring up some marinara sauce which is the part that really makes it feel homemade. From there you just layer the sauce, frozen ravioli, and cheeses until you’ve got an amazing ravioli lasagna bake ready to put in the oven! If you want to prepare it ahead of time, just assemble it in an aluminum baking pan and stick it in the freezer for an even faster school-night meal or to deliver to a friend.

ravioli lasagna with fresh basil on top.

Doesn’t that just look beautiful! Easy to make and easy to please. This is a great meal to make a big group happy. If you make it please share how it goes!

Storing Lasagna Made With Ravioli

You can keep this lasagna in the fridge in an airtight container for 3-4 days no problem. Reheat individual servings in the microwave or cover the top with foil and reheat the whole thing (or a large portion) at 350 degrees until warmed through.

After a few days it’s a good idea to freeze any leftovers. Wrap it tightly in tinfoil or plastic wrap and save it for another day. The lasagna will stay fresh for 2-3 months. Thaw it overnight in the fridge, at least 12 hours, and then reheat it at 350 for about 30 minutes.

What to Serve With Ravioli Lasagna

If it’s a busy night just go grab that frozen garlic bread and a bagged salad and call it done. If you have a little more time try some of my favorite homemade breads and salads! This can be a serious special occasion dinner when you add the good stuff alongside.

Garlic Knots << these are NO. JOKE. The best garlic knots I’ve ever had

Quick and Easy French Bread << you will be shocked how fast this is!

The Best Garlic Butter Bread << heaven is a place where I’m with garlic bread

My Favorite Green Goddess Salad << creamy herby dressing and perfect greens, yes please

Strawberry Spinach Salad << a legendary recipe for a reason!

Apple Gorgonzola Salad (Buca di Beppo Copycat) << fruit, nuts, and cheese: perfect combo

More great school-night dinners!

Easy Cheesy Asparagus Tortellini Bake << this one’s quick

Baked Ziti << one of my favorite casseroles of all time!

Chicken Parmesan Pot Pie << just one skillet!

Chicken and Dumpling Casserole from Chef in Training

Italian Sausage Casserole from Dinners, Dishes and Desserts

Cheesy Ravioli and Italian Sausage Skillet from The Comfort of Cooking

Facebook | Pinterest | Instagram

Easy Ravioli Lasagna from The Food Charlatan
Print

Easy Ravioli Lasagna

This easy ravioli lasagna bake is a hearty no-brainer dinner to make on busy back-to-school nights. You don't even have to cook the ravioli, just throw it in frozen. It's a total crowd-pleaser! And a great make-ahead meal too.
Course Main Course
Cuisine Italian
Prep Time 15 minutes
Cook Time 30 minutes
Total Time 45 minutes
Servings 6 Servings
Calories 841kcal

Ingredients

  • 1 pound Italian sausage
  • 1 jar marinara sauce
  • 1 14-oz can crushed tomatoes
  • 1 tablespoon Italian seasoning
  • 20-25 ounces ravioli fresh or frozen
  • 15 ounces ricotta cheese
  • 2-3 cups shredded mozzarella
  • basil fresh, to garnish, optional

Instructions

  • In a large skillet, cook and crumble the sausage over medium heat. Drain well.
  • Add the marinara sauce and crushed tomatoes. Add Italian seasoning.
  • Preheat the oven to 350 degrees F. Grease the edges of a 9×13 inch casserole dish.
  • Spoon about a half cup of the sauce into the pan and spread it all around the bottom.
  • Layer half of the ravioli on top in a single layer.
  • Spread half of the ricotta over the top of the ravioli (do your best, it doesn’t need to be perfect).
  • Top with half of the remaining sauce.
  • Sprinkle with about 1 cup of mozzarella.
  • Repeat the layers: all the remaining ravioli, ricotta, sauce, and another cup or more of mozzarella.
  • Bake at 350 for about 30-40 minutes, or until bubbly and golden brown. You can broil it for the last minute if you love crispy cheese on top.
  • Garnish with fresh basil and dig in!

Nutrition

Serving: 1slice | Calories: 841kcal | Carbohydrates: 49g | Protein: 42g | Fat: 53g | Saturated Fat: 23g | Polyunsaturated Fat: 4g | Monounsaturated Fat: 16g | Cholesterol: 174mg | Sodium: 2024mg | Potassium: 680mg | Fiber: 5g | Sugar: 7g | Vitamin A: 1073IU | Vitamin C: 9mg | Calcium: 396mg | Iron: 13mg

Better Than Chipotle Cilantro Lime Rice

I have tried several recipes for Cilantro Lime Rice–they all tasted the same as regular rice, with maybe some vague limey notions. I don’t ever want the lime in my life to be vague. This recipe, also known as Arroz Verde (Green Rice) brings the zip! We start with aromatic basmati rice, add a couple…

I have tried several recipes for Cilantro Lime Rice–they all tasted the same as regular rice, with maybe some vague limey notions. I don’t ever want the lime in my life to be vague. This recipe, also known as Arroz Verde (Green Rice) brings the zip! We start with aromatic basmati rice, add a couple special ingredients to amp up the creaminess and flavor, finishing with lime juice AND zest. This is my favorite side dish to serve with Chicken tacos, Fajitas, Carne Asada, Burritos, you name it. Or just eat all by itself, it’s that good!

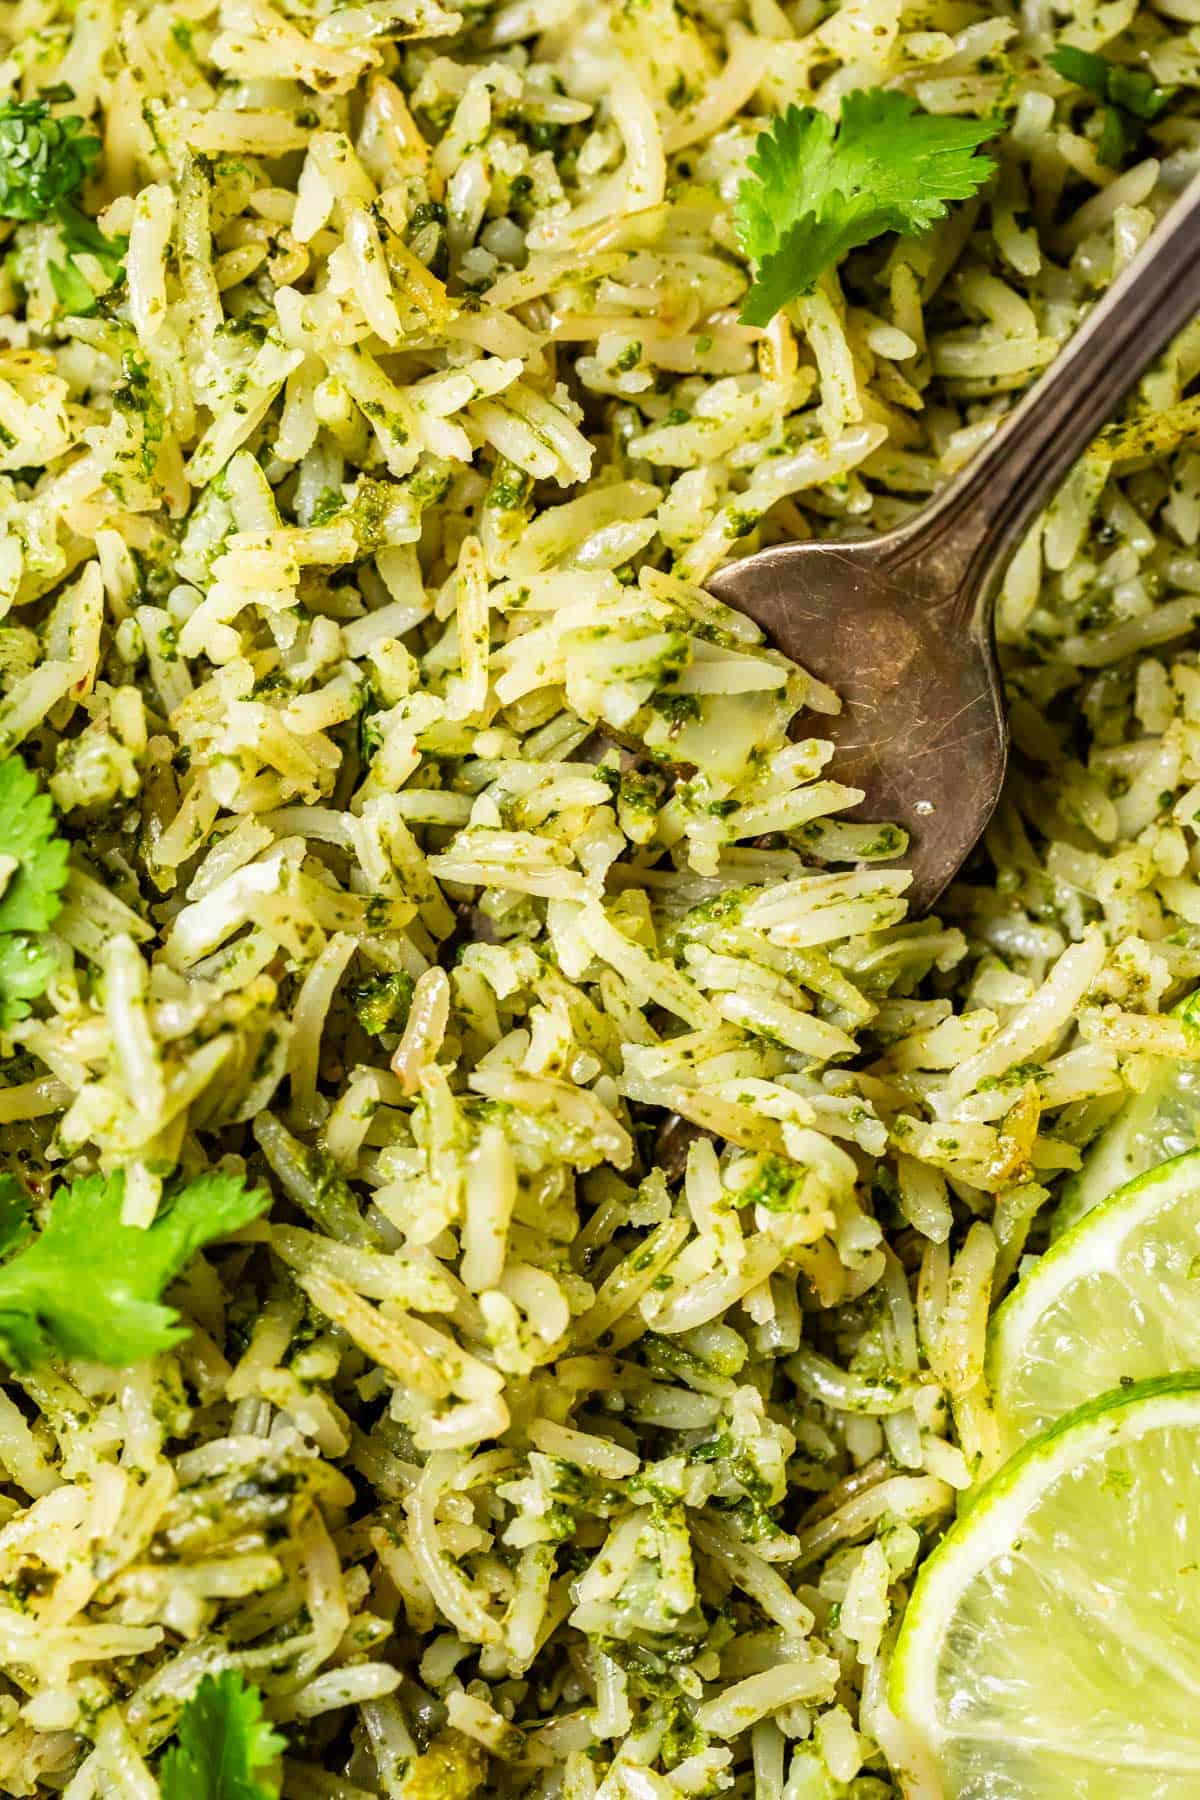
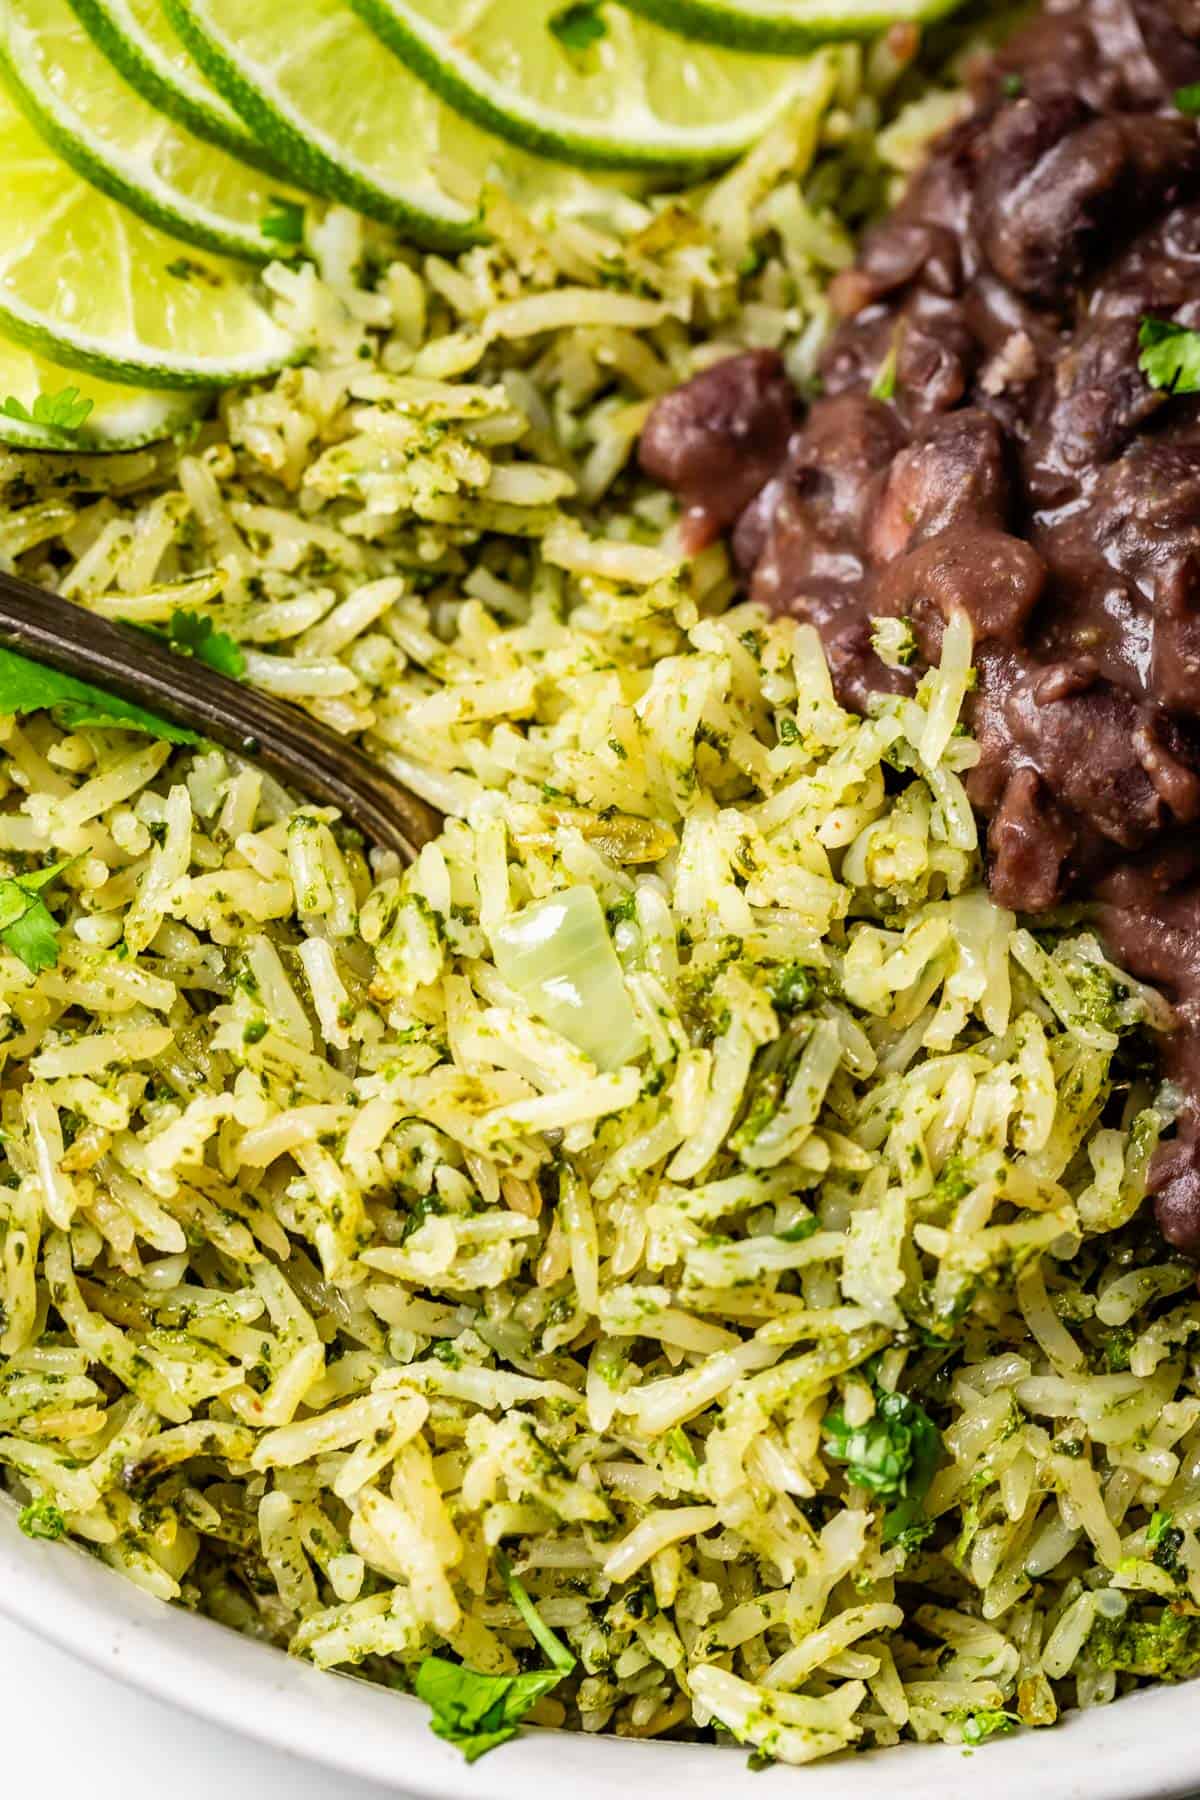
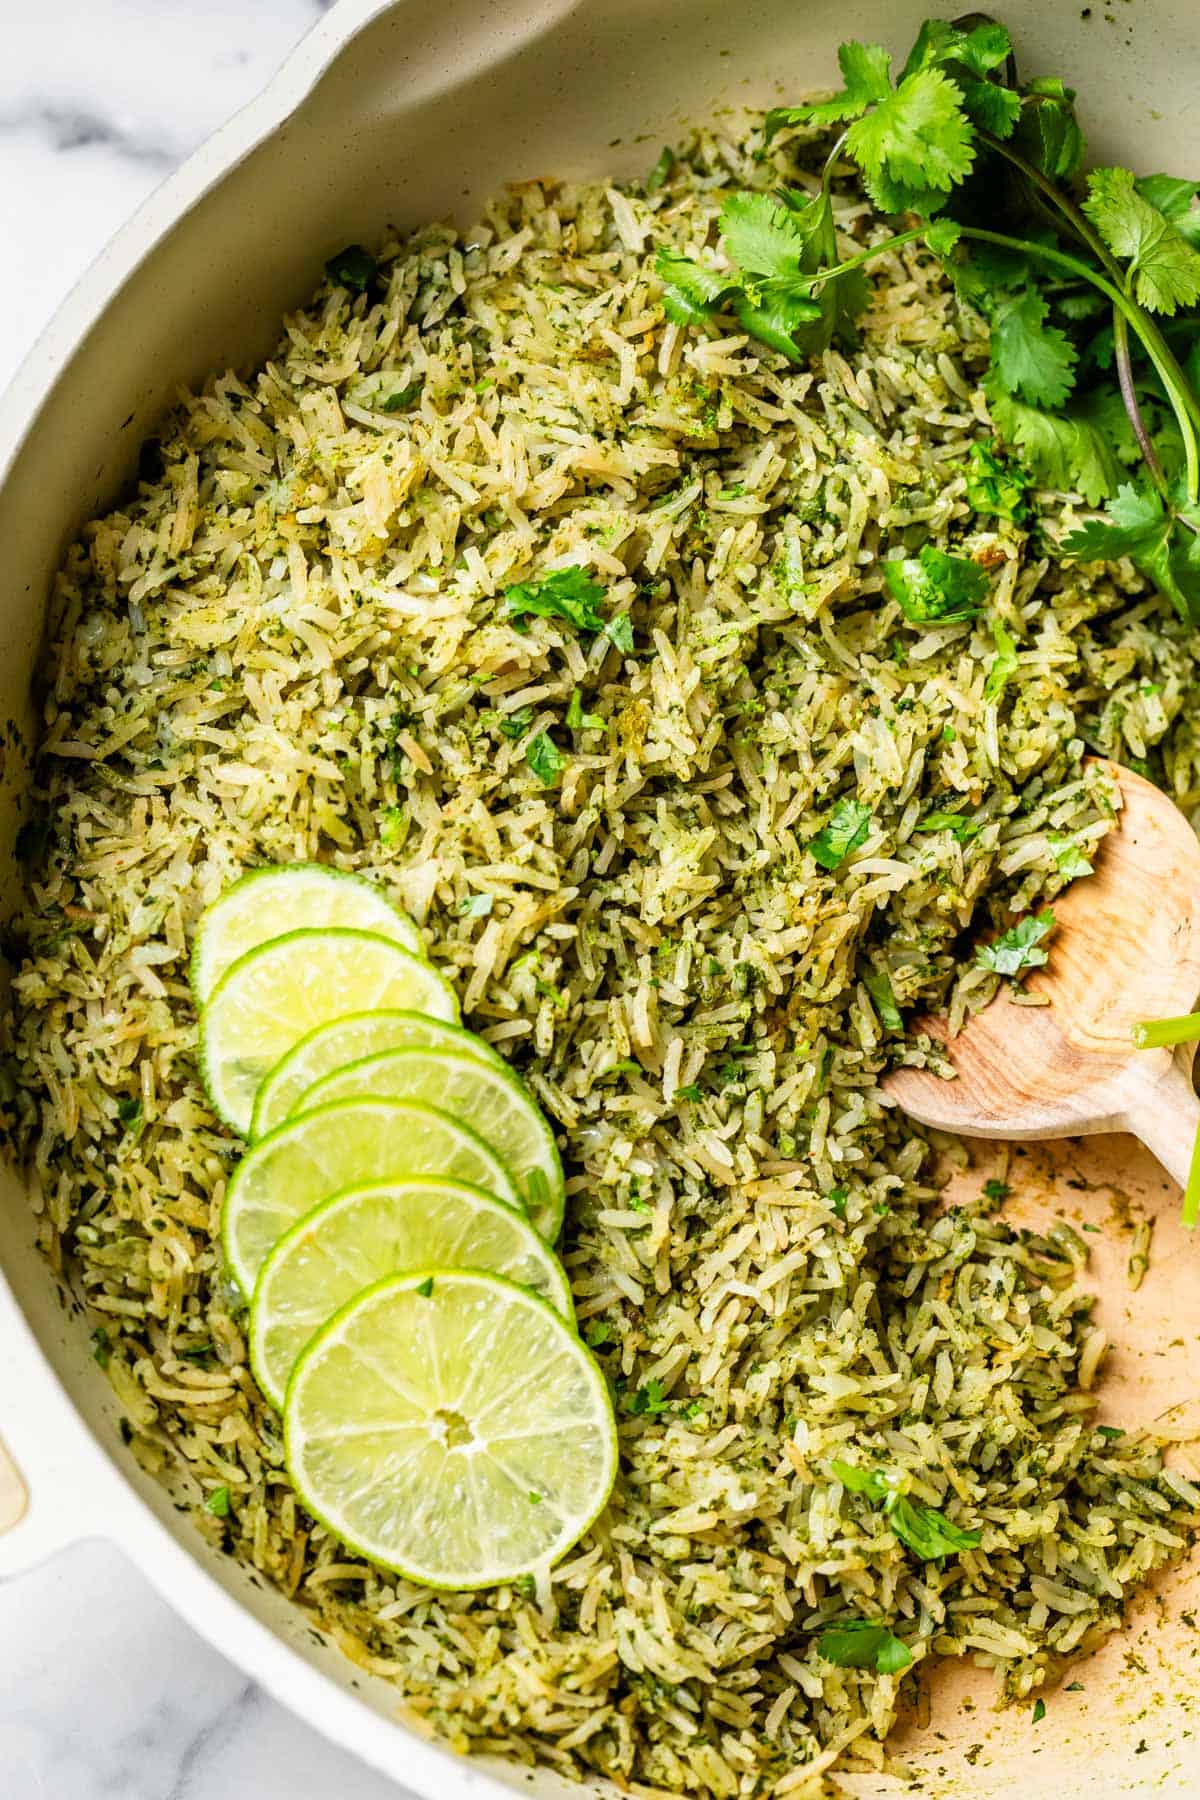
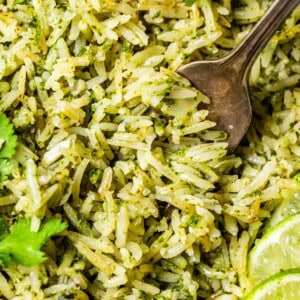
a metal fork digging in to a close up shot of green cilantro lime rice with cilantro garnish.
Table of Contents
  1. The best cilantro lime rice recipe
  2. Easy cilantro lime rice ingredients
  3. How to make cilantro lime rice
  4. What goes with cilantro lime rice?
  5. How to store leftovers for cilantro lime rice
  6. Can you freeze cilantro lime rice?
  7. Cilantro lime rice frequently asked questions
  8. More sides to go with all your mains
  9. Cilantro Lime Rice Recipe
  10. Easy Black Beans Recipe

Recently Eric and I escaped life for a few days and flew to a cute little spot in Cancun. I never thought I would be one for all-inclusive-resorts (My family traveled a lot. I hit 35 states by the time I was 17. I was taught that vacations are about cramming in as much sight seeing as possible…paltry concerns such as sleep or meals be damned.)

But for this stage of young motherhood and all the wildness it brings, I love a good beach trip where the only thing on my agenda is drinking a second virgin Pina Colada and lounging with a book. Turns out, Eric and I are really excellent at this whole “doing nothing” thing.

man and woman drinking from pineapple, then sitting at a lunch table by the beach.

And eating. We are really good at eating. You can see above my selections from the buffet. Who needs lunch when you could have an entire plate of petit fours?

The thing about an all inclusive resort is, you really can order as much food as you want. (And I don’t even feel guilty; we are their cheapest customers because we don’t drink alcohol 😂)

So we’re at a restaurant one night, and Eric orders dessert. The waiter pauses from taking his notes, looks up and asks, “Are you telling me what you want, or are you just reading the menu out loud?” Because Eric had ordered ALL the desserts on the menu. All of them. Send help guys 😅 You better believe we demolished every last bite.

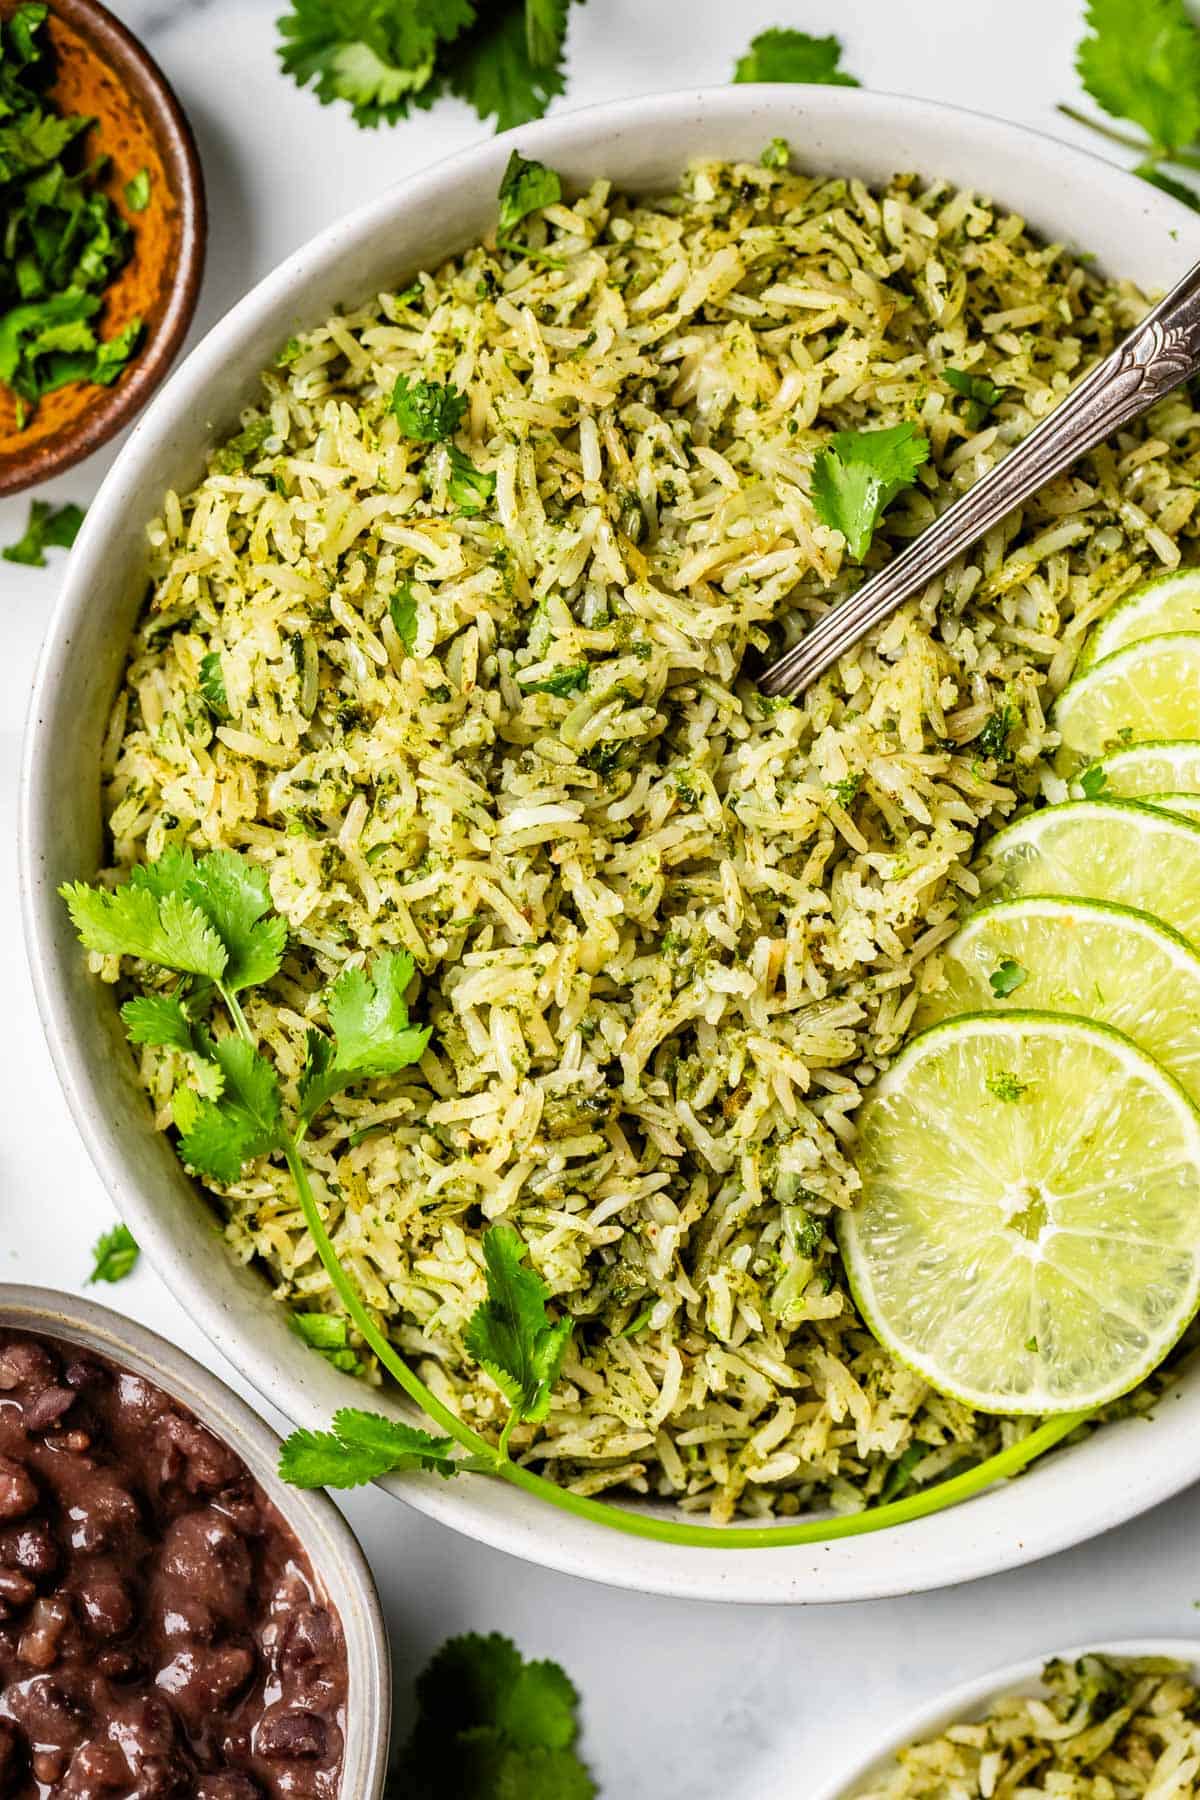
ceramic bowl filled to the brim with cilantro lime rice with a work and lime & cilantro garnish.

The best cilantro lime rice recipe

Do you have a Chipotle where you live? It’s a great fast-casual Mexican joint. My friend Katie’s son loves the Cilantro Lime Rice they serve so much that he orders not one, but TWO side dishes of rice with his meal every time they go. This cracks me up for some reason!

I’ve tried lots of different recipes for Cilantro Lime Rice and guys, none of them blew me away. Rice is good all by itself (with a lil help from our bubba butter of course) and when you add some cilantro and lime at the end, it’s good. But I was looking for that GREEN and SUPER FLAVORFUL rice I’ve had in certain “fancier” Mexican restaurants, where the cilantro lime flavor is absorbed in the rice itself, amping up the flavor significantly. Chipotle’s rice is good, but honestly it’s got nothing on the green stuff.

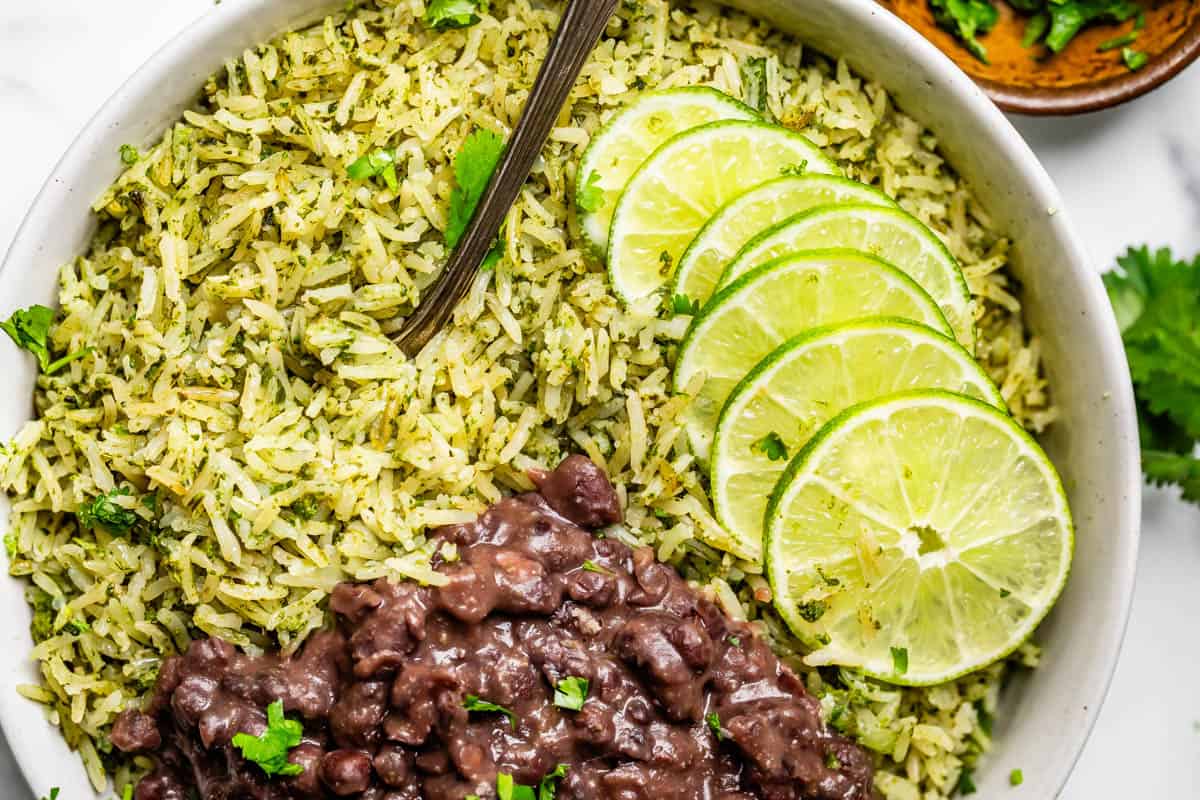
close up of green cilantro lime rice with lime garnish and a side of black beans.

Then, last summer, I was visiting my friend Kim, and she made Carnitas for the whole family, because she really loves us (this is the best way to show love for me ;) She had this bright GREEN rice simmering on the stove and I was so excited! I asked to see the recipe right away, hadn’t even tasted it yet.

Then I DID eat it with my carnitas and could. not. stop. It’s so good, just all by itself, but especially with all the fixins like Pico de Gallo and a pot of Tejano Pinto Beans. So what makes it so good?

The method is a huge part of it. Instead of adding cilantro to already-cooked rice, we are pureeing it with milk and chicken broth (so much more flavorful and creamy than water!), so the cilantro flavor can literally seep into the rice as it cooks and absorbs liquid.

And p.s., we’re not just using cilantro! The secret ingredient that makes the rice such a vibrant green is the spinach we’re adding to the blender. Say what now? Yes, really, spinach. You can’t taste it, but who could say no to adding all that good healthy stuff to a pot of rice? It’s a no brainer! I LOVE it, both for color and the nutrition bump.

Then, we toast the rice until it’s golden brown in some butter and olive oil. This browning adds in lovely flavor that you can’t get any other way. Then some easy aromatics, onion and garlic, add in even more umph.

And finally, once the rice is mostly cooked, we add in not just lime juice, but also plenty of lime zest too, to bring that punch of citrus flavor that I love.

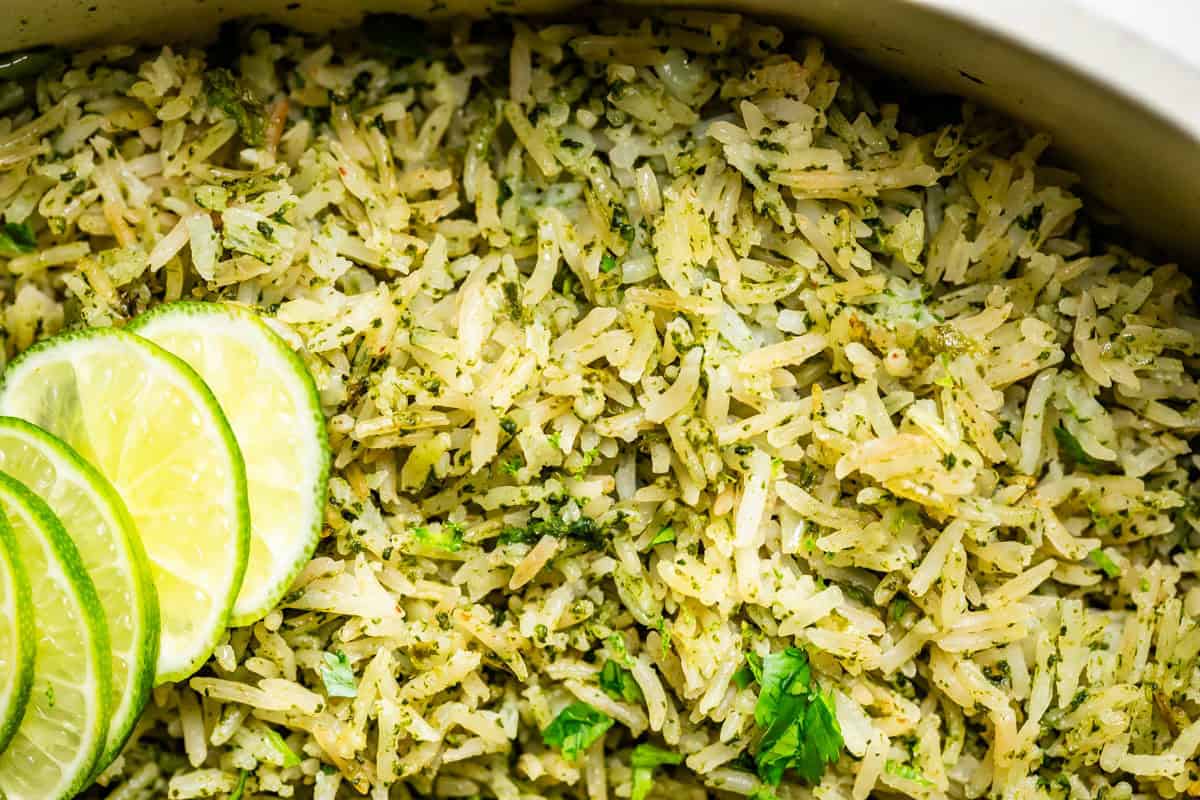
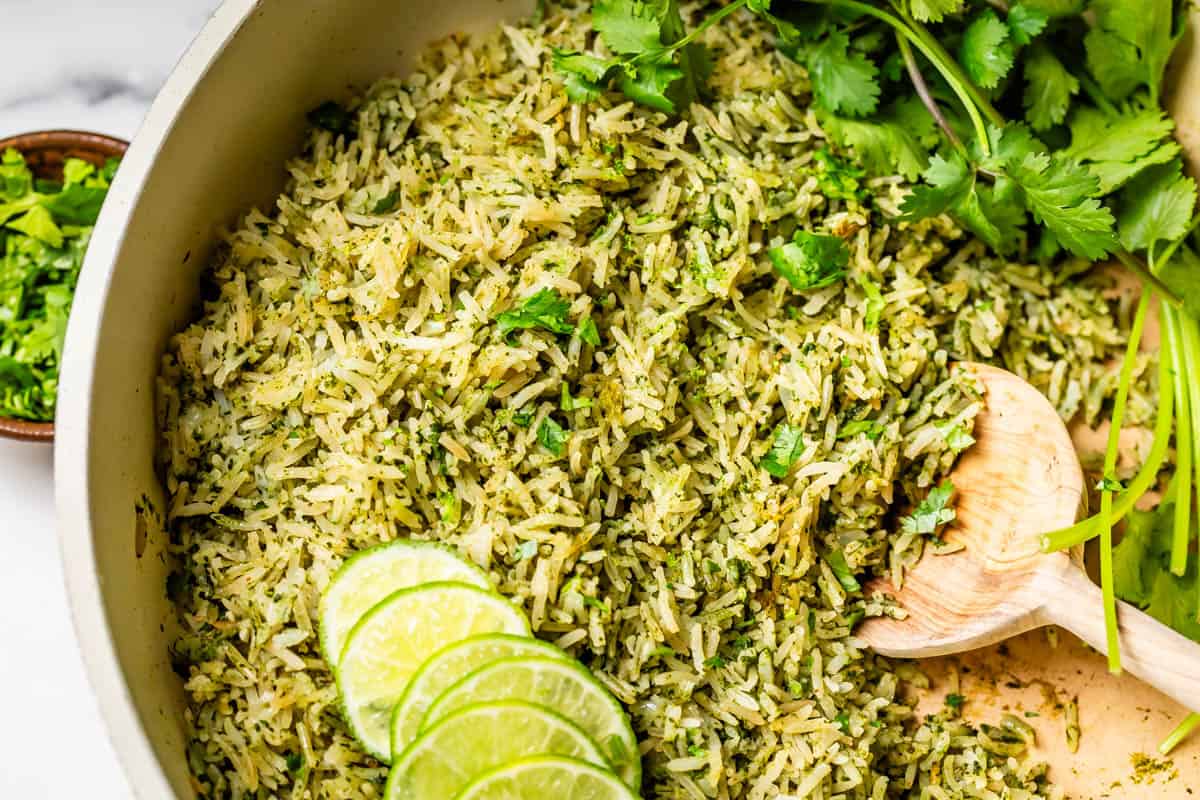
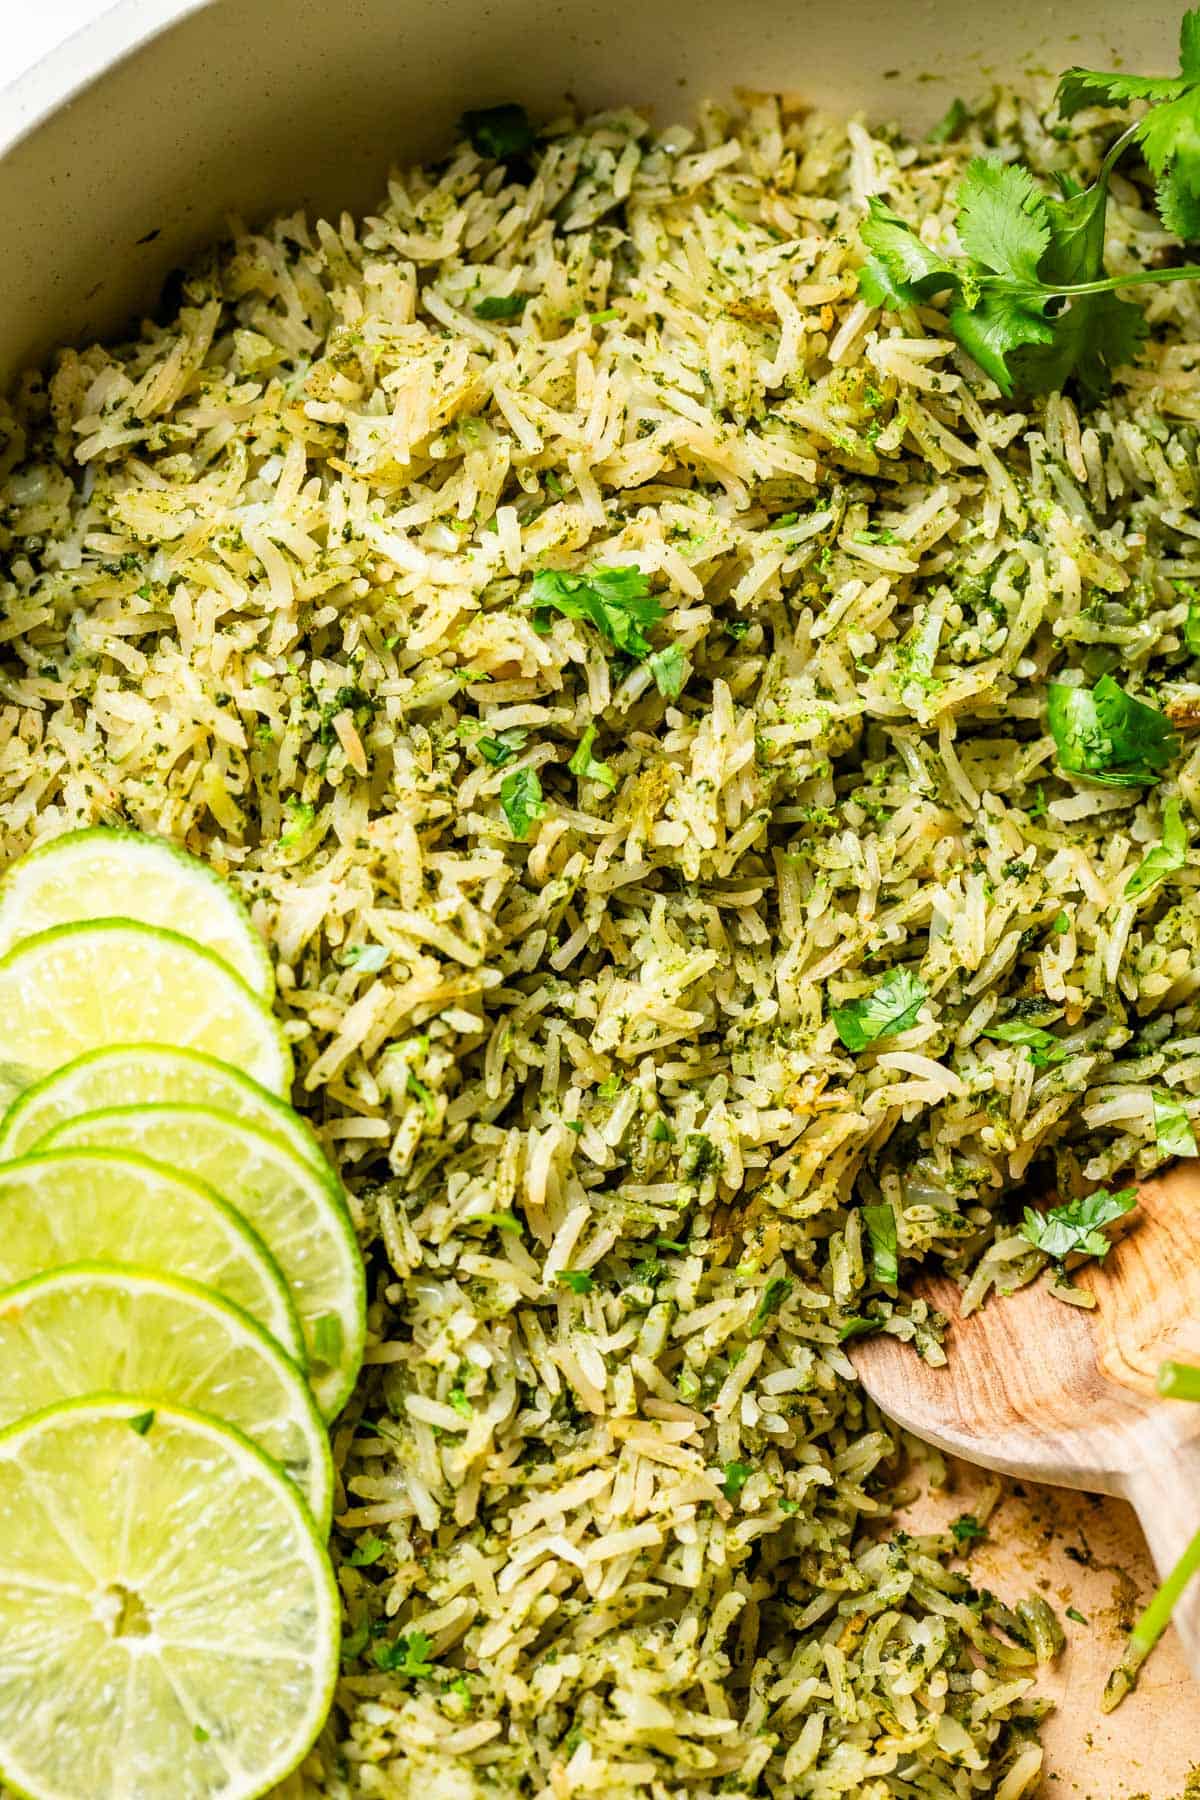
close up showing individual grains of cilantro lime rice.

I could eat a bowl of this rice all by itself, so happily. Bless you for this recipe, Kim! I’m so excited I finally have a level-up cilantro lime rice that I love! I’m going to try it next with Sweet Potato Black Bean Enchiladas. Or maybe with Carne Guisada! yes please. Okay here we go, let’s make it!

Easy cilantro lime rice ingredients

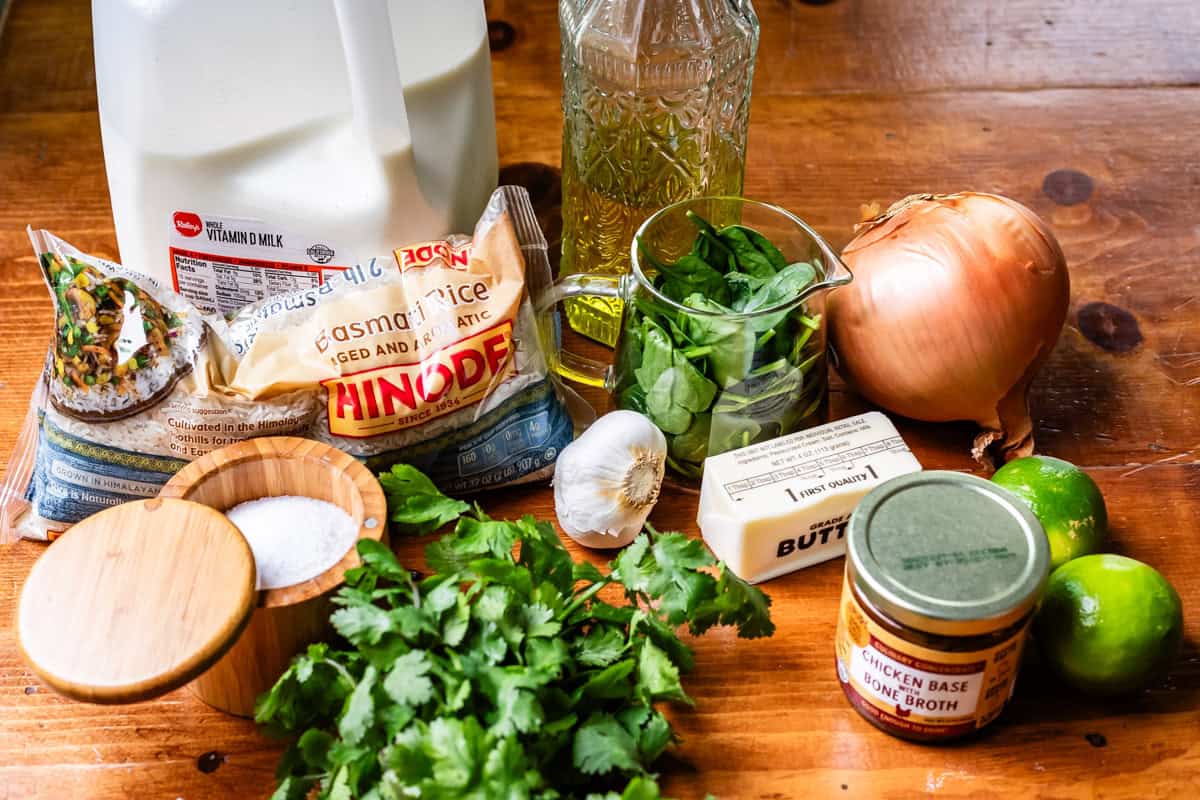
The ingredient list is pretty short, this is all you need! The full recipe measurements and instructions are in the recipe card below.

wood table with cilantro lime rice ingredients set out, like, garlic, milk, and more.
  • spinach
  • cilantro
  • chicken broth
  • milk
  • kosher salt
  • butter
  • olive oil
  • basmati rice
  • onion
  • garlic
  • lime zest
  • lime juice

How to make cilantro lime rice

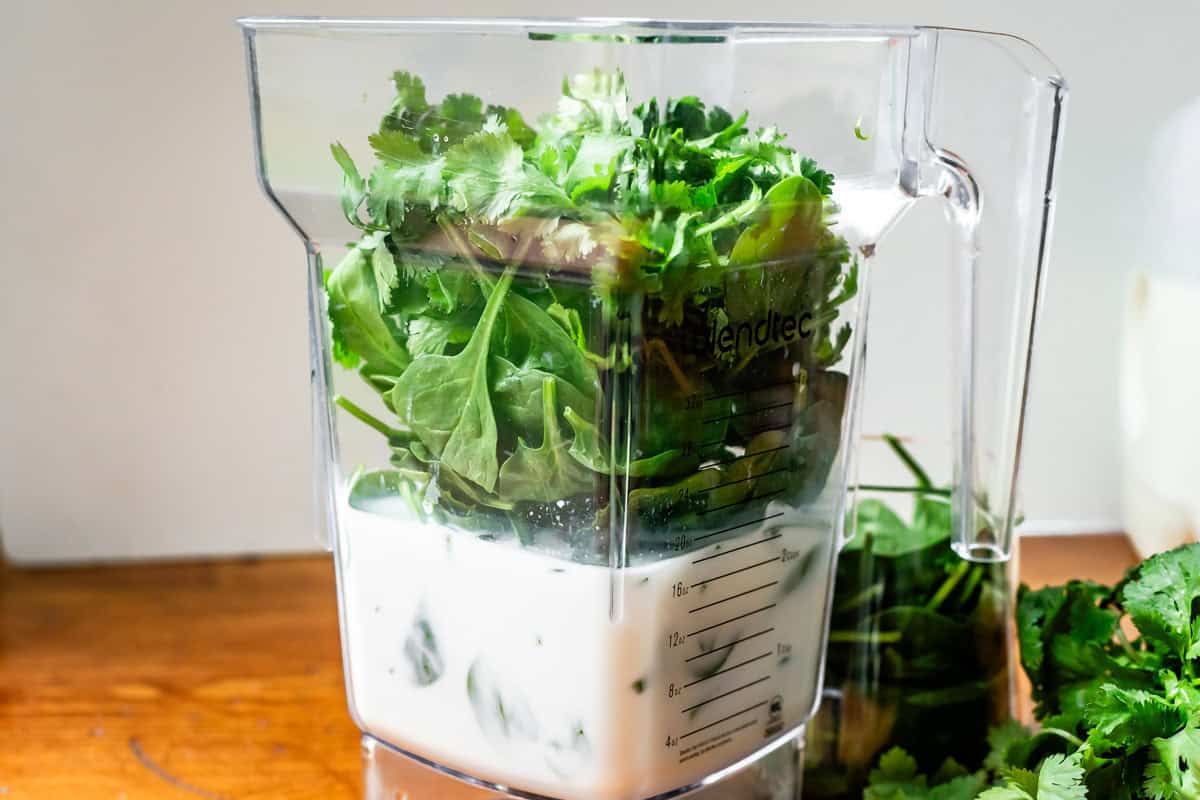
First up, grab your blender! Add in your chicken broth, milk, salt, spinach and cilantro. There is something extremely satisfying about shoving what looks like too-many green things into a blender, and knowing that it’s all going in your body eventually, am I alone here? PILE IT ON!!

a blender filled with milk, broth, spinach, and cilantro for cilantro lime rice.

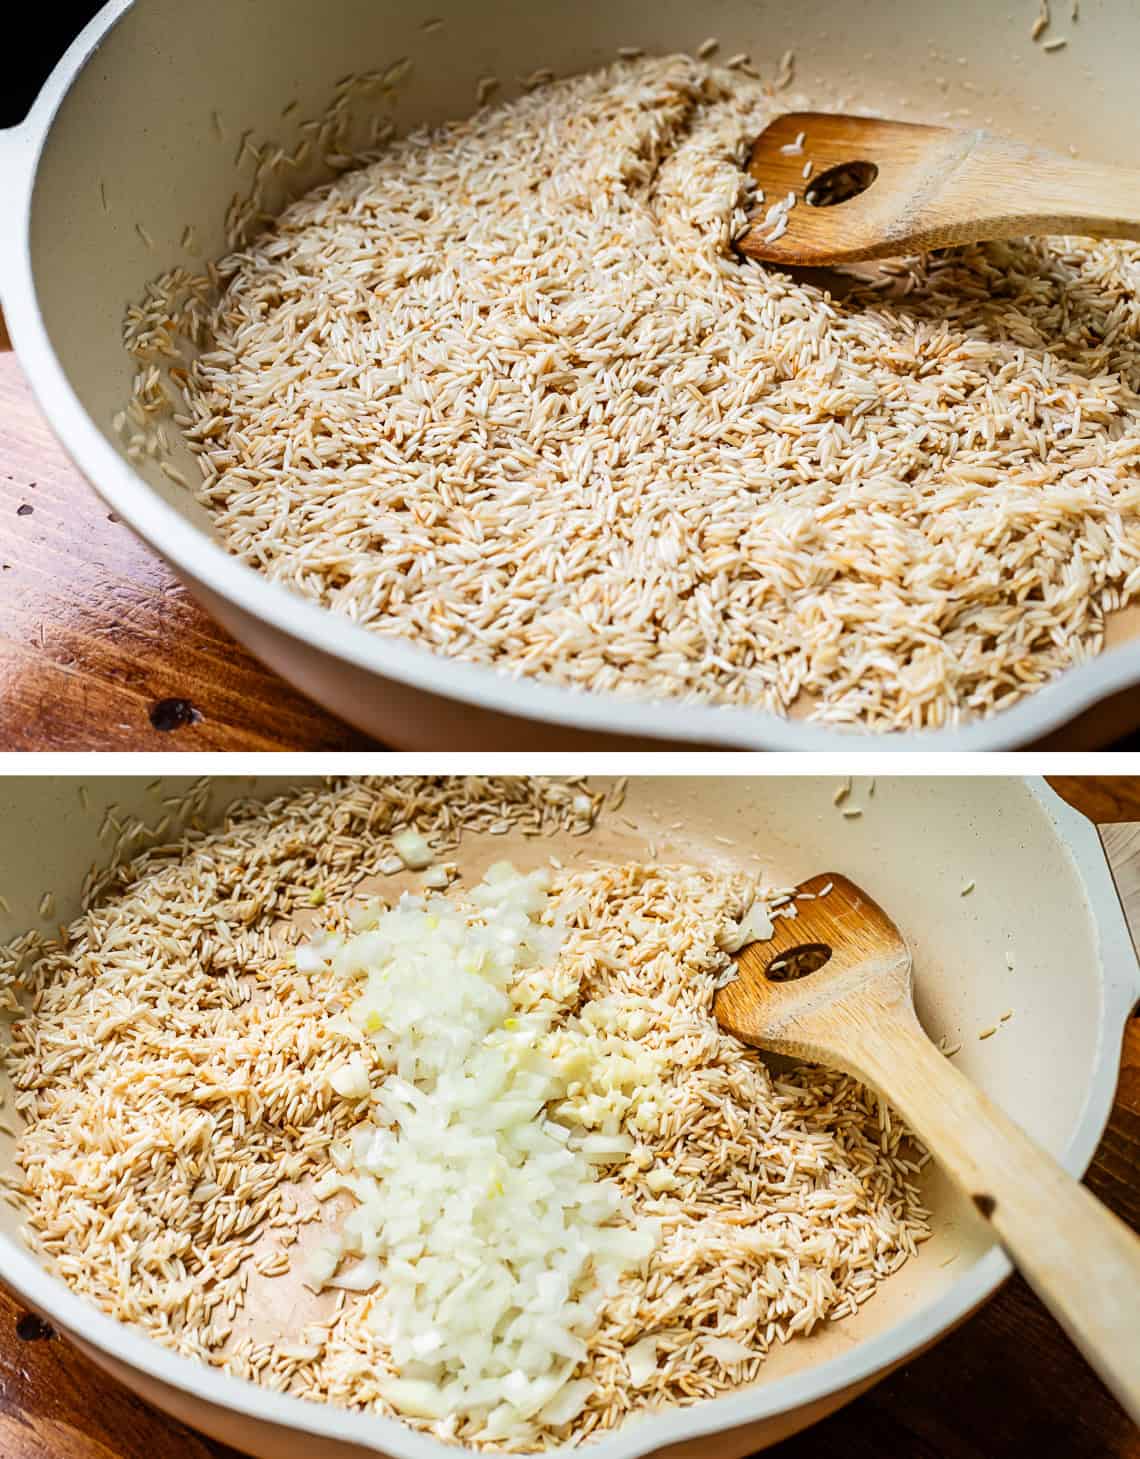
Meanwhile, toast the rice in some butter and oil. I LOVE the flavor this brings out in the rice! I wish I made time to do this every time I cooked rice. Definitely don’t skip it for this recipe. That golden brown flavor is just 🤌

top pic rice toasting in a pot with a wooden spoon, bottom chopped onion added to rice.

After the rice has toasted a bit, add in the onions and garlic and keep sautéing for a bit.

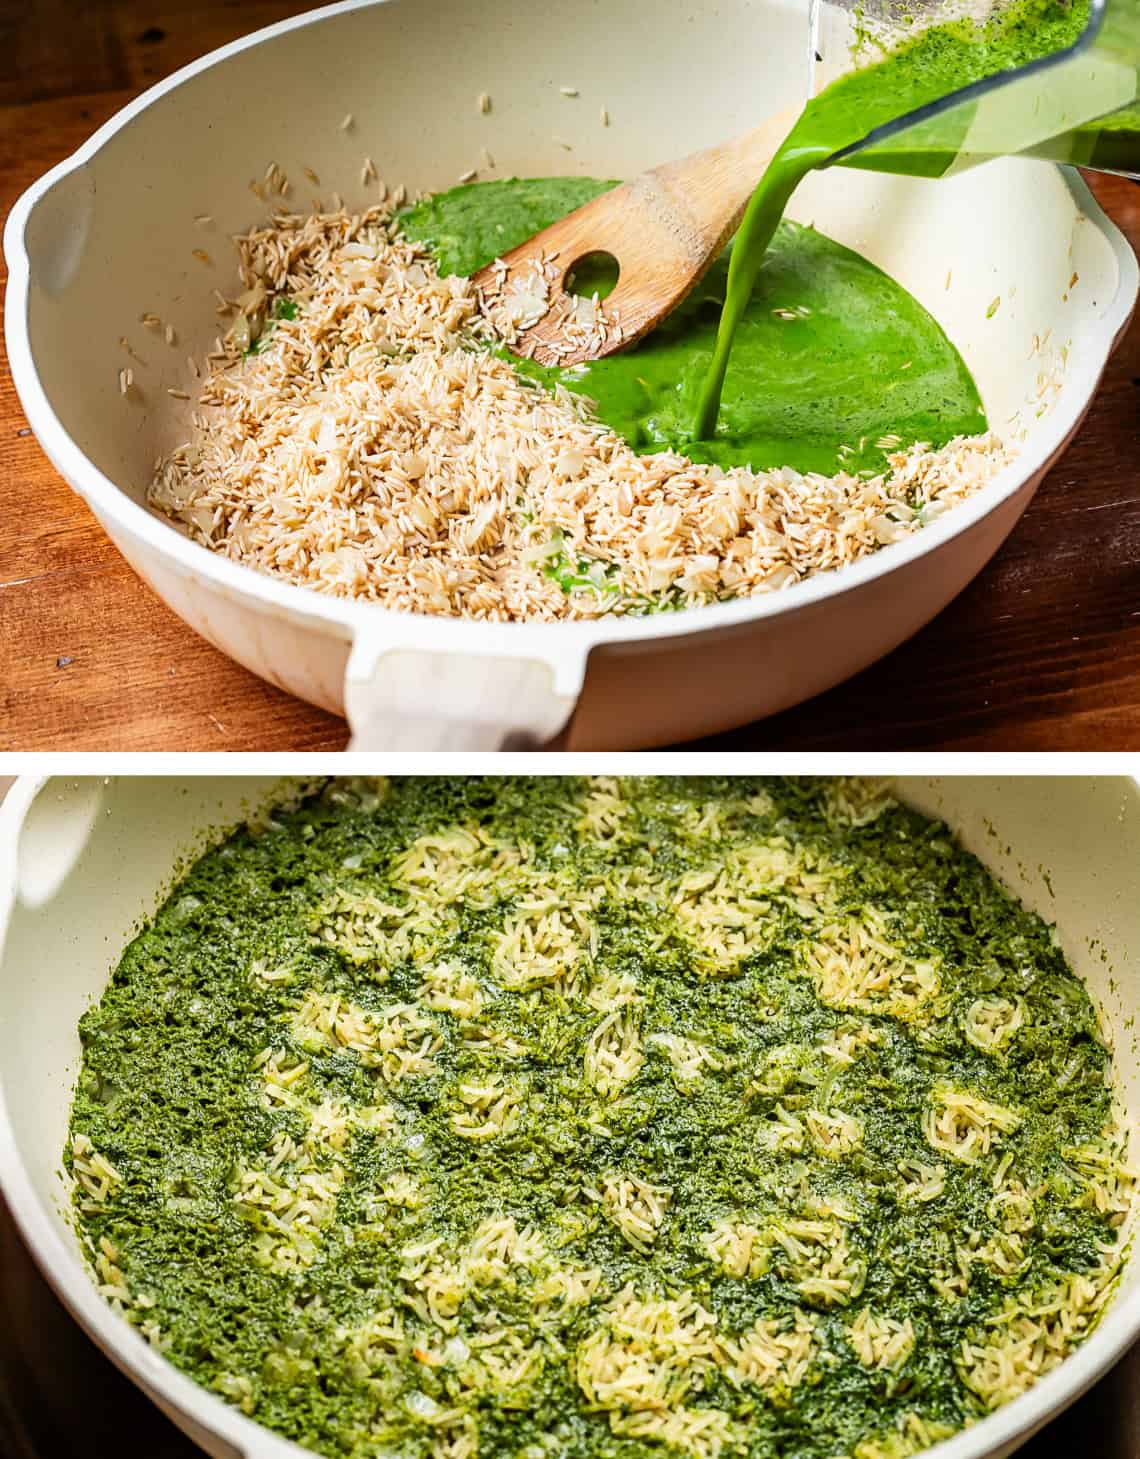
Now it’s time for the fun. Pour in the green stuff!

top pic pouring green liquid from blender into pot with rice, bottom cooked rice in green liquid unstirred.

Bring it to a bowl, then cover and heat on low for a while. After about 15 minutes, it will look like this. ↑ So fun right?

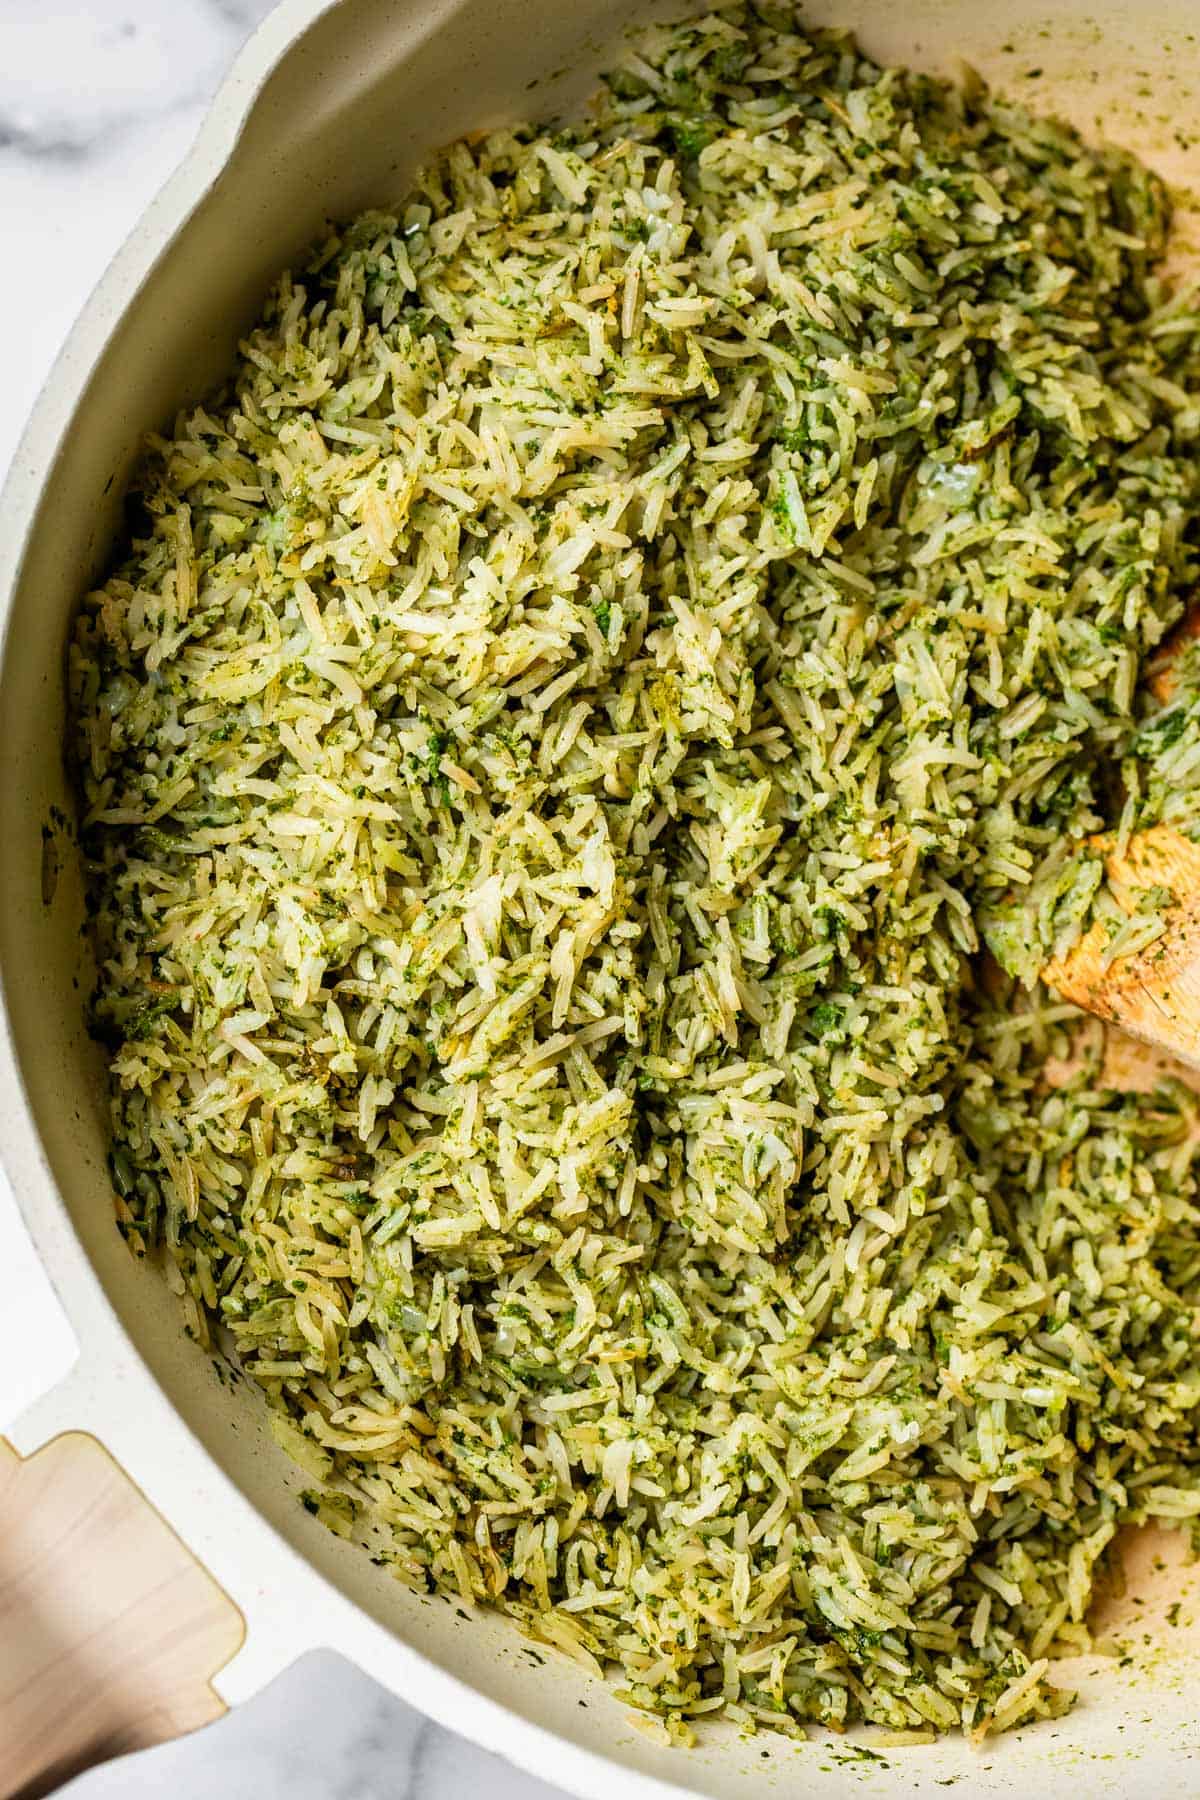
Fluff it up a bit, then don’t forget to add in the lime juice and zest.

cooked and stirred cilantro lime rice in a cooking pot with a wooden spoon.

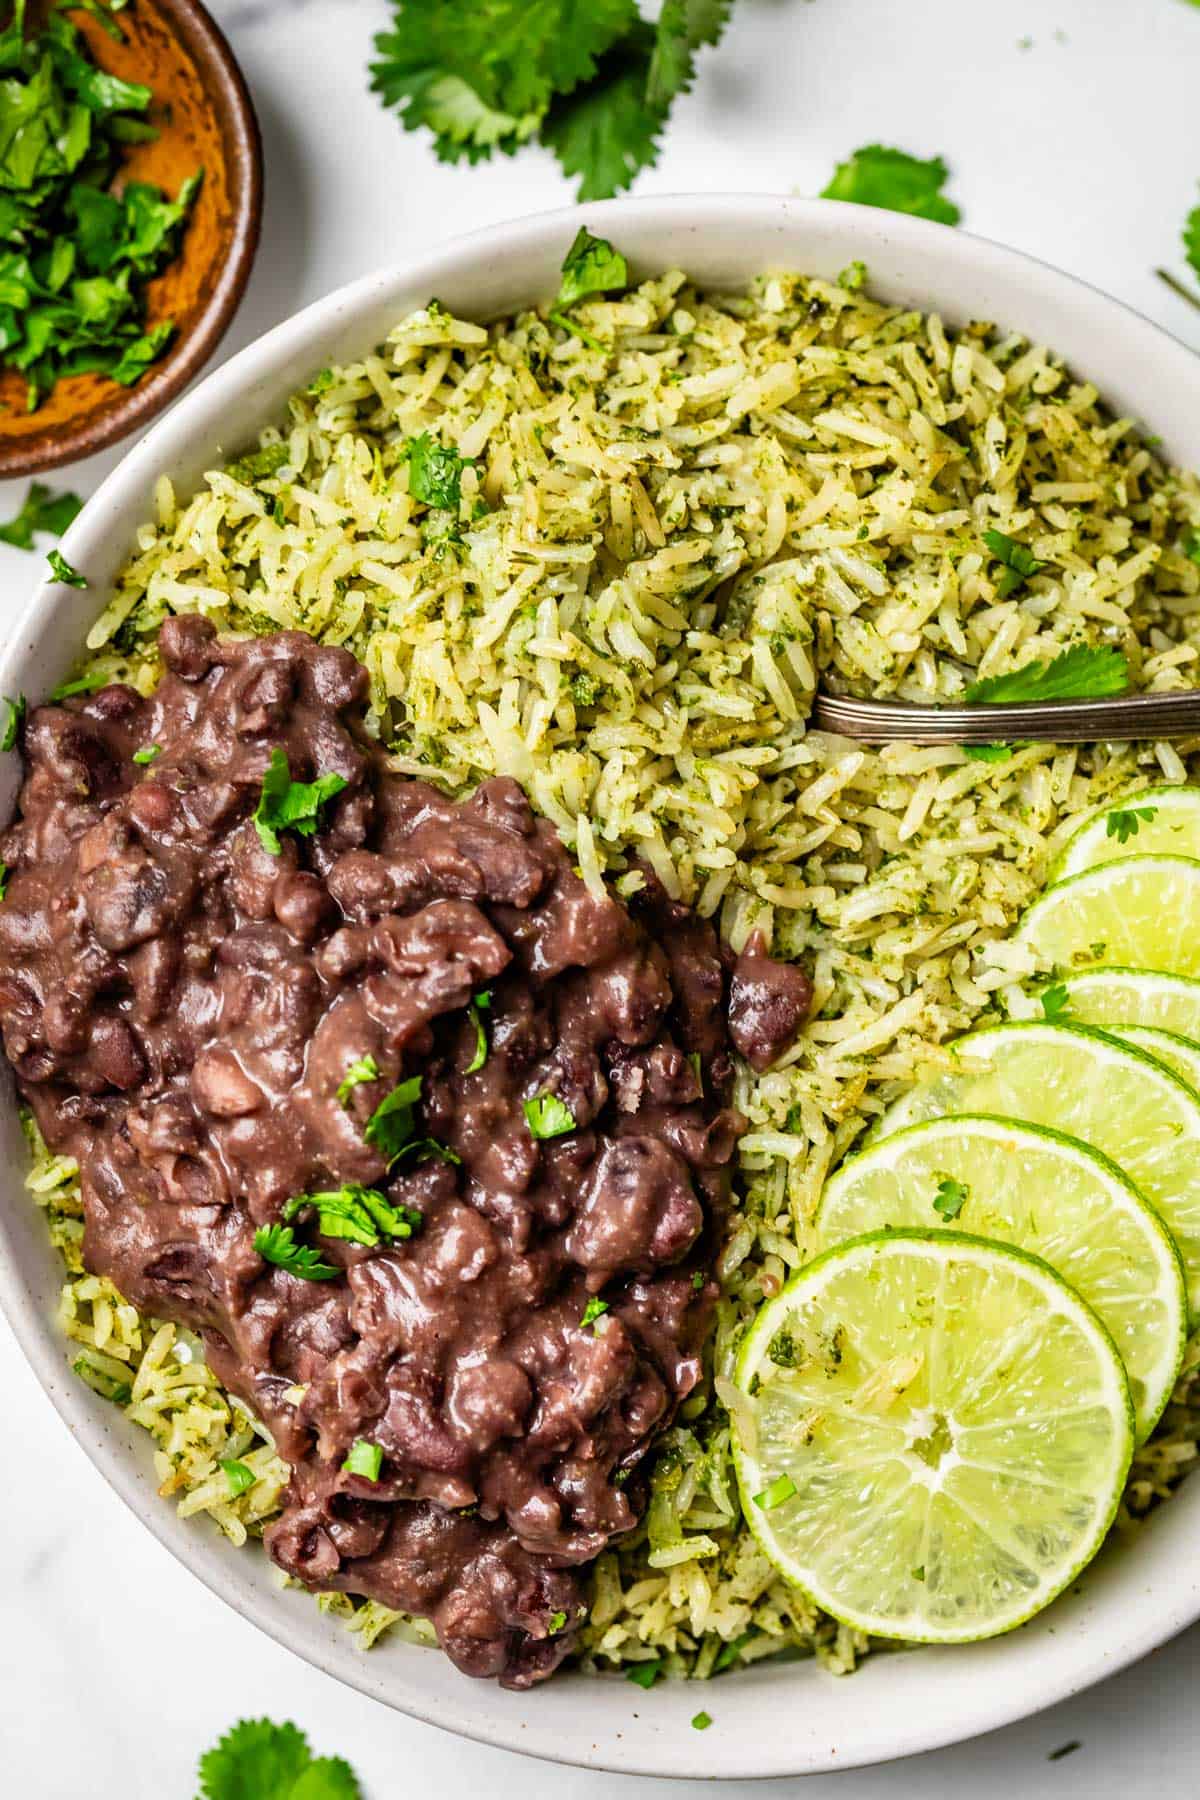
And voila! That’s it! Easy peasy. If you don’t have the time to make a full Mexican meal to go with this rice, make the simple black beans recipe I’ve included in the recipe notes. It’s super basic, but they are really good and a make a great (and cheap) last minute dinner! Those are the beans you see in some of today’s photos. I love slapping a fried egg on top. Add in some fried plantains, and you have one of my favorite meals of all time!

bowl of rice and beans with a spoon on a marble counter with cilantro garnish.

What goes with cilantro lime rice?

I mean, what doesn’t go with cilantro lime rice? In the dinner world, I can envision this rice pairing well with any kind of Mexican dish, Asian flavored dish, or sittin pretty with some grilled meats and veggies. Really, almost any time you use white rice this could be a much more flavorful replacement. Here are some dishes that I think go spectacularly with cilantro lime rice.

How to store leftovers for cilantro lime rice

Rice is so easy to store and lasts a good 4-5 days in the refrigerator. It’s a great side for any meal prep you are making for the week. You could even double it and use it for two different meals throughout the week. Place the cooled rice into a container with an air-tight lid and put it in the refrigerator.

To eat leftover rice, make sure it’s in a microwave safe dish, spritz with a bit of water, then cover with a splatter shield and microwave on high. The water spritzing is important, rice loses a lot of moisture as it sits in the fridge and you need to restore some of that if you want rice that isn’t dry as a bone.

If it’s a single portion, try one minute, stir, and if it’s not all the way warmed through add another 30-60 seconds. If it’s a family sized serving, sprinkle with water, cook for 3-4 minutes, stirring once or twice, until hot and steaming.

large pot filled with cilantro lime rice, garnished with lime and cilantro.

Can you freeze cilantro lime rice?

Yes totally! Cilantro lime rice (and really any cooked rice, for that matter) is super easy to freeze and a really great way to get dinner on the table really quickly for a future meal. Let the rice cool, then carefully transfer it to a ziplock freezer bag. Squeeze out all the air, seal, and put it in the freezer. It will be good for about 3 months in the freezer, after that it starts to dry out and the quality deteriorates.

To use, you can thaw the rice in the fridge overnight or on the counter for a few hours, then warm in the microwave for 1-5 minutes depending on portion size. Sometimes to speed up the process, I’ll take a bag straight from the freezer, open the seal but leave it in the bag and microwave for one minute. After that, it’s thawed enough to break into chunks into a serving bowl and then microwave until hot as instructed above. Don’t forget to add a little water.

a large wooden serving spoon stirring a pot of cooked cilantro lime rice.

Cilantro lime rice frequently asked questions

How to make chipotle Cilantro lime rice?

Well, I don’t have Chipotle’s exact recipe but this is a close copycat, with a couple additions! I think it’s even better than the Chipotle version, because hello green flavor! Especially if you are planning to add this rice to a burrito or a salad. You will love it I promise.

how to make cilantro lime rice in the Rice cooker?

I haven’t tried it but I think it would work! You could also try the slow cooker. Nora over at A Clean Bake has a slow cooker rice recipe that you could try out and adapt with these ingredients. If you are making this in the slow cooker OR rice cooker, I would blend the ingredients called for in the recipe, sauté the onion and garlic, then add everything to the rice cooker and follow the rice cooker’s instructions (or follow Nora’s instructions for slow cooking). You’ll want to make sure you use the recommended rice to liquid ratio, so you can either leave some liquid out or add water as needed.

Can dogs eat cilantro lime rice?

The things people google, y’all 😂 No pooches please! I didn’t know this, but apparently lime zest (and lesser so, the juice) is toxic to dogs and could irritate the digestive system. Who knew?? Not only that, this rice has oil, butter, milk, and more that wouldn’t be great for a dog. Definitely keep this side dish for the humans of the household!

large bowl with cilantro lime rice and quick black beans, with a spoon and lime slices.

More sides to go with all your mains

A really great side dish can make or break your dinner. You want it to be just as flavorful as the entree! These are some side dishes I turn to time and time again, and that are versatile enough to pair with SO many main dishes.

Facebook | Pinterest | Instagram

pot with cilantro lime rice being stirred with a wooden spoon and lime slice garnish.
a metal fork digging in to a close up shot of green cilantro lime rice with cilantro garnish.
Print

Cilantro Lime Rice

I have tried several recipes for Cilantro Lime Rice–they all tasted the same as regular rice, with maybe some vague limey notions. I don't ever want the lime in my life to be vague. This recipe, also known as Arroz Verde (Green Rice) brings the zip! We start with aromatic basmati rice, add a couple special ingredients to amp up the creaminess and flavor, finishing with lime juice AND zest. This is my favorite side dish to serve with Chicken tacos, Fajitas, Carne Asada, Burritos, you name it. Or just eat all by itself, it's that good!
Course Side Dish
Cuisine American, Mexican
Prep Time 10 minutes
Cook Time 20 minutes
Steam time 10 minutes
Total Time 40 minutes
Servings 5
Calories 332kcal

Ingredients

  • 1 cup chicken broth*
  • 1 cup milk I used whole milk, any kind will do
  • 1 and 1/2 teaspoons kosher salt or use 1 teaspoon of table salt
  • 1 cup spinach packed
  • 3/4 cup cilantro packed tight (about 1 bunch)
  • 2 tablespoons butter
  • 2 tablespoons olive oil
  • 1 and 1/2 cups basmati rice
  • 1/4 yellow onion chopped small
  • 1 clove garlic
  • 2 teaspoons lime zest buy at least 2 limes
  • 3 tablespoons lime juice

Instructions

  • Blend. In a blender, add 1 cup chicken broth*, 1 cup milk, and 1 and 1/2 teaspoons kosher salt. Pack a 1 cup measuring cup with spinach, then add it to the blender.
    Clean your cilantro, then use a knife to cut the leaves away from the stems. Add the whole bunch worth of leaves to the blender (or less, if you are not that into cilantro. Also you can hold some leaves back for garnishing later, if you want.) If a few stems get tossed in, that's okay. Blend the mixture until it is smooth and vibrantly green.
  • Prep the veggies. Cut 1/4 of an onion into a small dice. This could be anywhere from 1/4 to 1/2 cup onion; add more if you love onion! This recipe is forgiving.
    Smash a clove of garlic with the side of a chef's knife, peel, then mince finely. Set aside.
  • Toast the rice. In a 2 or 3 quart pot that has a properly fitting lid, heat 2 tablespoons butter and 2 tablespoons oil over medium heat. Add 1 and 1/2 cups basmati rice. Stir with a wooden spoon and toast for about 3-5 minutes, until the rice is fragrant and starting to turn golden brown (not dark brown, don't over do it!)
  • Add the chopped onion and 1 clove of garlic to the rice in the pan. Stir and saute for about 1-2 minutes, until the garlic is fragrant.
  • Pour in all the green stuff from the blender. I love this part! Liquid health. Stir it all together.
  • Turn the heat up to high and bring to a boil.
  • Once it boils, cover the pot with a lid and immediately turn the heat down to low. Set a timer for 15 minutes.
  • Prep the limes. While the rice is cooking, zest 2 limes. (I love my microplane grater for this!) You need about 2 teaspoons. Cut the limes and juice them until you have at least 3-4 tablespoons juice.
  • When the rice has cooked for 15 minutes, remove the lid and add the lime zest and juice. Use a rubber spatula to stir it all together. Turn the burner off but leave the pot on the still-hot burner.
  • Put the lid back on and let the rice steam with the lime for another 5-10 minutes.
  • Remove the lid, fluff the rice with a fork a bit, and it's ready to serve! Eat hot with Chicken tacos, Fajitas, Carne Asada, Burritos, Taco Salad, you name it! Or serve simply with the black beans recipe I've included in the notes. A favorite dinner of mine, with a fried egg maybe. Mm-mm. Rice and beans foreverrr!

Notes

*Instead of chicken broth, I used 1 cup water and 1 teaspoon chicken base. I have two brands I like, Zoup Chicken Culinary Concentrate, and also Better Than Bouillon Chicken Base. I love keeping these products on hand in my fridge! 

Easy Black Beans Recipe

I love to make this rice with my stupid-easy black beans from a can. Here’s the recipe if you want it, it’s super simple but sometimes really hits the spot for a quick dinner, especially if you eat it with a fried egg on top. And don’t even get me started on fried plantains added to this situation–not an ingredient I usually have on hand! This could be my last meal guys. I’m a simple girl.
  • 1 tablespoon oil
  • 1/4 cup chopped onion
  • 1 clove garlic
  • 1 can black beans, don’t drain it, just dump in the whole thing.
  • 1 teaspoon kosher salt (use like 1/2 teaspoon table salt)
  • 1 teaspoon cumin
  • 1 teaspoon oregano
  • 2 teaspoon taco seasoning (or a sprinkle of chili powder will do here) 
  • 2-3 tablespoons chopped cilantro
Heat the oil in a pot, and add in the garlic and onions. Saute for 3-5 minutes over medium heat, until onions soften slightly. Add the whole can of beans, no draining, we need that liquid. Add 1 teaspoon kosher salt, 1 teaspoon cumin, 1 teaspoon oregano, and 2 teaspoon taco seasoning. I just made up all these spice measurements, btw. (Except the salt; 1 teaspoon kosher salt is about what you need for 1 can of beans.) Play around and see what you like! Heat the beans over medium, until they come to a simmer. Serve right away, or let it keep simmering as long as you need, turning it to low if it’s going to be a while. Add 2-3 tablespoons chopped fresh cilantro. 

Nutrition

Calories: 332kcal | Carbohydrates: 49g | Protein: 6g | Fat: 12g | Saturated Fat: 5g | Polyunsaturated Fat: 1g | Monounsaturated Fat: 6g | Trans Fat: 0.2g | Cholesterol: 19mg | Sodium: 936mg | Potassium: 215mg | Fiber: 1g | Sugar: 3g | Vitamin A: 950IU | Vitamin C: 6mg | Calcium: 91mg | Iron: 1mg

30 Minute Korean Beef Recipe

Guys, there’s easy, and then there’s this recipe. Korean beef is unbelievably good for how little effort it takes. A pound of ground beef and some Asian pantry ingredients turn into a magical dinner in just a few minutes. Dress it up as much or as little as you want. Rice is a go-to, but…

Guys, there’s easy, and then there’s this recipe. Korean beef is unbelievably good for how little effort it takes. A pound of ground beef and some Asian pantry ingredients turn into a magical dinner in just a few minutes. Dress it up as much or as little as you want. Rice is a go-to, but you could add any veggies you have in your fridge, like cucumbers, carrots, edamame, broccoli…the options are endless. My new favorite weeknight meal!

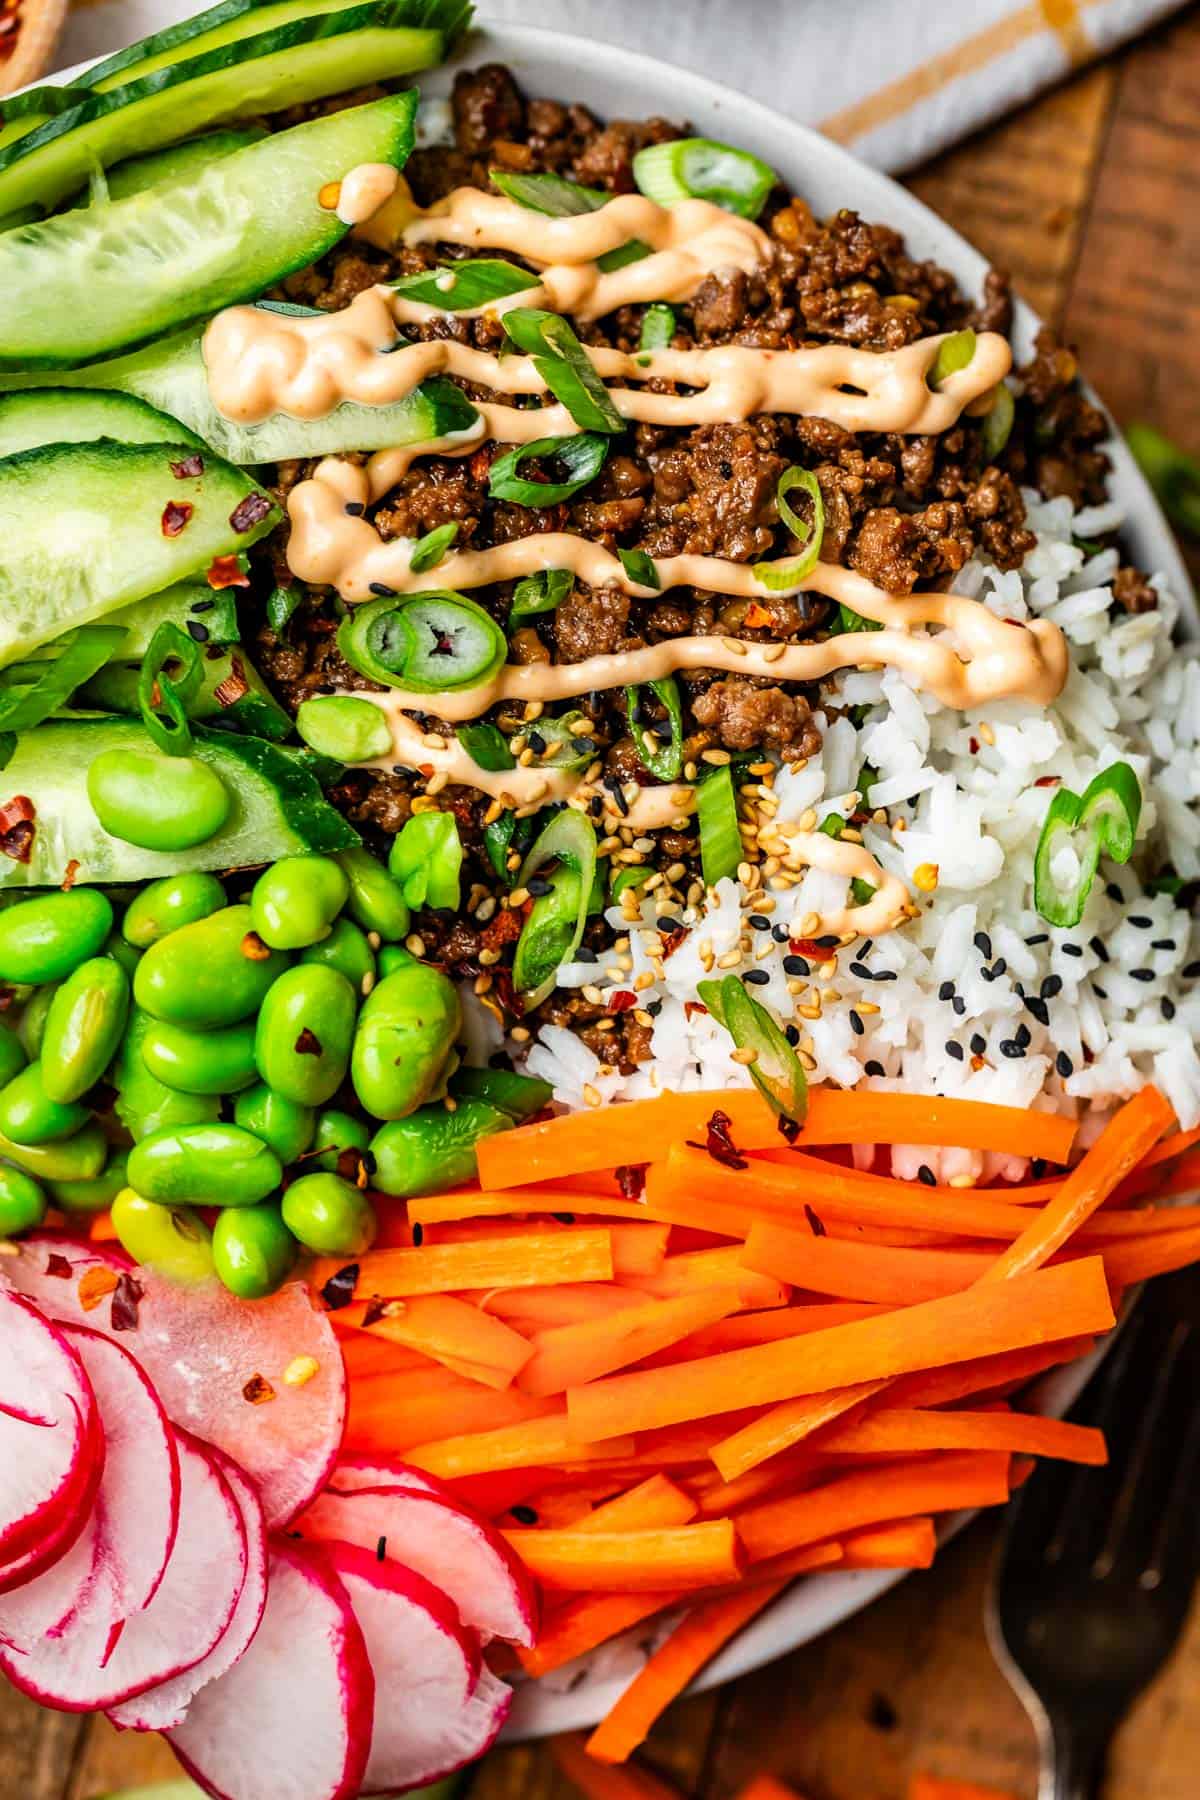
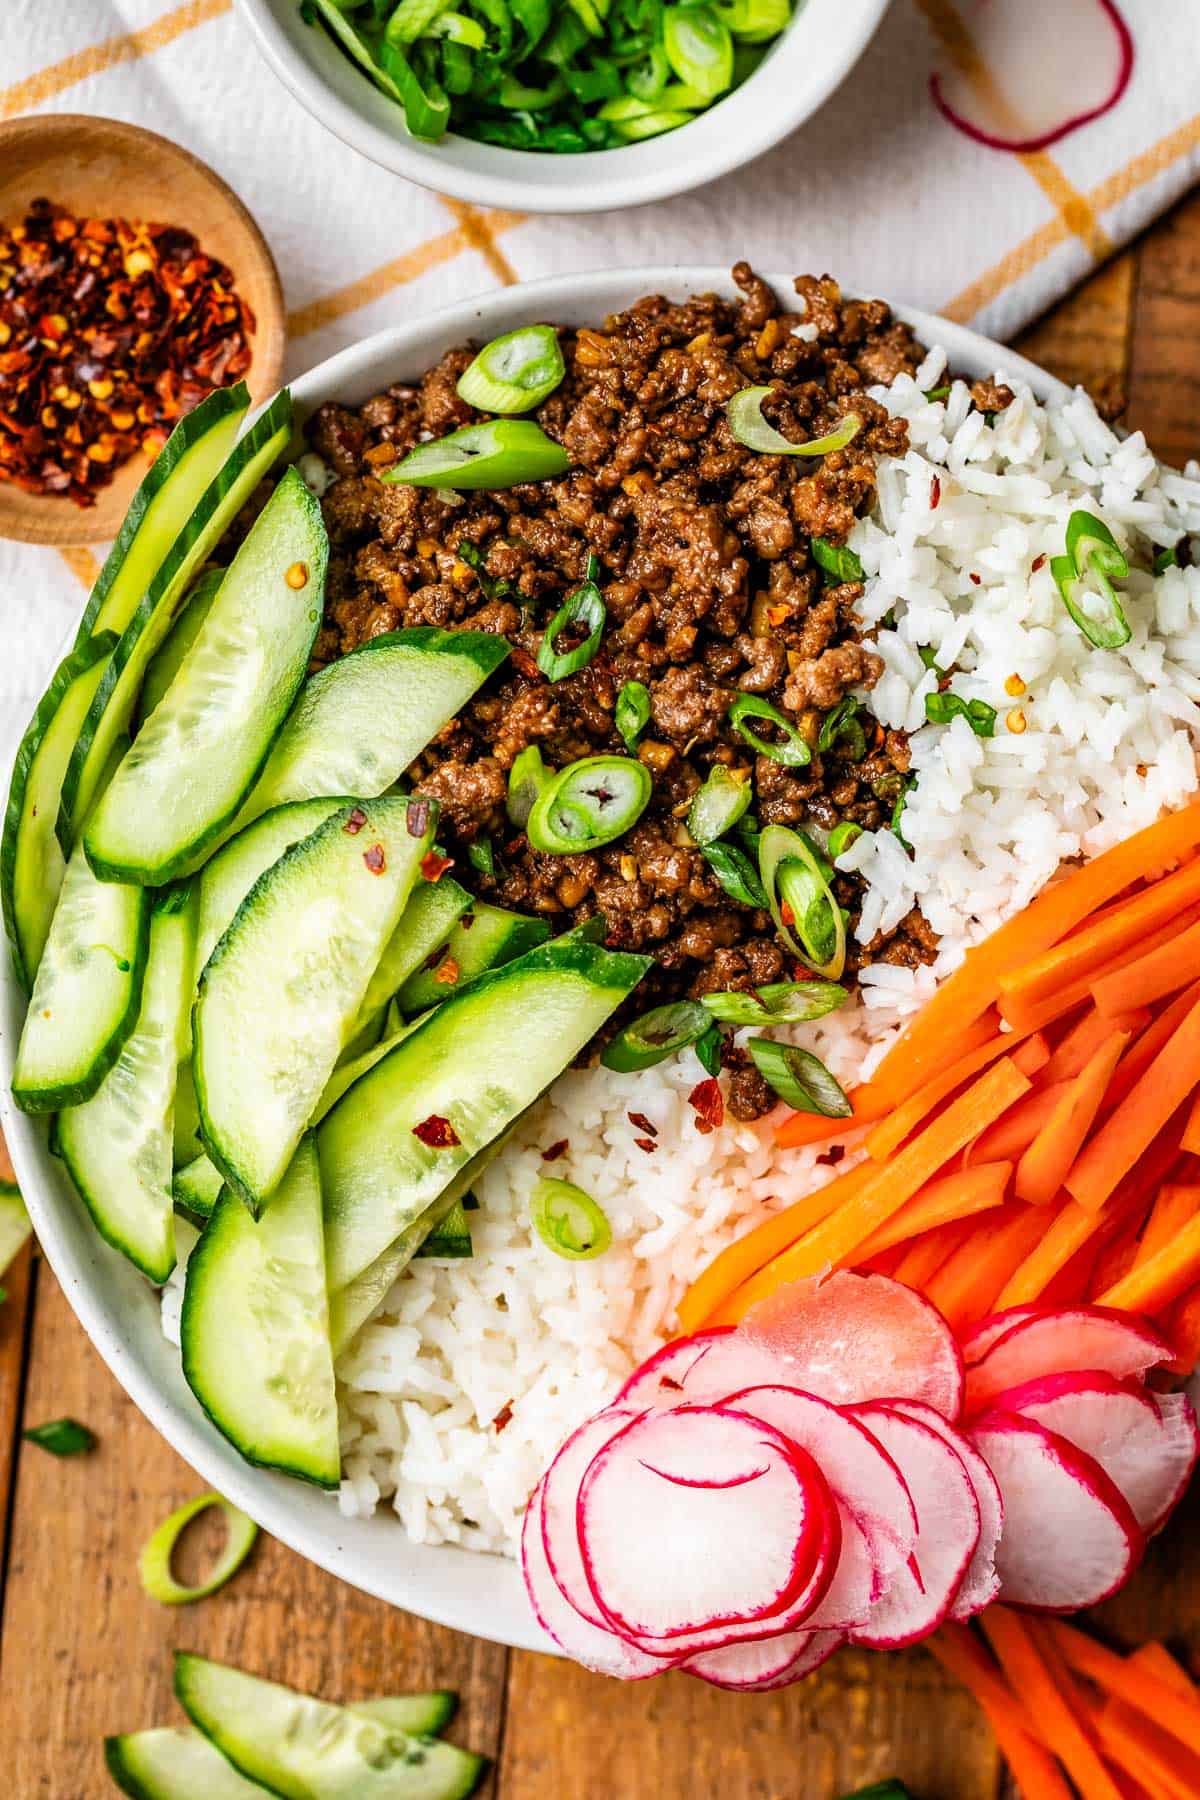
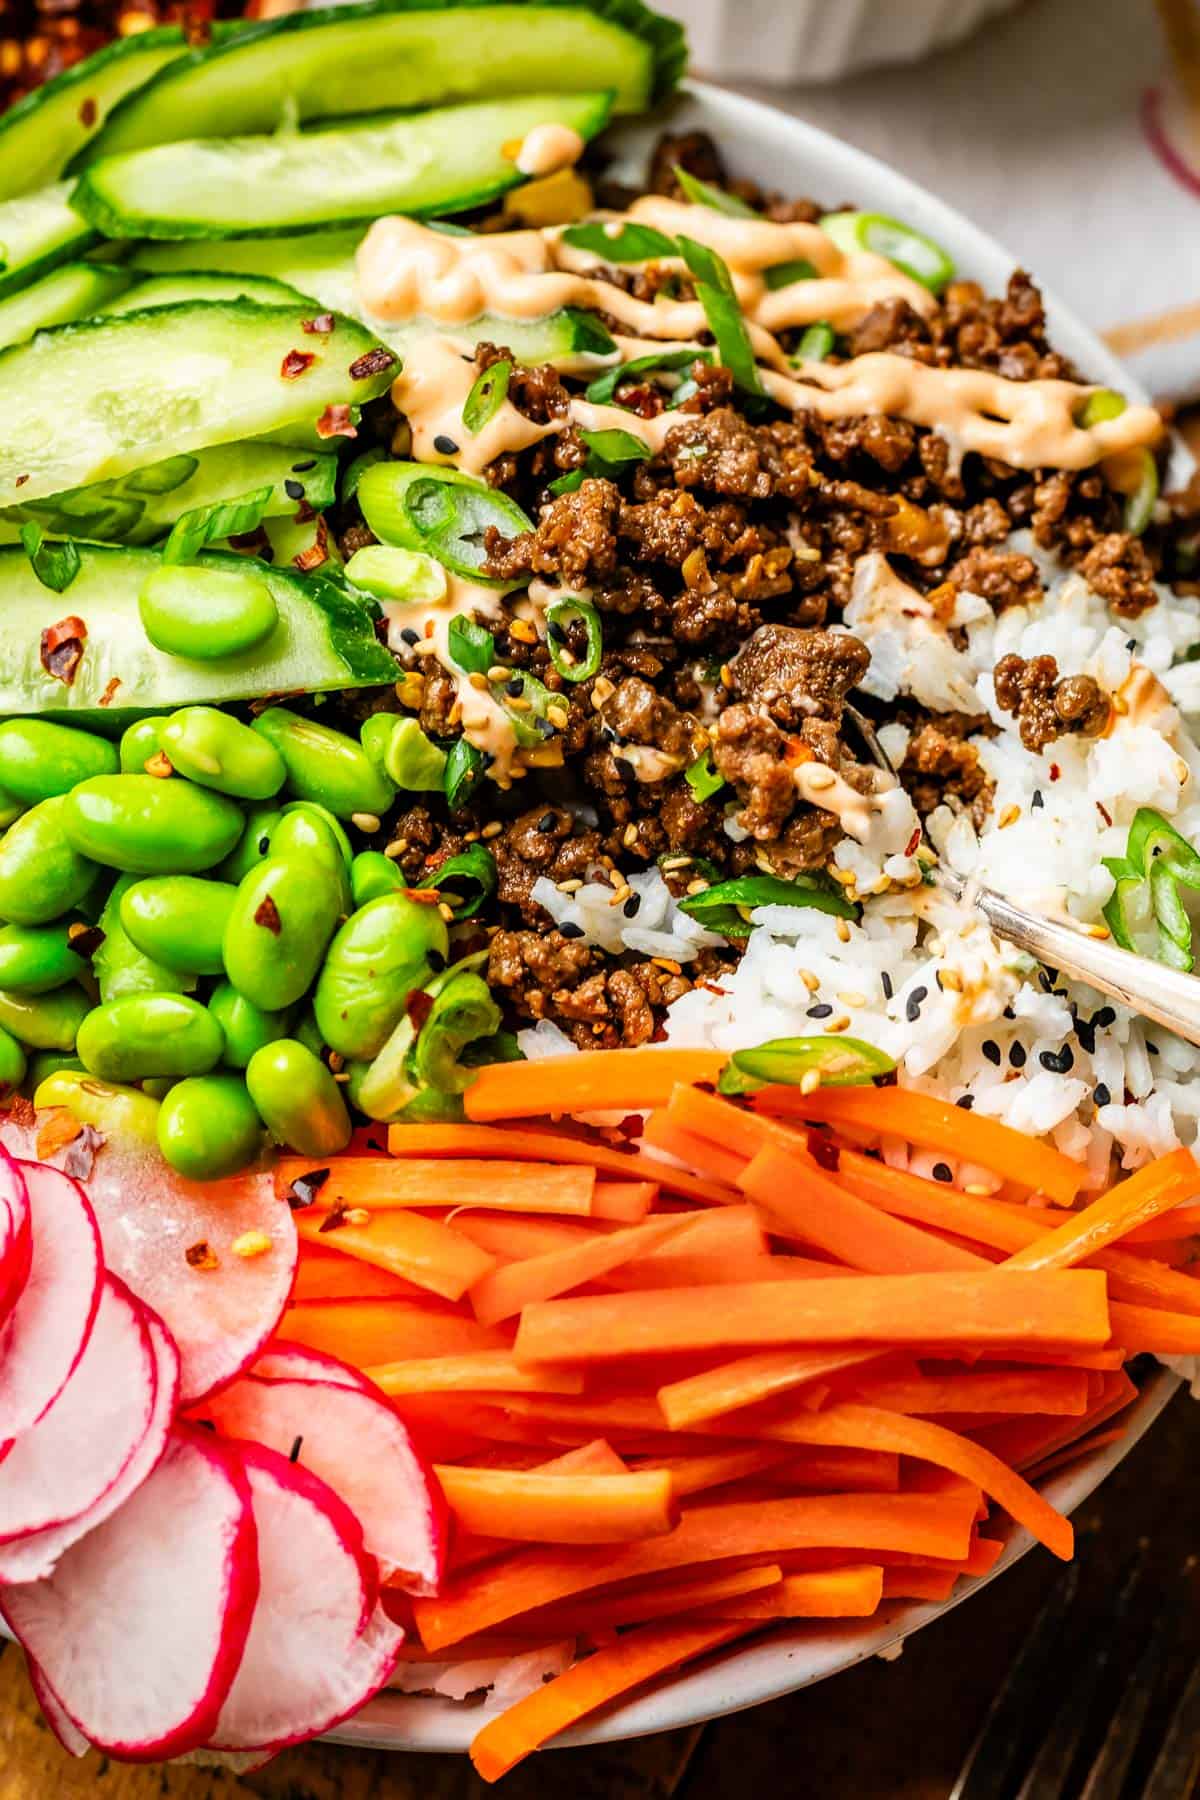
bowl brimming over with sections of rice, Korean beef with Sriracha mayo, veggies, and sesame seeds.
Table of Contents
  1. Korean beef
  2. Korean beef ingredients
  3. How to make Korean Beef
  4. What to serve with Korean beef bowls
  5. How to store Korean beef
  6. Can you freeze Korean beef?
  7. Korean beef frequently asked questions
  8. Easy ground beef recipes
  9. More stupid easy FAST dinner recipes
  10. 30 Minute Korean Beef Recipe Recipe

I looked up from my spot at the kitchen barstool the other day to see that my 4-year-old son Edison had something in his hair. I reached up to brush it away, and realized it WAS his hair. His completely shriveled, singed blond hair.

blonde boy with singed hair

I sent this picture to my family: “Edison, when he smells a candle.” My family’s response:

“I think he’s drunk. Have you had him walk a straight line, or do finger-to-nose yet?”

“Poor kid. It’s rough being 4. 😂”

“At least the eyelashes were spared!!”

“I hope he makes it to adulthood.”

I sure hope he does too guys, it gets pretty dicey sometimes with this kid!! His face is all red, not from scorch marks (thank goodness), but because earlier that day at “play school,” he decided to paint his face instead of the paper. Of course.

I should probably stop lighting candles in my house altogether. So much for a lovely scented kitchen. I don’t think I’ve ever gone so deep on “stop drop and roll” demonstrations for such a young kid. He probably thought I was the crazy one after seeing me flail around all over the floor after he did something so innocuous as smelling a candle.

It’s shenanigans like this that mean I NEED some amazing 30-minute dinners like the one I’m sharing today. I can’t keep up with these kids as it is, forget an overly-involved dinner!

My sister Laura is the mastermind behind today’s Korean beef recipe. She is a pro at whipping up super quick and HEALTHY dinners. (anyone can pasta all day, but this girl knows where it’s at when it comes to nutritious meals.) Have you made Korean Beef before? There’s a reason it’s super popular.

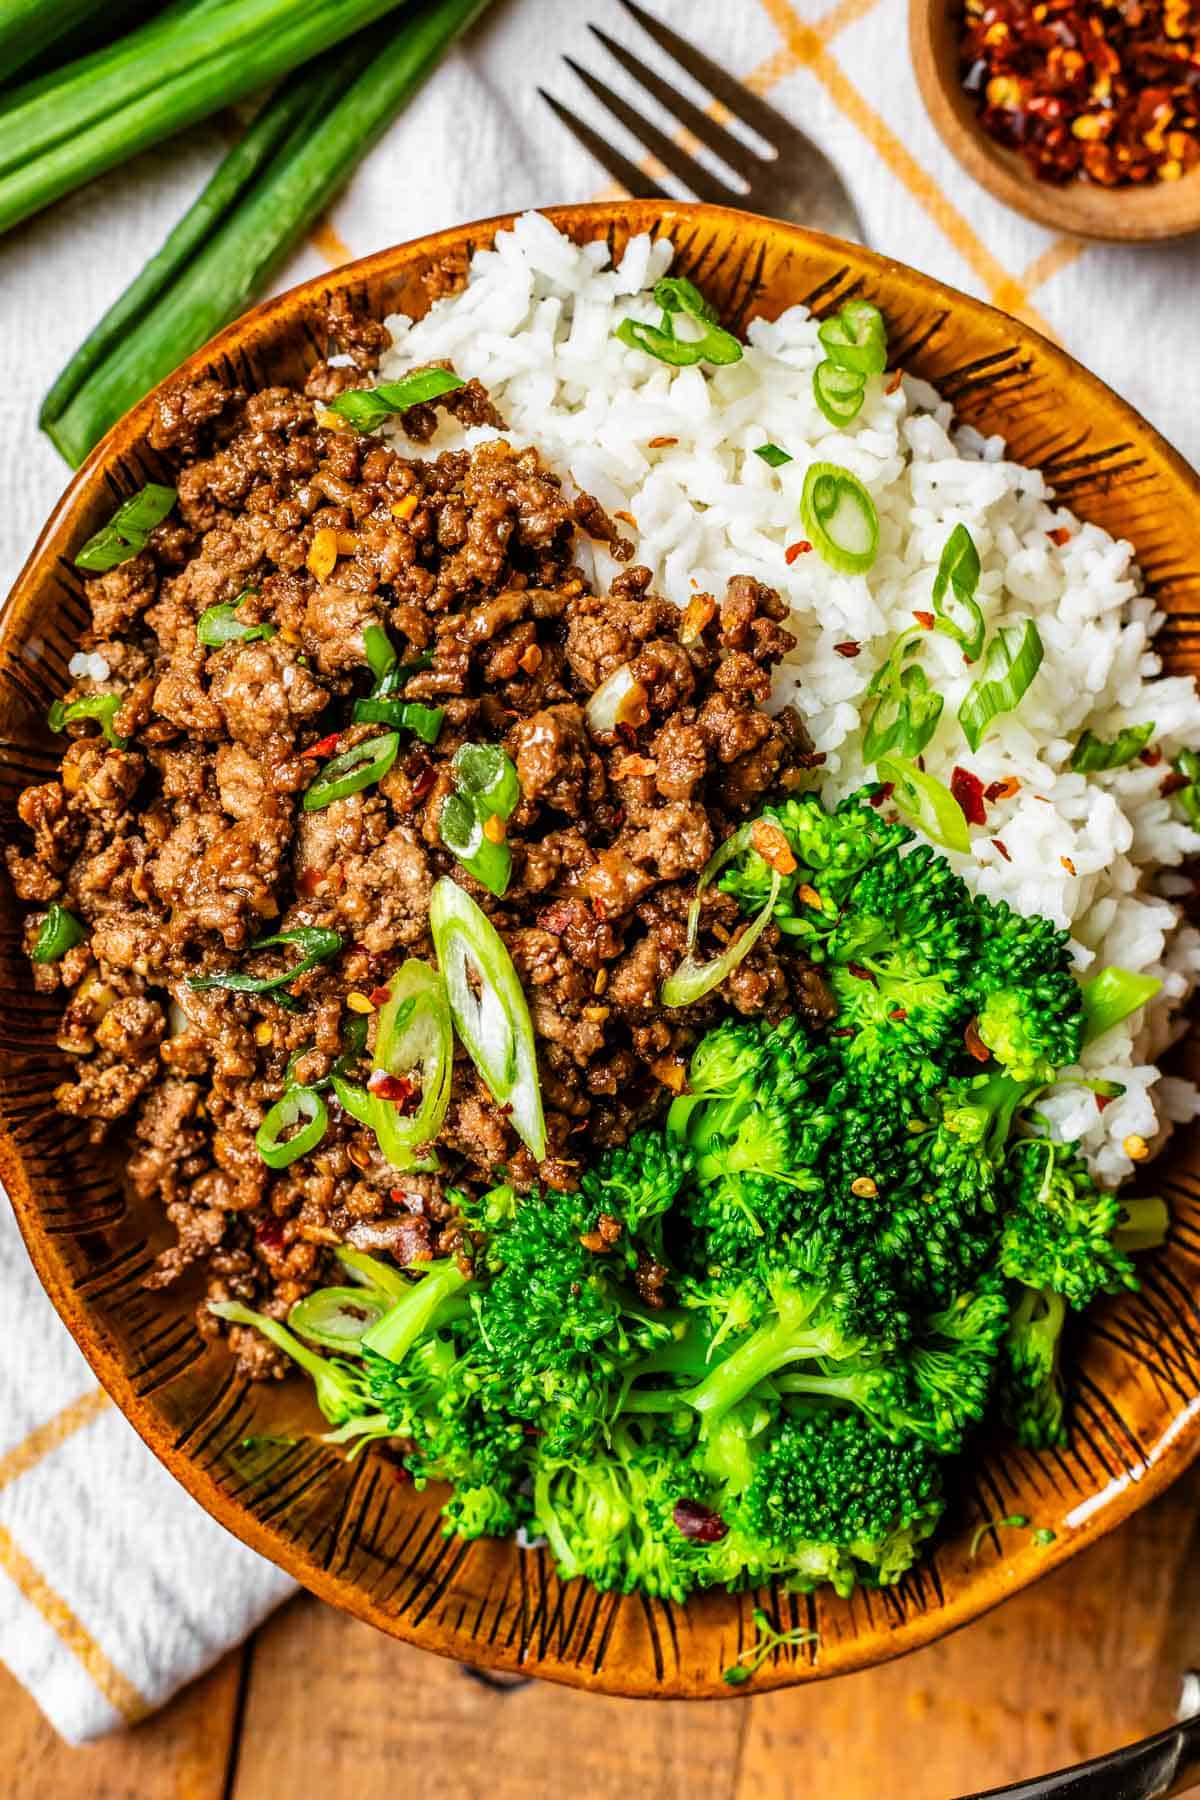
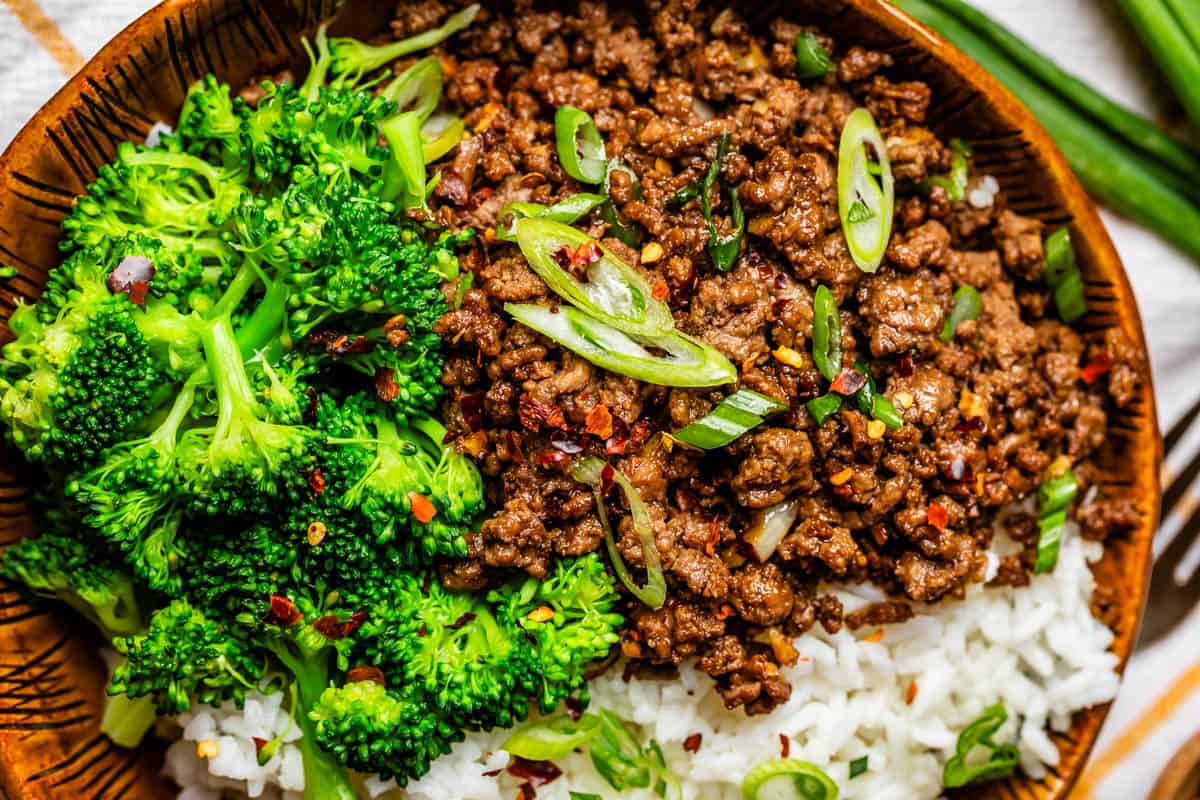
Brown ceramic bowl filled with rice, broccoli, and Korean beef with green onion garnish. this one for hero? what do you think?

Korean beef

I never thought much of Korean beef. I’d seen the pictures. Looks like some ground beef with spices over white rice. Big woof. But since making it, I’ve come around. Because the FLAVOR, oh my goodness. It’s amazing what these few simple ingredients can do for a pound of ground beef.

I’m usually the person who is telling you to buy 80/20 ground beef, because for things like Smash Burgers, you NEED all that fat to make your burger juicy. But for Korean beef, it’s best to use lean ground beef. I like 93/7 best. It’s a bit more expensive, but in this dish it means you don’t have to drain the grease, and helps to avoid that slick, greasy feel on the beef. PLUS it allows us to use toasted sesame oil in the pan before browning the meat (usually totally unnecessary with fattier beef) which gives the perfect flavor.

Then we’re going to add some simple but potent flavors like garlic, ginger, sesame oil, and soy sauce to truly transform the plain beef. A hint of dark brown sugar gets mixed in, LOTS of green onion and some sesame seeds sprinkled over the top, and voila, your Korean beef is DONE. It’s really that easy! Serve with your favorite rice and stir fry veggies, or put it together in a rice bowl like I’ve done for the photos today. Trust me when I say it will be a new favorite in your dinner rotation!

bowl with Korean beef, rice, cucumber slices, and matchstick carrots.

Korean beef ingredients

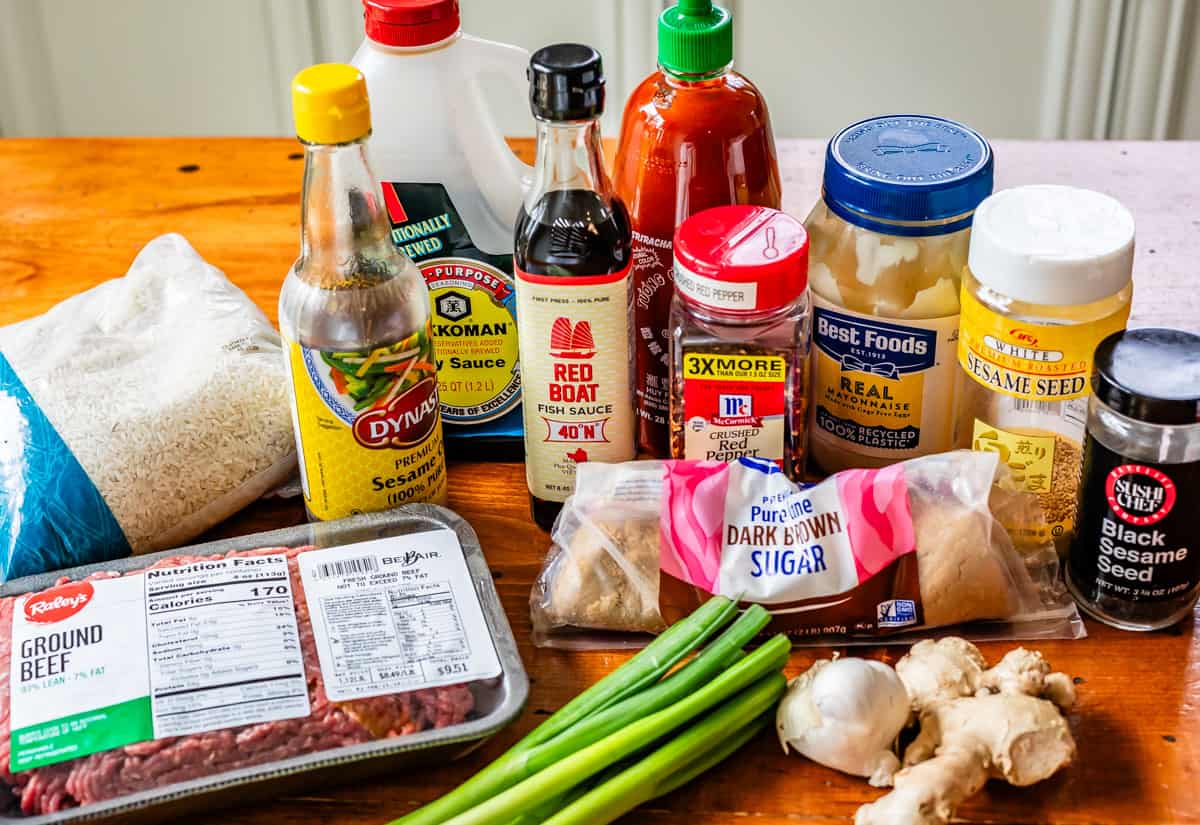
Check out what you’ll need for the recipe here, but be sure to look at the recipe card to get exact measurements and full instructions!

cast of ingredients for Korean beef including sesame oil, soy sauce, brown sugar, etc.
  • lean ground beef
  • sesame oil
  • garlic
  • ginger
  • red pepper
  • soy sauce
  • fish sauce (optional, but the UMAMIIII)
  • dark brown sugar
  • green onions
  • sesame seeds
  • rice, to serve with
  • More veggies to serve it with, see recipe
close up of cooked broccoli next to Korean beef topped with green onion.

How to make Korean Beef

If you’re planning to serve this with rice, get the rice started first thing. Korean beef is done so fast that the rice will actually take longer to cook than the beef, so let it do it’s thing while you prep everything else.

When I make this for my family, I make white rice for the kids and Cauliflower Rice (or Asian Cauliflower Rice) for me and Eric, because we prefer to eat low-carb dinners most days. Sometimes I buy a head of cauliflower and make it homemade, and sometimes I buy the pre-riced frozen cauliflower. It’s so easy, just heat it up in a pan with some oil and salt.

Once you have your rice going, set a large skillet over medium high heat and add the toasted sesame seed oil. I love the taste of toasted oil, but normal sesame seed oil will work fine. Add the ground beef, and stir occasionally to break down the meat until it is all well browned. It’ll probably take about 5 or so minutes.

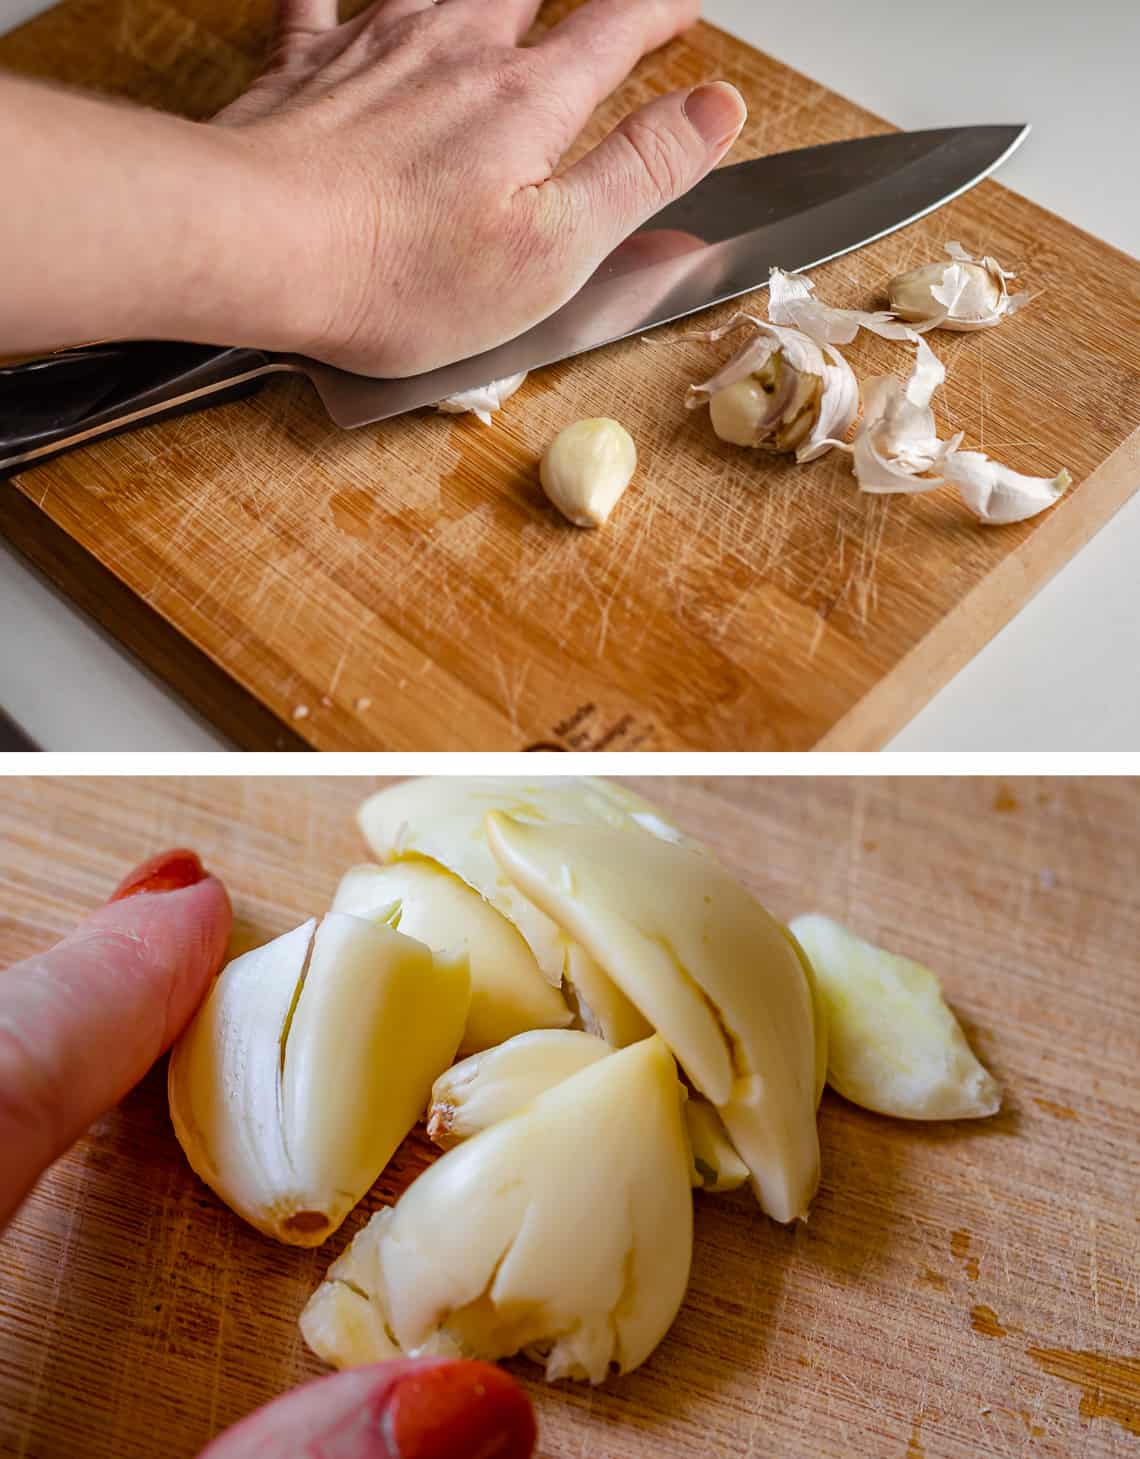
top chef's knife smashing garlic cloves, bottom fingers on smashed, skinless garlic.

While the beef browns, prep your other ingredients. Smash and finely mince your garlic cloves.

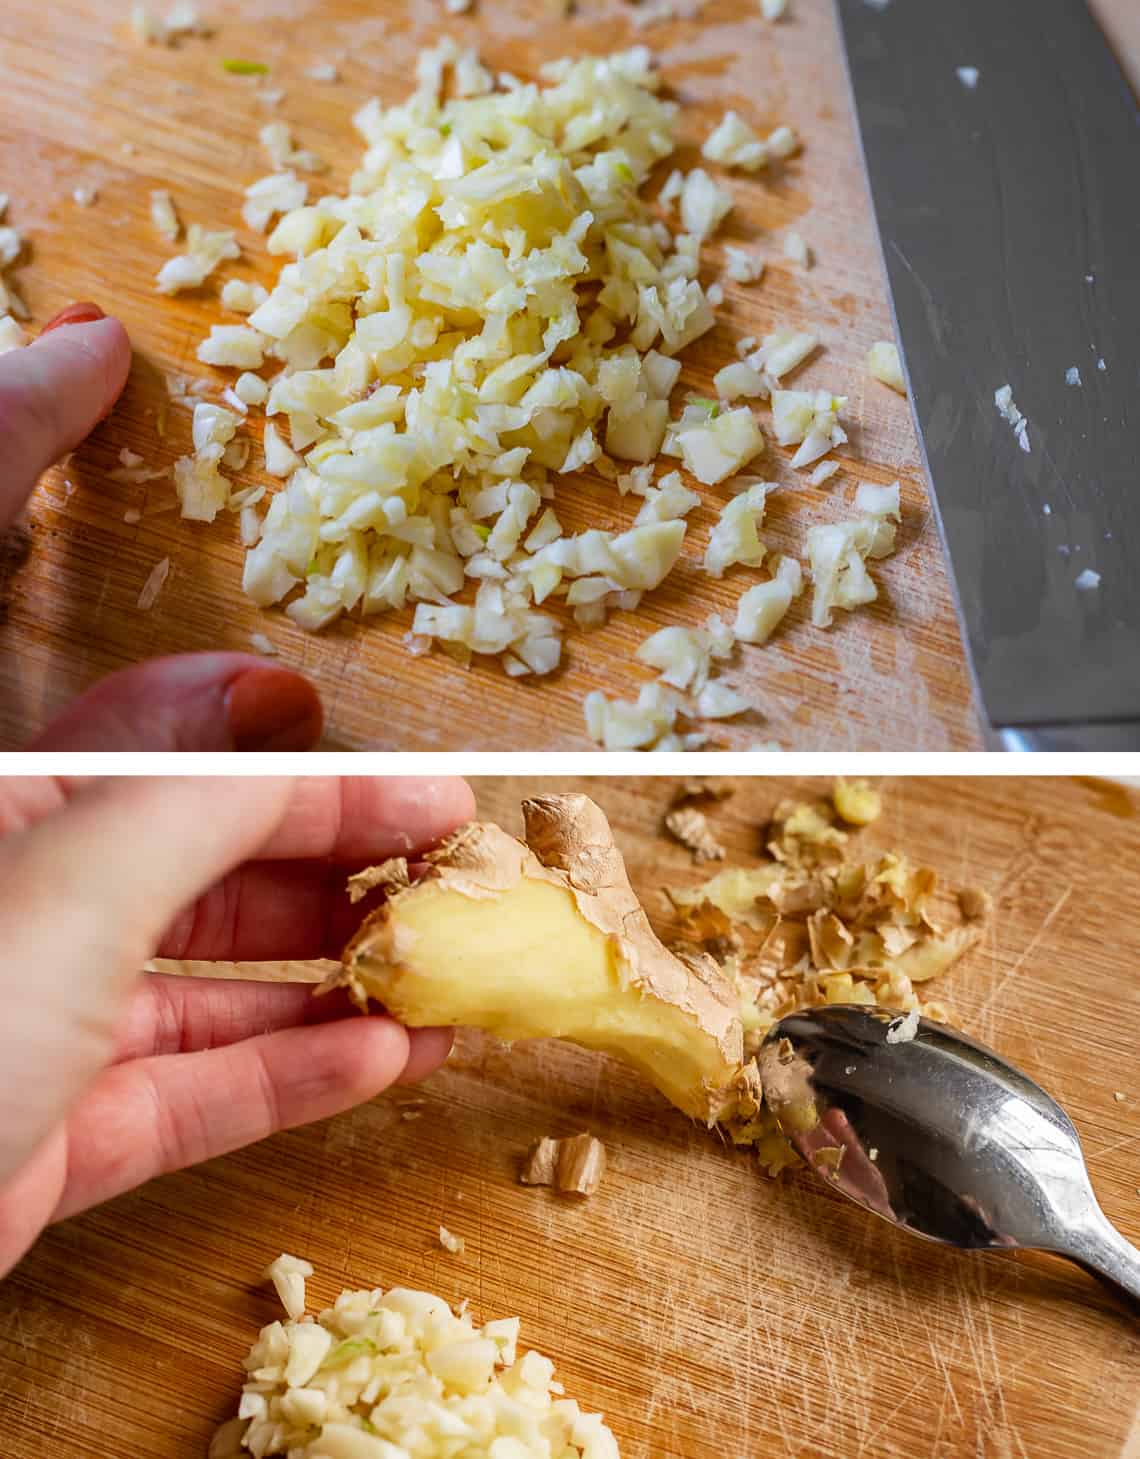
top minced garlic on a wooden chopping board, bottom peeling ginger with a spoon.

Grate or mince your fresh ginger. I sometimes peel my ginger with a spoon, easy peasy (a vegetable peeler works great too.) My sister Laura doesn’t even peel ginger anymore 🤯 she just scrubs it real good and chops it up! THE FREEDOM, GUYS!!

If you’re really in a pinch, you can use bottled garlic and ginger, but the flavors won’t be as strong.

When the ground beef is thoroughly cooked, add in the garlic, ginger, and red pepper flakes. Mix it in with the meat and let it cook for 1-2 minutes until fragrant.

top minced ginger and garlic on top of cooked ground beef, bottom pouring in soy sauce.

Add the soy sauce, brown sugar, and fish sauce to the mixture. The fish sauce is technically optional, but please, if you do ANY (even elementary level) Asian cooking, stick this on the door of your fridge. The Red Boat brand is best. It’s bottled umami. Add a teaspoon to literally any Asian style dish and it will amp up the flavors.

Stir up all those ingredients until well combined, and let it cook another 1-2 minutes. Turn off the burner. Y’all…THAT’S IT.

bias cut green onions sprinkled over the top of finished Korean beef.

Okay except it’s really good with some green onions, so don’t forget those.

Here’s a little trick for ya. I like to use my kitchen shears to cut the green onions right into the pan, instead of chopping them. If you don’t have kitchen shears, chopping with a knife is of course just fine.

I hired a kitchen assistant recently, to help me out on shoot days (hi Katie!!) and she asked where my kitchen shears were, and I was like uuhhmmmmm…. basically any pair of scissors lying around my kitchen turn into “kitchen shears” when I need to cut food. Voila, it’s like magic, for low class people with very few sanitary boundaries.

Okay sorry, back to the recipe. I like to chop/cut about 3/4 of the bunch of green onions and mix that into the beef where they *very slightly* wilt. Once that’s stirred in, cut the remaining onions over the top. Or save to pass at the table so they are very fresh.

Don’t forget to garnish with sesame seeds! I love the nutty flavor it adds!

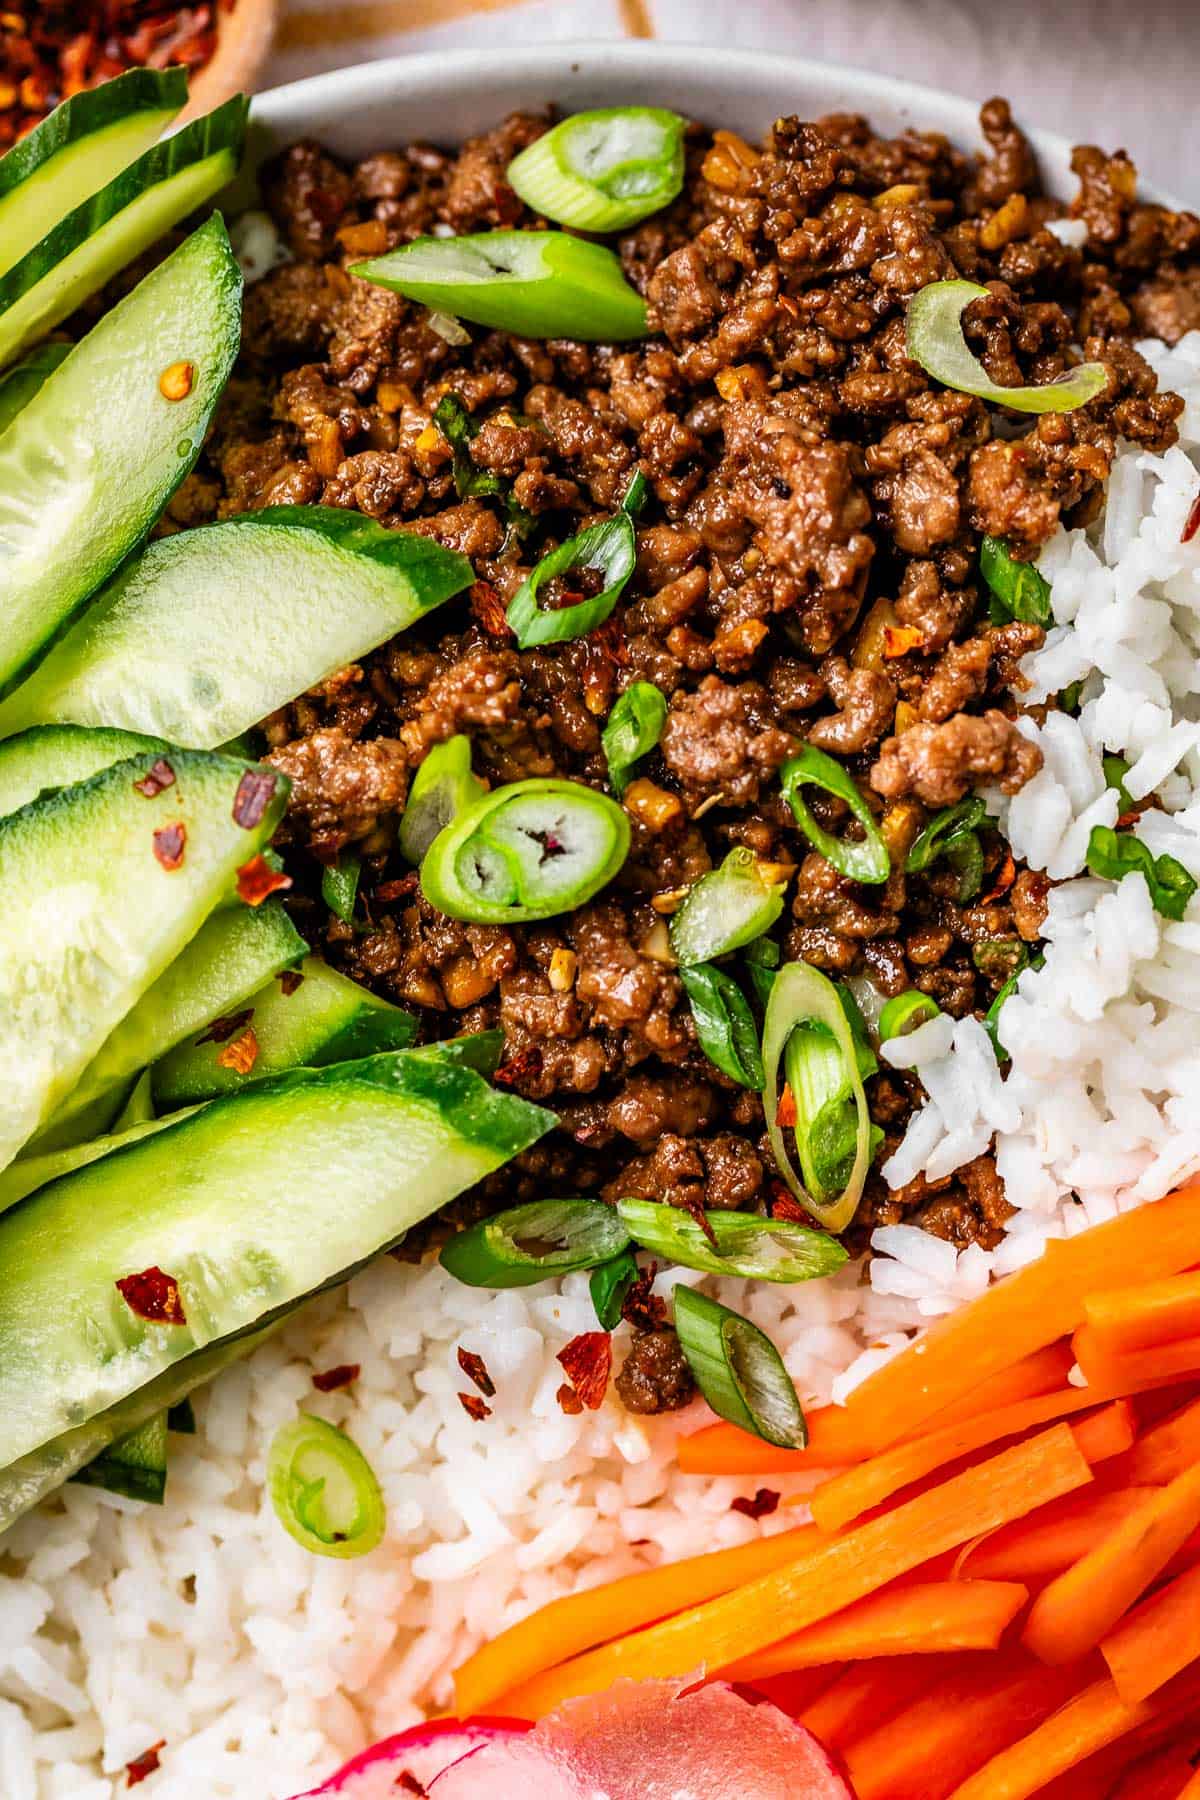
close up of rice topped with Korean beef and drizzled with Sriracha mayo.

But of course, if you really love yourself, you’ll make some Sriracha mayo to dollop on top. And literally any veggie that’s lying around in your fridge. Sooo good!

What to serve with Korean beef bowls

When I really need this meal to be the quickest possible, I serve it with rice and a bag of stir-fry veggies from the fresh produce aisle. It’s usually a mix of cabbage, broccoli, carrots, and maybe some snow peas, snap peas, or brussels sprouts. If I have more time, I’ll cut up whatever is in my fridge and stir fry it, or make a separate veggie side. Here are some great rice and veggie options to choose from!

Korean beef bowl with rice and veggies on a wooden table with bowl of red pepper flakes.

How to store Korean beef

Transfer any leftover beef to a container with an air-tight lid and put it in the refrigerator. It will last there for about 5 days. Korean beef actually makes great meal prep! If you feel like doing yourself a favor, get a container you can microwave and add some leftover rice, beef, and veggies in the portion sizes that work for you, and store all together.

When it’s time to eat lunch just bust it out and you’re all ready to go! To heat up Korean beef that’s been in the refrigerator, use the microwave. Lean meat can get tough if it’s overcooked, so use 50% power for 1-2 minutes until it’s as warm as you’d like it to be.

Can you freeze Korean beef?

I love freezing Korean beef! It’s so easy and makes for a dinner that’s even easier than the night you made it, which is saying something. Sometimes I double or even triple the recipe to be sure to have enough to freeze for a “next time.” Add any beef you plan to freeze to a freezer ziplock bag, flattening it out to store and thaw easier. Seal, and let come to room temperature.

Once it’s cool enough, stick it in the freezer and it will stay good there for 4-6 months. When you decide to use it, pull the bag out of the freezer and put it in the refrigerator overnight or on the counter for a few hours. Warm up over low heat in a skillet on the stove. You may want to add 1-2 tablespoons of water to keep it from drying out.

broccoli, rice, and Korean beef served together in a ceramic bowl.

Korean beef frequently asked questions

What is korean beef?

Korean beef is basically the easy, weeknight dinner knockoff version of Beef Bulgogi. Korean beef basically copies the flavor profile of Beef Bulgogi: sesame, soy, ginger, garlic, sugar but without the added sweetness of blended Asian pear. The original Bulgogi also uses a very thinly sliced cut of premium beef like ribeye or sirloin, and Korean beef keeps it simple (and cheap) by using ground beef.

What is korean beef called?

Well, to answer this question we need to differentiate between two things. First, there is the recipe called “Korean Beef,” which is what this recipe post is all about.

Then, there is a type of beef raised and butchered in Korea. “Korean Beef,” also called Hanwoo, is one of the rarest and most expensive meats in the world. Hanwoo, or Korean Beef, is so expensive because the meat comes from a small cattle that lives only in Korea. For the most part it is not sold in the U.S. and is very much a delicacy, even in Korea.

is korean beef healthy?

I think it’s a pretty darn balanced meal, personally! Lean ground beef offers lots of protein, you can add veggies galore for good nutrition, and you determine your carby (or non carby) side amount. While I think for most people this is already a healthy meal, there are plenty of things you can try to make it even leaner if you like. You can try swapping lean ground turkey for the beef, switching to cauliflower rice or serving the meat and veggies in lettuce wraps, or even using a brown sugar substitute to lower calories.

rice in a bowl topped with Korean beef, sliced cucumbers and radishes, and matchstick carrots.

Easy ground beef recipes

The ever present “what am I gonna do with this ground beef?” question. Does anyone else have this problem? Here are some great options when you’re stuck in a (ground beef) rut!

More stupid easy FAST dinner recipes

Some nights you just gotta get ‘er done, amiright? Check out some of my other quick & easy favorites!

spoon digging into a bowl with rice, Korean beef, edamame, carrots sticks, cucumber, and more.

Facebook | Pinterest | Instagram

bowl brimming over with sections of rice, Korean beef with Sriracha mayo, veggies, and sesame seeds.
Print

30 Minute Korean Beef Recipe

Guys, there's easy, and then there's this recipe. Korean beef is unbelievably good for how little effort it takes. A pound of ground beef and some Asian pantry ingredients turn into a magical dinner in just a few minutes. Dress it up as much or as little as you want. Rice is a go-to, but you could add any veggies you have in your fridge, like cucumbers, carrots, edamame, broccoli…the options are endless. My new favorite weeknight meal!
Course Main Course
Cuisine American
Prep Time 15 minutes
Cook Time 10 minutes
Total Time 25 minutes
Servings 4

Ingredients

  • 1 pound lean ground beef 93/7 is best
  • 1 and 1/2 teaspoons toasted sesame seed oil or regular sesame oil
  • 1 tablespoon finely minced garlic about 4-5 cloves
  • 1 tablespoon ginger grated or minced
  • 1/2 teaspoon red pepper flakes more or less to taste
  • 1/4 cup low sodium soy sauce
  • 1 teaspoon fish sauce optional
  • 1/4 cup dark brown sugar* more or less to taste
  • 1 bunch green onions chopped

Garnishes

  • 1/2 cup mayonnaise
  • 2 teaspoons sriracha sauce or your favorite hot sauce, add more to taste
  • sesame seeds to garnish

Veggies you need for a Korean Beef Bowl

  • 3 medium carrots sliced into matchsticks
  • 1 English cucumber sliced
  • 4 radishes sliced very thin
  • 1 (5-ounce) bag frozen edamame

For the rice

  • 1 & 1/2 cups long grain white rice
  • 2 & 1/4 cups water
  • 1 teaspoon kosher salt
  • 1 teaspoon garlic smashed and minced

Instructions

  • Start your rice first. Add 1 and 1/2 cups long grain rice, 2 and 1/4 cups water, 1 teaspoon kosher salt, and 1 teaspoon garlic (you can use jarred garlic) to a medium saucepan and bring to a boil over high heat, with the lid on.
  • Once it reaches a boil (steam escapes from the lid) turn the heat down to low and set a timer for 10 minutes. When the timer goes off, turn off the heat but don't remove the lid. After another 10 minutes fluff with a fork. Leave the lid on until you are ready to eat.
  • Brown the meat. Place a 12-inch skillet over a burner and set the heat to medium high. Add 1 and 1/2 teaspoons of toasted sesame seed oil and swirl to coat. Once the pan is hot, add 1 pound of lean ground beef. Stir and break up the meat into small pieces. Keep cooking until all the meat is completely cooked, about 5-8 minutes. Turn the heat down to medium.
    (If you didn't use lean ground beef, take a minute now to drain the grease from the pan.)
  • Add seasonings. Smash the 5 cloves of garlic and mince finely, you should end up with about 1 tablespoon. Grate or mince the ginger until you get about 1 tablespoon.
  • Add the garlic and ginger to pan. Add 1/2 teaspoon red pepper flakes. If you like just a hint of spice, start with 1/2 teaspoon, if you like things very spicy start with 1 teaspoon. You can always add more flakes later if you like it hot.
  • Stir everything together and cook for 1-2 minutes over medium heat until the garlic and ginger are very fragrant.
  • Add sauce ingredients. Add in 1/4 cup of low sodium soy sauce, 1 teaspoon of fish sauce, and start with 2 tablespoons brown sugar. Stir it all in and let it cook for a minute or so.
  • Taste it and decide if you want it sweeter. I usually add 2 more tablespoons to make it a full 1/4 cup of brown sugar. Play around with it until you get the sweetness level you like. You can also add any salt or black pepper to taste at this point (but remember, even low sodium soy sauce is very salty so be careful.)
  • Add green onions. Once you have the taste where you like it, turn off the burner. Chop the bunch of green onions. Or, use scissors to snip them directly into the pan.
  • Add about three quarters of the bunch of onions. Mix well to let them wilt slightly with the warm beef. Sprinkle the rest over the top, or reserve for passing at the table.
  • Prep the veggie toppings, if using. Peel and chop 2 carrots into matchsticks.** Slice the cucumbers. Slice the radishes very thin. Follow the instructions on the bag of edamame for steaming in the microwave (it should say to microwave for about 2-3 minutes.) Don't forget the reserved green onions.
  • You can either add all the veggies to individual bowls and have guests build their own dinner, or plate each bowl of Korean beef with the veggies on top.
  • Sesame seeds. Don't forget the sesame seeds! I love the nutty flavor they add. Black or toasted white seeds are really good.
  • Make the sriracha mayo (optional) (but not really). In a small bowl, mix together 1/2 cup of mayonnaise and 1-3 teaspoons of sriracha sauce (or your favorite hot sauce) until combined.
    You can thin it with 1-2 teaspoons of milk if you want. Use a spoon to drip over the top of the beef and rice when plating. This mayo is not really traditional with Korean Beef, but I never pass up an opportunity to drizzle my food with sriracha mayo. Don't be a fool.

Notes

*I’ve successfully swapped out normal dark brown sugar for brown sugar Splenda to cut down on sugar content. Just add it in to taste! You can of course also use light brown sugar in place of dark. Keep in mind with either of these switches, the deeper molasses flavor won’t be as present.
**If you are not into raw carrots, saute the matchsticks in a teaspoon of oil in a hot pan for about 7-9 minutes, until softened. Or, follow the instructions for pickling carrots on my Banh Mi sandwich recipe! That would be so good. Daikon would be another great veggie topper for this meal. 
UPDATE: I just tried this recipe with ground turkey instead of ground beef. You should have seen the looks on my kids faces when I told them we were having Korean Turkey for dinner 😂 It was really good! A great option for those who prefer/require lean meats. 

Grandma Georgia’s Chicken and Rice Casserole

Did your grandma make you Chicken and Rice Casserole? It was my Grandma Georgia’s signature dish, pure comfort food. She called it “Chicken Continental.” She used Minute Rice and canned soup. I’ve updated the recipe to be completely from scratch, with a homemade sauce and white rice (which is more nutritious.) It’s still really easy,…

Did your grandma make you Chicken and Rice Casserole? It was my Grandma Georgia’s signature dish, pure comfort food. She called it “Chicken Continental.” She used Minute Rice and canned soup. I’ve updated the recipe to be completely from scratch, with a homemade sauce and white rice (which is more nutritious.) It’s still really easy, and a great old-fashioned recipe for when you feel like you need a warm hug from your dinner!

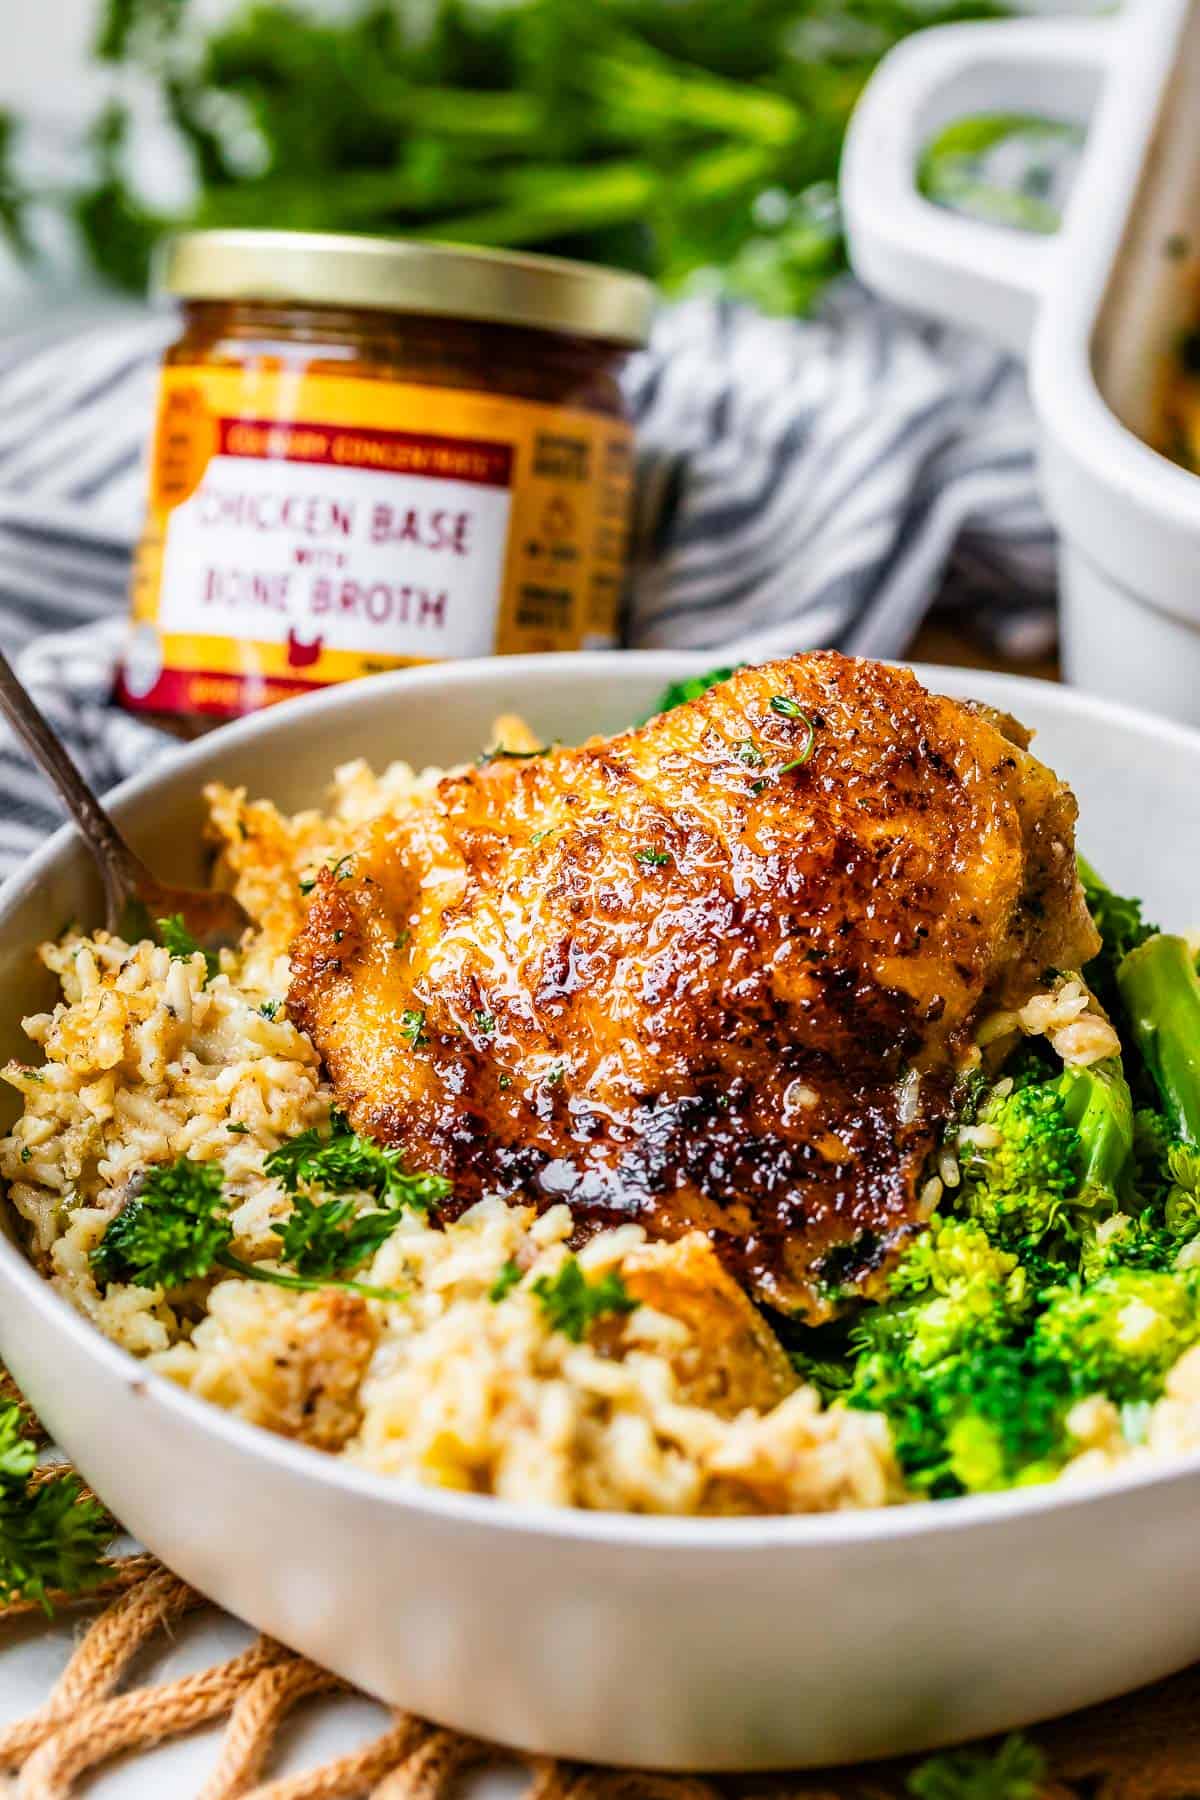
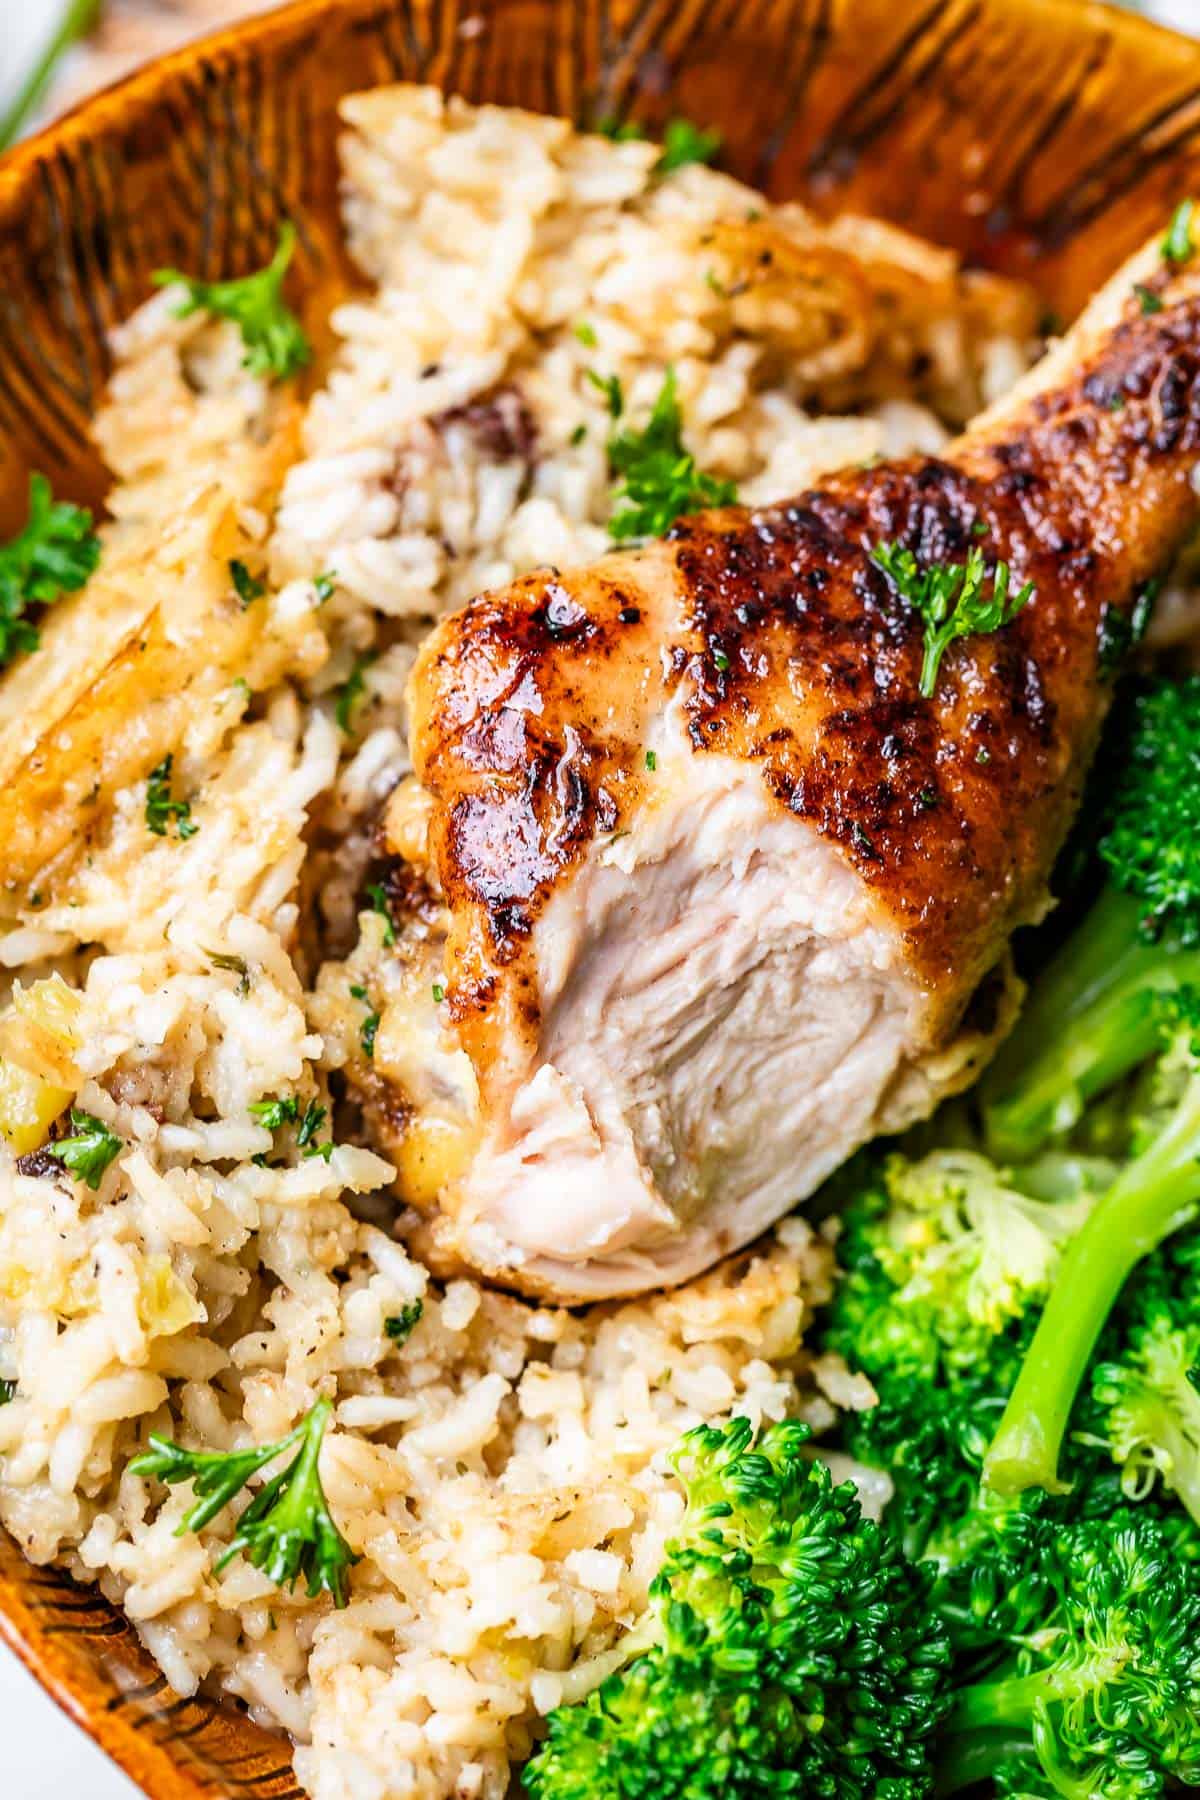
sliced chicken thigh in a bed of rice with broccoli in a wooden bowl.
Table of Contents
  1. Old-fashioned chicken and rice casserole
  2. Zoup! Culinary Concentrate™
  3. Chicken and rice casserole recipe ingredients
  4. How to make chicken and rice casserole
  5. Do you cook rice before putting it in a casserole?
  6. What to serve with chicken rice casserole
  7. How to store easy chicken and rice casserole
  8. Can you freeze chicken and rice casserole?
  9. Rice and chicken casserole frequently asked questions
  10. More comfort food meals you’ll love
  11. Grandma Georgia’s Chicken and Rice Casserole Recipe

This post is sponsored by Zoup! Good, Really Good®, but all opinions are my own of course! Thanks for supporting the amazing brands that keep The Food Charlatan chugging along.

My Grandma Georgia was an amazing lady who grew up poor, helping her family on their farm from a young age. She remembers hearing the wind whistle between the wooden slats of their house growing up in the 1920s. Once when I was like 13, she saw me wearing overalls and she gave me a funny look. “Why are you wearing those? When I was a girl, that’s what I wore when I went outside to WORK.” My 2001 fashion statement was strange to her. (To be fair, if you saw pictures of me when I was 13, you would think I looked strange no matter what I wore. Puberty hit me HARD, y’all 😂)

Grandma would bring us roses cut from her garden every time she visited in the spring. She had porcelain figurines (dogs, cats, dancing ladies) all over her house that I adored. She made me a homemade dress every Christmas, and quilts too. She grew her own grapes and blackberries in the backyard and made the most amazing juice and pies.  

One time when I was very young, grandma had to cancel dinner plans because she got a stomach bug. We decided to make her get well cards. I drew an extremely detailed picture of her bathroom, down to the bath toys she had for us, and the potpourri on the back of the toilet. I was very proud of my picture, and devastated when my sister told me we probably shouldn’t give it to her…because it also showed grandma on her knees violently throwing up in the toilet. (Still wish someone had saved that picture, ha!)

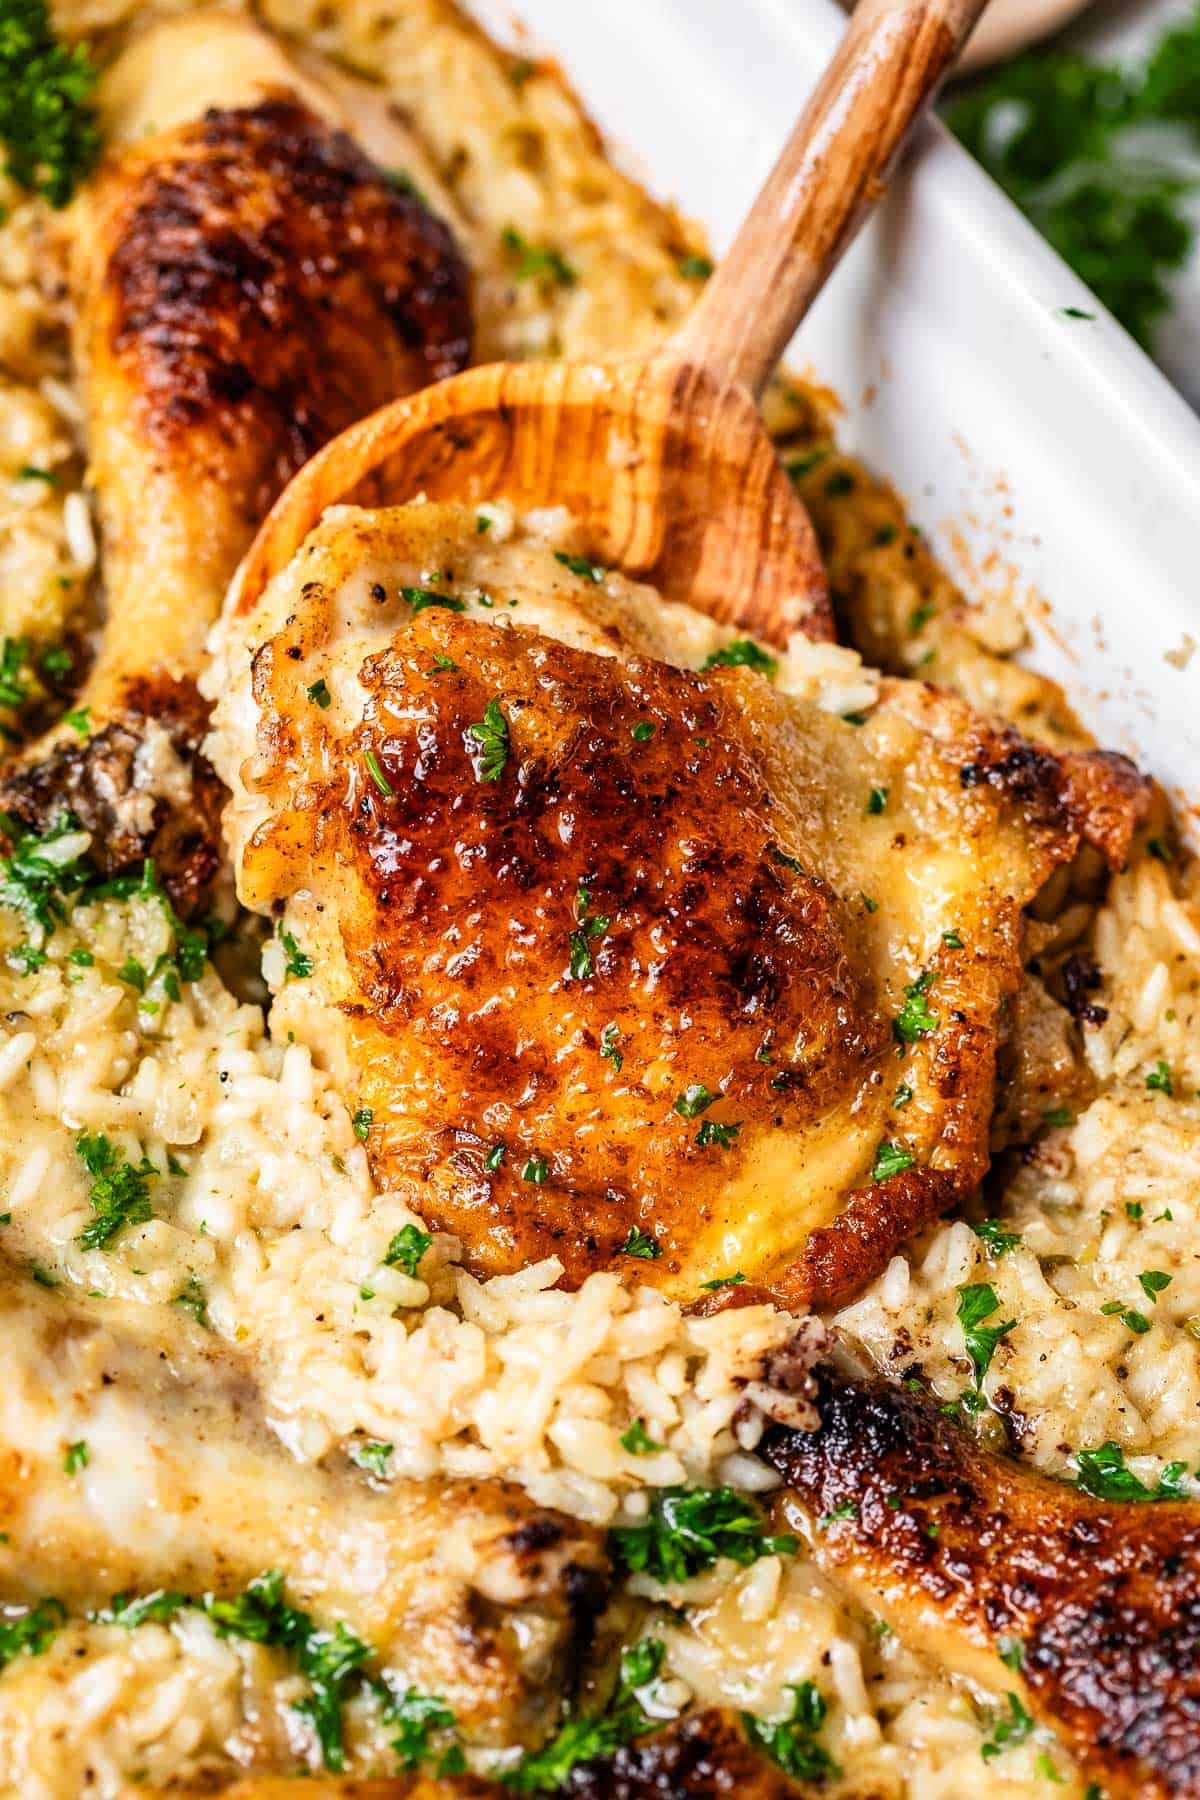
wooden spoon scooping up a cooked chicken thigh from the rice in a casserole dish.

My grandma passed away when I was 20 years old, about a month after my wedding. We had just spent time together, and Eric and I were poor. (Not overalls-poor, not wind-in-the-slats-poor…but just starting out, and we felt poor). I lived out of state and decided not to attend the funeral, since I had been able to say my goodbyes at the wedding. I don’t have a lot of intense regrets in my life, but this is one of them. Funerals are much more about closure for the living, something I didn’t realize at the time.
I’ve come to terms with it, but there is still a hint of yearning, a little bittersweetness, whenever I think deeply about her, that I don’t think I will ever lose.

When I make her recipes, I feel a little connection to my past, a connection to HER, that I treasure so much. She was the most quintessential of grandmothers so of COURSE she was a phenomenal cook. My siblings and I often reminisce about the good ol days when she would serve up Chicken and Dumplings with a glass of fresh grape juice and Blackberry Torte for dessert (recipe coming this summer!)

Her signature dish was this “Chicken Continental,” or chicken and rice casserole. I can’t even describe the dreamy look in my dad’s eye when he talks about his mom making this dish. There is something about food from your childhood, right? His and mine both. It’s like a hug from your dinner…the next best thing to an actual hug from your Grandma.

seared chicken pieces in a casserole dish surrounded by creamy cooked rice.

Old-fashioned chicken and rice casserole

The recipe sounds so basic. Chicken and rice, what’s the big deal? Sounds kinda dry right. But I’m telling you, get ready for some MAGIC. When I finally nailed the recipe, I sent it to my best friend Sarah and she made it for her family. She texted me:

text message saying how good a recipe was.

The depth of flavor is legit. The chicken gets cooked alongside the rice, and absorbs all the amazing flavor. We are using skin-on, bone-in chicken, and that’s not an apology. I told you, this recipe is old school. After breading and browning it, the skin magically stays super crispy throughout the bake, even with the moisture of the rice.

Using bone-in dark meat, like drumsticks and thighs, ensures that the chicken doesn’t get dry, even with the long bake time. Grandma Georgia’s original recipe calls for searing a whole fryer chicken, but I’m not mature enough for that. 😂 Using bone-in dark meat gives you the same result.
After searing the chicken, Grandma mixed together a couple cans of cream of mushroom soup with some Minute rice and tossed it all in the oven. Today we are making our own sauce instead of canned soup. I promise it’s not hard, and the flavor is so good.

We are also using regular white rice. Minute Rice is basically half cooked white rice, and it turns out pretty gummy. It also doesn’t have a lot of nutrients (we need that fiber!), and it’s not an ingredient I usually have in my pantry (but I always have rice). The total time for baking ends up being longer using white rice, but I think it’s worth it.

bowl filled with chicken and rice casserole and broccoli on the side.

This recipe is NOT the same as a Chicken Broccoli Casserole. That recipe starts out similar, with some cream of chicken soup and chicken, but ends with a panko topping and lots of gooey cheddar cheese. Cheese is always a good idea right?

No no no. I LOVE me some cheese my friends, but it has no place in this dish. Cheese would overpower the deep chicken flavor we are going for in this recipe.

My absolute favorite part of this dish is the crispy bits of rice on the edges and bottom of the pan that Sarah mentioned. Almost every culture that uses rice as the staff of its diet has a name for the crispy, golden rice. Persians call it Tahdig. In the Dominican Republic they call it “concon.” In Indonesia it’s called “intip.”

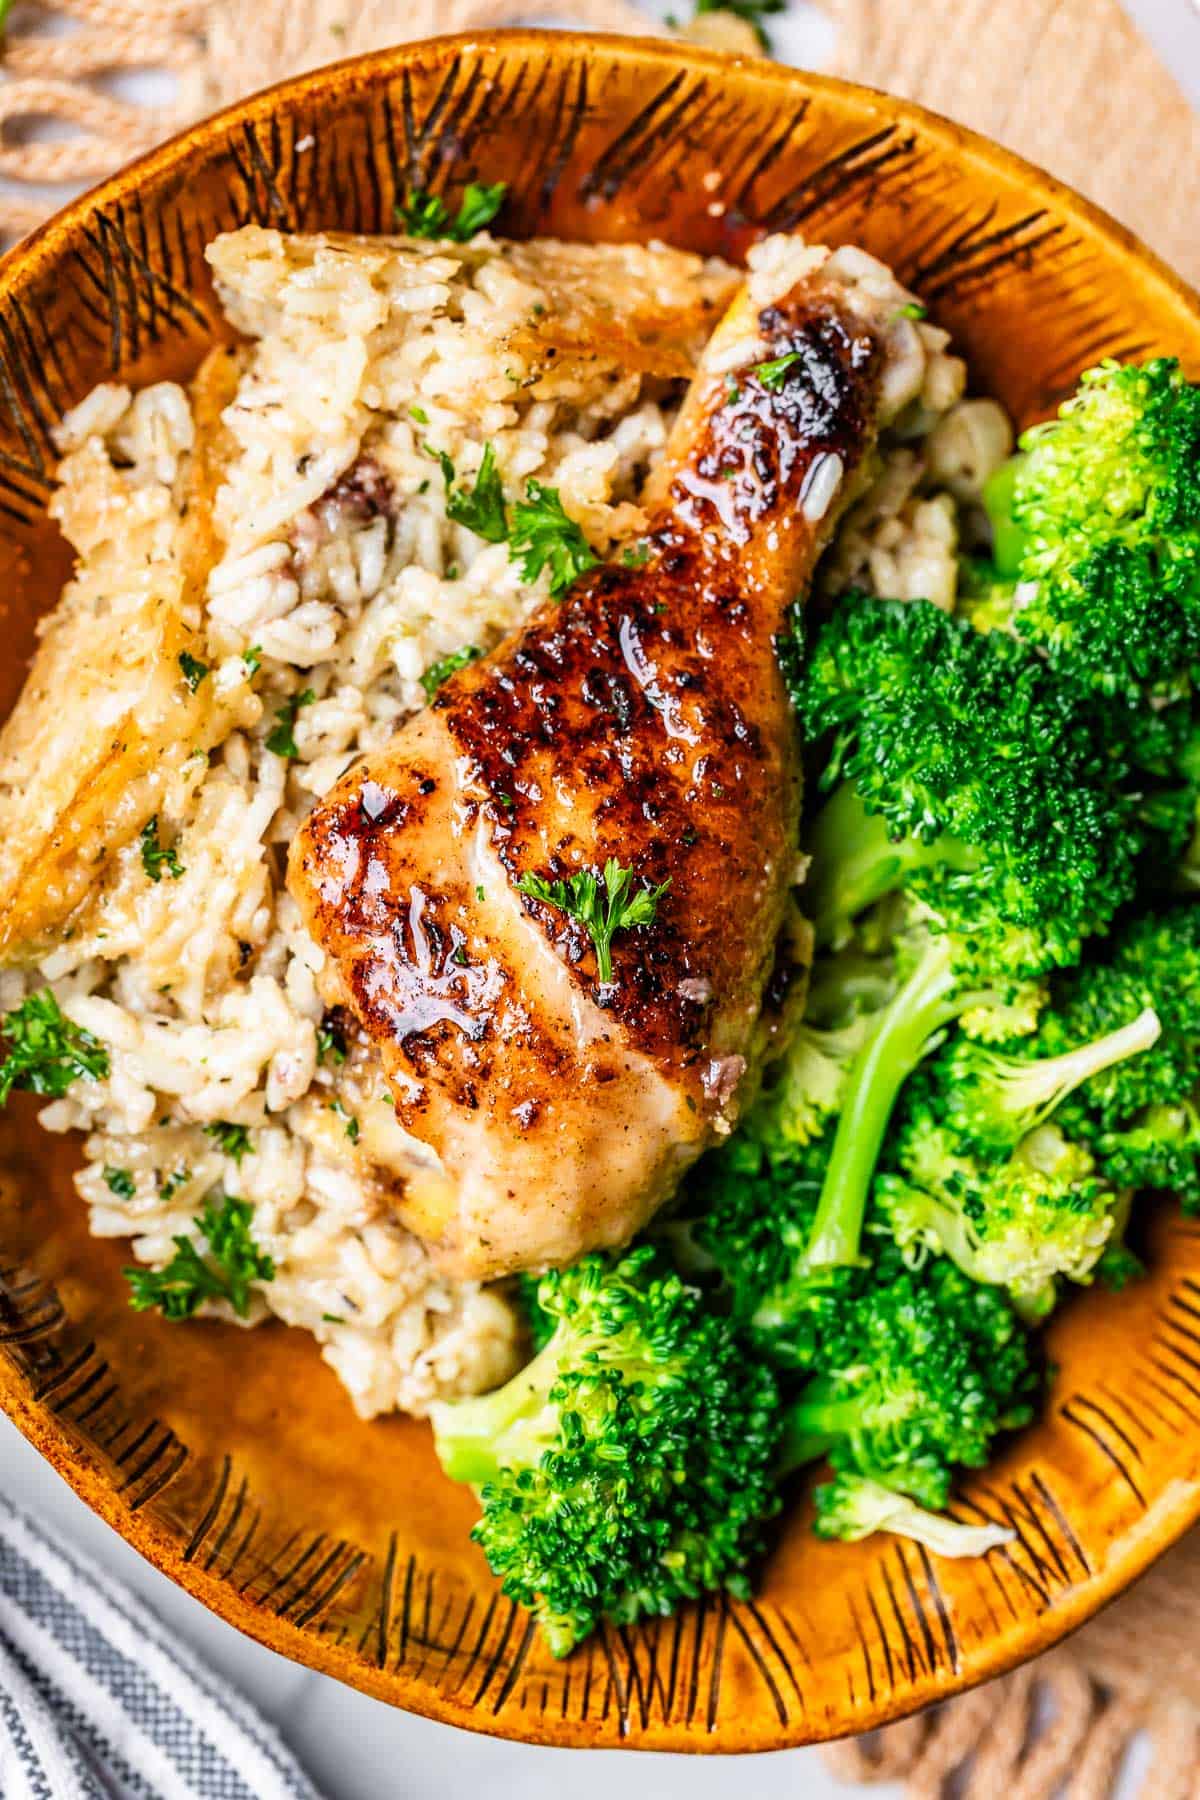
creamy rice, cooked chicken drumstick, and broccoli in a ceramic bowl.

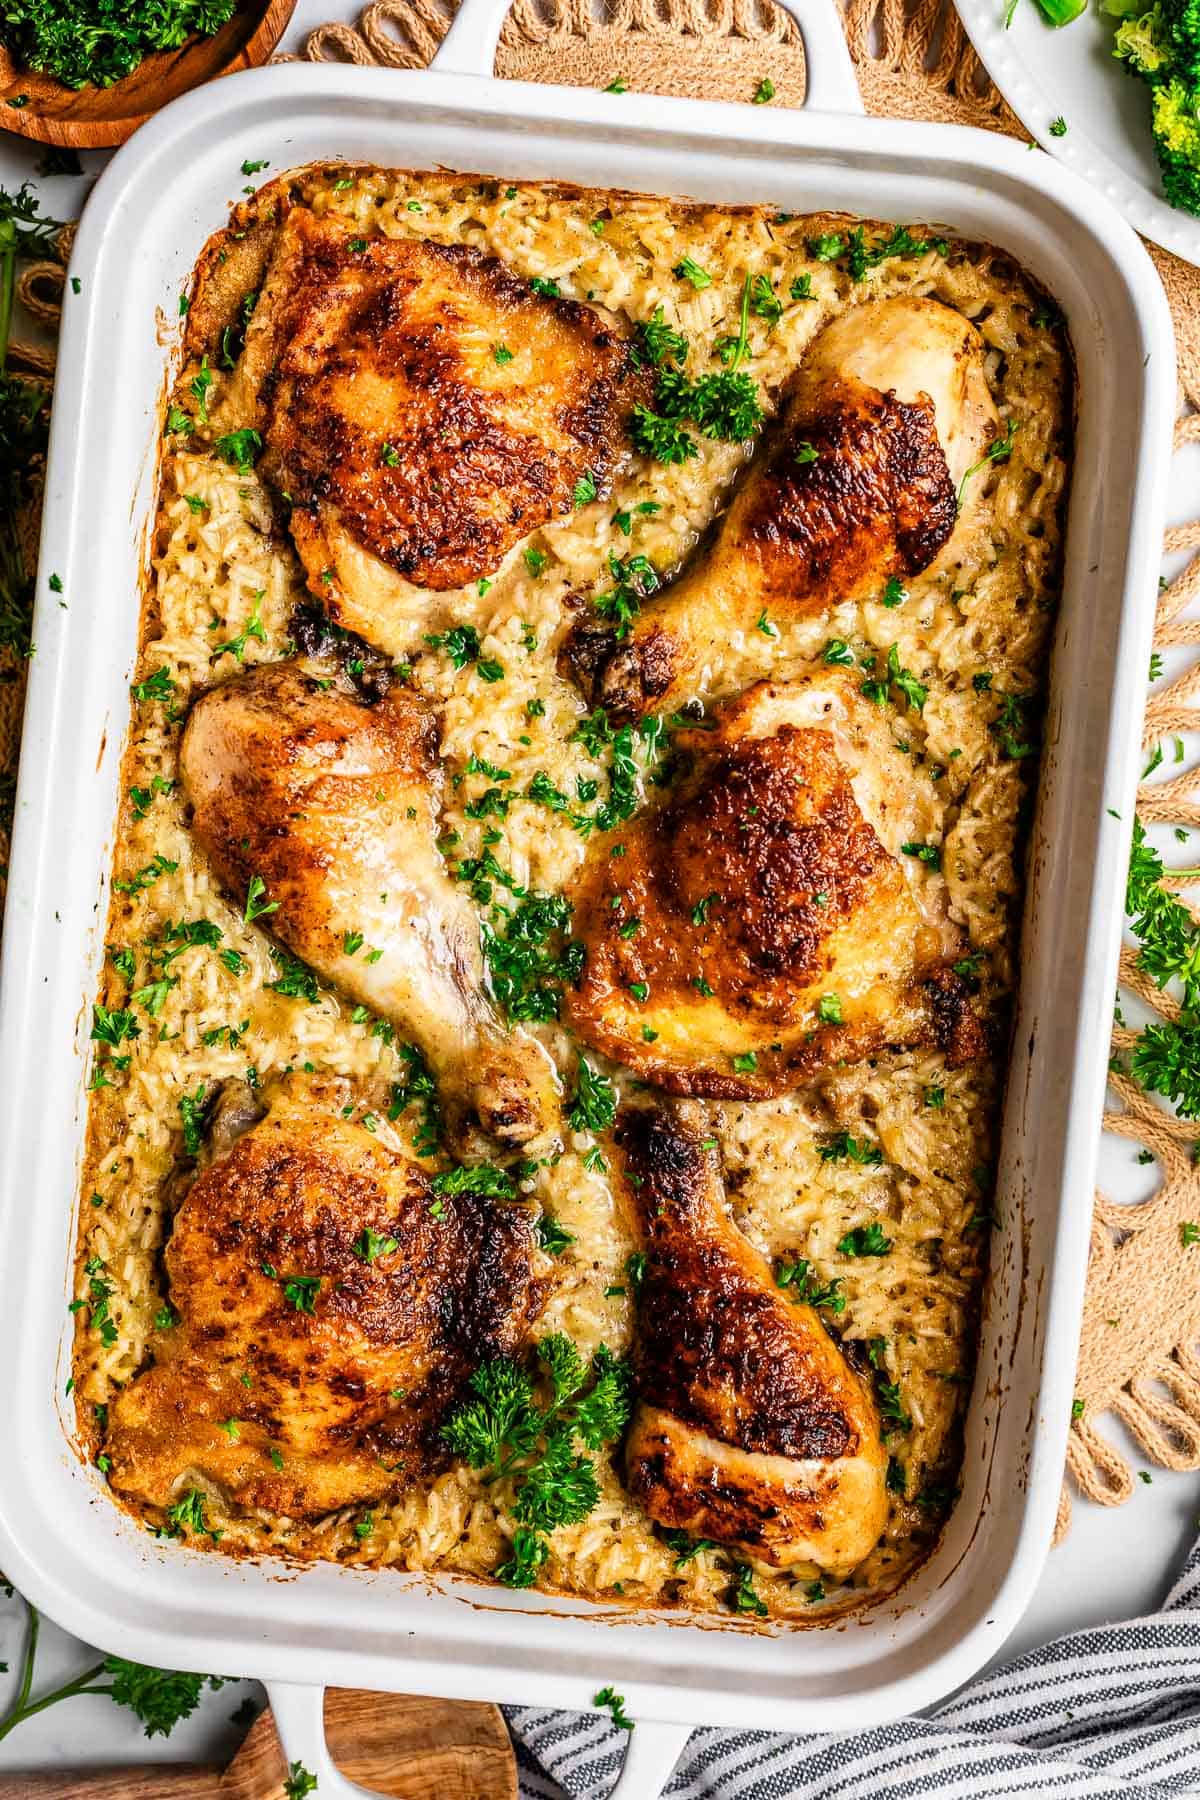
You can see it in the photo above, the golden crisp rice on the top and left side that still has the shape of the pan it was scraped from. It’s SO good.

Zoup! Culinary Concentrate™

Today’s post is brought to you by Grandma Georgia, of course, but also by Zoup! Good, Really Good®. I’ve worked with Zoup! in the past using their chicken broth (Creamy Turkey Rice Soup) and beef broth (Beef Bourguignon). Let me tell you, this company knows what’s up when it comes to flavorful broths! That’s actually how they got started, they were the team behind an actual soup restaurant (Zoup! Eatery) before they started expanding into products. So they really know how to bring in that flavor!

This time they asked me to try out their new product, Zoup! Culinary Concentrate™. I was SO excited. I’ll tell you a secret, I almost never have regular broth on hand in my kitchen. I rely on broth bases that are concentrated, so that I can just add water to them to make broth when I need it. It’s not only my favorite way to have instant shelf-stable broth on hand at all times, but it’s also my secret ingredient in SO many recipes, even those that don’t call for broth. A spoonful-here or a stir-in there takes your ho-hum soup or stir fry up about 10 notches in 10 seconds.

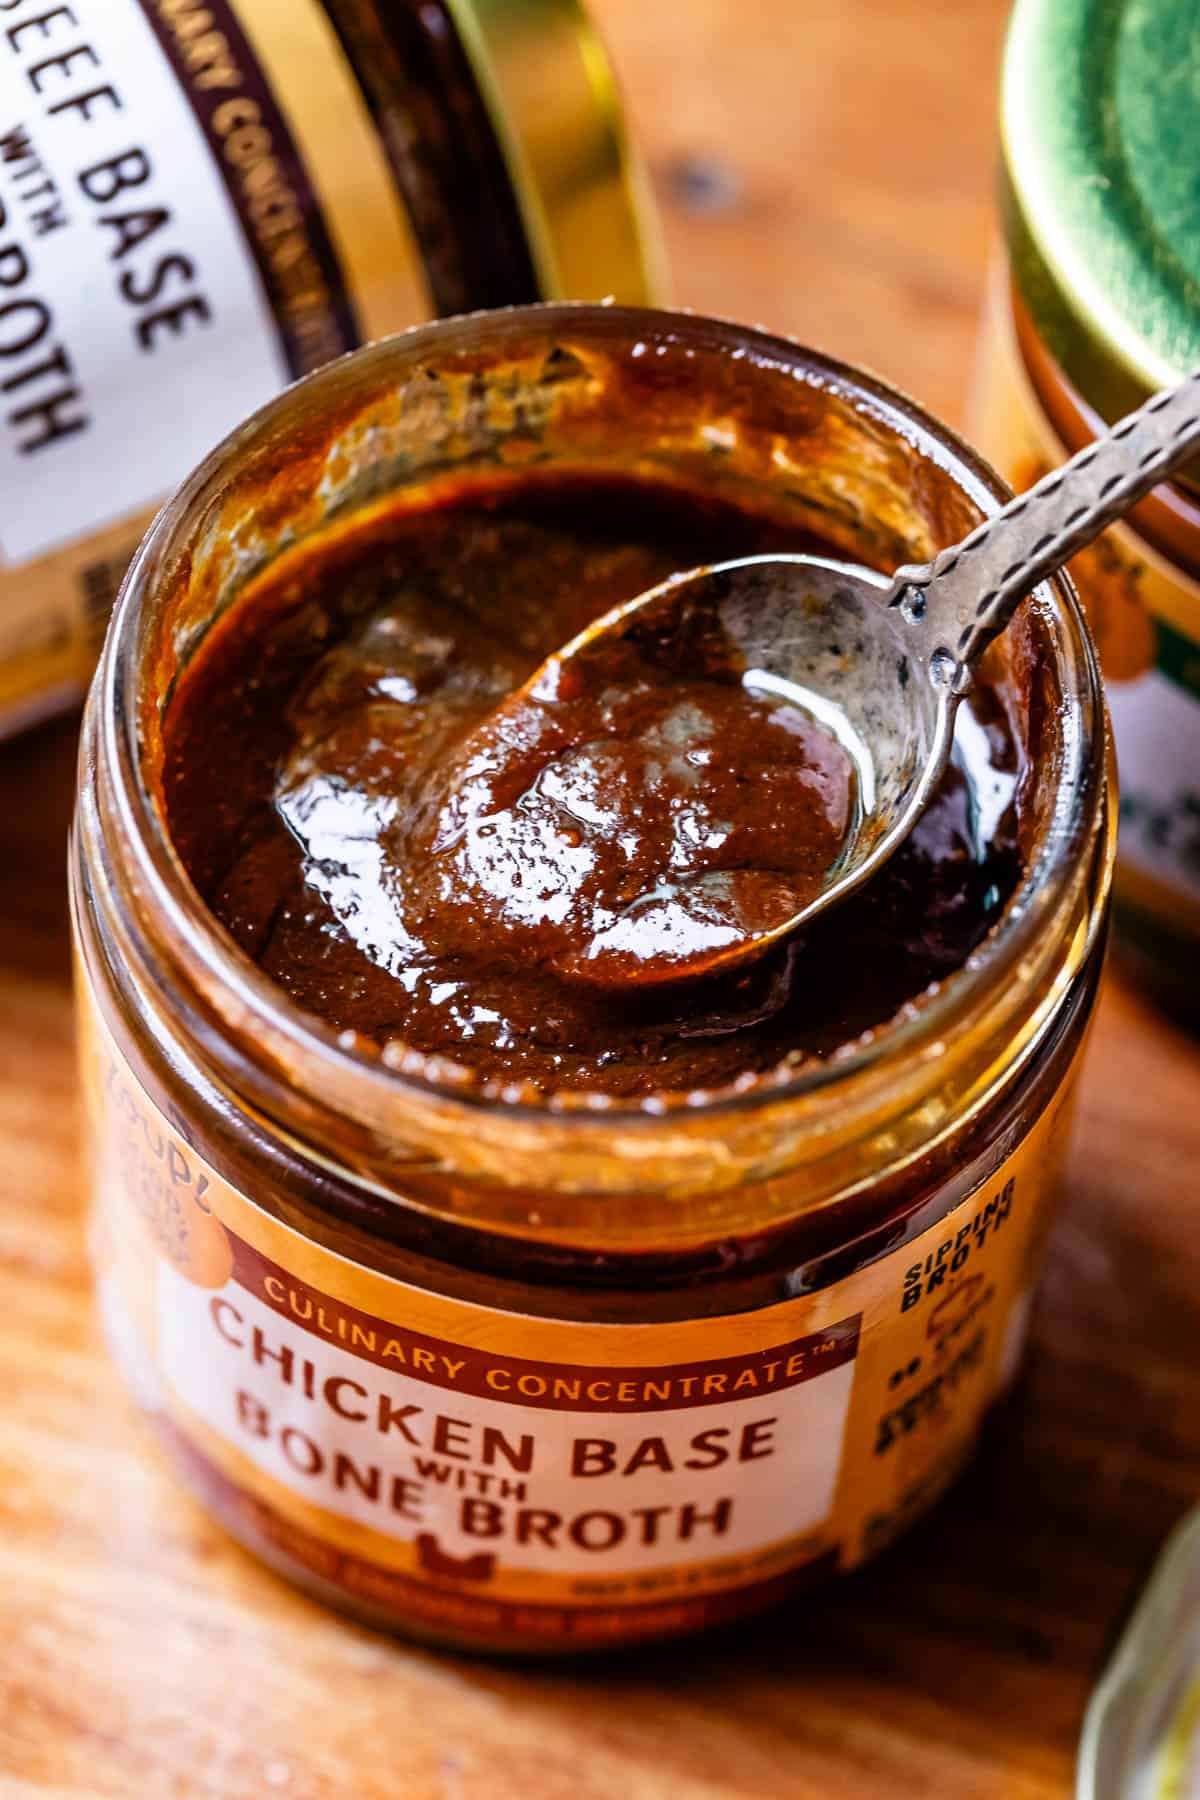
a spoon dipping into a jar of chicken broth base on a table.

There are not a lot of brands that offer this product and I’m SO glad that Zoup! has branched into this market! Just look at the gorgeous color of this base. You will not believe how amazing it smells. It’s so good, and you can even turn it into a sipping broth. It’s good enough to drink, just mix with hot water. There are no artificial flavors, no preservatives, no inexpensive fillers, and no added sugars.

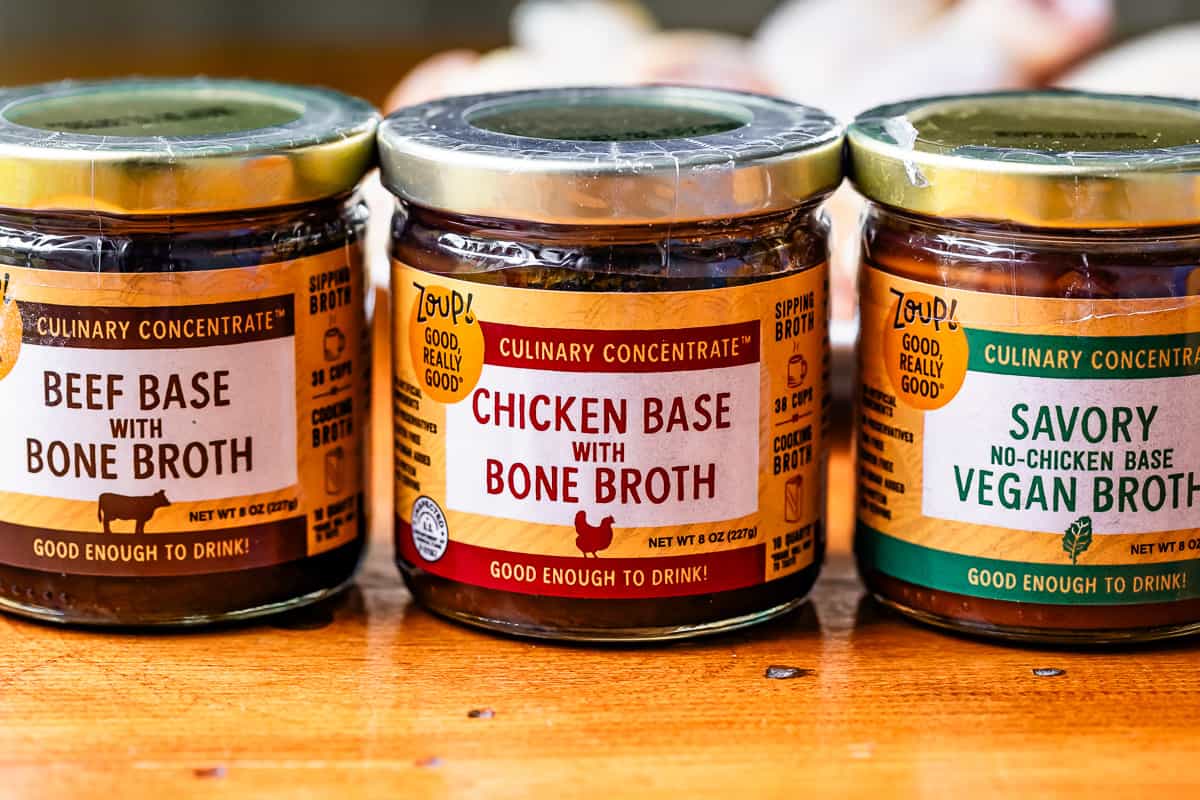
3 cans of broth base concentrate on a tabletop.

I love Zoup! because they make their products in small batches, meaning the nuances of the recipe don’t get lost. So far, they are offering beef, chicken, and vegan broth bases. The depth from this concentrate seeps into the rice in today’s casserole and makes every single bite so, so flavorful. They are not cutting corners and it shows!

I found Zoup! Culinary Concentrate™ at my local grocery store, but you can also get it at Zoupbroth.com or on Amazon. In addition to these broth bases, Zoup! also offers traditional broths and bone broths, including chicken, beef, and veggie, plus super-premium, shelf-stable soups available in nine, flavor-forward recipes, like Chicken Potpie and Butternut Squash with Brown Butter and Sage.

If you buy these products on Amazon, I have a code for 20% off your first order! It’s 20Charlatan. The code is valid until April 12, 2024. Follow ZoupGoodReallyGoodBroth on Facebook, Instagram, Tiktok, and Pinterest!

Chicken and rice casserole recipe ingredients

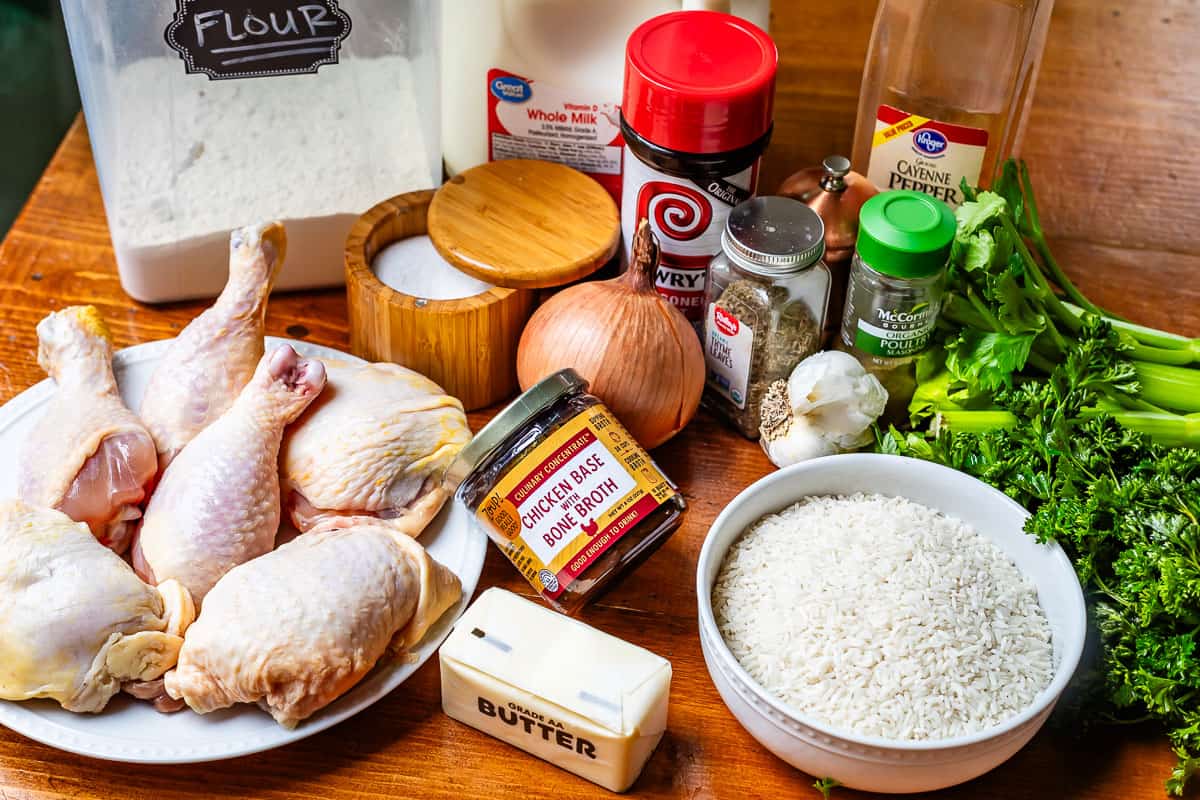
Back to the recipe! Here’s everything you need to make Grandma Georgia’s rice and chicken casserole! You probably already have a lot of these spices in your cupboard. Take a look, and be sure to check out the recipe card for exact amounts and instructions.

Ingredients to make chicken and rice casserole - chicken, rice, and ingredients for white sauce.
  • bone in, skin-on chicken thighs
  • chicken drumsticks
  • kosher salt
  • flour
  • seasoning salt
  • poultry seasoning
  • black pepper
  • cayenne
  • butter
  • oil

How to make chicken and rice casserole

This recipe is so easy! My grandma used an entire fryer chicken to make this recipe, that she would break down herself, but umm…I’m not grown up enough for that 😂 So instead we are cheating by using some thighs and drumsticks.

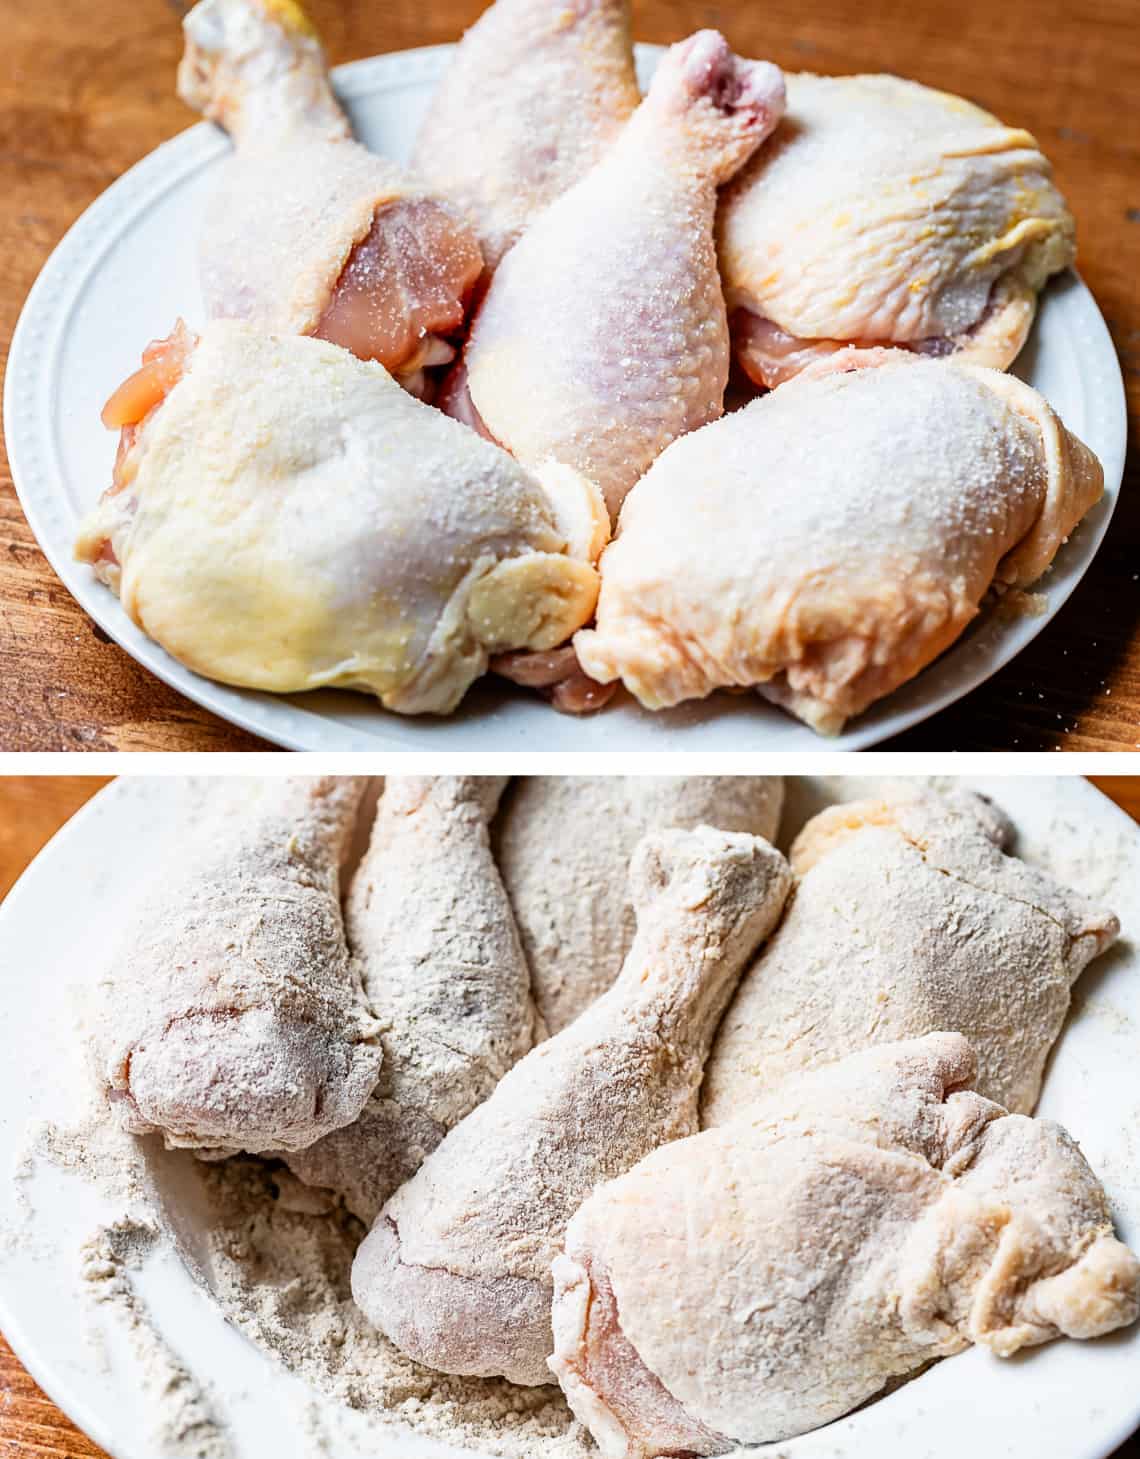
top raw bone in chicken, bottom same chicken pieces dredged in flour mixture.

Dark meat all the way! (You could certainly make this with chicken breasts, but your chicken might get a little dry in the oven since it has to cook so long.) Coat your chicken in the flour mixture, and DON’T throw away the leftover flour!

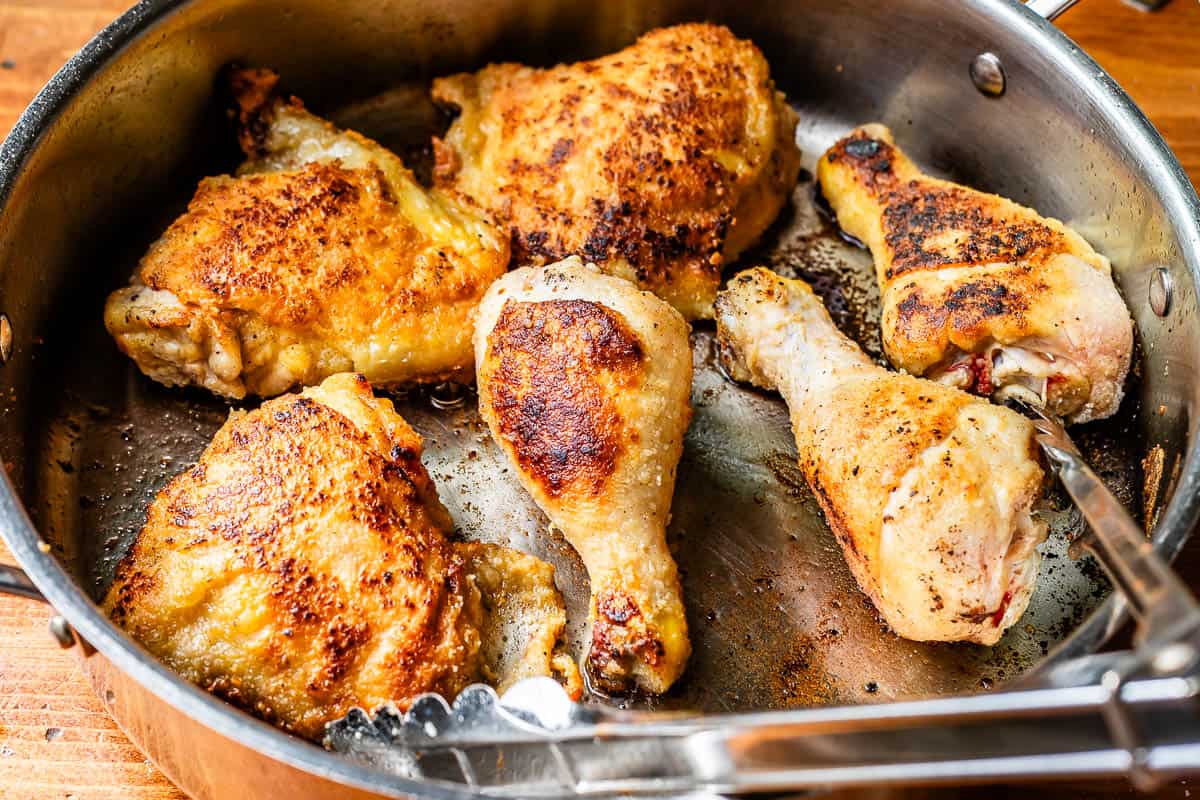
a large skillet with 3 chicken thighs and three drumsticks, all seared on the top.

Now it’s time to sear the heck out of your breaded chicken! Crank up the heat and brown the chicken in some oil. My grandma did this in butter (that’s what the recipe says!), but I have no idea how she didn’t burn the butter in the process. Vegetable oil has a higher smoke point, so it can handle a hot sear without smoking or scorching. To add in the flavor of the butter though, we are flipping the chicken and adding it to the pan for the sear on the second side. It does the job great! Gimme all that buttery flavor.

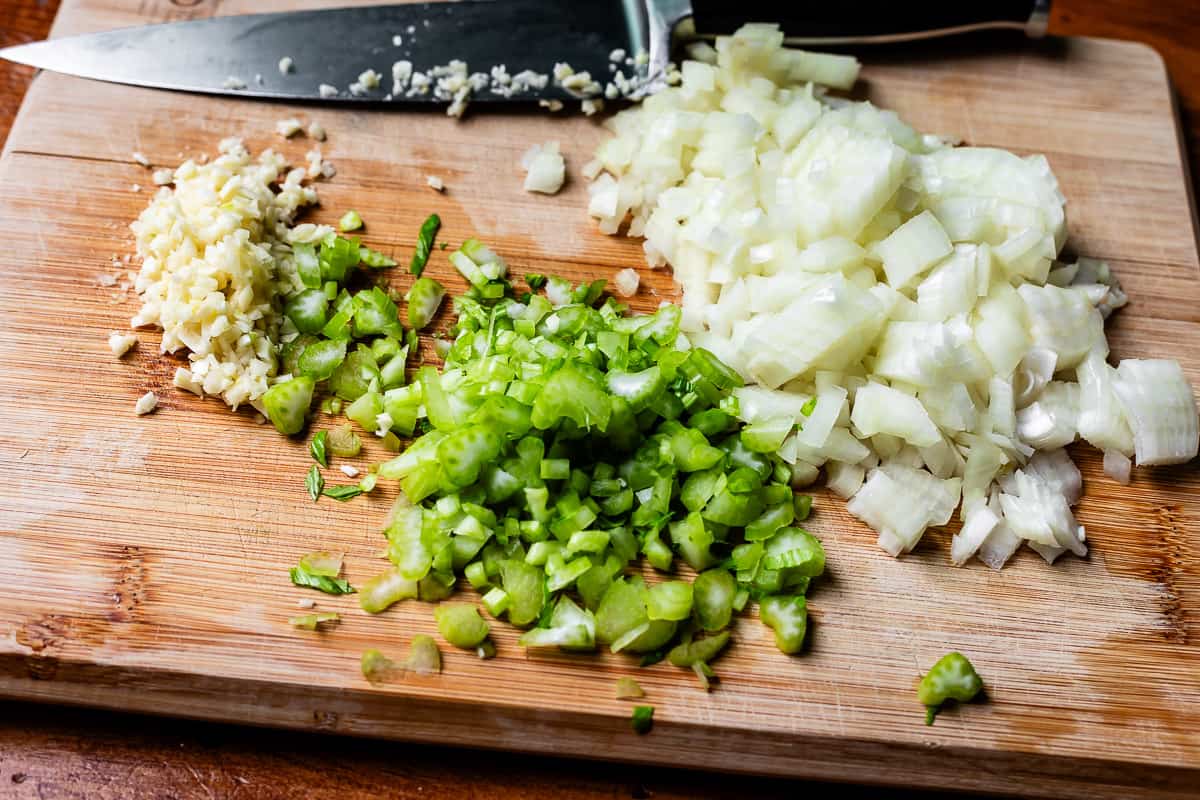
Now if you haven’t already, take a minute to chop up your veggies: onions, celery and garlic. I used fresh garlic this time, but I often cheat and just use the jarred stuff.

chopped onion, celery, and garlic on a cutting board with a chef's knife in the background.

You want to chop your veggies on the small side. We are looking for flavor, but the onion and celery should kind of melt into the sauce and rice. My grandma actually grated her onion, and didn’t use a ton, just a few tablespoons. I wanted bigger onion flavor (and I’m way too lazy to grate…are you noticing a theme here?? 😂) It’s workin for me guys!

Okay now we are going to turn this into a white sauce. Mine is usually not white at all, because I tend to be an onion browner, not to mention a chicken-searer-gone-rogue. I love blackened edges too much, okay??

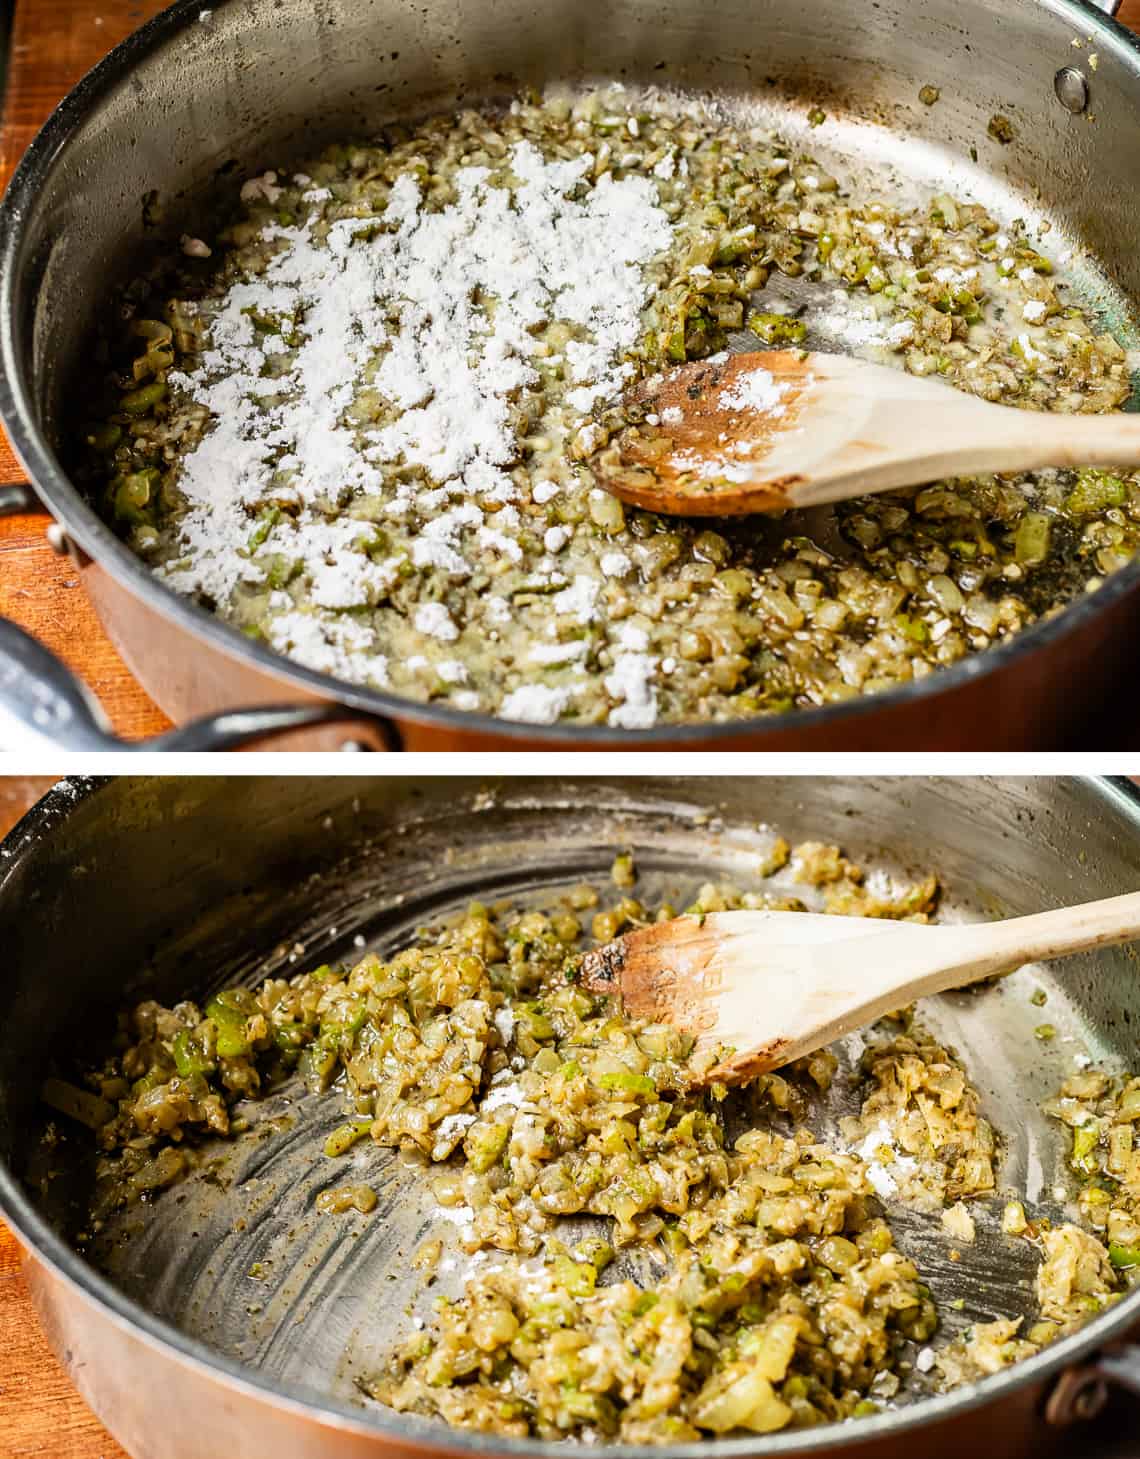
top flour added to sautéed onions and celery in skillet, bottom flour all mixed in and coating the veggies.

Your onions will start to stick together like this once you add the flour to the mixture.

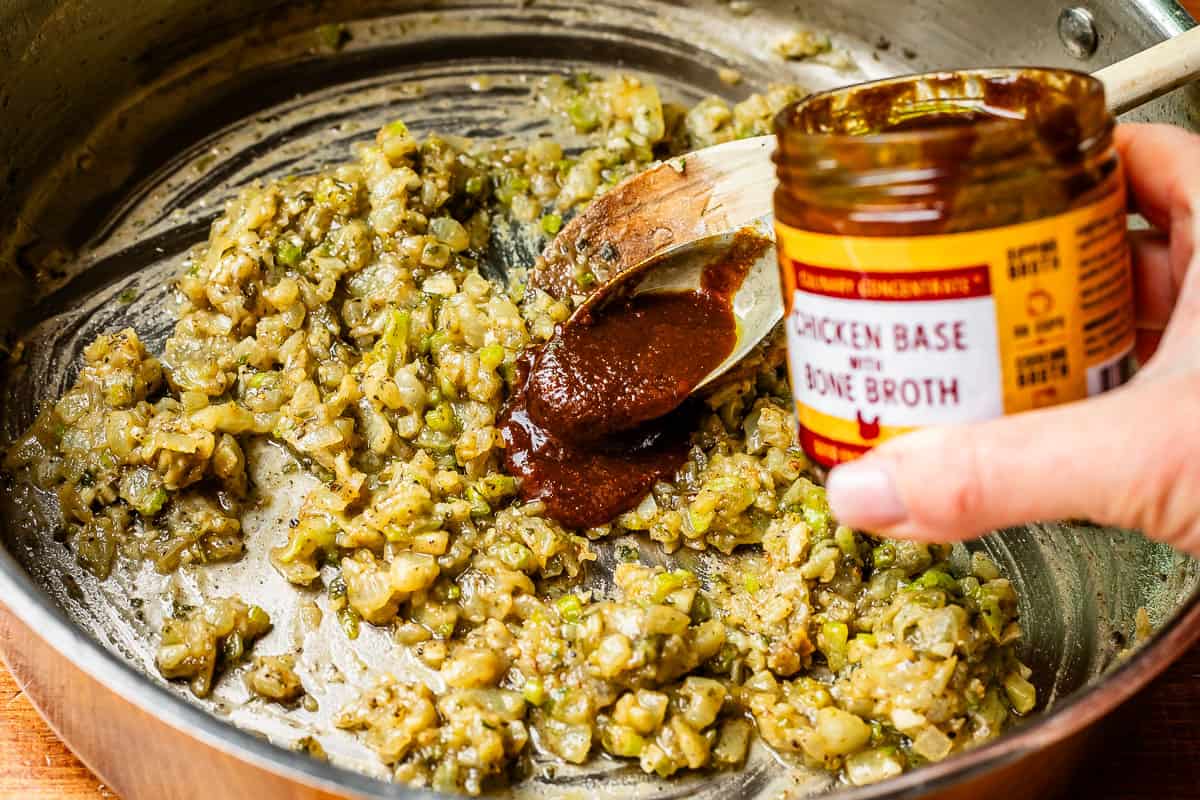
adding zoup chicken base with bone broth into the skillet with the flour coated vegetables.

Now it’s time to add in our Zoup Culinary Concentrate™! This stuff is liquid GOLD you guys. Give it a sniff, it will knock you out, it smells so good. Stir it into your onions and let the aroma transport you to your childhood.

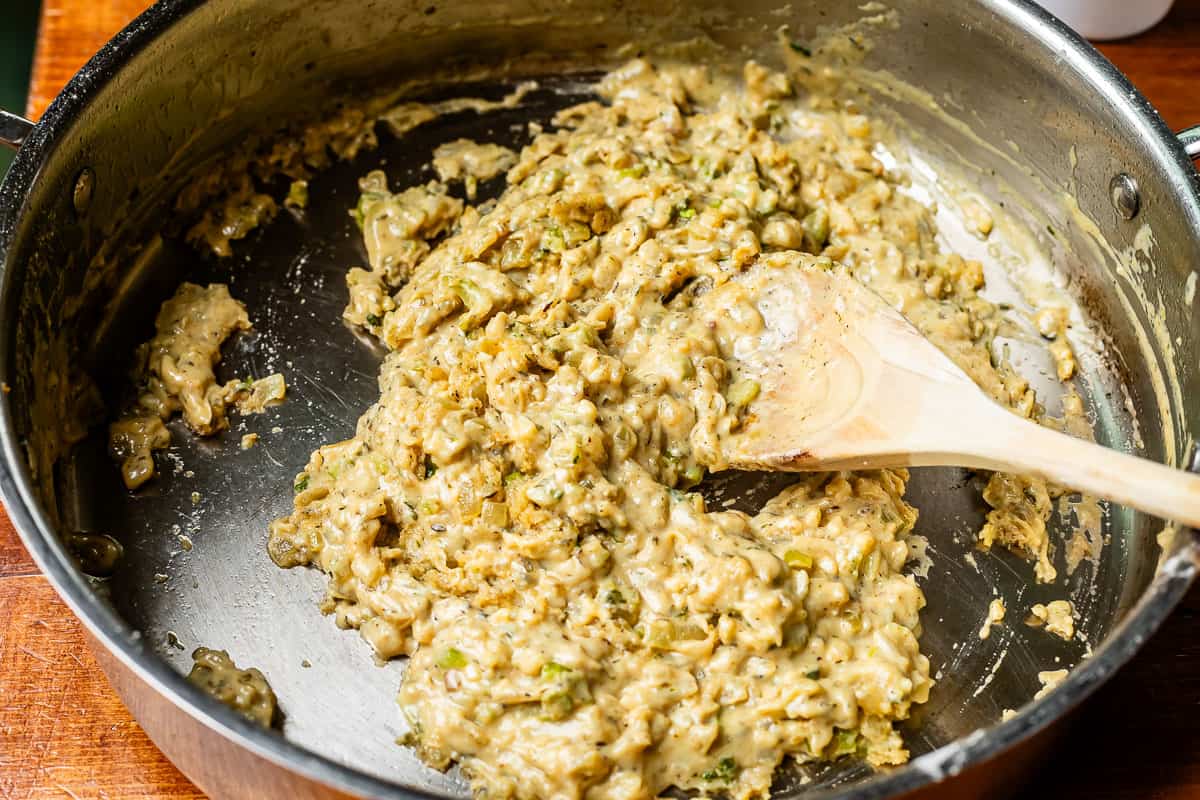
wooden spoon stirring flour and zoup bone broth base covered veggies in metal pan.

Next we’re going to add in some milk and water to turn it into a creamy sauce. You have to stir constantly as you add the liquid, so the sauce doesn’t get clumpy.

Do you cook rice before putting it in a casserole?

We are not cooking the rice before it goes in the oven! Add the remaining water and rinsed rice straight to the casserole dish.

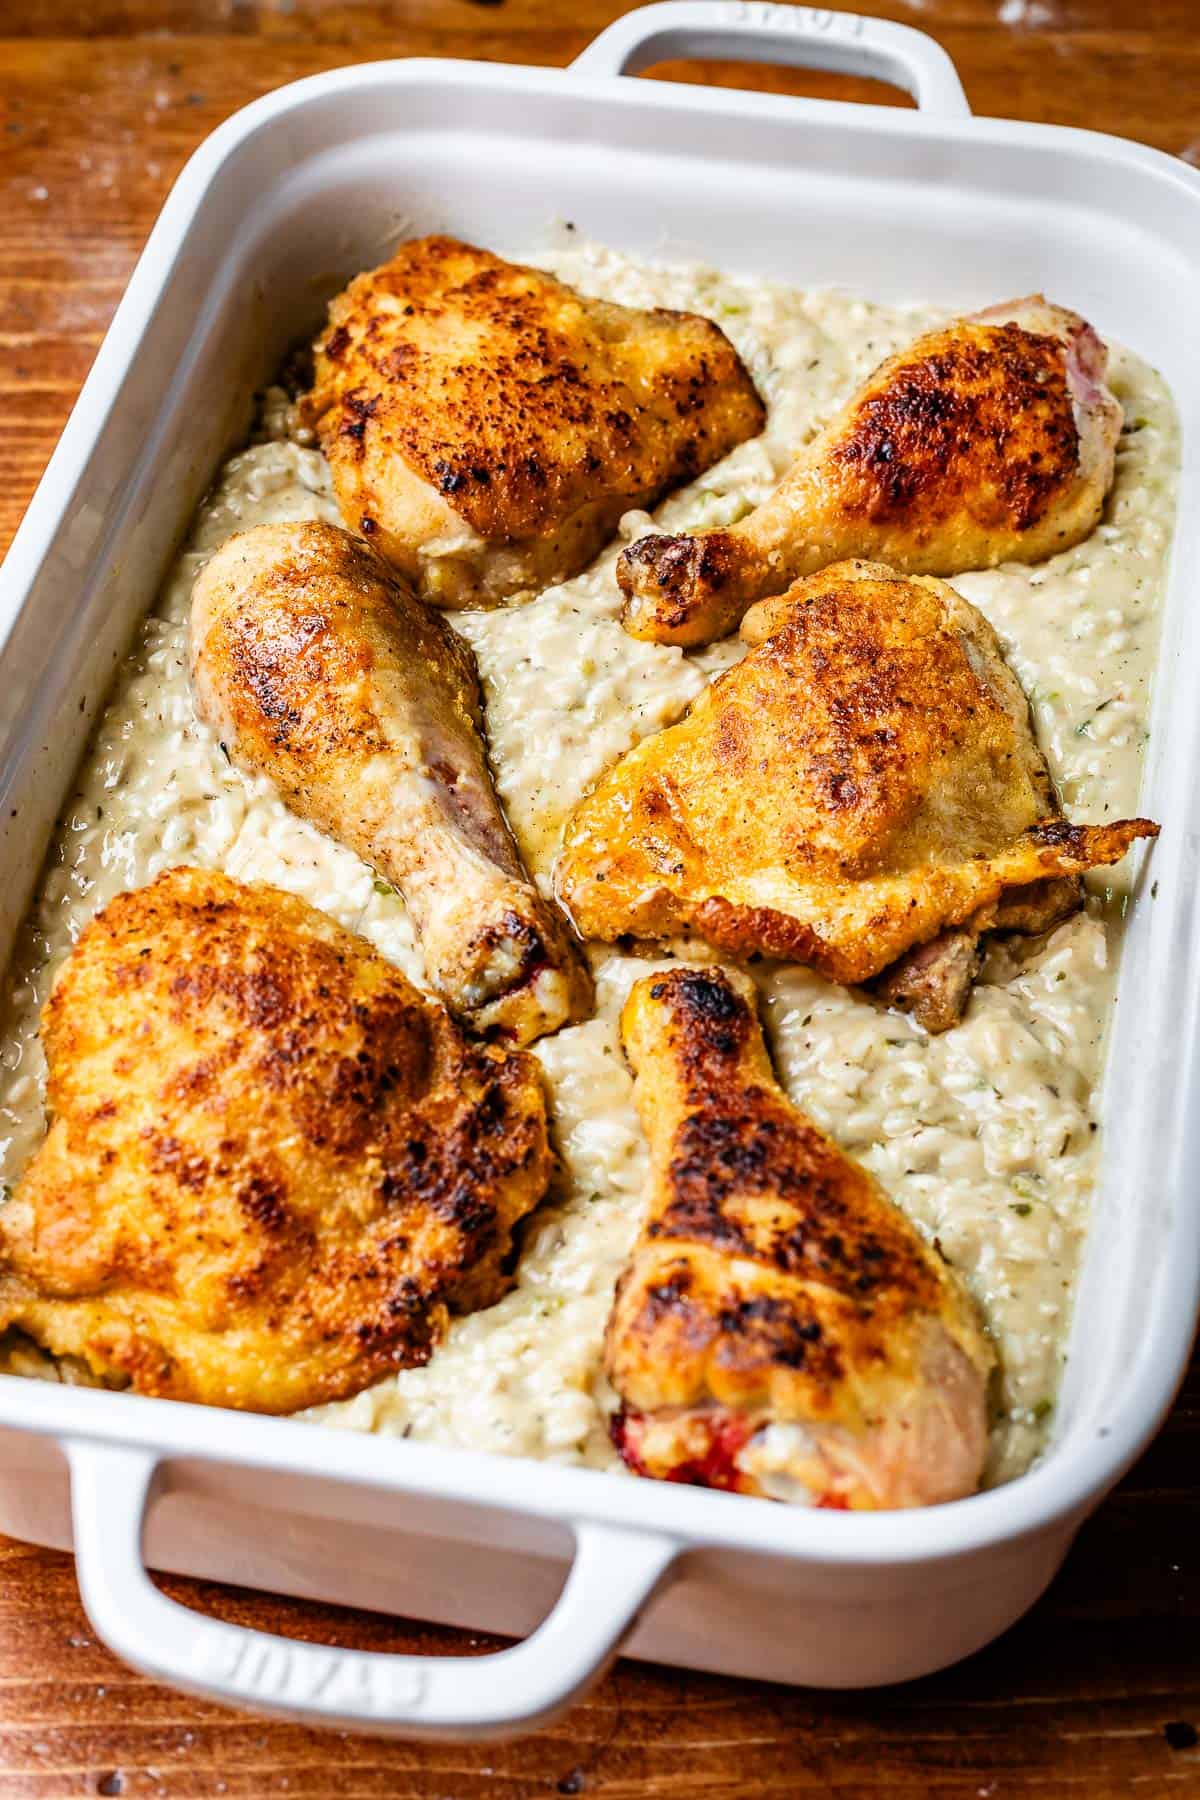
Add the white sauce to the casserole dish with the rice and water, then top with the seared chicken. Doesn’t it look so good already??

seared chicken pieces nestled into a rice and white sauce/water mix in a casserole dish.

Don’t forget to tightly cover the dish with aluminum foil before putting it in the oven. This is really important! You must cover a pot of rice when you cook it on the stove, to lock in the steam, and the same thing applies here.

Then, cook in the oven for a good long while. Usually we wouldn’t bake chicken this long, but this is a special case. With all the moisture and steam, plus using only dark meat, the chicken comes out tender and flavorful, not dry at all.

The casserole does take a while to bake, so plan ahead. But from this point on you can just sit back and relax, the work is done!

Make some broccoli as a side dish, sprinkle on some parsley garnish, and bon appetit! I wish you could see my dad’s face when I make this for him. Grandma Georgia was his mom. There is NOTHING that brings you back like the smells and tastes of your mama’s kitchen!

looking down on a chicken and rice casserole filled 9x13 ceramic dish.

What to serve with chicken rice casserole

There is usually a lot going on in a casserole, so I tend to prefer simpler sides. My favorite sides are usually some kind of salad or a cooked vegetable I know my kids will eat. Here are some great options!

rice, broccoli, and chicken drumstick with bite taken out of it a wooden bowl.

How to store easy chicken and rice casserole

This is a really easy meal to store. Spoon the casserole into an airtight container and place it in the refrigerator. Easy peasy! It’ll last in the fridge for 4-5 days. If you wanted, you could use individual meal prep containers and add a portion of rice and a piece of chicken to each to make easy lunches throughout the week. To reheat, warm it covered in the microwave at 50% heat for 2-3 minutes until hot.

Can you freeze chicken and rice casserole?

Freezing leftover casserole is a great idea when you have a lot leftover or want to store individual portions for another time. It works great! Wait for the chicken and rice to cool, then add to freezer ziplock bags or freezer safe containers with airtight lids.
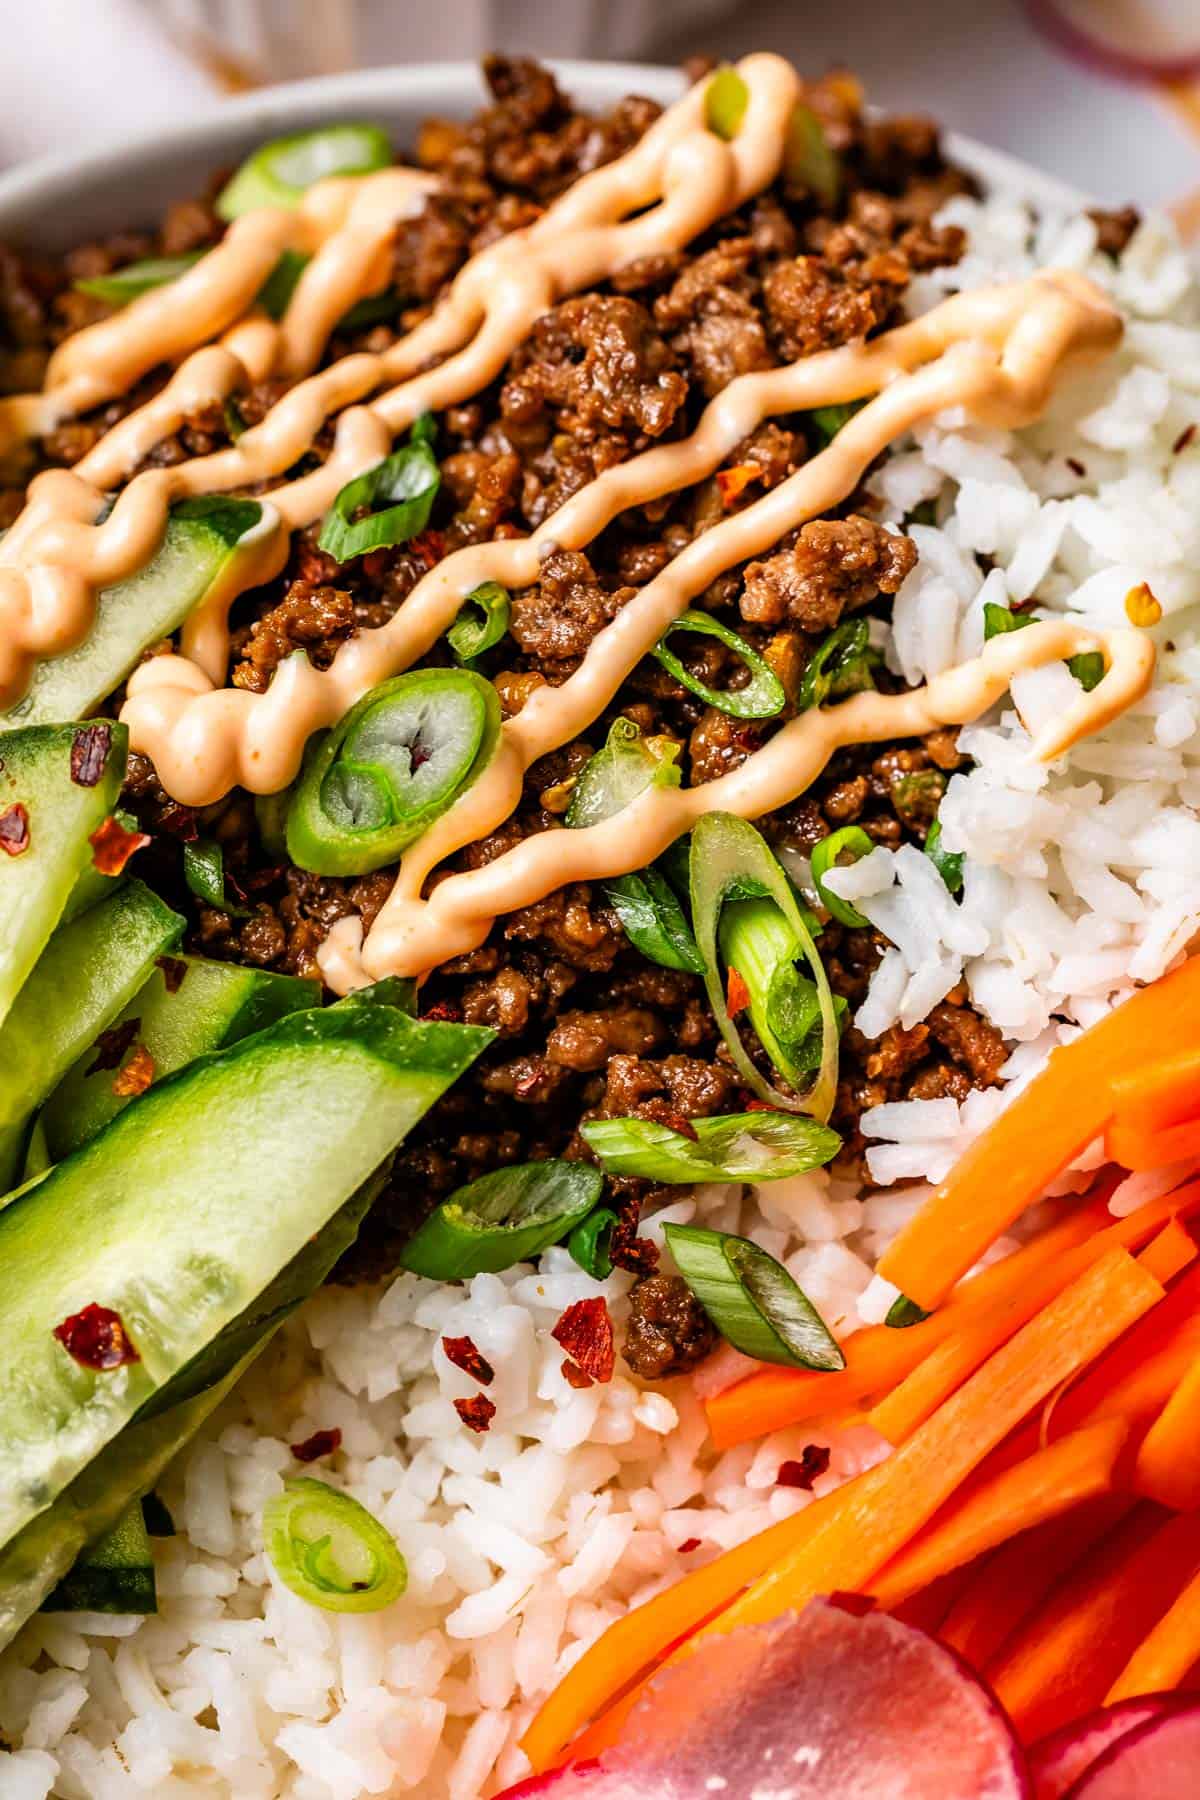
If you really want to get ahead in life, you can prepare this meal in disposable foil casserole trays and freeze directly in the tray after cooking. Put the cooled pan in the freezer for about 30 minutes to flash freeze. Take out, wrap well in plastic wrap, then wrap in aluminum foil. Label the top in sharpie so you don’t forget what it is! It will last in the freezer for 3-4 months. Thaw in the refrigerator overnight and place individual portions in the microwave, cover, and heat at 50% power for 2-3 minutes.
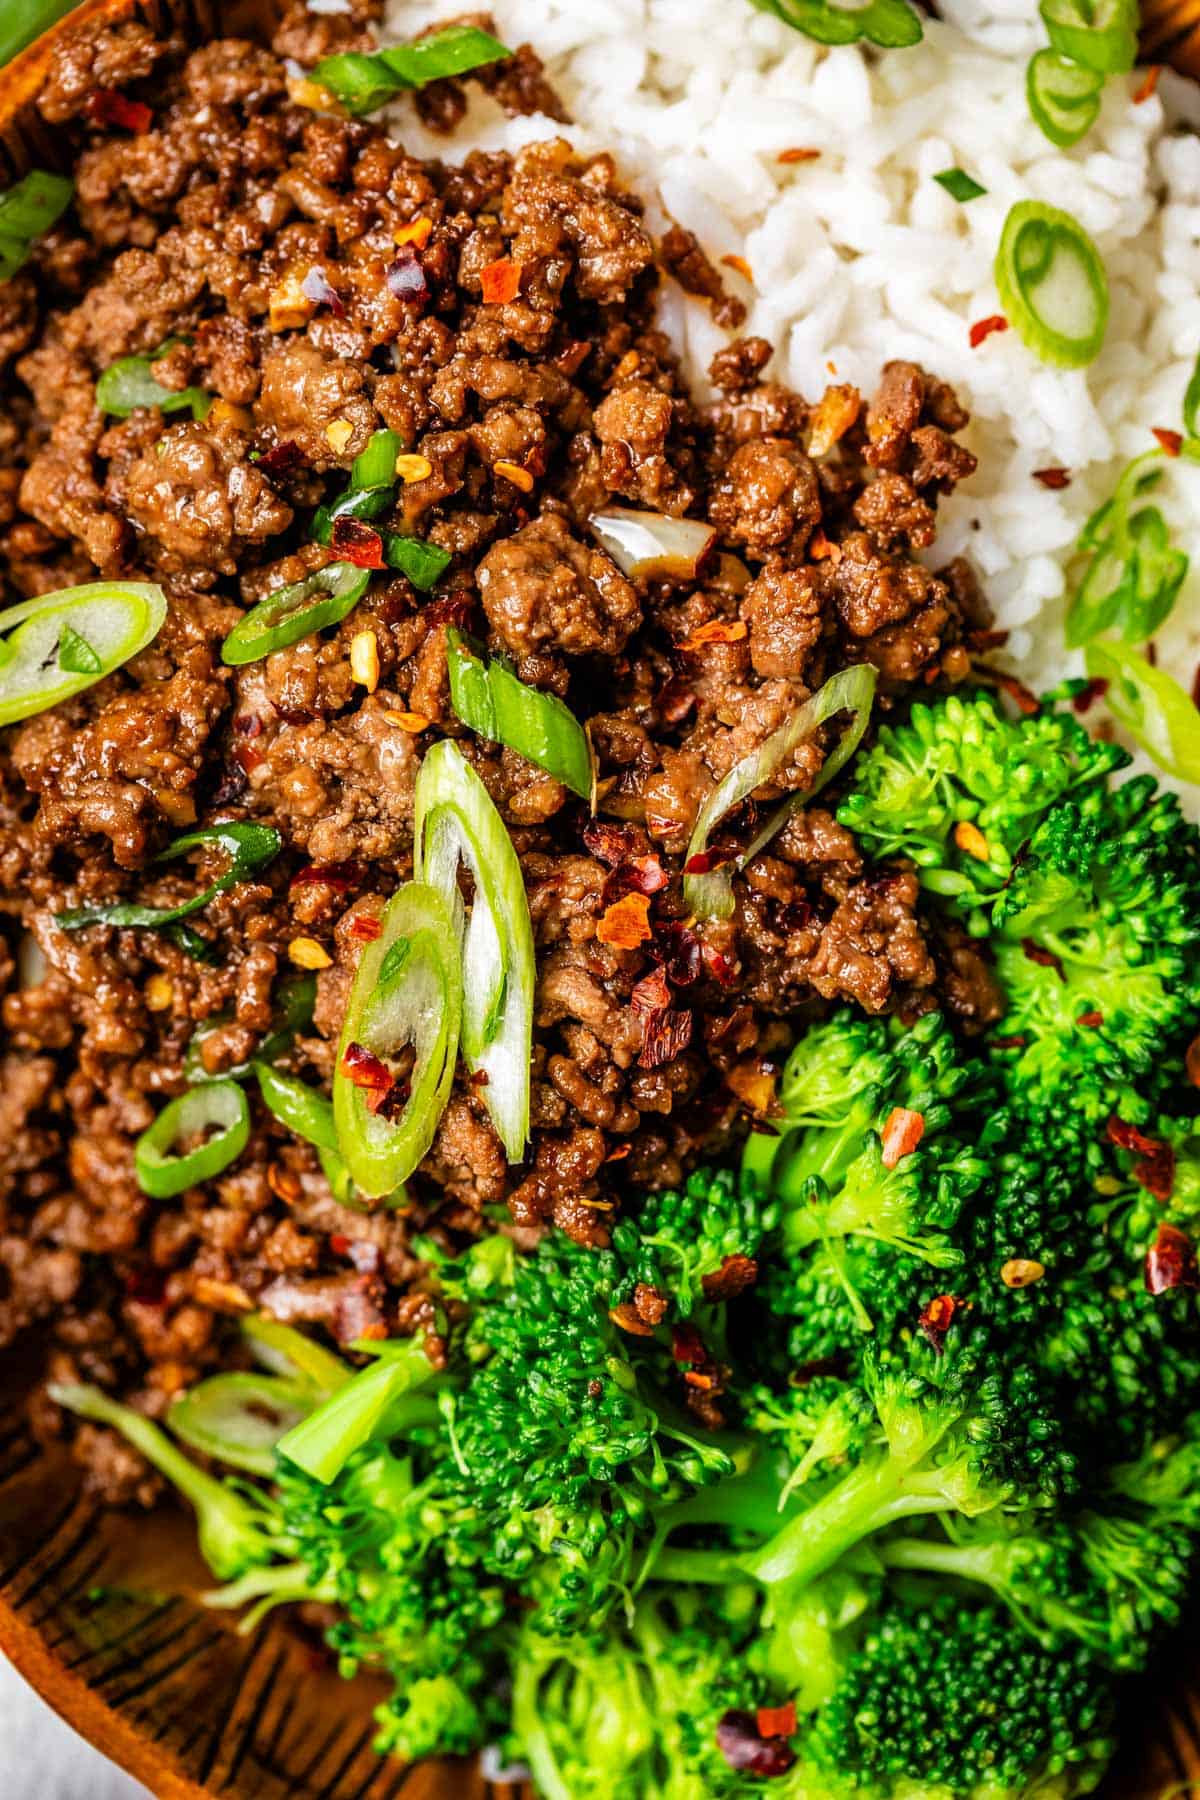
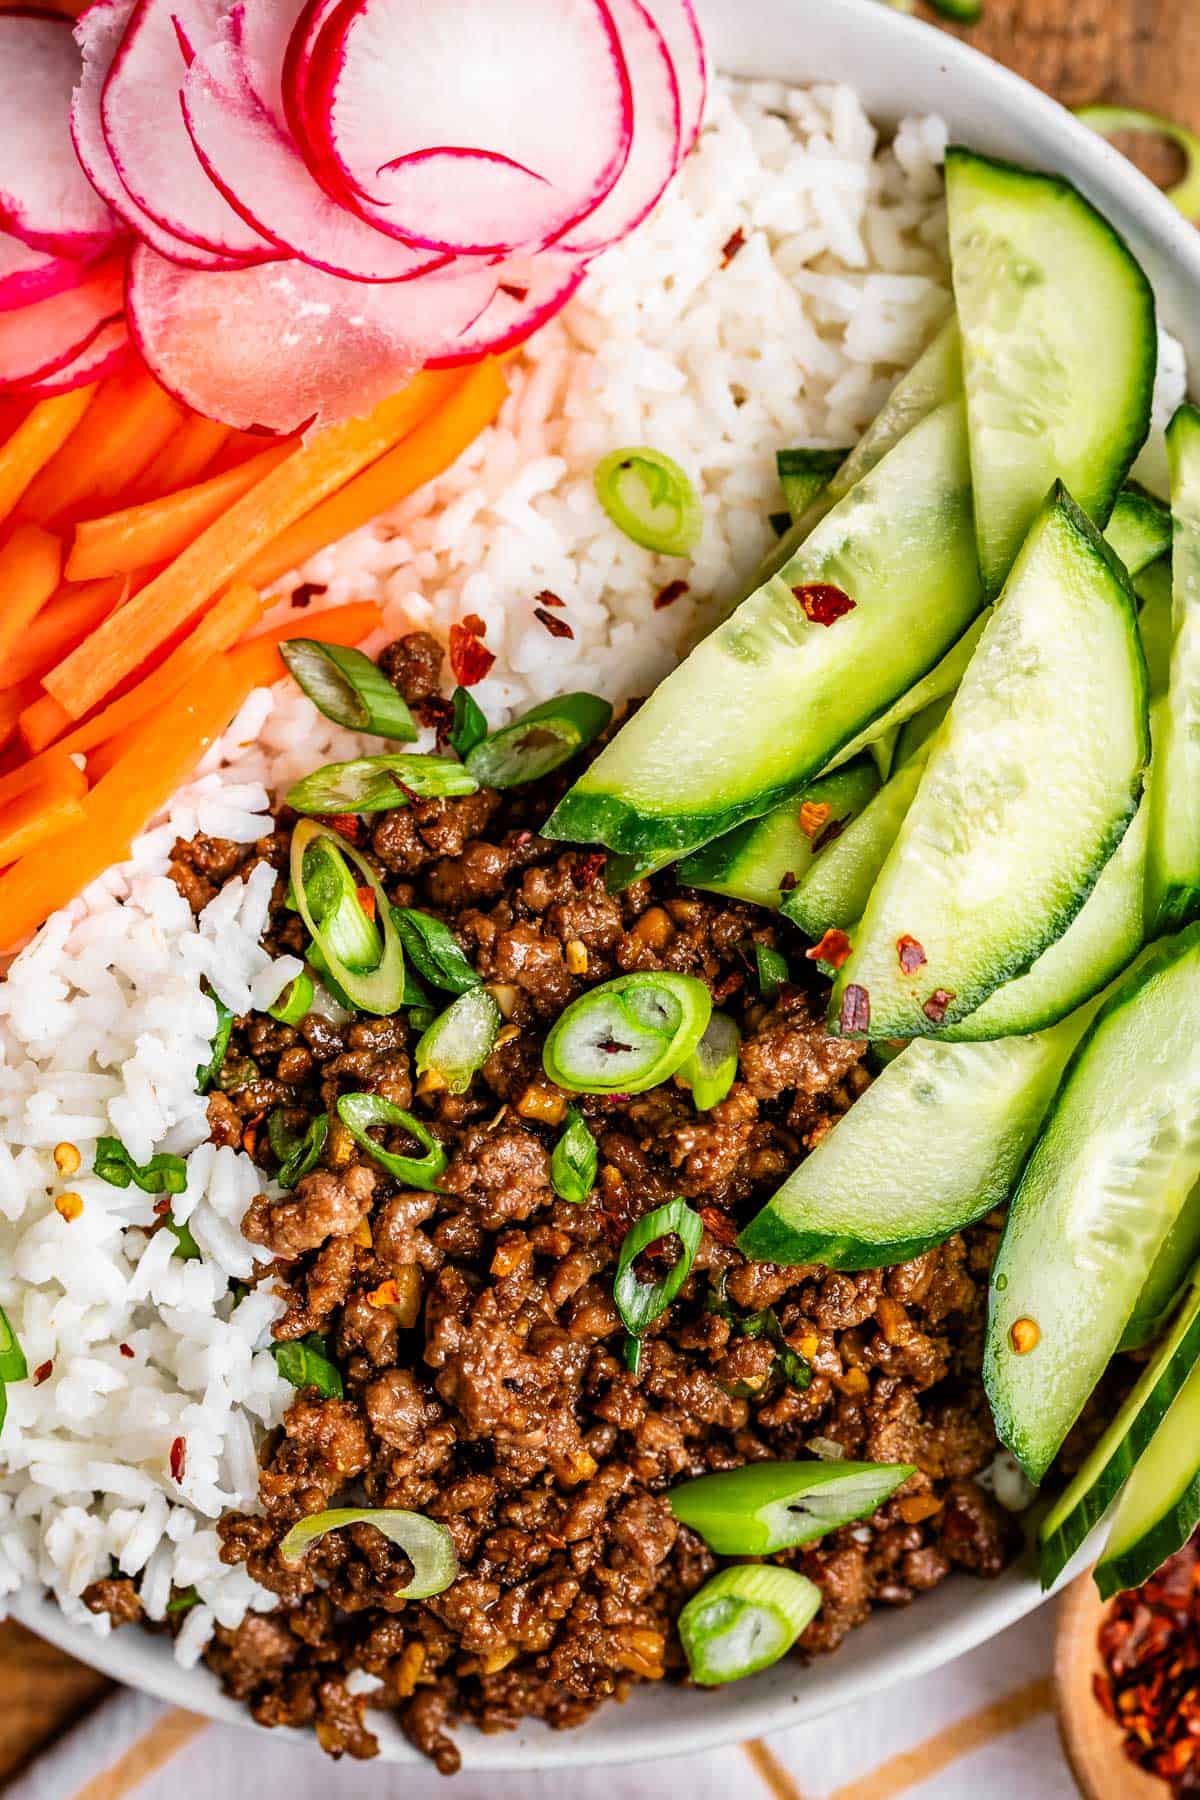
To reheat an entire frozen pan, first be sure to remove the plastic wrap. Put the foil back on and put the pan into a cold oven. Set the temperature to 350 degrees. The casserole should be ready in about 2 hours. You can remove the foil the last 10-15 minutes if you’d like to get it browned. You can also thaw the casserole in the fridge overnight and bake at 350 degrees for 45-60 minutes.

well seared chicken thigh on a bed of creamy rice with broccoli in a bowl.

Rice and chicken casserole frequently asked questions

what are the four components to a casserole?

There are obviously huge variations among casseroles, and some may not have every single component. But generally, what you’ll find in casseroles are a starch, a protein, a vegetable, and a binding agent or sauce. For this chicken and rice casserole, we’re doing three of the four
, leaving veggies out to ride solo on the plate next to the casserole.

how do you make chicken and rice casserole?

It’s a pretty simple concept! We’re going to lightly bread and sear some chicken pieces, then make a delicious white sauce to douse the chicken and rice in a casserole dish. For a step-by-step guide, you can look through the “How to” section above or check out the recipe card below!

Can you reheat chicken and rice casserole?

Absolutely! It can be warmed up in the microwave or in the oven. Over cooked chicken tends to get dried out, so if you use the microwave use 50% power and be sure to keep a cover over the food to keep moisture in and block splatter.

To reheat the entire casserole dish in the oven, add a couple tablespoons water to the bottom of the pan, if there are some servings missing. This will help keep it from scorching. Learned that trick from my mother-in-law! Then make sure it’s covered tightly in foil to keep moisture in, and put the dish into a cold oven. This is mostly to prevent a cold glass dish from breaking by going into a hot oven, so you can preheat if you’re not using glass. Then set a timer for 45 minutes. Check after the timer goes off, it may need another 15-30 minutes to get hot depending on your baking dish, and how much is in it. Because it makes so much, you can even split into two pans and bake that way. This works great for busy weeknights!

cooked chicken pieces and creamy cooked rice in a casserole dish.

More comfort food meals you’ll love

I don’t know about you, but anything my Grandma made growing up counts as comfort food, so this casserole is on my list for sure! Check out these other recipes I love to make when I need a big hug from my dinner.

browned chicken drumstick with rice from the casserole and broccoli in a ceramic bowl.
sliced chicken thigh in a bed of rice with broccoli in a wooden bowl.
Print

Grandma Georgia’s Chicken and Rice Casserole

Did your grandma make you Chicken and Rice Casserole? It was one of my Grandma Georgia's signature dishes. She called it "Chicken Continental." It called for Minute Rice and canned soup. I've updated the recipe to be completely from scratch, with a homemade sauce and regular white rice (which is more nutritious.) It's still really easy, and a great old fashioned recipe for when you feel like you need a warm hug from your dinner!
Course Main Course
Cuisine American
Prep Time 30 minutes
Cook Time 1 hour 45 minutes
Total Time 2 hours 15 minutes
Servings 6
Calories 671kcal

Ingredients

  • 1 pound bone in, skin-on chicken thighs (about 3 thighs)
  • 1 pound chicken drumsticks (about 3 drumsticks)

Flour mixture to go on chicken. Save the remainder!

  • 1/2 cup flour
  • 1 tablespoon dried parsley or use 2 tablespoons fresh parsley
  • 1 and 1/2 teaspoons kosher salt
  • 1 teaspoon seasoning salt
  • 1 teaspoon poultry seasoning
  • 3/4 teaspoon black pepper
  • 1/2 teaspoon dried thyme
  • 1/4 teaspoon cayenne pepper

Fry the chicken

  • 2 tablespoons vegetable oil
  • 2 tablespoons butter

For the white sauce

  • 6 tablespoons butter
  • 1 medium onion chopped finely
  • 3/4 cup celery finely chopped
  • 1 tablespoon garlic smashed and minced (about 4-5 cloves, or from a jar)
  • 1 and 1/2 tablespoons Zoup! Culinary Concentrate™ Chicken Bone Broth
  • 1/2 cup of the remaining seasoned flour mixture
  • 1 cup milk
  • 1 cup water to add to onions
  • 1 and 3/4 cup water to add to rice in casserole dish
  • 1 and 3/4 cup white long grain rice rinsed until the water runs clear
  • parsley chopped, to garnish

Instructions

  • Preheat your oven to 375 degrees F. Grease the edges of a large 9×13 inch casserole dish and set aside.
  • Chop the veggies: Finely dice 1 medium onion, in smaller pieces than you normally do. Dice 3/4 cup celery, don't be afraid to chop up some celery leaves too, they have great flavor. (I chop from the end of the full head of celery, I don't bother with individual stalks.) Smash and mince 1 tablespoon garlic (or, use the garlic from a jar if you are feeling lazy). Set aside.
  • Make the flour mixture: In a medium bowl, add 1/2 cup flour, 1 tablespoon dried parsley, 1 and 1/2 teaspoons kosher salt, 1 teaspoon seasoning salt, 1 teaspoon poultry seasoning, 3/4 teaspoon black pepper, 1/2 teaspoon dried thyme, and 1/4 teaspoon cayenne pepper. Stir together.
  • Trim any excess skin off of the edges of the chicken thighs, if there is a lot hanging off.
    Dredge each piece of chicken in the flour mixture, being sure to coat each piece top and bottom and all over. DO NOT discard the remaining seasoned flour!
  • Sear the chicken: Heat a high-sided 12-inch skillet over medium high heat. Add 2 tablespoons oil and swirl to coat. Add the chicken in a single layer; do not crowd the pan. Leave 1-2 inches of space in between pieces. Do it in two batches if your pan is small. Let the chicken sear over medium high heat for about 2 minutes, until well-browned. We are not cooking it all the way, just browning the edges.
  • Use tongs to flip each piece of chicken. Once the chicken is flipped, add 2 tablespoon butter and swirl around the edges of the chicken, lowering the heat a little if necessary to avoid burning the butter. After 1-2 minutes of searing the second side, when it is nice and browned, remove the chicken to the same plate from before.
  • Make the white sauce: Leave any drippings in the pan. Lower the heat to medium. Add 6 tablespoons butter. Add the diced onion and celery and saute for about 4 minutes until soft. Add 1 tablespoon minced garlic and cook for another 1 minute.
  • Measure the remaining seasoned flour mixture (that you have leftover from dredging the chicken). Add more flour as necessary to make sure it comes to about 1/2 cup. Slowly sprinkle the flour over the onions, stirring as you go.
  • Add 1 and 1/2 tablespoons Zoup! Culinary Concentrate™ Chicken Bone Broth to the onions and stir it in.
  • Stirring constantly, gradually add 1 cup milk, whisking constantly to break up the flour. Do not add more liquid until the last bit has been incorporated.
  • Slowly pour 1 cup water into the onions, stirring constantly to make sure it combines with the sauce; you don't want lumps. Once it is incorporated, cook the mixture over medium heat for about 2 minutes, then turn off the heat.
  • Rinse 1 and 3/4 cup white rice in a strainer under running water. Rinse until the water runs clear, at least 30-60 seconds (this makes your rice less gummy.) Add the rice to the greased 9×13 inch casserole dish. Add 1 and 3/4 cup water to the rice in the dish.
  • Add the white sauce mixture to the rice and water in the pan, and stir.
  • Place the chicken on top of the rice mixture. It will sink down a bit, that's okay. Cover the pan tightly with aluminum foil, this is very important! Sometimes I even wrap the foil around the bottom of the dish just to make sure I have a good seal.
  • Bake at 375 for 45 minutes. Remove the foil and bake for another 30 minutes. At this point, turn the oven up to 400 degrees and bake for another 20-30 minutes.
    When the chicken is nice and brown, and the rice looks bubbly and thick on top, it's done. The edges of the pan should be very brown. The liquid will not look completely absorbed. To be 100% sure the rice is cooked, you can nab a spoonful from the center and taste it to see if it's nice and soft. If not, leave it in another 10 minutes. The chicken should be above 165 degrees. The top of the casserole will still look a little liquidy. The casserole will settle as it rests and continue absorbing some of the sauce, but it is meant to be a little saucy, it won't look as dry as rice you've cooked with water. The rice should be soft and the pan should be jiggly but not sloshy when you shake it.
  • Remove from the oven and let stand 10 minutes. Serve right away, sprinkled with chopped parsley as a garnish. I love this Easy Roasted Broccoli Recipe as a side dish with this meal!

Nutrition

Calories: 671kcal | Carbohydrates: 56g | Protein: 26g | Fat: 37g | Saturated Fat: 15g | Polyunsaturated Fat: 7g | Monounsaturated Fat: 12g | Trans Fat: 1g | Cholesterol: 155mg | Sodium: 1523mg | Potassium: 458mg | Fiber: 2g | Sugar: 3g | Vitamin A: 699IU | Vitamin C: 3mg | Calcium: 107mg | Iron: 2mg