I try to always have homemade granola bars in the fridge for an easy grab and go breakfast or snack. These granola bars are easy to make and made with basic pantry ingredients. They are satisfying, sweet, and taste so much better than store bought gran…
I try to always have homemade granola bars in the fridge for an easy grab and go breakfast or snack. These granola bars are easy to make and made with basic pantry ingredients. They are satisfying, sweet, and taste so much better than store bought granola bars. These are our favorite granola bars because we…
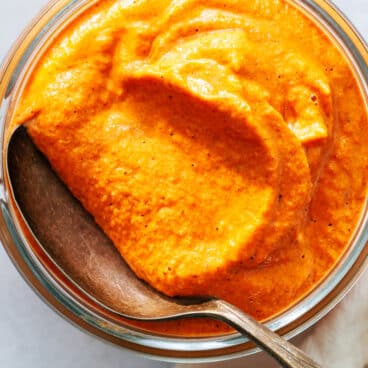
This honey garlic sauce recipe is simple to make and works with anything! Try it on salmon, chicken, stir fries,…
This honey garlic sauce recipe is simple to make and works with anything! Try it on salmon, chicken, stir fries, and more.
Need a simple, homemade sauce that will dress up any meal? Try this Honey Garlic Sauce recipe! It comes together with just 8 ingredients in less than 10 minutes, making it an easy, no-hassle sauce for quick meals.
You’ll want to paint a swath of this sticky, flavor-popping sauce on just about anything! It’s great for salmon, chicken, stir fries, and more. We first made it for our Honey Garlic Salmon, which was so good we’ve been making the sauce ever since.
Featured reader comment
“Just made this for some salmon. I followed the recipe to a T. Wow! This is my new sauce for everything.” -Rick
Ingredients in honey garlic sauce
This honey garlic sauce has a short ingredient list of mostly pantry ingredients, which magically come together into a sticky, thick glaze. It’s great for stir fries, though we love it best painted on a lovely fillet of salmon. Even our 5 year old son loves it, which is a big win in our book! Here are the ingredients you’ll need for this simple recipe:
Soy sauce: We like using regular soy sauce for the most full flavor (not low sodium). Substitute tamari for gluten-free.
Honey: Honey brings a nuanced sweetness. For vegan, substitute maple syrup.
Rice vinegar: Rice vinegar is a vinegar made with fermented rice that’s often used in Asian cuisine; it has a lightly sweet, tangy flavor.
Olive oil: Olive oil is our preferred cooking oil, but you can substitute with any neutral oil. Sesame oil would work well here.
Garlic and garlic powder: For a flavor packed sauce, use both fresh garlic (not jarred) and garlic powder.
Ginger root: Ginger root packs spicy, zingy flavor to this sauce. You can leave it out if it’s not a refrigerator staple for you, but it adds a depth that we think is absolutely worth the purchase.
Cornstarch: Cornstarch gives a shiny, thick body to the sauce (arrowroot powder works as a good substitute).
Pro tip
Use a microplane for easy grating! You can use it for both the garlic and ginger: you don’t even need to peel the ginger!
How to make honey garlic sauce: step by step
This honey garlic sauce is so quick and simple to make: it will take you longer to read about it than actually make the recipe itself! Here’s what to do:
Step 1: In a small saucepan, combine the soy sauce, honey, rice vinegar, oil, garlic powder, grated ginger and grated garlic over medium heat. Bring to a simmer and then reduce the heat to low.
Step 2: In a small bowl, whisk together the water and cornstarch. Pour the mixture into the saucepan and whisk until the sauce thickens, about 1 minute. Remove from the heat.
More about the cornstarch slurry
This honey garlic sauce recipe uses a cornstarch slurry, which is a mix of cornstarch and water (or another room temperature liquid). Here’s why:
If dry cornstarch is added directly to heated foods, it clumps up. It’s best to add it to sauces and stir fries mixed with a little liquid first.
Cornstarch must be heated to around 203°F for the thickening to occur. It’s called “starch gelatinization”: the process where the the particles of cornstarch absorb water. You’ll notice that once you add the cornstarch slurry to the warm sauce, it immediately starts to thicken: the starch gelatinization has been activated!
Ways to use honey garlic sauce
How do you plan to use your honey garlic sauce? This recipe is extremely versatile and works with many different types of foods. Here are a few ideas:
This recipe is quick to whip up and stores well. Store homemade honey garlic sauce refrigerated for up to 2 weeks. After 2 weeks, it starts to lose some of the potency in flavor.
More sauce recipes
Love making homemade sauces? Here are a few sauce recipes to try:
This honey garlic sauce recipe is vegetarian, plant-based, dairy-free and gluten-free. For vegan, use maple syrup or agave syrup instead of honey.
Frequently asked questions
What is honey garlic sauce made of?
This versatile sauce typically combines soy sauce, honey, garlic, ginger, and sometimes rice vinegar or sriracha for a touch of heat.
What does honey garlic sauce taste like?
It’s a beautiful balance of sweet and savory! The honey adds a touch of sweetness that complements the savory notes of soy sauce and the pungent kick of garlic and ginger.
What can I use honey garlic sauce for?
The possibilities are endless! Here are some ideas: Marinade: Marinate chicken, fish, tofu, or tempeh for a flavorful and sticky glaze. Dipping sauce: Perfect for dumplings, spring rolls, chicken wings, or anything that needs a delicious dip. Stir-fry sauce: Toss your stir-fry veggies and protein in honey garlic sauce for a quick and flavorful meal. Glaze: Brush honey garlic sauce on chicken, salmon, or tofu during the last few minutes of cooking for a sweet and sticky glaze. Noodle sauce: Toss cooked noodles with honey garlic sauce for a simple and satisfying dish.
Can I make honey garlic sauce ahead of time?
Absolutely! This sauce keeps well in an airtight container in the refrigerator for up to 2 weeks.
How can I make my honey garlic sauce spicier?
Add a pinch of red pepper flakes, sriracha, or a chopped fresh chili pepper to the sauce while cooking.
This honey garlic sauce recipe is simple to make and works with anything! Try it on salmon, chicken, stir fries, and more.
Ingredients
¼ cup regular soy sauce
¼ cup honey
1 tablespoon rice vinegar
1 tablespoon olive oil
¼ teaspoon garlic powder
2 garlic cloves, grated
½ teaspoon fresh grated ginger
1 tablespoon cornstarch
6 tablespoons water
Instructions
In a small saucepan, combine the soy sauce, honey, rice vinegar, oil, garlic powder, grated ginger and grated garlic over medium heat. Bring to a simmer and then reduce the heat to low.
In a small bowl, whisk together the water and cornstarch. Pour the mixture into the saucepan and whisk until the sauce thickens, about 1 minute. Remove from the heat. Use immediately or refrigerate for up to 2 weeks.
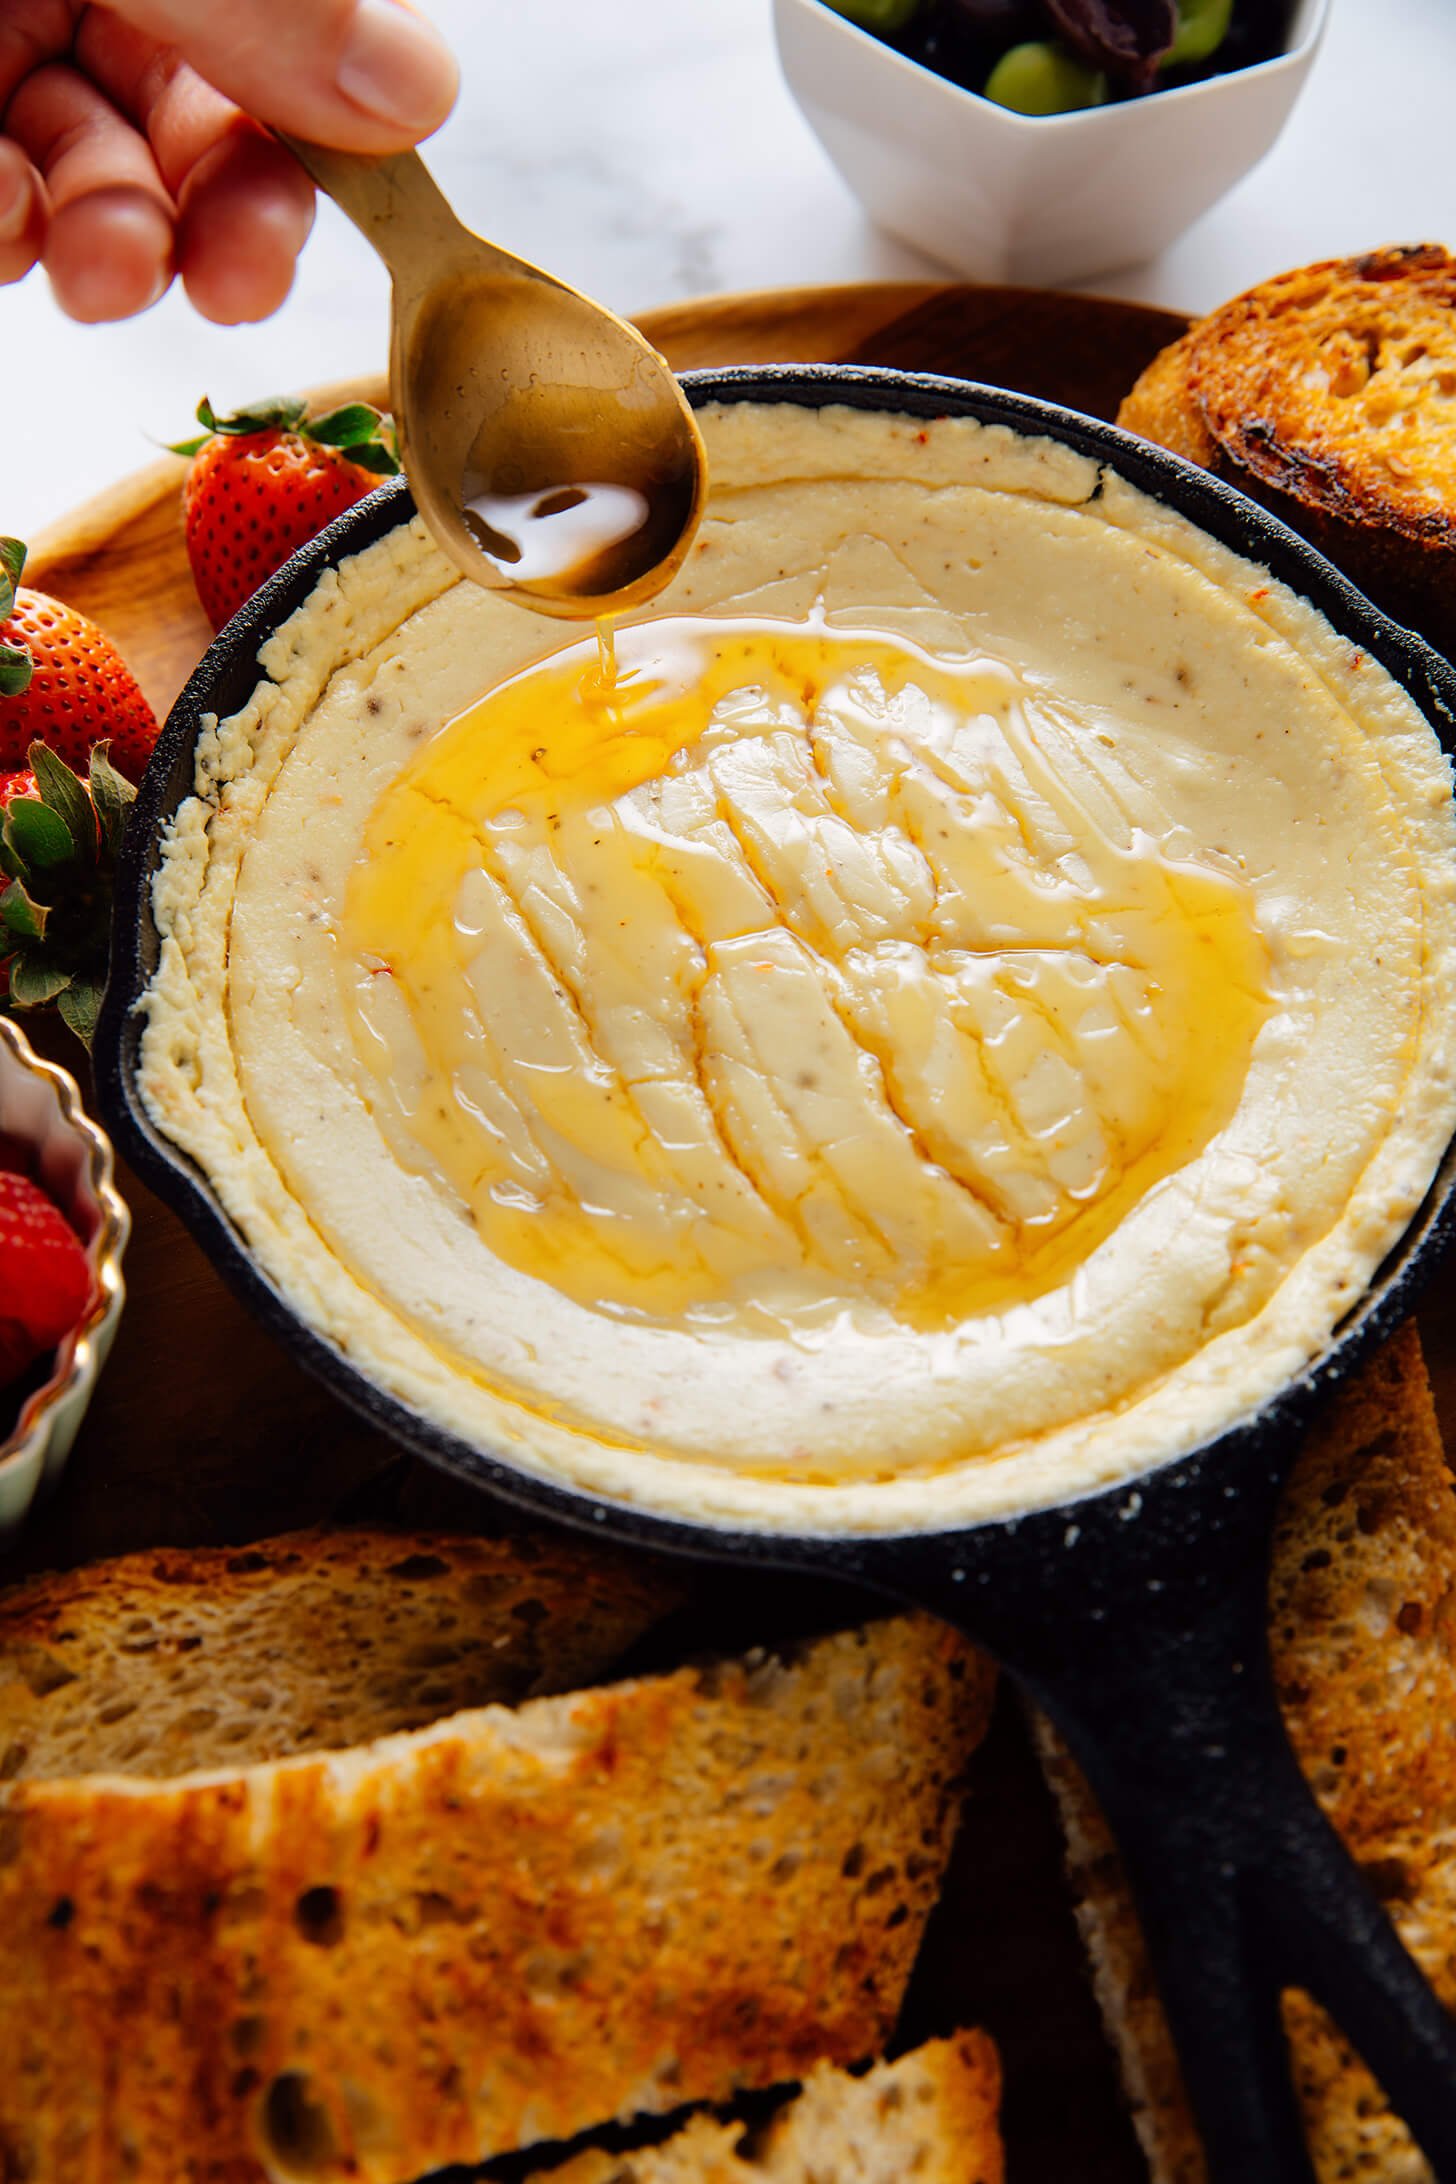
Friends coming over? Make this baked goat cheese! It’s warm, creamy, tangy but lightly sweetened with honey, and a touch savory. This irresistible appetizer comes together quickly…
Friends coming over? Make this baked goat cheese! It’s warm, creamy, tangy but lightly sweetened with honey, and a touch savory.
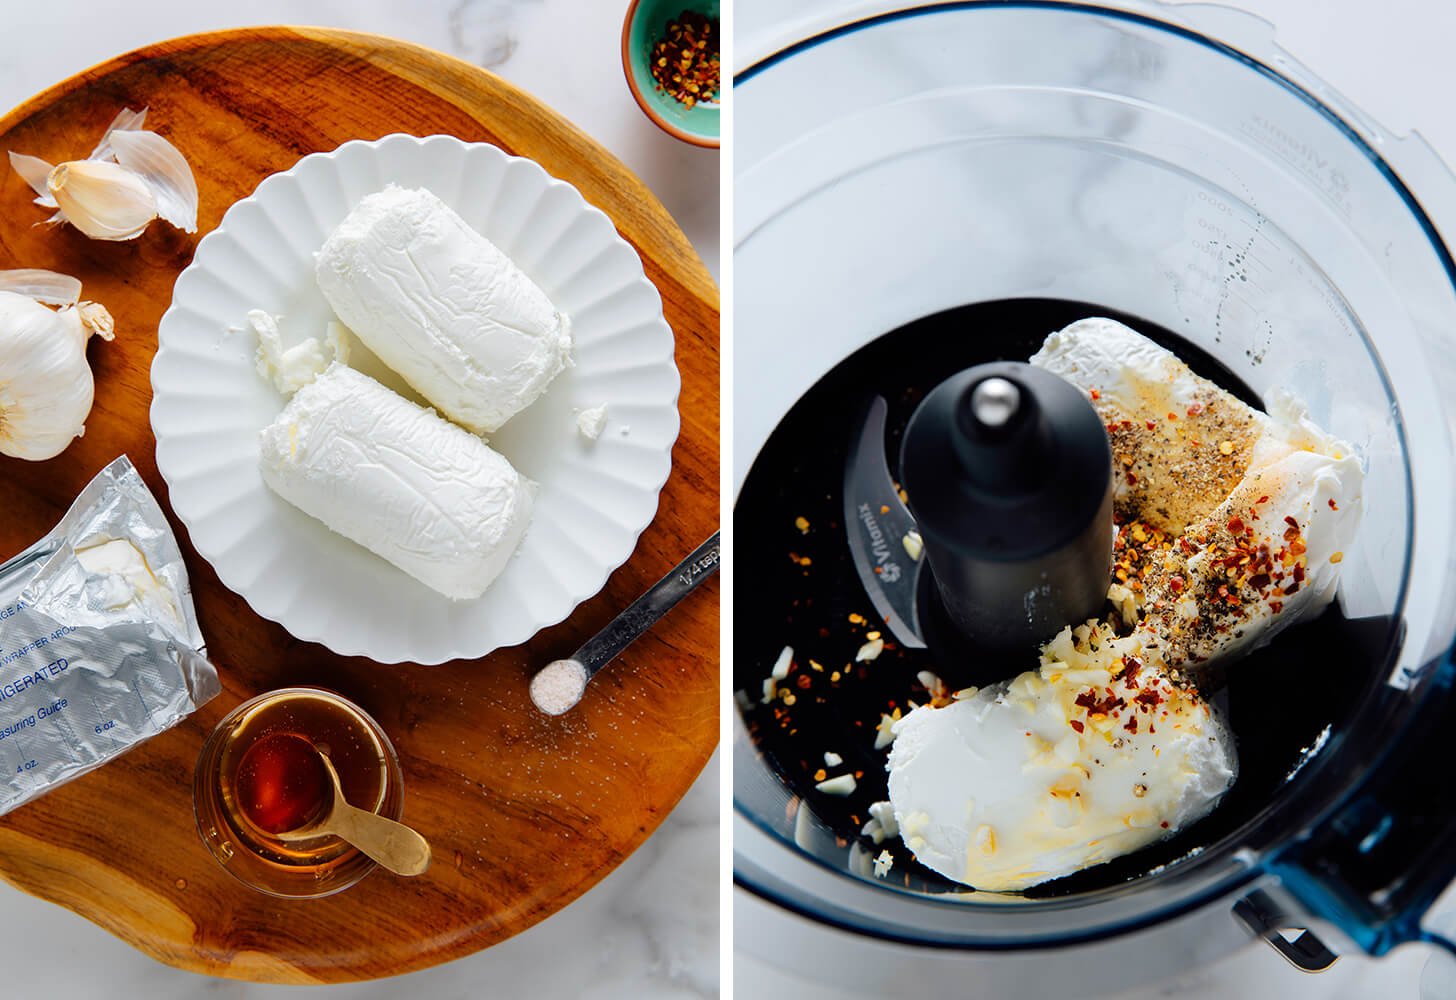
This irresistible appetizer comes together quickly in a food processor with simple ingredients. We’ll whip the goat cheese with cream cheese, honey, garlic and seasonings. Once baked, this dip is your favorite restaurant-level delicious.
I modeled this recipe after the lovely goat cheese dip at Rye, a restaurant in Kansas City. We visited a couple of times to research the French Blond Cocktail (reportedly Taylor Swift’s favorite!) and I remembered how much I love their goat cheese appetizer.
I asked about the ingredients and came home determined to recreate it. I’ve simplified the ingredients a bit, but this dip is just as nice. I hope you’ll try it!
This 3-ingredient strawberry mousse is light, fluffy, and bursting with berry flavor! Made with just strawberries, whipped cream, and a touch of sweetness, it’s the perfect easy dessert for any occasion.
Here at A Couple Cooks we’ve been on a kick of creating 3 ingredient recipes, because who doesn’t love simplicity? (We’re even authors of a cookbook of simple recipes.) Here’s our latest simple dessert idea: this strawberry mousse recipe! A combination of ripe berries, heavy cream, and a touch of sweetener takes just minutes to whip up and makes a pile of fluffy, berry-scented goodness. We saw this concept on social media and created our own spin using maple syrup, an immersion blender, and a whisk. If you’re like us, add a handful of crushed pretzels for that nostalgic sweet and salty hit!
All you need are 3 ingredients for this strawberry mousse
There’s a certain satisfaction to making something with only 3 ingredients, right? This sweet treat is perfect for whipping up in a few minutes for dinner guests or with a kid in your life. You’ll need a small blender (or blender, keep reading for why), a whisk, and this handful of ingredients to make this lusciously fluffy berry mousse. Here are the ingredients you’ll need:
Strawberries: Try to find the ripest, reddest berries you can. Bonus points for local berries! Keep in mind that out of season berries can be tart and tasteless, so making this in the winter months it’s not as tasty (though you can add more sugar to compensate).
Pure maple syrup, honey or sugar: We like this dessert best sweetened with maple syrup, particularly the type marked “Grade A: Dark Color and Robust Flavor” in the US. We find it has the best flavor and avoid any syrups marked amber. Honey works well as a sweetener as well, as does granulated sugar.
Heavy cream: This ingredient is what makes the magic! There are no substitutes for heavy cream here, since the dairy fat is what makes the fluffy texture.
A delicious shortcut for mousse
We will admit this strawberry mousse is not “technically” a traditional mousse like this chocolate mousse, which is cooked on the stovetop and thickened with eggs. Think of it as a delicious shortcut! Because of that, the texture is more light and fluffy than a standard mousse. You can refrigerate the mousse after whipping it up, which helps to make more of a “set” texture.
You can adjust the sweetness to taste
We like making this strawberry mousse recipe with 2 tablespoons sweetener, which makes for a lightly sweet mousse. But if you’re used to very sweet desserts or are cooking for a crowd that is, use 3 tablespoons sweetener for a sweet-tasting strawberry mousse. You also may want to use sugar as your sweetener, as it brings a more direct sweetness compared to the nuanced flavor of maple syrup or honey.
Don’t have a small blender? No problem
This recipe uses a small or immersion blender because the overall quantity of berries is so small, it doesn’t blend well in a standard size of blender. (If you’ve tried it, you know!)
A food processor should also work for this recipe. Or, double the recipe and make it in a standard blender so the quantity is large enough to blend. Then just use half the strawberry puree for the mousse and use the rest in other ways (see these ideas!).
Another way to serve it: as strawberry mousse pie!
This strawberry mousse is delicious served up in little jars with crushed pretzels or graham crackers. Or if you like, you can make double the recipe and pour it into a pretzel crust or graham cracker crust! Make sure to refrigerate it for a few hours before serving to set the mousse to a thicker texture.
Diet considerations, and a trick for vegan
This strawberry mousse recipe is vegetarian and gluten-free. We have not tested a vegan variation, but we’d suggest trying this vegan heavy whipping cream by Nora Cooks and gently folding in the strawberry puree. Let us know if you try it!
More strawberry recipes we love
Embrace the season with more of our favorite strawberry recipes! We hope you love this recipe and let us know what you think in the comments below.
This 3-ingredient strawberry mousse is light, fluffy, and bursting with berry flavor! Made with just strawberries, whipped cream, and a touch of sweetness, it’s the perfect easy dessert for any occasion.
Ingredients
1 cup diced strawberries (about 8 ounces)
2 tablespoons* maple syrup (or honey or sugar)
1 cup heavy cream
Instructions
Clean and chop the strawberries. Using a small blender or immersion blender,** blend the berries with the maple syrup. Add the cream and pulse 2 to 3 times until combined.
Pour the cream mixture into a bowl. Whip with a whisk for 2 minutes until thickened and fluffy.
Serve immediately or refrigerate until serving. Serve with crushed pretzels or graham crackers if desired.
Notes
*2 tablespoons maple syrup makes for a lightly sweet mousse. Use 3 tablespoons if you prefer a sweet mousse.
**A food processor should also work. Doubling the recipe works in a standard blender since the quantity is large enough to blend. If you don’t have a small blender, you can blend double the berries in a large blender and use half the puree for the mousse.
This easy balsamic vinaigrette recipe uses only 4 ingredients and whips up in minutes! With its balance of sweet, tangy, and savory, it will become your go-to salad dressing. Ditch store bought dressing for good!
Looking for a simple salad dressing to make at home? There’s really nothing better than this balsamic vinaigrette recipe. It’s creamy, tangy, a little bit sweet, and has that “something” that keeps you coming back for another bite. It’s extremely versatile, perfect on everything from a classic strawberry salad to a simple green salad. It has a short ingredient list and it comes together in less than 5 minutes. So why ever buy it again?
Ingredients in this balsamic vinaigrette
This balsamic vinaigrette recipe is very simple to whip up, especially because you might already have the ingredients on hand in your pantry. For this recipe you’ll need:
Aged balsamic vinegar: The quality of balsamic does make a difference! Look for a mid-priced commercial grade balsamic vinegar, also known as balsamic vinegar of Modena (IGP) or aceto balsamico di Modena. It has a developed, tangy sweet flavor and is perfect for salad dressings.
Dijon mustard: This ingredient adds tangy flavor and helps the dressing to become thick and creamy.
Maple syrup: The sweetness balances the tang of the vinegar. You can also substitute honey.
Extra virgin olive oil: This rich oil makes the dressing come together.
Salt: Add just the right seasoning with a hint of salt.
How to make balsamic vinaigrette dressing
This balsamic vinaigrette recipe is incredibly simple. The flavor is zesty and bright, tangy from the vinegar, balanced with a touch of maple syrup. Then it’s mixed together with extra virgin olive oil to form a creamy emulsion. We’ve also added a touch of Dijon mustard to give a little more zing and to help the creamy dressing stay emulsified. Here’s how to make this balsamic vinaigrette:
Whisk the ingredients in a medium sized bowl. In order to get the oil and vinegar to incorporate well, use a medium-sized bowl to allow for enough movement of the whisk. First, whisk the balsamic vinegar, Dijon mustard, maple syrup, and salt.
Add the olive oil gradually. We typically add it tablespoon by tablespoon and whisk in between until the oil fully incorporates.
Don’t omit the mustard! The Dijon mustard helps to form and lock in the emulsion. This technique works in a few other vinaigrette salad dressing recipes, like our Classic Vinaigrette and Italian Dressing.
Types of balsamic vinegar
There are lots of types of balsamic vinegar at the store, and they vary widely in quality. There are three categories of balsamic vinegar:
Traditional balsamic vinegar, aka aceto balsamico tradizionale. This type of balsamic is aged 12 to 18 years, and has a very thick, syrupy texture. It’s the highest quality and most expensive. It’s not necessary for this recipe.
Commercial grade balsamic vinegar, aka balsamic vinegar of Modena (IGP) or aceto balsamico di Modena. This type is aged less than 12 years and has a developed, tangy sweet flavor. Try a commercial grade balsamic for this recipe if you can find one!
Condiment grade balsamic vinegar is the lowest grade. It has a thinner texture that’s more similar to other types of vinegar. The flavor varies widely on the brand. Very cheap brands can use sugar to mimic the sweetness of grapes, so look for bottles with ingredients that are only grapes or grape must.
A good rule of thumb for buying a good balsamic: look for a mid-priced bottle. Price is typically indicative of quality!
Ways to serve it!
This balsamic vinaigrette recipe is perfect on any type of salad that you throw together, especially salads with a sweet element like apples, berries, or sweet potatoes! Here are a few ideas of how to use it:
This easy balsamic vinaigrette recipe uses only 4 ingredients (plus salt) and whips up in minutes! With its balance of sweet, tangy, and savory, it will become your go-to salad dressing. Ditch store bought dressing for good!
In a medium bowl, whisk together the balsamic vinegar, Dijon mustard, maple syrup, and salt until fully combined.
Gradually whisk in the olive oil, adding 1 tablespoon at a time and whisking until it incorporates, until an emulsion forms.* Serve immediately. Store refrigerated and bring to room temperature before serving (keeps at least 2 weeks).
Notes
Taste, and if you prefer a sweeter balsamic vinaigrette, you can add up to 1 tablespoon additional maple syrup.
Category:Salad Dressing
Method:Whisked
Cuisine:American
Keywords: Balsamic vinaigrette recipe, Balsamic vinaigrette dressing, How to make balsamic vinaigrette
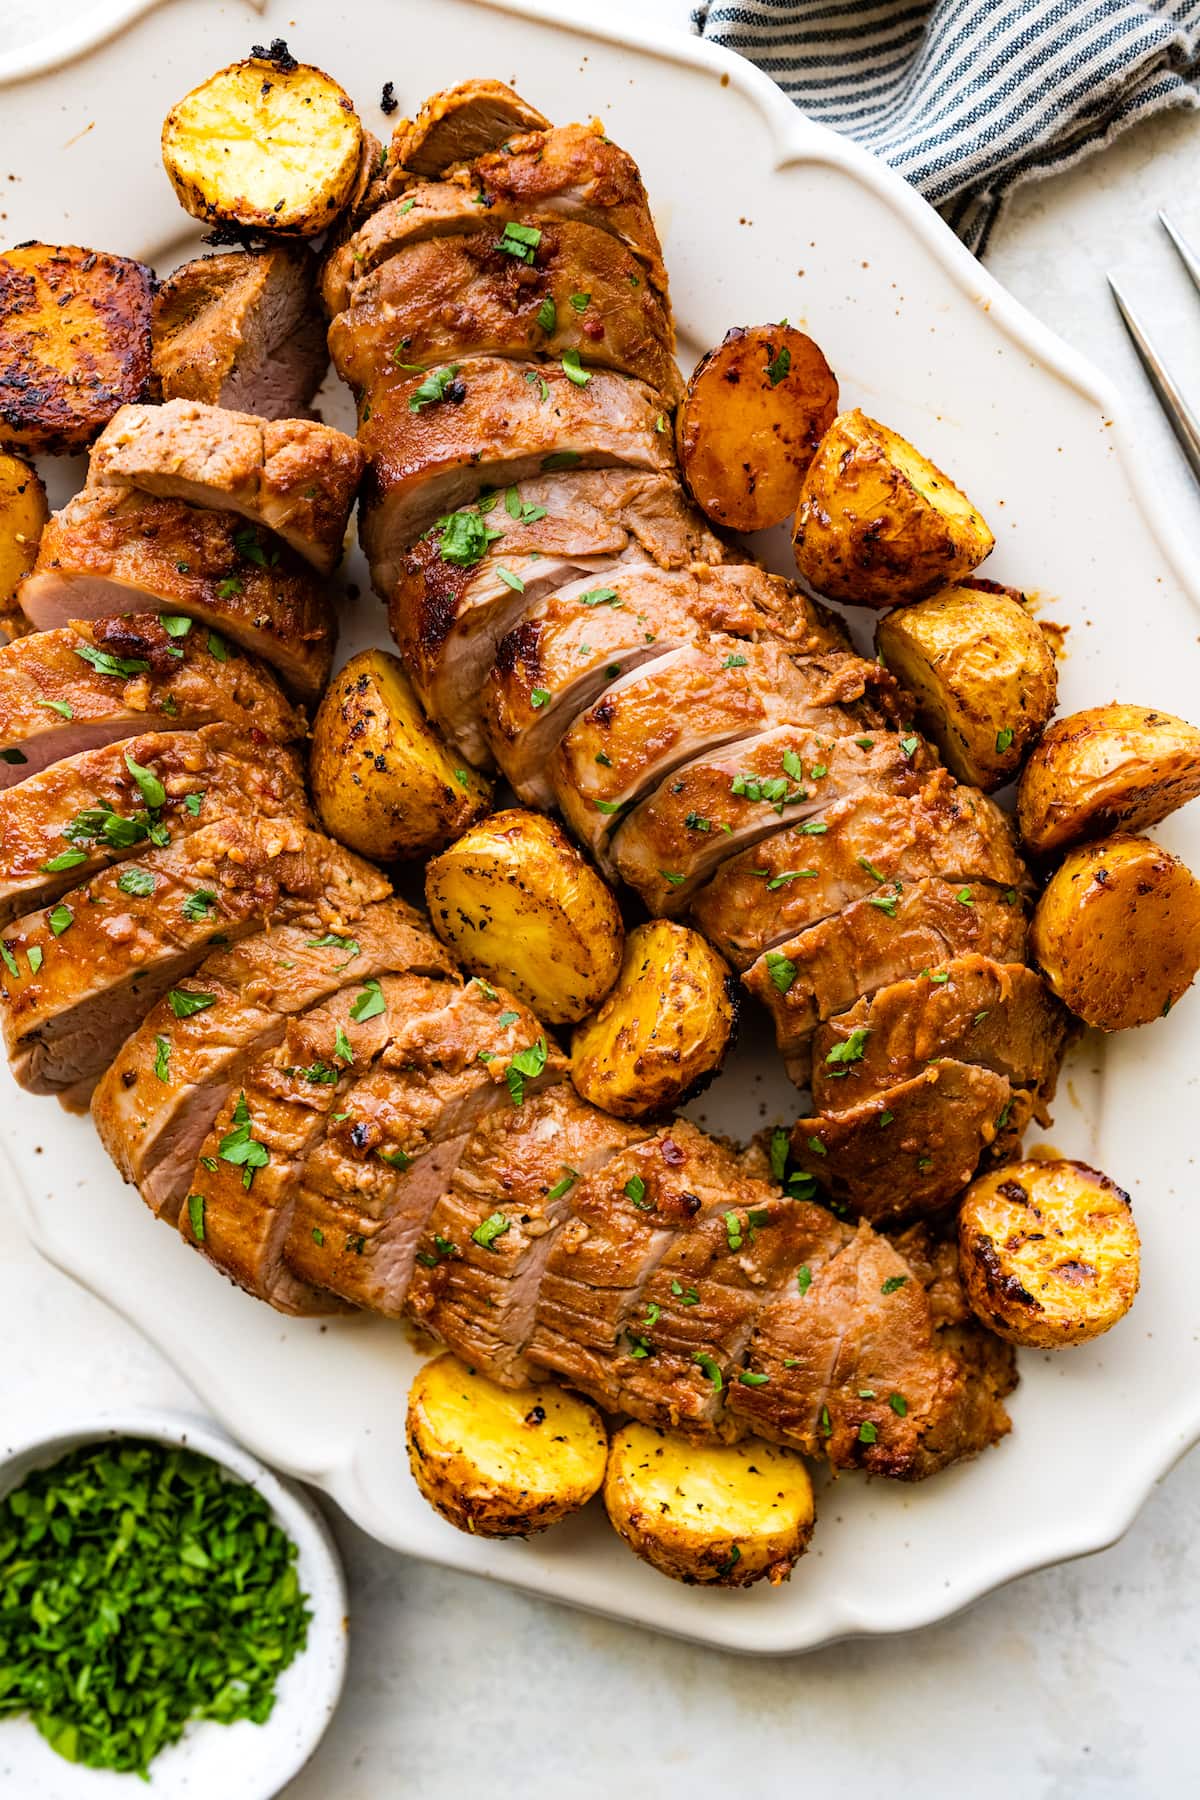
This easy baked Pork Tenderloin with potatoes is one of our staple meals for busy weeknights or easy entertaining. It is simple and comes out perfect every single time! The marinade is easy to whisk together and gives the lean pork lots of flavor. Mari…
This easy baked Pork Tenderloin with potatoes is one of our staple meals for busy weeknights or easy entertaining. It is simple and comes out perfect every single time! The marinade is easy to whisk together and gives the lean pork lots of flavor. Marinate for at least 30 minutes or for up to 24…
If you are looking for an easy and healthy meal, I have a the perfect recipe for you! Honey Mustard Salmon with Citrus Salsa. I know it sounds a little gourmet, but this recipe is SO easy! It only takes about 20 minutes to make. You can’t beat th…
If you are looking for an easy and healthy meal, I have a the perfect recipe for you! Honey Mustard Salmon with Citrus Salsa. I know it sounds a little gourmet, but this recipe is SO easy! It only takes about 20 minutes to make. You can’t beat that! The honey mustard sauce is easy…
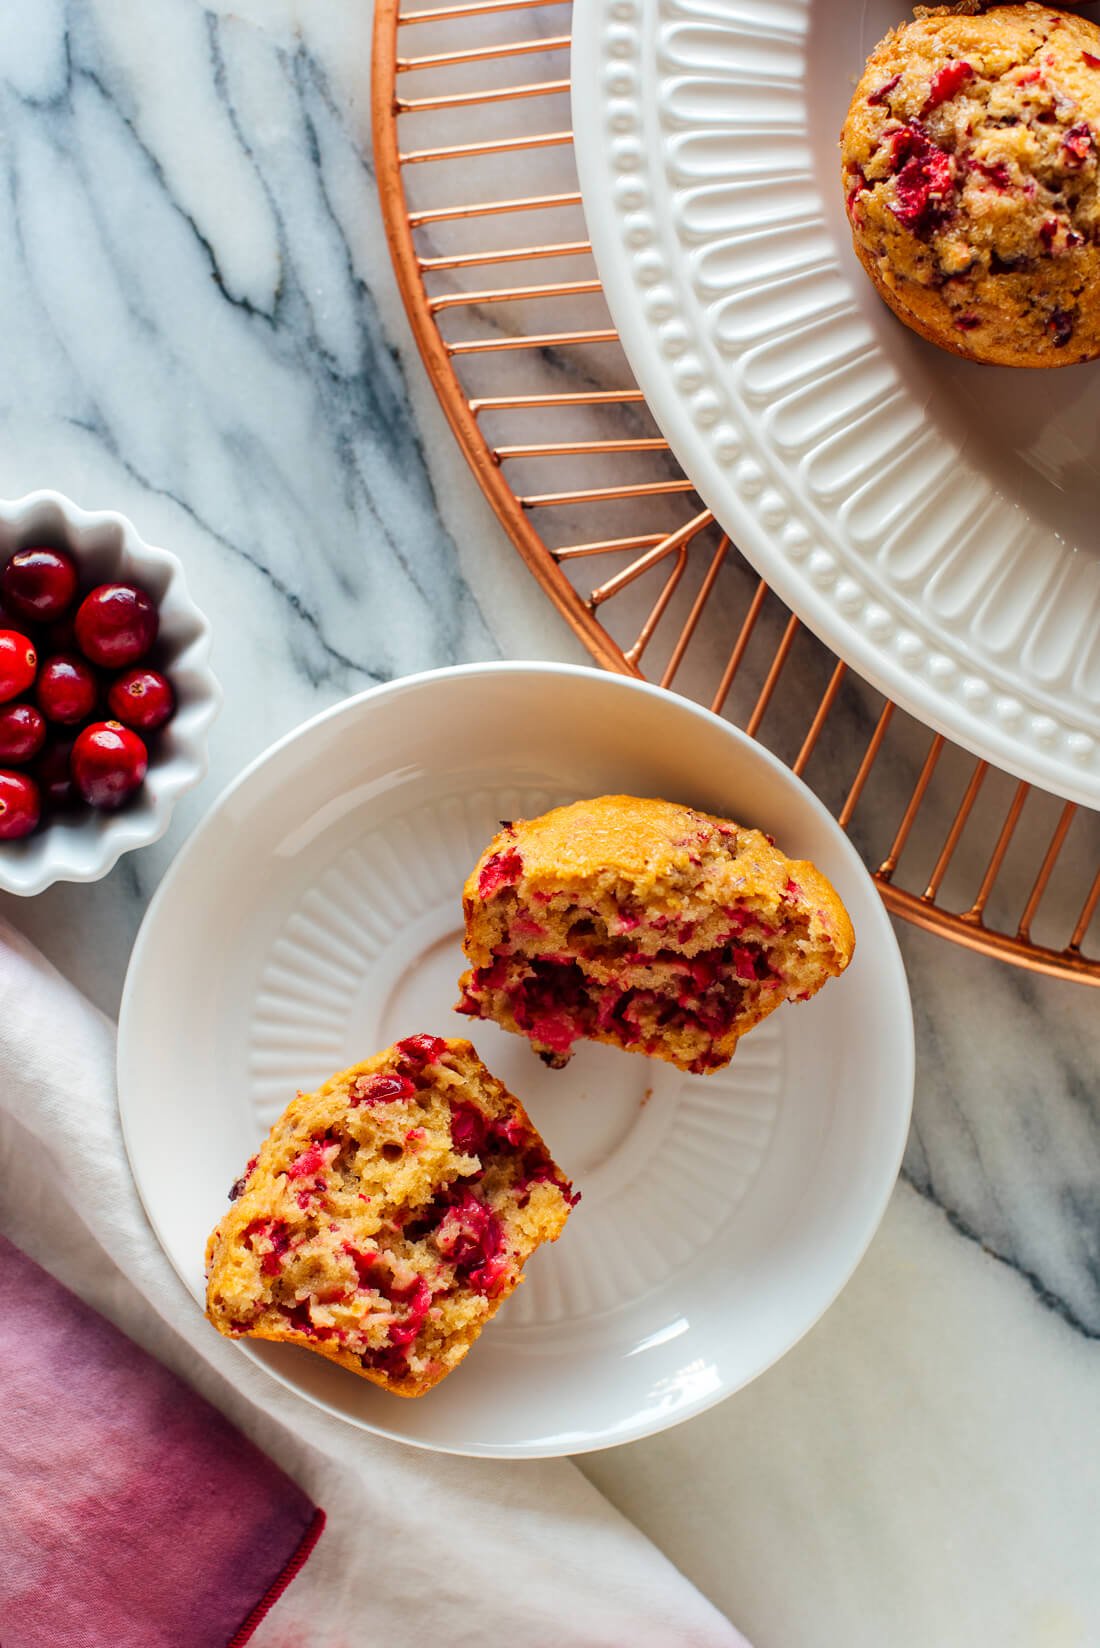
These fluffy cranberry orange muffins will make your house smell like the holidays! I hope they become your new favorite holiday muffin recipe. They’re fluffy and moist…
These fluffy cranberry orange muffins will make your house smell like the holidays! I hope they become your new favorite holiday muffin recipe. They’re fluffy and moist and delicious—everything I want a muffin to be.
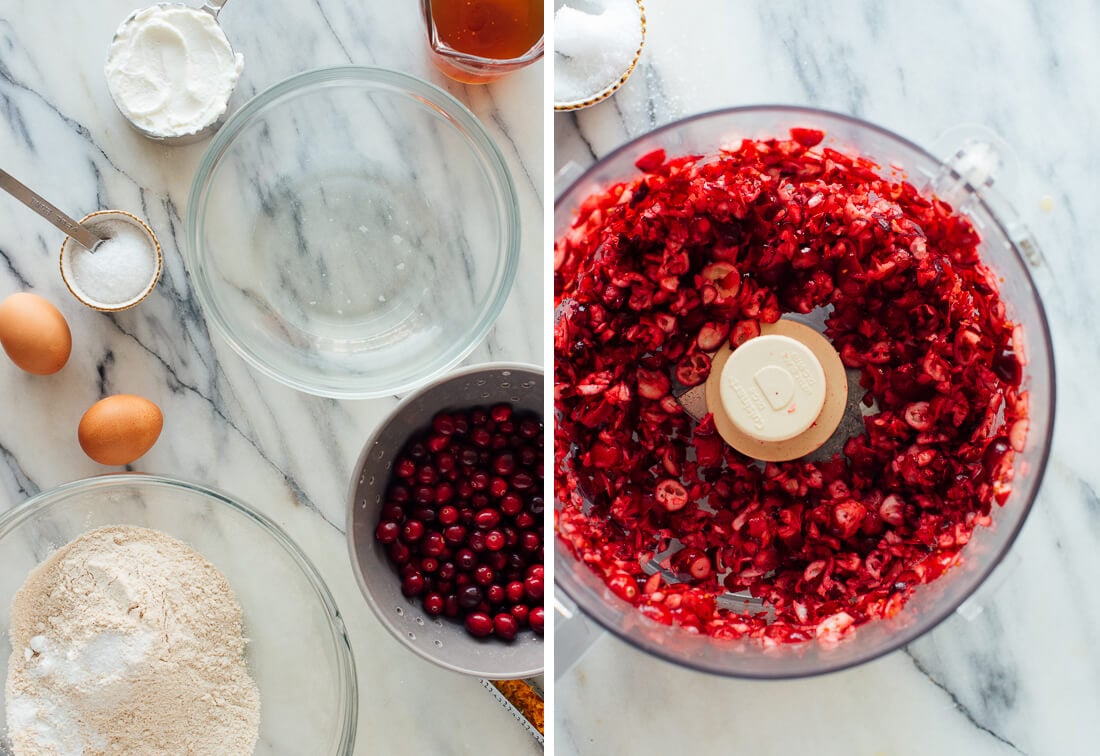
These muffins are bursting with fresh cranberry and orange flavor. This recipe calls for fresh cranberries, which are generally available in United States grocery stores from October or November through December. You can also use frozen cranberries, but I don’t recommend dried cranberries here.
These muffins are made with wholesome ingredients like whole wheat flour and Greek yogurt. They’re naturally sweetened with honey or maple syrup. You can keep those details to yourself, though—no one will guess that these muffins are healthier than most.
You can easily mix these together by hand. No mixer required. Serve them for breakfast or brunch, or bring them to your holiday parties!
It took me eight tries to get these muffins just right, but they were absolutely worth the effort. I’m sharing the recipe again because they’re just so wonderful this time of year.
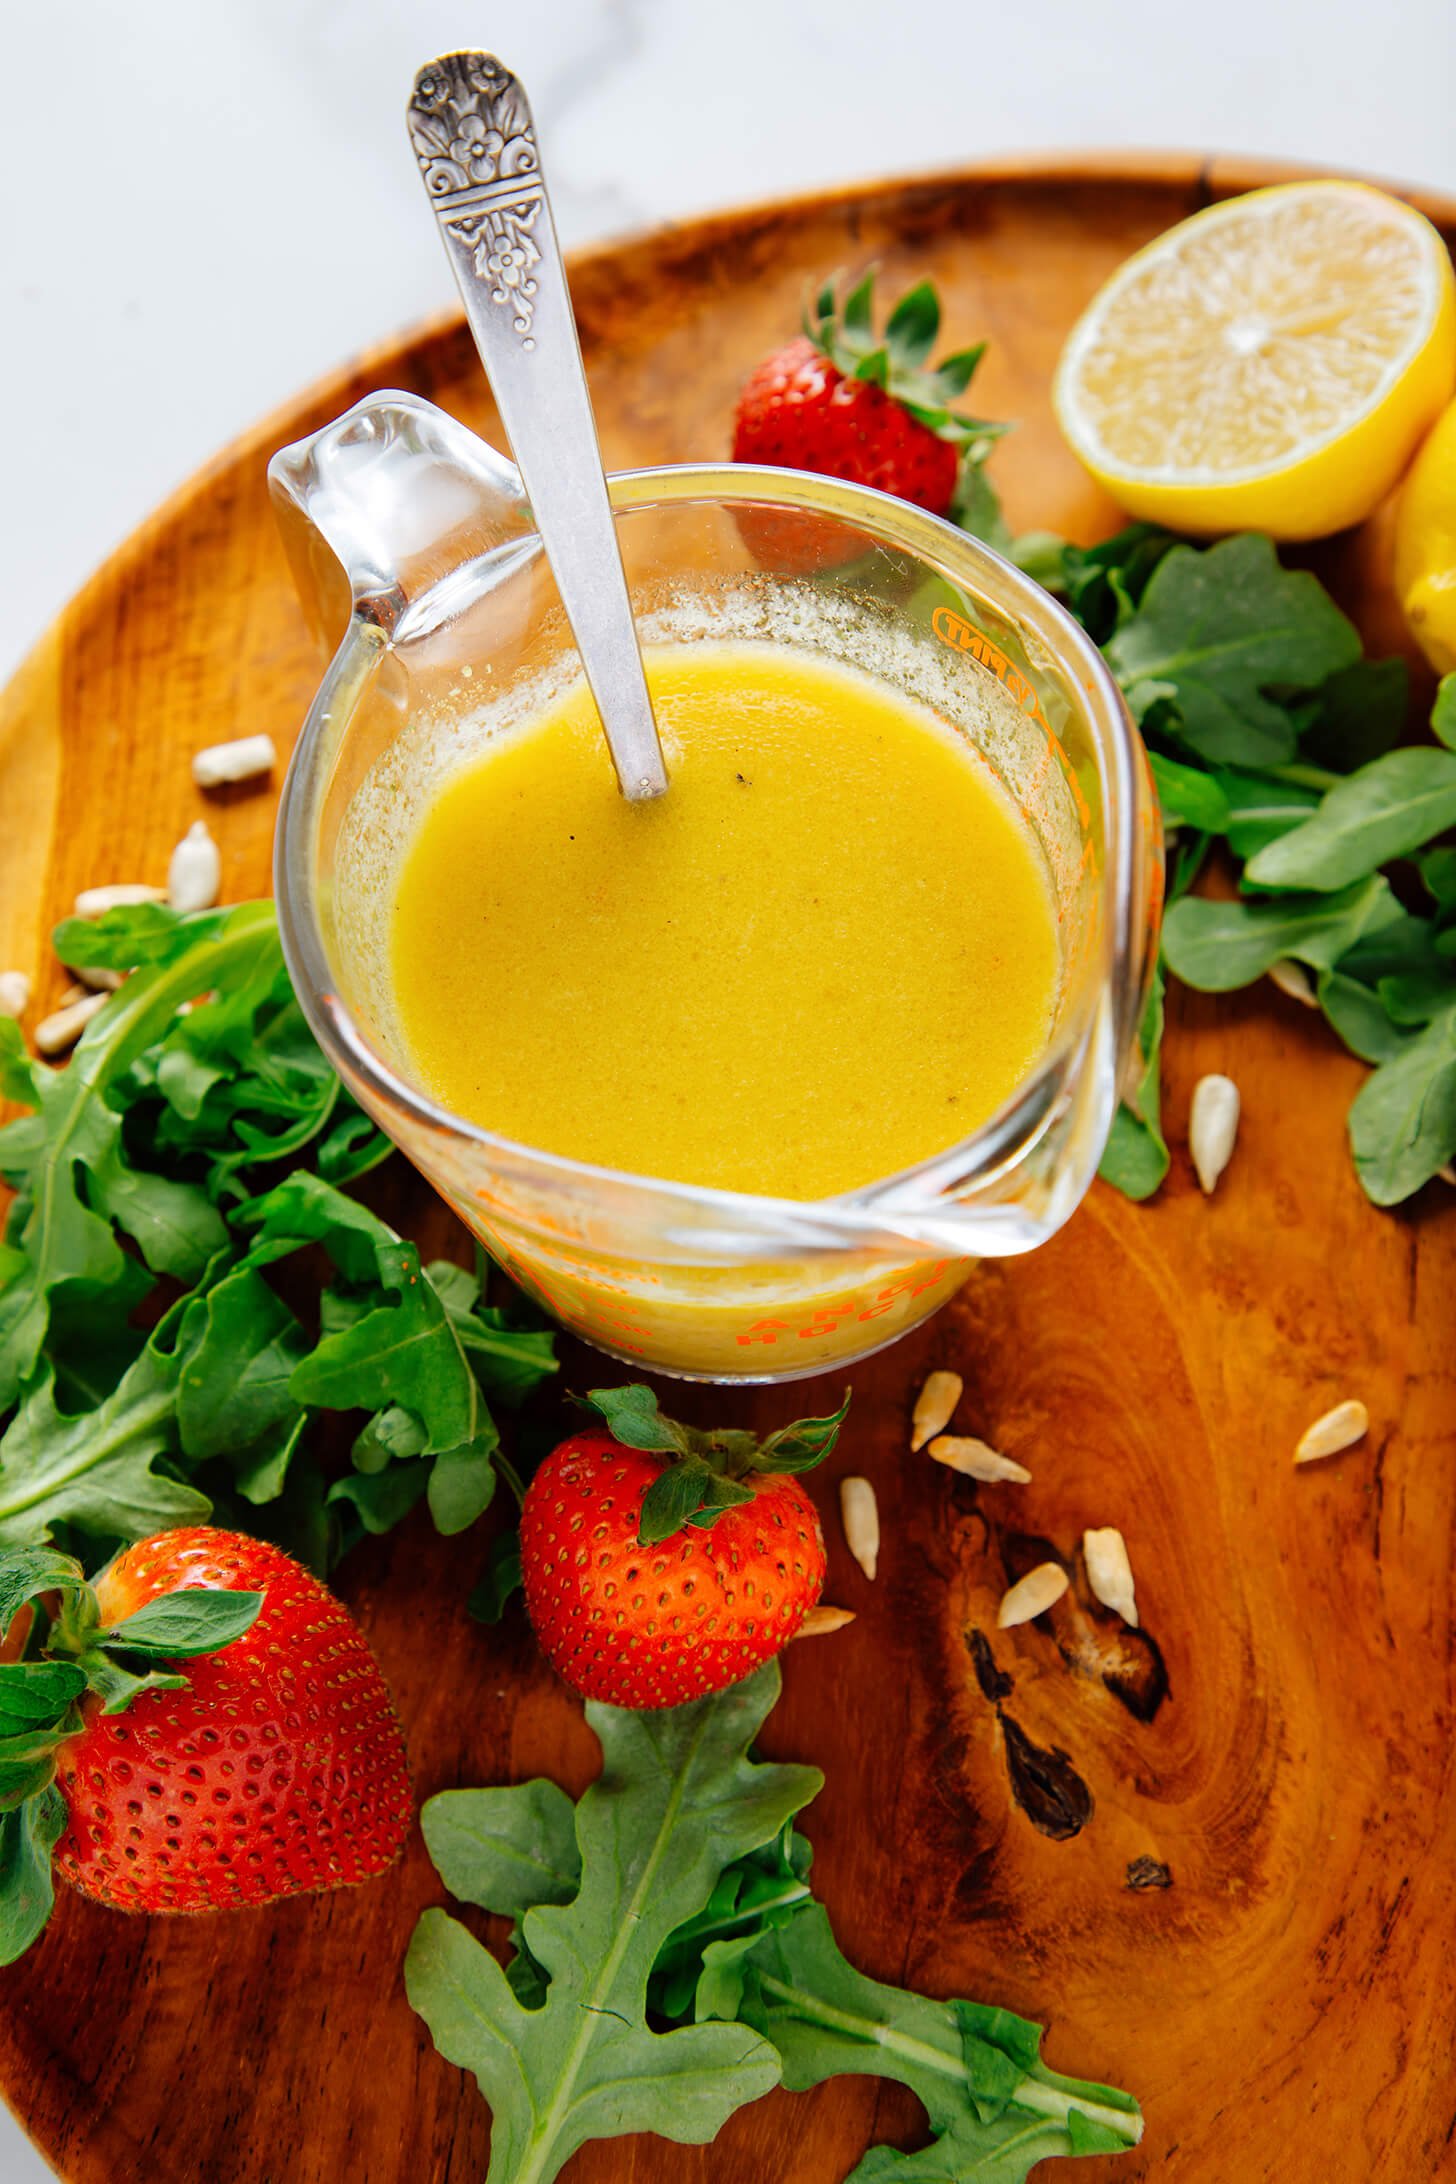
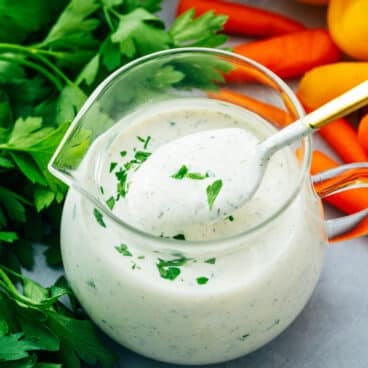
Homemade lemon vinaigrette is one of the most versatile salad dressings! Today, I’m sharing my go-to lemon dressing recipe for all of your salad needs. It’s light…
Homemade lemon vinaigrette is one of the most versatile salad dressings! Today, I’m sharing my go-to lemon dressing recipe for all of your salad needs. It’s light and lively, and goes with nearly any salad.
Lemon juice shines in this simple recipe using basic, high quality ingredients. No store-bought salad dressing can compete with these vibrant, freshly-squeezed flavors.
To make this lovely dressing, you’ll need just five basic ingredients. Fresh lemons and garlic are key—please no pre-squeezed juice or pre-minced garlic here. You’ll also need extra-virgin olive oil, Dijon mustard, and honey or maple syrup. The Dijon mustard rounds out the flavor and helps emulsify the ingredients so they stay blended together.
This dressing yields enough for six generous side salads and keeps in the refrigerator for up to ten days. I’ve enjoyed this dressing for years and know you will, too!
Impress everyone with this honey glazed salmon recipe! The easy flavorful sauce features honey, soy, miso and garlic.
Here’s a dinner idea that gives you maximum return on investment: this Honey Glazed Salmon recipe! In under 30 minutes, you’ve got tender, flaky salmon fillets that are bursting with flavor from a sticky glaze of honey, soy sauce, miso and garlic. That’s what we mean by return on investment: there’s little time needed to make this incredible dish that will have everyone licking their plates clean!
Ingredients in honey glazed salmon
This honey glaze for salmon can be made in just 5 minutes, making it the ideal quick sauce for weeknight meals. Mix up the 6-ingredient sauce in a bowl, then brush half of it onto the salmon. Broil it up, then pour the remaining glaze on before serving. It makes the best sticky sauce that coats everything in savory sweet flavor. Here’s what you’ll need for this recipe:
Salmon fillets, wild caught if possible
Olive oil
Yellow or white miso
Honey
Soy sauce
Rice wine
Garlic powder
Ground ginger
Olive oil, for brushing
Types of miso
Miso is a Japanese fermented soybean paste that’s full of nutrients and savory flavor. It’s known for its intense savory flavor, otherwise known as umami: the fifth flavor. You can find miso in the international foods aisle near the Japanese ingredients. There are many different types of miso, and they all taste different. We recommend using white or yellow miso for this miso butter recipe: sometimes they’re labeled as “light miso”.
White miso (Shiro miso): This variety has a mild, more delicate flavor and less salt than darker miso.
Yellow miso: This type is fermented a little longer than white miso and has a mild, lightly sweet flavor.
Red or dark miso: This variety is fermented longer than white or yellow miso. It has a very strong flavor and can overwhelm the flavors in a dish, so we don’t recommend using it here.
Tips for buying salmon
The most important thing when it comes to making this honey glaze salmon recipe is the quality of the fish. Lower quality salmon can taste very fishy and have a mushy texture. It can also have a lot of white stuff (called albumin) when it’s cooked: while it’s not harmful, it doesn’t look appetizing! Here’s what to know when shopping for salmon:
1 to 1 1/2-inch thick fillets are good for this recipe and look impressive; you might find it labeled center cut at the store.
Look for wild caught salmon. Fish that is wild caught in your country is usually a sustainable choice. (There are also quality options in well-regulated farms; see Seafood Watch Consumer Guide.)
Buy fresh salmon. Salmon that’s fresh from the fish counter usually has the best flavor. Frozen can work too, but try to find highest-quality frozen salmon. Avoid those big economy-sized bags, which we’ve found it typically thinner and can taste fishy.
How to cook honey glazed salmon
This honey glazed salmon recipe is broiled salmon, an efficient method that skips the oven preheating time and cooks the fish in just 10 minutes! You can also make this recipe oven baked or grilled (see below), but our favorite way is broiled because it’s so quick and it gets nicely crisp and browned on top. Oven baking can work, but the salmon comes out more moist and soft. Here are a few tips for this recipe:
Allow the salmon to come to room temperature before cooking (brine it if possible!). This can take 15 to 20 minutes, but it’s important. If the salmon is too cold when heat is applied, the outside can cook much faster than the inside. We recommend brining the salmon, which is letting it sit in salt water while it comes to room temperature. This helps to season the fish and also avoids the white stuff (albumin) when the fish is cooked.
Remember the thickness determines the cook time. 1-inch salmon takes 8 to 11 minutes to broil. Very thin salmon can broil in just 5 minutes, so adjust the cook time accordingly.
Keep an eye on the broiler! Salmon can go from pink to brown very quickly in the broiler: so don’t stray too far away, especially at the end of the cook time.
The salmon is done with the internal temperature is 125 to 130°F when measured in the thickest part. The fish will continue to cook after you remove it from the heat. To ensure full safety, the FDA recommended temperature for seafood is 145°F, or well done.
Other methods: baked and grilled
This honey glazed salmon recipe also works baked or grilled! Here’s how to do it:
Baked: Follow the instructions in Easy Oven Baked Salmon, but follow the seasoning instructions in the recipe below. Brush on half the glaze before baking, then pour on the remaining half once it’s done.
Grilled: Follow the instructions in Grilled Salmon, but follow the seasoning instructions in the recipe below. Brush on half the glaze before grilling and brush on half afterwards.
More salmon recipes
This honey glazed salmon recipe is one of our favorite salmon recipes to date! Here are a few more to try with this tasty fish:
Brine the salmon* (optional): In a shallow dish whisk together 4 cups room temperature water and 3 tablespoons kosher salt until it dissolves. Place the salmon in the water and wait for 15 minutes.
Preheat the broiler to high.
Make the glaze: Meanwhile, in a small bowl, stir together the miso, honey, soy sauce, rice wine, garlic powder, and ground ginger.
Prepare the salmon: Place a large sheet of aluminum foil on a baking sheet and brush it with olive oil. Pat each piece of salmon dry and place it on the foil skin side down. Brush the salmon with a bit of the olive oil and sprinkle with the ½ teaspoon kosher salt evenly divided among the fillets. Reserve about half of the glaze and brush the remainder on the salmon.
Broil the salmon: Broil 7 to 10 minutes for 1-inch thick salmon (or less for thinner fish), until it’s just tender and pink at the center (the internal temperature should be between 125 to 130°F in the center). Pour the reserved glaze onto the salmon and garnish withe parsley, if using. Serve immediately. Leftovers last refrigerated for up to 3 days.
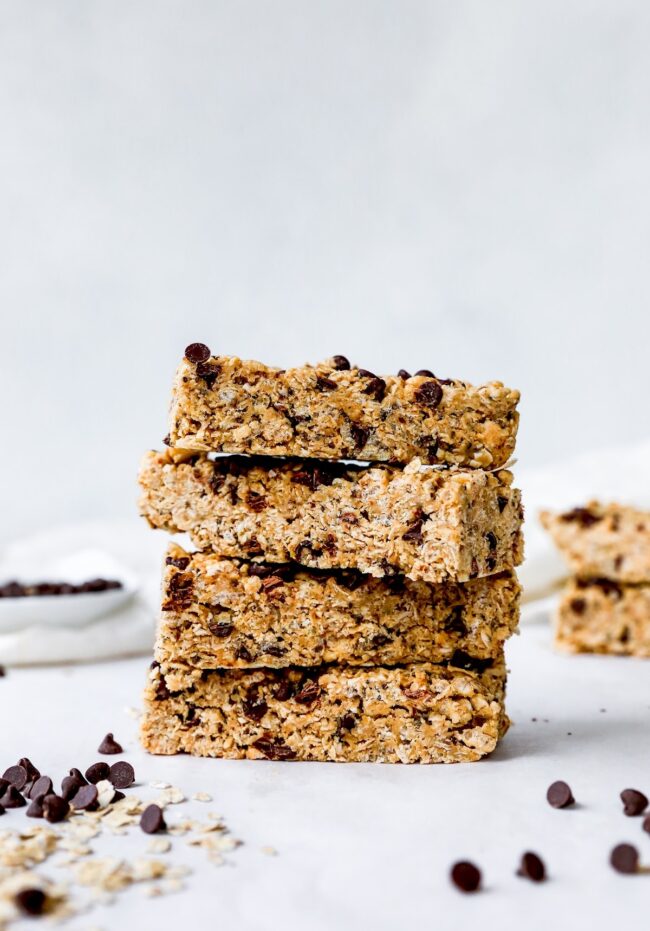 I try to always have homemade granola bars in the fridge for an easy grab and go breakfast or snack. These granola bars are easy to make and made with basic pantry ingredients. They are satisfying, sweet, and taste so much better than store bought granola bars. These are our favorite granola bars because we…


 This easy baked Pork Tenderloin with potatoes is one of our staple meals for busy weeknights or easy entertaining. It is simple and comes out perfect every single time! The marinade is easy to whisk together and gives the lean pork lots of flavor. Marinate for at least 30 minutes or for up to 24…
 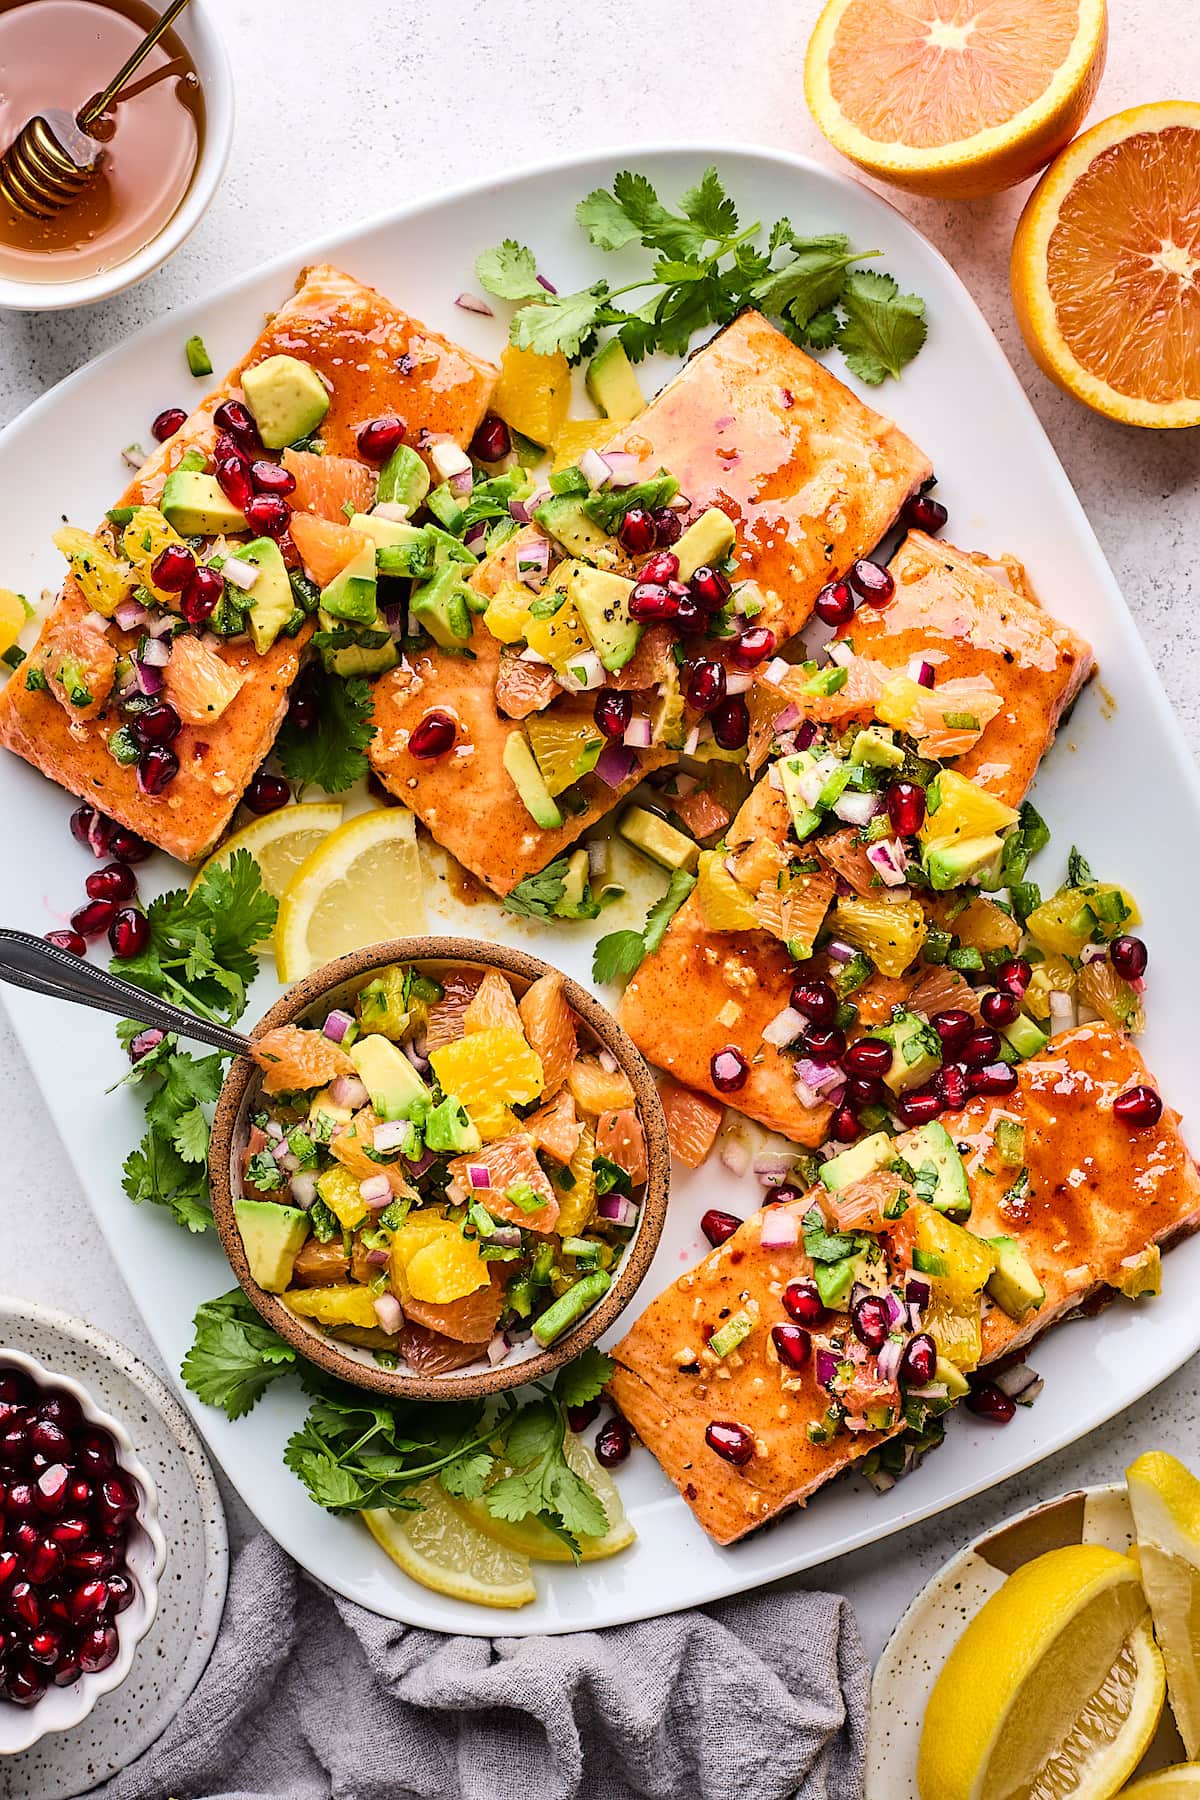 If you are looking for an easy and healthy meal, I have a the perfect recipe for you! Honey Mustard Salmon with Citrus Salsa. I know it sounds a little gourmet, but this recipe is SO easy! It only takes about 20 minutes to make. You can’t beat that! The honey mustard sauce is easy…